Strength Training on a Treadmill: Unconventional Moves for Impressive Gains

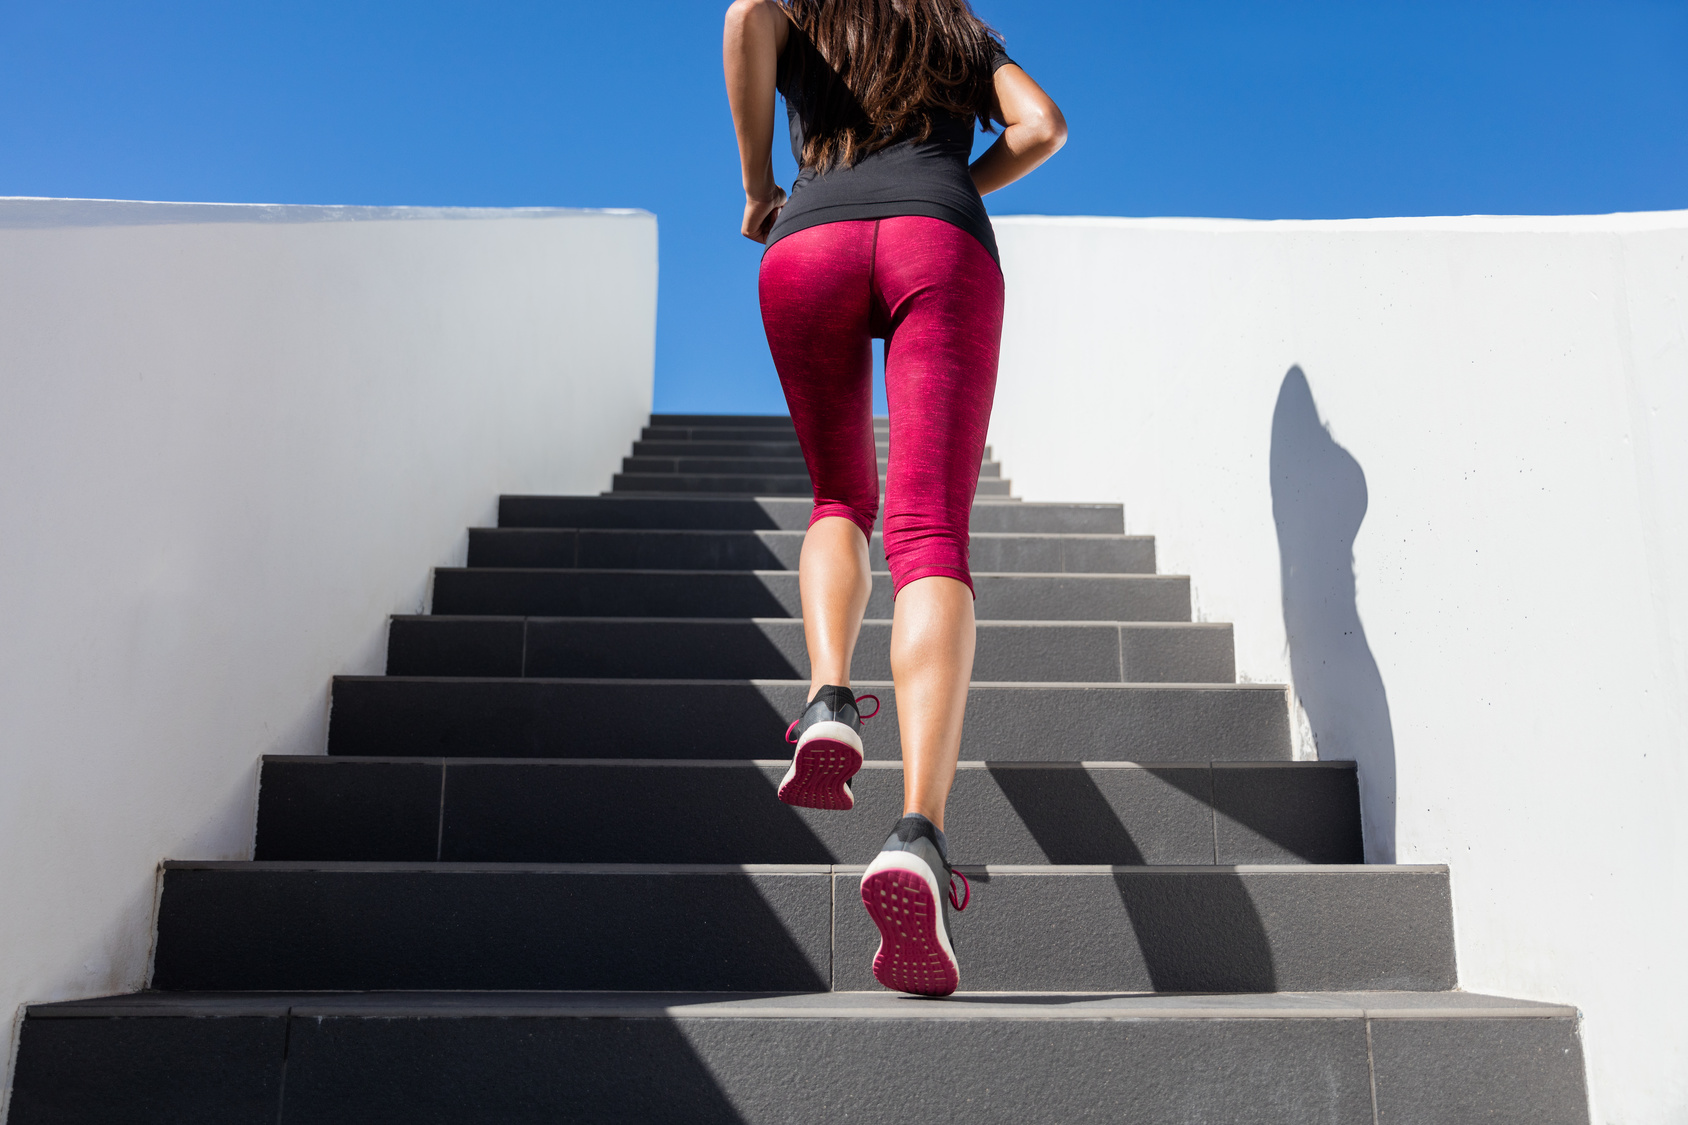
Tired of the same old treadmill routine? It’s time to shake things up and discover the incredible benefits of strength training on a treadmill.

While treadmills are primarily designed for cardiovascular training, there are some strength exercises you can perform on them

Picture this: lunges, side shuffles, mountain climbers, and more, all right there on your trusty treadmill. No need for an expensive gym membership or fancy equipment; your treadmill can do it all.

And the best part? You’ll be tackling these exercises in a high-intensity circuit, pushing your limits, and taking your fitness game to new heights.

So, lace up those sneakers, and let’s embark on a journey that promises to challenge your body, invigorate your workouts, and leave you feeling stronger and more confident than ever. Get ready to discover the world of treadmill strength training like never before!

Benefits of Treadmill Strength Training

Strength training on a treadmill is more than just a trend; it’s in fact a powerful tool to add to your training routine.

Let’s dive into the incredible benefits that await you when you incorporate these exercises into your routine.

Improve Strength

Treadmill strength training can help you become a stronger, more enduring, and faster runner. These exercises target muscle groups often overlooked during traditional treadmill runs, giving you the power to conquer new personal bests. By challenging your body in unique ways, you’ll build the strength needed to outpace your previous limits.

Protect Against Injury

Running can take a toll on your body, but treadmill strength training can help you stay injury-free. By strengthening your core, shoulders, and other muscle groups, you’ll create a robust foundation that supports your running form.

Improve Calorie Burn

Who doesn’t want to maximize their fitness gains and torch those extra calories? Treadmill strength training does precisely that. These exercises elevate your heart rate, boost your metabolism, and engage multiple muscle groups simultaneously. The result? An efficient and effective workout that leaves you feeling accomplished and closer to your fitness goals.

Warm-Up and Safety Precautions

Before diving into these invigorating treadmill strength training exercises, it’s crucial to set the stage with a proper warm-up and ensure your safety throughout your workout. Let’s go over these essential steps.

Warm-Up

Never skip your warm-up; it’s your ticket to a successful workout. Start with a slow-paced walk or light jog on the treadmill for about five minutes. This gets your blood flowing and muscles loosened up and prepares your body for the challenges ahead.

You can try my dynamic warm up here.

Stay Safe

Safety always comes first. Whether you’re a seasoned fitness enthusiast or just beginning your fitness journey, these guidelines are essential:

  • Maintain a firm grip on the treadmill’s side rails if needed for balance.
  • Keep your attention on your movements; avoid distractions like phones or TVs.
  • Wear appropriate workout attire and supportive shoes.
  • Keep a water bottle nearby to stay hydrated.

Mastering Proper Form and Posture

Maintaining the right form and posture ensures you’re working the intended muscle groups and minimizes the risk of injury. Here are some pointers to keep in mind:

  • Engage your core muscles to stabilize your body.
  • Keep your back straight and chest up during exercises.
  • Maintain proper foot alignment to avoid strain on your knees and ankles.
  • Focus on controlled, deliberate movements for each exercise.

Incorporating Resistance or Speed Adjustments Over Time

To keep challenging your muscles and cardiovascular system, consider these options:

  • Treadmill Incline: Gradually increase the treadmill’s incline during your walking lunges or side shuffles. This added resistance will engage your muscles differently.
  • Speed Variations: Periodically introduce short bursts of higher speed during exercises like side shuffles or dynamic mountain climbers. These bursts can intensify your workout and boost calorie burn.
  • Weighted Vest: For those seeking extra challenge, a weighted vest can be added to increase resistance during walking lunges or side shuffles.

Mountain Climbers

Mountain climbers target your entire core and shoulders with this dynamic treadmill exercise. Here’s how to perform dynamic mountain climbers:

Muscles Targeted: The entire core and shoulders.

Setup: Start by setting your treadmill to dynamic mode. Assume a plank position with your hands firmly on the floor and your feet positioned in the middle of the treadmill.

Form: Maintain a straight line from head to heels. Keep your arms fully extended, engaging your core throughout.

Execution: Now, here’s the twist. Instead of static planking, you’re going to make the treadmill belt your mountainous terrain. Grip the moving belt with your toes while maintaining the plank position. As the treadmill belt moves, drive one knee toward your chest while extending the other leg backward, mimicking a mountain climber’s motion.

Duration: Continue this mountain climbing motion for one full minute. Feel the burn in your core and shoulders as you keep up the pace.

Transition: Once the minute is up, smoothly transition to the next exercise in your circuit. This dynamic movement will elevate your heart rate and engage your core muscles for a challenging workout. Keep up the great work!

Modification: Begin by setting the treadmill to a very low speed or even stopping it. Assume the plank position without any motion initially. Focus on holding the plank and gradually introduce the dynamic movement as you become comfortable.

Treadmill Walking Lunges

Let’s target those glutes, quads, and calves with Treadmill Walking Lunges. Here’s how to perform this effective exercise:

Muscle Targeted: Glutes, quads, and calves.

Setup: Begin by setting your treadmill to a moderate speed, approximately 1.5 to 2.0 mph. This speed will allow you to perform the walking lunges safely.

Balance: While performing the lunges, it’s important to maintain balance. You can hold onto the treadmill’s side rails lightly for support.

Form: Start with your right leg. Take an exaggerated step forward, ensuring your right knee bends to a 90-degree angle. As you lunge forward, your left knee should hover just above the treadmill belt.

Execution: Push through your right heel to rise up, bringing your left leg forward. Now, repeat the lunge with your left leg. Continue alternating between legs for one full minute.

Posture: Focus on maintaining proper form. Keep your body centered between your legs, your back flat, and your chest up throughout the exercise.

Duration: Perform Treadmill Walking Lunges for one full minute, feeling the burn in your glutes, quads, and calves.

Transition: After completing the lunges, smoothly transition to the next exercise in your circuit. This exercise is an excellent way to strengthen your lower body while using the treadmill in a creative way.

Modification: Start without any incline on the treadmill, and set the speed to a slow and comfortable pace. As you get more confident, you can gradually increase the treadmill’s incline and speed.

Additional Resource  – Your guide to anti-gravity treadmills

Treadmill Side Shuffles

Muscle Targeted: Inner and outer thighs and calves.

Let’s get those inner and outer thighs working with Treadmill Side Shuffles. Follow these steps:

Starting Position: Begin by standing sideways on the treadmill. Ensure your back is straight and your knees are slightly bent. This position will help you maintain balance and stability during the exercise.

Safety Note: If you’re new to this exercise or need extra support, it’s a good idea to hold onto the railings of the treadmill.

Speed Setting: Adjust the treadmill speed to approximately 3.0 to 4.0 mph. This setting will provide enough momentum for effective side shuffles.

Execution: Start performing rapid and quick side shuffles. Focus on landing on the balls of your feet throughout the exercise. This will engage your inner and outer thigh muscles as well as your calves.

Duration: Continue the side shuffles for one minute, feeling the burn in your thighs and calves as you move laterally.

Switch Sides: After completing one minute on one side, it’s time to switch sides. Carefully step off the treadmill, reposition yourself on the other side, and repeat the exercise in the opposite direction.

Modification: Begin at a slow pace and a low incline to get accustomed to the movement. As your balance and coordination improve, you can increase the speed and incline to intensify the exercise.

Walking Plank

Muscles Targeted: The entire core and the shoulders.

Setting the Treadmill: Begin by setting the treadmill to a low speed, around 1 to 2 mph. This speed allows you to focus on your form and stability during the exercise.

Plank Position: Stand behind the treadmill and assume a plank position. Place your hands firmly on the sides of the treadmill base, with your palms facing down. Your legs should be stretched out behind you.

Core Engagement: Engage your core muscles. A strong core is crucial for maintaining stability during this exercise.

Walking Motion: Once you’re set in the plank position, carefully place your hands onto the moving treadmill belt. Start walking your hands forward while keeping your body in a plank position. Your shoulders and core will be working hard to support your weight.

Duration: Continue “walking” with your hands for one full minute. You’ll feel the challenge in your core and shoulders as you maintain this position.

Transition: After completing one minute of the Treadmill Walking plank, transition to the next exercise in your circuit.

Modification: Begin with the treadmill stopped and assume the plank position. Focus on maintaining a stable plank. Once you feel confident, start walking your hands on the stationary treadmill belt to mimic the motion.

Low Squat Side Shuffles

Muscles Targeted: The glutes, quads, hamstrings, glutes, and the core.

Starting Position: Begin just like the previous side shuffle exercise, standing sideways on the treadmill. Ensure your back is straight and your knees are slightly bent.

Quarter-Squat Position: This time, assume a quarter-squat position. Keep your back flat, core engaged, and chest up throughout the exercise. This lower squat position intensifies the workout, engaging your leg muscles and core more effectively.

Adjusting the Speed: Set the treadmill to a moderate speed, around 2.0 to 3.0 mph. This speed provides the right balance of intensity and control for this exercise.

Side Shuffling: While staying in the quarter-squat position, start performing quick side shuffles. Maintain a distance between your feet that’s at least hip-width apart throughout the exercise.

Duration: Continue side shuffling at this challenging pace for one full minute. You’ll feel the burn in your glutes, quads, hamstrings, and core as you power through this exercise.

Switch Sides: After completing one minute on one side, switch to the other side to ensure balanced muscle engagement.

Modification: Begin with the treadmill at a low speed and without an incline. Focus on your squat form and side shuffling motion. As you build strength and confidence, increase the speed and incline gradually.

Treadmill Bear Crawl

Muscles Targeted: The core, shoulders, and legs.

Speed Setting: Set the treadmill to a slow speed, typically ranging from 1.0 to 2.0 mph. Starting slow is essential for safety and control during this exercise.

Starting Position: Assume a pike position at the back of the treadmill. Your hands should be firmly placed on the treadmill base, and your feet should rest on the sides of the treadmill.

Weight Distribution: Most of your weight should be on your hands, with your fingers pointing forward. This position will engage your core and shoulders.

Start Bear Walking: Be extremely cautious as you begin. Gradually step your feet onto the moving belt of the treadmill and start walking your feet towards you. Imagine imitating the movement of a bear’s crawl.

Exercise Duration: Continue the bear crawl for one full minute. This exercise challenges your core stability and works your shoulders and legs simultaneously.

Rest Period: After completing one minute, carefully stop the bear crawl. Take a well-deserved rest for one to two minutes. Catch your breath and prepare for the next circuit.

Repeat: To maximize the benefits, repeat the entire circuit two to three times. Each round will further engage your core and help you build strength and stability.

Modification: Start with the treadmill stopped and assumed the pike position. Gradually introduce the crawling motion by stepping one foot at a time on the stationary treadmill belt. As you feel more comfortable, increase the speed slightly.

9 Simple Ways To Enjoy Long Runs

Beginners Runner Guide To Negative Splits

Looking for practical tips to help you enjoy long runs? Then you’ve come to the right place.

In a world where speed is often celebrated, long-distance running is the quiet champion of endurance.

It’s not just about racing against others; it’s about racing against yourself, pushing boundaries, and discovering what lies beyond your comfort zone.

Whether you’re a seasoned marathoner or someone contemplating your first long run, you’ve come to the right place.

This article is your guide to not only surviving but truly enjoying those extended journeys on foot. We’ll delve into strategies that will not only make your long runs bearable but turn them into a source of exhilaration and accomplishment.

So, lace up your shoes because we’re about to explore the secrets of making long-distance running a gratifying experience. Let’s embark on this journey together.”

  1. Get Ready

As Woody Allen once wisely quipped, “80 percent of success is showing up.” The remaining 20 percent is all about the details. So, let’s lace up those running shoes and dive in.

First things first, you don’t need a mountain of gear to start running. All you really need are a pair of comfortable, well-fitting running shoes, suitable running attire, and perhaps a trusty watch. Once you’ve got these essentials squared away and ready to roll, you’ll find it much easier to simply step out the door without second-guessing yourself.

Now, here’s an important piece of advice, especially for those new to the world of running: don’t rush into long distances. Pushing yourself too hard too soon can lead to injuries, and that’s definitely not what we’re aiming for.

The key to a safe and injury-free running journey is to build your foundation carefully and then gradually increase both distance and speed. This is where the walk-run method comes in handy. It’s a fantastic way to build up your stamina and cardio fitness safely.

To guide you on your journey, here are three articles that offer valuable insights:

Now, here’s a pro tip: preparation is your best friend when it comes to long runs. The night before your run, gather all your running gear – clothes, shoes, your trusty watch, and even your favorite tunes if you’re into that. Plan your nutrition and map out your running route. In essence, get everything sorted and ready before you hit the sack. This way, you eliminate those pesky early-morning excuses that might try to hold you back.

Have trouble sticking to a morning running routine? Check this article.

2. Keep the Tanks Humming

To ensure your long runs are a gazillion times better, you’ve got to keep those running engines humming with the right fuel. Long runs are voracious beasts, and they’ll certainly deplete your energy stores.

So, here’s the deal: to conquer those long miles, you need to nourish your body properly, or you risk discomfort, early fatigue, burnout, and a host of other health issues.

Now, let’s be crystal clear here – a long run is not a free pass to indulge in unhealthy eating. It’s not a green light for processed foods, sugars, cakes, or cola.

You get the drift, right?

So, here’s the how-to for keeping those tanks full and your running engines roaring:

Step 1: Pre-run Meals

Make your pre-run meal a top priority. Even if it’s just half an hour before you hit the road, refuel those tanks with the right stuff.

For some delicious pre-run meal ideas, check out “Pre & Post-Run Nutrition – What & When to Eat For Maximum Running Performance.”

Step 2: Fuel During the Run

Don’t wait until you hit a wall to refuel during your run. Start taking in those much-needed calories around mile 4 or 5.

Waiting until your energy levels plummet is a recipe for misery. Aim for 150 to 200 calories per hour – enough to keep you going without upsetting your stomach.

Step 3: Hydration is Non-Negotiable

Stay hydrated – before, during, and after your run. Hydration is absolutely key, especially on those hot days. Sip water throughout the day and during your long runs.

But here’s the secret sauce – it’s all about experimentation. There’s no one-size-fits-all solution here. You’ve got to figure out what works best for you and stick with it for the long run – both literally and figuratively.

For the full guide on eating during long runs, check my post here.

  1. Run to Music

Running to music can transform a long run into an enjoyable and efficient experience. It has the magical power to whisk your mind away from fatigue, aching legs, and those pesky doubts that sometimes creep in during a run.

But here’s the catch – there’s a downside to cranking up the music to the max while running.

It can cut you off from the world around you, potentially causing permanent ear damage. Moreover, it might drown out your body’s signals of pain and discomfort, which could eventually lead to injury and burnout.

So, if you’re a music-loving runner, here’s how to do it right:

Step 1: Craft Your Playlist

Plan your own playlist. Opt for songs with a slow tempo, ideally between 70 to 80 beats per minute (BPM). These tunes are the perfect companions for your long runs.

While songs with over 100 BPM can get your heart pumping and boost motivation, they’re better suited for high-intensity workouts like intervals and fartleks.

Step 2: Slow is the Way to Go

For those serene, low-intensity long runs, slow-speed songs are your best bet. Dr. Costas Karageorghis from Brunel University London has research to back this up. Trust me; these slower songs are your secret weapon for keeping a steady pace and enjoying the journey.

Step 3: Stay Aware and Mindful

Now, here’s the golden rule: never let your music disconnect you from your surroundings. It’s crucial to maintain situational awareness while you run. Be mindful of where you’re running, and never, ever ignore your body’s signals of discomfort or pain.

And here’s a little bonus tip: if music isn’t your thing, consider tuning into audiobooks or podcasts.

They’re fantastic alternatives that can keep your mind engaged during those long stretches of road.

  1. Avoid Chafing

Chafing is every runner’s arch-nemesis. It’s the kind of irritation that can turn a long run into an ordeal. But fear not because we’re here to make sure you stay “chafe-free” and keep the joy in your run.


The Downside:

Honestly, it’s tough to find a downside to avoiding chafing. It’s like having a smooth, pain-free run, which is pretty much what we all want, right?

So, let’s skip the downsides and jump right into how to do it.

How to Do it:

  • Choose Moisture-Wicking Fabric: Wear clothing that wicks away moisture and sweat. This helps reduce the friction that causes chafing. Experiment with different fabrics and sizes to find what works best for you.
  • Lube Up: For those hot spots like inner thighs, nipples, arches, and toes, use a quality lubricant. It creates a protective barrier and reduces friction. Don’t forget to tape these areas if needed.
  • Invest in Proper Gear: Run in good-fitting shoes to prevent blisters and other lower-body issues. Head to a specialized running shoe store and get fitted properly. It’s not just about avoiding blisters; it can also prevent various running injuries and enhance your overall performance and enjoyment.
  • Affordable Running Shoes Exist: You don’t need to break the bank for quality running shoes. Around $100 can get you a great pair that suits your needs.
  1. Run with a Buddy

Running with a buddy can be a game-changer for your long runs.

Countless studies have shown that exercising with a partner or in a group can boost your stamina, make your workouts feel less exhausting, and turn your training sessions into enjoyable social hours.

When you run with a partner, you get to share the road and the conversation. This is crucial because long runs should be kept at a conversational pace – you should be able to run and chat comfortably at the same time.

Now, here’s a little secret: I used to have a running partner, my cousin, who was also my mentor during the early years of my running journey. Those weekend 15-milers were a lot more fun with him by my side.

The Downside:

But here’s the catch – relying solely on one running partner can be a bit risky. What if you have a falling out, or they’re out of town, busy, injured, or just in a bad mood? The list goes on. That’s why you need to have a few tricks up your sleeve and be flexible in your approach.

How to Do it:

  • Find the Right Partner: Before you hit the road with a potential running buddy, make sure you both have similar fitness levels and goals. Discuss your running schedules – when and where you’ll run – and establish your pace goals.
  • Be Open to Variety: Running with multiple partners or joining a running club can be a great way to diversify your running experience and reduce dependence on one person. Embrace Solo Runs: Sometimes, running alone can be a beautiful and meditative experience. Learn to enjoy your own company and relish the solitude of the open road.
  • Explore Online Resources: If you’re surrounded by people who don’t share your passion for running, or you’re a bit shy, turn to the internet. There are plenty of online resources, like meetup.com, buddyup.com, runners’ forums, and social media, that can help you connect with like-minded runners in your area.
  1. Know the Route

Nothing can put a damper on your long run, quite like getting lost along the way. It’s a nightmare scenario, especially when you’re out on the trails where public transportation is nowhere in sight to rescue you.

Plus, you might be tired, exhausted, or worse – injured – making walking back seem like an insurmountable challenge.

The Downside:

Now, here’s a pitfall to watch out for some runners become creatures of habit, sticking to the same tried-and-true route week after week.

While consistency is good, this approach can lead to monotony and ultimately drain your motivation to train. So, it’s crucial to change things up from time to time and explore new routes to keep things fresh.

How to Do it:

  • Plan Your Route: Before embarking on your long run, have a general idea or a set of trails you’d like to explore. Know where you can hydrate and refuel, especially if you’re planning to run for more than an hour.
  • Stay Safe: Carry your phone with you, and make sure it’s fully charged. GPS can be a lifesaver if you find yourself off-course. Additionally, have some cash on hand for emergencies.
  • Embrace Exploration Runs Sparingly: While it’s fun to go off the beaten path and discover new trails and routes, reserve these exploration runs for occasional adventures. It shouldn’t be your default mode for long runs, as getting lost repeatedly can take the fun out of the experience.
  1. Break up the Long Run

Breaking up your long run is a smart strategy to make those daunting distances feel much more manageable. It’s all about tricking your brain into thinking you’re tackling a series of shorter, easier courses instead of one seemingly endless journey.

The Downside:

Now, if measuring distance seems challenging, don’t fret. Instead of breaking up mileage, you can divide the duration of your run into manageable chunks.

Think 15- to 20-minute segments, for example. It’s essential to keep the entire distance or duration realistic and within your fitness level. Pushing too hard can lead to exertion or injury.

How to Do it:

Here’s the secret: approach your long run like you would eat an elephant – one bite at a time. Break it into three to four increments, depending on the total distance and your preference. For instance, if you’re planning a 15-mile run, divide it into three to four-mile segments. Then, focus on completing one segment at a time.

By doing this, you make the distance feel easy peasy. Three or four miles at a time? Totally manageable. Plus, it helps you maintain a more manageable pace throughout your run, ensuring you finish strong.

  1. Reward Yourself at the End

Rewarding yourself at the end of a long run can be a game-changer, making those miles more enticing and motivating. It’s backed by research, which shows that the mere anticipation of a reward can supercharge your motivation.

The Downside:

Now, here’s a word of caution: the “reward yourself with food” mantra may not be the best choice. Post-run nutrition is vital for recovery and providing your body with the nutrients it needs for repair and replenishment. Indulging in unhealthy eating as a reward for a healthy run can backfire in the short and long term.

How to Do it:

Instead of reaching for junk food, decide in advance what pleasurable activity you’ll treat yourself to after completing your run. The possibilities are endless – a long, relaxing bath, a soothing massage, a pedicure or manicure, a delicious and nutritious dinner, a trip to the movies, or diving into your favorite book by a beloved author.

The key is to choose something that genuinely brings you joy and makes you look forward to your post-run reward. However, if you still want to reward yourself with food, that’s perfectly fine – just do it in moderation.

  1. Keep Doing it

In order to get good at running, you will simply have to run more.

To become a better runner, there’s no secret formula – you simply have to run more. The more you run, the more your brain and body become adept at using the right muscle fibers, allowing you to run with greater efficiency and less effort.

So, keep running, and then run some more. But remember, these adaptations take time, and there’s no overnight transformation. Consistency is key.

The Downside:

While running more is essential, it’s crucial to understand that more isn’t always better. Quantity should never overshadow quality. Overdoing it can lead to burnout, injuries, and frustration.

To avoid this, incorporate recovery weeks into your training program, typically every fourth or fifth week. These weeks should prioritize rest and rejuvenation. Additionally, consider adding recovery runs to your schedule.

How to Do it:

To make running a lifelong habit, turn regular exercise into something that’s second nature to you. Human beings are creatures of habit, and we tend to repeat physical and mental patterns without even realizing it.

You can use Tony Schwartz’s approach from “The Power of Full Engagement” to turn running into a lifelong habit. Simply stick with your desired running behavior (the habit) for at least a month without fail.

Initially, it might be challenging, but after a few weeks, long runs will become a part of your daily life. Running will become as automatic as brushing your teeth.

Incorporate your workouts into your schedule for the upcoming four weeks and commit to checking them off your list. It may be tough at first, but with time, regular exercise will become a natural and enjoyable part of your life.

Elevate Your Workout: The Comprehensive Hill Hike Treadmill Workout

Picture this: You’re about to embark on a journey that will not only challenge your fitness but also transport you to the exhilarating feeling of conquering steep terrains, all from the comfort of your indoor treadmill.

Whether your treadmill reaches the heights of a 15 percent grade or stops at a sturdy 10 percent, we’ve got a heart-pounding adventure in store for you.

But wait, there’s more! If you’re seeking the ultimate challenge, it’s time to lace up those sneakers, adjust your speed, and take on my 20-minute hike treadmill workout.

This workout isn’t just about breaking a sweat; it’s about building endurance and strength while exploring the world of incline training right at home.

Whether you’re a beginner starting at a comfortable 2.5 to 3 mph or a seasoned pro ready to crank it up to 5 mph, you’re in control. This journey is about tailoring the challenge to your fitness level and goals, and I’m here to guide you every step of the way.

Ready?

Let’s go

What Is Incline Training On The Treadmill?

Treadmill incline training, often referred to as hill training, is a workout technique that involves raising the front of the treadmill to simulate an uphill climb.

Most modern treadmills are equipped with an incline feature, enabling users to simulate uphill terrains. These inclines can range from a gentle slope to a steep mountain.

While it might sound straightforward, the benefits it offers are anything but ordinary.

Let’s dive into what makes this training method so valuable.

Enhanced Cardiovascular Health:

One of the standout benefits of incline training is its ability to elevate your heart rate and challenge your cardiovascular system. Research shows that uphill running or walking can improve your VO2 max, a measure of aerobic fitness, which is essential for endurance athletes and anyone looking to boost their stamina.

Calorie Burn and Weight Management:

If you’re aiming for weight loss or maintaining a healthy weight, treadmill incline training can be your ally. The added resistance of the incline makes your body work harder, resulting in more calories burned during and after your workout.

Leg Strength and Muscle Toning:

As you climb that virtual hill, your leg muscles – quads, hamstrings, glutes, and calves – get a serious workout. This strength development not only improves your running or walking performance but also helps in injury prevention.

Time Efficiency:

Incline training allows you to achieve effective workouts in less time. You can get a challenging session in as little as 20-30 minutes, making it an excellent option for those with busy schedules.

Mental Toughness:

Tackling incline training builds mental resilience. The uphill battle, whether you’re walking or running, is as much a psychological challenge as it is a physical one. Conquering those inclines can give you the mental edge needed to push through other fitness goals.

Safety Precautions For Treadmill Incline Training

While treadmill incline training offers an array of benefits, it’s essential to approach it with mindfulness and safety in mind. Here are a few key points to consider:

  • Start Slow: If you’re new to incline training, ease into it. Begin with a modest incline level that you can comfortably walk or jog on. Gradually increase the incline and intensity as you become more accustomed to the workout.
  • Proper Form: Maintain good posture and proper running or walking form, even on inclines. This helps prevent strain or injury and ensures that you’re reaping the full benefits of the exercise.
  • Listen to Your Body: Pay close attention to how your body responds to incline training. If you experience pain or discomfort, particularly in your hip flexors, it’s crucial to address it. Overexerting on steep inclines can lead to injuries.
  • Know Your Fitness Level: Understand your current fitness level and set realistic goals. Whether you’re a beginner or an experienced athlete, there’s room to challenge yourself safely within your capabilities.

Getting Started with Treadmill Incline Training

Now that you’re familiar with the fantastic benefits of treadmill incline training, it’s time to delve into the nitty-gritty of getting started.

Before you embark on your uphill journey, there are several essential considerations to keep in mind.

Setting Up Your Treadmill

Before you start your incline training, familiarize yourself with the controls and settings of your treadmill. Most treadmills offer the option to adjust both incline levels and speed. Here are some guidelines:

Adjusting Incline Levels:

The beauty of treadmill incline training is the ability to customize your workout. Begin with a modest incline, especially if you’re new to this type of training. A 4-5 percent incline is an excellent starting point. As you get stronger, you can gradually up the incline level.

Managing Speed:

Your walking or running speed on the treadmill is equally adjustable. If you’re a beginner, start at a speed of 2.5 to 3 mph and maintain it during your workout. Up for the challenge?  Feel free to increase the speed, but always ensure it aligns with your fitness level and comfort.

Alright, no more chit-chat. Time to dive into that invigorating routine!

Warm-Up:

Begin your treadmill hill hike with a proper warm-up. Ease into it by walking or jogging slowly for five minutes. During this time, we’re going to add a little spice. Gradually, over the course of these five minutes, increase the incline by 1% every minute while maintaining the same speed. By the end of these five minutes, you’ll be standing tall on a 4 to 5 percent incline.

Two-Minute Incline:

Now, let’s kick it up a notch! Ramp that incline up to a challenging 8 to 10 percent while keeping your speed consistent. Aim for a perceived exertion level of around 7 on a scale of 1 to 10. This is where the real fun begins.

One-Minute Recovery:

Okay, take a breather! Reduce your incline to a comfy 4 to 5 percent while maintaining the same speed. This is your chance to catch your breath and gear up for the next round.

Three-Minute Incline:

It’s time to tackle a 12 percent incline, but don’t worry; it’s only for three minutes. If you’re feeling feisty, you can increase your speed for an added challenge, but make sure your Rate of Perceived Exertion (RPE) stays below 8 on a scale of 1 to 10.

One-Minute Recovery:

You know the drill by now – back down to a 4 percent incline. Recover and recharge for the grand finale.

Four-Minute Incline:

Here comes the big one! Crank up that incline to a whopping 15 percent and keep it there for a solid four minutes. This is where champions are made. Maintain excellent form throughout, and aim for an RPE of 9. Push yourself to the limit!

Five-Minute Cool Down:

You did it! Now, it’s time to wind things down. Gradually reduce your incline to a gentle 2 percent and jog slowly for five minutes to cool down. You’ve conquered the hill, and now you’re coming in for a smooth landing.

Mastering Hill Running: 7 Essential Strength Exercises For Hill Training

Looking for some of the best strength exercises to help you with your hill running game? Then you’re in the right place.

Here’s the truth. Hills can be brutal. But here’s a little secret: They’re also one of your best allies.

Your legs, with their ever-faithful glutes, hamstrings, quads, and calves, are just waiting for the right challenge to level up. Not to mention that powerhouse core of yours that’s itching to show off its stability skills on an uphill battle.

Let’s get down to the juicy bit.

If you’re on a quest to conquer those inclines like the legends before you, I’ve got a treasure trove of exercises. With these seven gems, you’ll not only master hill running but also build muscles that would make even the mightiest mountains jealous.

Ready to dive in? Let’s go.

The Benefits of Strength For Running Hills

When it comes to conquering hills, strength training can be a game changer. Here are four reasons why:

Stronger Legs, Faster Ascents!

Think of your legs as the engine of your car. Strength training, especially exercises like squats, lunges, and deadlifts, will bulk up that engine. More muscle power? Faster, more efficient hill climbs!

And don’t take my word for it. A study found that runners who added strength training improved their running economy, which means you’re using less energy for the same pace. Cool, right?

Sturdy Ankles and Injury Prevention

The hills, especially on rugged terrains, can be unpredictable – roots, rocks, uneven terrain.

By incorporating exercises that enhance ankle strength and stability (like calf raises or single-leg balance drills), you’re not only increasing your chances of staying upright when the going gets tough but also reducing the risk of strains, sprains, and other nasty injuries.

Powerful Descents

Ever feel like your legs turn to jelly after a steep descent? Strength training, especially eccentric exercises (those where muscles lengthen under load, like in the downward phase of a squat), can help condition your muscles for the demands of downhill running. This means less muscle damage, less soreness, and more confidence as you zoom downhill.

Better Balance & Form

Running uphill or downhill requires a good amount of core stability to maintain form. Exercises like planks, Russian twists, and mountain climbers will give you that solid core.

This isn’t just about having abs to show off at the beach! A strong core helps with posture, balance, and energy transfer, ensuring you’re not wasting any precious energy while conquering those hills.

Warm-Up & Cool-Down Routines

Never dive straight into these exercises. Preparing your muscles is crucial.

Warm-Up: 

Start with a 10-minute jog followed by dynamic exercises.

Let me explain.

  • Jog it Out: Before anything else, get those legs moving with a gentle 10-minute jog. This isn’t a race, so just keep it relaxed and enjoy the rhythm.
  • Dynamic Exercises: Post-jog, let’s get dynamic! Swing those legs, make some big ol’ arm circles, and channel your inner athlete with some high knees.

Cool-Down:

End with 5-10 minutes of walking followed by static stretches targeting the muscles worked.

The 7 Essential Strength Exercises For Hill Training

Without further ado, here are the strength exercises you need for a smooth hill running experience.

1. Step-Ups

Targeted muscles: Quadriceps & Glutes.

Getting Started:

Grab a sturdy chair or a bench. Trust me, you want this to be solid – no wobbling tragedies here, okay?

Step-by-Step Guide:

Kick it off by placing your right foot onto that platform, imagining it’s the first step to that viewpoint!

Make sure your right knee is forming a neat 90-degree angle. And hey, don’t forget to keep that left leg ramrod straight and grounded.

Keeping your spirit high (and your chest higher!), lift your left foot up, mirroring that right knee’s 90-degree angle.

Slowly, as if you’re testing the temperature of the water, lower that left foot. As you do, flex the hip and knee of the dominant right leg, giving the floor a gentle tap – that’s one rep down!

Throughout this dance, your right foot should be as steadfast as a mountain. No shuffling or wobbling – it’s the anchor of the move.

Aim to repeat this 12 to 16 times on each side, and give yourself a pat on the back! One set, nailed!

2. Squat

Targeted muscles: Quads, Hamstrings & Glutes.

Getting into Position:

Stand like you own the place: feet hip-width apart, back as straight as a knight’s lance and toes pointing straight ahead, ready to charge!

Step-by-Step Guide:

Here’s where the magic begins. Shift your weight onto your heels, pretending you’re about to sit on that coveted chair.

Descend till your knees are bending into a neat 90-degree angle. Oh, and you’ll feel it – those quads, hamstrings, and glutes coming alive like they’ve had a double shot of espresso.

Ready for liftoff? Push through those heels and rise like the royalty you are, back to standing.

Keep that core tight chest proud, and make sure your knees are playing nice, tracking over the toes throughout.

Feeling gutsy? Amp it up by clutching some dumbbells or rest a loaded barbell on your upper traps. It’s like upgrading from a horse to a dragon.

12 to 16 reps, and voila! You’ve completed a set.

3. Lunge with a Kickback

Muscles Targeted: Glutes, hamstrings, and quadriceps.

Do you feel like adding a little oomph to your regular lunges? Introducing the lunge with a kickback! Think of it as your standard lunge but with a cheeky wink at the end.

Proper Form

Get yourself in a starting pose with a pair of dumbbells dangling by your sides, like you’re about to dance the tango with them.

Own the stage: Step out with your left leg, and let’s lunge! Both knees bend into a solid 90 degrees, sending you deep into that lunge.

Rise like a phoenix! As you come up, kick that right leg straight up behind you. Imagine you’re trying to close a car boot with your foot. Pause there – feel that glute squeeze? Magic!

Now, with finesse, glide that right leg back down and forward, setting up for the next round. This time, let your left leg do the talking.

Throughout this sassy move, remember: back straight, chest out, and torso standing tall as if you’re balancing a book on your head.

4. Calf Raises

Muscles targeted: The calves.

Have you ever admired a ballet dancer’s chiseled calves and thought, “I wish my calves looked that toned”? Well, I’ve got a little secret move for you: the Calf Raises. Not only will this exercise give your calves the workout they deserve, but it’s also easy to do, and you don’t need a ballet barre!

Proper Form

Position yourself so that just the balls of your feet are resting on the edge of a step. Now, keep those feet about a sneaker’s length apart and ever so slightly turn your toes outward like you’re about to do the cha-cha.

With your spine straight and tall, lift those heels high, just like you’re trying to sneak a peek over a tall fence. Feel that in your calves? Yup, that’s them working!

Now, add a little groove. Pulse those hips gently up and down, dancing to the beat of your own rhythm and zoning in on that lovely calf stretch.

Keep this calf party going for about 45 seconds to a minute.

5. Split-Stance Jumps

Muscles Targeted: Glutes, hamstrings, and quadriceps.

Get into position:

Stand with a fierce split stance – right foot taking the lead, half a step ahead of the left. This is your launchpad.

Ready for take-off? Power up by bending those knees, then shoot up, aiming for the stars.

While you’re soaring, play a little switcheroo with your legs. Yup, right becomes left, and left takes the lead.

Aim for 12 to 16 jumps. By the end, you’ll not just have stronger legs, but you’ll also feel like you’ve got springs for feet!

6. Straight Arm Planks Row

Muscles targeted: Upper back and core muscles.

Set the Stage:

Get down into a straight arm plank position. Ensure those hands are beneath the chest, arms locked and strong right under the shoulders. Imagine a straight line running from your head down to those power-packed ankles.

Grab that Dumbbell: Now, with your core tighter than a drum, pick up one dumbbell. Feel the weight? That’s your upper back getting ready to work!

Row, Row, Row Your Dumbbell: While maintaining that plank (remember, no sagging!), lift the dumbbell towards your ribcage. Feel that squeeze in your back muscles? That’s the magic! Now, slowly bring it down to the floor with control. Don’t just drop it!

Repeat with the other arm. That’s one rep down!

7. Deadlift

Muscles Targeted: Core, glutes, hamstrings, and calves.

Starting Stance:

Position yourself so that your feet are shoulder-width apart. Have your toes ever-so-slightly pointing outward. Ensure the balls of your feet and the bar are BFFs lined up and ready for action.

Now, lower yourself into a squat position and grasp that bar. Shoulders-width apart is the sweet spot.

As you begin to lift, think of this as a holistic movement. Your goal? Keeping the bar snuggled close to you as you straighten your legs to a full extension. Feel those muscles come alive!

Relish at that moment when you’re fully upright.  But don’t dally too long – gently lower the bar by pushing those knees forward. Give the floor a gentle tap with the weight before rising like a phoenix once more. And that’s how you perform a deadlift.

Remember, like a protective parent, ensure your back remains straight and those knees follow the path set by your feet.

Conquer Trails with Confidence – The Trail Runner’s Ultimate Guide to Strength Training

Whether you’re lacing up your shoes for the first time or you’ve been conquering the trails for years, this article is crafted with you in mind.

Let’s make something crystal clear: trail running is an evolving journey.

And no one can deny it. The more you lace up and hit those trails, the better and bolder you become. But that doesn’t mean that strength training doesn’t deserve a spot on a trail runner program.

Here’s the truth. Strength training isn’t just about looking buff or flexing for the gram. It’s also about upgrading your running machine and protecting yourself from those overuse injuries. The is especially the case for trail runners.

That’s why today I decided to delve deep into some of the best exercises for trail runners. But before I do that, let’s first discuss how strength training can help level up your trail running escapades.

Why Every Trail Runner Needs This

Here’s what today’s article will help you accomplish:

For Beginners:

If you’re just starting out, this guide will give you a foundation of exercises to kickstart your trail running journey. These exercises aren’t just about muscle strength; they’re about giving you the confidence to tackle those trails, knowing your body has got your back (and legs and core!).

For The Seasoned Runners:

Think you know all there is to know? Well, consider this: even the best can always find ways to improve. These exercises might remind you of the basics or introduce you to something new. Maybe you’ve missed out on an exercise that could be your new secret weapon against those challenging trails.

So, whether you’re at the start line of your trail running adventure or miles deep into the journey, these exercises are here to ensure every step you take is stronger, safer, and more efficient. Embrace the challenge, and let’s hit those trails together!

The Benefits Of Strength For Trail Runners

Here are five game-changing reasons why you should be hitting the weight room as a trail runner:

Build Power

Let’s talk glutes, hamstrings, quads, and calves. A little love for these muscle groups, and boom! You’ll be powering up those hills with an ease that surprises even you. Like a mountain goat, but in trail shoes.

Descend Like a Pro:

Ever felt that slightly out-of-control sensation when descending? Strength training has got your back (and your knees, and your ankles). It preps your muscles for that controlled resistance against gravity, making downhill runs smoother.

Improve Technique

Make it even better with a power pose. A solid core workout routine ensures you’re running with the kind of upright posture that screams confidence. Plus, efficient breathing? Check!

Become Incline-Proof:

Hill running can take a toll on your body. But with strength training helps you fortify your tendons, muscles, and ligaments. This, in turn, protects you against injury, both in the short and the long term.

Improve Stamina

Strength training doesn’t just boost your hill prowess; it also amps up your stamina big time. Imagine crushing those hills and still feeling pumped for more. Sounds like a dream? Well, it’s totally achievable.

The Rules of The Game

As you get into strength training, keep in mind that this isn’t a race to see who can lift the heaviest or jump the highest. It’s about steady, safe progress. Here’s how to ace it:

  • Start light: Begin with a weight that feels manageable. If you can do your reps without compromising form, you’re golden.
  • The 10% rule: When increasing weights, aim for no more than a  5 to 10% increase at a time. This helps your body adjust without going into shock mode.
  • Rest and recover: Think of rest days as your body’s pit stops. It’s when the magic of muscle repair and strengthening happens.

Modifications for Specific Injuries or Limitations:

Before you try any of the following exercises, please make sure abide by the following, especially if you’ve a history of the mentioned issues.

  • For Bad Knees: Avoid high-impact exercises like jumps. Instead, focus on low-impact strength training like wall sits or resistance band exercises. If doing squats, consider a half-squat to reduce pressure on the knees.
  • For a Weak Lower Back: Strengthening your core is vital. Planks or bird-dogs are great exercises that can be incorporated. When doing deadlifts or squats, always prioritize form over weight. Use lighter weights until you’re confident in your technique.
  • For Ankle IssuesBalance exercises are a game-changer. Try standing on one foot, progressing to doing it with closed eyes, or on an unstable surface like a pillow.
  • For Shoulder Pain: If holding weights overhead or in front of you is painful, consider weight-free exercises or use resistance bands as a gentler alternative.

The Strength Exercises For Optimal Trail Running

Without further ado, let’s get into the exercises you need to fortify your trail running game

Single-Leg Deadlifts

Apart from making you feel like an absolute fitness god/goddess, single-leg deadlifts target the often-neglected hamstrings, glutes, and hips. A study from the Journal of Sports Science & Medicine highlighted the importance of hamstring strength, especially in athletes, to reduce the risk of injuries.

Proper Form

Stand tall with a hint of sass! Keep those knees slightly bent, feet chatting away hip-width apart. Grasp a dumbbell in each hand, letting it rest against your thighs.

Keeping your spine neutral (think of it as your proud warrior pose!), lift one foot off Mother Earth. Now comes the fun part: hinge at the hip while raising your back leg.

Lower those dumbbells gracefully down your legs, halting the journey just below the knees.

Give it a pause – savor the moment! Then, with power, press back up, owning your starting position.

Rinse and repeat. As you groove, you should feel a teasing pull in the glutes and hamstrings, whispering, “You’re doing it right!”

Don’t forget to switch sides – let’s keep things fair and square!

So, next time you’re at the gym or cozying up at home, sprinkle in some single-leg deadlift magic. Your hamstrings, glutes, and hips will sing songs of gratitude!

2. Single-Leg Forward Jumps

The single-leg forward jump is a full-blown strength training party for your calves, quads, glutes, and, hold your breath… your ENTIRE core! But there’s more. This plyo exercise is also your secret weapon to toughen up those ankles. Stronger ankles mean less risk of those dreaded sprains, especially if you’re someone always on the move.

Proper Form

Start by standing tall on your right foot. Engage that core – think of it as hugging your inner superhero! Keep that back flat like a plank, arms casually by your sides.

Here’s where the magic happens: using your arms like they’re wings, propel yourself forward, taking a leap of faith!

Remember, we’re aiming for distance, not the stars, so keep that jump controlled and gentle. Land like you’re stepping on eggshells – softly on your right foot.

Maintain your balance. If you wobble, that’s cool. It’s all part of the journey!

Time to show the left leg some love. Swap sides and repeat.

Pro tip: Feeling like a pro? Amp up the challenge by doing it with your eyes shut. Talk about trusting yourself! Additional resource – How to choose trail running gaiters

3. Box Jumps

Box jumps are like a full-throttle power-up for your legs and hips. You know that explosive drive you need when trail running or sprinting to catch the bus? That’s what these bad boys develop.

But there’s another ace up the Box Jump’s sleeve: they’re fantastic for building rock-solid knee stability. Because, let’s face it, wobbly knees on a run? No, thank you!

Proper Form

Start by positioning yourself, feet hip-width apart, behind your trusty box (or step/platform).

Engage that core like you’re prepping for a superhero landing. Keep your back poker-straight.

Ready for take-off? Hinge at the hips, swing those arms back for momentum, and then – launch forward and upward onto that box.

Aim to land squarely with both feet and knees at a comfy 45-degree angle. Think of it as a soft, controlled landing rather than a thud.

Relax those shoulders, neck, and head. You’re jumping, not stressing!

Glide back down to your starting position and blast off again!

As you get more confident, challenge yourself: up the number of reps or elevate the height of your jump.

So, are you ready to jump into one of the best plyometric exercises out there? Lace up those shoes, and let’s get airborne with Box Jumps!

4. Bulgarian Split Squat

Along with giving your quads a serious workout, Bulgarian Split Squats are stellar at activating stabilizer muscles. These are the unsung heroes that amp up your balance and coordination, ensuring you’re steady no matter the terrain.

Proper Form

Kick things off with a pair of dumbbells or kettlebells in hand. Position yourself for a lunge, but here’s the twist: your back foot should be perched on a box or bench about one to two feet high.

Engage that core! Think of it as your body’s natural seatbelt, keeping everything aligned.

As you lower yourself, keep your back straighter than a ruler. Bend the front knee, making sure it never sneaks past your toes.

Aim to lower until that front thigh is parallel to the ground. Feel that burn? That’s the magic happening!

Hold it for a beat, then power back up, squeezing those glutes with gusto.

So, ready to add some Bulgarian flair to your workout routine? Give this mighty squat a whirl, and watch those quads flourish!

5. Plyometric Lunges

These aren’t just for showing off at your next fitness class. Plyometric Lunges help develop explosive power in your legs, which is vital for those uphill bursts. Plus, they enhance your reactive strength, making sure you’re nimble-footed on unpredictable trails.

Proper Form

Stand tall, oozing confidence. Step one foot forward into a lunge, ensuring both knees are bent at a 90-degree angle.

Now for the fun part: explode upwards, using your arms for momentum, and switch legs in mid-air. Land softly into a lunge with the opposite foot forward.

Keep your core engaged, posture upright, and ensure your knees don’t overshoot your toes. We’re lunging, not diving!

Mix It Up!

To Challenge Yourself: Add some hand weights or increase the speed of your lunges. Feel that extra burn? That’s progress!

For A Kinder Approach: If the jumping feels too intense, stick to alternating reverse lunges. It’s the same movement, minus the aerial acrobatics.

6. Plank to Push-Up

Strengthening the core is crucial for maintaining posture and stability during those long trail runs. Plus, having a strong upper body ensures you have the balance and strength to ward off any accidental trips or falls.

Proper Form

Start in a plank position, forearms on the ground, body straight from heels to head.

Push up from your forearms, placing one hand at a time on the ground until you’re in a high plank or push-up position.

Lower back down onto your forearms one arm at a time.

Maintain a strong core, ensuring your hips stay level throughout. No twerking here!

Switch Things Up:

To Ramp Up The Heat: Add a push-up every time you come into the high plank position. Because, why not?

To Ease On Down: Stick to holding a forearm plank, focusing on keeping that core engaged and body straight.

Listen To Your Body

Although I’m a big fan of pushing oneself out of comfort zone, there’s one thing you shouldn’t do: push our body too far.

Imagine your body’s like a vintage radio, always tuning in and sending signals.

Sometimes, it plays rock anthems that scream, “Go for it!” Other times, it’s a soulful ballad saying, “Take it slow.” The key? Always be listening.

Signs Your Body’s Is Under Too Much Duress:

Overtraining is like that annoying song that gets stuck in your head—nobody wants to be overtrained but it sometimes sneaks up on the best of us. To stop it in its tracks, look out for:

  • Persistent soreness.
  • Fatigue that makes a sloth look hyperactive.
  • Sleep disruptions.
  • Mood swings.
  • Decreased performance.
  • Unplanned weight loss
  • Chronic aches and pains
  • Elevated heart rate

Trail Running 101: Overcoming the Top 5 Fears Every Runner Faces

Ever felt that tingle of excitement when thinking about trail running but immediately overwhelmed by fear of the off-beaten path?

You’re in good company! Venturing into trail running can be like diving into an epic movie scene – exhilarating, yes, but oh boy, those plot twists!

You might be picturing yourself tangled up in roots, wandering aimlessly through the woods, or even having a surprise meeting with not-so-friendly wildlife.

Well, we’ve all been there! Every trail runner, including yours truly, started with a mix of excitement and apprehension. But guess what? I’ve got your back! Together, we’ll tackle those fears head-on and pave your way to some epic trail tales.

Ready to gear up and demystify trail running? Let’s go.

Additional Resource – Here’s how to protect yourself from dogs

Fear # One: Falling While Trail Running

Whether you’re a seasoned trail blazer or a newbie just itching to hit the ground running (hopefully not literally), the fear of falling is as real as it gets.

But let’s have a heart-to-heart here. Life, in general, is packed with unpredictable moments. I mean, how many times have you stubbed a toe on your own furniture? Ouch, right? A study from the Journal of Safety Research highlighted that a whopping majority of accidents actually happen at home. So, if we’re playing the odds game, your living room might be more of a “danger zone” than those scenic trails.

However, let’s get real. Tumbles on the trail? They’re kinda of like battle scars for trail runners – a testament to the rugged paths conquered. If you’re out there exploring undulating terrains filled with rocks, roots, and everything in-between, chances are, gravity might catch you off-guard occasionally.

The Solution

Try keeping a rhythm with about 180 steps per minute. Research from the Journal of Sports Science & Medicine has shown that this swift, chippy cadence can help position your feet squarely beneath you, making those surprise trips less likely.

Oops, did you miss a step? No worries!

Instead of taking a headlong plunge, chin in, core tight, and roll over your leading arm to the back of your shoulder. Think of it as your superhero landing – minus the explosion in the background.

Check this YouTube Tutorial.

Fear # Two: Wildlife Encounters While Trail Running

Whether it’s the rustle of leaves or a shadow darting away, wildlife encounters can make anyone’s heart race faster than their legs!

Here’s the good news: while you’re out there thinking you’re about to star in a live-action wildlife documentary, most of our forest friends are basically thinking, “Human alert! Retreat, retreat!” Yep, these natural inhabitants are pros at detecting us from a distance and usually bail out before we even notice.

In other words, they’re more afraid of you than you’re of them.

The Solution

Make some noise! Think of it as your live concert for the critters. Sing, chat, or shout out an enthusiastic “Howdy!” Not only will this warn the animals of your approach, but it’ll also give you an excuse to finally showcase those shower singing skills.

But let’s address the elephant (or bear) in the room. What if you and a wild animal end up in a surprise meet-cute?

Rule number one: keep your cool. No sudden movements. Just gracefully back away and give them their VIP space.

As for the “race” aspect? These critters have home turf advantage, so trying to outrun them? Yeah, not the brightest idea.

To amp up your trail prep, tossing in some bear mace and a whistle in your kit is a smart move. Trust me, in the slim chance you need them, you’ll be patting yourself on the back for that foresight.

Number Three: Getting Lost While Trail Running

Have you ever had that fleeting, gut-twisting thought, “Uh, where the heck am I?” while clocking miles on a trail? Thankfully, with some handy tips and tools, you can turn that “lost” storyline into a “well-guided adventure” narrative.

The Solution

Think of your first solo trails as your cozy neighborhood jog – something so familiar, you could almost do it with your eyes closed. (Although, let’s not actually test that theory, okay?)

You want paths that feel like an old friend, routes that, if they could talk, would be reminiscing about that time you tripped over that ‘invisible’ root. Loop trails are a great choice here – it’s like running in a circle, bringing you right back to where you started.

Your smartphone? Sure, it’s a powerhouse of navigation. And mapping apps can be real game-changers. But remember, your trusty device isn’t invincible. Between pesky low battery alerts and trees conspiring to block your signal, going digital-only might leave you in the lurch. So, old school it up! For long excursions into the off-beaten path, have a detailed trail map, bond with a compass, and learn to read those topographical lines.

What’s more?

While solo runs have their charm, teaming up can be a smart choice. Consider buddying up with a fellow runner or even joining a trail-running group.

Apart from shared laughter and potential inside jokes, there’s practicality here, too. More eyes on the trail, more brains to decipher routes, and shared experience can make for a much more confident run.

Here’s how to plan your running routes.

Fear # Four: Ankle Sprains While Trail Running

Ankle sprains are a trail runner’s rite of passage. One misstep and you’re suddenly doing the ankle-twist dance nobody signed up for. And if your ankles have played this tune before, they’re more likely to groove to it again.

The Solution

Start by being picky. Seek out those forgiving, well-trodden trails. Let those rugged, ankle-challenging paths be a future conquest when you’re more trail-savvy

Facing a steep ascent or a technical section? Swap that run for a power walk. And here’s the golden rule: look forward. Your eyes should be set on what’s ahead, not inspecting your fancy trail shoes. After all, in trail running and in life, it’s about the journey, not just the step you’re on.

What’s more?

Make sure to keep nimble, and quick steps. This is what I call the art of tiptoeing through the trail of tulips, making you feel as airy and spry as a woodland sprite.

Before you know it, you’ll be gracefully sidestepping those treacherous spots, making it look like you’ve got some trail magic up your sleeve!

Additional Resource – Gaiters For Trail Running

Fear # Five – Being Slow While Trail Running

If road running is like cruising the highway, then trail running? Well, that’s more akin to exploring a winding, ever-changing mountain road. The uneven ground, the quick twists and turns, and the sudden steep inclines: the trails are a different beast altogether.

And here’s a heads-up: that digital pace pal that’s been your loyal companion on urban jaunts? It might do a double-take when you take it to the trails.

The Solution

First things first: shift your mindset. Those wild, adventurous trails don’t care about your mile times. What might seem like a slow crawl amidst gnarly roots and rocks is actually a heart-pumping, skill-honing challenge.

For this reason (and some more), I’d recommend giving your GPS watch a day off. Instead of being in a race against time, pick a duration. Say, if you’ve been ruling the roads at 8 miles an hour, then shoot for an hour of trail exploration. And if you want to keep it simple, an out-and-back route is your trusty sidekick. You get halfway, and it’s time to turn around.

Trail Running Fears – The Conclusion

There you have it.

The above tips and guidelines are all you need to get over your trail running fears.

Now, It’s up to you to take action on what you have just learned.

The rest is just detail.

Please feel free to leave your comments and questions in the section below.

In the meantime, thank you for reading my post.

Keep Running Strong.

David D.

How To Stop Your Calves From Hurting While Running

Are your calves hurting from running and you’re seeking solutions? Then you’ve come to the right place.

Running, while exhilarating, has its quirks – especially when it comes to those pesky calf muscles.

This pain can be the unsolicited “party crasher” of your running spree. And while it might feel like a cruel joke, understanding the root causes and remedies can be your golden ticket back to pain-free miles.

So, whether you’re a newbie runner or a seasoned marathoner, let’s delve deep into why your calves might be hurting from running and how you can make it stop.

Sounds great?

Let’s get started.

Why Do My Calves Hurt When I Run?

Although running has a lot to offer, its high-impact nature can take a toll on your body—especially on your calves. Many training and non-training variables can increase this load.

Let’s discuss a few.

Increases in Training Intensity

You know that feeling when you’re all pumped up and decide to ramp up your training intensity overnight? It can happen to the best of us.

Whether it’s adding extra miles to your weekly mileage, diving headfirst into speed work, or conquering those steep hill sprints, your calf muscles might just throw a little rebellion party.

Why? Because they need time to adapt to this new regime.

Calf Weakness

Now, imagine your calf muscles as little soldiers. If they’re not well-trained and strong, they’ll give in sooner than you’d like. Weak calf muscles are like a weak link in the chain; they can’t handle the stress and might just call it quits.

That’s why you can’t skip the basics and jump into hardcore endurance training without building a solid foundation first.

Calf Tightness

When your calves feel like they’re in a never-ending tug-of-war with your flexibility, trouble’s brewing. This tightness can lead to muscle strains, thanks to that relentless “pull.”

Plus, it messes with your walking style, forcing your heel to part ways with the ground prematurely. Guess what? This puts a boatload of pressure on your forefoot, setting the stage for all kinds of overuse injuries, like those pesky bunions. Ouch!

Improper Running Form

Ever heard of the saying “no pain, no gain”? Well, that can ring true when you’re trying to level up your running technique.

Switching from a heel strike to a forefoot strike is like introducing your calves to a whole new world of challenges. They might protest at first, feeling tight or sore, but don’t fret – it’s just your body adapting to the change.

Dehydration

Your body is like a well-oiled machine, but it needs the right fluids to keep things running smoothly. When you’re not giving it enough H2O, and you’re sweating like a fountain, your calves might decide to rebel with cramps.

The severity of the soreness depends on how parched you are – mild dehydration can lead to chronic tightness, while a full-blown drought can trigger intense cramps and spasms, leaving you with some annoying calf soreness.

Lack Of Warm-Up

Are you experiencing mild but consistent soreness following a run? Your warm-up could be to blame.

Skipping the warm-up forces you to get started on tight and cold muscles. This often triggers muscle spasms while running.

How To Stop Your Calves From Hurting While Running

The exact remedy measures you need to deal with calf issues while running depends on the root-cause of the problem.

Let’s explain a few of the main causes of calf pain in runners and how to deal with each.

Calf Cramps

So, what’s the game plan when you’re in the middle of a run and a cramp decides to gate-crash? First, try to be the peacemaker. Gently stretch and massage the area that’s throwing a tantrum. Think of it as giving your muscles a little pep talk – “Hey there, let’s calm down, shall we?

If the cramp is playing hard to get and won’t budge, try incorporating some leg stretches into your routine for a few moments.

Now, if you’ve tried it all and the cramp is still holding its ground, don’t be a hero – it’s okay to stop running. Your health is the top priority. If cramps become frequent visitors, it’s a good idea to consult with your doctor. They can help you rule out any underlying causes and ensure your running journey stays cramp-free.

Calf Strains

Ah, the not-so-friendly neighbor called muscle strain. It’s time to bring out the RICE method – your trusty first aid kit for handling this unwelcome guest!

Here’s the game plan:

  1. Rest: First things first, give that affected leg a break. It’s like telling your muscles, “Hey, it’s time for a little vacation.”
  2. Ice: Grab an ice pack or, in a pinch, a bag of frozen peas (they work surprisingly well, don’t they?). Apply it to the injured area for about 15 to 20 minutes, but remember the golden rule – don’t put ice directly on your skin; wrap it in a cloth or towel.
  3. Compress: It’s like giving your muscle a gentle hug – use a bandage to compress the injured area. But here’s the kicker: If the pain starts acting up or gets worse, don’t be afraid to loosen that bandage. We’re all about comfort here!
  4. Elevate: Elevate that injured leg when you’re sitting or snoozing. It’s like giving your muscle a VIP seat – propped up higher than the rest. This can help reduce swelling and promote healing.

Consider Drugs

When the pain is playing hardball, sometimes you need a little extra firepower to quell the discomfort. In serious cases, consider reaching for nonsteroidal anti-inflammatory drugs (NSAIDs) like ibuprofen or aspirin.

These medications can be like your trusty sidekicks in the battle against pain and inflammation. They help soothe your discomfort and reduce swelling, giving your body a better shot at healing.

However, it’s important to use them responsibly. Follow the recommended dosage instructions on the label, and don’t make a habit of relying on them long-term without consulting a healthcare professional.

And if you have any underlying medical conditions or are taking other medications, it’s always wise to chat with your doctor before introducing NSAIDs into your routine.

See A Doctor

If you’ve tried all the home treatments in your toolkit and your pain is still putting up a fight, it’s time for a consultation. Especially if you’re dealing with symptoms like swelling, severe pain, pins and needles, numbness, or redness – these are red flags that shouldn’t be ignored.

Here’s what you can expect when you seek professional help:

  1. Diagnosis: Doctors and physical therapists are like the Sherlock Holmes of the medical world. They’ll work on unraveling the mystery behind your pain, figuring out what’s causing it, and ruling out any serious underlying issues.
  2. Treatment Plan: Once they’ve cracked the case, they’ll create a customized treatment plan just for you. This might include various therapies, exercises, or even medications, depending on your specific condition.
  3. Deep Tissue Massage: Some therapists may prescribe deep tissue massage sessions to aid in your recovery. It’s like getting a helping hand to knead away the tension and knots in your muscles.
  4. Night Splint: If your muscles are prone to seizing up while you sleep, a night splint might come to the rescue. It helps maintain a gentle stretch in your muscles, ensuring they don’t tighten up overnight.

Additional resource – Iliotibial band syndrome

The Return To Running

The wise move is to hold off on your running adventures until your calf is back in tip-top shape and your knee and ankle are singing the songs of normalcy. Pushing through the pain isn’t a badge of honor; it’s a recipe for disaster.

Why? Because if you rush back into running without giving your calf the time it needs to recover and regain strength, you’re not just risking re-injury – you’re practically inviting it to the party. And trust me, that’s not a party you want to attend.

So, here’s the golden rule: Patience is your best friend in the world of recovery. Give your body the time it needs to heal, rebuild, and come back stronger. The road to recovery might feel like a detour, but it’s the surefire way to ensure you’re back on track, pain-free, and ready to conquer those miles once again.

What Makes Kratom Gummies The Best-Selling Product In The Market?

Kratom gummies have taken the market by storm in recent years, becoming one of the most popular products. The reasons behind their popularity can vary, but one thing is certain – kratom gummies have firmly established themselves as a beloved item among consumers. The aroma, taste, and ease of consumption are some factors that have propelled these tasty treats to the very top of the market. Not only are they a delicious and effortless way to get your daily dose of kratom, but they are also easy to store and transport for on-the-go consumption. If you’re looking for a top-quality product you can trust, buy kratom gummies from Golden Monk. Their exceptional quality and customer service will ensure you get the best kratom gummies available anywhere on the market.

7 Factors Kratom Gummies Are The Best-Selling Product

  1. Convenience and portability

When it comes to consuming supplements, convenience and portability are two factors that are not to be taken lightly. That’s why Kratom gummies have gained immense popularity in the market. People lead busy lives, and finding the time to prepare, measure, and ingest Kratom powder can be challenging. On the other hand, Kratom gummies are incredibly easy to carry around, and you can pop them into your mouth like regular candy without worrying about the messy powder getting everywhere. This convenience factor, combined with the delicious taste of these gummies, has made them a top-selling product in the Kratom market. So, if you’re looking for a hassle-free way to enjoy Kratom’s benefits on the go, you should try these gummies!

 2. Availability

Regarding Kratom products, the popularity of gummies continues to soar. Among the many factors that make these gummies stand out, availability is among the top reasons. Unlike other forms of Kratom, such as powder or capsules, gummies are convenient and easily accessible. Anyone can purchase them from their local store or online retailer anytime. Additionally, the gummies’ package quality and unique flavors make them more attractive to customers. Users enjoy the ease and convenience of Kratom gummies, making them the top-selling product in the market.

 3. Potency

Kratom gummies have taken the market by storm, and it’s no surprise why. Potency is a key factor that makes these gummies the best-selling product in the market. Unlike traditional Kratom powders or capsules, gummies are a more convenient and tastier way to consume Kratom. Despite their size, these small gummies pack a powerful punch and deliver the same benefits as their bulkier counterparts. Whether you are looking for a quick way to boost your energy levels or a natural alternative to help with tension and pressure, Kratom gummies are a great option. Their potency and ease of use make them a favorite among Kratom enthusiasts and newcomers to the market alike.

 4. Taste

As human beings, our taste buds are always on the lookout for something that is both palatable and satisfying. That is why Kratom gummies remain one of the most popular products today. Not only do they offer a unique and convenient way to consume Kratom, but they also come in various flavors that cater to different tastes. Whether you have a sweet tooth or prefer something a little tangy, there is something for everyone. By balancing amazing taste with the benefits of Kratom, these gummies have won the hearts of many and continue to be a top choice among consumers.

 5. Non-injection

Kratom gummies have recently taken the market by storm as a preferred method of consuming the herb. This product has become the favorite choice of many customers for many reasons. Perhaps the most significant of all these reasons is that it offers a non-injection alternative to the traditional methods of consuming Kratom. While injections aren’t necessarily unpleasant, many people still shy away from them due to discomfort. Kratom gummies eliminate this worry, offering the same experience in a pill form that can be enjoyed almost anywhere. This convenience and ease of use make Kratom gummies an attractive option for busy individuals who want to reap the benefits of the herb without the hassle.

 6. Legal

Legalization can make or break a product’s success in the market. This couldn’t be any truer for Kratom gummies, which are currently enjoying widespread popularity as one of the best-selling products in the market. While numerous factors have contributed to their success, their legal status is perhaps the most significant. Kratom, a tropical plant native to Southeast Asia, has been debated recently. Despite its purported benefits, the plant was banned in several states due to its opioid-like properties. However, the legalization of Kratom in several regions has opened up a massive market for its derivatives, particularly Kratom gummies. As consumers become more health-conscious and seek natural alternatives to traditional medications, Kratom gummies provide an attractive option. The fact that they are legal has only added to their appeal.

 7. Affordability

In a world where stressors are aplenty, more and more people are looking for ways to manage their anxieties. For some, this means turning to alternative remedies, like Kratom gummies. With so much uncertainty in the world, it’s understandable that people are looking for peace wherever they can. Fortunately, Kratom gummies provide that peace without breaking the bank. It’s no wonder they’re flying off the shelves!

Final Thoughts

In conclusion, it is not surprising that Kratom gummies are the best-selling product in the market. The benefits gained from the natural herb Kratom have been widely recognized for centuries. By adding it into a gummy form, not only do consumers get to enjoy the nutritional value, but they also get to experience the ease of consumption. Moreover, Kratom gummies cater to various needs, whether it is to boost energy, alleviate discomfort, improve mood, or reduce tension. With many still discovering the beauty of this product, it is expected to remain popular and highly sought after for years to come. Therefore, if you are looking for a delicious and convenient way to enjoy the benefits of Kratom, Kratom gummies are the way to go.


Strengthen Your Stride: The Essential Guide to Calf Training for Runners

running shoes for overpronators

Running isn’t just about speed or endurance; it’s also about having your muscles work in harmony to propel you forward efficiently.

As I’ve explained in an earlier post, our body relies on a set of specific muscles when logging the miles, chief among them are the calves.

Nestled in the lower half of the leg, these powerful muscles play an outsized role in every step, push-off, and stride, making their strength and flexibility paramount for those who lace up their shoes and hit the track or trail.

While their importance might be underrated, neglecting your calves could lead to a slew of issues, from stalled performance to higher injury risk, and you don’t want that right?

So what’s the solution? The good news is that there are many things you can do to make your calves ready for the action and impact. The most important strategy is strength training.

Fret no more. Today’s article delves into calf exercises tailored for runners, ensuring that these powerful muscles get the attention they rightfully deserve.

But first things first, let’s delve deeper into why you should strengthen your calves as a runner.

The Benefits of Strong Calves In Runners

The calf muscles—comprising primarily the gastrocnemius and soleus—are the unsung heroes of a runner’s anatomy. They spring into action with each push-off, propelling runners forward and dictating the power and length of each stride. For a runner, a strong calf isn’t just about muscle definition; it’s about efficiency, speed, and maximizing the output of each step.

For those unfamiliar with the biomechanics of running, the importance of calf muscles might be overlooked. After all, aren’t the thighs doing most of the heavy lifting? In reality, the calves play a pivotal role in a runner’s journey.

Here’s why:

Forward Propulsion. The primary role of the calf muscles, primarily the gastrocnemius and soleus, is to help in propelling the body forward. In fact, every you’re your foot pushes off the ground, you’re primarily using your calf muscles.

Shock Absorption. Your calves act as shock absorbers. Each foot strike puts a lot of load on your muscles and joints, and the calves help dissipate this force. This, in turn, helps reduce strain on your main weight-bearing joints and muscle, reducing in injury risk.

Stride Efficiency. Strong calf muscles can increase the power of each stride, which allows you to cover more ground with relative less energy expenditure. Over time, this can improve your training efficiency and race times. That’s a good thing if you ask me!

Endurance and Fatigue Resistance: Robust calf muscles don’t tire out easily. This resilience ensures consistent performance throughout a run, whether it’s a short sprint or a marathon.

Prevent Injury . Strong calves are better equipped to handle the stress of running. This, as you can already tell, can limit the risk of overuse injuries such as Achilles tendonitis or shin splints.

More Stability. Having a history of ankle sprains or run often on uneven surfaces? Then a set of strong calves are what you need to help provide better ankle stability and control. This can be particularly important for trail runners.

Improved Recovery. Regular calf strength training can enhance blood flow to the lower limbs. This, in turn, may help fluish out waste products and speed up recovery post-runs.

The 5 Best Calf Exercises For Runners

Without further ado, here are m top picks for calf exercises for runners.

Enjoy!

Double-Leg Calf Raises:

An essential move in any runner’s repertoire, the double-leg calf raise strengthens both the gastrocnemius and soleus muscles. This exercise amplifies the force in your push-off, optimizing your running stride.

Step-by-Step Instructions:

Stand upright on the edge of a step or platform, feet hip-width apart. Heels should hang slightly off the edge.

Holding onto a wall or railing for balance, push through the balls of both feet to raise your body upwards.

Reach peak height by fully extending the ankles, then slowly lower your heels below the level of the step.

Repeat for the desired number of reps..

Soleus Squats:

While traditional calf exercises predominantly target the gastrocnemius, the soleus squat hones in on the deeper soleus muscle. This is crucial for runners, as a strong soleus provides added stability during long runs and reduces fatigue.

Step-by-Step Instructions:

Stand with your back against a wall, feet shoulder-width apart and roughly a foot from the wall.

Slide down into a squat until your thighs are parallel to the ground, ensuring your knees are directly above your ankles.

While maintaining this position, lift your heels off the ground, pressing onto the balls of your feet.

Lower your heels back to the floor and then rise back to a standing position.

Repeat for the desired number of reps.

Heel-Toe Walk:

The Heel-Toe Walk is more than just a calf strengthening exercise; it’s an active lesson in balance and proprioception.

By shifting weight from the heel to the toe, runners can refine their footwork, enhancing stability and ensuring that every step lands just right.

Step-by-Step Instructions:

Begin in a standing position, with an erect posture and arms slightly out to your sides for balance.

Place your focus on a stationary object in the room to maintain balance.

Step forward, landing first on your heel. Gradually roll forward onto your toes.

Push off from your toes and repeat the motion with the opposite foot.

After covering a certain distance forward, reverse the motion, stepping backward from toe to heel.

Return to the starting position and repeat.

Seated Calf Raises:

The Seated Calf Raise is a rare gem that effectively targets the soleus muscle, often overshadowed by its more prominent counterpart, the gastrocnemius.

Strengthening the soleus is vital for endurance runners, as it provides sustained power during prolonged activities.

Step-by-Step Instructions:

Sit on a bench or chair, placing a weight (like a dumbbell or plate) on your thighs for resistance.

Position the balls of your feet on a raised platform or block, with heels hanging off.

Slowly lower your heels towards the ground until you feel a stretch in the calves.

Push through the balls of your feet, raising your heels as high as possible.

Slowly return to the starting position and repeat.

Single-Leg Calf Raise:

For those seeking an advanced twist to the traditional calf raise, the Single-Leg variant delivers. By isolating each calf it not only intensifies the workout but also pinpoints and rectifies imbalances, ensuring symmetrical strength and flexibility.

Step-by-Step Instructions:

Stand on a raised platform or step, positioning yourself near a wall or railing for balance.

Shift your weight onto one foot, letting the other foot hang or bending it behind you.

Slowly lower the working heel below the level of the platform, feeling a stretch in the calf.

Push through the ball of your foot, raising the heel to its peak height.

Slowly lower and repeat for the desired reps before switching legs.

Single-Leg Calf Raise:

Brief Description: The Single-Leg Calf Raise is where advanced strength training meets targeted focus.

By isolating each calf muscle, this exercise demands greater stability, balance, and power, ensuring each leg gets the undivided attention it deserves and highlighting any strength imbalances.

Step-by-Step Instructions:

Stand on a raised platform or step, positioning yourself near a wall or railing for balance.

Transfer your weight onto one foot, letting the other foot hang or bending it behind you.

Gently lower the working heel beneath the level of the platform, feeling a deep stretch in the calf.

Drive through the ball of your foot, lifting the heel to its utmost height.

Steadily return to the start and complete the desired reps before switching legs.

Jumping Calf Raises:

If you’re aiming to add dynamism and explosiveness to your calf training, the Jumping Calf Raise is your go-to.

This plyometric exercise not only builds powerful calves but also boosts athletic reflexes, making it essential for sprinters and those seeking a burst of speed.

Step-by-Step Instructions:

Begin in a standing posture with feet flat on the ground and hands by your sides.

Engage your core and keep your back straight.

Explosively press off the floor with the balls of both feet, propelling yourself into the air.

Softly land on the balls of your feet, absorbing the impact by slightly bending the knees.

Instantly spring back up and repeat.

Calcium for Runners: Boost Bone Health and Performance

Whether you’re dashing through marathons like a seasoned pro or lacing up your sneakers for a leisurely jog, one thing’s for sure: your body is your most loyal running buddy. And just like any partnership, it’s crucial to keep your body fueled and energized for the journey ahead.

Now, we all know that carbs, protein, and fats are like the essential gears in your running machine, powering you through every stride. But here’s the curveball: have you given calcium its rightful spotlight in your nutrition playbook? Yep, that’s right—we’re talking about that mineral superhero that’s been quietly working backstage to keep your bones, teeth, and overall well-being in check.

Think about it: your body is like a treasure chest, and inside, it’s stashing as much as two pounds of calcium. And where does it store this valuable loot? Well, 99 percent of it is neatly tucked away in your bones and teeth, making sure they stand tall and strong through all your running adventures.

But hold on a second—before you lace up and dash off, let’s have a heart-to-heart about calcium. Are you really giving your body enough of this essential mineral? Sure, you might be acing your carb-loading rituals and topping up on protein, but what about calcium?

Fret no more.

In today’s article, I’ll dive deep into its role in your running journey and beyond. And as a little bonus treat, I’ll  unveil a delicious lineup of calcium-rich foods that can easily find their way onto your plate.

So, are you ready to roll?

Let’s dive in!

Why Runners Need Calcium

Picture this: you’re out there, pounding the pavement, feeling like an untamed wind. Running, they say, is the closest we get to defying gravity. But here’s the plot twist: those bones of yours need a little love to keep up with your adventures.

Imagine your bones as a dynamic duo, taking center stage in your grand running spectacle. Now, let’s introduce their sidekick, calcium—your own secret weapon in the bone-strengthening game. It’s like that invisible ally that fuels your superpowers. Without enough calcium in your corner, those miles might start leaving a dent.

But wait, the story gets more interesting. Ever heard of the saying “runners don’t break, they bounce”? Well, calcium is like the trampoline beneath your every step. It’s the safety net that prevents those bone-crunching impacts from leaving a lasting mark.

If you’ve been dealing with those pesky stress fractures or fearing bone injuries like an arch-nemesis, guess what? Calcium could be your unexpected hero.

Now, let’s flip the script a bit. Calcium isn’t just about bones—it’s like the secret ingredient that keeps your body’s orchestra in harmony. Imagine your muscles, your heart, and even those sneaky nerves—each one playing their tune.

Research papers and studies? Oh, they’re the backup dancers confirming this cosmic dance. They’ve shown that calcium isn’t just a bone’s BFF; it’s like your body’s MVP, improving cardiovascular function, regulating nerve signals, and even giving your blood pressure a friendly nudge.

And if you’re all about keeping your blood vessels in tip-top shape and waving away insulin resistance, guess what’s standing right beside you? That’s right, it’s calcium, your behind-the-scenes wellness warrior.

How Much Calcium Do Runners Need?

Alright, calcium seekers, let’s talk numbers! Imagine your body as a bank account, and calcium is your currency for strong bones and a healthy you. Now, how much should you be saving up in this calcium vault? Well, here’s the scoop:

If you’re dancing around under the age of 50, your magic calcium number is between 1,000 to 1,200 mg per day. But what if you’re gracefully gliding into the golden years, past the big 5-0? Hold onto your running shoes, because your body deserves a calcium upgrade—aim for around 1,300 mg daily. It’s like treating your bones to a VIP package as they age like fine wine.

Now, let’s put those numbers into real-life bites. Ever craved a glass of silky smooth skim milk? Well, that’s about 1,000 mg of calcium right there, almost like getting a bone-strengthening hug in a glass. Or maybe you’re a yogurt enthusiast, diving into a cup of plain yogurt. Guess what? You’re getting your daily calcium dose while enjoying that creamy delight.

But wait, it gets cheesier! Imagine a thick, indulgent slice of cheddar cheese. That savory slice isn’t just about taste—it’s like a calcium treasure chest, giving you the same 1,000 mg boost. It’s like having a delicious secret weapon for bone health, hidden in plain sight on your plate.

Now, the plot thickens. You’ve probably heard of calcium supplements, those little pills promising a shortcut to bone strength. But here’s the twist—your body is like a savvy detective when it comes to calcium. It prefers the real deal, the natural sources that come straight from the kitchen, not the pharmacy. It’s like your body saying, “Hey, I want the whole orchestra, not just a single note.”

Research studies? They’ve found that your body responds better to natural calcium from food sources rather than synthetic supplements. It’s like your bones throwing a party, celebrating the joy of nutrients that come from the earth, not a lab.

Calcium-Rich Foods For Runners

Here are the main sources of calcium and how to get the most out of it.

Raw Milk

First up on the menu: the timeless classic—raw milk. Imagine this: you’re transported to a rustic dairy farm, where the cows graze contentedly on fields of green. From that pastoral scene comes your calcium magic. A single cup of cow’s milk boasts a calcium content that’s like a mini fortress for your bones—ranging from 270 to 350 mg. It’s like a liquid masterpiece that’s 25 to 30 percent of your recommended daily calcium intake, all in one cup.

But let’s not stop there, because milk is like a nutritional goldmine. It’s not just calcium; it’s also packing a punch of magnesium and a dose of potassium. Think of magnesium as your body’s relaxation specialist, ensuring your muscles and nerves are as calm as a peaceful sunrise. And potassium? It’s like the conductor of your body’s fluid orchestra, making sure you’re properly hydrated and your metabolism is in sync.

Now, imagine sipping that milk and feeling not just refreshed, but also like you’ve unlocked a secret to bone health. That’s the magic of milk, a liquid legacy that’s nourished generations.

But wait, there’s more! Picture this: you’re raising a glass of milk to your lips, not just savoring its taste, but knowing that you’re giving your body a symphony of benefits. It’s like a toast to strong bones, hydrated muscles, and a metabolism that’s humming along.

Kale

Calling all plant-loving calcium seekers! If you’re on the hunt for a green powerhouse that’s as nutrient-packed as it is vibrant, say hello to kale—the unsung hero of the plant-based calcium world.

Picture this: you’re wandering through a garden of emerald leaves, and there, in all its glory, is kale. Just one cup of this leafy legend serves up around 100 mg of calcium, like a secret stash for your bones. That’s a cool 10 percent of your recommended daily allowance, right there in a single serving. It’s like Mother Nature’s way of saying, “Hey, I’ve got your calcium needs covered.”

But hold onto your gardening gloves, because kale isn’t just any old calcium source—it’s like the superstar of nutrient absorption. You see, the calcium in kale is more bioavailable than the kind found in milk. It’s like your body opening its doors wide, ready to embrace every bit of calcium goodness that kale delivers.

But wait, the kale magic doesn’t end there. Imagine diving into a bowl of kale salad, and with each bite, you’re not just nourishing your bones—you’re treating your body to a nutrient symphony. Kale is like a treasure trove of vitamins and minerals, each playing a vital role in your wellness story. It’s got more vitamin A than you’d expect, like a superhero for your vision and immune system. And don’t get us started on the vitamin C—it’s like a burst of sunshine for your skin and overall health.

Try this recipe.

Sardine

If you’re a fan of the ocean’s bounty, get ready to meet your new favorite calcium-rich companion—sardines!

Imagine cracking open a can of these salty little fish, and there you have it—seven sardine fillets, like tiny nuggets of calcium gold. That’s roughly 320 mg of calcium, a whopping 30 percent of your daily recommended allowance, all neatly tucked within those silvery bites. It’s like the ocean’s way of offering you a nutrient-packed sea treasure.

But hold onto your fishing rods, because sardines aren’t just about calcium. Picture this: with each bite of these flavorful fish, you’re not only nourishing your bones but also treating your body to a nutrient festival. Think of vitamin B12 as the conductor of your nervous system, ensuring those messages from brain to body flow smoothly. And hey, when it comes to brain health, vitamin B12 is like the VIP ticket to keeping your gray matter in tip-top shape.

But wait, there’s more!

Sardines are like a vitamin and nutrient treasure chest. Imagine soaking in the sun’s rays, capturing that precious vitamin D. Well, sardines are like little sun-soaked bites, packing in a good dose of this sunshine vitamin that’s vital for strong bones and a healthy immune system. And let’s not forget the omega-3 oils—the unsung heroes that keep your heart happy, your brain sharp, and your overall well-being on point.

Try this recipe.

Plain Yogurt

Get ready to spoon up some creamy goodness that’s not just a treat for your taste buds, but a bone-loving delight! Meet plain yogurt—your ticket to a calcium-packed snack that’s like a high-five for your bones.

Imagine dipping your spoon into a cup of plain yogurt and indulging in a swirl of tangy deliciousness. That one cup holds within it around 320 mg of calcium, or around 30 percent of your recommended daily intake.

But here’s the yogurt magic that goes beyond calcium. Some yogurts come with an extra surprise—live probiotic bacteria that ensure your gut health is as harmonious as a perfect melody. These help soothe constipation, prevent pesky diarrhea, and keep your digestion function at its best.

But wait, there’s more to this yogurt story. Imagine a nutrient-packed parade, and yogurt is leading the way. Alongside calcium and those gut-friendly probiotics, yogurt boasts a line-up of vitamins and minerals that your body adores. Think of it as a vitamin B-12 booster, your secret weapon for a nervous system that’s as steady as a rock. And don’t forget potassium—it’s like the heart’s best friend, keeping your heartbeat on point and your body hydrated.

But that’s not all, folks. Yogurt is also packing a phosphorus punch, a mineral that’s like the building block for strong bones and teeth. And let’s not overlook the protein—the muscle-repairing, hunger-slaying superstar that’s essential for a well-rounded diet.

Watercress

Watercress is a leafy gem that’s like a hidden treasure trove of nutrients! In just one cup—about 34g—of this aquatic marvel, you’re treating your body to 41 mg of calcium. It’s like a nutrient infusion that your bones will thank you for, a little sprinkle of calcium magic that adds up to big benefits.

But the watercress journey doesn’t end there. It’s not just rich in flavor, but also packed with iron—the kind that keeps your blood strong and oxygen-rich. And here’s the surprise: watercress boasts even more iron than spinach, the leafy green superhero we all know and love.

But wait, there’s more! Think of watercress as your vitamin C powerhouse, delivering a dose that’s as generous as an orange’s sunny offering.

And that’s not all—watercress is like a nutrient medley, offering folate, protein, copper, and even pantothenic acid, a nutrient that’s like a guardian angel for your energy metabolism.

Now, imagine a salad that’s not just a plate of greens but a nutrient-packed celebration. A watercress salad is like a burst of freshness and flavor, an ode to nature’s bounty. And if you’re looking to up your nutrient game, simply toss watercress into your main meal as a vibrant, nutrient-rich side dish.

Try this recipe.

Broccoli

A single cup of broccoli, like a nutrient-packed nugget, contains a calcium punch that’s like a little gift for your bones—44 mg to be exact.

But here’s where broccoli steps into the spotlight and starts singing a vitamin C symphony. Oranges are the classic vitamin C hero. Now, double that, and you’ve got broccoli’s vitamin C offering. It’s like a burst of immunity-boosting sunshine in every bite, as if Mother Nature herself is cheering you on.

Broccoli is also rich in riboflavin, thiamin, iron, and magnesium—each one playing a role in your body’s well-being. And let’s not forget about phosphorus and selenium, minerals that are like the building blocks for strong bones and a healthy immune system.

Now, a word of advice: cooking is like a culinary dance, and broccoli is a partner that needs just the right moves. Don’t cook it too long, because you want to savor every bit of its goodness. It’s like preserving a treasure chest of nutrients, making sure you get the most out of every mouthful.

So, whether you’re steaming, roasting, or sautéing, remember that broccoli is more than just a vegetable—it’s a nutritional powerhouse, delivering a nutrient-packed performance that’s as vibrant as its color.

Cheese

Now, let’s dive into a world where cheese isn’t just about taste; it’s a calcium-packed superstar that’s here to nourish your bones. Whether it’s a velvety slice of cheddar or a crumbly piece of parmesan, cheese, in all its glorious varieties, is like a treasure trove of calcium goodness.

Take parmesan cheese, for example—it’s like a calcium powerhouse in a compact form, packing about 330 mg of calcium in a single ounce serving. This amount stands at around 33 percent of your daily recommended intake. It’s like getting a bone-loving boost with every sprinkle or slice.

But wait, the cheese story doesn’t stop with calcium. Cheese is not just a delight but also a nutritional boost, delivering a dose of vitamin A and vitamin B12.

And here’s a secret that cheese knows how to keep: protein power. Imagine feeling full and satisfied, like your hunger pangs are on vacation. Cheese helps prevent those mid-afternoon crashes and supporting your body’s recovery after a workout.

But like any superstar, cheese has a note of caution—a melody of high fat and calories. So, imagine enjoying a decadent cheese plate or a gooey grilled cheese sandwich, but with a pinch of moderation. It’s like savoring life’s rich moments without overindulgence.

Almonds

If you’re a fan of that satisfying crunch and the feeling of a delicious munch, then get ready to fall head over heels for almonds. Imagine a handful of these little powerhouses, like nature’s way of saying, “Here’s a tasty treat that’s also incredibly good for you.”

Almonds, not just delicious but also packed with a secret weapon—calcium. Imagine indulging in an ounce of these gems, about 23 whole almonds, and getting a burst of 75 mg of calcium.

But here’s where the almond magic truly shines. Roast these gems in a touch of oil, and you’ll be transforming them into little calcium powerhouses that deliver a whopping 450 mg of calcium per ounce.

Now, here’s the fun part—adding almonds to your meals. Feel free to sprinkle them over your salad, or simply tossing them with a sprinkle of Himalayan salt for that perfect blend of flavors.

And let’s not forget the protein—about 10% of your daily requirement in one ounce. It’s like nature’s way of ensuring your body has the building blocks it needs for strength and vitality.

And don’t be afraid of the healthy fats in almonds. It’s the kind of fat that’s like a superhero, swooping in to reduce bad cholesterol levels while showering you with a multitude of health benefits. It’s like embracing a snack that loves you back.