How to Avoid Wild Animal Attacks While Trail Running

Would you like to learn how to prevent animal attacks while running? Then you’ve come to the right place.

Whether you’re an urban athlete or a trail junkie, you’re like to come across different creatures of the animal kingdom sooner or later.

Pursue running long enough; whether you’re a trail junkie or an urban athlete, an aggressive animal will likely cross your path sooner or later.

These unforeseen run-ins with wildlife during a run can be unnerving. However, most such encounters while running will be harmless.

But, to err on the side of caution, you should learn in advance what to do when you encounter an animal during a run (both for your and the animal’s safety). That’s where today’s post comes in handy.

Fearing Animal Attacks While Trail Running

One of the main fears preventing many runners from trail running is an animal encounter.

But here’s the truth.

Although the danger is real,  the fear of wildlife shouldn’t keep you away from the trails.  Trail running isn’t any more or less dangerous than road running – as long as you take the right precautions.

There are risks whenever you leave your home—and trail running is no exception.

The Bad News

How often have you read news articles about runners and outdoor ashless getting harmed or killed by rampant wildlife?

If this is news to you, check the following articles;

A woman gets attacked by a bear in the middle of a marathon

I can go on and on, but by now, you should have heard of plenty of horror stories. And the media is doing a great job at scaring us from venturing into the trails.

But it shouldn’t. Death is always around the corner. We drive cars. We cross the street. We meet strangers. We do many things that might invite Angel’s death to our doorsteps. Life is dangerous.

And so it trails running.

The fact is, we are exposed to several dangers every time we hit the trial.

I hate to sound like a broken record, but animal encounters are lower on the list. The main danger, in my experience, is serious injury from fallen goon technical terrain, roots, or, God forbid, rocks.

Of course, you also risk getting lost or exposed to extreme weather conditions on the trails.

How to Avoid Wild Animal Attacks While Trail Running

Here are some general tips to help you stay safe out there

Use Common Sense

Overall, wild animals tend to avoid humans but can attack if they feel in danger. You shouldn’t get out there to pick fights with animals – The odds are not in your favor.

Pay attention to your environment, the type of wildlife you’re likely to encounter, and the risk they pose. Avoidance is the best strategy.

Don’t Panic

I know I would panic if I were suddenly being stared down by an angry bear. But the golden rule of staying calm as possible is the way to go. Animals can sense fear, and losing one’s s$$t tells the animal you’re a likely victim. This, in turn, may goad an attack. And you don’t want that

Keep Distance

Stick to marked trails as often as possible during your trail runs. The safest thing to do when you run across an animal is to give it distance. You’re, after all, on their turf, so you better respect that fact. Most wildlife feels threatened when you invade their territory.

Animals mostly become aggressive once they feel distressed or threatened. However, animals will also attack if they’re wounded, starving, dehydrated, etc.

Be Prepared

Depending on where you’re going, being prepared may mean having defensive tools, such as pepper spray, a sharp knife, a club, or even a firearm. You can also use rocks or whatever you can lay your hands on to fend off an animal attack if things turn wrong.

Petting Is A Bad Idea

Avoid petting animals in the wild at all times. That cute baby bear trotting alone likely has a mother nearby who will attack if she thinks you are dangerous. Touching wildlife is out of the question. It’s neither safe for you nor for them.

Make Noise

An effective strategy to protect yourself from wildlife is to make noise and a lot of it. If not careful, you can easily frighten a wild animal, which might provoke an attack. So whenever you approach a dense route or sharp corner, make some noise, so the wildlife knows you’re nearby.

If you come across one, talk calmly to them so they know you’re a human and do not mistake you for dinner.

Be A Tracker

Watch for animal tracks and droppings as you run through the wilderness. These often indicate the presence of animals nearby. Therefore, stay alert and keep a safe distance.

You can also go the extra mile by learning to identify scat and tracks of various animals (link).

Partner Up

Whether you’re running through a dark alley or a secluded trail, there’s always strength in numbers. The more people with you, the less likely a predator will dare to approach and attack.

That’s why running with another person—or a group—will greatly reduce the risks of an imminent attack.

Avoid Animals

In the end, the best way to survive a dangerous wildlife encounter is to avoid it in the first place. Overall, most animals may go out of their way to avoid humans.

Believe it or not, we’re at the top of the food chain. And most animals are well aware of that fact.

That said, just like us, animals will fight tooth and nail for their survival and their cubs’ survival. So you’re better off not threatening either one.

How to Manage Wildlife While Running

Here’s a more personalized approach to dealing with various and common animal encounters during your runs.

Avoid Dog Attacks While Running

Run long enough, and you’ll eventually come across a dog.

Canine encounters are, after all, one of the most common animal encounters.

Usually, behind a fence or on a leash, dogs pose little to no threat, yet that’s not the case all too often.

Dogs can get territorial, defend their turf, and act aggressively.

And you never know how other people treat the dog.

That’s when an untrained, aggressive, and unsupervised dog attack can cause serious damage.

(Check this story)

Warning signs:

  • Charging through doors
  • Hindering your path
  • Stopping eating on the approach
  • Getting very still and ridge
  • Barking and showing teeth
  • Lunging forward

How To Approach Them

  • Avoid eye contact, or you’re asking them to lunge at you.
  • Stay calm. A dog will pick up on your fear.
  • Stop running and stand tall. Avoid many any jumpy movements that can trigger the canine chase instinct
  • Avoid sticking out an open hand or jumping up and down excitedly.
  • Stand sideways while keeping the dog in your side vision.

Avoid Wolf Attacks While Running

The image of coming face to face with a pack of hungry, wild wolves may send shivers down your spine, but attacks on humans are not the norm.

They’re so rare as this animal would rather avoid people at all times.

Behaviorally, wolves tend to be pack hunters covering huge uninhabited areas. That’s why if you spot one in the wild, chances they’re not alone.

What’s more?

Wolves are coursing predators; they love the chase and will pursue prey on the run.

Warning signs:

  • Bristling the pelt as if looking bigger and more threatening
  • Erect Ears
  • Crouching backward
  • Making a barren, irritated expression
  • Curling back the lips to show the fangs and gums

How To Approach

  • Make a lot of noise. Shout at the wolves as loud as possible.
  • Toss branches and rocks at the animal but without looking vulnerable.
  • Raise your jacket or shirt over your head to appear bigger and more threatening.
  • opt for a strong, confident body posture
  • Back away slowly if you see a wolf before it sees you.
  • Avoid eye contact, but don’t look scrawny. A wolf considers eye contact a challenge.
  • Do not run. You’re not fast enough.
  • When attacked, keep the wolf away from vulnerable spots such as your neck and head. Then attack their nose and eyes. Go for their head if you’re lucky enough.

Avoid Mountain Lions Attacks While Running

Also known as panthers or cougars and weighing between 120 to 180 pounds, mountain lions are infamously stealthy and, at times, lethal predators.

Typically, mountain lions prey on mammals, such as deer, raccoons, and beaver.

But occasionally, they develop a taste for humans.

About 10000 mountain lions are believed to dwell in the Western U.S. alone.

You’re likely to run into one either in the late spring or early summer.

During this period, young mountain lions gain independence from their mothers and drift widely, seeking untaken territory.

Warning Signs

  • Crouching
  • Stalking while trying to stay under the radar the entire time.
  • Creeping and moving silently toward the prey.
  • A mountain lion often goes for the neck and shoulders on the fence.

How to Approach

  • Always give the animal enough space to escape
  • Stand tall and make loud noises, raising your arms slowly and opening your jacket. Try banging rocks together.
  • Pick up a branch, wave it around, or toss it at the animal to show you have no fear. Act the part of a predator.
  • Do not run. Again, you’re not the fastest animal here.
  • Do not bend or crouch to pick up anything, nor turn your back.
  • If attacked, fight back and protect your neck and throat. Again, pepper spray will be so helpful in this case.
  • Again, pray, pray very hard.

Avoid Bears Attacks While Running

Bears tend to be omnivorous.

They prefer to munch on berries rather than human flesh, which doesn’t make them less threatening.

Most bear attacks result from the animal feeling threatened and then reacting in a manner that eliminates the threat.

Nothing personal.

The worst thing you can do is to startle them as you come running across the corner.

And God forbid, if you surprise a nursing mother, you’ll get attacked as she tries to defend her cubs if she thinks you’re a threat.

Mother bears are behind 70% of all fatal human injuries.

Solo males on the hunt are dangerous, too.

Warning Signs

  • Bear seems hostile, as in standing tall, groaning, etc.
  • Swatting the ground or nearby vegetation with the front paw
  • Lunging or feign-charging toward you
  • Ears getting flat against the head

How To Approach

  • Pay attention so you can spot a bear scrabbling around in the bushes before it sees you.
  • Be loud. Shout at the bear. Hopefully, it understands that you’re human, not prey.
  • Get the hell out of there if you spot any cubs. It’s not time to take pictures.
  • Avoid climbing trees. Most bears are better climbers than you.
  • Throw things at the bear, displaying confidence.
  • Keep bear spray on you so you can use it quickly if an aggressive bear is 30 to 40 feet away.
  • When attacked, drop on the ground and play dead. Protect your face with your forearms and the back of your neck with your hands.
  • Pray, and pray hard.

Avoid Deer Attacks While Running

Deer are timid by nature and make off the moment they spot a human.

They’re also rarely aggressive and one of the most common animal encounters for runners.

But a deer feeling threatened is another story; a deer attack can cause serious damage.

Avoid provoking this animal, especially during the fall—the mating season during which they’re most aggressive.

Warning Signs

  • Deer approaching you while making loud noises
  • Changing  the stance and ear posture
  • Avoid Stomping the feet while huffing

How To Approach

  • Avoid getting close to one, especially on foot. You don’t want to be kicked and fly.
  • Pay attention to your running route to avoid a collision.
  • Have situational awareness.
  • When attacked, climb a tree or hide behind a rock.

Avoid Snakes Attacks While Running

Snakes are another animal that poses little to no threat, as the majority tend to fall within the harmful variety.

Only a small minority of snakes are poisonous, so you shouldn’t treat them all as if they are.

For example, there are only 20 species of venomous snakes in the U.S.—the most dangerous one is the infamous rattlesnake.

If you encounter a snake with a triangular-shaped head—as opposed to a round one—your life might be in danger.

That’s a telltale sign of a poisonous serpent.

Like most other animals, snakes are only a danger when harassed or feel threatened.

Otherwise, they want nothing to do with you.

What’s more?

Most snakes are nocturnal creatures, spending most of the day sleeping or sunning themselves, and are most active throughout spring and early fall.

The Warning Signs

  • Hissing
  • trying to escape
  • Feign striking
  • Assuming an S position.
  • Withdrawal of the head or tail
  • Hiding the head
  • Watching you and stalking your movement.

How To Approach

  • Pay attention to where you’re placing your feet and hands, especially when running over a log or climbing over boulders.
  • Suppose you see a snake on a trail or road; back away slowly and far from the snake. Stop and sprint in the other direction if you have to. If you are confident enough to jump far, take a big leap.
  • Do not goad the snake in any way. But, again, this is not the time for selfies.
  • When attacked, stay calm and head to the emergency room ASAP. Call 911 if you suspect a poisonous attack. Keep in mind that sucking out venom only works in the movies. Sucking venom makes it spread quicker into your system. Lethal!

Avoid Moose Attacks While Running

This may surprise you, but moose are likely the most dangerous farmyard animals.

They’re huge and have a bad temper, so stay away from them for your safety.

Again, moose want nothing to do with you unless they feel endangered.

Bulls—the male moose—is super territorial, and females may see you as a threat to their calf.

Moose pose the most danger during the spring—the calving season—and fall—the rutting season.

Warning Signs

  • Broadside display in an attempt to show off size.
  • Animals move their ears, smacking their lips and raising the hair on their hump.
  • Yes, a pissing contest.
  • Pawing the ground with the forefoot.
  • Licking the lip

How To Approach

  • Keep your distance from moose.
  • Suppose it charges, sprint away. They often drop the chase after a few strides.
  • When attacked, climb a tree or head for the fence. It’s not the time to test your superpowers (not yet).

Avoid Animal Attacks While Trail Running – The Conclusion

Exploring the unknown while logging the miles is one of the greatest pleasures of being a runner.

All in all, keeping your eyes open is your best defense against animal attacks while running.

If you see one before it sees you, you’ll have enough time to scurry away and avoid an unpleasant experience.

Any experience running into wildlife?

Feel free to share along with your tips and tricks!

Here’s the full guide to running safety.

In the meantime, thank you for reading my post.

Stay safe out there.

Keep Running Strong.

David D.

How to Walk 10,000 Steps A Day?

walking 10,000 steps

Walking—it’s a simple yet highly effective way to improve your fitness, shed some pounds, and boost your endurance.

But let’s face it: ramping up your daily step count isn’t always a walk in the park. Whether you’re tethered to a desk for most of the day, live in a city that’s not exactly pedestrian-friendly, or simply lack the motivation after a long day, challenges abound.

Before you toss in the towel, though, I urge you to read on. While a daily 20-minute stroll is better than staying sedentary, more steps are generally better for your health. In fact, numerous health organizations and fitness experts recommend a daily target of around 10,000 steps.

At first glance, 10,000 steps might seem like a Herculean task, but with the right habits, it can become an achievable goal. Today, we’re diving deep into this step-by-step journey, covering everything from the distance of 10,000 steps to the benefits of reaching that milestone.

Are you ready to explore how walking can transform your life step by step? Lace up your shoes because we’re about to embark on a journey to better health and vitality

10,000 Steps Per Day Explained

The 10,000 steps per day target has become a widely recognized goal for daily physical activity, but its origin is indeed tied to a marketing campaign rather than scientific research. Here’s the story behind it:

In the 1960s, shortly after the 1964 Tokyo Olympic Games, a Japanese company began selling a pedometer called the Manpo-kei. In Japanese, “Man” means 10,000, “po” means steps, and “kei” means meter. So, the name Manpo-kei roughly translates to “10,000 steps meter.”

This pedometer quickly gained popularity and became a success. As a result, the idea of walking 10,000 steps a day as a measure of physical activity was born. The simplicity and roundness of the number, as well as the success of the marketing campaign, contributed to its widespread adoption.


Establish a Routine

Even if you’re not a fan of strict planning, having a daily routine can work wonders in keeping you on the right track. Think of it as your trusty guide to those 10,000 daily steps.

Here’s the lowdown: Pick a time of day that suits your schedule best for knocking out your recommended steps. Then, commit to it every single day until it becomes as natural as your morning coffee routine. After all, forming a habit is the name of the game here.

Now, you might be wondering, is there a perfect time of day to get those steps in? Well, the good news is there isn’t a right or wrong time. It’s all about what works best for you. However, keep in mind that consistency is key.

So, here’s a simple 10,000 steps plan to get you started:

  • By 10:00 AM, aim to have about 2,000 steps under your belt.
  • Come noon, you should be around 3,500 steps.
  • As the clock strikes 3:00 PM, push yourself to reach 5,000 steps.
  • By 6:30 PM, you’ll be looking at 7,500 steps.
  • And when 9:00 PM rolls around, you’ll have successfully wrapped up your 10,000 steps for the day.

See, by setting a schedule like this, you’re not just tracking your progress, but you’re also holding yourself accountable. It’s a tried-and-true strategy for reaching any goal.

Determine your Current Average

Okay, before you dive headfirst into a 10,000-step-a-day challenge, you’ve got to know where you’re starting from. So, let’s take a little step (no pun intended) back and figure out your current baseline.

For a few days, keep a close eye on your step count. You can use a trusty step counter or even a nifty smartphone app to help with this. It’s all about understanding where you stand right now.

But hey, no one’s expecting you to magically transform from 2,000 steps a day to a whopping 10,000 overnight. That’s just not how our bodies work. So, once you’ve got your baseline, set a more realistic goal. Aim to add around 1,500 to 2,000 steps a day – that’s like walking an extra mile daily.

Get A Fitness Tracker

Alright, here’s a game-changer: a fitness tracker. You’ve got to have a reliable tool to keep tabs on those precious steps. With so many options out there, you’ll easily find one that fits your budget and your goals. But here’s the golden rule: once you’ve got it, use it properly and consistently. Don’t just let it gather dust on your wrist – that’s like buying a shiny new bike and never taking it for a ride!

One of my top picks is the Fitbit. It’s a fantastic all-rounder that not only counts your steps but also tracks your heart rate, elevation gain, sleep patterns, and more. It’s like having a personal assistant for your health and fitness journey. So, if you’re looking for a solid option, Fitbit’s got you covered.

Lunch Hour Walk

Got a lunch break? Perfect! Use it to your advantage. Whether it’s a quick stroll around the block or an indoor walk, aim to spend 20 to 30 minutes moving during your break. Feeling lazy? Don’t worry, you can even walk indoors. In just half an hour, you can rack up an impressive 3,400 to 3,700 steps, which is more than a third of your daily goal.

Here’s the bonus: depending on factors like your weight, walking pace, and the terrain, you might torch up to 200 calories during this lunchtime jaunt. Plus, when you return to work, you’ll feel more focused and ready to tackle tasks, making your boss pretty happy, too!

Go Hands-Free

Here’s a nifty trick to up your step game: go hands-free during work calls. Instead of being tethered to your desk, take those calls on the move. Whether it’s a business meeting or a casual chat, those minutes spent strolling while on the phone can really add up.

Consider this: a 20-minute phone call while walking could earn you about 1,700 to 1,900 steps, which is approximately 20% of your daily goal. Plus, you’ll enjoy the company of your own thoughts or maybe even some fresh air on your stroll. Double win!

Active Weekends

While the temptation to lounge on the couch during the weekend is strong, staying active can set a positive tone for your entire week. Even if you’re having a staycation, there are plenty of ways to combat weekend laziness and make the most of your time off.

Here are some weekend activity ideas to consider:

  • Explore a nearby town or neighborhood on foot, discovering new sights and hidden gems.
  • Embark on a hiking adventure in a local mountain or nature reserve.
  • Participate in a charity walk or local community event that promotes physical activity and a good cause.
  • Visit a nearby park and explore the various trails, immersing yourself in the beauty of nature.
  • In essence, any activity that gets you out of the house and moving is an excellent way to make your weekends more active and enjoyable. So, why not seize the opportunity to get moving and create lasting memories this weekend?

Park Farther Away

Here’s a simple trick to help you get in more steps during your day: whenever you’re heading to your workplace, the mall, or the grocery store, make a conscious effort to park your car as far away as possible from your destination. Those few extra steps walking to and from your parking spot can add up surprisingly quickly.

But that’s not all—there’s an added benefit! Parking at the back of the lot can also help protect your car from dents and dings. So, while you’re getting some exercise, you’re also taking good care of your vehicle. It’s a win-win situation!

Get Off Earlier

Here’s a clever trick for commuters using public transport: try getting off your train or bus one stop earlier than your usual destination. By doing this, you can add over 1,700 valuable steps to your daily count in just 20 minutes—that’s a significant 18 percent of your daily goal. Plus, the brisk walk to catch up with your work meeting or appointment can be invigorating and help you stay active.

Partner Up

Why walk alone when you can share the experience with family and friends? Walking together is not only a fantastic way to connect with others but also a great opportunity to be more social, which can have a positive impact on your overall health and well-being. Plus, time seems to fly by when you’re engaged in conversation, making your walks even more enjoyable!

Play With your Kids

Allocate some family walking time, ideally for 30 to 45 minutes, at least three days a week. This will help you make progress toward your daily physical activity goal and set a healthy example for your kids as well. Encouraging an active lifestyle from a young age can lead to improved physical performance in children.

There are plenty of fun games you can play together, whether it’s soccer or Frisbee in the park, a game of hide and seek or a simple walk around the block. Not only will you all benefit from the physical activity, but you’ll also create wonderful family memories.

Walk To The Store

If you live within a 15 to 20-minute walking distance of the grocery store, pharmacy, or post office, consider using your feet instead of your car for these errands. Even if the post office is a bit farther away, you can always park your car a little farther from your destination and enjoy a brisk walk. It’s a small change that can add up to a healthier, more active lifestyle.

Take The Stairs

Opting for the stairs instead of the elevator can significantly boost your daily step count. Each flight of stairs you climb is equivalent to about 40 steps on flat ground. So, if you work on the fourth floor of a building, you can easily add over 200 steps to your daily total by choosing the stairs.

Furthermore, climbing stairs is an efficient way to burn calories. In just 20 minutes, you can burn about 70 to 100 calories, depending on factors like your weight, fitness level, and climbing speed. The faster you climb and the more weight you carry, the more calories you’ll burn.

Walk The Dog

Attention, dog owners! Walking your dog is not only a fun way to spend quality time with your furry friend but also an opportunity to log some extra steps. Since dogs need daily exercise, it’s a win-win situation for both you and your pet.

When walking your dog, remember to keep them on a leash and actively participate in the walk rather than just letting them roam freely. Following your dog’s lead can lead to a brisk walk, helping you accumulate more than 3,000 steps in just 30 minutes.

Get Dancing for a Fun Cardio Workout

Make chasing those 10,000 steps a more enjoyable experience by putting on your favorite music and dancing around your living room. It’s a great way to have fun, get your heart rate up, and add some steps to your daily count. And don’t worry, there’s no need to be self-conscious—dance like nobody’s watching!

Try a Standing Desk for Added Health Benefits

Standing desks offer a host of health benefits, from reducing back pain and the risk of heart disease to helping prevent weight gain. If you can’t afford a standing desk, look for opportunities to stand during tasks like reading printed reports or taking phone calls. Every bit of standing can contribute to your daily step count.

Use a Pedometer for Tracking

A pedometer is a handy device that helps you monitor your daily step count. It serves as a motivational tool and keeps you accountable for reaching your 10,000-step goal. Some pedometers come pre-programmed with a daily step goal of 10,000 steps, making it easy for you to track your progress. For instance, if you see that you’ve only taken 3,000 steps by 4 p.m., it can motivate you to get moving and reach your target before the day ends.

Your Walking Technique

To get the most out of your walking routine and prevent discomfort or injury, it’s important to practice good walking form throughout your walks. Proper technique allows you to walk longer and more comfortably.

Here are some key tips to keep in mind:

  • Maintain Good Posture: Keep your posture straight, avoiding leaning backward or forward. Stand tall with your shoulders back and relaxed.
  • Engage Your Core: Keep your core muscles engaged and firm as you walk. This helps with stability and posture.
  • Keep Your Chin Parallel: Keep your chin parallel to the ground, looking ahead rather than down at your feet.
  • Continuous Hip Movement: Maintain a rhythmic, continuous movement of your hips from side to side as you walk. This natural sway aids in balance and fluidity.
  • Proper Foot Position: Point your feet forward while walking. Avoid excessive outward or inward pointing, which can lead to discomfort or injury.
  • Maintain Spinal Curves: Keep your body tall and aligned without arching your back excessively. Allow for the natural curves in your spine.

Getting Started With 10000 Steps A Day

Embarking on the journey to achieve 10,000 steps a day doesn’t mean you have to reach that goal right away. In fact, it’s often more effective to start small and gradually increase your activity level.

Here are some tips for getting started:

  • Begin with 20-30 Minutes: If you haven’t been walking regularly, start with a manageable goal of 20 to 30 minutes of consecutive walking. This helps build your endurance gradually.
  • Divide Your Walks: If longer walks seem daunting, break your activity into three 5-minute walks throughout the day. This can be just as effective as a single longer walk.
  • Progress Gradually: As you become more comfortable with your routine, increase the duration or intensity of your walks. The more active you become, the more you can do to improve your health and well-being.

10K steps per day –  The Conclusion

There you have it! If you’re looking to increase your daily step count—and why not reach 10,000 steps or more—then today’s post will get you heading in the right direction—no pun intended. The rest is really up to you.

Please feel free to leave your comments and questions in the section below.

In the meantime, thank you for dropping by.

Keep training strong.


Breaking the Barrier: How to Run a Faster Mile and Set New Records

How To Run A Sub 1.30 Half Marathon

Ready to kick your running into high gear and conquer that mile? Well, my friend, you’ve landed in the perfect spot.

Whether you’re just starting out on your running journey or aiming to shave seconds off your 5K time, improving your mile speed is a goal that will ignite your passion for the sport. Running a faster mile is no small feat, but with a few simple adjustments to your training regimen, you’ll be well on your way to achieving your speed goals.

In today’s post, I’m excited to share with you some tried-and-true strategies that will have you zooming past the finish line in record time. We’re talking about turning your mile dreams into a reality (and trust me, it’s not as far off as you might think).

So, what can you expect from this article? Allow me to give you a sneak peek:

We’ll start by diving into the nitty-gritty of what exactly the mile is and why it holds such significance in the running world.

Ever wondered how long it should take to conquer that single mile? We’ll answer that burning question.

But wait, there’s more! We’ll also delve into the juicy details of how to run a faster mile, including game-changing interval training techniques and how to gauge your mile pace.

Are you ready? Let’s get going.


How To Run a Faster Mile

Here are the tips you need to improve your mile time as fast as possible

Start With A Baseline

If you’re unsure of your current mile time, fear not! There’s a simple and effective way to find out. It’s time for a timed trial run. Think of it as your personal mile-time investigation, where you’ll uncover your starting point and pave the way for future progress.

But where shall this thrilling quest take place? The answer lies on the beloved standard track. Each lap on a standard track measures a precise 400 meters, and when you conquer four laps, voila! You’ve conquered the mile.

Now, here’s a friendly reminder: not all tracks are created equal. Some may be slightly shorter or longer, so it’s essential to do your math before embarking on this adventure. And if you’re unsure about the track’s length, don’t hesitate to ask. The track aficionados will happily guide you.

Before diving headfirst into the timed trial, it’s crucial to warm up those muscles and prepare your body for the challenge ahead. Dedicate a solid 10 minutes to a warm-up routine that gets your blood pumping and primes your legs for action.

Now, the moment has arrived. It’s time to put your mettle to the test and unleash your inner speed demon. Aim for a mile run that lands at a 9 out of 10 exertion rate. Push yourself, feel the burn, and give it your all. Once you cross that finish line, take note of your time and discover where your current ability lies.

But don’t stop there. This trial run isn’t a one-time affair. To truly gauge your progress and witness your growth, I recommend performing this test every 8 to 12 weeks. Tailor it to your training goals and personal preferences, allowing yourself to track your improvement.

Interval Training For A Faster Mile

Get ready to ignite your speed and unleash the running beast within. We’re about to delve into the world of high-intensity interval training—the secret sauce to improving your speed and boosting your running confidence. It’s time to leave your comfort zone behind and embrace the challenge of pushing your limits.

Now, the length and intensity of each interval will be as unique as your fingerprint. It all depends on factors such as your current fitness level, mile goals, and injury history. So take a moment to assess your individual circumstances and tailor your approach accordingly.

To embark on this exhilarating journey, start with a thorough 10- to 15-minute warm-up to get those muscles primed and ready for action. Once you’ve sufficiently awakened your inner speed demon, it’s time to dive into the heart-pounding, breath-taking world of speed intervals.

Here’s the drill: Alternate between sprinting at a blazing pace for a predetermined distance and then ease into an easy jog or a refreshing walk for the same distance to catch your breath and recover. Start with four to five repeats of these exhilarating cycles, and as your body adapts and grows stronger, gradually work your way up to eight reps over a few months..

You might opt for a few invigorating 200-meter sprints—half a lap—followed by a brief recovery period. Or, if you’re up for the challenge, you can tackle full 400-meter sprints—a full lap—before catching your breath. The choice is yours.

If you opt for 200-meter sprints, begin with six reps and gradually work your way up to 8 to 10 reps as you embrace your newfound speed and endurance. For those daring to conquer the 400-meter challenge, start with a more modest three to four reps, then gradually increase to five or six. Remember, you can perform these electrifying sessions on a track, a well-measured stretch of road, or even on the trusty treadmill.

When it comes to incorporating speedwork into your training plan, make sure to allocate at least one dedicated day per week for these exhilarating sessions. If you’re feeling extra competitive and hungry for progress, consider adding a second speedwork day into the mix—but don’t rush into it. Take the time to allow your body to adapt and savor the process.

Find Your Target Lap Time

Now that you’re ready to chase down your mile goal, it’s time to set your sights on a target time that will fuel your determination and guide your training.

If you’re uncertain where to begin, fear not! I’ve a starting point test that will help you gauge your current speed and serve as a launching pad for your mile conquest. After a solid 10-minute warm-up to awaken your muscles, it’s time to unleash your full effort and run that mile like there’s no tomorrow. Take note of your time, and this will serve as your initial baseline.

Now, let’s head over to the track. Picture it as your personal arena, where dreams of speed and endurance come to life. Remember, a standard track measures 400 meters per lap, which means you’ll need to complete four laps (plus an extra nine meters) to conquer the mile.

To determine your lap time goal, divide your desired mile time by four. Let’s say you’re aiming for a magnificent 7-minute mile. This means you’ll need to maintain a pace of 1 minute and 45 seconds per lap, or 4 minutes and 20 seconds per kilometer.

With your goal lap time in mind, it’s time to put your speed to the test. Start with a series of 8 to 10 exhilarating 200-meter repetitions at your target pace of 1 minute and 45 seconds per 400 meters. After each sprint, take a well-deserved 30-second recovery period to catch your breath and prepare for the next round. Feel the rush as you push yourself to match your goal pace and bring your mile aspirations to life.

Additional resource – How to run at night

Build Endurance

Speed is undoubtedly important when it comes to running a fast mile, but let’s not forget about the other crucial piece of the puzzle—your ability to conquer longer distances. To truly enhance your mile performance, it’s essential to build your endurance and push beyond the mile marker.

Now, you might already be comfortably running distances that extend beyond a mile, but we’re going to take it up a notch. Prepare yourself for a run that’s significantly longer than what you’re accustomed to. This is where the magic happens.

To gradually increase your running distance, it’s best to start with a steady and measured approach. Begin by adding a mile or two to your weekly mileage, giving your body the chance to adapt and strengthen. For instance, if you’re currently running two to three miles in each session, aim to add one mile to your weekly total each week until you’re consistently covering six to eight miles per session. Slowly but surely, you’ll expand your running horizons.

Let’s break it down further. Suppose your longest run currently stands at a respectable four miles, and your weekly mileage amounts to a solid 12 miles. In that case, you can aim to increase your longest run by approximately one mile per week. This gradual progression allows your body to adjust and prevents overexertion. Alternatively, you can aim to increase your total weekly mileage by up to 10 percent each week, providing a balanced approach to building your endurance.

Now, if you’re setting your sights on a half marathon or even a full marathon, it’s crucial to keep building distance on that long training day. The long run, complemented by your other scheduled runs, will work wonders for your endurance, stamina, and ultimately lead to faster times in your mile pursuits.

Improve your Leg Strength for a Faster Mile

When it comes to improving your mile time, it’s not just about speed and endurance—it’s also about building strength. While running more and pushing your limits is crucial, what you do on your non-running days can make a world of difference in your performance.

Strength training is a key component for unlocking your full running potential. Your calves, hamstrings, quadriceps, glutes, and core all play vital roles in propelling you forward and maintaining efficient form. By strengthening these muscles, you set yourself up for success, allowing you to run faster with greater ease and less effort.

But don’t worry, we’re not talking about becoming a professional bodybuilder here. Incorporating a few targeted exercises into your routine can work wonders.

Let’s explore some of the best exercises to boost your running speed:

  • Squats: These compound exercises engage multiple muscle groups simultaneously, including your glutes, quads, and hamstrings. Squats are a powerhouse movement that can enhance your overall lower body strength.
  • Squat-thrusters: Taking the squat to the next level, squat-thrusters combine a squat with an explosive jump, activating your leg muscles and elevating your heart rate. They’re fantastic for building power and explosiveness.
  • Lunges: Lunges target your glutes, quads, and hamstrings individually, helping to correct muscle imbalances and improve stability. They also mimic the running motion, making them highly functional for runners.
  • Burpees: Burpees are a full-body exercise that combines strength, cardio, and coordination. They engage your upper body, lower body, and core, providing a comprehensive workout in a single movement.
  • One-legged squats: Also known as pistol squats, these challenging exercises strengthen your legs individually while improving balance and stability. They’re excellent for targeting muscle imbalances and enhancing overall leg strength.
  • Calf raises: Strong calves are essential for powerful push-offs and efficient running strides. Calf raises specifically target the calf muscles, helping to improve your running economy and speed.

As a general guideline, aim for 10 to 15 repetitions of each exercise within a circuit. You can perform multiple circuits, typically two to three, to maximize your training. Remember, consistency is key. Incorporate strength training sessions into your weekly routine, aiming for two 30- to 45-minute sessions. This dedicated time will yield great results and complement your running endeavors.

Run Hills To Improve Mile Speed

Ready to take your training up a notch? How about incorporating the power of hills into your speedwork and strength training routine? Hill reps are like the secret weapon of runners, igniting your glutes, increasing leg strength, and propelling you toward that faster mile time.

Why are hills so magical? Well, besides the obvious challenge they present, running uphill can actually work wonders for your running efficiency and lactate threshold. It’s like giving your legs a turbo boost while improving your overall endurance. Plus, the best part is that hill workouts put less stress on your body compared to flat surface running, so you can reap the benefits without overtaxing yourself.

So how do you incorporate hills into your mile training plan? It’s simple, really. First, scout out a hill that’s about 300 feet long with a moderate gradient. You want it to be steep enough that running up feels like an 8 or 9 out of 10 in terms of effort. This is where the magic happens.

Now, get ready for some uphill sprints. Start with six to eight reps, giving it your all for about 30 seconds on each sprint. Then, take a nice, leisurely jog back down the hill to recover. It’s a cycle of intensity and rest, pushing yourself to the limit and then catching your breath. And trust me, you’ll feel the burn.

As you tackle those hill reps, pay attention to your technique. Focus on maintaining good form and don’t try to brute force your way to the top. It’s all about controlled power and efficiency. And if you’re up for an extra challenge, find a steeper hill that will really put your leg power to the test.

If you find yourself confined to the treadmill, don’t worry. You can still reap the benefits of hill training. Just set the incline to around 4 to 6 percent, and you’ll mimic the resistance and intensity of running uphill. It may not be the same as conquering a real hill, but it’s a great alternative when the terrain isn’t on your side.

Improve Your Form

Running a faster mile is like a well-choreographed dance, where every move matters. It’s not just about logging more miles on the pavement; it’s about honing your technique.

So, let’s dive into the world of running form and discover how it can elevate your speed and endurance.

As you lace up your running shoes, focus on maintaining proper form throughout your stride. Imagine a string pulling you upward, elongating your spine, and keeping your back straight. Engage your core to provide stability and power to your movements. And remember, relaxed shoulders are the secret to a fluid and efficient run.

As you pound the pavement, pay attention to your foot strike. Aim to land on your midfoot, allowing for a smooth transition from one step to the next. This not only enhances your speed but also reduces the risk of injury.

Keep your head up, gazing straight ahead, as if there’s a finish line waiting for you in the distance. Avoid the temptation to hunch over or tilt your neck down—it’s all about maintaining a balanced and confident posture.

Now, let’s talk about those arms. Keep them bent at a comfortable 90-degree angle, with a slight bend at the elbows. Your arms should act as efficient pendulums, swinging back and forth to propel you forward. Think of them as your secret weapon, assisting your legs in their quest for speed.

Remember, it’s not just about how you move; it’s also about how you engage your core and take those strides. Activate your core muscles, those powerhouses in your midsection, to maintain stability and generate efficient force. Embrace quick and short strides, avoiding the temptation to overstride. Taking giant leaps may seem impressive, but it can actually hinder your speed and put unnecessary strain on your muscles and joints.

Now, let’s spice things up with some dynamic warm-up drills. These drills serve as a warm-up for your body and a tune-up for your running technique. They help optimize your movement and ensure that every step counts.

Incorporate drills that emphasize different aspects of proper running form into your warm-up routine. Start with some butt kicks to activate your hamstrings and improve your stride. Then, channel your inner soldier and march forward with purpose, focusing on your posture and leg extension.

Improve Your Cadence

Imagine your feet as the percussion section of an orchestra, setting the rhythm and tempo of your run. It’s not just about the length of your stride; it’s about the rate at which your feet hit the ground—the enchanting dance known as running cadence.

So, let’s explore how this rhythmic element can unlock your speed potential and keep you injury-free.

When you’re aiming to pick up the pace, resist the temptation to elongate your stride. Instead, focus on increasing your cadence by taking shorter and quicker steps. It may seem counterintuitive, but research has shown that this adjustment can not only boost your speed but also reduce the risk of overuse injuries. It’s like finding the perfect rhythm for your body to thrive.

While many running experts tout a cadence of 170-180 strides per minute as the gold standard, it’s important to note that cadence is a deeply personal metric. Each runner has their own unique cadence sweet spot. So, don’t be swayed by a one-size-fits-all approach—let your body guide you.

Let’s dive into how you can determine your current cadence and work towards improving it. During your next run, take a minute to count the number of steps you take with just one foot. Double that count to get your total cadence. If you have a trusty running watch, it might even estimate your cadence for you, adding a touch of modern convenience to your journey.

Now, if you find that your current stride falls on the lower side of the spectrum, fear not. Improving your cadence is a gradual process that requires patience and consistency. Begin by gradually increasing your stride count by 3 to 5 steps every few runs.

Recover Well

Recovery is the unsung hero of your journey to a faster mile. While it’s vital to push yourself outside your comfort zone during training, giving your body the time and space to recover is equally crucial in achieving the results you desire. It’s all about finding that delicate balance between pushing your limits and allowing yourself to recharge.

Now, let’s explore some tried-and-true methods to optimize your rest days:

First and foremost, make sure to schedule at least one full rest day each week. This is your opportunity to kick back, relax, and let your body rejuvenate. Trust me, your muscles will thank you for it.

Remember, variety is the spice of life, especially when it comes to training. Avoid consecutive days of intense workouts, such as back-to-back interval training or grueling hill reps. Your body needs time to recover from the intensity, so mix it up and give yourself some breathing room.

Ah, glorious sleep! Don’t underestimate the power of a good night’s rest. Aim for a solid 7 to 9 hours of sleep each night to allow your body to repair, regenerate, and prepare for your next epic running adventure.

A balanced diet is your ticket to optimal recovery. Ensure your nutrition plan includes all three macronutrients—carbohydrates, proteins, and healthy fats—and focus on nourishing, nutrient-dense foods. Think of your body as a high-performance machine that needs the right fuel to keep running smoothly.

Stretching is like a magical elixir for your muscles. Incorporate regular stretching sessions into your routine to improve flexibility, prevent injuries, and promote faster recovery. You can even explore the realm of yoga and try poses specifically designed to rejuvenate your running muscles. Trust me, your body will thank you for the added flexibility and grace.

Don’t forget the power of the mighty foam roller. It’s like a personal masseuse that works out all the kinks and knots in your muscles. Roll away the tension, release any tight spots, and let the soothing sensation of the foam roller bring you sweet relief.

If you’re looking for an extra dose of relaxation and restoration, consider treating yourself to a massage. Whether it’s a professional massage therapist or a self-massage session at home, kneading those weary muscles can do wonders for your recovery process.

Ever heard of acupressure? It’s like unlocking the hidden energy pathways within your body. You can explore the world of acupressure mats or try applying targeted pressure to specific points to alleviate muscle soreness and promote healing. It’s a whole new level of recovery bliss.

For the full guide to recovery for runners, check my post here.

Be Consistent

Listen up, my friend, because I’m about to drop some wisdom that applies to more than just running a sub-7-minute mile. Whether you’re chasing a 7-figure income or striving for athletic greatness, one thing holds true: consistency is the golden key to success.

Now, let’s dive into the world of running and uncover the secrets of consistent training to improve your mile time. It’s time to go beyond whimsical jogs and embrace a structured plan that will take you to new heights.

As a general rule, I strongly recommend following a training plan. You can find one online or even seek guidance from a knowledgeable coach. The key is to have a roadmap that outlines your running journey and keeps you on track towards your goal. Trust me, having a plan in place will work wonders for your mile-crushing endeavors.

Here’s the secret sauce: aim to run four to five days a week. Consistency is the name of the game here. It’s not about sporadic bursts of running brilliance; it’s about building a solid foundation and sticking to it. By logging those miles on a regular basis, you give your body the chance to adapt and thrive under the high-impact stresses of running faster.

Think of it like building a grand masterpiece. You don’t just slap a few brushstrokes on the canvas and call it a day. No, my friend, you carefully and consistently add layer upon layer, stroke by stroke, until your creation comes to life. Running is no different. Each mile you conquer is a stroke of progress, and the key to unlocking your full potential lies in the consistent repetition of those strokes.

Here’s how to weave consistency into your running routine:

  • Step one: Find a training plan that suits your needs and aligns with your goals. Whether it’s a tried-and-true plan from the running gods of the internet or a personalized masterpiece crafted by a coach, choose a path that resonates with you.
  • Step two: Lace up those running shoes and hit the pavement with dedication. Commit to running four to five days a week, rain or shine. Make it non-negotiable, just like brushing your teeth or scrolling through your favorite social media feed (we all have our guilty pleasures).
  • Step three: Embrace the journey. Consistency is not a sprint; it’s a marathon (pun intended). It takes time for your body to adapt and for those improvements to shine through. Be patient, my friend, and trust the process. The magic happens when you show up day after day, putting in the work and allowing your body to transform into a well-oiled running machine.

How To Run a Faster Mile –  The Conclusion

There you have it! Trying to run a faster mile shouldn’t be that complicated. All you need is the right mindset, strategies, and a bit of luck. Don’t forget to have enough rest and recovery, so your body will work effectively.

Please feel free to leave your comments and questions in the section below.

In the meantime, thank you for dropping by.

Keep training strong.

David D.

From Novice to Elite: How to Avoid Running Injuries and Keep Your Stride Strong

prevent running injuries

If you’re a runner on the quest to keep those injury woes at bay, you’ve landed in the right spot.

Let’s face the truth—running injuries, particularly those pesky overuse ones, can derail your running journey faster than a flat tire on a race day. These little troublemakers often target the joints, ligaments, and muscles of your lower limbs, showing no mercy.

Here’s the kicker: no runner, from novices to elites, is immune to the threat of injury. It’s a common pitfall, especially for those who overlook preventive measures. In fact, research paints a sobering picture, with more than half of all runners getting sidelined by injuries, many of which strike at the knees, shins, or Achilles tendon.

But here’s the good news—we’re not defenseless in this battle! Today’s post is your arsenal of precautions to tilt the odds in your favor. So, if you’re ready to lace up your running shoes and explore the strategies to keep injuries at bay, stay with me.

Know Your Limits To Prevent Running Injuries

This is the foundation for dodging all kinds of sports injuries. It’s what I call “doing too much, too soon, too fast.” Your body needs time to adapt, or you’re cruising for disaster.

Here’s what to do.

Add recovery days and weeks to your training plan. Give your body a full-on break, physically and mentally.

Embrace the sacred day of rest each week. Mix it up by sprinkling in easier recovery runs between those hardcore hill repeats and sprints.

Off-time? Get into some cross-training. Swim, pedal on a low-intensity bike, or dive into my personal favorite, Yoga. Yin or Gentle yoga is pure magic for easing the stress in your body, especially within that fascia tissue.

Here’s the big one: Don’t crank up your mileage by more than 10 percent each week. It’s the slow and steady path to safely adapting your body.

Listen To Your Body

Running injuries usually don’t just sneak up on you (unless you trip on your shoelaces). They often come with warning signs – discomfort, soreness, aches, and, yes, persistent pain. But here’s the kicker: it’s up to you to pay attention.

Set up your own early warning system for pain. Get to the bottom of what’s causing it.

At the first hint of trouble – whether it’s a pain that flares up during a run or forces you into an awkward gait – hit the brakes. Take some days off and reassess your game plan.

Look, aches and running are like two peas in a pod. But if that pain sticks around and starts messing with your groove, it’s time to sit up and listen.

Here’s the golden rule: if your body’s hurting, just don’t run. That’s all there is to it.

Remember, fellow runners, you’re in this for the long haul. So, be kind to your body, heed its warnings, and keep those injury bugs at bay!

Strength Train

Now, let’s chat about a game-changer in your running journey – strength training. It’s not just about looking like a superhero (although that’s a nice bonus); it’s about boosting your running performance and keeping those pesky injuries at bay.

Get Ready to Power Up

Regular strength training is your ticket to improved structural fitness. Think of it as armor for your muscles, tendons, ligaments, and bones, making them more resilient to the pounding of running.

Hips Don’t Lie: Hip Muscles Matter

Pay special attention to your hip muscles – those adductors, abductors, and gluteus maximus. Strengthening these bad boys can work wonders for your leg stability, saving you from ankle woes and knee drama.

Here are the runners-oriented strength routines you need:

Stretch Your Body

Increasing your range of motion can do wonders for your running efficiency and injury resilience. When your muscles can stretch and bend like a yoga master, your body moves with grace and less risk.

Runners have a knack for keeping tension in their hamstrings, calves, hip flexors, and glutes – prime real estate for potential injuries. Think knee pain, plantar fasciitis, and Achilles tendon issues.

I’ve got you covered with flexibility routines that’ll leave you feeling as limber as a rubber band. Say goodbye to those trouble spots and hello to injury prevention:

Calves of Steel

R.I.C.E – Treating Running Injuries

When aches and pains sneak up on you, don’t worry – you don’t need to be an E.M.T. to master these simple steps.

The R.I.C.E method is your superhero sidekick for immediate relief.

R is for Rest

If your knee, ankle, or any other part is giving you trouble, it’s time to hit pause. Take a breather and give your body the rest it deserves.

I is for Ice

Grab an ice pack or even a bag of frozen peas (I won’t judge). Apply it to the sore spot for 10-15 minutes, 3-4 times a day. Say goodbye to inflammation!

E is for Elevate

Lift that injured area to the sky (or at least above your heart). Elevating helps reduce swelling and promotes speedy healing.

C is for Compression

Get cozy with an A.C.E. bandage or compression socks. They’ll team up to battle inflammation and send pain packing.

Trust the Process

Remember, you’re not in this alone. R.I.C.E is here to help you bounce back from those running hurdles. So, when discomfort strikes, don’t hesitate to call on your trusty first aid squad!

Run on Proper Surfaces

Running on unforgiving surfaces like concrete or asphalt? It’s time to rethink your strategy.

Concrete and uneven terrain may look harmless, but they can wage war on your ligaments and joints. The result? An impact-heavy assault on your body.

If you want to stay in the race for the long haul, make softer surfaces your go-to. Think park paths, dirt trails, grassy roads – places that cradle your steps.

For a reliable, flat surface, hit the local track. It’s the ally you can count on to keep your running game strong.

Remember, your battleground choice can make or break your running journey. So, pick your battles wisely, and keep those injuries at bay.

Proper Running Shoes

In the world of running, your shoes aren’t just footwear – they’re your trusted allies. Here’s the deal: you can’t afford to underestimate the importance of proper running shoes. They’re not an accessory; they’re a necessity.

Don’t play the guessing game when it comes to your shoes. Head to a specialty-running store where knowledgeable staff can analyze your gait and foot type. They’ll help you find the perfect pair that suits your unique needs.

Even the best shoes have a shelf life. Plan to replace your running shoes every six months or after about 400 to 500 miles. If you start noticing discomfort or calluses on your heels, consider it a warning sign – it’s time for a change.

For those with bigger feet or unique proportions, finding the ideal pair can be a challenge. Don’t compromise on size or fit; invest in your running future.

Your running shoes are your armor on the track. Keep them in top shape, and they’ll keep you running strong.

Additional resource – How to treat black toenails from running

Proper Running Form

Your running form is like the foundation of a house. If it’s shaky, everything else can crumble. But if it’s solid, you’ve got a sturdy base for your running journey. Let’s get your form on point!

  • Imagine you’re running on a cloud. Keep your entire body relaxed, from your neck down to your fingertips. Don’t clench your fists – it leads to tension in your arms, shoulders, and neck.
  • Focus on the path about 15 to 20 feet ahead of you. Avoid the urge to stare at your feet. Keeping your gaze forward helps maintain balance and form.
  • Switch from heel striking to landing on the middle of your foot, then rolling through to your toes. It’s a game-changer that can boost your efficiency and reduce the risk of injury.
  • Make sure your feet are pointing straight ahead. Running with your feet turned in or out is not only inefficient but can also increase the risk of injuries. Keep those toes pointed in the direction you want to go.

Prevent Running Injuries – The Conclusion

There you have it! If you’re looking to prevent overuse running injuries, then today’s post will get you started on the right foot. The rest is just details.

Feel free to leave your comments and questions below.

Keep Training Strong.

David D.

Top 9 Overuse Running Injuries: Understanding the Causes and Prevention Strategies

running injuries

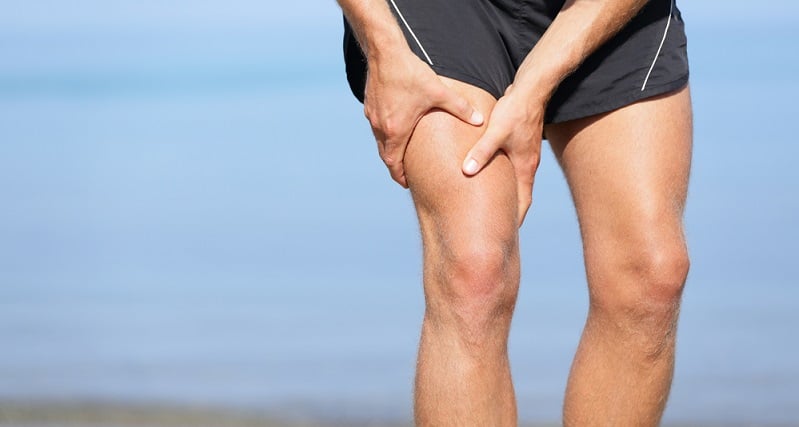
Let’s talk about something important today—the not-so-glamorous side of running.

Sure, hitting the pavement or trails is exhilarating, and it does wonders for our physical and mental well-being. But let’s be real here, there’s a downside to this amazing sport: injuries.

Sigh.

Now, I don’t want to be the bearer of bad news, but it’s important to address the elephant in the room. The truth is, if you’re a dedicated runner, chances are you’ll come face to face with an injury sooner or later. It’s like an unwelcome guest crashing your perfect running party. But hey, don’t just take my word for it. Surveys and polls have shown that a staggering 80 percent of runners experience injuries every year. Yikes! Those odds aren’t exactly in our favor, are they?

You see, when we log those miles, it’s the lower limbs that bear the brunt of the impact. So it’s no surprise that injuries love to haunt our knees, feet, calves, shins, and ankles. And it doesn’t stop there—our trusty weight-bearing limbs like thighs, hips, and back are also susceptible to these pesky injuries. It’s like a never-ending battle between our love for running and the potential pitfalls that come with it.

But fret no more.

I’ve got some good news for you today. In this blog post, I’m diving deep into the world of running injuries. We’ll explore some of the most common ones that haunt us runners and, most importantly, I’ll share the best ways to treat and prevent them once and for all. Consider it your survival guide to staying injury-free on your running journey.

Now, before we jump right in, let’s set the ground rules. I want to make it crystal clear that I’m not a certified sports physician, and this blog post can’t provide a one-size-fits-all solution for every injury out there. Safety first, my friends! If you’re dealing with a specific injury, it’s always wise to consult a professional and get personalized advice. They’ll guide you on the appropriate treatment options based on your symptoms and situation.

Alright, now that we’ve got that disclaimer out of the way, let’s embark on this injury-fighting adventure together.!

Overuse Running Injuries Explained

Let’s dive into the intriguing world of running injuries, shall we? Picture this: you’re out there, enjoying the freedom of running, when suddenly, bam!—you find yourself face-to-face with an unwelcome companion called a running injury. It’s like stumbling upon a roadblock on your running journey, and trust me, they can be quite the nuisance.

But before we tackle these injuries head-on, let’s break it down and understand what exactly a running injury is. In simple terms, it’s when you push a specific body part beyond its limits, subjecting it to excessive stress that it just can’t handle anymore. It’s like asking your poor knee or ankle to carry the weight of the world, and eventually, it rebels against you. Ouch!

Here’s the thing: no runner is immune to these pesky overuse injuries. We’re all susceptible to them, whether we’re beginners or seasoned veterans. But here’s the good news—most running injuries are often a result of factors like poor training practices, inadequate conditioning, unsuitable gear, or even our unique biomechanical limitations. In other words, they’re not entirely out of our control.

Now, imagine this scenario: you’re in the midst of your running routine, feeling unstoppable, and suddenly, that dreaded injury strikes. It can be a real buzzkill, forcing you to reduce your training volume or, in severe cases, halt your training altogether due to unbearable pain. These injuries don’t just affect your running—they can interfere with your daily life, making it a struggle to walk, work, and do all the things you love. It’s like putting a temporary pause on your running adventures, and trust me, they suck!

The Most Common Overuse Running injuries

Chronic injuries are, by far, the most common type of injuries, outnumbering acute injuries among runners of every background and training level.

But since they tend to be lower in pain than acute injuries, overuse injuries don’t attract immediate medical attention.

Without further ado, here a list of some of the most common running injuries as well as how to treat and prevent them.

Running Injury. 1 – Achilles Tendinitis

Your Achilles tendon, the largest tendon in your entire body, connects the back of your heel to the powerful calf muscles—the Gastrocnemius and Soleus. It’s like a crucial link in a chain, responsible for absorbing several times your body weight with every single stride. Talk about a load-bearing hero!

But here’s the thing—repetitive stress is the Achilles’ heel of the Achilles tendon. The more you push yourself, the longer and faster you run, the more stress you put on this precious tendon. It’s like subjecting it to a constant barrage of micro-tears, little by little, until it starts screaming for a break. And let me tell you, when it reaches that breaking point, it’s not a pretty sight.

That’s when tendinopathy strikes, bringing along its painful sidekick—good old-fashioned pain. And let’s not forget that sometimes, the pain can be so severe that it forces you to take a step back from your training. Time off from running? Ain’t nobody got time for that!

But hey, let’s not lose hope just yet. Science to the rescue! Countless studies and research papers have delved into the realm of Achilles tendonitis, shedding light on effective ways to treat and prevent this nagging injury. From eccentric calf exercises to proper warm-up routines and even custom orthotics, there’s a whole toolbox of solutions waiting to help you conquer this pesky Achilles villain.

Now, let me share a little anecdote with you. Picture a passionate runner, just like you, facing the wrath of Achilles tendonitis. But instead of giving up and throwing in the towel, they took matters into their own hands. With a combination of rest, physical therapy, and a dash of patience, they bounced back stronger than ever. It’s like witnessing a phoenix rising from the ashes, defying the odds and reclaiming their running glory.

So, my fellow warriors, don’t let Achilles tendonitis bring you down. Armed with the knowledge, advice, and techniques from reputable sources, you have the power to tackle this injury head-on. Take care of your Achilles tendon, listen to your body, and be proactive in your prevention and treatment strategies. Together, we’ll show Achilles tendonitis who’s boss and get back to running with a vengeance. Onward, my friends, to a pain-free and unstoppable running journey!

The Stats

Achilles Tendinitis, the sneaky culprit responsible for about 10 percent of all running injuries.

It’s like that one pesky friend who always manages to find a way to crash the running party. But fear not, my friends, because today I’m diving deep into the contributing factors and symptoms of Achilles Tendinitis.

The Contributor Factors

Now, let’s uncover the villains that often pave the way for Achilles Tendinitis to make its grand entrance. First on the list is the classic case of ramping up your weekly training load too quickly. It’s like going from zero to hero overnight, pushing your body beyond its limits. Remember, slow and steady wins the race when it comes to increasing your training volume—don’t exceed that golden 10 percent per week rule!

But wait, there’s more! Weakness in the posterior chain muscles—those glutes, hamstrings, and calves—can also contribute to the rise of Achilles Tendinitis. It’s like having a weak link in the chain that leaves your precious Achilles tendon vulnerable to injury.

Tight calf muscles, especially the gastrocnemius muscle, can be another culprit. It’s like having a pair of overly tight rubber bands ready to snap at any moment. So, don’t forget to show your calves some love with regular stretching and mobility exercises.

Now, let’s talk about our trusty running companions—our shoes. Wearing improper running shoes is like embarking on a marathon in stilettos. Not the best idea, right? Invest in a good pair of running shoes that provide proper support and cushioning to protect your Achilles tendon from unnecessary stress.

And here’s a gentle reminder: being overweight can also contribute to the development of Achilles Tendinitis. It’s like putting extra pressure on that already hardworking tendon. So, let’s strive for a healthy weight through a balanced lifestyle, giving our Achilles tendon a break.

Symptoms Of Achilles Tendinitis

The Achilles Tendinitis experience can be summed up in two words—tender pain. You might feel this pain in the lower calf near the heel or at the back, especially when you’re running, tip-toeing, or even taking that first step out of bed in the morning. Ouch! It can be severe enough to keep you from running, and we all know how heartbreaking that can be for us passionate runners.

Keep an eye out for any visible swelling or a knot in the affected area. It’s like a little bump reminding you that your Achilles tendon needs some extra TLC. And brace yourself for some strange noises—cracking or popping—when you flex or point your foot. It’s like a little orchestra of sounds, but trust me, you don’t want your Achilles tendon to join in on that symphony.

How To Treat Achilles Tendinitis

If you have Achilles tendinitis, take as many days off as possible. You cannot run through this injury as it will only get worse, which can take more than a few months to fully heal.

Next, apply ice for 10 to 15 minutes on the injured area twice daily.

To soothe the pain, stretch your calves and wear supportive shoes. Research also suggests that compression socks for hard runs relieves and prevents Achilles tightness.

You’ll need clinical treatment for severe cases of the condition. Some options include physical therapy methods of electrical stimulation, such as transcutaneous electrical nerve stimulation (TENS), high-voltage galvanic stimulation (H.V.G.S.), and ultrasound.

How to Prevent Achilles Tendinitis

The Achilles Tendinitis nemesis has shown its face, but fear not, my running comrades! We have an arsenal of preventive measures to keep this injury at bay. Prepare to arm yourselves with knowledge and techniques that will fortify your Achilles tendons like impenetrable shields.

First and foremost, let’s talk about strengthening those posterior muscles. We’re talking about exercises that will make your glutes, hamstrings, and calves sing with joy. Picture yourself doing eccentric heel drops, where you raise your body up on your toes and then slowly lower your heels down below the level of the step. It’s like giving your Achilles tendon a love tap, reminding it of its strength and resilience. And don’t forget about calf raises, lunges, squats, deadlifts, and toe walks—these exercises are like power tools for building a strong posterior chain that will have your Achilles tendon dancing with delight.

Next up, let’s stretch those calves like graceful ballerinas. Imagine lifting your toes back toward your shin while keeping your heel firmly planted on the ground. It’s like a gentle stretch that will lengthen and loosen your calf muscles, giving your Achilles tendon the space it needs to thrive. Trust me, your calves will thank you for it!

Now, let’s address the importance of proper form. Remember, running is not just about putting one foot in front of the other—it’s an art form. Work on improving your foot strike, aiming for a midfoot or forefoot strike rather than landing heavily on your heels. It’s like finding the perfect rhythm in a dance, where every step is light and effortless. And hey, if you’re finding it hard to master, why not recruit a partner or join a running group? They can provide guidance and support, helping you find your running groove and reducing the stress on your Achilles tendon.

Oh, and let’s not forget about the footwear we choose to adorn our feet. When it comes to Achilles tendon protection, opt for shoes with ample support and cushioning. Think of them as the loyal bodyguards of your Achilles tendon, shielding it from potential harm. Flip-flops and high heels? Let’s save those for special occasions and not let them irritate our precious tendons.

Running Injury. 3 – Runner’s Knee

Runners knee is pain caused by the irritation of the cartilage on the underside of the kneecap, nestled within the patellar tendon and connected to the powerful quadriceps muscle group. It’s like a delicate dance between the kneecap and the thigh bone, but sometimes, the rhythm is disrupted, leading to the frustrating symptoms of runner’s knee.

But what causes this disruption in the delicate dance of our knee joint? Ah, let me shed some light on the matter. You see, runner’s knee occurs when the kneecap fails to glide smoothly in the femoral groove at the lower end of the thigh bone. This misalignment can be attributed to various factors, such as muscular imbalances, poor biomechanics, or even overuse and repetitive stress on the knee joint.

The Stats

Ah, the infamous runner’s knee—a formidable adversary that has plagued many a runner on their noble quests. It’s a knee injury that knows no boundaries, affecting runners from all walks of life and training backgrounds. In fact, research has revealed that knee injuries account for a whopping 40 percent of all running-related injuries, with runner’s knee taking a significant slice of that pie.

In a recent poll conducted by runnersworld.com, a staggering 13 percent of runners confessed to experiencing knee pain within the past year.

The Symptoms

You’re out on a run, conquering the miles with determination and gusto. But as you encounter a downhill slope, a sharp twinge of pain reverberates around your kneecap. Descending stairs becomes a dreaded endeavor, as the discomfort intensifies with each step. Even after a long period of sitting, your knee protests as you rise to your feet. And don’t even get me started on the woes of squatting.

These are the telltale signs of patellofemoral pain syndrome, a condition that causes stubborn and tender pain around or behind the patella—the very center of your knee.

How To Treat Runners Knee

The first step on this journey is to heed the whispers of our bodies and listen to their plea for rest. Make sure to decrease his running volume by half. By avoiding consecutive days of running or even taking a temporary break from the sport, you give your knees the chance to find their footing once again.

What’s more?

Make sur

Ru

e to apply ice to your ailing knee for 10 to 15 minutes, multiple times a day. This cool warrior helps to calm the fiery storm within, providing much-needed relief to the throbbing joint. It’s a simple yet powerful tool in our arsenal, cooling the flames of discomfort and hastening the path to recovery.

How to Prevent Runner’s Knee

A group of passionate runners sharing their tales of triumph and resilience, ready to unravel the secrets of knee preservation.

First and foremost, let’s build a fortress of strength around our knees. Imagine the quadriceps, hip flexors, and glutes as the valiant defenders, ensuring our knees stay on the right track over the treacherous femoral groove. Studies have shown that strengthening these support muscles can help alleviate the burden on our knees and improve their alignment.

But strength alone is not enough; flexibility must join the ranks of our knee’s loyal guardians. Imagine the hamstrings and hip flexors as the agile dancers, ready to perform their moves with grace and fluidity. Weaving a routine of stretches and exercises to keep them loose and supple becomes our secret weapon. Through gentle movements and stretches, we unleash the hidden potential within our muscles, enhancing their flexibility and ensuring a harmonious balance in our running stride.

Now, let’s talk about stride length, my fellow road warriors. Imagine your stride as a dance partner, and your knees as the graceful leaders. To reduce the impact on our knees, we must embrace the art of the shorter stride. Picture this: as you take each stride, let your knee softly bend, absorbing the shock with ease. By landing with a slightly bent knee, we unlock the magic of minimizing stress on our knee joints, allowing them to stay strong and resilient throughout our running endeavors.

Research papers and anecdotal experiences remind us of the significance of proper running shoes in the battle against runner’s knee. Seek out the expertise of knowledgeable professionals who can analyze your gait and recommend the ideal footwear for your unique stride. Remember, the right shoes can provide the necessary support and cushioning, reducing the strain on our precious knees and enabling us to conquer the miles with confidence.

Running Injury. 4 – Stress Fractures

While running may seem like a non-contact sport, the repetitive high-impact nature of our beloved activity can put our bones under immense strain, risking the dreaded fracture.

Imagine your bones as the resilient pillars supporting your running endeavors. Day after day, they bear the weight and impact of each stride, absorbing the forces generated by our movements. But like any structure pushed beyond its limits, there comes a breaking point. Stress fractures occur when the cumulative stress on a bone exceeds its threshold, causing tiny cracks to appear. It’s as if our bones whisper a plea for respite, a gentle warning that they can no longer bear the burden we place upon them.

Research papers and studies have shed light on the main cause of stress fractures: excessive training and the resulting sub-maximal stress on the bone. Picture your training as a puzzle, with each piece representing a workout, a run, a training session. Individually, these pieces may not seem significant, but when combined over time, they create a mosaic of stress that can push our bones to their limits.

Now, let’s focus on the battlefield where stress fractures commonly strike among runners. Imagine the metatarsals, those small but crucial bones in your foot, as the delicate soldiers on the frontlines. Among them, the fifth metatarsal, affectionately known as your pinky toe bone, often bears the brunt of stress fractures. It’s as if this little warrior valiantly fights the battle of impact, sometimes succumbing to the relentless forces placed upon it.

Stats

Ah, stress fractures, those formidable foes that can bring even the most dedicated runners to their knees. Studies and research papers have uncovered that stress fractures account for a notable 6 percent of all running injuries. While the percentage may seem small, the impact on our running journeys can be substantial.

Imagine yourself on a typical run, feeling the rhythmic pounding of your feet against the pavement. It’s in these moments that stress fractures can silently weave their way into your bones, like a stealthy infiltrator. The symptoms may start as a whisper, a subtle pain around the affected bone that intensifies the longer you run. It’s as if a tiny crack forms within your very foundation, causing discomfort that begs for attention. But here’s the catch: when you rest, the pain seems to subside, luring you into a false sense of security.

Tenderness and swelling often accompany the pain, like red flags waving in the wind. These symptoms serve as a reminder that your body is sending distress signals, urging you to pay heed. As the stress fracture progresses, the pain can escalate from mild annoyance to a formidable adversary that halts your running endeavors for weeks, even months.

In advanced cases, stress fractures can turn even the simplest act of standing into an uncomfortable and painful ordeal. It’s as if your feet rebel against the weight they bear, reminding you of the delicate balance within your bones. As runners, we understand the significance of staying on our feet, and when stress fractures challenge our every step, we realize the profound impact they can have on our lives.

Now, let’s delve into the contributing factors that make us susceptible to these insidious fractures. Overtraining, that relentless pursuit of pushing our limits beyond reason, can play a significant role. It’s like asking our bones to withstand an unrelenting assault without the chance to recover and rebuild. Our bodies are resilient, but even they have their limits.

But it’s not just training intensity that can tip the scales towards stress fractures. Nutrient deficiencies can weaken our bones, leaving them vulnerable to injury. It’s like trying to build a sturdy fortress with incomplete supplies. Ensuring proper nutrition and a well-balanced diet can provide the building blocks our bones need to withstand the demands of running.

The surface we run on also plays a part in the battle against stress fractures. Just as a delicate artifact is more likely to break when dropped on a hard floor, our bones can suffer when subjected to the unyielding nature of unforgiving surfaces. Running frequently on these hard surfaces can increase the strain on our bones, pushing them closer to their breaking point.

Female runners face their own set of challenges when it comes to stress fractures. Due to factors such as inadequate caloric intake, nutritional deficits, and low estrogen levels, they may be more prone to these fractures.

How to Treat Stress Fractures

Now, let’s talk about the timeline for recovery. Patience is key as it can take anywhere from six to eight weeks to fully bounce back from a stress fracture. Each body is unique, so the duration may vary based on the severity of your injury.

But don’t let the downtime bring you down! Embrace the art of cross-training, where you explore new avenues of fitness while giving your bones the chance to rejuvenate. Picture yourself gliding through the water in aqua jogging, feeling the resistance of each stroke as it strengthens your muscles without the impact on your healing bones. Or imagine the serenity of a yoga session, gently stretching and aligning your body, providing a nurturing environment for your bones to heal. And if you’re craving the thrill of the wheels beneath you, low-intensity cycling can be a wonderful option, allowing you to keep that cardiovascular engine running while giving your bones the TLC they need.

When the time comes to lace up those running shoes again, remember to listen to your body. Start with a gentle jog, testing the waters and gauging any lingering pain. It’s like dipping your toes into a cool stream, feeling the sensations and ensuring that the currents of discomfort have subsided. If you can jog pain-free, with no traces of lingering discomfort, you’re on the right track to resuming your former running routine.

However, if pain persists despite your efforts, it’s essential to take a step back and reevaluate. Our bodies have their own way of telling us when they need more time and attention. In some cases, it may be wise to seek medical intervention and run some tests to gain a deeper understanding of what’s going on beneath the surface. It’s like seeking the guidance of a skilled navigator to steer you through uncharted waters and bring you back to the path of recovery.

How to Prevent Stress Fractures

First and foremost, let’s talk about the importance of finding the perfect running shoes. It’s like finding a trustworthy companion who will support and cushion your every step. Do your research, try on different styles, and find the ones that provide the right blend of stability, cushioning, and support for your unique feet.

Now, let’s dive into the world of strength training. It’s like building a sturdy foundation for your body, strengthening the fortress that protects your bones. Incorporate exercises that target your muscles, particularly those surrounding the legs and core. A balanced routine that includes squats, lunges, deadlifts, and other resistance exercises will help improve your bone density and overall strength.

When it comes to choosing your running terrain, consider the surface beneath your feet. Soft surfaces like grass and dirt trails are your allies, gently absorbing the impact of each stride, while harder surfaces like asphalt and sidewalks can be harsh on your bones. It’s like choosing to dance on a plush carpet instead of a concrete floor.

Now, let’s talk about nutrition, the fuel that nourishes your bones and keeps them strong. Calcium, the superhero of bone health, plays a vital role in preventing stress fractures. Ensure you’re consuming enough calcium-rich foods like dairy products, leafy greens, and fortified foods.

Running Injury. 5 – Iliotibial Band Syndrome (ITBS)

Picture your IT band as a resilient road that stretches from the hip to the thigh, connecting the two like a well-traveled path. It’s like the scenic route that links the bustling city of your pelvis to the vibrant town of your lower limbs. However, as with any journey, sometimes unexpected obstacles arise.

When you run or engage in activities that involve bending your knees, the IT band comes into play, acting as a supportive partner for your knee’s movements, ensuring that your knee flexes and extends smoothly.

But here’s where the story takes a twist. Imagine this: you’ve been on the road for a while, constantly rubbing against the side of the femur as your knee moves back and forth. It’s like the constant friction between two surfaces, gradually wearing down the harmony of the journey. Over time, this repetitive motion can lead to irritation, causing pain and inflammation to rear its unwelcome head.

Research and studies have shed light on the causes of this pesky syndrome. Factors such as overuse, muscle imbalances, and poor biomechanics can contribute to the development of IT band syndrome. It’s like an ensemble of circumstances, each playing their part in the emergence of this uncomfortable condition.

Stats

Surveys and studies have revealed that I.T.B.S. accounts for approximately 12 percent of all running injuries. It’s like a mischievous troublemaker lurking in the shadows, waiting to pounce on unsuspecting runners. But fear not, for knowledge is power, and understanding the signs and symptoms is key.

Symptoms

In the early stages of I.T.B.S., you may experience a stinging sensation on the outside of your knee. It’s as if a mischievous needle is pricking at your joint, mimicking a knee injury. However, it’s crucial to recognize that I.T.B.S. is a different beast altogether, requiring its unique approach to treatment and management.

Now, let’s unravel the contributing factors that invite this troublesome condition into our running lives. It’s like solving a puzzle, piecing together the elements that lead to the emergence of I.T.B.S.

The Causes

One factor to consider is the temptation to push ourselves too hard, too soon. It’s like an overzealous sprinter bolting out of the starting blocks, disregarding the need for gradual progress. Listening to our bodies and gradually increasing our training load can help us avoid falling into the clutches of I.T.B.S.

Weakness in the hip abductor and gluteal muscles can also be a contributing factor. Picture these muscles as the sturdy pillars supporting your running form. When they are weakened or imbalanced, the strain on your IT band increases. Incorporating targeted exercises to strengthen these muscles can help restore balance and alleviate the burden on your IT band.

Runners with leg-length discrepancies or those who overpronate are also more prone to I.T.B.S. It’s like having a slightly uneven road or a car with misaligned wheels. Over time, these imbalances can lead to excessive stress on the IT band, paving the way for discomfort and pain. Seeking professional guidance, such as gait analysis or orthotic inserts, can help address these underlying issues and set you on a smoother running path.

Furthermore, research has shown that runners with a body mass index (B.M.I.) of 25 or higher who engage in weekly runs of two hours or more are at a heightened risk of developing I.T.B.S. It’s like carrying excess baggage on a challenging journey. The added weight places extra strain on the IT band, increasing the likelihood of irritation and inflammation. Keeping a balanced and healthy B.M.I., along with gradual training progressions, can help minimize the impact on your IT band.

How to Treat Iliotibial Band Syndrome

When it comes to preventing injury, it’s like walking a tightrope—a delicate balance that can mean the difference between continued progress or a painful setback. Let’s explore some strategies to navigate this tightrope and keep ourselves on the path to success.

Imagine this: you’re out on your usual running route, feeling invincible as you conquer each mile. But suddenly, a slight twinge of discomfort begins to nag at you. It’s like a subtle whisper, a gentle reminder from your body that something might be amiss. This is the moment to pay attention and take action.

At the first sign of trouble, it’s crucial to heed the warning and make adjustments. Picture it as a yellow caution sign along your running journey. One effective approach is to reduce your mileage by 50 percent for a couple of weeks. It’s like applying the brakes, allowing your body the necessary time and space to heal and recover. By taking this proactive step, you could prevent a minor annoyance from spiraling into a more serious injury.

On the flip side, ignoring those warning signs and stubbornly pushing through at your typical mileage is like turning a blind eye to a ticking time bomb. It’s like pouring fuel on a smoldering fire, exacerbating the issue and potentially leading to a longer road to recovery. Remember, our bodies are resilient, but they also have limits. Respecting those limits is key to long-term success.

During this recovery period, embrace the power of the R.I.C.E method. Rest, ice, compress, and elevate—like a soothing balm for your body. Allow yourself the time to heal by resting and avoiding activities that aggravate the pain. Apply ice to reduce inflammation, gently compress the affected area for support, and elevate it to alleviate swelling. This combination of care can work wonders in easing your discomfort.

However, if the pain persists and becomes too much to handle, it might be time to seek professional help. Booking a physiotherapy appointment can provide valuable insights and targeted treatment options. Additionally, non-steroidal anti-inflammatory drugs (NSAIDs) can offer temporary relief. But be mindful not to rely solely on pills to mask the pain. It’s like using a band-aid without addressing the underlying issue. Taking the necessary steps to address the root cause of the problem is always the best approach.

How To Prevent Iliotibial Band Syndrome

Imagine this: you’re gearing up for a run, lacing up your shoes, and preparing to hit the pavement. But before you take off, let’s take a moment to give your body the love and attention it deserves. A proper warm-up is like a gentle wake-up call to your muscles, preparing them for the demands of the road ahead. Engage in dynamic stretches and movements that activate your hips and legs, getting them ready for the miles that await.

Now, let’s talk about strengthening those hip abductors—the unsung heroes that provide stability and support to your running form. Think of them as the sturdy pillars that keep your body in alignment, preventing unnecessary stress on your IT band. Exercises such as side leg lifts, lateral side steps, and one-legged squats are like power tools for your hip abductors. Incorporating them into your resistance training routine can work wonders in fortifying these muscles, making them resilient against the onslaught of ITBS.

In the realm of running, stride length and cadence are like the yin and yang—a delicate balance that can make or break your running experience. When it comes to ITBS prevention, consider shortening your stride and increasing your cadence turnover. It’s like finding the perfect rhythm in a song, where your feet gracefully land and take off with each step. This adjustment can help reduce the stress placed on your IT band, allowing for a smoother and more efficient running motion.

Ah, the famous 10% rule—a principle that whispers words of wisdom to all runners. It’s a gentle reminder to respect the limits of your body, especially when increasing your mileage. The rule suggests that you should not increase your weekly mileage by more than 10% to avoid overloading your muscles and joints. Think of it as nurturing a delicate plant, allowing it to grow and flourish at a steady and sustainable pace. By embracing this principle, you give your body the chance to adapt gradually, minimizing the risk of ITBS and other running-related injuries.

Running Injury. 6 – Plantar Fasciitis

Picture this: you’re lacing up your running shoes, ready to embark on a new adventure. Little do you know, there’s a band of warriors beneath the surface of your foot, tirelessly working to provide support and stability—the plantar fascia. This mighty band of ligaments and tendons, akin to the strings of a musical instrument, extends from the heel to the toes, joining the heel and forefoot together. It acts as a protective shield, offering crucial arch support for every step you take.

Now, let’s dive into the numbers. Plantar fasciitis, the notorious culprit behind heel pain, is quite the common ailment among runners, accounting for approximately 10 to 15 percent of all running injuries. A poll conducted by runnersworld.com unveiled that a staggering 10 percent of their readers experienced the sting of this injury within the past year. These statistics highlight the significance of this condition and the importance of understanding how to prevent and treat it effectively.

Symptoms of Plantar Fasciitis

Let’s delve into the fascinating world of this condition and uncover its secrets, so you can understand the factors at play and find effective ways to kick that pain to the curb.

Imagine this: you lace up your running shoes, excited to hit the pavement and conquer the miles ahead. But as soon as your foot touches the ground, a sharp, tight sensation grips your heel. It’s as if you’ve inadvertently stepped on a nail or find yourself treading on a precarious path of shattered glass. Ouch! That’s the kind of pain that plantar fasciitis brings to the party.

Plantar fasciitis can turn the simple act of walking or running into a painful ordeal. The most common symptom is a tight and tender sensation at the base of your heel, ranging from mildly irritating to downright excruciating. It’s like having a persistent thorn in your shoe, constantly reminding you of its presence with each step you take.

Now, let’s uncover the main factors that contribute to the development of this troublesome condition. Picture your foot as a complex ecosystem, with various components working in harmony to support your every movement. However, when imbalances occur, trouble can brew, leading to the onset of plantar fasciitis.

One key factor is the weakness and dysfunction of the muscles within your foot. Think of these muscles as the pillars of support for your heel, responsible for distributing the load and keeping everything in proper alignment. When these muscles are weak or not functioning optimally, the burden falls disproportionately on your heel, causing it to endure more stress than it can handle. It’s like asking a single pillar to bear the weight of an entire building—it’s bound to crumble under the pressure.

Prolonged periods of standing on hard surfaces without supportive footwear can also contribute to the development of plantar fasciitis. Imagine standing on a concrete floor for hours on end, with no cushioning or arch support to alleviate the strain. It’s like subjecting your feet to an arduous test of endurance, where they bear the brunt of the unforgiving surface. Over time, this constant stress can lead to the inflammation and pain associated with plantar fasciitis.

Another fascinating factor to consider is the uniqueness of your feet. Some runners may have abnormal feet, characterized by either a high arch or a low arch. These variations can impact the way your foot absorbs shock and distributes forces during each step. It’s like having a unique blueprint for your feet—a one-of-a-kind design that may require some extra attention and care to keep everything in balance.

How to Treat Plantar Fasciitis

Imagine this: you lace up your running shoes, eager to conquer the world with each stride. But as soon as your foot hits the ground, a sharp pang shoots through your heel, almost like a jolt of lightning. It’s as if a mischievous fairy has hidden a pebble of pain in your shoe, determined to sabotage your every step. That’s the telltale sign of plantar fasciitis, my friend—an unwelcome guest that can make each run feel like an uphill battle.

So, how can you fight back against this heel-hijacking villain? Let’s start with some tried-and-true techniques that can help alleviate the pain and promote healing.

Step one: Take a break from running. Yes, I know it’s tough to press pause on your passion, but trust me, giving your foot some rest is crucial for recovery. Especially if the pain is severe, it’s essential to step back and allow your body time to heal. But don’t worry, it doesn’t mean you have to abandon all activity. Engage in low-impact exercises like swimming or cycling to maintain your fitness level while giving your foot a well-deserved break.

Now, let’s talk about the power of stretching. Imagine your plantar fascia as a resilient rubber band. When it’s tight and tense, it can cause discomfort and pain. But fear not, my friend, for stretching can be your secret weapon in the battle against plantar fasciitis. Regularly stretching the fascia tissue, as well as your calf muscles, can help relieve tension and promote flexibility. Picture it as giving your foot a gentle, rejuvenating stretch, like a yoga class for your arches.

But why stop there? The magic of self-massage awaits! Grab a tennis ball or a frozen water bottle and let it be your foot’s best friend. Roll your injured foot over the ball or bottle for a few minutes, several times a day. It’s like giving your foot a refreshing massage, soothing the inflamed tissue and providing relief. And for an extra touch of relaxation, a foam roller can work wonders in loosening up the plantar fascia. Think of it as treating your foot to a spa day—indulging in some well-deserved pampering.

Running Injury. 7 – Shin Splints

Picture this: you lace up your running shoes, ready to conquer the road ahead. But as you hit the pavement, a dull ache begins to radiate along the front portion of your lower leg, as if a tiny army of invisible warriors is diligently hammering away at your shinbone. These warriors are none other than shin splints, the inflammation that can make each stride a painful endeavor.

Now, let’s dig deeper and understand the precise cause of this overuse injury. Imagine your connective tissues as a delicate web that supports and cushions your lower leg. With each step you take, this web is subjected to microtrauma—tiny tears and damage that accumulate over time. It’s like a battle waged between your running routine and the connective tissues in your lower leg, resulting in inflammation and discomfort.

But where exactly is the battlefield? Shin splints target the tendons and muscles that surround your tibia, the mighty shinbone. This bustling area becomes a hotspot for inflammation, as if it’s become a bustling city besieged by the relentless forces of pain.

Now, let’s delve into the numbers. Shin splints have a knack for targeting beginners and those returning to running after a prolonged break. It’s like a rite of passage—a test that many runners face when they first embark on their running journey or when they try to pick up the pace after a hiatus. Surveys have revealed that shin splints account for a substantial portion, approximately 15 to 20 percent, of all running injuries. These numbers highlight the prevalence and significance of this condition among the running community.

Symptoms Of Shin Splints

The pain of medial tibial stress syndrome can range from a mild annoyance to an excruciating ordeal. It’s like a spectrum, with each step serving as a gauge for the intensity of the battle being fought within your leg. You might feel it primarily along the inside of your shin, roughly halfway down, or it may encompass the entire length of the bone. It’s a relentless companion that can make its presence known during your runs, and in some cases, even at rest.

But what are the contributing factors that give rise to this unwelcome companion? Let’s explore some intriguing insights:

Drastic changes in training volume can be a culprit in triggering medial tibial stress syndrome. Imagine your body as a finely tuned instrument, accustomed to a certain level of stress and impact. When you suddenly ramp up the intensity, especially with sprint training, it’s like pushing that instrument beyond its limits, causing it to rebel and protest.

Your choice of footwear can also play a significant role in the development of shin pain. Picture your shoes as loyal allies in your running journey. If they’re the wrong fit or excessively worn, they can betray you, leading to increased stress on your shins. It’s like having a pair of unreliable sidekicks, undermining your efforts to conquer the road.

The surfaces you run on can be deceptive terrain that either supports or sabotages your shins. Imagine running on a hard surface, like a concrete jungle. Each impact reverberates through your lower leg, amplifying the strain on your shins. Similarly, running on cambered terrains—slightly arched surfaces—can throw off the alignment of your legs, placing uneven pressure on your shins. It’s like navigating a treacherous landscape, where each step can make or break your journey.

Now, let’s talk about arches—those unique contours of your feet. Having high arches or flat feet can predispose you to medial tibial stress syndrome. It’s not a matter of fault or blame; it’s simply the hand you’ve been dealt. High arches can create excessive rigidity and limited shock absorption, while flat feet may lack the necessary support and stability.

How To Treat Shin Splints

When it comes to shin splints, early intervention is crucial. As soon as you feel that familiar twinge of pain, take a step back and listen to your body’s warning signals. Reduce your training volume for a couple of weeks, allowing your shins to recover and heal.

But simply reducing your mileage is not enough. Treat your injured shins with care by icing them for 15 to 20 minutes each day and elevating them at night to alleviate swelling. Imagine it as giving your shins a refreshing ice bath and tucking them in with a cozy blanket for a restful night’s sleep.

Now, let’s talk about some additional strategies to aid in your recovery and prevent future bouts of shin splints. Regular stretching can work wonders in keeping your shin muscles supple and resilient. Incorporate specific stretches that target the muscles around your shins, such as toe taps and heel walks. It’s like giving your shins a gentle massage, promoting flexibility and preventing tightness from taking hold.

If you’re in need of some extra support, consider using over-the-counter anti-inflammatory drugs or experimenting with Kinesio tape and neoprene sleeves. They can provide some relief and stability to your shins during your runs. It’s like equipping your shins with protective gear, shielding them from unnecessary stress and strain

Rest days are essential for recovery, but that doesn’t mean you have to abandon all physical activity. Embrace low-impact exercises like swimming, biking, pool running, or yoga to maintain your fitness levels without putting excessive weight-bearing stress on your shins. It’s like taking a detour on your running journey, exploring alternative paths that still keep you on the road to fitness.

When you finally bid farewell to shin pain and return to running, ensure that you do so pain-free. Gradually increase your mileage and intensity, allowing your body to adapt and strengthen over time. Remember, it’s not just about applying the RICE method—it’s about ensuring that your shins have fully recovered before hitting the pavement again.

If your shin splint troubles persist for more than a month despite your best efforts, it may be time to seek the guidance of a physician. They can conduct a thorough examination and provide tailored advice for your specific situation. It’s like calling in a skilled strategist to assess the battlefield and devise a winning plan.

Prevention

Gradual progression is key. Increase your training volume slowly, allowing your body to adapt and build resilience.

Pay attention to your anterior tibialis muscle—the unsung hero on the front of your shin. Strengthen it with exercises like heel walks and toe taps, giving it the power to withstand the demands of running.

Don’t forget about the importance of proper nutrition. Boost your calcium and Vitamin D intake to support strong and healthy bones.

Strengthen your calves, for they are vital supporters of your lower legs. Toe raises, eccentric heel drops, and calf raises can help fortify these essential muscles.

If you have flat feet, consider consulting with a doctor about the potential benefits of orthotics. They can provide additional support and stability, acting as your trusted allies in the battle against shin splints.

Give compression running socks a try. These magical socks apply gentle pressure to your lower legs, improving blood circulation and reducing muscle vibrations during your runs.

Running Injury. 8 – Patellar Tendinitis

Imagine your patellar tendon as a sturdy bridge connecting your kneecap to the top of your tibia, the mighty shinbone. This tendon plays a crucial role in leg extension during activities like running and bending motions at the knee. It’s like the support beam that allows you to push off the ground with each powerful stride.

However, the repetitive and high-impact nature of running can sometimes wreak havoc on this resilient tendon. The constant stress placed upon it can lead to small tears, causing inflammation, pain, and swelling. It’s as if the bridge is being pushed to its limits, gradually developing cracks that weaken its structural integrity.

Stats

Research has shown that patellar tendinitis affects approximately 11 percent of runners. That’s a significant number of athletes grappling with this frustrating condition.

The Symptoms

When it comes to patellar tendinitis, the pain tends to center around the bottom of your kneecap, right over the patellar tendon. However, the tenderness can manifest anywhere along this crucial structure. It’s like a troublesome ache that lingers, making its presence known whenever you engage in activities that involve knee bending—kneeling, squatting, sitting, jumping, or even ascending stairs.

The Contributing Factors

When it comes to patellar tendinitis, several factors can contribute to its development. Overtraining is like pushing the pedal to the metal without giving your body a chance to catch its breath. It’s like revving your engine without ever taking a pit stop. The constant strain on your patellar tendon can eventually lead to inflammation and pain.

Too much hill training can also be a culprit. While conquering those inclines can make you feel like a champion, the repetitive stress on your knees during uphill runs can take a toll on your patellar tendon. It’s like constantly climbing a without giving your legs a break.

Running on uneven or slanted surfaces is another sneaky trigger for patellar tendinitis. Imagine navigating a rocky terrain where every step requires additional effort to maintain balance. Your knees have to work overtime to stabilize your body, and the patellar tendon may suffer the consequences.

Biomechanical challenges, such as overpronation, can also put extra strain on your patellar tendon. It’s like driving with misaligned wheels that cause uneven wear and tear on your tires. Similarly, when your biomechanics are off-kilter, your knees may bear the brunt of the load, leading to tendon inflammation and discomfort.

Treatment

When you first notice the pain, it’s essential to take a step back from high-impact training and give your body some well-deserved recovery time. Think of it as hitting the pause button on your running routine to allow your patellar tendon to heal properly.

You may need to reduce your weekly mileage or even temporarily halt your running altogether. It’s like taking a detour on your running journey, exploring alternative activities that don’t put excessive stress on your knees. Give your body the time it needs to transition from the acute phase of pain to the healing phase.

During this recovery period, ice becomes your best friend. Apply an ice pack to the affected area for 15 to 20 minutes, three to four times a day. It’s like giving your knees a chilly embrace, reducing inflammation, and providing relief

Once you’re pain-free, you can gradually reintroduce running into your routine. Start with shorter distances and listen to your body. If the pain returns, take a step back and adjust your training accordingly. It’s like testing the waters, slowly wading in before diving back into your regular running regimen.

Prevention

Strengthening the muscles around your knees is key to providing extra support to the patellar tendon. Think of it as building a sturdy fortress around your knees, reinforcing their stability and resilience.

When increasing your mileage, remember the golden rule: no more than a 10 percent increase from one week to the next. It’s like taking small, calculated steps instead of giant leaps. Prioritize recovery and give your body time to adapt to the increasing demands of running.

Don’t neglect the importance of flexibility. Keeping your calves and hamstrings loose and limber can help alleviate strain on your knees. It’s like keeping your muscles well-oiled and ready for action.

Running Injury. 9 – Muscle Strains

Picture this: you’re out on the open road, feeling the rhythm of your strides, when suddenly, a sharp pain shoots through the back of your thigh. It’s like a sudden hiccup in your running symphony, throwing off your stride and leaving you in discomfort. That, my friend, is a hamstring strain—a slight tear or overextension of the muscles that reside in the back of your thigh, responsible for bending your knee.

The hamstrings, composed of the semitendinosus, semimembranosus, and biceps femoris muscles, are the workhorses that propel you forward with every step. But when pushed beyond their limits or subjected to sudden bursts of speed, they can rebel against you, causing pain and frustration.

Your muscles are like untrained warriors stepping onto the battlefield for the first time. They haven’t developed the endurance and resilience required for the high-impact nature of running.

If you’re a speed demon, addicted to the thrill of sprinting or engaging in frequent speedwork sessions, you may be dancing on a fine line. Pushing your muscles to their absolute limit in these intense bouts can increase the risk of hamstring strains. It’s like revving your engine to its maximum capacity without giving it a chance to cool down—it’s a recipe for trouble.

Skipping a proper warm-up is another red flag that can lead you straight into the arms of a hamstring strain. Think of your muscles as a group of friends preparing for a thrilling adventure. They need time to loosen up, stretch, and wake up from their slumber before embarking on a vigorous run. Neglecting this crucial step is like sending your friends off on a daring expedition without any preparation—it’s a surefire way to encounter setbacks.

Symptoms of Muscle Strains

When your hamstrings decide to rebel, they make their presence known through tender stiffness and pain. It’s like a grumpy old man refusing to stretch his legs in the morning, protesting with every movement. Trying to stretch your hamstrings, accelerating or decelerating during a run, or engaging in any knee-bending activity can elicit discomfort and remind you of their presence.

Treatment

Most hamstring strains can be handled right in the comfort of your own home, without the need for dramatic interventions. It’s not as dire as a ligament sprain, where the very fibers of your body’s support system are torn asunder.

If you suspect a hamstring strain, the first rule of thumb is to halt your running endeavors immediately and apply the tried-and-true RICE method.

Picture this: you’re lounging on your couch, legs elevated on a plush pillow, a cold pack soothingly numbing the affected area. This is the essence of the RICE method—Rest, Ice, Compression, and Elevation. Give yourself a well-deserved break from running for a couple of days, or even longer if needed. Ice the painful area for 15 to 20 minutes a few times a day, allowing the cool embrace to reduce swelling and kickstart the healing process. And don’t forget to elevate that injured leg, as if it were the crown jewel of your recovery kingdom.

Now, here’s the part where patience becomes your greatest ally. Recovery time for hamstring strains can vary from runner to runner, taking anywhere from a mere two weeks to a more challenging three months. The severity of the strain plays a significant role in determining the duration of your healing journey. So, be kind to your body, listen to its cues, and allow it the time it needs to mend those strained hamstrings.

But my dear runners, prevention is always the best medicine. Let’s unlock the secrets to ward off those pesky muscle strains and keep our hamstrings happy and healthy. It all begins with a proper warm-up, as if you were enticing your muscles into an exhilarating dance. Before each run, take a few moments to awaken your body with light jogging, dynamic exercises, and stretches that ignite your muscles and prepare them for the journey ahead.

And for those sprint enthusiasts and speedwork aficionados, pay extra attention to your warm-up routine. Take 15 to 20 minutes to engage in a dynamic warm-up that primes your body for those lightning-fast bursts of speed. Embrace the power of inchworms, squats, and lunges, unleashing your inner athlete and giving your hamstrings the attention they deserve.

Additional resource – How to stop runners toes

More Injuries and Pains To Deal With When Exercising

The above list only covers a small portion of injuries you can encounter when exercising regularly. So, as a bonus, I decided to share a few more so you can protect yourself out there, whether when running or cross-training.

Enjoy!

Blisters

Let’s start with those dreaded blisters. Picture this: you’re out on a run, feeling the wind on your face and the rhythm in your stride, when suddenly, a tiny demon starts rubbing your skin raw. Yes, we’re talking about blisters—those fluid-filled sacks that can turn a blissful run into a painful ordeal. But fear not, my fellow runners, for there are ways to combat these pesky blisters.

Prevent it

Blisters are born from the friction between your running shoes, socks, and delicate skin. It’s like a battle of wills, with your feet caught in the crossfire. To prevent these unwelcome companions, let us employ the power of lubrication. Before lacing up your shoes, apply a trusty lubricant, like petroleum jelly, to those areas prone to blister formation.

Think of it as a shield of slippery protection, allowing your feet to glide through your runs with ease. And don’t forget the importance of well-fitting shoes and running-specific socks—they’re like armor for your feet. Consider doubling up on the socks for extra defense or bidding farewell to worn-out socks that have stretched their limits.

Pectoral Injury

Now, let’s shift our focus to pectoral injuries—a common plight among the strength enthusiasts among us. It’s as if the weightlifting gods are testing our limits, luring us into lifting heavier than we should, only to unleash the wrath of a torn chest muscle or its tendons.

But fear not, my fellow gym-goers, for we shall overcome this challenge with proper preparation.

Prevent it

Before diving into your weightlifting endeavors, let us pay homage to the warm-up and stretching routine. Engage your pectorals with gentle movements and stretches, priming them for the intense battle ahead.

And remember, a strong core is your ally in this fight—activate those abdominal muscles and brace yourself for the task at hand. When it comes to lifting weights, let wisdom be your guide.

Choose a weight that you can handle with proper form, ensuring that your movements remain controlled and precise. As the saying goes, “form over ego.” If you feel your technique starting to falter, it’s a sign that the weight is too heavy for you to conquer alone.

Bicep Tendon Rupture

Lastly, we must confront the bicep tendon rupture—a formidable adversary born from the perilous act of curling a weight that exceeds our capabilities or succumbing to the sudden drop of a dumbbell. It’s like a battle between our muscles and the forces of gravity, with the delicate tendon that connects our biceps to our shoulder and elbow bearing the brunt of the damage. But fret not, my fellow lifters, for we can emerge victorious by heeding a few crucial precautions.

Prevent it

To prevent the bicep tendon from crying out in agony, let us exercise prudence in our weight selection. Choose a weight that you can handle throughout your sets while maintaining proper form—a weight that respects your body’s limits and avoids pushing you into the danger zone. And when the weights become truly heavy and the battle intensifies, don’t hesitate to call upon the assistance of a spotter. They are the unsung heroes of the weight room, ready to lend a helping hand and ensure your safety.

Sternum Fracture

Let’s begin with the dreaded sternum fracture—a nightmare scenario for any dedicated bench presser. Picture this: you’re lying on the bench, determined to conquer that weight, when suddenly, your strength wanes, and the bar refuses to budge. The weight becomes an immovable force, and before you know it, your sternum bears the brunt of the strain. It’s a painful lesson in knowing our limits, but fear not, my fellow lifters, for there are ways to prevent this unfortunate outcome.

Prevent it

To safeguard against sternum fractures, let us embrace the power of proper lifting techniques. Develop a strong foundation of form and ensure that you’re using weights that align with your abilities. Remember, it’s not a competition of ego but a journey towards strength and resilience. And in those moments of heavy lifting, when the weight pushes the boundaries of your capabilities, call upon the assistance of a trusted spotter. They are the guardian angels of the weight room, ready to lend a helping hand and protect you from potential injuries.

Joint Dislocation

Finally, let us confront the treacherous realm of joint dislocations—a realm where improper form and excessive weights can wreak havoc on our precious joints. Imagine this: you’re in the midst of a lift, the weight is demanding, and in the struggle to conquer it, you compromise your form. With a jarring force, the joint gives way, leaving you in excruciating pain and grappling with a dislocation. But fret not, my fellow lifters, for there is a path to joint protection.

Prevent it

In the quest to prevent joint dislocations, we must cultivate mindfulness and respect for our joints’ range of motion. Nurture mobility through targeted exercises and stretches, allowing your joints to move freely and gracefully. Work on correcting any muscle imbalances that may be placing undue stress on your joints, ensuring that the forces you exert are distributed evenly throughout your body. And when it comes to lifting weights, let wisdom be your guide. Use weights that you can handle with good form, maintaining proper alignment and technique throughout your lifts. Remember, it’s a harmonious symphony of strength and stability—a symphony that protects your joints from the perils of dislocation.

Running Injuries – The Conclusion

So, my fellow warriors in the pursuit of fitness, there you have it! A glimpse into the world of overuse injuries that afflict runners and gym enthusiasts alike. But remember, this is just the beginning of your knowledge journey. Seek further guidance, consult with experts, and always listen to your body’s


Sugar Intake Unveiled: How to Take Control of Your Health

reduce sugar intake

Are you ready to take down the sugar monster and reclaim control over your health? Well, buckle up because we’re about to dive into some eye-opening truths about sugar and equip you with six powerful strategies to reduce your intake and restore balance to your diet.

Let’s start with the hard facts. Sugar, my friend, is the ultimate diet saboteur. It’s like a sneaky infiltrator, adding little to no nutritional value while piling on the calories. Talk about a wolf in sheep’s clothing! But that’s not even the worst part.

Sugar has been identified as the primary culprit behind a laundry list of diseases that can send shivers down your spine. We’re talking type II diabetes, obesity, infertility, impotence, depression, tooth decay, and high blood pressure. It’s like a toxic cocktail that wreaks havoc on your body and mind.

Hold on tight because the statistics are staggering. According to the Food and Drug Administration (FDA), approximately 16% of the typical American diet is made up of sugar. That’s a significant chunk! As a nation, we’re simply overdosing on the sweet stuff. But it gets worse. Research has revealed a jaw-dropping shift in our sugar consumption over the years.

Back in the 1800s, we were chowing down on a modest 10 pounds of sugar per person per year. Fast forward to today, and that number has skyrocketed to a mind-boggling 150 pounds per person, per year. That’s enough sugar to build a sweet fortress!

To put this sugar avalanche into perspective, imagine lugging around three pounds of sugar every week. It’s like carrying the weight of half a gallon of milk, a box of wine, or a giant can of Crisco shortening. I don’t know about you, but that visual sends shivers down my spine.

But wait, there’s more. Brace yourself for this one—on average, the typical American diet includes a staggering 30 teaspoons of added sugar daily. That’s over 500 calories, equivalent to chugging down two 20-ounce sodas. It’s like pouring a sugar tsunami into your system every single day.

Now that we’ve laid bare the sugar epidemic, it’s time to take action.

Are you ready to kick this nasty habit to the curb?

Fantastic! Here are six powerful strategies that will empower you to break free from the clutches of sugar and embrace a healthier, more vibrant life. These strategies are backed by research, tested by countless individuals, and proven to make a significant impact on reducing sugar intake.

Are you in? Let’s do this!

My Sugar Addiction

Sugar, oh sugar, you were my ultimate vice, my guilty pleasure that I couldn’t resist. From my earliest memories, I found solace in the sweetness, seeking comfort in the embrace of biscuits, donuts, chocolate bars, and all things saccharine. I even had a weakness for sugary breads, muffins, and indulging in the creamy delight of heavy cream. It was an insatiable craving that seemed to have no bounds.

Deep down, I knew the truth. I knew that sugar was my enemy, lurking in the shadows of my indulgence, wreaking havoc on my health. I was well aware that I exceeded the recommended daily limit of the stuff. But knowing something is harmful and taking action to change it are two different battles, aren’t they? It’s a constant struggle we face when confronted with our weaknesses.

If you’re reading this, chances are you understand the struggle all too well. Cutting sugar from our lives is no easy feat, and there are countless reasons why it’s an uphill battle. Sugar has infiltrated every corner of our lives, stealthily finding its way into our diets. It’s omnipresent, hidden in processed foods, tempting us with its alluring sweetness. And let’s not even get started on the tantalizing deliciousness of foods with added sugar. It’s as if they were crafted to captivate our taste buds and keep us hooked.

I used to believe that my active lifestyle would save me from the consequences of my sugar addiction. With my dedication to running, weight lifting, and yoga, I thought I had a free pass to indulge in all the sugary delights. How wrong I was. The truth slapped me in the face like a wake-up call. Being a runner doesn’t grant us immunity to the effects of a poor diet. No matter how fast or fit we are, we can’t outrun the consequences of a crappy diet.

Then, about 18 months ago, a pivotal moment arrived in my life. It was a turning point that forced me to confront the harsh reality of my family’s medical history—metabolic syndrome, diabetes, and heart disease. Feeling motivated enough, I mustered the strength to make a change. It wasn’t an easy journey. I stumbled and fell countless times, trying various methods and failing miserably most of the time.

But slowly, with persistence and determination, I made progress. Eleven months of trial and error brought me to a place where most people would consider me sugar-free. It’s an achievement I hold dear and take pride in. Of course, I still allow myself the occasional cheat day, because life is all about balance. However, the difference now is that I make the conscious choice to indulge, and that sense of control empowers me.

Breaking free from the clutches of sugar is a battle worth fighting. It’s a journey that requires resilience, self-discovery, and a deep understanding of oneself. Trust me, the feeling of triumph over your sugar addiction is a sensation like no other. With every temptation resisted and every craving overcome, you gain a newfound strength that resonates through every aspect of your life.

The takeaway?

If you take anything from my story, realize that this process does not happen overnight.

It takes a lot of patience and strength to make it happen, but long term, it’s worth the trouble.

How To Reduce Sugar Intake

What follows are some of the steps (not necessarily in chronological order) that I took to get rid of sugar without going bonkers or feeling deprived.

Eating the way I’m describing today will help you kick sugar to the curb but also help you feel lighter, more energized, and much healthier.

That’s a bunch of good things if you ask me.

1.     Admit You’re an Addict

First things first, let’s address the elephant in the room. You might be thinking, “What’s all this talk about addiction? It’s just sugar!” Well, hold on tight, because the reality is far more unsettling than you might expect.

Here’s the deal: If you find yourself consuming copious amounts of sugar, it’s not just your waistline and overall health that suffer. Recent studies have shown that sugar can actually trigger addiction-like symptoms. Yes, you heard me right. Sugar can hijack your brain and send it into a pleasure frenzy. In fact, research has revealed that sugar stimulates the same pleasure centers in the brain as notorious substances like heroin or cocaine. Now, that’s a wake-up call.

Let’s get scientific for a moment. When you consume sugar, it sets off a chain reaction in your brain. The nucleus accumbens, a region responsible for producing dopamine, gets activated. And guess what? Dopamine is the superstar neurotransmitter that’s closely linked to pleasure. So, every time you indulge in a sugar-laden treat, your brain lights up like fireworks on the Fourth of July.

To drive this point home, let’s take a look at a fascinating study conducted at Connecticut College. Researchers decided to put the beloved Oreo cookie to the test. They examined how Oreos affected the brains and behavior of rats. And what they discovered was jaw-dropping: Oreos could be as addictive as cocaine! Now, I’m not suggesting you should never savor an Oreo again—I’m not that cruel. But this study highlights the astonishing grip sugar can have on our brains.

Now, here’s where things get personal. To truly grasp the extent of your sugar addiction, I challenge you to take the Yale Food Addiction Scale test. It consists of 25 thought-provoking questions designed to shed light on whether you’re dependent on sugar.

This test isn’t just about sugar; it also measures your dependency on high-fat foods. It’s an eye-opening experience that can help you gauge the seriousness of your addiction and take the necessary steps toward reclaiming control.

Think of it as a detox, similar to quitting hard drugs. Just like any addiction, kicking the sugar habit can come with intense cravings and withdrawal symptoms. It’s not an easy journey, but trust me, it’s worth it. By gradually weaning yourself off sugar, you can break free from its clutches and regain control over your health and well-being.

2.    Cut Back On Bread

Bread is the beloved staple of the Western world’s diet. It’s time we have a heart-to-heart about why bread may not be the best companion for your health journey. And trust me, the reasons are plenty.

Let’s start with the basics. Bread, even the so-called “healthy” whole wheat varieties, is brimming with carbohydrates and refined sugar. And when it comes to essential nutrients and fiber, well, let’s just say bread falls short in that department. This is particularly true for its paler cousin, white bread, which can wreak havoc on your weight and overall well-being.

But hey, don’t just take my word for it. Science is right there in my corner, waving its research papers and saying, “Hold up, folks!” A study conducted at the University of Navarra in Spain found that consuming more than three or four slices of white bread each day was associated with a whopping 40 percent higher risk of becoming obese. Now, that’s food for thought.

I get it, though. Bread is a universal delight. Its tantalizing aroma, its irresistible taste—no wonder it has such a hold on us. But fear not, my friend, for I’m here to tell you that bidding farewell to bread doesn’t have to be an insurmountable challenge. With a dash of motivation and a sprinkle of discipline, you can conquer this task.

Let’s start by making small adjustments. Say “no” to sandwiches that come wrapped in carb-loaded bread. Next time you dine out, resist the temptation of the bread basket, teasing you with its seductive offerings. And if you find yourself unable to part ways completely, limit your bread intake to just one slice per meal. It’s all about baby steps.

Now, if you simply can’t fathom a life without bread, I have some fantastic news for you. There’s a world of delicious low-carb bread recipes waiting to be explored. Yes, you heard me right. You can whip up your very own bread creations that are both convenient and easy to make, all while keeping those pesky carbs in check. It’s a win-win situation.

And if you’re feeling adventurous, why not swap out that traditional white bread for healthier alternatives? Think of options like nutty barley, protein-rich quinoa, earthy brown rice, or the trusty whole-wheat bread. These choices will not only add variety to your meals but also provide you with a nutrient boost that bread alone can’t offer.

For more on why you should ditch white bread, check the following studies:

3.    Go For Low-Carb Snacks

When cutting down on sugar, it’s good to have a few healthy snacks in case you get hungry between meals. Trust me, it happens to the best of us.

Especially in the early weeks of your new sugar-reducing regime, having the right snacks can make all the difference. But here’s the twist: most snacks out there are loaded with sugar and unhealthy additives. It’s like they’re little sugar bombs disguised as innocent munchies, offering little to no nutritional value. Sneaky, right?

But fear not, for I have a solution that will change the snacking game for you. It’s time to bid farewell to those sugary villains and swap them out for healthier alternatives. The key is to choose snacks that are high in healthy fats, lean protein, and fiber, while keeping the sugar, grains, and carbs in check. Enter low carb snacking. These snacks will not only keep you satisfied but also help you consume less during your upcoming meal and throughout the day. Talk about a win-win situation!

Now, let me introduce you to some of my all-time favorite healthy snacks. We’ve got cheese, providing both protein and deliciousness. Then we have almonds, walnuts, peanuts, and hazelnuts, packed with healthy fats and a satisfying crunch. And let’s not forget about our dear friend, the avocado, with its creamy texture and abundance of healthy fats.

But wait, there’s more! Say hello to berries, nature’s little bursts of sweetness that also come with a healthy dose of fiber. Non-starchy veggies make an appearance, offering a crunchy and guilt-free snack option. And last but certainly not least, we have the vibrant and refreshing kiwi, ready to tantalize your taste buds and provide a boost of vitamins.

These snacks will become your go-to allies on this sugar-cutting journey. Keep them stocked in your pantry or fridge, ready to rescue you from the clutches of unhealthy snacking. Remember, it’s all about making smart choices that nourish your body and keep those sugar cravings at bay.

4.    No Sugary Drinks

If you’re on a mission to cut down on sugar, let me tell you, boycotting sugar-sweetened drinks should be right at the top of your to-do list. Trust me, I’ve been there, and eliminating those liquid sugar bombs from my life made a world of difference in my overall diet. It’s like taking a massive leap towards a healthier, sugar-free paradise.

But why are sugary drinks so bad for you? Well, let me break it down for you. These beverages are notorious for packing excessive amounts of added sugar. And you know what happens when you consume too much sugar, right? It’s like opening the floodgates to a whole host of health risks, including the dreaded type 2 diabetes, metabolic syndrome, and unwanted weight gain. Not exactly the squad you want to join.

Now, if you need some convincing, let me hit you with some mind-blowing research. Brace yourself. A study published in the prestigious American Journal of Public Health revealed a strong link between soda consumption and an increased risk for diabetes, heart disease, obesity, and a whole bunch of other health ailments. It’s like a red flag waving frantically, trying to grab your attention.

But let’s zoom out for a moment and take a look at the bigger picture. The National Institute of Health reports that soda, my friend, is the third largest source of calorie intake in the typical American diet. Can you believe that? And here’s a jaw-dropper for you: sweet beverages account for almost half of the added sugar in the average American’s diet, according to the Center for Science in the Public Interest. It’s like we’re swimming in a sea of liquid sugar.

Now, let’s get real about portion sizes. You can’t fool yourself into thinking that limiting yourself to just one can a day will do the trick. Oh no, not even close. A 12-ounce can of soda can contain a whopping 30 to 50 grams of sugar. That’s more than an entire day’s worth of sugar intake in one little can. Mind-blowing, right?

To put things into perspective, let’s play a little comparison game. One can of soda is equivalent to devouring one cup of ice cream, munching on four Tim Tams (yes, those chocolatey delights), savoring three English muffins, or enjoying four large peaches. That’s a lot of sugar packed into a seemingly innocent can.

5.    Stop Drinking Fruit Juice

Fruit juices are nothing more than glorified junk food. Yep, I said it.

Sure, they might contain a smidge of nutrients and minerals, but let’s be honest, that doesn’t make up for what they’re lacking. When you sip on that glass of fruit juice, all you’re really getting is a concentrated dose of sugar and water, with one crucial ingredient missing: the healthy fiber that the fruit itself provides. It’s like plucking the heart out of a story and expecting it to make sense. It just doesn’t work that way

Now, here’s the kicker: fruit juices aren’t all that different from the regular ol’ Coke you’d find on a store shelf. Yes, you heard me right. Those innocent-looking fruit juices are packing a punch of sugar that rivals the notorious Coke. Let’s break it down. A cup of apple juice can contain a whopping 29 grams of sugar, while grape juice can hit you with 35 grams in a cup. Take a moment to let that sink in.

Now, compare it to the 39 grams of sugar found in a 12-ounce can of Coke. Shocking, isn’t it? It’s like guzzling a can of Coca-Cola disguised as a fruity treat.

So what’s the solution? Well, it’s time to give those fruit juices the boot and opt for the ultimate hydration hero: water. Yes, good old H2O. It’s calorie-free, refreshing, and does wonders for your body. And if you’re craving a little flavor, you can jazz up your water game by tossing in a slice of lemon or orange. Trust me, it’s a game-changer.

But here’s an even better idea. Why not enjoy the whole fruit itself? You know, the one that still has its nutrient-packed flesh and fiber intact. That way, you get the full package—the vitamins, the minerals, the fiber—all wrapped up in a delicious and satisfying bite. It’s like experiencing the complete story, rather than settling for a mere summary.

6.    Use Sweeteners Instead of Sugar

Picture this: just one innocent tablespoon of white sugar contains a whopping 12 grams of carbs. But here’s the real kicker—it’s not just any carbs we’re talking about. No, no. It’s sucrose, a mischievous combination of 50 percent glucose and 50 percent fructose. That’s a whole lot of sugar packed into a tiny spoonful.

Here’s the sliver lining. There are actually a few sugar-free sweeteners out there that might just surprise you with their health benefits. Yeah, you heard me right. Sweeteners that won’t send your blood sugar skyrocketing and might even bring a few positive perks along for the ride. Sounds like a win-win, doesn’t it?

Let me introduce you to a couple of these sugar-free wonders that have been making waves in the market. First up, we’ve got Stevia. It’s the cool kid on the block, a low-calorie sweetener extracted from the leaves of the Stevia Rebaudiana plant. The best part? Stevia practically has zero calories, so you can sweeten things up without worrying about the calorie overload. And get this—it has even been found to help regulate blood sugar and blood pressure for folks with diabetes. Talk about a multitasking superstar!

Next in line is Xylitol. This little gem is a sugar alcohol derived from birch bark and can also be found naturally in many fruits and vegetables. While it does have a calorie count of 2.4 calories per gram (which is about two-thirds of what you’d find in table sugar), it packs in 100 percent of the sweetness. So, you can indulge your sweet tooth without going overboard on the calorie front.

Last but not least, let me introduce you to Erythritol. It’s another sugar alcohol that occurs naturally in certain fruits. Now, here’s the fascinating part—it boasts a mere 0.24 calories per gram, which is roughly just 6 percent of the caloric value of table sugar. But don’t let its low-calorie status fool you—it still brings about 70 percent of the sweetness. Talk about having your cake and eating it too!

7.    Focus on Non-Starchy Vegetables

I love vegetables—and for all the right reasons.

Vegetables are an ideal source of nutrients and fiber.

They’re also rich in phytochemicals (plant compounds), many of which stimulate the immune system, slow the growth rate of cancer cells, reduce inflammation, etc.

That said, when I got serious about getting rid of sugar—especially after I started the keto diet—I realized that some veggies contain more sugar than others.

Avoid starchy ones like carrots, peas, beets, sweet potatoes, corn, and lima beans when choosing veggies.

These have drastically higher sugar content, which means that eating them can quickly take you to your maximum daily sugar intake—and you don’t want that.

Instead, opt for low-carb, non-starchy vegetables.  The following are among the best:

  • Broccoli
  • Cucumber
  • Leeks
  • Artichoke
  • Asparagus
  • Brussel sprouts
  • Kohlrabi
  • Mushroom
  • Okra
  • Baby corn
  • Cauliflower
  • Onions
  • Chayote
  • Celery
  • Jicama
  • Bamboo shoots
  • Cabbage
  • Daikon
  • Radishes
  • Salad greens
  • Swiss chard
  • Turnips
  • Peppers
  • Sprouts
  • Squash
  • Eggplant

You have plenty of options.

Who says eating low carb is a hassle?

8.    Eat Low Carb Dairy

After being on the keto diet for quite a while, I’ve become quite the connoisseur of low-carb dairy products. And let me tell you, they’re like the unsung heroes of fitness and health. Not only are they incredibly satisfying, but they also bring a whole host of benefits to the table.

Picture this: you’re enjoying a creamy and indulgent bowl of dairy goodness, and not only does it keep you feeling fuller for longer, but it also works its magic to reduce your appetite. It’s like a superhero cape wrapped around your stomach, whispering, “No more unnecessary snacking, my friend.”

But that’s not all! These dairy powerhouses have been found to lower the risks of heart disease, boost bone health with their rich supply of magnesium and calcium, and even offer a secret weapon called conjugated linoleic acid (CLA).

Now, let’s talk about this CLA. It’s like the hidden gem within dairy, a naturally occurring fatty acid that has caught the attention of researchers in several studies. And guess what they found? It’s a health promoter! It’s like the sidekick that accompanies your dairy intake, working behind the scenes to support your overall well-being.

But here’s the thing: not all dairy is created equal. You see, there are some sneaky imposters in the dairy world that you need to watch out for. We’re talking about those frozen yogurts, fruit-flavored yogurts, and puddings that claim to be your friends but are secretly loaded with carbs, sugar, and a whole bunch of additives.

They’re like wolves in sheep’s clothing, tempting you with their sweet promises while wreaking havoc on your low-carb goals.

When it comes to choosing your dairy delights, opt for those with less sugar added. Look for the full-fat options that are brimming with goodness. You see, low-fat products like yogurt, shakes, and smoothies might try to lure you in with their promises of being healthy, but guess what?

They often come with a hidden secret—more sugar than their full-fat counterparts. So, stick to the real deal, my friend. Embrace the creaminess, the richness, and the fullness that full-fat dairy has to offer..

9.    Plan your Meals

If you’re on a mission to shed those pesky 10 pounds and transform your eating habits, I’ve got a golden nugget of wisdom for you: meal planning is the key to success.

Think of it this way: meal planning is like having your own personal GPS system for healthy eating. Without a plan, you’re simply sailing through life without a rudder. It’s like wandering aimlessly through a maze, hoping to stumble upon the right path. But my friend, failing to plan is, in fact, planning to fail. You need to take control of our nutritional destiny and pave the way for success.

Picture this: it’s a busy day, you’re juggling a thousand tasks, and the clock is ticking. In those moments, our willpower is put to the ultimate test. We’re more likely to succumb to the siren call of convenient, ready-to-eat meals that are loaded with empty calories, sneaky sugars, and unhealthy fats.

But fear not! The power of meal planning swoops in to save the day. Here’s what you need to do: carve out some time, preferably on a serene Sunday when you can bask in the calmness of the day, and sit down to create a master plan.

Start with breakfast, that glorious fuel that kickstarts your day. Decide what delicious and nourishing options will grace your morning table.

Move on to lunch, crafting a lineup of satisfying meals that will keep you energized and focused throughout the day.

And finally, conquer the kingdom of dinner, where you’ll create mouthwatering feasts that align perfectly with your goals.

Once your plan is solidified, let it guide your shopping trips. Armed with your list, venture into the grocery store like a skilled hunter, picking up only the ingredients you need for your pre-determined meals.

Get Enough Sleep

Now, picture this: you’ve had a few rough nights in a row, tossing and turning like a ship lost at sea. You wake up feeling groggy, irritable, and craving all the wrong foods. It’s like a recipe for disaster, right? But fear not because science has our back on this one.

In the hallowed halls of British research, a groundbreaking discovery was made: the undeniable link between sleep deprivation and those devilish cravings for unhealthy, sugary delights. It’s not just my subjective observation, my friends. It’s backed by cold, hard evidence.

Here’s what they found: when those brave subjects prioritized their nightly slumber and got some quality shut-eye, something remarkable happened. Their cravings took a nosedive. In fact, a good night’s sleep had the power to reduce their sugar intake by up to a whopping 10 grams the following day. Now that’s some serious sleep magic right there!

But you may be wondering, why does sleep deprivation turn us into sugar-seeking machines? Well, according to the prevailing theory, it all comes down to our hormones. You see, when we skimp on sleep, it messes with the delicate balance of these hormonal warriors. It suppresses the hormones that tell us we’re full and satisfied while cranking up the ones that shout, “Feed me, I’m famished!”

In other words, the less time you spend cozied up in dreamland, the more ravenous you’ll feel. It’s like your body’s internal hunger alarm goes haywire, constantly demanding fuel to keep you going. No wonder those late-night sugar cravings feel utterly irresistible!

So what’s the solution? Well, if you want to banish those sugar cravings and unlock the power of a restful night’s sleep, listen closely.

First and foremost, create a pitch-black haven in your bedroom. Embrace the darkness, my friends, for it stimulates the production of the magical melatonin hormone—a key player in achieving that restful slumber we all crave.

Next, brace yourself for the challenge ahead. Yes, I’m talking about avoiding screens in the hours leading up to bedtime. I know, it’s like asking a magician to give up their wand, but trust me, it’s worth it. Those screens emit a pesky blue light that disrupts your sleep-wake cycle, making it harder for you to drift off into dreamland.

Now, consistency is key, my friends. Make it a habit to hit the hay at roughly the same time every day, even on the glorious weekends when temptations to stay up late beckon. Your body craves routine, and by honoring it, you’ll pave the way for a peaceful slumber.

11.  Practice Out of Sight Out of Mind

Here’s a simple equation for you: a stocked pantry full of sweet treats equals a higher chance of indulging. It’s as clear as day. I don’t know about you, but if I have a bag of mouthwatering cookies or a tempting chocolate bar within arm’s reach, resistance becomes a Herculean task.

My best advice? Take control of your pantry. I’d urge you to embark on a mission of elimination, clearing away the sugary seductions that lurk in your cupboards, fridge, and freezer.

In this grand purge, leave no stone unturned, no treat untouched. Toss out the Pop-Tarts, banish the Halloween candy, and bid farewell to all those sugar-rich culprits that have been sabotaging your journey towards a healthier you. Trust me, leaving nothing to chance is the secret sauce to success.

By setting your environment up for success, you’ll find it easier to resist the allure of sugary temptations and make choices that align with your goals.

Now, I know we can’t always control every environment we find ourselves in, but guess what? You have the power to control the battleground of your kitchen. It’s time to reclaim that sacred space and turn it into a beacon of wholesome nourishment.

12. Eat Your Protein

Let’s dive into the nitty-gritty of why protein is your new best friend. Picture this: with every protein-packed bite, you’re igniting a chain reaction of satisfaction that lingers for hours. How does it work?

Well, protein has a magical ability to trigger the release of the fullness hormone PYY, giving you that blissful feeling of being satisfied for longer periods of time. Say goodbye to those pesky hunger pangs!

But wait, there’s more! Protein has another superpower—it knows how to keep that pesky hunger hormone ghrelin in check. By hindering its release, protein acts as a shield against those relentless cravings, ensuring you stay on track towards your goals. And here’s a bonus: protein gives your metabolism a much-needed boost, revving up the engine that burns those calories. It’s like having a personal trainer for your metabolism!

So how do you get the most out of protein? Simple. Start your day with a protein-powered breakfast. Think of it as your secret weapon against the sugar temptations that lurk around every corner. By fueling your morning with a protein-rich breakfast, you’ll be armed and ready to face the challenges that come your way.

Here are some of the best sources of protein:

  • Meat (think juicy steaks or tender chicken breasts)
  • Poultry (chicken and turkey, anyone?)
  • Fish (delight in the wonders of salmon, tuna, or trout)
  • Cheese (yes, cheese lovers, rejoice!)
  • Eggs (nature’s protein powerhouse)
  • Greek yogurt (creamy and packed with protein)
  • Nuts (snack on almonds, walnuts, or cashews for a protein boost)

With these mighty protein sources at your side, you’ll be well-equipped to conquer your sugar demons and achieve your health goals.

13. Read The Labels

When I embarked on my mission to conquer the sugar monster, I knew I had to arm myself with knowledge. So, I delved into the world of research, ready to decode the secrets hidden within ingredient labels.

Let me tell you, it was like peering behind the curtain of a grand illusion. My eyes were opened, and I was determined to crack down on those sneaky sugar-laden culprits lurking in our everyday products.

Once I knew more than average guy, I set out to identify the culprits that were sabotaging my sugar-free goals. Juice? No more. Soda? Out the door. Candy, sauce, crackers, desserts, and condiments? Consider them banished from my pantry. It wasn’t an overnight transformation, but let me assure you, the effort was well worth it—and it will be for you too.

However, sugar goes by many aliases, disguising itself in the most cunning ways. Allow me to unveil just a few of its deceptive names:

  • Molasses, the sweet and sticky charmer.
  • Fructose corn syrup, the notorious troublemaker.
  • Dried cane syrup, the refined sugar in disguise.
  • Brown rice syrup, the seemingly innocent imposter.
  • Maple syrup, the natural seducer.
  • Agave, the sweet-talking deceiver.
  • Organic cane sugar, the sneaky disguise.
  • Fruit juice concentrate, the concentrated sweetness trap.
  • Sucrose, glucose, maltose, fructose, lactose, and other culprits ending in “ose.”

If you spot more than a handful of these sugar aliases on an ingredient list, my friend, it’s time to bid farewell to that product. Trust me, it’s far less healthy than it pretends to be, and you deserve better.

14. Drink water

Water is key to life. This magical elixir has an array of benefits that are bound to leave you in awe. Not only does it cleanse your system by flushing out toxins, but it also quenches your skin’s thirst, boosts your energy levels, and ensures the smooth sailing of your cells’ intricate operations.

But that’s not the whole story. Staying hydrated is your secret weapon in the battle against sugar cravings.

You see, my friend, our bodies often confuse thirst with hunger. But fear not, for water is here to save the day. Sometimes, all it takes to kick those sugar cravings to the curb is a refreshing glass of H2O. In fact, for some of us (including yours truly), staying hydrated can vanquish up to 80 percent of those pesky desires.

So, before you succumb to the siren call of the vending machine or surrender to the temptation of a box of doughnuts, pause for a moment and reach for a glass or two of water. Quench that thirst and give it a few moments. You might just discover that your body was simply yearning for water, not food, and those nagging pangs fade away into oblivion.

To keep your body happily hydrated throughout the day, I’ve got a few tips up my sleeve. Start your morning off right by drinking a refreshing glass of water to kickstart your hydration journey. Then, become best friends with a trusty water bottle that accompanies you wherever you go.

Oh, and here’s a little secret: your pee holds the key to hydration wisdom. Take a moment to examine its color. If it’s on the darker side, it’s a sign that you need to up your fluid intake. Remember, once you feel that undeniable thirst, it’s already a sign that dehydration has set in.

Go Keto

I’ve always been a bit skeptical when it comes to extreme diets or rigid eating plans. I believe in finding balance and enjoying a wide variety of foods. However, there was something about the ketogenic diet that piqued my curiosity. Its simplicity and potential effectiveness intrigued me, so about nine months ago, I took the plunge and decided to give it a shot. And let me tell you, it was a game-changer.

So, what exactly did this keto adventure entail? Well, it meant bidding farewell to carbs and wholeheartedly embracing a world of healthy fats. I stocked up on delicious goodies like cheese, avocados, nuts, and salmon, and let me tell you, it was a flavor party for my taste buds. Of course, I had to weather the stormy seas of the dreaded keto flu during the initial couple of months.

But once I sailed through that challenging phase, the results were remarkable. I shed 10 pounds of pure fat, my energy levels skyrocketed, and my entire perspective on eating underwent a transformation. It was like unlocking a secret portal to a healthier, more vibrant life.

Now, you might be wondering, what exactly is this keto eating all about? Let me break it down for you. The ketogenic diet is all about keeping those carbs in check, moderating your protein intake, and embracing healthy fats with open arms.

By reducing your carb consumption and obtaining 70 to 80 percent of your daily calories from good fats, you can nudge your body into a state of metabolic wonderland called ketosis.

How To Reduce Sugar Intake – The Conclusion

There you have it! If you’re looking for ways to cut out sugar from your diet then today’s post should get started on the right foot. The rest is just details.

Please feel free to leave your comments and questions in the section below.

In the meantime thank you for dropping by.

David D.

How To Start Mountain Running (+ 4 Mountain Races to try)

mountain running

Looking for the best mountain running tips? Then you’ve come to the right place.

though running on a mountain can be a truly transformative experience, it’s no easy walk in the park.

The steep terrain, the technical trails, and the lung-searing thin air will challenge your body (and mind) like nothing else.

But the rewards more than make up for all the trouble.

Once you reach the top, you’re treated to fresh air, pristine views, and an unrivaled sense of accomplishment.

What could have been a boring yet another run has turned into something that engages all of your senses and is a welcome change to the usual weekend plod.

What’s more?

Tackling mountains makes your training more fun and helps take your running performance to a whole new level.

How To Start Mountain Running

In today’s post, I’ll share a few guidelines to help you get started with mountain running the right way so you can improve your readiness, technique, endurance, and enjoyment.

Sounds great?

Let’s get started.

Get The Right Mountain Running Gear

Heading into the mountains for a run differs from pounding the urban streets.

Weather conditions can change fast in higher elevation, and storms can roll in quickly.

This could mean cold rainstorms or scorching hot weather.

Therefore, having the right mountain running kit is key for safety and comfort.

Here’s what you need:

  • Fuel and hydration. To stay well-fueled and hydrated, take a small snack or energy bar and enough water. In addition, I’d recommend using a small fanny pack and/or waist belt for short jaunts.
  • Sun protection. Protect yourself with sunscreen, but do not apply too much, as it can block sweat pores and cause you to overheat. Sunglasses are also a must.
  • Base layer. This one should be made from breathable, high-performance, moisture-wicking fabrics. Your socks should also be synthetic or wool. Avoid cotton at all times.
  • Lightweight wind jacket. It can get very windy and wet fast on top, so a water- or windproof jack is a must.

Don’t worry about it, though.

The more experience you gain from mountain running, the more it’ll help you become more in tune with your needs over time.

Pace Yourself Running Up A Mountain

Your mountain running pace is likely slower overall and much less consistent from the mile to a mile than when running on paved, flat surfaces.

While you might be able to log in an 8-minute mile on the road, don’t be shocked if, on mountainous trails, your average pace works out to 12 to 15 minutes per mile—or even slower.

As a rule, run according to your effort instead of pace.

This means adjusting your pace to the terrain: run quicker on flat-ish sections on well-worth tracks or paths, but take your time on steep and technical terrains.

Slow down or speed it up as it feels right.

Here’s how often you should run per week.

Master The Technical Terrains

Getting into mountain running isn’t complicated, but there’s more technique involved than you might realize.

Think of mountain running as an obstacle-course run, an endless romp over roots and rocks.

Here’s how to improve your technique.

Over technical surfaces, shorten your stride length so you can easily navigate the terrain and react without overstriding.

The steeper the slope, the smaller the steps.

This helps you maintain a good pace and prevents you from getting tired.

The same goes for steep hills, both up and down.

Power hike if the slope is over 20 degrees and when going up a long trail.

This should also help you up there with technical footing and altitude.

You can also develop your ability to move efficiently through technical terrains by going for long hikes through talus or scree fields, especially if you’re prone to ankle sprains and/or have poor balance and coordination.

how to start running on mountains

Stay Safe On The Mountain

If this is your first time running in the mountains, please pay attention to safety.

By their very nature, mountainous paths are far-off than pavements or roads.

You’re also exposed to elements and wildlife, so getting help if things go south is more of a challenge.

Here are a few things to keep in mind.

  • Don’t run alone. Instead, run with your buddies or a dog if possible. Running with others provides an element of safety in case things turn south.
  • Leave word. Tell someone where you’re going to run and the expected return time. God forbid, if you get lost or hurt, at least someone else knows where you are.
  • Have network. Take a cell phone with you, not just for selfies, but for safety. In case of network, coverage is an issue, take a trail map and monitor where you are along the trail as you go.
  • Plan your course. Know where you are running and estimate how long it will take you.
  • Be mindful. Always pay attention to what’s going on around you.

Don’t let your guard down.

Try A Mountain Race

Mountain racing is ideal for testing your mettle in endurance and long-distance racing.

Taking place on the world’s toughest and most challenging terrains, these races are the pinnacle of fitness tests and the best way to push your physical and mental resolve to the breaking point.

Here is a list of five of the toughest mountain races in the U.S.

Breck Crest

Organized by the team at Maverick Sports, the Breck Crest is a running event that features a variety of races of different lengths: a 10K, a 13.3-mile half marathon, and a 23-mile beast mountain marathon course (called a marathon thanks to the challenging terrain).

Breck Crest takes place in the heart of the pristine Ten Mile Range in the Rocky Mountains above Breckenridge, Colorado. The racecourse traverses over the magnificent high alpine terrain, full of breathtaking mountain views, alpine lakes, and wildflowers.

Fees: The 10K costs $40, the Half $65, and the Marathon $80.

The Official Website – http://www.mavsports.com/breck-crest/

Mid Mountain Marathon

Presented by ZB Sports, Mountain Trails Foundation, and Snyderville Basin Recreation, the Mid Mountain is a 26,2-mile trail running event that kicks off at Deer Valley Resort, traverses Park City Mountain Resort and the colony before descending and finishing in the Canyons base area.

The single-track racecourse begins at about 8,000 ft of elevation and peaks at about 8,400 ft, taking runners through pristine forests and the stunning views of Park City and The Canyons.

The downside is that organizers limit the number of participants to 400, so register as early as possible to snatch a spot.

Fees: 70$ to 90$.

Official Website – http://mountaintrails.org/event-race-mtf/mid-mountain-marathon/

Barr Trail Mountain Race (BTMR)

Organized by Team Colorado, a nonprofit organization of elite trail runners, BTMR is a 12.6-mile competitive mountain trail running event held in July at the Manitou Springs Cog Railway Train Depot, Colorado.

Runners start the race in Manitou Springs at about 6,570 ft and climb up Pikes Peaks’ iconic Barr Trail to Barr Camp (10,200 ft) before racing back and finishing off with a fast trip back to the starting line.

Fees: $55 to $80

Official Website – https://barrtrailmountainrace.com/

Loon Mountain Race, Lincoln, N.H.

Presented by Acidotic Racing in Lincoln, New Hampshire, this race is one of the most competitive hill climb races in the U.S.

Loon Peak race will force competitors to run roughly 5,5 miles with 2,200 ft of vertical gain. The racecourse averages about 15 percent grade, with some sections of more than 40 percent.

The last mile of the race is straight up the infamous Upper Walking Boss, roughly one kilometer on a rock and grass-covered slope with angles exceeding 40 percent grade. This makes it one of the hardest and most challenging finishes in the fast-growing sport of mountain running.

Fees: $50

Official Website – loonmountainrace.com

How To Start Mountain Running – The Conclusion

There you have it.

If you’re looking to make mountain running a part of your workout routine, the above measures are enough to get you started.

The rest is up to you.

Please feel free to leave your comments and questions in the section below.

Thank you for dropping by.

How to Choose The Right Running Group

how to choose a running group

Looking to join a running group? Then you have come to the right place.

Joining a running group is a good idea, but what if you’re worried about logging the miles in the company of a bunch of strangers?

The experience can be less than ideal when you have those fears.  In fact, for some runners, beginners and elite alike, logging the miles in a group of strangers can be scary.

But running groups exist and exist for a reason. And they can be a lot of fun.

Once you summon up the courage to join, you’ll reap the benefits yourself.

In today’s article, I’ll share tips on finding a running group that fits your running goals and schedule. By the end, you’ll have enough confidence to schedule your first group run.

The Benefits of Running in Groups

Before I get into how to choose a running group, let’s first take a quick look at why you should consider pairing up with other runners. Keep in mind that many of these benefits also apply to group training in general. 

Continuous support and motivation

Running can be hard work, especially when you have a specific fitness goal you are working towards. However, stressors from our daily lives can cause us to lose motivation for exercise. This has particularly been the case throughout the coronavirus pandemic, where one study found that stress and anxiety sabotage exercise motivation.

Running in a group can help to combat this lack of motivation. Each group member can help to support one another during the run, giving everyone the continuous motivation to see it through to the end.

Push each other to do better

Not only does running in a group help you to simply get through the run, but it can also help you to become better. As you are running as a team, you are committed to running at the same pace as the other runners. This can push you to improve your performance, increase your pace, and perhaps even set your personal best.

It’s a lot safer

Running alone can be a risky business, especially if you are a woman. One scary statistic shows that 60% of women have been harassed while running. This is especially the case when it is dark outside, as potential harassers might use the darkness as a cover.

Thus, running in a group can be a lot safer than running alone, as you will have a group of people who can protect you if anything was to go awry. If running outside still spooks you, even in a group, you can still run with your friends indoors.

You’ll never be bored

Many people like to run with their headphones on, blasting a playlist of their favorite motivational songs. However, even then, it can be quite easy to get bored! Instead of letting your run drag on and on, try chatting with your friends as you go, catching up on the latest gossip. This way, you will never get bored.

You might also be more likely to switch up your running routes, making training more interesting. Ask your running buddies for ideas on new routes and agree to try a new one together every week to switch it up.

Sense of community

It is always rewarding to spend time with people with the same interests and outlook on life. As you run with a group, you will foster a sense of community, building a network of peers you know will cheer you on even in the most trying times.

Overall, running in a group can transform how you approach logging the miles, helping us stay motivated, push our limits, and stay safe.

Other benefits include:

  • Providing friendly competition
  • Structured running routines
  • Exploring new routes
  • Making new friends with a similar mindset
  • Celebrating achievement together
  • Training for tough races together
  • Inspiring each other to be better
  • Discounts on races and gear
  • Learning more about the sport of running
  • Safety for early morning and/or night runs
  • And so much more.

How To Choose A Running Group

Here are my best tips for finding and joining a running group.

Enjoy

Know Your Pace

Your Fitness level is the main factor when choosing a running group.

In most cases, you’ll get asked about your current running pace, especially for distances such as the 5K, 10K, and half marathon. That’s why you need to know your running paces before showing up on any running group’s doorstep.

Choose the wrong group for your fitness level, and all of your fears of running in a group will become a reality.

Don’t worry if you don’t already know your current running paces. My article here should help.

Additional resource – How to run at night

Focus on Your run

When logging the miles, you shouldn’t be looking over your shoulder to check if the rest of the group analyzes every step you take.

Instead, focus on yourself and regularly remind yourself how great you’re doing. Need a distraction? Consider immersing yourself in music to take your mind off what others might think of you.

Commit to it

Commit to yourself, not just give group training a try, but maybe at least three to five times. The more you do it, the better.

Scheduling a group run once in a blue moon will keep you feeling awkward and uncomfortable, but if you do a couple per week, your brain will get more comfortable, and you’ll be building the habit much faster.

Ask A Friend to Join

Don’t know anyone in the running group? Then invite a friend you know and trust.

When you’ve company, you’ll feel more secure and confident. Even if you feel out of place, having a familiar face with you can help encourage you to keep going.

running in groups
Group of friends jogging during the morning exercise in the park near the lake

Assume The Best

Your mindset also matters. Sometimes things will go south if we expect them to do so—and vice versa. That’s why heading out for a run with a positive attitude is always a good idea.

Forget About Others

You might feel like everyone in the group is rolling their eyes at your, but they’re busy doing their own thing.

They’re either checking their pace, assessing their technique, losing their thoughts, or dealing with their insecurities.

I hate to break it to you, but you’re not that important.

What’s more?

Everyone in the group has been where you are and knows exactly how you feel. Some may even offer a few hints if you ask them for advice.

Embrace The Fear

Have a fear of joining a running club? Then listen up.

The best way to deal with your fears is to feel them and do the right thing.  You shouldn’t lose sleep over making mistakes. Once you’ve completed two-three group runs, you’ll start to get the hang of it.

Start Your Own Running Group

Can’t find any running group in your region?

Then consider starting and organizing your group runs. Then, you’ll state the rules of conduct when you have your own group. You’re, after all, the leader.

Unlike other group classes—I think CrossFit—running is pretty straightforward. You just lace up and hit the road running.

Finding Running Groups

Don’t know where to find a running group? Look in the following place

  • Local Stores – most local sports and running stores have at least one weekly group run. Ask around
  • com – The best online place to hunt for finding running groups in your area.
  • Com – In online forums, such as CoolRunning.com, you’ll find plenty of experienced runners answering questions about every burning running question you might have. Running groups in your area is no exception.

How To Choose A Running Group – The Conclusion

There you have it! Today’s post should be enough to help convince you to join a running group. I hope the guidelines shared here can set you on the right path. The rest is just details, as the saying goes.

Please feel free to leave your comments and questions in the section below.

In the meantime, thank you for dropping by.

David D.

Find Your Perfect Running Mate: Tips for Choosing an Ideal Running Partner

running partner

Looking for the perfect running partner? You’re in the right place!

Let’s face it: finding the ideal running buddy isn’t as simple as it sounds. Runners come in all shapes and sizes, with varying paces, schedules, and preferences. It can be a real challenge to find someone who aligns with your running goals and lifestyle.

So, how can you successfully find and run with a compatible partner despite these obstacles? That’s precisely what this article is here to help you with.

Read on to discover the advantages of having a running partner and learn how to choose the right one (or ones) for you.

The Benefits Of a Running Buddy

In life, as the old African adage goes, if you want to go fast, go alone, but if you want to go far, go together. This wisdom holds true in many aspects of life, including running. A running buddy is not just a companion; they are one of the most valuable assets you can have in your training journey.

If you’re still unsure about teaming up with fellow runners, here are some compelling reasons to consider it:

  • Social Outlet: As adults, finding time to spend with friends can be challenging. However, not every social interaction has to take place at a bar or home. Running together allows you to engage in social activities with your friends and stay connected amidst the busy adult life.
  • Accountability: Self-accountability can be difficult, but having a running buddy to share your goals and progress with makes it easier. Whether you’re a student in your twenties or a seasoned traveler, making new friends is always possible.
  • Achieving Goals: Accomplishing your running goals requires dedication and consistent effort. A running partner can motivate you to keep pushing forward, even when you feel like giving up. Sharing your goals with your running buddy can make achieving milestones, such as running five miles in a day, more attainable.
  • Mutual Accountability: On some days, you might feel like the weak link, and other days, your running partner may feel the same. However, what truly matters is that your running buddy will motivate you, ensuring you both get out of the house and stick to your running routine. This mutual accountability keeps you honest and on track.
  • Conversation and Diversion: Running with a partner provides an excellent opportunity for conversation and diversion. Engaging in a chat while you run can make the time fly by, and you’ll barely notice the physical exertion as you share stories and experiences.
  • Improved Performance: According to research from Kansas State University, individuals tend to push themselves harder when exercising with a partner they perceive as slightly fitter. This perception, whether accurate or not, can be a powerful motivator. Running with someone faster than you can encourage you to step out of your comfort zone, ultimately helping you become a faster and stronger runner.
  • Enhanced Safety: There’s a sense of safety in numbers when you’re out running. Having a workout buddy by your side can provide added security, whether you’re concerned about personal safety or encounters with wildlife. In case of an emergency, your running partner can offer assistance or seek help.

How To Choose The Right Running Partner

Finding the right running partner in a perfect world should be easy peasy. After all, running is a super popular sport, with millions of people engaging regularly.

However, finding the most suitable running partner can be tricky—especially someone who shares your goals and vision.

But don’t worry about that. Today, I got you covered.

Here are a few tips to help you —and be—an awesome running partner.

Know Yourself

Before you invite a friend or gym buddy to join you for a run, it’s essential to understand your own running profile and preferences. Here are some key questions to help you assess your running personality:

Pace: What’s your typical running pace? Do you have specific paces for different distances, like 5K or 10K races?

  • Location: Where do you prefer to run? Are you more inclined toward city streets, scenic trails, or perhaps a mix of both?
  • Competitiveness: Are you a competitive runner, always striving to improve your personal best, or do you prefer a more relaxed and non-competitive approach?
  • Distance: Do you typically run shorter distances, like 5Ks and 10Ks, or do you enjoy tackling longer distances, such as half marathons or marathons?
  • Versatility: Are you a well-rounded runner, comfortable with various types of workouts, such as intervals, hill sprints, and long, steady-state runs?
  • Conversation: Do you like to chat while you run, or do you prefer to focus on your workout in silence?
  • Music: Are you someone who enjoys listening to music during your runs, even when you have a running buddy?
  • Weather: Do you relish running in extreme weather conditions, such as rain, snow, or sweltering heat?
  • Terrain: Are you more inclined to run on smooth pavement, challenging trails, or a mix of both?
  • Advice: How do you handle unsolicited advice or suggestions from others about your running?

Having a clear understanding of your own running preferences and tendencies can help you find a compatible running partner. Whether you’re seeking someone with a similar pace, a shared love for trail running, or a fellow music enthusiast, knowing yourself is the first step to finding the perfect running buddy.

Compatibility

When searching for the ideal running buddy, compatibility in terms of running ability and training intensity is key. Running with someone who matches your level of fitness and goals can make the experience more enjoyable and productive.

Here’s why compatibility matters:

  • Balanced Effort: Running with a partner who has a similar fitness level ensures that both of you can maintain a balanced effort during the run. If there’s a significant gap in abilities, one person may end up pushing too hard or holding back too much.
  • Shared Goals: Discuss your short-term and long-term running goals with your potential partner. It’s essential to align your objectives to ensure that your training plans complement each other.
  • Trial Runs: Before committing to regular runs together, start with a few trial runs. These initial runs will help you gauge compatibility, reliability, and positivity in your potential running buddy.
  • Communication: Open and honest communication is key. Be ready to discuss your running abilities, training plans, and expectations. Ask your partner similar questions to ensure you’re on the same page.
  • Fitness Level: Look for a running partner whose fitness level is in the same ballpark as yours. A marathon-ready runner and a beginner just starting a running program might not be the best match for regular runs.
  • Compatible Pace: Running at a compatible pace is crucial. You should both feel comfortable with the chosen speed and be able to maintain it throughout the run.
  • Long-Term Commitment: While finding a great running buddy is valuable, it’s essential not to overcommit too quickly. Begin with a few trial runs to assess compatibility before scheduling more workouts together.

Additional resource – Common running injuries

Pick The Right Pace

Alright, fellow runners, let’s talk about one of the most crucial aspects of running with a partner – picking the right pace. We all know that runners come in various shapes, sizes, and experience levels. Whether you’re an experienced road warrior or a newbie lace-upper, finding that harmonious pace is the key to a successful run together.

Picture this: you’re a seasoned runner with years of pounding the pavement under your belt, but your partner, let’s say your spouse, is just starting their running journey. Your typical easy three-mile recovery run might as well be their weekly uphill battle. So, how do you strike that perfect balance and ensure a satisfying run for both of you?

Here’s the game plan:

  • Plan Ahead: Before you embark on your running adventure, sit down and plan. Decide on the running distance, how long you’ll be out there, the pace you’ll maintain, and the route you’ll conquer. No surprises, no confusion – just a clear roadmap for your run.
  • The Pace Game: Now, here’s the golden rule – the faster runner doesn’t call the shots on pace. Nope, that’s right! It’s the slower runner who takes the lead in this dance. This ensures that everyone stays comfortable and can complete the run without feeling like they’ve run a marathon.
  • Communication is Key: Throughout the run, keep those lines of communication open. Stay side by side and chat, motivate, or simply enjoy the silence together. The more you talk, the more you bond, and the better your run becomes.
  • Be Patient: If you’re the experienced one, remember that running with a slower partner may require some patience. But guess what? It’s a rewarding experience, and you’re helping someone embark on their fitness journey.
  • Enjoy the Experience: Running together isn’t just about the workout; it’s about sharing an experience. Take in the surroundings, enjoy the company, and relish the motivation that comes from running as a team.
  • Respect Goals: Lastly, remember that you both have individual goals. Respect each other’s aspirations and appreciate that your run together can contribute positively to those objectives.

Do Not Compete

Let’s be honest, we all have that inner competitor who occasionally rears its head when we’re out there on the road, especially when you’re running with a partner. But here’s the golden rule to remember – your running buddy is not your competition. If you turn those enjoyable runs into a high-stakes race, you’re not doing yourself any favors.

When you get caught up in the “who’s faster” mindset, you lose sight of what truly matters in your running journey. It’s not about leaving your partner in the dust; it’s about helping each other grow, improve, and overcome obstacles. Plus, nobody likes to be on the losing end of a running rivalry, right?

The buddy system is all about mutual support and motivation, not winning or losing. Sure, a little friendly push is okay, but turning every run into an all-out competition benefits no one. It’s like trying to win a race against your own shadow – it’s pointless.

Instead, shift your focus to working together to conquer plateaus and achieve gradual goals. Remember, your biggest competitor should always be the person you see in the mirror every morning – yourself.

Listening to your body and staying within your fitness limitations is crucial. Pushing too hard can lead to injury or accidents, and that’s definitely not what we signed up for.

Be Patient

Here’s the deal – when your running partner is struggling, whether it’s that last lap or that final mile, this is not the time to unleash your inner comedian and crack jokes about their pace or fitness level. Trust me, nobody likes a snarky running buddy.

Instead, be attentive and understanding. Take a moment to consider your partner’s fitness level, their comfort, any injuries they might be dealing with, or any other issues they’re facing. Respect where they are on their journey and meet them there. Remember, you were once a beginner too.

Now, especially if you happen to be the speedier runner in the duo, this is where your patience is going to shine. Finding that perfect pace that works for both of you can take some time, but it’s worth the effort. Remember, it’s about running together, not leaving your partner in the dust.

So, whether you’re working through a tough run or just enjoying the beautiful outdoors, patience is your secret weapon. It’s the glue that keeps your running buddy relationship strong. So, be kind, be patient, and enjoy the journey together.

Have Multiple Running Partners

Let’s talk about the importance of having multiple running partners. After all, commitment is fantastic until life throws a curveball, like your running buddy getting injured, taking a vacation, or getting swamped with work. Suddenly, you’re left pounding the pavement solo.

That’s why it’s a great idea to diversify your running relationships and maybe even join a running group. In the world of running, you’re not bound by exclusivity; it’s an open relationship, and that’s perfectly okay!

Why, you ask? Well, for starters, running with the same person all the time can get a tad monotonous. And let’s face it, running should be exciting and motivating, not dull and routine. So, spice things up by mixing and matching your running partners.

Variety, my friends, is the spice of life. Plus, having multiple running buddies ensures you’ll always have someone to hit the road with, no matter what life throws your way. It’s a win-win.

Don’t Be A Preacher

Now, here’s a golden rule to remember: Don’t be a preacher. Not everyone is cut out for running, and that’s perfectly fine. If your significant other or friend isn’t interested in running, don’t push them into it. Respect their interests and differences, and find your running companions elsewhere.

Finding a Running Buddy

So, you’ve decided to embrace the buddy system and make your runs more enjoyable and motivating. Great choice! Now, let’s dive into some top-notch strategies to help you find that perfect running partner:

  • Tap Into Your Inner Circle: Begin with your existing network. Ask your family, friends, co-workers, and fellow gym buddies if they’d like to lace up their running shoes and hit the road with you. Sometimes, the best running partners are closer than you think.
  • Join the Local Running Club: Check out the Road Runners Club of America. They’ve got an extensive list of running clubs all across the country. Joining one of these clubs can be a goldmine for finding like-minded runners who match your pace and passion.
  • Explore Running Specialty Stores: Local running specialty stores are often hubs of the running community in your area. They might organize group runs or have boards where runners seek partners. Swing by and see what’s on offer!
  • Gym Enthusiasts Unite: If you’re a gym-goer, inquire at your fitness facility about running clubs or partner sign-up opportunities. Many gyms offer resources to help you connect with fellow runners. Don’t forget to check their bulletin boards!
  • Joggingbuddy.com: Take advantage of this fantastic free resource! Joggingbuddy.com can help you find running partners, no matter where you are in the world. It’s like a matchmaking service for runners.
  • The Cold Approach: Sometimes, all it takes is a friendly chat. Strike up a conversation with a fellow runner you often spot at the park or on your favorite running route.

Is Running Together A Date

So, you’ve been invited to go for a run by someone you’re interested in. Exciting, right? But before you hit the pavement, here are a few things to consider to make your run together a great experience:

  • Come Prepared: Bring along body wipes and a change of clothing, especially if you plan to grab a drink or a bite to eat after the run. You’ll want to freshen up and feel your best.
  • Choose the Right Time: Pick a date and time that works for both of you. Running together should be enjoyable, so make sure it fits into your schedules comfortably.
  • Set the Pace: Discuss and agree on the pace you both want to maintain during the run. It’s important that you’re both comfortable with the chosen speed. And don’t forget to decide if you’ll be running with music or not.
  • Embrace the Sweat: Remember, it’s a run, and sweating is completely expected. Don’t let it bother you, and embrace the workout.
  • Plan Ahead: Think about what you’d like to do after the run. Having a plan in place ensures you won’t be scrambling for ideas when you’re sweaty and tired. Whether it’s grabbing a coffee, having a meal, or simply heading home, knowing your next steps will make things smoother.

Finding The Right Running Partner – The Conclusion

I can’t begin to count the many runs I’d have skipped without my running partner, especially on chilly mornings when I’d rather stay tucked in the comfort of the sheets than go out for a long run.

What about you? Do you have any running partners?

Please feel free to leave your comments and questions in the section below

In the meantime, thank you for reading my post.

Keep Running Strong

Top 30 Low-Carb, High-Fat, Ketogenic Recipes

ketogenic recipes

Are you in search of the finest low-carb and ketogenic recipes available on the internet? Well, you’ve come to the right spot. These recipes are centered on healthy fats and low-carb vegetables, delivering exceptional flavor and nutritional value, all while containing 5 to 10 grams of carbohydrates per serving.

Furthermore, they are abundant in essential fats, nutrients, and delectable flavors that will keep you satisfied and energized throughout the day.

Please note that the photographs are copyrighted by the blog that initially shared the recipe. To access the full recipe on the original blog, just click on the recipe title beneath any photo.

The Keto Diet Defined

The ketogenic diet, often referred to as keto, is a unique eating plan designed to encourage your body to use fat as its primary source of energy. Here are the key components:

  • High-Fat: The diet emphasizes the consumption of healthy fats, making up the majority of your daily caloric intake.
  • Moderate-Protein: Protein intake is moderate and carefully controlled, preventing excessive consumption that might hinder ketosis.
  • Very Low-Carb: Carbohydrates are significantly restricted, with daily intake limited to fewer than 25 grams.

The Science Behind Ketosis:

When you drastically reduce your carb intake, your body undergoes a remarkable transformation. Instead of relying on glycogen (sugar) for energy, it switches to burning stored fat.

Here’s how it works:

The liver engages in a process called ketogenesis, where fats are broken down into ketone bodies. These ketones serve as a vital energy source for the brain and other cells.

This metabolic state, characterized by elevated ketone levels, is known as ketosis.

Additional resource  – Can you run on the keto diet?

The Complete Keto Food Diet List

When you’re embarking on a keto journey, knowing what to eat and what to avoid is crucial for success. Here’s a comprehensive list of keto-friendly foods to stock up your kitchen, as well as items to steer clear of:

Keto-Friendly Foods to Stock:

  • Fats and Oils: Load up on healthy fats and oils such as butter, olive oil, sesame oil, almond oil, and flaxseed oil. These will be your primary sources of energy.
  • Dairy Products: Opt for full-fat dairy options like sour cheese, sour cream, heavy cream, and Greek yogurt. These provide essential nutrients while keeping carb intake low.
  • Eggs: Eggs are a keto staple, packed with protein and healthy fats. They’re incredibly versatile for keto cooking.
  • Meat: Enjoy a variety of meats, including chicken, beef, goat, veal, and other low-carb options. They provide essential protein and fats.
  • Fish: Fish like trout, salmon, sardines, catfish, and tuna are rich in healthy omega-3 fatty acids and make excellent keto choices.
  • Nuts and Seeds: Walnuts, almonds, pumpkin seeds, sunflower seeds, and sesame seeds are keto-friendly snacks packed with nutrients.
  • Low-Carb Fruits: Some fruits, like avocados, strawberries, and raspberries, are relatively low in carbs and can be included in your keto diet in moderation.

Foods to Avoid on Keto:

  • Grains and Starches: Eliminate grains like wheat, corn, oats, and rye, which are high in carbohydrates.
  • Processed Foods: Avoid processed foods, especially those containing carrageenan, as they can hide hidden carbs and additives.
  • Sugary Foods and Drinks: Stay away from sugary foods and drinks, as they are rich in carbs and can easily kick you out of ketosis.
  • Low-Fat Products: Skip low-fat products, including drinks, gluten-free items, and diet sodas. These often contain added sugars or unhealthy artificial sweeteners.
  • Fruits: Most fruits are high in natural sugars, making them incompatible with keto. Exceptions include the low-carb fruits mentioned earlier.
  • Root Vegetables: Avoid starchy root vegetables like potatoes, carrots, and beets, as they are carb-heavy.
  • Beans and Legumes: Beans, lentils, and other legumes are carb-rich foods and not suitable for keto.
  • Alcohol: Most alcoholic beverages are high in carbs. While some low-carb options exist, alcohol can affect ketosis and should be consumed in moderation.
  • Sugary Ingredients: Read labels carefully and avoid any products containing added sugars or high-carb ingredients.

Additional resource – Marathon on Keto Training

Top 30 Low-Carb, High-Fat, Ketogenic Recipes

Without further ado, here’s my best list of keto recipes for a low-carb delight.

1 – Garlic Keto Bread

Garlic Keto Bread is a recent low-carb bread recipe that has captured my heart. It’s versatile and can be enjoyed as a snack, appetizer, or side dish, making it perfect for those on a healthy ketogenic diet. When it comes to garlic flavor, you have two options to choose from.

You can use fresh garlic (grated or pressed) for a more Italian bruschetta-like bread or opt for garlic powder to achieve the classic American garlic bread taste. If you’re a fan of spices, feel free to add some dried basil to suit your taste buds. It’s all about flavor customization!

Ingredients

  • Almond flour
  • Ground psyllium husk powder
  • Baking powder
  • Egg white
  • Sea salt
  • White wine vinegar
  • Garlic clove
  • Butter
  • Fresh parsley
  • Fresh thyme
  • Dried oregano

View Full Recipe

2 – Low Carb Broccoli Cauliflower Salad With Bacon & Mayo

Low Carb Broccoli Cauliflower Salad with Bacon and Mayo is a satisfying and extremely low-carb dish. It’s bursting with flavor and comes together in just 10 minutes, making it a colorful, easy-to-make option suitable for any occasion.

Plus, it tastes fantastic, and you can even prepare it ahead of time as it maintains its deliciousness when stored in the fridge overnight. If you want an extra layer of flavor, consider adding a creamy and tangy dressing to elevate it even further. Enjoy!

Ingredients

  • Fresh thyme
  • Olive oil
  • Garlic powder
  • Mayonnaise
  • Lemon juice
  • Sea salt and pepper

3  –  Zucchini Noodle Salad With Cheese & Tomatoes

Zucchini Noodle Salad with Cheese and Tomatoes is a delightful and healthy dish that will make you want to invest in a spiralizer if you haven’t already. This recipe features raw spiralized deli veggies, avocado, cucumber, and a low-carb dressing of your choice.

It’s an excellent option for those seeking a low-carb pasta replacement. Plus, if you already have cooked bacon or turkey on hand, there’s no need for any additional cooking. Enjoy this flavorful and nutritious salad!

Ingredients

You’ll need a spiralizer to make zucchini noodles.

I love this one from Amazon.

  • Zucchini
  • Cherry tomatoes
  • Shredded cheese
  • Mozzarella pearls
  • Fresh basil
  • Dressing
  • Extra virgin olive oil
  • Lemon juice
  • Red wine vinegar
  • Garlic powder
  • Sea salt and pepper.

Additional resource – Salt for runners

4 – Keto Eggplant Burgers

If you’re craving burgers but want to stick to your keto diet, this recipe is perfect for you. It features keto eggplant burgers with eggplant slices as the buns, which hold together nicely when cooked. These burgers are a great keto-friendly snack or side dish. You can use your choice of ground meat but don’t forget to prepare the recommended dipping sauce for added flavor. Enjoy a delicious and satisfying keto-friendly burger experience!

Ingredient

  • Japanese eggplant
  • Ground pork
  • Green onion
  • Black pepper
  • Ginger
  • The dipping sauce
  • Tamari sauce
  • Garlic cloves
  • Apple cider vinegar
  • Sesame oil
  • Salt and pepper

View Full Recipe

keto food list
Ketogenic low carbs diet concept. Healthy eating and dieting with salmon fish, avocado, eggs and nuts. Top view

5 – Keto Garlic Bread

If you’re a fan of garlic bread but want a low-carb and gluten-free option, you’ll love this keto-approved version. Keto garlic bread is a healthier alternative to traditional bread, with a soft inside and crispy outside.

The addition of cream cheese adds richness and creaminess to the bread. Best of all, this recipe has only 1.5g net carbs per slice, making it a perfect addition to your keto diet without compromising on taste. Enjoy this keto garlic bread any time of the day!

Ingredients

  • Almond flour
  • Eggs
  • Shredded mozzarella cheese
  • Kosher salt
  • Baking sold
  • Topping
  • Melted butter
  • Kosher salt
  • Garlic powder
  • Dried oregano
  • Shredded mozzarella cheese

6 – Keto Salad Niçoise

The classic Niçoise salad traditionally contains potatoes, green beans, and other ingredients that are not keto-friendly. However, this keto version of the Niçoise salad is packed with nutrients and flavors while keeping the carb count low and adding healthy fats.

It makes for a delicious and satisfying lunch or dinner option, and it’s great for meal prepping. For an extra burst of flavor, serve it on a bed of zucchini noodles. Enjoy this keto salad Niçoise without worrying about your carb intake!

Ingredients

  • Ground black pepper
  • Chopped garlic
  • Eggs
  • Celery root
  • Green beans
  • Olive oil
  • Tomatoes

Dressing

  • Dijon mustard
  • Worcestershire sauce
  • anchovies
  • Small capers
  • Mayonnaise
  • fresh parsley
  • olive oil
  • minced garlic clove
  • lemon juice

Additional resource – macros for runners

7 – Cornbread Keto Bread

If you’re missing the taste of cornbread while following a keto diet, this recipe is perfect for you. This “corn” bread recipe doesn’t contain corn, but it’s still delicious and allows you to enjoy the flavors of cornbread in a healthy way on your keto journey.

It has a wonderful texture and is low in carbs, with approximately 0.6 net carbs per serving. You can enjoy this keto cornbread without worrying about your daily carb intake.

Ingredients

  • Almond flour
  • Egg
  • Green onions
  • Baking powder
  • Full-fat sour cream
  • Melted butter
  • Salt

8 – Grilled Eggplant Salad

This grilled eggplant salad is both easy and delicious, making it a perfect accompaniment to any grilled meat, especially during a summer barbecue.

If you want to enhance the flavor, consider adding smoked almonds, Himalayan salt, or chili powder. You can also experiment with various spices to tantalize your taste buds. Enjoy this flavorful and healthy salad!

Ingredients

  • Eggplants
  • Olive oil
  • fresh mozzarella cheese
  • Garlic powder
  • Lemon juice
  • fresh mint
  • Anchovies
  • Tomatoes
  • smoked or roasted almonds
  • Sea salt and pepper

9 – Salad With Roasted Cauliflower

The Salad with Roasted Cauliflower is a delightful low-carb dish featuring refreshing flavors and a zesty lemon dressing, with the option to add a spicy kick if desired. This recipe is particularly useful for those following a vegan keto diet, showcasing that it’s feasible to be both vegan and keto.

Plus, with avocados, nuts, and olive oils as key ingredients, this dish is rich in healthy fats, aligning perfectly with the keto diet principles. To elevate the dish, consider garnishing it with fresh thyme and a low-carb crumb for an extra layer of flavor. Enjoy this nutritious and flavorful salad!

Ingredients

  • Large head cauliflower
  • Garlic cloves
  • Olive oil
  • Lemon
  • Avocado
  • Nuts
  • Garnish green onion
  • Salt and pepper

View Full Recipe

You might want to refrain from cauliflower and broccoli for people with an upset stomach.

These build up more gas inside your tummy and make you bloated.

10 – Zucchini Crust Grilled Cheese

Indulge in a bread-free zucchini grilled cheese that is both low-carb and gluten-free with this recipe. The zucchini “bread” is crafted from shredded zucchini, Parmesan, mozzarella, and a blend of seasonings.

These grilled cheese sandwiches offer a healthier and lower-carb alternative to traditional options, making them a delicious choice for those on a keto or low-carb diet. Enjoy the savory flavors and satisfying crunch of this zucchini crust grilled cheese!

Ingredients

  • Grated zucchini
  • Egg
  • Green onion
  • Grated Parmesan
  • Shredded cheddar
  • Cornstarch
  • Salt and pepper
  • Vegetable oil—for cooking

View Full Recipe

The super yummy choice for cheese lovers.

My secret tip is to add grilled or diced Halloumi cheese for extra taste.

Worth a try!

11 – Keto Caesar Salad

Enjoy a keto-friendly twist on the classic Caesar salad with this delicious recipe. This keto Caesar salad features crisp romaine lettuce, generous amounts of Parmesan cheese, and tender chicken, all tossed in a flavorful homemade Caesar dressing made with keto-approved ingredients like lemon juice, olive oil, garlic, and anchovies.

It’s a simple and mouthwatering option for those following a ketogenic diet. Don’t forget to add extra cheese and opt for low-carb croutons for an extra indulgent experience!

Ingredients

  • Romaine lettuce
  • Slices of chicken or bacon cooked and crumbled
  • Shredded parmesan cheese
  • Gluten-free garlic croutons (check the recipe here)
  • Sea salt & pepper
  • Tomato
  • Cucumber
  • Hard-boiled eggs
  • Chicken breast
  • Olive oil

Dressing

  • Mayonnaise
  • Lemon juice
  • Dijon mustard
  • Grated parmesan cheese
  • Fresh black pepper
  • Garlic clove
  • Mustard powder
  • Sea salt and pepper

Another secret tip from me.

Salted eggs! No need to add more salt since it will give you a different experience for a salty and creamy meal.

Pick one made of goose or duck eggs.

12 – Creamy Meatballs

Treat your taste buds to a flavorful and satisfying meal with these creamy ketogenic meatballs. These juicy meatballs are paired with a rich and creamy queso sauce, making them an irresistible option for the whole family.

You can serve them as a keto-friendly appetizer or as a meal, perhaps over cauliflower rice or zucchini noodles, depending on your preference. The best part? You can prepare and sear them in about 30 minutes and then let them slow cook to perfection. Enjoy a delicious and hassle-free keto meal with these creamy meatballs!

Ingredients

  • Ground beef
  • Yellow onion
  • Egg
  • Garlic powder
  • Black pepper
  • Cream cheese
  • Butter
  • Cream sauce
  • Cream cheese
  • Heavy whipping cream
  • Tamari soy sauce
  • Salt and pepper

View Full Recipe

I called this lazy food.

Why?

Because it is suitable for filling my tummy during my lazy day.

Super creamy and mouthgasmic.

Additional resource – Diet mistakes runners make

13 – Coconut Flour Keto Flatbread

When you’re short on time and need a versatile keto-friendly option for burger buns, sandwich bread, or pizza bases, this coconut flour keto flatbread is your go-to solution. With just five simple ingredients, it’s quick and easy to prepare, taking only 10 minutes to make.

You have the freedom to load it up as an open sandwich, spread it with peanut butter, dip it in sauces, create a mini pizza, or use it as sandwich bread. Get creative and savor this delicious and convenient flatbread!

Ingredients

  • Coconut Flour
  • Coconut oil (or melted butter)
  • Egg
  • Baking powder
  • Salt

View Full Recipe

14 – Spicy Shrimp And Avocado Salad

If you’re a fan of avocado and shrimp, you’re not alone! Here’s an amazing recipe for you to enjoy. Spicy shrimp and avocado salad is packed with fresh ingredients that will tantalize your taste buds with every bite.

This recipe is quick to make and highly portable. Simply sear the shrimp in butter, dice some veggies, whip up a dressing, and you’re good to go. For an extra kick, you can even sprinkle some chili powder on it before tossing it into the pan. Get ready to savor the deliciousness!

Ingredients

  • Baby kale and baby spinach mix
  • Shrimp
  • Avocado
  • Cilantro
  • Olive oil
  • cucumber
  • Lime juice
  • Garlic
  • Cumin
  • Salt and pepper to taste

View Full Recipe

15 – Low-carb Cheese Taco Shells

If you’re a fan of Mexican food, especially tacos, but want to stay low-carb, here’s a fantastic recipe for you. Regular tacos may be off-limits on the keto diet due to their high-carb content, but these low-carb cheese taco shells are the perfect solution.

Made from baked cheddar cheese and shaped into a taco shells, they’re quick to prepare (just a matter of minutes!), gluten-free, and keto-friendly. Not to mention, they’re delicious, crunchy, and come close to the real thing. Fill them with your favorite keto-friendly toppings like grated cheese, ground meat, diced onion, sour salsa, shredded lettuce, chopped peppers, and more. Enjoy your keto-friendly tacos!

Ingredients

  • Shredded Cheese
  • Ground cumin

View Full Recipe

16 – Egg Salad Stuffed Avocados

Eggs and avocados are both fantastic sources of healthy fats, making them essential for a ketogenic diet. Eggs are rich in complete protein, which helps keep you feeling full all day long. That’s why this dish is a must-try for any dedicated keto enthusiast. It also serves as a delightful, straightforward, and fulfilling lunch option. Enjoy!

Ingredients

  • Hard-boiled eggs
  • Celery
  • Lime juice
  • Avocado
  • Hot sauce
  • Cumin
  • Salt and pepper

View Full Recipe

17 – Salmon and Avocado Nori Rolls

Traditional sushi with rice is a no-go on the keto menu due to its high carb content. However, you can still enjoy a delicious sushi-like dish without rice. This recipe uses riced cauliflower as a low-carb alternative to traditional rice. The best part? It only requires five ingredients and 20 minutes of your time. Enjoy a keto-friendly sushi experience!

Ingredients

  • Sliced smoked salmon
  • Cream cheese
  • Chopped pickled ginger
  • Nori sheets (grilled preferably)
  • Avocado

View Full Recipe

18 – Keto Fish Sticks

If you’re a fan of fish sticks but want to enjoy them in a healthier way, you’re in luck. This keto-friendly fish sticks recipe allows you to savor the flavors of this classic dish without derailing your healthy eating habits. You can make them as traditional breaded fish sticks or as fish nuggets, depending on your preference. Plus, they’re quick and easy to prepare, making them a convenient meal option. Enjoy your guilt-free keto fish sticks!

Ingredients

  • Pork rinds
  • Eggs
  • Alaskan cod filet
  • Coconut flour
  • Grated Parmesan
  • Garlic powder
  • Cooking spray
  • Salt and pepper

19 – Low Carb Taco Salad

Craving tacos but want to keep it low carb? You’re in luck! This low carb taco salad recipe allows you to enjoy all the delicious flavors of tacos without the carbs. Made with keto-friendly ingredients like ground turkey, avocado, olives, and lettuce, it’s a perfect option for lunch, dinner, or as a tasty side dish. Plus, it’s easy to prepare and packed with mouthwatering flavors. Say goodbye to taco cravings and hello to a satisfying low carb taco salad!

Ingredients

  • Ground beef
  • Chili powder
  • Avocado
  • Shredded cheddar cheese
  • Tomatoes
  • ground cumin
  • Dried parsley
  • Romaine lettuce
  • Sour cream
  • Garlic powder
  • Green onions

The seasoning

  • Cumin
  • Chili powder
  • Paprika
  • Onion powder
  • Garlic powder
  • Black pepper
  • Oregano

20 – Keto Cheese Roll-ups

Looking for a quick and easy keto-friendly snack? These keto cheese roll-ups are the answer! They are incredibly simple to make and require ingredients that you probably already have on hand. These roll-ups are not only delicious on their own but also pair perfectly with dips like guacamole, low-carb pizza sauce, or Ragu sauce.

Whether you enjoy them for breakfast or as a convenient on-the-go snack, you can fill them with your favorite keto-friendly ingredients. The possibilities are endless, so get creative and satisfy your cravings with these tasty keto cheese roll-ups!

Ingredients

  • Butter
  • Cheddar cheese in a slice

21 – Deviled Eggs

If you’re a fan of deviled eggs but want a keto-friendly option, look no further! This keto deviled eggs recipe uses avocados to achieve that creamy texture without relying on commercial mayonnaise or processed ingredients.

Not only are they delicious, but they’re also a great source of healthy fats. You can prepare a batch and store them in an airtight container for up to 4 days, making them a convenient and nutritious snack option, especially for runners. Enjoy these keto deviled eggs as a tasty and satisfying treat that aligns with your low-carb lifestyle!

Can’t beat them.

Ingredients

  • Eggs
  • Mayonnaise
  • Dijon mustard
  • Paprika
  • Fresh Dill
  • Salt and pepper

22 – Keto Hot Dogs

You heard it right! Embracing a low-carb lifestyle doesn’t mean saying no to hot dogs. With this keto hot dog buns recipe, each bun contains just 2 grams of carbs, a stark contrast to the roughly 20 grams of carbs found in regular hot dog buns. These buns are also easy to make—simply wrap, roll, and bake in the oven.

When it comes to fillings, your options are only limited by your imagination. Consider delicious options like meatballs, pepper-grilled chicken, smoked chicken, tuna, bacon and ham, veggies, avocado, and more. Enjoy your keto hot dogs guilt-free!

Ingredients

  • Almond flour
  • Baking powder
  • Eggs
  • Hot water
  • Apple cider vinegar
  • salt

View Full Recipe

23 – Cinnamon Bread

Indulge in the deliciousness of cinnamon bread with this versatile and low-carb recipe. This bread is a delightful combination of spicy, sweet, filling, and it tastes just like the real thing. Whether you enjoy it as a decadent dessert, hearty breakfast, or a satisfying snack, this low-carb option is sure to please.

With only 4 grams of net carbs per serving, it’s perfect for those following a low-carb lifestyle. The best part? You can whip it up in less than 5 minutes, making it a quick and easy treat.

Ingredients

  • Egg white
  • Coconut flour
  • Flaxmeal
  • Almond flour
  • Ground cinnamon
  • Melted butter
  • Baking powder
  • Raisins

View Full Recipe

24 – Keto Cheese Chips

If you’re craving a crunchy keto snack, these three-ingredient keto cheese chips are the perfect solution. Made primarily with mozzarella and seasoned with oregano and garlic (or any other keto-friendly flavor of your choice), these chips are a delightful low-carb treat.

For a heartier option, consider using Halloumi cheese for a thicker texture. These chips are delicious on their own or paired with guacamole or marinara sauce for dipping. Enjoy a satisfying and crunchy keto snack with these easy-to-make cheese chips.

Ingredients

  • Cheddar cheese
  • Paprika powder
  • Sea salt and pepper

25 – Keto Greek Salad

Keto Greek Salad, also known as Horiatiki, is a perfect representation of healthy Mediterranean cuisine. It’s inherently keto-friendly, as long as you avoid adding gluten or bread to the recipe. This delightful low-carb dish can be enjoyed at any time of the day or week.

The key to crafting an exceptional Greek salad lies in its simplicity and the use of the freshest keto-approved ingredients. Enjoy the vibrant flavors of Greece with this keto Greek Salad recipe.

Ingredients

  • Tomato
  • Green capsicum
  • Cucumber
  • Red onion
  • Green bell pepper
  • Fet cheese
  • Dried oregano
  • black Greek olives
  • Olive oil
  • salt and pepper

26 – Cottage Cheese-filled Avocado

Cottage Cheese-filled Avocado is a simple yet nutritious snack that owes its thanks to the Aztecs. Avocados are indeed a versatile and highly nutritious food. Mixing them with cottage cheese creates a snack rich in healthy fats and protein, helping you stay satiated until your next meal.

This snack is an excellent choice to curb mindless nibbling and unhealthy snacking that can contribute to weight gain. The preparation is quick and easy – just slice an avocado in half lengthwise, remove the pit from one-half, and fill the cavity with cottage cheese. For an extra kick, consider adding a pinch of cayenne pepper or regular black pepper.

Ingredients

  • Avocado
  • Sliced cheese

27 – Keto Egg Muffins

Keto Egg Muffins are a fantastic, time-saving, and keto-approved breakfast option. Whether you’re meticulously monitoring your keto macros or simply need a convenient and quick grab-and-go breakfast, keto egg muffins are an excellent choice.

These muffins are versatile and come in a variety of flavors, making them suitable for meal prep and various occasions. They’re especially appealing to those who enjoy the satisfying combination of bacon, cheese, eggs, and sweet potatoes. You can prepare a batch of these muffins and store them in the fridge for several days, providing a convenient and nutritious snack option whenever you need it. If you want to extend their shelf life, you can even freeze them.

Ingredients

  • Eggs
  • Scallions
  • Onion
  • Shredded cheese
  • Red peso
  • Salami
  • Sea salt and pepper

28 – Keto Jalapeno Poppers

If you’re in the mood for something spicy and savory, Keto Jalapeno Poppers are the perfect treat. These poppers combine the fiery kick of jalapenos with the rich flavors of bacon and cheese, making them a delicious and indulgent snack.

While preparing them involves a few steps, the effort is definitely worth it. Just be sure to exercise some self-control and avoid devouring them all in one sitting—they’re meant to be a satisfying snack, not a replacement for your main meals. Remember, it’s important to maintain a balanced diet even when enjoying delicious keto-friendly snacks like these poppers.

Ingredients

  • Shredded sharp cheddar
  • Cream cheese
  • Jalapenos
  • Bacon
  • Black pepper
  • Salt

29 – Low Carb Tortilla Chips

Don’t worry, you can still enjoy chips even on a keto diet! These Low Carb Tortilla Chips are a fantastic keto-friendly alternative that delivers the delicious taste and texture of traditional chips with just a fraction of the carbs.

They’re made using almond flour and cheese to mimic the texture of corn tortilla chips, giving you that satisfying crunch without all the added carbs. So, if you’re craving chips but want to stay on track with your keto goals, give these a try!

Ingredients

  • Almond flour
  • Golden flaxseed meal
  • Shredded mozzarella
  • Sea salt and pepper.

30 – Healthy Ketogenic Snacks

In case hunger strikes before one of the main meals, keep it at bay with any of the following options.

  • Cheese with olives
  • Two hard-boiled eggs
  • Strawberries and cream
  • A handful of almonds and nuts.
  • One avocado with pepper and salt
  • Green bean fries
  • Kale chips
  • String cheese
  • Jerky
  • Celery filled with cream cheese
  • Lettuce or cucumber smeared with peanut butter
  • Radishes smeared with butter

One Week Sample

Here how a week of eating looks like on the ketogenic diet.

Monday

  • Breakfast: Eggs, bacon, and tomatoes cooked in coconut oil
  • Lunch: Burger with cheddar cheese, guacamole, and nuts.
  • Dinner: Salmon, egg, and mushroom cooked in coconut oil.

Tuesday

  • Breakfast: Egg, basil, avocado, and cheddar cheese omelet.
  • Lunch: Chicken salad with olive oil and avocado.
  • Dinner: Mackerel with asparagus and spinach cooked in butter.

Wednesday

  • Breakfast: Omelet with peppers, broccoli, salsa, and spices.
  • Lunch: Shrimp salad with feta cheese and olive oil.
  • Dinner: Romaine lettuce with low-carb, high-fat dressing

Thursday

  • Breakfast: Cheese omelet with vegetables and avocados.
  • Lunch: Ham and cheese slices with almonds.
  • Dinner: Salad greens with high-fat dressing

Friday

  • Breakfast: Fried eggs with mushrooms and onions.
  • Lunch: Shrimp salad with feta cheese and olive oil.
  • Dinner: Low Carb Salmon Patties

Saturday

  • Breakfast: Eggs, bacon, and tomatoes.
  • Lunch: Four ounces of baked fish with butter sauce
  • Dinner: Steak and eggs with vegetables.

Sunday

  • Breakfast: Coffee with heavy crème
  • Lunch: Burger with cheddar cheese, guacamole, and nuts.
  • Dinner: Three cups shredded cabbage sautéed in butter and onions

Low Carb, Ketogenic, Recipes you Should Try – The Conclusion

There you have it! If you’re looking for a long list of low-carb ketogenic recipes then today’s post is the right catalyst. The rest is just details.

Please feel free to add your favorite keto recipes in the section below.