Circuit Training For Runners – The 30-Minute Indoor Workout

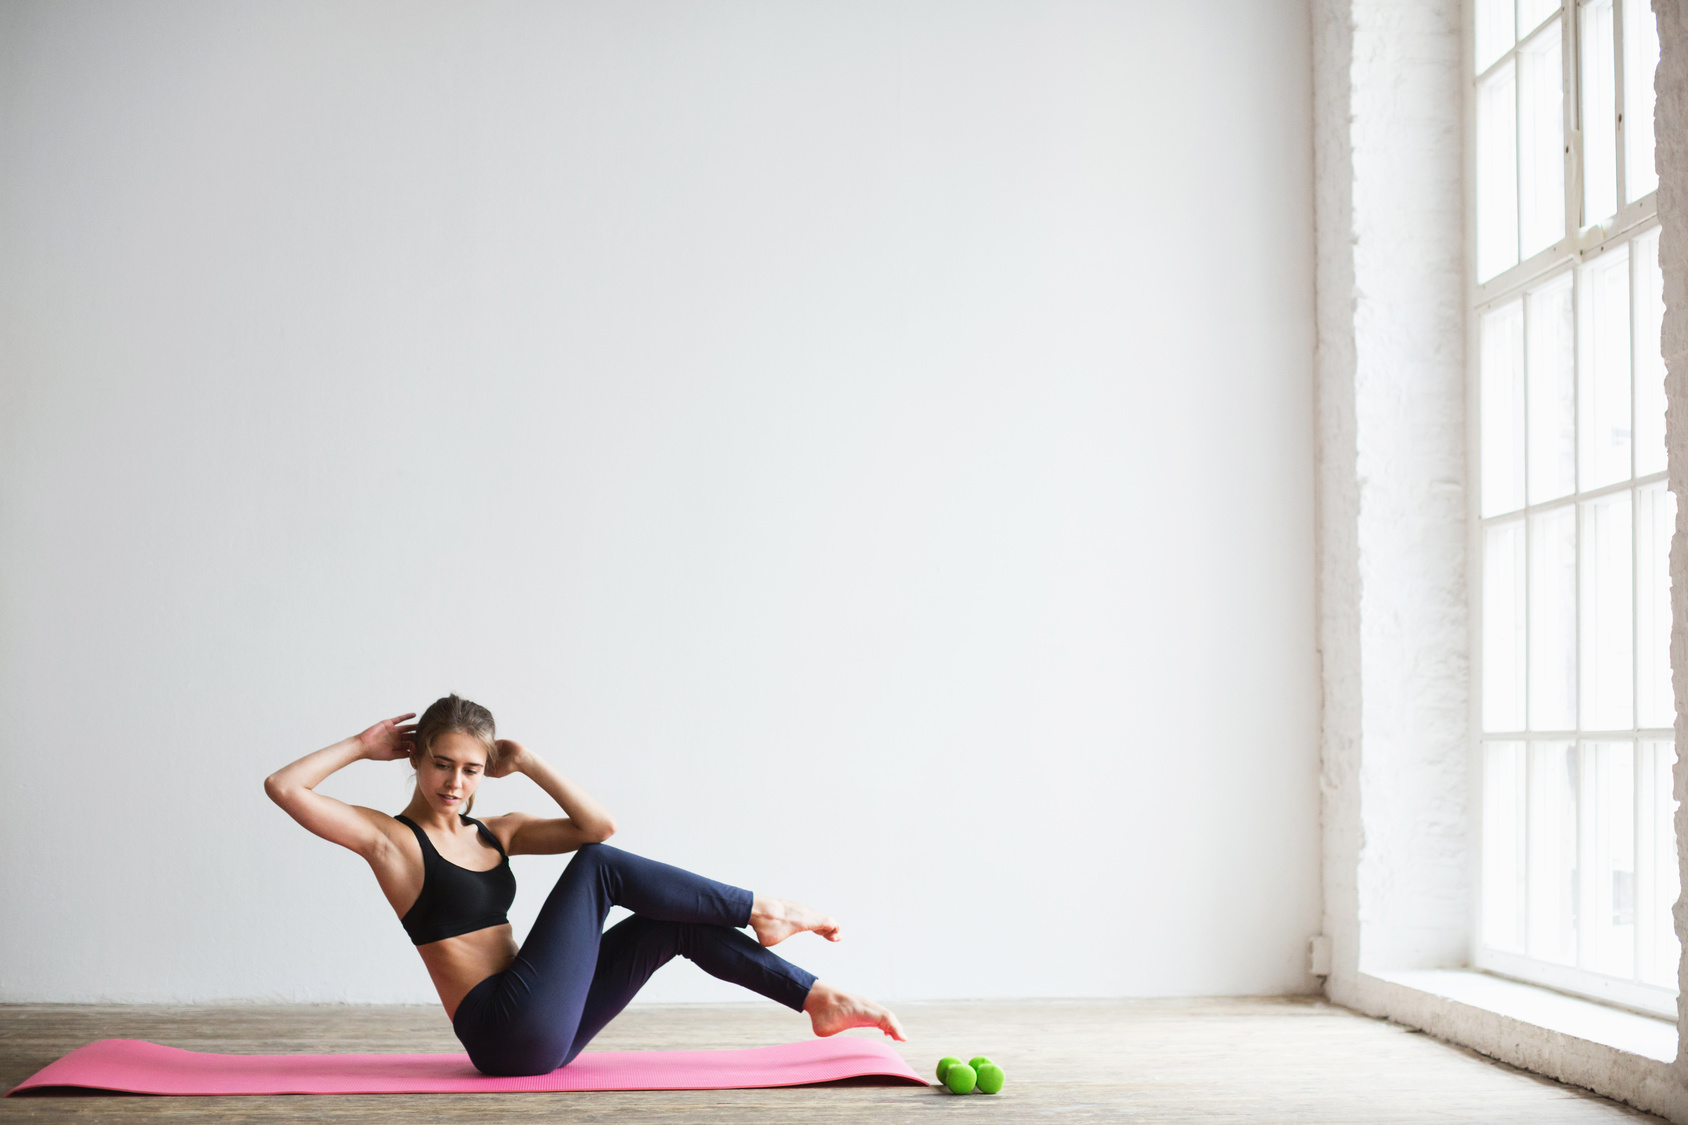
female doing ndoor Circuit Workout

If it’s not possible for you to go for an outdoor run, and you don’t want to jump on the treadmill for the hundredth time this month, then here is an indoor workout you can do at home for free.

No need for special equipment.

No need for hefty gym fees.

Oh! I forgot, it will also get you sweating like crazy and push your conditionning level to the max.

So are you excited? Then here we go…

Circuit Training For Runners – The 30-Minute Indoor Workout

If you are currently stuck inside, due to the weather, a baby, safety concerns, monetary reasons, you name it, the circuit I’m sharing with you today is the perfect solution.

In fact, this indoor workout routine is ideal for the cold winter month and perfect if time crunched fitness nuts.

Most of the exercises below require minimum equipment and can be done almost anywhere, as long as you have enough space.

These exercises will boost your heart rate, sculpt your body and get you out of running rut and help you smash through a training plateau.

For more challenge, use heavier dumbbells, medicine balls and push as hard as you can, or shoot for more rounds.

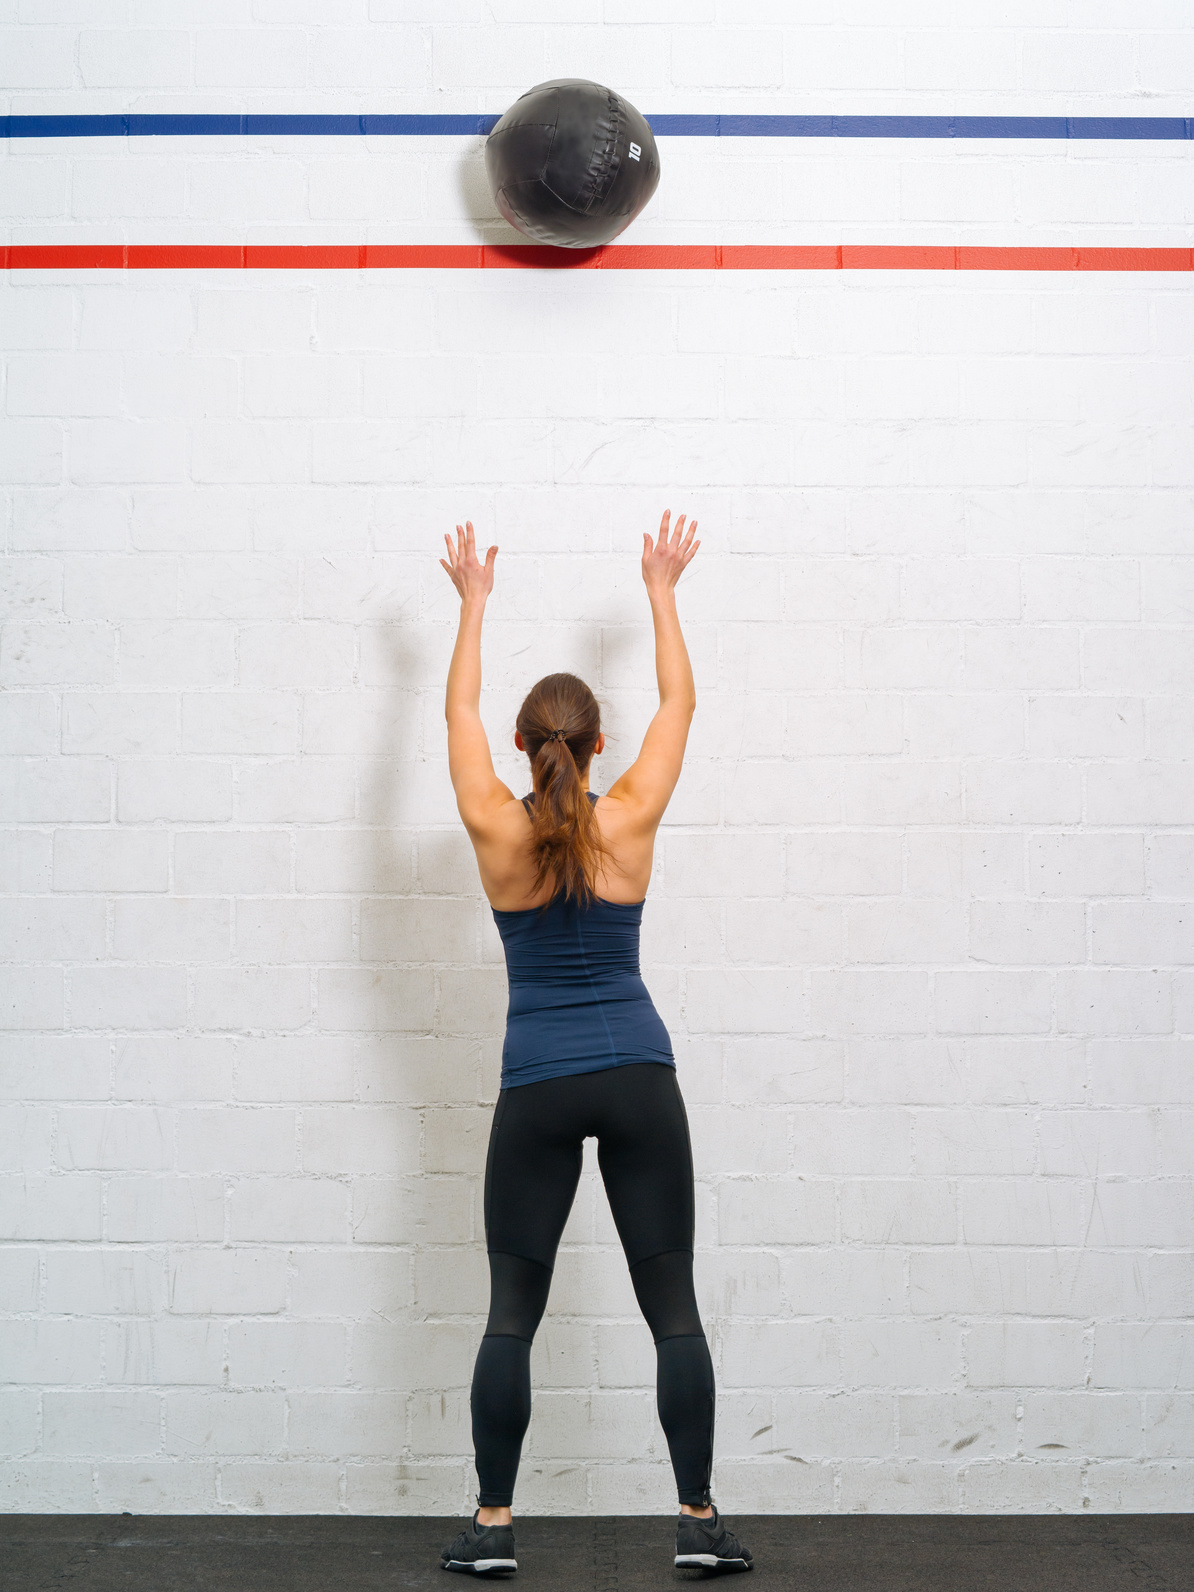
runner doing ndoor Circuit Workout

The Warm-Up

Warm up right by jogging in place at a comfortable pace for five minutes.

Make sure to land on the balls of your feet.

Exercise one: Jog in Place

Once you are warmed up, pick up the pace and jog in place as fast as you can by driving your arms back and forth and lifting your knees to waist level.

Make sure to run in place as fast as you can while pumping your arms back and forth, engaging the upper body as well.

Alternate between jogging at high intensity for 30 seconds, then slow it down and recovery for another 30 seconds, bringing your heart rate up in the process.

Exercise Two: High Knee Sprints

While jogging, pick up the start performing high knee sprints by bringing your knees up high toward your chest as fast as you can while engaging the glutes and keeping your torso upright.

Make sure to focus on high speed and knee lift while swinging your arms back and forth to generate momentum.

Sprint in place for one full minute to complete one set.

Exercise Three: High Lunges

Stand tall with back straight and core engaged, then step your left foot forward as far as possible so you are in a wide lunge position.

Next, while keeping your torso upright and gazing straight ahead, push through your left heel and drive your right knee forward and up toward your chest, then return it to starting position and repeat as fast as you can.

Do 10 to reps on each side to complete one set.

Exercise Four: Burpees

From a standing position, lower down and place your hands on the floor on either side of the feet.

Next, kick your feet back so you are now in a plank position, then immediately bring the feet back to between your hands and explosively jump up into the air, clapping your hands mid-air.

Make sure to land softly on the floor, then repeat as fast as possible while keeping good form throughout the exercise.

Exercise Five: Squat Jumps

Stand with feet hip-width apart with arms crossed over your chest.

Next, while keeping your head up and core engaged, squat down until your upper thighs are parallel to the ground, then, while pressing mainly with the balls of your feet, and using the thighs like springs, jump straight up in the air as high as you can.

Last up, land softly on the floor, bend your knees and sink back into the squat position and immediately jump again.

Please make sure to land with control and be extra caution if you have any knee or back injuries.

Repeat for 12 to 16 to complete one set.

Exercise Six: Butt Kicks

Begin by standing with your legs shoulder width apart, with the arms bent at your sides.

Next, while keeping your back straight and core engaged, run in place by kicking your heels up toward your butt, pumping your arms back and forth with elbows bent at a 90-degree angle as quickly as you can.

Make sure that your thighs do not move much as you lift and kick one heel at a time to your butt.

Lift your heels as close as you can to your butt, using a quick leg movement on the balls of your feet.

To do this circuit right, make sure to take minimum recovery between each exercise.

Your heart rate should remain high throughout the entire circuit.

Exercise Seven: Ski Abs

Assume a straight arm plank position, with back flat, head in neutral position and feet together.

Next, while engaging your core, hop both of your feet up to the left side, aiming to bring your knees to the outside of your left elbow, then quickly hop back into starting position, and change sides to complete one rep.

Repeat the exercise for one full minute to complete one set.

Circuit Training For Runners – The Conclusion

There you have it! If you’re looking for a cross training workout for runners, then this post is perfect for you. The rest is just details.

Please feel free to leave your comments and questions in the section below.

In the meantime thank for dropping by.

David D.

Revitalize Your Fitness Routine with These Beach-Inspired Workouts!

runner doing Beach Workout

If you’re yearning to inject a dose of excitement into your workout routine, you’re in for a treat! Whether you’re a beach bum or a landlocked fitness enthusiast, this guide is here to light up your exercise routine like a summer sunrise.

Today, I’m thrilled to spill the beans on some fantastic exercises that can turbocharge your strength, speed, and agility, all while you bask in the sandy embrace of the beach.

Now, you might wonder, “Where can I partake in these sandy delights?” Well, of course, the beach is the ultimate playground, but fear not if you don’t live seaside! A long jump pit or a sand volleyball court can serve as your fitness canvas as long as there’s sand beneath your toes, ample space, and a safe workout environment.

Ready? Let’s go!

Benefits of Sand Workouts

Sand workouts can offer a range of advantages that make them an excellent addition to your training routine.

Here’s why you should consider incorporating them into your training plan:

Lower Body Strength:

Running in the sand engages the muscles below the knee, including your ankles and toes, in unique ways that flat surfaces can’t replicate. The added resistance of the sand challenges these muscles, making them stronger and more resilient.

Stabilizer Muscles:

Sand workouts require you to constantly adjust your balance as the sand shifts underfoot. This engages your stabilizer muscles, which are often underused in regular running. Strengthening these muscles can enhance your overall stability and reduce the risk of injury.

Increased Challenge:

Performing bodyweight exercises on sand adds an extra layer of difficulty due to the resistance it provides. It pushes your muscles to work harder, making your workouts more challenging and rewarding.

Speed and Agility:

Sand’s resistance forces your muscles to adapt and become more powerful. This can translate to improved speed and explosiveness in your running, helping you become a faster and more agile athlete.

Beach Vibes:

If you’re fortunate enough to live near a beach, sand workouts offer a refreshing change from the gym’s monotony. Exercising in the sun and natural surroundings can boost your mood and add a new dimension to your fitness routine.

Minimal Equipment:

One of the best things about sand workouts is that they require very little equipment. You’ll need your running shoes (or you can go barefoot), your body weight, and, of course, sand. It’s a convenient and accessible way to challenge both your aerobic and anaerobic systems.

Choose the Right Beach

Choosing the right beach is a crucial first step when planning your sand workout. Not all beaches offer the same conditions, and your choice can significantly impact your experience.

Beaches can vary widely in terms of their surface. Some may have slanted or uneven terrain, while others could be littered with rocks and debris, which can be uncomfortable.

While it might seem like soft sand would be easier on your muscles and joints, it can actually be quite challenging to run on. Soft sand has a lot of “give,” making each step more demanding and increasing the risk of foot and ankle injuries, especially if you’re not accustomed to it. For a safer and more comfortable workout, opt for firmer sand, which provides adequate cushioning without the added strain.

What’s more?

Wet sand near the water’s edge is often the best choice for a sand workout. It offers a firm yet supportive surface that’s easier on your body. Start your runs here, and as your lower body strengthens and you become more accustomed to running in the sand, you can gradually progress to softer sand if desired.

Additional resource  – Trx exercises for runners

Protect Yourself from The Sun

Beach running comes with its own set of challenges, including exposure to direct sunlight. Protecting your skin from the sun is essential to avoid sunburns and reduce the risk of skin issues, including skin cancer.

For starters, apply a broad-spectrum sunscreen to all exposed areas of your skin. Opt for a sunscreen with a high SPF, ideally 50 or higher, and make sure to apply it generously. Reapply as needed, especially if you’re sweating. Sunscreen is your primary defense against harmful UV rays.

Try to schedule your beach runs during the early morning or late evening when the sun’s intensity is lower. Avoid running during peak hours, typically between 10 a.m. and 4 p.m., when the sun’s rays are at their strongest.

What’s more?

Wear lightweight, long-sleeved shirts to cover your arms and upper body. Consider adding a running hat or visor to shield your face from the sun. Sunglasses with UV protection can also help protect your eyes and the delicate skin around them.

Depending on your preferences and needs, you may want to invest in specialized beach running gear. For example, women may find athletic tankinis suitable for beach workouts as they offer both comfort and coverage.

Manage Your Expectations

Research indicates that beach running can burn up to 1.6 times more calories per mile compared to running on typical surfaces. This increased calorie expenditure is due to the added resistance of the sand, which engages your muscles more intensely.

That’s why you should adjust your pace. Beach running is significantly more challenging, so don’t expect to maintain your usual running pace. Be prepared to slow down and adjust your expectations. It’s essential to listen to your body and prioritize building strength and endurance over speed.

What’s more?

Running on soft sand can alter your running form, as it requires more effort to stabilize yourself. Pay attention to your form, engage your core, and maintain good posture to reduce the risk of injury.

Additional resource – One-mile training plan

The Right Start

For your initial beach runs, stick to the hard, wet sand near the water’s edge. This firm surface is more forgiving and easier to run on compared to soft, dry sand. Limit your first sessions to around 15 to 20 minutes to prevent overexertion.

Beach running places unique demands on your muscles and joints. Slowly increase your running time by adding 5-minute increments as your body adjusts to the sand. Be patient and prioritize a gradual progression to avoid overuse injuries.

While wet sand is an excellent starting point, don’t confine yourself to a single surface. As you gain confidence, incorporate short intervals (2-3 minutes) on the softer, drier sand. Afterward, switch to jogging or walking on the firm, wet sand to aid in recovery.

Although beach running offers fantastic benefits, refrain from doing all your runs on the beach, especially as a beginner. Overdoing beach running can increase the risk of Achilles tendon and ankle issues. Maintain a balanced training program that includes various surfaces.

Barefoot or Not

Beach running, with its pristine scenery and invigorating feel, can be an incredibly rewarding experience. However, the choice of whether to run barefoot or wear shoes is crucial, especially for beginners. Here’s a breakdown to help you make the right decision:

Running Barefoot

Pros:

  • Offers a unique sensory experience as you connect directly with the sand.
  • Strengthens foot muscles and enhances proprioception (awareness of body position).
  • Provides a more natural running gait and encourages a midfoot or forefoot strike.

Cons:

  • Requires calloused feet to avoid blisters and discomfort.
  • Puts added stress on the plantar fascia, Achilles tendon, and calf muscles, increasing the risk of soreness or injury.
  • Offers minimal protection against sharp objects in the sand, like rocks and seashells.
  • May exacerbate or lead to issues such as Achilles problems, plantar fasciitis, or ankle sprains due to the lack of support.

Running with Shoes:

Pros:

  • Provides support and cushioning, reducing stress on the feet and lower legs.
  • Offers protection against sharp objects hidden in the sand.
  • Suitable for runners who haven’t conditioned their feet for barefoot running.
  • Reduces the risk of developing or aggravating foot and lower leg issues.

Cons:

  • Limits the direct sensory experience of the sand.
  • May encourage a heel strike, which can be less efficient than a midfoot or forefoot strike.
  • Tips for Running with Shoes on the Beach:
  • Opt for lightweight, flexible-soled trainers designed for natural movement.
  • Choose shoes with a tight mesh to prevent sand from entering while maintaining breathability.
  • Ensure a snug fit to prevent blisters and discomfort.
  • Regularly inspect your shoes for sand and debris to maintain their performance.

Additional resource – How To walk 10,000 steps everyday

Stay Hydrated

Proper hydration is essential for a successful and safe beach run. Here are some key tips to help you stay hydrated before, during, and after your run:

Pre-run Hydration:

Aim to drink approximately one ounce of water for every 10 pounds of body weight in the three to four hours leading up to your run. This will help ensure that you start your run properly hydrated.

Be mindful of your timing to allow for a restroom break before you start your run.

Hydration During Your Beach Run:

For beach runs lasting longer than 30 minutes, it’s crucial to carry water with you or plan your route near water sources where you can hydrate.

Sweat Test for Hydration:

Perform a sweat test to gauge your hydration needs.

Here’s how:

  • Weigh yourself before your beach run.
  • Run as usual, and try to maintain your typical pace and effort.
  • After your run, weigh yourself again.
  • The difference in weight reflects the amount of fluid you’ve lost through sweating during your run.

To determine your fluid loss, know that 1 pound of body weight is approximately equal to 16 ounces (or 473 milliliters) of fluid. For example, if you lost 2 pounds during your run, you should aim to replace about 32 ounces (946 milliliters) of fluid.

Additional Tips for Hydration:

  • Listen to your body and drink when you feel thirsty during your run.
  • Consider carrying a hydration belt or handheld water bottle to stay properly hydrated while running.
  • In hot and sunny conditions, you may need to increase your fluid intake to account for increased sweat rates.
  • Rehydrate after your run by drinking water or a sports drink with electrolytes to replenish lost fluids and minerals.

Stay Safe

Safety should always be a top priority when embarking on your beach running adventures.

Here are some essential safety tips to keep in mind:

  • Start Gradually: If you’re new to beach running, begin with shorter workouts lasting no more than 20 to 25 minutes. As you build strength and endurance, gradually increase the duration and intensity of your runs. This gradual approach reduces the risk of injury.
  • Protective Gear: Protect yourself from the elements. Wear sunglasses to shield your eyes from glare, a hat to provide shade, and apply sunscreen to prevent sunburn, especially in exposed areas.
  • Stay Hydrated: Carry a water bottle with you during your beach run to ensure you stay well-hydrated. Dehydration can lead to fatigue and other health issues.
  • Footwear: Choose appropriate footwear for beach running. Lightweight, flexible-soled running shoes offer support and protection while allowing you to adapt to the unstable surface.
  • Foot Care: Pay attention to your foot health. Running on sandy terrain can lead to blisters or discomfort if your feet aren’t used to it. Ensure your feet are in good condition, and consider using moisture-wicking socks to reduce friction.
  • Beach Conditions: Be aware of the beach conditions. Not all beaches are the same. Some may have uneven terrain, hidden obstacles like rocks or seashells, or soft sand that can be challenging to run on. Choose your running area wisely.
  • Timing: Avoid running during the hottest part of the day when the sun’s intensity is at its peak (usually between 10 a.m. and 4 p.m.). Opt for early morning or late afternoon runs when it’s cooler.

The 30 Minute Beach Running Workout

Looking for an effective and challenging beach running workout? Try this 30-minute routine that combines sprints, strength exercises, and a cool-down for a complete beach workout experience.

The Warm-up

Start your workout with a proper warm-up to prepare your body for exercise. Begin with a slow jog for 5 to 10 minutes to increase your heart rate. Incorporate dynamic exercises like squats, inchworms, and lunges to activate your muscles.

Exercise One: Sand Sprints

Sand sprints add an extra layer of resistance, making them more challenging than regular sprints. Follow these steps:

Find a flat section of sand and mark out a distance of 80 to 100 feet (or use landmarks like two canes).

Sprint as fast as you can from one marker to the next, ensuring each sprint lasts 15 to 20 seconds.

Take a 10-second break between sprints.

Focus on maintaining good sprinting form: run tall with a straight back, keep your torso and hips facing forward, and swing your arms back and forth with a 90-degree bend.

Be cautious if you have a history of Achilles tendinitis or ankle sprains, as running on sand can increase the risk of injury.

Exercise Two: Single-leg Jumps

Begin this exercise by jogging to create the forward momentum.

Next, after a few feet, forcefully push off with your lead foot, leaping from one leg to the other with minimal contact with the sand as you drive your lead arm forward.

Stay light on your feet the entire time.

Make sure to land with your knee slightly bent, moving immediately into the next jump.

Exercise Three: Prisoner Squat Jumps

Stand tall with your hands behind your head and feet shoulder-width apart.

Next, while keeping your chest up, arms in place, and head up, squat down as low as you can, then explode up and jump forward several feet.

As you land on the ground, assume a squat position to absorb the impact, then jump again.

Repeat the squat jumps 10 to 12 times, covering as much distance as possible without losing form.

Exercise Four: Walking Lunges

Assume a standing position with feet hip-width part, chest up, and core engaged.

Next, step your right foot forward and assume a low lunge position, bending both knees to a 90-degree angle.

Then, pull your body up over the right foot and step forward to the next lunge.

Just be careful here; performing walking lunges with bad form can lead to a high risk of an injury to your back, hips, knees, or ankles.

So, keep good form throughout the movement.

Exercise Five: Bear Crawl

Begin by standing feet hip-width apart, then bend your knees, fold forward, and place your hands about three to four feet in front of you. That’s your starting position.

Next, while keeping your hips back and core engaged, bear crawl (by walking your hands and feet) 20 feet forward, 20 feet laterally to the right, 20 feet backward, and 20 feet to the left back to the starting point.

To make it more challenging, add ten push-ups after every 20-foot crawl.

Exercise Six: High Knees

Begin by standing straight with your feet hip-width apart.

Then, run in place, bringing both of your knees up to your chest as you can.

Make sure also to pump your arms as fast as you can, aiming to land on the balls of your feet.

And please keep your core engaged, back flat, and chest up the entire time.

Exercise Seven: Butt Kicks

Begin by standing tall with feet shoulder-width apart and arms bent at the sides.

Next, flex your right foot and kick your heel up towards your butt.

Then repeat on the other side and continue alternating between each leg as fast as you can without losing form, and do your best to kick your heels to your glutes each time.

To gain speed and momentum, make sure to swing your arms as quickly as you can while using your core to control your body and to keep good form.

Step Up Your Fitness Game: The Ultimate Guide to Stair Training For Runners

Staircase Workout execise

Ready to take your workouts to new heights? Today, I’ve got something exciting to share with you – it’s all about stair training!

Now, I didn’t stumble upon this fitness gem by accident. Stair climbing workouts quickly became my go-to for boosting aerobic fitness without pounding the pavement endlessly.

But guess what? Stairs aren’t just for cardio junkies like me. They’re a secret weapon for building lower body strength, enhancing agility, improving flexibility, and even diving into anaerobic conditioning.

So, if you’re itching to elevate your training routine and conquer new fitness goals, you’re in the right place!

Get ready to step up your game as we dive into the world of stair training.

Let’s go!

The Benefits of Stair Sprints Training

Here are some of the benefits to expect if you do stair workouts on a regular basis.

Improves VO2 max

VO2 max, or the maximum amount of oxygen your body can use during intense exercise, gets a significant upgrade with stair workouts. In fact, here’s a little nugget: climbing just 200 steps twice a day, five days a week over two months, can lead to a whopping 17% increase in your VO2 max.

Strengthens the legs

Forget the leg press machines – stairs are where it’s at! They’re your secret weapon for sculpting those lower body muscles. Think glutes, quads, and calves, all getting toned up without the jarring impact of running or sprinting.

Costs nothing

As long as you’ve got access to a staircase, whether it’s a public one, stadium bleachers, or the stairs in your apartment block, you’re all set. No fancy gym memberships are required. Your fitness journey begins right at your doorstep.

Offers variety

Staircases are like your personal fitness playground. You can shake things up with sprints, plyometric moves that’ll have you feeling like a superhero, and creative variations of classic bodyweight exercises. Think push-ups, squats, lunges, and more.

The Ultimate Stair Workout for Runners

Now that you’re all clued in on the incredible benefits of stair climbing, it’s time to dive into this high-intensity interval training (HIIT) staircase workout. This routine is not just your average workout; it’s your ticket to improved fitness, enhanced strength, and becoming the best runner you can possibly be.

Find the Right Stairs

Before you embark on your stair-climbing adventure, let’s find the perfect set of stairs to conquer.

Ideally, you’ll want a safe and well-lit staircase to ensure you’re training in the best possible conditions. High school stadiums and football arenas often offer great stair-climbing venues. The bleachers or a local park can also be excellent options.

However, if you can’t find any of these, don’t worry! Even a large flight of stairs in your building or office can work wonders. What’s essential is that the staircase has a sufficient number of steps, ideally between 20 to 40 steps or more. Climbing the entire flight should take you roughly 10 to 20 seconds.

Additionally, make sure that your entire foot comfortably fits on each step tread. This not only ensures enough room for strength exercises but also makes your stair-running experience smooth and trouble-free.

Additional resource  – Trx exercises for runners

Warming Up For Stair Workouts

Warming up is your ticket to a safe and effective stair-climbing workout. Let’s get those muscles primed and ready for action!

Start with a gentle jog for about 5 to 10 minutes to get your heart rate up and your body moving.

Next, it’s time for some dynamic moves. Think lunges, inchworms, squats, and more. These exercises help limber up your body and activate those muscles. Repeat this dynamic warm-up sequence two to three times to ensure your body is thoroughly prepared for the stair workout ahead.

Now, a word of caution: The workout we’re diving into is intense.

If you haven’t been doing high-intensity exercises lately, it’s essential to be realistic and ease into it. You can start with fewer reps, always staying within your current fitness capabilities.

Stair Training Exercise One: Sprints

Position yourself at the base of the stairs, ready to conquer them. Picture yourself as Rocky Balboa, and those stairs are your challenge!

When I say “go,” I want you to explode up those stairs like a rocket. Pump your arms vigorously by your sides, and as you sprint, tap each step and launch off it as fast as you can.

Go!

Once you’ve conquered the climb, take a leisurely walk back down to your starting point. This is your chance to catch your breath and gear up for the next round.

Now, how many rounds should you do? That’s where your fitness level and the staircase length come into play. Aim for six to eight rounds, but listen to your body. Don’t push it too hard if you’re just starting out.

Stair Training Exercise Two: Step Forward Lunges

Start at the base of the staircase, and here’s the plan: Step your right foot onto the second or third step, and bend both knees to form perfect 90-degree angles. That’s your lunge position.

Now, push off with your right foot; give it some oomph! Propel yourself up the stairs, step by step. As you do, your left leg should follow suit, meeting your right. Keep that momentum going and step it forward, lowering into the next lunge.

Feel the burn as you continue lunging forward, one step at a time, conquering each step like it’s a victory waiting to be claimed.

Keep your front knee tracking right over your toes, and make sure your torso stays upright. We want those lunges to be picture-perfect!

Once you reach the pinnacle of your staircase conquest, take a stroll back down. This is your well-deserved recovery time before your next lunge adventure

Stair Training Exercise Three: Squat Jumps

Start at the bottom of the stairs and lower your hips down into a squat position. Engage that core!

Swing your arms as you prepare for takeoff.

Hop up to the next step using both feet and stick the landing like a pro back into that squat. Hold it for a quick moment to catch your breath, and then, without missing a beat, leap to the next step.

Keep this squat-jumping rhythm going, transitioning seamlessly from squat to jump as you ascend to the summit of the staircase. Each jump propels you one step closer to victory.

Stair Training Exercise Four: Skip a Step

https://www.youtube.com/watch?v=ydAjynaxqbU

Just like in Exercise One, you’ll start at the bottom of the stairs. But this time, we’re adding a twist. Your mission, should you choose to accept it, is to sprint-jump high enough to skip not just one but a step or two!

It’s all about that explosive power. Pump those arms like you mean it and maintain perfect form as you ascend. Keep those knees aligned over your feet, and don’t let that back slouch or bend at the waist. Your goal is to conquer those stairs with finesse and style!

Once you’ve conquered the climb, it’s time to gracefully descend. Walk back down for a well-deserved recovery. Catch your breath and get ready for the next round!

Stair Training Exercise Five: Skater Steps

Stand tall, facing the staircase. It’s time for some fancy footwork! Start by stepping your left foot onto the far-left end of the second step.

Now, this is where the magic happens. Push off with your left foot and execute a graceful hop onto your right foot, placing it on the right side of the next step.

Rinse and repeat this ascending dance, alternating sides with each step. You’re like a stair-climbing maestro!

Keep going until you conquer that staircase and reach the glorious summit. Victory is yours!

But wait, it’s not over yet. To ensure a safe landing, walk back down for some well-deserved recovery. It’s all part of the stair-stepping rhythm!

Stair Training Exercise Six: Triceps Stair Dips

Start by finding a comfy spot on the edge of the second or third step. Plant your feet firmly on the ground and position your hands under your shoulders. This is your launching pad for triceps greatness!

Now, let’s lift those hips! Push through your hands until your arms are straight and your legs extend, with your heels resting on the floor. Keep those hands shoulder-width apart and your shoulders relaxed throughout the entire exercise

That’s your starting position, and you’re looking good!

It’s time to engage that core and dive into the dips. Lower your body down and then push it back up. Feel those triceps working their magic? That’s what we’re aiming for!

Remember, the power here comes from your arms, not from bouncing your butt up and down. Keep the focus on those triceps.

Stay in the groove and shoot for at least 12 to 15 reps to complete one set. You’re well on your way to triceps greatness!

Stair Training Exercise Seven: Hop Ups

Position yourself at the base of the stairs with your feet a bit wider than shoulder-width apart. Engage that core because we’re about to take off!

Now, let’s hop to it! Jump up and down from the first or second step for a solid 20 to 30 reps without hitting the brakes. That’s what we call one set.

Here’s the secret sauce: keep those hops powerful and lightning-fast. You’re not just going through the motions; you’re giving it your all!

Stair Training Exercise Eight: Mountain Climbers

https://www.youtube.com/watch?v=fBZHkGT0W5Y

Turn to face the stairs and place your hands on the second or third step. Lock those arms in, extend your legs behind you, and engage that core. We’re in for a ride!

Now, here’s the drill: lift your right foot off the ground and drive that right knee as close to your chest as humanly possible. Then, smoothly return to the starting position and switch sides.

It’s a leg-switching extravaganza! Alternate those legs and bring your knees to your chest as quickly as you can while maintaining impeccable form.

Keep up the pace! You’ve got 16 reps on each side to conquer without hitting the pause button. Once you do that, you’ve just nailed one set of mountain climbers.

Stair Training Exercise Nine: Single-Leg Hops

Start at the bottom of the staircase, and stand strong on your right leg while keeping your left leg slightly bent. Balance is key, so if you need extra support, lightly hold onto the railing or a nearby wall.

Now, engage that core and maintain those soft knees. It’s time to take flight! Begin jumping up, one step at a time, until you conquer the entire flight of stairs.

Feel the burn? It’s working! Now, take a breather and walk back down the stairs for some well-deserved recovery. Then, switch sides and let your left leg take the lead.

I’d also recommend this speed ladder drills routine.

Featured Image Credit  – Lorna Jane via Flickr

Prevent Running Injuries with These 5 Hip-Strengthening Exercises For Runners

If you’re on the hunt for the ultimate hip-strengthening exercises to boost your running game and keep those pesky injuries at bay, you’ve landed in the right spot!

Today, we’re diving headfirst into the world of hip strength training for runners, and trust me, it’s going to be a game-changer.

Here’s the lowdown on what’s coming your way:

  • We’ll break down the hip muscles so you know exactly what we’re working with.
  • Discover how these hip muscles play a crucial role in your running performance.
  • Uncover the fascinating connection between hip muscles and running injuries (yes, we’ve got some science-backed insights for you).
  • Get ready for the main event – the top 5 exercises that’ll have your hip strength and mobility skyrocketing.
  • Plus, a whole lot more to keep you informed and inspired.

Excited? Well, let’s lace up those running shoes and dive in.

Anatomy of The Hips Muscles

Your hips aren’t just there to look good in yoga pants; they’re true workhorses. Nestled in your upper legs, the hip allows  you to strut your stuff, climb stairs, grab that fallen pen, or gracefully park yourself on the couch.

But here’s the real star of the show: the hip joint! It’s a nifty ball-and-socket setup, and it’s key to everyday movements.

Every time you take a stroll, conquer a staircase, reach for your dropped phone, or elegantly plop onto your favorite chair, your hip joint and its trusty muscle squad swing into action.

And guess what? We’ve got more hip intel coming your way, so stay tuned

The most important muscles of the hips include :

The Hip Flexors

The hips flexors play a vital role in the grand scheme of things. They’re like the supporting cast in your body’s blockbuster film, making sure everything runs smoothly.

And consist of five muscles:

  • Rectus Femoris
  • TFL (Tensor Fasciae Latae)
  • Iliacus
  • Psoas
  • Sartorius

These hip flexors are the MVPs behind knee elevation and keeping your pelvis and legs in perfect harmony during your runs.

Think of them as your body’s own mechanics for knee operations. But here’s the kicker: weak hip flexors could spell trouble, with the dreaded runners’ knee and iliotibial band syndrome lurking in the shadows

Adductors

The adductors are responsible for pulling your legs inward and orchestrating those nifty cross-body moves.

And consist of the following:

  • Adductor Brevis
  • Adductor Longus
  • Adductor Magnus
  • Pectineus
  • Gracilis

Think of them as your body’s graceful dance troupe, ensuring your legs move seamlessly in any direction you desire.

These performers add finesse to your legwork and contribute to the harmony of your hip movements. Without them, things might get a bit clunky on the dance floor—or, should we say, the running track?

Glutes

The Glutes are the powerhouse behind your backside and so much more!

Meet the Gluteal squad:

  • Gluteus Maximus
  • Gluteus Medius
  • Gluteus Minimus
  • Tensor Fasciae Latae

These muscles are your body’s true all-stars, responsible for various functions, from extending your hip and moving your leg out to the side to ensuring your leg’s external rotation.

The Importance of hip Muscles While Running

Let’s dive deeper into the critical role of hip muscles while running.

Efficient and Injury-Free Running:

Whether you’re a casual jogger or a marathon enthusiast, strong and functional hips are your secret weapon. They keep you in the game, preventing those dreaded injuries.

Stabilizing Powerhouses:

These muscles aren’t just for show; they’re the guardians of your running stance. They ensure each leg is rock-solid during every step, maintaining stability in the process.

The Perils of Weak Hips:

Now, imagine weak hip flexors crashing this party. Your performance takes a nosedive, your form goes haywire, and injuries gatecrash your running journey.

Studies linking hip weakness to running injuries

There’s some compelling research highlighting the connection between hip weakness and running injuries.

Study 1: Hip Rotation and Iliotibial Band Syndrome

This study, published in the Journal of Orthopedic & Sports Physical Therapy, unveils a crucial link. It suggests that when hip rotation and inward collapse occur excessively during the gait cycle, the risk of Iliotibial Band Syndrome shoots up.

Study 2: Weak Hip Muscles and Lower Extremity Injuries

In another study featured in the Clinical Journal of Sports Medicine, the evidence becomes even more compelling. It draws a strong association between weak hip muscles, including the abductors, adductors, and flexors, and a range of overuse injuries in the lower extremities.

Study 3: Runners’ Knee and Weak Hip Muscles

The Clinical Journal of Sports Medicine presents evidence that links overuse injuries like Runners’ Knee to weaker hip muscles. Specifically, the hip abductor, adductor, and flexor muscles were weaker in individuals with these injuries compared to a control group. This underscores how critical strong hips are in preventing injuries like Runners’ Knee.

Study 4: Pelvic Instability and Runner’s Knee

Another study published in Medicine & Science in Exercise & Sports delves into pelvic stability and its role in Runner’s Knee among women. It was discovered that women who developed Runner’s Knee exhibited greater pelvic instability in their gait compared to those who remained injury-free. This insight highlights the significance of hip and pelvic stability for injury prevention.

Study 5: Hip Strength Training for Iliotibial Band Syndrome

The study by Frederickson et al. focused on 24 distance runners dealing with Iliotibial Band Syndrome, a common issue among runners. They examined the hip abductor strength in the injured limb compared to the healthy leg and a control group.

Notably, they found a 2 percent strength deficit in the Gluteus medius of the injured limb. However, after undergoing a six-week strength training program, 22 out of 24 injured runners were able to return to training with minimal or no symptoms. It underscores the potential of targeted hip strength training in rehabilitating running injuries.

The Evidence is Overwhelming!

It’s clear that hip strengthening exercises should be a priority for every runner to prevent injuries and enhance performance. Ignoring hip strength can lead to a host of problems that no runner wants to deal with.

The great news is that there’s a wide array of effective hip-strengthening exercises available. These exercises are a proactive approach to injury prevention and overall improved running performance.

By dedicating time to strengthening your hip muscles, you’re investing in your long-term running success.

Remember, once your hip strength is improved, you’re not only less likely to experience pain and injuries, but you’ll also find your running form and efficiency improving.

5 Hip Strengthening Exercises For Runners

Consistency is key when it comes to strengthening your hip muscles. Starting with one set of 8 reps and gradually progressing to three to four sets of 12 to 15 reps is an excellent approach.

It allows your body to adapt and grow stronger over time, reducing the risk of injury and improving your running performance.

Remember, patience and persistence pay off when it comes to fitness and strength training. Keep up the good work, and you’ll undoubtedly notice significant improvements in your hip strength and overall running abilities in just a few weeks

Hip Strengthening Exercise – 1. Single-Leg Bridge

Targeted Muscles: Glutes, Lower back, Calves, Quads, and Hamstrings.

Proper Form

Lie on your back with both knees bent and feet flat on the floor, arms pressed against the floor by your sides.

Then, lift your hips, engage your thighs, and squeeze your glutes.

Next, raise your right leg in the air as straight as possible, keeping the foot flexed, and extend it while raising your lower back and butt.

Lift your hip as high as possible by engaging your abs and pressing down through the left heel.

Hold the position for 5 to 10 seconds; lower your hips to lightly touch the ground, then switch legs.

Number of sets: Three to four sets

Number of Repetitions: 8 to 12 reps.

Hip Strengthening Exercise 2. Donkey Kicks

Targeted muscles: All three butt muscles — gluteus maximus, gluteus medius, and gluteus minimus, plus the lower back

Proper Form

Get on all fours, with your hands directly under your shoulders and knees under the hips, wrists aligned under your shoulders.

Next, draw your abdominals in you gradually lift your leg behind you until it’s almost parallel to the floor, with knee bent and foot flexed.

Hold the position and pulsate your flexed foot toward the ceiling by engaging and squeezing your glutes.

Keep the motion small and controlled with the muscle doing most of the work.

Focus on the muscle, and avoid using momentum.

And make sure to keep your back straight and spine in a neutral position.

Last up, return to the starting position to complete one rep.

Number of sets: Two to three sets

Number of Repetitions: 12 to 15 reps

Hip Strengthening Exercise 3. Side-Lying Hip Abduction

Targeted muscles: Gluteus Maximus, Gluteus Medius, Gluteus Minimus and Tensor Fascia Lata.

Proper Form

Lie down on your side on the floor or the mat.

Make sure your hips and feet are stacked in a neutral position—Meaning the right hip is directly over the left hip (or the other way around).

And keep your body in a straight line from ankles to head.

Next, place your lower hand on the floor in front for support, and your upper hand resting upon your upper hip.

Keep your pelvis in a neutral position.

Engage your core muscles to support the spine.

Then, exhale and extend and raise your top leg off the lower while keeping the knee straight and your foot in a neutral position.

No hip rolling—forward or back—is allowed.

Raise the top leg as high as possible.

Inhale and slowly return the leg to the starting position in a slow and controlled manner.

After finishing the set, roll over and repeat on the other side.

Number of sets: Two to three sets

Number of Repetitions: 8 to 10 reps

Hip Strengthening Exercise 4. Bird Dog Hip Strengthening Exercise

Targeted Muscles: Glutes, Lower Back Muscles, and Rectus Abdominis Muscle.

Proper Form

Get down on all fours on your hands and knees with palms flat on the floor and shoulder-width apart, with knees directly under the hips and hands beneath the shoulders.

Make sure to keep your lower back and abdomen in a neutral position.

Next, engage your core to keep a good balance; raise your left arm and extend it straight out in front of your body as you raise your right leg and straighten it behind you.

Hold the position for 3 to 5 seconds, return to the starting position, and repeat.

Number of sets: Two to three sets.

Number of reps: 6 to 8 reps.

Hip Strengthening Exercise 5. Single-Leg Deadlift

Muscle engaged: Glutes, Hamstrings, Spinal Erectors, and Abs

Proper Form

Stand on your left leg with your right leg behind you and in the air.

Then, while keeping your shoulders back and back straight throughout the movement, hinge forward at the waist and raise the right leg behind you, then reach your hands toward the ground.

Last up, come back to the starting position by engaging your glutes and hamstring of the left leg.

For more challenges, use weight or a medicine ball for added resistance.

Number of sets: Three to four sets

Number of reps: 10 to 12.

Here are more strength exercises for runners.

 Bonus Hip Strength Exercises For Runners

Seated hip Flexion

This simple move activates the hip flexor past a 90-degree angle to condition the muscles throughout their range of motion.

Additional resource – Running Vs. Strength training

Proper Form

Begin by sitting on a chair with good posture.

Make sure your feet are flat on the floor, core engaged, and back flat.

Next, while bending your right knee to about a 90-degree angle, raise it toward your chest without letting your thigh roll in or out or leaning back, pause, then slowly lower it to start position.

Perform three sets of 10 to 12 reps on each side.

Add weights for more challenges.

Lunges

Another fantastic move for strengthening the hip muscles as well as the lower body.

To make the most out of lunges, make sure to include different variations of this standard lunge, including static, backward, and plyo versions.

Proper Form

Begin in standing position, feet just slightly apart, looking straight ahead with back flat and core engaged.

Next, place your hands on your hips, then take a giant step forward with your right foot.

Make sure your hips are hanging straight on either side of your body.

Then, once you ensure heel contact with the floor, bend the right knee over the ankle while bending the left toward the ground.

Last up, press back into the starting position, pushing off the ground with your leading foot.

Changes sides to complete one rep.

Skater Squats

This is one of my favorite squat variations, focusing specifically on the hips instead of every muscle in the lower body.

Proper Form

Begin by performing a mini-squat, bending from the hips and knee and lowering your butt toward the floor while keeping your chest lifted and back flat, then transition your weight to the right side and lift the left leg slightly off the floor, toes pointed ahead.

This is your starting position.

Next, slowly squat by pushing your hips and butt backward.

Keep squatting until your right knee is bent to a 90-degree angle, if possible.

Perform  10 to 12 reps on each side to complete one set.

Shoot for three sets.

Clamshell

You’ll often find this move on most lower body rehabilitation programs, the reason being it works.

Not only does it strengthen your hips and glutes, but it also stabilizes your pelvis muscles and helps soothe tightness in the lower back, which is key for injury-free training.

Proper form

Begin by laying on the mat on your side, hips stable, heels together, and legs stacked up on top of each other.

Your shoulders, hips, and heels should form a straight line.

If it’s uncomfortable to lay in this position, lie with your back against a couch.

Next, open your top knee so that it points at the ceiling.

Keep your feet stacked together and allow for no rolling backward throughout the movement.

Raise the top knee as far as possible without rotating your hip or lifting your bottom knee off the floor, then pause for a moment.

To complete one rep, close the leg.

Perform 16 to 20 on each side to finish one set.

Shoot for three sets.

For more resistance, wrap a resistance band around your lower thighs.

Standing hip flexion

Another excellent move for isolating the hip flexors while improving muscle control and balance.

The movement is easy to perform but provides the lower body a good workout.

Proper Form

Begin by assuming an athletic position, back straight, core engaged, and feet hip-width distance apart.

Next, while keeping your left foot planted in the ground, raise your right leg off the ground so that you form a 90-degree angle at the hip.

Then, hold for a count of five to ten, then slowly lower the leg.

Switch sides to complete one rep.

Perform five reps to complete one set.

For more challenges, use weight or slowly flex your hip forward.

Additional resource – Clamshells for runners

Hip Strengthening Exercises For Runners – The Conclusion

There you have it!

The above hip strengthening exercises should make a huge part of your resistance training if you’re serious about improving performance and preventing injury.

Whatever you do, make sure to stay within your fitness level the entire time. Doing regular exercises to strengthen your hips is a good thing, but overdoing it is not the way to go.

Please feel free to leave your comments and questions in the section below.

In the meantime, thank you for reading my post.

Keep Running Strong

David D.

The Stronger Runner: Unveiling the Secrets of Effective Strength Training

Attention, runners seeking to unleash their inner powerhouse! Get ready to dive headfirst into the ultimate treasure trove of weight training wisdom specifically designed to elevate your running game!

In this post, I’m about to unravel the full-fledged guide that will revolutionize the way you approach weight training. Get ready to embark on a journey thatwill take you from novice to seasoned pro, leaving no stone unturned.

By the time we cross the finish line, your mind will be filled with an abundance of knowledge.

Brace yourself to discover the incredible benefits of weightlifting tailored to runners like yourself.

We’ll explore the latest cutting-edge research, unveiling the secrets behind strength training as the ultimate shield against those pesky injuries that threaten to derail your running dreams.

Sounds great?

Let’s get started.

What’s Strength Training?

Imagine yourself as a runner on a long-distance race. You’ve been training for months, but as you hit the halfway mark, you feel the fatigue setting in. Your muscles ache, your form starts to falter, and your pace slows down. But what if I told you that there’s a way to break through that plateau and reach your running goals faster? Enter strength training.

Strength training is the secret weapon for runners looking to improve their speed, efficiency, and endurance. It involves using external resistance, such as weights or resistance bands, to challenge your muscles to adapt and get stronger. And the benefits are not just limited to physical performance.

Research on Strength Training for runners And Injury Prevention

Studies have shown that weightlifting can reduce injury risks and fix muscle imbalances caused by the repetitive motion of running.

In fact, a study published by the National Strength & Conditioning Association found that weightlifting strengthens muscles and joints, leading to proper form, improved running time, and reduced injury risks. Another study published in the Journal of Strength and Conditioning revealed that exercises like squats and single-leg hops not only help reduce injury risks but also improve performance.

But that’s not all. Strength training can also help you burn more calories. Many runners turn to running as a means of weight loss, but as their bodies adapt, they start burning fewer calories. Incorporating strength training into your routine can help increase your lean muscle mass, which in turn boosts your body’s ability to shed more calories.

Run Faster

Resistance training puts stress on your body, forcing it to adapt to boost its ability to withstand the extra load.

Over time, with regular training, these stress-induced adaptations can have an enormous impact on your running speed, efficiency, and endurance.

So, for instance, the stronger your leg muscles get, the more force you can generate on each stride and the more distance you can travel on each foot strike.

Plus, stronger shoulders and arms are essential in increasing your speed and form efficiency.

Fix Muscle Imbalances

Running is one-directional action, meaning it works some muscles more than others, leading to the onset of muscle imbalances.

This places excessive pressure on ligaments and tendons, reducing stride efficiency, limiting running economy, and increasing the risks of injury.

Research shows that, often than not, many runners nagging issues, such as shin splints, runners knee, Achilles tendinitis, etc., stem from muscle imbalances.

With all that being said, the good news is, as little as six weeks of proper weight training can reduce, or completely alleviate knee pain, according to a study.

Burns More Calories

Many runners took up running as means of weight loss. And as my experience dictates, running is helpful for shedding the pounds—especially during the first few months of training.

That said, once your body gets used to running (especially if you lack variety in your training), it’ll start to burn fewer calories.

For that reason, you might want to back up your running for weight loss training with a well-rounded and intense strength training schedule.

As a matter of fact, by increasing your lean muscle mass, you’ll boost your body’s ability to shed more calories.

Build Stronger Bones

In addition to helping you prevent injury, improve running performance, build muscle, and lose fat, weight lifting also improves bone density.

This can be typically measured using a DEXA scan, which is similar to an x-ray but more thorough.

But how does strength training make bones stronger?

It’s actually quite simple.

By stressing your bones, strength training can increase bone density, therefore, reducing the risks of bone-related issues.

That’s it.

This is especially the case for us runners as stress fractures—a common overuse injury—is every runner’s worst nightmare.

For the full scope on a stress fracture, check my full guide here.

Strong Arms

Have you ever tried running without using your arms? It’s not a good idea.

Swinging your arms faster automatically increases your step frequency, and vice versa.

We pump our arms as we run, and the stronger our arms are, the more powerful the forward drive, and the faster we move forward.

That’s no secret.

Be More Efficient

Running doesn’t just involve relying on the leg for forward propulsion, but we’re also using our core, back, arms, shoulders, and chest to balance and improve efficiency.

When the legs are exhausted, we use the upper body more because of the kinetic chain.

Everything is working together in one interlocked system.

Better Form

Your running form can ultimately make or break you as a runner.

That’s why if you can’t hold proper form throughout your runs, you’ll never reach your full running potential.

Improving your upper body strength can make your posture more efficient and help you keep a consistent form, especially as fatigue starts to set in.

Fortunately, improving upper-body strength can upgrade your technique and help you keep consistent form.

Signs of a bad form may include:

  • Rounding the shoulders,
  • Shrugging the shoulder near the ears,
  • Holding on to tension,
  • Swinging the arms too widely,
  • Holding a cell phone or water bottle,

But when you keep your posture straight, head held high, shoulder loose and square, and your arms functioning properly, you’ll ensure that you won’t get hurt.

What’s more?

A stronger upper body, especially a well-developed back, and core muscles help protect your spine from the impact of running.

Additional Resource – Here’s another strength training program for runners to check out

It Requires Little Time

You don’t need to train like an elite bodybuilder or CrossFitter to reap the benefits of strength training.

In fact, all you need is no more than a 30- to 45-minute session two to three times per week, to reap the benefits of strength training as a runner.

Here is the full guide on starting strength training for runners.

Note: Strength training should be performed according to your fitness level and training goals.

For that reason, you need to opt for a well-rounded strength program designed specifically to meet your running needs.

This is why a sprinter strength routine can look so different from a long-distance athlete program.

Are you looking for a way to take your running to the next level? Look no further than strength training! And the best part? It doesn’t require hours upon hours of time in the gym. In fact, all you need is 30-45 minutes, two to three times per week, to start seeing the benefits of strength training as a runner.

Muscles Anatomy

Your body is a complicated piece of machinery, and muscles are a huge part of what’s driving it.

According to experts, five main groups of muscles are used while running—quads, hamstrings, hip flexors, gluteals, and calf muscles.

Your body also uses secondary muscles to keep you going forward, such as the core and upper body muscles. 

These typically provide stability throughout the gait cycle and improve speed and running economy.

The Quadriceps

The quadriceps, the muscles on the front of the thighs, are in charge of forward leg movement.  Also known as the quads, these run from the hips down to the kneecap and are composed of four muscles:

  • The Vastus Medialis,
  • Intermedius,
  • Lateralus, and
  • Rectus Femoris.

The Hamstrings

The hamstrings consist of a single large tendon located at the back of the thigh and play a key role in standing, walking, or running, as well as hip extension and knee flexion. These muscles are comprised of

  • The biceps femoris,
  • The Semitendinosus, and
  • The Semimembranosus.

The Gluteals

Consisting of a group of three muscles, the gluteals are located in the buttocks and are responsible for hip extension, posture and proper knee alignment, and leg stability. The glutes consist of the following:

  • The Gluteus Maximus,
  • The Gluteus medius, and
  • The Gluteus minimus.

The Hip Flexors

The hip flexors, while smaller in size, play a crucial role in our everyday movements. From walking to squatting, these muscles are constantly activated, which is why it’s important to keep them strong and flexible.

Tight hip flexors can lead to discomfort and even pain, while a strong and healthy hip flexor group can improve posture, stability, and overall athletic performance.

The Calves

Located on the back of the lower leg, just below the knees, the calves are another supercritical running muscles.

Why? These provide spring in your step, extend and flex each foot as you land and push off, and maintain lower body balance and coordination. The calves consist of:

  • The large gastrocnemius, or outer calf; and
  • The smaller soleus, or inner calf.

Research has shown that incorporating exercises that specifically target these muscle groups can have a significant impact on running performance. In a study published in the Journal of Strength and Conditioning Research, researchers found that a six-week strength training program targeting the glutes and hip flexors led to improved running economy and performance in female distance runners.

The Best Strength Exercises For Runners

Try adding this powerful routine to your easy or cross-training days. The workout will take roughly 45 minutes to complete and can be done twice a week. That’s a small amount of time to invest in a big payoff.

I’ve also provided you with YouTube tutorials showing you exactly how to do each exercise. Proper form is king! For a better grip, try out this liquid chalk.

1. Planks

One of the core exercises that ended up becoming a staple in my training was the plank.

It’s one of the best core exercises because it targets every aspect of the core, as well as the lower back and shoulders.

Proper Form

  1. Lie on your stomach
  2. Prop yourself up on your elbow with feet slightly apart, toes hip distance apart with shoulders directly above the elbows
  3. Aim to straighten your whole body, so it’s forming a straight line from the top of your head to your heels.
  4. While engaging your core and keeping a straight line (your butt should not stick up in the air), hold the position for 30 seconds to a full minute.

As you get stronger, you should gradually add more time.

You can also make it more challenging for yourself by placing a weight plate on your back.

2. Russian Twists

The Russian twist targets a bunch of muscles, including the abs, obliques, lower back and your hamstrings as well.

You can use a medicine ball or a plate for extra resistance.

Proper Form

  1. Grab a weight, then lie on your back with your upper legs perpendicular to the floor and your knees bent at a 90-degree angle.
  2. Hold the weight in front of your body while keeping your back straight.
  3. Twist your torso as far as you can to the right side, tap the weight on the floor, then reverse your motion to the other side.

3. Overhead Lunges

The overhead lunge targets the whole body—quadriceps, hamstrings, glutes, shoulders and core muscles.

It’s the perfect fit-it-all-in move, so it’s great if you’re pressed for time.

It also increases flexibility and mobility in your hip flexors.

Proper Form

  1. Hold a pair of dumbbells or a weighted bar above your shoulder, with your arms straight, and your elbow locked, feet shoulder-width apart, and knees slightly bent.
  2. While holding the weight directly overhead, step forward with your right leg into a deep lunge position, bending both your knees.
  3. Return to the starting position and repeat on the other side. That’s one repetition.

Do 12 steps on each side to complete one set.

4. Air Squats

Bodyweight squats are some of the best strength exercises you can do.  These should be an integral part in any runner’s strength-oriented training program.

Squats target a lot of running-specific muscles.

They are convenient to do, and can easily be added to your post-run routine.

Proper Form

  1. Stand with your feet hip-distance apart with your toes facing forward
  2. With your arms out in front at shoulder height, squat down by bending your knees, leaning forward at the waist while keeping your back flat and your knees tracking behind your toes
  3. Squat until your thighs are parallel to the ground.
  4. Press up through your heels to return to starting position.

5. Single-Leg Deadlifts

The single-leg deadlift is the ideal slow-burn move for building strong hamstrings and glutes, which can help you tackle steep hills with ease.

This exercise can also improve your balance and boost your stability.

Proper Form

https://www.youtube.com/watch?v=mG-Stc3c7N0

  1. Start by holding two dumbbells or a weighted bar in front of your body.
  2. While standing tall, shift your weight to your right foot
  3. Hinge forward by slightly bending your right knee and raising your left foot behind you in line with your torso, letting the weights hang down
  4. Lower the weight while keeping it close to the tops of the legs.
  5. Once the weight goes past your knee, pause, then return to the starting position.

6. The Pistol

Also known as the one-legged squat, the pistol is a powerful squat variation that builds strength and balance in your lower body.

If you have issues with lower body flexibility or mobility, use a chair or a bench for the assisted pistol option. That’s how I got pretty decent at doing pistols.

Proper Form

  1. Standing tall, balance on your right foot,
  2. Squat down by bending at the knee and sitting your hips back.
  3. Once your right knee is at about a 90-degree angle, push back up by extending your leg to starting position.s

7. Rotational Shoulder Press

This move is ideal for targeting your upper body muscles, with the emphasis on the shoulder and core muscles.

Proper Form

  1. While standing tall with your feet hip-width apart, hold a pair of dumbbells just outside your shoulders.
  2. As you press the weights up with your right hand, rotate your body to the right side.
  3. Lower the weights to your shoulder as you rotate back to the center, then rotate to the left as you press your left again upward this time.

weight training for runners


Weight Lifting For Runners  – The Conclusion

There you have it ! The above weight training for runners guidelines all you need to help you prevent overuse injuries and increase athletic performance without logging in more miles. The rest is up to you.

Please feel free to leave your comments and questions in the section below.

In the meantime thank you for reading my post

Keep Running Strong

David D.