How to Score Affordable Running Clothes and Save for the Extra Miles

plogging

Let’s face it – getting your hands on affordable running gear can sometimes feel like solving a Rubik’s Cube blindfolded. But guess what? It doesn’t have to be that way. In fact, I’ve got some insider secrets to share with you.

If you’re tired of feeling overcharged and want to find top-notch running gear that won’t drain your bank account, you’re in the right place. So, buckle up those running shoes because we’re about to dive into a world of budget-friendly athletic goodness.

Ready to score amazing deals on running shoes, snag stylish apparel without breaking the bank, and even save on race registrations? Well, let’s get this frugal running party started!

Where to Find Cheap Running Clothes

So, you want to score some affordable running clothes without emptying your wallet?

Well, you’re in luck! Here are some fantastic places to get your hands on budget-friendly activewear:

Old Navy:

The Old Navy Active line has a great selection of workout shirts, shorts, tops, and pants that won’t break the bank. And here’s a little secret: They often have sales with discounts ranging from 30 to 40 percent off! Clothes here typically range from $5 to $30 per item.

H&M:

If you’re looking for trendy yet budget-friendly activewear, H&M is your go-to. They offer stylish activewear items that work perfectly for your runs. Prices usually range from $10 to $50.

Macey’s:

Macey’s: Macey’s isn’t just a grocery store; they also offer exercise clothing like shorts, shirts, sports bras, and socks at budget-friendly prices. But here’s the kicker—they carry reputable shoe brands like Nike, Asics, Adidas, and Skechers! Keep an eye on their regular sales and consider signing up for their newsletter to stay updated on promos and deals. Prices for clothing typically range from $5 to $30.

GAP: 

GAP Fit, the activewear line by GAP, is another fantastic option for affordable activewear. They offer a wide variety of stylish and comfortable styles and make it easy to shop by the type of workout and intensity level. Prices here usually range from $10 to $30 per item.

Zappos: 

Zappos is a go-to destination for a wide range of activewear suitable for runners of all ages, genders, and sizes. What’s more, they offer an extensive selection of running shoes from well-known brands like Nike, Brooks, Asics, Hoka One One, and many others.

Zappos is known for providing free standard shipping on virtually all orders, and they don’t require a minimum purchase, making it a popular choice for online shoppers. When shopping here, you can expect prices to range from $10 to $30 per item.

Stick to Quality

Now, let’s talk about the importance of sticking to quality when buying your running gear.

When searching for the perfect workout attire, it’s tempting to go for something that looks amazing. However, durability is key. Nobody wants to spend their hard-earned money on a piece of clothing that falls apart after just a few runs. Quality gear should endure more than a single season.

Here are a few things to keep in mind to determine if your workout items are well-made:

  • Material: Opt for materials that are known for their durability, moisture-wicking properties, and comfort. Look for items with a good blend of synthetic and natural fibers.
  • Stitching: Check the stitching on seams. Reinforced stitching and flatlock seams are signs of quality construction.
  • Zippers and Fasteners: Ensure that zippers and fasteners are sturdy and functional.
  • Reviews: Read reviews and ratings from other shoppers to get an idea of a product’s quality and durability:

The Fabrics

Let’s dive deeper into what to look for when assessing the quality of running gear, focusing on fabrics and seams.

Here’s what to pay attention to.

  • Moisture-Wicking: Ensure that the fabric has moisture-wicking properties. This is crucial for keeping you dry and comfortable during your run. Natural wicking fabrics like bamboo and wool are great options, as are synthetics like Lycra and Polyester.
  • Specialized Fabrics: Look for specialized fabrics such as Coolmax and Supplex. These materials are designed to allow sweat to evaporate from your skin while preventing you from feeling overly sweaty and uncomfortable.
  • Check for Brittleness: Examine the fabric for any signs of brittleness, which can be a red flag for low-quality material. High-quality fabric should feel soft and durable.
  • Seam Quality: The stitching and seams of your running gear can reveal a lot about its quality:
  • Inspect the Seams: Carefully check the seams of the clothing. Well-stitched seams are one of the best indicators of high-quality construction.
  • The Pull Test: To assess seam strength, perform a “pull test.” Hold the fabric on both sides of a seam and gently pull. If you can see through the other side or notice any signs of fraying, it may indicate that the item was not sewn properly.

Stay Injury Free

Staying injury-free is not only crucial for your physical well-being but also for your financial health, as medical bills can quickly add up in case of an injury. Here are some tips to prevent injuries and their associated costs:

  • Listen to Your Body: Your body is like your personal coach. It knows when to push and when to rest. Pay attention to any pain, discomfort, or signs of overtraining. Rest when needed to avoid more severe injuries.
  • Progress Slowly: Avoid sudden increases in your training intensity or mileage. The 10 percent rule is a good guideline – never increase your weekly mileage by more than 10 percent from the previous week. Gradual progression allows your body to adapt and reduce the risk of injury.
  • Stretch and Foam Roll: Incorporate regular stretching and foam rolling into your routine. This helps improve flexibility, range of motion, and muscle suppleness, reducing the likelihood of muscle strains or injuries.
  • Cross-Train: Engage in cross-training activities, especially strength training and non-weight-bearing exercises. Research has shown that resistance training can help runners prevent injuries by strengthening muscles and improving overall fitness.
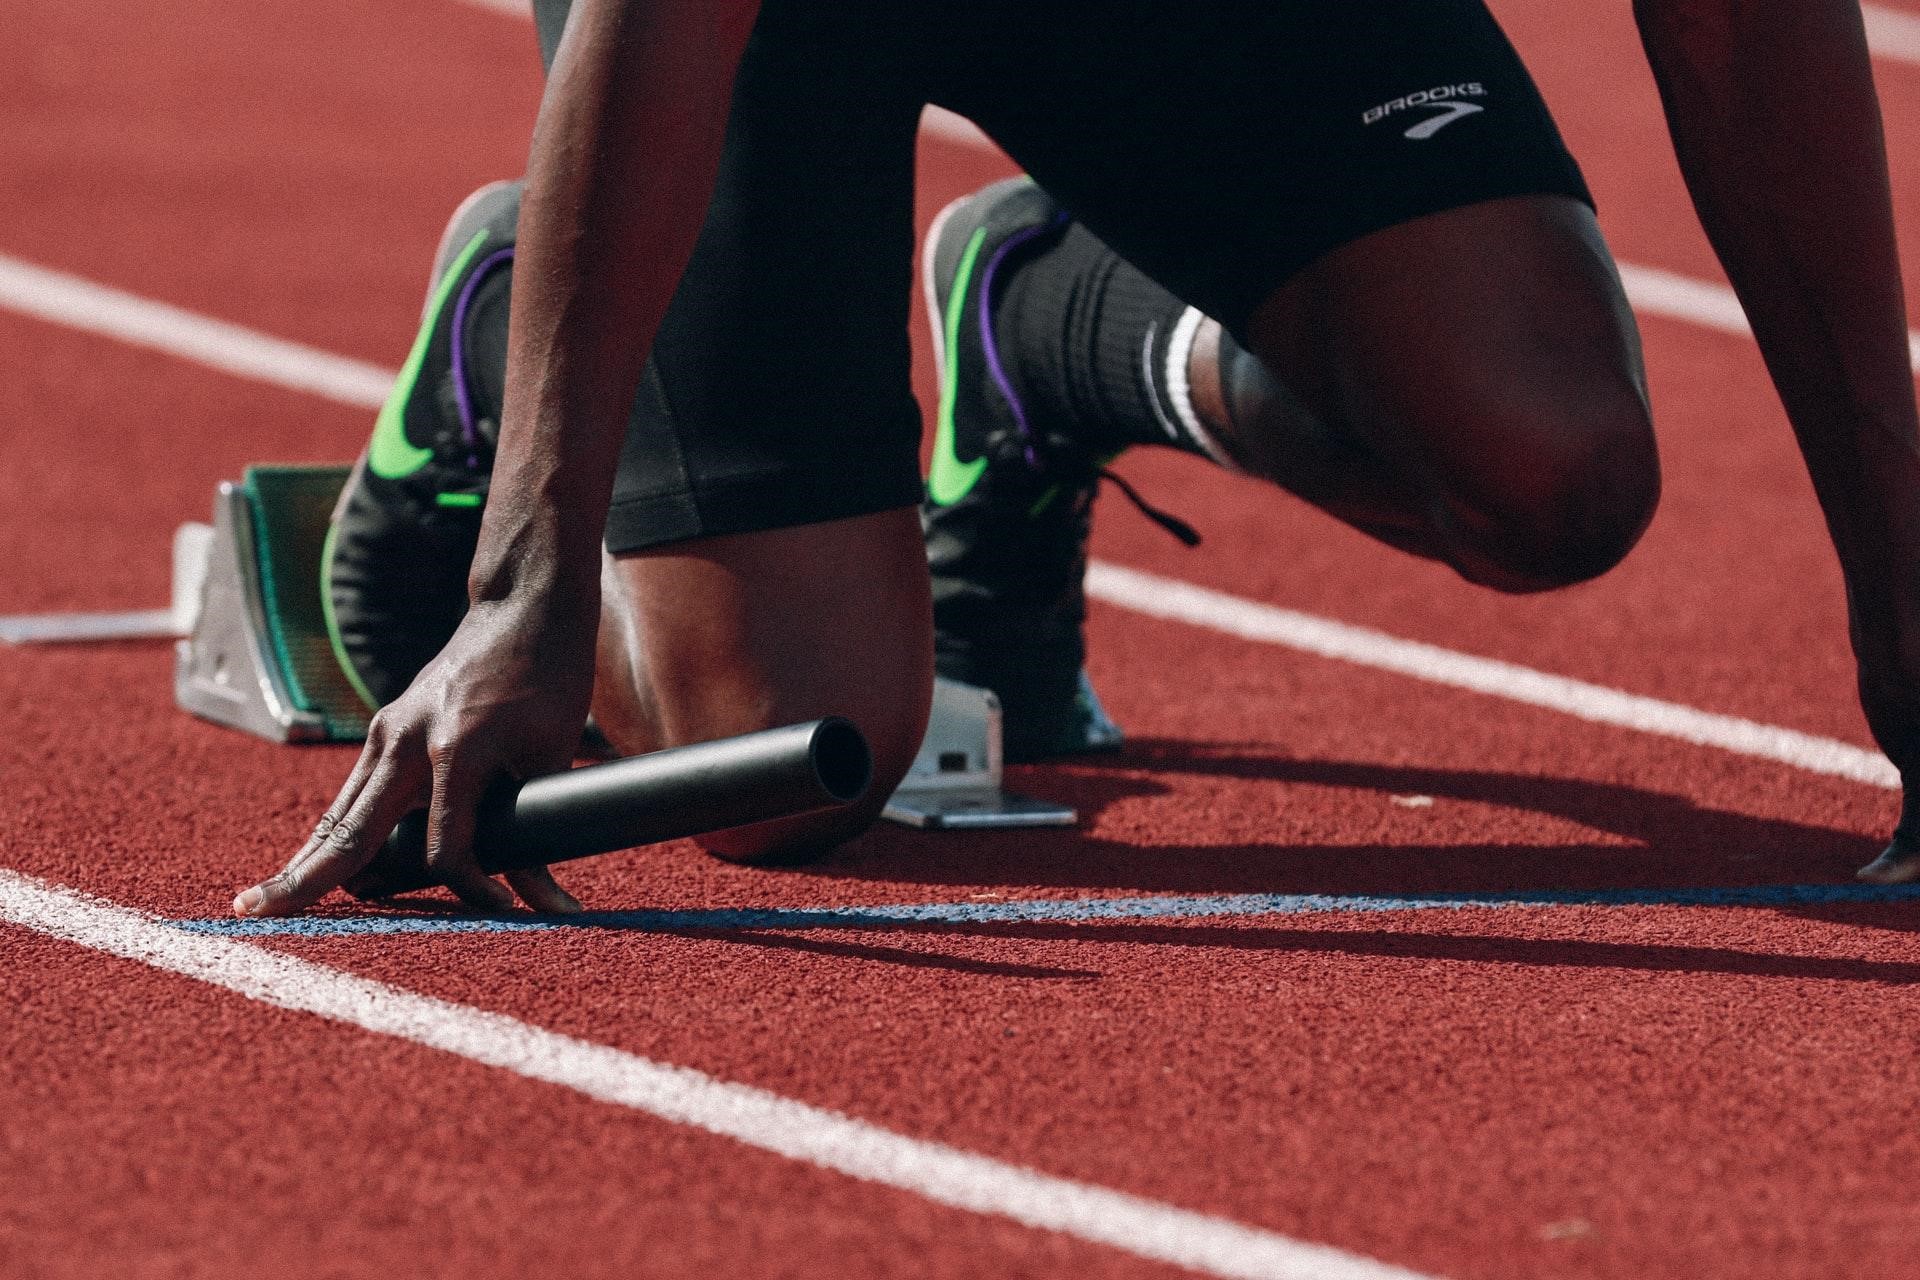
  • Proper Footwear: Invest in the right running shoes that suit your foot type and running style. Ill-fitting or worn-out shoes can contribute to injuries.
  • Warm-Up and Cool Down: Always warm up before your runs and cool down afterward. Proper warm-up and cool-down routines can prepare your muscles for exercise and aid in recovery.
  • Rest and Recovery: Adequate rest and recovery are essential for injury prevention. Ensure you get enough sleep and allow your body time to recover between intense workouts.
  • Nutrition: Maintain a balanced diet to support your overall health and muscle recovery. Proper nutrition can also help prevent injuries related to nutritional deficiencies.
  • Stay Hydrated: Dehydration can increase the risk of cramps and muscle injuries. Stay hydrated before, during, and after your runs.
  • Regular Check-Ups: Consider regular check-ups with a sports physician or physical therapist. They can identify potential issues and provide guidance on injury prevention.

For more, check these posts:

Cheap Running Gear – The Conclusion

There you have it! If you’re looking for cheap running gear, today’s measures and tips should help you get started on the right foot. The rest is just details.

Please feel free to leave your comments and questions in the section below.

In the meantime, thank you for dropping by.

Keep training strong

David D.

The Half Marathon Pace Chart You Need To Run Your Best Race

half marathon pace chart

So, you’ve got a half marathon on the horizon, and you’re ready to conquer it. But wait, before you lace up those running shoes, you need to get acquainted with my half-marathon pace chart.

Why is this important, you ask? Well, one of the first questions that pops into every runner’s mind when preparing for a half marathon is, “What’s my target finish time?” To answer that burning question and help you set realistic goals, I’ve put together a comprehensive guide that not only explains the marathon distance but also provides you with the insights you need to tackle this challenge head-on.

The Importance of Running Charts

Understanding your race pace and sticking to it on race day is absolutely vital for your training progress and ultimate success in the race.

Pace charts serve a valuable purpose for runners of all levels, from beginners to elites. Whether you’re gearing up for your very first half marathon, aiming to set a personal record, or embarking on a long training run, knowing your pace is the key to better running and racing.

Here’s why you should embrace pace charts:

  • Race Pace Guidance: Pace charts help you determine the pace you need to maintain to achieve a specific finish time for your half marathon. For instance, you can easily find out what pace is required to complete the race in 1 hour and 30 minutes.
  • Training Insights: These charts also assist you in determining your ideal running pace for training runs. For example, you can figure out how fast you should be running during a 10-mile long run. Often recommended to be run one to two minutes slower than your goal half marathon pace.
  • Visual Impact: Pace charts offer a visual representation of how even a small change in pace can significantly affect your half marathon finish time. Just 15 seconds per mile could be the difference between finishing in under 1 hour and 40 minutes or slightly over that mark.

So, whether you’re a rookie or a seasoned runner, embracing pace charts can be a game-changer in your half-marathon journey.

Additional Source – Check this treadmill pace chart

The Importance of Finding Rhythm

In the world of half marathons, maintaining a consistent and steady pace throughout the race is a surefire strategy for running your best and achieving a personal record.

Attempting to start the race faster than your goal pace is a common mistake that often results in a significant drop in performance during the later miles of the race. Trust me, that’s something you want to avoid.

As a rule of thumb, it’s crucial to establish your target pace right from the start and stick to it. You might consider picking up the pace around mile 10 or 11, but only if you’re feeling exceptionally strong and confident.

Presenting The Half Marathon Chart

Now, let’s dive into the half marathon pace chart and why it’s a valuable tool for your race preparation.

This chart presents average paces per mile or kilometer, providing you with a clear understanding of the pace required to achieve your desired finish time. It’s a fantastic resource for setting and reaching your race goals.

Here’s how it works: The chart lists various finish times and their corresponding per-mile or per-kilometer paces. So, if you have a specific goal finish time in mind, you can easily identify the pace you need to maintain.

For example, if you aim to complete a half marathon in 1 hour and 30 minutes, the chart will show you that you need to run at a pace of 6 minutes and 52 seconds per mile.

This information is incredibly valuable because it allows you to tailor your training program to meet your goal. Whether you’re aiming for a specific finish time or looking to fine-tune your pace with 30-second increments, this chart has you covered.

However, it’s essential to keep in mind that this half marathon pace chart doesn’t take into account specific race conditions like hills, weather, or terrain. So, be prepared to adjust your pace accordingly on race day to account for these factors.

THE CHART

Adjusting for Race Conditions

While the pace chart provides an essential framework for your half marathon timing, it’s imperative to understand that actual race conditions can significantly impact your pace. These conditions might require adjustments to your strategy on the big day. Let’s delve into some common race conditions and how they can affect your pace:

Hills:

  • Uphill: Running uphill is more strenuous, and it’s natural for your pace to slow down. Instead of focusing on maintaining a constant speed, concentrate on keeping a steady effort. Your heart rate will be a good indicator. Use shorter strides and lean slightly into the hill.
  • Downhill: This might feel easier, but it can strain your legs. Maintain control and use gravity to your advantage, allowing for a slight increase in speed but ensuring it’s sustainable.

Weather:

  • Hot and Humid: These conditions can be especially challenging. It’s crucial to stay hydrated and perhaps even slow down your expected pace to prevent overheating.
  • Cold Weather: It might take longer to warm up, so consider an extended pre-race warm-up. Once running, the cold can actually be conducive to faster paces but watch for icy conditions.
  • Windy Conditions: A strong headwind can slow you down, much like running uphill. Conversely, a tailwind can aid your pace. Adjust your effort based on the wind’s direction and strength.

Terrain:

  • Trail vs. Road: If your half marathon is on a trail, expect a slower pace due to the uneven ground, potential obstacles, and softer surface. Trail shoes can provide better grip and protection.
  • Tarmac vs. Grass: Running on grass might be softer on the joints but can also be more energy-consuming than running on tarmac.

Tips for Adapting to Race Conditions:

  • Reconnaissance: If possible, train on the actual race route or similar terrains. Knowing what to expect can help you adjust your strategy accordingly.
  • Listen to Your Body: Always pay attention to how you feel during the race. If conditions are tough, it’s okay to slow down. The key is to maintain a steady effort throughout.
  • Adjust Expectations: Your goal finish time is just that – a goal. Based on race day conditions, it might be wise to adjust expectations and focus on completing the race safely and enjoyably.

Remember, every race is unique, and while pace charts provide valuable guidance, being adaptable and understanding the impact of race conditions will ensure a successful and enjoyable half-marathon experience.

Additional resources:

What Are Pre-Workout Supplements? Do I Need One?

race warm-up

Pre-workout supplements are all the rage nowadays. However, it can be a bit tricky for a newcomer to figure out what a pre-workout supplement even is. Pre-workouts have replaced the pre-workout meal with an array of vitamins, supplements, minerals, and nutrients that many people swear by nowadays.

But what exactly are pre-workouts, and why do they come in so many shapes and sizes? What kind of ingredients are included in a pre-workout supplement? These are the questions that we aim to answer today.

What Exactly Is a Pre-Workout Supplement?

A pre-workout is pretty much exactly what it sounds like: something that you take before your workout. The idea behind a pre-workout is that the vitamins and minerals included in the supplement will help improve your workout.

Pre-workouts can come in a variety of different forms. The most common is a powder that you can mix into a drink. However, you can also find pre-workouts in these forms:

  • Capsules containing a number of different vitamins and minerals
  • Chewable pre-workout supplements
  • Canned or bottled drinks with various ingredients
  • ‘Shaker bottles’ which contain a pre-workout that can be mixed into the drink by shaking it

No matter what form you get your pre-workout supplement in, though, you can expect that it’s going to have the same general idea behind it: helping you work out harder, better, faster, and stronger.

That said, the chances of you finding the same pre-workout recipe from a different company is pretty slim. There are hundreds, if not thousands of different ingredients out there that can help improve your workout. Each company has their own recipe and their own ingredients.

A lot of pre-workout supplements use proprietary blends, as well, which means that they won’t even tell you what’s in the supplement. If you’re interested in trying one of these products then you’ll have to rely on the reviews of other people to decide whether or not the supplement will work for you.

We advise reading more about the best pre workout supplements.

What’s In a Pre-Workout Supplement?

As mentioned above, the ingredients in a pre-workout supplement tend to vary from company to company. There are a lot of different things that might be included in a pre-workout supplement.

Carbs or No Carbs?

Some pre-workout supplements focus on supplying you with a healthy dose of carbs. Carbs are an energy source, and healthy carbs are a great way to get powered up before a workout. With enough carbs, you’ll feel like you’re ready to rock the gym.

However, not everyone likes to rely on carbs as an energy source. The keto diet fad has shown many people that fat is a viable energy source, in many ways better and more sustainable than carbs. For that reason (as well as a few others) some pre-workout formulas make a point of being low-carb or carb-free.

Stimulants?

Some pre-workout supplements focus on getting you to jack up your output. One of the ways to do this is by putting stimulants in the pre-workout supplement. These stimulants will kick in as you begin your workout, allowing you to work harder at the gym.

  • Caffeine is the most common stimulant used in pre-workouts (and throughout the world). Caffeine stimulates your nervous system and makes it easier to do heavy workouts. However, it can also keep you awake at night – so avoid using a pre-workout with caffeine too late in the day.
  • Some pre-workout supplements contain other natural stimulants like ginseng or guarana. These aren’t as powerful as caffeine but they also aren’t going to keep you up at night. They also don’t strain your immune system.

Amino acids?

A lot of pre-workout supplements contain amino acids. Amino acids are the building blocks of protein. They can also have interesting effects on their own. Some common amino acids used in pre-workout supplements include:

  • L-arginine, a popular amino acid supplement that is known to enhance blood flow throughout the body. This brings more blood and oxygen to your muscles so you can work them harder.
  • L-ornithine, which is supposed to kick in your fight-or-flight response and improve your performance by causing you to push harder.
  • L-citrulline, which has similar effects as L-arginine and actually turns into L-arginine once you digest it.

Nitric oxide?

If you don’t know what nitric oxide is, it’s not too late to learn. This is a compound that your body produces. It’s used to help dilate your blood vessels so that you can get oxygen and blood traveling through your body. It’s extremely important for athletes and bodybuilders because it allows your muscles to get the supplies they need to work properly.

Many pre-workout supplements contain supplements that help to boost levels of nitric oxide, such as beetroot powder or certain amino acids.

Do I Need a Pre-Workout Supplement?

The reality is that nobody needs a pre-workout supplement. There’s some debate as to whether or not they’re good in the long-haul. Pre-workouts are great for pushing your body past its natural limit.

This benefit is also the downfall of the pre-workout: you’re pushing yourself harder than you would be able to otherwise. The jury is out as to whether or not this is a safe or healthy idea in the long-run.

However, in the short-term, there’s no denying that pre-workouts can improve your workouts. You’ll probably notice that your endurance goes up, you get more results from your workouts, and you’re able to tone up much quicker than you would be able to without the pre-workout.

Whether or not you want these benefits is up to you. Some prefer the challenge of seeing how strong they can get working within the limits of their body. Others prefer to push it up to the next level by using pre-workouts.

Conclusion

Pre-workout supplements vary from company to company, but ultimately they’re all designed to help you work out better. If you think a pre-workout might help you, don’t hesitate to start using one and see how it feels.

Note – This is A guest post by Huge Supplements .

How To Properly Warm Up For The 5K, 10K, Half Marathon, & The Full Marathon

race warm-up

Whether you’re gearing up for a sprint, a marathon, or anything in between, the secret to unlocking your best race lies in the often-underestimated realm of the warm-up.

Let’s face the truth, shall we? The warm-up isn’t just a cherry on top of your race day preparations—it’s the secret sauce that can make or break your performance! Yet, it’s astonishingly one of the most overlooked aspects of pre-race readiness.

The best part? Your warm-up doesn’t need to be a complicated puzzle. You just need the right key to unlock your full potential. And that’s precisely what today’s post is all about!

No matter your race distance or terrain, this warm-up routine is your trusty companion in gearing up for the big event. Inside the article, we’ll explore:

  • Why the warm-up is an absolute game-changer
  • The array of benefits it bestows upon you
  • Tailored warm-up strategies for various race scenarios
  • And a whole lot more nuggets of wisdom!

So, let’s lace up those shoes and dive headfirst into the world of race-day readiness!

The Golden Rule of Race Warm-Ups

Overall, the shorter the race, the longer and more thorough the warm-up needs to be.

The length and intensity of your race warm-up depend on your race distance and fitness level. Overall, warm-up seeds are more intense for shorter distances, such as a 5K,  and less strenuous for longer races, such as the marathon.

That’s why you should tailor your warm-up to the type and distance of the race.

For example, if you want to run your best 5K race, you’ll need to be at race speed from the start.

What’s more?

I’d recommend that you keep it similar to the same way you warm up during training. Don’t try anything new on race day.

Additional resource – Guide to pacing strategies for different races

The Benefits Of  A Race Warm-up

A proper warm-up prepares your body for the physical demands of the race ahead. It gradually transitions your body from a resting state to an active, race-ready state, minimizing the shock to your system when the race starts.

Here’s the science behind it:

  • Increase Core Temperature: Warming up elevates your core body temperature, which helps heat your muscles. This temperature increase enhances your metabolism and speeds up the energy supply to your muscles, priming them for better performance.
  • Improve Muscle Performance: A warm-up leads to an increase in heart rate, which in turn elevates muscle temperature. As a result, the viscosity or resistance within your muscles decreases. This improved muscle dynamics enhances muscle contraction and relaxation, ultimately improving your athletic performance.

Prevents Injury

A warm-up helps increase tissue and muscle flexibility. When your muscles are warm and pliable, they can better handle the stress of intense movements. This improved flexibility reduces the likelihood of muscle strains or tears.

Improving Heart Function

A warm-up increases cardiac output, which is the amount of blood your heart pumps per minute. This heightened cardiac output ensures that your muscles receive an adequate supply of oxygen-rich blood during the race.

Prime Up Cardio Output

Warm-ups also increase your respiratory minute volume, which is the amount of air you can breathe in one minute. This helps improve your VO2 max, the maximum amount of oxygen your body can utilize during exercise.

For more on the importance of warming up for running performance and injury prevention, check the following sources;

Don’t Wait For Too Long

Although, as you can Cleary see, warm-ups have a lot to offer, as a rule, you shouldn’t wait too long between your warm-up and race start time. Or else, you risk losing some of the benefits of the warm-up.

As a general rule, complete the warm-up 5 to 10 minutes before the race starts.

I know.

This is not always possible due to corrals, crowds, wave start, bathroom wait, etc.

But at least pay attention to this and have a backup plan.

I’d recommend finding space away from the crowds and then performing your warm-up.

Next, head to the start line 5 to 10 minutes before the signal. You should also pay attention not to warm up too hard or too long before the race. This, again, can be counterproductive.

A long, intense warm-up may cause fatigue, negatively impacting your race performance.

Stuck in a line? Then do butt kicks and high knees in line.

Additional guide – Here’s how to breathe when running in the cold

Warming Up for The 5K

A 5K is an intense race. Therefore, it calls for an intense(r) warm-up. You’ll want to be 100 percent at the start line to run at your goal race pace.

So, how should you warm up?

Depends on your fitness level and racing goals.

If this is your first 5K or you are joining a fun run (where speed doesn’t matter), performing a light 10 to 15-minute warm-up before the start should be enough.

I’d recommend walking briskly or jogging for 5 to 10 minutes to gradually raise your heart rate and circulation.

Then, perform 5 minutes of dynamic exercises to get your muscles and joints ready and release any tightness.

By then, your body will be warm and set to go.

But, if you’re looking to get the most out of the race or racing hard, you’ll want to prepare your body for top speed ahead of the start.

Start with a 5-minute walk to wake your body up, then run one to two miles at an easy and conversational pace. During the last half of the running warm-up, add four to six 30-second accelerations at your race pace. The stride-outs should feel comfortably hard.

Next, do a series of dynamic stretches, performing each movement for 30 to 45 seconds. The more, the merrier.

Some of the best moves include:

Leg Swings

Walking Lunges

Butt Kicks

High Knees

Inchworms

What’s more?

Try to complete your warm-up as close to the start of the race as you can. This might be easier in smaller events and more trying in larger ones. But at least do your best.

Have to get to the start line earlier? Then do your warm-up but then keep moving in the corral by running in place, doing butt kicks or knee lifts. Keep it active. This will help keep your body warm, especially on colder days.

A beginner runner? Try this couch to 5K plan on the treadmill.

Additional Resource – What’s A Good 5K Time For A Beginner.

Warming Up for The 10K

The 10K is another distance that will require you to start hard and fast if you want to run your best.

Run for 10 minutes at an easy pace. It shouldn’t feel hard at all. Then do 4 to 6 strides at your 10K pace to get your body primed for fast speed.

Sure, I know it sounds counterintuitive to run before a race but trust me, accelerations and strides are helpful—just make sure not to do too much.

Next, perform a dynamic stretching routine, doing plenty of high knees, running in place, butt kicks, and lunges. These should help you loosen up for the race.

Just keep in mind that static stretching—holding a strong stretch for 30 seconds or longer—is not recommended before racing, as research has shown that it can increase injury risk and hinder performance.

Going to be standing around before the race starts? Then you should stay warm and shed clothes just before the start (if possible).

I’d recommend starting your warm-up 30 minutes before the start time. This will give you enough time to warm up and get to the race’s start line. (Here’s the full guide to the couch to 10K plan.)

Additional Resource – Here’s how to run a 10K in one hour

Warming Up For The Half Marathon

Finding the right recipe mix between energy conservation and preparation is tricky regarding the half marathon.

If this is your first half marathon, keep your warm-up simple since you’re trying to make it to the finish line and earn that medal instead of chasing a PR.

I recommend keeping it to a 5-minute brisk walk and some easy jogging for a few minutes to get your body loose. Then, save your energy for the race course.

Trying to PR and competing in a half marathon? Then run 2 miles and include a few race pace intervals later in the warm-up.

Is it a cold-weather race? Then, jump into a hot shower before the race to help warm up your body before you head to the race venue.

Remember that you need to conserve your energy, so don’t perform too intensely of a warm-up and burn out before the start line. Ten minutes is enough, so plan it around the start line.

Additional Reading – Half marathon pace chart

Warming Up for The Marathon

I hate to state the obvious, but the full marathon is another event in which you’ll want to minimize your warm-up time and conserve your energy.

You have plenty of time to get into your race pace during a marathon. However, burning off a lot of energy in the warm-up can be detrimental to your race performance.

Again, how you warm up depends on your fitness level and race goal.

In it for a PR? A 10-minute brisk walk, a few dynamic stretches, and yoga-like movements to focus on your breathing and how your body feels in the movement.

Remember that when it comes to the marathon, you still have plenty of miles—21.2 miles, to be precise—to get into your race pace and settle. So don’t feel ice you have to rush or expend too much energy that hinders your performance during the race.

Additional resources:

Race Warm-up Guide – The Conclusion

There you have it! If you’re serious about running your best event, you should always start off with the right race warm-up. The rest is just details.

Please feel free to leave your comments and questions in the section below.

In the meantime, thank you for dropping by.

Keep training strong.

The Benefits of Ice Baths For Runners

ice baths for runners

If you’re into fitness, you shouldn’t be surprised to see runners—and athletes across all disciplines—jumping into an ice bath after a hard workout.

Also known as cryotherapy or cold water immersion, this “super cold” practice is touted to help reduce muscle pain and soreness.

In this article, I’ll touch on some of the main benefits ice baths offer and how to make the most out of polar practice.

What is An Ice Bath

An ice bath is exactly what it sounds like: an immersion in super cold water. Unlike relaxing baths that you might take for stress and relaxation purposes, ice baths are swift, therapeutic immersions in water filled with ice cubes.

Ice baths are used by athletes from various sports as part of a post-exercise recovery route but can be helpful any time of the day. More on this later.

What Do Ice Baths Do

As long as you’re healthy and don’t have any chronic conditions, ice baths may have a lot to offer.

It cannot only help you relax and feel better but can also help you feel better, enhance your mood and even improve your performance.

Let’s explore some of the benefits of ice baths for runners.

Reduce Core Body Temperature

I hate to state the obvious, but an ice bath can bring your temperature down like nothing else.

This is especially the case if you just worked yourself into a sweat.

Ice baths are a common therapeutic tool for marathon runners and other athletes experiencing heat injuries. The ice can be lifesaving as it has been used to treat serious conditions such as heat stroke.

But be careful. Taking the cold plunge for too long can reduce your core body temperature too much, which is dangerous.

Reduce The Impact of Heat & Humidity

Whether you just finished a long and hard run or are in the middle of summer, cooling off fast can be crucial in many situations.

An ice bath can cool you off quickly—and much more effectively than other methods.

What’s more?

A cold plunge before a long race in heat or humidity can reduce your core body temperature to enhance performance.

Don’t take my word for it.

A review of 19 studies has reported that jumping in cold water cooled off overheated subjects twice as fast as otherwise. But this is only possible if much of the skin is immersed.

Soothe Sore Muscles

After a hard run, plugging into cold water can rely in sore and burning muscles. The cold constricts your blood vessels which slows circulation and soothes some of that soreness and swelling in your muscles post-exercise.

Again, don’t take me for word for it. Some research has shown that cold water immersion limits muscle soreness post-exercise.

According to a study that looked into volleyball, players reported that cold baths benefit muscle recovery in those who practiced it post-workout over 16 days

That’s not the whole story.

Another study found that immersion in cold water can lower inflammation and muscle soreness after intense exercise. The researchers had 15 subjects plunge into cold water at 50 degrees F (10 degrees C) for 15 minutes after their workout. The control group was kept at room temperature.

In the end, the researchers found that the cold water was effective at suppressing the inflammatory markers neopterin two hours following an intensive bout of exercise. That’s a good thing if you ask me.

Simply spending 15 minutes in cold water can help reduce muscle soreness following a workout rather than just resting at room temperature.

However, remember that you’re only using the cold to soothe post-workout aches and not actual pain.

Additional resource – Should I run Today? 

Reduce Inflammation

Inflammation is our body’s reaction to injury and is characterized by redness, pain, and swelling. Again, the cold has been shown to help with this.

The theory is cold water constrict your blood vessel by decreasing the local temperature after exercise, which can help reduce swelling and inflammatory response. This, in turn, helps you recover faster.

It almost functions like a drug-free anesthetic.

Runners with inflammatory conditions, such as arthritis, will find great relief in cold water immersion as it helps reduce discomfort and swelling from flare-ups post-run.

Just keep in mind that some people get better results with heat, so it’s a matter of finding out what feels best for your body at the end of the day.

Additional resource – Running with a labral tear

Improve your Focus

Another benefit of cold water immersion is that it snaps your brain into focus.

Although plunging into cold water may seem like the last thing to do, studies have found some surprising benefits for brain power and mental health.

Like breath work, meditation, and mindfulness, cold water immersion is another efficient practice for your cortisol levels, stress, and mental state.

Additional Resource – Here’s the full guide lower abdominal pain while running.

Trains Your Vagus Nerve

Cold water immersion can also benefit your nervous system.

Ice baths may help you train your vague nerve, which is linked with the parasympathetic nervous system and training.

The vague nerve is a long nerve that extends from the brain to the stomach and helps us deal with stressful situations.

Improved Vagus nerve function improves mental function, cognition, and digestion, reducing anxiety and so much more.

Again, don’t take my word for it.

Research has reported that cold stimulation activates the Vagus nerve, especially in the neck region. Therefore, reducing heart rate and likely soothing stress.

What’s more?

A review of different research papers has reported that cold showers have an antidepressant effect. Another review of hydrotherapy treatments found that cold exposure can improve the capacity and function of the certain nervous system (CNS). A functional CNS can help you feel better and sleep better.

Although more research needs to be conducted to get the full picture of the link between ice baths and mental conditions, jumping into cold water every now and then might help your mood.

Additional resource – Sore quads after running

The Risks of Ice Baths

Although cold water immersion are beneficial, just like anything else, there are some side effects.

For starters, jumping into icy water feels very cold—especially the first few times you do this.

In addition to this superficial “discomfort,” ice baths’ main downside applies to those with high blood pressure or any preexisting disease.

The immersion in ice constricts blood vessels and slows down circulation in your body.

This can be unsafe if you have circulation problems which can put you at risk for cardiac arrest or stroke.

What’s more?

You may also risk hypothermia, especially if submerged in icy water.

Additional resource  – Here’s the full guide to aqua jogging

Who shouldn’t try ice baths?

Staying in an ice bath for too long can also cause hypothermia, which occurs when your body temperature drops too low.

That’s why it’s important to use a timer and keep your ice baths brief. And remember to pay attention to your body. You should get out of an ice bath immediately if you start shivering uncontrollably or notice skin color changes.

Though cold water plunges are likely a risk for everyone, some people may be especially vulnerable. That’s why it’s key to ensure it’s safe for you before jumping into cold water.

Avoid ice bathing if you have:

  • Type 1 or 2 diabetes
  • A cardiovascular condition or high blood pressure
  • Peripheral neuropathy.
  • Poor circulation
  • An open wound
  • Venous stasis.
  • Cold agglutinin disease.
  • Conditions that increase your cold sensitivity
  • Another preexisting condition limits your body’s ability to regulate body temperature or blood pressure.

Not sure if ice baths are a good idea? Get the green light from your doctor first.

The Cold Isn’t A Fix For Serious  Injuries

Although cold water immersion can help soothes your aches and pains, it’s not the right option if you’re suffering from something more serious, like a fracture, ligament tear, or a chronic overuse injury.

That’s why you need to ensure you’re not dealing with an underlying issue.

Additional Resource – Your Guide to Groin Strains While Running

Tips For Taking An Ice Bath

Ready to take the plunge? Then there are a few things to make sure you make the most out of it.

How do you make an ice bath? 

You can throw together an ice bath by failing your bathtub halfway with cold water and then tossing in a few large bags of commercial ice.

You can also use a smaller container to zone in on a specific part of your body, such as your calf.

The Temperature

The temperature of the ice should usually be roughly 50 to 59 degrees Fahrenheit. Likewise, the water shouldn’t be colder than 50 degrees Fahrenheit.

Timing is everything

Spending a long time submerged in cold water can have negative consequences.  So, limit your cold exposure to no more than 10 minutes. Start with 5 minutes and slowly work your way up.

It may not seem that cold, but you’ll feel the chill.

Also, use a bath thermometer to ensure you’re doing it right.

Additional Resource – Can You Run With An Abdominal Strain?

Exposure

To make the most out of the cold bath, immerse your entire body in the cold water. This should have the most positive impact on blood vessel contraction.

If this is your first few times, make sure to first expose your feet and lower legs. Then, as you get used to the cold, move toward your chest and upper body.

Bath Timing

The sooner you jump into the cold water following a hard run or workout, the better the effect.

This helps you target your muscles while they’re still in the healing process. Otherwise, some inflammatory and recovery processes may have already run their course if you wait an hour or longer.

Additional resource – Common running injuries

How Long To Ice Bath

If this is your first time, keep it quick. I’d recommend starting with no more than five minutes, then max out at 10.

If this is your first time trying ice therapy, most experts recommend starting much warmer—maybe at around 58 to 62 Degrees.  Just keep in mind that it’s cold for a bath.

What’s more?

Research also tells us that ice baths have little to nothing extra to offer after a few minutes. Furthermore, research has suggested that after around three minutes, extra benefits taper off.

Additional resource –  Prevent Sunburn in runners

Conclusion

Although more research is needed to look into the effects of cold baths on performance, recovery, and overall health, the current scientific consensus is favorable.

How Long Is A Half Marathon?

How Long Is A Half Marathon?

Wondering how long a half marathon is? Then you’ve come to the right place.

A half marathon is exactly 13.1 miles. There you have it. The answer you seek.

For many, a half marathon is a challenging distance. It’s also one of the most popular distances around the world.

If this is your first time running a half marathon, or you are just looking for some motivation to run your 11th marathon, this article has got you covered.

More specifically, I’ll delve into

  • How many miles in a half marathon
  • What’s a good time for a half marathon
  • How long it takes beginners to run a half marathon
  • Half marathon training tips
  • And so much more

How Long Is A Half Marathon?

Before you sign up for a half marathon and start training, it’s a good idea to consider how long a half marathon is so that you can evaluate your current fitness skill and learn more about training for the race.

So, how many miles is a half marathon exactly?

The official half marathon distance is exactly 13.10 miles or 21.09 kilometers in length.

A half marathon is also:

  • 5 Feet
  • 5 Meters
  • 5 Yards
  • 830610 Inches

As you can already tell, the half marathon length is quite precise. This strangely precise distance forms the full marathon length, which has a long history. Here’s the full guide to how long is a marathon.

Putting the distance Into Perspective

Let’s examine the half marathon length in another way.

For example, the standard length of most sports is 400-meter long. So, you’ll need to run around 53 laps to cover a half-marathon distance. Again, yes, that’s a lot of laps.

How Many Steps in A half Marathon

Overall, your height and gender impact the most your stride length.

Thanks to these two variables, stride length varies from one runner to under and among sexes.

Overall, the taller you’re, the longer your stride length, so you can cover more ground on each walking step and/or running stride. By the same token, those who aren’t that tall will have shorter stride lengths, so they’ll have more spites to cover the same distance as a taller person when walking or running.

On average, you can take up to 20,000 steps to run a half marathon. So yes, that’s a lot of steps.

But How Does That Stack up?

Surveys show that the average American takes around 4,000 steps per day.

This means you would take around five times as many spites as the average person in The United States.

There are around 22,000 walking in a half marathon when an average of all sexes and heights run at a pace of around 9 to 10 minutes per mile.

Half Marathons Are Common

Half marathons are attracting more and more runners.  Thanks to this rise in popularity, events are everywhere, as more and more keep popping up across every corner of the globe.

Not only that, but half marathon races are also easy to find and are a fantastic excuse to travel to a new city. Almost every city will nowadays host at least one of these races every year.

Of course, don’t take my word for it.

Research released by Run Repeat reported that half marathons boast the highest numbers of participants, with over two million athletes in 2018.

The main reason is that up HM training isn’t as physically demanding nor time-consuming as training for the full marathon.

Additional resource – How to use running pace charts

Is Running a Half Marathon Hard?

It depends on the person. If you’re not used to endurance training, logging 13.1 miles in one go can be daunting.

That’s why you should follow the right HM training plan to help you build endurance and strength, regardless of your current fitness level.

With the right plan, everything is “relatively”’ easy. At least consider something within your reach.

If you’re a beginner, start with the couch to a half marathon plan. During this plan, you start with easier sessions that consist of a mix of walking and running; then, you build up your weekly volume over long weeks up to the event.

This allows you to gradually build your endurance without risking injury or burnout.

What’s more?

If you’ve just finished running a 5K or 10K race and still looking for more challenges, signing up for a half marathon is the exact thing you need.

how many miles is a half marathon

How Long It Takes to Finish a Half Marathon

How long it takes you to complete a half marathon will depend on several variables, such as your age, fitness level, gender, running experience, race course, and temperature.

Most beginners may complete it in two to three hours. However, opting for the walk/run method might take longer.

In most races, the cut-off time for completing the half marathon is around 3.5 to 4 hours, depending on the race.

So as long you can walk fast and throw in the occasional jog, you can finish before the cut-off time.

Here are some estimates.

  • Beginners Runners – The average half marathon time is around two to three hours.
  • Intermediate runners – The average half marathon time is around one hour 40 minutes to two hours.
  • Advanced runners – The average half marathon is around one hour, 10 to one hour 40 minutes.

Additional Resource  – Running for time Vs. distance

Your First Half Marathon Goal

If this is your first very first half marathon, set a goal of making it to the finish line instead of finishing in a certain time.  Depending on your first endurance level,  training plan, and race course, you might expect to reach the finish line between two to three hours.

How Long It Takes To Train For a Half Marathon

Most half-marathon training programs last between 12 to 16 weeks. At the very least, it will take you three months to race, but again, it depends on your starting option.

Beginner runners must follow a beginner half marathon plan—such as the couch to half marathon plan—that lasts no less than 16 weeks to be race ready.

However, if you’re more of an intermediate runner, expect to train for 12 to 16 weeks for the distance.

Last but not least, advanced runners will follow a plan that’s 12 weeks long.

However, keep in mind that these are just suggestions. Your current fitness level is the deciding factor.

Tips For Beginners

Training for a half marathon isn’t just about lacing your shoes and running as far as you can a few times a week. Instead, you need to follow a sensible plan that helps you build endurance without risking injury or burnout.

Consult Your Doctor

Before you sign up for your first race, get the green light from your healthcare provider first.

They can confirm whether your new adventure aligns with any medical conditions or physical limitations you might have.

Sign Up In Advance

As a beginner, you might need to train for 16 weeks—or longer—to be ready for the race.

So, sign up for a race in advance and start training accordingly. Don’t sign up for a race on a whim.

Fortunately, you can find a variety of half-marathon plans designed for different experience levels.

Choose A Good Plan

To run a half marathon, you’ll need to start with a training schedule that suits your fitness level, running experience, and goals.

Choosing a plan that will fit in with your lifestyle is also important. For example, you’re simply wasting your time if you opt for a plan that requires you to run five times a week if you cannot commit.

Get The Right Shoes

I cannot emphasize this enough, but proper running shoes are key for efficient training and racing.

Therefore, as a rule, choose a pair of running shoes that fit well and provide plenty of support. Head to the nearest running specialty store and ask the staff to help find the perfect pair.

Expect to pay around $100 for a decent pair. Other than time, getting proper shoes is the most important investment in your half-marathon training.

Build Up Your Mileage

Avoid doing too much too soon.

During the early stages of your training, focus on running a few miles a week and then slowly increase your weekly load.

I’d recommend following the 10 percent rule, in which you increase weekly mileage by no more than 10 percent from one week to the next.

Check this guide for the full scope.

Cross Train

Spending more time running is the best way to improve your running performance. Practice makes perfect and all that.

But that’s no excuse to dismiss the impact of proper cross-training on your running performance.

Non-running exercises such as strength training, biking, yoga, and swimming can help improve your overall fitness without adding running-related stress to your body.

Come Up With A Race Strategy

Once you have signed up for a half marathon, it’s time to devise a race strategy.

Start by determining your race pace, then break down the distance into manageable chunks.

For example, if you’re aiming to finish the race in two hours, this is the strategy for you

Keep It Up

Training for a half marathon can be challenging, so you must find ways to help you stay motivated for the long haul.

So what should you do?

I’d also recommend that you make your goals public and seek support from other like-minded individuals—and runners. Peer pressure can do wonders for your motivation.

Additional resource – How long is a 100-mile race?

How Long Is A Half Marathon? – The Conclusion

There you have it! If you’re curious about how long is a half marathon as well as how to train for one, then today’s post should get you started on the right foot. The rest is just details.

Please feel free to leave your comments and questions below.

Thank you for dropping by.

Your Guide To The Single-Leg Bridge Exercise – Benefits & Technique

Guide To The Single-Leg Bridge Exercise

Do you run regularly but are often plagued with an injury? Then you should add the single-leg bridge exercise to your training plan.

The single-leg bridge is an awesome exercise to isolate and strengthen your hip extensors—key running muscles (more on later).

You don’t need any special equipment for this exercise, so it can be performed virtually anytime, anywhere.

This makes the perfect fit for lower body exercises performed at the gym, in your bedroom, or even while traveling.

But how do you make the most out of it? That’s where today’s post comes in handy. In this article, I’ll be diving into the following:

  • What the single-leg bridge
  • The benefit of the single-leg glute bridge
  • Who should be doing the single-leg glute bride
  • How to do the single-leg glute bridge
  • And so much more

What is the Single-Leg Glute Bridge

A form of advanced bridge exercise, this single-leg glute bridge is a fantastic exercise for targeting your posterior chain.

Consisting of a unilateral variation, the Single-Leg Glute Bridge targets muscle groups throughout your body, like the hip flexors, hamstrings, lower back muscles, and gluteal muscles, including the gluteus maximus, gluteus Medius, and gluteus minimums.

Without strong running muscles, you risk putting undue stress on your joints and other body parts. This not only hinders performance but can also cause injury.

The Benefits of Single-Leg Glute Bridge

the Single-Leg Glute Bridge is a unilateral exercise.

Unilateral training—or training one side at a time—works well to prevent and fix muscle imbalances. By performing unilateral exercises, you can build your muscles more evenly, which leads to better functionality and athletic power.  

In addition, this exercise can also be used as a strength test, helping to determine whether you’re at risk of certain injuries, especially a hamstring injury.

What’s more?

If you’re suffering from back, whether because you spend a long time in sitting positions or simply because of bad posture, strengthening your glutes may help relieve your pain.

Guess which exercise targets your glutes like nothing else? Of course, the Single-Leg Glute Bridge.

For more on the benefits of the single-leg bridge exercise, check the following resources:

Additional Resource – Your Guide to Groin Strains While Running

How to Perform The Single Glute Bridge

Start by laying on your back, hands by your sides, feet flat on the floor, with knees bent.

While engaging your core and glute muscles to support your body and pressing your left heel into the floor, kick your right foot up, extending your leg fully, so it is around 45 degrees on the ground.

While performing the single-leg bridge, keep your glutes and core engaged, toes pointed up. As you raise your hips, breathe and press down into the ground through your heel.

Hold the upward position for a moment, then lower your hoops slowly while keeping your right leg extended to return to the starting position.

Repeat 8 to 12 times, then switch sides to complete one set.

Perform reps and sets based on your strength level to maintain proper form throughout all sets and repetitions.

Additional Guide – Leg workouts for runners

Making The Single-Leg Bridge More Challenging – Variations

You can perform the single-leg bridge in many ways to match your skill level and goals.

Let’s look at some variation

Two-Leg Bridge

If you cannot perform the single-leg glute bridge, consider making it easier by sticking to the classic variation, in which you keep both feet on the floor bridge while performing the hip raise.

This should help you build enough strength and endurance to progress to the one-leg variation.

Additional resource – Clamshells for runners

Longer Hold

Instead of holding the top movement for a moment, try to keep your leg up for longer.

This puts even more pressure on your hips while further activating your core. I’d recommend starting with a 10-second hold, then working your way up to 45-second holds before returning to the starting position.

Additional Resource – 13 Exercises to improve running

Bridge March

Another variation that will have you panting for air is the bridge march. This exercise teaches you to stabilize your pelvis as your legs move and is ideal for runners and preventing low back pain.

Here’s how to perform the bridge march variation.

Begin by lying face-up, knees bent, and arms folded across your chest. Place your weight on your heels, with the toes slightly off the ground. Engage your reglues and core to bridge up.

Next,  press your heels into the ground and lift your hips up until your shoulders and knees are aligned, then raise your right leg toward your chest until your hip is at 90 degrees.

Hold for a moment, lower your right foot to the ground, and lift the left leg while keeping your hips raised throughout the movement.

Keep alternating your legs for the rest of the exercise. And do not let your hips sage as you march.

Additional reading – How to Avoid Running Injury

Debunking the Myths: The True Story of Lactic Acid in Running

lactic acid while running

Looking for the best ways to manage lactic acid while running? Then you’ve come to the right place.

Here’s the truth.  

We’ve all been there, haven’t we? Pushing through those final miles, teeth gritted, as an unforgiving wave of fiery sensation conquers our muscles.

Common lore would have us believe that lactic acid is the sneaky mischief-maker behind this discomfort. And, like dedicated detectives, athletes and runners from every corner of the globe have committed to hunting down strategies to mitigate this infamous burn. East, west, north, south—you name it, they’ve searched it!

But here’s the truth.

Lactic acid has been accused, tried, and convicted in the court of athletic opinion without a fair trial. Yep, it turns out we might owe lactic acid an apology for labeling it the “bad guy” in our painful post-run pains.

In today’s post, we’ll be diving into the true secrets behind lactic acid and its often-misunderstood role in our athletic endeavors.

If you’ve ever whispered a small curse towards lactic acid (we’ve all done it!), this is the place to uncover the truths, debunk the myths, and perhaps shed light on an unexpected hero in our workout saga!

Ready to leap into this adventure and unearth the mysteries of muscle burn together? Let’s hit the ground running!

What is lactic acid?

Lactic acid isn’t just a random substance your body produces; it’s pivotal for our well-being. It emerges during the breakdown of glucose through a process called glycolysis. Think of glycolysis as your body’s backup generator. When your muscles can’t get enough oxygen (especially during high-intensity exercises like sprinting or heavy weight lifting), glycolysis kicks in, producing ATP energy without oxygen.

Science backs this up.

Research out of the Journal of Physiology found that during high-intensity exercises, our muscles prefer to generate energy through this anaerobic (without oxygen) pathway.

That’s right!

The more you push yourself, the more lactic acid your body churns out.

The Process Of Lactic Acid Production

Have you ever wondered how our bodies keep up with demanding workouts? One word: energy. And a key player in this energy game is lactic acid.

Let’s break down this fascinating process without getting bogged down in the science jargon.

From Dinner Plate to Muscle Power

When you munch on that delicious bowl of pasta, your body gets to work. The carbohydrates you consume are broken down into glucose, ready to fuel your muscles. Through a process called glycolysis, this glucose is transformed into an energy molecule known as adenosine triphosphate (ATP).

Oxygen’s Role

Now, here’s where things get interesting. The amount of ATP produced hinges largely on one factor: oxygen. Simply put, the more oxygen available, the more ATP produced.

High Intensity = Low Oxygen

Imagine you’re running a 100m dash, giving it your all. Your body demands high power in a snap. This task falls on your fast-twitch muscle fibers. But there’s a catch – these fibers aren’t the best at using oxygen.

So, even though your muscles scream for more ATP during these intense moments, there isn’t enough oxygen around to produce it efficiently.

Enter Anaerobic Glycolysis

This is where your body pulls off a clever trick. When oxygen is scarce, it shifts to anaerobic glycolysis. In this process, glucose is not fully broken down in the oxygen-dependent pathways. Instead, it turns into lactate. This shift allows the muscles to keep working, albeit for a short duration.

Additional Resource – Your Guide to Groin Strains While Running

Does Lactic Acid Make Your Muscles Burn When While Running & Exercising?

For years, if you asked anyone why our muscles burn during an intense workout, they’d point the finger at lactic acid. And honestly, it seemed like a convincing culprit. But science, ever-evolving and enlightening, has revealed that the story isn’t so simple.

The Lactic Acid Misconception

Most of us have been there: pushing hard during a workout, and then WHAM, a burning sensation in the muscles that make us want to stop. It was traditionally believed that this discomfort was caused by a buildup of lactic acid. The thinking went something like this: the harder you exercise, the more lactic acid your muscles produce, and this excess lactic acid causes the burn.

But Here’s the Plot Twist

The truth is, lactic acid is not the villain in this tale. In fact, when your body produces lactic acid, it quickly splits into its constituent parts: a lactate ion and a hydrogen ion.

The real mischief maker? Those hydrogen ions.

Let me explain.

Hydrogen Ions Are The Real Villains

Research has turned the tables on the old belief. While lactic acid does play a role in the process, it’s not the direct cause of the burn. When we exercise, our bodies produce lactate, which splits into lactate ions and hydrogen ions. As the intensity of the exercise grows, these hydrogen ions accumulate faster than our body can eliminate them. This excess of hydrogen ions makes the cellular environment more acidic, and voila!

That’s the familiar burning sensation you feel during a particularly grueling set of squats or that final sprint.

Lactic Acid’s Brief Existence

Here’s an interesting tidbit: technically speaking, lactic acid doesn’t really ‘hang out’ in our bodies. The moment it’s produced, it splits due to the alkaline environment of our blood. Our blood’s pH, which usually stays between 7.35 and 7.45, is not acidic enough to maintain lactic acid in its complete form.

Don’t take my word for it.

Lactic acid is created when a hydron atom bonds with the lactate molecule. It’s specifically a blend of a positive hydrogen ion and a negative lactate ion. However, researchers have discovered that lactic acid as a molecule cannot exist in the body in its complete form since the pH of the human body is too high.

Additional resource – Here’s how much water a runner should drink

But what about post-exercise muscle soreness?

Delayed Onset Muscle Soreness, or DOMS for short, is the kind of muscle soreness that sets in a day or so after exercise. It’s different from the acute type of soreness you feel during or immediately after a workout.

Why Does DOMS Happen?

There are several theories about what causes DOMS, but the most widely accepted explanation is the one related to muscle microtrauma:

When we push we muscles harder than usual, it results in tiny tears in the muscle fibers. This microdamage triggers inflammation as the body tries to repair and protect the area. Inflammation, in turn, leads to swelling and soreness.

Eccentric exercises, or the lengthening phase of a movement (like when you’re lowering a weight during a bicep curl or going downhill while running), can cause more significant muscle damage, leading to more pronounced DOMS. That’s why if you incorporate a new exercise with lots of eccentric action, you might find yourself wincing when you sit down or climb stairs the next day!

Additional resource – Running with a labral tear


How To Properly Choose Running Belts

run commute

If you often run, especially if you train for a longer race such as the marathon, odds are a running belt will help you. Choosing a proper running belt is just as crucial as good running shoes.

Fortunately, there’s a belt for every type of runner, and with some research, you’ll be able to find a proper belt that doesn’t chafe or bounce while logging the miles.

In today’s post, I’ll explain the importance of running a hydration belt and a few things you need to consider when choosing one.

What Are Hydration Belts?

A running belt is a must-have item for runners who need something to keep their bits and pieces. Most running belts are specifically designed for the activity by reducing the risk of bouncing and chafing, which often comes with high-impact activity.

Runners belts are a convenient, comfortable, and hands-free way to carry your running essentials.

These belts strap onto your waist with the capacity to hold one to four water bottles, depending on the brand.

In addition, these belts allow you to carry your keys, phone, and even water one run while keeping your hands and pockets free.

Although the running market is flooded with these belts, most are similar. They’re made of various materials, have several compartments, and come in various sizes depending on the runner’s needs.

And don’t worry. You can find lots of styles and storage options that fit your need.

Now that you know a thing or two about running belts, let’s learn how to choose a good one.

Additional resource – Strava for runners

Tips For Choosing A Running Belt

Choosing a new running may seem overwhelming, thanks to the abundance of choices on the market. So with hundreds and hundreds of models and brands, how do you know which running belt is best for you? Which features should you look for?

Worry no more.

Consider the following points before buying your next (or first) running belt.

The Right Fit

To get the right fit, the belt has to be positioned low with the pouch at the front at the widest part of your hips. Start by measuring your hips before making sure you find the right-sized belt.

I’d recommend a belt with an adjustable strap. This allows you to adjust the belt.

Choose a belt that can be pulled firmly around your waist so it lies flat against your lower back. This helps limit the amount if moves during running.

You should also choose one with a stretchable elastic band so it can be adjusted for a comfortable and snug fit.

Additional resource – Prescription Glasses for runners

Grippers and Bounce

Another feature to seek is silicone grippers. Why? Running belts that feature silicone grippers on the inside are less bouncy.

What’s more?

Check if the belt’s design is evenly distributed, so there is zero to little interference while you run.  When the belt is ergonomically designed, it’s less likely to cause chafing.

Additional Resource – Your Guide To Runners Nipples

Water Capacity

Depending on how long you plan to run, you may need more water. Overall, the longer you run, the more water you’ll need. Endurance athletes will need more water than recreational 5K runners.

Different running belts have different water-holding capacities. Some allow one big bottle, some allow for 2 to 4 bottles, some allow just one small one to be held, and some brands feature tailed water bladder.

Additional resource – Here’s how much water a runner should drink

Hydration Capacity

Taking enough water to drink while running will reduce your risk of dehydration, fatigue, and heat stroke.

How much fluid you need during a run depends on how long you plan to run and your hydration needs, but overall, you may need more or less space for water bottles on your running belt.

The water bottle can be divided into three types:

  • A water pouch with just one bottle
  • A fully loaded running belt with one or two bottles of 12 and 16 ounces capacity, respectively.
  • A running belt with a holster for your own water bottle of up to 20 ounces capacity.

Regardless of your choice, ensure the water bottle is easy to access and use. It should also come with a silicone mouthpiece and a quick-flow spout. You should also make sure that you can slide the bottle in and out of the holsters in a way that won’t interfere with your run or spill water on yourself.

Additional Resource – Prevent chafing when running

Weight of The Running Belt

This shouldn’t be a surprise, but carrying a heavy load, especially when running for an extended period, can impact your running performance.

Instead, choose the lightest running belt—as long it meets your need. Less load improves running efficiency. Thus, you’ll be able to comfortably run farther and faster. That’s a good thing if you ask me.

Need a lot of water on the run? Then a heavy belt could drastically change your running pattern.

Additional Resource – What’s the best temperature for running?

Materials

Another thing to look for is the right material. Make sure to that material is comfortable while strapped onto you. This is important to ensure no excessive build-up of sweat.

Overall, I’d recommend Neoprene fabric as it is elastic, lightweight, and less bulky than other options.

Training in rainy weather? Go for fabrics that are water-resistance to protect your valuables. Keep in mind that belts with stitches or zippers can be water-proof.

Choose a belt designed from a water-resistant material.  Neoprene is a good option since it’s water-resistant and breathable, stretchy, lightweight, and durable.

Though you might tuck your t-shirt under your running belt, if the fabric isn’t breathable, it can still cause chafing and discomfort.

Pay Attention To Pouch Size

The pouch is a key feature to consider when choosing a running belt.

Consider the size of your essentials, too. For example, you might carry a bigger smartphone than the standard size. Therefore, you’ll need a bigger size or one with an extra phone pocket.

In other words, the pouch size depends on what you intend to carry with you. But, whatever you choose, ensure that that belt can sit comfortably against your back.

Running Belt and Gender

Most running belts are unisex—men and women can use them.

However, some running bets may offer gender-specific features that can help you along the mile more comfortably. Some are designed to be better suited for female runners and more male-specific.

Consider The Extra

Some running belt features are added extra to fit your running needs. Others let you personalize them to your own needs.

Some of the things to consider include the following:

  • Integrated bib toggles for racing
  • Sunglasses pouch
  • Bottle holster add-on
  • Reflective details for extra visibility
  • Luminous color options
  • Loops for energy gel packets
  • Interior pocket
  • Separate case for a phone

Choose Running Belts – The Conclusion

There you have it! If you’re looking for the complete guide to running belts then today’s post has you covered. The rest is just details.

Please feel free to leave your comments and questions in the section below.

Thank you for dropping by.

Conquering the Sahara: Inside the Grit and Glory of the Marathon Des Sables

For those seeking the ultimate test of endurance, the Marathon Des Sables is a race like no other. Often regarded as the toughest ultra-marathon in the world, it’s not for the faint of heart.

Imagine six grueling days of running, covering a staggering 156 miles. You’ll navigate through unforgiving dunes, scorching salt plains, and rugged hills. The catch? You must carry everything you need to survive throughout the race.

The Marathon Des Sables is legendary in the realm of extreme sports.

In this article, we’ll delve into what makes this event so remarkable and what it takes to embark on this epic journey.

If you’re ready to test your limits and embrace the adventurer within, read on to discover what conquering the Marathon Des Sables entails.

What is The Marathon Des Sables

The Marathon Des Sables, also known as the Marathon of Sands or MDS, is a renowned ultra-distance race considered one of the toughest footraces in the world. This extraordinary event takes place in the Sahara Desert of Morocco, an extremely inhospitable environment.

Here’s what makes the Marathon Des Sables so challenging:

  • Distance: The race spans over 250 kilometers (approximately 155 miles) and is completed in six days. Participants face six stages of varying distances, ranging from 21 kilometers to a grueling 82 kilometers per day.
  • Self-Supported: One of the distinctive features of MDS is that it’s a self-supported race. This means participants are responsible for carrying all their supplies, including food, clothing, and sleeping gear, throughout the race. There are no external race crews to assist with these essentials.
  • Harsh Environment: The Sahara Desert presents a harsh and unforgiving environment. Daytime temperatures can soar up to 45 degrees Celsius (113 degrees Fahrenheit), while nighttime temperatures drop to below 10 degrees Celsius (50 degrees Fahrenheit).
  • Varied Terrain: Runners navigate through a challenging terrain that includes rocky plains and massive sand dunes. The shifting sands and challenging landscapes make each day’s run a unique test of endurance.
  • Ultramarathon Format: MDS is an ultramarathon event, which means participants are required to cover distances that far exceed those of a traditional marathon.
  • Multi-Day Race: The race is not a one-day event but a multi-day endeavor with six consecutive racing days and a rest day. This extended format adds to the physical and mental demands placed on participants.

Despite these extreme challenges, the Marathon Des Sables attracts runners and walkers from around the world who are drawn to the ultimate test of human endurance in one of the world’s most iconic deserts.

Additional resource – Marathon pace chart

The Difficulties of Running The Marathon of Sands

Running the Marathon Des Sables is an incredibly demanding feat, and participants face a multitude of difficulties during this extreme race:

  • Elevation Changes: The race route includes near-vertical rocky ascents with over 1,000 meters of elevation gain. These steep climbs are physically demanding and require a great deal of endurance.
  • Physical Toll: The grueling conditions take a toll on participants’ bodies. Feet can blister, swell, crack, and bleed as runners log miles in the harsh desert environment. This physical strain can lead to a high rate of injuries and discomfort.
  • High Dropout Rate: Due to the extreme nature of the race, it’s not uncommon for a significant percentage of participants, around 30 to 40 percent, to drop out before reaching the finish line. The Marathon Des Sables is known for being a challenging race that tests the limits of endurance.
  • Wildlife: The Sahara Desert is home to various wildlife, including over 20 species of snakes and ten scorpions, some of which are venomous. While these creatures tend to be more active at night, participants must still be cautious.

Additional Reading – Here’s your guide to obstacle race course training.

The Rules of Marathon Des Sables

The Marathon Des Sables (MDS) is governed by a set of rules and regulations to ensure the safety and fairness of the race.

Here are some key rules and aspects of the race:

  • Race Stages: The MDS consists of six stages, with five of them being competitive stages where participants are timed. The final stage is a non-competitive charity stage meant for enjoyment.
  • Self-Sufficiency: One of the defining features of the MDS is self-sufficiency. Participants are required to carry everything they need for the race on their backs, except the water provided by the race organizers. This includes their own gear, food, camping materials, and survival tools.
  • Navigation: Runners must navigate the course using the provided maps and checkpoints. GPS devices and external assistance are not allowed.
  • Safety Equipment: Participants are required to carry safety equipment, including a distress flare, a venom pump, a compass, and a whistle.
  • Medical Checkpoints: There are medical checkpoints along the course where participants’ vital signs and health conditions are monitored. If a participant is deemed medically unfit to continue, they may be withdrawn from the race.
  • Environmental Respect: Runners must respect the environment and follow Leave No Trace principles. Any littering or damage to the desert environment is strictly prohibited.
  • Camp Regulations: Participants are expected to follow camp regulations, including adhering to designated camping areas and using the provided communal tents.
  • Race Etiquette: Respect for fellow competitors and race officials is essential. Unsportsmanlike conduct is not tolerated.
  • Drop Bags: Participants are allowed a limited number of drop bags at specified checkpoints for storing extra gear and supplies.
  • Mandatory Gear: There is a list of mandatory gear items that each participant must carry, including a backpack, sleeping bag, and signaling mirror, among others.
  • Disqualifications: Violating the rules or failing to meet mandatory requirements can result in time penalties or disqualification from the race.

Additional Guide – What’s The Fastest Marathon Time?

When Is The Marathon Des Sables

The Marathon Des Sables typically occurs during the first two and a half weeks of April each year, taking advantage of the springtime in the Sahara Desert.

For the 2023 event, the race is scheduled to run from April 21st to May 1st. This timing allows participants to experience the unique challenges of the desert environment while avoiding the extreme heat of the summer months.

What to Carry

Participants in the Marathon Des Sables are required to carry a backpack weighing around 14 to 36 pounds, and this weight includes their food (excluding water). The day before the race, the backpacks are checked for the necessary supplies, which include:

  • Backpack
  • Lighter
  • Topical disinfectant
  • Sleeping bag
  • Ten safety pins
  • Whistle
  • Signaling mirror
  • Head torch and a complete set of spare batteries
  • Anti-venom pump
  • 200 euros (currency)
  • One tube of sun cream
  • Compass, with 1° or 2° precision
  • Knife with a metal blade
  • One aluminum survival sheet
  • Identity card
  • An original medical certificate signed by a doctor
  • Original ECG and its tracing
  • Passport or ID card
  • Survival blanket

These items are essential for the participants’ safety and well-being during the challenging race through the Sahara Desert.

How Does The Marathon Des Sables Work?

The Marathon Des Sables is a challenging race that spans six stages over seven days, covering a total distance of approximately 156 miles or 250 kilometers.

Here’s how the event works:

  • Race Course: The exact race course is kept secret until a few weeks before the event. It changes each year, so participants do not know the terrain they will face in advance.
  • Stage Distances: For the first three days of the race, participants run the distance of a marathon each day, which is approximately 26.2 miles (42 kilometers) per day. These are competitive stages.
  • Long Stage: On day four, there is a “long stage” where participants cover a longer distance, roughly equivalent to a double marathon.
  • Rest Day: Day five serves as a rest day, providing participants with an opportunity to recover.
  • Final Stage: The race concludes with a final stage on day six, marking the end of the event.
  • Course Markings: The race course is marked with indicators approximately every 500 meters, ensuring that participants stay on course
  • Checkpoints: Checkpoints are strategically placed along the course, typically every five to nine miles. At these checkpoints, participants can check in, undergo medical checks, refill their water supplies, and dispose of trash.
  • Tent Accommodations: Participants stay in shared tents at designated campsites along the route. Each tent accommodates a group of runners.

Additional Resource – Here’s your guide to hydration running vests

How Long Does It Take to Run The Marathon Des Sables

The time it takes to complete the Marathon Des Sables varies significantly among participants due to factors such as terrain, weather conditions, and individual fitness levels.

Here are some approximate time frames based on official statistics:

  • Fastest Runners: The fastest runners in the race can complete the entire Marathon Des Sables in approximately 18 hours for men and around 24 hours for women.
  • Average Pace: On average, participants who are running competitively may complete the race with an average pace of around 7 minutes per mile.
  • Slower Paces: Slower participants or those who choose to walk parts of the course may take much longer, possibly more than 20 minutes per mile on average.

It’s important to note that these times are rough estimates, and individual performances can vary widely. The challenging conditions of the Sahara Desert make the race a true test of endurance, and many participants prioritize completing the race over achieving a specific time goal.

Additional resource – Here’s how to avoid a DNF in a race

How To Enter The Marathon Des Sables

Entering the Marathon Des Sables is a significant commitment, not only in terms of physical preparation but also financially.

Here are the steps to enter the race:

  • Registration: Visit the official Marathon Des Sables website and look for registration details. Registration typically opens well in advance of the race, so plan ahead.
  • Entry Fee: Be prepared to pay a substantial entry fee, which can vary from year to year but is generally quite high. As of the previous year, the cost was around 4,000 USD per person. This fee covers some aspects of the race, such as logistics and support.
  • Travel: While the fee may include travel from Europe to Morocco, it does not cover trans-Atlantic flights for participants from outside Europe. You will need to arrange and pay for your own flights to Europe and then to Morocco.
  • Required Kit: Participants are required to have specific gear and equipment for the race, including a sleeping bag, shoes, gaiters, stove, and more. This gear can add up to an additional cost of around 6,000 USD.
  • Training: Prepare yourself physically and mentally for the challenges of the race. Training for a multi-day ultramarathon in a desert environment is essential for your safety and success.
  • Visa and Travel Documents: Ensure you have the necessary travel documents, including a passport and any required visas for travel to Morocco.
  • Health and Medical Check: Complete any required medical checks and provide the necessary health documentation, including an original medical certificate signed by a doctor.
  • Logistics: Pay close attention to logistics and transportation details provided by the race organizers. Understand the race schedule and requirements for self-sufficiency during the event.
  • Safety and Preparation: Prioritize safety and adequate preparation. Familiarize yourself with the race rules, safety protocols, and desert survival techniques.
  • Fundraising: Some participants choose to fundraise for charity as part of their Marathon Des Sables experience. If you plan to do this, consider setting up a fundraising campaign.

Additional Resource – How Many Calories Should a Runner Eat

How to Sign Up

Signing up for the Marathon Des Sables involves the following steps:

Visit the Official Website: Go to the official Marathon Des Sables website that corresponds to your country of origin. The specific websites mentioned are:

For US and international residents: marathondessables.com

For UK residents: marathondessables.co.uk

Review Rules and Requirements: Thoroughly review the rules, requirements, and eligibility criteria for participating in the Marathon Des Sables. Ensure you meet all the prerequisites before proceeding with registration.

Complete Registration Forms: Fill out all the required registration forms and provide accurate information. These forms may include personal details, medical information, emergency contact information, and payment details.

Payment: Be prepared to make the necessary payment for your registration. Keep in mind that the entry fee for the Marathon Des Sables can be substantial, so ensure you have the required funds available.

Medical Certification: You will likely need to provide an original ECG (electrocardiogram) and a medical certificate signed by a doctor confirming your fitness to participate in the event.

Insurance: Consider obtaining insurance that covers potential cancellation due to injury or illness before the race. This can protect your financial investment.

Payment Deadlines: Adhere to all payment deadlines and requirements specified by the race organizers. Failure to meet these deadlines may result in forfeiting your spot.

Chronic Conditions: If you have any chronic medical conditions, be prepared to provide any necessary documentation, such as a sealed letter addressed to the Medical Director.

Submit Your Application: Once you have completed all the required forms, documentation, and payments, submit your application for review.

More Rules

Certainly, here are some of the additional rules and requirements that participants in the Marathon Des Sables (MDS) must adhere to:

  • Acceptance of Race Rules: Participants must acknowledge and accept the rules and regulations that govern the Marathon Des Sables. These rules cover various aspects of the race, including safety, behavior, and logistics.
  • Payment Deadlines: Participants are expected to meet payment deadlines specified by the race organizers. Failing to meet these deadlines may result in disqualification or forfeiture of the entry fee.
  • Completion of Required Forms: Participants must complete all necessary registration and waiver forms. These forms typically include personal information, medical history, emergency contact details, and acceptance of liability.
  • Cancellation Insurance: Participants are encouraged to take out insurance that covers the possibility of cancellation due to injury or illness before the race. This insurance can provide financial protection in case a participant is unable to compete.