Mastering Trail Ultra Nutrition: What to Eat for Peak Performance

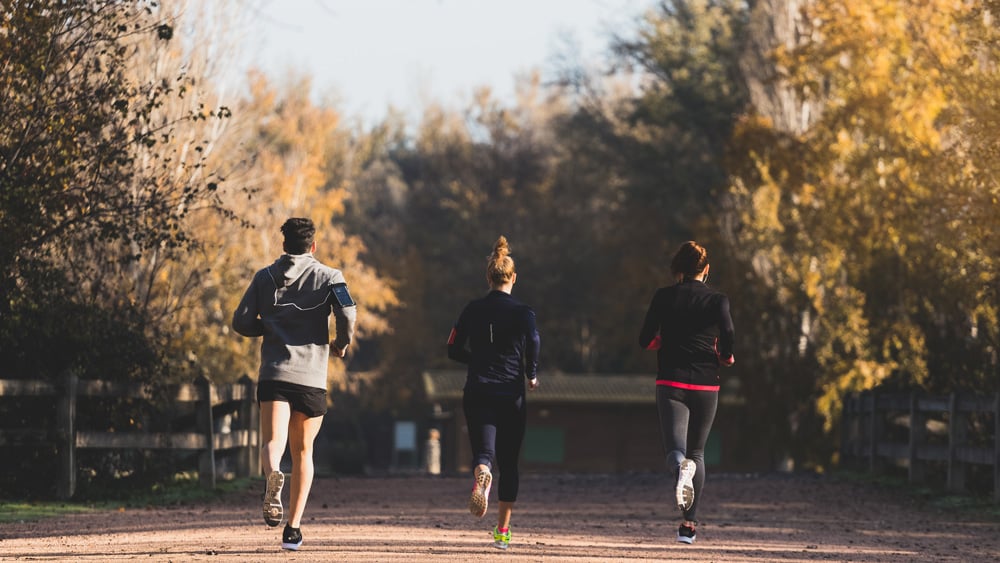
Interested in fueling your body for ultramarathon training on challenging trails? You’re in the right spot.

When it comes to endurance trail training, nutrition isn’t just fuel; it’s a vital part of your toolkit. Spending extended hours on the trails means your body craves a steady supply of energy, hydration, and nutrients to keep you going strong.

Think of it this way: just as you wouldn’t embark on a long journey without a map and supplies, you shouldn’t dive into ultramarathon training without a solid nutrition plan.

No need to fret.

In today’s article, I’ll dig into the basics of nutrition for ultramarathon training, customized for the unique demands of technical trail running. We’ll explore how to nourish your body before, during, and after those challenging trail adventures, highlight the significance of staying hydrated, and offer some handy tips for tackling common dietary challenges.

Ready to fuel your success? Let’s dive in.

Understanding Energy Needs

When it comes to making the most out of your trail runs and races, what you eat matters a lot. Your body’s basal metabolic rate (BMR) is your starting line—the baseline calories you burn just being you, every day. Whether you have the quick-fire metabolism of a sprinter or the enduring burn of a long-distance runner, knowing your BMR is like mapping your unique nutritional terrain.

For instance, a 25-year-old woman, standing 5’2″ and weighing 110 pounds, might have a BMR around 1200 calories daily without lifting a finger. Meanwhile, a 25-year-old man at 6’5″ and 250 pounds would be starting his day at a burn rate of approximately 2070 calories. This exemplifies the vast differences in nutritional needs, even before accounting for the miles logged during training.

So, I’d recommend that you start off by actually determining your own needs. The rest is just details.

Calculate How Much You Need

To calculate the number of carbohydrates needed during a race, you can use a simple equation: Weight in kilograms = Carbohydrates per hour you need to consume

For example, if you weigh 88 kilograms, you should aim to consume around 70 to 80 grams of carbohydrates per hour during your races. It’s crucial to note that this calculation is based on grams of carbohydrates, not calories.

You should also keep in mind that you might need time and practice to get your body—and digestive system—used to consuming that much on the go.

Believe it’s not easy so expect a few hurdles along the way—it’s also the reason I insist on practicing your fueling strategy during training, not during the race. The golden rule is to never try to something new on race day. I cannot emphasize this enough.

Regardless of your choice of fuel, it’s essential to ensure you’re consistently consuming the total grams of carbs each hour to maintain a steady energy flow.

When examining nutrition labels, pay close attention to the serving size indicated. Sometimes, labels may refer to a larger quantity of the product in the packet, which could inadvertently disrupt your fueling plan.

Gels typically contain between 16 to 25 grams of carbs, depending on the brand and type, while sports drinks also vary in carbohydrate content. Therefore, it’s vital to carefully check each label and calculate your intake accurately to meet your fueling needs during the race.

Fueling Beyond the Basics:

As you log the mile on the off-beaten path, your calorie needs skyrocket. Every mile could devour up to 100 calories from your energy stores. Skimping below your BMR or not adequately compensating for increased activity levels isn’t just counterproductive; it’s a direct route to burnout and injury.

The key is to fuel efficiently, matching your intake with your output to ensure your body has what it needs to perform and recover.

Carbohydrates: The Premier Fuel

Carbohydrates are the sprinters of your diet, offering quick energy when you need it and stocking up reserves for the long haul. As you lace up for those endless trails, carbs are what your body calls on first, breaking down into glucose for that immediate energy surge or being stored away as glycogen in your muscles and liver, waiting for their turn to keep you moving.

For ultramarathoners, the strategy is clear: carbs are king.

They should form the lion’s share of your diet, about 50-70% of your total calorie intake, blending a mix of complex carbs for sustained release and simple carbs for those critical moments when you need a quick energy lift.

Proteins: The Recovery Agents

The aftermath of an ultramarathon leaves your muscles begging for repair, and that’s where proteins step into the spotlight. They’re the construction workers of your body, rebuilding the wear and tear inflicted by those relentless miles.

As an ultrarunner, I’d recommend upping your protein intake to about 15-20% of total calories, focusing on quality sources like lean meats, fish, dairy, beans, and legumes.

Fats: The Endurance Enhancers

Fats are like the slow-burning logs in a fire, providing sustained energy long after your carb reserves start to dwindle. In the long stretches of an ultramarathon, when your body begins to tap into these reserves, fats become an invaluable asset, fueling you to the finish line.

Accounting for 20-30% of an ultrarunner’s diet, healthy fats from avocados, nuts, seeds, and olive oil are not just energy sources; they’re vital for absorbing vitamins and supplying essential fatty acids.

Hydration Strategies

Hydration is way more than grabbing a quick drink during your run—it’s a crucial slice of the runner’s performance pie. Getting your hydration right helps keep your body cool, your performance on point, and all those runner-specific bodily functions humming along smoothly.

To dial in on your hydration needs, getting a handle on your personal sweat rate is a total game-changer. It’s not just about figuring out if you’re a heavy sweater or not; it’s about getting down to the nitty-gritty, quantifying exactly how much you sweat so you can hydrate like a pro.

Here’s How to Calculate Your Sweat Rate:

1. Pre-Run Prep: Stick to your usual water-drinking habits and hit the bathroom before you step out the door.

2. Initial Weigh-In: Weigh yourself right before your run. Make a note of this number because it’s your starting line.

3. Target Intensity Run: Hit the pavement or the trails for a run that lasts about 60 to 90 minutes, aiming for the pace you’re planning for race day.

4. Bathroom Breaks: Try to keep it simple and avoid using the bathroom during your run. It’s a bit of a challenge but necessary for accurate results.

5. Post-Run Weigh-In: Once you’re done, pat down any sweat on your skin and hair, and hop on the scale again.

6. Calculate Your Sweat Rate: Check the difference between your weights before and after the run. Convert any weight loss into fluid ounces (1 pound of weight loss = 16 ounces of fluid).

What to Eat Before Long Training Runs:

Fueling your body before long training runs is essential for maintaining energy and endurance. The key is to consume meals that provide a solid foundation, rich in easily digestible carbohydrates for a quick energy boost, along with a moderate amount of protein and minimal fat.

When it comes to preparing for ultra distances, each runner has their own preferences when it comes to food and fluids leading up to the race. Some may benefit from carbohydrate loading, a strategy that should be discussed with a Sports Dietitian to ensure optimal results.

Many ultra runners opt to increase their carbohydrate intake in the days leading up to the event, while keeping their race-day breakfast light and easily digestible. However, if the running pace is expected to be slower for longer distances, a more substantial breakfast may be suitable.

For the pre-race or pre-event meal, focus on carbohydrates with small additions of protein to stave off hunger. I’d also urge you to avoid excessive fat and fiber to promote gut comfort during the run.

When it comes to suitable pre-run breakfast options, consider:

  • Whole grain waffles with maple syrup and a side of sliced peaches
  • Light cereal or oats/porridge with fruit
  • Banana pancakes made with oats and eggs, served with a drizzle of honey
  • Breakfast burrito filled with scrambled eggs, black beans, and salsa
  • A toasted sandwich
  • Pasta or rice dish
  • Quinoa porridge with almond milk, chopped nuts, and dried apricots
  • Cottage cheese mixed with diced pineapple and a sprinkle of chia seeds
  • Rice cakes with peanut butter and banana
  • Greek yogurt topped with granola and sliced strawberries
  • Toast with vegemite accompanied by a piece of fruit
  • Multigrain toast with avocado smash and cherry tomatoes

If solid foods don’t sit well before a race, or if nerves are a factor, a liquid option like a fruit smoothie containing protein and carbohydrates can be a good alternative. Ultimately, individual preferences and tolerance levels will influence pre-race food and fluid choices.

Timing Your Nutrition Right

Have your primary meal 3-4 hours before your run. This window allows your body ample time to digest the food and convert it into energy you can use during your run.

Next, grab a small, carb-rich snack about 30-60 minutes before heading out. This acts as a final energy boost to top off your fuel tank.

Eating on the Go

During an ultramarathon, eating becomes a balancing act of keeping energy levels up without breaking your stride. Choose foods that are portable, easy to consume, and packed with carbohydrates.

Here are some on-the-run food ideas:

  • Portable Energy: Energy gels, chews, and bars are specifically designed for endurance activities, offering a compact and quick energy source.
  • Real Food Options: If you prefer whole foods, peanut butter sandwiches or salted boiled potatoes are great options. They’re high in carbs and easy on the stomach.
  • Natural Quick Fixes: For a burst of natural energy, bananas and dates are perfect. They’re high in sugar for a quick energy release and easy to carry.

How Much To Carry?

Carrying the right amount of nutrition and hydration during a race is crucial for maintaining your energy levels and performance. It’s always wise to err on the side of caution and bring more than you think you’ll need, just in case.

Having extra fuel and hydration ensures that you’re prepared for unexpected circumstances or if your body requires more than anticipated. Plus, it gives you peace of mind knowing you won’t run out during a critical moment of the race.

However, if you prefer relying on aid stations for nutrition and hydration, it’s essential to familiarize yourself with what they offer beforehand. This allows you to plan your race strategy accordingly and ensures that you’re comfortable with the options available.

Remember, practice makes perfect. Experiment with different nutrition and hydration products during your training runs to determine what works best for you. By doing so, you’ll be well-prepared and confident come race day.

Maximize Your Race Day Performance: The Ultimate Guide to Pre-Race Shakeout Runs

Considering whether you should lace up your running shoes for a shakeout run before the big race day? Then you’ve come to the right place.

Let’s cut to the chase – we all know that rest and recovery are like the secret sauce for those crucial days leading up to a race. But here’s the scoop from my own experience: runners who sneak in a quick run before the race often end up performing their absolute best.

In essence the shakeout run is a gentle stretch session of the running world. This little session helps loosen up your body and set the stage for maximum performance when it really counts.

But why should you even consider doing a shakeout run, you ask? Well, my friend, that’s precisely what we’re diving into in today’s post.

In this article, I’m your guide to all things shakeout runs. I’ll break it down for you:

  • What in the world is a shakeout run, anyway?
  • The ins and outs of a shakeout run.
  • Why every runner, should seriously consider a shakeout run before race day.
  • How to do it like a pro.
  • How long these shakeout runs should be
  • And so much more.

Sounds like a great plan?

Then let’s get started.

What is a Shakeout Run?

A shakeout run is essentially a brief, gentle run typically done the day before, or the morning of, a race. Think of it as a warm-up act for the main event. Its purpose isn’t to boost fitness, but rather to keep your muscles limber and primed for action. I like to think of it like starting my car and letting it hum gently before setting off on a long journey.

This light jog is designed to loosen up your muscles, get your blood circulating, and help shake off any nerves or stiffness that might be lingering.

The timing of your shakeout run can vary. It often depends on the race distance and your own running experience. For newer runners tackling longer distances, it’s generally a good idea to have your shakeout run the day before the race. On the flip side, seasoned runners gearing up for shorter distances might opt for a shakeout run on the morning of the race.

Travel can also play a role in deciding when to do a shakeout run. If you’ve been cooped up in a car or plane, a shakeout run can be a fantastic way to stretch your legs and ease any travel-induced stiffness.

Top of Form

Difference from Regular Training Runs and Tapering:

Regular training runs are the core of your marathon preparation. These are the long, challenging miles where you build endurance, speed, and strength. They’re like intense gym sessions where each drop of sweat brings you closer to your goal. These runs push your limits and expand your capabilities, serving as the meat and potatoes of your training diet.

On the other hand, shakeout runs are the light, refreshing salad. They’re not about pushing or challenging; they’re about maintenance. Short, slow, and easy, these runs are like a leisurely stroll in the park rather than a rugged hike.

Their purpose is to gently awaken your muscles and cardiovascular system, ensuring everything functions smoothly without adding stress or fatigue. The goal is to shake off stiffness, calm pre-race nerves, and prime your body for the effort ahead

The Benefits of Shakeout Runs

Shakeout runs might not get all the glory, but they’re real game-changers for runners gearing up for a race.

Here’s why squeezing in a shakeout run two days before your big event can make all the difference:

Improved Blood Flow:

A shakeout run gently nudges your circulation into gear, pumping blood and oxygen to your muscles. It’s like giving your car a warm-up before hitting the road to ensure everything runs smoothly. This boost in blood flow primes your muscles for action, making sure they’re fueled up and ready to perform on race day.

Enhanced Wakefulness:

Nothing beats a shakeout run for shaking off any leftover sleepiness. It’s your wake-up call, sharper than your morning coffee, ensuring you’re wide awake and ready to go at the starting line. Research tells us that being up and about for at least a couple of hours before a race is key for top performance. A shakeout run makes sure you’re fully awake and geared up for the challenge ahead.

Reduced Stiffness:

After a day of rest or a sudden drop in training, stiffness can sneak in and slow you down. But a shakeout run is like a quick stretch session that gets your muscles firing again. It helps ward off that sluggish feeling that can come from tapering too abruptly or fueling up the wrong way. By keeping your body moving, even just a bit, you stay loose and ready, avoiding any grinding halts.

Clearing the Mind And Knowing What’s Ahead:

Even if mornings aren’t your thing, a shakeout run can be your secret weapon for clearing away any mental fog. It’s like hitting the reset button for your brain and getting a sneak peek at the racecourse. Taking a spin around part of the route during your shakeout run gives you a feel for what’s to come on race day.

Stocking Up on Energy:

Shakeout runs aren’t just about mental clarity; they can also help your body stock up on glycogen more efficiently. Keep them short and slow to avoid depleting your glycogen stores. Especially for longer races like marathons, you want those energy reserves fully stocked and ready to go.

Muscle Prep on Race Day:

Before you hit the starting line, it’s crucial to get your blood flowing and shake off any muscle stiffness. Stiff muscles can put a damper on your performance and increase your risk of injury. By warming up properly, you’re ensuring your muscles are limber and ready to tackle the challenge ahead.

Calming the Pre-Race Jitters:

Race day nerves are no joke – even seasoned runners get jittery. It’s easy for your mind to spiral into worst-case scenarios, but a morning run can help put those fears to rest. Take just 15 minutes to gather your thoughts, repeat your favorite mantra, and connect with your “why.” Let those feel-good endorphins kick in and ease your nerves.

Boosting Confidence:

Feeling a bit shaky before the race? A quick jog can work wonders for your confidence. Use this time to reflect on all the hard work you’ve put in and remind yourself of your goals. It’s the perfect opportunity to get your race day mindset in check and focus on the reasons you’re out there pounding the pavement.

Getting Your Mind Right:

A shakeout run isn’t just about physical prep – it’s also your chance to get mentally dialed in for the race ahead. Think of it as your quiet time to visualize the course, strategize your approach, and get your head in the game. It’s like plotting your first moves in a game of chess – calmly and confidently setting the stage for success. Use this time to banish any doubts, recall your strengths and tactics, and remind yourself of the hard work that brought you here.

Pre-Race Bathroom Break:

Let’s face it – struggling to find a bathroom before a big race is nobody’s idea of fun. Nerves often play a role, but whatever the reason, it’s a situation you definitely want to avoid. Every runner knows the drill: you’re fine until you start running, and then suddenly, nature calls. A shakeout run can help take care of this issue, ensuring you’re ready to hit the starting line feeling confident and comfortable.

How Fast Should You Run Your Shakeout Run?

When it comes to the speed of a shakeout run, think “easy does it.” It’s all about getting those legs moving and waking up your body, rather than pushing your limits. In fact, the focus isn’t about pace; it’s about preparing your body and mind for the race ahead. Focus on how you feel rather than how fast you’re going.

The idea is to keep the effort so low that you could chat with a friend or belt out your favorite tunes without gasping for air. This pace is a notch below what you’d consider an “easy” run, making sure you’re not stressing your body or burning through your energy too soon.

As a rule, you shouldn’t be huffing and puffing. Your breath should be steady and controlled, so much so that you hardly notice it.

When it comes to rate zones, aim to stay in Zone 1 during your shakeout run—that’s below 70% of your max. This helps make sure you’re keeping the effort light and not putting any unnecessary stress on your body right before the big day.

How Long Is A Shakeout Run?

The perfect duration for a shakeout run really depends on what kind of race you’re gearing up for and what works best for you.

Here’s a bit of guidance to help you nail down the right length for your shakeout run:

  • For Short Races (like 5Ks): If you’re prepping for a shorter race, your shakeout run might only need to be about 10 to 15 minutes long. The goal is to get your blood moving and help you shake off any pre-race jitters without tiring out your muscles.
  • For Longer Races (like Marathons): When you’re facing a marathon or another long-haul race, a 10-minute shakeout run is usually enough. These races are tough, so you want to wake up your muscles and get your heart going while still saving as much energy as possible.
  • A Handy Rule of Thumb: A good general tip is to make your shakeout run about half the distance or time of what you’d do on an easy running day. This way, you get enough movement to feel the benefits without the risk of doing too much.

For Beginners or Shorter Distances (e.g., 5K):

Here are examples of shakeout run workouts designed for runners at various stages of their running journey and targeting different race distances:

For Beginners or Tackling Shorter Distances (Like a 5K):

  • Duration: Keep it to a quick 10-15 minutes of easy jogging.
  • Pace: Aim for comfortably slow, think of it like a brisk walk but with a bit more energy. The pace should be easy enough to chat through.
  • Focus: The key here is simplicity and relaxation. You want to calm any pre-race nerves and make sure you’re stepping up to the start line feeling refreshed and eager.

For Intermediate Runners or Mid-Distance Races (10K to Half Marathon):

  • Duration: Spend about 20-25 minutes at a pace that doesn’t feel like work.
  • Pace: It should feel comfortable and effortless. You’re not trying to push; you’re trying to stay loose.
  • Additional Work: Throw in 3-4 strides towards the end of your run. These are short bursts (20-30 seconds) where you up the pace just a bit, concentrating on moving smoothly and easily without any push.

For Advanced Runners or Long-Distance Endeavors (Marathon):

  • Duration: Mix it up with 25-30 minutes of easy jogging, combined with specific movements to wake up your muscles.
  • Pace: This should be an easy, comfortable jog throughout.
  • Additional Work: Include 4-5 strides to get those fast-twitch muscles ready, followed by dynamic stretches that target leg mobility and flexibility. This combo is great for ensuring you’re not just ready to run but ready to perform.

Each of these shakeout run workouts is designed to prep your body and mind for the race ahead without draining the tank. Whether you’re just starting out, moving up in distance, or tackling the big miles, there’s a shakeout run that fits your needs.

The Ultimate 4-Week Guide to Running a Mile Without Stopping for Beginners

Ready to conquer that one-mile run without breaking a sweat? Well, you’ve landed in the perfect spot.

Let’s skip the fluff and get down to brass tacks: mastering that first mile is a pivotal moment in any runner’s journey. It’s not just a physical test; it’s a dance of pacing and mental fortitude.

That initial mile without stopping? It’s a rite of passage. Building endurance doesn’t happen overnight, and it’s all too common to start off with a burst of enthusiasm only to find yourself walking, wondering where that initial burst went.

But here’s the deal—I’m here to guide you through this with the ultimate beginner’s playbook to owning that mile. Through my own trials and triumphs, I’ll share the secrets to building your stamina, a beginner-friendly game plan for training, and how to ensure your heart is just as in it as your legs.

These tactics are your roadmap to running a mile without gasping for air. With the right approach, extending those runs will soon feel less like a chore and more like a victory lap.

So, lace up. Are we doing this?

How Far Is A Mile?

Understanding the distance of a mile is essential, especially as you gear up to conquer it on your run. It’s one of those basics that can sometimes slip under the radar, but having a solid grasp on just how far you’ll be running can really set the stage for your training.

So, let’s break it down. If I asked you, “How far is a mile from where you are right now?” would you have an immediate answer? It’s okay if you don’t. Unless you’ve got a bit of a runner’s mindset already or you’re just naturally good at judging distances, pinpointing exactly how far a mile stretches might not come easily.

And if you’re someone who thinks in kilometers, the concept of a mile might seem a little unfamiliar. Just keep this in mind: one mile translates to about 1.609 kilometers. That’s a handy conversion to remember, whether you’re planning your runs or engaging in friendly distance debates.

Here’s a simple way to visualize a mile: imagine a standard running track. Circling that track four times, with each lap being 400 meters, gets you pretty close to a mile, totaling 1609.344 meters. It’s a practical visual that can help bridge the gap between abstract numbers and tangible distance.

Average One Mile Run time

For new runners, a common question is, “How long does it take to run a mile?” Well, the answer varies depending on your speed.

The time it takes to complete a mile varies from person to person. Most runners can finish a mile in under 15 minutes, which is achievable with a brisk walk. So don’t worry about speed – focus on building your endurance and enjoying the journey, one step at a time.

Preparing for the Mile Run:

Getting ready for your mile run is key to having a smooth and successful training session. Here are some practical steps you can take to boost your chances of nailing it:

Gear Selection:

Your shoes are pretty much your BFFs for the run, so make sure they’re a perfect fit and give your feet the love they deserve. And about your outfit, choose something that lets your skin breathe and suits the weather. You want to feel comfy and cool, not like you’re running in a sauna suit.

Pick the Perfect Spot

Finding the right place to run is like hitting the jackpot. A nice, flat path is your golden ticket, especially if you’re just starting out. A park, a track, or a quiet street—anywhere you can run without dodging cars or leaping over roots. Save the adventure race for later!

Flat First, Hills Later

Start on the straight and narrow. Hills will be there tomorrow, and they can wait. Get comfy with the distance first. And when you do face a hill, remember, it’s not a monster. Let your arms help, and take it easy. It’s a marathon (or a mile), not a sprint.

Fine-Tune Your Form

Running is an art and a science. Here’s how to brush up on the basics:

  • Look Ahead: Keep your head up and eyes forward. Imagine you’re drawing a straight line to the finish. Focus forward, not down.
  • Shoulders Down and Back: Relax those shoulders. Let your arms swing naturally, like they’re just chilling but helping you keep the pace.
  • Lean In: Lean from your ankles, not your waist. It’s like you’re reaching out for your goal, one stride at a time.
  • Land Softly: Aim to land on the middle of your foot, right under your body. Think “light and easy” with each step, like you’re trying not to wake someone up.

Power Walking:

When guiding newbie runners towards smashing their mile run goals, I often kick off with something unexpected yet fundamental: power walking. Think of it as prepping the soil before planting—essential for growth and strength.

It might raise some eyebrows, but walking is actually a secret weapon in the journey to effortlessly run a mile non-stop. Introducing walking breaks and a run-walk approach can revolutionize the experience for beginners.

Here’s the lowdown: Taking walking breaks is like hitting a mini reset button. It lets you catch your breath, eases your heart rate, and gives your muscles and joints a moment to relax. This strategy is a stepping stone to longer, more intense workouts, gradually ramping up your stamina until that mile run feels like a breeze, no pauses needed.

Go Run/Walk

Embracing the run-walk method, famously known as the Galloway Method, can be a game-changer for those new to running. This approach uses specific intervals of walking and running, letting you build up your fitness without feeling like you’ve hit your limit too soon.

Imagine starting with a simple routine: 1 minute of jogging, followed by 2 minutes of walking. This isn’t set in stone; as you gain more strength and confidence, you tweak the intervals. Perhaps you shift to 2 minutes of jogging and 1 minute of walking. The beauty of this method lies in its flexibility and focus on gradual improvement, allowing your body to adjust naturally and comfortably.

The goal isn’t to make giant leaps but to progress steadily. By gradually changing the walk-run ratio, you can increase the time you spend running. Eventually, you might find yourself running more than walking, all the while ensuring your body adapts to the new demands without feeling overwhelmed.

The Power of Slow and Steady

 A common trap for newcomers is trying to hit top speed too early in their running journey. The trick is to slow down. Why? Because a gentler pace lets your body efficiently use oxygen, keeping those muscles moving.

Forget about speed for a moment. Focus instead on your effort level, aiming for a 6 or 7 out of 10. It might feel slower than you’d like, but patience is key. Running success is measured not by how fast you can go out of the gate but by how well you can sustain and build your endurance over time.

Consistency is Key:

Consistency is the bedrock of success when it comes to running a mile without stopping. Just as a garden needs regular watering to thrive, your running journey requires a consistent approach to training. Here’s why consistency is key:

  1. Foundation of Progress: Running sporadically won’t cut it. Commit to running at least 3 days a week to build a solid foundation for your goal. Each run contributes to the groundwork needed to achieve your milestone of running a mile without a break.
  2. Physiological Adaptations: Consistent running—ideally 2-3 days per week—provides the stimulus necessary for your body to adapt and become stronger. This strengthens your heart, lungs, and legs, enhancing your stamina and endurance over time.
  3. Avoid Plateaus: Running randomly once a week won’t yield substantial progress. Consistency ensures that your body becomes accustomed to the demands of running, making genuine strides in your fitness journey.

However, while consistency is paramount, it’s equally essential to heed your body’s signals. If you’re feeling fatigued or sore, don’t hesitate to take a rest day. Rest is vital for recovery, allowing your body to repair and grow stronger. Strike a balance between consistency and listening to your body to ensure sustainable progress towards your running goals.

Start With a Flat Route

As a running coach, I’m all about mixing hills into your runs to boost your strength and speed over time. But when you’re gearing up for that first mile, it’s all about setting yourself up for success.

Choosing a flat route for your  mile run can really work in your favor. While a rolling course can be fun with its downhill stretches, starting flat takes away any unnecessary mental stress.

When you’re just starting out and aiming to conquer that first mile, your main focus should be on gradually increasing your distance rather than tackling tough inclines. So, scout out the flattest route possible to get comfortable with the distance.

Once you’ve nailed down that 1-mile mark, then you can think about adding some hills into your routine. But take it easy! As you approach those inclines, ease up on your pace to conserve your energy and prevent burnout. Remember, you can pick up the pace on the downhill stretches.

The 4-Week One-Mile Training Plan For Beginners

Ready to lace up those shoes and hit the pavement? Awesome, because I’ve got just the thing to get you started on your running journey: a simple, no-nonsense 4-week training plan to help you conquer that first mile like a champ.

Now, why bother with a training plan, you ask? Well, think of it like a roadmap to success. Following a plan not only helps you build up your endurance safely, but it also keeps you motivated by gradually increasing the challenge. Plus, it’s a surefire way to steer clear of those pesky overuse injuries.

So, what’s the deal with this 1-mile training plan? It’s perfect for folks who are just dipping their toes into the running world and want to work up to running a mile without any walking breaks. Yup, you heard that right – no stopping allowed!

Here’s the lowdown: each week, you’ll nudge up your running distance a tad and dial back on the walking. By the end of the 4 weeks, you’ll be breezing through that mile like it’s nobody’s business.

Feeling up for a challenge? If you’re itching to push yourself a bit further, you might wanna check out these other programs:

Here’s the plan:

Week 1:

  • Day 1, 3, 5: Run for 2 minutes, then walk for 3 minutes. Repeat this sequence 4 times.
  • Day 2, 4, 7: Rest or do some cross-training activities.

Week 2:

  • Day 1, 3, 5: Increase your running duration to 4 minutes, followed by a 4-minute walk. Repeat 4 times.
  • Day 2, 4, 7: Rest or cross-train.

Week 3:

  • Day 1, 3, 5: Push yourself further with a run of 6 minutes, then walk for 3 minutes. Repeat this cycle 4 times.
  • Day 2, 4, 7: Take it easy with rest or cross-training.

Week 4:

  • Day 1, 3, 5: It’s time to put it all together! Run continuously for 10 minutes.
  • Day 2, 4, 7: Rest or engage in cross-training activities.

If you find the program moving too fast, feel free to repeat a week before moving on. Consistency is key here. Stick to the plan, and by the end of four weeks, you’ll be amazed at how far you’ve come. Good luck on your journey to running continuously for a set duration!

Swollen Fingers and Toes After Running: Causes and Quick Fixes

Ever find yourself finishing a run and noticing your fingers and toes looking puffier than usual?

You’re not alone.

Swollen fingers and toes after a run are common among runners. It might raise an eyebrow or two, but worry not, because we’re diving deep into this mystery.

In today’s article, I’m going to demystify the swelling phenomenon that often accompanies your post-run cool-down.

We’ll uncover the physiological reasons behind it and arm you with practical tips to keep those digits in check.

Ready to jump in? Let’s roll!

The Science of Swelling

So, what’s the deal with swollen fingers and toes after a run? Well, it all comes down to science. When we run, our bodies do some fascinating things. One of those things is increasing blood flow to our hardworking muscles. Now, this shift in blood flow can cause the blood vessels in our hands to widen, leading to that pesky swelling.

But wait, there’s more. Exercise also triggers vasodilation, which is just a fancy word for blood vessels expanding to accommodate the increased blood flow. Combine this with gravity, and you’ve got a recipe for blood pooling in your fingers and toes, causing even more swelling.

Plus, microtears in our muscles and venous valves (known as venous insufficiency) can contribute to fluid buildup and, you guessed it, more swelling.

What’s more?

When you run, your arms naturally assume a bent position at the elbows and are often held at or above waist level. This posture can hinder proper circulation in the fingers, potentially resulting in swelling.

Contributing Factors

Several factors can affect the swelling in your toes and fingers after running. These include:

  • Temperature: When it’s hot, your blood vessels tend to expand, which can increase swelling. Conversely, in cold weather, blood is directed to your body’s core to keep warm, potentially causing swelling when it returns to your extremities after warming up.
  • Hydration Status: Maintaining the right balance of fluids is crucial. Both dehydration and overhydration can disrupt your body’s sodium levels, which are important for regulating fluid balance. Any imbalance in sodium can contribute to swelling.
  • Running Duration and Intensity. The longer and/or more intense you run, the more noticeable the swelling due to prolonged increased blood flow and pressure on the feet.

Swollen Hands and Toes While Running – Solutions

Dealing with swollen toes and fingers after a run is all about finding the right balance. Here are some strategies that might help:

Proper Arm Mechanics:

Let your arms swing naturally and keep them slightly lower than your heart.  You should also keep your hands relaxed while running. Avoid clenching your fists or holding them too tightly, as this can impede blood flow.

This can improve circulation and reduce swelling in your fingers.

Stay Hydrated, but Not Too Much:

Hydration is crucial for maintaining fluid balance, but drinking excessive amounts of water can lead to swelling, especially in your hands and feet. Be mindful of your water intake, and if you’re running a marathon or long distance, watch out for signs of overhydration like nausea and vomiting.

Replace Your Electrolytes

Salt plays a key role in preventing tissue swelling. If you’re sweating a lot during your run, you may lose sodium, which can contribute to swelling. Replenish lost electrolytes by drinking sports drinks, using gels, taking salt shots, or snacking on salty foods like pretzels.

Spacious Toe Box and Arch Support:

Look for running shoes with a roomy toe box and adequate arch support. This allows your toes to splay naturally and provides stability and alignment for your feet. Make sure the shoes match your foot type and running style.

Consider Sizing:

Opt for shoes that are at least half a size larger than your regular street shoes. Feet tend to swell during exercise, so by going half a size up, you can prevent tightness and discomfort. It’s also a good idea to try on shoes after a run when your feet are naturally swollen, which is why I always recommend buying shoes in the late evening.

Moisture-Wicking Socks:

Choose socks made from moisture-wicking materials to keep your feet dry and comfortable. These socks help prevent friction and heat buildup, which can contribute to swelling and blisters.

Foot-Strengthening Exercises:

Add in foot-strengthening exercises into your routine to improve stability and reduce the risk of toe swelling. Exercises like toe curls, toe spreads, and calf raises can help strengthen the muscles in your feet and lower legs, making them more resilient to the demands of running.

Elevate and Relieve

After your run, take some time to elevate your feet. This helps promote blood and fluid circulation, reducing swelling. Simply prop your feet up on a pillow or ottoman while relaxing

Elevate Your Hands Post-Run:

Similar to elevating your feet, raising your hands above heart level can encourage blood flow back to your heart, minimizing swelling. You can achieve this by simply raising your arms above your head for a few minutes post-run.

Analyze Your Stride:

Consider getting a professional analysis of your running gait or consulting a running coach. Adjusting your stride and form can alleviate pressure on your toes and reduce the risk of swelling.

Diverse Terrain Exploration

Mix up your running routine by alternating between different surfaces. Running on softer surfaces like grass or trails can reduce the impact on your toes compared to harder surfaces like pavement. This variety can help prevent overuse injuries and swelling.

When to Seek Medical Help:

Normal post-run swelling is mild and goes away within a few hours. But swelling in both hands or feet is usually normal. But if one side is significantly more swollen or comes with severe pain, redness, or heat, it could be a problem. Numbness, tingling, or skin color changes could indicate nerve or blood flow issues.

Overall, contact your doctor if:

  1. The swelling persists and hampers movement.
  2. You experience severe pain or skin discoloration.
  3. You have pre-existing health conditions like heart disease, kidney problems, or diabetes and notice changes in swelling.
  4. The swelling appears suddenly with symptoms like shortness of breath or chest pain, which might indicate a blood clot.

Conclusion:

Swollen fingers and toes are common among runners, but you can manage and prevent them.

Pay attention to your running form, gear, and lifestyle. Consult healthcare professionals when in doubt.

Keep running, and don’t let swelling hold you back from your goals.

Why Your Face Turns Red When You Run: Understanding and Managing Post-Run Flushing

woman running

Ever finished a run, glanced in the mirror, and thought, “When did I join the tomato club?” You’re not alone. That post-run beet-red face is practically a rite of passage for runners, from those who are lacing up for the first time to the seasoned marathoners among us. It’s like our faces are throwing their own little celebration, lighting up to say, “Hey, good job out there!”

But ever wonder why your face decides to mimic a stop sign after a few miles? It’s a question that puzzles many of us, whether we’re doing a casual loop around the block or pushing through the final stretch of a long-distance challenge.

In this article, we’re going to unravel the mystery behind our crimson complexions post-run. I promise to keep it light, simple, and straight to the point – something every runner can appreciate, no matter your pace or distance. Ready to decode the red? Let’s jump right in.

Thermoregulation

The most common reason your face get red while running boils down to the exercise itself.

Let me explain more.

Ever noticed how your face gets all red and flushed when you’re working out? That’s your body’s way of waving a flag saying, “Cooling system on!” It’s sending warm blood up to the surface of your skin to help get rid of the heat, making sure you stay in the comfy zone.

Now, let’s add a twist. When you’re really pushing it, especially if it’s hot outside, your face might just light up like a heat lamp. It’s your body doing its best to keep you from getting too hot. But here’s the deal: if you start feeling dizzy, sick to your stomach, or like you just need to sit down, it’s your body telling you, “Hey, I need a break!” These are signs that your body’s cooling off team is having a hard time keeping up, and you need to chill for a bit to avoid overheating.

Skin Sensitivity

Have you ever noticed how some runners turn beet-red in no time, while others seem to stay cool as cucumbers?

Well, our skin type and sensitivity also impacts face redness while running. Take my friend with fair skin, for example. Even a brisk walk turns them into a lobster, let alone a run. Then there are those friends who stay pale as ghosts even when they’re sweating buckets.

So, what’s behind this colorful transformation, especially during running? It’s mostly about the sensitivity and pigmentation of our skin.

According to dermatology, we all tend to flush a bit when we’re pushing ourselves, but it’s a more intense for those with fair skin. Darker skin tones have melanin that can sort of hide the flushing.

Plus, some are born with a busy network of tiny blood vessels near the skin’s surface, making any redness pop even more.

The Role of Fitness Level

Our fitness level plays a significant role in how our skin reacts when we hit the pavement for a run. As our blood pumps vigorously, our skin cells respond differently depending on our fitness level.

Some of us may experience the release of prostaglandins, contributing to a healthy rosy glow. Meanwhile, others might find their skin cells opting for histamines, intensifying the flush factor.

Histamines and Post-Workout Redness

Histamines are like the body’s defense squad, addressing inflammation and warding off any unwelcome visitors but might contribute to the post-workout redness many of us experience.

However, this burning face is typically just our body’s way of signaling that everything is functioning as it should, and it usually fades as quickly as it appears.

Environmental Conditions

Environmental conditions play a significant role in determining how much we blush during a run. Let me explain the ones with the most impact:

  • Temperature: Running in high heat is akin to sprinting through a sauna, prompting our bodies to ramp up cooling mechanisms and resulting in a flushed face. Conversely, cold weather can also lead to flushing as our internal warmth contrasts sharply with the chilly air.
  • Humidity: High humidity levels create a sensation akin to running with a wet blanket draped over you. This diminishes the effectiveness of sweat, prompting our bodies to redirect more blood to the skin’s surface, intensifying redness.
  • Wind: Depending on its strength and temperature, wind can either be a welcome cooling breeze or a chilly adversary. In either case, it influences our body’s cooling strategy and may contribute to facial flushing during a run.

Reducing and Managing Facial Redness

Want to dial down the red-face look after a solid run? You’re not alone. Here a few tips to help you make sure your face that doesn’t get super red after running.

Before You Bolt

Kick off with a chill warm-up. Ease into your run to let your body get the memo that it’s go time, helping you avoid the instant beetroot look.

Cool Down Like a Pro

After your run, don’t just stop cold. Ease out of it with some stretches and a relaxed walk to bring your body temp back to normal gently. It’s like telling your body, “Hey, we’re winding down,” avoiding that sudden flush.

Hydration Station

Drink up, not just before you run but all day. It keeps the blood flowing smoothly and might just keep the redness in check by keeping you cool from the inside out.

Shield Your Skin

Slap on some zinc oxide sunscreen to fend off the sun. It’s a double win: you dodge that extra redness and keep your skin looking young and fresh.

Moisturize to Maximize

Keep your skin happy and hydrated. A good moisturizer acts like armor against the harsh world, making your skin less likely to freak out after your run.

Listen Up

Pay attention to what your body’s telling you. If certain runs make you redder than others, maybe tweak your pace or path. It’s all about finding what works for you.

Seek Shade

Try to run when the sun’s not blazing. Early mornings or late evenings can be your best bet for cooler, kinder runs.

Health Check

If your face is pulling a red alert and it feels off, maybe check in with a doc. Especially if it’s coming with some bonus symptoms like chest feels or puffing more than usual. It’s all about keeping you running safely.

Choosing Skincare Wisely

Already have skin sensitivities? Then you should pay attention to your skincare ingredients. Avoid alcohol-based products and harsh retinoids, as they can exacerbate skin sensitivity.

Instead, look for products containing anti-inflammatory ingredients like hyaluronic acid, vitamin C, and niacinamide. For example, the Replenix Hyaluronic Acid Hydration Serum provides intense hydration without aggravating redness, promoting a healthy post-run complexion.

Running in the Heat

Schedule runs during cooler times of the day, such as early mornings or late evenings, to minimize exposure to extreme heat. If outdoor conditions are unfavorable, consider indoor alternatives like treadmill workouts. Stay hydrated before, during, and after your run, and don’t hesitate to cool down with water splashes mid-run to manage rising temperatures and reduce facial flushing.

Heat-related Symptoms

Facial redness during exercise can sometimes indicate underlying heat-related illnesses, such as dehydration, heat stroke, or heat exhaustion. If you experience symptoms like dizziness, nausea, or feeling off, it’s essential to prioritize your safety. Stop your run, hydrate, and seek shade immediately to prevent further complications.

When to Seek Medical Advice

When it comes to knowing when to seek medical advice, keep an eye out for serious signs. If you notice intense facial redness during your run, especially if it covers a big chunk of your face or comes out of nowhere, it’s a warning sign.

Rosacea is a long-term issue marked by persistent redness, visible blood vessels on your cheeks and nose, and pimple-like bumps.  This condition can be effectively managed with prescription creams or treatments like Intense Pulsed Light (IPL).

It’s also crucial to review your medications with your doctor. Certain medications, including acne treatments like benzoyl peroxide, some antibiotics, blood pressure medications, and phosphodiesterase 5 inhibitors (used for pulmonary hypertension and erectile dysfunction), can trigger or exacerbate flushing.

To minimize skin irritation, consider skipping harsh topical treatments like retinol or chemical peels before a long run or intense workout. Managing these triggers and consulting with healthcare professionals when unusual symptoms arise can help keep your running experience both enjoyable and healthy.

Unlock Your Run: Essential Ankle Flexibility Exercises for Runners

Looking for the best stretches for improving your ankle flexibility and mobility? Then you’ve come to the right place.

Improved ankle mobility allows for a greater range of motion, helping you navigate uneven surfaces with ease and agility. Conversely, lack of mobility limits our mobility and range of motion, impedes our running performance, and even puts us at risk for injuries.

In short, by enhancing ankle mobility and strength, you’re setting a solid foundation for your running performance. It’s an investment in your running future, reducing the risk of injuries and ensuring your legs can carry you through many more miles.

In this article, I’ll explain the ankle’s role in running, then share with you specific stretches for runners to make sure you keep training comfortably and pain-free.

Sounds like a good idea?

Then let’s get started.

Ankle Anatomy 101

Let’s get straight to the point about the role of your ankles in running.

These are crucial for absorbing the impact each time your foot lands and for pushing you forward efficiently. At its core, the ankle is a hinge joint made up of the leg bones (fibula and tibia) and a foot bone (talus).

This setup is crucial for running movements, and that includes:

  • Plantar Flexion: This is when you push your toes down toward the ground, giving you that oomph in the push-off phase.
  • Dorsiflexion: Here, you’re lifting your toes up towards your shin, prepping for a smooth foot strike.
  • Inversion and Eversion: These side-to-side movements add stability, especially helpful on those tricky, uneven paths.

As you run, your ankles are on double duty – soaking up the shock each time your foot lands and then helping to launch you forward for the next step. This dual role highlights just how vital they are for both the mechanics of running and keeping injuries at bay.

Here are three reasons why strong ankles are key in runners:

  • Shock Absorption and Propulsion: The ankle’s knack for handling impacts and aiding in propulsion is at the heart of running mechanics.
  • Stability: It’s also the anchor that keeps your foot landings safe and efficient, especially important when you’re navigating uneven ground and need that extra balance and flexibility.
  • Injury Prevention: By keeping your ankles strong and flexible, you’re setting up a defense against common running injuries, ensuring stability, and proper force distribution all the way through your lower legs.

Common Ankle Issues Faced by Runners

Let’s explore some common ankle issues that runners face and tips for avoiding or managing them:

  • Ankle Sprains. These are the classic missteps—literally. You might be enjoying a run, hit an unexpected bump, and suddenly, your ankle’s twisted.
  • Achilles Tendinitis. This is what happens when you overwork that crucial tendon connecting your calf to your heel. Too much, too soon, and it gets inflamed, leaving you with a sore ankle.
  • Plantar Fasciitis. It starts in your foot but can throw your whole ankle game off. That band running under your foot? When it’s unhappy, you’ll feel it.
  • Peroneal Tendonitis. This one targets the outer side of your ankle. Repetitive motion can get these tendons all riled up, making every step feel tough.
  • Ankle Arthritis. Think you’re too young for arthritis? Think again. Hard miles on your ankles can lead to stiffness and aching.
  • Stress Fractures. These tiny bone cracks are your body’s way of saying, “Time to take it easy!” Overdoing it with distance or pounding on hard surfaces is often the culprit.
  • Chronic Ankle Instability (CAI). Sometimes after an injury, your ankle might feel a bit wobbly and less reliable, often leading to a cycle of instability.
  • Foot Arch. If your foot’s arch is more flatline than arch, it can lead to ankle discomfort due to altered foot mechanics.
  • Getting Old. It’s not just an age thing. Past injuries or just lots of use can lead to osteoarthritis in your ankles, causing pain and stiffness.
  • Wrong Shoes. The wrong shoes can do a number on your ankles. Always choose the right footwear for your foot type and running style.

Ankle Mobility And Flexibility Explained

Ankle mobility is essentially how freely your ankle can move. This isn’t just about muscle and ligament flexibility; it’s about the overall movement range of your ankle, which directly impacts your running form and foot placement.

Now, while flexibility and mobility might sound similar, they’re different. Flexibility refers to the muscles and ligaments’ ability to stretch, but mobility is about the ankle joint’s range of motion and its effectiveness. Both matter for runners, but mobility gives a more complete understanding of how the ankle functions during a run.

Let me dive a little deeper into the importance of ankle mobility:

  • Injury Prevention: Good ankle mobility helps spread the impact of running more evenly across your lower body, cutting down the risk of injuries.
  • Boosted Performance: When your ankle moves freely, you get a better push-off and transfer energy more efficiently, making your run smoother and faster.
  • Better Terrain Handling: This is a big deal for trail runners. Strong ankle mobility allows you to tackle uneven ground with more stability and flexibility, keeping you safer and more confident on tricky paths.

Ankle Stretches for Runners

Adding ankle stretches to your running routine not only helps you dodge injuries but also improves running efficiency. Imagine if tight ankles were holding you back, making your run more of a hop across the terrain.

Here are my go-to exercises:

Ankle Circles

  • What It Does: Boosts your ankle’s range of motion and loosens up the joint.
  • How to Do It: Whether sitting or standing, lift one foot and draw circles in the air with your toes, moving from the ankle. Do 10 circles one way, then switch directions. Swap feet and repeat.

Toe Walks

  • What It Does: Strengthens your feet and lower leg muscles, giving your ankles more stability.
  • How to Do It: Stand tall and pop up on your tiptoes. Strut forward for 20-30 seconds without letting your heels touch down.

Heel Walks

  • What It Does: Activates the shin muscles and boosts dorsiflexion movement.
  • How to Do It: Keep the front of your feet lifted and tiptoe in reverse, walking on your heels for 20-30 seconds.

Standing Achilles Stretch

  • What It Does: Increases flexibility in your Achilles and calves, key for a smooth foot strike.
  • How to Do It: Face a wall with one foot ahead of the other. Keep your back heel down, lean in, and wait for that sweet stretch in your lower leg. Hold, switch legs, and repeat.

Plantar Fascia Stretch

  • What It Does: Aims at the plantar fascia, increasing flexibility and cutting down injury risks.
  • How to Do It: Sit and cross one leg over the other. Grab the toes of the crossed leg and gently pull them toward you until you feel a stretch under your foot. Hold, switch, and repeat.

Ankle Mobility Exercises For Runners

If you’re a runner, you know all too well how much we rely on those trusty ankles of ours. So, let’s talk about some top-tier stretches and exercises to keep them in tip-top shape.

Standing Calf Stretch

  • What It Does: This one’s a big thank you to your calf muscles for all their hard work.
  • How to Do It: Find a wall, lean into it with your hands, step one foot back, keep it straight, and press that heel down. Feeling that stretch? Awesome, hold for 20-30 seconds and then switch it up.

Seated Towel Stretch

  • What It Does: Dives deep into that plantar fascia and gives a little love to your Achilles and calves.
  • How to Do It: Sit with your legs stretched out, loop a towel around your foot, and gently tug towards you with a straight leg. You’ll feel a solid stretch. Hold, switch, and repeat.

Ankle Circles

  • What It Does: It’s like taking your ankles for a little joy ride, boosting flexibility and movement.
  • How to Do It: Lift a leg and start drawing circles with your foot—10-12 in one direction, then switch. Repeat with the other foot. Feeling looser? Perfect!

Achilles’ Heel (Achilles Stretch)

  • What It Does: Hits your Achilles tendon and those lower calf muscles.
  • How to Do It: Hands on a wall, one foot back, straighten that leg, press the heel down and lean in. There’s the stretch. Switch after 20-30 seconds.

Band Dorsiflexion Stretch

  • What It Does: Strengthens the muscles for lifting your foot, crucial for that push-off.
  • How to Do It: Sit, legs out, wrap a resistance band around your foot, and flex towards you. Aim for 10-15 reps, then show your other foot some love.

Ankle Alphabets

  • What It Does: Works on mobility and stability, plus you get to doodle with your toes!
  • How to Do It:: Sit down, lift a leg, and start writing the alphabet in the air with your foot. Switch after Z. It’s a fun way to end your session!

Conclusion

In a nutshell, mixing up your routine with these ankle-focused stretches and exercises is key for any runner looking to boost performance and steer clear of injuries.

By weaving in dynamic stretches before you run, static stretches after, and regular strength exercises, you’re giving your ankles the strength and flexibility they need.

This little bit of ankle TLC goes a long way in making sure you can keep hitting the pavement injury-free, with better balance and efficiency. So, here’s to happy running and even happier ankles!

Mile Repeats: Your Secret Weapon for Marathon Training Excellence

Running VS. Strength Training

Looking to improve your marathon time? Then you should seriously consider adding mile repeats to your training plan.

Here’s the truth. Think of mile repeats as the secret sauce to marathon success. This isn’t just another run-of-the-mill workout; it’s a strategic move that can elevate your game, regardless of whether you’re just starting out or you’ve been hitting the pavement for years.

I’m talking about a workout that not only ramps up your speed but also fine-tunes your running efficiency, making those long distances feel a bit more manageable.

In this guide, I’m going to walk you through everything you need to know about weaving mile repeats into your marathon training.

From the nitty-gritty of why they’re so beneficial to offering you some killer sample workouts to get you started, I’ve got it all covered.

Sounds like a great deal?

Then let’s get started.

Understanding Mile Repeats

Mile repeats involve running a mile at a targeted pace, followed by a period of rest or easy jogging, and repeating this sequence multiple times. This workout is a fantastic way to dial in your race pace, whether you’re gearing up for a speedy 5K or prepping for the long haul of a marathon.

Why Opt for Mile Repeats?

Here’s why they’re a game-changer:

  • Endurance Boost: Mile repeats aren’t just about putting in the miles; they’re about building up that engine, enhancing your aerobic capacity with every repeat.
  • Pace Mastery: They’re your practice ground for nailing that perfect, consistent pace, so come race day, you’re ready to roll without burning out too soon.
  • Quicker Recovery: Those rest periods? They’re golden for teaching your body to bounce back quicker between hard efforts.

Running Mile Repeats Like a Pro

So, what does a solid mile repeat session look like? You might find yourself tackling anywhere from 5 to 8 repeats, pushing a bit harder than your marathon cruise speed but not going all-out like you would in a short race. And between each mile? Give yourself 3-4 minutes to catch your breath or jog it out.

If the 5K is your arena, try 2-3 repeats right at the pace you’re aiming to hit on race day, with a three-minute recovery jog to reset. Eyeing a 10K? Then you’re looking at 5-8 repeats, each one a tad quicker than your goal pace, but with those recovery breaks to keep you from overdoing it.

Benefits for Marathon Runners

I know, I know – talking about mile repeats might feel like we’re going over the same track again, but there’s a good reason they’re such a hot topic for marathon runners. Let’s break down why mile repeats are a game-changer for those looking to conquer the marathon:

  • Amp Up Your Aerobic Engine. At the heart of marathon success is your aerobic capacity – essentially, your ability to keep on trucking over those long miles. Mile repeats challenge and expand this capacity, building the endurance you need to keep a steady pace throughout the 26.2-mile journey.
  • Speed Boost on Tap. Incorporating regular mile repeat sessions into your training is a surefire way to see your speed increase. Pushing yourself to run these repeats at a pace that feels a bit out of your comfort zone teaches your body to adapt and run faster over time.
  • Mastering Your Marathon Pace. Getting your pace right is crucial for marathon running. Mile repeats give you the chance to dial in that race pace, ensuring you can maintain a consistent speed across the entire distance.
  • Building Mental Fortitude. Tackling mile repeats, especially when you’re tired, is as much about mental toughness as it is about physical endurance. This prepares you to face those challenging moments during a marathon head-on.
  • Run More Efficiently. One of the perks of mile repeats is improved running economy. This means you get to run faster and longer using less energy. Who wouldn’t want that?
  • Elevating Your VO2 Max. These workouts are great for boosting your VO2 Max – the peak amount of oxygen your body can use during intense workouts. A higher VO2 Max is like having a bigger engine, and who doesn’t want more horsepower?
  • Strengthen Muscles. Mile repeats are fantastic for building leg strength and developing both your slow-twitch and fast-twitch muscle fibers. This not only helps with speed and endurance but can also have anti-aging benefits too.

Keeping Things in Balance

Remember, mile repeats are just one piece of the marathon training puzzle. It’s crucial to balance them out with other key ingredients:

  • Long Runs: These are your bread and butter for building endurance.
  • Recovery Runs: Slow and easy does it here, helping your body heal and adapt.
  • Cross-Training: Activities like cycling or swimming keep you fit without the pounding, offering your joints a breather.

This well-rounded approach keeps training fresh and prevents overloading your body, setting the stage for solid performance on race day.

Scheduling Mile Repeats

The optimal timing for mile repeats depends on your specific race goals and current fitness level. But, overall, I’d urge you to build a solid base before introducing mile repeats.

Let me explain more.

If you’re looking to improve your marathon speed, start adding mile repeats into your plan 8-10 weeks out from race day. Wrap these sessions up 10-14 days before the event to give your body ample time to recover and enter the taper phase fresh.

How many? I’d recommend doing mile repeats once a week or every other week, based on how well you recover and your total training load.

If you’re new to this, starting with 2-3 repeats per session and gradually building up is wise as your fitness level improves. But for those with more miles under their belt might tackle 4-6 repeats, tailored to their fitness and specific race objectives.

Determining the Right Pace

Your mile repeat pace should be quicker than your marathon pace but not as fast as your all-out 5K speed. Aiming for a pace that’s 10-15 seconds per mile faster than your 10K pace strikes a nice balance.

Think of hitting a 7-8 on a 10-point effort scale. It should feel challenging and push you, but you shouldn’t be gasping for air like you’re sprinting to the finish line. As you get fitter, be ready to adjust your pace. The goal is to keep the effort consistently challenging.

Recovery Between Repeats

Recovery periods let your heart rate come down and give your muscles a breather. This way, you can tackle each repeat with a relatively fresh set of legs and lungs.

Recovery time generally lasts 1-3 minutes, ideally about half the time it takes to complete a repeat. Depending on how hard you’re pushing and your current fitness level, recovery could extend from 2 to 5 minutes.

During these breaks, feel free to opt for light exercise like or walking or easy jogging. This helps keep your muscles warm and ready for the next round without cooling down too much.

How to Perform Mile Repeats:

Executing mile repeats efficiently is about preparation, pacing, and recovery. Here’s how to get started and make the most of this powerful workout:

Finding Your Mile

A standard running track is perfect since it’s 1/4 mile per lap; four laps will give you your mile.

No track? No problem. You can measure out a mile using your car’s odometer or a GPS-based app like MapMyRun. Treadmills are also a solid option, giving you precise control over distance and pace.

Warming Up

Kick things off with dynamic stretches—think high knees and butt kicks. These movements get your muscles ready and your blood flowing, setting you up for an effective session.

Running Your Mile Repeats

Start by running each mile just a tad faster than your marathon goal pace, around 10 to 15 seconds quicker per mile. If you’re aiming for a more intense session, push yourself to hit your 10K or even 5K pace.

After each mile, dial it back with a half-mile jog or take two to four minutes of rest. The goal during recovery is to let your heart rate and breathing ease back down to more relaxed levels before you hit the next repeat.

Building Up

Begin with three repeats in your first session. In each subsequent session, add one more repeat, focusing on maintaining a consistent pace across all repeats. The aim is not just to finish but to finish each repeat strong, without needing longer breaks for recovery.

Beginner’s Mile Repeat Workout

This session is perfect if you’re just getting into running, coming back after a break, or prepping for a 5K or 10K.

Here’s how to proceed:

  • Kick things off with a mile of easy jogging to get those muscles warm and your heart rate up.
  • Run a mile at the pace you’re aiming for in your upcoming race.
  • Slow down for a 4-minute jog to let your heart rate come back down.
  • Tackle another mile at your goal race pace, followed by another 4-minute easy jog.
  • Wrap up with a mile jog to help your body start the recovery process and ease muscle soreness.

Intermediate Mile Repeat Workout

If you got some speed work under you belt and are eyeing 10K or half marathon distances, then this workout is for you.

Here’s how to proceed:

  • Start with a mile jog to get ready for the more intense effort to come.
  • Run a mile at your target race pace.
  • Take a 2-minute easy jog to recover.
  • Complete this cycle to do a total of 4 mile repeats and 4 recovery jogs.
  • End with a mile of jogging to facilitate recovery and maintain flexibility.

Marathon Mile Repeat Workout Overview

Tailored for intermediate to advanced runners focusing on marathon training.

Here’s how to proceed:

  • Begin with a mile of jogging to get the blood flowing and muscles ready for action.
  • Run a mile at your intended marathon pace.
  • Follow up with 2 minutes of easy jogging.
  • Keep the sequence going to finish 5 mile repeats and 5 recovery jogs.
  • Close out with a mile jog to cool down, aiding in recovery and minimizing injury risk.

Note: If you’re feeling up for it, challenge yourself by adding another mile repeat, bringing the total to 6, to push your endurance and pace management skills even further.

Conclusion:

Incorporating mile repeats into your training is akin to equipping your running arsenal with a powerful tool. They not only enhance your speed and endurance but also boost your mental resilience.

Success in running, particularly in marathons, is a gradual process that demands consistency, patience, and trust in your training.

The Runner’s Guide to Energy Gel Timing: When and How Many?

Curious about the perfect timing for those energy gels during your races? Then you’re in the right place.

When it comes to running, fueling up is as crucial as putting gas in a car before a long journey. Imagine trying to race with an almost empty tank – it’s like attempting a cross-country road trip without a pit stop in sight. That’s where energy gels come to the rescue.

As a runner myself, I’ve had my fair share of experiences with energy gels, both on the training track and in the thick of a race. The journey of understanding how to harness the power of these gels has been a mix of trial, error, and those moments of pure, energized bliss when everything just clicks.

In this article, I’m delving deep into the world of energy gels. We’ll uncover what they’re made of, why they work so well for runners, and most importantly, how to use them effectively to power your way through races.

Ready?

Let’s dive in!

What Are Energy Gels?

Here’s the lowdown: at their core, energy gels are concentrated carbs. you’re pushing the limits. The star of the show is usually maltodextrin, a carb derived from corn. You’ll also find fructose in the mix – yep, the same sugar that gives fruits their sweetness. These ingredients are the quick-fix energy boost your muscles need when you’re on the move.

Why do they work so fast? It’s all about how easily our bodies can break down maltodextrin and fructose. They’re the speedsters, getting that energy straight to your muscles ASAP.

Now, if we tried to fuel up with complex carbs mid-run, our bodies would be lagging, trying to convert that food into energy when it’s too late. That’s why energy gels are such a game-changer.

And get this – they’re not all about the squeeze packets. Some gels come ready to mix into your drink, making it even easier to stomach when you’re in the thick of it.

The Main Ingredients

Diving into the heart of energy gels reveals a cocktail of performance-boosting ingredients designed to keep you running stronger and longer.

Here’s a breakdown of what’s inside these little packets of power:

Carbohydrates: The Fuel Core

Packing 20 to 30 grams of carbs, each gel is pretty much the energy equivalent of a banana, but way easier to carry. And the flavors? There’s a whole spectrum, from classic fruit tastes to more adventurous ones like Rhubarb and Custard or even Apple Crumble.

Electrolytes: The Balance Keepers

Sodium, potassium, and magnesium make up this crucial trio. Beyond flavor, electrolytes are crucial for fluid balance and muscle function, ensuring you stay hydrated and cramp-free as the miles add up.

Caffeine: The Optional Kick

Not every gel has it, but caffeine can be that extra zing, mentally and physically, like pressing a boost button when you need it. It’s great for sharpening focus and adding a spring to your step.

However, Caffeine’s not for everyone, and its inclusion varies by gel. Its impact can differ greatly among runners, so it’s a bit of a personal preference.

Variety: The Spice of Running Life

Energy gels offer a flavor and function playlist for your runs. Whether you’re in the mood for something sweet, nutty, or even savory, there’s a gel for that.

It’s not just about taste. Some gels offer an instant energy surge, while others provide a steadier, more prolonged fuel release. It’s like choosing between a quick splash of energy or a longer-lasting fuel drip for your endurance efforts.

The Science Of Energy Gels For Runners

The role of energy gels in boosting athletic performance isn’t just anecdotal; it’s also well-documented through scientific research. Here’s a snapshot of what science tells us about the effectiveness of energy gels:

Energy Gels and Endurance Performance

A study in the Journal of the International Society of Sports Nutrition demonstrated that energy gels significantly enhance endurance performance. Participants who consumed energy gels showed improved outcomes over those who took a placebo, underscoring the value of carbohydrate intake during extended physical activity.

The Impact on Running Distance and Fatigue

In a rigorous test involving 14 male recreational runners, a study compared the effects of a carbohydrate gel (with fructose and maltodextrin) to a placebo during a 2-hour treadmill run. The findings were striking – runners using the carbohydrate gel increased their running distance by 14.6% and reported feeling less fatigued and exerted than the placebo group. This experiment highlighted not only the physical but also the perceptual advantages of energy gel consumption.

Energy Gels in Half Marathon Performance

Another investigation targeted the influence of carbohydrate gel consumption on half marathon performance among 16 trained runners.

The study pitted a carb gel against a placebo to observe differences in completion times and subjective experiences. The results? Runners who took the energy gel finished the simulated half marathon about 5 minutes faster than the placebo group, with times averaging 93.5 minutes compared to 98.5 minutes.

What’s more?

This group experienced lower fatigue levels and perceived exertion, reinforcing the dual benefits of energy gels on both objective performance and runners’ subjective feelings during the race.

The Downsides of Energy Gels

While energy gels undoubtedly offer a convenient energy boost during long runs, they also carry some notable downsides worth considering:

GI Distress:

One of the most common issues associated with energy gels is gastrointestinal (GI) distress. This discomfort often arises when the gel is consumed without sufficient water, leading to inefficient fuel absorption. Consequently, the gel may linger in the stomach, providing a feast for natural bacteria and triggering unpleasant symptoms like bloating, cramps, and diarrhea. As someone who has experienced their fair share of GI issues during long runs, I can attest that it’s far from pleasant.

Energy Rollercoaster:

Energy gels, primarily composed of fast-acting carbohydrates like glucose, deliver a rapid energy boost. However, this quick absorption can lead to sharp energy spikes followed by abrupt crashes, leaving you feeling drained and fatigued.

Synthetic Flavors:

The artificial flavors used in some energy gels may not be to everyone’s taste. Disliking the flavor may lead runners to unconsciously delay or avoid consuming gels during a race or long run. This reluctance can result in inadequate fueling, leading to hitting the dreaded “wall” and underperforming when it matters most.

Despite these drawbacks, proper hydration, strategic consumption, and experimentation with different brands and flavors can help mitigate these issues, allowing runners to harness the benefits of energy gels while minimizing the downsides.

Determining Your Energy Needs

Figuring out how much energy you need for your runs is crucial for nailing your fuel strategy. It’s a bit like knowing the right amount of gas for different car trips. Here’s how to match your energy intake with the distance you’re running:

Short Races (5K, 10K):

Think of these as your quick city drives. For these distances, you might not even need energy gels since your body typically has enough fuel in the tank to get you through without dipping into reserves.

Half-Marathons and Marathons:

This is where energy gels come into play. As you clock up the miles, your body starts to burn through its stored energy, and without a top-up, you might find yourself running on empty. Popping a gel can give you that much-needed energy boost to keep you going.

Ultra Marathons:

Ultra marathons are the ultimate test of endurance, akin to those epic, day-long road trips. Here, keeping your energy levels consistent is as important as staying hydrated. Regularly consuming energy gels can help maintain a steady energy supply, ensuring you’ve got the stamina to cross the finish line, no matter how far off it may seem.

Mastering the Timing of Energy Gel Intake

The impact and absorption timing of energy gels can differ widely among runners. While some may experience an energy surge within minutes, others might find it takes longer. Remember, high-intensity exercise diverts blood from the stomach to the muscles, potentially delaying gel absorption and, in some cases, causing gastrointestinal discomfort.

To avoid hitting the dreaded wall, it’s better to consume a gel before your energy dips too low. This makes it essential to experiment with gel timing during your training runs to discover what works best for you.

Scheduling Regular Energy Gel Intake During Races

Aiming to consume an energy gel every 30-45 minutes during a race is a strategy akin to scheduling regular pit stops to refuel. This consistent intake helps prevent your energy levels from plummeting. Yet, it’s important to note that preferences and specific product recommendations vary—some gels are designed for consumption every 20 minutes, while others may recommend longer intervals.

Research, including studies from the Journal of Strength and Conditioning Research, highlights that consuming energy at regular, shorter intervals can significantly enhance endurance performance. This underscores the need to personalize your energy gel consumption plan, taking into account your own experiences and the guidelines provided by the gel brand you choose.

Adjusting Timing Based on Personal Needs and Race Dynamics

As your race progresses, your energy needs may evolve. In the beginning, you might not need gels as frequently. However, as the miles add up and fatigue sets in, the demand for quick energy boosts increases. Recognizing the early signs of energy dips, like fatigue or heavy legs, is crucial for timely gel intake.

Insights from Research:

A study with cyclists investigated the effects of energy gel consumption frequency on performance. The participants were divided into three groups:

  1. Control Group: This group did not consume any energy gels, serving as a baseline for performance comparison.
  2. Manufacturer’s Guidelines Group: Cyclists in this group consumed energy gels every 45 minutes, adhering to the recommended intake frequency.
  3. Increased Frequency Group: This group consumed energy gels every 30 minutes, more frequently than the manufacturer’s suggestion.

The outcomes were revealing. Teams that incorporated energy gels clearly outpaced the gel-free group, underscoring the efficacy of energy gels in boosting endurance.

More specifically, Team Three, with their accelerated gel consumption rate, reported a significant 5-7% improvement in performance over Team Two. This is proof that shorter intervals between energy gel intakes could be key to maximizing athletic output.

But you should be aware of your body’s carb absorption capacity, which generally maxes out at around 60 grams per hour—or roughly two or three energy gels. Going over this limit may not provide any additional benefits; it could likely cause gastrointestinal distress or other issues, and you don’t want that.

How Many Gels do I need for a Marathon?

Let me give you a practical example by discussing how the number of energy gels you need for a marathon. Here’s a simple way to calculate your needs:

Given that the general recommendation is to consume about 60 grams of carbohydrates per hour, and most energy gels contain around 30 grams of carbs (though this can vary, so always check the label), you’re looking at needing two gels for every hour you’re on the move.

Here’s a quick reference based on your expected finish time:

  • 6-hour marathon: Prepare for 12 gels during the race, plus one before you start, totaling 13 gels.
  • 5-hour marathon: You’ll need 10 gels while running, plus one pre-race, making 11 gels.
  • 4-hour marathon: Plan on 8 gels during the marathon, with an extra one before, coming to 9 gels.
  • 3-hour marathon: Expect to use 6 gels as you race, plus one beforehand, totaling 7 gels.

Tackling a half marathon in roughly two hours? You might use four gels during the race. Since it’s a good idea to fuel up about 20-30 minutes before starting, that means you’d need about five energy gels in total for race day.

Wrapping Up

Energy gels serve as a crucial ally in reaching the finish line, embodying the essence of careful planning and attentiveness to your body’s signals. Whether you’re an experienced marathon runner or just starting, mastering the art of using energy gels can significantly enhance your performance.

What’s The Typical Heart Rate Zone During A Marathon?

Curious about how fast your heart should beat during a marathon? Then you’ve come to the right place.

Monitoring your heart rate during a marathon is more than just a numbers game; it’s like having a conversation with your body. It’s your body’s way of whispering when to push harder and when to ease off the gas pedal.

Now, you might be wondering, “What’s the average heart rate for marathon runners during the race?” and “In which heart rate zone do most runners compete?” I won’t sugarcoat it – I don’t have one-size-fits-all numbers for you because, let’s face it, we’re all as unique as our running styles.

But don’t fret!

In today’s blog post, I’ll take you on a journey through the fascinating universe of average marathon heart rates during a race.

Plus, we’ll delve into the myriad factors that can make your heart race faster than a sprint finish.

Ready? Let’s get started.

Understanding Heart Rate and Running

In essence, heart rate is the number of times your heart beats per minute (BPM), and it plays a vital role in your running performance.

Now, you might ask, why does it matter in running? Well, your heart rate is like the indicator of your body’s effort level. It tells you how hard your body is working and how much energy you’re using. When you’re running, each beat of your heart sends oxygen-rich blood to your muscles, ensuring they function optimally.

So, how do we measure this important metric? Enter heart rate monitors and smartwatches – handy tools for runners. These devices provide real-time feedback on your BPM, helping you stay in tune with your body’s exertion.

But it’s not just about the numbers. Let’s talk about heart rate zones. Think of these zones as different gears in your running machine, each with its own intensity level.

These zones range from easy-paced jogging (about 50-60% of your maximum heart rate) to high-intensity, hard-pushing efforts (around 80-90% of your max heart rate).

Training in these different zones is like preparing your body for various challenges during your run. It helps you build endurance, speed, and efficiency.

And please don’t take my word for it.

Research published in the Journal of Applied Physiology indicates that runners who train in specific heart rate zones enhance their running economy – that’s akin to getting more mileage from your running sessions.

Factors Affecting Heart Rate During a Marathon

Before we dive into the heart rate intricacies of marathons, let’s acknowledge that marathon runners are a diverse bunch. Each one of us brings our unique characteristics to the starting line, making it a challenge to pinpoint a one-size-fits-all heart rate.

Let’s explore some of the factors that can cause our heart rates to sway.

  • Maximum heart rate tends to decrease steadily with age. Consequently, older runners often maintain a lower marathon heart rate compared to their younger counterparts, even when both are exerting the same percentage of their maximum heart rate or VO2 max.
  • Training Level. Studies suggest that the anaerobic threshold typically hovers around 83-87% of VO2 max and the corresponding maximum heart rate. However, training can elevate this threshold to around 90% of max HR, allowing for higher-intensity exercise.
  • Running Experience. Running experience adds flavor to your performance. Seasoned runners may find their heart rates beating steadily, unaffected by the race’s ups and downs.
  • Effort Level. How hard you push during the race significantly impacts your marathon heart rate. Not all marathoners aim for personal records; some opt for a more relaxed pace, savoring the experience.
  • Outdoor Conditions. Marathon running isn’t just about you and the road; it’s also about where you run. High temperatures can quicken your heart rate as it works to cool your body.
  • Race Day Conditions. The excitement at the starting line can set your heart racing even before your legs move. It’s the adrenaline, the crowd, the anticipation—all contributing to an increase in BPM. Your pacing strategy also matters.

Typical Heart Rate Ranges During a Marathon

So, what’s the heart rate scoop during a marathon? Let’s break it down!

Experts often guide marathoners to aim for a heart rate between 65 and 80% of their maximum during the race. This range, known as the aerobic zone, is key to sustaining endurance without tipping over into the anaerobic zone, where the body starts running out of fuel too quickly.

For well-trained runners, staying within this zone can mean the difference between hitting the wall and cruising to the finish line.

Heart Rate Variations by Experience

The journey of a marathon runner is unique and varies widely across different skill levels. By understanding how heart rate behaves for novices, intermediates, and advanced runners, we can tailor training and race strategies to better suit individual experiences and goals.

The Heart Rate Spectrum

  • Novices: If you’re new to marathons, you might find your heart racing at 70-85% of your maximum heart rate (MHR). This high tempo, driven by excitement and adrenaline, can lead to a vibrant but potentially uneven pace as you navigate through your first marathon experience.
  • Intermediate Runners: Seasoned with more miles and perhaps a few races, intermediates typically find a rhythm at 60-75% of their MHR. This demonstrates a more mature approach, where the thrill of the run is matched with a strategic pacing that ensures a smoother race.
  • Advanced Runners: The crème de la crème of marathoners usually maintain a heart rate between 55-70% of their MHR. This efficiency reflects their high level of conditioning, allowing for fast paces without overexerting the heart, a true testament to their skill and preparation.

Leveraging Heart Rate for Better Performance

Understanding your heart rate during a marathon is more than academic; it’s practical knowledge that can refine your training approach and race day strategy. For example, heart rate zone training can boost your metabolic efficiency, enhancing endurance and paving the way to achieving faster paces as you build experience and fitness.

How to Discover Your Maximum Heart Rate

Finding your MHR is crucial for setting accurate training zones. While the formula “220 minus your age” offers a general estimate, individual variances mean it’s not one-size-fits-all. A more personalized method involves a field test under professional guidance, providing a clearer insight into your unique MHR.

Tailoring Your Marathon Heart Rate Zone

  • Recreational Runners: Aiming for a heart rate zone of 65-70% of your MHR is advisable if your goal is to enjoy the marathon journey without pushing to the brink of exhaustion.
  • Elite Runners: Chasing personal records or competitive achievements may require you to sustain a heart rate above 85% of your MHR, a demanding but necessary effort for peak performance.

Implementing Marathon Pace Runs

Incorporating Marathon Pace (MP) runs into your regimen can help you identify and adjust to the heart rate zone you’ll likely experience on race day. These “dress rehearsals” are crucial for fine-tuning pace and endurance, ensuring you’re not caught off-guard when the marathon begins.

Track Running Etiquette: Navigating Lanes and Rules for Runners

Looking for a no-nonsense guide to mastering the track? Well, you’re in the right place!

The track – it’s more than just oval lanes; it’s where your running journey can take off like a sprinter out of the blocks or unfold like a marathoner’s epic race. Whether you’re a rookie lacing up your running shoes or a seasoned marathon pro, the track is the ultimate proving ground to test your mettle, shatter your personal records, and chase that runner’s high.

But before you hit the ground running for your next (or very first) track workout, let’s chat about the heart of today’s discussion: track etiquette and rules.

Following these rules isn’t just about staying in line – it ensures everyone’s safety and turns every lap into an enjoyable experience.

In this post, we’ll dive deep into the world of track running rules, starting with the basics of understanding the layout of the track and decoding some common terms used in this fast-paced realm.

Sound like a plan? Great, let’s dive right in!

Lanes:

When you step onto a running track, you’re entering a world where every lane and curve is designed with precision for performance and fairness. Whether you’re a seasoned track athlete or a runner looking to understand the nuances of the track, here’s what you need to know about its layout and lanes:

  • Number of Lanes: A standard outdoor track usually features between 6 to 8 lanes, though you might find some tracks with more. Each lane is about 1.22 meters wide, giving athletes enough room to run without interference.
  • Distance Variations: Because of the track’s oval shape, the distance around in each lane varies. The inside lanes are shorter, making them the prime spots for shorter races. For longer distances, athletes can be found across all lanes, but staggered starts help even out the differences.
  • Sequential Numbering: Lanes are numbered from the inside out, starting with lane 1. This lane hugs the innermost part of the track and has the shortest overall distance.
  • Curve Complexity: Running in the lower-numbered lanes means dealing with tighter curves, which can be a technical challenge at high speeds. It requires skill and practice to maintain speed without veering out of your lane.

Common Distances on a Track:

Now, let’s talk distances. Knowing these common distances on a track can help you plan  training and races effectively. Regular training and practice can improve speed and endurance, allowing athletes to tackle faster sprints and longer runs as they gain confidence in their abilities.

I remember my first attempt at running 400 meters, which is approximately one lap around a standard track. I felt like I was on a never-ending sprint!

Here are some common track distances:

  • 100 meters: The length of each straightaway, used for sprint races.
  • 200 meters: Half lap around a standard track.
  • 400 meters: Approximately a quarter-mile or one lap around a standard track.
  • 600 meters: Half lap followed by one full lap around the track.
  • 800 meters: Approximately half a mile, equivalent to 2 laps around the track.
  • 1200 meters: Approximately three-quarters of a mile, or 3 laps around the track.
  • 1600 meters: Approximately 1 mile, or four laps around the track.

General Etiquette for Track Running

Track running, like any communal activity, relies on mutual respect and awareness. Understanding and practicing good track etiquette ensures safety for all and enhances the experience for everyone involved.

Let’s dive in.

Be Aware of Written Rules:

Many tracks post their rules online or on signage around the venue. These might include specific hours for public use versus team training, or rules about equipment use. A quick look can save you a lot of hassle.

Respect Designated Times:

If there are set times for different activities or user groups, make sure you’re hitting the track at the right time for what you want to do.

Shared Space:

Remember, the track is for everyone—from those clocking in their daily miles to teams practicing relays. Keep an eye out for others and be ready to share the space.

Stay Ready:

Before you step onto the track, make sure you’re all set to go—gear in hand, shoelaces tied. The track is a no-parking zone to keep the path clear for others.

No Stopping:

It might be dramatic in the Olympics, but on a community track, halting in your tracks is a no-go. Always step off the track if you need to pause for any reason, be it a cramp, a phone call, or just to catch your breath.

Merge Wisely:

Joining the track? Treat it like getting on the freeway. A quick look both ways ensures you’re not jumping in front of someone mid-sprint.

Exit Considerately:

When it’s time to head off, glance over your shoulder to ensure you’re not cutting off a fellow runner. Think of it as closing a door gently instead of slamming it shut.

Passing Protocol:

Generally, the fast lane is to your right on a counterclockwise track. When you’re zooming past someone, give them a heads-up to prevent any startles. A simple “on your left” or “on your right” does wonders.

Side to Pass On:

While the right side is standard for overtaking on a counterclockwise loop, tracks and local customs can vary. Stay observant and be ready to adapt, keeping in mind the direction that seems to be the norm for that particular track.

Use the Innermost Lane When Running:

Navigating the lanes on a running track can feel a bit like choosing the right lane on a highway; each one serves a specific purpose to maintain smooth traffic flow.

Here’s how to pick your lane wisely:

  • Inner Fast Lanes: Lanes 1 and 2 are the express lanes of the track world, set aside for speed demons and those doing intense speed work. Think of these as the left lanes on the freeway, where the pace is brisk and the action is non-stop.
  • Middle Lanes for Moderate Pace: Lanes 3 and 4 strike a balance, offering a space for moderate-paced running or those engaging in interval training. These lanes are the middle ground, perfect for runners who are pushing the pace but not sprinting.
  • Outer Lanes for Leisure and Warm-ups: Lanes 5 and beyond are the scenic routes of the track, ideal for joggers, walkers, and those in the warm-up or cool-down phases of their workout. These lanes provide a more relaxed space, away from the hustle of the inner lanes.

Avoid Blockades:

Walking or coming to a halt in the fast lanes (1 and 2) is a major faux pas. It’s like parking in a no-parking zone; it disrupts the flow and can be a hazard. If you need to slow down or stop, gracefully move to the outer lanes.

Pick Your Pace Lane:

Slower-paced runners and walkers should gravitate towards the higher-numbered lanes. This segregation ensures that everyone from sprinters to strollers can coexist peacefully on the track.

Changing Lanes with Care:

Just like you’d check your mirrors and blind spot before changing lanes on the road, always take a quick look over your shoulder before shifting lanes on the track. This simple action can prevent collisions and ensure you’re not inadvertently cutting someone off.

Aim for a gentle merge into the next lane, rather than a sudden swerve. This gives others on the track time to adjust to your movement.

Overtaking Etiquette:

When you need to pass someone, do so on their left side. Since most tracks run counterclockwise, this means you’ll be moving into an outer lane to overtake.

A quick “on your left” lets the person in front of you know you’re coming through. This heads-up is all about promoting safety and courtesy on the track.

Busy Times vs. Less Crowded Times:

When the track feels like a runner’s rush hour, sticking to your designated pace lane becomes even more crucial. This helps keep the flow of foot traffic smooth and prevents bottlenecks.

If you find yourself on the track during a lull, you’ll likely have more leeway in lane choice. However, maintaining the habit of sticking to appropriate lanes keeps you in good practice for busier times and upholds the spirit of track etiquette.

Standard Direction:

Traditionally, running on tracks is done in a counterclockwise direction. This is similar to following the hands of a clock in reverse. This standard direction helps maintain a consistent flow and reduces the risk of head-on encounters or confusion among runners.

Even if the track is empty when you arrive, it’s important to start running counterclockwise.

Some tracks may alternate directions daily or weekly to provide a balanced workout for frequent users.

When in doubt, follow the lead of other runners on the track. Running in the same direction as others reduces the risk of collisions and ensures a harmonious experience.

Running in the Opposite Direction:

Occasionally, certain tracks may permit running in the opposite direction, typically on designated days or during specific training sessions. This is similar to driving on the other side of the road and should be done with caution.

If you choose to run clockwise on a track that typically goes counterclockwise, be sure to follow the track’s specific rules and be extra cautious to ensure safety and avoid disrupting other runners.

Respect the Hours of Use:

Many tracks have specific hours when they are off-limits to recreational runners. It’s essential to check the rules for each track you use. Some tracks restrict use during school hours for the safety of students, while others may allow recreational runners in the outer lanes while teams are training. Some tracks may also have restrictions after dark.

Bringing and Using Equipment:

Equipment like hurdles, starting blocks, and cones are essential for specific training but require special consideration. Always check the facility’s rules regarding the use of equipment, as some tracks may have specific times or lanes designated for this purpose. When setting up equipment, be mindful of other runners and ensure it doesn’t obstruct or pose a hazard to them.

Personal Items:

Personal items such as water bottles, towels, and music players are commonly used by runners. Keep these items close to the edge of the track to prevent tripping hazards and ensure they are within reach without interfering with other runners.

Safety Considerations for Electronics:

While it’s safer to use headphones on the track, it’s wise not to completely block your sense of hearing. Play music at a very low volume or use one earbud so you can hear other runners and stay aware of your surroundings.

Leaving your headphones at home is a good option, especially if the track is busy. Avoid broadcasting your music to others with a stereo or speaker.

Stretching and Recovery Practices:

When engaging in stretching or recovery practices, use areas that don’t impede others. Utilize the infield, sidelines, or areas behind the start or finish lines, keeping the lanes clear for active runners. It’s about sharing the space thoughtfully, similar to finding a quiet corner in a library to read without disturbing others.

Guidelines for Bringing Children and Pets:

Check if the track allows children and pets, and if they are permitted, ensure they are always under supervision. Children and pets should not wander onto the track or into the path of runners for their safety and the safety of others.

Overview of Specific Rules:

During organized events and competitions, there are often specific rules participants must follow, such as lane assignments, starting procedures, and rules about overtaking or pacing. Familiarize yourself with these rules before the event to ensure fair play and enjoyment.

Differences in Track Usage During Competitions:

Tracks during competitions are strictly regulated, with lanes assigned for specific events and restricted areas for warming up or cooling down. It’s a structured environment designed to ensure fairness and order during the competition.

Conclusion

These etiquette tips are like the secret handshake of the track community, helping you seamlessly blend in and make the most of your running sessions. Remember, running is not just a physical activity; it’s a shared journey with fellow enthusiasts.

Thank you for stopping by.

Keep training strong.