How to Stop Runners Itch – Your Guide To Itchy Legs While Running

runners itch

Looking for solutions for the runners itch? You come to the right place.

Here’s the truth. Run long enough and, sooner or later, you’ll have to stop, mid-run, to relieve an itchy leg.

Coming down with this one time is one thing, but having it several times during your runs is another thing.

Fret no more.

In today’s article, I’ll explain some of the main causes you feel itchy while running and what to do to treat and prevent it.

What Is A Runners Itch?

First things first, what’s an itch, and why it happens?

Technically known as pruritus, an itch is a general sensation caused by the irritation of skin cells or the nerves within the skin.

The itch may feel like a slightly electrical, burning sensation or like something is crawling along the skin.

More specifically, itching occurs when the nerve endings, known as proprioceptors, are activated by chemicals, temperature, infection, injury, or the body’s own immune response.

Upon stimulation, these proprioceptors send messages to your brain and spinal cord, which, in turn, trigger a rubbing or scratching reflex.

In most cases, the moment you scratch the affected area, you interfered with these nerve signals, providing immediate relief.

Although uncomfortable, itching serves a key sensory and self-protection role and a warning sign of an abnormal physical condition, as do other skin sensations such as pain, touch, cold, heat, and vibration.

So, what is a runner’s itch?

A runner’s itch is generally a tingling or itchy sensation that strikes runners. In most cases, the uncomfortable sensation slowly moves up the legs while logging the miles.

In some cases, the itching may be so extreme that you have to stop and scratch, which messes up the flow of your workout. The itching may also stride during intense cardio training and can spread beyond the legs. This is really, really annoying.

Fortunately, it’s often the case that a runner’s itch isn’t a cause for concern. In fact, there are many simple steps you can take right now to treat and prevent it without much hassle.

But first things first, let’s take a look at what’s causing workout itchiness in the first place.

The Causes Of Itchy Legs While Running

There are many causes of the itchy feeling on the skin when running.

Let’s discuss a few

Taking Running Again

Let’s take a look at what happens to your body.

While working out, your heart rate is increased for a sustained period in order to transfer oxygen and nutrients to your muscles. This forces the arteries and capillaries in your muscles to expand.

This is what’s known as vasodilation, a process by which blood vessels open up and expand to allow for more blood to come through.

Here’s the downside. Vasolidation causes a sensation that your brain perceives as itchiness.

Fortunately, if you can push through the discomfort, the itchiness usually fades away as you build more endurance.

Additional resource – Prevent Heart Burn In Runners

Dry Skin

Runners who have naturally dry skin or get drier skin in the cold season are prone to itchiness.

Also, taking too many showers, or soaking in a hot bath, may strip your skin of some of the natural oils that keep it moist, setting the stage for itchiness. The loss of moisture in your skin is the reason that makes it prone to irritation from contact, which leads to itchiness.

Sensitive Skin

Often, the itching can simply be caused by something as simple as an allergic reaction to clothing material or laundry detergent and perfume with high alcohol ingredients.

You might not feel itchy during normal use, but sweating can exacerbate the reaction and cause a serious runners itch.

Irritating Fabrics

Clothing dermatitis is another common reason for runners itch. This is especially the case if you start noticing your itching problems just after trying a new running outfit.

Dermatitis occurs when the skin reacts badly to the fibers in the clothing as well as to the resin, dyes, and other chemicals used to treat what you wear.

Any type of fiber may trigger an itch, but you’re more likely to get textile dermatitis from material made with synthetic fibers such as rayon, polyester, spandex, nylon, or rubber. These fabrics may not breathe as well as natural fibers, making you sweat more, which, in turn, makes itching worse.

Additional Resource – Why Do I sweat too much while running?

Histamine Release

Histamine is a substance produced by the body and is typically associated with itching, allergic reactions, and inflammation. The substance works to expand your blood vessels, which the brain reads as a sign of itchiness.

Here’s the kicker. Recent research has suggested that exercise may trigger the release of histamine to protect against fatigue instead of just being an allergic reaction.

To check for this, try taking an antihistamine before running to see if it helps with runners itch. Be careful because some antihistamines may cause drowsiness.

Exercise-Induced Urticaria

Exercise-induced urticaria is a type of allergic reaction that strikes when you come down with itchiness along with hives or tenderness of the skin.

This common allergic phenomenon can be triggered by sweating, extreme heat or cold, or exercising.

It occurs during or after hard exercise, especially when the train in hot or cold weather with dry humidity.

Other symptoms include

  • Headache
  • Stomach cramps
  • Swelling of the hands, face, or tongue
  • Difficulty breathing.

For more in-depth look into runners itch, check the following sources:

How To Treat Runner’s Itch

The causes of a runner’s itch may vary from something as simple as irritating workout gear to a serious skin condition that you might not be aware of.

That all being said, soothing itching legs while running may take you a little trial and error.

All in all, keeping a consistent running routine while taking some of the preventative measures shared below is the best way to stop runners’ itch and reduce their frequency/intensity.

Avoid Skin Irritants

As I explained earlier, there are many things that can irritate your skin and causes itchiness. You might not feel itchy on a normal day, but then you go for a run, and you find yourself having to stop every few minutes to scratch the itchiness away.

Some of the common irritators to avoid include:

  • Use The Right Detergent – Choose a gentler detergent. I’d recommend a naturally made product or a sensitive skin brand that helps soothe itching.
  • Use Mild Soap When Showering – Your soap should work with you, not against you. Choose a gentle, mild soap. This might not be what you like, but it’s a step in the right way for preventing itchy legs while running.
  • Hand soap – Use brands that contain moisturizers to help prevent your skin from getting dry.
  • Go natural, less alcohol, less paraben

Warm up Properly

If the itchy feeling is caused by a sudden return to exercise, make sure to start your runs with a proper warm-up. This helps get your blood flowing and increases body temperature before you pick up the pace.

Additional resource – Your guide to Charleys Horse


Use A Moisturizer

More than likely, dry skin is the reason behind your itchiness, so use a moisturizer and lotion to help restore some oils to your skin.

Apply the moisturizer to your legs as well as other itch-prone areas before you go running. Just remember to avoid products that contain dyes or perfumes, as some of these may trigger allergic itching in some people. If you feel moisturizer still too thick for you, shoot for coconut oil.

Additional resource – What’s the best temperature for running

Runners Itch Antihistamine

Another option is to take an antihistamine roughly 20 to 30 minutes before you plan to run. Antihistamines function as an allergy medication and since your runners itch might be caused by allergic reaction, it might help reduce your symptoms.

To make sure you’re using the best antihistamine for runners itch, I’d recommend to consult your doctor for a thorough examination. This is especially the case if you notice symptoms that seem to go beyond runner’s itch.

Stay Well Hydrated

It should come as no surprise, but proper hydration is key for optimum athletic performance. You have to stay well hydrated to run your best—or else, your performance will be subpar.

That’s not the whole story. Staying well hydrated also has an impact on your skin. That’s the reason when your body lacks water, your skin may look dull and sallow.

So drink plenty of water throughout the day—not just during and after your runs. Here’s the full guide to proper running hydration.

Additional Resource – Here’s the full guide lower abdominal pain while running.

Is Itchy Legs While Running Dangerous?

Experiencing itchiness while running isn’t a call for concern.

But if it persists despite taking some of the preventative measures, consult your doctor. They might help you get at the root cause of your itchiness and find if there are some other factors, such as food allergy,  behind your workout itching episodes.

This is especially the case if the itchy feeling is accompanied by

  • Lightheadedness
  • Dizziness
  • Hives that strike along with severe pain or burning that don’t fade within a few minutes
  • Difficulty breathing.

Are you still feeling itchy? Consult a dermatologist to be checked for skin disease or an internal medicine physician to be evaluated for other diseases. Cover all bases.

Additional resources:

Runners Itch  – The Conclusion

In most cases, runner’s itch is an annoying, mostly temporary, problem that isn’t anything to worry about. You can soothe the itchy feeling by running regularly, avoiding triggers and skin irritants, and keeping your skin healthy.

How To Choose The best Weighted Vest for Running

weighted vest for running

Curious about trying a weighted vest for running? Then you’ve come to the right place.

Weight vests have gathered a lot of steam over the past few years as a resistance training tool.

Strapping on one will instantly amp up your training intensity, whether you’re doing sprints or bodyweight exercises for resistance.

Fyi, it’s not only for soldiers. The vests are also available virtually everywhere and can be bought at sporting goods stores and online.

But when it comes to choosing the best weighted vest, there are so many features, benefits, and safety concerns to consider before using one.

Fret no more.

To help you find and the ideal weighted vest for running (and training in general), today’s guide will put you on the right path.

By the end, you’ll learn more about:

  • The benefits of training with weighted vests
  • Types of weighted vest
  • Different uses of weighted vests
  • How to choose a weight vest
  • How to start training
  • And so much more.

Sounds great?

Let’s get started.

What is A Weighted Vest For Running?

If you have no idea what weighted vests are all about, know that’s not overly complicated.

As the name implies, weighted vests consist of a vest-like garment that’s worn over clothing during training for increased cardio and resistance conditioning.

Since it’s harder to exercise while using the vest, your body starts to adapt to the extra resistance, making it easier to move around when you are not wearing the vest.

Weighted vests work the same way as ankle weights, but the extra load is centered on your core instead of your ankles.

The most popular design for a weight vest is similar to armor or life jacket with many small pockets, front and back.  These pockets can be filled with small weights such as steel weights (specifically designed to fit inside), sand, and so on.

The vest sits over the shoulders, back, chest, and core like any vest you’d wear under a suit or a life vest for swimming.

This helps keep the weight secure, preventing any moving around or shifting with minimal bounce while working out, whether you’re running, doing intense bodyweight exercises, or whatever.

The load intensity varies by product. Most weighted vests can accommodate additional weight for extra resistance.

The heavier the load, the more resistance you’ll experience. How much weight you should use is a question I’ll answer later on.

Most experts recommend starting training with a vest that’s about 5 percent of body weight, then work up from there. How you choose to train with one depends on your goals and fitness. Again, more on this later.

But what exactly does a weight vest accomplishes? Does it help you increase strength? Lose weight? Improve Your endurance?

The answer is, of course, yes. But it also largely depends on how you use it.

Let’s unpack this first.

The Benefits of Weighted Vest Workouts

Here are a few things you stand to gain when running with a weighted vest.

Increased Intensity

The main benefit of wearing a weight vest is to force your body to work harder during exercise.

Whether you choose to run, do bodyweight exercise, or whatever, using a weighted vest will amplify your effort, triggering further stress adaptation.

Improved Cardiovascular Function

One of the measurements of cardiovascular function is VO2max.

VO2 Max refers to the maximum amount of oxygen that your body’s cardiovascular system can absorb during training.

The harder you push yourself, the more oxygen is needed to sustain your activity.

By using a weight vest, you force your muscles to work harder, which increases oxygen needs. This, in turn, translates to an improved cardiovascular function in order to sustain the increased load.

Improved Speed

If you’re looking to improve your speed or athletic explosiveness in general, using a weighted vest is a step in the right direction.

Don’t take my word for it. Research has reported that long-distance runners were able to increase their speed by roughly three percent after weighted vest training.

When you put on a weighted vest, you force your body to exert more force during your training. Once you remove the added weight, you’ll notice a big difference in your speed and power.

Additional resource  – Your guide to running belts

Burn More Calories

The increased intensity translates to higher energy expenditure. That’s why wearing a weighted vest burns a lot more calories than performing the same routine without the added weight.

For example, let’s consider someone weighing 160 pounds and running at a challenging pace (9:00 minute per mile) for 30 minutes. According to science, they’ll burn roughly 460 calories during their session.

Another person weighing 180 pounds and running at exactly the same pace and time will burn nearly 500 calories. The differences may seem minor, but over time they do add up.

Why is the 180-pound runner burning more calories?

. And according to simple physics, it takes much more energy to move a heavier object.

When you’re training with a weighted vest, you’re adding more bulk to your body, making it heavier than it should be. For this reason, your body exerts more calories to keep pushing you forward.

Increased Bone Density

Wearing a weighted vest not only improves your cardiovascular and muscular gains but might also increase your bone density.

Any type of resistance helps improve bone density and strength—wearing a weighted vest is all the same. A Weight vest allows more bone remodeling.

Again, don’t take my word for it. Research has revealed that performing regular exercise while wearing a weighted vest may help prevent hip bone loss in postmenopausal women.

Better Options

Weighted vests are safer than any weighted clothing options.

For example, strapping on wrist, ankle, hand, or ankle weights places direct stress on the area applied. This not only increases injury risk but also impacts the way you run.

On the other hand, as I alluded to earlier, a weighted vest load is centered on your body. This allows for a better load distribution throughout your body which helps you maintain a proper posture.

How Heavy Should a Weighted Vest be For Running

The Downsides Of Using A Weighted Vest For Training

Just like any exercise equipment, weighted vests have certain downsides as well, which are key to pay attention to.

All in all, the risk degree depends on how you use the weighted vest.

Bad Form And Injuries

The main risk is that training with your technique. Bad exercise forms, such as weak posture, curved back, or whatever, can strain your muscles and joints and likely cause a tear or injury under the extra weight.

Not only that, strapping too much weight too soon could put stress on your muscles and joints before they can adapt, which results in injury. Bad form combine with weight does your spine no good. Your natural spine curvatures are designed to hold a certain load, but with bad form, the curvatures ain’t there anymore. Back pain is the main symptom.

What’s more?

A weighted vest may also throw you out of balance if you do not have it properly secured.

Get the technique first. Once you have, move to heavier loads. Don’t put the cart before the horse. It doesn’t work that way in the real world. Sorry!

Make Injuries Worse

Using a weighted vest can backfire if you have any current issues in your weight-bearing joints and muscles.

The added load may exacerbate existing conditions, and you don’t want that. This might be a back injury, knee pain, or whatever

Still want to use a weighted vest? Then at the very least, get the green light from your doctor or simply use a lightweight. Stop whenever you feel the pain getting worse.

Not For Everyone

Although weighted vests have a to offer, they’re not everyone. In fact, you can only start using a weighted vet once you already a base and want more from your workouts.

Wearing a weighted vest can stress your cardiovascular and musculature system—the reason why it works in the first place.

Keep in mind that if you have a history of hips, knees, feet, or ankle injuries, every additional pound puts more stress on those joints, which, in turn, increases injury risk. So tread carefully.

How To Choose The Best Weighted Vest for Running

There are various products on the market, and each one of them has specific designs to suit different training goals.

Some brands tend to be unisex, some feature adjustable straps that can be customized according to the user’s preferences, whereas others are available in a one-size-fits-all style

So how do you make sense out of all this? Keep on reading.

Here are a few of the measures for choosing the best weight vest for you.

How Heavy Should a Weighted Vest be For Running

If this is your first time using a weighted vest, start small.

There is a reason why weighted vests come in various weight options, ranging from 1o pound to over 80 pounds. Everyone has different needs and training goals—runners are no exception.

Pick a load that will push you but still allows you to stay within your fitness skill.

When starting out, I’d recommend a vest of 5 to 10 pounds for both HIIT training and running.

Have no idea where to start?

  • Get a weighted vest that’s five percent of your weight. For example, if you weigh 160 pounds, that roughly eight 8 to 12 pounds.
  • Strap it on and hop on a treadmill and start jogging at a mild speed for 15 to 20 minutes, then see.

This will help make sure that your speed and intensity stay consistent. It also provides you the opportunity to work on your breathing while using a vest, which is a skill in itself.

When using a weighted vest, you will want to learn how to breathe with the added load on your chest and core, so it is better to do it in a safe and controlled environment.

As long as you stay within a low to mild training intensity, feel free to use the weighted vest throughout your workout.

Keep in mind that weighted vests are workout equipment, not torture devices.

Get The Right Fit

Improper fit is a common cause of injury.

So before you go sprinting or perform bodyweight exercises in a weighted vest, be sure to get the right fit. The vest should sit snugly to your body, snug but not too tight that it restricts breathing or movement.

It should not, at any moment, bounce around too much while you exercise.

What’s more?

The weight should also feel equally distributed over your torso and trunk.

All in all, I’d recommend that get an adjustable weighted vest. These work very well thanks to the straps allow you to adjust the weighted vest exactly to your body shape.

Just like when you buy running shoes, when shopping for a weighted vest, try on different shapes and styles and see which one fits the best.

Based on Activity

You can follow these recommendations based on activity type.

For Running

When it comes to running a weighted vest, you’ll want a vest of lower weight capacity and with reflective material.

As a rule, start out with a vest at 5 percent of your total body weight.

I’d recommend wearing one during a long walk to figure out if you can handle the cardio load before you start adding it to your runs.

What’s more?

Choose a compact weighted vest that fits snugly when walking, jogging, and running. It should also allow for a wide range of motion.

For Bodyweight Training

If you are looking for a vest designed for building muscle and strength training, your best option is to go for an adjustable weighted vest that you can grow into.

The vest should feature a slender design and plenty of ventilation, so you don’t draw in your own sweat while exercising. It should also feature plenty of pockets and weights for added resistance.

The durability of the vest material is another important factor to consider.

Just keep in mind that these usually tend to be less comfortable to wear for a long time.

You will likely get more bang with a vest that tops out at about 80 pounds.

Secure The Weight

The last thing you want when using a weight vest is to get knocked off and lose your balance. This often occurs if the weighted vest is not preload and the load isn’t evenly spread on various parts of your torso and trunk.

To prevent this, make sure that the weight is properly secure and evenly distributed around your body. Any shifting or jerking of the weight while training could trip you over and result in injury. And you don’t want that.

Consider Your Body Type

As I explained earlier, weighted vests feature various designs and styles. Some are made for thinner trainees, while others are made for people with broader and wider shoulders. Pick the one that suits your body type.

What’s more?

Some weighted vests are made especially for women’s breasts and curves.

Pay attention to design and dimensions. This is key for your comfort and proper range of motion.

If you’re a woman, consider getting an X design weighted vest as this will better support your chest nicely and are ideal for optimal range of motion. Make sure that the vest doesn’t smother your breasts. Any excess fat jiggling around your armpit or over your breast indicates improper fit.

Material

When choosing a weighted vest, make sure it’s made of material that can withstand wear and tear.

As a rule, the vest should be both sweat and tear-resistant.

Worried about sweating? Choose a weighted vest with more ventilation and breathability.

All in all, a thinner weighted vest that covers less of your torso will ensure that you stay relatively dry and comfortable during training.

Listen to your body

At the end of the day, the best thing you can do to prevent injury is to pay attention to your body.

If something feels—or seems—off, stop doing it.  Consult your doctor if you have any chronic muscle or joint pains. Better be safe than sorry.

How To Use it

You got many options when it comes to training with a weighted vest—you can walk, run, sprint, or simply do bodyweight exercises such as pull-ups, push-ups, etc.

Here are three weighted vest workout routines to try.

The Weighted Vest Sprint Workout

Looking to increase your running speed? Then here’s how to use a weighted vest to help you achieve exactly that.

First, begin with a proper 10-minute dynamic warm-up. Some of you might need more time for warm-up, take your time. Then, without using the vest, perform a 2-3 sprint at maximum speed for 20-30 seconds.

Next, put on the vest and perform 4-5 sprints, running as fast as you can, for 20-30 seconds.  Then perform two more sprints but without the added weight (can you feel the difference?).

Finish the workout with a 5-minute slow jog cool down to bring your heart down to normal.

And that’s it.

Start with a weight that’s heavy enough to be challenging, but make sure it doesn’t move around.

As you get stronger, slowly add the smelly amount of weight—just make sure to keep good form the entire time.

The Weighted Vest CrossFit WOD

I believe a huge part of weighted vest success can be credited to the rise of CrossFit training programs over the last few years.

That’s why I have decided to add this CrossFit workout.

Perform the following exercises while using a weighted vest, and do as many as you can in 30 minutes. Record your rep count and try to beat it next time.

  • 200-meter run
  • 20 push-ups
  • 30 squats
  • Max pull-up
  • Ten burpees

Weighted Vest Long Walks

If you have never used a weighted vest before, your best course of action is to strap one on a walk or hike. By doing this, you will get your body used to the added load without compromising your form.

Focus on using proper arm motion and a more powerful stride. Your walking form is vital

How far you go depends on your pace and fitness level. I’d suggest 45 to 60 minutes if you are just starting out. Do more if you can do more but remember to stay safe throughout. Don’t chew more than you can swallow.

What’s more?

Focus on your core. All of your movement should generate from the core, so you should keep it activated while you walk—or perform any other form of exercise. Core activation will ease the work on your spine.

How To Choose The Best Weighted Vest for Running – The Conclusion

There you have it! Adding weight vest training to your workout routine shouldn’t be that complicated. It’s just a matter of choosing the best weight vest, then following sensible training guidelines with progression. The rest is just details.

Please feel free to leave your comments and questions in the section below.

In the meantime, thank you for dropping by.

Keep training strong.

David D.

Top 6 Causes Of Neck Pain While Running

Neck Pain While Running

Running is a sport that mainly uses the legs.

That’s why overuse running injuries are lower extremity injuries, such as runners knee, shin splints, plantar fasciitis, and the rest.

However, train long (and hard) enough, and you’ll notice that your upper body, especially your neck and shoulders, is sore or painful during a run or the day after.

So what gives? Isn’t running a lower body exercise per excellence?

Yes and no. Although your lower body does most of the work while running, your upper body is also an important piece of the puzzle.

As a result, if you’re feeling any sort of soreness or pain in your neck and shoulders while running, know that there are many (running and non-running) causes that you need to address promptly if you’re serious about staying pain-free for the long haul.

So, what’s causing this pain in the neck while running? And most importantly, how to stop and prevent it?

That’s where today’s post comes in handy.

Top 6 Causes Of Neck Pain While Running

In this article, I’ll delve into the top 6 reasons you could be feeling neck and shoulder pain during and after running as well as how to prevent it from returning in the future.

Sounds great?

Let’s get started.

  1. Weak Posture

One of the most common causes of neck pain while running is attributed to poor posture. This is not only true during running but during other activities as well.

This one is especially common in runners who work long hard at the office joins or spend the majority of their time behind a desk.

Being behind a desk often requires sitting with the head forward, chin down, and back arched. This weak posture, known as forward head posture, translates into your running form.

Add in the impact forces of logging the miles, and the weak posture can indirectly contribute to neck and shoulder pain, specifically irritate your cervical spine indirectly by changing the center of gravity.

The Fix

To prevent weak posture, try running with a neutral neck—a position in which all muscles are working optimally to counteract loading. In fact, you should be maintaining this posture no matter what exercise you’re doing.

Your head should be balanced directly over your spine, making sure it’s not cocked or leaning forward to one side or the other.

Your shoulders should be nearly level and pressed down your back instead of being hunched.

That’s not the whole story. There are also plenty of exercises to help strengthen the muscles of your neck, which, in turn, helps keep your neck in proper alignment.

Additionally, make your workstation as ergonomic as possible. Set up your computer screen to eye level and keep your foot supported on the ground.

For more reading on office ergonomics, check the following posts:

  1. Clenching Your Fists

Clenching your fists while running creates tension that travels up your forearm and upper arm and into your trapezius muscled and neck.

The more miles you log in, the more stress and strain you produce in your arms. Also, don’t forget about the bouncing factor.

Log in enough miles, and this tension can cause place drastic stress on your arms, shoulders, and neck, which impacts how you run.

The Fix

If you start feeling tensed up in the shoulders or the neck while running, try and relax your hands and let them hang.

Imagine you have a butterfly in your palms, but at the same time, you don’t want to crush it.  You can also imagine holding a penny between your forefinger and thumb and don’t want to drop it as you run.

Additional resource – Chiropractor for runners

  1. Gazing Down At The Ground

Although the eyes are not talked about much when it comes to running technique, the rest of your body will follow your gaze. Gazing down flexes your neck too.

This causes all sorts of troubles not only in your upper body but in your hips and knees as well.

The Fix

To combat this, tuck your chin in and keep your gaze up toward the horizon while running. By doing this, your body will be directed according to your line of sight.

  1. Excessive Pumping OF The Arms

Keeping a proper arm motion is key to your running form.

When you excessively move your arms, you’ll more than likely experience undue strain on your shoulders and neck.

This, again, sets you up for neck and shoulder pain while running.

It’s also a major waster of energy.

Additional Resource – A Tibial Posterior Tendonitis Guide in Runners

The Fix

To prevent excessive arm pumping while running, try pulling your shoulders down and back and curving your arms at a 90-degree angle. Then, keep pumping your arms forward and backward from the shoulders.

As a rule, keep the movement smooth, loose, but in control. Keep in mind that the movement is taking place at your shoulder, not your elbow.

Just keep in mind that it takes practice over time to hone your arm swing, but once you have it, it can do wonders for your running form.

I’ve already described in length what a proper arm swing should look like on my blog, and I believe it’s an integral part of proper running form.

Additional Resource -Your guide to jaw pain while running

  1. Your Body is Dehydrated

This may surprise you, but dehydration is a common culprit of both neck stiffness and neck pain.

When your body is dehydrated, your muscles, ligaments, and tendons get tighter, which can lead contribute to neck pain.

Additionally, dehydration can also cause a headache. This results in tension, and most of it builds up in the neck and shoulders, causing “you know what.”

What’s more?

Staying well-hydrated can help prevent cervical disc degeneration, which is a common cause of neck pain. Your spine discs consist mostly of water and collagen.

Drinking enough water keeps the discs between your spine’s vertebrae well lubricated—key for maintaining disc height and spinal alignment. Thus, the weight distribution will be even.

The Fix

Drink plenty of water throughout the day. This should help keep your body well hydrated not only around your runs but throughout the day.

At the very least, shoot for eight large glasses of water per day. Drink more on heavier training days or during the summer.

Running in the morning? You’re more likely to wake up lacking fluid, so hydrate before you head out the door. Make sure you check your urine color as a standard hydration check.

Take water with you for runs exceeding one hour. This is especially the case if you’re running in hot and/or humid conditions.

Additional resource – Common cause of lower leg pain after running

  1. A Running/Athletic injury

Another culprit behind neck pain while running is when you have actually hurt your neck—or the muscles and joints surrounding it—while doing something else.

This can be an acute injury such as lifting a heavy object or throwing a ball or overuse injury while sitting or working for long hours in bad posture in front of a computer.

Other (non-running related) causes of neck pain may include:

  • Arthritis of the neck, such as rheumatoid arthritis or osteoarthritis.
  • Meningitis, which is the infection of the lining of the spinal cord and the brain.
  • Spinal stenosis, which refers to the narrowing of the spinal canal.
  • Simple neck strain, often caused by sitting too long at a computer, sleeping in an improper position, etc.
  • Ruptured cervical disc, which happens when the disc between the bones of your neck protrudes from its normal position.
  • And so much more.

Your doctor can help with this.

The Fix

First, see if keeping proper posture while running helps to soothe pain, but more than often, you might have to take a few days off the running track to give your body the chance to heal. Or take your regular prescribed medication in case you have an ongoing condition.

If it’s not the case, then check the following tip.

When to See a Doctor for Neck Pain

In case all of the above has failed to soothe your symptoms, it’s time to seek medical help.

Still not feeling any relief in spite of taking some of the above measures? Then it’s time to consult your doctor or physical therapist.

This is especially the case if your neck pain hasn’t subsided within a couple of weeks.

In fact, seek medical help if you’re suffering from any of the following symptoms:

  • Numbness, needles, pins, or weakness that gets worse in one or both arms.
  • Constant headache with squeezed sensation behind your neck and scalp.
  • Experiencing ringing in your ears, blurred vision, or dizziness that doesn’t subside within 48 hours.
  • Have balance or coordination issues since your neck pain has started.

Additional Resource – Here’s how to use KT Tape for runners knee.

Neck Pain While Running – The Conclusion

There you have it. If you’re suffering from shoulder or neck pain while running, today’s post should have provided more than an answer to what’s ailing you. Please take care of yourself and don’t neglect any kind of problem—neck pain is no exception.

Feel free to leave your comments and questions in the section below.

In the meantime, thank you for dropping by.

Keep running strong.

How Many Laps is a Mile Around A Track

track running

Curious about how many laps is a mile around a track? Then you’ve come to the right place.

Whether you’re trying to improve your conditioning or aiming to run a faster 5K, track workouts are a great addition to your running plan.

However, if you want to make the most out of your track workouts, knowing your track distance numbers and how far you’re actually running is key.

In today’s article, I’ve put together a guide to track laps around and how long one lap. I’ll look into:

  • How many times is a mile around a track
  • How long is track lap
  • How to measure your track running distances
  • and so much more

This should help you better understand—and measure—how far you’re running every time you’re training on a track.

How Many Laps is a Mile Around A Track – The Test

Before we get into how many laps on a track is a mile, let’s first start with a little quiz and see how adept you are in track terminology.

Question 1: Does Running three laps around a 400-m track equals one mile?

Question 2: Does running seven laps in lane 3 equals two miles?

Question 3: Is a straightway 100-meter long?

Question 4: Are all lanes of a track of the same distance?

Question 5: Is a “metric mile” 1500M?

The answers: 1/No, 2/, 3/yes, 4/no, 5/yes.

So how did your answers stack up? If you got more wrongs than rights, then you should keep reading and give yourself some education to stay on track—no pun intended.

So How Many Laps is a Mile?

Although people (in imperial system countries) measure their run in miles and feet covered, most standard outdoor tracks and circuits use the metric system and tend to be 400 meters in length, which might be annoying if you just want to run a mile.

How long one lap depends on what kind of track you’re running.

A standard outdoor track is precisely 400 meters around the innermost lane.

Since a mile is 1600 meters, four laps around a standard track will amount to one mile.

The width of the standard track is divided into eight-lane and only lane 1, the interior most lane, is 400 meters in length. The farther out from lane 1 you go, the longer your distance will become.

So if you want to keep things simple, stick to the interior lane.

Since the standard track is 400 meters long, it makes it ideal for performing running intervals and even a tempo workout.

Additional resource – How To Run An 8-Minute Mile?

How Many Laps Around a Track is a Mile – The Exact Numbers

One mile equals 1,609 meters, which is roughly 5,280 feet.

Most standard outdoor tracks are designed such that lane 1 (the inner lane) is exactly 400 meters, which is about 1,312 feet.

The track distance increases in each length.

Each track lane has a standard width of 1.22 meters, so for every lane out from the center, the lap length goes up by roughly 7.67 meters or 25 feet. The distance you’d cover in lane 8 is 453 meters.

That’s why if you want to accurately measure your track running distance, you’ll need to do some math, but it doesn’t take too much to determine the number of circuits you’ll have to complete around the track in order to complete one mile.

Additional Resource – Here’s your guide to the Yasso 800 Workout

How Many Laps is a Mile

Know your Track Lane Distances

Getting your head around common track distances can help ensure that you’re making the most out of your track training and getting what you expect from your track workouts.

The running distances you choose should be within your reach and based on your current fitness ability. Don’t try to chew more than you can swallow.

Here are a few examples of setting you on the right path:

  • 100 meters – The length of each straightway and the shortest distance for an outdoor sprint.
  • 200 meters – Half lap around an outdoor track
  • 400 meters – roughly a quarter-mile, or one lap around a standard track
  • 600 meters – Half lap followed by one full lap
  • 800 meters – Roughly a half-mile or two laps around the track
  • 1200 meters – Roughly three-quarters of a mile or three laps around the track.
  • 1600 meters – Roughly one mile or four laps around the track.

How Long Is A Track

As I touch upon before, not all lanes are made equal.

The farther you go from the innermost lane, the farther you’ll be running, completing one lap. It’s the reason why you might see so many runners all trying to cram into lane one on a race.

So how long is each lap? Check the following:

Here the track distance by lane.

To help you with the calculation, here are the standard lengths of the lanes of a track:

  • Lane 1 – 400.0 meters
  • Lane 2 – 407.7 meters
  • Lane 3 – 415.3 meters
  • Lane 4 – 423.0 meters
  • Lane 5 – 430.7 meters
  • Lane 6 – 438.3 meters
  • Lane 7 – 446.0 meters
  • Lane 8 – 453.7 meters

Learn more about rack running distances and rules by checking out the following official sources.

how many laps around a track is a mile – The Conclusion

There you have it! If you have ever wondered how many laps is a mile around a track or any other track distances, then today’s post should get you started on the right path. The rest is just up to you.

Please feel free to leave your comments and questions down below.

In the meantime, thank you for dropping by.

Keep Training Strong

David D.

Running Vs Jogging – The Main Differences Between A Run & A Jog

how to choose a running group

Is there a difference between running and jogging?

Can we use the terms exchangeable?

Does it really matter?

If you’re looking for answers to these questions, then know, my friend, you have come to the right place.

When it comes down to it, there’s not much much difference between jogging and running.

After all, you’re simply putting one foot in front of the other at a pace faster than walking but slower than sprinting.

But, if we dig a little bit deeper, there are actually many clear-and-cut differences between jogging and running.

In today’s article, I’ll delve into some of the main differences (as well as the similarities) between running and jogging to help you better understand which is which.

Sounds great?

Let’s get started

The Similarities Between Running & Jogging

Whether you see yourself as a runner or jogger, both provide plenty of amazing benefits to your body.

Let’s start by sharing what running and jogging have in common.

Although most people may use the terms running and jogging interchangeably, the main common denominator is that they’re forms of cardiovascular training.

Here’s where they overlap:

  • Burning calories
  • Aiding in weight loss
  • Strengthening muscles
  • Improving confidence
  • Reducing stress
  • Building stronger bones
  • Outdoor workout gear

Now that we go the similarities out of the way, let’s delve into what sets running and jogging apart.

Running Vs. Jogging – The Pace

Ask the average person on the street about the difference between running and jogging, and they’d likely say that jogging is a slow form of running.

This is, in fact, the main difference.

Jogging, as defined in the running community, is going at a pace of slower than 5 miles per hour or a pace of 1 mile in 12 minutes.

When you jog, you troll along at a more comfortable pace that’s easy enough for you to keep a conversation—or recite the pledge of allegiance—without panting for air.

In fact, you could practically jog for hours as long as you keep your pace under control.

On the other hand, running refers to anything faster than 6 miles per hour.

Running Vs Jogging – Running Is Harder

Although this might be subjective, there’s a reason why jogging “feels” less demanding than running, and it’s because you’ll likely expend more energy on a run than on a jog.

Thanks to the faster pace, running is a more intense form of aerobic training than jogging and therefore takes more effort than jogging.

That’s actually the reason runners tend to be generally fitter than joggers, especially when it comes to cardio endurance and fitness. You can debate me on this another time.

Research out of the journal Scientific Reports revealed that the faster you move, the more energy you expend.

For example, if you run a 7-minute per mile pace, it’ll take you roughly 20 minutes to finish a 5K race. A 10K race with the same pace will you over 40 minutes to complete.

Surveys show that the average running pace for men is 9:03 per mile and the average running pace for women is 10:21 per mile.

So if you’re short on time and looking to get the most out of your workout, you’re better off running hard for 20 minutes instead of an easy jog for the same duration.

Running Vs. Jogging – Calorie Burn

It doesn’t matter whether you jog or run, you’ll be burning calories, but all in all, running burns more per minute than jogging.

That’s, as explained earlier, due to the energy expenditure increase when you pick up the pace. The faster you run, the harder your body works, and the more calories you burn.

For example,

In fact, a 160-pound person will shed about 300 calories jogging at a pace of five miles per hour for 30 minutes.

Up the speed to eight mph, and the same person will burn over 430 calories during the same period of time.

jogging vs running
Young people jogging and exercising in nature, Back view

What’s more?

Research shows that sprinting, which is a form of interval training, is far more superior when it comes to burning calories and reducing body fat.

Of course, don’t take my word for it. Research out of the International Journal of Obesity has revealed that high-intensity workouts, such as sprinting, shed a more drastic amount of total body mass than steady-state, low-intensity exercises such as jogging.

That’s not the whole story.

Running, especially interval running, produces a more significant workout after-burn or excess post-oxygen consumption—what’s usually referred to as the after-burn.

The more you push your body out of its comfort zone, the more you deplete its fuel stores, and the harder it has to work to restore them—hence the after-burn. This calls for energy and results in continued calorie burn up to 48 hours following the workout.

Additional link – How to perform running strides for beginners

Running Vs. Jogging – The Mindset

The differences between jogging and running extend beyond the physical.

For starters, as far as I can tell, runners tend to be more goal-oriented that love to set goals and go after them. However, joggers adopt a more casual approach. In fact, they might prefer to stick to an easy pace without trying to break any personal record or work on their speed.

This is actually one of the main reasons runners don’t like to call joggers. It’s like telling, “bro, you’re not serious enough about the craft.” That’s the biggest insult to a runner.

Running Vs. Jogging – The Form

Although proper running form is similar, there are a few things that sets jogging from running when it comes to technique.

For starters, jogging comprises more bouncy movements, while running requires a steady rhythm and involves faster arm swings and longer strides.

Runners are also more likely to land the forefoot, keep the knees aligned with your toes, and pump the arms back and forth to generate enough momentum to sustain your speed over a longer distance. The knees may come up more, coupled with a stronger arm swing.

But there’s less action while jogging since you’re going at a slower pace. You won’t need to produce and generate.

While running, you’re also taking a deeper breathe to ensure the delivery of oxygen into your muscles to meet the high demands being placed on your body while running.

The Main Differences Between Jogging and Running – The Conclusion

At the end of the day, both jogging and running have a lot to offer. They both provide immense positive results for your overall physical, mental, and emotional well-being, as well as protect your body from a plethora of chronic diseases.

Whether you decide to choose to run or jog, remember to always start your workouts with a 5-10 minute warm-up to get your body ready for training. Here’s the sequence I recommend.

Then, end the session with a 5-minute cool-down, either as a slow jog or walk, to slowly bring your body back to the pre-workout state.

If you’re a complete beginner and planning to start jogging or running, make sure to first consult your doctor, especially if you have any chronic conditions or a history of athletic injury. It’s always better to err on the side of caution.

The Complete Beginners Guide To Curved Treadmills

Serious about trying a curved treadmill? Then you’ve come to the right place0

Treadmills have turned over the last few decades into one of the most reliable cardio equipment out there.

And recently, a new type of treadmill has gathered a lot of steam in the fitness industry—the curved treadmill.

In fact, curved treadmills are fast becoming the go-to cardiovascular machine at both health clubs and CrossFit gyms all over the globe.

But what do you actually know about them? Have you ever used a curved treadmill before? And what sets them apart from classic models?

That’s where today’s post comes into the picture.

In this article, I’m sharing with you the full guide to curved treadmills.

By the end, you’ll learn more about:

  • What is a curved treadmill?
  • The benefits of curved treadmills
  • The downsides
  • How to run on a curved treadmill
  • How to buy a Self-Propelled treadmill
  • And so much more

Sounds great?

Let’s lace up and dig in.

What is A Curved Treadmill?

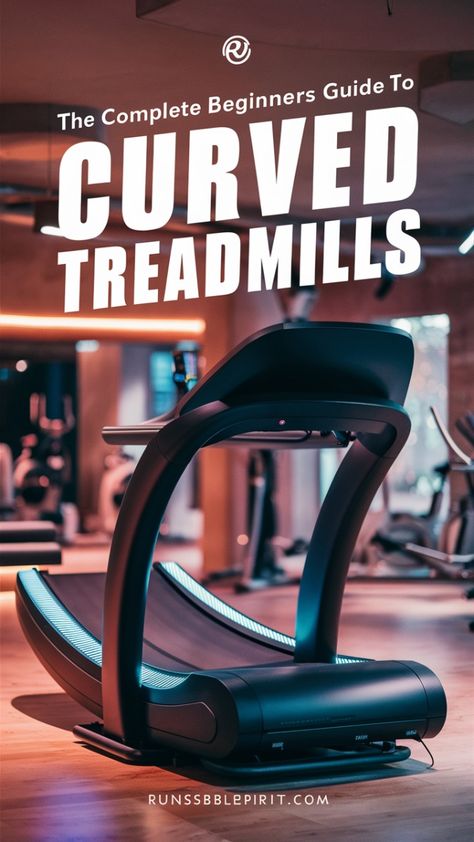
In essence, a curved treadmill features a curved running deck that allows you to walk and run on it, with each foot strike propelling the belt behind you.

Curved treadmills have no motor and need no electricity. The belt is propelled by the motion of your own body.

Let’s check some of the research.

Research conducted at the University of Essex reported that running on a curved treadmill was associated with a drastic increase in perceived and physiological demands and effort. In fact, the subject reported feeling as if they were working about 25 percent harder on the curved treadmill.

That’s not the whole story. The research has also reported an increase of over 30 percent in oxygen consumption and 16 percent in heart rate and a 2.5 percent increase in cadence.

This, as you can already tell, is proof enough that hopping on a curved treadmill is the recipe for pushing yourself to the next level.

What Makes Curved Treadmills Unique

The reason curved treadmills are unique boils down to their unique U shape, which may limit joint stress while keeping your form in line.

A curved belt is designed to follow the arch of your feet travels throughout the running stride.

This shape may reduce joint impact and facilitate a more natural feel while you keep your running form efficient.

Curved Treadmill Benefits

Just like any other training equipment, curved treadmills have their own pros and cons.

Let’s discuss a few.

More Muscle Activation

One of the main advantages of using curved treadmills stems from using more muscles than the basic flat treadmill.

Compared to running on motorized treadmills, curved treadmills are designed to force your lower body to them from the get-go—engaging everything from your calves to your glutes to kickstart the machine. This means more energy expenditure and further fitness gains.

Run more Naturally

Thanks to the increased muscle engagement, running on a curved treadmill may help you adopt a more natural form compared to motorized flat treadmills.

The science is, you’ll be driving your feet into the belt to keep it moving instead of chasing the powered belt like with a standard treadmill. The U shape will also force you to land on the balls of your feet.

The form that is needed to keep your body propelling forward.

This mirrors outdoor running.

What’s more?

You might also be able to minimize vertical oscillation, which the amount of bounce while running. This, in turn, makes your training much more efficient.

Additional Resource  – When to replace a treadmill belt

Lower Injury Risk

Since curved treadmills promote a more natural stride pattern while running by encouraging you to run on the balls of your feet, you may reduce the impact on your muscles and joints. This ultimately helps prevent pains and injuries.

What’s more?

Thanks to the rubber surface, a curved treadmill may help absorb the stress on your joint and tissue more effectively.

Increased Calorie Burn

Research has shown that subjects tend to run roughly 30 percent harder on a curved treadmill. That means burning a third or more calories than running on a traditional treadmill.

Good Incline

If your upcoming race takes place on hilly terrain and/or lives in a flat area, hopping on a  curved treadmill is a great way to do some incline training.

No Electricity

Since you’ll be using your own body to propel the machine, this type of treadmill requires no electricity, thus, won’t add a dime to your electric bill.

Don’t worry about the built-in displays, as they’re battery-powered.

You also won’t need to look for an electrical outlet to plug your machine into nor get jumbled in miles of extension cords.

Additional Resource  – Your guide to anti gravity treadmills

Longer Service Life

With a standard motorized treadmill, you’ll be definitely paying for maintenance fees as all models prone to breaking down and needing repair.

Curved manual treadmills, on the other hand, tend to require less upkeep than standard machines as they feature fewer moving parts—and the fewer moving part, the less repair you’ll have to do over the long haul.

Also, the slatted belt tends to much more durable than standard treadmill belts.

Disadvantage of Curved Treadmills

Here are some of the downsides of curved treadmills.

Expensive

The main downside of purchasing a curved treadmill is the price tag.

That’s why budget might stand in your way of buying a curved treadmill unless you have a lot of money or managed to convince a family member or a friend into partnering up in exchange for being allowed to use it.

If you live in a big city, chances are you’ll find a gym nearby that has a curved treadmill, so you might not have to spend your money at all.

Foot Print

If you’re planning to add a curved treadmill to your home gym, size will matter.

Most curved treadmills tend to be bigger than compact flat-belt treadmills. They range in size from roughly five to six feet in length and about three feet in width.

Not Ideal For Slow Runs

Although there’s a myriad of workouts you can do on curved treadmills, sessions such as easy runs or long, slow runs are out of the realm of possibility.

As we’ll see later, a curved treadmill works well for interval-style workouts such as sprinting, just based on its design.

How To Use A Curved Treadmill

The answer is simple—just like you’d run outside, especially after you get used to the machine’s curvature.

In short, run as naturally as possible. Don’t try to tweak your running form.

When running on a curved treadmill, remember to:

  • Proper posture. Gaze ahead, engage your core, pull your shoulder back, pump your arms and breathe deep.
  • Stay in the center. Position yourself in the center of the machine—the further forward you put your feet, the faster belt goes.
  • Stay relaxed. Although nervousness while using the machine for the first time is normal, the more tension your hold in your body, the harder it will be for you to move.
  • Stay safe. Use the handrails as the belt grinds to a halt, especially if you’re panting for air.

How Fast Can you Run On A Curved Treadmill?

Other than the unique design, the most telling difference between a curved treadmill and a motorized treadmill is speed.

On traditional, motorized treadmills, you simply choose the speed/incline manually then get to work.

But when training on a curved treadmill, you’ll have to re-adjust your speed automatically according to the curves of the machine and your body.

In fact, there is practically no limit to how fast you can run on a curved treadmill.

As long as your legs can sustain the speed, you’ll keep going.

Elite runners have been reported to reach speeds of over 24 mph. That’ fast. Really fast.

Additional Source – Check this treadmill pace chart

The Best Workout On Curved Treadmill

There are many different running workouts you can perform on a curved treadmill, depending on your running goals and fitness level.

Let’s discuss a few.

Sprints

By far, the best workout you can perform on this machine is the good old’ sprints.

Curved treadmills are ideal for sprint workouts. Whether you’re looking to change up your running routine or looking for a fast way to lose weight, it’s a fantastic way to get faster.

This is the case since a curved treadmill allows you to pick up the pace fast without having to wait for the belt to catch up with you. Just like when running outside, you can speed up and slow down easily. You really have complete control over your pace.

What’s more?

You’re also running on a more stable surface than when running outside.

Additional resource – Here’s your guide to buying a second hand treadmill.

Curved Treadmill Price – How Much Do Self Propelled Treadmills Cost?

It’s going to cost a lot to buy a curved treadmill.

A high-quality motorized model will set you back roughly $1500-$1800. That said, curved models start at roughly $4,000 then go up. High-quality models max out at around $10,000.

But how would you justify such an expensive purchase?

There are many things that make curved treadmills so different from motorized models.

For starters, maintenance fees are pretty low on curved treadmills, so they should be operational for a while before they require any repair.

Additionally, the lack of electricity also adds to the equation.

But at the end of the day, it’s up to you.

Additional Resource – Here’s how many miles should a beginner run

How To Buy A Curved Treadmill

Have enough money to purchase a curved treadmill? Good.

However, just because you can afford it, avoid impulsive buying. Instead, take your time to find the model that best suits your individual needs and training goals.

Here are a few features to consider when choosing a curved treadmill.

  • Price – Retailed at $4000 and over, curved treadmills vary widely in price depending on the brand. The more features you want, the more you pay.
  • Weight limit – Choose a model with a max recommended limit that’s high enough to support you and keep you steady.
  • Comfortable – The best curved treadmill is the one that best fits your running form and stride. Test out various models to determine which fits the best so that there is less risk for injury.
  • Have enough space – Curved treadmills are big, thus require a lot of space in your living room—or wherever you plan to put them. You’ll also need a lot of space while using the machine, so there’s less risk of injury in case you fall off the machine.
  • Quality – Make sure the handrails are strong enough to support your body: the better quality, the less money and time you’ll spend on maintenance later.
  • Customer service – Just like any other piece of equipment, as you use the machine regularly, it will incur some wear and tear that needs to get serviced. That’s why you need to make sure the company offers great customer service.
  • Warranty – Most companies offer warranties on their machine that range anywhere from one to five years.

Conclusion

A curved treadmill is a fantastic way to change up your running routine and/or take it to the next level.

It will help engage more muscle groups, improve your form, burn more calories, and upgrade your overall speed and conditioning.

What’s not to like, really!

That’s why I think it’s worth considering—if you have the money—to get your own curved treadmill for home use.

Or, at the very least, look for a health club or a CrossFit gym nearby that has them (chances you’ll if you live in a big city). Just make sure don’t spend over your budget and abandon it later.

Please feel free to leave your comments and questions in the section below.

In the meantime, thank you for dropping by.

Keep training strong.

David D.

The Best Yasso 800 Workout for A Marathon PR

Yasso 800 Workout

If you have ever trained for a marathon or had a specific marathon goal, you more than likely have heard of the famous Yasso 800 workout.

You might even have tried them in the past.

Yasso 800s are a popular workout among serious runners looking to run their fastest marathon ever.

In this article, I’ll share with you the full guide to Yasso 800s, covering the basics, history as well as how to add the session into your training plan in the most effective way.

Sounds great?

Let’s get started.

What Is Yasso 800 Workout?

Although the long run is the bread and butter of marathon training, it’s by no means the only workout you should be doing, especially if you have a specific marathon goal in mind.

In fact, regardless of your marathon goals, performing Yasso 800s is a sure way to help you achieve them.

So what are they all about?

Quite simple. Yasso 800s involves performing 800-meter reps, usually on a standard track.

The goal behind them is to get your body accustomed to running at the exact pace you’ll run during the event with minimal recovery between sets.

More specifically, performing a series (usually 10) 800 meters reps alternated with short breaks will simulate the effort and pace of running a marathon at your target pace.

Before I explain more, let’s first say a few words about the man behind the workout. He coined it, after all.

Enter Yasso Bart – The Gurus’ Guru

As the name implies, Yasso 800s comes from Bart Yasso, the legendary biathlete and former chief running officer at Runner’s World Magazine.

Having run races on all seven continents, he’s unofficially referred to in the running community as “the mayor of running.”

Yasso won the 1987 U.S. national Biathlon Long Course Championship, ran the Badwater Ultramarathon, and has competed in five Ironman triathlons.

In other words, the guy is a true running legend.

The Theory Behind The 800 Yasso Workout

Yasso 800s are popular because they’re a quick and simple way to guestimate your marathon time based on your 800-meter time.

According to Yasso, the average time it takes a runner to perform ten 800-m intervals in minutes and seconds roughly correlates to the marathon time expect to run in hours and minutes.

For example, if you ran 800-meters in two minutes and 40 seconds on the track, your estimated marathon time will be around two hours and forty minutes.

The workout is also simple. The session consists of 10 intervals of 800-meters (or two laps around a standard track), with recovery intervals of the same length between each interval.

Additional resource – How to qualify for the Boston Marathon

The Best Yasso 800 Workout for A Marathon PR

Start by determining your marathon goal time in hours and minutes. Next, convert it to minutes and seconds.

For example, if you’re shooting for a four-hour marathon ( a common goal among beginner runners), your converted time will 4 minutes per interval.

By the same token, if you’re a faster runner aiming for a sub-3 hour marathon, your Yasso 800m goal time should be a sub 3 minutes too.

Once you have figured out your time, perform the following routine.

  • Warm-up. This is the first step. Perform a 10-minute dynamic warm-up that consists of 5 minutes of jogging and another 5 minutes of dynamic warm-up exercises (as described here). You can also perform a few 100-meter strides to get your body really ready for faster-paced running.
  • 800-meter interval. Run your first 800 meters (roughly half a mile) at your converted time (4 minutes in this example).
  • Recovery: Jog slowly for the same amount of time to recover. (again, 4 minutes in this example)
  • Repeat: Shoot for three to four reps per session in the first few weeks. Up the ante later on.
  • Cool-down: Finish your session with 5 to 10 minutes of easy jogging, following by stretching.

And voila! There’s nothing to it but to do it.

Yasso 800s Workout for a marathon

How Many 800s Reps?

Although the exact number of intervals you perform may vary according to your fitness, when this is your first time doing Yasso 800s, start with no more than four reps and work your way up to completing ten in a single session two weeks before race day.

As you get fitter, aim to add one more repetition every other week until you reach ten repetitions per training session.

It should feel really easy during the first few weeks and don’t worry about running under your goal time. Don’t chew more than you can swallow, or you’ll regret it later on.

Can’t keep up the goal pace throughout all the intervals? Then simply stick with fewer reps again during your next speedwork—only progress when you can handle it.

Additional resource – When to skip a run

How Many Yasso 800s Workouts Per Week?

Aim to complete one Yasso 800-m session a week. Doing more will defeat the purpose, and remember that a well-rounded marathon training program includes other sessions, such as easy runs, interval workouts, and the long run.

Where To Do Yasso 800 Workout?

The best—and most practical place—to perform Yasso 800s is on a track since it makes it easy to measure 800 meters, which is about two laps around a standard track, or roughly one-half mile.

However, feel free to also do the workout on a treadmill as long as you keep track of how far and fast you’re running.

What’s more?

As long as you know the distance, feel free to do Yasso 800s on a long stretch of rad if you have a track or treadmill at hand.

Follow A Well Rounded Marathon Training Plan

Although Yasso 800s are a tried-and-true strategy for running a faster marathon, the workout is not the answer to all of your marathon prayers. In fact, it should be used in conjunction with other training runs.

As a rule, you should follow a well-rounded training plan that includes various runs such as progressive, tempo, and long runs, especially long runs with a few miles at your goal marathon pace.

What’s more?

Besides endurance, speedwork training can take a toll on your body, so cap it at no more than twice per week to prevent injury and/or burnout when training for a marathon.

The guy himself prescribes doing the workout one per week, but if you haven’t been doing speed work lately,  feel free to do the Yasso 800s every other week.

That’s ok, too.

Check the couch to marathon plan.

Yasso 800 Workout – Conclusion

There you have it! If you’re planning to add the Yasso 800 workouts to your running plan, then this article should be enough to set you on the right path. The rest is just details.

Please feel free to leave your comments and questions in the section below.

In the meantime, thank you for dropping by.

Keep training strong

David D.

Conquering the Pain: A Runner’s Guide to Managing & Treating Hemorrhoids

Running with Hemorrhoids

Looking for some valuable advice on how to conquer the tricky challenge of running with hemorrhoids?

Well, you’ve landed in the perfect spot. Trust me, I’ve got your backside covered!

Now, let’s get real for a moment. Running with hemorrhoids can be an absolute pain in the, well, you know where. Those swollen, inflamed anorectal veins can make every step a painful reminder that life isn’t always fair. Sitting becomes a struggle, walking feels like tiptoeing on hot coals, and the thought of running seems like a distant dream. But fear not, my determined friend, because where there’s a will, there’s a way.

Are you ready to uncover the secrets of running with hemorrhoids? I know you are! And guess what? It’s totally possible to hit the pavement and conquer those miles, even with those pesky swollen veins. But first, you need to know what you’re doing. That’s where today’s post swoops in to save the day!

In today’s article, I’m going to unveil all the secrets to running with hemorrhoids. I’ll equip you with the knowledge, strategies, and guidelines you need to not only find relief but also prevent these pesky veins from ruining your running bliss. Consider this your personal roadmap to success, specially designed for those facing the hemorrhoid hurdle.

Ready? Let’s get going.

What Are Hemorrhoids?

Alright, let’s dive into the fascinating world of hemorrhoids and unravel the mystery behind these pesky little buggers!

Picture this: your rectum is like a bustling neighborhood, and within it, there’s a group of veins that are just a little more sensitive than the others. We call them hemorrhoids. They’re like the varicose veins of the rectum, and they can cause quite a commotion, especially for us runners.

So, here’s the deal. Hemorrhoids are these swollen, weakened veins that form lumps of tissue inside the rectum. Think of them as the cushions of vascular tissues in your anal canal, working hard to provide support and comfort. But just like the varicose veins you may have seen on legs, these little vessels can become overwhelmed under pressure. And boy, can they make their presence known!

Pain, itching, and even bleeding are some of the delightful symptoms that hemorrhoids bring to the party. And let’s be honest, as runners, the last thing we need is an unwelcome guest in our rectal neighborhood causing a ruckus. But fear not, my friend, because we’re about to equip you with the knowledge and strategies to tackle these annoyances head-on.

Here’s a mind-boggling statistic for you: surveys have shown that a whopping 70 to 80 percent of adults in the U.S., both men and women, will experience hemorrhoids at some point in their lives. That’s right, it’s like a secret club that most people are unwittingly a part of. But here’s the good news: hemorrhoids aren’t typically dangerous or life-threatening. And here’s an even better news flash: they’re not contagious! Phew, we can all breathe a sigh of relief there.

Internal Vs. External Hemorrhoids

Just like a rollercoaster ride, hemorrhoids come in different levels of intensity, and we’re here to take you through each thrilling stage!

First up, we have the first three stages of hemorrhoids, also known as the undercover agents of the rectal realm. These sneaky fellows hide away, not visible to the naked eye. But don’t be fooled, they might decide to make a grand entrance and show themselves outside the anus, leaving behind traces of blood on toilet tissue or in your stool. It’s like their secret code, a signal that they’re up to no good.

Now, here’s an interesting tidbit: internal hemorrhoids, even though they may not be painful at first, can be quite mischievous when it comes to bleeding, especially when you’re out there pounding the pavement or engaging in high-impact activities. They love to make a grand spectacle, reminding you of their presence with each stride you take.

But wait, there’s more! Enter the fourth stage, the external hemorrhoids. These are the rebels that you can see and feel, hanging out around the opening of the anus like uninvited guests at a party. They bring along a whole entourage of discomfort, including pain, itching, swelling, and bleeding. Oh, and let’s not forget the mucus they like to leave behind as their calling card. They’re the troublemakers of the bunch, causing a real ruckus, especially when you’re trying to enjoy a peaceful run.

Here’s the thing: if you neglect these external troublemakers, they can become real troublemakers indeed. They have a knack for forming blood clots, turning a simple annoyance into a potential medical emergency. That’s when you might need some expert intervention to prevent further complications and ensure your running adventures remain worry-free.

Additional guide  – How to run with seasonal Allergies

Hemorrhoids Symptoms

As runners, we’re no strangers to aches and pains, but when it comes to those pesky hemorrhoids, how do we know if we’re dealing with the real deal? Let’s dive in and unravel the clues, shall we?

First off, let’s talk about internal hemorrhoids, the masters of disguise. These crafty fellows like to keep things low-key, but they do leave behind some telltale signs. One of their favorite party tricks is bleeding during bowel movements. It’s like their secret code, a subtle hint that they’re up to something.

But wait, there’s more! These sneaky internal hemorrhoids might decide to take center stage and prolapse or protrude to the outside when you least expect it. That’s when you might experience some discomfort and pain, like an uninvited guest overstaying their welcome.

On the flip side, we have the external hemorrhoids, the rebels of the rectum. They’re not ones to shy away from making their presence known. If you’re dealing with these troublemakers, you might encounter a whole range of symptoms. Picture this: pain or discomfort, a bit like an annoying itch that just won’t go away.

They also have a flair for dramatics, so don’t be surprised if you witness some bleeding or notice some anal swelling. And let’s not forget the irritation and itchiness they bring along, like a mischievous prankster trying to disrupt your peace. Plus, these external troublemakers have a stubborn streak—they refuse to be manually reduced, making it even more frustrating to deal with them.

Additional resource – Running with osteoarthritis 

Causes Of Hemorrhoids in Runners

When it comes to the root causes of hemorrhoids, it’s like navigating through a maze with multiple pathways. One prominent theory that has made its way into the medical literature points to factors such as constipation, straining during bowel movements, and even prolonged sessions on the porcelain throne. These can all contribute to a disruption in the delicate balance of blood flow, leading to the dreaded swelling and inflammation of those pesky veins.

Now, here’s where things get interesting for us runners. The culprit that often sneaks into the spotlight is none other than dehydration, that sly thief of bodily fluids. Picture this: as runners, we push our limits, pounding the pavement with every stride. But if we neglect to replenish our water stores, chronic dehydration creeps in, leaving our bodies parched like a desert.

And what happens when we don’t have enough water flowing through our systems? You guessed it—constipation takes center stage, starring as the villain in this tale. With hard stools that require Herculean efforts to pass, we find ourselves straining, unknowingly placing extra pressure on those innocent hemorrhoids.

But wait, there’s more! The cast of characters behind hemorrhoids doesn’t end there. Research has uncovered a motley crew of culprits. Frequent bouts of diarrhea can throw a curveball into the mix, wreaking havoc on the digestive system.

Weight gain and poor digestion join forces, casting shadows on our gut health.

And let’s not forget the role of diet—a protagonist or antagonist, depending on our choices.

Genetics play their part too, as our DNA whispers secrets that may make us more susceptible to these unwanted visitors.

For some, the chapters of pregnancy and childbirth add their own twists and turns to the hemorrhoidal tale. And as we age, the plot thickens, with the passage of time becoming a contributing factor. Oh, and let’s not overlook the importance of the poop position—a seemingly insignificant detail that can make all the difference.

Can Running Cause Hemorrhoids?

In the realm of running and hemorrhoids, it turns out that running itself is not the villain. No, no, my friends, running is actually a hero in the battle against those swollen blood vessels.

When done in moderation, physical activity like running can be your trusty sidekick, aiding in colon health and helping you maintain a healthy weight. It’s like having a superhero protecting your backside from the clutches of hemorrhoids.

But wait, there’s more to this story. If you find yourself straining like there’s no tomorrow during your bathroom visits, constantly battling chronic dehydration, munching on a low-fiber diet, or even having a family history of hemorrhoids, then the plot thickens. These factors, combined with your hardcore running regimen, could potentially create a perfect storm, paving the way for those unwanted hemorrhoids to make their grand entrance.

Now, let’s talk about the unfortunate scenario where you’re already grappling with those pesky piles. If you’re in that boat, lacing up your running shoes and hitting the pavement may not be the most pleasant experience. You see, running is like a mischievous trickster, a high-impact and repetitive activity that can wreak havoc on your perianal skin and delicate hemorrhoidal tissues. It’s as if every step sends a jolt of discomfort through your nether regions, intensifying your pain and making you wish for smoother trails.

But hold on, my fellow runners, there’s a silver lining. While running may temporarily exacerbate your hemorrhoid-related symptoms, it doesn’t mean the condition itself will permanently worsen. Think of it like a passing storm, where the rain may pour a little harder for a while, but eventually, the skies will clear. So don’t be too quick to hang up your running shoes just yet.

Can You Run With Hemorrhoids?

First things first, let’s get one thing straight. Running itself doesn’t bear the blame for causing hemorrhoids. However, it’s important to note that any high-impact exercise that aggravates those pesky swollen blood vessels can prolong your road to recovery.

And let’s be honest, my fellow runners, the sooner we heal, the faster we can lace up our shoes and return to the bliss of logging those satisfying miles.

Now, here’s the crucial part: You need to be mindful and not exacerbate your condition by going full throttle with your running routine. Listen closely to what your body is telling you. If your hemorrhoids are causing you discomfort or pain that’s beyond what you can tolerate, it’s time to hit the brakes and give yourself some well-deserved rest. Think of it as a pit stop on your running journey, where you can take the time to heal and recharge before hitting the road once again.

If your symptoms are mild and manageable, running with hemorrhoids should be a walk (or rather, a run) in the park. In fact, for many runners, engaging in their beloved activity while dealing with this condition poses no significant harm.

However, let’s not disregard the warning signs along the trail. If you experience extreme pain and discomfort while running with hemorrhoids, it’s crucial to listen to your body’s distress signals. Don’t push through the agony, my friends. It’s essential to prioritize your well-being and give yourself the time and space needed for healing.

Additional resource – Salt tablets for runners

Treating Hemorrhoids in Runners

First things first, let’s establish a crucial fact: Hemorrhoids don’t exactly “heal” in the traditional sense. They have their ups and downs, much like the undulating terrain we encounter during our runs. But fret not, my resilient friends, for we have tools at our disposal to manage and alleviate the discomfort.

When it comes to treatment, the approach you take depends on the severity of your condition and the extent of the damage. But let’s start with some fundamental lifestyle adjustments that can make a significant difference in your battle against hemorrhoids..

Medication

As runners, we understand the importance of choosing the right gear for the job. Similarly, selecting the appropriate over-the-counter medications can help alleviate the discomfort caused by hemorrhoids.

Nonsteroidal anti-inflammatory drugs (NSAIDs) like Ibuprofen or Tylenol can be a runner’s ally in soothing the pain and reducing inflammation. However, it’s important to note that painkillers may only mask the symptoms temporarily, so anti-inflammatories are often recommended.

But wait, there’s more! In our quest for relief, you have a range of other solutions to explore. Ointments, suppositories, and pads come to the rescue, offering potential relief for the affected area. Look for salves containing witch hazel or hydrocortisone, which have a reputation for soothing itching and pain.

Rubber Band Ligation

When all else fails and the home remedies have left you yearning for relief, it might be time to consider this intriguing option, carried out by a skilled doctor. Picture it as a strategic maneuver in the battle against hemorrhoids, designed to cut off their blood supply and bring about their ultimate demise.

In this “non-invasive” procedure, a tiny rubber band takes center stage. It slips around the base of the hemorrhoid, constricting its blood flow and leaving it no choice but to surrender. It’s as if we’re tying a knot to prevent an escape route, sealing the fate of those troublesome piles.

Now, here’s the interesting part: Over the course of a few days, the banded hemorrhoids, deprived of their life force, begin to wither away. It’s like watching the leaves of a once-mighty tree shrivel and fall to the ground, bidding farewell to their existence. This natural process allows the body to eliminate the remnants of the hemorrhoids.

But let’s not sugarcoat the truth. This procedure may come with its share of discomfort and bleeding, like unexpected potholes along our running route. Some cases experience these side effects two to three days after the procedure. It’s crucial to keep in mind that while the majority of cases proceed smoothly, severe complications are rare but can occur.

Once the procedure is complete, it’s time for the crucial after-care phase. Just as we adjust our training and recovery routine after a challenging race, a drastic diet change may be in order to support the healing process. This dietary shift aims to prevent irritation in the affected area, much like a gentle breeze soothing a tender wound. Hard stool is the nemesis here, so we must be mindful and take measures to ensure a smoother recovery.

Additional Resource – Your Guide To Runners Nipples

Consult Your Doctor

If despite your best efforts, those pesky symptoms just won’t quit, it’s time to pick up the phone and reach out to your healthcare provider. Remember, we’re talking about prolonged discomfort and, most importantly, any form of excessive or profuse rectal bleeding. That’s the moment to hit the brakes and seek guidance.

Why is this step so crucial, you might wonder? Well, let’s consider the bigger picture. While hemorrhoids themselves typically aren’t life-threatening, there’s a chance that your symptoms could be a sign of something more serious lurking beneath the surface. We don’t want to play a game of chance when it comes to our health, right?

In such situations, it’s wise to consult a specialist who focuses on colon and rectal health. Think of them as the seasoned captains navigating the treacherous waters of gastrointestinal issues. They possess the knowledge and expertise to identify any potential red flags and guide you toward the most appropriate course of action.

One of the reasons it’s essential to consult a specialist rather than a general practitioner is because, in rare cases, hemorrhoids can evolve into a more advanced and serious condition, such as colon cancer. Now, we don’t want to go down that road, do we? By proactively seeking the advice of a specialist, we can address any concerns early on, ensuring the best possible outcome.

T

Additional Resource – Your Guide To Joggers Nipples

Running With Hemorrhoids – The Conclusion

There you have it!

If you’ve ever suffered from hemorrhoids while running but wanted to keep your running routine on the go, then today’s article should have provided you with enough answers and guideposts on what to do.

Please feel free to leave your comments and questions in the section below.

In the meantime, thank you for dropping by.

Have a painless run!

David D.

The Beginners Runner Guide To Negative Splits

Beginners Runner Guide To Negative Splits

Whether you’re training for your first 5K or for a new personal record, your pacing strategy can make the difference between failure or success

One simple yet very reliable strategy is the negative split. Performing them is one of the best ways to build your aerobic base and endurance, which is more critical at events like the half marathon and marathon.

Would you like to learn more about how to practice this strategy in your training? Then keep on reading.

In today’s article, I’m going to share with you the full guide to negative splits without any technical jargon or complicated non-sense.

In short, I’ll look at:

  • What are negative splits?
  • The benefits of negative splits
  • The downsides of negative splits
  • How to incorporate them
  • How to practice negative splits
  • How to follow a negative split on race day
  • And so much more.

Sounds great?

Let’s get started.

What Is Negative Split?

Keeping a steady pace during a race is tricky. Competition, terrain variability, elevation changes, and weather conditions can all impact your running speed.

That said, and most experts would agree, negative splits are an unfailing pacing strategy in virtually every racing scenario—or whenever trying to improve your running times.

In fact, by design, negative splits are an advanced tactic that can guarantee a fast finish time.

So what are negative splits? And why should you care?

First things first, let’s start with the basics.

A split in the running world refers to the time it takes to complete a certain distance.

Are you still confused? Then simply break down your run into two or three more equal-distance portions. A split refers to the time needed to complete one of those segments.

So what does make a split negative?

In essence, a negative split refers to running the back half of a run or race faster than you ran the first half. You run slower in the first part, then speed up in the second half.

This can mean 10 seconds faster or five minutes faster, but most runners would stick to an even pace through most of the race then gradually speed it up as they get close to that finish line.

For example, if you run a half marathon with 10K splits of 55:15 and 54:45 for 01:53:40 (including the additional sprint to the finish line), you have just run a negative split as the second portion of the race is faster than the first.

By doing this, you save a lot of power, endurance and feel like you have more energy during the race.

Additional Resource – Here’s how many miles should a beginner run

What Are Positive Splits?

As the name implies, a positive split is the opposite of a negative split. When you do a positive split, you actually run the second half of the run/race slower than the first half.

This strategy is helpful if you’re want to stay consistent while running, especially if you’re tackling a really hilly course with lots of elevation changes and/or terrain variability. But again, it may not work for everyone.

What Are Even Splits?

Again, this is simple. An even split involves keeping a consistent pace throughout the entire run/race. This means running the two halves of a race—or a run—in the same amount of time.

For example, if you want to run one mile on a standard track in 4:48, you’d have to run four 72-second laps, with each lap counting as a split to achieve this goal.

This is a common goal among beginner racers in virtually all distances.

Unfortunately, all it takes is a bit of distraction, fatigue, or a tiny problem, and your even splits are ruined. Unless you can keep that even pace throughout, this strategy may prove futile.

The Benefits of Negative Splits

As you can already tell, negative splits have a lot to offer.

Let’s discuss a few of the perks.

Warm Up Properly

Kicking up your runs at a slow pace allows for your muscles and joints to gradually warm up, which may help avoid injury and ensure optimal performance.

Find True Pace

One of the most common mistakes runners make is rushing out of the gate during a race.

For this reason, determining your true pace helps set a realistic time goal for your next run/race.

Figuring out your “true pace” is key, especially when running for an extended period. By doing a negative split, you’ll start your session at a conservative pace then speed it up in line with your current fitness level.

Ensure Good Speed

Negative splits, by definition, involve running the latter portion of a race faster than the first half—as long as you stick to a realistic pace.

That’s why if you plan them right, you’ll, consequently, conserve your energy and be able to run your fastest race.

It also reduces the risk of slowing down as the race drags on.

Additional resource – How many miles is a half marathon

The Downside

As in everything else in life, negative splits are not the answer to all of your running race prayers.

One downside is the fact that negative splits do not work on all race distances/courses.

For example,  a racecourse that kicks off downhill and finishes with a drastic elevation gain may require a positive split, in which you run at the end even effort.

How To Execute A Negative Split

While it’s easy to say, “run the second half faster than the first,” it’s actually much more challenging to put it into practice.

In fact, Practicing negative splits is tricky, especially in the midst of a race when your adrenaline is soaring and other runners begin to outpace you.

To get the hang of it, you’ll need to follow a proper training plan and practice negative splits as often as possible.

Practice makes perfect, after all. And it’s what you need to ensure that you get used to the experience of performing a negative split so you can easily follow the strategy on race day.

negative splits guide
Athlete running on an all-weather running track alone. Runner sprinting on a blue rubberized running track starting off using a starting block.

The Step By Step Guide

First, begin by figuring out your goal pace goal, for example, 10K race pace, or simply a pace you can keep up.

During the first few miles, focus on saving up your energy by running 20-30 seconds per mile slower than your goal pace. Don’t focus too much on speed.

During the first third, focus on saving energy by running 10 to 30 seconds per mile slower than your goal pace.

As you near the middle third of the race, kick it up a notch to a realistic pace that you can keep up for the remainder of the race.

Once you reach the final stretch of the race, use any remaining energy and run as fast as possible. Shoot for 20 to 30 seconds faster than your goal pace.

For instance, if you’d like to negative split a half-marathon, and you feel confident you can finish it in precisely two hours, aim to run the first half in roughly 61-63 minutes. Then, on the second half, aim to finish it within 57-59 minutes.

Now let’s look at some ways by which you can start adding negative splits into your training.

Steady Runs

Steady runs, anything from two to six miles at a steady effort, should be negative splits all the time, even if you don’t have any specific racing goals.

Here’s how.

Break your session into three thirds.

For example, if you’re running for 45 minutes,(1) jog the first 10 minutes at an easy pace, (2) run the middle 20 minutes at a medium-fast pace, then (3) the last 15 minutes as fast as possible for the remaining duration.

This will definitely guarantee a negative split run which helps your body practice what it’s like to finish faster than the start.

Progression Run

Another way to practice negative splits is to do a progression run, which is gradually increasing your pace throughout the session.

Here’s how.

Start slower than you have to, then increase the pace in increments (every mile or so) until you’re running as fast as you can in the final mile. This is an ideal strategy to help teach your body and mind how to speed up on tired legs, which inherently translates to a faster finish time.

Here’s a simple six-mile workout.

  • One mile at an easy pace
  • One mile at marathon pace
  • One mile at half marathon pace
  • One mile at 10K pace
  • One mile at 5K pace
  • Five minutes jog/walk as cool down.

Interval Training

The best way to practice negative splits by doing interval workouts.

For example, if you’re training for a 5K, perform 10 X 400m at your desired speed, along with a one-minute break after each interval. Your goal is to get run each interval a little bit faster than the previous one until you’re running the last one as fast as you can.

Here’s is a sample session:

  • Start with a 10-15 dynamic warm-up. Here’s how.
  • Perform 8 to 10 400-meter with 60 to 90 seconds of rest between each interval.
  • Finish with a 10-minute cooldown.

Here’s another variation

Example one–  10 X 400-meter reps with a one-minute rest break.

  • Run intervals 1 to 4 five seconds slower than your goal pace.
  • Run intervals 5 to 8 at your goal pace
  • Run the last two intervals 5-10 second faster than you goal pace.

Example Two – 8 X 800-meter with 90 seconds break.

  • Run intervals 1 and 2 five seconds slower than your goal pace.
  • Run intervals 3 to 5 at your goal pace
  • Run the last three intervals at 5-10 seconds faster than your goal pace.

The Long Run Negative Split

Long runs are another suitable workout for negative splits, especially when training for a long-distance race, such as a marathon.

And it’s really simple.

Start slow and steady, then settle into a comfortable pace. Complete the first 60-70 percent of the session at an easy, conversational pace. You should be able to recite the pledge of allegiance without panting for air.

Then, gradually pick up the pace for the last quarter until you’re running at your 10K pace or a little bit faster.

For example, if you’re running for two hours, run the first 80 to 90 minutes at the easy pace, then pick up the pace over the last 40 to 30 minutes of the run.

Beginners Runner Guide To Negative Splits – The Conclusion

Most running coaches and experts emphasize the importance of protecting a good pacing strategy for the optimal racing experience.

As you can tell by now, I’m a big fan of the negative splits, and I believe it’s the ideal way to pace on race day.

You just need to practice it more during your training so you can set realistic expectations and learn how your body reacts to the pace.

The rest is just details, really.

Please feel free to leave your comments and questions in the section below.

In the meantime, thank you for dropping by.

Keep training strong.

David D.

Cross Country Running Tips For For Beginners

cross country running

Cross country running is no easy jog in the park—you need to ready for anything in your path.

Rocks, roots, steep inclines, streams, and adverse weather can all be challenging but fun “complications.”

Training properly for a cross country event will give you the endurance, agility, and strength needed to reach your full performance potential.

In today’s article, I’ll spill the beans on cross country running and why so many enjoy it.

I’m also sharing a few tips on how to get started with cross country running and how to make the most out of it.

Sounds exciting?

Let’s lace up and dig in.

What is Cross Country Running?

Also known as XC running, cross country running is a form of racing that takes place in open-air, natural environments and seldom run along paths or roads.

From obstacle to jump over, steep hills, and slippery muddy descent, cross country running offers a broad range of challenges that will literally keep every runner on their feet.

What’s more?

Cross-country events take place in all sorts of weather conditions, which can drastically impact performance.

These include rain, snow, wind, ice, hail as well as heatwaves. In fact, cross-country events are seldom canceled because of adverse and bad weather.

XC running races are held during the fall or winter months, and many runners, recreational and elite alike, use the sport as means for improving endurance and staying fit throughout the cold months.

The Distance Of Xc Running Events

Just like other races, XC running varies in distance and will typically depend on the age group, but typically the distances from 4km to 12km.

Some of the most popular XC running events include:

The annual World Cross Country Championships

  • NCAA Cross Country
  • Cross Country Championships
  • The English National Cross-Country Championships

The History

Cross country events trace their history to the 19th century in the form of an English game called “hard and bounds” or “the paper chase.”

English schools began holding competitions in cross country running as far back as 1837, then on the 7th December 1867, the national championship was held for the first time on Wimbledon Common in south-west London, then the first international one took place in 1903 at Hamilton Park Racecourse in Scotland.

Not long thereafter, cross country running made its way to the Olympic Games in 1912, becoming a popular event for the games.

But the sports didn’t fare well in the Olympics.

A Disaster of Olympic Proportions

At the 1924 Paris Olympics, a devastating heatwave during the race resulted in only 15 of the 38 participants reaching the finish line.

Eight of those ended up needing serious medical help.

Jose Andia and Edvin Wide were both reported dead (but the reports of their demise were actually exaggerated)  while the medics spent hours trying to locate the participants who fainted along the course.

In fact, one of the competitors started to run tight circles after reaching the stadium until he knocked himself unconscious while another collapsed a few meters from the finish line.

Although the fatality reports were unfounded, the public was so horrified at the conditions of the race that Olympic officials ruled to ban cross country running races from future games. Things may change in the upcoming Olympic event but fingers “crossed.”

For more on the history of cross country running, check the following articles:

Additional Resource – Here’s how many miles should a beginner run

When Is Cross Country Season?

Cross country running races normally take place during the autumn and winter season, usually held from early October up until February and early March.

Not Easy

X-C running is no joke. In fact, it’s one of the most challenging events out there.

The sport isn’t just about the competition between you and other runners.  You also need to overcome mother nature as you make your way through slippery roads, steep hills, technical terrains, and everything in between.

All of these challenges conspire to constantly disrupt your rhythm and throw you off your footing much more than your typical race on a flat, predictable surface.

That’s why you’ll need specific cross-training training to make it through over the variety of surfaces unscathed.

Beginner Cross Country Running Tips

Now that you know a thing or two about XC running, the question is, how do you actually train for one?

Let’s find out.

How Train For Cross Country Running

As previously explained, typical XC running events range from 4 to 12 kilometers.

All these distances are primarily aerobic, meaning if you go off the gate too fast, you’ll run yourself into the ground in the latter portions of the race. Few things are as bad as being passed by runner after the next over the last part of a cross country event.

That’s why to run your cross country race, make sure you’ve enough endurance to run well over a distance of 6.2 miles. This is a key factor in cross-country success.

Additional Reading – Here’s the full guide to obstacle race course training.

 cross country running

Crush Hills

One of the most challenging aspects of cross country running is how much up and down is involved in the race.

Although the typical XC running events aren’t long, the constant up and down is involved in the race can be tricky.

That’s why simulating these conditions before the race will better prepare your body and mind for the event.

How? Quite simple –train on hills. Doing hill work—either hill sprints or uphill endurance running—is one of the best ways to get your body used to the changing pace of an XC running event.

Even if you hate hills, incline training is key to building country running specific speed, strength, and endurance.

Here’s a sample workout to try out.

Locate a hill of no more than 400 to 600 meters in length, preferably on a softer surface off the asphalt.

Next, following a dynamic warm-up on a flat surface, run the uphill portion at a sustainable yet challenging effort, focusing on being fast and efficient, Then jog down for recovery.

Repeat for a minimum of 6 to 8 reps, depending on your fitness level and weekly mileage, then finish with a 10-minute slow jog.

For more on-hill training for runners, check my guide here.

You can also work on improving your form by doing agility ladder drills.

Your Running Shoes

To properly train for and run a cross-country race, make sure you have proper footwear.

Picking the proper pair is key to reduce your injury risk while subsequently improving your performance.

Runners who compete in X-C races usually used spiked shoes. These shoes are specifically designed to offer traction and grip on all sorts of surfaces and terrains.

What’s even better?

Get yourself a pair of proper X-C running shoes. These are designed to be more robust and versatile than track spikes and usually have better grip and traction.

I’d recommend visiting the nearest running store to get the needed shoes. You can also check out online shopping websites that also offer great cross-country running shoes.

Additional resource – How to choose running gloves

Cross Country Running Tips For For Beginners – Conclusion

Giving cross country running isn’t that hard. All you need is the right mindset, a reliable training plan, and the right gear. The rest is just details.

Please feel free to leave your comments and questions in the section below.

In the meantime, thank you for dropping by.

Keep training strong.

David D.