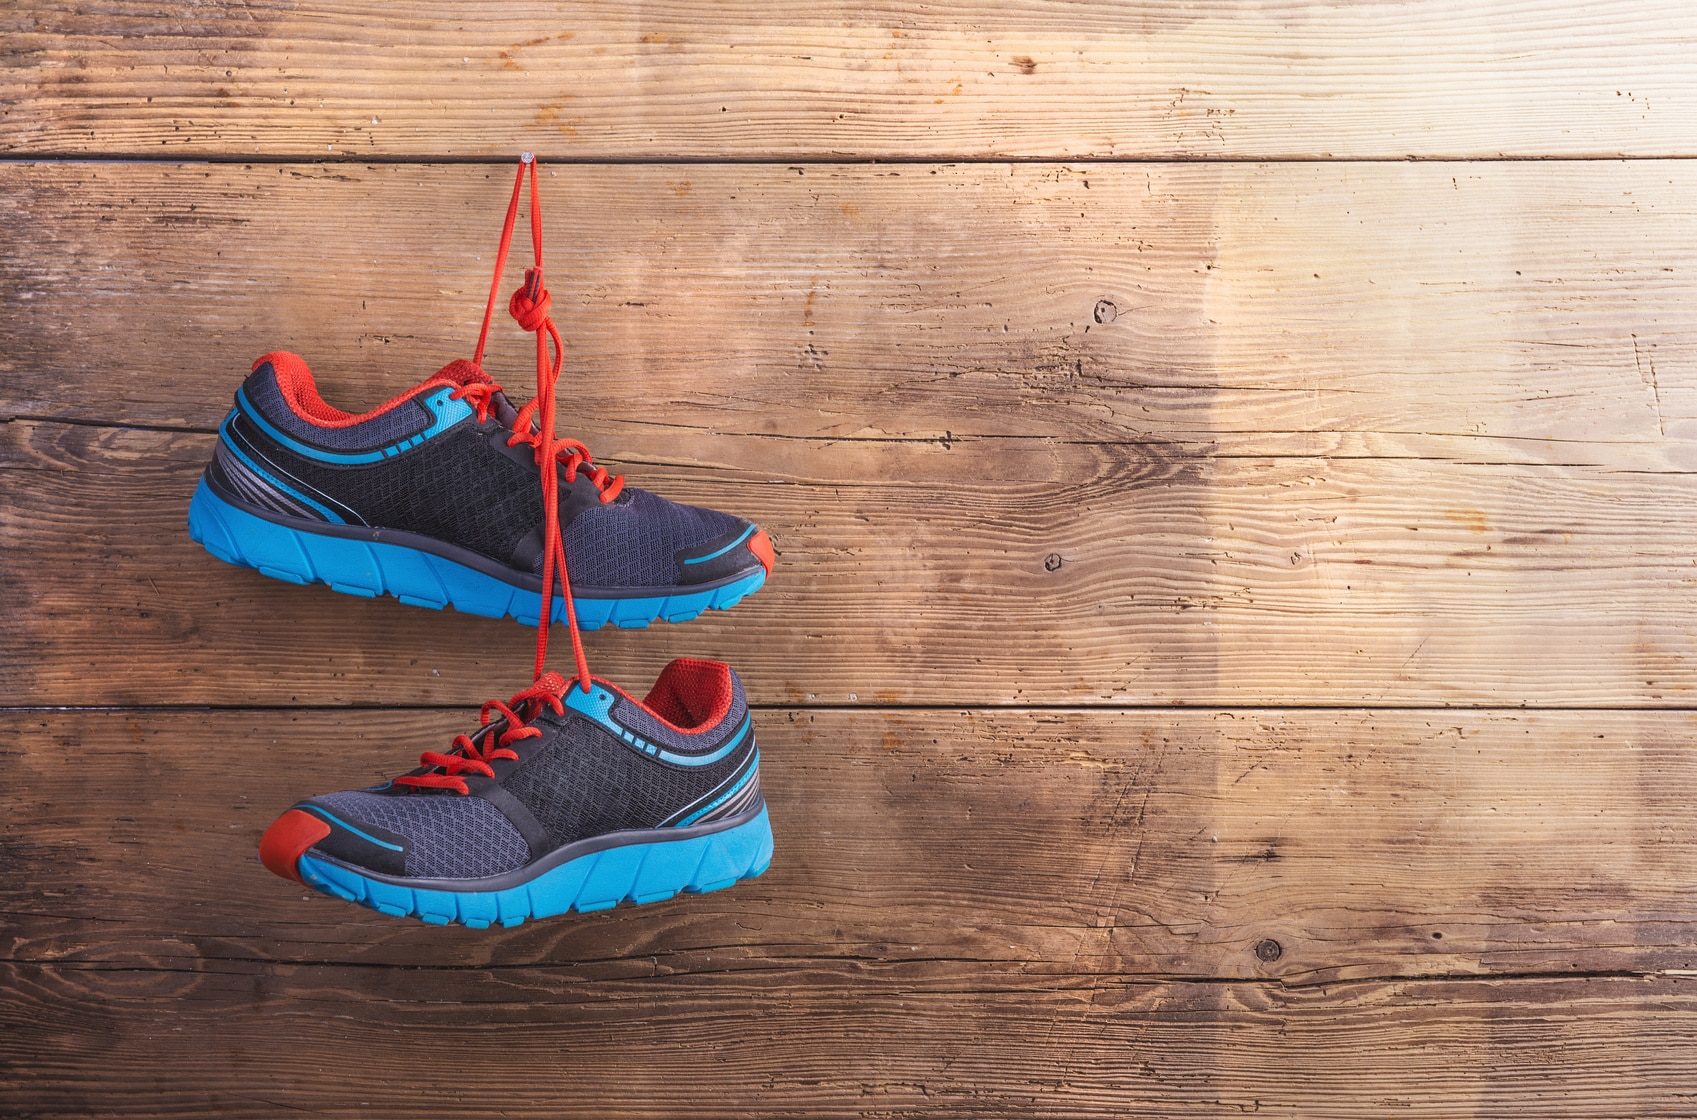
Running’s supposed to be simple, right? Just lace up and go. That’s the lie we’ve all believed at some point — until blisters, busted toenails, shin splints, or a bloody shirt from chafing bring us crashing back to reality. I’ve been there. Probably more than I care to admit.
Here’s the truth: the right gear won’t magically turn you into an Olympian. But the wrong gear? It can sideline you for weeks. And the brutal part is, you often don’t realize your gear’s the problem until it’s too late.
This isn’t a “buy all the shiny new toys” kind of guide. This is my Running Gear Bible — built from miles in the trenches, real coaching wins and fails, and the stuff that actually matters when you’re out there. No fluff. No marketing hype. Just the good, the bad, and the “never again” moments every runner should know.
If you’ve ever wondered which shoes won’t wreck your knees, what running watch features are worth your money, or which shirts won’t rub your nipples raw — you’re in the right place. Let’s get to it.
Table of Contents
- Why Running Gear Matters (Even If You Think It Doesn’t)
- How to Pick Running Shoes That Actually Fit Your Feet
- Understanding Pronation Without Overthinking It
- The 7 Main Shoe Types (and Which You Actually Need)
- Matching Shoes to Your Race Distance
- Carbon Plates: Game-Changer or Gimmick?
- Trail vs. Road Shoes (and Hybrids)
- Essential Running Tech: Watches, GPS, and Smart Training Tools
- Must-Have vs. Nice-to-Have Features
- Garmin vs. Coros vs. Polar vs. Apple: Honest Comparisons
- Avoiding Data Burnout
- Running Apparel That Works (and What to Avoid)
- Shirts, Shorts, and the Anti-Chafe Formula
- Socks That Save Your Feet
- Sports Bras, Underwear, and Base Layers
- Headwear for Sun, Sweat, and Cold
- Cold Weather Gear: Layering Without Overheating
- Trail Running Essentials
- Footwear Built for the Wild
- Gear for Confidence and Safety
- Accessories That Actually Help
- Hydration Packs, Belts, and Bottles
- Safety Gear for Night Runs
- Gaiters, Gloves, and Extras
Why Running Gear Matters (Even If You Think It Doesn’t)
Look, running’s supposed to be simple, right? Just lace up and go. But here’s the truth — the gear you use matters. A lot more than you think.
I used to believe all I needed was willpower and maybe a halfway decent pair of shoes. That was before I learned the hard way — busted toenails, shin splints, gear that rubbed me raw like I’d been in a sandpaper wrestling match. Trust me, bad gear doesn’t just ruin a run — it can sideline you for weeks. Lemme unpack this more…
Good Gear Won’t Make You a Hero — But Bad Gear Will Break You
Let’s clear this up fast. There’s no magic shoe that’ll turn you into Kipchoge. But there is gear that can hold you back — stuff that chafes, rubs, slips, overheats, or just flat-out hurts.
Ever run in cotton socks and end up with a blister the size of a quarter? Or kept training in worn-out shoes that wrecked your knees? Then you know what imma talking about. And it’s not just anecdotes – the stats back it up: According to research, around 79% of runners get injured, mostly in the legs and feet — and I bet my new Hoka SG6 that bad gear is one of the leading causes.
Shoes that are too stiff or too soft, shirts that trap sweat, socks that slide — it’s all friction. Literally and mentally.
Your Gear Should Have Your Back
The right shoes cushion your joints and keep you running longer without that sharp pain in your heel (yep, plantar fasciitis is real, and it sucks). Quality shirts and shorts? They wick sweat, breathe, and don’t feel like a wet towel by mile two.
This isn’t about looking like a sponsored athlete. It’s about feeling good in your body so you can focus on the run — not the gear glitch that’s rubbing your nipple raw. (Yes, that’s a thing. It’s called runner’s nipple. Look it up — or better yet, avoid it with a decent shirt.)
It’s Not Just Your Body — Your Head’s in the Game Too
Mental friction is real. A sock that slides, shorts that ride up, or a GPS watch with 30 buttons you don’t understand — it all messes with your focus. Running’s hard enough already. You don’t need distractions.
I always tell new runners: lay out your gear the night before. Not just for convenience — it removes decisions. When you’re half-asleep at 6 AM and your brain’s saying “maybe skip today,” you’ve already got your gear waiting. Less resistance = more miles.
Don’t Hoard — Build a System
You don’t need a gear explosion. You need a kit that works.
I’ve got go-to outfits for hot days, cold days, and everything in between. A rotation of shoes (daily trainers, long run shoes, race-day rockets). A headlamp for dark mornings. A couple of pairs of compression socks I trust.
That’s it. Each piece earns its spot. It’s not fashion. It’s function.
Got two solid shoes? Rotate them. Let one rest while you beat up the other. Got a rainy-day jacket that doesn’t feel like a trash bag? Keep it. Got three identical hats but only wear one? Ditch the rest.
What the Pros Get (And What They Don’t Bother With)
Here’s a little secret: elite runners are often minimalists. Sure, they obsess over shoes — dialing in the perfect model for their stride — but they’re not dragging along a hydration vest, music playlist, and five gadgets for a 5K.
Watch them on race day. Singlet, half tights, racing shoes. That’s it. Why? Because every extra thing is just another thing that can go wrong.
So what can you take from that? Focus on gear that actually helps you. Streamline. Simplify. Make it easier to run — not harder.
Buy Less, But Buy Smart
You don’t need more gear. You need better gear.
Gear should fix a problem or make running easier. That’s it. If it doesn’t stop blisters, prevent chafing, protect your knees, or get you out the door faster, then it’s just extra weight — literally or mentally.
Like one coach said, the shoe won’t make you faster — your training will. But the wrong shoe can definitely make you slower… or injured. So build your gear list like you build your fitness: one smart step at a time.
How to Pick Running Shoes That Actually Fit Your Feet
Let’s get one thing straight right off the bat: the best running shoe isn’t the one with the fanciest foam or the newest marketing buzz. It’s the one you lace up and forget about. No blisters. No weird pressure. Just you, the pavement, and the run.
1. Pronation – Don’t Overthink It, But Know the Basics
Alright, let’s talk pronation. I know, sounds like a science class word. But hang with me—it’s simple.
When your foot hits the ground, it rolls slightly. Some people roll in too much (overpronate), some roll out (supinate), and some are just right (neutral). That roll matters because it affects how forces travel up your legs. Too much roll? Hello, cranky knees and ankles. Too little? You lose natural shock absorption.
If you’re an overpronator, a stability shoe might help—a little more structure on the inner side of the shoe keeps your foot from collapsing inward. Neutral runners or folks who supinate usually want a neutral shoe—more flexibility, less interference.
You don’t need a fancy lab scan to figure this out. I’ve helped folks just by looking at how they stand, or by checking wear patterns on their old shoes. (Pro tip: If your soles wear down more on the inside edge, you might be overpronating. Outside edge? Supination could be your thing.)
And no, you don’t need custom orthotics right out the gate. Just the right shoe that works with your natural stride—not against it. Here’s my rule of thumb as a running coach: If your ankles always ache in new shoes, try a stability model. If those bulky motion-control shoes felt like bricks, go for something more neutral and flexible.
But again—don’t let this stuff overwhelm you. Most modern shoes are smart. They offer just enough support without overdoing it. If the shoe feels comfy and stable when you run—no wild tipping or awkward pressure—it’s probably a good fit.
2. The Shoe Types, Coach-Style Breakdown
Walk into any big running store and you’ll see this giant wall of shoes. It’s overwhelming. So let me break down running shoe types like I would for one of my new runners:
Daily Trainers
This is your go-to. Your mileage workhorse. A good daily trainer is comfy, durable, and ready for anything from a 20-minute jog to a weekend long run.
They usually last around 300–500 miles (that’s about 500–800 km). When they start to feel flat, or you’re getting weird aches where you didn’t before—it’s time to retire ‘em.
Lightweight or Tempo Shoes
These shoes are for when you want to move. They’re snappier, a little lighter, and give you that “I’m flying” feeling during intervals or tempo days. Not for everyone, but a solid second shoe if you’re getting into speed work.
If your trainer feels clunky when you’re trying to go fast, a tempo shoe might make you actually enjoy those hard days. Crazy, I know.
Racing Shoes / Carbon-Plated “Supershoes”
Now we’re getting fancy. These shoes are like race cars—lightweight, stiff, and loaded with tech (carbon plates, space-age foam, you name it). Studies have shown they can make you more efficient—up to 4% at marathon pace for trained runners. (the keyword is trained runners)
But listen: they’re not for beginners. If you’re running 10-minute miles, one study says you might only get a 0.5–1% boost. That’s seconds, not minutes.
And they’re pricey ($200+), wear out fast, and can strain your calves if your body’s not ready. Don’t let hype push you into a shoe your tendons ain’t trained for.
Coach’s Call: Earn these shoes. Train smart. Break them in during workouts before racing. Then? Let ‘em help you fly.
Max Cushion Shoes
These feel like clouds—Hoka-style thick soles that soak up impact. Great for recovery runs or heavier runners who want to baby their joints a bit.
They’re heavier and you lose a bit of road feel, but if they make your knees happy, who cares? Some folks swear by ‘em.
The science is mixed—some studies say they help reduce joint stress, others say they just shift where the stress goes. Try them. If you love them, that’s your answer.
Stability Shoes
Like I mentioned earlier, these are designed for folks who overpronate. Firmer foam on the arch side, guiderails, stuff like that.
But here’s the modern take: don’t assume you need max stability just because you have flat feet. Some mild overpronators do just fine in neutral shoes. Always trust how the shoe feels more than a chart.
Zero-Drop & Minimalist Shoes
These are the barefoot-style shoes, or ones with zero heel-to-toe drop (like Altra). They aim to mimic natural movement and strengthen your feet. Cool concept, but they require a slow, slow transition.
If you jump from regular trainers to these overnight, your calves and Achilles are going to light you up.
Research backs this up—a large study found that runners in big, cushy shoes often lose foot strike awareness and get hurt more. But switching to minimalist too fast is also risky. It’s not the shoe type—it’s how you adapt.
My Advice: If you go this route, give yourself months to adjust. Start by walking in them, then very short runs. Build slow.
Rule #1: Fit Beats Fashion—Every. Damn. Time.
Let me be real with you—cool-looking shoes mean nothing if they hurt your feet.
You know that snug little pinch you felt when you jogged around the store? Multiply that by five miles and throw in a hill. If a shoe bugs you out of the gate, it’s only going to get worse.
Your feet swell when you run. That’s just part of the deal. So, make sure there’s a thumb’s width of space in the toe box. Shoes that are too tight? Welcome to Blister City. Black toenails, hot spots, and numb toes—ask any seasoned runner, we’ve all made that mistake at least once.
So, please, when you’re trying out new shoes, do the following:
- Wear your usual running socks
- Go in the evening if you can—your feet will be a little swollen, which mimics mid-run conditions
- Jog around the store or hop on their treadmill
And here’s a golden rule:
The best running shoe is one you forget you’re wearing.
If you’re wrestling with heel slippage, weird arch placement, or any rubbing—walk away. That’s not your shoe.
Also, ignore the hype. I don’t care if it’s the limited-edition neon unicorn colorway—if it doesn’t fit your foot, it’s trash for you. Don’t let marketing wreck your training.
Know Your Drop & Stack
Let’s decode this real quick.
Heel-to-Toe Drop
That’s just the height difference between the heel and the forefoot.
- Traditional shoes: 10–12mm drop
- New-school shoes: 4–8mm, sometimes zero-drop
A higher drop can take stress off your Achilles but might shift it to your knees. A lower drop? You’ll feel it more in your calves and Achilles—great if you’re conditioned, risky if you’re not. Just let me add one more thing. The Journal of Strength & Conditioning Research shows no major performance difference across different heel drops. But injury patterns do shift. So it’s less about what’s “best” and more about what your body is used to.
Stack Height (aka Cushion Thickness)
- High stack = more cushioning (think marshmallows for your feet)
- Low stack = more ground feel (think ninja shoes)
Trail ultra? You might want some serious cushion to fight off rock bruises and reduce leg fatigue. But for short races or speedwork? A lower, firmer shoe gives you better control and quicker turnover.
A University of Florida study made waves by finding that overly thick, soft shoes mess with your body’s ability to sense landing. Runners lost touch with their gait and got injured more. Meanwhile, those in lower-profile shoes with wide toe boxes had better stride awareness.
Replace Before They Betray You
Every shoe’s got an expiration date.
Most running shoes are toast after 300–500 miles. Heavy runner? Rough trails? You’ll burn through ‘em quicker.
Signs they’re cooked:
- Tread looks slick
- Midsole is wrinkled and flat
- You start feeling weird aches—hips, knees, arches outta nowhere
Dr. Gregory Alvarez, DPM, nailed it: once the support’s gone, the injury risk shoots up. Your old faithfuls might look fine, but if they’ve lost their bounce or feel “dead,” it’s time.
Find a Brand That Loves Your Feet Back
Not all brands are shaped the same—and neither are our feet.
- Wide-foot runners: Check out Altra (they’re known for that roomy toe box and zero drop), New Balance, or Brooks (especially 2E or 4E models).
- Narrow-foot folks: Asics, Nike, and some Saucony models tend to run tighter or come in narrow options.
Note: If you’ve got duck feet like me, don’t force yourself into a narrow shoe because it looks fast. You’ll regret it halfway through your long run.
Shoe Fit 101: Get the Right Gear or Pay the Price Later
Let’s get real—your shoes can make or break your running game. I’ve seen too many runners sidelined by blisters, beat-up toes, and sore arches, all because they were wearing the wrong pair. Been there myself, limping home mid-run, wondering why I didn’t just trust my gut instead of chasing hype. So here’s the no-BS guide to shoe fit, broken down by foot type and what actually works.
Wide Feet? You’re Not Alone
If your feet are spilling over the sides or your pinky toe feels like it’s screaming by mile two, you probably need a wider shoe. No shame in it.
Brands like New Balance, Brooks, HOKA, and Asics usually offer wide (2E for men, D for women) and even extra-wide (4E for men, 2E for women) versions of their top models. And if you’ve never tried Altra, you might want to—they’re shaped more like your actual foot, roomy up front so your toes can spread out like nature intended.
Tight shoes aren’t just annoying—they can lead to metatarsalgia, blisters, and hotspots that’ll make every step miserable. Don’t let the wrong width hold you back.
Narrow Feet? Lock It Down
If your feet are sliding around like you’re ice skating inside your shoes, you’re likely on the narrow side. Brands like Nike and Asics run a bit snug by default, and Brooks offers narrow sizing (B for men, 2A for women) in certain models.
Still loose even after cranking down the laces? Try thicker socks or different lacing tricks to dial in the fit. But at the end of the day, if your shoe doesn’t hug your foot like a glove, you’re going to be wasting energy every stride.
Got High Arches or Flat Feet?
This one’s less about brand and more about model. If you’ve got high arches, your foot’s not doing much shock absorbing, so your shoe needs to pick up the slack. Look for neutral shoes with solid cushioning—think of it like strapping a pillow under your midfoot.
Flat feet? You might need some stability or structured cushioning, especially if you’re prone to overpronation. But here’s the kicker: comfort trumps all. I’ve seen flat-footed runners fly in neutral shoes and high-arched folks swear by stability. Try before you buy.
Orthotics: Bring ‘Em With You
If you wear orthotics—custom or off-the-shelf—bring them when you try on shoes. You’re gonna need a pair with removable insoles and a little extra room to fit everything in without squishing your toes.
In general, neutral shoes pair better with orthotics, because they’re not fighting the support your insert’s already giving you. Don’t double-down on control unless you want your feet barking back.
Always Take ‘Em for a Spin
Standing in the store? Useless. You need to run in the shoes. Most legit running stores have treadmills or let you jog outside for a bit. Use that. That “perfect” shoe on the shelf might turn into a heel-slipping, arch-bruising nightmare once you’re in motion.
Some places even offer liberal return policies—like, run in them for 30 days and return them if they suck. That’s gold. If you’re buying online, check the return terms before clicking “order.”
Carbon Plates: Edge or Hype?
Let’s cut through the noise. Carbon-plated shoes — yeah, those fancy rocket ships everyone’s racing in — can help you run faster. No question. Study after study says they can improve running economy by around 2-4% on average. Some runners even clock close to a 10% gain. That’s huge.
But here’s the kicker — not everyone gets that magic boost. Some folks? They actually perform worse. True story. The Journal of Sports Sciences dropped a study showing individual responses were all over the place. Some runners thrived, others flatlined, and a few even went backward.
And the pace matters. These shoes are built to bounce when you’re pushing it. If you’re running at a slower speed, you’re not getting the full return. It’s like putting race fuel in a lawnmower — doesn’t do much unless you’re firing on all cylinders.
Another thing no one tells you? They can mess with your perception. Carbon shoes make your legs feel springy — almost too good. So you push harder than your body’s ready for. That’s when overuse injuries creep in. Stress fractures, calf strain, you name it. I’ve seen runners go from “Wow this feels great” to sidelined in two weeks because they thought the shoes would carry them through without the leg strength to back it up.
And let’s not ignore the price tag and shelf life. Most carbon racers are toast after 150–250 miles. That’s two marathons and a couple of workouts, tops. Not exactly built to last.
Matching Shoes to the Distance: The Real Playbook
Let’s break this down by race type — what your feet need changes as the miles add up.
- 5K–10K: Speed is king. Go light. You want quick turnover, not cloud-like cushion. Something like a 6 oz flat gets the job done.
- Half Marathon: You need some padding but still want zip. A 7–8 oz plated shoe or light trainer can strike that sweet balance.
- Marathon: This is where cushion matters. Look for something in the 7–9 oz range with bounce and protection. If you’re less experienced or prone to injury? No shame in a comfy 10 oz workhorse.
- Ultras: Comfort, grip, and protection win here. It’s okay if the shoe’s a tank. If it keeps your feet happy for 50K+ on dirt and rocks, that’s the shoe for you.
Trail vs. Road Shoes: Know the Difference Before You Slip
You ever take road shoes onto a muddy trail? Yeah? Then you already know — not all shoes are built for all surfaces.
Trail shoes are a different beast. They’re built for grip, protection, and stability. Think cleats for dirt. The rubber lugs on the bottom bite into mud, gravel, and loose rock. You’re not skating around corners or eating dirt on downhills. You’re planted.
Road shoes? Smooth outsoles. Great for pavement. Terrible for wet grass or loose rock. If you’re slipping and sliding on a trail, your shoes are the problem.
Different trail shoes have different lugs:
- Shallow lugs (tighter pattern) = great for dry, hard-packed trails and rocks.
- Deep, spaced-out lugs = better for mud, snow, or soft terrain. They dig in and shed mud like champs.
And then there’s the rubber. Trail shoes usually use stickier stuff — so you can grip even when it’s wet. That’s huge on rocky or rooty trails.
Water Resistance & Drainage: Pick Your Poison
Trails mean water—streams, puddles, rain. The trappings of trail running. Trail shoes come prepped: some use hydrophobic materials or fast-dry linings. Others go full waterproof with Gore-Tex. Here’s the catch: once water gets inside a waterproof shoe (say from the top), it stays. Your foot becomes a swamp.
That’s why a lot of us prefer breathable, quick-dry trail shoes. Yeah, they’ll get wet—but they’ll also dry out fast and drain better. Especially in warm weather, I’d rather run in soggy shoes that dry than hike in mini saunas.
Waterproof is great if it’s snowing, cold, or you know the trail is a wet mess from the jump. Otherwise? Go light and let it breathe.
And by the way—most trail shoes are mud-resistant. Not mud-proof, but many shed gunk better than road shoes. Some even rinse off easy. Try that with open mesh road shoes and you’ll be scrubbing for days.
When Not to Rock Trail Shoes
Look, trail shoes are awesome — until they’re not. I’ve made the mistake of wearing a beefy trail shoe on a long road run, and man, my joints felt it for days. Don’t do it.
If your run has you spending more time on pavement than dirt, leave the trail shoes at home. They’re heavier, stiffer, and made to grip — not to cruise smooth asphalt for 8 miles. You’ll wear down the lugs fast and maybe even feel beat up after.
Same goes for crushed limestone or groomed dirt paths — those buttery-smooth “trails” where a road shoe flies. If you’re doing speedwork or tempo on that kind of surface, throw on a lighter road shoe. Save the tank treads for when you actually need ‘em.
And heads-up: trail shoes can run hot. Built with thicker, burlier material to protect your feet, they tend to trap heat. On a scorcher of a day on an easy trail? That burly upper can feel like a sauna. You’ll end up with sweaty, swampy feet just because you picked the wrong tool for the job.
The Hybrid Trap
Let’s talk “road-to-trail” shoes for a sec. Yeah, they promise the best of both worlds. But too often? They end up average at everything. Jack-of-all-trades, master of none.
If your runs start on the road but take you deep into real trail territory — rocks, mud, roots — you’ll want something with solid grip and bite. A hybrid might get you there, but good luck when the trail gets sloppy. Been there. Slid everywhere. Never again.
Now, if your trails are tame and you’ve got a couple of miles of pavement to reach them, a hybrid might make sense. It’s a compromise, not a cure-all. Just know what you’re signing up for.
Bottom line: If you run serious trails regularly, pony up for real trail shoes. Your ankles, your confidence, and your pace on gnarly terrain will thank you.
Trail vs. Road — What Really Matters
It comes down to three things: traction, protection, and durability.
- Traction: Road shoes can get away with smooth soles. Trails? Not so much. Trail shoes are built to grab — they’ve got aggressive lugs that claw into dirt, mud, and rock.
- Protection: Trails throw all kinds of junk at your feet — roots, rocks, branches. Trail shoes are armored up to protect your toes and sides from those nasty surprises.
- Durability: Trail shoes can take a beating. Road shoes wear smooth if you drag them through dirt and gravel. That means you burn through them faster and spend more money.
But the biggest benefit? Confidence. With the right trail shoe, you stop tiptoeing and start charging. That’s when trail running becomes fun. As one runner told me: “My road shoes can go on trails… but my trail shoes make me love them.”
Gear should never hold you back. It should unlock your flow.
The Real Deal on Running Watches
Let’s be honest—running watches can either be your best training buddy or just a fancy wristweight. Depends how you use ’em. You don’t need to spend a fortune to get value, but if you’re gonna train smart, there are a few features that actually matter. Here’s what I always recommend:
Lap Splits & Structured Workouts
Every runner should know how to track a lap. Whether it’s your warm-up mile or rep #3 on the track, splits tell the story.
Most watches these days have some kind of lap function—auto-lap (every mile/km) or manual lap button. If you do intervals, tempo runs, or speed workouts, you want a big, easy-to-hit button. Some budget watches bury that function behind menu layers or make you double-tap. Nope. That’s a recipe for missed splits.
The better watches? They let you pre-program full workouts. I’m talking warm-up → intervals → cooldown. So your watch buzzes when it’s time to shift gears. Super helpful when your brain is fried mid-set and you don’t want to think. Stuff like “6x3min hard / 2min jog” becomes automatic. If you like structured training, don’t skimp here—mid-tier and up usually have this nailed. Entry-level watches? Not always.
Navigation & Mapping: Are You a Trail Beast or a City Cruiser?
Trail runners, adventurers, folks who like getting “just a little lost”—listen up. Navigation features can save your run (or your butt).
High-end watches from Garmin, Coros, and Polar let you load routes and follow a breadcrumb trail or even full-on color topo maps. Super clutch if you’re out on a new trail or in a different city trying to find your way back.
If you never leave your neighborhood, you might not care. But if you’ve ever taken a wrong turn 6 miles from home and had to backtrack uphill, you’ll see the value.
Just a heads-up: mapping features eat battery. Not always a dealbreaker—but don’t expect 20 hours of juice with full maps running.
VO2 Max, Training Load & Recovery Stats:
Let’s talk data. Stuff like VO2 max, training load, and recovery time can be cool and motivating. It’s like having a little coach on your wrist whispering, “You’re getting fitter” or “Chill, bro—you’re toast.”
But here’s the thing: that coach is kinda dumb sometimes.
These numbers are guesses—based on heart rate, GPS, and built-in formulas. They’re decent for spotting trends over time. If your VO2 max keeps climbing, you’re probably doing something right. If it says “You’re strained” and your legs feel like bricks, maybe back off.
But don’t lose sleep over every little dip. Watches don’t know you did heavy squats yesterday or that your heart rate is wonky from too much coffee. One runner told me he started stressing more about his “body battery” score than his actual runs. That’s backwards.
Pacing Tools: Help or Distraction?
Let’s be honest: keeping pace is hard. Watches try to help with features like pace alerts (buzz if you’re too fast or slow), virtual pacers (run “against” a previous effort or set pace), and even race predictors (fun, but not always accurate).
These tools can help, especially for long runs or races. But don’t forget—GPS pace can bounce around like a toddler on sugar. Under trees, around tall buildings… you name it. That’s why a lot of experienced runners look at lap pace (the average for the current mile/km) instead of instant pace.
Oh, and if you’re a numbers geek, some watches now measure “running power” (similar to cycling power). It’s a newer metric—useful on hills and effort-based training—but still kinda wild west. The numbers vary between devices, and no one fully agrees on how to train with it. If you like experimenting, cool. If you just wanna run? You can skip it.
Smartwatch vs Run-Only
Some watches do everything short of making coffee. Texts, music, calls, payments—you name it. Apple Watch is basically a phone on your wrist. But its GPS battery? Meh. And while it does have run tracking, it lacks some of the deeper running metrics.
Garmin, Coros, Polar? Built for fitness first. Most let you store music, pay at the coffee shop post-run, and get notifications—especially in mid to high-end models. Just expect better battery and more run-specific goodies.
If you want total focus and zero distractions, a basic GPS-only watch might actually serve you better. Some folks run best when it’s just them and the road, no buzzing or DMs interrupting a tempo run.
Garmin vs Coros vs Polar vs Apple: Who’s Got Your Back?
Here’s the scoop on the top dogs:
- Garmin – The old-school champ. Tons of models (Forerunner for runners, Fenix for adventurers). Solid GPS, great apps (Garmin Connect, Strava sync), reliable features. Battery life? Good—not always amazing unless you go high-end. They’ve also got the slick new AMOLED screens (Forerunner 265/965) if you like pretty visuals.
Garmin packs a lot into each model—recovery tips, music, payments, safety alerts. But heads up: you might need to go higher-tier to unlock everything. And the model choices? Whew. It’s a maze.
- Coros – The new kid that’s making waves. Lighter on price, big on features. Their app is solid, battery life is killer, and they tend to give all features to all models if the hardware can handle it. Great for mountain/trail athletes.
- Polar – Old-school Euro brand. Good HR tracking, solid running basics, some recovery tools. UI can feel clunky compared to Garmin/Coros, but the data is there. Not as flashy, but reliable.
- Apple Watch – Best for lifestyle runners. Music, apps, calls—yes. Long runs? Watch the battery. Deep training stats? Meh. But if you’re already in the Apple world and don’t mind charging daily, it works.
Final Word: No one-size-fits-all. If you run trails and want long battery, Coros. If you love data and structure, Garmin. If you want music and texts while jogging, Apple. Pick the tool that fits your runs.
Coros: The Battery Beast That’s Quietly Taking Over
Coros came out of nowhere and is now a favorite in the trail and ultra scene. It’s also my favorite – using a Coros Apex 2 right now (cheap but does all). Why? Battery life for days. I’m talking 20-30 hours of GPS on watches that cost way less than Garmin’s big boys.
The Pace and Apex models are their bread and butter. Simple dial/button combo, not a ton of fluff, just solid performance. They don’t do fancy stuff like contactless payments or music storage—but if you care about battery life and a no-BS training experience, Coros delivers. Plus, they don’t lock new features behind new models—older watches get software updates too. Respect.
They’ve got big names backing them too (yeah, Eliud Kipchoge uses one). Not for flash; for function.
Polar: Heart Rate Royalty
Polar’s been in this game forever, and they still hold the crown when it comes to heart rate training. If you’re the type who trains by HR zones, Polar’s worth a hard look.
Their watches—like the Grit X and Vantage series—focus on training load, recovery, and nailing HR accuracy. Hill Splitter is a cool tool that tracks your hill reps automatically. The wrist-based HR sensors are no joke, and they’ve got chest straps (like the Polar H10) that are some of the best out there.
Downsides? The screens aren’t as sharp, and their app’s a bit clunky next to Garmin’s polish. But if you want rock-solid HR data without breaking the bank, Polar gets it done.
Apple Watch: Jack of All Trades, Master of… Some
The Apple Watch is great if you’re running short and want one device to do it all—calls, music, texts, GPS. It’s crazy accurate for GPS and HR, especially paired with good apps like Strava or WorkoutDoors.
But the battery? Brutal. You’ll be lucky to get 5-6 hours of GPS before it gasps for life. Not ideal if you’re gunning for a marathon or hate charging things daily. Plus, sweaty touchscreens mid-run are annoying. Give me buttons any day.
Still, for beginners or casual runners, it’s solid. Some serious runners use it too—but most switch once they need more than what Siri can offer.
Suunto: Built Like a Tank, But Fading
Suunto’s still hanging in there—especially for trail beasts. Their watches (like Suunto 9 or Vertical) are durable as hell, with huge battery life and rugged builds.
But… they’ve been losing ground. Their app’s laggy, updates have been slow, and third-party support isn’t great. Still, for pure endurance and navigation in the backcountry, they’re an option.
Entry-Level vs. Pro Gear: What Do You Really Need?
Let’s cut through the noise.
Entry-Level ($100–$200): More Than Enough
These watches will track your pace, distance, time, and heart rate. That’s all most new runners need. You won’t get music or barometric altimeters, but who cares when you’re just trying to build consistency?
Standouts:
- Coros Pace 2 – Insanely good battery (~30 hours), super light, even has running power metrics. Seriously, this thing punches above its weight.
- Garmin Forerunner 55 – Friendly UI, workout suggestions, pace alerts. Garmin’s intro model that actually teaches you stuff.
Bottom line: Don’t let your wallet stop you from starting. These watches do the job.
Mid-Range ($200–$400): The Sweet Spot for Most
Now you’re getting extras: better screens, music storage, altimeter, training status, maybe even triathlon modes.
Best bets:
- Garmin Forerunner 245/255/265 – Adds training insights, optional music, longer battery. 265 brings AMOLED if you want that flashy display.
- Coros Apex series – Clean look, breadcrumb navigation, solid multisport features.
This is where most committed runners settle. You get function, battery, and style—without feeling like you’re wearing a computer.
High-End ($400+): Watch Nerd Paradise
These are your heavy hitters: Garmin Forerunner 965, Fenix series, Apple Watch Ultra, Polar Vantage V2, Coros Vertix, Suunto Vertical, etc.
What you’re paying for:
- Fancy materials (sapphire glass, titanium)
- Multi-band GPS for crazy accuracy
- Training readiness, HRV scores, recovery insights
- Full-color topo maps, solar charging, advanced running metrics
But real talk? Most of it’s overkill. Cool as hell, sure—but you can become a great runner with a $150 watch. I’ve seen sub-3 marathoners wear beat-up old Garmins.
Which Watch Works? Here’s the Real Talk Rundown
Let’s cut through the fluff. Most watch reviews are packed with spec-sheets and tech terms. Here’s what actually matters, from a runner who’s tested them in the trenches:
🔹 Garmin vs. Coros
Think of Garmin like the Swiss Army knife — loaded with features, maybe more than you need. Great smartphone integration, music, cycle tracking, maps, you name it.
Coros? It’s your rugged sidekick. Way simpler interface, but damn near impossible to kill — the battery lasts forever. I’ve gone over a week without charging it.
Want something that can track your sleep, menstrual cycle, and play Spotify on the run? Go Garmin. Want a no-frills, dialed-in training tool that doesn’t nag you? Coros all day.
🔹 Apple Watch vs. Actual Running Watches
Apple Watch is the king of polish and smart features. You’ll get text messages, music, payment, and rings to close. But… plan to charge it every day. Maybe twice if you’re using GPS.
For runs longer than an hour or two, especially with music, you’ll want the cellular version or to carry your phone. Oh, and if you’re running in the rain? That touchscreen can get moody unless you lock it.
Apple Watch Ultra fixed some of that — way better battery, rugged build — but the price tag might make your wallet weep.
Bottom line: If you’re mostly focused on lifestyle and light running, Apple wins. If your watch is for training first, a Garmin or Coros is probably a better fit.
🔹 Polar vs. Garmin
Polar’s got a loyal following — especially among heart rate nerds. Their recovery data and metrics like “Training Load Pro” are sharp and often feel more conservative (aka realistic). Their layout is clean, and they don’t try to be your everything.
Garmin’s a bit flashier. It’s got a smoother UI, and better app ecosystem. If you like syncing to multiple platforms or love deep customization, it’s got the edge.
Which one’s better? Honestly, it’s more about which system you vibe with. I know runners who swear by Polar’s honesty and others who can’t imagine running without Garmin Connect.
Avoiding Data Burnout (Yes, That’s a Thing)
These watches can track everything — cadence, stride length, ground contact time, oxygen saturation, stress, sleep score, hydration… I could go on.
Problem is, more data ≠ more improvement. Here’s how to keep it simple:
✅ Pick Your Top 1-2 Metrics
You don’t need to watch everything. Maybe you just care about weekly mileage and average pace. Maybe heart rate and sleep. That’s enough.
✅ Clean Up Your Watch Display
If your screen shows six stats during your run, that’s five too many. I keep mine to time, distance, and pace. Some days, just time.
You don’t need to see vertical oscillation while grinding up a hill. Save that for your nerd session after the run (if you even look).
✅ Use Zones & Alerts, Not Constant Checks
Set your pace or heart rate zones and let the watch buzz if you go off-range. That way you focus on feel — not numbers.
✅ Leave the Watch at Home Once in a While
Run naked. No data. No buzz. Just the road and your thoughts.
✅ You’re the Boss — Not Your Watch
Here’s the deal: If your Garmin says “unproductive” but you just crushed a tempo workout? Trust yourself.
These algorithms aren’t perfect. Sometimes they glitch. Sometimes they misread recovery. Sometimes, like one guy told me, they flip out during hot weather and tank your VO2 max estimate.
Don’t let your gear gaslight you. Use what helps — ignore the rest.
TL;DR – Choosing a Watch: Start Simple
New to running? You don’t need the spaceship on your wrist. The Garmin Forerunner 55 or Coros Pace 2 has all the juice you need: pace, time, intervals, basic tracking. More than enough to build fitness and stay accountable. I’ve coached runners to half-marathons using nothing but a phone app and a kitchen timer.
If numbers fire you up, cool. Track away. But use the info to make better decisions—don’t just scroll and sigh. Otherwise, it’s like reading a weather app after already getting rained on.
AND…. If your watch is stressing you out more than it’s helping, ditch it for a week. Run on feel. Tune into your breath, your rhythm, your legs. You’ll be shocked how sharp your instincts actually are.
Running Clothes That Work
Now let’s talk gear from the neck down. And no, this isn’t about being “on trend.” It’s about preventing disaster—because nothing derails a run faster than bleeding nipples or a chafed inner thigh that feels like sandpaper.
Shirts
Cotton? Forget it. It might seem harmless, but trust me—it’s a slow-motion trap. Gets heavy, holds sweat, rubs your skin raw, and turns into a bacteria swamp. You don’t want to be that guy or gal steaming down the trail in a clingy, wet rag.
What to look for instead:
- Moisture-wicking fabric: Think polyester, nylon blends, or merino wool. These keep sweat moving away from your skin.
- Flat seams or seamless: Less rubbing = more comfort.
- “Anti-odor” or “anti-microbial” tags? Nice bonus if you’re logging lots of miles.
- UPF protection? Cool if you’re skipping sunscreen, but don’t overthink it. A cheap tech tee still does the job.
Fit: Loose, Tight, or Tanked?
- Tanks for hot days? Great airflow, just mind the sunburn.
- Short sleeves are your all-around workhorse.
- Long sleeves for cooler weather or sun protection.
Fit-wise, go with what makes you feel good. Loose is chill and lets the breeze in. Tight feels fast—but might trap heat. Try both and see what vibes.
Do You Need to Drop $$$ on Shirts?
Nah. Some of my favorite running shirts came free at races or from clearance bins. As long as they’re sweat-friendly and don’t chafe, they’re keepers. You don’t need to spend $80 to feel fast.
Shorts
Let’s talk shorts—because trust me, the wrong pair can make your run miserable real fast. From inner-thigh burn to a soggy mess down there, I’ve had it all. But once you find your go-to pair? Game changer. So here’s the real breakdown—no gear-jargon, just what actually works on the road.
Length
Shorts come in all lengths—from barely-there 2-inch splits (think elite dudes showing thigh for days) to knee-length 9-inch tanks that double as gym gear. Shorter means more airflow and freedom; longer gives you more coverage, modesty, and helps if your thighs tend to rub.
For most guys, a 5-inch short hits the sweet spot—not too “look at me,” but won’t slow you down either. Ladies, you’ve got similar options, and I know many who swear by bike-style spandex shorts for that no-chafe lockdown feel.
Liner or No Liner?
Most running shorts come with a built-in liner—like mesh undies sewn inside. And yes, that means you don’t need regular underwear underneath (especially not cotton—unless you enjoy swamp butt and chafing). The liner’s there to wick sweat and cut down on friction.
That said, if the liner feels weird or rubs you wrong, you can snip it out and use your own moisture-wicking briefs. Just make sure it’s synthetic or performance fabric. No cotton down there, ever.
Me? I roll with liner briefs. But I know runners who swear by going liner-free with compression shorts underneath. Trial and error is key.
How to Stop Chafing Before It Starts
If your thighs rub (happens to a lot of us), you need longer shorts or ones with a tight inner layer. Enter the 2-in-1 shorts—loose outer layer + snug inner liner = anti-chafe armor.
Another option? Straight-up half tights—tight spandex shorts with no liner needed. They hug everything, stay in place, and kill the chafe before it starts.
And don’t sleep on BodyGlide or anti-chafe balm. Rub it on inner thighs before runs if you’re going short or going liner-free. Ladies, some use boyshorts under split shorts for the same reason. Guys—if your boxer-brief liners ride up and start irritating, lube that hem or try a different length.
Pockets
Some shorts have that tiny key pocket in the waistband. Cool. But these days, you’ve got options with rear zip pockets big enough for a phone, card, or gel.
If you hate running with stuff in your hands (I do), find a pair with a secure phone pocket. Just don’t overload your shorts unless you want them bouncing like crazy (here’s more on how to carry a phone while running). For heavier stuff, throw on a run belt or vest (covered in another section).
Trail runners—check out shorts from brands like Path Projects or North Face with full-on waistband storage. It’s like a built-in utility belt.
Fabric
Your shorts should feel like you’re wearing nothing. Seriously. Technical fabrics like polyester blends or stretch knits are light, breathable, and dry fast. Avoid anything cotton or plasticky—it’ll trap sweat and chafe you to death.
Trail shorts might be a little thicker for durability, but the key is smooth seams and no rough spots where thighs touch.
Socks
You might not think about socks much—but your feet definitely do. Crappy socks = blisters, swampy feet, and run-ending misery. A good pair? It’s like foot armor.
Here’s how to get it right:
Moisture Matters (A Lot)
Running = sweat. Feet included. Cotton socks soak it all up and hold it against your skin. That’s how blisters strike.
Running socks, on the other hand, are made of smart fabrics—polyester, nylon, even merino wool blends—that wick sweat and dry fast. This keeps your feet cool, dry, and far less blister-prone.
Switching from cotton to real running socks? I’ve had runners tell me it’s the biggest comfort upgrade they’ve made.
Fit & Padding
Good socks hug your feet. They’ve got just enough cushion in the heel and toe (the high-impact zones), flat seams so nothing rubs, and sometimes even arch support. Some are even left/right-specific for better fit.
Compression zones can also help with blood flow and keeping the sock from sliding around. End result? Fewer hot spots, fewer blisters, and feet that don’t hate you after a 10-miler.
Blister Blockers
Some socks go next-level—like WrightSock’s double-layer design, which has one layer that rubs against the other instead of your skin. Others throw in high-tech yarns to reduce friction.
But honestly, 90% of your blister battles are won with:
- Good socks,
- Good shoes,
- A dab of lube on known hotspots (toes, heels).
Nail that trio, and your feet will be golden.
Sock Height
No-shows, quarter, crew—it’s up to you.
No-shows are great for road running, but make sure they’ve got that little heel tab so they don’t slip into your shoe (ask me how I know).
Crew socks give you more protection—nice for trail running or cold mornings. Some even give a bit of calf compression, which might help reduce fatigue over long miles.
But functionally? No big difference. Just don’t let style get you blisters.
Merino Wool = Magic
Merino wool socks are my go-to for just about everything — hot, cold, wet, dry. This stuff is thermoregulating (that’s just a fancy way of saying it keeps you warm when it’s cold and cool when it’s hot). The modern versions aren’t itchy either — they’re blended with nylon so they stretch, hug your foot, and hold up over time.
Bonus: wool still insulates when it’s wet. That’s why ultrarunners wear them in freezing rain and still finish with ten toes intact. Plus, they fight odor like a champ. No stink, even after back-to-back long runs? Sold.
Synthetic Socks Work Too
Don’t count out synthetics. A good poly/nylon blend sock can be soft, friction-free, and smooth like butter in your shoe. Some have silver or copper threads to keep the funk away. I’ve worn both types in marathons — no blisters, no regrets.
How Many Should You Own?
You’ll need several pairs. One run, one pair. Rotate them. When the cushioning goes flat or they get thin and crusty? Toss ’em.
Look, a good running sock might cost $15 — and it’ll do more for your comfort than a $150 watch. That’s the real contrarian take right there: skip the gadget, buy the gear that actually touches your body.
Ask yourself: Do your socks actually help you run better — or are they just taking up space?
Compression Socks: Helpful or Hype?
Let’s clear the air on compression socks.
These tight knee-high suckers aren’t just for old folks or airline passengers. Some runners swear by them for long runs and recovery — and they do help with circulation, especially after a tough session. The idea is they improve blood flow back to your heart and reduce muscle bounce.
Here’s the deal: science says they probably don’t make you faster, but they might help reduce swelling and soreness. Some folks feel fresher with them on, especially in ultras or back-to-back training days. At the very least, they can prevent calf fatigue, and in cold weather, they double as leg warmers or scratch guards on trail runs.
If you try them, make sure they fit right. Too tight? You’ll lose feeling. Too loose? Might as well wear regular socks.
Undergarments
It’s not glamorous, but let’s be real: under the shorts matters.
Guys – If your running shorts don’t have a liner, wear supportive underwear. Not boxers. Not cotton briefs. Get something made for movement — think Saxx, Under Armour, or similar athletic brands. Moisture-wicking, no seams in the wrong places, snug but breathable.
Ladies – A good sports bra is mission-critical. It should fit snug, wick sweat, and stay put. If your shorts don’t have liners, performance underwear can help too — seamless, breathable, and built to stay where they belong.
Pain down there? Ain’t nobody got time for that.
Headgear
Your head is basically your body’s radiator — tons of heat escapes up top. Cover it right, and you stay cooler, drier, and protected.
Hats
Running caps aren’t just about fashion — they’re functional. Shield your face from the sun, keep sweat out of your eyes, even block light rain.
Look for:
- Lightweight, quick-dry material
- Mesh panels for breathability
- Under-brim in dark color (reduces glare)
- Reflective trim if you run in low light
Hot weather trick? Shove some ice under your hat. I’ve done it mid-race — cold water drips down your neck as it melts. Feels amazing. Some hats even have built-in ice pockets. Brilliant.
Make sure the fit’s dialed in. Too tight = headache. Too loose = it flies off at mile three.
Visors
Visors are caps without the top. Great for hot days if you run hot (or have thick hair). They keep the sun off your face but let heat escape out the top.
Downside? Your scalp’s exposed — so if you’re bald or thin up top, don’t forget sunscreen.
Some ultrarunners swear by visors. Others think they look goofy. Who cares? If it works, wear it.
Headbands & Sweatbands: The Unsung Heroes
Sweat getting in your eyes sucks. It burns, it distracts you, and it makes you look like you’ve been sobbing during a hard race. That’s where a good headband or sweatband saves the day.
If you’re a heavy sweater (like me on any run over 5 miles), grab a forehead band. It’s simple, cheap, and so underrated. Some are thin and meant purely for sweat. Others are thicker and double as mini ear warmers in cooler weather.
Now, if you really want a do-it-all option, check out a Buff. It’s like the Swiss Army knife of runner gear. Neck gaiter? Check. Headband? Yep. Wrist sweat-wiper? Totally. Hat liner in winter? Nailed it. Face mask on freezing days? Absolutely. Plus, it wicks sweat, dries quick, and adds a bit of sun protection on your neck if you’re out there for hours.
Beanies & Winter Hats: Don’t Lose Heat Out the Top
Come winter, that wet head of yours becomes a heat drain. You lose a ton of body heat through your noggin. A fleece beanie or running-specific winter hat makes a huge difference.
Good ones are moisture-wicking (so sweat doesn’t freeze on your scalp), and some have ponytail holes or windproof fronts. More on full winter layering in the next section, but know this: running in 20°F without a hat = not fun.
Running Caps vs Baseball Caps: There’s a Difference
Sure, your old Yankees cap works in a pinch, but it’s probably cotton, and once that soaks up sweat or rain, it turns into a wet sponge on your head.
Running caps are lighter, breathable, and made to dry fast. Some fold up and bounce right back—easy to stuff in your shorts or pack mid-run.
And in the rain? A brimmed hat is a game-changer. Keeps water out of your eyes so you’re not blinking your way down wet roads. Pro tip: darker underbrims reduce glare off wet pavement.
Socks Matter More Than Your Shirt. No Joke.
Let me say this again: your socks matter way more than your shirt. Trust me—I’ve seen runners ruin great runs because of $3 bargain bin socks.
Here’s why: socks touch the most friction-heavy, sweat-loaded, high-impact area of your body—your feet. Cheap socks get wet, slide around, and rub you raw. Blisters, hot spots, toenail carnage—you name it.
On a budget? Splurge on socks, not a $60 shirt. A cheap tech tee wicks fine. But crap socks? Misery.
Same goes for underwear and bras—anything that’s snug and takes a pounding. Bad fabric there = disaster. That’s why I always tell my runners: spend where it counts—feet, privates, and skin that rubs.
Chafing: The Stuff No One Warns You About
Let’s get real for a sec. Chafing is the devil. Inner thighs, underarms, sides, nipples—anywhere two things rub, they will light up on a long run if you’re not prepared.
I learned the hard way. Did a long run once in a loose tank I hadn’t tested. Looked fine in the mirror. But 10 miles in? Those armholes were slicing my ribs like sandpaper. Got home, looked like I wrestled a raccoon. Never again.
Use BodyGlide or anti-chafe balm on the usual suspects: nipples, thighs, underarms. Test your gear before big days. If a shirt even slightly rubs at mile 3, it’s gonna feel like sandpaper at mile 13.
Guys: “runner’s nipple” is real. I’ve seen finish-line photos with blood streaks down white shirts. You don’t want to be that guy.
Fixes: Wear smooth tech shirts, use tape/bandaids, or go shirtless (but don’t forget SPF on your chest and back).
Jackets for Runners
A good running jacket can be your savior in nasty weather—or it can ruin your run faster than a blister in mile one. Pick the wrong one, and you’ll feel like you’re running inside a sweaty trash bag. Pick the right one, and it’s like armor against the elements—with airflow.
Here’s the no-BS breakdown…
Waterproof vs Water-Resistant: Which One Do You Actually Need?
Here’s the run-down:
Waterproof:
This is the full fortress. Materials like Gore-Tex block rain from seeping in. Sealed zippers. Taped seams. Bring on the downpour—you’re staying dry… on the outside.
But here’s the catch: waterproof often means less breathable. Which means the rain stays out, but your sweat? It gets trapped inside. End result: you’re soaked anyway, just from the inside out. I’ve seen runners cook themselves like a baked potato because they picked a waterproof jacket with zero airflow.
If you’re hiking or jogging easy in steady cold rain, sure, waterproof helps. But if you’re pushing the pace or the temps are warmer? It’ll swamp you.
Water-Resistant (DWR):
These are your breathable buddies. They shed light rain, mist, or drizzle—basically the kind of stuff that makes you damp but not drenched. Way more breathable. Perfect for 50°F and spitting rain. Bonus: they’re lighter, pack smaller, and dry fast.
So what’s better? Depends. Unless it’s a full-on downpour or freezing wet, I’d go water-resistant. Getting a little damp isn’t the end of the world—but overheating and soaking your layers from sweat? That’s a quick ticket to misery.
Breathability
If a running jacket doesn’t let vapor out, it’s useless for running. Some brands list breathability ratings—look for:
- RET score <6 = excellent
- MVTR >15,000 g/m²/24hr = solid
Gore-Tex Shakedry? Super light, breathes well, but costs a chunk and might wear out quicker. Some jackets get clever with design: waterproof front (blocks rain), breathable back (lets heat escape), or venting flaps under arms or down the back.
Venting & Features: The Real-World Stuff That Matters
✅ Pit Zips: These are magic. Zippers under your arms that dump heat without letting rain pour in. If your jacket doesn’t have pit zips or back vents, you better hope it’s paper-thin and breathable.
✅ Pockets: One is fine—just enough for a key or gel. More pockets = more seams = more chances to leak. Bonus if the jacket packs into itself. That’s great when the rain clears mid-run and you don’t want to tie a wet jacket around your waist like a cape.
✅ Fit: Not too tight, not flappy. You want to move without turning into a parachute. Some stretch helps, and articulated sleeves let you swing your arms naturally. Look for a drop-tail to keep your butt dry and seal out splashes.
✅ Hood Design: If it flops in your face or bounces around, it’s worthless. Get one with a brim and adjustment cord. Some roll into the collar, which is handy. In light rain, I sometimes skip the hood and wear a cap—it blocks rain from my face and keeps heat from building under the hood.
Packability: Because Weather Has No Chill
If you’ve ever started a run under blue skies only to get ambushed by a surprise downpour halfway through… you know what I’m talking about.
That’s why packable jackets are clutch.
I’m talking jackets that squish down into something barely bigger than a protein bar. Some even ball up into their own pocket—like magic. You shove it into your waist belt or hand, forget it’s there, and bust it out when the skies open up.
Some of these ultralight windbreakers weigh like 3 ounces—nothing. And now, even full-on waterproof shells are getting the same treatment. Look up ShakeDry or Pertex Shield models. Some of those sit under 6 ounces and still block rain. Total game-changer.
Some even come with a strap or carabiner loop so you can hang ’em off your shorts like a boss. Also: go bright. Neon green or orange isn’t just cool—it keeps you visible when it’s gloomy and wet.
Jacket Weight: How Light Is Right?
Here’s a cheat sheet:
- Basic windbreaker: ~3–4 oz (90–120g)
- Lightweight waterproof: ~6–7 oz (180g)
- Fully-featured rain armor: ~10–12 oz (300g+)
The lighter it is, the easier to stash—but also the less it protects. Thin fabrics can wet through fast, and one bad snag on a branch? Ripped. So ask yourself: do you need it to survive the apocalypse, or just get you through a sketchy 20-minute downpour?
My rule: If it rains every other day where you live, get something more durable. If you just want “break glass in case of emergency” coverage, go wispy. I live in Bali and it practically rains everyday during the rainy season. But it also hot and humid. My go-to jacket is no more than a thin outer shell. Live somewhere cold? My jacket won’t work for you.
How to Layer Like a Pro (And Not Suffer)
Running in a rain shell directly on skin? Rookie move. It’ll feel clammy and gross. Always, always wear at least a thin base layer underneath. It wicks sweat, and even if water gets in, it keeps you warmer and way less sticky.
Pro move: Zip and unzip as needed. I’m constantly adjusting on the run—rain slows down, I unzip halfway. Wind picks up, hood goes back up. It’s not a “put it on and forget it” piece—it’s a tool. Use it.
Don’t Chase the Highest Waterproof Rating
You see “20,000mm waterproof” and think, “Sweet, I’m invincible!”
Not so fast.
That stuff’s great if you’re standing still in a downpour. But you’re running. Breathing hard. Sweating buckets. Breathability trumps raw waterproof numbers almost every time for runners.
I’d take a jacket with 10,000mm waterproofing and great breathability over a suffocating 30,000mm shell any day—unless you’re racing Noah’s Ark in the middle of a monsoon.
And sometimes—if it’s warm enough—skip the jacket altogether. Wear less. Get wet. Just don’t wear gear that chafes like sandpaper when soaked.
When You Need Waterproof, No Questions Asked
If it’s cold (say, under 45°F) and raining steadily the whole time—and you’re going long—you need a real waterproof jacket. No debate. Hypothermia sneaks in fast when you’re soaked and moving in the cold. Look for one with vents or breathable membranes and run smart. Wet + cold = danger zone.
If It Keeps You Dry but Cooks You Alive — It’s Failing
Let’s get brutally honest: A jacket that keeps rain out but turns you into a sweaty mess? That’s not helping. That’s just a wearable sauna with a zipper.
The best running jacket? It’s the one you forget you’re wearing. It blocks wind and rain, keeps the chill off, but doesn’t have you wringing out your shirt five miles in. If you’re hotter with the jacket on than without — and I mean sweating buckets, feeling clammy, cursing your life — ditch it.
I’ve done the test. Ran in light rain with a jacket, then again without. Sometimes, getting a little wet is actually the better call. A breeze hits, sweat evaporates, you stay cool and comfortable. Meanwhile, that “waterproof” oven you zipped into is just stewing you in your own sweat. Lovely, right?
Moral of the story: use the jacket when it makes sense. Not every drizzle calls for one. I used to panic at the sight of dark clouds, throw on my shell, and end up boiling by mile two. Now? I carry it just in case, but I don’t wear it unless the skies really open up.
Your jacket is a tool, not body armor. Know when to use it — and when to let it ride in your pack.
Accessories That Save Your Run (And Your Skin)
In today’s guide I yapped about many things: shoes, watches, clothes and so much more. But now let’s get into the stuff that doesn’t get Instagram love but might just save your run — the little things experienced runners swear by that beginners always overlook.
These aren’t flashy. They’re functional. And trust me, they matter.
1. Anti-Chafe Balm: The $5 Savior
Let me say this clearly: if you’ve never had a chafing problem, congrats — but your day is coming. And when it does, it won’t be subtle. I’ve finished long runs with my inner arms raw from just brushing my sides. Learned the hard way.
Now? A quick swipe of BodyGlide or Vaseline and I’m golden. Inner thighs, underarms, waistband, nipples, toes — hit the danger zones before you head out. You don’t need much, but it makes a massive difference. Especially in heat or rain.
You might think your $150 earbuds matter, but that little stick of lube? It’ll keep you from bleeding through your shirt. Literally.
Pro tip: if you’re prone to rubbing, carry a travel-size balm on long runs. In a pinch, even spit or water can give temporary relief. But don’t let it get to that point. Prevention is everything.
2. Running Belts & Pouches: No More Jangling Keys
If your keys are jingling or your phone’s slapping your thigh every step, stop. That’s not just annoying — it messes with your rhythm and focus. You need a system.
Enter: the running belt. I’m talking SPIbelt, FlipBelt, or whatever flavor fits you best. They sit tight on your hips, hold your essentials, and don’t bounce if sized right.
Personally, I keep mine stocked with just the basics: one key, ID, maybe a $10 bill, phone, and a gel if it’s a long one. That’s it. Streamlined and ready.
FlipBelts are sleek and stretch to hug your gear. SPIbelts zip up and handle big phones well. Either way, it beats trying to stuff everything into your pockets — or worse, carrying your phone in your hand the whole time like a club.
Armbands? Some folks swear by them, but they never worked for me — too tight or too itchy. I’d rather strap my gear around the waist and forget about it.
3. Hydration Gear: Don’t Be a Hero
If you’re running over 45-60 minutes, especially in heat, you need water. Period.
Toughing it out sounds cool until you’re cramping at mile five and eyeing the nearest lawn sprinkler like it’s an oasis.
You don’t need a full-on hydration vest (unless you’re going long). A simple handheld bottle with a strap works great. Or a small waist belt with one or two bottles. Nothing fancy — just something to carry water and maybe a gel or two.
A $15 handheld saved my butt more times than I can count during summer training blocks. Don’t sleep on it.
Staying hydrated = staying in the game. Don’t wait until you’re gasping to take a sip.
Headlamp, ID & Personal Safety Gear: Run Smart, Not Scared
If you run when it’s dark, get a headlamp. Seriously. I don’t care if it “feels dorky”—you’ll feel a whole lot worse if you trip on a curb or a pothole you didn’t see. A small LED headlamp (100–200 lumens) is plenty for city runs. Hitting trails at night? You’ll want 300+ lumens.
Modern headlamps are featherlight and rechargeable. Some even weigh less than 2 ounces—you won’t notice them after a mile. Hate headbands? Clip a light to your hat brim or waistband. At bare minimum, use your phone light in a pinch. But honestly, that’s not ideal. A proper runner’s headlamp throws a flood beam and frees your hands—no bouncing flashlight.
Reflective Gear: Be Seen, Stay Alive
If you’re running near traffic, visibility’s everything. Don’t trust your neon shirt to save you. Drivers need movement and reflection to spot you. Reflective vests, sashes, or arm bands are cheap—like $10 cheap—and make a huge difference.
I strap reflectors to my ankles or wrists for every dusk/dawn run. Moving reflectors = better visibility. Shoes and gear often say they’re reflective, but don’t bet your safety on a tiny swoosh logo lighting you up.
ID: It’s Not Paranoia—It’s Preparedness
Nobody likes thinking about accidents. But if something happens out there—you trip, pass out, or worse—you want people to know who you are.
Options:
- Road ID wristbands or shoe tags: Name, emergency contact, allergies. Done.
- ID card or a scrap of paper in your pocket works too.
- If you carry a phone, make sure it has emergency info on your lock screen or in a Medical ID app.
Pepper Spray & Alarms: Just In Case
Running solo on remote roads or trails? Worried about sketchy areas or stray dogs? A tiny pepper spray or personal alarm can go a long way. They make hand-strap versions that won’t bounce around or slip. They’re light, easy to carry, and can give you peace of mind.
Just one thing—practice. Know how to unlock and aim it. The last thing you want is to fumble around when you’re scared. And don’t forget: wind direction matters if you ever use spray (ask me how I know…).
Recovery Tools: The Cheap Gear That Saves You from the Expensive Stuff
Forget the flashy massage guns for a second. You know what works? A $20 foam roller and a $5 lacrosse ball.
- Foam roller: Self-massage for tight quads, calves, IT bands. Five minutes a day = fewer injuries, better mobility, less soreness. The first time might feel like torture (it did for me), but it gets easier. And your legs will love you for it.
- Massage balls/sticks: Great for hitting your glutes, arches, or shins. Especially after long runs when you feel like you got hit by a truck.
- Stretch straps: Ever tried to stretch your hamstrings and felt like you needed three arms? These solve that. Even an old tie or resistance band works.
Runner Truth: If you’re adding miles, this stuff isn’t optional. It’s the difference between staying in the game or sitting on the sideline with a preventable injury.
First-Aid Stuff: Every Runner Should Have a Kit (Even if It’s in the Car)
You won’t carry this on every run, but stash it in your gym bag or glove box:
- Blister bandages (Compeed is a lifesaver)
- Regular band-aids
- KT tape or Leukotape for those “uh-oh” muscle twinges
- Anti-chafe balm
- Pain relievers (ibuprofen, acetaminophen)
- Electrolyte tabs or drink mix
- Alcohol wipes, ointment
Pro runners pre-tape their known trouble spots. Smart amateurs do too. If you feel a hot spot on your heel—stop, tape it, and save yourself a week of hobbling.
Printed Checklists & Logs: Old-School Tools that Actually Work
Not everything has to be digital. A simple checklist before a race or long run can save your sanity: shoes, socks, fuel, anti-chafe, ID, headphones, backup pair of socks… you get the point.
Same goes for training logs. Whether it’s Strava, a spreadsheet, or a notebook, track your runs, your shoes’ mileage, what gear you wore in what weather. It’ll help you catch patterns (e.g., “Every time I wear these socks in the rain, I get blisters”).
Running Electronics: Music, Motivation & Distractions
Running headphones, GPS watches, and smart gadgets can spice things up. Just keep it real: if the budget’s tight, buy good shoes and socks before blowing cash on wireless earbuds.
That said, the right music or podcast can pull you through a grindy run. Just make sure your headphones are sweatproof, don’t bounce, and stay put. There’s nothing more annoying than fixing earbuds every 3 minutes. Hot Take: A $3 anti-chafe stick will improve your run more than a $300 pair of earbuds
Adding It All Up: How Much Should You Spend?
When building your running kit, it’s important to strike a balance between quality and budget. While there is no set amount you should spend on running gear, prioritizing items that enhance comfort, safety, and performance is a wise investment. Estimated Budget for Basic Gear:
- Running Shoes: $80-$160
- Running Clothing (shirts, shorts, tights): $20-$70 per item
- Sports Bras: $20-$50
- Running Socks: $10-$30 per pair
- Running Jacket: $20-$70
- Headphones: $20-$150
- Sports Watch: $10-$300+
- Heart Rate Monitor: $30-$350
- Hydration Packs and Accessories: $20-$100
Total Range: Approximately $200-$800+ depending on your choices and whether you go for budget-friendly or premium items. Conclusion: The Right Gear for a Successful Run The perfect running gear depends on your personal needs, training goals, and environment. Whether you’re a beginner finding your rhythm or an experienced runner looking to optimize performance, investing in quality gear will pay off in comfort, durability, and motivation. Remember, each piece of equipment plays a role in your running experience, so choose items that fit well, function effectively, and align with your running style. Stay safe, run smart, and enjoy every step of the journey!