Does running burn belly fat?
The answer is a heck yeah!
In fact, a lot of beginners take up running to lose belly fat and and get a flat stomach.
When it comes to losing weight, it’s hard to beat running.
You can burn up to 600 to 800 calories while running, depending on your factors such as your size, training intensity, and fitness level.
But long runs alone aren’t going to help you lose that belly fat.
In fact, you need to back up your plan with the right diet and lifestyle changes—or else, you’ll fail miserably.
And you don’t want that.
In today’s post, I’m sharing with you some of the most effective ways to get rid of that stubborn belly fat and get a flat stomach.
But first things first, let’s discuss what’s belly fat as well as some of the dangers it poses.
What’s Belly Fat?
Belly fat, or “visceral fat” in medical terms—is the most dangerous fat there is.
This lethal fat accumulates in the abdominal area and envelopes your organs.
Surveys show that 30 percent of U.S. adults are classified as obese.
That’s just over one in three people, making the US one of the fattest countries in the world.
Probability, half the population of the US will be obese by 2040.
This fat not only affects how you look, but it’s also a significant risk factor for many serious diseases, including:
- Type II diabetes
- Heart diseases
- Coronary artery disease
- Hypertension
- Some cancers
- Sleep apnea
- Shorter life expectancy
Part 1 – Diet Changes to Get A Flat Stomach
The kitchen is the heart of the house and also where the battle for losing belly fat is won or lost.
Make the following changes to your nutrition plan and see your belly slimming down as a result.
1. Remove The Sugars
One of the best things you can do right now to get a flat stomach as soon as possible is to reduce your daily sugar intake.
Don’t take my word for it.
Science agrees.
Here are a few studies:
- Research revealed that subjects who consumed four to five servings of white bread a day resulted in more belly fat gains than those who only had one serving of white bread, even though both groups consumed the same amount of calories.
- Research has found that consuming low-carb diets resulted in reduced appetite, which is conducive to weight loss.
- A study from the University of North Caroline at Chapel Hill determined that the average American consumes about 80 more calories per day than they did in 1977.
Action Step
Cut back (or eliminate them for good) on all forms of refined and processed calories, including white bread, cookies, waffles, muffins, candy, chips, bagels, pastries, cakes, donuts, pasta, crackers, junk & fried foods and any other processed foods you get in a bag or a box.
I know that’s a lot, but you can do it in a slow manner.
2. Banish Liquid Calories
These liquid calories come in just about any form—soda, coffee, energy drinks, fruit juice, beer, and other sugar-sweetened beverages.
Liquid sugars are the worst as they don’t get “indexed” by the brain in the same way as it would index solid food.
In short, you end up taking in a lot of extra calories without even taking notice.
Even diet coke is bad for you.
A study published in the Journal of the American Geriatrics Society found that people who consumed diet soda on a regular basis gained about triple the amount of fat over a period of nine years as those who didn’t drink it.
That’s why I said any form of sugar, even artificial.
Action Step
Mindful eating!
Eat what’s essential and good for you.
Limit your intake of all sources of liquid calories, and that includes coke, sports drinks, beer, alcohol, juice, coffees, and other forms of sugar-sweetened drinks.
Instead, drink water.
Note – Looking for the best Beginner’s Guide To Running?
Then Check my Runners Blueprint System Here.
3. Eat More Healthy Fats
Are you in the habit of skimping on fats because you want to lose weight? That’s a big mistake
The truth is, not all fats are bad for you.
In fact, you need fats as much as you need carbs and proteins in your diet.
Healthy fats increase satiety levels, improve fat burning, increase metabolism, regulate blood sugar levels, etc.
Research published in the journal Diabetic Care reported that a diet rich in monounsaturated fats is more effective at regulating blood sugar levels than a high-carb diet
Another study published in the medical journal Appetite revealed that long-chain omega-3 fats could help control hunger.
Action Step
Healthy fats are abundant in:
- Olives and olive oil
- Canola oil
- Flax oil
- Seeds
- Peanuts
- Cashews
- Almonds
- Peanut butter
- Avocadoes
- Sesame seeds
- Tahini
- Pesto sauce
4. Count Your Calories
Let’s be honest, we are terrible at guesstimating the amount of calories consumed during a meal, and the number of calories burnt during a workout.
Research out of the Pennington Biomedical Research Center found that subjects who kept track of calories consumed still missed roughly 18 percent of them.
Further research also has shown that people—both those who are overweight or those within a healthy weight—tend to overestimate the amount of calories burnt during exercise.
So, you are not alone.
Action Step
Learn how to log smarter.
There is a wide range of apps and online resources to help you simplify the calorie counting process—provided that you’re willing to engage in it regularly.
Here are a few apps and websites:
- SparkPeople
- Lose it!
- MyPlate
- FitDay
- MyFitnessPal
- Cron-o-meter
To figure out how many calories you should eat each day, use this calculator
- Training intensity
- Fitness level
- Age
- Bodyweight
- Gender
5. Eat A High-Protein Diet
Protein is an essential nutrient that not only helps you build muscle but also loses weight.
During an experiment published in The FASEB Journal, female subjects were instructed to follow a diet for two months that consisted of roughly 30 percent protein, 30 percent fat, and 40 percent carb.
While the control group stuck to a diet that was 16 percent protein, 26 percent fat, and 55 percent carbs.
Result shown that the first group lost drastically more fat—including belly fat—than the other group without losing muscle mass.
Action Step
As a general guideline, roughly 30 to 35 percent of calories should come from lean sources of quality protein.
These include:
- Lean meats
- Whole eggs
- Fish
- Nuts, and
- Dairy
6. Eat Probiotics
Probiotics are various types of healthy bacteria found in a variety of foods and supplements. Bioma Probiotics is a great example of a supplement that can help introduce these beneficial bacteria into your system.
These have a lot to offer, but more importantly, they help reduce tummy fat.
In research published in the European Journal of Clinical Nutrition, subjects had two cups per day of fermented milk containing Lactobacillus Gasseri, (a probiotic strain), for a period of three months.
The subjects reported a reduction in abdominal visceral fat by roughly 4.6 percent and subcutaneous fat by just over 3 percent.
Another research shows the supportive result that: Probiotics are not only conducive to weight loss, but also work very well for belly fat.
Let’s say its like a detoxing agent.
Action Step
You need to support the growth of probiotic bacteria by eating plenty of prebiotic foods that naturally pack in a lot of soluble fiber.
These include:
- Asparagus,
- Bananas,
- Jerusalem artichokes
- Garlic,
- Onions,
- Leeks.
7. Try Intermittent Fasting
A review of research conducted on intermittent fasting reported that subjects experienced a 4 to 7 percent reduction in abdominal fat within a period of two to six months.
Another research published in the journal Cell Research revealed that intermittent fasting could cause drastic weight loss in just weeks in a mice group who were fed a typical diet for two days, followed by a 24-hour fast.
So, how does IF work?
Intermittent fasting is effective due to a mix of the following mechanisms:
- Lowering insulin levels.
- Regulating ghrelin levels, AKA “the hunger ”
- Promoting the release of human growth hormone.
- Increasing abdominal subcutaneous blood flow.
- Stimulating anti-inflammatory cells.
Action Step
In the past few years, I’ve experimented with a few different IF schedules, and this is my personal favorite as it’s easy to implement once your body has adjusted to the new eating approach.
The 16/8 method involves fasting for 16 hours per day, then having all of your meals in an 8 hour period.
For example, you could restrict your food intake to the hours of 1 pm to 9 pm.
So, basically, you’re just hopping breakfast and making lunch your first meal of the day.
Sure, feel free to drink your coffee in the morning—but that’s it.
Try to refrain from any sugar or sweets for breakfast if you don’t want to spend the remaining hours with hunger pangs.
I know there are a lot of IF variations, but 16/8 is the best and easiest form for beginners.
8. Drink Green Tea
When it comes to healthy beverages, green tea tops the list.
I’m talking about pure green tea, no latte, no frappe.
Just classic green tea ala Japan.
Research reported that drinking green tea can increase metabolism by up to 4 percent.
It may not seem as much, but it adds up.
What’s more?
According to research published in the American Journal of Clinical Nutrition, subjects who drank green tea with caffeine saw their weight drop and also reduced their belly fat more than those who only had caffeine.
Action Step
Shoot for 600 mg—or the equivalent of two to three cups of green tea per day.
For those with insomnia, try to have it gradually so you won’t disrupt your sleeping pattern.
Additional resource – Here’s how to lose body fat.
9. Eat Plenty of Soluble Fiber
An experiment, published in the journal Obesity, reported that for every ten grams increase in soluble fiber intake per day, subjects were able to reduce their tummy fat by roughly 3.7 percent over a period of five years.
Examples of ten grams of soluble fiber include two servings of black beans, two small apples, and two cups of asparagus
Another study published in the Journal of Nutrition revealed that subjects who consumed more fiber from whole grains and cereals had less body fat and belly fat than those who skipped the fiber.

Action Step
Soluble fiber can be found in different foods, including:
- Flaxseeds
- Brussel sprouts
- Avocadoes
- Shirataki noodles
- Legumes
- Blackberries
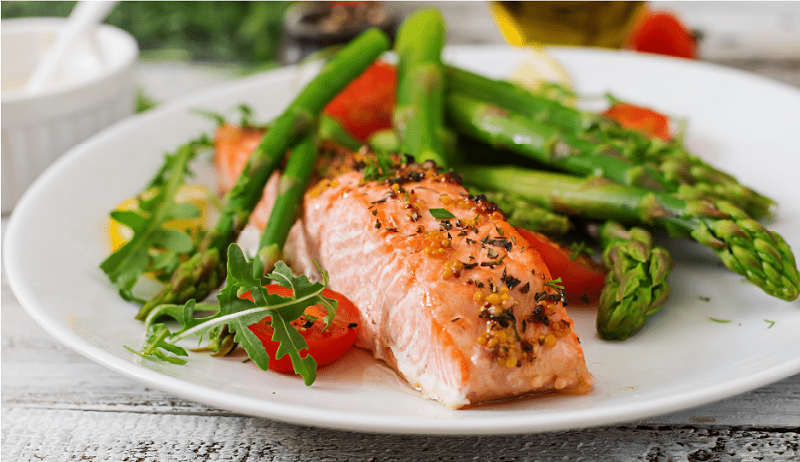
10. Eat Fatty Fish
A study published in the British Journal of Nutrition that found that consuming omega-3 fatty acids from fatty fish, like mackerel, is effective at reducing visceral fat.
You can also turn to fish oil supplements if you can’t find a good fish source.
Research conducted on subjects with liver fatty diseases reported that fish oil supplements could drastically reduce abdominal and liver fat.
Action Step
Aim for, at least, three servings of fatty fish per week to get enough levels of omega-3’s.
Here are the few:
- Sardines
- Halibut
- Salmon
- Herring
- Mackerel
11. Go Easy on The Alcohol
They call it a beer belly for a reason.
A single serving of wine, beer, or spirits can pack in roughly 120 to 150 calories, and if you tend to overindulge, you can end with severe calorie overload.
A study published in Obesity found that alcoholic drinks make your brain more sensitive to the smell of food, increasing appetite.
Action Step
I’m not saying that you should give up beer altogether.
But a little moderation can go a long way in helping you get a flat stomach.
Part 2 – Exercise & Running Strategies to Lose Stomach Fat
The way you run, and exercise in general, also matters when it comes to burning belly fat.
Apply the following strategies to ensure you’re making the most out of your sweat time.
12. Do Intervals
I’ve already confirmed that running does burn stomach fat, however, logging endless miles isn’t the best way to go.
Instead, do intervals by alternating between high-intensity bursts of running and slow jogging or walking for recovery.
Not only good for speed work, according to studies, intervals are proven to reduce belly fat and boost metabolism.
Action Step
Start with a proper warm-up of 5 to 10 minutes of slow jogging to raise your core temperature and get your muscles ready for the task ahead.
Go hard for 30 seconds, then rest for one minute, then go hard again.
Shoot for 8 or 9 on the RPE scale.
Repeat the process for 15 to 20 minutes. Don’t forget a proper cool down.
For more, check my six fat burning workouts. This guide on running for abs is also helpful.
13. No More Crunches
Classic ab exercises like sit-ups and crunches can strengthen your abs, but they’re not the most efficient exercises you can do to help you lose belly fat.
So what kind of ab exercises you should be doing?
You need exercises that engage multiple muscle groups and also challenge your cardiovascular system, so you end up burning off more calories.
These also work well for building strength in the core muscles—upper and lower abs, obliques, glutes.
Action Step
One of the best core exercises in the world is the good ol’ planks, where you hold yourself in a standard push-up position, core engaged, back flat, forearms resting firmly on the ground.
Planks cannot only hit your core hard, but they also activate your legs, chest, and shoulders.
Alignment first, strength later.
If you are beginner, then start with 3 to 5 sets of plank hold for 20 to 30 seconds each.
As you get stronger, hold it for longer and try adding in more variations.
14. Try HIIT Bodyweight Training
High-intensity interval training, as the name implies, consists of alternating between intense exercise intervals with recovery periods of low-intensity training.
Greek researchers found that performing intervals helped subjects lose more belly fat than moderate steady-state cardio training.
Another research published in the Journal of Sports & Physical Fitness showed that HIIT style workouts increase metabolism.
This means you continue burning calories at a higher rate for several hours post-workout.
“Also, You can try some waist cinchers while HIIT Bodyweight Training.
Learning about Best Waist Trainer it will make your time less consumed and eventually you would see the results much faster.”
Action Step
You can copy my bodyweight routine below and do reps as many as possible with good form.
Take 20 seconds of rest between each exercise, then rest for one to two minutes between each round.
Aim for six to eight rounds
15. Perform Resistance Training
Research reported that resistance training to be super beneficial for people with prediabetes, type II diabetes, and other metabolic issues.
For instance, this experiment revealed that a mix of strength training and cardio exercise is most effective in reducing visceral fat in overweight teenagers.
Action Step
Incorporate the following guidelines into your training program:
- Start out training with a personal trainer. This will help you nail good form from the get-go—key to injury-free and efficient training.
- Combine it with cardio. How? By adding kettlebells, battle ropes, medicine ball exercises.
- Do compound moves. Spot reduction is a myth. Instead, do multi-joint, full-body exercises that target many muscles at once. Examples include squats, bench presses, deadlifts, overhead presses, burpees, etc.
- Go heavy or go home. Research shows that opting for heavier weight with fewer reps is most useful for shedding body fat. And don’t worry about getting bulked up.
Lifestyle Changes To Get a Flat Stomach
Your everyday lifestyle choices can also affect your belly fat loss results.
Don’t worry.
I’m sharing with you below the exact measures you need to take to get your lifestyle up to speed.
The sweat will be for nothing if you neglect your lifestyle.

16. Sleep Well
According to a study published in the journal Sleep, people how logged six to seven hours of sleep during the night’s time had the lowest levels of visceral fat.
The researchers concluded that sleeping above or below that range was linked to more belly fat, and those who slept less than 5 hours reported the worst numbers.
In a 16-year study, 68,000 women who logged in less than five hours of sleep per night were likely to gain weight than those who slept seven hours or longer per night.
Research also has associated sleep deprivation with a number of conditions that contribute to excess visceral fats.
These include:
- Increased concentration of the hormone cortisol and serotonin..
- Reduced insulin sensitivity
- Reduced levels of the satiety hormone leptin and increased secretion of hunger-inducing ghrelin.
Action Step
Here is what you need to ensure that you are getting enough sleep.
- Sleep at least 7 to 8 hours of high-quality uninterrupted sleep during the night’s time.
- Ensure quality sleep by removing all sorts of distractions, like your TV, Smartphone, and other electronics, from your bedroom.
- Keep your room cool—around 65 degrees. Some people prefer a warm room, so make it as comfy as you want.
- Avoid caffeine and other stimulants three to four hours before going to bed.
- Keep a strict and fixed sleeping schedule by going to bed and getting up at the same time, even on the weekend.
- Accept the fact that you cannot accomplish everything on the to-do list. That’s life, and bad stuff happens to good people all the time.
- Your bedroom has two functions: Sleep and sex. So keep it that way.
17. Reduce Stress
A study from the Ohio State University revealed that stress could hinder you from losing weight, or even add more pounds, by disturbing healthy hormone regulation.
It will make you hungry as your body keeps on releasing cortisol as long as the stress continues.
The bad news is when you are stressed out, you will tend to go for high-fat, high-calorie treats, and foods because these foods stimulate the brain to release good-feel chemicals that ease the tension.
Action Step
Here are a few things you can do here:
- Start meditating. Techniques like Vipassana and Transcendental Meditation can be easily learned in the comfort of your house. Not into silent meditation? Try vibrational meditation like a Tibetan bowl or gong bath.
- Keep a daily journal and jot down what’s bothering you. This will help you identify major stressors in life, along with ways of dealing with them.
- Start a yoga class, especially restorative yoga.
- Make more time for yourself. Learn how to be more assertive and say no to family members, friends, and the rest of the world, especially when they ask you for something you just don’t have the time to do.
- Get enough sleep—at least 7 to 8 hours a night.
- Remove friction and grey zone areas from your life.
- Find time to do the things you enjoy—even if it’s watching South Park for the third time.
18. Set Challenging Goals
Research reported in the Journal of Human Nutrition & Dietetics suggested that the key to long-term weight loss is setting challenging goals.
The study, led by researchers at Nottingham University, assessed the impact of goal setting in roughly 24,000 overweight participants for a 12-month duration.
The following conclusion:
- Subjects who set no clear goals were the least successful overall
- Those who set relatively modest goals shed 10 percent of their body weight.
- Those who set more challenging goals lost an average of 19 percent of their body in one year–almost twice as much weight as the “realistic group.”
Also, this falls within the expert recommendation for a safe weight loss of one to two pounds per week.
Action Step
As a rule of thumb, start out by setting short-term fat loss goals.
These shorter, mini, goals are gradual achievements that lead up to your ultimate goals.
A good example would be to lose one pound per week.
That might not seem like much, but it adds up.
Keep that weight loss consistent for three months, and you’ll achieve the longer-term goal of shedding 10 to 12 pounds, in other words, aim for 10-20% from your old bodyweight.
You should expect slow, gradual weight loss, but not instant results. Everything instant are never good.
19. Stay Consistent
Consistency at its best!
The key to shedding the pounds and keeping them off is consistently losing a small amount each week, according to research conducted at the Drexel University.
Duing the experiment, a group of 183 overweight participants went on a weight loss plan for a year.
In the end, subjects who shed a consistent amount of weight over the first two months of the experiment ended up losing more weight than the yo-yo dieters, despite the latter group reporting bigger weight loss results to start.
Further research on achievement and personal success shows that the most successful people in the world—those you might consider lucky—possess a tremendous level of perseverance.
Never give up before you even start it.
Action Step
Make exercise a daily must remove junk foods from your life, do the work, and you’ll see improvement, but just not right away.
It’s okay to have some time for recreational foods or cheating day, but please limit it as much as possible.
And that’s all.
Today’s post is full of useful strategies to help you burn belly fat and get a flat stomach.
But it’s up to you to get started on the path.
Eat right, exercise often and take care of your body.
The rest is just details.
Conclusion
I think that’s it for today. If you’re still asking yourself “does running burn belly fat?” then today’s article should get you started on the right path.
Don’t worry, I will be writing more about running to lose belly fat in the near future.
Please do your best to put into action what you just learned so you can lose your belly fat and enjoy a flat stomach.
In the meantime, thank you for reading my post.
Feel free to leave your comments and questions below.
David D