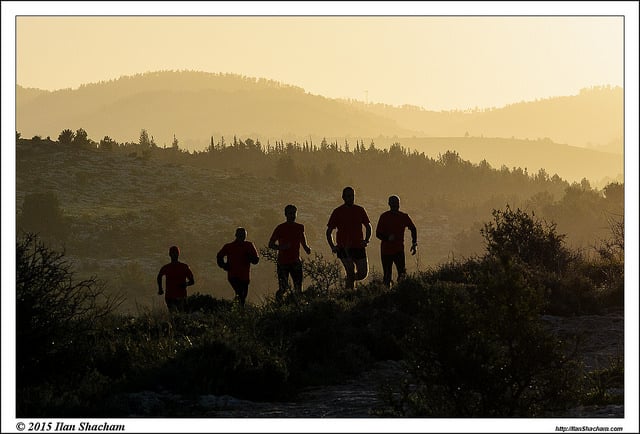
Let’s be real—Hills Are Intimidating
Every runner has faced that moment when the road tilts upward and your brain says, Nope.
They slow you down, your lungs catch fire, and your legs feel like concrete.
But here’s the truth: hills are where the magic happens. They turn an ordinary runner into a strong, efficient, and mentally tough athlete.
But here’s the truth.
Hills don’t lie.
You can’t fake strength or form on an incline.
They reveal your weaknesses—but if you face them, they’ll turn you into a faster, more resilient runner without spending a minute in the gym.
Let me share with you my full guide to hill training…
Why Runners Should Fall in Love with Hills
Here’s the short version: running uphill is strength training in disguise.
- Leg Power: Every stride is like a one-legged squat. Your glutes, hamstrings, quads, and calves all fire harder than they ever would on flat terrain.
- Full-Body Engagement: Hills naturally make you lift your knees, drive your arms, and engage your core. Your stride becomes more powerful—without thinking about it.
- Free Speed on the Flats: After a few weeks of hill work, your flat-ground pace will feel effortless. Many runners notice they get faster without adding any extra track workouts.
Plus, there’s the mental toughness factor. Grinding up a hill teaches you to stay composed under fatigue.
The next time you hit a late-race surge or a windy stretch on the flats, your brain will go, I’ve handled worse. That’s a superpower.
Please don’t take my word for it. Next let’s look at the science…
The Science Backs It Up
Hill training isn’t just a “coach’s secret”—research shows it works.
- Muscle Activation: A Sports Medicine study found that hill running lights up the lower-body muscles like resistance training does. Every step uphill is a mini strength rep for your glutes, hamstrings, and calves.
- Power Without the Pounding: Running uphill lets you produce sprint-level force without the impact of sprinting on flat ground. Translation: explosive strength gains with less injury risk.
- Injury Resistance: By strengthening the posterior chain (glutes + hamstrings) and improving running form, hills help protect you from common overuse injuries.
Boost Your Engine with Hill Running
You want to get faster, stronger, and tougher without adding endless miles? Hills are your secret weapon.
They torch your lungs, light up your legs, and build a runner’s engine that can power through anything from 5Ks to marathons.
Here’s the truth: hills are free speedwork and strength training rolled into one. You just have to respect them and train smart.
1. Hills Supercharge Your Endurance (VO₂ Max)
When you charge up an incline, your heart and lungs are working overtime.
Your breathing deepens, your heart rate spikes, and your body is screaming for oxygen. That’s the magic—pushing uphill forces your aerobic system to level up.
Research backs this up:
- Two hill workouts per week for 6–12 weeks can boost VO₂ max and lower your resting heart rate.
- Runners who did high-intensity uphill intervals for six weeks shaved about 2% off their 5K times—roughly 30 seconds for a 25-minute 5K—without any extra mileage.
Think of hills as built-in high-intensity intervals.
Gravity forces your cardiovascular system to work harder than the same pace on flat ground, which makes your heart stronger and your body more efficient at using oxygen.
Over time, flat runs start feeling like you took the training wheels off—your easy pace feels easier, and long runs feel smoother.
2. Hills Fix Your Running Form
Hills don’t just make you fitter—they make you run better.
You can’t fake it on an incline. The hill forces you to:
- Lean slightly forward (from the hips, not the waist)
- Land under your center of mass
- Pump your arms like you mean it
- Lift your knees higher than usual
Basically, hills are form drills Mother Nature built into the terrain.
Try to overstride or slouch and you’ll grind to a crawl. Sprint up with good posture and short, snappy steps, and your stride naturally becomes more efficient.
Even better, hill sprints train your neuromuscular system.
Every time you explode up a hill, your brain learns to fire muscle fibers faster and more efficiently.
That means better turnover and a springier stride even on flat ground.
Like Olympic champ Frank Shorter said:
“Hills are speedwork in disguise.”
Run them consistently and you’ll stand taller, feel lighter, and notice your cadence and form improving without overthinking it.
Conquer Your First Hill Workout Without Dying (or Hating It)
If you’ve never done a hill workout before, let me warn you: hills are humbling. They don’t care how fast you are on flat ground.
But that’s the beauty of them—they build strength, power, and mental grit like nothing else in running.
Here’s how to pick your first hill and crush it without wrecking yourself.
1. Find a Beginner-Friendly Hill
You don’t need Everest. Start with a gentle to moderate slope—around 3–5% grade.
- Steep enough to make you breathe harder
- Shallow enough that you can run without clawing at the ground on your toes
About 100–200 meters (roughly a city block) is perfect. Long enough to feel the burn, short enough to keep your form in check.
Not sure about the grade? Go by feel: if it slows your pace noticeably but doesn’t make you want to crawl, that’s your hill.
Flat city runner? Use the treadmill:
- 4–5% incline = mild hill repeats
- Up to 10% for short sprints (but watch those Achilles)
No treadmill either? Hit stairs or stadium bleachers. Not identical to hill running, but they’ll torch the same muscles and build that climbing strength.
2. Warm Up Like Your Knees Depend on It
Running uphill cold is asking for trouble.
Hills load your calves, glutes, and hamstrings harder than flat running—so they need a proper wake-up call.
Here’s my go-to hill warm-up:
- Easy jog – 5–10 minutes on flat ground
- Dynamic drills – 10–15 reps of:
- Leg swings (front & side)
- Walking lunges
- High knees & butt kicks
- Strides – 2–3 × 20 seconds at a relaxed pickup pace
By the time you’re at the bottom of that hill, you should feel loose, warm, and ready—not like the Tin Man creaking out of bed.
Pro tip: Always cool down after hills. Walk or jog 5–10 minutes to flush the legs, and maybe hit some light stretching or foam rolling later. Hill soreness is real, and a proper cool-down keeps you running tomorrow instead of hobbling like you just climbed Everest.
3. Start Small: The Perfect First Hill Session
Your first hill workout is not the day to play hero. You’re here to introduce your body to uphill running, not crush every muscle fiber in your legs.
Try this beginner-friendly session:
- Warm-up (as above)
- Run uphill for 10–20 seconds at a strong but controlled effort
- Think “catching a bus,” not “full-on sprinting for your life”
- Walk back down to recover (~30–60 seconds)
- Repeat for ~15 minutes total (about 6–10 reps for most runners)
- Cool-down for 5–10 minutes on flat ground
That’s it. Simple. Effective. Brutal in the best way.
Focus on form, not numbers. Quality uphill efforts beat sloppy, desperate ones every time. Build gradually, stay consistent, and watch your strength and confidence climb along with those hills.
Control Your Body: Effort Beats Speed on the Hills
Here’s the first rule of running hills: forget about pace.
If you try to sprint uphill like you’re on a flat road, the hill will chew you up and spit you out halfway up.
The secret isn’t speed — it’s effort control.
Think of it this way: hills are strength workouts in disguise. Your goal isn’t to win the bottom of the hill — it’s to crest the top still running, not gasping like a fish.
Here’s how to tame the beast one step at a time:
1. Shorten That Stride
Long, bounding steps uphill will torch your quads and calves fast.
Take quick, light steps.
- Your cadence (step turnover) should stay roughly the same as on flats, but your steps cover less ground.
- Imagine you’re tiptoeing up a flight of stairs — efficient, quick, and under control.
2. Lock Into an Even Effort
Forget the watch for a moment.
Run by effort, not pace.
- A hill at easy effort will still be slower than your flat pace, and that’s okay.
- If you’re using heart rate, aim for your usual zone.
- If not, think: breathing hard but in control, not panicked gasps.
3. Put Your Arms to Work
Your arms aren’t just along for the ride. Pump them straight forward and back (no flailing).
- Keep elbows around 90°
- Drive your arms back with intent — that momentum carries to your legs
- A strong arm swing naturally tips your body into the right forward lean
4. Keep Your Eyes Up
Don’t stare at your feet — it will hunch your posture.
- Pick a spot 10–20 feet ahead on the hill and work toward it
- Break the hill into mental chunks — mini “finish lines” help you stay focused
5. Breathe with Rhythm
Hills make you want to pant, but shallow breathing is a trap.
- Try a 2-2 pattern (inhale for two steps, exhale for two)
- Deep belly breathing delivers more oxygen and keeps you calm under pressure
Power-Hike Without Shame
If a hill is stupid-steep or endless, walk it with purpose.
In ultras and trail races, power-hiking is often faster than “heroic” shuffling.
Walking gives certain muscles a break and saves your engine for the rest of the run.
Even in road running, a short walk to reset effort is smarter than blowing up early.
When to Start Hill Training
If you’re new to running, pump the brakes before jumping into hill repeats.
Hills are strength + speed work combined, and your body needs a base first.
- Build 2–3 months of steady running (3–4 runs per week, ~15 miles/week) before tackling structured hills.
- It’s fine to jog or walk hills on your easy runs early on — that’s free strength work without the strain.
Once you’re ready:
- Start with one hill workout per week.
- Keep the rest of your runs easy to let your legs adapt.
- Introduce hill sessions early in a training cycle or offseason — they prep you for speedwork later.
Finding the Right Effort on Hills (a.k.a. The Sweet Spot)
When you hit the hill, forget the pace on your watch — effort is your compass.
Hills will always slow your speed, but they can sharpen your strength if you learn to dial in the right intensity.
Your first sessions aren’t about proving how fast you can sprint uphill — they’re about learning to push hard without blowing up.
- Aim for roughly 70–80% of your max effort.
- That’s “comfortably hard” — breathing heavy, legs working, but you’re still in control.
Imagine your all-out sprint is 100% (the kind you can hold for only 10 seconds).
Your hill effort should feel more like something you could sustain for 30–60 seconds: powerful, challenging, but not a collapse-at-the-top ordeal.
Here’s the gut check: you shouldn’t be able to hold a conversation — maybe just toss out a word or two — but you also shouldn’t be seeing stars or bent over gasping.
If that happens, you went full rookie mode. Controlled effort beats reckless sprinting.
If you love numbers, here’s a loose translation into race effort:
- 10–20s hill sprints ≈ mile pace effort
- 30–60s hills ≈ 5K effort
- 2–3 min climbs ≈ 10K effort
The actual pace will be slower because gravity’s a beast, but the perceived effort is what matters.
Over time, you’ll instinctively know when you’re right in that sweet spot: strong, smooth, and ready to crush the next rep without feeling like you need a stretcher.
Mastering the First Few Steps
The bottom of the hill is where most runners blow it.
They see the incline, adrenaline spikes, and they charge like they’re escaping a bear. Five seconds later, their lungs and quads file a complaint.
Instead, start smooth and deliberate:
- Shorten your stride and quicken your cadence — think of “downshifting” like a car climbing a hill.
- Lean slightly forward from your ankles, not your waist.
- Run as if the hill is twice as long as it really is.
This does two things:
- It prevents the redline in the first few steps.
- It gives your muscles a chance to settle into a rhythm.
I like to visualize the hill as a challenge to flow up, not attack with reckless hops. Quick, springy steps always beat overreaching or stomping.
Another trick is to match your breathing effort from the flat right before the hill. Don’t suddenly spike your effort because the grade changed.
Let the hill slow your pace naturally, but keep that steady breathing rhythm.
As you climb, keep these non-negotiables in check:
- Eyes forward, chest up — slouching will rob your power and strain your back.
- Drive with your arms — they’re your metronome and momentum source.
- Stay springy — light, rhythmic footstrikes help conserve energy.
The first steps set the tone for the whole repeat. Strong, smooth, and controlled beats heroic but doomed every single time. Nail this habit and you’ll own the hill from bottom to top, instead of letting it chew you up halfway.
1. Short Hill Sprints – Your Explosiveness Factory
What:
8–20 second all-out uphill sprints. Short, brutal, and wildly effective.
Why:
This is how you build raw power and speed without stepping in a gym. Hills force your body to fire those fast-twitch fibers, strengthen tendons, and jack up your running economy.
Think of it as plyometrics meets sprinting – every stride is strength training for runners.
How to Do It:
- Find a steep 50–100m hill (5–15% grade).
- Warm up well, then sprint uphill as hard as you can for 8–20 seconds.
- Walk back down and recover fully (1–2 minutes).
- Start with 4–6 reps, build to 8–10 as your legs adapt.
Coaching Tip:
Quality beats quantity. Six all-out 10-second sprints are better than 12 half-hearted ones. These should leave your legs buzzing, not dragging.
Personal Take:
I still remember my first short hill session on a scrappy little hill behind my house. Ten seconds in, lungs on fire. By rep four, my quads were jelly.
I questioned my life choices. But week after week, I got sharper. A month later, I could fly up that hill, and suddenly my flat sprints felt snappier too.
Short hills are the secret weapon most runners skip.
2. Long Hill Repeats – The Strength-Endurance Grind
What:
1–3 minute uphill repeats (up to 5 min for seasoned runners).
Why:
These are strength plus cardio rolled into one. They teach your legs to push hard for longer and raise your lactate threshold so flat race paces feel easier.
If short sprints are your “explosive power,” long repeats are your “diesel engine” workout.
How to Do It:
- Find a 300–800m hill with a moderate 5–7% incline.
- Run uphill at 7/10 effort – think 10K pace grind, not a sprint.
- Jog back down for recovery (about the same time as the climb).
- Beginners: 2–3 × 1–2 min.
- Advanced: 4–6 × 2–3 min.
Coaching Tip:
Stay smooth and consistent. Don’t blow up on the first rep and crawl the last. A slight slowdown is normal, but effort should stay honest.
Real-World Edge:
Boston Marathoners swear by these. Half-mile repeats on Newton-like hills build the exact strength to crest hills while others fade.
Even on flat courses, this grind pays off. I’ve had runners tell me that after a 4 × 3 min uphill block, their next tempo on the flats felt like cheating – the legs just turned over easier.
3. Long Hill Runs – The Grind That Builds Champions
What It Is:
A long hill run is exactly what it sounds like—a continuous climb that lasts for minutes, not seconds.
We’re talking a steady grind up a road, trail, or bridge, anywhere from 1 to 10+ miles depending on your level.
It’s less about speed and more about endurance under load.
Why It Works:
If short hill sprints are the gym session for your legs, long hills are the marathon of strength building. These runs:
- Train your slow-twitch endurance fibers to stay strong under prolonged stress
- Build aerobic capacity in a way flat runs can’t
- Harden your mind to keep moving when the climb doesn’t quit
Trail and mountain runners live by long hill runs—but even road racers benefit. After a few weeks of long climbs, flat long runs feel almost… easy.
How to Do It:
- Find Your Hill:
- Ideal: a steady climb you can run for 10–30 minutes without stopping
- Options: local fire roads, mountain trails, long bridges, or a treadmill with incline
- Run It Smart:
- Go easy to moderate effort—think conversational pace, not a gasping sprint
- Focus on form over speed: short, quick strides, light lean forward
- Walking on super-steep grades is fine—keep moving upward
Beginner Approach:
Sprinkle a few long climbs into your regular long run (ex: 5 miles with 2 continuous uphill miles in the middle).
As you progress, build to a 20–60 min continuous climb if your terrain allows.
Coach’s Tip:
What goes up must come down. Plan your descent carefully—downhill can torch your quads if you’re not ready.
Start with smaller climbs and earn your way up to big mountain grinds. Recovery after these sessions is key—they’re sneaky-tough.
4. Downhill Running – Training the Brakes
What It Is:
Downhill running is your secret weapon for quad strength and race readiness. Every step downhill forces your quads to absorb impact while lengthening (eccentric contraction)—the ultimate anti–runner’s knee workout.
Why You Need It:
Eccentric strength in your quads = fewer sore quads in hilly races.
Teaches fast leg turnover and smooth form at speed.
Prepares you for race-day pounding—if you’ve ever bombed a downhill unprepared, you know how sore that next day feels.
How to Train It:
- Start Gentle:
- Pick a hill with a 3–5% grade, 100–200m long.
- Focus on Form:
- Slight forward lean (not sitting back).
Light, quick steps—let gravity assist, don’t fight it.
Land midfoot, keep everything relaxed.
- Slight forward lean (not sitting back).
Workout Examples:
Downhill Repeats: Run down 100–200m at fast-but-controlled pace, walk or jog up as recovery. Repeat 4–8 times.
Long Downhill Segment: On a long run, include a 1–2 mile steady descent to practice quad control.
Bonus:
The jog back uphill to reset for repeats? That’s your stealth uphill strength training. One hill, two benefits.
5. Downhill Running: Train the Brakes, Unlock Free Speed
Most runners obsess about climbing hills but ignore the other half of the battle: running down them fast and in control. If you want to crush a hilly race—think Boston’s early miles or any trail race—you need to train the muscles that act as your “brakes.”
Here’s the truth:
Downhill training is a secret weapon. It strengthens your quads, teaches your body to absorb impact, and builds confidence so you can let gravity work for you instead of against you.
How to Train It:
- Once every 3–4 weeks, add a simple downhill workout: 5 × 100m downhill strides. Run down at a controlled, fast effort, then walk back up to reset.
- For variety, try 2-min up, 2-min down repeats: run uphill strong, turn around, and run downhill faster with smooth control.
- Or make it fun: fartlek the downhills on a rolling route, surging on each descent.
Form Tips:
Stay smooth and light, not stiff.
Engage your core and shorten your stride to stay in control.
Avoid aggressive overstriding—let your legs spin, don’t slam.
Why It Works:
Downhill running triggers eccentric contractions in your quads, which makes them more resilient.
Studies show it can improve running economy by teaching your muscles to handle impact more efficiently.
Confidence skyrockets: once your legs are trained, you’ll stop “braking” on descents and start flying.
Caution: Your first downhill session will light your quads up like a gym squat day. Plan it away from key races or long runs, and let soreness teach your muscles to adapt. Over time, that soreness fades, and your legs become downhill-proof.
I personally hit some downhill strides every few weeks, and it’s changed my racing—I’m no longer the runner getting passed on descents.
6. Hill Bounding and Skipping: Power Drills for Explosive Strides
If you want next-level hill strength and running economy, it’s time to add hill bounding and skipping drills. These are advanced plyometric-style moves that train explosive knee drive, ankle stiffness, and forceful push-off—basically teaching your body to run with more power for less effort.
How to Do It:
Find a moderate hill (5–8% grade). Too steep and you can’t bound properly.
Bounding: Take long, leaping strides uphill. Drive the knee high, spring off the back foot, and use powerful arm swings. Think “running in slow-motion with springs in your legs.”
Skipping: Do exaggerated high-knee skips uphill. This is a lower-impact version that still builds bounce and coordination.
Start small: 10–20 bounds or skips, then walk down to recover.
Pro Tips:
Focus on quality over quantity. Sloppy bounds are wasted effort.
Recover fully between sets—fatigue kills form.
Work up to 3–4 short sets once you’re stronger.
Who Should Do It:
Only add bounding once you’ve got a solid hill and strength base.
Make sure your calves and Achilles are ready—single-leg hops or jump rope on flat ground are good prerequisites.
Why It Works:
Hill bounding is like weightlifting for runners without the barbell. It recruits more muscle fibers per stride, which makes your regular running feel lighter and snappier. Many elites use it in base training to dial in efficiency, and recreational runners can get the same benefit if they respect the progression.
Do it right and, after a few weeks, your flat-ground running will feel spring-loaded. But don’t rush it—a few crisp bounds are better than 50 sloppy ones.
4-Week Beginner Hill Running Progression
Build strength. Gain confidence. Conquer climbs.
Hills are the ultimate runner’s strength training—you just use gravity instead of a barbell. But they can also chew you up if you charge in without a plan. That’s why this 4-week beginner-friendly progression ramps up gradually.
One hill workout per week. Each week, a bit more volume or intensity. Stick to the plan, and by Week 4, flat runs will feel like flying.
Week 1: Meet Your First Hill
Workout: 2 short repeats on a light incline (~4–5% grade)
Goal: Learn the ropes. Build confidence and practice form without frying your legs.
Here’s how:
- Warm up with 5–10 minutes of easy jogging plus some leg swings and lunges.
- Find a gentle slope. Run 20–30 seconds uphill at a moderate effort (6–7/10). Focus on:
- Core tight
- Slight forward lean (from ankles, not the waist)
- Short, quick strides
- Arms driving like pistons
- Walk back down for full recovery—take a minute or more.
- Repeat once (2 total uphill efforts).
That’s it. Week 1 is about feeling the hill, not setting records. You’ll probably be shocked at how your heart rate spikes. That’s normal. Own those two reps and call it a win.
Week 2: Turn Up the Effort
Workout: 3 repeats on a moderate incline (~5–7%)
Goal: Start building hill strength and test your endurance a bit.
- Warm up as usual.
- Run 30–40 seconds uphill at a strong but controlled effort (7/10). You should finish breathing hard but not gasping for air.
- Walk down and recover fully.
- Repeat for 3 total climbs.
Pro tip: Pick a landmark—mailbox, tree, or lamppost—where 30 seconds gets you. Try to hit that same spot each repeat. By the third climb, you’ll feel that glute burn. Congrats: your hill legs are waking up.
Week 3: Go Longer
Workout: 4 repeats, 40–50 seconds each
Goal: Build endurance and mental toughness on the hill.
- Same warm-up routine.
- Run 40–50 seconds uphill at a steady 7/10 effort.
- Walk/jog down to recover.
- 4 total climbs.
These longer efforts will sting by the last 10 seconds. Stay relaxed. Keep your form tight. This week pushes you out of the comfort zone—you’re building serious hill stamina now.
Week 4: Mix It Up & Finish Strong
Workout: 5 repeats with incline variety (4–8%)
Goal: Build power and versatility on different grades.
Try this structure:
- First 2 repeats: Easier hill (~4–5%) for 40 seconds, focus on quick turnover and speed.
- Last 3 repeats: Steeper hill (~6–8%) for 40–50 seconds, focus on driving knees and powering up.
- Recover by walking down after each.
If you only have one hill:
- Do 2 repeats at moderate effort,
- Then 3 repeats pushing harder,
Or start slightly farther down where it’s steeper for the last set.
By your fifth climb, your legs will feel like lead—but notice how much stronger you are compared to Week 1. Two little hills felt brutal then. Now you’re handling five.
Key Tips for All Weeks
- Recover fully between climbs—quality over quantity.
- Keep at least 2 easy/rest days between hill sessions to let muscles rebuild.
- Listen to your body. Muscle burn = good. Sharp joint pain = stop.
- Cool down with 5–10 minutes of easy jogging or walking, and stretch/foam-roll after.
Finish these four weeks, and you’ll have a solid hill foundation. Your glutes will fire better, your stride will feel stronger, and flat runs will seem effortless.
Next step? You can start adding more repeats, extending the uphill time, or eventually sprinkle in hill sprints for pure power. But for now, enjoy that feeling of turning a weakness into a weapon.
How Much Hill Training Is Enough?
So you’ve started tackling hills and you’re feeling strong… and maybe a little addicted to that post-hill burn. But now you’re wondering:
“How often should I do this? Can you overdo hills?”
Short answer: Yes, you can absolutely overcook yourself on hills. Hills are strength work in disguise, and like any hard session, you need to respect recovery.
Start Simple: Once a Week Is Plenty
If you’re new to structured hill training, start with one dedicated hill workout per week.
That might be your Wednesday “hill day,” with the rest of the week for easy runs, a long run, and maybe a speed session if you’re more advanced.
Some runners even go every other week in a base phase. That’s fine too — hill workouts are quality over quantity.
Why so conservative? Because hills are sneaky hard. They fry your quads, calves, glutes, and even your nervous system. Doing them daily or too often is a fast track to burnout or injury.
As one coach put it:
“Hill workouts should be hard, strong, and infrequent.”
Build Volume Gradually
Inside that one hill workout, how much climbing should you actually do? Here’s a rough guide:
- Beginner: 5–10 minutes total uphill (ex: 6 × 1-min hills = 6 min)
- Intermediate: 10–20 minutes total (ex: 8 × 2-min = 16 min)
- Advanced: 20–30 minutes total (like 4 × 5-min climbs or a mix of short and long)
Pro Tip: Always leave a repeat “in the tank” your first few weeks. It’s better to finish wanting one more than to limp home wrecked.
As you adapt, you can:
- Add a repeat
- Run slightly longer
- Progress to a second, shorter hill session in the week if your body’s thriving
Rotate Workouts to Stay Fresh
Mixing up your hill sessions keeps your body guessing and prevents overuse. For example:
- Week 1: 8 × 20-sec steep sprints (explosive power)
- Week 2: 4 × 2-min moderate climbs (strength/endurance)
- Week 3: 10 × 15-sec sprints (speed focus)
- Week 4: Hilly route long run or tempo run
Rule of thumb:
The steeper the hill, the shorter the repeat.
Gentle hills = longer efforts.
Steep monsters = short, powerful bursts.
Match Hill Training to Your Goals
- 5K / 10K runners: Short, steep sprints once a week are gold for power.
- Marathoners: Hills once a week early in training for strength; later, shift focus to flat tempo runs with an occasional hill session to maintain.
- Trail / Ultra runners: Hills are your bread and butter. Keep them weekly, in both workouts and long runs.
Listen to Your Legs (and Your Ego)
Too much hill work will let you know — sore quads, tight calves, lingering fatigue, or little nagging pains like Achilles irritation.
Recovery is where you actually get stronger.
Avoid stacking a brutal track day and a hard hill session in the same week (or at least space them 3–4 days apart).
- Good hill fatigue: Legs feel worked but bounce back in a day or two.
- Bad hill fatigue: Perpetual soreness, declining pace, or twinges that don’t go away.
Dial it back if you start feeling the latter.
Conclusion: Conquer the Hill, Conquer Yourself
At first glance, hill running can feel like punishment. That steep stretch on your route seems like it’s daring you to quit. But here’s the truth: hills are the secret weapon of stronger, faster, more resilient runners.
They build muscle like the weight room, challenge your lungs like a tough interval, and fine-tune your form like a running drill. Every climb is a full-body workshop in running strength.
And the payoff comes quicker than most realize. One runner shared that after a single month of weekly hill sessions:
“My usual pace felt easier, and I dropped nearly 20 seconds off my mile without touching the track.”
That’s the hill effect — it’s a shortcut to strength.
Key Takeaways for Every Climb
- Embrace the effort. Hills are hard, and that’s the point. Lean in, both mentally and physically. Hills don’t lie — they show you your true effort.
- Form is your foundation. Chest tall, arms pumping, feet quick. Hills are nature’s form coach.
- Progress patiently. Start small. Fewer repeats. Gentler slopes. Your body adapts shockingly fast with consistency and smart recovery.
- Listen to your body. Too much too soon can backfire. Rest and recover so the work can make you stronger.
- Mix your hills. Short sprints, long climbs, downhills — variety keeps training fresh and effective.
- Train your mind. Every hill you crest is a mental rep that builds grit. Race day will feel easier because you’ve done the hard work alone.
Soon, the hill that once made you groan becomes a trusted ally — your private training ground where speed, strength, and confidence are built.
So next time a slope rises in front of you, don’t sigh. Smile. That hill is an invitation — to rise, to strengthen, to level up as a runner.
Tackle it with these tips in mind, and step by step, you’ll run yourself into a stronger, faster, and tougher version of you.
Hills don’t just build better legs. They build better runners.
Lace up, find your hill, and go climb your next breakthrough.