How Often Should You Take Breaks During a Long Run?

You’re out on a long run, feeling good, then suddenly your legs feel heavy, breathing’s tough, and you wonder, “Should I take a break?”

I’ve been there.

Knowing when to stop isn’t about quitting—it’s about running smarter.

When I started adding long runs into my routine, I often took a quick 1-2 minute break every 20-30 minutes. It keeps my energy up and prevents burnout.

Even nowadays, I’d still take such breaks during my 20-mile plus long run for water and bathroom (in case of emergency).

I see no shame in that.

But, of course there’s a sweet spot. If you have to stop too often, you might be pushing too hard or not fueling right.

In this article, I’ll share with you some of my thoughts and strategies on how to make the most out of your long runs.

Sounds like a great idea?

Let’s get to it.

How Often Should You Take Breaks During a Long Run?

As a general rule, take a break every 20-30 minutes during long runs. A quick 1-2 minute break helps maintain your energy and keeps you from burning out. This is especially the case if you’re a beginner and still trying to build up your long runs.

It’s simple: break up your run into manageable chunks to avoid hitting that dreaded wall.

Here are a few signs to watch for when it’s time to take a break:

  • Breathing becomes hard: If you’re gasping for air or feel like your lungs are about to give out, it’s time to take a moment.
  • Muscle fatigue sets in: If your legs are starting to feel like lead and you can’t maintain a smooth stride, it’s a sign to slow down and rest.
  • Mental fatigue: If your mind starts wandering, losing focus, or your form starts slipping, it’s your body’s way of saying it needs a break.
  • Heart rate spikes: If your heart rate shoots up beyond your comfortable range, especially if you’re struggling to keep pace, ease off and take a breather.

When Is the Best Time to Take Breaks During Long Runs?

The best time to take breaks is when you notice any of the signs mentioned above—like shallow breathing or muscle fatigue. It’s all about knowing your limits and being proactive.

For most runners, I found that taking a break every 20-30 minutes helps prevent hitting the wall later on in the run.

How to Incorporate Walk Breaks Into Your Long Runs

The walk/run method isn’t just for beginners—it’s a game-changer at every level.

Early on, I hated the idea of taking breaks during long runs.

I thought it meant I wasn’t tough enough or that I was “cheating.” But then I learned the truth: taking breaks on long runs actually improves performance.

Even elite marathoners use a version of this method. Some use a 4:1 ratio—four minutes of running, one minute of walking.

It’s not about slowing down; it’s about staying fresh and maximizing performance.

The beauty of the walk/run method is its flexibility. You can tailor it to your fitness level and adjust it as you progress.

So, whether you’re just starting or you’re training for your first marathon, don’t underestimate the power of breaks. They’re the secret to staying strong and finishing your long runs feeling good.

Taking Breaks: Why It’s NOT a Fail 

We’ve all been there—sweat dripping, legs on fire, and then—you hit a stoplight or spot a water fountain.

Instant break. And you know what? That’s actually a good thing.

The goal of a long run isn’t to never stop.

It’s about pacing yourself, keeping your form in check, and building endurance without burning out. Those breaks? They’re just part of the process. They allow you to recharge, reset, and keep moving forward.

So, don’t feel bad about taking that break when you need it.

Hydrate, catch your breath, stretch, or just walk for a minute. It’s not cheating; it’s how you stay fresh and finish strong.

The Power of a Strategic Pause

One of the biggest mistakes I made in my earlier runs was starting too fast.

I’d feel great at the start—bursting with energy, thinking I was invincible. But by the time I hit the halfway point, I was already dragging.

The fix? Smart pacing.

And guess what? Breaks play a huge role in pacing yourself. In fact, research actually shows that the run/walk method helps you finish faster because it reduces muscle strain and keeps your energy levels up.

So, take that break.

Hydrate, stretch, or walk for a minute. It’s not a failure—it’s the strategy that keeps you going the distance.

When Breaks Become a Problem

Of course, there’s such a thing as too many breaks.

If you find yourself stopping every few minutes, something’s off. Ask yourself these questions:

  • Am I running too fast? If you’re pushing your pace like it’s race day, your body’s going to hit a wall. Slow it down! A good rule of thumb is to run 90 seconds to 2 minutes slower than your race pace during training runs.
  • Am I fueling properly? If you’re running for more than 75 minutes without taking in fuel (gels, water, etc.), your body will run out of energy. This is a biggie—keep your body fueled to avoid those sudden energy crashes.
  • Is stress affecting my run? Life doesn’t stop just because you’re running. Stress from work, relationships, or other life factors can mess with your mental focus, making you feel like you need to take more breaks. If that’s the case, it’s worth stepping back and addressing the mental load. Adjust your schedule if needed.

Quick Guide to Taking Breaks During Long Runs

Here’s a quick checklist to help you make the most of your breaks during long runs:

  • When to break: Aim for a break every 20-30 minutes of running.
  • How long should the break be? A 30-second to 2-minute pause is ideal.
  • What to do during the break: Hydrate, stretch lightly, take deep breaths to relax your muscles.
  • How to adjust breaks: If you’re a beginner, start with a 1:1 ratio of running and walking. As you get stronger, adjust the intervals (e.g., 3 minutes running, 1-minute walking).
  • Listen to your body: If your legs are dead or you’re losing focus, take a break. Don’t wait for the fatigue to take you out—be proactive.

Final Thoughts: Breaks are Part of the Process

Don’t let the idea of stopping during your long runs make you feel weak or like you’re doing something wrong.

Taking breaks is a key strategy for long-run success.

Whether it’s for hydration, recharging, or preventing burnout, breaks give you the reset you need to finish strong.

The real win isn’t about never stopping; it’s about building endurance, pacing yourself, and coming through the other side feeling stronger than before.

So go ahead—take that break, and keep moving forward. You’re doing exactly what you need to do.


How Often Do You Take Breaks During Your Long Runs? Comment below and let’s compare strategies!

The Guide to Your First Week of Running

Starting to run felt like stepping into a whole new world for me—equal parts exciting and totally overwhelming.

I remember my first week thinking, “How far should I even run without wrecking myself?”

If you’re new to running, here’s my best advice: forget miles for now.

Focus on time. Aim for 20-30 minutes, 2-3 times a week, mixing walking and running to build your stamina without burning out.

In this guide, I’ll walk you through why the first week always sucks a little, how to tell the difference between good and bad fatigue, and why consistency beats speed every time.

I’ll also share how to recover smartly so you don’t get sidelined, when and how to gradually step up your runs, and why slowing down now sets you up to run longer later.

Let’s get to it.


Running Sucks At First Your first week of running?

Yeah, it’s gonna suck. Your legs will probably feel heavy, and you might wonder if it’s worth it halfway through.

But that’s completely normal.

At the start, it’s less about speed and more about allowing your body to adjust to running. Your muscles, tendons, and even your mind are getting used to something new.

The key is recognizing the difference between ‘good’ fatigue and ‘bad’ fatigue.

  • Good fatigue is the kind where your legs feel tired, your lungs are working, and you’re sweating, but it feels earned
  • Bad fatigue is when you’re in pain or your body’s telling you to stop. Sharp pain or strain, particularly in your knees, hips, or lower back, is a warning sign.

Running through pain can lead to injury, so it’s important to listen to your body.

It’s essential to listen to your body.


Start Slow: It’s About Time, Not Distance

Let’s talk about the biggest mistake new runners make: doing too much too soon.

You’re excited, you’ve got the gear, and you’re ready to crush it. But here’s the truth: running too far, too soon, only leads to burnout and injury.

It’s way better to start small and build up than to push yourself hard and crash out.

When I first started, I thought I could nail a 5K right off the bat.

Many beginners make the mistake of thinking they can handle a 5K right away.

I barely made it through one mile without needing a break. It wasn’t until I focused on time, not distance, that I started making real progress.

My best advice? Start with 20-30 minutes of running, but break it up.

Run/walk intervals are your best friend. Try running for 60 seconds, then walking for 90 seconds. Repeat that for the whole session.

Don’t feel guilty about taking it slow. That’s how you build the stamina to keep going without wrecking your legs.


Set a Time Goal, Not a Distance Goal

Let’s cut through the noise here—forget about distance for now.

If you’re just starting, chasing miles is a recipe for frustration.

Focus on time. Aim for 20-30 minutes of movement, mixing in running and walking. Your body will figure it out. I get it—when I first started, I was obsessed with hitting a certain distance.

Stick with it. You’ll be amazed at how quickly your body adapts. Soon, you’ll be running longer without even thinking about it. But for now? Keep it simple and just get the time in. The rest will follow.

How to Handle the First Week As A Runner

Wondering how much you should run in your first week?

Let’s keep it simple to avoid overdoing it:

  • Start with 20-30 minutes, 2-3 times a week. Don’t stress about distance—just focus on time. Move at your own pace, alternating between walking and running as you feel.
  • Rest is key. Give yourself at least one rest day between runs. If you’re itching to move, go for a walk or do some light stretching. But don’t push it.
  • Your body is adapting, so let it rest. Focus on effort, not speed. When you’re running, aim for a pace where you can still talk without gasping for air. If you’re too out of breath to get a full sentence out, slow down.

When to Progress? Don’t Rush It

Alright, you’ve made it through your first week, and now you’re probably thinking, “When can I run farther?” Here’s the deal: progress isn’t about rushing through the miles. Seeing results from running takes times.

Once you’re comfortable running for 30 minutes, then you can start increasing your distance—but don’t go overboard.

So what should you do? Simple. Don’t jump from 2K to 5K in one shot. Gradually increase your distance—around 500 meters at a time.

For example, if you’re running 3K in 30 minutes, push it to 4K next. Give your body time to adjust. Don’t rush into that 5K until it feels like a natural next step. Once you can run a 5K in 30 minutes, then shoot for a faster time – so on and so forth.


The Power of Consistency

This is the big one: consistency. It’s not about trying to do everything at once. It’s about building the habit.

Running one day, resting the next, and running again the day after—that rhythm? That’s your best friend.

At first, it won’t feel like you’re sprinting toward progress, but trust me, if you stick with it, you’ll get stronger, faster, and more confident over time.

Week by week, you’ll start noticing the improvements, and before you know it, you’ll be running longer without even thinking about it.

Small, steady progress—that’s the name of the game.


What to Do If You’re Feeling Tired After Your First Run?

Feeling wiped out after your first few runs? Totally normal. Your body is just figuring it all out.

Here’s how to recover like a pro:

  • Sleep – It’s simple, but it’s crucial. Make sure you’re getting enough rest to let your body rebuild and repair.
  • Hydrate – After your run, drink water and replenish those electrolytes. Don’t go overboard with sports drinks just yet—plain water is usually all you need.
  • Stretch – Spend a few minutes stretching your legs, calves, hamstrings, and quads. It doesn’t have to be a deep stretch, just enough to loosen up. Trust me, it makes a huge difference in reducing soreness.
  • Active Rest Days – Don’t just sit around. Go for a light walk or swim to keep your body moving and blood flowing. Your muscles will thank you.
  • Fuel Right – Refuel with a carb-protein snack within 30 minutes of finishing your run. This helps kickstart recovery and keeps you feeling strong for your next workout.

How Far to Run on Your First Week: Quick Tips

  • Start slow—aim for 20-30 minutes, 2-3 times a week.
  • Focus on time, not distance.
  • Mix running with walking to build stamina.
  • Gradually increase your distance once you’re comfortable.
  • Listen to your body and rest when needed.

Conclusion: Keep It Slow, Keep It Steady

The goal in your first week is simple: get out there, move, and stay consistent. Forget about chasing miles and focus on the rhythm of the run.

Listen to your body, take rest days seriously, and know that every step you take is getting you closer to your running goals.

Thank you for dropping by.

Pls let me know if you have any questions

David D.


The Runner’s Roadmap: Navigating the Cooper 12-Minute Run Test

The Cooper Test is one of the most honest tools in your running toolkit.

Developed by Dr. Kenneth Cooper back in 1968 for the U.S. military, it’s still going strong over 50 years later.

Why? Because it strips everything down to the bare essentials: run as far as you can in 12 minutes.

That’s it. No gadgets. No labs. Just effort.

What you get from it is a raw, powerful snapshot of your VO₂ max—the size of your aerobic engine.

In layman’s terms, it tells you how well your body uses oxygen when things get hard. The farther you go, the fitter you are. Simple.

Let me explain more…

Why It Matters (and Why Runners Love It)

Why the Cooper Test Rocks

You don’t need fancy gear. You don’t need a lab. Just a flat stretch of road or track, a watch, and the guts to go all out for 12 minutes.

Here’s why I love this test — and why it’s in the toolbox of coaches, soldiers, gym teachers, and serious runners around the world:

  • It’s Simple (But Brutal). No VO₂ mask. No GPS wizardry. Just run. As far as you can in 12 minutes. Done.
  • Fast Feedback. Busy? No excuses. The whole thing — warm-up, test, cooldown — can be wrapped in under 30 minutes. That’s a full fitness assessment in less time than it takes to watch an episode of your favorite show.
  • Tracks Progress Over Time. Run it again in 6–8 weeks. Did your distance go up? That’s improvement you can measure — no guessing. Maybe you ran 1.5 miles in July and 1.7 in September. That’s real growth.
  • Correlates to VO₂ Max. This test was literally built to estimate VO₂ max — and it’s been proven to do it well. The farther you go in 12 minutes, the higher your cardio ceiling.
  • Used by Pros. This isn’t some trendy TikTok fitness challenge. The U.S. Air Force, police departments, and coaches worldwide use the Cooper Test to gauge real-world endurance.
  • Builds Mental Toughness. Twelve minutes of non-stop effort with no pacing crutch — it’s all feel, grit, and guts. It trains your brain as much as your body.

How to Run the Cooper Test (Without Blowing Up)

Let’s walk through it, step by step:

1. Warm-Up (10 Minutes Minimum)

Do not skip this. Jog. Do some dynamic stretches. Fire up the legs.

Going from couch to full-throttle in 60 seconds is a recipe for disaster. Trust me—I’ve seen it. You want to feel ready, not rusty.

2. Set the Course

Use a 400-meter track if possible (easy to measure).

No track? No problem. Use a flat road and GPS. Just make sure you know your start point and how far you’re going.

Even a treadmill works—just crank it to a 1% incline to mimic outdoor effort.

3. The Test: Go Hard. Steady. Relentless.

Start the clock. Now run as far as you can in 12 minutes.

Not a sprint. Not a jog. Sustained discomfort.

  • Don’t go out like a bat outta hell and fade in 4 minutes.
  • Don’t pace it like a Sunday long run either.

Find that redline, hover near it, and kick hard in the last minute.

4. Record Your Distance

Track your total distance in meters or miles.

  • On a track, count laps and add any extra distance.
  • On GPS? Grab that number.

Say you ran 1.6 miles (2,575 meters)? Lock it in.

5. Cool Down

Walk or jog for 5–10 minutes. Breathe. Recover. Stretch.

Your lungs might be on fire, but this step helps settle the system and flush out the post-test tightness.

Bonus tip: Cold water on the neck after helps if you’re overheating.

Additional Tips

To make sure you’re doing the cooper test right, do the following:

  • Pick a decent weather day—no windstorms, heatwaves, or icy roads.
  • Be fresh. Don’t test the day after leg day or a tempo run.
  • If you’re recovering from illness or feeling off? Postpone it.
  • You want max effort, not a half-hearted shuffle.

And yeah, if you’re new to running or have health conditions, get cleared by a doc first. Safety first.

How to Estimate VO₂ Max From Your Cooper Test

After the test, you can plug your result into a formula and estimate your VO₂ max.

The Formula (Meters)

VO₂ max = (Distance in meters – 504.9) ÷ 44.73

Example: If you ran 2,575 meters → (2,575 – 504.9) ÷ 44.73 ≈ 46.3 ml/kg/min

The Formula (Miles)

VO₂ max = (35.97 × miles) – 11.29

Example: For 1.6 miles → (35.97 × 1.6) – 11.29 = 46.3

Boom. You’ve got a VO₂ max estimate.

Keep in mind this is an estimate—it’s not a clinical lab test. Terrain, pacing, wind, even GPS accuracy can swing the number a bit.

But if you give it 100%? It’s damn close and super useful.

Tracking Progress

Repeat the test every couple of months and track progress.

If your VO₂ max goes up, you’re doing something right.

Cooper Test Performance Standards (Age 20–29)

Let me give you some reference points so you can make sense of the numbers:

Men (20–29)

  • Excellent: Over 2800 meters (that’s 1.74+ miles)
  • Good: 2400–2800 meters
  • Average: 1800–2399 meters
  • Poor: Less than 1800 meters

Women (20–29)

  • Excellent: Over 2700 meters (1.68+ miles)
  • Good: 2200–2699 meters
  • Average: 1600–2199 meters
  • Poor: Less than 1600 meters

(And yeah, these numbers shift down a bit as you get older. What’s “excellent” for a 50-year-old might be just “average” for someone 25 — because age matters, and so does context.)

What These Numbers Actually Mean

  • “Excellent” means your aerobic engine is firing strong — likely a VO₂ max over 50 if you’re male and in your 20s. This is elite territory for recreational runners.
  • “Good” means you’re in solid shape, better than average — your training’s paying off.
  • “Average” is the middle of the pack. Not bad, but lots of room to grow.
  • “Poor”? Hey, it’s just your starting line. Everyone starts somewhere. Use it as fuel, not shame.

Limitations of the Cooper Test (And Why It’s Not for Everyone, Every Time)

As you can already tell, I’m a fan of the Cooper test — but let’s be honest, it’s not a magic metric. It’s a tool. A good one, yes. But like any tool, it has its limits.

Before you lace up and race the clock, here’s what you need to know.

It’s Brutal If You Don’t Know How to Push

To get meaningful results, you’ve got to go all out for the full 12 minutes. That’s not a casual run. That’s you red-lining the whole way.

  • If you hold back? Your distance won’t reflect your real fitness.
  • If you go out too fast? You might blow up by minute six and crawl the rest.
  • If you’re not used to this kind of effort? You’re gonna feel wrecked.

Bottom line: This test assumes you can pace and suffer. That’s not beginner-friendly.

Not Ideal for Beginners or Rehab Runners

Twelve minutes of steady pounding at max effort isn’t great if:

I’ve seen new runners attempt it and end up wiped out—or worse, hurt.

If you’re just starting out, or if you’ve got health limitations, do yourself a favor: try something like the Rockport 1-mile walk test or a gentle time trial first.

Build up.

The Cooper test is more advanced than most people realize.

Conditions Can Screw With Your Score

This test is simple—run as far as you can in 12 minutes. But it’s not perfectly controlled.

  • Running in 90°F heat vs. 50°F chill? That’ll affect your performance.
  • Humidity, headwinds, hills, uneven trails — all of it matters.

If you want to compare your results over time, try to run in similar conditions each test:

  • Same track
  • Similar weather
  • Similar surface (avoid trail-to-track comparisons)

Your fitness might actually be better than your test score shows — just know the context.

Pacing Errors & Mental Grit Can Sabotage You

The Cooper test assumes you know how to pace yourself.

  • If you start off sprinting, you’ll fade fast.
  • If you hold back too much, you’ll leave potential on the table.

And doing it alone? That’s a mental game.

You’ve got to push hard, even when your lungs scream. That’s tough without competition or accountability. That’s why some folks perform better in group settings or simulated races—it helps them dig deeper.

My best advice?

I’d recommend that you practice pacing before your test. Do a few controlled efforts to get the feel for discomfort. There’s no shame in learning how to hurt smart.

It Doesn’t Measure Everything

The Cooper test is great for gauging aerobic endurance, but it’s not the full picture.

  • A runner with great form will cover more ground than one who’s inefficient, even at the same fitness level
  • A bigger or more muscular runner might have a high VO₂ max but run a slower time due to mechanics or mass
  • A sprinter-type athlete might be insanely fit but not suited for a 12-minute sustained effort

In other words, you can be fit and still perform poorly if running economy or mechanics are off. This test doesn’t account for that.

It’s a Hard Workout—You’ll Need Recovery

Treat your Cooper test like a tough interval day. You’re going all out—it’s basically a race.

Expect sore legs, tight calves, or general fatigue afterward.

I always tell runners:

  • Don’t schedule anything tough the next day.
  • Fuel up. Rest up. Respect the effort.

So… Is the Cooper Test Still Worth Doing?

Absolutely. Just do it when you’re ready, not when you’re guessing.

Use it for:

  • Progress checks during a training cycle
  • Benchmarking VO₂ max or pacing
  • Building mental toughness

Skip it (or modify it) if:

  • You’re new
  • You’re injured
  • You haven’t trained at higher intensities yet

And remember, there are other options.

If 12 minutes at max effort isn’t realistic for you right now, try a time trial, shuttle test, walk test, or just work with a coach to find something better suited to your current level.

🧠 Final word: The Cooper test doesn’t lie — but it can mislead if done at the wrong time or in the wrong way.

Approach it smart, and it becomes a powerful weapon in your training toolkit.

How Many Calories Do You Burn Running a Mile?

If you’re just getting into running and hoping to drop some weight, you’ve probably asked yourself:

“How many calories do I burn running a mile?”

I know I did when I first started pounding the pavement trying to burn off extra fat.

Back then, I heard that running burns “about 100 calories per mile.”

Sounded simple. Multiply your miles by 100, boom—fat gone.

But the truth?

It’s not that neat. Not even close.

Running does burn calories—lots of them—and that’s one reason many of us lace up to slim down.

I used to be one of those “run-to-lose-weight” guys in my early 20s. And yep, it worked.

But what I didn’t know back then—and what I’ve learned through coaching hundreds of runners—is that not everyone burns the same number of calories running a mile.

That 100-calorie rule? It’s just a rough guess.

According to VeryWell Health, your actual calorie burn can swing 20–50% higher or lower, depending on your size, pace, terrain, effort, and more.

Quick Answer:

Most people burn somewhere between 80 and 120 calories per mile.

If you’re on the lighter side or jogging easy, it’ll be closer to 80. If you’re heavier, running fast, or slogging through hills, you might torch 130+.

So yeah, 100 is a good ballpark—but it’s not a magic number.

Here’s what really determines how many calories you burn:

  • Your weight
  • Your speed and effort
  • How fit you are
  • The surface you’re running on
  • The weather
  • Your training style (steady runs vs. intervals)

Let’s break each one down. I’ll mix in real stories from my own running life and coaching experiences to show how this plays out beyond the science.

But before we dive in, one thing I’ve got to say: Don’t obsess over the exact calorie number.

I used to log every single bite and every single run like a madman. And while it helped me get lean at first, it also messed with my mindset.

Running is more than math. It builds your lungs, clears your head, toughens your legs, and sharpens your discipline.

And as for weight loss?

A 5-mile run doesn’t give you a free pass to devour a pizza. (Been there. Didn’t work.)

Want to burn more fat? Train smart. Eat smarter. Sleep. Repeat. Calories matter—but so does consistency, recovery, and not losing your mind over the numbers.

Alright, coach hat on—let’s get into what really affects how many calories you burn.

1. Body Weight: Why Heavier Runners Burn More Calories Per Mile

Let’s keep it real — the number one thing that decides how many calories you burn per mile is your body weight.

More weight = more work. It’s basic physics.

Every step takes more effort when you’re carrying extra pounds, which means you torch more calories. Simple as that.

When I first got into running, I was overweight — like, not just a few pounds. I had some serious fat to lose.

At the time, I didn’t care much about pace or distance. I just wanted to sweat and shed weight. And I did.

But here’s something I didn’t expect: as I got lighter, my runs started burning less per mile.

At 200 pounds, an easy mile left me gasping and probably burned around 140 calories.

After I dropped to 170? That same jog only burned about 100–110.

That’s the trade-off no one talks about: You lose weight, you become more efficient… but you also don’t get that calorie-burn bonus anymore. I won’t lie — part of me missed seeing those big numbers on my fitness tracker.

But hey, progress is progress.

I see the same thing with beginners I coach. When they’re heavier, they actually burn more calories per mile than someone smaller doing the same workout.

I always tell them — don’t hate the struggle. Your body’s working hard, and that work is paying off.

Here’s a quick breakdown to show how weight affects calorie burn per mile (don’t overthink the numbers — they’re ballpark):

  • 120 lbs : about 90 calories/mile
  • 150 lbs : 100–110 calories/mile (this is where that “average 100-calorie mile” comes from)
  • 200 lbs : 140 calories/mile
  • 250 lbs : 170+ calories/mile

That’s a difference of 50–80 calories per mile just from body weight. That adds up.

Now, body composition plays a role too. Muscle burns more than fat. So two people who weigh the same can burn slightly different amounts based on muscle mass.

A muscular 150-lb guy might burn a bit more than a 150-lb person with higher body fat.

Men tend to carry more muscle, so they often burn a few extra calories compared to women of the same weight — but let’s be clear: weight matters more than gender here. A 180-lb woman will still burn more per mile than a 130-lb man.

One thing I always remind people: just because your per-mile burn goes down doesn’t mean you’re backsliding. It means you’re getting fitter.

But it also means you might need to adjust your food or add a bit more distance if weight loss is still the goal.

I learned that the hard way when I’d reward every run with a slice of cake… and then wondered why the scale didn’t budge. (Yeah. Rookie mistake.)

2. The Faster You Run, The More You Burn (Yep, Afterburn Is Real)

Let’s break a myth real quick: a mile is a mile, right?

Doesn’t matter if you crawl it or sprint it?

Well… not quite.

Yes, the distance stays the same, but how you cover that mile makes a big difference.

When you run faster—really push the pace—your body has to work way harder. You recruit more muscle, breathe like you’re chasing your last breath, and your heart pounds like a war drum.

It’s less efficient on purpose. That’s the point. You burn more fuel because your body’s going full throttle.

I learned this the hard way.

For years, I was a steady plodder—easy pace, just logging miles. Then one week, a coach buddy dragged me to a track session. 400-meter repeats. I was like, “You want me to sprint?!” But I gave it a shot.

Total game-changer.

I was gasping at the end of each lap. Drenched in sweat. And even after I stopped running, my body didn’t calm down. My heart rate stayed jacked. I kept breathing heavy.

I could feel the engine running under the hood long after I was done. That’s when I discovered the afterburn effect—and why fast running torches more calories than jogging.

What’s the Afterburn Effect?

It’s officially called EPOC—Excess Post-exercise Oxygen Consumption.

Basically, your body keeps burning calories after the workout ends.

Kind of like how a car engine stays hot even after you park it. Your system needs time to cool down, refill oxygen, clear out lactic acid, and rebuild what you just wrecked.

According to the Cleveland Clinic, that “afterburn” can account for an extra 6 to 15% of the calories you burned during the workout.

That might sound small, but it adds up—especially over time.

Just don’t treat it like a free pass to inhale a cheeseburger after every run. It’s a calorie bonus, not a buffet license.

Let’s Talk Numbers

Let’s say you weigh around 150 pounds (68 kg):

  • Jog a mile in 12 minutes (around 5 mph)? You’re burning roughly 100 calories.
  • Push that same mile in 8 minutes (7.5–8 mph)? That same mile could cost you 140–150 calories instead.

That’s a big difference in a short time.

And I feel it too.

When I run fast—really fast—my breath turns into a wheeze, sweat pours, and everything inside me is screaming. But I also know I’m torching calories at a whole different level.

Some folks argue, “Walking three miles burns the same as running three miles.”

Not quite. Over the same distance, yeah, the difference isn’t massive—walking might burn 60–80, running about 100+—but intensity changes the rules.

The faster you go, the more muscles fire up, your form shifts, you dip into that anaerobic zone—and that’s where the afterburn kicks in.

One Mile All-Out vs. Two Miles Easy?

Here’s the nuance: a fast mile burns more than an easy one. But two easy miles might out-burn one mile all-out, just by duration.

It’s a trade-off. Intensity vs. time.

Want to lose weight? You’ve got options:

  • Go hard and short: Fast intervals = big burn + afterburn.
  • Go long and steady: More total distance = more cumulative calories.

Best move? Mix both into your weekly routine.

3. Fitness Level & Efficiency: When Getting Fitter Burns Fewer Calories

This one can feel a bit unfair: the fitter you get, the fewer calories you burn doing the same run.

Sounds backwards, right?

You’d think being in great shape would turn you into a calorie-torching machine.

But here’s the twist—your body gets smarter. It figures out how to use less energy for the same job. Like switching from a gas guzzler to a hybrid—suddenly, you’re running more miles on less fuel.

I learned this the hard way. A year into consistent running, I was cruising through my usual 5K loop in the neighborhood without breaking a sweat.

My breathing? Chill. My heart rate? Way lower. That same loop used to leave me wrecked and burned around 400 calories.

Now? Closer to 300. My body wasn’t slacking—it had just leveled up. I had trained it to move efficiently, and that meant less calorie burn per mile.

And I’m not the only one. This is actually backed by science.

According to studies like those published in the Journal of Strength & Conditioning Research, beginners tend to burn more because their form’s a mess, their muscles are weaker, and everything feels like a struggle.

But once your body adapts—better form, stronger legs, a more efficient cardio engine—you stop fighting the run and start gliding through it. That’s good for performance… not so great if you’re banking on burning calories.

Now here’s the kicker: even though you burn fewer calories per mile, you’ll probably run more miles or go faster without even realizing it. That adds up.

I might’ve lost 20% of the calorie burn in a 30-minute run once I got fitter—but I could now cover 50% more ground, or hammer out intervals I couldn’t dream of doing before.

Total weekly burn? Higher.

That’s why it’s so important to mix up your training once progress stalls (and yeah, we’ll dig into that in the training section).

Another factor that messes with this whole equation: age and muscle mass.

As we get older, we naturally lose some muscle, and metabolism tends to slow down. I’ve coached some older runners in their 50s and 60s who were fast. Like, pace-for-pace faster than some 20-year-olds.

But because they were leaner, more efficient, and had been running for decades, a moderate 5-miler barely nudged their heart rate. To get a real calorie burn, they had to crank the intensity or run long.

So, if you’re picking up running later in life—or coming back after a long break—just know your baseline burn might not be the same as it was in your younger days.

That’s not a failure.

It just means you’ve got to be smart with effort, duration, and yes… your diet too (metabolism’s not what it used to be, especially after 40).

Here’s a true story: I hit a nasty weight-loss plateau around month six of running. In the beginning, I was dropping kilos like crazy.

Then? Nothing.

I was still running the same three-mile loop, eating the same meals—but the scale wouldn’t budge.

My body had caught on. It wasn’t burning as much on those easy runs anymore, and it had probably adjusted my appetite too (thanks, biology).

So I made a move. I kept my mileage about the same but added one hill workout and one sprint session each week. I also brought in some light strength work—just enough to spark change.

Within a few weeks, the scale started moving again.

Not because I was doing magic—just because I shocked my body out of its groove. New stress = new results.

The takeaway?

If you’ve been running for a while and the fat loss train has stalled, you’re probably not doing anything wrong.

You’re just fit now. You’ve adapted. So change something. Run longer. Run harder. Lift. Mix it up.

4. Terrain & Surface: Hills, Trails, and Treadmills 

If you’ve ever run a steep hill or hit a trail that felt like it was trying to chew up your ankles, you’ve probably thought: “Why does this feel way harder than my usual loop?”

Good news—you’re not imagining it. Your body works overtime on uneven ground, and yes, you’re burning more calories.

Living in Bali, I get a daily reminder of this.

We’ve got everything here—beach sand, jungle trails, and some hills that feel like vertical walls. There’s this one trail I love (and hate)—it climbs a small mountain just outside the city.

The first time I tackled it, I was breathing like I’d just sprinted a 400m… except I was barely moving. My calves and quads were screaming. The whole run was just two miles, but I was toast by the end.

Later, I checked my watch—calories burned per mile? Way higher than normal. No surprise there.

Let’s crunch some simple numbers:

➡️ A 140-lb runner cruising 3 miles on flat pavement? Around 300 calories.

➡️ Same person on a hilly route? Easily 360–450 calories—depends on how mean those hills are.

➡️ Treadmill trick: Add a 5% incline. That alone can boost your burn by 20–25%. A 150-lb runner at a 12-min mile might go from ~100 calories to ~125 per mile. That adds up fast.

5. Does Temperature Actually Change How Many Calories You Burn?

Short answer? Yeah, it does.

But it’s not always straightforward.

Running in Bali heat has taught me one thing: when the air feels like soup and the sun is frying your brain by 7 AM, your body works double time.

I’ve led group runs at sunrise where the humidity wrapped around us like a wet blanket. Even at an easy pace, your heart rate spikes.

Why?

Because your body isn’t just powering your legs—it’s also working hard to keep you cool.

It pumps more blood to the skin, cranks out sweat like a busted faucet, and uses energy to try and cool you down. All of that adds to the calorie burn.

But here’s the thing: heat is tricky.

Sure, it makes your body work harder, but it also wears you down fast.

On really hot days, I’ve had to cut runs short or slow way down. So you might burn more per minute, but the total calories? Depends how long you can actually hold on.

Then there’s the cold.

I’ve done races in icy weather, and while the first 10 minutes feel like breathing razors, once I warm up, it’s golden. Cold weather forces your body to burn a little extra just to stay warm.

Shivering? That’s your body torching calories to make heat.

My quick breakdown:

  • Hot Weather: My heart rate shoots up even when I’m going slow. I finish drained. Lots of sweat, lots of fluids lost, and yes—a decent calorie burn. But it’s not easy.
  • Humid Weather: Brutal. Sweat doesn’t evaporate, so cooling off is harder. I once did a 2-mile run at 34°C with 90% humidity and nearly passed out. It probably burned more calories than a 4-mile run in cooler weather—but was it worth it?
  • Cold Weather: Once I’m warm, I fly. Cool temps are my favorite. You burn a bit more in the first few minutes, and if you’re wearing layers, the added weight can up the effort. Cold also helps recovery sometimes.

6. Steady Runs, HIIT, Long Runs — Which Burns the Most Calories?

Not all runs are created equal when it comes to calorie burn.

Some torch fat fast. Others take their time but keep the burn going longer.

Here’s what I’ve learned:

Steady-State Runs (Endurance Runs):

This is your basic, consistent-pace jog. I used to do 3 miles every morning like clockwork. Good for maintenance, but eventually, my body got so used to it that it stopped being a real challenge.

You can still burn a lot of calories if you run long enough, though. A slow 5-mile run can burn more than a fast 2-mile sprint.

HIIT / Speed Work:

This is the spicy stuff. Sprint, jog, repeat. These workouts are intense, and they’re over quick. But the real magic is in the afterburn.

Ever heard of EPOC?

It’s when your body keeps burning calories after the workout to recover. I’ve finished a 30-minute interval run and ended up burning as much as I would in a full hour of steady jogging. Plus, intervals boost your fitness like crazy.

Long Slow Distance (LSD):

These are your weekend long runs. I remember marathon training and doing 18-milers that burned 1,500+ calories.

It’s about duration here. Even a 90-minute jog can torch 800-1,000 calories depending on your weight and pace.

The catch? You get super hungry after. You have to watch the post-run fridge raids.

Running Frequency & Rest:

I’ve made the mistake of thinking I needed to run every day to lose weight.

It backfired. I got injured, burned out, and ate everything in sight.

Now I tell beginners: start with 3-4 runs a week, space them out, and take your rest seriously. Your body burns calories while it recovers too.

Cross-Training & Strength Work:

Not running, but it counts.

Lifting weights bumps up your metabolism by building muscle.

A solid circuit workout can leave you sore and burning calories for hours. I added two strength days per week and noticed better running and more muscle tone.

Real Examples: Calories Burned Running a Mile

Look, every run hits different.

Terrain changes. Your pace fluctuates.

And let’s be real — our weight, mood, and effort play a huge role.

But here’s a quick breakdown of how many calories you might burn per mile under a few common conditions. These aren’t perfect — your numbers may vary — but they give you a solid sense of what’s going on.

Example 1: Easy Jog on Flat Ground (5 mph / 12-min mile)

Think: Recovery jog or beginner pace on flat pavement.

  • 120 lbs: ~90 calories
  • 140 lbs: ~100 calories
  • 160 lbs: ~115 calories
  • 200 lbs: ~140 calories

Coach’s note: When I first got into running, I hovered around the 90-100 cal/mile mark. At that stage, every step felt like a victory.

If you’re heavier, the calorie burn naturally goes up. That’s not a bad thing — it just means your body is working hard to move, and that’s progress.

Example 2: Incline Run (5 mph with 5% incline)

Treadmill incline or hilly outdoor route, same pace but uphill.

  • 120 lbs: ~110 calories
  • 140 lbs: ~125 calories
  • 160 lbs: ~145 calories
  • 200 lbs: ~175 calories

Coach’s note: Add incline and your legs will definitely notice. Your heart rate spikes, and the calorie burn shoots up too.

I’ve done plenty of these on Bali’s backroads — it’s a grind, but a satisfying one. Even a short hill adds up.

Example 3: Fast Run on Flat Ground (8 mph / 7:30–8:00 pace)

Hard effort, flat road, no room for slacking.

  • 120 lbs: ~130 calories
  • 140 lbs: ~150 calories
  • 160 lbs: ~170 calories
  • 200 lbs: ~200 calories

Coach’s note: This is where the real calorie burn happens. I’ve hit this zone during tempo runs, and trust me — it’s not sustainable for long unless you’ve built a solid base.

But if you’re gunning for max burn and speed? This pace will do it.

Takeaway: The combo of weight, speed, and incline really tells the story.

A lighter runner sprinting up a hill could burn just as much as a heavier runner jogging flat. Stack weight and incline and speed? That mile will cost you — and it’ll feel like it.

Is Running Really the King of Calorie Burn?

Short answer: Yep.

Here’s how running stacks up against other cardio when you’re going all in for about an hour (based on an average-weight adult, ~150–160 lbs):

  • Running (6–7 mph): ~600–1000 cal/hr
  • Jump rope (fast pace): ~700–1000 cal/hr (if you can keep it up that long!)
  • Swimming laps (vigorous): ~700–900 cal/hr
  • Rowing machine (hard effort): ~600–800 cal/hr
  • Cycling (moderate effort): ~500–700 cal/hr
  • Brisk walking (4 mph): ~250–350 cal/hr
  • Singles tennis (moderate intensity): ~500–600 cal/hr

Coach’s note: Running holds its ground, especially if you’re not just cruising.

You don’t need to go max effort all the time — but compared to walking or casual biking, running is your calorie-burning beast. That’s why so many folks chasing fat loss lean on it.

Final Thought: It’s Not Just About Calories

Let’s not sugarcoat it — running is one of the most efficient ways to burn calories. But calories aren’t the only reason I lace up.

When I started in my early 20s, sure, I wanted to drop some weight.

But the real rewards? They were never on the scale.

  • That post-run peace of mind after a stressful day
  • The confidence that came from sticking to the plan
  • The clarity I got watching a Bali sunset while running solo

Those are the wins I didn’t expect — and they’re why I keep going.

And if you’re only thinking, “How many miles do I need to burn off this burger?” — pause.

Running isn’t punishment.

It’s freedom. It’s your time. Your space.

Use it to grow stronger, not to cancel out a snack.

Real Talk Recap:

  • You don’t burn the same number of calories every mile. That’s a myth.
  • Heavier runners burn more per mile — that’s basic physics.
  • Speed and incline crank up the effort and the burn.
  • Running burns more calories per hour than almost any other cardio.
  • But don’t run just to burn calories — run for the joy, the focus, the fire inside you.

How to Prevent Ankle Sprains When Running on Uneven Surfaces?

Ankle sprains suck.

If you’ve been running for any length of time, you know they’re just part of the deal.

One minute, you’re cruising along, and then bam—you’re down, wondering how you managed to roll your ankle again.

I’ve been there more times than I care to admit. But here’s the thing—it doesn’t have to be your story forever.

Whether you’re running trails, playing basketball, or just walking up stairs, your ankles don’t have to hold you back.

Over the years, I’ve learned some simple but powerful tricks to keep my ankles strong and injury-free. Let me share them with you.

How to Build Ankle Strength for Injury Prevention

Here’s the truth: bad balance just invites ankle sprains to show up.

I used to think balance drills were for newbies—I was wrong. Trust me, don’t skip this.

Want strong ankles?

Do this:

Single-leg Balance Drills:

  • Stand on one leg.
  • Hold it for 30 seconds.
  • Want to make it harder? Close your eyes.

Single-leg Squats:

  • Stand on one leg.
  • Lower yourself like you’re sitting back in a chair.
  • Push back up to standing.
  • Repeat 10-15 times per leg.

Ankle Rotations:

  • Stand on one leg.
  • Rotate your ankle clockwise for 10 reps.
  • Switch to counterclockwise for 10 reps.

Calf Stretches:

  • Stand facing a wall.
  • Place your hands on the wall and step one foot back.
  • Keep your back leg straight and heel on the floor.
  • Hold for 30 seconds and switch legs.

Best Shoes for Ankle Support

Let’s be real—your running shoes aren’t for looking good. They’re for protecting your ankles.

Running in the wrong shoes? You’re gambling with your ankles. Think of your shoes as your foundation—treat them like it.

If you’re running on trails, get shoes with extra grip and solid ankle support to keep you stable on rocky, uneven ground.

Road shoes should prioritize cushioning because you’re hitting pavement, and you need something that absorbs impact and protects your joints.

Try Taping

Taping: It’s not just for safety—it actually works.

Proper taping isn’t just a “safety net”—it helps your brain understand where your ankle is in space. Once you get it right, you’ll wonder how you ever ran without it.

Coming back from an injury or doing a lot of side-to-side moves (like basketball)? A brace can make all the difference. It’s not a miracle worker, but it definitely gives you that extra security.

My advice?

Taping sounds easy—until you try it. It takes practice, and I’ve messed up enough tape jobs to know: it’s worth taking the time.

Don’t Skip Your Warm-Up

Skip warming up, and your body will remind you real quick why you shouldn’t.

I used to think warm-ups were for “other people”—you know, the ones who actually care about their bodies. Yeah, I was a fool.

Here’s what I do before I hit the pavement:

  • Ankle Rotations: Stand on one leg and rotate your ankle in circles—clockwise, then counterclockwise. Get the blood flowing. Don’t skip this for both ankles.
  • Calf Stretches: Tight calves are like a ticking time bomb. Loosen them up before you run, or your ankle’s going to feel wobbly as hell. Trust me, you don’t want that mid-run.

Watch Your Terrain

Look, if you’re running on rocky trails or playing sports on uneven ground, your ankles are eventually going to let you know they’re not happy.

If you can, stick to smooth, solid ground. It’s just safer, plain and simple. But hey, if you have to go off-road, just stay sharp.

Here’s what I’ve learned the hard way:

  • Watch where you step: I know it’s easy to get lost in the run, but rocks, holes, and roots don’t care about your groove. Keep your eyes on the ground, or you’re going to pay for it.
  • Downhill running: Downhill running feels great at first, right? But trust me, your ankles hate it. It’s tempting to go all out, but take it easy. Go too fast, and you’ll end up hobbling off the trail instead of enjoying the view.
  • Take smaller steps: When you’re running on uneven terrain, take smaller, controlled steps. It’s tempting to stride out like you would on flat ground, but when the trail’s rocky, short, steady steps give you more control and help avoid twists and turns that could lead to injury.

Conclusion: 

Preventing ankle sprains doesn’t take magic—just smart choices. Strengthen your ankles, wear the right shoes, listen to your body, and keep it real with your terrain.

It’s all about consistency.

Every time you dodge an injury, consider it a win. Seriously, every run without an injury is a small victory.

Don’t take that for granted.

Your ankles are your ticket to staying injury-free, so take care of them, and they’ll keep you running longer, faster, and with less pain.

Thank you for stopping by.

David D.


Quick Tips for Preventing Ankle Sprains

  • Strengthen your ankles with simple drills
  • Pick shoes that match your running surface
  • Use tape or a brace for extra ankle support

How to Deal with Fear of Running in Public

Every step I took when I was just getting into running felt like I was auditioning for some invisible crowd—like everyone was staring, judging every awkward move I made.

Was I running weird?

Too slow?

Did people think, “What’s he even doing out here?”

That voice in your head? The one whispering, “You don’t belong,” or “You’re not fast enough”?

I won’t lie—it nearly stopped me from running altogether.

But here’s the truth: that voice is lying.

Most people are too busy worrying about their own run to notice you.

In this guide, I’m sharing how I quieted that nagging voice, why picking quiet routes and wearing what makes me feel comfortable was a game-changer, and how finding the right people or even trails helped me build confidence.

Plus, I’ll tell you my go-to tricks for handling anxiety mid-run—breathing exercises, breaking your run into bite-sized goals, and why giving yourself permission to slow down can make all the difference.

Let’s get to it.


Go Easy at First: Pick Quiet Spots and Times to Ease Into It

If running in public freaks you out, take it slow and start somewhere quiet.

You won’t have to worry about anyone staring or judging. When I first started, I didn’t dare run through a packed park—I stuck to quiet streets.

Early mornings when the streets were practically empty, and honestly, it felt so much easier to breathe and focus. You don’t need to put on a show for anyone. No one’s going to bother you, and you won’t feel the pressure. 

Also, make sure to plan out your running routes properly.


Step It Up Slowly

Once you get the hang of it, start testing the waters—try running where there’s more action.

As you get more comfortable, you can start venturing into busier areas. Try running on sidewalks or paths where people walk their dogs or jog during the morning rush.

At first, you’ll feel a little self-conscious, but here’s the thing: most people aren’t watching you.

They’re just doing their own thing, focused on their own run.

The more you run, the less you’ll even notice anyone around you.


Wear What Makes You Feel Good, Not for Anyone Else

It’s not about impressing anyone—it’s about feeling comfortable while you run.

When I first started running, I felt a bit awkward at first too.

A lot of people I know feel the same way, so here’s what I did: I wore things that made me feel like I could just blend in.

For me, that meant throwing on a hat and headphones—even if I wasn’t listening to anything. It gave me a little shield, something to focus on so I didn’t feel like everyone was watching.

When you let go of distractions, both in your head and around you, it’s easier to focus on your run. The rest of the world can fade away.

Here’s what helped me feel more at ease:

  • Headphones: Even if I wasn’t listening to anything, they helped block out the world.
  • Hat: Kept my head low and made me feel less visible.
  • Sunglasses: Made me feel like I was in “incognito mode” and could just focus on running.

Here’s your guide to running gear.


Here’s a Hard Truth—No One’s Really Watching You

And I keep repeating it.

No one’s actually watching you.

The more you run, the more you’ll realize people don’t even notice.

I hate to break it to you, but guess what? No one cares. They might glance at you for a second, but they’re not judging your form, your speed, or the fact that you’re struggling to catch your breath.

They’re just doing their own thing. So stop worrying about what others might think. Focus on you.

Don’t let the spotlight effect stand in your way to success.


Find Your People (They Get It)

If the nerves are kicking in, join a running group. They get it. You’re not alone in feeling that way.

Everyone’s been there. When you run with others, you quickly realize that everyone is just focused on their own run, not critiquing you.

It’s a space where no one’s judging you. Before you know it, you’ll start building confidence and feel more comfortable in your own skin.

If a full group feels like too much right now, find a buddy to run with. Having a friend to share the run with makes it feel way less intimidating, and you’ll both enjoy the company.

Start small. Get out there. Find people who get it.


Try Trail Running

Normally, I wouldn’t recommend trail running for beginners, but if social anxiety is holding you back from getting those miles in, this might be just the thing for you.

One of the best pieces of advice I’ve gotten is to run where people aren’t.

If running on sidewalks or through crowded parks feels too overwhelming, trail running can be a game-changer.

The quiet, nature-filled trails give you a peaceful space to focus on your run without worrying about who’s around.

You’ll likely see fewer people, and it might help ease that anxiety while still getting the miles in.


Techniques for Handling Anxiety in the Moment

Sometimes, anxiety just shows up out of nowhere—one minute you’re feeling fine, and the next BAM, your mind starts racing mid-run.

Here’s what I do when that happens:

  • Take a few deep breaths: Seriously, slow down your breathing for a bit. In for four counts, out for four counts. It doesn’t take long, but it helps calm the nerves and reset your mind.
  • Set a tiny goal: Instead of stressing over the entire run, break it down into small chunks. Focus on getting to the next street corner, the next tree, or just making it through the next 30 seconds of running. These little goals make it all feel more doable.
  • Remember why you’re running: Whenever the anxiety kicks in, I remind myself: I’m doing this for me. Who cares if I look goofy or if people pass me? I’m out here getting stronger, staying healthy, and improving for myself. Once that clicked, the anxiety started to fade.
  • Focus on your surroundings: When anxiety creeps in, I shift my focus to the environment around me—whether it’s the rhythm of my feet hitting the pavement or the sounds of nature. It helps me stay grounded and distracts me from the anxious thoughts.
  • Give yourself permission to slow down: If the anxiety is still getting to you, don’t be afraid to ease up the pace. It’s okay to take it slow and let the moment pass. Slowing down doesn’t mean quitting—it means giving yourself the space to work through it without pushing yourself into more stress.

The Bottom Line: Be Consistent, and It Gets Easier

I’m not going to sugarcoat it: running in public can be uncomfortable at first, especially if you have social anxiety.

But here’s the secret: the more you run, the easier it gets.

Every step you take is progress. Keep showing up, stay consistent, and before you know it, you won’t even notice those people around you.

You’ll be focused on you, your run, and how far you’ve come.

Trust me, it gets easier.

David D.

How Many Steps Are in a Mile? Walking vs. Running Explained

How Many Steps In One Mile Walking Vs. Running?

If you’ve ever wondered how many steps it really takes to walk or run a mile, the answer isn’t as simple as the old “2,000 steps = 1 mile” rule.

The number of steps you take depends on a bunch of factors like your height, stride length, pace, and even the terrain.

So, let’s break it down with some numbers and, of course, a bit of my own experience running and walking—because trust me, it’s not as straightforward as it seems!

I’ll also toss in some expert tips to help you improve your step efficiency so you can get the most out of every step.

Average Steps per Mile: Walking vs. Running

Studies and wearable data show that the step count for a mile can vary widely.

On average, most people take between 2,000 and 2,500 steps to walk a mile. But when it comes to running, you’re looking at roughly 1,400 to 2,000 steps. The reason? Running involves longer strides, so you’re covering more ground with each footfall.

So, if you’re gunning for that classic 10,000-steps-a-day goal, you’ll be covering about 4 to 5 miles—though that varies depending on your stride.

For a clearer picture, check out these benchmark numbers from a research study on stride length and pace:

  • Walking (20 min/mile, ~3 mph): ~2,252 steps per mile
  • Brisk Walking (15 min/mile, ~4 mph): ~1,935 steps per mile
  • Jogging (12 min/mile, ~5 mph): ~1,951 steps per mile
  • Running (10 min/mile, ~6 mph): ~1,672 steps per mile
  • Fast Run (8 min/mile, ~7.5 mph): ~1,400 steps per mile

As you can see, a slower 20-minute mile walk could be around 2,250 steps, whereas a quicker 8-minute mile run might drop to as low as 1,400 steps. For most casual runners (let’s say in the 9–10 min/mile range), you’re typically looking at somewhere between 1,600–1,800 steps per mile, assuming you’re of average height.

What’s more?

For many people the difference between walking and running isn’t huge at more recreational paces. If it takes 2,000 steps to walk a mile, you might only take 1,600–1,800 steps to run it. Still, those few hundred steps saved per mile really add up over time—especially for longer distances.

Fun fact: The word “mile” actually comes from the Latin mille passus, meaning “a thousand paces.” One historian pointed out that a mile was originally defined as 1,000 double-steps (around 2,000 single steps) back in Roman times. So if you’ve heard that “2,000 steps in a mile” idea before, it’s actually not far from the mark!

How Many Steps Are in a Mile

Why Your Step Count Per Mile Varies

Here’s where things get interesting. The number of steps you take per mile isn’t set in stone. It can vary a lot depending on a few key factors:

  • Height and Stride Length: The taller you are, the longer your stride, which means fewer steps. I’ve definitely noticed this in my own running. At 6’1”, I typically take about 1,700–1,800 steps per mile, but my partner who’s 5’1” might take around 2,500 steps. It’s wild how much height can impact stride length. So, the “2,000 steps per mile” rule? It’s a general average, but definitely not accurate for everyone.
  • Pace and Effort: Speed plays a big role in how many steps you take. When I jog at a 12-minute pace, I’m hitting about 2,000 steps per mile. But if I pick it up to an 8-minute pace, my step count drops to around 1,400 steps. Faster runners? They’re looking at an even bigger difference. The faster you go, the farther you cover with each stride, and the fewer steps you take.
  • Terrain: Running on trails is a whole different story. When I hit the trails, especially rocky or hilly ones, I shorten my stride to keep my balance and avoid tripping. Same goes for walking on sand—long strides are harder to take, so the step count goes up. But on smoother surfaces like a track or treadmill, I can stretch out my stride more and take fewer steps.
  • Individual Stride Habits: Everyone has their own unique stride. Personal stride habits play a big role in how many steps you take, even if you’re the same height as someone else.

Here’s a table of the average number of steps per mile running, according to data analyzed by an  ASCM Health and Fitness Journal.

Height and how many steps in a mile

Stride Length, Cadence, and Step Efficiency

Alright, we’ve covered step counts, but now let’s dive into stride length and cadence—these two things can make or break your run in terms of efficiency and injury risk.

You’ve probably heard the magic number: 180 steps per minute. It’s like the holy grail of running cadence. But listen, here’s the deal—180 steps per minute might be a sweet spot for some, but it’s not a one-size-fits-all rule.

Every runner’s different.

I’ve learned the hard way that overstriding—taking those long, stretched-out steps—will kill your speed. You feel like you’re reaching for the finish line with every stride, but really, you’re just wasting energy and setting yourself up for injury.

When you take long steps, your foot lands way out in front of you. It’s like putting the brakes on every time you land.

All that extra stress hits your joints and hips, and it’s way less efficient. Think about it like driving with one foot on the gas and the other on the brake. Yeah, that’s not gonna get you far.

So, what’s the fix? Shorter, quicker strides. If you keep your cadence up and shorten your stride, your feet land right under your body, making the whole thing feel smoother and more efficient. As I always tell my runners, “Shorten your strides, and your run will feel stronger.”

And yeah, research backs this up too.

Studies show that shorter, quicker strides help reduce the impact on your knees and hips, making your run more comfortable and less tiring. I’ve seen it firsthand in my own training—shorter strides not only boost your speed, but they also keep you running longer without that knee pain that comes from overstriding.

As a coach, I always tell my runners, “Don’t just go after speed—go after smart running. Shorter strides might feel awkward at first, but trust me, once you get the hang of it, you’ll feel a huge difference.”

Tips to Make the Most of Your Steps

Whether you’re trying to hit more steps for fitness or working on your running form, here are some solid tips from my own experience and expert advice:

  • Know Your Numbers: The first step is to figure out how many steps you take per mile. It’s easy to do—just use a GPS watch or fitness app on a known distance. Head to a track (4 laps = 1 mile) or pick a route you already know. Walk or run at your usual pace and check what your device says. This personalized number will be way more accurate than any guess you find online.
  • Calibrate Your Fitness Tracker: Got a Fitbit, Apple Watch, Garmin, or something else? Make sure your height is entered correctly—these trackers use your height to guess your stride length. If you want even better accuracy, input your custom stride length. You can measure it by counting steps over 100 feet or so and doing the math. Once you tweak this, your device will give you a much better read on your distance. And don’t forget—some trackers even use GPS to fine-tune the data as you move.
  • Use Steps as Motivation, Not Gospel: Don’t stress over little fluctuations in your step count. One day you might hit 2,300 steps for a mile, and the next it’s 2,400—that’s normal. Use your step count as a way to keep moving, but it doesn’t have to be a competition. Adjust your goals based on how active you are that day. You can use that 10,000 steps/day target to keep you motivated (take the stairs, go for a quick stroll), but don’t make yourself obsessed with hitting that number perfectly.
  • Shorten Your Stride for Injury Prevention: If you’re a runner who gets sore legs or injuries, consider your cadence. Picking up your foot turnover a little might make your stride feel smoother and easier on your joints. Try using a metronome app or playlist set to around 170–180 beats per minute and match your steps with the beat. Don’t force it, but aim for quicker, smaller steps.
  • Don’t Overthink It on Easy Days: While good technique is important, don’t get too caught up in micromanaging every step. One coach gave me this advice: “Run tall, and let everything else take care of itself.” Your body naturally adjusts your cadence based on how fast you’re going—faster when you pick up the pace, slower when you’re taking it easy. Just focus on standing tall, keep your back straight, and let your feet find their rhythm. If you’re staying comfortable and not getting injured, your step length and cadence are probably just fine.

FAQ: Steps, Miles, and Walking

Q1: How many steps are in a mile?

The number of steps in a mile varies, but the average adult takes 2,000 to 2,500 steps per mile, depending on stride length.

Q2: Does walking or running affect step count?

Yes—running typically takes fewer steps per mile because your stride length increases at higher speeds.

Q3: What factors change your steps per mile?

Height, leg length, speed, and walking surface all influence how many steps it takes to cover a mile.

Q4: How can I accurately measure my steps?

Use a fitness tracker, pedometer, or smartphone app—and calibrate it by comparing your steps over a known distance, like a measured mile.

Q5: How can I increase my steps per day?

Take the stairs, walk during breaks, park farther from entrances, and consider walking meetings or short strolls after meals.

Q6: Do different types of terrain affect step count?

Yes—hilly or uneven surfaces can slightly increase step count per mile due to shorter steps and increased effort.

Q7: Is counting steps a good way to track fitness?

Yes—tracking steps is a simple, effective way to monitor daily activity and set achievable goals.

Q8: Can I convert steps to calories burned?

Roughly—an average adult burns 40 to 50 calories per 1,000 steps, but it varies based on weight and pace.

Q9: How many steps a day are recommended?

The general recommendation is 10,000 steps a day, but any increase from your baseline is beneficial.

Bottom Line:

Your step count isn’t set in stone—it’s personal to you. When you understand how your height and pace influence your step count, it’s a great way to track progress or sneak in extra activity.

But don’t compare yourself to others. Whether you take 1,500 or 2,500 steps, the goal is to keep moving. Lace up, grab your tracker (if you’ve got one), and get going. One step at a time.


The Åstrand Treadmill Test – VO2 Max Protocol for Runners and Athletes

You don’t need a lab coat or a $2,000 VO₂ mask rig to figure out how fit you are.

The Åstrand Treadmill Test is old-school, science-backed, and brutal in the best way.

It’s like running uphill until your lungs beg for mercy—and that’s exactly what makes it valuable.

This test was built in the 1950s by Swedish exercise legend Per-Olof Åstrand, and guess what? It’s still around because it works.

Coaches, athletes, and even rehab specialists use it to get a clear read on aerobic fitness, all with just a treadmill and a stopwatch.

Let’s break down how this works, why it matters, and how to make it part of your running toolbox.

So, What Is the Åstrand Test?

It’s simple in design—but tough in practice.

Here’s how it works:

  • You run at a steady pace: 5.0 mph (that’s 8.0 km/h)
  • The incline increases every few minutes
  • You keep going until you physically can’t

That’s it. You don’t change speed. Just the grade. Think of it like a treadmill slowly turning into a mountain.

And when your legs give out or your lungs can’t keep up—that’s your finish point.

Based on how far you make it, you can estimate your VO₂ max—aka, your body’s max oxygen capacity.

The bigger your number, the bigger your “aerobic engine.”

No gas exchange equipment.

No blood lactate tests.

Just grit, effort, and incline.

Why VO₂ Max Matters (A Lot More Than You Think)

VO₂ max is your oxygen efficiency. It’s how well your heart, lungs, and muscles work together when the going gets tough.

The higher it is, the more oxygen you can use. The more oxygen you use, the longer and faster you can go.

Here’s what a better VO₂ max does for you:

  • Improves your endurance: You can hang at higher paces without redlining
  • Boosts your recovery: Your body clears fatigue faster
  • Extends your race ceiling: You can hold goal pace longer with less strain
  • Improves longevity: A high VO₂ max isn’t just about running—it’s tied to living longer and having a stronger heart

Want proof? Look at Jeannie Rice, the 77-year-old marathon machine with a VO₂ max that puts 30-year-olds to shame. She’s not just crushing age-group records—she’s aging well because she built a cardiovascular engine that lasts.

Why Use the Åstrand Test (Instead of a Fancy Lab)?

Because it’s simple. Repeatable. And most importantly—it gives you feedback that matters.

It lets you track real aerobic gains. If you do the test once, then train for 6 weeks and do it again—and you last longer before gassing out?

Your VO₂ max is improving. Period.

And like I always like to say: “You can’t improve what you don’t measure.”

You wouldn’t train for a race without checking your pace. Why train your engine without checking its output?

This test is for:

  • Runners who want a legit, no-guesswork baseline
  • Athletes who can handle uphill running without joint issues
  • Anyone motivated by progress they can see and feel

Skip it if:

  • You have heart conditions, balance issues, or recent injuries
  • You’re not cleared for max effort testing
  • You hate incline running (seriously—this thing ramps up quick)

VO₂ Max Testing: Åstrand vs. Other Protocols (What Runners Should Know)

VO₂ max tests are one of the best ways to get a read on your endurance engine.

But here’s the thing—there’s more than one way to measure it, and not every method is right for every runner.

Let’s break down three common approaches: the Åstrand treadmill test, the Bruce treadmill protocol, and the classic Cooper 12-minute run.

Åstrand Treadmill Test – Uphill Battle, Steady Effort

If you want something controlled, repeatable, and treadmill-friendly, Åstrand’s your guy.

The Åstrand protocol is simple. You’re not playing with both speed and hills. Just the grade changes, which means you’re not sprinting or trying to multitask your pace. If you can handle the steady 5 mph, it’s mostly a matter of grit and leg strength to fight through the climbing.

If you’re highly trained, the slow pace with steep inclines can fry your calves or glutes before your heart gets maxed. That’s the downside of a one-size-fits-most test—it might not push your cardio to the edge if your legs give out first.

Bruce Treadmill Test – Speed and Steepness Combined

The Bruce test is the one you’ve probably seen in cardiac stress testing or research labs. It’s no joke.

  • Every 3 minutes, both speed and incline go up.
  • Starts slow: 1.7 mph at 10% incline.
  • Ends with you gasping at 5+ mph and what feels like a mountain under your feet.

This is a true maximal effort test. Most labs will strap a mask on you to directly measure oxygen uptake. It’s legit, but it’s also intense.

When you perform this test, you get a true VO₂ max value (not just an estimate), assuming you push to full failure. It’s great if you’re being tested in a lab or you’re working with pros.

Here’s the downside. It gets fast. And steep. If you’re not used to treadmill running—or fast uphill running—it can crush you early. That limits how accurate the “max” effort is for some folks.

Cooper 12-Minute Run – Old School Field Test

This is the simplest method out there.

You don’t need fancy gear. Just a track or flat path. That’s why it’s used by the military and in high schools—it’s practical and easy to implement for groups.

Just pay attention to pacing. If you blow out the first 5 minutes and crawl to the end, your VO₂ max number won’t reflect your true fitness.

Also, weather and terrain can mess with your result.

So Which Test Is Best?

Short answer: Whichever one you’ll actually repeat.

  • Got a treadmill and want a consistent solo test? Åstrand.
  • Want lab precision and don’t mind going full red zone?
  • Prefer outdoor effort with no tech?

📈 Bottom line: The test is just a tool. What really matters is doing the same one over time so you can track progress. Your exact VO₂ number? Less important. Seeing that number improve? That’s what counts.

Who Should Do the Åstrand Treadmill Test?

The Åstrand protocol isn’t for everyone—but it’s a great fit for a lot of recreational runners and endurance athletes.

Here’s who should take it on:

  • Healthy, moderately fit adults. If you can jog 20 minutes without falling apart and aren’t afraid of climbing grades, you’re probably a good match.
  • Runners & Triathletes in Base or Preseason. It’s perfect for getting a baseline before training kicks into high gear. A 20-miles-per-week runner? Ideal candidate.
  • Those without access to lab gear but still want a benchmark. All you need is a treadmill and some fire in your gut.

But you shouldn’t take if:

  • Beginners who can’t comfortably jog for 15+ minutes. Start with basic aerobic work first—this test is tough.
  • Highly trained athletes looking for lab-grade data. If you’re already elite, the Åstrand test might cap out due to leg fatigue before you hit cardio limits.
  • People with injuries or joint issues. Incline running stresses the calves, Achilles, and lower back. Don’t risk it if you’re rehabbing something.

Preparing for the Åstrand Test (Don’t Wing It)

This is max effort. So treat it like a race.

First: Be Smart About Safety

If you’re over 40, haven’t had a recent checkup, or have any history of heart issues, get cleared by your doc.

Doesn’t matter how fit you “feel.” This is a stress test—know you can handle the stress.

Also, don’t test when you’re already beat up or sick. No PRs come from dragging yourself onto a treadmill half-recovered.

Skip the heavy lifting and hard workouts 24–48 hours before test day. Rested legs = better data.

Treadmill Check: Don’t Trust a Dusty Machine

First up, your treadmill needs to be dialed in.

Make sure it:

  • Can go up to 15% incline (or more)
  • Holds steady at 0 mph (8 km/h)—no random speed drops
  • Isn’t overdue for servicing (worn belts or off calibration = garbage data)

Also, learn the controls cold—how to stop it, change incline fast, and where the emergency stop is.

If you’re solo, clip on that red safety cord. You might feel goofy, but trust me: if your legs give out mid-test, you’ll be glad the machine stops instead of launching you into the wall.

Environment: Don’t Turn Your Test Into a Sauna

VO₂ tests heat you up—fast. So make sure the room isn’t an oven.

Here’s the ideal setup:

  • Cool, well-ventilated space (fan or AC is a bonus)
  • No direct sun or heaters nearby
  • If at the gym, pick a treadmill not stuffed in a corner with no airflow

Elite runners do this in labs with controlled temps for a reason: heat wrecks performance. You want to test fitness, not how fast you overheat.

What to Wear: Dress for a PR, Not a Casual Jog

Wear what you’d wear for a hard track workout:

  • Light, breathable clothes
  • Secure, well-tied running shoes
  • Optional but helpful: a heart rate monitor (chest strap or wrist)

The monitor isn’t required for the Astrand test, but it’s awesome data: you’ll learn your peak heart rate and how fast you recover post-effort.

Plus, it gives you something else to nerd out on afterward.

Have a Spotter (Seriously)

Don’t do this test totally alone if you can avoid it. Grab a buddy, coach, partner—someone who:

  • Knows what you’re doing
  • Can assist if you stumble
  • Can yell out incline changes so you focus on surviving

In a lab, they have 3–4 people standing by. That’s not overkill—that’s smart. At the very least, text someone:

“Hey, doing a treadmill max test at 12:00. If you don’t hear from me by 12:30, check in.”

Test your limits, not your luck.

I cannot emphasize enough the importance of safety.

Mental Prep: Know What’s Coming

This test is simple—but brutal. Speed stays locked at 5.0 mph. Every 2 minutes, the incline increases.

That’s it.

But don’t let the simplicity fool you—it gets nasty fast.

Here’s what I recommend:

  • Visualize the first few rounds
  • Tell yourself: “I’ll hold on one more incline”
  • Play music if it helps you push
  • Take a deep breath and treat it like a race—it’s short, but intense

You’re not just testing your body—you’re testing your head.

Gear Checklist

Here’s everything you actually need—no fluff:

  • Treadmill with incline (≥15%) and steady 5.0 mph
  • Stopwatch or timer (backup in case the treadmill clock dies)
  • Heart rate monitor (optional but great)
  • Partner or assistant (someone to supervise and call out inclines)
  • Towel and water (you’re gonna need it after)

Important: don’t try to chug water mid-test. Wait until you’re cooling down unless you want to learn how water and VO₂ testing don’t mix.

The Åstrand Treadmill VO₂ Max Test  

Want to test your engine? Here’s how to run it, step by step.

Step 1: Warm-Up – Flat and Steady (0% Incline)

Start at 5.0 mph on a flat treadmill (0% incline). That’s a 12:00 mile pace. Feels easy for most trained runners, steady for beginners.

  • Run for 3 minutes at this pace.
  • Don’t speed up. This stage is about getting your body warm and your breathing steady.

If 5.0 mph already feels like a max effort—stop the test. That’s a sign this protocol might be too aggressive right now.

Step 2: Start the Climb – 2.5% Incline

At the 3-minute mark, bump up the incline to 2.5%—keep the speed locked at 5.0 mph.

  • Run at this incline from minute 3 to 5.
  • Expect it to feel a little harder—legs working more, breathing heavier.
  • Maintain good form: slight forward lean from your ankles, not your waist. Keep turnover quick and light.

Step 3: Every 2 Minutes, Steepen the Hill

Now the real test begins. Every 2 minutes, increase the incline by another 2.5%—don’t touch the speed.

Keep it at 5.0 mph the entire time.

Here’s how the incline stacks up:

  • Minute 5 → 5% incline
  • Minute 7 → 7.5%
  • Minute 9 → 10%
  • Minute 11 → 12.5%
  • Minute 13 → 15%
  • Minute 15 → 17.5%
  • Minute 17 → 20%
  • And so on…

Each step gets steeper, harder, and more taxing. The hill keeps growing—you just hang on.

No speed changes. No rests. That’s the test. You’re measuring how long your lungs and legs can handle a steady pace with ever-growing incline.

Step 4: Keep Going Until You’re Cooked

You stop when you’re done. Done means:

  • You physically can’t hold 5 mph anymore,
  • You’re grabbing the handrails,
  • Or your form’s falling apart and you’re one stumble away from a faceplant.

This is a max effort test. Most trained runners last around 12–15 minutes.

Newer or less conditioned runners might tap out closer to 8–10 minutes. If you’re super fit? You might go past 15—but that incline gets brutal fast.

Tip: If you’re getting close to failure, signal someone nearby or hover your finger over the stop button. No shame in bailing early to avoid a crash.

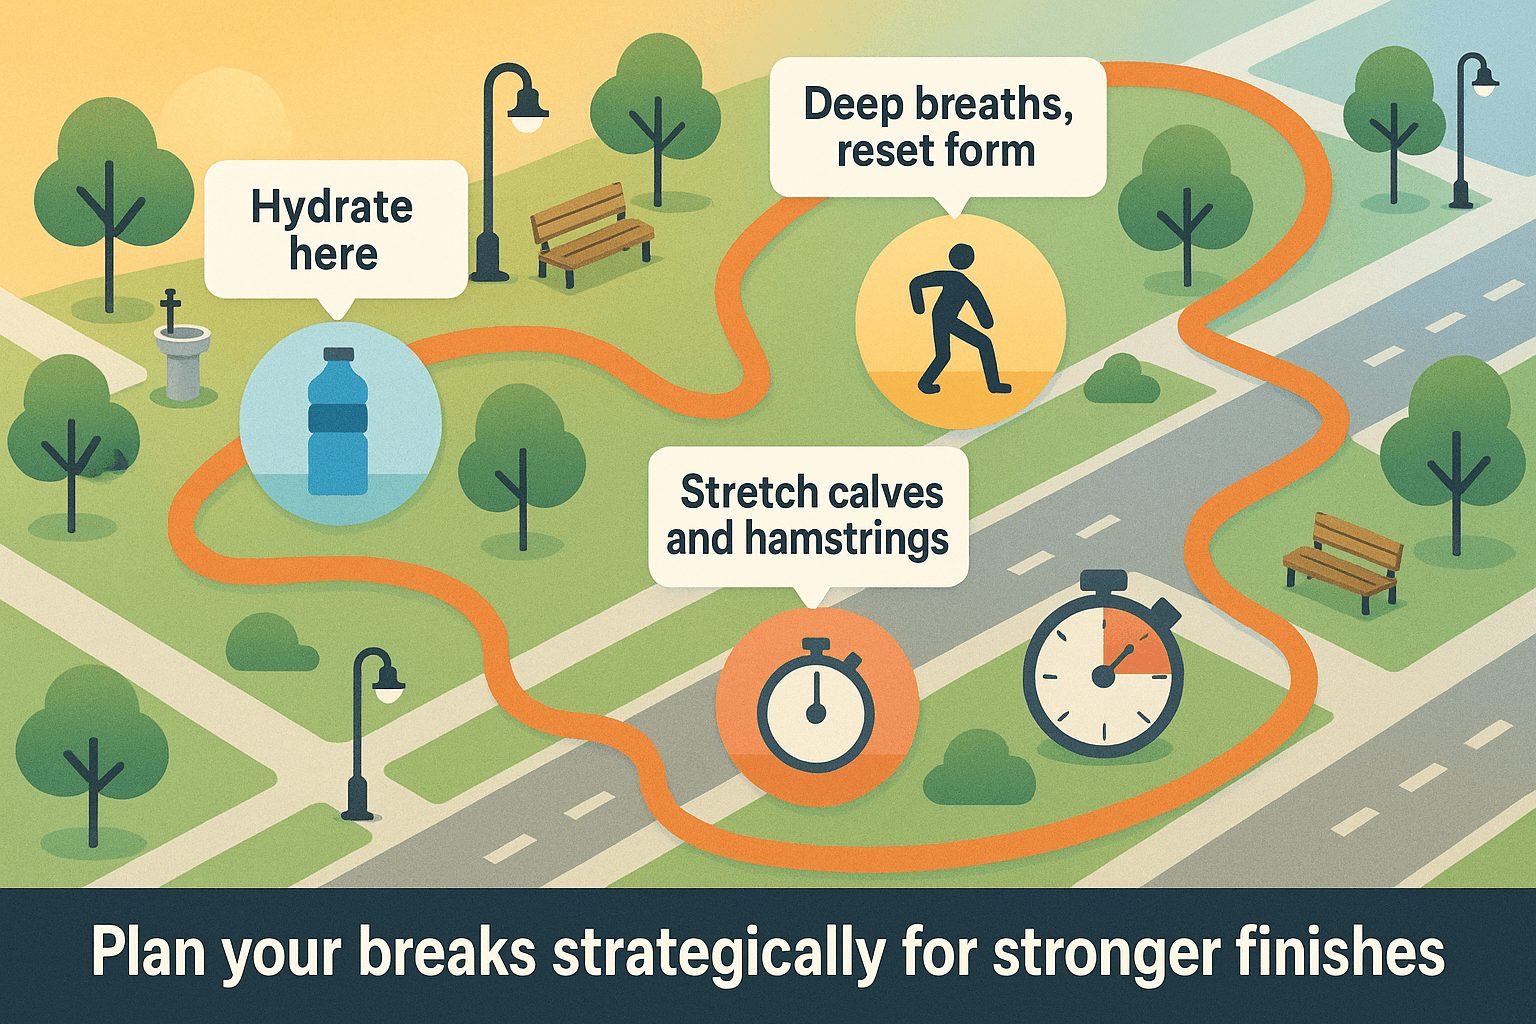
Step 5: Cool Down (Don’t Skip This)

As soon as you stop the test, drop the incline and slow the speed down. Walk it out for a few minutes.

  • Don’t just jump off and collapse—this can mess with blood pressure and make you dizzy.
  • Keep walking, breathing, and letting your heart rate come down slowly.

Many runners feel shaky or light-headed after this test. That’s normal. Hydrate, catch your breath, and reflect on the grind you just survived.

Step 6: Record Your Total Time

Now the key detail: record your exact test time in decimal format.

Here’s how to convert:

  • 15 seconds = 0.25
  • 30 seconds = 0.50
  • 45 seconds = 0.75

So:

  • 13:30 = 50 minutes
  • 14:15 = 25 minutes

Pro tip: Don’t make the rookie mistake of logging 13:30 as 13.30. That’ll mess up your VO₂ max calculation.

Step 7: Calculate Your VO₂ Max

Time to crunch the numbers.

Use this formula:

VO₂ max (ml/kg/min) = (Time × 1.44) + 14.99

Let’s say you lasted 12:00 minutes:

  • (12.00 × 1.44) + 14.99 = 27 ml/kg/min

If you made it to 15:00:

  • (15.00 × 1.44) + 14.99 = 59 ml/kg/min

Every extra minute you survive tacks on 1.44 points to your VO₂ max. Simple, clean, and surprisingly accurate if you execute the test correctly.

Step 8: Note How You Felt—Because the Numbers Don’t Tell the Whole Story

This isn’t part of the official test formula, but trust me—write down how it felt.

VO2 max scores are great for benchmarking, but your body has valuable feedback too.

Were your lungs gasping before your legs gave out? Did your quads feel like jelly at the end? Did you stop because your breathing maxed out—or because your calves just gave up?

That matters.

Here’s why:

  • If your legs quit first but your breathing was under control, you might be dealing with a local muscular limit—not a cardiovascular one. That could mean you need to build more strength, do more hill work, or maybe just get more familiar with the treadmill setup.
  • If your lungs were maxed and your legs felt fine, that’s classic cardio ceiling territory—meaning the test likely measured your true VO₂ max.
  • Any cramps or weird symptoms? Write them down. Were you dehydrated? Was the room hot? Did you have a fan? That kind of stuff can skew results—and should be consistent when you retest later.

So yeah—jot some notes. You’ll thank yourself later when you repeat the test and want to compare apples to apples.

Let’s Walk Through a Real Example

Sometimes, numbers don’t click until you see the math play out.

So here’s a straightforward case.

Meet John

  • Age: 27
  • Test duration: 13 minutes and 30 seconds before hitting his limit

Step 1: Convert the time

13 minutes + 30 seconds = 13.5 minutes

Step 2: Plug into the formula

VO₂ max = (Time × 1.44) + 14.99

  • 5 × 1.44 = 19.44
  • 44 + 14.99 = 34.43 ml/kg/min

So John’s VO₂ max is 34.4.

Step 3: What Does That Number Mean?

On its own, “34.4” doesn’t say much. But let’s put it in context:

  • For a 27-year-old male, 34.4 is average to slightly below average in most charts.
  • For a trained male runner in this age group? It’s on the lower end—runners in their 20s often fall in the 45–50 range.
  • For a non-athlete population? It’s respectable.

A rough rule of thumb some coaches use:

“If your VO₂ max is higher than your age, you’re probably in decent shape.”

So John at 27 with a 34.4 VO₂ max? Decent. Not elite. Room to improve.

We’ll break down exact VO₂ max charts next, but for now: John’s number tells him he’s got a good starting point—but if he wants to race competitively, there’s work to do.

Step 4: What Should John Do Now?

Now that he has the number, here’s what it means for him:

  • It’s a baseline. In 8–12 weeks, he can retest to see how training is affecting his aerobic fitness.
  • If the number increases, he’s getting more aerobically fit.
  • If it doesn’t budge, he might need to change something: more volume, better intervals, or perhaps tweak nutrition or recovery.

He can also plug his VO₂ max into race calculators to get a rough prediction for 5K/10K times (though real race results or heart rate zones are often more useful for pace-setting).

Is the Åstrand Test Reliable? Here’s the Straight Talk

The Åstrand treadmill test has been around for decades.

It’s a trusted method for estimating VO₂ max—but like any test, you’ve gotta know what it can and can’t tell you.

So, is it reliable? Yes—if you do it right.

Let’s break it down.

Validity: Does It Actually Measure VO₂ Max?

Yes—within reason. The Åstrand test gives you a solid estimate of your aerobic capacity.

If you push to a true max effort, your result will likely land pretty close to your real VO₂ max.

Is it perfect? No—it’s based on formulas, not direct gas exchange like you’d get in a lab.

But for the vast majority of runners, the Åstrand result is good enough to benchmark fitness and track improvement.

If your score goes from 34 to 38 over six weeks, you can trust that your aerobic fitness improved—even if the absolute number is slightly off.

TL;DR: It’s not lab-grade, but it’s accurate enough to see trends in your progress.

Reliability: Will You Get the Same Result Next Time?

In theory, yes—as long as you test under the same conditions.

Same shoes, same treadmill, same time of day, same effort level.

You should land in the same ballpark.

Small changes (a better night’s sleep, more motivation, a different breakfast) might nudge your time up or down a little. That’s normal.

What matters is the big picture: If your time increases significantly over a few weeks, that’s real. If it’s just a 10-second bump, don’t overthink it.

Factors That Skew the Results

Here’s what can throw off your number—up or down:

Motivation & Pain Tolerance

This test hurts at the end. You’ve got to want it. Two runners with identical VO₂ max might get different scores if one digs a little deeper. That’s not fitness—it’s mental grit.

“The test didn’t surprise me—I just confirmed I need to train harder.” —A runner who nailed it.

Treadmill Familiarity

If you’re not used to treadmill running—or incline running—you might underperform.

Awkward stride? Poor rhythm? That can mess with your result.

The fix: train on the treadmill once a week if you plan to retest with Åstrand.

Environment

Hot room? Poor ventilation? Didn’t hydrate?

All of those can tank your endurance during the test. Try to test under the same conditions every time.

Equipment Calibration

If the treadmill’s speed or incline is off even slightly, your score will be too.

Stick with the same machine if possible—even if it’s off, at least your progress comparisons will still be valid.

Individual Physiology

The Åstrand formula is one-size-fits-most, not tailor-made for you.

If you’re amazing at incline running (because you do a lot of trail running), your result may skew high.

If you have poor running economy or carry extra bodyweight, it might skew low.

Doesn’t mean the test is wrong—it just means it’s not perfect.

How It Compares to Other Tests

The Åstrand test is:

  • Safer than an all-out Cooper or 1-mile test (especially for non-elites)
  • More structured than some of the wild “run ’til you drop” protocols
  • Easier on the body than the Bruce Protocol, which has sharp speed jumps

That said, if you’re an elite runner, you may max out the treadmill before you max out your body.

In that case, a custom protocol or lab test will give you a truer ceiling. But for 95% of runners, Åstrand works just fine.

Submax vs Max Confusion

Some call the Åstrand test a “submax test.” That’s partly true—but it depends how you do it.

  • In labs, they often stop the test early and use heart rate to predict VO₂ max (more error-prone).
  • In real-world use (like ours), you’re going all-out. That’s a maximal test, and it gives you a more accurate result.

If you cut it short or don’t push, the estimate gets fuzzier.

Rule of thumb: If you’re not breathing fire by the end, you didn’t go to max.

Common Mistakes Runners Make (And How to Fix Them)

Here some of the common errors I see many people when performing this test:

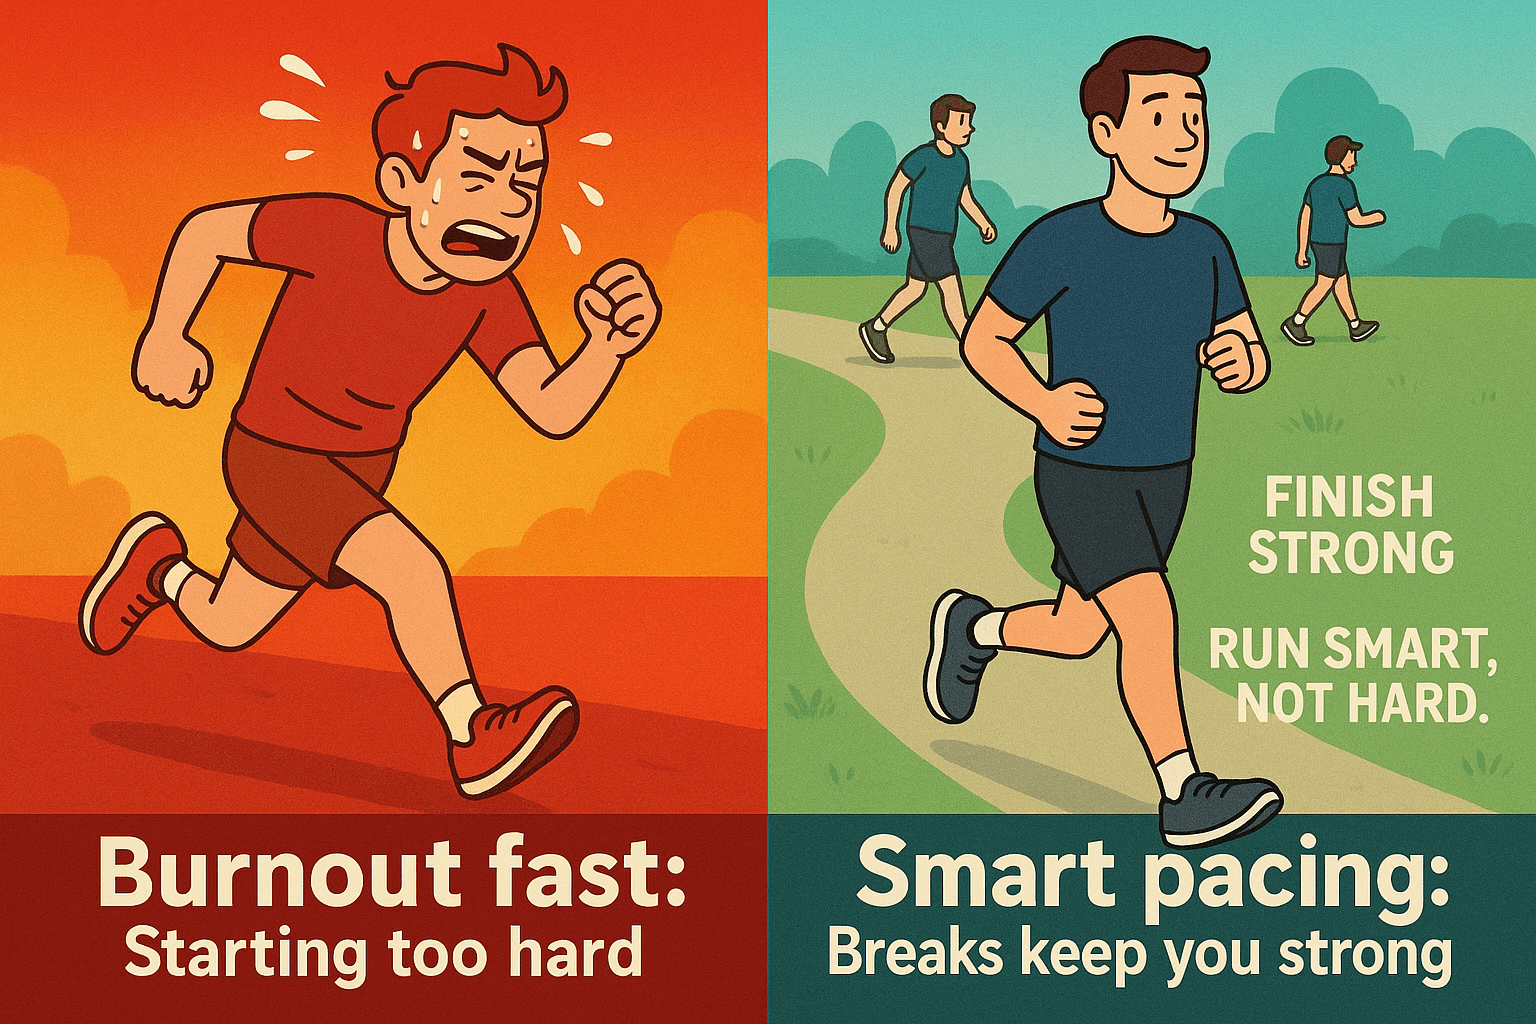
1. Starting Too Fast or Hard

Mistake: Cranking the treadmill to 6.0+ mph to prove something or skipping your warm-up entirely.

Why it’s a problem: The Astrand test is built for 5.0 mph. If you change the speed, the incline progression doesn’t apply, and your result will be junk. And skipping a warm-up? That’s just begging for a shock to the system.

Fix it: Stick to the protocol. If 5.0 feels tough from the start, do a 5-minute jog beforehand. Don’t “out-tough” the test—just do it right.

I’ve seen runners blow up before the incline even gets spicy. One guy bragged about starting at 6 mph… until he bailed at 7 minutes. His VO₂ estimate tanked. Don’t be that guy.

2. Skipping Warm-Up or Cooldown

Mistake: Treating the 3-minute flat stage like a waste of time, or hopping off the treadmill the second the test ends.

Why it’s a problem: That first 3 minutes is there to prime your engine. No warm-up = tight muscles and shortness of breath. No cooldown = blood pools in your legs, and you might black out (yes, really).

Fix it:

  • Warm-up: Focus on smooth form and breathing. If needed, do 5 minutes of light running first.
  • Cooldown: Walk or jog for 3–5 minutes. Stretch after. Let your body come down slowly.

More than one athlete has finished the test and then gone woozy and wobbly. Cool down like it matters—because it does.

3. Misreading the Stopwatch

Mistake: Finishing at 13:45 and writing “13.45” on your sheet. Spoiler: that’s not how time works.

Why it’s a problem: The Astrand formula needs your time in decimal minutes. “.45” doesn’t mean 45 seconds—it means 27 seconds. That mess-up can swing your VO₂ max result by a few points.

Fix it:

  • Use this cheat sheet:
    • 15 sec = 0.25
    • 30 sec = 0.50
    • 45 sec = 0.75
  • Double-check with a calculator.
  • Or better yet: record the test and check your exact finish time once you’ve caught your breath.

Brain fog is real after you hit your limit—don’t trust your mid-suffer-math.

4. Treadmill Troubles: Calibration & Setup

Mistake: Using a sketchy treadmill or forgetting to check units (mph vs km/h).

Why it’s a problem: If your treadmill is off—even by a little—you’ll either make the test too hard or too easy. Plus, a wobbly treadmill is just dangerous when your legs are fried.

Fix it:

  • Use the same, well-maintained machine each time.
  • Make sure you’re in mph, not km/h (5.0 mph = 8.0 km/h).
  • Confirm 0% incline actually means zero—some machines fake it.
  • Always clip the safety stop to your shirt. Looks goofy, but it could save you from eating belt.

5. Going Solo Without a Spotter

Mistake: Doing the test completely alone, with no one around to back you up.

Why it’s a problem: If you faint, fall, or trip while maxed out, no one’s there to help. Also, you’re more likely to quit early when there’s no one watching or pushing you.

Fix it:

  • Have a friend or coach nearby—even if they’re just in the same room.
  • Ask them to call out encouragement, time your intervals, or shout out how much time’s left.
  • Even a little “you’ve got this!” at the end can squeeze out an extra 30 seconds.

If lab tests use proctors and hype, why shouldn’t you?

Mistake #6: Quitting the VO₂ Max Test Too Early

The Mistake: Bailing When It Gets Uncomfortable

A lot of runners hit this wall—not physically, but mentally. They start the VO₂ max test, get into that dark zone where the lungs are burning, the legs are screaming, and instead of pushing through to the actual edge, they pull the plug.

That’s not a max test. That’s just a hard run.

And guess what? That undercuts your results. You get a VO₂ number, sure—but it’s not your true capacity. You leave gas in the tank and rob yourself of the data that could actually move your training forward.

The Fix: Train Your Mind to Stay in the Fire

Make a deal with yourself before you even start the test: you’re not stopping unless your body truly can’t go another second.

  • Break the test into mental chunks: “Just get to 8 minutes… now 10… now 12…”
  • Use mantras: “One more minute.” “Stay in it.”
  • Imagine racing a rival or hitting the final stretch of your dream race.
  • And always remember: the last 1–2 minutes are supposed to suck. That’s where the magic (and the data) happens.

Of course, use common sense. There’s a difference between redlining and risking injury. Chest pain, dizziness, blackout vibes—shut it down. But if it’s just discomfort? That’s the point. Lean into it.

Final Thoughts from the Coach’s Corner

The Åstrand VO₂ max test is a killer tool—but it’s just that: a tool. It doesn’t define you, and it doesn’t tell the whole story. Here’s how to use it the smart way:

Use It as a Benchmark—Not a Report Card

Your VO₂ score isn’t a grade. It’s a snapshot.

Whether it’s 38 or 68, the number is there to guide you. If it’s low, no problem—now you know what to build. If it’s high, great—but what are you doing with it?

I’ve seen guys with a VO₂ max in the 70s who still can’t break 3:15 in the marathon. Why? Because speed isn’t everything. Endurance, threshold, and economy matter just as much.

So take the number, and then build around it.

Retest Every 6–8 Weeks

Don’t just test once and forget it. Recheck every 1.5 to 2 months. That’s long enough to adapt, short enough to spot trends.

If your VO₂ max is climbing, awesome—your training is working. If it flatlines, it might be time to reassess.

That feedback loop is powerful. And let’s be honest—watching your score go up is really motivating.

Pair the Test with Other Data

One test won’t give you the full picture. But combined with other metrics? Now you’re cooking:

  • Training log: Are you recovering quicker? Holding paces easier?
  • Races: Are your times improving, or does your training VO₂ max not translate to performance?
  • Heart rate trends: If you’re running the same pace at a lower HR, your fitness is clearly rising—even if VO₂ max is flat.
  • How you feel: Energy levels, sleep, soreness—these tell you just as much as any number.

Data is great. Contextualized data is better.

Progress Over Perfection

Forget chasing some magic number.

Improving from 32 to 37? That’s massive. Going from 40 to 44? That’s hard-earned.

VO₂ max doesn’t need to hit “elite” to change your running life. A modest gain can shave minutes off your 5K or marathon time.

I once coached a runner who started in the mid-20s VO₂ max range—deconditioned, just getting back into the game. A year later, she was at 36, running 10Ks with confidence and chasing a half marathon. That’s the real win.

Don’t Let One Number Define You

Maybe the test didn’t go great. You were tired. Or distracted. Or just had a bad day.

Happens to everyone.

That’s why we don’t hang our identity on one result. And it’s why I say: track your trend, not your peaks. Progress doesn’t mean smashing every test—it means building upward, one block at a time.

And when you do hit a big number? That’s awesome. Now go turn it into performance. Because VO₂ max is the engine—but races are where you drive it.

Bottom Line: Use the Tool, But Stay the Course

The Åstrand test isn’t a magic fix. It’s a flashlight. It shows you where you are and lights up the next step forward. Use it wisely. Train smart. Keep showing up.

And remember this:

“If you’re not tracking your progress, you’re just hoping you’re improving—and hope isn’t a training plan.”

—David Dack

Now go earn your next number.

Can You Lose Weight by Only Running? Real-Runner’s Truth

When I got into running, I thought it would be the magic fix for losing weight.

Lace up, hit the road, and boom—pounds would just melt away, right?

Nope.

Not even close.

It took me a while—and a few hard lessons—to figure out that running alone wasn’t going to cut it.

If you want real weight loss, you’ve got to get honest with your diet, and you’ve got to add some strength training.

Trust me, building muscle changed the game for me.

In this article, I’m breaking down the truth I wish someone told me earlier: why just running won’t get you there, how to train smarter with intervals and hills, and why lifting weights can actually turn your body into a fat-burning machine.

If you’re ready to stop spinning your wheels and start making progress that sticks, stick with me.


Why Running Alone Won’t Lead to Significant Weight Loss

Let me say it again: running burns calories, but don’t think you’ll drop pounds just by pounding the pavement.

I used to think I could run my way to a smaller waistline.

After a long run, I’d think, “I totally earned that pizza!”

But guess what? That pizza and beer pretty much wiped out all the good I did with the run.

You can burn a decent amount of calories, but if your diet isn’t on point, you’re just spinning your wheels.

The truth is simple: calories in vs. calories out—that’s the rule.

Running boosts your metabolism, but it’s useless unless you’re burning more than you’re eating.

So, yes, run like a beast, but get real with your food choices. That’s where the real results will come from.

Let me break it down for you:

  • Calories burned per mile: around 100-150 (depends on how fast you run and your body)
  • Calories for 1-pound weight loss: 3,500
  • Calories burned per 3-4 mile run: 500

From this we can conclude:

  • Running burns about 100-150 calories per mile, depending on your pace and body type.
  • To lose 1 pound, you need to burn about 3,500 calories.
  • If you’re running 3-4 miles a day, that’s about 500 calories burned each day.
  • So, if your diet is on track, that adds up to about 1 pound per week.

My best advice? Stick with it, and you’ll probably drop 15-20 pounds in about 3 months.

That’s around 1 pound per week, which is sustainable and real progress.


    Fat Loss? It’s About More Than Running

    Look, I’m not bashing running.

    It’s a huge part of the puzzle. But if you’re serious about shedding fat, running alone isn’t going to cut it. It’s like building a house with just a hammer—you need the full toolkit.

    Here’s the thing: your diet’s 80% of the weight loss game, no question.

    I hate to say it, but you can’t outrun a bad diet. No matter how many miles you log, if your eating habits aren’t on point, you’re not going to see the results you want.


    Add Strength Training

    If you’re only running and not lifting weights, you’re missing out.

    When I started running, I thought strength training was just for bodybuilders. I couldn’t have been more wrong.

    Running’s great, but if you really want to burn fat, you’ve gotta build muscle. 

    Strength training isn’t just about getting bigger—it actually helps you burn more calories, even when you’re not running. More muscle means more calories burned at rest.

    Plus, strength training will help keep you from losing muscle mass, which can happen if you’re only running.

    Not ideal.

    So, how do you get started?

    You don’t need to turn into the Hulk. Just start with two days a week of basic bodyweight exercises—squats, lunges, and push-ups. Keep it simple, and you’ll get stronger faster.


    The Calorie Deficit Rule

    I know, I know—it’s a broken record, but it’s worth repeating: weight loss comes down to the calorie deficit.

    Here’s the harsh truth: it doesn’t matter how far you run if you’re eating too much.

    Here’s how it works: you’ve got to burn more calories than you’re eating.

    Period.

    Running helps burn calories, but if you’re going hard on pizza and cookies every weekend, you’re basically sabotaging your progress.

    No matter how much you run, you can’t outrun a bad diet.


    Mix It Up 

    Your body is smarter than you think. If you’re running the same route at the same pace every day, your body will adapt. And when that happens, you’re not burning as many calories. You’re basically running to maintain, not improve.

    To keep losing weight and making progress, you’ve got to keep challenging yourself. The key? Variety.

    Here’s how to mix it up:

    • Speed Work: Try intervals, fartleks, or tempo runs to get your heart rate up and burn more in less time.
    • Hills: Increase intensity with uphill runs. They’re tough on your legs, but they’ll burn more calories than running flat.
    • Long Runs: Gradually build your distance. The longer you run, the harder your body has to work, which means more calories burned.

    Conclusion: Running is Great – But You Need More

    Every mile you run gets you closer to becoming the runner you want to be—stronger, faster, healthier. But remember, it’s not about the number on the scale.

    Keep pushing, stay consistent, and don’t let that number define your success.

    Don’t obsess over the scale. Instead, focus on how you feel, how much stronger you’re getting, and how much farther you can run.

    The weight loss? That’ll follow.


    Quick Tips for Running and Weight Loss:

    • Strengthen your ankles with simple drills
    • Pick shoes that match your running surface
    • Use tape or a brace for extra ankle support

    FAQ: Common Questions About Running and Weight Loss

    How many days a week should I run to lose weight? For weight loss, aim for at least 3–4 days of running per week, depending on your fitness level.

    Can strength training really help with weight loss? Yes! Strength training builds muscle, which boosts your metabolism and helps burn more calories, even at rest.

    How can I stay motivated to run regularly for weight loss? Set small goals, track your progress, and find a running buddy or join a group for accountability.

    What’s the best running routine for weight loss? A mix of long runs, interval training, and hill sprints can maximize fat loss. Don’t forget to include strength training.

    How can I balance running and eating for weight loss? Focus on creating a caloric deficit while maintaining proper nutrition. Eat nutrient-dense foods and avoid overindulging after runs.

    How Long Does It Really Take to See Results from Running?

    When I first started running, I thought the weight would just fall off if I kept hitting the pavement. Sound familiar? You lace up, run a few times, and wonder, “Why isn’t this working?”

    If you’re trying to lose weight, get stronger, or just feel like a total badass, frustration is normal when results don’t show up overnight. I’ve been there. The truth? It’s a slow grind with no shortcuts.

    In this article, I’m breaking down when you can actually start seeing changes, why running alone won’t make the magic happen, and how adding strength training can fast-track your progress.

    You’ll get real numbers on calories burned, what to expect with your fitness over weeks and months, and why patience and consistency are your best friends.

    If you want to stop guessing and start making steady progress, stick with me.

    This is the no-BS guide to running smarter and losing weight the right way


    Why Running Alone Won’t Slim You Down

    Let me say it again: running burns calories, but don’t think you’ll drop pounds just by pounding the pavement.

    I used to think I could run my way to a smaller waistline.

    After a long run, I’d think, “I totally earned that pizza!”

    But guess what? That pizza and beer pretty much wiped out all the good I did with the run.

    You can burn a decent amount of calories, but if your diet isn’t on point, you’re just spinning your wheels.

    The truth is simple: calories in vs. calories out—that’s the rule. Running boosts your metabolism, but it’s useless unless you’re burning more than you’re eating. So, yes, run like a beast, but get real with your food choices. That’s where the real results will come from.


    When Will You Start Feeling Fitter from Running?

    Alright, let’s talk about the “easy” thing. I get it—running feels brutal at first, and you’re probably waiting for that moment when it just clicks and feels effortless. 

    But here’s the truth: running doesn’t get “easy.” You just get better at handling the hard part.

    As you keep going, you’ll be able to push harder, run farther, and recover quicker—but that doesn’t mean it’s going to feel like a walk in the park.

    You’ll still sweat, still grunt, and still have those tough days.

    The difference? It’ll feel more controlled, more manageable.

    My best advice?

    Don’t expect big changes after a couple runs. Keep running, and one day you’ll look back and realize that the hilly route you used to dread is now just another Tuesday jog.

    Keep at it. It feels easier, but that’s because you’re getting stronger.


    How Running Helps You Build Muscle and Lose Fat

    Running alone isn’t going to turn you into a bodybuilder, but it will help build muscle in your legs—quads, hamstrings, calves.

    If you’re throwing in some hill sprints or speed work, you’ll definitely see more muscle growth.

    Over the next 6-12 weeks, you’ll start noticing your legs getting more toned.

    But if you want to see faster, more noticeable results, add some strength training. Trust me, you’ll really feel the difference.

    Running alone builds endurance. Running with strength training? Now you’re talking.

    What to Do If You’re Not Seeing Results from Running?

    If you’ve been running consistently but aren’t seeing results, it’s time to take a step back.

    Maybe your diet isn’t aligned with your goals, or you’re not getting enough variety in your workouts.

    Take a closer look at your eating habits and add in some strength training for a more balanced routine. Even if you’re doing everything right, results sometimes take time—don’t get discouraged.

    If your workouts feel like they’re plateauing, challenge yourself with some interval training or more intense runs.


    When Will You Start Feeling Fitter?

    Everyone asks this: when will I start feeling fitter? The honest truth? It won’t happen after just a few runs.

    But here’s the good part: around 3-4 weeks in, you’ll notice your lungs opening up. Breathing will get easier, your legs won’t burn as much, and your heart rate won’t spike like it used to.

    But it’s really after 2-3 months of consistent effort that you’ll feel like, “Okay, I’ve got this.”

    That’s when it starts to feel like real progress. You’re not just showing up anymore—you’re performing.

    My best advice?

    Don’t freak out if you don’t see huge changes after a week or two. Keep running, stay consistent, and I promise you’ll start noticing those little wins. Trust me, it all adds up.


    To Conclude

    The reality is that running takes time. But that doesn’t mean you’re not improving.

    Every time you lace up and put in the miles, you’re getting better, stronger, faster.

    Every run, every mile, every sweat session—it’s all part of the bigger picture. Stick with it, trust the process, and watch the results roll in.

    It might take a few weeks to notice, but believe me, it’s happening.