How to Make a Successful Travel Planning If You Are A Runner

The competitive season usually begins in spring, so every running enthusiast should start choosing their races, especially if they plan to run a marathon in another country.

If money is tight right now, don’t rush to get upset and dismiss the trip idea. Nowadays, covering travel expenses with vacation loans is easier than ever, and the tips we have gathered will help balance the event budget.

Why Choose International Running Races?

Expanding your horizons depends on the places you’d like to visit. You can run along city squares or take place on tropical beaches. Choosing the right place motivates you when you feel tired, and the atmosphere makes running more exciting. Runners often feel that their purpose is achieved when they cross a finish line in another country.

Planning a trip, adapting to different foods, and meeting participants from around the world are all a part of a great experience. You can set new purposes, such as completing international marathons on different continents or enjoying an adventure. One more reason is meeting diverse running communities. You may hear different perspectives on pacing, stretching routines, or recovery tactics.

Useful Budgeting Tips to Manage Costs Clearly

Travel can be expensive. Flights, hotels, meals, and races have their prices. You must plan early, define clear purposes, and watch for hidden expenses. You can also build an emergency fund for unexpected circumstances, like gear replacements or flight delays.

Keep a separate account for race-related funds to prevent confusion between daily expenses and your travel budget. You can also search for cheaper ways in the off-season or sharing accommodation with other runners. Consider all travel expenses for your international race before you finalize your plans. Include ground transportation, rental cars, or trains. Research local food prices, especially if you need a diet. Plaid budget for extra gear, such as shoes or local race-day souvenirs.

The cost of traveling abroad is growing. Runners can set aside an income part each month or rely on part-time jobs to get extra money. Be honest about your budget from the start because overspending can distract you from enjoying the race in the future. If you plan thoughtfully, you can stay focused on your training abroad.

Prepare for Traveling

Planning your journey includes many actions. Think about these necessities before you go on a trip:

Pick the Perfect Destination Race

Before you register for a particular event, research the course profile. If you prefer flat routes, check official race websites for elevation charts. If you enjoy a challenge, consider ultra-distance races. Make sure the race length suits your desires because the variety is huge.

Look at the official cutoff times, especially if you need a certain pace. Also, check previous years’ climate data. Hot and humid conditions require extra hydration, and colder climates demand layered clothing. Be aware of local holidays that might result in weekends and crowds. Consider the event’s expo as well. Races can host large expos with vendors, workshops, and talks by elite runners.

Arrange Travel Insurance and Documents

Running can be a dangerous sport, as anyone can get injured. In this case, you will need insurance. Also, research the visa requirements; some nations issue visas upon arrival, and others require applications weeks in advance. Ensure your passport is valid for at least six months beyond travel dates. You may need an international permit for drivers if you want to rent a car.

Contact your bank about travel plans so they don’t freeze your account due to unusual activity abroad. Keep digital and hard copies of all important documents, such as passports, race confirmations, and insurance policies. You might also need proof of vaccination or certain medical screenings. Check the official race website for requirements or email the support team.

Plan Accommodation and Flights

Where you stay can influence how you recover and prepare. Look for hotels close to the race to simplify transportation on the big day, or stay farther away for a quieter setting. Consider arrival times that allow enough space to adjust to time zones. Jet lag can be tough on your training schedule.

Arrive at least two or three days before the race to get a feel for the local weather and settle in. Check if your airline has special baggage allowances for sports gear. Read reviews from runners who have stayed at the same place in previous years for lodging. They share tips on early check-in or whether the hotel offers a pre-race breakfast.

Plan Your Essentials Packing

A well-prepared runner is less likely to face panic the night before the event. Start with the most important things you need: gear, fueling products, documents, medicals, casual clothes, chargers, etc.

You might include comfort items, such as a lacrosse ball for muscle knots and a compact foam roller for daily stretching. Pain relief ointments, band-aids, and anti-chafing creams can save you from store trips in an unfamiliar place. Keep your passport, race confirmation, and other documents in a carry-on bag. That way, they’re safe if your checked luggage is delayed.

Handle Race Day Logistics

Aim to arrive at the start area early to have enough time for a final warmup, bathroom stops, or bag drop if the event offers that service. Look around for any posted signs about wave starts or updated rules. Bring hydration or snacks if you have specific energy needs.

Study the course map in advance. Identify where aid stations, restrooms, and medical tents are placed. Consider the local climate; wear sunscreen or a visor if the sun rises earlier. Reflective running gear or a headlamp are necessary if you’re running at night. Try to enjoy the scenery. Focus on your breathing and keep a positive mindset. Running abroad is about turning each mile into a personal milestone.

Final Thoughts

One can agree with the statement, “anyone can run a marathon,” adding an important remark – “with proper preparation.” Planning your international race with attention to budgeting, logistics, and training ensures a smooth experience, allowing you to focus on the journey rather than the stress. Whether chasing a personal best or simply embracing the thrill of running abroad, thoughtful preparation will turn your race into an unforgettable adventure.

How to Set and Achieve Your Running Goals: From 5K to Marathon

Whether you’re just starting out in running or looking to take your training to the next level, setting and achieving running goals is a big part of any runner’s journey. Whether your goal is to run a 5K, beat your race time or cross the finish line of a marathon, having a plan and sticking to it is key to success. But how do you go from a beginner to crossing the finish line of a marathon? How do you stay motivated through the ups and downs of training?

In this article we’ll show you how to set realistic running goals and create a step by step plan to achieve them, no matter what your current fitness level. But before we get started sign up for a $15 welcome bonus to help kickstart your journey to success—whether it’s buying new running gear or just motivating you to take the first step!

Step 1: Start with a Clear Goal

Before you begin training you need to define your specific running goal. Are you looking for your first 5K, your personal best in a 10K or the ultimate challenge of running a marathon? Having a clear, measurable goal will guide you through the process and keep you motivated.

If you’re a beginner you may want to start with a 5K. This distance is manageable for most people and is a great way to build your fitness without feeling overwhelmed. If you’ve already run a few races, then running a marathon might be the next logical step. No matter your goal, be realistic about what you can achieve in your timeframe.

Step 2: Break Your Goal Into Smaller Milestones

Running a big goal, like a marathon, can feel scary. To stay motivated break your goal into smaller milestones. For example if you’re looking to run a marathon your milestones might be:

  • Completing a 5K without walking
  • Running a 10K
  • Completing a half marathon
  • Running a full marathon

By breaking your goal into smaller chunks you’ll have a clear path to follow and each milestone will give you a sense of accomplishment to keep you going. Plus these smaller goals allow you to assess your progress and adjust your training if needed.Setting a timeline for your goal is important but just as important is making sure your timeline is realistic. For a beginner runner training for a marathon can take anywhere from 16 to 20 weeks depending on your fitness level. For a 5K a 10 week plan might be sufficient, for more experienced runners a 12 week plan can work for a marathon.

When setting your timeframe be mindful of other factors such as your schedule, injuries and the amount of time you can realistically commit to training. The more realistic your expectations the more likely you’ll stick to the plan and achieve your goal.

Step 4: Create a Training Plan

Once you have a clear goal and timeline it’s time to create a training plan. A solid training plan is key to reaching your running goals whether you’re training for a 5K or a marathon. You need to build your running volume gradually to avoid injury and make sure you’re improving consistently.

If you’re training for a 5K your plan might focus on building up your running distance while improving your pace. For a marathon your plan will need to increase your weekly mileage and include long runs to prepare your body for the race day distance.

Here’s a simple breakdown of a beginner’s marathon training plan:

  • Week 1-4: Focus on building a solid running base, gradually increase the distance of your runs.
  • Week 5-8: Start incorporating interval training or hill workouts to increase your speed and endurance.
  • Week 9-12: Focus on long runs and maintaining a steady pace while adding some tempo runs to build stamina.
  • Week 13-16: Taper your training in the last few weeks to allow your body to recover and prepare for race day.

For a 5K your training plan will be:

  • Week 1-3: Shorter runs of 2-3 miles, gradually increase the time you spend running.
  • Week 4-6: Introduce interval training, alternating between jogging and faster paced running to improve speed.
  • Week 7-9: Focus on running at a consistent pace, add a longer run (4-5 miles) to increase endurance.
  • Week 10: Rest week, focus on light runs and recovery.

Training plans vary by experience level so make sure to adjust your plan based on your starting point and race goals.### Step 5: Stick to Your Training

Consistency is key when it comes to your running goals. It’s easy to get sidetracked by work, social obligations or even bad weather but sticking to your training schedule is crucial for progress.

Even on days when you’re tired or unmotivated try to get in a short run. Short runs will keep you on track without feeling like you’re overdoing it. Consistency over time even in small doses will help you achieve your goal whether it’s your first 5K or a marathon.

Step 6: Listen to Your Body and Rest

Rest is just as important as training when it comes to running. Overtraining can lead to injury and burnout so make sure you’re including rest days in your plan. Listen to your body and adjust your training if you’re feeling fatigued or sore.

If you’re training for a marathon you’ll need to take rest seriously to allow your muscles to recover, 5K runners may need fewer rest days but should still take time to let their bodies rest between runs.

This is your guide to marathon heart rate.

Step 7: Stay Motivated

Staying motivated can be tough especially as the race approaches. To stay motivated:

  • Celebrate milestones: Whether it’s running your first 3 mile run or completing a half marathon, celebrate your progress.
  • Join a running community: Connect with other runners online or in person to stay motivated and inspired.
  • Track your progress: Use a running app or fitness tracker to monitor your distance and time to stay focused and feel accomplished.

Remember motivation will come and go but consistency and small achievable goals will keep you moving forward.

Step 8: Race Day Prep

As the race approaches make sure you’re fully prepared. Plan your race day outfit, double check your gear (running shoes, socks, water bottle etc) and focus on eating the right foods in the days leading up to the race. Don’t try anything new on race day and instead rely on what has worked for you during training.

Make sure you get plenty of rest in the days before the race and pace yourself during the event. Start slow, conserve energy and try to finish strong.

Conclusion: 

Achieve Your Running GoalsAchieving your running goals from 5K to marathon takes dedication, planning and perseverance. By setting clear goals, breaking them down into smaller milestones, creating a training plan and sticking to it you’ll be crossing that finish line in no time. With the right mindset and approach you can go from beginner runner to completing your dream race.

Remember sign up for a $15 welcome bonus to motivate yourself even more as you get started on your running journey. Whether it’s investing in gear or just fuel for your motivation this bonus is your first step to success.

Ankle Pain When Running: Causes, Treatments, and How to Fix Sore Ankles

achilles pain


Why Do My Ankles Hurt When I Run?

If you’ve been running long enough, you’ve probably had that moment—your ankle starts talking to you mid-run. First it whispers, then it yells. Ignore it, and you might end up limping to the car (or worse, not finishing your race).

I’ve seen this too many times. One marathoner told me he brushed off a dull ache in his ankle for weeks—until it blew up mid-race, forced him to DNF, and sent him into a two-month rehab spiral. Lesson? Your ankles aren’t optional—they’re carrying 13x your body weight every single stride. When they start hurting, it’s a signal you’d better listen to.

So let’s cut the fluff and get to what matters:

  • Why ankles hurt when you run
  • How to tell the difference between soreness and injury
  • When to stop, when to keep running, and how to fix it

You’re here because you want to run pain-free—not just now, but long-term. Let’s make that happen.

Stress on the Ankles

Simple answer? Stress. A lot of it.

Your ankle joint is a complex little beast—bones, ligaments, tendons, and muscles all working overtime every time your foot hits the pavement. When any of those structures get overworked or messed up (even a little), your ankle fires a warning shot. That’s the pain.

Most ankle issues fall into two buckets:

  • Acute Injuries – The “Oops” Kind
    You land weird, roll your foot, and bam—instant sharp pain. This is your classic ankle sprain.
  • Overuse Injuries – The Slow Burn
    You ramp up mileage too fast or run the same loop every day with a slight camber, and over time, things like Achilles tendinitis or stress fractures creep in.

Sometimes, it’s not even a full-blown injury—it’s just soreness from tight calves or weak ankle stabilizers. But don’t blow that off. Most real injuries start small.

Let’s break down the big four ankle pain causes for runners:

1. Ankle Sprain

It’s a classic. You roll your ankle stepping off a curb, hit a root wrong on a trail, or land sideways mid-run.

That sudden twist stretches (or tears) the ligaments outside your ankle. Usually, you’ll feel sharp pain on the outer side, maybe even hear a “pop.” Swelling kicks in fast, followed by bruising and that uh-oh, something’s not right feeling.

I had a runner tell me she rolled her ankle at mile 2 of a 50K. Adrenaline carried her to the finish… but her ankle looked like a softball afterward and she missed the next six weeks. Don’t be a hero—be smart. Stop when it happens.

How to Fix It (And Not Make It Worse)

First 48–72 hours: R.I.C.E.

  • Rest: No running. Period. Crutches if needed.
  • Ice: 15–20 mins, every couple hours
  • Compression: Elastic wrap—snug, not tight
  • Elevation: Prop it up above heart level

Anti-inflammatories like ibuprofen can help early on. But after the first few days, movement is medicine—gentle range-of-motion drills, easy mobility, and low-load strength work.

Healing Timeline:

  • Grade I (mild): 2–3 weeks
  • Grade II (moderate): 4–6 weeks
  • Grade III (full tear): longer, possibly surgery

Don’t return to running until:

  • You can walk pain-free
  • Swelling is down
  • You can hop on one foot without wincing

💡 Pro Tip: Taping or bracing for the first few return runs can help you feel stable. But don’t rely on it forever—your goal is strong ankles, not bandaged ones.

The Rehab Most Runners Skip (But Shouldn’t)

Too many people ice, rest, then jump right back into training. That’s how you end up with chronic ankle instability or repeat sprains.

Take a few extra days to do the stuff that keeps you out of the injury cycle:

  • Single-leg balance (stand on one foot, close your eyes = fun times)
  • Resistance band ankle movements (side, up, down)
  • Calf raises + eccentric lowers
  • Short foot exercises for arch control

Train your ankle to react, stabilize, and handle uneven ground. That’s how you bulletproof it for the long haul.

Is It Just Soreness… or a Real Injury?

Here’s the test:

SymptomWhat it might mean
Dull ache after long runMuscle fatigue, tightness = probably okay
Pain that sharpens over timeTendon irritation or early injury = caution zone
Pain with swelling, bruisingLikely a sprain or worse = stop running
Burning/tinglingPossible nerve issue (Tarsal Tunnel) = see a doc
Pain during daily activitiesBig red flag – take it seriously

If your ankle’s sore for a day and it improves with rest? You’re probably good.

But if it’s not getting better—or getting worse—you’ve got to address it before it blows up into something worse.

2 Achilles Tendinitis

The Silent Stride Killer You Don’t Want to Ignore

Feel that dull ache in the back of your ankle? Like your heel’s got a built-in whine every time you start a run? Yeah, that’s probably your Achilles waving a red flag.

The Achilles tendon is your running shock absorber. It connects your calves to your heel and handles a ton of force with every step. But here’s the thing—it’s not invincible.

Most Achilles issues don’t start with a bang—they creep in. Maybe it’s a little stiffness in the morning. Or some tightness in the first mile that eases up… only to come back with a vengeance after your run. That’s your warning sign. Ignore it, and you’re cruising for a breakdown.

What Causes It?

  • Too much mileage, too fast
  • Hill repeats or speedwork overload
  • Crappy shoes with no heel support
  • Biomechanics gone rogue (think overpronation or weak glutes)

In short, it’s an overuse injury. The tendon gets micro-tears, doesn’t get time to heal, and then starts rebelling—hard.

A Real Runner’s Warning

I know a woman in her 50s who pushed through “just a little tightness” during marathon training. Finished the race, sure—but wrecked her Achilles in the process. MRI said full-blown tendinosis. Six months benched.

What started as a tweak became a tendon disaster. Moral of the story? Don’t be a hero. Catch it early, fix it fast.


Treatment Game Plan

Step 1: Dial It Back

Rest or switch to biking, swimming, or elliptical for at least a week or two. You’re not being lazy—you’re letting the tendon catch its breath. Avoid hills, speed, and long mileage until things calm down.

Step 2: Calm the Fire

  • Ice 15–20 mins post-activity
  • Elevate when you can
  • Maybe take anti-inflammatories for a day or two (but don’t rely on them long-term)

Step 3: Start Gentle Movement

Once pain eases:

  • Try ankle mobility (like tracing the alphabet with your toes)
  • Begin eccentric heel drops—stand on a step, rise with both feet, lower slowly on the affected side. This is gold for tendon healing.

Start with both feet. Build to single-leg. Aim for 3×15, once or twice a day. Don’t push through sharp pain, but mild discomfort is okay.

You can also try:

  • Calf raises
  • Calf raises with a small ball between your heels (activates inner calf and stabilizers)

Coming Back to Running

Use the “pain scale” rule:

  • Pain during a run = 0–2 out of 10? Probably okay.
  • Worse the next morning? Not okay.
  • Pain during running goes above a 3? Shut it down.

Think of tendon pain like a blinking check engine light. You might be fine, but ignore it, and you’ll stall out hard.

What If It Won’t Go Away?

Still limping after doing all the right things? Time to call in the pros:

  • Heel lifts to reduce tendon strain
  • Night splints
  • PRP injections (that’s Platelet-Rich Plasma)
  • In worst-case scenarios? Surgery. But that’s rare.

Most runners recover just fine with rehab and smart adjustments. Mild cases = a few weeks. Chronic cases? 2–3 months. Tendons are stubborn, but they heal. You just gotta give them the time.

Don’t rush it. Rehab like it matters—because it does.

3. Stress Fractures

When “Just a Little Pain” Becomes a Full Stop

Every runner’s nightmare: the stress fracture.

One day it’s a dull ache in your ankle or foot. A few runs later, it’s stabbing pain that won’t let up—even when you’re just walking to the kitchen.

Unlike a sprain, this doesn’t come from a fall or twist. It builds up quietly, then boom—sidelined for months.

How to Know It’s a Stress Fracture

Here’s the pattern:

  • Pain is localized—you can point to the spot
  • Pain increases with impact
  • You might feel it even when walking
  • Tender to the touch
  • Maybe mild swelling

If you’ve been pushing mileage, upping intensity, or skipping rest days, this pain could be your bone saying: “I’m done.”

High-Risk Bones

Stress fractures often hit:

  • Tibia (shinbone)
  • Fibula (outside of lower leg near the ankle)
  • Talus (deep in the ankle)
  • Metatarsals (top of the foot)

Common Triggers

  • Big mileage spikes
  • Poor fueling (especially low calories, calcium, or vitamin D)
  • Menstrual issues in female athletes (RED-S / female athlete triad)
  • Repetitive hard surface running
  • Worn-out shoes or bad mechanics

This injury doesn’t show up overnight. It builds—then breaks.

Real Story, Real Regret

A runner I know trained through ankle pain thinking it was a sore tendon. She finished her marathon. Then came the limping. Turns out? Fibular stress fracture. What could’ve been a 6–8 week break turned into 14 weeks in a boot and zero running.

Her words: “Next time I feel that kind of pain before a race, I’m pulling the plug.”

Lesson? Trust your gut—and your pain.

What to Do if You Suspect One

  • Stop running. Immediately.
  • Get checked—X-ray or MRI (many don’t show up on X-ray early on)
  • Follow the timeline—most heal in 6–8 weeks with rest
  • Fuel up—focus on protein, calcium, vitamin D
  • Cross-train smart—ask your doc what’s safe (bike, pool, elliptical)

Don’t run through it. Don’t bargain with it. Stress fractures are one of those injuries where “toughing it out” backfires hard.

Suspect a Stress Fracture? Stop. Running. Now.

Yeah, I know—you’re tough. But if there’s even a chance you’ve got a stress fracture, it’s time to shut it down. No “just one more run.” No testing it. Because here’s the brutal truth: run through a stress fracture, and you could turn a hairline crack into a full-blown break. The kind that needs a surgeon to fix.

Get it checked. Period. A doc will likely order an X-ray, MRI, or bone scan—because stress fractures don’t always show up on X-rays early on. They sneak in, and by the time you feel them, they’ve already made trouble.

What Healing Looks Like:

  • 6–8 weeks of no running or impact. Let the bone knit itself back together.
  • Boots or crutches may be needed—depends on where the fracture is.
  • Something like a fibula fracture? Might just need rest and a brace.
  • Talus or tibia? You’ll likely need to stay off it completely.

And don’t forget your nutrition. Calcium and vitamin D need to be dialed in—ask your doc if supplements make sense. Bones can’t heal without the right building blocks.

Can You Cross-Train?

Yes, but only if it’s pain-free. Deep water running, swimming, or maybe even cycling (if and only if it doesn’t stress the injured area) can keep your cardio up.

But don’t assume every cross-training option is safe. For example, even cycling might irritate a foot fracture if pushing on the pedals hurts. When in doubt, ask your doc. This is one of those “don’t guess” situations.

Why Did It Happen?

Stress fractures are usually a result of:

  • Too much, too soon (ramping up mileage without enough recovery)
  • Poor nutrition
  • Hormonal issues or low bone density
  • Bad footwear or mechanics

So yes, heal first—but don’t skip the post-mortem. Figure out why it happened. And fix it. Or you’ll be right back here next season.

And once it heals? Go slow. Most return-to-run plans start with short walk/run intervals. Think boring 3-minute jogs at first. That’s okay. The goal isn’t to come back fast. It’s to come back for good.

The One-Legged Rule of Thumb

  • “If you’re limping, get imaging.”

If you’re walking funny, if it hurts at rest, if it wakes you up at night—get it looked at. You don’t mess with bone pain. It’ll mess back.

4. Tarsal Tunnel Syndrome: That Weird Nerve Pain in Your Ankle

Ever feel burning, tingling, or numbness creeping into your heel, arch, or toes—especially mid-run? Like your foot’s falling asleep in a painful way? That’s not plantar fasciitis. That could be Tarsal Tunnel Syndrome (TTS).

It’s basically carpal tunnel… in your ankle.

There’s a tiny space on the inside of your ankle called the tarsal tunnel. Nerves, tendons, and vessels run through it. When that space gets tight or inflamed, the posterior tibial nerve gets squeezed—and starts throwing a fit.

Symptoms to Watch For

  • Burning or tingling near your arch or heel
  • Weird numbness that lingers
  • Vague aching that gets worse after long runs
  • Foot feels “off” or “electrical” but not in a sharp way

It’s sneaky. Some runners mistake it for plantar fasciitis or just a cranky arch. But this is nerve stuff—not tendon or bone. And if you keep running through it? It’ll just get worse. Way worse.

What Causes It?

  • Overpronation (foot rolling inward too much)
  • Flat feet or collapsing arches
  • Swelling from a nearby tendon injury or old sprain
  • Tight calves or ankle structures
  • Rarely: bone spurs, cysts, or even systemic issues like arthritis or diabetes

Bottom line: if your foot mechanics are off, your nerve takes the hit.

Treatment: Relieve the Pressure

  • Support your arch – Get into stability shoes if you’re overpronating. Add an orthotic or arch support insert. The goal: stop that inward collapse so the nerve isn’t getting crushed with every step.
  • Back off running – At least for now. Don’t run through nerve pain. That burning and tingling? Your body waving a red flag.
  • Reduce inflammation – Ice the area to shrink swelling. NSAIDs can help in the short term, but they won’t fix a mechanical issue.

Still hurting? See a doc or podiatrist. They might try a corticosteroid injection into the tunnel. Worst-case scenario: surgery to release the nerve—but that’s rare.

Bonus Tips

  • Work on calf mobility—tight calves can tug on structures around the nerve
  • Compression socks might help reduce fluid build-up
  • Cross-train with low-impact stuff like swimming or cycling (if it doesn’t trigger symptoms)

Be patient—nerve stuff heals slow. If you rush it, it’ll just bounce back louder.


How to Treat Running-Related Ankle Pain (Step-by-Step)

Let’s say the damage is done and you’re hurting. What now? Time to go into fix-it mode.

Step 1: Immediate First Aid – R.I.C.E.

Classic protocol still works. Hit it hard for the first 48 hours.

R – Rest
Get off it. That doesn’t mean lie in bed for three days. But avoid loading the ankle. If it’s bad, maybe crutches for a day or two.

I – Ice
Throw some cold on it. 15–20 minutes at a time, 3–4 times a day. Bag of frozen peas works just fine. Cold numbs the pain and tamps down swelling.

C – Compression
Wrap it. Elastic bandage, compression sleeve, or KT tape—whatever gives support without cutting off circulation. Keeps the swelling in check and reminds you not to push it.

E – Elevation
Kick your foot up above your heart. Lay back, prop it on a pillow, let gravity help. Especially useful early on when swelling’s at its worst.

Extra Notes:

  • Don’t switch to heat too early—only after the swelling is gone.
  • Kinesio tape can be helpful if you know how to apply it (or get a PT to do it).
  • If walking hurts, don’t run. That’s not toughness—it’s self-sabotage.

Getting Back to Running (Without Screwing It Up)

So you’ve rested, done your rehab homework, and your ankle finally feels decent. Awesome. But before you sprint back into your old routine like nothing happened—pause. I’ve seen too many runners rush this and wind up back at square one.

Start slow. Think run-walk, not tempo runs.

Your first outing back? Try something like: jog 1 minute, walk 2 minutes, repeat for 10–15 minutes. See how the ankle feels that day—and more importantly, the next day.

If it’s all clear (no new pain, just a little stiffness), next run might look like 2 minutes running, 2 walking for 20 minutes. Then 5 run / 1 walk. You get the picture.

Take it one step at a time. Only bump one variable at a time—either the total time or how long you run between walks. Not both.

Stick to flat, predictable surfaces early on. I’m talking treadmill, smooth road, or track. Save the rocky trails and hills for later—especially if you’ve had Achilles or ligament issues.

Hills = more strain. And leave the speedwork out of the picture for now. All your early miles should be at a pace where you could hold a conversation.

A lot of coaches (myself included) use the 50% rule: start at half of your pre-injury weekly mileage during week one. If that feels good? Bump it by 10–15% per week. If not? Back off.

Some mild discomfort early on is totally normal—as long as it’s low-level (think 1–2 out of 10) and doesn’t get worse over time.

But if you’re limping, gritting your teeth, or waking up swollen the next morning? You’re not “toughing it out”—you’re risking a setback. Take the hint and slow down.

Don’t Just Rehab the Ankle—Fix the Whole Chain

Here’s something runners don’t realize until it’s too late: your ankle might be the site of the pain, but the problem could be coming from upstream. Weak hips, sloppy core control, lazy glutes—they all mess with your form and pile stress on your lower legs.

Use this downtime to shore up the rest of your body.

Stuff like clamshells, glute bridges, side planks, single-leg squats—yeah, it’s not glamorous, but it’s how you build better mechanics and run smoother.

If your hip stabilizers are weak, your form falls apart as you fatigue, which means your foot collapses inward and your ankle pays the price.

Want to run pain-free long-term? Treat your core and glutes like part of your “ankle plan.” I’ve seen runners come back from ankle injuries stronger than they were before—because rehab forced them to address all the weak links they were ignoring.

How to Not End Up Injured Again

Let’s be real—rehab sucks. You don’t want to go through that again. Here’s how to make your ankles more bulletproof moving forward.

Strengthen the Whole Support Squad

Ankles don’t do it alone. They rely on solid backup from your calves, peroneals, tibialis posterior, and even the tiny muscles in your feet. Weakness in any of these = disaster waiting to happen.

Here’s the core crew:

  • Calves (Gastrocnemius & Soleus): Handle your push-off. Do both straight-leg and bent-knee calf raises a few times a week. Strong calves = stronger Achilles = less overload on your ankle.
  • Peroneals: Run along the outside of your lower leg. They help stop ankle rolls. Hit them with lateral band walks, resisted eversion, and side-to-side hops. Research shows weak peroneals = higher sprain risk. Don’t skip this one.
  • Tibialis Posterior: Deep muscle on the inside of your ankle. Controls pronation and keeps your arch lifted. Try heel raises with a ball between your heels or banded inversion. This guy’s a silent MVP—ignore it, and you’ll be limping later.

And don’t forget your foot muscles. Towel curls, toe spreads, barefoot balance work—it’s all part of building a stable foundation. Strong feet = better shock absorption = less ankle strain.

Honestly? I coach most of my runners to include 1–2 ankle-focused strength drills in their warm-up or cooldown year-round. Keeps things tight without adding big time commitments.

Train Your Balance (Like, Every Day)

You don’t need to be on a BOSU ball at the gym for an hour. Start simple.

  • Stand on one foot while brushing your teeth.
  • Add hop-to-balance drills post-run.
  • Do lateral skater hops or yoga balance poses like tree or warrior III.

Balance training isn’t just for rehab—it prevents you from needing it again.

Studies show athletes who train balance have way fewer ankle sprains. It teaches your body how to catch itself when things get wobbly.

Try a 5-minute ankle circuit after your run:

  • Single-leg stands
  • Single-leg hops in place
  • Lateral skaters
  • Slow controlled toe walks

Fun, simple, and effective.

Don’t Sleep on Your Shoes

Shoes matter. No magic pair will prevent every injury, but the wrong ones can absolutely make things worse.

What to look for:

  • If you’ve got low arches or overpronation, try stability shoes or custom inserts. They can prevent your foot from collapsing inward too much and straining the ankle.
  • Got high, stiff arches? You probably need more cushioning to absorb shock.
  • Most important? A study showed runners who picked shoes based on what felt best had fewer injuries. Trust your body here.

And if something feels off—too tight, too sloppy, rubbing your ankles raw—fix it. Hit up a proper running store, get your gait checked, and find what works.

Ankle Pain: When to Push, When to Pivot

Runners are tough. Sometimes too tough for our own good. We push through soreness, ignore aches, and treat any deviation from the plan like failure. But here’s the truth:

Running on a sore ankle isn’t always weakness—it’s strategy.

The key is knowing the difference between manageable discomfort and a full-blown red flag. A little soreness after a tough run? Maybe you can keep moving, slowly and mindfully. But running through pain that changes your stride or gets worse every mile? That’s flirting with disaster.

As I always say: You don’t have to stop running when something hurts—but you do have to train smarter.

Mental Flexibility: Runners Need It

Type-A runners hate altering the plan. I get it. But that same mindset that drives PRs can also drive injuries.

There are times when the bravest, toughest, most disciplined thing you can do is stop—or modify your training. Think big picture: it’s better to line up at your race slightly undertrained but healthy than to arrive broken because you insisted on hitting every single workout.

So don’t see adjusting your training as a step back. See it as a smart pivot to stay in the game.

What Ankle Pain Is Telling You (And Why You Should Listen)

Your ankles might seem like background players in the running world, but trust me—they carry the show. Literally. And when they start talking, you better pay attention.

Most ankle pain isn’t random. It’s feedback. It’s your body saying:

  • “Hey, those shoes are shot.”
  • “Your stabilizers are weak.”
  • “You ramped up mileage too fast.”
  • “This terrain is wrecking me.”

Ignore those whispers, and they turn into shouts. Don’t wait until it’s a full-blown injury to respect the warning signs.

Sore vs. Injured: Read the Signs

You can run with a mildly sore ankle—if:

  • The pain is low-grade
  • It doesn’t change your stride
  • It improves as you warm up
  • You’re modifying pace, volume, and terrain

You should not run if:

  • Pain sharpens or worsens during your run
  • Your form is compensating
  • Swelling or instability is increasing
  • You’re limping or avoiding load

This isn’t about being soft—it’s about being smart.

The Contrarian Truth: Pain Isn’t the Enemy

Pain is data. It’s the check engine light on your dashboard.

If you respond early—rest, roll, rehab, adjust—you often avoid major setbacks. But if you ignore it, you risk breakdowns that’ll cost you way more time and momentum.

Every injured runner I know has learned this lesson the hard way, myself included. I’ve run through little twinges that turned into tendonitis, and I’ve also made smart adjustments that helped me dodge injuries entirely.

Trust me, the injury you prevent is a win—even if no one else sees it.

Treat Your Ankles Like Gold

Here’s how to keep them strong and happy:

  • Warm them up: Ankle circles, balance drills, hops—prime them before pounding pavement.
  • Strengthen stabilizers: Do your single-leg work, resistance band drills, and foot strengthening.
  • Rotate your shoes: And toss them when they’re past their mileage.
  • Choose your surfaces wisely: Avoid cambered roads or sketchy trails when sore.
  • Listen and adjust: That hill workout can wait. So can that extra-long long run.

Your ankles will repay you with smoother strides and longer, injury-free training blocks.

Injuries Are Physical, But Also Mental

Let’s be real: injuries suck. They mess with your mind as much as your body.

If you’re sidelined (or close to it), stay positive. Use that downtime to fix weaknesses, cross-train, work on mobility. I’ve seen runners come back stronger and more focused after addressing an ankle issue early.

It’s not a step backward—it’s a strategic regroup.

Share Your Lessons

Got a go-to ankle drill that saved your training cycle? A shoe that helped stabilize your stride? A brutal mistake you swore you’d never repeat?

Share it.

We’re a community, and your story might be exactly what another runner needs to hear to avoid their own injury spiral.

Final Word: Your Ankles Are Talking—Are You Listening?

You don’t have to fear every ache—but you do have to respect what your body’s telling you.

Tune in early. Train smart. And remember:

Tough runners don’t push through pain blindly. They adjust, adapt, and show up consistently. That’s what builds longevity.

Here’s to strong ankles, smarter decisions, and many smooth miles ahead.

Have you battled ankle pain during training? What helped the most in your recovery or prevention? Drop your tips or story below—your experience might save another runner’s season.

Running with Bunions – When Running Meets Real Pain

running with a bunion

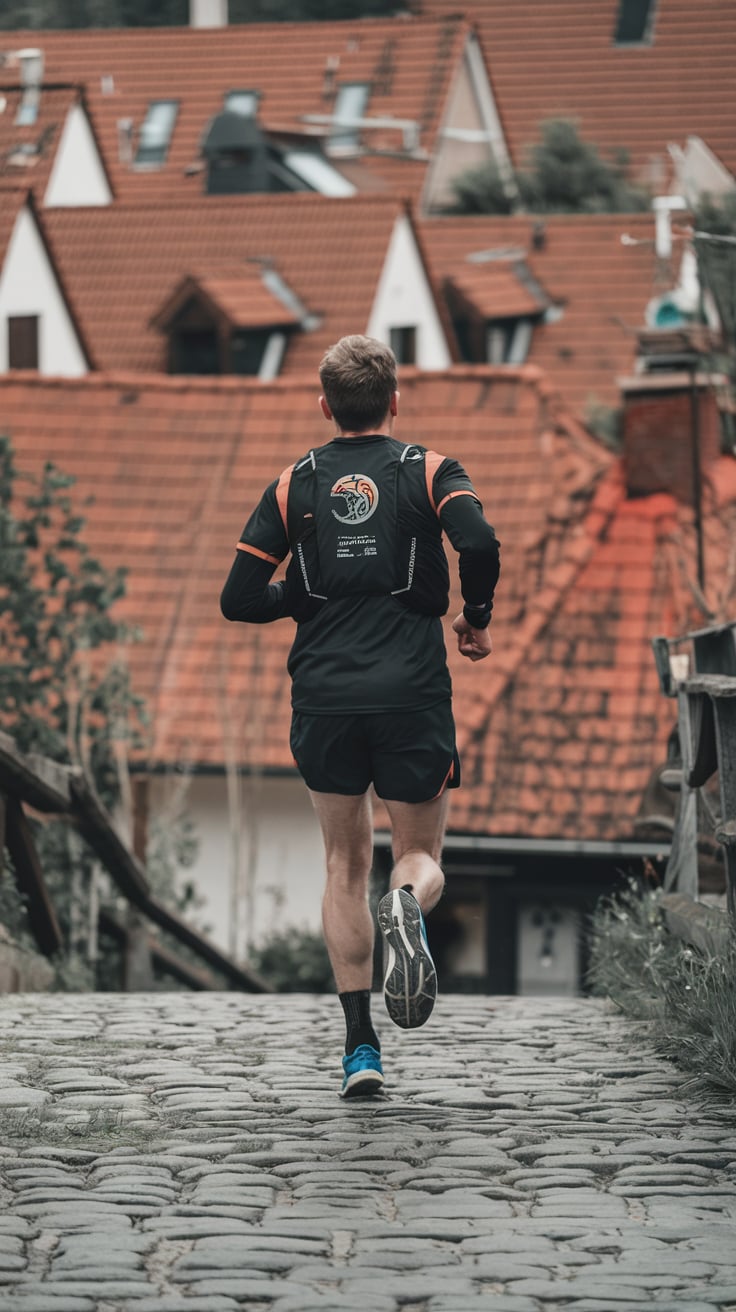
Mile 11. I was hobbling, gritting my teeth, and yeah—ripping my shoe off mid-race like a madman. My bunion was on fire, and I’d hit my limit. If you’ve ever tried pushing through a long run with a bunion screaming at you, you know it’s not just “foot pain.” It’s war.

But here’s the deal: you don’t have to let bunions bench you. This guide is for runners who still want to chase miles, even when their feet have other plans. I’m not gonna sugarcoat it—bunions suck. But if you’re smart about it, you can manage the pain, stay strong, and keep logging those miles.

Ignoring bunion pain doesn’t make you a tougher runner—it just makes the injury list longer. Let’s get ahead of this thing, so you can run smarter, not sidelined.

What’s a Bunion Anyway (And Why Should Runners Care)?

So what even is this little devil? A bunion—officially called hallux valgus—is that bony bump at the base of your big toe. It happens when the first metatarsal bone drifts outward and the big toe starts leaning in like it’s trying to make friends with its neighbors.

For runners, this matters. A lot. That joint—your first MTP—is a powerhouse during toe-off. When it’s outta whack? Every step starts to feel like you’re rolling your foot over a sharp pebble.

And bunions aren’t rare either. About 23% of adults under 65 have one. For folks over 65, it jumps to 36%. These things don’t care how fast you are—they just show up and cause problems.

A lot of runners start unconsciously shifting their stride to dodge the pain. Maybe you start landing on the outer edge of your foot, or limping without realizing it. Sounds harmless, right? Nope. That little adjustment can mess up everything—your knees, hips, even your lower back.

I’ve coached runners who ended up sidelined not from the bunion itself, but from the cascade of issues it started.

Like one foot doc put it: “You change your gait to protect that bump, and suddenly your knees are ticked off, your hips are mad, and your back is barking.”

Oh, and don’t forget bunionettes. Yeah, there’s more than one flavor. That’s a similar mess on the outside of your foot, under your pinky toe. Same fix-it tips apply—roomy shoes, toe protectors, and foot-strength work.

Can You Still Run with a Bunion? Heck Yes—But Run Smart

Short answer? Yep. You can absolutely run with a bunion. But it’s gotta be on your terms—not the bunion’s.

For minor bunions that just get cranky every now and then, a few simple tweaks can keep you cruising. I’ve seen plenty of folks who treat their bunion like an annoying teammate—just something to manage. The right shoes, toe spacers, maybe some tape, and they’re back to business.

One runner I coached has had bunions since high school. She still crushes 5Ks—because she ditched narrow shoes, uses arch supports, and doesn’t try to look “cute” on race day. Function over fashion, always.

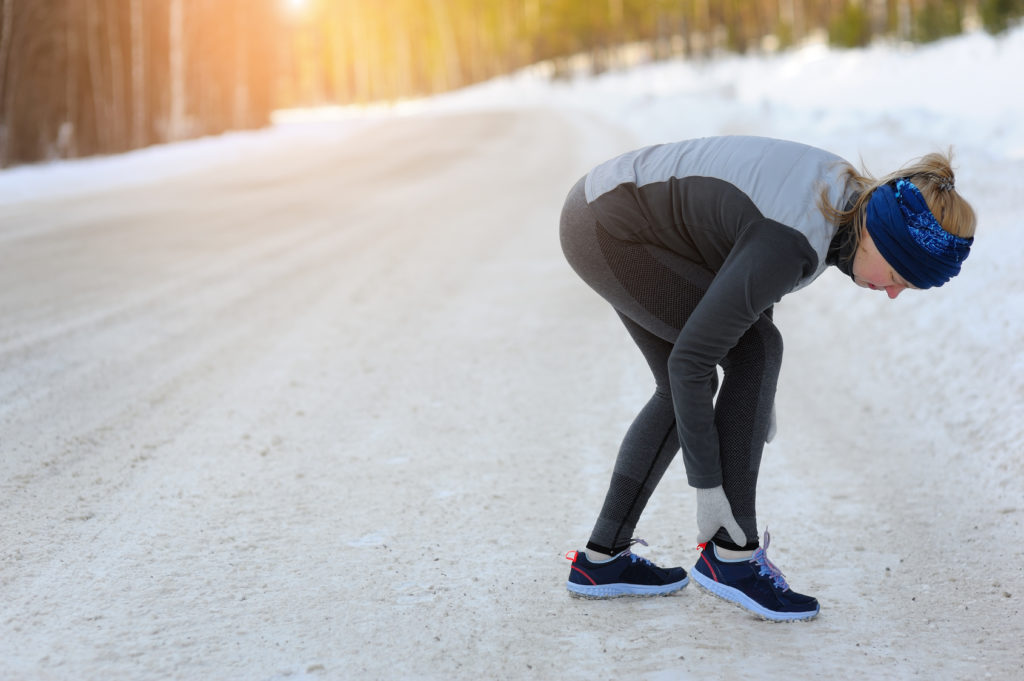
But if your bunion’s getting worse? If it feels like someone’s stabbing your toe every time you push off? That’s your body waving a big red flag. Ignoring it doesn’t earn you a medal—it earns you time off.

I remember one college runner who kept limping through runs. At first it was just a nag. Then it started messing with their form so bad, they were barely jogging. That bunion went from manageable to run-killing because they didn’t back off soon enough.

If you’re limping, swelling up after every run, or avoiding your usual pace? Don’t power through. That’s not being tough—that’s being reckless.

Run or Rest? Here’s Your Gut-Check Moment

Here’s a quick cheat sheet to help you decide if it’s time to run, rest, or reboot:

🟢 Mild ache or blister now and then?
You’re probably fine to keep running. Just be proactive. Check your shoes (wide toe box is king), toss in a spacer, maybe tape up. Keep tabs on how your foot feels during and after runs.

🟡 Pain mid-run, swelling after, or gait getting funky?
Time to pump the brakes. You don’t have to shut it all down, but cut back on mileage, skip the speed work, and maybe add in some cross-training until things cool off. This isn’t “normal runner stuff”—it’s your body asking for help.

🔴 Altering your stride, limping, or toe joint throbbing after every run?
That’s your body saying “enough.” This is when it’s smart to get checked out by a sports podiatrist. You don’t need perfect feet to run, but you’ve gotta protect the ones you’ve got.

I’ve seen runners bounce back strong just by giving themselves a short break and making smart adjustments. Long-term running wins come from playing the long game—not grinding through pain like a hero.

Surgery? We’ll get into that later. It’s not the boogeyman everyone makes it out to be. But for now, just know this: you’ve got options before going under the knife.

Why Runners Get Bunions (Let’s Be Real About It)

Alright, let’s talk bunions.

Yeah, those nasty bumps on the side of your big toe joint that make your shoes feel like torture devices. Bunions suck. But runners? We get them more than most, and there’s usually more than one reason why. Let’s break it down without sugarcoating it.

1. Born With It? Welcome to the Club

First off, blame your parents (lovingly). If your mom or dad had bunions, odds are you’re set up for the same fun. It’s all about how your foot’s built—flat feet, loose joints, all that biomechanical jazz that makes your forefoot a wobbly mess.

If you’re a runner who overpronates (aka your foot rolls in too much), you’re throwing extra pressure on the inner edge of your foot. That big toe joint—the first MTP joint—takes a pounding. One step at a time, it starts drifting sideways like a busted shopping cart wheel.

The Journal of Strength & Conditioning Research even backs this up: overpronation can gradually deform that joint. And once that starts? The bunion train’s already left the station.

I’ve coached plenty of runners with flat feet who kept wondering why their big toe looked like it was trying to escape. It’s not rocket science—it’s mechanics.

Your move: Know your foot type. If it’s sketchy, take it seriously.

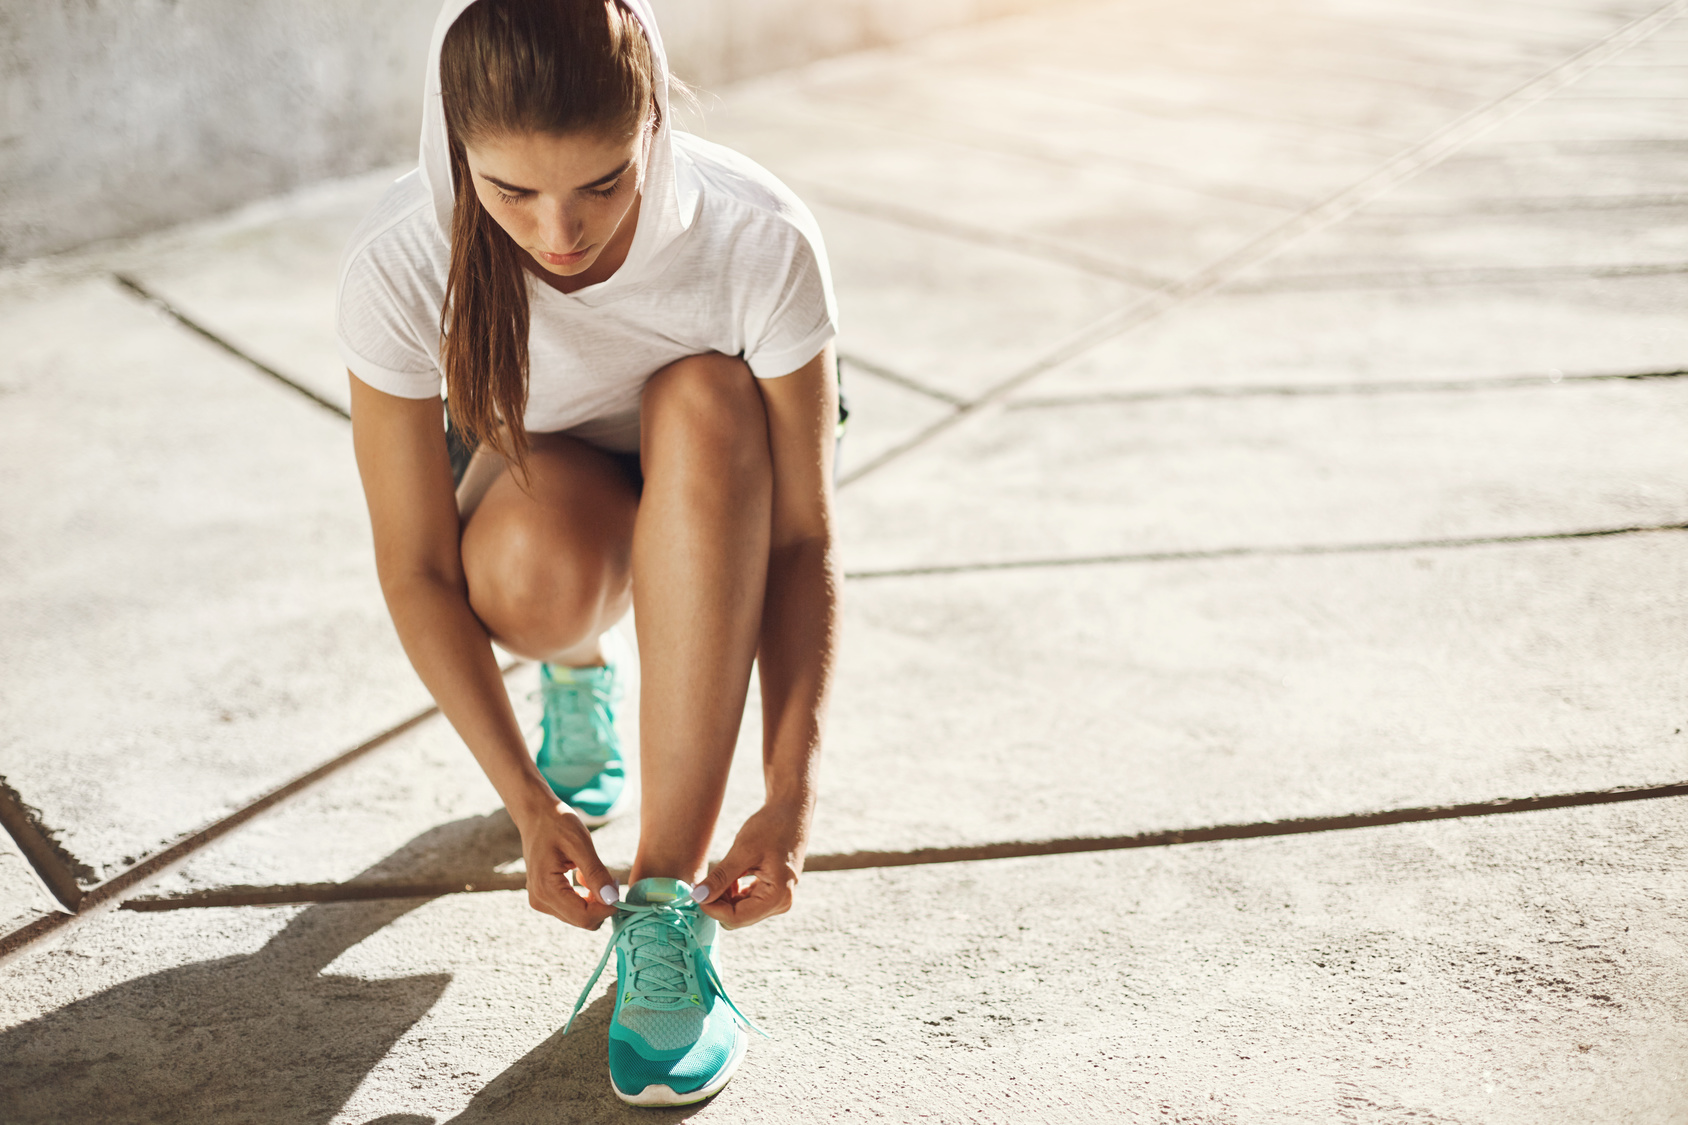
2. Crappy Shoes: The Silent Bunion Builders

Here’s the truth—shoes alone don’t “cause” bunions. But they can take a small issue and throw gasoline on it.

According to Yale Medicine, narrow shoes, pointy toes, and high heels just crank up the pressure. Everyday dress shoes? Offenders. Heels? Don’t even get me started.

But for runners, it’s often racing flats or snug trainers that do the damage. If your big toe is getting shoved inward every step, that bunion bump is taking the hit.

I had a runner come to me wondering why her bunion flared up every time she raced. She was wearing narrow shoes with a tight toe box—classic mistake. You’ve got to let that toe breathe, or else.

And yep, bunions show up more in women. Not a coincidence. Narrow shoes, more flexible joints, fashion torture devices—it all adds up.

Ask yourself: Are your shoes helping or hurting?

3. Running Ain’t the Cause—But It’ll Speed Things Up

Here’s the deal: running doesn’t cause bunions from thin air. But if you’re already predisposed—bad foot mechanics, bad shoes, or just bad luck—then every mile adds fuel to the fire.

Each foot strike hits the forefoot. If your alignment’s even slightly off? Thousands of steps will yank that big toe further out of whack.

One study on foot and ankle issues called out repetitive activities like jogging as a trigger for bunion development when the joint is already vulnerable.

I’ve seen it play out: runners who come in with a small bump and a big training load. They don’t tweak anything—no shoe changes, no support—and a few months later, it’s way worse.

And let’s not forget the classic irritation dance: bunion rubs inside your shoe → inflammation → swelling → more misalignment. It’s a vicious cycle.

Lesson: Running isn’t the villain—it’s just the accelerant.

4. Bonus Culprits: Hormones, Age, and Life on Your Feet

Other stuff piles on, too.

Women deal with looser ligaments thanks to biology (and again, heels). Age makes it worse—more miles on the feet, more wear and tear.

Some folks with conditions like rheumatoid arthritis or generalized ligament laxity? Yeah, they’re playing this game on hard mode.

Even pregnancy can stir the pot. The hormonal changes can loosen up your foot’s structure and—bam—suddenly that mild bunion’s growing up fast.

Oh, and shoutout to all the runners who stand all day for work—nurses, teachers, retail warriors—you’ve got double duty on those feet, which means bunions can worsen faster.

So… Does Running Cause Bunions?

Not on its own. Think of it like this: if your foot mechanics or shoes have already lit the match, running just adds wind.

If you’ve got perfect alignment, wear roomy shoes, and run smart? You could crank out 50 miles a week without ever seeing a bunion. But if you’ve already got one forming—even a baby one—heavy mileage is like hitting the gas.

One sports podiatrist put it best: runners who “pound their feet every day” in bad shoes or without support see bunions snowball way faster than they should.

Real Talk Wrap-Up

Here’s the bottom line, plain and simple:

  • Bunions are mostly bad luck (genetics).
  • But bad shoes and high-impact running? That’s the fuel.
  • You can’t change your DNA. But you sure as hell can fix your footwear and training habits.

Trust me—bunion management isn’t about quitting. It’s about running smarter.

Next up: I’ll walk you through how to keep running strong, even if you’ve got a bunion hitching a ride. We’re talking smart shoes, toe spacers, tape hacks, and tweaks that’ll keep you moving without making the bump worse.

Tape It Up Like You Mean It: Quick Fixes for Bunion Pain

Alright, let’s talk tape—one of the oldest tricks in the runner’s survival kit. When that bunion starts flaring up mid-run, you don’t need some fancy product—you just need to slap some tape on it and go.

Here’s the deal: that bump on your foot? It loves to rub the wrong way inside your shoe. The right tape job? That’s your shield. I’ve seen runners go from limping to cruising just by taping smart.

My go-to? Sports tape or kinesiology tape. Wrap it right over the bunion before your sock goes on. Make sure it sticks to the skin around it—not just the bump—so it stays put. Some old-school road warriors swear by duct tape. Yeah, duct tape. One buddy of mine said, “Band-aids fell off as soon as I started sweating. Duct tape? Stayed on the whole marathon.” No joke.

You can also grab moleskin or those donut-shaped pads from the pharmacy. Cut a hole in the center, slap it around the bunion, and boom—pressure offloaded. Your shoe hits the pad, not your foot. Clean. Simple. Game-changer.

Blister problems? Tape might be your best defense. I’ve had clients who couldn’t fix bunion blisters with double socks or bandages—but a decent tape job? No more hot spots.

And if you’re into the techy side of taping, some folks use KT tape to realign the toe a bit—like putting a mini splint on the big guy. One runner I worked with said her doc showed her how to “buddy tape” the big toe to its neighbor with a spacer in between. It looked weird, but man, she said it eased the pressure on long runs.

Want to see how to do it right? YouTube’s your coach—search “bunion taping for runners.” One runner even tapes her toe in position and leaves it on for days. Says it reduces joint stiffness. I tried it. It’s legit.

Hot tip: After taping, wear socks that don’t mess with the tape job. Thin toe socks like Injinji can help keep friction low—especially between the toes if you’re running taped up.

And for long runs? Add a layer. Some trail runners even stick a piece of foam or gel pad over the bunion for bonus cushion. Try that out on a shorter jog before race day though—no surprises when it counts.

Bottom line: tape is about buying your foot some breathing room. One runner told me, “When I tape, my foot relaxes. The pain isn’t gone, but it’s quiet. And that’s enough to finish strong.”

Your move: What’s your taping trick? Tried duct tape? Foam? What worked—or totally failed—for your feet? Let’s hear it.

Toe Spacers: Not Magic, But They Help

Okay, toe spacers. You’ve seen them, probably tried them—or at least wondered if they actually do anything. Let’s clear it up.

Those little silicone dudes? They aren’t gonna “correct” a bunion. That ship sailed when the toe bone started moving. But they can give you some real relief, especially if your toes are stacking or rubbing.

Here’s the real talk: research shows spacers can ease pain and improve alignment during your run—even if they don’t actually change the angle of the bunion. One study found runners had less pain using toe splints during runs—even though the bone didn’t move. Another study found toe spacer insoles beat out night splints when it came to pain relief. So yeah, they work—just not in a bone-fixing kind of way.

Now, can you run with them? Depends on the spacer. The squishy gel ones that fit between your big toe and second toe are usually low-profile enough to slide into your shoes. There’s a brand called Correct Toes that a running podiatrist designed specifically for this. Smart guy. A lot of runners start wearing them around the house or in casual shoes to ease into it.

I’ve had athletes improvise too—one gal once shoved a wine cork between her toes when she lost her spacer. She laughed, but said it actually helped ease her post-run soreness. Use what works, right?

If running with them feels weird or they keep sliding around, no big deal. Pop them on after your run. I know runners who swear by the “spacer recovery routine”—soon as they get home, shoes off, spacers on. Says it helps undo the tight squeeze from miles of compression.

Also worth a look: Bunion sleeves. They go over the joint and give you a bit of cushioning. Some are slim enough to run in, too. And then you’ve got night splints—big, bulky contraptions that hold your toe out straight while you sleep. They aren’t gonna cure you, but they can help maintain flexibility and stop your toe from curling in more.

A Healthline review summed it up best: these devices help with pain, not correction. But hey, pain relief? I’ll take that every day of the week if it keeps me running.

Toe Spacers: Do They Actually Work?

Let’s talk about toe spacers. Yeah, those weird rubbery things that look like mini torture devices for your feet. But don’t knock ’em till you’ve tried ’em — they’ve got a solid rep in the running world.

I remember chatting in a runners’ group about foot pain — bunions, especially. It blew up. Dozens of runners jumped in to say toe spacers saved their feet. One woman swore by them during a brutal bunion flare-up — said she wore them all over the house, and the relief was real. Another runner? She was all in on Correct Toes — they were designed by a former bunion surgeon who got fed up with quick fixes and made something that actually worked.

Now here’s the thing: you don’t just slap them on and go for a 10K. Your feet need time to adjust. Think of it like breaking in new shoes. Start small — wear them around the house for a few minutes a day, then gradually build up. A runner in her 40s told me she wore Yoga Toes for over two hours a day — for a year. Paired them with wide shoes and solid insoles, and it kept the pain tolerable until she finally went in for surgery.

Bottom line? Toe spacers won’t magically fix a bunion. But if they buy you more pain-free miles, that’s a huge win. A lot of runners mix it up: tape during runs, spacers for recovery. It’s trial and error. Find what keeps your foot happiest and roll with it.

What about you? Ever tried spacers? What worked (or didn’t)? Let’s hear it.

Train Smarter, Not Just Harder

Alright, gear’s only part of the fix. If you’ve got a bunion and still want to run (been there), you’ve gotta tweak your routine a bit. Not talking full-on couch mode — just smart adjustments to keep you in the game.

1. Run on Softer Ground

Hard pavement is brutal when you’ve got foot issues. That shock goes straight through your forefoot — aka bunion zone. Trails, grass, even a treadmill with decent cushioning are way easier on your joints. I’ve had clients swap just two road runs a week for trail work and they noticed a difference within days.

Also, watch out for roads with a tilt (cambered shoulders). Running the same direction on a slanted road every day? That’s a recipe for aggravating one foot more than the other. Switch it up, run both sides, or find a flatter path.

2. Shorten Your Stride

This one’s huge. Overstriding jacks up the pressure on your big toe at push-off. Take quicker, shorter steps instead. Picture an easy, high-cadence jog — it naturally lightens the load on your feet.

And it’s not just runner lore — the Journal of Strength & Conditioning Research and Runner’s World both back this up. Higher cadence = less stress on your toes and joints. Next run, try it. Light, quick steps. Feel the difference.

3. Speed & Hills? Maybe Not Right Now

Speed intervals, sprints, hill repeats — all put your forefoot to work. If you feel your bunion screaming after track workouts, it might be time to scale it back. Switch to tempo runs, fartleks, or hit the bike for your hard days.

And don’t sleep on downhills — they sneak up on you. That braking force on steep descents? Straight to your toes. Stick to flatter or gently rolling routes till your foot chills out.

4. Cross-Train Like a Pro

If running is too painful some days, don’t just grit your teeth and suffer through. Grab a bike, jump in the pool, hit the elliptical. Keep that engine running while your foot recovers.

Rest days matter too. Use them. Ice your bunion, do some foot stretches, and let the swelling die down. I had a runner who took two weeks off, mixed in some PT, and came back basically pain-free. Worth it.

5. Pain = Info, Not a Challenge

This one’s hard for us runners to hear: don’t push through bunion pain. It’s not the good kind. It doesn’t toughen you up — it sidelines you. If your toe starts to bark mid-run, cut it short, tape it up, and reassess. Don’t run yourself into a forced layoff.

As someone wisely said in a forum: if it hurts every time you run, go see a pro. Don’t be stubborn.

You Can Still Crush Goals

You don’t need to give up your training dreams because of a bunion. I’ve seen runners nail marathon prep while dealing with foot pain. The secret? Be flexible. Tweak your runs. Sub in the bike. Ice often. And listen to your dang feet.

Training smart beats training hard — every time.

Foot Fix: Exercises That Actually Help with Bunions (Yes, Really)

Let’s get this straight from the start—foot exercises won’t magically straighten out a bunion like some Instagram miracle hack. That bump on your big toe? It’s bone, not Play-Doh. But here’s the good news: training the small muscles in your feet can still make a world of difference.

Stronger feet mean better alignment. Better alignment means less pain. And when the big toe can pull its weight (literally), everything downstream—your stride, your balance, your push-off—feels smoother. I’ve seen it with runners I coach, and I’ve felt it myself.

Ready to put your feet through their paces? Here’s your foot gym routine:

Toe Curls with a Towel

Old-school, but still golden.

  • Lay a towel flat on the floor.
  • Sit down barefoot and use your toes to claw it toward you, then push it back out.
  • Do 2–3 sets of 10 reps per foot.

What’s happening here? You’re working your foot’s intrinsic muscles—the little guys that don’t get much love but are crucial for toe control. When those get stronger, the bunion joint isn’t doing all the heavy lifting. You might just feel that dull ache dial down a notch.

💬 Mini coaching moment: I used to do these while brushing my teeth—habit stacking, baby.

Toe Spreads (AKA “Toe Yoga”)

Sounds chill, feels tough.

Try to spread your toes apart like you’re making a claw. Focus on moving your big toe away from the rest. Do this standing or sitting—whatever works.

This one targets the abductor hallucis—that’s the muscle that fights against the bunion’s inward pull. You’re retraining it to do its job. Do 10–15 reps, a few times a day. Think: desk break or TV time.

📣 Real talk: First time I tried it, my foot just stared back at me like “you want me to what now?” But after a couple weeks, the difference in toe control was night and day.

Marble Pickups

Turn your foot into a claw machine.

  • Drop 10 marbles (or coins or small rocks) on the floor.
  • One by one, pick them up with your toes and drop them in a cup.
  • Go for 10 per foot.

You’re working toe dexterity and flexor strength here. Translation? More stability and power during toe-off when you run. It also makes you feel weirdly accomplished for mastering a kids’ game.

💡 Try this: Challenge your kid or partner to a marble pickup race. Loser makes the post-run smoothie.

Calf Stretch & Ankle Mobility

Don’t skip this—it’s a bunion secret weapon.

Tight calves mess up your stride. When your ankles can’t flex well, your foot rolls in too much (hello, overpronation), which throws even more pressure onto that bunion joint.

Stretch those calves—straight-knee and bent-knee versions against a wall. Also throw in ankle circles and some shin rolling (foam roller or tennis ball works great).

🏃‍♂️ Runner insight: Loosening that lower leg chain helps keep your heel down longer, reduces awkward toe-off, and takes a load off the forefoot.

Big Toe Mobility Work

Stiff toe = cranky toe.

Use your hands to gently pull your big toe straight, then move it up and down. This keeps the joint from locking up.

Want more challenge? Loop a resistance band around the big toe, anchor it, and pull outward. This is resisted abduction—teaching the toe to stay in line. Even doing slow toe circles with your hand helps with mobility.

🧠 Pro tip from the Journal of Strength & Conditioning Research: More toe range of motion = better function = less pain.

Foot Doming (aka “Short Foot”)

Sounds weird, feels amazing.

Imagine pulling the ball of your foot toward your heel, but don’t curl your toes. You’re lifting your arch to create a little “dome.”

This one targets the deep foot stabilizers. Strong arch = better pressure distribution = less bunion stress. Try holding it for 5 seconds, then relax. Repeat a bunch.

🧱 Think of this as core training for your feet. Subtle, but mighty.

Make It Stick: The Bunion Game Plan

Do these 3–5 times a week. Treat them like you treat your warm-ups or foam rolling—non-negotiable. One podiatrist told me that building foot strength boosts balance and makes your feet work smarter, not harder. Totally tracks with what I’ve seen in runners, especially those dodging bunion surgery.

There’s even a runner in one of my groups who swears that toe spacers plus these exercises kept her bunion from worsening for years. She dodged the scalpel and still knocks out 10Ks like a champ.

Runner-to-Runner: Why This Matters

You’re not just easing pain here. You’re making your feet stronger, your push-off snappier, your stride smoother. One day you’ll run and realize, “Hey, my foot doesn’t feel like it’s arguing with me anymore.” That’s the win.

💬 What’s your mile pace feeling like lately? Are your feet helping or holding you back?
Drop a comment, tell me what you’re working on, and let’s trade foot battle stories.

Let your foot muscles do some heavy lifting—they’ve got more in them than you think. Keep at it. Progress happens toe by toe.

When to Think About Surgery (And What It Really Feels Like)

Alright, let’s get real. No one wants to talk surgery. It sounds drastic. But sometimes? You’ve tried the shoes, the inserts, the rest days, and that damn bunion still feels like it’s stabbing your foot with every step. If running’s become miserable—or you’re limping just walking to the fridge—it might be time to face the big decision: bunion surgery.

Here’s when I tell runners to seriously consider it:

  • That pain in your big toe joint just won’t quit—no matter how many orthotics, spacers, or “good shoes” you throw at it.
  • You’ve backed off running. Heck, maybe you’ve stopped altogether. And even walking still sucks.
  • The toe is drifting like a slow-motion train wreck—getting worse no matter how careful you’ve been.
  • You’ve got complications now: bursitis that won’t go away, arthritis setting in, maybe hammertoes joining the party.

And look, I get it—if you’re in your 20s or 30s, a lot of docs might say, “Wait it out.” Bunions can come back. But guess what? I’ve seen plenty of young runners get the surgery and bounce back better than ever. If your bunion is genetic and getting worse, it won’t just magically vanish. The real trick? Find a surgeon who gets runners—not just walkers—and understands your goal isn’t to stroll pain-free, it’s to crush miles again.

So What Happens in Surgery?

Bunionectomy sounds fancy, but at its core, it’s about putting your foot back in working order. They reposition bones, ligaments, tendons—whatever it takes to straighten that toe. There are a TON of different surgical methods (we’re talking 100+), but don’t stress. Your surgeon will pick what works for your foot.

For runners, they’ll usually aim to keep your joint moving and get you back on your feet fast. One of the go-to moves is something called a distal metatarsal osteotomy (fancy name for cutting and realigning the bone), sometimes with soft tissue tweaks.

And yeah, it sounds intense—but I’ve seen runners literally walk out of surgery in a boot.

I’m not kidding. One runner I coached? She was in a surgical shoe the same day, used pain meds for three days, and slipped into a wide running shoe by week four. No more pain. No comeback bunion. That’s not just hope—that’s modern technique. Stuff like lapiplasty and minimally invasive surgeries are changing the game. Don’t let your aunt’s horror story from 1992 scare you off.

What Recovery Really Looks Like

Let’s talk recovery. Every surgery’s different, but here’s what I’ve seen most runners go through:

  • Day 1: You’ll be rocking a post-op boot or stiff surgical shoe. Some people can put a little weight on it right away, depending on the procedure. Others need crutches or a knee scooter for a few weeks.
  • 2 Weeks In: Stitches usually come out around day 10–14. You’re still protecting the foot, maybe starting gentle mobility if the doc gives the green light.
  • 4–6 Weeks: This is when the magic starts. Bones start knitting together. You might ditch the boot and lace into a wide sneaker. PT usually kicks in now—gotta get that strength and range of motion back.
  • 8–12 Weeks: You’re on the comeback trail. Some runners start easing into jogging around this time. According to a sports podiatry source, you might even hop on an anti-gravity treadmill earlier if your doc says it’s cool. By three months, you could be running short stints again—just be smart about it.
  • 3–6+ Months: Time to rebuild your miles. The foot’s still getting stronger, but most runners are back to regular runs by this point. A full comeback—where the swelling’s gone and everything feels solid—can take up to a year. But most folks feel great long before that.

Real Runner Comebacks

I’ve seen it firsthand—and so have thousands of others.

One runner told me she was back at it by week nine, no regrets, and wished she’d done it sooner. Another was jogging again by month three, training smart, and gearing up for races by month five.

Sure, not every case is smooth. Some folks rush back and pay for it—scar tissue, stiffness, setbacks. One runner in her 20s told me she pushed too soon, skipped PT, and walked too much too early because of school. Her result? Some stiffness that lingered. She still runs, but she learned the hard way: respect the recovery.

Pick the Right Surgeon (And Ask the Right Questions)

If you’re thinking surgery, don’t just pick any doc from a Google search. You need someone who knows feet and understands athletes.

Ask them:

  • Have you worked with runners?
  • What procedure do you recommend for someone chasing half-marathons?

Sometimes, they’ll go with a slightly more aggressive fix to make sure it stays fixed. That might mean a few extra weeks on the bench, but hey—better that than a comeback bunion haunting you later.

My Real-World Coaching Tips for Running with Bunions

Look, I’ve coached runners with all kinds of foot quirks—some with bunions so gnarly they looked like they were growing a second big toe. But guess what? They still got their miles in. Bunions don’t have to bench you. You just gotta be smart about it. Here’s what’s worked for me and my runners—the kind of stuff you won’t always hear in a sterile doctor’s office.

Custom Lacing: Skip the Pain

You don’t need fancy inserts or space-age shoes right away. Start with your laces. Ever heard of the “bunion window”? It’s not a house thing—it’s a lacing trick. You skip an eyelet or two right over the bunion to ease off the pressure.

Some runners I’ve coached swear by lacing normally up to the last two holes, then crossing the laces underneath before tying. It lifts the shoe right off the bunion zone. Less pressure = less pain. Period.

I had one runner come back after trying this and say, “Coach, my foot stopped going numb mid-run!” A little tweak, big difference. Don’t overthink it—YouTube “bunion lacing” and you’ll be good in five minutes.

💬 What about you? How’s your lacing game? Ever tried this hack?

Sock Smarts: Your Toes Need Breathing Room

Yeah, socks matter. Toe socks (like the ones from Injinji) are lifesavers. They keep your toes from playing bumper cars inside your shoe—especially if your bunion’s pushing the big toe into its neighbor.

I’ve seen blisters the size of nickels because of this. One runner told me regular socks felt like a “vise grip.” Switched to toe socks, problem solved.

Also, ditch anything with seams right over the bunion. You want smooth, soft, and breathable. Some folks even stick bunion pads on their socks during long runs. Not a bad move.

Play around with sock thickness too. Thin for space, thick for padding—it all depends on how your shoes fit.

💬 What socks are working (or not working) for you right now?

Post-Run Foot TLC: Cool It Down, Stretch It Out

You iced your knees after long runs—why not your bunions? After pounding pavement, hit that bunion with ice for 10 minutes. Follow that with toe stretches or pop in some toe spacers while you sip your recovery shake.

One marathoner I worked with has a solid routine: finish the run, kick off shoes, pop on toe spacers and sandals, elevate the feet, ice while hydrating. Not glamorous, but her feet stay happy.

Keep those calluses trimmed, too. A pumice stone can work wonders. Dry, crusty bunion skin = blister central.

💬 Got a post-run ritual yet? Time to start one. Your feet deserve it.

Rotate Shoes & Change It Up

Different shoes hit your feet in different ways. If you’ve got more than one pair, rotate ’em. It spreads out the pressure and lets your feet breathe.

Same goes for orthotics—try switching between runs with and without them, if your doc gives the okay.

And when you’re not running? Ditch the heels or dress shoes. Go comfy. Supportive sandals, athletic shoes, or even barefoot at home (if it’s safe) are golden.

One runner told me ditching her everyday flats for cushy Hokas made more difference than any toe spacer.

💬 How many pairs are in your rotation? What’s your go-to?

Form Fixes: Run Smarter, Hurt Less

Good form = less pain. I always tell runners: aim for a midfoot strike and boost that cadence. Somewhere around 170–180 steps per minute is the sweet spot.

If you’re heel-slamming or toe-jamming every step, your bunion’s gonna scream. And if you overpronate? Get some stability shoes or orthotics—don’t mess around. Bunions already twist your foot. Overpronation just makes it worse.

Don’t forget: strong glutes and hips help your form. It’s like fixing a roof by reinforcing the foundation. Worth it.

💬 When’s the last time you checked your form or cadence?

Foot Massage = Foot Heaven

Grab a lacrosse ball or golf ball. Roll it under your foot for 2–5 minutes after a run. It loosens tension and gets blood flowing.

I like hitting the forefoot right under the bunion joint—feels like you’re unlocking your foot. You can also gently massage around the bunion. Don’t go Hulk on it—just enough to ease the tightness.

💡 Give this a try tonight. You’ll thank me tomorrow.

Be Smart on Trails

Trails are awesome. But if they’re super rocky or off-camber, they can jack up your toe alignment—especially the big toe. That’s bunion trouble waiting to happen.

Stick to smoother trails if you can. I’ve had runners switch sides on the track every mile to avoid always leaning into the curve on the same foot. Small stuff like that adds up.

💬 Trail runner? What terrain’s been bunion-friendly for you?

Slow Changes = Happy Feet

New shoes? New orthotics? Toe spacers? Ease in. Don’t go hammer out a 10-miler with brand-new gear. Your feet need time to adjust.

Same for bunion exercises. They’ll help long term, but the first week might feel like your foot hit the gym. That’s normal. Just build up.

💬 Trying something new? Start small and listen to your feet.

Pain ≠ Progress. Know When to Adjust

I’m all for pushing hard. But there’s a difference between that satisfying post-run soreness and sharp bunion pain. That pain? It’s your body saying, “Hey, fix this before it gets worse.”

Don’t ignore it. Work with it. Plenty of runners crush marathons with bunions—it’s all about managing them the smart way.

💬 Feeling that “bad pain”? Let’s talk fixes, not heroics.

Don’t Let a Bunion Steal Your Joy (or Your Miles)

Look, running with a bunion sucks. I won’t sugarcoat it. Some days it throbs like it’s got its own heartbeat. Some days you’re limping before you even lace up. And yeah, you might wonder if it’s even worth pushing through.

But here’s the truth: you’re still a runner. That lump on your foot? It doesn’t get to call the shots—you do.

You’ve got tools. Real tools. We’re talking shoes that don’t jam your toes, toe spacers that actually work, taping tricks that reduce pressure, strength moves to keep things aligned, and rest (yes, even rest) when your body demands it.

You’re not stuck. You’re adapting. You’re figuring out how to run smarter.

And you’re not alone. Plenty of runners have been there, limping around after a long run thinking, “That bunion might be the end of me.” But it wasn’t. It was just the beginning of learning how to listen to their body and take back control.

I’ve coached runners who avoided surgery just by changing up their daily habits—switching shoes, dialing in their foot strength, doing a little toe yoga in the evenings. One athlete in her 30s hasn’t felt foot pain in years because she stuck to a routine that worked. Another runner? He went ahead with the surgery—and came back stronger, smarter, and pain-free.

And then there are the quiet warriors: weekend runners, marathoners, trail junkies. They didn’t let a bunion bench them. They found better gear. They kept moving. They stopped trying to be perfect and focused on progress.

Let me tell you: you don’t need a flawless foot to be a strong runner. You just need to care for the one you’ve got. I’ve seen folks with jacked-up feet cross the finish line of 5Ks, marathons, even ultras. And they did it by outsmarting the pain—not ignoring it.

Stay in the Fight—Adjust, Don’t Quit

If something you’re trying isn’t working—maybe your new shoes feel like bricks, or taping just makes it worse—don’t throw in the towel. Pivot. Try something else.

New research is coming out all the time. Sports medicine is way ahead of where it was even five years ago. We’re talking better orthotics, less invasive surgeries, smarter rehab tools.

Get a solid PT or podiatrist on your team if you can. Sometimes just learning how to mobilize your foot or slipping in a custom insert can flip the script entirely.

And please, don’t suffer in silence. Runners are a tribe. There are forums full of bunion-battling runners swapping hacks and war stories. Find your people.

Keep the Joy First

Above all, make sure running stays something you love. That might mean trading roads for trails. Or backing off pace goals while you heal. Or just having a laugh when your bunion acts up again (“Great, it’s throwing a tantrum today”).

Celebrate the good runs. Laugh off the weird ones. The foot freakouts, the sock drama, the surprise blisters—it’s all part of the adventure.

And remember—every runner’s got something. Plantar fasciitis, old IT band flare-ups, knees that creak like haunted doors. Your “something” just happens to be a bunion. It’s not your identity. It’s just one bump in the road (literally).

You’ve got this.

Keep running hard. Run smart. And run because you love it—bunions be damned.

The No-Budget Budget: A Lazy Canadian’s Guide to Saving Money

Saving money feels impossible when there are bills to pay, groceries to buy, and unexpected costs popping up. Traditional budgeting can be complicated and may require spreadsheets, calculations, and endless tracking. But what if there was an easier way? If you’re someone who hates strict budgets but still wants to grow your savings, a no-budget budget might be the perfect solution.

What Is a No-Budget Budget?

A no-budget budget is a simple approach to managing money without tracking every dollar. Instead of setting strict spending limits for every category, you focus on three basic steps: automate savings, cover fixed expenses, and spend the rest guilt-free. This method works well for people who don’t want to stress about budgeting but still need financial control.

The idea is to build habits that naturally lead to saving money. With the right setup, you can grow your savings without making constant financial decisions. For example, opening a savings account at InnovationCU allows you to set up automatic transfers and makes the process effortless. The goal is to remove the need for willpower by creating a system that works on autopilot.

Step 1: Automate Your Savings

One of the biggest reasons people struggle with saving is that they wait until the end of the month to see what’s left. With a no-budget budget, you do the opposite — save first. The easiest way to do this is by setting up an automatic transfer to your savings as soon as you get paid.

Most banks allow you to schedule these transfers, so you don’t have to think about them. Even if it’s just $50 per paycheck, it adds up over time. This method ensures that saving happens before you get a chance to spend the money elsewhere.

How Much Should You Save?

If you’re unsure how much to save, start with 10% of your income. If that feels too high, begin with 5% and increase it as you adjust. The key is consistency — small amounts saved regularly can make a big difference.

Income RangeSuggested Monthly Savings
Less than $2,000$50–$100
$2,000–$4,000$100–$300
$4,000–$6,000$300–$600
Over $6,000$600+

Step 2: Cover Fixed Expenses Automatically

The next step is ensuring your essential bills are paid without effort. These include rent or mortgage, utilities, phone bills, subscriptions, and insurance. The best way to handle these expenses is through automatic payments.

Automating your fixed expenses helps you avoid late fees and ensures your essential costs are covered. This makes it easier to manage the rest of your money without stress. Most banks and service providers allow automatic bill payments, which makes this a simple step to implement.

Step 3: Spend Freely Without Guilt

After setting up automated savings and covering fixed expenses, the remaining money is yours to spend however you like. This is what makes the no-budget budget so appealing — you don’t have to track every dollar or feel guilty about buying coffee or eating. Some months, you might spend more on entertainment, while other months, you might spend less. The key is knowing that your financial essentials are already covered.

Extra Tips to Make the No-Budget Budget Even Better

Reduce Unnecessary Expenses Without Thinking

  • Use cash or debit instead of credit to avoid overspending.
  • Cancel unused subscriptions like streaming services or gym memberships.
  • Cook at home more often to reduce takeout costs.
  • Buy generic brands instead of name brands when grocery shopping.

Take Advantage of Free Money

Many Canadians miss out on free money simply because they don’t know it exists. Some ways to get extra cash include:

  • Cashback rewards: Use a no-fee cashback credit card for purchases.
  • Employer matching: If your workplace offers RRSP matching, take full advantage.
  • Government benefits: Check if you qualify for programs like the Canada Child Benefit or GST credit.

Build an Emergency Fund

An emergency fund is one of the most important financial safety nets. Ideally, aim for three to six months’ worth of expenses in a separate account. If that feels overwhelming, start with a small goal — $500 or $1,000 can provide a cushion for unexpected costs.

Is the No-Budget Budget Right for You?

This method works best for people who want a simple way to manage their money without strict tracking. If you struggle with traditional budgeting, this approach can help you save without feeling restricted. However, if you have high debt or unpredictable expenses, you may need a more detailed budget to stay on track.

Final Thoughts

Saving money doesn’t have to be complicated. The no-budget budget makes it easy by focusing on automating savings, covering fixed costs, and spending the rest without stress. Setting up the right habits will allow you to improve your finances without the effort of traditional budgeting. This method proves that small changes can lead to big financial results.

“I Couldn’t Breathe” – When Running Meets Asthma

running with asthma

He still remembers the first time it hit: a routine easy run, nothing fancy. Then suddenly, it felt like an invisible hand wrapped around his chest and started squeezing. Breathing got tight. Heart pounding. Legs moving, but lungs saying nope. He slowed down, hands on knees, gasping, thinking, “Am I really this out of shape?”

But it wasn’t just fitness. It was the wheezing that gave it away. A few doctor visits later, the verdict was in: exercise-induced asthma. Not what he wanted—but weirdly, a relief. At least it had a name. And more importantly, a plan.

Here’s the truth: asthma doesn’t have to end your running journey. You’re not the only one who’s had to pull up short, wondering if your lungs were betraying you. With the right tools, you don’t quit—you just run smarter.

What Asthma Really Is—and How It Shows Up in Runners

Asthma’s not just about breathing “a little hard.” It’s a chronic condition where your airways inflame and tighten, making airflow feel like it’s coming through a straw. Add some mucus and boom—running gets brutal real quick.

The common signs:

  • Wheezing
  • Chest tightness
  • Shortness of breath
  • Coughing, especially during or after runs

Running with asthma is like showing up to a race with a headwind in your chest. And if you’ve got exercise-induced bronchoconstriction (EIB)—asthma triggered specifically by physical activity—then yeah, those hard efforts? That’s where the breathing gets rough.

Here’s a wild stat: up to 90% of people with asthma feel symptoms during exercise. And even some folks who don’t have full-blown asthma can still get EIB when they push hard.

But here’s the kicker: while running can trigger symptoms, it can also train your respiratory system to get stronger over time. It’s that classic paradox: running is both the challenge and the solution.

So… Can You Run with Asthma?

Yes. Full stop.

Asthma doesn’t mean hanging up your shoes. It means planning better and listening harder to your body.

Need proof? Paula Radcliffe—yeah, that Paula Radcliffe—was diagnosed with exercise-induced asthma at 14. She was told, “This doesn’t mean you stop. You just learn how to manage it.” So she did. She used her inhaler before training, kept it with her during races—and went on to break the marathon world record.

She’s not alone. At the 2012 London Olympics, over 700 athletes had diagnosed asthma. And get this: they were almost twice as likely to medal as their non-asthmatic peers. Twice. That’s not a weakness—that’s grit with a prescription plan.

So yeah, asthma runners can and do crush it. But it takes prep. Talk to your doc, build an action plan, use your meds. Carry your inhaler. Know your triggers. Pay attention to effort, not ego.

As one runner told me, “If I take my inhaler before the run, I’m good. But if I forget? By mile two, I’m toast—breathing through a straw and heart rate through the roof.” That’s the difference between being proactive and winging it.

Is Running Actually Good for Asthma?

Short answer: Yep. As long as you manage it, running can help your asthma—not hurt it.

Stronger Lungs = Less Struggle

A meta-analysis of 22 studies showed that consistent aerobic exercise (like running) helped improve FEV₁—that’s the volume of air you can force out in one second—and peak flow. That means more efficient breathing and better quality of life.

One study even found that adults with mild-to-moderate asthma who trained at high intensity actually slowed the normal age-related lung function decline.

Translation? The more you run, the better your lungs work.

Better Oxygen Use = More Stamina

Running trains your body to use oxygen more efficiently. VO₂ max increases. Your muscles learn to grab more oxygen from your blood. Heart pumps harder. You feel less gassed at a pace that once smoked you.

A study from UC Davis backed this up—showing aerobic training boosted oxygen use and overall endurance. That’s good news for any runner. But for asthmatics? It’s gold.

Real runners see it, too:

  • One guy told me, “Ever since I started running regularly, I haven’t had a full-blown asthma attack.”
  • Another said, “Four years asthma-attack free—thanks to daily inhaler use and weekly runs.”

Running + meds = breathing better. Simple, but powerful.

Running with Asthma: How to Breathe Easier and Take Back Control

Let me say this straight up: asthma sucks. I’ve worked with runners who’ve battled wheezing mid-run, clutched their inhaler like a lifeline, and felt the frustration of wanting to move but being held back by a tight chest.

But here’s the good news: running can actually make your asthma better.

I’m not saying it’ll disappear—but you can absolutely get stronger, go longer, and breathe easier with the right approach. Let’s break it down.

Running = More Control, Fewer Flare-Ups

If you’ve ever wondered, “Does running help or hurt asthma?”—the answer is: done right, it helps. A lot.

A review of 11 legit studies (over 500 asthmatic adults) found that regular aerobic exercise improved asthma control. Fewer symptoms. Less wheezing. Less nighttime coughing. Less reliance on that rescue inhaler. That’s huge.

One study ran a 5-week endurance program for folks with mild asthma—and the results were clear:

  • VO₂ max went up
  • Heart rates came down
  • Running got easier
  • Post-exercise flare-ups? Fewer and less intense for most of them

Seven out of nine participants actually reduced their bronchospasm after exercise. Small sample, but a powerful trend. Bottom line? When you stick with it—slow, steady, consistent—your body starts handling running better.

Doctors believe it’s because regular running conditions your airways, reducing what they call “airway hyper-responsiveness.” Translation: your lungs stop freaking out every time you breathe hard.

Real talk: I’ve seen runners go from gasping after 5 minutes to comfortably jogging 30. And they didn’t need a miracle—just patience and a plan.

Running Can Actually Reduce Inflammation (Seriously)

Asthma = inflammation. Swollen airways. Overreactive bronchi. That’s the enemy.

Here’s where it gets interesting: aerobic exercise may actually reduce that inflammation over time.

A 2022 study found that after 12 weeks of training, inflammatory markers dropped in people with asthma. Another review in 2020 showed that exercise boosted anti-inflammatory cytokines—the good guys that help calm the chaos in your lungs.

Now, not every study agrees on which markers improve (science loves being complicated), but one thing’s clear: exercise doesn’t make inflammation worse. If anything, it pushes your body in the right direction.

And some runners find they can reduce medication use (always talk to your doc first) because their lung function just gets… better.

The Bonus Benefits: Beyond the Lungs

Running helps asthma directly—but it also hits it from the side:

  • Helps with weight control (less strain on your lungs)
  • Boosts immunity (fewer colds = fewer flare-ups)
  • Reduces stress (which can trigger asthma in some folks)

Running strengthens your breathing muscles, improves how efficiently your lungs work, and teaches your body to handle effort without panic. It doesn’t happen overnight. But if you stick with it? It’s a total game-changer.

As one doc put it: “Exercise like running strengthens the lungs and reduces inflammation. It’s a long-term win.”

Know Your Triggers (So You Don’t Get Wrecked Mid-Run)

Here’s the deal: while running helps, certain conditions can throw gas on the asthma fire. Know them. Plan around them. Here’s a cheat sheet with examples:

TriggerWhen It Hits
Cold airWinter runs in dry, icy weather. That first inhale can hit like a sledgehammer.
Dry airDesert climate or low-humidity gyms. Think: treadmill next to a cold AC vent.
PollenSpring/fall mornings—especially high tree, grass, or weed pollen days.
Air pollutionCity running on traffic-heavy roads or during smog alerts.
OverexertionGoing out too hard, too fast. Classic rookie mistake.
ChlorineFor swimmers—pool chemicals can irritate lungs.
Dust & MoldTrail runs in dry weather or musty indoor tracks.
SmokeWildfires, field burning—stay away from these like your lungs depend on it.

Everyone’s asthma reacts differently. Some folks run fine in the cold but struggle with pollen. Others are good on trails but get wrecked by city smog.

One teen on a forum said she has to avoid running when farmers burn their fields—and when she listens to her body and adjusts, her asthma stays quiet. Smart runner.

Pro Tip: Exercise Is a Trigger (But a Controllable One)

Here’s the stat that freaks people out: 40–90% of people with asthma deal with EIB (exercise-induced bronchoconstriction).

But here’s what I tell my runners: don’t panic—plan.

  • Use a reliever inhaler before hard runs (if prescribed)
  • Extend your warm-up
  • Control the environment (run indoors on bad days)
  • Avoid starting your run with a sprint. Always build up.

If you do this right, running becomes your training ground—not your enemy.

What Asthma Feels Like When You Run (And What to Do About It)

Look, running is supposed to be hard. You’re gonna breathe heavy, feel that burn in your lungs, and sweat it out—especially during speed work or hills. But asthma? That’s a different beast entirely. And if you’ve ever felt like you were sucking air through a straw mid-run, you know exactly what I mean.

So how do you tell the difference between normal effort and asthma creeping in? Let’s break it down from my coaching experience—and from runners who’ve been through it.

Early Warning Signs (Pay Attention Here)

The first symptoms are usually subtle. You might feel a weird tightness in your chest—like someone cinched a belt around your ribs. Not painful exactly, but uncomfortable. You might get a dry cough that kicks in 5–10 minutes into the run and won’t go away.

Then there’s wheezing—a whistling sound when you exhale. Sometimes it’s loud, other times it’s just a weird noise deep in your chest or throat. You may not notice it at first, but it’s a clue your airways are starting to clamp down.

Another red flag: you can’t talk. Even on an easy run, you feel like your words are stuck in your throat. Sure, all runners breathe hard. But if you’re gasping for air just trying to say, “Let’s turn left,” something’s off.

Use the talk test: if you usually chat during your easy runs but suddenly can’t get more than one or two words out, back off. That’s not just tired lungs—it could be asthma kicking in.

As one runner told me, “I had to think consciously about every breath I took. That’s when I knew it wasn’t just being out of shape—it was asthma.” When breathing becomes something you have to work at, it’s a sign.

When It Gets Worse (Stop Before It Gets Here)

Ignore those early cues, or run into something like cold air or a cloud of pollen, and the symptoms can blow up fast.

  • Shortness of breath gets intense—you’re gulping air and still feel like you’re drowning.
  • Dizziness, spots in your vision, or feeling like your legs are giving out? That’s your body telling you it’s not getting enough oxygen.
  • Some runners describe burning in the chest, or a sensation like the lungs just locked up.
  • Your lips or fingers turning bluish? That’s an emergency. Stop and get help.

And that panic you feel when you can’t get air? That only makes things worse. Anxiety fuels more breathlessness, and before you know it, you’re in a full-blown asthma attack.

If your breathing doesn’t return to normal after a few minutes of walking or resting, that’s your cue: it’s not just a hard run. Use your rescue inhaler, and don’t mess around. I’ve seen runners try to tough it out, and it never ends well.

So What Does It Actually Feel Like?

Picture trying to run underwater. Or at high altitude. Everything’s harder than it should be—your chest feels squeezed, your breathing sounds off, and it feels like your body is running on low power mode.

You might feel fine at the start, and then boom—suddenly, it’s like someone stole all the oxygen out of the air. It’s scary, and it can hit fast.

But here’s the thing: if you know the signs, you can take control. I’ve coached runners with asthma who’ve gone on to crush half marathons, marathons, trail ultras—you name it. They learned to tune in, listen to their body, and make smart moves before things spiral.

Golden Rule: Listen to Your Body, Not Your Ego

If your breathing starts to feel wrong, slow down. Walk. Stop if you need to. Don’t wait until it’s a full-blown episode to admit something’s off. There’s zero shame in walking or calling it early. Every runner has had those days—for asthmatics, it just happens for a different reason.

You’re not weak. You’re smart. And staying smart means you get to run another day.

Pre-Run Prep: Set Yourself Up to Breathe Easy

Running with asthma? You’re not alone. I’ve coached plenty of runners who manage their lungs like they manage their mileage: proactively. Here’s how to make sure you’re not wheezing by mile two.

1. Stick to Your Asthma Action Plan

First rule: don’t wing it. Have a written plan. Know your meds. Use them.

If your doctor prescribed a rescue inhaler before running (like albuterol), use it 10–15 minutes before your run. Don’t wait for trouble—stay ahead of it.

I’ve seen runners blow up mid-run just because they skipped the inhaler. One athlete told me: “If I don’t use it, I can maybe hang on for a mile and a half. After that, it’s chest tightness, wheezing, and survival mode.”

Don’t gamble. Med first, then miles.

2. Warm Up Like It Matters (Because It Does)

For asthmatics, warm-ups aren’t optional—they’re your first line of defense.

  • Start with 5–10 minutes of easy jogging or brisk walking
  • Add some dynamic movements: leg swings, lunges, arm circles
  • Finish with a few relaxed strides

Why? Because a good warm-up opens your airways gradually. That mild stress at the beginning often triggers a protective effect later, like your lungs saying, “Okay, we’ve seen this before. We’re ready now.”

Pro tip: If it’s cold out, warm up indoors first. Don’t shock your lungs with freezing air right off the bat.

3. Check the Air Before You Go

If the air quality sucks, your lungs will tell you.

  • Check the AQI (Air Quality Index). If it’s orange or worse, run inside.
  • Know your allergy triggers—pollen, dust, smog—and plan accordingly.
  • Post-rain runs are often cleaner and easier on your lungs.
  • Cold and dry? Cover your mouth with a buff or gaiter to warm the air before it hits your lungs.

This isn’t overkill—it’s smart running.

4. Time Your Allergy Meds Right

If you have allergic asthma, timing matters. Antihistamines work better when taken hours before your run—not right before.

Also, if you’re on daily inhalers or controller meds, don’t skip doses on training days. Keep inflammation low = better breathing window when you hit the road.

5. Avoid Known Triggers

Don’t try to be tough around your triggers. Be smart.

  • Cold air? Run later in the day or indoors.
  • Pollen issues? Stick to post-rain or non-peak hours.
  • Pollution? Find a cleaner route—ditch traffic-heavy streets for parks or trails.

Also, intervals over long grinds can help early on. Give your lungs recovery windows. Build endurance gradually.

During Your Run: Smart Strategies That Keep You Moving

6. Pace Yourself: Run Easy to Run Far

Stick to a conversational pace, especially if you’re new to managing asthma and running.

Can you talk in full sentences while jogging? Then you’re in the sweet spot.

Start with run-walk intervals if needed—3–4 min run, 1 min walk—and stretch that over time. One runner I coached started with slow jogs while chatting with friends. Now she’s running marathons without needing a puff mid-race. That’s how you build your lungs—one manageable effort at a time.

Save hard workouts for when your asthma’s well-managed, and never skip the pre-run warm-up or meds on those days.

7. Always Carry Your Inhaler—No Excuses

This is your safety net. Never leave without it.

  • Use a running belt, armband, vest, or zip pocket.
  • Keep backups: in your car, your gym bag, next to your shoes.
  • Tell your running partner what to do if you get into trouble (yes, really).

Some runners say just knowing they have their inhaler keeps them calm—which, ironically, can reduce symptoms.

This isn’t paranoia. It’s preparation.

Final Takeaway: Control What You Can, Prepare for What You Can’t

Running with asthma takes extra steps. But if you train smart, prep well, and listen to your body, you can absolutely run strong.

I’ve seen asthmatic runners hit PRs, qualify for Boston, and crush ultras—not because they ignored asthma, but because they planned for it.

You don’t need perfect lungs—you need a smart system.

Running With Asthma: How to Stay Smart, Safe, and Strong

If you’ve got asthma, you know the deal—some runs go smooth, others can get sketchy fast. Maybe your lungs tighten, maybe you wheeze a bit, maybe it feels like your chest’s playing tug-of-war with your breath. But the truth is, you can absolutely run with asthma—you just need a game plan.

Let’s cut the fluff and talk real-world strategies to help you manage asthma while keeping your training on track.

Stay Tuned Into Your Breathing (Don’t Zone Out)

Music and daydreams are great—but if you have asthma, you need to check in with your body more often than most.

Ask yourself during the run:

  • “How do my lungs feel right now?”
  • “Am I breathing clearly?”
  • “Any weird tightness, coughing, or wheezing starting?”

Catch symptoms early. That little tickle in your lungs? It’s your warning sign. Slow to a walk. Try some controlled breathing (pursed-lip breathing works great—inhale through the nose, exhale slowly through puckered lips).

If it gets worse? Use your inhaler immediately—don’t wait for it to become a full-blown attack. Step off the path, give yourself a breather. Some runners resume after a few minutes if things settle, others call it a day. Follow your doctor’s advice on that. Bottom line: be proactive, not heroic.

Protect Your Lungs in Cold Air

Cold, dry air is a known trigger. It dries out your airways fast and can cause bronchospasm. That tight, chesty cough that kicks in mid-run? Probably the cold air hitting raw lungs.

Smart fixes:

  • Wear a buff or face mask over your nose/mouth. It traps heat and moisture from your breath and keeps incoming air from being too harsh.
  • Choose technical fabrics, not cotton. Cotton gets wet and can actually make things worse in freezing temps.
  • Breathe through your nose as much as possible—your nose warms and humidifies better than your mouth.
  • Pre-heat: some runners do light cardio indoors before stepping out to run—get your lungs warmed up before facing the cold.

And if your lungs still don’t cooperate even with a mask? It’s okay to move your run indoors.

Be Strategic With Your Routes

If you’ve got asthma triggers, your route matters.

Route hacks:

  • Avoid traffic-heavy streets if smog or exhaust sets you off.
  • Skip grassy meadows or dusty trails if pollen’s a trigger.
  • On a “rough breathing day,” choose flat routes over hills to reduce workload.
  • Stick close to home or your car—loop a 1-mile route if you’re unsure how your lungs will behave that day. That way, you’re never far from your inhaler or a safe place to stop.

One runner I coached swore by a 1-mile loop near his house on tough days. He didn’t always need to cut it short—but knowing he could helped him relax and actually run better.

Run With a Buddy (Or at Least Be Prepared)

You don’t always need a partner—but it helps. Not just for motivation, but for safety too.

Make sure your buddy knows:

  • You have asthma
  • Where your inhaler is
  • What to do if symptoms kick up

If you run solo, always carry your phone, and let someone know your route if you’re doing a long or remote run.

After the Run: Don’t Rush Recovery

Cool Down Gradually

Don’t go from sprint to stop. A quick, cold shutdown can actually trigger post-exercise bronchospasm—that annoying cough or tightness that hits after you finish.

  • Slow jog or walk 5–10 minutes after your run. Keep breathing deep and steady.
  • Do your stretching inside if it’s cold out—warm environments help your lungs settle faster.

Monitor Post-Run Symptoms

If you cough a bit after a run, you’re not alone. Many asthmatics do. But if you’re hacking for an hour, wheezing, or struggling to breathe after the cooldown? That’s a sign.

Keep a training log:

  • “Felt tight near the highway today.”
  • “Used inhaler after cold run, recovered in 5 mins.”
  • “Cough lasted 30 min—might need pre-run meds next time.”

A journal helps you spot patterns—so you can adjust. If you use a peak flow meter, take a reading after your run. If numbers drop consistently, bring it up with your doc.

Hydrate and Recover

Simple but important: drink water. Dehydration dries out your airway lining and can make irritation worse. Staying hydrated = easier breathing, thinner mucus, happier lungs.

Also, don’t be afraid to use your inhaler after a run if you need it. You don’t have to wait until it’s “bad enough.” Use it as prescribed.

Run Smarter With Asthma: Learn, Adapt, Repeat

If you’ve got asthma and you’re a runner, you know the deal: it’s a bit of a balancing act. But with a solid routine and a few smart adjustments, you can train hard, run far, and stay in control. The secret? Don’t ignore the signals—plan for them.

Learn From Every Run

Each run teaches you something—use it.

  • Did your pre-run inhaler hold up?
  • Did that dusty stretch of trail make your lungs cranky?
  • Did cooler weather help or hurt?

Take notes. If you needed your rescue inhaler mid-run, maybe that route or pace was too aggressive for that day. Next time? Back off the intensity a bit, warm up longer, or talk to your doc about dialing in your medication plan.

And if everything went great? Awesome—remember those conditions and replicate ‘em.

One more thing: if you’re allergy-prone, rinse off post-run (hair, skin, clothes), and maybe flush your sinuses with a saline spray. The less junk in your system, the better you’ll breathe tomorrow.

Don’t Skip Recovery—Especially in Cold Weather

Running in cold air can feel great at first… until it hits your lungs afterward. Once you’re done, get warm fast. Cold air post-run can keep irritating your airways.

  • Wrap up in a jacket
  • Get indoors
  • Keep breathing easy till your chest fully settles

Still tight after 15 minutes? Take another inhaler puff or try diaphragmatic breathing to reset. Don’t ignore lingering symptoms. The “I’ll be fine” mentality can backfire.

Remember: recovery isn’t just about your legs—it’s about your lungs, too.

Best Breathing Techniques for Runners With Asthma

Breathing better can help you run better. These techniques won’t replace your inhaler, but they’ll make your runs smoother and help you stay calm and in control when your chest tightens up.

1. Pursed-Lip Breathing

What it is: Inhale through your nose, then exhale slowly through pursed lips like you’re blowing out a candle. Try to exhale twice as long as you inhale (like 2-count in, 4-count out).

Why it helps:

  • Keeps airways open longer
  • Prevents “air trapping” in your lungs
  • Slows down your breathing rate

This is your go-to if you’re feeling winded mid-run. Practice at rest so it’s second nature when you need it.

Think of it as controlled exhaling—your body gets more oxygen with less stress.

2. Diaphragmatic Breathing (Belly Breathing)

What it is: Instead of shallow chest breathing, you draw air deep into your lungs by using your diaphragm. Belly rises, chest stays quiet.

How to do it:

  • Hand on your belly, hand on your chest
  • Inhale through your nose—belly expands
  • Exhale through your mouth or pursed lips—belly contracts

Why it helps:

  • Strengthens your respiratory muscles
  • Pulls in more oxygen per breath
  • Lowers the chance of hyperventilating

Use it pre-run to warm up your lungs, mid-run to stay relaxed, and post-run to cool down your system.

Practice makes perfect. Over time, it becomes your default. And when your breathing stays calm, so does your mind.

3. Rhythmic Breathing (3:2 or 2:2 Pattern)

What it is: Syncing your breath with your steps.

  • Easy run? Try a 3:2 pattern – inhale for 3 steps, exhale for 2
  • Moderate effort? Maybe a 2:2 works better
  • Sprinting? All bets are off—expect 1:1 bursts

Why it helps:

  • Prevents erratic breathing
  • Keeps you from holding your breath (yes, it happens)
  • Adds a calming rhythm when things get tough

Some runners even use mantras to time their breath (“strong” on the inhale, “steady” on the exhale). And if you lose the rhythm, no biggie—pause, take a couple deep belly breaths, and reset.

This one works best when paired with diaphragmatic breathing. Together, they make breathing feel smoother and less panicked—even during hills or longer runs.

Off-Road Breathing Drills: Train Your Lungs Like You Train Your Legs

Here’s the truth: you can’t fake breathing when you’re running—especially if you’ve got asthma. But that doesn’t mean you’re helpless. In fact, you’ve got more control than you think.

And the secret weapon? Practicing your breathing outside of running.

Yep, just like you do strength work for your legs or foam roll your IT band, you can “cross-train” your lungs. Even 5 minutes a day can make a difference.

Breathing Drills That Actually Work (For Some)

Techniques like Buteyko breathing (breath holds, light controlled breaths) and the Papworth method (relaxation + nose breathing) have been used for asthma control. They won’t stop an attack mid-run, but they can reduce sensitivity over time. And they’re simple enough to do while sitting on the couch or winding down at night.

Pranayama (yoga breathing) is another tool. I’ve had runners swear by it for lung control and focus. It won’t magically expand your lungs overnight, but it can help you stay calm when your breathing starts getting ragged mid-run.

There are also tools—inspiratory muscle trainers—that make you breathe against resistance, kind of like weight training for your diaphragm. Studies show they can help asthmatics delay symptoms and push further before they feel that tight chest.

💡 Pro tip: Work with someone who knows lungs. If you’ve got access to a respiratory therapist or a coach who’s worked with asthma, they can help tailor the drills to your situation. The technique matters. Don’t just wing it.

Why It’s Worth the Effort

Breathing drills won’t replace your inhaler. Let’s be clear on that. You still need your meds. But this work gives you something extra in the tank—more control, more confidence, and more resilience.

When that tightness creeps in mid-run, it’s powerful to know you’ve trained for this moment. You can switch to pursed-lip breathing, slow things down, and ride it out. That’s the difference between panic and control.

And here’s the mental side: mastering your breath gives you confidence in everyday life too. Stairs, hikes, random sprints to catch the bus—you stop fearing them. You’re not waiting to be blindsided by an asthma flare-up. You’re prepared.

So yeah, asthma might make breathing more complicated. But if you put in the work, you’ll come out stronger than runners who never even think about how they breathe.

When to See a Doctor About Asthma (Yes, Even if You Think You’ve Got It “Handled”)

Let’s be clear: running with asthma is doable — and often empowering — but only if you’ve got your medical game locked in. Self-management is important, yeah, but you shouldn’t be trying to tough out breathing issues like it’s just part of the grind.

Here’s when to stop guessing and get a professional in your corner.

1. Before You Start Running (Especially if You’re New or Just Diagnosed)

First step? Get the green light from a doc, preferably someone who knows asthma well — like a pulmonologist.

They’ll probably run a lung function test, maybe even an exercise challenge test, and most importantly, help you dial in the right meds. Rescue inhaler? Check. Controller inhaler? Maybe. Proper use? Definitely.

It’s not about fear — it’s about setting yourself up to win. I’ve coached runners who felt super anxious about running with asthma until they had that talk with their doctor. One good visit, a clear asthma plan, and boom — confidence unlocked.

👉 Think of this as your baseline check-in. Like a tune-up before a race build.

2. If You’re Using Your Inhaler Too Much or Symptoms Are Constant

If you’re pulling out your rescue inhaler mid-run every time — or you need it just to get through a walk or climb a flight of stairs — that’s not “just how it is.”

That’s a sign your asthma isn’t under control.

  • Using your inhaler multiple times per run?
  • Wheezing a lot during easy runs or recovery days?
  • Waking up coughing at night?

Don’t settle for struggle. Go to your doc. You might need a daily controller inhaler, a dosage tweak, or something like Singulair (a med that helps prevent exercise-induced flares).

💬 One runner said that getting prescribed Advair was “a game changer” — no more mid-run wheezing, no more cutting workouts short. That’s the kind of fix that changes your entire training block.

3. If Symptoms Suddenly Get Worse (Or Just Feel… Weird)

Sometimes asthma evolves. New environment? Seasonal change? Suddenly you’re gasping mid-run in a park that never gave you issues before.

Or worse — you feel tightness in your chest that doesn’t go away with your inhaler.

Time to see your doctor.

You might’ve picked up a new trigger (pollen, pollution, cold air), or your old plan just isn’t cutting it anymore. And don’t rule out other stuff — vocal cord dysfunction or even cardiovascular issues can mimic asthma.

If your symptoms feel different — like coughing up odd mucus, weird wheezing, or heavy chest pressure that doesn’t feel like your usual flare — don’t wait. You need a deeper look.

4. After a Scary Flare-Up or Uncontrolled Attack

Let’s say your inhaler didn’t do the job. Or you had to use it twice back-to-back. Or worse — you needed urgent care after a run.

That’s your body yelling: “Hey! We need help here.”

Any serious episode = automatic follow-up. Your doc might change your meds, tell you to ease off running for a bit, or just help you reassess where your asthma control really is.

Even if you didn’t hit the ER, but you felt totally wiped after a run and wheezed for hours? Call your doc. That’s not normal.

5. For Regular Checkups and Maintenance

Even if things are smooth? Still check in at least once a year.

Why?

  • Asthma can shift over time.
  • You might be doing something wrong with your inhaler (super common).
  • You might be training harder now — and your meds might need to catch up.

A quick doctor visit can tweak your action plan, give you updated triggers to watch out for, and just make sure you’re set up to train safely.

It’s like rotating your tires. You don’t wait for them to blow.

6. If Something Feels Off — and You’re Not Sure It’s Asthma

This one’s sneaky. Sometimes it’s not your lungs causing the issue.

If your inhaler doesn’t help a chest-tightness during a run? That might not be asthma — that could be your heart. Or vocal cord dysfunction (where your vocal cords slam shut during exercise). Or allergies. Or sinus pressure.

These things need different treatments. So if what you’re doing isn’t working? Get tested. A doctor can run the right labs or imaging and make sure you’re not misdiagnosing yourself.

Final Thoughts: Asthma Doesn’t End Your Running Story—It Redefines It

Let’s get something straight: running with asthma doesn’t make you weak—it makes you one of the toughest athletes out there. Why? Because what most runners take for granted—just breathing—you have to fight for.

And you show up anyway.

Every run, every mile, every step you take with asthma is a statement: I won’t be sidelined by this. That’s not just running—that’s warrior work.

Like I always tell my runners: Asthma doesn’t disqualify you from the starting line—it makes your presence there even more badass.

You’ve learned how to warm up smarter, how to adjust on tough days, how to breathe when your lungs want to shut down. That’s not just fitness—that’s discipline. That’s grit. That’s knowing your body better than most ever will.

And yeah, some runs are going to be harder. There will be setbacks. There will be days you gasp and wonder if it’s even worth it. But the answer is always yes. Every time you show up—especially on the hard days—you’re proving that you’re not defined by your limits. You’re defined by your response to them.

Just ask the countless asthmatic runners out there crushing 5Ks, finishing marathons, or just knocking out their daily miles. They didn’t get there by pretending asthma didn’t exist. They got there by planning, adapting, and showing up again and again.

One runner told me, “My lungs used to hold me back. Now they’ve made me stronger.” That’s the truth right there.

Asthma gives your running story a plot twist—but not a dead end. You’re the main character here. And every finish line you cross? That’s another chapter where you beat the odds.

So take a deep breath, grab your inhaler, lace up, and go. You’ve already proven you’ve got the heart. Now show the world the lungs and legs to match.

Run smart. Run tough. Run free.

You’re not just a runner with asthma. You’re a damn warrior.

Let’s go.

9 Agility Ladder Drills for Runners to Boost Speed & Cadence

When I first heard about agility ladder drills, I thought they were some kind of secret weapon for speed.

Back then I was still a newbie runner, and convinced that a few quick foot tricks would turn me into Usain Bolt in flip-flops.

Reality smacked me hard.

On my first ladder workout, I tripped over the rungs like a baby goat on roller skates. My coach was trying not to laugh.

I was red-faced, tangled up, and questioning all my life choices.

But honestly? That awkward first session was a turning point.

After a few weeks of sticking with it, things changed. My feet started moving with purpose. I wasn’t just surviving trails anymore—I was gliding through rocky terrain, hopping over roots, and weaving past stray dogs.

That’s when I realized agility work wasn’t just about speed. It was about control. Coordination. Building the kind of movement that makes you feel fast even when you’re not racing.

These days, as a coach, agility ladder drills are a regular part of what I give my runners. Not because they’re flashy, but because they work. They sharpen your footwork, lift your cadence, and prep you for trail chaos.

No, they won’t magically shave minutes off your 5K time—but they will build the groundwork for smoother form and faster reactions.

So if you’re serious about running smarter and moving better, stick with me.

I’ll walk you through the whole thing—what ladder drills actually are, why they matter (with a few honest truths), and my 9 favorite drills.

I’ve also added a 4-week plan you can do at home, plus real-world answers to the most common questions I get.

Let’s break it down.

What Are Agility Ladder Drills?

Agility means being able to change direction fast, without flailing or losing control.

It’s not just about being quick—it’s about reacting. Moving clean. Staying in control when things go sideways.

Sounds fancy, but here’s what it means for runners: being able to adjust your stride at the last second—like when you suddenly spot a hole in the pavement or have to swerve around pedestrians hogging the sidewalk.

Agility ladder drills help you get better at that. You move your feet through a ladder laid flat on the ground, following specific step patterns—kind of like foot choreography for runners.

These drills train your feet to be quicker and more precise, which means more control on the run.

I tell my athletes: “Ladder drills teach your feet to dance.” They dial in your brain-to-foot connection—what nerds call the neuromuscular system—so that when the road gets sketchy or the trail gets wild, your feet already know what to do.

I’ve had moments out running—like flying downhill in the rain or threading through a crowded street—where I could literally feel the ladder work kicking in.

My legs moved faster than my brain could think. That’s the magic of training this way.

Now, don’t get it twisted: agility ladder drills aren’t true agility. In sports like soccer or tennis, athletes respond to unpredictable cues—like a defender or a ball. Ladder drills are planned.

You’re following patterns, not reacting to surprises.

But that’s okay. These drills still build the raw tools—balance, foot speed, coordination—that help you react better in the real world.

So think of agility drills like sharpening your blade. They’re not the whole battle, but they make you a better fighter.

What Is an Agility Ladder (a.k.a. Speed Ladder)?

An agility ladder is basically a flat ladder you roll out on the ground. (See Image)

No, not the kind you use to clean gutters. It’s usually made of nylon sides and thin plastic “rungs” spaced about 18 inches apart. Each box is a landing zone for your feet during drills.

You can buy one online or at a sporting goods store for around $20. Mine’s been with me for years and rolls up like a yoga mat. Easy to pack. Easy to toss into a backpack.

But if you’re scrappy (or broke), make your own.

I once built a DIY ladder in my garage with duct tape and a pile of paint stir sticks. Took about an hour, and it worked just fine. There’s something satisfying about training with gear you built yourself.

Here’s what you’ll need if you go the DIY route:

  • About 25–30 feet of duct tape
  • 10 flat sticks or cardboard strips (around 18 inches long)
  • Measuring tape (space rungs ~18 inches apart)
  • Scissors

Lay out two long strips of duct tape, slap the “rungs” between them, and boom—you’ve got a functional agility ladder. Not pretty, but it gets the job done. Chalk or even jump ropes on the ground can work in a pinch, too.

Agility Ladder Specs:

  • Most are 10 yards long, 16 rungs.
  • Modular ones come in smaller sections (great if space is tight).
  • Flat rungs are safer—because trust me, you will hit them sometimes.
  • Use it on a grippy surface like grass, rubber floor, or turf.
  • Avoid concrete unless you like sore joints and the taste of gravel.

I usually throw mine down in a parking lot or quiet patch of grass. Indoors, tape it to a hallway floor or gym mat. Just make sure there’s nothing breakable nearby—especially if you’re still working on your coordination!

Why Should Runners Care?

This isn’t just about looking cool or copying football players. Agility drills make you better on trails, in races, and in life.

They help you stay upright when the ground gets sketchy, or when you need to change direction without throwing your stride out of whack.

Here’s what I’ve seen in my own training and with my runners:

  • Cadence goes up: You learn to move your feet faster, without trying harder.
  • Form gets smoother: The foot-brain link strengthens, reducing the clunky shuffle that slows you down.
  • Confidence spikes: You trust your body more, especially when terrain gets tricky.

And here’s the kicker: agility work is fun. It breaks up the grind of regular mileage. It makes you feel like an athlete, not just someone out logging steps on Strava.

But yeah—don’t expect miracles. Ladder drills alone won’t get you to a sub-20 5K. You still need tempo runs, intervals, and strength training. But they will make those runs feel smoother and more dialed-in.

Let me break down the reasons runners need agility ladder training.

🔹 They Fire Up Your Brain–Body Connection

You ever feel like your feet and brain aren’t always on the same page—especially when you’re tired? Ladder drills fix that. They train your brain and legs to talk fast and react even faster.

I remember the shift myself. After a few weeks of drills, I was hitting rocky trails with more control, barely thinking about foot placement. It was like my nervous system finally got the memo.

🔹 They Help You Pick Up Cadence (Yes, That Means Speed)

Stuck in that heavy, slow stride that sounds like bricks hitting pavement? Been there. Ladder drills force you to move fast and light. Think quick, short, snappy steps.

I’ve coached runners who couldn’t break 160 steps per minute. After adding agility work, they started hitting 175+ like it was nothing. It’s not magic. It’s muscle memory.

🔹 They Make You a More Efficient Runner

No wasted motion. That’s what we’re after. Ladder work teaches you to move clean—less flailing, more control. You’ll start landing under your center of gravity instead of reaching and overstriding.

For me, I felt it most on long runs. My legs didn’t fall apart late in the game. They held strong. That’s running economy in real life—not just something you read in a study.

(But for the record, this stuff is backed by science—like a study in the Journal of Strength & Conditioning Research showing agility drills improve lower-body coordination and speed.)

🔹 They Wake Up Your Balance and Stability Muscles

Every little hop and shift in a ladder drill lights up those tiny stabilizer muscles—especially in your feet, ankles, and hips. These are the muscles that stop you from rolling your ankle on a root or crashing on a descent.

Trust me, I used to crash. A lot. Rocky trails were my nemesis until I built up this kind of foot control. Now I stay upright more often than not.

🔹 They’re Trail Running Gold

If you love trail running like I do, these drills are your cheat code. You’ll move laterally better, lift your feet higher, and react faster to whatever nature throws at you.

I swear by lateral ladder drills before a big trail race. Makes dodging roots and rocks feel automatic.

Coach’s Final Word

Look, ladder drills won’t replace your hill repeats or tempo runs. But they will sharpen the blade. You’ll feel quicker, more controlled, and more confident out there.

I treat them like a secret weapon. 10–15 minutes, twice a week, and the benefits sneak up on you.

So if you’ve been skipping footwork drills because they look “fancy” or “not for runners,” stop that. They’re for you. Let’s level up your stride.

9 Agility Ladder Drills for Runners

These are the drills I keep coming back to—with myself and with the runners I coach. I’ve broken them down with clear steps and thrown in some personal notes to show how each one plays out in real life.

(Quick note: Do each drill for 30 seconds to a minute. Rest. Then repeat for 2–3 rounds. Twice a week is enough to see gains.)

1. Ladder Linear Run (The Classic Speed Drill)

This is your bread and butter. Great warm-up. Great turnover booster.

This drill didn’t click for me at first. I was too stiff, trying to “nail” each step perfectly. One day I just sprinted through—no overthinking—and boom: I flew. No ladder hits. Just flow. Felt like I unlocked a new gear in my legs.

Once you feel it, you’ll know. The rhythm is addicting.

How to do it:

  • Start at the bottom of the ladder, facing straight ahead.
  • Run through it, one foot per box—left-right-left-right.
  • Light steps. Stay bouncy. Don’t let your heels drag.
  • Land on the balls of your feet. Keep it fast and light—imagine running over hot coals. Arms should drive in rhythm.

2. High-Knees Run (The “A-Skip” Variation)

If your stride feels sluggish or you struggle with posture, this one is for you.

I used to picture running through tires, like in those old football training montages. One day I was doing this drill in a park and a bunch of kids started mimicking me—knees way too high, laughing the whole time.

At first I felt silly. Then I realized: screw it, I’m training smart. They were just having fun. This drill helped fix my lazy shuffle. Gave me more spring and improved my form. If you’re always dragging your feet, start here.

How to do it:

  • Both feet land in each box.
  • Right foot in → left foot follows.
  • Then next box. Each time, lift your knee high—aim for waist height.
  • Keep elbows bent at 90 degrees. Drive your arms with the opposite knee. It’s a rhythm thing.

3. Lateral Quick Step Shuffle

Running isn’t just about pounding forward. If you’ve ever had to dodge a wayward scooter in Bali or hop a puddle mid-run, you already know that side-to-side agility is crucial.

The lateral shuffle drill trains exactly that—giving your feet the kind of quickness that keeps you upright, stable, and ready to move.

How to Do It:

  • Start by facing sideways at the edge of the ladder, with it stretching out to your right.
  • Step your right foot into the first box, then quickly bring your left foot in too—both feet land inside.
  • Now step out with your right foot (outside the ladder), then left foot into the next box, followed by right foot in again.
  • Repeat this “in-in, out” rhythm as you shuffle laterally down the ladder.

4. Carioca (Grapevine) Step

Here’s where things get spicy. The carioca drill—some call it the grapevine—is all about hip mobility, timing, and smooth coordination. Think of it as dancing through the ladder while secretly training your running mechanics.

How to Do It:

  • Stand on the left side of the ladder with your right shoulder facing it.
  • Step your right foot into the first box, then cross your left foot behind the right into the next box.
  • Right foot into the third box, left foot crosses behind again into the fourth box, and so on.

5. In-and-Out (Jumping Jack Feet)

Ready to get your heart rate up? This one’s like a horizontal jumping jack—simple, but man, it wakes up your legs and coordination fast.

I used to think my coordination was solid… until I realized my left foot was always late to the party. This drill exposed that. It also lit up my adductors (inner thighs), which I didn’t even know were weak.

Now I think of this drill as mini ski hops—it’s helped my trail running, especially when pushing off from uneven terrain.

How to Do It:

  • Stand at the start of the ladder with both feet together.
  • Jump both feet into the first box, landing hip-width apart.
  • Then jump forward out of the ladder, landing with your feet straddling the next rung—wider than hip width.
  • Next, hop both feet together into the second box. Then out again, and so on.
  • Bounce on the balls of your feet. Keep your knees soft and chest up. Arms help: down when feet are together, out when feet go wide—just like a jumping jack. Use your eyes to scan ahead, not down.

6. Ickey Shuffle (Three-Step Lateral Pattern)

This is the drill that makes you feel like an athlete. Named after NFL legend Ickey Woods, it’s all about rhythm and reaction—perfect for runners who want sharper footwork and faster cadence.

How to Do It:

  • Start on the left side of the ladder. The pattern is “In-In-Out.”
  • Step your right foot into the first box.
  • Bring your left foot in.
  • Step your right foot out to the right of the ladder.
    Then:
  • Step your left foot into the next box.
  • Bring your right foot in.
  • Step your left foot out to the left side.
  • Repeat all the way down.

7. Forward & Backward Jumps

This one’s a killer — I call it the boomerang hop. It teaches your feet to react fast and your brain to stay locked in. The rhythm is simple: two boxes forward, one back. It sounds playful — but it’ll torch your calves and challenge your focus like crazy.

How to Do It:

  • Stand at the base of the ladder. This is a two-foot jump drill.
  • Start by hopping over the first box and landing in the second.
  • Then jump backward one box to the first.
  • Next, jump forward two — you’ll land in box 3.
  • Then back to box 2. Forward to box 4. Back to 3. Keep going.

The pattern:
Box 2 → back to 1 → into 3 → back to 2 → into 4 → back to 3… and on.

My routine? I walk back to the start after each round (honestly, that walk is the best breather). If you want extra challenge, flip the drill: go forward one, back two. But trust me — forward-2, back-1 is already a mental workout.

Form Tips:

  • Keep your landings soft.
  • Swing your arms with the movement — forward when jumping ahead, back for the reverse.
  • Don’t rush the jump back. Regain your balance, then push off.

8. Lateral Shuffle (Two Feet In Each)

This is one of the simplest ladder drills — but don’t sleep on it. Done right, it sharpens your lateral speed and balance. I like using it as a warm-up or reset when other drills get too tricky.

How to Do It:

  • Stand facing down the ladder, with it at your side.
  • Step your left foot into box 1, then your right.
  • Step out with your left, then move your right into box 2, followed by your left.
  • Repeat: two feet in each box, one at a time, moving sideways.

In short:

  • Step in with lead foot,
  • bring the trailing foot in,
  • step the lead foot out,
  • repeat into the next box.

Once you hit the end, face the other way and come back — your opposite foot will lead this time.

9. Single-Leg Hops (Hopscotch Balance)

Okay, now we’re getting serious. This drill is tough. It’s all about control, balance, and single-leg strength — which runners desperately need. Remember: every stride is a one-leg jump. So this is just running, turned up a notch.

When I first tried this, my left leg was a mess. Wobbly, weak, uncoordinated. It exposed a clear imbalance I had been ignoring. So I added it to my drills every week.

After about a month? Huge difference.

This drill hits all the little stabilizer muscles — foot, ankle, glutes. It’s a hidden gem for injury prevention.

How to Do It:

  • Start on one leg — right foot, left foot raised.
  • Hop into the first box.
  • Keep hopping through the entire ladder, staying on that one leg.
  • Switch legs and return hopping on the other foot.

You don’t need to move sideways — just hop forward and zigzag slightly into each box. Control matters more than speed here.

4-Week Agility Ladder Plan (Runner-Tested & At-Home Ready)

When I first added agility ladder drills to my training, I was all clumsy feet and tangled steps.

I mean it. I looked like I was playing Twister on fast-forward.

But over time, that awkward mess turned into smooth, quick steps. And now, it’s one of my favorite ways to wake up my legs and brain.

So if you’re wondering how to fit ladder drills into your running routine, here’s a no-fluff 4-week plan I use with my runners here in Bali.

All you need is about 10–15 minutes, a little space, and some willingness to look silly before you get good. Trust me, it’s worth it.

The Basics

  • Schedule: Start with 2 ladder sessions per week. Move up to 3 in week 3 if you’re feeling good.
  • When to do them: On your easy run or cross-training days. Or tack them on after an easy run as part of your drills.
  • Warm-up: Always jog 5–10 minutes and do dynamic stretches before ladder work.

WEEK 1: Learn the Moves

  • Focus: Nail the basics, stay light on your feet.
  • Sessions: 2 (e.g., Tuesday & Friday)
  • Drills: Ladder Linear Run, High-Knees, Lateral Shuffle, In-and-Out
  • Tip: Walk or jog through drills first. It’s about rhythm, not speed. By the end of the week, you should feel more coordinated.

WEEK 2: Add a Little Spice

  • New Drills: Carioca & Ickey Shuffle
  • Session A: Linear Run (2 rounds, a little quicker), High-Knees (2 rounds), Carioca (2 rounds each way), Lateral Shuffle (2 rounds)
  • Session B: In-and-Out (3 rounds), Ickey Shuffle (3 rounds), Forward/Backward Jumps (2), Single-Leg Hops (start easy)
  • Tip: It’s normal to feel awkward with the new drills. Break them down step-by-step. Rest as needed.

WEEK 3: Turn Up the Volume

  • Sessions: 2–3 (add a third light one if you’re up for it)
  • Session A: High-Knees (3 rounds), Linear Run (3 rounds, last one fast), Lateral Shuffle (3), Carioca (2)
  • Session B: Ickey Shuffle (4), Forward/Backward Jumps (3), In-and-Out (3), Single-Leg Hops (2 each leg)
  • Optional Session C: Focused technique work on your weakest drill
  • Tip: Try going circuit-style: run straight into the next drill, then rest. And yes, hitting a rung happens. Laugh, reset, go again.

WEEK 4: Own It

  • Session A: Create a circuit: Linear Run → High-Knees → Ickey Shuffle → Lateral Shuffle. Repeat 2–3 times.
  • Session B: Power session: In-and-Out (2 rounds fast), Forward/Backward Jumps (2), Single-Leg Hops (2 each leg), finish with your favorite drill
  • Tip: Imagine you’re on a technical trail or dodging crowds. Let your body move freely. Feel the work you’ve put in come together.

After Week 4

By now, these drills should feel familiar. You can:

  • Add more rounds
  • Toss on a light weight vest
  • Use them in your warm-up before interval runs

Just don’t drop them altogether. Keep ladder work in your rotation 1–2 times a week. Your future self will thank you.

Final Thoughts: My Take

I started as the guy who tripped over every rung. Now? The ladder is my secret weapon. It wakes up my coordination and helps me feel fast even on tired legs.

I use this stuff with the runners I coach — beginners and marathoners alike. One runner I worked with used to call herself “awkward and slow.” A few weeks in, she was gliding through the ladder with confidence. That’s what this work does. It builds belief.

Ladder drills are more than physical. They’re a mindset. They teach agility, yes, but also patience and play. Blast some music, smile when you mess up, and high-five yourself when you get it right.

So what’s your move? Have you tried ladder drills before? Got a favorite pattern? Ickey Shuffle still tripping you up? Drop a comment and let’s talk.

And remember: Every fumble is one step closer to feeling fast and free.

Get after it. Your agile, strong self is waiting.

Balancing CrossFit and Running: A Runner-Coach’s Guide

crossfit and running

Ever tried running the day after a gnarly CrossFit WOD and felt like your legs were filled with cement?

I’ve been there.

I once showed up for a long run after hammering box jumps and thrusters the night before—my legs were toast by mile two.

Mixing CrossFit and running can feel like juggling dumbbells while sprinting.

It’s awesome when it clicks, but if you don’t manage it right, you’re on the fast track to injury.

Trust me, I learned the hard way after pulling a hamstring trying to do it all.

These days, after years of coaching runners, I’ve figured out how to make it work.

I treat CrossFit as support, not competition, for my running.

If I’m chasing a marathon finish, CrossFit becomes light strength work.

If I’m trying to hit a PR in the box, my runs are short, easy, and recovery-focused.

Let me walk you through how to build your own mix—with lessons I’ve learned (sometimes painfully), and real-life tips to keep you strong, fast, and injury-free.

What is CrossFit?

Think of CrossFit like a mixed workout buffet.

One day it’s deadlifts and pull-ups.

Next day, you’re doing sprints, kettlebell swings, or burpees.

It’s intense, and yeah, sometimes chaotic—but it’s all functional. That means it builds real-world strength: pushing, pulling, lifting, moving fast.

The official definition is “constantly varied functional movements performed at high intensity.”

Translation: it keeps your body guessing and builds strength from head to toe.

As a coach, I call CrossFit the adult playground. You’ll find me side by side with someone twice my size doing box jumps, wall balls, or sandbag carries.

And here’s the cool part—CrossFit often includes running too. You’ll see 400-meter repeats or sprint finishers pop up all the time. It’s already part of the mix.

Why Combine CrossFit and Running?

If you love running but feel like you’re missing something—like strength, speed, or durability—CrossFit can fill that gap.

  • Strength Gains: All those squats, deadlifts, and presses build a solid base. Stronger glutes and hamstrings mean more power in your stride. Studies have shown runners who lift or do plyos improve their running economy. I’ve seen this firsthand—runners with stronger cores and legs just move better.
  • Cardio Kick: CrossFit workouts are short and brutal. AMRAPs (as many rounds as possible), EMOMs (every minute on the minute), timed intervals—all of it gets your heart pumping.
  • Injury Protection: Most runners have muscle imbalances. Tight hips. Weak glutes. CrossFit movements like kettlebell swings or ring dips target muscles running often ignores. I struggled with IT band pain for months until I added CrossFit-style glute work. No fancy rehab needed—just the right kind of training.
  • Core for Days: Planks, overhead presses, Turkish get-ups—your core will get torched. And a strong core helps you keep form in the final miles of a race, especially when your legs are screaming.
  • It’s Fun: Let’s be real. Running every day can get boring. Toss in a WOD with friends, sweat it out, laugh through the pain—it gives your brain a break while still getting the work in.

Bottom line?

CrossFit won’t magically make you faster. But it can help you become more durable, balanced, and powerful.

Building Your Weekly Plan (Beginner to Advanced)

The trick is knowing your priority. Are you a runner who cross-trains? Or a CrossFitter who jogs to stay lean?

If you’re chasing running goals:

  • Make long runs, speed work, and recovery days your anchor.
  • Fit CrossFit in 2–3 times per week on your easier run days.

If CrossFit is your main jam:

  • Keep runs short—30-minute recovery jogs, light hills, or sprints.
  • Focus most energy on your big lifts or metcons.

Here’s how a week might look:

Beginner (run-focused)

  • Monday: Easy run + light CrossFit
  • Tuesday: Intervals
  • Wednesday: Rest or yoga
  • Thursday: Tempo run
  • Friday: CrossFit (short)
  • Saturday: Long run
  • Sunday: Rest

Advanced (CrossFit-focused)

  • Monday: CrossFit
  • Tuesday: 30-min run
  • Wednesday: CrossFit
  • Thursday: Short intervals
  • Friday: CrossFit
  • Saturday: Long walk or recovery jog
  • Sunday: Rest

One Reddit coach said it best: “I do CrossFit M/W/F. Run T/Th/S. Recovery is everything.” That setup works because it spreads the load, keeps things fresh, and gives your body space to adapt.

Beginner Plan

(If you’re just starting CrossFit or getting back into running after a long break)

  • Monday: 20–30 minute easy run + beginner CrossFit (focus on basics: planks, air squats, bird-dogs). Keep it smooth.
  • Tuesday: Total rest or just some gentle yoga.
  • Wednesday: Light CrossFit skills day (bodyweight stuff: squats, lunges, push-ups). Keep the weights light and nail the form.
  • Thursday: Short run day. Warm up 5–10 mins, then do 3×200m strides. Walk between.
  • Friday: Active recovery – foam roll, do some mobility drills. Nothing hard.
  • Saturday: Fun combo: CrossFit cardio WOD + a short 200m jog to finish. Think jump rope, step-ups, bodyweight stuff.
  • Sunday: Full rest or go for a chill walk.

Why it works:

You’re getting in 2 runs and 2-3 light CrossFit sessions. The point isn’t intensity—it’s consistency and building a foundation without injury. I always tell beginners: don’t chase PRs, chase good habits.

Intermediate Plan

(If you’ve dabbled in both worlds but need more structure)

  • Monday: Easy 30-minute run + core/mobility (think planks, leg raises, bird-dogs).
  • Tuesday: CrossFit strength WOD (moderate weight: deadlifts, presses, pull-ups, wall balls).
  • Wednesday: Tempo run (5–10 mins easy, then 15–20 mins strong effort) + light upper-body CrossFit (push-ups, ring rows, kettlebells).
  • Thursday: Active recovery (swim, foam roll, yoga).
  • Friday: CrossFit power session (burpees, swings, box jumps) + 2–4 sprints (200m).
  • Saturday: Long run day: 45–60 mins easy pace.
  • Sunday: Total rest. You earned it.

Why it works:

Three runs, three CrossFit days. One long run, one tempo, and optional sprints. You’re never overdoing it back-to-back, and each day has a purpose. Trust me, this mix builds grit without burning you out.

Advanced Plan

(If you’re already strong and fast, and want to juggle both worlds)

  • Monday: Speed run (5×400m repeats w/ 90s rest) + lower-body CrossFit (deadlifts, split squats). P.S. This is my favorite workout.
  • Tuesday: Recovery day: swim, stretch, walk, whatever feels good.
  • Wednesday: Upper-body CrossFit (pull-ups, core work) + easy 20–30 min jog.
  • Thursday: Tempo run (5–10 min easy, then 30 min moderate).
  • Friday: Full-body CrossFit WOD (AMRAP/EMOM: thrusters, pull-ups, wall balls, rowing).
  • Saturday: Long run (60–75+ mins) + recovery work.
  • Sunday: Rest. Seriously.

Why it works:

You’re training hard, but smart. CrossFit days are placed to avoid trashing your legs before long runs. I’ve trained like this leading into ultra prep – just tweak the intensity based on how your body feels. If something’s off? Pull back.

Injury Prevention Tips

The harder you train, the higher your risk of injury. Ward it off by doing the following:

  1. Don’t go all in too fast. I tried doing every WOD and long runs early on, and my Achilles and shoulder had other plans. Start slow.
  2. Form over ego. CrossFit loves complex lifts. Bad form = injury. I jacked up my back on a rushed kettlebell swing once. Lesson learned. Master the basics before piling on the plates.
  3. Watch volume. Feeling wrecked every day? Struggling to sleep? Back off. I swap out box jumps for step-ups when my legs feel cooked. That little shift makes a big difference.
  4. Warm up and cool down. I never jump into burpees cold. Always do light movement first (jog, dynamic stretches). Finish with a few cooldown stretches. Think of it as insurance.
  5. Ignore the CrossFit haters. People love to say it’s a fast track to injury. But honestly? It helped fix imbalances in my hips and knees that running alone never addressed.
  • Sleep is the secret weapon. I run like a zombie on 5 hours. Aim for 7–9. One guy on Reddit trains 30k weekly and CrossFits 3x/week, no problem – but he’s religious about sleep, food, water, and recovery.
  • Active recovery > doing nothing. I’ll swim for 15 mins or take an easy walk instead of just sitting around. Movement = circulation = healing.
  • Mobility work daily. Every night I foam roll and stretch. It keeps my hips loose and my calves from turning into rocks.
  • Refuel like it matters. After training? Eat. Something with protein + carbs. Chicken and rice. Yogurt and banana. And chug that water. Dehydration kills progress.
  • Deload weeks are golden. Every 3–4 weeks, dial things back. Cut running mileage by 40–50%, and go lighter in the box. These chill weeks have saved me from burnout.


How To Make Your Travel Adventure Relaxing Yet Fun This Season?

Traveling is all about creating unforgettable experiences, but finding the perfect balance between relaxation and excitement can be challenging. Whether you’re exploring a bustling city, lounging on a serene beach, or embarking on an adventurous road trip, the key is to plan wisely and stay flexible. From choosing the right destinations to incorporating moments of rest without missing out on fun activities, there are many ways to make your journey both enjoyable and stress-free. This season, embrace a travel style that lets you unwind while still making the most of every adventure. Here’s how you can achieve the perfect mix of relaxation and fun on your next trip!

7 Ways To Make Your Travel Adventure Relaxing Yet Fun This Season

Plan a mix of adventure and relaxation

Plan a mix of adventure and relaxation to make your travel adventure relaxing yet fun this season. A well-balanced itinerary allows you to enjoy thrilling experiences without feeling exhausted.

Start your days with exciting activities like sightseeing, hiking, or exploring local markets, and set aside time to unwind with a spa visit, a quiet sunset view, or a leisurely walk. This approach ensures you make the most of your trip while feeling refreshed. By blending excitement with moments of rest, you create a travel experience that is both fulfilling and enjoyable.

Pexels

Stay in comfortable accommodations

Stay in comfortable accommodations to make your travel adventure relaxing yet fun this season. Where you stay plays a big role in your trip’s enjoyment, so choosing a hotel, resort, or rental that offers both convenience and a cozy atmosphere is essential.

Look for places with amenities that match your needs, whether a peaceful retreat with scenic views or a centrally located spot with easy access to attractions. A good night’s rest and a welcoming environment help you recharge after a day of exploring, ensuring you wake up refreshed and ready for new adventures.

Balance exciting and laid-back activities

Balance exciting and laid-back activities to make your travel adventure relaxing yet fun this season. While adrenaline-filled experiences like zip-lining, city tours, or water sports add thrill to your trip, it’s just as important to slow down and enjoy peaceful moments. Spend an afternoon at a quiet café, take a scenic boat ride, or unwind at a local park to recharge.

Alternating between high-energy and relaxed activities ensures you don’t feel overwhelmed while still making the most of your journey. This thoughtful balance keeps your travel experience both enjoyable and refreshing.

Pack light and stay organized

Pack light and stay organized to make your travel adventure relaxing yet fun this season. Carrying only the essentials saves you from the hassle of lugging around heavy bags and makes moving between destinations easier.

Choose versatile clothing, pack travel-sized toiletries, and use packing cubes to keep everything in order. A well-organized bag means you can quickly find what you need without stress, allowing you to focus on enjoying your trip. Simplifying your packing creates a smoother and more enjoyable travel experience.

Keep a flexible schedule

Keep a flexible schedule to make your travel adventure relaxing yet fun this season. While having a planned itinerary helps maximize your trip, leaving room for spontaneity allows you to embrace unexpected experiences without feeling rushed.

Avoid overloading your days with too many activities, and give yourself time to explore at your own pace. Whether discovering a hidden café, extending a beachside stay, or simply taking a break when needed, a flexible approach reduces stress and makes your journey more enjoyable. By balancing structure with freedom, you create a trip that feels both exciting and effortless.

Enjoy local food and culture slowly

Slowly enjoy local food and culture to make your travel adventure relaxing yet fun this season. Instead of rushing through meals or sightseeing, take the time to truly experience the flavors and traditions of each destination. Savor authentic dishes at local restaurants, visit markets, and engage with artisans to learn about their craft.

Whether you’re tasting regional delicacies or exploring a cultural festival, immersing yourself fully enhances your trip. Pairing a leisurely evening with a cup of herbal tea or browsing specialty shops for unique finds, like THC oil tinctures from https://cbdfx.com/collections/thc-oil-tinctures/, can add a touch of relaxation to your adventure. By embracing the local pace, you make lasting memories while keeping your journey enjoyable.

Unplug when needed

Unplug when needed to make your travel adventure relaxing yet fun this season. Constant notifications and digital distractions can take away from the joy of exploring new places, so setting aside moments to disconnect allows you to be fully present. Put your phone away during meals, enjoy scenic views without a screen, and take in your surroundings without needing to capture every moment.

Whether it’s a quiet morning walk, a deep conversation with locals, or simply soaking in the atmosphere, stepping away from technology helps you appreciate the experience. Finding a balance between staying connected and being in the moment makes your journey more fulfilling and stress-free.

Why To Make Your Travel Adventure Relaxing Yet Fun This Season?

Making your travel adventure relaxing yet fun this season ensures you enjoy the best of both worlds—excitement and rejuvenation. A trip that is all adventure can leave you feeling exhausted, while one that is only about relaxation might lack memorable experiences.

Striking the right balance allows you to explore new places, try exciting activities, and still have time to unwind. It helps you create lasting memories without feeling overwhelmed or rushed. By planning a mix of thrilling and peaceful moments, you make the most of your journey while returning home refreshed and satisfied.

Pexels

Final Words

A well-planned trip should leave you with unforgettable memories, not stress and exhaustion. By balancing adventure with relaxation, choosing comfortable accommodations, staying organized, and embracing local experiences at a leisurely pace, you can create a travel adventure that is both exciting and refreshing. Flexibility and moments of unplugging allow you to truly soak in the beauty of your journey without feeling rushed. This season, focus on making your travels enjoyable, stress-free, and fulfilling so you return home with stories to cherish and a renewed sense of joy.

Saunas and Running: Can Heat Training Improve Your Endurance?

Heat exposure has long been a key component in athletic conditioning, with sauna use emerging as a powerful tool for endurance athletes. For runners, integrating saunas into their training regimens can lead to significant physiological adaptations, such as increased plasma volume, improved thermoregulation, and the activation of heat shock proteins (HSPs) that aid in muscle recovery.

The Science Behind Heat Adaptation and Endurance

One of the primary benefits of heat exposure for endurance athletes is an increase in plasma volume. Sauna use can cause a temporary expansion of blood plasma, allowing for better circulation and oxygen delivery to working muscles. This adaptation improves stroke volume and reduces cardiovascular strain during exercise.

Studies have shown that after several weeks of heat exposure, plasma volume can increase by 4-15%, contributing to improved endurance and faster recovery times.

Regular sauna exposure helps the body become more efficient at cooling itself. Over time, the sweat glands adapt to activate sooner and produce more diluted sweat, allowing runners to maintain a lower core temperature during exercise. This improvement in thermoregulation is crucial for athletes who compete in hot and humid environments, as it delays the onset of fatigue caused by overheating.

Heat shock proteins (HSPs) play a critical role in protecting and repairing muscle tissue. These proteins become activated in response to heat stress, helping to prevent cellular damage and accelerate muscle recovery after intense training. Studies indicate that sauna exposure for 20-30 minutes at temperatures of 176-212°F (80-100°C) can significantly increase HSP expression, reducing inflammation and soreness in endurance athletes.

Heat Training vs. Altitude Training for Runners

Both heat training and altitude training have been shown to improve VO2 max, a key indicator of cardiovascular endurance. While altitude training increases red blood cell production due to lower oxygen availability, heat training enhances blood plasma volume, leading to similar aerobic performance benefits. Some studies suggest that combining both methods can yield the greatest improvements in endurance performance.

Altitude training forces the heart and lungs to work harder due to lower oxygen levels, while heat training strengthens the cardiovascular system by increasing blood flow and improving thermoregulation. Both methods enhance cardiovascular efficiency, allowing runners to maintain a faster pace for longer periods.

Altitude training requires access to high-altitude environments or hypoxic chambers, making it less practical for many runners. In contrast, heat training can be easily incorporated into a routine using saunas or running in warm conditions, making it a more accessible option for endurance athletes looking to gain performance benefits.

How Often Should Runners Use Saunas?

Studies suggest that runners can benefit from sauna sessions 3-5 times per week after workouts, with each session lasting 15-30 minutes at temperatures between 176-212°F (80-100°C). This frequency allows for heat adaptation without excessive strain on the body.

For endurance training, sauna sessions should be performed immediately after a run to extend the effects of heat exposure. Research indicates that post-exercise sauna use can increase endurance by up to 32%, with adaptations occurring within 10-14 days of consistent use.

Beginners should start with shorter sauna sessions (10-15 minutes) and gradually increase exposure time. Overexposure can lead to dehydration, dizziness, and electrolyte imbalances, which can negatively impact performance.

If you’re considering investing in your own setup, reputable providers like Sun Valley Saunas offer options that can bring the benefits of heat training right into your home.

Sauna Use for Marathon and Ultramarathon Runners

For runners competing in hot climates, such as the Boston Marathon, Western States 100, or Badwater Ultramarathon, sauna training can be a crucial tool for adaptation. Heat acclimation through sauna use allows the body to perform efficiently in extreme temperatures, reducing the risk of heat exhaustion and dehydration.

Marathon and ultramarathon runners place immense strain on their muscles. Sauna exposure post-run aids in reducing muscle damage, improving circulation, and accelerating glycogen replenishment, ensuring faster recovery between sessions.

Long-distance races require mental resilience. Sauna use conditions the body to withstand heat-related stress, training runners to stay focused and composed under challenging race conditions.

Potential Risks and Overuse of Saunas

Excessive sauna use can lead to dehydration, particularly if proper hydration strategies aren’t followed. Runners should drink electrolyte-rich fluids before and after sauna sessions to maintain optimal hydration levels.

Frequent exposure to high temperatures can influence hormone levels, potentially leading to increased cortisol production. While short-term sauna use enhances recovery, excessive exposure may result in chronic stress and fatigue.

To prevent negative effects, runners should monitor their body’s response to heat training and adjust sauna session frequency based on their individual tolerance levels. Listening to the body and prioritizing rest is essential for preventing burnout.

Scientific and Expert Insights on Sauna Training

Multiple studies have demonstrated the positive impact of sauna training on endurance. A 2015 study published in the Journal of Science and Medicine in Sport found that runners who used post-exercise sauna sessions saw a 32% increase in their time to exhaustion compared to those who didn’t incorporate heat exposure.

Elite athletes like Cristiano Ronaldo, LeBron James, and Tom Brady have long incorporated saunas into their training and recovery routines to maintain peak performance. Ronaldo often shares images of himself using saunas to aid muscle relaxation, while LeBron swears by heat therapy to help with post-game recovery.

Tom Brady, known for his longevity in the NFL, regularly uses infrared saunas to reduce inflammation and keep his body in top condition. Tennis superstar Novak Djokovic also integrates sauna sessions as part of his contrast therapy, helping him stay resilient through long, grueling matches.

These athletes understand that heat therapy can improve endurance, enhance circulation, and accelerate muscle recovery, keeping them at the top of their game.

If you’re interested in wagering on any of these athletes’ sporting events, click here to explore sportsbook apps.

While professional athletes have access to advanced recovery techniques, everyday runners can still benefit from sauna use. Whether training for a 5K, half-marathon, or ultra-distance race, integrating sauna sessions can enhance endurance and aid in post-run recovery.

Is Sauna Training Worth It for Runners?

Sauna training offers a host of benefits for endurance athletes, including improved cardiovascular efficiency, enhanced thermoregulation, and faster recovery times. Compared to altitude training, heat exposure provides an accessible and practical way to increase endurance performance.

However, proper hydration and moderation are key to avoiding risks such as dehydration and hormonal imbalances.

For marathon and ultramarathon runners, heat acclimation through sauna use can be a game-changing factor when preparing for hot-weather races. With scientific research and endorsements from elite athletes supporting its effectiveness, sauna training proves to be a valuable tool in a runner’s endurance arsenal.