When you wake up on race day and hear rain pounding the window, what’s your gut reaction?
Some runners thrive on it.
I’ve heard folks call stormy runs “freeing” and even “therapeutic.”
Others? They’ll ghost a 10-miler faster than Anakin whining about sand.
And I get it—racing in the rain is uncomfortable, unpredictable, and straight-up messy.
But here’s the truth: bad weather builds tough runners.
Sunny days don’t forge grit.
Running soaked and freezing while still holding your pace?
That’s what separates weekend joggers from racers who can handle anything.
I tell my athletes all the time—you can’t train for perfect conditions, because race day doesn’t care.
The rain isn’t out to get you. It’s out to test you. And if you train and race through it, you’re going to come out stronger, sharper, and a whole lot tougher.
So, let’s dig into how to prep, race smart, and stay healthy when the skies open up.
From myth-busting to gear tips and pacing hacks—it’s all here. Ready to run wet and come out swinging? Let’s go.
Will Running in the Rain Make You Sick?
Short answer: nope. Getting wet doesn’t give you a cold. Viruses do. And they’re not riding in on raindrops.
In fact, most cold and flu viruses spread better in dry, cold air—not during a muggy downpour.
So that “you’ll catch a cold if you run in the rain” line your grandma used to say? Myth.
But here’s the twist—running cold and wet for too long can wear you down. It won’t give you a virus, but it can lower your body’s defenses just enough to make you an easier target if you come into contact with one.
And please don’t just take my word for it.
A 2022 study found that cold exposure, especially in your nasal passages, might temporarily weaken your immune response.
Translation? Being cold and damp doesn’t infect you—but it might open the door a little.
So don’t just grin and bear it. Dress smart, and change into dry clothes as soon as you cross that finish line. Hypothermia’s rare in most races, but if it’s cold and windy? It can sneak up fast.
Rain-Ready Gear Checklist: From Head to Toes
The rain’s coming? Then gear up like a pro. The right setup can turn a soggy sufferfest into a gritty, splash-filled PR.
Base Layer: Say No to Cotton
Rule #1: Cotton is the enemy. Once it’s wet, it stays wet. It clings, sags, and rubs your skin raw.
You want a base layer that works with the rain, not against it. That means moisture-wicking, fast-drying fabric. Think:
- Polyester blends
- Polypropylene
- Merino wool (yep, even in the rain)
- Nike Dri-FIT, CoolMax, or other tech stuff
Outer Shell: Don’t Sweat It (Literally)
When it’s pouring, don’t reach for that full-on hiking raincoat unless you’re planning to run inside a sauna.
I’ve seen runners come to the start line wrapped in heavy, “100% waterproof” jackets, only to be dripping in their own sweat two miles in.
You’re not a baked potato—you need to breathe.
Instead, go light. A water-resistant, breathable jacket or windbreaker with DWR coating (that’s Durable Water Repellent) is the move.
It’ll shed light rain, block some wind, and let heat escape. That’s the balance you want. Vests work too if you just need to keep your core warm.
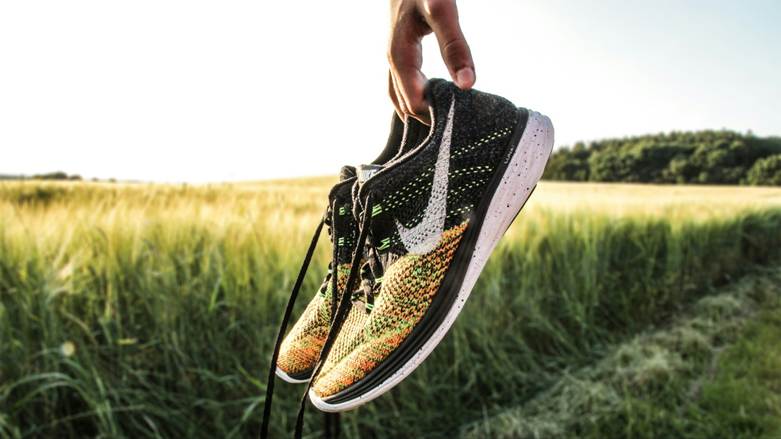
Shoes & Socks: Footwork Matters
Your shoes are your traction, your lifeline, your wet-weather tires.
And if they’re worn smooth? You’re asking for a slip-and-slide mid-turn.
Regular road shoes usually do fine if they’ve got decent grip.
But if you’re racing in serious rain or you know the course is slick? Some runners switch to light trail shoes with extra lugs for grip. I’ve done that on rainy race days, and yeah—it’s saved my skin more than once.
If you’ve got a pair of GORE-TEX® trail shoes sitting around, they’ll keep your feet drier in long downpours. But honestly? For shorter races, that extra waterproofing isn’t essential—and it can trap sweat too. Up to you.
Now socks—this is big. No cotton. Period. Wet cotton = soggy torture device.
Go with synthetic or merino wool.
They wick moisture, hold their shape, and help stop blisters before they ruin your race. Some folks even double up thin socks to create a buffer, or use toe socks like Injinjis to keep toes from rubbing. Whatever your setup, test it first.
Head, Hands & Arms: Stay Sharp, Stay Warm
A running hat with a brim? Helps a lot in the rain.
It keeps water out of your eyes so you’re not squinting like a pirate halfway through your run.
On warmer days, a lightweight visor is perfect—keeps the rain off your face while letting heat escape. Cold out? Toss on a tech running cap or layer a thin beanie under it.
Some runners even go with light-tinted sunglasses in rainy weather. Helps with visibility when the sky’s gloomy. Just make sure they don’t fog up—anti-fog spray helps, but it’s not bulletproof in a downpour.
Now your hands? Don’t ignore ’em. Cold, wet fingers are no joke—especially when you’re fumbling to rip open a gel or grab a cup at a station. Lightweight running gloves (preferably water-resistant) can save the day. Get the kind you can wring out or stash in your waistband if you overheat.
And arm warmers? Absolute gold. Pair them with a singlet and vest—they’re easy to roll down or yank off once you get cooking. Way more adaptable than committing to a long sleeve top.
Lastly, buffs (aka neck gaiters): throw one around your neck or pull it over your head to stop cold water from dripping down your back. You can use it as an ear cover, a forehead shield, even a wipe if needed. Buffs do it all.
After-Race Clothes: Don’t Be the Freezing Runner Wrapped in Regret
Here’s the truth: the race isn’t over when you cross the finish line—especially on a rainy day. That soaked singlet you barely noticed at mile 20? It’s about to turn into an ice vest the moment you stop moving.
I’ve seen runners go from triumphant to trembling messes in under five minutes because they didn’t bring dry clothes. Don’t make that mistake. Your future post-race self is begging you—pack dry gear.
What to Bring
Throw a dry set of clothes into a waterproof bag. Keep it simple and smart:
- Dry shirt (long sleeve or tee)
- Sweatpants or shorts
- Fresh socks
- Dry shoes or sandals
- Hoodie or fleece
- Beanie or dry cap for that soaked-head chill
Optional but gold: a towel and a mylar blanket (those heat sheets volunteers hand out). You can wrap up while you wait to change.
If there’s a gear check or drop bag option? Use it. If not, stash your stuff in a car nearby or hand it off to a friend who’ll be near the finish. The goal is to get out of your wet gear ASAP—not 20 minutes later while you’re shivering and wondering if this is how hypothermia starts.
Runner real talk: One marathoner told me her worst memory wasn’t the rain mid-race—it was the 50°F downpour at the finish. She stopped, her body cooled fast, and bam—uncontrollable shivering. Couldn’t even open her heat sheet alone. A kind volunteer helped her into dry sweats, and within minutes, she was back to celebrating.
The lesson? Be ready. Comfort isn’t a luxury—it’s a recovery tool.
Oh—and if you see the volunteers? Thank them. They’ve been standing in that same rain for hours, probably colder than you.
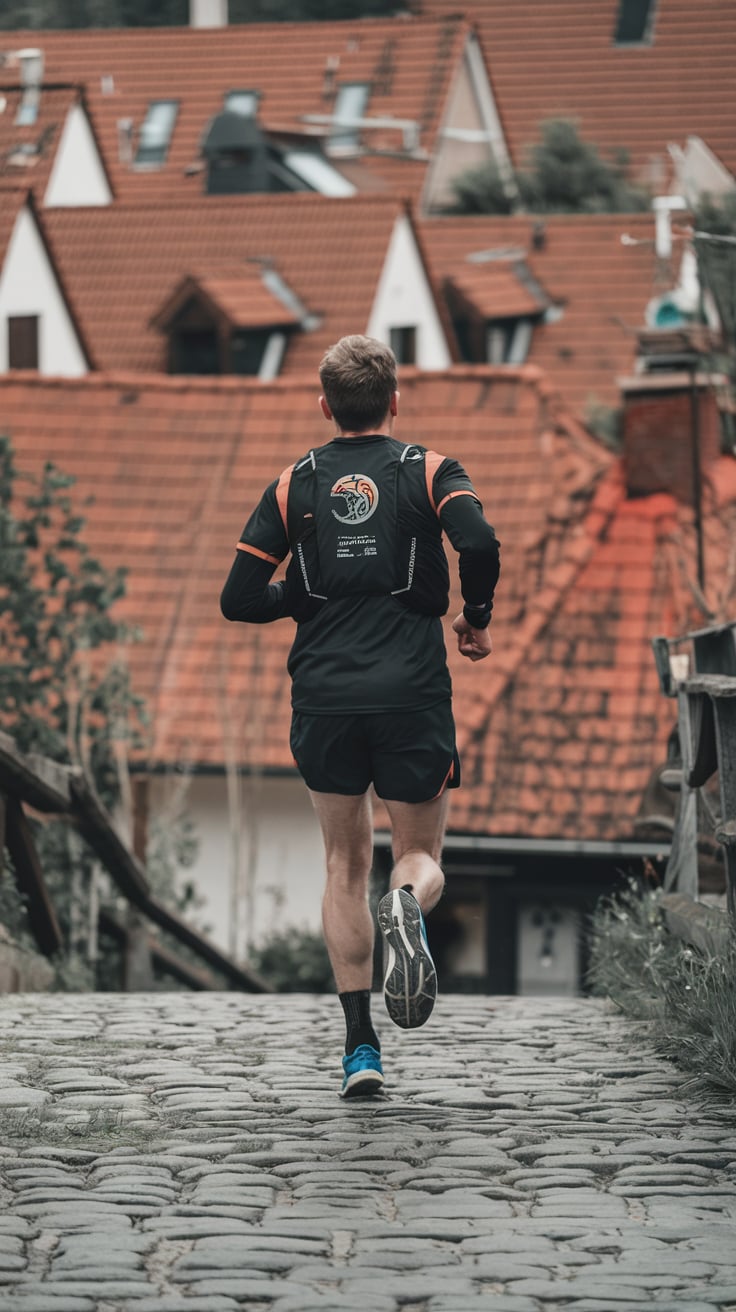
Racing in the Rain? Here’s How to Adjust Like a Pro
Rain changes the game—and not just your outfit. Your strategy, form, and mindset need a tune-up too. Slick roads don’t care about your PR dreams unless you’re smart about how you run.
Running Form in the Rain: Smooth > Speed
Think of running in the rain like driving on a wet road—the goal is traction, not turbo.
Here’s the breakdown:
- Shorten your stride. Quick, light steps give you better control. Long, bouncy strides? Recipe for slipping.
- Pick up your cadence. Faster foot turnover keeps you stable. Aim for smooth rhythm over speed.
- Slight forward lean (from the ankles, not the waist). Think “momentum,” not “hunchback.” Helps prevent a backward fall if your foot slips.
- Stay relaxed. Light arms, steady rhythm. No need for power moves or sharp corners. Treat wet pavement like it’s out to get you—because sometimes it is.
- Watch your footing. Avoid painted lines (those suckers are ice rinks), metal grates, or deep puddles. And don’t leap onto curbs like a parkour champ—keep it safe.
Visual tip: Picture a cat walking across a wet porch. Light. Balanced. Controlled. That’s the vibe.
Pacing Strategy: Ditch the Ego, Run Smart
Rain = resistance. It can sap your energy, soak your shoes, and mess with your pace. So don’t force a fast day if the conditions are trash.
- Start a little slower. Give yourself space to adjust. The first few miles will be crowded and slippery. Let the race come to you.
- Expect to be 5–10 seconds slower per mile in the early going—that’s normal. If you’re steady and feeling good later, then you can pick it up.
- Run by effort, not pace. Heart rate or perceived effort (RPE) wins in tough conditions. Focus on staying consistent, not on the numbers flashing on your watch.
- Finish strong—but stay smart. If you’ve got juice left, you can surge past soaked, demoralized runners in the final miles. But if you kick too hard on a wet street, you’re one bad step from face-planting. Avoid slippery paint lines. Turn over your feet fast and stay upright.
And listen—if the weather’s total garbage? Let go of your time goals. Use the race as a hard training effort. Surviving a storm with mental grit builds toughness you can’t get on a treadmill.
A sunny-day PR feels good—but finishing strong in the rain with soaked shoes and numb hands? That’s something you carry with pride.
After-Race Clothes: Don’t Freeze Your Butt Off
Let me hit you with a hard truth—that soaked race kit that felt “fine” at mile 20 will feel like an ice blanket the second you stop running.
Rainy race day or not, you need to pack dry clothes for after the finish line. Period.
I’ve seen it too many times: folks cross the finish, adrenaline wears off, and boom—they’re shivering uncontrollably in the rain, soaked to the bone, can’t even open a banana.
Bring a Full Change
- Dry socks and shoes
- Sweatpants or shorts
- Fresh shirt
- Warm layer (hoodie, fleece, whatever)
- Beanie or dry hat (yep, “wet hair chill” is real)
- Small towel
- Waterproof bag to keep it all dry
You’ve got options. If your race has gear check or drop bags, use it. If not, stash a dry kit in your car or hand it off to a friend near the finish line. Either way, change ASAP.
Some marathon vets even toss a mylar blanket or disposable poncho in the mix for right after the finish. It’s not fancy, but it buys you time while you change or hunt down your stuff.
True story: One runner I coached told me the toughest part of her downpour marathon wasn’t the rain during the race—it was after. She finished, stopped moving, and within a minute she was shivering like crazy in 50°F rain. Luckily, she’d stashed sweatpants and a hoodie in her bag. A volunteer helped wrap her in a heat sheet, and 10 minutes later she was sipping hot coffee and laughing again.
Moral of the story? Dry clothes = recovery gold.
Also, do yourself a favor: thank the volunteers out there in the cold, handing out heat sheets or digging through gear bags. They’ve been getting soaked too, and they’re absolute legends.
Racing in the Rain? Adjust Your Game Plan
Rain doesn’t just change your outfit—it changes the whole damn race strategy. If you want to run strong and stay upright, you’ve got to race smart.
Let’s break it down.
Running Form: Keep It Tight, Keep It Light
Rainy roads = slippery roads. And slick roads are not the place to run like a gazelle. Think control, not chaos.
Here’s what to do:
- Shorten your stride. Quick, light steps = better traction and balance. Long, bouncy strides? That’s how you slip and eat pavement.
- Increase your cadence a touch. Faster turnover keeps you centered over your feet and helps avoid slipping. Think more steps, less air time.
- Slight forward lean—from the ankles. Not the waist. You want momentum, not hunchback posture. The goal: if you slip, you fall forward, not backwards.
- Keep your arms relaxed. A few elite runners even tone down their arm swing to minimize torso twist on slick surfaces. Keep your body moving forward like a unit.
Picture a cat trotting across a wet driveway—light, balanced, alert. That’s the vibe.
Most importantly: don’t panic if you feel a slip. Stay calm. Shorten up. Stay focused. No sudden jukes, no sharp corners, and for the love of your knees—don’t leap puddles unless you’re sure you’ll land clean.
Pacing in the Rain: Play It Smart, Not Heroic
If you were gunning for a PR, I get it. But here’s the truth: rain slows most people down. That’s not an excuse—it’s just science.
Studies show that rain, especially when it’s cold, drags down finish times. Your body’s working harder to stay warm, your shoes get heavier, and the wind adds insult to injury.
So what do you do?
- Start conservative. The early miles will be chaotic—puddle dodging, tight packs, slippery turns. Give yourself grace if you’re a few seconds off pace. You can always surge later if the weather clears or you settle into a groove.
- Run by effort, not just pace. If it’s raining buckets or gusting wind, ignore the watch for a bit. Stay locked in on effort—your breathing, your form, your rhythm. You’ll get more out of that than forcing splits that don’t match the conditions.
- Be smart about the kick. You saved energy? Great. But don’t go full send on wet pavement. Slick paint, finish-line chaos, and adrenaline are a dangerous combo. If you’re going to kick, choose your line carefully, stay light on your feet, and trust your training—not your ego.
- Let go of the clock if needed. Some days are about finishing strong, not fast. If conditions are rough, shifting to “training effort” mode isn’t a failure—it’s a veteran move.
There’s something badass about finishing a rainy race tougher, not just faster.
Remember: It’s not always about the PR. Sometimes it’s about finishing with pride and your body intact.
Hydration in the Rain: Don’t Let the Wet Fool You
Alright, let’s clear something up right now: just because you’re soaked doesn’t mean you’re hydrated.
I’ve heard it a hundred times—“It was cool and raining, so I didn’t need to drink much.” That’s a rookie mistake, and I’ve made it myself. The rain may cool you down, but it doesn’t refill your tank. You’re still sweating. You’re still breathing hard. And you’re still leaking fluids—even if you don’t feel like it.
Why You Still Need Water (Even When You’re Wet)
Cold, rainy weather tricks your brain. Your thirst signal gets turned way down, and that “wet skin” feeling can fool you into thinking you’re not sweating. But trust me, you are. Maybe not buckets like on a 90° day, but it’s still coming out—through your skin and every breath in that chilly air.
I once bonked hard during a rainy half-marathon because I skipped water at two aid stations. Felt fine… until I wasn’t. Dizzy, heavy-legged, and just dragging through the final miles. All because I assumed cool weather meant I didn’t need to drink.
Stick to your hydration routine. Rain or shine.
Watch for Sneaky Signs of Dehydration
In cool rain, dehydration doesn’t always slap you in the face—it sneaks up like a ninja.
Here’s what to watch for:
- Dry mouth (even in damp air)
- Sudden fatigue or feeling “off”
- Dizziness
- Sweat just stopping mid-run (bad sign)
- Post-run pee looking like apple juice instead of lemonade
Yeah, gross—but it’s a solid gut check.
And if you get cold and stop sweating altogether? That’s red alert territory. You’re possibly sliding into hypothermia, dehydration, or both. Not a good combo.
How to Hydrate Smart in the Rain
Here’s what I do—and what I tell every runner I coach:
- Stick to your usual schedule: Take sips every 20 minutes or so. Don’t skip just because you “don’t feel thirsty.”
- Electrolytes still matter: Cold weather might kill your salt cravings, but you’re still sweating some out. Pop an electrolyte capsule or use a sports drink if it’s a long race.
- Cold = more pee: It’s called cold diuresis. Cold temps increase urine output. Translation: you’re losing more fluids than you realize.
- Pre-hydrate smart: Day before and morning of, drink like you normally do. Maybe throw in a salty snack or light sports drink to top things off. But don’t go overboard—this isn’t a water-loading contest.
- Post-race = rehydrate too: Just because you’re cold doesn’t mean you didn’t lose fluids. Once you get dry and warm, sip on water, tea, or a good recovery drink. Your body still needs refueling
Quick Dos & Don’ts
- Do drink at aid stations—even just a sip or two.
- Don’t force-feed water just out of habit. Listen to your body but remember that thirst can lag behind your needs.
- Do stay on top of hydration early. Waiting until you’re crashing is too late.
- Don’t use the weather as an excuse to skip your bottle or belt.
Chafing & Blisters in the Rain: Suit Up or Suffer
Let’s talk about the two things that’ll ruin your rainy run real fast: chafing and blisters.
Rain turns your favorite running gear into a torture device. That soft shirt? Now it’s sandpaper. Those go-to socks? Now they’re a swamp for your feet. So unless you want to finish the race looking like you wrestled a cheese grater, you need a chafe plan.
Lubrication: Your First Line of Defense
This isn’t optional—you must lube up on rainy days. Here’s where I go full-body armor:
- Inner thighs
- Groin area
- Underarms
- Around your chest/nipples
- Toes, heels, and foot hot spots
Use Body Glide, Vaseline, Squirrel’s Nut Butter, Aquaphor—I don’t care what your weapon of choice is, just slather it on.
One runner I coached once skipped lube on a rainy 10K because “he never needed it before.” He ended that race with raw thighs and bleeding armpits. Lesson learned.
Special Attention: Your Feet
Your feet are ground zero for rain-related disasters. Wet socks = blisters. Every. Time.
Here’s what works:
- Coat your toes and heels in Vaseline or anti-blister cream before putting on socks
- Try powder first, then lube if your feet tend to blister easily (sounds weird, works great)
- Some runners even smear Vaseline on top of their socks to help water slide off and reduce friction
Weird? Sure. Effective? 100%.
Nipple Defense 101
Let’s talk nips. Wet shirts + bounce = pain.
For guys: slap on some Body Glide or Vaseline — or better yet, cover ‘em. NipEaze, waterproof bandages, surgical tape. Heck, one guy told me he uses duct tape (pro move, brutal removal).
For women: under the sports bra band and strap zones — lube it up. Wet bras chafe like crazy.
Long Race? Plan to Re-Apply
Marathon or ultra? Don’t expect one pre-run lube job to get you through.
- Carry a mini tube in your belt
- Use the Vaseline sticks at aid stations (they’re there for a reason)
- Grab single-use packets (like Butt Butter) — they’re cheap and a lifesaver
One ultrarunner I know re-applies at mile 10, again at mile 18. His logic? “One minute of re-gliding saves hours of pain.” He’s right.
Waterproof Tape, Blister Fixes & Skin-Saving Hacks
Look, if you’re heading into a rainy run or long race, don’t just hope your skin holds up—prep like it won’t. Because once the chafing or blistering starts, you’re in damage-control mode. And it’s way harder to fix mid-race than it is to prevent it from happening in the first place.
Tape Up Like You Mean It
Blisters love moisture and friction. And in the rain, your feet become a friction factory. That’s where waterproof tape becomes your best friend.
Got a trouble spot? Tape it. Runners use stuff like kinesiology tape, Leukotape, even duct tape if they’re in a pinch. The key is using tape that sticks even when wet—think 3M Transpore or Leukotape. Stick it to clean, dry skin, and don’t apply over lube (tape won’t stay put on slippery skin).
Here’s where runners usually tape:
- Toes – wrap ‘em individually if they blister (some ultrarunners basically mummy-wrap their feet)
- Heels & Achilles – prime chafe zones
- Ball or arch – especially if you’re prone to hot spots there
- Nipples – trust me, tape ‘em or regret it
Tape works by creating a slicker second skin—so the rubbing happens on the tape, not your flesh. It’s that simple.
Want an extra-strong bond? Benzoin tincture. It’s a sticky liquid you rub on before applying tape. It’s overkill for a casual 5K, but in a wet marathon, that stuff turns your tape job into Fort Knox.
Moleskin, Patches & Plan B
Not into tape? Or need a backup plan? Moleskin or blister patches (like Compeed) can also do the trick. Pre-place them on known hot zones before you run. They hold up surprisingly well—just know that if your feet get soaked, even the best adhesive might peel eventually.
Quick tip: Always carry a couple of extras in your gear bag or drop bag, just in case.
Dress Like You Mean It
No amount of tape or lube can save you if your clothes are betraying you.
Tighter is better in the rain. Baggy shorts or cotton shirts? Recipe for chafing hell. Go for snug-fitting, sweat-wicking gear. Compression shorts, capris, fitted singlets. Leave the flappy stuff for laundry day.
Real-runner story: I once had a new marathoner skip foot lube on a rainy half. “Didn’t think it’d be that bad,” he said. By mile 10, his soaked socks had chewed his feet up like raw meat. Lesson learned. He’s now religious about lubing between the toes and heel with Body Glide when rain’s in the forecast.
Bottom Line: Taping, lubing, and dressing smart aren’t optional in wet conditions—they’re survival. Do it right, and you’ll run clean. Skip it, and you’ll be hobbling before the finish.
Phone & Electronics Protection: Don’t Fry Your Gear
Running with your phone is second nature now. But water + electronics? That’s a race-ending combo. One solid rainstorm can ruin your phone, short out your earbuds, or brick your GPS.
Here’s how to keep your tech dry when the sky opens up:
1. Get a Waterproof Case (or Fake It)
Best bet: Use a waterproof case like Lifeproof or OtterBox—especially if you’re racing in wet weather. Some even let you fully use your screen without issue. Test it first.
No case? Zip-lock to the rescue. Yep, a freezer bag. Squeeze out the air, seal it up tight, and boom—makeshift waterproofing. You can still tap through the plastic. Some runners double-bag just to be safe.
Pro tip: Bag the phone before it goes in your armband or waist belt.
2. Where You Stash It Matters
- Use inner waterproof pockets if your jacket has one
- Keep it close to your body—like waistband or inner pocket—not some exposed mesh pouch
- Your body heat helps it stay dry and avoid freezing up
3. Ask Yourself: Do I Even Need My Phone Today?
Some runners ditch it entirely for races.
GPS watch = ✅
Race photographer = ✅
Meeting friends after = ✅ (as long as you have a solid plan)
Leave the phone in your gear check or car and enjoy the freedom. If you do this, just make sure someone knows where to find you post-race.
4. Protect Your Other Gear Too
- GPS watches are usually fine in rain—but double-check your model’s waterproof rating
- Headphones? Use a cheap backup pair for wet runs
- Running with a GoPro? Use waterproof housing or at least slap on a silicone sleeve
- Hearing aids or medical devices? Look into specialized covers. Don’t wing it—those are too important to gamble with
5. Rain Messes with Touchscreens
If it’s pouring, expect touchscreen chaos—ghost touches, unresponsive swipes, the works.
Trick: Duck under shelter or shield your screen with your hat brim if you need to change a playlist or check your map mid-run. Some runners mess with Vaseline on their screens to repel water, but it can kill responsiveness—so test that hack on your own time.
Mental Game for Racing in the Rain
You trained your body — now you’ve gotta train your mind. Because when the skies open up on race day, your mindset becomes your greatest weapon.
Running is already 90% mental, right? In the rain, that number jumps to about 150%. But here’s the good news — if you flip your mindset from “this sucks” to “bring it on,” that rainy race can go from miserable to legendary.
Here’s how to get your head in the game when the weather turns nasty:
1. Reframe the Rain
Don’t see it as a setback — see it as a test.
Rainy races weed out the pretenders. Most people hate discomfort. But you? You’ve trained for this. You’re built for hard things.
Tell yourself:
“Rain doesn’t ruin a run — my mindset does.”
If you believe the rain’s out to ruin your day, it will. But if you see it as fuel — as the thing that makes this run mean something — suddenly you’re in control.
Heck, I’ve told runners to imagine they’re the star in a gritty sports movie montage, running through the storm while everyone else quits. Sounds cheesy, but it works.
💪 Need a real-world boost?
Remember the 2018 Boston Marathon. Absolute downpour. Freezing. Headwinds straight out of hell. And you know what happened? Des Linden gutted it out and won while elites dropped like flies. She didn’t have a magical race — she just didn’t break. Be like Des.
So yeah, remind yourself of your own rainy day grit. Every drippy training run you survived? That’s mental ammo for race day.
2. Visualize the Chaos
Don’t just picture crossing the finish line in glory — picture the ugly stuff too.
Imagine the puddles. The soaked socks. The foggy glasses. Picture how you’ll handle those things:
- “If my hands are freezing, I’ll flex them and keep moving.”
- “If my shoes get squishy, I’ll laugh and think, ‘Well, I’m waterproof now.’”
Why visualize that mess? Because when it actually happens mid-race, you won’t panic. You’ll nod and think, “Ah, there it is — just like I expected.” And keep pushing.
3. Embrace the Suck — Then Find the Joy
Yep, it might suck. You might be cold. Soaked. Numb fingers. Vision blurry. That’s the price of entry.
But once you stop resisting it — once you stop mentally whining and just accept, “this is the game today” — you unlock a new kind of power. You free up energy to actually enjoy it.
You might notice how quiet the streets are. You might smile as you splash through puddles like a kid again. Or you might just feel like a total badass for being out there while others stayed curled up at home.
That’s when rainy races become stories you’ll tell for years. Not because they were easy — but because you showed up and didn’t fold.
4. Lean on Your Training
This ain’t your first rodeo.
Run in the rain before? Good — remind yourself of that.
“I crushed that 12-miler last month in a downpour. Six miles today? I got this.”
Didn’t train in rain? No problem. Think back to other tough runs — heat waves, brutal hills, days when you almost quit but didn’t. Proof you can suffer and still finish strong.
Your legs know what to do — trust them. Now let your mind match that confidence.
5. Mantras + Milestones = Mental Armor
Mantras are your mental armor when the weather starts chipping away at your willpower. Simple phrases like:
- “Strong and steady through the storm.”
- “Rain builds resilience.”
- “This is making me tougher.”
One of my go-to reminders for runners:
“If you only train in comfort, don’t expect to perform in chaos.”
Say that out loud when the wind slaps you in the face. Remind yourself: this is the work that matters. This is why you trained.
Bonus tip: break the race into chunks. Make it to the next mile marker. The next aid station. Every checkpoint is a win. Mini victories = major momentum.
Story time:
One runner told me she was about to give up around mile 18 of a marathon — soaked to the bone, miserable, ready to DNF. But then she remembered her friends and family were tracking her. She started chanting, “I can do this. I am doing this.”
That got her to the finish line — exhausted, drenched, and proud as hell.
Comfort at the Finish Line
Sometimes just knowing you’ve got warm clothes, a towel, and a hot cup of coffee waiting is enough to pull you through the storm.
Picture peeling off those soggy shoes. Imagine stepping into dry socks. That post-race burrito or hot cocoa? That’s your reward. Chase it.
Each mile brings you closer. One wet foot in front of the other.
Safety Tips for Racing in the Rain
Because slipping, skidding, or freezing your butt off mid-race ain’t part of the plan.
Let’s be real—racing in the rain sucks. But sometimes, Mother Nature just doesn’t care about your PR. The good news? You can still crush it without face-planting, skidding on paint lines, or freezing in a puddle post-finish. It’s all about adapting.
Here’s your wet-weather survival playbook, no fluff, just real talk.
Watch Your Footing
Wet roads are tricky. Painted lines? Like stepping on ice. Cobblestones and wooden bridges? Good luck staying upright if you’re bombing downhill on those.
Pro move: Take shorter, quicker steps when you see sketchy terrain. And slow the heck down if it looks slick—trust me, falling costs more time than playing it safe.
No Sudden Moves
Everyone’s dodging puddles. You zigzag once, fine. Do it at mile 3 in a pack of 300 runners? You’re asking for a wipeout—or worse, taking someone else down with you.
Keep it steady, keep your head up, and leave a little space in case the runner in front of you eats it.
Be Seen (and Not Run Over)
Rain = darker skies = drivers who can’t see for crap.
If it’s an open course, wear something bright or reflective. Even better? Clip-on blinking lights. Cheap, easy, and they might save your life.
One year, I ran a local 10K in a storm and only finished the race because a volunteer spotted my blinking shoe light just before I hit a pothole the size of Texas. That little $12 light? Totally worth it.
Also, use those mylar blankets they hand out pre-race. Wrap up while waiting around, or even drape it across your shoulders early in the race if you’re running in open traffic. Just don’t let it become a parachute.
Lightning = Game Over
If there’s lightning, don’t be a hero. Most races will pause or cancel if storms roll in. And if they don’t? You have permission to bail. There’s no medal worth getting zapped for.
Race tip: Follow official updates via Twitter, race apps, or PA systems. If they tell you to take shelter—you take shelter.
Avoid Hypothermia on the Course
Cold rain is sneaky. You feel fine during mile 5, then mile 9 hits and suddenly you’re shivering, stumbling, and your fingers feel like popsicles.
Watch for:
- Shaking
- Goosebumps
- Feeling clumsy or foggy
If that happens, get to a medical tent or warm area fast. Fueling during the race helps too—carbs = heat. Even a cup of sports drink can help stoke your internal fire.
Go Easy on Downhills
Wet downhill + tired legs = recipe for disaster.
Slow it down. Land midfoot if you can and use short, quick steps—not heel strikes that’ll send you sliding.
Remember: you’re racing the clock, not gravity.
Trust the Volunteers
If a volunteer shouts “Slippery corner ahead!”—listen up. They’ve seen the spills, the potholes, the poor soul who didn’t slow down. They’re basically your mid-race spotters.
Post-Race: Dry Off, Warm Up, Don’t Die
Yeah, I’m joking. Kind of. Once you stop moving, the cold hits fast. You just ran a hard race—your body’s cooked. That post-race chill is real.
What to do:
- Keep walking right after the finish. Get your heart rate down slowly.
- Wrap yourself in that mylar blanket like a baked potato.
- Get out of wet clothes ASAP. Change in a porta-potty if you must. I’ve done it—it’s not glamorous, but it beats standing around soaked and shivering.
Hot Spots? Fix ‘Em
If your feet are talking to you mid-race (aka “Ow, my blister!”), don’t tough it out by limping. That throws off your form and opens you up to bigger injuries.
Hit the medical tent. Tape it. Adjust your sock. One minute now could save you a week of hobbling later.
Know When to Pull the Plug
Sometimes, the weather wins.
If you’re shivering uncontrollably, can’t think straight, or the road looks more like a river, it’s okay to call it. DNF doesn’t mean you’re soft—it means you’re smart.
You live to race another day. Wet shoes and ego bruises heal. Broken bones and hypothermia? Not so fast.
Post-Race Protocol: Don’t Let the Chill Take You Out
You crossed the finish. Boom. But you’re not done yet—not if it’s cold and wet.
Here’s your must-do checklist for getting dry and warm fast:
1. Keep Moving
Resist the urge to collapse or sit on the curb. You’re soaking wet, and the second you stop running, your internal furnace cools fast. Walk for 5–10 minutes.
Let your body transition out of race mode without crashing.
2. Get Dry. Now.
Find your gear bag. Towel off. Swap out those soaked socks, shirts, shorts—all of it.
Even if it means doing a quick-change under a finisher’s poncho or porta-potty stall (been there), it’s worth it.
Dry clothes = warm body = safer recovery.
3. Rehydrate and Refuel – No Skipping This Part
You crossed the finish line, soaked to the bone, and maybe a little delirious. Now’s not the time to wander around pretending you’re fine. Refuel and rehydrate like it’s part of the race.
Here’s the thing: Cold weather messes with your thirst signals. Just because you’re not dying for a drink doesn’t mean you’re not dehydrated.
Get something with electrolytes into you—ASAP. Sports drink, warm broth, chocolate milk—whatever you can stomach.
And don’t forget food. Within 30–60 minutes, eat something with carbs and protein to kickstart muscle repair. A protein bar, banana with PB, even a warm sandwich if there’s food at the finish line—just get it in.
Pro move: If the race offers hot coffee, tea, or cocoa—grab it. Warm drink = hydration + heat = double win.
4. Warm Up Slowly (No, Not with a Scalding Shower)
If you’ve got a hot shower waiting, great. Just don’t sprint in and crank it to lava-mode if you’re frozen stiff.
I’ve seen runners get woozy or even faint from the temp shock.
Start with layers, blankets, warm drinks. Then ease into that shower (keep it warm, not boiling).
No access to one right away? No problem. Dry clothes + car heater = heaven. Heated seats? That’s luxury recovery.
5. Do a Damage Check
Once you’re warm and breathing like a human again, check your feet and skin.
Blisters? Chafing? Anything raw?
Clean it. Treat it. Bandage it. And if you lubed and taped like a boss beforehand, you might come out clean.
But don’t skip the inspection—it’s better to catch a hotspot early than deal with a nasty blister later.
6. Stretch Gently – Or You’ll Regret It Tomorrow
I know—it’s tempting to plop on the couch and not move for the next six hours. But cold, rainy miles tighten you up like a knot.
After that shower (or while still warm), hit a few gentle stretches or foam rolling. Target the spots that took the brunt today—calves, quads, IT band.
Just a little goes a long way to keep DOMS (delayed-onset soreness) from wrecking your week.
7. Celebrate the Slog – You Earned It
Let’s not forget the mental game here. You didn’t just run—you conquered rain, cold, maybe even wind. That’s something to be proud of.
Reflect. What went well? What gear saved your butt? What sucked—and how can you fix it next time? That’s how you level up.
💡 Real runner story: One guy I know ran a wet, cold marathon and skipped the dry clothes after. Ended up in the med tent with borderline hypothermia. He learned his lesson. Now? He crosses the line, walks it off, throws on a dry hoodie and hat, and sips hot chicken broth from a thermos. That’s his new finish-line ritual. You live, you learn, you adapt.
Pro tip: Party later. Change first. Even if there’s a beer garden and a DJ, you’ll enjoy it way more when you’re dry, warm, and not shivering like a human maraca.
And if the post-race chills hit hard? Don’t be shy—head to the med tent. They’ve got thermal blankets, heaters, and people who’ve seen it all. No shame in needing help after a tough effort.
Final Take: Rainy Races Don’t Cancel You—They Toughen You
Look, running in the rain isn’t everyone’s dream. But it can be one hell of an adventure—and you’ll remember it forever.
Prepping for the weather, running smart on slick ground, and recovering like a pro afterwards? That’s what makes you one of the gritty ones. One of the runners who doesn’t flinch when conditions get nasty.
It’s not about being dry (spoiler: you won’t be). It’s about being smart, safe, and unstoppable.
So next time the sky opens up, don’t whine—gear up and go. Run through puddles. Laugh at the mess. Be the badass who shows up when others bail.
As I always say: Rainy runs teach you to stay calm when everything around you is uncomfortable. That’s a skill that goes way beyond the finish line.
Lace Up. Show Up. Splash On.
Puddles? Bring it.
Wind? You’ve faced worse.
Cold? You’ve got layers.
What matters is that you didn’t back down.
So run through the storm. Change into dry gear. Grab a hot drink. And walk away stronger than you started—mentally and physically.
You didn’t melt. You conquered.
See you in the rain.


 A no-budget budget is a simple approach to managing money without tracking every dollar. Instead of setting strict spending limits for every category, you focus on three basic steps: automate savings, cover fixed expenses, and spend the rest guilt-free. This method works well for people who don’t want to stress about budgeting but still need financial control.
 Reduce Unnecessary Expenses Without Thinking