When To Run Through Pain & When To Stop?

When To Run Through Pain

Whether you just took up running or a serious athlete, log enough miles, and you’ll experience aches and pains in your muscles, joints, bones, and connective tissue.

In some cases, you might able to keep running through the discomfort, but often serious running pain means that you need to assess your running routine, even stop training altogether.

So how do you know when it’s okay to run through the pain, when to slow it down, and when to rest and go see a doctor?

If you’re looking for answers, then you’re in the right place.

In this post, I’ll briefly explain the different types of running pains, with suggestions on when it’s okay to keep training and when to stop.

Sounds great?

Let’s get started.

Word of caution. Let the record clearly state that I’m not encouraging anyone to keep running through injury.

If you have chronic pain, get it checked out by a professional.

I’m not a doctor nor play one on the internet.

Measure your Pain

Running pains are not created equal.

Instead, these come in many forms, whether it’s a sore muscle, achy joint, bone fracture, inflamed tendon, or throbbing headache.

They also vary from one runner to the next.

To help you decide how to best react to these running pains, consider grading them on a pain scale of 1 to 10.

Here’s how.

Mild Pain 1-3

You experience it at the beginning of a run, but it usually subsides as you start to warm up and continue running.

In general, it’s safe to run through mild pain.

If you have any problem areas, opt for the RICE protocol after your session.

Moderate Pain 4-6

This type of pain manifests as you start running, but stays at a tolerant intensity throughout the workout.

While you can still run through it, it’s better to listen to your body and adjust your training approach accordingly to prevent things from getting worse.

Severe pain – 7 to 10

This type of pain is so serious that you feel it before, during, and after your runs.

In fact, the agony increases as you log in more miles, forcing you to limp or change your gait.

Never run through this type of pain as it will do you more harm than good.

Instead, take as many days off from training as long as you have symptoms.

You should also consult your doctor, who will recommend the right treatment and prevention options to help you return to running pain-free.

Where is the pain?

Now let’s dive into some of the most commonly affected limbs while running.

Pinpointing the exact affected area can help you determine what’s going on and how best to proceed.

runner training through pain

Pain Region – The Head

If you’re experiencing a headache after running, it could be caused by bright sunlight (especially squinting), dehydration, or exhaustion (due to swelling blood vessels).

To avoid it, make sure (1) you’re drinking plenty of water before, during, and after your runs; (2) wear a hat with a brim and running sunglasses when running in the sun; and (3) change your running duration or time of the day.

But if you often get headaches after running, or suffer from any other unusual symptoms, such as a stiff neck, confusion, double vision, vomiting, or God forbid, fainting and loss of consciousness, then seek medical care.

Pain region – The Foot

Since the feet take the brunt of the repetitive pounding of the sport, it’s an injury-prone region in runners.

The foot is an incredibly complicated structure made up of a network of bones, tendons, ligaments, muscles, and fascia that work together in harmony and serve as the foundation to every running step you take—and there are plenty of things that can go awry with this key body part.

One dysfunctional cog and the whole machine can be slowed down to a screeching halt—or stop functioning altogether.

Let’s look at a few issues.

Reason 1 – Improper Running Shoes

If your feet feel tingly or numb, poor blood circulation could be the culprit.

Check if your shoes are too tight.

If it’s the case, loosen them up and give your toes enough wiggle room.

Apply the RICE protocol as soon as you get home.

Seek medical care if the numbness persists.

Reason 2 -Heel Pain

If you experience most of the pain in your heel, especially if it’s worse in the morning, you could be dealing with plantar fasciitis.

Every case is different.

You might push through mild plantar fasciitis, but in other cases, any extra miles can cause more damage to the ligament.

If your pain is severe, stop training for a few days, then start running again once you’re pain free.

Reason 3 – A Blister

Blisters are by no means a serious injury, thereby, running through them should be no problem, as long as you minimize the friction against your skin.

Apply gel, jelly-like blister bandages or put a tissue over the affected area

Pain Region – The Shins

The lower leg, including everything between the knee and ankle, is a prime spot for aches and pain thanks to running’s high impact nature.

Runners can suffer from a couple of different overuse injuries that strike this region.

Reason 1 – Shin Splints

If the pain is neither on the front or the back of the shins, you could have shin splints, which is a common overuse injury among beginner runners who try to do too much too soon.

Shin splints are the catch-all term used to describe pain below the knee either on the inside part of the leg (medial shin splints) or on the front outside part of the leg (anterior shin splints).

Shin splints can often be treated with rest and ice, but if symptoms don’t improve, consult your physician to make sure you have a stress fracture.

Reason 2 – Stress Fracture

If the pain starts off mildly and gradually gets worse the more miles in, it could be a stress fracture, which requires immediate medical attention.

Stress fractures consist of small cracks, or severe bruising, in a bone that causes discomfort and pain.

It often strikes runners in the shins and feet.

The condition happens when muscles become fatigued and can no longer absorb added shock.

Taking time off running is essential as continued strain on the bone can lead to more serious injury.

And you don’t want that.

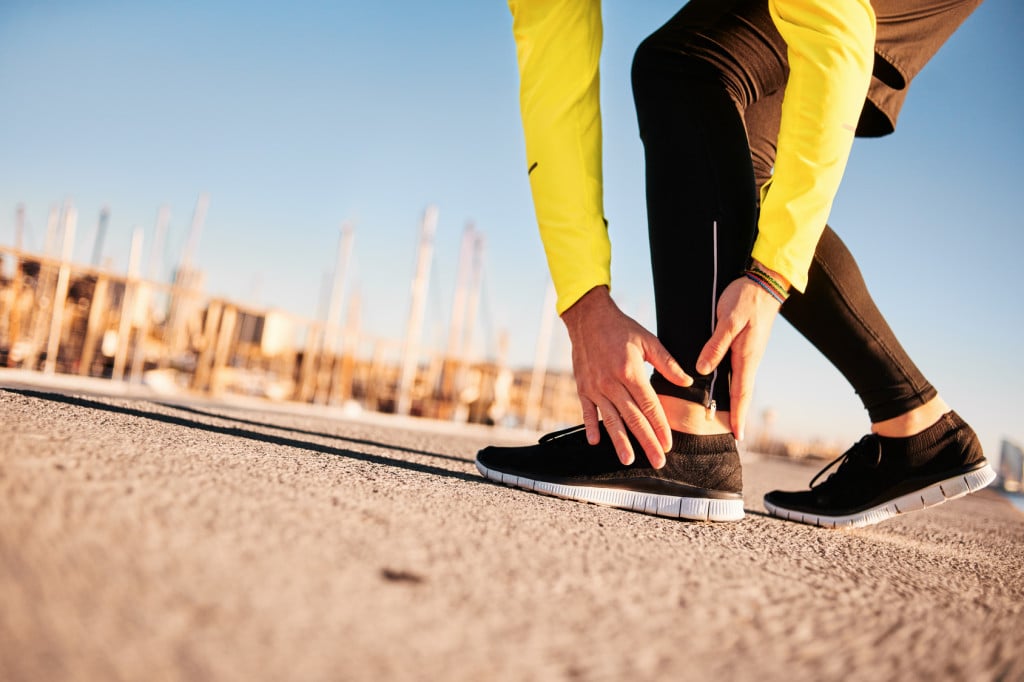
Pain Region – The Ankle

Your ankle joint is one of the most important running joints—so it’s no surprise that it’s a common source of pain.

The joint forms the connection between your body and the ground, and there are several roots for running-induced ankle pain.

The following are the most common:

Reason 1 – Ankle Sprain

If you sprain your ankle during a run, stop running, especially if the joint is swollen or the pain is intense.

Running on a sprained ankle may damage the affected ligament, making you prone to further injury.

As a rule of thumb, get home straightway, and apply the RICE method.

Try to keep the affected joint mobile but don’t overstress it.

Reason 2 – Achilles Tendonitis

Experience soreness on the back of the ankle?

It could be Achilles tendonitis, which is an overuse injury of the Achilles’ tendon, the large tendon that attaches your calf muscles—the gastrocnemius and soleus— to the back of your heel bone.

Under repeated load, the tendon contracts and is forced too hard, resulting in inflammation or irritation.

If you have it, stop running and go home.

Next, rest, apply ice, compress, and keep the affected limb raised above heart level.
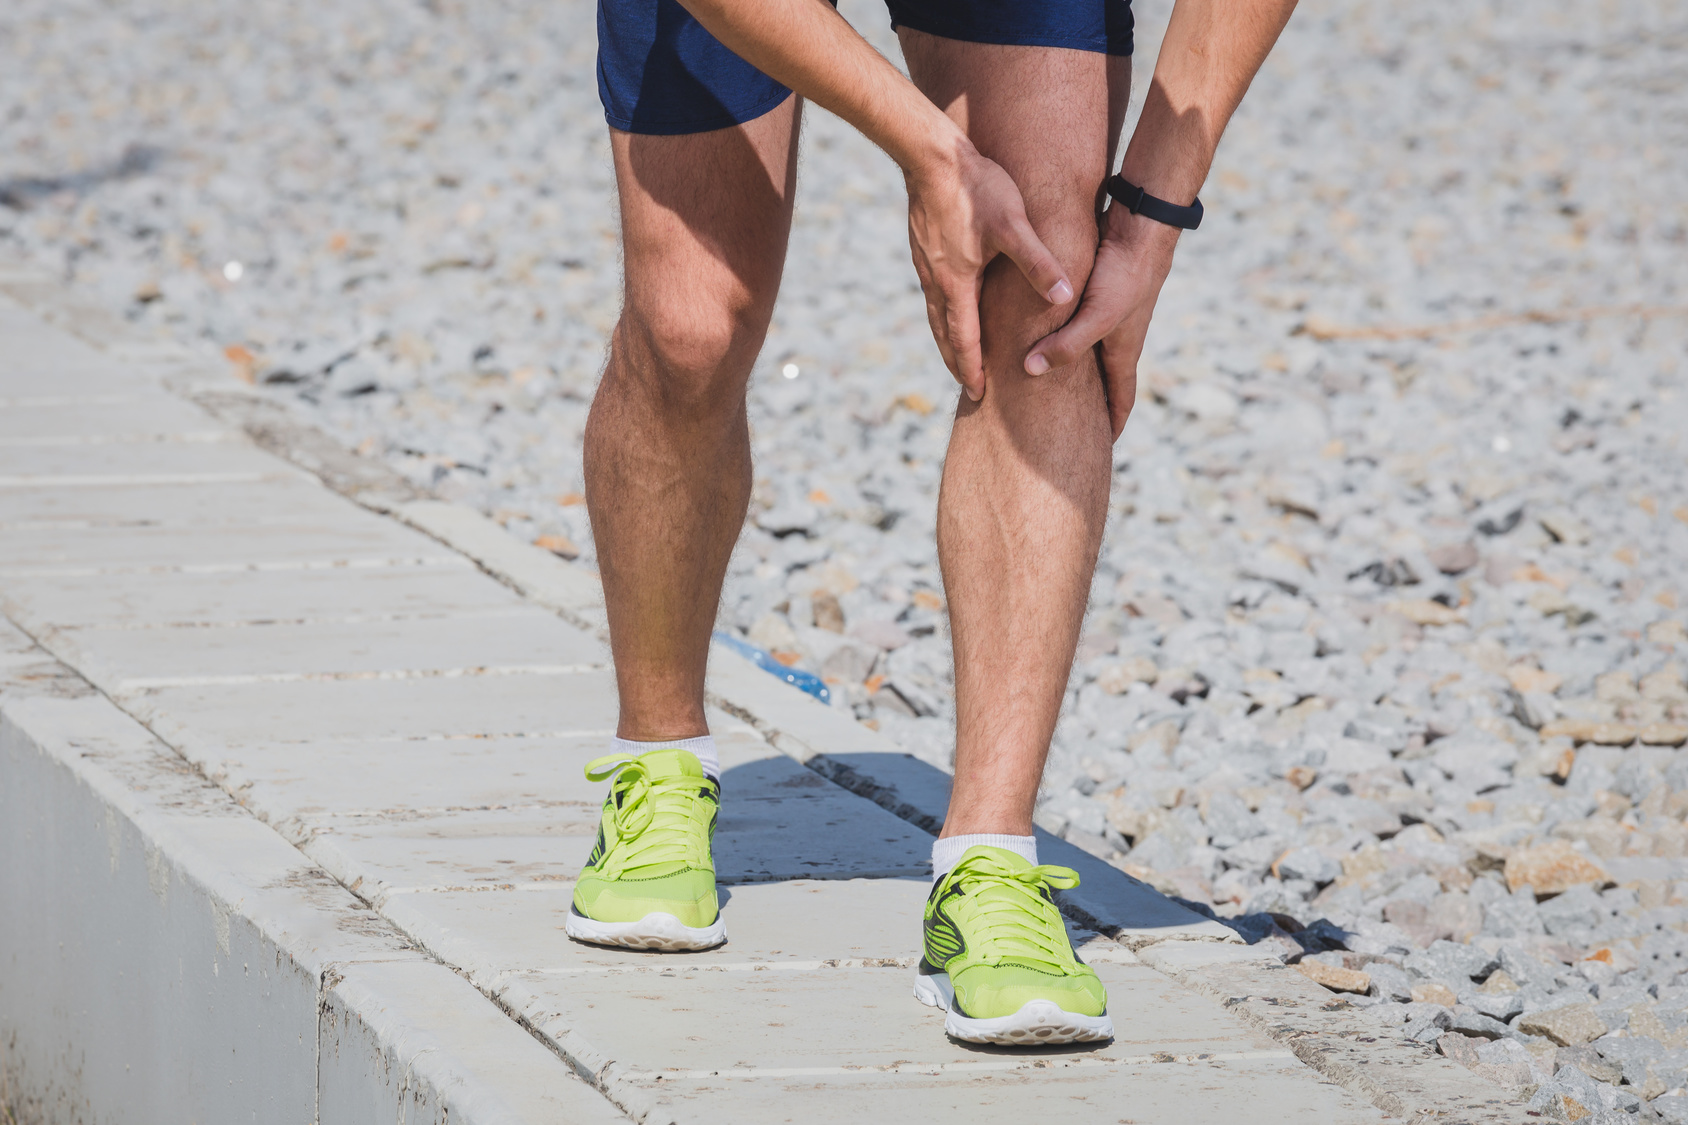
Pain Region – Knees

The knees are a problematic area for runners as there are different overuse injuries that involve knee pain.

In fact, out of all aches and pains that plague runner, knee pain from running is the most frustrating and debilitating.

Reason 1 – Runners Knee

If you feel pain under or around the kneecap, runners’ knee might be the culprit.

Also known as patellofemoral pain syndrome, the condition consists of damage to the cartilage under the kneecap, and it’s often caused by movements that load the knee joint on a flexed position.

Stop running for a few days, and RICE the affected knee.

You should also work on strengthening your quadriceps and stretching your hamstrings and hip muscles.

Reason 2 – Iliotibial Band Syndrome

If you feel pain around the knee on the outside of your leg, it could be the inflammation of the iliotibial band.

The IT band stretches along the outside edge of the upper leg, from hips to the knee.

Rest immediately the moment you notice IT band pain.

That means shorter distances or no running at all.

The condition can turn chronic if you don’t give yourself a break from running.

Reason 3 – Patellar tendon strain

Feel the pain just below the kneecap?

If so, it could be a patellar tendon strain, which is an inflammation of the tendon surrounding the kneecap (patella).

This tendon is a key part of leg structure, attaching the patella to the shinbone as well as helping keep the patella in line as the leg bends and straightens during the running gait.

Running through a tendon strain is asking for trouble.

If the pain doesn’t subside within a few days, have it looked at.

Pain region – The Hips

Prolonged sitting often causes tight hip flexors, which are usually made tighter the more miles you log in without following a consistent stretching routine.

That’s why hip pain from running is a common concern in the running world.

Reason 1 – Typical Soreness

When it’s just soreness.

In most cases, the pain subsides as you get fitter and gain more experience running.

You should also stretch and use a foam roller to improve mobility and release tension in that area, especially in the hip flexors.

Reason 2 – Bursitis

If you notice pain or swelling directly in the joint, then you could be dealing with hip bursitis.

If it’s the case, halt your running routine and opt for pain-free cross-training options and stretches you can do at home.

Pain region – The Lower back

Running’s high impact nature can take a toll on your back, causing soreness in the lower back, especially in runners taking up the sport for the first time.

Experience back pain during a run?

Try stopping and stretching for a few minutes.

If symptoms don’t improve, stop running altogether, and seek treatment.

Most cases of back pain are caused by a specific cause that you need to address before it gets better.

To prevent lower back pain in general, work on strengthening your core as well as trunk control and unilateral lower-body resistance training.

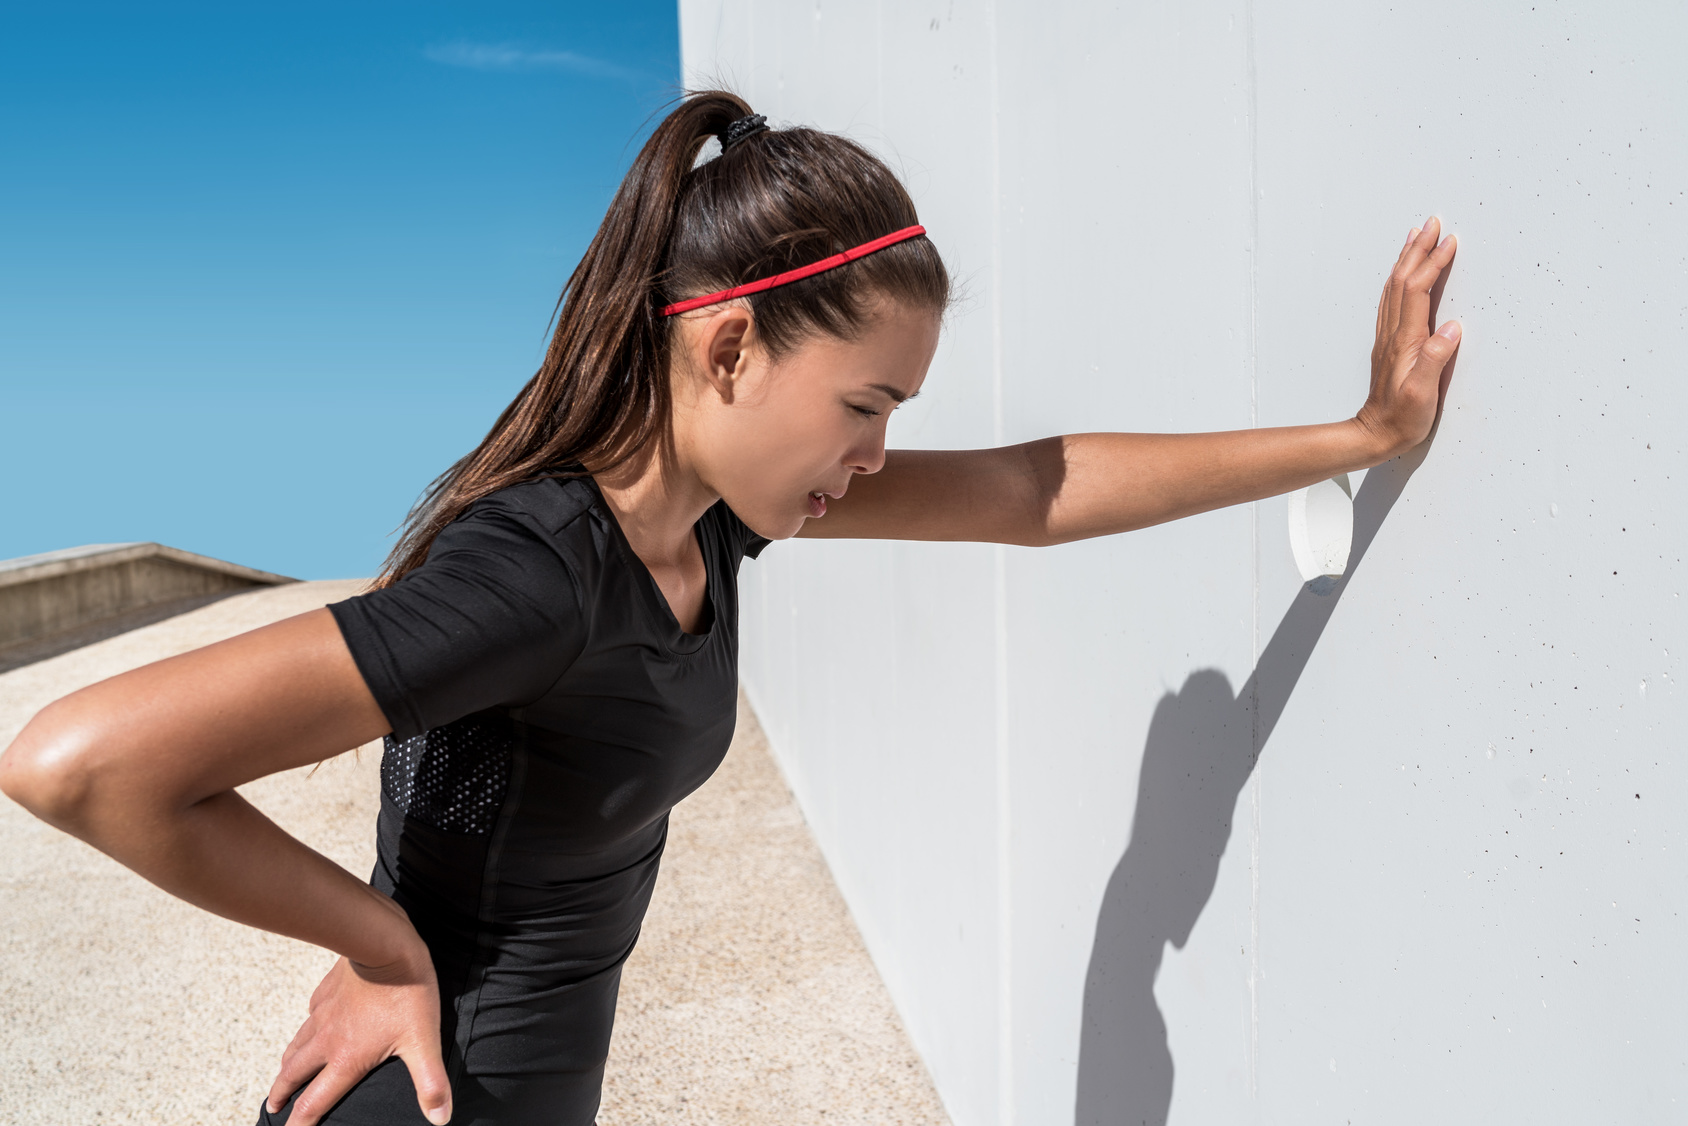
Pain region – The Chest

Stop running on the sport if the pain is spreading to your neck or shoulder and/or being accompanied by double vision, breathlessness, profuse sweating, and faintness.

In some cases, these are the symptoms of a heart attack.

Next, seek medical help immediately —or pray someone is nearby to help.

Conclusion

There you have it.

The above covers some of the most common pains runners experience during training as well as how to proceed in the presence of pain.

The key thing is to always listen to your body and readjust your training approach accordingly.

The rest is just details, as the saying goes.

Please feel free to leave your comments and questions in the section below.

In the meantime, thank you for dropping by.

David D.

Unlock Speed & Agility: How to Incorporate Strides into Your Running Routine

how to run faster

If you’re a beginner looking to delve into the world of running strides, you’ve come to the right place.

Running strides can be a valuable addition to your training routine.

They introduce your body to faster paces and speedwork, help you prepare for challenging sessions, and allow you to loosen up after easy workouts. In essence, by incorporating strides into your running routine, you’ll be taking significant steps toward achieving your running goals.

So, what exactly are running strides, and why are they important? In this post, we’ll answer these questions and guide you on how to integrate strides effectively into your weekly running regimen. Let’s dive in and get started.

What are Strides in Running?

Whether you’re a 10K beginner, cross country athlete, or training for the 9th marathon, strides are key for building coordination and speed—the kind you need to reach your full running potential.

Strides, also referred to as accelerations, are a valuable tool in a runner’s training regimen, regardless of their experience level. These short bursts of speed can help you build coordination, increase speed, and enhance your overall running performance.

Strides are brief, controlled bursts of speed during a run. They typically involve transitioning from a relaxed jog to nearly 95 percent of your maximum speed and then gradually decelerating to a stop. The goal is to run smoothly, focusing on good form and controlled effort.

Purpose of Strides:

Strides serve several purposes in a runner’s training routine:

  • Speed Development: Strides help improve your top-end speed, which can be beneficial for finishing races strongly or achieving personal records.
  • Running Mechanics: During strides, you can concentrate on your running form, ensuring that you maintain proper posture, arm movement, and foot placement.
  • Coordination: Strides enhance your neuromuscular coordination by requiring precise control over your running motion.
  • Anaerobic Capacity: These short, intense efforts engage your anaerobic energy system, improving your body’s ability to handle faster paces.

Why Do I Need To Do Running Strides?

Running strides, those brief and speedy bursts during your workout, offer a multitude of advantages that can significantly boost your running performance. Let’s dive into why you need to incorporate them into your training regimen:

  1. Speed Enhancement:

Strides provide a convenient way to introduce speed work into your training routine without dedicating an entire day to high-intensity workouts.

They help you acclimate your body to running at a faster pace, preparing you for hard training sessions or races.

  1. Improved Running Technique:

Strides are an effective tool for refining your running form and enhancing your running economy. By reinforcing proper running techniques, they make you more efficient.

They encourage a focus on aspects like posture, arm movement, and foot placement, promoting better running mechanics.

Strides can also increase your stride length, further improving your running mechanics and speed.

  1. Time-Efficient:

Perhaps one of the most appealing aspects of strides is their time efficiency. You can reap significant benefits in just a few minutes.

Strides can be seamlessly integrated into your training, whether it’s after an easy run as post-run drills or as part of a structured workout.

  1. Versatile Location:

Strides don’t require a specialized location. You can perform them virtually anywhere as long as you have enough space to accelerate and decelerate safely.

Whether it’s a track, a grassy field, or a quiet road, you can easily incorporate strides into your training terrain.

  1. Mental Focus:

Strides demand a high level of concentration and control, which can sharpen your mental focus and resilience.

Mastering the art of striding with precision can translate to improved race performances, as you’ll be better equipped to maintain your form during the toughest moments of a race.

Additional source – Here’s the full guide to average stride length.

picture of sunburn

How To Perform Running Strides

Here’s a comprehensive guide on how to execute them effectively:

  1. Choose Your Terrain:

Find a flat, straight surface that’s long enough to sustain a 30-second burst of speed. A typical range is about 250 to 300 feet, but adjust as needed based on your fitness level.

Ideal locations include tracks, long stretches in local parks, or quiet dead-end streets away from traffic.

  1. Start Gradually:

Begin the stride by running at an easy pace for approximately five seconds. Focus on maintaining a quick and short stride during this initial phase.

  1. Accelerate Smoothly:

Gradually increase your speed as you progress through the stride. Lengthen your stride and put in more effort.

By the time you reach the three-quarter mark of your chosen distance, you should be running at close to your maximum speed.

  1. Decelerate Gradually:

As you near the end of your chosen distance, start to slow down. Shorten your strides and ease into a gentle deceleration.

Avoid abrupt stops, as these can strain your muscles and disrupt your form.

  1. Transition to a Jog:

After completing the stride, transition smoothly into a slow jog. This phase helps in recovery and gradually brings your heart rate down.

  1. Post-Stride Walk:

Walk for one to two minutes after your stride to facilitate recovery and allow your heart rate to return to a comfortable level.

  1. Repeat as Desired:

You can incorporate multiple strides into your workout routine, with each one separated by a short recovery period.

The number of repetitions and the frequency of strides depend on your fitness goals and the specifics of your training plan..

Strides – The Running Technique

When it comes to running strides, having the right form is crucial to maximize their effectiveness and minimize the risk of injury. Here’s a breakdown of the key elements to focus on:

Posture Is Paramount:

Maintain an upright, tall posture throughout your stride. Keep your back flat and your core engaged.

Slightly lean forward from the ankles, creating a subtle forward tilt. This helps you harness the force of gravity for propulsion.

Embrace Relaxation:

Strides should feel effortless and fluid. Avoid tensing up any part of your body.

Unclench your jaw, let your cheeks dangle, and relax your facial muscles. Facial tension can sometimes translate into bodily tension.

Loosen Up:

Keep your body relaxed and free from tension. Ensure your arms, shoulders, and neck are loose.

Let your arms swing naturally at your sides. Avoid overextending or flailing them, as this can waste energy.

Short, Quick Strides:

Keep your strides short and quick to minimize overstriding.

Land Lightly:

Aim to land on your midfoot, closer to your toes, rather than striking with your heel. This promotes a more efficient stride.

A light, controlled landing reduces the risk of jarring impact on your joints and muscles.

Focus on Breath:

Pay attention to your breathing rhythm. Maintain a steady and controlled breath pattern.

Sync your breathing with your stride to ensure a smooth flow of oxygen to your muscles.

Additional resource – Bolt top running speed

When and How Many Running Strides For Beginners

Running strides can be integrated into your workout routine in various ways, each offering unique benefits:

  • Warm-up: Strides can be used as part of your warm-up routine. They help elevate your heart rate, increase blood flow to your running muscles, and mentally prepare you for the upcoming run, all of which contribute to improved performance.
  • Weekly Runs: Incorporate strides into your weekly runs, particularly during easy runs or as part of your speed workout. This allows you to practice speed and form in a controlled manner while breaking up the monotony of long, steady runs.

To maximize the benefits of strides, try adding them to your routine for a few weeks and assess how they impact your running. As a general guideline, aim to perform strides two times a week, with each session consisting of 4 to 8 strides, each lasting approximately 20 to 30 seconds.

Additional Resource – Here’s your guide to cross-country running

Do A Variety Of Strides

While we’ve covered the fundamentals of running strides, it’s essential to recognize that there’s more to this valuable training tool than meets the eye. F

or beginners and seasoned runners alike, delving into different types of strides can provide a more comprehensive understanding of how to incorporate them effectively into your training regimen.

Downhill Strides:

  • Purpose: Downhill strides involve running at a faster pace while descending a gentle slope. They are excellent for building speed, coordination, and leg turnover.
  • Benefits: Downhill strides challenge your body in a unique way by emphasizing eccentric muscle contractions, which can enhance strength and stability. They are particularly useful for downhill sections in races.
  • Technique: When doing downhill strides, focus on maintaining control and balance. Keep your strides short and quick to avoid overstriding, which can lead to injury.

Uphill Strides:

  • Purpose: Uphill strides involve running at an increased effort level while ascending a hill. They improve strength, power, and cardiovascular fitness.
  • Benefits: Uphill strides target your quadriceps, glutes, and calf muscles, helping to build strength and endurance for hillier courses. They also improve your aerobic capacity.
  • Technique: When tackling uphill strides, maintain an upright posture and focus on driving your knees and arms to generate power. Shorten your stride and take quicker steps.

Strides on a Track:

  • Purpose: Utilizing a standard 400-meter track can be an excellent way to measure your strides accurately and gauge your progress over time.
  • Benefits: Strides on a track allow you to fine-tune your pacing and get a better sense of your speed improvements. They are a fantastic addition to your speed workout routine.
  • Technique: Run one stride along the straight section of the track and recover by jogging or walking around the curve. Repeat this process for several laps.

Progressive Strides:

  • Purpose: Progressive strides involve gradually increasing your speed within each stride. They are effective for teaching your body to transition smoothly from easy to hard efforts.
  • Benefits: Progressive strides mimic race scenarios where you start at a comfortable pace and progressively increase your effort. They improve your ability to handle pace changes during a race.
  • Technique: Start each stride at a slower pace, and then pick up the speed as you go along. The last few seconds of the stride should be at close to maximum effort.

Strides with Form Focus:

  • Purpose: These strides emphasize running with impeccable form. They can be integrated into your regular runs to reinforce proper technique.
  • Benefits: Strides with form focus help engrain good running habits and make you more conscious of your technique during races and workouts.
  • Technique: Concentrate on specific aspects of your form during these strides, such as arm swing, posture, or foot placement.

Progressing Your Running Strides:

As a beginner, incorporating running strides into your training routine is an excellent way to improve your speed, running form, and overall performance.

Although strides have a lot to offer, it’s also key to follow a structured progression plan to ensure continued growth and prevent plateaus.

Here’s how you can progress your stride workouts effectively:

  1. Frequency:

Start with one stride workout per week: When you’re just beginning, one session of strides per week is sufficient. This allows your body to adapt gradually to the increased intensity.

Progress to two sessions per week: After a few weeks of consistent strides, consider adding a second session. Ideally, space these sessions a few days apart to allow for recovery.

  1. Intensity:

Begin with moderate intensity: Initially, focus on strides that are around 80-90% of your maximum speed. This moderate intensity helps your body adapt to the demands of faster running.

Increase intensity gradually: As you become more comfortable with strides, start incorporating faster bursts, reaching closer to 95-100% of your maximum speed. This higher intensity can further improve your speed and running economy.

  1. Duration:

Start with shorter strides: Initially, aim for 20-30 second strides. This duration allows you to focus on form and get used to the feeling of running at higher speeds.

Extend stride duration: Over time, consider gradually increasing the duration of your strides. You can work your way up to 40-60 second strides, but maintain a strong focus on maintaining proper form throughout.

  1. Recovery:

Shorten recovery periods: In the early stages, take longer recovery periods between strides to allow for adequate rest. A 1-2 minute recovery between strides is a good starting point.

Reduce recovery time: As you progress, work on reducing the recovery time between strides. Aim for 45 seconds to 1 minute of recovery between each stride.

  1. Total Volume:

Start with a lower volume: When you begin, limit the number of strides in each workout. Four to six strides per session can be a suitable starting point.

Gradually increase stride volume: As your fitness and comfort with strides improve, you can gradually increase the number of strides in a single session. Aim for 8-10 strides or more, depending on your goals.

  1. Incorporate Variety:

Experiment with different types of strides: As you become more experienced, consider incorporating variations like downhill strides, uphill strides, or diagonal strides. These variations challenge different aspects of your running performance.

Running Strides for Beginners – Conclusion

There you have it.

That’s all you need to know about running strides for beginners.  These are easy to implement and can help you achieve great progress toward your running goals.

The rest is just details.

Please feel free to leave your comments and questions in the section below.

In the meantime, thank you for dropping by.

Keep running strong.

The Couch to 5K Treadmill Plan You Need

So, you’re ready to tackle the Couch to 5K, but the thought of running outside right now isn’t appealing?

Trust me, I’ve been there!

Sometimes the weather or the idea of dodging cars and people makes running outside feel like a chore.

Enter the treadmill—your new best friend for getting started on your running journey.

Without further ado, let me break down what the couch to 5K treadmill plan is all about.

Why the Treadmill Works for C25K

While the traditional C25K plan usually takes place outdoors, there are many reasons to consider running indoors.

Training on a treadmill has advantages from avoiding bad weather to easily tracking your pace and progress. This beginner running treadmill plan lets you ease into running while offering the convenience and control of indoor workouts.

I trained exclusively on a treadmill to build my endurance when I started running.

The consistent surface, ease of pace control, and the ability to track all my stats in one place were game-changers for me.

I didn’t have to worry about outdoor conditions, which gave me the mental space to focus on improving my fitness.

Is Couch to 5K Possible on a Treadmill?

Absolutely! Running on a treadmill can be just as effective as outdoor running.

It can sometimes be more convenient, especially when weather or terrain challenges make it tough to run outside.

The treadmill offers a soft, cushioned surface, which is easier on your joints than pounding the pavement. Plus, you can easily adjust your pace and incline, simulating the ups and downs of an outdoor course without leaving your house or gym.

You can also check my original C25K plan.

Beginner Treadmill Running Tips

Here are some important tips to keep in mind as you get started with your Couch to 5K treadmill plan:

  1. Choose the Right Shoes: Make sure your running shoes have good cushioning and support for treadmill running. Treadmills may be easier on the joints, but you’ll still need footwear that’s up for the challenge.
  2. Set a Comfortable Pace: Aim for a conversational pace where you can still speak without getting winded. For beginners, this might be around 6-8 km/h (3.7-5 mph) for running, and 3.5-4.5 km/h (2.2-2.8 mph) for walking. Don’t worry if it feels slow initially—focus on building endurance.
  3. Watch Your Form: Keep your posture upright and avoid slouching over the treadmill console. Look ahead, not down at your feet, and maintain a relaxed, steady stride.
  4. Start Slow, Build Gradually: The Couch to 5K is about easing into running. Don’t push yourself too hard—stick to the plan, listen to your body, and take walking breaks as needed.

The Couch to 5K Treadmill Plan: Week-by-Week Breakdown

This eight-week C25K treadmill plan is designed to take you from zero running experience to completing a 5K (3.1 miles).

You can also check this beginner post and my C10K program for more running advice.

The beginner running treadmill program involves three sessions per week. On your non-running days, feel free to work your muscles in other ways by doing different forms of exercise, such as strength trainingspinning, or yoga.

The more, the merrier. However, always listen to your body, adjust your training, and plan as needed to allow  recovery.

Personal Tip: Watch Out for the “Dreadmill”

I’m not going to sugarcoat it—the treadmill can get boring. That’s why I call it the “dreadmill” sometimes. But you can fight the boredom with a few tricks. I’ve had some of my best treadmill runs while watching old “How I Met Your Mother” episodes or listening to podcasts like “The Joe Rogan Experience.” Distracting your mind helps, trust me.

Week 1: Building the Habit

  • Workout 1: Run 1 minute, walk 2 minutes. Repeat 8 times.
  • Workout 2: Run 1 minute, walk 2 minutes. Repeat 10 times.
  • Workout 3: Run 1 minute, walk 1 minute. Repeat 8 times.

Week 2: Gaining Confidence

  • Workout 1: Run 2 minutes, walk 2 minutes. Repeat 5 times.
  • Workout 2: Run 2 minutes, walk 2 minutes. Repeat 7 times.
  • Workout 3: Run 3 minutes, walk 2 minutes. Repeat 4 times.

Week 3: Pushing Forward

  • Workout 1: Run 3 minutes, walk 2 minutes. Repeat 5 times.
  • Workout 2: Run 3 minutes, walk 1 minute. Repeat 5 times.
  • Workout 3: Run 2 minutes, walk 2 minutes. Repeat 5 times.

Week 4: Longer Runs, Fewer Breaks

  • Workout 1: Run 5 minutes, walk 3 minutes. Repeat 3 times.
  • Workout 2: Run 5 minutes, walk 2 minutes. Repeat 3 times.
  • Workout 3: Run 5 minutes, walk 2 minutes. Repeat 4 times.

Week 5: The Next Challenge

  • Workout 1: Run 8 minutes, walk 3 minutes. Repeat 2 times.
  • Workout 2: Run 8 minutes, walk 2 minutes. Repeat 2 times.
  • Workout 3: Run 6 minutes, walk 2 minutes. Repeat 3 times.

Week 6: Pushing Through

  • Workout 1: Run 10 minutes, walk 3 minutes. Repeat 2 times.
  • Workout 2: Run 10 minutes, walk 2 minutes. Repeat 2 times.
  • Workout 3: Run 12 minutes, walk 2 minutes. Repeat 2 times.

Week 7: Almost There

  • Workout 1: Run 12 minutes, walk 3 minutes. Repeat 3 times.
  • Workout 2: Run 12 minutes, walk 2 minutes. Repeat 2 times.
  • Workout 3: Run 15 minutes, walk 2 minutes. Repeat 2 times.

Week 8: Race Week

  • Workout 1: Run 20 minutes, walk 5 minutes, run 10 minutes.
  • Workout 2: Run 20 minutes, walk 5 minutes, run 15 minutes.
  • Workout 3: Run a 5K distance at a comfortable pace.

By the end of this eight-week plan, you’ll be ready to run a full 5K! Once you’ve completed the program, I recommend transitioning to outdoor running to mix up your routine.

Running outside is a different experience, and adjusting can take a little time. But with your treadmill training base, you’ll be ready for the challenge!

Want more challenge? Try my 8K training plan.

In Conclusion: Stick With It

If you follow this sofa to 5K treadmill plan consistently, you’ll be amazed at how far you can go in just eight weeks. Start slow, trust the process, and keep moving forward—even on the tough days. And remember, every runner starts somewhere. You’ve got this!

Feel free to reach out if you have any questions or need some motivation along the way. I’m here to help you make the most of your running journey, whether on the treadmill or outdoors.

Keep Training Strong, David D

Plantar Fasciitis Unveiled: Causes, Treatment, and Prevention for Runners

How to Prevent Plantar Fasciitis When running

Ready to lace up those sneakers and hit the pavement? Well, hold on tight because today, we’re diving headfirst into the world of plantar fasciitis – that pesky, heel-aching injury that can strike fear into the hearts of runners everywhere.

In fact, it’s so notorious in the running community that it’s earned itself a nickname: ‘Runners Heel.’ Yes, that’s right! Plantar fasciitis is the heel’s arch-nemesis, and it’s responsible for a whopping 80% of all those dreaded cases of heel pain.

But here’s the kicker – it’s not just a pain in the heel; it’s also one of the top culprits behind about 1 in every ten running injuries out there.

Fret no more.

In today’s post, we’re diving deep into this condition. More specifically, I’ll be explaining:

  • What is plantar fascia
  • The causes of the injury
  • Why it’s common among runners
  • The fastest way to treat it
  • How stretching helps
  • The link between running surfaces and heel pain
  • Exercises you can do to prevent heel pain
  • And so much more

Sounds exciting? Let’s get started.

What’s the Plantar Fascia?

Plantar fasciitis is a common cause of heel pain that affects both runners and non-runners. The human body is equipped with this fibrous band of tissue called the plantar fascia. It’s like the support beam of your foot, stretching from your heel (the calcaneum) to the middle of your foot bones, bridging the gap between your heel bone and your toes.

Now, when that support beam gets all irritated and inflamed, that’s plantar fasciitis for you. It’s like your foot’s way of saying, “Hey, I hurt!”

It’s especially common in runners

Plantar Fasciitis is no stranger to runners.

In fact, it’s one of the most frequently reported causes of chronic heel pain. A study published in the Journal of Foot and Ankle Research vouches for this.

And in the realm of running, Plantar Fasciitis is quite the troublemaker. It’s responsible for approximately 8 percent of all running injuries, as revealed by a retrospective study analyzing 2000 running-related injuries.

The Process of The Injury

Plantar Fasciitis kicks off when the delicate fibers of the fascia, that fibrous band of tissue running from your heel to your toes, start to accumulate tiny tears.

It’s like your foot’s way of saying, “Hey, we’ve had enough tension here!”

Initially, it might seem like a minor annoyance, but as you keep pounding the pavement, those small irritations can snowball into a full-blown injury.

The key here is early detection and prompt treatment. Ignoring it could lead to some unpleasant consequences down the road.

Causes of Plantar Fasciitis

Overuse is the main culprit. However, several factors can increase your chances of developing this painful condition.

Here’s the lowdown on some of them:

  • Overdoing It Too Quickly: Pushing your limits too fast is a classic mistake. Rapidly increasing your running distance can put undue stress on your plantar fascia, paving the way for injury.
  • Carrying Extra Weight: If you’re on the heavier side, your plantar fascia might bear the brunt of the load. Those extra pounds can lead to irritation, pain, and, eventually, Plantar Fasciitis.
  • Gender: Surprisingly, women are about twice as likely to develop Plantar Fasciitis compared to men, as indicated by research.
  • Inadequate Footwear: Wearing the wrong running shoes can spell trouble. Shoes with insufficient arch support, heel cushioning, or sole flexibility can exacerbate the problem.
  • Poor Running Form: If you’re not running with the proper technique, you’re increasing the strain on your plantar fascia. Make sure to follow guidelines on proper running form to minimize the risk.
  • Mobility Issues: Research suggests that a tight Achilles tendon, that large tendon above your heel, can contribute to the development of Plantar Fasciitis. Stretching exercises can help alleviate this problem.

The Main Symptoms

Plantar Fasciitis typically presents with distinct symptoms that can help you identify the condition:

  • Gradual Heel Pain: The hallmark of Plantar Fasciitis is the gradual onset of sharp pain on the bottom of your heel, especially near the inside of the foot.
  • Morning Discomfort: You might notice intense heel pain during your first few steps in the morning. This phenomenon is often referred to as “first-step pain.”
  • Pain After Rest: After periods of rest, such as sitting for a while or getting up from a chair, you may experience heel pain.
  • Aggravation with Activity: Activities that put pressure on your feet, like climbing stairs or standing for extended periods, can trigger or exacerbate the pain.
  • Evening Recurrence: The heel pain may temporarily subside during the day, but make a return in the evening.

Treatment of Plantar Fasciitis

As I have already clearly stated, the condition can be a real nagging injury that only gets worse the longer it’s present.

Hence, the sooner you put in place an aggressive treatment plan, the better off you’ll be, both for the short and long term.

For that, here is the step-by-step treatment plan you need to follow:

Rest

Taking a break from activities that aggravate your condition, such as running and high-impact exercises, is essential. The duration of your rest period can vary depending on the severity of your condition. It might last a few days, several weeks, or even a few months. Pay attention to the intensity and frequency of your pain as a guideline for when to resume activity.

Keep in mind that Plantar Fasciitis typically develops over time due to accumulated injuries, so it’s important to give your foot the time it needs to heal properly. Resting is a crucial step in the recovery process.

Additional resource – How to Prevent ITBS in Runners

Massage for Reducing Pain

Self-massage and soft-tissue manipulation can provide relief from Plantar Fasciitis pain.

Here’s how you can do it:

  • Get a golf ball or a similar round, hard object.
  • Gently roll the affected foot back and forth over the ball.
  • Start with a few minutes a day and gradually increase to 5 minutes daily.

You can also use a frozen water bottle by rolling it under your injured foot.

Active Release Technique is a more advanced soft-tissue manipulation technique that may help alleviate Plantar Fasciitis pain. While scientific evidence supporting its effectiveness is limited, some individuals find it beneficial.

Try Orthotics

Consider using Over-The-Counter (OTC) orthotics to provide additional arch support, especially if you have a history of Plantar Fasciitis, faulty foot mechanics, or high arches. Research indicates that orthotics can help reduce pain and address faulty foot mechanics, a common cause of this condition.

OTC orthotics are readily available and cost-effective compared to custom orthotics, which can take weeks to receive. Ensure you use them in both shoes, even if only one foot is affected. If OTC orthotics don’t provide relief, consult a podiatrist for custom orthotics tailored to your needs.

Additional Resource – Overpronation vs. Underpronation

Kill the Pain

If you’re experiencing severe pain, consider using cold therapy on the affected area. Apply an ice pack (you can use a store-bought ice pack or a bag of frozen peas or corn wrapped in a towel) for 10 to 15 minutes daily.

Additionally, you can take over-the-counter pain relievers like ibuprofen, naproxen, or paracetamol to alleviate pain and inflammation.

Stretch it

Stretching is another effective strategy to expedite your recovery and reduce the risk of re-injury. Incorporate these stretches several times a day, making sure to stretch both feet.

Perform a few (check below) stretches pre-run, in the morning, and whenever you experience soreness or pain after running. A recommended stretching routine involves three to five sets of 30 seconds per stretch.

See a Doctor

If your pain persists despite trying the aforementioned measures, it’s crucial to consult a sports podiatrist.

In some cases, your doctor may recommend treatment options like cortisone injections, foot taping, night splints, or other tools to alleviate symptoms and expedite recovery. In severe cases, physical therapy may be necessary to fully restore plantar fasciitis function.

How to Treat Plantar Fasciitis When Running – The Conclusion

There you have it.

The above measures are some of the best you can implement right now as a part of your running routine to help reduce the risks of developing plantar fasciitis.

If you suspect you have plantar fasciitis—or any other overuse injury—visit your doctor or physical therapist for an evaluation.

The best way to determine the culprit behind your pain and provide a quick path toward full recovery is by doing a full examination of the biodynamics of your ankle, foot, and gait.

As a runner, your feet are your best ally.

They take you wherever you want to go.

But you have to take good care of them to lead a healthy, active life.

The rest is up to you.

Please feel free to leave your comments and questions in the section below.

In the meantime, thank you for reading my post.

Keep Running Strong.

David D.

Underpronation Meaning – What is Under Pronation While Running?

picture of underpronation

As a runner, you may have heard the word before—but what does underpronation (supination) mean and why is it (allegedly) a bad thing?

That’s what we are going to tackle in today’s as I’ll be giving you the full low-down on what under pronation is all about.

Hopefully, by the end of this post, you’ll be better placed to assess whether you suffer from supination and to know how to deal with it.

But first things first, let’s explain what under pronation actually entails.

Underpronation Meaning

Pronation refers to the normal rolling-in motion of the ankles and flattening of the arches that happen during the walking and running gait.

Some pronation is a must—ideally, 15% roll-in collapse at the ankle—as it helps distribute the shock of impact while walking or running.

Virtually everyone pronates, but to different degrees.

Some may pronate much more or much less than others. Too much pronation during the running cycle—what’s known as overpronation—can result in collapsed arches, or flat feet, and lead to trouble in the hips, knees, and, of course, the ankles.

Underpronation, also known as supination,  is the exact opposite of overpronation. It also comes with its own set of problems—some of them which we’ll discuss in today’s post.

In today’s article, I’ll solely focus on underpronation as I have already written an in-depth post on overpronation is a previous article that you can find here.

Under Pronation Defined

Also known as underpronation, supination is a foot positioning issue usually stemming from having high arches. Technically, it refers to the insufficient inward rolling of the foot after landing on the ground during the walking and running gait.

In a normal stride, the feet slightly roll inward and sit evenly on the heel so that the body weight is on the ball of the foot, then push off the big toe.

However, runners who supinate tend to rest the bulk of their body weight on the outer edge of the foot, then push off from toes instead.

This excessive stress placed on the outer edge of the foot, mainly on the pinky side, can cause problems for runners or any athlete performing high-impact sports.

Supination might be caused by having naturally high-arching feet. Certain muscle imbalances in the lower leg, improper footwear as well as a history of chronic injury, may also turn you into an under pronator.

The Issues of A Supinator Runner

If you tend to under pronate, chances are you may develop several conditions, some of which include

  • Knee pain
  • Ankle Sprains
  • Swelling of ankle or foot
  • Lower back pain
  • Plantar fasciitis, which inflammation of the sole
  • Calluses
  • Hammertoes or clawed toes
  • Running bunions
  • Bunions on the outer edge of the foot
  • Shin splints
picture of underpronation

The Main Signs Of a Supinator Runner

What follows are some of the most common signs that you may be an excessive supinator.

Assess Your Running Shoes for Supination

The simplest way to tell if you supinate or not is to check the wear pattern on the rubber on a used pair of shoes.

Start by placing your used running shoes on a table in front of you, then assess the back of the heels. If you notice drastic wear and tear on the outside, or lateral, portion of your shoes, then you most likely under ponate.

As a supinator, the outside of the heel of your foot strikes the ground first. Since the foot does not adequately roll inward after hitting the ground, the force of impact stays concentrated on that particular region of the foot.

That’s why you’ll notice much more wear on the outside heel as well as in the forefoot area—just behind the toes.

Check Your Foot Print

The second thing you can do is to examine your foot type. The wet test a good objective assessment that determines whether or not you underpronate.

To perform it, wet the bottoms of your feet with water, then step onto a flat surface, preferably walking across some cardboard, thick paper or any surface that clearly reveals a footprint. Remember to get print of both your feet to assess them closely.

Feet with a normal amount of pronation and healthy arches will leave a visible arch connected to the forefoot by a strip roughly 1-2 the width of the foot on the outside of the sole.

Yet, if only a fraction of your arch is visible (as shown in the image)—or none at all—then you probably have high arches, therefore,  might be a supinator.

Note: The footprint you leave behind—mainly the way in which your arch appears—is a clear sign of how your foot pronates, but it’s not the ultimate sign of underpronation. Make sure to follow your foot type test with a visit to a certified professional (i.e., podiatrist, physical therapist, or running coach) who can provide a proper gait analysis.

Additional Resource – Overpronation vs Underpronation

Tight Achilles and Calves

Tightness of the calf muscles tends to reinforce the movement pattern caused by under pronation, which, in turn, magnifies the effect of supination.

This usually results in plantar fasciitis, which is a common overuse injury that manifests as sharp pain or aches along the arch of the foot or in the middle of the heel.

How to Deal With Under pronation While Running

Supinators out there, there’s still hope for you. Here are some things you can do and measures you can take right now to soothe what ails you.

Strength Train

The most recommended measure for alleviating the negative effects of underponation is strength training.

Strength training is key for injury prevention, as I hate stated in some previous posts. That’s why you should increase strength all the way through your kinetic chain

Focus on, ankle, feet, and hip strengthening exercises. These will provide much more stability to your lower leg.

Also, strengthening the inner calf muscle—mainly the gastrocnemius—can help reassert muscular imbalance and provide more stability throughout your gait.

Here are some of the best exercises :

Lunges


Calf Raises

Crab Crawls

Squats

Underpronation Running Shoes

Good footwear is key in addressing supination.

Most experts recommend going for flexible and lightweight running shoes for runners who supinate. This means shoes with additional flexibility and cushion.

As a side note, make sure to visit a podiatrist first who may recommend the most appropriate type of shoe for supination.

What’s more?

Remember to replace your used up running shoes before they’re drastically worn on the outer side. Here’s the full guide you need.

You should also consider getting your shoes from a specialty running store to get some additional advice before you make any purchase.

Additional resource – Calf pulls from running

Try Orthotics

Experts also recommend using under pronation friendly orthotics. The right orthotics should focus on offering cushioning and a comfy surface area for your foot. These can support the arch and heel to control the motion of the foot.

Inserts for underpronation can be found in stores and one. But, to err on the side of caution, consider getting a custom-made by a podiatrist. This is especially the case if you log in serious mileage and/or have a history of under pronation issues.

Additional guide – Running with bunions guide

Stretch Regularly

Although the science on the effectiveness of stretching is still inconclusive, I strongly believe in its importance in injury prevention—especially for underpronators.

Having a full range of motion is extremely important in injury prevention. When your muscles are flexible, they’ll be able to move more efficiently and perform without being overstretched.

Regularly stretch your shins, calves, ankles, and Achilles to help reduce the tension that might be contributing to your supination.

Here are some of the stretches you should be doing on a daily basis.

Toe Touch

Quadricep Stretch

Leg Raises

Lifted Toe Step

https://www.youtube.com/watch?v=fL5feWVqqPY

Proper Running Form

Last but not least, take a look at your running technique.

It’s vital to opt for proper running technique to address excessive under pronation.

Here are the main proper technique guidelines you need :

Land as lightly and softly on the feet, hitting the ground as close to the midfoot as possible instead of the heel.

Stay light on your feet rather than pounding your feet too hard on the ground.

Aim for a soft landing. Imagine running on eggshells of trying to run on water.

Shorten your stride and improve your running cadence.

Land closer to your midfoot, rather than at the back of the heel.

New to Running? Start Here…

If you’re serious about running, getting fit, and staying injury free, then make sure to download my Runners Blueprint Guide!

Inside this guide, you’ll learn how to start running and lose weight weight the easy and painless way. This is, in fact, your ultimate manifesto to becoming a faster and a stronger runner. And you want that, don’t you?

Click HERE to check out my Runners Blueprint System today!

Don’t miss out! My awesome running plan is just one click away.

Conclusion

There you have it. If you tend to under pronate during the running gait, then the above guidelines are exactly what you need to help you soothe—and prevent—any potential pain or issues.

Please feel free to share your thoughts and questions in the comments section below.

In the meantime thank you for reading my post.

Keep running strong

David D.

supply cheap https://www.redditwatches.com/. famous mark https://tbfreewheelers.com. more best swiss high quality www.audemarspiguetwatches.to. https://www.vapespen.fr/ magasin de cigarette electronique aren?ˉt as common as some of the other brands. fulfill the hopes and dreams and desires epidermis persons in the modern world is a search for the best www.vapesshop.pl in the world. profession in manufacturing https://www.tagheuer.to/. find the cheap prices on iqosvape.com. best reallydiamond.com with professional customer services. buy your loewe outlet online on the official brand website.

Runners Nipples Guide – Stop Your Nipples From Bleeding While Running

Picture of joggers nipples

Looking for the perfect guide to runners nipples? Then you’ve come to the right place.

I remember the first time I got joggers nipples while running.

It was a few years ago.

After getting home from a long run on a hot day, I walked into the living room, only to find my sister looking at me with horror.

I looked down and gasped upon seeing that my tee shirt was soaked in blood.

It was only after I’d taken off my shirt that I realized that both my nipples were gushing blood.

I was completely freaked out, and worried that something was wrong with me.

Fast forward a few Google searches I learned that it was nothing to worry about and that avoiding the bloody condition is not rocket science.

Once I applied some preventive measures, bloody nipples became a thing of the past.

rIf you’re looking for practical ways to prevent bloody nipples from running, this post is perfect for you.

Why do Nipples Bleed When Running

Known as a fissure of the nipple, or runners nipples,  joggers nipples is a pretty common occurrence among male runners.

When you’re running, your body’s blood flow increases and blood comes closer to the surface of your skin.

When this happens, most people’s nipples begin to harden.

Once your nipples get hard, continuous rubbing against the fabric of your shirt creates more friction than your skin is used to.

Combine the direct effects of rubbing against clothing with the salt from sweat, and bloody nipples can happen.

They start as a stinging or burning sensation as the skin gets rubbed raw, and this can lead to bleeding if allowed to continue.

After a while, you’ll experience a nasty cutting sensation with every stride you take.

Jogger’s nipple is more common in extremely hot or wet and cold weather and primarily affects male runners.

Female runners tend not to have the issue as long as their sports bra provides adequate support.

Here are more resources to deepen your understanding of joggers nipples;

How To Stop Your Nipples From Bleeding While Running

Thankfully, dear (mostly male) readers, preventing nipple bleeding while running is easy.

Seriously, it’s super simple.

Here’s how to start your chafed nipples while running.

Runners Nipples Fix – 1.   Lubricants

If you want to prevent chafing disasters—not just joggers nipples, but all over —start lubing.

This is what helped me the most with nipple chafing during a run.

How lubrication works is no mystery.

Lube serves as a protective barrier between the nipple and the shirt, reducing undue friction.

It also softens the nipples and keeps them from drying, which in turn lowers the risk of irritation.

As a rule, generously apply a lubricant like Body Glide or petroleum jelly to the nipple area before heading out for a run.

Make sure to apply it to all the areas prone to chafing, including your underarms and thighs.

Make sure you apply it liberally, especially if you’re going to be running for a while.

In some cases, especially during long runs, you may want to carry a small packet of it with you in case the constant running and sweating wear away the lubricant you’ve already applied.

Additional resource – Here’s how to stop chafing while running

Runners Nipples Fix – 2. Get the Right T-Shirt

Quite often, preventing joggers nipples is a simple matter of opting for the right clothing.

Here’s what I mean.

If your running T-shirt is either made of or has cotton in it, you’re asking for chafed nipples.

Cotton is your nipples’ worst nightmare.

Instead of wearing a cotton shirt or bra, go for synthetic materials such as Coolmax, Dri-Fit, or polypropylene, especially for the layer that will be closest to your skin.

These fabrics will help wick moisture away from your skin, keeping you dry and limiting friction.

Clothing made from technical fabric also dries faster than cotton, which is key because wet skin can make chafing worse.

If it’s appropriate and possible, you can also consider running shirtless — this should put an end to your upper body chafing issues.

For female runners, a properly-fitting bra that limits breast movement helps prevent jogger’s nipple, according to my research and the testimony of some of my female friends.

Additional Resource – Your Guide To Runners Nipples

Runners Nipples Fix – 3. Use a Product

Some of my running friends use a product like NipGuards to protect their nipples.

I’ve never used them.

All I know is that they work and can cost about $10 for ten sets, and that can get expensive.

NipGuard, as the name implies, is a popular product designed to protect the nipples from the chafing caused by rubbing against upper body clothing.

That, in theory, should prevent the condition.

According to the product’s official website, NipGuards are exceptionally sticky.

They adhere directly to the nipple and stay on, even during long training runs.

If you can’t afford NipGuards, simply cover your nipples with Band-Aids or tape.

I’ve done this many times, and it works just fine.

Keep in mind that these may not stick well if you’re sweating profusely, so you may have to experiment with a few options before you find what works best for you.

joggers nipples

How To Treat Joggers Nipples

Treatment of runners nipples depends on the severity of your injury, but here’s what should generally be done.

  • Rinse the chafed nipples with lukewarm water and dry them thoroughly. I’d recommend doing this in the shower so you don’t have to apply pressure with a washcloth, or something else that may exacerbate your pain. You can also try cleaning the wound with hydrogen peroxide.
  • To avoid further irritation, apply A&D ointment or Neosporin. Cover your nipple with sterile gauze, then use athletic tape to attach it to your chest. This can help prevent infection while your nipples heal.
  • Err on the side of caution and take a couple of days off from running to give your nipples time to heal and recover.
  • If your runners nipples persist and your nipples are still swollen, crusted, or bleeding, seek medical help.

If the area is infected, you might need a prescription-strength antibiotic ointment.

An underlying condition can also be the source of your trouble.

These include eczema, psoriasis, impetigo, fungal infection, or allergic reaction.

New to Running? Start Here…

If you’re serious about running, getting fit, and staying injury free, then make sure to download my Runners Blueprint Guide!

Inside this guide, you’ll learn how to start running and lose weight weight the easy and painless way. This is, in fact, your ultimate manifesto to becoming a faster and a stronger runner. And you want that, don’t you?

 Click HERE to check out my Runners Blueprint System today!

Don’t miss out! My awesome running plan is just one click away.

Runners Nipples  -The Conclusion

Although joggers nipples is pretty common among runners of all fitness abilities, there’s no need to let the condition get in the way of your running routine.

The preventive measures shared here, along with a bit of forethought, can help you keep running strong without having to deal with runners nipples.

Keep in mind that you may need to test out a few approaches or mix them before you find what works best for you.

After all, no suit fits all.

In the meantime, thank you for dropping by.

Feel free to leave your comments or question in the section below.

How to Stop Feeling Nauseous After Running

picture of nausea

You crush a long run. Legs feel strong, lungs are dialed in, and mentally—you’re on top of the damn world. Then boom.

Your stomach flips.

You’re hit with this wave of nausea that sends you doubling over, gagging, maybe even dry-heaving in your driveway. That runner’s high you were riding? Gone.

If this sounds familiar, you’re far from alone. Post-run nausea is a real thing, and I’ve coached more runners than I can count who’ve dealt with it—myself included.

One runner in marathon training said it best: “I felt amazing during the run… but anything I ate afterward made me feel pukey.”

Yup. Classic case.

First of All, You’re Not Broken

Here’s the deal: feeling sick after running doesn’t mean you’re soft or your training is trash.

Most of the time, this stuff boils down to timing, fueling, and stress on your system.

In fact, sports docs and studies back this up—some data shows 30–50% of endurance athletes experience stomach issues like nausea or vomiting during hard efforts.

Translation? It happens. And you can fix it.

Let’s break it down so you stop fearing the finish line and start owning it.

What Is Running-Induced Nausea, Anyway?

Running-induced nausea = that awful queasy, I-might-vomit feeling that shows up mid-run, right after, or sometimes hours later. Some runners feel it during race day sprints.

Others only get it once the adrenaline wears off and the body starts cooling down.

Symptoms can be mild—like “Ugh, I don’t feel so hot”—or brutal enough to send you running for a bush or trash can. Either way, it sucks.

The important thing to know? It’s not just in your head. This is a real physical response, not just nerves or bad luck.

Why the Heck Does Running Make You Feel Sick?

Most of the causes fall into two buckets:

  1. How your body reacts internally (physiological stuff)
  2. What running physically does to your gut (mechanical jostling, pounding, etc.)

Let’s unpack the big culprits.

1. Blood Flow Gets Re-Routed (aka “Gut Shutdown”)

When you’re running hard—especially long or fast—your body makes a critical decision: “Send blood to the muscles, not the stomach.”

That means digestion goes into low-power mode.

During a tough session, up to 80% of your normal gut blood flow gets redirected to your working muscles and skin (for cooling). So if there’s food or fluid still hanging out in your stomach?

Guess what: It’s just sitting there. Undigested. Sloshing.

No wonder your gut gets pissed off.

This is exactly why running too soon after a meal is a nausea trap. Your digestive system can’t do its job mid-run. It’s like trying to do taxes while running sprints.

2. Dehydration = Disaster for the Gut

Running low on fluids? That makes things worse.

  • Blood volume drops
  • Heart rate spikes
  • Even less blood gets to your digestive system

Cue that gross, shaky, lightheaded feeling. Nausea is often the first red flag that you didn’t hydrate right.

Now here’s the kicker: drinking too much water can also cause nausea. It dilutes electrolytes, throws off sodium balance, and can leave your stomach feeling bloated and off.

 If you head out the door under-fueled, your blood glucose can crash. When your brain and muscles don’t have enough fuel, everything feels off—dizzy, weak, and yep, nauseous.

This is classic in runners who:

  • Skip breakfast before long runs
  • Wait too long after waking up to eat
  • Don’t fuel mid-run on long sessions

I’ve seen runners bonk hard because they thought “fasted runs burn fat” — instead, they just burned out and barfed.

The “Bouncing Gut” Effect – Yeah, It’s a Thing

Let’s talk about one of the grossest, most annoying parts of running with a full stomach: your insides bouncing around like a washing machine mid-spin.

I call it the bouncing gut effect—and if you’ve ever had to pause a run to clutch your stomach or dry heave behind a tree, you know exactly what I mean.

Running is high-impact. Every stride? You’re launching your body off the ground and slamming it back down. That constant jostling shakes your stomach and intestines like a snow

globe—and if there’s a bunch of undigested food sloshing around in there? Oof.

I once ate a big burrito 90 minutes before a long run (rookie move), and let’s just say I spent more time regretting than running.

I felt like I was on a boat in a storm. It wasn’t pretty.

If you’ve got reflux, GERD, or just a sensitive system, this bouncing can also send stomach acid splashing right into your esophagus.

That’s where the heartburn and nausea kick in. Some runners describe it like motion sickness—but from the inside out.

The Fix?

Don’t go into a run with a full stomach. Keep it light—maybe just a banana, a few crackers, or a shake if needed. Liquids and simple carbs are usually your safest bet.

Pro tip: A nearly-empty stomach = less sloshing = happier gut = smoother run.

Eating the Wrong Stuff

It’s not just when you eat—it’s what you eat that can mess you up.

Heavy foods (lots of fat, fiber, or protein) just hang around in your gut.

They take forever to digest, especially if you wolf them down right before heading out.

Stick with: easily digestible, bland, carb-focused snacks if you’re fueling up before a run. Save the feast for post-run victory meals.

Running on Empty (Low Blood Sugar)

Going out on an empty tank—especially early mornings—can backfire fast.

You’ll start feeling shaky, nauseous, maybe even a little lightheaded.

That’s your blood sugar crashing and your body sending out distress flares.

Now, I love fasted runs sometimes, but if you’re prone to nausea or haven’t eaten in 6+ hours? Throw your body a bone and give it some fuel first.

Doesn’t have to be much—just something small and carb-y to take the edge off.

On the flip side, if you slam down a sugary drink or gel too fast, and your body isn’t ready to absorb it? That can mess you up too.

It’s a tightrope that you gonna have to learn how to walk. But I promise you it’s worth it.

Dehydration (or Overhydration) Can Both Wreck You

This one’s sneaky. You’re out there sweating buckets, and suddenly you feel woozy, dizzy, or like you might puke.

Classic dehydration—or worse, an electrolyte imbalance.

If you sweat a lot but only drink plain water, you can dilute your sodium levels and still feel awful. That’s called hyponatremia, and it’s dangerous.

The Fix?

  • Sip water, sure.
  • But also include electrolytes—either in your drink or with tabs.
  • If it’s a longer run, bring hydration with you or loop by a water stop.
  • On hot days? Hydrate ahead of time too, not just mid-run.

Why You Feel Nauseous After Running (And How to Fix It)

Let’s talk about that gut-churning, stomach-flipping, “please-don’t-vomit-on-the-sidewalk” feeling some runners get after pushing too hard.

If you’ve ever finished a run feeling dizzy, nauseous, or on the verge of tossing your breakfast, you’re not alone.

But you’re also not powerless.

Most of the time, there’s a reason behind it.

Let’s break it down.

Overexertion: When You Go Too Hard, Your Gut Pays the Price

There’s a reason coaches say, “Don’t run so hard you puke.” Because… well, if you push past your limits, you just might.

When you run all-out or go way beyond your current fitness level, a few things happen:

  • Blood gets shunted away from your stomach (where it helps digestion) and redirected to your muscles.
  • Your body floods with stress hormones.
  • Blood acidity rises thanks to lactate buildup.

That’s a nasty combo — and your gut doesn’t like it. Scientists even have a name for this: exercise-induced gastrointestinal syndrome.

Basically, when you overdo it, your stomach rebels. Hard.

If you’re always getting sick during fast runs or after longer sessions, you’re likely jumping the gun — increasing pace or mileage too quickly.

Ease into the hard stuff.

Earn it.

Skipping the Cooldown? Big Mistake

Stopping dead after a hard run? That’s a rookie move, and your stomach knows it.

Here’s the deal: when you go from full throttle to zero without a cooldown, blood pools in your legs, your heart’s still racing, and your brain (and gut) get less blood flow than they need.

That dizzy, queasy, “I might faint” sensation? Yeah, that’s your body trying to tell you something.

Cool down properly — walk it out, jog it down. Give your system time to reset. Your stomach will thank you later.

Medical Issues (And Other Sneaky Triggers)

Sometimes, there’s more going on than poor pacing or bad food choices.

Here are a few underlying causes that can mess with your stomach mid-run:

  • GERD (acid reflux): Running can slosh acid upward — hello, heartburn and nausea.
  • IBS or gut sensitivities: High-impact movement can flare things up fast.
  • Migraine-prone runners: Exercise can trigger nausea, even without the full-blown headache.
  • Inner ear issues: Mess with your balance = mess with your stomach.
  • Certain meds or supplements: Especially on an empty stomach.

If nausea is hitting often — and you’re doing everything else right — it might be time to talk to a doc. There could be a bigger piece to the puzzle.

Know When to See a Doc (Most Don’t Need To — But Some Should)

Most post-run nausea can be traced to simple things: not cooling down, eating too close to a run, overexerting, or dehydration.

But if you’ve tried all the smart fixes and you’re still getting sick every time you lace up?

Time to get it checked out.

Red flags you shouldn’t ignore:

  • You feel nauseous or vomit after every run — even short or easy ones.
  • You can’t hold down fluids for hours after your workout.
  • You’re dealing with other symptoms, like chest pain, heart palpitations, major stomach cramps, dizziness, or confusion.
  • You’ve got a known medical issue (like diabetes, GERD, or another condition that could mess with your response to exercise).
  • You’ve cleaned up your training, fueling, and pacing — and you still feel awful.

There are some rare but real conditions — like exercise-induced anaphylaxis, vestibular issues (inner ear), or even hormonal imbalances — that can trigger this stuff. A doctor can rule those out and help you manage symptoms if needed. In some cases, meds like antacids or anti-nausea pills (under supervision) can help with race-day gut trouble.

Wrap-Up: Run Strong, Not Sick

Let’s be honest—few things suck more than finishing a run and immediately fighting the urge to puke.

You nailed the workout, but now your stomach’s flipping like a pancake. Not exactly the post-run high we’re after.

The good news? In most cases, that wave of nausea isn’t some unsolvable mystery—it’s your body saying, “Hey, something was off.” And more often than not, it’s fixable with a few smart tweaks.

Why Do I sweat So Much When I Run?

female runner wiping sweat after a running workout

“Why do I sweat so much when I run?”

If you’re looking for an answer, you have to the right place.

When I first took up running a few years ago, I relied on sweat as my main indicator of how hard I was pushing myself.

The more I sweat, the better and more accomplished I felt.

As I got fitter, however, I noticed that I’d started to sweat a lot more than before.

In fact, most of the time I ended up a sweaty mess by the end of my runs.

The profuse sweating scared me, as I thought there was something wrong.

Concerned,  I did what most people would do:

I Googled it.

To my relief, I found that I’d been worried over nothing.

In this post, you’ll learn the basics of what sweating is, why it happens, and how to deal with it if you’re concerned about it.

You’ll soon understand that when you’re a runner, sweating is your best ally and friend.

Sweating While Running Explained

Let’s break down the science of sweat.

Sweating is the natural process that regulates your core body temperature by keeping it as close to 98.6 degrees as possible.

When your body starts to overheat (for instance, while running), the nervous system activates the sweat glands to release perspiration, which is a water-and-electrolyte solution.

That in turn cools off the skin, resulting in a chain reaction of temperature reduction that eventually brings your core temperature down.

There are other forms of sweat that have nothing to do with heat regulation.

People sweat profusely when they’re nervous, or even as a response to spicy foods or hormonal changes.

Why Do I Sweat so Much When I Run – The Factors

Since every runner’s body is different, sweat rates vary from one person to the next.

The exact amount that you sweat is determined by a slew of factors including the number of sweat glands you have (between 3 and 5 million), outdoor temperature, resting body temperature, clothes worn, training intensity, fitness level, etc.

Generally speaking, the fitter you are, the more you’ll sweat.

The reason boils down to engine efficiency.

Fitter athletes tend to sweat more, and they start sweating a lot earlier in their workouts because their body’s thermoregulation system kicks into action faster.

That in turn helps them keep their core temperature down from the start of their session to the end.

Speaking for myself, I started noticing my increased sweat rate once I got serious about my running, doing lots of long runs and more intense interval workouts.

Nowadays I simply think of it as the price I pay for being fit.

What’s Normal Sweating?

Any amount of sweat is considered normal.

Everyone sweats a baseline amount at all times, even if you’re sweating more profusely than your training buddy.

The average person sweats between 0.8 to 1.4 liters, or 27.4 to 47.3 ounces per hour of exercise.

That’s equal to roughly one to three pounds of body weight.

Excessive Sweating While Running

If you still think you sweat too much, you probably do, especially if you sweat from a specific area of the body without engaging in any physical activity.

It may indicate hyperhidrosis, a common affliction marked by excessive sweating that affects roughly three percent of the U.S. population.

Hyperhidrosis is typically described as any sweating that obstructs normal daily activities.

People who have it may sweat up to four to five times the amount that other people do.

They also report sweating in cool environments for no obvious reason.

If this is your particular case, consult a doctor to discuss the treatment options available and to rule out any other underlying conditions.

Keep in mind that only a certified physician can officially diagnose such a condition.

Additional resource – What’s the best temperature for running

runner sweating while running on a trail

Why Do I Sweat So Much When I run – The Solutions You Need

Tired of dealing with sweat during your runs?

Try these simple solutions:

Measure Your Sweat Rate

Still don’t know whether you sweat more than normal?

Try measuring your sweat rate.

Doing so will help put your concerns to rest.

You do it by monitoring your pre and post-training bodyweight.

To begin, record your nude body weight before a run, then once you’re done, dry yourself immediately, strip down, and step on the same scale again.

The difference between your weight before and after your workout shows exactly how much fluid you lost.

For this to work, you need a digital scale, as it will show more detailed numbers (think 177.9 vs. 177).

Also, make sure your bladder and bowels are empty before stepping on the scale.

Record what and how much fluid you consumed during the run itself, as well as the weather conditions.

Your next step is to convert your sweat loss to ounces.

This tells you your fluid needs following a workout.

For each pound, you lost 16 ounces of fluid.

(or one liter of fluid for each kilogram).

For example, if you lose 2 pounds, your sweat rate for that particular session is 32 ounces.

This tells you that you need to drink that same amount to replace any fluid losses and stay well hydrated.

Additional resource – Running in the sun

Hydrate

Now that you know how much you’re sweating when running, the next step is to replace the fluid losses.

To keep your body well hydrated, make sure to drink plenty of water before, during and after your runs.

For longer sessions, hydrate on the run.

Drink eight to ten ounces of water for every 15 to 20 minutes of exercise, and make sure to drink an extra eight to ten ounces of fluid within 30 minutes of finishing your run.

During your runs, you’re also likely losing lots of vital electrolytes through your sweat.

If you sweat profusely or run for extended periods of time in hot weather, make sure to take in some salt to make up for your electrolyte losses.

Additional resource – Sodium for for runners

Turn On a Fan

When running on a treadmill, turn on a fan, open a window, or lower the air conditioning to reduce humidity in the air.

Consider Medicating

Use an over-the-counter antiperspirant containing about 10 to 15 percent aluminum chloride, and don’t restrict your use to your armpits.

Antiperspirants can also help curb sweating when applied to the palms and soles of the feet.

Just keep in mind that some antiperspirants are prescription only, so consult your doctor for the best option for you.

Cool Off

Immediately following a run, take a cold shower (if possible).

Anything that lowers your core body temperature will help you stop sweating faster.

Keep It Tidy

Shaving your armpits removes hair that keeps deodorant and antiperspirants from getting to your skin.

It also helps decrease odor because your hair holds more bacteria than your skin does.

Dress Properly

Invest in summer-friendly running apparel.

That means going for lightweight, synthetic fabrics with ample ventilation that will pull sweat away from your skin to the outer surface where it evaporates.

This type of clothing allows heat to move away from the body.

Merino and bamboo are excellent options.

Here’s the full guide to cold weather running gear.

Watch Your Diet

Your diet can influence your athletic performance, your health, and your sweat rate.

Consuming certain foods, including caffeine, garlic, onions, and curry, can stimulate your sweat glands, making you sweat more than normal.

Making these simple tweaks to your diet might solve your sweat problems.

New to Running? Start Here…

If you’re serious about running, getting fit, and staying injury free, then make sure to download my Runners Blueprint Guide!

Inside this guide, you’ll learn how to start running and lose weight weight the easy and painless way. This is, in fact, your ultimate manifesto to becoming a faster and a stronger runner. And you want that, don’t you?

 Click HERE to check out my Runners Blueprint System today!

Don’t miss out! My awesome running plan is just one click away.

Conclusion

There you have it! I hope today’s post offers a clear answer on the “Why do I sweat so much when I run” question.

If you have any concerns or questions, feel free to leave them in the comments section below.

In the meantime, thank you for reading my post.

David D.

How To Start Running Again After A Long Break

start running again

Wondering how to get back into running after a long break? You’re not alone.

Whether it’s been a few months or over a year, the idea of lacing up those shoes again can feel exciting—and a bit intimidating.

I’ve been there too. Life happens—injuries, busy schedules, or sometimes, the motivation just fades.

The good news? You can absolutely get back into it, stronger and wiser than before.

Today, I’ll share the step-by-step that helped me get back to running without breaking myself (again)

Whether you’re a beginner or someone who used to run marathons, you’ll find practical tips to ease back into running while staying motivated.

Start Small After a Long Break

Let’s kick off with the basics—starting small is key when you’re making a comeback.

I get it—if you used to run five or ten miles like it was nothing, it’s tempting to jump back into your old routine.

But trust me on this one; easing back is key.

My first run after a two-month break was a humbling experience. I went out thinking I could handle a slow three-miler, only to find myself winded by mile two. It felt like I was starting from scratch! That’s when I realized the importance of a gradual comeback.

For your first week, try short 15-20 minute runs, three times a week. It might feel like ‘barely anything,’ but trust me—consistency is what really counts. You’ll thank yourself later when you’re injury-free and feeling stronger every week.

Be Honest About Where You’re Starting

No matter what kept you from running—injury, life chaos, or just a break—it’s all about starting from where you actually are now

Don’t compare yourself to the runner you were before the break. Even if you’ve been staying active with other forms of exercise, running is a high-impact sport, and it places different demands on your body.

I’d been cycling to keep my fitness up during my last break, but getting back to running showed me how different those muscles really are. Running uses different muscles and places more stress on your joints and tendons than most cross-training activities.

Action Step:

Start with easy, short runs two or three times a week. After each run, ask yourself:

  • Did I feel out of breath?
  • Did I experience any pain or discomfort?
  • Was I able to maintain a consistent, easy pace?
  • Did I have to walk more than expected?

Answering these questions will help you gauge how your body is responding and where you need to adjust.

The Benefits of a Gradual Return to Running: What Research Says

After taking a break from running, it’s tempting to jump right back in where you left off. But easing into it gradually is crucial for avoiding injury and building long-term consistency.

Here’s what recent research has to say about the benefits of a gradual approach.

Reduced Injury Risk

Returning to running too quickly is one of the top reasons runners experience setbacks. A study published in the Journal of Orthopaedic & Sports Physical Therapy found that runners who gradually increased their training load after a break were significantly less likely to experience overuse injuries, such as shin splints, knee pain, or Achilles tendinitis.

Slowly rebuilding your mileage allows your muscles, tendons, and bones time to adapt and strengthen, reducing your risk of injury.

Improved Physical Conditioning

After time off, your cardiovascular fitness may decrease, and your muscles might need time to adjust back to the demands of running.

According to a study in the European Journal of Sport Science, gradually increasing your mileage helps rebuild aerobic fitness and muscle endurance more effectively than jumping into high-intensity workouts. This approach supports steady progress without overwhelming your body.

Set One Clear Goal to Stay Focused

Keeping that motivation alive is probably the toughest part of jumping back into running.

In the past, I used to load up on goals, trying to improve my 5K time, build mileage, and hit the gym all at once. It was overwhelming, and I often ended up burned out. Sound familiar?

Eventually, I simplified things. I set one goal: to run a 5K without stopping. That became my focus, and I taped it to my fridge as a reminder. When I achieved it, I set a new goal. It’s been a game-changer. Now, I always have one clear goal to keep me motivated and focused.

Go ahead, pick one goal that gets you a little pumped—it’ll keep you moving forward

Whether it’s to complete a 5K, hit three runs a week, or build up to 30-minute runs, write it down and put it somewhere you’ll see every day. You’ll be surprised how much that simple reminder can keep you going!

Rebuild Your Endurance

One thing to expect when you’ve been away from running is loss of fitness. How much fitness loss depends on the length of your break, but studies show that you can lose up to 20% of your VO2 max (your body’s ability to use oxygen efficiently) after two months off. After three months, that number can climb to 50%.

It might sound a bit intimidating, but hang tight—your body will surprise you with how quickly it comes back. The key is to gradually rebuild your endurance by running at a conversational pace (where you can easily talk without gasping for air).

After a month off for vacation, I thought I could just jump back into my old routine.

Nope!

My first run was a mess—my legs felt like lead, and I was out of breath within minutes. I had to take a step back and rebuild slowly.

For a couple of weeks, I stuck to shorter, easier runs, focusing on running by effort rather than pace. It took time, but each run felt a little better. Before I knew it, I was back to my regular distances and feeling stronger than ever.

In those first few weeks, keep it easy and low-pressure. It’s tempting to try to push yourself, but this is where many runners end up injured. Be patient and focus on increasing your running time before worrying about speed or distance.

The Rates of Fitness Loss

Here are the general guidelines on how much maximal aerobic capacity is lost after a given break.

  • You lose up to 5 to 7 percent of VO2max after two weeks.
  • You lose up to 20 percent of VO2max after two months.
  • You lose up to 30 to 50 percent of VO2max after three months.

Still curious? Check the following research papers on deconditioning:

The Conversational Pace

During the rebuilding period, stick to a conversational pace throughout your runs.

It’s called the ‘talk test’—basically, if you’re able to chat without gasping, you’re in the right zone.

So, for instance, if you can barely recite the pledge of allegiance while running, you’re pushing it too hard.

When I was just getting back into running after an injury, my coach told me to run at a conversational pace.

At first, I didn’t get it—I thought I had to push hard to make progress.

But then I realized that running while being able to hold a conversation not only made my runs more enjoyable, but it also kept me injury-free.

Now, even when I’m in good shape, I make sure to keep most of my runs at a comfortable, talkable pace. It’s amazing how much more I enjoy running when I’m not gasping for air!

Rates Of Return To Running After A Break

The way you get back into running depends on how long you’ve been away from the miles.

Here’s a breakdown:

  • Less than 10 days off: You can likely jump back into running at about 90% of where you left off. Just take it easy on your first run, and listen to your body.
  • Two to three weeks off: Start slower and cut your mileage in half. Run one to two minutes per mile slower than your usual pace for the first few runs.
  • One to two months off: If your break was longer, use the run-walk method. Alternate between 30-60 seconds of running and 30 seconds of walking for 20-30 minutes. Gradually increase the running time and reduce walking intervals over the next few weeks.
  • Three months to a year off: This is where you may need to start from scratch. Begin with brisk walking, and once you can walk for 45-60 minutes without discomfort, transition to the run-walk method. Over time, build up to 30-minute runs at an easy pace. Or you can also follow a couch to 5K plan.

Pinpoint Your Issues

We have to learn from our mistakes. Otherwise, we are bound to repeat them, especially if an injury was what derailed you from training in the first place.

Whether it’s runner’s knee, plantar fasciitis, or ITBS, you must take a proactive approach this time around so that you don’t get derailed again.

The rebuilding phase is a good time to take a look at any issues you may have experienced in the past while running. It’s also not the time get lax on your physical therapy and rehab exercises.

In fact, a lot of runners recovering from injury find themselves re-injured because they either ignored proper rehab work or increased mileage too soon.

I used to struggle with runner’s knee, and every time I tried to start running again, the pain would come back. It was frustrating!

Finally, I saw a physical therapist who helped me figure out the root of the problem—weak hips and poor form. By strengthening my hips and focusing on running form, I was able to get back into running without pain.

Now, I make sure to keep up with strength training and stay mindful of my form.

It’s all about identifying and fixing the underlying issues.

I cannot emphasize this enough.

Stay Motivated: Find Inspiration

Getting back into running is as much a mental game as it is physical. If you find yourself struggling with motivation, find inspiration wherever you can.

Whenever I hit a low point in my running, I find inspiration in the stories of other runners. I remember reading about a runner who came back from a serious injury to qualify for the Boston Marathon. 

That story stuck with me and pushed me to keep going, even on the tough days. I also love listening to podcasts and reading books about running—they remind me why I started and help me stay motivated when things get tough.

You might also want to consider joining a running group or finding a running buddy. Running with others not only makes the process more enjoyable, but it also keeps you accountable. Having a partner who’s counting on you to show up makes it harder to skip your workout!

Find Your Mantra

The most inspiring thing for me comes in the shape of running mantras and running quotes.

I like to print them out and put them where I can see them on a regular basis—usually alongside my goals.

Here are a few:

  • “Strive for progress, not perfection.” -Unknown
  • “Running is the greatest metaphor for life because you get out of it what you put into it.” – Oprah Winfrey”
  • “You want me to do something… tell me I can’t do it.” – Maya Angelou
  • “Pain is inevitable. Suffering is optional.” ― Haruki Murakami,
  • “You miss 100% of the shots you don’t take.” -Wayne Gretzky
  • “Pain is weakness leaving the body.” – Marine Corps
  • “Strength does not come from physical capacity. It comes from an indomitable will.” -Mahatma Gandhi

If these don’t do the trick, you can always GOOGLE them.

Listen to Your Body

Above all, listen to your body. When you’re starting back, it’s normal to feel a bit of soreness or fatigue.

But if something feels off—sharp pain, persistent soreness, or anything that makes you feel worried—take a step back. Don’t push through pain in the hopes it’ll go away.

It’s always better to be cautious, especially when you’re rebuilding.

Returning to running after an injury? Make sure you’re cleared by a doctor first, and don’t skip the rehab exercises.

The patience you show now will set you up for a stronger, healthier running journey.

Structured Return-to-Running Plan: Week-by-Week Guide

Jumping back into running after a break? Start slow, stay consistent, and remember that gradual progress is key to building back safely.

Here’s a step-by-step plan to help you ease into your running groove again.

Week 1: Build a Walking Base
Kick things off with walking to reintroduce your body to regular movement without added impact.

Goal: Walk for 20-30 minutes, 3-4 times per week.

Coach’s Tip: Use this week to focus on your posture, core engagement, and breathing. Even while walking, these basics set a strong foundation for when you begin jogging.

Week 2: Begin Walk/Run Intervals
Once walking feels easy, add in short jogging intervals to start activating your running muscles.

Plan: Alternate between 1 minute of jogging and 4 minutes of walking. Repeat for a total of 20-30 minutes.

Coach’s Tip: Don’t worry about speed! Focus on a comfortable, easy pace during your jogging intervals to keep things low-impact.

Week 3: Increase Running Time
As you feel more comfortable, extend the jogging intervals to gently build endurance.

Plan: Jog for 2 minutes, followed by 3 minutes of walking. Repeat for a total of 20-30 minutes.

Coach’s Tip: Take note of how your body feels. Any soreness or fatigue? Adjust as needed, but if you’re feeling strong, you’re ready for more.

Week 4: Continuous Running at an Easy Pace
By this point, your body should be adapting to the rhythm of running. Now it’s time to try continuous running.

Goal: Aim for 10-15 minutes of easy, continuous running.

Coach’s Tip: This run should feel light and enjoyable. Keep the pace easy—your goal is endurance, not speed. If you need to break it up, that’s okay! You can alternate running and walking as needed.

Share Your Return-to-Running Journey

Have you recently returned to running? Share your progress, any tips you’ve found helpful, or challenges you’re overcoming in the comments below!

Your story could inspire and guide fellow runners who are also making their way back to the trails or treadmill.

The 13 Best Exercises To Improve Running

Strength Exercises For Runners

Are you looking for the best exercises to improve running skills? You have come to the right place.

Once I started strength training regularly, I became a much more efficient and injury resistant runner.

And I believe the same could happen to you if you only just heed the advice I’m going to share with you in today’s post.

In fact, increasing total body muscular strength should be a part of every runner’s cross-training fitness plan.

Backing your road miles with off-road strengthening exercises will not only assist in injury prevention, but also turn you into a stronger, and more efficient runner.

And that’s a good thing if you ask me.

In other words, strength training is the backbone of great running training—no matter what your goals are.

Why do you need to strength train?

Well, for many reasons, including:

  • To increase strength and power in key running muscles such as the calves, quads, glutes, and hamstrings. This translates into better athletic performance both on and off the running track.
  • To fix muscle imbalances. Research has linked muscles imbalances (when a muscle group is stronger or weaker than the opposite group) to all sorts of overuse injuries, such as Runners Knees, IT band syndrome and the like.
  • To improve running form. Your muscles play a major role in helping you develop and keep proper form—especially when fatigue starts to set in. That’s why increasing strength in your core and upper body muscles is crucial. Doing so also provides you with more stability and support throughout a running gait.

Of course, as a runner myself, I’m assuming that you want the above things as well.

The 13 Best Exercises To Improve Running

Without further ado, here are the exercises most appropriate for runners.

Exercise To Improve Running No – 1. Forward Lunge

This asymmetrical standing exercise is among the most running friendly exercises out there—and for many reasons.

Lunges are convenient, versatile, and focus on the muscles runners use the most: glutes, hamstrings, and quadriceps.

Plus, they also increase the range of motion and improve balance and coordination—key running skills.

Proper Form

Begin by assuming a feet shoulder-width apart while holding a dumbbell in each hand.

Next, step forward with your right foot, shifting your weight to that foot’s heel.

Step far enough forward that both of your knees are bent at about 90-degree angle.

Lower your body until the front knee is positioned over the ankle and the back knee is a few inches off the ground. Make sure to remain as stable as possible with spine neutral throughout the movement.

Then step back to starting position, and repeat on the other side.

Perform 12 to 16 reps to complete one set. Aim for three sets.

Exercise To Improve Running No – 2. Planks

One of my favorite core exercises of all time!

Your core muscles, including the lower back, glutes, rectus abdominis (the six-pack), transverse abdominis (the “deep” abs), and obliques, work together to maintain pelvis neutrality and hold proper form when you run.

Plus, a strong core also reduces energy waste, preventing a litany of injuries and boosting your stride power. As you already know, runners are all about preventing injury and improving performance.

Proper Form

Begin by propping yourself on your elbows with the feet slightly apart.

Keep your abdominals engaged, back straight,

and shoulders directly above the elbows down and back, arms parallel to the body.

Instead of locking your knees, make sure to keep them slightly bent.

Hold this position for one full minute to complete one set.

Gradually add time (or weights!) as your gets stronger.

Additional Resource – Your guide to weighted vests for running.

Strength Exercises For Runners

Exercise To Improve Running No – 3. Push-ups

Just because you’re a runner does not mean that upper body strength is trivial.

The fact is, as already stated in this post, proper upper body strength is key for both efficient running and proper form. No doubts.

Not only that, but it also helps take the pressure off your hips, knees, and ankles as fatigue sets in.

And when it comes up building upper body strength and power, you cannot go wrong with pushups.

This symmetrical exercise helps develop upper body and core strength and endurance like nothing else.

More specifically, pushups target the pectoralis muscles of the chest, but they also train the triceps—the muscles at the back of the upper arms, and the shoulders.

Proper Form

Assume a plank position with your hands shoulder-width apart, back flat, and feet slightly apart.

Next, lower your body by bending your elbows to a 90-degree angle, keeping them relatively close to your torso, until your chest hover the ground.

Keep your glutes engaged and torso rigid throughout the exercise—hiked, or sagging hips is a sign that you lack enough strength to perform the exercise properly.

Then press back up to starting position and repeat.

Do as many push-ups as possible with good form to complete one set. Aim for three sets.

Exercise To Improve Running No – 4. The Twisting Lunge

This lunge variation is a great core exercise that also increases lower body strength, coordination, and balance.

Also, the twisting motion forces the glutes to contract more fully while it engages the core.

Proper Form

Assume an athletic position while holding a dumbbell or a medicine ball in front of you with elbows bent at approximately 90-degree angle.

Step forward with your right foot into a lunge position.

Then, while keeping your knee on the right foot, twist your upper body to the right.

Maintain a 90-degree angle bent in the front knee, then straighten and engage your rear leg.

Last up, slowly press back to starting position.

Exercise To Improve Running No – 5. Russian Twists

These are one of the best exercises for working the obliques—the muscles that help rotate the torso and stabilize the spine.

Plus, Russian twists can also target the hips, back, arms, and shoulders, depending on the weight apparatus used and/or loading of the movement.

Proper Form

Begin by sitting down on the floor while keeping your back at 45-degree angle, both feet either flat the floor (easy) or in the air (more advanced) so your body is forming a V shape.

Make sure to keep your back flat at this angle throughout the movement. Do not hunch your shoulders forward.

Next, twist your upper body to the right, hold for a count of three, then slowly rotate back to starting position.

Repeat on the other side.

For more challenge, hold a dumbbell in each hand as you twist.

Exercise To Improve Running No – 6. Squats

If I had to pick one exercise that fits perfectly with the demands of running, then it would be squats.

This fantastic exercise boosts leg power, improves knee stability, increase the range of motion—all of which can prevent a plethora of overuse running injury.

For the full guide to squat variations, check my post here.

Proper Form

Assume an athletic position with feet shoulder-width apart, toes pointing ahead, while holding dumbbells at shoulder-height.

You can also perform this without weight while holding your arms extended in front or overhead.

Next, lower down by sitting back as if there is a chair behind you.

Lower your hips down until your thighs are parallel to the floor, forming a 90-degree angle. Just do not let your knees go past your toes.

Then press back up to starting position.

Exercise To Improve Running No – 7. The Bridge

This is one of the best exercises for strengthening the core stabilizer muscles, specifically the transversus abdominis and multifidus muscles.

The bridge also helps prevent lower back pain.

Not to mention that it’s the go-to move for toning the gluteus medius muscle—one of the three muscles responsible for creating the ever coveted lift.

Proper Form

Begin by lying down on your back with arms to the side, palms facing down, knees bent, and heels on the floor.

Next, raise your hips until knees, hips, and shoulders are in straight line. Squeeze your abs and glutes as you reach the top of the movement. Do not overextend your back during the exercise.

Hold the bridge post for a couple of seconds before easing back down.

Last up, slowly lower your hips back to the floor and allow to briefly touch the floor before completing another rep.

Exercise To Improve Running No – 8. Wall Sits

This isometric exercise is one of my favorites!

It’s an impressive lower body move that builds strength and endurance in the calves, glutes, and more importantly, the quadriceps.

Walls sits are also easy on the knees and can be performed by almost anyone.

Proper Form

Stand roughly two feet away from a wall.

Next, press your back against the wall with your feet shoulder-width apart and slide down the wall until you end up in a sitting position. Imagine there is a chair under you.

Keep your thighs parallel to the ground and feet firmly planted on the ground throughout the hold.

Hold the position for as long as you can. And remember to engage your legs and core muscles, while keeping the back flat throughout the hold.

Last up, slide up the wall to starting position to complete one set.

Exercise To Improve Running No – 9. The Deadlift

The deadlift is the mother of all full body exercises.

In fact, it’s one of the most basic powerlifting exercises.

The classic deadlift hits almost every muscle in the body, including the quads, calves, lower back,  and the core muscles.

Furthermore, study shows that the deadlift can also increase strength and muscle mass by boosting the release of the growth hormone.

Proper Form

Start by placing a heavy barbell on the floor in front of you, positioning your feet about halfway under the bar—roughly 3 inches from touching it.

Next, while hinging at the hips and keeping your back straight with the core engaged,  bend over until your shins touch the barbell then grab the loaded barbell.

Next, to pull the barbell off the ground, extend your hips and knees until you’re standing up straight.

On the way down, slowly lower the weight to the floor until you’re back to the starting position.

Perform 8 to 10 reps to complete one set.

Aim for three sets.

Exercise To Improve Running No – 10. Overhead Lunge

This is a quite challenging variation of the classic bodyweight lunge that targets the shoulders, the core, the glutes, hamstrings, and quadriceps—making it a total body exercise per excellence.

Not only that, but overhead lunges will also help you build and increase flexibility in the hip flexors.

Also, they are ideal for challenging your balance, proprioception, and overall mobility.

Proper Form

Start by standing tall with feet shoulder-width apart while holding a plate, a pair of dumbbells or a barbell straight above your shoulders.

Please, make sure that your arms are straight with the elbows locked.

Next, while keeping the weight directly overhead (in line with the shoulder joint )take a large step forward with your right leg and lower your body until your right knee is bent at 90-degree angle.

Last up, return to the starting position and repeat with your left leg to complete one rep.

If this is too challenging for you, then feel free to hold the weight at shoulder level.

Exercise To Improve Running No – 11. The Chin-up

Another awesome upper body weight that’s guaranteed to help you achieve the kind of upper body strength you always wanted.

This ideal exercise targets the core, the back and biceps muscles like nothing else.

If performing straight chin-up is too much for you, then feel free to use a chair assist for more help.

(check the YouTube Tutorial for how).

Proper Form

While using a pull-up bar, grab it with your palms facing you and with hands a bit wider than shoulder width apart.

Next, while keeping your core engaged and letting your body hang, raise yourself up until your chin is parallel with or over the bar.

Then, slowly release and repeat.

Exercise To Improve Running No – 12.  Kettlebell Swing

You might not be familiar with this kettlebell exercise, but kettlebell swings are some of the best functional and total body exercises that there is.

This particular exercise is good for runners because it can help you boost endurance, core stability, strength, and balance—all of which can help you improve your overall running power for any distance and running terrain.

Proper Form

Start by standing tall feet hip-width apart while holding a dumbbell (or a kettlebell) with both hands at arm’s length.

Next, bend your knees slightly, rock back and lower the weight to between legs until it’s below your butt.

Then, with a hip snapping motion, thrusts the hips forward and swings the kettlebell forward to shoulder height.

Please do this while keeping the arms straight and core engaged through the movement.

Continue swinging back and forth, allowing momentum to swing the kettlebell upward instead of trying to actively lift it with the arms.

Do 12 to 16 swings to complete one set.

Aim for three sets.

Exercise To Improve Running No – 13 Front Squat to Push Press

Also known as thrusters in the CrossFit circles, and it’s a mix of the classic squat and the powerful push press exercise.

This exercise hits almost every major muscle group in the body with the added benefits of increasing total body endurance, flexibility, mobility and coordination like nothing else.

Just be careful.

This is an advanced exercise.

You can only start doing it after mastering basic squat variations as well as the stand push-press exercise.

Proper Form

Start by standing with your feet shoulder-width apart while holding hold a sandbag on the shoulder and upper chest (or a barbell across the front of the shoulders).

Next, while keeping the core engaged and back flat, lower Don by pushing your hips back and bending your knees until you are in a full squat position.

Hold for a moment, then from the bottom position, explode back and stand back up as hard as you can while pushing the weight overhead, with the legs straight, shoulder stacked over your hips and arms fully extended.

This is one rep.

Do 8 to 12 reps to complete one set.

Aim for three sets.

New to Running? Start Here…

If you’re serious about running, getting fit, and staying injury free, then make sure to download my Runners Blueprint Guide!

Inside this guide, you’ll learn how to start running and lose weight weight the easy and painless way. This is, in fact, your ultimate manifesto to becoming a faster and a stronger runner. And you want that, don’t you?

Don’t miss out! My awesome running plan is just one click away.

Click HERE to learn more about The Runners Blueprint System today!