Ready to ditch the city streets and venture into the wild world of trail running? You’re in the right spot!
If you’ve been pondering the idea of hitting the trails but aren’t quite sure where to begin, don’t fret. Many new runners face the same dilemma. The world of trail running offers a refreshing escape from the concrete jungle, but those first steps can be intimidating.
But hey, there’s no need to worry any longer! In this article, we’re about to embark on a journey—a complete guide to trail running that’ll turn you from a city slicker to a trail-blazing pro. By the time you finish reading, you’ll have all the knowledge you need to:
Start trail running with confidence
Discover fantastic trails near you
Stay safe and sound during your trail adventures
Pick the perfect trail running gear
Excited? Good! So, let’s lace up those shoes, embrace the great outdoors, and dive into the exciting world of trail running.
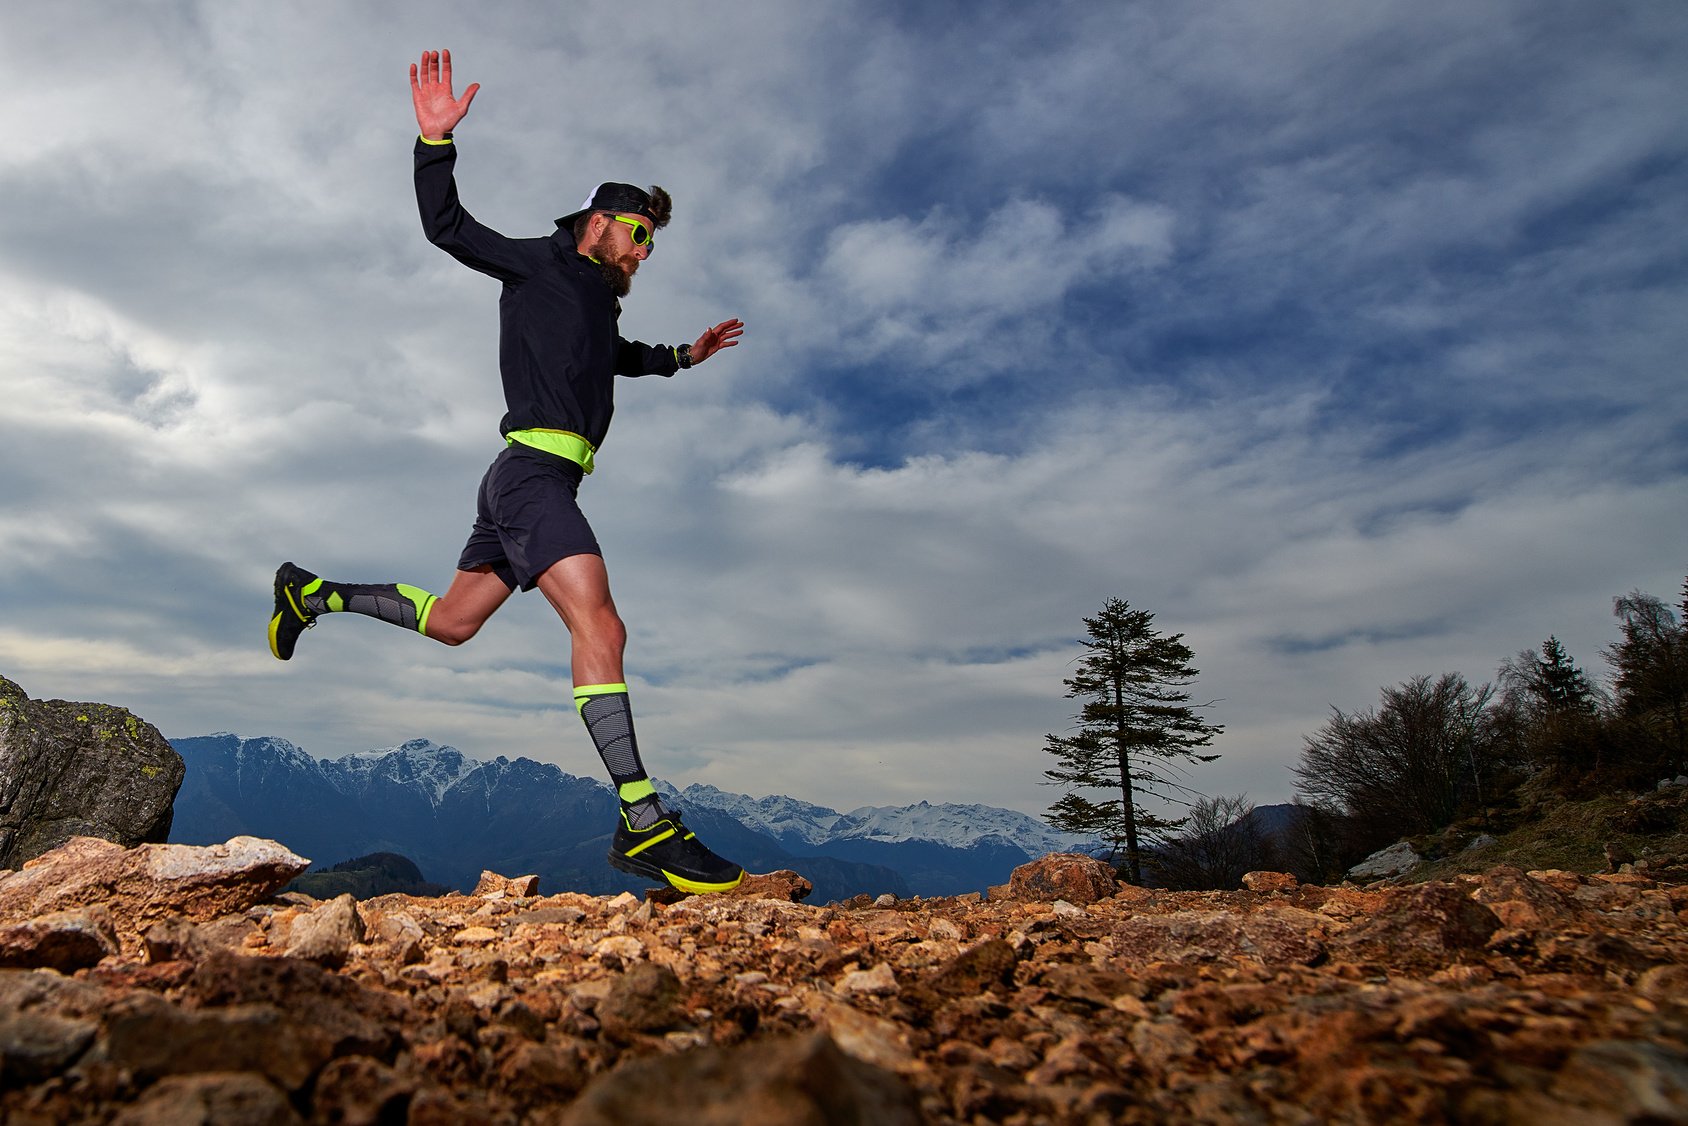
Trail Running Explained
So, what’s trail running all about?
In layman’s terms, trail running involves running on anything that is unpaved and/or natural, mostly taking place on softer, more cushioned surfaces like dirt paths and grass.
In general, a good trail surface should:
(1) Offer natural obstacles (think roots and rocks),
(2) Be unpaved (preferably natural),
(3) Provide great scenery (away from the hustle and bustle of the city) and
(4) Involve elevation gain (lots of ascents and descents).
The Benefits of Trail Running
Let’s uncover the treasure trove of benefits that await you in the world of trail running. It’s not just a run; it’s a journey filled with advantages you won’t want to miss out on.
Less Risk of injury. Trail running is your body’s best friend. Why? Because it’s a kinder, gentler alternative to the relentless pounding of pavement. The surfaces beneath your feet are forgiving, like a plush carpet for your muscles and joints.
More challenge. Trail running serves up a smorgasbord of obstacles. You’ll conquer steep hills that leave your lungs gasping for air, navigate technical terrain that demands quick thinking and nimble footwork, and power through mud, rocks, and roots.
Burns more calories. Research shows that trail running can torch around 10 percent more calories than road running. Sure, 10 percent might not sound like a lot, but it adds up over time. So, if you’re looking to shed those extra pounds while enjoying nature’s beauty, trail running is key.
Improves balance and coordination. As you navigate the unpredictable terrain, your body engages those smaller, intrinsic “helper” muscles, especially in the hips and core. These muscles work in harmony to keep you upright, helping you develop a rock-solid foundation and agility.
Gets you into nature. The off-beaten path whisks you away from the hustle and bustle of city life, immersing you in the tranquility of the wilderness. Picture yourself running alongside glistening streams, weaving through ancient forests, and breathing in the pure, untamed air.
What’s not to like!
The Bad News
Now, before you dive headfirst into the thrilling world of trail running, let’s address the elephant on the trail: the challenges. Here a few:
The Rugged Terrain: Mother Nature doesn’t always lay out a red carpet for trail runners. You’ll encounter steep ascents and descents that feel like scaling a mini-mountain, jagged terrains that test your footing, and sneaky spots in the sand that can throw off your balance. But guess what? These challenges are what makes trail running an epic adventure.
Nature’s Little Surprises: Picture this: branches seemingly conspiring to trip you up, low-hanging trees that demand you to duck and dive, and rocks and roots that play hide-and-seek with your feet. It’s a wilderness out there, and these surprises are all part of the game.
Finding the perfect trail is like discovering a hidden gem, and it can make or break your trail running experience.
Here are a few tips on how to locate the best trails around you.
Urban Trails Exist:
Living in a bustling urban area doesn’t mean you’re miles away from trails. You’d be surprised at how many hidden pockets of nature you can find. Look for local reserves, parks, or even the network of gravel roads and dirt trails that many towns and cities offer. These can be your starting point for off-road running adventures.
Connect with the Community:
Joining local running clubs or visiting running stores is like unlocking a treasure trove of trail knowledge. These seasoned runners can point you in the right direction and even introduce you to fellow trail enthusiasts. It’s a win-win!
Tech-Savvy Solutions:
In this digital age, technology can be your trusty sidekick. Consider using apps like Suunto Heat Maps to discover new trails, or simply rely on Google and Google Earth to scout potential routes. The internet is teeming with resources like Trail Run Project, where you can find valuable trail information and even connect with the trail-running community.
Know Your Terrain:
Before you lace up those trail shoes, do some research on your chosen trail. Understand its unique characteristics, from potential obstacles and hazards to convenient pit stops.
And don’t forget to check for any wildlife encounters you might expect—knowledge is your best friend when it comes to staying safe.
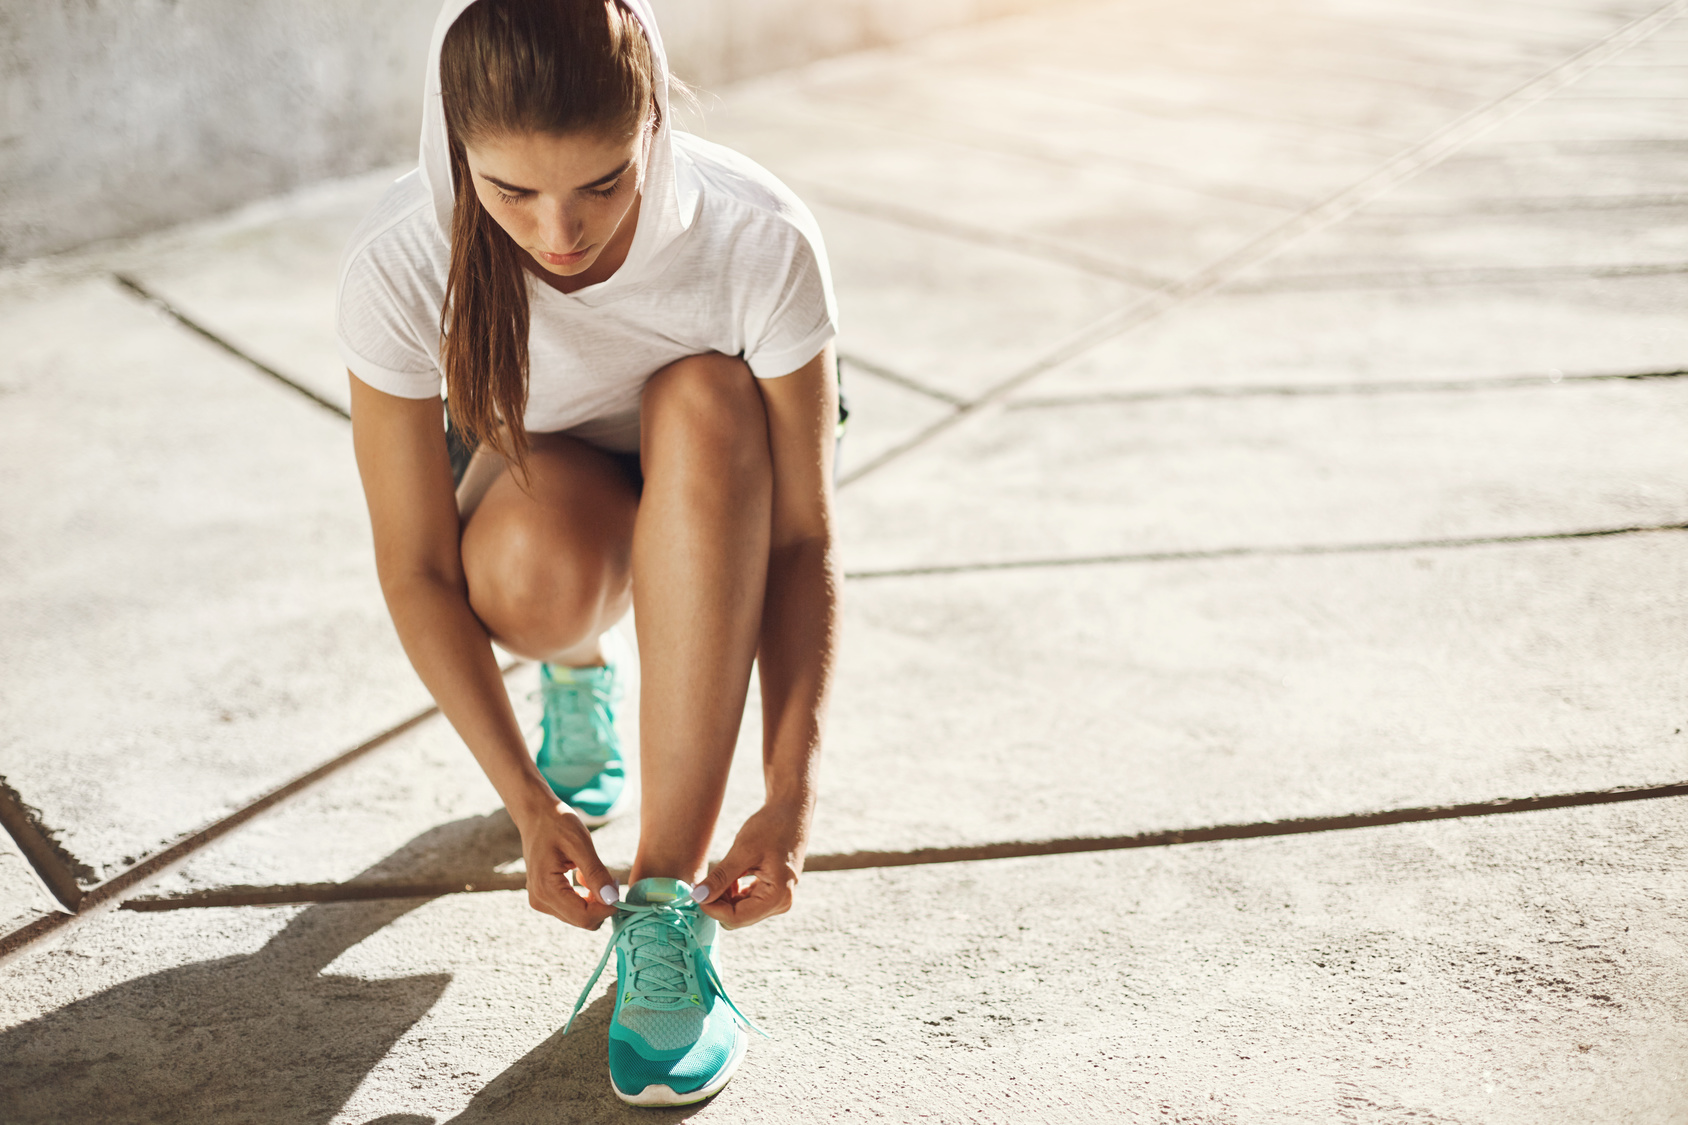
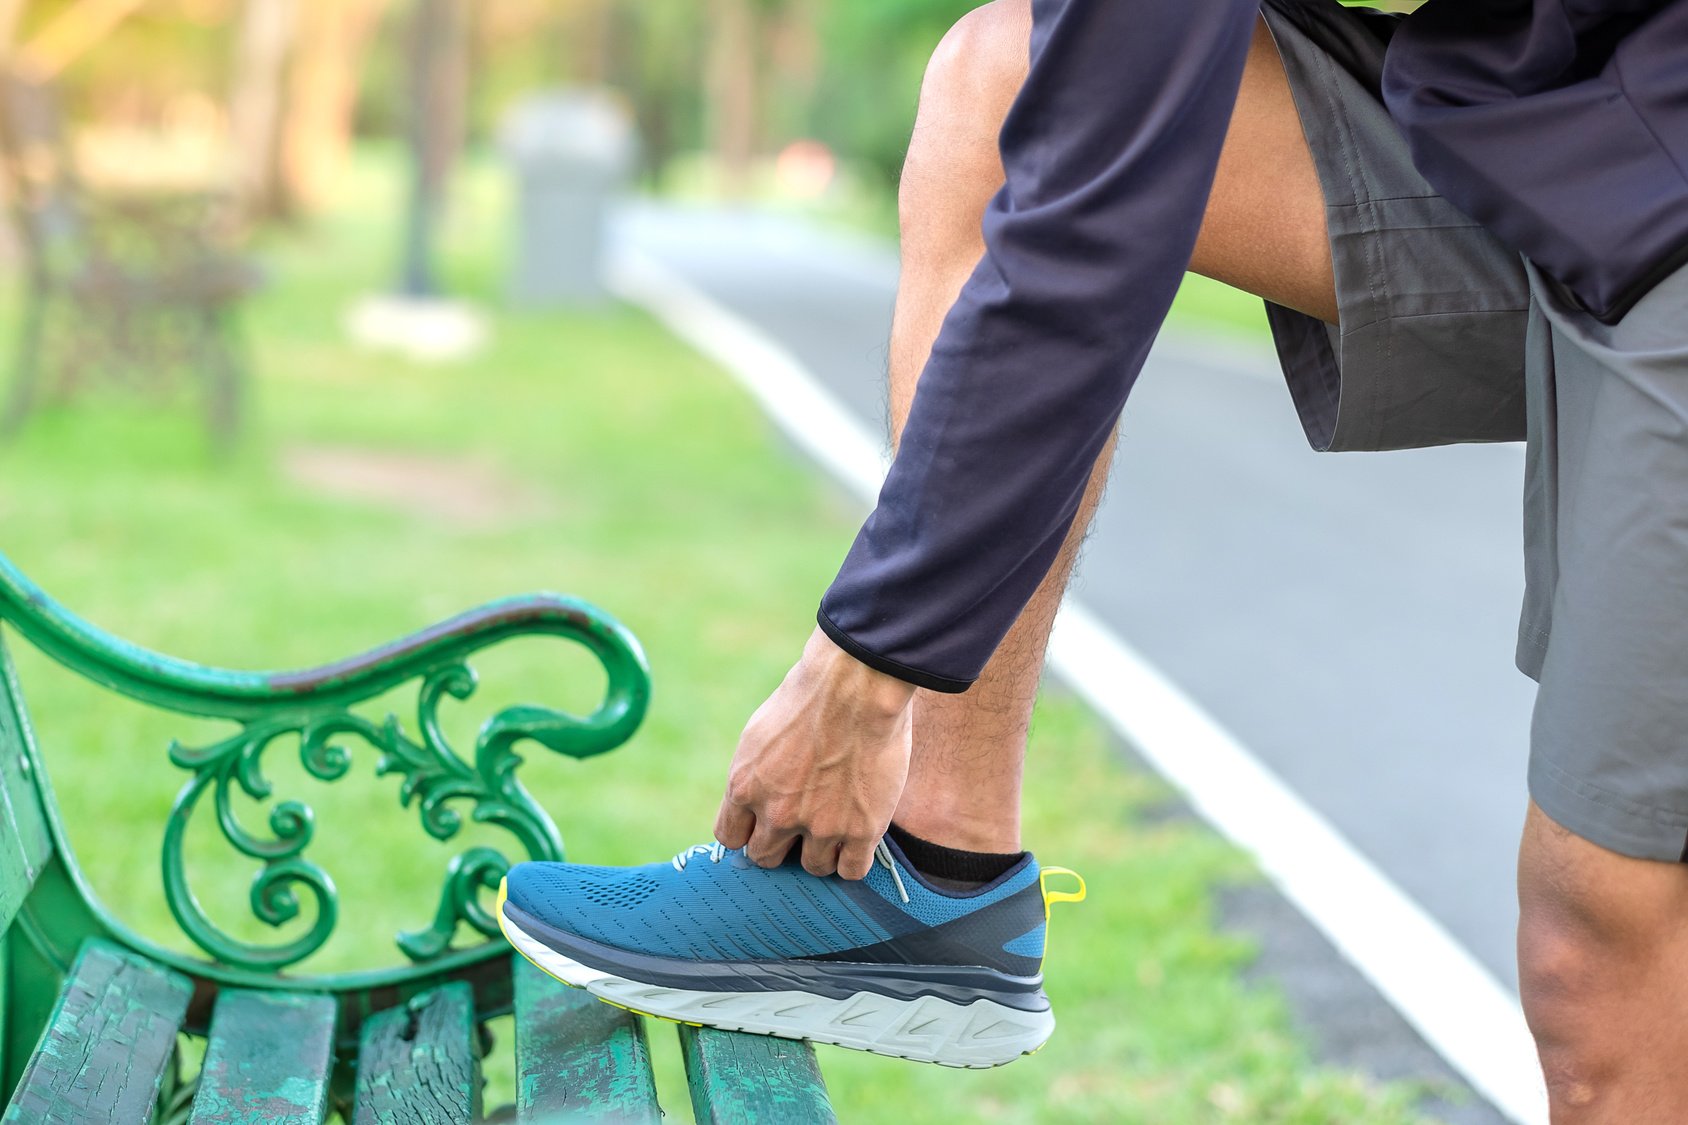
Get the Right Trail Running Shoes
Ah, the age-old debate: road shoes vs. trail shoes. Let’s dive into this footwear conundrum, shall we?
Road Shoes vs. Trail Shoes:
You might wonder if your trusty road shoes can handle the trails. Well, for short trail runs, they can do the job, but hear us out. Regular trail running will eventually call for a pair of dedicated trail shoes. Why, you ask? Let’s break it down:
Protect Those Feet:
Trail shoes are your armor against all sorts of foot-related troubles. From the ever-dreaded stubbed toes to bruised soles and slippery falls, they’ve got you covered. Plus, with those gnarly terrains and uneven surfaces, a sprained ankle might be lurking.
Lower to the Ground:
Here’s a nifty trick that trail shoes bring to the table—they tend to be lower profile, meaning they sit closer to the ground. Why is this important, you wonder? Well, it significantly reduces your risk of those pesky ankle twists and sprains. No one wants to hobble home after a run, right?
Traction Galore:
Ever found yourself sliding around on muddy trails like Bambi on ice? Trail shoes come equipped with rugged treads that offer more grip than a superhero on a mission. Slippery slopes and muddy paths won’t stand a chance.
Get the Right Trail Running Gear
Now, let’s talk gear because hitting the trails isn’t just about the shoes; it’s about being well-prepared for whatever Mother Nature throws your way.
So, gear up, trailblazers!
Trail-Worthy Threads:
Your regular running gear won’t cut it here. Opt for technical clothing made from synthetic, moisture-wicking fabric. It’s like your second skin, keeping you dry and comfortable through mud, rain, or sweat
Battle the Bugs:
Depending on where and when you run, insects might decide you’re their new favorite snack. Arm yourself with insect repellent—your shield against pesky bites and unwelcome tick guests.
Gaiters: The Unsung Heroes:
These might look like oversized socks, but they’re your secret weapon against nature’s little surprises. Gaiters guard your feet and shoes against the elements—think dirt, debris, and pebbles. They’re like a forcefield for your feet.
Shine a Light:
Planning a dawn or dusk adventure? A headlamp or flashlight is your trusty sidekick. Navigating the trails in the dark becomes a breeze, and you’ll avoid those accidental encounters with tree branches. Ouch!
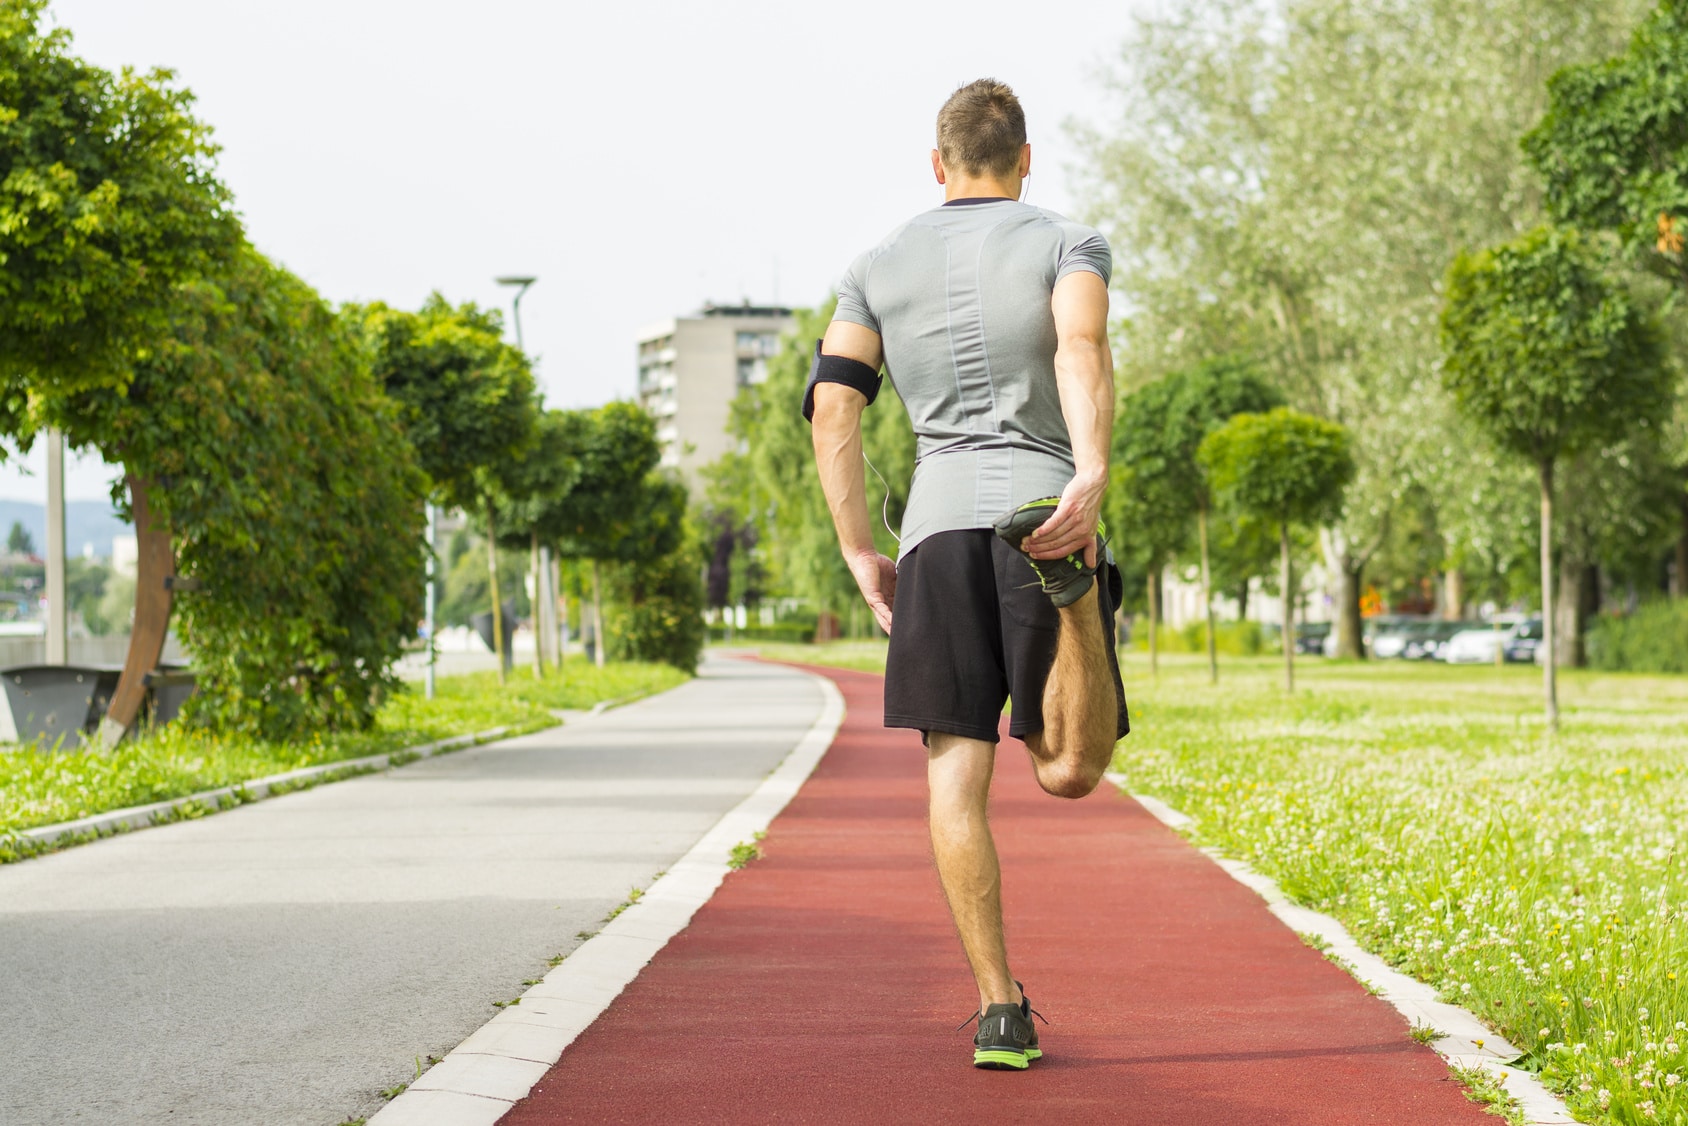
Alright, let’s get real about your first trail runs. Remember that feeling when you first started running? Well, you might just experience it all over again, and yes, it might not be all sunshine and rainbows.
Even if you’re a seasoned road runner, brace yourself for a reality check: trail running can slow you down. In fact, according to Trail Running magazine, expect to be 10 to 20 percent slower on those winding trails compared to your flat-road pace.
Here’s a little math for you: if you usually conquer a 5-mile road run in a cool 50 minutes, that same distance on the trails might stretch into more than an hour. Yep, it’s a whole different ballgame out there.
However, don’t fret about your pace. Instead, focus on finding your trail running groove. Start with about 60 to 70 percent of your usual effort. Take your time, soak in the surroundings, and, most importantly, keep an eagle eye out for those sneaky obstacles Mother Nature throws your way.
Hydration is always important when you’re running, but it becomes much more crucial during your trail adventures, especially when you find yourself deep in the wilderness, far from the familiar sights of urban life.
Here’s the golden rule: aim to drink at least 15 to 20 ounces of liquid for every hour you’re out there pounding the trails. But hey, if you feel like your body’s thirsting for more, don’t hold back. Listen to what it’s telling you, and gulp down that refreshing H2O.
Now, it’s not just about chugging water; you’ve got to keep those electrolytes in check. Electrolytes are key for optimal performance – calcium, magnesium, potassium, sodium – they’re the ones responsible for muscle function, water retention, and even blood pH levels.
To keep the hydration game strong, think about investing in a trusty hydration belt or pack. Sure, some folks might opt for the handheld water bottle, but let’s be honest, it can be a bit distracting – not to mention it might throw off your trail-running groove.
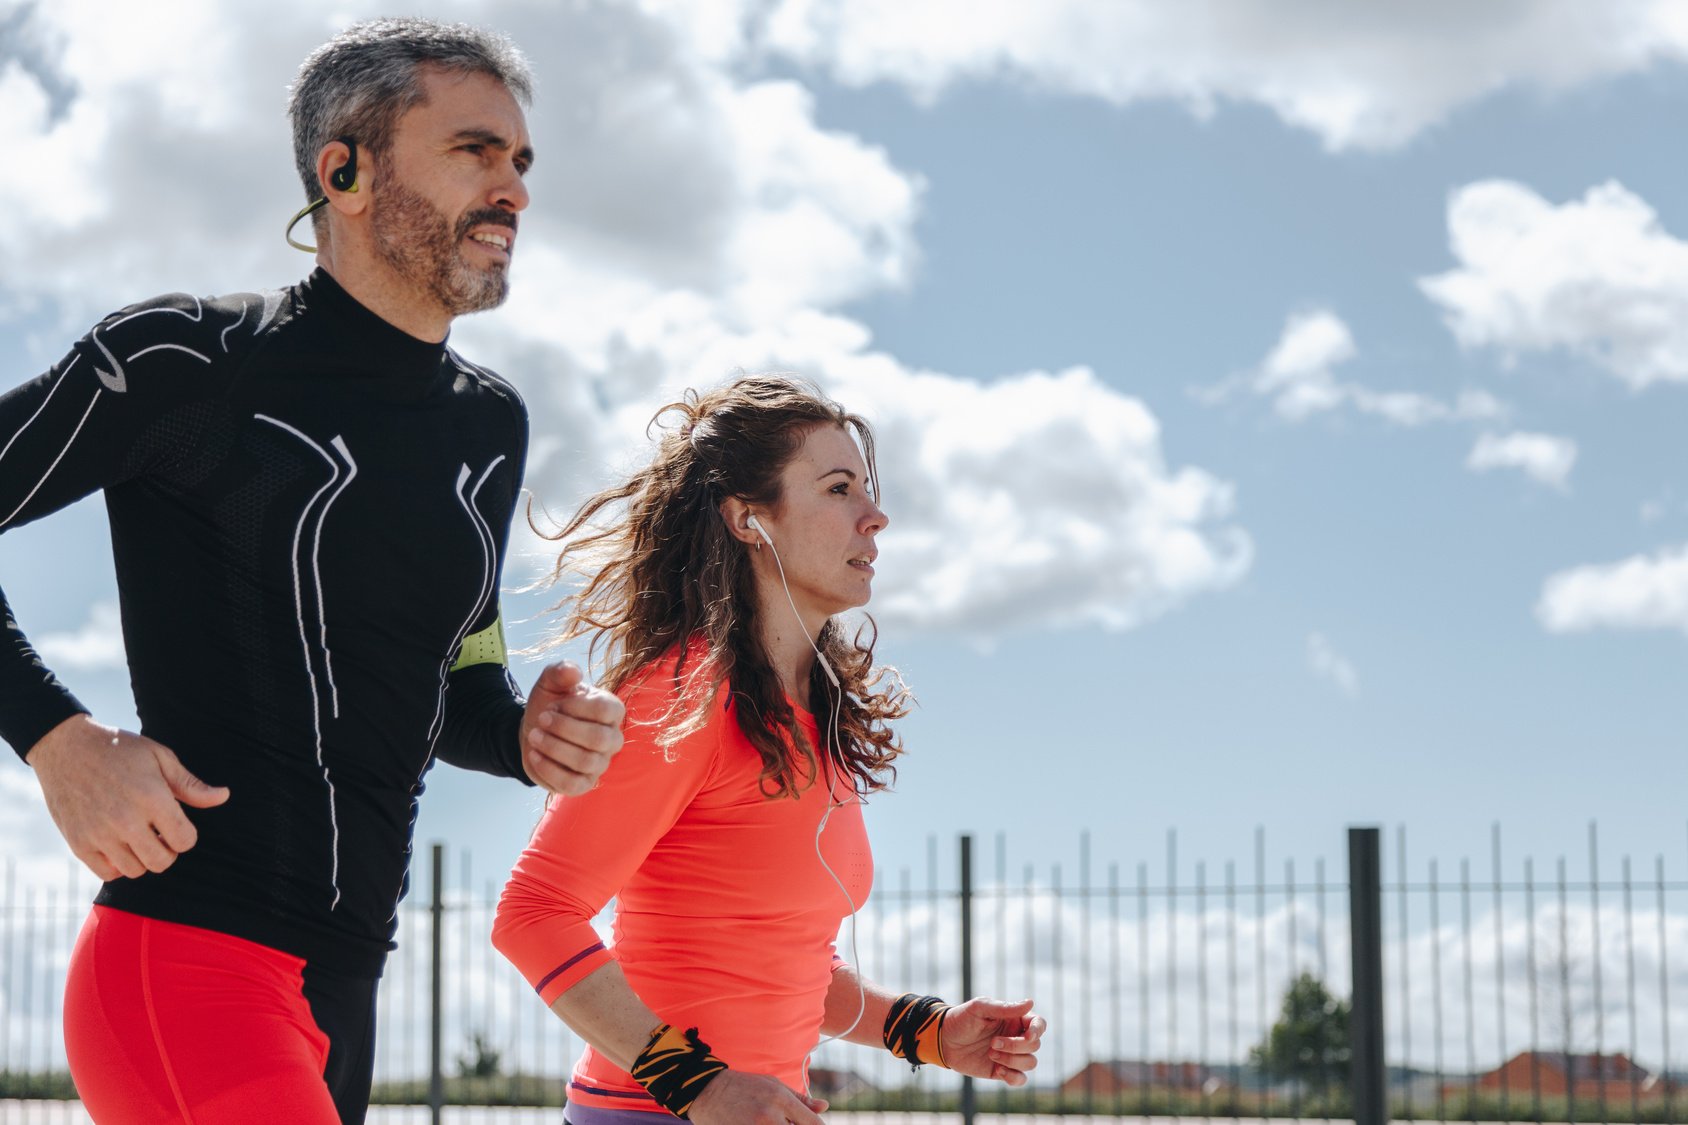
Trail Running Safety
Like any other outdoor sport, trail running has its dangers, and if you plan to spend any length of time on remote trails, it’s key to know how to stay safe.
To stay safe on the trails, do the following:
Say something. Tell someone—a family member, a friend, a neighbor, you name it—where you’re running and let them know when they should expect to hear back from you. Here’s the full guide to safe running.
Cell phones & maps. Bring your cell phone, and learn how to use a map and a compass —in the event you get lost. Of course, most phones today are equipped with a GPS system, but you should keep in mind there may be no signal outside city limits.
Be identifiable. Bring with you your ID and a list of emergency contacts—in the off chance something bad happens to you, God forbid.
Run distraction-free. Leave your headphones at home so you can keep your ears on your surroundings. Remember to enjoy the pristine sights and sounds of the natural world—without letting them distract you from the task at hand.
Stay on the mark. Keep your runs on marked trails as often as possible, and don’t be afraid of running right through a stream—getting your feet wet is part and parcel of the trail running experience.
Run with others. There is safety in numbers, to do your best to schedule your trail runs with a training buddy or a running group.
Beware of animals. Familiarize yourself with the type of wildlife in your area, and know what to do when you come face to face with a bear, a mountain lion, a snake, or any other dangerous animal.
Protect yourself. You can always bring with you pepper spray if you are running alone and safety is an issue.
Use a Safety app. Download and use safety apps for your phones, such as Road ID and bSafe.
Bring energy. For long trail runs, make sure to bring with you water and some food and fuel.
Be visible. Put on a headlamp or flashlight if you are planning to run when it’s dark.
Keeps your eyes open. Be mindful of your surroundings. Use common sense. Listen to your gut, and never ignore those ancient gut feelings.
Practice Good Trail Running Etiquette
Trails have their own unspoken code, and if you want to keep the outdoors safe and friendly, it’s time to embrace it. Here are some pearls of wisdom to make you the trail etiquette champ:
Mind Your Manners: Always be aware of fellow trail users. Nobody likes surprises, so if you’re coming up from behind, give a friendly heads-up with a hearty “Passing on your right (or left),” especially if you’re about to zoom past them. It avoids startling them and keeps everyone on the same page. And on those narrow single tracks, be ready to yield if needed.
Maintain Your Space: If you’re part of a running pack, remember the ten-foot rule – keep a healthy distance from each other. This not only ensures you get a better view of the terrain ahead but also prevents any accidental stumbles or tumbles.
Friendly Vibes Only: Embrace your inner trail ambassador. Be the hiker, runner, or walker who smiles, nods, and shares a few friendly words. It’s amazing how a simple “hello” can create a sense of camaraderie on those winding trails.
Spread the Love: Remember, it’s not just about following the rules; it’s about contributing to the thriving trail community. Whether it’s a smile, a nod, or a few encouraging words, spread positivity and make the trail a welcoming place for all.
Looking for the best advice on how to choose running shoes for beginners? Then this article is for you.
Whether you’re running to lose weight, or training for a marathon, proper running shoes are key.
I don’t want to scare you off from the get-go, but choose the wrong running footwear, and you risk plantar fasciitis, shin splints, blisters, black toenail, and other injuries.
Your running performance will suck, too. That’s not cool at all!
Here’s is more bad news.
With a host of price ranges, shoe types, a dizzying selection of styles and brands, trying to find a proper pair of sneakers is like looking for a needle in a haystack.
“Why things have to be this hard, David!”.
Simple: Not all runner’s needs are the same.
All sorts of things—your running style, your weight, your biomechanics, the surfaces you run on, and your running workouts—can impact shoe choice.
Not sure what all of this means?
Keep reading.
In this post, I’m sharing with you my full guide to choosing proper running shoes.
By the end, you’ll learn all you need to know about finding running shoes that fits your running needs like a perfect glove.
Let’s lace up and dig in.
The Benefits of Proper Footwear For Runners
Proof that running shoes help prevent injuries is still, surprisingly, a controversial subject in the running community.
It’s not, in fact, settled from a scientific standpoint.
But all in all, I think that shoe choice matters for injury-free and efficient training.
Let me explain.
Running shoes serve the function of protecting your feet from running’s impacts, as well as help you achieve and maintain top speed.
Problems you can avoid by choosing the right running footwear include :
Since you’re here reading this article, I’d bet that you also share my opinion and believe in the importance of running shoes.
How To Choose Running Shoes For Beginners
Here is the step-by-step system for choosing running shoes that suit your fitness level, body type, training goals, and personal preferences.
The Golden Rule
Guess what’s the most important factor in choosing running shoes?
To no body’s surprise, it’s actually comfort, according to a study published in the British Journal Sports Medicine.
Sure, comfort is subjective as it means different things for different runners.
It’s also not easy to measure nor to keep track of.
But, as far as I can tell, here’s what it means for me.
The ideal running pair should feel like a part of your foot, smoothly matching your specific biomechanical needs.
It’s a mismatch when it’s not the case.
That’s why I always urge my readers and running friends to try different sizes, brands, and models until they find that one that just “clicks”.
Now we got that out of the way, how do you make sure, really sure, that a shoe has passed the comfort test?
Other than running in it for a few weeks, ask yourself the following questions:
How does the pair feel on initial contact?
How well does it transition?
How flexible is the shoe?
Do you feel any rubbing/abrasion inside of the shoe or at the back of the heel?
If your answers are nothing but positive, you got yourself a winner. Congratulations!
Go to a Specialty Running Store
When looking for new running shoes, get them from a local specialty running store instead of a wholesale sporting goods store or online.
In general, special running stores hire professional staff who understand shoe construction and are experts in matching foot type and mechanics to running footwear.
This is exactly the kind of assistance you’ll need to find the right sole-mate.
Keep in mind that this whole shoe fitting process takes time, at least a half an hour.
Your right and left feet are of slightly different shapes and sizes, with one—usually the dominant one—larger than the other.
This is the reason you need to have both of your feet measured.
What’s more?
Foot size changes over time and one model can be significantly different from another, so go by what feels most comfortable, not by your “standard size.”
I’d recommend that you measure your feet for length and width at least twice a year, or whenever trying new running shoes.
You should also do this in the evening as feet tend to swell after prolonged sitting or standing.
Test Out Running Shoes
A common mistake I see beginners make is trying to cram the feet into the shoe.
That’s the wrong approach.
A shoe has to conform the shape of your feet—and anyone who tells you otherwise is lying to you.
Again, some Salespeople just want to make a commission—they don’t care about your needs.
I understand. Everyone has to make a living, but not on the back of my running comfort.
Sorry!
I’d recommend that you test out the shoe on the in-house treadmill.
Most specialty running stores provide this “free” service.
Not possible?
At the very least, ask the staff if it’s all possible to take a lap around the store or the block.
As a rule, test out four to five pairs from different models and brands and ranging in price from $75 to $110.
Don’t get fixated on just one brand—loyal consumers can be, sometimes, dumb consumers.
“Yes, David, your tips seem to fine and dandy, but good running shoes are pricey, right?
Yeah, no.
The most expensive shoe in a store doesn’t mean it’s the best option.
But, most importantly, there are many things you can do to find cheap options.
For starters, go for last year’s version of a mid or top-range shoe.
The differences won’t be that important, but you’ll, at least, get a top-shelf pair for a fraction of the price.
You can also look for bargains. Some of the places to check out when shopping for running shoes are department stores and outlet malls.
Most shoe retailers, including Nike, Adidas, and Brooks, have homes at these outlets, which means you can get your hands on those expensive pairs at a discount.
These stores also prefer to move products quickly, so they often discount the slow-selling items, such as running shoes, as well as semi-annual sales they’re always advertising.
Getting your shoes online is another option.
According to the analysis of prices from 41 online retailers conducted by RunRepeat.com, getting your shoes on, one can save you about 40 percent.
That stands for roughly $40.
Of course, this option only when you already know your feet really well.
Here are a few of my favorite shoe websites:
Zappos –offers a wide range of running shoes with free shipping and returns.
ShoeKicker—this handy website helps you pinpoint the lowest possible prices on shoes in one place.
Shoebuy –comes with a price-match guarantee, meaning if you could find a better deal on another website, they’ll refund you 100 percent of the difference.
The above tips should help any beginner find proper running shoes, but if you’re looking for more advice, especially technical advice, or just want to be a self-proclaimed expert on running shoes (just like me), then the rest of this article should get you started on the right foot.
Let’s nerd out a bit.
Warning: Arch type and running gait can be a part of the shoe fitting process, but they are not the ultimate measuring stick.
If you feel like you’re being pushed into a buying a certain shoe to control your pronation, or whatever, then think twice.
Comfort first!
Mine unlike yours and yours, unlike mine.
Arch Type In Runners Explained
When you hear people talking about foot arch, they’re mainly referring to the height of the medial arch, which tends to differ from one person to the next.
See picture.
The Foot Type Tests You Need
To determine your foot type, you can do any of the following:
Have a podiatrist assess your foot type.
Check the wear patterns on the soles of a pair of worn-in shoes.
Or, perform the “Wet Test.” Highly recommended.
The Wet Test For Finding Foot Type Explained
The “Wet Test” is not the most accurate arch type test, but it’s a good start, and a convenient, free, way to figure out your arch type.
Here is how to how to do it:
Dip your foot in the bowl of water for a few seconds,
Stand on the paper bag to show an imprint.
Take a look at the imprint that your foot left on the brown paper bag
Compare the imprint to the images below.
Foot Types
There are three main foot types based on the height of the medial arch.
Here there are, along with the corresponding recommended running shoes.
Roughly 20 percent of the populace falls into this category.
As you can see from the image, these have very low or non-visible arches. In fact, flat feet imprints display the entire sole of the foot.
In theory, having flat feet might present some serious trouble for runners, increasing the risks of heel pain, arch pain, and plantar fasciitis.
The Best Shoe?
Motion-control shoes and stability shoes.
The Medium Arch Type
Approximately 60 percent of the general population falls into this category.
The medium arch is the ideal type as it is flexible and can help you absorb a lot of impact while running.
For the most part, runners with a medium arch tend to be neutral or may overpronate on some occasions.
Also, having a medium height arch that naturally supports body weight is a sign of biomechanical efficiency, but it does not necessarily mean that they are injury-proof.
If you fall into this category, lucky you for because a broad range of shoe options is available, but stability shoes still the best.
You can also go for a minimalist shoe if minimalist running is something you want to try.
The High Arch Type
If your arch type belongs to this category, then your feet may pronate enough to absorb the maximum amount of shock.
Research has linked having a high arch with stress fractures, and heel pain issues since this type of foot tend to be less flexible, taking in extra impact.
Best Shoes
Runners with a high arch often, but not always, require shoes with extra cushioning.
Running Gait Demystified
Once you determine your foot arch, you’ll want want to figure your running gait cycle type.
In essence, running gait is a set of unique actions and reactions that a foot performs while in motion (whether it’s walking, running, etc.) in order to provide support, balance, and shock absorption for the body.
The most important thing about running gait that you need to understand is pronation.
Pronation Explained
Pronation is part and parcel of the natural movement of the human body.
In essence, it’s the foot’s natural inward rolling for impact distribution, following the heel striking the ground during a running gait.
Getting your head around your own pronation type is one major puzzle piece in helping you pick a comfortable running shoe.
Assessing Running Gait
Here are the two options you have to determine your running gait:
The Pro Option
The best way to determine your running gait is to have your foot analyzed by a specialist using multi-angled cameras and a treadmill.
While using these special tools, the specialist can assess your gait and measure how much your foot rolls in, or rolls out.
If you have a neutral gait, then you might be a biomechanically efficient runner.
A neutral gait means that your ankle, knees, and hips are all in alignment, therefore, be able to absorb impact, and reduce pressure on the joints and knees.
The Ground Contact
During the neutral gait, the outside of the heel strikes the ground first, then the foot pronates to absorb the shock and support body weight.
The Test
When a pair of used shoes do not show any inward or outward tilt and/or showing signs of wear down the middle of the sole, it usually indicates a neutral gait.
Common in
Runners with medium arches, as you can already tell.
Best Running Shoes?
I highly recommend a stability shoe or neutral shoe.
As I have already stated, all runners pronate—to one degree or the other.
The forward roll of the foot following a foot strike helps distribute the shock of impact, reducing the risks of overuse injury in the process.
So, a little pronation is a good thing.
But a little too much can be problematic, resulting in overpronation, which is an exaggerated form of the foot’s natural inward roll.
The Ground Strike
During the overpronation gait, the foot lands on the outside of the heel, then pronates excessively inward, transferring the shock of the impact to the inner edge of the foot instead of the ball.
In theory, if you tend to overpronate, then you are risking knee pain and injury.
The Test
If the shoes have a slight or a substantial inward tilt along with signs of wear on the inside by the big toe, then you might have an overpronation running gait.
Common in
This gait type is mostly common among flat-footed and/or low arch runners.
Best Running Shoes?
The type of shoe you need depends on the degree to which you overpronate.
Stability shoes works very well for mild-overpronators.
But if you severely over-pronate, go for motion control running footwear.
If your shoes have a slight or a significant outward tilt along with wear patterns on the outside edge of the sole, then chances you have an underpronation/supination running gait.
Common in
Runners with high arches are likely to be supinators.
Best Running Shoes?
I highly recommend neutral shoes with adequate cushioning properties for increased shock absorption.
Measure your arch really well so you can add sufficient cushion.
Shoe Types
As I have already stated, running shoes come in many different sizes, shapes, and levels of stability.
Stability shoes feature a good dose of medial support and midsole cushioning and are perfect for runners who exhibit mild to moderate overpronation.
Motion Control Shoes
If you tend to exhibit moderate to serious overpronation, then motion control shoes are what you need.
These come in with extra built-in support and flatter outsoles—the exact mix you need to ward off excessive pronation and providing sufficient stability to the feet.
Neutral Running Shoes
If you are looking for minimum medial support and maximum midsole cushioning, then neutral running shoes are the best choice.
Neutral running shoes provide a bit of medial (arch-side) support and midsole cushioning for extra shock absorption ability.
In fact, some brands of super-cushioned shoes can provide as much as 50 percent extra cushioning than standard shoes.
Barefoot Running Shoes
For the most part, most barefoot running shoes have no cushion in the heel pad.
They also come with a very thin layer of the shoe between the ground and the skin.
Just keep in mind that with this type of running shoes, you’ll be provided with the bare minimum when it comes to protection from the elements and potential risks on the ground.
Another thing you need to consider—especially when it comes to making your shoes last as long as possible while providing maximum protection—is the type of terrain and/or surfaces you’ll be running on.
Here are the main running surfaces to consider along with the ideal type of a shoe for each terrain.
Classic Road Running Shoes
If you are like the majority of recreational runners out there and tend to run on paved roads, indoor tracks, and/or packed trails, then classic road shoes are all you need.
Most classic road shoes have flexible outsoles and are fortified to provide enough cushioning during repetitive strides on hard, even terrains—think paved surfaces—flat and hard surface.
Trail Running Shoes
If you trail run often, consider investing in a trail running shoe.
As the name, Trail shoes are designed for the beaten and off-road paths.
These surfaces are usually peppered with mud, roots, rocks, gnarls, and other (injury causing) obstacles.
Most trails running shoes are fortified with a much denser rubber outsoles than the standard road shoe.
They are also designed to provide better tread and superior grip, which can provide better control on softer, often slippery or uneven terrains.
Cross-trainers
If you’re in the market for a sports shoe for the gym, or CrossFit workouts, then go for cross-training shoes.
Most cross-trainers are designed to have more contact with the ground or floor.
As a runner, you’ll be doing plenty of cross-training workouts.
For that, check my page here.
It got all sorts of strength training, yoga workout, and everything in between that you need to become a well-rounded runner.
Do not wear the same running pair two days in a row.
They need time to air out and bounce back.
By doing so, you extend the lifespan of your shoes.
So, for instance, if you’re logging in serious miles in preparation for a longer race, consider rotating two—or more—pairs of shoes during the same season.
This is also helpful for tailoring the specific shoe for the type of run.
Storing Your Running Shoes
Exposing your running shoes to extreme temperatures and elements can cause severe strain on the shoes.
Storing your shoes in your box after use, car trunk during the summer heat, or outside when temperatures are freezing is the fastest way to break them down.
Instead, store them in moderate temperature, preferably in an open area where they can air dry and breathe.
It’s the ideal opportunity to shed winter’s layers and hit the outdoors.
But when the temperature rises, running becomes a huge physical undertaking, and intense running can be quite dangerous.
In fact, run too long in the heat leads to heatstroke—that excruciating fatigue that makes you feel like you’re about to explode from the heat.
While running in the heat is often safe for most runners, taking a few preventative steps will help you stay safe and prevent complications associated with the heat.
This hot season, do your part in avoiding heat stroke when running by following the tips below.
But first things first, what is heat stroke and why it occurs?
Heat Stroke in Runners Explained
Heatstroke, the most dangerous form of heat-induced illness, occurs when the body’s heat-regulating system is compromised by excessive heat.
During the condition, body temperatures increase above its normal range, which is a degree or two of 98.6° F or 37° C.
Signs include nausea, confusion, seizures, disorientation, and often a loss of consciousness or coma.
Treating Heat Stroke When Running
On the onset of any symptoms, do the following immediately:
Out Of The Sun
If you suffer from any heat-related illness symptoms, it’s key to immediately get out of the sun and rest, preferably in an air-conditioned room.
If you can’t get indoor, try to find the nearest cool place or at least shade.
Elevate
Lie down and raise your legs to a level above your chest to get the blood flowing.
No Clothing
Remove any tight or extra clothing and equipment.
Drink
Drink plenty of fluids, such as water or sports drink to replace lost liquids and salt.
Don’t guzzle, though, but take sips.
Apply Cold
Bring your core body temperature down by applying cool towels to your skin, taking a cool bath, spraying yourself with a garden hose, or placing ice packs or wet towels on your neck, head, armpits, and groin.
Seek Medical Help
If these measures fail to improve your symptoms within 10 to 20 minutes, seek medical help.
Left untreated, heatstroke can cause organ failure, brain damage, and even death.
If you don’t cool down your body, heatstroke can lead to organ failure, serious injury, or even death.
How To Prevent Heat Stroke When Running
When it comes to managing and dealing with heat-related issues in runners, prevention is the best course of action.
After all, prevention is better than cure.
Here are the measures you need to protect yourself from heatstroke when running in the heat.
When the mercury rises, you need workout clothes that can keep you fresh, dry, and comfortable.
Go for high-performance fabrics that will wick the moisture and sweat away from your body.
High-performance fabrics have tiny channels that wick moisture away from your skin to the outer layer of the clothing, where it can evaporate faster.
Some of the best fabrics include Drymax, Coloma, Smartwool, polypropylene, and other high-performance athletic fibers.
What’s more?
Avoid tight clothing as it restricts the heat removal process as well as dark colors as they absorb the sun’s heat and light.
Protect Your Head
A running hat can help protect your face from the sun’s UV rays, as well protect your eyes from UV rays (again) impact that may lead to cataract and other eye problems after years of exposure.
In order to prevent exertional heat stroke, it’s key to gradually acclimate yourself to running in hot weather.
It takes roughly two weeks for your body to adapt to the heat.
This is what’s known as heat acclimatization, and it consists of a series of physical adaptations that help your body better manage heat stress, cooling itself more efficiently in the process.
During that period, your working heart rate decreases, your core body temperatures lower, and sweat rate increases.
Instead of pushing the pace, scale down your running distance or intensity for the first few weeks.
Why do some long-time runners look old? If you’re looking for an answer, then you’ve come to the right place.
You’ve probably heard the rumors that running can make you look old or even cause wrinkles. But is there any truth to it?
The answer might surprise you.
Running is an intense activity that puts a lot of strain on your body, and it’s natural to wonder if it could also be taking a toll on your face.
In this post, we’ll dive into the science behind runners’ face and separate fact from fiction.
You’ll discover that the idea of a runners’ face is nothing more than a myth and learn some tips to protect your skin while running.
So, whether you’re a seasoned runner or just getting started, keep reading to find out the truth about runners’ face.
The Truth Behind Runners Face
The mysterious “Runner’s Face” phenomenon is a fascinating yet controversial topic that has captured the attention of many runners and non-runners alike.
This alleged premature-aging phenomenon supposedly affects runners in their 30s and beyond, leaving them with a less-than-youthful appearance. But let’s delve into the depths of science and statistics to uncover the truth behind this enigma.
Some believe that the repetitive up-and-down motion of running causes the skin to lose its elasticity, resulting in sagging cheeks and facial structures. However, before we jump to conclusions, let’s examine the evidence at hand.
Contrary to popular belief, the theory of bouncing faces is nothing more than an urban legend. There is a distinct lack of solid scientific proof to support this claim. Instead, much of the so-called evidence stems from anecdotal accounts or dubious “sponsored articles” by beauty clinics attempting to prey on the insecurities of potential customers. So, when it comes to putting fillers in your face, you can confidently say, “No, thank you!”
But here’s the twist: While the bouncing face theory may not hold water, there are genuine reasons why some endurance athletes may appear older than their actual age. These factors have nothing to do with the repetitive motion experienced during training. It’s time to separate fact from fiction and uncover the true culprits.
Let’s get to the truth.
Why Do Runners Look Old – The Free Radical Theory
Research suggests that running and other forms of cardio training can cause free-radical stress that may damage collagen and elastin, the skin’s most vital supportive fibers. When you exercise, your body develops free radicals from training stresses, which is a natural response from the process of recovering and patching up the muscles. The problem is, depending on the length, type, nutrition, and recovery time, the excess of free radicals can accumulate and damage the cells, which we usually associate with aging.
Is It Hopeless?
Don’t throw your running shoes into the trash just yet. A study published in Free Radical Biology and Medicine reported that only extremely intense training results in cell damage.
So, what qualifies as extremely intense?
Any training for 90 minutes or longer at 70 to 80 percent of maximum heart rate, according to research.
Maybe this is the reason why you’re more likely to notice some of these effects on serious endurance runners who log a lot of miles every week. Mild intensity is defined as training at 50 to 60 percent of the maximum heart rate three to five times a week.
In other words, if you’re a recreational runner performing most of your runs outside of the intense category, then you shouldn’t worry about scaling back your running to protect your precious face.
It’s important to note that regular exercise, especially running, is one of the major triggers for healthy skin. Exercising regularly can increase circulation, improve bone density, and upgrade your immune system, which may grant your skin a more youthful and lively appearance. Plus, exercise is also one of the best anti-aging measures you can take for your lungs, heart, brain, productivity, and brainpower.
Running outside can be an invigorating and rewarding experience, but it can also put your skin at risk. Exposure to the sun can do a number on your skin and leave you looking older than your years.
Did you know that every minute spent under the sun counts as one exposure? So, if you’re going on a 2-hour run, you’re racking up around 120 exposures! The sun’s UV light can damage your skin’s layers and cause age spots, uneven pigmentation, and even skin cancer. According to research, 80 percent of the signs of aging are attributed to sun damage.
Air Pollution
It’s not just the sun you need to worry about. Air pollution can also contribute to the formation of a less-than-radiant complexion. In fact, a study in the Journal of Investigative Dermatology found that exposure to air pollution can drastically increase the signs of skin aging. If you’re curious about the impact of pollution in your area, you can check out Dermalogica’s Skin Pollution Index. The higher the number, the greater the impact on your skin.
For more on the impact of running and the elements on your face, check out the following sources:
Here are a few tips to help you protect your face while exploring the outdoors.
Use Sunscreen
Are you tired of constantly battling sunburn and uneven skin tone after a long run outdoors? Look no further than sunscreen, the ultimate weapon against the damaging effects of the sun’s harmful ultraviolet rays. And no, sunscreen isn’t just for women – it’s for anyone who wants to keep their skin looking young and healthy, regardless of gender.
But not all sunscreens are created equal. To get the most protection possible, choose a broad-spectrum sunscreen with at least 30 SPF, which blocks both UVA and UVB rays. And don’t forget to apply sunscreen to your lips – after all, they need protection too.
If you’re a long-distance runner, opt for a spray sunscreen for easy reapplication during your run. But don’t forget to apply your sunscreen at least 15 to 20 minutes before your run to allow your skin to absorb it fully.
And here’s a pro tip: sunscreen typically starts to lose effectiveness after about two hours, or even sooner if you’re sweating heavily. So be sure to reapply frequently, especially during long runs.
If you have sensitive or acne-prone skin, opt for a sunscreen with SPF 50 and no higher. While higher SPF may seem like a good idea, it can actually lead to a greater risk of clogged pores and breakouts.
But sunscreen isn’t the only defense against outdoor elements. Air pollution can also wreak havoc on your skin, leading to uneven pigmentation, age spots, and even skin cancer. To find out the impact of pollution in your area, check Dermalogica’s Skin Pollution Index.
Wear A Hat And Sunglasses
Let’s shed some light on the essential accessory that should be a staple in every runner’s wardrobe—the mighty hat or sun visor. This multitasking marvel not only shields your face from the scorching sun but also comes to the rescue when the sweat starts pouring. Say goodbye to pesky droplets interrupting your flow! A hat or sun visor soaks up that perspiration, leaving you with a cool and comfortable running experience.
Now, let’s talk about the windows to your soul—your eyes. Did you know that UV rays bouncing off the pavement or sand can wreak havoc on your ocular health? Don’t fret! We’ve got your back with a simple yet powerful solution—sunglasses! These stylish accessories are not just a fashion statement; they are a vital line of defense against the harmful effects of UV radiation. By donning a pair of sunglasses with UV/UVB protection, you shield your eyes from potential threats like pterygium, ocular melanoma, and cataracts. Now, that’s a sight for sore eyes!
But hold on, before you rush to grab any pair of shades, let’s dive into the science behind UV protection. Opt for sunglasses that offer reliable UV filters to safeguard your vision. Steer clear of those trendy but ineffective eyewear options that lack the necessary protective coatings. Remember, the more light that penetrates your pupils, the greater the risk to your eyes. So, be a savvy runner and choose sunglasses that prioritize your eye health without compromising on style.
Don’t Run Shirtless
While going shirtless may seem like a way to beat the heat, it actually exposes your skin to more sun, leaving it vulnerable to potential damage. What’s more, running shirtless can trap sweat against your skin, keeping you warmer than you’d like. But fear not, for there’s a simple solution that will revolutionize your running experience.
Enter the world of technical, high-performance shirts—the superheroes of moisture-wicking magic. By opting for a quality wicking shirt, you bid farewell to sticky sweat and embrace a drier, more comfortable run. These shirts work their magic by efficiently pulling sweat away from your skin, allowing it to evaporate and keep you cool. But not all shirts are created equal, so choose wisely!
When selecting your ideal running shirt, seek out breathable, lightweight fabrics that allow your body to breathe and regulate its temperature. Look for clothing designed with the Ultraviolet Protection Factor (UPF), a measure of how effectively the fabric blocks harmful UV radiation. The higher the UPF rating, the greater the protection for your skin. For example, a shirt with a UPF of 50 will only allow approximately 1/50th of the sun’s UV radiation to reach your precious skin. Now that’s impressive!
If you prefer running in sleeveless shirts or tank tops, worry not. You can still keep your arms protected by investing in sun-protective sleeves. These nifty accessories offer an extra layer of defense against the sun’s rays while allowing you to enjoy the freedom of your preferred running attire.
Now, let’s talk about fabrics to avoid—namely, cotton. While cotton may feel soft and cozy, it falls short in the sun protection department. Cotton fabrics typically have a UPF factor of approximately 5-7, meaning they allow a significant amount of radiation to reach your skin. So, bid adieu to cotton and embrace the world of performance fabrics engineered to keep you safe and comfortable.
Eat Lots of Antioxidants
Imagine this: a plate bursting with vibrant colors, brimming with the power to protect your skin. Say hello to the superheroes of nutrition—the antioxidant-rich foods that can thwart potential damage caused by those pesky free radicals. Let’s dive into the delectable options that can revolutionize your skincare game.
First up, we have the tropical delights of kiwi and pineapple, packing a punch of antioxidants to fortify your skin’s defense. These exotic fruits are not only a feast for the senses but also a feast for your skin’s vitality. Next, we venture into the realm of berries—the small but mighty warriors against free radicals. Blueberries, strawberries, raspberries, and blackberries offer an abundance of antioxidants that can help keep your skin radiant and youthful.
But wait, the citrusy wonders of fruits like oranges, lemons, and grapefruits are also on the menu. Rich in vitamin C, these zesty treats not only give your immune system a boost but also work wonders for your skin’s health. The secret lies in their antioxidant properties, shielding your skin from the harmful effects of oxidative stress.
Vegetables take the stage as well, with broccoli leading the charge. This cruciferous powerhouse is not only packed with essential nutrients but also serves as a source of skin-loving antioxidants. Green and red peppers join the party, adding a vibrant touch to your plate while bolstering your skin’s defenses.
But let’s not forget the skin-boosting wonders of carotenoids—the antioxidants that lend a vibrant hue to fruits and vegetables. Tomatoes, sweet potatoes, carrots, pumpkins, papaya, and mango are just a few examples of the skin-loving treasures that nature provides. By indulging in these colorful delights, you give your skin a powerful ally in the fight against free radicals.
If you’re looking for an extra boost, turn to skin supplements that contain vitamins A and E. These trusty allies work hand in hand to nourish your skin from the inside out, providing added support in your quest for youthful radiance.
Runners Face – The Conclusion
I hate to disappoint you, but there isn’t such a thing as runners face.
The up-and-down movement is nothing to worry about, and it’s definitely not going to age your skin faster.
But that doesn’t mean that you shouldn’t protect your face when running outdoors.
By taking the above steps, you can drastically slow down the aging of your skin.
Rewriting is the rest of the steps of the trip, as you’ll need to make constant tweaks in order to reach your destination.
That’s why goal setting is a skill.
The more you practice it, the better you’ll get at it.
Write down your goals every day—even if this seems redundant.
The often your rewrite your goals, the clearer and more refined they get.
Doing so also reminds you of what you want to achieve.
4. Turn your Goals into Pictures
Post a picture or a visual representation of your running goals somewhere visible where you can see it on a daily basis.
Take three to five Post-It notes then jot down your top fitness and health goals.
Make sure that each goal is a few words long, just like a mantra.
Run three times a week, for example.
Other examples include:
Losing an X amount of pounds,
Developing healthy eating habits,
Improving running performance,
Increasing total body strength,
Getting more quality sleep,
Next, print out your goals in big words. Then, post them up on your refrigerator, computer desktop, your wall, or at work.
If you are running as part of a team or club you can also create visuals of the above goals by making custom patches for each goal. You can choose services of a patch manufacturer like UltraPatches to get your patches designed and manufactured in various types for your clubs and teams for every specific goal you want to visualize and use them as rewards and giveaways for achievements to motivate and boost the morale of members.
5. Plan your Running Routine
in Advance
“Action expresses priorities.” Mahatma Gandhi
Plan, to the letter, the type of run, date, time, and place of each session in your daily calendar.
This might be the best time investment you’ll ever make.
For an average month, you might go for a total of 15 to 20 workouts, depending on your schedule and training goals, of course.
Next, schedule your sessions the way you do with your social events and work meetings.
6. Plan Your Gear in Advance
I hate to sound like a broken record, but success does favor the prepared mind.
This is especially the case when trying to become a regular runner.
The better you prepare in advance, the easier you make it on yourself, and the more likely you’re to do it.
I hate to admit it, but the number of times I skipped a run because I couldn’t find my favorite running shirt is quite annoying.
Lay out everything you need for your run—clothes, trainers, water bottle, headphones, armband, general positivity—then place them on the kitchen counter or near your bed, so you always have every ready to go.
At least, never run in a rush so you won’t get irritated before you hit the track.
This may seem a bit out there, but drafting a contract can push your motivation to the next level.
This is especially the case when you’re willing to do what it takes to achieve your goals.
Inside of contract, make sure to include the following:
Your long term goals
Your short terms goals
Your exact action plan
A list of your excuses
Rewards and punishments
Date at which you should reach your fitness goals.
Your signature and the date of signature
Next, hold yourself accountable for doing what needs to be done in order to apply the terms of the contract in your daily life.
8. Build a Support System
Research shows that building a support system can increase your odds of success.
This support system may include members of your family, friends, colleagues, and workout buddies.
Instead of plodding alone, build a supportive cast of encouraging and like-minded people, whether in person or online.
Just like my girlfriend and I, we try to be as annoying as possible whenever one of us is trying to be a couch potato or reach for the low hanging fruit.
Stay hard!
9. Find A Running Motivation Buddy
Having a running buddy keeps you honest—for both the short term and the long.
In fact, a workout buddy can provide you with a mix of accountability, competition, and support that can virtually ensure success.
Ask everyone—your family, friends, co-workers, and neighbors.
You can also join a local sports club, or go online to find the perfect match.
What’s more?
Make sure you share similar fitness goals and have the same fitness level.
10. Make a Public Commitment
Want to use peer pressure to the max?
Share your goals with others.
Sure, this might not work for everyone, but it’s worth trying as research shows that making such a commitment makes it more likely to achieve one’s goals.
Share your goals with your family members, friends, co-workers, online buddies, then keep them updated on your progress.
11. Have a Killer Running
Motivation Playlist
According to study, listening to music while working out can improve mood, boost athletic performance, and increase consistency.
Then, write down a suitable reward or treat for every mini-goal.
By suitable I mean, it’s suitable to (1) the size of the goal ( for example, don’t reward completing a 45-minute weight lifting session with a long vacation in Paris).
And (2) does not compromise your ultimate goal—so, for instance, if you’re trying to lose 30 pounds of body fat, don’t reward a short run with a dessert binge.
You’ll only sabotage your results.
Common rewards include:
A nice healthy dessert
Reading your favorite book
Taking a long nap
Going to a nice restaurant
Binge-watching your favorite show.
Getting a message
A hot bath
13. Get a Coach
In case you can afford it, get a coach or mentor to work with, especially when you feel like you need more direction.
Here are a few perks of having a personal trainer:
Provide you with a structure for your training.
Provide you with the tools you need to break through some of your emotional barriers.
Learn the correct form and avoid technical mistakes.
Hold you accountable for your progress, improve your consistency, and speed up your fitness gains.
14. Keep a Running Journal
Monitoring your training helps you detect a pattern in training, which is vital in uncovering what works the best for performance and injury prevention. This is the case whether you’re a stressed mother, overworked manager, or a busy student.
You can monitor your goals online by using an app like LogMyRun to prompt you to enter data about your training,
After each run, note the following in your running log:
Time and distance
How you were feeling (physically, emotionally, and mentally)
Approximate mileage
Running speed
Weather conditions
Pre-run meal
Calorie burn
Sets performed
15. Chart Your Progress
“If you can’t measure it, you can’t improve it.”- Peter Drucker.
Not keeping track of your progress (or lack thereof) is the recipe for stalled results.
It also makes it more likely for you to forget about the little improvements you have made.
Keep track of your progress using a training log or diary.
Or you can also use apps like JEFIT, Fitocracy, or Fitness to keep tabs on weights.
Here’s what to keep track of:
Your weekly body weight,
Your body measurements,
Number of reps and sets along with the weight used on each exercise,
Your weekly running mileage,
Your daily calorie intake,
Before and after pictures,
Websites like MyFitnessPal and Fitbit are also great resources and tools for keeping track.
16. Use Affirmations
Still, struggling with your running plan?
Try using affirmations.
Affirmations are specific, positive, and empowering statements that can help you overcome negativity, self-sabotage, etc.
Here is a list of some of my favorite affirmations.
I love fitness and exercise every day.
I am motivated at all times to work out.
I embrace success in all areas of life.
I am becoming more and more motivated every single day.
I find it easy to motivate myself and get myself in the right state of mind.
My life is full of purpose and motivation.
I feel motivated and am moving in the direction of my fitness dreams.
I am a highly motivated person
I am highly motivated, ambitious and driven
I am always looked up to as someone with high energy, drive, and motivation
17. Act Like it
This is an excellent tool I picked up from the world of Neuro-Linguistic Programming (NLP).
And in essence, it’s the good old fake it until you make it tactic.
According to the “act as if” principle, it’s possible to manifest outer circumstances and conditions by acting “as if” they already happened.
By “acting as if” you already have something you want (even though you might not feel like doing it), you’ll create the conditions for it to manifest in your life with greater ease and possibility.
There is nothing spooky about it.
For instance, we can feel happy by acting as if we are already feeling happy (even if we are miserable as f**).
By doing so, you’ll find it that you actually start to feel motivated for the workout.
18. Use the Stick
Humans are not that complicated when it comes to motivation.
We are either motivated by the things we want—the carrot, or by the things we don’t want—the stick.
What’s more?
Research shows that pain is actually a stronger motivator.
To use the stick, ask yourself the following question:
What is the cost (physical, emotional, social, and health-wise) of failing to see your running resolution to fruition?
What are you standing to lose by not getting fit?
What are the consequences of leading an unhealthy life?
Next, write down your answers and revisit them on a daily basis.
19. Put Money On the Line
There are plenty of websites and apps that help you bet on your training goals.
If you don’t want to stay accountable for your action, you lose money or have to donate to a charity whose cause you don’t support.
If you accomplish your goal, you’re either rewarded with a paycheck or donation to your favorite charity.
You can also pre-book your gym sessions—and pay for them in advance.
Or plunk down some money for a race.
Once you prepare an ongoing group class or a personal trainer, you’ll want to show up to get your money’s worth.
20. Take a Recovery Week
Running, especially high-intensity training, can put a lot of stress on your muscles, tendon ligaments, joints, and the nervous system.
By taking time off, you help your body to repair damaged muscle tissues.
Schedule a recovery week every fourth or fifth week of intense training.
Do it in a periodic manner, and you’ll always come on top.
During the recovery week, you’re not allowed to run, lift, or do anything at all.
You only need to go on walks and mind your diet.
There’s no fixed rule on this. Feel free to set goals and recovery on your own.
21. Don’t Skip Your Runs
You might feel tempted to tell yourself, “No biggie, I’ve been running for a few weeks in a row…I’ll just skip it for a couple of days, then I’ll be back on track,” that may harm your running motivation.
Cracks are starting to form, and you’re trying to ignore them.
Make it a rule to not skip a single run, especially during the few first weeks. If it’s on schedule, it has to be done.
If you fail, don’t beat yourself up, nor be harsh on yourself—everyone messes up sometimes.
22. Run in the Morning
Research shows that people who exercise first thing in the morning tend to stay better consistent with their training program.
It’s a matter of priorities.
You’ll be less likely to get distracted in the morning when the rest of the world, especially your children (if you have any), are still asleep.
To make this a reality, set your alarm, put it somewhere it away from reach, lay out everything you need for our morning workout, then go to sleep.
Give it a try! Surely you are going to be addicted.
Running is a fantastic exercise, but it’s also a great mode of transportation, so try running to or from work.
In some cities, running can be often faster than driving during rush hour.
Who knows, you might end up getting home earlier than you’d normally do taking the public bus.
The first step? Simply stuff your essentials—cash, credit card, ID, phone, etc.—into a runner-friendly backpack or fanny pack and run home from work instead.
Remember: Check for the safest and best routes in your location.
Lots of people take up running because they want to lose weight.
But regular training benefits go beyond the scale. In fact, if you’re only running to slim down, you’re not seeing the big picture.
Here’s what you stand to gain from exercising regularly:
Reduce the risks of chronic diseases,
Strengthen your body,
Decrease your risk of heart disease,
Strengthen your immunity system,
Improve productivity,
Add years to your life,
Fight off mental problems, like depression and anxiety,
Boost your endurance and strength,
25. Compare Yourself To Yourself
Being competitive is a good thing, but when you start comparing yourself to others, you might end up doing more harm than good.
This is, of course, something we all do: we look at the guy (or girl) next door and check if they’re doing or having better or more than us.
This achieves nothing but makes us feel bad.
Instead of comparing yourself to other people, build the habit of comparing yourself to yourself.
Yes, it’s a skill that requires practice, patience, and time to fully develop.
But, by building this habit, you’ll learn how to keep the focus on you.
On your own achievements.
On your own results.
And nothing else.
26. Be Grateful
Being a runner is a gift that you should never take for granted. Just think about the last time you got injured and couldn’t go for your 5-mile run. It sucks, doesn’t it?
But are you grateful?
If you’re not, which is likely the case, then
grab a little notebook and start jotting down the things you are grateful for. Begin with the obvious and build it up from there.
These might include:
Having a family that supports you,
Being able to work out (many people cannot due to serious health issues),
Having a roof over your head,
Being able to read these words,
Waking up this morning,
Getting to work on time,
Having enough money in your bank account,
Not living in a war zone,
27. Don’t Give up
Fall down seven times, get up eight, Japanese saying .
Running motivation is a fleeting mistress.
It comes and goes. You cannot confine it.
In fact, making mistakes and falling off the fitness wagon is 100 percent normal.
Nothing happens overnight except for failure.
Failure can pull the rug under you without you even noticing anything going wrong until it’s too late.
Please, whatever you do, do not give up.
When all else fails, just keep on going. It’ might just take you a few tries before you make it to the end goal.
Keep on going strong toward achieving your goals.
That’s what matters in the long term—not just some hacks and tactics you picked up from a blog or website.
Conclusion
There you have it! The above running motivation tips should be enough ignite your fire and get you going as fast as possible.
Taking the first step is often the hardest, so the easier you can make that, the more successful you’ll be. The rest is just detail, as the saying goes.
Please feel free to leave your comments and questions in the section below.
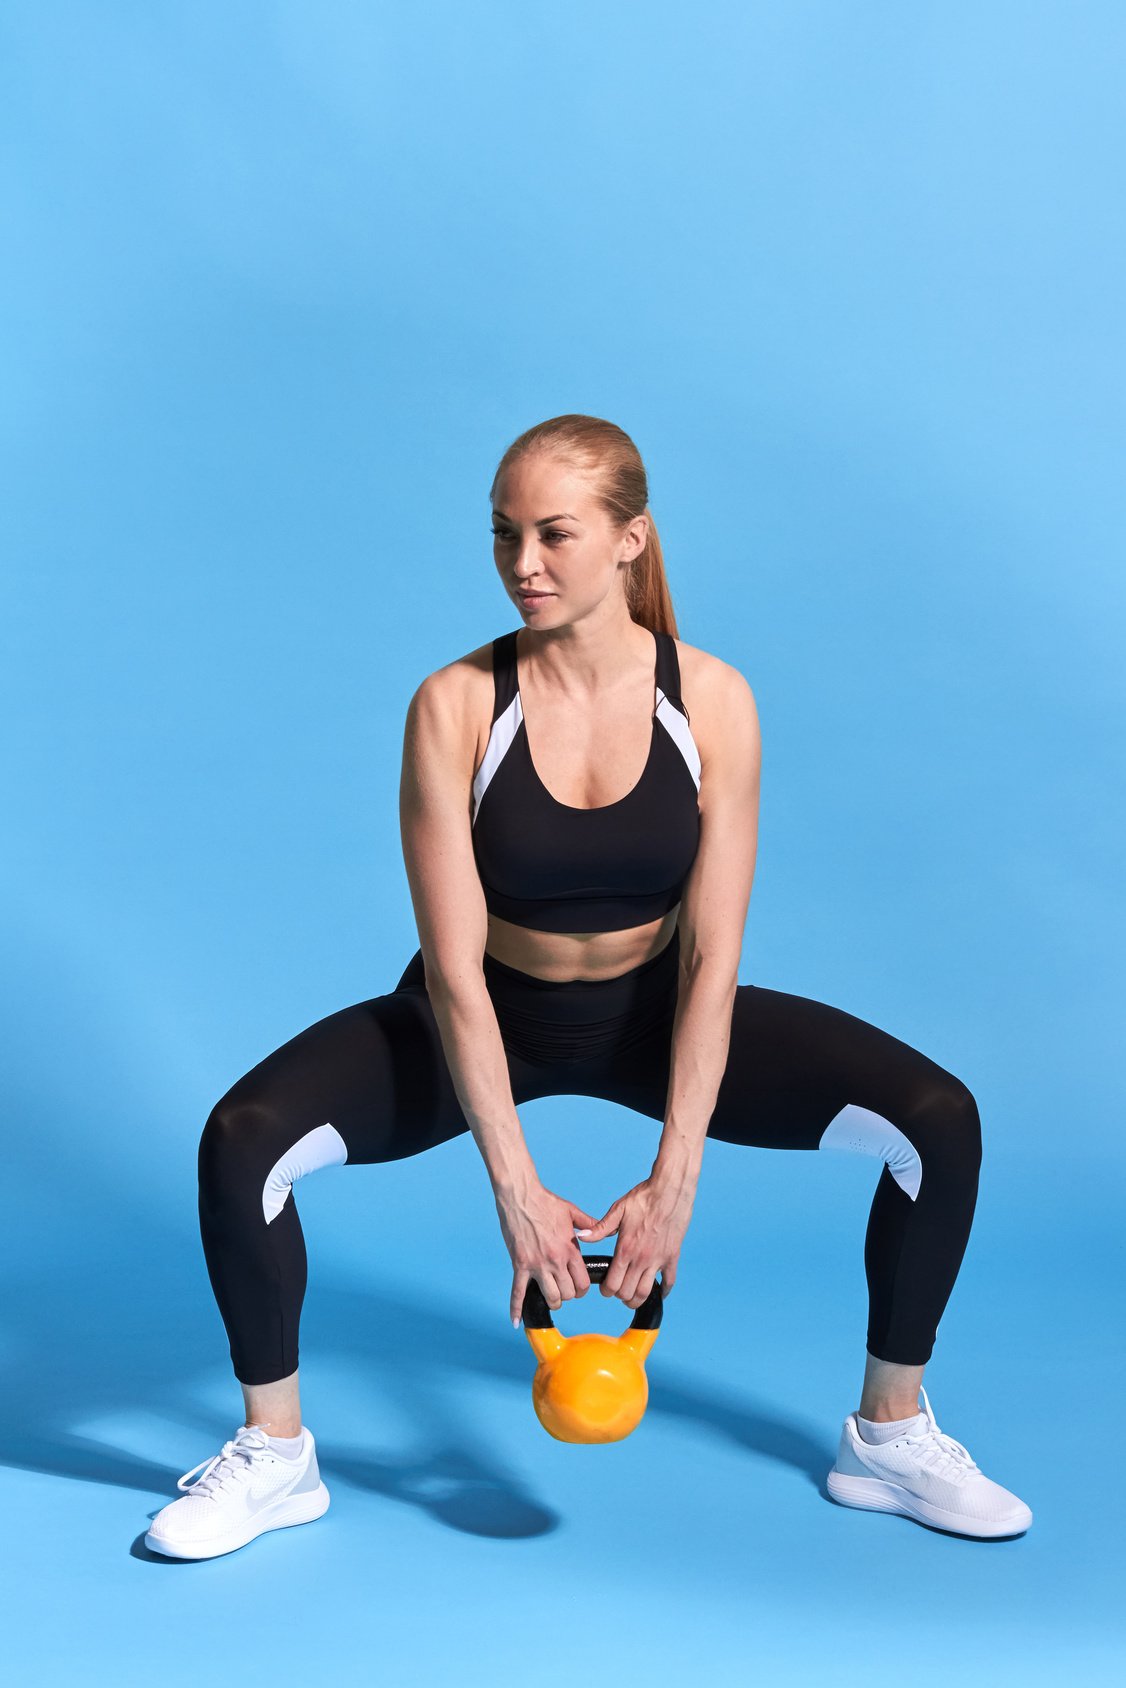
If you’re serious about taking your running game to the next level and reducing your risk of injuries, then listen up, because I’ve got some exciting news for you. It’s time to bring deadlifts into the spotlight and make them your new best friend on the road or trail!
Now, you might be thinking, “Wait a minute, isn’t running all about endurance? Why would I need to bother with body strength?” Well, my friend, let me tell you something: that’s a common misconception, and it’s time to set the record straight. Strength training is an absolute game-changer for runners, and one exercise in particular stands tall among the rest—yes, you guessed it—the deadlift!
But hold on, don’t roll your eyes just yet! I promise you, this is not your typical boring workout routine. Deadlifts are like a secret weapon for runners, providing a whole range of benefits that can supercharge your performance. They’re not only runner-friendly but also downright awesome for building strength and resilience. Trust me, once you discover the power of deadlifts, you’ll wonder how you ever ran without them.
In this article, I’m going to spill the beans and share with you why deadlifting is an absolute must for runners. I’ll also let you in on a few of the most efficient deadlift variations that you can seamlessly integrate into your cross-training routine. So, lace up your shoes, grab a water bottle, and let’s dive into the world of deadlifts together!
Ready? Let’s hit the ground running, quite literally, and uncover the secrets behind this extraordinary exercise. Buckle up, because it’s about to get exciting!
Are Deadlifts Good for Runners
Let’s talk science for a moment. The deadlift is not just any exercise—it’s a compound movement that targets a wide range of major muscles in your body. We’re talking about the ones that truly matter for us runners, like the powerful back muscles, glutes, and hamstrings.
These muscle groups are the driving force behind our forward propulsion, and they hold the key to unlocking our speed and stability while pounding the pavement or conquering the trails.
Now, you might be wondering, “How exactly do I nail the deadlift technique?” Fear not, my friend, for I’ve got your back. There’s a treasure trove of deadlift variations out there, just waiting for you to discover them and add them to your cross-training routine. But here’s the catch: you’ve got to do them right. We don’t want any unnecessary injuries derailing your running dreams, do we? Proper form is crucial, so take the time to learn and master the technique.
But hey, don’t fret over which variation is the “best” one for you. The beauty of deadlifts lies in their versatility. Choose the variation(s) that resonate with you the most, considering factors like personal preference, injury history, and your specific training goals. It’s like crafting your own unique path to greatness, tailor-made for your individual needs.
Now, I know you might be thinking, “Hey, can you back up these claims with some evidence?” Absolutely! Let me unleash the power of research and share a few pearls of wisdom with you. Numerous studies and research papers have highlighted the remarkable benefits of deadlifts for runners. They not only enhance overall strength but also contribute to improved running economy and injury prevention. It’s like giving your body an upgrade, boosting your performance, and safeguarding you from potential setbacks. Talk about a win-win situation!
Beginners Start Slooooow
Beginners, start with a relatively lightweight and focus on proper form.
So if you are a beginner, start with relatively lightweight (a 40-pound loaded bar, for instance) and focus on your technique.
Ego won’t work here, make sure to make form a priority.
Here are six deadlift variations to try, whether you’re seeking to improve your strength, speed, power or endurance
1. Conventional Deadlift
This is the classic form of a deadlift and the foundation of all other variations.
Get this one right, and the other versions will come in handy.
There is a lot to cover here, so please hang with me here.
Proper Form
Stand tall, feet a bit wider than shoulder-width apart, toes pointing straight ahead or slightly outward.
Line up the balls of your feet under the bar.
Then, hinge from the hips, bend your knees, then grip the barbell with shoulder width or slightly wider with an overhand grip.
This is your starting position.
Be kind to your spine.
Always protect your spine by activating your core.
I’m talking about your abdominal muscles here.
If you feel somehow painful in your lower back, drop it down, activate more.
Next, raise the weight up by extending your hips and.
Remember to contract your glutes, hamstrings, quads, and calf muscles while keeping the weight close to your body head up, chests out, back flat, and knees pointed in the same direction throughout the movement.
Hold for a moment, then slowly bring the weight down to the floor by bending your hips and knees.
2. Sumo Deadlift
The sumo deadlift is the wider stance version of a deadlift, and it focuses primarily on the quadriceps, the inner thighs, and glutes.
The move can also help you improve your range of motion (especially within your hip flexors) needed for lifting heavier weights without injury.
Proper Form
Start by standing tall, feet twice shoulder-width apart, toes pointing out at an angle, chest up, again core should be activated.
Next, while keeping your back flat, bend your knees, hold the bar and lift it up by pressing through your heels and thrusting your hips forward.
Stand all the way up, pause, then slowly lower it to starting position and repeat.
3. Romanian Deadlift
The Romanian Deadlift is a fantastic variation for the hamstrings, an important running muscles.
Feel free to perform it by either using a loaded barbell or with dumbbells.
Proper Form
Begin by standing with shoulder width or a narrower stance—depending on your own personal preference.
Grab the bar from the floor with shoulder width to wide overhead grip and keep looking straight ahead as you lift the weight up.
Next, while keeping your arms straight and knees slightly bent, slowly bend at your hip joint and lower the loaded barbell as far as you can without rounding your back.
Make sure to extend your hips forward until you starting feeling a good stretch in the back of your thighs.
Bend down as far as your flexibility allows, but don’t force it; otherwise, expect trouble.
Once you reach the bottom portion, pause, then pull the weight back up to starting position and repeat.
Make sure to squeeze your hamstrings and core muscles at the top of the motion.
4. Trap Bar Deadlift
Trap Bar version is back friendliest deadlift-.
No room for injury to stop you.
This variation helps you cut injury risk while upping your ability to lift heavier loads.
Proper Form
Stand in the center of the trap bar, bend your hips and knees, then lower down until your thighs are parallel to the floor.
Next, while keeping your back straight and core engaged, grab hold of the bar’s handles using a neutral grip, then lift it up by thrusting your hips forward, pause, then slowly return to the starting position.
5. Kettlebell Sumo Deadlift
The Kettlebell Sumo Deadlift focuses on the inner thighs and lower back muscles.
It also improves balance, strength, coordination in the entire lower body.
Proper Form
Assume a wider stance, your toes pointing outwards, core engaged, and back flat.
Next, while bending at the hips, grasp a kettlebell of challenging weight with both hands, then lift up off the ground by extending your knees and hips.
Then, stand tall with chest out, head held high, and core engaged.
Lift the kettlebell off the floor by extending your hips and knees.
Make sure to stand tall, with chest out, core engaged, and back straight.
The Single-Leg Deadlift works the glutes like nothing else.
The glutes are the central power of your running stride, and essential for keeping stability throughout your gait.
Make sure to build the proper form first before do it with single leg.
I’d suggest that you perform this variation with a kettlebell as it’s more convenient, but feel free to use other tools.
Proper Form
Hold a 15 to 20-pound kettlebell in your right hand, and lift your left foot slightly off the ground.
Next, while activating your core and keeping your back straight, lean your entire torso forward and lower the weight toward the floor by bending at the hip and extending the left leg behind.
Hold for a count of three, then press back up to starting position.
Super worth a try, right?
For a stable posture during your running schedule. Deadlift not as scary as the name, though.
Have you ever thought about supercharging your running routine with a touch of yoga magic? Well, today is your lucky day!
In this comprehensive guide, I’ll be your yoga guru, unveiling a treasure trove of poses to boost your flexibility, mobility, and strength.
But before we roll out the yoga mat, let’s first uncover the incredible perks yoga brings to your running game.
Yoga Increases Flexibility
As a runner, you’re no stranger to muscle tightness. Those nagging aches and pains often stem from muscles that are too tight, leading to injuries and subpar performance. But fear not, yoga has your back (and hamstrings and calves)!
Yoga is your secret weapon against muscle tightness. Through regular yoga practice, you’ll improve your flexibility, which is crucial for maintaining a healthy range of motion in your joints and muscles. Say goodbye to those stiff glutes, hamstrings, and lower back muscles – yoga will help you regain your suppleness.
Enter yoga, your ticket to a balanced, full-body workout. In yoga, you’ll engage all your muscles in various poses and movements, building strength evenly across your body. Think of it as a holistic approach to fitness. With yoga, you’ll discover newfound strength in your core, upper body, and those oft-neglected stabilizing muscles.
Yoga Enhances Mind-Body Connection:
Running can sometimes turn into a monotonous activity – one foot in front of the other, focusing on your pace, and miles ticking away. Yoga adds a refreshing twist to your routine by introducing mindfulness and a deep mind-body connection.
Yoga encourages you to be present in the moment, tuning into your body’s sensations and connecting with your breath. This newfound awareness can enhance your running form, making you more efficient and less prone to injury.
Strengthen Your Mind with Yoga
Running isn’t just about physical endurance; it’s a mental game as well. Your inner game, which includes self-confidence, self-esteem, and mental resilience, plays a vital role in achieving your running goals and conquering life’s challenges.
Yoga is your go-to tool for building a robust inner game. Through yoga, you’ll learn valuable techniques to calm your mind, manage stress, and boost your self-confidence. Poses like the Warrior series can instill a sense of power and determination, translating directly to your running endeavors. When your mind is strong, your body follows suit.
Breathe Deep With Yoga
As a runner, you understand the critical importance of lung capacity. Efficient breathing fuels your runs, providing the oxygen your muscles need to perform at their best. Yoga takes your lung capacity to the next level.
Yoga teaches you the art of full-spectrum breathing, engaging not just your shallow upper lungs but also your middle and lower lungs. This holistic approach to breathing increases your lung capacity and oxygen intake, benefiting your running performance.
On the yoga mat, you’ll discover the significance of breath control. Deep, controlled breathing not only optimizes your physical performance but also nurtures your mental state. It helps you stay calm under pressure, manage pre-race jitters, and focus during challenging runs.
Yoga For Runners as a Restorative Practice
Yoga, especially its restorative asanas (postures), possesses incredible soothing and healing powers. These gentle poses are like a comforting embrace for your tired body. They promote deep relaxation and conscious restoration after a challenging run.
This restorative aspect of yoga accelerates your recovery process, making you a healthier and more resilient runner in both the short and long term. It’s your secret weapon to bounce back faster and stronger.
Yoga is The Best Form Of Active Recovery
Active recovery, the practice of engaging in light exercise on your rest days, is essential for runners. Yoga reigns supreme in the realm of active recovery. Why, you ask?
Imagine this: It’s your rest day, and you’re itching to stay active without pushing too hard. Yoga steps in as the perfect solution. It provides a gentle yet effective way to keep your body engaged, promoting flexibility, mobility, and muscle recovery.
So, when recovery days roll around, don’t miss the opportunity to incorporate yoga into your routine. It’s your chance to rejuvenate and maintain your running prowess.
The Yoga Gear You Need
So, you’re ready to dive into yoga as a runner, but before you strike a pose, let’s talk yoga gear.
Having the right equipment can elevate your practice and ensure you’re getting the most out of it. Don’t worry; you don’t need a shopping spree – just a few essentials to get started. Let’s break down what you need:
A Yoga Mat
Just as runners rely on their shoes, yogis lean on their mats. A yoga mat is your sacred space, offering comfort and stability for your practice. It’s where you’ll find your balance, both physically and mentally.
Investing in a quality mat is worthwhile. Look for renowned brands like Hugger Mugger or JadeYoga.
While fancy mats can range from $90 to $120, you can snag a starter mat for as little as $25 on Amazon. Keep in mind that cheaper mats may lack durability and cushioning, so consider your usage frequency when choosing.
Straps
When practicing yoga, comfort is key. Opt for breathable, moisture-wicking yoga attire that allows you to move freely. Whether it’s leggings, shorts, or tank tops, make sure your outfit supports your practice.
Yoga Blocks:
In the world of yoga, the trusty yoga block is your best buddy. It’s a versatile tool that can help you enhance your practice, improve flexibility, and maintain proper alignment. Whether you’re a beginner or an experienced yogi, yoga blocks have your back (or should we say your spine?). Let’s dive into why these blocks are a game-changer:
Bolster:
If you want to take your practice to the next level, consider a yoga bolster. It’s a cushioned prop that enhances relaxation during restorative poses and meditation.
Just as you choose the right running gear, picking the perfect yoga clothing can make a world of difference.
Here’s what to consider:
High-Performance Fabrics: Seek out yoga attire made from high-performance, moisture-wicking fabrics. These materials keep your body dry and comfortable during your practice.
Yoga Pants: A classic choice for both men and women, yoga pants come in various colors like navy, brown, or black. They offer flexibility and ease of movement, allowing you to flow through your practice comfortably.
Form-Fitting Tops: Opt for form-fitting tops that stay in place, even during those deep forward bends. You don’t want your shirt flying over your head mid-pose!
Mix and Match: Get creative with your yoga attire by mixing and matching different tops and pants. Express yourself through your clothing choices while keeping functionality in mind.
Take Classes
Embarking on a yoga journey is a marvelous way to harmonize mind, body, and soul.
But where do you begin? Allow me to guide you through the process:
Explore Live Classes
The energy of a live yoga class is truly unique. Consider joining a local yoga studio or fitness center. You’ll experience the guidance of a skilled instructor and the camaraderie of fellow yogis. It’s a journey best shared.
Online Yoga Classes
If a live class isn’t accessible, online classes are a fantastic alternative. You’ll discover a multitude of free yoga classes on platforms like YouTube.
Here are some YouTube channels that I recommend:
Travis Eliot
Yoga with Kassandra
Yoga With Adriene
Online Subscription Services
For a more extensive yoga experience, you might explore subscription services like Yoga Download. These services typically cost between $10 to $15 per month and offer a treasure trove of yoga courses suitable for all ages and backgrounds. They may even have specialized programs tailored for runners.
Whichever path you choose, remember that yoga is a personal journey. It’s not about how perfectly you perform each pose; it’s about connecting with your inner self, finding balance, and embracing mindfulness.
Yoga For Runners – The Best 27 Poses
Without further ado, here’s a long list of yoga poses for runners that improve flexibility, strength, and functional fitness.
Enjoy!
Note – A Yoga Warm-up Routine
Before you try any of the yoga poses shared below, please make sure you’re well warmed up.
Perform the following warm-up yoga sequence (even following a run) to get your muscles and joints for action.
Yoga For Runners – The Flexibility Routine
The following yoga poses are exactly what you need to improve your flexibility as a runner.
1. Forward Fold (Uttanasana)
The Forward Fold asana is ideal for runners since it opens up and stretches out the hamstrings, glutes, and lower back—some of the most troubled areas in runners.
Proper Form
Begin in standing pose, then as you exhale, hinge at the hips and bend forward, lengthening the front of your torso.
Next, fold forward slowly and grab onto your shins, or for a more intense stretch, reach down for your toes or ankles.
Breathe deeply and let the crown of your head move toward the floor, releasing and relaxing your neck and head as much as possible.
I highly suggest that you hold this pose for as long as you can.
Anyway, as long as you are breathing deeply and feeling the stretch, you are doing just fine.
A yoga strap is really welcome.
Step over the strap and try to pull the strap first.
After your spine neutral, reach deeper with the strap.
2. Downward-Facing Dog (Ado Muka Svanasana)
This asana mainly stretches the hamstrings.
Runners are notoriously infamous for tight hamstrings— this tightness can hinder performance and lead to injury.
Plus, it also adds strength to the ankle, thighs, and knee, helping you ward off a plethora of running injuries.
Proper Form
To perform the Triangle pose, begin by standing straight and extending your right leg to the side a little more than hip-width distance apart.
Make sure to turn the right toes in slightly and rotate the right thigh open to turn your left foot at about 90-degree angle.
Next, turn your right foot perpendicular to your left as you extend your right arm straight above your right foot, then gradually fold over at your right hip and lower your hand down to grab your thigh, knee or shinbone.
If you want more, slowly walk your hand down to grasp your calf or ankle, or big toe, but never compromise good form.
Hold the position for five breaths, then slowly press back to starting position and switch sides
5. Eagle Pose (Garudasana)
This is a must yoga pose for runners since it opens up and stretches the scapula, shoulders, elbows, ankles, hips, and knees, and also strengthens the calves and ankles, as well as improving balance and coordination.
Plus, it speeds up blood flow, leading to faster recovery rates after a workout.
Proper Form
Stand with your feet hip-width apart, raise your hands above your head, and swing them down in front of your body, wrapping your left arm under your right arm.
Next, bend your right knee and cross your left leg around the right leg, hooking your left foot on either side of your right leg.
Lower your butt down as much as you can and lift up through the arms to stay well balanced.
Keep the pose for the five deep breaths, then unwind and switch sides.
6. Camel (Uṣṭrāsana)
As a runner, chances that you spend a lot of time hunched over, shoulders in, and chest down.
That’s why a heart-opening pose, like the Camel, is ideal.
This yoga asana improves flexibility and strength in the upper body, and it also can help you build better posture—on and off the running track.
Plus, opening your chest will not only counter some of the bad posture patterns from running, but it will also open up your chest and give you more space to breathe, and as you know, the better you breathe, the more oxygen you pump into your blood and working muscles, thus the better you run.
Proper Form
To safely perform the Camel asana, begin with your knees on the floor, hip-width distance apart, and hands on the hips.
Next, stack your hips right over your knees, draw the shoulder blades down the back, and reach back with your hand to take your low back.
Focus on your knees, if its in a V shape, you are doing something wrong.
Then, from there, take the center of your chest up and slide your palms down as far as you can.
Try to reach back to take hold of your feet or ankle.
Reach as far down as it’s pain-free.
Shoulder blades should be facing to the sides of your body, not forming M shape.
Avoid M shape on your shoulder blades for deeper pose and bigger space.
Stay in the pose for five deep breaths, then slowly come back to starting position.
7. Pigeon (Eka Pada Rajakapotasana)
As a runner, stress, and tension can build up in the hips and create tightness—a tightness that can compromise performance and lead to a plethora of running injuries.
The Pigeon asana increases the range of motion and flexibility in your hips, boosting running performance and reducing the risks of injury—especially knee pain.
Proper Form
To perform the Pigeon right, start from table pose (on all fours), then slide your right knee forward toward your right hand, then straighten and stretch your left leg back as far your hips will allow.
Rest your right shin on the floor, slightly behind your hands.
Next, square your hips and lower your body down as far as you can while feeling the stretch in your hips, glutes and groin area.
You can sit up and rest on your palms, elbow, or lie all the way down for a deeper stretch.
Hold the pose for five deep breaths, then to come out from the Pigeon, tuck your left toes under and bend your left knee and slowly glide your right leg back until you are back to starting position.
Switch sides.
Yoga For Runners – The Recovery Routine
Here are my yoga poses for post-run muscle soreness and recovery for runners.
8. Legs Up The Wall (Viparita Asana)
If you pick only one pose from my my yoga for runners list, do the Viparita asana.
This inverted pose speeds up recovery by draining fluids from the legs, stretching the hamstrings—troubled area for runners—and releasing tightness and stress in the lower back, feet, and legs.
Plus, it’s so simple and easy to perform.
Proper Form
To perform the Viparita asana, start by sitting with one hip close to a wall.
Next, swing both legs up the wall and get your butt as close to the wall as it’s comfortable.
If you feel any pain in the lower body—especially in the hamstrings—then slide a few inches away from the wall.
Hold the position for as long as you can, then to come out safely from the pose, bring your knees into your chest for a couple of breaths, roll to one side, rest for a moment, then slowly get up.
Make sure spine neutral, not curving so your legs are not going to put stress on your spine.
9. Seated Star Pose (Baddha Konasana)
A great pose for releasing tension in the hips, lower back, shoulders, and neck.
Proper Form
Begin by sitting down on the floor with the soles of the feet together, heels roughly 20 inches in front, and knees bent in a kite shape, forming a diamond shape with the legs.
Next, straighten your spine then slowly round the spine forward, bringing the forehead towards the heels.
Hold the pose for one to two minutes before slowly releasing.
Here are seven yoga poses for your post-run routine that will help you speed up recovery rate, thus bounce back faster and keep you running injury free for the long haul.
A great restorative yoga asana for releasing the abductors, chest, hips, groin, and the lower back.
Proper Form
Start by sitting in a Staff Pose, with the legs extended straight in front of you on the floor.
Then, bend your knees and draw your heels in toward your pelvis.
Next, press the soles of your feet together and slowly drop the knees open to the sides, then slowly lean backward and bring your elbows to the mat.
Lower your back as far as you can.
Hold the pose for ten deep breaths, then to come out safely, roll over to your right side, and sit up, using the hands to support you.
Feel free to use props to deepen your pose.
Blocks can be placed under the knee.
If you are into Iyengar, you can wrap strap and sit on it, so you can really control the stretch.
12. Happy Baby Pose (Ananda Balasana)
Another ideal pose for opening and releasing the hips and groin.
This pose stretches the hip joints, which can get tight and stiff from running.
Plus, this pose is very calming for the body and mind.
Proper Form
Start by lying down on your back, and on the exhale, draw your knees into your chest and grab the outside edges of your flexed feet with your hands.
If this stretch feels too much, then grab behind your thighs.
Next, open the knees and bring your hips down to the floor as far as you can, and hold the outside of the feet as you draw the knees toward your armpits while keeping your lower back firmly on the floor.
Breathe deeply and make sure to rock gently from side to side to release any tension.
Hold the pose for ten deep breaths, then move on to the next pose.
13. Supine Spinal Twist (Supta Matsyendrasana)
This asana twists and releases the spine, and also stretches the shoulder, glutes and the hips—troubled areas for runners.
This pose lengthens the back muscles, which is good for relieving back pain— especially following a long run or after sitting for prolonged periods of time.
Proper Form
Start off by lying on your back, then bend both knees and place the soles of your feet on the floor.
Next, bring your right knee close to your chest and extend the left leg straight on the floor.
For the twist, drop your right knee over to the left side of your body, twisting the spine and low back.
For more stretch in the upper body, open your right arm to the right side in line with your shoulders, while resting your left hand on your right knee for a deeper release and twist in the spine and lower body.
Hold the pose for ten deep breaths, then slowly bring your right knee back, straighten your right leg, and do the other side.
14. Corpse Pose (Savasana)
The perfect pose for rest, relaxation, letting go, and contemplating after a workout.
Proper Form
To make the most out of this awesome pose, lie flat on your back with your knees bent, feet on the floor.
Use a small pillow (or fold your mat) below your neck if you have to.
Next, close your eyes, keep your legs comfortably apart, release your feet and knees complexly and breathe deeply.
There is nothing to do.
Just be present and turn your attention inward and scan your body from head to toe, looking for tension and contracted muscles.
Go as deep as you can, and enter a complete state of total relaxation.
Let your mind go then bring all of our attention to your breath.
Be in the now.
Stay in Shavasana for at least 10 minutes.
You can have soothing and relaxing music in the background.
It’s okay to fell asleep during this pose.
Most of the yogis did that too!
Yoga for runners couldn’t be this easy.
Yoga For Runners – The Strength Routine
Here are seven yoga poses that every runner should do to increase strength in the whole body
If you find any of these poses too easy and boring, then just hold the asana for one full minute or longer while making sure you have proper alignment and the right form to test your strength and stamina.
Don’t cheat.
That’s the motto.
15. Four-Limbed Staff Pose (Chaturanga Dandasana)
This is a must since running is an exclusive lower-body activity, so the upper body gets tossed to the side.
So don’t be surprised if you have the upper strength of a 9-year-old.
The good news is that this pose is perfect for you.
This yogic pushup position builds strength in the upper body when done properly.
Yoga for runners at its best.
Proper form
Lie facedown, then propel yourself up to plank position.
Make sure your body is aligned from head to toe.
Next, come a little bit forward on your toes and bend the arms straight back, keeping the upper arms hugging into your sides as you lower your body to hover a few inches above the floor.
Pause for a moment, then push back up slowly to a plank position, or roll over the toes, and come back to upward facing dog.
Make sure to keep your shoulder below the level of your elbows and keep your whole body straight.
Do at least ten slow push-ups before you move on to the next asana.
Ideally, shoot for five sets of 10 reps.
Try not to collapse your hip or chest.
For easier one, try to move your wrist wider to the side.
16. Low Lunge (Anjaneyasana)
The low lunge is a great pose that strengthens the thighs and the calves.
This asana also stretches the front of your hips.
Proper Form:
To perform Burning Low Lunge, step your right forward three to four feet to assume a lunge position.
Next, press back through the right heel to straighten the left leg.
Lower your left knee until it almost touches the floor and bring down your hands to the sides of the front foot, under the shoulders.
Hold the position for five deep breaths, then switch sides.
17. Warrior III (Virabhadrasana III)
Warrior III increases strength and length in the spine, core, and torso while also strengthening the muscles in your legs.
Plus, it also builds balance and concentration.
Proper form
Start by standing in mountain pose with feet hip-distance apart, arms at your sides.
Then, step forward with your right foot three to four feet in front.
Turn your right foot out 90 degrees, so your toes point to the top of the mat, and pivot your left foot inward at a 45-degree angle.
Next, shift your weight forward onto the front heel as you gently kick up your back up in the air while bringing your torso forward until it is parallel to the floor.
Make sure to engage your core and that your neck is in a relaxed position.
Gaze at the floor a few feet in front of your body and hold the pose for five deep breaths, then bring your left leg slowly to the floor, and switch sides.
18. Crescent (Anjaneyasana)
This dynamic standing yoga pose strengthens all the muscles in your lower body. It also stretches the lower body while improving balance and stability.
Proper form
From mountain pose, step your right foot three to four feet in front of you, then lower your hips into lunge position and shift your weight onto the ball of your back foot, bringing your hands to your hips or above you and reach for the ceiling, with palms facing each other if balance is not an issue.
Make sure to keep your upper body as high as you can while staying up on the ball of the back foot.
And check that your hips are squared the entire time.
Hold the position for five breaths then switch sides.
19. Goddess (Utkata Konasana)
Running requires a lot of glutes and quads action, and this pose can come in handy.
The Goddess asana is a wide squat variation that will tone your lower body and core like no other asana.
Proper form
From mountain pose, take a step open to the right, so your feet are about three to four feet apart, and lift your arms out to the sides at shoulder height.
Next, turn your toes out slightly, then on the exhalation, bend your knees directly over your toes and squat down, so your quads are parallel with the floor.
Hold the position for up to ten deep breaths, then slowly lower your hands to your hips, and press firmly into your feet to go back to starting position.
20. Three-Legged Dog (Eka Pada Adho Mukha Svanasana)
This is a powerful variation of the classic downward dog asana, and it will help you build immense strength and mobility in your lower body, especially in the glutes—also known as the buttocks—and lower back.
Proper Form:
In downward dog, step your feet together, so your big toes are touching.
Then with arms and legs straight, inhale and raise your right leg while keeping your hips level and the right foot strongly flexed, raising the right leg up in the air, and coming into a downward Dog split.
Hold the pose for five deep breaths, then switch sides.
Make sure to engage your core throughout the pose and to keep your shoulder parallel to the floor.
For more challenge, try balancing on one the right foot, left arm, then switch side—left foot with the right arm.
21. Bent Standing Split (Tadasana)
If you have any flexibility issues in the hamstrings, quads, and hips, then this asana will be extremely difficult (and really useful!).
Chances you are tight in these areas if you run regularly (and don’t a proper stretching routine to counteract the effects of pounding the pavement).
This move also increases balance, which enhancing coordination and strengthening the thighs, knees, and ankles—this can help you stop ankle sprains and reduce the risks of knee pain and injury.
Proper form
From mountain pose or Tadasana, hinge at the hips to come into a mild forward fold, with your fingertips touching the ground.
Next, shift your weight onto the right foot, then on the inhale, lift your left leg parallel to the floor.
As you lift your leg higher, bring your torso closer to your right leg.
For more challenge, walk your hands to either side of your right foot and grab your foot or ankle as much as you can.
Hold the pose for five deep breaths, then bring your left leg down on the exhale, recover for a moment, then on the inhale repeat on the other side.
The core muscles are key for developing good running form and posture, stopping you from bending at the waist—especially when fatigue starts to set in.
This can help you ward off back pain along with a host of biomechanical problems.
The sequence includes seven powerful yoga poses to fire up and strengthen all of your core muscles—with no exception.
It also builds upper body and low back strength and lengthens the spine.
Proper Form
Assume a push-up position with hands and knees shoulder width apart, fingers spread wide apart with the middle finger pointing forward, and toes tucked under, pressing into the palms with the straight arms.
Form a straight line from your head to your ankles by tucking your tailbone under and engaging your core muscles to keep your pelvis torso steady and firm.
No sagging allowed.
To keep your legs active through the hold makes sure to press with your heels toward the back of the mat.
While maintaining your neck soft and gazing down at the floor, hold the plank position for one to two minutes before moving into the next asana.
Lift the base of the skull away from the back of your neck and gaze down the floor.
To come out of this pose, slowly bend your knees to the floor to assume child pose, then move on to the next asana.
23. Dolphin Plank (Makarasana)
Or elbow plank, this is a variation of the classic plank, resting on the elbow this time.
This asana targets more of the muscles of the abs, with less strain on the arms and shoulders.
This is a great asana for runners since it targets the entire core as well as helping improve posture and adding strength to stabilizer muscles.
Proper Form
Start by lying face down on the mat, resting your upper body on your forearms with your elbows right under the shoulders, and palms firmly grounded.
Next, to come into the dolphin plank, raise your hips towards the ceiling, coming onto the tips of your toes while staying on your forearms.
Make sure to maintain a straight line from your head to your heels by keeping your back flat and abs engaged throughout the hold.
If your spine curving, retreat and try again.
Make sure to protect your spine straight.
Hold the pose for one to two minute, then lower down and move to the next asana.
24. Balancing Star (Vasisthasana)
This is the third plank variation I’m sharing with you today.
This asana mainly targets your side core muscles—what’s known as the obliques—as well as strengthening the thighs, glutes, shoulders, and arms.
It also challenges your balance like no other asana—except for, maybe, Warrior III.
Proper Form
Start in the classic plank position, then roll open to your right side and raise your left hand off the floor, and stack your left leg your right leg.
Then, shift to face the side of your mat with your weight equally distributed between your right arm and right foot.
Make sure to keep your shoulders, spine, and hips in one straight line from the head to the ankle.
You can stay here balancing on your right hand with feet stacked.
But to come into the full version of Balancing star, raise your left foot up as high as you can and reach your arm to the ceiling as high and straight as you can without losing balance.
Be sure to keep a straight line from your head to your ankles.
For more challenge in the balance department, try looking up at your top hand.
Hold the pose for 45 seconds to one full minute while keeping the core engaged and pose steady throughout the hold.
To come down, lower slowly to classic plank then switch sides.
25. Boat (Navasana)
This is one of the simplest yoga moves with one and only purpose: sculpting and toning the abdominals.
This asana engages the deeps muscles of the abs and will improve your running posture and stability.
Proper Form
Begin by sitting on your mat with legs in front of you.
Next, bend your knees, lift your legs off the mat, and lean back a bit to balance on your sit bones, then bring your knees in toward your chest with your thighs at a right angle to the floor and shins parallel to the floor.
To do the Boat right, make sure to sit as tall as you can, then slowly start to straighten your legs, bring your arms out straight in line with your shoulders, forming a “V” shape with your body.
Don’t lean on your buttocks, that’s cheating as you’re not engaging your core properly.
Hold the pose for one to two minutes, then take your time to slowly lower down to the floor.
26. Sunbird Pose
Begin in tabletop pose, then reach forward with your right arm like you are about to shake someone’s hand and raise your left leg up, holding it parallel to the floor.
Make sure to engage your core muscles while you are doing your best to pull the extended limbs away from each other.
Next, bring your knee towards your chest while curling the right elbow to the left knee on the exhale, as if you are performing a crunch.
Then inhale and extend your arm forward and leg back.
Continue the motion for 12 to 15 reps, then switch sides.
27. Locust Pose (Salabha)
This asana is ideal for strengthening the lower back, the muscles that surround the back of the spine and abdominals as well as improving posture.
It’s also a great spine opener.
And it can help you undo the hunching effects of running, vital for building better posture, both on and off the running field.
Proper Form
Begin lying on your stomach on the mat with arms along the sides of your torso.
Then, place your hands, palms faced down, next to your chest, with your elbows bent like chicken wings.
Next, raise your chest off the mat by only using your back muscles, curving your spine upwards, and lifting your legs off the mat using your inner thighs up toward the ceiling as you reach the crown of your head up as high as you can.
In fact, if you log in serious miles every week and have zero calluses, consider yourself one of the lucky ones.
Here’s the truth.
Excessively large calluses aren’t just a problem of appearance, but can also cause discomfort during exercise, especially when running.
They’re also pretty common among athletes from all training backgrounds.
In today’s post, we’ll go through what causes this skin build-up while running, how to prevent calluses, and how to treat them.
Sounds great?
Let’s get started.
Foot Callus From Running – The Definition
Also known as a corn, a callus is hardened skin that occurs in friction-prone areas, such as the bottom of the foot, or over bony projections.
Often painless, calluses are your skin’s natural protective reaction of pressure sites.
The affected skin may start getting dry, flaky, and harder than the rest of your skin.
For most runners, this hardened mass of skin tends to build up in the heel, likely from the edge of the shoe rubbing repeatedly against the back of the foot.
What’s more?
If you run in improper shoes, you might develop a callus along the outside of your big toe.
Here’s the good news.
There are many things you can do to lower your risk of developing calluses during running.
Here are a few.
The Symptoms of A Running Callus
It’s easy to tell that you have a callus.
Usually, the skin of a plantar callus is yellowish or gray.
It may also feel flaky, tough, and dry.
The skin may be tender when direct pressure is applied to the region.
Not a Bad Thing
Getting a callus as a runner isn’t necessarily a bad thing.
There’s actually a benefit of having calluses when pounding the pavement.
This hardened skin buildup in areas prone to friction and rubbing against your shoes protect you from forming blisters.
In essence, calluses protect your feet against blisters and sores while running.
Although calluses your our body’s natural reaction for protecting the skin, like all good things in life, too much of a good thing can do you more harm than good.
How To Prevent A Running Callus
Here are a few simple measures to help you prevent and manage painful calluses.
Proper Running Shoes
Running in improper shoes can be a real problem for your feet, likely resulting in numbness, blisters, and calluses.
This is especially the case if your shoes are too narrow and tight in the forefoot, causing pinched-nerve pain and calluses.
If you’re prone to calluses, make sure your running shoes suit your feet and running style.
They should be wide enough across the front, so there little no friction or pinching.
If your calluses are painful, you should take some measures to ease the pain.
Here’s how to treat running-induced calluses by yourself.
First, start by soaking your feet in soapy, warm water for 5 to 10 minutes. This helps soften the skin.
Next, get a pumice stone (available at your local drugstore), get it wet, then gently shave lightly the dead skin, AND the callus using circular or sideways motions for two to three minutes.
Stay safe.
Do not take too much skin off—or else, you’ll wound your foot.
And you don’t want that.
Repeat this process many times per week or as needed.
Apply moisturizing foot cream following the scrub sessions to keep the area soft.
The ingredients should include Ammonium, Salicylic Acid, Urea, or Ammonium Lactate.
When to See A Doctor
Although most cases of callus do not require medical attention, you need to have it looked at by your doctor or podiatrist.
The following scenario deserves attention from a healthcare professional.
The callus is red, dry, and cracking. This may indicate chronic athlete foot.
The callus is chronic and recurring. Your sports-oriented physician may help you figure out why your calluses keep returning.
If you notice that your callus is warm to the touch, red, or particularly painful, seek medical attention.
These red flags could signal an infection.
The callus is thick and painful. It should be treated by a sports-oriented physician.
The callus has clear fluid or pus discharge. This could indicate that the callus might be infected or ulcerated, thereby, requires medical attention.
If you have heart problems, diabetes, or circulatory problems, suffering from any of these conditions makes it more likely for you to develop an infection.
If you have any of these conditions, check your feet for damage regularly.
Training on the treadmill is a fantastic way to stay consistent with your training all year round.
But pounding the belt day in and day out can get boring—pretty fast.
Don’t lose hope.
With the right tools and mindset, you can make treadmill training something to look forward to.
One way to get the most out of your treadmill runs is to use one of the many running apps available.
A lot of companies have started in recent years to develop apps that make treadmill training much more fun and challenging.
You can find apps that encourage you to reach your running goals.
You can even participate in group run classes from the comfort of your home, and so much more.
Want to try some of these running apps on your own?
Then you’re in the right place.
In today’s post, I’ve separated the wheat from the chaff and am sharing five apps that will take your indoor runs up a gear.
They’ll motivate you to hit the belt again and again
1. Zwift
Want to be taken into a virtual reality world?
Then Zwift is all you need.
Zwift lets you run in Watopia, complete with the road, trails, sand, jungle, volcanoes, and the countryside, plus routes in New York, London, among others.
You can choose from 5 virtual worlds and with over 80 routes.
However, there’s a downside.
This running app requires a bit more accessories to help provide you with accurate feedback on cadence and speed.
First, you’ll need to bring up the app on your phone, tablet, laptop, or tv.
You’ll also need a footpad to monitor your cadence and heart rate monitor.
This app has been around for a long time, and it keeps on getting better.
You can find within the Nike + Run Club app more than 50 guided runs—some of which are led by Nike superstars, such as Shalane Flanagan and Eliud Kipchoge.
You can also choose from six running routines, specifically tailored for the treadmill.
The sessions are roughly 15 to 20 minutes long and come with audio instructions—for everything from speed and incline settings to encouraging tips.
What’s more?
By setting your running surface, the app monitors your pace, time, distance, and calorie burn.
The instructions provide good suggestions on how fast or had you should go, so it’s a good idea to know your training and recovery paces beforehand.
What’s more?
You can also link the app with other Nike products, like the Fuel band, load up on Nike Fuel.
This app is for you, especially if you love the energy of group classes.
You can find more than 170 Tread Studio live on-demand running classes that range from 15 to 60 minutes long.
These routines cover everything from recovery runs to interval workouts and hill reps.
You can also filter by class type, duration, difficulty, instructor, or music genre.
The app also has also other types of guided training, such as stretching yoga, walking, and boot camp, and other exercises that require no equipment at all.
Looking to turn your treadmill runs into a horror movie adventure with zombies?
Try Zombies.
Run! App.
The app comes with basic features you’d expect in a running app, but it’s also a multi-player game, taking place in a post-apocalyptic world infested with zombies.
Zombies! Run is straightforward.
You set it up, put on your earbuds, and start playing one of the 60 missions.
You begin by walking, or running, then as soon as you hear zombies approaching, you run for your life.
5. Ghost Race
Ghost Race may seem to have a lot in common with Zombies, Run! But the ghost here isn’t much of a supernatural entity but a virtual body you create before each workout to compete against.
This created entity is crafted based on your pace, distance, and time, though you can re-adjust to push yourself even harder.
The app also allows you to monitor your times on different surfaces and compare your performance from day-to-day.
It also keeps you updated on your growth against your ghost in real-time.
What’s more?
You can also save previously running times and then race against those during future training sessions.
When you fail to keep up your previous time, a “ghost” will manifest in front of you, moving at a faster pace.
Conclusion
There you have it.
Using running apps, like the ones mentioned above, is one of the best ways to make treadmill training more fun and less boring.
Now it’s up to you to download the apps and start training.
The rest is just details.
Please feel free to leave your comments and questions in the section below.
Looking for a powerful mobility training routine to help you improve performance and reduce injury risk?
You’re in the right place.
All runners know that stretching is part and parcel of a well-rounded training plan.
Regular stretching feels good, increases flexibility, releases tension, corrects muscle imbalance, and improves technique—all of which make running more enjoyable and efficient.
That said, mobility training is also important.
It’s actually one of the keys to training longevity as it helps reduce injury risk, keep the joints healthy, and ensure optimal performance.
Yet, so many runners miss out on its benefits, whether they don’t know much about mobility’s impact on performance or are simply unwilling to invest time doing mobility drills (I understand, we’re all busy, but that’s no excuse).
Here’s the truth: Improving your mobility doesn’t have to burn off long hours from your day.
In fact, as little as 10 to 15 minutes a day is enough to reap physical performance gains.
In today’s article, I’ll explain what mobility is all about and share a few mobility drills as well as how to incorporate mobility work into your workout routine.
Before we go into the many ways mobility training improves your athletic performance, let’s take a look at what mobility actually means.
Flexibility VS Mobility
Most runners know what flexibility is, but they often confuse it with mobility.
Understanding the difference is key as mobility training is much more than just stretching.
Let’s see which is which.
Flexibility stands for the ability of the soft tissues to stretch in a specific direction.
It’s the lengthening of muscles in a passive way.
For example, if you can reach your toes from a standing position without bending your knees, or scratch every part of your back unassisted, you’re pretty flexible.
Mobility, on the other hand, is about how freely you can move a joint through a range of controlled motions, before being limited with control.
It’s your ability to exert force throughout a greater range of motion.
For example, if you can press dumbells behind your neck, get into a deep squat with weights on your back, or do gymnastics, you have good mobility.
Now that you have an idea what mobility is all about, let’s look at how it can help improve your running performance.
The Benefits Of Mobility Training For Runners
Whether you just took up running to lose weight, are preparing for your 5th marathon, or just running for the joy of it, working on improving your mobility could give you a big performance boost!
Good mobility helps us pay more attention to our bodies and our range of motion, leading to improved running technique and fewer injuries.
Let’s see why…
Improved Speed
Poor mobility limits your ability to run at a faster pace.
The main goal of mobility training is to improve the position of the joint, which helps increase power output, resulting in efficient performance.
When you have a good range of motion, you can push move much more efficiently.
This translates to a faster pace and improved athletic performance.
Reduced Injury Risk
A lack of mobility makes you prone to pain and injury, especially as you ramp up your training.
For instance, research shows that limited hip mobility may lead to patellofemoral pain syndrome, iliotibial band syndrome, hip pain, and a host other issues.
Better Awareness & Technique
Mobility training can make you more aware of how your body moves and your range of motion, which results in better running form.
The Mobility Training Routine You Need
Here’s a 15-minute routine to improve the range of motion in all major joints and strengthen the surrounding stabilizing muscles.
You can perform these movements as part of your dynamic warm-up or your cool-down.
Perform it two to three times a week to take your running efficiency and power to the next level.
Squat to Stand
A great movement for mobilizing the inner thighs and hamstrings.
Proper form
Begin by standing, feet slightly farther than shoulder-width apart.
Next, while bending your knees much as needed, bend over and grab the bottom of your feet, pulling yourself into a deep squat position.
As you assume the bottom position, focus on pushing your knees out, forcing your chest up, and keeping the heels low as you lower your body toward the floor.
Hold for a moment, then push your hips upward until you feel the stretching in your hamstrings.
Try to keep a slight arch in the lower back, chest up and knees out the entire time.
Without further ado, here’s a series of exercises you can almost do anywhere to improve your hip mobility and strength. The following exercises will help loosen your hip flexors and strengthen the surrounding stabilizing muscles.
Standing Hip Figure Eight
Begin by standing on your left leg, then bring your right knee up to a 90-degree angle and then move it through a figure “8” motion. Hold on to a chair or wall for balance.
2. The 90/90
Start by sitting on the ground, then bend your right leg in front of your body with your hip rotavated out.
Next, get your chin as close to your foot as possible by moving your upper body forward. Again, keep the motion fluidly and only hold at the bottom for a moment.
Repeat the movement 8 to 10 times, then switch sides. Make sure to keep your torso stacked over your hips the entire time.
You should feel tension throughout your body as you go through the movements.
Spend around 60 to 90 seconds on each side to complete one set.
Start by placing your right leg forward and your left back. Next, position your left leg beside you while keeping your hip rotavated inward and your ankle and shin on the floor. Next, bend your right knee so your leg forms a 90 degrees angle. Your ankle should be neutral, and your left knee in line with your hip.
3. Spiderman Stretch
Assume a push-up position, supporting your weight on your hands and toes. Make sure to engage your core, so your back is flat and not arched or rounded.
Next, bring your right leg to the outside of your hands, with the foot pointed forward and the entire foot planted on the floor. Next, let your right knee travel far ahead of your foot for more stretch by dropping your hips toward the ground. Just keep your heel planted on the ground the entire time.
Hold the position for 5 to 10 seconds, flexing slightly forward for a deeper stretch. Then bring your right leg back to the push-up position and change sides for anywhere from 6 to 8 reps for each leg.
4. Supine Hip Rotation
Start by lying flat on your back, arms extended to your sides with your palms on the floor.
Next, while bending your knees to a 90-degree angle, bring your legs into the air, then drop them to your right side. Again, make sure to keep the upper and middle back flat on the ground.
You should feel the stretch deep into your left hip. Hold for 15 to 20 seconds, then bring your legs back to the starting position and switch sides.
Repeat 4 to 6 times per side.
5. Frog Stretch
Start in a table position on your hands and knees, facing sideways on your mat. Make sure your knees are under your hips and your wrist under your shoulders.
Next, lower your upper body to your forearms while sliding your knees apart. If your knees are sensitive, you can fold your yoga mat or add planets to help take off some of the pressure.
Hold the stretch for one to two minutes. Then slowly return to starting position. You’re doing it right if you only feel the stretch or tightness in your inner thigh/adductor area.
6. The Yogi Squat
This is a hard one to pull off, so if you struggle to stay upright and/or on your feet, feel free to hold onto a chair or railing for balance.
Assume an athletic stance, with feet about shoulder-width apart and legs turned out from your hips. Next, while engaging your core and keeping your low back fat, lower yourself into a low squat position. Do your best to tock side to side without falling over.
Bend your knees and hips and slowly lower into a very low squat while keeping your chest up, knees in line with your toes, and heels planted on the floor the entire time.
For a deeper stretch, place your elbows within your knees, then press your palms together in front of your chest.
7. Reverse Plank/inverse tabletop
Start by lying on your back with hands placed by your rips and fingertips facing your feet.
Next, press your hips upward so that your hands and feet are the only part of your your body in contact with the ground. Make sure your body is straight from your head to your feet.
For a deeper stretch, lift your right knee off the floor and hold for 20-30 seconds.
Conclusion
There you have it! If you’re looking to improve your mobility as a runner, then today’s article will put you on the right path. The rest is just details.