Conquer Runner’s Stomach: Expert Tips to Avoid Mid-Run GI Distress

runners stomach

Ever experienced a “Code Brown” situation mid-run?

You know, when your stomach stages a revolt against your running routine? Whether you call it “runner’s trots,” “the runs,” or “workout stomach,” we’ve all been there.

Runner’s stomach can be quite the unpleasant companion on your runs. But fear not! I’m here to share the ultimate guide to help you conquer those GI distress troubles.

In this article, we’re diving deep into the belly of the beast (pun intended), covering everything you need to know:

  • What exactly is a runner’s stomach?
  • How running can turn your tummy into a ticking time bomb.
  • The mechanical culprits behind runners’ diarrhea.
  • Tips and tricks to keep your stomach in check while you chase your running goals.

So, if you’re tired of making unexpected pit stops during your runs, keep reading. We’re about to drop some knowledge bombs to help you stay on course without unwanted detours.

Sounds great?

Let’s get started.

GI Distress When Running Is A Very Common Problem

If you’ve ever experienced the discomfort of GI distress during or after a run, rest assured that it’s a common problem among runners. Research has shown that many of us have faced this issue to varying degrees.

In fact, a study published in the academic journal Current Opinions in Clinical Nutrition and Metabolic Care found that approximately 50 percent of runners encounter GI distress problems during hard runs, especially during long, grueling ones.

And here’s an interesting tidbit: runners are twice as likely to experience GI issues compared to athletes in other endurance sports like swimming or cycling.

If you’re aiming for elite status, beware that GI distress seems to be even more common among top-tier athletes, with its frequency being 1.5 to 3 times higher than recreational runners, according to research published in a journal from Lippincott William and Wilkins

What is GI Distress

GI distress is like a grab bag of stomach-related issues that can strike runners at the most inconvenient times.

Most runners experience symptoms like abdominal cramping, excessive gas, belching, irritable bowel syndrome, indigestion or dyspepsia, vomiting, heartburn, constipation, nausea, diarrhea, and, in extreme cases, even gastrointestinal bleeding.

In other wrods, it’s a smorgasbord of digestive discomfort.

Research has shown that GI distress is one of the top reasons runners drop out or underperform in long-distance races, especially during the grueling half-marathons and marathons.

Why My Stomach Gets Upset From Running?

Running might be a fantastic way to keep your body in shape, but it can be a real troublemaker for your stomach.

The truth is, running is a high-impact sport that doesn’t just challenge your muscles and joints—it also takes a toll on your digestive system. This mechanical pressure can accelerate the movement of food and waste through your GI tract while diverting blood away from your intestines to fuel your hardworking muscles.

So, what does this mean for runners? Well, it makes practically all of us vulnerable to stomach issues. But here’s the silver lining: it’s not a life sentence! There are plenty of things you can do to ease or even avoid a runner’s stomach altogether, from managing your hydration and diet to controlling your running intensity and even calming those pre-run jitters.

Don’t think you’re immune, though—whether you’re male or female, a runner’s stomach doesn’t discriminate. The longer you run, the more likely you are to cross paths with this unwanted companion.

While the exact cause of these stomach woes isn’t fully understood, several factors can increase your risk. It’s crucial to keep an eye on these variables if you’re prone to stomach issues, including eating a meal within two to three hours of running, downing sugary fruit juices before hitting the road, and letting dehydration sneak up on you.

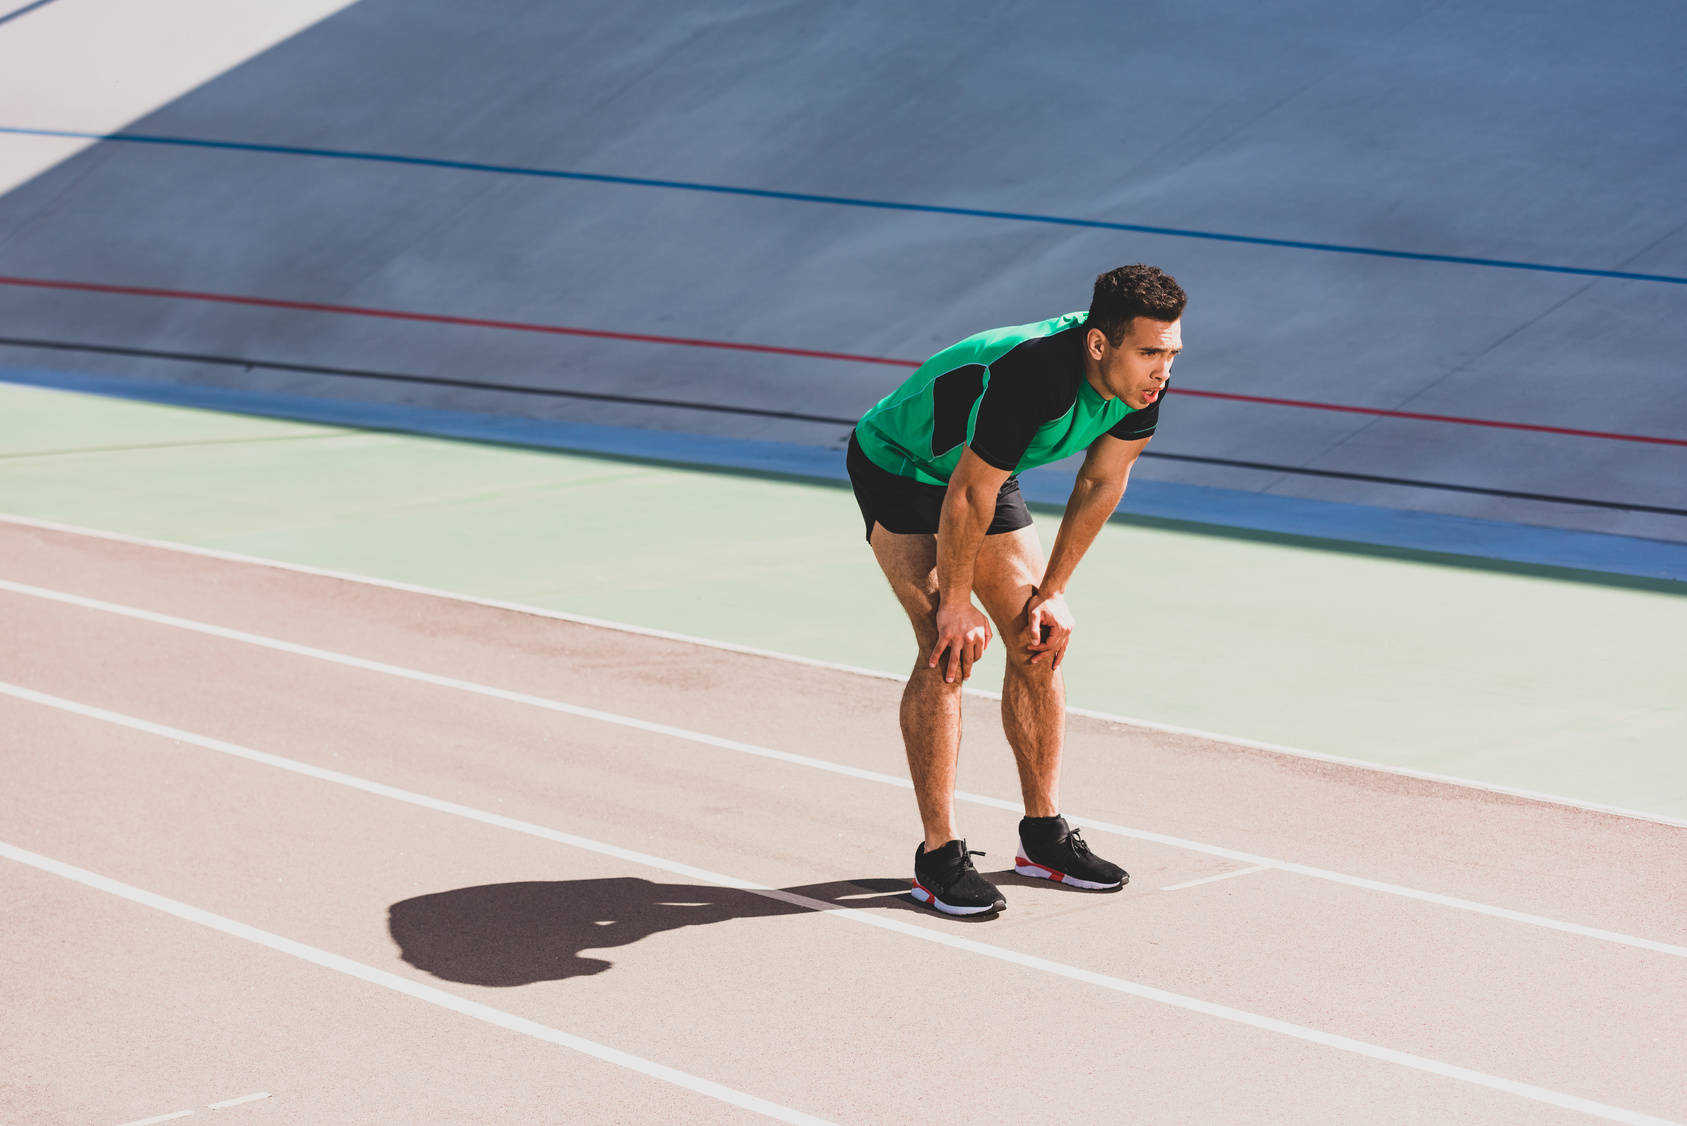
Can you treat or prevent Runners’ Stomachs while running?

Runner’s stomach might not be the most severe running-related issue, but it can certainly make your runs feel miserable. For some runners, chronic gastrointestinal distress can even lead to a reduction in training intensity or cause them to give up running altogether.

Before we dive into how to prevent this condition, it’s crucial to understand just how troublesome high GI (gastrointestinal) issues can be for runners.

How Does GI Distress Happen When Running

When you hit the pavement for a run, your body shifts its focus towards supplying maximum oxygenated blood to your working muscles. In doing so, it diverts blood away from your stomach and intestines, essentially putting digestion on the back burner while your body prioritizes delivering oxygen and nutrients to your muscles.

But that’s not all. The mechanical bouncing associated with running could also play a role in the relatively high occurrence of GI distress among runners, especially when compared to lower-impact sports like swimming or cycling. This theory suggests that the bouncing motion of running can jostle your digestive tract, irritating the GI tract and potentially leading to gastric distress issues..

Causes of GI Distress During A Run

Gastrointestinal (GI) distress during a run can be attributed to a variety of causes and conditions, often stemming from a combination of internal and external factors. These factors can set the stage for GI discomfort. Here’s a breakdown of common external and internal causes:

External Causes:

Consuming a heavy meal too close to your run or eating something that doesn’t agree with your stomach.

Insufficient hydration before or during your run can contribute to GI distress.

Internal Causes:

During exercise, blood flow is redirected away from the digestive tract to supply working muscles, which can hinder digestion.

The physical jostling and bouncing associated with running may irritate the GI tract.

Stress, anxiety, or pre-race nerves can affect digestion.

Pre-existing gastrointestinal issues such as viruses, stomach bugs, ulcers, or other ailments can exacerbate GI distress.

Additional resource –  Prevent Sunburn in runners

Physiological Changes From Running

During exercise, specially intense or prolonged running,  your gut hormone levels are impacted. These changes may affect digestion and lead to symptoms like nausea or changes in appetite.

Running diverts blood flow away from the digestive system and redirects it to the working muscles. This can slow down digestion and affect the absorption of nutrients.

What’s more?

Intense exercise, such as running, can reduce the rate of gut absorption. This can lead to feelings of fullness, bloating, or discomfort.

Lower Esophageal Sphincter Tone:

The lower esophageal sphincter (LES) is a muscular ring that separates the esophagus from the stomach. Running can sometimes weaken the tone of the LES, increasing the risk of gastric reflux or heartburn.

Running can slow down the movement of food from the stomach to the intestines. This delay in gastric emptying can cause feelings of fullness and discomfort.

It’s important to note that these physiological changes are part of the body’s response to intense physical activity, and they can vary from person to person. Some runners may experience minimal GI distress, while others may be more susceptible.

The Impact of Food On Runners Stomach

Consuming foods that are high in fiber, fat, or protein too close to a run can slow down digestion and increase the risk of GI symptoms. Foods that are spicy or contain a lot of spices can also be problematic for some runners.

Drugs & the Digestive Tract

NSAIDs, including ibuprofen, are commonly used to relieve pain and reduce inflammation. However, they can irritate the stomach lining and increase the risk of gastrointestinal issues, such as gastritis or stomach ulcers. Running while taking NSAIDs, especially on an empty stomach, can further exacerbate these risks.

How to Prevent Runner Trots When Running

Proper hydration is your first line of defense against stomach discomfort and unwanted pit stops during your runs. We all recognize the importance of staying hydrated for optimal running performance, but it’s equally crucial for preventing GI distress while running.

A study found that roughly 80 percent of runners who experienced fluid losses of 4 percent or more of their body weight reported suffering from GI distress issues. This suggests a strong link between dehydration and stomach problems in runners.

Several factors contribute to this connection. Dehydration can slow down gastric emptying, making it harder for your stomach to process food and fluids efficiently. Additionally, exposure to heat, especially during the summer, can exacerbate GI distress issues. When it’s hot, your body redirects more blood to the skin to cool down, which can further stress your digestive system.

Here are some hydration tips to help you combat GI distress:

  • Stay hydrated throughout the day, not just before your run. Consistently drinking water ensures you start your run well-hydrated.
  • Don’t wait until you’re thirsty to drink. By the time you feel thirsty, you may already be somewhat dehydrated.
  • Hydrate when you wake up in the morning, especially if you’re running in the early hours. After a night’s sleep, your body can be dehydrated even if you don’t feel thirsty.
  • If your run lasts longer than 45 minutes, consider bringing a water bottle and practicing the “one gulp every mile” strategy, even if you don’t feel an immediate need for fluids..

Additional resource – Prevent Acid Reflux In Runners

Go Easy With the Mileage

Running long and hard training sessions can increase the likelihood of experiencing GI problems, and this is due to several factors, including dehydration, elevated body temperature, increased blood flow to working muscles, and the mechanical impact of running. Essentially, the nature of running, with its repetitive and high-impact movements, makes runners more prone to GI distress.

The good news is that, similar to how your muscles and cardiovascular system adapt to training, your gastrointestinal system can also become more accustomed to the demands of running. Here’s how you can “train” your stomach to handle food more effectively:

  • Experiment with different foods and drinks during your training sessions. Pay attention to how your stomach reacts to various options. This experimentation allows you to find what works best for you.
  • Keep a food journal to track the foods and drinks you consume and their impact on your GI tract. This record will help you identify patterns and pinpoint which items may trigger discomfort.
  • Try different eating plans to see how they affect your stomach. With time and experimentation, you’ll likely discover a winning formula that minimizes GI distress during your runs.

Give It Time

Be Patient with Your Belly

Your stomach deserves some respect, so don’t rush it! Give it the time it needs to process your food, especially after a big meal. Here’s the lowdown:

Therefore, try to schedule your main meal a comfy two to three hours before your run. This gives your stomach the chance to work its magic without feeling rushed.

Need a Quick Fix?

If patience isn’t your strong suit, consider a light pre-run snack about an hour before your workout. Keep it easy on the tummy, though, so you don’t feel like you’ve swallowed a brick.

Everyone’s digestive system dances to its unique beat. So, get curious and experiment! Try different meal timings and foods to discover what your belly loves best. In the end, it’s all about finding your digestive groove for the long haul.

Keep your Diet Simple

Eating a meal loaded with fiber, fat, protein, or sugar bombs right before a run is like inviting GI distress to the party. No thanks!

Especially on those tough training days, opt for a straightforward diet. Look for these winning traits in your pre-run meal: not too huge, low on fiber, low-fat, a touch of protein, and not drowning in sugar.

If you’re gearing up for a marathon or a lengthy endurance mission, sports drinks can be your best bud. They give you the fuel to keep going. But, a word of caution: avoid those with over 10% carb concentration to dodge tummy troubles. Aim for 5% or less to play it safe.

Acidic foods and drinks can stir up trouble for your tummy. Before your run, dodge stuff like alcohol, super strong coffee, milk, eggs, gluten-heavy grains, nuts, and tomatoes. Instead, roll with low-acid champs like bananas, leafy greens, soy, lentils, and more.

Avoid Caffeine

Caffeine is like rocket fuel for your performance. It revs things up and can make you feel unstoppable on the track.

But caffeine is also a stimulant that can kickstart peristalsis—the fancy term for those gut muscles that push food through your digestive system.

If caffeine isn’t your gut’s best friend, swap it for water. Hydration is always a good idea, and it won’t send your stomach on a rollercoaster ride.

Craving that cup of joe?  Have it well before your run. Give your system some time to cozy up with caffeine, so it won’t interrupt your workout.

Additional resource – How to manage heart murmurs

Run Around Bathrooms

For those of us who are a tad more prone to GI distress during runs, planning our routes strategically can be a game-changer. Look for routes that have bathrooms along the way. Knowing you have a safe haven for emergency pit stops can provide tremendous peace of mind.

But, sometimes, emergencies strike when you least expect them. That’s where a little pocket-sized preparation comes in handy. Carry wet wipes or toilet paper with you during your runs, just in case a disaster decides to pay a visit.

And here’s a pro tip for extreme cases: consider having an over-the-counter anti-diarrhea medication like Imodium on hand. It’s like your emergency kit for those unexpected GI issues. But remember, don’t make it a habit without your doctor’s approval.

Manage Stress

According to a study, stress, anxiety, and other mental problems can take a toll on your stomach.

Research has linked these psychological problems with your GI tract’s ability to function optimally and adequately.

So it’s not just what you eat and drink before and during a run. What you think matters as well.

Consider incorporating practices like meditation and yoga into your routine. These activities can help you manage your physical, emotional, and intellectual energies, creating a harmonious balance.

Now, let’s talk about race day stress. Competitions can be nerve-wracking, especially if you’re putting immense pressure on yourself. If you’re racing in a new city, try arriving a few days earlier to acclimate to the unfamiliar surroundings.

Listen to Your Body

Ultimately, your body is the best judge of what works for you. But there’s a catch – you need to be ready to listen. Ignoring your body’s signals won’t get you anywhere.

Let’s face it: what you put into your body matters, affecting both your performance and your stomach’s well-being. So, it’s crucial to cultivate body awareness.

Pay attention to how your body feels before, during, and after a run concerning the foods and beverages you’ve consumed.

Maintain a diary to track your experiences. Note the symptoms and document what you ate or drank on days when GI issues reared their ugly head. This way, you can gradually decode your body’s unique language.

When to Consult A Doctor For Runners Stomach

Experiencing gastrointestinal distress as a runner is a common issue, but it’s crucial to recognize that if you frequently encounter a runner’s stomach, it may not be exclusively related to running. Conditions such as celiac disease and irritable bowel syndrome share similar symptoms with a runner’s stomach and can have diverse underlying causes.

In such cases, it’s advisable to seek guidance from a medical professional. They will conduct an assessment of your symptoms to determine whether they are primarily associated with running or if there might be an alternative diagnosis. Additionally, your doctor may recommend procedures like a colonoscopy to rule out any potential underlying issues.

It’s essential to be vigilant and attentive to certain warning signs that could indicate a more severe ailment, including:

  • Sustained diarrhea lasting more than 24 hours.
  • Sudden and severe headaches with no apparent cause.
  • Pronounced heart palpitations.
  • Presence of mucus or blood in your stool.
  • Persistent and intractable vomiting or nausea.
  • Feeling full more rapidly than usual.
  • Unexplained weight loss.
  • Experiencing loss of consciousness or fainting episodes.

If you experience any of these symptoms, it is crucial to promptly seek medical evaluation to ensure your health and well-being

GI Distress in Runners  – The Conclusion

In conclusion, mitigating the risk of experiencing runners’ stomach requires a proactive approach to your diet, hydration, and training habits. To minimize the likelihood of gastrointestinal distress during your runs, consider the following recommendations:

  • Be mindful of the foods you consume before running and the day prior, avoiding high-fat and high-fiber foods whenever possible
  • Allow ample time for digestion by refraining from running immediately after a meal, akin to swimming.
  • Maintain proper hydration throughout the day, ensuring you carry a water bottle during extended runs, particularly in hot weather conditions.
  • Engage in experimentation with various foods and beverages, maintaining a training journal to monitor their impact on your stomach.
  • Provide your body sufficient time to adapt to increased training intensity and volume.
  • Seek professional guidance from a physician if you have concerns or persistent issues related to gastrointestinal distress during your runs.

By implementing these strategies and staying attuned to your body’s signals, you can work towards a more comfortable and enjoyable running experience, minimizing the risk to runners’ stomach.

The Benefits of Running and Physical Exercise for Poker Players

As in other professions and other habits such as sports, poker is a discipline that requires a great deal of preparation to reach an optimal level as a professional player. The stars of this mental sport are aware that they need to maintain a healthy life in which both mind and body are in a comfort zone. Only in this way can good results be achieved.

How to take care of mind and body when you are a poker player?

Imagine you are playing at an online video poker on a reputable Australian casino, Joe Fortune. The game goes on longer than you would like, and with the fast-paced dynamic of the game, fatigue and demotivation start to set in. Your back and legs start to ache from the time you’ve been sitting down, even though the graphics are immersive, and the gameplay is straightforward and hassle-free. Sometimes, despite the motivation to keep playing, your body and mind revolt, as you find it hard to concentrate on the task.

Finally, it’s time for the river, and at that moment, the dealer turns over that card that can change the course of the game. Your brain is racing, your shoulders tense up, and adrenaline is pumping.

It is at that moment that you must understand the need to take care of yourself and avoid overloading your mind and body when playing poker so as not to damage your mood.

Here are ways to take care of your mind and body:

Good nutrition

Nutrition is a must if you want to be healthy. Poker players need to motivate their bodies to endure the long sessions of tournaments; for that, the diet is fundamental. Too much will be a problem, and too little will be also a problem.

Fruits, vegetables, and nuts are recommended since they will give the organism energy and mental agility that seems fundamental. But to abuse it is not good either; Players must vary their diet.

Why Physical Activity is Important for Poker Players

Of course, absorbing nutrients will not be the only thing we will consider in poker.

Poker is often associated with unhealthy behaviors: smoky environments, hard liquor in industrial quantities, and unhealthy food. However, with the advent of iGaming platforms, where anyone can open a poker platform and start playing it, there has been a realization that to play at one’s best, it is essential to be clear-headed to know how to self-control.

In competitive tournaments, for example, concentration must be through the roof; one wrong or risky move can lead to elimination in a flash.

As a sport on its right-included in the table by the International Olympic Committee-poker thus needs not only proper eating behaviors but also good mental and physical preparation.

Finally, poker involves many hours sitting in front of a monitor or at a table beside opponents. This makes it essential to do sports to leave behind toxins and elements the body does not need.

The Benefits of Running

Running, in particular, is something many poker players will enjoy. The phenomenon of the ‘runner’s high’ truly replicates the thrill of playing the classic card game – as you run for a long time, a sudden feeling of relaxation steeps in, which will imbue your body with a burst of happiness hormones.

To achieve the effect, you should get more sleep and strive to run longer – a run of two hours tends to produce the euphoric feeling. So, try to pursue lengthy exercises in order to lower your anxiety and reach the limits of your endurance. Besides, experts recommend that you keep the running pace a bit slower than the 10-K race pace, often referred to as tempo pace.

Elimination of vices

Another element is directly connected to both mental and physical health work: vices. Alcohol, tobacco, or added sugars are best left aside. The organism will suffer if we tolerate these things in addition to the efforts involved in playing poker and dedicating oneself professionally to it. Everyone needs to indulge, but with caution and without the indulgence becoming routine.

Try to disconnect

But not only the body needs to lead a good life in poker, but also the head. Disconnecting is a fundamental activity. Many poker players who have their work at home do not manage to have moments in which they do not think about it. That exhausts one’s brain and does not perform at 100% as needed. That’s why it is so important to combine poker with other activities.

Exercise the mind

And since we are focusing on the brain, it is good to perform mental exercises that put it to the test regularly. Specifically, it can be something on the margin that helps the memory, decision-making capacity, and how to support the pressure.

Research demonstrates a strong link between aerobic exercise like running and the enhancement of cognitive functions. This applies to basic tasks like problem-solving and active, short-term memory. Therefore, strive to prioritize running or other endurance-intensive activities to ensure that your mind operates on the maximum level.

Be consistent

Combine mental exercises with constant and daily training because no one is born learned in the process of learning to play poker, and we can always try something new that we were not aware of.

Manage your money properly

Even those who can already win good picks of money must consider the management of their stack, not only in poker as such but also in everyday life.

Define a good strategy

If you will participate in some tournaments, apply a personal strategy according to your goals. The way to be happy with yourself is to set realistic achievements and be able to reach them.

Conclusion

Poker is a mental sport, so most players need to pay more attention to the physical aspect. The truth is that taking care of your body makes a difference in controlling your mood, concentration, energy, and motivation in that tense moment of the game.

Remember that perseverance and hard work are the keys to poker. So, with discernment, calm, and good physical condition, you will be a few steps ahead of others.

How to increase the speed of running and not to get injured

Running speed is proportional to cadence and stride length. You need to raise at least one of these parameters to increase speed. In this article, the essay writer who provides essay help writing explains how they influence each other and what other factors you need to consider to increase your running speed safely.

Even in an amateur race, there are always two types of runners. Some run with the frequent shuffling of their feet. Others move with sprawling strides. The former has a higher cadence, but the latter has long strides. Both approaches should have a positive effect on speed. Who should we look up to?

Cadence is one of the quantitative characteristics of running, equal to the frequency of steps per minute. Most often, it’s the number of times both feet touches the ground – about 160-200 steps per minute.

To measure a basic cadence, you run at an average pace, count the number of steps with one foot in 30 seconds, and then multiply this by four.

Length of steps

With a longer stride length, you stay in the air longer, which is a plus. But when you land on an extended straight leg, the load on your joints and tendons is significantly increased compared to landing on a leg with a more relaxed knee. At the same time, even a tiny error in landing can lead to injury.

Long stride running is a particular exercise that helps improve muscle work while pushing off while running.

At the same time, it takes more work to maintain a high pace with long strides. If you drastically increase the stride length, the step frequency will decrease, and the speed gain will not be as significant.

Frequency of steps

You’ve probably heard of the ideal rate of 180 steps per minute. But if you increase your cadence by 20-25 steps per minute at once, there’s a good chance that your HR will jump. This is not good either. Keep your base cadence the same by 5% per week or two.

The “magic” number 180 was derived from an analysis of Olympic running. Amateur-level running does not have to be strictly within this value. A slight deviation is acceptable and depends on anatomical features (leg length, joint mobility) and running experience.

How to run faster

First, it is worth asking yourself the question: whether it is necessary at all. After all, we’re talking about running for health and pleasure. An amateur runner can and should focus more on feeling rather than numbers.

But if you’re not interested in running without increasing your numbers, it’s worth remembering that in addition to cadence and stride length, many factors affect your running speed:

  • Choosing the right shoes for your foot structure and treadmill surface;
  • Choosing clothing that wicks away moisture and is appropriate for the weather;
  • Regular exercise, including cross-training to help strengthen the cortex muscles and develop joint mobility;
  • Sufficient rest time, traditional massage or sauna;
  • A good quality warm-up before a run;
  • Adequate goals and patience.

How to run safer

Unprofessional runners often run at their natural stride rate, which differs from the ideal. Some are more prone to injury, and others less so. A pair of scientific papers investigating the difference between the two were presented in June at the annual meeting of the American College of Sports Medicine.

The first study involved 32 healthy and 93 injured runners. It showed that the average cadence of the runners in the two groups differed slightly: 164 and 161, respectively.

The scientists compared the load on foot, and the injured runners did have a higher gear. However, they could not correlate this parameter with the cadence of healthy and injured runners.

Another study involved 28 amateur runners who were training for a half marathon. In this case, there was a clear correlation between injury and cadence:

8 out of 12 runners with a cadence below 162 were injured, 67%;

5 out of 7 runners with a tempo of 163-168 were impaired – 71%;

only 2 out of 9 runners with a cadence above 169 were injured – 22%.

It is worth noting that this study did not consider the runners’ initial training. During the study, the average cadence of all participants increased from 165 to 173 due to race preparation. It is likely that runners with higher cadence were initially better prepared and were, therefore, less prone to injury.

The research evidence needs to be clarified. Of course, we cannot say that cadence is irrelevant for safe running. However, starting from this parameter alone does not make sense: it is too early to name the ideal number.

At the same time, less contact with the ground with a greater length of steps also does not guarantee less load on the leg.

Good news

With experience, cadence and stride length increase in parallel, and running become more efficient and enjoyable.

Running in long strides is very tiring and, therefore, unsafe. I was immediately comfortable running with a cadence close to 180. But most of the time, I run in the gym on the treadmill – this helps increase my tempo. When I run outside, the steps lengthen, but the speed stays the same as the steps become less frequent. Either way, I always run without too much fatigue.

When To Replace Your Running Shoes

When to replace running shoes

Do you know how often to replace running shoes?

If you answer no, you’re about to learn all you need to know about running shoes’ lifespan and how to make sense of it.

Here’s the truth.

Running shoes are an invaluable training asset. They help protect and support your feet throughout the running gait, which, in turn, improves performance and prevents injury.

What’s not to like?

Besides finding a pair of shoes that suit your running style and needs, the next thing you need to do to make the most out of your running kicks is to replace them regularly.

So, how many miles can I get out of running shoes? Then you’re asking the right question.

This is, in fact, a common question among most runners – knowing the exact mileage to run before a pair of running is truly worn out and needs replacement.

I hate to break it to you, but there are no black-or-white answers. There’s no formula. The recommended range can be as slow as 300 miles to over 600 miles, as it all hinges on several variables.

In today’s post, I’m explaining how long running shoes typically last and some warning signs that your shoes are past their time.

Let’s lace up and dig in.

Why Replace Running Shoes?

Run long enough, and your running shoes will wear and tear, especially the midsole.

So what’s the midsole, and why it’s so damn important?

The midsole has a thick layer supporting the feet throughout the running gait cycle.

Often made from foam materials, either Ethylene Vinyl Acetate (EVA), Polyurethane (PU), or a mix of both materials.

Viewed under a microscope, the midsole can be seen as made of hundreds of tiny air pockets that look like a sponge.

On every foot strike, these air pockets compress like a sponge, reacting and absorbing the stress and returning energy to you as you begin your next stride. This is the reason behind the bounce we experience in our shoes while running.

Here’s the truth.

When your footwear no longer provides enough protection and support as before, you’ll feel pain.

The longer you run in worn-out shoes—as in they don’t have the structure and components they were designed with—the higher the risk for something to go wrong—and it eventually does.

That’s why replacing your running shoes regularly is one of the best things you can do to prevent overuse injuries.

Additional resource – How to rotate running shoes

How Often to Replace Running Shoes?

Most experts recommend swapping out running shoes every 400 to 500 miles.

If you average 30 miles a week, look for new kicks every four to five months.

But the 500-mile isn’t gospel, even though it works pretty well.

The rule might be too simplistic and doesn’t apply to every runner or every shoe brand.

The exact number depends on many factors, such as running biomechanics (such as foot type and foot-strike pattern), running surfaces, body weight, and the type of running shoe.

Heavy runners who often run on a hard surface may need a new pair at the lower end of the recommendation range, while light runners who stick to

By the same token, if you often stick to a treadmill, you might not need to retire your kicks as soon as you’d if you regularly tackle technical trails.

Here are a few variables that impact your running shoes’ lifespan.

Shoe Construction

The exact mileage limit of running shoes will mainly depend on the way they’re wet-built.  That’s why choosing higher quality shoes will ensure you can reach the maximum mileage they can sustain.

The shoes’ materials impact how the lifespan of the shoes. Higher-quality materials are built for durability and endurance. This helps you get more miles from them.

The Surface

Depending on where you run, the bottoms of your running shoes can break down at various rates.

For instance, asphalt or urban sidewalks are much harder on the bottom of the shoes compared to softer surfaces such as grass or dirt paths.

Where you often run can also impact how often you should replace your running shoes. Whether it’s trails, roads, or a treadmill, pay attention to how the various surfaces affect the condition of your shoes.

Your Weight

Another crucial variable that impacts shoe lifespan is your weight. The heavier you’re, the more load you put on the shoes, wearing them down faster.

Your Running Style

Your pronation type can also impact the lifespan of a shoe and how many miles you can squeeze out of them.

For example, if you tend to overpronate, your shoes will likely wear out faster than a neutral runner training the same frequency.

That’s why you should examine your running gait at a running-specialty store or self-assess yourself, then choose cash that suits your style. This helps the shoes last longer and may save pain and injury.

how to often to replace running shoes

10 Signs You Need To Replace Your Running Shoes

Here’s what you need to pay attention to ensure your running shoes don’t run you into the ground.

1. Check The Tread

Paying attention to the appearance of your running kicks can reveal the early signs that it’s time to replace them.

One pointer is a worn-out outsole.

The outsole is the rubber part that comes in contact with the ground from your heel to the toes, and it’s an essential shoe part as it not only supports your feet but also provides the clearest signs of wear and tear.

Over time, the outsole begins to wear away.

Just like car tires, when they lose tread, the outsole smooths over and starts looking like a bald tire.

Examine any bald spots where the rubbers have worn out or broken away on the outsole.

A little abrasion should be no big deal, but when the tread is completely worn out, and the white midsole is exposed, it’s time to ditch that pair of running shoes.

Here’s the full guide to running shoe anatomy.

2. Check For Absorption

As I previously stated, the midsole is important because that’s part of the shoes that offers most of the support and cushioning come from.

Log too many miles, and this structure starts to break down and become useless.

Here’s how to check the midsole for wear and tear.

Put one hand inside the shoe, then press your thumb into its center (that’s where the midsole is located).

Get new shoes if you can feel your fingers cramming through the shoe and/or if the midsole feels rigid and hard.

You can also perform a flexibility test.

Hold your shoes with laces up, then bend the toe to the heel.

A shoe that folds easily indicates that it lacks proper support and is no longer suitable for running.

If the shoe feels firm, it’s still providing proper support.

3. Damaged Heel

In most cases, all you need to do when your foot slides up and down your shoe is to tighten the laces. But if doing so didn’t help, it’s a sign of significant wear on the inside of the heel as the shoe begins to fray.

4. Lack of Springiness

Though the outside of your shoes may look great, you may need to replace thyme if the sole has compressed, losing its cushioning and springiness ability.

Additional resource- How to prevent runners toe

5. You’re Feeling Pain

If you notice unusual pain while running, the wear and tear of your shoes could be the culprit. Of course, it’s not always the case, but nothing has changed about your training and form; the shoes must be checked out.

So if you experience little niggles in places you had none before — especially in the soles, arches, shins, and knees— then it’s time to look at your shoes.

This is especially the case when experiencing pain on both sides— for instance, in both knees.

6. You Can Feel Everything With Every Step

Feeling every stone with every step is a serious sign of wear. Running shoes should provide protection and proper cushioning so that your feet land softly on the ground without feeling stones and rocks.

If you don’t toss the shoes, it will eventually lead to pains, blisters, and soreness.

7. You Can Feel Discomfort And Pain

The second you feel discomfort or pain while running, the chances are your shoes have run their course. Aches are never a good sign, and one of the problems causing this is worn-out cushioning. The pains usually appear right after a run, a solid sign that you need to replace the shoes.

Yes, these symptoms can appear for other reasons, but you must check your shoes once you notice any muscle stiffness, pain, or discomfort. Always pay attention to the alerts coming from your body. The aftermath of a run should leave you happy and accomplished, not extra-tired and with painful feet, ankles, lower back, or shins.

8. You Notice Slipping

It does look like an obvious pointer. Unfortunately, many people decide to ignore it. Slipping while running on a dry surface usually means it’s game over for the shoes.

If you’re an experienced runner, you already know that slipping can happen, but mostly during winter when the temperatures are cold, and there’s ice on the ground. But once you start noticing it on dry surfaces, get ready to splurge on a new pair.

9. Check The Soles

Flip your running shoes to check the soles for damage, especially in the midsole area. People have different running styles, meaning not everyone will wear their shoes equally. They can look great on the outside at first glance, but paying close attention to their appearance is important once you’ve run over 500 kilometers.

The outsole is usually the first part that shows signs of wear, and the midsole follows. Next, check the treads; if they look worn out, you have some shopping.

10. Check For Blisters

Another sign to remember is constant blisters on your feet after running. It can mean that you simply don’t have the right pair of running shoes or that it’s time to retire the one you have.

So, if you suddenly have blisters, especially in the middle part of the sole, unfortunately, time to ditch your old running shoes. With use, the shoes change their shape, end up worn out, and don’t fit your feet how they’re supposed to.

Making Your Shoes Last Longer

Now that you know something about the many things that wear out your shoes, let’s look at what you can do to prolong your footwear’s life. To help keep your shoes going strong, try these tips.

Use them For Running

Using your running shoes while running errands around the house or the supermarket might make you feel comfortable, but it will also speed up the wear and tear of the shoe, and you don’t want that.

Save your running shoes for running, walking shoes for walking, and hiking shoes for hiking. Every shoe is built with a purpose and for a purpose. You’re doing your body and the shoe a big disservice by using the wrong footwear for the wrong activity.

Rotate your shoes

Another trick to help extend your footwear is to have more than two pairs of shoes in rotation. Rotating your shoes may also grant midsoles enough time to decompress and the whole shoe time to dry out.

Get Quality

Make sure you’re using high-quality shoes. Most experts suggest that running shoes have a lifespan of between 300 to 500 miles. I know, that’s a wide range (more on why later, I promise).

Let’s do some math to put that number into perspective. First, assume an average of 400 miles and check how long your shoes will last.

  • 10 miles a week – 40 weeks
  • 20 miles a week – 20 weeks
  • 30 miles a week – 13 weeks
  • 40 miles a week – 10 weeks
  • 50 miles a week – 8 weeks

Take Care Of Your Shoes

Another key tip is to clean and dry your running shoes after each run to prevent bacteria and smells from forming. This is especially the case following a wet or muddy run.

Had to run into water or rain? Then crumble up some newspaper and stuff it inside your shoes for a quick dry. To help deodorize your shoes, use cedar-filled shoe inserts. This helps refresh stinky running shoes.

Conclusion

There you have it.

The above guidelines cover most of what you need to know about how often to replace running shoes.

Remembering to check them for signs of wear from time to time is crucial to prevent injuries and properly protect your body. These shoes don’t last for a lifetime; they eventually hurt your feet, causing blisters, discomfort, pain and even slipping off the ground. To prevent all these moments, make

The rest is just details.

Please feel free to leave your comments and questions in the section below.

In the meantime, thank you for dropping by.


Running with Bunions: Prevention, Care, and Keeping Your Stride

running with a bunion

Are you a runner suffering from bunions?

Then you have come to the right place.

For most people, the word bunion conjures images of ugly foot deformities and long-term pain, especially in the running community.

But it doesn’t have to be that way.

As repelling and scary bunions can be, there are a few measures you can take to help you live with them and keep running strong.

In today’s post, I’ll share with you what you need to do to treat and prevent the progression of bunions while running.

More specifically, I’ll dive into the following:

  • What is a bunion?
  • How do bunions form?
  • Can you run with a bunion
  • What causes bunions in runners
  • How to soothe bunion pain
  • How to run safely with bunions
  • And so much more

Sounds great?

Let’s get started.

What’s The Bunion?

A bunion, also known as Hallux valgus, is a foot deformity that affects the metatarsophalangeal (MTP) joint, primarily on the inside portion of the big toe. In simpler terms, a bunion occurs when the big toe joint shifts out of its normal position, causing the affected toe to protrude or form a noticeable bump.

This condition typically results from ongoing stress and pressure on the metatarsophalangeal joint. Over time, the big toe may move out of alignment, turn inward, and become swollen, leading to the development of a painful bump on the side of the foot.

Because the metatarsophalangeal joint bears a significant portion of the body’s weight during walking and running, bunions can be quite painful, especially when engaging in physical activities like running.

While a bunion may begin as a mild issue, it can worsen over time, potentially becoming a severely debilitating and visually noticeable foot deformity.

Bunions are relatively common, affecting a large percentage of the global population. They are estimated to impact about 25% of individuals aged 18 to 65 and more than one-third of people over the age of 65.

This condition is particularly prevalent among individuals who spend extended periods on their feet, such as waitstaff, nurses, teachers, and many runners.

What Causes Bunions in Runners?

Bunions can develop in runners due to a variety of factors, much like the causes of foot problems in general. Some of the factors and conditions that can contribute to the development of bunions in runners include

  • Loose Joints and Tendons: Individuals with naturally loose joints and tendons may be more prone to developing bunions as the joints and ligaments around the big toe may not provide adequate support.
  • Bad Footwear: Wearing shoes that are too tight, narrow, or have a narrow toe box can increase pressure on the big toe joint, potentially leading to the formation of bunions.
  • Low Arches: Runners with low arches (flat feet) may be at greater risk of developing bunions as the lack of arch support can affect foot mechanics and joint alignment.
  • Genetics: A family history of bunions can increase an individual’s susceptibility to developing them. Genetic factors can play a significant role in determining foot structure and function
  • Pregnancy: Pregnancy-related hormonal changes and weight gain can lead to changes in foot mechanics, potentially contributing to bunion development.
  • Jobs Requiring Long Standing Periods: Occupations that involve prolonged periods of standing or walking, such as teachers, nurses, or cooks, can place continuous stress on the feet and toes, increasing the risk of bunions.
  • Weak Foot Muscles: Weakness in the muscles that support the arches and toes can affect proper foot mechanics and contribute to bunion formation.
  • Muscle Imbalances: Muscle imbalances in the feet and lower legs can lead to abnormal foot mechanics, potentially causing bunions over time.

Does Running Cause Bunions?

Running itself doesn’t directly cause bunions to develop, but it can exacerbate existing bunions and contribute to their progression. The development of bunions is primarily influenced by genetic factors and foot structure, as mentioned earlier.

The key points to consider are:

  • Genetic Predisposition: Bunions often run in families, suggesting a genetic component. If your parents or close relatives have bunions, you may be genetically predisposed to develop them as well.
  • Foot Structure: Certain foot structures, such as having low arches or flat feet, can increase the risk of bunions. These structural characteristics can be inherited and are not caused by running.
  • Running Impact: While running itself is not a direct cause of bunions, the repetitive impact and pressure placed on the forefoot and toes during running can aggravate existing bunions. The friction between the bunion and the side of the running shoe can lead to increased pain and discomfort.
  • Exacerbation: Serious cases of bunions can significantly impact a runner’s ability to continue their training. In some cases, surgical intervention may be necessary to correct the joint deformity.

Additional resource – Black toenail guide

Can You Run With A Bunion?

It depends!

If it’s not causing you much grief or discomfort, go ahead and keep up your training. Just remember, your choice of shoes can make a world of difference we’ll dive into that soon).

But if that bunion is making a fuss, don’t fret.  I’ve got your back with some top-notch precautions to ensure a pain-free run. No need to cut your run short because of those pesky bunions.

Keep scrolling to find out how to keep running comfortably with a bunion.

Do Bunion Correctors Work?

Bunion correctors, such as toe splints or separators, may provide some pain relief and improved comfort for individuals with bunions, but they are not typically considered definitive solution for correcting or eliminating bunions. The effectiveness of bunion correctors can vary from person to person, and research on their long-term impact is limited.

Studies have shown mixed results when it comes to the ability of bunion correctors to realign the big toe or permanently correct bunions. While some individuals may experience reduced pain and discomfort while using these devices, the overall impact on bunion alignment appears to be limited.

It’s important to understand that bunion correctors are often recommended as a conservative, non-surgical option to manage bunion-related symptoms, such as pain and pressure. They may provide temporary relief by promoting better toe alignment and reducing friction between the toes.

However, they are not a guaranteed method for correcting the underlying structural issue causing the bunion.

Treating and Preventing Bunions While Running

Most bunions are permanent unless surgically removed or corrected.

But there are a few steps you can take to make running with bunions more comfortable, even to slow a bunion’s progression.

Tape The Bunion

Taping or padding the affected toe can be a helpful strategy for individuals with bunions who experience discomfort or pain while running. Here’s how you can tape your bunion:

Materials needed:

  • Medical tape or adhesive padding: You can find these items at most drugstores.
  • Toe separator (optional): Toe separators can be used in combination with padding for added relief.

Steps:

  1. Prepare your foot: Make sure your foot is clean and dry before applying any tape or padding.
  2. Apply padding: Cut a piece of medical tape or adhesive padding to the appropriate size to cover your bunion. The padding should be soft and cushioned to reduce pressure on the bunion.
  3. Place the padding: Carefully apply the padding over the bunion, ensuring that it covers the bunion’s prominent area. You may need to adjust the positioning to find the most comfortable and protective fit.
  4. Secure the padding: Gently press down on the padding to make sure it adheres to your skin and stays in place.
  5. Consider toe separators (optional): If you have toe separators, you can use them in conjunction with the padding. Toe separators help create space between your toes and reduce friction. Place them between the affected toe and its neighboring toe.
  6. Put on your running shoes: Ensure that your running shoes provide enough space to accommodate the padding and any toe separators comfortably. You should not feel excessive pressure or discomfort when wearing your shoes.

By padding and taping your bunion, you can help reduce the direct pressure and friction on the affected area, which may alleviate pain and discomfort during running. However, it’s important to note that this is a temporary solution and may not address the underlying structural issue causing the bunion.

Additional resource – Side stitch when running

Strength Exercises

Strength training not only makes your foot muscles strong but can also protect you against bunions. Now, don’t expect these exercises to magically zap your bunions away – they’re like that stubborn roommate who never moves out.

But they can definitely make your life more comfortable and keep those bunions from getting any fancier.

So, why does this matter?

Well, stronger foot muscles mean better support for your tootsies. And if you’re a runner or just love to strut your stuff, you’ll appreciate the improved mobility in your big toe and less of that nagging discomfort during your daily strolls or jogging sessions.

Now, let’s dive into the muscles you want to target. Think of it as a superhero lineup for your feet:

  • Adductor Halluces: These little guys help bring your big toe back to center stage.
  • Flexor Halluces Brevis: These champs keep your big toe flexible and ready for action.
  • Abductor Halluces: The bodyguards of your big toe, they prevent it from wandering off.
  • Fibularis Longus: The supporter of your pinky toe, ensuring it doesn’t feel left out.
  • Tibialis Posterior: The stabilizer – it helps keep your arch from taking a vacation.

Now, for the fun part – the exercises! Here’s your superhero training program:

  1. Single-Leg Calf Raises: Get ready to stand on one leg and give your calf muscles a workout they won’t forget.

  1. Shin Release with a Lacrosse Ball: Roll out those shins to ease tension and improve flexibility.

  1. Toe Extensor Exercise: Train your toes to lift like they’re reaching for the stars

  1. Calf Release with a Lacrosse Ball or Foam Roller: Roll away the stress in your calf muscles with the help of a lacrosse ball or foam roller. Check out this video [link] for guidance.

  1. Big-Toe Adductor Exercise: Get your big toe moving with this exercise that uses a resistance band.

Have The Right Shoes

Finding the right shoes for your running adventures is like finding the perfect sidekick. They need to have your back, especially if you’re dealing with bunions. Trust me, the right shoes can be a game-changer, and the wrong ones? Well, they’re like that villain who just won’t quit.

So, here’s the scoop – head over to a specialty running store pronto. These folks know their stuff and can help you find the perfect-fitting shoes to keep those bunions in check.

Now, let’s talk shoe features to look out for:

  • Go Wide: Wide-fitting running shoes are your new best friends. They provide your bunions with the space they need to breathe and stretch out. It’s like giving them their own cozy room. You wouldn’t want your big toe feeling cramped, right?
  • Go Soft: Soft toe boxes are a lifesaver. They help prevent any unwanted rubbing or chaffing on your bunion, especially if it’s feeling tender or has some extra fluid hanging out. Soft is the way to go!
  • Go Low: Say goodbye to elevated heels! Look for shoes with no heel elevation, also known as ‘zero drop’ shoes. They keep your feet happy and bunion-friendly.
  • Enough Room: The toe box is where it’s at. Make sure there’s plenty of space for your toes to wiggle and groove without feeling squished. Opt for shoes with minimal stitching and breathable mesh around the bunion area – they won’t cramp your style.
  • A Flexible Sole: Think of it as giving your feet a little workout. Look for shoes with flexible soles that let your foot muscles do their thing. Rigid soles? No thanks, they’re like that annoying friend who won’t let you dance freely.

Use the Right Knot

You know what they say: it’s all in the details – even when it comes to lacing up your running shoes. Tying them the right way can make a world of difference, especially if you’ve got bunions.

Here’s the trick – focus on loosening up those laces near your toes. This nifty move reduces the pressure on your toes, bunions, and the ball of your foot. It’s like giving your feet some breathing space!

But wait, there’s no need to fret if you’re not sure how to master this lacing technique. I’ve got your back with this handy YouTube tutorial. It’ll walk you through the “Bunion Step-Over” lacing technique, making it a piece of cake

Seek Surgery

When those at-home remedies just aren’t cutting it, and your bunion pain is cramping your running style, it’s time to consider the big guns – surgery.

Now, don’t get too anxious; this isn’t your run-of-the-mill operation. It’s what the experts call a “bunionectomy.” It’s a fancy term, but it gets the job done.

Research has reported over 100 types of surgery can be performed to remove bunions. Common interventions include repositioning ligaments, tendons, and the joint, causing alteration in the angle of the big toe.

The goal? To realign that big toe joint, wave goodbye to the deformity, and restore normal function – all while giving your foot some much-needed relief.

The process is a bit messy. The surgeon delicately opens up that big toe joint and works their magic to reposition the bones.

In some cases, they may need to do a bit more, like trimming bones or securing things in place with metal plates or screws. It’s all in the name of getting your feet back in tip-top shape.

But here’s the pro tip: when you’re on the hunt for a surgeon, make sure you find one who knows the running game inside and out. Bonus points if they’re a runner themselves – that’s when you know you’ve hit the jackpot.

So, if you’re at that point where bunion pain is just too much to bear, don’t hesitate to reach out to a sports podiatrist who can guide you through the process and help you get back to pounding the pavement in no time.

Full Recovery Period

A bunionectomy can put you out of commission for a few days to a few weeks and wearing a surgical boot for roughly a month.

Full recovery from this can take anywhere from 8 to 12 weeks. So, going back to your former running glory should take a while.

This might sound like a long time away from your running shoes.

But it’s a much better option than suffering severe pain on every step you take while running.

Don’t you think so?

During your recovery period, do plenty of low-impact exercises to keep fit and going strong.

Running With Bunions – The Conclusion

Although the above measures seem simple, they can make a big difference. Dealing with bunions while running does not have to be complicated—as long as you know what you’re doing.

You can make some simple changes to how you train that can protect you and prevent the progression of toe deformities.

Please feel free to leave your comments and questions in the section below.

In the meantime, thank you for reading my post.

Keep Running Strong.

David D.

Running With Asthma – The Complete Guide

running with asthma

It’s no secret that running with asthma can be tricky.

Many runners with asthma may experience wheezing, coughing, difficulty breathing, or chest tightness during and after running.

That’s why many asthmatic people try to avoid running.

But, in actuality, cardio workouts, like running, may help you improve breathing control and minimize the effects of asthma, research shows.

Today’s article will dive into the benefits and downsides of running with asthma and how to do it the right way.

More specifically, I’ll look into the following:

  • What is asthma
  • The benefits of running for people with asthma
  • The challenges
  • Can you run with asthma
  • How to run safely with asthma
  • And so much more

Sounds great?

Let’s get started.

Note – Just because you cough or have difficulty breathing while running doesn’t mean you have an asthma attack. A host of conditions can mimic asthma, such as vocal cord dysfunction or allergies. Consult your doctor for a full diagnosis. Also, get the green light from your doctor before you start running or make any drastic exercise change.

Exercise-Induced Asthma Explained

Asthma is a respiratory condition known for inflammation, swelling, and narrowing of the airways. Besides the increase in mucus release, these airway issues can cause difficulty breathing, wheezing, coughing, rapid respiration rate, and stubborn respiratory infections.

There are many types of asthma, but in runners (and active people in general), the most common one is what’s known as exercise-induced bronchoconstriction, or EIB for short. As the name implies, this condition is triggered by exercise—running is no exception.

EIB causes wheezing, shortness of breath, coughing, and other symptoms during or after exercise, triggered by narrowing airways.

What’s more?

It’s possible to be diagnosed with EIB without a diagnosis of asthma.

A survey shows that roughly 10 percent of people with asthma symptoms only during exercise don’t have a history of the condition.

What Happens When you Run With Asthma?

Since running is a form of cardiovascular exercise, logging the miles with asthma can be chilling. Any narrowing of the airways may restrict breathing, making it harder to deliver enough oxygen to your heart and work muscles.

Over 90 percent of people with asthma suffer from asthma symptoms during or after exercise.  Even if you don’t have chronic asthma, you can still develop exercise-induced asthma. Surveys show that around 10 percent of asthma-free people may experience exercise-induced asthma.

If you have asthma, your body reacts by narrowing the airways, which is known as bronchoconstriction. This causes wheezing, tightness in the chest, and shortness of breath as your oxygen levels plummet. Over 90 percent of people with asthma suffer from exercise-induced bronchoconstriction.

This can be a frightening experience whether you’re dealing with exercise-induced asthma or it’s triggered by pollution.

What’s more?

Asthma symptoms can come and go, and specific triggers, such as cold air, smoke, dust, mold, and pet danders, can cause flare-ups (often out of nowhere). In addition, the ebb-and-flow nature of the conditions makes managing it a little more challenging.

What’s more?

Exercise-induced asthma is common among top athletes, including Olympic athletes and professional hockey players.

Factors that may increase the risk of exercise-induced asthma include:

  • Dry air
  • Cold air
  • Air pollution
  • Long-distance running
  • Chlorine in swimming pools

Common Asthma Symptoms in Runners

Common symptoms of EIB may begin during or soon after running, lasting for an hour or longer if left untreated.

The symptoms may appear five to ten minutes after exercise ends and often go away within an hour of rest.

Some of these include:

  • Wheezing
  • Coughing
  • Shortness of breath
  • Fatigue during running
  • Tightness in the chest
  • Mediocre athletic performance

Can You Run With Asthma?

Of course, you can – as long as you take the right measures since exercise generally may worsen asthma symptoms for some people.

Here’s the truth. Running DOES improve lung function, but it often doesn’t feel that way when you’re coming down with an asthma attack and/or when you first start.

Of course, running may not boost your lung capacity since your body size primarily determines it. But, according to research, logging the miles regularly can help your lungs perform better.

With proper care and medication, you can reach your full running potential. However, remember that you might need to take even more measures during winter since cold air can trigger asthma attacks (more on this later.

how to run with asthma
Jogging outdoors. Young man and woman running at park

Can You Run a Marathon With Asthma?

And the answer is yes, of course, you can.

Don’t take my word for it. The legendary marathoner Paula Radcliff had asthma throughout her career.

And she’s not the exception. Surveys have shown that over 700 athletes that completed the 2012 London Olympics had confirmed asthma. Yet, the same athletes were twice as likely to gain a medal than their asthma-free rivals.

Again, don’t get me wrong, though. Training for a marathon while having asthma isn’t going to be easy. The more severe asthma you have, the harder it will be.

But don’t let that stand in the way of your marathon goals. Instead, approach it the same way you approach any other injury – Devise an action plan and learn how to stay consistent.

Is Running Good For Asthma?

Running with asthma can certainly has its cons, but there are a lot of benefits to gain if you choose to log the miles.

This may shock many people, but research found that running is good for people with asthma. The impact of running and exercise on asthma has been examined for a while and is widely recommended by health and medical experts.

In addition to the well-known benefits of running, such as improving endurance, increasing strength, losing weight, reducing  stress, and building bone density, hitting the pavement can also help you manage asthma symptoms in the following ways:

Additional resource – Dealing with heart murmurs

Running Improve Asthma Control

Yes, that’s right. Running can be an ally when it comes to dealing with asthma.

Again, don’t take my word for it.

Research examining the effect of endurance running for five weeks on an adult with mild asthma reported that endurance running could boost the aerobic fitness of adults with asthma. The researchers also suggested that it also limits the severity of exercise-induced asthma.

Another review of 11 studies with over 500 subjects with asthma concluded that aerobic exercise, such as running, improved overall asthma control in most of the subjects. This improves asthma control and limits the rate and severity of asthma attacks.

Improved Lung Function

I hate to state the obvious, but weak lung function indicates asthma.

Here’s the good news. Research has found that sticking to a consistent exercise routine can improve lung function and slow down the age-related decline in lung function in asthmatic people.

For example, this study has demonstrated that high-intensity exercise improved lung function while slowing down the decline in adults with mild or moderate asthma.

Improved Oxygen Uptake

Running is a cardiovascular exercise per excellence. Hence it improves the oxygen delivery capacity of your lungs. Again, a study has found that improved oxygen capacity can make breathing much easier, especially when it comes to improving lung strength and function. As you can tell, this can lead to oxygen uptake increases.

The more efficient your oxygen uptake, the less effort it takes you to breathe.

Reduce Airway Inflammation

Airway inflammation is one of the main signs of asthma, resulting in wheezing, coughing, and shortness of breath. So anything that helps soothe inflammation in the airways can help reduce asthma symptoms, especially when they’re triggered by airway inflammation.

Guess what’s good for this? Of course, exercise.

Again, don’t take my word for it. Research has found that three-month aerobic exercise plans reduced airway inflammation markers in asthma patients.

How To Run With Asthma

If you’re serious about running regularly with asthma, paying attention to your satsuma is key. Then, you can take a few measures to ensure your training is safe and comfortable.

Without further ado, here are a few measures to help you make the most of your runs when you have asthma.

Have A Running With Asthma Action Plan

Failing to plan is planning to fail. This is a true statement whether you’re trying to make a 6-figure income or planning to run with asthma.

A good asthma action plan should include preventive measures to manage asthma symptoms and limit flare-ups. In most cases, it should contain more than a few strategies for running with asthma to feel more confident in your ability to train safely and comfortably.

When you create an effective asthma plan, you’ll have the strategies you need for running with asthma which will improve your confidence to have effective and safe training.

For the most effective plan, consult your doctor and know your options. For example, they might prescribe a daily inhaler to reduce risk by soothing airway irritation.

The plan should help you manage your EIB symptoms.

What’s more?

Your doctor might also suggest you take a rescue inhaler around 10 to 15 minutes before

Warm-up

I cannot emphasize the importance of proper warm-ups while running. This is especially the case if you’re running with asthma.

A good warm-up prevents injury and ensures good performance. It could also keep your asthma at bay by preparing your lungs for the hard work ahead. By easing into your runs, you’ll give your airways and lungs enough time to handle the hard work to come. Otherwise, you might risk a flare-up, and you don’t want that.

Always begin by jogging slowly for five minutes, then perform a set of dynamic stretches quickly and continuously.

Think lunges, inchworms leg swings, butt kicks, etc., then do a few short, hard pick-ups—or bursts of speed running at a controlled pace.

Carry Your Inhaler

Have your rescue inhaler with you while out running. And this is the case whether it’s something you tend to use often or not. The moment you start experiencing symptoms while running, use it right away. No more dilly dally.

Find The Right Time

If you’ve known asthma triggers, such as smog or pollen, figure out when to run outside.

Pollen is often higher in the early morning, whereas smog is usually problematic later in the day.

As a rule, avoid running or only go for a short run on days when pollen counts are elevated.

Check Pollen Counts

Is Pollen a trigger for you? Then make sure to be careful during the spring when the pollen count is high since pollen causes cause bronchial spasms and airway irritation that can lead to flare-ups.

I hate to sound like a broken record, but you always have the option of moving your runs indoors on days when the pollen count is high.

Know Your Limits

The key to avoiding asthma attacks while running is to start slowly and pay attention to how fast and far you can go.

Don’t push your body too far—or you’ll regret it later.

So how do you keep things under control?

Measure your training intensity using the talk test.

You’re likely okay if you can keep a conversation going while running.

If your breathing becomes restricted or you start to feel faint or dizzy, ease back and rest until your breathing is back to normal. I’d recommend that you rely on effort instead of pace or mileage to guide your runs.

Pay attention to your breathing and notice any signs of an asthma attack, such as flushed skin, faster breathing, excessive sweating, wheezing, coughing, or chest tightness.

If you feel any of these, slow down or stop and take your rescue inhaler. It’s always better to be safe than sorry.

Choose The Right Weather and Season

In general, it’s best run in humid and warm conditions.

Pay attention during spring and fall.

Some of you might have pollen or grass sensitivity that triggers asthma.

If you have to run outside in the cold, put on a scarf or facemask to cover your mouth and nose— this helps warm the air up before it reaches your lungs, preventing it from irritating your airways.

Or, jump on the treadmill—indoor running is less like to induce an asthma attack.

Check Air Quality

Pollution is a common cause of asthma symptoms.

I recommend using an app like AirNow.gov and checking the air quality before heading out for a run. Keep it short or very easy if it’s yellow.  I recommend skipping your outdoor run and training indoors if the air quality is orange or red. It’s not worth it.

For the best air conditioning, I’d recommend running after it rains. You should also try running on trails to avoid pollution from cars and industrial zones.

Cover Your Face

As I hate stated earlier, even if you don’t have asthma, you might cough while running in cold temperatures. The reason is simple. Breathing in cold and dry air can irritate your airways, which is a trigger for bronchospasm.

For this reason, I’d recommend covering your mouth and nose while running, so the “warmed” air you exhale helps moisten the air you inhale.  Avoid a bandana or face cover made from cotton, which can freeze in cold and wet conditions.

Your best options are a fleece balaclava or neck gaiters.

Take Your Meds

Take your allergy medication roughly 4 hours before running. Some research suggests that taking too close to running time may impair your breathing, and you don’t want that.

Asthma medication used before working out can control and mitigate exercise-induced asthma symptoms, especially short-acting beta-2 asthma medication, such as albuterol.

Even if you only use it once in a blue moon, it’s better to safe than sorry. Consult your doctor if you have persistent side effects from medication, such as palpitations or tremors, before you start logging miles.

Pay Attention to Your Body

If your lungs are acting up, slow down or stop running altogether.

You may experience wheezing, chest tightness, shortness of breath, or coughing.

Next, get your rescue inhaler and follow your asthma treatment plan.

Start running again once your symptoms subside by walking slowly or even walking.

Running through the symptoms only makes things worst.

When to See A Doctor

If you’re dealing with asthma, it’s key to consult your doctor before starting a running plan. They can work with you to make the right training and treatment plan. This helps that running is safe.

What’s more?

Remember that various health conditions may mimic asthma and cause similar symptoms, making getting a thorough and accurate diagnosis important.

Running with Asthma  – The Conclusion

Ultimately having asthma shouldn’t stop you from pursuing your running goals and living a healthy lifestyle.

And, in some cases, running with asthma can help your symptoms

By taking the right asthma measures during and after your runs, you can safely and comfortably keep running and doing this sport to meet your training goals.

So lace up those running shoes and run with them.

Aqua Jogging For Runners – The Benefits & Technique

aqua jogging

Aqua jogging is a fantastic cross-training, rehabilitation, and conditioning workout for runners, and it’s getting more popular among elite athletes.

It’s also pretty simple. You strap a floatation device around your middle, head into the deep end of a swimming pool, and simulate the running movement by treading water. The rest is just details.

So what’s the most effective aqua jogging method? Should you only cross-train when inured? How to make the most out of aqua jogging? That’s where this post comes in handy.

In today’s article, we’ll explore some benefits of running in deep water and how to add it to your workout routine.

More specifically, I’ll cover:

  • What is aqua jogging
  • What’s the science behind aqua jogging
  • How to use aqua jogging to supplement your road miles
  • What is the proper aqua-jogging form
  • Aqua jogging workouts to try
  • Who should and should not do aqua jogging
  • What is required aqua jogging gear
  • The pros and cons of aqua jogging
  • How to increase aqua jogging efficiency
  • And so much more.

Sounds great?

Let’s get started

What is Aqua Jogging?

Aqua jogging has gathered a lot of steam over the past few years. However, unlike using an elliptical machine or cycling, aqua jogging is quite similar to running on land—at least regarding the range of motion and muscle engagement.

Also known as deep water running, aqua jogging simply runs while in water but without touching the pool bottom. It involves using a floatation device and then moving your arms and legs in a running motion in the deep end of the pool and practically removes any jarring effect of running.

Aqua jogging is a powerful crossbreed of running and swimming that is gentle on your joints and muscles. Still, it can help keep or even boost your cardiovascular endurance and improve your running technique (we’ll dive into the benefits later on).

It simply simulates the running movement but with the assistance of water in the pool. You put on a flotation device around your midsection, jump into the deep end of the pool and move your arms and legs in a running motion.

It’s the ideal form of cross-training for runners since it mimics virtually the same running movements and employs the same muscles as running.

Your goal is to avoid touching the bottom or the sides. Instead, you move around the pool at a slow and steady pace. Buoyancy device is designed to keep you balanced and upright in the water so you can focus on aqua jogging.

Don’t have a belt? Then you can run laps in the shallow waters of the pool. Aqua running is most effective in deep water, though some specific exercises can also be performed in shallow water.

Who Should Try Aqua Jogging

From the looks of it, virtually all runners can reap some benefits from aqua jogging, but if you fall into any of the following groups, aqua jogging will be so much more beneficial if you:

  • Are nursing or recovering from an injury and you need to maintain your fitness
  • Have tight tips or are prone to injury
  • Spend long hours in a seated position
  • Don’t normally cross-train, train
  • Have arthritis since the pressure of the water can help soothe the pain
  • Are overweight and dealing with issues with joint pain
  • Have access to a pool and love to be in the water

Is Aqua Jogging Good For Runners

Of course, it is. Let me explain why.

Here’s the truth. Running is a cardiovascular exercise per excellence. But it has a huge downside – it’s also hard on your body. Surveys show that most runners will get injured at one time or the other during one year of running.

Yes, overuse injuries are that rampant, and for the serious runner, there is no bulletproof way to sidestep this nagging issue.

Aqua jogging enters the picture. Initially designed as a fix for injured and recovering athletes, aqua jogging is a fantastic tool for runners nursing an injury.

Since you’re performing similar movements to running underwater, aqua jogging isn’t hard to learn.

The Benefits Of Aqua Jogging For Runners

When done correctly, aqua jogging offers a lot of benefits to runners.

By adding aqua jogging to your running plan, you’ll boost your cardio power, improve form and build muscular strength—all while limiting the wear and tear on your muscles and joints.

Here are a few.

Maintaining Fitness Through Injury

Aqua jogging is often used to maintain cardiovascular conditioning and help recover after an injury. The water resistance, the free range of motion, and the minimum impact on bones and joints allow you to exercise pain-free without risking further injury.

Of course, don’t take my word for it.

The research examined a group of ten well-trained runners who exercised exclusively with deep water running for a month and compared 5K race performance pre-deep water and post-deep water running.

The conclusion?

The researchers reported no statistical difference in 5K time or other metrics for performance, such as lactate threshold and submaximal oxygen consumption.

In English, please. This means aqua jogging can help you maintain running fitness for up to a month, even if you’re well-trained.

In another experiment, the researchers monitored the impact of aqua jogging over six weeks. During the study, 16 subjects were divided into two groups:

  • Group I  did aqua jogging sessions
  • Group II ran on land.

Opting for the same training durations and intensities, the researchers reported no statistical difference in performance markers such as blood lactate, maximal blood glucose, and body composition between the two groups.

Helps With Recovery

Looking for a tool to help you with recovery? Look no further than aqua jogging.

Water running is the go-to option for injured runners as it allows them to run without pain or risk making an injury associated with hitting the pavement worse. It gives you that running-related workout without making your injury worse. It can even speed up your recovery time.

Again don’t take my word for it.

This research has reported that aqua jogging can be employed as a recovery tool to speed up the repair of damaged muscles after hard training. Another research has also reported that aqua jogging g while rehabbing an injury can help maintain optimal shape

So what does this mean?

This means that aqua jogging is a super useful recovery tool and the ideal cross-training method for injured runners.

Additional guide – Heart murmurs and running

Burns A lot of Calories

Research has reported that running in deep water may burn more calories than on land, so if you’re looking to maintain a healthy body weight while on a running sabbatical, aqua jogging should help.

But how many calories aqua jogging burns is tricky. The average calorie burn for a 30-minute aqua jog may hover around 200 to 250 calories. But that’s exactly what is average. So you never know for sure.

Improved Muscle Strength

Running through water is more challenging than running on land. Since water is denser than air, your movements in the water are met with greater resistance than it is used to.  Moving in water has around 12 times the resistance of air.

This, in turn, helps build strength in often neglected areas in runners, such as the hip flexors and arms/shoulders.

Aqua jogging also forces you to keep an upright posture which is a great strengthener for your core muscles.

Intense But Gentle

Aqua jogging offers a great workout that’s also gentle on your body. If you’re looking to reap the benefits of regular exercise but can’t join in because of injury or chronic conditions, aqua jogging is the ideal choice for low-impact aerobic exercise.

All runners, beginner and elite alike, can benefit from jogging in the deep water.

Build Proper Technique

Aqua jogging isn’t just for injuries. One of its main benefits is simulating land running techniques. Like when you run on land, aqua running calls for a strong and upright posture.

That’s why deep-water running is a fantastic way to improve your running technique without increasing the pounding on your muscles and joints. In other words, it allows you to focus on refining your technique in a safe, low-impact setting.

What’s more?

Aqua jogging helps improve running form because the resistance of the water makes it harder to swing your arms.

Keep your legs moving and leaning forward (more on aqua jogging form later).

Cross-Training

By simulating land-based runs, intervals, tempo, or fartlek, you’ll reap the same benefits without adding stress to your running muscles and joints. Water running is also a safe and effective alternative to running on land on hot or cold days.

Improved Balance

Running in deep water improves coordination and balance by building strength in your supportive muscles and enhancing your agility skills in the comfort of a warm swimming pool.

The Downsides of Aqua Jogging

There’s no such thing as the perfect exercise. ALL workout routines come with downsides. And aqua jogging is no exception.

The main downside of aqua jogging is that you won’t be able to get your heart as elevated as when running on land.

What’s more?

Thanks to the water resistance, you likely will feel sore when you first begin aqua jogging.

What’s more?

Depending on where you live, you might have trouble finding a proper to practice in. This may make sticking a regular aqua jogging routine tricky.

How to Get Started With Aqua Jogging

Now that you know more about the benefits of aqua jogging for both injured and injury-free runners, it’s time to jump in the pool.

The Gear You Need For Aqua Jogging

Aqua jogging requires little gear.

As a runner, you’ll want an active swimsuit, goggles, and—most importantly—a flotation belt.

The Floating Device

A good running floatation belt should help put you into a forward as if running on land. So, getting a floatation belt is key if you’re trying to focus on your form.

Some pools may have this equipment, usually near the kickboards and pull buoys. Just whatever you choose, pick a comfortable belt that does cause any rubbing or blisters on your body like some of the belts at the pool.

I’d recommend all aqua jogging beginners to use a belt as it helps keep you torose above the water—otherwise, you’ll be spending too much energy trying to stay afloat, which is not ideal.

Once your technique improves, you can run in deep water without help.

As a rule, make sure the pool end in which you train is deep enough so your feet won’t reach the bottom when you run. In addition, having the right posture is crucial to effective aqua jogging. You’ll want to stay completely upright—with your feet directly under your shoulders.

To warm up, start treading water on the spot for 5 to 10 minutes, driving your arms and legs in a running motion, and using good form

Aquatic Shoes

One additional gear to consider is a pair of aquatic shoes. These may allow you to achieve better cardiovascular intensity when compared to skimping and running barefoot in deep water.

Most aquatic shoes are designed with purposefully placed fins and vents that make it easy to increase your heart rate and keep there, which might be one of the most frustrating aspects of deep aqua jogging.

Some of these shoes are also designed with detachable cushioned insole for better comfort and arch support for stability. The shoes also feature drainage ports for fast drying.

What’s more?

A pair of aquatic shoes will help you against slips and falls. As you might already know, the smooth pool floor of shallow water makes the stage for the ideal slip-n-slide surface to glide over.

Start Slow

Take it slow if this is your first time trying aqua jogging or you haven’t been in the water for a while.

I’d recommend spending a few days getting used to the feeling of water and swimming with gentle strokes and kicks until you feel comfortable. I’m not implying that you should become a pro swimmer before you start aqua jogging, but some familiarity with the water should help

Aqua Jogging Form

Using proper form is key to getting the most from every workout. As a rule, try to mimic your natural running style.

Here are a few hints:

  • Bring your knees toward your chest and go through your full range of motion the same way you’d on land but in a more exaggerated manner.
  • While keeping your fists closed, pump your arms vigorously.
  • Keep your body straight and avoid leaning forward too much, which is somewhat different than your typical running posture.
  • Perform higher knee lifts and a more compact back kick than running on land.
  • Find a focal point at eye level ahead of you to keep your head level. Avoid wobbling your shoulder.
  • Strive to establish an efficient, smooth-running form without any excessive movement.
  • Keep your posture close to perpendicular to the surface of the pool. Imagine you have a cord through your center, pulling you up.
  • Just as you’d when pounding the pavement, run tall with your body straight and pay attention to upper body rotation. Imagine yourself running around an athletic track or along a beautiful trail. Don’t let your hands move past your aqua running belt and come up to roughly chest height.
  • Keep your core engaged and shoulders locked in place, pointing down the pool.Don’t cheat. Avoid paddling with your hands. Keep driving your arms back and forth rather than across your body.
  • Keep your fists loosely closed, and let your legs carry you forward.
  • Avoid holding on to the side of the pool when recovering. Instead, keep your legs moving as if you’re treading water, and breathe deep.

Aqua Jogging Without A Belt

Planning to try aqua jogging without a flotation belt? Then know it can be done. But it’s going to be harder and more energy-consuming than using a belt since you have to work hard to stay upright.

Using a flotation device helps make aqua jogging easier and can shift your center of buoyancy, forcing you to change your running position. But, with no belt, your lungs become the center of your buoyancy, forcing you to engage your core muscles to stay upright. But, of course, this also works at your core.

The thing is. A flotation belt helps with form, and when you’re using it, you’ll get to focus on moving fast, increasing your heart rate, and getting a good session. On the other hand, having no belt will make the workout much more challenging as you’ll work harder to keep your head out of the water.

To keep your head above water while aqua jogging with no belt, do the following:

  • Move your legs back at a wider angle than when running on the road
  • Perform fast leg turning
  • Push down your feet at the bottom of the stride
  • Keep taking deep breaths
  • Engage your core

Like swimming for the first time, with little practice, you’ll get much better and get a good workout without the belt. After that, it’s just a matter of practice and patience.

Warming Up For Aqua Jogging

Warm up for your workout by doing a few minutes of easy pool running, just like you’d do easy running on dry land. Your warm-up doesn’t have to be complicated. Keep your heart rate at around 60 to 70 percent of your max.

A Beginner Aqua Jogging Workout To try

Aqua running workouts can recreate and mimic the time-based interval format of the typical running program.

Here’s a beginner aqua running routine.

10-minute dynamic warm-up, followed by:

Three minutes of medium tempo effort—80 percent of max power.

  • One minute of running hard at your maximum speed.
  • 2-minute rest.
  • Repeat four times.
  • 5-minute cooldown.

The Pyramid Aqua Jogging Workout

10-minute easy warm-up, followed by:

  • One Minute hard – 30 seconds easy
  • Two Minutes hard – 30 seconds easy
  • Three Minutes hard – 30 seconds easy
  • Four Minutes hard – 30 seconds easy
  • Four Minutes hard – 30 seconds easy
  • Three Minutes hard – 30 seconds easy
  •  Two Minutes hard – 30 seconds easy
  • One Minute hard – 30 seconds easy
  • 10 minutes easy cool down.

The Aqua Jogging Fartlek Workout

10 minutes easy warm-up, followed by:

  • One minute sprint at your maximum heart rate. This is an all-out effort.
  • One minute medium jog at around 80 to 90 percent max. This should feel like a tempo effort.
  • 30-second recovery jog.
  • 30-second medium effort.
  • One minute all-out effort
  •  One-minute recovery jog
  • Repeat the tempo, sprint, and recovery efforts at random intervals for at least 15 to 20 minutes.
  • 10-minute easy cool down.

Aqua Jogging For Runners – The Conclusion

I won’t lie to you and pretend that aqua jogging is nothing but a walk in the park.

It isn’t.

Running in deep water is numbingly boring and requires much more physical and mental effort than running on dry land.

There’s no scenery to enjoy while doing this.

Plus, you’re moving forward really, really slow.

But, as you can see in today’s post, it’s worth the effort.

The benefits of aqua jogging are too good to pass on.

Please feel free to leave your comments and questions in the section below.

In the meantime, thank you for dropping by.

How to Run a Faster Mile

How To Run A Sub 1.30 Half Marathon

Looking to run a faster mile? Then you have come to the right place.

Whether you’re a beginner runner or looking to run a faster 5K, improving your mile speed is a goal worth pursuing. In fact, for many runners, running a faster mile is a major goal. With some simple tweaks to your training plan, you’ll be set up to have your fastest mile yet.

In today’s post, I’ll share a few strategies to help you run a faster mile (almost overnight).

More specifically, I’ll cover the following:

  • What is the mile?
  • Why the mile Matters
  • How Long Should It Take To Run one Mile?
  • The Fastest Mile Ever Run
  • How To Run a Faster Mile
  • Interval Training For The mile
  • How to Know Your mile Pace
  • One-Mile Training Plan
  • And so much more

Sounds great?

Let’s lace up and dig in.

What is the Mile Anyway?

Before you start training for your fastest mile, it’ll be helpful to understand how long a mile is.

The word “mile” is derived from the Latin term “mille passes,” which means one thousand paces. This is because one mile was originally defined as one thousand Roman strides, each stride being two paces.

If you live in the U.S., where you always use miles when measuring distances, you might already know and understand how far a mile is.

But if you’re using the metric system, know that a mile is 1609.34 meters. So you’ll need to complete four loops (and a few steps) on a standard track to complete one mile.

For perspective, to cover the distance of a mile, you’ll need to;

  • Walk at a leisurely pace for 20 minutes
  • Cover 17 and a half football fields
  • Walk 20 New York city street blocks

Why the Mile Matters

A mile may sound short compared to classic race distances, but it’s a distance not to scoff at. Running a fast mile requires a lot of endurance, strength, physical fitness, and mental toughness.

What’s more?

Devoting time and effort to running a faster mile will help you build endurance and a solid base for your next training phase.

How Long Should It Take To Run 1 Mile?

I wish I had the exact answer, but it varies from runner to runner.

Overall, the time it takes to run a mile hinges on many variables, such as your current fitness level, Age, weight, height, gender, and running experience.

A beginner can likely complete a mile run in roughly 12 to 15 minutes. They can achieve this by running relatively slowly or following the run-walk method, during which the runner alternates between walking and jogging.

If you’re a beginner with no running experience, I will urge you to start with this method to ensure that you don’t push yourself too hard as you take your first few steps on your running journey. The average runner can cover a mile in 8 to 12 minutes. This pace is relatively fast but drastically slower than a 6-minute mile runner.

A good runner should be able to run a mile in less than 6 minutes. This pace is quite fast, but remember that Eliud Kipchoge completed the berlin marathon at 2:01:09. That’s an impressive 4:37 per mile. Here’s your guide to average mile times. And here’s how long it takes to walk a mile.

The Fastest Mile Ever Run

The fastest mile every run to date is a sonic 3:43.13 held by Hicham El Guerroum from  Morocco since July 1999. This standing world record for the imperial mile was achieved at the Stadio Olimpico in Rome during the world championship games.

As for women, the Ethiopian Sifan Hassan is the current female world record holder for the fastest mile of 4:12;33.

Fun fact – The mile has been the only non-metric distance recognized by the IAAF since 1976.

How To Run a Faster Mile

Here are the tips you need to improve your mile time as fast as possible

Start With A Baseline

Have no idea what your actual mile time is? Then perform a timed trial run. This should help you set a benchmark to measure your progress. It’s virtually impossible to reach a destination if you don’t know where you are and where you’re going.

Where? Of course, a standard track.

One lap on a standard track is precisely 400 meters long. This means that four laps roughly equal one mile.

Remember that some tracks may be shorter (or longer), so do your math first. If you’re unsure about the length of the track, just ask.

Following a 10-minute warm-up, run a mile at 9 out of 10 regarding exertion rate, then see where your current ability lies. I’d recommend performing this test every 8 to 12 weeks, depending on your training goals and personal preferences.

Interval Training For A Faster Mile

One of the best ways to improve your speed—and running confidence—is to do high-intensity interval training. Adding speed intervals to your training plan can help to improve your one-mile pace and overall conditioning.

How long and fast you go on each interval will depend on your fitness level, mile goals, and injury history.

The How? Simple.

Following a 10- to 15-minute warm-up, alternate between running fast for a given distance and then easy jogging or walking for the same distance to recover. I recommend starting with four to five repeats, then working to eight reps over a few months.

For example, you might run a few 200-meter sprints on a track – half a lap—or 400-meter sprints -full lap—with a short recovery between each effort. The session is pretty straightforward.

Performing 200-meter sprints? Then start with six reps and work it up to 8-10.

Performing 400-meters? Then start with fewer reps—let’s three to four—then try working your way to five or six. You can perform these reps on a track or any well-measured stretch of road. You can also do these sessions on the treadmill.

You should include at least one day per week to speedwork. Consider including two days per week if you’re super competitive—but don’t rush it out. Take your time.

Word of caution. If you’re a beginner, I’d advise you not to perform any speed work runs until you have a few months of steady-state training.

Find Your Target Lap Time

The second step is to define your goal time for running the mile.

If you have no idea, then the starting point test should help. Following a 10-minute warm-up, run a mile at full effort and see where your current speed lies.

Next, hit the track.

Remember that a lap around a standard track 400-meter so four laps (plus nine meters at the end) will get you a mile.

Next, divide your goal mile time by 4 to determine your target lap time.

For example, if you’re shooting for a 7-minute mile, you’ll have to run the equivalent of four laps at a pace of 1:45 minutes per lap. This is a pace of 4;20 minutes per kilometer.

A good starting pointing it completing a series of 8 to 10 reps of 200-meter at this goal pace of 1:45 minutes per 400-meter, then taking a 30-second recovery in between each repetition.

Additional resource – How to run at night

Build Endurance

Speed is just one piece of the puzzle. You’ll also need to improve your ability to run longer distances than the mile.

You might already run a few times longer than a mile, but you’ll want to add one run that’s drastically longer.

To build your running distance, start by slowly increasing your weekly mileage. Start with two to three miles, then add one mile a week until you cover six to eight-mile a session.

For example, if your longest run is 4 miles and your total weekly mileage is 12 mine, add roughly one mile per week until your longest run is over 8 miles.

This can be done by adding a mile to your longest run or increasing your total weekly load by up to 10 percent each week.

Planning to train for a half marathon or full marathon? Then keep building distance on that long training day. Completing one long run per week—as well as other runs on schedule—will improve your endurance and stamina, which will result in faster times.

run a faster mile

Improve your Leg Strength for a Faster Mile

Speed, endurance, what else?

Of course, strength.

Although running (more and faster) is the best way to improve your performance, what you do on your non-running days can drastically impact your mile time.

Strength training is key for optimal running performance. Your calves, hamstrings, quadriceps, glutes, and core all play an important role.

Stronger muscles set you up for healthy form and efficient performance, which allows you to run faster at a faster pace with less effort.

Lifting weights can also increase your stride length, which is key for faster running.

Some of the best exercises to improve your running speed include:

  • Squats
  • Squat-thrusters
  • Lunges
  • Burpees
  • One-legged squats
  • Calf raises

As a rule, shoot for 10 to 15 reps of each exercise. In addition, aim for two to three circuits.

Remember that you don’t need to become an Olympic weightlifter to see gains in speed. At a minimum, you’ll need two 30- to 45-minute sessions per week to see great results.

Run Hills To Improve Mile Speed

Looking for more?

One thing you can do to mix speedwork and strength training is to do hill reps. This is, in fact, one of the most effective ways to fire up your glutes and increase your leg strength.

Uphill running can also enhance your running efficiency and improve your lactate threshold—all of which help improve your mile speed.

Hills are a great addition to a mile training plan because they feel challenging, but put less stress on your body than running on a flat surface.

Hill training also requires more muscular engagement and calorie burn, making them harder sessions before speed is considered.

Hills are an ideal way to improve leg strength.

First, locate a hill that measures around 300 feet with a moderate gradient. Make sure the hill is steep enough that running up it feels like an 8-9 out of ten in terms of effort. Next, complete six to eight reps, with a jog back for recovery.

Run as fast as possible for 30 seconds, then walk down to recover. Once you’re done, finish your session with a 10-minute cool-down jog on a flat surface.

Keep your focus on good technique, and don’t try to force your way to the top. For more challenges, go for a steeper hill to work on power.

Start with five to six reps, and work to at least 10.

Stuck on the treadmill? Shoot for a 4 to 6 percent incline.

Improve Your Form

Running a faster mile isn’t just about running then more running. Technique also matters—and it matters a lot.

Proper form helps you move more efficiently, which increases not only your speed but also your endurance. You should aim to improve your form before speed, especially if you’re a beginner runner.

There are many things you can do to improve your running form.

  • Try to run as tall as possible, back straight, core engaged, and shoulders relaxed while striking the ground on your midfoot.
  • Keep your head up to keep good posture and balance. Avoid hunching over or tilting your neck down.
  • Bent your arms around a 90-degree angle with a little elbow bend. Make sure you have a nice comfortable arm swing.
  • Activate your core and use quick and short strides. Avoid overstriding, as taking giant leaps can only slow you down and put more pressure on your muscles and joints.

What’s more?

You can also perform dynamic warm-up drills focusing on different aspects of good running technique. This helps make sure that your movement is optimized during your workout. The efficiency of movement is key and all that.

To put this into practice, perform drills that accentuate various aspects of proper form. Do them as a part of your warm-up. Some of these drills include:

  • Butt kicks
  • Soldier walk
  • Fast feet drill
  • Backward running
  • Carioca

Improve Your Cadence

Also known as stride rate, running cadence is the rate at which your feet hit the ground while running.

Instead of trying to lengthen your stride to cover more ground when trying to pick u the pace, increase your cadence and focus on taking short and quick steps as you run faster. This increased cadence may also help prevent many common overuse injuries, research shows.

Most running experts preach a cadence of 170-180 strides per minute. But keep in mind that the research suggests that cadence is highly personalized.

Here’s how to determine your cadence and how to improve it.

First, know your current stride over.

On your next run, count the number of steps you take in one minute. Try counting just one foot and then double it to get your total cadence. Some running watches also can estimate cadence.

Next, if your current stride is too low, gradually improve it by adding 3 to 5 steps every few runs. The rest is just details. Just remember not to obsess over cadence when you’re a beginner runner. Instead, run in a comfortable way, letting your body find its natural rhythm.

Lose Extra Weight

Looking for extra motivation to lose weight? Then this should get you.

Weight is a compound measurement that depends on many variables such as diet, access to food, hormone, sleep, lifestyle, socioeconomic factors, etc. But, overall, expect to improve your speed by losing any excess weight you might be carrying.

The larger your body, the more energy you burn off since running is a weight-bearing exercise. This means that your weight influences the force and intensity of the activity.

Of course, don’t take my word for it.  Research has shown that runners can get 2 seconds per mile faster for every excess pound they lose. This means a 16-pound weight loss could shave 30 seconds off your mile price time. That’s a lot.

And it’s not just one research. This 1978 experiment looked into how a 12-minute run performance was impacted when adding 5 percent, 10 percent, and 15 percent extra weight compared to the subject’s normal body weight.

The researchers concluded that the running pace was slowed by roughly 1.4 seconds per mile for each extra pound added.

Another research looked at the same thing but used the reverse approach. Instead of adding weight, the researchers lightened runners by 5 to 10 percent of their normal body weight via ropes and pulleys while they ran on a treadmill.

In the end, it was reported that they were about 2.4 seconds faster per mile for every “lost pound.”

At a glance, this may not seem like much, but a 16-pound loss would equate to a roughly 20 to 30 seconds faster mile, with all equal.

Remember that these studies are conducted in a lab setting, so it’s quite different from real-world conditions.

What’s more?

And if you try to lose weight, you might also lose some muscle with the fat, which is not optimal. You might also be fueling while training for a hard race, which compromises training and can limit overall performance.

Recover Well

You can train hard seven days a week, but your efforts will be in vain without proper recovery. Though getting outside your comfort zone is key when working toward running a faster mile, your recovery time is just as crucial in your result.

For this reason, feel free to push yourself during training, but don’t forget to go all out when you recover. It’s a fine balance between stress and recovery. Don’t overtrain, nor should you undertrain. Find the sweet spot.

As a rule, you should schedule at least one full weekly rest day.

  • Avoid training hard two days in a row, such as an interval training or hill reps workout.
  • Get adequate sleep – shooting for 7 to 9 hours per night.
  • Balanced diet – your nutrition plan should include all three macronutrients and be composed of nutrient-dense foods.
  • Stretch often. Try these yoga poses.
  • Foam roll
  • Massage
  • Acupressure or acupressure mats
  • Recovery doesn’t mean a lazy day. Instead, feel free to perform cross-training activities like biking, walking, or swimming.

For the full guide to recovery for runners, check my post here.

Be Consistent

I hate to sound too cliché, but consistency is key – and that’s the case whether you’re trying to make a 7-figure income or run a sub-7-minute mile.

As a rule of thumb, I urge you to follow a training plan (one you find online or one designed by a coach) and include at least four to five days of running each week to improve your mile time.

Running on a whim isn’t the best way to improve performance. Instead, you must log the miles on a consistent base so the body can adapt to the high-impact stresses of running faster. And that doesn’t happen overnight.

Let’s see how to put this into practice.

One-Mile Training Plan

Just because it’s just a “mile,” it doesn’t mean you shouldn’t follow a running program to help you improve your time.

Depending on your running experience and starting point, training for the mile might sound like a little or a lot. But, regardless of your current goals, there’s always room for improvement when it comes to the mile.

A 1-mile training plan is useful for any serious runner craving more structure as they strive to improve their mile time and performance.

The good news is that there are many one-mile training plans available online. But before you go and pick one, I recommend you review any schedule with a running coach or someone with more running experience than you.

Don’t have access to a running coach? Then feel free to email me at [email protected] or, at the very least, ensure your chosen training plan is well-rounded.  An ideal running schedule for the mile should include short-distance sessions, long-distance sessions, cross-training workouts, and rest days—just like any other training plan would.

The main variable is the distance. For example, a long-distance marathon session might be 20 miles, but you won’t need to run that far to improve your mile time.

The exact training plan will depend on your fitness level, pace, running and experience, and most importantly, your goal pace.

What’s more?

Remember that you don’t need to train on specific days, but you might want to avoid running twice a row as a beginner. The fitter you get, the more load you can handle over time.

On your non-running days, feel free to cross-train or rest so your body can recover and adapt to training.

The below one-mile training plan is ideal for beginners, those returning from break, or runners looking to keep base training fitness during the off-season.

 Week One 

  • Monday – Three miles easy
  • Tuesday – Cross train or rest
  • Wednesday –Speedwork: 10 X 200-meter. 30 seconds rest.
  • Thursday – Cross train or rest
  • Friday – three miles moderate
  • Saturday – 45 to 60 minutes long run at an easy pace
  • Sunday – Cross train or rest

Week Two

  • Monday – four miles easy
  • Tuesday – Cross train or rest
  • Wednesday – Speedwork: 8 X 400-meter. One minute rest.
  • Thursday – Cross train or rest
  • Friday – Four miles moderate
  • Saturday – 60 minutes long run at an easy pace
  • Sunday – Cross train or rest

Week Three 

  • Monday – Three miles easy
  • Tuesday – Cross train or rest
  • Wednesday –Speedwork: 5 X 800-meter. One minute rest
  • Thursday– Cross train or rest
  • Friday –Three miles easy
  • Saturday – 80 minutes long run at an easy pace
  • Sunday – Cross train or rest

Week Four 

  • Monday – Four miles easy
  • Tuesday – Cross train or rest
  • Wednesday – Speedwork: 10 X 400-meter at target pace. 30-second rest
  • Thursday – Cross train or rest
  • Friday –Three miles moderate
  • Saturday – 80 minutes long run
  • Sunday – Rest

Week Five

Monday – Test Run or Race!

Race Day Advice For Running Your Fastest Mile

Feel like you’re ready to test your mettle? Then let’s see how fast you can run that mile.

Warm-up

I hate to sound like a broken record, but before you try to run your fastest mile, you should get your muscle set and ready first. A proper warm-up is key for injury prevention and sets the stage for optimal performance.

So what kind of warm-up I’d recommend?

Simple. Start by jogging for 10 to 15 minutes, then perform a series of dynamic stretches such as high knees, butt kicks, inchworms, and toy soldiers. Next, perform fast but short strides to get your body firing on all cylinders.

Get Your Mind Ready

The mile is no distance to scoff at, so you better approach it with the right mindset and respect. Although it’s only four laps around the track, it will hurt.

Mentally go through the four laps in your head. Know exactly what times you want at each lap, then picture yourself running the perfect mile. See yourself running strong, tall, and with good technique. Leave nothing for chance.

Stick to Your Target Lap Time

Have a mile goal? Great. Now break down your target mile time by 4 to determine your target lap time.

If you aim to run a 7-minute mile, you have to run the equivalent of four laps of a standard track at exactly 90 seconds per lap or a 3.45 minute per kilometer.

Have A Stopwatch

A useful tool to have during your mile training is a stopwatch.

When running at a measured distance, a stopwatch will help you accurately measure your lap times and ensure you’re running at the right pace in line with your mile training plan.

The First Lap

Run the first lap as fast as possible, even if it means kicking off the one-mile run faster than needed to get your goal time.

Mentally you’re likely to slow down as you run more laps, so make up for lost time during the first lap. But be careful not to spend all your energy.

The Second Lap

Run this lap at exactly your target time. For example, in the 7-minute mile I mentioned before, lap two is when you should be running exactly one minute 45 seconds, so your time by the halfway point should be around 3:25 to 3:29.

The Third Lap

Lap 3 is the critical part of the mile distance, where you must push yourself the hardest to ensure you don’t slow down. Focus to keep yourself on pace when every cell in your body is begging you to slow down.

To psych up, try devoting that third lap to someone important in your life and promise not to disappoint them.

The third lap is the toughest. This is, in fact, the lap that will determine whether you achieve your goal time or not. You’re more likely to slow down for your initial pace.

The Fourth Lap

The last lap is where you lay it all out. You’re at the final stretch of the mile. The hardest part is already over, and it’s time to run as fast as possible.

Chances you’ve already slowed down on your previous laps, so you need to dig deep and push yourself the hardest. Know that the end is nigh.

And during the last curve, perform the “kick” by sprinting the last 200 meters as fast as possible.

How To Run a Faster Mile –  The Conclusion

There you have it! Trying to run a faster mile shouldn’t be that complicated. All you need is the right mindset, strategies, and a bit of luck. Don’t forget to have enough rest and recovery, so your body will work effectively.

Please feel free to leave your comments and questions in the section below.

In the meantime, thank you for dropping by.

Keep training strong.

David D.

How to Prevent Running Injury

prevent running injuries

Looking for the best advice on what to do to prevent running injury? Then you’ve come to the right place.

Here’s the truth. Overuse injuries can throw a wrench in your running plans like nothing else. These are usually joint, ligament, and muscle issues that plague the lower extremities.

And no one is immune—both beginner and elite runners are prone to injury. This makes them quite common, especially among those not taking steps to prevent them.

In fact, research shows that over half of all runners get injured, with many of those occurring in the knee, shins, or Achilles tendon.

But there are a few precautions you can take to help stack the odds in your favor. That’s where today’s post comes in handy.

How to Prevent Running Injury

Whether you’re a beginner runner training for your 1st 5K or a pro runner aiming for a sub-3 hour marathon,  here are 9 nine things you can do to help reduce your risks of getting injured while running.

Know Your Limits

This is, by far, the cardinal rule for avoiding all kinds of sports injuries.

This is what’s commonly referred to as doing too much, too soon, too fast

Your body needs time to recover and adapt to increases in speed or mileage.

Push your body too much, and you will be flirting with disaster.

Action Steps

Take plenty of rest.

Make sure to add recovery days and weeks to your training plan by taking a complete break from training physically and mentally.

Take one day off a week, and space out those hard runs—think hill repeats and sprints—with some easier recovery runs.

During the off-time, cross-train with low-impact activities, such as swimming, low-intensity biking, or, my favorite, Yoga.

Especially Yin or Gentle yoga will help you decompress the stress inside your body, especially within the fascia tissue.

What’s more?

Use the 10 percent rule.

Don’t increase your running mileage by more than 10 percent from one week to the next.

Listen To Your Body

Overuse running injuries don’t happen overnight (falling flat on your face is the exception here, but we already discussed that).

Most running injuries come with early warning signs—discomfort, soreness, aches, and persistent pain—but it’s up to you to listen to them and take the right measures.

Action Steps

Have an early warning system for pain, and do your best to get to the root cause of what’s causing it.

At the first sign of onset, whether it’s a pain that gets worse during a run or forces you to change your running gait, take some days off and reevaluate your approach.

Don’t get me wrong, aches and running go hand in hand, but if the pain persists and/or it’s taking a toll on your body, you need to start paying attention.

In a nutshell, if your body hurts, do not run.

That’s it.

Strength Train

Regular strength training helps improve performance and protects against injury by improving your structural fitness.

This helps your muscles, tendons, ligaments, and bones to better endure the high-impact nature of running.

For instance, strengthening the hip muscles—mainly the adductors, abductors, and gluteus maximum—can boost leg stability to the ankles and prevent knee pain and injuries.

Action Steps

Strengthen your lower body muscles, especially your quads, glutes, and hip muscles.

Here are the runners-oriented strength routines you need:

Stretch Your Body

Just like strength training, stretching is another off-road thing you can do to protect your body against common running injuries.

Current research finds no link between stretching and injury prevention, but I will bet my money on this, and I strongly urge you to boost your range of motion.

When you improve the range of motion of your running muscles, your body will move more efficiently and have less risk of injury.

Runners tend to be tights in the hamstrings, calves, hip flexors, and glutes, so you are more likely to get injured in and around those areas.

Tight hamstrings can lead to knee pain and other trouble.

Tight calves are also bad since they have been linked to the plantar fascia and Achilles tendon injuries in research.

Action Steps

Lucky for you, I have written a lot about the subject, and here are three flexibility routines that can help stretch your running muscles and help you prevent injury in the process.

R.I.C.E

As previously stated, when you got aching or painful joints or muscles, look no further than R.I.C.E for immediate treatment.

You don’t have an E.M.T. course certificate to do these simple steps.

For example, if your knee hurts, take a few days off from running (Rest).

Ice the painful area for 10 to 15 minutes, three to four times a day.

Plus, elevate the injured knee to limit swelling.

For more, you can also use compression, an A.C.E. bandage or compression socks, which can help reduce inflammation and provide instant pain relief. Remember that how fast you treat running injury is key to your comeback. There’s no way around that.

how to prevent running injuries

Run on Proper Surfaces

Running on hard and/or uneven surfaces, like concrete or asphalt, puts undue stress on ligaments and joints.

And as a runner, the last thing you want is more impact.

Run often on hard surfaces, and you’ll be risking medial tibia stress syndrome, stress fractures, and other overuse injuries are very high.

Action Steps

Do the bulk of your running on softer surfaces, be it a path through the park, a dirt trail, a bike path, a grass road, and other similarly yielding surfaces.

You can also head to the local track for a more firm and flat surface.

Proper Running Shoes

I can’t emphasize this one enough.

Sure, running does not require a lot of equipment, but shoes are still a MUST.

So make sure to have the right pair on.

Action Steps

Head to a specialty-running store and have your gait and foot type analyzed by expert staff so they can help you pick the perfect pair.

It can be tricky for those with big feet or a big proportion of the front part.

Make sure to replace your running shoes at least every six months—that’s about 400 to 500 miles of running.

This, of course, depends on your weight, size, foot strike, shoe type, and weekly mileage.

The earliest warning of “wear and tear” shoes can take place on the heels part and big toe.

If you feel something not nice or sometimes you spot calluses in your heels, change.

Additional resource – How to treat black toenails from running

Proper Running Form

Poor form can limit your performance and lead to undue pain and injury, leading to shin splints, back pain, limited performance, and so on.

On the other hand, proper form will also help you run more efficiently, so you will run farther and faster with less fatigue.

Action Steps

Here are a few pointers to help you develop and keep good form:

  • Run in a relaxed manner with the least tension possible. As you run, do your best to keep your entire body relaxed, especially your neck, shoulder, arms, and hands. Avoid clenching your fists, as this can lead to tightness in the arms, shoulders, and neck.
  • Keep looking ahead. You should be gazing at the ground about 15 to 20 feet ahead of you. Never stare at your feet.
  • Land on your midfoot. I used to be a heel striker, which limited me in many ways. Nonetheless, things changed for the best when I started consciously working on landing on the middle of my foot, then rolling through to the front of the toes.
  • Point your feet straight head. Running with your feet pointed in or out could increase the risks of injuries, and it’s inefficient. So make sure to point your toes in the direction you want to go

Coping With A Running Injury

Already injured? Here’s how to make the most out of your recovery process.

Become a Student

Educating yourself about your injury and healing process is the ideal place to start your recovery journey.

Most running injuries are simple.

There are no big mysteries behind them; there’s always a reason why they happen.

By learning more about the symptoms, treatment, causes, and prevention of your condition, you’ll gain greater confidence and control over your current predicament, which helps ease any anxiety you’re going through.

Here are some of the questions you need to ask your healthcare professional.

  • What’s the full diagnosis? What type of injury do I have?
  • What made me injured in the first place?
  • How long will recovery typically take?
  • What are the red flags that the injury is getting worse?
  • What are my treatment options?
  • What’s the goal of treatments?
  • What should I expect during the recovery period?
  • What alternative exercises can I safely do during the rehab period?
  • What can I do to prevent or fight off the inevitable weakness, stiffness, and lack of coordination that increases the risks of relapse?

Set Realistic Goals

Just because an injury sidelines you doesn’t mean you should stop setting goals.

The truth is proper goal-setting post-injury can help instill motivation and foster diligence as you start your recovery journey.

What’s more?

Setting goals grants you an active role in the recovery process, helping you increase self-confidence.

This also cuts your fear and anxiety by helping you focus on what can be done.

Once you have discussed the ins and outs of your injury with your doctor, set SMART goals, an acronym for Specific, Measurable, Achievable, Result-focused, and Time-bound.

Here’s how to set SMART goals:

  • Specific. Focus on a specific area with a clear map of how and why you’ll improve it.
  • Be able to define clear and quantifiable outcomes, monitor progress, and set benchmarks.
  • Make sure your running goal is possible and that you believe in yourself that you can do it. Go for goals that stretch you slightly but do not hinder your healing process.
  • Result focused. Use your recovery targets to measure outcomes, not actions.
  • Time-based. Set a date for when you want to achieve your goal with a progressive and practical sense of urgency.

Maintain Your Fitness

Getting injured doesn’t inherently equal sitting on the couch the whole day and doing nothing.

Sure, there may be a few days of true rest when recovering from a serious injury, but be sure to consult with your doctor for a list of cross-training options you can do.

I know it’s hard to keep working out when you’re injured, but stopping all physical training may do you more harm than good.

Inactivity may slow down your recovery and drastically lower your feel-good hormones, such as serotonin, endorphins, and dopamine, and drastically—setting you up for more trouble down the road.

Low-impact exercises such as swimming, yoga, deep water running, walking, or moderate strength training can substitute for running and help maintain cardiovascular power and sanity.

Just remember to take it slow and get your doctor, therapist, or trainer’s green light before you establish a good alternative workout program.

Stay Positive

For a quick recovery, you need to heed your doctor’s instructions.

Show up for your treatments, rest, and keep track of your healing process.

But that’s not the whole story.

You also need to monitor your attitude—your emotional states and inner talk regarding your injury and the recovery process.

Work hard to keep a positive attitude to get the most out of your recovery process.

Stay focused on what you need (and can) do instead of what you’re missing out on.

I know it’s easier said than done, but keeping a positive attitude is key for a faster recovery.

What’s more?

Surround yourself with supportive people and encouraging items while repeating positive affirmations.

And keep in mind that things will eventually get better.

It’s just a question of time.

Here are more tips on how to increase your confidence.

How to Prevent Overuse Running Injuries – The Conclusion

The things I shared with you today should be enough to help you prevent running injuries. The key is to implement as many as possible. The rest is just details.

Now it’s up to you to take action and start training pain- and injury-free.

What’s not to like?

Do you have any favorite running tips?

9 Overuse Running Injuries: How To Treat & Prevent

running injuries

Running is awesome. It burns many calories, strengthens the joints, and keeps the crazy away, but there’s a downside:  overuse injuries—all of which can be painful, stubborn, and depressing.

Train long enough, and you’ll, sooner or later, pick up one or more injuries.

Don’t take my word for it.

Polls show that roughly 80 percent of runners get injured every year. These are not great odds.

Since we mainly use the lower limbs when logging the miles, most injuries afflict the knees, feet, calves, shin, and ankles. Other weight-bearing limbs, such as the thighs, hips, and back, are also prone to injury.

Here is the good news.

Today, dear reader, I will delve deep into some of the most common running injuries and the best ways to treat and prevent them for good.

But first things first, let’s explain what running injuries are all about.

Note: Before we proceed, I’d like for the record to explicitly state that it’s beyond the scope of this blog post to provide detailed information about sports injuries without knowing all the symptoms. To err on the side of caution, consult a certified sports physician to determine the appropriate treatment options before applying any of the advice shared below.

Overuse Running Injuries Explained

So, what’s a running injury?

“running injury” refers to the injuries that occur during running. You injure yourself whenever you put a particular body part under excessive stress that it can no longer function properly.

No one runner is immune to overuse injury. But most conditions result from poor training practices, lack of conditioning, wrong gear, or biomechanical limitations.

A running injury can force you to reduce your training volume or stop training altogether in cases of severe pain. Injuries can also interfere with how you walk, work, and do everything else.

In other words, the last thing you’d want to run into when logging the miles is a running injury. They suck!

The Most Common Overuse Running injuries

Chronic injuries are, by far, the most common type of injuries, outnumbering acute injuries among runners of every background and training level.

But since they tend to be lower in pain than acute injuries, overuse injuries don’t attract immediate medical attention.

Without further ado, here a list of some of the most common running injuries as well as how to treat and prevent them.

Running Injury. 1 – Achilles Tendinitis

Achilles tendonitis is an inflammation of the Achilles tendon, the largest tendon in the body.

The Injured Part

The Achilles tendon is a major tissue that connects the back of the heel to the two major calf muscles: the Gastrocnemius & Soleus muscles. This vital tendon absorbs several times your body weight on each stride.

The Main Cause of Achilles Tendinitis

The primary cause is repetitive stress to the tendon.. The longer and faster you run, the more stress you put on this tendon. This causes micro-tears to the tendon eventually resulting in tendinopathy. This equals pain—and when severe enough, time off training.

The Stats

According to survey, Achilles Tendinitis makes up roughly 10 percent of all running injuries.

The Contributor Factors

  • Increasing weekly training load too fast, especially when it’s more than 10 percent per week.
  • Weakness in the posterior chain muscles—the glutes, hamstrings, and calves.
  • Tight calf muscles, especially the gastrocnemius muscle.
  • Improper running shoes,
  • Being overweight.

Symptoms Of Achilles Tendinitis

The main symptom is a tender pain in the lower calf near the heel or on the back—especially when you run, tip-toe, or step out of bed in the morning. The pain can be severe enough to keep you from running.

Achilles tendinitis may manifest as visible swelling or a knot in the affected area. You might also notice strange noises, like cracking or popping, in the tendon when your foot is flexed or pointed.

How To Treat Achilles Tendinitis

If you have Achilles tendinitis, take as many days off as possible. You cannot run through this injury as it will only get worse, which can take more than a few months to fully heal.

Next, apply ice for 10 to 15 minutes on the injured area twice daily.

To soothe the pain, stretch your calves and wear supportive shoes.  Research also suggests that compression socks for hard runs relieves and prevents Achilles tightness.

You’ll need clinical treatment for severe cases of the condition. Some options include physical therapy methods of electrical stimulation, such as transcutaneous electrical nerve stimulation (TENS), high-voltage galvanic stimulation (H.V.G.S.), and ultrasound.

How to Prevent Achilles Tendinitis

  • Strengthen your posterior muscles. Ideal exercises include eccentric heel drops, calf raises, lunges, squats, deadlifts, and toe walks.
  • Stretch your calves. Lift your toes back toward your shin while keeping your heel on the ground the entire time.
  • Proper form. Work on improving your foot strike and running cadence. Too hard? Run with a Partner or group and ask for
  • Consider wearing orthotics or running in shoes with more support. Steer clear of flip-flops, high heels, or any footwear irritating the Achilles tendon.

Running Injury. 2  –Ankle Sprains

Ankle sprains are an acute, traumatic, injury that plagues the ankle joint. They’re pretty common among runners and athletes who do sports requiring lots of jumping or switching directions.

The Injured Part

There are three grades of ankle sprains. The most common ankle sprain in runners is grade 1 and 2, which consists of a stretched ligament or a partial tear of the anterior talofibular ligament—the ligament in the front and outside of the ankle.

The Main Cause Of Ankle Sprains

Ankle sprains happen when the foot is turning, twisting, or rolling movement. This action stretches the ligament surrounding the ankle beyond its normal range, tearing them in the process.

The Contributor Factors

  • Running on uneven surfaces
  • Missing the curb
  • Tripping over a rock
  • Stepping into a pothole
  • Landing awkwardly upon foot strike.

The Stats

Roughly 25,000 people sprain their ankles daily, according to the American Academy of Orthopedic Surgeons. Runners are at higher risk.

Symptoms of Ankle Sprains

Ankle sprains manifest as tender pain in the ankles—especially when bearing weight on the injured foot.

Other symptoms include bruising, skin discoloration, and a limited range of motion in the ankle area. In severe cases, this ligament may also tear completely.

How To Treat Ankle Sprains

Ice the injured ankle for 15 to 20 minutes three to four times a day. Focus on the affected part first, then circulate over the swollen area. You can also wrap or compress the ankle with an elastic bandage to ease the inflammation and speed recovery.

During the acute period, consider sleeping with the affected foot elevated higher than your chest.

How long to rest depends on the sprain’s severity, so if the injury lingers for more than two weeks, see a physician for a thorough action plan.

In most cases, your physician might recommend taping the ankle, an air case, or an ankle brace to speed up recovery and/or prevent re-injury as you slowly return to your running routine.

As a cardinal rule, start running again once you:

  • can do it pain-free,
  • have a full range of motion in the injured joint, and
  • the strength of the injured limb is equal to that of the healthy side.

How to Prevent Ankle Sprains

  • Strengthen the muscles surrounding your ankle with balance training.
  • Run on proper and smooth surfaces, and avoid technical, trail, and terrains, especially if you have a history of ankle sprains.
  • Improve your running technique, especially your foot strike patterns and leg turnover.

Running Injury. 3 – Runner’s Knee

Often referred to as Patellofemoral Pain Syndrome, a runner’s knee is associated with pain in the knee and around the kneecap. The injury is the most common cause of knee pain from running.

The Injured Part

This overuse injury is an irritation of the cartilage on the underside of the kneecap. This cartilage is located in the patellar tendon and connects to the quads muscle group.

The Exact Cause

Runner’s knee happens when the patella (the kneecap) fails to move smoothly in the femoral groove at the lower end of the thigh bone. This, in turn, irritates the cartilage on the underside of the kneecap.

The Stats

This notorious knee injury is the most common affliction among runners—from all training backgrounds. Research show that about 40 percent of running injuries are knee injuries—and runners’ knee makes up a large percentage.

According to a runnersworld.com poll, about 13 percent of runners reported knee pain in the past year.

Symptoms Of Runners Knee

Patellofemoral Pain Syndrome manifests as stubborn and tender pain around or behind the patella—usually under the bottom edge of the kneecap. The pain gets worse when:

  • Running downhill
  • Descending the stairs
  • After prolonged sitting
  • Squatting

The Contributing Factors

The leading causes of runners’ knees tend to differ from one runner to the next. Some of these include:

  • Weak glute, hip, or quad muscles
  • Faulty biomechanics, especially Overpronation, is excessive inward foot rolling during a foot strike. This can be congenital or acquired.
  • Muscle imbalances
  • Too much downhill running
  • Improper footwear.

How To Treat Runners Knee

Decrease your running volume by half, avoid running on consecutive days, or take a break from the sport altogether.

Next, ice the affected joint for 10 to 15 minutes,  three to four times a day. Aggressive treatment options include using a knee brace and/or knee tape or taking anti-inflammatory medication.

See your physician in case the pain gets worse.  Left untreated, runners’ knees can progress into a more serious ailment that may require surgical intervention, such as fracturing or fissuring the kneecap.

How to Prevent Runner’s Knee

  • Strengthen your knee’s support muscles, mainly the quadriceps, hip flexors, and glutes. This should help keep your knees tracking correctly over the femoral groove.
  • Keep your hamstrings and hip flexors flexible and loose. Try this routine.
  • Shorten your stride length while landing with the knee slightly bent. Doing so may take some impact off your knee joint.
  • Get proper running shoes. Check this post.
  • Stick to flat or uphill terrain, running on softer surfaces whenever possible.

Running Injury. 4 – Stress Fractures

Sure, running is a non-contact sport, but the high-impact nature may “break” your bones in what’s known as a stress fracture.

The Main Cause

Stress fractures are tiny cracks in a bone caused by sub-maximal cumulative stress on the bone. This results from excessive training, forcing the bone to take on greater force than it can handle.

overuse running injuries

The Injured Part(s)

The injury can strike any bone, but in runners, the most commonly afflicted areas include the main weight-bearing bones, such as the metatarsals – especially the fifth metatarsal, your pinky toe, the tibia—the lower leg bone, and sometimes, but not as often, the femur—anywhere in the upper leg, even the pelvis or sacrum.

Stats

Polls show that stress fractures are behind 6 percent of all running injuries.

Symptoms of Stress Of Stress Fractures

A stress fracture starts as pain around the affected bone that worsens the longer you run but subsides at rest. Tenderness and swelling are also common red flags.

Pain ranges from mild to sufficiently debilitating to stop you from hitting the pavement for weeks, even months.

In advanced cases, stress fractures will make standing on your feet uncomfortable and painful.

The Contributing Factors

  • Overtraining, as in doing too much too soon.
  • Certain nutrient deficiencies
  • Running hard and often on hard surfaces
  • Female runners are prone to stress fractures due to inadequate caloric intake, nutritional deficits, and low estrogen levels.

How to Treat Stress Fractures

The first thing to do to give your bones the necessary downtime to recover. You can always use RI.C.E method to speed up recovery and alleviate pain.

In most cases, it might take up to at least six to eight weeks to achieve full recovery—depending, of course, on how severely you were injured.

During the downtime, cross-train. Aqua jogging, yoga, and low-intensity cycling are good options.

You can return to your former running routine once you can jog pain-free with no lingering pain.

But if pain persists, back off. In extreme cases, you might need to run some tests to see if it’s time for medical intervention.

Additional reading – How to Prevent Running Injury

How to Prevent Stress Fractures

  • Wear the right running shoes
  • Strength train regularly. Try this routine
  • Run on soft surfaces like grass and dirt trails and steer clear of harder surfaces such as asphalt and sidewalks.
  • Consume enough nutrients—especially calcium, to keep your bones strong.
  • Doing plenty of non-weight-bearing cross-training exercises like swimming, cycling, or yoga.

Running Injury. 5 – Iliotibial Band Syndrome (ITBS)

Also known as I.T.B.S., Iliotibial band syndrome is an inflammation of the IT band.

The Injured Part

The Iliotibial band is a thick piece of connective tissue stretching from the pelvic bone down your thighs.

The Main Cause

When you run or perform any knee-bending movement, your IT band rubs on the side of the femur to help your knee flex and extend.

Do this for an extended period, and the action can lead to irritation that results in pain and inflammation.

Stats

According to the survey, iliotibial band syndrome makes up roughly 12 percent of all running injuries, making it the fourth most common ailment in the running world.

Symptoms of Iliotibial Band Syndrome

I.T.B.S. manifests as intense pain around the outside of the hip or knee that’s felt down the leg—especially when running downhill or while using the stairs.

At the first stage of the condition, you might feel a sensation of stinging on the outside of the knee—mimicking a knee injury, but still, I.T.B.S. is completely different.

The Contributing Factors

  • Doing too much too soon
  • Weakness in the hip abductor and gluteal—butt—muscles
  • Runners with leg-length discrepancies or those who overpronate
  • Runners with a B.M.I. of 25 or higher who do a weekly run of two hours or more.

How to Treat Iliotibial Band Syndrome

At the first sign of trouble, reduce your mileage by 50 percent for a couple of weeks, and you could prevent serious injury. But, on the other hand, you’ll do nothing but exacerbate injury if you ignore the warning signs and keep running at your typical mileage.

Use the R.I.C.E method as long as there is pain. Then, consider booking a physio appointment or using NSAIDs when the pain is too much to handle—especially if you start experiencing it on the outside of your knee.

Avoid abusing pills just because you’re too lazy to make an appointment.

Stretching and foam rolling may also help you relieve pain.

During the recovery period, you can cross-train by opting for low-impact activities, like swimming, biking, pool running, and yoga, to help keep your fitness base. Then, start again only when you’re ready.

How To Prevent Iliotibial Band Syndrome

  • Add hip abductor strength exercise to your resistance training. These include side leg lifts, lateral side steps, and one-legged squats.
  • Perform a proper warm-up before every run.
  • Shorten your stride and increase your cadence turnover
  • Respect the 10% rule.
  • Use a foam roller to loosen the band and roll out the sides of your hips, which can help break up the tissue knots in the area.

Running Injury. 6 – Plantar Fasciitis

Plantar fasciitis is the inflammation of the plantar fascia.

The Injury Part

The plantar fascia is a thick band of ligaments and tendons that covers the bones along the bottom of the foot. This band of tissue runs from the heel to the toes, joining the heel and forefoot and providing arch support.

The Stats

Plantar Fasciitis is one of the most common culprits of heel pain in runners and amounts to roughly 10 to 15 percent of all running injuries. A poll run by runnersworld.com revealed that up to 10 percent of its readers suffered from this injury this past year

Symptoms of Plantar Fasciitis

The common symptom of plantar fasciitis is a tight, tender sensation at the heel’s base that can range from irritating to excruciating. Most runners describe the pain as stepping heel-first onto a nail or walking on glass.

The Main Factors

  • Weakness and/or dysfunction in the muscles of the foot may force the heel to take in more load than it can handle
  • Standing for extended periods, especially on hard surfaces without supportive footwear.
  • Runners with abnormal feet—those with a high or low arch
  • Overpronation—the excessive inward roll of the foot during a foot strike, and supination—the excessive outward roll
  • Prolonged periods of standing, typically on hard surfaces without supportive footwear.

How to Treat Plantar Fasciitis

Step back from running, especially if the pain is severe, and stretch the fascia tissue at least a couple of times per week.

Preferably, roll your injured foot over a tennis ball or a frozen water bottle for a few minutes, five times a day. A foam roller also helps loosen up the plantar fascia.

Stability shoes and orthotics can also help limit symptoms and hasten recovery, but they’re not a permanent fix, so don’t always rely on them.

Try stretching. This simple stretch can help. Doesn’t have to be with a strap at first.

If the pain persists, see a physician. They might suggest putting on custom-made orthotics or a night splint to speed up recovery.

How to Prevent Plantar Fasciitis

  • Stretch your plantar fascia and calves consistently—especially when running in the morning, as the fascia tends to tighten overnight.
  • Improve your core strength—especially if you have a bad injury history.
  • Strengthen your calves with heel raises, toe raises, and eccentric heel drops.
  • Avoid using high heels or flip-flops, which can irritate this band of tissue and shorten the calf muscles.
  • Run in the right shoes. And stick to the 10% rules.
  • Improve your running form.

Running Injury. 7 – Shin Splints

Also known as medial tibial stress syndrome, shin splints are an inflammation of the tissues around the shinbone.

The Exact cause

This overuse injury is caused by microtrauma to the connective tissues located in the front portion of the lower leg.

The Injured Part

Shin splints are an inflammation of the tendons and/or muscles around the tibia—shinbone.

Stats

Shin splints are common among beginners and those returning to the sport after an extended layoff. Surveys show that it accounts for 15 to 20 percent of all running injuries.

Symptoms Of Shin Splints

Medial tibial stress syndrome manifests as aching, stabbing pain felt along the inside front of the lower leg, roughly halfway down the shin, or all along the bone—especially during the first few miles of a run.

The pain can range from mild to excruciating and can be felt in both the front and the outer portion of the shin. It may start as mild numbness or tingling along the shin, felt only when running. Then, over time, the pain may progress to a stubborn irritation noticeable at rest.

The Contributing Factors

  • Drastic changes in training volume before your body is prepared to handle the new stress, especially sprint training.
  • Running in the wrong and/or excessively worn shoes.
  • Running on hard and/or cambered—slightly arched—terrains
  • Having high arches or flat feet (it’s not your fault, I know).

How To Treat Shin Splints

At the first sign of pain, reduce your volume for at least a couple of weeks before slowly ramping it up as long as you can do it pain-free. Running through pain might eventually lead to a stress fracture, and you don’t want that.

Next, ice the injured shin for 15 to 20 minutes daily and keep it elevated at night to ease swelling.

Regular stretching might also help, as well as taking over-the-counter anti-inflammatory drugs, using Kinesio tape, or running with neoprene sleeves.

During the “relative rest” day, you can swim, bike, pool run, or do yoga if you don’t want to lose fitness. Avoid weight-bearing during your rest days.

Return to running pain-free once you can—even long after you stop applying the RICE method. If the problem persists for longer than a month, see a physician for a thorough examination of the entire shin bone.

How To Prevent Shin Splints

  • Increase training volume gradually and slowly.
  • Do anterior tibialis muscle exercises. These include toe taps and heel walks.
  • Get more calcium and Vitamin D.
  • Strengthen your calves with toe raises, eccentric heel drops, and calf raises.
  • For runners with flat feet, orthotics might help but talk to your doctor before you make any decisions.
  • Strengthen the anterior tibialis muscle on the front of your shin. Good exercises include heel walks and toe taps.
  • Try compression running socks.

Running Injury. 8 – Patellar Tendinitis

Also known as “Jumper’s knee,” patellar tendinitis is an inflammation of the patellar tendon.

The Injured Part

The patellar tendon runs from the kneecap to the top of the tibia. This vital tendon assists leg extension during running and other knee-bending motions.

The Exact Cause

The repeated high-impact nature of running might place too much stress on the patella, resulting in small tears in the tendon, leading to pain and swelling.

Stats

Research show that the condition has a prevalence of 11 percent

Symptoms of Patellar Tendinitis

To be precise, patellar tendonitis pain is felt at the bottom of the kneecap—directly over the patellar tendon. However, the tenderness might take place anywhere along this structure.

The pain is worse when making knee-bending activities, such as kneeling, squatting, sitting, jumping, or ascending stairs.

The Contributing Factors

  • Overtraining
  • Too much hill training
  • Running on uneven or slanted surfaces.
  • Overpronation (and other biomechanical challenges)

How to Treat Patellar Tendinitis

Take a step back from high-impact training to provide your body with enough recovery time.

Step back from your running and/or drastically reduce your weekly mileage- even stop it all at once, giving your body the time it needs to end the acute phase and begin the healing process properly.

Next, ice the affected area for 15 to 20 minutes three to four times per day

Return slowly and gradually to your previous training volume once you’re pain-free.

How To Prevent Patellar Tendinitis

  • Strengthen the muscles surrounding your knees, mainly the quads, hamstring, and calves, to provide more support to the patellar tendon.
  • Increase your mileage by no more than 10 percent from one week to the next, making sure to make a recovery a priority here.
  • Keep your calves and hamstrings loose and flexible.

Running Injury. 9 – Muscle Strains

Muscle strains are common among athletes from all backgrounds and training levels—runners are no exceptions.

Muscle pulls in runners usually affect these muscles:

  • Hamstrings
  • Quadriceps
  • Calves

The most common type that plagues runners is hamstrings strains, the muscles running down the back of the thigh.

Remember that the same advice applies to most other running-induced muscle pains.

The Injured Part

Hamstring strains refer to a slight tear or overextension of one or more of the three muscles in the back of the thigh (the semitendinosus, the semimembranosus, and the biceps femoris), all of which are in charge of bending the knee.

The Contributing Factors

Beginner runners are more prone to muscle strains because their muscles are not used to the high-impact nature of the sport.

If you do any sprinting or a lot of speedwork, then you are more likely to get the condition. Other causes of the condition include skipping a warm-up, and doing too much too soon.

Symptoms of Muscle Strains

Hamstrings strains manifest as tender stiffness and pain along the back of the thigh, especially when trying to stretch the muscle, speeding up or slowing down while running, or sometimes, anytime you perform any knee-bending activity.

How to Treat Muscle Strains

Most hamstring strains can be treated at home. It’s not as bad as a sprain, leading to the ligament’s tearing. If you have just strained your hamstrings, stop running immediately, and apply the RICE method on the spot.

Take a couple of days off (or more) from running, ice the painful area for 15 to 20 minutes a couple of times a day, and keep the injured leg elevated on a pillow to speed up recovery and reduce swelling.

Recovery time varies from one runner to the next, taking anything from two weeks to three months, depending on how serious the muscle strain is.

How to Prevent Muscle Strains

  • Start all of your runs with a proper warm-up.
  • If you plan to do a sprint or speedwork session, do 15 to 20 minutes in a dynamic warm-up comprising light jogging, and dynamic exercises, such as inchworms, squats, and lunges.
  • Improve your flexibility and mobility in the posterior muscles and tendons, so your hamstrings are no longer prone to being strained or overstretched.

Additional resource – How to stop runners toes

More Injuries and Pains To Deal With When Exercising

The above list only covers a small portion of injuries you can encounter when exercising regularly. So, as a bonus, I decided to share a few more so you can protect yourself out there, whether when running or cross-training.

Enjoy!

Blisters

Running blisters consist of fluid-filled sacks on the skin’s surface. This quite annoying condition is caused by friction between your running shoes or the sock and your skin.

Prevent it

Reduce friction by applying lubricant, such as petroleum jelly, on areas prone to blisters. You should also wear properly fitting shoes as well as running-specific socks. For extra protection, consider doubling on the socks or even throwing the old socks away regularly every time you start to feel them stretched too much.

Pectoral Injury

A very common injury among strength nuts. The injury is often caused when trying to lift a weight heavier than normal, resulting in -a tear of one of the chest muscles or its tendons.

Prevent it

Warm up and stretch out your pectorals before working out. Make sure the core is active. Only work with a weight you can control—you will know it’s too heavy when your form starts to break down— and use a spotter for intense sets. Then, you train for your own, don’t be a shower.

Bicep Tendon Rupture

Attempting to curl a too-heavy weight or suddenly dropping the dumbbell can cause a tear in the bicep tendon, which is the tendon attaching your biceps muscle to bones in the shoulder and the elbow.

Prevent it

Use a weight that you can handle throughout with proper form. For heavy sets, call out for the help of a spotter.

Sternum Fracture

Being unable to lift a bar when bench pressing to the safety point can cause a sternum fracture, a break in the sternum bone situated at the front of the chest. This injury is one of the most dreadful and common gym nightmares.

Prevent it

Work on developing proper lifting techniques, load the bar with weights you know you can handle, and always use a spotter to help you through your heavy sets.

Hamstrings Strains

Hamstrings strains happen for two main reasons: improper form and strength imbalances. But, unfortunately, it’s also very rampant among runners.

As you boost your speed, you also extend your stride, which puts excessive pressure on the hamstrings.

Prevent it

Address any possible muscle imbalances in your lower body. If you don’t know or don’t notice it, seek help from your physical therapist to analyze your form. Make sure also to use proper form—especially when running.

Joint Dislocation

Opting for too much weight and/or improper lifting form can cause a dislocated knee, hand, elbow, or shoulder.

If you put too much pressure on a ligament without a proper form, you will force the bone out of its regular position, leading to serious injury.

Prevent it

Be mindful of your joints and their range of motion. Work on developing mobility and aim to correct muscle imbalances.

Develop good form and only use weights you can handle without putting the joint under too much pressure. Keep the alignment good.

Running Injuries – The Conclusion

There you have it! If you’re looking for a  comprehensive list of overuse injuries that afflict runners, then my article should get you started on the right path. The rest is just details.

Please feel free to leave your comments and questions below.

In the meantime thank you for dropping by.

David D.