How to Break Your PR: Mental Strategies and Tips to Push Beyond Your Limits

When I crossed the finish line at the Maybank Bali Half Marathon in 2024, something clicked.

When I crossed that line, I realized I had pushed myself harder than I ever had before. I wasn’t just running to run anymore—I was racing against myself, and it felt damn good.

From that moment on, every run became a chance to improve.

No longer was I just out for a jog. I was actively hunting down a better version of myself. And let me tell you, that shift wasn’t easy.

Some days, I questioned whether I had it in me. But there was no turning back. PRs weren’t just a dream—they were a goal I could reach.

Let’s get into the practical stuff.


How to Train for a PR: Why Casual Runs Won’t Get You There

Here’s the thing: you can’t hit a PR by being casual about your training. If you want to break your personal best, you have to put in the work.

I ditched the easy runs and started adding speed drills, tempo runs, and interval training into my routine.

There were days when I dreaded the idea of pushing myself that hard, but deep down, I knew I had to. It wasn’t just about running longer distances—it was about running smarter, harder, and with purpose.

And on those tough days, when I just didn’t feel like pushing, I remembered the excitement I felt crossing that finish line at the Bali Half Marathon. That kept me going.


Chasing a PR with the Long-Run Mindset

Chasing a PR isn’t just about one race. It’s about a long-term mindset. I’ve learned that the journey doesn’t end when the race is over.

It’s a cycle.

It’s not just about getting that shiny new PR at one race—it’s about setting the stage for the next one and the one after that. Every run, every workout, no matter how tough, is one more step toward the next goal.

And let me tell you, the sense of accomplishment you get from reaching that goal is worth every painful mile, every struggle. On those days when my body was telling me to stop, I kept going.

Because in the back of my mind, I knew that each step was getting me closer to that ultimate achievement.


Overcoming Mental Blocks – Using a PR as Motivation

Let’s be real—there were days when I didn’t want to train. I was tired. My legs were sore. And my mind?

Full of doubts. I’d ask myself, “Can I really do this?

Can I really hit that PR?” But here’s the thing: that’s when the mental game kicks in.

It wasn’t about the physical exhaustion—it was about battling the voices in my head telling me to quit.

On those days, I broke the run into smaller pieces, telling myself, “Just get to that next mile, then we’ll see how you feel.” Slowly, the negative thoughts faded. Sometimes, you just have to push through the mental blocks. And once I did, I felt like I could conquer anything.


How to Build a Long-Term PR Mindset

To build a long-term PR mindset, you have to accept that the process is slow. It’s not about hitting a PR every time you race—it’s about the steady progress over time.

Early on, I was obsessed with seeing instant results.

But now, I know that consistency is the key. The work you put in today will show up tomorrow, and the day after that.

Sure, the PRs feel amazing when you hit them, but it’s the process—the day-in, day-out grind—that prepares you for those moments. And it’s in those tough moments, when everything seems impossible, that you really grow.


Fueling and Recovering for PR-Focused Training

When you’re training for a PR, you need to fuel your body for performance, not aesthetics.

I used to think skipping meals or not fueling properly would give me a quicker edge. But I was wrong. Fueling properly with the right nutrition makes all the difference.

And recovery? Just as important. Your muscles don’t grow while you’re running—they grow when you rest. And trust me, there’s no skipping rest. Skipping it only leads to burnout, and we all know how that story ends.


Managing Expectations 

You know what’s tough? Managing setbacks. Not every race goes as planned. There were days when my splits didn’t line up and the PR seemed out of reach.

On those days, I had to remind myself that sometimes, finishing strong was more important than hitting a new personal best. I’ve learned that setbacks aren’t failures—they’re part of the journey.

Every time you face a setback, you have the choice to let it break you, or to use it as fuel for the next race.


Mini-Guide for New Runners Chasing Their First PR

If you’re just starting out on your PR journey, here’s a few things I learned the hard way:

  1. Start Small: Don’t try to shave minutes off your time right away. Start with small, realistic goals like improving your time by 30 seconds or a minute.

  2. Consistency is Key: It’s not about perfection—it’s about showing up. Train regularly, and you’ll see progress.

  3. Recovery Matters: Don’t skip your rest days. Your body needs time to rebuild.

  4. Track Your Progress: Keep a log of your runs. Even small improvements are worth celebrating.


Celebrating the PR – The Real Achievement

When I finally hit that PR, yeah, it felt incredible.

But it wasn’t just about the time on the clock—it was about everything that led up to it. The tough training days, the sacrifices, the moments when I wanted to quit.

Those were the moments that made that PR so much sweeter. Because when you work hard for something, it’s not just the finish line that matters. It’s everything you learn along the way.


Keep Chasing Your Best Self

So, what’s next? Keep chasing those goals, keep improving, and keep striving for more.

But most importantly, enjoy the ride. The true victory isn’t just about hitting a new PR—it’s about becoming a better version of yourself, one run at a time.

Should I Run Today? When to Skip a Run (& When You Shouldn’t)

You know that feeling when you wake up, your legs are sore, and you look at your running shoes like they’re the last thing you want to see?

I’ve been there.

Just last Sunday, I was planning my long run from Sanur Beach to Kuta, then up to Renon (Bali).

I was feeling a little hesitant because it was raining, and I had some aches from my 5 x 1-mile intervals on Friday.

But I got up, put on my shoes, and went for it anyway.

By the time I hit the first mile, I felt way better. The first mile is always hard, but once you get through it, you’ll start to feel better.

But some days, skipping the run is the best choice.

Here’s how to tell if today’s a “run day” or a “rest day” without overthinking it.


When to Skip a Run – If You’re Sick

This one’s easy to figure out. If you’re feeling like your body is fighting off a cold or if you’ve got a fever, don’t go running. I made this mistake once—ran with a 101°F fever thinking I could “sweat it out.”

Spoiler: I spent the next three days in bed, binge-watching Netflix with a side of regrets.

Pro Tip: Skip It If You Have a Fever. If you have a fever, take a few days off. Trust me, one run isn’t worth it.  Now, if it’s just a sniffle, and you don’t feel like you’re about to drop, some easy jogging could actually help get your blood flowing. But if you’re in full “I’m about to drop dead” mode—yeah, skip it. Take a break, hydrate, and let your body heal.


Shortness of Breath – Is Your Body Saying “No”?

If you’re huffing and puffing like you’ve just sprinted a 5K and you’ve only been running for 5 minutes, something’s off.

I’ve had those runs where I felt like I couldn’t catch my breath, and it turns out, I wasn’t just out of shape.

I was pushing myself too hard, or I wasn’t listening to my body.

Listen to Your Body. Listen, pushing through breathlessness can cause bigger issues. Don’t do it. If you’re gasping for air and you’re not sure why—stop—and take a break. There are times when you’re running and suddenly feel like your lungs are closing up. It could be from allergies, dehydration, or maybe you’re just going too hard for the day. Whatever the case, don’t push it. And if this happens more than once, it’s time to see a doctor.


Muscle Pain – Is It Just Soreness or a Bigger Problem?

So you’re running, and those quads? They feel like they’re about to explode.

I get it.

But muscle soreness is a part of the game, right?

Here’s the deal: not all pain is the same.

Soreness vs. Injury. If it’s that “oh yeah, I pushed hard yesterday” pain, that’s fine.  But if your muscles are on fire to the point where you’re struggling to walk after, take the day off. That pain isn’t the normal soreness you feel after a workout—it’s a sign you might hurt yourself. 


Joint Pain – A Big Warning Sign

Joint pain is something we all know too well as runners. That annoying ache in your knees or ankles that pops up when you’ve been going hard for a few weeks?

I used to ignore that, thinking I was just “toughing it out.” Big mistake.

Take Care of Your Joints. Your joints take longer to heal than muscles. If you’re feeling that dull ache under your knee cap or your hip joints feel like they’re made of rusted metal, take a step back. Running on sore joints will just make things worse. If it’s bad, you’re going to be out for a while—so take those extra days off and let them recover.


Chest Pain – Stop Right Away

Alright, this one’s serious. If you’re feeling chest pain while running, that’s your body screaming at you.

I don’t care if you’re in the middle of a race or trying to push through a workout—stop immediately.

Call It a Day for Chest Pain .If you feel pressure in your chest, it might be a serious issue. Don’t ignore it. And don’t get me wrong, I’ve had those moments where I thought, “It’s just a weird twinge,” but you don’t want to take that risk. If chest pain comes with dizziness, shortness of breath, or nausea, call it a day, and get medical attention. 


Dizziness – Take a Break

We’ve all had it. That moment where you think you’re about to fall over mid-run.

Don’t worry, you’re not alone in this. I’ve gotten dizzy a few times in my life—usually from not eating enough before a run or running when I hadn’t hydrated enough. 

It’s a pretty solid indicator that your body needs some TLC.

Stop and Hydrate. If you’re dizzy, stop, sit down, and drink some water. If it’s more than just feeling lightheaded, or if you’re still dizzy after resting, go get checked out. Your body knows when it’s pushing its limits, so listen to it.


Pregnancy – Listen to Your Body

Running during pregnancy is awesome if you’re used to it and feeling good.

But if anything feels off—don’t risk it. Here’s the deal: growing a baby is tough—don’t push yourself too hard. Shortness of breath, dizziness, or chest pain? Not worth the risk. Always check with your doctor, just to be sure.


Injury – Take Time to Heal

Let’s be real—injuries suck. They really suck. Running through an injury is like trying to drive a car with flat tires—eventually, it’s just gonna break.

If you’re seriously hurt, stop running. You’ll do more harm than good by trying to push through it.

Rest and Cross-Train. I’ve had my fair share of injuries that kept me sidelined longer than I wanted. My advice? Rest, ice, and cross-train while you heal. Trust me, you’ll come back stronger—and injury-free.


Overtraining – Know When to Rest

Now, let’s talk about the beast we all fear: overtraining.

If you’re feeling burned out, your performance starts dipping, or your recovery’s taking longer than usual, that’s your body giving you a little warning flag.

It’s like your car’s check engine light turning on—if you keep going, something’s gonna break.

Overtraining is sneaky. It doesn’t just happen overnight. It creeps in, and before you know it, you’re running on fumes. Here’s how to spot it:

  • Fatigue: You’re tired all the time, and even easy runs feel tough.
  • Sluggish Performance: You can’t hit your usual paces or complete workouts like you used to.
  • Elevated Heart Rate: Your resting heart rate is higher than normal. Not just after a workout, but even when you’re chilling.
  • Mental Exhaustion: You’re not just physically drained; mentally, you’re checked out. You’re dreading every workout, and it feels like a chore.

Listen to Your Body. Overtraining isn’t just about pushing yourself too hard in a workout; it’s about not allowing recovery. Your muscles, your mind—they all need time to bounce back. And if you’re constantly tired, can’t hit your paces, or your resting heart rate is way up, it’s time to reassess. Rest isn’t weakness—it’s part of getting stronger.


The Three-Day Rule: A Simple Way to Recover

Here’s a trick I’ve learned that’s saved me more than once: the Three-Day Rule.

When you’re feeling off, whether it’s a small injury, muscle fatigue, or just general exhaustion, give it three days. Not one, not five, but a solid three. That’s usually enough time to reset without derailing your training.


Final Thoughts: Train Smarter, Not Harder

At the end of the day, it’s not about how many miles you can crank out or how tough your workouts are. It’s about being smart. Adjust when you need to, back off when your body is telling you to, and rest when it’s time.

Trust me, I’ve learned the hard way that taking care of yourself is the best way to make progress.

The real wins come from being consistent—showing up day in and day out, taking care of your body and mind, and knowing when to back off so you can come back stronger. It’s all about playing the long game.

Don’t let pride or stubbornness keep you from reaching your potential. Know when to push, and know when to rest.

Minutes vs. Miles – What’s Best for You?

You’ve probably been there before—lacing up your shoes, trying to decide whether you should run by time or distance.

It’s one of those questions I get asked all the time, whether it’s from a new runner or someone gearing up for a big race.

The truth? There’s no one perfect answer.

It’s not as simple as “should I run more miles or more minutes?” It really comes down to your goals, how fit you are right now, and how your body reacts.

But here’s the good part — I’m here to help you figure it out. Stick with me, and by the end of this, you’ll know exactly which method suits you, no fluff.

Running By Time: The Smart Choice for Many

Let’s get this out of the way first: running by time is a game-changer, especially if you’re just starting out.

Here’s the deal: You’re not overdoing it right off the bat.

Just starting? Perfect.

Time-based runs help you build endurance at your own pace, so you avoid pushing too hard and risking injury. I’ve made this mistake myself — starting out thinking I could smash 10K, only to end up with shin splints.

That’s a rookie move. You don’t need to run miles to see progress — you just need to put in the time.

It helps you keep your effort in check.

Want to run 30 minutes? That’s a solid goal.

Push the pace a little if you’re feeling it, but the clock’s your guide. No need to worry about how far you’re going; focus on maintaining a consistent effort.

Trust me, some of my best runs were 40-minute loops, just staying in the zone.

I get it — life gets busy.

We’ve all been there: juggling work, family, social life.

Time-based runs let you squeeze in a workout no matter how tight your schedule is. You know that 45 minutes is all it takes — you don’t need to stress about finishing a certain number of miles.

Plus, it’s easier to commit. “I’ve got 30 minutes to run” sounds way less overwhelming than “I’ve gotta get 5 miles in.

The Downsides of Running by Time

But here’s the catch — running by time can get a little dull if you’re not mixing it up.

Lack of Motivation to Push

I’ll be honest, this is where it can get boring.

You’re running for time, and while that’s good for endurance, there’s less incentive to really push yourself.

To really make progress, you’ve got to push yourself a bit more than just “keeping the clock ticking.” The good news is, you’ll get there.


Running By Distance: Perfect for Racing and Pacing

So, you’re aiming for a new race PR, huh? Distance-based training might be your best friend here.

Ideal for Speed and Race Prep

When you’re racing — whether it’s a 5K or a marathon — running by distance is the way to go. Here’s why: you’ve gotta get used to the idea of covering a specific distance.

That means figuring out how much energy you’ve got for each mile, and learning how to pace yourself.

Trust me, every race I’ve done was all about figuring out how to pace my miles. You’ve got to nail down that pace, and the best way to do it is by running for distance.

Think 10×400 meters, each at race pace, or 3×1-mile intervals to get your body used to the effort.

Pacing & Strategy

Proper pacing? Yeah, it’s a whole art form.

I’ve messed up pacing in a race more times than I care to admit.

But when you train by distance, it forces you to learn how to run a consistent pace. It’s all about getting that pacing dialed in for race day.

Here’s a little runner’s secret for you.

When you’re hitting mileage goals, you’re also tracking how many miles your shoes have seen. Running by distance helps you know exactly when it’s time to toss those kicks and get a new pair.

Take it from me — this way, you’ll save your feet from a lot of discomfort (and maybe even prevent injuries).


The Downsides of Running by Distance

The flip side? You can get too competitive with yourself.

You Might Push Too Hard

Yeah, this happens. I’ve had days when I pushed a little too far just to hit the right mileage. Overdoing it when you’re not feeling great is a recipe for burnout, or worse, overuse injury.

That’s why it’s crucial to listen to your body. Don’t be a hero — adjust your plan if the weather’s terrible or the course is too hilly. Sometimes, running by time gives you that flexibility.


Mixing Both for Peak Performance

Look, here’s the secret: don’t pick one or the other — use both time and distance to your advantage. They each have their role.

Time-based runs: Perfect for recovery, endurance building, and staying injury-free.
Distance-based runs: Key for race prep, pacing, and strength-building.

Here’s how you use both:

  • Start with time-based runs to build a strong base.
  • As you get stronger, introduce distance to work on your race pace.
  • Keep your recovery runs short and time-based — no need to overdo it when your legs are tired.
  • Use distance when training for a specific race — those intervals are going to feel a whole lot better when you’re used to running real miles.

I’ve coached hundreds of runners, and those who combine both methods always see the best results.

One method helps you build a foundation, and the other sharpens your skills. Mix them right, and you’ve got a winning formula.


Conclusion

So, there you have it. Whether you’re just starting out or gearing up for a race, time and distance both have their place in your training routine.

Start with time-based runs if you’re building that base, then bring in distance as you level up. But don’t forget to mix it up. Keep your training smart, consistent, and balanced — that’s how you avoid injury and get faster.

And remember — every single mile, every single minute, is part of the process. You’ve got this. Keep moving, keep improving, and stay in the game.

How to Get the Right Treadmill For You

I’ll never forget my first treadmill.

It was sitting in the corner of a dusty garage, half-buried under old gym bags.

The owner barely used it, but for me, it became the start of hundreds of miles of winter training. It wasn’t perfect, but it got the job done — and taught me a lesson I’ve shared with dozens of runners since:

A treadmill is only as good as the miles you put on it.

Whether you’re buying brand new or scoring a secondhand deal, the goal stays the same: find a machine that fits your needs without draining your wallet or your patience.

In this guide, I’ll break down what really matters when choosing between used and new treadmills — based on what I’ve seen work (and not work) for real runners over the past decade.

Let’s get to it.


Why Getting The Right Treadmill Actually Matters

A treadmill isn’t just another thing sitting in your living room gathering dust.

Pick the right one, and it’s a total game-changer

You’ll run no matter the weather, time of day, or mood.

You’ll build fitness from couch to 5K… and beyond.

You’ll lose weight (if that’s your mission).

You’ll train for races without dodging cars, potholes, or loose dogs.

Here’s the truth most fitness blogs won’t share:

In the long run, a good treadmill saves you from wasting money on gym memberships you’ll stop using.

Trust me, I’ve made that mistake—wasting money on a ‘fancy’ gym I never used.

And what about pace control?

Set your pace, and it stays locked in—no interruptions. No traffic lights, no wind slowing you down, and no excuses.

If you’re really into making progress, this is a must. But here’s the thing: Not all treadmills are made for actual runners.
Some treadmills look awesome online, but then break down quicker than you can say ‘pizza.’

Let’s go for a reliable workhorse, not something that will break down at the first sign of trouble.


Step One: Know Your Space (Before You Dream Big)

Reality check: Where is this beast going? Treadmills take up space. And make sure there’s enough room so you’re not running into your coffee table.

Measure your space—twice. If you’re tight on room, folding models exist — but measure both unfolded AND folded dimensions.
Just because it’s foldable doesn’t mean it’ll fit anywhere. 

Picture yourself trying to clean around it. Opening the closet. Running hard without shoulder-checking a bookshelf.

If it feels cramped, rethink. And hey — if you live in a shoebox apartment? Walking pads exist. They slide under desks or beds, perfect for casual walking days.

But if you’re training for anything serious? Skip the pad.

Get a real treadmill. One of my friends tried to cram a treadmill into his tiny apartment. He ended up climbing over it to reach the bathroom. Every. Single. Day.

Take it from him, don’t make that mistake.


Step Two: Set a Real Budget (Without Selling a Kidney)

Here’s the unfiltered truth: Treadmills aren’t cheap. But you don’t need to rob a bank either — you just need to know where your money’s going.

Budget Breakdown for Real Runners:

  • Under $600 ➔ Decent for walking. Jogging? Sketchy. Running? Forget it.
  • $600–$1000 ➔ Some hidden gems for walkers and casual joggers — especially during big sales.
  • $1000–$1500 ➔ Solid sweet spot. Durable motors, good cushioning, incline options. A real runner’s entry point.
  • $1500–$2500 ➔ Great features, tougher frames, better electronics.
  • $2500+ ➔ Luxury zone. Daily runners, marathoners, tech lovers, this is your playground.

Manual vs Motorized Treadmills: Real Talk (Runner to Runner)

Alright, here’s the no-B.S. breakdown nobody else will tell you: Manual treadmills sound cool in theory — you power the belt yourself, Rocky-style, no electricity needed.

In reality?

It feels like dragging your feet through quicksand while wearing a weighted vest.

Fantastic workout, sure… but if you’re planning real runs, real workouts, or real mileage? You’ll be swearing under your breath before you hit mile two.

Motorized treadmills, on the other hand? Push a button, hit your pace, climb the hills, hammer intervals. These are the ones you want if you’re serious about anything beyond casual walking.


Match the Treadmill to Your Running Style

Buying a treadmill without matching it to your style is like running a marathon in flip-flops. Technically doable… but you’re gonna regret it real fast.

Here’s the crash course:

  • Walkers: You’ll want a machine with a 2.0+ CHP motor, nice handrails, and good deck cushioning. Smooth, easy, nothing fancy — just sturdy.
  • Joggers: Shooting for casual runs and steady miles? Look for 2.5+ CHP, a top speed of at least 8 MPH, and some decent shock absorption so your knees don’t file a complaint.
  • Serious Runners: Marathoners, sprinters, pain-chasers: You need 3.0+ CHP, a top speed of 12 MPH, a wide and long belt (especially if you’re over 6 feet tall), and easy-to-reach speed/incline buttons for those gut-check interval days.

Don’t Ignore the Deck and Belt (Your Knees Are Begging You)

Let’s talk decks and belts — the unsung heroes of treadmill survival.

If you’re tall (over 6 feet)? You’ll need a minimum 54″ deck length if you actually want to stretch out and stride.

Belt quality matters too. Two-ply belts = smoother ride, quieter sessions, and a treadmill that won’t sound like it’s dying every time you pick up the pace.

Bonus Features: 

Look — bonus features are like dessert. Fun to have, but not the main course.

Stuff worth eyeballing:

  • Built-in programs (hill repeats, intervals, Netflix guilt distractions)
  • Big fancy screens (cool, but don’t overpay unless you’re really gonna use it)
  • Bluetooth and App Sync (Garmin Connect, Peloton, Zwift — if you’re a numbers nerd)
  • Tablet holders (essential for zoning out with trash TV during long runs)
  • Fans (spoiler: 90% of built-in fans blow about as hard as a tired Labrador)
  • Heart-rate monitoring if you’re into training by zones
  • Customizable outdoor course programming (simulate racecourses or brutal hill repeats indoors — love/hate relationship guaranteed)

Warranty = Your Secret Weapon

Before you hand over your card, check the fine print:

✅ Lifetime warranty on the frame
✅ Lifetime on the motor
✅ 5+ years on electronics
✅ 2+ years on labor

Anything less? Walk away.

Try Before You Buy (Or Regret It Later)

If you’re buying local? Put the thing through its paces:

  • Run for at least 10 minutes (not just a 30-second jog)
  • Test the incline and speed buttons (they should react fast, no weird lags)
  • Listen for suspicious clunks, screeches, or “is this thing gonna explode?” noises
  • Shake it a little — it should feel rock-solid, not like a carnival ride

Buying online?

Deep dive into runner reviews and forums. Skip the sponsored Amazon raves. And unless you secretly enjoy throwing out your back?
Pay for white glove delivery. Moving a 300+ pound treadmill up the stairs solo = instant regret.


Final Miles: You’re Ready to Choose

Now you’re armed with the truth, not marketing fluff. You know how to dodge the duds, spot the beasts, and pick the machine that fits your grind.

No more treadmills that turn into coat racks.

No more buyer’s remorse.

Final bit of runner wisdom: “The best treadmill isn’t the fanciest one. It’s the one you’ll actually use.”

Now get out there — indoors or out — and keep chasing those miles.

Catch you on the run.

-David

How To Choose The Right Running Belt

You ever head out for a long run, feeling like today’s the day — smooth pace, fresh legs — only to spend half the damn time punching your belt back down because it’s riding up your ribs like it’s trying to choke you out?
Yeah. I get that.
One time, my so-called “no bounce” running belt bounced so much I almost launched it into a dumpster behind the third water station.
Halfway through the Batur 30K trail race. In front of a crowd. And the look of fury on my face – unmatched.
Honestly, might’ve been my best athletic move of the day. Moral of the story? Not all running belts are made the same.


Why You Probably Need a Belt
If you’re running for more than 30 minutes or planning to race, you need a place to stash your stuff that isn’t your sweaty hand or that sad, floppy side pocket in your shorts. Holding your phone, keys, gels, and emergency “please come pick me up” money while you run? It’ll drive you crazy. And possibly turn into a yard sale mid-stride if you’re lucky. A good belt means smooth runs and no distractions. No bouncing gear, no sweaty phone disasters, and no awkward chafing in places you don’t want to explain to your doctor.


What the Heck Is a Running Belt, Anyway?
Think of Batman’s utility belt — but with sweat, dehydration, and less cool factor. A good running belt sits low across your hips (not your waist — you’re not Grandpa shuffling around the mall). It hugs your body like a teammate who actually wants you to PR and lets you carry what you need without throwing off your stride. There’s two major types: Some are barely-there minimalists — lightweight enough you forget they exist. Others are full-on hydration tanks — built for trail beasts and long-haul warriors.


How to Choose a Belt That Doesn’t Make You Hate Running
Alright, here’s the honest truth you really need to hear. Fit is everything. If the belt doesn’t fit right, it’s torture in stretchy form. The right belt does three things: It sits low across your hips, hugs you snug like a teammate, and stays put when you sprint. If the belt is sliding, bouncing, or causing you to question your life choices mid-run, it’s not the right one. Measure your hips, not your waist, and pick a belt with an adjustable buckle.


2. Silicone Grippers: Your Unsung Heroes
You know that weird sticky strip hiding inside some belts? The one that feels a little creepy at first, like a clingy second date? Yeah. That’s your MVP. No grippers = belt climbs your torso like a terrified squirrel halfway through your long run. Good grippers = belt stays put like it’s glued to you. First time you wear a gripper belt? It’ll feel weird. But after a couple miles, you’ll realize it hasn’t budged once.


Hydration — Don’t Be a Camel, Man
You can’t outrun dehydration. If you’re out there longer than 45 minutes, you better have a plan. Otherwise, you’re basically slow-roasting yourself in sneakers. Real-world hydration belt setups: One bottle for short runs, two bottles for half marathons, and bladder systems for marathons and trails. Soft flasks mold better, bounce less, and ride smooth — like a good running buddy. Hard bottles, however, bounce around and cause mid-run water battles.


Light Is Right — Unless You Like Suffering
Golden Rule: Light belt = fast, happy, bouncing-back runner. Heavy belt = sore, slouchy, cramping disaster by mile 9. Go for the lightest belt that still carries your must-haves. If you feel like you’re smuggling bowling balls around your hips, you picked wrong. Trust me, that extra two pounds feels like twenty once your legs start writing angry letters to your brain at mile 10.


Fabric Matters (Way More Than You Think)
True story: I thought I scored a sweet $10 deal on a belt at a sketchy outlet mall. Neoprene-ish, looked pretty legit. By mile 6 in 90°F heat? It turned into a medieval sweat sponge glued to my waist. Pretty sure medieval prisoners had it better. Neoprene is fine for cold-weather runs, but for humid conditions, elastic blends are better. Ripstop Nylon is the most durable, tough enough for trails and bad decisions.


Size the Pouch to Your Life (and Your Bad Decisions)
Got a phone bigger than your head? Rolling with four gels, two house keys, and a lucky pebble from a trail run? Yeah. You’re not alone. Whatever you’re hauling, make sure it fits without exploding like a piñata mid-run. Test-load your belt before race day. Trying to cram a giant phone into a toddler-sized pouch while 2,000 other runners shove past you? That’s how you panic and drop your gear.


Gender-Specific Fits Are Kinda a Thing
Most belts are labeled “unisex,” which translates to “It’ll fit everyone awkwardly unless you pick smart.” Women’s belts tend to be narrower, and men’s belts are straighter across the hips. Try it on and trust your gut. Comfort always beats marketing. If it fits better, it’s yours. If it doesn’t, walk away like you just ghosted a bad first date. The tag doesn’t know your body. You do.


Extras That Are Actually Worth Paying For
Marketing loves slapping extra features on belts like sprinkles on a sad gas station donut. Some extras are junk. Some are worth it. Reflective strips are a must for safety, race bib toggles save you from stabbing yourself, and separate waterproof pockets protect your phone. Bright colors? They might not be scientifically proven, but neon feels faster. Choose extras that make your run easier, not just cute on Instagram.


Care and Feeding: Belt Survival 101
Want your belt to last longer than a TikTok trend? Hand rinse it after sweaty runs and air dry flat. Don’t put it in the dryer. Check your stretch bands every few months. If it feels floppy and sad, it’s time to upgrade. Little TLC goes a long way. Your gear carries you — at least you can do is return the favor.


The Bottom Line: Pick Smart, Run Happy
Running already beats the hell outta your body. Your gear shouldn’t join the fight against you. Pick a belt that fits snugly without cutting off your air supply, doesn’t bounce, carries what you need, and feels light. Everything else? Style, color, extra pockets — that’s just extra frosting on your marathon cake. You earned it.


🎯 Bonus Mini FAQ (Because You’ll Wonder Eventually)
Q: Do running belts cause chafing?
Only if they fit wrong or are made out of junk fabric. Stretchy + breathable = happy skin and fewer awkward conversations later.
Q: Can belts replace hydration vests?
For runs under 2 hours? Absolutely. Long-haul death marches? Bring backup gear unless you like playing dehydration roulette.
Q: How much water should I carry in a belt?
500ml if you’re cruising under 90 minutes. 1L if you’re grinding longer or it’s hotter than Satan’s armpit out there.
Q: Can I wear my belt higher if I’m short-torsoed?
Hell yes. Comfort rules over “rules” every damn time.


Coach’s Brutally Honest Top 5 Running Belts
Look — I’ve mangled enough belt choices to save you some future swearing. Here’s the no-filter list of belts I’d actually tell a buddy to buy over beers after a long run.


1. Naked Running Band ($55)
Best for: Minimalists who want to carry everything but still feel naked.
Real talk: I was super skeptical at first. A belt that’s basically a stretchy tube? Thought it would flop everywhere.
But this thing hugs you like a jealous ex — once it’s on, it’s not going anywhere.
Ran my first real long trail run with it and forgot it was even there… until I pulled out 3 gels, a phone, and a crumpled granola bar like some running magician.
Heads up: No zippers. If that freaks you out, move along. If you like sleek and stupid-simple, welcome to the cult.


2. Nathan Zipster Max ($40)
Best for: Carrying phone, keys, and snacks without feeling like you’re wearing a fanny pack from 1993.
True story: This was my first-ever running belt. Bought it at a gear expo because the guy said “zero bounce” and I was young enough to believe marketing.
Honestly? It delivered.
It’s got that perfect “not too tight, not saggy” flex that stays put even when you jam a giant phone and a wad of gummies in it. Plus — it saved my ass on a rainy 10K when my phone stayed bone dry inside the water-resistant pocket.
Downside: After about a year of abuse, mine got a little floppy. But honestly? For the price, it’s still a freaking workhorse.


3. Ultimate Direction Race Belt ($55)
Best for: Staying hydrated without looking like you’re wearing a water balloon around your waist.
Runner confession: Hard bottles are a pain in the ass sometimes. This belt nails it by giving you soft flask space that actually locks in without sloshing around.
Quick grab, quick stash. No wrestling matches with your gear mid-run.
The Velcro front? Bonus points for no dangly straps slapping your gut like a dead fish.


4. UltrAspire Fitted Race Belt 2.0 ($33)
Best for: Budget-conscious runners who still want real-deal performance.
Real deal: This belt is like that dependable friend who never bails but also never tries to be cooler than they are.
It’s not flashy. It’s not Instagram famous.
It’s just a simple, flexible, reliable belt that does its damn job for cheap.
Pro tip: Don’t overload it. It shines best when you’re packing just the essentials — not a mobile aid station.


5. Nathan Peak Hydration Waist Pack ($40)
Best for: Half marathoners, trail junkies, and chronic heavy sweaters.
Battle-tested tip: If you know you’re gonna need legit water access — like more than a few sips — this belt slaps.
Carries a good hard-sided bottle right at your lower back without bouncing like a jackrabbit.
Yeah, it’s bulkier than a minimalist belt. But if dehydration ever sucker-punched you mid-run (been there, bonked that), you’ll love having your bottle locked and loaded.


🛠️ How to Pick Your Poison
• Want to forget you’re even wearing a belt? ➔ Naked Running Band.
• Need bombproof storage for your phone, keys, and shame? ➔ Nathan Zipster Max.
• Planning mid-run water battles? ➔ Ultimate Direction Race Belt.
• Tight budget but still want a warrior? ➔ UltrAspire Fitted 2.0.
• Training long or dying in the heat? ➔ Nathan Peak Hydration.


Belt Choice By Race Distance

Race DistanceRecommended Belt Type
5K / 10KOne bottle / minimal pouch
Half MarathonTwo bottle setup + small storage
Full MarathonBladder system or dual bottle belt
Trail UltraHigh-capacity bladder system

• 👉 Bonus: “If you’re out longer than 90 minutes, plan your hydration like your race depends on it — because it does.”


📋 Final Tough Love Tip
👉 Test your belt loaded and sweaty — not dry and empty standing in your living room.
The first 10 steps of a real run will expose a bad belt faster than a bad Tinder date.


Tl;Dr

BeltBest ForMy Brutal Take
Naked Running BandMinimalists“Hugs like a jealous ex. No zippers. All magic.”
Nathan Zipster MaxPhone + Keys“Saved my ass in a rainstorm. Built like a workhorse.”
Ultimate Direction Race BeltHydration“No slosh, no bounce. Water without the struggle.”
UltrAspire Fitted 2.0Budget Pick“Not sexy. Just shows up and works every damn time.”
Nathan Peak Waist PackLong Runs/Heat“Carry water or die trying. This belt gets it.”

How to Choose the Right Running Hat

I know what you’re thinking: “Really? A whole article about hats?”

But stick with me.

A good running hat is like that reliable training buddy who’s always there—blocking the sun, keeping the sweat out of your eyes, and just making your run a bit easier.

And trust me, you’re going to want one for those brutal summer days or those rainy morning miles.

Now, there are so many options out there, but you don’t want to waste your cash on a hat that doesn’t fit or falls apart after one run. So let’s break it down. I’m going to give it to you straight—no fluff, just real talk.

Why You Need A Running Hat

First things first—running hats are more than just a fashion statement.

Sure, they look cool, but they actually have a job to do.

I’ve been caught in downpours where I was drenched and blinded by rain, but my trusty hat kept the water out of my eyes so I could see the road (or at least not trip over a pothole).

And when the sun is blasting you like an oven? That hat is your best defense against overheating.

Plus, if you hate how your sunglasses bounce around, a hat’s a two-for-one deal—protecting your eyes and keeping your head cool.

Pick The Right Fit (Because Size DOES Matter)

I get it—some of you’ve tried the “one size fits most” hats, but if you’ve got a big head or a lot of hair, you’ll need something adjustable.

Measure your head, check those size guides, and make sure it fits snugly. The last thing you need is your hat flying off mid-run. Trust me, I’ve been there, and it’s not a good look.

Ventilation Is Key (We’re All Sweating)

You’re gonna sweat, no doubt about it. Long runs in the heat? Forget it. That’s why you need a hat with ventilation—think mesh panels or something that lets air flow through.

You don’t want a sweat bath on your head—believe me, it’s brutal.

The best hats let the sweat escape, so you’re not running around with a wet towel on your head.

Bonus tip: If it’s scorching, give a visor a shot. Less hat, more breeze, still protecting your eyes.

Reflective Features

If you’re one of those early birds or night owls, visibility is key. You don’t need to go full Christmas tree, but a little reflection goes a long way.

You want everyone—drivers, cyclists, and other runners—to see you coming from a mile away. Safety matters.

Sweat-Wicking

Let’s get real for a second. Sweat dripping down into your eyes sucks. It’s like having a personal rainstorm in your face.

A solid running hat has a sweatband to catch that sweat before it messes up your run.

If you’ve ever had to squint your way through a run because your eyes are stinging from sweat, you know exactly what I’m talking about.

The Bill: Don’t Underestimate It

You definitely need protection from the sun. A good brim blocks that harsh sunlight from your face. Look for a 3-inch brim, or even better, a bendable one you can adjust for maximum sun protection. 

Don’t let your face get fried because you’re too cool to care about the little things. Trust me, that sunburn is a painful lesson.

Be Prepared for Anything

Weather can change fast, and a solid running hat will help you stay ready.

Hot day? Grab a lightweight cap with breathable fabric.

Cold? Choose something that gives warmth without making you feel like you’re wearing a wool hat.

Running hats should keep you comfortable in all conditions, so choose wisely.

The Price Tag

Here’s the lowdown. Yes, Nike, Adidas, and Under Armour make some solid hats, but you don’t have to waste your paycheck on one.

They’ll set you back anywhere from $20 to $50, and while they’re great quality, you can find similar options for less if you shop around.

Hit up a sports warehouse, or keep your eyes peeled for deals around Black Friday or holiday sales.

Heck, if you’re into vintage, you might even find a gem at a thrift store.

My Two Cents on Aesthetic

I know this isn’t a fashion show, but let’s be honest, we all care about looking decent while we run.

Pick a hat that suits your body and style.

If you’re on the shorter side, avoid a huge, wide-brimmed hat that’ll make you look like you belong in a circus. Find a balance between function and look, and you’ll be good to go.

Here’s your guide to other running gear.

Top Running Hats:

I reached out to a bunch of runners—trail lovers, road warriors, even some ultrarunners—and we really put these hats to the test.

Also being a runner mysellf, I’ve experiemented with a bunch of hats and let’s stay I know a thing or two about them.

I’m talking about hats that work—through sweat, sun, rain, and everything in between.

Here’s the rundown on some of the top picks:

1. Janji AFO Hyperlight Cap

Price: $38

Best For: Lightweight sun protection and packability

Pros:

  • Super Light: Weighs only 29 grams, making it practically invisible when you wear it.
  • Packable: It scrunches down into nothing, so it’s perfect for packing into your running vest or bag when you don’t need it.
  • Breathable: The material is super breathable and dries quickly—ideal for hot runs.
  • Eco-Friendly: Made from 88% recycled polyester, so you can feel good about your purchase.

Cons:

  • Limited Color Options: If you’re someone who loves a splash of color, you’re limited here.
  • Not the Best for Wind: It’s so light that, on windy days, you might feel like you need to adjust it constantly.

Why It Stands Out: If you’re running in the heat or want a hat that won’t weigh you down, this is your go-to. It’s perfect for stashing in your bag when the sun’s blazing and then tossing on when you need some shade.


2. Ciele Athletics ALZCap SC

Price: $50

Best For: Sun protection with style

Pros:

  • UPF 40 Protection: This cap’s got you covered when it comes to sun protection—no more worrying about sunburn on your scalp.
  • Quick-Drying: Made with Coolmatic mesh material, it dries fast, which is a lifesaver on those sweaty runs.
  • Packable and Stylish: You can fold it up and stuff it in a bag, and the soft curve of the brim makes it a little more stylish than your typical running hat.

Cons:

  • Pricey: At $50, it’s definitely on the higher end. Not everyone wants to drop that much on a running hat.
  • Not Ideal for Heavy Rain: While it’s great for sun and sweat, it doesn’t hold up as well in the rain, so it’s not your go-to in downpours.

Why It Stands Out: This one’s perfect for those who want a mix of performance and style. It’s comfortable, breathable, and looks good—whether you’re running or just wearing it around town.


3. Patagonia Duckbill Trucker Hat

Price: $39

Best For: Versatile, breathable, and durable

Pros:

  • Breathable: The mesh back makes it super breathable, so it won’t get soggy even on the hottest runs.
  • Durable: The nylon-foam blend on the front is tough, and the hat can withstand a lot of wear and tear.
  • Water-Repellent: Great for those surprise rain showers on trail runs, as it dries quickly and doesn’t soak through.
  • Versatile: Not just a running hat—this is perfect for hiking, biking, or any other outdoor activity.

Cons:

  • Limited Sun Protection: The mesh back offers ventilation but doesn’t provide as much sun protection for the top of your head. If you’ve got thin hair, you might need something else for full coverage.
  • Brim Can Curl: After packing it up for a while, the brim might lose its shape and start curling. Just something to keep in mind if you’re stuffing it into a pack.

Why It Stands Out: This hat is a workhorse—it’s comfortable, breathable, and durable, making it perfect for anyone who spends a lot of time outdoors. It’s great for those who want a performance hat that doubles as an all-around outdoor cap.


4. On Lightweight Cap

Price: $45

Best For: Speedwork and high-intensity runs

Pros:

  • Lightweight and Breathable: This cap feels like you’re barely wearing anything at all, with laser-cut ventilation holes that help keep the sweat off your face.
  • Quick-Drying: The sweatband is soft and does a great job of absorbing moisture without feeling bulky.
  • Adjustable Fit: It’s easy to adjust to get a perfect fit, and the brim is just the right size to block the sun without getting in your way.

Cons:

  • Price: Again, this one’s not cheap. At $45, you’re paying for the quality and performance.
  • Sweatband Texture: Some runners have found the texture of the sweatband to be a bit abrasive, especially if you’re wearing it for long periods.

Why It Stands Out: If you’re doing high-intensity runs or need a lightweight hat for speedwork, the On Lightweight Cap is perfect. It’s breathable, quick-drying, and designed to keep you comfortable when you’re pushing the pace.

Bottom Line: Just Buy the Right Hat

At the end of the day, your hat should do one thing—make your run easier.

That’s it. It should protect you from the sun, keep you cool, and keep sweat out of your eyes.

If it’s too tight, too loose, or just uncomfortable, toss it. Don’t let some overpriced piece of gear mess up your stride.

And hey, if it looks cool too? Bonus.

Got any running hat horror stories? Drop ’em in the comments—I’d love to hear ‘em. And remember, keep running strong!

How to Clean Your Running Shoes Like a Pro

A couple of weeks ago, I was trail running up Batur Mountain in Bali, just like any other day.

But that day? It was pouring rain, and the trail turned into a giant mud pit. My shoes were covered in so much mud, they could’ve been mistaken for clay sculptures.

The next day, I went to grab them for another run—and let’s just say, they could’ve been their own hazard zone.

They were a total wreck, and the smell?

Let’s just say it wasn’t anything I’d want to breathe in. I had to take them to a shoe repair guy to save them from the damage I caused.

Don’t let this happen to you. Let me show you how easy it is to clean your shoes and keep them lasting longer.


Why Shoe Care is About More Than Looks

Clean shoes don’t just look good—they help you run better and feel more comfortable. Ever run in shoes full of mud? You’re basically asking for a slip and fall.

I ignored cleaning my shoes after a race, thinking they’d be okay, but trust me, they weren’t. By mile 5, I felt like I was running on a beach. All that dirt wore down the soles, and I could feel my grip slipping.

Taking care of your shoes now can save you headaches later.


The Comfort Factor: Clean Shoes = Happy Feet

Running in shoes that feel like they’re falling apart? Worst feeling ever. But dirty shoes mess with how they feel, too. Sweat and dirt build up, and next thing you know, your shoes are uncomfortable.

Clean shoes? They keep your feet happy and blister-free, mile after mile.


How Often Should You Clean Your Shoes?

How often you clean your shoes depends on how much you run and the conditions you run in.

If you’re running often, try cleaning them every couple of weeks.

After a muddy trail run or a rainy race, clean them ASAP.

Pro Tip: I’ve skipped cleaning my shoes too often, and every time, it bites me back.


What You’ll Need for the Job

Let’s make this easy. Here’s what you need to clean your shoes the easy way:

  • Mesh laundry bag (for the laces)
  • Heavy-duty detergent (athletic shoe cleaner is key)
  • Baking soda (for those stinky insoles)
  • Scrub brush (old toothbrush works great)
  • White tissue paper or towels (to help dry and keep shape)
  • Bucket of warm water (avoid hot water, it can damage the shoes)

Gear List for Cleaning Like a Pro

Get the right tools, and you’ll see how much easier it is:

  • Soft Bristle Brush: Perfect for scrubbing the uppers without damaging the fabric. Think of it as your shoe’s gentle massage therapist.
  • Firm Bristle Brush: For those outsoles that’ve been caked with mud, grit, and who knows what else. This is the heavy-hitter you need to get into the nooks and crannies.
  • Dirt Pick: Ever have a rock stuck deep in your shoe tread, and it feels like it’s going to be there forever? Grab a toothpick or a specialized dirt pick to get those tiny stones out.
  •  Washing Soda: This stuff is like a secret weapon for shoe cleaning. When you mix it with warm water, it works wonders for breaking down dirt, stains, and that post-run funk.
  • Mesh Laundry Bag: If you’re putting laces and insoles through the wash, do yourself a favor and toss them in a mesh laundry bag. You’ll avoid the tangling mess and save your gear from any unnecessary damage. Invest in these basics, and you’ll be cleaning like a pro.

Step-by-Step: How to Clean Your Running Shoes

Forget the washing machine. I’ve been there, and it’s not worth it. Here’s how to do it by hand, the right way.

  • Remove Insoles and Laces. First thing’s first: take out the laces and insoles. This is the most basic step, but it makes a huge difference. Don’t let dirt hide in places you can’t reach. An old toothbrush works great for getting into the eyelets and cleaning out dirt.
  • Use the Right Detergent. When I first started cleaning my shoes, I used regular laundry detergent. Bad move. It’ll wear down the fabric and the glue that holds the shoes together. Get a cleaner specifically made for running shoes, like Nikwax Tech Wash or Sport Shoe Wash. These are designed to be gentle on the materials while still getting the job done.
  • Scrub the Insoles. Your insoles can get pretty funky if you don’t clean them. Scrub them gently with soapy water and a brush. Don’t soak them—they’re made of foam, and soaking them could ruin their shape. Once cleaned, let them air dry.
  • Wash the Shoes. Fill a bucket with warm water (not hot!) and add your detergent. Let the shoes soak for a while, then scrub the soles and uppers with a sponge. For any tough spots or stubborn mud, use the toothbrush to get into the nooks and crannies.
  • Dry the Shoes Properly. Don’t even think about throwing them in the dryer. The heat will melt the glue and shrink the materials. Instead, stuff your shoes with tissue paper or towels to absorb moisture and help keep their shape. Let them dry in a cool, dry place—away from direct sunlight.


Soaking Method: Deep Clean That Funk

Sometimes, regular cleaning just won’t cut it. For those shoes that have seen a little too much action—whether it’s mud, sweat, or a mix of both—it’s time for a deep clean.

Here’s a pro tip: if you’ve got shoes that need some serious TLC, it’s time to soak them.

Mix up a hydrogen peroxide, washing soda, and detergent solution. Here’s the breakdown:

  • 1/2 cup hydrogen peroxide (this stuff’s a miracle worker)
  • 1/2 cup washing soda
  • 2 tablespoons laundry detergent

Dump your shoes into a bucket or sink with this mixture and let them soak for at least an hour. If they’re really grimy, you can leave them soaking for up to 8 hours—this gives the grime time to break down.

After soaking, give them a good scrub with a stiff brush to get those tough stains out. Rinse them well, and don’t forget to air dry.

This deep-cleaning method will leave your shoes looking fresh and feeling like new, so you can hit the ground running—without the stank or stubborn stains.


Shoe Material Care

Now, if you’re rocking shoes with special materials—like Gore-Tex®—you’ve got to show them some extra care.

Gore-Tex® is great for keeping water out, but it needs to be treated carefully to maintain its performance.

Regular soap and harsh detergents? Nope, that can break down the water-resistant membrane.

Instead, grab a specialized shoe cleaner that’s designed for high-tech materials. A gentle clean will keep your shoes’ water resistance intact, and you won’t end up with soggy feet halfway through a run. Trust me, I’ve learned the hard way!


Drying Tips: Patience Is Key

Listen up: drying your shoes the wrong way is a rookie move. I get it—you want them ready for your next run ASAP, but no direct heat.

Don’t toss them in the dryer or leave them by the heater.

That intense heat will mess with the glue, shrink the fabric, and warp the shape.

What you want to do is air dry them in a mild-temperature spot.

Stuff the shoes with some paper towels or newspaper to help absorb the moisture and keep the shape intact.

Let them dry naturally—this isn’t a race. If you’re really in a pinch, using a fan can speed things up, but let’s be honest—giving your shoes time to dry properly will help them last longer. Patience, my friend.

What to Do With Your Old Running Shoes

I hate to state the obvious, but running shoes are built to last—for a while.

Eventually, even your best pair is going to hit the wall. Whether you’ve logged 400 miles or just went hard on the trails, those shoes are going to wear out.

But instead of chucking them into the trash (or worse, letting them rot in a landfill), how about giving them a second life?

I’ve thrown out more worn-out shoes than I care to admit.

But a few years ago, I realized—why waste them when you could recycle, repurpose, or donate those old kicks?

It’s a game-changer.

So let’s dive into some ways to put those old shoes to use, because they still have plenty of life left in ‘em.


Find A Cobbler (Yes, You Can Fix ‘Em)

Alright, I know what you’re thinking—“Are you telling me to repair my old running shoes?!” Yep, that’s exactly what I’m telling you.

Not every worn-out pair of shoes is worth repairing, but a good cobbler can work magic on minor fixes.

Loose stitching, cracked soles, or worn-out eyelets? A cobbler can give them a few more miles.

The Fix:

  • Look for a cobbler who specializes in athletic footwear. Some even do custom soles and repairs.
  • Consider turning those runners into casual shoes. They might not be fast anymore, but they’ll still get you to the store.

Donate Your Old Running Shoes 

Just because your shoes are “done” for you doesn’t mean they’re done for the world.

There are tons of people out there who need shoes more than you need your old pair. In fact, running shoes can do a lot of good, even when they’re no longer race-ready.

The Fix:

  • Clean your shoes before donating. It’s the right thing to do, and they’ll go to a good cause.
  • Consider programs like Soles4Souls, Sneakers4Funds, and One World Running. They’ll ensure your shoes are put to good use.

Repurpose Your Running Shoes for New Tasks

Alright, don’t roll your eyes at me. I know what you’re thinking: “Repurpose my running shoes? What, am I going to start wearing them to the grocery store?” But hear me out—if they’re done for running, they’re not done for everything else.

The Fix:

  • Use old shoes for yard work, DIY projects, or even as your new “muddy shoe” for hiking.
  • When the cushioning’s toast, they still work great for tasks where comfort isn’t as critical.

Find A Local Shoe Recycling Program (Save The Planet)

Okay, now we’re talking. If your shoes are really past the point of no return, it’s time to recycle them. Sure, recycling shoes isn’t as easy as tossing plastic bottles in a bin, but some programs are set up to break down your old shoes and repurpose the materials.

The Fix:

  • Check out Nike’s Reuse-A-Shoe program or Teracycle for shoe recycling.
  • Just make sure you’re aware that some programs (like Teracycle) may require a small fee to send in your shoes.


Quick Actionable Checklist: 

  • Fix ‘Em: Take them to a cobbler for minor repairs. If they’ve got life left in them, fix it.
  • Donate ‘Em: Find a charity like Soles4Souls and give your shoes to someone in need.
  • Repurpose ‘Em: Use them for dirty work around the house or in the yard. You’d be surprised how useful old shoes can be.
  • Recycle ‘Em: Look for recycling programs like Nike’s Reuse-A-Shoe and keep them out of landfills.

Conclusion

Listen, it’s easy to toss your shoes in the trash and forget about them.

But trust me, there’s so much more you can do with your old pair. Whether you’re donating them, recycling them, or using them for your next muddy project, don’t let them end up in a landfill.

Give them a second life, and you’ll feel better about your miles—and the planet.

Every mile builds the runner you’re becoming—and every shoe you recycle keeps the world a little cleaner.

David D.

The Different Types of Running Shoes (Updated Guide 2025)

Types of Running Shoes explained

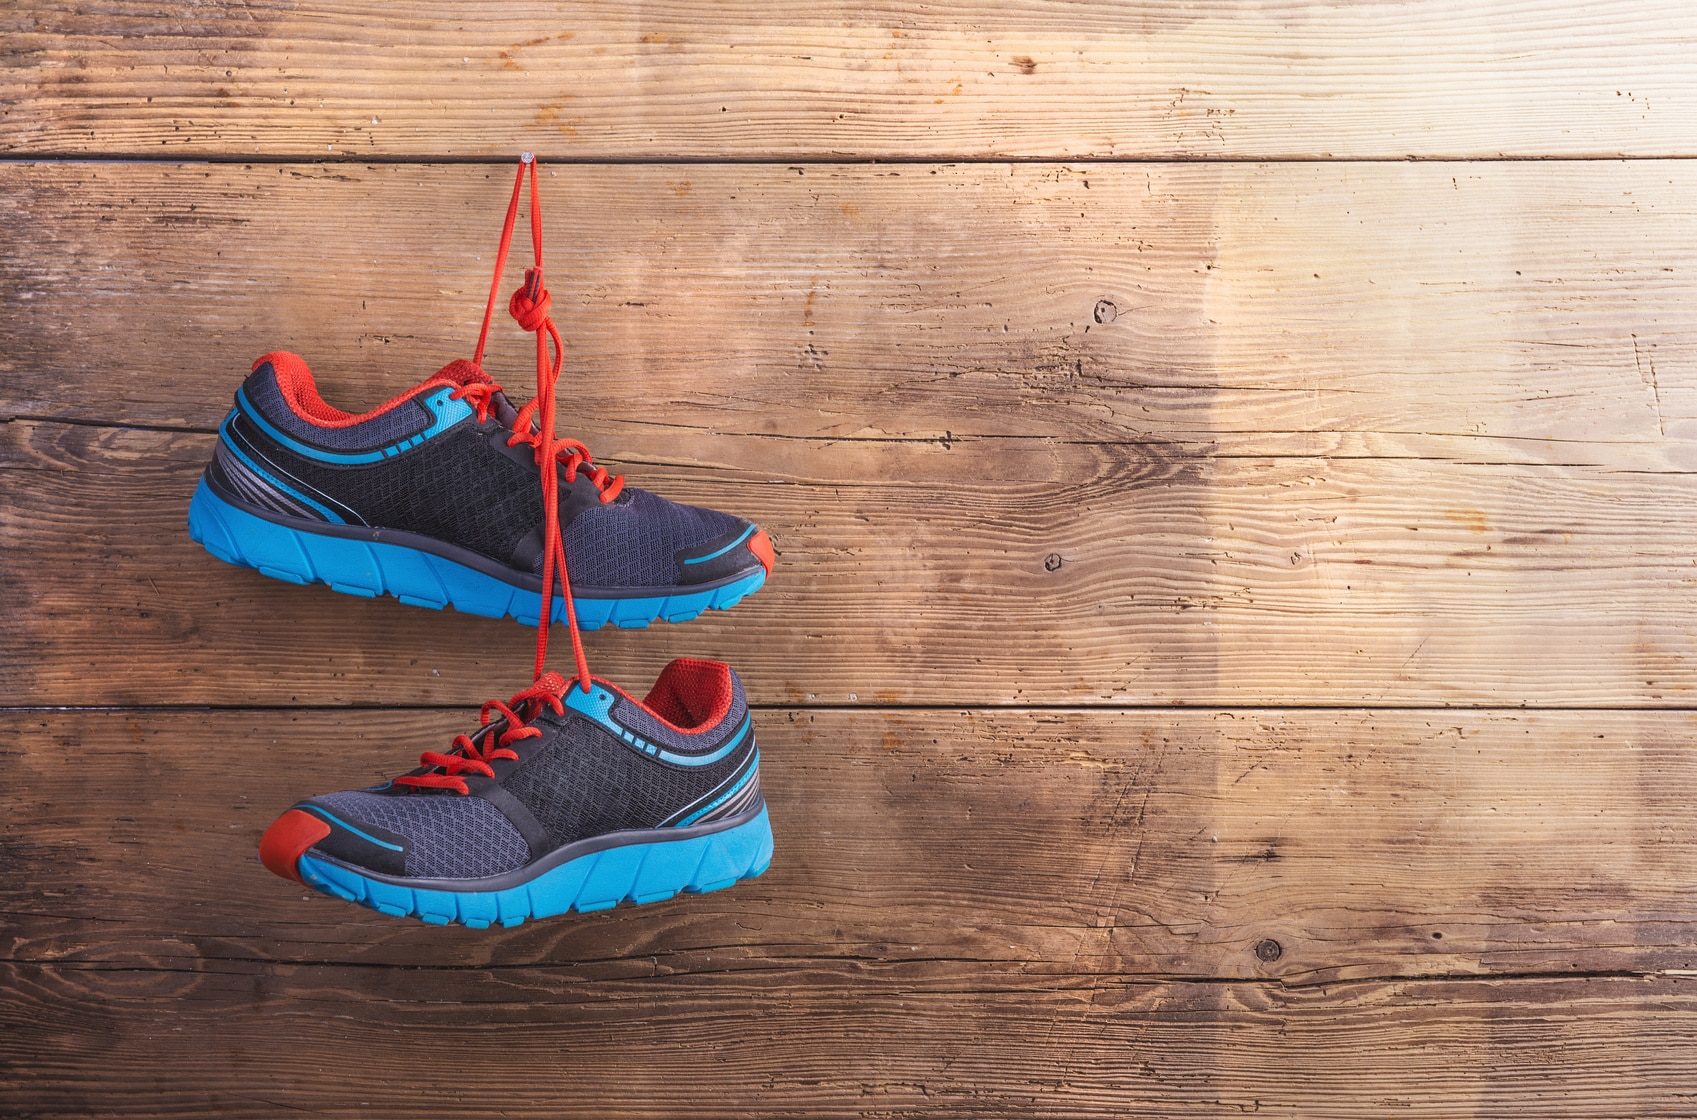
If you’ve been running for a while—or even just thinking about it—you’ve probably heard how important it is to wear the “right” shoes.

I used to think that was just marketing fluff.

Back in my early days, I’d lace up whatever old sneakers I had lying around and hit the road.

Big mistake.

My knees and shins were screaming within a couple of weeks. Eventually, I got a gait analysis and found out I was running in the wrong shoe type.

Switched to a another pair , and it was like flipping a switch. No more daily pain. That one change made running feel less like punishment and more like freedom.

So yeah—this stuff matters.

A lot.

That’s why I put together this guide to help you cut through the noise and actually find a pair of running shoes that fits your body, your goals, and your training.

I’ll break down the types of shoes out there, who they’re for, and which models are crushing it in 2025 from brands like Nike, Brooks, Asics, Hoka, and Saucony.

I’ll also throw in some personal stories, real-runner insights from Reddit, and coaching notes from runners I’ve worked with.

The goal? Help you find something that actually works for you—not just what’s trending.

Main Types of Running Shoes (Broken Down, No BS)

Here’s the rundown:

  • Neutral Cushioned Shoes – Made for comfort and shock absorption. Great if your feet don’t roll too much or if you’ve got high arches.
  • Stability Shoes – If your feet roll in (overpronation), these help guide your stride and keep things aligned.
  • Motion Control Shoes – For runners with flat feet or serious overpronation. These are like tanks—built for max support.
  • Trail Running Shoes – Tough shoes with grip and protection for dirt, rocks, and whatever else the trails throw at you.
  • Lightweight/Racing Shoes – Stripped-down and speedy. Some even have carbon plates. Ideal for race day and tempo runs.
  • Minimalist Shoes – These try to mimic barefoot running. Super light, barely any cushion. Niche crowd, but some runners swear by them.

Each type has its place. Let’s dig into them, starting with the most forgiving: cushioned neutral shoes.

Cushioned (Neutral) Running Shoes

If comfort is what you’re after, cushioned shoes are where it’s at. These are the go-to choice for daily mileage, especially on tired legs.

If your feet don’t roll in too much—or if they roll slightly out—you’re probably fine in neutral shoes.

They’re also perfect if you’ve got high arches like I do. No anti-pronation gimmicks here—just a soft ride that absorbs the pounding.

I lean on cushioned shoes during recovery weeks and long easy runs. On tired legs, that plush ride saves me. I’ve tested stiff shoes before—didn’t love it. For me, these are the “comfort food” of running gear.

When I coach beginners, I often steer them toward neutral shoes. They give you room to move naturally and help keep your joints happy as you build up mileage.

Who they’re for:

  • Runners with neutral form or high arches
  • Folks doing long or recovery runs
  • New runners who want something forgiving on the legs

Solid Neutral Cushioned Models (2024–2025 Picks):

Nike Air Zoom Pegasus 41

This shoe is the jack-of-all-trades. Cushioned but not too soft, fast enough for workouts but comfy for everyday miles. It’s the one I recommend if you only want to own a single pair. According to irunfar.com, it’s ideal for both beginners and marathoners.

Asics Gel-Nimbus 25

This one’s built like a pillow. Seriously. Great for long, slow runs or days when you just want comfort. The newest version really upped the softness, and irunsg.com says it’s perfect for runners who need that extra shock absorption.

Brooks Ghost 15/16

This shoe is like the dependable friend who always shows up. Fits well, feels great right out of the box, and doesn’t overcomplicate anything. According to runningwarehouse.com, it’s one of the most trusted trainers on the market.

Hoka Bondi 8

If you’re all about maximum cushion, this is your shoe. The Bondi has a massive slab of foam underfoot—it’s heavier, sure, but your knees will thank you.

I use it for those extra slow recovery days when I’m just trying to protect my joints. RunRepeat says it’s ideal for anyone chasing joint relief over speed.

Trail Running Shoes: Your Off-Road Lifeline

Let’s get one thing straight—if you’re taking your runs off pavement and into the wild, you need trail shoes. Not optional. I learned that the hard way.

Trail running shoes aren’t just “outdoor” versions of your road shoes. They’re built like tanks—with grippy, gnarly outsoles that bite into dirt, mud, rocks, and whatever else the trail throws at you.

We’re talking deep lugs that act like cleats, durable uppers that take a beating from roots and rocks, and, in most cases, a rock plate to protect your soles from sharp jabs underneath.

Think of them as your trail armor.

I’ll never forget my first real trail run in Bali. I showed up in regular road shoes—smooth bottoms, zero traction—and it had rained the night before.

Big mistake.

Within minutes, I was skating across mud, tripping over roots, and nearly kissing the dirt on a downhill. One sketchy moment on a wet descent nearly sent me flying face-first into volcanic rock.

That run humbled me. Right after, I picked up my first pair of real trail shoes.

The change? Night and day. Suddenly, I wasn’t tiptoeing down slopes—I was running with confidence. Grippy soles, extra stability… trail running became fun, not fear.

What Makes Trail Shoes Different?

Trail shoes come in all types. Some are light and speedy—great for races or fastpacking. Others are beefy and built for ultras or rugged terrain.

You’ll find shoes with deep, mud-shedding lugs for wet trails and smoother soles for hard-packed dirt. But they all share one thing: they’re made for grip, protection, and handling unstable ground without wrecking your feet.

When do you need them?

If you’re hitting trails regularly—especially technical or muddy ones—don’t mess around. Get the shoes.

If you’re just dabbling in light trails now and then, your road shoes might hold up, but you’ll miss out on grip and might wear them down quicker than you’d like.

David’s Top Trail Picks (Based on Sweat, Not Just Hype):

Hoka Speedgoat 6

These beasts are loved by trail runners around the globe—and for good reason. They’ve got thick cushion for long hauls and 5mm Vibram lugs that cling to everything short of vertical ice.

I use mine on Bali’s rocky mountain trails, and they handle volcanic terrain like a champ. If you want confidence bombing down technical stuff, these are hard to beat.

Brooks Cascadia 17

A trail classic. Not flashy, not super light, but tough and reliable. The rock plate keeps your feet safe, and the stable ride works great across all types of trail conditions.

New to trail running? This is your no-nonsense starter shoe. It’s got enough cushion for comfort and just the right firmness to keep you in control.

Saucony Peregrine 13

Fast, low-profile, and grippy as hell. This one’s made for those who like to feel the trail underfoot but still want solid protection. Great for races, great for mud.

Saucony added a rock plate and just enough cushioning to keep your feet fresh without making you feel like you’re bouncing on pillows.

Nike Pegasus Trail 4

For those hybrid runners—door-to-trail, road-to-gravel types. The Peg Trail isn’t the most rugged, but it’s comfy and smooth on mixed terrain.

Just don’t expect it to dominate deep mud or rocky trails like the Speedgoat or Peregrine. That said, if your daily run starts in the neighborhood and ends in a forest, this one fits the bill.

Coach David’s Take:

Trail running isn’t just “running in nature.” It’s an adventure. One minute you’re floating on packed dirt, the next you’re dodging roots, slipping on wet leaves, or navigating ankle-twisting rocks. You need gear that matches that chaos.

A good trail shoe is like a 4×4 for your feet—grip when you need it, protection when it counts. I’ve had moments where my trail shoes saved me from a nasty spill.

My road shoes? Not so much. One slip in the wrong shoes was all it took for me to wise up.

If you’re serious about running off-road—even once a week—don’t wing it. Get the shoes. Break them in. Get them dirty. That’s what they’re made for.

Minimalist (Barefoot-Style) Running Shoes

Minimalist shoes are like the rebel cousins of cushioned trainers.

They strip everything down—hardly any padding, little structure, and often zero drop (which means your heel and toe sit at the same level).

The idea? Get as close to barefoot as possible without stepping on rocks and glass.

We’re talking about shoes like Vibram FiveFingers—you know, those odd-looking toe gloves—Merrell’s Glove series, and the zero-drop gear from Xero Shoes.

These aren’t just “less shoe.” They’re a mindset.

The thinking behind them is simple: remove the support, and your feet and legs will have to do the work. You’ll land more naturally (usually forefoot or midfoot), build stronger foot muscles, and maybe even dodge some common overuse injuries in the long run.

What the Research Says

Studies are a mixed bag. Some show that minimalist shoes can reduce joint impact and improve form by encouraging softer landings.

Others—and plenty of real-world stories—say injury risk goes up when people switch too fast. We’re talking stress fractures, shin and calf issues, the works.

One study from The Running Clinic found that runners new to minimalist shoes reported more shin and calf pain than those sticking to traditional pairs. Injury rates were higher too.

Their conclusion? Take it slow if you’re curious. Really slow.

Should You Try Minimalist Shoes?

Only a small percentage of runners fully thrive in them. More folks use them once in a while—to build foot strength or work on form—and plenty decide they’d rather have some cushion underfoot.

There’s no one right answer here. It depends on how you run, your foot shape, and what makes you feel good.

These work best for:

  • Runners with efficient form
  • Folks looking to wake up weak foot muscles
  • Anyone who just loves the barefoot vibe

That said, even if you’ve had trouble with regular shoes, you can test minimalist options… but please don’t go from zero to 10 miles. Ease in. Like, really ease in.

Examples of Minimalist Shoes

Vibram FiveFingers (VFF)

These are the OGs of the barefoot world. They look wild—like rubber gloves for your feet—but they let you feel everything. Fans say they help fix form and make running feel fun again. But you’ve got to start small. Like walk-around-the-block small.

Merrell Vapor Glove & Trail Glove

These feel more like regular shoes, just with barely-there features. Vapor Glove is better for road or track—it’s featherlight and super flexible. Trail Glove adds some protection for off-road terrain. Great for runners who want minimalism without looking like a hobbit.

Xero Shoes HFS & Sandals

Think huarache-style sandals and zero-drop sneakers that hug your feet and keep things super basic. Some runners swear by these for that “barefoot but not bloody” feeling.

Definitely a niche, but if freedom of movement is your thing, they might hit the spot.

Stability Running Shoes

Stability shoes are made for runners who overpronate—that’s when your foot rolls too far inward during your stride. A little roll is natural, but too much can lead to knee pain, shin splints, or even hip issues over time.

These shoes use firmer foam, medial posts, or guide rails to gently correct your form without forcing your feet into a rigid motion. Think of them as bumpers on a bowling lane—there when you need them, invisible when you don’t.

Here’s why stability footwear help:

  • They reduce stress on knees and ankles caused by overpronation

  • Help with injury prevention, especially for runners with flat feet or weak arches

  • Ideal for daily training, especially if you’ve dealt with joint pain or instability before

Good picks

Brooks Adrenaline GTS 23

A workhorse stability shoe with smooth transitions and built-in guide rails. This one doesn’t feel clunky or restrictive—just quietly corrects your stride. Great for everyday miles. Running Warehouse ranks it as one of the best stability shoes year after year.

Asics GT-2000 12

Reliable, slightly firmer ride with just enough support to rein in mild-to-moderate overpronation. If you’re looking for a shoe that doesn’t scream “orthopedic,” this is your guy. Asics dialed in the fit and cushioning this year, making it a solid choice for new and experienced runners alike.

Saucony Guide 17

Light, responsive, and surprisingly soft for a stability shoe. It blends comfort with control without weighing you down. Believe in the Run called this model one of the most versatile options for everyday runners who need support but still want some zip in their stride.

Motion Control Shoes: Built Like a Tank

Motion control shoes are the most supportive type of running shoes out there. They’re designed for runners with severe overpronation, flat feet, or instability issues that need serious correction—not just a gentle nudge.

These shoes typically have a stiff medial post, extra cushioning, and a structured build that controls how your foot moves with each step. If neutral shoes are like running barefoot and stability shoes are like bumpers, motion control shoes are more like training wheels that keep everything upright.

Why Use Motion Control Shoes?

  • Help prevent injury for runners with excessive inward foot roll

  • Offer maximum arch support for flat-footed runners

  • Improve stability for heavier runners or those coming back from injury

Who Motion Control Shoes Are For:

  • Severe overpronators

  • Runners with collapsed arches or flat feet

  • Heavier runners who need maximum support

  • Anyone recovering from injury needing extra structure and stability

Rock-Solid Motion Control Picks 

Brooks Beast 20 / Ariel 20 (Women’s)

An absolute tank in the best way. Massive support, soft cushioning, and guide rails that gently steer your stride. Heavier runners or those with serious overpronation issues swear by this shoe. It’s not light—but it’s reliable.

Asics Gel-Foundation 14

A lower-profile motion control option that still delivers on support. Ideal for runners who want structure without the bulk. Great for daily mileage or beginners who need help correcting form while building a base.

New Balance 1540v3

One of the few shoes still officially labeled “motion control.” Double-density foam, supportive upper, and a wide base make this a go-to for flat-footed runners. It’s also a top pick for orthotic users, thanks to its roomy fit and removable insole.

How to Handle Heartburn and Acid Reflux While Running

If you’ve been dealing with acid reflux while running, you’re not alone.

I’ve had my share of gut-wrenching moments. (And no, I’m not talking about the miles. I mean actual gut problems.)

Here’s the deal: heartburn during a run can suck the life out of you.

You’re trying to hit that pace, feeling good, and suddenly—BOOM—your stomach turns on you.

That burning sensation in your chest, the regurgitation, the sudden halt in your stride because your body’s saying “Nope.” So, what’s the fix?

In this post, I’m going to show you how to prevent and treat heartburn while running—without giving up your favorite sport. By the end, you’ll know how to run hard without worrying about heartburn making you slow down.


What is Acid Reflux?

Heartburn is just a fancy term for that gnawing, fiery sensation that happens when stomach acid finds its way up into your esophagus. And no, it’s not a heart attack.

But it sure feels like one when you’re in the middle of a run, right?

This whole acid reflux thing usually happens when the valve that keeps stomach acid where it belongs gets a little too relaxed.

Running, with all its bouncing and core engagement, can be like an all-you-can-eat buffet for that pesky acid, pushing it right up where it shouldn’t be.


What’s Going On Inside Your Body?

When you’re running, especially those high-impact strides, the last thing your digestive system wants is a workout.

The muscles in your stomach that usually keep acid down are like, “Nah, I’m good,” and let that acid sneak up into your throat. Add some jostling and you’ve got a recipe for disaster.

Plus, if you’re still trying to digest food while running, you’re basically asking for trouble.


Why Does Running Make Heartburn Worse?

Here’s the kicker: running messes with digestion. You’re getting that blood flow to your muscles and away from your stomach, which is already working overtime to process whatever you ate.

Running also messes with your body’s position—especially when you’re hunched over or breathing hard—and all that can make the acid climb higher than it should.

It’s like your stomach’s trying to escape your body and make its way up to your chest.

Not exactly ideal, right?


How to Treat Heartburn While Running

First off, if you feel the burn creeping in, try not to panic. I know, easy for me to say, right?

But seriously, don’t stop running unless you have to.

You don’t need to call it quits just yet.

Instead, slow down, take deep breaths, and maybe try running at a less intense pace.

Keep some water on hand too, not too much though, or you’ll just slosh it around. 


The Real Trick: Prevention

So, how do you stop heartburn before it even starts? First, let’s talk food. You’ve gotta lay off the Four C’s—Citrus, Caffeine, Carbonated drinks, and Chocolate—before you run. Seriously, these are the big troublemakers.

And, if you’ve had a heavy meal, don’t even think about hitting the road right after. Give your stomach some time to settle . A light snack 30-60 minutes before your run should do the trick, but nothing too heavy.


Eat the Right Stuff

Now, I know we all love a good post-run snack (or pre-run, whatever). But if you’re serious about avoiding heartburn, eat something that’s not going to trigger the acid factory in your stomach.

A banana with peanut butter? Perfect. A small bowl of whole-grain cereal? Solid. Avoid the heavy, greasy stuff that will just sit in your stomach like a rock. Keep it light, and your stomach will thank you. Here’s your guide.


Time It Right

Listen, if you’re planning on running, give your stomach time to digest your meal.

That means no heavy meals 2-3 hours before a run. And don’t try to run on an empty stomach either—because guess what? That’s going to make your acid reflux way worse. So, balance it out, find what works for you, and stick with it.


Hydration is Key

Now, I’m not saying you should run a marathon with a dry throat. Drink water, but don’t overdo it. Too much water in your stomach before you run is just as bad as eating a huge meal. Aim for just enough to stay hydrated without feeling like you’re carrying a water balloon in your stomach.


Loose Clothes

Compression gear has its place, but if you’re prone to acid reflux, tight clothes around your stomach are the last thing you need. You want freedom for your gut to digest properly without getting squished.

Opt for loose-fitting gear that won’t make you feel like you’re wrapped in a tight plastic bag. Your stomach (and your running) will thank you.


Medications—When You Need Them

Alright, let’s get real. Sometimes, it’s not about mindset or timing—it’s about a little chemical help.

Antacids. If you’ve ever popped a Tums before a race, you know what I’m talking about.

Sometimes, you just need to give your stomach some relief so you can get through the run without feeling like you’ve swallowed a lava lamp. I’ve had my share of times where Tums were my best friend before heading out.

They’re quick, easy, and don’t take long to kick in. Gaviscon, though? That stuff’s a game-changer if you want a bit more of a buffer between you and the pain.

I used to keep a bottle in my bag for long races. Nothing beats that moment when you feel the burn creeping up, pop a little, and bam—relief.

But don’t go relying on them every run, okay? They’re for emergencies. If you find yourself popping Tums before every long run or race, you might want to talk to a doc about long-term solutions—because, spoiler alert, you don’t want to live on Tums.


Do Not Stop Running

Heartburn sucks. It really does.

But do NOT let it stop you from hitting your goals. Just because you get heartburn during a run doesn’t mean you need to stop running altogether. It is not a valid excuse.

Remember, exercise helps reduce GERD symptoms in the long run, so don’t give up on your fitness just because of a little acid. Stick with it, adjust your routine, and keep moving forward.


Final Thoughts

Heartburn while running isn’t the end of the world, but it can sure feel like it. Just like any injury or setback, you’ve got to learn how to work with it, not against it.

If you’re smart about what you eat, when you eat, and how you run, you can keep that heartburn at bay. Don’t let it take you down.

So, next time heartburn tries to crash your run, take a deep breath, adjust your game plan, and get back at it. You’ve got this.
Keep running strong,

David D.