Why Your Face Turns Red After Running (And What You Can Do About It)

woman running

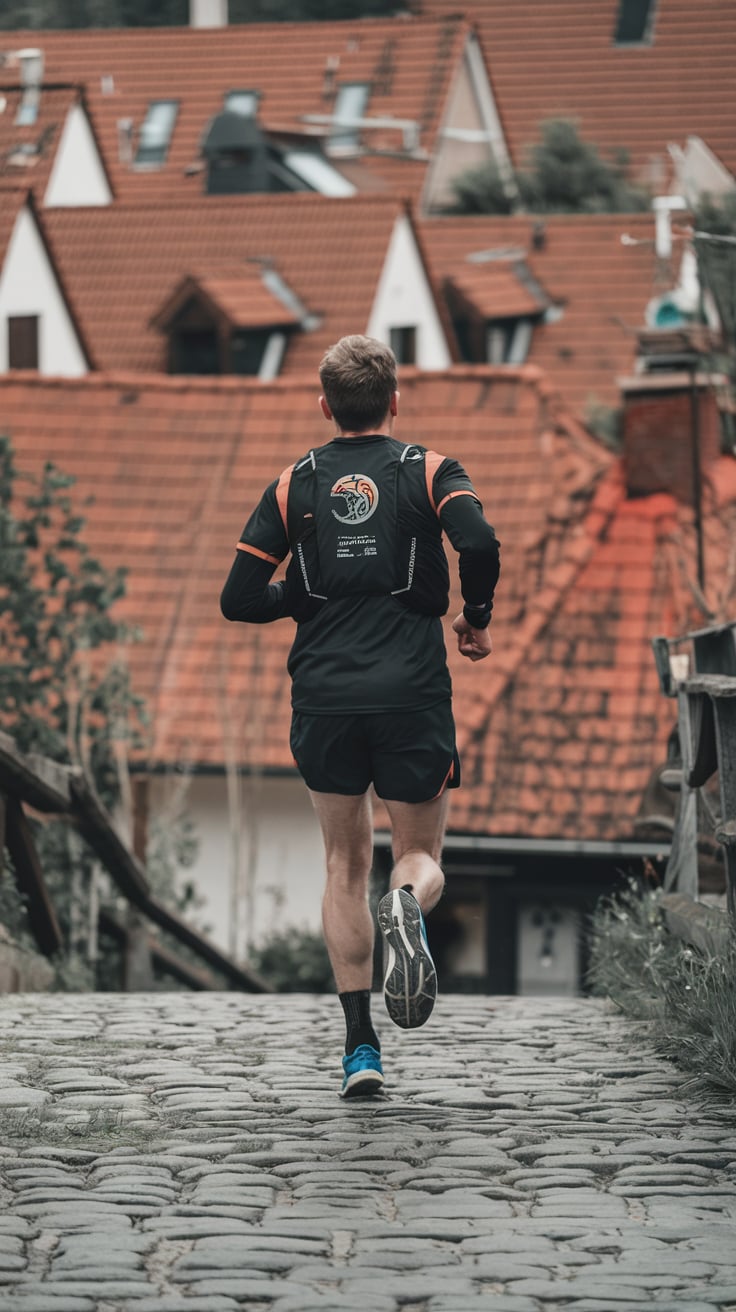
I’ll never forget crossing the finish line of a sticky summer 10K and catching a glimpse of myself in a car window. I looked like a fire truck. Bright red. Straight outta the oven. My friends ran over thinking I was about to collapse. One of them laughed and said, “You joined the tomato club, huh?”

Honestly, I felt fine — better than fine. I crushed that race. But my face? It told a different story. And that wasn’t the first time. I’ve coached tons of runners who’ve had the same “what the heck is wrong with my face?” moment.

Heck, one bald guy I know finished a treadmill run, walked up to the front desk to ask for water, and the hotel clerk gasped like he’d been hit by a bus. Gave him three bottles and a chair. The poor guy was just really red.

The truth? It wasn’t heatstroke. It wasn’t dehydration. It wasn’t anything serious.

It was just a classic runner flush — and yep, it’s totally normal.

So Why Does My Face Look Like It’s Been Boiled?

Here’s the short and sweet: when you run, your body heats up — fast. Your heart kicks into overdrive, your core temp rises, and your body’s gotta dump that heat somewhere. That’s where your skin comes in — especially your face. Blood vessels near the skin open up (this is called vasodilation) to bring hot blood to the surface so the heat can escape.

Think of it like your body’s radiator — when things start running hot, that radiator has to cool the engine. Your face is the radiator.

Now, your face is packed with capillaries, and when that warm blood rushes up, it’s like turning on a red light. Boom — cherry face.

Totally normal. Nothing to panic over.

But here’s the deal — if your red face comes with dizziness, chills, nausea, or a pounding headache… that’s not just a post-run glow. That could be heat exhaustion creeping in. And trust me, you do not want to mess around with that. Stop, hydrate, get in the shade, and cool down ASAP.

If you feel good and it’s just a color change? That’s your body doing its job. Just wear it like a badge of effort.

Why Do Some People Look Like Beets and Others Barely Blush?

Ah yes, the classic runner mystery: why do some of us go full tomato mode while others finish looking like they just stepped out of yoga class?

Short answer: genetics. Longer answer? Skin tone, capillaries, and how your body reacts to heat.

If you’ve got lighter skin, you’ll see that red pop more — especially if you’re from Northern European descent (shout out to my Celtic crew, I see you). It’s just biology. Your capillaries are closer to the surface, so when the blood rushes in, it’s front and center.

Darker-skinned runners still flush, but it might not be as obvious because melanin masks it a bit. Same heat response, just less visible.

Some folks just have super sensitive skin or a ton of superficial blood vessels — the kind that makes you blush just thinking about talking to someone cute. Same thing happens with wine, embarrassment, and yes… running.

No, it doesn’t mean you’re out of shape. No, it doesn’t mean you’re dying. It just means your body is cooling itself down the way it knows how.

5 Big Reasons Your Face Goes Crimson While Running

Let’s break this down like I do with my coaching crew. These are the most common reasons you’re lighting up like a holiday bulb:

1. Thermoregulation — Your Body’s Cool-Down System

This is the big one. Running raises your core temperature, so your body sends hot blood to the skin to release heat. It’s a built-in AC system.

The harder you push (or the hotter the day), the redder you’ll get. It’s normal. It means you’re working. But if you stop sweating and start feeling weak or dizzy? Game over — cool down, drink up, and listen to your body.

2. Skin Sensitivity and Your Natural Complexion

Some of us were just born to flush. Fair-skinned runners? You’re going to look like you ran through a chili field — and that’s fine.

People with more pigment? Might not show the flush, but the blood’s still moving. Don’t let your mirror tell you how hard you worked — let your body tell you how you feel.

What Can You Do About It?

  • Hydrate like it’s your job. Dehydration cranks up the heat response.
  • Wear a light, breathable hat to protect from sun and hide the flush if it bothers you.
  • Stick to shady routes on hot days — your skin will thank you.
  • Cool down post-run with a splash of cold water or a damp towel around your neck. I’ve even tossed ice in my hat on brutal days.

3. Histamine: Your Body’s Built-In Alarm System

Ever finish a run and look like someone slapped your face with a tomato? Maybe you even get those itchy red blotches that make you wanna claw at your skin. You’re not alone. One big reason? Histamines — your body’s chemical fire alarm.

See, for some of us, exercise doesn’t just crank up the heart rate — it sets off a histamine surge in the skin. These are the same little troublemakers that go off when you have allergies. They open up blood vessels, crank up circulation, and yeah… they can make your skin red, hot, and itchy.

Some experts think it’s part of your body’s way of coping with the stress of hard work — getting more blood and oxygen to the muscles, helping with minor tissue stress. Pretty clever, actually. But for those of us who are “histamine releasers,” it can feel like your skin’s throwing a tantrum mid-run.

And sometimes, it’s more than a flush. A small percentage of runners deal with exercise-induced urticaria — basically, hives or intense itching caused by the histamine dump. Sounds dramatic, but the good news is it usually chills out once you cool down.

If you’re one of those folks who turns into an itchy tomato after a hard session, talk to your doc — they might suggest an antihistamine. But don’t just pop one without guidance. Some meds mess with your body’s ability to handle heat, which can be risky on a long summer run.

Runner reality check:
That red, splotchy look? It’s not a problem — it’s your body yelling, “We’re working hard!” If it fades as you cool down and doesn’t cause major issues, it’s just part of the ride.

4. Fitness Level & Intensity: It’s Not Just a Beginner Thing

Alright, let’s squash a myth: turning red after a run doesn’t mean you’re outta shape.

Sure, when you’re new to running, everything feels hard. Your heart’s pounding, your face is glowing, and you’re wondering if this is how you die. That deep red flush? Totally normal. It’s your body hustling hard — trying to cool off, manage blood flow, and keep you upright.

But here’s the twist — seasoned runners flush too. One guy I coached could run a sub-20 5K but still lit up like a stoplight during hill sprints. The difference? He’s working at a higher intensity. For him, it takes a beastly effort to hit that flush zone, but it still happens.

As you get fitter, your body gets better at cooling. You start sweating earlier and more efficiently — your internal thermostat gets dialed in. That means you might not get as red during the same easy-paced run you struggled through six months ago.

One runner told me she used to flush just jogging around the block. A year later? Only breaks into tomato-mode when she’s pushing tempo in the summer heat.

So, does it ever go away? Not really. You just have to run harder to get there. Like a veteran marathoner once joked to me, “The red face never left — I just earned it at faster paces.”

Here’s the bottom line:
Your red face is a sign of effort, not weakness. Beginners, elites — we all wear it when we’re working hard. Don’t stress it.

Runner challenge:
Think back — when was the last time your effort made your face match your shirt? What level of intensity gets you there these days?

5. Weather: Your Face vs. Mother Nature

Now let’s talk about something you can’t control — the elements. Nothing messes with your skin like weather, and it absolutely plays into how red your face gets on a run.

Heat

Running in hot weather? It’s brutal. Your body is doing double duty — trying to power your stride and dump heat. That means more blood gets shuttled to your skin, and boom: flushed face.

Cold

Cold weather’s sneaky. You’d think freezing temps would cool you off, but it’s the opposite sometimes. Warm blood meets cold air and your face gets red anyway — like you’ve just come off a ski slope. Plus, the dry air and wind can chafe your skin. Instant windburn.

Humidity

High humidity is like running through soup. Sweat can’t evaporate, so you don’t cool down as well. Your body cranks up the skin blood flow, and you turn beet-red faster than you can say “Where’s the shade?”

Sun

Even if you don’t burn, direct sunlight heats your skin. That means even more flushing. Long-term exposure can dilate capillaries too — which is why some outdoor lifers have that constant ruddy look. And if you’re prone to rosacea? UV rays are one of the biggest triggers.

Wind

Wind can be your best friend or your skin’s worst enemy. A cool breeze helps sweat evaporate, which keeps you cooler. But a cold blast? That’s irritation city. Dryness, chapping, redness — especially on the nose and cheeks. Winter runners know this struggle all too well.

Real talk:
I’ve had winter long runs where my face felt like sandpaper for days after. I’ve also had summer track sessions where I looked like I’d just run through a volcano. Neither meant anything was wrong — just nature doing its thing.

Runner pro tip:
Pay attention to the weather before you head out. That flushed face might be more about the temp, humidity, or wind than your effort. Adjust your gear and hydration accordingly.

How to Stop Looking Like a Tomato After Your Run 

Listen — some of us are just wired to turn into walking beets when we run. Doesn’t mean you’re weak, broken, or doing something wrong. It’s just your body saying, “Hey, I’m cooling you down.”

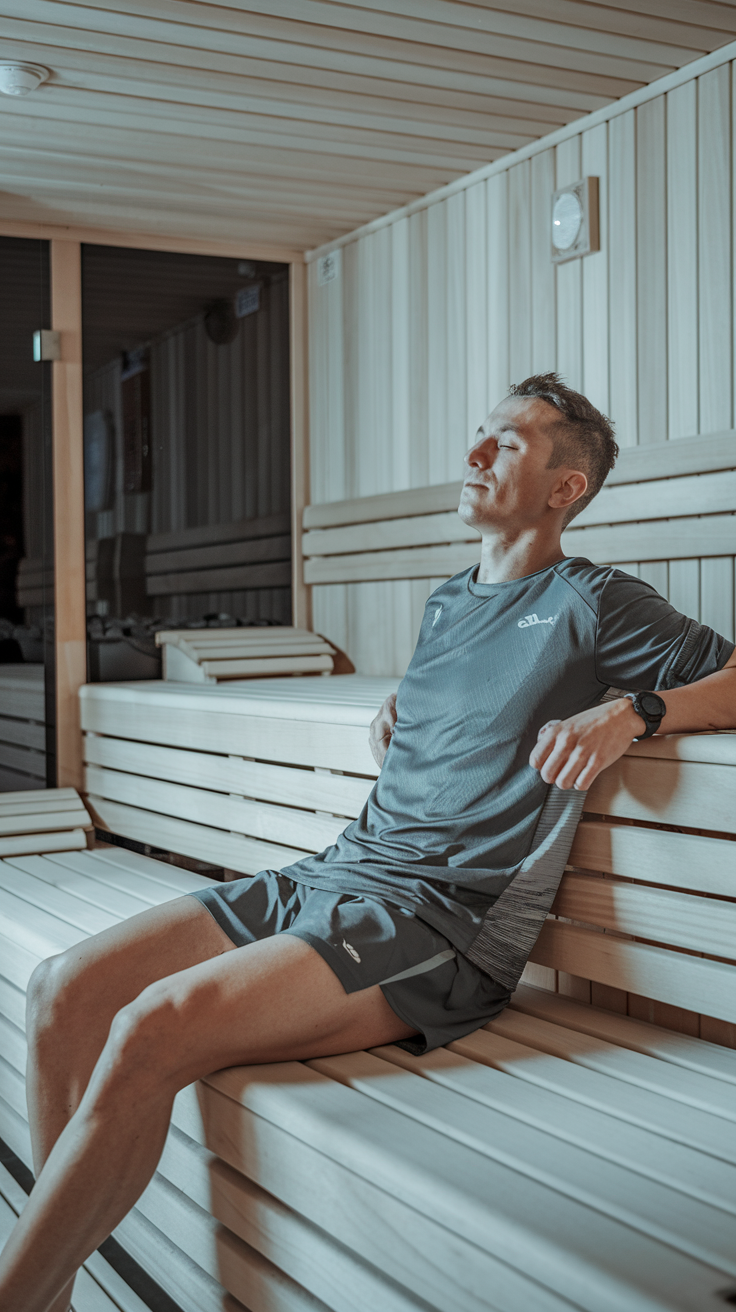
That said, if you’re tired of finishing every run looking like you wrestled a jalapeño in a sauna, here’s a checklist that actually helps.

This ain’t magic, but it works.

PRE-RUN: SET YOURSELF UP TO STAY COOL

Run Smart, Not Hot

Time your run early in the morning or late in the evening. You’re not proving anything by going out at noon in July. Cooler temps mean your body doesn’t have to work overtime to dump heat, which means less red-face drama.

Stuck with a midday run? Hunt down shade or head to the treadmill.

Hydrate Like You Mean It

Don’t just slam a bottle right before you lace up. Stay hydrated throughout the day. Think of it like prepping your internal air-conditioning — blood that’s well-hydrated flows better, regulates temp better, and helps you cool down without frying your cheeks.

Dress for the Mission

Lightweight. Loose. Breathable. Go for moisture-wicking gear that doesn’t trap heat like a trash bag. And ditch the black hoodie unless you want to look like a boiled lobster.

Light colors reflect heat — dark ones soak it up. Simple move, big difference.

Slap on the Right Sunscreen

Go for zinc-based or titanium dioxide sunscreens — they’re physical blockers, not chemical fryers. Plus, zinc actually helps calm your skin.

I’ve run with the wrong stuff and ended up redder and itchy. Look for labels that mention rosacea or “sensitive skin.”

Moisturize, Bro

Yeah, I said it. A thin layer of oil-free moisturizer with calming stuff like green tea or niacinamide can act like armor for your face.

It keeps the wind and dry air from wrecking your skin — and helps reduce that post-run flush. Bonus: feels good too.

Watch the Pre-Run Fuel

Skip the booze and spicy burritos a couple hours before your run. Both can dilate blood vessels and get you flushed before you even hit mile one.

Same goes for caffeine and chocolate — some folks get heat-face from ’em. If you’re one of those, keep pre-run snacks cool and mild.

DURING YOUR RUN: STAY COOL, STAY SAFE

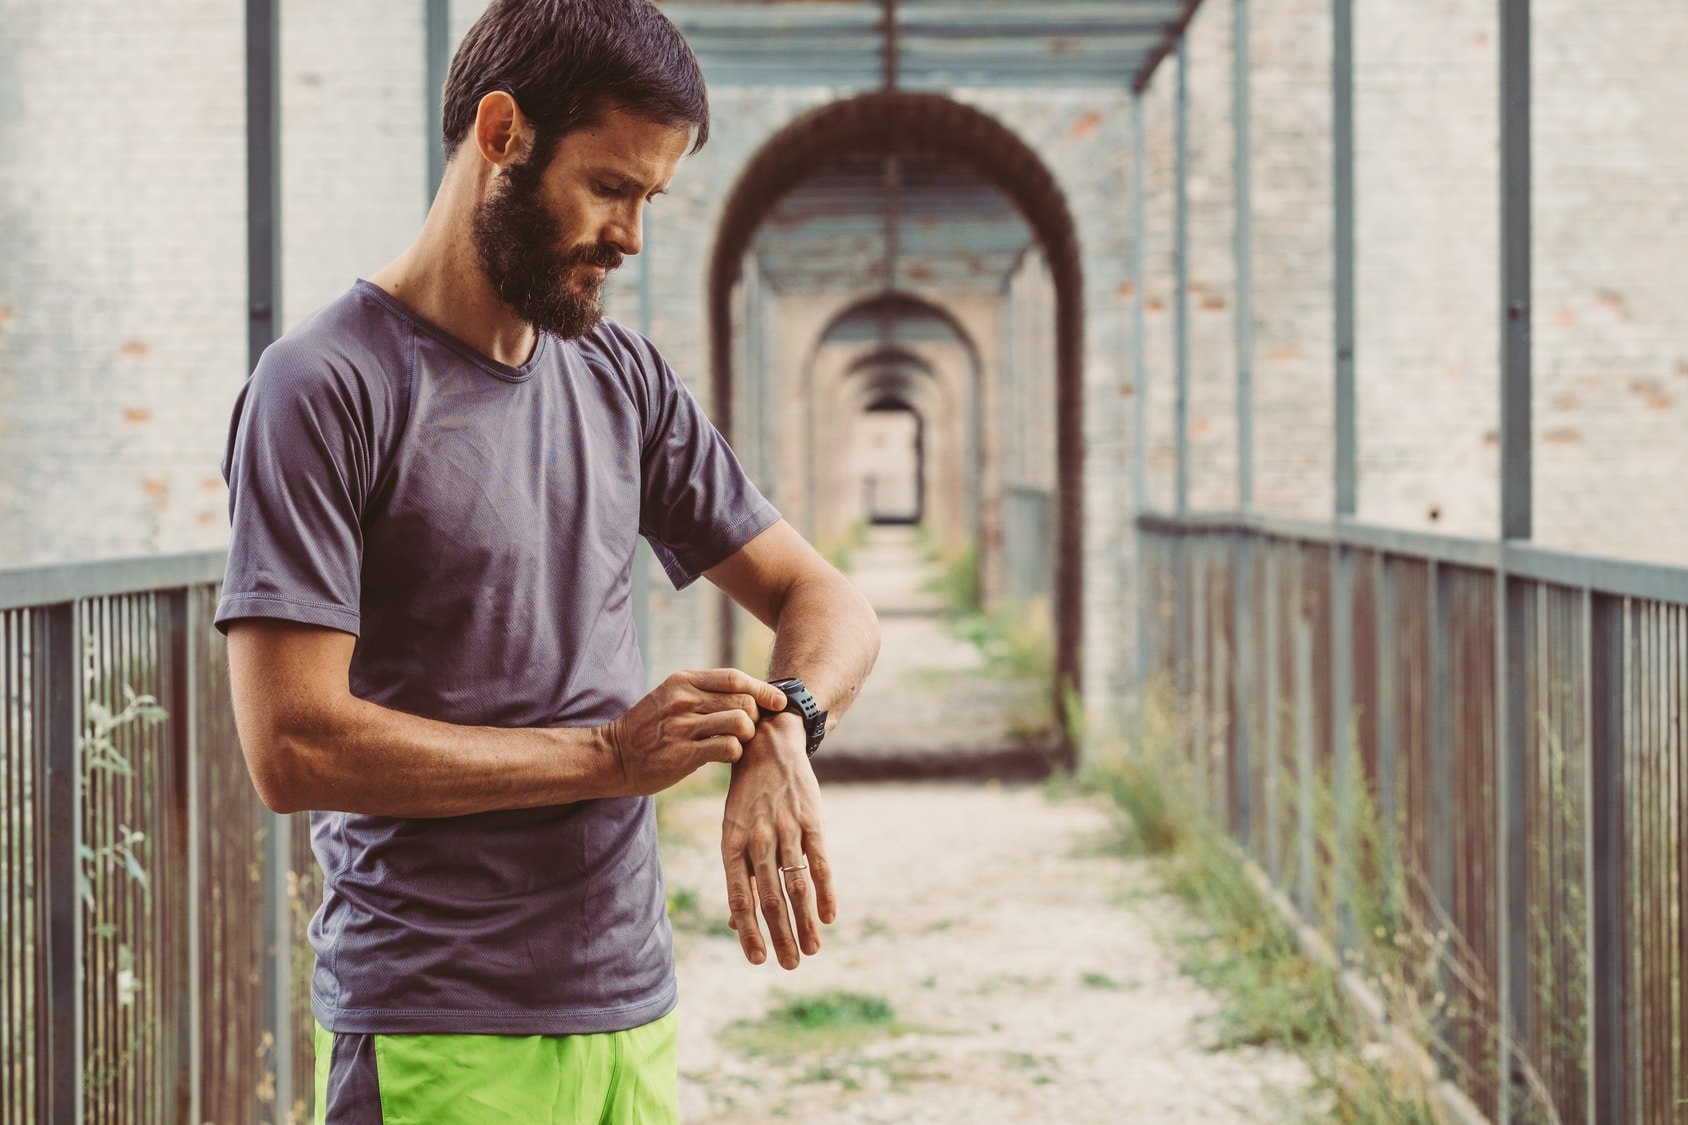
Listen to Your Body, Not Your Watch

If your face starts to feel like it’s on fire or you get dizzy, don’t be a hero. Ease up. Walk. Let your system cool off. You’re not quitting — you’re running smart.

Going red is normal. Going red and feeling off? That’s your body saying, “Slow the heck down.”

Splash & Cool

Bring a water bottle or plan for a water stop. Splashing water on your face, neck, or wrists cools you quick — especially if it’s cold.

I carry a soaked bandana on hot days and drape it over my neck mid-run. Feels like heaven. Bonus trick: hold an ice cube in your mouth if you’ve got one — cools your core from the inside.

Find the Shade or Create a Breeze

Run shaded routes. Even dappled tree cover makes a difference. A light breeze is your best running partner in the heat — it pulls sweat off your skin and cools you down fast.

On the treadmill? Set up a fan in your face like a boss. Doesn’t just feel good — it keeps your face from going nuclear.

Drink While You Move

If you’re out for more than 30 minutes, sip as you go. Water or electrolyte drink — your call. But don’t wait until you’re parched.

A few gulps every 10–15 minutes keeps your engine cool. Mild dehydration messes with your blood flow and sweating — and you’ll turn red faster than you can say “PR.”

After Your Run: Cooldown Like a Pro (Not a Rookie)

Alright, you crushed your run. You’re dripping sweat, heart’s thumping like a bass drum, and your face is lighting up like a stop sign. Been there. So, what now?

Here’s how to bring it back down without wrecking your skin or feeling like you’ve been hit by a freight train.

Ease Off — Don’t Slam the Brakes

First rule: don’t just stop cold after your last stride. That’s rookie stuff. I see it all the time — someone finishes a hard tempo run and just drops into a bench like they crossed a finish line in the Olympics.

Bad idea.

Instead, spend 5 to 10 minutes walking or slow jogging. Let that heart rate come down like a dimmer switch, not a light switch. You want the blood flow to return to normal — not pool in your face and make you look like you just sprinted out of a volcano.

Trust me, it feels better. Your circulation thanks you. And yeah, it even helps that tomato-face flush go away quicker.

Go Cold — ASAP

This part’s gold: cold therapy right after you stop. I’m talking face and neck — cool ‘em down fast.

Me? I keep a little towel in the freezer or cooler. Some folks dunk a washcloth in cold water before heading out. When you finish, slap that sucker on your cheeks, forehead, and neck. Few minutes is all you need. Boom — those blood vessels start to shrink back down.

No towel? Splash your face with cold water. Or press a cold water bottle on your face like a mini ice pack. I’ve even seen runners dunk their hats and slap ’em back on their head — whatever works. The goal? Drop your skin temp before your body turns you into a bonfire.

Soothe the Skin, Don’t Torch It

Once you’re cooled down, treat your skin like it just finished a 10-round boxing match — gentle stuff only.

Start with something calming: aloe vera gel is a solid go-to. It’s cooling, anti-inflammatory, and your skin loves it. Want to take it up a notch? Look for stuff with niacinamide (that’s vitamin B3 — great for calming redness and rebuilding your skin barrier) and hyaluronic acid (gives your skin moisture without the grease or sting).

One that runners in our circle swear by? Replenix Hyaluronic Acid Hydration Serum. Goes on light, no irritation, and brings your skin back to life.

Bottom line: your skin just battled wind, sweat, heat, maybe even sunburn. Be kind to it.

No Harsh Stuff for 24 Hours — Seriously

If your skin’s still red and raw, do it a favor: skip the tough stuff for the rest of the day.

No scrubs. No retinol. No acid toners. Save those heavy hitters for another time. Using them right after a run is like throwing hot sauce on a sunburn. Doesn’t end well.

If you’re on prescriptions like tretinoin or anything else that already messes with redness? Schedule them for your off days or bedtime — not right after a 6-mile tempo.

Gotta Be Seen? Use the Green

Now, if you’re heading to a meeting or brunch and your face still looks like a red light — yeah, there’s a fix.

Green-tinted primer or BB cream. Sounds weird, works like magic. Green tones down red. It’s like color math.

Pick one that’s made for sensitive skin — some even come with soothing ingredients built in. Just a thin layer, and you’re good to go. Nobody needs to know you just ran a 10K before coffee.

Of course, you don’t need makeup. Embrace the glow if that’s your vibe. But the green trick? Handy when you need to look less like a tomato and more like a human.

When Red Flags Aren’t Just About Your Face

Most of the time, a red face is just your body doing its job. But don’t ignore when it feels off. Here’s when that flush might mean something more serious:

Heat Exhaustion or Heat Stroke

You’re red, but now you’re also dizzy, nauseous, weak, and your head’s pounding? That’s not just post-run fatigue — that’s your body throwing up red flags.

Heat exhaustion sneaks up fast — especially on hot, humid days. It’s when your body’s struggling to cool down, and if you ignore it, it can slide into heat stroke — which is no joke. We’re talking 911 territory.

Here’s what to look for:

  • Red, sweaty skin
  • Pounding heart
  • Lightheadedness or nausea
  • Cramps
  • Maybe even vomiting

If that’s you, don’t play hero. Stop running, get in the shade, pour cold water over yourself, hydrate, and rest. If you’re not feeling better quick, seek help.

Worse? You stop sweating altogether and your skin’s hot and dry? That’s heat stroke. If you’re confused or about to faint, someone needs to call for help immediately.

Know the signs. Respect your body. No PR is worth your health.

Wrap-Up: Less Fire Engine, More Rosy Glow

You’re probably not gonna eliminate facial redness completely — especially if you’re the type who turns red fast (I do). But you can cool down smarter, treat your skin better, and stay safe on hot days.

And if you ever feel like that redness is more than just skin deep — don’t mess around. Your body talks. Listen to it.

When Red Means More Than Just “You Worked Hard”

Look, most of us get that post-run tomato face. It’s part of the game — especially after a hard effort or on a hot day. But if your face stays red long after you’ve cooled down — or turns beet-red after a light jog — there might be more going on than just heat.

I’ve had runners come to me thinking they were just “bad flushers,” only to find out it was actually something like rosacea or a side effect from meds. So let’s break it down.

Rosacea: More Than Just a Red Face

If your face looks sunburned for hours (or even days) after a run, or you’re red even when you’re chilling on the couch — don’t brush it off. That could be rosacea. It’s a skin condition that sticks around long after your cooldown. We’re talking:

  • Constant flushing (cheeks, nose, forehead)
  • Visible little blood vessels
  • Sometimes even acne-like bumps

Unlike the normal post-run flush that fades as you sip water and stretch, rosacea lingers — and it doesn’t take much to set it off. Heat, spicy food, alcohol… all common triggers.

I had one runner tell me even standing by the stove fired up her face like she just finished a 10K.

If that sounds familiar — red face hours after your run, burning, stinging, or patchy bumps — it’s time to see a dermatologist. They can help figure out if it’s rosacea, sensitive skin, or something else.

There are treatments, too. Prescription creams like metronidazole or azelaic acid help calm things down. And there’s brimonidine gel, which literally tightens up blood vessels to reduce redness fast. In tougher cases, dermatologists use laser treatments like IPL or pulsed-dye laser to zap those tiny vessels and reduce the permanent redness.

Bottom line? If your face doesn’t calm down within an hour or two, or if you notice uneven flushing (rosacea often shows up like a butterfly across the cheeks and nose), don’t just tough it out — get checked.

Is It Your Meds?

Sometimes, it’s not your skin — it’s what you’re putting into your body.

Certain meds can trigger flushing or make it worse. Common offenders include:

  • Blood pressure meds (especially vasodilators)
  • High-dose niacin (vitamin B3)
  • ED meds like sildenafil (Viagra) – yep, they dilate blood vessels
  • Some antibiotics like doxycycline, especially if you’re getting sun exposure too

These can make your face flush like you just ran hill repeats — even if you didn’t move. So if you’re suddenly red during or after your runs and nothing else has changed, check your med list. Talk to your doc and let them know what’s going on.

And while rare, medical issues like hyperthyroidism, carcinoid syndrome, or severe allergic reactions can also cause flushing. Most runners won’t deal with these, but if you’re seeing red outside of workouts, or feeling faint, breathless, or weirdly out of it — get it checked. Better to be safe than sidelined.

Red Flags to Watch For

Okay, here’s when to stop guessing and talk to a doc:

  • Redness that sticks around for hours after your run
  • Flushing when you’re at rest or cool
  • Skin that’s red and painful, burning, or bumpy
  • Redness with other symptoms like shortness of breath, chest tightness, irregular heartbeat, or feeling faint (especially mid-run — that’s a 911 moment)
  • A sudden change in how your face reacts. If you’ve always gone a little pink but now you’re full beet with minimal effort, something’s up.

I’m not saying panic. Most of the time, it’s harmless. But tuning into your body and asking the right questions? That’s part of running smart.

Skincare for Runners Who Go Red

If your face looks like a ripe tomato after every run, it’s time to give your skincare routine some love. No, I’m not talking about 12-step routines or spa days — just the right stuff to cool, calm, and protect.

Here’s what I tell my runners:

Do This

Go for Soothing Ingredients

Use stuff that hydrates and calms your skin — not strips it. Look for:

  • Niacinamide (Vitamin B3): This is the MVP for redness. It calms, strengthens your skin barrier, and helps reduce inflammation. I use a serum with about 5% niacinamide in the morning and evening.
  • Aloe Vera & Plant Extracts: Think green tea, chamomile, licorice root. They’re like ice packs in a bottle. I’ll hit my face with a mist after hot runs — cucumber + green tea is my jam.
  • Hyaluronic Acid (HA): Big hydration boost, zero irritation. It draws water into your skin without making it greasy. Great after a sweaty run when your face is thirsty and grumpy. Products like Replenix’s HA serum are clean, light, and don’t clog pores.

Use Mineral Sunscreen — Every Day

Even if it’s cloudy. Even if it’s cold. UV rays will mess with your skin and crank up redness — especially if you’ve got rosacea.

Go with zinc oxide or titanium dioxide sunscreens. Look for ones made for sensitive skin, like EltaMD UV Clear SPF 46 — it has niacinamide built in and doesn’t feel heavy.

Cleanse Gently After Runs

When your face is red and hot, don’t attack it with gritty scrubs or harsh soaps. Go sulfate-free.

Cream cleansers or gentle gel washes are your friend. Look for ones with calming extras like oatmeal or feverfew (yep, it’s a thing).

Don’t Do This

  • Don’t use harsh exfoliants or anything labeled “deep clean” or “tingling” (that’s usually code for “will torch your face”).
  • Skip products with heavy fragrance, alcohol, or menthol — they’re known irritants.
  • Avoid hot water post-run. Lukewarm is plenty.

Don’t Jack Up Your Skin: What to Avoid if You Flush Like Crazy

Alright, let’s talk about what not to do if your face turns beet red after every run — especially if your skin’s already on the sensitive side.

I’ve coached plenty of runners who thought they were doing their skin a favor, only to end up looking like they lost a fight with a chili pepper. If that sounds familiar, read on.

Here’s what to steer clear of if you don’t want to inflame your face even more:

Skip the Sting: No Alcohol-Based Toners

You know that tight, tingly feeling some toners give you? That’s not your pores getting “clean” — that’s your skin screaming for help.

Those alcohol-packed toners or quick-dry lotions dry out your skin and turn up the redness. Especially before a workout, that’s a recipe for tomato face.

Hydrating toner? Maybe. No toner at all? Even better in a lot of cases. Your skin doesn’t need more drama before a run.

No Harsh Exfoliants Before You Lace Up

Exfoliating can be good… if you time it right. But slathering on an AHA/BHA peel, glycolic acid, or your fancy retinoid right before a workout? Bad move.

Here’s the deal — those products bring new skin to the surface. That fresh layer is more sensitive and prone to flushing when blood starts pumping. Add sweat and sun, and you’ve got a flush fiesta.

Instead, use exfoliants or retinoids at night and on rest days. And don’t overdo it. Exfoliate too often and you’ll keep your skin in a state of constant irritation.

Remember: moderation isn’t weakness — it’s smart skincare.

Cut the Fragrance — Seriously

Fragrance might smell nice, but it doesn’t do a damn thing for your skin. And for sensitive runners? It’s often the hidden trigger behind that persistent redness.

We’re talking skincare, sunscreen, laundry detergent — even the stuff you wash your headbands with. Go fragrance-free when you can. The fewer irritants you’re loading onto your skin, the less likely it’ll blow up mid-run.

Ease Off the Hot Water

This one’s subtle but makes a big difference. After a run, your face is already hot and flushed. If you wash it with steaming water? Boom — even more redness.

Hot water dilates your blood vessels. That’s why you turn lobster-red in a hot shower. Use cool to lukewarm water on your face, especially post-run. It helps your skin chill out faster.

Pro tip: If you’re someone who deals with rosacea, dermatologists often say to stick with tepid showers overall. And if you need heat for sore muscles, keep it below the neck.

Be Kind to Your Face — Every. Single. Day.

At the end of the day, building a gentle, calming routine is what helps. It’s not just about what you use on race day — it’s the daily stuff that builds your skin’s resilience. The better your baseline, the less intense your post-run flush will be.

Over time, with the right approach, you might notice your skin gets less red overall, and bounces back quicker after a tough run. That’s progress you won’t see in your mile splits — but it counts.

One Last Thing: Everyone’s Skin is a Little Weird

You might read online that “everyone” loves niacinamide or that “this sunscreen works for all skin types.” Yeah, until it doesn’t.

Every face is different. So take it slow. Try one new product at a time, and don’t panic if something doesn’t work for you.

If you’re dealing with rosacea or your skin just seems extra touchy, get a dermatologist on board. No shame in that game.

How To Make Your Travel Adventure Relaxing Yet Fun This Season?

Traveling is all about creating unforgettable experiences, but finding the perfect balance between relaxation and excitement can be challenging. Whether you’re exploring a bustling city, lounging on a serene beach, or embarking on an adventurous road trip, the key is to plan wisely and stay flexible. From choosing the right destinations to incorporating moments of rest without missing out on fun activities, there are many ways to make your journey both enjoyable and stress-free. This season, embrace a travel style that lets you unwind while still making the most of every adventure. Here’s how you can achieve the perfect mix of relaxation and fun on your next trip!

7 Ways To Make Your Travel Adventure Relaxing Yet Fun This Season

Plan a mix of adventure and relaxation

Plan a mix of adventure and relaxation to make your travel adventure relaxing yet fun this season. A well-balanced itinerary allows you to enjoy thrilling experiences without feeling exhausted.

Start your days with exciting activities like sightseeing, hiking, or exploring local markets, and set aside time to unwind with a spa visit, a quiet sunset view, or a leisurely walk. This approach ensures you make the most of your trip while feeling refreshed. By blending excitement with moments of rest, you create a travel experience that is both fulfilling and enjoyable.

Pexels

Stay in comfortable accommodations

Stay in comfortable accommodations to make your travel adventure relaxing yet fun this season. Where you stay plays a big role in your trip’s enjoyment, so choosing a hotel, resort, or rental that offers both convenience and a cozy atmosphere is essential.

Look for places with amenities that match your needs, whether a peaceful retreat with scenic views or a centrally located spot with easy access to attractions. A good night’s rest and a welcoming environment help you recharge after a day of exploring, ensuring you wake up refreshed and ready for new adventures.

Balance exciting and laid-back activities

Balance exciting and laid-back activities to make your travel adventure relaxing yet fun this season. While adrenaline-filled experiences like zip-lining, city tours, or water sports add thrill to your trip, it’s just as important to slow down and enjoy peaceful moments. Spend an afternoon at a quiet café, take a scenic boat ride, or unwind at a local park to recharge.

Alternating between high-energy and relaxed activities ensures you don’t feel overwhelmed while still making the most of your journey. This thoughtful balance keeps your travel experience both enjoyable and refreshing.

Pack light and stay organized

Pack light and stay organized to make your travel adventure relaxing yet fun this season. Carrying only the essentials saves you from the hassle of lugging around heavy bags and makes moving between destinations easier.

Choose versatile clothing, pack travel-sized toiletries, and use packing cubes to keep everything in order. A well-organized bag means you can quickly find what you need without stress, allowing you to focus on enjoying your trip. Simplifying your packing creates a smoother and more enjoyable travel experience.

Keep a flexible schedule

Keep a flexible schedule to make your travel adventure relaxing yet fun this season. While having a planned itinerary helps maximize your trip, leaving room for spontaneity allows you to embrace unexpected experiences without feeling rushed.

Avoid overloading your days with too many activities, and give yourself time to explore at your own pace. Whether discovering a hidden café, extending a beachside stay, or simply taking a break when needed, a flexible approach reduces stress and makes your journey more enjoyable. By balancing structure with freedom, you create a trip that feels both exciting and effortless.

Enjoy local food and culture slowly

Slowly enjoy local food and culture to make your travel adventure relaxing yet fun this season. Instead of rushing through meals or sightseeing, take the time to truly experience the flavors and traditions of each destination. Savor authentic dishes at local restaurants, visit markets, and engage with artisans to learn about their craft.

Whether you’re tasting regional delicacies or exploring a cultural festival, immersing yourself fully enhances your trip. Pairing a leisurely evening with a cup of herbal tea or browsing specialty shops for unique finds, like THC oil tinctures from https://cbdfx.com/collections/thc-oil-tinctures/, can add a touch of relaxation to your adventure. By embracing the local pace, you make lasting memories while keeping your journey enjoyable.

Unplug when needed

Unplug when needed to make your travel adventure relaxing yet fun this season. Constant notifications and digital distractions can take away from the joy of exploring new places, so setting aside moments to disconnect allows you to be fully present. Put your phone away during meals, enjoy scenic views without a screen, and take in your surroundings without needing to capture every moment.

Whether it’s a quiet morning walk, a deep conversation with locals, or simply soaking in the atmosphere, stepping away from technology helps you appreciate the experience. Finding a balance between staying connected and being in the moment makes your journey more fulfilling and stress-free.

Why To Make Your Travel Adventure Relaxing Yet Fun This Season?

Making your travel adventure relaxing yet fun this season ensures you enjoy the best of both worlds—excitement and rejuvenation. A trip that is all adventure can leave you feeling exhausted, while one that is only about relaxation might lack memorable experiences.

Striking the right balance allows you to explore new places, try exciting activities, and still have time to unwind. It helps you create lasting memories without feeling overwhelmed or rushed. By planning a mix of thrilling and peaceful moments, you make the most of your journey while returning home refreshed and satisfied.

Pexels

Final Words

A well-planned trip should leave you with unforgettable memories, not stress and exhaustion. By balancing adventure with relaxation, choosing comfortable accommodations, staying organized, and embracing local experiences at a leisurely pace, you can create a travel adventure that is both exciting and refreshing. Flexibility and moments of unplugging allow you to truly soak in the beauty of your journey without feeling rushed. This season, focus on making your travels enjoyable, stress-free, and fulfilling so you return home with stories to cherish and a renewed sense of joy.

Saunas and Running: Can Heat Training Improve Your Endurance?

Heat exposure has long been a key component in athletic conditioning, with sauna use emerging as a powerful tool for endurance athletes. For runners, integrating saunas into their training regimens can lead to significant physiological adaptations, such as increased plasma volume, improved thermoregulation, and the activation of heat shock proteins (HSPs) that aid in muscle recovery.

The Science Behind Heat Adaptation and Endurance

One of the primary benefits of heat exposure for endurance athletes is an increase in plasma volume. Sauna use can cause a temporary expansion of blood plasma, allowing for better circulation and oxygen delivery to working muscles. This adaptation improves stroke volume and reduces cardiovascular strain during exercise.

Studies have shown that after several weeks of heat exposure, plasma volume can increase by 4-15%, contributing to improved endurance and faster recovery times.

Regular sauna exposure helps the body become more efficient at cooling itself. Over time, the sweat glands adapt to activate sooner and produce more diluted sweat, allowing runners to maintain a lower core temperature during exercise. This improvement in thermoregulation is crucial for athletes who compete in hot and humid environments, as it delays the onset of fatigue caused by overheating.

Heat shock proteins (HSPs) play a critical role in protecting and repairing muscle tissue. These proteins become activated in response to heat stress, helping to prevent cellular damage and accelerate muscle recovery after intense training. Studies indicate that sauna exposure for 20-30 minutes at temperatures of 176-212°F (80-100°C) can significantly increase HSP expression, reducing inflammation and soreness in endurance athletes.

Heat Training vs. Altitude Training for Runners

Both heat training and altitude training have been shown to improve VO2 max, a key indicator of cardiovascular endurance. While altitude training increases red blood cell production due to lower oxygen availability, heat training enhances blood plasma volume, leading to similar aerobic performance benefits. Some studies suggest that combining both methods can yield the greatest improvements in endurance performance.

Altitude training forces the heart and lungs to work harder due to lower oxygen levels, while heat training strengthens the cardiovascular system by increasing blood flow and improving thermoregulation. Both methods enhance cardiovascular efficiency, allowing runners to maintain a faster pace for longer periods.

Altitude training requires access to high-altitude environments or hypoxic chambers, making it less practical for many runners. In contrast, heat training can be easily incorporated into a routine using saunas or running in warm conditions, making it a more accessible option for endurance athletes looking to gain performance benefits.

How Often Should Runners Use Saunas?

Studies suggest that runners can benefit from sauna sessions 3-5 times per week after workouts, with each session lasting 15-30 minutes at temperatures between 176-212°F (80-100°C). This frequency allows for heat adaptation without excessive strain on the body.

For endurance training, sauna sessions should be performed immediately after a run to extend the effects of heat exposure. Research indicates that post-exercise sauna use can increase endurance by up to 32%, with adaptations occurring within 10-14 days of consistent use.

Beginners should start with shorter sauna sessions (10-15 minutes) and gradually increase exposure time. Overexposure can lead to dehydration, dizziness, and electrolyte imbalances, which can negatively impact performance.

If you’re considering investing in your own setup, reputable providers like Sun Valley Saunas offer options that can bring the benefits of heat training right into your home.

Sauna Use for Marathon and Ultramarathon Runners

For runners competing in hot climates, such as the Boston Marathon, Western States 100, or Badwater Ultramarathon, sauna training can be a crucial tool for adaptation. Heat acclimation through sauna use allows the body to perform efficiently in extreme temperatures, reducing the risk of heat exhaustion and dehydration.

Marathon and ultramarathon runners place immense strain on their muscles. Sauna exposure post-run aids in reducing muscle damage, improving circulation, and accelerating glycogen replenishment, ensuring faster recovery between sessions.

Long-distance races require mental resilience. Sauna use conditions the body to withstand heat-related stress, training runners to stay focused and composed under challenging race conditions.

Potential Risks and Overuse of Saunas

Excessive sauna use can lead to dehydration, particularly if proper hydration strategies aren’t followed. Runners should drink electrolyte-rich fluids before and after sauna sessions to maintain optimal hydration levels.

Frequent exposure to high temperatures can influence hormone levels, potentially leading to increased cortisol production. While short-term sauna use enhances recovery, excessive exposure may result in chronic stress and fatigue.

To prevent negative effects, runners should monitor their body’s response to heat training and adjust sauna session frequency based on their individual tolerance levels. Listening to the body and prioritizing rest is essential for preventing burnout.

Scientific and Expert Insights on Sauna Training

Multiple studies have demonstrated the positive impact of sauna training on endurance. A 2015 study published in the Journal of Science and Medicine in Sport found that runners who used post-exercise sauna sessions saw a 32% increase in their time to exhaustion compared to those who didn’t incorporate heat exposure.

Elite athletes like Cristiano Ronaldo, LeBron James, and Tom Brady have long incorporated saunas into their training and recovery routines to maintain peak performance. Ronaldo often shares images of himself using saunas to aid muscle relaxation, while LeBron swears by heat therapy to help with post-game recovery.

Tom Brady, known for his longevity in the NFL, regularly uses infrared saunas to reduce inflammation and keep his body in top condition. Tennis superstar Novak Djokovic also integrates sauna sessions as part of his contrast therapy, helping him stay resilient through long, grueling matches.

These athletes understand that heat therapy can improve endurance, enhance circulation, and accelerate muscle recovery, keeping them at the top of their game.

If you’re interested in wagering on any of these athletes’ sporting events, click here to explore sportsbook apps.

While professional athletes have access to advanced recovery techniques, everyday runners can still benefit from sauna use. Whether training for a 5K, half-marathon, or ultra-distance race, integrating sauna sessions can enhance endurance and aid in post-run recovery.

Is Sauna Training Worth It for Runners?

Sauna training offers a host of benefits for endurance athletes, including improved cardiovascular efficiency, enhanced thermoregulation, and faster recovery times. Compared to altitude training, heat exposure provides an accessible and practical way to increase endurance performance.

However, proper hydration and moderation are key to avoiding risks such as dehydration and hormonal imbalances.

For marathon and ultramarathon runners, heat acclimation through sauna use can be a game-changing factor when preparing for hot-weather races. With scientific research and endorsements from elite athletes supporting its effectiveness, sauna training proves to be a valuable tool in a runner’s endurance arsenal.

The Runners Guide To The Clamshell – The Exercise That Saved My Hips

clamshell exercise

I used to laugh off the small stuff.

I was the runner who’d log 50-mile weeks and the lifter who chased heavy squats—but ask me to lie on the floor and do clamshells? Forget it.

That changed the day my hip sent me a not-so-subtle message.

Sharp twinge, followed by weeks of nagging IT band pain.

Suddenly, sitting hurt.

Running? Off the table.

I was limping through life and mad about it.

That’s when my PT handed me the most humbling assignment of my running life: Lie down and open your knees like a clamshell.

I rolled my eyes so hard I nearly strained something else. But I was desperate. So I did it. And I kept doing it.

Fast-forward a few weeks? My hips were stronger.

My knee stopped aching.

And just like that, I was running pain-free again.

So yeah—I’m now that guy who preaches clamshells to every runner I coach.

Because they work. They’re not flashy, they’re not sexy, and your gym buddies won’t be impressed.

But they’ll keep you out there logging miles instead of icing sore hips on your couch.

What’s a Clamshell Exercise, Anyway?

Simple setup: lie on your side, knees bent, feet stacked. Keep your feet together, and lift the top knee like you’re opening a clamshell.

That’s it.

But don’t let the simplicity fool you—this move hits muscles most runners ignore.

Namely:

  • Gluteus medius The stabilizer on the outside of your butt
  • Hip rotatorsDeep little guys that keep your legs aligned
  • Core – Yep, it fires that too (if you do it right)

Clamshells were born in rehab settings and Pilates classes.

They’re low-impact, slow, and designed to activate, not annihilate.

Think of them as a wake-up call to sleepy stabilizers.

A lot of runners go hard on squats and lunges—great. But those big moves often let the smaller hip muscles off the hook.

Clamshells bring them back into the game.

Why Every Runner Should Be Doing Clamshells

Let’s break down exactly why this little move belongs in your toolkit.

1. They Wake Up Your Glute Medius (AKA the Pelvic Boss)

This muscle’s job? Keep your pelvis stable every time your foot hits the ground.

Weak glute medius? You get the dreaded hip drop, poor alignment, and overcompensation everywhere else—knees, IT band, even lower back.

Strong glute medius? You stay aligned, strong, and smooth.

Clamshells hone in on that muscle like a laser.

You’re not just building strength—you’re teaching your brain to fire the right muscle at the right time. That neuromuscular connection is key.

Ever heard of “dead butt syndrome”? Clamshells are one of the antidotes.

2. They Fight Off Knee, Hip & IT Band Pain

I’ve seen this first-hand over and over: runners with chronic IT band pain, patellar tracking issues, or mystery hip tightness?

Nine times out of ten, weak glutes are part of the problem – or even, in some cases, the root-cause of the issue.

Clamshells fix that imbalance by strengthening the muscles that keep your leg aligned as you run.

One of my athletes had knee pain that flared up every long run.

We added clamshells daily, and boom—within a few weeks, pain dropped off. No magic, just better muscle control and balance.

Science backs it too:

Your hips are the steering wheel. Strengthen them, and your whole body drives smoother.

3. They Build a Foundation (Runners, Lifters, Desk Jockeys – Listen Up)

You don’t need to be training for a marathon to benefit from clamshells.

  • Lifters use them to improve squat mechanics.
  • PTs use them to fix back pain.
  • Office workers? You probably have sleepy glutes too—clamshells can help reset the system.

Even elite athletes throw these in their warm-up routines because they know: when the small muscles fire first, the big ones follow better.

If you’ve ever felt your hamstrings or quads take over during squats, try doing 2–3 sets of clamshells beforehand. You’ll feel your glutes light up—and your form tighten up.

No Gym? No Excuse

Clamshells are as no-BS as it gets. No machines, no fancy gear. Just you, the floor, and gravity.

They’re the ideal bodyweight exercise for runners.

Watching Netflix? Do a set.

Stuck in a hotel room on a work trip? Do a set.

Cooling down after a run? You get the idea.

You don’t even need resistance bands to get benefits (though they do ramp things up).

The barrier to entry is zero, which is why physios and coaches hand them out like candy — because you’ll actually do them.

They’re joint-friendly, low-impact, and take up about as much space as your foam roller. Add a few sets to your rest days or warm-ups and they’ll quietly start building serious hip strength.

This, overtime, guards you against all sorts of overuse injury. What’s not to like, really!

Builds Symmetry & Hip Stability (No More Wobble)

Here’s the deal: your body is a master at compensating.

If your glutes are asleep, other muscles step in — but that often leads to breakdown.

Clamshells target the gluteus medius, that sneaky little muscle on the side of your hip that stabilizes everything when you run, squat, or walk stairs.

Strengthening it balances the load between your outer hips, thighs, and core.

That means fewer wobbly landings, less knee collapse, and a smoother stride.

Ever feel your knee cave inward on squats? Or your hip drop on one side when running? That’s your glute med not doing its job. Clamshells fix that.

Makes Your Big Lifts Better (Yes, Really)

Want to squat deeper? Lunge with more control? Stop your back from taking over deadlifts? Clamshells help you get there.

They fire up the hip abductors and external rotators — the muscles that keep your knees tracking over your toes and prevent your pelvis from tipping.

And when your glutes are properly activated, your quads and hamstrings don’t have to carry the whole show.

Do a few sets of clamshells before squats, and you might be surprised at how much cleaner your form feels.

It’s pre-activation that primes your glutes so they show up when it counts.

How to Do the Classic Clamshell (The Right Way)

The clamshell is a simple move—but don’t let that fool you. Most runners either rush it or butcher the form, and then wonder why their glutes aren’t firing.

Do it right, and your glute medius (aka the muscle that keeps your hips stable and knees happy) will light up in a good way.

Let’s break it down so you get the full benefit.

Step-by-Step: Classic Clamshell Form

  • Lie on your right side on a mat or soft surface.
  • Stack your left leg directly on top of your right, knees bent at about 90°.
  • Your knees should be slightly in front of you, feet in line with your butt.
  • Feet stay stacked, and your hips stay stacked—left hip right over right, no tipping back.
  • Rest your head on your right arm or a pillow so you’re not straining your neck.

Brace That Core

Pull your belly button in just slightly—like someone’s about to lightly jab your stomach. This keeps your pelvis stable and your spine from twisting.

Lift the Top Knee (Slow and Controlled)

Keep your feet touching, and raise your top knee (left) as high as you can without rolling your hips. This is the clamshell “opening.”

Your movement is at the hip, not the back or waist.

🧠 Form cue: Imagine a hinge at your hip joint. Your knee opens, but your pelvis stays frozen. If your top hip rolls back, you’re cheating and missing the glutes.

Don’t Overdo the Range

Most people max out around 45°–60°. You don’t need to go crazy high. Just get enough lift to feel that upper butt working.

Pause and Squeeze at the Top

Hold for a second at the top. Squeeze your glutes. This pause is where the magic happens.

Lower with Control

Bring the knee back down slowly. No flopping. Take 2–3 seconds.

Eccentric control = stronger hips.

Reps and Burn

Go for 12–20 reps per side, depending on your current strength. Start lower if you’re new. Do 2–3 sets.

If 20 feels like a breeze? Time to add a resistance band or level up.

Switch Sides

Roll over and hit the other side for the same number of reps. Balance matters.

Pro Tips to Nail Your Clamshells

  • Keep hips stacked like you’re resting against a wall—don’t roll open.
  • Thighs stay angled about 45° in front of your torso—don’t let the knees drift up toward your chest.
  • Spine neutral—no twisting, no arching.
  • Feet together at all times.
  • Abs engaged the whole way to stop pelvic tilting and protect your back.
  • Feel the burn in your glute, not your lower back or IT band.

If you’re feeling it in the wrong spots, slow down and reset your form.

Who Should Be Doing Clamshells? (Short Answer: Pretty Much Everyone)

Runners & Endurance Athletes

If you run — even casually — you need clamshells. Period.

Every stride puts you in a single-leg stance. That’s a stability challenge. Weak glutes = poor form = injuries.

We’re talking IT band syndrome, runner’s knee, hip pain, shin splints, ankle sprains — the whole messy list.

Your foot or knee pain? Probably starts with weak hips.

Clamshells target your glute medius — the little side butt muscle that keeps your stride aligned and your pelvis level.

In fact, studies show that hip strengthening beats knee-only exercises when it comes to fixing runner’s knee.

Add clamshells to your weekly routine — especially during peak mileage or race prep. They’re injury insurance.

Lifters, CrossFitters, and Booty Builders

Lifters, listen up: if your knees cave in on squats, or you struggle to feel your glutes in deadlifts, guess what?

You’re likely under-activating your glute medius.

Clamshells help fix that. They strengthen the hip abductors and retrain the glutes to fire properly.

This means better mechanics, more power, and less risk of injury.

Even bodybuilders use clamshells or cable abductions to round out the upper glute — yep, that’s glute medius, giving your butt that nice wide cap.

No shame in chasing aesthetics and performance.

Desk Warriors & Sedentary Folks

Sitting all day turns your glutes off. It’s called glute amnesia — and it’s real.

Meanwhile, your hip flexors get tight and start yanking on everything. That’s how you get low back pain, poor posture, and hip dysfunction.

Clamshells are the antidote. You can literally do them while watching Netflix.

Even 2–3 sets every other day will start reversing the damage. Wake up your butt and take the pressure off your spine.

Your posture (and future back) will thank you.

Rehab Warriors

Got knee surgery, hip surgery, or low back pain? Clamshells are one of the first things a good PT will throw into your plan.

Why? Because they safely re-strengthen the hips without loading the injured joint. Gentle, controlled, low-impact — and ridiculously effective when done right.

I’ve seen clamshells used for:

  • ACL rehab
  • Post-hip surgery strength
  • Chronic low back pain relief
  • Early-stage return-to-walk training

Studies show that people with back pain often have weaker hips. Strengthen the hips, and everything else feels better.

If you’re rehabbing, follow your therapist’s plan. But know this — clamshells are probably coming your way.

Older Adults or Anyone Working on Balance

As we age, we lose hip strength and balance. That’s what causes so many falls — not clumsiness, just weakness.

Clamshells are perfect because:

  • They’re done lying down
  • They’re safe and stable
  • They directly improve hip control for walking and balance

Mix them with bridges or gentle leg lifts, and you’ve got a solid base program for staying strong and upright for years to come.

Common Clamshell Mistakes (and How to Fix Them)

Clamshells look simple—and they are. But don’t let that fool you.

Bad form can turn this great glute move into a total waste of time (or worse, an injury waiting to happen).

Here’s what I tell runners who aren’t feeling the burn where they should, or are wondering why their hips still suck even after doing “all the right stuff.”

1. Rolling Your Hips Back

This one’s the biggie. As soon as your top hip starts to roll backward, you’re out of position. What you think is glute work turns into TFL or lower back compensation.

Fix it:

  • Keep your hips stacked vertically—think: one hip right over the other
  • Only the top knee moves, not your whole body
  • Do it with your back against a wall—if your hips or shoulders come off the wall, you’re cheating

👊 Coach tip: Smaller range, strict form > big range, sloppy reps.

2. Speeding Through Reps

Going fast might feel like a workout, but momentum isn’t muscle. If you’re bouncing your knee up and down, you’re not actually working the glute.

Fix it:

  • Go slow and controlled
  • Pause at the top for a beat—squeeze your glute
  • Lower down just as slow

You should feel the burn kick in around rep 10. If you don’t, slow it down more.

3. Not Squeezing at the Top

That “open like a clam” position? That’s where the magic happens. If you just tap that spot and drop back down, you miss the whole point.

Fix it:

  • Pause at the top, even just for a second
  • Actively squeeze your glute
  • Don’t just go through the motion—engage the muscle

🎯 Think: lift, squeeze, then lower. That’s a full rep.

4. Knees and Feet Drifting

As you rep out, your setup might start shifting—knees inching forward, feet sliding around. That changes the angle and pulls in the wrong muscles.

Fix it:

  • Start with knees bent about 90°
  • Feet in line with your body
  • Keep everything locked in—only the top knee opens

If your bottom leg is sliding? Reset. If your knees creep up toward your chest? Reset.

5. Tension in the Neck and Shoulders

Weird, but common. You’re working your hips, but suddenly your neck’s stiff and your traps are on fire.

Fix it:

  • Relax your upper body
  • Support your head with your hand or a pillow
  • Let your face and shoulders chill—all the work should be below the belt

6. Feeling It in the Wrong Places

If your lower back, IT band, or hip flexors are taking the heat? Something’s off.

Fix it:

  • Check your hip position—are you rolling back?
  • Slow it down, engage the glute consciously
  • Try pressing your heels together—it helps cue the glute
  • You can even poke your glute while doing the rep—yes, seriously. It boosts muscle activation

One runner said, “I feel it everywhere but my glutes!” That’s a dead giveaway that your form needs a reset.

7. Doing Too Much Too Soon

Clamshells seem easy—until you do them right. If you go from zero to 3 sets of 30 with a heavy band, you might end up sore in all the wrong places.

Fix it:

  • Start small: 1 set of 10–15 unbanded reps
  • See how you feel the next day
  • Add a band or more reps only when your body says it’s ready

Don’t let ego wreck your hips. Progress takes consistency, not heroics.

Final Thoughts: Boring, Unsexy… and Absolutely Essential

Let’s be honest—clamshells aren’t sexy. No one’s flexing after a killer set of clamshells. You’re not gonna post a time-lapse of you knocking out reps next to your foam roller and get a thousand likes.

But here’s the truth I’ve learned after years of running and coaching: it’s the boring stuff that saves your butt—literally.

Clamshells won’t give you a pump. They won’t leave you gasping for air. But they will do something way more important: keep you in the game.

When you’re 18 miles into a marathon, or deep into a squat cycle and your form holds, that’s clamshells doing their quiet work.

Foundations First

In my playbook glutes and hips are your foundation.

That’s your power center.

And if it’s weak, it’s just a matter of time before your knee hurts, your IT band flames up, or your piriformis locks up like a vice.

I tell my athletes this all the time:

“If you skip the small stuff, don’t be surprised when the big injuries show up.”

Clamshells are the small stuff. They’re the no-glory, rehab-style drills that actually fix the real issues.

They teach your body to fire the right muscles, the right way, at the right time. That’s how you move better, stay pain-free, and rack up miles without breaking down.

Your Turn

  • Have clamshells saved your running career like they did mine?
  • Got a favorite way to sneak them into your routine?
  • Or still doubting the power of the “boring stuff”?

Drop a comment. Let’s hear it.

Because consistency beats cool. And the clamshell?
It’s the unsung hero of strong, injury-free running.

Cable Hip Abduction Exercises for Runners: Build Stronger Glutes, Prevent Injuries, and Improve Stride

I’ll be the first to admit it—I used to skip hip work.

Like most runners, I figured miles on the road and a few squats in the gym would keep me covered.

Big mistake.

It wasn’t until nagging IT band pain sidelined me for weeks that I realized just how much I was neglecting my lateral hips.

Weak abductors don’t scream at you during the first mile.

They wait until mile ten, when your stride breaks down, your knees cave, and your body cashes a check your muscles can’t cover.

That’s when I dug into the science, the training, and yes—the cables.

And let me tell you, the difference has been night and day.

Stronger hips gave me smoother form, better stability, and most importantly—kept me running pain-free.

Now, every runner I coach hears the same thing: don’t wait for injury to wake up your hip training.

Build that strength before it’s too late.

Let me share with you some of favorite exercises.

1. Standing Cable Abduction

(The bread-and-butter for outer hip strength)

This is your go-to if you want to isolate the glute med and TFL with control and resistance. It’s like a standing leg lift on steroids—minus the momentum.

How to do it:

  1. Set the pulley low (near your ankle).
  2. Strap the ankle cuff to your right leg.
  3. Stand sideways to the machine (machine on your left if your right leg is working).
  4. Plant the non-working leg solidly.
  5. Kick your right leg straight out to the side. Lead with the heel. Don’t swing—lift with control.
  6. Bring it back slowly. Repeat. Then switch legs.

Form tips:

  • Keep your torso upright—don’t lean like you’re dodging a punch.
  • Engage your core, keep toes pointing straight forward, and avoid turning this into a forward kick.
  • It’s a pure side movement. If you’re using your upper body to yank the weight, it’s too heavy.

Sets & reps:

  • Start with 2–3 sets of 12 reps per leg.
  • Want strength? Go heavier for 8–10 reps.
  • Need more endurance or rehab? 15s with lighter weight.
  • Got a weak side? Hit it with an extra set.

Why it works:

The constant tension fires up your abductors the entire rep. That’s massive for hypertrophy and strength building.

Plus, the standing position forces your stabilizing leg to do work too. That’s real-world core and balance training—especially useful for runners pounding uneven pavement or trails.

A study once showed runners with IT band syndrome had weaker abductors. This exercise? It’s the antidote. If bands are your warm-up, cables are your strength builder.

2. Cable Side Kicks with Pause

(Time-under-tension monster)

This is the slower, meaner sibling of the standing abduction. Same move—but with a hold. And man, that hold burns.

How to do it:

Set up just like the standing cable abduction.

But this time, when you lift your leg out, hold it at the top for 2–3 seconds before bringing it back.

You can:

  • Do normal tempo reps with a short pause
  • Add a brutal tempo: 3-sec up → 2-sec hold → 3-sec down
  • Or just hold for 10 seconds straight as a finisher

Want to hit the TFL a bit more? Kick the leg out at a ~30° angle forward instead of perfectly lateral. Just don’t let it turn into a front kick.

Form tips:

  • That pause should be solid. No bouncing, no shaking.
  • If you can’t hold it, lighten the weight.
  • Focus on squeezing the side-hip hard at the top.
  • No leaning back or twisting your torso.

Sets & reps:

  • Try 2 sets of 8–10 reps per leg (with 2–3 second pause each rep).
  • Or tack it on after regular abductions: do 10 reps, then hold the last one as long as possible.

Why it works:

Holding the leg in that extended position builds control and peak strength—stuff you need when your stride’s loaded on one leg mid-run.

This isn’t just about building size—it’s about teaching your hips to hold position under stress. It’s like isometric training for stability endurance.

More control = fewer wobbles = better running form = less injury.

3. Standing Cable External Rotation

Let me tell you about one of the most underrated moves I’ve ever added to my routine—it’s called the standing cable external rotation. Sounds fancy, right? But this little move has helped me and some of the runners I coach fix nagging form issues like knees collapsing in and hips wobbling like crazy on long runs.

It’s not some trendy band exercise or glute kickback fluff. This one hits deep—targeting the piriformis, external rotators, and even your glute max where it matters most: rotation.

How to Do It Right

Setup

  • Head to the cable machine. Set the pulley to about knee height. Use the ankle strap.
  • Face the machine. Strap your right ankle.
  • Stand on your left leg, just in front of the cable line.
  • Your right foot should cross slightly in front of you—the cable should be pulling it inward across your body.

Execution

  • Keep your right knee bent at about 90°, foot lifted just off the ground.
  • Now, externally rotate the right hip—move your right foot out and away in an arc.
  • It’s not a big swing; think of your thigh as a door hinge. You’re rotating, not flailing.
  • Slowly bring it back across your body under control.

Feel that deep burn in the side of your hip? That’s the stuff.

Form Tips That Actually Matter

  • Keep hips level. No twisting your torso.
  • Use light weight—this isn’t about ego.
  • Don’t turn it into a side-leg kick or let momentum take over.
  • Hold something for balance if needed. Precision > performance here.
  • No cable machine? Loop a resistance band around a post and do the same thing.

Reps and Sets

  • 2–3 sets of 10–15 clean reps per side
  • Go slow. If you’re not feeling it in your deep hip muscles, something’s off.

Hip Abductor Strength Plan for Runners (No Excuses Version)

Let’s be honest—most runners don’t carve out time for this stuff. And then they wonder why they’re getting IT band pain, knee flare-ups, or funky form in mile 10.

In my practice as a running coach, I’ve always found a strong link between strength and overuse injuries.

Here’s the fix: train your abductors and glutes twice a week. That’s it. Just two short sessions.

Stick to non-consecutive days.

Add it after easy runs, or on cross-training days when your legs aren’t shot. You only need 15–20 minutes. That’s shorter than the time you spend scrolling Strava or Instagram.

Sample Weekly Setup

  • Option 1 – Tues/Thurs
  • Option 2 – Mon/Fri
  • Option 3 – Post-run add-on (on easy days)

What to Do

A mix of:

  • Band work
  • Bodyweight
  • Cables

Focus on:

  • External rotation (like this move)
  • Hip abduction (side steps, clamshells)
  • Glute med and glute max activation
  • Core stability (dead bugs, planks)

Use it for injury prevention. Use it for stronger strides.

Just use it.

Sample Hip Abductor Training Plan for Runners

If you’re a runner and you’re ignoring your hip abductors, you’re leaving performance on the table—and flirting with injury.

These little muscles on the outside of your hips keep your knees tracking straight, your stride smooth, and your form strong when you’re dog-tired late in a race.

This isn’t fluff work. It’s armor-building.

Here’s a smart, no-frills schedule that I’ve used myself and with runners I coach:

Weekly Plan Overview

DayExercise ComboSets × Reps (each side)
Tuesday (post easy run or PM session)Monster Walks + Fire Hydrants3 × 30 sec walks each direction; 3 × 15 reps
Thursday (cross-training or no-run day)Clamshells + Cable Standing Abductions3 × 20 reps; 3 × 12 reps per leg

Tuesday Breakdown (Activation + Burnout)

You just finished a recovery run. Now what? You hit this little 10-minute circuit. No excuses.

  • Monster Walks (banded): Get that side-to-side hip fire going. Walk left, walk right. Keep tension.
  • Fire Hydrants: Drop to all fours and hit those glute meds one leg at a time. Don’t rush.

Rest 60 seconds between rounds. That’s it.

This pairing lights up both hips dynamically, then zooms in on each one individually. Think of it as prepping your stabilizers for battle.

Thursday Breakdown (Strength + Control)

You’re not running today—or maybe just cycling or walking. Perfect time to hit strength.

  • Clamshells (floor-based): Add a band if you’re breezing through 20 reps. Feel the burn on the side of your butt? Good.
  • Cable Standing Abductions: Or band kick-outs if you’re at home. Controlled movement. No flailing.

You can alternate legs or go all one side then switch. Either way, make it clean. No rushing. This is where you build raw strength and movement quality.

Alternate Pairing Ideas (Mix It Up)

Keep your hips guessing. These are some plug-and-play combos:

  • Option A: Glute Bridge with Band Abduction + Side-Lying Leg Raises
  • Option B: Single-Leg Squats + Clamshells
  • Option C: Hip Hikes + Monster Walks
  • Option D: Cable External Rotation + Fire Hydrants

You can run these as circuits (minimal rest, cardio bonus) or straight sets (more rest, more strength). Depends on your focus.

Scheduling Tips That Actually Work

  • Don’t lift heavy or do long hip sessions the day before speed or long runs.
  • If you run hard on Wednesdays and Sundays, hit the hips Monday and Friday.
  • Doing workouts on Tuesday/Thursday? Train hips on Monday/Friday or even Wednesday/Saturday.

And don’t forget—on workout days, a quick mini-band warm-up (5 minutes tops) with monster walks, clamshells, and leg swings is killer for activation. Just enough to wake things up, not wear them out.

Set your routine in stone: “Tues & Thurs = Hip Time.” Write it down. Stick to it.

Track What Matters

Log your reps. Note the band tension or cable weight. Write down how the exercises felt. After 4–6 weeks, you’ll notice:

  • Less knee pain
  • Better stability during runs
  • More power in your stride
  • Stronger finish when others fade

This stuff is your injury insurance and performance booster rolled into one.

How to Add Hip Abductor Work Without Burning Out 

So, you get it now—hip abductor strength isn’t optional if you want to stay injury-free and run strong.

You’ve got your go-to moves, bands in hand, motivation on point. But how do you actually fit this into your routine without turning every week into a leg day and killing your run mojo?

Here’s how I coach runners to train smart, not just train more.

Keep It Tight: 2–3 Days Is Plenty

You don’t need to do hip work every single day. In fact, more isn’t better here. Research—and experience—suggests that 2–3 days a week of targeted glute/hip work is the sweet spot for most runners. Enough to get stronger. Not so much you’re waddling around too sore to run.

  • If you’re already lifting heavy—like squats or deadlifts—twice a week for your lower body, then 2x hip-specific sessions are probably enough.
  • Not lifting? You can go 3x a week, but space it out (like Mon/Wed/Sat) and keep your sessions short and sharp.

👉 Start small: 2 sets per move, 4–6 moves total. That’s it. Shoot for 10–15 reps per set, quality over quantity.

If your side glutes are sore the next day? That’s normal. If you can’t walk straight for 3 days? You overdid it. Ease in.

When Should You Do It?

Timing makes or breaks your recovery. Here’s how to play it:

After Easy Runs
One of my favorite times to add hip work is right after an easy run. You’re already warm. You’ve already got movement patterns going. So just finish with 10–15 minutes of focused strength.

Think of it as reinforcing your form while your body is already a bit fatigued—which mimics how your hips will feel late in a race.

On Cross-Train or Rest Days
Got a swim, bike, or full rest day? Perfect slot for hip work. Cycling barely hits those lateral stabilizers anyway, so your hips will be fresh.

On total rest days, a short routine can help recovery—gets blood flow going without overtaxing you.

Avoid Before Long Runs or Key Workouts
Please don’t crush monster walks or heavy band circuits the night before a tempo or long run. That’s a fast track to wobbly hips, trashy form, and possible injury.

👉 Pro move: On race day or before a big workout, just do a light activation set—like a single round of clamshells, band walks, or bridges. Low resistance. Just enough to wake the glutes up—not burn them out.

Know When to Back Off

Strength is good. But there’s a line between productive fatigue and overcooked.

Sharp Pain = Stop Immediately. If you feel pain—especially sharp, pinchy, or in the joint—shut it down.

Form Breaking Down? Call It. Your last rep should still be clean. Once you start leaning, shaking, or compensating like crazy, the set’s done.

Muscle “Failure” Isn’t the Goal .You’re not a bodybuilder trying to annihilate every fiber. You’re a runner. You want fatigue—not collapse.

Watch for Overtraining Red Flags. These include:

  • Heavy, dead-feeling legs on every run?
  • Glutes that stay sore 4–5 days after every session?
  • Progress stalling instead of building?

That’s your body saying, “Too much.”

Back off. Drop volume. Cut to 1–2x a week. Let your legs bounce back.

Have a Past Injury?

If you’ve dealt with glute med pain, bursitis, or tendinopathy, tread carefully. Ease back in slow.

If a move flares something up repeatedly, pause and see a PT. This stuff should help—not hurt.

For example, if hip hikes make things worse, you might be better off with modified side planks or band clams until your hip calms down.

Bottom line: Hip abductor work makes you stronger, more efficient, and less injury-prone—but only if you respect recovery, timing, and form.

Recovery Is Training – Don’t Skip It

Just because you’re not doing hip circuits today doesn’t mean you’re off duty. Recovery days aren’t rest days in disguise—they’re how you set up your next strong session.

Here’s how to recover like a pro:

  • Gentle glute and hip flexor stretching
  • Foam rolling your outer thigh and IT band
  • A massage ball under the glute to hit tight spots

That’s not fluff—that’s maintenance. The stuff that makes the next session work.

And if Monday’s hip workout torched you? Make Thursday’s lighter. Maybe more mobility, less load. That’s smart progression, not weakness.

Remember why you’re doing this: you’re not training to win a hip-thrust contest—you’re training to run better.

After a few solid weeks, you’ll feel it:

  • Smoother stride
  • Stronger push-off
  • Fewer mystery twinges in the knees or hips

That’s your reward for training smart.

Final Word From Coach David

Here’s something I tell my athletes all the time:

“You can’t run your best on a shaky foundation.”

And your hips? That’s your foundation. If you’re running on weak hip abductors, you’re asking for trouble—just like running on worn-out shoes. Doesn’t matter how fit you are. If your hips collapse under pressure, everything falls apart with them.

These exercises aren’t optional. They’re essential gear. Just like your shoes, your GPS watch, your fueling plan. The difference? You don’t see them until something goes wrong. But trust me—they matter just as much.

Strong Hips = Injury Shield

Weak abductors are sneaky. They don’t scream when they’re off—they just quietly mess up your form until something else breaks.

  • Your stride gets sloppy
  • Your knees take the heat
  • Your lower back pays the price

Train your lateral hips now, and you won’t need rehab later.

Quality Over Quantity (Every Time)

Don’t chase 20 new exercises. Master five good ones. Do them well. Do them often.

  • Track your progress
  • Focus on form
  • Stick with it

You’ll go from wobbling in a single-leg stand to feeling rock-solid in less than two months if you’re consistent.

🚫 Random YouTube routines every day = overkill
✅ Two smart, focused sessions each week = results

Remember: consistency > novelty.

Strength Takes Time – But Pays Off for Miles

The first couple weeks? You’ll be sore. That’s your body learning.

By week 4 or 5? You’ll feel solid. Stronger. Quieter form. More control on downhills. Less wobble in your stride.

Don’t drop the routine once you’re feeling good. That’s when most runners fall into the trap—“Oh, I’m fine now.” Then a few weeks later: injury.

Keep your hip work going year-round. Even in off-season. Even when nothing hurts. It’s way easier to maintain strength than rebuild it after everything falls apart.

Train to Support the Miles

Injuries don’t just happen on the run. They happen in the gaps—when we ignore the small stuff.

“Training isn’t just the miles you run. It’s what you do to support those miles.”

Strong hips let you run longer, smoother, and with fewer setbacks. They help you race harder, recover faster, and stay in the game.

So treat this stuff like your daily brushing and flossing. Maybe not exciting—but if you skip it, the cost adds up.

Your Move

  • Not sure which hip exercises to start with?
  • Coming back from a strain and need a safe progression?
  • Want a two-day-a-week hip strength plan that actually fits your training?

Drop your goal and schedule—I’ll help you set up a no-fluff routine that keeps your hips solid and your stride strong. Let’s build the foundation your running deserves.

How to Increase Running Speed: A Coach’s Guide to Running Faster

runner trying to Increase Running Speed

Trying to run faster but stuck at the same pace?

I’ve been there.

I’m David Dack – running coach, Bali-based pavement beater, and former pace-plodder.

When I first got into running, I figured speed would just come from piling on the miles. So I ran more. Then I ran even more. And guess what? I ended up tired, banged up, and slower than ever.

Turns out, running faster isn’t about grinding yourself into the ground.

It’s about training smarter – dialing in your form, building real strength, and mixing up your workouts. Once I made that shift, I shaved minutes off my times within a few weeks.

No fancy watch.

No secret supplement.

Just better training and a little stubbornness.

If you’re new to running and frustrated with your speed, don’t worry – you’re not broken.

And no, you don’t need to become a full-time athlete. With the right plan (and a little coaching insight), you can start moving faster without burning out.

This guide blends what I’ve learned from coaching runners all over the world with what I’ve learned from dragging my own legs through brutal heat, bad races, and breakthrough moments.

Let’s break some myths, challenge the usual “run more” advice, and help you run stronger, faster, and with more purpose.

Quick & Dirty: How to Get Faster (Even as a Beginner)

  • Add speed intervals: Try short bursts of fast running (30 seconds to 2 minutes), followed by slow jogging. One study showed just six of these sessions in two weeks helped runners shave about 6% off their 3K times. That’s huge for something so simple.
  • Sprint uphill: Think of hills as your sneaky strength session. A 6-week study showed hill sprints improved 5K speed by around 2%. It hurts – but it works.
  • Strength train weekly: Stronger legs = faster legs. Do 2–3 sessions a week of squats, lunges, and core work. It’ll boost your power and help delay fatigue.
  • Fix your form: Aim for about 170–180 steps per minute and stand tall. Cleaner form = less wasted energy = faster pace with the same effort.
  • Be consistent: Running 3–4 times a week beats one hard run and five rest days. Keep showing up. That’s how speed is built. Stick around – I’ll walk you through how to use these tips without feeling overwhelmed. We’ll talk wins, screw-ups, and what actually works on the road.

1. Strength Training 

Let’s get one thing straight:

If you want to run faster, you need to get stronger. Period.

For years, I barely touched strength work. I thought lifting was for bodybuilders, not runners.

But then came the injuries… and the embarrassment of being smoked in a 5K sprint by a guy who looked like he skipped leg day for a decade.

I still remember limping home after one of those races.

My breathing was fine, but my legs? Toast.

That night, a buddy (who’s a personal trainer and never sugarcoats anything) looked at me and said, “Man, you’ve got no power in those chicken legs.” Ouch. But he wasn’t wrong.

So I started doing the work. I began with bodyweight squats and planks in my living room, slowly added weights, and within weeks, I could feel the difference – not just in the mirror, but in my stride.

Suddenly, hills didn’t suck as much. I had some extra kick at the end of workouts.

And most importantly? I stopped breaking down every few weeks.

Why Strength Makes You Faster

Running might feel like a cardio game, but it’s your muscles that push you forward.

The stronger your legs, core, and hips, the more force you put into every step. And stronger muscles mean less pounding on your joints – which keeps you running longer.

Think of your body like an engine.

Strength training upgrades that engine. Same fuel, more output.

The Journal of Strength & Conditioning Research backs it up – studies show that runners who lift improve their running economy (that’s how efficiently you move) and top-end speed.

My Go-To Moves for Speed Gains

You don’t need a gym membership or a barbell to get started. Just commit to a few solid moves, and hit them a couple of times a week.

  • Squats: The OG of leg strength. I started with air squats and later moved on to dumbbells. This one’s essential – stronger quads and glutes mean better push-off, especially on hills or during sprints.
  • Lunges & single-leg work: Running is basically jumping from one leg to the other. So training each leg on its own builds balance and fixes those pesky strength imbalances. I mix in walking lunges, step-ups, and single-leg deadlifts.
  • Planks: A strong core keeps everything aligned when your body’s under stress. Side planks, regular planks – they all matter. It’s your mid-run armor.
  • Plyometrics: Think jump squats, box jumps, or bounding. You don’t need to do these every day, but even a little bit fires up your fast-twitch fibers – the ones that make you explosive. And yes, explosive = fast.

I usually do 2 strength sessions a week, often on easy run days or when cross-training. Doesn’t need to be fancy – 30 to 45 minutes is enough. Focus on form, keep it consistent, and trust the process.

2. Interval Training 

If there’s one workout that lit a fire under my pace, it was intervals.

I still remember one sweaty afternoon in Bali, dragging myself to the track with a simple plan: sprint hard for one minute, jog for two, repeat.

Sounds easy, right? Nah.

Two rounds in, I was already tasting my breakfast and gasping like a fish on land. I remember thinking, “Why the hell am I doing this?”

But I didn’t quit. I kept showing up.

A few weeks later, those painful 9-minute miles started dropping. Low 8s. Then high 7s. That’s when I knew – this stuff works.

What Are Intervals, Really?

Think of intervals as controlled chaos. You go fast – not kinda fast, really fast – for a short burst, then slow down just enough to catch your breath before doing it again.

For example: run hard for 30 seconds or 200 meters, then jog or walk for a minute. Rinse and repeat.

It’s like training your body to get comfortable with being uncomfortable.

You’re not just building fitness – you’re teaching your legs, lungs, and heart what fast feels like. And the more you do it, the more that “fast” becomes your new normal.

Why Intervals Actually Work

There’s a reason coaches call interval training a shortcut to speed.

When you push all-out, you tap into your anaerobic system – that’s the system that powers your final kick at the end of a race.

The recovery jogs in between aren’t just rest – they’re part of the lesson. You’re teaching your body to recover quickly and go hard again.

This kind of training boosts your VO₂ max – basically, how much oxygen your body can use when you’re running hard – and improves your running economy, which just means you move better, more efficiently. Plus, intervals burn a ton of calories in not a lot of time.

And here’s the kicker for us time-crunched folks: you can get a solid workout in just 20–30 minutes.

That’s huge.

No need for 10-mile slogs every day. Hit it hard. Recover. Done.

Try This: Beginner Interval Workout

If you’re new to speedwork, ease into it. No need to blow out your hamstrings on Day 1.

Here’s a starter workout I give to a lot of my beginner clients:

  • Warm-Up
    Easy jog for 10 minutes. Add some light movement drills – leg swings, ankle rolls, a few jumping jacks – get the body fired up.
  • Intervals (6–8 rounds)
    • Run hard for 30 seconds (aim for 80–90% of your max effort – you should be gasping by the end).
    • Jog or walk for 1–2 minutes to recover.
    • If 30 seconds gets too easy, bump it up to 1-minute bursts with 2-minute jogs. Make it hard, but doable.
  • Cooldown
    Finish with 5–10 minutes of easy jogging or walking. Let your heart rate come down slow. Trust me, you’ll need this part.

During the fast bits, focus on good form: stay tall, pump your arms, don’t flail like you’re fighting bees.

By the last couple of intervals, you should be hurting – that’s where the gains are made. But take those recovery jogs seriously too. Go slow. Let your body bounce back so you can hit it again.

Pro tip: use a stopwatch or a running app to stay on track. It’s easy to lose count when you’re sucking wind. Or hit a track and do it by distance – 200m or 400m reps work great.

3. Speed Drills & Strides

Back when I first started running, I thought speed drills were just for sprinters or old-school track kids.

High knees? Butt kicks? Skipping around like a five-year-old? No thanks.

For years, I skipped drills completely. And yeah—big mistake.

One day after an easy run, a buddy of mine dragged me into doing a few.

I remember feeling ridiculous lifting my knees like I was marching in a parade while people jogged by pretending not to stare. But after a couple of weeks? I was sold.

My stride felt smoother. My cadence got quicker. And without changing anything else, I was shaving seconds off my mile. That’s when I started calling drills my secret weapon—and now I get every runner I coach to do them.

So What Are Running Drills?

Think of them as short, focused moves that teach your body how to run better and faster.

Not longer runs. Not fancy workouts.

Just technique-building movements that work like a tune-up for your form and your brain.

Here are a few common ones:

  • High Knees – Run in place or move forward with exaggerated knee lift.
  • Butt Kicks – Heels up, tapping the back of your thighs.
  • Skipping or Bounding – Explosive hops that build spring and strength.
  • A-Skips/B-Skips – Track-style skips that feel weird at first, but really fine-tune form.
  • Strides – Short bursts (50–100m) at about 85–95% effort, focusing on smooth, fast turnover.

Each one lasts just 10–20 seconds, but they help your body lock in the habits that make fast running feel natural.

Why They Actually Work

Let me break it down like I do with new runners:

  1. You move better. Drills exaggerate the good parts of form—quick feet, upright posture, solid push-off. So when you go back to your regular runs, your body remembers. You run smoother without overthinking it.
  2. Your cadence improves. A lot of runners shuffle along at 160 steps per minute. Drills train your legs to move faster without forcing it. It’s like a metronome for your stride.
  3. You wake up your sprint muscles. Even if you’re not racing 100m, those fast-twitch fibers matter. Whether it’s a final kick in a 5K or dodging a pothole mid-run, drills make sure those muscles are ready to fire.
  4. Perfect for warm-ups. I don’t start any speed session or race without a few drills. They crank up the heart rate, loosen the legs, and flip the switch mentally—“Okay, time to move.”

My Drill Routine (No Track Required)

Here’s how I usually mix drills in:

  • 2×20 seconds of high knees
  • 2×20 seconds of butt kicks
  • A few skips or hops for bounce
  • Then 4–6 × 100m strides at a relaxed-but-fast pace (think mile race effort, not all-out)

Strides are my favorite.

You feel fast, but not wrecked. Just pick a flat stretch—like from one lamp post to the next—and run smooth, relaxed, and quick. Then walk back and do it again.

What Changed for Me

Once I added drills and strides into my week, something clicked. Intervals felt easier. I could pick up the pace mid-run without my form falling apart. It was like I finally unlocked that extra gear.

This isn’t just me talking, either.

I remember reading a Reddit post from a guy who called himself a “forever slow runner.” He joined a local track group that did weekly drills and strides.

After a season with them, he said, “I never thought I’d be fast… but here I am running PRs.” That stuff works, even if it feels silly at first.

4. Hill Repeats 

There’s an old saying in the running world: “Hills are speedwork in disguise.”

I used to avoid hills like the plague. Seriously—if a route had even a slight incline, I’d reroute. My quads would scream, my lungs would burn, and my brain would yell, “Turn back!”

But here’s the truth: once I stopped dodging hills and started using them, everything changed.

A few years ago, I trained for a 10K on a brutally hilly course. I spent two months hammering out weekly hill sprints on a steep little road near my place in Bali (yes, Bali’s got hills too—not just beaches and scooters!).

Come race day, every climb felt like a warm-up. I beat my old PR—on a flatter course. That’s when I truly bought into hill work.

Why Hills Are Worth the Pain

Running uphill is like strapping weights to your legs while cranking your heart rate through the roof.

It hits your glutes, quads, calves—heck, even your arms and core get dragged into the fight. It’s strength training wrapped into your run. And the payoff is big.

When you get stronger on hills, flat ground feels like cheating. Suddenly your legs feel snappy, and your stride gets more efficient. Even your breathing improves.

One study in the International Journal of Sports Physiology & Performance found that runners who added six weeks of hill intervals shaved about 2% off their 5K time. That’s 30–60 seconds faster for most people—without touching track work.

Hills also clean up your form. You’re forced to lean forward (from the ankles, not the waist), lift your knees, land midfoot, and keep your cadence quick.

Try overstriding on a steep hill—you’ll learn fast why that doesn’t work. It’s like free coaching from the terrain itself.

And mentally?

Hills teach you how to suffer. Repeating tough climbs trains your brain to stay in the fight. That grit pays off big when you hit the pain cave during races.

My Go-To Hill Workout

You don’t need a mountain. A modest hill—one that takes 30 to 60 seconds to climb—works just fine. Here’s a no-BS hill session that’ll build strength and stamina:

  • Warm-Up: 10–15 minutes of easy jogging on flat ground. Throw in some dynamic moves (like leg swings or skips) and maybe a couple of strides.
  • The Repeats: Sprint uphill at a strong effort—not all-out, but like you’re doing a hard 400m rep. Lean slightly forward from the ankles, pump your arms, pick your knees up, and drive through your toes. Focus your eyes a few meters ahead—not at your feet.
  • Recover: Walk or jog down slowly. Use this as your break. Let your heart rate come back down before starting the next rep.
  • How Many? If you’re new, start with 4–5 reps. Been running hills a while? Go for 6–10. You can increase duration to 60 seconds per climb as you build strength.
  • Cooldown: Jog 5–10 minutes easy. Stretch your quads and calves—you’ll thank yourself tomorrow.

This workout is hard.

The first couple reps might feel okay. But by the last one? Legs on fire. That’s the sweet spot.

You’re building serious leg power and heart strength. Once a week is enough. Treat it like an interval workout—recovery matters.

Can’t Find a Hill? Here’s What to Do

  • Use a treadmill. Crank the incline and simulate hills that way. Just be careful getting on and off during rest.
  • Stadium stairs. They’re great for mimicking that uphill grind.
  • Overpasses or ramps. Ugly? Maybe. Effective? Absolutely.

Just a heads-up: don’t bomb downhills unless you’re training specifically for that. Running hard downhill beats up your legs. Stick to easy descents for now, especially if you’re new to this.

And listen to your body.

Hill sprints are intense. If your calves or Achilles start acting up, shorten the hill, take more rest, or walk part of the way.

No shame in scaling—it still counts if you’re pushing relative to your own effort.

Bottom Line: Hills Don’t Lie

5. Plyometric Training 

I’ll be honest—when I first heard the word “plyometrics,” I pictured pro athletes doing ridiculous box jumps in slow-mo highlight reels.

The kind of stuff that feels worlds away from regular runners like us. I used to laugh and say, “If I try that, I’ll probably face-plant.”

But I couldn’t ignore the buzz. Runners were raving about how plyos gave them that “extra gear” on the road. So I gave it a shot.

I started simple—jump squats, single-leg hops, just messing around on a patch of grass near my house. And yeah, my legs hated me the next day.

But something changed. My stride started to feel lighter, more powerful. I could pop off the ground quicker, especially during strides and surges. I was hooked.

So, What Are Plyometrics, Really?

Plyos are basically jump training.

They’re explosive movements that force your muscles to fire fast and hard. We’re talking moves like jump squats, box jumps, burpees, single-leg hops, even jump rope.

The goal is to build that snap in your stride—turning basic leg strength into actual speed.

Think about running for a second: every step is like a mini jump. So it makes perfect sense—train your legs to jump better, and your stride gets stronger and snappier.

Why Plyos Matter for Runners

Here’s the big win: plyos help cut down your ground contact time—that tiny window when your foot’s touching the ground each step.

Fast runners bounce off the ground like rubber balls. Slow runners? They stick like glue.

Plyos teach your muscles and tendons to act like springs.

You train that “stretch-shortening cycle,” meaning your muscles load and release power fast. Less time on the ground means more speed without more effort.

I saw one runner online say plyos gave them “literally free speed.” They tracked their ground contact time dropping from 0.22 seconds to 0.20.

That sounds tiny, but stretch that over thousands of steps in a 5K or 10K, and you’re shaving serious seconds off your finish time.

And it’s not just about speed—plyos improve your form too.

You’ll naturally start pushing off the ground stronger, hitting more of a midfoot strike, and running more efficiently.

Bonus? They’re good for your bones and joints.

Plyos strengthen tendons and help your body handle impact better. That’s injury prevention baked right into your speed work.

Plyos You Can Start Today (No Gym Required)

You don’t need a fancy setup. Just your body, some space, and maybe a soft patch of grass or mat.

  • Jump Squats. Drop into a squat, then explode straight up. Land soft, reset, go again. 8–10 reps per set. This lights up your quads and glutes. First time I did these, I tapped out at 5 reps. Total leg noodles.
  • Box Jumps. Find a low, sturdy box or bench. Squat slightly and jump up, landing with both feet. Step down carefully. It’s not about height—it’s about clean, explosive takeoff.
  • Single-Leg Hops. Balance on one leg and hop forward 10–15 times. Switch legs. This builds leg power and ankle strength like nothing else. Use soft ground if you can.
  • Lateral Jumps. Jump side to side over an invisible line. Keep it quick and controlled. This is great for activating stabilizer muscles we often ignore.
  • Burpees (with a Jump at the End). Classic move—drop to plank, back to squat, jump up. Brutal but effective. Full-body cardio and power in one hit. Even 5 reps can wreck you.
  • Jump Rope. Old-school but gold. Light, rhythmic plyo that builds coordination, foot speed, and ankle toughness. Plus, it’s easy to sneak into your warm-up or cooldown.

How to Add Plyos Without Wrecking Yourself

Start slow.

One or two sessions a week is plenty, especially if you’re also doing strength or speed work.

Don’t go straight from a long run into max-effort box jumps either.

I like to toss in a 5-minute plyo circuit after strength work—say, lunges and planks, then jump squats and lateral hops to finish.

Quality matters more than volume. You want these explosive, not sloppy.

And for the love of running, warm up first.

Cold muscles and high-impact moves are a recipe for trouble. Also, if your joints start complaining, take that seriously.

Muscle soreness is okay. Joint pain? That’s a red flag.

What the Pros Say (And Do)

One experienced runner shared how they add 3 minutes of plyos before lifting sessions—just part of the warm-up.

Things like pogo jumps and quick rebound hops off a step. They dropped their ground contact time by 20 milliseconds and swore it felt like getting faster for free.

You don’t need to measure milliseconds to notice it. You’ll just feel quicker. Running starts to feel more like you’re bouncing forward, not dragging yourself down the road.

Run Light, Run Fast 

I still remember the first time a coach broke down my running form.

He didn’t start with fancy shoes or expensive gear—he just asked me to count my steps for 60 seconds.

I barely hit 160. I thought I was cruising, but I was overstriding like crazy—taking big, lazy steps that looked fast but felt heavy. My legs were absorbing more shock than they needed to, and my pace wasn’t improving.

“Let’s bump that up closer to 180,” he said.

At first, it felt awkward.

I had to shorten my stride and move my feet faster. But something clicked.

Within a few weeks, I was running smoother, faster—and my legs weren’t trashed after every session. That’s when I realized how much cadence matters.

What’s Cadence, Anyway?

Cadence is just the number of steps you take per minute.

Count how many times your right foot hits the ground in 60 seconds and double it. That’s your cadence.

Most recreational runners clock in around 150 to 170 SPM on easy runs. Elite runners? They’re often around 180+, even when running at a moderate pace—and can push past 200 when sprinting.

That 180 number gets thrown around a lot, and while it’s not some magic golden rule, it is a solid benchmark. Research from the Journal of Strength & Conditioning Research found that many efficient runners naturally hover around this cadence.

Now, if your cadence is down in the 150s or 160s when you’re cruising, odds are you’re overstriding—your foot’s landing too far ahead of you.

That’s like tapping the brakes with every step. Upping your cadence helps you land more under your center of gravity, so there’s less braking and more flow.

Why Cadence Impacts Your Speed (and Your Legs)

Think about it this way:

Speed = stride length × stride rate.

Most runners try to get faster by stretching their stride longer. But that often leads to sloppy mechanics and injury.

Instead, increasing your step rate is usually a smarter move. It keeps your form tighter, reduces the time your foot spends on the ground, and makes your stride more efficient.

Even bumping your cadence by 5–10% from where you are now can help reduce impact forces and make running feel smoother.

A study published in the Journal of Orthopaedic & Sports Physical Therapy found that increasing cadence leads to less load on the knees and hips—especially helpful if you’re injury-prone.

Bottom line? A higher cadence helps you run faster, more efficiently, and with less wear and tear.

And no, you don’t need to hit 180 on every run. If you’re at 165, try nudging it to 170–175 and see how it feels.

So How Do You Improve Your Cadence?

Start with this: Count your steps. On your next run, count how many times your right foot lands in 30 seconds, then double it. If you’re under 170 and want to get faster or reduce injury risk, try these tools:

  • Cue Yourself: “Quick and Light”. Don’t try to force it. Just shorten your stride slightly and think light, quick steps. I sometimes imagine the ground is hot lava—keeps my feet moving fast and clean.
  • Use Music or a Metronome. I know, sounds goofy—but it works. Download a metronome app and set it to 175–180 BPM. Or pick songs that match that beat. Rock Lobster by The B-52s? Weird song. Perfect cadence.
  • Do Cadence Drills. Quick-feet drills, high knees, or even strides focused on faster turnover can work wonders. One classic move: count your steps for 30 seconds while running in place and try to beat that number next week. Doesn’t have to be fancy—just consistent.
  • Take it Slow. Don’t jump from 160 to 180 overnight. That’ll leave your calves screaming. Aim for 5% jumps at a time. Sit at the new number until it feels right, then bump it again.
  • Fix Your Form. Cadence and form go hand-in-hand. A quicker cadence helps you land more underneath you, which is what you want. Keep your upper body relaxed and pump your arms just a bit faster—your legs will follow.

7. Jump Rope 

Who knew that one of the best tools for becoming a faster runner was something most of us left behind on the playground?

I sure didn’t—until I gave it a shot.

I picked up jump rope during a cross-training phase.

It wasn’t some grand plan. I just remembered reading that Muhammad Ali used it for footwork. If it was good enough for the champ, why not me?

First try? Total disaster.

I was tripping after every 10–15 skips, sweating buckets in the Bali heat, and breathing like I’d just sprinted a 400-meter repeat.

But I stuck with it a few days a week. It became this weird mix of fun and brutal, and to my surprise, something changed on my runs: my feet felt snappier.

My cadence got quicker. I was spending less time on the ground. Even my balance and calf strength improved.

That’s when it hit me—this little rope was teaching me the exact kind of springy footwork good runners are built on.

Why It Works

Jumping rope is basically secret sauce for runners. It trains your feet, calves, and Achilles to load and rebound fast—just like they should when you’re running.

You’re hopping on the balls of your feet over and over, which forces those muscles to get better at absorbing and returning energy.

Think of it like mini plyometrics with rhythm.

It also sharpens your coordination and balance, especially in your ankles and feet—which, by the way, are literally where all your running starts. Ignore those areas and you’re asking for injuries.

Jumping rope lights up your heart rate fast too, so it’s solid cardio. And here’s the kicker—it rewards good form and punishes bad.

If you land heavy on your heels or let your rhythm slip, the rope catches. You’ll feel it right away.

That feedback forces you to stay light and quick—pretty much the exact traits we chase in fast running.

Some running coaches actually use rope skipping to help athletes fix overstriding or heavy footfalls.

The rope makes you land under your center with bent knees, not out in front. That’s how we should be running anyway—centered, springy, and smooth.

How To Add It To Your Training

You don’t need to go full Rocky Balboa. Just start small. Here’s how I’d do it:

  • Pick the Right Rope: A simple speed or PVC rope does the job. Stand on the middle—handles should hit around your armpits.
  • Keep It Simple: Begin with 5 rounds of 30 seconds, or 50 skips per round. Trust me, it’s harder than it sounds if you haven’t done it since grade school. Stay on your toes, jump just high enough to clear the rope, and let your wrists—not your arms—do the work.
  • Use It As a Warm-Up or Extra Cardio: 3–5 minutes pre-run gets your feet and ankles firing. Or throw in 10–15 minutes on a non-running day as a cross-training burn.
  • Try Variations: Once you nail the basics, do jogging steps (alternate legs), lateral hops, or short single-leg hops. These mimic real run movements even more.
  • Build Gradually: Over time, work your way up to 5 minutes nonstop. That’s plenty for runners. Boxers might do 10+, but even half that will light up your calves and sharpen your form.

My Routine

I like throwing jump rope in after an easy run or on off days.

I’ll hit 10 minutes of different skips—two-foot, high knees, lateral steps. It gets my heart pumping and my calves humming, and when I head out for a run the next day, I feel quicker off the ground. It’s like it resets my stride.

Backed by Science, Too

This isn’t just a “feels good” thing.

A study in the Journal of Strength & Conditioning Research found that runners who used jump rope as a warm-up improved their 3K time trial results compared to those who just did static stretching.

Their ankle strength got better too. Just five minutes of jump rope before running was enough to see results.

Why? Likely because it fires up the nervous system and gets your lower legs primed to move well.

8. Nail Your Form 

I used to think running form was something you were either born with or not. I’d see photos of elite runners gliding effortlessly, arms smooth, posture perfect—and assume I looked kinda like that.

Then I saw a race pic of myself.

I was slouching, heel-striking, and flailing my arms like I was chasing a mosquito swarm. Brutal.

That photo was a wake-up call. I realized that proper form isn’t about looking good—it’s about running better. Smoother, faster, more efficiently. And the best part? Form isn’t fixed. You can train it.

I had to relearn the basics myself after a coach pointed out I was overstriding like crazy.

Fixing it took a ton of work—cue reminders mid-run, watching myself on video, and form drills till I wanted to puke—but once I locked it in, I could feel the difference instantly. It was like my body stopped fighting itself.

Think of it like tuning up a car. Same engine, but now it runs way better with less fuel.

What Good Form Actually Looks Like

Let’s break down what actually matters when it comes to running form. These are the real-world fixes that help you go faster without even trying harder.

Posture: Run Tall

Stand proud. Imagine a string pulling you up from the top of your head. That posture opens your chest, helps you breathe deeper, and fires up your core to keep you stable.

Avoid the slouch—shoulders rolled forward = short breaths, less power.

I tell my athletes: “Chest proud. Eyes on the horizon. Not on your shoes.”

Lean In (Just a Bit)

You want a slight forward lean from the ankles—not your waist.

Like you’re falling forward and catching yourself. Subtle, but powerful. If someone watched you, they might not even notice it—but you’ll feel it.

And whatever you do, don’t bend at the hips. That’s back pain waiting to happen.

Footstrike: Land Under Your Hips

This one’s huge. Most beginners land way out in front, smacking the ground with their heel. That’s not running—that’s braking.

Instead, aim to land with a bent knee directly under your body, not ahead of it.

Whether you hit midfoot or forefoot isn’t as important as where and how you land. Soft. Controlled.

I used to heel-strike hard. Over time, I shifted toward a midfoot strike—and that alone helped me run smoother and stay injury-free longer.

Arm Swing: Controlled Power

Your arms aren’t just passengers—they help drive your rhythm and speed.

Keep them bent at 90 degrees. Swing front to back, not across your body. The swing should come from your shoulders, not your elbows.

Imagine brushing your hips with your thumbs. That motion keeps you straight and strong. If you want to speed up, pump your arms faster—your legs usually follow.

And yeah, sprinters pump like mad for a reason.

9. Lighten the Load, Pick Up the Pace

Let me start by being real with you: This tip only matters if you actually have extra weight to drop.

I’m not talking to lean runners chasing unrealistic goals or getting obsessed with the scale. But for those of us carrying a little more than we need—yeah, it makes a difference.

I’ve lived this one.

A few years back, I hit a wall with my race times. I was grinding: speed sessions, long runs, tempo work—you name it. But my performance just flatlined.

What I didn’t want to admit at first was that I was carrying around 10–15 pounds of nasi goreng weight. If you know Bali, you know what I mean. Delicious, greasy, and deadly for waistlines.

Eventually, I cleaned things up—no crash diets, just smarter food choices, smaller portions, and fewer late-night snacks. I dropped about 12 pounds over a few months.

And let me tell you—it was like someone flipped a switch.

Suddenly, every run felt smoother.

Hills weren’t as brutal.

My feet hit the ground lighter.

It felt like I’d taken off a weighted vest—because I basically had. I remember running a 5K not long after that and clocking nearly a full minute faster.

No magic workouts. Just less drag.

Why Extra Weight Slows You Down

Here’s the basic physics: every step you take, you’re moving your body forward.

More body mass = more effort. And if some of that mass is just excess fat, then losing it can straight-up make you more efficient.

Think of it like this: if a sports car is loaded with luggage, it won’t accelerate the same.

Take that load off, and it moves like it’s supposed to. Same with your body.

There’s actually a general rule floating around: lose a pound, gain about 2 seconds per mile—all else equal.

Runner’s World highlighted this in a piece based on research and coaching insight. That means a 10-pound drop could make you about 20 seconds per mile faster, just from shedding fat—not changing your training at all.

In my case?

I lost 12 pounds and took about 45 seconds off my 5K. That math checks out for me.

What the Science Says

The energy cost of running goes up with body weight. So yeah—lighter runners use less energy at the same speed. Or flip it: you can go faster for the same effort.

And we’re talking fat loss here, not muscle. You want to keep the muscle that helps you move—especially in your glutes, quads, and calves. That’s your engine.

How I Did It (And You Can Too)

No fads. No fasting apps. No cutting carbs down to dust.

I just:

  • Cleaned up my meals (less junk, smaller portions)
  • Stayed in a small calorie deficit (maybe 300–500 a day)
  • Aimed for 0.8–1g of protein per pound of goal weight to protect muscle
  • Tracked my weight weekly, not daily
  • Kept running consistently

It took a few months, but the difference was night and day. And running actually felt better each week. That’s the best part: as you lose, your runs improve, which motivates you to keep going.

One Warning: You Can’t Outrun a Bad Diet

Especially if you’re just starting out. In the beginning, sure, running burns a bunch of calories. But eventually, your body adapts. Diet becomes the lever that moves the needle.

That old saying is true: you can’t outrun a bad diet—not if you’re trying to lean down.

More Than Just Speed

Losing excess weight doesn’t just help your mile time. It reduces the pounding on your joints, too. Less stress on knees, hips, ankles—especially important if you’re running big mileage or doing trail runs like I do.

It also bumps up your VO₂ max per pound of body weight. That’s basically your aerobic horsepower. Same oxygen, smaller body to fuel.

This is why elite runners are so lean—they’re not light for vanity, they’re light for performance.

No, you’re not an elite. Neither am I. But the principle still holds.

Don’t Just Take My Word for It

I remember reading a thread on Reddit where someone wrote: “I lost weight. All the above advice was good, and I lost weight.” That was it.

And honestly? It hit. Sometimes we overcomplicate the hell out of this game. For a lot of beginners, the simplest move is just dropping extra pounds. Training stays the same—but boom, the times fall.

That said, you don’t need to lose weight to get faster. Some of the strongest runners I know are heavy for their frame, but they move well because they train smart.

But if you are overweight and trying to get faster? Dropping that baggage gives you a double-win: better engine + less load.

Do It the Right Way

Here’s what worked for me and my coaching clients:

  • Eat Real Food: Load up on veggies, lean protein, good carbs, and healthy fats. Ditch the sugar bombs and ultra-processed crap.
  • Avoid Starving Yourself: If your runs start to feel awful and recovery tanks, you’re cutting too much.
  • Stay Hydrated: Especially in places like Bali. Sometimes you’re just thirsty, not hungry.
  • Lift Weights: Keep the strength sessions. They help protect muscle and can boost metabolism a bit.
  • Sleep Like It’s Training: Sleep messes with your hunger hormones more than most people realize.
  • Be Patient: You didn’t gain it overnight, and you’re not going to lose it in a week either.

10. Be Consistent and Patient 

Let’s be real—nothing you’ve read so far matters if you only follow it once in a blue moon.

The real game-changer? Consistency. It’s not flashy, it won’t win social media points, but it’s the truth.

You can have the fanciest training plan on Earth, but if you bail on it after week two, it’s worthless. I’ve coached runners of all kinds, and the ones who make serious progress aren’t necessarily the ones logging crazy mileage or crushing monster workouts.

They’re the ones who show up. Week after week. No drama. No magic. Just honest work.

When I first got into running, I was all over the place. One week I’d run every day. The next, I’d vanish into a Netflix hole and ghost my shoes. I didn’t get anywhere. Eventually, I made a deal with myself—four runs a week, no matter what.

Bali rains? Bring it.

Bad day? Doesn’t matter. I stuck with it.

And the magic? It didn’t show up in a single run—it showed up in the weeks stacked on top of each other. My average pace dropped by over a minute per mile. Not because I suddenly got talented, but because I stopped quitting.

Why Consistency Actually Works

Your body adapts when you train it regularly. Not just when you feel like it. Skip two weeks and you’re basically restarting from scratch. That momentum you were building? Gone.

Consistent running keeps the signal going: “Hey body, get stronger, get faster, stay sharp.”

Miss too many runs, and that signal gets weak. Your gains fade. Your habits break. You start questioning your motivation.

Here’s another thing—consistency builds identity. When you’re the kind of person who runs four days a week, even when it sucks, it becomes who you are. No mental wrestling every morning.

Small progress compounds. One extra rep. One longer long run. One faster mile. Stack those over months, and suddenly you’re a completely different runner.

Patience: The Other Half of the Formula

Look, improvement isn’t a straight line. Especially once you’ve moved past beginner gains. Sometimes you train hard for weeks and feel stuck. Then boom—one day you nail a tempo run or crush a 5K out of nowhere.

That’s just how the body works. Progress hides until it doesn’t.

I tell my runners: trust the boring stuff. The quiet weeks. The runs that feel “meh.” They’re working behind the scenes. Just don’t stop.

Don’t Mistake Consistency for Overkill

This doesn’t mean hammering yourself every day. That’s how you burn out or get injured. I see this mistake all the time—someone goes hard seven days straight, then disappears for three weeks with shin splints.

Real consistency means sustainable effort. I’d rather you run four times a week at easy to moderate paces and stick to it for three months than go beast mode for two weeks and crash.

Recovery isn’t weakness—it’s part of the plan.

Rest days are when your body actually gets stronger. So schedule them. Protect them. Earn them.

Sample Week: A Balanced Consistency Blueprint

Here’s a rough layout I use with intermediate beginners (someone comfortable running 3–4 miles). Adjust the volume if you’re newer, but the structure? It’s gold.

  • Monday – Intervals: 8 × 400m at 5K effort with 200m jogs. Or 8 × 1-minute hard, 2 minutes easy. Push the pace here. This is your “speed punch.”
  • Tuesday – Strength + Easy Run: Squats, lunges, planks for 30 minutes. Then maybe 2–3 miles slow. Legs recover. Body gets stronger.
  • Wednesday – Hill Work: 6–8 uphill sprints (20–30 seconds each). Power + endurance in one go.
  • Thursday – Easy Jog or Rest: 3–4 miles conversational. Optional: toss in a few relaxed strides to keep the legs snappy.
  • Friday – Tempo Run: 4 miles at that “comfortably hard” effort. Feels tough but controlled. Builds speed endurance.
  • Saturday – Long Run: 6–8 miles slow and steady. This is your foundation builder. Keep it chill.
  • Sunday – Rest or Cross-Train: Go for a walk, a swim, jump rope, or just recover hard.

You’ll notice: only 2–3 “hard” days. The rest? Easy, steady, or full recovery. That balance is what lets you show up fresh on workout days—and actually improve.

How Fast Will You Get?

From what I’ve seen, most runners who train smart and stay consistent see real improvement in about 4–6 weeks.

That’s the sweet spot. But don’t stop there. The longer you stay at it, the more you unlock. It builds. Like bricks in a wall.

Mindset Check: Don’t Rush It

Everyone wants to sprint their way to speed. But the truth? It’s a grind. You’ve got to be okay with slow growth.

I once coached a guy stuck at 30 minutes for the 5K. He felt hopeless.

For three months, we kept things steady—building base, adding short intervals, keeping things sustainable. He barely noticed the change. Until I had him do a time trial… 26:00 flat. Shocked him.

That’s what consistent, smart training does. It sneaks up and transforms you.

Kill the Comparison Game

You’ll always find someone faster. Someone who seems to leap forward while you’re stuck grinding. Ignore it. Everyone’s got their own pace. Focus on your path.

If you plateau? Don’t freak out. That’s normal.

Tweak something. Hold steady. Sometimes you just need one new stimulus—or a rest week—and you’re back climbing again.

Stay Accountable

Here’s what helps:

  • Run with a buddy once a week. Non-negotiable miles.
  • Sign up for a race 6–8 weeks away.
  • Log your runs. Even a calendar with checkmarks can be satisfying.

I still get a little dopamine hit from crossing off a training day. It works.

Celebrate those mini-wins. You ran three times this week? Hell yes. Your pace dropped 30 seconds? That’s real progress. Stack those and they’ll carry you through the tough days.

Final Takeaway

Consistency and patience are the bedrock. Everything else—speed drills, form tips, shoes, training plans—won’t stick without them.

If you fall off track? No big deal. Get back to it the next day. That’s how you build a long-term habit that actually changes you.

I always say: training is like planting seeds. You water them. You wait. You trust. And one day, there’s a breakthrough.

Maybe it’s a shiny new PR. Maybe it’s just the feeling of flying down a stretch of road you used to struggle on. That’s the harvest. That’s why we run.

What’s Next?

Now it’s your turn.

  • What’s your mile pace right now?
  • What day this week will be your interval day?
  • Can you commit to four runs this week?

Pick one action. Just one. Then go do it.

Got a question? A win to celebrate?

Drop it in the comments—I’d love to hear it. Let’s build a community of runners who show up, run hard, rest smart, and stay the course.

Speed is earned. Now go earn it—one step at a time.

Racing in the Rain: How to Gear Up, Show Up & Get It Done

When you wake up on race day and hear rain pounding the window, what’s your gut reaction?

Some runners thrive on it. I’ve heard folks call stormy runs “freeing” and even “therapeutic.” Others? They’ll ghost a 10-miler faster than Anakin whining about sand.

And I get it—racing in the rain is uncomfortable, unpredictable, and straight-up messy.

But here’s the truth: bad weather builds tough runners. Sunny days don’t forge grit. Running soaked and freezing while still holding your pace? That’s what separates weekend joggers from racers who can handle anything.

I tell my athletes all the time—you can’t train for perfect conditions, because race day doesn’t care. The rain isn’t out to get you. It’s out to test you. And if you train and race through it, you’re going to come out stronger, sharper, and a whole lot tougher.

So, let’s dig into how to prep, race smart, and stay healthy when the skies open up. From myth-busting to gear tips and pacing hacks—it’s all here. Ready to run wet and come out swinging? Let’s go.

Will Running in the Rain Make You Sick?

Short answer: nope. Getting wet doesn’t give you a cold. Viruses do. And they’re not riding in on raindrops.

In fact, most cold and flu viruses spread better in dry, cold air—not during a muggy downpour. So that “you’ll catch a cold if you run in the rain” line your grandma used to say? Myth.

But here’s the twist—running cold and wet for too long can wear you down. It won’t give you a virus, but it can lower your body’s defenses just enough to make you an easier target if you come into contact with one.

A 2022 study found that cold exposure, especially in your nasal passages, might temporarily weaken your immune response. Translation? Being cold and damp doesn’t infect you—but it might open the door a little.

So don’t just grin and bear it. Dress smart, and change into dry clothes as soon as you cross that finish line. Hypothermia’s rare in most races, but if it’s cold and windy? It can sneak up fast.

Bottom line: Rain won’t wreck your immune system—but being soaked and shivering just might. Run hard, but stay warm. Your immune system will handle the rest.

Rain-Ready Gear Checklist: From Head to Toes

The rain’s coming? Then gear up like a pro. The right setup can turn a soggy sufferfest into a gritty, splash-filled PR.

Base Layer: Say No to Cotton

Rule #1: Cotton is the enemy. Once it’s wet, it stays wet. It clings, sags, and rubs your skin raw.

You want a base layer that works with the rain, not against it. That means moisture-wicking, fast-drying fabric. Think:

  • Polyester blends
  • Polypropylene
  • Merino wool (yep, even in the rain)
  • Nike Dri-FIT, CoolMax, or other tech stuff

I had a runner race a rainy marathon last fall in just a lightweight merino wool base layer—no jacket. She was soaked by mile three but never got chilled. Wool kept her warm even wet. She finished strong, while folks in plastic ponchos were overheating or freezing their butts off.

Moral of the story? Layer smart. A snug, wicking tech tee or long-sleeve is your best friend. Skip loose, heavy gear—it’ll drag you down like wet denim.

Quick tip: Try on your gear wet before race day. Seriously. Take it for a spin in the rain. Find out what chafes, what holds water, and what works.

Outer Shell: Don’t Sweat It (Literally)

When it’s pouring, don’t reach for that full-on hiking raincoat unless you’re planning to run inside a sauna. I’ve seen runners come to the start line wrapped in heavy, “100% waterproof” jackets, only to be dripping in their own sweat two miles in. You’re not a baked potato—you need to breathe.

Instead, go light. A water-resistant, breathable jacket or windbreaker with DWR coating (that’s Durable Water Repellent) is the move. It’ll shed light rain, block some wind, and let heat escape. That’s the balance you want. Vests work too if you just need to keep your core warm.

But if it’s warm rain? Heck, I’ve started races in a trash bag. Yeah, you heard that right. Cut a head hole and armholes, throw it over your body like a rain shell, and once you warm up, Hulk Hogan that thing right off. A cheap poncho works too—just make sure it’s not so long that you trip on it. And please, don’t chuck it in the middle of the course. Toss it near a trash can or hand it to a volunteer. We’re runners, not litterbugs.

Now, if you’re ready to invest, there are some awesome lightweight running rain jackets out there—packable, vented, and made to shed water without cooking you inside. But real talk? In a full-on downpour, you’re getting wet no matter what. Don’t waste energy chasing “dry.”

Like one hardcore triathlete told me: “You won’t be comfortable. That’s not the point. Stay warm. Stay moving. That’s the win.”

Bottom line: Your outer shell isn’t there to keep you perfectly dry. It’s there to keep you from freezing your butt off in those early miles.

Shoes & Socks: Footwork Matters

Your shoes are your traction, your lifeline, your wet-weather tires. And if they’re worn smooth? You’re asking for a slip-and-slide mid-turn.

Regular road shoes usually do fine if they’ve got decent grip. But if you’re racing in serious rain or you know the course is slick? Some runners switch to light trail shoes with extra lugs for grip. I’ve done that on rainy race days, and yeah—it’s saved my skin more than once.

If you’ve got a pair of GORE-TEX® trail shoes sitting around, they’ll keep your feet drier in long downpours. But honestly? For shorter races, that extra waterproofing isn’t essential—and it can trap sweat too. Up to you.

Now socks—this is big. No cotton. Period. Wet cotton = soggy torture device. Go with synthetic or merino wool. They wick moisture, hold their shape, and help stop blisters before they ruin your race. Some folks even double up thin socks to create a buffer, or use toe socks like Injinjis to keep toes from rubbing. Whatever your setup, test it first.

Pro tip: The night before race day, spray your shoes with something like Kiwi Rain & Stain or NeverWet. It won’t make them waterproof, but it’ll buy you a few dry miles. Just give it 24 hours to dry.

And don’t forget to check your tread. If your soles are bald, it’s time for a fresh pair. Just don’t wear brand new shoes on race day. Break ’em in first with a couple short runs. Your feet will thank you when the puddles come.

Head, Hands & Arms: Stay Sharp, Stay Warm

A hat with a brim? Total game-changer in the rain. Keeps water out of your eyes so you’re not squinting like a pirate halfway through your run. On warmer days, a lightweight visor is perfect—keeps the rain off your face while letting heat escape. Cold out? Toss on a tech running cap or layer a thin beanie under it.

Some runners even go with light-tinted sunglasses in rainy weather. Helps with visibility when the sky’s gloomy. Just make sure they don’t fog up—anti-fog spray helps, but it’s not bulletproof in a downpour.

Now your hands? Don’t ignore ’em. Cold, wet fingers are no joke—especially when you’re fumbling to rip open a gel or grab a cup at a station. Lightweight running gloves (preferably water-resistant) can save the day. Get the kind you can wring out or stash in your waistband if you overheat.

And arm warmers? Absolute gold. Pair them with a singlet and vest—they’re easy to roll down or yank off once you get cooking. Way more adaptable than committing to a long sleeve top.

Lastly, buffs (aka neck gaiters): throw one around your neck or pull it over your head to stop cold water from dripping down your back. You can use it as an ear cover, a forehead shield, even a wipe if needed. Buffs do it all.

After-Race Clothes: Don’t Be the Freezing Runner Wrapped in Regret

Here’s the truth: the race isn’t over when you cross the finish line—especially on a rainy day. That soaked singlet you barely noticed at mile 20? It’s about to turn into an ice vest the moment you stop moving.

I’ve seen runners go from triumphant to trembling messes in under five minutes because they didn’t bring dry clothes. Don’t make that mistake. Your future post-race self is begging you—pack dry gear.

What to Bring

Throw a dry set of clothes into a waterproof bag. Keep it simple and smart:

  • Dry shirt (long sleeve or tee)
  • Sweatpants or shorts
  • Fresh socks
  • Dry shoes or sandals
  • Hoodie or fleece
  • Beanie or dry cap for that soaked-head chill

Optional but gold: a towel and a mylar blanket (those heat sheets volunteers hand out). You can wrap up while you wait to change.

If there’s a gear check or drop bag option? Use it. If not, stash your stuff in a car nearby or hand it off to a friend who’ll be near the finish. The goal is to get out of your wet gear ASAP—not 20 minutes later while you’re shivering and wondering if this is how hypothermia starts.

Runner real talk: One marathoner told me her worst memory wasn’t the rain mid-race—it was the 50°F downpour at the finish. She stopped, her body cooled fast, and bam—uncontrollable shivering. Couldn’t even open her heat sheet alone. A kind volunteer helped her into dry sweats, and within minutes, she was back to celebrating.

The lesson? Be ready. Comfort isn’t a luxury—it’s a recovery tool.

Oh—and if you see the volunteers? Thank them. They’ve been standing in that same rain for hours, probably colder than you.

Racing in the Rain? Here’s How to Adjust Like a Pro

Rain changes the game—and not just your outfit. Your strategy, form, and mindset need a tune-up too. Slick roads don’t care about your PR dreams unless you’re smart about how you run.

Running Form in the Rain: Smooth > Speed

Think of running in the rain like driving on a wet road—the goal is traction, not turbo.

Here’s the breakdown:

  • Shorten your stride. Quick, light steps give you better control. Long, bouncy strides? Recipe for slipping.
  • Pick up your cadence. Faster foot turnover keeps you stable. Aim for smooth rhythm over speed.
  • Slight forward lean (from the ankles, not the waist). Think “momentum,” not “hunchback.” Helps prevent a backward fall if your foot slips.
  • Stay relaxed. Light arms, steady rhythm. No need for power moves or sharp corners. Treat wet pavement like it’s out to get you—because sometimes it is.
  • Watch your footing. Avoid painted lines (those suckers are ice rinks), metal grates, or deep puddles. And don’t leap onto curbs like a parkour champ—keep it safe.

Visual tip: Picture a cat walking across a wet porch. Light. Balanced. Controlled. That’s the vibe.

Pacing Strategy: Ditch the Ego, Run Smart

Rain = resistance. It can sap your energy, soak your shoes, and mess with your pace. So don’t force a fast day if the conditions are trash.

  • Start a little slower. Give yourself space to adjust. The first few miles will be crowded and slippery. Let the race come to you.
  • Expect to be 5–10 seconds slower per mile in the early going—that’s normal. If you’re steady and feeling good later, then you can pick it up.
  • Run by effort, not pace. Heart rate or perceived effort (RPE) wins in tough conditions. Focus on staying consistent, not on the numbers flashing on your watch.
  • Finish strong—but stay smart. If you’ve got juice left, you can surge past soaked, demoralized runners in the final miles. But if you kick too hard on a wet street, you’re one bad step from face-planting. Avoid slippery paint lines. Turn over your feet fast and stay upright.

And listen—if the weather’s total garbage? Let go of your time goals. Use the race as a hard training effort. Surviving a storm with mental grit builds toughness you can’t get on a treadmill.

A sunny-day PR feels good—but finishing strong in the rain with soaked shoes and numb hands? That’s something you carry with pride.

After-Race Clothes: Don’t Freeze Your Butt Off

Let me hit you with a hard truth—that soaked race kit that felt “fine” at mile 20 will feel like an ice blanket the second you stop running.

Rainy race day or not, you need to pack dry clothes for after the finish line. Period.

I’ve seen it too many times: folks cross the finish, adrenaline wears off, and boom—they’re shivering uncontrollably in the rain, soaked to the bone, can’t even open a banana.

Bring a Full Change

  • Dry socks and shoes
  • Sweatpants or shorts
  • Fresh shirt
  • Warm layer (hoodie, fleece, whatever)
  • Beanie or dry hat (yep, “wet hair chill” is real)
  • Small towel
  • Waterproof bag to keep it all dry

You’ve got options. If your race has gear check or drop bags, use it. If not, stash a dry kit in your car or hand it off to a friend near the finish line. Either way, change ASAP.

Some marathon vets even toss a mylar blanket or disposable poncho in the mix for right after the finish. It’s not fancy, but it buys you time while you change or hunt down your stuff.

True story: One runner I coached told me the toughest part of her downpour marathon wasn’t the rain during the race—it was after. She finished, stopped moving, and within a minute she was shivering like crazy in 50°F rain. Luckily, she’d stashed sweatpants and a hoodie in her bag. A volunteer helped wrap her in a heat sheet, and 10 minutes later she was sipping hot coffee and laughing again.

Moral of the story? Dry clothes = recovery gold.

Also, do yourself a favor: thank the volunteers out there in the cold, handing out heat sheets or digging through gear bags. They’ve been getting soaked too, and they’re absolute legends.

Racing in the Rain? Adjust Your Game Plan

Rain doesn’t just change your outfit—it changes the whole damn race strategy. If you want to run strong and stay upright, you’ve got to race smart.

Let’s break it down.

Running Form: Keep It Tight, Keep It Light

Rainy roads = slippery roads. And slick roads are not the place to run like a gazelle. Think control, not chaos.

Here’s what to do:

  • Shorten your stride. Quick, light steps = better traction and balance. Long, bouncy strides? That’s how you slip and eat pavement.
  • Increase your cadence a touch. Faster turnover keeps you centered over your feet and helps avoid slipping. Think more steps, less air time.
  • Slight forward lean—from the ankles. Not the waist. You want momentum, not hunchback posture. The goal: if you slip, you fall forward, not backwards.
  • Keep your arms relaxed. A few elite runners even tone down their arm swing to minimize torso twist on slick surfaces. Keep your body moving forward like a unit.

Picture a cat trotting across a wet driveway—light, balanced, alert. That’s the vibe.

Most importantly: don’t panic if you feel a slip. Stay calm. Shorten up. Stay focused. No sudden jukes, no sharp corners, and for the love of your knees—don’t leap puddles unless you’re sure you’ll land clean.

Pacing in the Rain: Play It Smart, Not Heroic

If you were gunning for a PR, I get it. But here’s the truth: rain slows most people down. That’s not an excuse—it’s just science.

Studies show that rain, especially when it’s cold, drags down finish times. Your body’s working harder to stay warm, your shoes get heavier, and the wind adds insult to injury.

So what do you do?

  • Start conservative. The early miles will be chaotic—puddle dodging, tight packs, slippery turns. Give yourself grace if you’re a few seconds off pace. You can always surge later if the weather clears or you settle into a groove.
  • Run by effort, not just pace. If it’s raining buckets or gusting wind, ignore the watch for a bit. Stay locked in on effort—your breathing, your form, your rhythm. You’ll get more out of that than forcing splits that don’t match the conditions.
  • Be smart about the kick. You saved energy? Great. But don’t go full send on wet pavement. Slick paint, finish-line chaos, and adrenaline are a dangerous combo. If you’re going to kick, choose your line carefully, stay light on your feet, and trust your training—not your ego.
  • Let go of the clock if needed. Some days are about finishing strong, not fast. If conditions are rough, shifting to “training effort” mode isn’t a failure—it’s a veteran move.

There’s something badass about finishing a rainy race tougher, not just faster.

Remember: It’s not always about the PR. Sometimes it’s about finishing with pride and your body intact.

Hydration in the Rain: Don’t Let the Wet Fool You

Alright, let’s clear something up right now: just because you’re soaked doesn’t mean you’re hydrated.

I’ve heard it a hundred times—“It was cool and raining, so I didn’t need to drink much.” That’s a rookie mistake, and I’ve made it myself. The rain may cool you down, but it doesn’t refill your tank. You’re still sweating. You’re still breathing hard. And you’re still leaking fluids—even if you don’t feel like it.

Why You Still Need Water (Even When You’re Wet)

Cold, rainy weather tricks your brain. Your thirst signal gets turned way down, and that “wet skin” feeling can fool you into thinking you’re not sweating. But trust me, you are. Maybe not buckets like on a 90° day, but it’s still coming out—through your skin and every breath in that chilly air.

I once bonked hard during a rainy half-marathon because I skipped water at two aid stations. Felt fine… until I wasn’t. Dizzy, heavy-legged, and just dragging through the final miles. All because I assumed cool weather meant I didn’t need to drink.

Stick to your hydration routine. Rain or shine.

Watch for Sneaky Signs of Dehydration

In cool rain, dehydration doesn’t always slap you in the face—it sneaks up like a ninja.

Here’s what to watch for:

  • Dry mouth (even in damp air)
  • Sudden fatigue or feeling “off”
  • Dizziness
  • Sweat just stopping mid-run (bad sign)
  • Post-run pee looking like apple juice instead of lemonade

Yeah, gross—but it’s a solid gut check.

And if you get cold and stop sweating altogether? That’s red alert territory. You’re possibly sliding into hypothermia, dehydration, or both. Not a good combo.

How to Hydrate Smart in the Rain

Here’s what I do—and what I tell every runner I coach:

  • Stick to your usual schedule: Take sips every 20 minutes or so. Don’t skip just because you “don’t feel thirsty.”
  • Electrolytes still matter: Cold weather might kill your salt cravings, but you’re still sweating some out. Pop an electrolyte capsule or use a sports drink if it’s a long race.
  • Cold = more pee: It’s called cold diuresis. Cold temps increase urine output. Translation: you’re losing more fluids than you realize.
  • Pre-hydrate smart: Day before and morning of, drink like you normally do. Maybe throw in a salty snack or light sports drink to top things off. But don’t go overboard—this isn’t a water-loading contest.
  • Post-race = rehydrate too: Just because you’re cold doesn’t mean you didn’t lose fluids. Once you get dry and warm, sip on water, tea, or a good recovery drink. Your body still needs refueling

Quick Dos & Don’ts

  • Do drink at aid stations—even just a sip or two.
  • Don’t force-feed water just out of habit. Listen to your body but remember that thirst can lag behind your needs.
  • Do stay on top of hydration early. Waiting until you’re crashing is too late.
  • Don’t use the weather as an excuse to skip your bottle or belt.

Chafing & Blisters in the Rain: Suit Up or Suffer

Let’s talk about the two things that’ll ruin your rainy run real fast: chafing and blisters.

Rain turns your favorite running gear into a torture device. That soft shirt? Now it’s sandpaper. Those go-to socks? Now they’re a swamp for your feet. So unless you want to finish the race looking like you wrestled a cheese grater, you need a chafe plan.

Lubrication: Your First Line of Defense

This isn’t optional—you must lube up on rainy days. Here’s where I go full-body armor:

  • Inner thighs
  • Groin area
  • Underarms
  • Around your chest/nipples
  • Toes, heels, and foot hot spots

Use Body Glide, Vaseline, Squirrel’s Nut Butter, Aquaphor—I don’t care what your weapon of choice is, just slather it on.

One runner I coached once skipped lube on a rainy 10K because “he never needed it before.” He ended that race with raw thighs and bleeding armpits. Lesson learned.

Special Attention: Your Feet

Your feet are ground zero for rain-related disasters. Wet socks = blisters. Every. Time.

Here’s what works:

  • Coat your toes and heels in Vaseline or anti-blister cream before putting on socks
  • Try powder first, then lube if your feet tend to blister easily (sounds weird, works great)
  • Some runners even smear Vaseline on top of their socks to help water slide off and reduce friction

Weird? Sure. Effective? 100%.

Nipple Defense 101

Let’s talk nips. Wet shirts + bounce = pain.

For guys: slap on some Body Glide or Vaseline — or better yet, cover ‘em. NipEaze, waterproof bandages, surgical tape. Heck, one guy told me he uses duct tape (pro move, brutal removal).

For women: under the sports bra band and strap zones — lube it up. Wet bras chafe like crazy.

Long Race? Plan to Re-Apply

Marathon or ultra? Don’t expect one pre-run lube job to get you through.

  • Carry a mini tube in your belt
  • Use the Vaseline sticks at aid stations (they’re there for a reason)
  • Grab single-use packets (like Butt Butter) — they’re cheap and a lifesaver

One ultrarunner I know re-applies at mile 10, again at mile 18. His logic? “One minute of re-gliding saves hours of pain.” He’s right.

Waterproof Tape, Blister Fixes & Skin-Saving Hacks

Look, if you’re heading into a rainy run or long race, don’t just hope your skin holds up—prep like it won’t. Because once the chafing or blistering starts, you’re in damage-control mode. And it’s way harder to fix mid-race than it is to prevent it from happening in the first place.

Tape Up Like You Mean It

Blisters love moisture and friction. And in the rain, your feet become a friction factory. That’s where waterproof tape becomes your best friend.

Got a trouble spot? Tape it. Runners use stuff like kinesiology tape, Leukotape, even duct tape if they’re in a pinch. The key is using tape that sticks even when wet—think 3M Transpore or Leukotape. Stick it to clean, dry skin, and don’t apply over lube (tape won’t stay put on slippery skin).

Here’s where runners usually tape:

  • Toes – wrap ‘em individually if they blister (some ultrarunners basically mummy-wrap their feet)
  • Heels & Achilles – prime chafe zones
  • Ball or arch – especially if you’re prone to hot spots there
  • Nipples – trust me, tape ‘em or regret it

Tape works by creating a slicker second skin—so the rubbing happens on the tape, not your flesh. It’s that simple.

Want an extra-strong bond? Benzoin tincture. It’s a sticky liquid you rub on before applying tape. It’s overkill for a casual 5K, but in a wet marathon, that stuff turns your tape job into Fort Knox.

Moleskin, Patches & Plan B

Not into tape? Or need a backup plan? Moleskin or blister patches (like Compeed) can also do the trick. Pre-place them on known hot zones before you run. They hold up surprisingly well—just know that if your feet get soaked, even the best adhesive might peel eventually.

Quick tip: Always carry a couple of extras in your gear bag or drop bag, just in case.

Dress Like You Mean It

No amount of tape or lube can save you if your clothes are betraying you.

Tighter is better in the rain. Baggy shorts or cotton shirts? Recipe for chafing hell. Go for snug-fitting, sweat-wicking gear. Compression shorts, capris, fitted singlets. Leave the flappy stuff for laundry day.

Real-runner story: I once had a new marathoner skip foot lube on a rainy half. “Didn’t think it’d be that bad,” he said. By mile 10, his soaked socks had chewed his feet up like raw meat. Lesson learned. He’s now religious about lubing between the toes and heel with Body Glide when rain’s in the forecast.

Bottom Line: Taping, lubing, and dressing smart aren’t optional in wet conditions—they’re survival. Do it right, and you’ll run clean. Skip it, and you’ll be hobbling before the finish.

Phone & Electronics Protection: Don’t Fry Your Gear

Running with your phone is second nature now. But water + electronics? That’s a race-ending combo. One solid rainstorm can ruin your phone, short out your earbuds, or brick your GPS.

Here’s how to keep your tech dry when the sky opens up:

1. Get a Waterproof Case (or Fake It)

Best bet: Use a waterproof case like Lifeproof or OtterBox—especially if you’re racing in wet weather. Some even let you fully use your screen without issue. Test it first.

No case? Zip-lock to the rescue. Yep, a freezer bag. Squeeze out the air, seal it up tight, and boom—makeshift waterproofing. You can still tap through the plastic. Some runners double-bag just to be safe.

Pro tip: Bag the phone before it goes in your armband or waist belt.

2. Where You Stash It Matters

  • Use inner waterproof pockets if your jacket has one
  • Keep it close to your body—like waistband or inner pocket—not some exposed mesh pouch
  • Your body heat helps it stay dry and avoid freezing up

3. Ask Yourself: Do I Even Need My Phone Today?

Some runners ditch it entirely for races.

GPS watch = ✅
Race photographer = ✅
Meeting friends after = ✅ (as long as you have a solid plan)

Leave the phone in your gear check or car and enjoy the freedom. If you do this, just make sure someone knows where to find you post-race.

4. Protect Your Other Gear Too

  • GPS watches are usually fine in rain—but double-check your model’s waterproof rating
  • Headphones? Use a cheap backup pair for wet runs
  • Running with a GoPro? Use waterproof housing or at least slap on a silicone sleeve
  • Hearing aids or medical devices? Look into specialized covers. Don’t wing it—those are too important to gamble with

5. Rain Messes with Touchscreens

If it’s pouring, expect touchscreen chaos—ghost touches, unresponsive swipes, the works.

Trick: Duck under shelter or shield your screen with your hat brim if you need to change a playlist or check your map mid-run. Some runners mess with Vaseline on their screens to repel water, but it can kill responsiveness—so test that hack on your own time.

Mental Game for Racing in the Rain

You trained your body — now you’ve gotta train your mind. Because when the skies open up on race day, your mindset becomes your greatest weapon.

Running is already 90% mental, right? In the rain, that number jumps to about 150%. But here’s the good news — if you flip your mindset from “this sucks” to “bring it on,” that rainy race can go from miserable to legendary.

Here’s how to get your head in the game when the weather turns nasty:

1. Reframe the Rain

Don’t see it as a setback — see it as a test.

Rainy races weed out the pretenders. Most people hate discomfort. But you? You’ve trained for this. You’re built for hard things.

Tell yourself:
“Rain doesn’t ruin a run — my mindset does.”

If you believe the rain’s out to ruin your day, it will. But if you see it as fuel — as the thing that makes this run mean something — suddenly you’re in control.

Heck, I’ve told runners to imagine they’re the star in a gritty sports movie montage, running through the storm while everyone else quits. Sounds cheesy, but it works.

💪 Need a real-world boost?
Remember the 2018 Boston Marathon. Absolute downpour. Freezing. Headwinds straight out of hell. And you know what happened? Des Linden gutted it out and won while elites dropped like flies. She didn’t have a magical race — she just didn’t break. Be like Des.

So yeah, remind yourself of your own rainy day grit. Every drippy training run you survived? That’s mental ammo for race day.

2. Visualize the Chaos

Don’t just picture crossing the finish line in glory — picture the ugly stuff too.

Imagine the puddles. The soaked socks. The foggy glasses. Picture how you’ll handle those things:

  • “If my hands are freezing, I’ll flex them and keep moving.”
  • “If my shoes get squishy, I’ll laugh and think, ‘Well, I’m waterproof now.’”

Why visualize that mess? Because when it actually happens mid-race, you won’t panic. You’ll nod and think, “Ah, there it is — just like I expected.” And keep pushing.

3. Embrace the Suck — Then Find the Joy

Yep, it might suck. You might be cold. Soaked. Numb fingers. Vision blurry. That’s the price of entry.

But once you stop resisting it — once you stop mentally whining and just accept, “this is the game today” — you unlock a new kind of power. You free up energy to actually enjoy it.

You might notice how quiet the streets are. You might smile as you splash through puddles like a kid again. Or you might just feel like a total badass for being out there while others stayed curled up at home.

That’s when rainy races become stories you’ll tell for years. Not because they were easy — but because you showed up and didn’t fold.

4. Lean on Your Training

This ain’t your first rodeo.

Run in the rain before? Good — remind yourself of that.

“I crushed that 12-miler last month in a downpour. Six miles today? I got this.”

Didn’t train in rain? No problem. Think back to other tough runs — heat waves, brutal hills, days when you almost quit but didn’t. Proof you can suffer and still finish strong.

Your legs know what to do — trust them. Now let your mind match that confidence.

5. Mantras + Milestones = Mental Armor

Mantras are your mental armor when the weather starts chipping away at your willpower. Simple phrases like:

  • “Strong and steady through the storm.”
  • “Rain builds resilience.”
  • “This is making me tougher.”

One of my go-to reminders for runners:
“If you only train in comfort, don’t expect to perform in chaos.”

Say that out loud when the wind slaps you in the face. Remind yourself: this is the work that matters. This is why you trained.

Bonus tip: break the race into chunks. Make it to the next mile marker. The next aid station. Every checkpoint is a win. Mini victories = major momentum.

Story time:
One runner told me she was about to give up around mile 18 of a marathon — soaked to the bone, miserable, ready to DNF. But then she remembered her friends and family were tracking her. She started chanting, “I can do this. I am doing this.”

That got her to the finish line — exhausted, drenched, and proud as hell.

Comfort at the Finish Line

Sometimes just knowing you’ve got warm clothes, a towel, and a hot cup of coffee waiting is enough to pull you through the storm.

Picture peeling off those soggy shoes. Imagine stepping into dry socks. That post-race burrito or hot cocoa? That’s your reward. Chase it.

Each mile brings you closer. One wet foot in front of the other.

Safety Tips for Racing in the Rain

Because slipping, skidding, or freezing your butt off mid-race ain’t part of the plan.

Let’s be real—racing in the rain sucks. But sometimes, Mother Nature just doesn’t care about your PR. The good news? You can still crush it without face-planting, skidding on paint lines, or freezing in a puddle post-finish. It’s all about adapting.

Here’s your wet-weather survival playbook, no fluff, just real talk.

Watch Your Footing

Wet roads are tricky. Painted lines? Like stepping on ice. Cobblestones and wooden bridges? Good luck staying upright if you’re bombing downhill on those.

Pro move: Take shorter, quicker steps when you see sketchy terrain. And slow the heck down if it looks slick—trust me, falling costs more time than playing it safe.

No Sudden Moves

Everyone’s dodging puddles. You zigzag once, fine. Do it at mile 3 in a pack of 300 runners? You’re asking for a wipeout—or worse, taking someone else down with you.

Keep it steady, keep your head up, and leave a little space in case the runner in front of you eats it.

Be Seen (and Not Run Over)

Rain = darker skies = drivers who can’t see for crap.

If it’s an open course, wear something bright or reflective. Even better? Clip-on blinking lights. Cheap, easy, and they might save your life.

One year, I ran a local 10K in a storm and only finished the race because a volunteer spotted my blinking shoe light just before I hit a pothole the size of Texas. That little $12 light? Totally worth it.

Also, use those mylar blankets they hand out pre-race. Wrap up while waiting around, or even drape it across your shoulders early in the race if you’re running in open traffic. Just don’t let it become a parachute.

Lightning = Game Over

If there’s lightning, don’t be a hero. Most races will pause or cancel if storms roll in. And if they don’t? You have permission to bail. There’s no medal worth getting zapped for.

Race tip: Follow official updates via Twitter, race apps, or PA systems. If they tell you to take shelter—you take shelter.

Avoid Hypothermia on the Course

Cold rain is sneaky. You feel fine during mile 5, then mile 9 hits and suddenly you’re shivering, stumbling, and your fingers feel like popsicles.

Watch for:

  • Shaking
  • Goosebumps
  • Feeling clumsy or foggy

If that happens, get to a medical tent or warm area fast. Fueling during the race helps too—carbs = heat. Even a cup of sports drink can help stoke your internal fire.

Go Easy on Downhills

Wet downhill + tired legs = recipe for disaster.

Slow it down. Land midfoot if you can and use short, quick steps—not heel strikes that’ll send you sliding.

Remember: you’re racing the clock, not gravity.

Trust the Volunteers

If a volunteer shouts “Slippery corner ahead!”—listen up. They’ve seen the spills, the potholes, the poor soul who didn’t slow down. They’re basically your mid-race spotters.

Post-Race: Dry Off, Warm Up, Don’t Die

Yeah, I’m joking. Kind of. Once you stop moving, the cold hits fast. You just ran a hard race—your body’s cooked. That post-race chill is real.

What to do:

  • Keep walking right after the finish. Get your heart rate down slowly.
  • Wrap yourself in that mylar blanket like a baked potato.
  • Get out of wet clothes ASAP. Change in a porta-potty if you must. I’ve done it—it’s not glamorous, but it beats standing around soaked and shivering.

Hot Spots? Fix ‘Em

If your feet are talking to you mid-race (aka “Ow, my blister!”), don’t tough it out by limping. That throws off your form and opens you up to bigger injuries.

Hit the medical tent. Tape it. Adjust your sock. One minute now could save you a week of hobbling later.

Know When to Pull the Plug

Sometimes, the weather wins.

If you’re shivering uncontrollably, can’t think straight, or the road looks more like a river, it’s okay to call it. DNF doesn’t mean you’re soft—it means you’re smart.

You live to race another day. Wet shoes and ego bruises heal. Broken bones and hypothermia? Not so fast.

Post-Race Protocol: Don’t Let the Chill Take You Out

You crossed the finish. Boom. But you’re not done yet—not if it’s cold and wet.

Here’s your must-do checklist for getting dry and warm fast:

1. Keep Moving

Resist the urge to collapse or sit on the curb. You’re soaking wet, and the second you stop running, your internal furnace cools fast. Walk for 5–10 minutes.

Let your body transition out of race mode without crashing.

2. Get Dry. Now.

Find your gear bag. Towel off. Swap out those soaked socks, shirts, shorts—all of it.

Even if it means doing a quick-change under a finisher’s poncho or porta-potty stall (been there), it’s worth it.

Dry clothes = warm body = safer recovery.

3. Rehydrate and Refuel – No Skipping This Part

You crossed the finish line, soaked to the bone, and maybe a little delirious. Now’s not the time to wander around pretending you’re fine. Refuel and rehydrate like it’s part of the race.

Here’s the thing: Cold weather messes with your thirst signals. Just because you’re not dying for a drink doesn’t mean you’re not dehydrated.

Get something with electrolytes into you—ASAP. Sports drink, warm broth, chocolate milk—whatever you can stomach.

And don’t forget food. Within 30–60 minutes, eat something with carbs and protein to kickstart muscle repair. A protein bar, banana with PB, even a warm sandwich if there’s food at the finish line—just get it in.

Pro move: If the race offers hot coffee, tea, or cocoa—grab it. Warm drink = hydration + heat = double win.

4. Warm Up Slowly (No, Not with a Scalding Shower)

If you’ve got a hot shower waiting, great. Just don’t sprint in and crank it to lava-mode if you’re frozen stiff.

I’ve seen runners get woozy or even faint from the temp shock.

Start with layers, blankets, warm drinks. Then ease into that shower (keep it warm, not boiling).

No access to one right away? No problem. Dry clothes + car heater = heaven. Heated seats? That’s luxury recovery.

5. Do a Damage Check

Once you’re warm and breathing like a human again, check your feet and skin.

Blisters? Chafing? Anything raw?

Clean it. Treat it. Bandage it. And if you lubed and taped like a boss beforehand, you might come out clean.

But don’t skip the inspection—it’s better to catch a hotspot early than deal with a nasty blister later.

6. Stretch Gently – Or You’ll Regret It Tomorrow

I know—it’s tempting to plop on the couch and not move for the next six hours. But cold, rainy miles tighten you up like a knot.

After that shower (or while still warm), hit a few gentle stretches or foam rolling. Target the spots that took the brunt today—calves, quads, IT band.

Just a little goes a long way to keep DOMS (delayed-onset soreness) from wrecking your week.

7. Celebrate the Slog – You Earned It

Let’s not forget the mental game here. You didn’t just run—you conquered rain, cold, maybe even wind. That’s something to be proud of.

Reflect. What went well? What gear saved your butt? What sucked—and how can you fix it next time? That’s how you level up.

💡 Real runner story: One guy I know ran a wet, cold marathon and skipped the dry clothes after. Ended up in the med tent with borderline hypothermia. He learned his lesson. Now? He crosses the line, walks it off, throws on a dry hoodie and hat, and sips hot chicken broth from a thermos. That’s his new finish-line ritual. You live, you learn, you adapt.

Pro tip: Party later. Change first. Even if there’s a beer garden and a DJ, you’ll enjoy it way more when you’re dry, warm, and not shivering like a human maraca.

And if the post-race chills hit hard? Don’t be shy—head to the med tent. They’ve got thermal blankets, heaters, and people who’ve seen it all. No shame in needing help after a tough effort.

Final Take: Rainy Races Don’t Cancel You—They Toughen You

Look, running in the rain isn’t everyone’s dream. But it can be one hell of an adventure—and you’ll remember it forever.

Prepping for the weather, running smart on slick ground, and recovering like a pro afterwards? That’s what makes you one of the gritty ones. One of the runners who doesn’t flinch when conditions get nasty.

It’s not about being dry (spoiler: you won’t be). It’s about being smart, safe, and unstoppable.

So next time the sky opens up, don’t whine—gear up and go. Run through puddles. Laugh at the mess. Be the badass who shows up when others bail.

As I always say: Rainy runs teach you to stay calm when everything around you is uncomfortable. That’s a skill that goes way beyond the finish line.

Lace Up. Show Up. Splash On.

Puddles? Bring it.
Wind? You’ve faced worse.
Cold? You’ve got layers.

What matters is that you didn’t back down.

So run through the storm. Change into dry gear. Grab a hot drink. And walk away stronger than you started—mentally and physically.

You didn’t melt. You conquered.
See you in the rain.

Sub-5 Minute Mile: Training Plan, Strategy & What It Really Takes

Alright, let’s break it down.

Running a mile in under five minutes? That ain’t jogging around the park.

I’m talking about locking into a 12 MPH pace and hanging on for dear life for four full laps of pain.

That’s 75 seconds per lap. Every. Single. One.

You mess up just a bit? Boom—you’re over five and it’s back to the drawing board.

Ever hopped on a treadmill and cranked it to 12.0? Try staying on for more than 60 seconds.

Most runners are hanging by a thread by then.

Now imagine holding that speed for five minutes straight.

No breaks.

No second chances.

That’s what it takes to hit sub-5.

It’s not just speed—it’s grit, focus, and an insane tolerance for discomfort.

Now let me show you how to actually get there:

Why 5:00 Is a Wall Most Runners Never Break Through

Let’s keep it real—sub-5 isn’t just “fast.” It’s rare.

For most runners, breaking 6 minutes is a huge achievement.

Breaking 5? You’re stepping into elite territory. Top 1% stuff.

You don’t trip into a 4:59. You build it. Brick by brick, rep by rep, week after week. And yeah, it hurts.

The Numbers Game: How Fast Is Sub-5?

Let’s look at the cold, hard math.

To run a 4:59 mile, you need to average right around 74–75 seconds per 400m.

That’s it. Four laps.

Each one has to be near-perfect.

Some runners like to go out hot—maybe 71–73 on that first lap—to “bank” a second or two.

Sounds smart on paper, right?

But here’s the trap: if you blow your load early, lap three becomes a war zone.

You’ll crawl through it and torch your time.

What works for most? Either an even pace (75–75–75–74) or a tiny positive split like 73–75–77–74. Keep it steady, save something for that last lap kick.

Why It Matters

You can’t fake a sub-5.

It doesn’t happen on a whim.

It doesn’t care about your Strava kudos or how good your shoes are.

If you’ve hit it, it’s because you earned it the old-school way—with blood, sweat, and too many 400s to count.

And yeah, 5:00 doesn’t get you in the Olympic Trials.

But it does get you into a club that most runners never even sniff.

You don’t break 5 unless you’ve put in real work. You’ve got to run smart, recover right, and show up on the days you don’t feel like it.

Chasing the Sub-5 Minute Mile (12-Week Plan That Actually Works)

Alright, you’re serious about that sub-5 mile? Good.

Now we need a game plan that doesn’t waste time or get you hurt.

Here’s how I coach runners through it—12 weeks, broken into three dialed-in phases. B

ut don’t even think about starting this plan if you’re not already logging 20+ miles a week. Seriously.

If you’re running like twice a week and jump straight into intervals, you’re not training—you’re asking for a trip to injury town.

As Coach Jack Daniels once said (not the whiskey, the running legend), “Don’t jump into intervals until you’ve got some base mileage.” And he’s right.

Personally, I won’t start anyone on this until they’ve had 4–6 weeks of running 20–30 miles a week over at least 4–5 days.

That’s your runway.

Skip it, and you’re not flying—you’re crashing.

Let’s break it down.

Phase 1 (Weeks 1–4): Build the Engine & Grease the Gears

Goal: Get your lungs and legs ready. Lay the bricks.

This isn’t the sexy part. No flashy track workouts yet. Just good, honest mileage and some speed primers to set you up for the real grind later.

Mileage: You’re shooting for 25–30 miles per week, spread over 4 to 5 days. Keep most of it easy. Like, “can-talk-about-Netflix-while-running” easy. The mile is roughly 80% aerobic, especially for trained folks.

Long Run (1x a week): Go 8–10 miles. Keep it chill. For younger runners, that’s about 60–75 minutes. Adults? You might stretch to 90 if your legs are used to it. Just one a week, but it built the strength to finish strong when it counted.

Strides (2x a week): After a couple easy runs, throw in 4–6 strides. These are 15–20 second bursts at about mile pace, with full recovery. You’re not going all-out, you’re just reminding your legs what speed feels like. It’s like muscle memory training.

Optional: Hill Sprints (1x a week): Want to spice it up? Find a steep hill. Sprint up for 8–10 seconds, then walk down and repeat 4–6 times. These build power, boost speed, and toughen you up. Think of it as strength training for runners. One study even showed that hill sprints—just two sessions a week—can improve VO₂ max, speed, and race times.

Important: I know it feels like you’re not “training for sub-5” yet, but this is the work that matters. I’ve seen so many runners stuck at 5:07, 5:10, because they skipped this phase and rushed into intervals.

Phase 2 (Weeks 5–8): Now We Get Fast

Goal: Teach your body what 5:00 pace feels like—and how to hold it.

This is where you earn it. The speedwork starts, but it’s not about killing yourself every session. It’s about learning control, rhythm, and toughness at pace.

Week 5: 200s at Goal Pace

  • 10 x 200m in 37–38 seconds (that’s 5:00 mile pace)
  • 60 seconds rest

Simple, but deadly. You’re not sprinting—just flowing at goal pace. Keep it locked in. If 10 feels too easy? Go 12. Too much? Start with 6–8 and build up.

Week 6–7: 300s at Goal Pace

  • 6–8 x 300m in 56–58 seconds
  • 75 seconds rest

Now we’re testing your speed endurance. The last 100 meters of each rep will sting—that’s the point. You’re learning to stay smooth when the legs get heavy.

Week 8: The Big Test – 400s at Goal Pace

  • 6–8 x 400m in 75 seconds
  • 90 seconds rest

Classic. If you can run 8 x 400m in 75s with solid rest, you’re ready. Stick to 75s and stay consistent. No hero reps up front. Even pacing wins the day.

Tempo Work (1x/week)

Don’t ditch your endurance just because you’re on the track now. Add a threshold run once a week:

  • 3-mile tempo at 6:00–6:15 pace
  • OR 4 x 1km at 5K pace, short rest

Why? Because the mile is still mostly aerobic. I’d dare say that the mile is about 80% aerobic for trained runners. That tempo work builds the resistance to lactic burn in the later laps—and sharpens your mental grit.

Phase 3: The Final Push – Mile-Specific Sharpening (Weeks 9–12)

This is where things get real. The goal for this last month? Dial in your race pace, build up that speed endurance, and train your brain to embrace the pain.

Race pace isn’t just a number—it’s a mindset.

Mile Simulation Workouts: Practice the Pain

Time to start flirting with race-day intensity. These workouts aren’t just hard—they’re calculated.

Here are a few weapons for your final training block:

600m Repeats (Lactate Buffet)

This one stings—but it works. Knock out 3–4 x 600m a little faster than your mile goal pace. Let’s say you’re gunning for a 5:00 mile—your reps should be around 1:50–1:52. Take a full 3–4 minutes to recover between reps. Walk. Breathe.

Your legs are gonna fill with lactic acid like wet cement. But that’s the point—you’re training to keep form when everything screams “stop.”  It’s brutal, but it’s the kind of lactate stacking that preps you to fight through that third lap wall.

Use these once a week, max. They take a lot out of you.

Goal-Pace Ladder: 400–800–400

This one’s sneaky tough. Start with a 400m in 75 seconds. Rest 2 minutes. Then go for an 800m in 2:30 (right at 5:00 pace), rest 3 minutes. Finish with another 400m in 74–75. That’s a full mile broken into three chunks with minimal rest.

It mimics the rhythm of a race: strong start, grind in the middle, then gut it out at the end. If you’re hitting those splits without falling apart, you’re in the ballpark.

“In & Out” 200s (Floating Reps)

Ready for advanced class? This one’s for you.

Alternate 200m hard (~34–35s) with 200m float (~50s jog) for 8 reps. No standing rest.

Just go, float, go, float—for a full mile or more. This teaches your body to recover while still moving fast, and it boosts your lactate clearance. It’s how you build that second wind mid-race.

If you’re newer to intervals, maybe skip this one. But if you’ve been training consistently, it can give you a real edge.

Test Yourself: Time Trials & Tune-Ups

Every 3–4 weeks, get after it with a time trial—mile or 1200m. Don’t treat it like a casual tempo. Warm up right (easy miles, drills, strides), get someone to time you, and give it a real go.

This isn’t just about hitting a time—it’s about learning how to pace, how to dig in, and how your legs feel under fire.

Track your progress. Maybe you start with a 5:20, then dip to 5:10. That means it’s working. If you can, hop in an all-comers race or even a local road mile. Nothing fires you up like real competition and a little adrenaline.

Week 12: Taper Time

Last week before your goal mile? Back off a bit. You want to show up fresh, not fried.

Cut your mileage, keep your runs easy, and do a light tune-up workout 3–4 days before the big day. Something like 2 x 400m at mile pace or a few 200m strides—just enough to stay sharp without zapping your legs.

Final Coaching Moment: Don’t Overcook It

This is where a lot of runners mess up. They feel “behind,” so they cram in one more workout, one more interval session… and boom—injury or burnout.

Listen to your body. If something feels off, back off. One of my mantras: it’s better to be 10% undertrained than 1% overtrained.

Consistency always wins over perfection.

Race Day Strategy – How to Actually Run a 5:00 Mile

Alright, you’ve done the work. The grind. The long runs. The gasping intervals.

Now it’s go-time.

A sub-5:00 mile isn’t just about being in shape—it’s about showing up with a plan and the guts to stick to it when it hurts like hell.

Let’s walk through how to race this beast, lap by lap. Trust me—I’ve been there, and so have my athletes.

Lap 1 – Controlled Aggression (0–400m)

The gun goes off. Adrenaline’s surging. You feel like a cheetah in carbon plates. Don’t blow it.

I’ve seen runners cook their race in the first 200m, flying out like it’s a 100m dash. One of my guys once dropped a 68 on lap one. He looked like a hero until lap three turned him into roadkill.

Here’s what you want: 74 to 75 seconds. That’s your zone.

It’s okay to ride the excitement a bit—that energy may let you sneak 2–3 seconds under goal pace without wrecking yourself. But you’ve gotta be smooth. Think gliding, not grinding.

Get behind someone if you can—let them pull you into pace. If you’ve trained with 200s and 400s at this clip, this first lap should feel fast but doable. You’re fresh. Stay relaxed.

Lap 2 – Settle and Stack (400m–800m)

This lap is about rhythm. You want to stack another 75 seconds on top of that first one. This isn’t time to get fancy—just hold your ground.

Hit the halfway point (800m) in about 2:28–2:29 if you’re on track.

That gives you a little breathing room. If you’re sitting right at 2:30, you’re still fine. Stay chill, keep your form tight, and don’t zone out.

It’s easy to drift here. I’ve done it myself—lap 2 feels boring compared to the start and the chaos to come.

If you’re solo, peek at your 600m split (~37–38 sec for that 200m segment) and make sure you haven’t slipped.

If you’re in a pack, great—draft off someone, conserve mental energy, and ride the pace.

Lap 3 – The Grind Zone (800m–1200m)

Here’s where it gets dark.

Welcome to no man’s land.

This lap is where the wheels come off—or don’t. Oxygen debt kicks in. Your legs scream. Your brain whispers lies: “Ease up. Save something. Just slow a little…”

Nah. Not today.

Every coach I know says the third lap is where races are won. You have to fight for it.

Break it down: 200m chunks. Focus on your form. Stay with your target. Use the crowd. Use anything.

When you hit 1000m, say to yourself: “Only 600 to go.” That’s nothing—you knock out 600m reps in workouts all the time.

Split check at 1200m: ideally 3:45–3:47. If you’re at 3:48–3:50, don’t panic—you’re still in striking range.

Lap 4 – Close with Chaos (1200m–1609m)

Bell lap. This is it.

You’ve got one lap to bring it home. No overthinking. No hesitation. Just raw effort.

I tell my runners: focus on each 100m. That’s all. If you can, build from 300m out—gear up, get tall, and start pumping. Most runners kick from 200m out. That’s your sling-shot moment—come off that final curve like it owes you money.

Can’t kick? That’s fine. Hold pace. The key is not to fade.

Ignore your brain—it’ll be screaming for mercy. It lies. You’re not going to collapse. You’ve done this in training. Remember those 8x400s or brutal 600s? This is why you did them.

If you hit 1200m at 3:48, you need a 72-second lap. Hard? Yeah. Doable? Absolutely.

Speed Development: Sharpen That Blade

Want to make 5:00 pace feel like a jog? Then you’ve gotta flirt with paces even faster than your mile effort. I’m talking sprinter-style workouts. Stuff that makes your legs pop and your form tight.

Here’s one that’s spicy: 4×200m + 4×150m + 4×100m, all hard. I used to do these with full recovery between each—no shortcuts. Think 200s at around 32 seconds, 150s at 23s, 100s around 15s. That’s basically your 400m race pace or quicker.

This stuff improves your raw speed and high-end mechanics. Yeah, I know—100m sprints don’t scream “mile training,” but they teach you how to move efficiently and powerfully. After hitting those, a 75-second quarter feels almost chill. It’s like tuning a sports car—once you hit top gear, cruising speed feels easy.

Another speed burner? 12×200m at 32–33 seconds with generous rest. I picked this one up from a forum full of sub-5 crushers. It’s not for cardio—this is pure sharpening. Just remember, speed like this comes with a price: you better warm up like a pro. I’m talking A-skips, butt kicks, strides—the whole warm-up parade. Don’t skip it unless you like ice packs and physio bills.

Coach Tip: On speed days, keep the volume low. Go for pop, not puff. Save your hero efforts for race day.

What’s the fastest 200m you’ve run in training? Have you tried a sprinter workout lately?

Pacing Drills: Feel the Clock

Ever blown up in a race ‘cause you went out too hot? Been there. That’s where pacing drills come in—and one of my favorites is “teleport 400s.”

You run a lap at goal mile pace—no peeking at your watch. Just run by feel. Afterward, check the time. You’d be surprised how often you’re off. Then jog a lap, regroup, and try again.

By the last rep, you’ll hit 75.0 seconds on feel alone. That’s gold when your watch glitches or you’re racing on a track without splits. Internal pacing = race day weapon.

Another good one? In-and-out 200s—alternate fast and steady efforts. These mimic race chaos: surges, slowdowns, mental recalibration.

Ever run a 400 “blind”? Try it. Your body should know the pace better than your watch.

Lactic Tolerance: Embrace the Burn

Now we’re talking pain cave.

These are the workouts where your legs turn to soup and your brain begs you to stop—but this is where your ceiling rises.

One of my go-to death sessions: 3×(3×300m) at fast pace, minimal rest. It’s like layering burn on top of burn.

Another one that nearly broke me (in a good way)? An inverted ladder:

  • 800m @ 5K pace
  • 600m @ 5K
  • 2×400m @ mile pace
  • 2×200m @ 800m pace
  • Then back up: 2×400, 600, 800

This sucker hits every gear—and every muscle fiber. After a session like that, racing one mile feels… doable. I remember walking off the track thinking, “If I didn’t die today, I’m not dying on race day.”

What’s your hardest workout to date? That one you still brag about surviving?

Recovery on Speed Days 

The secret weapon? Recovery. That’s where the real gains come from. Here’s how I handle mine:

  • During the workout: Respect the rest. If it says 90 seconds, take it. Jog or walk—keep moving to help flush that burn. Heart rate still sky-high? Don’t be a hero—extend the rest. The goal is quality, not collapse.
  • After: Cool down with 1–2 easy miles. Then foam roll or stretch—especially those fried hamstrings and calves.
  • Refuel smart: Within 30 minutes, I crush a banana with PB or hit chocolate milk. Carbs refill the tank; protein helps rebuild the muscle you just tore down. Sports science is clear on this—don’t wait.
  • Hydration: Speed work = sweat factory. Drink up. Water’s fine, but toss in some electrolytes if it’s hot or a longer session.
  • Rest next day: This is non-negotiable. Easy jog or full rest. Some guys running sub-5 do their recovery days at 8:00+/mile. There’s zero shame in slow.
  • Track recovery: I log how I feel: soreness, sleep, mood. Some folks use HRV or resting HR apps. If I’m dragging two days later, I adjust. No shame in bumping a workout. Better to delay than derail.

What’s your go-to recovery trick after a brutal workout? Foam rolling, naps, snacks?

Mind Games & Pacing Tricks

Speed sessions aren’t just about the legs—they’re about the head too.

When I do 400m repeats, I drill pace control. First 200m? Nail it at 37–38 seconds. Go out too hot? I course-correct next rep. Sometimes I’ll push the third rep of a broken mile workout just to simulate the race’s breaking point.

One drill I love: 4×400m with 100m jog between. Try to make the third lap the fastest. This rewires your brain to surge when it hurts most.

Got a mental trick for pushing through pain? Share it—I’m always stealing good ones.

Build the Whole Engine

The magic to sub-5? You’ve gotta touch all the gears:

  • Sprint work for pop
  • 400s for pacing
  • Tempo runs for strength
  • And drills that build grit

I’ve seen it in myself and the runners I coach—hit these sessions, and things start clicking. Your 200s get quicker, your breathing settles, and your confidence builds.

Keep a training log. Write down your splits, how you felt, and where you crushed or struggled. That log becomes your blueprint.

Most of all—enjoy the grind. There’s something addictive about flying around the track, gasping for air, and realizing… you’re stronger than last week.

Mile training is tough. But damn, is it worth it.

So what’s your current mile time? What’s your next PR target? Drop it in the comments—I’m here for it.

The Real Race is in Your Head

Let’s talk about the silent killer: your mindset.

If you believe 5:00 is out of reach, guess what?

You’ll run like it is. I’ve coached runners who had all the tools—speed, fitness, the right workouts.

But deep down, they didn’t see themselves breaking 5.

And that self-doubt showed up when it got gritty. They’d hold back when they should’ve pushed. Give up when it burned.

I’ve been there myself. There was a time when I told myself 4:59 was a pipe dream.

And like clockwork, I’d run 5:06, 5:07, 5:10. Close, but no cigar. Once I started running with belief—not ego, but quiet confidence—everything changed.

I stopped bailing on the hurt. I committed.

Now, don’t get cocky either. Thinking you’ll cruise to sub-5 without a fight is just as dangerous. That’s how you blast out in 70 seconds, blow up, and limp home at 5:25. I’ve coached athletes who had one great workout and suddenly thought they were untouchable. Spoiler: they weren’t. Stay hungry.

Bad workout? Shrug it off. It’s one data point, not your destiny. Great workout? Cool—keep grinding. No goal worth chasing is ever a straight line. You’ll zig, you’ll zag. The ones who get there are the ones who keep adjusting and stay in the fight.

Fix It Before It Breaks

Here’s a pro move: keep a training log and check in weekly. What went right? What sucked? If your splits are slipping or your legs feel fried, don’t wait for a blow-up. Make a move. Maybe you need more recovery.

Maybe you need to tighten up pacing. Maybe both.

When in doubt, ask someone who knows their stuff.

A coach, a faster buddy, your running group nemesis—anyone who can call out your blind spots.

We all need that. I’ve had guys point out stuff I completely missed in my own training.

Huge difference-maker.

And listen, I’ve made every mistake in the book. Mis-paced races. Skipped rest. Trained through sickness. You name it. But the difference between “almost” and “nailed it” was using those screw-ups to get smarter.

As Coach Gags (Frank Gagliano) famously said: “Good decisions come from experience, and experience comes from bad decisions.”

So don’t beat yourself up if you bombed your last mile attempt. That was tuition. Now apply what you learned and get back to it.

Sub-5 Isn’t About Perfection—It’s About Grit

This goal? It ain’t for the faint of heart. You’re chasing something most folks will never even try. That alone puts you in rare air. But to actually do it, you need more than just talent or a pretty Strava feed.

Let’s recap the essentials:

  • Build Your Engine: Get your mileage in. 20–30 miles per week minimum if you’re serious. Long runs, hills, strides—stack that aerobic foundation. Speed without a base is like a Ferrari with no gas.
  • Train at 5:00 and Faster: Your body needs to know what 75-second laps feel like. Run 200s, 300s, and 400s at race pace until it’s second nature. Then dip under—150s, 200s, sprint work. If you can hit a 58-second 400, 75s will feel chill by comparison.
  • Get Stronger, Not Just Fitter: Strength work isn’t optional. Hit the gym, do your core, master bodyweight circuits. And clean up your form—high hips, quick turnover, midfoot landing. Little tweaks = big gains.
  • Win Lap 3: This is the pain cave. Train it. Love it. Rehearse the surge. The runners who break 5 don’t survive lap 3—they attack it.
  • Race With Heart: Don’t go out like a maniac. But don’t coast either. Race with guts. Trust your work. You’re gonna hurt. That’s normal. Dig in. Commit.
  • Stay Consistent, Stay Hungry: Some days, you’ll fly. Other days, you’ll crawl. That’s the game. Just keep stacking weeks, adjusting smart, and showing up. Every workout adds up.

Road Running Safety: 22 Rules Every Runner Should Know

Running the streets can feel like freedom. It’s easy, raw, and gives you that sense of control—just you and the road.

No treadmill. No trail map. Just pavement and pace.

But let’s not sugarcoat it—road running comes with real danger.

Over 8,000 pedestrians were killed in 2022 alone. That’s one death every 64 minutes.

Most of us don’t think about it until it’s too late—until there’s a close call with a distracted driver, or you’re nearly clipped crossing a busy street.

I’ve logged thousands of miles in the city.

If you’ve ever been to Bali then you know how chaotic traffic can be in South East Asia.

I’ve dodged turning cars, stepped over potholes, and dealt with more red-light runners than I can count.

If you’re gonna make road running part of your training—whether it’s early morning or after work—you’ve gotta do it smart.

This guide breaks down 22 rules every runner needs to survive the streets. These aren’t just theories. They’re real-world tips from people who’ve been out there and stayed safe.

Use them. Live them. So you can run stronger, longer—and most importantly, make it home in one piece.

Why Road Running Safety Really Matters

Let’s be real: the road wasn’t made for runners. It was built for 2-ton machines going 40+ mph. You? You’re just out there in shorts and shoes.

That’s the hard truth. When you’re running on the street, you’re the vulnerable one. You’ve got zero protection, and if a car hits you, it’s not gonna be a fair fight.

Here’s what the stats say: 1 in 5 traffic deaths is a pedestrian. And most of those happen outside of crosswalks, or on fast roads where drivers don’t expect people on foot.

Runners often blend into the background—especially in bad lighting.

I’ve had drivers pull out without looking, blow through stop signs, or stare straight through me like I was invisible.

If you’ve ever flinched at a horn or jumped back from a turning car, you know what I’m talking about.

And it gets worse at night. Over 75% of fatal pedestrian crashes happen after dark. Why? Because it’s harder to see, and drivers go faster when the roads feel empty.

But here’s the good news—you can run the roads safely. You just need to build good habits. That means knowing how to move, where to run, what to wear, and how to stay seen.

It’s not about being paranoid. It’s about being prepared.

Let’s get into the rules.

21 Road Running Safety Rules Every Runner Should Follow

Here’s your no-BS runner’s code for the streets. Live by these, and you’ll be safer, stronger, and way more confident out there.

1. Use the Sidewalk—No Excuses

If there’s a sidewalk, use it. Period.

I don’t care how smooth that shoulder looks—sidewalks exist to keep you alive. They put a layer of distance between you and traffic, and in most places, it’s the law.

Sure, there are times you’ll need to hit the road—rural routes, snow-covered sidewalks, races where the roads are closed.

But for everyday runs? Stay on the sidewalk. Even if it’s a little cracked or uneven, it’s still better than dodging SUVs.

If the sidewalk’s out of commission, run way off to the edge—like your life depends on it. Because honestly? Sometimes it does.

2. Face Traffic. Always.

Let me repeat that: ALWAYS run facing traffic.

If there’s no sidewalk and you’re running on the road, get your butt on the left side so you can see what’s coming. This gives you a fighting chance if a car drifts or a distracted driver doesn’t see you in time.

Running with your back to traffic is like playing Russian roulette with a moving vehicle.

You won’t see that danger until it’s on you—and by then, it’s too late.

Now, if you’re on a curve or crest where visibility sucks, okay, fine—you might need to switch sides briefly. But get back to facing traffic as soon as you can. It’s not negotiable.

3. Run Single File on Narrow Roads

I get it—running with a friend makes miles fly by. But when the shoulder gets tight? Line it up. Single file.

That side-by-side jog chat might feel good until a car swings around a corner and suddenly there’s no room for everyone.

You don’t need to look like a military unit—but when the road narrows or cars are flying by, tighten it up. Chat when it’s safe. Otherwise? File in and run smart.

I’ve had too many runners in my group get honked at (or worse) because they were hogging the road.

Let’s be courteous—and smart.

4. Be Seen: Wear Bright, Reflective Gear

Here’s the deal: If drivers can’t see you, they can’t avoid you.

So ditch the all-black ninja outfit, especially at night or early morning. I’ve made that mistake—and nearly got clipped for it.

Go for neon colors: bright yellow, orange, even white.

In low light? Add reflective bands, vests, or strips. Clip-on lights? Even better. Think of it like turning yourself into a walking road flare—make drivers notice you from a mile away.

A friend of mine runs with a neon vest and a headlamp every super early morning. “I look ridiculous,” he says, “but I haven’t been hit yet.” That’s the goal, right?

Better to look goofy and live to run another day.

5. Bring Your Own Light

If you’re running in the dark, don’t rely on luck or streetlights—bring your own damn light.

A solid headlamp or handheld flashlight can be a total game-changer.

And yeah, I get it—headlamps can feel a bit nerdy at first. But you know what’s way worse? Face-planting into a pothole or getting clipped by a distracted driver who didn’t see you.

The deal is simple: your light lets you see the road and lets others see you. That includes cars, bikers, other runners… even loose dogs.

I’ve had my own close calls stepping on uneven sidewalks or dodging trash cans on trash day—things you just don’t spot until it’s too late unless you’ve got a beam lighting your path.

Some headlamps even have a flashing mode—great for grabbing attention. Just aim the light about 10–15 feet ahead so you’re not blinding drivers, but still lighting your way.

These days, the good ones are light, rechargeable, and barely noticeable once you’re moving.

What’s more?

I’d also recommend combining your headlamp with reflective gear and you’ll be lit up like a Christmas tree.

That’s exactly what you want when you’re out before sunrise or after dark.

6. Never Assume Drivers See You

This right here? Golden rule. Act like drivers are blind.

Even if it’s your right of way, never step into the street assuming that car is going to stop. Way too many runners have ended up in the ER because they assumed a driver was paying attention.

Truth is, lots of drivers are zoned out—texting, messing with the GPS, sipping coffee, yelling at their kids in the back seat—you name it. They’re looking for other cars, not a solo runner in a hoodie.

I’m speaking from personal experience.

A few weeks ago, I almost got flattened outside of fast food joint in Sanur near my house.

I was on the sidewalk.

The driver was looking right for traffic and never even glanced left—nearly took me out pulling out of the lot. Luckily, I stopped just in time. The driver didn’t even notice and they just kept on driving.

Scary.

The Road Runners Club of America says it straight:

“Never trust a driver. Drivers are distracted and you are not their first priority.”

Harsh? Sure. But 100% true.

If you want to keep running tomorrow, you yield first—always—unless you’re absolutely sure they’ve seen you and are slowing down. Even then, don’t drop your guard.

7. Cross Smart, Not Wild

Let’s kill the bad habit of playing real-life Frogger.

Darting mid-block or bolting between parked cars? That’s asking for trouble.

Always, and I mean always, cross at crosswalks or intersections when you can.

That’s where drivers expect to see people on foot.

It doesn’t make you invincible—some drivers will still try to turn into the crosswalk while scrolling TikTok—but it does improve your chances of being seen and gives you some backup (like traffic lights or stop signs).

No crosswalk? Fine. Pick a spot that’s well-lit with a clear line of sight in all directions.

Wait for a big, obvious gap in traffic—don’t trust that they’ll slam on the brakes for you.

And never jump out from behind a car or bush. If they can’t see you, they can’t stop for you.

8. Obey the Damn Traffic Laws

Look, just because you’re running doesn’t mean the rules of the road don’t apply to you. You’re not above the law because you’re in spandex.

Red light? Stop. Stop sign? Slow your roll. “Do Not Walk” signal? Wait.

And for the love of running, don’t be the person who darts into the street against traffic with earbuds in, hoping for the best (already written a post on why you should ditch earphones while running)

Sure, it’s annoying to break stride. But trust me—jog in place, stretch, do a couple of knee lifts—whatever keeps you moving.

What matters is that you’re not blindly running into cross traffic and giving the rest of us a bad name.

Respect the lights, respect the road, and believe me, drivers will respect you more too.

9. Watch the Corners

Blind curves are sketchy as hell. You can’t see around them—and neither can that car flying toward you.

When you hit a bend or hill where visibility drops, slow it down.

This is where you might want to cross to the other side of the road so you’re more visible—especially if you’re running against traffic (which you should be doing anyway).

Night running? Flash your light ahead—just a quick pop—so any car knows there’s a human up ahead. It’s not overkill. It’s smart.

Running blindly into a sharp corner is like rolling dice with your kneecaps. Don’t do it.

10. Ditch the Noise (Or at Least Turn It Down)

I love music on the run. Pump-up playlists, podcasts, whatever. But on busy roads? You gotta stay alert.

Headphones can turn you into a moving target—especially if both ears are plugged and the volume’s cranked.

The stats back this up. One study showed cyclists with two earbuds in missed 68% of nearby traffic sounds.

That’s basically running deaf.

And a 2012 analysis of pedestrian accidents found that nearly 3 out of 4 serious injuries involving headphones happened because the person didn’t hear the warning in time.

I’m not saying ditch the tunes forever. But at least try these runner-approved tricks:

  • Keep the volume low
  • Use just one earbud (traffic-side ear stays open)
  • Try bone-conduction headphones—they let you hear the world while still rocking your soundtrack

And maybe once in a while? Try a no-music run. Listen to your footfalls, your breathing, the world around you. It’s grounding. You might even like it.

I hate to tell other people what to do but no playlist is worth cleaning asphalt out of your teeth.

11. Ditch the Bling

If you’re heading out with gold chains, diamond studs, or a flashy smartwatch—just stop.

I get it—you’re used to wearing them. But out on the road? That shiny stuff can attract attention you don’t want, especially early in the morning or after dark. Worst-case, you make yourself a target.

Best-case? It’s annoying. Earrings bounce. Necklaces tangle. Rings can fall off when your fingers get sweaty.

Leave the valuables at home. You’re not out there to look fancy—you’re out there to get stronger.

I tell my female clients all the time: swap those nice earrings or engagement rings for something cheap (or better yet, nothing).

You want drivers to notice your reflective vest, not your diamond studs.

12. Carry Some ID—Always

Running without ID? Not smart.

You never know when something might go sideways—a fall, an allergic reaction, a random accident.

If you’re out cold or can’t talk, ID tells the EMTs who you are, who to call, and if you’ve got any medical stuff they need to know.

Best bet? Keep a license and a card (or wristband) with emergency contact info and allergies/blood type.

Some running belts and shorts have pockets for this. Or grab a Road ID tag—super handy.

I once talked to a runner who’s also an EMT. They said they’ve shown up to too many calls where the person lying there has no ID. No phone. Nothing. Makes everything harder.

Phones can lock. Batteries die. Your ID won’t. Two seconds to grab it—do it.

14. Your Phone = Safety Tool

This isn’t about Instagram stories mid-run. Your phone is your lifeline if something goes wrong.

Get hurt? Lost? Feel unsafe? You can call for help—or use that GPS tracking a lot of apps and watches have now.

Some gear even has “incident detection” features that ping your emergency contact if you fall. Pretty slick.

But here’s the kicker—don’t be glued to your screen. I’ve seen people nearly run into traffic checking their messages.

Use voice controls. Keep it in a belt or armband. Set it up so you can get help fast without needing to dig around or unlock things.

And for the love of shoes, don’t text while running. It’s as bad as texting while driving.

15. Stash a Little Cash or a Card

Stuff happens. You might twist an ankle and need a ride. Or bonk and need to buy water. Or get caught in a storm and need to duck into a cafe.

Carrying just $10 or a credit card gives you options. I always tuck a folded bill in a shoe insert or a little plastic zip bag inside my shorts pocket. You might not use it often—but when you need it, it’s a total lifesaver.

It’s part of your emergency kit, just like your ID.

16. Use Hand Signals Like a Pro

Cyclists do it all the time—and runners should too.

If you’re crossing the road or moving to pass something, stick out an arm. Just like on a bike. Drivers aren’t mind-readers. A quick hand signal shows them what you’re doing and keeps you safe.

Running on the left and crossing over? Point with your right hand. About to pass a walker? Give a quick wave. It helps everyone.

It might feel awkward at first, but trust me—drivers get it. And it beats getting honked at or nearly sideswiped because you swerved last second.

17. Speak Up When Passing

Nobody likes being snuck up on mid-run. If you’re about to pass someone—runner, walker, dog walker, cyclist—give a heads-up.

A simple “On your left!” or “Passing right!” works. Loud enough so they hear it. About 10 feet before you pass is good timing.

Don’t be that silent ninja runner. People get startled. And then accidents happen.

Bonus tip: If someone gives you the pass call, don’t freak out—just hold your line or scoot over if you can.

18. Be Predictable (No Sudden Moves)

Here’s a basic rule: don’t make random moves in traffic. If you suddenly cut across a lane or dodge a puddle without looking, drivers don’t have time to react. That’s how people get hurt.

Hold your line. Look before you move. Ease into turns or lane shifts. Even your posture can signal intent—start leaning into your turn before you actually take it.

Don’t assume drivers will just go around you. They won’t always. And they definitely won’t if you dart out in front of them.

Be steady. Be seen. Give people time to work around you. Predictability is what keeps close calls from becoming full-on accidents.

19. Trust Your Gut – It Knows Stuff Before You Do

Let me say this loud: your gut is smarter than you think. If something feels off on a run—even just a little—it probably is.

I’ve had runs where I caught a vibe. Maybe it was a weird dude sitting in a parked car too long, or an alley that just looked… wrong.

I didn’t wait to “figure it out.” I changed my route.

No shame.

No ego.

Even though I think I can pretty much defend myself in most scenarios.

But it’s never worth the risk.

Here’s the deal: your brain takes in tons of info you’re not even conscious of—body language, lighting, sounds—and when something doesn’t add up, your gut fires off a warning. That “weird feeling”? It’s real.

Plenty of runners—especially women—have stories that start with “I just knew something was off.” And the ones who listened? Most of them avoided bad stuff. You don’t need a full explanation to act. Cross the street. Turn around. Cut the run short. Call someone. Do whatever it takes to feel safe.

Even the Road Runners Club of America says the same thing: if something (or someone) gives you bad vibes, change your route. Don’t explain it. Just move.

You’re not training for a bravery award. You’re training to get stronger, healthier—and get back home.

20. Avoid Night Runs (If You Can) – Darkness Changes the Game

Yeah, I get it. Night runs feel peaceful—cool breeze, quiet streets. But here’s the truth: they’re also way riskier than daytime runs.

Statistically? I ‘ve already mentioned that about 76–78% of pedestrian deaths happen after dark.

That’s not fear-mongering—that’s cold hard numbers.

Why? Simple. Drivers can’t see you as well, and a bunch of them are either tired, distracted, or—let’s be real—buzzed.

You might think you’re visible. You’re not. Even if you lock eyes with a driver, that doesn’t mean they’ve registered you.

I always say: assume they don’t see you—even if they’re looking straight at you.

If your schedule allows, run in daylight. Mornings right after sunrise or evenings before the sun goes down are golden—better visibility, lighter traffic, fewer drunks.

But if nighttime is your only option, don’t wing it:

  • Stick to well-lit, familiar routes
  • Load up on reflective gear
  • Use lights—headlamp, vest, whatever
  • Run with a buddy if you can

Some folks go pre-dawn instead of late-night—less traffic, quieter roads. That works too. Just make sure you’re lit up like a Christmas tree.

You can’t get faster if you don’t make it home. Remember that.

21. Watch Those Intersections – Every. Single. Time.

If there’s one place runners get into real danger, it’s intersections. Don’t let your guard down—even when you’ve got the light.

Cars turning left or right often don’t look for runners. They’re scanning for other cars, not someone trotting through the crosswalk. I’ve had more close calls here than anywhere else.

Here’s a classic trap: You’re crossing, light says WALK, everything seems clear… then BOOM—a car whips a left turn into your path. Did they see you? Doesn’t matter. You need to make sure they do.

  • Make eye contact with drivers
  • Give a wave
  • Wait a beat if you’re unsure

Another nasty setup? Multi-lane roads.
Just because one driver stops doesn’t mean the one in the next lane will. A runner once told me she nearly got clipped by a bus after a car waved her through—and that bus didn’t see her till the last second.

Rule of thumb: treat every intersection like it wants to kill you.

  • Look left, right, left again
  • Don’t trust just the signal
  • Even on a one-way street, check both ways—people make dumb mistakes

Add two seconds of caution now, save yourself months of recovery later.

22. Don’t Race Cars – You’ll Lose. Every Time.

Let me spell it out: you are not faster than a car. Not now, not ever.

Usain Bolt? Top speed around 27 mph. A car at a neighborhood crawl? 30 mph, easy. And most drivers don’t crawl.

So don’t play chicken with a vehicle thinking, “I can beat it across.” You can’t. Or maybe you can—once. But the risk? Not worth it.

I’ve seen runners dart across roads with that “just gotta make it” mentality. That’s how people end up on stretchers. Or worse.

Cars move faster than you think, and they can pick up speed fast. And if the driver doesn’t see you in time—or misjudges your speed—it’s game over.

Someone once posted online:

“The car always has the right of way—feel free to challenge it from whatever afterlife you believe in.”

Dark? Yep. But dead-on.

Road Running Safety FAQs – Real Questions from Real Runners

Q: Should I run against or with traffic?
A: Always run against traffic (left side of the road). You need to see those cars coming. Trust me, having eyes on a distracted driver is better than being surprised by one blowing past your shoulder. Facing traffic gives you that extra second to move if someone’s not paying attention.

Q: What should I wear when running at night?
A: Be obnoxiously visible. Neon, reflective gear, headlamp—go full Christmas tree. I’d rather look like a dork than become a shadow on someone’s windshield.

Stats don’t lie: over 70% of pedestrian injuries happen in low light. You don’t win style points in the dark—just make sure they see you.

Q: Can I wear headphones while running on the road?
A: If you’re running street-side, skip the noise-canceling. Better yet, skip the tunes altogether. But if you must, keep it low and only use one earbud—the side away from traffic. Or use bone-conduction headphones so you still hear the world around you.

One study showed pedestrian injuries tripled in recent years due to headphone use. That’s no joke. I personally save my playlists for the treadmill or quiet trails.

Q: Should I carry pepper spray?
A: Depends where you run. If you’re hitting isolated roads or sketchy neighborhoods—or you’ve had a run-in with a sketchy person or aggressive dog—carry it.

I know plenty of runners (especially women) who won’t head out without a runner-specific spray strapped to their hand. If that makes you feel safer? Do it. Just learn how to use it first so you don’t end up pepper-spraying your own face.

(And yeah, check your local laws—some places have rules about carrying it.)

Q: What’s the safest time to run?
A: Daylight, hands down. Late morning or midday if you can swing it. Drivers are more alert, you’re easier to see, and traffic’s usually lighter.

Avoid rush hours and nighttime when possible—the stats show 6 p.m. to midnight is the danger zone. Early morning after sunrise is a solid sweet spot. Also, weekend midday runs in quiet neighborhoods? Chef’s kiss for safety.

Q: How do I make sure drivers notice me?
A: Be loud with your presence.

Wear the bright stuff, but also move in ways that say “hey, I’m here.” Pump your arms, wave, nod—whatever grabs their eye. If you’re crossing in front of a car, a little hand wave that says “I see you—see me” goes a long way.

Also, don’t hug the bushes. Stay where drivers expect people to be. Use the shoulder, not the ditch. Trust me, you want to be in their line of sight, not a blur from the corner of their eye.

Your Turn

What’s your running route look like? Are you out on city streets, country roads, or quiet neighborhoods? Ever had a close call or a “never again” moment with traffic?

Drop a comment and let me know—let’s talk street running survival.

Q: What if there are no sidewalks and the road’s barely wide enough for a bike, let alone a runner?

Been there. Those country roads might be beautiful, but they can be brutal. If there’s no shoulder, no sidewalk, and barely a lane, here’s the deal: treat that run like a survival mission.

First, see if you can reroute—even if it adds a mile or two. I’ve added loops around neighborhoods just to avoid a sketchy two-lane stretch with blind corners. Worth it every time.

If that’s not possible? Run during the quietest time of day—early mornings, mid-afternoon, whenever traffic is lightest. Load up on high-vis gear and blinking lights—especially a rear-facing red light so drivers from behind know you’re there. Think “Christmas parade,” not “stealth mode.”

And here’s a trick a lot of rural runners use: step off the road. When you hear a car coming, just move off into the grass or dirt and let it pass. I’ve literally stopped and stood in someone’s driveway just to avoid becoming roadkill. That’s not cowardly. That’s smart.

Narrow, shoulder-less roads are high risk. Don’t play tough. Play smart.

Q: What do I do if someone harasses me while I’m running?

Unfortunately, this crap still happens—catcalls, honks, even people chucking stuff out their window like it’s funny.

Rule one: don’t engage. As tempting as it is to flip someone off or yell back, that just adds fuel. Most of these losers are looking for a reaction. Don’t give them one.

If it gets persistent—like someone circling back, following, or creeping slowly—head for people. Public place, gas station, busy street, whatever. Pull out your phone. Call someone or start recording. That alone often makes them bail.

Worst case? Flag down another car, knock on a door, or straight-up call the cops. Trust your gut. If it feels like it’s escalating, don’t try to be polite—get to safety fast.

And if one route gets sketchy often? Change it up. Or bring a buddy. Or run during busier hours. You’re not weak for being cautious—you’re strong for keeping yourself safe.

Let me say this clearly: you didn’t cause the harassment. It’s not on you. It’s on them. But your job is to get home safe. Period.

Q: Got any tips for running in winter or crappy weather?

Oh yeah. Bad weather turns every run into a game of “Can I be seen and not die?”

Rain, fog, snow, ice—visibility tanks. Drivers are dealing with slippery roads, foggy windshields, and sometimes they’re white-knuckling just to stay in their own lane. That means they’re not watching for you.

So double down on lights, reflectors, neon gear—you know the drill. Wear layers that shine. A reflective jacket, LED arm bands, even clip-on lights for your shoes.

Watch for plowed snow blocking your shoulder, puddles that hide potholes, or ice slicks near gutters. I’ve had runs where I had to shuffle in someone’s shoveled driveway just to avoid skating into traffic.

Traction devices (like Yaktrax) can help on snow/ice, but be careful: cars still slide. Just because you’ve got grip doesn’t mean the guy in the Corolla does.

Honestly, if it’s sheet-ice or pouring rain, it might be a treadmill day. I know it sucks, but staying vertical > PR pace.

Recap: Run Like Your Life Depends on It (Because Sometimes It Does)

Running on the road can be freeing. It can feel like you’ve got the world to yourself. But don’t forget—you’re out there unprotected, and your best defense isn’t muscles or speed. It’s your mindset.

Here’s the real takeaway:
Smart runners are the ones still running years from now.

That means:

  • Wearing gear that says, “See me or hit a guilt trip for life”
  • Running facing traffic—always.
  • Choosing your routes and run times like you’re planning a mission.
  • Being hyper-aware, not hyper-distracted.
  • Knowing when to back off—because one cautious decision can prevent six weeks in a walking boot.

And honestly? Confidence grows with safety. When you feel in control out there, you run smoother, stronger, and with more purpose. That kind of energy adds up over time.

Set the Standard. Lead the Pack.

Every time you take road safety seriously, you’re not just protecting yourself—you’re raising the bar. You’re showing new runners, younger kids, even drivers how runners should handle the streets.

That reflective vest? That friendly wave? That careful crossing? It might change how a driver reacts next time. That stuff matters. We build safer roads for runners one respectful, smart choice at a time.

Before You Lace Up—Quick Checklist:

✅ High-vis gear?
✅ Reflective lights or strips?
✅ Charged phone and ID?
✅ Route mapped?
✅ Head clear and alert?

You good? Then hit that run.

And when you pass another runner doing it right—vest on, lights flashing—give ‘em a nod. That’s your crew. That’s how we roll.

Now You:

Got a safety tip that’s saved your skin? Ever had a sketchy close call you learned from? Drop it in the comments. Your story might help another runner make it home tonight.

Run smart. Run strong. Run again tomorrow.
Catch you on the road.

Let’s Talk:

Ever had a close call? What’s your top road safety habit that’s saved your hide? Drop it in the comments—I’d love to hear how you stay sharp out there.

And if this made you rethink your next run… good. That’s the point. We run to get stronger—not to get flattened.

Stay alert. Keep pushing. Run smart.

Heart Rate Recovery (HRR): Your Fitness Mirror

Let’s talk about one of the most powerful—but overlooked—metrics in running: Heart Rate Recovery, or HRR.

If you’ve ever finished a run with your heart pounding and wondered how long it should take to come back down, this one’s for you.

HRR is a simple number with huge meaning—it tells you how well your body is bouncing back, and that tells you a whole lot about your fitness, health, and recovery readiness.

Now it’s my turn to tell you more about it.

Sounds like a good idea?

Let’s get to it.

What Is HRR?

At its core, HRR is the drop in heart rate during the first minute after you stop exercising.

Example: if your heart rate is 160 bpm at the end of your run and it drops to 130 bpm after 60 seconds, your 1-minute HRR is 30.

Why does this matter?

Because it’s one of the clearest windows into your cardiovascular health and nervous system balance (specifically, how well your parasympathetic nervous system kicks in after stress).

A sluggish HRR could be a sign your body’s struggling—whether from overtraining, stress, illness, or underlying heart issues.

What’s a “Good” HRR?

Here’s the general breakdown (based on studies and coaching experience):

  • Excellent: Drop of 30+ bpm in 1 minute
  • Good/Normal: 15–25 bpm drop
  • Needs Attention: 12 bpm or less drop = red flag (worth looking into)

Don’t take my word for it.

Let’s look at some of the science.

In a landmark study published in the New England Journal of Medicine, a 1-minute HRR of 12 bpm or less doubled the risk of death over the next 6 years.

Another study in JAHA found that even a 10-second HRR was predictive: slow recovery = higher risk.

That’s not just training feedback. That’s life-saving data.

What Affects Your HRR?

HRR isn’t static—it changes based on:

  • Your fitness level (improves as you get fitter)
  • Workout intensity (harder = slower recovery)
  • Hydration (dehydration slows recovery)
  • Sleep, stress, illness, and even age

So don’t freak out if your HRR is slower after a brutal hill session. Track the trend, not a single number.

“If my usual recovery is 25 bpm and suddenly it’s 10 after an easy run? That’s a red flag. Time to back off or rest.” – Coach Dack

How to Measure HRR

It’s easier than ever:

  1. Look at your heart rate at the moment you stop
  2. Then record it again one minute later
  3. Subtract the difference = your HRR

If you have a fitness watch, many do this for you automatically.

If not, go old-school: find your pulse (wrist or neck), count beats for 15 seconds, multiply by 4.

Do that right when you stop, and again after 60 seconds.

Consistency is key—same time interval, same post-run routine.

Why Runners Should Track It

  • HRR is one of the earliest indicators of overtraining or burnout
  • A faster HRR = better aerobic fitness
  • Slower than usual HRR = check your stress, sleep, nutrition, or workload

Don’t Compare to Others

Some runners naturally recover fast. Some don’t.

What matters is:

  • Are you improving?
  • Is your HRR getting slower despite easier workouts?
  • Is it consistently poor?

Those are the real questions. HRR isn’t a race. It’s a mirror—use this key running metric to reflect on your overall fitness picture.

How to Bring Your Heart Rate Down After a Run

You crushed your run. You’re sweaty, satisfied… and your heart’s still hammering an hour later.

Yeah, that post-run heart rate that refuses to chill out? It’s a thing.

But the good news? You can do something about it.

Here’s how to help your body shift out of “go mode” and into recovery — fast and smart.

Active Cool-Down

This is huge. Don’t go from all-out effort to a full stop. Ease into recovery:

  • Jog the last few minutes of your run
  • Then walk for 5–10 minutes
  • Let your breathing normalize gradually

This smooths the handoff between your “go hard” system and your “rest and recover” system.

Bonus: You’ll feel way less dizzy, stiff, or wiped out later.

Stretch, Breathe, Hydrate

After your walk, go into light stretching, especially hips and hamstrings. This keeps blood flowing and aids HRR.

Pair it with deep breathing. Inhale slowly through your nose, exhale long through your mouth.

That breathing shift tells your body: “Workout’s over. Time to recover.”

Elevate Your Breathing (Literally)

Ever notice runners with their hands on their head, gulping air after a race? That’s not just drama — it helps.

Standing tall or raising your arms opens your chest and gives your lungs more room to breathe.

That means more oxygen in, more carbon dioxide out, and a smoother path to lowering your heart rate.

  • Breathe slow and deep. Inhale through your nose, exhale through your mouth.
  • Focus on belly breathing — this calms your nervous system and kicks in your body’s “rest-and-digest” response.
  • Avoid the hunch-over collapse — it restricts your lungs.

Rehydrate — The Right Way

Dehydration = harder time cooling = heart rate stays high. Fix that.

  • Sip water or a sports drink slowly. Gulping it down just makes your stomach revolt.
  • Add electrolytes — sodium, potassium, magnesium — especially after sweaty runs.
  • Rule of thumb: Half your body weight in ounces per day. Add more if you’re training hard or it’s hot out.

If your heart’s still racing hours later, and you haven’t peed? You’re probably still low on fluids.

Cool Your Core Temp

Your heart rate might be staying high because your body’s still trying to cool down. Help it out.

  • Splash cold water on your face, wrists, or neck
  • Wipe down with a cool towel
  • Sit in front of a fan or take a quick cold shower

This can trigger a natural response (called the diving reflex) that slows your heart rate fast.

You don’t need an ice bath — just cool yourself down.

Try “Legs Up the Wall”

This yoga classic is pure gold post-run.

  • Lie on your back, scoot your butt near a wall, and extend your legs up
  • Chill there for 5–10 minutes

It helps drain blood from your legs, reduce swelling, and calm your nervous system. I always notice my heart rate dropping noticeably while in this position.

Gentle Stretching or Foam Rolling

Stretch your hamstrings, quads, calves. Light foam rolling is fine too — just don’t go full beast mode.

The goal is relaxation, not a deep-tissue session.

Let your body know it’s time to downshift, not rev up again.

Calm Your Head, Calm Your Heart

Sometimes it’s not your body — it’s your nervous system that’s still buzzing.

Maybe your brain’s racing, or you’ve still got that post-run high running through your veins.

  • Try box breathing (inhale 4 counts, exhale 6–8 counts)
  • Chill music or a few minutes of mindfulness go a long way
  • If you’ve got a smartwatch with breathing guidance, use it

Stress keeps your heart rate up. Calm kills it.

Plan Real Recovery Days

If your heart rate stays elevated regularly after easy runs, something’s off.

You might be training too hard, too often — even if you don’t “feel” burned out.

Give yourself 1–2 true recovery days each week — walking, yoga, or just putting your feet up.

Your heart’s a muscle. If it’s always redlining, it never gets stronger.

When to Worry About Your Heart Rate 

Let’s be clear: it’s normal for your heart to pound during a hard run.

Especially after intervals, tempo sessions, or races, your heart rate’s going to be up—and it’ll stay up for a little while after.

That’s just your engine cooling off.

But sometimes? It doesn’t cool off. Or it does weird stuff. And that’s when it’s time to pay attention.

Here’s how to know if your post-run heart rate is just working overtime—or sounding the alarm.

Here are the red flags to pay attention to:

1. Your Heart Rate Stays Sky-High for Hours

If you finish a run, cool down, drink water, and your heart rate is still over 100 bpm hours later while sitting still?

That’s not normal.

This might be a sign of:

  • Dehydration
  • Overtraining
  • Arrhythmia or another heart issue

Especially if your heart’s still racing by bedtime after a morning workout? It’s a clue something deeper might be going on.

2. You Feel Dizzy or Like You Might Pass Out

Lightheaded right after a run? That can happen from blood pooling—but it should go away with a good cool-down and walking it off.

If you’re still seeing stars or getting dizzy every time you stop, that’s a sign your blood pressure or heart rhythm isn’t playing nice. Don’t ignore it.

3. Irregular Heartbeats or Palpitations

Feel like your heart is skipping beats, fluttering, or pounding oddly during cooldown? That could be:

  • SVT
  • Atrial fibrillation
  • Or just benign extra beats

If it passes quickly, it may not be a big deal. But if it lasts or happens often, tell your doc. Even a short episode is worth mentioning.

4. Chest Pain or Pressure

This one’s a biggie. It’s never “just a stitch” if it:

  • Feels like pressure
  • Radiates to your arm or jaw
  • Comes with nausea or shortness of breath

It could be a strained muscle—but it could be your heart. If it feels like anything other than a mild side cramp, don’t risk it.

5. Excessive Fatigue That Won’t Quit

Finishing a long run tired is normal.

Feeling like you’ve been hit by a truck for the rest of the day, with a racing heart and zero energy? That’s not.

Some runners call it feeling “wired but tired.” That can point to:

  • Overtraining
  • Anemia
  • Thyroid issues

If your body doesn’t bounce back like it usually does, get it checked.

6. Your Resting Heart Rate is Climbing—And Stays Up

Keep an eye on your morning resting heart rate (RHR). If it’s:

  • Up by 5–10 bpm consistently
  • Staying up for several days
  • Accompanied by poor sleep, mood dips, or bad workouts…

Your body might be saying: “I’m not recovered.” Or worse—“I’m getting sick.”

Long-term? A steadily rising RHR has been linked to increased heart disease risk.

Short-term? It’s a red flag that you need more rest, better fueling, or both.

What Happens When You See a Doctor

Let’s say one of those red flags rings true. What next?

Here’s what your doc might do:

  • ECG: Checks heart rhythm and looks for abnormalities
  • Stress test: Monitors your heart while you run on a treadmill
  • Holter monitor: Worn for 24–48 hours to track rhythm in real life
  • Blood tests: To rule out anemia, thyroid issues, or electrolyte imbalances
  • BP checks: To see if blood pressure drops post-run or during recovery

Most of the time? It’s something simple—like dehydration, overtraining, or too much caffeine. But if it’s something serious, you’ll be glad you caught it early.

One More Thing to Consider: Heart Rate Monitor Accuracy

Before you panic over a high heart rate reading on your watch, take a breath—literally.

Not all spikes are real. Sometimes, heart rate monitors—especially wrist-based ones—glitch.

They might lose skin contact or mistake cadence for pulse, particularly with chest straps. That 180 bpm reading? It could just be your stride rate doubled.

If you feel fine, but your watch says you’re skyrocketing, trust your body first.

Cross-check by taking your manual pulse.

I’ve seen athletes get worried over a number that simply wasn’t real. No symptoms, no real issue.

On the flip side, if the high heart rate is real and you’re feeling off—lightheaded, nauseated, weak—that’s your cue to stop and assess.

That’s when action is warranted.

Quick Check: End-of-Race Response

True or False? After an 800m race, an athlete’s breathing and heart rate are elevated.

True – and expected.

In an all-out effort like an 800m, heart rate can hit 90–100% of max, and breathing will be rapid and heavy.

That’s your body doing what it’s supposed to.

What matters is the recovery:

  • Breathing should start to ease within a few minutes.
  • Heart rate should come down significantly within 30–60 minutes (faster for trained runners).

If it doesn’t? That could signal something more serious—like exercise-induced asthma or cardiac arrhythmia.

In those cases, follow up with a medical pro.

Conclusion: Listen to the Beat

Your heart works hard for you every run. Paying attention to how it ramps up and how it calms down afterward is one of the smartest things you can do—for your performance and your long-term health.

A healthy heart will:

  • Spike appropriately during effort
  • Settle back down soon after
  • Improve its recovery time as your fitness builds

If your heart rate stays high longer than usual post-run, that’s a signal—you might need more recovery, better hydration, or even a check-in with your doctor.

As Coach David Dack says: “Your heart rate recovery is your built-in coach. It tells you if the engine is humming or needs a tune-up.”

Try This Challenge

For your next three runs:

  1. Record your heart rate the moment you stop.
  2. Record it again one minute later.
  3. Write down the difference.

That’s your personal baseline. Over time, as you train smarter—adding cool-downs, proper hydration, and better pacing—you’ll likely see that number grow.

And you’ll feel it, too: less fatigue, more energy, smoother recoveries.

Final Word: Train With Your Heart in Mind

Heart rate recovery isn’t just about data—it’s about durability, health, and longevity.

A well-conditioned heart that recovers quickly isn’t just more efficient during workouts—it’s more resilient when it counts. That’s the kind of fitness that lasts.

So keep an eye on the numbers, but listen to how you feel. Stay consistent, hydrate well, recover fully—and give your heart the attention it deserves.

Run smart. Run strong. And remember: your heart’s got your back—if you take care of it in return.