Whether you are a runner, a biker, a Crossfitter, or just a fitness enthusiast, the quality of the foods you consume has a huge impact on your fitness gains and results.
And as you might already know, there are mainly two categories of foods: natural foods and processed foods.
So what’s the difference between these two?
Which one is better for you?
Why?
Which one (s) should you avoid?
These are some of the questions I will give a clear and jargon-free answer to.
In today’s post, I will dive a little deeper into what makes (and defines) natural foods versus processed foods as there some to still be many misunderstandings regarding this topic.
So are you excited?
Then here we go…
Natural Foods
For most people, hearing the words “natural foods” conjures up pictures of health stores and strict vegan lifestyle choices.
But, in essence, the term refers to any food that has undergone minimal processing, whose ingredients come from natural sources, and contains little or no artificial additive or preservatives before consumption.
And by far, consuming a natural food rich diet is the healthiest and best nutrition decision you can ever make.
Why Natural Foods are Better?
Consuming whole and unprocessed foods, such as vegetables, fruits, meats, whole grains, and non-homogenized dairy products, has immense health benefits as they’re rich in nutrients and contain fewer additives than heavily processed foods.
For instance, whole-wheat based bread is healthier than bread made from white flour, potatoes are more nutritious than potato chips, and oranges cannot be held on the same pedestal as orange juices sold in convenience stores.
Natural foods score high in vitamins, minerals, amino acids, (the good) carbohydrates, water, fiber, fatty acids, and much more.
These are all essential to optimal human nutrition.
Natural foods can help regulate blood sugar levels, reduce cholesterol, cut the risks of cardiovascular disease, prevent diabetes, speed up weight loss, and help you get into the best physical and mental shape of your life.
The full list benefits go beyond this article’s scope, but I think you are getting the big picture.
The Foods to Eat
Here are some of the natural food components you need to consume for more bang for your buck.
Fresh vegetables and fruits, such as kale, asparagus, cabbage, broccoli, spinach, Brussels sprouts, cherries, pears, berries, apples, and plums.
Lean sources of meat, free-range chicken, wild fish, and grass fed beef, fresh fish/shellfish, eggs, etc.
Beans and legumes, especially lentils, and chickpeas.
Nuts, such as walnuts, almonds, macadamia nuts, pistachios, and pecans.
Seeds, such as flax, Chia, sunflower and pumpkin
Processed Foods
Processed food stands for any food that has been purposefully altered in a “food lab” in some way or the other before consumption.
This is done for four main purposes: (1) to postpone spoilage, (2) to make our lifestyle easier, (3) to increase food lifespan, and most importantly, (4) to make more money for the food manufacturer—which is the driving force in most cases.
As a rule of thumb, processed foods have more than one ingredient.
Food companies usually rely on artificial sugars, dyes, preservatives, bad fats such trans and saturated fats, and other harmful dietary chemicals in the everyday production of processed foods.
Processed foods might include food that has been canned, cooked, packaged, soaked, frozen, or changed in nutritional structure, whether it’s through preserving, fortifying, fermenting or preparing in different ways.
So, any time you bake, cook or prepare food, the term processed can be applied.
Examples of processed foods include processed meats, snack chips, cake mixes, candy, bread, sodas, savory snacks, such as crisps, frozen dinners, convenience foods, such ready meals or microwaved meals.
Other foods include a muffin, soda, Boca burgers, donuts, pizza, almost every at McDonald, Burger King, and the rest of fast food in restaurants, etc.
So, they are not just microwaved meals and boxed macaroni, and drive-thru snacks.
They are, typically, high-calorie items that provide many calories with little to no nutritional value to your body.
Therefore, a proceeded food diet—one that’s high in preservatives, artificial ingredients and awash with added sugars and fats is NOT the best thing to fuel your body with.
I hate to break it to you, but if you consume nothing but (heavily) processed foods, then you are CHEMICALLY and STRUCTURALLY harming your body.
Eat nothing but processed foods, and you’ll find yourself faced with a host of weight and health issues.
Not convinced yet?
Well, just take a look at the soaring rates of the so-called Diseases of Civilization we are facing today.
Research has shown that processed food consumption is a major culprit in our nation’s obesity epidemic, the rise of Type 2 diabetes, high blood pressure, cardiovascular diseases, some cancers, and other health issues that were almost non-existent before processed foods—typically sugar and flour—entered the food supply.
Are Processed Foods Always a Bad Choice?
Here is a thing.
Eating processed foods is not always a bad choice.
In fact, there a few instances when you can consume processed foods and remain healthy.
Not only that, some types of processed foods are actually good for you. Consuming some of them in limited portions will not throw your whole healthy nutrition plan out of whack.
For some of you out there this might sound sacrilegious but just bear with me for a moment.
The fact is, processing does not inherently and innately turn food into a wretched thing.
For instance, milk and some juices can be fortified with vitamin D and calcium.
Dried herbs, such as cilantro, chili, ginger, basil, parsley, and oregano, are rich in antioxidants, and other health promoting nutrients.
Canned fruit is a great alternative when fresh fruit not obtainable.
All you have to do is draw a CLEAR and BIG line between foods that have been lightly processed and heavy heavily processed items.
Said otherwise, avoid foods with heavier processing or added artificial ingredients.
This is typically what I have in mind whenever I hear someone talk about processed foods.
The Good
Good examples of lightly processed foods include (but not limited to) hard boiled eggs, pre-cut apple slices, frozen vegetables.
The Bad
Here is a list heavily processed ingredients and foods to avoid
High-fructose corn syrup.
Artificial sweeteners
Artificial dyes
Trans fats
Fruit or vegetable juices,
Fruit canned in heavy syrup
Food in a package, can, or box.
Food additives such as sodium nitrate, propyl, monosodium glutamate, and bromate.
Potato chips
Processed meats, especially chicken fingers, bacon, sausage, hot dogs, fish sticks, potted meats, deli meats, and Spam—the brand ofcanned cooked meat.
Salted and/or seasoned nuts.
Sweetened yogurts.
Ice cream bars
To Conclude
As a rule of thumb, the ideal human diet should revolve around whole and natural food, not food that was manufactured in a lab.
Eating junk food can only do more harm than good—especially if you are trying to lose weight or improve your athletic performance.
Instead, eat primarily real and natural foods for the best nutrition.
One of favorite healthy eating mottos is, “If your great-grandmother wouldn’t recognize it as food, then it’s not food.”
Are you a beginner runner struggling to build endurance? Or an experienced athlete looking to take your performance to the next level?
Either way, the Run Walk method might just be the answer you’ve been searching for.
This method was pioneered by Jeff Galloway, a former Olympian and renowned coach who has helped countless people get into running.
But what exactly is the Run Walk method? It’s a simple yet effective training strategy that involves mixing low-intensity running intervals with walking breaks.
By finding the right balance between running and walking, you can improve your fitness, build stamina, and reduce the risk of injury and burnout.
It’s time to lace up your shoes and give this method a try!
The Benefits of The Run-Walk Method for Beginners
Jeff Galloway, a former Olympian and renowned coach, pioneered the Run-Walk Method, which has helped over 200,000 runners and walkers improve their running performance. The method is simple: mixing low-intensity running intervals with walking breaks can improve performance and reduce the risk of injury.
For beginners, this method is particularly useful as it allows them to slowly build up their endurance without risking discomfort, injury, or burnout. And for those returning to running after a long hiatus, the walk/run sessions can help fortify slow-twitch muscle fibers and improve recovery time.
But don’t be fooled into thinking this method is only for beginners. Intermediate and advanced runners can also benefit from the Run-Walk Method. In fact, it can help them stay safe while nursing an injury and even improve their race times.
Don’t take my word for it.
A study published in the Journal of Strength and Conditioning Research found that runners who used the run-walk method had similar improvements in running performance as those who completed a continuous run. The study also found that the run-walk method resulted in less muscle damage and inflammation, suggesting that it may be a useful tool for reducing the risk of injury.
Another study published in the Journal of Sports Science and Medicine found that novice runners who used the run-walk method with a 3:1 ratio of running to walking had significantly lower levels of perceived exertion and muscle soreness than those who completed a continuous run. The study also found that the run-walk method led to similar improvements in running performance as continuous running.
The Downsides of the Walk Run Method
While the run-walk method has become increasingly popular among runners, it’s important to consider both the potential benefits and downsides before trying it.
One potential downside of the run-walk method is the risk of losing mental focus during the walking intervals. That’s why you might find it hard to get into running after stopping for a walk break. It’s like hitting a speed bump on the road – it interrupts your flow and can be jarring to your system. However, some runners find that the structured intervals of the run-walk method actually help break up the monotony of continuous running and can help keep them engaged throughout the workout.
Another potential downside of the run-walk method is the risk of slowing down the overall pace. This can be frustrating for runners who are used to maintaining a consistent pace throughout their runs.
However, studies have shown that the run-walk method can actually be an effective way to improve overall pace over time.
A study published in the Journal of Science and Medicine in Sport found that runners who used the run-walk method in a half marathon were able to maintain a faster pace overall compared to those who ran continuously. This is likely because the walking intervals help reduce fatigue and allow runners to recover more quickly between running intervals.
It’s also important to note that the run-walk method may not be suitable for everyone. For example, if you have a specific time goal for a race, the run-walk method may not be the best approach. In this case, continuous running may be a more effective strategy for achieving your goal.
Run Walk Ratio For Beginners
To make the most out of this method, take the walk breaks before fatigue starts to set in.
Contrary to popular belief, the walk/run method does not mean that you should take breaks only when tired.
If you wait until you are completely drained, you might go over the red line, thus burning your engine before you are done working out.
To determine the appropriate run-walk ratio for your individual needs, consider factors such as your current fitness level and personal preferences. A study published in the Journal of Sports Science and Medicine found that a run-walk ratio of 3 minutes running to 1-minute walking was more efficient and less taxing on the body than a continuous run for novice runners.
Here are three walk-to-running ratios to try out.
Choose whatever ratio of walking and running that works for you.
The Beginner: Run for 15 to 30 seconds. Then walk for one to two minutes
The Intermediate: Run for two to five minutes. Then walk for one to two minutes.
The Experienced: Run for eight to ten minutes. Then walk for 30 seconds to one full minute.
As you become more comfortable with the run-walk method, you can progress the ratio over time, like a gardener tending to a plant and allowing it to grow and blossom. A gradual increase in the amount of running and a decrease in the amount of walking can help build endurance and improve overall running performance.
As you become more comfortable with the run-walk method and your fitness level improves, you can gradually progress the run-walk ratio to challenge your body and continue improving. This may involve increasing the amount of time you spend running while decreasing the amount of time you spend walking or experimenting with different ratios to find the one that works best for you.
A general rule of thumb is to increase the running time by no more than 10% per week while also reducing the walking time by a corresponding amount. For example, if you start with a 1:1 ratio and run for one minute and walk for one minute, you might progress to a 2:1 ratio, running for two minutes and walking for one minute.
It’s important to listen to your body and make adjustments as needed, especially if you experience any pain or discomfort. Gradual progression is key to avoiding injury and getting the most out of the run-walk method over the long term.
Go For Time, Not Distance
So do you make the most out of the run walk method?
Simple. The key is to focus on time, not distance. Instead of feeling pressure to cover a specific distance at a certain pace, measure your walk and run segments in terms of minutes. This takes the pressure off and allows you to focus on improving your endurance and stamina.
The Ideal Session
For an ideal session, start with a 5-minute warm-up walk, then begin an easy run/walk routine, alternating between jogging slowly for 1 minute and walking for 2-3 minutes for recovery. Make sure to fully recover during the walk segments before beginning again. Repeat the cycle 5-7 times and end with a proper cool-down.
If you’re a beginner, assess your fitness level and set realistic targets. For example, aim to run a 5K (3.1 miles) within 8-12 weeks of beginning your training. As you progress, increase your training volume, intensity, and frequency. And remember, consistency is key. By following this method consistently, you’ll be able to improve your endurance, reduce the risk of injury, and eventually run longer and faster than you ever thought possible.
Applying The Method
To incorporate the run-walk method into your training program, start with a few run-walk workouts per week and gradually increase the number of continuous runs over time like a sculptor gradually chiseling away at a block of marble to reveal a beautiful statue.
It’s also important to listen to your body and adjust your training program as needed, like a musician tuning their instrument to produce the best sound.
If you’re feeling fatigued or experiencing pain, it may be time to decrease the overall volume or intensity of your workouts, while if you’re feeling strong and making progress, you can gradually increase the volume and intensity of your workouts.
With patience and persistence, the run-walk method can be a valuable tool for improving your running performance and achieving your fitness goal.
Training Plans
The Internet is full of elaborate training programs, but I believe in keeping it simple.
Here are more tips for a great training plan:
Aim to exercise at least three times per week.
Walk, run/walk, or run for 20 to 30 minutes, three days a week.
Cross train or rest on your off days.
Keep your workouts at a conversational pace. AKA the Talk Test.
Stay In Your Lane
Remember, the key to injury-free training is staying within your fitness level. No more, no less. The Internet may be full of elaborate training programs, but keeping it simple is often the best approach. So, grab your running shoes, check the temperature, and get ready to hit the pavement with the run walk run method. Your running journey starts here!
The Run Walk Method – The Conclusion
And there you have it, my friends!
If you’re itching to dive into the world of running for the very first time, let me tell you, the run walk run method is your golden ticket. It’s the ultimate gateway to unleashing your inner runner, and the best part? The rest is just minor details. Trust me, you’ve got this!
Thank you so much for joining me on this exciting journey. Remember, when it comes to your training, keep pushing yourself and staying motivated. You’re capable of incredible things!
Wishing you endless miles of exhilarating runs and unforgettable adventures,
If you’re a runner in search of the best way to wind down after your runs, you’ve landed in the right spot. The cool-down phase marks the conclusion of your run, and it’s a crucial element often underrated in a running routine.
During the cool down, your heart rate gradually decreases, and blood flow redistributes, particularly to essential organs, such as the brain. This is why emphasizing a proper cool-down is so critical immediately after a run.
In this post, we’ll explore the various benefits of cool-downs and provide practical guidelines to help you make the most of this essential aspect of your running routine. So, are you ready to learn more?
Let’s dive in.
Cool-Downs and Recovery Rate—Reality or Myth?
According to conventional wisdom, a proper cool-down can reduce muscle soreness, cut the risk of injury, and speed up recovery time.
But is there any evidence to support this? Should you invest any of your precious time in a cool down? Does the cool-down help reduce post-workout muscle soreness?
Well, here is the simple answer.
Recent research has shown that this is not the case.
In fact, study has found no concrete evidence that (traditional) cool-down methods can help prevent muscle soreness after exercise.
Don’t get me wrong.
This does not mean that the cool-down is a complete waste of your time.
As we are going to see, the cool-down has its own benefits.
And You should never toss it to the side.
Nonetheless, you MUST and SHOULD cool down after a run.
And here is why.
Cool Down Benefits
The main aim of a cool-down is to bring your body back to a resting state, or near the resting level for breathing rate, heart rate, blood pressure, and other factors.
In fact, in some individuals (especially those who are extremely out of shape or have cardiovascular issues), stopping on the spot can lead to extreme dizziness, even a loss of consciousness.
This brings me to the main benefit that cooldowns have to offer: preventing blood pooling.
You’ve probably heard a zillion times that stretching is the magic potion that prevents injuries, right? Well, here’s the scoop – studies haven’t always been on the same page about that. Some say yes, some say no, and some just shrug their shoulders.
But hey, don’t chuck your stretching routine out the window just yet! Stretching still has its perks, and I’ll tell you why.
First off, stretching is like a mini spa day for your muscles. It’s that moment when your muscles breathe a sigh of relief after all that hard work. Tension? Gone. Flexibility? Increased. It’s like a little treat for your body.
Plus, it’s a bit like yoga for runners, helping you stay flexible and nimble. Think of it as your secret weapon against the dreaded stiffness that can creep in after a workout.
Now, even though the studies might not be on stretching’s side when it comes to injury prevention, think of it as insurance.
The Exact Cool Down Breakdown
Proper cool-down consists of the following two elements:
The Jogging to Walking Portion
Now, let’s dive into the art of the cool-down – your victory lap after a solid workout!
Here’s the deal: during your cool-down, you’re not coming to a screeching halt. Nope, think of it as a gentle transition, like easing off the expressway onto a quiet side street.
So, picture this: you’ve just crushed your workout, and now it’s time to downshift from turbo speed to a more leisurely pace.
The first leg of your cool-down journey? A smooth, low-intensity jog – you’re not sprinting anymore, just cruising. It’s like your car going from a Ferrari to a comfy sedan.
After a bit of that easy jogging, it’s time to slow things down even further. You transition to a leisurely walk, like a relaxed stroll through the park on a sunny day.
Why do this, you ask? Well, it helps your body cool down gradually, like letting your engine cool off after a long drive. Plus, it gives your heart and lungs a chance to catch their breath.
And here’s a bonus: this gentle cool-down helps move away those waste products your muscles have been working hard to produce.
The Stretching Portion
Now that you’ve gracefully cruised into your cool-down, it’s time to add the final touch to your workout masterpiece – stretching!
Here’s the lowdown: stretching isn’t just a fancy add-on; it’s the grand finale, the cherry on top, and it can do wonders for your body when done right.
You see, right after your run, your muscles are in prime-time warmth mode. They’re like a rubber band fresh out of the sun – super pliable and stretchy. This is when your muscles are most willing to embrace those lovely stretches.
Stretching at this stage helps improve your flexibility, making you as bendy as a yogi while also reducing the risk of muscle tears and injuries. It’s like giving your muscles a little spa treatment after their hard work.
So, how do you stretch like a pro? It’s easier than you might think!
Step 1: If you’re new to stretching, start with some basic static stretches. Think of it as your body’s way of saying, “Hey, thanks for the awesome run!”
Step 2: Incorporate stretching into your routine. It should feel as natural as warming up before your run. Stretching isn’t just a one-time thing; it’s a regular part of the workout show.
Step 3: Aim for a 10 to 15-minute stretching session, hitting all those key muscle groups. It’s like giving each muscle its own VIP experience.
Stretching Tips
Stretching is key, but let’s do it right, shall we?
Here are some tips for stretching like a pro and enjoying every moment of it!
Slow and Steady: Picture yourself as a graceful ballerina – stretch your muscles slowly, with purpose, and oh-so-gently. Hold each stretch for a serene 20 to 30 seconds, then switch sides like a pro dancer.
Reach for the Stars: Stretch each muscle to its glorious maximum range of motion. But remember, there’s a limit to everything – don’t overdo it. Pushing too hard is like trying to fit one more suitcase in an already full trunk – it won’t end well.
Comfort Is Key: When you stretch, aim for that sweet spot of mild discomfort, not pain. Pain is not your stretching buddy; it’s like inviting the Grinch to your holiday party. So, be kind to your muscles.
Breathe: Don’t forget to breathe! Inhale the good vibes, exhale the tension. Your breath is your stretching partner, helping you release any tightness. Breathing is the secret sauce to stretching success.
Warm It Up: Never, ever stretch a cold muscle. It’s like trying to bend a frozen popsicle stick – not a great idea. Warm-up with a light jog or some gentle movements before diving into your stretches. Your muscles will thank you.
What to Stretch During The Cool-Down?
Stretching is like giving your muscles a warm, loving hug after a run.
But, let’s make sure you’re hugging all the right muscles.
Here’s your guide on what to stretch:
Hamstrings – The Back of the Thighs: These are the muscles that run down the back of your thighs. Keeping them flexible is essential to avoid lower back pain, knee issues, and overuse injuries. So, show them some love!
Quadriceps – The Front of the Thighs: Your quadriceps are the muscles at the front of your thighs. They’ve been working hard, so make sure to stretch them out. It’s like thanking your thighs for their stellar performance.
Iliotibial Band (IT Band) – The Side of the Leg: The IT band is a tough customer. It runs from your hip to your knee along the outside of your leg. Stretching this area can help prevent IT band syndrome and keep your legs happy.
Hip Muscles – The Hips Don’t Lie: The muscles around your hips deserve some TLC too. This includes the glutes, lateral rotators, adductors, and iliopsoas. A happy hip region equals a happy runner!
Calves – Don’t Forget Those Calves: Your calf muscles have been working hard, propelling you forward with every stride. Stretching them can help maintain stride efficiency and keep cramps and injuries at bay.
Look, I love data. GPS watches, heart rate zones, pace charts — they all have their place.
But sometimes, the best training tool isn’t on your wrist… it’s in your gut.
That’s where RPE comes in.
RPE stands for Rating of Perceived Exertion — which is just a fancy way of saying “how hard does this feel right now?”
Learning to train by feel isn’t some new-age voodoo. It’s old-school, it’s raw, and it’s incredibly effective.
And when things go sideways — dead GPS, faulty HR monitor, brutal weather — your sense of effort is what’ll carry you through.
Trust me.
So… What the Heck Is RPE?
Let’s break it down.
RPE is a scale that tells you how hard you feel you’re working — not how fast you’re going or what your watch says, but what your body’s screaming at you in the moment.
Weird, right? But if you add a zero to those numbers, you get a rough heart rate estimate.
So RPE 12? About 120 bpm.
Handy before heart rate monitors were a thing.
These days, we keep it simple with a 1–10 scale. One is sitting-on-the-couch easy, and ten is full-on, red-zone, lungs-on-fire effort.
This scale isn’t just for runners. Cyclists, lifters, HIIT athletes — even triathletes use it to judge effort.
In the gym, you’ll hear lifters say “that set was an RPE 9,” meaning they had one rep left in the tank.
It’s all about knowing your limits and training smart.
But here’s where it really shines — out on the run.
Why Every Runner Should Master RPE
Even if you’re rocking the latest GPS gadget or tracking every zone on Strava, RPE is still your best friend.
Here’s why…
1. It Keeps You From Burning Out
I see it all the time — runners hitting every “easy” run like it’s a tempo day.
No wonder they’re always sore, tired, or sidelined with shin splints.
Real talk: if your recovery run feels like a 6 or 7 out of 10, it’s not recovery. It’s junk miles heading straight to burnout city.
Using RPE teaches you what easy really feels like. A 3/10 effort should be chill — conversational pace, barely breaking a sweat.
When you tune into that, you learn to back off on easy days so you can hit the gas when it counts.
One runner I coached ignored this advice — every run was a grind.
A few weeks later? Plantar fasciitis. Another runner confessed they went hard every day… until the shin splints kicked in.
Now? They live by RPE — and their running finally feels sustainable.
2. RPE Builds Your Inner Pacer
Ever blown up halfway through a race because you went out too fast?
Yeah. Been there. RPE is how you fix that.
When you train by feel, you sharpen your internal pacing dial. You start knowing — in your bones — what a 7/10 or 8/10 effort feels like.
That’s gold on race day when adrenaline’s tricking you into thinking you’re floating at mile one… only to crash at mile six.
I always tell my runners: if your GPS died mid-run, would you know what kind of workout you were doing?
RPE gives you that confidence. You stop chasing numbers and start understanding effort.
3. It Adjusts Automatically When Tech Fails or the Weather Sucks
Here’s the thing: heart rate and pace data can lie. Big time.
Hot as hell outside? Your heart rate spikes even if you’re going slower.
Elevation? Same thing. Tired from a bad night of sleep or didn’t hydrate enough? Your “easy pace” suddenly feels like tempo.
That’s where RPE becomes your North Star.
When conditions go sideways, RPE adjusts.
If your easy 9-min pace suddenly feels like an 8/10 effort because it’s 90°F and humid, guess what? It’s not an easy day anymore. Slow it down. That’s what effort-based running teaches you.
I’ve had runners say, “I couldn’t believe how high my heart rate was on an easy run in the heat.”
Yeah, because your body’s working harder even if your pace doesn’t show it.
Or maybe you’re running up a hill and your pace drops off a cliff — but your effort is sky-high. RPE knows. Your watch doesn’t.
4. It Builds Mental Grit
Running by feel forces you to pay attention — to your breathing, your legs, your focus.
You stop relying on screens and start tuning into your body. And that’s where the real growth happens.
So if you’ve never tried a “watch-free” run, give it a shot. It might just remind you why you fell in love with running in the first place.
5. Coming Back from Injury or Burnout?
If you’ve ever come back after time off (sick, injured, or just mentally fried), you know how frustrating it is when your old paces feel way too hard.
That’s when RPE saves your ass. It adjusts with you. A 3/10 effort post-injury might be slower than your old warm-up pace — and that’s exactly where you should be. You’re not chasing your old self; you’re building up again, smarter this time.
Don’t Toss the Watch — Just Don’t Worship It
Your GPS is great. But it’s not gospel. RPE is like learning your body’s native language. It tells you stuff your watch can’t — how your body is handling the stress. Use both together and you’re golden.
Coach’s gut check: If the effort feels way off from the numbers, trust the effort. If it feels wrong, it probably is.
How to Actually Use RPE in Your Runs
Okay, you’re sold on the idea — now let’s make it work.
The RPE scale runs from 1 to 10, with 1 being “couch potato” and 10 being “I’m dying, please make it stop.”
The magic is learning to connect those numbers to how your body feels while running.
Here’s a real-world breakdown so you can start dialing it in:
RPE 1 – Full Rest
You’re chillin’. Watching Netflix. Zero effort.
🟢 Running example: Nope. You’re horizontal and proud.
RPE 2–3 – Super Easy
You can talk about your weekend plans with zero breath strain. This is light movement — a walk, maybe a shuffle jog. 🟢 Running example: Warm-up walk, shakeout jog, or cool-down stroll.
RPE 4–5 – Easy Effort
You’re running, but it’s comfy. Breathing is light, you can hold a conversation. You’re warming up, not pushing.
🟢 Running example: Easy run or recovery day pace. This is your bread-and-butter zone for building mileage.
RPE 6–7 – Moderate to “Comfortably Hard”
You’re working now. Talking in short phrases. Breathing is heavier, but steady. You’re in a rhythm, but it’s no cakewalk.
🟡 Running example: Tempo runs or marathon pace work. That “I can do this, but I need to focus” kind of effort.
RPE 8 – Hard
You’re grinding. Breathing’s tough. Legs are working hard. You can’t say more than a couple words.
🟠 Running example: 800m or mile repeats. Fast, but not quite dying. Think 5K race effort for experienced runners.
RPE 9 – Brutal
This is where you’re gasping. Everything’s screaming. Talking? Forget it.
🔴 Running example: Last lap of a mile race. Final hill sprint. The kind of workout that leaves you on the grass after.
RPE 10 – Max Effort
You’re sprinting like a bear’s chasing you. All-out. No pacing, just pure fire.
🔴 Running example: 100m dash. Final 10 seconds of an all-out effort. You can’t hold this long, and you shouldn’t.
RPE Scale for Runners (1–10)
RPE
Description
Running Example
Talk Test
1
Rest – No effort
Sitting on the couch
Talking? You’re basically napping.
2–3
Very Light – Easy warm-up
Brisk walk or super slow jog (Zone 1)
Full convo, no problem.
4–5
Light/Easy – Comfortable
Easy run pace (Zone 2), recovery runs
Talking in full sentences, relaxed breath
6–7
Moderate – Steady effort
Tempo run, marathon or threshold pace (Zone 3)
Can talk in short bursts, breath gets sharper
8
Hard – Difficult to talk
Long intervals, 5K pace (Zone 4)
Can maybe say a few words
9
Very Hard – Gasping
Short intervals, mile pace
Gasping between words, talking is tough
10
Max Effort – All-out sprint
100m sprint, race kick (Zone 5)
Forget talking – you’re just surviving
Use the Scale In Real Time
Think of RPE like your run’s volume knob.
Before and during a run, ask: “How hard does this feel from 1–10?”
Start easy: Warm up at a chill RPE 2–3.
Know your target: Got a tempo run? Stay around 6–7. Hill sprints? Expect 8–9.
Adjust on the fly: If your “easy” run feels like an 8… something’s off. Maybe you’re tired, dehydrated, or pushing too hard.
Log the effort: After each run, write down how it felt. You’ll see patterns – and progress – over time.
Talk Test = Instant Check
If numbers aren’t your thing mid-run, go by your breath:
Can chat freely? You’re in the easy zone (1–4).
Breathing heavy but can spit out phrases? Moderate zone (5–6).
Struggling to speak? You’re working hard (7–8).
Can’t say anything but “help”? You’ve hit the wall (9–10).
How to Train with RPE
Set a goal before you start. “This 5-miler should feel like a 4.” If you’re doing intervals, maybe the hard reps hit RPE 8–9.
Check in mid-run. Ask yourself: “What’s my RPE right now?” Adjust if it’s too high or too low.
Use it for intervals & hills. Don’t sweat the pace numbers. Go by effort. On hills, forget your watch. If it feels like RPE 6, you’re doing it right.
Watch for RPE drift. Feeling like a 4 at mile 1 but a 7 by mile 6 on your “easy run”? You’re probably under-fueled, dehydrated, or overcooked.
Cool down, then reflect. Wrap it up with a 2–3 effort jog. Then jot down how it felt (“6 miles, felt like a 5, last mile crept to 6”).
RPE vs. Heart Rate Zones – How They Sync Up
Let’s cut through the noise: you don’t need a heart-rate strap, a $300 GPS watch, or a training app screaming in your ear to train smart.
Don’t get me wrong—those tools are great.
But if you learn how to listen to your body? That’s next-level running. That’s where Rate of Perceived Effort (RPE) comes in.
RPE is your body’s built-in effort gauge.
It’s how hard the run feels, on a scale of 1 to 10. And here’s the cool part—when you line up RPE next to heart rate zones, the numbers actually match up pretty well for most runners.
Let me break it down, real simple:
RPE 2–4 = Zone 1 (Very Light, 50–60% HRmax)
This is warm-up, cool-down, active recovery. Feels like a brisk walk or a super slow jog. You’re cruising, barely breathing hard. I do this after a tough workout or on those “I still want to move but don’t want to die” days. It’s chill.
RPE 4–5 = Zone 2 (Easy Running, 60–70% HRmax)
Ah, the sweet spot. Zone 2 is where the magic happens for endurance. This is your bread-and-butter pace—what most people call conversational.
You can chat, maybe even tell a story. You’re burning fat, building aerobic base, and not drowning in lactic acid. Most of my easy runs live here.
RPE 6–7 = Zone 3 (Moderate/Threshold, 70–80% HRmax)
Now we’re working. This is tempo territory—comfortably hard. Think 10K race pace, maybe up to an hour of effort.
You can talk, but only in quick phrases. Legs are working, lungs are paying attention, but you’re still in control.
RPE 8–9 = Zone 4–5 (Hard, 80–90% HRmax)
This is where the grind begins. You’re running fast, breathing heavy, maybe knocking out 3–5 minute intervals.
It’s hard to talk.
You’re bumping into your VO₂ max zone—tapping into anaerobic stuff now. Great for improving speed and aerobic power… but you can’t hang here too long.
RPE 9–10 = Zone 5 (Max Effort, 90–100% HRmax)
This is the red zone. All-out sprints, finishing kicks, gut-busting HIIT stuff. You’re barely breathing, legs are screaming, heart’s doing jumping jacks in your chest.
RPE 10 is everything you’ve got, for a few seconds max. Good for sharpening that top-end gear, but it’ll leave you wrecked if you overdo it.
RPE Ain’t Perfect—But It’s Freakin’ Useful
Now, before you start tattooing these zones on your arm, know this: they’re not exact for everyone.
Two runners could be at the same heart rate, but feel totally different based on fitness, sleep, hydration, or even caffeine.
Science backs this up—research shows well-trained runners have a tighter sync between heart rate and RPE, while beginners may need more practice dialing it in.
Sometimes your heart rate spikes ’cause you’re dehydrated or fighting a bug, but the run doesn’t feel any harder. That’s when RPE steps up. It tells you, “Something’s off.” Trust it.
The flip side? You might be amped, caffeinated, or just hyped for a run—your heart rate’s high, but you feel great.
That’s why using both tools—RPE and heart rate—is the best combo. Let RPE guide you during the run, and use heart rate afterward to confirm or adjust.
🔄 Real-Life Example:
Say you head out planning an easy Zone 2 run. You’re feeling it, breathing easy, chatting with a friend. Feels like an RPE 4.
Later you check your watch—yep, you hovered around 65% of your max HR. Nailed it. That’s the beauty of syncing feel with data.
Some PTs break it down like this:
RPE 1–2 = Zone 1
RPE 3–4 = Zone 2
RPE 5–6 = Zone 3
RPE 7–8 = Zone 4
RPE 9–10 = Zone 5
It’s not magic—it’s pattern recognition. You run enough, you’ll start feeling the zones in your bones.
Bonus nerd fact: The OG RPE scale (Borg 6–20) was made to match heart rate.
Multiply RPE × 10, and you’d get a ballpark HR. RPE 15? About 150 bpm. These days we use 1–10 for simplicity, but the relationship still holds in a general sense.
Going Watchless – My Month of Training by Feel
I’ll tell you a quick story.
A few years back, I ditched the watch for a month. No GPS, no pace per mile, no live heart rate. Just me, my legs, and the trail.
At first? I was lost. Every five minutes I’d glance at my empty wrist, like a phantom limb.
I kept thinking, “Am I running too fast? Too slow?” But I stuck with it. I started asking myself mid-run:
How’s my breathing?
Can I hold a convo?
Do my legs feel snappy or tired?
I’d rate it right there: “This feels like an RPE 3. Chill. Stay here.” Or, “Okay, now I’m at 6–7. Tempo mode.” I started feeling the zones again.
And guess what? On one long run, I ran entirely by RPE—kept it at a solid 4–5 the whole way. When I mapped it out later? I hit my usual long run pace. Nailed it, no tech needed.
Zach Miller, the elite trail beast, once trained for an entire ultra by just running until the clock on his cabin wall said he was done.
No splits. No GPS. Just effort. Dude crushed it. That story stuck with me.
RPE in the Real World – How Running by Effort Changed My Game
After a full month of ditching the GPS and leaning into RPE, I started seeing things shift in my training.
I’m talking real changes—not just in performance, but in mindset.
Let’s take tempo runs. Before, those used to psych me out. I’d see a workout like “5 miles at tempo pace,” and instantly feel pressure: Can I hold 6:50s for that long? What if I blow up? But running by feel? That took the edge off.
I’d settle in around RPE 7—just at that comfortably hard zone—and let go of the numbers.
Some days I ran a little slower (heat, stress, poor sleep), other days I surprised myself with a faster pace.
But the effort stayed consistent. That’s the magic. The workouts got done, and I wasn’t mentally frying myself chasing a number on the screen.
Even better? I started recovering better. Because I stopped lying to myself on easy days.
I used to say, “Yeah, this is an easy run,” while pushing close to tempo pace just because it “felt good.”
But when I forced myself to keep things at RPE 4, sometimes even slower than I wanted, I realized how much fresher I felt heading into the next workout. Recovery isn’t sexy, but man, it’s effective.
What I Learned from Running “Naked”
Training by feel taught me I didn’t need perfect splits to run smart.
What I needed was honesty.
If I truly tuned into effort—and not what my ego wanted to see—I stayed in the right zone.
It also took the anxiety out of running. Every day wasn’t about crushing a pace.
It became more about how I was running, not just how fast.
And let me tell you, I’m not alone.
Some of the most dialed-in runners I know do “naked runs” regularly—no watch, no pressure. They say it brings back the fun and freedom. I agree.
RPE for Beginners vs. Seasoned Runners
Now let’s talk about how RPE plays out at different stages of your running journey.
Because let’s be real: how you use RPE depends on where you’re at.
Lemme explain more…
New to Running? RPE Is Your Best Friend
If you’re a beginner, here’s the deal: most new runners go too hard, too often. They think every run needs to leave them breathless or it’s not “real training.” Sound familiar?
You’re probably running at RPE 7 or higher without knowing it. That’s why you feel smoked after every run. That’s why progress stalls, and sometimes injury creeps in.
RPE gives you a gut-check.
If you’re out of breath, can’t talk, and your legs are screaming—that’s not easy running.
That’s redlining. Back it off to an RPE 3–4.
You should feel like you could chat with a buddy, maybe recite the opening lines to your favorite movie. (Yes, even if it’s The Fast and the Furious.)
I’ve coached folks who needed to slow down to a brisk walk/jog to stay in the easy zone.
And guess what? That’s totally fine. That’s where your aerobic base gets built. That’s how you stay injury-free and get consistent.
Also, don’t stress about pace.
You might run a 12:00 mile at RPE 4 today, and in a few months, you’re cruising at 10:30/mile with the same effort. RPE adjusts automatically—pace doesn’t matter if the effort is right.
Why Beginners Burn Out (And How RPE Saves You)
Too many rookies chase pace instead of listening to their body.
I’ve seen runners quit because they think they’re not improving—when really, they just never gave themselves a chance to recover.
With RPE, you’re learning body awareness from the jump.
That’s huge. It’s the difference between guessing and actually knowing what your body’s telling you.
One of my favorite beginner tips: Run at RPE 3–4. Keep it easy.
Get consistent. Don’t worry about speed. That comes later. RPE will help you build that patience—and patience is how you go the distance.
Veterans Use It Differently—But Still Use It
For more experienced runners, RPE becomes a trusted filter. You know your paces and zones already—but RPE tells you what’s really going on under the hood.
Maybe you’re supposed to hit tempo pace today, but you’re feeling trashed.
RPE 7 feels like 9. You back off. Smart move.
Or maybe you’re cruising and RPE 5 feels like flying—so you let it ride.
RPE keeps you honest, and it keeps your ego in check.
Final Words
Here’s what I tell every runner I work with: Your body speaks in effort. Learn to listen.
Heart rate monitors and GPS watches are cool tools. But they’re just translations of what you’re feeling. If you don’t understand the original language, you’re always guessing.
And guess what? Sometimes your watch fails. Race day brings heat, wind, hills. Stuff breaks. Conditions change. But your effort scale? That’s always on.
As Trail Runner Magazine once said, “RPE is well-suited to the ever-changing nature of trail and ultrarunning.” I’d argue it’s perfect for all running.
And once you train this skill, a few awesome things happen:
Your easy days actually feel easy (and do what they’re supposed to).
Your hard workouts are cleaner, more consistent.
You become a mental ninja — aware, steady, unshakable.
Look, I’m not saying ditch your watch. But I am saying don’t let it control you. If your GPS dies mid-run, you should still know exactly how to train. Can you say yes to that?
The midsole? The tongue? Eva? What does this all mean? If you are serious about learning all about the anatomy of a running shoe, then you are in the right place.
But why would you care?
Here is the basic premise: understand basic shoe anatomy, and you’ll increase your chances of buying the right pair that meets your physiological needs and personal preference.
Do You Habla Runnerlese?
Runners have a language all on their own.
You can call it Runnerlese, Runnerlish, or Runnerilian, whatever… And in contrast to, let’ say, German or Japanese, the language of running is not difficult to pick up.
In a previous post, I shared with my dear readers an exhaustive list of the most common terms runners—from all levels and training backgrounds—use to talk about and refer to their running experience.
Go through both these posts, and never be left in the dark, running-wise, ever again.
These Shoes Are made For Running
Running shoes are made to optimize training performance, and make training as safe and comfortable as possible.
There is a vast array of technical features to a pair of running shoes—and the terminology can scare off even the most well-intentioned and serious and smart beginners.
But worry no more.
I got you covered, buddy.
Today I will spill the beans on running shoe anatomy.
I’ll break down some of the must-terms you should understand that should shed more light on the features and structure of a given running shoe.
In Essence, I’ll walk you through each part—what it is and why should you care—layer by layer, starting with the upper.
Are you excited?
Then here we go.
Anatomy of a Running Shoe – The 7 Main Parts
In general, the anatomy of a running shoe is made of seven main parts: the upper, the midsole, the outsole, the tongue of the shoe, the heel counter, the toe box, and the last.
Each portion of shoe serves a particular function and has distinct features and properties that you need to be aware of to make the right running shoe buying decision.
Just don’t feel overwhelmed by any of this.
In this post, I’ll examine each component and give you practical advice on what to look for when purchasing your next pair of running shoes.
1. The Upper
Let’s start from the top.
Held together by the laces is the upper, which is the portion of the shoe above the midsole that encloses the foot, keeping the shoe in place, and protecting against dirt, rocks, and the elements.
The upper is typically made from a variety of materials, including mesh for breathability, synthetic leather for durability, or knits for a smooth, chafe-free feel.
When choosing a shoe, make sure the upper must fit well with the shape and size of your feet.
This can provide your feet with more stability over the long run.
2. Tongue of the Shoe
Underneath the shoe laces, you’ll find the tongue of the shoe.
This is the part of the shoe sticking out like a human tongue from the opening of the shoe, hence the name.
The tongue is the separate strip on the upper that protect the top of the feet from the pressure of the laces, preventing them from rubbing against the instep of the feet. That’s why it’s a key part of the anatomy of a running shoe
The tongue also makes it easier to put the shoes on and take them off.
A proper tongue should be of an appropriate size that it does not rub against the foot just above the ankles and thick enough (or well-padded) to protect the top of the feet against pressure from the laces.
Shoe manufacturers use the tongue to meet various needs, too.
For instance, trail shoe tongues are stitched to protect against the elements.
So, keep that in mind whenever you’re assessing the suitability of a given pair of shoes.
3. The Heel Counter
On the back of the shoe, you’ll find the heel counter, which is the exoskeleton of inflexible materials that wraps around and surrounds the heel.
This stiff structure around the heel reduces Achilles tendon irritation, provides a more secure heel fit, excellent cushioning, and rotational control.
The heel counter is made of stiff materials that protect against the impact forces that the feet experience while running.
4. The Last
The last refers to the three-dimensional, foot-shaped mold that determines the outline of the shoe.
Think of it as the foot model over which a shoe is assembled.
Lasts can be straight, curved, or semi-curved.
According to theory, some lasts are best suited for a particular feet anatomical structure.
A straight last tends to be heavier, providing more support under the arch, which might help control excessive the inward collapsing motion following a foot strike.
That’s why they are often recommended overpronators—mostly runners with flat feet.
A Curved last is lighter and less supportive.
Thus, they are usually recommended for supinators—typically runners with very high arches.
Semi-curved last is a hybrid of the two—not quite as thick as the straight type but still offer ample support under the arch.
Most running shoes out there are made with semi-curved last, but, and as a rule of thumb, the last has to match the shape of your foot.
This provides better pronation control and greater comfort.
5. The Toe Box
The toe box is the front platform of your shoes that houses your toes—the space that fits around the widest part of the toes and feet.
And by far, the toe box is the most important ingredient in finding a good fit.
A running pair should fit like a glove, with no sense of cramming or constraining in the toe box.
The toes should not touch the inside front of the shoes, and the feet should not feel clasped at all.
If the toe box is too tight, or the toes do not have enough room between your longest toe and the front of the toe box, it can affect the mechanics of your movement, leading to black toenails, discomfort, and hindered performance.
When fitting a shoe, make sure you have enough room to comfortably fit your toes.
The toe box should have sufficient space to allow the toes to wiggle freely, and for the feet to swell while running.
In essence, you should be able to play the piano with your toes.
Ideally, you should aim for a distance equal to the width of your thumb between your longest toe and the tip of your toe box.
Also, Make sure the height of the shoe box comfortably fits your toes.
6. The Midsole
Moving down, you’ll find the midsole, which is the thick layer of technical foam or rubber sandwiched between the upper and the outsole.
More specifically, the midsole is the materials that sit above the outsole and below the upper.
Midsoles are another important part of the anatomy of a running shoe
They provide cushioning while controlling excessive foot motion (pronation or supination).
Most of the shock absorption and cushioning is provided by the midsole.
The cushioning properties are usually attached to or embedded within the midsole.
Most midsoles are typically constructed of foam type compound commonly known as EVA, or polyurethane. EVA stands for ethylene vinyl acetate and is the most common commercially mass-produced midsole foam used in running shoes.
In general, EVA is softer material due to its lightness and more cushioned feel. But it compresses, and breaks down quickly, losing rebound after constant impact.
On the other hand, polyurethane is heavier and more durable than Eva.
But a few shoes have polyurethane as the midsole.
Furthermore, some high-tech midsoles are made with non-foam technologies, such as airbags or GEL, to increase protection and durability.
7. The Outsole
The outsole is the threaded layer of rubber on the bottom your trainers—the portion of the shoe that makes contact with the ground, providing traction and durability.
Hence, this is the part of the shoes that shows the most wear and tear.
Most outsoles have treads for traction, multidirectional flex grooves for flexibility, and provide protection against rocks, dirt, etc.
For trail runners, the outsole is the most important layer to consider.
There is a broad range of outsole types to choose from.
Outsoles are usually made from carbon rubber, blown rubber, or a combination of the two—all of which offer different levels of durability and traction.
Runners looking for a sturdy pair should opt for outsoles made with carbon rubber (same material as tires).
Carbon is the more durable, but it’s also stiffer and heavier than blown rubber.
But if your priority is flexibility and a “softer feel” shoe, then blown rubber outsoles are exactly what you need.
These are more cushioned, more flexible, but not as durable as carbon rubber.
New to Running? Start Here…
If you’re serious about running, getting fit, and staying injury free, then make sure to download myRunners Blueprint Guide!
Inside this guide, you’ll learn how to start running and lose weight weight the easy and painless way. This is, in fact, your ultimate manifesto to becoming a faster and a stronger runner. And you want that, don’t you?
Click HERE to check out my Runners Blueprint System today!
Don’t miss out! My awesome running plan is just one click away.
Anatomy of A Running Shoe – The Conclusion
There you have it! If you’re curious about the many parts that make up a running shoe, then today’s post has you covered. The rest is just details.
Feel free to leave your questions and comments in the section below.
Looking for the best advice on how to choose running socks?
You’re in the right place!
If you’re like me, you might not have thought much about socks when you first started running.
But trust me, the right pair of running socks can make all the difference between a comfortable run and one that leaves you with blisters, sore feet, or worse.
I used to think socks were just socks—until I started running seriously.
After several runs that ended with painful blisters, I finally learned that the socks you wear matter just as much as your shoes.
So, let’s talk about how you can find the perfect pair of running socks that will keep your feet dry, comfortable, and happy.
Why Proper Running Socks Matter
New to running? Let me help you skip the sock-related soreness
The right running socks can make a world of difference.
They’re designed specifically for the demands of running. They’re not just regular socks—they’re made to keep your feet dry and blister-free, even during long runs. Whether you’re heading out for a quick jog or a long-distance run, choosing the right socks is critical to your performance and comfort.
Poorly fitting socks can cause everything from toenail troubles to blisters and infections.
Wear the wrong socks, and every little irritation becomes magnified by mid-run.
The good news? Picking the right socks isn’t hard once you know what to look for.
How to Choose the Right Running Socks
When it comes to picking running socks, there are a few key factors to consider, including the material, size, length, and thickness.
Here’s what I’ve learned about choosing the right socks, so you can skip the trial and error:
Avoid Cotton Socks
One of the first lessons I learned about running socks was to avoid cotton at all costs. I used to wear cotton socks, thinking they were comfortable, but every time my feet got sweaty, they stayed wet. One rainy morning, I went for a run in those cotton socks. By the time I got home, my feet looked like raisins, and I was dealing with painful blisters.
That’s when I made the switch to synthetic materials. Socks made with CoolMax or polyester changed everything. My feet stayed dry, and the blisters became a thing of the past.
Here’s the truth.
Damp feet are a recipe for misery and blisters when running.
Running with wet feet also increases the chances of infections and can make cold-weather runs feel even colder. Instead, you want socks made from moisture-wicking materials that pull sweat away from your skin.
Fabrics too shoot for include:
Synthetic blends: Polyester, nylon, acrylic, and spandex are great for wicking away moisture.
Merino wool: A great natural option that wicks moisture, regulates temperature, and prevents odors.
CoolMax or Drymax: These high-tech fabrics are specifically designed to keep your feet dry.
Choosing the right material means drier, more comfortable feet with fewer blister worries.
The Right Size Of Running Socks
I used to think, “If the sock fits, wear it.” But I quickly realized that size really matters. Too tight, and your feet feel like they’re in a vice grip. Too loose, and you’ll end up with saggy socks and blisters.
For me, finding the right fit was all about getting that heel portion to land exactly where it should—right on my heel. It sounds simple, but it’s a game-changer.
One time, I wore a pair of socks that were just slightly too big. I didn’t think it would matter until I felt them bunching up in my shoes during a long run. By mile five, I had blisters forming under my arch. Lesson learned.
This is how to tell if your socks fit right:
The heel cup of the sock should line up with your actual heel.
There shouldn’t be any bunching or slipping.
The socks should feel snug, but not so tight that they’re cutting off circulation or overstretched.
What’s more?
Always try socks with your running shoes to avoid pressure points
The Many Lengths Of Running Socks
When it comes to sock length, I’ve tried them all. Crew socks, ankle socks, and those low-cut ones that barely peek above your shoe. I quickly learned that crew socks are a lifesaver when running trails with overgrown brush. And when I’m going for a casual road run, ankle socks are usually my go-to.
Once, I chose ankle socks for a muddy trail—big mistake. I spent the entire run stopping to empty out dirt and tiny pebbles that found their way in.
Since then, I’ve saved the ankle socks for cleaner routes and wear crew-length socks on those trail adventures.
Here’s a quick guide to the different sock lengths:
No-show or ankle socks: These are great for summer runs when you want to keep cool and don’t need extra coverage. They sit right above your shoe line.
Crew socks: These come up to mid-calf and offer more protection from debris and trail running hazards.
Compression socks: These knee-high socks provide graduated compression that improves blood flow and helps with recovery. They’re especially popular for longer runs or recovery after a race.
Thickness of Fabric
One of the most confusing things for me in the beginning was figuring out how thick my socks should be. I tried super-thin socks once on a summer run, thinking they would keep my feet cool. But I ended up with friction burns because they offered almost no cushioning. After experimenting, I found that a medium thickness works best for most of my runs.
Now, I keep a variety of socks on hand. When it’s colder out, I opt for thicker pairs that offer more warmth and protection. In the summer, I choose a lighter option that still provides some padding.
So as a rule:
Thin socks: These are lightweight and ideal for summer running or if you prefer a minimal feel. However, if you’re prone to blisters, thin socks might not offer enough protection.
Thick socks: Thicker socks offer more cushioning, especially around the heel and ball of the foot. They’re great for added comfort during long runs or if you’re running on harder surfaces.
Running Compression Socks
I was skeptical about compression socks at first. Could they really make a difference? Rave reviews from other runners convinced me to try them during half marathon training. And honestly, I haven’t looked back since.
For me, compression socks aren’t just about performance. They also help my legs feel less fatigued after long runs. I’ve even started wearing them after tough workouts to speed up recovery. I can’t say for sure if they’ve made me faster, but I definitely feel more comfortable and less sore.
Compression socks tighten around the ankle and loosen up the calf, boosting circulation. They also help with swelling and can prevent that heavy-leg feeling you sometimes get after a tough run. If you’re curious about compression socks, give them a try—you might just find they’re the boost you need for faster recovery.
Avoiding Blisters
Blisters are a runner’s worst enemy, but there are ways to avoid them, starting with the right socks. If you’re prone to blisters, look for socks that offer extra protection in high-friction areas, like the heel and toes. Some brands offer double-layer socks designed to reduce friction between your foot and the shoe.
You can also try wearing two pairs of socks—one thin and one thicker—to create a barrier between your foot and the shoe. This method works well for some runners, though I personally prefer single-layer socks with targeted cushioning.
Frequently Asked Questions
I know that you have more than one pressing questions about running socks. Let me address some of the most common ones.
How often should I replace my running socks?
Running socks, like any part of your gear, wear out over time. Typically, you’ll want to replace them every 6–12 months, depending on how often you run and the conditions you run in. If you notice signs like thinning fabric, loss of elasticity, or if they just don’t feel as cushioned, it’s time for a new pair. Worn-out socks can lead to more friction, which means a higher chance of blisters!
Can I use hiking socks for running?
While hiking socks are designed for comfort and durability, they’re often thicker and made from materials that aren’t as moisture-wicking as running socks. Hiking socks can work in a pinch, especially on colder days, but for regular runs, especially long distances, stick with socks specifically designed for running. They’re optimized for breathability, moisture management, and minimal friction—exactly what your feet need on a run.
What length of sock is best for running?
This really depends on your preference and the type of running you do. No-show and ankle-length socks are popular for road runners who prefer minimal coverage. For trail running or areas with brush, crew-length socks offer extra protection from dirt and debris. On cold days, longer socks (like calf-length) can provide additional warmth. The right length ultimately comes down to comfort and the conditions you’re running in.
The Conclusion
Ultimately, picking the best running socks is about what feels right for you.
My advice is to experiment with different types, lengths, and thicknesses to find what works best for you. I’ve found that having a variety of socks keeps me prepared for any weather or training condition.
Trust me, once you find your perfect pair, you’ll wonder how you ran without them.
If you’re serious about reaching your full running potential, then you’re in the right place.
In today’s post, I’m sharing more than 100 running tips designed to help make your workout routine a complete success.
Follow these practical, simple, and proven strategies, and you’ll reach your full running potential in no time.
Let’s get this ball rolling…
Without further ado, here’s a list of the best running tips ever.
Get the Right Shoes
Shoes are the most important running equipment.
Period.
A proper shoe not only makes running feel more comfortable, but also help improve your performance and ward off all sorts of injuries, including shin splints, plantar fasciitis, knee pain, and foot pain.
How do you pick the right shoes?
The golden rule is to go for a shoe that feels comfortable.
That’s the conclusion of a study published in the British Journal of Sports Medicine.
The right shoes have to match your natural foot shape and biomechanics.
As a rule of thumb, leave at least a thumbnail’s distance (roughly 1 cm, or ½ an inch) from the end of your longest toes (while flat on the floor) to the end of the shoe.
In other words, you should be able to freely wiggle all of your toes, with plenty of room to spare.
For the full guide on how to choose the right running shoes, see my post here.
Visit a Specialty Running Store
Don’t know what it takes to pick a proper pair?
Head to a specialty running store dedicated specifically to running-related gear, accessories, and gadgets.
Once you’re there, have your foot type and gait analyzed by the professional staff.
That’s how you’ll find out things you might not know on your own – you might be a severe overpronator or underpronator who needs trainers with a bit of more support than the typical (mostly neutral) runner.
They’ll know and explain what you need.
When you go shoe shopping, treat their staff the way you would a physician.
Be willing to answer all sorts of questions regarding your training goals and personal preferences.
It’s worth the extra cost you’ll pay there to get a true “shoe fitting” service.
Wear the Right Clothing
Once you have the right running shoes, add on some basic running clothing and apparel.
You’ll need shirts for different seasons, preferably made of moisture-wicking technical fabrics that can help pull the sweat away from your skin and keep you dry and comfortable in the process.
Some of the best fabrics include Coolmax and Dri-fit.
Special apparel costs a little bit more than casual clothing, but you’ll find that it’s worth every penny — especially if you’re serious about staying comfortable for the long haul.
You’ll need a couple of pairs of bottoms: shorts, tights, pants, or even a skirt if you find that more comfortable.
And female runners need a good sports bra that both provides support and reduces the risk of chafing.
Other items to consider include (but are not limited to) running sunglasses, hats, hydration belts, sports watches, heart monitors, and more.
Here’s the full guide to cold weather running.
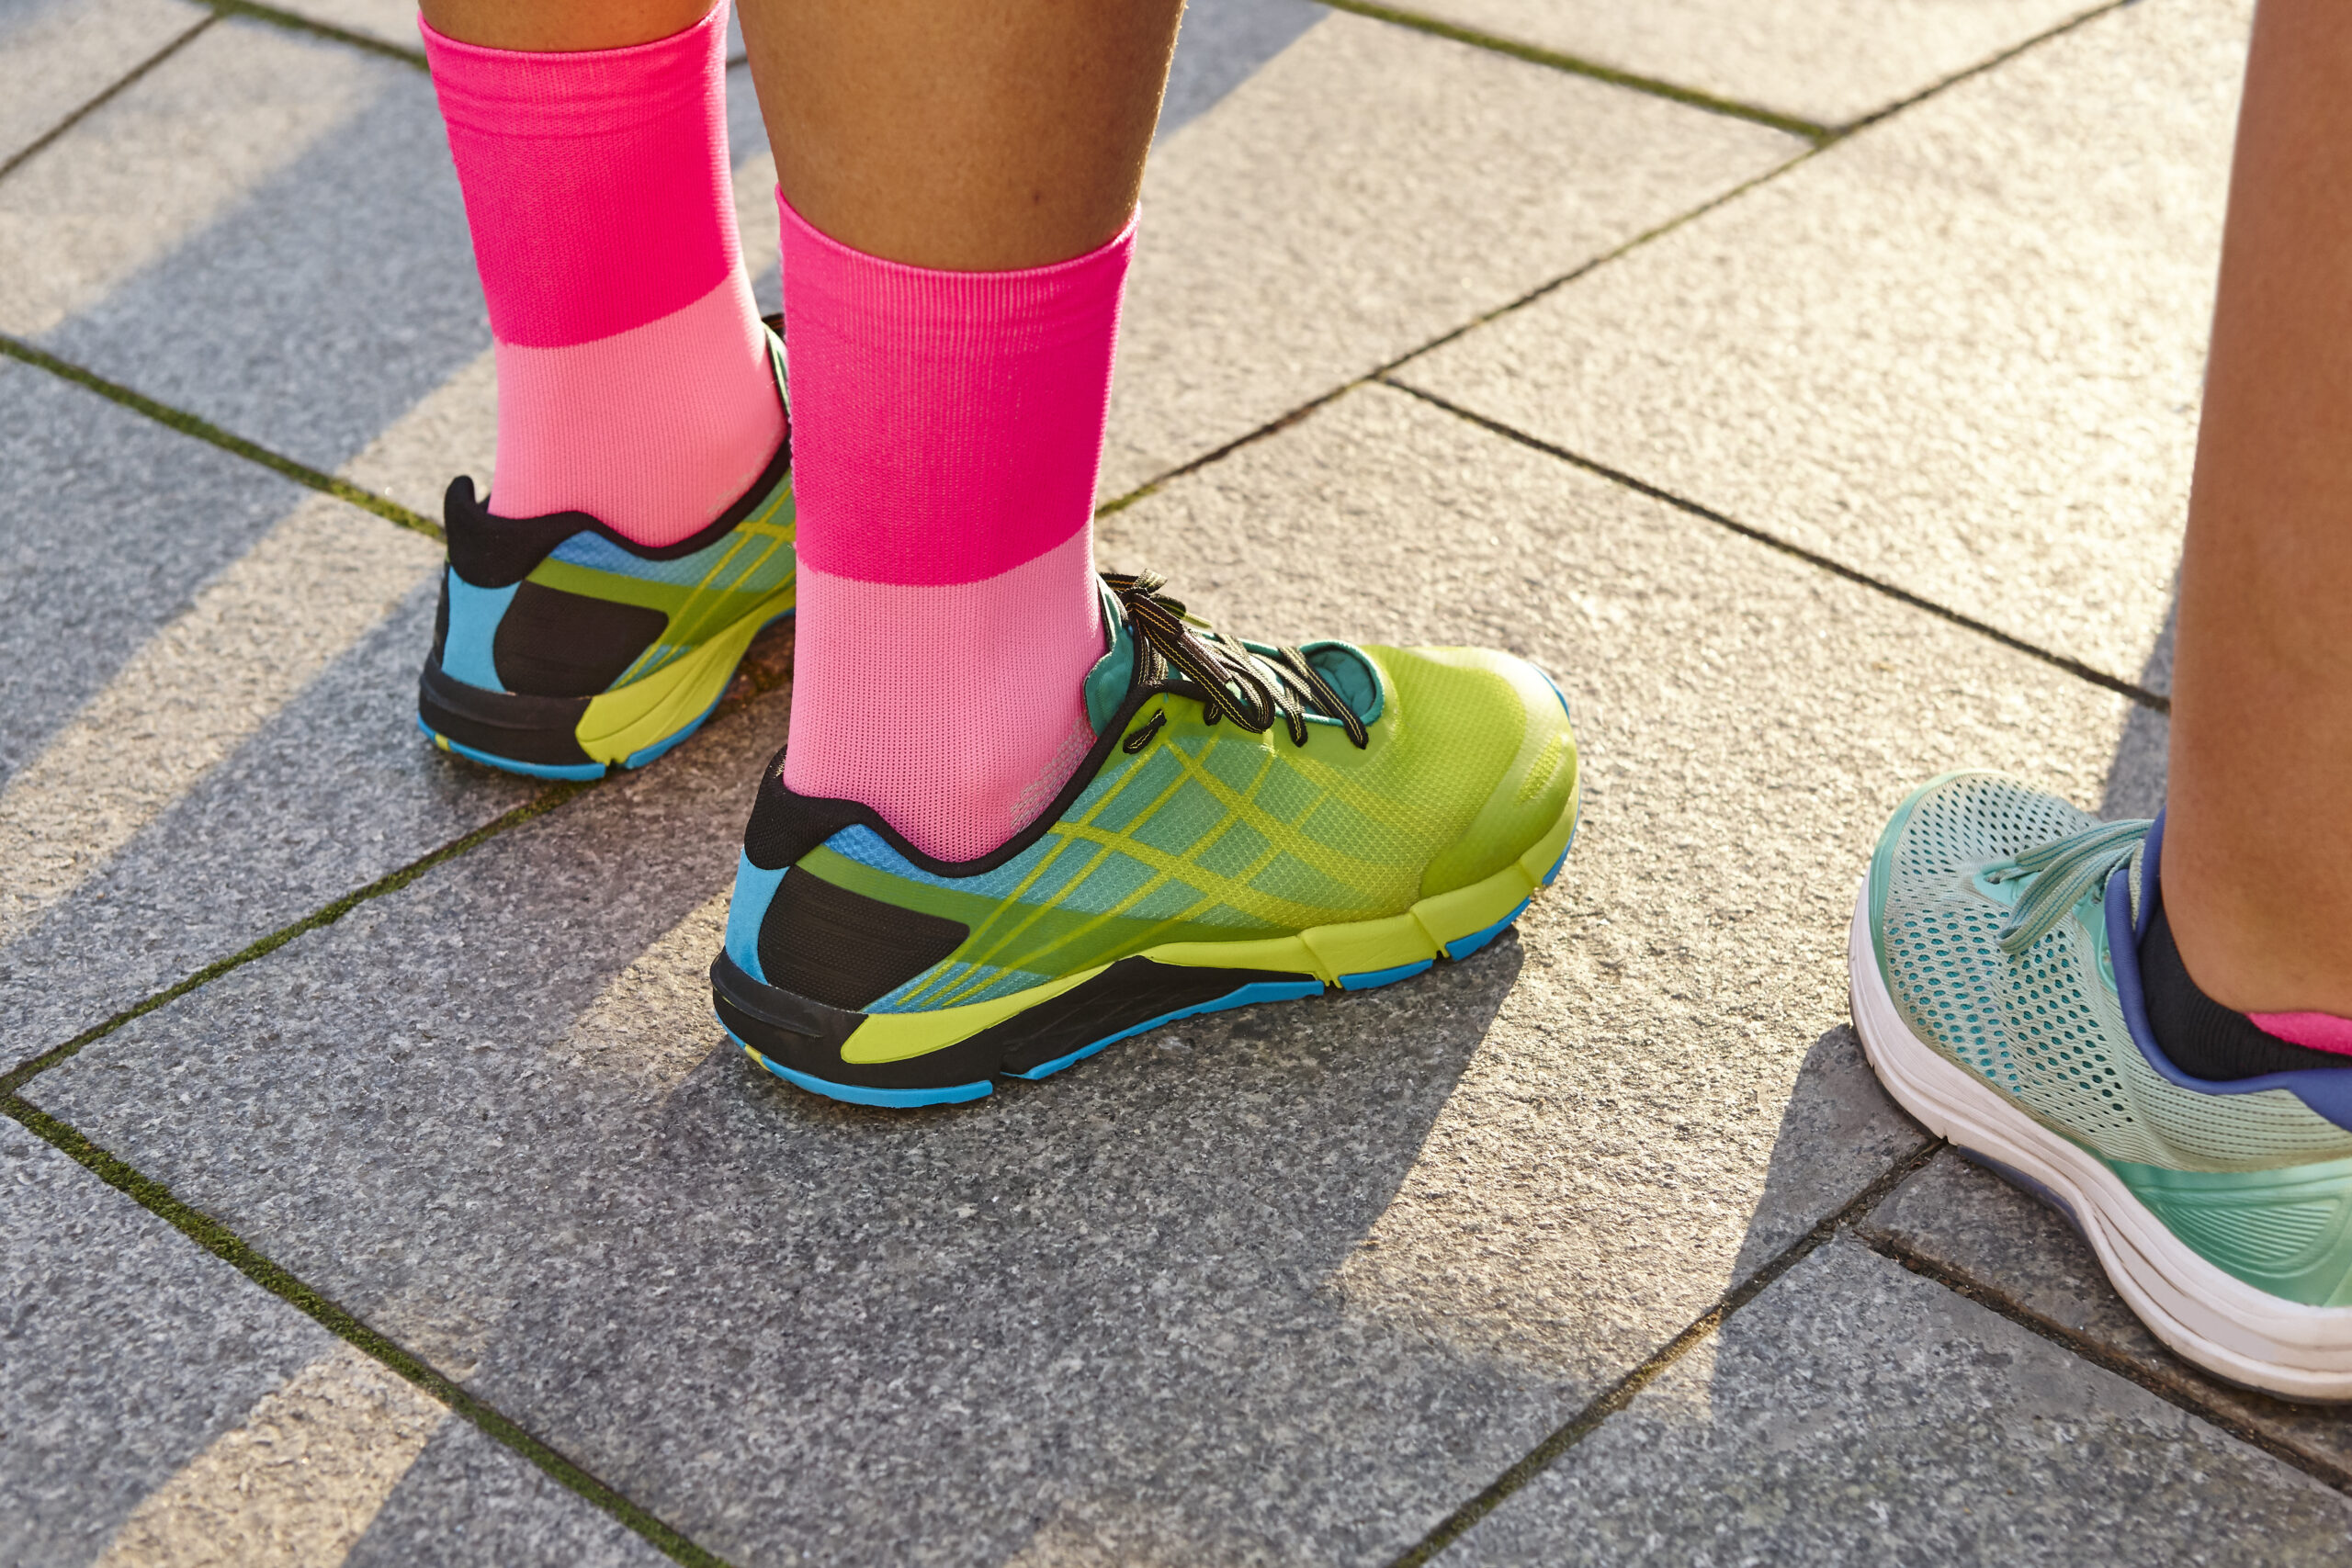
Opt for Smart Socks
The golden rule on running is that you should not run in cotton socks. Cotton absorbs and retains moisture, and since your feet will sweat, running in cotton will leave your feet soggy and moist.
This leads to the two side effects of moisture and friction —calluses and blisters.
These wick moisture away from your feet, keeping them comfortable and relatively dry.
Smart socks are made from either a blend of natural fibers such as wool, or from synthetic fibers such as nylon, acrylic, or Coolmax.
You can also try compression socks.
Have More than One Pair
According to research published in the British Journal of Sports Medicine, runners who rotate their shoes among various models during a 6-month period had a 40 percent lower risk of incurring a running injury than those who ran in the same pair through the same period.
If you’re serious about reducing your risk of injury, train in more than one pair.
Clean Your Shoes
If you take care of your running shoes, they’ll return the favor and take good care of your feet.
They’ll also last longer.
Failure to do so will mean that your shoes will lose their cushioning properties sooner than they need to: neglect wears them out prematurely.
Here are a few shoe-cleaning rules:
Do not toss your running shoes in the washer. Wash them manually instead.
Use an old toothbrush or nail brush and mild soap — preferably an anti-grease soap. A bit of water added in will wash away stains, dirt, and mud.
Do not toss your shoes in the dryer. Dry them in the open air under direct sunlight.
Replace Your Running Shoes
Sooner or later, your trainers will wear out and lose their shock-absorption properties.
That’s when you need to ditch them and get a new pair.
Here’s the bad news.
As far as I know, there’s no proven formula that tells you exactly when to replace your running shoes.
That’s because there are many factors that impact running shoe lifespan, including:
Running surfaces
Runner weight
Weekly mileage
Training intensity
Running biomechanics
The climate you run in
As a rough guide, a running shoe should last you between 500 and 600 miles. Once your shoes go beyond this range you’re risking discomfort and pain, as well as injury.
My best advice is to use an app like MapMyRun to keep tabs on the mileage of a specific pair, or you can do it the old-fashioned way, using pen and paper or an Excel spreadsheet.
Tying their shoes is something that well-accomplished 5-year-olds can do with ease. But there are many different ways to lace trainers, and different techniques can not only make them more comfortable, but also help avoid all sorts of discomfort.
According to a study conducted at the University of Duisberg-Essen in Germany, shoe-lacing technique has a huge influence on impact force, pronation, and foot biomechanics.
In this infographic, you’ll find a lineup of top knots to learn.
Bonus tip: You can also invest in a pair of Lock Laces.
Dress For 10 Degrees Warmer Than What the Thermometer Says
Running during the winter has its challenges, but if you overdress, you’ll get in trouble.
For winter running, you need to aim for warmth, but without making yourself sweat so much that you get a chill.
That’s why I highly recommend that you dress as if it’s 10 to 15 degrees warmer than it is outside. You should feel slightly cold when you take your first few steps outside. Once you get moving you’ll warm up quite a bit, so don’t worry about feeling cold at first.
Try YakTrax
As a winter runner, you need good traction to prevent sliding and slipping — especially when road conditions are freezing and/or snowy.
One thing you can do to make sure that you stay on your feet is to try YakTrax. It’s a traction device that meets the needs of runners during wintertime. They improve control and stability when there’s snow, sleet, and ice underfoot.
Buy Running Garments On Sale
Are you a runner on a tight budget?
Buy your athletic garments at the end of the season.
As with any other store, running specialty stores put sale items on clearance as the weather changes to make room for the new models and styles that are coming in.
I’ve purchased some of my favorite summer running clothes in late autumn or winter when it was too cold to run in them, and my favorite cold-weather running gear when the temperature outside was hot
There’s nothing wrong with last season’s styles. They’re generally made from the same materials, and running clothes are performance tools, not fashion statements.
For the best running shoe deals on the web, check ShoeKicker.com. It’s a great website that scours the internet looking for the best deals.
Use GPS Tracking Apps
Being able to measure your day-to-day performance is a great way to reach the next athletic level. After all, if you can’t measure, you can’t improve it.
Fortunately, advances in mobile apps mean that you can challenge yourself each time you head out the door. Running apps are perfect for beginning runners who need a little bit of a push and a way to monitor their progress, as well as for elite runners trying to stay in peak shape throughout the racing season.
That’s why, whether you’re training for your first 5K or your 11th marathon, your smartphone (or any other “smart” device) can be an excellent coach.
Here are a few of some of the best apps out there:
Runtastic
RunKeeper
Strava
MapMyRun
Edmundo
MyFitnessPal
Use a Heart Rate Monitor
Using a heart monitor is like having a coach along for every run. When used right, it can show you, down to the stride, how hard or easy you are working. It can help you find your running sweet spot and prevent overtraining or undertraining in the process.
Here are the four main heart rate training zones you need to be aware of. Plan your workouts within each zone for a well-rounded training program
Zone 1—The recovery or energy efficient zone, it’s roughly 60 to 70 percent of maximum heart rate, or MHR.
Zone 2—The aerobic heart rate zone, it’s roughly 70 to 80 percent of MHR.
Zone 3—The anaerobic zone, it’s about 80 to 90 percent of MHR.
Zone 4—The VO2Max or Red Zone, it’s approximately 90 to 99.99 percent of MHR
If you do a lot of running in the rain with a non-waterproof phone or GPS watch, then you need to protect your electronic devices from water damage.
Here’s how:
Store your device(s) in a lightweight zip-lock bag. The bag should to be securely sealed to prevent water from leaking in.
You can also cloak your device in plastic wrap, leaving no “skin” exposed. When wrapping, make sure that the charger port is well covered.
What I love about using plastic wrap is that it’s dense enough to protect against moisture but thin enough that you’ll still be able to use the touchscreen through the plastic.
If all the jingling and jangling of running with keys in your pocket drives you nuts, you’re not alone. Here’s my favorite solution:
Take the key off of its keychain, unlace your shoe a notch, then slide one of your shoelaces through the key and put it on the string. Tuck the key under the other lace before retying your shoe.
To keep the key from bouncing around, tie your shoe using a double knot and secure the other end of the key under the crisscrossed laces.
This technique will give you peace of mind and allow you to enjoy your run.
If you don’t want to do this, you can put a rubber band around your keys before tossing them in your pocket, or try putting them on a shoelace and wearing them like a necklace.
Long Walks First
If you’ve been exercising regularly for the last 3 to 6 months and you’re already in good shape, you may choose to skip this step, but if you’re a real beginner, this is the most important step for building the right foundation.
Before you start running, do plenty of walks to prep your body. Start out with 30 minutes of brisk walking, then build it up to a full hour, three times a week for a full month.
By week four you should be walking for at least 60 minutes at a brisk pace three times per week. Now you’re ready to move onto a walk/run schedule.
Walk/Run
The walk/run method is ideal for helping new trainees get fit without getting hurt. The key here is to gradually stretch your comfort zone without overextending it.
Here’s how to do it
Start with a proper warm-up of 10 minutes of walking at a brisk pace. This will get your heart rate up and the blood flowing to your muscles.
Next, jog slowly for 20 to 30 seconds. Slow it down and walk for 30 seconds to a full minute, then jog again for another 20 seconds.
Keep repeating the cycle for 15 to 20 minutes, then end your session with a 10-minute cooldown.
If everything is going well, increase your running time by 5 to 10 seconds from one session to the next. Do these increases gradually, staying within your fitness level the entire time.
Give C25K a Try
Newcomers to running or those returning to it after a long layoff should give the C25k app a try.
This handy app offers a nine-week training plan that can help you train for a 5K race (roughly 3.1 miles) in a gradual and safe manner. You only need to commit 20 to 30 minutes, three times a week.
The treadmill is the perfect tool for building endurance without putting too much stress on the body. It gives you full control over your speed and incline, and allows you to adjust your speed and intensity to match your fitness level.
You really can’t overtrain on the treadmill unless you’re doing so on purpose, ignoring your body’s signals of pain and discomfort.
Here’s the workout routine you need:
Warm up for 10 minutes. Start with a 10-minute walk at 1.5 to 2 mph, then jog for three minutes at a pace of 2.5 to 3 mph for next three minutes. Make sure to practice good running form.
Increase the speed to 3.5 to 4 mph and stick to this relatively fast pace for one full minute before slowing back down to a walk for another 4 minutes.
Increase your speed to 3 mph and jog for three minutes, then run for one minute, picking up your pace to 4 to 5 mph (or even faster if your fitness allows it). Back off if your body hurts or your form starts to suffer.
Finish off with a 10-minute cooldown walk.
The Talk Test
As a beginning runner, make sure that you’re running at what is known as a conversational pace. This means you should be able to speak in full sentences on-the-go without gasping for air. Want to test yourself?
If you can recite the Pledge of Allegiance without too much difficulty, you’re not running too hard.
By sticking to this rule, you’ll build your aerobic endurance based on the right foundation, and this will set you up for success later on.
The only exception to this rule is when doing any sort of speed work training. Speedwork includes sprints, fartleks, hill reps, or racing. These are not moves you should concern yourself within the early stages of your training.
Run For More
After three to four weeks of using the run/walk method, start lengthening your running segments until you can run at a comfortable pace for 30 minutes straight.
Depending on your fitness level and training consistency, this may take you a while. But if you stick with it long enough, you’ll get there.
Once you can run for 30 minutes straight without much trouble, feel free to take your running to the next level. That’s when you’re going to start seeing some amazing results.
Once you’ve increased your running time to an hour or more, you will be in good enough shape that you’ll be able to sign up for 5k races, do interval or hill training, and much more.
Avoid The Rueful Toos
Runners who do too much too soon without giving their body enough time to adapt to their new training load will eventually run into trouble. It’s one of the most common mistakes beginners make.
Don’t fall into the trap of “too much, too soon, too often, too fast, with too little rest.” Instead, build a solid base of easy, short, aerobic distances before you up the ante with speed, distance or hill training.
Even if you feel like you can do more during the first few months of training, rein that temptation in. The temporary sense of accomplishment you might get is not worth the risk of a painful injury or a burnout.
Dynamic Warm-up
A good warm-up is the backbone of effective training, especially when doing hard, intense runs such as interval sessions or hill runs.
Warming up the right way can improve your performance as well as reduce the risk of injury.
Here’s a simple routine you can try.
Do at least ten reps of each exercise below for two to three rounds.
High kicks
Lunge with a twist
Inchworms
Hip stretch with a twist
Butt kicks
Or check my full routine here.
Cool Down Right
The cooldown is just as vital to your performance and fitness as the warm-up.
A proper cool down can help transition blood from the working muscles to the normal resting flow, but when you stop on the spot, blood can start to pool in the legs and feet, leading to dizziness, vertigo, and discomfort in some people.
Here’s how to cool down properly. Jog or walk for at least 5 to 10 minutes (depending on your training intensity). Then do some post-run strength, mobility, and stretching exercises.
Stretch After Your Runs
The benefits of stretching are a hotly debated topic in both the scientific and running world, but I still recommend stretching as a way of preventing injury and improving performance.
Here a few benefits of stretching:
Improves muscular coordination
Reduces lower back pain
Enhances posture
Alleviates post-run soreness
Increases range of motion
Whatever you do, don’t stretch before a run like we used to do in high school gym class. Studies show that static stretching before a workout can compromise performance and may lead to injury (think muscle tears).
Aim to stretch for at least 10 to 20 minutes after a workout, focusing on the main running muscle groups including the hips, the glutes, the hamstrings, the quads, and the calves.
Hold each stretch for 20 to 30 seconds, and breathe deeply into your stretch to release any tension or discomfort.
Learn Lexicology
As you get more into running, sooner or later you’re going to run into some technical jargon. As is true in most sports, running has its own verbiage that you need to get good at if you’re going to be serious about calling yourself a runner.
In other words, you have to talk the talk.
Here is my full list of running jargon, where you’ll find more than 160 definitions of most common running terms.
Have a Plan
“If you fail to plan, then you’re planning to fail.”
That quote might sound like a cliche, but that does not make it any less true, especially when it comes to running. Following a training plan will help you remove the guesswork from your workout routine.
Pick a training plan. You can find an array of intricate plans online, with something for everyone. All in all, the best plan is a well-rounded plan, whether you’re a recreational runner doing it for health and fitness or an elite marathoner hoping to optimize your performance.
Include the following five elements in your training program:
Interval workouts
Tempo runs
Hills runs
Long runs (or LSDs)
Easy run (for recovery).
Add a Long Run
Longs runs are vital for training. They increase stamina, build proper form, burn mad calories and will get you in tip-top running shape for any race or distance. And adding long runs into a running plan is not that complicated.
After at least six months of regular training, increase your longest running session—typically, your weekend workout—by up to 10 percent from one week to the next. Keep doing this until you’re running for two and a half to three hours.
Do your long runs at approximately 60 to 70 percent of your 5K pace—that should be a comfortable pace. To make sure you’re doing LSD runs right, do a quick talk test whenever you feel you might be working too hard.
Speed Work
Whether you’re looking to outpace your running buddy or aiming to beat your current PB at a given distance, speedwork is the way to go. It can also increase your range of motion, improve your conditioning, burn mad calories and build muscle mass, all of which can make you a stronger and fitter runner.
Here are the main speedwork sessions you need to add to your training schedule:
Classic 200m sprints
Tabata sprints
400m laps around a track
Short and medium hill sprints
Fartlek sprints
As a rule, aim for quality over quantity. Speedwork should account for no more than 20 percent of your weekly total mileage.
Sprint
Long sessions have their benefits, but to take your running to the next level, sprinting is of the utmost importance.
A form of high-intensity interval training (HIIT), sprinting can help you burn three times more calories than steady-state running. According to studies, it also boosts your metabolism and helps develop killer lower body strength and speed.
What I really like about sprinting is that it takes just half an hour to complete an entire session. What’s not to love?
Here’s how to proceed:
Start with a proper warm-up. Do five minutes of slow jogging followed by dynamic movements such as knee circles, inchworms, lateral lunges and walking lunges.
Then go for your first sprint, running at 70 percent of your top speed for 30 seconds. Take a minute to recover and then do it again, running your next sprint at 80 percent of your max effort.
Shoot for eight to ten sprints, then finish off the workout with a decent cooldown. Jog slowly for five minutes, then stretch your whole lower body.
Tempo Run
Also known as lactate threshold, LT, or threshold runs, tempo workouts are faster-paced runs that are vital for boosting metabolic fitness.
The primary purpose for tempo runs is to increase your lactate threshold level, the point at which the body fatigues at a certain pace.
As a general rule, your tempo workouts should feel comfortably hard. A good example is a comfortably hard and sustained 3- to 4-mile run.
Here’s how to proceed:
For a five-mile tempo workout, start by warming up with a 5-minute slow jog, then run a mile at 20 seconds slower than your half-marathon pace.
For the remainder of the workout, pick up the pace every mile by five to 10 seconds until you’re running the final mile 20 seconds faster than your half marathon pace.
Tackle the Hills
Hills build leg strength, boost lung capacity, improve running form and reduce the rate of injury. For these reasons and more, do not avoid hill workouts, but make sure you train using proper form. Your uphill running should mimic your sprinting form.
Here’s how:
Run tall, with your core engaged and your back flat. Do not lean forward.
Engage your hamstrings, quads, and glutes on the way up. Make sure to push from the hip while engaging your entire lower body to get up the hill.
Feel free to walk on the steepest sections of any given hill.
Train Negative
If you want to improve your running speed/time, practice negative splitting. This means running the second half of your session a bit faster than the first.
In the ideal negative split run, once you reach the midpoint of the workout each mile gets increasingly faster than the last. As long as you finish the last mile faster than the first, you’re in a good place.
Here’s an example of a 4-mile session:
After a thorough warm-up, run your first two miles at an easy and controlled pace—shoot for 15 to 30 seconds slower than your average pace for that distance. Once you’ve reached the midpoint, pick up your speed to a 10K or 5K pace, then switch to maximum speed for the last 100 to 200 feet of your run.
Try Fartleks
Fartlek is a Swedish term that means speed play. It’s a non-structured form of interval training developed in the early 1930s.
The primary purpose of a fartlek workout is to increase your speed and endurance in the most unpredictable and playful way possible.
Here’s how to proceed:
Start your workout with a 10-minute warm-up jog, then sight an object in the distance: it can be a tree, a parked car, or a building. Run towards it fast. Once you reach it, slow down and recover. Sight the next object and repeat.
Whatever you do, make it random. Make it fun.
Try Tabata Protocol Runs
Made famous by a 1996 study by Dr. Izumi Tabata and his colleagues, the Tabata protocol is a very specific method of interval training proven to shed body fat and increase performance.
A session consists of twenty seconds of maximum burst (max effort/max reps) followed by ten seconds of recovery.
To do Tabata, sprint for 20 seconds at full speed, then rest for 10 seconds.
You can also up the ante by adding in some bodyweight exercises to make the workout more challenging.
Here’s a simple Tabata protocol to try.
Set 1: Sprint at a moderate pace for 20 seconds. Rest for 10 seconds.
Set 2: Do as many push-ups as possible in 20 seconds. Rest for 10 seconds.
Set 3: Sprint for another 20 seconds at max speed. Rest for 10 seconds.
Set 4: Do as many squats as possible in 20 seconds. Rest for 10 seconds.
Set 5: Sprint as fast as you can for 20 seconds. Rest for 10 seconds.
Rest for two minutes and repeat the whole circuit twice.
Cross Train
Cross training is vital for runners because it can help prevent overuse injuries such as runner’s knee, ITBS, shin splints, and stress fractures, as well as lower back issues, hip, joint and knee pain.
Cross training can also boost your speed, increase your stride length, improve your running form and boost your overall fitness and health level.
Here are eight super-effective training methods to try:
Yoga
Cycling
Weight training
CrossFit
Swimming
Jumping rope
Rowing
Get Explosive
Plyometric training, also known as explosive or jump training, is another excellent cross-training method that research shows can increase running speed and power.
This type of training requires a fast and forceful recruitment of muscles fibers through high velocity, dynamic moves. These are key for building explosive power both on and off the running field.
Here’s a list of some of the best explosive exercises for runners:
The core is made up of the muscles that connect the upper and lower body. It includes the glutes, lower back, hip, and abdominal muscles.
Your core muscles work in tandem to hold your torso upright and provide stability for your entire kinetic chain while running. That’s why you MUST do a core strengthening routine two to three times a week.
One of the best exercises for runners is the good old planks. I cannot recommend these enough. In addition to building up your core, they’ll also help develop endurance and strength in the shoulders, arms, and back.
Check the following tutorial to help you build and keep good plank form.
Test Yourself
To improve your running, you MUST measure it — otherwise, you’ll have no idea whether you’re progressing.
The best way to measure your fitness progress is to test it.
Here are the main tests you should be taking on a monthly basis:
The 400m sprint
The one-mile run
The Cooper 12-minute test
A 5K distance run
A 10K distance run
Build the Habit
There’s are few things that feel worse than falling off the fitness wagon after investing so much time into building the right foundation.
That’s why even once you’ve reached your fitness goals, you have to keep your training program going strong. Quit or slack off, and you risk undoing all your hard work—and you don’t want that.
To stay consistent with your new running routine, make sure you turn it into a habit.
Here’s how:
Use a calendar and book your running sessions the same way you schedule an important family event or work meeting. If you create a sense of urgency and importance around your run, you’re more likely to carry through.
Start running with a friend or training partner. This will boost your motivation and add a sense of accountability to your program. This is vital for consistency.
Resolve to run at least three to four times a week for the upcoming 8 to 12 weeks. Do what you have to do never to miss a session.
For my guide on habit formation, check this post.
Set Goals
When it comes to running, it’s vital to have something to work towards regardless of your training aspirations.
Whether your goal is weight loss, improved performance, stress relief, or anything else, having a set of goals creates a benchmark of progress as well as a sense of accomplishment once you start achieving them. I cannot overemphasize the importance of goal setting—even if it’s something you’ve never consider doing before.
Setting goals is what helped me go from being a complete couch potato to becoming a consistent runner, so please start setting fitness goals.
Here’s the golden rule of good goal setting:
Make your goals S.M.A.R.T., And that’s an acronym that stands for Specific; Measurable; Achievable; Realistic; and Time-related.
For my in-depth article on this topic, check my post here.
Run With a Partner
Running is, by definition, a solitary sport and a solo journey, but it doesn’t have to be that way.
Research shows that pairing up with a training buddy can lead to better consistency, help you become more accountable, and may even make you exercise a bit harder than you would when you run alone. All of these can do wonders for your running routine.
I’d go so far as to claim that training partners might be the most valuable tools you can have as a runner.
Ask a friend, a family member, a gym partner, or neighbor to run with you.
If you can’t find a suitable partner among people you know, join a local running group or hunt for one online.
Chart Your Progress
As I’ve already stated, if you can’t measure it you can’t improve it.
That’s why I keep stressing the importance of monitoring your progress (or lack thereof, for that matter).
Keep a written log of your running routine. You don’t need anything fancy – a standard training journal, a spiral notebook or a plain notepad will suffice.
Here are some of the things and factors you need to keep track of:
Your running times
Your running distances
Your heart rate (and its fluctuations)
Calories burned
Running routes
Aches, pains, and injuries
Cross training workouts and reps
Body weight
Body measurements
Use Excel spreadsheets to create simple charts for tracking your progress.
You can also keep tabs on your progress online using sites like MapMyRun, DailyMile.com, or RunKeeper.
Run To And/Or From Work
Finding balance between everyday life obligations, work chores, and a running routine is no easy feat. This is especially the case if you’re already burning the candle at both ends.
Instead of running to catch up with the train or a bus, try running to or from work. Put your commute time to good use. But whatever you do, make sure you do the following two things:
First, plan your run-commute thoroughly. Have everything ready the night before, from clothes to shoes, hydration and more.
Second, invest in the right backpack. You might need to think this one through before you make a buying decision. Your pack should be runner-friendly and must not bounce with every step.
Reward Yourself for Your Successes
Rewards are positive reinforcement, and can be a powerful motivator.
When you reach a certain benchmark or achieve a given goal, treat yourself for the hard work you’ve put in and what you’ve accomplished.
Here are some ideas:
Buy a new running shirt or a pair of shorts
Have a meal at a nice restaurant
Watch your favorite Netflix show
Go on a special trip
Go to the movies
Take a long nap
Try Zombies, Run!
For runners looking to turn their everyday workouts into an immersive adventure through a zombie-infested wasteland, look no further than this fantastic gaming app — especially if you’re running out of enthusiasm and need to add a bit of adventure and fun.
Zombies, Run! is an amazing audio adventure for thriller-seeking runners. Thanks to this game you’ll be the hero of your very own zombie adventure story. You’ll run through various missions while being chased by zombies, while also collecting the items you need to progress through the game.
Studies have linked listening to music to improved athletic performance, better training experience, and superior training consistency.
It’s not rocket science. All you need is the right playlist for the job.
Here’s the golden rule: when picking songs for your running playlist, stick with songs that have a BPM (Beat Per Minute) in the range of 120 to 140.
Here’s how:
You can do it manually, but it’s a real hassle. I don’t recommend this method unless you have a lot of time to spare.
Instead, check out websites that have already compiled thousands of songs and playlists tailored to all sorts of runs and events.
RunHundred.com and RunningPlaylist.Com are two of the best of these.
Get Ready the Night Before
To set yourself up for running success, lay out your running gear the night before your workout. Doing so will help eliminate any barriers between you and your workout, save you a lot of time, and keep your mornings stress-free and smooth.
It should take you no more than 5 to 10 minutes to get these things together:
Your running clothes, including pants, socks, t-shirt, underwear, etc. (or sleep in them if you want to)
Your waterbottle
Your music playlist
Your pre-run snack
Your running route
Your workout
Join Online Fitness Groups and Forums
Online health communities, whether they’re fitness groups, forums, social media website or some other type of group, are all great venues for expanding your social circle and connecting with like-minded fitness folks.
Joining up will help you increase your motivation and give you the push you need to exercise a little bit harder and stay consistent over the long haul.
Some of the best fitness-oriented online resources include:
Men’s Health
Runners World Forum
My FitnessPal
Fitbit
Cool Running
Jefit
BodySpace
Nerd Fitness
Transformative Fitness
Race
Choose one of the many running-related events in your area, whether it’s a fun local 5K race, an obstacle race course, or a serious half-marathon or marathon distance challenge, and pay your registration fees in advance to keep yourself accountable.
Just make sure that the race fits your fitness level and schedule. If you’ve never done any sort of running before, spend a few months preparing for the race and make it a shorter distance such as a 5K or 10K run.
Change The Direction of Your Runs
If you run the same route day in day out, sooner or later you’re going to get bored, and that’s when you’re most likely to slack off. It’s bad for your consistency and overall training experience, so switch up your running route regularly.
The simplest way to do this is to run your typical route backward every other week.
Don’t like this idea?
For another option, use crowd-sourcing apps like MapMyRun or a web resource like WalkJogRun to find and discover new routes close to where you live.
Run in The Morning
Becoming a morning runner was a true godsend for me. It helped me stay consistent and become the runner I’m today.
As a bonus, research shows that those who exercise first thing in the morning are more consistent and efficient than the folks who work out later in the day.
Morning runs can improve your mood, boost productivity, shed more calories, and increase your focus and energy for the rest of the day, so if it’s all possible, run first thing in the morning.
Here are the golden rules:
Prepare the night before by laying your workout gear out
Aim for seven to eight hours of quality sleep
Place your alarm clock far away from your bed to force yourself to get up and out
Drink plenty of water and have a light pre-run snack before you head out the door
Work on your Running Form
Proper training form is king, whether you’re lifting weights in the gym or circling the running track. The right technique can help reduce your risk of injury and make your workouts more efficient.
Run with bad form, and you’re risking all sorts of strains, aches, pains, and injuries.
Here’s how to build good form:
Run tall.
Prevents neck strains by keeping your head straight and your eyes straight ahead. Don’t look down at your feet.
Keep your shoulders relaxed, back, and down. Don’t let them tense up toward your ears.
Lean Forward
This is something I learned from the Chi Running method, and I’ve found it to be very helpful.
Instead of running with a upright posture, run with a slight forward lean of about 8 to 10 degrees. By doing so, your body falls forward with every step, which in theory helps propel you forward and increases your stride turnover.
Mastering the forward lean is more easily said than done. One major mistake I see many runners make is leaning from the waist. Running this way can put a lot of undue pressure on the lower back and slows you down.
Instead, lean from the ankles while engaging your core muscles and keeping your spine straight, allowing for no bending in the waist.
Keep Your Body Relaxed
As a runner, tension is enemy number one. It wastes energy, triggers bad form and can compromise the quality of your workout, leading to premature fatigue and increasing the risk of injuries.
Check your form throughout your run, allowing no chance for tension to creep into your workout.
Here are the few hacks that can help:
Shake your arms and hands every couple of miles and try rolling your neck forward, backward, and to the sides.
Imagine you’re holding an egg in each hand, gently cupping your palm with your thumb resting on your fingers instead of clenching your fist.
Breathe deeply and consciously, letting go of tension and discomfort. You have to get good at catching yourself in the act, and that requires practice.
Pump Your Arms
As a runner, you’re, mainly relying on your legs to propel you forward, but that’s not the whole story. Your arms can help too.
Research shows that opting for a strong arm swing has a drastic impact on the smoothness of your running gait, resulting in a reduced workload on your legs and an increase in your economy of motion.
To boost your endurance and speed, drive your arms in a fluid motion, forward and backward, aiming for a 90- to 100-degree bend at the elbows. Do not pump your arms across the midline of your body—doing so wastes energy and tires your muscles. It might also hinder the forward motion of your body.
Your elbows should swing anywhere between the waistline and chest.
Kill the Bounce
Research shows that vertical oscillation (running with a bounce) has an enormous negative impact on running economy and speed.
When your body is moving up and down too much, you’re wasting a lot of energy and putting undue pressure on your lower body, especially your quads. This leads to premature fatigue and soreness.
Here’s how to keep it under control:
Imagine you’re running under a low roof hovering a few inches above your head. Do not hit your head on the ceiling.
Land with your foot almost directly below your knees. Do not let your foot land in a spot ahead of your knee.
Focus on a faster leg turnover by running lightly and landing softly on your foot. Think quick steps. Focus on keeping your feet under your knees.
Shorten Your Stride
When you overstride your foot lands on the ground well ahead of your hips. This runs the risk of increasing the stress load on your lower body. It also creates a braking effect that can hinder performance.
So, what’s the solution?
It’s simple: shorten your stride. Doing so helps reduce the braking effect and encourages a smoother, more natural running gait.
Here’s how:
To cover more ground, focus on springing off rather than trying to lengthen your stride.
Think short, light foot strikes and keep shortening your normal stride until you reach the perfect running cadence.
Keep your knee positioned above your foot and keep your shin vertical as your foot strikes the ground below you.
To boost speed, increase your leg turnover, driving your leg back from the hips instead of reaching forward with your foot.
All of this may sound a little complicated, but with a little of practice you’ll be able to wrap your head around it in no time.
Increase your Cadence
In running lexicology, running cadence stands for the number of steps you take per minute while running.
When it comes to improving speed, cadence is a vital factor. Opting for the proper cadence reduces the impact of stress on your feet, knees, and ankles, and improves running economy.
According to Jack Daniels (the legendary running guru), the optimal cadence for running is roughly 170 to 180 steps per minute.
Your cadence doesn’t have to be exactly 180 throughout your training — in fact, your racing cadence and easy training cadence shouldn’t be the same.
Breathe Rhythmically
Rhythmic breathing is a form of synchronized breathing that consists of timing your breaths to your foot strikes. The right breathing ratio depends mostly on your current fitness level and training intensity.
So how do you pick the right ratio?
If you’re a complete beginner, start with a 3:3 ratio. This means that you breathe in on three steps—RIGHT foot, LEFT foot, RIGHT foot, then breathe out on the next three steps—LEFT foot, RIGHT foot, LEFT foot.
Using this pattern, you will be taking in roughly 25 to 30 breaths per minute.
This ratio is also ideal for easy (and recovery) runs.
If you feel like this is too slow for you, opt for a 3:2 ratio: inhale on the RIGHT, LEFT, RIGHT foot strikes, then exhale on the LEFT, RIGHT foot strikes.
A 2:2 ratio is ideal for when you’re running a tempo pace, or whenever you need more of a push. For the most part, this means cruising at roughly your 10K race pace, or maybe a bit slower. For quality workouts, opt for a 2:1 or even 1:1 ratio.
Here’s my full guide to proper rhythmic breathing while running.
Breathe Deeply
To improve performance and stamina, cultivate the habit of diaphragmatic breathing.
Most runners are chest breathers. That’s neither the most efficient nor the healthiest way to breathe while running. Chest breathing increases the risks of hyperventilation and reduces your intake of oxygen while running.
The good news is that by switching to deep breathing you get more oxygen into your bloodstream. This can boost lung power as well while reducing the risk of side stitches.
Downhill Running
As the saying goes, what goes up must come down. That’s why you should never forget the importance of downhill running.
On the descent, proper form can improve your performance and reduce post-workout soreness—especially in the quads.
Here’s the right way to run downhill:
Stay upright, keeping your posture perpendicular to the ground beneath you. Do not lean back or overstride, as doing so creates a braking action. The only exception is on the steepest grades.
Brace your core to keep control over your body and the hill. Don’t let the hill control you on the way down.
Do not look straight down. Look ahead while focusing on the line you wish to follow for balance.
Increase your cadence, aiming for quick, light steps and fast leg turnover.
Let Go of the Handles on the Treadmill
When you’re running on a treadmill, holding onto the handles may help when fatigue starts to set in, but doing so will compromise your overall workout. Positioning your hands on the handles aligns your body in an abnormal way, leading to discomfort and even injury, especially in the hips, lower back, knees, and shoulders.
Instead of touching the equipment, swing your arms backward and forward while engaging your core. This will not only help you keep good form, but will also engage your core, give you a full body workout, and burn more calories.
Have a Pre-run Meal (or Snack)
The main goal behind a pre-run meal is to give you a boost of energy without giving you a troubled stomach on the road.
For a proper pre-run meal, focus on high-quality carbs and low-fiber, low-fat foods.
Make sure you time your pre-run meals correctly. Timing is the most critical variable in the pre-run meal equation.
As a general guideline, if you have an hour or more before a run, you can eat at least 250 to 300 calories worth of food. If you’ve no more than half an hour before a run then eat no more than 140 calories worth. This is frequently the case if you’re running early in the morning but don’t want to go out the door on an empty stomach.
Post-Run Eating
The foods you consume immediately following a run are crucial for optimizing recovery and energy renewal.
Your post-run meal should score high on protein to help repair muscles and speed up recovery. You should also take in good carbohydrates to replenish your glycogen stores and get your body ready for your next run.
Here are three of my favorite post-workout meals:
Chocolate milk. The mix of carbohydrates (chocolate) and protein (milk) is just right for refueling your weary body. In fact, according to a study in the Journal of Clinical Nutrition, consuming chocolate milk after a workout can increase muscle protein synthesis.
Fruit salad. Fruit will not only help you replenish your energy stores with needed energy, but it will also help break down nutrients. Plus, the mix of fruits delivers a healthy punch of enzymes—anti-inflammatory properties that speed up recovery.
Egg whites deliver a healthy punch of proteins and key amino acids, which can help you rebuild damaged tissues after strenuous exercise.
Hydrate Properly
Dehydration can lead to all sorts of serious issues such as headaches, premature fatigue, muscle cramping, decreased coordination, heat exhaustion, and more.
To keep it at bay, drink plenty of water, regardless of whether the weather is cold or warm. As a general rule, you need at least 12 to 16 glasses of water a day.
Please take note that the previous rule isn’t written in stone. The exact amount of water you need depends on many variables, including your age, body weight, gender, fitness level, training distance/intensity, sweat rate, physiology, and outdoor temperature.
One way or another, I highly recommend that you stay well hydrated throughout the day.
Look At Your Pee
I hate to sound like a broken record, but research shows that dehydration can lead to decreased performance, premature fatigue, seizures, blood clots, and even death.
To check for signs of dehydration, look at your pee. You should be drinking enough water throughout the day for your urine to be a light straw color, or mostly clear with a tinge of yellow.
If your urine looks like chardonnay, or is yellow or orange, then you’re dehydrated and need to be drinking a lot more.
Iron is a vital component of the body’s red blood cells. Blood cells contain hemoglobin, and are crucial for transporting oxygen to your body’s various muscles and tissues. Iron deficiency leads to a reduction in hemoglobin level, which in turn hinders proper oxygen delivery.
Some of the best food sources for iron include egg yolks, lean meat, dark green leafy vegetables, lean meats, dried fruits, legumes, and whole grains. You can also go for iron-enriched or fortified cereals and bread.
To improve absorption, consume iron-rich foods with vitamin C like orange juice.
Have a Sports Drinks
Sports drinks are runner-friendly beverages that score high on both carbohydrates and electrolytes. These two nutrients are vital for staying well fueled and hydrated during intense aerobic activity.
Aim for taking in at least 30 to 50 grams of carbs for each hour spent running, but keep in mind that 8 ounces of a typical sports drink might contain roughly 16 grams of carb. During a long run, aim for taking in 4 to 6 ounces of fluid for every 20 to 30 minutes spent running.
Some of the best brands include Gatorade, HEED, PowerBar Perform, and GU Roctane.
If money is an issue, then the next tip will come in handy
Make your Own Sports Drink
I make my own sports drinks using whole foods and natural ingredients, and I love it. By doing so, I’m saving a lot of money while choosing a healthier path by going for more natural, whole ingredients.
Well, you’ve stumbled upon the holy grail of foot-strengthening exercises, right here, right now.
Listen up, because this is important. As a runner, you know that strength training is like the secret sauce that adds power and resilience to your performance. You’ve probably been diligently working on strengthening your muscles, which is fantastic.
But here’s the million-dollar question: Have you ever considered giving some love and attention to your hardworking feet? If your answer is a hesitant “no,” then hold onto your running shoes, because we’re about to open your eyes to a game-changing aspect of training that you’ve been missing out on.
You see, your feet are the unsung heroes of your running journey. They endure countless strides, absorb impact, and propel you forward mile after mile. Yet, they often don’t get the attention they deserve. It’s time to change that, and unlock a whole new level of performance.
By incorporating specific foot strengthening exercises into your training routine, you’ll unleash a world of benefits. Picture this: enhanced stability, improved balance, reduced risk of injuries, and increased overall foot strength.
Now, don’t worry if you’re not sure where to start. We’ve got your back. In this comprehensive guide, we’ll walk you through the best foot strengthening exercises tailored specifically for runners like you.
Are you ready? Let’s get started.
The Benefits of Foot Exercises For Runners
Let’s dive into the incredible world of feet!
Did you know that each foot is a complex powerhouse with roughly 20 muscles working in harmony? These muscles, including the anterior tibial, peroneal tibial, posterior tibial, flexors, and extensors, play a vital role in supporting our every move.
Numerous studies and research papers have delved into the fascinating mechanics of these muscles, shedding light on their intricate functions and how they contribute to our overall performance.
But that’s not all—your feet are home to an impressive collection of 26 bones, accounting for a whopping 25 percent of all the bones in the human body.
Imagine that! Alongside these bones, you’ll find a network of 33 joints, more than 80 tendons, and ligaments that provide stability and flexibility to this remarkable structure.
Now, let’s talk about the significance of our feet in our daily lives. We rely on them to stand, walk, run, and perform a wide range of athletic movements, such as squatting, balancing, and jumping.
They truly are the unsung heroes of our physical endeavors. In fact, the metaphorical weight they carry is immense—they can make or break us as runners.
Given the incredible demands we place on our feet, it’s no wonder that they are the most used and abused part of our bodies. Every step we take, every leap we make, puts tremendous pressure on this intricate system.
Without further ado, here are the best foot strengthening exercises for runners. Strengthen your feet for running by performing these exercises at least two to three times a week.
Foot Exercise for Runners – 1. Shin Curls
While using a step or a box, stand while assuming an athletic position with the toes hanging off the edge as much as you feel comfortable.
Next, curl your toes and foot up toward your shin as high as possible without rocking backward, hold the dorsiflexed position for a moment, then slowly lower your toes to the starting position to complete one rep.
Foot Exercise for Runners – 2. Single Leg Balance
Stand with feet hip-width apart, with the core engaged, back flat, and both hands are resting gently on your sides.
Next, lift your left leg straight toward the 12 o’clock position and balance on your right leg.
If you have any balance issues, then feel free to use a wall or a stable chair for more assistance.
For more challenge, try swinging the lifted leg forward and back, from the 12 o’clock to 6 o’clock, so and so forth, or balance on a balance disc or a seat cushion. You can also try single-leg bridges to test your balance.
Foot Exercise for Runners – 3. Heel Walking
Lift up both your feet, then pace the whole length of the room by walking slowly on your heels.
Make sure that you are on your heels the entire time.
For more, keep your toes pointed forward.
Foot Exercise for Runners – 4. Toe Presses
Assume an athletic position with a slight bend in the knees.
Next, lift your toes off the ground then flex the foot (pull the ankle back towards your shin), hold the contraction for a count of three, then release it slowly to the ground.
You can do this exercise while standing tall or while sitting.
Start by placing a towel on the floor, then spread your toes like a fan, then grip the object and pull it toward you.
Repeat 8 to 10 times, then work the other foot.
Foot Exercise for Runners – 6. Calf Raises
Begin by standing in a shoulder-width stance with the toes flat on the edge of a step or a box, near a doorway or a counter, then hold on light for balance.
Next, raise up by pushing your toes into the step, hold for a count of three, then lower your back to the starting position.
You’ll know that you are doing this one right once you start feeling a stretch in your calves.
Are you looking to give resistance band training a try? You’ve come to the right place.
Strength training is a crucial part of any running program, regardless of your current fitness level and training goals. In other words, if you run, you should incorporate strength training. There’s no way around it.
Why is it so important? Here are two key reasons:
Boost power and strength in essential running muscles like the glutes, quads, and calves. This leads to improved running economy and performance.
Correct muscle imbalances, which results in fewer injuries and less discomfort while running.
While I could talk endlessly about the benefits of strength training for runners, that’s not my main goal today. Instead, I want to share a set of resistance band exercises you can do at home to enhance your overall body strength.
So, why resistance bands? Well, keep reading for the answers.
Enter Resistance Bands
Resistance bands are fantastic fitness tools. They’re typically made from strong, thin, and durable rubber and feature handles at each end.
The best part? They come in various resistance levels, so you can choose the perfect fit for your current fitness level and training objectives.
These bands are incredibly versatile and customizable to suit your unique needs. Whether you’re a fitness newbie or a seasoned pro, there’s a resistance band for you.
From my experience, I can confidently say that resistance band exercises are among the best ways to maintain strength training routine, especially if you can’t make it to the gym or have your own personal reasons for avoiding it.
Let’s face it: having a stack of dumbbells in your living room might not be the most appealing option for everyone.
Resistance Bands Offer a lot of exercises
The beauty of resistance bands lies in their versatility. With these simple yet effective tools, you can unlock a world of diverse bodyweight exercises. In fact, there’s virtually no limit to the types of resistance exercises you can perform.
From squats to push-ups, chest presses to rows, triceps extensions to overhead presses, and bicep curls, the list goes on.
The best part? You can do all of these exercises without the need for dumbbells or a weight bar.
Many Muscle Groups
Resistance bands are incredibly versatile when it comes to targeting specific muscle groups. They can effectively engage the major muscle groups crucial for running, such as your core, glutes, and legs.
Moreover, you have the freedom to select exercises that align with your fitness goals and preferences. Whether you’re looking to work on your overall strength or isolate particular muscle groups, resistance bands have got you covered.
Connective Tissues
Resistance bands offer unique benefits for connective tissues like tendons and fascia. They can help improve the function of these crucial connective tissues, which is essential for overall mobility and injury prevention.
Additionally, resistance bands are incredibly cost-effective, making them one of the most budget-friendly options for strength training, second only to bodyweight exercises. You can find resistance bands for as little as $5, and even the more advanced options rarely exceed $25. This affordability makes them accessible to virtually anyone.
Moreover, their compact and portable nature adds to their convenience. You can easily roll up resistance bands and take them with you when you travel, ensuring that you can maintain your strength training regimen no matter where you go. This portability is a significant advantage for those who are constantly on the move or prefer to work out in different locations.
How to start Resistance Bands Exercises For Runners
If you’re new to resistance bands training, here are some essential tips to get you started on the right foot:
Choose the Right Band: As a beginner, opt for a thinner band, typically in green or yellow. This level of resistance is ideal for newcomers and allows you to focus on proper form and technique. Remember, you can always increase the resistance as you become more experienced and stronger.
Master the Basics: Begin with fundamental exercises to build a solid foundation. Exercises like squats, rows, and chest presses are excellent starting points. These movements target major muscle groups and prepare your body for more advanced exercises.
Proper Form is Key: Pay close attention to your form. Ensure that you’re using the correct posture and technique for each exercise. This not only maximizes the effectiveness of the workout but also prevents injuries.
Gradually Increase Resistance: As you progress and feel more confident, challenge yourself by using a band with higher resistance. Bands in blue or green offer increased resistance and intensify your workouts.
Adjust Band Length: You can make exercises more challenging by shortening the bands or even doubling them up. Experiment with different band lengths to find the right level of resistance for your current fitness level.
Consistency is Key: Like any form of training, consistency is crucial. Incorporate resistance band exercises into your routine regularly, aiming for at least two to three sessions per week. This consistency will lead to steady progress over time.
1. Side Steps
This exercise is a fantastic way to stabilize and strengthen your hip abductors, which are crucial for runners. Research has shown that many overuse running injuries, such as Runner’s Knee and IT Band Syndrome, can be linked to weakness in the hip muscles.
Here’s how to do it correctly:
Proper Form:
Set Up: Begin by looping the resistance band either above your knees, below them, or for added resistance, around your ankles.
Athletic Position: Assume an athletic position with your feet hip-width apart and your knees slightly bent.
Step Out: Step out to the right side, planting your right heel and pulling your left foot over so you return to a hip-width stance. Maintain tension on the resistance band throughout the exercise.
Keep Feet Apart: Be sure not to let your feet come into contact during the movement.
Repetition: Repeat the sidestepping movement for at least 12 to 16 steps in one direction, and then reverse back to the starting point.
Progression: As you become stronger, challenge yourself by increasing the distance and resistance of the exercise.
2. Monster Steps
This exercise is another fantastic way to target the hip muscles and strengthen your entire lower body, with a special focus on the glutes. Here’s how to perform it correctly:
Proper Form:
Set Up: Loop a resistance band around both ankles and another one around your knees. Ensure that there is enough resistance so that the band is taut when your feet are hip-width apart. If it feels too easy, adjust the band to provide more resistance.
Starting Position: Begin with your knees slightly bent and engage your glutes. This is your starting position.
Movement: Sink into a semi-squat position, and then step forward and out to the side at a 45-degree angle.
Take Monster Steps: Step forward with your left foot, taking “monster” steps by keeping your feet as wide apart as possible. Continue walking in this manner for a distance of 16 to 20 feet.
Walk Backward: After reaching your desired distance, walk backward to return to your starting point.
3. Standing Hip Abduction
This exercise is a personal favorite of mine, and it’s incredibly effective for targeting the hip muscles and glutes. It also incorporates balance, making it an excellent choice for runners.
Proper Form:
Set-Up: To perform this exercise, you’ll need a resistance band and a sturdy object to anchor it. Create a loop by passing one handle of the band around the sturdy object and the other handle around your right ankle. Stand tall with your left foot on the tubing while holding the opposite handle.
Balance Assistance: If you have concerns about balance, you can hold onto a secure object for support.
Movement: Begin with your right knee straight and engage your core muscles. Kick your right leg outward, away from your body, while keeping your hips level and preventing any rotation. Hold this position for a moment.
Return: Slowly return your right leg to the starting position.
Focus on Hip Muscles: Throughout the exercise, concentrate on using your hip muscles rather than allowing your hips to rotate.
Repetitions: Aim to complete 12 to 16 repetitions on each side to finish one set.
4. Ankle Dorsiflexion
This exercise is particularly valuable if you’ve experienced lower leg pain or shin splints in the past. Dorsiflexion involves flexing your ankle by bringing your foot toward your shin, and it’s an effective way to strengthen your lower legs and reduce the risk of common overuse injuries.
Proper Form:
Set Up: Begin by sitting on a mat with your legs extended. Take the middle of the resistance band and wrap it around your right foot, then hold onto the band’s handle.
Movement: Pull your right foot up toward your shin as far as you can, maximizing dorsiflexion. This is the primary movement.
Return: Slowly lower your foot back to the starting position as soon as you’ve reached the maximum dorsiflexion. This completes one repetition.
Repetitions: Aim to perform at least 12 to 16 repetitions on each side to complete one set.
Clams:
Clam exercises target several muscle groups, including the outer thighs, glutes, groin, and hip flexors.
Proper Form:
Starting Position: Begin by lying on your right side, supporting your head with your hand or arm, or propping yourself up on your forearm. Your knees should be slightly bent, and your feet should be stacked, one on top of the other.
Band Placement: Loop the resistance band around your knees, ensuring it’s secure.
Movement: Lift your top knee upward about 8 to 10 inches while keeping your feet together throughout the movement.
Hold and Return: Hold the elevated position for a count of three, emphasizing the contraction in your hip and thigh muscles. Then, slowly lower your knee back to the starting position.
Repetitions: Perform the clam exercise for 12 to 16 repetitions on each side to complete one set.
5. Squat with Resistance Band
Squats are undoubtedly one of the best strength exercises, and when paired with resistance bands, they become even more effective for runners. Squats target various muscle groups, including the core, glutes, quadriceps, and calves. Additionally, they promote mobility and a full range of motion in the lower body, which is essential for runners.
Proper Form:
Starting Position: Stand on the resistance band with both feet, positioning them shoulder-width apart. Ensure the band is taut and centered under your feet.
Grip Handles: Squat down by pushing your hips back and reach down to grip a handle in each hand. Keep your chest up and your back flat.
Squat Movement: With the handles raised to shoulder height, maintain an upright posture while squatting down. Imagine you’re sitting in a chair positioned behind you.
Full Squat: Continue to lower your body until both of your knees are bent at approximately a 90-degree angle.
Return to Standing: Push through your heels to stand back up, returning to the starting position. This completes one repetition.
Knee Tracking: Pay attention to your knee alignment, ensuring they track over your toes throughout the exercise.
6. Standing Kickbacks
This exercise primarily targets the hamstrings (the muscles at the back of the thighs) and the gluteus maximus (the butt muscles). It’s an excellent addition to your resistance band routine to strengthen these crucial muscle groups.
Proper Form:
Ankle Loop: Begin by looping the resistance band just above your left ankle. Ensure it’s secure and won’t slide down during the exercise.
Sturdy Object: Stand facing a sturdy object that you can hold onto for balance. This could be a chair, a wall, or any stable support.
Knee Bend: Slightly bend your right knee while keeping your upper body upright.
Kickback Motion: Lift your left foot off the ground, driving your heel backward in a kickback motion. Focus on contracting your hamstrings and glutes.
Top Position: Hold the position for a moment when your left leg is fully extended backward, engaging your core for stability.
Lower and Repeat: Lower your left leg back down with control, and then repeat the kickback motion on the same side.
Core Engagement: Maintain engagement in your core muscles throughout the exercise to support your posture and balance.
Avoid Rocking: Ensure that your upper body doesn’t rock forward as you perform the kickbacks.
Looking for the best advice on how to get smell out of running clothes? Then you’ve come to the right place.
Log in a couple of sweaty runs, and you’ve shirts, shorts, socks, and underwear that smell like a locker room.
That’s why figuring out how to get the smell out of running clothes is one of the biggest of all training mysteries.
If you’re a runner dealing with stinky workout gear, then, you’ve come to the right place.
In today’s post you’ll discover the exact steps you need to remove the sweat smell and nasty odors from running shirts, shorts, and other training clothes the easy way.
But first things first, let’s discuss why running clothes can stink so badly.
The Source of The Stink
Bad smells, be it coming from garbage cans or bad breath, is the by-product of bacteria, in one form or the other.
Generally speaking, a good wash is all that’s needed to remove the bacteria from your casual clothing.
But it’s not always the case when it comes to high performance fabrics.
So, why do running clothes tend to hold onto smells even after being washed?
Blame the Technology
The stinky odor can be blamed on the bacteria found on your skin that get trapped in the fabric fibers.
But isn’t regular washing supposed to take care of that?
That’s actually when things go awry.
High-performance clothing designed specifically for running are usually made with high-performance stretchy materials—typically of smooth synthetic tubes—think fishing line. This helps divert water and allows for sweat to evaporate off the skin, keeping your body dry and comfortable.
But here’s the downside.
High-performance fabrics may have extra crannies and nooks that cling to dirt and odors. And the typical washing process usually has a hard time getting penetrating those grooves.
That’s why synthetic materials—such as Supplex, Lycra, Coolmax, Dri-fit, Climacool, and Tactual—can turn into stink magnets.
If it seems like you can never quite the funky smell out of your favorite workout tops, you ‘re probably right—your workout gear is working against you.
Don’t Hesitate to Wash
Keeping your running kit in a pile or letting it sit in a hamper after a run encourage the bacteria to grow and for the smell to linger and get worse.
And The longer your precious workout kit stays dirty, the more difficult to remove the smells.
Make it a rule never to let your running gear stew in its stench. Once you get home after a workout, remove your kit as soon as possible (or take it out of the bag) and dry it quickly.
Not doing laundry right away? Hang them up or lay them on a drying rack so they can breathe in the fresh air before laundry day.
Air Them out
Your first line of defense against the smelly odors is to expose your running clothes to natural air as soon as you are done running.
If you keep your clothes in an enclosed space, your clothes will become a breeding ground for bacteria.
In fact, the longer you keep your workout clothes in an enclosed area, the more intense your running clothes may smell.
But it’s not the whole story.
Doing this can also wear down the fabric of your clothes, contributing to a faster deterioration of your running garments.
And I’m assuming that you don’t want that.
Therefore, in case you are not planning on washing your running clothes right away following a workout, make sure to put them where they can air out instead of tossing them on the floor of your bathroom or in your laundry hamper.
For the best results, hang your clothes outside, on a drying rack if it’s available.
If it’s not the case, then the side of a laundry basket can do the trick.
Ease up on the Detergent
Most people believe that more detergent is good.
But in reality, it’s worse.
Why?
Well, most washing machines have a standard cycle that’s set to handle a set amount of the stuff. Thus, any excess of it does not get washed out. Instead, it ends up lingering on your clothes, causing all sorts of trouble.
This builds up on your clothing, trapping mold and mildew— creating an ideal breeding environment for bacteria.
As a result, to err on the side of caution, opt for half or three-quarters of the amount of detergent you typically use. Then do a sniff test to assess how things are going.
Or at least, wash your running clothes with a detergent that’s specially designed to handle fitness and sports clothing.
Some of the best brands include Tide plus Febreze Freshness Sport, and Win High-Performance Sports Detergent (Get it here on Amazon).
You can also add in an anti-odor in wash eliminator. One effective product to try out is Febreze In-Wash Odor Eliminator. ( Get it here on Amazon).
Skip the Fabric Softener
What you need to watch for, when it comes running clothes, is fabric softener.
In fact, I’d go as far as to say that fabric softener is your running gear’s worst enemy.
Instead of cleaning the clothes, fabric softeners can, in fact, create a sort of fence that traps rotten smells in. This also keeps detergent and water from penetrating those grooves for a thorough wash.
Not only does it make your running clothes stink, but it also ruins the way they fit. Fabric softeners tend to break down any materials that stretch—the building blocks of technical workout attire.
Henceforth, whether in the form of sheets or liquid, you don’t want to this stuff near your running clothes. Or, at least, go for detergents that are free of dyes or fragrances.
For the odor, try adding half a cup of white vinegar to your wash cycle (for more on how to do that, check tip No. 5).
Pre-Soak Your Running Gear
This is another simple, yet overlooked, step that can help tremendously with the stinky smells.
Before you toss your workout clothes into the wash, presoak them in four parts cold water and one part white distilled vinegar for 30 minutes.
White vinegar has a very low level of acid that cuts through the stubborn bacteria and releases it to be flushed away during the wash.
Wash your Clothes ASAP
This might sound redundant, but if your running clothes are drenched in sweat following a workout, then you gotta wash them immediately.
Do not let your workout clothes steep. That’s the Cardinal Rule.
Action Steps
Here are the three guidelines you need for a perfect wash:
(1) Use your hands
In case you don’t have a washing machine nearby, then hand wash them.
In fact, in my experience, this might be the best thing you can do to fight off the smells, be rid of those pesky stains, and prolong the lifespan of your garments.
(2) Flip Them
Flipping your running kit—especially leggings—inside out while washing give direct detergent access to the smelliest and dirtiest parts of the fabrics. These are the areas in direct contact with your skin, and the breeding ground for bacteria.
What’s more?
By exposing the inside of your running kit to all that pilling and ripping while protecting the exterior.
(3) Wash them Separately
If you want to save your other casual clothing from the smell, then PLEASE wash your regular clothing separately.
In fact, even if you followed the plan I’m sharing with you to the letter, some stubborn smells are there to stay.
So please don’t pass it on to your work or casual clothing.
Also, do not combine two (or more) people’s smelly workout clothes. Otherwise, neither set would end up smelling fresh.
Use the Right Amount of Laundry Detergent
Using too much of detergent with hoping the more the merrier may backfire on you.
The excess stuff will only build upon your workout gear, which will then trap dead skin and foster fungus. Ick!
Whether you’re using plain old Tide, or special sports detergent (like Nathan’s Sports wash), it’ important to add the right amount to your washing machine.
I’d recommend using no more than two teaspoons of high performing brands, like Persil, Wish, or Tide, per full load. This is often more than enough per a load of laundry.
For more, try adding half a cup of baking soda to your laundry during the rinse cycle to help remove the odors.
A powerful solution I found to be super helpful when it comes keeping my running clothes smelling fresh is to soak them in white vinegar just before washing them.
Actually, this might be the miraculous cure you need for getting rid of the smells altogether.
Here is how to do the vinegar pre-wash tactic:
First, soak your workout clothes in a clean kitchen sink with one part white vinegar and four parts cold water, then let the stuff chill for at least a half an hour. This is going to disinfect and loosen the stains before the wash.
Next, proceed with the washing—whether manually or using a washing machine.
For more, you can also add one cup of white vinegar to your wash during the rinse cycle.
If you are trying to get rid of a huge stink, then feel free to up that to two cups.
6. Hang Them to Dry
Most running clothes is what you may call tech gear. They are made from special fabric that insulates heat, wicks moisture away, you know the drill…
Thus, you should never toss them in the dryer.
In fact, high heat will cause shrinkage or damage to your gear, shortening its lifespan in the process. And you don’t want that.
So, what is the best course of action?
The best way to dry technical fabric is to hang dry them. So please, if you have a drying rack in your bath, then let them dry there.
Or if it’s possible, put your running clothes where they can dry in direct sunlight.
In fact, the sun’s rays naturally deter the growth of bacteria and will zap stains and odors right out of the clothing, keeping them cleaner and smelling fresher for longer.
In case it’s not possible for you to air dry your workout clothes, then put them in the dryer, opting for the lowest heat setting on your dryer possible. This will save the elastic and won’t cause much shrinkage or damage to your clothes.
Still, I’m really against this. But desperate times call for desperate measures.
If you’re serious about running, getting fit, and staying injury free, then make sure to download myRunners Blueprint Guide!
Inside this guide, you’ll learn how to start running and lose weight weight the easy and painless way. This is, in fact, your ultimate manifesto to becoming a faster and a stronger runner. And you want that, don’t you?
Click HERE to check out my Runners Blueprint System today!
Don’t miss out! My awesome running plan is just one click away.