How to Use KT Tape for Runners Knee While Running

knee brace for knee pain

Are you on the hunt for a simple yet effective solution to ease those pesky knee issues? Well, you’re in for a treat because I have just the thing for you: KT tape for runners’ knee. Yes, this magical tape might just be the answer you’ve been seeking.

Let’s get real for a moment. We’ve all heard of the dreaded runner’s knee, haven’t we? It’s that bothersome knee pain that can really put a damper on our running game. They call it chondromalacia patella in fancy medical terms, but what we’re after is relief—fast and long-lasting.

Enter KT tape, the trusty companion of many runners who’ve battled with knee pain. This kinesiology tape has proven to be a reliable ally in soothing the aches and discomfort associated with runner’s knee. Not only does it provide immediate relief, but it also works wonders in improving your knee mechanics, helping you prevent future problems.

But before you dash off to grab yourself a roll of KT tape and hit the pavement, I want to make sure you know what you’re dealing with. That’s why I’ve put together this guide on using KT tape specifically for runners’ knee.

Trust me, there’s more to it than just slapping on some tape. You’ll learn about the incredible benefits of taping, including compression and support, which can work wonders for your knees.

Runners Knee Explained

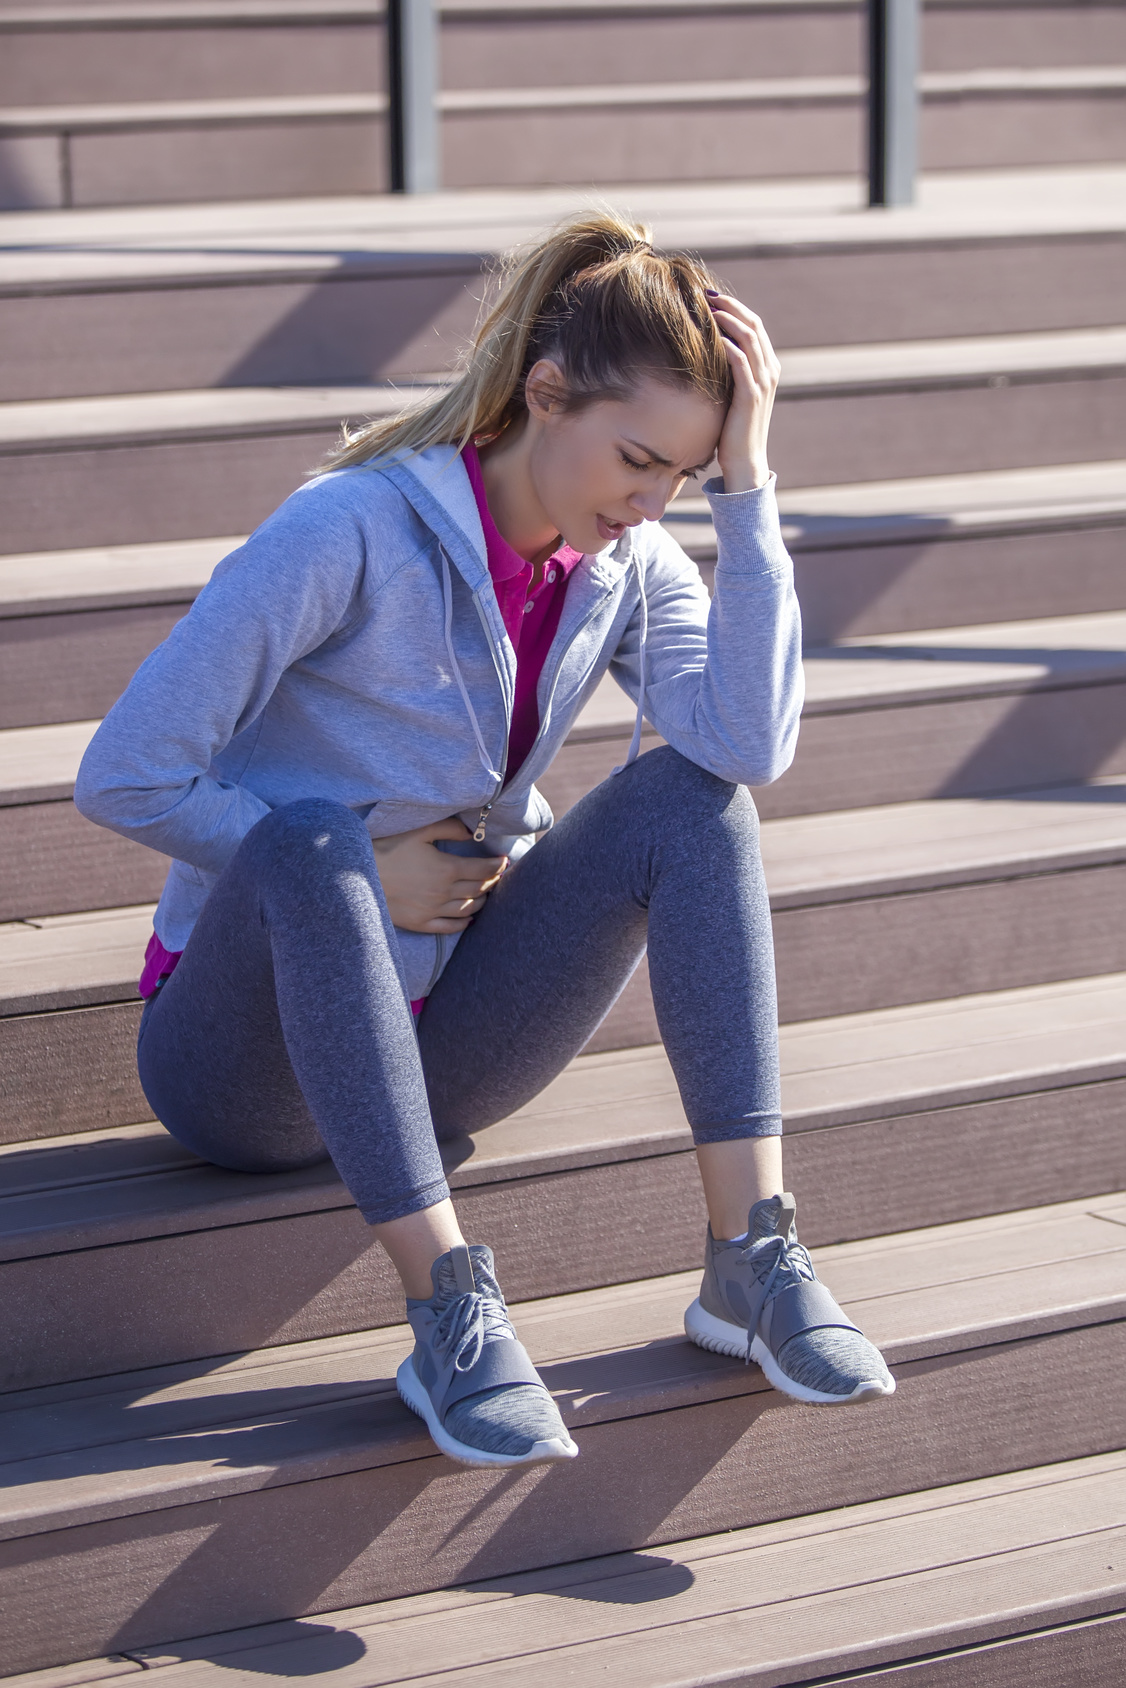
Picture this: you’re out on the trails, the wind in your hair, and the sun kissing your skin. It’s the perfect day for a run. But then, out of nowhere, that familiar pain starts creeping up on you—runners’ knee strikes again. Ah, the woes of our trusty patella!

Runners’ knee, my friend, is a result of the wear and tear we subject our knee joints to during those exhilarating runs. It’s like a battle between our ambitious running goals and our poor, overused kneecap. And let me tell you, the kneecap doesn’t always come out victorious.

So, what does this runners’ knee bring to the table? Well, you can expect local swelling and pain that makes its grand entrance whenever you put weight on that knee or bend it. And if that’s not enough, you might even experience a disconcerting clicking sensation around the kneecap. Definitely not a fun party trick.

Now, here’s the kicker: runners’ knee doesn’t discriminate. Whether you’re a seasoned marathoner or a fresh-faced beginner, this condition can sneak up on anyone. It’s like a mischievous sprite, playing tricks on our knees when we least expect it.

When you find yourself facing the wrath of a knee pain, you’ll notice that the pain usually hangs out on the lateral side of the knee during weight-bearing. That’s just a fancy way of saying it loves to throw a party around the patellar tendon. Talk about a knee that knows how to make its presence known!

At first, the pain might seem mild, like a distant annoyance. But don’t be fooled. Over time, it can transform into a stabbing pain that just won’t quit. And if that’s not enough, it may even decide to take a road trip down to your lower leg. Now, that’s one unwelcome guest!

Now, let’s talk about the culprits behind this knee-drama. There are a myriad of factors that can contribute to the development of runners’ knee. It’s like a perfect storm of knee alignment issues, muscle weakness, and faulty running mechanics. But fear not for there are ways to treat and prevent this troublesome condition.

If you’re eager to delve into the realm of runners’ knee remedies, I’ve got you covered. Check out my comprehensive guide where I spill all the beans on how to tackle this pesky knee pain. From treatments to prevention strategies, it’s a treasure trove of knowledge that’ll have you back on your feet in no time.

KT tape and its Impact on Knee Pain

Over the past few years, the use of KT tape has exploded in the running world. Go to any running event, from your local 5K to a marathon race, and you’ll likely see more than one runner using kinesiology tape.

But what is KT tape, and how come it has become a reliable tool in the fitness world?

Keep on reading.

Additional resource – CBD oil for runners

What Is KT Tape

Imagine a world where tape becomes your trusty sidekick in the battle against muscle pain and joint discomfort. KT tape, the hero of our story, takes center stage with its stretchy, elastic nature and ability to provide sensory input while allowing your body to move with freedom.

But where did this remarkable tape come from? Well, its origins can be traced back several decades. Dr. Kenzo Kase, an ingenious mind in the field of medical solutions, developed the concept of KT tape in the 1970s. He sought to provide his patients with practical solutions that extended beyond the confines of his clinic. With his innovative tape, Dr. Kase aimed to promote the body’s natural mechanisms and maintain proper joint alignment even after his patients left his care.

Dr. Kenzo’s journey was not an easy one. He tirelessly researched and experimented to create an adhesive tape that would mimic the unique characteristics of human skin. He delved into the depths of tape technology, exploring elasticity, thickness, flexibility, and breathability. The result? KT tape, a tape that could seamlessly blend with the human body, becoming an extension of oneself.

And what does science have to say about this tape marvel? Well, research has shown promising results. Studies have reported that the use of KT tape can provide relief for individuals suffering from osteoarthritis, reducing pain and improving joint mobility. It’s like a ray of hope, illuminating the path to a pain-free existence. The statistics speak for themselves, showcasing the potential benefits that lie within the reach of KT tape users.

But here’s the best part—KT tape isn’t just for the elite few or the medically inclined. No, it’s for everyone. Whether you’re a seasoned athlete recovering from an intense workout or an everyday warrior battling the aches and pains of daily life, KT tape has something to offer.

Additional resource – Common running injuries

How to Use KT Tape for Runners Knee

Imagine your knee as a delicate balancing act, with the patella at the center, moving smoothly and harmoniously as you navigate through life. But sometimes, this balance is disrupted, and knee pain becomes an unwelcome visitor. That’s when the art of taping comes into play, offering a potential solution to restore stability and ease your discomfort.

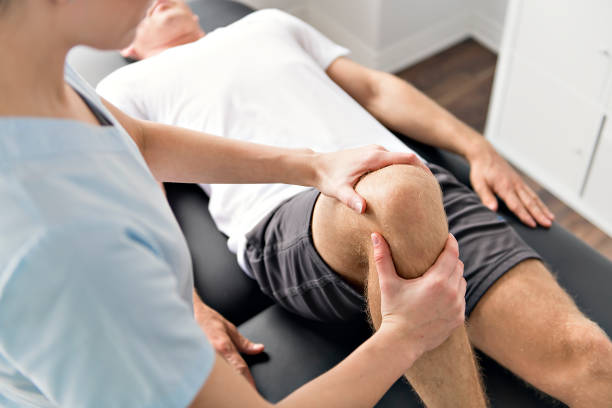
When it comes to knee pain, one technique that often comes to the rescue is the art of patellar taping. This method, developed by the skilled Jerry McConnel, aims to correct altered patellofemoral kinematics, allowing you to regain control and resume your daily activities—well, almost all of them, as running may require some extra caution.

Patellar taping is like a secret weapon in your self-management arsenal. It’s easy to apply, cost-effective, and can be highly effective in reducing pain and preventing excessive movement while bearing weight. It’s like having a guardian angel gently guiding your patella back into alignment, restoring the harmony within your knee joint.

Additional Resource – Running after knee replacement

Knee Tape for Running – The Goal

Here’s the important thing to remember: taping is an art, and like any art form, it requires finesse and precision. You don’t want to end up with a masterpiece gone wrong. That’s why it’s crucial to find the right method for your specific issue.

Research and resources can be your allies in this journey, offering insights into the correct taping techniques and ensuring you apply the tape in a way that brings relief rather than exacerbating the problem.

Speaking of resources, have you ever considered running after knee replacement surgery? It may seem like a daunting challenge, but fear not. Additional resources are available to guide you on your post-surgery running adventure, providing valuable insights and tips to keep you moving forward towards your goals.

Warning

Now, let’s talk about the goal of knee taping—improving stability. Think of it as a supportive hug for your knee joint, providing that extra layer of security as you go about your activities. The tape acts as a silent companion, reducing pain and limiting excessive movement, allowing you to conquer each step with confidence.

But here’s a word of caution—tightness matters. You want the tape to provide support, but not at the cost of hindering circulation. It’s a delicate balance, finding that sweet spot where the tape embraces your knee with just the right amount of pressure. So, take your time, experiment, and adjust until you find what works best for you.

Additional Resource – Running with Hemorrhoids

The Process Of Taping For Knee Pain

KT tape is like a superhero cape for your body, designed to mimic the incredible elasticity of human skin. It’s not just your ordinary tape that peels off at the slightest touch. Oh no, this tape means business. Once you apply it, it’s there to stay, even through intense training sessions and refreshing showers. Talk about durability!

But what sets KT tape apart from its mundane tape cousins is its magical ability to lift and create space. Imagine a gentle breeze lifting a curtain, revealing a hidden world behind it. That’s exactly what KT tape does to your skin. It delicately lifts the surface, creating a space between your skin and the underlying tissues. And why does this matter? Well, my friend, this space works wonders for your body.

When you’re injured, your body’s natural response is to send fluid rushing to the affected area. It’s like a traffic jam of blood and other fluids, causing swelling and inflammation. But fear not, for KT tape is here to save the day. By lifting the skin, it helps improve circulation and lymphoid flow. Think of it as clearing the roads for a smooth flow of traffic, reducing congestion and allowing the fluids to disperse.

With improved circulation, the swelling begins to retreat, giving you some much-needed relief from the pressure. And that’s not all. As the circulation returns to normal, a wave of nutrients and oxygen washes over the injured tissues, aiding in their healing and recovery process. It’s like a rejuvenating elixir, bringing life and vitality to the area that needs it the most.

How To Apply KT Tape for Runners Knee While Running

Alright, let’s get our taping game on! Before we dive into the world of tape and scissors, let’s gather our supplies. It’s like preparing for a grand adventure, where every tool counts. Here’s what you’ll need on your taping quest:

First, we have the tape itself. Choose a high-quality KT tape that suits your needs. It’s like picking the perfect sword for battle, ensuring you have the right weapon in your arsenal. And don’t forget your trusty scissors, ready to trim the tape to perfection.

Next, we have the low allergy or elastic tape. Think of it as the secret potion that helps the adhesive tape stick like a champ. It’s like a magical glue that ensures everything stays in place.

But wait, we’re not done yet! We need to prepare our battlefield—uh, I mean our knee—for the tape. Enter the pre-wrap. It’s like laying a protective layer before the final armor. Wrap your knee with the pre-wrap, ensuring it’s clean and ready for the tape’s magical touch.

Now that we’ve gathered our supplies, it’s time to dive into the taping process. But fear not for it’s not as complicated as it sounds. In fact, some KT tape products come precut, making your life a whole lot easier. Simply choose the right size for your leg, like finding the perfect fit for a well-crafted piece of armor. Once you’ve got the right size, you’re good to go!

Now, let’s unveil the steps to taping mastery:

  1. Start with a clean knee, like a blank canvas ready for a masterpiece. Ensure there’s no dirt or sweat to hinder the tape’s adherence.
  2. If you’re using pre-wrap, gently wrap it around your knee. It’s like laying down a foundation, creating a smooth surface for the tape to adhere to.
  3. Grab your precious KT tape and carefully apply it to the desired area. Remember, precision is key here. It’s like sculpting a masterpiece, shaping the tape to provide the support and stability you need.
  4. As you apply the tape, smooth it out with your hands, ensuring a secure bond. It’s like ironing out any imperfections, making sure the tape hugs your knee snugly.

And there you have it, my fellow adventurer! You’re now equipped with the knowledge to tape like a pro.

Patella Taping Method

Ah, patella taping, the art of aligning the kneecap like a skilled sculptor. If you’re ready to embark on this taping adventure,

I’ve got just the tutorial for you. Head over to this YouTube link:

It’s like a treasure map leading you to the secrets of successful patella taping.

Before we dive into the tutorial, let’s gather our tools and knowledge. Grab a measuring tape and get ready to explore the bumps and contours of your knee. We’ll start by measuring the distance from the bump under your patella, known as the tibial tubercle, to your quadriceps tendon.

Now that we have our measurements, it’s time to prepare the tape. Cut two strips of KT tape of similar length, but remember to round the ends to minimize peeling. We want the tape to stick like a loyal companion throughout our taping journey.

To begin the taping process, we need a sturdy anchor and protector for the skin. Place the low allergy tape over the front of the affected knee, creating a foundation for our masterpiece.

Now, imagine you’re an artist creating a masterpiece on a canvas. Take a piece of rigid tape and carefully position it towards the top of your patella. It’s like placing a pivotal brushstroke, setting the tone for the entire composition.

But wait, we’re not done yet! Add two more pieces of tape, strategically positioning them to enhance the alignment and stability of your patella. It’s like adding delicate details to bring your artwork to life.

And now, let’s create a teardrop shape that would make even the greatest artists envious. Place two strips of KT tape on your quads, then gracefully run them down both sides of the affected knee. It’s like tracing the graceful curves of a beautiful teardrop, ensuring your knee feels supported and secure

Congratulations, you’ve mastered the art of patella taping! Now, you have a few options. If you’re about to embark on a run, applying the tape beforehand can help soothe your knee pain, like slipping on a suit of armor before battle.

Alternatively, you can leave the tape on after your run until it gracefully falls off, typically taking around 24 to 48 hours. It’s like keeping a cherished memento of your taping adventure, a reminder of the support you provided to your knee.

When it’s time to bid farewell to the tape, remember to remove it slowly and gently. Peeling it off too quickly may irritate your skin, and we certainly don’t want that. It’s like unwrapping a precious gift with care, revealing the vibrant and resilient skin beneath.

The Research On KT Tape & Knee Pain

Ah, the elusive effectiveness of KT tape for knee pain, a topic that stirs both curiosity and skepticism. While many have shared their personal success stories, the scientific evidence is still playing catch-up in this realm.

It’s like diving into a treasure hunt, searching for concrete proof amidst a sea of anecdotal claims. I scoured the research papers, but alas, I couldn’t unearth any conclusive evidence to support the tape’s effectiveness in managing knee pain. The scientific landscape remains murky, my friend.

However, there’s a glimmer of light in the form of a review published in the esteemed Journal of Sports Medicine. This review delved into the use of KT tape for managing sports injuries and reported no clinically significant results supporting its use for pain relief. Though, intriguingly, some studies hinted at potential effects on muscle activity, leaving us uncertain about the tape’s true impact—like deciphering a cryptic code with no clear answer.

Additional resource – Knee brace for running

Consult Your Doctor

Remember, my fellow tape enthusiast, consulting your doctor or a trained physical therapist is of utmost importance. Seeking their wisdom and guidance will ensure you tread the right path in your taping journey. A runner’s knee is no mere trifle—it can sideline you for weeks or even months if not properly addressed. So, let’s align ourselves with the experts to avoid exacerbating our condition.

But wait, there’s more! It’s essential to understand that KT tape isn’t a one-size-fits-all solution, nor a magical cure for runner’s knee. Its role is limited, and it shouldn’t be viewed as a long-term fix. If you find that the tape didn’t yield the desired results or even worsened your condition, waste no time in consulting your doctor. They’re the compass that will guide you back on the right path.

KT Tape for Knee Pain While Running – The Conclusion

There you have it! If you’re looking for practical ways to tape your knee for pain then today’s article should put you on the right track. The rest is just details.

Please feel free to leave your comments and questions in the section below.

Thank you for dropping by.

The MYRTL Routine: Your Secret Weapon for Stronger Running

Myrtl Routine

Looking to level up your running game and dive into the world of the Myrtle routine? Well, you’ve landed in the perfect spot. Get ready to warm up those muscles and unleash your inner running beast!

Now, let’s talk about the first step to ace any run or race: a killer warm-up. But hold up, we’re tossing static stretches out the window. You know, those poses where you hold on for dear life for what feels like an eternity? Nah, not anymore.

Instead, we’re diving headfirst into the dynamic warm-up scene—a routine that’s got everyone buzzing, from newbie joggers to the crème de la crème of athletes. Why? Because it’s a game-changer. It improves your range of motion, fires up those key running muscles, and sets the stage for a triumphant performance.

Now, let me introduce you to the star of the show—the Myrtle routine. It’s like a trusty sidekick that’s got your back, no matter your fitness level. This bodyweight sequence is straightforward yet powerful, packed with exercises that will have you feeling like a true running superhero.

In this article, I’m going to take a deep dive into the magical world of the Myrtle routine. I’ll be your guide, sharing all the juicy details, from its incredible benefits to breaking down each exercise with precision.

Ready? Let’s get started.

What Is Myrtl Routine?

Let me introduce you to a little gem called the Myrtle routine. It’s like a secret weapon for building up that hip muscle strength and taking your running game to a whole new level. And guess what? You can knock it out in just about ten minutes. Now, who doesn’t have time for that?

This routine is all about those bodyweight exercises that might seem deceptively simple, but trust me, they pack a serious punch. We’re talking about exercises that zoom in on the hip girdle—a region that often gets neglected by us runners. But fear not, the Myrtle routine is here to give those hip muscles the attention they deserve.

Now, let’s give credit where credit is due. The mastermind behind this routine is none other than Jay Johnno’s, a running coach extraordinaire from the beautiful state of Colorado. He’s the brains behind this ingenious sequence of movements that target those stabilizing, smaller muscles around the hip girdle. You know, the ones that kick into action when fatigue starts creeping in during those last grueling miles of a long run or race.

But here’s the real kicker. By incorporating these prescribed exercises into your regular routine, you’ll not only improve your flexibility and range of motion, but you’ll also give those pesky pains and injuries a run for their money. It’s like building a fortress of resilience for your body, keeping you in the game and free from unnecessary setbacks.

The Benefits of Myrtl Routine For Runners

Let’s dive into the incredible benefits that the Myrtle routine brings to the table for us runners. Get ready to unlock a world of dynamic flexibility, core strength, and overall running prowess.

Picture this: you’re gearing up for a run, lacing up your shoes, and feeling the excitement building up. But before you hit the pavement, there’s something you should never skip—a flexibility routine. And that’s where the Myrtle routine shines. 

Research has shown that incorporating a flexibility routine into your pre and post-run rituals can work wonders.

It’s not just about the stretches, my friend. It’s about giving your body that extra boost of dynamic flexibility, activating key muscles, and preparing them for the journey ahead. Even devoting just five minutes to stretch work can kickstart your blood flow and rev up your heart rate.

How Often Should You Perform The Myrtle Routine

Now, let’s talk about consistency. How often should you perform the Myrtle routine to reap its full benefits?

Well, here’s the golden rule: aim for three to four times per week. Better yet, make it a non-negotiable part of your pre-run routine. By integrating it into your regular regimen, you’re building a powerful habit that will fuel your progress and make you unstoppable.

Whether you’re gearing up for a short sprint or a marathon distance, the Myrtle routine has got your back. It doesn’t discriminate based on distance. It’s there to enhance your performance and protect your body, no matter what lies ahead.

The Myrtle Routine For Runners

Here are the exercises you need to perform to complete the Myrtl routine.

Lateral Leg Raises

Begin with laying on your right side, legs straight. Raise your left leg to a 45-degrees and then slowly lower it. Keep your legs straight the entire time.

Perform five reps with the neutral foot, another 5 with toe pointed up, and five reps with toes pointed to the floor.

Next, switch sides and repeat.

Clamshell

Lay on your right side while keeping your knees bent at 45-degrees.

Next, while keeping your heels together, lower your left leg, then repeat. You should form a shape of the clamshell.

Shoot for eight reps on both sides to complete one set.

Hold the pose for a moment, then slowly lower your knee back to starting position.

Additional resource – Guide to big toe pain from running

Donkey Kick

To do donkey kicks, start on all four in a table position, then bring your right knee toward your richest.

Next, kick the left leg behind with the foot flexed, and the knee bent to create a hook over your back.

Shoot for eight reps, then switch to the other side.

Fire Hydrant

Again, start in table position, then raise your right leg to the side until your knees reach your hip height.

Next, while keeping your knee bent, lower it to the starting position.

Shoot for eight reps on each side.

Donkey Whips

Begin with your hands and legs down in a table position.

Next, raise your right leg and extend it behind you. Then, swing it to the right side and then back to the center.

Perform this movement five-time, then switch sides.

The Myrtle Girdle Exercises

The Myrtle routine also focuses on the muscles in the girdle to improve the range of motion. In most cases, your mobility and range of motion degrade the longer you run regularly.

Hurdle Trail Legs

Begin by standing straight while keeping your hands on your hips or the wall for support.

Next, stand on your left leg and imagine that you’re skimming your right leg over a hurdle at the hip joint.

Perform five reps, then switch sides.

Once the set is compelled, repeat the entire movement while circling your leg backward.

Knee Circles

https://www.youtube.com/watch?v=uGtYeLWut8M

Start on your fours. Then make backward circles with your right leg whelk keeping your knee bent.

Shoot for five reps and then switch sides.

Linear Leg Swing

https://www.youtube.com/watch?v=naW8u72lOzI

Begin by standing, feet hip-width apart. Feel free to grab a wall or a chair for balance

while keeping your body straight; swing your right leg in the front and then in the behind. Make sure your foot is reaching roughly hip height when you swing it.

Complete ten reps, then switch sides.

Linear Leg Swing With Bent Leg

Stand tall with your feet hip-distance apart next to a wall and rest your right arm on it for balance.

Next, bend your left knee at 90-degree to hip height in front of you, then swing it to the front and behind.

Shoot for ten reps on each side.

Additional resource – How to warm up for a race

Lateral leg swings

Start straight with your feet hip-width apart while facing a wall, then place both hands on it for support.

Raise your right foot out to the right side, then swing it across your body.

Keep swinging your right foot back and forth for a total of 10 reps, then switch sides.

Lateral Leg Raises

Lay down on your right side while keeping your legs straight.

Next, leave your left leg to 45-degrees, then lower it. Repeat the movement five times with neutral foot, five times in toe position, and five times switch toe-in position.

How to distinguish between various types of mountain bikes?

There are multiple types of mountain bikes that you can buy these days, so it can be a bit challenging to narrow down what model is ideal in your situation. That’s why it makes a lot of sense to distinguish between the multiple types of mountain bikes available at this time. Each one of them comes with its pros and cons, so it all comes down to where and how you want to choose a mountain bike. Here are the things you need to keep in mind.

Cross-country mountain bikes

These Mountain Bike models are created for those that want great pedaling performance. They are great if you want to go uphill without a problem, and they are also very efficient and have really good endurance. Their geometry is very similar when you compare these with road bikes. These cross-country models are lightweight and very focused on efficiency. However, their downhill performance is not the best, which is okay, since they are more suitable for regular biking on offroad locations.

That being said, these models are very good for any biker that wants to pedal for miles without worrying about comfort or anything like that. Most of these cross-country models have a larger wheel size, and they are ultra-light. Hardtails are preferred in most cases, and the wheelbase, as well as chainstay, is longer here. With that in mind, you do want to have great rolling resistance and efficiency instead of control or traction.

Downhill/freeride mountain bikes

As the name suggests, these are designed for things like jumps, big drops, and speed. Most of the time, you want a durable frame, adequate suspension travel, and a low center of gravity. This gives you the confidence you want even if the terrain is very aggressive. The dual crown forks are actually very much preferred for these models, which is something you need to take into consideration here. These models also have lots of durability and traction. Two-ply casings are ideal here.

Enduro or All Mountain bikes

The all mountain bikes are designed to combine uphill and downhill bikes for a great equalizer. Most of these mountain bikes come with a 27.5” or even 29” wheel, and they have a bit less suspension travel when compared to a trail bike. However, descending is preferred in this situation, and that’s something to keep in mind.

Some of the terms to focus on here are things like a slack head angle, a low bottom bracket, and a long reach and wheelbase. These are things to keep in mind and the value you receive as a whole is among some of the best on the market. With that being said, the tires are known to favor aggressive knobs for traction and cornering.

Trail mountain bikes

These Types of Mountain Bikes are great for bringing lots of suspension and components focused mostly on gravity. They also offer a relaxed geometry when compared to other models. With that being said, these are really easy to use and they do help with both downhill and uphill situations as well. They are the ideal option if you want great durability, rolling efficiency, and traction. Also, trail mountain bikes are what people mostly refer to as mountain bikes anyway, but you can find some expensive models here as well. It’s a good idea to give these a try if you want value, quality, and a great attention to detail while riding. Some electric mountain bike models are in this category as well.

Conclusion

As you can see, there are always going to be challenges when it comes to finding the best mountain bike that suits your needs. However, Cool Mountainbikes covers the information on these mountain bike models, with which you will have no problem overcoming any kind of biking challenge. All you have to do is to give it a try for yourself, and we guarantee that you will be very happy with the benefits and experience. Rest assured that mountain bikes are always going to be exciting and a pleasure to use, just make sure that you pick the one you like the most. It will take a bit of a trial and error to find the right mountain bike style and type, but it’s worth it!

How To Get Started With Interval Training

track running

Obesity is a global epidemic and it has been on the rise for decades. The World Health Organization estimates that more than 1 in 10 adults across the globe are obese, which means over 600 million people worldwide. Obesity rates have doubled since 1980 and continue to grow at an alarming rate. In America alone, over two-thirds of American adults (approximately 150 million) are either overweight or obese, with about one-third being classified as obese.

This staggering number translates into shockingly high health care costs for both individuals and taxpayers alike; obesity-related medical expenses account for nearly ten percent of all national healthcare expenditures in the United States – roughly $190 billion annually! It’s not just America though: globally, obesity accounts for 2%to 7% of all health care costs. We need to do something about obesity rates. But what can we do?

Exercise is a key part of the solution, and interval training is one of the best types of exercise for weight loss and overall health. Let’s take a closer look at interval training and how you can get started.

What is interval training?


Interval training is a type of exercise that alternates short periods of high-intensity activity with short periods of lower-intensity activity or rest. The high-intensity intervals are typically performed at or near your maximum effort, while the lower-intensity intervals are done at a moderate intensity. This type of training is more effective than traditional steady-state cardio for improving overall health, burning fat, and building muscle. Getting the appropriate running equipment, especially shoes should be your number one priority. Many amazing choices are available online such as on Runner’s Lab where you can compare prices and models so by doing some research beforehand you can find a model that is appropriate for your needs and budget.

How to get started with interval training

If you’re interested in starting interval training, there are a few things you need to know. First, it’s important to start slowly and gradually increase the intensity of your intervals over time. This will help prevent injury and allow your body to adapt to the new demands being placed on it. Second, it’s important to have an appropriate level of fitness before starting interval training. If you’re not in good shape, start with some basic cardio exercises and work your way up.

Start slowly

If you’re new to interval training, start by doing just two or three high-intensity intervals and then rest for an equal amount of time. As you get more comfortable with the routine, gradually increase the number of intervals you do. 

Build your core

To perform interval training safely and effectively, you need a strong core. Core exercises will help you stay stable during your high-intensity intervals and prevent injuries. There are many different core exercises you can do, so find a few that you like and stick with them.

Avoid potential risks

Interval training can be risky if not done correctly. One of the risks is that you can overdo it and end up injured. These injuries can be mild, like a muscle strain, or more serious, like a stress fracture. To avoid these risks, start slowly and gradually increase the intensity and duration of your intervals. If you are new to interval training, start with three minutes of intervals at a moderate intensity and work your way up from there.

Additional Resource – Here’s your guide to the Yasso 800 Workout

Overtraining syndrome

Another risk of interval training is that you can push yourself so hard that you end up feeling sick or fatigued. This is known as overtraining syndrome, and it can lead to several negative side effects, including decreased performance, fatigue, decreased immunity, and even mental health problems. To avoid overtraining syndrome, always listen to your body and back off when you feel like you’ve pushed yourself too hard. If you’re not feeling well or if your performance starts to suffer, take a break from interval training until you feel better. 

Additional Resource – Here’s how to run faster

Recover between workout intervals

Interval training is intense, and it’s important to get enough rest between workouts. Aim to get at least eight hours of sleep per night and allow yourself plenty of time for recovery between workouts. 

In order to get the most out of your interval training, you need to make sure that you are fully recovered between workouts. This means giving yourself enough time to rest and rebuild your muscles. Depending on how hard you worked during your intervals, you may need up to 48 hours of recovery time. If you’re doing back-to-back interval workouts, make sure you allow for at least one day of rest in between.

Preparation exercises

It’s important to do some preparatory exercises before starting interval training. These exercises will help you get ready for the intense workout and prevent injuries. Some good preparatory exercises include squats, lunges, and hip bridges. Do a few sets of each exercise and rest for about 60 seconds between sets.

If you’re doing intervals on a track, do a light jog for about five minutes before starting your intervals. This will help get your body warm and ready for the intense workout.

End with a cooldown

Finish your interval workout with a few minutes of low-intensity cardio. This will help cool down your body and prevent injuries. Low-intensity cardio exercises include walking and light jogging.

Interval training can be a great way to improve your fitness level and get in better shape. However, it’s important to do it safely and intelligently. Start slowly, build up your core strength, and avoid overtraining syndrome. And be sure to end your workout with a cooldown period. Listen to your body, and take a break if you need it. And don’t forget to cool down after your workout.

As you can see, there are many things to consider before starting interval training. But if you take the time to prepare properly, you can enjoy the many benefits of this intense workout routine.

Remember to take precautions to avoid potential risks, such as overtraining syndrome and injuries. By starting slowly and gradually increasing the intensity and duration of your intervals, you can safely enjoy the benefits of interval training without any negative side effects. By following these tips, you can enjoy all the benefits of interval training while minimizing the risks.


How To Stay Relaxed While Running

Looking to improve your running speed and become a faster running?  Then staying relaxed while running is key.

How come?

Tension compromises your running technique, making your movement less efficient.  Anywhere you’d hold under tension, you’re burning up energy could be spent elsewhere.

This may seem counterintuitive since most runners usually focus on increasing their effort when trying to speed up, but tensing up creates more tension in the body. And the more you tense up, the more energy you waste. And you don’t want that.

Relaxing your body can help you achieve an efficient mile throughout your runs, allowing you to speed up for that finishing kick.

Here are some of my best tips on how to stay relaxed and run faster during your next run/race

Enjoy

1. Pay Attention to Tension

The first step to relieving all of that tension and staying relaxed begins with you catching yourself in the act. Or as like to stay put Attention on tension.

In other words, know your tensions spots.

Let me explain.

  • Your Arms and Shoulders

As a runner, you’re more likely to carry tension in your upper body, so pay attention to your shoulders and arms.

Are your shoulders hunched?

Are your shoulders moving up toward your ears?

Are your arms bent at a 90-degree angle?

Are you swinging your arms too forcefully? Or across the mid-line of your body

Are you clenching your hands?

For example, most runners tend to move up their hands toward their shoulders as they get tired or tense.

These are common running technique errors that could create more tension in your body.

The Solution

While logging the miles, regularly check the position of your shoulder to ensure they’re staying relaxed throughout.

Keep your arms swinging at your side and not cross your midsection.

When you’re crossing your arms over your chest, they’ll begin to move up toward your shoes which force you to hunch over. This not only makes it harder to breathe but causes discomfort and pain in your neck, shoulders, and back.

If you notice tension building in your arms, drop and shake them out. Next, re-position the anthem at a 90-degree angle while keeping your shoulders back and loose.

Guilty of holding onto tension in your shoulders? Roll your head and push your shoulder blades together, then let your shoulders drop.  This should release any tension in the area.

Feel the tension in your fist? Try squeezing them even hard for a moment and then relax. Your hands should be unclenched—imagine you’re holding a raw eggs butterfly.

  • Your Face

The face is another prone area to tension. Pay Attention to your face.

Are you clenching your jaw?

If you notice any of these, you’re not only exerting extra effort but also limiting your oxygen intake.

The Solution

Try opening and closing your mouth a few times—think exaggerated yaw or taking a slow and long inhale and exhale.

  • Your Neck

Another common tense-prone area in runners is the neck.

How far your chin sticks out as well as your head tile are key to proper posture.

Bad head posture—or what’s known as texting neck—can result in stress in the upper body, which may slow down your stride.

The solution

If you notice that you are straining or tightening up your neck, try rolling it forward for a moment, then backward, then to the sides while taking deep breaths.

Gaze ahead naturally, not down at your feet.  Gaze ahead roughly 30 to 60 feet ahead of you’re and only glance down if needed—when encountering an obstacle on the road, for instance.

This should be enough to straighten your back and neck and bring them into proper alignment. Avoid jutting out your chin.

2. Look for the Pain

Bring your Attention to any uncomfortable or painful areas in your body.

This could lead to tension build-up in other areas. Keep in mind that your body works like one system.

It’s only as strong as its weakest link. Pain in your shins may build up tension in your calves and quadriceps, forcing you to alter your running technique. This can lead to many issues on its own.

3. Try A Mantra

Mantras can also help you instill relaxation and calmness into your running form.

In essence, mantras consist of a word—or a set of words—that you repeat to yourself. This should help soothe your nerves and keep your mind calm when things don’t go as smoothly as planned.

I’d recommend picking a short sentence—no more than a few words is ideal—that helps center and inspire you.

Next, the moment you feel things are spiraling out of control, repeat your mantra—either inside of your head or out loud—over and over again to bring your attention back to the center and distract you from any discomfort or negative thoughts.

4. Hire A Coach

In case this is too much to hand, or you feel confused about it, I’d recommend that you hire a coach to help you detect your tense spots so that you make your proper changes and take the right steps to provide relief.

Conclusion

This may seem like a lot opt digest, but assign things in life; practice makes perfect. So the more you practice these traits and try to build the habit, the better you’ll get.

Avoalre Running Socks Full Review

Although most runners go through a long process before deciding to buy a pair of running shoes, most will likely devote a few seconds to sock selection.

But that’s a big mistake since the humble running sock plays a vital role in keeping your feet dry, warm, and comfortable. In fact, your socks are just as important as the rest of your running kit.

Proper running socks function as a barrier between your foot and the shoe—think of them as a foot shield. Not only does this help prevent blisters and keep your feet happy and dry, but it’ll also make your whole training just feel right.

For these reasons—and some more—in today’s post, I wanted to share the full review of one of my favorite sports socks—Avoalre.

Last month I received a package of running socks to try out. The socks made it to my home in Bali in a good state and very reliable box protecting the items inside.

After trying them for a few days, even on a long hike to Gunung Padang, I must say that I’m impressed. In fact, these Avoalre socks have become some of my favorite exercise socks to road running in, going to the gym, or while hiking.

They’re comfortable to wear, really easy on the feet, and don’t slip when you take your shoes.

So what is Avoalre running socks, and what’s so special about them?

Keep on reading for the answers.

Avoalre Explained

Avoalre is an activewear brand that’s becoming increasingly popular in running and cycling circles for its reliable lineup of high-performance products.

The company focuses on making premium fitness gear at affordable prices. Between exercise socks, yoga mats, sunglasses, and other items, Avoalre has plenty of products for every fitness enthusiast out there. You can read more about Avolare here.

But overall, Avoalre has some of the best running socks around. Though most brands focus on the designs and look without paying much attention to the actual fabric or the customer’s comfort, Avolare socks cover all bases: design, look, materials, you name it.

As a result, if you’re looking to buy new running socks, here are some reasons why you should go for Avoalre’s socks over any other brand in the running market.

Sounds great?

Let’s lace up and dig in.

Moisture Wicking Technology

One thing that runners hate about their socks is the smell.

Fortunately, Avoalre sports socks got you covered. These socks are made with high-performance moisture control and fast-to-dry CoolMax fiber, which can move moistures away from your skin surface. So your feet may still be dry and comfortable after a 15-mile run in wet weather.

This can help reduce your risk of blisters and stop your feet from smelling bad.

Breathable

Run often in hot weather? Then your socks should be super breathable to help prevent your feet from overheating.

One of the most important features of a good running sock is its breathability. Socks that aren’t breathable are going to create blisters.

That’s where Avoalre socks can help.

These socks are designed with mesh ventilation construction to promote and improve airflow within the fabric. According to the company, mesh ventilation provides 30 percent more breathability than most other running socks.

Greater Resistance To Wear & Tear

Avoalre sports socks are made with durable materials that can take a beating.

Made with over 30 percent nylon, Avoalre socks are more resilient than many other running socks. According to the company, the lifespan of these running socks is roughly three times other socks.

What’s more?

The unisex variety is made for everyday use for any activity, such as walking, running, standing, hiding, playing tennis, working, etc.

Can Be Multipurpose

Although I mainly use Avoalre socks while running, they’re suitable for different activities such as walking, hiking, playing tennis, and even be used on everyday mundane activities.

Super Comfortable

According to my experience, the fit sets Avolare socks from any other brand in the market.

The socks fit perfectly and ensure everything stays in place in your shoes while logging the miles.

The brand offers plenty of choices of sizes, so you’re guaranteed to find the right fit for you.

What’s more?

Avoalre running socks are designed with right and left labels, which offer a more customized and personalized fit that provides better comfort and support to each foot.

Different Color Designs

Avoalre athletic socks come in two color designs: grey with white and black with grey, and four different sizes:

  • S 35-38
  • M 39-42
  • L (43-46)
  • XL (47-50)

I wear size nine, so I went with a large size, and the socks were snug and fit, really, well.

The Price

Sure, Avoalre socks are pricier than the cheapest running socks, but they’re not going to break your bank. Instead, I think it’s worth paying the extra buck for a pair of socks that’s reliable and fit well, even with repeated use.

When it comes to price, Avoalre socks are within the mid-price, affordable range, which is what I almost always recommend for socks.

Starting at $19.99 for three pairs, I’d consider Avoalre socks one of the upper end of what I’d normally consider, which works fine for me.

So what are you waiting for?

Buy Avoalre Socks Now and Get 10% OFF
by using the code BRLXQW9W
(expiry date: 2025-12-31)

Thanks for stopping by.

Top 5 Essential Oils For Runners

running with hernia

Ever laced up your running shoes and wished for a secret ingredient to boost your performance? Essential oils might just be the unexpected game-changer you’re looking for!

While they aren’t a magic potion to turn you into an Olympic runner overnight, they pack some pretty cool perks.

From easing those post-run aches to giving your stamina a little nudge, today, we’re diving deep into the world of essential oils for runners. Ready to get the inside scoop? Let’s roll!

Ready? Let’s go!

Essential Oils Explained

At their core, essential oils are the lifeblood of plants. Think of them as the “soul” of seeds, trees, barks, flowers, roots, and pretty much every part of the plant kingdom. These super-charged compounds play the ultimate survival game, helping plants fend off diseases, attract helpful pollinators, and scare away those nasty predators.

Now, here’s a mind-blowing fact for you: Essential oils are 50 to 70 times more potent than the plants they come from. Need a real-world comparison? Imagine having a drop of peppermint essential oil in your hand. That tiny drop has the same punch as about 28 cups of peppermint tea!

And speaking of potency, ever wondered how much effort goes into making that aromatic bottle of rose essential oil? Hold onto your hats: it takes a whopping 65 pounds of rose petals to produce just 15 ml of rose essential oil. That’s a lot of roses!

But why are these oils so concentrated? The magic happens during the distillation process. This entails carefully pressuring or steaming plants and herbs, teasing out the purest of scents and flavors.

The result? High-quality essential oils that pack a multitude of health benefits in just one drop. Whether you’re using them for therapeutic purposes or simply to uplift your mood, these little bottles hold a world of wonder.

And there’s so much research backing up the benefits of essential oils! Studies have shown their potential in everything from reducing stress and anxiety to promoting better sleep and even supporting skin health.

5 Types of Essential Oils To Try

Now that you know a thing or two about the impact of essential oils on the body, let’s dive into some of the main ones.

There are many essential oils on the market that support many different aspects of athletic performance and recovery, but let’s stick with the essential oils most useful for runners.

  1. Peppermint

Ever wondered how you can naturally amp up your running performance? Meet peppermint oil – the MVP of essential oils for avid runners and, coincidentally, a personal favorite of mine. Let’s take a closer look at why this aromatic wonder has won the hearts of athletes around the world.

Why I Love Peppermint Oil:

I have a little secret to share. My journey into the world of essential oils started with a single drop of peppermint. And that one drop? It’s as potent as 28 cups of peppermint tea. Impressive, right?

Why Peppermint Oil is the Real MVP:

This essential oil is more than just a runner’s aid. It boasts an array of benefits:

  • Mental Boost: Say goodbye to brain fog. Peppermint oil sharpens your mental alertness.
  • Cardiovascular Regulation: It plays a role in regulating blood pressure and heart rate.
  • Athletic Edge: As mentioned, it can substantially enhance athletic performance.
  • Breath Easy: Struggling with stuffy sinuses? A whiff of peppermint oil can open them right up, facilitating better breathing.
  • Digestive Aid: It can help with digestion and even relieve gassiness.
  • Nausea No More: Feeling queasy? Peppermint oil can help in reducing nausea.
  • Stay Sharp: It’s a fantastic aid for improving mental focus, keeping you zoned into your task or training.
  1. Lavender

When you think of lavender, perhaps the first thing that springs to mind is its delightful aroma. But for runners, this fragrant herb has much more to offer than just a pleasant scent. Recovery, as every runner knows, is the unsung hero of the training regimen. Pushing yourself too hard without adequate rest can sideline your progress, opening the door to injuries and the dreaded burnout. Enter Lavender essential oil.

Why Lavender is a Game-Changer for Runners:

Post-run, when your muscles are crying out for some TLC, lavender essential oil might just be the answer to their call, especially when sleep is involved. You see, one of the best times to facilitate recovery is during sleep, and lavender oil is renowned for ushering in a peaceful, rejuvenating slumber.

The Benefits Breakdown:

Let’s delve into what makes lavender essential oil a runner’s best ally during those all-important recovery phases:

  • Wound Warrior: Accidental scrapes or minor cuts from a trail run? Lavender’s antiseptic properties can help wounds heal faster.
  • Dream Weaver: Trouble sleeping post-run? A whiff of lavender can guide you into a deep, restorative sleep.
  • Muscle Mender: Aching after that intense sprint? Lavender can help soothe those sore muscles.
  • Anxiety Alleviator: Pre-race jitters? Lavender’s calming properties can help ward off anxiety, keeping you centered and focused.
  • Skin Saver: From minor rashes to other skin irritations, lavender offers a gentle remedy.
  • Allergy Assistant: Seasonal allergies throwing off your outdoor runs? Lavender can help manage those pesky symptoms.

Additional Resource – Your Guide to feeling sleepy after running

  1. Eucalyptus Oils

When you hear “eucalyptus,” you might conjure images of serene spa settings with soft melodies playing in the background. While that’s a lovely association, eucalyptus oil’s benefits stretch far beyond the confines of relaxation rooms.

Unlocking the Wonders of Eucalyptus:

This essential oil, extracted from the tall, evergreen eucalyptus trees, offers a bounty of therapeutic qualities. Here’s why it might just be the next must-have in your wellness arsenal:

  • Breath of Fresh Air: One of eucalyptus oil’s most celebrated benefits is its ability to support respiratory function. Whether you’re congested or just looking to take deeper breaths, a touch of this oil can pave the way for clearer breathing.
  • Muscle Maven: Pushed yourself a tad too hard during that workout? Eucalyptus oil is known for its anti-inflammatory properties, helping to soothe muscles that feel like they’ve had one squat too many.
  • Asthma Ally: Asthma can be a daunting condition to manage, especially for active folks. While eucalyptus oil isn’t a replacement for medical treatments, it can assist in calming asthma attacks when used in tandem with prescribed medications.
  • Nature’s AC: Feeling the heat after a summer run? A few drops of eucalyptus oil can provide a cooling sensation, making it a refreshing choice during those sweltering days.
  • Flexibility Friend: If you’re aiming for a deeper stretch or just want to maintain joint health, eucalyptus oil can contribute to improved flexibility.
  • Mental and Physical Revival: Fatigued in body and mind? Eucalyptus oil serves as a rejuvenating elixir, invigorating both your physical and mental state.
  1. Lemon

While most of us are familiar with the refreshing twist it adds to a chilled drink or its usefulness in fending off colds, there’s more to lemon than meets the eye (or the taste buds).

Specifically, let’s dive into the zesty world of lemon essential oils.

Why Lemon Essential Oil is a Runner’s Gold:

You’ve laced up, hit the track, and now you’re seeking something to aid recovery and boost your overall health. Enter: Lemon essential oil. Derived from cold-pressing the lemon peel, it packs a powerful punch and serves as an ally for runners and fitness enthusiasts.

Benefits Beyond the Zest:

  • Guardian of Health: Lemons are synonymous with immune support. This oil, rich in vitamin C, bolsters the immune system, helping you combat those pesky seasonal ailments.
  • Seasonal Respiratory Rescue: Breathing can be tough when the seasons change. Lemon essential oil can ease respiratory discomfort, allowing for a more comfortable run or workout.
  • Mood Elevator: Feeling the post-run blues or just need a pick-me-up? The uplifting scent of lemon essential oil can do wonders for your mood.
  • Awaken and Energize: A whiff of lemon essential oil stimulates the nervous system, awakening your senses and providing that much-needed post-run alertness.
  • Athlete’s Foot Adversary: Not one, but twice on the list! And for good reason. The antifungal properties of lemon essential oil can treat and prevent the annoying symptoms of athlete’s foot, ensuring your feet remain happy and healthy.
  • Digestive Dynamo: Upset stomach after that intense interval session? Lemon essential oil aids digestion, ensuring your gut feels as good as your glutes after a solid workout.
  • Detox Delight: Toxins be gone! Lemon essential oil acts as a detoxifier, helping to cleanse and refresh your system post-exercise.

In essence (pun intended!), lemon essential oil isn’t just a tangy addition to your pantry. It’s a holistic champion that supports and nurtures, making it a must-have for everyone, especially those who love to run or exercise. So the next time you’re unwinding post-run, consider reaching for that little bottle of liquid sunshine.

  1. Lemongrass Oil

When we think of lemongrass, many of us picture delicious Asian dishes infused with its distinct, tangy flavor. But did you know that lemongrass also gives us a potent essential oil brimming with health benefits? Let’s unravel the magic of lemongrass oil and discover why it deserves a prime spot in our wellness toolkit.

Lemongrass Oil: More than Just Culinary Charm:

This fragrant oil, extracted from the leaves and stalks of the lemongrass plant, has been cherished in traditional medicine for its myriad of health benefits. And while it’s an aromatic delight, its potency goes far beyond its pleasing scent.

Healthful Highlights of Lemongrass Oil:

  • Headache Helper: Whether it’s from tension, stress, or just one of those days, lemongrass oil can offer relief from nagging headaches, allowing you to refocus and re-energize.
  • Cramp Comforter: For those times of the month when period cramps have you curled up in discomfort, a gentle massage with diluted lemongrass oil can offer some soothing solace.
  • Muscle Mellowing: Pushed your muscles a tad too hard at the gym? A touch of lemongrass oil can help relax those tense muscles, prepping you for your next session.
  • Joint Pain Alleviator: Joint pain can be debilitating. Thankfully, the anti-inflammatory properties of lemongrass oil can provide relief, allowing for easier movement.
  • Nature’s Antiseptic: Minor cuts and scrapes are a part of life. Using lemongrass oil (properly diluted) can act as a natural antiseptic, aiding in quicker healing and reducing the risk of infections.
  • Tummy Tamer: Got a case of the stomach jitters? Lemongrass oil can offer relief from various stomach issues, ensuring your digestive system stays in harmony.

Tips For Using Essential Oils

Essential oils have earned a reputation as nature’s little miracle workers. Their wide range of therapeutic benefits makes them a favorite for many. However, while they’re derived from natural sources, they pack a powerful punch and need to be used with caution. Here are some guidelines to ensure you enjoy the benefits of essential oils while minimizing any potential risks:

Patch Test First:

Before slathering on any essential oil, it’s always a good idea to do a small patch test. Apply a diluted drop to a small area of your skin, like the inside of your wrist, and wait for 24 hours. If there’s no reaction, you’re likely good to go. No redness or itching means a green signal!

Say No to Direct Ingestion:

While some might argue that certain essential oils are safe to consume, it’s generally a good rule of thumb to avoid ingesting them. They are potent concentrates and can be harmful if taken orally. Always consult a healthcare professional before even considering this route.

Watch Out for Reactions:

Your body has its way of speaking to you. If you notice redness, itching, or any form of discomfort after using an essential oil, it’s signaling you to stop. Listen to it! Discontinue the use of that particular oil and consult a dermatologist if the reaction persists.

Dilute, Dilute, Dilute:

Pure essential oils are incredibly concentrated. Always dilute them with a carrier oil, like jojoba, almond, or coconut oil, before applying to the skin. This not only reduces the risk of a skin reaction but also ensures the oil is spread more evenly.

Less is More:

When starting with essential oils, it’s tempting to use a lot to bask in their therapeutic goodness. However, a few drops often go a long way. Begin with smaller amounts and adjust as necessary.

Keep Out of Reach of Children and Pets:

Kids and pets, curious as they are, might find those little bottles intriguing. Always store your essential oils out of their reach to avoid any accidental ingestion or spills.

Avoid Sensitive Areas:

Some areas of the body are more sensitive than others. Always avoid applying essential oils to areas like the eyes, inner ears, and broken or irritated skin.

Top 9 Exercises to Prevent Knee Cracking and Snapping

Can You Run After Knee Replacement

Have you ever heard a crackle in your knee when you climb the stairs or squat? This has probably got you thinking whether you’ve overloaded them or is it worth worrying about? Firstly it’s essential to know the causes behind the crackles or snaps. The first thing you have to notice is whether the snap brings along a wave of pain or swelling. 

If you do not feel any pain or witness swelling, this could probably be due to age. The cartilage covering the bones wears out with age which causes a sound when the bones come in contact due to friction.

However, if your crackles come with pain and swelling, there could be serious issues that these symptoms can hint towards. 

  • Meniscus damage: Meniscus plays the role of dividing the load of the knee. If you are still young, this might be caused by load due to exercise or injury. However, at older ages, this damage can be caused by smaller loads.
  • Cartilage damage: Cartilages function as a protective covering of the bones. With age, this can suffer from wear and tear on its surface, causing swelling and difficulty in movement. In the case of highly damaged cartilage, it can become arthritis. 

Since the area has no nerves, the patient doesn’t feel any pain. Pain only appears in the case of osteoarthritis, which is a degenerative disease. People aged above 40 are more likely to suffer from this.

  • Cavitation: This happens when the joint pressure in your knees fluctuates. Our joins have a liquid synovial fluid around them. When the pressure changes, the fluid becomes saturated with carbon dioxide, creating bubbles in the joint. These bubbles form air that bursts to create a crackling or popping sound.
  • Tense thigh muscles: Due to tight or tense thigh muscles, they might limit your knees’ range of motion. Due to the load, they create a crackling sound when you move. 
  • Tension in ligaments or tendons: The sound may also be caused due to tensed ligaments. They might have also caught up on a bony bump that creates a snap sound when you move as it gets back in its place.
  • Larger kneecap: If your kneecap is larger than the indention in your thigh bone, then you may hear crackling or snapping sounds. 

If you are worried about the new sounds that you are hearing from your knee, then visit a doctor. Otherwise, there are several practical exercises that you can try to prevent knee cracking and snapping. Make sure to wear knee sleeves during these exercises to support your joints. 

Additional Resource – Here’s how to use KT Tape for runners knee.

Effective Exercises to Prevent Knee Cracking and Snapping 

Perform the following exercises to protect your knees from cracking and snapping. 

Standing Front Thigh Stretching

  • Stand straight with feet hip-width.
  • Bend your knee back so that your toes touch your hips. 
  • Grab onto your ankle with your hand.
  • You will feel the tension in your thighs muscles, both front and back.
  • Hold the position for thirty seconds. 
  • Repeat with the other leg. 

Front Thigh Massage with Foam Roller 

  • Wear the powerlifting knee sleeves, lie down on your stomach and place the roller under your thigh.
  • Keeping it just above your right knee, lean on your right leg and roll it up till your hip bone and down till your knee.
  • Make sure to keep your intensity moderate to have a smooth movement and lower the stress on your kneecap.
  • Switch legs.
  • Complete 5 reps on each leg.

Standing Single Leg Rotation

 Wearing your lifting knee sleeves, stand against the wall or chair to follow the correct form.

  • Keeping your back straight, lift your right leg towards your chest, making a 90 degrees angle.
  • Move your hip to draw a circle with your lifted knee. This will stretch your thigh muscles.  
  • Complete one set of 10 reps each. 
  • Switch legs and complete 10 reps again. 

Static Lunge

      Start with standing straight. Then take a step forward with your left leg and bend your knee.

  • Take a step back with your left foot and stretch your leg. 
  • Lower your rear so that your right leg makes a 90 degrees angle.
  • Keep your back upright and your abs contracted. 
  • Stay there for 20 seconds, then repeat with the other leg.
  • Repeat 5 times for each foot.

Straight Leg Raises

  • Lay on your back and bend both your knees. 
  • Now lift your left leg straight in front of you with the other knee bent. 
  • Squeeze your quadriceps, then lower the leg slightly towards the floor.
  • Raise it about 8 inches above the floor, then lower it back again. 
  • Repeat with the other leg.
  • Begin with 2-3 reps, then keep increasing to 12. 

Deadlift

  • Wear your powerlifting knee sleeves. You can perform this exercise with or without the weight as per your fitness level.
  • Stand upright and feet hip-width.
  • Bend your knees and pull your torso forward towards the ground.
  • Make sure to keep your back straight and neck neutral. 
  • Keep your core tight and feel the tension in your back, lower back, and hips. This will minimize the load on your knees.
  • Return to the starting point. 
  • Repeat.

On Wall Squats

  • Stand with your back up straight against the wall.
  • Keep your feet about 2 inches away from the wall.
  • Using the wall’s friction, lower yourself down till you are in a sitting position. 
  • If that places pressure on your back, don’t go that far. Stay in the position for 20 seconds. 
  • Lift yourself back up to the starting position.
  • Complete 10 reps. 

Inner Thigh Squat  

  • The inner thigh is always weaker than the outer thigh. Therefore, this exercise will strengthen your inner thigh.
  • Stand with toes out and feet hip-width apart.
  • Begin with lowering yourself in a half-squat, then lower yourself deep down. 
  • Make sure you don’t lower yourself any more than 90 degrees. 
  • Drive through the heels of your feet back to the starting position.
  • Complete 3 sets of 15 reps each.

Calf Muscle Stretching

  • Wear your CrossFit knee sleeves to relieve your calf muscles from the tension. 
  • Sit down on a mat. Bend one leg and extend the other one.
  • Place a roller under the calf of your extended leg. You can also do this with a tennis ball.
  • Lifting your body up on your arms, gently roll your calf forward and backward. 
  • Keep doing this for 30 seconds. 
  • Switch legs and repeat for 30 seconds. 

Wearing weightlifting knee sleeves through all the exercises mentioned above is highly significant. They help reduce swelling and soreness and enhance blood flow. Since you want to improve your body movement through exercises, knee sleeves will play an integral role. 

We suggest you go for powerlifting knee sleeves by DMOOSE as it increases compression, enhances mobility, and is super comfortable. 

The Bottom Line

Our knees can go through wear and tear for multiple reasons, so it’s essential to build strength in your knees and improve mobility during early ages to prevent them from snapping. Exercises like static lunges, on-wall squats, and straight leg raises will reduce the load on your knees. Start doing it, and you will keep your ears from hearing a new knee sound every day. 

The Beginner’s Guide To BCAAs for Runners

BCAAs for runners

Ready to supercharge your running game with BCAAs?

Runners, listen up! If you’re on the hunt for that extra edge in performance and recovery, those three magic letters—BCAAs—might just be what you need.

In this article, we’re not only going to unravel the mysteries of BCAAs but also explore how they can benefit you as a runner.

Curious? Let’s dive in and give your running journey a boost

What Is BCCA?

You may have heard these three-letter wonders mentioned in the fitness world, and yes, they’re closely related to protein. But let’s break it down.

Protein, the mighty macronutrient, is like the building blocks of your body. It’s not just about bulking up muscles; it’s everywhere! From your skin to your bones, hair to every tissue you can think of.

Now, protein itself is a team of 21 amino acids. These include heavy hitters like Valine, Leucine, Arginine, and more. Each of them plays a unique role in your body’s grand scheme.

But here’s the twist: nine of these amino acids are essential. Your body can’t whip them up on its own, so you gotta get ’em from your diet. These essential amino acids are like VIPs:

  • Isoleucine
  • Valine
  • Lysine
  • Methionine
  • Histidine
  • Tryptophan
  • Leucine
  • Phenylalanine
  • Threonine

Branched Amino Acids

BCAA stands for “Branched-Chain Amino Acids,” and they are indeed a group of essential amino acids crucial for various aspects of health and fitness. Let’s break down the essentials:

More specifically, BCAAs consist of three essential amino acids, each with its unique contribution to muscle health and overall well-being. These amino acids are:

  • Valine
  • Leucine
  • Isoleucine

Why the Name “Branched-Chain”?

The name “branched chain” refers to the molecular structure of these amino acids, which includes a branching side chain. This unique structure sets BCAAs apart from other amino acids.

Benefits of BCAAs

BCAAs offer a range of benefits, including:

  • Reducing muscle soreness
  • Promoting muscle growth
  • Enhancing hormone function
  • Supporting exercise recovery
  • Aiding in protein synthesis

The Star Player: Leucine

Leucine is considered the most critical amino acid among the BCAAs. It plays a significant role in promoting muscle protein synthesis, making it especially important for athletes and fitness enthusiasts.

Why BCCAs Are Unique

Branched-Chain Amino Acids (BCAAs) have garnered attention in the fitness world for their unique characteristics, including their ability to provide rapid energy during exercise. Here’s what makes BCAAs stand out:

Muscle Fuel

BCAAs have a remarkable capability to be oxidized (broken down) directly within muscle tissue for energy. This is a crucial advantage because they can be swiftly utilized by the muscles without having to go through the liver for initial processing. This translates to quick energy delivery right where it’s needed.

Fast Delivery

Because BCAAs can skip the liver’s metabolic processes, they reach the muscles rapidly. This fast delivery of amino acids can have a noticeable impact on energy levels and performance during exercise.

Enhanced Energy

Research has indeed shown that taking BCAAs can enhance overall energy levels during aerobic activities. Some studies have reported improvements of up to 10 percent in total energy output when BCAAs are incorporated into an athlete’s regimen.

Let me dive more into some of the benefits.

How BCCAs Help Runners?

People consume BCCAs for a wide range of reasons. Some of the most common benefits of BCCAs for runners include:

Improved muscle growth

One of the primary benefits of BCAA intake is their capacity to enhance muscle growth. This effect is primarily attributed to a specific amino acid within BCAAs: leucine. Let’s dive into how leucine and BCAAs contribute to improved muscle growth:

Leucine’s Key Role

Leucine plays a pivotal role in the muscle growth process. It acts as a key regulator by activating signaling pathways in the body that stimulate protein synthesis. This activation sets in motion the production of more protein, which is essential for tissue repair and muscle growth.

Evidence-Based Benefits

Research studies have provided substantial evidence supporting the muscle-building effects of BCAAs, particularly leucine. Here are a couple of noteworthy findings:

  • A study reported that consuming BCAAs, as opposed to water, resulted in a remarkable 22 percent increase in muscle protein synthesis. This demonstrates the ability of BCAAs to enhance the body’s recovery and repair processes after muscle damage.
  • A 2014 review indicated that BCAA supplements, particularly those with ample leucine content, have the potential to increase muscle mass. This improvement in muscle mass can contribute to enhanced body composition, which is a significant goal for many fitness enthusiasts.

Decrease Muscle Soreness

Muscle soreness, often referred to as delayed onset muscle soreness (DOMS), is a common sensation experienced by runners and athletes after intense training. It’s typically associated with tiny muscle tears that occur during rigorous exercise.

Here’s how BCAAs can play a role in decreasing muscle soreness and expediting recovery:

Muscle Protection and Repair

BCAAs can be valuable in limiting the rate of muscle breakdown and accelerating the rate of muscle repair. This dual action can aid in reducing the severity and duration of muscle soreness. Furthermore, some experts suggest that BCAAs may assist in managing cortisol, the stress hormone, which has the potential to contribute to muscle breakdown.

Evidence-Based Support

Numerous research studies have explored the effects of BCAAs on muscle soreness and recovery.

Here are a few noteworthy findings:

  • One study discovered that supplementing with BCAAs resulted in decreased muscle soreness following an intense session when compared to a placebo.
  • Research published in the Journal of the International Society of Sports Nutrition suggested that consuming an appropriate amount of BCAAs can be effective in reducing delayed onset muscle soreness.
  • Another study reported that individuals supplementing with BCAAs experienced a significant reduction in soreness levels, with up to a 33 percent decrease compared to those given a placebo.

It’s important to note that BCAAs have been widely utilized to enhance recovery in various contexts, including musculoskeletal injuries and surgical procedures. In these scenarios, swift tissue repair and healing are crucial for optimal outcomes

Reduce Fatigue

Fatigue can be a significant hurdle for athletes and runners during exercise, particularly for those engaged in long-distance training. Here’s how BCAAs can play a role in reducing fatigue and enhancing endurance:

Inhibiting Serotonin Production

High levels of BCAAs may interfere with the entry of tryptophan into the brain. Tryptophan is a precursor to serotonin, a neurotransmitter associated with feelings of fatigue during exercise. By limiting tryptophan’s access to the brain, BCAAs can potentially reduce the sensation of fatigue.

Supporting Evidence

Research has provided some support for these fatigue-reducing effects of BCAAs:

A small study involving college-age males found that those who consumed 20 grams of BCAAs before a workout exhibited lower levels of serotonin post-exercise compared to those given a placebo.

By incorporating BCAAs into your pre- and intra-workout nutrition, you may be able to better preserve your glycogen stores, efficiently allocate energy to your muscles, and hinder the production of fatigue-inducing neurotransmitters. This could be especially beneficial for athletes engaged in prolonged training and endurance activities.

BCAAs and Weight Loss

If you’re aiming to shed excess body fat, BCAAs (Branched-Chain Amino Acids) could be a valuable addition to your nutrition and workout regimen. Here’s how BCAAs may contribute to improved weight loss:

Increased Muscle Mass

BCAAs are known for their ability to support muscle growth and maintenance. As you build more muscle, your body’s metabolic rate increases. Muscle tissue requires more energy (calories) to maintain than fat tissue, which means having more muscle can boost your daily calorie expenditure. This can be advantageous for weight loss, as it creates a scenario where you burn more calories throughout the day.

Enhanced Fat Loss

The combination of increased muscle mass and improved fat loss can lead to more effective weight management. While strength training is a proven method for accelerating fat loss, BCAAs can help optimize your muscle-building efforts during workouts.

A study found that participants who consumed 14 grams of BCAAs per day experienced a 1% reduction in body fat and gained an additional 4.4 pounds of muscle compared to those who took whey protein. It’s important to note that dietary habits can significantly influence these results.

For more on the benefits of BCCA for athletes, check the following resources:

Will BCAA Make You A Faster Runner?

The relationship between BCAAs (Branched-Chain Amino Acids) and running speed is a topic that has garnered some attention in the fitness and endurance sports communities. While BCAAs are known for their role in muscle recovery and growth, can they actually make you a faster runner?

The Research is Inconclusive

To date, research on the direct impact of BCAAs on running speed remains inconclusive. There have been mixed findings, and several factors come into play.

Ultra-Marathon Study

In one study conducted during a 100K ultra-marathon, participants who were given BCAAs did not show significant improvements in finish times compared to those who received a placebo. This suggests that BCAAs may not enhance running speed in ultra-endurance events.

Sprint Power Study

On the other hand, a different study reported that supplementing with BCAAs for ten weeks resulted in a 19% increase in all-out sprint power and a 4% increase in power relative to body mass. This finding suggests that BCAAs may have the potential to enhance sprinting performance.

The Complexity of Running Performance

Running speed is influenced by various factors, including aerobic fitness, anaerobic capacity, endurance, and technique. BCAAs primarily play a role in muscle recovery, protein synthesis, and reducing muscle soreness. Their impact on running speed may be more significant in short bursts of high-intensity sprinting rather than long-distance endurance running.

Individual Variability

It’s important to recognize that individual responses to BCAAs may vary. Some runners may find that BCAAs help improve their sprinting abilities, while others may not experience the same benefits. The effectiveness of BCAAs can be influenced by factors such as training status, diet, and overall workout routine.

The Side Effects of BCCAs

The relationship between BCAAs (Branched-Chain Amino Acids) and running speed is a topic that has garnered some attention in the fitness and endurance sports communities. While BCAAs are known for their role in muscle recovery and growth, can they actually make you a faster runner?

The Research is Inconclusive

To date, research on the direct impact of BCAAs on running speed remains inconclusive. There have been mixed findings, and several factors come into play.

Case 1: Ultra-Marathon Study

In one study conducted during a 100K ultra-marathon, participants who were given BCAAs did not show significant improvements in finish times compared to those who received a placebo. This suggests that BCAAs may not enhance running speed in ultra-endurance events.

Case 2: Sprint Power Study

On the other hand, a different study reported that supplementing with BCAAs for ten weeks resulted in a 19% increase in all-out sprint power and a 4% increase in power relative to body mass. This finding suggests that BCAAs may have the potential to enhance sprinting performance.

The Complexity of Running Performance

Running speed is influenced by various factors, including aerobic fitness, anaerobic capacity, endurance, and technique. BCAAs primarily play a role in muscle recovery, protein synthesis, and reducing muscle soreness. Their impact on running speed may be more significant in short bursts of high-intensity sprinting rather than long-distance endurance running.

Individual Variability

It’s important to recognize that individual responses to BCAAs may vary. Some runners may find that BCAAs help improve their sprinting abilities, while others may not experience the same benefits. The effectiveness of BCAAs can be influenced by factors such as training status, diet, and overall workout routine.

BCCAs For Runners  – The Conclusion

As you can tell, BCCAs are not just helpful for strength buffs but runners as well, as they can help improve your performance.

The stuff has the ability to help improve your energy output and reduce fatigue during training, aid in muscle growth, speed up recovery—and so much more.

Can Testosterone Boosters Help Boost Testosterone Naturally?

running at night

Are you looking for a way to boost your testosterone levels? If so, you may be wondering if testosterone boosters can help. There is a lot of discussion around testosterone boosters and whether or not they work. Some people swear by them, while others think they waste money. So, what’s the truth? Can testosterone boosters help boost testosterone naturally? The answer may surprise you. This article will discuss the benefits of testosterone boosters and how they can help improve your overall health.

What are Testosterone Boosters?

Testosterone boosters are supplements that are designed to increase your testosterone levels. They typically contain various ingredients that are thought to boost testosterone, such as vitamins, minerals, herbs, and amino acids. While there is no one-size-fits-all testosterone booster, they are generally safe for most people to take.

However, you need to note that the market is filled with supplements that claim to be testosterone boosters but don’t contain any ingredients that have been proven to boost testosterone. So, it’s essential to do your research before buying a supplement. The best ones must contain clinically-proven ingredients that have been shown to increase testosterone levels.

How do Testosterone Boosters Work?

The human body produces testosterone naturally. However, as men age, the amount of testosterone produced by the body decreases. This can lead to several issues such as muscle loss, fatigue, and decreased libido. Testosterone boosters are designed to help increase the amount of testosterone in the body, which can help reduce these symptoms.

There are several different testosterone boosters on the market. Some work by increasing the amount of testosterone produced by the body, while others work by blocking the absorption of estrogen, which can help reduce the symptoms caused by low testosterone levels.

Do Testosterone Boosters Help Boost Testosterone Naturally?

There is a lot of debate over whether testosterone boosters help boost testosterone levels naturally. According to some testosterone booster reviews, some people believe they do help. Several studies have been conducted on the subject, and the results have been mixed.

Some studies have shown that testosterone boosters can help increase the amount of testosterone in the body. Others have shown that they do not help boost testosterone levels and can even be harmful. More research is needed to determine if testosterone boosters effectively increase testosterone levels naturally.

If you are thinking about taking a testosterone booster, you must speak with your doctor first. They will advise you on whether or not a booster is right for you. Some studies have shown that testosterone boosters can be harmful, so it is essential to ensure that you take a safe and effective product.

Additional Resource – Your guide to running and sex drive.

Benefits of Using Testosterone Boosters

There are several potential benefits associated with using testosterone boosters. Some of these include:

  • Increased Strength: Testosterone is responsible for the growth and development of muscle tissue. By increasing the amount of testosterone in the body, you may increase your strength.
  • Improved Muscle Mass: Testosterone boosters can also help improve muscle mass. By increasing the amount of testosterone in the body, you may build more muscle tissue.
  • Improved Libido: Testosterone is also responsible for libido. By increasing the amount of testosterone in the body, you may improve your sex life.
  • Reduced Fatigue: Testosterone boosters can help reduce fatigue. This is because testosterone plays a role in energy production.

There are several other potential benefits associated with using testosterone boosters. Speak with your doctor to determine if a booster is right for you.

Side Effects of Testosterone Boosters

There are several potential side effects associated with using testosterone boosters. Some of these include:

  • Gynecomastia: Gynecomastia is the development of breast tissue in men. This is a common side effect of testosterone boosters.
  • Hair Loss: Hair loss is another common side effect of testosterone boosters.
  • Acne: Acne is a common side effect of testosterone boosters. This is because testosterone can increase sebum production, which can clog pores and lead to acne.
  • Increased Aggression: Testosterone boosters can also cause increased aggression. Testosterone is responsible for the “fight or flight” response.

You need to note that these side effects vary from person to person. Not everyone will experience them. It is advised to start with a lower dose and increase it gradually to minimize the risk of side effects. You should also speak with your doctor if you think about taking a testosterone booster.

Testosterone Boosters vs. Hormone Replacement Therapy

There is a lot of debate over whether testosterone boosters are better than hormone replacement therapy. Hormone replacement therapy replaces the hormones that are no longer being produced by the body. Testosterone replacement therapy is the most common form of hormone replacement therapy.

Testosterone boosters might help some people boost their testosterone levels, but this is not always the case. Some people might experience better results than others, and the specific ingredients in a testosterone booster can make a big difference. It’s essential to do your research before purchasing any booster and consult with a healthcare professional if you have any questions or concerns.