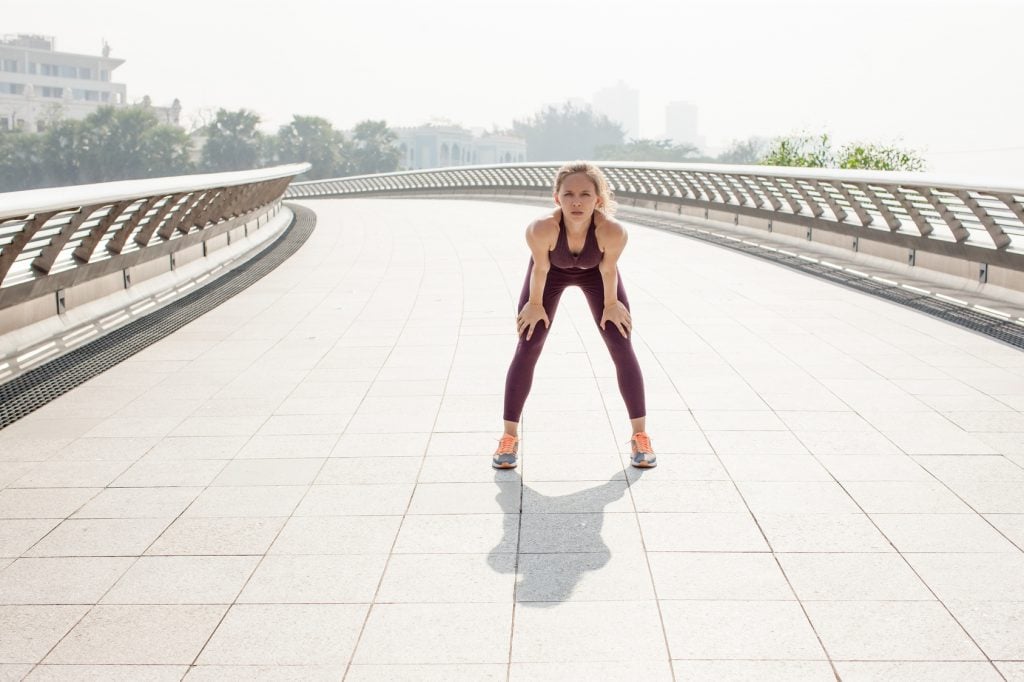
30-Day Core Sculpting Challenge: Strengthen Your Core for Optimal Running Performance

Core Challenge exercises

Are you ready to embark on an incredible journey to strengthen your core and unleash your full potential? I present to you my 30-day core challenge, designed to transform your midsection and enhance your overall performance.

Whether you’re a casual runner, a seasoned athlete, or even a desk warrior, a strong core is essential for both your health and athletic prowess.

Think of your core as the sturdy foundation that supports all your movements, both on and off the field. It’s like the bedrock beneath a majestic mountain. When your core is weak, it’s as if cracks start to form, and trouble seeps in. Chronic pain, poor posture, nagging back issues—these are just a few of the woes that can plague you.

But fear not! By committing to this core challenge, you’ll be fortifying those foundational muscles and building a powerhouse within yourself.

Research studies have consistently highlighted the importance of a strong core. One study published in the Journal of Strength and Conditioning Research found that individuals with greater core stability had improved running economy and reduced injury risk. Another study in the European Journal of Applied Physiology showed that core strength training enhanced performance in various sports activities.

So, are you ready to embark on this transformative journey? Over the next 30 days, we’ll dive deep into a series of targeted core exercises that will challenge and strengthen your midsection.

The Core Challenge – It’s not what you think

Let’s break the repetitive record and dive deeper into the fascinating world of core muscles! You see, the core is not just about six-pack abs that make heads turn at the beach. Oh no, it’s so much more than that!

Think of your core as a powerful team, working together to keep you strong, stable, and balanced, each with their unique role to play. Sure, the abs might take center stage, but they’re not the only bad boys in town.

Let me introduce you to the stars of the show. We have the obliques, those sneaky muscles on the sides that help you twist and turn like a ninja. Then there’s the erector spinae, the unsung heroes that support your spine and keep it aligned. The abdominal muscles, both superficial and deep, work in harmony to provide strength and protect your precious organs. And let’s not forget about the glutes and lower lats, the powerhouses that give you stability and explosive strength.

Now, here’s where it gets interesting. Research studies have delved into the importance of training these core muscles as a whole. A study published in the Journal of Sports Science and Medicine found that core training significantly improved dynamic balance and functional movement performance. Another study in the Journal of Orthopedic & Sports Physical Therapy showed that core stability exercises reduced the risk of lower extremity injuries in athletes.

The 30 Day Core Challenge

Welcome to the 4-week core challenge, where we’re about to take your midsection on an exciting journey of strength and transformation! Buckle up and get ready for some serious core-crushing action.

But hey, before we dive in, let’s talk strategy. This challenge is all about quality over quantity. Each week, we’ve carefully crafted four unique workouts that will keep you on your toes. We’ve mixed up the length, intensity, and exercises to keep you engaged and motivated. Variety is the spice of life, after all!

During each workout, you’ll be spending a solid minute on every exercise. It’s like a thrilling race against the clock. But don’t worry, I’ve got your back. Take those well-deserved 20 to 30 seconds of rest between moves. Catch your breath, wipe off the sweat, and prepare to conquer the next challenge.

Oh, and speaking of challenges, here’s a little secret for you. As you progress through this journey, your core will become a force to be reckoned with. So feel free to push yourself further. Increase the time or reps on each move. Unleash the inner beast and embrace the burn!

But hold up, champ. I want to make sure you’re not overdoing it. Rest and recovery are as essential as the workouts themselves. Your core, just like any other muscle group, needs time to recharge and rebuild.

Let’s kick off this journey and show your core who’s boss! Are you up for the challenge? Let’s make those abs scream with delight!

Week 1 OF The Core Challenge

The first week is all about pacing yourself and finding where you are at when it comes to core strength and endurance.

This is why most of the exercises prescribed below are simple and straightforward.

Most of them are isometric exercises designed to test both your endurance and strength.

Nothing crazy here.

Workout I: The Core Shredder

Do the following;

One minute Plank hold

20 Crunches

15 Russian Twists

10 Leg raises

Repeat three to five times.

Workout II: The Love Handles Eliminator

Do the following:

Side Plank right side for one minute

Side plank left Side for one minute

15 reverse crunches

20 Bicycle crunches

Repeat three to five sprints

Workout III: The Explosive Core

Do the following:

One minute floor sprints

One minute High knees

15 Hanging leg raises

One minute Planks jacks

Repeat three to five times

Workout VI: The Core Blaster

Do the following:

One minute hold planks

15 Spiderman push-ups

One minute of Plank with knee to chest

20 alternating leg raises

15 Plank reaches

Repeat three to five times.

Additional Reading  – Does running give you abs?

Week 2 Of The Core Challenge

Workout I: The Core Shredder

Do the following

90 second of plank holds

30 Crunches

25 Russian Twists with a weight plate.

20 leg raises

Repeat  three to five times

Workout II: The Love Handles Eliminator

Do the following:

30 seconds of  side arm plank crunches (right side)

30 seconds of  side arm plank crunches (left side)

30 reverse crunches

40 bicycle crunches

Repeat three to five times

Workout III: The Explosive Core

Do the following:

Two minutes of floor sprints

Two minutes of high knees

30 Hanging leg raises

90 seconds of plank jacks

Repeat three to five times

Workout VI: The Core Blaster

Do the following:

Two minutes hold planks

20 Spiderman push-ups

90 seconds of Plank with knee to chest

30 alternating leg raises

20 Plank reaches

Repeat three to five times.

Week 3

Workout I: The Core Shredder

Do the following

Two minutes of plank holds

50 Crunches

40 Russian Twists with a weight plate.

30 leg raises

Repeat three to five times

Workout II: The Love Handles Eliminator

Do the following:

90 seconds of  side arm plank with opposite leg raised (right side)

90 seconds of  side arm plank with opposite leg raised (left side)

40 reverse crunches

50 bicycle crunches

Repeat three to five times

Workout III: The Explosive Core

Do the following:

Three minutes of floor sprints

Three minutes of high knees

30 Hanging leg raises

Two minutes of plank jacks

Repeat three to five times

Workout VI: The Core Blaster

Do the following:

Three minutes hold planks

25 Spiderman push-ups

Two minutes seconds of Plank with knee to chest

40 alternating leg raises

25 Plank reaches

Repeat three to five times.

Week 4 OF The Core Chalenge

As you are coming to week 4, you are coming near the end of this 30-day challenge.

So you have to give it your best here.

Go for the extra mile, if you have to.

Some of these workouts are quite challenging.

This is no longer beginner territory, so pace yourself if it feels like too much of a challenge.

You are the boss.

You call the shots.

Workout I: The Core Shredder

Do the following:

Three minutes of plank holds

70 Crunches

50 Russian Twists with a weight plate.

40 leg raises

Repeat three to five times

Workout II: The Love Handles Eliminator

Do the following

90 seconds of  side arm plank crunches (right side)

90 seconds of  side arm plank crunches (left side)

60 reverse crunches

60 bicycle crunches

Repeat three to five times

Workout III: The Explosive Core

Do the following:

Three minutes of floor sprints

One minute of Jumping Squats

Three minutes of high knees

One minute of Burpees

30 Hanging leg raises

Two minutes of plank jacks

Repeat three to five times

Workout VI: The Core Blaster

Do the following:

5 minutes Plank Hold

30 Spiderman Pushups

Two minutes of Plank knee jumps

50 alternating leg raises

30 Plank reaches

Repeat three to five times.

Core Challenge Exercise Demonstrations and Tutorials

In case you are not familiar with the exercises above, here are the form tips you need:

Plank Holds

Crunches

Russian Twists with a weight plate

Leg Raises

Side arm Plank Crunches

Reverse Crunches

Bicycle Crunches

Floor Sprints

Jumping Squats

High Knees

Burpees

Hanging leg raises

Plank Jacks

Spiderman Pushups

Plank knee jumps

Alternating Leg Raises

Plank Reaches

Featured Image Credit  – CCFoodTravel.com Via Flickr

Top 6 Cardio Alternatives to Running

Looking for the best cardio alternatives to running? Then you have come to the right place.

If you have trouble running—whether you’re injured, burned out or just looking to spice things up—know that you got alternatives.

You don’t have to suffer through pain or injury to increase your heart rate and get your body moving.

Here are my favorite running alternatives that can double up as exercises to replace running.

Enjoy!

*Disclosure: This post may contain affiliate links that at no additional cost to you. I only recommend products I’d use myself and all opinions expressed here are our own. 

Cardio Alternatives To Running Option I – Skipping

Skipping is awesome for many reasons.

This amazing workout can help you build speed, power, and agility in your legs without having to leave the comfort of your home.

How it does that?

First of all, skipping builds lower body strength—especially in the calves—and improves core power and endurance—fundamental aspects of building a powerful and injury free runner.

Also, jump roping workouts can help you become a faster running by training your legs to “spend” less time on the ground, which is one of the main keys to speed and agility.

In other words, jumping rope on a regular basis can help you improve speed, power, balance, coordination, and endurance.

These are the essential elements when it comes to becoming the best runner you can be.

Not only that, the rope also burns tons of calories.

According to research, jumping rope can burn up to 15 calories per minute, depending on intensity and your fitness level, of course.

The only downside of jump rope training that I can think of is that it’s high impact.

As a result, if you have any sort of serious injury, you should go easy on the rope and stay within your fitness level the entire time.

For more tips on jump rope training, check my post here.

Other than that, I see no objection to adding this excellent tool into your training program.

Cardio Alternatives To Running Option II – Rowing

I’m not a big rowing machine fan.

I wish I were, but I’m not.

Nonetheless, this doesn’t mean that this machine has got nothing to offer.

Au contraire, rowing is a fantastic cardiovascular exercise that targets the back, core, quads, hamstrings, glutes, as well as the shoulders and the arms, of course.

And with the right training form, you can target your abs, chest, triceps and biceps muscles in one continuous and non-stop motion and action.

In fact, the movement of pushing and pulling on a rowing machine might be more effective than traditional strength training since it hits and targets almost all of the major muscle groups, according to a study by Duke University.

That’s right.

This workout is total body exercise per excellence.

And you can do this all while getting your heart working to its max.

What’s more? Oh, rowing is also very low impact, so it’s an ideal alternative for runners recovering from an injury or looking for a low-impact exercise to replace running.

And if you’ve never used a rowing machine before, then don’t let that stop you.

The good news is that you can find an indoor rowing machine at most gyms and fitness facilities.

You might also consider signing up for an indoor rowing class or get yourself an indoor rowing machine to get the most out of this amazing workout.

Here is a YouTube tutorial to help you perfect your form and get ready to row with finesse or check this great beginner rowing machine workout plan.

Cardio Alternatives To Running Option III – The Stairs

According to a Canadian research, walking up 200 steps at least twice a day, five days a week for a duration of two months can lead to an increase in V02 max by up to 17 percent.

Which is great.

Not only that, but you also have to engage more leg muscles on the stairs since you have to constantly lift up your body upward with each step you take.

This boosts overall lower body strength like nothing else.

What’s more?

The stairs are also easier on the joints than classic sprints while also improving your range of motion and agility.

Therefore, if your office or apartment building has access to stairs, or you leave near a stadium, be sure to add this cardio option to your training arsenal.

To get the most of the stairs, be sure to switch it up between running, skipping, jumping, hopping and squatting.

For an impressive stair workout, check my post here.

Cardio Alternatives To Running Option IV – Cycling

This is my favorite cardio cross-training exercise.

I really love cycling because it works the lungs and the cardiovascular system in a similar manner to running, but without the high impact often associated with the sport.

Why?

For starters, this is one of the best workouts for shedding mad calories while building up muscles and power in the core, glutes, thighs, and legs.

Also, cycling is low impact, so it’s easier on the body and the perfect running alternative option for anyone nursing an injury.

And it’s also the ideal calorie burner.

In fact, research shows that you can burn as many calories as you would during a 45-minutes run during a typical spinning class.

Not only that, cycling can also increase your stride length and speed.

Maybe the only downside of this cardio option is that you’ll need some gear to get going, including a good bike (whether it’s a road bike, mountain bike, etc.), a helmet, and protective glasses and the right clothing.

Also, be sure to stay safe on the road.

Check my post for some of the best biking workouts for runners.

Cardio Alternatives To Running Option V –  Swimming

If you are a running fanatic, just like me, but are suffering from joint pain or an injury, then swimming might be the exact thing the doctor ordered.

Swimming can push your body and cardiovascular system to the max without so much impact on your joints—making it the IDEAL running alternative for those looking to reduce impact on their bodies and/or recovering from an injury.

In fact, according to a study in the Journal of Applied Physiology, hitting the pool for an hour, at least three times per week for ten weeks can increase VO2 max by up 10 percent.

Not only that, swimming also target almost every muscle in the upper body, making it for an excellent resistance training option.

Here is a YouTube tutorial to help you build perfect swimming technique if you are a complete beginner.

Alternatives To Running Option VI – Bodyweight Training

Last but not least, you can also get a great cardio workout without reaching for the rope, hopping on the rowing machine, hitting the pool, or purchasing an expensive bike.

Enter the world of the bodyweight training.

What I really love about bodyweight training is that it is easily scalable, convenient and mostly low impact.

This means you can do it in the comfort of your own house without paying for hefty gym fees or purchasing any expensive training equipment.

All you need is your body, a bit of space, and off you go.

What’s more? Body-only exercises are also so effective at burning calories and maximizing fitness gains.

In fact, performing bodyweight exercises in a high-intensity interval manner can be an effective way to increase total body strength while also the heart pumping.

Some of the best bodyweight cardio exercises include high knees, power skips, butt kicks, jumping jacks, bounding, plyo push-ups, squat jumps, box jumps, and burpees.

The list is almost endless.

Here are three routines to try:


Top 7 Hip Stretches For Runners

hip stretches for runners

Looking for some of the best hip stretches for runners?

You’re in the right place.

In today’s article I’ll show you how to stretch your hips in a safe and comfortable way. But first things first, let’s talk about why you need to add a few hip opening stretches to your training routine.

Let’s delve deeper…

*Disclosure: This post may contain affiliate links that at no additional cost to you. I only recommend products I’d use myself and all opinions expressed here are my own. 

What Are The Hip Flexors?

Located near the top of your thighs, the hip flexors consist of a group of muscles and tendons on the front—anterior—of your hip joint, connecting your legs to your pelvis.

When contracted, your hip flexors let you raise your knees or bend at the hip.

The primary hip flexor muscles are the psoas major and the iliacus— collectively known as the iliopsoas, (usually the weakest of all of the muscles).

Other hip flexor muscles include the sartorius, tensor fascia latae, and rectus femoris.

See image.

And here’s how they look like :

The main hip flexors muscles

Source – Wikipedia

The Functions Of the Hip Flexors

The hip flexor muscles are used in every stride when walking, running, and sprinting.

These allow you to walk, run, bend kick, and swivel your hips.

Your hip flexors are contracted on every step forward.

The more miles you log in, the more you put them to work.

Some of the main functions:

  • Bringing the thighs up toward the chest.
  • Driving the knees up and down.
  • Maintaining proper running form.
  • Moving the legs from side to side and front to back.
  • Stabilizing the pelvis.

Causes of Hip Issues

The hips is just one region of the body that’s prone to tightness if you’re a runner.

Running’s repetitive nature means that you’re constantly working the hip flexors and extensors through a very small range of motion.

So it’s not surprising that hip pain from running is such a common issue.

Add to this the fact that, thanks to our sedentary lifestyle, we spend the bulk of our time sitting—roughly a third of the day.

When you spend a lot of time in a seated position, your hip flexors are kept in a shortened position more than they should be, which, in turn, makes them super tight.

This has huge negative effects on your posture, spinal stability, and gait.

Ramifications of Tightness

Tightness in the hip flexors results in an exaggerated anterior pelvic tilt.

This occurs when the arch of the lower back increases while the backside stick out more.

The tighter your hip flexors get, the more your pelvis tilts back and the more likely you’re to lean forward—as in stick out your butt and arch your back—while running.

Not only this is bad form, but can also set you up for back pain and serious injury. And you want none of that.

For more on the research conducted on hip muscle tightness and overuse injury, check the following studies:

Study 1

Study 2

Study 3

Study 4

How To Test Your Hip Flexor Flexibility

Wondering if your hips are too tight—or loose enough? Take the Thomas test.

Also known as Iliacus test or Iliopsoas Test, this test is used to measure the flexibility of the hip flexors—more specifically, that of the iliopsoas muscle group, the pectineus, Rectus Femoris, gracillus as well as the Sartorius and Tensor Fascia.

Proper form

Start by laying or sitting at the very edge of a table or bent, with the tailbone resting at the edge.

Then, roll back onto the table while pulling both knees to your chest.

This helps ensure that your lumbar spine is flat on the table and your pelvis is posteriorly rotated.

Next, hold the opposite hip in maximum flexor with the arms, while the assessed limb hang down toward the floor.

Last up, perform on both sides and compare.

Results

If your left leg lower backs, and sacrum remain flat on the table with the knee bending to 70 to 90 degrees, kudos…you don’t have tight hip flexors.

However, if one of your thighs or legs stay up drastically higher than the other, then you do have tight hips, and regular hip openning stretches are required.

Now that you know a thing or two about the importance of hip stretches for runners, let’s get to the exercises themselves.

Top 7 Hip Stretches For Runners

Fortunately, there’s is an abundance of good hip openining stretches that you can perform at home to decrease tightness, relieve pain, and increase mobility in your hips.

You won’t need to join a gym, buy a lot of expensive equipment or even leave the comfort of your home to perform the following hip flexors exercises.

Enjoy!

Hip Stretch for Runner – 1. Pigeon

Also known as Eka pada rajakapotasana, this is a famous yoga pose, and one of the most effective hip flexors stretches, especially the hip abductors.

Proper Form

Begin by sitting with your right knee bent and left leg stretched behind you.

Next, while making sure that your left hip is always pointing toward the mat, drag your right heel toward your left hip.

Then rest your hands on your right thigh or your hips, then walk your hands out in front of you, and lower your hips down toward the floor over your right knee.

Hold the pose for 30 seconds to one minute.

Be sure to breathe into any area of discomfort or tension.

Repeat on the other side.

Hip Stretch for Runner – 2. Lunge Hip Flexor Stretch

One of the best best hip stretches for runners that  not only targets most of the muscles in the hips, but it’s also ideal for stretching the glutes, hamstrings, and quadriceps.

Proper Form

Assume a lunge position with your right knee forward.

Next, drop your left knee to the ground, and place your hands on your right knee or the floor under your shoulders, according to your flexibility level.

Be sure to keep your upper body tall, and core engaged the entire time.

Then, while keeping your front knee directly above your ankle, hold the position for 30 seconds to one minute, and feel the stretch in your left hip flexor.

Change sides and repeat.

Hip Stretch for Runner – 3. Happy Baby

Also known as Ananda Balasana in the yogic circles, this relaxing hip stretch also targets the lower back and the hamstrings.

Proper Form

Lay flat on your back with both knees bent while gently holding the outside edges of your feet with your hands.

Next, while keeping your arms on the outside of your legs, press both knees to the ground below your armpits.

Feel free to rock lightly from side to side if that feels good.

Hold the pose for at least one minute, then move to the next stretch.

Hip Stretch for Runner – 4. Butterfly

A powerful hip opener that also stretches the glutes and the inner thighs.

Proper Form

Assume a cross-legged seated position with the soles of the feet pressed together.

Next, while grabbing your ankles, lengthen your spine upward,  draw your belly button inward then slowly fold forward from your hips with a deep exhale.

Focus on your inner thighs and be sure to breathe into that area to release any tension or discomfort.

For more stretch, feel free to crawl your hands forward away from your body.

Hold the pose for one minute then slowly release and move to the next stretch.

Hip Stretch for Runner – 5. Extended Wide Squat

Not only this hip opening stretch is ideal for the hip abductors, but also increase mobility in the lower back, hamstrings, and glutes.

Proper Form

Assume a standing position, with the feet slightly wider than your hips, toes pointing out so that hips are open.

Next, while keeping your back flat and core engaged, slowly bend your knees and lower your hips toward the floor.

For more stretch, place your elbows inside of your thighs, gently pressing them out against the inside of your knees.

Hold the pose for 30 seconds to one minute then slowly release back to standing position.

Hip Stretch for Runner – 6. Frog Hip Stretch

This simple pose stretches and opens up the the hip abductors, the insides of the thighs, and the groin.

If you have any recent leg, hip or knee injury, be careful with this one.

Proper Form

This is one of my favorite hip flexor stretches.

Assume an all fours position with hands and knee in a tabletop position, then bring your forearms onto the mat or a yoga block.

Next, slowly slide both knees away from your body and widen them out as far as possible as you lower your chest and hips toward the floor.

Hold the position for one to two minutes then slowly release it and move to the next stretch.

Hip Stretch for Runner – 7. Standing Wide-Legged Split

This stretch will not only target your hips but also opens up your inner thighs and hamstrings.

Proper Form

Begin by sitting up tall with the feet three to four feet apart, heels a bit wider than the toes.

Next, while keeping the soles of your feet flat on the floor and torso long,  fold forward from the hips and place your hands on a yoga block or mat right below your shoulders.

Hold the pose for 30 seconds to one minute.

If your flexibility allows it, feel free to lower onto forearms for a deeper hips stretch.

hip flexor stretches for runners

New to Running? Start Here…

If you’re serious about running, getting fit, and staying injury free, then make sure to download my Runners Blueprint Guide!

Inside this guide, you’ll learn how to start running and lose weight weight the easy and painless way. This is, in fact, your ultimate manifesto to becoming a faster and a stronger runner. And you want that, don’t you?

 Click HERE to check out my Runners Blueprint System today!

Don’t miss out! My awesome running plan is just one click away.

Top 7 Hip Stretches For Runners – The Conclusion

There you have it!

The above hip flexor stretches for runners are all you need for to open your hip flexors and keep flexible for the long haul.

Just make sure to do them on a regular basis. The rest is just detail.

Top 6 Bike Workouts for Runners

runner doing cycling workout

If you’re a runner and want to add cycling to your routine, you’ve come to the right place!

Here’s the truth.

Just because you’re passionate about running doesn’t mean you should ignore the benefits of other forms of training—especially cycling.

Cycling can make you a faster, stronger, and less injury-prone runner.

It’s one of the best cross-training options available, and today, I will break it all down for you.

Keep on reading if you’re curious about adding a cycling routine to your training plan.

The Benefits of Cycling for Runners

Cycling is hands down one of the best cross-training exercises for runners, whether you’re looking to take it seriously or just want to use it to supplement your running routine.

Here’s why:

  • Targets key running muscles: Cycling strengthens the major leg muscles essential for running, like your glutes, quads, hamstrings, and calves. These muscles are critical for strong and efficient running.
  • Low impact: Unlike running, cycling is non-load-bearing, meaning your joints bear much less weight while your muscles do most of the work. This is a fantastic way to build strength and endurance without putting unnecessary stress on your knees, ankles, or hips.
  • Improves leg turnover: A high cycling cadence (around 90 revolutions per minute or more) helps improve your leg turnover when running. If you’ve ever struggled with sluggish, heavy-feeling legs during a run, cycling can help you shake that off by teaching your legs to move quickly and efficiently.
  • Variety of workouts: Just like running, cycling offers a wide range of workout options. You can do intervals, tempo rides, hill climbs, long endurance rides, and recovery spins. This variety helps build your aerobic base, muscular endurance, and overall cardiovascular fitness—all of which are key for running success.
  • Great for recovery: Cycling can serve as an excellent active recovery workout. After a tough run, hopping on the bike for an easy spin can increase blood flow to your tired muscles, reduce stiffness, and help you recover faster without adding more stress to your body.

Research-Backed Benefits of Cycling for Runners

Wondering if cycling can really make a difference in your running? Studies say yes! Cross-training with cycling offers unique benefits that support both your endurance and recovery—two key factors for improving your performance as a runner. Here’s a look at what the research says.

Improving Running Economy

Running economy, or the energy you use at a given pace, is crucial for efficient running, especially over long distances.
Research published in the Journal of Sports Science shows that cross-training with cycling can improve cardiovascular endurance and muscular strength, which contribute to a more efficient running stride. Cycling focuses on muscle groups like the quads, glutes, and calves, which power your stride and help you maintain speed with less effort over time.

Reducing Injury Risk Through Low-Impact Conditioning

High-impact running can put stress on your joints and muscles, especially during high-mileage weeks.
The Journal of Sports Medicine emphasizes that cross-training with cycling can enhance your aerobic fitness without the pounding of running, which is especially helpful if you’re managing minor injuries or looking to reduce injury risk. Cycling builds cardiovascular fitness and muscular endurance while giving your joints a break, making it an ideal complement to your regular running schedule.

Cycling vs. Running: Which Muscles Are Working?

As a runner new to cycling, it’s important to understand how each sport uses different muscles.

In cycling, the primary muscles at work are the quadriceps, hamstrings, and calves. These muscles are responsible for generating power as you pedal. Cycling also works your glutes, hip flexors, and core to a lesser extent, especially when climbing hills or riding in the saddle for long periods.

In contrast, running primarily engages the quadriceps, hamstrings, calves, glutes, iliopsoas, and core muscles. These muscles help with hip extension, knee flexion, and maintaining pelvis stability. Running is more of a full-body workout than cycling since you use your arms and upper body to help with momentum and balance.

Beginner’s Gear Guide for Cycling

Cycling requires more gear than running, but you don’t need to break the bank to get started.

When I decided to get serious about cycling, I had to face the reality that I needed my own bike. I walked into the bike shop with no clue what I was doing. The rows of shiny bikes were intimidating, and the price tags even more. I went for a solid entry-level road bike (nothing fancy, but it gets the job done) and some basic gear.

Let’s go over the essential items you’ll need:

  • A Bike: A good entry-level road bike will cost you around $1,000. But don’t worry; you can often find cheaper options online or by purchasing a second-hand bike. Make sure your bike fits you properly—just like you wouldn’t run in the wrong size shoes, a poorly fitting bike can cause discomfort and even injury.
  • Helmet: I cannot stress this enough. Studies show that wearing a helmet can reduce the risk of head injury by up to 50%. Accidents happen, and a helmet is a must whether you’re cycling on the road or on trails.
  • Cycling shoes:. Cycling shoes have stiff soles that prevent your feet from flexing too much, reducing the risk of pain and cramping, and they help transfer energy more efficiently into each pedal stroke.
  • Cycling shorts: Trust me—invest in padded cycling shorts. They will save your butt, quite literally, from discomfort. Proper cycling shorts will reduce saddle soreness and prevent chafing during long rides. Look for shorts made of wicking materials to keep you dry and comfortable.
  • Jersey: A cycling jersey helps regulate body temperature and wicks away sweat. Choose one that’s lightweight and brightly colored to make you more visible to other road users. Some jerseys come with zippers, making them easy to put on and adjust during hot rides.
  • Water bottle: Staying hydrated is essential, especially during long rides. Install a frame-mounted bottle cage on your bike to make it easy to access your water during a ride.
  • Floor pump: Keep your tires properly inflated with a floor pump. This ensures a smooth ride and prevents unnecessary flats.

Cycling Safely: What You Need to Know

Before you hit the road, make sure you understand basic cycling safety.

Here are my best tips on how to stay safe out there:

  • Know the laws: Get familiar with local biking laws. These rules are in place to keep you safe and ensure smooth traffic interactions.
  • Stick to the road: Don’t ride on sidewalks—those are for pedestrians. Even if you’re going slowly, a bike on a sidewalk can be dangerous for walkers and runners.
  • Use bike lanes: If available, bike lanes provide extra space for cyclists. Stay alert for parked cars or vehicles pulling in and out of driveways.
  • Signal clearly: Communication is key for safety on the road. Use hand signals to indicate when you’re turning, changing lanes, or slowing down. This helps other road users know your intentions and reduces the risk of collisions.
  • Be aware: Just like running, cycling requires your full attention. Stay focused on your surroundings, especially in areas with heavy traffic or narrow roads.

Too much to digest?

Then I recommend riding with a cycling group or buddy until you get comfortable with the rules of the road.

Riding in groups is a great way to stay safe on the road while having fun riding the miles.

Should You Try a Spin Class?

A spin class is a fantastic alternative if road cycling doesn’t appeal to you or the weather isn’t cooperating.

Most gyms offer spin classes, and they’re a great way to get in a tough workout without worrying about road hazards.

Plus, spin classes come with the added benefit of structure—an instructor usually leads you through various intervals, climbs, and recovery sections.

All you need is your gym membership and a solid playlist to help you power through those tough spin sessions. It’s a great way to get the benefits of cycling in a safe, controlled environment.

Improving Your Cycling Form

Cycling might feel a little overwhelming at first, but like running, it’s a skill that improves with practice.

I learned a thing or two about proper cycling form. Here’s what you need to know:

  • Cadence: In cycling, cadence refers to how many revolutions your pedals make per minute. Aim for around 90 RPM for an efficient, smooth ride.
  • Relax: Avoid gripping the handlebars too tightly. Keep your upper body relaxed, which will help you conserve energy and ride more comfortably.
  • Shift gears early: Anticipate changes in terrain and shift gears before you need to. This is especially important when approaching hills or stoplights to avoid losing momentum.
  • Climbing technique: When climbing, adopt a more upright position with your hands on the bar tops. Focus on maintaining a steady cadence and use circular pedal strokes rather than pushing down hard on each pedal.
  • Brake smart: When you need to stop, use both the front and rear brakes to avoid skidding. Always apply pressure to both brakes gradually for a smooth stop.

Balancing Running and Cycling:

The key to balancing running and cycling is to avoid doing back-to-back hard sessions. You want to allow enough recovery time between workouts to avoid overloading your body.

When I started adding cycling into my running routine, I thought I could do it all—long runs, interval sessions, and intense bike rides.

But after a few weeks, my body started sending me some pretty clear signals that I was doing too much.

I felt drained, my performance was slipping, and I even started to feel little aches and pains creeping in. That’s when I realized I needed to be smarter about balancing both.

Now, I plan my week so that my runs and bike rides complement each other.

If I have a hard interval session in the morning, I’ll do an easy recovery ride in the evening. Or, if I’m hitting the hills on the bike, I’ll keep my running light for a couple of days.

Running and Cycling Training Plan

Here’s an example of a balanced weekly plan for running and cycling:

Sample Weekly Plan:

  • Monday: Easy recovery ride (45 minutes)
  • Tuesday: Interval run (speed work)
  • Wednesday: Endurance bike ride (60-90 minutes)
  • Thursday: Tempo run (moderate effort)
  • Friday: Cross-training (light cycling or swimming)
  • Saturday: Long run (90 minutes or more)
  • Sunday: Rest or active recovery (yoga, stretching)

Top 6 Bike Workouts for Runners

Here are a few of my favorite cycling workouts designed specifically for runners. These sessions will help improve your strength, endurance, and overall performance as a runner and cyclist.

The Road Bike Cycling Workout

Fartlek is a Swedish term that means “speed play.” First used by runners in the 30s, fartlek training has, over the last few decades, spread to other sports—including cycling.

You can perform this workout on flat sections or hills; just make sure you are biking on feel and picking up the pace now and then.

The Workout

10 minutes of easy biking to warm up and get ready, then do the following:

  • 5 minutes of moderate biking
  • 2 minutes sprint
  • 4 minutes moderate
  • 1-minute sprint
  • 5 minutes moderate
  • 3 minutes sprint
  • 10 minutes of easy cooldown.

There is no magic formula for the perfect fartlek biking workout.

Feel free to let your creativity carry you forward, and remember to have fun.

It’s called “speed play” for a reason.

Endurance Ride Cycling Workout

The endurance workout is one of my favorite biking workouts—especially when I don’t feel like doing something intense but still get a sweat going.

The main goal of this session is to build endurance without causing too much fatigue.

You should feel the tension building in your muscles, but keep the speed at a conversational pace—meaning you can still talk without huffing and puffing.

The Workout

Start, like usual, with a 10-minute easy-paced pedaling to get you warmed and ready.

Next, aim to keep a steady cadence for the upcoming 45 to 60 minutes, shooting for an effort level of 6 to 7 on an effort scale of 1 to 10 and exercising at 60 to 70 percent of your maximum heart rate.

As a beginner, go for a low cadence—roughly 60 to 70 rpm for your first few endurance sessions. As you get fitter, work it up gradually up to more than an hour.

Last up, finish the ride with a 5-minute slow-spinning cool down at an easy pace.

Speed Intervals Cycling Workout

Intervals are a crucial part of any cycling training program.

These powerful sessions can help you increase aerobic capacity (VO2 max) and power burn mad calories, and they are perfect for the time-crunched runner.

You can perform this workout indoors or outdoors.—although I prefer doing it indoors, I can have more control over pace intervals, length, and duration.

The Workout

Start with a 10-minute easy-paced pedaling to get you warmed and set.

Next, perform at least six to eight one-minute fast-pedal intervals near top speed—nothing less than 90 percent of your max.

Slow down and recover with a one-minute easy-pace spin with minimal resistance.

After the last interval,  slow down and ride at a neutral pace for 5 minutes to cool down.

Tabata Intervals Cycling Workout

Tabata intervals are the brainchild of the Japanese exercise physiologist Izumi Tabata and consist of alternating between 20 seconds of a high-intensity interval with 10 seconds of recovery.

Tabata protocol workouts are perfect if you’re short on time and looking to maximize every minute you spend on a bike.

These also increase cardiovascular fitness and shed calories like nothing else.

Feel free to download this Tabata-timer app for a timer to keep track of your sprint and rest periods.

The Workout

Begin the workout with a 10-minute easy ride as a warm-up of easy spinning.

Next, increase the intensity by boosting gear ratio or tension, and sprint for 20 seconds as fast as possible.

Then, slow down and recover with a 10-second of easy spinning.

Repeat the on-and-off pattern eight times to complete one round.

The pedal is easy for one to two minutes, and then aim to do at least two to three more rounds.

Climbing Intervals Cycling Workout

The cycling climbing session helps build the strength and power needed to tackle the hills easily and will also totally challenge your muscular strength, endurance, and power on the bike.

You have two options here:

(1) Tackle a moderate-to-steep hill.

The ideal hill should take at least two to five minutes to climb and has a steady grade of 7 to 10 percent with no stop signs or traffic lights.

(2) Or hop on a stationary bike with a riser block under the front wheel to simulate a hill by raising the bike’s front wheel.

The Workout

Start with a 10-minute warm-up of easy pedaling.

Begin the uphill, aiming for an effort of 7 to 8 for at least 5 minutes and for 70 to 80 RPM.

Then, coast or recover downhill, and repeat for 25 to 30 minutes.

Repeat the cycle, then end the workout with a 5-minute easy pedaling cool-down.

Feel free to stand and attack for 15 to 20 pedal strokes a time at the fastest pace possible.

The Recovery Cycling Workout

A recovery ride serves the same purpose as a recovery run. As a result, you shouldn’t skip them.

The recovery will help you increase your biking mileage while also allowing your body to recover by spending some time in a lower-intensity training zone.

The Workout

This is easy: Ride as easily as you can for 30 to 45 minutes.

Go as embarrassingly slow as possible and do it deliberately.

Keep spinning easy, and don’t let your training buddy ruin this for you—regardless of how much they pressure you into speeding things up.

Sample Weekly Schedule: Balancing Running and Cycling

Here’s a sample weekly schedule that combines running and cycling in a way that optimizes performance, supports recovery, and avoids overtraining. Feel free to adjust based on your fitness level and goals.

Sample Week: Running-Focused with Cycling Cross-Training

  • Monday: Easy run (30–40 minutes) + Core workout (optional)
  • Tuesday: Interval run (e.g., 6x400m at a challenging pace)
  • Wednesday: Light recovery cycling (20–30 minutes at low intensity)
  • Thursday: Steady-state run (40–50 minutes at a moderate pace)
  • Friday: Strength-based cycling workout (e.g., 45 minutes with low resistance and moderate effort)
  • Saturday: Long run (60–90 minutes at an easy pace)
  • Sunday: Rest or gentle mobility/yoga

Conclusion

If you’re a runner who’s never thought about cycling, I get it—I used to be that way, too. But trust me, adding cycling to your routine can do wonders for your running.

Whether you’re looking to recover faster, build strength, or switch things up, cycling has something to offer. So, if you’re on the fence, borrow a bike or hit up a spin class. Who knows?

You might end up loving it as much as I do.

Revolutionize Your Run: The Ultimate Guide to Strengthening Your Obliques

Oblique Exercises

In my many discussions about core training for runners, there’s one muscle group that’s been lurking in the shadows: the obliques.

Today, I’m unveiling a workout specially crafted for these underappreciated wonders of our torso.

Why the focus on obliques now? Well, as we’ll unravel, they’re not just sideline muscles. The obliques play a pivotal role in the ensemble that is our core.

But before we delve into those specialized oblique workouts, let’s tackle an essential question: Why should the core, and especially those often-overlooked obliques, occupy a slot in your training regimen?

Join us as we navigate the intricate web of muscles to understand the significance of a strong core.

The Benefits Of A Strong Core

Sure, a toned tummy looks fabulous when you’re rocking your favorite swimwear, but the benefits go way beyond the aesthetic.

The core—your body’s power hub—plays a pivotal role in almost every move you make. Whether you’re busting out reps at the gym or simply reaching for something on a high shelf, a fortified core is your silent, ever-ready ally.

Think of it this way: a robust core isn’t just about acing athletic feats; it’s also your trusty sidekick for mundane tasks. From lugging grocery bags to strutting confidently down a corridor, a strong core is like your body’s superhero cape.

And here’s a health nugget to chew on: extensive studies have shown that excessive belly fat can be a precursor to numerous health issues, from diabetes and high blood pressure to the more severe like heart attacks.

So, while a flat stomach might be a confidence booster, it’s also a nod to a healthier, more robust you.

For more, check the following studies

What Are The Obliques? Defining The Side Abs

Imagine a set of muscles stretching in a diagonal path, linking your ribs to your pelvis and extending from the edge of your hipbone right up to your sternum. These are your obliques – the unsung heroes of your midsection.

More than just a name on your body’s roster, the obliques play a starring role in shaping and supporting your core. When you invest time in training them right, they perfectly complement your rectus abdominis (that’s the fancy name for the “six-pack” muscles). The reward? A waistline that not only looks stronger but also carries a certain sculpted elegance.

But wait, there’s more to the story! Your oblique family comprises two members: the external obliques, which you can think of as the outer guardians and the internal obliques, the deeper muscle layer. To ensure a core that’s not just show-ready but also performance-ready, it’s vital to give both these sets their due training time.

The External Obliques

Situated on the outer layer of your abdomen, they stretch diagonally from the sides of your rib cage right down to the peaks of your hip bones.

Picture this: every time you sway, swivel, or twist your torso, it’s the external obliques that come into play. What’s fascinating is the teamwork they exhibit. If you’re rotating your body to the right, it’s your left external oblique that takes charge, pulling the strings from the opposite side.

But the talents of these muscles don’t end there. Beyond aiding in those dance floor spins, the external obliques wear multiple hats. They’re pivotal in maintaining your posture, ensuring you stand tall and confident. Additionally, they act as guardians, generating a protective pressure that shields your vital internal organs. And if that weren’t enough, they also pitch in when it comes to spinal movements and other core functionalities.

In essence, these muscles aren’t just about the twist and shout on the dance floor; they’re integral to many of the movements and protections your body relies on daily.

The Internal Side Abs

Unlike their external counterparts, these are nestled snugly just beneath the rectus abdominis (your six-pack muscles) and sit slightly inside the hip bone.

While they may be tucked away out of plain sight, their role in body movement is undeniable. Similar to the external obliques, the internal ones are also intricately involved in twisting and turning. Yet, there’s a unique dance they perform. When you make a move like twisting to the left, both the left and right internal obliques are activated in tandem, working in harmony.

The Functions Of The External & External Obliques

Let’s dive into the choreography your obliques execute daily. Both the internal and external obliques are multitaskers, orchestrating a series of crucial moves that keep your torso flexible and strong.

Here are their headline acts:

  • Lateral Flexion: This is all about giving your torso its signature side-to-side bend. Think of those moments when you’re reaching sideways to pick something up or simply stretching after a long day.
  • Flexion: This move involves rounding your spine. Imagine the motion of curling forward into a ball or bending down to tie your shoes.
  • Rotation: The obliques’ grand finale! This function lets you twist and turn your torso. Whether you’re looking over your shoulder or pivoting in a dance, rotation is in play.

In sum, these functions highlight the obliques’ central role in giving your body its wide range of motion and stability. Whether bending, twisting, or flexing, they’re always at the heart of the action.

That’s why, if you’re aiming for superior performance, you need them to be strong.

As a runner, strong obliques can help you build and keep proper running form by ensuring spine stability and good posture throughout the running sessions.

This is especially the case when fatigue starts to set in.

The 7 Best Oblique Exercises To Try

Every muscle in your body follows the principle of ‘use it or lose it,’ and your obliques are no different. The more you challenge them, the stronger and more defined they become.

Want to put your obliques through their paces? Here’s a curated list of my top exercises that target every facet of oblique functionality, be it through rotation, testing their stability, or working under uneven loads.

Workout Breakdown

These side abs exercises are structured as mini-circuits, making them the perfect addition at the tail-end of your primary workout.

The Aim? To engage as many muscle fibers as possible in a swift yet effective manner. So, as you dive into these exercises, follow the sequence, reps, and rest intervals to the T.

Good News! There’s no need to break the bank with fancy gym memberships. The majority of these workouts are either equipment-free or simply need basic gear like a medicine ball or dumbbell.

A word of caution: This routine is designed to get your obliques burning with intensity! While the pace is brisk, never compromise on form. Prioritize clean, controlled movements to get the most out of each rep while keeping your body safe.

Ready to redefine those obliques? Let’s dive in!

  1. T-Stabilization

Assume a plank position with arms and legs straight but with the feet slightly wider.

Next, shift your weight to the right hand, stack up your feet, rotate the left side of your trunk up, and raise your left arm into the air so that your torso and arms are forming a “T” shape.

Hold the pose for 30 seconds to one minute, then switch sides to complete one set.

  1. Side Plank Crunch

Begin in a side plank on the left elbow with the left foot slightly in front of the right and the right hand behind the head.

Next, while keeping the waist lifted, core engaged, and torso steady, bring your right leg up toward your shoulder to lightly tap the right elbow, pause for a moment, and then bring it back to the starting position.

Aim to perform eight to ten crunches on each side to complete one set.

Shoot for three to five sets.

  1. Russian Twists Oblique Exercise

Sit on the floor with knees bent and feet flat on the floor, roughly hip distance apart, then lean back to a 45-degree angle.

For more challenge, use a heavier weight and/or lift both feet off the floor.

Next, while holding a weight plate and bracing the core, rotate your torso from right to left by twisting at the waist and swinging the weight across the body, tapping the weight to the floor, then twisting back over to the left side, tapping the weight to the left side of their body to complete one rep.

Aim for 12 to 16 reps to complete one set.

Shoot for three sets.

  1. Lying Side Oblique Crunches

Lie on your left side with legs on top of each other, knees bent, and core engaged, then place your right hand on the side of the head and the other hand on the oblique muscle.

Then, contract your oblique muscle by crunching the abs sideways.

Next, start performing sideways ab crunches, making sure to rise as high as possible, hold for a moment, and then slowly lower down to complete one rep.

  1. Metronome Side Abs Exercise

Begin by lying on your back with the knees slightly bent and raised over your hips, ankles parallel to the floor, and core engaged.

Next, rotate your legs to the right side, stopping short of tapping the ground, then move back to the center and rotate your legs to the other side to complete one rep.

Please don’t cheat by using momentum for the rotation.

Instead, move slowly and make sure to engage your core the entire time.

For more challenge, try to keep your legs as straight as possible.

  1. Around the World

Assume a shoulder-width stance with toes turned slightly out and tailbone tucked while holding a weight plate at the outside grip with the arms straight overhead.

Next, while engaging your core and keeping the back flat, bend your elbows and rotate your arms around to move the weight around your head in a circular motion.

Perform 8 to 12 “rotations” on each side to complete one set.

Do three sets.

  1. Spiderman Pushups Oblique Exercise

Assume a push-up position with legs and arms straight, core engaged, back flat, and head in a neutral position.

Next, as you lower your torso towards the ground, lift your right foot off the floor, then pull your right knee up and towards your right side to hip level or all the way up to the elbow, pause, then press back up to the starting position.

Switch sides to complete one rep.

Perform eight reps to complete one set.

Aim for three sets.

New to Running? Start Here…

If you’re serious about running, getting fit, and staying injury free, then make sure to download my Runners Blueprint Guide!

Inside this guide, you’ll learn how to start running and lose weight weight the easy and painless way. This is, in fact, your ultimate manifesto to becoming a faster and a stronger runner. And you want that, don’t you?

 Click HERE to check out my Runners Blueprint System today!

Don’t miss out! My awesome running plan is just one click away.

The 7 Best Oblique Exercises To Try – Conclusion

There you have it.

The above oblique exercises workout routine is all you need to build strong and powerful side abs. Just make sure to perform the seven side abs exercises on a regular basis while staying within your fitness level the entire time.

In the meantime thank you for dropping by.

Keep Running Strong

David D.

Top 15 HIIT Running Workout Routines

HIIT Workouts for runners

Looking for the ultimate HIIT running workout routines? Well, strap on your running shoes and get ready for a wild ride because you’ve stumbled upon the holy grail of high-intensity training.

And let me tell you, my friend, I am obsessed with running. Like, seriously obsessed. It’s been my passion for the past decade, and let me tell you, it hasn’t always been smooth sailing.

I’ll be real with you. I’ve made my fair share of mistakes along the way. I mean, who hasn’t? I’m not perfect, and neither are you. But here’s the thing: we learn from those mistakes and we grow stronger because of them. One mistake that stands out vividly in my memory is when I neglected the power of high-intensity interval training (HIIT).

For the first three years of my running journey, I was pounding the pavement tirelessly, thinking that sheer mileage would magically improve my performance. Boy, was I wrong. Not only did my progress come to a screeching halt, but I also found myself nursing a slew of frustrating injuries. And let’s not forget the unwanted weight gain from my repetitive running routine. It was a vicious cycle, my friend.

But then, everything changed when I incorporated HIIT into my training regimen. Let me tell you, it was a game-changer. Within just a few weeks, I started noticing incredible improvements, not only in my running abilities but also in my overall strength and athleticism. It was like unlocking a secret door to a whole new level of fitness.

And guess what? I don’t want you to go through the same struggles I did. That’s why today, I’m here to introduce you to the magic of HIIT training. Now, don’t worry, I won’t drown you in a sea of boring theories and scientific jargon. Nope, we’re going to keep it fun, practical, and actionable.

In this post, I’ll not only share some of the most effective running-specific HIIT routines but also throw in a few non-running workouts that will leave you breathless and begging for more. Trust me, it’s going to be epic.

Ready? Let’s do this!-

HIIT For Runners Defined

So, what the heck is HIIT, you ask? Well, let me break it down for you.

High-intensity interval training is like a thrilling roller coaster ride for your body. It’s all about pushing yourself to the limit through a strategic blend of intense anaerobic intervals and low-intensity aerobic activity.

Picture this: you go all out for 20 to 60 seconds, giving it everything you’ve got, and then you catch your breath during a brief period of rest or lighter activity. And guess what? You repeat this cycle for a total of 15 to 30 minutes of pure fitness bliss.

But what sets HIIT apart from the monotonous, never-ending treadmill sessions or steady-state cardio that most people dread?

Well, it’s all about the intensity. HIIT takes your workout to a whole new level by challenging your body to reach its maximum output capacity, boosting your VO2 max in the process. It’s like revving the engine of a high-performance sports car. You go full throttle, reach your peak heart rate, and then strategically recover before diving back into the action.

Now, let me share the secret sauce to maximizing your HIIT experience. Enter intensity. When those high-burst intervals come knocking, give it your all. Push yourself to the absolute limit and feel your heart racing, your muscles burning, and the sweat pouring down. Embrace the discomfort because that’s where the magic happens.

But remember that it’s crucial to allow yourself proper rest and recovery during the designated periods. It’s like catching your breath at the top of the roller coaster before plunging into the next exhilarating loop.

A Formula for Success

Still confused?

Here’s how to proceed:

  1. Start with a warm-up. Check this routine.
  2. First interval: exercise at maximum power for 30 to 60 seconds.
  3. Recover for 20 to 60 seconds (or longer, depending on the workout).
  4. Repeat step (2) and (3) seven to ten times.
  5. Cooldown. Check my routine here.

The Benefits of HIIT For Runners

High intensity interval training has a lot to offer, including:

Reduces Body Fat

Let me blow your mind with some fascinating research. There’s an Australian study that’ll make you think twice about your fat-burning strategy.

In this study, they pitted the high-intensity interval training (HIIT) group against the steady-state cardio group. And guess what? The results were mind-boggling. The HIIT group, following a mere 20-minute routine, managed to shed a whopping six times more body fat than their steady-state counterparts. Yes, you heard that right—six times more fat melted away in those who embraced the intensity of HIIT.

Now, what’s the takeaway from this remarkable study? It’s simple, my friend. When it comes to burning fat, it’s all about going hard and going short. Forget those long, tedious hours spent on the treadmill or elliptical machine. HIIT is here to save the day and kick fat to the curb.

And you know what I love most about it? It demolishes the age-old excuse of “I don’t have time for exercise.” Say goodbye to those time-consuming workouts because HIIT gets the job done in a fraction of the time.

I remember when I first ventured into the world of HIIT. I must admit, I was skeptical. How could a shorter workout make such a significant impact on the scale? But let me tell you, my friend, it was a game-changer.

Boost Metabolism

Thanks to a phenomenon called excess post-exercise oxygen consumption (EPOC), your body continues to torch calories even while you kick back and relax. It’s like getting a bonus boost to your metabolism!

And guess what? A study conducted by the brilliant minds at East Tennessee State University discovered that HIIT workouts can keep your metabolism revved up for hours, burning as much as an extra 100 calories post-training.

Now, you might be thinking, “100 calories? That doesn’t sound like much.” But my friend, those calories can add up over time, giving you an extra edge in your weight loss journey.

Build Muscle

But wait, there’s more! HIIT doesn’t just help you shed fat; it also helps you build muscle. You might be wondering, “But isn’t muscle building reserved for those heavy lifting sessions?” Well, think again.

A groundbreaking study published in the Journal of The International Society of Sports Nutrition revealed something fascinating. Even in the absence of traditional strength training, HIIT has the power to sculpt those muscles you’ve always dreamed of. It’s like a magical two-in-one combo—shedding fat while gaining lean muscle mass. How does it work?

HIIT creates an anabolic effect in your body, promoting muscle growth. And here’s the cherry on top: it skyrockets the production of human growth post-training, making your muscles say, “Hello gains, nice!”

Cutting the Junk Is the Big Promise

Researchers at McMaster University in Hamilton, Ontario cracked the code and discovered that HIIT is like a superhero for your fitness, capable of achieving in 2.5 hours what would take a whopping 10.5 hours of traditional endurance training.

You lace up your running shoes and hit the pavement for an interval run. You push your limits for short bursts of intense effort, followed by brief periods of active recovery. The result?

A fitness miracle that’s four times more effective than your standard cardio routine. It’s like discovering a hidden shortcut to your fitness goals, leaving those monotonous long runs in the dust.

I’ve personally experienced this transformation, and let me tell you, it’s nothing short of amazing.

By incorporating plenty of interval workouts while reducing my weekly mileage, I’ve not only become a faster runner but also managed to keep those pesky injuries at bay.

You Can Do It Anywhere

Now here’s the best part: high-intensity interval workouts can be done anywhere, anytime. They’re the chameleons of fitness, adapting to any environment and equipment you have available.q

Whether you prefer interval runs that make your heart pound like a tribal drum or fartlek runs that keep you on your toes, there’s a world of options at your disposal. And let’s not forget about the power of bodyweight exercises, dumbbells, kettlebells, jump ropes, weights, or even a trusty sandbag.

The possibilities are endless, and you can turn any space into your personal fitness playground.

The Dangers of HIIT For Runners

Listen up, my fellow fitness enthusiasts, because we’re about to dive into the nitty-gritty of HIIT and uncover the potential pitfalls that lie beneath its shiny surface.

Yes, it’s time to shed some light on the not-so-sunny side of this revolutionary training method. While HIIT has the power to transform your fitness journey, you must tread carefully and consider a few important factors before jumping headfirst into the high-intensity abyss.

Now, let’s get real for a moment. HIIT is a force to be reckoned with, pushing your body to its limits and demanding the utmost from your cardiovascular system. But that also means it’s not suitable for everyone, especially those who find themselves in a delicate state of injury recovery, dealing with cardiovascular or circulatory issues, or simply starting from square one on their fitness journey. In these cases, it’s crucial to prioritize your health and well-being above all else.

Here’s the deal: I’m not a doctor, but I strongly urge you to consult with a healthcare professional who can assess your current condition and guide you towards the best workout options for your specific needs. They have the knowledge and expertise to give you personalized advice that takes into account your unique circumstances.

Remember, your health is priceless. Taking a step back and ensuring you’re in the right physical condition to tackle the challenges of HIIT is a wise move. Think of it as protecting your investment. Just like a car needs regular maintenance to perform at its peak, your body deserves the same care and attention. So, don’t be shy about seeking professional advice. It’s better to be safe than sorry.

How to Start HIIT Workouts For runners 

Alright, my eager friend, now that you’ve received the green light from your doctor and you’re ready to take on the exhilarating world of HIIT, it’s time to lay down the foundation for success. I want you to dive into this training method with confidence, avoiding any unnecessary risks or setbacks.

Think of these benchmarks as stepping stones that will guide you towards a smooth and injury-free HIIT experience. They serve as a testament to your commitment and readiness to take on the challenges that lie ahead.

Without further ado, let’s dive into the three key benchmarks that will set you up for HIIT success.

First up, we have the habit of running regularly for the past three to four months. Consistency is key here. It’s all about building a strong foundation of cardiovascular endurance and getting those legs accustomed to the rhythm of the run. Lace up those shoes, hit the pavement, and make running a part of your lifestyle.

But we don’t stop there. It’s time to level up your running game. The second benchmark calls for consistently challenging yourself during your runs, pushing your effort level to a solid 70 to 80 percent. I’m talking about stepping outside your comfort zone, embracing that burn in your muscles, and breaking through any self-imposed limitations. This is where the magic happens.

Now, onto the third benchmark—the weekly long run. Picture this: you’re out there, pounding the pavement, one foot in front of the other, for a solid hour or more. It’s a test of mental and physical endurance, a chance to tap into your inner grit and discover what you’re truly capable of. This long run builds resilience and prepares your body for the challenges that await during HIIT workouts.

If you’ve checked off these three benchmarks and you’re feeling like a running rockstar, then congratulations! You’ve laid a solid foundation for the introduction of HIIT into your training routine. You’ve shown dedication, discipline, and a burning desire to take your fitness to the next level. But hold on, if you’re just starting out on your running journey or haven’t quite met these benchmarks yet, don’t worry.

If you find yourself in this position, my advice to you is simple: invest a few months into building up your stamina. Follow a well-rounded running program that gradually increases your mileage and endurance.

Top 15 HIIT Running Workout Routines

Here are 15 HIIT variations to help you get into the best shape of your life.

Pick one or two workouts to add to your weekly program.

Make sure you incorporate at least one day of rest between each workout.

HIIT Running Workout # 1 – Sprints

Before you dive into the heart-pounding action, let’s not forget the importance of a proper warm-up. Think of it as preparing your body for the exhilarating race ahead. Engage in dynamic stretches, loosen those muscles, and get that blood pumping. A warm-up primes your body for the intensity that awaits, helping you perform at your best and reducing the risk of injury.

Now, let’s talk about sprint distances. Choose a distance that suits your fitness level and pushes you just beyond your comfort zone. It’s like selecting the perfect gear for a thrilling race. Whether it’s a 100-meter dash or a longer sprint, find the sweet spot that challenges you without overwhelming you.

As you gear up for your first sprint interval, give it everything you’ve got.  Go all out at 80 percent of your maximum effort. Feel your muscles engage, your heart pounding, and the wind rushing past you.

After each sprint, take a well-deserved breather. Recovery is crucial to catch your breath and prepare for the next explosive burst of energy. Take between 30 seconds and one minute to recover, allowing your heart rate to settle and your body to replenish its energy stores.

Repeat this exhilarating process of sprinting and recovery six to eight times. Feel the rush of adrenaline with each interval, pushing yourself beyond your limits and unlocking new levels of strength and endurance. Embrace the challenge, and remember, it’s in these intense moments that growth happens.

As you approach the finish line of your workout, it’s time to cool down. Just like a victorious athlete savors their triumph, take five minutes to gradually decrease your pace and let your body ease into a state of relaxation.

HIIT Running Workout # 2 – Hill Sprints

Get ready to take your sprinting game to new heights with an electrifying twist – hill sprints! If you’ve mastered sprinting on flat ground, it’s time to conquer the majestic slopes and unleash your lower body speed and strength.

Now, it’s time to seek out the perfect hill for your sprinting adventure. Find a steep slope that stretches between 100 to 300 feet in length. It’s like scouting for the ultimate conquerable peak, where your efforts will be rewarded with incredible speed and strength gains.

As you embark on your hill sprint session, visualize yourself as an unstoppable force, conquering the incline with every powerful stride. Feel the burn in your quads, the surge of energy in your calves, and the wind whipping through your hair. Embrace the challenge, knowing that with each step, you’re building a stronger and faster version of yourself.

Once you reach the top of the hill, take a moment to catch your breath and enjoy the victorious view. It’s a triumphant pause in your ascent, a well-deserved reward for conquering the uphill battle. But don’t rest for too long, my friend, as you’ll need to make your way back down the hill for your recovery phase. Let gravity be your guide as you jog back down, allowing your body to recover and prepare for the next thrilling ascent.

Repeat this invigorating cycle of sprinting uphill and jogging back down five to eight times. Each repetition is like conquering a mini mountain, pushing your limits and elevating your performance to new heights. Embrace the burn in your muscles and the rapid beat of your heart, for it is in these challenging moments that true strength is forged.

HIIT Running Workout # 3 – The Bodyweight Routine

Picture yourself harnessing the might of your muscles, sculpting your body, and pushing yourself to new limits. Get ready for a bodyweight routine that will ignite your progress and lay the foundation for future challenges.

As a fan of bodyweight exercises, I can’t stress enough their benefits. They’re like the Swiss Army knives of the fitness world—convenient, versatile, and accessible to all. Whether you’re a beginner or a seasoned fitness enthusiast, bodyweight exercises offer a pathway to success, as long as you prioritize proper form and stay within your fitness level. It’s all about building a solid foundation to support your fitness journey.

Now, let’s dive into a beginner-friendly routine that will set you on the path to total body strength and endurance. By incorporating these exercises regularly, you’ll lay the groundwork for even more demanding workouts in the future. So, grab your enthusiasm, put on your workout gear, and let’s conquer this bodyweight routine together!

For each exercise, aim to complete five sets of ten-to-fifteen reps. Remember, it’s not just about the quantity, but also the quality of each repetition. Focus on maintaining proper form, engaging the target muscles, and challenging yourself without compromising safety.

First up, pull-ups, the ultimate test of upper body strength. Picture yourself hanging from a sturdy bar, channeling your inner warrior as you lift your bodyweight with sheer determination. This exercise targets your back, shoulders, and arms, building strength and definition in those upper body muscles.

Next, let’s embrace the power of air squats. Stand tall, feet shoulder-width apart, and sink into a squat position as if you’re preparing to sit on an imaginary chair. Feel the burn in your quadriceps and glutes as you rise back up, like a phoenix rising from the ashes. Air squats are fantastic for strengthening your lower body and enhancing your overall stability.

Prepare to take a dip into the world of dips! Find parallel bars or sturdy surfaces to support your body as you lower yourself down and push back up. This exercise targets your triceps, chest, and shoulders, sculpting those upper body muscles and improving your pushing strength. Embrace the challenge, and watch your body transform.

Now, let’s shift our focus to the classic pushup. Get into a high plank position, hands shoulder-width apart, and lower your chest towards the ground before pushing back up with controlled power. Feel your chest, shoulders, and triceps engage as you conquer each repetition. Pushups are like the bread and butter of bodyweight exercises, delivering a well-rounded upper body workout.

Last but not least, forward lunges, a move that activates your lower body and challenges your balance. Step forward with one leg, lower your body until both knees are bent at a 90-degree angle, and push through your heel to return to the starting position.

Alternate legs with each repetition, and feel the burn in your quadriceps and glutes as you stride towards greater strength.

HIIT Running Workout # 4 – Tabata Protocol

Get ready to experience a heart-pumping, calorie-blasting, and exhilarating workout that will push your limits and leave you feeling invigorated. Introducing one of my all-time favorite HIIT workouts—the Tabata protocol.

This workout is like a burst of lightning, delivering intense intervals of effort followed by moments of recovery. It’s a high-intensity dance between pushing your limits and allowing your body to recharge.

Studies have shown that Tabata workouts, like the one we just conquered, have numerous benefits. Research papers have revealed that this form of high-intensity interval training can enhance cardiovascular fitness, improve anaerobic capacity, and even boost metabolism long after the workout is over.

For the Tabata intervals, you’ll be running at your fastest pace for 20 seconds—a sprint that will make your heart race, your lungs gasp for air, and your legs feel like they’re on fire. Channel your inner Usain Bolt as you explode forward, pushing your limits with every stride.

But don’t worry, after each 20-second burst of speed, you’ll have a moment to catch your breath and recover. It’s like a brief respite amidst the storm—a chance to regroup, refocus, and prepare for the next exhilarating round. Use those 10 seconds of recovery to jog slowly, allowing your heart rate to settle and your muscles to relax before the next sprint.

Now, let’s repeat this electrifying pattern eight times. Eight cycles of pushing your limits, followed by moments of respite. It’s a beautiful balance between exertion and recovery. With each repetition, you’ll feel your body growing stronger, your endurance soaring, and your spirit igniting with a sense of accomplishment.

HIIT Running Workout # 5 – Tabata Protocol – The Strength Version

Are you ready to take your fitness journey to the next level? Brace yourself for the ultimate challenge—Tabata bodyweight training. It’s time to put your strength, endurance, and mental fortitude to the test. But before we dive into this exhilarating workout, let’s talk about what makes it so unique and why you need to approach it with caution.

Tabata bodyweight training combines the best of both worlds: aerobic and anaerobic exercises.

It’s like a fusion of fire and air, blending the intensity of high-intensity intervals with the power of bodyweight movements. This workout will make you sweat, burn calories, and leave you feeling like a warrior who has conquered the battlefield of fitness.

However, a word of caution—Tabata bodyweight training is not for the faint of heart. It demands discipline, proper form, and a keen understanding of your fitness level. It’s important to listen to your body and know when to push yourself and when to take a step back. Remember, your safety and well-being should always be a top priority.

Here’s the workout routine:

  • Do as many high knee sprints as you can in 20 seconds
  • Rest for 10 seconds
  • Do as many squats as you can in 20 seconds
  • Rest for 10 seconds
  • Do as many pushups as you can in 20 seconds
  • Rest for 10 seconds
  • Do as many burpees as you can in 20 seconds
  • Rest for 10 seconds
  • Do as many sit-ups as you can in 20 seconds
  • Rest for 10 seconds
  • Do as many squat jumps as you can in 20 seconds

Rest for one to two minutes.

Repeat the circuit two to three times.

Finish the session with a 10-minute cool-down.

You can also try this agility ladder workout.

HIIT For Runners Workout # 6 – HIIT Time Challenge

Looking for an extra edge with your training? Try the HIIT time challenge.

Start your session with a 10-minute warm-up of light jogging.

After that, spend 20 minutes doing as many rounds as possible (AMRAP) of:

  • Ten military style pushups
  • Ten hanging leg raises
  • Ten jumping squats
  • Ten burpees
  • Ten pull-ups.

Record your result, then during your next session aim to beat your record.

HIIT For Runners Workout # 7 – Jump Rope Routine

I’m a big fan of jump rope workouts.

These burn mad calories, improve your foot speed, increase coordination, and boost agility.

What’s not to like?

Here’s how to proceed:

Start with a 5 minute forward jumping rope exercise at a comfortable pace as a warm-up.

Afterward, put the rope down and do a set of full-body dynamic stretches.

Next, perform the following exercises:

  • One minute of forward jumps
  • One minute of alternate foot jumps
  • One minute of side-to-side jumps
  • One minute of double unders
  • One minute of high knee jumps
  • One minute of one-foot hops

Rest for two to three minutes, then repeat the circuit two to three times.

HIIT For Runners Workout # 8 – Plyometric HIIT Workout

Also known as explosive training, plyometric training requires your muscles to make use of maximum force in minimum time.

When doing this workout, go explosive for 30 seconds, then recover for another 30 seconds, move to the next exercise, and repeat.

Rest for one to two minutes after completing the whole circuit, then repeat it two to three times.

For a greater challenge, consider holding dumbbells at your sides while doing the workout, or wear a weighted vest.

  • Box Jumps
  • Plyo push-up
  • Jumping lunges
  • 180-degree squat jump
  • Burpees

HIIT For Runners Workout # 9  – The Ab Worker

I don’t believe in “spot reduction” exercises, but I’m pretty sure that HIIT training can tone your midsection.

It’s also a fun way to exercise your abs: HIIT style is much more enjoyable than doing crunches.

Here’s the workout.

Complete three sets of:

  • 25 Russian twists (on each side)
  • 20 Woodchoppers
  • 25 Mountain climbers
  • 20 Bicycle crunches
  • 20 Hanging leg

HIIT For Runners Workout # 10 – Medicine-Ball HIIT Workout

Medicine balls are usually lightweight.

They’re designed for simple grip and maneuverability, and they’re also a powerful tool for HIIT styled workouts.

Med ball exercises target multiple muscle groups, boost coordination, increase endurance, and improve grip strength.

Complete three sets of eight to 15 reps of:

  • Rock and roll up
  • Medicine ball push-up
  • V-up
  • Woodchopper
  • Wall toss.

HIIT For Runners Workout # 11 – Sleds Routine

Sled training is one of the most grueling workouts I’ve ever done.

The first time I ever tried it I truly thought I was going to die, but thanks to a training buddy that kept motivated, I was able to pull it through.

The premise is simple: push the sled from point A to point B as hard and fast as possible without sacrificing form.

That’s it!

If it’s your first time trying this workout, go light and slow.

Start out with a 35-pound slate or lighter.

Only after you’ve nailed proper form should you gradually add more weights and reps.

This I learned the hard way after my first go at sled workouts when I thought I was Superman, I couldn’t sit comfortably nor move my arms for two days!

Here’s how to proceed:

Load a sled on each side and push it for the desired distance.

Then rest for 30 seconds and repeat five to seven more times.

What’s good form? Keep a straight line from your head to your ankle and drive your feet diagonally into the ground with each step you take.

The power needed for the forward momentum must come from your hips and legs, not your arms.

HIIT For Runners Workout # 12 – “Fight Gone Bad” WOD

You cannot do HIIT workouts without throwing some CrossFit WODs (Workout of The Day) into the mix.

After all, CrossFit philosophy revolves around the principles of HIIT training.

I like the “Fight Gone Bad” WOD because it’s intense and will have you doing all sorts of plyo, resistance, and cardio exercises.

To do the “Fight Gone Bad” WOD, complete five rounds of:

  • Wall-ball, 20-pound ball, 10 ft targets (Reps)
  • Sumo deadlift high-pull, 75 pounds (Reps)
  • Box Jump, 20″ box (Reps)
  • Push-press, 75 pounds (Reps)
  • Row (Calories)

HIIT For Runners Workout # 14 – Filthy Fifty CrossFit Workout

The filthy 50 is another brutal CrossFit workout loaded with rigorous exercises guaranteed to push you to your breaking point.

The circuit involves performing 50 reps of 10 different exercises, all done as quickly as possible.

The exercises are:

  • 50 box jumps with a 24-inch box
  • 50 jumping pull-ups
  • 50 Kettlebell swings
  • 50 walking lunge steps
  • 50 knees to elbows
  • 50 reps of push presses with 45 pounds
  • 50 back extensions
  • 50 wall balls using a 20-pound ball
  • 50 burpees
  • 50 double-unders.

Amazing, right? If you can pull this off in under 30 minutes, then you’re in remarkable condition!

HIIT For Runners Workout # 15 – Heavy Rope HIIT Workout

Rope training is the most recent addition to my training regimen, and goodness, it’s freaking tough!

Heavy rope exercises target every major muscle in the body and will push you to the breaking point if you’re not careful.

Here’s a workout routine to try:

Start with a 10 to 15 minutes dynamic warm-up, then perform the following battling rope exercises:

  • One minute of rope waves
  • One minute of shoulder press
  • One minute of rope spirals
  • One minute of side slams
  • One minute of alternating wave lunge jump
  • One minute of start jumps.

HIIT Running Workout Routines – The Conclusion

There you have it. The above HIIT running workout routines are some of the most efficient and powerful workouts you can ever do to improve your fitness and health.

Feel free to leave your comments and questions below, and as always, thanks for stopping by. Keep running strong!

David D.

The 16 Best Bodyweight Exercises For Runners (& How to Start Body Weight Training)

female runner doing Bodyweight Exercises

Looking to start bodyweight exercises for runners but have no idea where to get started? Then you have come to the right place.

Here’s the truth.

Bodyweight training, or calisthenics, is one of the best options you got to improve your fitness, lose weight, and build the body of your dreams.

It’s the ideal way to work out at home, in the gym, or wherever you happen to be. Most calisthenic exercises are convenient, and by definition, require no equipment—just your body and some space around you.

Seems hard and scary, but don’t lose heart! As we’re going to see in today’s post, calisthenics is not rocket science.

Here’s your complete guide on how to start bodyweight training as a beginner.

In this sweet guide, you’ll learn:

  • The benefits of calisthenics
  • How to get started with bodyweight exercises
  • What is a calisthenic workout
  • The basic exercises you need
  • How to develop proper technique
  • And so much more.

Sounds good?

Let’s get started.

What are Bodyweight Training Exercises?

As the name implies, bodyweight training consists of strength-building exercises that utilize body weight to create resistance for the muscles against gravity instead of resistance in the form of bars, dumbbells, kettlebells, medicine balls, exercise machines, you name it.

Typical calisthenics workouts can range from straightforward sessions of push-ups and pull-ups to an elaborate routine of muscle-ups and jackhammers.

Bodyweight training is simple to learn, efficient, and can be done virtually anywhere, at work, at home, while traveling, etc. Think of it as a portable gym.

What I like the most about bodyweight training is scalability. You can easily modify and re-adjust your routine to match your fitness skill, whether you’re a newbie couch potato or an elite gymnast.

Bodyweight Exercises Benefits For Runers

Bodyweight exercises are some of the best moves that can help you improve your fitness level and get into the best shape of your life without paying for hefty gym fees, or be confined to a gym.

This kind of training is really convenient, and can be done anytime anywhere.

You don’t need any sort of fancy equipment or access to the gym.

All you need is your bodyweight, a clear and comprehensive routine and a bit of determination.

The bulk of bodyweight exercise is convenient, simple and scalable, so as you long as you are willing to keep good form the entire time, listen to your body, and do your best, you will be in a good place.

The routine I’m sharing with you today involves doing a set of challenging bodyweight exercises designed to push you hard, while the recovery periods refresh you for the next round of high-intensity work.

To make the most out of this workout, be sure to push your hardest on every interval—just keep good form the priority here—and by the end of the routine you should feel utterly exhausted.

If you are not completely worn out, you are not pushing it hard enough.

So make sure to push yourself as hard as possible while keeping proper form the entire time.

If your form starts to suffer, that’s a clear sign that you should back off, recover a bit, then go at it again.

Just don’t give up.

The 16 Best Bodyweight Exercises For Runners

If you haven’t exercised in a long time, a good segway to the world of bodyweight training is starting with basic exercises—think push-ups and pull-ups.

These exercises are building blocks of strength training. They form the foundation of almost every move you’re going to make in the future.

Do them with good form, though. Proper technique is especially vital for beginners, as the movement habits you develop off the bat will stick you as you progress.

Once you master the basic callisthenic exercises shared below, the fancier moves will start to seem much more doable.

Bodyweight Exercise For Runners – 1. Air squats

Benefits

Bodyweight squats are wonderful multi-joint exercises target almost every muscle in your lower body.

They are also key for boosting endurance, especially if you are doing any type of running, biking, and swimming.

Here are some of the common mistakes:

  • Rounding the shoulders and curving the back as you squat.
  • Excessive forward knee bending until they extend past the toes.
  • Knees falling inward or outward.
  • Dumping weight into the toes, which places strain on the knee joints.
  • Misalignment of the knees and toes.

Proper Form

Begin by standing with your feet a little wider than hip-width apart, toes should be slightly turned out, with the arms resting at your sides.

Next, while bracing your core and pulling your shoulder blades in towards each other, start squatting by bending your knees slowly while putting most of your bodyweight onto your heels.

Make sure to keep your knees aligned over your ankles and back straight the entire time.

As soon as you reach the bottom of the squat, press back up through the heel and return to standing position.

Do this exercise slowly and gradually at first, but as you master proper form, be sure speed it up to boost the cardiovascular activity and burn some mad calories during this exercise.

Bodyweight Exercise For Runners – 2. Push-ups

The push-up is a classic bodyweight exercise targetting the upper body and core. It works the biceps, triceps, and pecks like nothing else—as long as you perform it right

Not only bad push-up form is a waste of time and energy, but it could also lead to lower back pain and severe shoulder and wrist issues.

Here are some of the common push-up pitfalls:

  • Lifting the butt high in the air.
  • Performing half a push-up—not going low or high enough.
  • Sinking the hips down.
  • Holding the breath.
  • Placing the palms in front of the shoulders.
  • Keeping the chin too close to the chest.
  • Poor head position.
  • Putting the hands too far forward.
  • Not fully straightening the arms on the push-up.

Proper Form

Begin by setting up your weight supported onto your toes and hands.  Place your hands underneath your shoulders, then extend your legs straight out behind you. Keep your head in a neutral position, arms and hands slightly below your shoulders, fingers pointing forwards.

Tighten your core, squeeze your butt, then lower your body until your chest is an inch or two above the floor, elbows pulling back at about a 45-degree, then rise back up by fully extending your arms. That’s one rep.

Engage your core and buttocks and keep your elbows tucked in to your sides throughout the movement. This helps keep your body in a straight line from head to heels.

Can’t perform a single push-up? Use a bench or an elevated surface to put your hands on. I won’t recommend dropping to your knees as it instills lousy form.

As you get stronger, opt for lower surfaces for your hands until you can do clean pushups with no assistance.

Push-up variations: Military pushups, wide-stance pushups, incline/decline pushups, archer push-ups, one-hand push-ups, Hindu push-ups, etc.

Bodyweight Exercise For Runners – 3.Plank

The plank is one of the most basic core exercises out there, but it’s not as simple as you might think. It’s actually one of the most common mistakes when it comes to technique.

Planks are versatile exercises that increase core strength and relieve the lower back. But if performed wrong, they can do more harm than good.

Here are some of the common form errors:

  • Not engaging the core muscles
  • Sinking the hips
  • Arching the back
  • Looking up straight ahead
  • Tilting the hips
  • Positioning the hands too far apart
  • Placing the arms behind or in front of the shoulders
  • Lifting up the hips too high
  • Bringing the shoulders beyond the elbows
  • Not engaging the legs and butt

Proper Form

Begin on your knees and hands in the classic tabletop position.

Position your elbows underneath your shoulder, then tuck your toes and lift your knees off the floor, and look straight toward the floor.

Engage your shoulder muscles and keep your neck aligned in a neutral position, feet together, and toes touching the ground.

Readjust your hand position until your wrists are lined up under your shoulders.

Hold the plank position for as long as possible without losing form.

Plank variations: low plank arm reach, reverse plank side start plank, low side plank, extended plank, low side plank crunch, forearm plank, etc.

Bodyweight Exercise For Runners – 4. Bench Dips

Also known as a triceps dip, this is a classic bodyweight exercise. Dips target the chest and triceps and are best performed off the platform of a chair or a bench.

Here are some common mistakes to watch out for:

  • Not going low enough or going too low
  • Moving too fast
  • Flaring the elbows to the side
  • Not engaging the core
  • Gazing at the ceiling
  • Butt tilting

Proper Form

Start facing away from a chair or bench, then the front of the platform with both hands shoulder-width distance apart, extending legs out in front of you.

Engage your core, flex at the elbows to slowly lower your body until your arm at the forearm forms a 90-degree angle. Pause at the bottom for a one to tow count, then lift yourself powerfully using your triceps. That’s one rep.

Once you can breeze through 12 to 16 reps, move on to a more advanced move, like close grip push up.

Bench Dips Variations: band-assisted dips, dip to leg raise, assisted dip machine, weighted dips, jumping dips with negatives, etc.

Bodyweight Exercise For Runners – 5. Pull-ups

Pull-ups are maybe the best back exercise and better done with a pull-up bar. It’s also one of the hardest, so take your time and start with easier variations.

Here are some common pull-ups mistakes:

  • Not getting the chin above the bar
  • Gripping too wide
  • Staying straight as an arrow
  • Not using the full range of motion
  • Letting the elbow flare
  • Not keeping the back flat
  • Not keeping the shoulders back
  • Not going to “dead hang”

Proper Form

Grab a horizontal bar with both hands, palm facing away from you and hands at shoulder-width apart.

Next, while flexing your traps and shifting your shoulders up and back, pull your body up toward the bar, then slowly lower down to complete one rep.

Pull-ups variations: chair-assisted pull-ups, close grip pull-ups, wide grip pulls, butterfly pull-ups, kipping pull-ups, etc.

Bodyweight Exercise For Runners – 6. The Bridge

Also known as the hip raise, the bridge is a fantastic pose for increasing strength in the hamstrings, back, and glutes.

When performed incorrectly, the bridge can lead to neck, lower, back, or knee issues.

Here are some of the common blunders:

  • Lengthening the muscles within the quads
  • Having the feet too close to the butt.
  • Lifting the heels off the ground
  • Not keeping the toes in line with the knees
  • Put too much force on head and neck

Proper Form

Begin by lying down flat on your back. Pull your shoulders back and down.

Place your arms alongside your body, then bend your knees and place your feet on the ground, a hip-width distance apart.

Walk your feet back towards your butt, then, on the inhale, press into your arms and feet to lift your hips towards the ceiling. Squeeze your glutes as you rise to create a straight line from your knees to shoulders.

While keeping your knees, hips, and chest aligned, hold the top of the movement for three to ten seconds. Do not let your hips sag or drop.

Slowly lower down and repeat.

Bridge variations: single leg bridge, bridge with a squeeze, weighed bridge, pulsating bridge, etc.

Bodyweight Exercise For Runners – 7. Lunges

Another fantastic lower body exercise for building up the glutes and the quads.

Lunges also help improve coordination and balance, and they’re great for improving proprioception.

But they are also extremely and commonly easy to get wrong. Bad technique doesn’t just look sloppy; it could also cause injury.

Avoid these common pitfalls:

  • Bending the torso forward
  • Leaning forward or back
  • Turning the foot inward
  • Externally rotating the back knee
  • Lowering the rear knee too fast
  • Not maintaining a straight back
  • Losing balance
  • Taking very short strides forward or backward
  • Extending the knee past the toes on the lunge
  • Shifting the weight from the heel to the toes—or riding the toes.
  • Pushing the hips forward

Proper Form

Assume an athletic position, with the feet hip-width apart, back flat, and core engaged.

Take a slow, controlled step forward with your right leg as far as possible. Your front heel is roughly two feet in front of your rear knee as it bends toward the ground.

While keeping the weight in the heels and spine flat, lower your body until both of your knees are bent at a 90-degree angle. Avoid leaning back or forward throughout the movement.

Hold for a moment, then take a big step forward with your left leg. Keep alternating the legs to move forward across the floor. Avoid bouncing or using too much momentum.

Lunge variations: jumping lunges, static lunges, isometric lunges, reverse lunges, step up reverse lunge, rear foot elevated lunges, lung with reach, weighted lunges, etc.

Hardest Bodyweight Exercises For Runners

once you master the basic bodyweight movements, make your workouts more challenging by adding the following exercises.

Bodyweight Exercise For Runners – 8. Spiderman Plank Crunch

Benefits

This awesome exercise will not only raise your heart rate through the roof, but it will also test your core strength and balance to the breaking point.

Proper Form

To do them right, start in a standard plank position with your body perfectly straight from head to toe, forearms firmly resting on a mat.

Make sure to keep your back straight and core engaged the entire time.

Next, lift your right foot off the floor, then bring your right knee forward towards your right elbow, pause, then slowly return to the starting position.

Repeat on the other side to complete one rep.

Alternate sides for a total of 12 reps to complete one set.

Aim for three sets.

Bodyweight Exercise For Runners – 9. Dive Bomber Pushups

Benefits

These are my favorite types of a push-up. Also known as the Hindu push-ups, this exercise can help you tone up almost every muscle in your body while providing you with a killer cardiovascular workout

Proper Form

This will push your heart rate to the max.

So make sure to pace yourself here.

Begin in a downward dog position with your butt elevated in the air, and feet spread roughly shoulder width.

Make sure your body is forming an inverted “V’ shape, with your head down.

Next, lower your chest to the floor by bending your elbows toward the floor until your chest almost touches it, then push forward into a dip motion to an upward dog position.

Pause for a moment, then return back to the standing position to comlplete one rep.

Do 10 reps to complete one set, aiming to perform 3 total sets.

Bodyweight Exercise For Runners – 10. Side plank crunch

Benefits

Planks are some of the best bodyweight exercises, so make sure to do a lot of them.

However, the variation I’m sharing with you today will not only test your core mettle, but they will also drive your heart rate through the roof.

Side plank crunches strengthen the obliques and the deep ab muscles, and they are an awesome cardiovascular exercise.

Proper Form

Begin in a standard plank position with legs together, back straight and core engaged.

Then, lean to your left side while lifting your right arm up toward the ceiling, bend your right elbow and place your right hand behind your head.

Next, while keeping your right shoulder tracking over right hand and hip raised the entire time, bend your right knee and bring in to touch your top elbow, and start performing crunches.

Do 8 reps on each side to complete one set.

Aim for three sets.

Bodyweight Exercise For Runners – 11. Pike Jumps

Benefits

This is another awesome core exercise that will help you develop core strength and stability while hitting your hips and quads hard and pushing your cardiovascular endurance to the limit.

Proper Form

Begin in a standard plank position with palms on the ground, core engaged, back perfectly straight and hands directly beneath your shoulders.

Make sure to form a straight line your head to your heels.

Next, while engaging your core, jump your feet together and forward and assume a pike position with butt raised in the air, pause for a moment, then jump back to the plank position while making sure to keep the hands firmly placed on the ground.

That’s one rep.

Do 16 reps to complete one set.

Aim for three sets.

Bodyweight Exercise For Runners – 12. Jump Squats

Benefits

Jump squats are some of the best plyometric exercises you can do to develop explosive power, which is key to building your muscles’ ability to generate force more quickly.

This exercise mainly works the calves, quadriceps, hamstrings, and glutes—vital running muscles.

Proper Form

Stand as straight as possible with the feet spread shoulder-width apart, arms hanging at the sides and core engaged.

Next, while keeping your chest up and back straight, squat down by bending your knees until your thighs are parallel to the ground.

Be sure to keep your back straight and knee is tracking over your toes.

Then, while pressing mainly with the ball of your feet, jump up explosively in the air as high as you can, using the thighs like springs.

As soon as you land on the floor, go straight away to the next squat and jump again.

Do 20 reps to complete one set.

Aim for three sets.

Bodyweight Exercise For Runners – 13. Windshield Wipers

Benefits

This awesome core exercise is ideal for targeting the rectus abdominis and obliques muscles to activate and strengthen your core stabilizing muscles, which is crucial for keeping your trunk steady and good posture while you are running.

Proper Form

Start out by lying down on your back, then raise your legs to a 90-degree angle.

For more support, feel free to spread your arms straight out to your sides.

Next, to perform this exercise, rotate your legs to your right side, stopping short of touching the floor, pause for a moment, press back up, then turn to the left side, and press back to starting position to complete one rep.

Make sure your legs are moving from side to side in a “windshield wiper” motion.

As you get stronger, make it more challenging by bringing your arms closer into your sides so they offer less support.

Do 10 slow reps to complete one set.

Aim for three sets.

Bodyweight Exercise For Runners – 14. Single Leg Elevated Glute Bridge

Benefits

As you may already know, glutes are the source of power when it comes to running.

Good news is the single leg elevated glute bridge exercise is one of the best exercises that target these large and powerful muscles.

Strong glutes can help you run faster and longer while preventing common injury.

Plus, it also builds balance and coordination.

Proper Form

Lie down on your back with your feet flat, knees bent, ankles hip-distance apart, then raise your right leg off the floor, pulling the knee to your chest.

This is the starting position.

Make sure to extend your right leg as straight as possible toward the ceiling.

Next to perform this exercise, raise your glutes off the floor by driving through the heels and extending your hip upward.

Be sure to extend your right leg as far as you can, hold it for 30-second to one full minute, then slowly lower your leg down and switch sides to complete one set.

Aim for three sets.

Bodyweight Exercise For Runners – 15. Side Lunges

This is a unique variation of the standard lunge that builds strength in the hamstring, abductors, quadriceps, and glutes. This lateral exercise is also great for coordination.

When side lunges are performed incorrectly, they can result in pain or injury to the lower back, hips, and knees.

Here are some of the common form errors:

  • Not keeping the torso uprightand engaged core
  • Extending the knees out too far
  • Stepping too wide while performing the side lunge movement
  • Not keeping the weight distributed evenly
  • Not keeping the toes in line with the lunging knee.

Proper Form

Assume an athletic position with your feet together, knees and hips slightly bent, and head and chest up.

On the inhale, take a slow, lateral step to the right side, then bend into the right knee and sit your hips back as you’re going to sit in a chair.

Stay low while keeping the weight in your heel and bending your knee to a 90-degree angle, knee staying in line with the toes.

Exhale and press through the right heel to straighten the leg and step back to starting position.

Switch sides and repeat.

Side Lunge variations: Plyo side lunge, dumbbell lateral lunge, reverse side lunge, curtsey lunge with a kick, single-leg deadlift to reverse lunge.

Bodyweight Exercise For Runners – 16. Burpees

Benefits

This compound movement will blast your heart and increase your stamina like nothing else.

Burpees target virtually every major muscle group in the body while helping you become functionally fit in the shortest time possible.

It’s no wonder that the burpees are the bread and butter of most CrossFit workouts and military training programs.

Here are a few of the sad burpees errors that bring tears to my eyes:

  • Going too fast while ignoring proper
  • Not properly stabilizing the core.
  • Allowing for the back to sag when doing the push-up.
  • Holding the breath.
  • Sacrificing reps for form.

Proper form

Start by standing with feet shoulder width apart.

Squat down by bending your knees, then lower your body toward the floor by putting your hands on the floor in front of you.

Thrust your feet back, and lower yourself into the bottom portion pushup position, so your legs are fully extended, abdominals tights, and arms straight.

Then in one swift and smooth motion, jump your feet back into the squat position and leap up as high as possible from the squat position.

That’s one rep.

Repeat as fast as possible.

Burpee variations: push-up burpee, superman burpee, side burpee, start jump burpee, mountain climber tuck jump burpee, dive bomber burpee, etc.

The Bodyweight Strength Routine For Running 

We’ve all heard of the saying, “failing to plan is planning fail.”

You need a concrete plan if you want to reach your fitness goals. Not only does it improve your training consistency, but it also allows you to monitor your progress and see where you need more work.

The following plan has been designed to increase endurance, build strength while burning some mad calories in the process.

Perform the exercises in order, two to three times a week, with at least one day of full recovery between each go. Take 30 to 60 seconds to rest after each round. Repeat five times.

Whatever you do, make sure to start in line with your current fitness skill, training goals, schedule, and personal preferences. Give it a few months, and you’ll be a leaner, stronger athlete for it.

To get you started, try the following 3-day program.

Monday, Wednesday, Friday: Full body circuit

  • Ten push-ups
  • 30 squats
  • 20 sit-ups
  • Ten chair dips
  • Five pull-ups

Repeat the entire circuit 5 times.

More Bodyweight Exercises

As you get fitter, feel free to add in more bodyweight exercises of various intensities and reps. Some of these include:

Bodyweight Y Squats
X Pushup
Bodyweight Single-Leg Deadlift
Bodyweight Lateral Squat
Mountain Climbers
Bodyweight Shoulder Taps
Calf raises
Dead Bug
Bird Dog with Rotation
Bodyweight Bird Dog
Double Lunge with Reach
Back Extensions
Hand Curls
Chin-ups
Leg raises
Sit-ups
Scissors
Cross-Body Mountain Climbers
Squat Thrusts
Reverse Lunge and Hop
Cross-Body Extension
Elbow to Knee
Wall Slides
Side Plank with Rotation
Dive Bomber Push-Ups
Side Plank with Extension
Jump Squats
Plank to Push Up
Single-Leg Up and Down Dogs
Figure 4 Mountain Climbers
T Push-Ups
Jumping Lunges
Single-Leg Burpee
Scissors
High Knees
Cross Overs
And so much, so much, more.

New to Running? Start Here…

If you’re serious about running, getting fit, and staying injury free, then make sure to download my Runners Blueprint Guide!

Inside this guide, you’ll learn how to start running and lose weight the easy and painless way. This is, in fact, your ultimate manifesto to becoming a faster and a stronger runner. And you want that, don’t you?

 Click HERE to check out my Runners Blueprint System today!

Don’t miss out! My awesome running plan is just one click away.

How to Increase Running Speed

runner trying to Increase Running Speed

Looking for the best advice on how to increase running speed? You’ve come to the right place!

Whether you’re training for your first 5K or aiming to improve your marathon time, getting faster is a goal most runners have.

When I first started running, I was obsessed with getting faster. I thought the secret was just running more and more miles and I found myself frustrated and wondering what I was missing.

That’s when I started to explore other techniques—ones that didn’t just focus on piling up the miles.

And once I tried out the strategies below, my speed picked up in weeks.

So, if you’re looking to break through that speed barrier without burning out, this guide is for you.

Strength Training

Strength training really speeds you up. When you build stronger muscles, you can generate more power each each stride.

Getting strong also helps prevent injuries. This is because stronger muscles are better equipped to handle the repeated impact that comes with running.

I didn’t pay much attention to strength training for a long time. After injuries and getting outrun, I learned gym time is essential

I started with basic bodyweight exercises like squats and planks, and eventually added in weights. I was surprised at how quickly I saw improvements in my endurance and speed. It turns out that stronger legs and a solid core really do make a difference.

Here are the exercises I swear by:

  • Squats: A fantastic exercise to build strength in your quads, hamstrings, and glutes. These muscles generate a lot of power when running, especially when you’re trying to pick up the pace.
  • Planks: A strong core is essential for maintaining good running posture, which helps you run efficiently.
  • Lunges and single-leg exercises: These strengthen each leg independently, improving balance and stability.
  • Plyometric exercises: Explosive moves like squat jumps and box jumps help develop fast-twitch muscle fibers, which are responsible for bursts of speed.

Try to include two strength training sessions per week into your routine. Focus on full-body exercises, but don’t forget to give special attention to your legs and core.

Don’t know where to start?

Check these five posts:

Interval Training

Interval training will definitely speed you up. This type of training alternates between high-intensity running (sprinting) and low-intensity recovery periods (jogging or walking). Interval training pushes your cardiovascular system to its limits, helping you build endurance and speed simultaneously.

My first interval session was brutal. My lungs felt like they were on fire, and I questioned whether it was worth it. But after just a few weeks, the results were undeniable. My legs felt springier, and I was able to maintain a faster pace on my regular runs.

One of my go-to workouts now is a simple interval session where I sprint for 30 seconds, then jog for 60. I try to do at least eight repeats, and even though it’s brutal, there’s something satisfying about pushing myself to the limit.

Intervals train you to run faster, without extra miles. It’s also a great way to burn a ton of calories in a short period of time.

How to get started:

  • After warming up, sprint for 30 seconds to one minute at near-maximum effort.
  • Follow this with one to two minutes of easy jogging or walking to recover.
  • Repeat this cycle 6 to 8 times.

As you get stronger, you can increase the number of intervals or the length of your sprints. Remember, the key is to give it your all during the sprint so that by the end of your interval, you’re feeling it.

Note – You’ll need need a stop watch to keep track of time when performing intervals.

Drill Training

I ignored speed drills for too long. Then, a running buddy convinced me to join him in some acceleration strides and high-knee drills after one of our easy runs. I felt ridiculous at first, lifting my knees so high and sprinting in short bursts, but the drills helped me improve my form and increase my cadence.

I’ve kept them in my training routine ever since, and I can say without a doubt that they’ve helped me shave off some seconds from my race times.

Here’s the truth.

Speed drills will fast-track your pace and polish your form. Speed drills help improve your coordination, strengthen your muscles, and increase your running cadence—all crucial components for running faster.

Some speed drills to try:

  • High Knees: This drill helps improve your knee lift and running cadence. Focus on quick, powerful steps while engaging your core.
  • Butt Kicks: Another great drill to help you focus on increasing your cadence and getting your feet off the ground quickly.
  • Strides: Run at a controlled fast pace for 20–30 seconds, focusing on good form. Strides help you work on maintaining speed without the pressure of a full sprint.

These drills are excellent to incorporate into your warm-up before a run or as a standalone workout once or twice a week.

You can also try this agility ladder routine.

Hill Training

For speed and stamina, run hills.

Running uphill forces you to engage more muscle fibers than running on flat terrain. It’s a tough workout, but the payoff is huge. Hills help build strength in your quads, hamstrings, and calves, which in turn gives you more power when you return to flat running.

Here’s how to start: Find a hill that’s about 50 to 100 meters long and not too steep. After a warm-up, run uphill at a hard but manageable pace. Once you reach the top, jog or walk back down to recover, repeat this 6 to 8 times. Over time, aim to increase the number of repeats or the distance you’re running uphill.

Plyometric Training

Plyometric exercises, or “jump training,” help develop explosive strength. Since running is essentially a series of single-leg jumps, plyometrics train your muscles to generate more power with each stride.

Plyometrics sounded intimidating to me at first. I imagined myself face-planting while attempting box jumps or landing awkwardly during squat jumps.

But I decided to give them a shot, starting with basic moves like jump squats and single-leg hops.

At first, my legs were jelly after just a few reps, but as I kept at it, I noticed that my running stride felt more powerful and efficient.

Here some exercises to try:

  • Box Jumps: Jump onto a sturdy box or platform and step down. This builds explosive leg strength.
  • Lateral Jumps: Jump side-to-side over a line or cone. This helps improve coordination and leg power.
  • Burpees: A full-body movement that combines a squat, jump, and push-up.

Adding plyometric exercises into your strength training routine once or twice a week will help you develop the power needed for faster running.

Improve Your Running Cadence

Running cadence refers to how many steps you take per minute. Research shows that the most efficient runners have a cadence of around 180 steps per minute. If your cadence is lower, it means you’re likely overstriding, which can waste energy and slow you down.

Here how to improve your cadence:

  • Start by counting how many times your right foot hits the ground in one minute, then multiply by two to get your total steps per minute.
  • If your number is below 170, focus on taking shorter, quicker steps. It should feel like you’re “dancing” lightly on your feet.

Jump Rope

Jumping rope is an underrated but highly effective exercise for runners. It improves foot speed, coordination, and endurance—all while giving your calves, quads, and glutes a great workout. Jump rope also strengthens the muscles around your ankles, helping to prevent injuries.

Start by incorporating 5 to 10 minutes of jumping rope into your warm-up or cross-training routine. As you get more comfortable, increase the duration or try different variations like alternating feet or high knees while jumping.

To take this classic workout to the next level, increase the duration and intensity of your jump rope exercise, building it up to 20 to 30 minutes.

You can also play with your feet for more challenge. Try alternating feet, jumping on one foot, or jumping on your heels.

Focus on Proper Running Form

I only focused on form after a coach noticed my overstriding. It took some practice (and a lot of mental reminders) to correct my posture, but once I did, I started running more efficiently.

Here’s what you need to keep on mind when it comes to running form:

  • Keep your torso tall and chest open. Imagine a string pulling you up from the top of your head.
  • Focus on landing your foot directly underneath your body, not in front of you. This helps reduce the impact on your joints and keeps your momentum moving forward.
  • Keep your arms at a 90-degree angle, swinging them forward and back (not across your body) to help drive your legs.
  • Relax your hands and shoulders. Tension in these areas wastes energy.

Lose Weight (If Necessary)

After struggling with a plateau in my speed, I decided to make some changes to my diet and shed a few extra pounds. I didn’t expect it to make a huge difference, but it was like flipping a switch. Running felt easier, and I started hitting paces that seemed impossible before.

Don’t take my word for it.

Research revealed that losing weight (fat, not muscle) can help runners improve running times—cutting roughly two seconds off a mile for each pound lost.

For example, a 15-pound weight loss should cut about 80 to 90 seconds of 5K race time.

The reasoning?

The more weight you carry, the more effort you expend to run from point A to point B, thus, the less power you have overall.

Don’t believe me?

Try running while strapping on a 25-pound backpack then tell me how you feel.

You’ll, sooner than later, realize how hard it is to achieve, let alone maintain, speed.

Now picture how much easier it would be if you were many pounds lighter.

Be Consistent

Finally, one of the most important aspects of improving your running speed is consistency.

Speed doesn’t come overnight—it takes time and dedication. Make sure you’re running at least three to four times a week, with a mix of interval training, long runs, and strength workouts.

Being consistent with your training allows your body to adapt, helping you gradually become stronger and faster.

Here’s a simple plan you can follow to work on your speed:

  • Monday: Interval run – 8 x 400m at 80–90% effort
  • Tuesday: Strength training (focus on legs and core)
  • Wednesday: Hill workout – 6–8 hill repeats
  • Thursday: Easy run or rest day
  • Friday: Tempo run – 4 miles at a comfortably hard pace
  • Saturday: Long run at an easy pace
  • Sunday: Rest day or light cross-training

Running Speed FAQ

I know that you have more than one pressing questions about boosting your running speed. Let me address some of the most common ones.

How long does it take to increase running speed?

The timeline for speed improvements varies, but with a consistent speed-focused training plan, most runners see progress within 4-6 weeks. This timeframe allows your body to adapt to new training stimuli, such as interval training, tempo runs, and hill sprints. Remember, consistency is key. Stick to a routine, and you’ll likely notice gradual improvements in your pace and endurance.

What is the best exercise to improve running speed?

There’s no single “best” exercise for speed, but interval training is highly effective. Short bursts of fast-paced running followed by rest or easy jogging help increase your anaerobic capacity and teach your body to handle higher speeds. Workouts like 400-meter repeats on the track or timed sprints (30 seconds on, 30 seconds off) are great options. Try incorporating intervals into your training once or twice a week for maximum benefit.

Does running on hills help with speed?

Absolutely! Hill training is like strength work in disguise—it builds power, endurance, and speed all at once. Uphill sprints strengthen key muscles used in running and improve your form by promoting a forward lean and higher knee drive. Try hill repeats once a week, running hard uphill for 20-30 seconds, then walking back down to recover.

What should I do if I don’t see improvements in my speed?

If you’re not seeing progress, consider tweaking your routine. Common issues include overtraining without enough recovery, or not varying your workouts enough. Make sure you’re balancing hard effort days with easier ones, and try different types of speed work like intervals, tempo runs, and hill sprints. Give yourself time, stay consistent, and keep track of your progress. Sometimes, small adjustments can make a big difference!

Conclusion

By doing interval workouts, increasing cadence, working on technique, losing weight, running hills, and incorporating consistency, you’ll be able to take your running speed to an entirely new level.

Now the ball is in your court. Do you have any other tips to share? If so, then feel free to do so in the comments section below.

I hope my guidelines for increasing running speed will help you become faster than you ever thought possible.

In the meantime, thank you for dropping by.

Keep running strong.

David D.

The Best 5 Quad Exercises For Runners

Strength training has been a game-changer for my running, and it might be for you too

I didn’t pay enough attention to my quads at first, and that was a mistake

And if there’s one muscle group that deserves focus, it’s definitely the quads.

These powerhouse muscles support your body with each stride and help propel you forward.

But don’t just take my word for it

Research shows that during an 8:00-per-mile pace, the quads are responsible for 35% of the force that pushes you ahead.

Your quads not only power each stride but also help protect your knees from pain

Let’s dive into how to strengthen this vital running muscle.

What Are the Quadriceps Muscles?

The quadriceps, commonly known as the “quads,” are a group of four muscles located on the front of your thighs. They’re some of the strongest muscles in your body and key for movement, stability, and power.

Here’s a breakdown of each one:

  • Vastus Medialis: The teardrop muscle is located on the inner part of your thigh near the knee.
  • Vastus Lateralis: Found on the outer part of the upper thigh, responsible for leg extension.
  • Rectus Femoris: A key player in hip flexion, this muscle runs down the middle of your thigh.
  • Vastus Intermedius: Positioned deep in the thigh between the vastus medialis and vastus lateralis.

These muscles extend your knee, so they’re important for activities like walking, running, and jumping.

Let me explain more why you should never ignore these important muscles.

Why Strengthen Your Quads?

Strengthening your quads can make a big difference for runners. Here’s why:

  1. Improve Speed: Strong quads give you the power to push off the ground, making it easier to run faster and take on hills.
  2. Injury Prevention: Weak quads are often linked to running injuries like runner’s knee. Strong quads help stabilize your knee and track your kneecap properly during your runs.
  3. Boost Endurance: If your legs get tired at the end of long runs, stronger quads can help delay that fatigue.
  4. Shock Absorption: Strong quads help reduce knee impact and protect against overuse injuries.

How to Strengthen Your Quads as a Runner

Ready to strengthen those quads? Here are some key tips

Start Slowly

As with any new training, take it easy at first. Gradually increase the intensity by adding more weight or reps over time.

Warm Up Properly

Warm up with 5 minutes of jogging, then do squats, lunges, or high knees to get your muscles ready

Proper Form

Good form is crucial, so focus on quality over quantity.

Don’t add reps if it means sacrificing good form.

Remember that as you make your training more challenging, you’ll perform fewer reps but still gain strength.

Don’t Forget Your Hamstrings

You also need to strengthen your hamstrings in conjunction with the quads.

Only focusing on quads can lead to muscle imbalances, so don’t neglect your hamstrings

As a runner, your quads might be already stronger due to the running motion. That’s why runners are more prone to have weaker hamstrings than quads.

I highly recommend stiff-legged deadlifts and leg circles for training your hamstrings.

The Top 5 Quad Exercises for Runners

These exercises target your quads from different angles, helping you build strength, stability, and power.

1. Squats

I started with bodyweight squats but added dumbbells for an extra challenge once I got stronger. Make sure your form is solid: keep your back flat, core engaged, and knees in line with your toes.

Ideal for building overall leg strength and improving balance, which is crucial for long-distance runners. Squats target the quads, glutes, and core, helping you develop a stable base that supports better form and reduces fatigue over long distances.

How to do it:

  • Stand with feet shoulder-width apart, back straight, and core engaged.
  • Lower into a squat by bending your knees and pushing your hips back as if you’re sitting in a chair.
  • Go down until your thighs are parallel to the floor.
  • Push back up through your heels to return to the starting position.

2. Single-Leg Squats (Pistol Squats)

When I first tried single leg squats, I had to hold onto a chair for balance. I can do them unassisted, and the strength gains have been huge.

How to do it:

  • Stand on one leg, extending the other leg in front of you.
  • Slowly squat down on the standing leg, lowering your body as far as possible while keeping your core engaged.
  • Push through your heel to return to standing.

3. Leg Extensions

Leg extensions isolate the quads and target those muscles without engaging other lower-body groups.

How to do it:

  • Sit on a leg extension machine with the pad resting against your shins.
  • Extend your legs fully, squeezing your quads at the top.
  • Slowly lower the weight, but stop before your knees reach a 90-degree angle.

4. Weighted Walking Lunges

I love this move because it’s dynamic and mimics the motion we use in running. Plus, it targets the quads, especially the rectus femoris, which is key for hip flexion.

How to do it:

  • Hold dumbbells at your sides or place a barbell across your upper back.
  • Step forward with one leg and lower your body into a lunge until both knees are bent at 90 degrees.
  • Push off your front foot to bring your back foot forward, and continue walking in the lunge position.

5. Leg Press

I don’t use machines too often, but when I do, I love the leg press for its ability to isolate the quads. Just be careful to maintain good form and avoid locking your knees.

How to do it:

  • Sit on the leg press machine with your feet shoulder-width apart on the footplate.
  • Press the weight by extending your knees, keeping your back flat against the pad.
  • Lower the weight slowly, ensuring your knees are aligned with your toes, and don’t bow inward or outward.

Frequently Asked Questions

I know you have many questions about to make the most out of quad exercises. Let me address some of the most common ones.

How often should I do quad exercises?

For most runners, I recommend doing quad exercises 2-3 times per week. This frequency strikes a good balance—enough to build strength without overloading the muscles, which could interfere with your running performance. If you’re just starting, begin with two sessions per week and work up to three as your quads adapt. Consistency here is key, so try to stick with it each week to see results.

Can quad exercises help prevent knee injuries?

Yes, strong quads play a big role in knee stability, which is essential for injury prevention. The quadriceps help to stabilize and control knee movement, reducing strain on the knee joint. This is particularly important for runners, who face repetitive impact with each stride. By strengthening your quads, you can help protect your knees from common injuries like runner’s knee and patellar tendonitis.

Should I do these exercises before or after my run?

This depends on your training goals. For injury prevention and general strength, it’s best to do quad exercises on cross-training days or after an easy run. This helps avoid fatigue on days when you need peak running performance. If you’re aiming to build explosive power for sprints or hills, try doing quad exercises after your run while your muscles are still warm. Just remember to allow 48 hours of rest between intense quad sessions to give your muscles time to recover.

What’s the best time to do quad exercises in my training schedule?

For injury prevention, you can add quad exercises on cross-training days or after an easy run. This helps build strength while keeping you fresh for more intense running days. If your goal is to build power for sprints or hill running, try doing quad exercises after your run, so your muscles are already warmed up. Keep in mind that recovery is key, so give yourself at least a day of rest between tough strength and running sessions.

Final Thoughts

Strong quads are key for running performance, endurance, and injury prevention. Incorporating these exercises into your routine will help you run faster, longer, and with fewer injuries. I’ve seen the benefits firsthand—it’s made a huge difference in my running journey, and can do the same for you.

So, are you ready to give your quads the focus they need? Lace up your shoes, hit the gym, and let’s build those powerhouse legs that will carry you across every finish line—stronger, faster, and injury-free!

quadriceps exercises


The Conclusion

There you have it!

The above quad exercises are the best when it comes to increasing strength in your lower body, especially in the rectus femoris muscle.

Do this awesome quad workout on a regular basis if you’re serious about making real progress. Also, keep in mind to stay within your fitness level the entire time.

Here are more  strength exercises for runners.

Please feel free to leave your comments and questions in the section below.

In the meantime thank you for reading my post

Keep Running Strong

David D.

Circuit Training For Runners – The 30-Minute Indoor Workout

female doing ndoor Circuit Workout

If it’s not possible for you to go for an outdoor run, and you don’t want to jump on the treadmill for the hundredth time this month, then here is an indoor workout you can do at home for free.

No need for special equipment.

No need for hefty gym fees.

Oh! I forgot, it will also get you sweating like crazy and push your conditionning level to the max.

So are you excited? Then here we go…

Circuit Training For Runners – The 30-Minute Indoor Workout

If you are currently stuck inside, due to the weather, a baby, safety concerns, monetary reasons, you name it, the circuit I’m sharing with you today is the perfect solution.

In fact, this indoor workout routine is ideal for the cold winter month and perfect if time crunched fitness nuts.

Most of the exercises below require minimum equipment and can be done almost anywhere, as long as you have enough space.

These exercises will boost your heart rate, sculpt your body and get you out of running rut and help you smash through a training plateau.

For more challenge, use heavier dumbbells, medicine balls and push as hard as you can, or shoot for more rounds.

runner doing ndoor Circuit Workout

The Warm-Up

Warm up right by jogging in place at a comfortable pace for five minutes.

Make sure to land on the balls of your feet.

Exercise one: Jog in Place

Once you are warmed up, pick up the pace and jog in place as fast as you can by driving your arms back and forth and lifting your knees to waist level.

Make sure to run in place as fast as you can while pumping your arms back and forth, engaging the upper body as well.

Alternate between jogging at high intensity for 30 seconds, then slow it down and recovery for another 30 seconds, bringing your heart rate up in the process.

Exercise Two: High Knee Sprints

While jogging, pick up the start performing high knee sprints by bringing your knees up high toward your chest as fast as you can while engaging the glutes and keeping your torso upright.

Make sure to focus on high speed and knee lift while swinging your arms back and forth to generate momentum.

Sprint in place for one full minute to complete one set.

Exercise Three: High Lunges

Stand tall with back straight and core engaged, then step your left foot forward as far as possible so you are in a wide lunge position.

Next, while keeping your torso upright and gazing straight ahead, push through your left heel and drive your right knee forward and up toward your chest, then return it to starting position and repeat as fast as you can.

Do 10 to reps on each side to complete one set.

Exercise Four: Burpees

From a standing position, lower down and place your hands on the floor on either side of the feet.

Next, kick your feet back so you are now in a plank position, then immediately bring the feet back to between your hands and explosively jump up into the air, clapping your hands mid-air.

Make sure to land softly on the floor, then repeat as fast as possible while keeping good form throughout the exercise.

Exercise Five: Squat Jumps

Stand with feet hip-width apart with arms crossed over your chest.

Next, while keeping your head up and core engaged, squat down until your upper thighs are parallel to the ground, then, while pressing mainly with the balls of your feet, and using the thighs like springs, jump straight up in the air as high as you can.

Last up, land softly on the floor, bend your knees and sink back into the squat position and immediately jump again.

Please make sure to land with control and be extra caution if you have any knee or back injuries.

Repeat for 12 to 16 to complete one set.

Exercise Six: Butt Kicks

Begin by standing with your legs shoulder width apart, with the arms bent at your sides.

Next, while keeping your back straight and core engaged, run in place by kicking your heels up toward your butt, pumping your arms back and forth with elbows bent at a 90-degree angle as quickly as you can.

Make sure that your thighs do not move much as you lift and kick one heel at a time to your butt.

Lift your heels as close as you can to your butt, using a quick leg movement on the balls of your feet.

To do this circuit right, make sure to take minimum recovery between each exercise.

Your heart rate should remain high throughout the entire circuit.

Exercise Seven: Ski Abs

Assume a straight arm plank position, with back flat, head in neutral position and feet together.

Next, while engaging your core, hop both of your feet up to the left side, aiming to bring your knees to the outside of your left elbow, then quickly hop back into starting position, and change sides to complete one rep.

Repeat the exercise for one full minute to complete one set.

Circuit Training For Runners – The Conclusion

There you have it! If you’re looking for a cross training workout for runners, then this post is perfect for you. The rest is just details.

Please feel free to leave your comments and questions in the section below.

In the meantime thank for dropping by.

David D.