23 Best Core Exercises for Runners to Run Stronger (2025 Guide)

The Benefits Of Core Training For Runners

One of the best ways to improve your running without running more is improving your core power and strength. The core—as the name implies—is the baseline of human performance.

What Is The Core?

The core muscles are the epicenter of the body. They connect the pelvis, spine and trunk to each other and to the rest of your body, including your shoulders blades, hips and legs.

They are at the center of everything—the the basis for all of your movement, whether you are an elite runner or an Olympic power lifter.

It’s More Than Abs

First of all, you need to understand that your “core” isn’t just your abs. it’s more than that. Having a solid core is more than just having strong abdominal muscles. The core extends to the lower back, gluteal muscles, and other areas.

The core involves five main areas.

The rectus abdominus—what we usually refer to the six-pack muscle.
The oblique—or what’s known as the side abs.
The erector spinae—aka the lower back muscles.
The transversus muscles or deep abs, and
The gluteal muscles—the butt muscles.

The Best 5 Quad Exercises For Runners

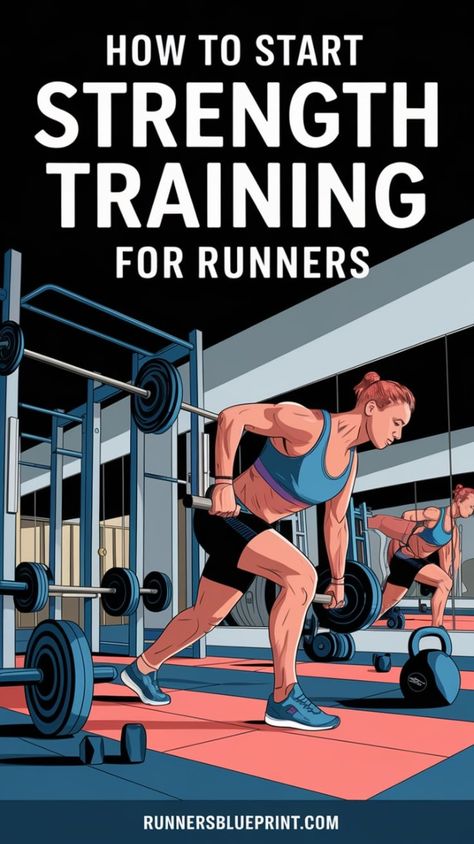
When I first got into running, I thought mileage was all that mattered.

I’d lace up, grind through my runs, and skip anything that looked like a gym workout.

Big mistake.

It wasn’t until knee pain started creeping in and hills left me gasping that I realized my legs weren’t as strong as I thought.

The missing piece? Quad strength.

Once I started training my quads consistently, everything changed—my pace got faster, hills felt doable, and those post-run aches became rare.

Now I coach other runners through that same transition.

Let’s talk about why strong quads matter and how to build them the smart way.

What Are the Quads, Anyway?

The quads are a team of four muscles:

  • Vastus Medialis: That teardrop-shaped muscle near your inner knee. Helps with knee extension and patella tracking.
  • Vastus Lateralis: The big one on the outside of your thigh. Drives that push-off power.
  • Rectus Femoris: Sits right down the middle. Helps lift your knee and extend it.
  • Vastus Intermedius: Hidden under the rectus femoris. Quiet but crucial for knee extension.

Together, they connect into the patellar tendon and keep you upright, springy, and steady when running.

I like to say your quads are your leg’s suspension system—ignore them, and sooner or later, something’s going to rattle loose.

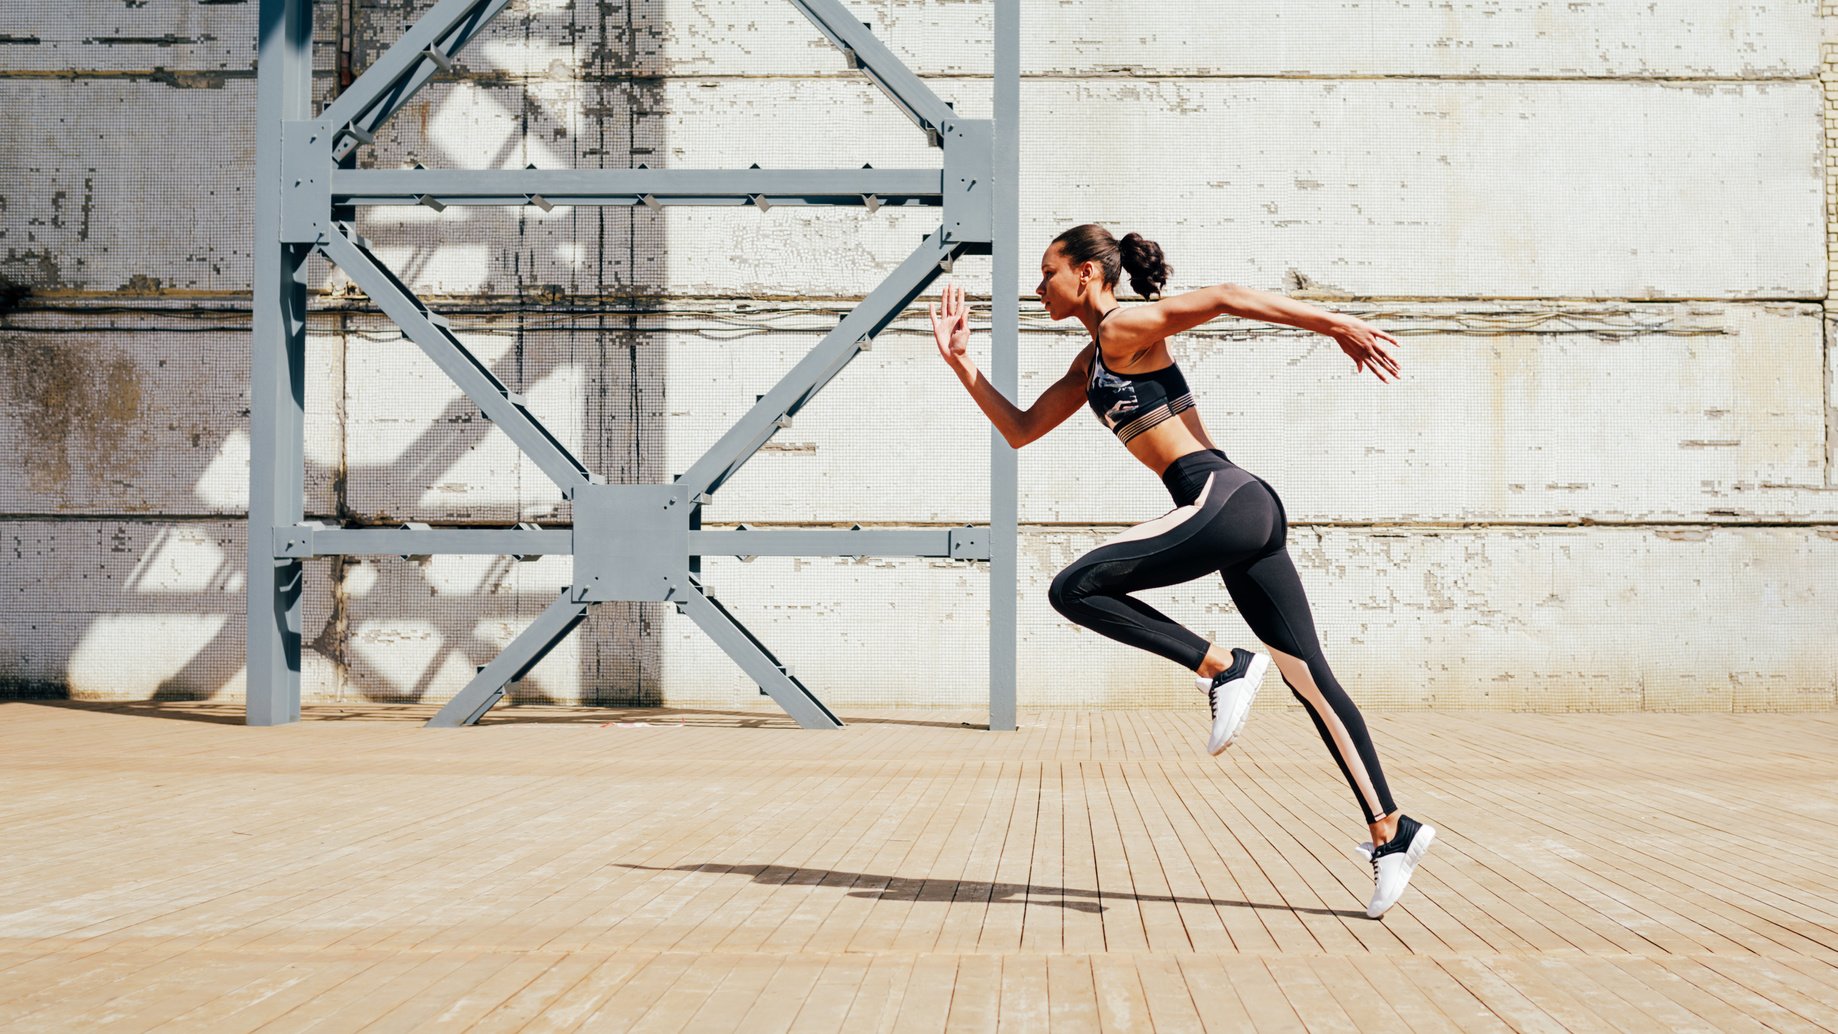
Why You Should Train Your Quads

Here’s what strong quads do for your running:

1. More Speed, More Power

Whether you’re sprinting or grinding up a hill, it’s your quads doing most of the heavy lifting. Build them up, and you’ll feel that extra kick in your stride.

A trail runner I coached once told me he’d burn out on downhills. We added controlled single-leg strength work—things like slow step-ups—and soon those hills weren’t such a beast.

2. Injury Protection—Especially Knees

Runner’s knee is no joke—and guess what’s often behind it? Weak quads.

I’ve coached plenty of runners who came in with knee pain. Strengthening their quads, hips, and glutes almost always made a difference. One beginner even ditched their runner’s knee completely after adding Bulgarian split squats to their routine.

3. Better Endurance, Less Burnout

You know that jelly-legged feeling at mile 10? Strong quads help delay that. They take over when your other muscles start fading.

I call them the “mile 20” muscles—the ones that keep you moving when everything else is screaming stop.

Many marathoners I work with report smoother final miles after consistently training their quads. It’s not magic. It’s just muscle.

4. Shock Absorption and Downhill Control

Running is impact. Your quads are built to handle it—if you train them right. Downhill runs especially load your quads hard. That eccentric (braking) force? Brutal if you’re undertrained.

Now I preach:

Train slow, controlled step-downs:

  • Poliquin step-ups
  • Wall sits

They prep your quads for battle and save you days of soreness.

5. Improved Running Form

Strong quads don’t just keep you moving—they keep you moving right.

When they’re weak, your knees wobble, your stride shortens, and you compensate in weird ways. But when they’re solid? Your posture holds. Your form stays sharp even deep into the run.

I tell my runners: “Strength fills the cracks in your form.” Without it, you leak energy and risk injury.

How to Train Your Quads Without Wrecking Your Runs

Here’s how I approach quad training with my runners:

Start Easy

Don’t go from zero to max squats overnight. You’ll wreck your legs and end up skipping your runs. I’ve seen it too many times. Start with bodyweight movements—just 1 or 2 sets. Learn the form. Then slowly add reps, sets, or weight.

Warm Up Right

Cold quads = trouble. Before you lift, jog or cycle for 5–10 minutes, then hit some dynamic moves like:

  • Bodyweight squats
  • Walking lunges
  • Leg swings
  • High knees

Think of your quads like chewing gum. Cold = stiff and easy to tear. Warm = stretchy and ready to roll.

My go-to warm-up: 5-minute jog + 10 squats + 10 walking lunges + 30 seconds high knees = ready to train.

Focus on Form, Not Ego Reps

Let me say this upfront: when it comes to strength work, form is king. You can crank out 20 sloppy reps, but if your knees are caving in or your back’s folding like a beach chair, you’re doing more harm than good.

I’ve seen it—and I’ve done it. I used to load up the squat bar like I was auditioning for a powerlifting meet, only to realize I wasn’t even going halfway down. My ego loved it. My quads? Not so much.

Once I swallowed my pride, dropped the weight, and actually hit depth with solid form, the real progress started.

I got stronger. My knees felt better. And I wasn’t limping around after leg day anymore.

So, what does “good form” actually look like?

Move with control. No bouncing. No jerky reps.

  • In squats or lunges, lower slow—feel your quads work on the way down—then push up with purpose.
  • Don’t let your knees cave in. Keep them in line with your toes.
  • Brace your core and keep that back from rounding.
  • Use a mirror or better yet, film yourself. What you think you’re doing might not be what’s really happening.

One rule I stick by—and preach to every runner I coach—is simple: never sacrifice form just to do more reps or heavier weight.

If your form starts breaking down, stop or lighten the load.

That’s not weakness—it’s smart training.

And here’s a little twist most runners overlook: sometimes lifting less with better form builds more muscle.

I’ve had athletes cut their leg press weight in half and double their results, just because they finally started working the right muscles instead of relying on momentum.

Keep this in mind: as you get stronger, you’ll naturally move toward fewer reps with heavier weight. That’s how real strength is built. You don’t need 20 reps if 8 well-executed reps leave your quads burning.

Quality over junk volume—always.

Quick checkpoint:

  • Are your reps controlled?
  • Are you feeling the muscle work?
  • Is your form staying solid all the way through?

If the answer isn’t a full yes—adjust. Train smart, not just hard.

Don’t Forget Your Backside: Glutes and Hamstrings

Now let’s talk about what most runners ignore: the muscles behind you.

Yeah, we’re quad machines. All that forward motion makes the front of our legs overactive. But if your hamstrings and glutes can’t keep up, your form falls apart. Your knees ache. Your posture sags. And worst of all—you get slower.

Been there. A while ago, I was hammering squats, doing hill sprints, thinking I was bulletproof. Then came a nasty hamstring pull during a simple stride session. That’s when I realized I had been training half my legs.

Fix the imbalance:

Examples:

  • Squats? Follow with glute bridges
  • Lunges? Pair with single-leg RDLs
  • Leg press? Add hip thrusts or band walks

And remember, strong glutes aren’t just for show—they’re your running engine. The quads are the gearbox. But without that engine, you’re not going anywhere fast.

One coach of mine used to say, “If your glutes are sleeping, your knees will cry.” I’ve found that to be painfully true in both my own training and my athletes’ struggles.

My Top 5 Quad Moves for Runners (That Actually Work)

Want stronger, more stable legs that won’t crap out at mile 18? These five exercises are my personal go-to’s for building quads that can take a beating and still push strong.

I’ve rotated through these for years, both in my own training and with clients. You don’t have to do them all in one go—3 to 4 per session is plenty—but trust me, they all earn their place in what I call the Runner’s Quad Hall of Fame.

Quick heads-up: If you’re new to strength work, start with just your body weight—especially on things like squats or lunges. Once it feels solid, then bring in the dumbbells or a barbell.

Oh, and if anything feels sharp or wrong? Stop. Muscle burn = good. Sharp pain = nope.
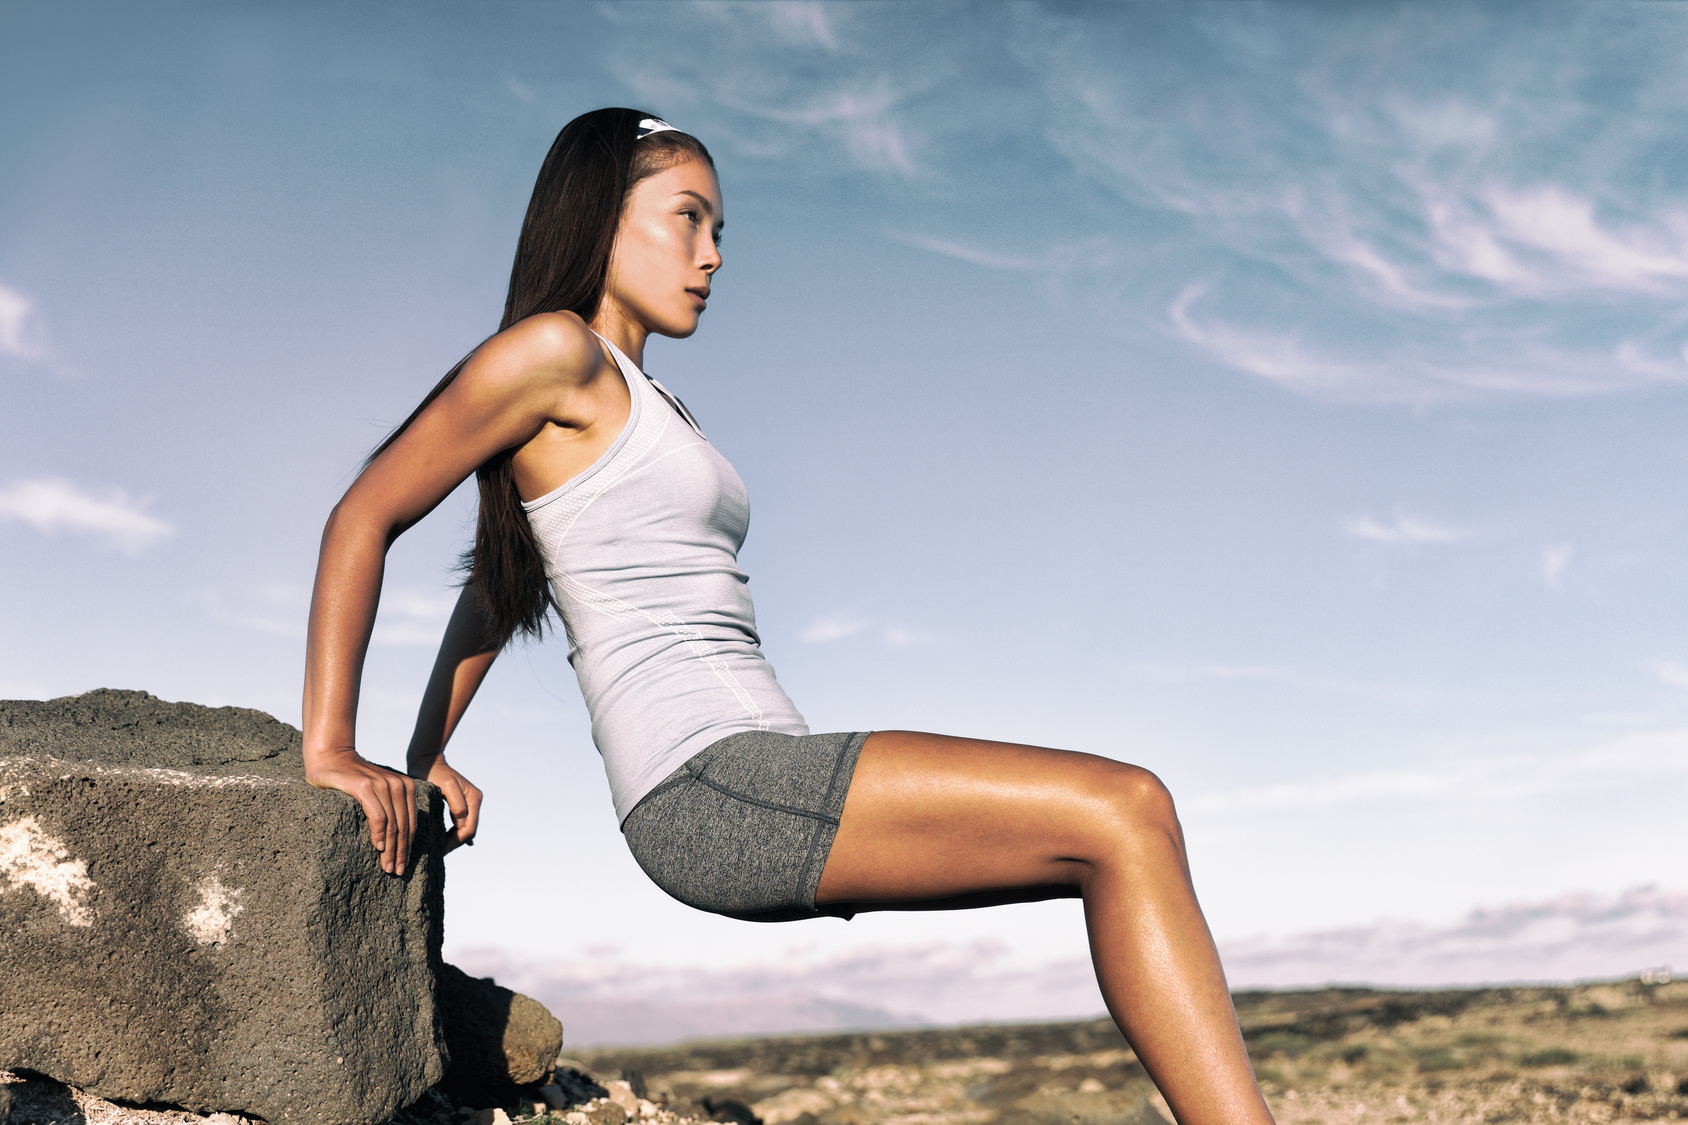
1. Squats

Let’s be real—squats are the bread and butter of leg strength. I call them the king of quad moves, and not just because they look cool with a barbell.

They hit your quads, glutes, and core all at once, and the strength you build here translates directly to better push-off and better posture when running.

When I first got into squats, I stuck with bodyweight. I wanted to master the movement before adding any load. That patience paid off—once I added weight slowly, my legs felt way more solid on long runs. Less wobble. Less fade. Way more power in the late miles.

Why runners should care:

Squats mimic real movements—like getting off a chair or climbing stairs. That makes them perfect for building running strength.

They also fire up your core, which helps you hold your form when things get tough.

After a couple of months of squatting regularly, I noticed I didn’t lean forward or collapse as much in the final stretch of races.

Bonus: they also wake up those small stabilizer muscles around your knees and ankles, the ones that keep you from rolling an ankle when you hit a weird patch of sidewalk or trail.

How to squat (the right way):

  • Stand with feet shoulder-width apart. Toes slightly turned out is fine.

  • Brace your core like you’re about to get punched.

  • Sit your hips back like there’s an invisible chair behind you.

  • Lower slowly, keeping your weight through your heels and midfoot.

  • Try to get your thighs at least parallel to the ground (deeper is great if your form holds).

  • Keep your knees in line with your toes. No knees collapsing inward.

  • Push through your heels to stand up tall. Exhale on the way up.

  • Do 8–12 reps for 2–3 sets to start.

Variations worth trying:

  • Goblet Squats – Hold a dumbbell at your chest. Great for posture.

  • Box Squats – Squat to a box or bench and stand back up. Teaches depth.

  • Jump Squats – Add these later for explosive power once you’ve built some strength.

2. Single-Leg Squats

These are the truth-tellers. They show you instantly if one leg is weaker than the other.

They’re also brutal (in the best way) and make a massive difference for runners—especially if you deal with imbalances or knee pain.

When I first tried pistol squats, I couldn’t get halfway down without tipping over. I had to hold a chair and cheat like crazy. But over time, I built it up. The balance, the strength—it all translated to better form on the trails and more drive off each step.

It was humbling, but totally worth it.

Why runners need these:

Running is basically a series of single-leg landings. So it makes sense to train that way.

These squats wake up your stabilizers, force you to balance, and strengthen your hips and knees on each side.

They also work the inner quad (your VMO), which helps keep your knees tracking right. A lot of runners with cranky knees end up here—on purpose—because it builds the kind of support regular squats can’t.

How to do it:

  • Stand near something sturdy for support
  • Lift one leg off the ground, keep it straight
  • Squat down slowly on the standing leg, pushing hips back
  • Go as low as you can with control—parallel or deeper is the goal, but start wherever you can
  • Push through your heel to stand back up

Can’t go deep yet? No worries. Just go partway. Even lowering to a chair on one leg and standing up is a solid starting point.


3. Leg Extensions

Leg extensions are one of those old-school moves that zoom in on the quads—specifically the front part of your thighs. We’re talking rectus femoris and vastus muscles doing most of the work here.

Unlike squats or lunges, this one’s a solo act for your quads—just your knees extending against resistance.

I don’t rely heavily on machines, but I do throw in leg extensions every now and then to finish off a leg session. They’re great when I want to empty the tank on my quads without my glutes or hamstrings stepping in. It’s like turning a spotlight on the front of your thighs and letting it burn.

But fair warning: this move puts direct pressure on your knees. If you’ve had knee injuries or tracking issues, tread lightly—or skip it altogether.

Some physical therapists even tell folks in rehab to stay away from the leg extension machine because the open-chain setup can overload the joint, especially with heavy weights or sloppy form.

That said, if your knees are healthy and you’re smart with your form and weight, it can be safe and effective. I always avoid locking out at the top—keeps the knees happier and the tension on the muscle, not the joint.

One thing I love about leg extensions is how they target the VMO (that teardrop-looking muscle by your knee). It’s key for keeping your knees stable. Try pointing your toes out slightly during the lift, and you’ll feel that inner quad light up.

I sometimes hold the top position for a second or two—just enough to make the quads scream (in a good way).

How I Set It Up:

  • Adjust the machine so the pad hits just above your ankles, and the pivot aligns with your knee

  • Start at 90 degrees or a little more—enough to keep tension on the weight stack

  • Lift smooth and controlled. Stop just short of locking out. Pause. Squeeze. Then lower under control

  • Keep your back glued to the seat, don’t rock or arch

  • Toes neutral or slightly out. No weird foot angles—it stresses the knee

  • Aim for 10–15 reps with good form. You should feel challenged but not like your knees are about to explode

4. Weighted Walking Lunges: Runner’s Secret Weapon

I’ve said it before—lunges are money for runners. And walking lunges? Even better. They add movement and flow, like slow-motion running with weights.

I love using them after runs for strength work (bodyweight style) or during gym days with dumbbells for more fire. The pattern mimics running—you step, lower, push off—and it trains your body to stay strong under fatigue.

Why they matter:

Walking lunges stretch and strengthen at the same time. When you step forward and drop into the lunge, your front quad is lengthening and loading up (eccentric strength), while your back leg gets a hip flexor stretch—something most runners desperately need.

Early on, I had IT band flare-ups. Lunges—done consistently—helped build hip strength and stability, and those issues faded.

Plus, they force you to balance, fire up your core, and stay tall. That control translates directly into smoother, more stable running form.

How to Do Them:

Hold dumbbells or go bodyweight

  • Step forward, drop the back knee gently, don’t crash
  • Keep your front heel down and your knee roughly over the foot
  • Push off and go right into the next step
  • Stay tall—don’t hunch or lean
  • Start with 6–8 lunges per leg for 2 sets. Build to 10–12 per leg for 3 sets.

You can also do stationary lunges if you’re tight on space—but the walking version brings in that extra challenge of forward movement and balance.

5. Leg Press: Don’t Sleep On It

I know, I know—some purists roll their eyes at the leg press. But I’m here to say it’s not just a lazy squat machine.

Used right, it’s a solid tool—especially when you want to blast your quads without straining your back or relying on perfect balance.

I don’t live on it, but when I had a minor lower back issue a few years ago, I subbed leg press for squats and still got strong. It kept my quads fired up while letting my spine recover.

Why it works for runners:

The leg press isolates your quads (and glutes to some extent), and lets you load heavier than you might with a barbell.

That means more pushing power and leg endurance—especially when your goal is a strong kick at the end of a race or better climbing strength for hilly runs.

Foot position matters. Lower placement on the platform hits the quads harder. Higher placement shifts the load to glutes and hammies.

Keep your feet flat, knees tracking with toes, and no locking out at the top. Always keep that slight bend.

How I Use It:

Sit back, plant your feet shoulder-width apart

  • Press up and unlock the sled
  • Push until your legs are almost straight—don’t lock out!
  • Control it back down. Don’t rush. Feel the stretch
  • Keep your hips and back pinned to the seat—if they lift, you’re going too deep or the weight’s too heavy

Start with moderate weight. It’s easy to slap on plates and chase ego numbers here, but form matters more.

Go for smooth, full reps and don’t let your knees cave in.

Sometimes I finish with high-rep burnouts—like 20 reps to toast the quads. It’s brutal, but effective.

Build Stronger Quads to Run Harder, Longer, and Smarter

Here’s the simple truth: if you’re skipping leg strength work, especially for your quads, you’re leaving speed and resilience on the table.

These five moves are my go-to for runners:

  • Squats
  • Single-Leg Squats
  • Leg Extensions
  • Walking Lunges
  • Leg Presses

Each one hits your quads differently.

Squats and leg press? They’re your heavy hitters — big, compound moves that build raw power.

Lunges and single-leg squats? Great for balance, stability, and ironing out side-to-side imbalances.

Leg extensions? They’re the isolation tool — great for fine-tuning and waking up underused fibers.

I like to mix things up. You don’t need to do all five in one session.

Example: squats, lunges, and leg extensions on Monday. Later in the week? Hit leg press and single-leg squats. Simple.

How much?

Stick to 2–4 sets of 8–12 reps. That range is solid for both building strength and adding a bit of tone.

Want to move faster? Then focus on moving better and stronger.

If you’re pressed for time, do them as a circuit—one set of each back-to-back. But I’ll warn you: your quads will be screaming. That burn? That’s the good stuff.

Big rule: Respect recovery. No leg day two days in a row. Let those muscles rebuild. That’s where the strength kicks in.


Real Talk: Common Questions I Hear From Runners

Let’s tackle the questions I get every week in coaching calls and inboxes. These come from runners of all levels — beginners to sub-3 marathoners.

🧠 How often should I train quads?

Most runners do well with 2–3 times per week. That’s the sweet spot. Enough to get strong, but not so much you’re hobbling during your long runs.

New to lifting? Start with 2 days (like Monday and Thursday).
More seasoned? You might handle 3 days (Monday, Wednesday, Friday).
Deep in a race build? Scale back to once or twice a week. Totally fine. You’re not slacking — you’re adjusting to survive marathon training.

Just stay consistent. Two sessions weekly, every week — that’ll do more for your quads than going hard once a month.


💪 Will lifting make my legs bulky?

Nope. That’s a myth — one I hear all the time.

You’d only bulk up if you lifted heavy daily, ate like a bodybuilder, and ditched cardio. That’s not us.

A solid strength routine for runners, paired with regular miles, won’t blow up your thighs. You’ll actually get leaner, stronger, and faster.

I’ve seen it in my own training — more quad work led to stronger finishes and new PRs. My weight stayed steady, but my legs felt bulletproof.

And science backs this up. As noted by Runner’s World, it takes a very specific overload + calorie surplus to build mass.

Running burns that off, especially with endurance mileage.

So no, you won’t look like a powerlifter. You’ll run like a stronger, more efficient version of yourself.

And your finish-line photos? Way more confident.


🦿 Can quad training help my knees?

Big time. This is one of the main reasons I preach quad strength.

Stronger quads = better knee control. They guide the kneecap and absorb impact, taking pressure off your joints.

I’ve seen runners with chronic knee pain start doing consistent quad + glute work, and within weeks the pain begins to fade. The muscles step in where the tendons and ligaments used to suffer.

Just don’t train quads in isolation — include glutes and hamstrings too.

That trio protects your knees from all angles. It’s like putting your knees in armor.

If your knees have been bugging you, especially post-run? Quad work could be the missing link.


🗓️ Should I lift on run days or rest days?

This is where strategy matters.

Here’s the mantra I follow: Hard days hard. Easy days easy. Stack your tough stuff together, then give yourself full rest days after.

  • Run hard in the morning? Do your strength later that day.

  • Doing an easy jog? You can tack strength on after.

  • Rest day? If you’re doing strength that day, make sure it doesn’t turn into a secret hard day. Keep it focused and short.

Avoid heavy quad workouts right before a big run. You don’t want jelly legs going into your interval session or long run.

Personally, I like pairing easy runs with leg strength. I’m already in my gear, already warmed up, and mentally in training mode.


🧭 When’s the best time in a training cycle for strength?

Think of your training like a wave:

  • Off-season/Base phase: Go hard. Lift heavy. Push your limits. You’ve got room to be sore.

  • Race prep: Maintain. Cut back volume, reduce intensity. Keep the gains without burning out.

  • Race week: Keep it light. No deep squats a few days before your marathon. Stretch, activate, and stay loose — no wrecking your legs.

Even in peak season, I recommend doing at least one quad session a week. Otherwise, you’ll lose the strength you worked so hard to build.

I usually drop my heavy lifting 7–10 days before a big race. No more barbell squats. Just bodyweight work and activation stuff.


🏔️ I run hills — do I still need quad workouts?

Hills are awesome. They build strength, power, and grit. Some people call them “the poor man’s weight room,” and they’re not wrong.

But… they’re not enough.

Hill running hits quads during the concentric phase (the push). What you miss is the eccentric work (the controlled lowering), which is key for protecting knees and building downhill durability.

Also, hills don’t address lateral stability or single-leg balance much. Exercises like lunges, step-downs, and single-leg squats fill that gap.

So yes, even if you run hills, add a little structured strength work. A couple of sets a week could be what breaks you through that plateau.


⏱️ Should I lift before or after a run?

After, most of the time.

Running requires fresh legs — especially speed or long sessions. If you lift first, your run suffers. Form breaks down. Injury risk goes up.

If you must combine them, do your quality run first, then strength. Or split them into morning/evening sessions.

Exception: Do light activation drills pre-run — stuff like lunges, skips, or leg swings — to wake up your muscles.

But skip the barbell squats beforehand.


Final Thoughts: Strong Quads, Strong Runner

Let me say this loud: your quads are your engine room. Build them up, and your whole running game changes.

I’ve been on both sides — the runner who skipped strength and paid for it with soreness and injuries, and the runner who lifts smart and sees the difference in every stride. The second version wins.

You’ll feel stronger on hills. Your stride will hold steady late in the race.

And maybe most importantly? Your knees will thank you.

So take this as your cue. Start small. Stay consistent. Own the process.

You don’t need fancy machines or a power rack — just some time, intention, and a willingness to grind.

quadriceps exercises


The Conclusion

There you have it!

The above quad exercises are the best when it comes to increasing strength in your lower body, especially in the rectus femoris muscle.

Do this awesome quad workout on a regular basis if you’re serious about making real progress. Also, keep in mind to stay within your fitness level the entire time.

Here are more  strength exercises for runners.

Please feel free to leave your comments and questions in the section below.

In the meantime thank you for reading my post

Keep Running Strong

David D.

Strength Training Program for Runners

woman running in trail

If you’re really serious about improving your running performance, you’re in the perfect spot.

As runners, we often get caught up in piling on the miles—but hitting the pavement isn’t the full story.

Here’s the truth.

Adding strength training to your routine changes the game. It’s more than muscle—think fewer injuries, better running efficiency, and a faster path to your goals

What’s not to like, really!

Now, if you’re thinking, “Strength training? That sounds intense,” don’t worry!

No matter where you are in your strength training journey—total beginner or gym regular—I’m here to help

In this post, I’ll guide you through setting up a strength training regimen that complements your running, whether you’re a beginner or seasoned in the gym.

What Is Strength Training?

At its core, strength training is all about making your muscles work against resistance—weights, machines, or even your own body. And don’t worry, you don’t have to lift heavy weights to see results.

Did you know that simple bodyweight moves like push-ups and squats can build strength and stamina just as well—if not better—than traditional weight lifting?

And the benefits don’t stop there.

I’ll be honest: for the longest time, I was one of those runners who thought all you needed was running to get better at running.

If I wanted to improve, I figured I just needed to run more miles maybe throw in some speed work.

It seemed logical—run more, get better. But that approach left me nursing shin splints, knee pain, and tight hips all too often

After a few frustrating months, a friend—a much better, more seasoned runner—asked me a simple question: ‘Have you tried strength training?’

So I decided to give it a try.

I started small with bodyweight exercises like squats, lunges, and planks. To be honest, at first, it felt a little pointless. I was not holding any weights here, just doing these slow, controlled movements.

But, after a few weeks of consistency I started getting stronger. And that strength carried over to my miles.

Let me explain more why strength for runners matters and it matters a lot.

Why Should Runners Do Strength Training?

When I first integrated strength training into my routine, I was skeptical. I mean, I’m a runner, not a weightlifter, right?

But after just a few months of consistent bodyweight exercises, the difference was undeniable.

My runs felt easier, my body felt stronger, and those nagging injuries? They started disappearing.

Don’t take my word for it. Let me back this up with some science:

  • Improved Performance: A study published in the Scandinavian Journal of Medicine and Science in Sports found that runners who combined endurance and strength training improved their 10K times and running economy. Muscle strength also saw a big boost.
  • Better Running Economy: A study in the International Journal of Sports Physiology and Performance showed that strength training improved running economy by 2.9% after six weeks. That’s a huge deal when it comes to running more efficiently.
  • Fix Muscle Imbalances: Strength training helps correct muscle imbalances, a common cause of overuse injuries. It can safeguard your body and keep you running strong.
  • Increased VO2 Max: A study in the Journal of Strength and Conditioning Research found that a 12-week strength program improved VO2 max by 5.7%. VO2 max measures your body’s ability to use oxygen, improving it helps your overall endurance.
  • No Bulking Up: Worried about bulking up? Don’t be. The right strength training plan will strengthen you without adding unwanted muscle mass.

Finding Balance Between Running and Strength Training

If you’re wondering how to fit strength training into your already-packed running schedule, don’t worry—it’s easier than you think.

First, focus on your goals. Do you want to correct muscle imbalances, improve your form, or prevent injury? Whatever it is, you can tailor your strength program to fit your needs. Just 20-30 minutes of strength work two or three times a week can make a difference.

I recommend giving your muscles 48 hours of rest between strength workouts to recover and grow stronger.

Figuring out how to balance running with strength training was a game-changer for me. Initially, I tried doing both on the same day, but I quickly learned that separating them gave me better results.

Now, I strength train on non-running days, and it’s made a world of difference in my energy levels and performance

Still hesitant? Here’s how to run after a strength workout.

Warm Up Before You Lift

Before jumping into your strength workout, warm up your muscles. A 10-minute warm-up of brisk walking, jogging, and dynamic stretches (like lunges or high knees) will prepare your body to lift. Remember to cool down and stretch—it’s key for flexibility and recovery.

The Importance of Proper Form

Proper form is crucial when it comes to strength training. It’s better to do fewer reps with perfect form than to rush through and risk injury. Bad form can lead to muscle imbalances and inefficient movement, which are not helpful in the long run.

And don’t take my word for it.

A study published in the Journal of Strength and Conditioning Research found that proper form during squats increased muscle activation in the quadriceps, glutes, and hamstrings.

To build proper form, do the following:

  • Engage your core, stand tall, and head in a neutral position.
  • Focus on smooth, slow lifts and equally controlled descents.
  • Move slowly, ensuring you rely on muscles, not the moment, to do the lifting.
  • Protect your joints by gripping them properly.
  • Keep your body well-aligned and move smoothly through each exercise. Don’t use momentum to swing the weight around.
  • Keep your shoulders relaxed and down. Do not shrug. Avoid aligning your ears with your shoulders.
  • Exhale as you lift the weight and inhale as you lower it.

What’s more?

Consider hiring a personal trainer to teach you proper form from the get-go and learn how to properly complete each exercise. Investing in a few sessions with a personal trainer was one of the best decisions I made for my strength training journey. They corrected my posture, taught me how to engage my core properly, and showed me that quality trumps quantity every time.

Can’t afford one?

Study online videos and tutorials to learn proper lifting techniques—plenty of sources are around.

Running vs. Strength Training: Start Simple

Let’s talk about balancing your running and strength training.

As a beginner, focusing on two non-consecutive days of full-body strength training each week is best. Start with simple, equipment-free routines that target five key movement patterns: squatting, pushing, pulling, hinging, and core work.

Mastering these fundamental movements will help reduce your risk of injury and set the foundation for lifting heavier weights down the road.

Once comfortable, you can add resistance to deadlifts, glute bridges, reverse lunges, overhead presses, hammer curls, and chest presses. Don’t worry if you’re unfamiliar with the equipment—bodyweight exercises are the perfect stepping stone to strength training. Research shows they can be as effective as weights, especially for beginners or those without gym access.

As you get fitter, try introducing tools like TRX bands, resistance bands, kettlebells, barbells, and machines. And remember, it’s all about progression—start small and build up as you get stronger.

Running and Strength Training Schedule

If you’re new to strength training, you might wonder how to combine it with your running routine. Should you run first, then weight train, or lift the weight and hit the pavement?

My advice is simple: lift first, run later. During your first few months, prioritize your strength training routine to improve your technique and form and avoid getting distracted by fatigue from running. Once you’ve developed a solid foundation, you can switch up the order or perform both workouts on separate days.

Here’s a basic schedule that can help you make progress and avoid injury:

  • Monday: Interval run
  • Tuesday: Strength workout
  • Wednesday: Easy run
  • Thursday: Strength workout
  • Friday: Long run
  • Saturday: Strength workout
  • Sunday: Rest

Finding the Right Weight

When it’s time to add weights, start with a manageable weight and slowly build from there. If you swing the weights around or use momentum, the load is too heavy, and you need to scale back.

Ideally, your muscles should feel fatigued by the last couple of reps. If you’re breezing through, it’s time to increase the weight.

The right weight depends on the exercise. For example, with chest presses, ensure you can control the weight throughout the movement. If you rely on momentum to finish those last reps, go for a lighter weight.

The Range Reps

When it comes to the number of reps, keeping them low and the weight challenging enough is the way to go. Opt for a weight you cannot lift more than eight times and do at least three sets of five to eight repetitions per exercise.

Reps really do impact your results

Here is a quick overview of the number of reps and its impact on your strength results

  • The 2 to 5 range rep builds super dense muscle and strength.
  • The 6 to 12 rep range: This builds both muscular strength and muscular
  • The 12 rep range and above. Ideal for building endurance.

Beginner Strength Running Plan For Beginners

If you are just starting, take your training slowly and alternate between weight-lifting and running days.

According to a study published in the Journal of Strength and Conditioning Research, alternating between strength training and cardio on different days can result in better performance improvements than doing both on the same day.

Otherwise, you risk overtraining, which can lead to injury and slow your progress.

As a beginner, start with two strength workouts a week for three to four weeks, then add a third workout in month two.

Research shows that beginners can gain strength with just two weekly workouts.

Shoot for at least 20 to 30 minutes per session, then gradually add time and intensity until you’re lifting hard for 50 to 60 minutes a session.

A study published in the Journal of Applied Physiology found that a longer duration of resistance exercise led to greater muscle hypertrophy, or growth, in untrained individuals.

The Concept of Training Split

To schedule your workouts the right way, you need first to determine what weight training split and weekly schedule to opt for.

If you’re familiar with strength training, you already know how splits work If not, then below is a simple explanation and description.

The most common and widely tested is the 3-day full body split. This is what I’d recommend any beginner. I cannot emphasize it enough.

Additional Resources

For further reading on the benefits of strength training for runners, check out these resources:

Share Your Strength Training Journey!

We want to hear from you! Your experiences with strength training can inspire and motivate fellow runners. Take a moment to share your thoughts in the comments below. Here are a few questions to get you started:

  • What strength exercises have you found most beneficial for your running?
  • How has strength training impacted your performance?
  • Do you have any tips for incorporating strength training into a busy schedule?

Your insights not only contribute to our running community but also help others who are navigating their own strength training journeys. Let’s learn from each other and build a supportive environment!

The 16 Best Bodyweight Exercises For Runners (& How to Start Body Weight Training)

female runner doing Bodyweight Exercises

Looking to start bodyweight exercises for runners but have no idea where to get started? Then you have come to the right place.

Here’s the truth.

Bodyweight training, or calisthenics, is one of the best options you got to improve your fitness, lose weight, and build the body of your dreams.

It’s the ideal way to work out at home, in the gym, or wherever you happen to be. Most calisthenic exercises are convenient, and by definition, require no equipment—just your body and some space around you.

Seems hard and scary, but don’t lose heart! As we’re going to see in today’s post, calisthenics is not rocket science.

Here’s your complete guide on how to start bodyweight training as a beginner.

In this sweet guide, you’ll learn:

  • The benefits of calisthenics
  • How to get started with bodyweight exercises
  • What is a calisthenic workout
  • The basic exercises you need
  • How to develop proper technique
  • And so much more.

Sounds good?

Let’s get started.

What are Bodyweight Training Exercises?

As the name implies, bodyweight training consists of strength-building exercises that utilize body weight to create resistance for the muscles against gravity instead of resistance in the form of bars, dumbbells, kettlebells, medicine balls, exercise machines, you name it.

Typical calisthenics workouts can range from straightforward sessions of push-ups and pull-ups to an elaborate routine of muscle-ups and jackhammers.

Bodyweight training is simple to learn, efficient, and can be done virtually anywhere, at work, at home, while traveling, etc. Think of it as a portable gym.

What I like the most about bodyweight training is scalability. You can easily modify and re-adjust your routine to match your fitness skill, whether you’re a newbie couch potato or an elite gymnast.

Bodyweight Exercises Benefits For Runers

Bodyweight exercises are some of the best moves that can help you improve your fitness level and get into the best shape of your life without paying for hefty gym fees, or be confined to a gym.

This kind of training is really convenient, and can be done anytime anywhere.

You don’t need any sort of fancy equipment or access to the gym.

All you need is your bodyweight, a clear and comprehensive routine and a bit of determination.

The bulk of bodyweight exercise is convenient, simple and scalable, so as you long as you are willing to keep good form the entire time, listen to your body, and do your best, you will be in a good place.

The routine I’m sharing with you today involves doing a set of challenging bodyweight exercises designed to push you hard, while the recovery periods refresh you for the next round of high-intensity work.

To make the most out of this workout, be sure to push your hardest on every interval—just keep good form the priority here—and by the end of the routine you should feel utterly exhausted.

If you are not completely worn out, you are not pushing it hard enough.

So make sure to push yourself as hard as possible while keeping proper form the entire time.

If your form starts to suffer, that’s a clear sign that you should back off, recover a bit, then go at it again.

Just don’t give up.

The 16 Best Bodyweight Exercises For Runners

If you haven’t exercised in a long time, a good segway to the world of bodyweight training is starting with basic exercises—think push-ups and pull-ups.

These exercises are building blocks of strength training. They form the foundation of almost every move you’re going to make in the future.

Do them with good form, though. Proper technique is especially vital for beginners, as the movement habits you develop off the bat will stick you as you progress.

Once you master the basic callisthenic exercises shared below, the fancier moves will start to seem much more doable.

Bodyweight Exercise For Runners – 1. Air squats

Benefits

Bodyweight squats are wonderful multi-joint exercises target almost every muscle in your lower body.

They are also key for boosting endurance, especially if you are doing any type of running, biking, and swimming.

Here are some of the common mistakes:

  • Rounding the shoulders and curving the back as you squat.
  • Excessive forward knee bending until they extend past the toes.
  • Knees falling inward or outward.
  • Dumping weight into the toes, which places strain on the knee joints.
  • Misalignment of the knees and toes.

Proper Form

Begin by standing with your feet a little wider than hip-width apart, toes should be slightly turned out, with the arms resting at your sides.

Next, while bracing your core and pulling your shoulder blades in towards each other, start squatting by bending your knees slowly while putting most of your bodyweight onto your heels.

Make sure to keep your knees aligned over your ankles and back straight the entire time.

As soon as you reach the bottom of the squat, press back up through the heel and return to standing position.

Do this exercise slowly and gradually at first, but as you master proper form, be sure speed it up to boost the cardiovascular activity and burn some mad calories during this exercise.

Bodyweight Exercise For Runners – 2. Push-ups

The push-up is a classic bodyweight exercise targetting the upper body and core. It works the biceps, triceps, and pecks like nothing else—as long as you perform it right

Not only bad push-up form is a waste of time and energy, but it could also lead to lower back pain and severe shoulder and wrist issues.

Here are some of the common push-up pitfalls:

  • Lifting the butt high in the air.
  • Performing half a push-up—not going low or high enough.
  • Sinking the hips down.
  • Holding the breath.
  • Placing the palms in front of the shoulders.
  • Keeping the chin too close to the chest.
  • Poor head position.
  • Putting the hands too far forward.
  • Not fully straightening the arms on the push-up.

Proper Form

Begin by setting up your weight supported onto your toes and hands.  Place your hands underneath your shoulders, then extend your legs straight out behind you. Keep your head in a neutral position, arms and hands slightly below your shoulders, fingers pointing forwards.

Tighten your core, squeeze your butt, then lower your body until your chest is an inch or two above the floor, elbows pulling back at about a 45-degree, then rise back up by fully extending your arms. That’s one rep.

Engage your core and buttocks and keep your elbows tucked in to your sides throughout the movement. This helps keep your body in a straight line from head to heels.

Can’t perform a single push-up? Use a bench or an elevated surface to put your hands on. I won’t recommend dropping to your knees as it instills lousy form.

As you get stronger, opt for lower surfaces for your hands until you can do clean pushups with no assistance.

Push-up variations: Military pushups, wide-stance pushups, incline/decline pushups, archer push-ups, one-hand push-ups, Hindu push-ups, etc.

Bodyweight Exercise For Runners – 3.Plank

The plank is one of the most basic core exercises out there, but it’s not as simple as you might think. It’s actually one of the most common mistakes when it comes to technique.

Planks are versatile exercises that increase core strength and relieve the lower back. But if performed wrong, they can do more harm than good.

Here are some of the common form errors:

  • Not engaging the core muscles
  • Sinking the hips
  • Arching the back
  • Looking up straight ahead
  • Tilting the hips
  • Positioning the hands too far apart
  • Placing the arms behind or in front of the shoulders
  • Lifting up the hips too high
  • Bringing the shoulders beyond the elbows
  • Not engaging the legs and butt

Proper Form

Begin on your knees and hands in the classic tabletop position.

Position your elbows underneath your shoulder, then tuck your toes and lift your knees off the floor, and look straight toward the floor.

Engage your shoulder muscles and keep your neck aligned in a neutral position, feet together, and toes touching the ground.

Readjust your hand position until your wrists are lined up under your shoulders.

Hold the plank position for as long as possible without losing form.

Plank variations: low plank arm reach, reverse plank side start plank, low side plank, extended plank, low side plank crunch, forearm plank, etc.

Bodyweight Exercise For Runners – 4. Bench Dips

Also known as a triceps dip, this is a classic bodyweight exercise. Dips target the chest and triceps and are best performed off the platform of a chair or a bench.

Here are some common mistakes to watch out for:

  • Not going low enough or going too low
  • Moving too fast
  • Flaring the elbows to the side
  • Not engaging the core
  • Gazing at the ceiling
  • Butt tilting

Proper Form

Start facing away from a chair or bench, then the front of the platform with both hands shoulder-width distance apart, extending legs out in front of you.

Engage your core, flex at the elbows to slowly lower your body until your arm at the forearm forms a 90-degree angle. Pause at the bottom for a one to tow count, then lift yourself powerfully using your triceps. That’s one rep.

Once you can breeze through 12 to 16 reps, move on to a more advanced move, like close grip push up.

Bench Dips Variations: band-assisted dips, dip to leg raise, assisted dip machine, weighted dips, jumping dips with negatives, etc.

Bodyweight Exercise For Runners – 5. Pull-ups

Pull-ups are maybe the best back exercise and better done with a pull-up bar. It’s also one of the hardest, so take your time and start with easier variations.

Here are some common pull-ups mistakes:

  • Not getting the chin above the bar
  • Gripping too wide
  • Staying straight as an arrow
  • Not using the full range of motion
  • Letting the elbow flare
  • Not keeping the back flat
  • Not keeping the shoulders back
  • Not going to “dead hang”

Proper Form

Grab a horizontal bar with both hands, palm facing away from you and hands at shoulder-width apart.

Next, while flexing your traps and shifting your shoulders up and back, pull your body up toward the bar, then slowly lower down to complete one rep.

Pull-ups variations: chair-assisted pull-ups, close grip pull-ups, wide grip pulls, butterfly pull-ups, kipping pull-ups, etc.

Bodyweight Exercise For Runners – 6. The Bridge

Also known as the hip raise, the bridge is a fantastic pose for increasing strength in the hamstrings, back, and glutes.

When performed incorrectly, the bridge can lead to neck, lower, back, or knee issues.

Here are some of the common blunders:

  • Lengthening the muscles within the quads
  • Having the feet too close to the butt.
  • Lifting the heels off the ground
  • Not keeping the toes in line with the knees
  • Put too much force on head and neck

Proper Form

Begin by lying down flat on your back. Pull your shoulders back and down.

Place your arms alongside your body, then bend your knees and place your feet on the ground, a hip-width distance apart.

Walk your feet back towards your butt, then, on the inhale, press into your arms and feet to lift your hips towards the ceiling. Squeeze your glutes as you rise to create a straight line from your knees to shoulders.

While keeping your knees, hips, and chest aligned, hold the top of the movement for three to ten seconds. Do not let your hips sag or drop.

Slowly lower down and repeat.

Bridge variations: single leg bridge, bridge with a squeeze, weighed bridge, pulsating bridge, etc.

Bodyweight Exercise For Runners – 7. Lunges

Another fantastic lower body exercise for building up the glutes and the quads.

Lunges also help improve coordination and balance, and they’re great for improving proprioception.

But they are also extremely and commonly easy to get wrong. Bad technique doesn’t just look sloppy; it could also cause injury.

Avoid these common pitfalls:

  • Bending the torso forward
  • Leaning forward or back
  • Turning the foot inward
  • Externally rotating the back knee
  • Lowering the rear knee too fast
  • Not maintaining a straight back
  • Losing balance
  • Taking very short strides forward or backward
  • Extending the knee past the toes on the lunge
  • Shifting the weight from the heel to the toes—or riding the toes.
  • Pushing the hips forward

Proper Form

Assume an athletic position, with the feet hip-width apart, back flat, and core engaged.

Take a slow, controlled step forward with your right leg as far as possible. Your front heel is roughly two feet in front of your rear knee as it bends toward the ground.

While keeping the weight in the heels and spine flat, lower your body until both of your knees are bent at a 90-degree angle. Avoid leaning back or forward throughout the movement.

Hold for a moment, then take a big step forward with your left leg. Keep alternating the legs to move forward across the floor. Avoid bouncing or using too much momentum.

Lunge variations: jumping lunges, static lunges, isometric lunges, reverse lunges, step up reverse lunge, rear foot elevated lunges, lung with reach, weighted lunges, etc.

Hardest Bodyweight Exercises For Runners

once you master the basic bodyweight movements, make your workouts more challenging by adding the following exercises.

Bodyweight Exercise For Runners – 8. Spiderman Plank Crunch

Benefits

This awesome exercise will not only raise your heart rate through the roof, but it will also test your core strength and balance to the breaking point.

Proper Form

To do them right, start in a standard plank position with your body perfectly straight from head to toe, forearms firmly resting on a mat.

Make sure to keep your back straight and core engaged the entire time.

Next, lift your right foot off the floor, then bring your right knee forward towards your right elbow, pause, then slowly return to the starting position.

Repeat on the other side to complete one rep.

Alternate sides for a total of 12 reps to complete one set.

Aim for three sets.

Bodyweight Exercise For Runners – 9. Dive Bomber Pushups

Benefits

These are my favorite types of a push-up. Also known as the Hindu push-ups, this exercise can help you tone up almost every muscle in your body while providing you with a killer cardiovascular workout

Proper Form

This will push your heart rate to the max.

So make sure to pace yourself here.

Begin in a downward dog position with your butt elevated in the air, and feet spread roughly shoulder width.

Make sure your body is forming an inverted “V’ shape, with your head down.

Next, lower your chest to the floor by bending your elbows toward the floor until your chest almost touches it, then push forward into a dip motion to an upward dog position.

Pause for a moment, then return back to the standing position to comlplete one rep.

Do 10 reps to complete one set, aiming to perform 3 total sets.

Bodyweight Exercise For Runners – 10. Side plank crunch

Benefits

Planks are some of the best bodyweight exercises, so make sure to do a lot of them.

However, the variation I’m sharing with you today will not only test your core mettle, but they will also drive your heart rate through the roof.

Side plank crunches strengthen the obliques and the deep ab muscles, and they are an awesome cardiovascular exercise.

Proper Form

Begin in a standard plank position with legs together, back straight and core engaged.

Then, lean to your left side while lifting your right arm up toward the ceiling, bend your right elbow and place your right hand behind your head.

Next, while keeping your right shoulder tracking over right hand and hip raised the entire time, bend your right knee and bring in to touch your top elbow, and start performing crunches.

Do 8 reps on each side to complete one set.

Aim for three sets.

Bodyweight Exercise For Runners – 11. Pike Jumps

Benefits

This is another awesome core exercise that will help you develop core strength and stability while hitting your hips and quads hard and pushing your cardiovascular endurance to the limit.

Proper Form

Begin in a standard plank position with palms on the ground, core engaged, back perfectly straight and hands directly beneath your shoulders.

Make sure to form a straight line your head to your heels.

Next, while engaging your core, jump your feet together and forward and assume a pike position with butt raised in the air, pause for a moment, then jump back to the plank position while making sure to keep the hands firmly placed on the ground.

That’s one rep.

Do 16 reps to complete one set.

Aim for three sets.

Bodyweight Exercise For Runners – 12. Jump Squats

Benefits

Jump squats are some of the best plyometric exercises you can do to develop explosive power, which is key to building your muscles’ ability to generate force more quickly.

This exercise mainly works the calves, quadriceps, hamstrings, and glutes—vital running muscles.

Proper Form

Stand as straight as possible with the feet spread shoulder-width apart, arms hanging at the sides and core engaged.

Next, while keeping your chest up and back straight, squat down by bending your knees until your thighs are parallel to the ground.

Be sure to keep your back straight and knee is tracking over your toes.

Then, while pressing mainly with the ball of your feet, jump up explosively in the air as high as you can, using the thighs like springs.

As soon as you land on the floor, go straight away to the next squat and jump again.

Do 20 reps to complete one set.

Aim for three sets.

Bodyweight Exercise For Runners – 13. Windshield Wipers

Benefits

This awesome core exercise is ideal for targeting the rectus abdominis and obliques muscles to activate and strengthen your core stabilizing muscles, which is crucial for keeping your trunk steady and good posture while you are running.

Proper Form

Start out by lying down on your back, then raise your legs to a 90-degree angle.

For more support, feel free to spread your arms straight out to your sides.

Next, to perform this exercise, rotate your legs to your right side, stopping short of touching the floor, pause for a moment, press back up, then turn to the left side, and press back to starting position to complete one rep.

Make sure your legs are moving from side to side in a “windshield wiper” motion.

As you get stronger, make it more challenging by bringing your arms closer into your sides so they offer less support.

Do 10 slow reps to complete one set.

Aim for three sets.

Bodyweight Exercise For Runners – 14. Single Leg Elevated Glute Bridge

Benefits

As you may already know, glutes are the source of power when it comes to running.

Good news is the single leg elevated glute bridge exercise is one of the best exercises that target these large and powerful muscles.

Strong glutes can help you run faster and longer while preventing common injury.

Plus, it also builds balance and coordination.

Proper Form

Lie down on your back with your feet flat, knees bent, ankles hip-distance apart, then raise your right leg off the floor, pulling the knee to your chest.

This is the starting position.

Make sure to extend your right leg as straight as possible toward the ceiling.

Next to perform this exercise, raise your glutes off the floor by driving through the heels and extending your hip upward.

Be sure to extend your right leg as far as you can, hold it for 30-second to one full minute, then slowly lower your leg down and switch sides to complete one set.

Aim for three sets.

Bodyweight Exercise For Runners – 15. Side Lunges

This is a unique variation of the standard lunge that builds strength in the hamstring, abductors, quadriceps, and glutes. This lateral exercise is also great for coordination.

When side lunges are performed incorrectly, they can result in pain or injury to the lower back, hips, and knees.

Here are some of the common form errors:

  • Not keeping the torso uprightand engaged core
  • Extending the knees out too far
  • Stepping too wide while performing the side lunge movement
  • Not keeping the weight distributed evenly
  • Not keeping the toes in line with the lunging knee.

Proper Form

Assume an athletic position with your feet together, knees and hips slightly bent, and head and chest up.

On the inhale, take a slow, lateral step to the right side, then bend into the right knee and sit your hips back as you’re going to sit in a chair.

Stay low while keeping the weight in your heel and bending your knee to a 90-degree angle, knee staying in line with the toes.

Exhale and press through the right heel to straighten the leg and step back to starting position.

Switch sides and repeat.

Side Lunge variations: Plyo side lunge, dumbbell lateral lunge, reverse side lunge, curtsey lunge with a kick, single-leg deadlift to reverse lunge.

Bodyweight Exercise For Runners – 16. Burpees

Benefits

This compound movement will blast your heart and increase your stamina like nothing else.

Burpees target virtually every major muscle group in the body while helping you become functionally fit in the shortest time possible.

It’s no wonder that the burpees are the bread and butter of most CrossFit workouts and military training programs.

Here are a few of the sad burpees errors that bring tears to my eyes:

  • Going too fast while ignoring proper
  • Not properly stabilizing the core.
  • Allowing for the back to sag when doing the push-up.
  • Holding the breath.
  • Sacrificing reps for form.

Proper form

Start by standing with feet shoulder width apart.

Squat down by bending your knees, then lower your body toward the floor by putting your hands on the floor in front of you.

Thrust your feet back, and lower yourself into the bottom portion pushup position, so your legs are fully extended, abdominals tights, and arms straight.

Then in one swift and smooth motion, jump your feet back into the squat position and leap up as high as possible from the squat position.

That’s one rep.

Repeat as fast as possible.

Burpee variations: push-up burpee, superman burpee, side burpee, start jump burpee, mountain climber tuck jump burpee, dive bomber burpee, etc.

The Bodyweight Strength Routine For Running 

We’ve all heard of the saying, “failing to plan is planning fail.”

You need a concrete plan if you want to reach your fitness goals. Not only does it improve your training consistency, but it also allows you to monitor your progress and see where you need more work.

The following plan has been designed to increase endurance, build strength while burning some mad calories in the process.

Perform the exercises in order, two to three times a week, with at least one day of full recovery between each go. Take 30 to 60 seconds to rest after each round. Repeat five times.

Whatever you do, make sure to start in line with your current fitness skill, training goals, schedule, and personal preferences. Give it a few months, and you’ll be a leaner, stronger athlete for it.

To get you started, try the following 3-day program.

Monday, Wednesday, Friday: Full body circuit

  • Ten push-ups
  • 30 squats
  • 20 sit-ups
  • Ten chair dips
  • Five pull-ups

Repeat the entire circuit 5 times.

More Bodyweight Exercises

As you get fitter, feel free to add in more bodyweight exercises of various intensities and reps. Some of these include:

Bodyweight Y Squats
X Pushup
Bodyweight Single-Leg Deadlift
Bodyweight Lateral Squat
Mountain Climbers
Bodyweight Shoulder Taps
Calf raises
Dead Bug
Bird Dog with Rotation
Bodyweight Bird Dog
Double Lunge with Reach
Back Extensions
Hand Curls
Chin-ups
Leg raises
Sit-ups
Scissors
Cross-Body Mountain Climbers
Squat Thrusts
Reverse Lunge and Hop
Cross-Body Extension
Elbow to Knee
Wall Slides
Side Plank with Rotation
Dive Bomber Push-Ups
Side Plank with Extension
Jump Squats
Plank to Push Up
Single-Leg Up and Down Dogs
Figure 4 Mountain Climbers
T Push-Ups
Jumping Lunges
Single-Leg Burpee
Scissors
High Knees
Cross Overs
And so much, so much, more.

New to Running? Start Here…

If you’re serious about running, getting fit, and staying injury free, then make sure to download my Runners Blueprint Guide!

Inside this guide, you’ll learn how to start running and lose weight the easy and painless way. This is, in fact, your ultimate manifesto to becoming a faster and a stronger runner. And you want that, don’t you?

 Click HERE to check out my Runners Blueprint System today!

Don’t miss out! My awesome running plan is just one click away.

Your Tabata Sprints Guide -The Tabata Workout Plan You Need

female runner doing Tabata Workout routine

If you do any form of exercise, you’ve probably heard about  Tabata sprints training one too many times.

But have you ever wondered where the heck Tabata came from ? and how it became such a big buzzword in the fitness world?

Well, if your answer is yes, then today you’re in luck as I’ve spent long hours researching the subject so you don’t have to, and the answers are quite amazing. You’ll definitely learn how to do tabata sprints without much second guessing.

I’ll also share with you a simple Tabata workout routine to get you started on the right foot without needing any special equipment and paying any gym fees.

Let’s delve in.

What Is Tabata Workout Training?

The Tabata training method involves exercising at full effort for 20 seconds, recovering for 10 seconds, then repeating the cycle for eight times for four minutes. The high-intensity burst is performed at or near maximal effort while the recovery period is usually at 50 percent of maximum capacity.

Genesis – Study Behind the Tabata Protocol

Quick history lesson: The Tabata method was developed by Izumi Tabata Ph.D., a former scientist, and researcher at Japan’s National Institute of Fitness and Sports in Kanoya,

Dr. Tabata took a group of young athletes from different background and skills, then split them into two groups: one performing moderate intensity training (the control group), the other high-intensity training.

His goal was simple: to see if the subjects would benefit from a 20/10 session repeated eight times. He wanted to assess how intense and intense, and how short, the interval session could be to result in measurable gains and growth.

And he got a sobering answer: Four Minutes.

The results were published in 1996 in the journal “Medicine and Science in Sports and Exercise.” Under the title “Effects of Moderate-Intensity Endurance and High-Intensity Intermittent Training on Anaerobic Capacity and VO2max.”

Let’s delve a little deeper into the research.

The Initial Study

The initial study goes back to 1996 when Dr. Tabata and his team of researchers examined two groups of amateur athletes in their mid-twenties for six weeks.

The athletes studied where divided into two groups, following two different workout protocols.

Group, I followed protocol One where they exercised for an hour of stationary cycling at 70 percent of VO2 max, five days a week. This is similar to a long-running session at a steady moderate pace.

Group I exercised for five days a week for a total of six weeks. Each session lasted one hour. That’s roughly 1,800 minutes of moderate intensity training for the control group over the six weeks.

Group II followed protocol Two in which they exercised four times per week, opting for a workout that consists of eight 20-second bursts of highly intense biking—at 170 percent effort—and 10-second of rest, totaling 4 minutes a workout. Think tabata sprints.

Group II exercised for four days a week for six weeks. Each session lasted four minutes and 20 seconds—with ten seconds of recovery between each set. That’s about 120 minutes of high-intensity training over the six weeks.

The Conclusion

The first group improved their maximum aerobic capacity (cardiovascular) by 9.5 percent but showed little or no improvements in their anaerobic system (muscle).

 Nonetheless, the Interval training group crushed it. Not only did they increase their aerobic capacity by 14 percent but they also improved their anaerobic power (how long you can exercise at maximum effort) by 28 percent. That’s huge.

To conclude, high-intensity interval training has a huge effect on both the aerobic and anaerobic systems. The group that worked out less, and thanks to high-intensity intervals, ended up fitter at the end of the six weeks.

MIND BLOWN!

Additional resource – Bolt top running speed

Benefits of Tabata Sprints Training

Here is a list of the benefits to expect if you do Tabata training on a regular basis:

Improved anaerobic capacity. Anaerobic power can be defined as the amount of extra work a runner can eke out beyond their aerobic capacity. According to research, an improved anaerobic capacity can help you run faster and longer by improving fatigue resistance and muscle’s ability to flush out lactic acid.

Burns mad calories. The typical Tabata workout routine can burn up to 12 to 15 calories per minute, according to a study. Therefore, the Tabata workout method is a 4-minute fat-burning miracle workout.

Endless combinations. What I like about Tabata workouts is the endless number of training combinations you can do. You can perform any exercise you like. You can do push-ups, squats, tabata sprints, burpees or any other exercise that hits large muscle groups.  

Saves times. Tabata can help you squeeze a workout in and stay consistent with your fitness routine—especially when pressed for time. All you need is some space, a mat, and there you go.

Here’s a list of further research about the effects of tabata style training.

Study 1

Study 2

Study 3

Study 4

Be A Well Rounded Athlete

Hopefully, by now, you’re  excited about incorporating Tabata sprints workouts into your routine, nonetheless, keep in mind that these shouldn’t be an alternative to your current running sessions.

Instead, to reach your best performance, make sure to follow a well-rounded running program that includes recovery runs, tempo runs, interval sessions, Fartlek intervals, and long runs.

Tabata Logistics – Time it Right!

To keep track of your training time and your cycles, you can simply use a stopwatch or a tabata app.

A timer is key for doing Tabata right and efficiently, especially if you’re running and are unable to look at a screen to check the time remaining for each round or bout.

If you’re pushing yourself to the max (which what you should be doing when Tabata training), then it’s going to be virtually impossible to keep it together while checking a watch,  your smartphone, or a wall clock.

I prefer using apps because they take the guesswork out of the equation, helping me stay focused on the task at hand. One of my favorites is the Tabata pro (Get it for $3). Or google search Tabata and you will find plenty of free versions that deliver.

Just set it once, press start, and get to work.

The 30-Minute Tabata Workout For Beginners

The below routine involves doing five rounds of intense work Tabata style. Each round lasts for four minutes

Here’s the truth. If you go maximum effort during the high-intensity intervals, the four-minute cycle will feel like the hardest and most challenging four minutes of your life.  It might be too much for some people.

Again, here’s how to proceed :

  • Work out at your maximum effort 20 seconds

  • Recover for 10 seconds

  • Complete eight rounds.

Push as hard as you for 20 seconds, either eking out as many reps as you can of an exercise or moving as fast as possible when doing sprints or any other form of cardio exercise.

Rest for 10 seconds, then repeat the process for a total of eight times.

Without further ado, here is my favorite Tabata workout protocol.

tabata sprints

The Warm-up

Before you perform any Tabata sprints, warm up by jogging for 5 minutes and doing dynamic exercises to increase your core temperature and loosen up your muscles and joints.

Regardless of the exercise you pick, please always start with a 10-minute warm-up. You want your core more temperate to raise and heart rate up, so you can perform at your best without hurting yourself.

Once you’re done tabata training, start the cooldown. Your heart will be racing like crazy and muscle twitching. Go for a slow jog, walk, or do some stretches to bring them back to normal levels.

Round One: Tabata Sprints

Sprint for 20 seconds, rest for 10, then sprint for another 20 seconds, shooting for eight sprints at an all-out effort.

You can also perform the sprints on a steep hill, but make sure to pick a hill that’s not too technical since you will be running at your maximum speed for at least the first set of reps.

Round Two: Tabata High Knees

https://www.youtube.com/watch?v=whHxoB-AFYQ

Stand feet hip-width apart. Keep your back flat, and core engaged the entire time.

Perform high knees by jumping from one foot to the other, lifting your knees as high as you can. Focus on lifting your knees up and down as fast as you can, landing on the balls of your feet as you run in place.

Do this for 20 seconds, rest for 10, then repast the cycle for eight times to complete the round.

Round Three: Tabata Jumping Lunges


Take a lunge position with your right foot forward, knees bent, and left knee nearly touching the floor.

Next, while extending through both legs, explode up and jump as high as you can, swinging your arms to gain momentum. Then switch the position of your legs mid-air, moving your left leg to the front and right leg to the back, and immediately lower yourself into a lunge on the opposite side.

Keep jumping back and forth for 20 seconds, then rest for 10, repeating the cycle for eight times.

If you can’t keep doing jump lunges with good form, then perform walking lunges instead. Be aware of your limits.

Round Four: Tabata Squats

Assume an athletic position with feet hip-width apart. For more challenge, hold a set of dumbbells or plates at shoulder-height.

Next, to perform the squat, bend your knees and sit back, lowering yourself down until your thighs are parallel to the floor. Keep your back flat, head facing forward and toes tracking over the knees the entire time.

Last up, return to standing by pushing through your heels.

Continue squatting for the full 20-second interval, moving as fast as you can, then rest for 10 seconds. Repeat the cycle eight times.

Round Five: Burpees

Stand feet hip-width apart, back straight and core engaged.

Next, squat down and place your palms on the floor, then jump both of your feet into a full plank position, then quickly hop your feet back into a squat and, explosively leap into the air, reaching your arms straight overhead. Add a clap for some sound effect!

In case you’re looking for more challenge, then you can either add a standard push up from your plank or drop your chest to the floor before jumping back up.

Conclusion

Here is the routine in a nutshell

Round 1 (4 minutes) Sprints

  • Sprint at your highest speed for 20 seconds.
  • Rest for 10 seconds.
  • Complete eight rounds for a total of 4 minutes.

Round 2 (4 minutes) High Knees

  • High knees for 20 seconds, as many reps as possible with good form.
  • Rest for 10 seconds.
  • Complete eight rounds for a total of 4 minutes.

Round 3 (4 minutes) Jumping Lunges

  • Jumping lunges for 20 seconds, as many reps as possible with good form.
  • Rest for 10 seconds.
  • Complete eight rounds for a total of 4 minutes.

Round 4 (4 minutes) Squats

  • Squats for 20 seconds, doing as many reps as possible with good form.
  • Rest for 10 seconds.
  • Complete eight rounds for a total of 4 minutes.

Round 5 (4 minutes) Burpees

  • Do as many burpees as you can for 20 seconds.
  • Rest for 10 seconds.
  • Complete eight rounds for a total of 4 minutes.


Tabata Sprints Workout –  The Conclusion

There you have it.

Whatever exercises you pick, your choices should target large of muscles to get the most out of Tabata sprints training.

It’s perfectly okay to feel some soreness or muscle pain during and following your first few Tabata sessions. That’s actually how you know that you’re doing it right.

As you get fit, you’ll body will adjust, and you’ll only experience a mild to moderate soreness after the beginning.

For more, here are some of my favorite cardio workout alternatives to running.

Please feel free to leave your comments and questions in the section below.

In the meantime thank you for reading my post.

Keep Running Strong

David D.

The Secret to Pain-Free Running: Defeating Muscle Imbalances

BCAAs for runners

Have you ever wondered why your legs feel a bit lopsided after all those invigorating runs? You’re in good company.

Whether you’re a seasoned marathoner or just dipping your toes into the running world, I’ve got something crucial to share with you.

Running, that exhilarating cardio adventure, does wonders for your fitness and those extra pounds. It’s like your legs are sculpted by the running gods themselves, right? Well, not quite.

There’s a sneaky culprit lurking in the shadows – muscle imbalances. They’re like the silent villains of the running world, and if left unchecked, they can turn your running paradise into a painful pitfall.

But fret not!

Today, I’m here to spill the beans on these muscle imbalances, understand what makes them tick, and, most importantly, discover how to outsmart them.

So, are you excited to dive into the world of balanced, pain-free running? Then let’s go.

Muscle Imbalances Explained

Muscle imbalances are like the yin and yang of your muscles.

Let me explain more. You’ve got muscles that do the heavy lifting, like the ones responsible for pulling off those impressive pull-ups at the gym. But what if these beefed-up muscles don’t have an equally tough opponent to spar with? That’s where the trouble starts.

Take our pull-up enthusiast, for instance. They’re nailing those upper body pulling exercises day in and day out. But bench presses or push-ups? Nah, it’s not their jam. The result? An upper body that’s like a seesaw, with one end doing all the heavy lifting while the other just chills.

Now, here’s the kicker – it’s not just the weightlifters who need to watch out. If you’re into any sport with repetitive moves, like our beloved running, you’re in the game too. Those marathon miles can be both a blessing and a curse, and the sneaky culprits are these muscular imbalances.

Here’s the deal: These imbalances are like tiny time bombs, ticking away as you hit the trails. They’re the reason you might feel those unnecessary aches and pains, and they can seriously cramp your running style.

The Solution

Alright, now that we’ve called out these muscle imbalances, it’s time to spill the beans on how to set things straight.

Here’s the deal – it might sound like Captain Obvious is in the room, but the best way to tackle these imbalances is by picking exercises that go head-to-head with those weaker muscles.

Let’s dive in.

A Fight of Planes – The Scoop behind the imbalances

Speedwork, hill sprints, and those long, glorious runs do wonders for sculpting your body into a lean, mean running machine. But there’s a catch, and it’s a hefty one. All this running comes at a cost – a rather substantial cost, if I may add.

You see when we lace up our running shoes and hit the pavement, our bodies rely heavily on a select group of muscles to propel us forward. These muscles are like the rockstars of the show, hogging the spotlight while the others play second fiddle in the background.

Enter the sagittal plane, the ruler of the running realm. This is where the action happens, where we move forward and backward like well-oiled machines. But hold on, what about the other two planes – the frontal and transverse? Well, they’re relegated to the sidelines during our running escapades.

And since we’re so fixated on that forward-backward motion, our calves and quads become the muscle MVPs, soaking up all the glory as they power us through. But what about the muscles in charge of the other two planes, like our shins and glutes? They’re left in the dust, growing weaker by the day.

Muscular imbalances can lead to a host of problems, from discomfort and pain to more serious issues like knee pain, muscle strains, Achilles tendonitis, piriformis syndrome, and IT band syndrome.

Problems linked to muscle imbalances

As you continue to rely on those dominant muscles, they start to put immense pressure and stress on various parts of your body.

Joints, ligaments, and even the very muscles you’re working so hard to strengthen become the victims of this one-sided affair.

The consequences? Well, they range from stalled fitness growth to discomfort and outright pain.

And let’s not forget about the more severe outcomes, like overuse injuries that can plague even the most dedicated runners.

We’re talking about the dreaded knee pain, bothersome muscle strains, Achilles tendonitis, the notorious piriformis syndrome, and the ever-persistent IT band syndrome.

It’s like a domino effect – one muscle group’s dominance leads to a breakdown in the harmony of your body’s movements, resulting in these unwelcome guests: pain and injury.

Common Muscle Imbalances in Runners

As you can tell now; muscle imbalances aren’t just an abstract concept. They can have a direct and tangible impact on your running and overall health.

Let’s break it down.

First up, let’s talk about those core muscles. I’m not just talking about washboard abs here; I mean the muscles of your abdomen, lower back, and even your glutes.

When these muscles are weaker than they should be, it’s like having a shaky foundation for a building. Your posture takes a hit, running efficiency goes down the drain, and before you know it, you’re stuck in the land of bad form. This domino effect can even affect your breathing, making it less than optimal, and it’s a one-way ticket to overuse injuries.

But wait, there’s more.

Another red flag is weakness in the hips and glutes.

According to a study conducted at East Carolina University, this kind of weakness is the culprit behind dreaded conditions like runner’s knee, the infamous IT band syndrome, and a whole host of knee-related problems. These issues can be a real game-changer when it comes to your running journey.

Now, what happens when certain muscles are overused, especially the hamstrings? Well, it’s like playing with fire. Overused muscles become susceptible to inflammation, nagging pulls, and chronic tightness – a triple threat that’s always bad for business.

But enough with the theory, right? It’s time to roll up our sleeves and dive into some practical training guidelines that will help you address these imbalances head-on.

How to Fix Muscle Imbalance in Legs For Runners

Now it’s time to unravel the power exercises that specifically target the common imbalances that often plague runners. With consistent training, they’ll become your secret weapon for restoring equilibrium in your muscles.

But first, a word on how to integrate these exercises into your routine. Ideally, aim to perform this routine two to three times a week. You can seamlessly incorporate them into your regular strength training regimen or tackle them during your post-run cool-down.

Remember, consistency is key.

And here’s a pro tip: if you suspect that you’re battling some major muscle imbalances, it’s time to go all-in. Dedicate yourself to this routine on your cross-training days diligently until you start noticing those signs of improvement. Your body will thank you, and your running journey will be smoother than ever.

1. Seated Row

Why:

Most runners who do not follow a strict strength routine usually have the upper body strength of a 10-year-old.

The good news is that this exercise helps you develop the upper body strength you need to maintain a good running posture—stopping you from hunching over.

Proper Form

Begin by sitting as tall as you can with a slight arch in the lower back with legs extended.

Sit

Next, inhale and draw the handlebars towards your ribcage without shrugging your shoulders upward or backward.

Focus on “pinching” your shoulder blades together.

Make sure to perform the movement slowly, keep the elbows tucked at the sides, and lift your chest throughout the eccentric portion of the movement.

Release slowly and repeat.

Aim for two to three sets of 10- to 12-rep.

Additional Guide – A leg workout for runners

2. Single Leg Squat

Why:

The Single Leg Squat is one of the best functional exercises that build strength and mobility in the glutes, hips, and core, as well as improving balance and coordination.

It also builds stabilization in the pelvis.

When the pelvis is steady and firm, your entire body, gait, and stride become more balanced, too.

This is especially helpful for runners with foot pronation issues.

Additional Resource – 13 Exercises to improve running

Proper Form

Stand tall with feet hip-width distance apart, then find your center and shift your weight to your right foot.

Next, raise your left foot and balance on your right, then squat down by bending at the knee and sitting your hips back as if you are going to sit on a chair behind you.

If mobility is a big issue, then you can either hold on to a suspended rope or squat down to sit on a bench or a chair behind you.

Avoid bad form at all costs.

Squat down slowly on your supporting leg as much as you can (at least 90 degrees in your knee), then slowly raise yourself up and extend your leg back up to standing.

The key is to focus on balance and good form.

Additional resource – Your guide to Charleys Horse in runners

3. Superman

Why:

For building strength and endurance in the entire lower back—a key component of the core, as well as the transversus abdominis—or the deep abs.

Proper Form

Begin by laying face down with your arms and legs extended out so you look like Superman flying through the air.

Next, lift your left arm with the right leg about five inches off the floor.

Hold for a count of five, then slowly lower down and alternate sides.

Do up to 6 to 8 reps on each side to complete one set.

Aim for two to three sets.

4. Single-Leg Deadlift

Why:

The Single-Leg Deadlift targets the piriformis and the glutes—which are common runners’ fragile spots that can be overwhelmed by stronger quads and hamstrings.

By doing this exercise, you will be building your gluteal muscles and making them strong enough to they can be used when running—especially if you do any hard hill running.

Proper Form

Begin by holding a light dumbbell or a medicine ball for an extra challenge.

Next, balance on your right foot and slightly bend the knee with your left foot behind you and in the air.

While keeping your back straight and shoulders back, hinge forward from the hips and tap the weight on the floor.

To come back to standing, engage the glute and hamstrings of the leg planted on the floor and slowly press up to standing.

Shoot for 8 to 10 reps on each side.

Aim for three sets.

5. One-Legged Bridge

Why:

It’s one of the best core strengthening exercises out there.

This one isolates the underworked muscles in the lower back and can help you build balanced core strength.

It also strengthens and isolates the gluteus muscles—also known as the butt muscles—as well as the hamstrings.

Proper Form

Lie on your back with your knees bent 90 degrees feet on the floor.

Then, raise your hips and back off the floor until your body forms a straight line from your knees to the shoulders.

Next, squeeze your glutes, then slowly raise and extend your right leg while keeping your pelvis raised.

Hold the pose for 20 to 30 seconds.

Release the leg down, and repeat on the other side.

Make sure to contract both lower back and abdominal muscles to hold your pelvis and keep it steady throughout the exercises.

Repeat 4 to 6 times to complete one set.

Do two sets.

6. Walking Lunge with Twist

This lunge variation is an impressive move that strengthens the core and builds lower body strength and balance while improving proprioception.

Proper Form

Begin by holding a medicine ball (or 10- to 25-pound weight plate) in your hands, elbows by the side.

Next, lunge forward until your front thigh is parallel to the floor and your back knee is almost touching the floor. Then, while contracting the core, rotate your torso to the same side as the front leg.

Lastly, rotate your body back to the center as you press back to a standing position.

7. Toe Raises

Shin’s muscles are a vital muscle group that’s in charge of controlling foot landing.

And when it’s weak, the calves wind up absorbing the bulk of the shock, which can set the stage for shin splints.

The good news is that the toe raises exercise is a simple exercise that can help you build strength in this critical—and often ignored—area.

Proper Form

While using a chair for balance or sitting on it  with the knees bent and feet flat on the ground, slowly lift your toe off the floor as high as you can, then lower them in a controlled and slow manner

That’s one rep.

Do 16 to 20 reps on each leg to complete one set.

Aim for three sets.

8. One-arm, One-leg Plank

The core isn’t just your abs.

It’s more than that.

The core usually includes the surface abs, the deep abs, the obliques, and the glutes.

The bad news is that the core isn’t working hard enough when running—expect when sprinting.

The good news is that a simple move like the plank can help you build total core power and strength.

For more challenges, try the one-arm, one-leg core variation below.

It will help you build strength as well as balance and total body endurance.

Proper Form

https://youtu.be/s1TN5d7AdSk

Begin laying face down, then prop yourself up onto your forearms.

Make sure your body is in a straight line from head to toe, core engaged, and back straight.

This is a basic plank position.

Next, if you are looking for more challenge, then reach out with your right arm in front of you while lifting the left leg behind you, hold it for a count of 10, then lower slowly down and switch sides.

Aim for 6 reps on each side to complete one set.

Do two sets.

Prevent Running Injuries with These 5 Hip-Strengthening Exercises For Runners

If you’re on the hunt for the ultimate hip-strengthening exercises to boost your running game and keep those pesky injuries at bay, you’ve landed in the right spot!

Today, we’re diving headfirst into the world of hip strength training for runners, and trust me, it’s going to be a game-changer.

Here’s the lowdown on what’s coming your way:

  • We’ll break down the hip muscles so you know exactly what we’re working with.
  • Discover how these hip muscles play a crucial role in your running performance.
  • Uncover the fascinating connection between hip muscles and running injuries (yes, we’ve got some science-backed insights for you).
  • Get ready for the main event – the top 5 exercises that’ll have your hip strength and mobility skyrocketing.
  • Plus, a whole lot more to keep you informed and inspired.

Excited? Well, let’s lace up those running shoes and dive in.

Anatomy of The Hips Muscles

Your hips aren’t just there to look good in yoga pants; they’re true workhorses. Nestled in your upper legs, the hip allows  you to strut your stuff, climb stairs, grab that fallen pen, or gracefully park yourself on the couch.

But here’s the real star of the show: the hip joint! It’s a nifty ball-and-socket setup, and it’s key to everyday movements.

Every time you take a stroll, conquer a staircase, reach for your dropped phone, or elegantly plop onto your favorite chair, your hip joint and its trusty muscle squad swing into action.

And guess what? We’ve got more hip intel coming your way, so stay tuned

The most important muscles of the hips include :

The Hip Flexors

The hips flexors play a vital role in the grand scheme of things. They’re like the supporting cast in your body’s blockbuster film, making sure everything runs smoothly.

And consist of five muscles:

  • Rectus Femoris
  • TFL (Tensor Fasciae Latae)
  • Iliacus
  • Psoas
  • Sartorius

These hip flexors are the MVPs behind knee elevation and keeping your pelvis and legs in perfect harmony during your runs.

Think of them as your body’s own mechanics for knee operations. But here’s the kicker: weak hip flexors could spell trouble, with the dreaded runners’ knee and iliotibial band syndrome lurking in the shadows

Adductors

The adductors are responsible for pulling your legs inward and orchestrating those nifty cross-body moves.

And consist of the following:

  • Adductor Brevis
  • Adductor Longus
  • Adductor Magnus
  • Pectineus
  • Gracilis

Think of them as your body’s graceful dance troupe, ensuring your legs move seamlessly in any direction you desire.

These performers add finesse to your legwork and contribute to the harmony of your hip movements. Without them, things might get a bit clunky on the dance floor—or, should we say, the running track?

Glutes

The Glutes are the powerhouse behind your backside and so much more!

Meet the Gluteal squad:

  • Gluteus Maximus
  • Gluteus Medius
  • Gluteus Minimus
  • Tensor Fasciae Latae

These muscles are your body’s true all-stars, responsible for various functions, from extending your hip and moving your leg out to the side to ensuring your leg’s external rotation.

The Importance of hip Muscles While Running

Let’s dive deeper into the critical role of hip muscles while running.

Efficient and Injury-Free Running:

Whether you’re a casual jogger or a marathon enthusiast, strong and functional hips are your secret weapon. They keep you in the game, preventing those dreaded injuries.

Stabilizing Powerhouses:

These muscles aren’t just for show; they’re the guardians of your running stance. They ensure each leg is rock-solid during every step, maintaining stability in the process.

The Perils of Weak Hips:

Now, imagine weak hip flexors crashing this party. Your performance takes a nosedive, your form goes haywire, and injuries gatecrash your running journey.

Studies linking hip weakness to running injuries

There’s some compelling research highlighting the connection between hip weakness and running injuries.

Study 1: Hip Rotation and Iliotibial Band Syndrome

This study, published in the Journal of Orthopedic & Sports Physical Therapy, unveils a crucial link. It suggests that when hip rotation and inward collapse occur excessively during the gait cycle, the risk of Iliotibial Band Syndrome shoots up.

Study 2: Weak Hip Muscles and Lower Extremity Injuries

In another study featured in the Clinical Journal of Sports Medicine, the evidence becomes even more compelling. It draws a strong association between weak hip muscles, including the abductors, adductors, and flexors, and a range of overuse injuries in the lower extremities.

Study 3: Runners’ Knee and Weak Hip Muscles

The Clinical Journal of Sports Medicine presents evidence that links overuse injuries like Runners’ Knee to weaker hip muscles. Specifically, the hip abductor, adductor, and flexor muscles were weaker in individuals with these injuries compared to a control group. This underscores how critical strong hips are in preventing injuries like Runners’ Knee.

Study 4: Pelvic Instability and Runner’s Knee

Another study published in Medicine & Science in Exercise & Sports delves into pelvic stability and its role in Runner’s Knee among women. It was discovered that women who developed Runner’s Knee exhibited greater pelvic instability in their gait compared to those who remained injury-free. This insight highlights the significance of hip and pelvic stability for injury prevention.

Study 5: Hip Strength Training for Iliotibial Band Syndrome

The study by Frederickson et al. focused on 24 distance runners dealing with Iliotibial Band Syndrome, a common issue among runners. They examined the hip abductor strength in the injured limb compared to the healthy leg and a control group.

Notably, they found a 2 percent strength deficit in the Gluteus medius of the injured limb. However, after undergoing a six-week strength training program, 22 out of 24 injured runners were able to return to training with minimal or no symptoms. It underscores the potential of targeted hip strength training in rehabilitating running injuries.

The Evidence is Overwhelming!

It’s clear that hip strengthening exercises should be a priority for every runner to prevent injuries and enhance performance. Ignoring hip strength can lead to a host of problems that no runner wants to deal with.

The great news is that there’s a wide array of effective hip-strengthening exercises available. These exercises are a proactive approach to injury prevention and overall improved running performance.

By dedicating time to strengthening your hip muscles, you’re investing in your long-term running success.

Remember, once your hip strength is improved, you’re not only less likely to experience pain and injuries, but you’ll also find your running form and efficiency improving.

5 Hip Strengthening Exercises For Runners

Consistency is key when it comes to strengthening your hip muscles. Starting with one set of 8 reps and gradually progressing to three to four sets of 12 to 15 reps is an excellent approach.

It allows your body to adapt and grow stronger over time, reducing the risk of injury and improving your running performance.

Remember, patience and persistence pay off when it comes to fitness and strength training. Keep up the good work, and you’ll undoubtedly notice significant improvements in your hip strength and overall running abilities in just a few weeks

Hip Strengthening Exercise – 1. Single-Leg Bridge

Targeted Muscles: Glutes, Lower back, Calves, Quads, and Hamstrings.

Proper Form

Lie on your back with both knees bent and feet flat on the floor, arms pressed against the floor by your sides.

Then, lift your hips, engage your thighs, and squeeze your glutes.

Next, raise your right leg in the air as straight as possible, keeping the foot flexed, and extend it while raising your lower back and butt.

Lift your hip as high as possible by engaging your abs and pressing down through the left heel.

Hold the position for 5 to 10 seconds; lower your hips to lightly touch the ground, then switch legs.

Number of sets: Three to four sets

Number of Repetitions: 8 to 12 reps.

Hip Strengthening Exercise 2. Donkey Kicks

Targeted muscles: All three butt muscles — gluteus maximus, gluteus medius, and gluteus minimus, plus the lower back

Proper Form

Get on all fours, with your hands directly under your shoulders and knees under the hips, wrists aligned under your shoulders.

Next, draw your abdominals in you gradually lift your leg behind you until it’s almost parallel to the floor, with knee bent and foot flexed.

Hold the position and pulsate your flexed foot toward the ceiling by engaging and squeezing your glutes.

Keep the motion small and controlled with the muscle doing most of the work.

Focus on the muscle, and avoid using momentum.

And make sure to keep your back straight and spine in a neutral position.

Last up, return to the starting position to complete one rep.

Number of sets: Two to three sets

Number of Repetitions: 12 to 15 reps

Hip Strengthening Exercise 3. Side-Lying Hip Abduction

Targeted muscles: Gluteus Maximus, Gluteus Medius, Gluteus Minimus and Tensor Fascia Lata.

Proper Form

Lie down on your side on the floor or the mat.

Make sure your hips and feet are stacked in a neutral position—Meaning the right hip is directly over the left hip (or the other way around).

And keep your body in a straight line from ankles to head.

Next, place your lower hand on the floor in front for support, and your upper hand resting upon your upper hip.

Keep your pelvis in a neutral position.

Engage your core muscles to support the spine.

Then, exhale and extend and raise your top leg off the lower while keeping the knee straight and your foot in a neutral position.

No hip rolling—forward or back—is allowed.

Raise the top leg as high as possible.

Inhale and slowly return the leg to the starting position in a slow and controlled manner.

After finishing the set, roll over and repeat on the other side.

Number of sets: Two to three sets

Number of Repetitions: 8 to 10 reps

Hip Strengthening Exercise 4. Bird Dog Hip Strengthening Exercise

Targeted Muscles: Glutes, Lower Back Muscles, and Rectus Abdominis Muscle.

Proper Form

Get down on all fours on your hands and knees with palms flat on the floor and shoulder-width apart, with knees directly under the hips and hands beneath the shoulders.

Make sure to keep your lower back and abdomen in a neutral position.

Next, engage your core to keep a good balance; raise your left arm and extend it straight out in front of your body as you raise your right leg and straighten it behind you.

Hold the position for 3 to 5 seconds, return to the starting position, and repeat.

Number of sets: Two to three sets.

Number of reps: 6 to 8 reps.

Hip Strengthening Exercise 5. Single-Leg Deadlift

Muscle engaged: Glutes, Hamstrings, Spinal Erectors, and Abs

Proper Form

Stand on your left leg with your right leg behind you and in the air.

Then, while keeping your shoulders back and back straight throughout the movement, hinge forward at the waist and raise the right leg behind you, then reach your hands toward the ground.

Last up, come back to the starting position by engaging your glutes and hamstring of the left leg.

For more challenges, use weight or a medicine ball for added resistance.

Number of sets: Three to four sets

Number of reps: 10 to 12.

Here are more strength exercises for runners.

 Bonus Hip Strength Exercises For Runners

Seated hip Flexion

This simple move activates the hip flexor past a 90-degree angle to condition the muscles throughout their range of motion.

Additional resource – Running Vs. Strength training

Proper Form

Begin by sitting on a chair with good posture.

Make sure your feet are flat on the floor, core engaged, and back flat.

Next, while bending your right knee to about a 90-degree angle, raise it toward your chest without letting your thigh roll in or out or leaning back, pause, then slowly lower it to start position.

Perform three sets of 10 to 12 reps on each side.

Add weights for more challenges.

Lunges

Another fantastic move for strengthening the hip muscles as well as the lower body.

To make the most out of lunges, make sure to include different variations of this standard lunge, including static, backward, and plyo versions.

Proper Form

Begin in standing position, feet just slightly apart, looking straight ahead with back flat and core engaged.

Next, place your hands on your hips, then take a giant step forward with your right foot.

Make sure your hips are hanging straight on either side of your body.

Then, once you ensure heel contact with the floor, bend the right knee over the ankle while bending the left toward the ground.

Last up, press back into the starting position, pushing off the ground with your leading foot.

Changes sides to complete one rep.

Skater Squats

This is one of my favorite squat variations, focusing specifically on the hips instead of every muscle in the lower body.

Proper Form

Begin by performing a mini-squat, bending from the hips and knee and lowering your butt toward the floor while keeping your chest lifted and back flat, then transition your weight to the right side and lift the left leg slightly off the floor, toes pointed ahead.

This is your starting position.

Next, slowly squat by pushing your hips and butt backward.

Keep squatting until your right knee is bent to a 90-degree angle, if possible.

Perform  10 to 12 reps on each side to complete one set.

Shoot for three sets.

Clamshell

You’ll often find this move on most lower body rehabilitation programs, the reason being it works.

Not only does it strengthen your hips and glutes, but it also stabilizes your pelvis muscles and helps soothe tightness in the lower back, which is key for injury-free training.

Proper form

Begin by laying on the mat on your side, hips stable, heels together, and legs stacked up on top of each other.

Your shoulders, hips, and heels should form a straight line.

If it’s uncomfortable to lay in this position, lie with your back against a couch.

Next, open your top knee so that it points at the ceiling.

Keep your feet stacked together and allow for no rolling backward throughout the movement.

Raise the top knee as far as possible without rotating your hip or lifting your bottom knee off the floor, then pause for a moment.

To complete one rep, close the leg.

Perform 16 to 20 on each side to finish one set.

Shoot for three sets.

For more resistance, wrap a resistance band around your lower thighs.

Standing hip flexion

Another excellent move for isolating the hip flexors while improving muscle control and balance.

The movement is easy to perform but provides the lower body a good workout.

Proper Form

Begin by assuming an athletic position, back straight, core engaged, and feet hip-width distance apart.

Next, while keeping your left foot planted in the ground, raise your right leg off the ground so that you form a 90-degree angle at the hip.

Then, hold for a count of five to ten, then slowly lower the leg.

Switch sides to complete one rep.

Perform five reps to complete one set.

For more challenges, use weight or slowly flex your hip forward.

Additional resource – Clamshells for runners

Hip Strengthening Exercises For Runners – The Conclusion

There you have it!

The above hip strengthening exercises should make a huge part of your resistance training if you’re serious about improving performance and preventing injury.

Whatever you do, make sure to stay within your fitness level the entire time. Doing regular exercises to strengthen your hips is a good thing, but overdoing it is not the way to go.

Please feel free to leave your comments and questions in the section below.

In the meantime, thank you for reading my post.

Keep Running Strong

David D.

The Stronger Runner: Unveiling the Secrets of Effective Strength Training

Attention, runners seeking to unleash their inner powerhouse! Get ready to dive headfirst into the ultimate treasure trove of weight training wisdom specifically designed to elevate your running game!

In this post, I’m about to unravel the full-fledged guide that will revolutionize the way you approach weight training. Get ready to embark on a journey thatwill take you from novice to seasoned pro, leaving no stone unturned.

By the time we cross the finish line, your mind will be filled with an abundance of knowledge.

Brace yourself to discover the incredible benefits of weightlifting tailored to runners like yourself.

We’ll explore the latest cutting-edge research, unveiling the secrets behind strength training as the ultimate shield against those pesky injuries that threaten to derail your running dreams.

Sounds great?

Let’s get started.

What’s Strength Training?

Imagine yourself as a runner on a long-distance race. You’ve been training for months, but as you hit the halfway mark, you feel the fatigue setting in. Your muscles ache, your form starts to falter, and your pace slows down. But what if I told you that there’s a way to break through that plateau and reach your running goals faster? Enter strength training.

Strength training is the secret weapon for runners looking to improve their speed, efficiency, and endurance. It involves using external resistance, such as weights or resistance bands, to challenge your muscles to adapt and get stronger. And the benefits are not just limited to physical performance.

Research on Strength Training for runners And Injury Prevention

Studies have shown that weightlifting can reduce injury risks and fix muscle imbalances caused by the repetitive motion of running.

In fact, a study published by the National Strength & Conditioning Association found that weightlifting strengthens muscles and joints, leading to proper form, improved running time, and reduced injury risks. Another study published in the Journal of Strength and Conditioning revealed that exercises like squats and single-leg hops not only help reduce injury risks but also improve performance.

But that’s not all. Strength training can also help you burn more calories. Many runners turn to running as a means of weight loss, but as their bodies adapt, they start burning fewer calories. Incorporating strength training into your routine can help increase your lean muscle mass, which in turn boosts your body’s ability to shed more calories.

Run Faster

Resistance training puts stress on your body, forcing it to adapt to boost its ability to withstand the extra load.

Over time, with regular training, these stress-induced adaptations can have an enormous impact on your running speed, efficiency, and endurance.

So, for instance, the stronger your leg muscles get, the more force you can generate on each stride and the more distance you can travel on each foot strike.

Plus, stronger shoulders and arms are essential in increasing your speed and form efficiency.

Fix Muscle Imbalances

Running is one-directional action, meaning it works some muscles more than others, leading to the onset of muscle imbalances.

This places excessive pressure on ligaments and tendons, reducing stride efficiency, limiting running economy, and increasing the risks of injury.

Research shows that, often than not, many runners nagging issues, such as shin splints, runners knee, Achilles tendinitis, etc., stem from muscle imbalances.

With all that being said, the good news is, as little as six weeks of proper weight training can reduce, or completely alleviate knee pain, according to a study.

Burns More Calories

Many runners took up running as means of weight loss. And as my experience dictates, running is helpful for shedding the pounds—especially during the first few months of training.

That said, once your body gets used to running (especially if you lack variety in your training), it’ll start to burn fewer calories.

For that reason, you might want to back up your running for weight loss training with a well-rounded and intense strength training schedule.

As a matter of fact, by increasing your lean muscle mass, you’ll boost your body’s ability to shed more calories.

Build Stronger Bones

In addition to helping you prevent injury, improve running performance, build muscle, and lose fat, weight lifting also improves bone density.

This can be typically measured using a DEXA scan, which is similar to an x-ray but more thorough.

But how does strength training make bones stronger?

It’s actually quite simple.

By stressing your bones, strength training can increase bone density, therefore, reducing the risks of bone-related issues.

That’s it.

This is especially the case for us runners as stress fractures—a common overuse injury—is every runner’s worst nightmare.

For the full scope on a stress fracture, check my full guide here.

Strong Arms

Have you ever tried running without using your arms? It’s not a good idea.

Swinging your arms faster automatically increases your step frequency, and vice versa.

We pump our arms as we run, and the stronger our arms are, the more powerful the forward drive, and the faster we move forward.

That’s no secret.

Be More Efficient

Running doesn’t just involve relying on the leg for forward propulsion, but we’re also using our core, back, arms, shoulders, and chest to balance and improve efficiency.

When the legs are exhausted, we use the upper body more because of the kinetic chain.

Everything is working together in one interlocked system.

Better Form

Your running form can ultimately make or break you as a runner.

That’s why if you can’t hold proper form throughout your runs, you’ll never reach your full running potential.

Improving your upper body strength can make your posture more efficient and help you keep a consistent form, especially as fatigue starts to set in.

Fortunately, improving upper-body strength can upgrade your technique and help you keep consistent form.

Signs of a bad form may include:

  • Rounding the shoulders,
  • Shrugging the shoulder near the ears,
  • Holding on to tension,
  • Swinging the arms too widely,
  • Holding a cell phone or water bottle,

But when you keep your posture straight, head held high, shoulder loose and square, and your arms functioning properly, you’ll ensure that you won’t get hurt.

What’s more?

A stronger upper body, especially a well-developed back, and core muscles help protect your spine from the impact of running.

Additional Resource – Here’s another strength training program for runners to check out

It Requires Little Time

You don’t need to train like an elite bodybuilder or CrossFitter to reap the benefits of strength training.

In fact, all you need is no more than a 30- to 45-minute session two to three times per week, to reap the benefits of strength training as a runner.

Here is the full guide on starting strength training for runners.

Note: Strength training should be performed according to your fitness level and training goals.

For that reason, you need to opt for a well-rounded strength program designed specifically to meet your running needs.

This is why a sprinter strength routine can look so different from a long-distance athlete program.

Are you looking for a way to take your running to the next level? Look no further than strength training! And the best part? It doesn’t require hours upon hours of time in the gym. In fact, all you need is 30-45 minutes, two to three times per week, to start seeing the benefits of strength training as a runner.

Muscles Anatomy

Your body is a complicated piece of machinery, and muscles are a huge part of what’s driving it.

According to experts, five main groups of muscles are used while running—quads, hamstrings, hip flexors, gluteals, and calf muscles.

Your body also uses secondary muscles to keep you going forward, such as the core and upper body muscles. 

These typically provide stability throughout the gait cycle and improve speed and running economy.

The Quadriceps

The quadriceps, the muscles on the front of the thighs, are in charge of forward leg movement.  Also known as the quads, these run from the hips down to the kneecap and are composed of four muscles:

  • The Vastus Medialis,
  • Intermedius,
  • Lateralus, and
  • Rectus Femoris.

The Hamstrings

The hamstrings consist of a single large tendon located at the back of the thigh and play a key role in standing, walking, or running, as well as hip extension and knee flexion. These muscles are comprised of

  • The biceps femoris,
  • The Semitendinosus, and
  • The Semimembranosus.

The Gluteals

Consisting of a group of three muscles, the gluteals are located in the buttocks and are responsible for hip extension, posture and proper knee alignment, and leg stability. The glutes consist of the following:

  • The Gluteus Maximus,
  • The Gluteus medius, and
  • The Gluteus minimus.

The Hip Flexors

The hip flexors, while smaller in size, play a crucial role in our everyday movements. From walking to squatting, these muscles are constantly activated, which is why it’s important to keep them strong and flexible.

Tight hip flexors can lead to discomfort and even pain, while a strong and healthy hip flexor group can improve posture, stability, and overall athletic performance.

The Calves

Located on the back of the lower leg, just below the knees, the calves are another supercritical running muscles.

Why? These provide spring in your step, extend and flex each foot as you land and push off, and maintain lower body balance and coordination. The calves consist of:

  • The large gastrocnemius, or outer calf; and
  • The smaller soleus, or inner calf.

Research has shown that incorporating exercises that specifically target these muscle groups can have a significant impact on running performance. In a study published in the Journal of Strength and Conditioning Research, researchers found that a six-week strength training program targeting the glutes and hip flexors led to improved running economy and performance in female distance runners.

The Best Strength Exercises For Runners

Try adding this powerful routine to your easy or cross-training days. The workout will take roughly 45 minutes to complete and can be done twice a week. That’s a small amount of time to invest in a big payoff.

I’ve also provided you with YouTube tutorials showing you exactly how to do each exercise. Proper form is king! For a better grip, try out this liquid chalk.

1. Planks

One of the core exercises that ended up becoming a staple in my training was the plank.

It’s one of the best core exercises because it targets every aspect of the core, as well as the lower back and shoulders.

Proper Form

  1. Lie on your stomach
  2. Prop yourself up on your elbow with feet slightly apart, toes hip distance apart with shoulders directly above the elbows
  3. Aim to straighten your whole body, so it’s forming a straight line from the top of your head to your heels.
  4. While engaging your core and keeping a straight line (your butt should not stick up in the air), hold the position for 30 seconds to a full minute.

As you get stronger, you should gradually add more time.

You can also make it more challenging for yourself by placing a weight plate on your back.

2. Russian Twists

The Russian twist targets a bunch of muscles, including the abs, obliques, lower back and your hamstrings as well.

You can use a medicine ball or a plate for extra resistance.

Proper Form

  1. Grab a weight, then lie on your back with your upper legs perpendicular to the floor and your knees bent at a 90-degree angle.
  2. Hold the weight in front of your body while keeping your back straight.
  3. Twist your torso as far as you can to the right side, tap the weight on the floor, then reverse your motion to the other side.

3. Overhead Lunges

The overhead lunge targets the whole body—quadriceps, hamstrings, glutes, shoulders and core muscles.

It’s the perfect fit-it-all-in move, so it’s great if you’re pressed for time.

It also increases flexibility and mobility in your hip flexors.

Proper Form

  1. Hold a pair of dumbbells or a weighted bar above your shoulder, with your arms straight, and your elbow locked, feet shoulder-width apart, and knees slightly bent.
  2. While holding the weight directly overhead, step forward with your right leg into a deep lunge position, bending both your knees.
  3. Return to the starting position and repeat on the other side. That’s one repetition.

Do 12 steps on each side to complete one set.

4. Air Squats

Bodyweight squats are some of the best strength exercises you can do.  These should be an integral part in any runner’s strength-oriented training program.

Squats target a lot of running-specific muscles.

They are convenient to do, and can easily be added to your post-run routine.

Proper Form

  1. Stand with your feet hip-distance apart with your toes facing forward
  2. With your arms out in front at shoulder height, squat down by bending your knees, leaning forward at the waist while keeping your back flat and your knees tracking behind your toes
  3. Squat until your thighs are parallel to the ground.
  4. Press up through your heels to return to starting position.

5. Single-Leg Deadlifts

The single-leg deadlift is the ideal slow-burn move for building strong hamstrings and glutes, which can help you tackle steep hills with ease.

This exercise can also improve your balance and boost your stability.

Proper Form

https://www.youtube.com/watch?v=mG-Stc3c7N0

  1. Start by holding two dumbbells or a weighted bar in front of your body.
  2. While standing tall, shift your weight to your right foot
  3. Hinge forward by slightly bending your right knee and raising your left foot behind you in line with your torso, letting the weights hang down
  4. Lower the weight while keeping it close to the tops of the legs.
  5. Once the weight goes past your knee, pause, then return to the starting position.

6. The Pistol

Also known as the one-legged squat, the pistol is a powerful squat variation that builds strength and balance in your lower body.

If you have issues with lower body flexibility or mobility, use a chair or a bench for the assisted pistol option. That’s how I got pretty decent at doing pistols.

Proper Form

  1. Standing tall, balance on your right foot,
  2. Squat down by bending at the knee and sitting your hips back.
  3. Once your right knee is at about a 90-degree angle, push back up by extending your leg to starting position.s

7. Rotational Shoulder Press

This move is ideal for targeting your upper body muscles, with the emphasis on the shoulder and core muscles.

Proper Form

  1. While standing tall with your feet hip-width apart, hold a pair of dumbbells just outside your shoulders.
  2. As you press the weights up with your right hand, rotate your body to the right side.
  3. Lower the weights to your shoulder as you rotate back to the center, then rotate to the left as you press your left again upward this time.

weight training for runners


Weight Lifting For Runners  – The Conclusion

There you have it ! The above weight training for runners guidelines all you need to help you prevent overuse injuries and increase athletic performance without logging in more miles. The rest is up to you.

Please feel free to leave your comments and questions in the section below.

In the meantime thank you for reading my post

Keep Running Strong

David D.