If you’re looking to lose weight—whether it’s 5 pounds, 10 pounds, 20 pounds or more —then you’ve come to the right place.
This article will take you through just about every aspect of weight loss possible, from exercise to diet, motivation to lifestyle, and everything in between.
Without further ado, here are 101 ways to lose the extra pounds for good. I hope you find my tips and strategies helpful.
Note: This is a super-long article (10000+ words). Don’t sit down to read it until you have enough time to dig into it. To make sure you don’t forget, bookmark this post and read it later, when you have time. In addition to the content I’ve written, I’ve also provided links to over 70 scientific studies related to weight loss and exercise. They’re worthwhile reading as well, so click through on the links for even more helpful information and detail.
Find Your Big Why
In my experience, the first step toward achieving anything in life—let alone losing weight—is having the right motivation.
Without a “Big Why,” you’ll have no (or too little) motivation — especially when you come across roadblocks. When you’re motivated enough, you’re in a good place. I can guarantee that you ’ll lose weight and keep it off for good once you know your Big Why.
So, What’s YOUR WHY?
Why do you want to lose weight?
Why do you want to start exercising?
Why do you want to live a healthy lifestyle?
Why?
Is it because you’re ashamed of your body?
Is it because losing weight is a matter of life or death?
Whatever your real reason is, after you’ve figured out your big WHY (or WHYs), write it down and keep it somewhere that you’ll see it on a daily basis. This will serve as a constant reminder when the going gets tough.
Diet Tips
Eat More Vegetables
There is no such thing as healthy eating without vegetables.
Why? Well for starters, vegetables score high in fiber and are low in calories— both key nutritional elements for successful weight loss. They’re also chock-full of minerals, vitamins, antioxidants and plenty of other valuable nutrients.
Do your best to eat as much as green stuff as possible. Some of the best options include broccoli, watercress, kale, cabbage, lettuce, cucumber, cauliflower, Swiss chard, and Brussels sprouts.
3. Eat Protein At Every Meal
Protein is your friend, whether you’re trying to increase muscle mass or lose weight.
Good protein can help keep you feeling full longer and controls your blood sugar levels, both of which can cut cravings for sugary, high-calorie, high-fat foods. Protein is also critical for muscle recovery and fat burning.
There is plenty of research to back these claims up. According to a study published in the American Journal of Clinical Nutrition, people who eat protein at each meal lost more weight than those who didn’t have the nutrient at certain meals.
Another study conducted at the University of Missouri found that people who had protein with each meal reported the most weight loss benefits.
Some of the best animal-based sources of lean protein include lean meat, seafood, and egg whites, and the best plant-based are nuts and beans.
Limit processed meats like ham, sausage, and bacon, or better yet avoid them entirely. These foods contain a lot of saturated fats and a plethora of chemicals and harmful ingredients.
Additional Resource: What is in a dairy-free Protein Powder?
Plan Your Foods
“If you fail to plan, then you’re planning to fail.” This maxim holds true whether you are the CEO of a 500-Fortune company or just a regular Joe (or Jane) trying to build healthy eating habits.
Planning your meals can help you take the guesswork out of the equation, and this, in turn, increases your chances of success.
The best way to plan your food intake is to spend at least an hour every Saturday or Sunday evening thoroughly planning your meals for the upcoming week. Then all you have to do the rest of the week is stick to the plan.
Try to prepare at least 10 to 12 meals and put them in Tupperware bowls, so you have them ready for the week ahead.
Eat More Fiber
Fiber is a type of carbohydrate found in plant foods like vegetables, fruits, and whole grains. According to a study published in the Journal of Nutrition, increasing fiber intake by 8 grams for every 1,000 calories you take in can promote weight loss and prevent weight gain.
Why?
Fiber, unlike other carbs, does not get easily absorbed by your body. This means that it helps you feel full for longer. Increasing your intake of fiber can also lower your cholesterol, and may even prevent colon cancer and other health ailments.
Shoot for at least 30 to 40 grams of fiber a day. Some of the best sources of fiber include beans, broccoli, asparagus, oats, Brussels sprouts, apples, and flax seeds, to name just a few.

Cut the Bad Carbs
Not all carbs are created equal. If you want to lose weight, eat the good carbs and avoid bad ones.
Good carbs are also known as complex carbs. They take longer to digest and can help you feel full longer. Some of the best sources of good carbs include vegetables, fruits, sweet potatoes, beans, brown rice, and other whole grain products.
Bad carbs are also known as simple carbs. They are digested quickly by the body, and this can lead to blood sugar spikes, cravings, and a host of health troubles.
Classic examples of simple carbs include bread, pasta, bagels, candy, muffins, donuts, French fries, sugary cereals, white rice, and any sugary or highly processed food.
Additional resource – A 7-day keto meal plan
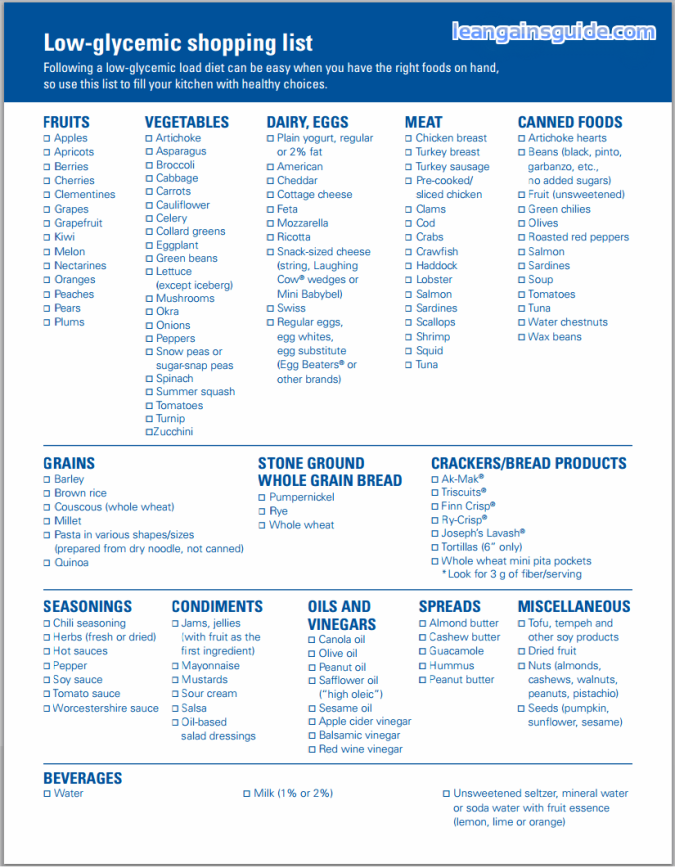
Eat Low GI Foods
Established about 30 years ago, the glycemic index is a scale that ranks foods from 0 to 100 based on the impact they have on blood sugar levels. According to studies, subjects who followed a low-GI diet have reported losing double their fat as compared to a high GI group.
Check the following list.

Many thanks to LeanGainGuide.com for this awesome list.
Don’t Fear Fats
Fats get a bad rap in the health community, but if you avoid them entirely, you’re doing yourself a great disservice.
Here’s the truth. Fats — the healthy kind — are an integral part of a healthy diet. Research shows that eating the right kinds of fats can help you lose weight and increase your overall health and well-being level.
So, which fats are good ones?
Good fats are monounsaturated fats, AKA MUFAs. They increase good HDL cholesterol while reducing bad LDL cholesterol.
Research shows that good fats can protect against the buildup of artery plaque, preventing heart disease and other health troubles. They can also suppress your appetite, reducing the number of calories you eat in a day while boosting your metabolism.
Some of the best sources of MUFAs include olive oil, coconut oil, canola oil, avocados, almonds, peanuts, and sesame seeds.
You don’t need too much good fat to get its benefits. Research suggests that two to three tablespoons of olive oil per day are enough to do the trick.
Consume Water-Rich Foods
According to a study conducted at the Pennsylvania State University, eating water-rich foods cuts overall calorie consumption, as many of these foods are low in calories but high in fiber.
Here is a list of some of the best water-rich foods:
- Tomatoes
- Cucumbers
- Iceberg lettuce
- Zucchini
- Green peppers
- Celery
- Cantaloupe
- Spinach
- Strawberries
- Radishes
- Grapefruits
- Watermelon
- Cauliflower
Keep a Food Journal
According to a six-month study published in the American Journal of Preventative Medicine, people who kept tabs on their daily eating habits for six days a week reported losing about twice as many pounds as those who didn’t keep written records.
By monitoring your daily eating habits, you give yourself a better idea of what’s going into your mouth, This can help you better assess your daily eating choices and habits. If traditional food tracking apps haven’t worked for you, consider exploring some myfitness pal alternatives that may better suit your needs and preferences.
Here’s what you need to do. Get yourself a diet journal and start tracking the amount of food you consume throughout the day, including snacks and treats.
Take Pictures of Your Food
Photographing your meals and snacks is another helpful way to keep tabs on your daily eating habits.
Doing so can also help you examine the quantity and quality of the meals you’re eating, as well as holding you accountable for every bite you eat.
Research backs this up.
According to a study conducted at the University of Wisconsin-Madison, taking pictures of every meal and snack you eat can encourage you to change your diet.
Eat Five Times a Day
Although there are no conclusive studies that prove that eating 4 to 5 mini meals a day can help you shed weight, many people say that eating small healthy meals multiple times a day has helped them lose weight.
As long as you’re eating the right foods, eating small meals throughout the day can help you win the battle of the bulge.
Try eating four to five 350 to 500-calorie meals every three to four hours. These small meals should include breakfast, a mid-morning snack, a small early lunch, a mid-afternoon snack, a finally a small, light dinner.
Here is a sample schedule:
- 7:30 am—Breakfast
- 10:00 am—Mid-morning snack
- 1:00 pm—Lunch
- 4:00 pm—Evening snack
- 7:00 pm—Dinner
Try Intermittent Fasting
Intermittent fasting is the artful form of skipping meals without hurting your weight loss efforts.
Intermittent fasting, or IF, involves regular, short-term fasts. According to research, fasting during short, specific windows during the day can help you consume fewer calories. It also optimizes some hormones linked to weight control.
There are several methods of intermittent fasting. One of the most popular is the 16/8 method in which you skip breakfast and eat during a limited 8-hour feeding period.
During the 16/8, you fast for 16 hours (including sleep time). For example, fasting from 9 p.m. to 1 p.m. adds up to 16 hours of fasting.
This method only requires that you trade your regular breakfast for a cup of coffee or some other non-caloric fluid. Then you can have lunch at 1:00 as your first meal of the day. This method only requires that you trade your regular breakfast for a cup of coffee, MUD\WTR, or some other non-caloric fluid
The 16/8 Method is convenient and simple, and does not require counting calories. You can do the 16/8 fast twice a week, on weekends, or every single day.
Additional resource – Here’s how long does it take to lose 100 pounds.
Fill Your Plate with Veggies First
As you may already know, eating more vegetables has been proven one of the most significant predictors of weight loss and ideal health.
But how do you ensure you’re getting enough veggies?
It’s simple. Fill up half of your plate with vegetables, then divide the other half into two equal-sized areas. Fill one with good carbs like sweet potatoes, brown rice or a slice of whole-grain bread. Fill the other with lean protein such as skinless poultry, fish, lean beef or beans.
With this simple trick you won’t even need to count your calories or worry about portion size.
Spice it Up
Spicy items like hot sauce, chopped jalapeno, and Cajun seasonings add a lot of flavor to meals with few calories. But that’s not the whole story.
According to research, most spicy foods contain a compound called capsaicin, which is the source from which chilies get their heat. According to research, this compound can tame your appetite and increase your metabolism.
Not only that, but capsaicin also may have a thermogenic effect, boosting body temperature after consumption. This may lead to a higher calorie burn for 20 to 30 minutes after you’re finished eating.
Additional resource – The best running songs
Cook with Coconut Oil
Two tablespoons per day of coconut oil can help you reduce your waist circumference by an average of 1.1 inches over the course of a month, according to a study.
Coconut oil scores high on the healthy medium chain saturated fatty acids fats (known as Medium Chain Triglycerides, or MCTs) that increase metabolism for immediate energy and decrease appetite.
To get the most benefit from this, use virgin coconut oil. It’s usually made with no chemicals, while refined or RBD oil is usually chemically treated.
Have Breakfast
A study conducted at Harvard revealed that obesity rates are roughly 40 to 50 percent lower in people who have breakfast on a consistent basis, compared with those who skip breakfast.
A healthy breakfast will make you less likely to be hungry later, which often leads to overeating over the remainder of the day.
Unless you’re doing intermittent fasting, you should never skip breakfast. As a rule, have up to 500 calories each day at breakfast, depending of course on your weight loss goals, age, fitness level, and exercise goals.
A healthy breakfast should consist of a serving of protein, a serving of whole grain carbs, and a serving of fruit—especially after a morning workout.
Eat Eggs for Breakfast
Eggs should be a staple of your daily eating plan, and research shows that the best way to get the most out of eggs is to start your day off with them.
A study found that obese subjects lost more weight and had a higher reduction in waist circumference when they ate a breakfast of two eggs instead of bagels, even though each group’s breakfast contained the same amount of calories.
Why? Eggs are rich in protein (one egg contains about six grams of protein) and other valuable nutrients, helping you feel full longer.
Have Barley for Breakfast
If you don’t like eggs for breakfast, then another healthy choice is barley.
Barley is one of the best foods you can eat.
According to Swedish researchers, having barley for breakfast can help you keep your blood sugar levels under control. Barley scores low on the GI index, meaning it raises your blood sugar level more slowly than high carbs foods like bagels and donuts.
As a rule, buy minimally processed hull barley, and avoid processed forms such as pearl barley.
Watch the Salad Dressing
Salads should be a big part of your eating plan. They’re one of the best ways to ensure you’re eating enough veggies.
But, if you don’t keep an eye on the goodies you put into your salad, they can end up more calorie-laden than pizza or bagel.
Many salad dressings are chock-full of preservatives, trans fats and artificial flavor, which can spell disaster for an otherwise healthy and green dish.
For more flavor, opt for low-calorie, healthier alternatives. Try avocado oil, refined olive oil, homemade Paleo mayonnaise, a squeeze of lemon juice, tomato juice, macadamia, balsamic vinegar or even some homemade salsa.
Eat Light at Night
By eating lightly during the late evening, you’ll not only prevent weight gain, you’ll also sleep much better and have a better appetite for a healthy breakfast in the morning.
Here’s how to make it happen:
Aim to consume at least three-quarters of your calories before dinner, then make sure to leave at least a gap of two to three hours between your last meal of the day and bedtime. This will help give your body enough time to digest your food before you sleep.
If you feel super famished just before going to bed, then opt for a small serving of protein such as a piece of cheese or a hard-boiled egg.
Eat More Slowly
It takes roughly 20 minutes for leptin, the body’s satiety hormone, to kick in. Once it does, your brain gets the signal of “fullness” from your stomach. In other words, your brain doesn’t register when your stomach is full right away.
As a result, give yourself at least 20 minutes to eat, and then wait after you’re done. If 20 minutes go by and you’re still hungry, go back and have a healthy snack. To help you eat slowly try using a set of chopsticks, or eat your meal with your less dominant hand.
Chew Your Food
Eating your meals more slowly and mindfully can drastically help you decrease the amount of calories you consume during a meal, according to a study published in the American Journal of Clinical Nutrition.
Chewing and eating your food slowly helps you feel full faster, and it’s when you feel full that you should stop eating.
Next time you sit down to a meal, make sure to take your time to chew your food rather than gulping it down as fast as you can.
Sit Down to Eat
If you’re in the habit of eating on the go, you may be heading in the wrong direction.
Research published in the Journal of Academy of Nutrition and Dietetics found that taking a seat at the table while eating can help you eat at a slower pace, and the slower you eat, the better.
As a rule, eat your food while sitting down, preferably from a plate.
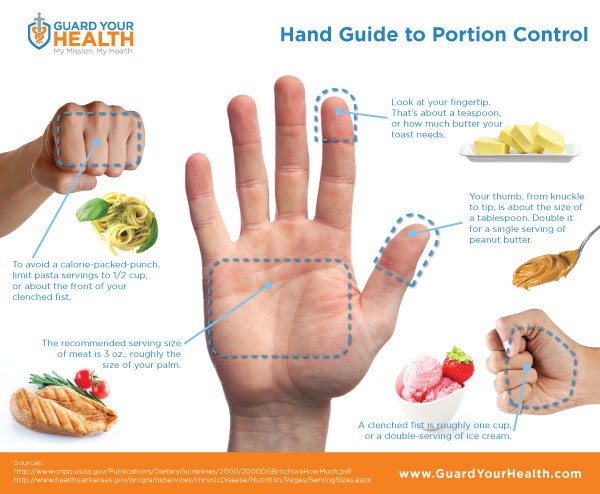
Mind your Portion Sizes
According to a study, subjects who practiced portion control for two years lost 5 percent more weight than those who didn’t.
Here’s more good news. Portion control is not rocket science. To master it, you simply need to learn how to measure portion size correctly. Doing so will help you know for sure the amount of calories you’re taking in and how they’re affecting your weight loss efforts.
Here’s a simple infographic to help you understand portion sizes.
Use Smaller Plates
A simple change from a 12-inch plate to a 10-inch plate can cut your food consumption by up to 20 percent, according to the Cornell and Brand Lab’s Small Plate Movement.
Make sure to serve yourself on a smaller plate that’s roughly the size of your grandmother’s china instead of one of the larger, more modern ones.
Photo courtesy of SkinnyRules.com

Change Your Plate Color
According to a study conducted at Cornell University, you can cut your serving size by 20 percent when opting for a contrasting plate color instead of for a plate whose colors blend in with your meal’s color.
Next time you sit down to a meal, make sure that your food color and plate color are different from one another. Many experts recommend using blue plates, but at the very least make sure your plate doesn’t match the color of your meal.
Turn Off the TV
According to a study from the University of Massachusetts, eating in front of the TV leads to consuming more than 300 extra calories. That’s because if you’re busy watching TV, you’re more likely to be so distracted that you devour an entire plate quickly without thinking about whether you’re satiated or not.
Create a distraction-free eating environment. Turn off the TV, put away your phone, shut down Facebook and enjoy your meal.
Find a Healthy Meal You Love and Eat it Over and Over Again
Come up with a list of low-calorie foods that you love and which satisfy your daily energy needs, then mix and match them, so you’re eating the same meals over and over again.
By planning your healthy meals this way, you’ll be less likely to make unhealthy last-minute food choices. This method will also help you spend less time fretting about the foods you need to eat.
Never Shop Hungry
According to a study conducted at Cornell University, eating something healthy before going to the grocery store makes shoppers less prone to buy junk food.
How come this trick works is no mystery. Shopping while feeling full strengthens your willpower and makes you immune to junk food temptations.
As a rule, never go shopping when you’re hungry. Instead, eat a filling meal, some produce or a healthy snack before you hit the grocery aisle.
Read the Labels
Not only will learning this skill give you a better idea of the number of calories you’re consuming, but it will also help you be more aware of food’s nutritional value. Take the time to read the labels, making sure you know how to interpret what you read.
Here is an infographic to provide you with a quick and easy guide.
Photo courtesy of UC Davis and Gkplace.com
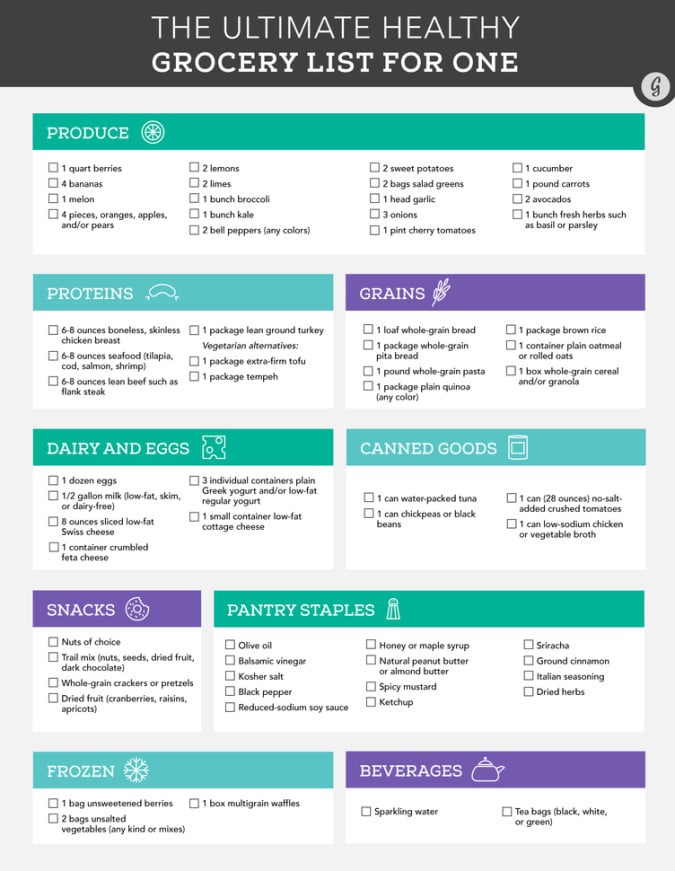
Make a Weekly Grocery List
To make sure you’re putting the right kind of foods in your shopping cart, write a detailed and thorough grocery list. Doing so not only help you get in and out of the store as quickly as possible, but it can also help you decrease impulse purchases and stick to your healthy eating plan.
Use this simple list to stock your kitchen up with healthy food all week (or month) long.
Here’s an infographic to help.
Infographic courtesy of Greatist.

Banish Emotional Eating
If you’re more likely to eat when you’re feeling depressed, anxious or lonely, you might be prone to emotional eating. According to research, emotional eating is one of the leading causes of bad food choices.
Emotional eating can compromise your weight loss efforts, especially since the food we crave at those times tend to be sweet, high-calorie, and fatty.
Reevaluate your relationship with the food you eat and learn how to differentiate between real hunger (physical hunger) and fake hunger (head hunger).
Say No to the Bread Basket
Research has found a direct link between regular consumption of white bread and being prone to weight gain.
White bread is bad for you for a slew of reasons. It adds a lot of empty calories to your meals, and it doesn’t keep you feeling full.
Bread is also high in carbs. Eating it in bulk will prevent stored body fat from being used as fuel, hindering your fat-burning process.
The real bad news is that white bread is a staple in most pantries.
So what should you do here?
It’s simple: Replace your white bread with whole grain or whole wheat bread whenever you can.
Banish Junk Food
To set yourself up for total weight loss success, declare your house a junk-food-free zone.
If you have no unhealthy food laying around, you’ll be more likely to stick to your healthy eating plan. In other words, practice the mantra “out of sight, out of mind.”
Purge your kitchen of as cookies, cakes, pies, candy, sugary drinks, biscuits, crisp pretzels pastries, and other sugar-filled, highly processed junk foods.
Stock Up on Healthy Foods
Instead of letting junk food into your home, fill your kitchen cupboards with healthier foods and snacks so when hunger pangs strike, you’ll reach for something that’s good for you.
Here are a few food items you should stock up on:
- Fruits
- Unsweetened or unsalted popcorn
- Baby carrots
- Nuts and seeds
- Hard-boiled eggs
Stop Drinking Soda
Research has linked soda to a host of health troubles, including obesity, diabetes, and a plethora of other troubles. And if you believe diet soda is a good alternative, you’re WRONG.
Diet soda is just as bad as regular soda. A study conducted by the University of Texas Health Science Center showed that subjects who drank two cans of diet soda are more likely to gain weight compared to those who didn’t drink the stuff. That’s right – they gained weight instead of losing it.
Don’t drink your calories. Doing so is even worse than eating junk food. Have water instead of soda, and you’ll be thinner and far healthier for it. Here’s How to measure body fat percentage
Reduce Your Alcohol Intake
A study published in Current Obesity Reports found that alcohol intake increases the risk of weight gain, especially for heavy drinkers.
And according to a UK survey, drinking alcohol weakens willpower and inhibits healthy eating decisions, making you more likely to indulge in high-fat high-calorie foods such as pizza, burgers, and chips.
If alcohol is your diet downfall, then you need to cut it out, or at least, have control over your drinking.

Drink More Water
Your body uses water to metabolize fat stores, and relies on it for every other process as well.
Water has no calories at all and can help you feel full, making it less likely that you’ll fill yourself up with more food.
Instead of drinking juices and soft drinks, I urge you to start drinking more water.
Shoot for at least 10 to 12 cups of water per day. Drink plenty of water before your workouts, during your workouts, and immediately afterward too.
Make sure your body is well hydrated throughout the day. You’ll feel fitter and healthier when you do so, and dampen any penchant for gorging at the same time.
Drink Water Before a Meal
Chugging a glass of water before a meal will help regulate your appetite, as the water will take up room in your stomach.
Research shows you can lose up to 30 percent more weight simply by having two cups of water before each meal.
Another study from the University of Birmingham in the U.K. found that drinking roughly 16 ounces of H2O 30 minutes before a meal promotes weight loss, without making any other dietary changes.
Drink Green Tea
I believe that green tea is the healthiest drink on the planet, right after water.
Why?
This remarkable beverage is rich in antioxidants, fights cancer and contains brain-healthy compounds and a host of other health-promoting and vital nutrients.
Not only that, according to a study published in the Journal of Nurse Practitioners, green tea can help you reduce your appetite and increase your metabolism, both of which are essential for weight loss.
Add green tea to your diet plan. Stick to two to three cups a day and opt for brewing your own instead of choosing bottled versions to avoid added calories and artificial chemicals and sweeteners.
Remember, adding sugar and cream to your tea will wipe out any weight loss benefits, so get used to drinking your tea with no sweeteners or adornment.
Snack Smart
Dumb snacking— and especially snacking on high-sugar, highly processed foods with little or no nutritional value — can compromise your weight loss goals.
Smart snacking between meals can tame hunger and control appetite, helping you prevent overeating and keep you from making bad food choices when meal time rolls around.
If you snack often, do it the smart way. Healthy ideas include hard-boiled eggs, apples, or a handful of nuts, seeds or dried fruits.
Don’t be a Perfectionist
Practice the 90/10 rule. What’s that?
As a rule of thumb, 90 percent of your diet should focus on healthy food (vegetables, lean protein, and healthy fats) while the remaining 10 percent can be devoted to “cheat meals.”
By adhering to this simple rule, you’ll indulge your sweet tooth and satisfy your cravings without throwing your whole intake out of balance.
Cheat meals are vital for a healthy diet, as long as you are doing them right.
Feel free to cheat every now and then. That’s how you’ll stay sane for the long haul. Just keep it to one meal, not every meal throughout the entire day.
Exercise Tips
Start Slowly
Whether you’re thinking about starting a running program, hitting the weight room, hiring a personal trainer, or joining a CrossFit class, starting slow is the way to go.
Once you decide on a workout program, start slow and stay within your fitness level at all times.
If you’re a beginner with little exercise experience, start with two to three workouts per week that last at least 30 minutes per session. As you get fitter, you can slowly and gradually ramp it up until you reach your challenge point.
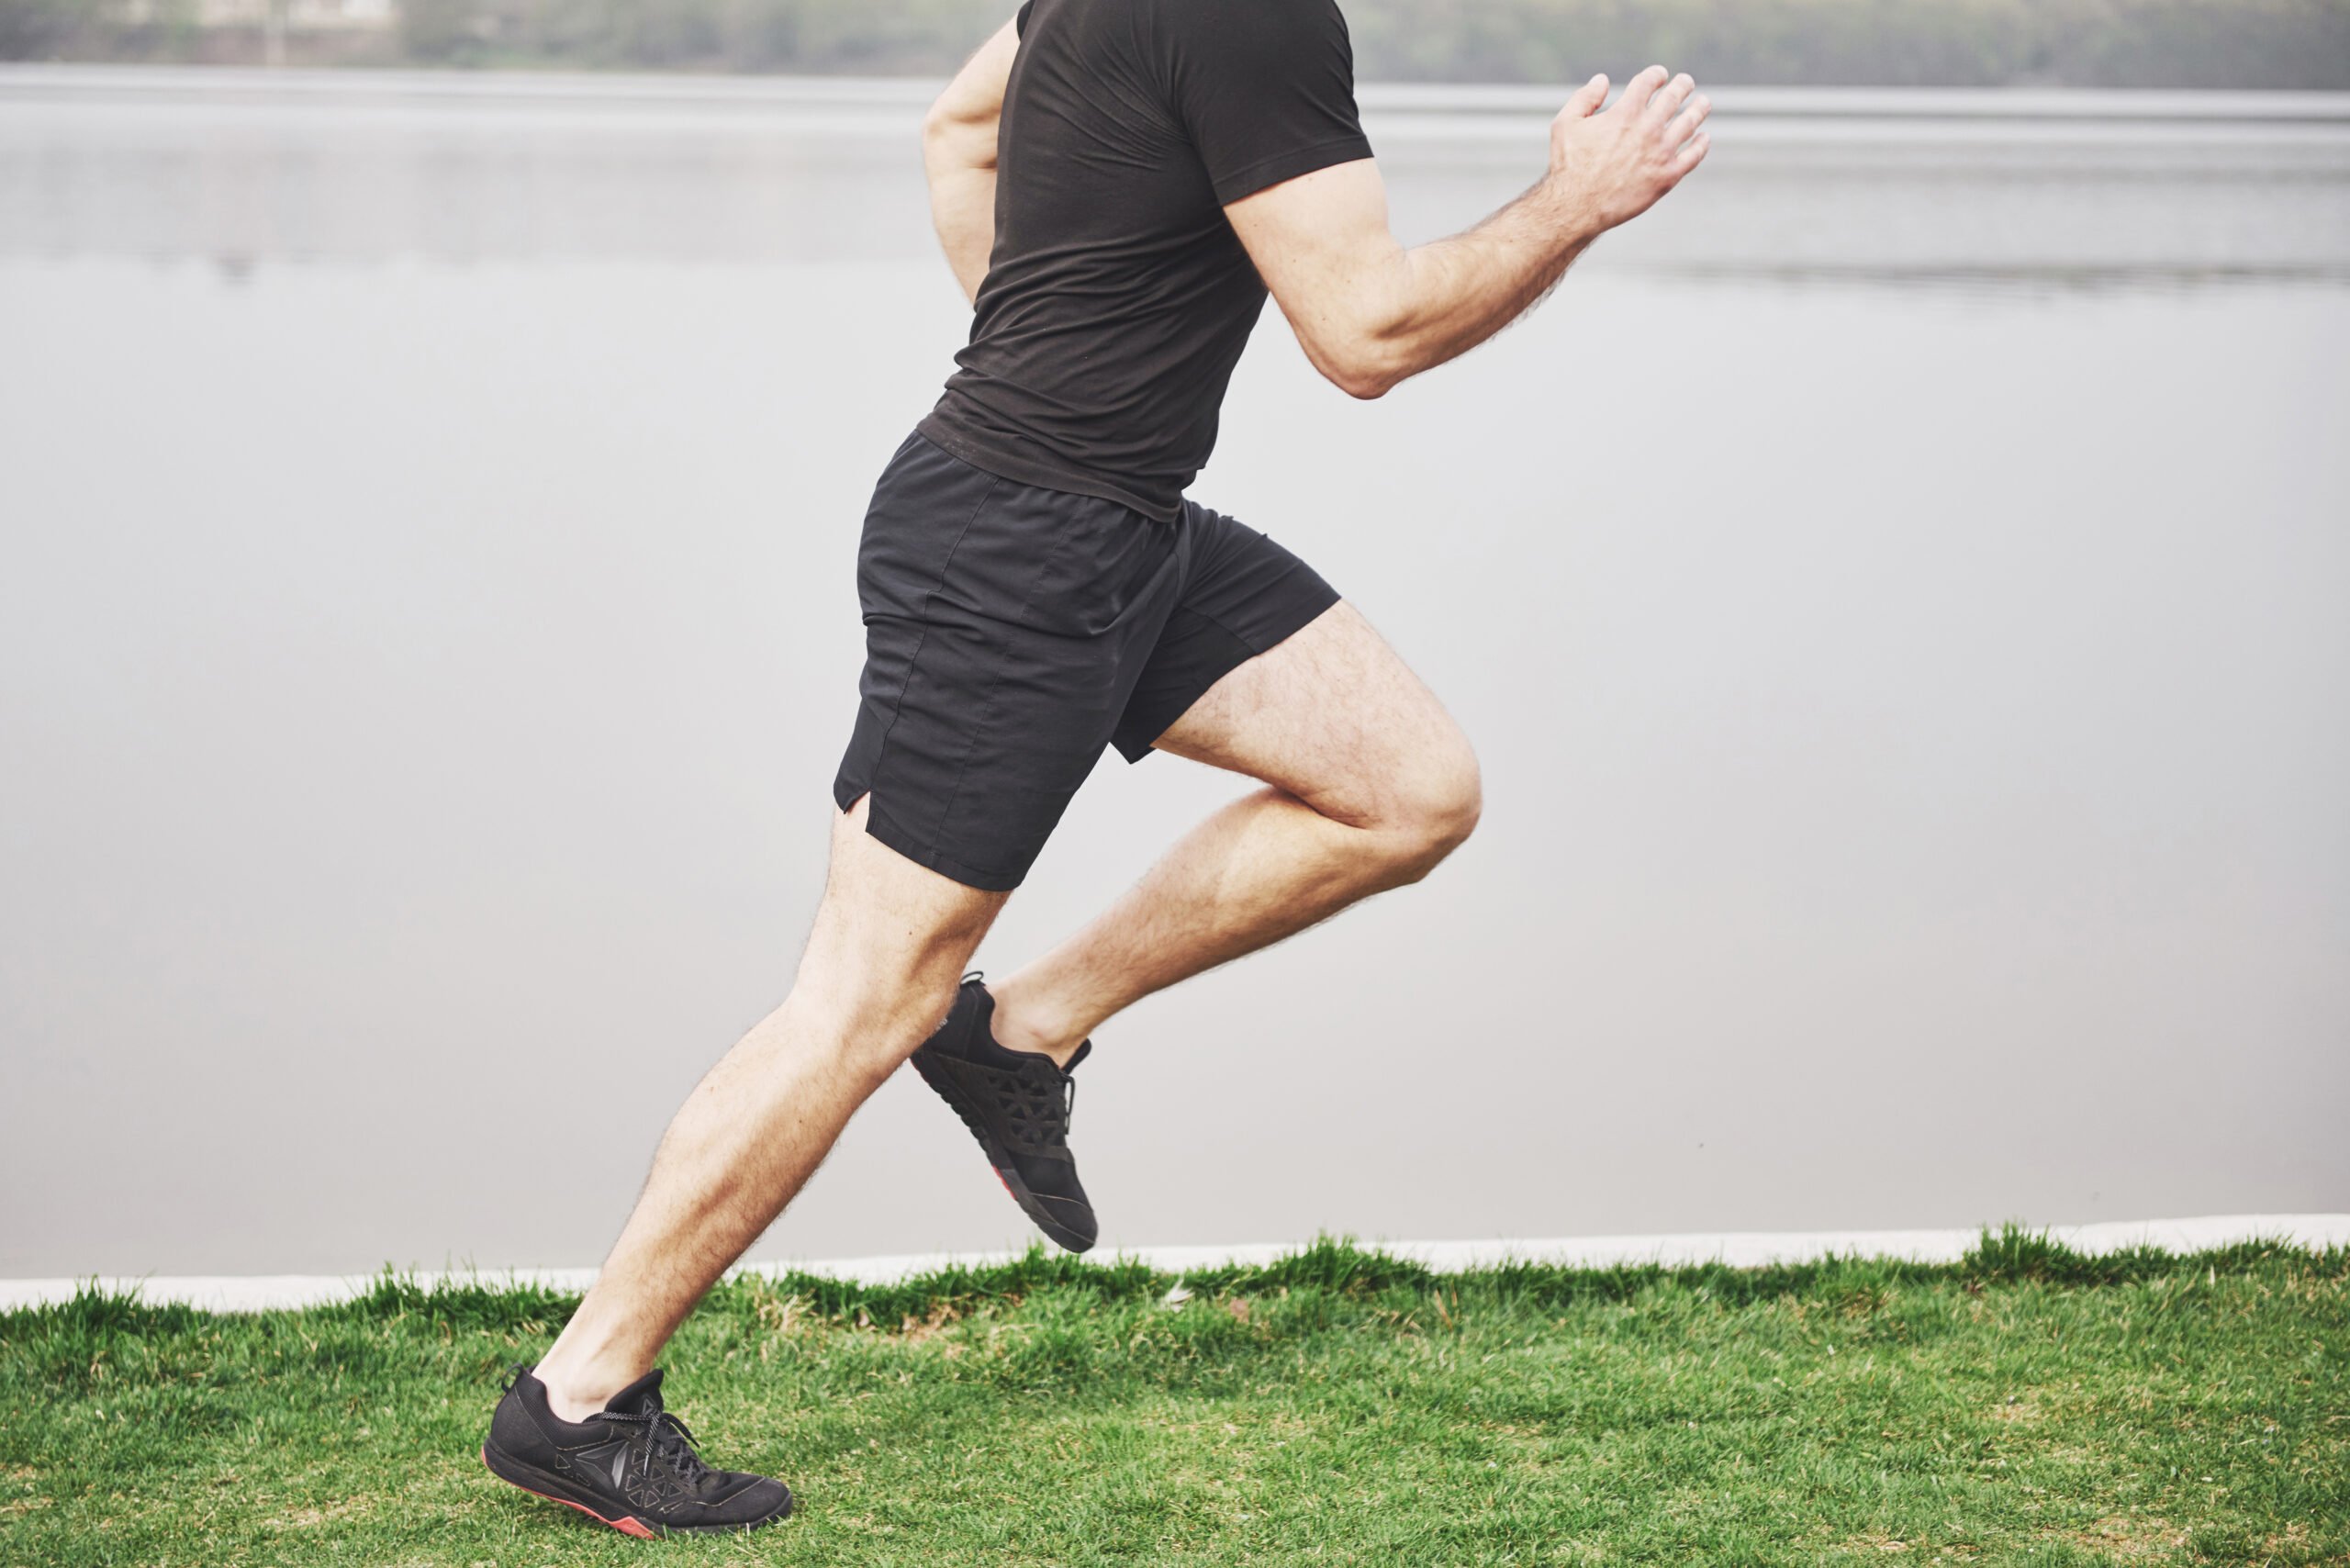
Start Running
Running is one of the best exercises you can do to lose weight and get fit for good. This sport is convenient and sheds mad calories. All you need is a pair of good running shoes, and you’re ready to go.
This whole blog is about running and the many ways you can incorporate it into your life, so why wait?
Here are the resources you need to get started without risking injury or burnout.
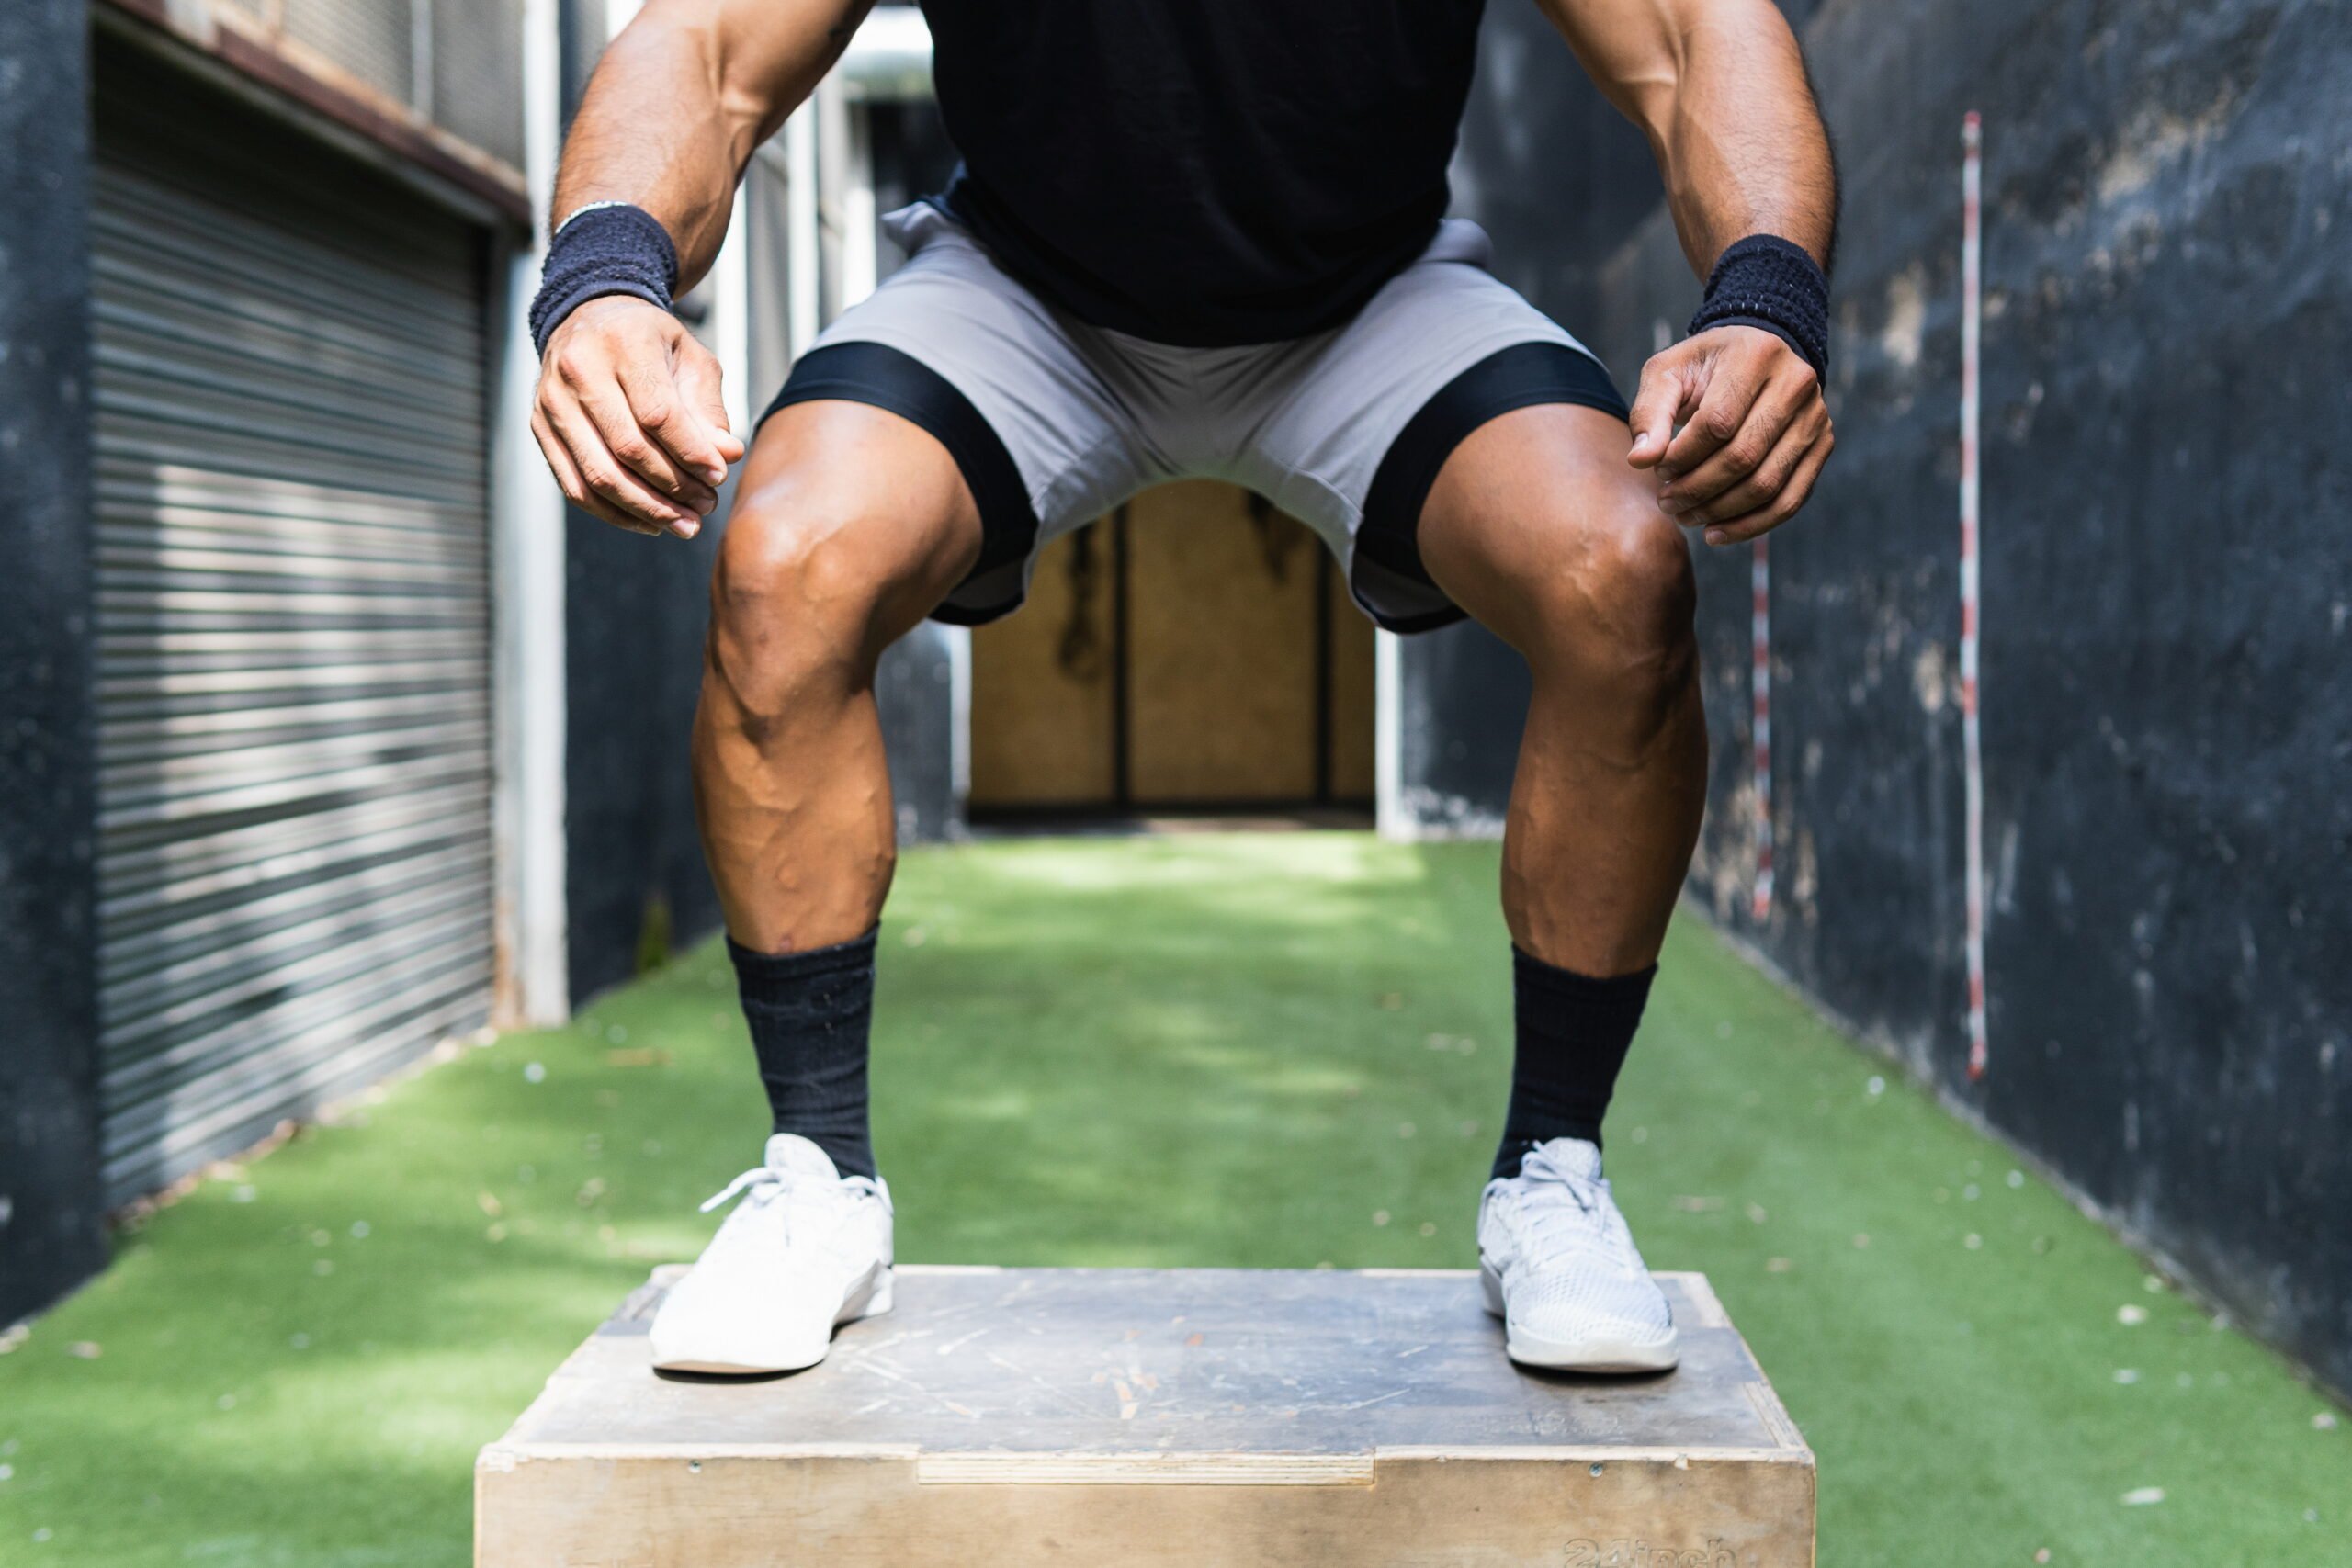
Lift Weights
Weightlifting is an INTEGRAL part of any weight loss program. If you’re skipping the strength room, you’re missing out.
Strength training builds muscles, and the more muscles you have, the higher your resting metabolic rate will be. This means you’ll burn more calories, even when you’re not working out. Isn’t that a good thing?
Add at least two strength workouts to your training program.
For the highest calorie burn, train your entire body in each workout. Focus on total-body exercises that challenge the large muscle groups, like pushups, squats, deadlifts, planks, lunges, and pull-ups.
Additional link – Slow running vs fast running for weight loss
Go Swimming
Swimming is a great low-impact option that burns mad calories without putting a lot of pressure on your body.
A 160-pound person can burn up to 520 calories by swimming laps for an hour. The exact number of calories burned depends on a wide range of factors, including weight, age, fitness level, and training intensity.
Swimming uses all of the body’s muscles, so with each kick, push, and stroke you’re performing a mini strength workout for your entire body, especially your glutes, core, hips, arms, and shoulders.
Do Yoga Two Times Per Week
Yoga is another low-impact exercise that can help you melt fat without breaking a sweat. According to research, overweight subjects who rolled out their yoga mat at least once a week for four years lost more weight than those who didn’t take the time to practice.
Yoga can also help you become more flexible, reduces stress and promotes a general sense of health and well-being. I could go and on about its benefits.
Add at least a couple of yoga sessions into your training program, either by following a yoga DVD program or enrolling in a class — make sure to do it with good form. You’re always better off doing yoga with the guidance of a certified professional. Once you nail the form, you can practice it in the comfort of your home.
Additional resource – Guide to running terms
Shoot for 10,000+ Steps Every Day
According to research conducted at Arizona State University, people leading an active lifestyle typically take over 10,000 steps per day.
This is very helpful if you can’t afford going to a gym, or if you’re looking for more ways to be active that don’t involve intense exercise.
10,000 steps a day might seem like too much walking, but it’s not. There are always opportunities to squeeze in more walks during everyday situations.
You’ve got plenty of options. Meet up with a friend and walk around the neighborhood or park. Go to a museum. Take a walk during your lunch break. If it’s possible, walk to work instead of taking a car or public transportation.
To make sure you’re on the right path, use a pedometer or fitness tracker to keep tabs on your daily steps.
Additional resource – How to reduce sugar intake
Challenge Yourself
Real growth happens when you step outside of your comfort zone. If you stick to the same exercise routine—whether it’s weightlifting, running, swimming, or anything else —you’ll invite boredom and training plateaus.
On the other hand, constant challenges lead to improvement.
I encourage you to challenge yourself to lift more weight, to run farther in the same amount of time, to make even the tiniest and smallest improvement. It all counts.
HIIT it Hard
High-intensity interval training is, by far, the ideal training method to help you burn calories and improve your fitness level. Countless studies have shown HIIT to be effective for weight loss as well as for improving fitness level. It’s like nothing else.
HIIT is all about mixing high-intensity exercise with low-to-moderate intensity exercises.
I have used it. I have done it. And I love it. I bet you will love it too once you get used to it and learn how to do it right.
Here’s your complete guide to the HIIT method.
Sprint It Out
Sprints are the ultimate form of high-intensity interval training. They’re simple, intense, and scalable, so you can always readjust them to fit your needs and training goals.
During sprint intervals, you alternate between running as fast as possible for a set distance and brief periods of slow jogging for recovery.
Here’s how to proceed with a sprint session.
After a thorough warm-up of 10 minutes, perform eight to ten 30-second, full effort sprints at your maximum speed.
Take one minute of recovery between each sprint, then finish your session with a 5-minute cooldown.
Run Some Hills
Hill reps are the next level of track sprints. They’re one of the best resistance exercises for the lower body, helping build strength and speed in your glutes, hamstrings, quads, and calves.
Hill sprints are also safer on your legs and take less time to perform than sprints.
Here’s how to proceed:
Find a steep hill that takes you 20 to 30 seconds to run to the top. Sprint up it as fast as you can, then slowly jog back down to recover.
Perform enough reps of this exercise for the session to last between 20 and 25 minutes, then end your workout with a 5-minute cooldown jog.
Here are five more hill workouts to try.
Rope Training
Rope training is one of the most under-utilized yet most effective training tools for increasing cardiovascular fitness. It speeds up weight loss and improves muscle endurance.
This training system is a fat burning machine. According to a study published in the Journal of Strength and Conditioning Research, battling the ropes for one minute can burn up to 10.3 calories per minute. That translates to 400 to 500 calories in a 30-minute workout.
Battling ropes exercises target almost every muscle in the body, especially the core, the glutes, lower obliques, and abs.
Here’s a battle rope workout routine to try out.
Use Kettlebells
Kettlebells are cannonball-like weights with a handle. They are one of the best training tools you can add to your workouts if you want to get a leaner, stronger body without spending endless hours in the gym.
According to research conducted at the University of Wisconsin, kettlebell training burns as many calories per minute as running a 6-minute mile, amounting to 400 to 500 calories for a 30-minute workout.
Other research has found that kettlebell training can lessen shoulder, neck and back pain by strengthening upper body and core muscles.
Here’s a simple workout routine to try:
After a thorough 10-minute warm-up, do 12 reps of kettlebell squat thrusts immediately followed by 16 reps of kettlebell swings. Then do 12 kettlebell snatches, rest for one to two minutes, then repeat the whole circuit three to four times.
Here’s another kettlebell workout to try.
Stop Doing Crunches
Crunches, sit-ups, and other traditional ab exercises are a waste of time and energy.
Sit-Ups and crunches can lead to lower back pain and may even cause herniated discs. They’re boring and not that effective, especially when performed using bad form.
Instead, do planks (with all of its variations) or total-body exercises such as deadlifts, squats, or floor wipes.
Additional resource – How to rotate running shoes
Do Tempo Runs on the Treadmill
Also known as lactate threshold (LT) or threshold runs, this is a faster-paced workout that’s vital for improving metabolic fitness and maximizing the number of calories burned on the treadmill.
Here’s how to proceed:
First step: Warm up with five minutes of easy jogging,
Second step: Run a mile at 20 to 30 seconds slower than your half-marathon pace. It’s a pace that feels comfortably easy.
Third step: Pick up the pace every mile by 5 to 10 seconds until you’re running the final mile 20 seconds faster than your half marathon pace.
Fourth step: Finish the workout with a slow five-minute jog and some light stretching.
Hill Treadmill Intervals
The second treadmill workout is a hill interval routine.
Performing indoor hill intervals can help you get more out of your treadmill workout by simulating outside hill running. This is vital for increasing endurance and building killer lower-body strength.
Here’s a hill treadmill workout to try out:
First step: Warm-up.
Second step: Raise the incline to three or five percent, and run for 90-seconds at a pace that’s 15 seconds slower than your 10K pace. The pace should feel mildly challenging.
Third step: Recover by jogging slowly for one full minute with no incline.
Fourth step: Raise the incline to five or seven percent and run for another 90-seconds at 15 seconds slower than your 10K pace. Recover for one minute.
Fifth step: Repeat the fourth step three to six times, depending on your fitness level and goals. You could also opt for a steeper incline.
Sixth step: Cooldown.
Embrace Free Weights
According to a study published in the Journal of Strength and Conditioning Research, exercising with free weights instead of machines leads to greater muscle activation.
With free weights, you can target every muscle group in your body without wasting precious time moving from machine to machine or going back and forth between different pieces of equipment.
Also, free weights can help you achieve better symmetry between both sides of your body by forcing the weak side to work unaided by the dominant side. They’re also convenient, scalable and easy to learn.
I could go on and on about the effectiveness of free weights, but you get the big picture.
Start CrossFit
I love CrossFit, and I believe it’s one of the best workout programs out there for helping you to push yourself and keep improving.
There are nine basic exercises in most CF training routines. These include the deadlift; sumo deadlift high pull; shoulder press; push press; air squat (without the weights); front squat; overhead squat; and medicine ball clean.
As you get stronger, you’ll be doing other exercises such as sprints, pull-ups, burpees, sit-ups, box jumps, rowing, gymnastics ring work, and other exercises.
The Tabata Protocol
Dubbed “the fat burning miracle training routine,” the Tabata protocol is a form of high-intensity training scientifically proven to improve aerobic and anaerobic threshold as well as calorie burn.
Studies show that the typical Tabata workout routine can burn 12 to 15 calories per minute.
Here’s a sample workout:
Perform the following exercises for as many reps as possible in 20 seconds, then rest for 10 seconds before moving to the next exercise and doing it as fast as possible for 20 seconds. Shoot for six to eight total rounds, resting one minute between each round.
- 20 seconds of squat jumps, 10 seconds of rest
- 20 seconds of burpees, 10 seconds of rest
- 20 seconds of jumping lunges, 10 seconds of rest
- 20 seconds of push-ups, 10 seconds of rest
- 20 seconds of kettlebell swings, 10 seconds of rest
Here’s another Tabata workout routine to try.
Medicine Ball Training
Medicine balls are powerful and can be a great addition to your training arsenal.
What I love about medicine ball exercises is that they’re some of the best and most challenging core exercises you can ever do, building both muscular power and endurance while pushing your cardiovascular system to its breaking point.
Here’s a medicine ball workout to try.
- Squat to chest pass
- Suitcase crunch
- Diagonal chop
- Russian twist
- Lunge to rotation
Here’s another medicine ball workout to try.
Add Short Cardio After Each Weight Workout
Engaging in intense exercise after 45 minutes-to-an-hour of weight training guarantees that the activity right after will immediately use up fat as the primary source of energy.
In other words, the window right after your weight workout session is prime fat-burning time. Make the most of it!
Here are three workout finishers to try:
Workout Finisher One
Do three rounds of:
- Plate push for 30 seconds
- Kettlebell swings, 15 reps
- Med-ball thrusters, 15 reps
Workout Finisher Two
Do three sets of:
- Lunge jumps, 20 reps
- Burpee, 15 reps
- Jump rope for one full minute
Workout Finisher Three
300-yard shuttle sprints.
Place two cones or water bottles roughly 25 yards apart, then run as fast as you can back and forth between the cones eight to ten times. Aim to touch the cones each time.

Try a Group Fitness Class
If you’re more of an extrovert and enjoy the company of others, consider joining a group fitness class.
These classes are a great way to stay on track, up the ante with your workouts, and meet active and like-minded people. As an added benefit, peer pressure can do wonders for your weight loss journey.
The good news is that there are a wide range of classes available, and you’re sure to find something that fits your budget, fitness level, and training goals.
Different classes offer different exercises and workout routines geared around building strength, endurance, and flexibility.
Try CrossFit, join an MMA class, try a spinning class, or enroll in a boot camp class. Just find a class you like and attend it consistently.
Try an Outdoor Activity
Working out outdoors not only helps you lose weight, it also provides a lot of health benefits.
Studies show that exercising outdoors boosts vitality, self-esteem, and enthusiasm and lowers levels of the stress hormone cortisol. Braving the outdoors can help you reduce tension, fatigue, and depression.
Here’s a list of outdoor activities and sports that will put your gym workouts to shame:
- Biking
- Kayaking
- Stand-up paddleboarding
- Skating
- Frisbee
- Surfing
- Rowing
- Bouldering
- Hiking
- Trekking
- Beach volleyball
- Rock climbing
- Badminton
Follow a Workout Plan
If you have a good plan, or even a mediocre plan, you’re more likely to lose weight and achieve your fitness goals than those who don’t have a plan at all.
The best workout plans involve working out three to four times per week, depending on your current fitness level and training goals.
Start your workouts with a proper warm-up, do the workout, then finish with a cool-down and a few stretches.
Never been to a gym? Ask a trainer for some advice, or hire them if you have a budget. It’s important that you start off on the right foot and build up the right way. If you’re unsure where to start or want to find a qualified personal trainer in your area, you can compare personal trainers near you using a comprehensive directory. A directory allows you to compare trainers based on their qualifications, experience, and client reviews, helping you make an informed decision about hiring a trainer that’s right for you.
Start a Workout Journal
In addition to regular fitness tests, one of the best ways I know of measuring your fitness progress (or lack thereof) is keeping track of your training routines and cycles in a workout journal.
I’d go so far as to say that keeping a workout journal is as important as training itself, especially if you’re serious about reaching your full potential.
Get yourself a workout diary and keep tabs of all your activities: training sessions, workout routines, daily miles, weights used, reps performed, number of sets, energy levels, performance numbers, and everything else.
Schedule Your Workout
To ensure training consistency, schedule your workouts the same way you schedule your important work meetings or family events.
By giving your training routine the same level of importance that you give your school deadlines, work meetings, and unpaid taxes, you’ll increase your odds of following through and staying consistent with it—especially if you lead a hectic life.
Spend at least 10 minutes every Sunday night planning your workouts for the week, the same way you would with other obligations.
Choose at least two workouts and schedule them the way you would an appointment that you don’t want to miss. These will be the most important workouts of the week, and should preferably include a total-body strength workout and an intense cardio session.
Jot down the exact time you are going to exercise on your daily calendar, then treat your workouts like an unbreakable commitment.
Exercise First Thing in the Morning
Research shows that people who work out first thing in the morning are more likely to stay consistent with their training programs than those who skip morning workouts.
When you exercise first thing in the morning, you’re done – you don’t have to worry about doing it later in the day. You also get the mental boost of knowing that you’ve accomplished what you need to do for the day while the rest of the world is still asleep.
Exercising in the morning is a great way to help you wake up, boost your energy levels and increase your brainpower and productivity for the rest of the day.
Go to bed 60 to 90 minutes earlier than usual so that you have enough time and have rested enough for a workout first thing in the morning.
Pair Up with a Training Buddy
According to research conducted at the University Of Pennsylvania School Of Medicine, working out with a partner speeds up weight loss results.
The more you rub shoulders with people who support your goals and your vision, the more likely you are to succeed.
Chances are you be more consistent with your workouts when you have a training buddy to motivate you who will hold you accountable for your action.
Whether you’re trying to get into better shape or just want to shed a few extra pounds, be sure to schedule your workouts (or at least some of them) with a workout partner.
Hire a Personal Trainer
If you’re looking to get the most out of every hour you spend working out, hire a personal trainer. They can help you learn proper form, hold you accountable to your goals, devise a smart workout strategy, overcome physical and emotional obstacles, and teach you how to safely adjust your workouts so you can keep on getting real results without hurting yourself.
Once you find a trainer you like, ask them to take you through a fitness assessment to identify your weaknesses and muscular imbalances. Doing this will help them come up with a well-rounded workout routine that fits your current fitness needs and future goals.
Do What You Love
In my opinion, the best exercise program in the world is the activity you already love doing.
When you choose to do an exercise you love, you’ll have more fun doing it and be more likely to keep doing it over the long haul, so if you like running, then run.
If you like swimming, then swim.
If you like skating, then skate.
If you like boxing, then box.
If you prefer lifting weights, then pump it hard.
If you like them all, then alternate between them as often as you like, for at least 30 to 40 minutes a day.
Do whatever you want. You’re the boss. You’re in charge.
The list of possible workout options available to you is long and varied; you have to find something you love doing.
Practice Proper Recovery
Spending endless hours working out eventually leads to diminishing returns. If your current workout routine doesn’t allow for proper rest, you’re flirting with disaster.
Inadequate recovery hinders your ability to train, and might set the stage for injury, burnout, and serious trouble. Becoming a workout addict will only get you in trouble, so you need to make sure to build good recovery habits.
For starters, space out your hard workouts, especially interval and intense strength sessions, with at least two days of rest. Take as many recovery days as you need, especially when experiencing symptoms of overtraining such as elevated heart rate or chronic soreness and fatigue.
Sleep is also essential for proper recovery. Aim for at least eight hours of high quality and uninterrupted sleep per night. You can also plan for a recovery week by decreasing your training volume 50 to 60 percent for every four to five weeks of training.
Motivation Tips
Manufacture Motivation
Motivation is of paramount importance, and maybe the most important thing on this list. On your weight loss journey, you’ll need lots of inspiration to help keep your inner fires burning.
What are some ways to keep motivation going strong?
You’ve got plenty of options. Read real-life success stories. Read fitness blogs and magazines and books. Use the reward system and the buddy system. Take before and after pictures. Set weight loss goals and make them public, Use mantras and motivational quotes.
Just be open and try them all.
Here’s a lit of my favorite fitness quotes.
Set S.M.A.R.T Goals
This is a good checklist to consider when you’re about to set goals for yourself.
S.M.A.R.T. stands for Specific, Measurable, Achievable, Results-focused and Time-bound. SMART goals are the right way to go about setting weight loss goals.
Setting smart goals can be the difference between success and failure. They will help keep you focused and motivated.
Here’s what you need to do. Come up with one weight loss goal and one performance goal, and keep these two goals somewhere visible, so you’re reminded of them every day.
For example, your goals might be “Lose 15 pounds in three months” and “Run three times per week for the next three months.”
Over the long term, the best weight loss goal is to lose one to two pounds a week. That may not seem like much, but if you keep doing it consistently, it adds up.
Do it for a month, and you’d shed 4 to 8 pounds.
Do it for three months, and you’d shed 12 to 20 pounds.
You get the picture. It might not be as fast as you’d like it to be, but slow and steady is what will help you win the flab race.
If you’re looking for more tips on how to set fitness goals, check this post.
Go Public With Your Goals
Research shows that if you make your goals public, you’ll be more likely to stick with your healthy lifestyle plan. It keeps you accountable for your behavior and your habits.
Your social circle can encourage you and push you to do your best and never give up.
I encourage you to make your weight loss goals public and commit to giving regular updates to your family members, friends or social circle every week or month.
Also share them on Facebook, Twitter, and other social media platforms.
Enlist Your Friends and Family For Support
The weight loss journey is not a smooth ride, so you’re going to need all the support you can get.
A strong support system can be the difference between success and failure. A study revealed that people who had the support of their social circle lost more weight than those who didn’t.
Let your family and friends keep you motivated and hold you accountable for your actions, making sure you never deviate from your weight loss journey.
At the same time, you need to banish negative people from your life. They’ll only bring you down and hamper your progress. You’re better off restricting yourself to spending time with people who believe in you and support your goals.
Get Your Partner on Board
When you go on a weight loss journey, your entire life has to change to make the changes you need. If you’re married or live with a partner, your decision will affect them too, so they need to be on board and provide their support.
Your partner’s heartfelt support can make the difference between reverting back to old, damaging ways and accomplishing the fitness goals you’ve set for yourself.
Where appropriate, consider starting a weight loss journey together: it’s a great way to keep each other on track.
One way or another, start preparing healthier dishes together. Eat at home more. Keep each other accountable. Go running together. Join a gym class. Build a home gym.
Use Online Support Networks
A study conducted by Britain’s Medical Research Council (MRC) found that people who joined a weight loss support group lost more weight than those who hadn’t.
A support group can help you talk through your troubles, provide you with practical solutions to your problems, and most importantly remind you that you’re not alone. Look for these online message boards, join one, then open up and talk about your struggles and victories.
Here’s a list of websites to check out:
Spark People
Diet.com
FitLink
Peer Trainer
Weight Loss Buddy
Weight Loss Wars
Weigh Yourself Once a Week
Keeping track of your weight is a good strategy, but obsessing over it is counterproductive. Your weight isn’t everything, and it doesn’t tell your whole story.
Stepping on the scale every day can have a negative impact on you. Your weight will fluctuate from day to day, and if you weight yourself daily, you’ll find yourself in a constant battle of ups and downs.
Most experts recommend that you weigh yourself once a week under the same conditions—preferably at the same time and on the same weekday. The best time is in the morning, shortly after finishing your morning ritual and just before you’ve eaten.
Take Progress Pictures
As I’ve already said, the scale only tells one side of the story. To get a full picture of your progress, you need to start taking pictures of your fitness and weight loss journey on a weekly basis.
Taking before and after pictures is not only perfect for keeping track of your progress, the “before” pictures can also be a huge wake-up call and provide the exact motivation kick you need to make your weight loss vision a concrete reality.
Here’s a short video to show you how to take your progress pictures the right way:
Track Other Body Stats
Weekly weigh-ins and photo shoots are often enough, but if you want a clearer picture of your weight loss journey, start tracking some other important body stats.
Here are the main ones to take and write down:
- Weekly measurements of your hips, chest, waist, upper arms, thighs
- Body fat percentage should be checked on a monthly basis using a body fat caliper
Additionally, use fewer objective measures of your progress. Ask another person — preferably a trusted friend or family member —for honest feedback, and check how your clothes fit. Are they looser than before?
Reward Yourself
Rewarding yourself for progress can help reinforce your new habits and provide you with the motivation you need to continue with your journey, so after reaching a performance or weight loss goal, treat yourself to something nice.
Some of the best things you can do to reward yourself include shopping for smaller sized clothes, going to the movies, taking a surfing lesson, taking a vacation to your dream destination, spending a weekend at the spa, reading a book, binge-watching your favorite show, or just sleeping in. It doesn’t matter whether it’s expensive or free, far-flung or in your home, as long as it is something that gives you pleasure and is not about food.
Sign Up for a Race
To keep yourself exercising regularly, consider signing up for a 5K race. This is a perfect distance for beginner runners who are looking to build cardio power and fitness the right way.
You can find plenty of 5K races in your city or cities near you by checking websites like Runners World or Running in the USA for local races and dates.
After signing up for a 5K race, find a training program to help get you ready and fit enough to cross the finish line.
As a general guideline, most 5K training plans last 8 to 12 weeks, so you signing up for one will give you a plan within a reasonable amount of time to get you in shape.
Lifestyle and Mindset Tips
Take Responsibility for Unhealthy Habits
You’re the one in charge.
You choose the script by which you live your life, and you’re the king or queen of your actions. No one is responsible for them but you.
Bad habits or not, they’re yours. You’re the one responsible for changing it. No one else.
You’ve built your habits through repetition, and through repetition, you can break them too.
Take conscious responsibility for your everyday actions—the good, the bad, and the ugly.
Doing so is empowering because it lets you realize that you’re the master of your destiny.
Get Enough Sleep
Lack of sleep will not only make your life miserable, it’ll also make your waistline bigger.
Research study after research study has revealed that sleep-deprived individuals are more likely to be overweight and to suffer from a plethora of health troubles.
Sleep deprivation can boost hunger, muscle loss, and unwanted weight gain, so log at least 8 hours of high quality, uninterrupted slumber each night.
Relax
According to research, stress is a primary cause of weight gain, while relaxation and calm can facilitate healthy weight loss.
When we’re stressed, we seek comfort and emotional release in food, usually by reaching for high-calorie, unhealthy foods.
Stress also increases the release of the hormone cortisol, known as a key culprit behind stubborn belly fat.
To tame stress, try meditating, taking long walks in nature, talking out your problems with a friend, getting enough sleep, getting rid of friction in your life, doing yoga, look into anti-stress supplements or therapy.
The bottom line is don’t ignore your stress. As long as you’re dealing with your it in a positive and constructive manner, you’re in the right place.
Try Meditation
Sitting blissfully on a cushion for endless hours does not burn a lot of calories, but research shows that mindfulness—one of the many benefits brought about by meditation—is key for weight loss and overall health and well-being levels.
Studies show that people who practice meditation on a regular basis are less likely to give in to emotional eating or unhealthy bingeing.
Meditation practice can also help lower high blood pressure levels and helps to manage stress, one of the primary causes of overeating and making bad food choices.
So what you are waiting for? The science backing up meditation is IRREFUTABLE.
Start with short meditation sessions lasting no more than 10 minutes. Sit comfortably, close your eyes, and focus on your breathing. Whenever your mind wanders—and it will have the tendency to do so— bring it back and keep focusing on each exhalation and inhalation.
Brush Your Teeth More Often
If you brush and floss your teeth right after dinner, you’ll find yourself less likely to crave snacks or sweet desserts late at night. This sets you up right for avoiding late night snacking.
It also helps keep your gums healthy and your teeth clean.
Additionally, if you follow this train of thought and brush your teeth after every meal, it will make you less likely to snack between meals.
Check Your Hormones With a Blood Panel
By learning more about your hormonal situation, you give yourself a better idea of the nutritional and lifestyle changes you need to speed up your weight loss and increase your energy and health.
A blood panel can help you assess your levels of the stress hormone cortisol, whether your adrenals are insufficient, whether you’re low in vitamin D3, or whether your cholesterol and blood sugar levels are within the normal healthy range.
Embrace the Cold
Spending time in relatively chilly temperatures can help you burn more calories, even if you’re just sitting around doing nothing. This may sound crazy, but research backs it up.
According to a study published in the journal Trends in Endocrinology and Metabolism, cooler temperatures can increase calorie burn by up to 30 percent, while another study published in the Journal of Clinical Investigations found that people who spend a couple of hours a day in mild cold—approximately 63 degrees F—for a period of six weeks burned more energy than those who spent the same amount of time in warmer temperatures.
Next time you’re thinking about skipping an outdoor workout because it’s too cold, remember that the cold is your weight loss friend.
Handle Social Festivities the Right Way
Studies show that most people gain two to ten pounds during the winter months, and one of the main reasons for this weight gain is the eating festivities during the holidays.
The best thing you can do to counter this effect is to eat before you go to a party. It will help curb your hunger and take the edge off your appetite.
If you want to go all out, you can also bring your healthy foods to make sure you have an alternative to the high calorie, fat-laden dishes your host or hostess is serving.
Watch Your Weekends
It’s totally doable to stick with a healthy diet and exercise plan during the week, but once the freedom of the weekend arrives, a lot of people take a break from their weight-loss resolution. This is a mistake. Doing so will only set you back and undo all your efforts from the week before.
You need to be conscientious when you’re attending that happy hour after work on Friday, the restaurant dinner on Saturday, and the home-cooked meal on Sunday. Otherwise, your weekends will turn into diet landmines that undo each week’s worth of healthy dieting and exercise.
Eating poorly and skipping workouts from Friday to Sunday add up to a whopping 12 days off a month. Not a good idea.
Be Patient
Patience is a virtue. It helps you reduce stress, control cravings, set the right goals, and most importantly it will keep you consistent, especially when all the odds are stacked against you.
Patience allows you to see beyond the current (unpleasant) moment to a future in which you’ve already achieved what you’re after.
Said in a different way, the more patient you are, the more likely you are to succeed.
Take the time you need to learn about what type of exercise works best for you, as well as about the various foods that offer the best nutrition.
Take Action
“Nothing happens until something moves.”—Albert Einstein.
Every minute you’re sitting around thinking about losing weight, surfing the net for magical diets, or checking Facebook, you’re not doing what’s needed to achieve your weight loss goals.
Regardless of how much you want to do to change your life or lead a healthier lifestyle, nothing will happen until you actually DO something. You can talk about starting a workout program and developing healthier eating habits as much as you want, but nothing will change until you start taking action.
This means you need to get moving NOW.
Here’s what you need to do: make a list of the lifestyle changes you want to see happen, then give yourself time to make each one a part of your life.
Practice Kaizen
The philosophy of Kaizen is all about going after small, continuous improvement. It builds up over time — over weeks, months and years of regular practice.
This approach is the best way to banish short-term and silver bullet thinking.
Achieving a healthy lifestyle is a marathon rather than a sprint. Slow, and steady will win the race.
Embrace the philosophy of small, continuous improvement and aim to get 1 percent better each day. Begin every morning by asking yourself what the one thing is that you can do today to improve your fitness and health? Start super small and go about achieving it.
There are hundreds of these little things, and if you keep adding one a day, they will quickly build up.
After you Lose the Weight, Stick to Your New Lifestyle
Research shows that most people gain back most of the weight they lose less than two years after losing it. This is atrocious.
Losing weight is hard enough. Gaining it back sucks.
Once you reach your target weight, keep in mind that you’ve only won half of the battle. You need to do your best not to revert to your old ways.
I hate to sound like a broken record, but the real secret to reaching your ideal weight and staying at that weight for life is to make a lifelong commitment to the all the diet, lifestyle and exercise habits listed above.
The moment you go back to your old ways is the moment when the pounds start creeping back.
If you’re serious about losing weight and never gaining it back again, you need to understand that your weight and health consciousness doesn’t ever stop.
All of it. The healthy eating. The sleeping. The running. It doesn’t stop.
You need to keep things going, prevent slip-ups and come up with creative ways to spice up your workouts and cope with whatever life throws at you.
Remember: It’s all About Creating a Calorie Deficit
Weight loss is all about creating a calorie deficit.
At this point you surely know that weight loss is a numbers game. Nothing more and nothing less.
If you eat more calories than you burn, you’ll gain weight.
If you burn more calories than you eat, you’ll lose weight.
A healthy weight loss goal is to aim for a 500 calorie deficit per day, and the best way to accomplish that goal is to do a mix of healthy eating and smart exercise.
That’s it. Weight loss, in its basic form, is a numbers game
Find What Works Best For You
Please keep in mind that the subject of weight loss—whether it’s diet, exercise or lifestyle-related—is one of the most controversial topics out there. Most of the tips and strategies I’m sharing with you are based on my own experience and research.
There are some contradictory tips—for instance, intermittent fasting versus eating breakfast—but there are some great ones here too.
What’s important to remember is that nothing is written in stone. Take all the tips with a grain of salt and remember that everyone is different and responds differently to different diet and exercise methods. Just because a weight loss tactic works for someone else, doesn’t necessarily mean that it will work for you.
Feel free to experiment to find what works the best for you.
Bonus Tip: Never Give up
This is where the rubber meets the road when it comes to losing weight and keeping if off for good.
Weight loss resolutions fail because people give up way too often and way too early in their journey.
Whatever you do, please don’t give up.
Don’t give up.
Don’t ever give up.
You’re going to have bad days, weeks, maybe even bac months. But don’t give up.
Shit happens. It’s part of life.
If you fail one day, the next day is a new start. Get up and go after it again. Change your approach, find a way to do things differently to make it work for you.
Please, please, please don’t let your past mistakes or past failures define who you are. You are much more than your past.
Welcome failure and let it shape your approach and course of action.
Conclusion
Boy, that was a long post! If you’ve made it this far, I applaud you for your commitment. You’re the best.
You rock for taking the time to invest in yourself.
Now go take action on what you’ve just learned, and thank you for reading my post.
Feel free to leave your questions and comments below.
David D.
Please share this post on Pinterest, Facebook, Twitter, Reddit, StumbleUpon, and other social media websites. Help me spread the word.
Featured Image Credit – Byong Wook via Flickr