Prevent Peeing When Running – A Stress Incontinence Guide

peeing when running

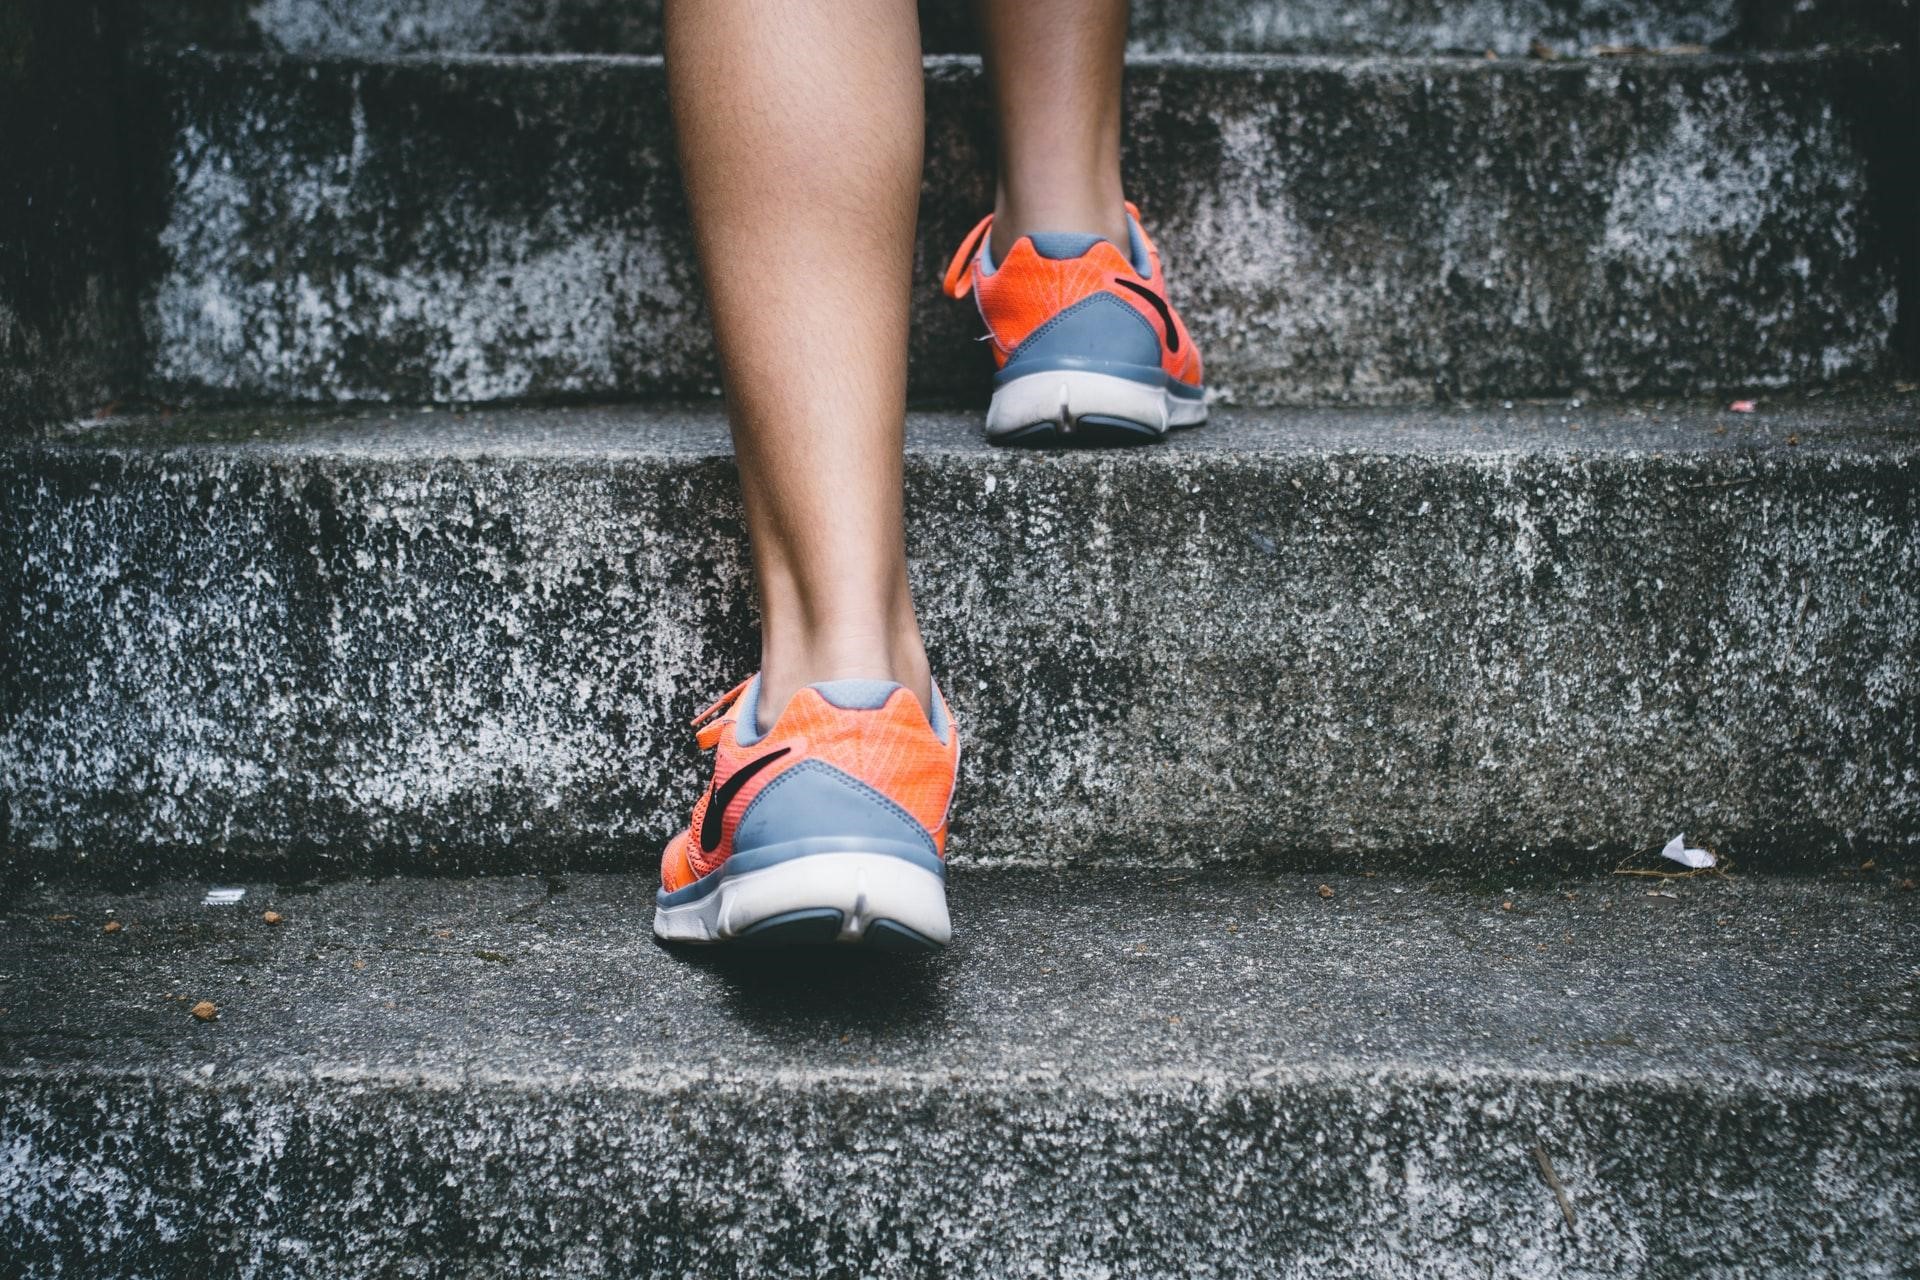
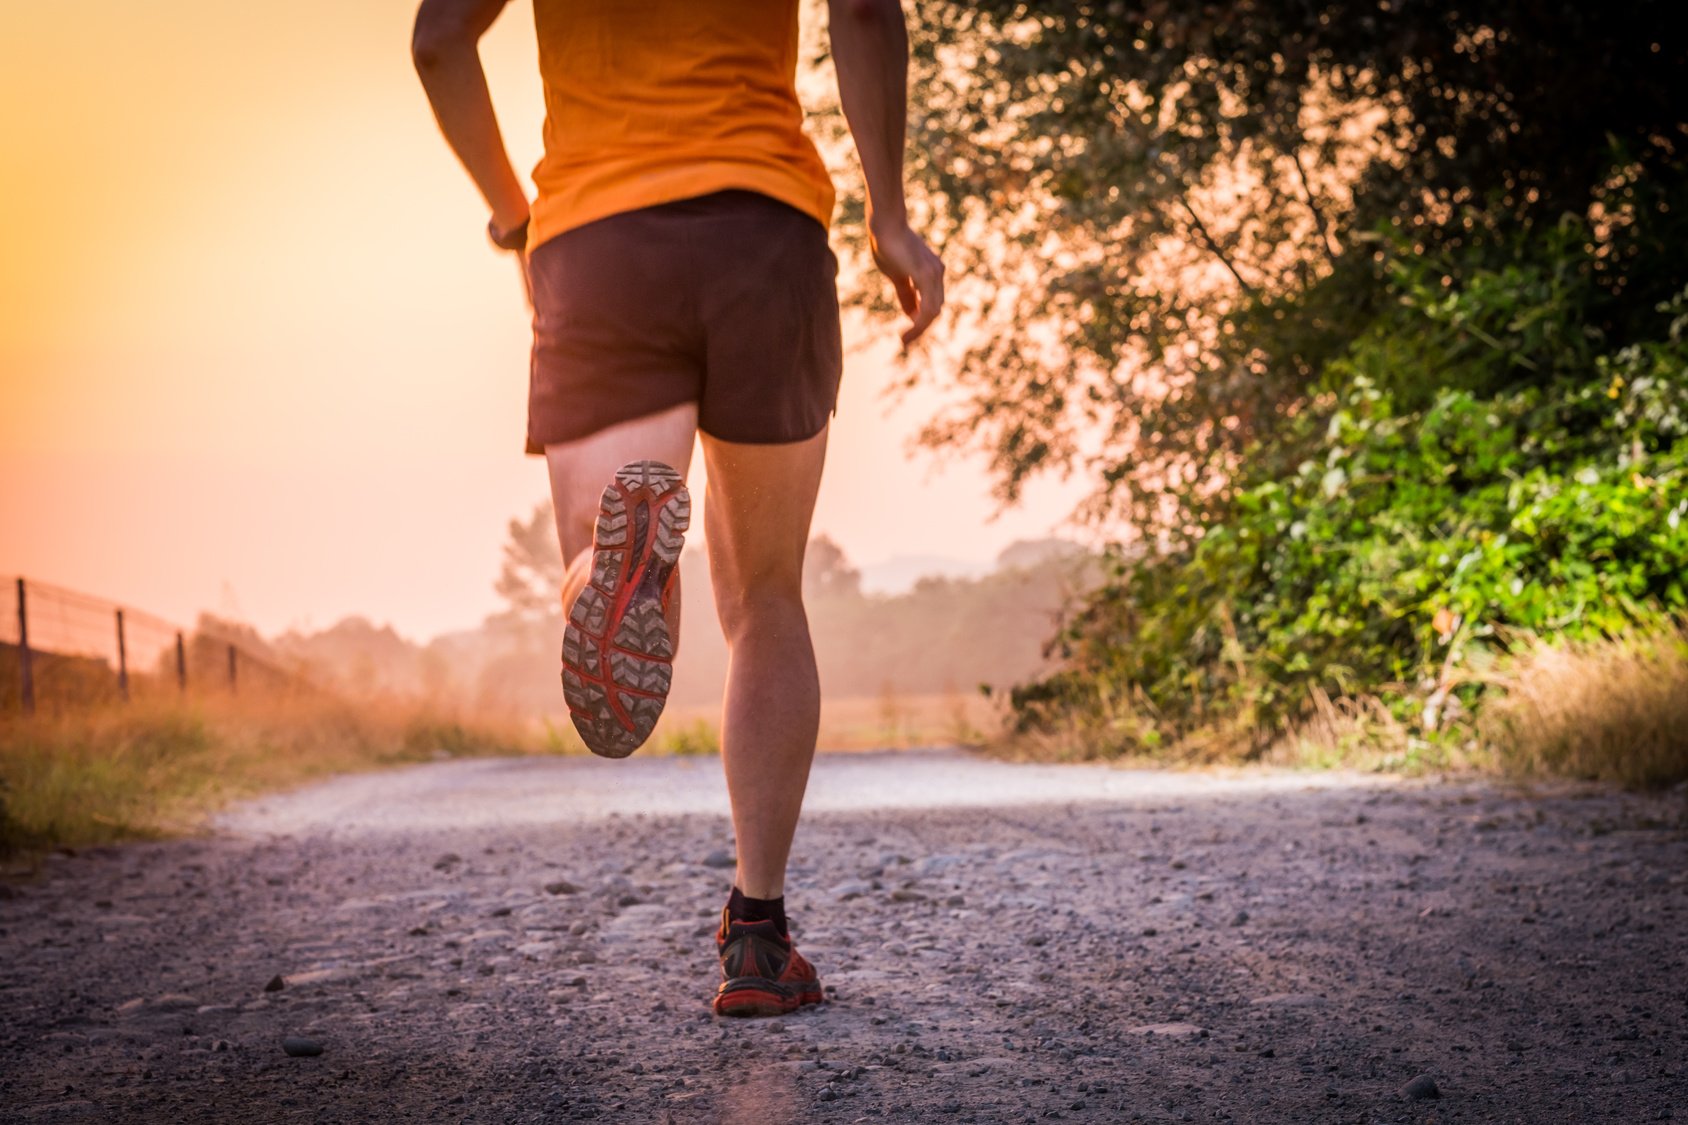
Running is an excellent way to burn calories, increase endurance, and build strength.

But run long enough, and you’ll likely wet your pants at some point.

Here’s the truth

Bladder leaks, ranging from mild to severe, are a real problem faced by many runners of all ages. They shouldn’t be given.

What’s more?

Incontinence doesn’t mean that you have to halt your running routine. On the contrary, by taking the right precautions, you can manage and cure this problem.

In today’s article, I’ll explain the link between running (and exercise) and incontinence and describe how to prevent and treat it.

The Link Between Running and Urine  Leaks

First, let’s learn more about incontinence.

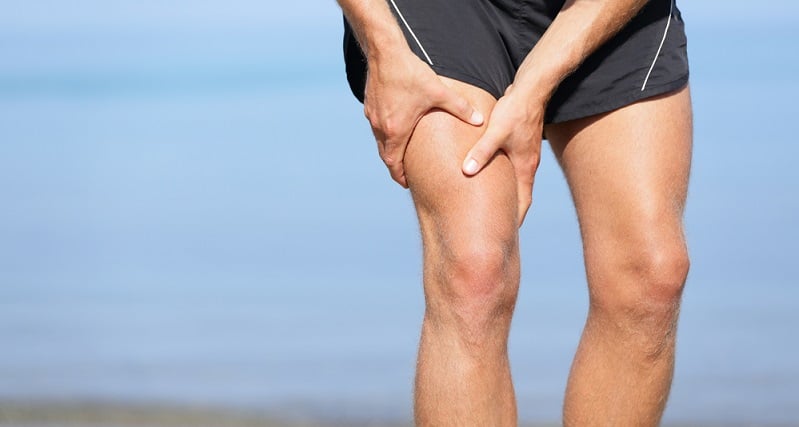
Technically known as”stress urinary incontinence (SUI), the condition refers to the involuntary loss of urine triggered by increased pressure or abrupt bladder muscle contraction.

In other words, it’s when you cannot control your bladder.

Incontinence can be a minor nuisance (just small leaks now and then) to a complete loss of bladder control.

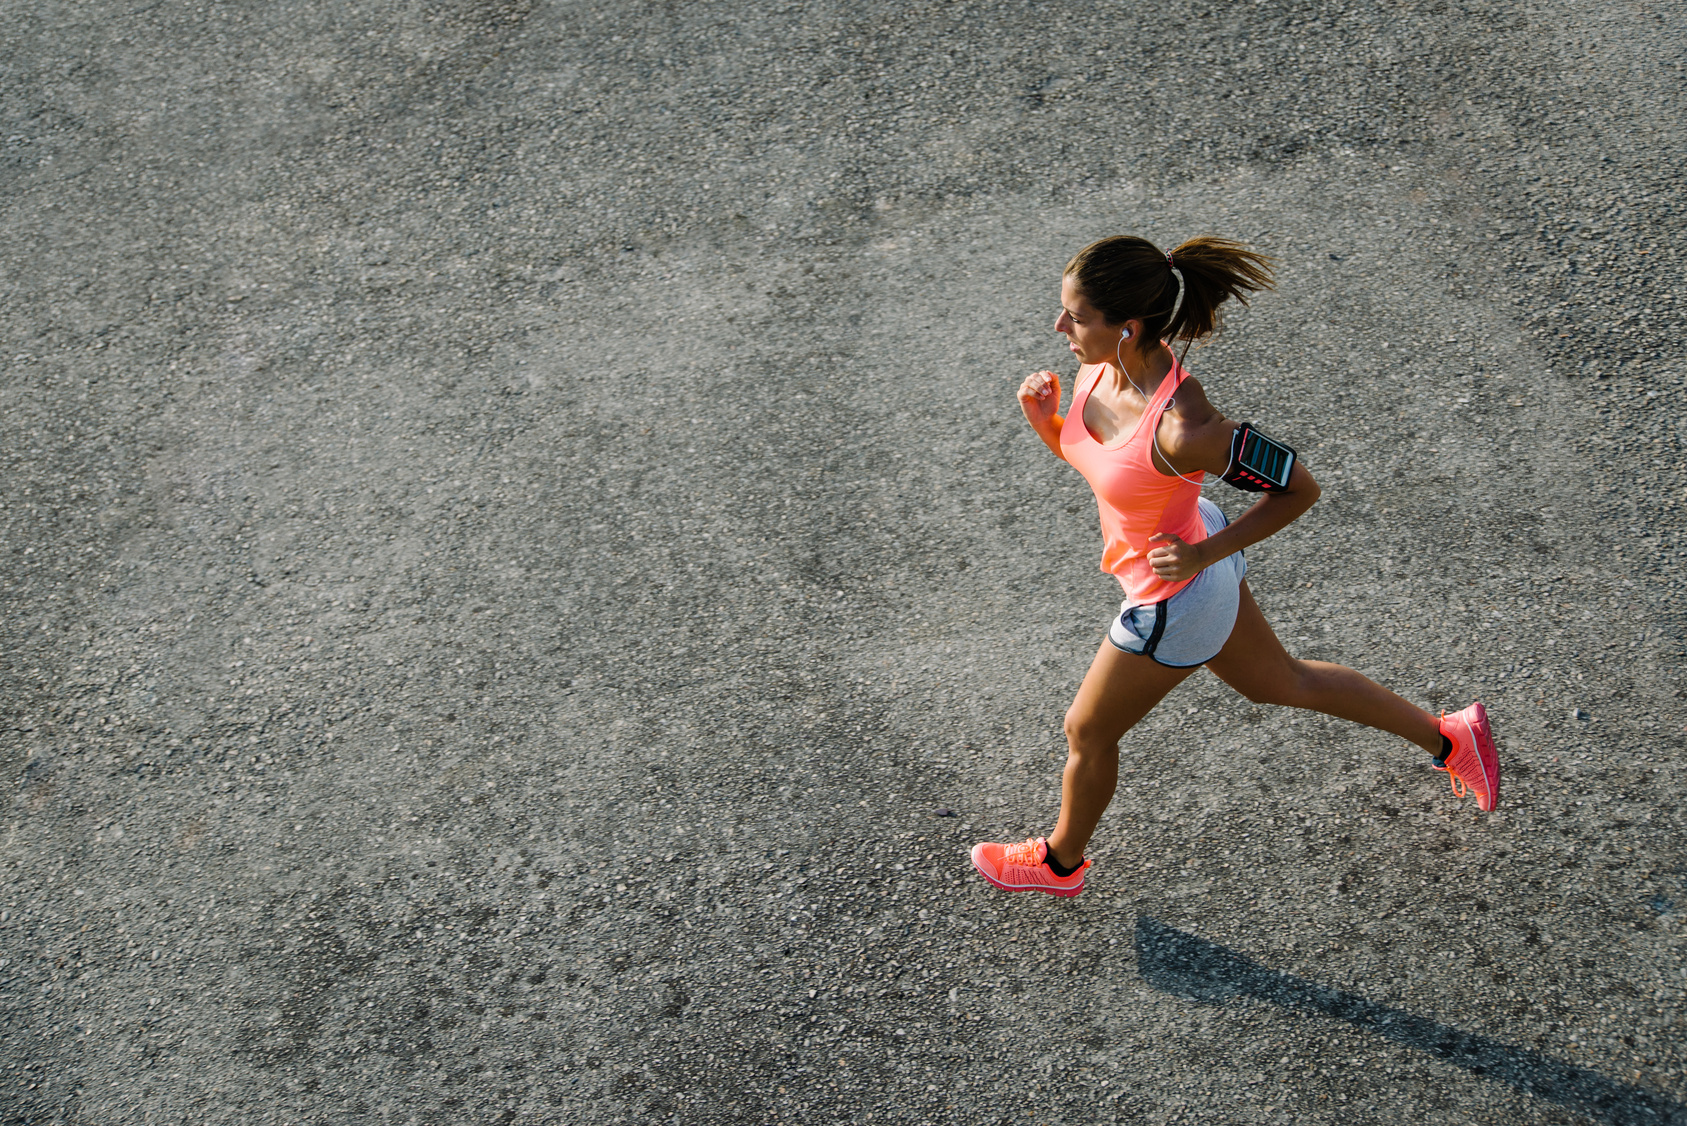
Surveys show that incontinence affects twice as many women as men. This may be blamed on hormonal changes and delivery history. At least one in three female runners over 30 may experience bladder leaks while running, research reports.

Why You Pee When Running

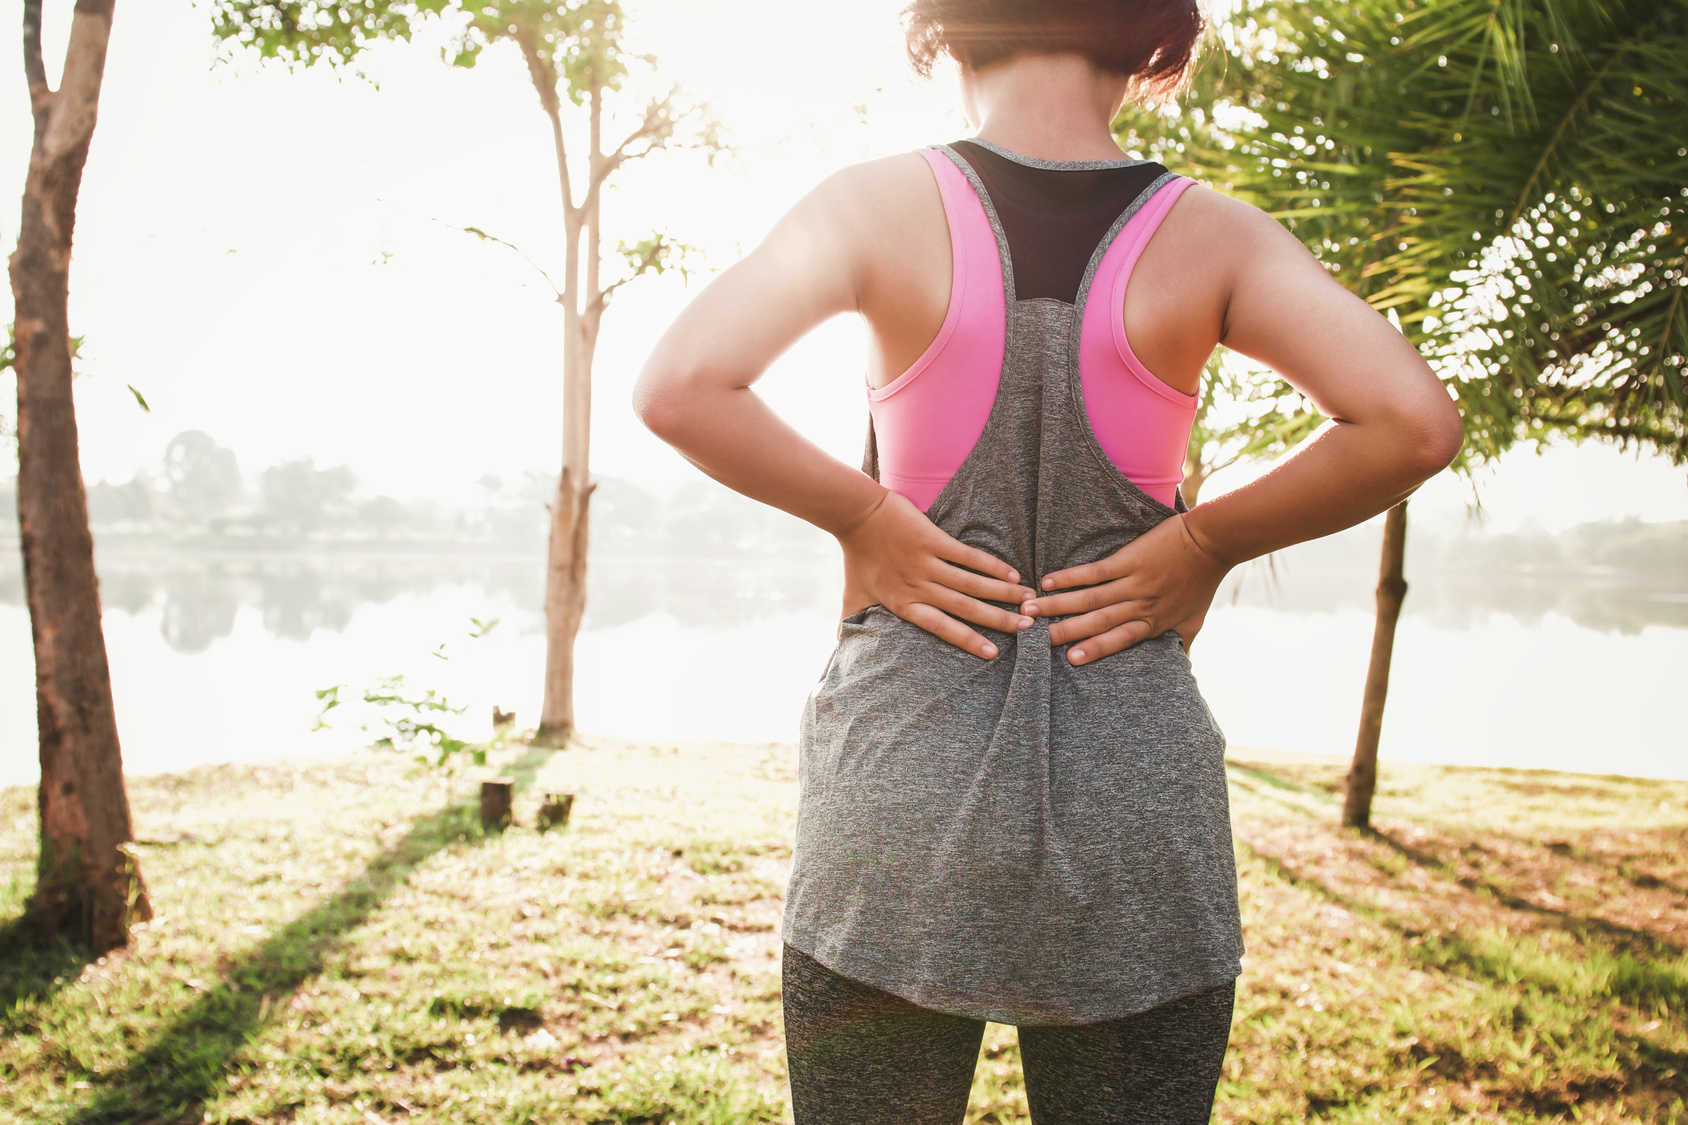
In most cases, you’ll experience leakage while running because you’re placing extra pressure on your bladder or pelvic floor muscles. Virtually all types of exercises, such as running, jumping, cycling, and weight lifting, put extra pressure that causes leakage.

No one is immune.

You may also experience leakage when coughing or sneezing. Surveys show that around 1 in 3 women sometimes suffer from SUI. The most common reason for SUI is the natural decline in pelvic floor muscle strength that comes with age.

Simply put, stress incontinence happens when the pressure on the bladder surpasses your internal capacity while running and exercising. In female runners, running puts vertical pressure on the perineum thanks to gravity, which can result in leakage.

The Risk Factors For Urinary Stress Incontinence

The following increases your risks of SUI:

  • Age, especially in people over 65 years old.
  • Pregnancy and childbirth procedures are often associated with the weakening of the perineum, which causes SUI.
  • A higher body mass index—the more overweight you’re, the greater your risk of developing SUI.
  • High impact activity
  • Weak pelvic floor muscles
  • Having a history of bladder conditions


It is normal to Pee Yourself While Running

Though it’s not normal, it’s more common than you think. Surveys say that 25 million adult Americans are dealing with urinatory incontinence.

So if you’re experiencing some urine leakage while running, know you’re not alone. Instead, you’re among a large percentage who have the same problem.

Again, don’t take my word for it. This survey has revealed that roughly half of female runners experience incontinence while running.

What’s more?

Most of the women in the survey had never given birth. This means they had no pelvic floor damage because of pregnancy or childbirth.

The Main Categories and Causes

Urinary incontinence is split into three main categories: Stress Urinary Incontinence (or SUI), Urgency Urinary Incontinence (UUI), and Urinary Overflow incontinence (OUI).

Let’s break them down.

Stress Urinary Incontinence

SUI, for short, is the most common type of incontinence among runners—and the topic of today’s post. This stress has nothing to do with the emotional anxiety you experience when fighting with your partner or preparing for your first marathon.

In this case, the stress stems from intra-abdominal pressure, forcing urine to leak out. This is often triggered by sneezing, couching, jumping, and running.

Urge Incontinence

Often referred to as overactive bladder, this happens when your bladder muscles squeeze incorrectly or lose the ability to relax. This often happens before you can get to the toilet.

Most common in the elderly, urge incontinence may indicate an overactive bladder, a tract infection from the imbalance passage, or prostate problems.

Overflow Incontinence

Overflow incontinence is having the urge to urinate but only releasing a small amount.

Because the bladder isn’t emptying fully, it leaks urine later. This is usually caused by something blocking the urethra, which causes urine build-up in the bladder.

How To Prevent and Stop Urine Leakage While Running

Now that you know why you’re leaking urine while running, what can you do?

The following.

Strengthen Your Pelvic Floor

The ideal way to limit urinary incontinence in runners is to strengthen the pelvic floor muscles, the sheet of muscles that supports the bladder and bowel.

When this sheet of muscle weakens, you may experience urine leakage whenever stress or strain is placed on it, especially when running.

Kegel exercises might help you, in which you consciously engage, then loosen the muscles that regulate urine flow. This help strengthen your pelvic floor, rectum, sphincter, bladder, and small intestine.

Don’t take my word for it. Research has reported that subjects who performed pelvic floor muscle training regularly were much more likely to improve their leaking than those who didn’t get training.

To locate your pelvic floor muscle, stop urinating in midstream.

If you can do that, you’ve got the right muscles. Here’s how to perform Kegel exercises:

  1. Squeeze the muscle you use to stop urinating midstream.
  2. Hold the squeeze for 6 to 8 seconds, then rest for 10 seconds.
  3. Perform three to four sets daily. And that’s it.

Repeat the movement 12 to 16 times in a row—and remember to do the exercise daily.

Be Prepared

While investing time in strengthening your pelvic floor is a step in the right direction, other measures can help you get back to running comfortably.

Padding is one of them.

Many over-the-counter products limit leaks before they happen. These often consist of small, soft foam patches that gently attach over the urethra to limit leaks while running.

As a rule, use a pad designed for bladder leakage instead of menstruating. According to my research, incontinence pads and sanitary pads are different things. Menstrual pads are designed for that purpose, and since they’re primarily cottonwood based, they don’t mesh well with liquid.

A wide range of incontinence products is also available, and you choose products designed to offer maximum comfort and discretion. These are also designed for runners and people with a more active lifestyle. You can also go for stretchy incontinence pants that provide freedom of movement.

You should also be prepared, especially on long runs. Bring wet wipes or tissue and spray stored in a Ziploc bag in case of an emergency.

Keep a Diary

Use a diary to keep track of your bladder habits. This should help you determine when it’s best to hit the bathroom to minimize leaks while running.

Keeping an accurate and thorough diary of your bladder weakness will allow your doctor to gain insight into the severity of your condition and enable them to develop a bladder training program specifically for you.

Try to keep your diary for at least a week before you see your doctor, then take it with you to your appointment. Your bladder diary should include a table with the following 7 rows : Time Urinated, Toilet, Leakage, Product or Clothing, Activity, Flui Intake/Output.

opic Overview

Keep a daily diary of all liquids taken in and all urine released, whether voluntary or involuntary. Your health professional may also call this a voiding log, bladder record, frequency-volume chart, incontinence chart, or voiding diary. The diary is usually kept for 3 to 4 days.

Record in your diary:

  • The time and amount of each urination.
  • The conditions under which urine release occurred, such as voluntary urination in the toilet, involuntary urine release, or leakage due to sneezing, laughing, or physical exertion.
  • The amounts and types of all liquids consumed. This includes frozen liquid items such as ice cream and frozen fruit juice bars.
  • Whether the liquid consumed contained caffeine (if your health professional instructs you to specify this information).

Based on the results of your bladder diary, your doctor or continence advisor have detailed insight into the severity of your bladder weakness and be in a better position to develop a bladder training program that’s right for you.

Instructions for Bladder Diary

  • Make at least seven copies of the blank bladder diary form so that you can keep the diary for a week.
  • Record the date and time of day when you urinated in the toilet or have light bladder leakage (LBL).
  • Note your health and general wellbeing, if applicable – Cold, hayfever, PMT etc
  • Record (yes/no) that you urinated in the toilet in the “Toilet” column.
  • Indicate the degree of leakage (none/damp/wet) in the “Leakage” column.
  • Indicate if you changed your absorbent product or had to change your clothing.
  • Note the activity you were undertaking at the time of any leakage – Driving, exercising, coughing, working, relaxing etc
  • Measuring the amount you drank or urinated may help the doctor or nurse assess your condition. If possible, record these measurements in the “Fluid Intake” and “Fluid Output” columns.

Also, keep track of your diuretic intake, like coffee.

Have Enough Water

Although I won’t recommend not drinking water before a run, I’d urge you not to drink too much fluid before you head out. Make sure you have enough, but not too much.

Bladder Training

As the name implies, bladder training is a plan that involves urinating on a schedule. The objective is to slow the amount of liquid you can hold comfortably.

Bladder training has often been used as a treatment for an overactive bladder. This method can be used alone or with medications and other interventions (some of which I’ll discuss in the following paragraphs).

Bladder training can help improve your stress incontinence symptoms by increasing the length of times your body can hold urine. This method is a low-cost, low-risk, and convenient way that doesn’t inherently require the guidance of a professional.

What’s more?

It’s simple. The program involves peeing on a set schedule to increase the time between restroom uses.

To begin bladder training, hold your pee for five minutes when you feel the urge to use a restroom. Then, slowly increase the time by roughly three to five minutes. Of course, this may feel challenging at first, but sooner or later, you’ll improve your SUI and make fewer trips to the bathroom.

Empty Your Bladder

This may seem redundant, but it’s a step many runners fail to take.

After all, a bursting bladder is more likely to leak than an empty one.

Exercising with a full bladder may also make you feel uncomfortable. It can even cause UT stone, according to research.

As a rule, stop by the bathroom before heading out and completely clear your bladder.

I’d suggest you do a double-void—urinate, wait for a couple of minutes, then urinate again. This ensures you got nothing left in the”tank.”

Plan Your Toilet Stops

As usual, planning is essential.

In case you’re running for a long distance, make sure to plan your route around places where you can stop for a restroom. For example, have a route that passes convenience stores with public bathrooms where you can easily pop in if you need to pee.

You can also use an app like SitOrSquat that shows you where the restrooms are along a pre-planned route.

Remember to bring some change with you, as some service stations may require them to use the restroom.

Breathe Properly

Another thing you can do to better manage your toilet stop is to pay attention to how you breathe. Though you might not see the connection, how you breathe while running can impact your pelvic floor muscles.

Breathing is crucial for limiting pressure on the pelvic floor while running.

On the inhale, the muscles of your pelvic floor are pushed downward, and on the exhale, these muscles draw upward.

If you’re breathing inefficiently while running, your pelvic flood muscles might be impaired, weakening them. This, in turn, may contribute to SUI.

To breathe correctly while running, ensure you’re breathing deeply in a relaxed and synchronized manner.

Did you know that diaphragmatic breathing can help with that “gotta go” anxiety feeling that accompanies urinary urgency and incontinence? About 40% of women in the United States experience urinary urgency, the feeling of having to urinate right now, or urinary frequency, having to pee too often. Many also know the angst that accompanies wondering if we’ll make it to the bathroom in time. These are real worries associated with bladder health and create symptoms that affect the quality of people’s lives. In fact, bladder symptoms have been associated with conditions such as anxiety and depression.

Bladder angst has been substantiated in the scientific community. Recent research identifies the influence of stress and psycho-social factors on  the development or exacerbation of bladder symptoms. A study of chronic psychological stress also shows that animals placed in stressful conditions experienced more bladder urgency, frequency and pain.

So what can be done to alleviate symptoms? Breathing!

Behavioral training has been used for overactive bladder syndrome (defined as frequent urination with or without urine leakage) and bladder pain symptoms. This technique focuses on improving voluntary control over bladder symptoms. One important area of control is using the breath. Breath control can be used as a “suppression” technique to gain control over the bladder symptoms of urgency and/or frequency.

There are actually several ways to breathe, but most of us aren’t conscious of the way we breathe, or how it may affect our bladders. Breathing into the belly takes thought and some practice to be tension free and expansive. Belly breathing is known as diaphragm breathing, and it helps decrease stress and anxiety associated with overactive bladder or painful bladder syndromes. Typically, when people are anxious they tend to take rapid, shallow breaths from the chest, and reversing this with belly breathing improves symptoms.

Tension free diaphragmatic breathing affects the autonomic nervous system which works to regulate bodily functions such as the heart rate, respiratory rate, and urination. In addition to reduced urinary urges, diaphragmatic breathing helps with a whole host of other stress-related symptoms and contributes to less angst all around.

Please enjoy and share the free download on how to perform tension free diaphragmatic breathing. Your bladder will thank you.

Wear Black Pants

If you don’t mind sogging yourself but prefer to keep it away from other people, consider wearing black running shorts, leggings, or pants. This simply trick can, at the very least, help you prevent any embarrassing scenarios.

To go the extra mile, consider getting loose-fitting clothing to hide any extra protection you might use to stop leakage while running.

Consult Your Doctor

Research estimates that around d60 percent of people with SUI wait roughly a year or longer before consulting a doctor about stress incontinence.

As a rule, consult a doctor to determine the right treatment and plan for you. The rest is just details. Remember that you might want to use stress incontinence as an excuse to give up on running. However, remember that exercise overall may help your incontinence problem long-term by strengthening pelvic floor muscles.

Depending on the severity of your incontinence and what you can cope with, your physician may suggest any of the following treatment options:

·       Medication. This can help your bladder retain more, improve your ability to empty it, and reduce urgency.

·       A Botox injection into the lining of the bladder to limit the release of chemicals that trigger muscle contractions.

·       Surgery.

Consider Surgery

Most treatment options for SUI are un-invasive and do not involve surgery, but in some cases, non-invasive intervention might not be enough.

The type of surgery you’ll need will depend on the severity of your condition and how much you can handle. Overall most physicians will only recommend surgery for severe conditions.

The two most common types of surgery to help with stress incontinence are tension-free vaginal tape and burch colposuspension.

Other procedures, used less often, include:

·       Sling procedure

·       Bulking agents

·       Anterior vaginal repair

·       Artificial sphincters

Conclusion

There you have it! You have several options for managing and preventing leakage while running. Try following some of the above strategies, and don’t let stress incontinence keep you from logging the miles.


Heel Pain From Running – Causes, Treatment & Prevention

heel pain from running

Would you like to learn how to swiftly manage and stop heel pain from running?

Then you’ve come to the right place.

Heel pain is one of the most common complaints among runners of different fitness levels and backgrounds. These injuries are usually the result of overuse, especially when a sudden change in load level or a biomechanical overload occurs.

Heel pain from running can be annoying, nagging, and troublesome thanks to the complex structure of muscles, tendons, ligaments, and nerves surrounding the area.

This is especially true if you don’t know what’s causing it.

What’s more?

Running through heel pain can lead to further damage and injury, so it’s key to recognize and determine the underlying causes of the aping before resuming training.

In this article, I’ll break down the most likely causes of heel pain from running and provide some treatment and prevention tips for fixing it.

That’s where today’s post comes in handy.

  • What is heel pain from running
  • What causes heel pain after running
  • How to treat heel pain in runners
  • How to prevent heel pain from running
  • And so much more.

By the end of this post, we will understand what heel pain in runners is all about and what to do when treating and preventing it.

What is Heel Pain in Runners

If you’re suffering from heel pain while running, know that there are many measures you can take soothe what’s ailing you.

All runners are prone to heel pain, but some elements make you more likely to experience heel pain after running. Heel pain from running can manifest as a sharp pain in the back of the heel or within the arch of the foot.

Overall, most cases of heel pain in runners are blamed for plantar fasciitis, but their also other conditions that could cause said pain which I’ll look at below.

The Anatomy 

Running takes a toll on your feet, especially your heels, as they are a huge burnt of that force.

Time for anatomy 101.

Here’s the truth.

The human foot is incredibly complex and houses around 25 percent of the bones in the body. In addition, it contains over 30 joints and 100s of ligaments, tendons, and muscles.

The heel bone originates in the Achilles tendon, which attaches your calf to your heel. The anatomy of your fete determines the arches of the feet.

The foot also has three large bones—navicular, cuboid, and cuneiform—found at the balls of the feet.

As you can tell, the toes are also a key anatomical feature of the feet. The toes are made of metatarsals and phalanges. Your muscles, tendons, and ligaments connect these bones to support your body and optimize movement.

As one unit, the arch of the foot and the heel distributes the stresses place dup your foot while walking, run, jump, etc.

Why Does My Heel Hurt When I Run?

There are more than a few reasons your heel might hurt during or after running. You may suffer heel pain if you overuse or damage these structures. It can range from minor pain to a debilitating injury.

The stress placed upon your foot while logging the miles is around 3 to 5 times your body weight. This impact, over the miles, can damage one (or many of) the structure(s) of the foot and lead to pain.

Some cases of heel pain can be so severe that home treatment won’t ease your pain; therefore, you’ll need a doctor to diagnose your case and prescribe treatment options.

Can You Run With Heel Pain?

The answer is it depends. In cases where you don’t have serious pain, nor does running make it worse, you can continue to run.

It’s usually not a good idea to run with severe heel pain. Pushing through can aggravate your symptoms and result in additional injury. In addition, heel pain can become a nagging issue if you’re carless early on.

If you still want to stay active, cross-train by doing low-impact exercises like strength training and swimming.

Once your pain has faded, you can slowly resume your training—as long as you do it slowly and incrementally.

Begin with shorter distances and slowly increase your mileage/intensity over time. This will grant your body enough time to adapt and limit re-injury risk, which is key for optimal training and health.

Causes of Heel Pain From Running

Heel pain from running can be blamed on a few conditions, such as muscular or structural imbalances, plantar fasciitis, improper gait pattern, or even ill-fitting footwear. So yes, you must consider all of this for a thorough diagnosis.

To get an accurate diagnosis, I’d recommend consulting a doctor. They can perform an exhaustive examination to determine the exact cause of your running-induced heel pain. They’ll go through your running experience and history, injury history, range of motion in your lower limbs, running gait analysis, and imaging techniques, such as ultrasound or X-ray imaging.

It’s often the case that a few variables combine to cause discomfort, pain, and other symptoms. For example, you might be more prone to heel pain from running if you’re overweight or have an injury history that impacts your movement and alignment patterns.

Let’s briefly discuss a few of the causes and injuries can affect your heel and cause pain

Plantar Fasciitis

The plantar fascia is a thick and flat band of tissue that stretches along the base of the foot, connecting the heel bone to the toes.

Inflammation of this band of connective tissues on the bottom of the foot is what’s known as plantar fasciitis.

By far, the most common cause of heel pain in runners. This injury is so common in running that it is often referred to as “runner’s heel.”

Achilles Tendonitis

Another common overuse injury that causes heel pain in runners is Achilles Tendonitis.

The Achilles tendon is a fibrous cord that connects the back of the calf muscles to the heel bone.

When dealing with Achilles Tendonitis, this fibrous cord gets damaged and inflamed, especially where the tendon connects to the back of the heel.

Heel Spurs

Heel spurs refer to abnormal bony enlargement that develops around the heel bone where the tendon joins it.

Also known as osteophytes or calcaneal spurs, a heel spur is a bony outgrowth of the heel bone. Although rarely painful, heel spurs can result in some discomfort roughly 5 percent of the time.

This causes damage to the tendon and results in pain when rubbing against shoes.

Occasionally, heel spurs are caused by excessive strain on the foot muscles and ligaments from walking, running, and jumping. In addition, wearing ill-fitted shoes can also lead to heel spurs.

The hallmark of a heel spur is heel swelling and pain at the front of the heel.

Though the condition may not cause pain by itself, it can result in inflammation of the surrounding tissues, causing pain.

Remember that heel spurs have symptoms similar to plantar fasciitis, so they’re often misdiagnosed.

Bursitis

If you feel pain in the center or the back of your heel where the the Achilles tendon inserts into the heel bone, you might be dealing with bursitis.

Bursitis, as the name implies, is an inflammation of the bursae, fluid-filled sacs between your heel bone and Achilles tendon. The bursa protect your bones form sliding or rubbing against muscles, tendons, or skin. They typically act as a lubricant and cushion between your muscles or tendons sliding over the bone.

This condition can impact your ability to move your ankle or foot. The pain is often worse in the center of the back of the heel at the insertion point of the Achilles tendon into the heel.

The overuse of the bursa can cause inflammation, which usually cause shooting or sharp pain, redness or swelling in the affected area.

Heel Fat Pad Syndrome

The heel fat pad is found on the underside of the heel bone, which functions as a cushion for the calcaneus. Excessive pressure on this fat pad while running can result in swelling and pain in the heel. This causes a “thinning” of the fat pad on the heel, leading to heel fat pad syndrome.

You’ll experience most of the pain in the central aspect of the plantar surface of the heel bone. A serious heel fat pad can make walking, running, or performing any weight-bearing movement extremely painful. This condition is also called heel fat pad atrophy or plantar fat pad syndrome.

Structural Problems

Anatomical deficiencies in the foot, especially when combined with improper footwear, bad technique, or overuse, can cause heel pain during and/or after running.

These imbalances can cause—or contribute—to muscle imbalances that strain one or more tendons, leading to irritation and pain over the long run.

For example, if you have high arches, most of the running’s impact might be on the top of the arch.

This can cause excess strain on the plantar fascia.

Additional Resource – Here’s your guide to Anterior Tibial Tendonitis 

Other Causes of Heel Pain In Runners

As far as I can tell, runners’ most common heel pain causes are Plantar fasciitis and Achilles Tendinitis.

Here are more factors that contribute to the onset of heel pain:

  • Being overweight or obese
  • Poor gait mechanics
  • Tight calf muscles that limit the proper range of motion in the ankle joint
  • Stress fractures
  • Nerve irritation
  • Arthritis

Additional resource – Common cause of lower leg pain while running

Heel Pain Risk Factors in Runners

You’re prone to running-induced heel pain if you:

  • Have super tight calves
  • Run on a hard surface
  • Running in ill-fitting or worn-out shoes
  • Increase your training load too fast
  • Are obese
  • Have high arches or flat feet

How To Treat Heel Pain From Running

Home treatment works best if you address the symptoms early, so start managing your pain as soon as you feel ankle pain during or after running.

Here are the steps you need to take to reduce pain, stress, and inflammation.

Stop Running

Your first step should be to stop training and give the affected limb enough rest.

As a rule, rest from running and other weight-bearing movements that cause pain.

Resume training only when your symptoms fade.

To soothe pain and improve your flexibility, perform gentle foot stretches three times daily for at least five minutes each session.

You can turn a temporary annoyance into a chronic condition by skipping rest. Conversely, scaling back on training or stopping altogether can help soothe your pain, inflammation, and stress.

heel pain while running

Ice Therapy

Cold therapy is a convenient and easy way to relieve heel pain by limiting inflammation in the affected area.

Easy.

Put a sports water bottle in the freezer, then roll your arch over it for 15 to 20 minutes every morning.

Try Out Inserts

If shelling money on a new pair of shoes isn’t within reach,  try protecting your feet from additional damage by wearing a set of orthotic inserts.

Also known as insoles or orthotics, inserts can provide extra support and cushion to help soothe your pain and prevent further damage.

Insoles fit inside your running shoes and function as a shock absorber between the base of the feet and the shoe’s base. These inserts may help improve your stability, correct muscle imbalances, and prevent your foot from moving excessively or incorrectly.

You can get over-the-counter (OTC) inserts or have them specifically made for you.

It all depends on your needs and your budget.

Night Splints

If plantar fasciitis is the cause of your heel pain from running. Then try a night splint. This should help keep the foot flexed, which stops the plantar fascia from shortening (the reason for pain on that first step in the morning).

Injections

If pain refuses to fade despite the home treatment, an injection into the bottom of your foot can help to soothe inflammation and pain.

What’s more?

Research has suggested that Botox injection for heel pain, for example, plantar fasciitis, might be even more effective than corticosteroid injections but consult your doctor first about your options.

Additional resource – Knee brace for runners

Always Have Your Shoes On

Avoid going barefoot to prevent further irritation and stress to your heel, especially when recovering from heel pain.

Most experts recommend wearing cushioning footwear for up to 6 weeks.

This is how long it can take for soft tissue injuries to heal.

Have Some Drugs

In cases of stubborn pain, consider taking nonsteroidal anti-inflammatory drugs (NSAIDs), such as naproxen and ibuprofen.

Feel free to experiment with natural pain relievers such as turmeric, cloves, and fish oil supplements.

Additional Resource – Your guide to runners itch

Try Shock Wave Therapy

If your heel pain refuses to fade, I urge you to consult a doctor about trying shock wave therapy.

This non-invasive procedure involves a probe that emits a burst of high-energy sound waves into the affected tissues. This tells the brain to start repairing the affected tissues. This, in turn, can sooth pain almost immediately.

Again don’t take my word for it.

This research has found that a single session of shock wave therapy helped with plantar fasciitis treatment and has helped with soothing pain over the long term.

Stretching

Your doctor or podiatrist will prescribe the most appropriate stretches for you to perform as a part of your treatment plan.

You can stretch your calf a few times throughout the day.

I’d recommend using a towel or belt to stretch your calf muscles. Do this first thing in the morning before you get out of bed for 45 to 60 seconds.

Standing Calf Stretch

https://www.youtube.com/watch?v=HSxnv6s-dAo

Rolling Stretch

Foot Flexes

Marble Pickups

Just be careful. Aggressive stretching may further irritate or damage injured tissues, so it’s always best to get your doctor’s green light before stretching.

Additional Resource – How To Prevent Ankle Pain For Runners

Stay Active

Consistent physical activity is the ideal natural anti-inflammatory measure you can take, so keep moving even if you find yourself injured.

All in all, choose exercises that cause no to minimum pain in the affected limb.

You’re doing it right as long as it’s a workout routine you love, and it’s not making your symptoms worse.

You have many options, such as pool running, elliptical machines, yoga, cycling, and other low-impact exercises.

It’s really up to you.

Patience is the most important thing to remember when recovering from heel pain.

The rest is just details, as the saying goes.

Additional Resource – Here’s your guide to calf pain while running

When To See a Doctor For Heel Pain

Mild heel pain from running can be treated with home treatments and preventive measures.

Initially, when you have heel pain from running, your first reaction is to wait and see if it improves. But if the pain lingers or worsens, it’s time to consult a doctor.

Most runners may dislike consulting with a physician every time something happens. After all, pain and injury are unavoidable if you run often and hard. However, pain is your body’s way of telling you something is wrong.

Here’s the truth

If your heel pain from runners worsens despite resting and applying home treatment, book an appointment with a doctor.

You might have injured one of the structures within your foot and ankle that need immediate medical attention.

Red flags that it might be time to see a physician include:

  • Weakness
  • Bruising
  • Heel pain even while resting
  • Fever
  • Inability to wear bear
  • Tingling
  • Limited range of motion in the affected limb
  • Numbness
  • Intolerable pain
  • Severe swelling
  • Heel pain accompanied by numbness or fever

Standard Treatments

To treat your heel pain, your doctor will assess your lower limb and check your medical history. They might also perform X-rays and other imaging modalities. This should help them tell which type of heel pain you suffer.

In some cases, especially if the pain didn’t fade with home treatments, your heel pain might be blamed on underlying medical conditions such as arthritis or diabetes.

Depending on what’s ailing, your doctor may offer different treatment options, including:

  • Physical therapy
  • Orthopedic shoes
  • Athletic wrap
  • Injections such as cortisone
  • Wound care
  • Shockwave therapy

Heel pain from running – The Conclusion

There you have it!

The above tips cover some of the best guidelines for treating and preventing heel pain from running.

Please feel free to leave your comments and questions in the section below.

In the meantime, thank you for dropping by.

Keep Running Strong

David D.

Intermittent Fasting for Runners – The Complete Guide

intermittent fasting and running

Running and intermittent fasting can mesh well if you do it right.

Today, I will share with you all you need to know about this practice, along with a few practical diet and training tips to help you proceed with this method without fail.

In this article, I’ll dive into the following:

  • What is intermittent fasting
  • The benefits of intermittent fasting for runners
  • The dangers and limits of intermittent fasting for runners
  • Can you run while intermittent fasting
  • And so much more

Let’s get in.

Intermittent Fasting – The Definition

Intermittent fasting consists of fasting and eating over a defined period.  It’s an eating method that cycles between fasting—calorie restriction—and normal eating during a specific period.

Intermittent fasting limits how much food eats for a given period, followed by an interval of normal eating known as the feeding window.

You’ll be fasting –not eating—for a period ranging from 16, 20, to even 36 hours, depending on your chosen IF method.

Intermittent fasting is not new. It has been practiced for millennia and used by many religions—mainly Judaism and Islam— for healing and spiritual enlightenment.

These belief doctrines regard fasting as a powerful healing method that allows the human body to take time out from the food toxins present in our bodies and as a means for reaching higher spiritual existence.

Intermittent Fasting and Running  – How To get Started

Now that you know a thing or two about intermittent fasting and how it can help (or hurt) your running performance, let’s dive into how to make the most out of it.

Sounds great

Let’s get started.

Don’t Eat Crap

Just because you are fasting doesn’t mean you can eat whatever you want during the feeding window.

That’s a common mistake.

People who fast are much more likely to binge and reach for high-calorie foods when they eat again.

There are many various ways to start intermittent fasting.

The method may differ in the number of fast times and calorie allowances.

People have different needs; therefore, different styles will suit them and help them get the most out of practice.

There are many ways to start intermittent fasting.

Just like any other health program, how you get started hinges on your fitness goals, workout routine, physiology, genes, and lifestyle—to name a few.

Break The Fast Right

Once it’s time to break the fast, go for a meal with plenty of complex carbs and proteins.

In other words, stick to healthy food choices.

Or it’s a no-deal.

Low Intensity

If this is your first time doing intermittent fasting, keep your runs at an easy pace, around 3 to 5 out of 10. When you stick to this pace, you’re mainly burning off fat as energy instead of glycogen will be depleted in a fasted state.

I’d recommend the Maffetone method (which also works great if you’re in the base building phase of a training cycle).

You might risk hitting the wall if you try to push the pace. You should never try your run your hardest while starving your body of energy. You won’t get that far.

Run Short

Another thing you can do is limit your training duration. For example, you don’t want to run for over 90 minutes in a fasted state.

As a rule, increase your running duration as you get more comfortable training in a fasted state. This, believe me, doesn’t happen overnight.

Feeling weak or dizzy in the middle of a run? Then either slow down or refuel with carbs and protein to give your body the energy boost it needs. A snack should help.

Choose The Right Time

I’d also recommend that you schedule your runs and workouts while fueling.

Running first thing in the morning in a fasted state? Then refuel the moment you’re done running. Refueling immediately helps you avoid muscle waste and speeds up recovery. That’s a good thing if you ask me.

Supplement Just In Case

During intense training days—if you have any speedwork or long run scheduled—take a supplement, such as BCAA.

Here are a few recommended dosages:

5 g of BCAAs before your run

5 to 10 g of BCAAs during long running sessions, and

10 to 15 of BCAAs immediately following a hard run.

Fasting Protocols For Runners

There are many ways to approach intermittent fasting.

Your chosen method depends mostly on your fitness goals, workout schedule, physiology, personal preference, lifestyle conditions, and other factors.

Here are the main protocols.

  1. The Periodic Fast

If you’ve never tried fasting before, then the periodic fast should be your trial fast—Your opportunity to take IF for a test drive before committing to anything serious or long-term.

Also, if it’s your first time doing it, write down your thoughts and notes, then use them as a reference for future practice.

The How

This method entails a fast for 24 hours, starting at any time of the day, preferably on a Sunday.

You can start at a specific time, on Saturday at 11 pm, for instance, drink plenty of water, then break your fast on Sunday night.

For the most part, you should not do this method more than once or twice a week.

  1. The Warrior Diet

The Warrior Diet consists of 20 hours of fasting, then a four-hour feeding period, and consuming one healthy meal daily.

This method can help you boost energy levels, shed weight, increase muscle mass, and save money.

The How

During the feeding window, usually, during dinner time, go for one large meal, aiming for roughly 2000 calories (or more, depending on your needs) in one sitting.

For the best results, put the feeding window at the end of the day, as it’s more suitable for family dinners and post-run sessions.

If you have a run or workout on the schedule,  plan it at the end of the fast.

  1. Leangains

The Leangains method was made famous by author Martin Berkham, consisting of a 16-hour fast (from 10 p.m. to 2 p.m. the next day, for instance), followed by an 8-hour eating window.

This method is great to increase muscle gains while shedding fat.

To make the most out of Leangains, skip breakfast daily, then break your fast roughly eight hours after waking up.

During the leangains approach, ensure the bulk of your calories during the post-run window, following a diet high in protein, complex carbohydrates, and some healthy fats, like olive oil and avocados.

The How

For example, on this plan, you’d fast from 9 pm Monday until 1 pm Tuesday.

If you were planning to run, you’d do it on Tuesday afternoon.

  1. Alternate-Day Fasting

This is similar to the last method but involves eating within a 24-hour window followed by 24 hours of true fasting every two-day cycle.

In other words, you simply eat every other day with this method.

According to research by the University of Illinois at Chicago, the Alternate-Day Fasting approach promotes weight loss and decreases the risks of coronary artery diseases.

During the feeding period, you can eat what you want and aim for a broad range of healthy food choices—especially if the 24-hour fast is too much.

The How

This is simple.

All you have to do here is fast one day and eat healthy the next day.

Listen to your body

Ultimately, you are the boss and can decide which approach works best for you.

With that said, to do that, you need to keep in mind that it’s of paramount importance to listen to your body’s signals of pain and discomfort—mainly your hunger signals.

Intermittent Fasting For Runners  – The Conclusion

There you have it! If you ever wanted to try intermittent fasting while running, then today’s post should get you started on the right foot. The rest is just details.

Please feel free to leave your comments and questions in the section below.

In the meantime thank you for dropping by.

Keep training strong.

David D.

How to Save Money With Buying a Treadmill?

buy used treadmills

Everyone loves finding a great deal – and when it comes to buying a treadmill, that’s no different! While you don’t want to sacrifice quality for the sake of saving money, there are still surefire ways to get your hands on brand-name treadmills at discounted prices.

From using coupon codes online or during sales events in-store, all the way down through taking advantage of reward programs from manufacturers and modern fitness trends by investing in used models – these tried methods offer potential shoppers like yourself more bang for their buck without sacrificing stability or comfort.

So if you’re looking for high performance with wallet-friendly savings attached; look no further than discount shopping strategies made convenient just for gym buffs searching out an unbeatable bargain!

#1 Prefer online shopping

Whether you’re looking to tone up, gain endurance or just stay in shape from the comfort of your home, there’s never been a better time to buy a brand-name treadmill. Many online fitness stores now offer big savings – often hundreds of retail prices plus free shipping and tax exemption on some orders. This can result in substantial cost reductions for savvy shoppers! Just be sure that any store you purchase from is reputable with secure ordering systems and an industry-standard money-back guarantee so your investment remains safe no matter what happens.

#2 Opt out of extended warranty

When shopping for a treadmill, don’t be taken in by the marketing ploys of companies offering extended warranties – their original warranty offer is generally enough. Choose one that comes with excellent coverage on frame, parts, and labor/service provided it lasts long enough – no extensions required!

#3 Buy a used treadmill

If you’re looking to save a few extra bucks, purchasing a used treadmill may be an option. Make sure that the make and model of your potential investment is well-researched, as there’s no warranty to protect it from any malfunctions down the road. Additionally, use store prices for reference when bargaining so you don’t overpay! Keep in mind what kind of workout plan best fits your lifestyle before making such an important decision – this way you’ll get maximum value out of every step on your new (or should we say pre-used?) treadmill.

In case the belt need replacement, here’s how.

Replacing A Treadmill Belt

#4 Search abroad

If you need a cheap treadmill, then you can try to order a treadmill from a neighboring region. Quite often in a neighboring country, there is equipment at more affordable prices. All you have to do is install VPN and buy a treadmill from a local Chinese store, for example. Before using it you should know what does a VPN hide to know how to save your money. Even though the shipping cost is high, it can be an order of magnitude cheaper than buying from a local store. Just install VeePN and you can save a lot of money on many products using this shopping scheme.

#5 Reduce workout programs

Looking to save some cash on your next treadmill purchase? Consider a model with only one or two preset workout programs – enough for most people. Not only is it more cost-effective, but you won’t be overpaying for extra features that you don’t need!

#6 Buy directly from the manufacturer

Get a great deal on your treadmill when you purchase directly from its manufacturer! You’ll save not only on markups but also shipping costs, and can even avail of tax exemptions. Plus, make sure to pick one that offers secure ordering plus an unbeatable 30-60 day money-back guarantee – so buying direct will be well worth the investment.

#7 Smaller running belt

Did you know that the size and thickness of your treadmill’s running belt have a huge impact on its performance? Larger, thicker belts require more power from the motor to keep it going as well as generate excess heat. While this won’t be an issue for most hardcore runners, if your primary use is leisurely strolling around then opt for something more comfortable: a standard 20″x 60″. Not only will you get all the benefits of extra comfort but also save those valuable bucks!

#8 Rejection of heart rate straps

Did you know that the size and thickness of your treadmill’s running belt have a huge impact on its performance? Larger, thicker belts require more power from the motor to keep it going as well as generate excess heat. While this won’t be an issue for most hardcore runners, if your primary use is leisurely strolling around then opt for something more comfortable: a standard 20″x 60″. Not only will you get all the benefits of extra comfort but also save those valuable bucks!

#9 Folding feature

If clearing up extra space in your room is not a top priority, going for the non-foldable option could help lower the cost of your treadmill. Folding models do come with a higher price tag, but offer convenience and storage advantages if you need them – so make sure to weigh out which features are most important before making that purchase!

Conclusion

In summary, buying a treadmill doesn’t have to be difficult or expensive. You can find quality models within your budget that provide top-of-the-line features and capabilities. Just remember to take into consideration factors like running space, incline, durability, size, and price before you purchase.

With the right tips, anyone can save money on their investment by shopping around and considering various options so they can get what they need without breaking the bank. And while it may not be fun having to go through all of these steps, with some patience and research it’s certainly possible to find a great treadmill that fits within your budget and gets you back to fitness for less.

Runners Diarrhea – Symptoms, Causes, Treatment & Prevention

runners stomach

Runners diarrhea.

Nature’s gift you didn’t ask for.

Few things can ruin a good run, like the fear of pooping your pants during a run.

To shed some light on this crappy situation (pun intended), I will share the full guide on runners’ diarrhea in today’s post.

By the end, you’ll learn more about:

  • What is Runner’s Diarrhea
  • The process behind Runner’s Diarrhea
  • The causes of Runners Diarrhea
  • Foods to avoid when you have runners trots
  • Is your clothing makes you want to poop your pants?
  • What kind of medication works for the runner’s diarrhea?
  • Imodium for runners’ diarrhea? Does it work?
  • And so much more.

Feel excited?

Let’s get started.

Runners’ Diarrhea Explained

Also known as runners colitis or runners trots, runners’ diarrhea refers to gastrointestinal issues during or following a run. The condition includes a wide range of symptoms: from bloating and nausea to painful cramping, flatulence, and actual loose stools.

For some runners, the urge to defecate might come about mid-run, and for others, it could happen immediately after running as the body is still experiencing the effects of the workout.

Surveys show that over a third of runners experience this.

This condition is also more common among endurance runners and tends to strike women more than men. If you run long distances, you can experience many symptoms during training. Unfortunately, the more miles you log in, the worse these symptoms could become.

Older runners are less likely to get than younger ones.

Some of the warning signs include:

  • Belly cramps
  • Heartburn
  • Bloating
  • Diarrhea
  • Urge to poop
  • Chest pain
  • Vomiting
  • Nausea
  • Bloody stool
  • Not being able to control bowel movements—or fecal incontinence

How Long Do Runners Trots Last?

Typical symptoms of runners’ diarrhea often kick off during your run and may persist in the hours post-run.

As a rule, the bout of diarrhea shouldn’t linger for more than 24 hours.

If you have diarrhea in the middle or cannot control your bowel movements, it might indicate another medical condition (more on later).

You’re Not Alone

Research reports that about y 60 percent of long-distance runners (those who log in 5 miles or more at a given time)  had to take a break during a run for a bowel movement.

Another study published in the British Journal of Sports Medicine claimed that about 30 percent of marathon runners suffer stomach issues during or after a race.

Infamous Incidents

If you’ve ever had to stop mid-run to answer nature’s call, know you’re not alone. Even world-class runners go through it. No one is immune.

Here’re a few infamous examples:

  • During the 2008 Göteborgsvarvethalf marathon, elite runner Mikael McKernan crossed the finish line in 21st place even though his lower body was covered with last night’s dinner.
  • Winner of the 1998 London Marathon, Catherina McKiernan, experienced chronic diarrhea during the race.
  • During the 2016 Summer Olympics, Yohann Diniz led the Men’s 50K walk race, but he fainted a few times due to stomach issues. But he kept going and finished in 8th place, only six minutes behind the winner, Matej Tóth.
  • The 2019 Perm internal Marathon winner, Alexander Novikov, completed the whole race suffering from a bad episode of diarrhea, which stained him with his own excrement.

Symptoms of Runners Diarrhea

Here are the telling signs of runners’ trots.

These can be experienced during or immediately after a run.

  • Nausea
  • Acid reflux
  • Flatulence
  • Cramping
  • Gas
  • Sudden urge to poop

The Causes of Running-Induced Diarrhea

So what’s causing you to poop during a run?

The answer remains unclear as it’s likely multi-factorial.

However, there are several theories about what triggers the runner’s diarrhea.

Let’s explain a few.

The Up & Down Motion

Running’s impact stirs the bowels and jostles the intestines.

This speeds up the flow of food, gas, and stool along the digestive tract, causing a sudden need for a bowel movement.

By the way, this is one of the reasons many doctors recommend regular exercise, especially the one focusing on abdominal work, to chronically constipated patients.

Limited Blood Flow

Often, running-induced diarrhea is caused by limited intestinal blood flow.

This blood gets diverted from the intestines and focuses on the legs and other body parts.

Our GI tract is sensitive. Once the blood flow is limited, the intestinal absorption of nutrients and water reabsorption in the colon will turn bad, causing loose stools.

Of course, don’t take my word for it.

Research reports that intense exercise may limit blood circulation to the colon and small bowels by as much as 80 percent.

Bad Food Choices Pre-Run

Diet is often cited as a leading trigger of runners’ diarrhea, especially when consuming high-fat or high-protein meals before a run.

Dehydration

Dehydration impacts not only your performance but your digestive function too.

Most people assume drinking too much water could contribute to diarrhea, but it’s not the case. Dehydration is a common cause of loose stools because lower blood volume can limit blood flow to the intestine. This, in turn, triggers a diarrhea episode.

In other words, when dehydrated, your intestine’s ability to absorb content dwindles. So they’re left with the only option: flush out the stomach content.

Other Causes

Many factors may contribute to the onset of diarrhea during or after a workout that could be unrelated to running.

These include:

  • Performance-enhancing drugs,
  • Some prescription medications,
  • Anxiety and stress.
  • Bowel issues like irritable bowel syndrome (IBS),
  • Hormonal changes,

What Should I do When I get runner’s Diarrhea?

When you start suffering from runner trots symptoms, your next step should be to locate the nearest restroom and head there as fast as possible. Slowing down may help you manage the urge sensation.

runners trots

How To Prevent Runner’s Trots

Now that you understand runners’ diarrhea, here are some tips for keeping running-induced diarrhea at bay.

You might not like it, but running-induced diarrhea is normal and often not a cause for concern.

Here’s more good news.

You can do many things right now to manage your symptoms and prevent runners’ trots in the future.

Eat The Right Things

The easiest way to manage runners’ trots is to consider your pre-run eating choice. I hate to state the obvious, but some food may trigger gas, nausea, and diarrhea during a run.

Analyze what you mostly eat before heading out, and always steer clear of trigger foods. As a rule, try to avoid anything that could upset your stomach in the hours before a run.

You may be left with nothing but a banana or a whole-wheat toast, but remember that you’re eating for performance, not pleasure. So have your meal once you’re done running.

Caffeine may work as a diuretic for some people, so test it out and see if it’s worth keeping. You should also cut on alcohol, artificial sweeteners, and sugars in the evening before a long morning run.

Be careful with energy gels and supplements that are “designed”’ to provide fast and portable fuel during training.

Unfortunately, most of these are loaded with artificial sweeteners and preservatives that could worsen your symptoms. And you don’t want that.

And most importantly, drink your water. It’s good for you.

So what should you eat?

Food that gets digested fast and doesn’t stress the GI track are ideal choices for what to eat before running. As long as you keep them simple—which means less waste is left over during digestion—the better off you’ll be.

Don’t Eat and Run

Timing is also important, though there’s no one-size-fits-all rule for it.

Generally, avoid eating an hour or two before a run. Space out your runs and meals longer if you’re prone to runners’ trots.

Having a meal two to three hours before a run?

Choose simple carbs and check back the list above.

Stay Well Hydrated

As I explained earlier, dehydration can contribute to loose stools while running.

As a general guideline, Stay well hydrated by drinking enough water. Shoot for at least 16 ounces of liquid roughly 60 to 90 minutes before you run and around 8 ounces of water every 20 to 30 minutes during your run.

During long runs, drink eight ounces of water every 15 to 20 minutes.

Just make sure to avoid warm liquids, as these may speed up the flow of food through the digestive tract.

What’s more?

Remember to keep track of your hydration levels.

Your pee should be a very light yellow.

If It’s dark, drink up.

Poop Before You Run

In an ideal world, you’d want to run just after caring for the nature business.

That way, you’ll ensure you’re running with an empty GI tract.

If you’re running first thing in the morning, give yourself at least 30 minutes to  “clear the pipes” before heading out.

Or simply plan your route the night before.

Use online maps or an app and choose the route with plenty of rest areas or public toilets.

For most runners, that’s 10 to 15 minutes into a run or about a mile.

You should also be prepared for emergencies.

Carry some spare toilet paper or wet wipes in a Ziplock baggie or your pocket, just in case.

Keep Track

Use a diet journal.

Inside it, keep tabs on everything you eat or drink and when it is ingested.

Then look for patterns that may contribute to the onset of the diarrhea episode mid-run, and assess what you did on the day your stomach misbehaved.

This will help you learn more about your unique food sensitivities and also help you find the most efficient ways of fueling your body.

You should also keep track of your bowel movements to schedule your runs immediately after your bowel movements.

Visit The Bathroom

If possible, empty your bowels immediately before a run or race. Consider taking a mild laxative a few hours before if you can.

Planning to race? Then at the very least, make it to the race venue early, so you don’t get stuck behind long lines.

Don’t worry. I’ve written a guide on making yourself poop before a run.

Wait on The Drugs

Avoid taking over-the-counter non-steroidal anti-inflammatory drugs like Aleve, Motrin, and Advice in the 24 hours before a run.

The International Journal of Pharmaceutical Sciences and Research reported that these drugs might cause side effects such as bloating, upset stomach, constipation, gas, and diarrhea.

In other words, if you’re already prone to runners trots, OTC drugs can only make your symptoms worse.

Wear Loose Clothing

Excessively tight clothing around the waist can constrict blood flow to the intestines, worsening diarrhea.

Everything from tight running shorts, compression garments, and running belts can be problematic, especially if you got a lot of content sloshing around your stomach.

This can make you feel you need a bowel movement or even cause diarrhea (and other stomach issues such as heartburn).

See a Doctor

It’s often the case that runners’ trots are a temporary annoyance that fades in a few days. But if you’re prone to it, you’ll want to consult your doctor to determine the cause, especially if you experience any of the following:

  • Suffering from diarrhea even when not running
  • Bloody stools
  • Sudden diarrhea onset
  • Fever
  • severe heart palpitations
  • Abdominal pain
  • acute headache that comes on suddenly
  • persistent diarrhea even after the exercise is over
  • Chronic nausea and ongoing abdominal pain.
  • Appetite change
  • diarrhea that lasts for 24 hours or more
  • fainting or loss of consciousness

If you experience a few of these symptoms, you could be dealing with a serious underlying condition that requires medical attention. Consulting with your doctor can help you better understand your unique situation. Sometimes, you may need medical help flushing out parasites or bacteria from your body.

They might recommend taking diarrhea pills or even undergoing a special examination on you, such endoscopy if the case seems worst. GI problems can recover well with early treatment.

You can also suffer from an underlying medical condition causing your workout trots. These include:

  • Ulcerative colitis
  • Crohn’s disease
  • Microscopic colitis
  • Celiac disease
  • Irritable bowel syndrome
  • Proctitis

Runners Diarrhea – The Conclusion

Runner’s diarrhea is not a welcome guest, whether before, after, or, worst of all, during a run.

Hopefully, with a little experimentation and a lot of paying attention to your body, you can manage your runner’s diarrhea on your own.

Conquer Runner’s Stomach: Expert Tips to Avoid Mid-Run GI Distress

runners stomach

Ever experienced a “Code Brown” situation mid-run?

You know, when your stomach stages a revolt against your running routine? Whether you call it “runner’s trots,” “the runs,” or “workout stomach,” we’ve all been there.

Runner’s stomach can be quite the unpleasant companion on your runs. But fear not! I’m here to share the ultimate guide to help you conquer those GI distress troubles.

In this article, we’re diving deep into the belly of the beast (pun intended), covering everything you need to know:

  • What exactly is a runner’s stomach?
  • How running can turn your tummy into a ticking time bomb.
  • The mechanical culprits behind runners’ diarrhea.
  • Tips and tricks to keep your stomach in check while you chase your running goals.

So, if you’re tired of making unexpected pit stops during your runs, keep reading. We’re about to drop some knowledge bombs to help you stay on course without unwanted detours.

Sounds great?

Let’s get started.

GI Distress When Running Is A Very Common Problem

If you’ve ever experienced the discomfort of GI distress during or after a run, rest assured that it’s a common problem among runners. Research has shown that many of us have faced this issue to varying degrees.

In fact, a study published in the academic journal Current Opinions in Clinical Nutrition and Metabolic Care found that approximately 50 percent of runners encounter GI distress problems during hard runs, especially during long, grueling ones.

And here’s an interesting tidbit: runners are twice as likely to experience GI issues compared to athletes in other endurance sports like swimming or cycling.

If you’re aiming for elite status, beware that GI distress seems to be even more common among top-tier athletes, with its frequency being 1.5 to 3 times higher than recreational runners, according to research published in a journal from Lippincott William and Wilkins

What is GI Distress

GI distress is like a grab bag of stomach-related issues that can strike runners at the most inconvenient times.

Most runners experience symptoms like abdominal cramping, excessive gas, belching, irritable bowel syndrome, indigestion or dyspepsia, vomiting, heartburn, constipation, nausea, diarrhea, and, in extreme cases, even gastrointestinal bleeding.

In other wrods, it’s a smorgasbord of digestive discomfort.

Research has shown that GI distress is one of the top reasons runners drop out or underperform in long-distance races, especially during the grueling half-marathons and marathons.

Why My Stomach Gets Upset From Running?

Running might be a fantastic way to keep your body in shape, but it can be a real troublemaker for your stomach.

The truth is, running is a high-impact sport that doesn’t just challenge your muscles and joints—it also takes a toll on your digestive system. This mechanical pressure can accelerate the movement of food and waste through your GI tract while diverting blood away from your intestines to fuel your hardworking muscles.

So, what does this mean for runners? Well, it makes practically all of us vulnerable to stomach issues. But here’s the silver lining: it’s not a life sentence! There are plenty of things you can do to ease or even avoid a runner’s stomach altogether, from managing your hydration and diet to controlling your running intensity and even calming those pre-run jitters.

Don’t think you’re immune, though—whether you’re male or female, a runner’s stomach doesn’t discriminate. The longer you run, the more likely you are to cross paths with this unwanted companion.

While the exact cause of these stomach woes isn’t fully understood, several factors can increase your risk. It’s crucial to keep an eye on these variables if you’re prone to stomach issues, including eating a meal within two to three hours of running, downing sugary fruit juices before hitting the road, and letting dehydration sneak up on you.

Can you treat or prevent Runners’ Stomachs while running?

Runner’s stomach might not be the most severe running-related issue, but it can certainly make your runs feel miserable. For some runners, chronic gastrointestinal distress can even lead to a reduction in training intensity or cause them to give up running altogether.

Before we dive into how to prevent this condition, it’s crucial to understand just how troublesome high GI (gastrointestinal) issues can be for runners.

How Does GI Distress Happen When Running

When you hit the pavement for a run, your body shifts its focus towards supplying maximum oxygenated blood to your working muscles. In doing so, it diverts blood away from your stomach and intestines, essentially putting digestion on the back burner while your body prioritizes delivering oxygen and nutrients to your muscles.

But that’s not all. The mechanical bouncing associated with running could also play a role in the relatively high occurrence of GI distress among runners, especially when compared to lower-impact sports like swimming or cycling. This theory suggests that the bouncing motion of running can jostle your digestive tract, irritating the GI tract and potentially leading to gastric distress issues..

Causes of GI Distress During A Run

Gastrointestinal (GI) distress during a run can be attributed to a variety of causes and conditions, often stemming from a combination of internal and external factors. These factors can set the stage for GI discomfort. Here’s a breakdown of common external and internal causes:

External Causes:

Consuming a heavy meal too close to your run or eating something that doesn’t agree with your stomach.

Insufficient hydration before or during your run can contribute to GI distress.

Internal Causes:

During exercise, blood flow is redirected away from the digestive tract to supply working muscles, which can hinder digestion.

The physical jostling and bouncing associated with running may irritate the GI tract.

Stress, anxiety, or pre-race nerves can affect digestion.

Pre-existing gastrointestinal issues such as viruses, stomach bugs, ulcers, or other ailments can exacerbate GI distress.

Additional resource –  Prevent Sunburn in runners

Physiological Changes From Running

During exercise, specially intense or prolonged running,  your gut hormone levels are impacted. These changes may affect digestion and lead to symptoms like nausea or changes in appetite.

Running diverts blood flow away from the digestive system and redirects it to the working muscles. This can slow down digestion and affect the absorption of nutrients.

What’s more?

Intense exercise, such as running, can reduce the rate of gut absorption. This can lead to feelings of fullness, bloating, or discomfort.

Lower Esophageal Sphincter Tone:

The lower esophageal sphincter (LES) is a muscular ring that separates the esophagus from the stomach. Running can sometimes weaken the tone of the LES, increasing the risk of gastric reflux or heartburn.

Running can slow down the movement of food from the stomach to the intestines. This delay in gastric emptying can cause feelings of fullness and discomfort.

It’s important to note that these physiological changes are part of the body’s response to intense physical activity, and they can vary from person to person. Some runners may experience minimal GI distress, while others may be more susceptible.

The Impact of Food On Runners Stomach

Consuming foods that are high in fiber, fat, or protein too close to a run can slow down digestion and increase the risk of GI symptoms. Foods that are spicy or contain a lot of spices can also be problematic for some runners.

Drugs & the Digestive Tract

NSAIDs, including ibuprofen, are commonly used to relieve pain and reduce inflammation. However, they can irritate the stomach lining and increase the risk of gastrointestinal issues, such as gastritis or stomach ulcers. Running while taking NSAIDs, especially on an empty stomach, can further exacerbate these risks.

How to Prevent Runner Trots When Running

Proper hydration is your first line of defense against stomach discomfort and unwanted pit stops during your runs. We all recognize the importance of staying hydrated for optimal running performance, but it’s equally crucial for preventing GI distress while running.

A study found that roughly 80 percent of runners who experienced fluid losses of 4 percent or more of their body weight reported suffering from GI distress issues. This suggests a strong link between dehydration and stomach problems in runners.

Several factors contribute to this connection. Dehydration can slow down gastric emptying, making it harder for your stomach to process food and fluids efficiently. Additionally, exposure to heat, especially during the summer, can exacerbate GI distress issues. When it’s hot, your body redirects more blood to the skin to cool down, which can further stress your digestive system.

Here are some hydration tips to help you combat GI distress:

  • Stay hydrated throughout the day, not just before your run. Consistently drinking water ensures you start your run well-hydrated.
  • Don’t wait until you’re thirsty to drink. By the time you feel thirsty, you may already be somewhat dehydrated.
  • Hydrate when you wake up in the morning, especially if you’re running in the early hours. After a night’s sleep, your body can be dehydrated even if you don’t feel thirsty.
  • If your run lasts longer than 45 minutes, consider bringing a water bottle and practicing the “one gulp every mile” strategy, even if you don’t feel an immediate need for fluids..

Additional resource – Prevent Acid Reflux In Runners

Go Easy With the Mileage

Running long and hard training sessions can increase the likelihood of experiencing GI problems, and this is due to several factors, including dehydration, elevated body temperature, increased blood flow to working muscles, and the mechanical impact of running. Essentially, the nature of running, with its repetitive and high-impact movements, makes runners more prone to GI distress.

The good news is that, similar to how your muscles and cardiovascular system adapt to training, your gastrointestinal system can also become more accustomed to the demands of running. Here’s how you can “train” your stomach to handle food more effectively:

  • Experiment with different foods and drinks during your training sessions. Pay attention to how your stomach reacts to various options. This experimentation allows you to find what works best for you.
  • Keep a food journal to track the foods and drinks you consume and their impact on your GI tract. This record will help you identify patterns and pinpoint which items may trigger discomfort.
  • Try different eating plans to see how they affect your stomach. With time and experimentation, you’ll likely discover a winning formula that minimizes GI distress during your runs.

Give It Time

Be Patient with Your Belly

Your stomach deserves some respect, so don’t rush it! Give it the time it needs to process your food, especially after a big meal. Here’s the lowdown:

Therefore, try to schedule your main meal a comfy two to three hours before your run. This gives your stomach the chance to work its magic without feeling rushed.

Need a Quick Fix?

If patience isn’t your strong suit, consider a light pre-run snack about an hour before your workout. Keep it easy on the tummy, though, so you don’t feel like you’ve swallowed a brick.

Everyone’s digestive system dances to its unique beat. So, get curious and experiment! Try different meal timings and foods to discover what your belly loves best. In the end, it’s all about finding your digestive groove for the long haul.

Keep your Diet Simple

Eating a meal loaded with fiber, fat, protein, or sugar bombs right before a run is like inviting GI distress to the party. No thanks!

Especially on those tough training days, opt for a straightforward diet. Look for these winning traits in your pre-run meal: not too huge, low on fiber, low-fat, a touch of protein, and not drowning in sugar.

If you’re gearing up for a marathon or a lengthy endurance mission, sports drinks can be your best bud. They give you the fuel to keep going. But, a word of caution: avoid those with over 10% carb concentration to dodge tummy troubles. Aim for 5% or less to play it safe.

Acidic foods and drinks can stir up trouble for your tummy. Before your run, dodge stuff like alcohol, super strong coffee, milk, eggs, gluten-heavy grains, nuts, and tomatoes. Instead, roll with low-acid champs like bananas, leafy greens, soy, lentils, and more.

Avoid Caffeine

Caffeine is like rocket fuel for your performance. It revs things up and can make you feel unstoppable on the track.

But caffeine is also a stimulant that can kickstart peristalsis—the fancy term for those gut muscles that push food through your digestive system.

If caffeine isn’t your gut’s best friend, swap it for water. Hydration is always a good idea, and it won’t send your stomach on a rollercoaster ride.

Craving that cup of joe?  Have it well before your run. Give your system some time to cozy up with caffeine, so it won’t interrupt your workout.

Additional resource – How to manage heart murmurs

Run Around Bathrooms

For those of us who are a tad more prone to GI distress during runs, planning our routes strategically can be a game-changer. Look for routes that have bathrooms along the way. Knowing you have a safe haven for emergency pit stops can provide tremendous peace of mind.

But, sometimes, emergencies strike when you least expect them. That’s where a little pocket-sized preparation comes in handy. Carry wet wipes or toilet paper with you during your runs, just in case a disaster decides to pay a visit.

And here’s a pro tip for extreme cases: consider having an over-the-counter anti-diarrhea medication like Imodium on hand. It’s like your emergency kit for those unexpected GI issues. But remember, don’t make it a habit without your doctor’s approval.

Manage Stress

According to a study, stress, anxiety, and other mental problems can take a toll on your stomach.

Research has linked these psychological problems with your GI tract’s ability to function optimally and adequately.

So it’s not just what you eat and drink before and during a run. What you think matters as well.

Consider incorporating practices like meditation and yoga into your routine. These activities can help you manage your physical, emotional, and intellectual energies, creating a harmonious balance.

Now, let’s talk about race day stress. Competitions can be nerve-wracking, especially if you’re putting immense pressure on yourself. If you’re racing in a new city, try arriving a few days earlier to acclimate to the unfamiliar surroundings.

Listen to Your Body

Ultimately, your body is the best judge of what works for you. But there’s a catch – you need to be ready to listen. Ignoring your body’s signals won’t get you anywhere.

Let’s face it: what you put into your body matters, affecting both your performance and your stomach’s well-being. So, it’s crucial to cultivate body awareness.

Pay attention to how your body feels before, during, and after a run concerning the foods and beverages you’ve consumed.

Maintain a diary to track your experiences. Note the symptoms and document what you ate or drank on days when GI issues reared their ugly head. This way, you can gradually decode your body’s unique language.

When to Consult A Doctor For Runners Stomach

Experiencing gastrointestinal distress as a runner is a common issue, but it’s crucial to recognize that if you frequently encounter a runner’s stomach, it may not be exclusively related to running. Conditions such as celiac disease and irritable bowel syndrome share similar symptoms with a runner’s stomach and can have diverse underlying causes.

In such cases, it’s advisable to seek guidance from a medical professional. They will conduct an assessment of your symptoms to determine whether they are primarily associated with running or if there might be an alternative diagnosis. Additionally, your doctor may recommend procedures like a colonoscopy to rule out any potential underlying issues.

It’s essential to be vigilant and attentive to certain warning signs that could indicate a more severe ailment, including:

  • Sustained diarrhea lasting more than 24 hours.
  • Sudden and severe headaches with no apparent cause.
  • Pronounced heart palpitations.
  • Presence of mucus or blood in your stool.
  • Persistent and intractable vomiting or nausea.
  • Feeling full more rapidly than usual.
  • Unexplained weight loss.
  • Experiencing loss of consciousness or fainting episodes.

If you experience any of these symptoms, it is crucial to promptly seek medical evaluation to ensure your health and well-being

GI Distress in Runners  – The Conclusion

In conclusion, mitigating the risk of experiencing runners’ stomach requires a proactive approach to your diet, hydration, and training habits. To minimize the likelihood of gastrointestinal distress during your runs, consider the following recommendations:

  • Be mindful of the foods you consume before running and the day prior, avoiding high-fat and high-fiber foods whenever possible
  • Allow ample time for digestion by refraining from running immediately after a meal, akin to swimming.
  • Maintain proper hydration throughout the day, ensuring you carry a water bottle during extended runs, particularly in hot weather conditions.
  • Engage in experimentation with various foods and beverages, maintaining a training journal to monitor their impact on your stomach.
  • Provide your body sufficient time to adapt to increased training intensity and volume.
  • Seek professional guidance from a physician if you have concerns or persistent issues related to gastrointestinal distress during your runs.

By implementing these strategies and staying attuned to your body’s signals, you can work towards a more comfortable and enjoyable running experience, minimizing the risk to runners’ stomach.

The Benefits of Running and Physical Exercise for Poker Players

As in other professions and other habits such as sports, poker is a discipline that requires a great deal of preparation to reach an optimal level as a professional player. The stars of this mental sport are aware that they need to maintain a healthy life in which both mind and body are in a comfort zone. Only in this way can good results be achieved.

How to take care of mind and body when you are a poker player?

Imagine you are playing at an online video poker on a reputable Australian casino, Joe Fortune. The game goes on longer than you would like, and with the fast-paced dynamic of the game, fatigue and demotivation start to set in. Your back and legs start to ache from the time you’ve been sitting down, even though the graphics are immersive, and the gameplay is straightforward and hassle-free. Sometimes, despite the motivation to keep playing, your body and mind revolt, as you find it hard to concentrate on the task.

Finally, it’s time for the river, and at that moment, the dealer turns over that card that can change the course of the game. Your brain is racing, your shoulders tense up, and adrenaline is pumping.

It is at that moment that you must understand the need to take care of yourself and avoid overloading your mind and body when playing poker so as not to damage your mood.

Here are ways to take care of your mind and body:

Good nutrition

Nutrition is a must if you want to be healthy. Poker players need to motivate their bodies to endure the long sessions of tournaments; for that, the diet is fundamental. Too much will be a problem, and too little will be also a problem.

Fruits, vegetables, and nuts are recommended since they will give the organism energy and mental agility that seems fundamental. But to abuse it is not good either; Players must vary their diet.

Why Physical Activity is Important for Poker Players

Of course, absorbing nutrients will not be the only thing we will consider in poker.

Poker is often associated with unhealthy behaviors: smoky environments, hard liquor in industrial quantities, and unhealthy food. However, with the advent of iGaming platforms, where anyone can open a poker platform and start playing it, there has been a realization that to play at one’s best, it is essential to be clear-headed to know how to self-control.

In competitive tournaments, for example, concentration must be through the roof; one wrong or risky move can lead to elimination in a flash.

As a sport on its right-included in the table by the International Olympic Committee-poker thus needs not only proper eating behaviors but also good mental and physical preparation.

Finally, poker involves many hours sitting in front of a monitor or at a table beside opponents. This makes it essential to do sports to leave behind toxins and elements the body does not need.

The Benefits of Running

Running, in particular, is something many poker players will enjoy. The phenomenon of the ‘runner’s high’ truly replicates the thrill of playing the classic card game – as you run for a long time, a sudden feeling of relaxation steeps in, which will imbue your body with a burst of happiness hormones.

To achieve the effect, you should get more sleep and strive to run longer – a run of two hours tends to produce the euphoric feeling. So, try to pursue lengthy exercises in order to lower your anxiety and reach the limits of your endurance. Besides, experts recommend that you keep the running pace a bit slower than the 10-K race pace, often referred to as tempo pace.

Elimination of vices

Another element is directly connected to both mental and physical health work: vices. Alcohol, tobacco, or added sugars are best left aside. The organism will suffer if we tolerate these things in addition to the efforts involved in playing poker and dedicating oneself professionally to it. Everyone needs to indulge, but with caution and without the indulgence becoming routine.

Try to disconnect

But not only the body needs to lead a good life in poker, but also the head. Disconnecting is a fundamental activity. Many poker players who have their work at home do not manage to have moments in which they do not think about it. That exhausts one’s brain and does not perform at 100% as needed. That’s why it is so important to combine poker with other activities.

Exercise the mind

And since we are focusing on the brain, it is good to perform mental exercises that put it to the test regularly. Specifically, it can be something on the margin that helps the memory, decision-making capacity, and how to support the pressure.

Research demonstrates a strong link between aerobic exercise like running and the enhancement of cognitive functions. This applies to basic tasks like problem-solving and active, short-term memory. Therefore, strive to prioritize running or other endurance-intensive activities to ensure that your mind operates on the maximum level.

Be consistent

Combine mental exercises with constant and daily training because no one is born learned in the process of learning to play poker, and we can always try something new that we were not aware of.

Manage your money properly

Even those who can already win good picks of money must consider the management of their stack, not only in poker as such but also in everyday life.

Define a good strategy

If you will participate in some tournaments, apply a personal strategy according to your goals. The way to be happy with yourself is to set realistic achievements and be able to reach them.

Conclusion

Poker is a mental sport, so most players need to pay more attention to the physical aspect. The truth is that taking care of your body makes a difference in controlling your mood, concentration, energy, and motivation in that tense moment of the game.

Remember that perseverance and hard work are the keys to poker. So, with discernment, calm, and good physical condition, you will be a few steps ahead of others.

Aqua Jogging: The Ultimate Guide for Runners

aqua jogging

I’ll be real with you—I used to think aqua jogging was a joke.

Running in water? Come on.

I pictured retirees in swim caps doing gentle pool aerobics, not something a serious runner would touch.

That was before shin splints nearly wrecked my marathon prep.

I was staring down a month or more of no running. Stress fracture looming. The panic of losing all that fitness I’d worked for? That hit hard.

Then a fellow runner said, “Try pool running.” I laughed. Then I did it.

And let me tell you—five minutes into my first deep-water jog, I was humbled.

I was sucking air, legs burning, core shaking. It was like running with a parachute in a gravity-free zone.

No impact, but somehow all the effort. I left that pool completely gassed—and totally convinced.

I stuck with aqua jogging for that whole injury block.

And when I got back to land? I hadn’t lost a step.

If anything, I came back stronger—especially in my hips and core.

I now use it with my athletes. I use it when I’m dinged up. And sometimes, even when I’m not—just to give my body a break from the pounding.

So yeah, consider this your guide to one of running’s best-kept recovery secrets.

Let’s get to it.

What Even Is Aqua Jogging?

Aqua jogging (or deep water running, pool running—call it what you want) is exactly what it sounds like: you run… in water.

But it’s not lazy laps or floaty fun. It’s work—done upright, in the deep end, with a running motion that mimics what you do on land.

You strap on a flotation belt (more on that below), stay vertical in shoulder-deep water, and drive your knees, pump your arms, and move like you’re out on the trail.

Except, instead of pounding your joints into the pavement, the water cushions every step. No impact. All resistance.

Here’s the kicker: water has about 12 times the resistance of air.

So every “stride” you take in the pool forces your muscles to work against constant drag.

That means you’re not just keeping your cardio sharp—you’re building strength at the same time.

No treadmill. No pounding. No excuses.

Talk about the perfect cross training option for runners.

Why Runners Shouldn’t Sleep on Aqua Jogging

Most runners only discover pool running after an injury.

But honestly? You don’t have to wait until your shins or knees revolt.

Here’s why this belongs in your toolbox:

1. It Saves Your Fitness When You Can’t Run

This is the big one. If you’re sidelined, aqua jogging can literally preserve your aerobic engine.

Don’t take my word for it. One study showed runners who swapped six weeks of running for aqua jogging had no loss in VO₂ max, 5K times, or lactate threshold.

That’s not just “maintained”—that’s holding peak performance while completely off land.

Another study? Injured athletes improved their 2-mile time trial after six weeks of pool running.

Read that again: they got faster without touching pavement.

I’ve seen it firsthand—athletes return from stress fractures or tendon flare-ups still sharp, because they aqua jogged like they meant it.

So if you’re injured or even flirting with overuse, deep water running is your get-out-of-jail-free card.

2. It’s Zero Impact, Not Zero Effort

This isn’t lazy cardio.

With proper form (and a solid effort), aqua jogging can be as brutal as any interval session.

You’re fighting resistance the entire time, and the water gives no free passes.

Want to make it hurt (in a good way)? Crank up the cadence. Try sprints. Do intervals. I’ve done workouts in the pool that left me more wiped than land sessions.

3. It Builds Core, Hips, and Stability

You don’t realize how much your stabilizers get involved until you’re running in water. Your abs fire like crazy to keep you upright. Your hips? They’re working overtime.

Especially for runners who’ve had issues with IT band, hip drop, or lower back tightness—this is gold.

I’ve had runners come back from pool-running blocks saying, “My stride feels more controlled now.”

That’s no accident. The water builds strength where runners tend to be weak.

What You’ll Need (Gear Basics)

  • Flotation belt: Non-negotiable if you’re new. Keeps you upright and lets you focus on form instead of treading water. Think of it as your training wheels.
  • Goggles: You’ll be staring underwater or at tiles. Might as well see clearly.
  • Patience: Yeah, it can get boring. But so does injury rehab. Choose your battle.

Pro tip: Add music (waterproof headphones), podcasts, or count intervals out loud. It helps keep your brain engaged.

Who Aqua Jogging’s Really For  

Let’s get this out of the way — aqua jogging isn’t just for runners on the injured list.

Yeah, it’s a go-to rehab move. But it’s also a damn smart tool for anyone who runs.

Period.

I’ve used it. I’ve coached runners who used it.

And I’ve seen it work for beginners, Boston qualifiers, post-op masters athletes, and even trail freaks stacking 100-milers.

If you run — and especially if you break down easily or want more mileage without breaking — water running should be on your radar.

Here’s who it really helps…

1. Injured Runners Who Can’t Run on Land 

This is the obvious one. Got shin splints, a stress fracture, cranky IT band, or post-op knees? Deep water running is your best friend.

I always tell my athletes:

“If you can’t run on land, run in water.”

Seriously — deep water mimics real running better than anything else.

The motion’s close enough that your brain and muscles stay in sync.

Unlike cycling or swimming, it actually keeps your running pattern firing. And there’s zero impact, so you’re not smashing already-inflamed tissues.

2. Older Runners & Folks With Joint Issues

If your knees or hips bark at every step, but your heart’s still in it — get in the pool.

Water takes a load off your joints. Literally. I have a 70-year-old client with two replaced knees who water runs 3x a week like clockwork.

She can’t handle the pavement grind anymore, but she can still chase that runner’s high in the pool.

Older runners, arthritis warriors, or anyone dealing with long-term joint wear — this is how you keep moving without wrecking yourself.

Even if you’re not injured — but you’re in that “gravel in the knees” stage of life — aqua jogging keeps the engine running.

3. Overweight or New Runners Starting From Scratch

Let’s be honest — starting to run when you’re carrying extra weight is tough.

It’s not just motivation — it’s physics.

More impact. Higher injury risk. More pain.

That’s where the water steps in.

The buoyancy supports your body so your joints aren’t getting crushed.

But your muscles and heart? They still get a workout.

You’ll burn calories, break a sweat, and move freely — even if land running isn’t doable yet.

In one study, obese adults aqua jogged twice a week for 6 weeks. They lost fat, shrank waistlines, boosted aerobic capacity, and felt better across the board — all without pounding their joints.

4. Healthy Runners Who Want Smart Cross-Training

No injury? Still run in the pool.

Aqua jogging is one of the best ways to build volume or intensity without upping injury risk.

Think:

  • Deload weeks
  • Recovery days after a hard race
  • Extra aerobic work without leg pounding
  • Keeping niggles from turning into layoffs

If you’re dealing with mild soreness or something that feels “on the edge,” a 45-minute aqua run is a smart sub for a land workout.

Pro runners do this all the time. They’re not lazy — they’re smart. You want to train hard and stay healthy? Add water miles.

5. Trail Runners & Ultrarunners Building Volume Without Breakdowns

If you’re doing big mileage — like 50K+, 100-milers, stage races — you know the grind. Long runs stack up.

The legs don’t always recover fast enough. That’s when aqua jogging becomes secret training sauce.

I’ve seen ultra folks double up:

  • AM land run
  • PM aqua jog

Or use pool days to replace one medium-long run a week. It keeps the aerobic engine roaring without trashing your legs.

Aqua Jogging vs. Land Running: Same Engine, Different Terrain

Let’s get one thing straight: aqua jogging isn’t a lesser version of running—it’s just a different thing.

If you go in expecting road-runner vibes, you’ll be frustrated.

But if you use it for what it is? It can be one of the smartest tools in your training toolbox.

Here’s how they stack up—no fluff, just straight talk:

Impact & Injury

Land running pounds your body with 2–3x your bodyweight every step.

That pounding’s great for building toughness—but it also wrecks you if you’re already hanging by a thread.

Aqua jogging = zero impact. You’re still moving like a runner, but without beating your bones and joints to death.

That’s why it’s a go-to for injured runners, and honestly? It saved my training cycle once when my shins went on strike.

But don’t get too comfy—you’re not building bone density or tendon strength in the pool.

So when you return to land, ramp back up slowly.

Your cardio might be ready to rock, but your lower legs and joints need time to catch up.

Cardio & Effort: Why It Feels Weird but Still Works

Here’s the mind-bender: you might be gasping like it’s tempo pace… but your heart rate monitor says “meh.”

That’s real. Studies show heart rates run 10–15 beats lower in water, even at the same oxygen demand.

It’s the water’s pressure helping circulate blood more efficiently. So your ticker doesn’t have to work as hard.

I tell my athletes: go by breathing, not by numbers.

If you’re breathing like it’s threshold pace, that’s the effort—even if your HR watch says “easy jog.”

The upside? Done right, deep water running can match land running in VO₂ max gains.

Yeah.

You’re not losing fitness in the pool—you’re just working through different feedback.

Pro tip: Ditch the pace obsession. Tune into RPE. If it feels like a solid tempo or interval on land, it counts—even if you’re treading water.

Mechanics & Speed: Drop the Pace Obsession

Speed? Distance? Forget about it. In the pool, you’re not racing the clock—you’re racing the resistance.

Unless you’ve got an underwater treadmill (hello, fancy), you’ll be jogging in place or inching down a lane like a snail.

And that’s fine.

Your stride will feel weird: higher knees, more arm swing, no toe-off.

But guess what? That forces good habits like a quick cadence and upright posture. You literally can’t overstride in water—it won’t let you.

Embrace it. You’re not training for GPS pace—you’re training your form and engine in a zero-impact zone.

Muscle Activation: Upper Body Surprise Party

Land running is leg day. Aqua jogging? Full-body grind.

That water resistance pulls your arms, shoulders, back, and core into the game.

It’s why your obliques and upper traps might feel roasted after your first session.

Even your feet and ankles are working to stay aligned and resist the flow.

But you won’t hit your calves and quads the same way, since there’s no ground to push off.

That’s why, when you come back to land, don’t expect to jump into a hard track workout on day one.

Your lungs might be ready. Your lower legs? Not yet.

Use it to build total-body durability—but don’t expect your calves to be race-ready unless you reintroduce impact gradually.

Boredom & Mental Toughness: Tiles Don’t Talk Back

Let’s not sugarcoat it—aqua jogging can be boring as hell.

No breeze. No scenery. Just water, lane lines, and your own thoughts. But that mental grind? It’s a feature, not a bug.

This is where you build grit. If you can crush 60 minutes of pool running with nothing but your breath and waterproof earbuds, you’re mentally tougher than half the field.

That said, gear helps. **Underwater headphones, a bungee tether, a good podcast—**these can save your sanity.

Honestly, if you survive the monotony of pool running, road racing starts to feel like a party.

Progress Tracking: Forget Pace—Track Time & Effort

Land runners love their splits. In the pool? It’s all about time, effort, and heart rate (loosely).

No GPS, no mile markers. Just raw effort.

Maybe the first week, 20 minutes fries you.

A few sessions later, you’re cruising at 45 and throwing in hard intervals.

You’ll feel progress through:

  • Better cadence
  • Longer durations
  • Less fatigue
  • Quicker recovery between efforts

Some folks use HR monitors—just remember, your “zone 3” in the pool may look like zone 2 on your watch. That’s normal.

You’re not logging miles—you’re logging commitment. And that counts.

Aqua Jogging Gear: What You Actually Need  

Let’s be real—one of the best parts of aqua jogging is that you don’t need a whole garage full of gear.

You’re not training for a triathlon. You’re just trying to stay in shape (or come back from injury) without wrecking your body.

That said, a couple key tools will make or break your experience in the pool.

Here’s what you need, why it matters, and when you can skip the extras.

The Flotation Belt: Don’t Get In the Pool Without It

If you’re only buying one thing for aqua jogging—make it the belt.

This isn’t about making things easier. It’s about doing the workout right.

A good flotation belt keeps you upright, lets you mimic a real running stride, and spares you from flailing like you’re drowning.

You’re here to run, not tread water for survival points.

Think of it as the pool version of a running shoe. Without it, your form goes to hell.

With it, you can focus on drive, turnover, posture—like you would on land.

What to Look For:

  • Comfortable foam that wraps around your waist
  • Adjustable strap (not too tight, not loose enough to ride into your armpits)
  • Popular brands: AquaJogger®, Speedo, TYR—they’re all solid

Aquatic Shoes: Nice to Have, Not Need-to-Have

Let’s talk footwear. Some folks use water running shoes—lightweight, designed to drain, sometimes with fins or resistance blades.

They add drag, increase resistance, and can fire up your legs in a good way.

But do you need them? If you’re doing deep water running where your feet never touch bottom—nope. I usually go barefoot. Feels cleaner, simpler, and just one less thing to fuss with.

That said, there are times shoes make sense:

✅ When to Wear Water Shoes:

  • Shallow water running: If your feet graze the floor, shoes help with grip and protection
  • Resistance training: Some shoes create drag to boost effort—great if you want more cardio burn
  • Foot support: A few options offer light arch support, which can be comforting if you’ve got foot issues (plantar fasciitis, flat feet, etc.)

I’ve used the Speedo Hybrid shoe—it’s basically a mesh sneaker that doesn’t soak like a sponge. I’ve also tried a finned version (name escapes me) that made my intervals feel like hill repeats. It was tough, but in a good way.

Aqua Jogging Gear & Safety: What You Actually Need  

Let’s be clear—you don’t need a high-tech setup to get a killer pool run.

Belt, water, and a little grit are the only must-haves.

But if you want to level up the comfort, safety, and maybe your enjoyment? These add-ons are worth knowing about.

Safety First: Grip the Deck or Risk the Fall

If you’re doing pool drills that have you hopping in and out (or maybe mixing in dryland work), water shoes with grip are a smart investment.

Not just for traction—some public pools actually require them for hygiene if you’re doing fitness work.

My best advice? Start with just the belt and your bare feet. No need to overcomplicate it.

If, down the line, you want more resistance or stability, grab a pair of aqua fitness shoes. But don’t stress about it out of the gate.

Other gear you might want to add to your list:

Swimsuit (Duh—but choose smart)

You’ll be moving a lot. Ladies—go for a one-piece that doesn’t need constant readjusting.

Men—ditch the big, drag-heavy board shorts. Trunks or jammers (those snug shorts that look like cycling gear) are ideal.

Unless you want to add resistance, leave the water parachute at home.

Goggles (Optional—but handy)

You’re not swimming laps, but if you like to dip your head or mix in a few strokes, bring them along. I like having them just in case.

Music = Mental Fuel

Let’s be real—pool running can feel like watching paint dry if your brain’s not entertained.

That’s where waterproof headphones come in. Whether you’re team pump-up music or podcast junkie, having audio turns your workout from a grind into a groove.

Tether (Optional—but awesome for small pools)

This is basically a bungee cord that clips to your belt and the pool ladder or lane line.

It keeps you in place so you’re not drifting all over like a pool noodle in a hurricane. Super handy if your pool is short or crowded.

Waterproof Heart Rate Monitor

This is for the data nerds (no shame). Just know: your HR will read lower in water than on land.

A steady effort might clock 10–15 bpm lower. Don’t let it throw you—just adjust zones accordingly.

How to Aqua Jog With Form That Actually Transfers to Running

This isn’t freestyle. You’re not here to dog paddle or float around like a tourist.

You’re here to run—with intention.

Do it right, and you’ll come out stronger, smoother, and maybe even faster on land.

Here’s how to nail deep water running like a pro:

1. Get Upright

Strap on that belt. Float in the deep end. Let your body settle vertical—head above water, chest up.

Imagine a string pulling the crown of your head to the ceiling.

Slight forward lean? Fine. But don’t slouch or lean back like you’re in a pool recliner.

Posture is everything. Engage your core like you’re bracing for a light gut punch.

2. Mimic Real Running (Don’t Pedal)

This is the meat of the movement:

  • High Knees: Bring each knee up toward your waist—higher than you would on land. Activate those hip flexors.
  • Drive Foot Down: Think “step on an invisible box.” Your foot pushes down and slightly back under your center—like you’re trying to shove the pool floor away.
  • Heel to Butt Recovery: At the bottom of your stride, your heel pulls up and back toward your butt. You’re firing glutes and hamstrings. It’s not just knee lift—it’s a full cycle.
  • Cadence: Fast strides, short stride length. Aim for a rhythm. You won’t hit 180 steps per minute like land running, but shoot for 150–170. No lazy flailing.

If your stride feels like you’re pedaling a bike—you’re doing it wrong. Fix it.

3. Don’t Forget Your Arms

Too many people forget their upper body. But in the pool, arms = effort.

  • Bend elbows ~90 degrees
  • Pump forward and back from the shoulders
  • Loose fists or flat hands, but no dog-paddling
  • Elbows should move like pistons—not sweeping out like you’re swatting flies

More arm movement = more cardio = more calorie burn. Simple math.

4. Lock In the Details

  • Head Forward: Pick a spot on the wall to look at. Don’t look down.
  • Shoulders Relaxed: No hunching. Keep ’em down.
  • Engage Core: Always. It keeps you balanced and protects your back.
  • Foot Position: Neutral or slight flex. Let them move naturally through the water.
  • No Wall Hugging: Rest if needed, but don’t live on the wall. Stay active.

5. Breathing: Match the Rhythm

One of the best parts about water running? Breathing feels easier. No dry air, no pounding steps.

You can breathe however feels natural—but syncing it to your arm swing helps:

  • Try: Inhale for 4 arm swings → Exhale for 4
  • When you do intervals, your breathing will automatically adjust. Let it.

Gauge Your Aqua Jogging Form  

One of the easiest ways to tell if your aqua jogging form is on point? Ask yourself how it feels.

After a solid session, you should have that even burn in your quads, hammies, glutes, and maybe even your core.

Not just your quads on fire, not just your hamstrings cramping—all systems engaged.

If your quads are gassed early, you’re probably just doing a high-knee march, not driving down with power.

On the flip side, if your hamstrings are seizing, you’re probably curling your leg too much like a butt-kick machine.

Aim for balance. After a few rounds, it should start to click—it’ll feel like real running, just in slow motion. You’ll catch the rhythm: arms and legs driving, steady breathing, smooth groove.

Don’t sweat it if you feel awkward at first—everyone does. I felt like I was flailing around in zero gravity the first few times.

But once I got the hang of it? Game changer.

In fact, some runners say aqua jogging improved their land form because the water stripped away all the extra junk movement. You’re forced to focus on the essentials.

If you’ve got a coach or friend who can watch and give feedback, great. If not, hop on YouTube—type in “aqua jogging form” and check out some demos.

But honestly, if you’re following the pointers here, you’re on the right track.

Warm-Up and Drills in the Pool: Don’t Skip ‘Em

Would you jump straight into mile repeats without a warm-up? Nope. Same deal here.

Start with 5–10 minutes of easy jogging in the water—keep it chill, maybe 50–60% effort.

Use this time to dial in your form, shake off any stiffness, and get your brain in the game.

I like to do what I call a “form check jog”—low effort, but focused on posture and rhythm.

Then throw in a few water-based dynamic drills:

  • High knees (drive them up strong)
  • Butt kicks (quick and snappy)
  • Straight-leg flutter kicks (grab the wall or a kickboard)

These warm up your hips, knees, and ankles—same as you’d do on land but with less pounding.

And hey—if you’re not a confident swimmer yet, it’s totally fine to spend your first couple sessions doing light swimming or water walking. Once you’re warm and comfy in the water, you’re ready to get to work.

Aqua Jogging Workouts for Every Level

Aqua jogging doesn’t have to be some endless, boring pool shuffle.

You can do intervals, tempos, fartleks—everything you’d do on land, just low-impact. Structured sessions keep your mind engaged and your heart rate honest.

Beginner Deep-Water Workout (30–35 min)

Goal: Build endurance, learn the motion, and get a solid cardio session—great if you’re injured or just new to the water.

Warm-Up (5–10 minutes)

  • Easy jogging
  • Stay upright, swing those arms like you’re running
  • Focus on steady breathing and smooth motion
  • Optional: a minute or two of water walking or gentle swimming

Do this cycle:

  • 3 minutes medium effort – About 75–80%. Think “steady run,” not sprint. You should be working, but still able to breathe in rhythm.
  • 1 minute hard effort – Push it! About 90–95%. Controlled power. Fast turnover. Visualize racing a rival down the home stretch.
  • 2 minutes easy – Light effort, like your warm-up. Let the heart rate come down, stay relaxed.

That’s one 6-minute cycle.

Repeat for 4 rounds. (2–3 if you’re just starting out.)

Tip: During the “hard” minute, crank your arms like pistons and drive those knees down. Don’t just move fast—move with power.

You won’t get that same breathless burn as land intervals, but trust your effort. You’ll feel it in your RPE (rate of perceived exertion) and breathing.

Cool Down (5 minutes)

  • Easy jogging or water walking
  • Let your effort taper down
  • Stretch your legs and arms gently in the water

This whole session clocks in around 35 minutes. Simple, effective, and beginner-friendly.

Once it starts to feel easy? Tweak the work intervals—try 4-minute steadies or 90-second surges.

Intermediate Pyramid Aqua Jogging Workout  

Goal: Break up the monotony, build real endurance, and challenge your mental grit.

This one’s a ladder-style beast—aka the pyramid—where we crank up the interval lengths, hit the top, then fight our way back down.

Mentally, this thing is gold. Just when you think it’s getting harder, it does… and then, thankfully, it starts letting up. A little.

But let’s be real—the work doesn’t end until the last rep is done.

The Warm-Up (10 Minutes)

You know the drill: no skipping warm-ups. Especially in the water, especially before intensity.

Do 10 minutes of easy aqua jogging. Add in some dynamic arm swings, butt kicks, high knees—anything that wakes up the whole system.

Main Set: Pyramid Intervals

Here’s what it looks like. Push at ~85–90% effort on each “hard” part—this is 5K effort or a touch stronger.

  • 1 min hard, 30 sec easy
  • 2 min hard, 30 sec easy
  • 3 min hard, 30 sec easy
  • 4 min hard, 30 sec easy
  • 4 min hard (yes, again), 30 sec easy
  • 3 min hard, 30 sec easy
  • 2 min hard, 30 sec easy
  • 1 min hard — finish strong

That’s 20 minutes of hard effort plus 3.5 minutes of recovery. Add your warm-up and a cooldown, and boom—you’re at ~45 minutes total.

Cool Down (5–10 Minutes)

Jog easy in the water. Or mix it up with light swimming, especially backstroke or freestyle to loosen your arms. Stretch your quads and hamstrings using the pool wall if you’ve got one.

Pro Tip: If 4-minute reps are a bit much, just peak at 3 and back down. Want more? Go all the way to 5. Just keep the recovery short to keep the challenge high.

Advanced Fartlek Pool Workout (45+ Minutes)

Purpose: Simulate a hard track session, minus the pounding. This one’s for runners who want a real aerobic punch in the pool.

Think of this as your water version of 800m repeats. But without the shin splints.

Warm-Up (10+ Minutes)

Do your standard 10-minute jog—but throw in 3×20-second fast builds with 40 seconds moderate. These primes the system and let your brain know something spicy is coming.

Main Set – Fartlek Mayhem

This isn’t your grandma’s water aerobics. You’re bouncing between sprints, steady efforts, and recoveries. The randomness? That’s the point.

Sample Round (about 10 minutes):

  • 1:00 sprint → 1:00 moderate
  • 0:30 sprint → 0:30 moderate
  • 0:30 sprint → 0:30 moderate
  • 1:00 sprint → 1:00 moderate
  • 2:00 steady-hard (like tempo pace) → 1:00 moderate
  • 0:30 sprint → 0:30 moderate
  • 1:00 sprint – finish strong

This round alone will leave you huffing. If you’re feeling fired up, repeat it twice (for 20 minutes of work), or three times if you’re out for blood. Rest for a minute or two between sets if needed.

Cool Down (10 Minutes)

Take your time here. You just lit the engine up—now cool it down gently. Try alternating 1 minute jog, 1 minute light swim. Focus on deep breathing. Stretch in the shallow end if you’ve got one.

Pro Reminder: Drink water. Just because you’re in a pool doesn’t mean you’re not sweating. Pool dehydration is sneaky.

How to Mix Pool Running Into Regular Training

You don’t need to be hurt to benefit. Here’s an example of how I might build it into a marathon week:

Sample Week

  • Mon: Rest or swim
  • Tue: Track session (land)
  • Wed: 40 min easy pool run (active recovery)
  • Thu: Medium-long run (land)
  • Fri: 45 min pool intervals (cross-train w/ intensity, save legs)
  • Sat: Easy run
  • Sun: Long run

Two days in the pool, no mileage sacrificed, body stays fresher. This structure works great for injury-prone runners, heavy trainers, or older athletes who can’t hammer high-impact work day after day.

Final Thoughts  

This might not be the most glorious part of your training journey. But it might be one of the most important.

“Training smart beats just training hard.”

Aqua jogging is the definition of that. It’s low-impact, high-return. Not everyone has the patience for it. But if you do? You’ll come out tougher, fitter, and sharper—mentally and physically.

So here’s your reminder:

  • Put in the effort.
  • Respect the work.
  • Stick with it.
  • And remember—you’re not starting over. You’re building forward.

How to Run a Faster Mile

How To Run A Sub 1.30 Half Marathon

Looking to run a faster mile? Then you have come to the right place.

Whether you’re a beginner runner or looking to run a faster 5K, improving your mile speed is a goal worth pursuing. In fact, for many runners, running a faster mile is a major goal. With some simple tweaks to your training plan, you’ll be set up to have your fastest mile yet.

In today’s post, I’ll share a few strategies to help you run a faster mile (almost overnight).

More specifically, I’ll cover the following:

  • What is the mile?
  • Why the mile Matters
  • How Long Should It Take To Run one Mile?
  • The Fastest Mile Ever Run
  • How To Run a Faster Mile
  • Interval Training For The mile
  • How to Know Your mile Pace
  • One-Mile Training Plan
  • And so much more

Sounds great?

Let’s lace up and dig in.

What is the Mile Anyway?

Before you start training for your fastest mile, it’ll be helpful to understand how long a mile is.

The word “mile” is derived from the Latin term “mille passes,” which means one thousand paces. This is because one mile was originally defined as one thousand Roman strides, each stride being two paces.

If you live in the U.S., where you always use miles when measuring distances, you might already know and understand how far a mile is.

But if you’re using the metric system, know that a mile is 1609.34 meters. So you’ll need to complete four loops (and a few steps) on a standard track to complete one mile.

For perspective, to cover the distance of a mile, you’ll need to;

  • Walk at a leisurely pace for 20 minutes
  • Cover 17 and a half football fields
  • Walk 20 New York city street blocks

Why the Mile Matters

A mile may sound short compared to classic race distances, but it’s a distance not to scoff at. Running a fast mile requires a lot of endurance, strength, physical fitness, and mental toughness.

What’s more?

Devoting time and effort to running a faster mile will help you build endurance and a solid base for your next training phase.

How Long Should It Take To Run 1 Mile?

I wish I had the exact answer, but it varies from runner to runner.

Overall, the time it takes to run a mile hinges on many variables, such as your current fitness level, Age, weight, height, gender, and running experience.

A beginner can likely complete a mile run in roughly 12 to 15 minutes. They can achieve this by running relatively slowly or following the run-walk method, during which the runner alternates between walking and jogging.

If you’re a beginner with no running experience, I will urge you to start with this method to ensure that you don’t push yourself too hard as you take your first few steps on your running journey. The average runner can cover a mile in 8 to 12 minutes. This pace is relatively fast but drastically slower than a 6-minute mile runner.

A good runner should be able to run a mile in less than 6 minutes. This pace is quite fast, but remember that Eliud Kipchoge completed the berlin marathon at 2:01:09. That’s an impressive 4:37 per mile. Here’s your guide to average mile times. And here’s how long it takes to walk a mile.

The Fastest Mile Ever Run

The fastest mile every run to date is a sonic 3:43.13 held by Hicham El Guerroum from  Morocco since July 1999. This standing world record for the imperial mile was achieved at the Stadio Olimpico in Rome during the world championship games.

As for women, the Ethiopian Sifan Hassan is the current female world record holder for the fastest mile of 4:12;33.

Fun fact – The mile has been the only non-metric distance recognized by the IAAF since 1976.

How To Run a Faster Mile

Here are the tips you need to improve your mile time as fast as possible

Start With A Baseline

Have no idea what your actual mile time is? Then perform a timed trial run. This should help you set a benchmark to measure your progress. It’s virtually impossible to reach a destination if you don’t know where you are and where you’re going.

Where? Of course, a standard track.

One lap on a standard track is precisely 400 meters long. This means that four laps roughly equal one mile.

Remember that some tracks may be shorter (or longer), so do your math first. If you’re unsure about the length of the track, just ask.

Following a 10-minute warm-up, run a mile at 9 out of 10 regarding exertion rate, then see where your current ability lies. I’d recommend performing this test every 8 to 12 weeks, depending on your training goals and personal preferences.

Interval Training For A Faster Mile

One of the best ways to improve your speed—and running confidence—is to do high-intensity interval training. Adding speed intervals to your training plan can help to improve your one-mile pace and overall conditioning.

How long and fast you go on each interval will depend on your fitness level, mile goals, and injury history.

The How? Simple.

Following a 10- to 15-minute warm-up, alternate between running fast for a given distance and then easy jogging or walking for the same distance to recover. I recommend starting with four to five repeats, then working to eight reps over a few months.

For example, you might run a few 200-meter sprints on a track – half a lap—or 400-meter sprints -full lap—with a short recovery between each effort. The session is pretty straightforward.

Performing 200-meter sprints? Then start with six reps and work it up to 8-10.

Performing 400-meters? Then start with fewer reps—let’s three to four—then try working your way to five or six. You can perform these reps on a track or any well-measured stretch of road. You can also do these sessions on the treadmill.

You should include at least one day per week to speedwork. Consider including two days per week if you’re super competitive—but don’t rush it out. Take your time.

Word of caution. If you’re a beginner, I’d advise you not to perform any speed work runs until you have a few months of steady-state training.

Find Your Target Lap Time

The second step is to define your goal time for running the mile.

If you have no idea, then the starting point test should help. Following a 10-minute warm-up, run a mile at full effort and see where your current speed lies.

Next, hit the track.

Remember that a lap around a standard track 400-meter so four laps (plus nine meters at the end) will get you a mile.

Next, divide your goal mile time by 4 to determine your target lap time.

For example, if you’re shooting for a 7-minute mile, you’ll have to run the equivalent of four laps at a pace of 1:45 minutes per lap. This is a pace of 4;20 minutes per kilometer.

A good starting pointing it completing a series of 8 to 10 reps of 200-meter at this goal pace of 1:45 minutes per 400-meter, then taking a 30-second recovery in between each repetition.

Additional resource – How to run at night

Build Endurance

Speed is just one piece of the puzzle. You’ll also need to improve your ability to run longer distances than the mile.

You might already run a few times longer than a mile, but you’ll want to add one run that’s drastically longer.

To build your running distance, start by slowly increasing your weekly mileage. Start with two to three miles, then add one mile a week until you cover six to eight-mile a session.

For example, if your longest run is 4 miles and your total weekly mileage is 12 mine, add roughly one mile per week until your longest run is over 8 miles.

This can be done by adding a mile to your longest run or increasing your total weekly load by up to 10 percent each week.

Planning to train for a half marathon or full marathon? Then keep building distance on that long training day. Completing one long run per week—as well as other runs on schedule—will improve your endurance and stamina, which will result in faster times.

run a faster mile

Improve your Leg Strength for a Faster Mile

Speed, endurance, what else?

Of course, strength.

Although running (more and faster) is the best way to improve your performance, what you do on your non-running days can drastically impact your mile time.

Strength training is key for optimal running performance. Your calves, hamstrings, quadriceps, glutes, and core all play an important role.

Stronger muscles set you up for healthy form and efficient performance, which allows you to run faster at a faster pace with less effort.

Lifting weights can also increase your stride length, which is key for faster running.

Some of the best exercises to improve your running speed include:

  • Squats
  • Squat-thrusters
  • Lunges
  • Burpees
  • One-legged squats
  • Calf raises

As a rule, shoot for 10 to 15 reps of each exercise. In addition, aim for two to three circuits.

Remember that you don’t need to become an Olympic weightlifter to see gains in speed. At a minimum, you’ll need two 30- to 45-minute sessions per week to see great results.

Run Hills To Improve Mile Speed

Looking for more?

One thing you can do to mix speedwork and strength training is to do hill reps. This is, in fact, one of the most effective ways to fire up your glutes and increase your leg strength.

Uphill running can also enhance your running efficiency and improve your lactate threshold—all of which help improve your mile speed.

Hills are a great addition to a mile training plan because they feel challenging, but put less stress on your body than running on a flat surface.

Hill training also requires more muscular engagement and calorie burn, making them harder sessions before speed is considered.

Hills are an ideal way to improve leg strength.

First, locate a hill that measures around 300 feet with a moderate gradient. Make sure the hill is steep enough that running up it feels like an 8-9 out of ten in terms of effort. Next, complete six to eight reps, with a jog back for recovery.

Run as fast as possible for 30 seconds, then walk down to recover. Once you’re done, finish your session with a 10-minute cool-down jog on a flat surface.

Keep your focus on good technique, and don’t try to force your way to the top. For more challenges, go for a steeper hill to work on power.

Start with five to six reps, and work to at least 10.

Stuck on the treadmill? Shoot for a 4 to 6 percent incline.

Improve Your Form

Running a faster mile isn’t just about running then more running. Technique also matters—and it matters a lot.

Proper form helps you move more efficiently, which increases not only your speed but also your endurance. You should aim to improve your form before speed, especially if you’re a beginner runner.

There are many things you can do to improve your running form.

  • Try to run as tall as possible, back straight, core engaged, and shoulders relaxed while striking the ground on your midfoot.
  • Keep your head up to keep good posture and balance. Avoid hunching over or tilting your neck down.
  • Bent your arms around a 90-degree angle with a little elbow bend. Make sure you have a nice comfortable arm swing.
  • Activate your core and use quick and short strides. Avoid overstriding, as taking giant leaps can only slow you down and put more pressure on your muscles and joints.

What’s more?

You can also perform dynamic warm-up drills focusing on different aspects of good running technique. This helps make sure that your movement is optimized during your workout. The efficiency of movement is key and all that.

To put this into practice, perform drills that accentuate various aspects of proper form. Do them as a part of your warm-up. Some of these drills include:

  • Butt kicks
  • Soldier walk
  • Fast feet drill
  • Backward running
  • Carioca

Improve Your Cadence

Also known as stride rate, running cadence is the rate at which your feet hit the ground while running.

Instead of trying to lengthen your stride to cover more ground when trying to pick u the pace, increase your cadence and focus on taking short and quick steps as you run faster. This increased cadence may also help prevent many common overuse injuries, research shows.

Most running experts preach a cadence of 170-180 strides per minute. But keep in mind that the research suggests that cadence is highly personalized.

Here’s how to determine your cadence and how to improve it.

First, know your current stride over.

On your next run, count the number of steps you take in one minute. Try counting just one foot and then double it to get your total cadence. Some running watches also can estimate cadence.

Next, if your current stride is too low, gradually improve it by adding 3 to 5 steps every few runs. The rest is just details. Just remember not to obsess over cadence when you’re a beginner runner. Instead, run in a comfortable way, letting your body find its natural rhythm.

Lose Extra Weight

Looking for extra motivation to lose weight? Then this should get you.

Weight is a compound measurement that depends on many variables such as diet, access to food, hormone, sleep, lifestyle, socioeconomic factors, etc. But, overall, expect to improve your speed by losing any excess weight you might be carrying.

The larger your body, the more energy you burn off since running is a weight-bearing exercise. This means that your weight influences the force and intensity of the activity.

Of course, don’t take my word for it.  Research has shown that runners can get 2 seconds per mile faster for every excess pound they lose. This means a 16-pound weight loss could shave 30 seconds off your mile price time. That’s a lot.

And it’s not just one research. This 1978 experiment looked into how a 12-minute run performance was impacted when adding 5 percent, 10 percent, and 15 percent extra weight compared to the subject’s normal body weight.

The researchers concluded that the running pace was slowed by roughly 1.4 seconds per mile for each extra pound added.

Another research looked at the same thing but used the reverse approach. Instead of adding weight, the researchers lightened runners by 5 to 10 percent of their normal body weight via ropes and pulleys while they ran on a treadmill.

In the end, it was reported that they were about 2.4 seconds faster per mile for every “lost pound.”

At a glance, this may not seem like much, but a 16-pound loss would equate to a roughly 20 to 30 seconds faster mile, with all equal.

Remember that these studies are conducted in a lab setting, so it’s quite different from real-world conditions.

What’s more?

And if you try to lose weight, you might also lose some muscle with the fat, which is not optimal. You might also be fueling while training for a hard race, which compromises training and can limit overall performance.

Recover Well

You can train hard seven days a week, but your efforts will be in vain without proper recovery. Though getting outside your comfort zone is key when working toward running a faster mile, your recovery time is just as crucial in your result.

For this reason, feel free to push yourself during training, but don’t forget to go all out when you recover. It’s a fine balance between stress and recovery. Don’t overtrain, nor should you undertrain. Find the sweet spot.

As a rule, you should schedule at least one full weekly rest day.

  • Avoid training hard two days in a row, such as an interval training or hill reps workout.
  • Get adequate sleep – shooting for 7 to 9 hours per night.
  • Balanced diet – your nutrition plan should include all three macronutrients and be composed of nutrient-dense foods.
  • Stretch often. Try these yoga poses.
  • Foam roll
  • Massage
  • Acupressure or acupressure mats
  • Recovery doesn’t mean a lazy day. Instead, feel free to perform cross-training activities like biking, walking, or swimming.

For the full guide to recovery for runners, check my post here.

Be Consistent

I hate to sound too cliché, but consistency is key – and that’s the case whether you’re trying to make a 7-figure income or run a sub-7-minute mile.

As a rule of thumb, I urge you to follow a training plan (one you find online or one designed by a coach) and include at least four to five days of running each week to improve your mile time.

Running on a whim isn’t the best way to improve performance. Instead, you must log the miles on a consistent base so the body can adapt to the high-impact stresses of running faster. And that doesn’t happen overnight.

Let’s see how to put this into practice.

One-Mile Training Plan

Just because it’s just a “mile,” it doesn’t mean you shouldn’t follow a running program to help you improve your time.

Depending on your running experience and starting point, training for the mile might sound like a little or a lot. But, regardless of your current goals, there’s always room for improvement when it comes to the mile.

A 1-mile training plan is useful for any serious runner craving more structure as they strive to improve their mile time and performance.

The good news is that there are many one-mile training plans available online. But before you go and pick one, I recommend you review any schedule with a running coach or someone with more running experience than you.

Don’t have access to a running coach? Then feel free to email me at [email protected] or, at the very least, ensure your chosen training plan is well-rounded.  An ideal running schedule for the mile should include short-distance sessions, long-distance sessions, cross-training workouts, and rest days—just like any other training plan would.

The main variable is the distance. For example, a long-distance marathon session might be 20 miles, but you won’t need to run that far to improve your mile time.

The exact training plan will depend on your fitness level, pace, running and experience, and most importantly, your goal pace.

What’s more?

Remember that you don’t need to train on specific days, but you might want to avoid running twice a row as a beginner. The fitter you get, the more load you can handle over time.

On your non-running days, feel free to cross-train or rest so your body can recover and adapt to training.

The below one-mile training plan is ideal for beginners, those returning from break, or runners looking to keep base training fitness during the off-season.

 Week One 

  • Monday – Three miles easy
  • Tuesday – Cross train or rest
  • Wednesday –Speedwork: 10 X 200-meter. 30 seconds rest.
  • Thursday – Cross train or rest
  • Friday – three miles moderate
  • Saturday – 45 to 60 minutes long run at an easy pace
  • Sunday – Cross train or rest

Week Two

  • Monday – four miles easy
  • Tuesday – Cross train or rest
  • Wednesday – Speedwork: 8 X 400-meter. One minute rest.
  • Thursday – Cross train or rest
  • Friday – Four miles moderate
  • Saturday – 60 minutes long run at an easy pace
  • Sunday – Cross train or rest

Week Three 

  • Monday – Three miles easy
  • Tuesday – Cross train or rest
  • Wednesday –Speedwork: 5 X 800-meter. One minute rest
  • Thursday– Cross train or rest
  • Friday –Three miles easy
  • Saturday – 80 minutes long run at an easy pace
  • Sunday – Cross train or rest

Week Four 

  • Monday – Four miles easy
  • Tuesday – Cross train or rest
  • Wednesday – Speedwork: 10 X 400-meter at target pace. 30-second rest
  • Thursday – Cross train or rest
  • Friday –Three miles moderate
  • Saturday – 80 minutes long run
  • Sunday – Rest

Week Five

Monday – Test Run or Race!

Race Day Advice For Running Your Fastest Mile

Feel like you’re ready to test your mettle? Then let’s see how fast you can run that mile.

Warm-up

I hate to sound like a broken record, but before you try to run your fastest mile, you should get your muscle set and ready first. A proper warm-up is key for injury prevention and sets the stage for optimal performance.

So what kind of warm-up I’d recommend?

Simple. Start by jogging for 10 to 15 minutes, then perform a series of dynamic stretches such as high knees, butt kicks, inchworms, and toy soldiers. Next, perform fast but short strides to get your body firing on all cylinders.

Get Your Mind Ready

The mile is no distance to scoff at, so you better approach it with the right mindset and respect. Although it’s only four laps around the track, it will hurt.

Mentally go through the four laps in your head. Know exactly what times you want at each lap, then picture yourself running the perfect mile. See yourself running strong, tall, and with good technique. Leave nothing for chance.

Stick to Your Target Lap Time

Have a mile goal? Great. Now break down your target mile time by 4 to determine your target lap time.

If you aim to run a 7-minute mile, you have to run the equivalent of four laps of a standard track at exactly 90 seconds per lap or a 3.45 minute per kilometer.

Have A Stopwatch

A useful tool to have during your mile training is a stopwatch.

When running at a measured distance, a stopwatch will help you accurately measure your lap times and ensure you’re running at the right pace in line with your mile training plan.

The First Lap

Run the first lap as fast as possible, even if it means kicking off the one-mile run faster than needed to get your goal time.

Mentally you’re likely to slow down as you run more laps, so make up for lost time during the first lap. But be careful not to spend all your energy.

The Second Lap

Run this lap at exactly your target time. For example, in the 7-minute mile I mentioned before, lap two is when you should be running exactly one minute 45 seconds, so your time by the halfway point should be around 3:25 to 3:29.

The Third Lap

Lap 3 is the critical part of the mile distance, where you must push yourself the hardest to ensure you don’t slow down. Focus to keep yourself on pace when every cell in your body is begging you to slow down.

To psych up, try devoting that third lap to someone important in your life and promise not to disappoint them.

The third lap is the toughest. This is, in fact, the lap that will determine whether you achieve your goal time or not. You’re more likely to slow down for your initial pace.

The Fourth Lap

The last lap is where you lay it all out. You’re at the final stretch of the mile. The hardest part is already over, and it’s time to run as fast as possible.

Chances you’ve already slowed down on your previous laps, so you need to dig deep and push yourself the hardest. Know that the end is nigh.

And during the last curve, perform the “kick” by sprinting the last 200 meters as fast as possible.

How To Run a Faster Mile –  The Conclusion

There you have it! Trying to run a faster mile shouldn’t be that complicated. All you need is the right mindset, strategies, and a bit of luck. Don’t forget to have enough rest and recovery, so your body will work effectively.

Please feel free to leave your comments and questions in the section below.

In the meantime, thank you for dropping by.

Keep training strong.

David D.

How to Prevent Running Injury

prevent running injuries

Looking for the best advice on what to do to prevent running injury? Then you’ve come to the right place.

Here’s the truth. Overuse injuries can throw a wrench in your running plans like nothing else. These are usually joint, ligament, and muscle issues that plague the lower extremities.

And no one is immune—both beginner and elite runners are prone to injury. This makes them quite common, especially among those not taking steps to prevent them.

In fact, research shows that over half of all runners get injured, with many of those occurring in the knee, shins, or Achilles tendon.

But there are a few precautions you can take to help stack the odds in your favor. That’s where today’s post comes in handy.

How to Prevent Running Injury

Whether you’re a beginner runner training for your 1st 5K or a pro runner aiming for a sub-3 hour marathon,  here are 9 nine things you can do to help reduce your risks of getting injured while running.

Know Your Limits

This is, by far, the cardinal rule for avoiding all kinds of sports injuries.

This is what’s commonly referred to as doing too much, too soon, too fast

Your body needs time to recover and adapt to increases in speed or mileage.

Push your body too much, and you will be flirting with disaster.

Action Steps

Take plenty of rest.

Make sure to add recovery days and weeks to your training plan by taking a complete break from training physically and mentally.

Take one day off a week, and space out those hard runs—think hill repeats and sprints—with some easier recovery runs.

During the off-time, cross-train with low-impact activities, such as swimming, low-intensity biking, or, my favorite, Yoga.

Especially Yin or Gentle yoga will help you decompress the stress inside your body, especially within the fascia tissue.

What’s more?

Use the 10 percent rule.

Don’t increase your running mileage by more than 10 percent from one week to the next.

Listen To Your Body

Overuse running injuries don’t happen overnight (falling flat on your face is the exception here, but we already discussed that).

Most running injuries come with early warning signs—discomfort, soreness, aches, and persistent pain—but it’s up to you to listen to them and take the right measures.

Action Steps

Have an early warning system for pain, and do your best to get to the root cause of what’s causing it.

At the first sign of onset, whether it’s a pain that gets worse during a run or forces you to change your running gait, take some days off and reevaluate your approach.

Don’t get me wrong, aches and running go hand in hand, but if the pain persists and/or it’s taking a toll on your body, you need to start paying attention.

In a nutshell, if your body hurts, do not run.

That’s it.

Strength Train

Regular strength training helps improve performance and protects against injury by improving your structural fitness.

This helps your muscles, tendons, ligaments, and bones to better endure the high-impact nature of running.

For instance, strengthening the hip muscles—mainly the adductors, abductors, and gluteus maximum—can boost leg stability to the ankles and prevent knee pain and injuries.

Action Steps

Strengthen your lower body muscles, especially your quads, glutes, and hip muscles.

Here are the runners-oriented strength routines you need:

Stretch Your Body

Just like strength training, stretching is another off-road thing you can do to protect your body against common running injuries.

Current research finds no link between stretching and injury prevention, but I will bet my money on this, and I strongly urge you to boost your range of motion.

When you improve the range of motion of your running muscles, your body will move more efficiently and have less risk of injury.

Runners tend to be tights in the hamstrings, calves, hip flexors, and glutes, so you are more likely to get injured in and around those areas.

Tight hamstrings can lead to knee pain and other trouble.

Tight calves are also bad since they have been linked to the plantar fascia and Achilles tendon injuries in research.

Action Steps

Lucky for you, I have written a lot about the subject, and here are three flexibility routines that can help stretch your running muscles and help you prevent injury in the process.

R.I.C.E

As previously stated, when you got aching or painful joints or muscles, look no further than R.I.C.E for immediate treatment.

You don’t have an E.M.T. course certificate to do these simple steps.

For example, if your knee hurts, take a few days off from running (Rest).

Ice the painful area for 10 to 15 minutes, three to four times a day.

Plus, elevate the injured knee to limit swelling.

For more, you can also use compression, an A.C.E. bandage or compression socks, which can help reduce inflammation and provide instant pain relief. Remember that how fast you treat running injury is key to your comeback. There’s no way around that.

how to prevent running injuries

Run on Proper Surfaces

Running on hard and/or uneven surfaces, like concrete or asphalt, puts undue stress on ligaments and joints.

And as a runner, the last thing you want is more impact.

Run often on hard surfaces, and you’ll be risking medial tibia stress syndrome, stress fractures, and other overuse injuries are very high.

Action Steps

Do the bulk of your running on softer surfaces, be it a path through the park, a dirt trail, a bike path, a grass road, and other similarly yielding surfaces.

You can also head to the local track for a more firm and flat surface.

Proper Running Shoes

I can’t emphasize this one enough.

Sure, running does not require a lot of equipment, but shoes are still a MUST.

So make sure to have the right pair on.

Action Steps

Head to a specialty-running store and have your gait and foot type analyzed by expert staff so they can help you pick the perfect pair.

It can be tricky for those with big feet or a big proportion of the front part.

Make sure to replace your running shoes at least every six months—that’s about 400 to 500 miles of running.

This, of course, depends on your weight, size, foot strike, shoe type, and weekly mileage.

The earliest warning of “wear and tear” shoes can take place on the heels part and big toe.

If you feel something not nice or sometimes you spot calluses in your heels, change.

Additional resource – How to treat black toenails from running

Proper Running Form

Poor form can limit your performance and lead to undue pain and injury, leading to shin splints, back pain, limited performance, and so on.

On the other hand, proper form will also help you run more efficiently, so you will run farther and faster with less fatigue.

Action Steps

Here are a few pointers to help you develop and keep good form:

  • Run in a relaxed manner with the least tension possible. As you run, do your best to keep your entire body relaxed, especially your neck, shoulder, arms, and hands. Avoid clenching your fists, as this can lead to tightness in the arms, shoulders, and neck.
  • Keep looking ahead. You should be gazing at the ground about 15 to 20 feet ahead of you. Never stare at your feet.
  • Land on your midfoot. I used to be a heel striker, which limited me in many ways. Nonetheless, things changed for the best when I started consciously working on landing on the middle of my foot, then rolling through to the front of the toes.
  • Point your feet straight head. Running with your feet pointed in or out could increase the risks of injuries, and it’s inefficient. So make sure to point your toes in the direction you want to go

Coping With A Running Injury

Already injured? Here’s how to make the most out of your recovery process.

Become a Student

Educating yourself about your injury and healing process is the ideal place to start your recovery journey.

Most running injuries are simple.

There are no big mysteries behind them; there’s always a reason why they happen.

By learning more about the symptoms, treatment, causes, and prevention of your condition, you’ll gain greater confidence and control over your current predicament, which helps ease any anxiety you’re going through.

Here are some of the questions you need to ask your healthcare professional.

  • What’s the full diagnosis? What type of injury do I have?
  • What made me injured in the first place?
  • How long will recovery typically take?
  • What are the red flags that the injury is getting worse?
  • What are my treatment options?
  • What’s the goal of treatments?
  • What should I expect during the recovery period?
  • What alternative exercises can I safely do during the rehab period?
  • What can I do to prevent or fight off the inevitable weakness, stiffness, and lack of coordination that increases the risks of relapse?

Set Realistic Goals

Just because an injury sidelines you doesn’t mean you should stop setting goals.

The truth is proper goal-setting post-injury can help instill motivation and foster diligence as you start your recovery journey.

What’s more?

Setting goals grants you an active role in the recovery process, helping you increase self-confidence.

This also cuts your fear and anxiety by helping you focus on what can be done.

Once you have discussed the ins and outs of your injury with your doctor, set SMART goals, an acronym for Specific, Measurable, Achievable, Result-focused, and Time-bound.

Here’s how to set SMART goals:

  • Specific. Focus on a specific area with a clear map of how and why you’ll improve it.
  • Be able to define clear and quantifiable outcomes, monitor progress, and set benchmarks.
  • Make sure your running goal is possible and that you believe in yourself that you can do it. Go for goals that stretch you slightly but do not hinder your healing process.
  • Result focused. Use your recovery targets to measure outcomes, not actions.
  • Time-based. Set a date for when you want to achieve your goal with a progressive and practical sense of urgency.

Maintain Your Fitness

Getting injured doesn’t inherently equal sitting on the couch the whole day and doing nothing.

Sure, there may be a few days of true rest when recovering from a serious injury, but be sure to consult with your doctor for a list of cross-training options you can do.

I know it’s hard to keep working out when you’re injured, but stopping all physical training may do you more harm than good.

Inactivity may slow down your recovery and drastically lower your feel-good hormones, such as serotonin, endorphins, and dopamine, and drastically—setting you up for more trouble down the road.

Low-impact exercises such as swimming, yoga, deep water running, walking, or moderate strength training can substitute for running and help maintain cardiovascular power and sanity.

Just remember to take it slow and get your doctor, therapist, or trainer’s green light before you establish a good alternative workout program.

Stay Positive

For a quick recovery, you need to heed your doctor’s instructions.

Show up for your treatments, rest, and keep track of your healing process.

But that’s not the whole story.

You also need to monitor your attitude—your emotional states and inner talk regarding your injury and the recovery process.

Work hard to keep a positive attitude to get the most out of your recovery process.

Stay focused on what you need (and can) do instead of what you’re missing out on.

I know it’s easier said than done, but keeping a positive attitude is key for a faster recovery.

What’s more?

Surround yourself with supportive people and encouraging items while repeating positive affirmations.

And keep in mind that things will eventually get better.

It’s just a question of time.

Here are more tips on how to increase your confidence.

How to Prevent Overuse Running Injuries – The Conclusion

The things I shared with you today should be enough to help you prevent running injuries. The key is to implement as many as possible. The rest is just details.

Now it’s up to you to take action and start training pain- and injury-free.

What’s not to like?

Do you have any favorite running tips?