Unlocking the Power of Tabata Sprints: A 4-Minute Fitness Revolution

female runner doing Tabata Workout routine

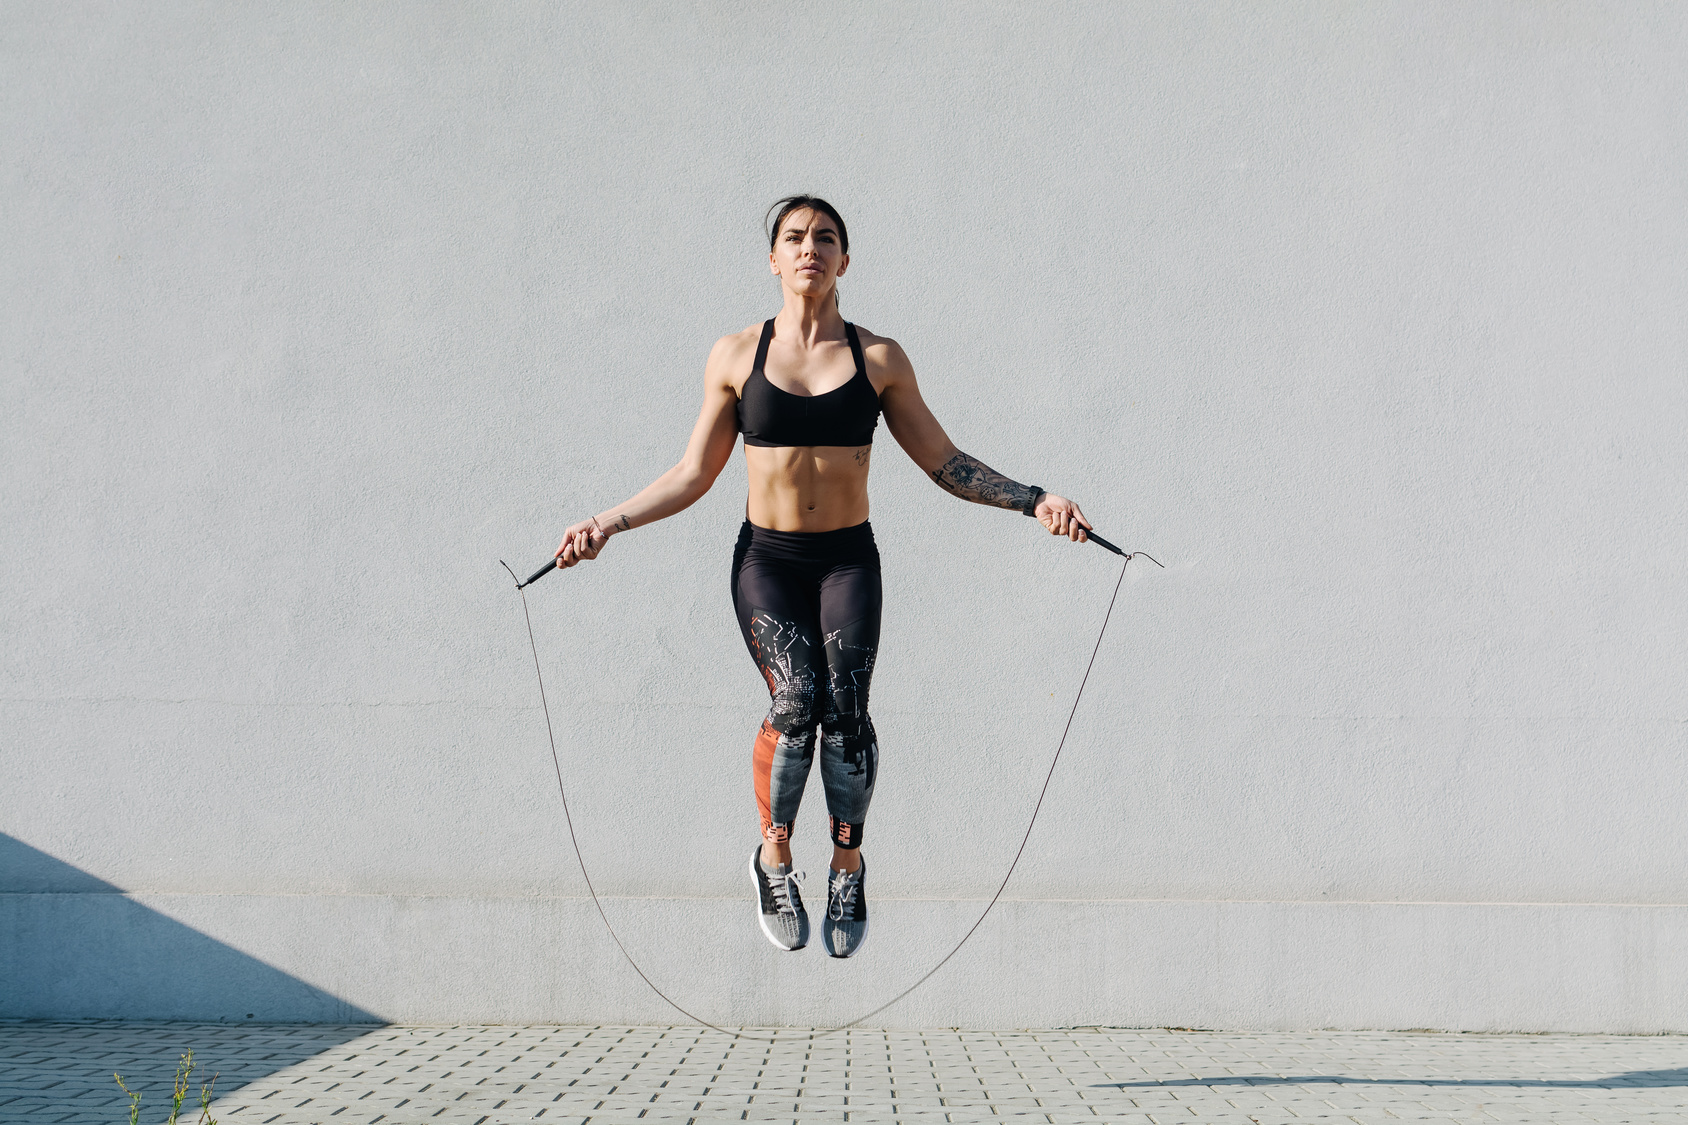
If you’re someone who’s no stranger to breaking a sweat, chances are you’ve encountered the term “Tabata sprints” more times than you can count.

But have you ever found yourself pondering, “Where on earth did Tabata originate, and why is it such a hot topic in the fitness realm?” I

f that thought has crossed your mind, today’s your lucky day. I’ve gone the extra mile, diving deep into the Tabata universe so you don’t have to.

And trust me, the story behind it is nothing short of fascinating.

In today’s article, you’ll not only discover the secrets of Tabata sprints but also learn how to incorporate them seamlessly into your fitness routine without any fancy equipment or gym memberships.

So, buckle up, and let’s embark on this exhilarating Tabata adventure together!

What Is Tabata Workout Training?

Alright, fitness enthusiasts, gather ’round. We’re about to dive into the incredible world of Tabata training, where just four minutes can change the game.

Here’s the lowdown:

Imagine this: 20 seconds of all-out effort followed by a 10-second breather, and you repeat this cycle eight times. That’s the Tabata training method in a nutshell. It’s like a fitness rollercoaster, and it works wonders.

Our story begins with Izumi Tabata, Ph., a former scientist and researcher at Japan’s National Institute of Fitness and Sports in Kanoya. Dr. Tabata had a grand experiment in mind.

Dr. Tabata gathered a bunch of young, eager athletes with diverse backgrounds and skills. He split them into two groups: one doing moderate-intensity training (the control group) and the other diving headfirst into high-intensity training.

The Four-Minute Revelation

After rigorous testing, Dr. Tabata dropped a fitness bombshell: Four minutes. Yes, you read that right. Four minutes of this high-intensity, heart-pounding workout was all it took to yield substantial gains and growth.

The Proof Is in the Research

In 1996, Dr. Tabata unveiled his groundbreaking findings in “Medicine and Science in Sports and Exercise.” The study titled “Effects of Moderate-Intensity Endurance and High-Intensity Intermittent Training on Anaerobic Capacity and VO2max” shook the fitness world.

Let’s dig deeper into the nitty-gritty of this research.

The Initial Study

Let’s rewind the clocks to 1996, a time when Dr. Tabata and his team embarked on an awe-inspiring fitness journey.  The subject of the research were broken down into two groups of eager, mid-twenties amateur athletes.

  • Group I embraced Protocol One, committing to an hour of stationary cycling at 70 percent of their VO2 max five days a week. This was your classic long-haul, moderate-paced workout.
  • Group II, on the other hand, were the Tabata trailblazers, choosing Protocol Two. They opted for an intense regimen: four days a week, eight explosive 20-second bursts of biking at a jaw-dropping 170 percent effort, sandwiched between 10-second recovery intervals.

Crunching the Numbers

  • Group I endured 1,800 minutes of moderate-intensity training over six weeks.
  • Group II? Well, they only sweated it out for about 120 minutes of high-intensity training during the same period. That’s the equivalent of just four minutes and 20 seconds per session.

The Mind-Blowing Results

  • Group I saw a decent 9.5 percent boost in their maximum aerobic capacity (the cardiovascular stuff), but their anaerobic system (the muscular side) didn’t budge much.
  • Group II not only crushed their maximum aerobic capacity with a 14 percent increase but also flexed their anaerobic power, showing an incredible 28 percent improvement.

Conclusion:

In a plot twist that left everyone’s jaws on the floor, high-intensity interval training proved to be the ultimate game-changer. The group that worked out for just four minutes and 20 seconds, thanks to the power of high-intensity intervals, emerged as the clear winners at the end of the six weeks.

MIND BLOWN!

So, there you have it, folks. The science-backed, time-efficient workout that forever altered the fitness landscape. Ready to give Tabata a whirl?

Benefits of Tabata Sprints Training

So, you’ve heard the buzz about Tabata sprints, and you’re ready to dive in. But what’s in it for you? Let’s break down the incredible benefits that await those who make Tabata a regular part of their fitness journey:

Improved Anaerobic Capacity

Imagine having a secret reserve of energy, the kind that kicks in when you’re pushing your limits. That’s what improved anaerobic capacity brings to the table.

It’s the extra oomph that lets you run faster and longer, enhancing your resistance to fatigue and helping your muscles battle lactic acid buildup, research shows.

Burns Mad Calories

Want to turn your body into a fat-burning furnace? Tabata’s got you covered. In a study, it was found that a typical Tabata workout can torch a mind-boggling 12 to 15 calories per minute.

That means, in just four short minutes, you’re on your way to burning calories like never before. It’s like a fat-burning miracle wrapped up in a 4-minute workout package.

Endless Combinations

 What I like about Tabata workouts is the endless number of training combinations you can do. You can perform any exercise you like. You can do push-ups, squats, Tabata sprints, burpees, or any other exercise that hits large muscle groups.  

Saves Time

In today’s fast-paced world, time is precious. Tabata recognizes this and offers a potent workout that fits into even the busiest schedules.

With just four minutes of high-intensity effort, you can reap the rewards that would take much longer with traditional workouts. Efficiency at its finest.

Metabolic Boost

Tabata isn’t just about the burn during your workout; it’s about the afterburn, too. High-intensity intervals like these can elevate your metabolism, causing your body to continue burning calories long after you’ve hit the showers. It’s like having a calorie-burning engine that keeps running, even at rest.

Here’s a list of further research about the effects of Tabata-style training.

Study 1

Study 2

Study 4

Tabata Logistics – Time it Right!

You have two main options to keep your Tabata workout on track: a trusty stopwatch or a Tabata-specific app. Each has its advantages, so let’s break them down.

Stopwatch:

A classic stopwatch is a simple yet effective tool. It’s a no-frills way to time your intervals and rest periods accurately. However, there’s a catch – it requires you to glance at it during your high-intensity sprints. When you’re pushing yourself to the max, that can be a challenge.

A Tabata App:

Enter the Tabata app, your digital training partner. These apps are designed with one goal in mind – to make your Tabata sessions seamless and hassle-free. They offer audio cues, visual countdowns, and round tracking, leaving you with zero guesswork.

Plus, they let you focus entirely on your workout without the distraction of checking the time.

If you’re wondering which Tabata app to go for, look no further. Here are a couple of recommendations:

  • Tabata Pro ($3): A premium choice that provides top-notch features and customization options. It’s like having a personal Tabata coach in your pocket.
  • Free Versions: If you prefer to keep it budget-friendly, a quick Google search for “Tabata apps” will yield plenty of free options. These can get the job done without breaking the bank.

Whichever timing method you choose, the key is consistency and precision. Your Tabata success hinges on hitting those 20-second bursts and 10-second rests spot on.

The 30-Minute Tabata Workout For Beginners

Are you ready to push your limits, break a sweat, and transform your fitness level? Look no further than this high-intensity Tabata workout that’s guaranteed to leave you breathless and exhilarated. Strap in and get ready to unleash your inner beast!

The Tabata Challenge – 5 Rounds of Pure Intensity:

Duration: Each round lasts a swift but potent 4 minutes, consisting of 8 rounds of explosive effort.

  1. Maximum Effort (20 seconds):

This is your moment to shine. Push yourself to the absolute limit. Whether it’s intense squats, lightning-fast sprints, or another cardio-busting exercise, go all out. Every second counts.

  1. Quick Recovery (10 seconds):

Take a well-deserved breather, but keep it snappy. It’s your brief respite before the next explosive round.

  1. Repeat x 8:

That’s right, you’ll be repeating this intense cycle eight times in total. It’s a relentless challenge, but the rewards are worth it.

The Tabata Battle Plan:

Here’s a quick rundown of the workout structure, just to keep you on track:

  • Round 1: Exercise 1 (20 sec) ➡️ Rest (10 sec) ➡️ Repeat x 8
  • Round 2: Exercise 2 (20 sec) ➡️ Rest (10 sec) ➡️ Repeat x 8
  • Round 3: Exercise 3 (20 sec) ➡️ Rest (10 sec) ➡️ Repeat x 8
  • Round 4: Exercise 4 (20 sec) ➡️ Rest (10 sec) ➡️ Repeat x 8
  • Round 5: Exercise 5 (20 sec) ➡️ Rest (10 sec) ➡️ Repeat x 8

Remember:

This Tabata workout is an all-out sprint, not a leisurely jog. Give it everything you’ve got during those 20-second bursts. It’s okay to feel challenged – that’s where the magic happens.

Exercise Selection:

Feel free to mix and match exercises to keep things fresh. Here are a few ideas to get you started:

  • High knees
  • Burpees
  • Jump squats
  • Push-ups
  • Mountain climbers
  • Bicycle crunches
  • Sprinting in place

The Warm-up

Think of your warm-up as the launchpad for your Tabata journey. It’s your chance to gradually elevate your heart rate, loosen up those muscles, and get your body primed for action.

  • Step 1: Begin with a 5-minute jog at a comfortable pace. This gentle introduction helps get the blood flowing and your muscles in the mood.
  • Step 2: Dynamic stretches are your best friends here. Perform leg swings, arm circles, hip rotations, and torso twists. These movements help increase flexibility, prevent injury, and mentally prepare you for the intensity ahead.
  • Step 3: Finally, perform a few short bursts of the exercise you’ll be doing during your Tabata sprints, but at a moderate pace. For example, if you’ll be doing high knees, start with a slower, controlled version. This helps activate the relevant muscles and refine your technique.

 The Cooldown (After the Sprints):

You’ve conquered those 20-second sprints – well done! Now, it’s time to transition back to a state of calm and allow your body to recover gradually.

  • Step 1: After your final sprint, avoid stopping abruptly. Instead, slow down your pace and jog lightly for a few minutes. This helps your heart rate gradually return to its resting state.
  • Step 2: Follow this with static stretches for the major muscle groups you’ve worked on during your sprints. Focus on your quads, hamstrings, calves, and hip flexors. Hold each stretch for 15-30 seconds to improve flexibility and reduce post-workout muscle tightness.
  • Step 3: Hydrate! Replenish those lost fluids by drinking water. You’ve earned it.

Round One: Tabata Sprints

Sprint for 20 seconds, rest for 10, then sprint for another 20 seconds, shooting for eight sprints at an all-out effort.

You can also perform the sprints on a steep hill, but make sure to pick a hill that’s not too technical since you will be running at your maximum speed for at least the first set of reps.

Round Two: Tabata High Knees

https://www.youtube.com/watch?v=whHxoB-AFYQ

Stand feet hip-width apart. Keep your back flat and core engaged the entire time.

Perform high knees by jumping from one foot to the other, lifting your knees as high as you can. Focus on lifting your knees up and down as fast as you can, landing on the balls of your feet as you run in place.

Do this for 20 seconds, rest for 10, and then repast the cycle eight times to complete the round.

Round Three: Tabata Jumping Lunges

Take a lunge position with your right foot forward, knees bent, and left knee nearly touching the floor.

Next, while extending through both legs, explode up and jump as high as you can, swinging your arms to gain momentum. Then switch the position of your legs mid-air, moving your left leg to the front and right leg to the back, and immediately lower yourself into a lunge on the opposite side.

Keep jumping back and forth for 20 seconds, then rest for 10, repeating the cycle eight times.

If you can’t keep doing jump lunges with good form, then perform walking lunges instead. Be aware of your limits.

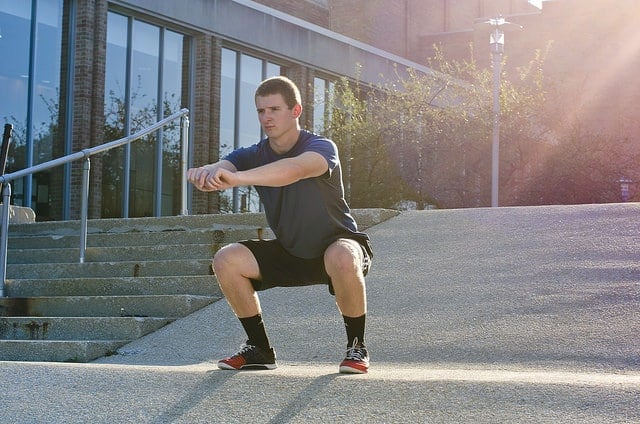
Round Four: Tabata Squats

Assume an athletic position with feet hip-width apart. For more challenges, hold a set of dumbbells or plates at shoulder height.

Next, to perform the squat, bend your knees and sit back, lowering yourself down until your thighs are parallel to the floor. Keep your back flat, head facing forward, and your toes tracking over the knees the entire time.

Last up, return to standing by pushing through your heels.

Continue squatting for the full 20-second interval, moving as fast as you can, then rest for 10 seconds. Repeat the cycle eight times.

Round Five: Burpees

Stand feet hip-width apart, back straight, and core engaged.

Next, squat down and place your palms on the floor, then jump both of your feet into a full plank position, then quickly hop your feet back into a squat and explosively leap into the air, reaching your arms straight overhead. Add a clap for some sound effects!

In case you’re looking for more challenge, then you can either add a standard push-up from your plank or drop your chest to the floor before jumping back up.

Conclusion

Here is the routine in a nutshell

Round 1 (4 minutes) Sprints

  • Sprint at your highest speed for 20 seconds.
  • Rest for 10 seconds.
  • Complete eight rounds for a total of 4 minutes.

Round 2 (4 minutes) High Knees

  • High knees for 20 seconds, as many reps as possible with good form.
  • Rest for 10 seconds.
  • Complete eight rounds for a total of 4 minutes.

Round 3 (4 minutes) Jumping Lunges

  • Jumping lunges for 20 seconds, as many reps as possible with good form.
  • Rest for 10 seconds.
  • Complete eight rounds for a total of 4 minutes.

Round 4 (4 minutes) Squats

  • Squats for 20 seconds, doing as many reps as possible with good form.
  • Rest for 10 seconds.
  • Complete eight rounds for a total of 4 minutes.

Round 5 (4 minutes) Burpees

  • Do as many burpees as you can for 20 seconds.
  • Rest for 10 seconds.
  • Complete eight rounds for a total of 4 minutes.


Tabata Sprints Workout –  The Conclusion

There you have it.

Whatever exercises you pick, your choices should target large of muscles to get the most out of Tabata sprints training.

It’s perfectly okay to feel some soreness or muscle pain during and following your first few Tabata sessions. That’s actually how you know that you’re doing it right.

As you get fit, you’ll body will adjust, and you’ll only experience a mild to moderate soreness after the beginning.

For more, here are some of my favorite cardio workout alternatives to running.

Please feel free to leave your comments and questions in the section below.

In the meantime thank you for reading my post.

Keep Running Strong

David D.

Conquer Winter Workouts: Essential Guide to Cold-Weather Running Gear

Hey there, winter warriors!

It’s that time of year again when the frosty winds and shorter days might tempt you to hibernate indoors. But wait! Before you trade your running shoes for cozy slippers, let’s talk about something magical: winter running.

Sure, the cold months can be a bit… well, chilly, but that’s no reason to hang up your running shoes. In fact, it’s the perfect opportunity to experience the thrill of running in a winter wonderland.

Picture this: You, bundled up like a pro, taking brisk strides as the snowflakes dance around you. The crisp air filling your lungs, and the world, still and serene, is your playground. Trust me, it’s an adventure waiting to happen!

Now, I get it; winter running can seem daunting. But fear not, because I’m about to spill the beans on how to conquer the cold and turn your winter runs into exhilarating escapades. From the right gear to pro tips, we’ve got it all covered.

So, are you ready to defy the winter blues and embrace the chill? Well then, let’s lace up those shoes and dive into the wonderful world of winter running!

The Golden Rule Of Proper Winter Running Clothes

When it comes to dressing for winter runs, there’s one golden rule that can be your saving grace: the 20-degree rule.

Here’s why it’s your best ally for staying comfortable and avoiding over-layering:

The Science Behind It

Your body’s perception of temperature changes as you start running, and your heart rate increases. What initially feels chilly can quickly turn into a comfortable temperature.

Preventing Over-Layering

Over-layering can lead to excessive sweating and discomfort. It’s a common mistake to overdress for the cold, only to regret it once you’re warmed up.

How It Works

If the outdoor temperature is 40 degrees Fahrenheit, following the 20-degree rule means dressing as if it were 60 degrees.

Expect to feel a bit cold during the first part of your run. As your body generates heat, you’ll quickly warm up and feel comfortable.

Layer Wisely

With the 20-degree rule in mind, opt for a moisture-wicking base layer, an insulating layer, and a windproof and waterproof outer shell as needed.

The Exact Winter Running Gear You Need

Dressing for winter running is all about covering your body from head to toe, leaving nothing exposed.

Doing this will not only make running in the cold more enjoyable and protect you from the cold and wind, but it will also prevent chapping, frostbites, and a host of other troubles.

Additional Resource – Here’s the full guide to a proper running kit.

Winter Running Clothes 1. Your Head and Neck

Keeping your head and ears warm during cold-weather runs is crucial for comfort and regulating your body temperature.

Here’s why it matters and how to do it right:

  • Significant Heat Loss: Your head is a prime area for heat loss, accounting for up to 10% or more of your body heat. Keeping it covered is essential.
  • Material Matters: Opt for a lightweight thermal hat made of technical materials. These fabrics lock in just the right amount of heat while keeping your head warm and dry.
  • Balaclava Bonus: Balaclavas are fantastic for extreme cold. They cover the head and part of the face, providing ultimate protection. You can even pull them over your mouth to warm the air you breathe.
  • Ear Protection: If you prefer not to wear a full hat, go for a thermal headband or ear warmer. These keep your ears toasty while preventing overheating.
  • Music Lovers’ Solution: Headbands also help music lovers by preventing pain in the inner ear caused by airflow between earbuds.
  • Vaseline or BodyGlide: For added protection, apply Vaseline or BodyGlide on exposed skin, especially on your lips, cheeks, nose, and ears. This guards against frostbite, chapping, and windburn.
  • Balance is Key: While staying warm is essential, be mindful of overheating. Dressing in layers allows you to adjust your attire as your body warms up during your run.
  • Windy and Frigid Days: On extremely windy and frigid days, extra coverage for your neck and face is a lifesaver.

Additional Resource- Here’s your guide to running sunglasses

Winter Running Clothes – 2. Upper Body Winter Workout Gear

Alright, winter warriors, it’s time to get down to the nitty-gritty of dressing for those chilly runs. When it comes to winter runs, the name of the game is layers. But not just any layers—smart, moisture-wicking, warmth-trapping layers!

Why Layers, You Ask?

The right layers act as your cozy cocoon, locking in precious body heat. So, even when it’s icy outside, you’ll feel snug as a bug in a rug.

Stay Dry, Stay SafHere’s the kicker—these layers don’t just keep the cold out; they also let the sweat out. That’s right; they’re breathable! Say goodbye to that clammy feeling and hello to dry, comfortable runs.

Look for fabrics that are lightweight, comfy, and breathable. One word of advice: steer clear of cotton! Cotton traps moisture, leaving you feeling like a walking icicle. Not fun..

Here is how you should layer on your upper body for an enjoyable and safe winter running experience:

Base Layer

Alright, let’s dive deeper into the world of winter running layers, starting with the MVP—the base layer. When it comes to staying toasty during those frigid runs, this layer is your best buddy.

Why Is the Base Layer So Important?

It’s the layer in direct contact with your skin, so it sets the tone for how warm and happy you’ll be out there.

This layer’s role is to wick moisture away from your skin. Fabrics like polypropylene, Thermax, Dryfit, CoolMax, or Thinsulate are your go-tos here. Say goodbye to sweaty discomfort.

Why Not Cotton?

Cotton may be comfy for your PJs, but it’s a no-go for running in the cold. Cotton traps moisture, leaving you feeling like you took a dive into a chilly pool. Not fun, right?

Choose Your Sleeve Length Wisely

If it’s above 35°F, a long-sleeve base layer can work wonders. But hey, it’s your run, your rules. Experiment with different layers until you find your perfect combo.

When the Mercury Drops…

If it’s colder than 35°F, consider tossing a midlayer into the mix for extra protection against the chill.

Additional guide – Here’s how to breathe when running in the cold

Middle Layer

When the mercury dips below 25°F, this layer becomes your best friend. It’s the key to trapping precious warmth on those bone-chilling days.

Choosing the Right Fabric

Look for fabrics like Dryline, polyester fleece, Thermafleece, Polartec, Akwatec, or Thermax. These materials excel at keeping you cozy.

Stay Warm, Stay Stylish

Depending on your preference, you can go for heavier layers made from fleece or polyester. Or if you’re braving frigid temps, consider an insulated jacket..

Outer layer

The outer layer is your final line of defense against the cold, rain, snow, and wind. It’s like your trusty shield, protecting you from Mother Nature’s worst moods.

Base, Mid, and Outer Layer

For low temperatures and precipitation, you need a trio of layers: a moisture-wicking base layer, an insulating midlayer, and the grand finale, your outer layer.

The Zipper Advantage

Opt for a jacket with a zipper or half-zipper. This nifty feature lets you regulate your temperature by zipping up or down. If things get too toasty, tie your jacket around your waist. Easy peasy!

Extra Length and Handy Pockets

Cover Your Assets: Look for a longer jacket that covers your behind. It’s a lifesaver in cold, wet conditions. And don’t forget pockets! They’re perfect for stashing your hat and gloves when you start feeling the heat.

The Right Fabrics for the Win

Fabric Matters: When shopping for an outer layer, focus on fabrics like Supplex, ClimaFit, nylon, Gore-Tex, Microsuplex, and Windstopper. These materials are like armor against the cold.

Vest Option

Go Sleeveless: If you’re not a fan of jackets, consider a vest. It’s a fantastic alternative that keeps your core cozy while letting your arms breathe.

Additional Resource – What’s the best temperature for running?

Winter Running Clothes 4. Hands

Chilly fingers cramping your running style? Say no more! I’ve got the scoop on keeping those digits toasty during your winter workouts.

The Mighty Mittens vs. Cool Gloves

Slip on a trusty pair of gloves when the mercury drops below 40 degrees F. Opt for gloves crafted from technical materials to keep your hands warm and dry. Polyester blends work wonders for winter runs.

Tech Savvy? Choose Wisely!

Are you glued to your smartphone even when you run? No worries! Look for gloves with “tech tip fingers.” They’ll let you work your touchscreen gadgets with ease while keeping your hands snug.

Additional Resource – Your guide to the best running hats.

Mittens for Frigid Days

When the cold bites and gloves just won’t cut it, it’s time to embrace the warmth and comfort of running mittens. These cozy hand-warmers are a true game-changer for frosty runs.

Hand Saver Extraordinaire

Mittens are your ultimate “hand savers.” They outperform gloves in the battle against the cold, providing top-notch protection and warmth.

Stay Toasty with a Handy Trick

While you’re out on your chilly run, keep those mittens toasty by gently clenching and unclenching your fists. Just remember, don’t overdo it—too much tension can zap your energy.

Additional Resource – Here’s your guide to hydration running vests

, winter running clothes – 5. Lower Body Gear

When it comes to your lower half during winter runs, remember this golden rule: dress for temperatures that are 20 degrees warmer than they actually are. Now, let’s dive into your options:

These are my top picks for staying cozy in cold weather. They provide that essential compression layer against your skin, wicking away sweat and keeping you dry and warm. Look for synthetic fabrics like Thinsulate, polypropylene, and Thermion for the best results.

Another option is layering. Start with a moisture-wicking base layer, then add running tights or pants over them. This combination keeps you warm while effectively managing moisture.

If you’re into a unique style, you can wear shorts over your tights. It’s not just a fashion statement; it also adds an extra layer of insulation.

Winter running clothes – 6. Winter Running Socks

Your feet deserve some love, especially during winter runs. Here’s the deal: never, and I mean NEVER, wear cotton socks for running. Cotton doesn’t play nice with moisture; it soaks it up and stays wet, making your feet cold, miserable, and susceptible to frostbites and blisters.

Instead, treat your feet to wicking socks made from materials like wool, CoolMax, or acrylic. These socks keep your tootsies warm and dry, which is precisely what you want for winter runs.

In my experience, Smartwool and Breath Thermo socks are top choices for winter running. Personally, I’m a fan of Smartwool Ph.D. Toe Sock Mini – they not only regulate temperature but also keep those stinky bacteria at bay.

Additional Resource – How to choose a running jacket

7. Shoes For Winter Running

When you’re hitting the snowy, slippery, and wet trails of winter, your choice of footwear can make or break your run. Regular running shoes, with all their ventilation, just won’t cut it when you’re battling the elements.

So, what should you look for in winter running shoes? Protection, traction, and warmth are key. You’ll want shoes that shield your feet from rain, snow, and all that winter nastiness. Plus, a little extra traction goes a long way in preventing those icy slips and slides.

Consider investing in a pair of winter-specific running shoes designed to tackle these conditions. They often feature waterproof or water-resistant materials, warm insulation, and improved traction. These specialized shoes will keep your feet cozy and safe, so you can keep conquering those winter runs.

So what’s the solution here? You have three options to choose from:

Option 1: Trail shoes

When it comes to winter running, having the right footwear can make all the difference. Trail running shoes can be a fantastic choice, especially if you pair them with moisture-wicking socks and do your best to avoid puddles.

Here’s why trail shoes shine in winter conditions:

  • Waterproofing: Trail shoes are often designed to be waterproof or water-resistant. This means your feet stay dry even when you encounter slushy, wet, or snowy terrain.
  • Traction: These shoes are built for the rugged outdoors, so they typically offer excellent traction. That extra grip can be a lifesaver on slippery winter trails.
  • Durability: Winter can be tough on your shoes. Trail running shoes are built to withstand rugged terrain, making them a durable choice for the season.

However, keep in mind that trail shoes might not always be the perfect fit. In some situations, you may need even more traction and protection. So, assess your running environment and choose your footwear accordingly.

Here is your second option.

Option 2: Winter shoes

When the cold weather sets in, and you’re determined to keep running, don’t underestimate the importance of the right footwear. Winter running shoes, especially those with waterproof features like Gore-Tex, can be a game-changer.

Here’s why winter running shoes are a must-have for chilly, wet, or snowy conditions:

  • Waterproof Protection: With waterproof fabrics in the shoe’s upper, your feet stay dry even in freezing rain or slushy snow. No more soggy, uncomfortable runs.
  • Traction: Winter running often means dealing with slippery surfaces, whether it’s icy sidewalks or wet trails. These shoes provide the extra traction you need to stay on your feet.
  • Stability: Uneven terrains and unpredictable winter surfaces require stability. Dedicated winter running shoes, like the Saucony Men’s Xodus 5.0, offer the support and balance you need.

Option 3: Winter-Proof your Shoes

Winter running can be challenging, especially if you don’t have dedicated winter or trail running shoes. But fear not, there are a couple of hacks to make your regular running shoes more winter-friendly:

  • Duct Tape for Extra Protection: If you can’t afford a pair of Gore-Tex or winter shoes, duct tape can be your best friend. Cover the mesh on the upper and toes of your regular running shoes with duct tape. This provides extra protection against cold, wind, and moisture, keeping your feet warmer and drier.
  • YaxTrax for Improved Traction: YaxTrax is a handy accessory that you can easily strap onto your running shoes. These traction aids offer better grip on icy roads and slippery terrain. They are a game-changer for winter runners, especially if you encounter icy patches during your routes. Just remember to remove them when running on dry surfaces to avoid feeling clunky.

Note – Here’s how to breathe in the cold.

Winter Running Gear – The Conclusion

Your comfort level while running in the cold will depend mainly on your own personal preference, how fast you are running, how long your run is, and how much you tolerate the cold, so your ideal winter running outfit may differ from mine or someone else’s.

Therefore, nothing is written in stone here.

In the end, it’s your call to make.

Every person is different and responds differently to different temperatures and weather conditions.

I hope you find my tips on proper cold-weather running gear to be helpful. And in case you have any additional tip you swear by and you would like to share, feel free to add them in the comments section. I will be really grateful.

Lunges for Runners: Boost Performance and Prevent Injuries

weighted lunge exercise

If you’re all about lunges, whether you’re rocking the weighted lunges, pulse lunges, or alternating lunges, then you’ve stumbled upon a goldmine of information right here.

Now, let me share a little secret with you: lunges hold a special place in my heart. They’re like the rockstars of strength exercises, always delivering a powerful punch to your lower body.

I’m talking about the classic lunges, but wait, there’s more! I’ll unveil 10 amazing variations that will spice up your routine and target different areas of those mighty legs.

But here’s the exciting part: lunges are not just any ordinary exercise. They have a special connection with runners, making them an ideal addition to your training regimen. Why, you ask? Well, when you perform lunges, you’re stepping into a world of balance and single-leg motion—just like when you’re out there on the running track.

With every lunge, your body slightly tips the scales, shifting the focus onto one leg at a time. It’s a dynamic movement that mimics the very essence of running itself. Talk about functional training, right?

Are you ready? Let’s lunge our way to superior running performance!

What Do Lunges Work?

Get ready to uncover the incredible benefits that lunges bring to the table. These bad boys are not just your average exercise—oh no, they hold the power to transform you into a speed demon, all while keeping injuries at bay.

Let’s dive into the magnificent world of lunges and discover why they’re a runner’s best friend.

Strong Muscles

Imagine this: you’re out on a run, feeling the wind in your hair and the pavement beneath your feet. But wait, what’s that? It’s the whisper of stronger, more powerful legs calling your name. That’s right, my friend, lunges are the key to unlocking your full running potential.

These leg-strengthening wonders target your quadriceps, hamstrings, and glutes like nothing else. It’s like a symphony of muscles working together, harmoniously propelling your body forward. By building strength and power in these areas, you’ll be ready to unleash lightning-fast sprints and conquer the track like a true champion.

But there’s more to the story than meets the eye. You see, lunges have a secret weapon—balance. As you gracefully lunge forward, your body demands stability. Meet the glute minimus and glute medius, the unsung heroes of your lower body stability. Strengthening these muscles indirectly through lunges adds an extra layer of protection to your running journey.

Protect Against Injury

We all know that running can be tough on the body, especially when it comes to our precious knees. But fear not, for lunges are here to save the day. By strengthening the muscles surrounding your knees—hello, hamstrings, quads, and calves—you’re providing them with a suit of armor. It’s like placing a shield of strength around your knees, shielding them from the high-impact nature of running and reducing the strain placed upon them.

Balance & Coordination

Just like a tightrope walker gracefully glides across the thin wire, lunges are the secret to enhancing your single-leg balance. Think of it as a dance between your body and the ground, a delicate ballet that strengthens your stability muscles. By incorporating lunges into your routine, you’re building a fortress of stability, protecting yourself from the treacherous ankle sprains that may lurk around the corner.

But there’s more to lunges than meets the eye. They hold the key to unlocking the power of your stride. Imagine yourself as a gazelle, gracefully bounding through the wilderness. Lunges can help you increase your stride length, propelling you towards newfound speed and agility.

In fact, a study published in the prestigious “Journal of Strength and Conditioning Research” discovered the remarkable connection between lunges and improved running performance. They found that lunges, both the forward and jumping variations, can skyrocket hamstring strength and boost your running speed. It’s like unlocking a hidden gear within yourself, ready to take on any race or challenge that comes your way.

But wait, there’s more! Lunges aren’t just a fantastic exercise to include in your workout routine—they’re also a powerhouse warm-up tool. Before you dive into the intensity of your training session, lunges can ignite the fire within your hamstrings and quadriceps. They prepare your lower limbs for action, enhancing their function and getting your body temperature rising. It’s like revving up the engine of a sports car, getting it ready to hit the track with power and precision.

Convenient

You’re on the go, traveling the world, and suddenly you feel the burning desire to squeeze in a workout. But wait, you’re in a cramped hotel room with limited equipment. Fear not, my friend, because lunges are here to save the day.

The beauty of lunges lies in their practicality. They require minimal space and can be done almost anywhere. All you need is a clear area to unleash your lunging prowess and the motivation to push yourself. Whether you’re in a park, at home, or even in a hotel room with limited legroom, lunges have got your back.

But what if you’re just starting your fitness journey or have specific fitness needs? Fear not, for lunges are a versatile exercise that can be tailored to suit your unique requirements. They are scalable, meaning you can easily modify them to fit your fitness level. Feeling like a lunging warrior? Add some weights to challenge your muscles even more. Want to amp up the intensity? Increase the number of reps or widen your lunges for an extra burn. The possibilities are endless, limited only by your imagination and determination.

Similar to the endless creativity of artists, lunges, just like push-ups, squats, and planks, provide an endless canvas of possibilities. You can explore forward lunges, reverse lunges, walking lunges, side lunges, jumping lunges, and so much more. It’s like having a buffet of lunging goodness, ensuring that boredom is banished from your fitness journey.

The 10 Lunges Variations to Try

This post outline 9  types of lunges you can add to your strength cross training workouts.

That’s a lot of variations, but if you are like me then you surely realize that variety is the spice of life.

1. The Basic Lunge

This is the standard lunge.

Use this one to master proper lunge form and to target the hamstrings and glutes.

Proper Form

Assume an athletic position with feet hip width apart, back straight, core engaged.

Next, take an exaggerated step forward with your right foot, then lower your left knee within an inch of the floor.

Next, use the muscles of your left leg to pull yourself back up into the starting position, then continue forward alternating between the right and left leg.

Make sure to keep your upper body engaged but in a neutral position, just like when standing with a proper posture.

Allow for no forwards nor backward leaning.

And don’t twist either.

Embrace your core by pulling your belly button back toward your spine. Focus on reaching ahead of your body as you as possible while moving in a straight line the entire time.

Complete 12 lunges with each leg to complete one set.

2. Weighted Lunges

Benefits

To make the basic lunge more challenging, add weights to it.

You can up the ante by using a set of challenging dumbbells, kettlebells or a loaded bar.

You can also use heavy gym bag or your kid, if they don’t mind.

Additional resource – The Myrtle routine

Proper Form

Begin by holding a dumbbell in each hand with arms fully extended overhead.

If you are using a barbell, then to rest it across your upper back and have control over the weight the entire time.

Next, step forward into a deep lunge with your right leg, then drop deep into the lunge by bending both knees to a 90-degree angle.

Please, keep your chest up and torso upright throughout the movement.

No hinging forward is allowed.

Keep your core engaged the entire time to help you keep good form and protect your lower back.

Last up, bring your left leg forward and switch sides to complete one rep.

3. Jumping Lunges

Benefits

Add a plyometric effect to your lunges by incorporating this powerful move into your training arsenal.

Jumping lunges are key for increasing explosive strength and endurance in your lower body, which can help you run faster, and more efficiently.

This is a high intensity exercises, so pace yourself and be careful.

Proper Form

Start in a basic lunge position with your right leg in front.

Next, lower down until your knees almost touches the floor, push through both feet then quickly explode upward so that your feet come together and switch your legs midair to end up in a lunge with your left leg in front.

Keep switching legs in this manner as fast as you can for one full minute to complete one set.

4. Backwards Lunges

Benefits

This is the backward way of doing the basic lunge.

The backwards lunge emphasizes the quads and glutes more than any other muscle.

Proper Form

https://www.youtube.com/watch?v=LWaVpSqXDE4

Assume an athletic position, then take a large and controlled step backwards with your right leg, landing on the ball of the foot, then bend both knees until they are bent at a 90-degree angle.

Lower your hips until your front thigh is parallel to the floor with the lead knee positioned directly over your ankle.

Make sure your left knee is over your left ankle.

Last up, extend your knees and hips and press back up to standing position, then switch sides.

Continue alternating legs for 24 reps total to complete one set.

Additional reading – How to Avoid Running Injury

5. Reverse Lunge and Kick

Benefits

This one takes the above a variation a level higher and it’s great as a warm-up exercise as well.

Plus, it’s a great dynamic stretch for your hamstrings and hip flexors.

Proper Form

Stand tall with back straight and core engaged.

Then step back with your right foot coming into a deep lunge, and bending both knees to a 90-degree angle.

That’s your starting position.

Next, to perform this variation, shift your weight into the left foot and press your left heel into the floor as you push off with your right foot, kicking your right leg up and out in front you (like a kickboxing move) and touching your right toes to your left hand (if you can).

Last up, return to the lunge position in a slow and controlled manner.

Switch sides to complete one rep.

Aim for 12 reps to complete one set.

6. Lateral Lunges

Benefits

Also known as the side lunge, this variation is key for building strength in the abductors and hip stabilizing muscles.

This move also improves flexibility in the hamstrings and hip flexors.

Proper Form

https://www.youtube.com/watch?v=Kg0cMxAbKV8

From a standing position, step your right foot directly out to you right side.

Next, bend your right knee and sit your hips back, while keeping your left leg extended, and both feet flat on the floor the entire time.

Focus on pushing your hips back as if going to sit down on a low chair and keep your foot flat on the ground the entire time.

Last, and with a smooth and effortless transition, press back up to starting posting by pushing with your right leg.

Then repeat on the other side.

Aim for 10 reps on each side to complete one set.

8. Lunge with Rear Leg raise

Benefits

This variation ups the ante with your stability and balance while hitting hard the glutes and hamstrings.

Proper Form

Start by performing the standard lunge with your right leg forward.

Next, while engaging your core and extending your right leg, hinge forward at the hips and lift your back leg straight up until it’s parallel to the floor.

Make sure to form a straight line from your head to your left heel.

Last up, return to standing position and switch sides.

Aim for 8 reps on each side to complete one set.

9. Step-up and Lunge

Benefits

This move will come in handy if you do any type of uphill running.

In fact, the step-up and lunge is one of the best runners oriented strength exercises that there is.

This move can also help you jump higher, sprint faster and build some serious muscles in your lower body.

To perform this variation, you will need a step or a box about mid-shin height.

Proper Form

Begin by stepping your right foot onto the box or step, while the left foot is firmly planted on the ground and stretched back into a lunge position.

Next, look forward, engage your core, push through your right heel, then stand all the way up and bring your leg left to a high knee.

Then move your leg back to starting position in slow and controlled manner and lower down into a deep lunge without wobbling.

Do 8 to 10 reps on each side to complete one set.

You can make this move more challenging by holding a dumbbell in each hand by your sides.

10. Pulse Lunges

Benefits

This one is ideal if you are looking to build endurance in you all of your lower leg muscles without moving much.

The pulse can teach you a lot of keeping yourself in check and under control while you feel the burn.

Proper Form

Assume a standard lunge position with your right leg as the lead leg.

Next, begin pulsing by lowering down and up about 3 inches repeatedly until you have performed all reps.

If you are starting to feel the burn and legs start shaking during this exercise, then you are in the right place.

This is what’s supposed to happen.

Perform 16 to 20 pulses in the low position on each side to complete one set.

Conclusion

And that’s it for today. I hope you like the above 10 lunge variations. Just make sure to start doing them ASAP. Strength training for runners is non-negotiable.

In the meantime, thank you for reading my post.

Feel free to leave your comments and questions below.

David D.

13 Squat Variations for Runners: From Basic to Weighted, Transform Your Running Game

Strength Exercises For Runners

Let’s talk squats, shall we? Imagine if I could serenade every runner with a strength training love song, it’d be crooning “Squat, squat, squat…” on a never-ending loop! Because if there’s one golden nugget of exercise that I’d shout from the rooftops for every runner to embrace, yup, you guessed it – it’s the squat.

Here’s the lowdown for my fellow pavement pounders: whether you’re just stepping into your running shoes or have countless miles under your belt, squats (with their trusty sidekick, planks) deserve a standing ovation in your training routine.

Do Squats Help with Running?

So what makes the squat such a fantastic exercise?

Here are some of the reasons:

Increased strength

To truly thrive in running, strength isn’t just a bonus; it’s a necessity. It’s your shield against injuries and your ticket to top-notch performance.

Enter squats.

They’re like the Swiss Army knife of exercises – efficient, versatile, and oh-so-effective. From your quadriceps to your glutes, squats ensure that every running muscle gets a piece of the action.

Check “The Effects of Resistance Training on Endurance Distance Running Performance Among Highly Trained Runners: A Systematic Review” by Rønnestad et al., which explores the impact of resistance training on endurance athletes.

Boosted Core strength

Think of your core as the control center. When you squat, it’s working overtime to keep everything in check, making sure you’re moving right and staying injury-free. Want to level up? Add some front squats, overhead squats, and those sassy twisting squats to the mix. Your core will thank you (maybe not immediately, but definitely in the long run!).

Don’t take my word for it. Check out a research like “Core Muscle Activation During Swiss Ball and Traditional Abdominal Exercises” by Escamilla et al. This study delves into the activation of core muscles during various exercises, including squats.

Prevents Injury

Ever heard of pesky nuisances like the iliotibial band syndrome or runner’s knee? Well, by turbo-charging muscles like your hip abductors and quads, squats are like your personal bodyguards, shielding you from these running woes.  Studies such as “Prevention of Running Injuries” by Fields et al. are a perfect example.  This research examines strategies for injury prevention in runners.

Improve Bone Mass

Squats, as well as other weight-bearing exercises, help fortify your bone mass. So, as you gracefully dance through the years, squats are ensuring your bones remain as sturdy as a fortress, keeping issues like osteoporosis at bay.

Improved Flexibility

Imagine squats as your personal yoga instructor, guiding your body to stretch, bend, and twist, exploring its full potential.

Every time you squat, you’re granting your ankles, knees, hips, and glutes a ticket to the flexibility fiesta! Embracing this complete range of motion? It’s not just a boon for turning you into a human rubber band, but it’s pivotal for elite performance and sidestepping injuries.

The 11 Best Squats For Runners

Squats can be performed in so many ways.

So here are 13 squat variations for your squatting pleasure.

Squat For Runners – 1. Basic Squat

This is the standard squat.

Master this basic move before you move onto the more challenging variations.

Here are a few pointers to help you master the basic form:

Before you dive headfirst into the ocean of squat variations, let’s get you acquainted with the OG: The Basic Squat. It’s the foundation, the bedrock, the ‘original’ in your squat playlist. And nailing this down? It’s your golden ticket to all the cool, fancy versions out there.

Want a visual? Check out this handy tutorial: YouTube Tutorial on Basic Squat

Step-by-Step to Squat Perfection:

Set the Stage:

Stand tall, feet hip-width apart. Point those toes out just a tad.

Let your arms chill by your sides.

Channel a proud peacock: shoulders back, core engaged, and stand as if you’re trying to impress someone cute across the room.

The Descent:

Now, the fun part! Lower down, bending those knees. Aim to get those thighs chatting with the floor, becoming parallel buddies. But hey, if you two don’t hit it off right away, just get as low as feels right.

Quick checkpoint: keep those knees playing nice with your toes. And those toes? They’re glued to the floor, no lifting!

Push through those heels, straighten up, and give your glutes a good squeeze as you ascend.

Pro-tip: Imagine you’re in a love triangle with your knees and toes. Keep the knees tracking over your toes the entire time. It keeps the drama in check!

And voila! You’ve just done the basic squat. Keep practicing, and soon, you’ll be the talk of the squat town!

Squat For Runners – 2. Weighted Squat

Once you get the hang of the basic squat, then you can up the ante by adding weights.

In this variation, make sure to have a set of dumbbells of a challenging weight.

Proper Form

Ready to turn up the intensity a notch?

Let’s introduce a little extra “oomph” to your squats with some added weight! Once you’ve danced with the basic squat and feel like you’ve got the rhythm, it’s time to jazz things up.

Why Weighted Squats?

When you add weights to your squat routine, you’re essentially challenging your muscles to work a bit harder. And guess what? They love a good challenge! It’s like turning your squat from a casual stroll in the park to a delightful uphill hike.

Need a step-by-step visual? Dive into this tutorial: YouTube Tutorial on Weighted Squat.

Let’s Break Down the Weighted Squat:

Starting Strong:

Grab a pair of dumbbells that give you that “just right” challenging feel. Not too light, not too heavy.

Stand athletic. Feet? Shoulder-width apart. Dumbbells? Held by your side, palms giving each other a secret handshake.

This is home base. Your starting position.

The Mighty Descent:

Engage that core, it’s your secret weapon!

Squat on down. Imagine there’s an imaginary chair you’re trying to sit on. Bend at those hips and knees.

Hold that squat for a moment.

Climbing Back:

Time to rise back to stardom. Slowly and powerfully push up, coming back to your starting pose.

Remember, it’s a performance, not a race. Grace over pace!

Your Challenge: Go for 10 to 12 reps.

Additional resource – The Myrtl routine

Squat For Runners – 3. Wall Squat

This variation is relatively easy and can help you build mobility and endurance in your lower body.

Do this variation more often if you are often plagued with runners’ knee or knee pain because wall squats are safe and target the quads more than the standard version; according to a study, weak quads are linked to knee pain in runners.

Proper Form

Ever felt like taking a bit of a lean against a wall while working on those legs? Well, the wall squat is your buddy!

It’s the cool cousin of the standard squat, giving you a mix of ease and challenge at the same time. Plus, for those of us who’ve felt the pesky sting of runner’s knee or the occasional knee twinge, this might just be the balm you need.

 Why Wall Squat?

The wall squat, while seemingly chill, is great for enhancing your lower body’s endurance and mobility. It’s especially nifty because it zones in on those quads. And a little birdie (actually, some smart research) says that beefing up those quads can be the key to waving goodbye to knee pain for runners. So, let’s give those quads some love!

Breaking Down the Wall Squat:

Start with the Wall:

Your back? Cozy against a wall. Your feet? Placed confidently about two feet out in front of you. Remember, stand tall and proud; this is your power pose!

Slide & Glide:

Now, imagine you’re about to sit in a chair that’s not there. Push those hips back against the wall and slide down. The goal? Get those knees to a comfy 90-degree angle.

Hold the Magic:

Here’s where the fun (and burn) starts. Hold that pose! Aim for one to two minutes. Feels long? Just think of all the strength you’re building!

Level Up:

Finding it too breezy? Let’s play a game. Lift your right foot for a few seconds, then the left. It’s like you’re dancing but also toning those calves.

When done, slowly glide back up, standing tall and feeling the victory in those legs.

So the next time you see a wall, you know it’s not just for leaning against casually. It’s your workout buddy! Happy wall squatting!

This will also engage more of your calves.

Squat For Runners – 4. Tiptoe Squat

Dreamed of dancing on your tiptoes but never signed up for ballet? Well, the tiptoe squat has got you covered. Not only is it a fun variation, but it’s also fantastic for getting those calves and quads in shape. And here’s the best part: If you’ve ever thought, “I wish my quads were more toned without enlarging my glutes,” then this is your golden ticket!

Why the Tiptoe Squat?

It’s all about targeting those specific muscles. This squat dives deep into the calves and quadriceps, ensuring you get that sculpted look.

Need a visual? Here’s how it’s done: YouTube Tutorial on Tiptoe Squat

Mastering the Tiptoe Squat:

Stand confidently, feet a hip’s distance apart. Now, channel your inner ballet dancer and elevate onto the balls of your feet. Voilà! Your power stance is ready.

With grace, lower into a squat. Remember, slow and steady wins the race here. Once you’ve gone as low as feels good, take a moment to appreciate the burn, then rise to your starting position, keeping those heels lifted.

Feeling wobbly? It’s natural. Engage that core for balance. This isn’t just about keeping you steady; it also acts as a shield for your lower back.

Tip: If you’re new to this and need some added stability, don’t hesitate to use a chair or wall for support.

Squat For Runners – 5. Figure-four Squat

This variation targets the glutes and legs (just like the standard squat) but with the added bonus of stretching out those often-ignored glutes.

In other words, It’s a squat and a stretch at the same time.

Figure-four squats are also ideal for boosting balance and endurance in the quadriceps and glutes.

Proper Form

The Technique

Start with a mini-squat: keep your back straight your core on alert. Now, lift that right leg, bend the knee, and gracefully cross it over the left, resting the right ankle just above the left knee. There you are—in your poised starting position.

The Dive & Rise:

Dive into a squat. Feel the glutes stretching? That’s the magic! Push those hips back, and bend that left leg. Once you feel the depth, ascend back to your starting grace. Voilà—one rep down!

Steady as You Go:

If you’re thinking, “This feels wobbly,” you’re not alone! So, if balance is a challenge, grab a chair or align with a wall. And always remember—core engagement isn’t just about abs; it’s your balance guardian.

Tip: Aim for eight reps on each side for a full set. And don’t rush; the beauty lies in the stretch and control.

Let the Figure-four squat be your go-to for those days when you desire both muscle engagement and a sweet stretch. Let’s get squatting—and stretching!

Squat For Runners – 6. Sumo Squat

Sumo squats engage about every muscle in the lower body, including the quadriceps, glutes, hamstrings, and calves.

Not only that, this variation also increases muscular endurance and mobility.

The bodyweight sumo squat is challenging enough, but if you are looking for more, feel free to use a barbell or dumbbell for more training effect.

Proper Form

Mastering The Sumo Stance:

Start with Swagger:

Plant your feet wide apart, wider than your usual squat. Channel your inner sumo wrestler – toes confidently pointing outwards just a tad. That’s your power stance.

The Drop & Pop:

Now, dive! Ensure those heels are glued to the floor. As you descend, think “proud chest” to keep that back straight. Lower until those thighs greet your knees. Relish the depth, then ascend back to that mighty sumo stance. Looking for an extra burn? Throw in a pulse at the bottom.

Rep It Out:

Go for 10 to 12 reps to seal one set. As you groove into this move, you’ll feel the power of the sumo taking over!

Incorporate the Sumo Squat into your routine and feel the comprehensive engagement it offers. From strength to flexibility, it’s all wrapped in this one squat style.

Squat For Runners – 7. Squat Jumps

Add a plyometric effect to your squat by incorporating this variation into your training arsenal.

The squat jump hits the core hard, targets just about every other muscle in the lower body, and will push your endurance and cardio conditioning to the breaking point.

Proper Form

Why Squat Jumps?

Elevate Your Heart Rate: This move doesn’t just sculpt your legs; it gives your heart a workout too. Say hello to better cardio conditioning!

Core Galore: Feel that? That’s your core working overtime to stabilize during those jumps.

Total Lower Body Fiesta: It’s a party down there! Quads, hamstrings, calves – everybody’s invited.

Curious? Dive into it: Squat Jump Video Tutorial

Nail That Form:

Ready Position: Begin with that athletic stance we all know and love. Feel grounded and strong.

Dip & Drive: Now, descend into a half-squat, then – boom! – power up with all your might. Aim for the clouds!

Graceful Landing: Remember, you’re a ninja cat – land softly, absorbing the impact through bent knees. And voila, you’re set for the next explosive jump!

Repeat: Flow through 12 to 15 of these, and you’ve nailed a set.

Additional reading – How to Prevent Overuse Injury

Squat For Runners – 8. Single-leg Squat

This isn’t just another squat variation—it’s THE variation that will redefine strength and balance for you. A challenging move? Absolutely. Rewarding? You betcha!

Why Single-leg Squat?

Solo Spotlight: By using one leg, you really hone in on and target those muscles.

No Weights? No Worries! Perfect for home workouts or when you’re on-the-go. Your body weight is the only resistance you’ll need.

Balance Bonanza: Engage that core! This move requires (and builds!) fantastic balance and stability.

Mastering the Move:

Start in an athletic stance, but let’s mix it up. Ground yourself on your right foot, with the left one stretched out ahead.

Lower yourself, imagining you’re sitting back in a chair. How low can you go while keeping that form pristine?

Pushing through your heel, rise to the starting position. Feel the power of that solo leg!

Stay Tall and Proud: Keep that back straight—no hunching! Posture makes perfect.

Repeat: Target 8 to 10 reps on each leg, and you’ve aced a set.

Squat For Runners – 9. Frog Jumps

This plyometric variation is vital if you are looking to build faster running muscles and power.

I read somewhere that frog jumps are Usain Bolt’s favorite exercise.

Proper Form

Get into your athletic stance, squat down, and let your arms touch the floor. Remember: chest up, gaze forward.

Explode upwards, drive those knees high, and don’t forget to snap those feet together. Feel the power!

As you rise, swing your arms overhead. They’re not just for show—they’ll give you that extra push!

Cushion your landing in a deep squat. Use those legs to absorb the impact.

Repeat: Looking for a full set? Aim for 8 to 10 power-packed jumps.

Squat For Runners – 10. Squat Box Jumps

This is another plyometric squat variation that can help you build explosive power and turbo-charge your running speed.

Just be careful here, there is an element of danger in it, so be safe the entire time. This is, after all, an advanced squat.

Tread carefully.

Proper Form

Jump with Precision:

Stand in front of a sturdy platform. Feet hip-width apart, arms ready for momentum.

Drop into a squat, then explode up, aiming to land softly on the box. Engage your core; this is key!

Land gently in a half-squat on the box. Balance is crucial!

Jump off, but be controlled. Land soft, ready for the next rep.

Challenge Yourself: Feeling unstoppable? Up the box height for a tougher challenge. But remember, always be safe!

Rack up those reps! Shoot for 8 to 10 to finish a set.

Squat For Runners -11. Overhead Squat

This is one of the most sought-after moves in the CrossFit world, and it’s famous for one reason: it delivers.

The overhead squat is vital for improving athletic movement, whether you are a recreational runner or an elite athlete.

Nonetheless, they require high degrees of balance, strength, and flexibility.

So be careful and only do the overhead squat once you have mastered the above variations (and the front squat as well).

Proper Form

Setup: Assume a confident stance, feet shoulder-width apart. Hold a barbell overhead with a grip wider than shoulder width. Your arms should be fully extended.

Steady: Engage your core, ensuring stability. Remember: this squat tests balance, too!

Descend: Push your hips back and squat down, ensuring your arms remain straight and the bar stays aligned overhead. Your hips should sink below your knees.

Rise & Shine: Push through your heels, extending your hips and knees to return to the starting position.

Flexibility & Form: It’s essential to have a limber lower body and strong core activation for this squat. Don’t rush; aim for precise movement.

10-12 reps make a set.

Squats for Runners – The Conclusion

Here you have it!

I hope you liked my 13 squat variations list. Just make sure to start doing them as soon as you can.

In the meantime thank you for reading my post.

Feel free to leave your comments and questions below.

Cheers

David D

Unleashing the Power of Isometric Training for Runners: Benefits and Techniques

Today, I’m about to introduce you to a workout routine that will push your limits and take your fitness to new heights. And the best part? You won’t need a single piece of equipment, gym membership, or even a personal trainer by your side. Intrigued? Let me unveil the world of isometric exercises!

Now, I must admit, when I first stumbled upon isometric training during my adventures with the famous P90X workout program, I was a bit skeptical. I mean, as a runner, I thrive on the freedom of movement, the thrill of conquering the outdoors, and the bustling streets. The idea of staying put in one place and holding a seemingly never-ending pose didn’t exactly excite me. But let me tell you something – isometric exercises pack a powerful punch.

Picture this: you’re in the comfort of your own home, no need to step foot outside, and yet you’re about to embark on a workout that will challenge every muscle in your body. Isometric exercises are all about holding a static position, activating multiple muscle groups simultaneously, and building strength and endurance like never before.

Now, are you ready to rise to the challenge? Let’s dive into the world of isometric training.

Isometric Exercises– The Simple Definition

Alright, let’s dive into the fascinating world of isometric training! Picture this: you’re in the midst of a workout, muscles engaged, but there’s one catch—no movement allowed.

That’s right, with isometric exercises, you’ll experience the power of static strength training. During these exercises, your muscles will contract and tense up, but without any noticeable changes in muscle length or joint angle.

Now, you might be wondering who typically ventures into the realm of isometric training. Well, it’s no surprise that physical therapists, Pilates trainers, and weightlifters are among the fitness aficionados who embrace these exercises. But here’s the exciting part: as a runner, you can also reap incredible benefits by incorporating isometric exercises into your strength training routine.

Research and studies have shown that isometric training can enhance muscle strength, stability, and endurance. In fact, a study published in the Journal of Strength and Conditioning Research found that isometric exercises can lead to significant improvements in muscular strength and performance.

Another study from the Scandinavian Journal of Medicine & Science in Sports discovered that isometric training can effectively improve joint stability and reduce the risk of injuries.

By integrating isometric exercises into your routine, you’ll target specific muscle groups, build strength in a controlled manner, and improve overall stability. Whether you’re focusing on your core, glutes, or lower body, isometric exercises allow you to activate multiple muscle fibers simultaneously, laying the groundwork for improved running form and efficiency.

Imagine this: as you hold a challenging isometric pose, your muscles are firing up like a well-coordinated symphony, creating a solid platform of strength and stability. It’s like unlocking the secret key to enhanced running performance. So, my fellow runners, don’t miss out on the incredible benefits that isometric training has to offer. Add these exercises to your repertoire and watch as your running game reaches new heights.

Isometric Exercises Benefits For Runners

Let’s talk about the incredible benefits that isometric training brings to the table. Prepare to be amazed!

First and foremost, let’s address convenience. Isometric training is the epitome of simplicity and accessibility. It’s like having a personal workout genie at your disposal. All you need is yourself, maybe a comfy mat if you prefer, and you’re ready to embark on your fitness journey. No need for fancy equipment or expensive gym memberships.

Now, here’s the beauty of isometric exercises—they deliver maximum impact in minimal time. So, even if your schedule is jam-packed and time is not on your side, you can still squeeze in an effective workout without compromising your other commitments.

One of the most remarkable benefits of isometric training is its ability to boost strength and endurance simultaneously. Research studies have shown that isometric exercises engage nearly all of the motor units in your muscles, resulting in increased strength and improved stamina. It’s like activating an army of muscle fibers, unleashing their full potential to conquer any physical challenge.

And the best part? You can achieve this without any equipment or external resistance—just your own bodyweight against the force of gravity. It’s like harnessing the power within to push your limits and emerge stronger than ever.

But wait, there’s more! Isometric training also has a hidden secret—it enhances flexibility. It’s like a two-for-one deal, giving you both strength and flexibility in a single package. By holding those intense static positions, your muscles adapt and become more pliable, improving your range of motion and overall flexibility. This not only enhances your performance in running and other physical activities but also helps prevent pesky injuries from slowing you down.

Now, here’s a game-changer—low impact. Isometric exercises are a runner’s dream, especially during recovery days or weeks. These workouts are gentle on your joints, providing a nurturing environment for your body to heal and rebuild. They target specific problem areas, like the quads, hips, calves, and back, helping correct muscle imbalances that may hinder your performance.

6 Isometric Exercises For Runners

Get ready to ignite your core, engage your glutes, and unleash a symphony of muscle activation throughout your entire body! The routine I’m about to share with you is like a fiery workout conductor, orchestrating strength and resilience in every move.

But here’s the exciting part—consistency is the key to reaping the rewards. By incorporating this routine into your regular training, you’re not only on your way to improving your running posture but also fortifying your body against those pesky overuse running injuries. Consider it a powerful suit of armor for your running adventures!

Now, let’s dive into the routine. Each exercise is designed to be held for one to two minutes, allowing you to truly feel the burn and challenge your muscles to their fullest potential. It’s like savoring each moment, immersing yourself in the intensity, and emerging stronger than ever.

Remember, transitions are just as important as the exercises themselves. Take a glorious 30-second rest between each move, allowing your body to recover and prepare for the next challenge.

To complete one circuit, perform each exercise in the prescribed order. Feel the rhythm of the routine as you progress from one move to the next, building momentum and intensity with each repetition. And don’t forget to infuse your journey with personalization. Rest for 30 seconds to one minute between each circuit, adjusting the duration based on your fitness level and the time you have at hand. I

1. Isometric Calf Exercise

Benefits

Strong calves are key for efficient and pain-free running.

Good news is isometric calf raises strengthen the larger, outermost muscle that is in charge the size and shape of your calves.

Proper Form

Start by standing tall on the edge of a step or on a sturdy box, with your feet shoulder width apart and knees straight.

Next, rise up onto your toes and try to balance your bodyweight on the balls of your feet.

If you have any balance issues here, then feel free to grab a chair or a wall if necessary.

Hold the position for one full minute then slowly lower your heels to starting position.

Remember these are not your typical calf raises, so hold the pose for as long as you can with good form.

Feel the burn, welcome it, and hold it for longer as you get stronger and fitter.

2. Isometric Leg Extensions

Benefits

This move mainly targets the quadriceps—muscles at the front of your thighs—as well as the hips flexors.

Strong hip flexor and quads have been shown by study to reduce the risks of runner’s knee and other overuse injuries.

https://www.youtube.com/watch?v=nP43Ni-Km90

Proper Form

Sit on a chair with your tailbone firmly against the back of the chair, hands resting on the chair with both feet flat on the floor.

Next, while gazing ahead and keeping the back straight, slowly extend your right leg out in front of you, engage your quads, and reach your toes toward your shin as much as you can without losing form.

Hold the position for 30 seconds to one minute, then lower down to starting position and change sides.

3. Isometric Wall Chair

Benefits

This beast of an exercise boosts endurance and strength in the quads, glutes, and calves—all major running muscles.

So it’s really a lower body exercise per excellence.

The isometric wall chair can also help you improve flexibility and mobility in your lower body.

Proper Form

Stand with your upper back and back of your head against the wall.

Keep your feet about two feet out in front of you.

Next, while holding your arms across your chest, lower yourself in a slow and controlled manner down by bending your knees until your thighs are parallel to the floor.

Hold this squat position for one full minute, then slowly press back up to starting position.

If this pose was too easy, you can always up the ante by alternating between lifting your right foot for a few seconds then your left.

Additional Resource – 13 Exercises to improve running Skills

4. Split Squat

Benefits

If you have weak glutes and quads, then you are running a high risk of runner knee and a plethora of other overuse injuries.

So ward off the risks by doing split squats.

This iso move focuses mainly on the glutes and quads, and will also help you boost hip flexor mobility and improve overall lower body flexibility.

Proper Form

Assume an athletic stance with back straight and core engaged, then step into a lunge position , making sure your toes are pointing straight ahead.

Next, make the pose more challenging by sinking down until your front knee is bent to a 90 degrees and your back knee nearly touches the floor.

This is the split squat position.

Hold for 30 seconds to one full minute, then push yourself back up to starting position, then switch sides.

5. Forearm Plank

Benefits

This is a great move to increase strength and endurance in your core muscles and shoulders.

Proper Form

Assume a plank position with the forearms on a well padded mat, back straight, and body forming a straight line.

Next, tighten your abs, squeeze your glutes, and hold the pose for one to two minute to complete one set.

Additional reading – How to Prevent Overuse Injury

6. Squat Hold

Benefits

An ideal move for increasing endurance and strength in all major running muscles—think glutes, quads and calves.

Holding the squat can also help you improve flexibility and mobility in your lower body.

https://www.youtube.com/watch?v=3Ds__e3TyBU

Proper Form

Start by standing with your feet about shoulder-width apart, core activated and back straight.

Next, bend your knees and squat down so your thighs are parallel to the floor.

Imagine that you are sitting on imaginary chair, and hold the pose for one to two minutes.

Bonus Isometric Exercises For Runners

Static Lunge

Muscles targeted: Quadriceps, glutes and calves.

Proper Form:

Stand feet hip-width apart, then step forward your right foot two to three feet in front of you.

Make sure to keep your hands on your hips, back flat, chest up, the entire time.

Next, while engaging your core, bend your knees and lower your body until both knees are bent at a 90-degree angle, slowly lower your left knee to within an inch of the ground, then hold the position for 30 seconds to one minute.

Last up, return to starting position, and switch sides to complete one set.

Isometric Push-up

Targeted muscles: Chest, biceps and back.

Proper Form:

Assume a proper push-up position with back straight, hands aligned with your chest with the fingers pointing straight forward.

Make sure your legs are straight and body forming a straight line from head to ankles.

Next, bend your elbows and lower down until your chest is about two to three inches off the floor.

Hold the position for 30 seconds to one minute, then push back up to starting position.

Superman

Muscles Targeted: The core and lower back.

Proper Form:

Begin by laying face down on your stomach, then extend your legs and arms as far forward and as far back you can.

Make sure to keep your neck and head in a neutral position.

Next, to perform the superman, simultaneously lift your arms and your legs slowly off the floor, forming an elongated “U” shape with your body, then hold the position for 20 to 30 seconds.

For more challenge, try squeezing your lower back and/or holding a set of light dumbbell in each hand.

Glute Bridge

Muscles targeted: Core, glutes and lower back.

Proper Form:

https://www.youtube.com/watch?v=-l-rslTuu5c

Lie down on your back on the floor with knees bent and feet flat on the floor.

Next, lift your hips up so your body forms a straight line from your shoulders to your knees.

Hold the position for 30 second to one minute, then slowly lower your body to starting position.

For more challenge, try lifting one leg off the floor, then extending it up toward the ceiling.

Static Sumo Squat

Muscles targeted: Glutes, Hip Adductors, quads, and calves.

Proper Form:

Begin standing with your feet wide apart, back flat and toes slightly turned out.

Next, while keeping your back straight and heels on the ground, bend your knees and squat down until your thighs are parallel to the ground.

Then, press your forearms or elbows against the inside of your knees then hold the position for 30 seconds to one full minute.

Last up, press back up to starting position, then move to the next exercise.

For more challenge, hold a medicine ball or a weight plate in front of your chest instead of pressing your arms against the inside of the knees.

Isometric Pull-ups

Muscles Engaged: Biceps and lats.

Proper Form:

Begin by gripping the pull-up bar with a palms facing away from your body, or what’s knows as a pronated grip.

Next, perform the pull up as you normally would, but once your chin touches the bar height, hold yourself there for 20 to 30 seconds.

Hold it for more once you get used to the exercise.

Last up, lower slowly to the floor, and repeat the whole circuit two to three times

Isometric Training for Runners  – The Conclusion

Now the ball is in your court. Just make sure to do the above isometric exercises for runners at least once a week. That’s enough training to help you improve your athletic performance and become the best runner you can be.

In the meantime thank you for reading my post.

Feel free to leave your comments and questions below.

David D.

The 30 Minute Jump Rope Workout For Runners (+22 Advanced Exercises)

woman doing Jump Roping Workout

Are you ready to unleash the power of the humble jump rope? Well, you’ve landed in the perfect spot.

Imagine this: an exercise that improves your endurance, builds strength, and torches calories, all in just 15 minutes! Sounds too good to be true, right? But trust me, it’s not a fairy tale. It’s the magic of jump rope!

In today’s article, I’m here to spill all the secrets of jump rope training, regardless of whether you’re a beginner or a seasoned pro. We’re diving deep into the world of skipping rope, exploring its incredible benefits, shedding light on its weight loss potential, and even picking the perfect rope for your needs.

But hold on, folks, that’s just the tip of the iceberg! I’ll also cover proper technique—because let’s face it, you don’t want to trip over your own feet—plus, I’ll guide you on how and where to kickstart your jump rope adventure.

Plus, for those of you seeking an extra challenge, we’ve got 22 intermediate and advanced jump rope exercises that’ll take your fitness game to new heights.

So, are you excited? Let’s go!

Benefits of Jump Rope Workout For Runners

Before I get into the list of jump rope moves, let me first explain some of the perks of skipping rope as well as how you can make use of it to achieve your fitness goals.

Improves athletic performance

There is a reason why elite boxers, tennis players, and some of the best athletes in the world use jump roping regularly: it delivers.

This training tool can help you boost agility, balance, speed, and coordination, helping you become the best runner (and athlete) you can be.

Iron Calves

The rope will help build endurance and strength in your calves—one of the most important of all running muscles.

Powerful calves can help you run further and faster while reducing the risks of injury.

Increased Speed

The rope can also help you increase your running speed by training your legs to decrease ground contact time, helping you be light on your feet and boosting stride frequency.

Sheds mad calorie

Sure, running burns a lot of calories, but so does jumping rope.

According to a study, 10 minutes of nonstop rope jumping at 120 RPMs can burn as many calories as jogging for 30 minutes, 720 yards of swimming, or two sets of tennis singles.

Pass a Plateau

The rope can help if you’re facing a plateau or just want to change things up.

This tool can be a great alternative training tool to boost your energy, strength, speed, and athletic performance without spending more time in the gym.

It’s convenient

Yeah, obviously, you can practically do jump rope training almost everywhere.

You can virtually perform jump rope exercises almost everywhere. It’s a simple and quick workout. You can take a jump rope with you wherever you go. You can perform the exercises at home, or you can take it outdoors. It’s really up to you.

Fitness/sport and healthy lifestyle concept – Jumping/skipping rope with blue handles on white wooden background

Jumping Rope is Cheap

A good jumping rope will not cost you more than $10 if you don’t have a jump rope someplace in your house.

Of course, top-of-the-line brands made with the best materials will cost more but nothing more than $60.

Additional resource  – TRX workout for runners

Choosing the Right Jump Rope

The fitness market offers plenty of different types of jump ropes to choose from, each with specific pros and cons. Choosing the one for you can seem overwhelming with the differences between styles.

But fear not, because I’ve got your back. I’ll guide you through the ropes (pun intended) of selecting the ideal jump rope, especially if you’re just starting out. So, let’s dive in!

Material

When it comes to jump ropes, you want to make sure you’re getting the right stuff. Pay attention to the material used in the rope’s construction. You’ll often encounter ropes made of cotton, polyester, or nylon, all braided to prevent those annoying tangles. Now, here’s the secret sauce: different materials offer different benefits.

Picture a PVC rope, a bit thicker with lower density. This bad boy gives you some air resistance, allowing you to pick up the pace and challenge yourself. On the other hand, imagine a sleek steel skipping rope, thin and dense. This one is built for speed demons who want to take their jump rope game to the next level. But for all you beginners out there, I’d recommend going with a PVC or cloth jump rope. They strike the perfect balance for starting your jump rope journey.

The Rope Length

Now that we’ve covered materials, let’s talk about length. You don’t want a rope that’s too short or too long for your height.

Tripping over your rope mid-jump is not the kind of excitement we’re aiming for.

So, here’s a handy rule of thumb: when you stand straight in the middle of the rope, the handles should extend comfortably to your arms. Simple, right? To be more precise, I’d suggest getting a jump rope that’s around three feet longer than your height. So, if you’re a proud 6-footer, aim for a rope that’s approximately 9 feet long.

And hey, don’t sweat it if you accidentally grab a rope that’s too long. Most jump ropes have adjustable handles, allowing you to customize the length to fit your needs. Just a quick readjustment, and you’re good to go.

More Challenge

Ready to crank up the intensity of your jump rope game? Well  it’s time to enter the realm of weighted ropes. Brace yourselves for a whole new level of challenge and awesomeness. Trust me, it’s worth it.

Why go for a weighted rope, you ask? Let me enlighten you. Not only does a heavier jump rope amp up the difficulty of your workouts, but it also helps you master the art of proper form and rhythm. Picture this: as the weight pulls the rope down, you can feel each rotation, giving you a tangible sense of the rope dancing around your body. This awareness makes it easier to time your jumps with precision.

Plus, the weighted rope allows for a nice and steady pace, making your jumps smoother and more controlled compared to using a lighter rope that can get all wild and unpredictable on you.

Now, hold your horses before you rush off to grab a weighted rope. Remember, it’s all about finding the right balance. You want a weight that challenges you without throwing you off balance or putting too much strain on your muscles. So, I encourage you to experiment with different weights until you find the one that feels just right for you.

Jump Rope On The Right Surface

The surface is another piece of the puzzle. If you’re a beginner, treat our precious muscles and joints with care. That means choosing an impact-friendly surface that cushions the landing.

Imagine a world where your jumps have a soft landing, like stepping on a cloud (well, almost). So, opt for surfaces with enough padding to absorb the impact, such as a wood floor (like a basketball court), a thin carpet, or rubberized flooring. Trust me, your body will thank you for it.

Jump Rope Workout For Runners – The Correct Form

Proper form is where the magic happens. So, buckle up and get ready to unleash your inner jump rope ninja!

Let’s get one thing straight. Jumping rope isn’t exactly rocket science, but there are a few key details you need to pay attention to.

Let’s break it down, step by step.

First things first, stand tall and confident with your feet shoulder-width apart, gripping the jump rope handles behind you. Make sure your hands are roughly the same distance apart from the centerline of your body.

Now, pay attention to your posture. Keep that spine nice and neutral, chest up, and head held high as you gaze forward like a champion. Pull those shoulders back, my friends, and let those elbows rest comfortably back and down.

When it’s time to unleash the magic, start the movement by rotating your forearms forward and then your wrists. This generates the momentum needed to keep that rope spinning. Remember, most of the rotations should come from those powerful wrists of yours. Keep those shoulders and elbows in check, minimizing unnecessary movement.

As you start hopping, aim for consistency. Keep those jumps around one to two inches off the floor, clearing the rope with ease. And here’s a pro tip: bend those knees slightly throughout the rotation and land softly on the balls of your feet.

Now, let’s talk about that back of yours. Keep it nice and neutral with a slight posterior pelvic tilt. And hold those elbows close to the sides of your body.

When it comes to your chin, make sure to tuck it in as if you were cradling a delicate egg under there. This not only keeps your form in check but also adds a touch of elegance to your jumps.

What’s more?

Let’s avoid the dreaded double jump, shall we? No jumping twice before that rope comes around. It’s all about staying in sync and keeping that rhythm flowing.

The 30 Minute Jump Rope Workout For Beginners

Without further ado, here’s the beginner jump rope workout to get you started on the right foot.

Warm up First (like usual)

After five minutes of jogging in place, do 12 to 15 reps of torso twists, shoulder rolls, calf raises, and cross crawls.

Next, get your body ready to jump by doing at least one minute of shadow jumping. Try rotating your wrists as if holding a rope to simulate real-life rope jumping. After the warm-up, perform the following jump rope workout exercises:

One Minute of Forward jump

This is the most basic jump.

Swing the rope over your head and jump over it with both feet on every rotation. You don’t have to jump too high, just high enough to clear the rope. Keep it up for one to two minutes, then take a 30-second break before you move to the next exercise.

One Minute of Alternate-foot Jump

Instead of jumping over the rope with both feet at once, alternate by landing on your right foot, then on your left foot on each rotation.

Imagine that you are running in place, and stay on the balls of your feet the entire time. Continue for one to two minutes, rest, then move to the next exercise.

One Minute of Side-to-side Jumps

Do the basic jump, but jump from side to side using both feet as you swing the rope. Keep it up for one to two minutes, rest, then move to the next exercise.

One Minute of Double Jumps

Jump high enough in the air, or swing the rope fast enough, to pass the rope under the feet twice before landing. This one is challenging, so do your best to stick with it for at least one full minute.

If you lose form, just get back on it. Continue for one to two minutes, rest, then move to the next exercise.

One Minute of Single Foot Hops

Start jumping over the jump rope on your right leg for 30 seconds, then switch sides without stopping. Get into a rhythm here. Keep it up for at least two minutes, then repeat the whole circuit two to three times.

Intermediate and Advanced Jump Rope Exercises To Try

Once you’ve mastered the beginner jump rope exercises shared above, it’s time to make your workouts more challenging and varied by trying the following, more advanced jump rope exercises.

Enjoy!

Jump rope Heel Toe Step

Frog Jump

Mike Tyson Jump Rope Squats

Jump Rope Mummy Kicks

The Boxer Skip

Jump Rope Burpee

Double Side Swipe

Double Unders

Criss Cross Double Unders

Backward Jumping

Jump rope jacks

Elevate 360 Wrap

Side Under Jumps

Jump Rope Half and Full Twist

Mic Release

Side Swing Cross Over

Skier & Bell Jumps

Jump Rope Criss-Cross

Jump Rope Side Swings

High knees

Push-Up Jump

Bonus – The Hybrid Total Body Jump Rope Workout

Once you’ve mastered the basic jump rope routine, feel free to move on to more challenging workouts.

For example, you can mix up jump rope exercise and calisthenics, just like in the following routine:

This challenging routine can be performed anywhere. All you need is a rope, your bodyweight, and some space.

Be careful, though. The workout is pretty intense as it will boost up your heart rate and work your calves, quads, core, triceps, and biceps.

  • One minute of basic jump
  • 25 push-ups
  • One minute of frog jumps
  • 25 floor dips
  • One minute of boxer skips
  • 30 air squats
  • One minute of high knees
  • 20 lunges on each leg
  • One minute of double unders
  • 90-second plank hold

Repeat the circuit two to three times.

Conclusion

There you have it!

Today’s article provides you the best jump rope workout for runners to get started  as well as taking your training to the next level. The rest is just details.

Please feel free to leave your comments and questions in the section below.

Keep training strong

David D

Kettlebell Kings: 9 Top Exercises to Revolutionize Your Running Performance

woman performing Kettlebell Exercise

If you’re aiming to enhance your overall running prowess and become a better runner, it’s time to shift your focus to training those running muscles for improved strength, core stability, balance, and endurance.

The solution? Kettlebells.

These versatile training tools are just what you need to level up your running game, helping you run with more strength and speed while torching calories along the way. Kettlebell exercises are renowned for being among the best for full-body strength and conditioning, making them a perfect fit for runners.

The beauty of kettlebells lies in their efficiency—they deliver a killer workout in under 20 minutes. What’s more, kettlebell training won’t bulk you up but will instead build strength in essential running areas like your glutes, legs, and core.

In this article, we’ll explore the top 9 kettlebell exercises tailored for runners, providing three workout routines that will have you swinging, lifting, and pressing your way to the next level of running excellence.

Are you ready to take your running to new heights? Let’s dive in!

1. The Cardio Blaster Workout

This workout will have you sweating and panting for a breath in no time, and it’s ideal if you are looking to improve your power and speed while also improving endurance in your muscles.

Just pace yourself here and make sure to pick a relatively lightweight because you will be doing a lot of reps with each move.

Swing

Kettlebell Swing

Begin by holding the kettlebell with both hands using a two-handed, overhand grip. Stand with your feet slightly wider than hip-distance apart, toes pointing slightly outward.

To perform the swing exercise, bend at the hips until the kettlebell is hanging between your legs. While engaging your core muscles, swing the kettlebell up by explosively extending through the hips and knees. Allow the weight to swing back to the starting position. This completes one rep.

Aim to do 16 to 20 reps to complete one set and aim for three sets.

Snatch

Kettlebell Snatch

Stand with your feet shoulder-width apart and hold the kettlebell with an overhand grip. Squat down until the kettlebell is positioned between your feet.

Explode up out of the squat and drive the weight overhead by pulling it along a vertical path in front of your body in one fluid motion. Pause momentarily at the top.

Lower the kettlebell down to the starting position. Perform 16 to 20 reps on each side to complete one set. Aim to do three sets of this exercise.

You can refer to the provided YouTube links for visual demonstrations of these exercises.

Thruster

Kettlebell Thruster

Begin by grabbing two kettlebells, one in each hand, and clean them up to shoulder height by extending your legs. This is your starting position.

To perform the thrusters, squat down while holding the kettlebells in your hands pause for a second. Then, reverse direction and stand up by pressing through your heels and extending your arms overhead. This completes one rep.

Aim to perform 12 to 16 reps to complete one set. Aim to do three sets of this exercise.

2. The Strength Builder Workout

For strength, do this workout. Make sure to pick a really challenging weight and perform the exercises in a slow and controlled manner.

Proper form is king here. This routine will help you build muscles all over your body with an emphasis on the glutes, quads, and core, key running muscles.

Kettlebell Front Squat

Hold two kettlebells in front of your shoulders.

Assume an athletic stance with your feet shoulder-width apart. Next, squat down by bending at the hips until your thighs are parallel to the floor.

Pause for a moment at the bottom of the squat. Then, stand back up by pressing through your heels and extending your knees and hips. Maintain a straight back and keep your knees pointed in the same direction throughout the movement.

This completes one rep. Aim to perform 10 to 12 reps to complete one set. Aim for three sets of this exercise.

Kettlebell Deadlift

Stand with your feet shoulder-width apart, with the kettlebell on the floor between your legs.  Pull your shoulders back, engage your core, and squat down to grab the kettlebell. Lift the kettlebell while keeping your chest high and squeezing your glutes.

Pause for a moment at the top of the movement. Squat down and lower the kettlebell to the floor to complete one repetition.

Aim to perform 8 to 10 reps to finish one set. Aim for three sets of this exercise.

The Turkish Get-up

Begin by lying face up on the floor while holding a kettlebell in your right hand, with your arm fully extended above your chest. This is the starting position.

To perform the Turkish Get-up, lift the kettlebell toward the ceiling as you roll up onto your left elbow by driving your right foot into the floor. Push yourself up to a standing position, keeping the kettlebell lifted overhead.

Stand tall with the kettlebell locked overhead, maintain a straight back, and pause for a moment. Reverse the movement back to the starting position, and then switch sides.

Perform 6 to 8 reps on each side to complete one set. Aim for three sets of this exercise.

3. The Core Ripper Workout

Kettlebells are so famous because they are some of the best core exercises there is. Therefore, here are 3 core moves to help you sculpt your core and build a strong midsection.

Kettlebell Plank with Row

Assume a plank position with your back straight, core engaged, arms straight, and hands grasping two kettlebell handles. Take a deep breath, then raise one kettlebell up until it reaches your hip.

Pause for a count of three at the top of the movement, then lower it down. Switch sides to complete one repetition.

Perform 10 to 12 reps to complete one set. Aim to do three sets of this exercise.

Kettlebell Windmill

Start by holding a kettlebell with your right hand and lift it up overhead while locking the arm and keeping the elbow straight, with your eyes on the weight throughout the movement. Turn your left foot out at a 45-degree angle.

Hinge at your hips until you can touch your left foot or the floor with your left hand. Pause for a moment at the bottom of the movement. Lift back to the starting position while keeping your legs straight, and the kettlebell lifted overhead.

Change sides to complete one repetition. Aim to perform eight reps to complete one set. Aim for three sets of this exercise.

Russian Twists

Sit on the floor with knees bent, feet about hip-distance apart, and core engaged.

Next, hold the weight with both hands at chest level, lean back, lift the legs off the floor, then rotate your torso from right to left, lightly tapping it to the ground with each rep.

Do eight reps on each side to complete one set.

Aim for three sets.

Featured Image Credit – Ville Cotimaki via Flickr

Stadium Workouts for Runners: Elevate Your Training to New Heights

Stadium Runners Workout Routine

Let’s be honest, running the same old route day in and day out can get seriously boring, am I right?

I mean, who wants to feel like a hamster on a wheel?

So, if you’re looking to shake things up and keep your running game strong in the long run, I’ve got just the solution for you.

Picture this: you step out of your comfort zone and take your runs to a whole new level by hitting the stadium. Yeah, that’s right! Not only will it add some much-needed spice to your workout routines, but it’ll also crank up the challenge factor. Trust me, it’s like a breath of fresh air for your running program.

But hey, let’s not stop there. There are loads of benefits that come with incorporating stadium workouts into your routine. So buckle up and get ready to discover how this exciting change can take your fitness journey to new heights.

Stadium Workout Benefits

Picture this: you step foot into the grand arena of a stadium, ready to embark on a fitness adventure like no other. The stadium becomes your playground, offering a treasure trove of possibilities to elevate your workout routine and unleash your full potential. It’s time to unlock the hidden gems of the stadium workout and discover the myriad benefits it has in store for you.

Forget about mundane laps and monotonous crunches. The stadium workout opens up a world of opportunities to enhance every aspect of your fitness journey.

Whether you’re aiming to boost your speed, build strength, or improve your endurance, the stadium has got you covered. It’s a one-stop destination where you can fine-tune your athleticism and push your limits to new heights.

What’s truly remarkable about the stadium is its versatility. It serves as a vast canvas upon which you can paint your fitness masterpiece. From the track that allows you to sprint like a pro, to the stairs that beckon you to conquer their challenging ascent, every nook and cranny of the stadium offers a unique workout experience. The sideline benches become your makeshift training station, the field transforms into your personal playground, and the stairs become your stairway to fitness heaven.

The best part? You don’t need any fancy equipment or specialized gear to make the most out of the stadium. It’s a universal gym in itself, where your body weight and determination are the only tools you need. All you have to do is show up, embrace the possibilities, and let the stadium become your fitness sanctuary.

Let’s talk about the true gem of the stadium workout: the stairs. These majestic steps hold the key to unlocking a whole new level of leg strength and power. As you ascend those stairs, you engage a multitude of leg muscles, including the mighty hamstrings and glutes. It’s like hill running on steroids, pushing your legs to their limits and sculpting them into lean, powerful machines. Each step becomes a metaphorical hurdle to conquer, propelling you towards a stronger, more resilient self.

The Stadium Workout Routine

Let me share with you a routine that never fails to ignite my fitness fire. Get ready to unleash your inner beast and conquer those bleachers like a champion!

First things first, find yourself a stadium near your apartment or any place that has bleachers. Now, remember, this routine isn’t just about running. I’m taking it up a notch by incorporating three bodyweight exercises to make things more challenging and exciting.

But hey, if you’re in the mood for an intense cardio session, feel free to sprint and run those stairs to your heart’s content. It’s your workout, after all, so make it as challenging as you want!

Now let’s get to it.

Perform the following stadium exercises back to back, with minimal rest between each exercise. Aim for that burn, that sweet feeling of pushing ourselves to the limit. And don’t worry, you can adjust the number of rounds based on your fitness level. Three to five rounds should do the trick, but feel free to challenge yourself further if you’re up for it.

Now, here’s a glimpse of what this stadium circuit entails

  • Feel the burn in your legs as you power through each step. Remember, it’s not just about reaching the top—it’s about embracing the journey along the way.
  • Explosive jump squats. Engage your lower body and explode upwards, as if you’re reaching for the stars. Land softly and repeat. Feel the power in your legs and let each jump propel you closer to your fitness goals.
  • Toe taps on the bleachers. Find a stable surface and alternate tapping your toes on it. Feel those abs working as you maintain balance and control. You’ll be one step closer to sculpting that strong, chiseled midsection.
  • Triceps dips. Find a sturdy bench or step, place your hands behind you, and lower your body by bending your elbows. Push yourself back up, feeling the burn in your triceps. This exercise will give you the strength to push through any challenge that comes your way.

Remember, this circuit should take you around 15 to 20 minutes to complete. But hey, it’s not about the time—it’s about the effort you put in and the satisfaction you’ll feel afterward. Listen to your body, pace yourself, and modify the exercises if needed.

Warm Up First For your Stadium Workout

Before I dive headfirst into the stadium workout, let me share a friendly word of advice: never underestimate the importance of a proper warm-up. Trust me, it’s like a shield of protection against potential disaster. So, let’s start off on the right foot and warm ourselves up for the incredible challenges that lie ahead.

First things first, we need to get our engines revving. A slow jog for 5 to 10 minutes will do the trick. Feel the pavement beneath your feet as you gradually pick up the pace. This gentle jog will get your blood pumping and your heart rate up, signaling your body that it’s time to rock and roll.

But don’t stop there. Make sure that every muscle in your body is awake and ready to conquer. That’s where dynamic exercises come into play. Picture this: you’re standing tall, ready to unleash your inner beast. Start by swinging your arms in big circles, getting those shoulder joints nice and loose. Then, do some high knee marches, lifting those legs up towards your chest as if you’re stepping over imaginary hurdles. This will fire up your hip flexors and warm up your lower body.

Now that we’ve primed our bodies and activated our energy, it’s time to tackle the stadium exercises that will push us to our limits. Let’s break them down, step by step:

Stadium Exercise 1: High Knees

Get ready to channel your inner sprinter as we elevate those knees to new heights. Run in place, pulling your knees as high as possible towards your chest with each step. Feel the burn in your legs as you power through this exercise. Aim to keep up the pace for one to two minutes, giving it your all with impeccable form. You’ll be amazed at what your body is capable of!

Stadium Exercise 2: Sprints

Get ready to unleash your lightning-fast speed on the track. Start at the straightway section, take a deep breath, and explode into action. Sprint with all your might for a thrilling 100 meters. Feel the wind rushing past you as you push your body to its limits. Once you’ve reached the finish line, take a well-deserved 30-second rest to catch your breath. But don’t get too comfortable—now it’s time to sprint back to the starting position, completing this exhilarating round.

Additional resource  – TRX workout for runners

Stadium Exercise 3: Burpees

Assume a sturdy stance with your feet hip-width apart, ready to unleash your inner powerhouse. Place your hands on the ground in front of your feet, like you’re about to conquer the world. Now, here comes the explosive part—hop your feet back, extending your body into a full push-up position. Feel the burn as you perform a powerful push-up, engaging those chest, shoulder, and arm muscles.

Then, swiftly hop your feet back towards your hands and prepare for takeoff. This is where the real magic happens. Propel yourself off the ground, launching into the air as high as humanly possible. You’re like a rocket reaching for the stars! Aim to complete as many reps as you can within one minute, all while maintaining impeccable form. Feel the fire in your muscles and let the adrenaline fuel your determination.

Stadium Exercise 4: Stair Sprints

Prepare yourself for the ultimate test of speed and endurance as we conquer the stadium stairs.]. Stand at the bottom of the stairs, ready to ascend to greatness. As you start running, feel the power surge through your legs, driving your knees up and using your arms to maintain momentum.

Remember to push yourself to your limits, but always prioritize safety and listen to your body. Once you’ve reached the top, take a well-deserved recovery break by walking back down the stairs, allowing your heart rate to settle before your next round.

Stadium Exercise 5: Elevated Pike Pushups

Find a sturdy bench and position yourself with your back facing it. This is where the magic begins. Assume a downward dog position, creating a V-shape with your body, and place your hands on the bench slightly wider than shoulder-width apart. Now, here’s where the fun really begins. Plant your feet on the bench behind you, locking them in place. You’re now in the perfect starting position, ready to conquer the world.

Bend your elbows, gradually lowering your head towards the ground with control and precision. Feel the tension in your muscles as you lower yourself just a couple of inches off the ground. Hold for a moment, savoring the challenge, and then push back up to the starting position.

That’s one rep down, my friend. Now, aim to complete as many reps as possible in one minute. Embrace the burn, embrace the challenge, and let the strength within you shine.

Stadium Exercise 6: Double-step Run

Now, get ready to conquer the stairs once again, but this time with a twist. Watch this incredible demonstration to visualize the power of the double-step run: Imagine yourself channeling that same strength and grace as you tackle this exercise head-on.

https://www.youtube.com/watch?v=SEdkl9dz_Oo

With every ounce of determination, sprint up the stairs as if you were chasing your dreams. Stride powerfully, skipping a step with each stride, and feel the explosive energy surging through your legs. You’re like a gazelle, gracefully leaping forward, defying gravity with every step. Push yourself to your limits and embrace the rhythm of your breath as you conquer each stride.

Stadium Exercise 7: Double-leg Hops

Begin by standing in front of series of steps with feet shoulder-width apart and arms overhead.

Next, drop into mid-squat position, and jump up and forward onto the first step, land softly with your knees slightly bent, then and without delay jump onto the second step and so on, until you reach top of the stairs or until you can do no more.

Turn around and slowly walk back down.

Rest for one to two minutes then repeat the whole circuit for two to three times.

Don’t miss out! My awesome running plan is just one click away.

The Stadium Workout –  The Conclusion

There you have. This stadium workout routine  is a fantastic addition to your workout routine, as long as you choose to perform these stadium exercises on a regular basis. The rest is just detail, as the saying goes.

Leg Power: A Runner’s Guide to Effective Leg Workouts

runner doing Legs Strength Exercises

Looking to take your running game to the next level? Well, you’ve stumbled upon a goldmine of lower body exercises that will give your legs the strength they need to conquer any challenge.

But before we dive into the nitty-gritty, let’s address the elephant on the track—why should you even bother with strength training?

Listen up, because I’m about to drop some truth bombs. Strength training is not just an option for runners; it’s an absolute necessity.

If you want to keep those pesky injuries at bay and unlock your full running potential, hitting the gym is non-negotiable. We’re talking about serious gains here, people. If

you dream of shaving seconds off your race times and reaching your peak performance, I’m going to say it again for the folks in the back: you need to strength train.

Strength training will not only bulletproof your lower body against common running injuries like runner’s knee and stress fractures but also supercharge your running efficiency.

No more excuses, no more coconuts. It’s time to get down to business with a short, yet mighty leg strength workout designed specifically for runners like you.

In just 30 minutes, you’ll be putting those muscles to work and laying the foundation for your strongest, most resilient legs yet.

Get ready to tackle these eight runner-friendly exercises that will transform your lower body into a force to be reckoned with. From explosive plyometrics to targeted strength moves, we’ve got you covered. So, lace up those shoes, grab your water bottle, and let’s dive into this leg-sculpting adventure that will leave you feeling invincible on the track.

Let’s go!

Leg Exercise for Runners 1 – Lunges

Targeted Muscles: Glutes, quads, calves.

Begin by standing with your feet shoulder’s width apart while resting a bar on the back of your shoulders, or holding dumbbells at the side.

That’s your starting position.

Next, take a giant step forward with your right foot, keeping your left foot planted on the ground.

Bend your right knee at a 90-degree angle, while simultaneously lowering your left leg toward the floor.

To complete one rep, push back up to the starting position and switch sides.

Do 10 to 12 reps on each side to complete one set.

Aim for five sets.

Leg Exercise for Runners 2 – Calf Raises

Targeted Muscles: The calves.

Begin by standing with your heels hanging off the edge of a step or a sturdy box, holding two dumbbells by the side.

Make sure to stand as tall as you can with the back straight the entire time.

Next, drive the balls of your feet into the step, then raise your heels as high as you can, pause for a count of three, then slowly lower the heels down to the starting position.

Aim for five sets of 12 to 16 reps to complete one set.

Feel free to up the ante by increasing weight and number of reps if the exercise is not challenging enough.

Additional resource – Maintaining muscle during marathon training

Leg Exercise for Runners 3 – Squats

Targeted Muscles: Quads, glutes, calves and core.

Assume an athletic position with feet shoulder-width apart, toes pointing slightly outward, and back straight.

Next, place a barbell across the back of your shoulders and traps, then squat down, bending the knees, until your thighs are parallel to the ground, pause for a moment, then push back up through your heels to return to starting position.

That’s one rep.

Make sure to keep your knees tracking over your toes through the squat motion.

Do 10 to 12 reps to complete one set.

Aim for five sets.

Additional reading – How to Prevent Overuse Injury

Leg Exercise for Runners 4 – Sumo Squats

Targeted Muscles: Inner thighs, and quads.

Assume a wider stand with the feet pointing further out than they would with the classic squat.

Make sure to load a barbell of a challenging weight and place it across the back of your shoulders and traps.

That’s the starting position.

Perform the sumo squat by sitting back until your thighs are parallel to the ground, then slowly come up to starting position.

Make sure to keep your back straight and knees tracking over the toes the entire movement.

You should feel your inner thighs on fire during this exercise; otherwise, you are not doing it right or are not using enough weight.

Do five sets in the 10 to 12 rep range.

Leg Exercise for Runners – 5 – Leg Presses

Targeted Muscles: Quads, glutes, calves, hamstrings.

Climb into a leg press machine, and place your feet hip-width apart on the platform.

Make sure that your heels are flat with the toes facing a bit outward.

To perform the move, slowly lower the platform until your knees are bent at a 90-degree angle, then press the platform back up until your legs are nearly straight.

Please don’t allow for a full locking in the knees.

Do five sets of 12 reps each.

Leg Exercise for Runners 6 – Single-leg Deadlifts

Targeted Muscles: Hamstrings, glutes.

Stands tall with feet hip-width apart and hold a pair of light dumbbells in each hand.

That’s the starting position.

Next, bend at the hips and raise your right leg behind while engaging your core muscles, then hinge forward and gradually lower your torso down as far as possible, pause for a second, then return to starting position.

Shoot for 8 deadlifts on each side to complete one set.

Aim for 5 sets.

Leg Exercise for Runners 7 – Lunges With Rotations

Targeted Muscles: Quads, glutes, calves and core.

Stand with feet wide and parallel, grab two light dumbbells with arms straight out sideways, then step forward into a lunge.

Next, lower your body into the lunge and rotate your torso 90 degrees to the right, then another 90 degrees to the left.

Next, take another step forward and repeat the motion.

Aim for 10-12 reps on each side to complete one set.

Do 5 sets.

Leg Exercise for Runners 8 – The Cable Knee Drive

Targeted Muscles: Hip flexors and glutes.

Begin this exercise by securing a strap around your right ankle then attaching it to the low cable pulley.

Next, while standing 1 to 2 feet away from the stack on one leg, drive your right knee explosively up in front your chest.

Do 10 to 12 reps on each side to complete one set.

Aim for five sets.

Additional resource – Clamshells for runners

The Best Leg Workout for Runners  – Conclusion

Here you have it! This is an amazing leg workout for runners you can do a few times a week reap huge gains.

This is a really powerful leg workout for runners. But you need to put it into action ASAP. The speed of implementation is what matters most.

In the meantime thank you for reading my blog.

David D.

Speed Training 101: Top 7 Drills for Faster Runners

athlete doing Speed Drills

Do you ever feel the need for speed? If you’re yearning to kick up the tempo and leave a trail of dust in your wake, then you’re in for a treat. Let me introduce you to the game-changer that transformed my running game: running drills for speed.

Picture this: I was in the midst of my Insanity DVD workout program, sweating buckets and pushing my limits. Little did I know that buried within this intense regimen were the secret ingredients to unlock my true athletic potential. Running drills emerged from the shadows and captivated my attention. Curiosity sparked, and I delved into the world of speed-enhancing exercises.

Let me tell you, my friend, the results were nothing short of phenomenal. Not only did my speed skyrocket, but my entire running form underwent a remarkable transformation. It was as if I had unlocked a hidden power within myself, propelling me forward with newfound agility and grace.

Nowadays, I make it a point to incorporate these drills into my regular cross-training routine. And here’s the best part: you don’t need to be a lightning-fast sprinter or spend endless hours on the track to benefit from them. I’m just an average runner with aspirations of becoming better than average, and these drills have become my secret weapon.

Get ready to break free from your limitations and sprint towards greatness. Are you ready to step up your running game? The starting line awaits you. Let’s do this!

The Speed Drills Routine For Runners

Whether you’re craving that extra burst of speed or simply seeking a fresh twist for your training regimen, incorporating a speed drill workout will be the game-changer you’ve been waiting for.

Imagine this: you’re out on the track, feeling the ground beneath your feet, ready to unleash your inner speed demon. As you dive into the world of speed drills, a whole new realm of possibilities opens up before you. And let me tell you, my friend, the benefits are nothing short of extraordinary.

Let’s dive into the advantages that await you when you embrace the power of running drills for speed:

  • Increased Range of Motion: Speed drills work wonders in enhancing the flexibility and range of motion in your joints. Picture your stride becoming more efficient, with each step covering more ground effortlessly.
  • Quick Feet and Explosive Power: We all know that lightning-fast footwork can make all the difference, whether you’re sprinting towards the finish line or evading opponents on the sports field. Speed drills are your secret weapon to developing that explosive power and lightning-quick feet. Trust me, these skills will transcend beyond running and elevate your performance in other sports as well.
  • Perfecting Your Form: Each drill in your speed workout places a special emphasis on specific aspects of proper running form. It’s like fine-tuning the intricate gears of a well-oiled machine. By incorporating these drills into your routine, your body becomes intimately familiar with the movements required for optimal running mechanics.

How Long Do Speed Drills Take?

Now, you might be wondering, “Will I need to carve out hours from my busy schedule for these drills?” Fear not! Most speed drill workouts can be completed in just 30 to 40 minutes.

They are incredibly convenient and require minimal equipment. So whether you find yourself at a local track, a neighborhood park, or even in the comfort of your own home, these drills can be seamlessly incorporated into your routine.

How & When to do Speed Drills

Are you ready to dive into the exhilarating world of speed drills? Let’s talk about how and when to incorporate these drills into your training regimen to maximize their effectiveness and keep you in top form.

First things first, you have a couple of options when it comes to integrating speed drills into your routine. If you’re already engaging in interval training, you can seamlessly weave these drills into your existing workouts. However, if you haven’t explored the world of cross-training (and trust me, you should), then I suggest adding the drills to the end of your running sessions.

Now, timing is everything. As a general rule of thumb, it’s best to perform speed drills after your easier workouts when you’re feeling fresh and still have some pep in your step. You don’t want to attempt these drills after a grueling, energy-draining run when your legs are begging for mercy.

To ensure optimal results, aim to incorporate speed drills into your routine twice a week on a regular basis. Give yourself at least two recovery days between sessions to allow your body to adapt and reap the benefits of the training. Consistency is key here, my friend. Stay committed to this schedule, and you’ll soon witness remarkable progress.

Now, let’s talk about the drills themselves. The recommended sequence consists of seven exercises carefully curated to target various aspects of your speed and running mechanics. I encourage you to go through the entire sequence at least twice to truly benefit from each drill’s unique contribution. If you find yourself with some extra time and a burning desire to push your limits, go ahead and repeat the sequence three times. The choice is yours!

Safety is paramount, my friend. To protect your precious joints and minimize the risk of injury, I strongly advise you to perform these drills on a soft surface. Seek out the infield of a track or a rubberized track if possible. Remember, we want to unleash your speed and power while keeping you safe and sound.

Before you embark on your exhilarating speed drill session, it’s crucial to properly warm up your body. Begin with a slow 5-minute jog to get your blood flowing and your muscles awakened. Then, transition into 10 minutes of dynamic stretches, as demonstrated in the routine provided. This warm-up will prepare your body for the explosive movements to come, priming you for an extraordinary training experience.

Top 7 Drills to Run Faster

1.     Bounding

This drill consists of an exaggerated running movement focusing on foot push-off and airtime.

It’s ideal for both increasing lower body power and single-leg stability during forward running motion.

This drill is essential for keeping proper running form—especially when fatigue starts to set in.

Proper Form

Begin this drill by jogging in one direction while keeping your head level and torso upright.

After progressing a few feet, start bounding by pushing off with one foot and bringing the other one forward.

Focus on achieving an explosive leap and a fast cadence.

Perform at least five to eight 50-meter reps.

2.    Butt Kicks

Butt kicks mainly target the hamstrings and stretch the quads.

This speed drill emphasizes the recovery part of the running gait and can also help you boost leg turnover cadence.

Proper Form

https://youtu.be/UfCH8LMmLH8

While running in place and with your thighs locked in a neutral position, kick your leg up to the butt, letting your heel make contact with the glute on each stride.

If you can’t reach your heels up to your glutes, aim to boost your dynamic range of motion.

To keep good form, keep the rest of your body as steady as possible and focus on a smooth, and fast action.

Perform at least three sets of 25 kicks with each leg.

3.    High Knees

This move improves knee lift by increasing speed and leg drive, targeting the hip flexors.

Adding power and speed to your hip flexor can also help prevent plantar fasciitis, Achilles issues, and other troubles.

Proper Form

Stand straight, with your feet shoulder-width apart, your arms hanging down by your sides and gazing straight ahead.

While keeping a slight forward lean from the ankles, alternate jumping from one foot to the other, aiming to raise your knees as high as possible.

4.    Running Backwards

Running backward strengthens both the glutes and the hamstrings.

This move also activates the muscles of the core and lower back.

Proper Form

Do your best to replicate the typical forward running motion while moving backward.

Maintain a normal running form while keeping your head up and back straight.

Push off with your forefoot and swing your arms to the side.

Increase your speed as you become more skillful.

Do at least five sets of 50 meters.

5.    Grapevines

Also known as karaoke, this exercise increases hip and leg mobility.

It’s also vital for developing footwork, balance, coordination and lateral speed, and strength.

Proper Form

Start by standing upright while facing forward, then step out to your right side on your right foot.

Follow the right leg with the left leg, placing it behind the right.

Repeat this step to the right again, but this time bring the left foot in front of the right one instead of behind.

Alternate crossing the left foot behind and in front of the right foot.

Keeping a fluid movement with your arms is the key to maintaining balance.

Stay on the ball of your foot or the forefoot throughout the entire motion.

Repeat the exercise in the other direction, letting the left leg lead and alternating putting the right foot behind and in front.

6.    Straight-Leg Shuffles

Straight-Leg Shuffles shorten ground contact and reduce the braking effect typically found in runners who overstride.

It also stimulates neuromuscular timing for fast cadence running

Proper Form

Begin bounding forward with a fast cadence, keeping your legs straight, your torso upright, and your ankles dorsiflexed the entire time.

Focus on driving your foot down, then allowing it to spring back up off the ground without lifting the knees.

Do at least three 50-meter reps.

7.    Ankling

Ankling helps develop correct foot-strike mechanics.

This increases coordination, efficiency, and speed.

Proper Form

Stand straight, with your feet shoulder-width apart.

Using a fast, very short stride, move forward taking small steps and landing on the balls of your feet.

As your feet strike the ground, be sure to use the ball of your feet to take your body to the next step.

Keep your steps as short and quick as possible, with a minimum knee lift.

Imagine yourself running on hot coals – the goal is to spend minimal time on the ground.

Running Drills for Speed  – The Conclusion

Add these speed drills to your training program as soon as you can. The speed of implementation will be the key to your success.

Feel free to leave your comments and questions below, and as always, thanks for stopping by. Keep running strong!

David D.