Leg Workouts for Runners: Top 8 Exercises for Strength and Speed

runner doing Legs Strength Exercises

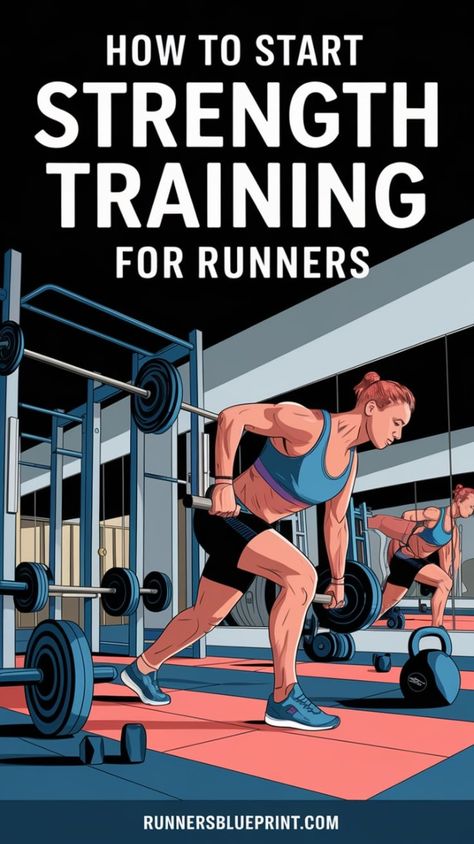
Let me guess—you’re a runner who avoids the weight room like it’s a trap. I used to be the same.

I figured pounding out miles was enough. I called myself a “pure runner” and believed leg workouts were just fluff. That fantasy ended at mile 15 of a brutal Bali trail race. My knee buckled, and I had to limp to the sideline, humiliated.

My PT hit me with the truth: “Your legs aren’t strong enough.”

That hit harder than the trail did. But it was a turning point. Since then, I’ve built strength, stayed injury-free, and helped dozens of runners do the same.

This guide isn’t some generic leg day blueprint. It’s what worked for me and the athletes I coach. You’ll get real-world tips, stories from the trenches, and a workout plan that fits into your week without frying your legs. Let’s go.

Why Runners Need Leg Strength (Trust Me, You Do)

Let me dive into why you need strength work as a runner:

🔹 Injury Prevention

Your muscles are shock absorbers. If they’re weak, your joints take the hit. Research even shows strength training can slash your injury risk in half. Personally? I haven’t had a serious injury since I started lifting.

🔹 Running Economy = Free Speed

Stronger legs mean you burn less energy at the same pace. After a few weeks of squats and lunges, my “easy pace” actually felt easy. Like running with upgraded legs.

🔹 More Power on Hills and Finishes

You want that final kick? Or the legs to power up a climb? Strength is the answer. I remember gunning up a hill at mile 10 of a half marathon after months of deadlifts. I didn’t just survive. I attacked.

🔹 Form That Holds Up

Running is basically balancing on one leg over and over. Weak glutes and hamstrings? That’s when your running form breaks down. Single-leg work cleaned up my stride and made me feel stable, even on Bali’s uneven sidewalks.

The 30-Minute Leg Workout for Runners

This workout hits every key lower-body muscle you use when running. Glutes, quads, hamstrings, calves, and core stabilizers. It takes about 30 minutes, tops.

How it works:

  • 8 moves total
  • Alternate between different muscle groups
  • Mix of single-leg and two-leg exercises
  • 3 sets of 8–12 reps (adjust if you’re new)
  • Rest ~60 seconds between sets
  • Warm-up first! Think 5–10 mins of light cycling, jogging, or bodyweight squats

Progress your training by:

  • Adding weight (start small, increase weekly)
  • Bumping up reps or sets
  • Switching to tougher variations (e.g. jump squats, single-leg deadlifts)

Heavy lifting (around 80% of your one-rep max) has been shown to improve running economy, but work your way up slowly and stay sharp with form.

1. Lunges

Muscles Worked: Glutes, quads, calves — plus a solid hit to your hamstrings and core for balance.

Lunges are my bread-and-butter leg move for runners. If running is all about single-leg strength and forward drive, lunges hit that right on the nose. Think of it like a slow-motion running stride, but with fire. When I started adding them regularly, I noticed two big changes: I had way more power in my push-off, and my knees stopped doing that sketchy wobble mid-run.

How to Do Them Right:

Stand up tall, feet about hip-width. Start with just your bodyweight if you’re new. If you’re ready for more, grab a couple of dumbbells or sling a barbell across your back.

Step forward with your right foot — not a baby step, but not a leap either — and plant it strong. Bend your front knee to roughly 90 degrees and let your back knee drop toward the floor (don’t slam it; control is everything). Your front thigh should end up almost parallel to the ground, and your knee should stay in line with your ankle — not flying past your toes.

Now here’s the real work: push through your front heel like you’re pressing the floor away and bring yourself back to standing. Alternate legs if you’re doing walking lunges, or do one side at a time if you want to fry your legs a little more.

Reps: I usually go 10–12 reps per leg, per set. You can walk them across a field or stick to in-place lunges — whatever gets you fired up.

David’s Go-To Variations:

  • Walking lunges = great for range of motion
  • Reverse lunges = easier on the knees
  • Bulgarian split squats = pure leg fire. You prop your back foot on a bench and go deep on the front leg. It’s brutal — but it builds monster strength and reveals if one leg is slacking. I love to hate this one.

2. Calf Raises

Muscles Worked: Your calves — both the gastrocnemius (the big one) and the soleus (the deeper one). These are your power generators for push-off and ankle control.

Here’s the deal: runners talk quads and glutes all day, but your calves? They’re the unsung heroes. Every time you toe-off, your calves fire. Strong calves make your stride more efficient and can keep nasty stuff like Achilles pain and calf cramps away.

I learned the hard way. I used to cramp up deep into long runs. My fix? Regular calf raises. It changed everything.

How to Do Them:

Find a step or a sturdy ledge. Stand with the balls of your feet on it, heels hanging off. Hold something for balance if you need to.

Push through your toes and raise up high — think ballerina tall. Pause at the top, feel that hard contraction in your calves, then slowly lower until your heels dip just below the step. That slight drop gives your calves a juicy stretch. No bouncing. No momentum. Just honest work.

Reps: I usually hit 12–16 reps per set. Some days I’ll do 15 with both feet, then 10 single-leg on each side. That one-leg version really exposes any imbalances.
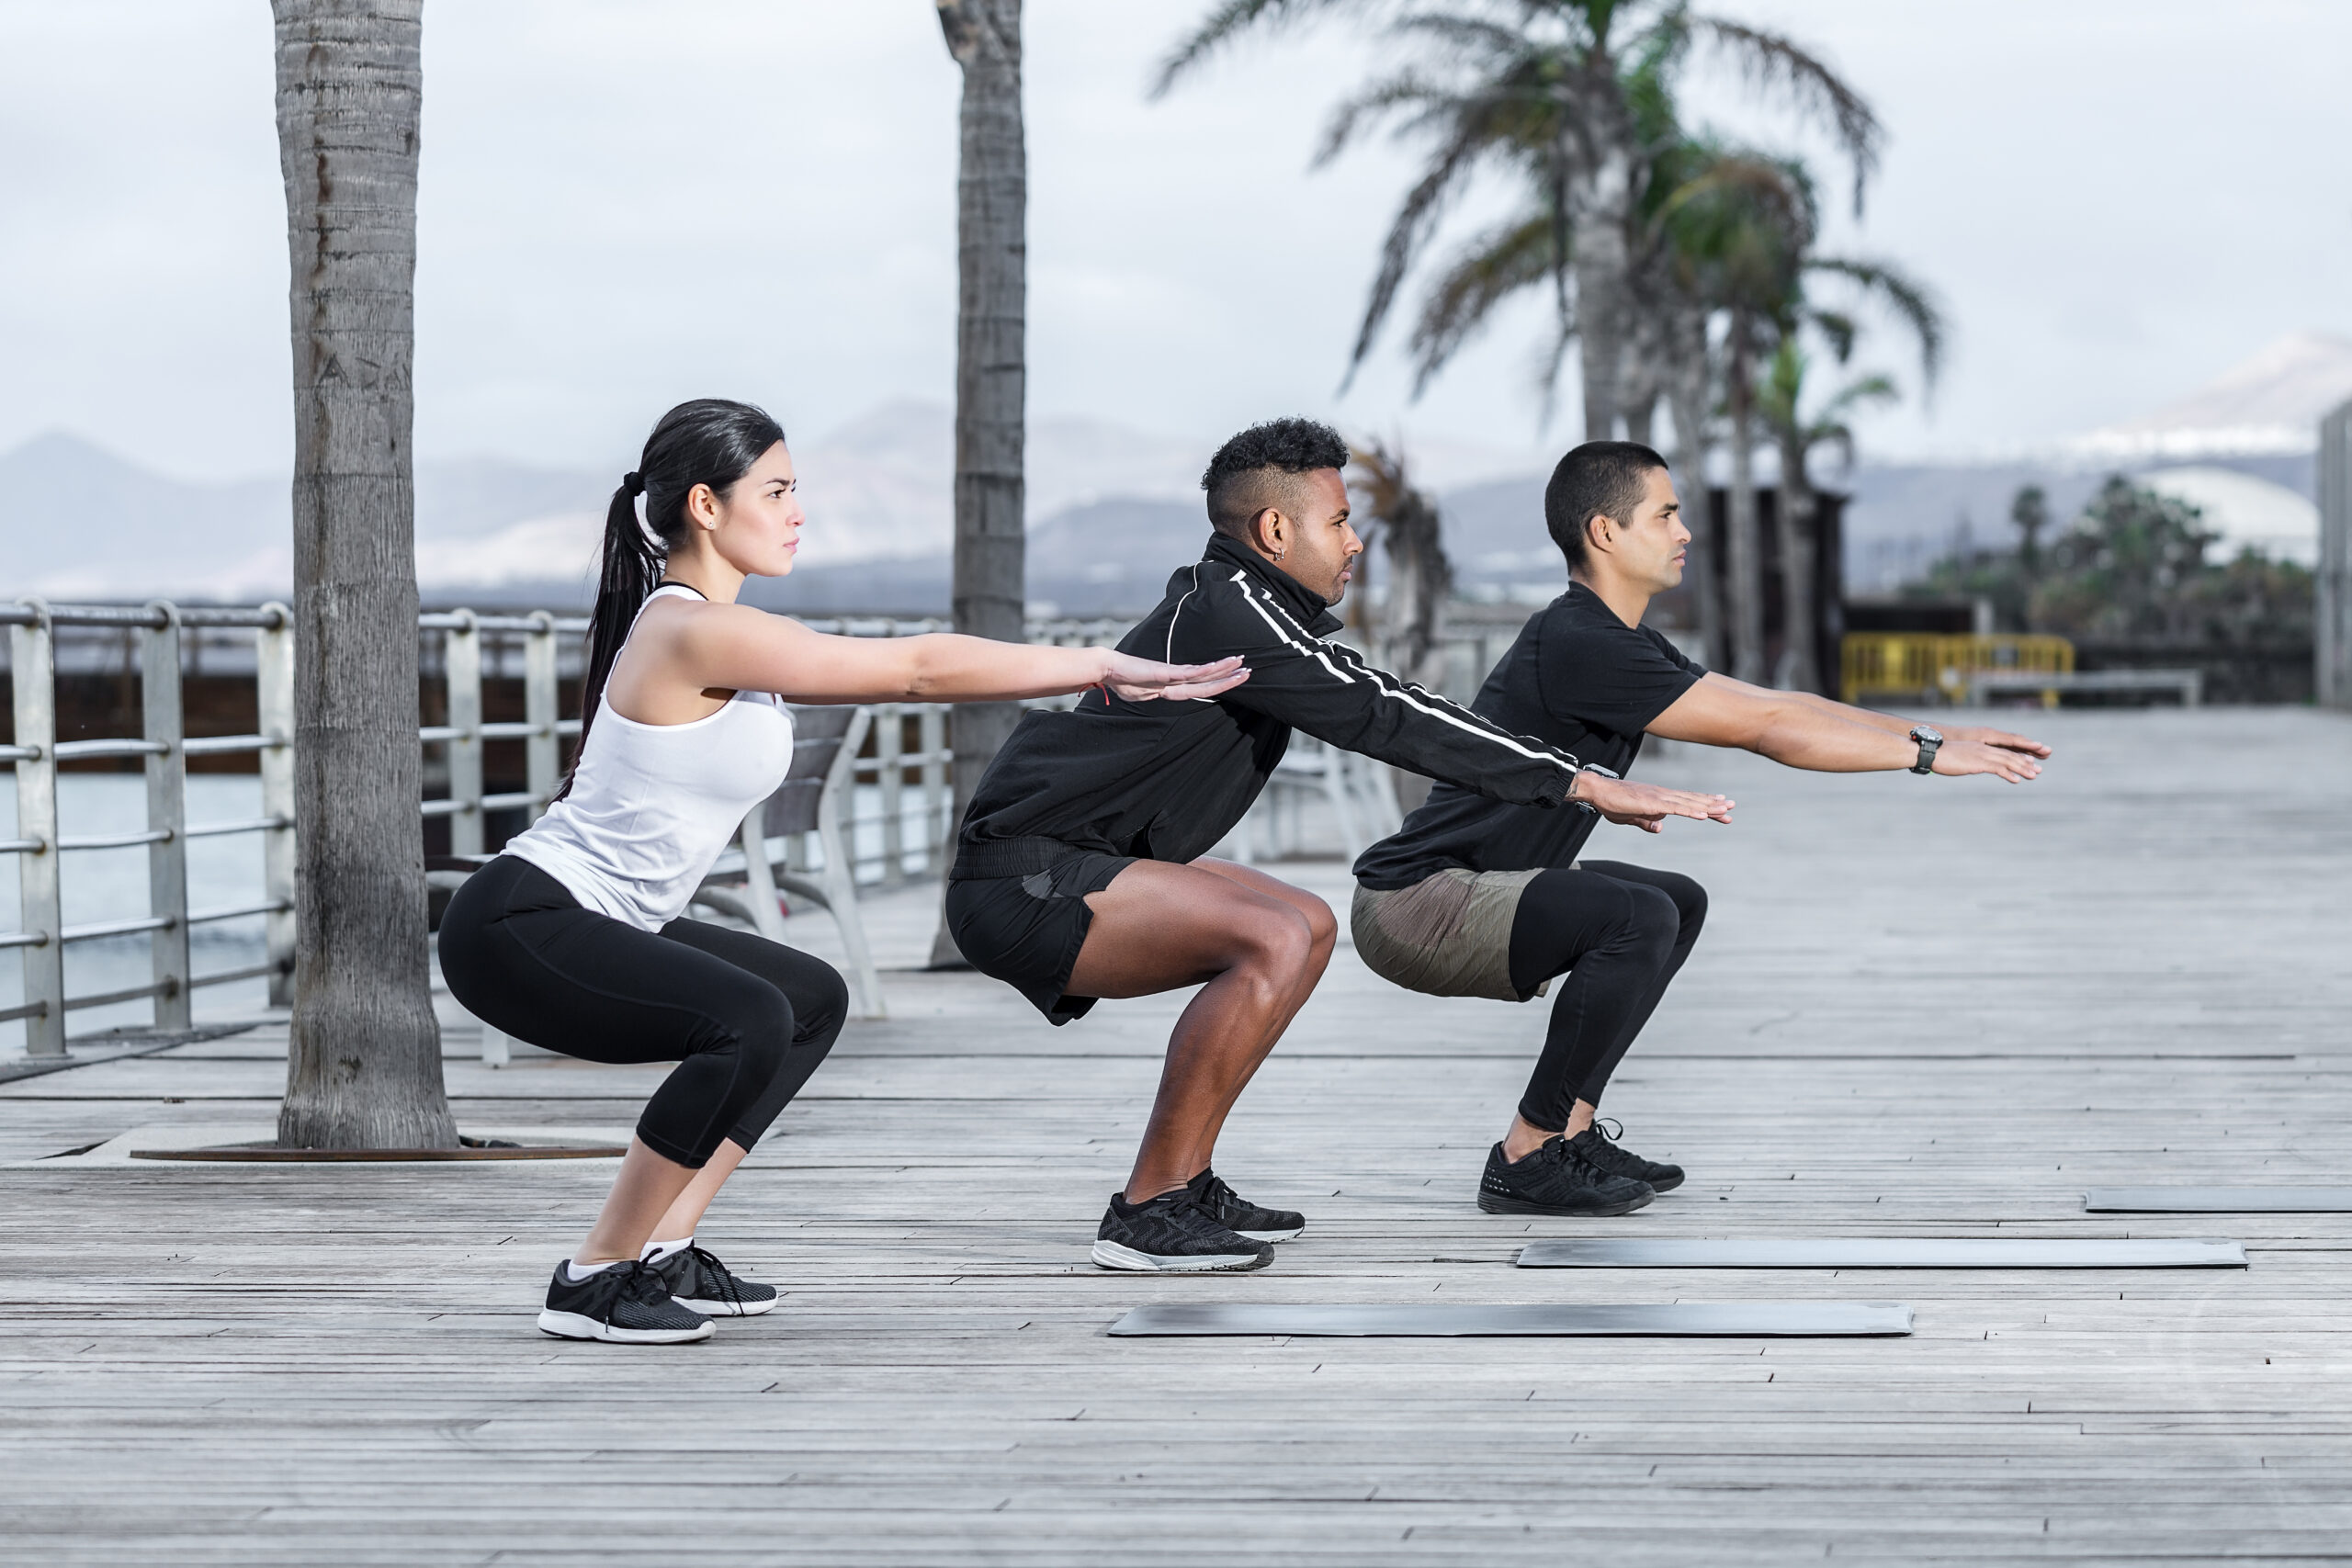
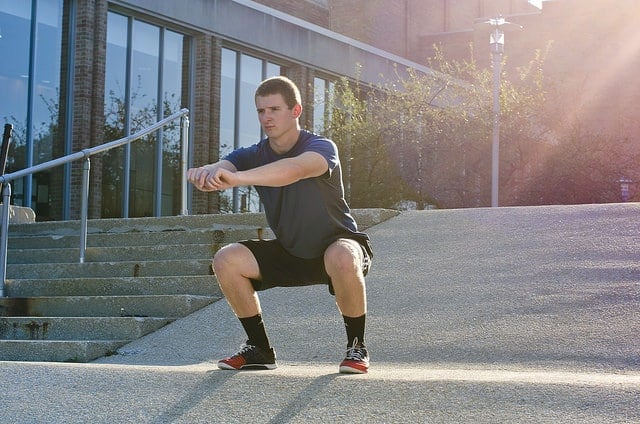
3. Squats

Muscles Worked: Quads, glutes, hamstrings, and core.

If I had to crown one strength move for total leg power, it’d be squats. Period. They build raw strength and help stabilize your knees, hips, and core. When I started squatting regularly, I stopped feeling sketchy going downhill. Before, I used to tip-toe down descents, worried my knees would buckle. That fear? Gone.

How to Do Them:

Feet shoulder-width. Toes turned out just a touch — whatever feels right for your hips. Drop it like you’re sitting in a chair behind you. Keep your chest proud, back straight, heels grounded. Don’t let your knees cave in or shoot forward past your toes.

Go down until your thighs are at least parallel to the ground. If you’ve got the mobility, deeper is great — more glute activation. Then drive through your heels and stand up strong.

Start with bodyweight. Goblet squats (holding a dumbbell at your chest) are also a solid entry point. More advanced? Load up a barbell for back squats.

Reps: 8–12 reps per set. Go heavier with fewer reps, lighter with more. Just never trade form for ego.

Coach’s Tip:

Form over depth. Always. Some runners obsess over going “ass to grass.” But if your form falls apart at the bottom, it’s not worth it. A solid partial squat with good control is better than a deep one that jacks up your lower back.

Also, your eyes should look straight ahead — not down. That tiny adjustment helps keep your spine aligned.

4 . Sumo Squats

Target Areas: Quads, glutes, and those underused inner thighs (adductors).

Sumo squats deserve their own spotlight. If you’re a runner struggling with knee wobble or hip instability, these can be a game-changer. The wide stance and feet turned out hit the inner thighs way more than your standard squat.

Why does that matter? Because your adductors help control side-to-side leg movement. If they’re weak, your knees might cave inward during a run, especially when fatigue sets in. I’ve seen this plenty in runners with IT band issues or that annoying “runner’s knee.”

Here’s how to do it:

  • Take a wide stance, feet pointed out at about 45 degrees.
  • Go bodyweight at first or hold a dumbbell/kettlebell between your legs. Barbell works too if you’re comfy with it.
  • Sit back and down, keeping knees aligned with toes (they should track outward, not collapse in).
  • Drop until thighs are parallel or you feel a good stretch in your inner thighs.
  • Push through your heels and squeeze your glutes to stand.

Shoot for 10–12 reps. Start light. Form over everything.

A common mistake? Knees collapsing inward. Fight that by driving them outward as you come up.

5. Leg Press

Target Areas: Quads, glutes, hamstrings, calves (a little).

The leg press machine catches a lot of hate from gym purists, but don’t dismiss it. Especially for runners new to strength training or anyone needing to load the legs safely. I leaned on leg press heavily when my squat form was garbage. It let me build strength and confidence without risking my back.

How to do it:

  • Sit down and set feet shoulder-width (or a little wider) on the platform.
  • Keep feet flat, hips and back pressed into the seat.
  • Start with knees bent around 90 degrees.
  • Press out until your legs are nearly straight (don’t lock out).
  • Lower back under control to that 90-ish degree bend.

Aim for 12 solid reps per set. Go heavier than your squats here — you’re supported, so you can push it. I do 3–4 sets of 10–12 when I’m in a heavy strength block.

Coach’s Tip: Foot placement changes what gets worked. High hits more glutes, low blasts quads. Keep knees aligned with toes. Never lock your knees at the top. Also, hands off your legs — use the grips, not your thighs, to stay stable.

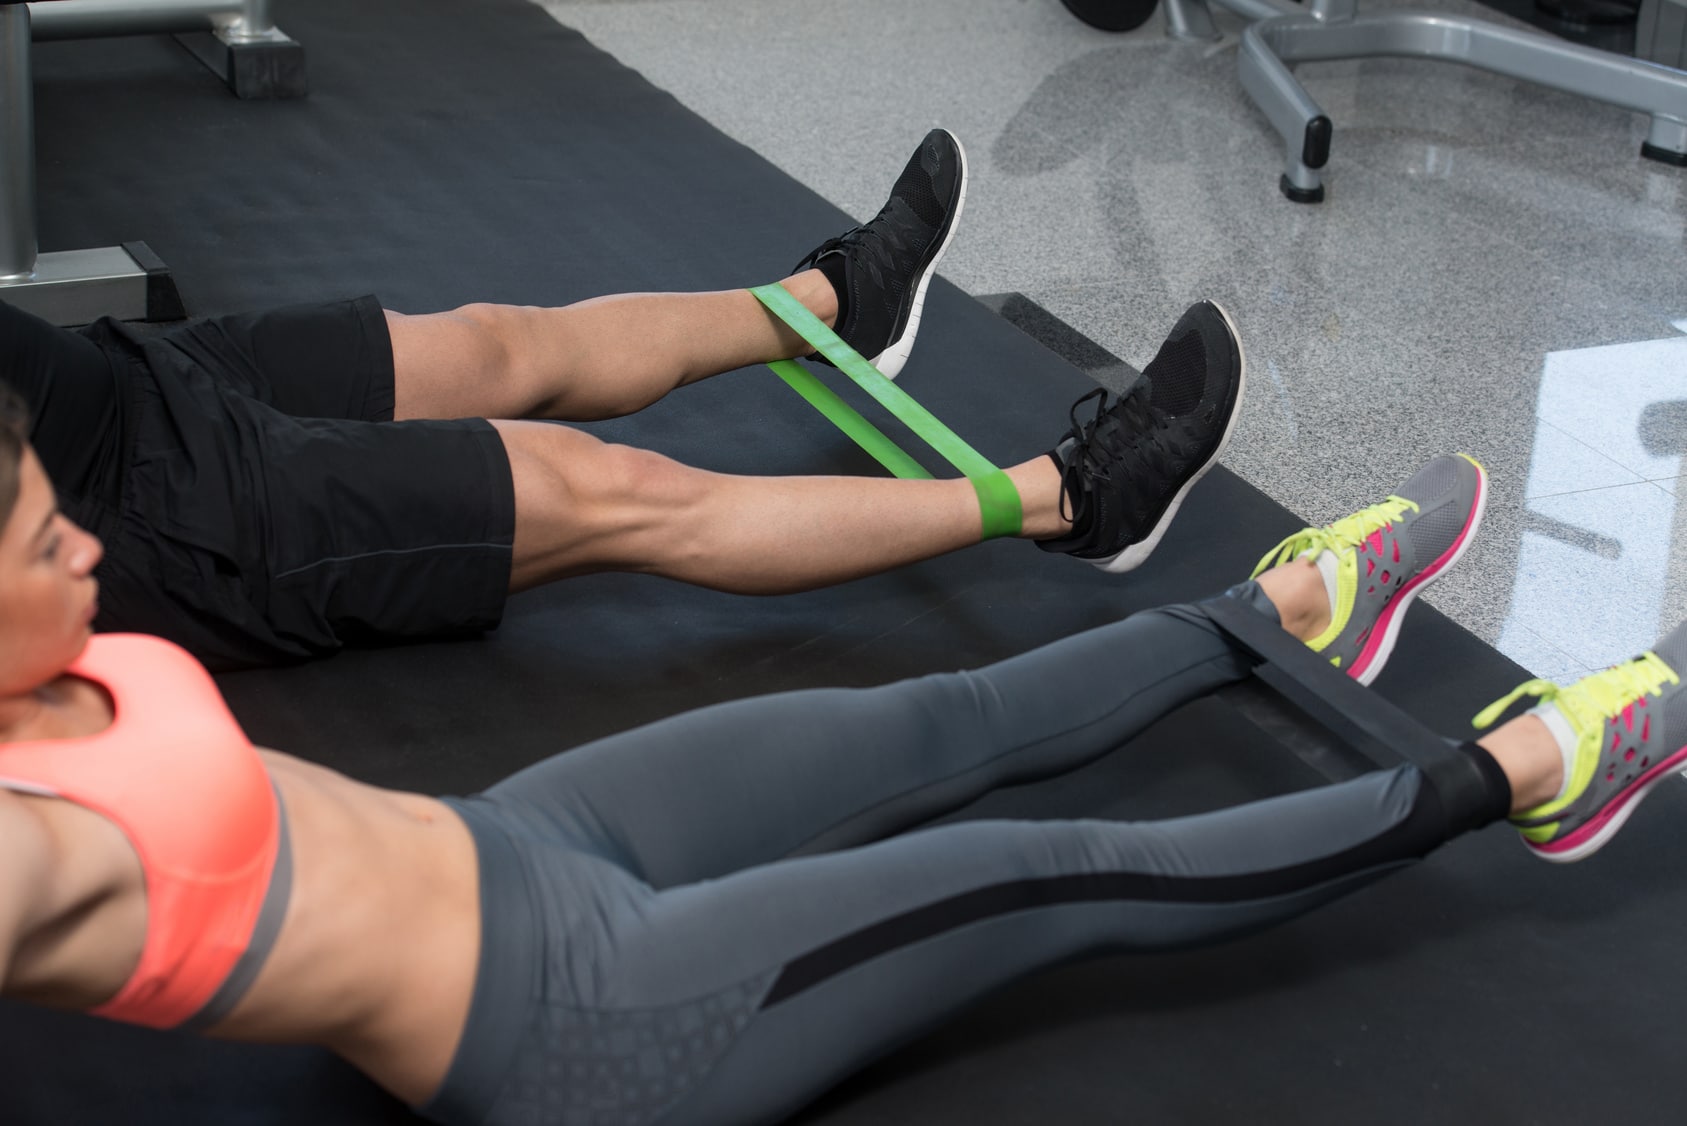
6. Single-Leg Deadlifts

Target Areas: Hamstrings, glutes, lower back, core.

If I could only give a runner two exercises, the deadlift would be one of them. Why? Because running is basically a series of single-leg stances. And this move not only strengthens your backside, but also reveals any lopsidedness between legs. Trust me — you’ll know which leg is weaker.

How to do it:

  • Stand on one leg, knee slightly bent.
  • Hold dumbbells or just go bodyweight at first.
  • Hinge forward at the hips as your free leg extends back.
  • Keep your spine flat and hips square (no twisting).
  • Lower until your torso is parallel to the ground (or as far as your hamstring flexibility allows).
  • Drive through your heel to return to standing.

Do 8–10 reps per side. It’s gonna feel wobbly. That’s part of the magic.

Coach’s Tip: Hips love to cheat and open up. A trick? Point your back foot’s toes toward the ground. It helps square your hips. Also, keep your back flat like you’re balancing a cup of coffee on it.

I once had a runner whose left leg trembled like mad on these. He stuck with it. A few weeks in, the shakes were gone and his form looked clean. That carryover to his running? Massive.

And hey, there’s a reason physios love single-leg work. Running is a one-legged sport. Don’t ignore it.

7. Lunges with Rotation

Target Areas: Quads, glutes, calves, obliques, balance muscles.

Add some twist to your lunge and suddenly it hits different. Running isn’t just forward and back. Your torso rotates with each stride. This lunge variation taps into that natural twist and strengthens your ability to stay upright and stable under motion.

How to do it:

  • Grab a medicine ball or dumbbell.
  • Hold it in front of your chest, arms straight.
  • Step into a lunge with your right leg.
  • As you sink into it, rotate your torso toward that same side.
  • Keep arms extended as you rotate from the spine.
  • Come back to center and step back.
  • Repeat on the other side.

10–12 reps per side does the trick. Don’t rush it.

Coach’s Tip: Smooth control is key. Don’t fling the weight. If you’re wobbling like crazy, lighten up or use just your hands. Keep chest up and eyes forward.

Why do I love this one? Because it mimics real-life running mechanics in a smart way. I used to have slight crossover gait and some IT band flares. My physio threw this move into my program and it paid off. My stride smoothed out, and my hips felt more locked in. It’s a small tweak with big returns.

8. Cable Knee Drives

Target Muscles: Hip flexors (mostly the iliopsoas), glutes, and your core for stability.

Let me tell you—this one hits a part of your stride that most runners ignore: the knee drive. That explosive motion that powers you forward, especially when you’re sprinting or charging up hills? Yeah, this is how you build it.

Funny thing is, for as much running as we do, hip flexors often get tight or weak from all the sitting and limited motion in daily life. Tight hips, short stride, sluggish form. Fixing that can make a night-and-day difference.

Cable knee drives aren’t just another gym move—they actually mimic how your leg works when running hard. I love using the cable machine here because it gives constant resistance through the full range of motion, just like your stride does.

How to Do It:

Set up at a cable machine with a low pulley and ankle strap. If you’re at home, a resistance band works too. Hook the strap to your right ankle and stand facing the machine, about two feet away so the cable has tension. Start light—this isn’t about heavy loads.

From there, balance on your left leg and drive your right knee up toward your chest, like you’re doing a high-knee sprint. Go for that 90-degree angle at the hip (think thigh parallel to the floor). Focus on a strong upward drive, not a lazy lift. Control the return—don’t just let it flop down.

Do 10–12 reps on one leg, then switch sides. Go for 3 rounds each leg. You’ll feel it fire up your hip flexors and make your stabilizing leg (the one on the ground) work too.

Coach’s Tip: Stand tall. Don’t lean back or hunch over. Let the movement come from your hips—not from swinging your body like a kettlebell. If you’re yanking with momentum, lower the weight. Trust me, you don’t need much here. Activate your abs on each rep too—that’s what your core does during real running.

No cable machine? No problem. Loop a resistance band around your foot, anchor it behind you, and mimic the same movement. Or grab some ankle weights and try high-knee marches. Just make sure there’s resistance as you lift the knee—that’s the magic.

Weekly Plan: Strength + Running

Here’s a simple way to mix strength into your week:

  • Monday: Easy run or full rest. No lifting.
  • Tuesday: Leg workout #1 (30 min)—can pair with a light run.
  • Wednesday: Medium-distance run or cross-train.
  • Thursday: Speed session (intervals, tempo).
  • Friday: Leg workout #2—again, pair it with an easy run if needed.
  • Saturday: Long run. The timing works—legs had a full day since lifting.
  • Sunday: Off or recovery jog.

You don’t need to follow this exact setup—just keep the principle: don’t blast your legs the day before a big run.

If you’re running every day (shout out to my streak runners), tack these on after short easy days or bunch them with speed days if you’re going with the “hard day, hard day” plan.

Here’s your guide to strength training for runners.


Progression Plan

Stick with this for 8 weeks and level it up like this:

  • Weeks 1–4: Get familiar with the moves. Start light. Bump up from 2 sets to 3 if things feel good.
  • Weeks 5–8: Add weight where it makes sense. Or sneak in a fourth set. Or try a harder version of the move.
  • By Week 8: You’ll feel stronger. You’ll run stronger. You’ll see the difference.

Maybe you’re cruising up hills you used to crawl. Maybe your easy pace is quicker at the same heart rate. Strength work doesn’t lie—it shows up in your runs.


Pre-Race Tapering

Got a race coming up? Ease off about 10–14 days before. The goal is fresh legs, not DOMS two days out. Some runners stop lifting altogether two weeks before, others just cut back to bodyweight or light stuff.

Me? I taper the load and volume, keep a bit of movement, and let the legs breathe.


Maintenance Phase

Race season gets hectic. You don’t have to go beast mode in the gym year-round. During heavy race blocks, keep just one full-body session per week. That’s enough to maintain the strength you built.

Remember: it’s easier to maintain than to build.


Recovery: Don’t Skip It

Strength training adds load. Respect the recovery. Eat right (protein matters), hydrate, sleep like it’s your job. I always foam roll my quads, calves, and hamstrings after leg day.

DOMS? That soreness is your badge of honor—it means you’re doing something new and your body’s adapting. A light recovery run or swim can help too.

I once read a comment from a seasoned runner on Reddit that stuck with me:

“DOMS is real, but it’s proof you’re working.”

True that. It fades, and then you level up.


Strong Legs = Strong Runner

If you’re serious about running better—not just logging miles but running with purpose—then get to work on your legs.

This isn’t about looking good in shorts. It’s about injury-proofing, building power, and running smarter.

The weight room (or your living room floor) is your next training ground.

Lace up. Load up. Let’s build those bulletproof runner legs.

5 HIIT Running Workouts for Beginners

HIIT Workouts for runners

Let’s talk about something that changed the game for me—HIIT.

That’s short for High-Intensity Interval Training. Yeah, it might sound a bit scary at first. I get it.

Years ago, I avoided anything that wasn’t a steady jog.

Long runs were my thing.

I figured that was the best way to build endurance.

But you know what? I hit a wall.

My times stopped improving. My legs felt like bricks. And I wasn’t seeing the results I wanted—physically or mentally.

Everything shifted the day I tried a HIIT run. It was rough.

I was gasping for air halfway through. But man, the results hit fast.

My pace got quicker.

My endurance shot up.

Even my motivation came back to life.

You don’t need to be a pro to make this work. If you’ve got shoes and the guts to push yourself a bit, you’re good to go.

Trust me, if I could drag myself through that first session, so can you.

In this guide, I’ll walk you through what HIIT running is, how to start it safely, and give you step-by-step workouts you can do today—even if you’re brand new to it.

Plus, I’ll bust some myths and throw in a few personal stories, the messy ones included. By the time you’re done reading, you won’t just understand HIIT—you’ll want to lace up and hit it.

What the Heck Is HIIT Running, Anyway?

HIIT (High-Intensity Interval Training) is a simple concept: you go hard for a short burst, then slow down to catch your breath, and repeat. That’s it.

Picture this: you run fast—like, 80 to 90% of your max—for 20 or 30 seconds.

Then you walk or jog for 40 to 90 seconds.

Do this on repeat for 10 to 20 minutes.

That’s your workout. Like a rollercoaster for your lungs and legs.

Here’s a real example I use with beginner runners:

20 seconds sprint40 seconds walk or slow jog → repeat 8 times.

It doesn’t seem like much. But by round four, you’ll be asking yourself why you ever agreed to this.

And that’s the beauty of it—HIIT works because it shocks your system in a good way.

You’re not just cruising at one pace. You’re forcing your heart to work harder, then back off. That teaches your body to recover quicker and handle more effort over time.

Plus, you fire up those fast-twitch muscle fibers you never use during your easy runs. This is what helps build speed, power, and even that gritty mental toughness runners don’t talk about enough.

One study from the Journal of Strength & Conditioning Research found that HIIT improves VO₂ max—a key measure of your aerobic fitness. It also ramps up your anaerobic endurance.

Translation?

You run faster and farther, and you bounce back quicker.

The Basic Formula for a HIIT Run

Here’s the exact structure I give to new runners. Print it out. Tape it to your wall. Tattoo it on your forearm (okay, maybe not that far).

1. Warm-Up (5–10 minutes)

Start with light jogging and dynamic stretches. Get your blood flowing and wake up those legs. Don’t skip this—your body isn’t ready to sprint cold.

2. Work Interval (30 seconds fast)

Run hard. Not sprinting-until-you-black-out hard, but about 8 or 9 out of 10 effort. If you’re new, a hard uphill run or super-fast jog is totally fine.

3. Recovery Interval (60–90 seconds slow)

Walk it off. Jog easy. Let your heart rate come down. You’ll feel winded—that’s part of the process.

4. Repeat 6–8 rounds

Start small. Even 4 rounds is better than zero. Build your way up to 8, then maybe 10+ once you’re feeling stronger.

5. Cooldown (5 minutes)

Jog or walk slow. Stretch gently. Let your body ease out of the effort.

That’s your HIIT session—done and dusted.

Simple? Yes.

Easy? Definitely not. But that’s where growth lives.

You don’t need to be fast to do this.

You just need to try hard.

Whether your “fast” is a jog or a sprint doesn’t matter. What matters is the effort. HIIT meets you where you’re at—and pushes you from there.

What About Beginners?

By now you might be wondering: “Sounds great, but what if I’m totally new or not fit yet?”

Good. Let’s talk about that—because HIIT is doable for beginners too. But the key is starting smart (more on that in the next section).

5 HIIT Running Workouts for Beginners (Step-by-Step Plans)

Ready to breathe fire?

Here are five HIIT running workouts designed for beginners who want to get faster, sweat buckets, and start building real stamina.

Each workout has its own flavor — some are more forgiving, others will leave your legs screaming — but all of them can fit into a beginner’s weekly routine.

I always tell my athletes: start slow, warm up properly, and never run these back-to-back. Stick to one HIIT session per week if you’re just getting started.

Easy runs and rest days matter even more when you throw hard intervals into the mix.

Let’s dig in.

HIIT Workout #1: Walk-Run Intervals (aka “The Beginner’s Blast”)

Why I love it: This one’s perfect if you’re new to high-effort training. It uses a run-walk structure that’s simple to follow, but don’t let that fool you — if you push those run segments, you’ll be sucking wind by round three.

This is exactly how I eased a couch-bound client into HIIT last year. She’s running 10Ks now.

Here’s the plan:

  • Warm up with 5 minutes of brisk walking + 5 minutes of light jogging. Toss in some leg swings if you’re stiff.
  • Run hard for 1 minute. That means a pace that feels like 8 out of 10 effort — faster than your regular jog, but not a full-out sprint. If 1 minute is too much, do 30 seconds. This is your workout — own it.
  • Walk for 2 minutes at a relaxed pace. Let your breathing calm down. By the end of the 2 minutes, you should feel ready to go again.
  • Repeat 6 to 8 times. First time? Stick with 6 rounds. You can build up as your fitness improves.
  • Cool down with 5 minutes of walking, followed by light stretching.

How long does this take? Around 20–25 minutes, including warm-up and cooldown.

Quick Tip : On the treadmill? Set intervals for 1-minute run / 2-minute walk. Outside? Use a watch or a timer app. I’ve even used the beat of a playlist to keep the rhythm.

Why it works:

You’re pushing your heart rate high with the run, then letting it drop during the walk — classic HIIT.

According to the Journal of Strength & Conditioning Research, this kind of training improves cardiovascular health, VO2 max, and fat burning faster than steady-state cardio.

But here’s the real kicker: it’s doable. One-minute pushes feel manageable, even when your legs are toast. This workout builds confidence while still torching calories.

HIIT Workout #2: Sprint Intervals (aka “The Speed Demon”)

Why I love it: This is your go-to if you want to feel powerful and fast.

It’s a classic: short sprints, long rest. You don’t need to be “in shape” to start — you just need to go all-in during the sprint and respect the recovery.

Here’s the plan:

  • Warm up well. Jog for at least 5–10 minutes. Add dynamic drills (high knees, butt kicks, skipping). Do 2-3 short strides to get your legs firing.
  • Sprint for 20–30 seconds at around 90% effort. That means controlled but aggressive. Think: arms pumping, legs driving, but not flailing.
  • Recover for 90–120 seconds. Walk the first 60 seconds, then jog the next 60 if you feel good. The goal is to be ready for another hard push.
  • Repeat 6 to 8 times. If you’re new to sprinting, stop at 6. If you’ve done some intervals before, push to 8 — but only if you can hold your form.
  • Cool down with 5 minutes of walking or easy jogging.

How long does this take? About 20 minutes, not counting warm-up and cooldown.

Where to do it: I like to do this on a track — sprint the straightaway, walk the curve. But any flat stretch of road or quiet park path will do. I’ve even used my local beach at low tide.

Hill variation: Want to reduce injury risk? Sprint uphill. It forces better form, lowers impact, and builds strength fast. Save flat sprints for when your body’s ready.

Why it works:

Sprinting taps into your fast-twitch muscle fibers — the ones that give you speed and power. It spikes your heart rate and teaches your body to recover faster. That’s huge for race performance.

Research backs this up: sprint-based intervals improve anaerobic conditioning and running economy faster than longer, moderate runs.

And let’s be real — there’s something primal and fun about sprinting like a maniac. It reminds me of racing kids in schoolyards. It’s raw. It’s simple. It’s effective.

Quick tip: Don’t over-stride. Think quick feet, not long leaps. The biggest mistake beginners make is trying to lengthen their stride to go faster. That’s a shortcut to injury.

HIIT Running Workout #3: Hill Sprint Challenge (The Up-and-Down Burner)

If you’ve got access to a hill, you’ve got a built-in torture device—and I say that with love. Hill sprints have been one of my favorite “no excuses” workouts since the early days.

No fancy gear, no stopwatch needed.

Just grit, gravity, and your will to fight back. I call this one the Up-and-Down Burner because, well, your legs are going to light up like a bonfire.

Why Hills?

They’re sneaky. Uphill running forces you to use great form—shorter, stronger strides—and it hits your legs like strength training.

Even better? Less impact on your knees compared to flat-out sprints.

According to research in the Journal of Strength & Conditioning Research, uphill running improves running economy and power output.

No surprise there—I’ve seen it firsthand in both my own training and with clients. And mentally? Hills toughen you up. They build that “don’t quit” muscle.

How to Do It:

  • Warm-Up (5–10 min): Start with a brisk walk or easy jog on flat ground. Get your calves and ankles ready—hills wake them up fast. Toss in some leg swings, high knees, and a light jog up the hill at a chill pace to get a feel for the terrain.
  • Find a Hill: Something that takes 30–60 seconds to climb when you’re pushing hard. If it’s a short hill, no worries—just run up, walk down, repeat. You can still make it burn.
  • The Sprint: Charge uphill for 30 seconds at around 8–9 out of 10 effort. Slight lean forward, knees driving, arms pumping. This part ain’t pretty—you’ll feel it in your lungs and quads halfway up. Embrace the suck. If 30 seconds is too much at first, start with 20. No shame.
  • Walk Down (Recovery): Walk down slowly, about 90 seconds. This is not a jog. It’s recovery. You’re letting the heart rate settle and prepping for the next round.
  • Repeat: Do 5–8 rounds total. New to hills? Start with 5. I’ve had runners build up to 10 over time, but only if your form stays solid.
  • Cool Down (5 min): Wrap it up with an easy jog or walk on flat ground. Let your legs calm down after going to war with that incline.

Coach’s Note:

Each rep should be a test—but not a form killer. If you find yourself hunching over or barely moving near the top, cut the interval short.

Train smart, not sloppy. I like to pick a visual target—tree, rock, whatever—and chase it each round. When your legs feel like jelly, and your lungs are gasping, that’s the hill doing its job.

And yeah, go slow on the way down. No heroics. Save your knees. You’re not racing the recovery.

Why It Works:

Hill sprints are basically powerlifting for runners. Every stride is like a single-leg press.

You’re building raw strength, cardio, and mental toughness all in one shot. And if you’ve got cranky knees or shin splints, you might find hills feel better than sprinting on flat pavement.

One of my older coaching clients—65 years old, knees not what they used to be—swears by hill intervals. “It’s hard, but not harsh,” he told me. And he’s right. It’s one of the best bang-for-your-buck workouts in the HIIT world.

HIIT Running Workout #4: Fartlek Fun Run (Speed Play for Grown-Ups)

Let’s be honest: Fartlek sounds like something a 10-year-old would giggle at.

But don’t let the name fool you—it’s one of the best tools for building speed and endurance without feeling like you’re trapped in a lab experiment. I use it all the time when I want freedom in a workout but still want to feel fast.

Fartlek is Swedish for “speed play,” and that’s exactly the vibe—loose, fun, and surprisingly tough.

How to Do It:

  • Warm-Up (5–10 min): Easy jog. Get into a rhythm. No need to overthink it—you’ll blend right into the workout from here.
  • Start Playing:
    Let’s say you’re doing a 20-minute run. Randomly toss in bursts of speed. Maybe you sprint to the next stop sign. Maybe you run hard during your favorite song’s chorus. Maybe you race your shadow. Keep the fast segments between 15 seconds to a minute—whatever feels right.
  • Recover Easy:
    After each burst, drop back to your normal jog or walk. Recover until you’re ready to go again. There’s no strict timing. Listen to your body. Jog a minute, walk thirty seconds, whatever works.
  • Repeat the Dance:
    You might throw in 6–10 speed bursts during a 20-minute run. Some can be all-out sprints. Others just a faster cruise. This isn’t a math equation—it’s you, having fun with pace.
  • Cool Down (last 2–3 min): Ease back to a walk or gentle jog. Let the heart rate come back down slowly.

Coach’s Note:

I use fartleks when I don’t feel like looking at my watch.

Sometimes I zig-zag through city streets, chasing lampposts and runners I see up ahead. Other times I’m on the trails, picking up speed between two random trees. It’s freeing. And still effective.

If you’re new to speed work, fartlek is your friend. You don’t need to hit exact splits. You just need to move faster for chunks of time—and back off when needed.

Why It Works:

Fartlek teaches you how to shift gears.

It builds both aerobic and anaerobic capacity. You’ll spike your heart rate during bursts, then bring it back down in recovery—a classic HIIT rhythm, just less rigid.

It’s also great for tuning into your body. You’ll start recognizing when you’re fully recovered, when you’ve got more in the tank, and when you need to back off. This awareness? That’s golden.

HIIT Running Workout #5: The 10-20-30 Intervals 

Let me tell you about one of my favorite sneaky-tough HIIT workouts: the 10-20-30 method. This one’s inspired by a Danish training approach that mixes up your pace in a way that keeps your body guessing—and your brain awake.

It’s kind of like Tabata’s chill cousin. Same intense spirit, but way more beginner-friendly. Instead of maxing out every round, you build up gradually: easy jog, pick it up a bit, then boom—sprint.

Simple. Powerful.

And yeah, it’ll leave you breathless in the best way.

How to Do It

Here’s your game plan:

  • Warm-Up: 5–10 minutes of easy jogging. Let your legs and lungs wake up.
  • The Interval Pattern (One Cycle):
    • 30 seconds: Easy jog—relaxed, cruise mode.
    • 20 seconds: Pick it up to a moderate pace. I tell runners to think “5K effort”—not crazy fast, but not comfy either.
    • 10 seconds: Go for it. A near all-out sprint. Push hard.

That’s one cycle. It takes just 60 seconds.

  • Rest: After each cycle, take 1–2 minutes of walking or light jogging. Listen to your body. Don’t rush. This isn’t a race—it’s training.
  • How Many?
    • Start with 5 total cycles (5 minutes of actual hard work).
    • Feeling strong and have a bit of running history? Try 2 sets of 5, with a 2–3 minute breather in between.
  • Cool Down: 5 minutes jog or walk. Bring that heart rate back to Earth.

Why It Works (And Why I Love It)

This workout tricks your body into working hard without frying your brain. You know what I mean—sprinting for a full minute is brutal.

But 10 seconds?

Anyone can survive that. And because your heart rate climbs during the 20-second push, you’re primed to get max value out of that final 10-second sprint.

A study in the Journal of Applied Physiology found that runners who used this 10-20-30 method boosted their 5K performance while actually spending less time training. Less grind, more gain? I’m in.

It also teaches pace control. I’ve coached beginners who couldn’t tell the difference between “moderate” and “race pace” when they started—but after a few weeks of this workout, they started to feel the difference. That’s where real growth happens.

For me, this workout feels like shifting gears on a mountain trail: smooth start, steady climb, full-send at the top. When I’m done, I feel fired up, not burned out.

Pro tip: Use a running app with a programmable timer (or a stopwatch if you’re old-school like me). Set it to beep or vibrate for the 30-20-10 sequence so you’re not staring at the clock like a hawk.

Your Turn—Let’s Talk Goals

What’s your sprint pace right now? Can you hold it for 10 seconds? Probably. Can you hold it after jogging and pushing hard right before? That’s the fun part.

Want More?

Mix and match with other beginner HIIT runs. But don’t get overwhelmed—mastering one solid workout is better than dabbling in ten. You can also check my post here for more ideas.

And always keep a balance: easy runs, strength days, and rest days matter just as much as HIIT.

Your fitness isn’t built in one day—it’s built brick by brick. This workout? Just one of those bricks. Lay it down solid.

Thanks for reading, and as always, keep running strong. I’m rooting for you. Now… ready, set, HIIT it! 🚀

Lunges Workout for Runners: 10 Variations That Build Strength, Balance & Power

weighted lunge exercise

Let me be straight with you—if you’re not doing lunges, you’re leaving serious gains on the table

Running is a one-leg-at-a-time sport.

Every stride is basically a single-leg squat on the move. So if you’re only doing two-leg lifts (like squats) and ignoring one-leg training?

You’re skipping half the work. That’s like showing up to race day with only half your gas tank full.

That’s why I’m a huge believer in lunges.

They force you to train each leg independently.

Balance, control, strength—it’s all in the mix.

They’re as close as you can get to mimicking your actual running mechanics in the weight room or at home. One coach nailed it: “If you’re only training both legs at once, you’re missing half the equation.”

The truth is: lunges don’t just build strength—they build control. Posture, balance, power… all wrapped into one simple move. Add them consistently and you’ll move better, feel more solid, and be way less likely to break down mid-run.

Stick with me—we’re diving into the muscles lunges target, the benefits you get as a runner, and 10 badass lunge variations to plug into your training right now.

What Muscles Do Lunges Work?

I like to think of lunges as the Swiss Army knife of lower-body strength.

They hit a ton of muscle groups in one move—especially the ones that matter most when you’re logging miles.

Here’s what you’re working with every rep:

  • Quads – These guys do the heavy lifting as you push up from the lunge.
  • Glutes – Your powerhouse. Especially the glute max, which drives hip extension and gives your stride that “kick.”
  • Hamstrings – They stabilize and assist on the way down and fire during the push-up. Great for keeping knees happy and healthy.

But lunges don’t stop there. Your core (abs and low back) has to stay braced to keep you upright.

Your hip stabilizers (like the glute medius) fire to stop you from tipping over. Even your calves and ankles kick in for balance and push-off power.

That’s what makes lunges so damn effective. One move trains your whole running system—from big muscles to the little guys you didn’t know you were neglecting.

And because lunges are unilateral (one side at a time), they help fix those sneaky left-right imbalances. Everyone favors one side. Lunges call you out and clean it up.

And please don’t take my word for it—science backs this up.

A study in the Journal of Strength & Conditioning Research found that forward lunges (including walking and jumping versions) improved hamstring strength and boosted sprint speed over just six weeks.

That’s not fluff—that’s results.

The eccentric control (that slow lowering phase) is where the real gold is. That’s what strengthens the hamstrings and glutes.

And if you’ve ever bombed a downhill and trashed your quads? You know how valuable that eccentric strength is.

Bottom line: lunges train you to be a more balanced, powerful, and injury-resistant runner.

10 Lunge Variations Runners Should Master

Not all lunges are created equal.

Each one hits different muscles and gives you different tools in your runner toolbox — from basic stability to raw power.

Let’s break it down. Master the forward lunge first, then level up with these variations.

1. Basic Forward Lunge

This is your go-to for effective strength training. Simple, effective, and brutally humbling when done right.

When to use:

Warm-ups, recovery strength days, or anytime you need to reinforce the basics. Rehab? This is often the first move I bring back to re-train proper mechanics.

Targets: Quads and glutes are the main hitters here, with hamstrings, calves, and your core tagging along to stabilize.

Form tips:

  • Big step forward.
  • Drop down ‘til both knees hit 90°.
  • Front knee stays stacked over your ankle — don’t let it cave in or fly past your toes.
  • Keep your torso tall, chest proud.
  • Push through the heel of your front foot to rise up.
  • No cheating with the back leg — front side does the work.

Coach cue: Picture a string pulling the top of your head toward the sky. That’ll help keep your posture clean.

Why it matters:

This move mimics running — but in a bigger range of motion. It trains your legs not to collapse when things get tough. It even reinforces better running form by teaching your body to stay tall and keep that knee from diving inward (a classic tired-runner mistake).

2. Weighted Lunges

Bodyweight lunges are great — but if you want more power, you’ve gotta load ‘em up.

When to use:

Hit these on strength days. They’re clutch during base training or off-season when you’re focused on building that running engine.

How to load:

Hold dumbbells at your sides, rack kettlebells at your shoulders, or throw a barbell on your back. Even a single dumbbell at your chest works if that’s all you’ve got. Start light and dial in the form.

Goal: Progressive overload — fancy term for making things harder over time. Add reps, add weight, rest less. That’s how you grow stronger. Weighted lunges hammer the quads, glutes, and hammies, setting you up for more force with every stride.

Key tip: Don’t let the weight wreck your form. Keep your chest up, abs tight. Take the same big step, hit that 90°, and push through the heel. If you’re leaning or wobbling, drop the weight and clean it up.

3. Jumping Lunges

Now we’re getting spicy.

Jumping lunges are plyometric, which means power-focused. They’re loud, explosive, and they’ll jack your heart rate fast.

When to use:

Throw them into a HIIT workout or plyo circuit once or twice a week. Especially great for sprinters, trail runners, and anyone looking for a quick burst at the end of a race. But don’t do them before long runs or races — save your legs.

Why bother:

These light up your fast-twitch muscle fibers — the ones that help you explode. That translates into better stride turnover, stronger finishes, and more pop in your push-off. Plus, they boost balance and coordination. Think of it like ninja training for your legs.

How to do it:

Start in a lunge. Jump up. Switch legs in mid-air. Land soft. Repeat. No breaks. No flailing.

Form tips:

  • Soft knees.
  • Tall chest.
  • Pump those arms like you’re sprinting.
  • Keep it snappy and springy.
  • Don’t grind — when you feel yourself slogging or your jumps get tiny, you’re done.

Heads up: If your knees or ankles are sketchy, skip these for now. Build base strength first. Impact’s no joke.

One sports study showed runners who added plyos (like jump lunges) actually improved their 10K times — even while running fewer miles. Why? Because plyos train your muscles to store and release energy better (called the stretch-shortening cycle). That’s a fancy way of saying: they make you springier.

4. Reverse Lunges 

Reverse lunges don’t get the hype they deserve—but trust me, they should. It’s the same basic move as a regular lunge, except you step back instead of forward. And that little tweak? It can make a huge difference—especially for beat-up knees.

Why I like ’em:

Forward lunges can feel like a punch to the kneecap if you’ve got cranky joints. Reverse lunges? Way gentler. By stepping back, you take pressure off the front knee and shift some of the load to your glutes and hamstrings. That’s not just easier—it’s smarter.

If your knees bark after every run, this variation could be your new go-to. I’ve coached runners who couldn’t lunge forward without pain, but switch it up to reverse and boom—smooth sailing.

There’s even research to back this up—reverse lunges put less stress on the patella, and more work into the posterior chain. Translation? Happier knees, stronger butt.

When to use ’em:

  • Coming back from knee pain? Start here.
  • Just getting into strength work? Start here.
  • Need a solid move in your warm-up or leg day routine? Yep—start here.

I often tell newer runners to master the reverse lunge before tackling forward ones. It’s easier to balance, easier on the joints, and still gets the job done.

What you’re hitting:

  • Glutes (big time)
  • Quads
  • Hamstrings
  • Hip flexor stretch on the trailing leg

You’ll really feel your front-leg glute kick in when you stand back up—that’s money right there. Feels a lot like the push-off in your run stride.

How to do it (the right way):

  • Stand tall, chest up.
  • Step back like you mean it.
  • Drop your back knee so it’s just above the ground.
  • Front knee should stay above your ankle, not wobbling all over.
  • Push through your front heel to come back up.

Keep your stance hip-width apart—you’re not walking a tightrope. Alternate legs or hammer one side at a time.

5. Running Lunges 

This one’s for the runners who are tired of lifting just for the sake of lifting. You want your gym work to actually make you faster, right? That’s where “running lunges” come in.

They’re not an official exercise name—it’s more of a coach’s hack. But they’re pure gold for translating strength to running power.

What They Are

Start in a forward lunge. As you rise up, drive the back leg up into a high knee, like you’re taking off in a sprint. Then step right back into the lunge and repeat.

It’s basically a running drill disguised as strength work.

Why It Works

  • Builds balance and coordination
  • Reinforces good form—chest up, core tight
  • Trains explosive hip drive
  • Teaches your body to generate force off one leg—just like running

And yeah, it’ll make your glutes burn like hell.

How to Nail It

  • Lunge forward with your right leg
  • As you rise, drive the left knee up like you’re sprinting
  • Arms should swing naturally (left knee up = right arm forward)
  • Hold that balance for a beat—then step back into the next lunge
  • Repeat or alternate sides (alternating is tougher)

When to Use

Use this as a form drill, a warm-up before speedwork, or as part of a runner-specific strength circuit. Two or three sets of 10–12 per leg is plenty. Go for clean reps, not sloppy speed.

I like to throw these in before strides or intervals. They wake up my hips and get my mind locked into fast running mechanics.

6. Pulse Lunges  

These bad boys don’t look like much—until your legs start shaking like Jell-O at mile 23.

They’re not fancy. But they’re brutal in the best way.

What’s the Deal?

Instead of going all the way up and down in a lunge, you get low… and stay low. Just pulse up and down a few inches at the bottom. That’s it. But don’t let the simplicity fool you—your quads are about to light up.

Why Bother?

  • Builds muscular endurance
  • Works your stabilizers and core
  • Great for mental toughness
  • Gets your legs used to working under fatigue (hello, last 5K of a marathon)

These are perfect for the end of a workout, when your legs are already cooked. Just a few rounds will smoke your quads, glutes, and hamstrings.

And yeah, that burn? That’s where the good stuff happens. Lean into it.

How To Do It

  • Start in a lunge (let’s say right leg forward)
  • Drop into position—back knee hovering off the ground
  • Now pulse up and down a few inches. Smooth and controlled.
  • Stay low. Stay steady. Try 15–20 pulses, then switch sides

Form Tips

  • Keep your front knee over your ankle—don’t let it drift past your toes
  • Stay upright—no slouching
  • Keep your core tight (this helps you balance when the burn kicks in)

If your legs shake? Good. That means you’re pushing it. But if you feel pain in your knees, stop and check your form.

7. Lateral Lunges  

Let’s be real—most runners live in one gear: straight-ahead grind. But life? Trails? Random curbs? They’ll throw sideways chaos your way. That’s where lateral lunges step in.

What’s the Move?

Instead of your usual forward or reverse lunge, this one goes sideways. Step out to the side, bend one leg while keeping the other straight. Boom—side lunge.

Why It Matters

This hits muscles you’ve probably been ignoring—especially if all you ever do is run in a straight line.

We’re talking inner thigh (adductors), outer hip (abductors like the glute medius), plus some quad and glute fire too.

And let’s not forget the sweet stretch in your groin and inner thigh—feels brutal at first, but in a good way.

Ever had IT band issues or knee pain that just shows up uninvited? Lateral lunges help fix the muscle imbalances that lead to that crap. Road runners: this keeps your knees tracking clean and tight.

Trail runners: this is your secret sauce for side steps, rock dodges, and not face-planting when the terrain gets messy.

When to Do Them

Toss them into your dynamic warm-up, strength day, or cooldown. They’re great for stretching out tight hips after a long run. If your first few reps feel stiff—good. That means you’re waking up neglected zones.

Shoot for 8–12 reps per side.

Coach’s Form Tips

  • Feet flat, toes mostly forward (a slight natural turn is fine)
  • Chest up, core tight
  • Sit back into the lunge, like you’re loading up a single-leg squat
  • Don’t let that bent knee cave inward—keep it lined up with your toes
  • Keep the straight leg… well, straight. You’ll feel that stretch, trust me

8. Reverse Lunge + Kick  

You want a move that fires up your hips, stretches your hammies, and gets you ready to fly? This one’s it.

The Move

Step back into a reverse lunge. Push up through your front leg, and swing your back leg forward into a kick. Repeat. You’re combining strength and dynamic stretch in one clean motion.

You’re not just standing there doing leg swings—you’re working both glutes, hammies, quads, hip flexors, and your balance all at once.

I use this one right before tempo runs or track work. Gets everything activated and loose in a way that static stretching just can’t touch.

Why Runners Love It

  • Reverse lunge = strong glutes, hamstrings, and quads
  • Kick = wakes up tight hamstrings and stiff hip flexors
  • Combo = better range of motion and smoother stride from the first mile

It also challenges your balance—because for a split second, you’re airborne and one-legged. Sound familiar? That’s basically what running is.

When to Use It

Perfect warm-up drill. Do 6–8 reps per leg before a hard run. Can also slide into a mobility circuit on strength days.

Pro Tips for Real Runners

  • Kick with control, not like you’re trying to break boards in karate class
  • Focus on quality, not speed
  • Point your toes up during the kick to really stretch that hamstring
  • Slight lean back during the kick? Fine. Just don’t overdo it
  • Balance shaky? Do it near a wall. No shame in that

9. Lunge with Rear Leg Raise  

This one’s sneaky hard. You’ll lunge forward like usual, but when you come up?

You’re lifting that back leg straight behind you. Hello, balance and booty burn.

What It Works

This combo lights up:

  • Glute max and hammies on the lifting leg
  • Glute medius on the standing leg (good luck staying upright without it)
  • Lower back and core to keep your torso from tipping over

It’s like mixing a lunge with a single-leg deadlift—and getting the best of both.

How to Do It (Without Falling Over)

  • Step into a forward lunge
  • Push through your front heel to stand
  • As you rise, hinge forward slightly and lift your back leg behind you
  • Keep everything in one clean line from head to heel—like a human letter T

Your back leg should get up to about parallel with the floor, or close. Squeeze the hell out of that glute at the top, then bring the leg back down and repeat.

Warning: This Will Challenge Your Balance

You will wobble. That’s the point. All those little stabilizer muscles (especially in your ankles and hips) are learning how to fire and keep you steady.

Coach truth: Running is a series of controlled single-leg hops. If your balance is trash, your form will be too. This move fixes that.

Start with 6–10 reps per side. Go slow. Form beats speed here.

Form Tips

  • Don’t round your back when you hinge—stay tall through your spine
  • Keep your weight mid-foot to heel on the standing leg
  • Feel like you’re tipping forward from your hips, not just flinging your leg back
  • Need to scale it? Skip the lunge and just work the rear leg lift until balance improves

This one’s a favorite in rehab routines for ankle sprains, IT band flare-ups, or post-injury reboots. It forces everything to fire together—glutes, core, balance—just like in real-world running.

Runner homework: Can you do this move without tapping your foot for balance? If not, that’s your new goal.

You’ll build not just strength, but body control—and that’s what keeps you upright on sketchy trails, uneven sidewalks, and random life chaos.

10. Step-Up + Lunge Combo 

Alright, if I could make every runner do one move outside of running, this one might be it.

The step-up + lunge combo? It’s a beast.

We’re talking full-on uphill power and downhill control in one punchy move. I’ve thrown this into my own workouts and coached others through it—and every time, it delivers.

You’ll feel it where it counts: quads, glutes, calves, and that stubborn core.

What You’ll Need

Nothing fancy. Just grab a solid bench, box, or step—around mid-shin to knee height. Make sure it doesn’t wobble. That’s non-negotiable. If it’s sketchy, skip it or find a sturdier option.

How to Do It (Without Busting Your Shins)

Here’s the play-by-play:

  1. Stand in front of the box.
  2. Step up with your right foot, drive through your heel, and bring that left knee high—like you’re climbing a steep hill.
  3. Step the left foot back down behind you into a reverse lunge. Your right foot stays up on the box.
  4. After the lunge, drive the left foot back up and repeat.

Do a full set, then switch legs.

This move flows—step up strong, control the step back, and lunge down smooth. No flopping, no shortcuts. Your legs will hate you, but your running will thank you.

Why This Move Works So Damn Well

It’s not just another leg exercise. This one’s built for runners.

  • That high knee? It mimics uphill running and builds drive power—hello glutes, hello hip flexors.
  • The reverse lunge? That’s your downhill controller. It works the eccentric phase (aka the braking system).

Runners don’t just go forward—we go up, down, and sometimes sideways. This helps you handle all of it.

So yeah, you’re building strength—but also coordination, balance, and real-world running mechanics.

When to Throw It In

  • 1–2x per week in your strength routine
  • Especially if you’re training for a hilly race or trail run
  • Great for boosting sprinting pop or vertical bounce (if that’s your thing)

Start with 6–10 reps per side. When it gets easy (it won’t, but if it does), hold some dumbbells. Want more of a challenge? Add a hop at the top after the step-up—but only if your form is rock solid.

Quick Form Tips from the Trenches

  • Plant your whole foot on the box. No heel hanging off.
  • Drive that opposite knee high at the top—like you mean it.
  • In the lunge, lower with control. Don’t crash down.
  • Front thigh = about parallel. Back knee = bent behind, not slamming into the ground.
  • Keep your torso tall and braced. Slight lean = fine. Folding like a lawn chair = not fine.
  • And again: check that box is secure. No one wants a wipeout story here.

Sample Lunge Workouts for Runners

Let’s put all this into action. Here are two ways to work lunges into your running life.

Pre-Run Lunge Activation (5 Minutes)

Warming up doesn’t have to be boring. This quick lunge circuit fires up the exact muscles you’re gonna need once you hit the road.

Do this right before a run—especially hard workouts or long runs.

  • Reverse Lunge + Kick: 6 each side
    (Loosens hips and wakes up hamstrings.)
  • Pulse Lunges: 10 pulses each leg
    (Burns your quads and glutes alive—in a good way.)
  • Lateral Lunges: 6 each side
    (Opens the hips and adds side-to-side stability.)

Go straight through with minimal rest. You’ll feel it. Legs will be more responsive from the first mile, and your form? Way sharper.

I’ve used this warm-up personally before tempo runs. The difference between a cold start and this? Night and day.

Runner’s Strength Circuit (20–30 Minutes, 2x/Week)

Do this on your strength or cross-training days. It’s the kind of routine that builds stronger runners—not bodybuilders.

One round =

  • Weighted Forward Lunges: 8 each leg
  • Step-Up + Lunge: 6 each leg
  • Jumping Lunges: 20 seconds (go hard, but stay clean)
  • Lateral Lunges: 8 each side
  • Plank: 30 seconds (core’s part of running too)

Rest for 1–2 minutes. Then go for 2–3 rounds total.

This hits strength, power, balance, and mobility. Everything you need to support your running without stealing your legs for days.

One runner told me after 4 weeks of doing a similar circuit, her long runs got easier. Her pace improved too. Not from running more—but from running stronger.

Don’t Let Lunges Wreck You – Common Screw-Ups to Avoid

Lunges are awesome.

But only if you don’t butcher the form.

Done wrong, they’ll mess with your knees and rob you of all the gains.

I’ve seen plenty of runners who mean well but end up hurting more than helping because they rush through sloppy reps.

So, let’s clean it up. Here’s what to watch for:

Leaning Too Far Forward

If your chest is diving toward the floor mid-lunge, that’s a red flag. You’re likely stepping too short or letting your core go limp. That forward lean? It dumps pressure onto your lower back and knees.

Fix it: Take a bigger step, and stand tall. Pretend there’s a string pulling your head to the ceiling. Keep your torso upright—just like your running form. Want to work hips more? Lean forward on purpose.

But otherwise, stay vertical.

Knee Caving Inward (Aka the “Oh No My ACL” Move)

This one’s serious. If your knee wobbles inward as you lunge, you’re stressing the ligaments—especially the ACL—and it usually means your glutes are sleeping on the job. Sound familiar? It’s a common issue when runners get tired too.

Fix it: Drive that knee out so it stays right over your toes. Strengthen your glute medius—think clamshells, band walks, side steps. You don’t need heavy weights to start. Get the form dialed first. Use a mirror if you need to check yourself.

Stepping Too Short or Too Long

Too short? You’re loading the knee big time. Too long? You’ll lose balance and probably skip that nice 90-degree bend you want in both knees.

Fix it: When you’re at the bottom of the lunge, your front shin should be vertical (knee over ankle), and your back knee should hover under your hip. It might take some trial runs to find your sweet spot—everyone’s hips are a little different.

Heel Coming Off the Ground

Pushing off your toes might feel natural, but it’s a shortcut to calf strain and cranky knees.

Fix it: Keep your front foot planted—heel flat—and push up through it. That’s how you wake up those glutes and take pressure off the knees.

Forgetting the Core & Upper Body

Look, your legs do the heavy lifting—but if your core’s on vacation and your shoulders are slouching, your form’s falling apart.

Fix it: Brace your abs like you’re about to take a punch. Pull your shoulders down and back. Think proud runner posture. You’re not just training legs—you’re training stability too.

Going Too Hard, Too Fast

A hundred lunges on day one? Cool if you like not walking for a week. I’ve seen it: runners go full beast mode, and then can’t train for days. Not worth it.

Fix it: Start small—bodyweight only, 2–3 sets of 8–10 reps. See how you feel tomorrow. Then slowly add weight or tougher variations. Progress, don’t punish.

Quickfire FAQs: Lunge Truth Bombs for Runners

Are lunges better than squats?

“Better” isn’t the right word. Different is.

Squats are great for power and balance, but lunges are more “runner real”—they work one leg at a time, like running.

That’s why most coaches (including me) always make room for lunges. Running = single-leg strength. Train for that.

Do both if you can. If you’re short on time, lunges give you more bang for your buck in running-specific strength and balance.

How often should I lunge?

2 to 3 times a week works for most runners. Mix it in with your strength days or even tack on a set of bodyweight lunges before runs to activate the right muscles. New to strength work? Start with 2 days. Keep it consistent. Muscle memory builds faster that way.

Are walking lunges runner-approved?

Heck yes. Walking lunges are gold. They stretch, strengthen, and mimic a longer stride. Great for hip mobility too. Add them to warm-ups, cooldowns, or field drills. Just don’t rush the form—same rules apply as with forward lunges.

Can lunges help with knee pain?

If you’re doing them right, absolutely. Lunges can protect your knees by building strength in the muscles that support the joint—glutes, quads, hammies. They also train proper alignment.

Already dealing with knee pain? Start with reverse lunges or partial range, and maybe chat with a physio to tweak the form. Done right, lunges are part of many rehab programs for a reason.

Why am I so sore after lunges?

Because they work! Especially if you’re new to them. DOMS (that post-workout soreness) is normal as long as it’s in the muscles—not in your joints.

To minimize the soreness:

  • Ease in slowly
  • Stretch and move afterward
  • Stay hydrated
  • Use active recovery (like a chill walk or easy spin)

Good news? The more you do lunges, the less sore you’ll get. Your body will adapt—and get stronger.

Can I swap my whole leg day for lunges?

If time is tight, yeah, you can make lunges your MVP. But ideally, toss in some variety: squats, deadlifts, step-ups, calf raises… each hits slightly different muscles and angles.

But if all you’ve got is 15 minutes and a patch of floor? Go hard on lunges—you’ll still walk away stronger.

Final Take: Build That Running Engine

Here’s the bottom line: Lunges are a runner’s secret weapon.

They train strength, balance, stability—and they fix imbalances before those imbalances wreck your stride.

Running is a one-leg-at-a-time sport. So, train that way.

Start with simple lunges—forward, reverse—master the form, then level up to weighted or jumping lunges as you go. Use them in warm-ups to wake up your glutes or on strength days to build power.

Be smart with the load. If your weekly running mileage is heavy, keep the lunge work light that week. If your running is dialed back, hit the strength a little harder. It’s all about balance. Listen to your body, and play the long game.

Your knees will thank you. Your stride will clean up. And trust me—when the hills hit or the final miles get gritty, those lunge-trained legs will carry you through.

The 13 Best Exercises To Improve Running

Strength Exercises For Runners

Are you looking for the best exercises to improve running skills? You have come to the right place.

Once I started strength training regularly, I became a much more efficient and injury resistant runner.

And I believe the same could happen to you if you only just heed the advice I’m going to share with you in today’s post.

In fact, increasing total body muscular strength should be a part of every runner’s cross-training fitness plan.

Backing your road miles with off-road strengthening exercises will not only assist in injury prevention, but also turn you into a stronger, and more efficient runner.

And that’s a good thing if you ask me.

In other words, strength training is the backbone of great running training—no matter what your goals are.

Why do you need to strength train?

Well, for many reasons, including:

  • To increase strength and power in key running muscles such as the calves, quads, glutes, and hamstrings. This translates into better athletic performance both on and off the running track.
  • To fix muscle imbalances. Research has linked muscles imbalances (when a muscle group is stronger or weaker than the opposite group) to all sorts of overuse injuries, such as Runners Knees, IT band syndrome and the like.
  • To improve running form. Your muscles play a major role in helping you develop and keep proper form—especially when fatigue starts to set in. That’s why increasing strength in your core and upper body muscles is crucial. Doing so also provides you with more stability and support throughout a running gait.

Of course, as a runner myself, I’m assuming that you want the above things as well.

The 13 Best Exercises To Improve Running

Without further ado, here are the exercises most appropriate for runners.

Exercise To Improve Running No – 1. Forward Lunge

This asymmetrical standing exercise is among the most running friendly exercises out there—and for many reasons.

Lunges are convenient, versatile, and focus on the muscles runners use the most: glutes, hamstrings, and quadriceps.

Plus, they also increase the range of motion and improve balance and coordination—key running skills.

Proper Form

Begin by assuming a feet shoulder-width apart while holding a dumbbell in each hand.

Next, step forward with your right foot, shifting your weight to that foot’s heel.

Step far enough forward that both of your knees are bent at about 90-degree angle.

Lower your body until the front knee is positioned over the ankle and the back knee is a few inches off the ground. Make sure to remain as stable as possible with spine neutral throughout the movement.

Then step back to starting position, and repeat on the other side.

Perform 12 to 16 reps to complete one set. Aim for three sets.

Exercise To Improve Running No – 2. Planks

One of my favorite core exercises of all time!

Your core muscles, including the lower back, glutes, rectus abdominis (the six-pack), transverse abdominis (the “deep” abs), and obliques, work together to maintain pelvis neutrality and hold proper form when you run.

Plus, a strong core also reduces energy waste, preventing a litany of injuries and boosting your stride power. As you already know, runners are all about preventing injury and improving performance.

Proper Form

Begin by propping yourself on your elbows with the feet slightly apart.

Keep your abdominals engaged, back straight,

and shoulders directly above the elbows down and back, arms parallel to the body.

Instead of locking your knees, make sure to keep them slightly bent.

Hold this position for one full minute to complete one set.

Gradually add time (or weights!) as your gets stronger.

Additional Resource – Your guide to weighted vests for running.

Strength Exercises For Runners

Exercise To Improve Running No – 3. Push-ups

Just because you’re a runner does not mean that upper body strength is trivial.

The fact is, as already stated in this post, proper upper body strength is key for both efficient running and proper form. No doubts.

Not only that, but it also helps take the pressure off your hips, knees, and ankles as fatigue sets in.

And when it comes up building upper body strength and power, you cannot go wrong with pushups.

This symmetrical exercise helps develop upper body and core strength and endurance like nothing else.

More specifically, pushups target the pectoralis muscles of the chest, but they also train the triceps—the muscles at the back of the upper arms, and the shoulders.

Proper Form

Assume a plank position with your hands shoulder-width apart, back flat, and feet slightly apart.

Next, lower your body by bending your elbows to a 90-degree angle, keeping them relatively close to your torso, until your chest hover the ground.

Keep your glutes engaged and torso rigid throughout the exercise—hiked, or sagging hips is a sign that you lack enough strength to perform the exercise properly.

Then press back up to starting position and repeat.

Do as many push-ups as possible with good form to complete one set. Aim for three sets.

Exercise To Improve Running No – 4. The Twisting Lunge

This lunge variation is a great core exercise that also increases lower body strength, coordination, and balance.

Also, the twisting motion forces the glutes to contract more fully while it engages the core.

Proper Form

Assume an athletic position while holding a dumbbell or a medicine ball in front of you with elbows bent at approximately 90-degree angle.

Step forward with your right foot into a lunge position.

Then, while keeping your knee on the right foot, twist your upper body to the right.

Maintain a 90-degree angle bent in the front knee, then straighten and engage your rear leg.

Last up, slowly press back to starting position.

Exercise To Improve Running No – 5. Russian Twists

These are one of the best exercises for working the obliques—the muscles that help rotate the torso and stabilize the spine.

Plus, Russian twists can also target the hips, back, arms, and shoulders, depending on the weight apparatus used and/or loading of the movement.

Proper Form

Begin by sitting down on the floor while keeping your back at 45-degree angle, both feet either flat the floor (easy) or in the air (more advanced) so your body is forming a V shape.

Make sure to keep your back flat at this angle throughout the movement. Do not hunch your shoulders forward.

Next, twist your upper body to the right, hold for a count of three, then slowly rotate back to starting position.

Repeat on the other side.

For more challenge, hold a dumbbell in each hand as you twist.

Exercise To Improve Running No – 6. Squats

If I had to pick one exercise that fits perfectly with the demands of running, then it would be squats.

This fantastic exercise boosts leg power, improves knee stability, increase the range of motion—all of which can prevent a plethora of overuse running injury.

For the full guide to squat variations, check my post here.

Proper Form

Assume an athletic position with feet shoulder-width apart, toes pointing ahead, while holding dumbbells at shoulder-height.

You can also perform this without weight while holding your arms extended in front or overhead.

Next, lower down by sitting back as if there is a chair behind you.

Lower your hips down until your thighs are parallel to the floor, forming a 90-degree angle. Just do not let your knees go past your toes.

Then press back up to starting position.

Exercise To Improve Running No – 7. The Bridge

This is one of the best exercises for strengthening the core stabilizer muscles, specifically the transversus abdominis and multifidus muscles.

The bridge also helps prevent lower back pain.

Not to mention that it’s the go-to move for toning the gluteus medius muscle—one of the three muscles responsible for creating the ever coveted lift.

Proper Form

Begin by lying down on your back with arms to the side, palms facing down, knees bent, and heels on the floor.

Next, raise your hips until knees, hips, and shoulders are in straight line. Squeeze your abs and glutes as you reach the top of the movement. Do not overextend your back during the exercise.

Hold the bridge post for a couple of seconds before easing back down.

Last up, slowly lower your hips back to the floor and allow to briefly touch the floor before completing another rep.

Exercise To Improve Running No – 8. Wall Sits

This isometric exercise is one of my favorites!

It’s an impressive lower body move that builds strength and endurance in the calves, glutes, and more importantly, the quadriceps.

Walls sits are also easy on the knees and can be performed by almost anyone.

Proper Form

Stand roughly two feet away from a wall.

Next, press your back against the wall with your feet shoulder-width apart and slide down the wall until you end up in a sitting position. Imagine there is a chair under you.

Keep your thighs parallel to the ground and feet firmly planted on the ground throughout the hold.

Hold the position for as long as you can. And remember to engage your legs and core muscles, while keeping the back flat throughout the hold.

Last up, slide up the wall to starting position to complete one set.

Exercise To Improve Running No – 9. The Deadlift

The deadlift is the mother of all full body exercises.

In fact, it’s one of the most basic powerlifting exercises.

The classic deadlift hits almost every muscle in the body, including the quads, calves, lower back,  and the core muscles.

Furthermore, study shows that the deadlift can also increase strength and muscle mass by boosting the release of the growth hormone.

Proper Form

Start by placing a heavy barbell on the floor in front of you, positioning your feet about halfway under the bar—roughly 3 inches from touching it.

Next, while hinging at the hips and keeping your back straight with the core engaged,  bend over until your shins touch the barbell then grab the loaded barbell.

Next, to pull the barbell off the ground, extend your hips and knees until you’re standing up straight.

On the way down, slowly lower the weight to the floor until you’re back to the starting position.

Perform 8 to 10 reps to complete one set.

Aim for three sets.

Exercise To Improve Running No – 10. Overhead Lunge

This is a quite challenging variation of the classic bodyweight lunge that targets the shoulders, the core, the glutes, hamstrings, and quadriceps—making it a total body exercise per excellence.

Not only that, but overhead lunges will also help you build and increase flexibility in the hip flexors.

Also, they are ideal for challenging your balance, proprioception, and overall mobility.

Proper Form

Start by standing tall with feet shoulder-width apart while holding a plate, a pair of dumbbells or a barbell straight above your shoulders.

Please, make sure that your arms are straight with the elbows locked.

Next, while keeping the weight directly overhead (in line with the shoulder joint )take a large step forward with your right leg and lower your body until your right knee is bent at 90-degree angle.

Last up, return to the starting position and repeat with your left leg to complete one rep.

If this is too challenging for you, then feel free to hold the weight at shoulder level.

Exercise To Improve Running No – 11. The Chin-up

Another awesome upper body weight that’s guaranteed to help you achieve the kind of upper body strength you always wanted.

This ideal exercise targets the core, the back and biceps muscles like nothing else.

If performing straight chin-up is too much for you, then feel free to use a chair assist for more help.

(check the YouTube Tutorial for how).

Proper Form

While using a pull-up bar, grab it with your palms facing you and with hands a bit wider than shoulder width apart.

Next, while keeping your core engaged and letting your body hang, raise yourself up until your chin is parallel with or over the bar.

Then, slowly release and repeat.

Exercise To Improve Running No – 12.  Kettlebell Swing

You might not be familiar with this kettlebell exercise, but kettlebell swings are some of the best functional and total body exercises that there is.

This particular exercise is good for runners because it can help you boost endurance, core stability, strength, and balance—all of which can help you improve your overall running power for any distance and running terrain.

Proper Form

Start by standing tall feet hip-width apart while holding a dumbbell (or a kettlebell) with both hands at arm’s length.

Next, bend your knees slightly, rock back and lower the weight to between legs until it’s below your butt.

Then, with a hip snapping motion, thrusts the hips forward and swings the kettlebell forward to shoulder height.

Please do this while keeping the arms straight and core engaged through the movement.

Continue swinging back and forth, allowing momentum to swing the kettlebell upward instead of trying to actively lift it with the arms.

Do 12 to 16 swings to complete one set.

Aim for three sets.

Exercise To Improve Running No – 13 Front Squat to Push Press

Also known as thrusters in the CrossFit circles, and it’s a mix of the classic squat and the powerful push press exercise.

This exercise hits almost every major muscle group in the body with the added benefits of increasing total body endurance, flexibility, mobility and coordination like nothing else.

Just be careful.

This is an advanced exercise.

You can only start doing it after mastering basic squat variations as well as the stand push-press exercise.

Proper Form

Start by standing with your feet shoulder-width apart while holding hold a sandbag on the shoulder and upper chest (or a barbell across the front of the shoulders).

Next, while keeping the core engaged and back flat, lower Don by pushing your hips back and bending your knees until you are in a full squat position.

Hold for a moment, then from the bottom position, explode back and stand back up as hard as you can while pushing the weight overhead, with the legs straight, shoulder stacked over your hips and arms fully extended.

This is one rep.

Do 8 to 12 reps to complete one set.

Aim for three sets.

New to Running? Start Here…

If you’re serious about running, getting fit, and staying injury free, then make sure to download my Runners Blueprint Guide!

Inside this guide, you’ll learn how to start running and lose weight weight the easy and painless way. This is, in fact, your ultimate manifesto to becoming a faster and a stronger runner. And you want that, don’t you?

Don’t miss out! My awesome running plan is just one click away.

Click HERE to learn more about The Runners Blueprint System today!

Strength Training Program for Runners

woman running in trail

If you’re really serious about improving your running performance, you’re in the perfect spot.

As runners, we often get caught up in piling on the miles—but hitting the pavement isn’t the full story.

Here’s the truth.

Adding strength training to your routine changes the game. It’s more than muscle—think fewer injuries, better running efficiency, and a faster path to your goals

What’s not to like, really!

Now, if you’re thinking, “Strength training? That sounds intense,” don’t worry!

No matter where you are in your strength training journey—total beginner or gym regular—I’m here to help

In this post, I’ll guide you through setting up a strength training regimen that complements your running, whether you’re a beginner or seasoned in the gym.

What Is Strength Training?

At its core, strength training is all about making your muscles work against resistance—weights, machines, or even your own body. And don’t worry, you don’t have to lift heavy weights to see results.

Did you know that simple bodyweight moves like push-ups and squats can build strength and stamina just as well—if not better—than traditional weight lifting?

And the benefits don’t stop there.

I’ll be honest: for the longest time, I was one of those runners who thought all you needed was running to get better at running.

If I wanted to improve, I figured I just needed to run more miles maybe throw in some speed work.

It seemed logical—run more, get better. But that approach left me nursing shin splints, knee pain, and tight hips all too often

After a few frustrating months, a friend—a much better, more seasoned runner—asked me a simple question: ‘Have you tried strength training?’

So I decided to give it a try.

I started small with bodyweight exercises like squats, lunges, and planks. To be honest, at first, it felt a little pointless. I was not holding any weights here, just doing these slow, controlled movements.

But, after a few weeks of consistency I started getting stronger. And that strength carried over to my miles.

Let me explain more why strength for runners matters and it matters a lot.

Why Should Runners Do Strength Training?

When I first integrated strength training into my routine, I was skeptical. I mean, I’m a runner, not a weightlifter, right?

But after just a few months of consistent bodyweight exercises, the difference was undeniable.

My runs felt easier, my body felt stronger, and those nagging injuries? They started disappearing.

Don’t take my word for it. Let me back this up with some science:

  • Improved Performance: A study published in the Scandinavian Journal of Medicine and Science in Sports found that runners who combined endurance and strength training improved their 10K times and running economy. Muscle strength also saw a big boost.
  • Better Running Economy: A study in the International Journal of Sports Physiology and Performance showed that strength training improved running economy by 2.9% after six weeks. That’s a huge deal when it comes to running more efficiently.
  • Fix Muscle Imbalances: Strength training helps correct muscle imbalances, a common cause of overuse injuries. It can safeguard your body and keep you running strong.
  • Increased VO2 Max: A study in the Journal of Strength and Conditioning Research found that a 12-week strength program improved VO2 max by 5.7%. VO2 max measures your body’s ability to use oxygen, improving it helps your overall endurance.
  • No Bulking Up: Worried about bulking up? Don’t be. The right strength training plan will strengthen you without adding unwanted muscle mass.

Finding Balance Between Running and Strength Training

If you’re wondering how to fit strength training into your already-packed running schedule, don’t worry—it’s easier than you think.

First, focus on your goals. Do you want to correct muscle imbalances, improve your form, or prevent injury? Whatever it is, you can tailor your strength program to fit your needs. Just 20-30 minutes of strength work two or three times a week can make a difference.

I recommend giving your muscles 48 hours of rest between strength workouts to recover and grow stronger.

Figuring out how to balance running with strength training was a game-changer for me. Initially, I tried doing both on the same day, but I quickly learned that separating them gave me better results.

Now, I strength train on non-running days, and it’s made a world of difference in my energy levels and performance

Still hesitant? Here’s how to run after a strength workout.

Warm Up Before You Lift

Before jumping into your strength workout, warm up your muscles. A 10-minute warm-up of brisk walking, jogging, and dynamic stretches (like lunges or high knees) will prepare your body to lift. Remember to cool down and stretch—it’s key for flexibility and recovery.

The Importance of Proper Form

Proper form is crucial when it comes to strength training. It’s better to do fewer reps with perfect form than to rush through and risk injury. Bad form can lead to muscle imbalances and inefficient movement, which are not helpful in the long run.

And don’t take my word for it.

A study published in the Journal of Strength and Conditioning Research found that proper form during squats increased muscle activation in the quadriceps, glutes, and hamstrings.

To build proper form, do the following:

  • Engage your core, stand tall, and head in a neutral position.
  • Focus on smooth, slow lifts and equally controlled descents.
  • Move slowly, ensuring you rely on muscles, not the moment, to do the lifting.
  • Protect your joints by gripping them properly.
  • Keep your body well-aligned and move smoothly through each exercise. Don’t use momentum to swing the weight around.
  • Keep your shoulders relaxed and down. Do not shrug. Avoid aligning your ears with your shoulders.
  • Exhale as you lift the weight and inhale as you lower it.

What’s more?

Consider hiring a personal trainer to teach you proper form from the get-go and learn how to properly complete each exercise. Investing in a few sessions with a personal trainer was one of the best decisions I made for my strength training journey. They corrected my posture, taught me how to engage my core properly, and showed me that quality trumps quantity every time.

Can’t afford one?

Study online videos and tutorials to learn proper lifting techniques—plenty of sources are around.

Running vs. Strength Training: Start Simple

Let’s talk about balancing your running and strength training.

As a beginner, focusing on two non-consecutive days of full-body strength training each week is best. Start with simple, equipment-free routines that target five key movement patterns: squatting, pushing, pulling, hinging, and core work.

Mastering these fundamental movements will help reduce your risk of injury and set the foundation for lifting heavier weights down the road.

Once comfortable, you can add resistance to deadlifts, glute bridges, reverse lunges, overhead presses, hammer curls, and chest presses. Don’t worry if you’re unfamiliar with the equipment—bodyweight exercises are the perfect stepping stone to strength training. Research shows they can be as effective as weights, especially for beginners or those without gym access.

As you get fitter, try introducing tools like TRX bands, resistance bands, kettlebells, barbells, and machines. And remember, it’s all about progression—start small and build up as you get stronger.

Running and Strength Training Schedule

If you’re new to strength training, you might wonder how to combine it with your running routine. Should you run first, then weight train, or lift the weight and hit the pavement?

My advice is simple: lift first, run later. During your first few months, prioritize your strength training routine to improve your technique and form and avoid getting distracted by fatigue from running. Once you’ve developed a solid foundation, you can switch up the order or perform both workouts on separate days.

Here’s a basic schedule that can help you make progress and avoid injury:

  • Monday: Interval run
  • Tuesday: Strength workout
  • Wednesday: Easy run
  • Thursday: Strength workout
  • Friday: Long run
  • Saturday: Strength workout
  • Sunday: Rest

Finding the Right Weight

When it’s time to add weights, start with a manageable weight and slowly build from there. If you swing the weights around or use momentum, the load is too heavy, and you need to scale back.

Ideally, your muscles should feel fatigued by the last couple of reps. If you’re breezing through, it’s time to increase the weight.

The right weight depends on the exercise. For example, with chest presses, ensure you can control the weight throughout the movement. If you rely on momentum to finish those last reps, go for a lighter weight.

The Range Reps

When it comes to the number of reps, keeping them low and the weight challenging enough is the way to go. Opt for a weight you cannot lift more than eight times and do at least three sets of five to eight repetitions per exercise.

Reps really do impact your results

Here is a quick overview of the number of reps and its impact on your strength results

  • The 2 to 5 range rep builds super dense muscle and strength.
  • The 6 to 12 rep range: This builds both muscular strength and muscular
  • The 12 rep range and above. Ideal for building endurance.

Beginner Strength Running Plan For Beginners

If you are just starting, take your training slowly and alternate between weight-lifting and running days.

According to a study published in the Journal of Strength and Conditioning Research, alternating between strength training and cardio on different days can result in better performance improvements than doing both on the same day.

Otherwise, you risk overtraining, which can lead to injury and slow your progress.

As a beginner, start with two strength workouts a week for three to four weeks, then add a third workout in month two.

Research shows that beginners can gain strength with just two weekly workouts.

Shoot for at least 20 to 30 minutes per session, then gradually add time and intensity until you’re lifting hard for 50 to 60 minutes a session.

A study published in the Journal of Applied Physiology found that a longer duration of resistance exercise led to greater muscle hypertrophy, or growth, in untrained individuals.

The Concept of Training Split

To schedule your workouts the right way, you need first to determine what weight training split and weekly schedule to opt for.

If you’re familiar with strength training, you already know how splits work If not, then below is a simple explanation and description.

The most common and widely tested is the 3-day full body split. This is what I’d recommend any beginner. I cannot emphasize it enough.

Additional Resources

For further reading on the benefits of strength training for runners, check out these resources:

Share Your Strength Training Journey!

We want to hear from you! Your experiences with strength training can inspire and motivate fellow runners. Take a moment to share your thoughts in the comments below. Here are a few questions to get you started:

  • What strength exercises have you found most beneficial for your running?
  • How has strength training impacted your performance?
  • Do you have any tips for incorporating strength training into a busy schedule?

Your insights not only contribute to our running community but also help others who are navigating their own strength training journeys. Let’s learn from each other and build a supportive environment!

Run Strong: 8 Essential Foot Strengthening Exercises for Runners

foot exercises for runners

Well, you’ve stumbled upon the holy grail of foot-strengthening exercises, right here, right now.

Listen up, because this is important. As a runner, you know that strength training is like the secret sauce that adds power and resilience to your performance. You’ve probably been diligently working on strengthening your muscles, which is fantastic.

But here’s the million-dollar question: Have you ever considered giving some love and attention to your hardworking feet? If your answer is a hesitant “no,” then hold onto your running shoes, because we’re about to open your eyes to a game-changing aspect of training that you’ve been missing out on.

You see, your feet are the unsung heroes of your running journey. They endure countless strides, absorb impact, and propel you forward mile after mile. Yet, they often don’t get the attention they deserve. It’s time to change that, and unlock a whole new level of performance.

By incorporating specific foot strengthening exercises into your training routine, you’ll unleash a world of benefits. Picture this: enhanced stability, improved balance, reduced risk of injuries, and increased overall foot strength.

Now, don’t worry if you’re not sure where to start. We’ve got your back. In this comprehensive guide, we’ll walk you through the best foot strengthening exercises tailored specifically for runners like you.

Are you ready? Let’s get started.

The Benefits of Foot Exercises For Runners

Let’s dive into the incredible world of feet!

Did you know that each foot is a complex powerhouse with roughly 20 muscles working in harmony? These muscles, including the anterior tibial, peroneal tibial, posterior tibial, flexors, and extensors, play a vital role in supporting our every move.

Numerous studies and research papers have delved into the fascinating mechanics of these muscles, shedding light on their intricate functions and how they contribute to our overall performance.

But that’s not all—your feet are home to an impressive collection of 26 bones, accounting for a whopping 25 percent of all the bones in the human body.

Imagine that! Alongside these bones, you’ll find a network of 33 joints, more than 80 tendons, and ligaments that provide stability and flexibility to this remarkable structure.

Now, let’s talk about the significance of our feet in our daily lives. We rely on them to stand, walk, run, and perform a wide range of athletic movements, such as squatting, balancing, and jumping.

They truly are the unsung heroes of our physical endeavors. In fact, the metaphorical weight they carry is immense—they can make or break us as runners.

Given the incredible demands we place on our feet, it’s no wonder that they are the most used and abused part of our bodies. Every step we take, every leap we make, puts tremendous pressure on this intricate system.

And here’s where things get interesting: any dysfunction or imbalance in the musculature structure of our feet can have a ripple effect on our overall running gait and range of motion. This can ultimately lead to overuse injuries, like Achilles Tendinitis, chronic ankle sprains, knee pain/injury, and even lower back pains and aches.

Want more? Here’s a guide on running after strength training.

8 Foot Strength Exercises For Runners

Without further ado, here are the best foot strengthening exercises for runners. Strengthen your feet for running by performing these exercises at least two to three times a week.

Foot Exercise for Runners – 1. Shin Curls

While using a step or a box, stand while assuming an athletic position with the toes hanging off the edge as much as you feel comfortable.

Next, curl your toes and foot up toward your shin as high as possible without rocking backward, hold the dorsiflexed position for a moment, then slowly lower your toes to the starting position to complete one rep.

Foot Exercise for Runners – 2. Single Leg Balance

Stand with feet hip-width apart, with the core engaged, back flat, and both hands are resting gently on your sides.

Next, lift your left leg straight toward the 12 o’clock position and balance on your right leg.

If you have any balance issues, then feel free to use a wall or a stable chair for more assistance.

For more challenge, try swinging the lifted leg forward and back, from the 12 o’clock to 6 o’clock, so and so forth, or balance on a balance disc or a seat cushion. You can also try single-leg bridges to test your balance.

Foot Exercise for Runners – 3. Heel Walking

Lift up both your feet, then pace the whole length of the room by walking slowly on your heels.

Make sure that you are on your heels the entire time.

For more, keep your toes pointed forward.

Foot Exercise for Runners – 4. Toe Presses

Assume an athletic position with a slight bend in the knees.

Next, lift your toes off the ground then flex the foot (pull the ankle back towards your shin), hold the contraction for a count of three, then release it slowly to the ground.

You can do this exercise while standing tall or while sitting.

Your choice.

Additional resource – Running Vs. Strength training

Foot Exercise for Runners – 5. Toe Curls

Start by placing a towel on the floor, then spread your toes like a fan, then grip the object and pull it toward you.

Repeat 8 to 10 times, then work the other foot.

Foot Exercise for Runners – 6. Calf Raises

Begin by standing in a shoulder-width stance with the toes flat on the edge of a step or a box, near a doorway or a counter, then hold on light for balance.

Next, raise up by pushing your toes into the step, hold for a count of three, then lower your back to the starting position.

You’ll know that you are doing this one right once you start feeling a stretch in your calves.

Additional guide – How to prevent Foot pain in runners

Foot Exercise for Runners – 7. Ankle Circles

While using a wall or a chair for balance, stand on your right foot, then raise the left foot a few inches off the floor.

Next, and without moving your legs, rotate your right ankle in a large circle in one direction.

Then perform a circular motion with the big toe.

Clockwise then counter-clockwise.

When you are done with the right foot, release and repeat on the opposite side.

Foot Exercise for Runners – 8. Toe Walks

Stand tall with your back flat, core engaged.

Next, while keeping the legs straight and heels pulled up towards the calves, walk forward on the balls of your feet for one full minute.

Make sure to keep your stomach tight and maintain an upright posture throughout the exercise.

Whatever you do, do not fold at the waist.

Here are more strength exercises for runners.

8 Foot Strengthening Exercises For Runners – The Conclusion

If you’re looking for practical advice on how to strengthen feet for running then today’s post has you covered. The rest is just details.

Please feel free to leave your comments and questions in the section below.

Thank you for dropping by.

How to Boost Your Running Performance with Resistance Band Training

Resistance Bands Training exercises

Are you looking to give resistance band training a try? You’ve come to the right place.

Strength training is a crucial part of any running program, regardless of your current fitness level and training goals. In other words, if you run, you should incorporate strength training. There’s no way around it.

Why is it so important? Here are two key reasons:

  • Boost power and strength in essential running muscles like the glutes, quads, and calves. This leads to improved running economy and performance.
  • Correct muscle imbalances, which results in fewer injuries and less discomfort while running.

While I could talk endlessly about the benefits of strength training for runners, that’s not my main goal today. Instead, I want to share a set of resistance band exercises you can do at home to enhance your overall body strength.

So, why resistance bands? Well, keep reading for the answers.

Enter Resistance Bands

Resistance bands are fantastic fitness tools. They’re typically made from strong, thin, and durable rubber and feature handles at each end.

The best part? They come in various resistance levels, so you can choose the perfect fit for your current fitness level and training objectives.

These bands are incredibly versatile and customizable to suit your unique needs. Whether you’re a fitness newbie or a seasoned pro, there’s a resistance band for you.

From my experience, I can confidently say that resistance band exercises are among the best ways to maintain strength training routine, especially if you can’t make it to the gym or have your own personal reasons for avoiding it.

Let’s face it: having a stack of dumbbells in your living room might not be the most appealing option for everyone.

Resistance Bands Offer a lot of exercises

The beauty of resistance bands lies in their versatility. With these simple yet effective tools, you can unlock a world of diverse bodyweight exercises. In fact, there’s virtually no limit to the types of resistance exercises you can perform.

From squats to push-ups, chest presses to rows, triceps extensions to overhead presses, and bicep curls, the list goes on.

The best part? You can do all of these exercises without the need for dumbbells or a weight bar.

Many Muscle Groups

Resistance bands are incredibly versatile when it comes to targeting specific muscle groups. They can effectively engage the major muscle groups crucial for running, such as your core, glutes, and legs.

Moreover, you have the freedom to select exercises that align with your fitness goals and preferences. Whether you’re looking to work on your overall strength or isolate particular muscle groups, resistance bands have got you covered.

Connective Tissues

Resistance bands offer unique benefits for connective tissues like tendons and fascia. They can help improve the function of these crucial connective tissues, which is essential for overall mobility and injury prevention.

Additionally, resistance bands are incredibly cost-effective, making them one of the most budget-friendly options for strength training, second only to bodyweight exercises. You can find resistance bands for as little as $5, and even the more advanced options rarely exceed $25. This affordability makes them accessible to virtually anyone.

Moreover, their compact and portable nature adds to their convenience. You can easily roll up resistance bands and take them with you when you travel, ensuring that you can maintain your strength training regimen no matter where you go. This portability is a significant advantage for those who are constantly on the move or prefer to work out in different locations.

How to start Resistance Bands Exercises For Runners 

If you’re new to resistance bands training, here are some essential tips to get you started on the right foot:

  • Choose the Right Band: As a beginner, opt for a thinner band, typically in green or yellow. This level of resistance is ideal for newcomers and allows you to focus on proper form and technique. Remember, you can always increase the resistance as you become more experienced and stronger.
  • Master the Basics: Begin with fundamental exercises to build a solid foundation. Exercises like squats, rows, and chest presses are excellent starting points. These movements target major muscle groups and prepare your body for more advanced exercises.
  • Proper Form is Key: Pay close attention to your form. Ensure that you’re using the correct posture and technique for each exercise. This not only maximizes the effectiveness of the workout but also prevents injuries.
  • Gradually Increase Resistance: As you progress and feel more confident, challenge yourself by using a band with higher resistance. Bands in blue or green offer increased resistance and intensify your workouts.
  • Adjust Band Length: You can make exercises more challenging by shortening the bands or even doubling them up. Experiment with different band lengths to find the right level of resistance for your current fitness level.
  • Consistency is Key: Like any form of training, consistency is crucial. Incorporate resistance band exercises into your routine regularly, aiming for at least two to three sessions per week. This consistency will lead to steady progress over time.

1. Side Steps

This exercise is a fantastic way to stabilize and strengthen your hip abductors, which are crucial for runners. Research has shown that many overuse running injuries, such as Runner’s Knee and IT Band Syndrome, can be linked to weakness in the hip muscles.

Here’s how to do it correctly:

Proper Form:

Set Up: Begin by looping the resistance band either above your knees, below them, or for added resistance, around your ankles.

Athletic Position: Assume an athletic position with your feet hip-width apart and your knees slightly bent.

Step Out: Step out to the right side, planting your right heel and pulling your left foot over so you return to a hip-width stance. Maintain tension on the resistance band throughout the exercise.

Keep Feet Apart: Be sure not to let your feet come into contact during the movement.

Repetition: Repeat the sidestepping movement for at least 12 to 16 steps in one direction, and then reverse back to the starting point.

Progression: As you become stronger, challenge yourself by increasing the distance and resistance of the exercise.

2. Monster Steps

This exercise is another fantastic way to target the hip muscles and strengthen your entire lower body, with a special focus on the glutes. Here’s how to perform it correctly:

Proper Form:

Set Up: Loop a resistance band around both ankles and another one around your knees. Ensure that there is enough resistance so that the band is taut when your feet are hip-width apart. If it feels too easy, adjust the band to provide more resistance.

Starting Position: Begin with your knees slightly bent and engage your glutes. This is your starting position.

Movement: Sink into a semi-squat position, and then step forward and out to the side at a 45-degree angle.

Take Monster Steps: Step forward with your left foot, taking “monster” steps by keeping your feet as wide apart as possible. Continue walking in this manner for a distance of 16 to 20 feet.

Walk Backward: After reaching your desired distance, walk backward to return to your starting point.

3. Standing Hip Abduction

This exercise is a personal favorite of mine, and it’s incredibly effective for targeting the hip muscles and glutes. It also incorporates balance, making it an excellent choice for runners.

Proper Form:

Set-Up: To perform this exercise, you’ll need a resistance band and a sturdy object to anchor it. Create a loop by passing one handle of the band around the sturdy object and the other handle around your right ankle. Stand tall with your left foot on the tubing while holding the opposite handle.

Balance Assistance: If you have concerns about balance, you can hold onto a secure object for support.

Movement: Begin with your right knee straight and engage your core muscles. Kick your right leg outward, away from your body, while keeping your hips level and preventing any rotation. Hold this position for a moment.

Return: Slowly return your right leg to the starting position.

Focus on Hip Muscles: Throughout the exercise, concentrate on using your hip muscles rather than allowing your hips to rotate.

Repetitions: Aim to complete 12 to 16 repetitions on each side to finish one set.

4. Ankle Dorsiflexion

This exercise is particularly valuable if you’ve experienced lower leg pain or shin splints in the past. Dorsiflexion involves flexing your ankle by bringing your foot toward your shin, and it’s an effective way to strengthen your lower legs and reduce the risk of common overuse injuries.

Proper Form:

  • Set Up: Begin by sitting on a mat with your legs extended. Take the middle of the resistance band and wrap it around your right foot, then hold onto the band’s handle.
  • Movement: Pull your right foot up toward your shin as far as you can, maximizing dorsiflexion. This is the primary movement.
  • Return: Slowly lower your foot back to the starting position as soon as you’ve reached the maximum dorsiflexion. This completes one repetition.
  • Repetitions: Aim to perform at least 12 to 16 repetitions on each side to complete one set.

Clams:

Clam exercises target several muscle groups, including the outer thighs, glutes, groin, and hip flexors.

Proper Form:

Starting Position: Begin by lying on your right side, supporting your head with your hand or arm, or propping yourself up on your forearm. Your knees should be slightly bent, and your feet should be stacked, one on top of the other.

Band Placement: Loop the resistance band around your knees, ensuring it’s secure.

Movement: Lift your top knee upward about 8 to 10 inches while keeping your feet together throughout the movement.

Hold and Return: Hold the elevated position for a count of three, emphasizing the contraction in your hip and thigh muscles. Then, slowly lower your knee back to the starting position.

Repetitions: Perform the clam exercise for 12 to 16 repetitions on each side to complete one set.

5. Squat with Resistance Band

Squats are undoubtedly one of the best strength exercises, and when paired with resistance bands, they become even more effective for runners. Squats target various muscle groups, including the core, glutes, quadriceps, and calves. Additionally, they promote mobility and a full range of motion in the lower body, which is essential for runners.

Proper Form:

Starting Position: Stand on the resistance band with both feet, positioning them shoulder-width apart. Ensure the band is taut and centered under your feet.

Grip Handles: Squat down by pushing your hips back and reach down to grip a handle in each hand. Keep your chest up and your back flat.

Squat Movement: With the handles raised to shoulder height, maintain an upright posture while squatting down. Imagine you’re sitting in a chair positioned behind you.

Full Squat: Continue to lower your body until both of your knees are bent at approximately a 90-degree angle.

Return to Standing: Push through your heels to stand back up, returning to the starting position. This completes one repetition.

Knee Tracking: Pay attention to your knee alignment, ensuring they track over your toes throughout the exercise.

6. Standing Kickbacks

This exercise primarily targets the hamstrings (the muscles at the back of the thighs) and the gluteus maximus (the butt muscles). It’s an excellent addition to your resistance band routine to strengthen these crucial muscle groups.

Proper Form:

Ankle Loop: Begin by looping the resistance band just above your left ankle. Ensure it’s secure and won’t slide down during the exercise.

Sturdy Object: Stand facing a sturdy object that you can hold onto for balance. This could be a chair, a wall, or any stable support.

Knee Bend: Slightly bend your right knee while keeping your upper body upright.

Kickback Motion: Lift your left foot off the ground, driving your heel backward in a kickback motion. Focus on contracting your hamstrings and glutes.

Top Position: Hold the position for a moment when your left leg is fully extended backward, engaging your core for stability.

Lower and Repeat: Lower your left leg back down with control, and then repeat the kickback motion on the same side.

Core Engagement: Maintain engagement in your core muscles throughout the exercise to support your posture and balance.

Avoid Rocking: Ensure that your upper body doesn’t rock forward as you perform the kickbacks.

The Runners Guide To Isometric Training Exercises

As a coach, I’ve witnessed the game-changing effects of strength and stability on a runner’s performance

But here’s the thing: there’s an often-overlooked tool that can transform your running game, and it doesn’t require a gym, fancy equipment, or even a lot of space.

I’m talking about isometric exercises.

When I first tried isometric training with P90X, I wasn’t convinced. I love the feeling of movement, the flow of running, and the freedom of hitting the trails. The idea of holding a static position didn’t exactly excite me.

But once I tried it, I was blown away by the results. Isometric exercises are simple, but they pack a punch. They improve strength, stability, and endurance to complement running perfectly.

So, want to strengthen your muscles, sharpen your form, and dodge injuries, all without any fancy equipment?

Let’s dive into isometric training.

What Are Isometric Exercises?

Simply put, isometric exercises mean holding a pose without budging.

Even though you’re still, your muscles work overtime to hold that position, boosting your strength, stability, and stamina.

This type of training has a lot to offer, especially for runners looking to improve their performance and prevent injuries.

When I first held a plank, I expected it to be easy. Spoiler: it wasn’t! The burn in my core, the tension in my shoulders, and the way every muscle seemed to scream for relief showed me just how effective this training style can be.

Now, I use isometric exercises regularly, and they’re a key part of my strength training.

Here are a couple of studies that looked into the impact of isometric training on athletes:

  1. Research published in the Journal of Strength and Conditioning Research shows that isometric exercises can lead to significant improvements in muscle strength and stability.
  2. A study from the Scandinavian Journal of Medicine & Science in Sports found that isometric training can improve joint stability, which is crucial for preventing injuries, especially in high-impact sports like running.

Why Every Runner Should Be Doing Isometric Exercises

Now, you might be wondering, “Why should I, as a runner, care about isometric exercises?” The truth is, they offer a ton of benefits that translate directly to your performance on the road or trail.

Here’s a breakdown of the science behind these simple but powerful moves:

Convenience

One of the best things about isometric exercises? They’re super convenient. You don’t need any equipment, which means you can do them anywhere—at home, during a break at work, or even on vacation. All you need is your body, a small space, and a bit of motivation.

Plus, because these exercises don’t require much time, you can easily fit them into your busy schedule, making it easier to stay consistent with your strength training.

Improved Muscle Stability

A study published in the Strength and Conditioning Journal found that isometric exercises enhance joint stability, which is key for runners. Since running involves repetitive motion, stability in joints like the knees, hips, and ankles can help you maintain form over long distances and uneven terrain. The study emphasizes that holding isometric positions, such as wall sits, can reinforce the smaller stabilizing muscles, reducing the risk of imbalance and injuries.

Injury Prevention Through Core Strength

Core stability is essential for runners, and isometric exercises like planks are some of the best ways to target those muscles. Research from the American Council on Exercise (ACE) shows that isometric core exercises activate deep core muscles more effectively than many dynamic movements. A strong core not only helps you maintain good posture during your run but also minimizes the stress on your lower back and hips, two common areas of pain for runners.

Enhancing Endurance and Mental Toughness

Isometric exercises aren’t just about building muscle—they also teach mental focus and resilience. Research reported that isometric exercises help improve muscular endurance and mental toughness, two qualities that are invaluable during long races. Holding positions like a plank challenges both your mind and muscles to stay steady under pressure, which can translate to a steadier stride and better form on race day.

Improved Flexibility

And it’s not just about recovery. I found that adding these holds to my regular training helped with flexibility too. Holding positions like a deep squat or a calf raise not only made me stronger but also improved my range of motion. Now, I’m much more flexible during my warm-ups, and I’m not as sore after long runs.

Low Impact

What I love most about isometric training is its low impact, perfect for recovery phases. A few months ago, I was dealing with some knee pain after increasing my mileage too quickly.

I needed a way to maintain my strength without aggravating my injury, and that’s when I turned to isometric exercises. They allowed me to work on building strength in my quads, glutes, and calves without putting extra stress on my knees.

6 Isometric Exercises For Runners

Now that you know why isometric exercises are great for runners, let’s dive into some specific moves. These exercises will strengthen the muscles you rely on most while running, like your core, glutes, quads, and calves.

Aim to hold each position for 1 to 2 minutes, and rest for about 30 seconds between each exercise.

Completing one circuit of these exercises will take about 15 minutes, making it a quick but effective addition to your routine.

Isometric Calf Raise

When I first started doing isometric calf raises, I realized just how much stronger my calves needed to be. I could barely hold the position for more than 30 seconds before my legs started shaking.

But after a few weeks, I was up to a full minute. The best part? Climbing hills on my runs became way easier, and I noticed less soreness in my lower legs.

Proper Form

Start by standing tall on the edge of a step or on a sturdy box, with your feet shoulder width apart and knees straight.

Next, rise up onto your toes and try to balance your bodyweight on the balls of your feet.

If you have any balance issues here, then feel free to grab a chair or a wall if necessary.

Hold the position for one full minute then slowly lower your heels to starting position.

Remember these are not your typical calf raises, so hold the pose for as long as you can with good form.

Feel the burn, welcome it, and hold it for longer as you get stronger and fitter.

Isometric Leg Extensions

I have a confession: I used to neglect my quads in my strength routine. That was until I experienced a mild case of runner’s knee.

My physical therapist introduced me to isometric leg extensions, and while it seemed simple at first, I quickly felt the burn in my quads. After a few weeks, my knee pain started to fade, and I’ve kept this exercise in my rotation ever since.

Proper Form

Sit on a chair with your tailbone firmly against the back of the chair, hands resting on the chair with both feet flat on the floor.

Next, while gazing ahead and keeping the back straight, slowly extend your right leg out in front of you, engage your quads, and reach your toes toward your shin as much as you can without losing form.

Hold the position for 30 seconds to one minute, then lower down to starting position and change sides.

Isometric Wall Chair

This one takes me back to my high school track days when my coach would make us hold wall sits for what felt like an eternity. Back then, I didn’t understand the purpose, but now I get it. Building that quad endurance has made a huge difference in my ability to power through the last mile of a race without my legs giving out on me.

Proper Form

Stand with your upper back and back of your head against the wall.

Keep your feet about two feet out in front of you.

Next, while holding your arms across your chest, lower yourself in a slow and controlled manner down by bending your knees until your thighs are parallel to the floor.

Hold this squat position for one full minute, then slowly press back up to starting position.

If this pose was too easy, you can always up the ante by alternating between lifting your right foot for a few seconds then your left.

Split Squat

This move humbled me big time. When I first tried it, I could feel my muscles shaking almost immediately. But I stuck with it, and now I love the feeling of holding that deep lunge position. My hip flexors have never been happier, and I can definitely feel the strength boost in my glutes on my long runs.

Proper Form

Assume an athletic stance with back straight and core engaged, then step into a lunge position , making sure your toes are pointing straight ahead.

Next, make the pose more challenging by sinking down until your front knee is bent to a 90 degrees and your back knee nearly touches the floor.

This is the split squat position.

Hold for 30 seconds to one full minute, then push yourself back up to starting position, then switch sides.

Forearm Plank

When I first added this to my routine, I thought, “I’ve got this.” But around the one-minute mark, I realized just how intense it really was. Planking has made a huge difference in my core stability, which helps keep my form in check during those final grueling miles.

This is a great move to increase strength and endurance in your core muscles and shoulders.

Proper Form

Assume a plank position with the forearms on a well padded mat, back straight, and body forming a straight line.

Next, tighten your abs, squeeze your glutes, and hold the pose for one to two minute to complete one set.

Squat Hold

The squat hold is another one of those exercises that look deceivingly simple. But when you’re halfway through holding that position, you’ll understand why it’s so effective. This exercise has helped me build strength in my quads and glutes, and it’s made a noticeable difference in my running performance.

Proper Form

Start by standing with your feet about shoulder-width apart, core activated and back straight.

Next, bend your knees and squat down so your thighs are parallel to the floor.

Imagine that you are sitting on imaginary chair, and hold the pose for one to two minutes.

If you’re thinking of trying these exercises, my best advice is to stay consistent. You don’t need to do them every day, but adding them once or twice a week can do wonders for your strength and stability. Remember to start slow, focus on good form, and embrace the burn. Trust me, your running game will thank you for it!

Isometric Exercises for Runners: FAQ

I know that you have more than one pressing questions about iso training for runners. Let me address some of the most common ones.

How often should I do isometric exercises?

Ideally, incorporate isometric exercises 2-3 times per week, either post-run or on designated rest days. Since these exercises are low-impact, they’re less taxing on the body, making them perfect for active recovery days. Consistency is key to building stability and strength, so aim to add them regularly without overloading your routine.

What’s the best way to add isometric exercises to my running routine?

A great approach is to add isometric holds at the end of your regular strength workout or run. Exercises like planks, wall sits, and glute bridges can be seamlessly integrated as a “finisher,” helping reinforce the stabilizing muscles you used during your run. Try holding each position for 20-30 seconds, then increase the time as you get stronger.

Are isometric exercises suitable for beginners?

Absolutely! Isometric exercises are accessible to all fitness levels. Beginners can start with shorter holds (10-15 seconds) and focus on maintaining good form. These exercises allow you to build foundational strength and stability without needing any equipment, making them a perfect addition to any runner’s training plan.

Can isometric exercises replace traditional strength training?

While isometric exercises are excellent for building stability and core strength, they’re best used as a complement to traditional strength training rather than a complete replacement. Traditional strength moves, like squats and lunges, target dynamic power and range of motion, while isometrics focus on stabilizing and holding muscles under tension. Together, they create a balanced approach, helping you build both power and control.

What if I have an injury?

If you’re dealing with an injury, isometric exercises can actually be a safe way to maintain strength without adding strain. For example, holding a static position like a wall sit or glute bridge is gentler on joints than dynamic movements. However, always consult with a sports therapist or healthcare provider to ensure you’re performing exercises safely and avoiding any positions that might aggravate your injury.

Conclusion: 

Adding isometric exercises into your training routine can be a game-changer. They strengthen key muscles, improve flexibility, and help prevent injuries—all without requiring much time or equipment.

Whether you’re a beginner or an experienced runner, these exercises can help you become stronger, more resilient, and better equipped to handle the demands of running.

So, give them a try! Add them to your weekly routine, and you’ll soon notice improvements in your strength, endurance, and overall running performance.

Keep training strong, and feel free to leave any questions or comments below!

Kettlebell Kings: 9 Top Exercises to Revolutionize Your Running Performance

woman performing Kettlebell Exercise

If you’re aiming to enhance your overall running prowess and become a better runner, it’s time to shift your focus to training those running muscles for improved strength, core stability, balance, and endurance.

The solution? Kettlebells.

These versatile training tools are just what you need to level up your running game, helping you run with more strength and speed while torching calories along the way. Kettlebell exercises are renowned for being among the best for full-body strength and conditioning, making them a perfect fit for runners.

The beauty of kettlebells lies in their efficiency—they deliver a killer workout in under 20 minutes. What’s more, kettlebell training won’t bulk you up but will instead build strength in essential running areas like your glutes, legs, and core.

In this article, we’ll explore the top 9 kettlebell exercises tailored for runners, providing three workout routines that will have you swinging, lifting, and pressing your way to the next level of running excellence.

Are you ready to take your running to new heights? Let’s dive in!

1. The Cardio Blaster Workout

This workout will have you sweating and panting for a breath in no time, and it’s ideal if you are looking to improve your power and speed while also improving endurance in your muscles.

Just pace yourself here and make sure to pick a relatively lightweight because you will be doing a lot of reps with each move.

Swing

Kettlebell Swing

Begin by holding the kettlebell with both hands using a two-handed, overhand grip. Stand with your feet slightly wider than hip-distance apart, toes pointing slightly outward.

To perform the swing exercise, bend at the hips until the kettlebell is hanging between your legs. While engaging your core muscles, swing the kettlebell up by explosively extending through the hips and knees. Allow the weight to swing back to the starting position. This completes one rep.

Aim to do 16 to 20 reps to complete one set and aim for three sets.

Snatch

Kettlebell Snatch

Stand with your feet shoulder-width apart and hold the kettlebell with an overhand grip. Squat down until the kettlebell is positioned between your feet.

Explode up out of the squat and drive the weight overhead by pulling it along a vertical path in front of your body in one fluid motion. Pause momentarily at the top.

Lower the kettlebell down to the starting position. Perform 16 to 20 reps on each side to complete one set. Aim to do three sets of this exercise.

You can refer to the provided YouTube links for visual demonstrations of these exercises.

Thruster

Kettlebell Thruster

Begin by grabbing two kettlebells, one in each hand, and clean them up to shoulder height by extending your legs. This is your starting position.

To perform the thrusters, squat down while holding the kettlebells in your hands pause for a second. Then, reverse direction and stand up by pressing through your heels and extending your arms overhead. This completes one rep.

Aim to perform 12 to 16 reps to complete one set. Aim to do three sets of this exercise.

2. The Strength Builder Workout

For strength, do this workout. Make sure to pick a really challenging weight and perform the exercises in a slow and controlled manner.

Proper form is king here. This routine will help you build muscles all over your body with an emphasis on the glutes, quads, and core, key running muscles.

Kettlebell Front Squat

Hold two kettlebells in front of your shoulders.

Assume an athletic stance with your feet shoulder-width apart. Next, squat down by bending at the hips until your thighs are parallel to the floor.

Pause for a moment at the bottom of the squat. Then, stand back up by pressing through your heels and extending your knees and hips. Maintain a straight back and keep your knees pointed in the same direction throughout the movement.

This completes one rep. Aim to perform 10 to 12 reps to complete one set. Aim for three sets of this exercise.

Kettlebell Deadlift

Stand with your feet shoulder-width apart, with the kettlebell on the floor between your legs.  Pull your shoulders back, engage your core, and squat down to grab the kettlebell. Lift the kettlebell while keeping your chest high and squeezing your glutes.

Pause for a moment at the top of the movement. Squat down and lower the kettlebell to the floor to complete one repetition.

Aim to perform 8 to 10 reps to finish one set. Aim for three sets of this exercise.

The Turkish Get-up

Begin by lying face up on the floor while holding a kettlebell in your right hand, with your arm fully extended above your chest. This is the starting position.

To perform the Turkish Get-up, lift the kettlebell toward the ceiling as you roll up onto your left elbow by driving your right foot into the floor. Push yourself up to a standing position, keeping the kettlebell lifted overhead.

Stand tall with the kettlebell locked overhead, maintain a straight back, and pause for a moment. Reverse the movement back to the starting position, and then switch sides.

Perform 6 to 8 reps on each side to complete one set. Aim for three sets of this exercise.

3. The Core Ripper Workout

Kettlebells are so famous because they are some of the best core exercises there is. Therefore, here are 3 core moves to help you sculpt your core and build a strong midsection.

Kettlebell Plank with Row

Assume a plank position with your back straight, core engaged, arms straight, and hands grasping two kettlebell handles. Take a deep breath, then raise one kettlebell up until it reaches your hip.

Pause for a count of three at the top of the movement, then lower it down. Switch sides to complete one repetition.

Perform 10 to 12 reps to complete one set. Aim to do three sets of this exercise.

Kettlebell Windmill

Start by holding a kettlebell with your right hand and lift it up overhead while locking the arm and keeping the elbow straight, with your eyes on the weight throughout the movement. Turn your left foot out at a 45-degree angle.

Hinge at your hips until you can touch your left foot or the floor with your left hand. Pause for a moment at the bottom of the movement. Lift back to the starting position while keeping your legs straight, and the kettlebell lifted overhead.

Change sides to complete one repetition. Aim to perform eight reps to complete one set. Aim for three sets of this exercise.

Russian Twists

Sit on the floor with knees bent, feet about hip-distance apart, and core engaged.

Next, hold the weight with both hands at chest level, lean back, lift the legs off the floor, then rotate your torso from right to left, lightly tapping it to the ground with each rep.

Do eight reps on each side to complete one set.

Aim for three sets.

Featured Image Credit – Ville Cotimaki via Flickr

The Stronger Runner: Unveiling the Secrets of Effective Strength Training

Attention, runners seeking to unleash their inner powerhouse! Get ready to dive headfirst into the ultimate treasure trove of weight training wisdom specifically designed to elevate your running game!

In this post, I’m about to unravel the full-fledged guide that will revolutionize the way you approach weight training. Get ready to embark on a journey thatwill take you from novice to seasoned pro, leaving no stone unturned.

By the time we cross the finish line, your mind will be filled with an abundance of knowledge.

Brace yourself to discover the incredible benefits of weightlifting tailored to runners like yourself.

We’ll explore the latest cutting-edge research, unveiling the secrets behind strength training as the ultimate shield against those pesky injuries that threaten to derail your running dreams.

Sounds great?

Let’s get started.

What’s Strength Training?

Imagine yourself as a runner on a long-distance race. You’ve been training for months, but as you hit the halfway mark, you feel the fatigue setting in. Your muscles ache, your form starts to falter, and your pace slows down. But what if I told you that there’s a way to break through that plateau and reach your running goals faster? Enter strength training.

Strength training is the secret weapon for runners looking to improve their speed, efficiency, and endurance. It involves using external resistance, such as weights or resistance bands, to challenge your muscles to adapt and get stronger. And the benefits are not just limited to physical performance.

Research on Strength Training for runners And Injury Prevention

Studies have shown that weightlifting can reduce injury risks and fix muscle imbalances caused by the repetitive motion of running.

In fact, a study published by the National Strength & Conditioning Association found that weightlifting strengthens muscles and joints, leading to proper form, improved running time, and reduced injury risks. Another study published in the Journal of Strength and Conditioning revealed that exercises like squats and single-leg hops not only help reduce injury risks but also improve performance.

But that’s not all. Strength training can also help you burn more calories. Many runners turn to running as a means of weight loss, but as their bodies adapt, they start burning fewer calories. Incorporating strength training into your routine can help increase your lean muscle mass, which in turn boosts your body’s ability to shed more calories.

Run Faster

Resistance training puts stress on your body, forcing it to adapt to boost its ability to withstand the extra load.

Over time, with regular training, these stress-induced adaptations can have an enormous impact on your running speed, efficiency, and endurance.

So, for instance, the stronger your leg muscles get, the more force you can generate on each stride and the more distance you can travel on each foot strike.

Plus, stronger shoulders and arms are essential in increasing your speed and form efficiency.

Fix Muscle Imbalances

Running is one-directional action, meaning it works some muscles more than others, leading to the onset of muscle imbalances.

This places excessive pressure on ligaments and tendons, reducing stride efficiency, limiting running economy, and increasing the risks of injury.

Research shows that, often than not, many runners nagging issues, such as shin splints, runners knee, Achilles tendinitis, etc., stem from muscle imbalances.

With all that being said, the good news is, as little as six weeks of proper weight training can reduce, or completely alleviate knee pain, according to a study.

Burns More Calories

Many runners took up running as means of weight loss. And as my experience dictates, running is helpful for shedding the pounds—especially during the first few months of training.

That said, once your body gets used to running (especially if you lack variety in your training), it’ll start to burn fewer calories.

For that reason, you might want to back up your running for weight loss training with a well-rounded and intense strength training schedule.

As a matter of fact, by increasing your lean muscle mass, you’ll boost your body’s ability to shed more calories.

Build Stronger Bones

In addition to helping you prevent injury, improve running performance, build muscle, and lose fat, weight lifting also improves bone density.

This can be typically measured using a DEXA scan, which is similar to an x-ray but more thorough.

But how does strength training make bones stronger?

It’s actually quite simple.

By stressing your bones, strength training can increase bone density, therefore, reducing the risks of bone-related issues.

That’s it.

This is especially the case for us runners as stress fractures—a common overuse injury—is every runner’s worst nightmare.

For the full scope on a stress fracture, check my full guide here.

Strong Arms

Have you ever tried running without using your arms? It’s not a good idea.

Swinging your arms faster automatically increases your step frequency, and vice versa.

We pump our arms as we run, and the stronger our arms are, the more powerful the forward drive, and the faster we move forward.

That’s no secret.

Be More Efficient

Running doesn’t just involve relying on the leg for forward propulsion, but we’re also using our core, back, arms, shoulders, and chest to balance and improve efficiency.

When the legs are exhausted, we use the upper body more because of the kinetic chain.

Everything is working together in one interlocked system.

Better Form

Your running form can ultimately make or break you as a runner.

That’s why if you can’t hold proper form throughout your runs, you’ll never reach your full running potential.

Improving your upper body strength can make your posture more efficient and help you keep a consistent form, especially as fatigue starts to set in.

Fortunately, improving upper-body strength can upgrade your technique and help you keep consistent form.

Signs of a bad form may include:

  • Rounding the shoulders,
  • Shrugging the shoulder near the ears,
  • Holding on to tension,
  • Swinging the arms too widely,
  • Holding a cell phone or water bottle,

But when you keep your posture straight, head held high, shoulder loose and square, and your arms functioning properly, you’ll ensure that you won’t get hurt.

What’s more?

A stronger upper body, especially a well-developed back, and core muscles help protect your spine from the impact of running.

Additional Resource – Here’s another strength training program for runners to check out

It Requires Little Time

You don’t need to train like an elite bodybuilder or CrossFitter to reap the benefits of strength training.

In fact, all you need is no more than a 30- to 45-minute session two to three times per week, to reap the benefits of strength training as a runner.

Here is the full guide on starting strength training for runners.

Note: Strength training should be performed according to your fitness level and training goals.

For that reason, you need to opt for a well-rounded strength program designed specifically to meet your running needs.

This is why a sprinter strength routine can look so different from a long-distance athlete program.

Are you looking for a way to take your running to the next level? Look no further than strength training! And the best part? It doesn’t require hours upon hours of time in the gym. In fact, all you need is 30-45 minutes, two to three times per week, to start seeing the benefits of strength training as a runner.

Muscles Anatomy

Your body is a complicated piece of machinery, and muscles are a huge part of what’s driving it.

According to experts, five main groups of muscles are used while running—quads, hamstrings, hip flexors, gluteals, and calf muscles.

Your body also uses secondary muscles to keep you going forward, such as the core and upper body muscles. 

These typically provide stability throughout the gait cycle and improve speed and running economy.

The Quadriceps

The quadriceps, the muscles on the front of the thighs, are in charge of forward leg movement.  Also known as the quads, these run from the hips down to the kneecap and are composed of four muscles:

  • The Vastus Medialis,
  • Intermedius,
  • Lateralus, and
  • Rectus Femoris.

The Hamstrings

The hamstrings consist of a single large tendon located at the back of the thigh and play a key role in standing, walking, or running, as well as hip extension and knee flexion. These muscles are comprised of

  • The biceps femoris,
  • The Semitendinosus, and
  • The Semimembranosus.

The Gluteals

Consisting of a group of three muscles, the gluteals are located in the buttocks and are responsible for hip extension, posture and proper knee alignment, and leg stability. The glutes consist of the following:

  • The Gluteus Maximus,
  • The Gluteus medius, and
  • The Gluteus minimus.

The Hip Flexors

The hip flexors, while smaller in size, play a crucial role in our everyday movements. From walking to squatting, these muscles are constantly activated, which is why it’s important to keep them strong and flexible.

Tight hip flexors can lead to discomfort and even pain, while a strong and healthy hip flexor group can improve posture, stability, and overall athletic performance.

The Calves

Located on the back of the lower leg, just below the knees, the calves are another supercritical running muscles.

Why? These provide spring in your step, extend and flex each foot as you land and push off, and maintain lower body balance and coordination. The calves consist of:

  • The large gastrocnemius, or outer calf; and
  • The smaller soleus, or inner calf.

Research has shown that incorporating exercises that specifically target these muscle groups can have a significant impact on running performance. In a study published in the Journal of Strength and Conditioning Research, researchers found that a six-week strength training program targeting the glutes and hip flexors led to improved running economy and performance in female distance runners.

The Best Strength Exercises For Runners

Try adding this powerful routine to your easy or cross-training days. The workout will take roughly 45 minutes to complete and can be done twice a week. That’s a small amount of time to invest in a big payoff.

I’ve also provided you with YouTube tutorials showing you exactly how to do each exercise. Proper form is king! For a better grip, try out this liquid chalk.

1. Planks

One of the core exercises that ended up becoming a staple in my training was the plank.

It’s one of the best core exercises because it targets every aspect of the core, as well as the lower back and shoulders.

Proper Form

  1. Lie on your stomach
  2. Prop yourself up on your elbow with feet slightly apart, toes hip distance apart with shoulders directly above the elbows
  3. Aim to straighten your whole body, so it’s forming a straight line from the top of your head to your heels.
  4. While engaging your core and keeping a straight line (your butt should not stick up in the air), hold the position for 30 seconds to a full minute.

As you get stronger, you should gradually add more time.

You can also make it more challenging for yourself by placing a weight plate on your back.

2. Russian Twists

The Russian twist targets a bunch of muscles, including the abs, obliques, lower back and your hamstrings as well.

You can use a medicine ball or a plate for extra resistance.

Proper Form

  1. Grab a weight, then lie on your back with your upper legs perpendicular to the floor and your knees bent at a 90-degree angle.
  2. Hold the weight in front of your body while keeping your back straight.
  3. Twist your torso as far as you can to the right side, tap the weight on the floor, then reverse your motion to the other side.

3. Overhead Lunges

The overhead lunge targets the whole body—quadriceps, hamstrings, glutes, shoulders and core muscles.

It’s the perfect fit-it-all-in move, so it’s great if you’re pressed for time.

It also increases flexibility and mobility in your hip flexors.

Proper Form

  1. Hold a pair of dumbbells or a weighted bar above your shoulder, with your arms straight, and your elbow locked, feet shoulder-width apart, and knees slightly bent.
  2. While holding the weight directly overhead, step forward with your right leg into a deep lunge position, bending both your knees.
  3. Return to the starting position and repeat on the other side. That’s one repetition.

Do 12 steps on each side to complete one set.

4. Air Squats

Bodyweight squats are some of the best strength exercises you can do.  These should be an integral part in any runner’s strength-oriented training program.

Squats target a lot of running-specific muscles.

They are convenient to do, and can easily be added to your post-run routine.

Proper Form

  1. Stand with your feet hip-distance apart with your toes facing forward
  2. With your arms out in front at shoulder height, squat down by bending your knees, leaning forward at the waist while keeping your back flat and your knees tracking behind your toes
  3. Squat until your thighs are parallel to the ground.
  4. Press up through your heels to return to starting position.

5. Single-Leg Deadlifts

The single-leg deadlift is the ideal slow-burn move for building strong hamstrings and glutes, which can help you tackle steep hills with ease.

This exercise can also improve your balance and boost your stability.

Proper Form

https://www.youtube.com/watch?v=mG-Stc3c7N0

  1. Start by holding two dumbbells or a weighted bar in front of your body.
  2. While standing tall, shift your weight to your right foot
  3. Hinge forward by slightly bending your right knee and raising your left foot behind you in line with your torso, letting the weights hang down
  4. Lower the weight while keeping it close to the tops of the legs.
  5. Once the weight goes past your knee, pause, then return to the starting position.

6. The Pistol

Also known as the one-legged squat, the pistol is a powerful squat variation that builds strength and balance in your lower body.

If you have issues with lower body flexibility or mobility, use a chair or a bench for the assisted pistol option. That’s how I got pretty decent at doing pistols.

Proper Form

  1. Standing tall, balance on your right foot,
  2. Squat down by bending at the knee and sitting your hips back.
  3. Once your right knee is at about a 90-degree angle, push back up by extending your leg to starting position.s

7. Rotational Shoulder Press

This move is ideal for targeting your upper body muscles, with the emphasis on the shoulder and core muscles.

Proper Form

  1. While standing tall with your feet hip-width apart, hold a pair of dumbbells just outside your shoulders.
  2. As you press the weights up with your right hand, rotate your body to the right side.
  3. Lower the weights to your shoulder as you rotate back to the center, then rotate to the left as you press your left again upward this time.

weight training for runners


Weight Lifting For Runners  – The Conclusion

There you have it ! The above weight training for runners guidelines all you need to help you prevent overuse injuries and increase athletic performance without logging in more miles. The rest is up to you.

Please feel free to leave your comments and questions in the section below.

In the meantime thank you for reading my post

Keep Running Strong

David D.