Stationary Bike Workouts & Cycling Plans for Runners: Train Smarter, Get Stronger

runner doing cycling workout

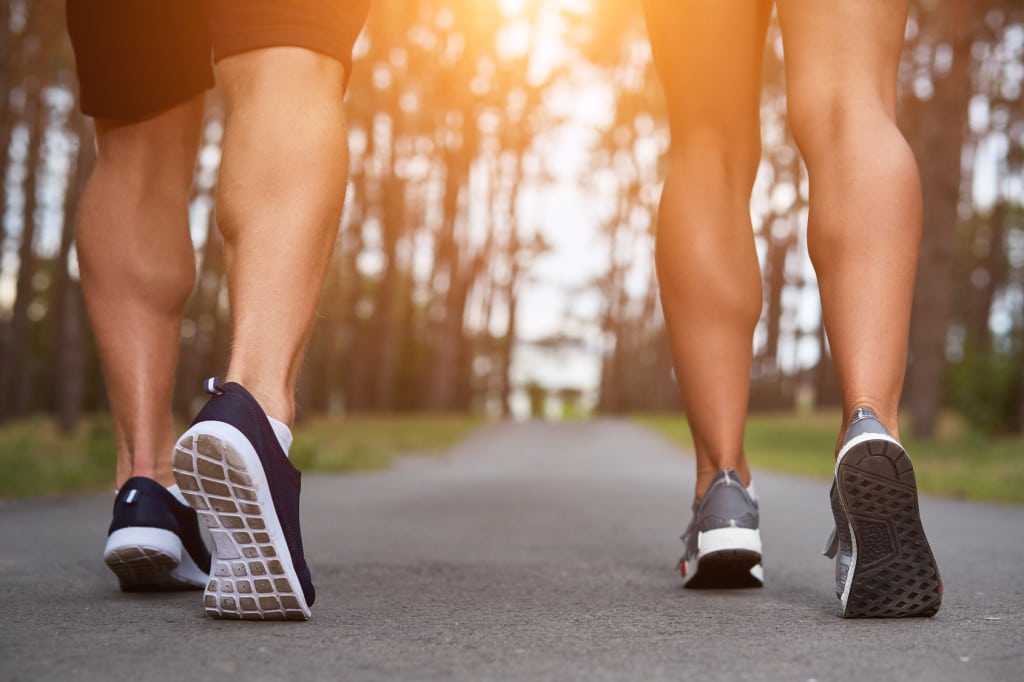
I used to think bikes were for people who couldn’t handle the grind.

If it didn’t involve lacing up and hitting pavement, I didn’t want to hear about it.

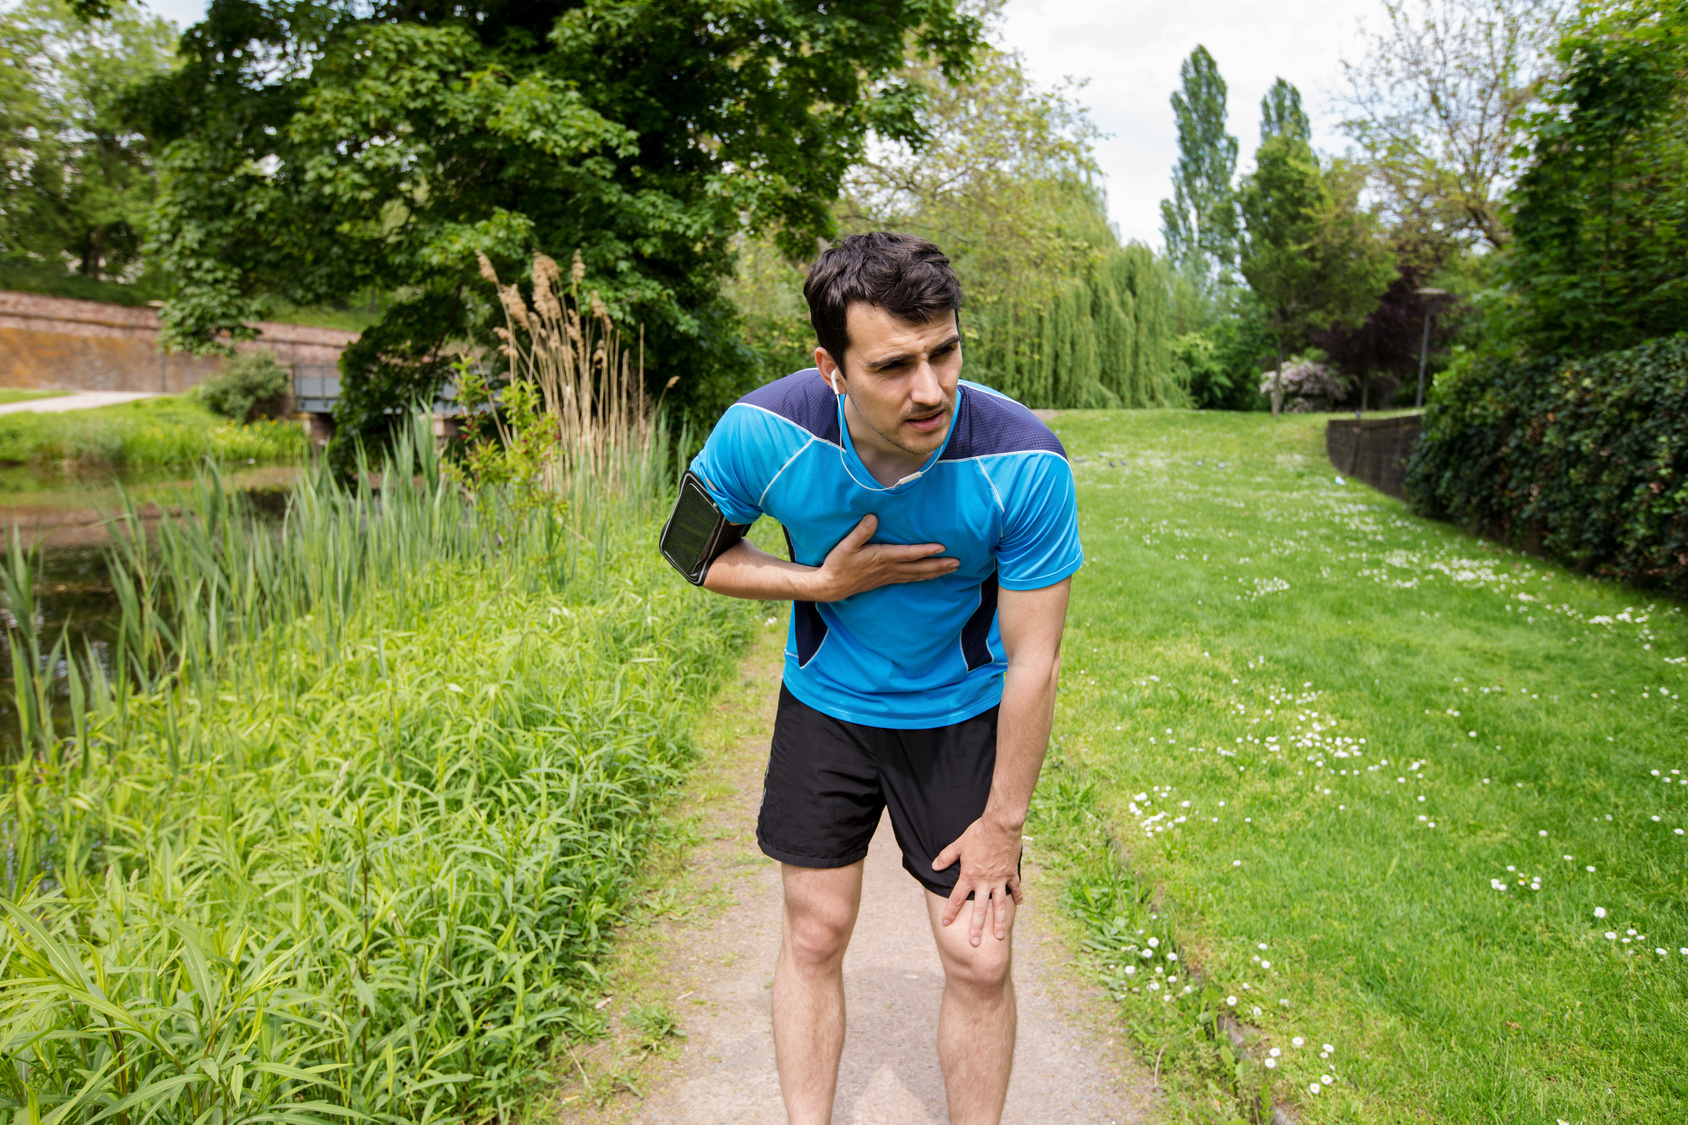
Then my knees had other plans.

After one too many injury layoffs, I finally gave in and jumped on a bike.

It wasn’t love at first spin—but I’ll tell you what: cycling saved my running.

My legs got stronger, my lungs got bigger, and I stopped breaking down every time I hit peak mileage.

Let’s be clear—cycling isn’t cheating.

It’s cross-training that actually builds you up. You can ride hard and still call yourself a runner.

If your goal is to run stronger and longer without breaking, here’s how cycling fits in.

But first things first, let me tell more reasons why you should hop on a bike.

Why Runners Should Embrace the Bike

Cycling is the best cross-training tool we’ve got.

It gives you all the aerobic work with none of the pounding—and science backs that up.

The proof: In one study, runners who swapped out 50% of their mileage for cycling held their 3K race times and VO₂ max just as well as runners who didn’t.

That means you can run less, bike more, and still perform just as well.

Faster Recovery

Post-run soreness? DOMS after hills? Instead of hobbling around, spin it out.

  • Easy bike rides boost blood flow
  • They flush out junk (like lactic acid)
  • They reduce soreness without adding more impact

Elite runners use cycling as “rest day” cardio. And for good reason—it works.

Build Endurance Without Breaking Down

You might hesitate to run 5 days a week for an hour (your knees would scream), but you can cycle for 5+ hours a week and feel fine.

  • More aerobic volume = bigger engine
  • No pounding = fewer injuries

Sound skeptical? Well, the truth is that you can ride for five hours a week and not break. Try running five hours and see what happens.

Stronger Legs = Better Running

Cycling hammers your quads and glutes—two muscle groups that runners often under-train.

After a few weeks on the bike, I noticed my stride felt stronger, my turnover improved, and hills weren’t so brutal.

My cadence got quicker—because my legs learned how to fire faster, without the cost of another run day.

Injury Prevention and Rehab Gold

Got shin splints? Knee pain? Plantar fasciitis? Nagging overuse injury? Cycling lets you train hard without the load.

One of my running friends recovering from plantar fasciitis told me that he cycled 5–6 days a week for a month.

When he returned to running, he actually felt stronger—his glutes, core, and upper legs had leveled up.

Cycling keeps your cardio base alive while giving your tendons, bones, and joints a break.

That’s huge for staying consistent and healthy.

It’s a Mental Reset

Burned out from pounding the same loops every day? The bike brings variety.

  • Ride through a new route
  • Try a spin class with music blasting
  • Or hit the trainer while watching Netflix

You’ll stay mentally fresher. And that makes a huge difference in long-term training.

Muscle Breakdown: What Works When

Understanding the difference between running and cycling muscles helps you train smarter—and keeps you from being blindsided when switching between them.

Here are the functions of each muscle group on the bike:

Muscle Group Running Cycling
Glutes ✅✅✅ Major power in stride ✅✅ Used especially on hills
Quads ✅✅ Push-off, knee lift ✅✅✅ Primary driver on the pedals
Calves ✅✅✅ Shock absorption, toe-off ✅✅ Stabilizers only
Hamstrings ✅✅ Hip extension ✅✅✅ Pull through pedal stroke
Core ✅✅ Posture, balance ✅ Basic stabilization

Why it matters:

Cycling is low-impact, seated, and quad-heavy. Running is weight-bearing, impact-loaded, and calf-dominant.

That’s why a cyclist hopping into running might be shocked when their calves cramp and feet ache—those muscles never had to deal with impact before. And why runners feel their quads burning out after a few hard hill climbs on the bike.

But When You Combine the Two…

You get the best of both worlds:

  • Stronger quads and glutes from the bike
  • Durable calves and foot strength from running
  • More total aerobic volume with less injury risk
  • A fresher brain and a body that recovers smarter

It’s the one-two punch that builds tough, injury-proof legs and keeps you consistent—year after year.

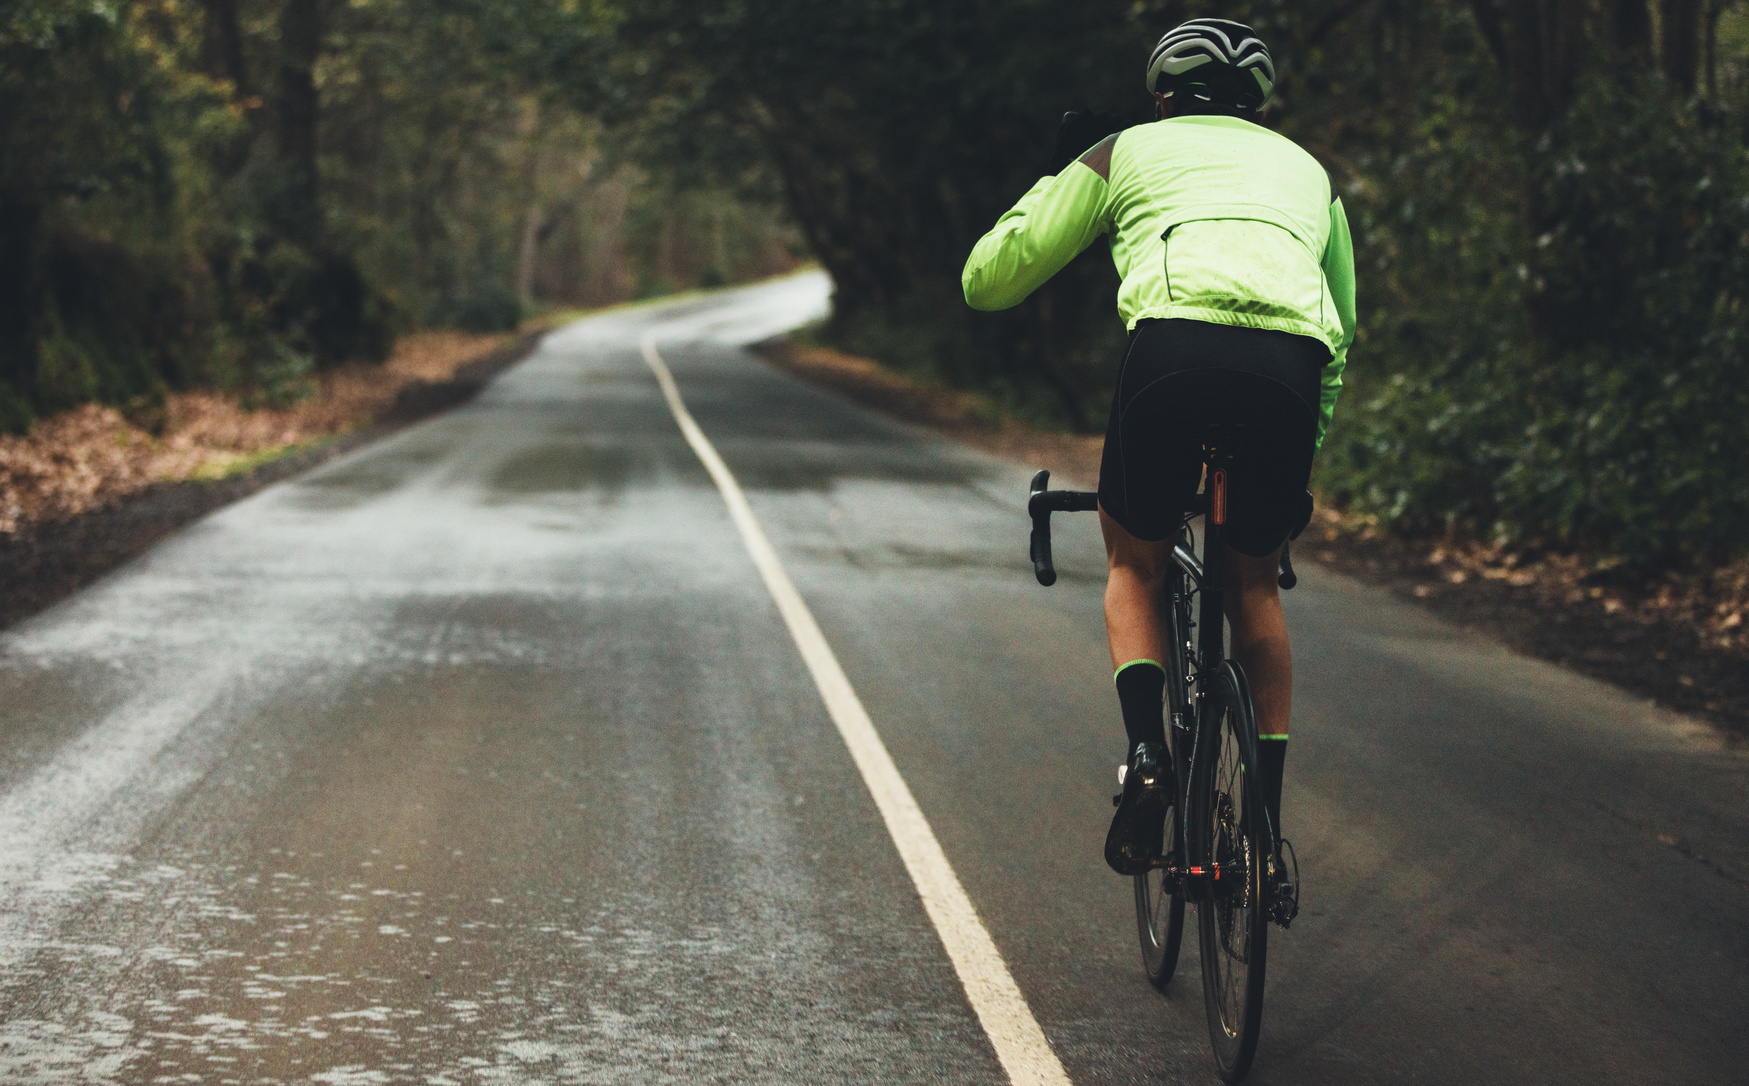
Cycling Safety: What Runners Get Wrong

When I first started cycling, I figured, “I’ve ridden a bike since I was 10—how hard could it be?”

Big mistake.

Within weeks, I had a few close calls that shook me up and made me realize: cycling on the road is a whole different beast than running.

You’re moving faster, sharing space with 2-ton vehicles, and your machine has gears, brakes, and moving parts to manage.

Here’s what I learned (sometimes the hard way), and what every runner-turned-cyclist needs to know to ride safe.

1. Follow the Rules Like You’re Driving

On a bike, you’re not a pedestrian—you’re a vehicle. That means:

  • Ride with traffic, not against it
  • Stop at red lights and stop signs
  • Yield when appropriate

Why? Because predictable riders are safer riders.

When you follow traffic laws, cars know what to expect from you.

That’s how you earn space and respect on the road.

2. Get Off the Sidewalk

Tempting? Yes. Safer? Nope.

Sidewalk riding is riskier than it looks:

  • Drivers won’t see you coming at intersections
  • You’ll scare pedestrians
  • And you’ll likely end up in a car’s blind spot

If you’re nervous around traffic, pick quiet side streets or bike paths.

But stay off the sidewalk. Trust me—you’ll be safer on the road where drivers expect you to be.

3. Be Visible. Be Predictable.

Visibility is survival.

  • Wear bright gear
  • Use a white front light and red rear light at dawn, dusk, or in shade
  • Don’t weave between parked cars
  • Take the lane when needed, especially if it’s too narrow to share safely
  • Use hand signals like you mean them—left, right, slowing down

Think of yourself as a communicator on wheels. When drivers know what you’re doing, they’re less likely to hit you.

4. Learn Your Gears (Before You Need Them)

Coming from running, I didn’t think about gears until I hit my first hill… in the wrong gear.

I practically stalled out and almost tipped over.

Lesson learned: shift early.

Here’s the rule:

  • Downshift before a hill or stop
  • Keep a smooth cadence, not a grind
  • Don’t wait until your legs are screaming to change gears

Smooth shifting = happy legs.

5. Keep Your Head Up, Always

As runners, we get away with zoning out.

On a bike? You do that, you’re toast.

  • Scan the road ahead for potholes, glass, car doors, people
  • Stay out of the door zone—at least 3 feet from parked cars
  • Watch every intersection and driveway
  • Make eye contact with drivers when possible
  • No texting. And if you listen to music, one earbud max

Riding defensively isn’t being paranoid—it’s being smart.

6. Ride With a Group or a Buddy

If traffic makes you nervous, find a group ride or ride with a friend. You’ll learn:

  • How to draft
  • Group hand signals
  • How to ride in traffic without panicking

And yeah—you’ll be more visible in a pack.

I joined a few local rides early on, and I credit those miles for giving me the confidence to ride solo later without fear.

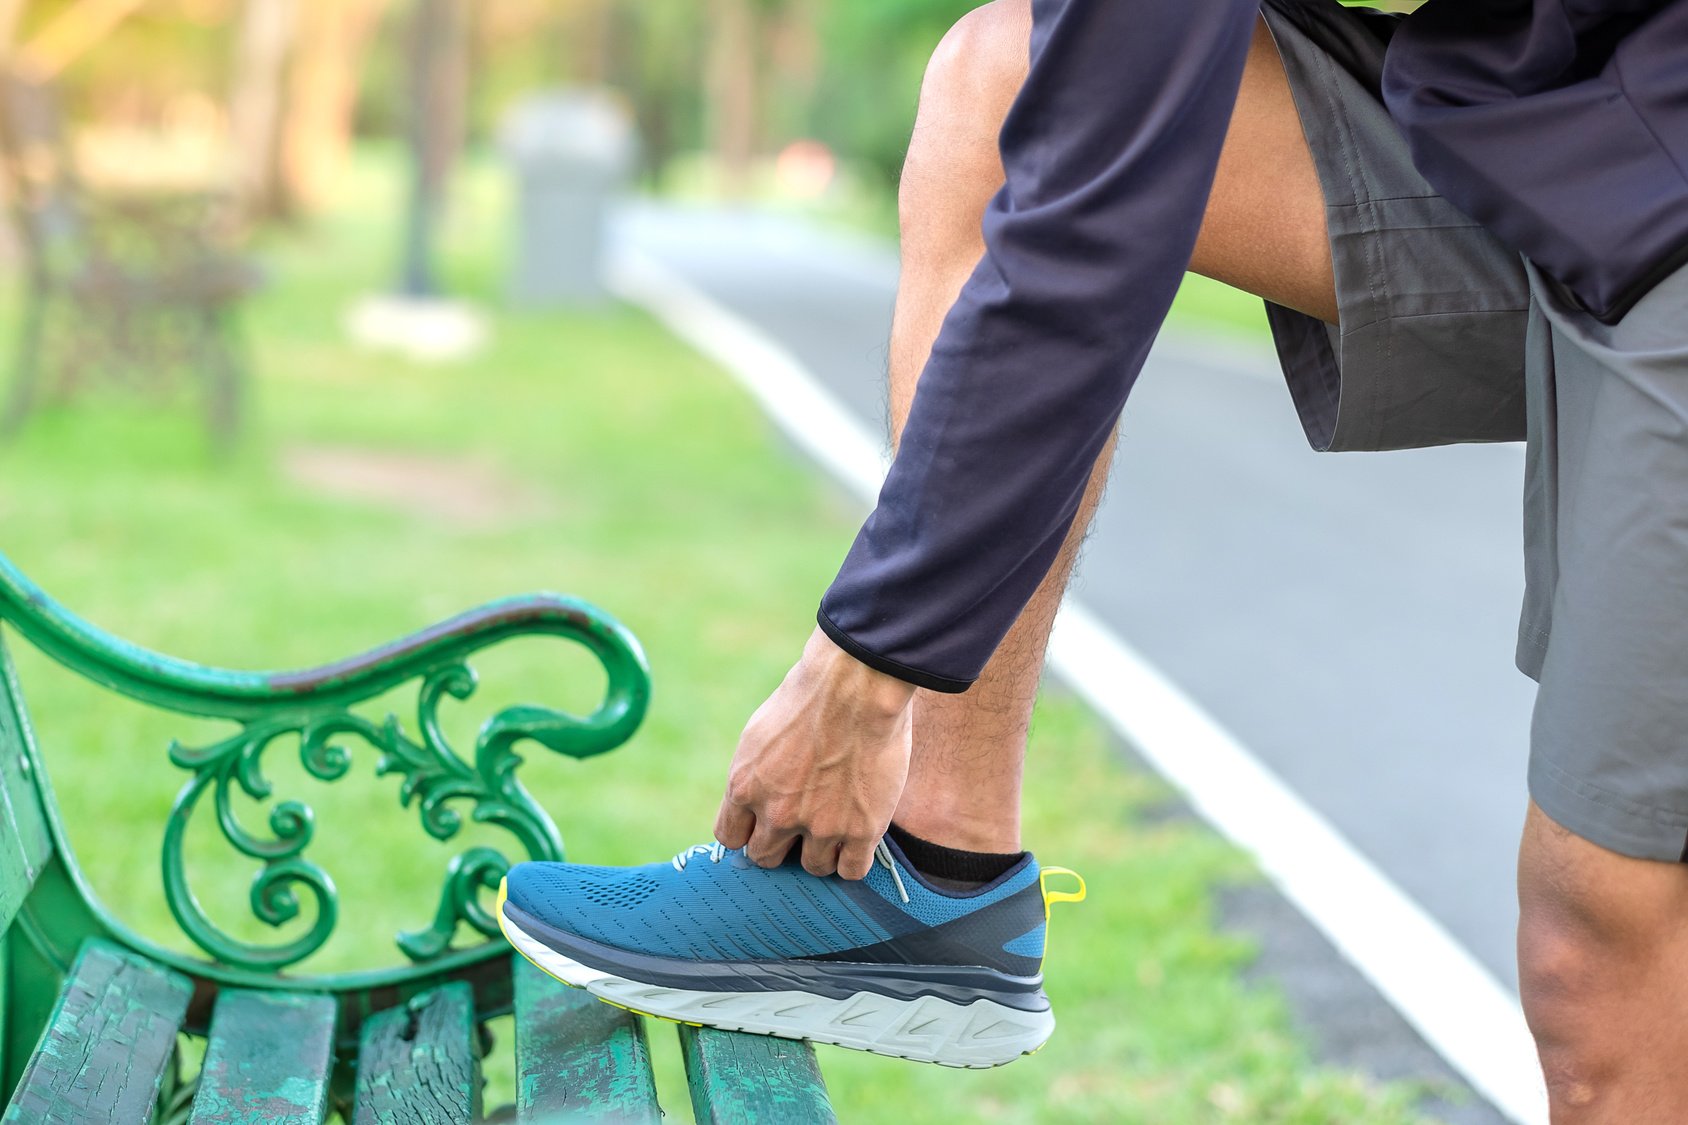
7. Pre-Ride Safety Check

Every time, before you roll:

  • Check tire pressure
  • Test your brakes
  • Lube your chain
  • Helmet on, ID in your pocket, cash and phone just in case

Optional but smart: mini first-aid kit (road rash happens).

Doesn’t take long, but it could make all the difference when things go sideways.

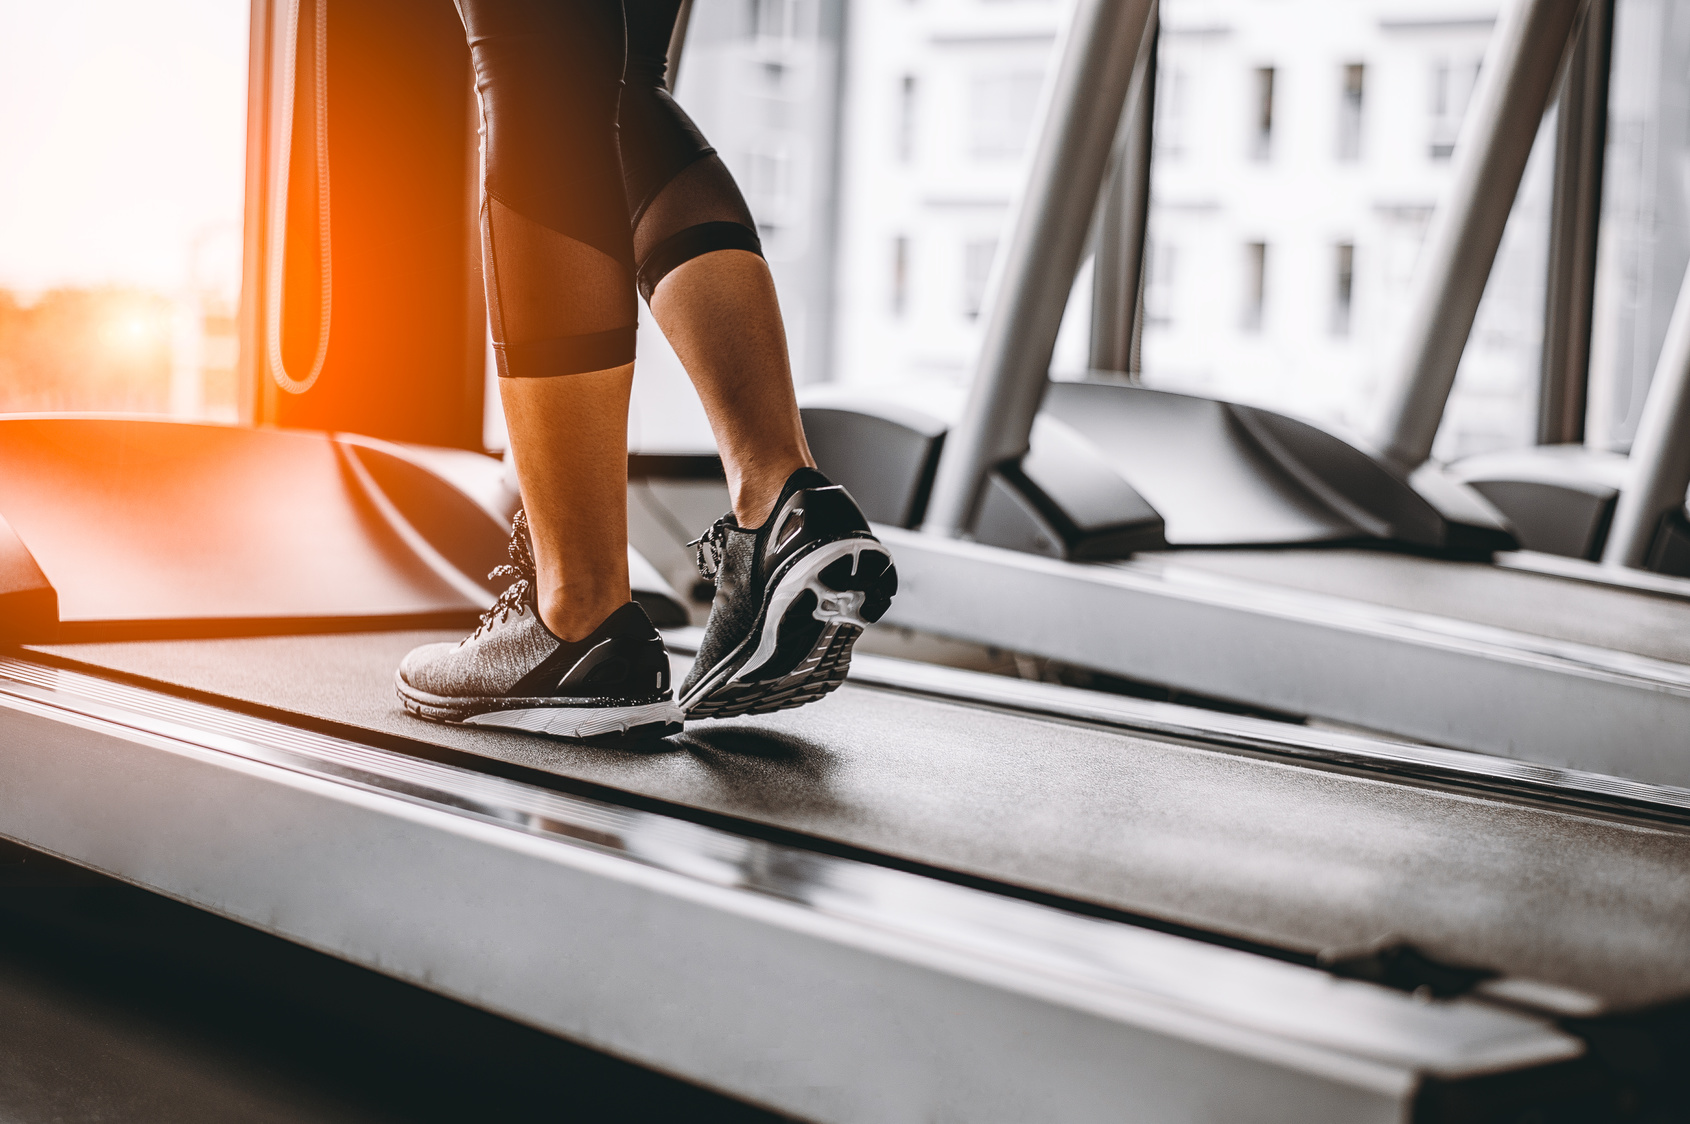
Sample Week: Running-Focused With Cycling for Support

So you’re trying to run strong and keep the wheels spinning? Smart move.

But here’s the deal—you can’t go hard every day.

Running and cycling both beat you up in different ways, and if you treat every day like a workout, your body’s going to push back… hard.

Here’s how to train smart:

Sample Week Breakdown

Monday: Easy Run (30–40 min)

  • RPE: 3–4 (comfortable conversation pace)
  • Purpose: Shake out the weekend fatigue
  • Optional: light core or bodyweight strength work

Coach tip: Keep this truly easy. Save your legs for Tuesday.

Tuesday: Hard Run Workout

  • Examples: 6 × 400m at 5K pace, 3 miles at tempo, or fartlek-style intervals
  • Purpose: This is your key speed session. Bring the focus.
  • NO cycling today unless it’s a lazy spin (10–15 min max)

Coach tip: Quality > quantity. Nail the form, hit the paces, and recover hard afterward.

Wednesday: Recovery Ride (20–30 min spin)

  • Effort: Zone 1 (RPE 1–2, embarrassingly easy)
  • Cadence: 90+ RPM with zero resistance
  • Purpose: Circulation, not training stress

Coach tip: If your ego’s getting in the way of spinning easy, ride indoors where no one can see you. Or skip it. This ride should feel pointless—that’s how you know it’s doing its job.

Thursday: Steady Medium Run (45–60 min)

  • Effort: Zone 2 (RPE 5–6)
  • Optional finish: A few 20-second hill strides to wake up the legs
  • Purpose: Aerobic development and controlled endurance

Coach tip: You should finish this with gas left in the tank. If you feel wiped, you went too hard.

Friday: Moderate Cycling Workout (40–60 min)

  • Example: 5 × 3-minute hill climbs with 2 min recovery spins
  • Effort: RPE 7–8 on the climbs, Z1/Z2 the rest
  • Purpose: Strength without impact

Coach tip: Stay seated, drive through the glutes. Think of this as gym day for your legs—with less risk to your knees.

Saturday: Long Run (75–90+ min)

  • Effort: Easy Zone 2 (conversational pace)
  • Purpose: Time on feet, build endurance

Coach tip: If you’re looking at your pace, you’re doing it wrong. This is about building the aerobic engine, not proving how fast you can run tired.

Sunday: Rest or Gentle Active Recovery

  • Options: Full rest, light yoga, easy swim, or a 15–20 min recovery ride
  • Effort: Minimal. Nothing that requires willpower.

Coach tip: Adaptation happens when you let your body breathe. If you always feel “on,” you’re not recovering—you’re just breaking down slowly.

Weekly Mix Recap

  • Running: 3–4 days (2 hard, 1 long, 1 easy)
  • Cycling: 2–3 sessions (mostly light, with 1 quality day)
  • Intensity: Balanced across the week (never back-to-back hard days)

Sample Week 2: 50/50 Balanced Plan

(aka The “Stay Healthy, Still Get Fit” Setup)

If you’re injury-prone, coming back from a strain, or just want to give your joints a break, this kind of week is gold.

Half running, half cycling, smartly split.

You’re still logging quality, but without beating your legs into the ground.

This plan keeps your aerobic engine revving while reducing impact—and gives your body room to recover and adapt.

Let’s break it down.

Weekly Overview

  • Goal: Maintain running fitness, reduce injury risk, and build cycling strength
  • Structure: 3 run days (1 hard, 1 steady, 1 short/off-bike) + 3–4 bike days
  • Intensity: One hard run, one moderately intense ride—rest is aerobic or recovery

Monday – Easy Recovery Ride

  • 45 minutes
  • Spin easy, Zone 1
  • High cadence, low resistance

This isn’t training—it’s flushing out fatigue. Spin the legs, loosen up, maybe toss on a podcast or just zone out. It’s active recovery after a bigger weekend. Keep it super chill.

Tuesday – Quality Run Workout (Speed Play or Intervals)

  • ~5 miles total
  • Main set: 6 × 2-minute pickups (RPE 8+)

Time to push. With Monday’s ride behind you, the legs should feel primed. Go by effort, not pace. Keep the pickups strong but sustainable—you’re not trying to win a 400m here. Easy jogs between reps. Don’t skip the warm-up and cooldown.

Wednesday – Endurance Ride (Zone 2 Builder)

  • 60–90 minutes
  • Steady Zone 2 ride, conversational effort

This replaces your typical midweek medium-long run. It builds aerobic capacity without the pounding.

Indoors? Load up a podcast or audiobook.

Outdoors? Pick a flat or rolling route. You’ll finish feeling worked, not wrecked.

Thursday – Steady Run (Cruise & Optional Strides)

  • 40 minutes, easy pace (Zone 2)
  • Optional: 4 × 20-second strides post-run

Nothing fancy here. Just log miles, enjoy the movement.

This could be a trail day or a soft surface run.

Strides at the end keep your form sharp, but skip them if anything feels tight.

Friday – Strength or Light Cross-Training

  • Option A: 30 min easy spin, swim, or elliptical
  • Option B: Strength or PT work (glutes, core, mobility)

This is prehab day.

Do your foam rolling.

Hit the hips and core.

If you’re rehabbing, this is where your PT homework goes.

Don’t go hard—this day is about maintenance, not maxing out.

Saturday – Long Ride + Brick Run (Optional)

  • 90-minute bike ride (Zone 2 with optional surges)
  • Optional 10–15 minute transition run (slow jog)

Here’s your “combo day.”

Start with a solid aerobic ride.

In the second half, add some short 1-minute surges every 10 minutes if you feel strong.

Then, toss on the running shoes for a short brick jog—just to get that jelly-leg adaptation in.

Keep it slow and smooth. If you’re injury-sensitive, skip the run. No shame.

Sunday – Rest & Recovery

  • Total rest
  • Eat well, walk, stretch

Recharge. Hydrate. Maybe do some light mobility or a chill walk. No structured training today—give your nervous system a full breather.

Training Balance Tips

  • Listen to your body.
  • If a ride leaves your legs cooked, ease up on your next run.
  • If your long run takes more out of you than expected, spin instead of smashing intervals the next day.
  • Flexibility > perfection.

Red Flags to Watch

  • Morning heart rate +5 bpm above normal?
  • Trouble sleeping, constant fatigue, or low motivation?
  • Legs feel like lead bricks for more than two days?

Those are signs you’re doing too much. Back off. You won’t lose fitness in a couple of light days, but you’ll lose weeks if you crash.

Endurance Zone 2 Ride – The Aerobic Engine Builder

Who it’s for:

Every runner. Seriously. Whether you’re chasing a marathon finish or just need a low-impact mileage boost, this is your go-to.

Perfect for building stamina without beating up your legs. And if you’re new to cycling? This is your no-pressure entry point.

What it improves:

Zone 2 riding builds your aerobic base — the foundation of endurance performance.

It boosts your heart’s efficiency, strengthens your lungs, and trains your body to burn fat as fuel.

All of that adds up to stronger long runs and faster recovery between workouts.

Oh — and it’s impact-free. So you’re stacking volume without hammering your joints.

How to do it:

  • Warm-up: 10 minutes of easy spinning
  • Main ride: 45–90 minutes in Zone 2 (60–70% of your max heart rate)
    • That’s about RPE 4–5 — you should be able to talk in short sentences but not sing karaoke.
    • If you’re huffing, you’re going too hard.
  • Cadence: 80–90 RPM (smooth, not grindy)
  • Cool-down: 5–10 minutes easy spin

Start with 45 minutes and work your way up. Aim for 1–2 Zone 2 rides a week during base training — more if you’re injured or replacing easy runs.

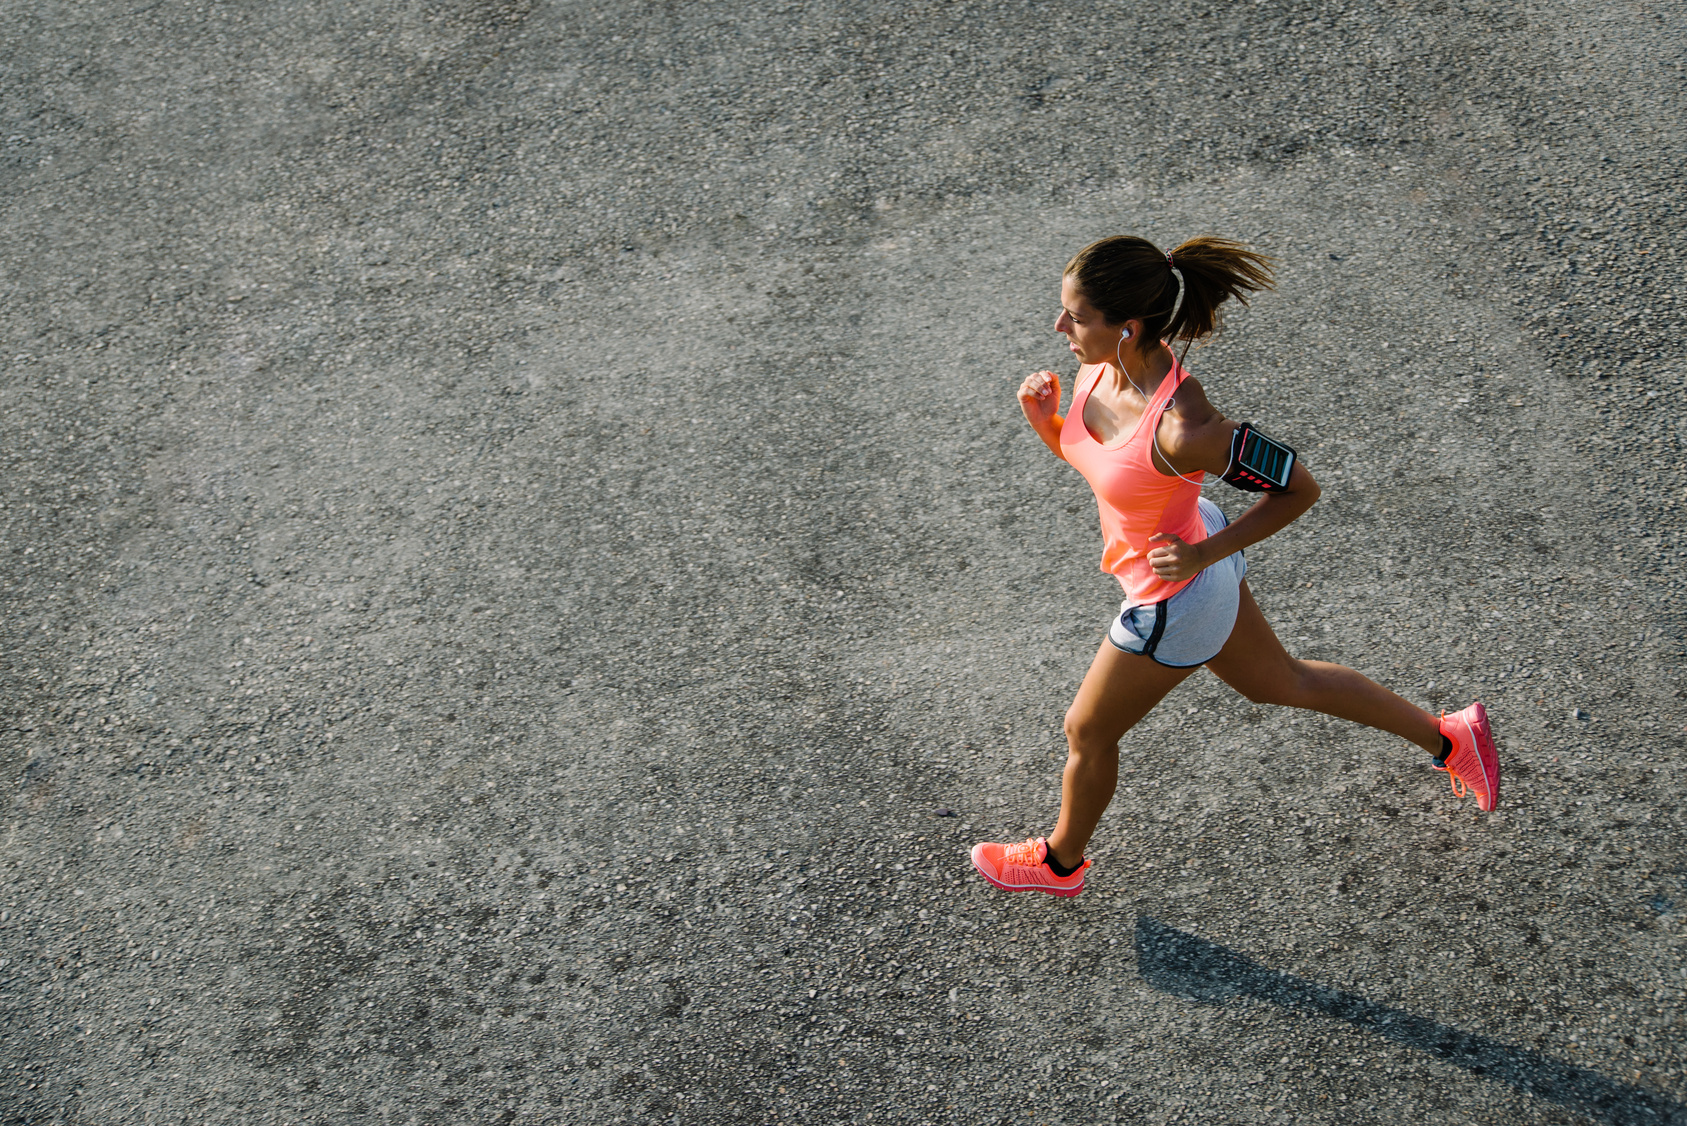
Speed Intervals on the Bike – VO₂ Max Booster

Who it’s for:

Time-crunched runners or anyone who wants to train that top gear.

If you want to push your VO₂ max and raise your redline — this is your session.

Perfect for sharpening fitness without trashing your legs like run intervals can.

What it improves:

Your max aerobic capacity — aka, how much oxygen you can use at full throttle.

That translates to faster 5Ks, stronger surges in races, and better endurance at all paces.

Bonus: because cycling targets the muscles a bit differently, you’ll get a killer workout without the impact wear-and-tear.

How to do it:

  • Warm-up: 10–15 min easy spin with 2–3 short pick-ups (10 seconds fast)
  • Main Set: 6–8 rounds of:
    • 1 minute hard (RPE 9/10 — not a sprint, but dang close)
    • 1 minute easy spin (light resistance, low gear)
  • Cool-down: 5–10 minutes easy

If 1 minute feels like too much to start, begin with 30 seconds hard / 30 seconds easy for 10+ rounds. Build up.

Feeling fit? Try 2 minutes hard / 2 minutes easy. Fewer reps, but deeper burn.

Tabata Sprints (20:10 HIIT Blitz)

Who it’s for:

Busy runner? Short on time? Tabata’s your no-excuse weapon.

This one’s for folks who want maximum intensity in minimum time.

Perfect if you’re plateauing, need a new challenge, or just want to fry your lungs in under 20 minutes.

But fair warning: this is not beginner territory. Scale it down if needed.

What it improves:

This classic HIIT format hits both ends of the fitness spectrum—your all-out sprint power and your aerobic engine.

The original Tabata study? Six weeks of 4-minute sessions led to 28% boost in anaerobic capacity and 14% jump in VO₂ max.

For runners, that means:

  • Faster recoveries between surges
  • Better kick at the end of a race
  • A higher ceiling overall

How to do it (Spin Bike or Trainer):

  • Warm-up: 10 minutes (toss in a few 20-second efforts to prep legs and lungs)
  • Find a hard gear or bump the resistance
  • Go: 20 seconds full send — RPE 10+, gasping for air by the end
  • Recover: 10 seconds easy pedal (or full stop if needed)
  • Repeat: 8 times = one brutal 4-minute round

You’ll hate it by round 5. That means it’s working.

Full session layout:

  • Warm-up: 10 min
  • Round 1: 8 × 20s on / 10s off
  • Recovery: 2 min easy spin
  • Round 2: same
  • Recovery: 2 min
  • Optional Round 3 (only if you’re hitting true effort)
  • Cool-down: 5–10 min

Start with just one round if you’re new. Add a second once you stop seeing stars afterward. If your third round is half-hearted? Don’t bother—quality > quantity.

During sprints:

  • Keep a tall posture
  • Drive hard through the legs
  • Engage the core, don’t rock your upper body
  • Pedal in smooth circles — push and pull

Use a Tabata timer or app — trust me, you won’t be able to count once the burn kicks in.

Do this once a week, max. Not before a long run or hard workout. Your legs and lungs will need a breather.

Hill Climb Repeats (Strength Training on Wheels)

Who it’s for:

If you dread hills on runs—or just want bulletproof legs—this is your jam.

Hill repeats on the bike build climbing power, mental toughness, and muscular endurance with zero pounding on your joints.

They’re great for:

  • Prepping for a hilly race
  • Subbing in for a leg day at the gym

What it improves:

Targets the big movers:

  • Quads
  • Glutes
  • Hamstrings

Plus your cardiovascular system works overtime to push against gravity (or resistance). You’ll climb stronger and run faster flat-out just from the strength boost.

I’m gonna recommend two routines:

Option 1: Outdoors

  • Find a steady hill (5–8% grade works great)
  • Warm-up, then climb 3–5 minutes at RPE 8 (hard but not maxed)
  • Stay seated as much as possible — feel glutes and quads doing the work
  • Stand up for 15–20 pedal strokes if you want to simulate an attack
  • Use the downhill for full recovery (2–4 minutes easy spin)
  • Repeat 4–6 times
  • Cool down on flat roads or easy spin home

💡 Bonus: Builds “real-world” confidence for hilly terrain.

Option 2: Indoors (Trainer or Spin Bike)

  • Warm-up: 10 min easy
  • Intervals: 5 × 4 minutes at high resistance (60–70 RPM = uphill grind)
  • Recover: 2–3 minutes between sets at low resistance
  • Stay mostly seated, hands relaxed, back straight
  • Add 15 seconds out of the saddle each interval to simulate a burst
  • Cool down: 5–10 min

Form focus: smooth pedal strokes, full-circle motion, no wild thrashing.

How to schedule it:

  • Once a week is plenty
  • Don’t stack it before a big long run or speed workout
  • Use it as a substitute for a lower-body strength day or as a finisher on cross-training day

Recovery Spin — “The Flush Ride”

Who it’s for:

Everyone. Beginners, elites, banged-up runners, overtrained weekend warriors — everyone can benefit from this one.

If your legs feel wrecked after a long run or a tough race, this is the fix.

Think of it as a moving massage, not a workout.

What it does:

A recovery spin clears the junk out of your legs.

It boosts circulation, speeds up muscle repair, and helps you bounce back faster — all without beating your body up.

You’re not training fitness here. You’re helping your last workout sink in.

It’s the cycling version of an easy jog — only even gentler.

Studies show active recovery helps clear out lactate and soreness better than sitting on your couch.

And honestly, it just feels good. I’ve used these flush rides the day after long runs, and my legs feel noticeably fresher afterward.

If I ran instead, I’d just pile on more fatigue.

How to do it:

Ride stupid easy. Like, “this barely counts” easy.

  • Time: 20–45 minutes
  • Effort: RPE 1–2 out of 10
  • Heart rate: Zone 1 (<60% of max)
  • Power (if you’ve got a meter): <50% of FTP
  • Cadence: Moderate to high (80–90 rpm)
  • Surface: Flat pavement, bike path, trainer — whatever’s smooth and chill

You should be able to hold a conversation and breathe through your nose the whole time.

If you finish and feel more tired? You did it wrong.

Bonus Tricks to Keep It Easy:

  • Ride out on a slight downhill so you cruise back slower
  • Throw on a chill playlist or an easy TV show indoors
  • Use the spin as meditation — focus on breathing and loosening up
  • Ride on grass or trails to naturally keep your speed low

For Injured Runners:

These spins are gold. If you’re recovering from a calf, hamstring, or foot issue, but can still bike pain-free, these light rides keep the blood flowing without irritating the injury.

Just make sure your bike fit isn’t stressing the wrong area. If it hurts — stop.

How to Adjust Your Schedule to Avoid Burnout

Blending running and cycling is powerful — but it’s also a trap if you’re not careful.

I’ve been there: stacking workouts back-to-back, thinking biking was “free” because it’s low-impact… and then wondering why I was fried and grumpy all the time.

Here’s how to do it right — without digging yourself into a recovery hole.

1. Coordinate Hard and Easy Days

This is non-negotiable.

Your body doesn’t care whether the pain came from a 10K tempo or a 45-minute bike interval session — stress is stress. You can’t keep hammering.

Here’s the rule of thumb:

If today was a hard run, tomorrow is either:

  • an easy spin
  • a total rest day
  • or a very gentle shakeout run

Same thing in reverse — hard bike today? Tomorrow’s run better be easy.

Pro coaching tip: No more than 3–4 total “intense” sessions per week, across both sports. That could be:

  • 2 hard runs + 2 hard rides
  • 3 runs + 1 ride
  • Or whatever mix fits your goal

But once you start doing 5+ hard sessions a week, you’re not adapting — you’re just accumulating fatigue.

Rest = Gains

Don’t skip this: you get stronger from rest, not just the workout.

The work tears you down. The recovery builds you back.

So schedule rest with the same intention you plan your long runs. It’s not lazy — it’s essential.

If your resting heart rate is creeping up, your sleep sucks, and you’re irritable? That’s your body begging for rest.

Not another “bonus ride.”

2. Watch for the Red Flags of Overtraining

Be your own coach. That means paying attention when your body’s waving the caution flag.

Overtraining isn’t always dramatic — it usually creeps in. If you catch it early, you can adjust and keep moving forward. But if you ignore it? That’s when the wheels come off.

Here’s what to watch for:

  • Elevated Resting Heart Rate
    If your usual morning pulse jumps by 5–10+ beats and stays there for days? That’s a sign your system’s under stress.
  • Chronic Fatigue
    Not “a little tired from yesterday’s workout.” This is heavy-leg, brain-fog, “I need four cups of coffee just to function” fatigue.
  • You’re Slowing Down (Despite Working Hard)
    Training hard but racing slower? Legs never feel sharp? Could mean your body hasn’t had enough recovery.
  • Mood Shifts
    Snapping at people? Dreading runs? Feeling anxious or flat? Overtraining hits your mood as much as your muscles.
  • Sleep or Appetite Goes Haywire
    Wide awake at 2 a.m. for no reason? Appetite spiking or vanishing? System overload.
  • Nagging Aches or Getting Sick More
    If little injuries keep showing up, or you’re catching every cold in town, your immune system might be waving the white flag.

Bottom line: don’t ignore these signs. Take a rest day. Drop intensity. Sub in an easy ride or chill. A few smart adjustments now can save your season later.

3. Add Volume Gradually

When you first add cycling, it might feel like free fitness. No sore legs? No problem, right?

Not so fast.

Fatigue from the bike builds just like run mileage — it just hides better.

Stick to a 10–20% increase in total training load per week.

Rough guide: 1 mile of running ≈ 3 miles of biking in training stress.

So if you’re running 30 miles a week, jumping into 100-mile bike weeks is asking for trouble. Ramp up slow and track how you feel.

4. Periodize Like a Pro

You can’t train at peak for both sports all year. That’s a fast path to burnout.

You’ve got to cycle your training focus — literally.

  • Race phase? Keep the bike easy. Use it for recovery, not crushing.
  • Base phase? Go heavier on the bike to build aerobic strength.
  • Winter/off-season? Flip the focus. Give running legs a break.

Think of it like shifting gears. You’re not slamming both pedals at once — you’re using the right gear for the right terrain.

5. Track Your Workload (and Your Body)

You don’t need a $500 watch to train smart — just a log and some honesty.

Write down:

  • Resting HR
  • Sleep quality
  • How you felt that day (“dragging,” “decent,” “snappy”)
  • Any soreness or weird twinges

Over time, you’ll spot patterns.

Like, “Every time I do a long run followed by a hard bike session the next day, I crash.” That’s your training log giving you gold.

Apps like TrainingPeaks, Garmin Connect, or even a notes app can track combined stress. But even a notebook and three smiley faces can work if you’re consistent.

Spin Classes for Runners: Worth It? Absolutely—Here’s Why

Not into dodging traffic or crafting your own bike intervals?

No worries—spin class has your back.

For runners, it’s one of the smartest ways to cross-train. I’ll admit, I used to think spin classes were just flashy music and people pretending to ride mountains. But after a few sessions, I was hooked. It’s structured, sweaty, and deceptively brutal in the best way.

Show Up, Zone In: No-Brainer Training

The beauty of spin is that you don’t have to think. Just show up and let the instructor guide the ride.

Sprints, climbs, fast flats, recovery spins—it’s all built in.

You’re not out there grinding intervals alone in a cold parking lot. You’re in a room with pumping music, someone yelling cues, and a dozen other people sweating alongside you.

You’ll push way harder than you would solo—and somehow, the time flies.

Aerobic & Anaerobic Gains, No Impact

Most spin sessions sneak in HIIT without you even realizing it. Every song is basically a new interval—hard push, recovery, repeat.

You’re working aerobic endurance and anaerobic power at the same time. Like a fartlek workout on wheels.

I know runners who hit spin hard twice a week and come back faster on the trails.

One spin instructor I trained with used to drop us all on hills—and she credited her bike sessions 100%. It’s that grinding leg strength from high-resistance intervals that makes the difference.

And here’s the best part: zero impact. You can go full-throttle without pounding your joints.

That’s a game-changer if you’re dealing with foot pain, shin splints, or just need a break from the daily run grind.

Motivation on Tap

Let’s be honest—cross-training can feel like a chore. But spin has this weird power to hype you up.

Dim lights. Loud music. One instructor yelling “Add resistance!” just as the beat drops.

Suddenly, you’re climbing out of the saddle like your life depends on it.

I’ve shown up to 6am spin classes half-asleep and left dripping sweat, fully alive, and wondering why I don’t do it more often.

If you’re someone who slacks during solo cross-training, this might be your fix.

First Spin Class? Here’s How to Crush It

1. Get There Early. Tell the instructor you’re new. They’ll help adjust your seat and handlebars. Proper fit = zero knee pain later.

2. Bring Water & A Towel. You’re gonna sweat. Like… a lot. Hydrate before, during, and after.

3. Ease Into Resistance. You’ll hear “add a turn” or “find your hill.” Don’t max out too soon. Use just enough tension to feel it without bouncing in the saddle.

4. Push Outside the Comfort Zone (But Don’t Die). Sprint when the group sprints. Climb when the beat drops. But if your lungs are in revolt? Back off. You’ll get stronger every class.

5. Nail Your Form

  • Don’t death-grip the bars
  • Shoulders relaxed, core tight
  • When standing: hips back slightly, smooth pedal strokes
  • Think “circles with your feet,” not piston mashing

These tweaks go a long way in avoiding soreness where you don’t want it (like your back, wrists, or knees).

6. Let It Be Fun. The first class might feel like a punch in the gut. But once you get the flow, it gets addictive. The music, the group, the sweat—it starts to feel like a celebration of effort. A break from pounding pavement, but still tough as hell.

Are Spin Classes Worth It for Runners?

Short answer? Yes. If you use them right.

Spin classes are one of the best bang-for-your-buck cross-training tools for runners—especially if you struggle with motivation on solo rides or want to cycle without messing with traffic and bike maintenance.

You get a killer workout in a controlled setting, no matter the weather, no gear needed. Just show up and get your sweat on.

And let’s be honest—on days when the idea of one more treadmill run makes your soul groan, a good spin class with thumping music can shake you out of the monotony and give you that endorphin rush you didn’t know you needed.

One Caution: It’s Still a Hard Workout

Don’t let the dim lights and pop music fool you—spin can wipe you out just as fast as a tempo run.

Slot it in like you would any hard session. That means:

  • Don’t spin hard the day after intervals
  • Don’t treat every spin like a race
  • Give yourself time to recover

Many spin instructors teach multiple classes a week—but most of us aren’t built for that load. Respect the effort, and your legs will thank you.

Pro tip: Nervous about your first class? Pick a bike in the second row. You’ll see the instructor and experienced riders without feeling like you’re on display. And truthfully—everyone’s too busy sweating to care what you’re doing.

Recap: Why Cycling Helps Runners

  • Less impact, more aerobic volume
  • Builds stronger glutes and quads (hello, better hill running)
  • Fights burnout with variety
  • A recovery tool that actually works
  • Cross-trains muscles you didn’t know were weak

You don’t have to go full “cyclist.” You don’t need Lycra kits or carbon bikes. Just swap one weekly run for a ride—outdoors, spin class, whatever you’ve got.

Even one low-key ride per week can unlock better recovery and a fresher mind. Add a second, and you might start noticing faster paces on fewer running days.

Your Move

Still skeptical? That’s fair. But consider this your nudge:

  • Try one spin class this week
  • Or hop on the gym bike for a 30-minute low-key session
  • Or borrow a friend’s bike and go chase some wind

You might be surprised at how different—but good—your next run feels.

Running and cycling aren’t rivals. They’re teammates. Use both, and you’ll be stronger, more resilient, and probably a lot less banged up.

Let’s Talk

What’s your biggest hesitation about adding cycling to your training? Worried about losing run fitness? Not sure where to start?

Drop your question. I’ve been there, and I’ll help you figure it out.

Running Streak Guide: How to Start a Run Streak Safely & Stick to It

How to Do a Run Streak

Ever found yourself wondering, “Should I try a run streak?” or “Is it even safe to run every single day?” You’re not alone.

I get asked that all the time—especially from runners who want to break through a plateau, build discipline, or just need a new challenge to stay fired up.

And the answer is: yeah, you can run every dayif you do it smart.

But let me be straight with you—it’s also a fast track to burnout or injury if you dive in blindly.

So before you lace up for 30 days straight, let’s walk through exactly how to do this right.

This guide isn’t fluff. I’ll cover:

  • What a running streak actually is (including official definitions)
  • How to start a streak without trashing your body
  • The pros, the cons, and everything in between
  • Real stories from the streaking trenches
  • And the running nerd stuff too—because yeah, there are rules and records

Sound good? Let’s dig in.

What Even Is a Run Streak?

Alright, here’s the deal.

A run streak means you’re running every single day, no breaks.

Not every other day. Not “most days.” Every. Single. Day.

Minimum distance? One mile.

And yes, that includes holidays, hangovers, sick days, and “I just don’t feel like it” days.

Official Definition

The folks at Streak Runners International (SRI) and the U.S. Running Streak Association (USRSA) define it like this:

You must run at least one mile (1.61 kilometers) within each calendar day.

Doesn’t matter where—road, treadmill, trail, around your couch.

If you cover that mile, the streak lives. Miss it? You’re back to day one.

Want your name in the record books? You’ll need to hit at least 365 days in a row. (Yeah, no pressure.)

But hey, you don’t need a plaque on a wall to make streaking worth it.

You can start a streak on your own terms.

For me, it’s about showing up—rain or shine, tired or not. And honestly, that mindset is half the reward.

Streaking ≠ Daily Training

Let’s clear something up—a run streak isn’t the same as following a smart training plan.

In a traditional plan, you’ve got rest days, hard days, long runs.

It’s designed to get you ready for a race. But with a streak, the streak itself is the goal. It’s about consistency over performance.

You’re not trying to set a PR every day.

Some days, your run might just be a slow mile around the block. And that’s totally fine.

A friend of mine hit a year-long streak running mostly easy miles—he just didn’t want to break the chain.

Bottom line: your streak is about showing up, not blowing up your legs.

The Wild World of Streak Runners

Think you’ll be alone out there? Not a chance.

There’s a whole world of streakers out there—and they take this seriously.

SRI & USRSA Stats (Yep, There Are Stats)

Women are holding it down too. The legendary Lois Bastien has over 45 years of streaking under her belt.

Now, I’m not saying you’ve gotta streak for half a century—but seeing what’s possible is pretty damn inspiring.

Streak Levels (A.K.A. Bragging Rights)

The community even came up with streak “tiers” based on how long you’ve been at it:

  • Neophyte: 1 to <5 years
  • Proficient: 5 to <10 years
  • Experienced: 10 to <15 years
  • Well-Versed: 15 to <20 years
  • Highly Skilled: 20 to <25 years
  • Dominators: 25 to <30 years
  • Masters: 30 to <35 years
  • Grand Masters: 35 to <40 years
  • Legends: 40 to <45 years
  • Coverts: 45 to <50 years
  • Hills: 50+ years (only a handful of humans have made it this far)

Sure, it’s tongue-in-cheek—but it’s fun. And it gives you something to shoot for if you love tracking your milestones.

Community Makes It Stick

Want to know what really keeps a streak alive (besides pure stubbornness)? Community.

There are massive online groups where streakers post daily updates, motivate each other, and share how they snuck in miles between diaper changes or work meetings.

A few great ones:

I’ve seen folks squeeze in midnight treadmill miles just to keep their streak alive.

One runner told me, “When you commit to running every day, you leave no room for excuses.”

Amen to that.

Whether it’s 5 a.m. in the dark or 11:59 p.m. in a hotel hallway—you show up.

And when you know there are thousands of others doing the same, it hits different. You’re not just running—you’re part of something.

For members of the Marathon Community, every running streak is a test of perseverance and persistence, and deserves to be commemorated in a special way. Enamel Pins Canada are the perfect way to express your love for running and your community’s achievements.

You can customize your pin with the number of days of your running streak, the community logo, or even your favorite running route. For example, choose a number representing the number of days of your streak to make it a unique commemoration of your running journey.

Attach the pin to your sports backpack or clothing for a stylish and unique look. GSJJ’s quick customization service will quickly realize your creative ideas.

Why Run Every Day? 

You’ve probably heard of “run streaks”—running every single day, no matter what. And maybe your first reaction was like mine: Why would anyone do that to themselves?

But hear me out. After years in the game—coaching runners, running through burnout, and watching my own habits evolve—I can tell you that streaking can help a lot.

It’s not about showing off.

It’s about building the kind of consistency and mental toughness that transforms you from someone who runs… into someone who doesn’t miss.

Let me explain more…

It Locks In the Habit (No More “Should I Run Today?” Debates)

One of the biggest wins of a run streak? It takes the decision-making out of the equation.

You stop asking, “Should I run today?” and instead start thinking, “When am I getting it done?” That mental shift alone is huge.

I’ve had runners tell me that once they committed to a 30-day streak, it actually got easier to get out the door.

Why? Because the inner negotiation disappeared.

You’re not making the choice every day. You already made it—on day one.

Lazy Day Killer

Let’s be real—some days you just don’t wanna move.

Maybe it’s cold, maybe you’re tired, or maybe life is just being… life.

But once you’ve got a streak going? You don’t want to break it. That alone can get you out the door when nothing else will.

David Pharr, a beast of a runner with an 11-year streak, said that before streaking, he’d go a full month without running just because the weather sucked or he felt off.

Now? No room for those excuses.

You Start Seeing Results

And here’s the kicker: consistency pays off.

One runner told me that during his year-long streak, he set PRs in almost every distance—from 5K to half marathon.

Now, look—I’m not saying everyone will get faster just by running every day. But daily, easy-paced running can improve aerobic fitness over time—especially if you manage the effort smartly.

At the very least, it keeps your base strong and your engine warm.

Excuse-Proofing Your Routine

Run streaks don’t care if it’s raining, snowing, or your day is packed. You find a way.

It might mean running before sunrise, after dinner, or during your lunch break. But you make it work. That’s a superpower.

No more excuses not to run.

When you’re streaking, there’s no space for excuses like missed alarms or late meetings. You just get it done.

Suddenly, you’re not the kind of runner who folds when life gets messy.

The Real Health Perks of Running Every Day

Yeah, it can help you live longer—and not just by a little.

We all know running is good for us, but here’s the kicker: even a short daily run—like 10 minutes—can pack some serious health punch.

Not saying you have to train like an Olympian, just lace up and move every day.

Keep it moderate. Keep it real.

1. Heart, Lungs, and Longevity

There’s a monster study from 2014 (over 55,000 people tracked) that straight-up showed daily runners—even those logging just 5 to 10 minutes a day—had up to a 45% lower risk of dying from heart disease. Let that sink in.

A short, consistent run can literally help you live longer. Your heart pumps stronger, blood flow gets better, and your lungs become more efficient. That’s not hype. That’s science.

When I first read that study, I thought: “That’s wild. You don’t even have to run long—just consistently.”

2. Cancer? Exercise Fights Back

Let’s talk real stats. A massive meta-study published in JAMA Internal Medicine looked at 1.4 million people.

Yep—million. The researchers found that people who exercised regularly (like those who get in a daily run) slashed their cancer risk in a big way.

Here’s how it breaks down:

  • Esophageal cancer: 42% lower risk
  • Liver: 27%
  • Lung: 26%
  • Kidney: 23%
  • Colon: 16%
  • Breast: 10%

This wasn’t just elite athletes—we’re talking average folks who stayed active.

That’s where a daily run streak fits in. You’re stacking the odds in your favor every time you lace up and move.

No, it’s not a magic bullet. But it does put you on offense instead of defense when it comes to your health.

3. Metabolic Mojo

Running every day—even at a chill pace—helps your body burn fuel better.

You become more insulin sensitive (that’s a good thing), your blood pressure starts behaving, and cholesterol levels can fall into place.

Think of it like tuning up your engine. When you run, your metabolism stays fired up. Miss too many days in a row and that engine gets rusty.

I’ve seen runners clean up their blood sugar numbers in just a few months of consistent easy running. Not by hammering hard workouts—just by showing up every day.

4. Mood Booster, Brain Fuel, Stress Killer

This one hits close to home. I don’t just run for fitness—I run for sanity.

Running gives your brain a chemical cocktail of endorphins and endocannabinoids (your body’s natural feel-good messengers). It lifts your mood. Clears your head. Helps manage anxiety and stress.

I’ve had those days too—when the run isn’t about pace or distance, it’s about showing up for yourself.

Daily runs = moving meditation. Some days it’s therapy. Some days it’s just sanity in a chaotic world.

The Downs Running Every Day

I get it—running every day sounds badass. It shows commitment, grit, and consistency.

But here’s the deal: it’s not all sunshine and runner’s highs.

There are downsides, and they’re real. I’ve seen it. I’ve felt it. So before you jump on that streak bandwagon, let’s break down the honest-to-God drawbacks of daily running.

No Rest Days = No Full Recovery

This is the big one. The absolute elephant in the room.

When you’re running every single day, you’re never really giving your body time off—and that’s a problem.

Even easy runs cause micro-damage to muscles, tendons, and joints.

Normally, your off days are when the body rebuilds and gets stronger.

But when you never shut it down, you never get that full repair cycle.

No rest = no full gains. Simple as that.

Can’t Take a Day Off—Even When You Should

This one hits home for a lot of streakers.

Say you wake up and your knee feels sketchy.

Or you’ve got the flu.

mart runner would rest. But the streak? That voice in your head says, “Just one mile… don’t break the chain.”

And that’s how minor pains turn into major injuries.

“Rest Day” = Still Running? Not Quite.

Some streakers say their “rest day” is a gentle mile.

And sure, trotting out a slow mile is better than hammering every day. I’ve done it too—just one lazy loop around the block to keep the streak alive.

But let’s not pretend that’s the same as actual rest. Your body still has to lace up, move, absorb impact. It’s active recovery at best—not full-on rest.

If your legs are toast from a long run or race, that extra day off could be the difference between bouncing back strong or setting yourself up for burnout.

Overuse Injuries: The Silent Streak Killers

Here’s the harsh truth—running every day jacks up your risk of overuse injuries.

I’m talking shin splints, stress fractures, tendonitis, IT band issues—the works.

And please don’t take my word for it.

According to a massive systematic review, runners doing over 40 miles per week had way higher injury rates—2.2x for men and a whopping 3.4x for women.

That’s not small. Sure, some streakers keep it low—just a mile a day.

But once that streak mindset kicks in, a lot of folks slowly add volume, chasing more miles without adding rest.

And frequency alone can mess you up.

A breakdown of multiple studies shows the safest sweet spot is 2–5 running days per week. Bump that to 6–7, and injury rates spike.

You’re putting more wear and tear on the same moving parts without the buffer of a recovery day.

Warning Signs You’re Running Yourself Into the Ground

Let’s talk about overtraining — the sneaky villain that creeps up on even the most motivated runners, especially during a run streak.

I’ve seen this too many times: someone’s 40 days deep into a daily streak, feeling invincible… until BAM — fatigue hits like a truck.

Suddenly, their easy pace feels like a death march, motivation tanks, and their body’s throwing up all the warning flags.

If that’s you — listen up.

Here’s how your body waves the red flag:

Resting Heart Rate is Creeping Up

You roll out of bed, check your pulse, and it’s 5–10 beats higher than usual? That’s not just caffeine or a bad dream — it could be your body shouting, “Dude, I’m not recovered.”

A lot of seasoned runners track their morning pulse for this exact reason. It’s like your early warning radar.

You Can’t Sleep

It’s weird, right? You’d think running daily would knock you out cold.

But when you’re overtrained, your nervous system is revving too high — and you’re tired but wired.

If you’re tossing and turning or waking up a ton, that’s a sign your body’s overstressed.

You’re Always Tired, Even on Easy Days

If your legs feel like lead every single run, and your recovery jogs feel harder than they should, something’s off. That zombie-run feeling? It ain’t normal. Time to pay attention.

You’re Getting Sick More Often

A suppressed immune system is another gift from overtraining. If you keep catching bugs or just feel “off” all the time, it could be your body breaking down instead of building up.

Your Mood is in the Gutter

Cranky, anxious, snapping at your spouse or cat? Yeah, it’s not just life stress — overtraining can wreck your mood. I’ve had runners tell me they lost all joy in the run. That’s your brain saying “ease up,” even if your ego says “keep pushing.”

Appetite or Weight Changes

Some folks suddenly drop weight (not always in a good way), or lose their appetite completely. Others develop monster cravings. If you’re eating weirdly and your body feels off — don’t ignore it. Overtraining messes with hormones and hunger cues.

Little Pains That Won’t Go Away

A sore Achilles that won’t quit. A shin that nags for a week. Those tiny injuries that linger? They can become big problems if you don’t back off. Don’t let a streak turn into a stress fracture.

So What Do You Do?

If you’re ticking off several of these signs, it’s time to step back and reassess.

👉 Maybe drop the pace.
👉 Cut mileage.
👉 Shuffle a slow 1-miler and call it good.
👉 Or — gasp — take a rest day. Yes, even during a streak.

One sports medicine doc said it best:

“Persistent fatigue, elevated heart rate, trouble sleeping, and mood changes lasting more than a few days are signs you need to pull back.”

Ignore those, and you risk blowing up. And guess what ends the streak anyway? Injury.

How to Start a Run Streak Without Blowing Yourself Up

You thinking about streaking? I respect that. It takes guts.

But here’s the deal: starting is easy, finishing strong takes smarts. Especially if you’re newer to running.

Don’t Start From Zero

If you’re brand new to running, don’t streak yet. Seriously.

Trying to run every single day without a running base is like trying to deadlift your bodyweight without ever hitting the gym. You will break.

I tell my coaching clients this all the time:

“Earn your streak.” You need at least 6 months of running 3–5 days a week before you go daily.

Build your base. Get your bones, joints, and tendons used to the pounding. Running daily is high-frequency stress, and beginners aren’t built for that yet. You’ve got to let your body catch up.

I recommend my couch to 5K training plan to get you started.

Beginner Option: Walk Streak or Run/Walk Streak

If you’re starting from scratch, try streaking with walking or run/walk combos:

  • Walk a mile every day
  • Do a 10-minute run/walk loop daily
  • Keep it chill but consistent

You’ll still build the habit—without the injuries.

Start With a Short Streak Goal

Don’t declare a lifelong streak on Day 1. That’s pressure you don’t need.

Instead, commit to a mini-streak:

  • Try 7 days straight. Can you do that?
  • Then 14. Then 30.
  • Stack wins.

Milestones Are Your Best Friend

Don’t stare at some 365-day Everest. Break it down:

  • Shoot for 10 days
  • Then 20
  • Then 30

Every milestone you hit builds confidence and routine. You start to feel like a runner—not someone “trying” to run.

Set an End Date (If That Helps)

If you’re streaking for a purpose—say, a holiday challenge or a training kickstart—it’s totally fine to pick an end date.

“30 days ‘til vacation,” “90-day New Year challenge,” whatever. That way, you know a rest day is coming, and you won’t mentally burn out.

You might decide to keep going after—but the finite goal makes it manageable in the beginning.

Keep It Easy, Keep It Short (Especially at the Start)

Let me be blunt: a running streak isn’t the time to go chasing PRs or piling on miles like you’re prepping for an ultra. The goal here is simple—show up every day. That means short, easy runs, especially in the beginning.

Most of your runs? They should feel like recovery jogs.

Easy enough to chat through. You’re not trying to be a hero—you’re trying to stay healthy and consistent.

On the effort scale, we’re talking a 4 out of 10. If you finish thinking, “I could’ve gone faster,” good—that’s the point.

Forget pace. Forget ego. Just run. If you’re tempted to push the pace, don’t.

Save that fire for a race. Some days, even run slower than you feel like you could. Consider that investment in tomorrow’s run.

One Mile Is Enough (Really)

Don’t underestimate a one-mile run. If you’re used to running 3 days a week, jumping to 7 is already a big leap. The body doesn’t just adjust overnight.

Start with a mile a day. That’s totally legit. T

he US Running Streak Association says one mile is the daily minimum for a streak—and plenty of long-term streakers live right at that line. It’s not about doing more. It’s about doing it again tomorrow.

Let’s say you were running 15 miles over 3 days a week. For the first few weeks of your streak? Spread those same 15 miles across all 7 days—or even back it off a bit. Once your body gets used to daily running, then you can gently nudge the volume up.

What About Speed Work?

Look, I get it—sometimes you wanna stretch the legs.

That’s fine… if you’re experienced.

Maybe one or two days a week you sneak in some moderate effort—like a tempo run or some strides.

But the rest of the time? Slow it way down to balance it out.

If you’re new to streaking? Skip the speed.

Your body’s already dealing with enough stress from the daily grind.

Think tortoise, not hare. Slow and steady keeps the streak alive.

Break the Boredom – Mix Things Up

Let’s talk variety. Running the same route, same pace, same time every single day? That’s a recipe for burnout—and overuse injuries. Your brain and body both need a little spice.

Here’s how to add some flavor:

Mix Distances & Intensity

Even if most runs are easy, they don’t have to be identical.

Maybe Saturdays you go a bit longer (5–6 miles if you’re feeling good). Maybe Tuesdays you toss in some fartlek pickups. Just be smart—any hard-ish efforts should be surrounded by extra-easy days.

Example week:

  • Monday: 2 miles easy
  • Tuesday: 3 miles w/ light fartlek
  • Wednesday: 1-mile shuffle
  • Thursday: 3 miles steady
  • Friday: 2 miles easy
  • Saturday: 5-mile long jog
  • Sunday: 1-mile recovery cruise

Try New Types of Runs

Sprinkle in strides. Hit a hill. Try a trail. Shuffle a mile barefoot in the grass if that’s your jam. Change your terrain, mix in different muscle use, and keep your body guessing (in a good way).

Change Your Route

This one’s huge for staying mentally fresh. If you’ve got a default loop, cool. But run it backwards once in a while. Or explore new streets. Drive to a park. Run at sunset instead of sunrise.

One runner I know made a game out of it—she’d do “route roulette” and run a new street every day until she’d covered her whole neighborhood. Kept things fun. Kept her going.

Use the 3-Day Rule

If a pain lasts more than 3 runs, or keeps getting worse? That’s your cue.

Take a break. Rest it. Don’t be the person who turns a mild tweak into a 6-month injury because they refused to miss Day 198.

Same goes for being sick. Fever? Flu? COVID? Your immune system needs every ounce of strength — don’t waste it trying to log a “sick mile.” You could make things way worse.

Even a one-mile shuffle might not be worth the risk if your heart’s under stress. I’ve seen runners ignore this and regret it big time.

Final Word: Streak Like a Smart Runner

Running every day is a commitment—but it shouldn’t be a punishment. Start easy. Stay easy. Focus on the streak, not the stats.

Here’s your mission:

  • Go slow.
  • Keep it short.
  • Mix it up.
  • Don’t break yourself.

The goal isn’t to impress your watch. It’s to stack those days. Show up. Repeat. Let that consistency build something powerful.

Now get out there and log your mile.

You in?

Defeating Calf Pain for Runners: Conquer Sore Calves and Run Stronger

picture of Calf Pain

If you’re dealing with calf pain after running, I’ve been in your shoes.

Back in my early running days, I used to brush it off.

Tight calves? Just part of the grind—or so I thought.

Then one early morning, just past sunrise, a cramp hit me so hard I had to sit on the curb. I was rubbing a knot the size of a golf ball and thinking, “Am I done running for good?”

That moment forced me to wake up and start listening to what my body was screaming.

What I learned from that scare didn’t just help me get rid of the pain. It helped me run stronger, smarter, and with way more awareness of how my body works.

Let’s get to it.

Calf Pain Is the Sneaky Villain Most Runners Ignore

Here’s the truth: calf pain is super common, but it doesn’t get talked about enough.

According to data, around 80–85% of runners report calf soreness after a run.

That’s nearly all of us.

Most runners obsess over their knees or ankles. But your calves?

They quietly take the hit on every single stride. Each time your foot hits the ground, your calf has to absorb the impact and help push you forward.

If your calves are tired, weak, or too tight to do their job?

Something else—like your knees or Achilles—ends up picking up the slack. That’s how overuse injuries sneak in.

Why So Many Runners Brush It Off

It’s easy to overlook calf pain. It doesn’t usually scream for attention.

It starts as a tight, post-run ache. You think, “No big deal.”

And because runners are tough (sometimes to a fault), we power through. But that dull ache can hide some real issues—strained muscles, overused Achilles, or worse.

Here’s a wild stat: 80–85% of runners regularly deal with sore calves.

The bottom line?

Calf pain is your body’s way of waving a red flag. Ignore it, and it’ll bite you later. Address it now, and you’ll not only feel better—you’ll run better.

Know Your Calves: The Muscles That Keep You Moving

Let’s break it down real simple.

Your calf isn’t one muscle—it’s a tag team: the gastrocnemius and the soleus.

  • Gastrocnemius (aka “gastroc”): This is the bulging muscle you see when you stand on your toes. It crosses both your knee and ankle, and it’s built for power. Think sprints, jumps, and fast bursts.
  • Soleus: This guy sits underneath the gastroc. It’s flatter, deeper, and doesn’t get much credit—but it’s a beast. The soleus helps you push through long runs and supports you when you’re standing for long periods. According to research, it can produce massive force—and it’s often undertrained. A big mistake I see in rehab routines all the time.

Together, these muscles join at the Achilles tendon, that thick cable running from your calf down to your heel. Every time you toe off the ground, your calf-Achilles combo powers that move.

If your calves are strong and loose, your stride becomes springy and smooth. But if they’re tight or weak? That spring turns into a rusty hinge.

Takeaway tip: Don’t skip calf work. Both strength and flexibility matter.

Why Do My Calves Hurt? Common Causes of Calf Pain in Runners

Let’s talk about it—calf pain sucks. It can hit hard or creep in slow, and whether it’s a sharp zing mid-run or that post-run tightness that won’t quit, it messes with your flow.

I’ve had my fair share of runs cut short by angry calves, and most of the time, the cause is one of these usual suspects:

1. Doing Too Much, Too Soon (Overuse and Strains)

This is the big one. I see it all the time—runners ramping up mileage or attacking hills before they’ve built the base.

The calf, especially that big gastroc muscle, doesn’t love surprises.

Push it too far too fast, and boom—you’ve got a strain.

Sometimes it feels like a sharp snap mid-run, or just soreness and stiffness creeping in later. Even without a full tear, micro-tears add up fast.

2. Cold Calves = Angry Calves (Inadequate Warm-Up)

Rolling out of bed and straight into a run? That’s a recipe for tight calves.

Muscles need blood flow and prep. Skip the warm-up, and you’re shocking your legs into motion. It’s like flooring a cold engine—things go wrong fast.

Those cramps in mile one? Often from going 0 to 100 with tight muscles. A 5-minute dynamic warm-up can save you weeks of pain.

3. Poor Running Form & Gait

How you move matters. If you run on your toes or strike too far forward (forefoot striking), your calves eat up all the impact.

Add in uphill climbs or overstriding, and you’re giving your lower legs a beating.

Even small quirks like toeing out or favoring one side can mess with you over time.

I’ve worked with runners who fixed chronic calf pain by simply adjusting stride length or aiming for a midfoot strike. Sometimes the solution isn’t more stretching—it’s better mechanics.

4. Muscle Imbalances or Weakness

Here’s the kicker—tight calves aren’t always strong calves. Sometimes they’re weak and overworked.

Maybe the gastroc is doing all the lifting while your soleus is snoozing. Or maybe your shins and hammies are too lazy to carry their share.

That’s when the calves step in and get mad. I tell my athletes: don’t just stretch, strengthen. Build balance. It pays off.

5. Dehydration & Electrolyte Issues

If you’ve ever woken up to a calf cramp that felt like a lightning bolt, you know what I’m talking about.

Lack of fluids and key minerals—like magnesium, sodium, potassium—can trigger those brutal spasms.

Training in heat makes it worse. One guy I coached was cramping constantly until we added a magnesium supplement. Magic.

Don’t underestimate the power of water and electrolytes—they’re your cramp insurance.

6. Footwear Fails & Foot Mechanics

Your shoes matter.

Worn out, unsupportive, or just wrong-for-you shoes can stir up calf pain fast.

Minimalist shoes can stretch your calves more—sometimes too much. Shoes with high heel drops might shorten the calves over time.

Rapid switches between the two? Bad idea.

Also, foot shape matters. Flat feet can lead to overpronation stress, high arches to poor shock absorption.

7. Old Injuries or Hidden Causes

Not all calf pain is straightforward. Sometimes it’s nerve-related, like sciatic issues sending pain signals to your calves. Old Achilles injuries, nerve tension, even circulation problems can be the culprit.

I’ve seen runners deal with calf pain for months only to find out it was a hidden nerve entrapment. If your pain lingers, feels odd, or swells up, get it checked. Don’t guess.

Bottom line?

Calf pain usually isn’t from just one thing. It’s a mix—bad shoes, skipped warm-ups, heat, form flaws, and more.

The fix? Take an honest look at your training, your gear, and your habits. The causes are fixable if you pay attention.

And trust me—as someone who’s had to limp home more times than I’d like to admit, fixing it is worth it.

Next up, we’ll dive into how to treat calf pain and keep it from derailing your training.

Can I Keep Running with Sore Calves?

I get this question a lot from runners I coach—and honestly, I’ve asked it myself plenty of times:
“Is it okay to run with sore calves, or am I just setting myself up for injury?”

Well, it depends. And I’ll break it down for you the way I would with any runner after a tough week of training.

1. Mild Soreness? You’re Probably Good to Go (But Don’t Be Stupid)

If your calves feel tight after a hard run, new shoes, hills, or speedwork—and we’re talking low-level soreness here, maybe a 2 or 3 out of 10—you’re likely dealing with Delayed Onset Muscle Soreness (DOMS).

This kind of soreness is normal. In fact, it often means you’re getting stronger. If movement helps it ease up, you’re okay to keep going—lightly. No all-out hill repeats the next day.

What I tell my runners: use the 24-hour rule. If the soreness eases up within a day and you’re not limping or changing your stride, then an easy run or some cross-training should be fine.

I’ve had plenty of runs where my calves were stiff at the start but loosened up as I got going. The key is to listen, not power blindly through. You’re not trying to prove toughness—you’re trying to stay consistent.

2. Sharp Pain or No Improvement? Time to Chill

Now, if that calf pain is sharp, locked-in, or just won’t go away—even with rest—stop running. I mean it.

Here’s where runners mess up: they feel something “off,” ignore it, and end up on the sidelines for six weeks instead of one.
I’ve seen it happen. Hell, I’ve done it.

Red flags you should never ignore:

  • Pain that messes with your stride
  • Swelling or bruising
  • Pain that’s still there even when you’re just walking around

One runner told me he heard a pop mid-run, pushed through it like a hero, and then couldn’t walk the next day. That “pop”? Classic calf tear.

One of the physiotherapy clinic site calls this a serious strain, and yeah—they’re right. Keep running on that, and you’re looking at weeks (or months) out. If anything feels off, get it checked.

And let’s talk about chronic tightness—if your calves never feel loose, even after warming up or stretching for weeks, then something’s up.

Could be a buildup of training mistakes, or something deeper like Achilles tendinopathy creeping in.

3. Not Sure? Rest Anyway. It’s Not Weakness—it’s Wisdom

If your calves are barking at you and you’re torn between pushing through or resting—just rest. One or two skipped runs won’t wreck your training.

But ignoring warning signs? That’s how you spiral into injury.

I’ve told runners this a hundred times:

“You won’t lose all your progress by taking 48 hours off. You might lose everything if you don’t.”

Take a short break, stretch, foam roll, hydrate, and reassess.

I read a story on Reddit where a guy tried to “run through” a calf strain and ended up DNF’ing a race. After finally taking 10 days off and rehabbing properly, he came back and crushed a personal best.

That’s the power of patience. Your body heals—if you let it.

Ever Heard of the “Calf Heart Attack”?

Old-school runners sometimes joke about this thing called a “calf heart attack.”

It’s not a real heart attack, obviously—it’s that sudden tearing pain in the calf, often in the medial gastrocnemius, that hits during speedwork. Feels like someone shot your leg.

It’s brutal. It happens more in runners over 40. And trust me—you don’t run through it.

You stop. Right there. Ice it. Rest it. Start a slow recovery plan.

As study explains, as we age, our calf muscles lose elasticity. That’s why warming up properly, especially before speed workouts, becomes non-negotiable.

You’re not fragile—you just need to train smarter.

Got Tight Calves Right Now? Here’s What Actually Helps

Let’s get to the good stuff—what to do when your calves are tight but not torn.

1. Can You Walk Without Pain?

Before you run, check if you can:

  • Walk pain-free
  • Do a few calf raises with no discomfort

If you can’t do those? You’re not ready to run. Back up and heal first.

2. Gentle Stretching (But Don’t Yank on It)

Stretching can help—but only when it’s done smart.

Here are my go-tos:

  • Straight-leg Calf Stretch (Gastroc): Hands on the wall, one foot back, heel pressed down, leg straight. Feel that stretch high up in the calf? Hold it for about 30 seconds. No bouncing.
  • Bent-Knee Calf Stretch (Soleus): Same setup, but this time bend the back knee slightly. This gets deeper into the soleus. Again, hold for 30–45 seconds.
  • Downward Dog Pose: Push your hips up, heels toward the ground, hands planted. You’ll feel it from your calves to your hamstrings. You can pedal your heels too—works each side individually.

Just a reminder: stretching shouldn’t be torture. You’re coaxing the muscle to relax, not punishing it.

A bit of tension is fine. Sharp pain? Back off.

Also—don’t stretch aggressively in the first 24–48 hours after a strain. Stick to light massage, ankle circles, and gentle mobility work first.

3. Make Stretching a Daily Habit

I tell my athletes to stretch calves every day, especially after a run while the muscles are still warm.

Before bed is a great time too—helps cut down that brutal morning stiffness.

One runner on Reddit said, “I stretch constantly and they’re still tight!”
And I get it. That’s because stretching is only part of the fix. The other key? Strength work. (We’ll get to that in the next section.)

4. Self-Massage and Foam Rolling (Calf Release Techniques)

You ever hit a tight spot in your calf with a foam roller and feel that “hurts-so-good” kind of pain? That’s your muscle saying, “Finally, some help.”

Self-massage is one of the simplest, most effective ways to loosen up tight calves and get the blood moving again.

Here’s what’s worked for me and the runners I coach:

● Foam Rolling

Grab a firm foam roller, drop to the floor, and get to work. Sit with one calf on the roller and support yourself with your hands behind you.

Roll slowly from your ankle to just below the knee.

Find a knot? Pause there. Breathe into it for 20–30 seconds and let the muscle release.

If you want more pressure, stack your other leg on top. Yeah, it’ll feel uncomfortable—but in a good way. That deep pressure can help flush things out.

One technique that’s gotten a lot of love is the “foam roller sit”—basically sitting on a long roller with it under your calves and rocking side to side.

I saw it on PogoPhysio, and it’s been a game changer when my calves are cranky. No fancy moves—just gravity doing the work.

Check out the technique below:

● Massage Stick (“The Stick”)

Looks like a rolling pin, and honestly, a kitchen rolling pin can do the trick in a pinch (I’ve done it). Just grab the handles and roll it up and down your calf like you’re kneading out pizza dough.

If you’ve been getting deep knots post-run, this one’s easier to control than a foam roller. And it takes about two minutes to get those calves feeling human again.

● Lacrosse or Massage Ball

For those spots that foam rollers can’t touch—usually around the outer calf or near the Achilles—a firm ball is your best friend.

Sit down, place it under your calf, and apply pressure. You can move in circles or just sit on that spot until the tension fades.

Just be careful near your Achilles—don’t go too hard there. Focus on the meaty upper part of your calf.

● Manual Massage

Got a massage therapist? Great.

If not, your own thumbs will do. Use your knuckles or thumbs to work up and down the calf, always pushing toward the heart.

I’ll do this at night while watching Netflix—thumbs digging into the tight spots while I zone out. A little lotion or oil helps smooth things out too.

You don’t need an hour. Just a few minutes a day keeps tightness from piling up. I keep a foam roller in my living room and a massage ball in my backpack. Recovery on the go.

Bonus tip: Heat helps before a massage or rolling session. A hot shower or a heating pad for 10 minutes gets the muscle loosened up—kind of like warming up clay before you shape it.

5. Compression & Elevation (Recovery Boosters)

Compression socks aren’t just for show. When I’m wearing them during long runs or hard workouts, my calves thank me later. Less soreness. Less wobble. More support.

While research is mixed on performance benefits, plenty of us runners—myself included—feel better after wearing them. Especially on days when I’ve got errands or work right after a long run.

Post-run, they help by improving blood flow and clearing out the junk that builds up after tough workouts. No fancy gear needed—just slide on the sleeves and let them do their thing.

Got tired legs? Elevate ‘em. Throw your feet up on a wall or pillow for 15–20 minutes post-run. I like to do the “legs up the wall” yoga pose—easy, calming, and it helps reset your calves. It’s a zero-effort win.

6. Topical Stuff: Balms, Rubs, and Gels

Magnesium spray. Arnica gel. Menthol rubs. I’ve tried them all. Do they fix the root cause? No. But they do offer short-term relief.

That warm, tingly feeling can distract from the soreness, and sometimes just massaging the stuff in is half the therapy. But a word of warning: don’t use heat rubs under compression sleeves unless you enjoy the feeling of lava on your legs. Trust me.

7. Active Recovery: Keep the Blood Flowing

This one’s big. Rest has its place, but movement heals.

If my calves are cooked the day after a big run, I don’t just crash on the couch. I go for a bike ride, take a brisk walk, or hit the pool. Nothing crazy—just enough to get the blood moving. That circulation helps clear out soreness and repair the muscle.

It’s not about being a hero. It’s about being smart. Gentle movement beats total rest for tightness 9 times out of 10.

Calf Pain Can Be the Fuel for Your Comeback

Here’s what I tell my runners: setbacks build grit. Calf pain isn’t just a nuisance—it’s your shot to level up. I’ve coached athletes who went from limping through easy runs to smashing PRs, simply because they stuck with the rehab process and kept showing up.

That can be you.

So if your calves have been a weak link, this is your moment to flip the script. Let those frustrating miles fuel your next breakthrough.

Every little step counts. That stretch today? That extra water bottle? That strength set you almost skipped? They all lead to one thing: crossing the line strong and pain-free.

Your Quick-Action Checklist: Beat Calf Pain for Good

  • Warm up like you mean it. Don’t skip the basics.
  • Strengthen with focused calf moves—raise, hold, repeat.
  • Stretch and roll after hard runs. Make it part of your cool-down.
  • Hydrate and fuel right. Your calves are muscles—they need it.
  • Rest when needed. One day off beats six weeks on the sideline.
  • Don’t ignore early signs. Catch it while it’s small.
  • Ask for help if it lingers. A good PT can save your season.

Now it’s on you. Lace up with purpose, take these tips seriously, and get to work. Stronger, pain-free runs are waiting. And trust me—there’s nothing better than feeling your legs fire without fear.

Go out there and own it.

Keep running strong,

David D.

Big Toe Pain from Running? Here’s What It Means and How to Fix It

running shoe brands

Running’s awesome—we all know that.

Builds fitness, burns calories, clears your head.

But man, all it takes is one tiny issue in the wrong spot to bring your whole training plan crashing down.

And nothing proves that more than a jacked-up big toe.

Yeah, the big toe.

That little thing you barely think about until suddenly it’s screaming every time your foot hits the ground.

Trust me, when that toe’s pissed off, it doesn’t matter how strong your legs are—you’re not running anywhere.

I’ve seen runners limp home from a 5-miler like they just finished an ultramarathon. Why? That dang toe.

So let’s break down why that toe matters so much, what causes it to hurt after running, and what you can do to get back on the road without flinching every step.

Why the Big Toe Packs a Punch 

Here’s what most runners don’t realize: your big toe—specifically the joint at its base—is a major player in every single stride.

It’s not just there for balance. That joint, called the metatarsophalangeal (MTP) joint, does some heavy lifting.

During the push-off part of your stride, that joint takes on 40–50% of your body weight when walking.

Now crank that up when you’re running—you’re talking 2 to 3 times your body weight smashing down on that little joint every step.

That’s a lot of load. And when something goes wrong there—stiffness, pain, swelling—it messes with your whole running form.

Your big toe works like a lever during toe-off.

It flexes, helps you launch forward, and keeps your arch stable.

It even helps control pronation—so if it’s not doing its job, the rest of your body starts overcompensating.

And guess what? That’s how you end up with ankle tweaks, knee issues, or that familiar runner’s nightmare: plantar fasciitis.

Try to “run through it”? You’re asking for trouble.

I’ve coached plenty of folks who ignored a nagging toe pain only to end up with a full-blown gait change—and then boom: knee pain, hip pain, the works.

It’s more common than you’d think. Studies estimate around 5% of running injuries hit that big toe joint.

Doesn’t sound like much, but when it hits you? It’s gonna stop you in your tracks.

Climbing stairs hurts, walking barefoot hurts… everything hurts.

Why the Big Toe Gets Wrecked in the First Place

Let’s talk shop: anatomy.

Your big toe (also known as the hallux) has two joints.

The little one near the tip and the main player—the first MTP joint at the base.

That MTP joint connects your toe to the first long metatarsal in your forefoot.

It’s small, but it’s the hinge that lets you roll through and explode off the ground.

You need about 65 degrees of upward bend (called dorsiflexion) in that joint to run smoothly.

Less than that? And your stride starts to fall apart. You’ll feel stiff, awkward, maybe even pain when you push off.

And running? It hammers that joint. Every stride loads it over and over again.

Your weight rolls from the outside of your foot inward, right through the ball, then up and out through the big toe as you toe-off.

That motion is constant.

And it puts your big toe under serious pressure.

If the MTP joint is inflamed, swollen, or just plain stiff, you’ll know.

It’s that sharp sting during push-off or the dull throb after your run. That’s your body saying: “Yo, something’s not right here.”

And once that pain kicks in, everything shifts. You start favoring the outside of your foot.

That messes with your balance and can cause stress elsewhere—ankles, shins, even up to your hips and back.

And this isn’t just opinion. Studies show that when athletes’ forefoot and toe joints were immobilized, their jump distance and power dropped fast—especially in horizontal jumps.

Translation: when your big toe doesn’t work, you lose power. You lose speed. Your performance tanks.

Big Toe Pain While Running? Here’s What Might Be Going On

I can think of a bunch of reasons your big toe might be screaming at you—some are wear-and-tear over time, others come out of nowhere.

Let’s break down the top culprits I’ve seen in my own training and from coaching hundreds of runners.

1. Hallux Rigidus: The “Stiff Big Toe” That Sneaks Up On You

Ever feel like your big toe’s rusted shut? That might be hallux rigidus.

It’s basically arthritis of the big toe joint (specifically, the MTP joint if you’re into names).

Over time, the cartilage wears down, bone starts grinding, and suddenly your toe doesn’t want to bend when you toe-off. That’s bad news for runners.

This thing’s super common—second only to bunions in the toe-pain game, especially as we get older.

You’ll feel it during the push-off in your stride.

It’s that stiff, jamming pain right at the base of the toe, sometimes with a bony bump popping up like an unwelcome house guest.

I’ve coached runners who developed this from high mileage, old trauma (like cracking their toe on furniture), or just years of biomechanical stress.

Early on, it’s called hallux limitus—you’ve still got some movement. But left unchecked, it can lock up like a rusty hinge.

Here are the symptoms to watch for:

  • Pain and stiffness in the big toe when running or walking
  • Trouble bending the toe upward
  • Swelling or a visible bump at the joint
  • Pain after long runs or hilly terrain
  • A grinding or “crunchy” feeling in the joint

What to do about it:

First off, you can’t ignore this. If you catch it early, you can manage it and stay running.

Start with the basics—ice after runs, some NSAIDs for pain, and toe mobility drills to loosen up the joint.

Gear is your friend here. Go for stiff-soled shoes with a wide toe box (cramped shoes will make it worse).

Some runners swear by carbon-fiber plates or orthotics that support the toe and reduce bend during push-off.

I knew of runners who completed marathons with hallux rigidus just by adjusting their footwear—seriously.

Cortisone shots can help knock down inflammation if it’s flaring. But if the pain keeps growing and your range of motion disappears, get it checked.

Doctors might suggest shaving bone spurs (cheilectomy), fusing the joint, or even putting in an implant.

Yes, fusion sounds scary, but people do still run with it—just with a different feel.

2. Ingrown Toenails: Small Nail, Big Pain

Now let’s talk about a less dramatic but seriously annoying toe issue—ingrown toenails.

Not the most hardcore-sounding overuse injury, but if you’ve had one, you know how nasty it gets fast.

Basically, when your nail starts growing into the skin around it (usually the edge of your big toe), it creates a mini war zone—pain, swelling, maybe even pus if it gets infected.

And guess what? Runners are prime targets. Why? Two words: tight shoes.

Here are the symptoms to watch out for:

  • Pain and pressure on the side of the nail
  • Redness, swelling, and tenderness
  • Yellowish drainage or pus if it’s infected
  • Sharp, stabbing pain when your shoe hits just right

What to do:

Early-stage ingrown? Soak it in warm water with Epsom salts.

Keep it clean, dry, and let your toe breathe—open-toed shoes are great for a day or two.

If you’re gentle, you can try to lift the nail edge a bit, but don’t go full bathroom surgeon. I’ve seen more damage than fixes from DIY toe ops.

Topical antibiotic cream helps, and roomy shoes are a must until it calms down.

If it doesn’t improve in a few days or you see signs of infection spreading, see a doc. They can numb it, snip the bad part, and boom—relief.

Recurring issue? There’s a quick fix where they zap part of the nail matrix so that corner doesn’t grow back.

Quick and clean, especially if you’re prone to these mid-training cycle.

How to Prevent

Let me tell you—there’s nothing glamorous about limping off a long run because your toenail decided to go rogue.

Preventing this stuff? It’s basic, but essential.

  • Trim your toenails straight across. Don’t go too short, and don’t round the edges like you’re prepping for a spa day.
  • Make sure your shoes give you enough space—at least a thumb’s width in the toe box.
  • If your nails are tapping the end of the shoe every step, you’re one long run away from bruises, blood, or worse—an ingrown nail.
  • If a shoe has a seam pressing into your nail bed? Ditch it. That thing’s a saboteur.

Some runners even file down their nails before a race.

I’ve done it—just a light smoothing to kill off any rough edge that might start slicing skin at mile 18.

And don’t forget: dry feet are happy feet.

Moisture-wicking socks are a game-changer here. Keep the swamp out of your shoes, and you’ll reduce soft skin that nails love to burrow into.

3. Blisters: The Tiny Monsters That Can Wreck Your Stride

Blisters don’t get the respect they deserve—until you’ve had one pop mid-race and ended up limping for 10 miles.

These little fluid-filled demons usually show up on your toes: tops, tips, between them.

And while they’re not deep injuries, they sure can feel like it when you’re out there grinding.

Let me tell more about them.

Blisters are all about friction plus moisture.

Your skin rubs, gets irritated, then heat and sweat do their thing, and boom—your toe looks like it’s growing a second knuckle.

Shoes too tight? Expect pressure blisters.

Too loose? Your foot’s sliding all over, and friction goes wild.

Add in seams from socks or bunching fabric, and it’s a perfect storm.

Long runs are blister factories—your feet swell, everything gets damp, and the miles just keep coming.

How to Handle It

If you feel a hotspot while running, stop and handle it. Slap on a blister bandage, a bit of tape, or rub some lube on it.

Don’t wait.

Got a full blister already? Don’t pop it unless it’s killing your stride—especially if it’s not in a spot that’s taking weight.

The fluid inside protects the skin. But if you do drain it, use a sterile needle, keep the skin intact, and cover it with something padded (moleskin donuts work wonders).

And keep it clean. A blister’s bad. An infected one is worse.

Stop Blisters Before They Start

Look, you can’t always prevent every blister. But you can stack the odds in your favor.

Here’s what I’d recommend you to do:

  • Shoes that fit right: Not too tight. Not too loose. You want toe room but no foot sloshing around. Wide toe box shoes can be game-changers if your toes always get beat up.
  • Moisture-wicking socks: Say goodbye to cotton. Grab synthetic or wool blends that pull sweat away. Some folks love toe socks (like Injinji) because they cut down skin-on-skin friction. The right gear matters.
  • Lube up: A little petroleum jelly or BodyGlide between the toes before a long run can save your skin.
  • Powder works too: Prefer dry over slick? Toss in some foot powder before the run.
  • Lace ‘em smart: Lacing can create or relieve pressure. Try different techniques—like skipping an eyelet or heel locking—to dial in your fit and stop sliding.
  • Ease into new shoes: Never take brand-new kicks on a 20-miler. Your skin needs time to toughen up. Break ‘em in easy.

Even with all the prep, blisters still happen sometimes. But don’t be a hero. If your foot’s talking, listen. A blister kit in your vest or pocket can save a race. One minute of care now is better than a week off nursing a nasty wound later.

4. Plantar Fasciitis: When Heel Pain Sneaks Into Your Toe

Let me guess—you’ve got pain near your heel or maybe under your arch, and somehow your big toe’s getting in on the misery too.

Weird, right? That’s plantar fasciitis for you. It’s known for heel pain, but it can sneak up and mess with your toes too—especially the big guy.

Why It’s Not Just a Heel Problem

The plantar fascia is this tough band of tissue that runs from your heel to the base of your toes.

So yeah, it starts in the heel, but it ends in the forefoot.

When it gets tight or pissed off, it can pull on everything it’s connected to—including the base of your big toe.

I’ve had runners tell me their heel feels like it’s getting stabbed first thing in the morning… and then later their big toe feels stiff or sore during push-off.

Totally checks out.

When that fascia’s inflamed, it limits the flex in your foot.

And guess what? Your big toe is supposed to bend up when you push off—part of this cool thing called the windlass mechanism.

When that system’s outta whack, toe pain’s not far behind.

How It Shows Up in Runners

Plantar fasciitis is classic overuse.

Usually hits runners who’ve ramped up miles too fast, or who have either flat feet or high arches—basically anyone with funky foot mechanics.

Here are the symptoms:

  • Sharp, stabbing pain in the heel or arch when you first get out of bed
  • Pain when standing up after sitting for a while
  • Hurts like hell, then loosens up… only to flare again after your run

And here’s the kicker: you’ll probably start changing your stride to avoid the pain—maybe skipping full toe-off or landing weird.

That ends up dumping more pressure on your big toe and the forefoot. Vicious cycle.

How to Deal With It

You need to be patient. Like… frustratingly patient.

  • Rest: No running while it’s flared up. Sorry, no workaround here. Running through it only rips up those tiny fascia fibers more.
  • Ice: Hit it after activity or first thing in the morning. A frozen water bottle rolled under the arch = simple and effective.
  • Stretch like a boss: Calf stretches, Achilles mobility, and plantar fascia stretches. Pull those toes back with a towel or band.
  • Support your feet: Shoes with good arch support, orthotics if needed. Taping or compression sleeves can help.
  • Night splints: Goofy-looking, but they stop the fascia from tightening overnight.
  • Toe mobility: If your big toe feels stiff, gently move it back and forth to keep it from locking.

Cross-train with cycling, swimming, or elliptical—low-impact stuff that doesn’t tear up your fascia.

5. Stress Fractures: The Sneaky Break That Can Ruin Your Season

This one’s a silent killer, especially for mileage junkies.

A stress fracture isn’t your typical snapped bone—it’s a slow-burn crack that builds up from too much pounding, too fast, with too little rest.

What Causes It?

Simple: too much, too soon. You spike mileage or intensity, and your bones can’t keep up.

Add low bone density, bad shoes, or constant pavement pounding, and you’re rolling the dice.

Most stress fractures hit the metatarsals, but the big toe can get cracked too—especially if you’ve got something like hallux rigidus that forces the joint to take more heat.

The Pain is Real

How you know it’s trouble:

  • Sharp, pinpoint pain in your forefoot or toe (not dull or achy)
  • Worse the longer you run—not better
  • Might throb at night or ache while walking
  • Swelling or bruising
  • Press the spot and it lights up like a warning sign

The Only Cure: Rest

You can’t grind through this one. Bones need time.

  • Stop running the second you suspect a stress fracture
  • See a doc: X-rays might miss early cracks, but MRIs catch them
  • 6–8 weeks off is typical (boot or crutches if bad)
  • RICE protocol: Rest, Ice, Compression, Elevation
  • Pain meds: Acetaminophen is safer than NSAIDs for healing bones

Light cross-training may be allowed later—if your doc clears it. Don’t get fooled if it “feels better” early. Stress fractures fake you out around week 4.

When You Come Back: Don’t Be Dumb

Ease in slowly.

  • Get fresh shoes with more cushion
  • Check for overpronation and consider orthotics
  • Audit your training: mileage spikes, intensity, or surfaces that caused it

When It’s Not Just “Runner Problems”: Less Common but Serious Big Toe Pain Culprits

Most toe pain in runners comes from the ones I mentioned before—blisters, bunions, stiff joints, tendon issues.

But sometimes it’s deeper and more stubborn. If your big toe keeps acting up despite rest, one of these culprits might be in play.

1. Turf Toe: Not Just a Football Thing

Turf toe is a ligament sprain at the MTP joint from the toe cranking upwards too hard. S

printing uphill, aggressive push-off, awkward landing—it happens.

How you know:

  • Swelling fast
  • Stiffness
  • Pain bending the toe

Treatment: Rest, ice, stiff-soled shoes. Severe cases? You’re benched for weeks.

2. Sesamoiditis: The Deep Ache Under the Toe

Under the big toe joint sit two tiny sesamoid bones. They act like pulleys for tendons. Overload them (especially with forefoot running), and they get inflamed.

How it feels:

  • Deep ache under the ball of the foot
  • Barefoot walking = brutal
  • Easily confused with a stress fracture

Fix: Rest it, pad with doughnut cushions, stiff shoes, or even a boot if bad. Ignore it? You risk a sesamoid fracture.

3. Gout: The Big Toe on Fire

If your big toe wakes up swollen, red-hot, and untouchably painful—it might be gout.

Not caused by running, but it’ll stop you in your tracks.

What it is: Arthritis triggered by uric acid crystals in the joint (classic spot = big toe).

Triggers: Dehydration, red meat, alcohol, certain meds.

Fix: See a doc. Meds plus hydration usually calm it down. Once it settles, you can ease back into running.

4. Morton’s Neuroma: That Fireball Feeling in the Forefoot

Okay, this one’s a curveball—it’s not in the big toe, technically, but it can send pain shooting across your forefoot like wildfire.

Morton’s neuroma is a pinched nerve between the metatarsals—most often between the 3rd and 4th toes.

Pain feels sharp, electric, sometimes like there’s a rock in your shoe. Tight shoes make it worse (classic).

If your toe pain feels more like burning or tingling across the forefoot, this might be it.

Fix? Go wide with your shoes, use metatarsal pads to give the nerve room, and in stubborn cases, you may need injections or surgery. Don’t ignore that “fire in the foot” feeling.

5. Capsulitis: The Joint Capsule Gone Rogue

If your toe joint feels sore on top or underneath, and it’s a little swollen or wobbly, capsulitis might be behind it.

It’s inflammation of the joint capsule—basically, the tissue sleeve that holds things together.

Usually from overuse or trauma (stubbing your toe mid-run, anyone?).

It often tags along with turf toe or limited big toe motion (hallux limitus).

Best fix? Rest, ice, maybe some tape to stabilize it. Pushing through the pain just drags out recovery.

6. Bunions: The Side Bump Saga

You know this one—the classic bony bump on the inside of your foot where the big toe drifts toward its neighbor.

Bunions aren’t caused by running, but they sure hate a tight shoe and high mileage.

They limit toe mobility, lead to that nasty hallux limitus/rigidus stuff, and straight-up hurt when jammed into snug shoes.

Relief tools: Toe spacers, bunion pads, and wide toe boxes help a ton. Severe cases? Surgery’s the fix—but lots of runners manage them fine with a smart setup.

7. Rheumatoid Arthritis (RA): Bigger Than Just Your Toe

RA’s a different beast. It’s an autoimmune deal that attacks your joints across the board.

If both big toes hurt, and your fingers or knees ache too, this might be what you’re dealing with.

It’s not just a foot thing—it’s full-body. You’ll need a rheumatologist to help you manage meds, and your running plan will have to flex with how your joints feel.

But yeah, you can still run—with guidance.

8. Raynaud’s: The Cold Foot Mystery

Ever run in cold weather and your toes go ghostly white, numb, then turn bright red and feel like they’re on fire?

That’s Raynaud’s.

It’s a blood flow issue, not an injury, but it hurts like hell in winter runs.

Here’s what helps:

  • Thick socks
  • Windproof layers
  • Slow warm-ups

Some folks even need meds to deal with it if it’s chronic.

Respect the Small Stuff

The simple stuff works: Clip your toenails, pick shoes that let your toes spread out, and do those weird little toe lifts and towel scrunches.

They matter. Take 5 minutes a day to take care of the feet that carry you through every mile.

Toe pain isn’t something to be tough about. It’s something to fix. Be the runner who trains hard, but also listens when their body whispers instead of waiting for it to scream.

Your big toe may be tiny, but it’s a beast when it comes to pushing you forward. Give it the credit it deserves. Treat it right and it’ll keep you charging down trails, crushing PRs, and toeing the start line (pun intended) for years to come.

So Here’s Your Challenge

👉 Feel something off in your toe? Don’t ignore it.
👉 Been putting off foot exercises? Start today.
👉 Still running in tight shoes? Time for an upgrade.

One little toe. One big difference.

Run smart. Run tough. But above all — run pain-free.

And give those hard-working toes a little thank-you tap after every run. They’ve earned it.

Got toe pain stories or fixes that helped you? Drop ’em in the comments — let’s keep each other running strong, one step at a time.

How to Run at Night Safely: Rules, Gear, and Real-World Tips

running at night

Let’s be real—running at night sounds sketchy to a lot of people.

Quiet streets, long shadows, and that voice in your head that says, “Hey, maybe don’t.”

I get it.

But lace up after sunset a few times and you’ll notice something different: the world dials down.

Traffic fades, heat backs off, and suddenly it’s just you, your breath, and a ribbon of calm pavement.

For summer runners, it’s not weird—it’s survival.

Now, I’m not here to sell you moonlight and vibes.

Night running has risks.

Low visibility.

Distracted drivers.

The occasional sketchy corner you don’t see coming.

You can’t outrun a bad decision.

But here’s the good news: with a smart plan, the right gear, and a little street sense, running after dark can be both safe and ridiculously rewarding.

In this guide, we’ll cut the fluff and get practical—routes that make sense, habits that keep you sharp, and the small changes that make a big difference.

By the end, you’ll know exactly how to own the night—or decide it’s not your move yet. Either way, you’ll run smarter. Let’s break it down.

Always Have a Plan—And Tell Someone 

Night running rule #1: Don’t just vanish into the dark. Plan your route. Know how far you’re going, and how long it should take.

Then—this part’s key—tell someone. Seriously. Text your partner, roommate, your mom, whoever. “I’m running three loops around Elm Street. Should be back by 9.” Boom. Takes 10 seconds.

This isn’t being dramatic—it’s just smart backup.

What if you twist an ankle? What if your phone dies and you need help?

If someone knows your route and when to expect you, they can step in if needed.

That tiny heads-up can be the thing that gets you out of a bad spot.

Even seasoned night runners I know still do this. Me? I shoot a quick text before I head out. It’s habit now. It should be for you too.

Situational Awareness: The Golden Rule

If there’s one thing you remember, make it this: always know what’s going on around you.

I don’t care if it’s a sunny afternoon or pitch black out—situational awareness is your #1 defense out there.

At night though? It’s even more important.

You’ve got less light, which means more chances to miss stuff that can trip you up—or worse.

Stay Locked In

Running can be meditative—trust me, I get it. But zoning out during a night run? That’s asking for trouble. You’ve gotta be tuned in like a hawk.

Scan ahead for obstacles, movement, changes in terrain. Peek left, glance right, and yep, every so often throw a quick look over your shoulder. Not because you’re paranoid—but because you’re smart.

Listen for cars, bike bells, footsteps, weird noises. Use every sense you’ve got.

A safety coach once told me: “Stay alert and use all your senses.” Couldn’t have said it better. Think of it like this: every so often, ask yourself—

  • What’s around me?
  • What’s ahead?
  • What’s behind?

Make it a habit, and it’ll feel natural in no time.

Choose Your Route Like a Pro

Where you run matters—a lot more at night than during the day.

I know that quiet forest trail or sleepy back alley might feel peaceful. Don’t do it. Peaceful doesn’t mean safe.

Stick to areas that are well-lit and active. I’m talkin’ neighborhoods with dog walkers, main roads with streetlights, parks with regular foot traffic.

Sure, it might be less scenic, but you want people around. If something goes sideways, you want someone close enough to hear you call out.

Avoid the dead zones—those are streets, trails, or parts of town where no one’s around.

I’ve even had runners do loops around the same bright block five times just to stay visible. Not thrilling, but way safer.

You know your city. If there’s a spot that gives you the creeps, skip it. If you wouldn’t walk there at night, don’t run there either. Period.

Keep Your Head on a Swivel

Look, when you’re running at night, your number one job is to stay sharp.

You don’t need to be paranoid, but you do need to be alert. I always tell my runners: run like you’re driving — eyes up, tuned in, ready to react.

Let’s talk real for a sec. You ever pass someone and just feel off? Maybe they’re loitering, maybe they’re giving weird vibes.

Trust that gut. It’s there for a reason. I’ve detoured into gas stations or crossed the street mid-run more times than I can count — and I’ve never regretted it.

Corners, bushes, alleys, parked cars — those are blind spots. Treat them like hazards. Give ‘em space when you can. And if you hear footsteps behind you that aren’t your own? Don’t ignore it. Turn, look, assess.

Most of the time, it’s just another runner or someone out walking. But if it doesn’t feel right, slow down, let them pass, or stop near a lit-up spot like a storefront. I’ve coached women who’ve made full loops in busy areas just to be sure someone wasn’t following them — and you know what? That’s not overreacting. That’s running smart.

Like I always say: run defensively, not trustingly.

Watch the Ground and the Road

Heads up, because the ground isn’t always your friend either. Night running isn’t just about staying aware of people — it’s about spotting danger before you face-plant into it.

You’d be shocked how many runners go down because of a stupid sidewalk crack they couldn’t see. I’ve had buddies wipe out on wet leaves, curbs, even a sneaky chunk of ice hiding in the dark. At night, your eyes are limited, so your brain needs to scan ahead like a radar.

Curbs, roots, trash, broken glass, potholes — stay alert or get hurt.

And traffic? Don’t even get me started.

Cars are deadly when drivers aren’t looking — and at night, you can’t assume they see you.

Make eye contact at every crossing. Seriously. I wave my hands, nod my head, whatever it takes. And keep your ears open — engines, the whoosh of tires, even a bike or e-scooter creeping up on you. Assume drivers don’t see you until they prove otherwise.

No Headphones at Night

Alright, I know some of you are about to get mad at me, but I’m saying it anyway: no headphones at night.

I love running with music too — gets me fired up. But night runs are a whole different beast.

Out there in the dark, your hearing becomes your superpower. Don’t take it away from yourself.

Let me break it down.

  • You hear danger before you see it.
  • That revving engine?
  • Those creeping footsteps?
  • That bark from a dog off-leash?

All of it is lost if you’re blasting your hype playlist.

And please don’t take my word for it.

A study from the University of Maryland School of Medicine showed that pedestrian injuries and deaths tripled between 2004 and 2011 when headphones were involved.

Worse? Nearly 70% of those were fatal. Why? They didn’t hear the warning in time — the horn, the train, the person yelling. They were zoned out, earbuds in, and paid the price.

This isn’t fear-mongering. This is real-life stuff. I’ve seen runners nearly get flattened because they couldn’t hear a car coming up behind them.

At night, your ears are your backup lights. Don’t disable them.

Keep One Ear Open – Literally

Look, I get it—sometimes you need your music. That playlist pumps you up.

That podcast distracts you from the suck of mile 4. I’ve been there. But if you’re running at night, it’s time for some tough love: safety beats sound. Every time.

If you absolutely can’t ditch the audio, then here’s how to not turn yourself into a human speed bump:

  • Use one earbud only — leave the other ear open to the world.
  • Keep your volume stupid low. You should still be able to hear a squirrel sneeze on the sidewalk.
  • Want an upgrade? Try bone-conduction headphones. They sit in front of your ears, not in them, so your ear canals stay open.
  • Go old-school: play tunes from your phone speaker or clip-on. The sound quality stinks, but at least your ears stay alert.

Real talk: at night, no headphones is still your safest bet. I don’t care how juicy that podcast is—if it means missing the screech of tires, it’s not worth it.

One study even called headphone-wearing runners “sensory deprived” — they literally couldn’t hear horns or people yelling. That’s terrifying. Don’t be that runner.

You vs. silence at night might feel a little weird at first — but that tension? That awareness? It could be the thing that keeps you sharp and gets you home.

It’s Not Just About You

Here’s something most runners don’t think about: headphones aren’t just risky for you—they’re rough on everyone else too.

In some places, it’s even illegal to wear headphones while walking or running on roads. Not joking. Just like biking with AirPods in—it’s banned in a lot of areas for good reason.

Even if it’s not against the law where you live, think about this:

  • What if a driver honks or yells a warning and you don’t hear it?
  • What if your buddy waiting at home gets that gut-punch call because you didn’t notice the car turning?
  • Or a cyclist shouts, “On your left!” and you don’t move — boom, collision.

We’re not in a vacuum out there. Other people matter. Your safety ripples out. So yeah, keep those ears open. For your sake — and theirs.

Be Traffic Smart (Or Be Roadkill)

This one hits close to home. I’ve had too many close calls with cars to sugarcoat it. At night, traffic is your biggest enemy—especially if you’re not doing the basics to keep yourself seen and safe.

Let’s go over what every runner needs burned into their brain:

Run Against Traffic – No Exceptions

This is rule #1. Non-negotiable. You should always run facing oncoming cars.

That way, you see them coming, and they see you.

Running with traffic is like running with a blindfold. Seriously.

One study in Finland found that pedestrian accidents dropped by 77% when people walked or ran facing traffic instead of with it. That’s not a stat, that’s a no-brainer.

Tiny exception: if you hit a crazy blind corner or a hill where neither you nor a driver can see each other until it’s too late, switch sides for a second, then jump back to the safe side ASAP.

But 99% of the time? Left side. Facing cars. Every run.

Follow the Dang Rules

Yes, even at night. Just because the roads look empty doesn’t mean you get to play Frogger.

  • Stop at red lights.
  • Use crosswalks.
  • Make eye contact with drivers.

It takes two seconds to make sure that car at the stop sign sees you. Don’t assume they do. Some of these folks are texting, half-asleep, or just plain clueless.

One experienced runner told me:
“I run like every driver is texting with a burrito in one hand.”

That mindset? Lifesaver.

Be a Human Glow Stick

We’ll dig deeper into gear later, but here’s the deal: you need to be lit up like a Christmas tree when you’re running at night.

That means:

  • Reflective gear: Vest, shirt, shorts — whatever glows.
  • Lights: Headlamp, clip-on blinking LEDs, even something on your shoes.
  • Placement matters: Reflectors on your ankles or wrists catch the eye fast because they move. That’s called biological motion, and research shows drivers recognize it way quicker than static reflectors.

Remember: nearly 3 out of 4 pedestrian deaths happen in low-light conditions. That’s not a scare tactic — that’s real.

Don’t Run Alone If You Don’t Have To

Yeah, yeah—I know. “I like the solitude.” Me too. But if it’s dark out and you’re feeling even a little uneasy, grab a buddy.

There’s real strength in numbers, and it could save your hide.

Most creeps and criminals don’t want a scene. They want easy targets. And two runners? That’s twice the trouble for them. I’ve heard from plenty of women I coach—just having one friend by their side makes all the difference.

Doesn’t even have to be a person. Bring your dog. No one wants to mess with someone getting towed by a barking, 60-pound fur missile.

And it’s not just about weirdos. Two sets of eyes and ears mean you’re way more likely to catch stuff like potholes, bikers with no lights, or that rogue scooter left in the middle of the sidewalk. One of you zones out? The other’s got your back.

Carry Your ID—Seriously

Alright, let’s talk about something nobody wants to think about… but we need to: ID.

It might not seem like a big deal, but carrying identification on a run—especially in the dark—is one of those things that separates smart runners from lucky ones. Because if luck runs out, ID speaks when you can’t.

Imagine this: You take a hard fall, crack your head, and now you’re lying there not knowing your own name. Scary? Hell yeah. But it happens. EMTs deal with this more often than you’d think.

I saw this post from an EMT on Reddit once—they were practically begging runners: “Bring some form of ID or ICE (In Case of Emergency) info when you head out… It’s a small thing that could save your life.”

What to Carry

  • Driver’s license or state ID card — slip it in your belt, pocket, or phone case.
  • A copy of your ID if you’re worried about losing the real one.
  • Road ID bracelet or tag — waterproof, lightweight, engraved with your name, emergency contacts, and key medical info.
  • Dog tags or an ID card under your insole (less ideal, since rescuers might not find it fast).

I’ve been using a Road ID bracelet for years—it never leaves my shoe.

What to Include

  • Name (obvious, but essential).
  • At least one emergency contact—someone who’ll pick up fast.
  • Medical info: asthma, diabetes, heart issues, allergies.

Real story: One runner blacked out mid-run, concussed and disoriented. A stranger saw the ID bracelet and called the spouse, and the medics got a heads-up on the runner’s peanut allergy. Fast action. That tag made it happen.

Keep It Secure

Whatever ID you choose, lock it down.

  • Zip it in a pocket that won’t bounce open.
  • Strap it on your wrist or shoe.
  • Add ICE info to your phone lock screen as backup (but don’t rely only on tech—phones break, tags don’t).

It’s Not Just for Emergencies

Even for the small stuff, ID is handy.

  • Sprain an ankle and limp into a store asking for help? You’ll need ID.
  • Random checkpoint at a night race? Covered.
  • Unexpected police chat? Covered.

It’s your “get home safe” card.

Think of ID like your seatbelt. Most runs, you’ll never need it. But on the one you do… you’ll be damn glad you had it.

Bring Your Phone — Seriously

Some runners like to “disconnect” on their runs — and hey, I get that

. But when it’s dark out and you’re running solo? That’s not the time to go off-grid.

Your phone isn’t just a distraction machine — it’s your lifeline.

1. Emergency Calls

Let’s start with the obvious. Twist an ankle? Feel off? See someone else who’s in trouble? You can hit 911 and get help fast.

And modern phones? They’re smart enough that even if you don’t know where you are, 911 can often find you using GPS. That’s huge, especially on unfamiliar routes.

2. Stay Connected

Even just having your phone makes you more trackable. I always tell my runners: “Leave word” — let someone know you’re out. But that only helps if your phone’s on and reachable.

  • Strava Beacon, Garmin LiveTrack, Road iD → let someone follow you live.
  • Find My iPhone or Google Location Share → simple backups.

If you stop moving unexpectedly, your contact can check in or send help.

One buddy of mine tripped hard and was down for a bit. His wife noticed on the tracker, called, and ended up coming to get him. Could’ve been way worse if he’d gone phoneless.

3. Ride, Map, Weather – All at Your Fingertips

Sometimes things just feel off. Maybe someone’s giving you weird vibes. Maybe the trail’s darker than you remembered. With a phone, you’ve got options:

  • Call a ride.
  • Text a friend.
  • Pull up your maps and find your way back.

And don’t underestimate the weather. Nighttime can get dicey — rain, lightning, wind. You can check radar or arrange a pickup instead of toughing it out and risking injury.

Your phone gives you flexibility. Use it.

4. How to Carry It Without Losing Your Mind

Nobody wants a phone flopping around like a dead fish while they run. Good news: you’ve got options.

  • Armband: Wraps around your bicep. Good ones fit even big phones and let you tap the screen through the cover.
  • Running Belt (FlipBelt, SPIbelt): Snug, sits on your waist, barely moves. My go-to on race day.
  • Built-in Pockets (shorts/tights): Zippered waistband or thigh pockets keep it tight. That back-waistband pocket? Gold.
  • Handheld Grip: Less ideal for long runs, but some runners dig it. Just make sure there’s a strap so you’re not death-clutching the phone.

Bottom line: pick what’s comfortable and secure. After a mile or two, you’ll forget it’s there.

Use Tech Like a Running Buddy That’s Got Your Back

Look, I’m not huge on tech for tech’s sake — I’d rather focus on getting the miles in.

But when it comes to staying safe, especially when you’re out there alone or running in the dark, having the right app in your corner can make all the difference.

Think of it like a virtual running buddy who’s watching your back.

There’s a ton of apps and wearables out there that’ll track your run in real time, alert your crew if something goes sideways, and even let you fire off an SOS without fumbling for your phone.

If you’re running solo or logging miles after sunset, this stuff can bring some serious peace of mind.

Let’s break it down.

Let Someone Track You Live (And No, It’s Not Creepy)

Some of the best run apps have built-in live tracking — and no, I don’t mean for Strava kudos.

I’m talking about giving your loved ones a way to follow your route in case you don’t make it back on time or take a detour into the unknown.

  • Strava Beacon: Paid feature. Sends a live GPS link to up to 3 contacts. Solid for mountain runs or early mornings.
  • Garmin LiveTrack: Syncs with your watch, emails/texts a link every time you start a run. Some models even detect falls.
  • Road iD (eCrumb): Free app. Shares your live route + SOS button. Auto-alerts contacts if you stop moving and don’t respond.
  • Other Apps (Nike Run Club, Runkeeper, etc.): Many now offer live tracking or emergency contact pairing.

Quick tip: Make sure your “safety team” knows how the app works. Should they call you first? Or send help if they get an alert? Clarity matters.

Safety-First Apps (Not Just for Runners, But Super Useful)

There are also apps built strictly for personal safety. Not running-specific, but powerful when something feels off.

  • bSafe: Full arsenal — SOS button, fake calls, live video, even voice-activated triggers.
  • One Scream: Designed for women. If you scream, the app detects it and alerts your contacts with location.
  • Kitestring: Old-school SMS check-in. No smartphone needed. Text it when you start and finish. If you don’t check in, it pings your people.
  • Others worth checking: SafeSteps, HollieGuard, Noonlight (panic button that calls 911 with GPS).

Pro move: Test your app before relying on it. Do a dry run, drain some battery, and see how it behaves.

Wearables Can Be Lifesavers — Literally

If you’re rocking a smartwatch or tracker, check if it has built-in safety features. Some of these tools have already saved lives.

  • Apple Watch SOS: Hold the side button to call emergency services + send GPS.
  • Fall Detection (Apple & Garmin): If you fall hard and don’t respond, it auto-alerts contacts (and sometimes 911).
  • Samsung Phones: Triple-press power button to send an SOS.

Real talk: If your watch has these features, activate them. Better to have it and not need it.

Panic Buttons: Physical or Digital

Some apps have a digital panic button (like Road iD’s SOS slider).

But you can also go physical — Run Angel clips on your gear, blasts an alarm, and alerts contacts when triggered. Handy if you don’t like carrying your phone.

Pick What Fits — Then Make a Plan

There’s no one-size-fits-all here. Maybe you prefer Kitestring’s simplicity. Maybe you want bSafe’s full feature set. Whatever you go with, make sure:

  • You’ve tested it on a run.
  • Your contacts know what to do if they get an alert.
  • It won’t kill your battery or fail where you run.

Bad signal? Skip live tracking — use timer-based check-ins instead.

And yes, privacy matters. Most apps send private links only to your chosen people. Just don’t blast your live location to public feeds — that’s asking for trouble.

These Tools Have Already Saved Lives

This isn’t theory — it’s real.

  • A woman collapsed during a run. Her Apple Watch fall detection got help before anyone nearby noticed.
  • Another runner, being followed, quietly hit bSafe’s SOS. Friends got the alert, heard what was happening, and called police — who arrived in time.

That’s tech doing its job.

Your turn: What safety setup do you use? Got a go-to app or device? Share it — other runners will thank you.

Mix Up Your Routes – Keep ‘Em Guessing

Look, I’m all about routines when it comes to training. But when it comes to safety? Predictability can be your worst enemy — especially if you’re logging miles at night.

Don’t Be Easy to Pin Down

Bad actors love patterns. If someone shady notices that every Tuesday and Thursday at 9PM you’re on the same dark trail… they’ve got a playbook.

One safety expert put it bluntly: “Stalkers look for patterns – break the pattern and you break their game.”

Just changing your start time, direction, or loop can be enough to throw them off.

Safe Doesn’t Mean Boring

Don’t take this as permission to go exploring sketchy alleys. You don’t need to be reckless to be unpredictable.

  • Set up 3–4 safe loops (neighborhood, park, commercial street).
  • Rotate them.
  • Switch direction now and then.
  • Start 15 minutes earlier or later.

Even small shifts keep you safer — and make runs more interesting.

Pull a Decoy Move (If You Ever Get That Feeling…)

Ever get that gut feeling you’re being followed? I have. Rare, but real.

Options:

  • Loop back suddenly.
  • Cut onto another street.
  • Call it and head home.

Still worried? Have a friend shadow your run once. If the same person shows up both times? Not coincidence. Time to call the cops.

Odds are low, but awareness is your ally.

Learn to Read the Field

This is where situational awareness meets runner instinct. You don’t get good at this overnight, but the more present you are, the better you’ll get at spotting when things feel “off.”

Example:

  • Same park, every night. One evening, the lights are out. It’s too quiet. Your brain says, “It’s fine.” Your gut says, “Something’s weird.” Take the long way.
  • Someone’s pacing you for a few blocks. Could be nothing, could be something. Stop and tie your shoe. Turn around. Cut down a side street. Shake ‘em off.

A lot of women runners already do this instinctively. I’ve heard stories of them darting toward porch lights or making sudden turns to ditch a tail. It works.

Survival > Politeness

This one’s especially real for women, who’ve been trained since birth to be “nice” even when they feel unsafe. But guess what?

Predators count on that.

You don’t owe anyone your time, your smile, or your manners when your safety’s at stake.

Cross the street. Yell. Call the police if someone gives you the creeps. One false alarm on record is better than no record at all.

We’ve got instincts for a reason. They’ve kept us alive for thousands of years. Don’t shut them down because you’re worried someone might think you’re “rude.”

Coach’s Call: Quick Instinct Rules

Here’s what I tell all my runners — especially those logging solo miles after dark:

  • Ditch the earbuds if things feel sketchy. You need all your senses.
  • Trust the heebie-jeebies. That weird feeling isn’t random. Act on it.
  • Never apologize for changing your plan mid-run. Safety comes first.
  • Call emergency if needed. That’s not weakness. That’s survival smarts.
  • Report anything weird. Even if nothing “happened.” It might help the next runner.

Night Running: Wrapping It Up Like a True Road Warrior

So, here we are — the final stretch. If you’ve made it this far, you’re clearly thinking hard about lacing up after dark. And good on you.

Because night running? When done right, it’s pure gold.

There’s Something Special About Running After Dark

Let’s be honest — there’s a magic to night running that daylight just can’t touch.

The world slows down. The heat backs off. The chaos fades. It’s just you, your breath, your rhythm… and maybe some stars overhead.

I always tell my runners: “Night runs are for unwinding, not overdoing.” That’s the vibe. It’s therapy with a pulse.

I can’t count how many times I’ve finished a quiet night run, body loose, mind calm, the noise of the day behind me. Then you hit a hot shower, slide into bed, and boom — lights out, literally and figuratively.

Online, I see stories from runners who went out for a midnight jog “just to try it,” and now they’re full-on hooked.

  • One runner in Tokyo said hitting touristy spots at 1 AM felt surreal — peaceful, quiet, no crowds, just them and the city lights.
  • Another knocked out a 12K at 1 in the morning and called it “midnight exploration.”

That’s the kind of stuff that turns skeptics into night owls.

Weighing It All: Is Night Running Right for You?

Is night running “good”? That depends on how you do it.

Upside: less heat, less traffic, less stress, more time, better sleep.
Downside: riskier if you wing it without gear, planning, or telling someone where you are.

Follow the playbook we laid out? Night running can be just as safe as morning runs — sometimes safer.

I know folks who switched entirely to evening runs — even marathoners who train at night to mimic race conditions. Some cities have clubs that only meet after 7 or 8 PM. It’s a whole subculture.

Stay Sharp, Always

Don’t get sloppy.

Like a seatbelt in a car — most times you won’t need it, but you buckle it anyway. Same with night running habits:

  • Check your route.
  • Tell someone your plan.
  • Bring your gear.

Night running is 99% chill — but the 1% is why we prep like pros.

Share the Road, Share the Wisdom

If you’re crushing those night runs and loving it, don’t keep it to yourself.

Invite friends. Share tips. Start a weekly group jog after work.

There’s power in numbers — for safety, motivation, and fun. Plus, the more runners out at night, the more cities take notice. Lighting improves. Drivers get used to seeing reflective blurs cruise by. Everyone wins.

And Sometimes… Don’t Run

Final piece of real talk: it’s okay to skip a night run.

  • Storm rolling in?
  • Streetlights out?
  • Something shady in the area?

Hit pause. No trophy for running through danger. You can run tomorrow. Or hop on the treadmill.

Night running is amazing — but not worth putting yourself in a situation that feels off.

Final Kick: You’ve Got This

You made it through the whole guide — now you’ve got what you need to own the night.

Don’t let fear hold you back. Let preparation give you confidence.

Picture it: you’re gliding through the cool night air, headlamp cutting through the dark, your vest lighting up like a neon sign. You’re calm. You’re strong. You’re doing this.

You finish that run not just alive — but alive.

That’s the feeling.

So go out there and earn it. Stay visible. Stay sharp. Stay strong.

And hey — if you’ve already hit your first night run, let me know. What worked? What spooked you? What made you feel like a badass?

Let’s keep the conversation going. Night runners unite.

Mastering Proper Treadmill Running Form: Tips For Better Technique

How to Run On a Treadmill

Running on a treadmill doesn’t feel natural at first — I get it.

You hop on, press start, and suddenly your form feels stiff, your neck’s tight, and you’re glancing at the screen every five seconds like it’s going to give you permission to stop.

But here’s the truth: a few simple tweaks can turn that awkward machine jog into a smooth, efficient session that actually transfers to outdoor running.

Research backs this up too — studies show that with a slight incline and proper posture, treadmill mechanics can closely mimic outdoor conditions (yep, it’s not just in your head).

Let me walk you through the same form fixes I use with the runners I coach — the ones that helped me go from clunky treadmill strides to feeling fast, light, and pain-free, even during long winter mileage sessions.

You’ll get practical tweaks, relatable stories, and real-runner tips you can use today.

Let’s get into it.

Start With an Athletic Posture 

Before you even touch the “Start” button, take a second to scan your setup from head to toe.

Head & Shoulders

  • Lift your head. Gaze forward. Not at your shoes. Not at the pace screen. Forward.

  • Roll your shoulders back and let them relax — no tension.

When I started out, I used to hunch over and peek at the display every 30 seconds. My neck would be toast after even a short run. Now I imagine scanning the horizon like I’m on a sunrise trail — it naturally fixes the slouch.

Spine & Core

  • Think “tall and active.”

  • Stand upright, lean just slightly from your ankles (not your hips), and keep your spine long — not stiff.

  • Tighten your core like someone’s about to poke your belly. That’s your base.

Back when I ignored this, I’d end treadmill runs with nagging lower-back pain. Once I focused on “running tall,” that pain disappeared. My balance improved too — especially when the belt picked up speed.

Hips & Feet

  • Face your hips straight ahead, not swaying side to side.

  • Keep your feet hip-width apart, toes pointing straight forward.

This keeps your knees tracking well and prevents awkward compensations that can throw off your stride. Too narrow and you’ll feel unstable. Too wide and your form starts leaking energy.

And yes, it’ll feel weird at first. You might catch yourself thinking, “This is too upright.” That’s just your old habits talking. Trust me — give it a few sessions and this new alignment will feel like home.

Don’t Stare at Your Feet. Seriously. Stop That.

This one’s huge — and most runners mess it up.

Where your eyes go, your form follows. Look down too often and you’ll hunch, lose balance, and feel stiff. I’ve coached dozens of runners who constantly drift on the treadmill — and it always comes back to the same bad habit: watching their feet like they’re walking a tightrope.

Fix it:

  • Pick a spot 10–15 feet ahead. Wall sign? Exit light? Picture on the wall? Doesn’t matter.

  • Just look forward — not down. It straightens your spine, lifts your chin, and frees your chest for easier breathing.

It’s how you’d run outside, so mimic that.

Also — if you’re addicted to checking your pace, cover the screen with a towel for part of the run. I do this myself on easy days. You’ll start tuning into your breathing, your stride, your effort — instead of just chasing numbers.

Quick Reset Tip: Every 5–10 minutes, do a “form scan.”

  • Are your hands clenched? Shake them out.

  • Shoulders tight? Drop them.

  • Breathing shallow? Take a slow, deep breath.

Small resets = big returns.

Mimic Your Outdoor Running Form

One of the biggest mistakes I see on treadmills? Treating them like a different sport.

Your running form shouldn’t suddenly go weird just because you’re indoors. The more your treadmill stride mimics your outdoor stride, the better.

Here’s how to get it right.

Use Your Real Stride — Not the Treadmill Shuffle

Run like you’re on the road. That means using your natural stride — not tiny panicked steps or exaggerated lunges just because the belt’s moving underneath you.

I see it all the time: people overthink the treadmill and end up changing everything.

If you usually run with a midfoot strike and moderate stride, stick with that. Don’t let the belt mess with your mechanics. Focus on landing your foot under your hips, not way out in front.

If you reach forward too much, the belt will yank your foot back before you’ve even had a chance to stabilize — and that’s when trouble starts.

I’ve coached runners who lost months to shin pain just from letting the belt dictate their stride. Keep it controlled. Let the treadmill follow your form — not the other way around.

Fix the Overstriding Mess

Overstriding — landing with your foot too far in front — happens outside too, but it’s even more punishing on a treadmill.

One guy I coached joked that he felt like “a drunken circus bear with crap form” when he first came back to treadmill running after years off.

I laughed, but I knew exactly what he meant. Overstriding feels clunky and off. You heel strike hard, the belt yanks your foot back, and your knees take the hit.

The fix?

  • Shorten your stride just slightly.
  • Bump your cadence.
  • Aim to land closer to your midfoot or forefoot — not your heel.

When your foot lands beneath you, the treadmill actually helps push you into the next step, making the whole motion feel smoother.

Add a 1% Incline — Trust Me

Here’s a trick that makes a huge difference: bump the incline up to 1%.

Why? Because that small incline mimics the energy cost of running outdoors.

The Journal of Sports Sciences backs this up — a slight incline compensates for the missing wind resistance and that little assist the belt gives you.

You don’t need to go wild — even 1–2% is enough. Personally, I find 2% is my sweet spot. It makes the run feel “real” — not artificially easy like a flat belt.

It also fires up your calves and glutes more and protects against the downhill-like pounding you’d get from staying at 0%.

Bonus: less repetitive stress on your legs = less chance of shin splints.

Here’s your guide hill treadmill training.

Stand Tall — Ditch the Forward Hunch

You’ve probably heard that a slight forward lean is good for outdoor running. That’s true — from the ankles, with a tall spine.

But on a treadmill, that belt is already doing some of the forward work.

So if you lean too far forward on the ‘mill? You’re just throwing off your balance and straining your back or neck.

Instead, focus on running tall:

  • Chest up

  • Eyes forward

  • Head neutral

Think “proud runner, not slouching zombie.”

Stack your ears over shoulders, shoulders over hips. If you catch yourself hunching or staring at your feet, reset your posture.

Mental Trick: Pretend You’re Outside

I’ll be honest — treadmill running can feel boring.

But here’s something I tell runners I coach: Visualize your favorite outdoor route while you’re on the machine. Seriously.

Close your eyes for a few seconds, picture that path, then sync your form with that memory. You’ll move more naturally — and it’ll snap your brain out of treadmill autopilot.

If something feels off (maybe your strides feel choppy or you’re slamming your heels), slow the pace.

Form > speed. Every time.

Shorten Your Stride 

I know I sound like a broken record but this bears repeating.

Back when I first started running indoors, I didn’t think much about my stride. I just hopped on, hit “start,” and hoped I looked like I knew what I was doing.

But I was overstriding like crazy — basically reaching forward with every step like I was trying to win a long-jump contest.

My knees didn’t appreciate it.

Then I discovered cadence.

Why Cadence Matters

Cadence is just how many steps you take per minute. Most solid runners hit somewhere around 170–180 steps per minute on easy runs.

That number isn’t just for outdoor purists — it applies on the treadmill too. In fact, it’s even more important indoors, where your form can go sideways fast.

Here’s the deal: when you increase your cadence, you automatically take shorter, quicker steps, which keeps you from overstriding.

A study in the Journal of Sports Science showed that this reduces the impact forces on your joints.

Translation? Less stress on your knees and ankles. That’s a big win in my book.

Too slow, and you’re just stomping the belt with every step — basically punching your joints in the face.

Cadence = Less Energy Burned 

Here’s the fun part. Most runners find that when they up their cadence, running actually feels easier.

Less bouncing, less braking, less wasted energy.

How to Actually Fix Your Cadence

This is the part most runners skip — but it’s where the magic happens.

  • Find your current cadence. Count how many times one foot hits the belt in 30 seconds and double it.

  • If you’re below 170, aim to bump it up slowly — just 5% at a time.

  • Use cues. Think: “Quick feet.” Or, pretend the belt is hot and your goal is to barely touch it.

  • Use a playlist or metronome. Look for songs around 170–180 BPM. Let the beat drive your stride.

I tell my runners: Your feet should be popping off the treadmill, not dragging like you’re stuck in glue.

Over a few weeks, your body will adjust. You’ll feel smoother, lighter, and your knees will thank you.

Cadence Also Wakes Up Lazy Muscles

Here’s something most people don’t realize: Running on a treadmill tends to turn off your hamstrings.

The belt does some of the work pulling your leg back. Studies show hamstring activation drops by 10–15% compared to running outside.

What does that mean? If you just cruise without thinking about form, your glutes and hammies might take a nap — leading to muscle imbalances and eventually pain.

A quicker cadence, especially paired with a midfoot strike, helps bring those muscles back into the game.

You’re not just “floating” — you’re working with purpose.

Let Your Arms Do Their Job 

Let’s get honest — if you’ve ever death-gripped the treadmill rails mid-run, you’re not alone.

I’ve been there too. In my early days, especially on steep inclines, I’d hold on like the machine was trying to buck me off.

Here’s the truth: Grabbing the rails wrecks your form. It’s one of the top mistakes I see runners make indoors.

Free Arms = Real Balance

Your arms are designed to swing. That’s what keeps your body balanced as your legs move.

Hold the rails, and you’re locking your upper body, throwing everything off.

You’ll probably lean back or shuffle. Your stride shortens. You end up stiff, awkward, and totally off rhythm.

Instead:

  • Let your arms swing naturally — bent at about 90 degrees
  • Keep your hands loose
  • Move them front to back (not across your body)
  • Stand tall. Let them lead your stride.

You might feel a little shaky at first, but give it a few runs.

Your core and balance will kick in and start doing the real work.

Grabbing the Rails = Cheating

Yup, I said it.

When you hold on, you’re taking weight off your legs and leaning into the machine. My old coach said it perfectly:

“You’re not getting your heart rate up. You’re not burning enough calories.”

Ouch. But true.

Holding on reduces your leg workload, messes with your posture, and cheats your fitness goals. If you’re doing a hard workout, it should feel hard — not supported by your arms.

What to Do If You Feel Wobbly

If you’re holding on because you’re off balance or it feels too fast, lower the speed or incline.

Better to run a little slower hands-free than to go fast while hanging on for dear life.

Rails are there for emergencies — not for every run. Build your stability. It’s part of the training.

Arm Swing 101

Here’s how to dial in arm form:

  • Elbows bent at ~90 degrees
  • Swing from the shoulders
  • Hands near your waist, moving gently back and forth
  • No clenched fists, no crossing your arms across your chest
  • Think: compact and relaxed

Fun fact: a strong backward arm drive actually helps drive your legs. It’s all connected.

Treadmill Mistakes That Wreck Your Running Technique

Let’s cut through the fluff.

If you want to get stronger on the treadmill — not just survive it — then you’ve gotta stop making these common mistakes.

I’ve seen them all, made some myself, and coached runners out of every single one.

Here’s what to watch for, and how to fix it without overthinking.


1. Overstriding Like You’re Chasing a Bus

You’re landing way out in front of your body — heel smashing down, legs fighting the belt.

That’s a recipe for sore joints and a stiff back. You’ll feel like you’re battling the machine instead of flowing with it.

Fix it: Shorten that stride. Pick up your cadence. Think quick, light steps — your foot should land under your hip, not in front. A midfoot strike works best. And hey — if your steps are loud, you’re stomping. Try to sound like a ninja, not an elephant.


2. Hunching Over Like You’re Reading Texts

Staring down at your feet or the treadmill screen? That slouched posture wrecks your neck and shoulders.

I used to finish runs with more neck pain than leg fatigue.

Fix it: Keep your eyes forward, chin neutral, chest open. Pretend a string’s pulling you up from the crown of your head. And do a quick shoulder shrug and drop every now and then to shake out tension. One runner I coached fixed their neck soreness just by lifting their gaze. No massage needed.


3. Clutching the Rails Like You’re on a Rollercoaster

Holding on for dear life? That’s fear — or fatigue — messing with your form.

It also robs you of balance, core engagement, and calorie burn.

Fix it: Drop your speed or incline to where you can go hands-free. Your arms are built for balance and rhythm, not decoration. Unless you’re climbing Everest on a 15% grade, ditch the rails.

4. Running on Your Tiptoes or Slamming Your Heels

Some folks bounce like they’re jumping rope. Others stomp like they’re marching.

Both mess with your stride and wear out your calves or knees.

Fix it: Aim for a soft midfoot strike. Your heel can gently kiss the belt, but your foot should land almost flat under your body. Think: light and quick. If you’re bouncing too high, you’re on your toes. If you’re thudding, you’re probably heel-slamming. I teach all my beginners this: quiet steps = efficient form.


5. Leaning Forward Like You’re in a Wind Tunnel

Leaning from the waist (instead of from the ankles) puts stress on your back.

It’s usually your body’s way of saying, “This pace is too dang fast.”

Fix it: Stand tall — ears over shoulders, shoulders over hips. Lock in your core. If you feel like you’re falling forward, hit that speed button and dial it down. Treadmill belts move for you — you don’t need to lean in like it’s uphill.


6. Hugging the Front Like It’s a Safety Blanket

Staying too close to the console cramps your stride and kills your arm swing.

It also makes you feel claustrophobic, like you’re about to trip.

Fix it: Slide back a bit. Find the center of the belt and claim your space. That extra room gives you freedom to move naturally. If you’re scared of drifting, clip on that safety key and start slow. You’ll build confidence with every run. I always tell my athletes: give yourself space to move like you would outdoors.

7. Tensing Up Like You’re Being Chased

Clenched fists. Tight shoulders. Locked jaw.

You’re not running — you’re bracing for impact. Happens a lot when nerves kick in or the pace creeps up.

Fix it: Shake it out. Literally. Do the following: wiggle your fingers, drop your arms and give ‘em a little floppy shake, and unclench your jaw and take a deep belly breath. You should feel relaxed and loose — like water flowing, not a robot ticking.


Everyone Slips Up

Even the pros. Even me.

Don’t beat yourself up if your form falls apart now and then.

The good news? The treadmill gives you instant feedback. If something feels off — slow down, reset, fix it, and go again.

And yeah, maybe you feel awkward sometimes, like everyone’s watching you.

Truth is, unless you’re flailing like Phoebe from Friends, no one cares.

You’re doing the work. That’s what matters.

Peeing While Running? You’re Not Alone — and You’re Not Broken

peeing when running

Let’s talk about the Thing No One Wants to Admit happens mid-run — Leaking

That awkward little dribble (or worse) that shows up when you’re just trying to clock your miles.

Embarrassing? Yeah.
Uncommon? Nope.

In fact, if you run long enough, it might happen to you. And guess what? It doesn’t mean anything’s wrong with your fitness — it just means your body’s sending up a flare that needs a little attention.

Here’s the real talk: Studies show 30–50% of female athletes leak urine during exercise. Men aren’t off the hook either — one study on elite athletes found about 15% of guys had incontinence issues too. Yet the silence is deafening. One survey found up to 92% of women never even told their doctor or coach. That’s wild.

As I tell the runners I coach: leaking doesn’t mean you’re weak — it means your body’s asking for support. And it sure as hell doesn’t mean you should quit the sport you love.

You don’t need to feel ashamed, and you don’t need to suffer quietly. You just need to understand why it’s happening and what you can do about it.

Let’s break it down.

Why the Heck Do I Pee When I Run?

Urinary incontinence = peeing without meaning to. It shows up in runners for a few different reasons. Here’s what you need to know.

1. Stress Urinary Incontinence (SUI)

This is the most common type for runners. Don’t let the name fool you — “stress” means physical pressure, not mental burnout.

When you run, your core takes a pounding with every step. That vertical impact pushes down on your bladder. If your pelvic floor (the group of muscles holding everything up) isn’t strong enough to keep the bladder shut tight, boom — a little leak.

This usually feels like a small squirt when your foot strikes, or when you laugh, sneeze, or power up a hill.

2. Urge Incontinence

Ever feel like you’re totally fine one second, then suddenly you need to pee RIGHT NOW? That’s urge incontinence — when your bladder contracts out of nowhere and spills before you make it to the bathroom.

It’s more about misfiring bladder signals than physical impact. Runners dealing with this type may sprint harder toward a toilet than they do toward the finish line.

3. Overflow Incontinence

This one’s less common in runners, but it’s real. Your bladder doesn’t fully empty, so leftover pee leaks out later — like an overfilled cup that keeps spilling.

This can be linked to things like urinary retention, nerve issues, or prostate trouble in men.

So, Why Does Running Trigger Leaks?

Running isn’t gentle. Every step is a mini earthquake for your core. Your bladder’s bouncing. Your pelvic floor is working overtime to hold the fort.

If your bladder’s full, or your pelvic muscles are weak or just plain tired, that pressure wins. That’s when the leaks show up.

A biomechanical study even showed that running and jumping create real downward force on the bladder and pelvic organs. Without solid support underneath, things get leaky.

Here’s the kicker: even super-fit, young, never-been-pregnant runners get SUI. It’s not just a “mom” thing or an “older runner” thing. It’s a runner thing.

One of my male clients, post-marathon, had a leak mid-run for the first time ever. Didn’t expect it. But the combo of long distance, dehydration, and poor pre-run timing (i.e. skipped the bathroom) caught up to him.

This can happen to anyone.

Who’s Most Likely to Deal With This?

Here’s who’s at higher risk for running-related leaks — but again, it can happen to anyone:

Pregnancy & Childbirth

Childbirth can seriously stretch the pelvic floor — especially vaginal deliveries. Even if it’s been years, the impact can linger.

Scar tissue, tearing, and general wear on pelvic support muscles often show up during high-impact activities like running.

But here’s the truth: plenty of women who’ve never had kids still deal with SUI. So childbirth isn’t the only factor.

Age & Menopause

Getting older changes muscle tone — everywhere. Hormonal dips around menopause? They thin the tissues that support your bladder and urethra.

That’s why SUI and urge incontinence both spike with age — in both men and women.

But aging isn’t a life sentence to peeing your pants. It just means you’ve gotta train smarter and support your body where it’s asking for help.

High-Impact Training

Here’s the ironic part — the fitter you are, the higher your chances might be.

Why? Because high-impact sports like running, CrossFit, and jumping sports repeatedly hammer the pelvic floor.

One study found that 44.4% of female athletes in track and running sports reported leaks, compared to only 10% of non-athletes. That’s a huge gap.

But it’s not about quitting — it’s about balancing the impact with strength work and awareness.

Higher Body Weight

More weight = more pressure on your bladder.

Even walking causes the pelvic floor to work harder in larger bodies, and running multiplies that effect.

The good news? Losing weight often reduces incontinence. And hey — running helps with that. Just means you might want to scale intensity early on and build pelvic strength in parallel.

Peeing Mid-Run? Let’s Fix That

Alright, let’s just put it out there—leaking during a run isn’t rare, and it’s nothing to be ashamed of. But it’s also not something you have to just live with.

A lot of runners—especially women, but not just women—deal with bladder leaks on the run. And yes, it can be awkward as hell. But guess what? It’s also fixable.

Let’s break down why it happens, and what you can actually do to stop peeing yourself mid-stride.

The Real Culprits Behind Leaking While Running

Pelvic Floor Dysfunction

This is usually the main player.

You’ve probably heard, “weak pelvic floor = leaks,” but it’s not just about weakness. Sometimes the muscles are too tight or just don’t fire at the right time.

  • Tense, tired muscles = poor timing = can’t squeeze shut when pressure hits (like during a stride).
  • If you’ve had surgery, nerve issues, chronic coughing—or even just years of not training these muscles—your pelvic floor might not be doing its job.

In short: if those sling-like muscles aren’t strong and well-coordinated, accidents happen.

Bad Breathing & Core Bracing Habits

Here’s a weird one: your breathing actually affects your bladder.

If you’re a shallow chest breather or you brace your abs super hard while running, you’re cranking up internal pressure—like stomping on a balloon. That pressure pushes down on your pelvic floor.

When your diaphragm and pelvic floor are synced, they move together:

  • Inhale = pelvic floor gently stretches
  • Exhale = pelvic floor lifts and contracts

If that system’s off, your bladder can pay the price.
(We’ll dig into breathing mechanics more later—but yeah, it matters.)

Other Troublemakers

  • Overactive bladder or history of UTIs → makes urgency worse
  • Constipation → straining messes with pelvic support
  • Men: prostate surgery/issues → can affect continence
  • Diet: caffeine and certain foods stir up the bladder (more on this in fluid management later)

Real Talk: You’re Not Alone

About 1 in 3 women over 30 have leaked while running—even those who’ve never been pregnant.

That’s not a niche problem—that’s common.

So if this is happening to you, you’re not broken. And you’re not the only one hustling through it.

You can fix this. Here’s how.

Step-by-Step: How to Stop Peeing While Running

Step 1: Train That Pelvic Floor

Your best long-term fix is to build a stronger, smarter pelvic floor. These muscles sit at the bottom of your core and help support your bladder. When they fire right, they help you hold it in—even under impact.

Do Your Kegels (But Do Them Right)

Don’t just “kinda squeeze.” Here’s how to do a proper rep:

  1. Find the muscles: Imagine stopping your pee mid-stream. (Don’t actually do it—just get familiar.)
  2. Squeeze and lift: Contract those muscles like you’re pulling up inside. Hold 5–8 seconds.
  3. Relax fully: Rest for 10 seconds. Let it go completely.
  4. Repeat: Do 8–12 reps per set. Hit 3 sets per day.

Tip: Start lying down or sitting. Once you get stronger, practice standing—just like you’d be during a run.

Common mistakes to avoid:

  • Don’t hold your breath
  • Don’t clench your glutes or thighs
  • Don’t rush it—quality over speed

Why it works: Up to 74% of women improve or stop leaking completely with consistent pelvic floor training (Cochrane review).

Step 2: Add Functional Strength Training

Kegels are just the start. You need your whole support crew strong—glutes, hips, deep core muscles.

When those are firing, your pelvis stays stable, and your pelvic floor doesn’t have to carry the whole load.

Try this combo:

  • Glute bridges – squeeze the pelvic floor during the lift
  • Clamshells
  • Squats – engage pelvic floor before each rep
  • Dead bugs & bird-dogs – core control with breath

Get Professional Help if Needed

A pelvic floor physio can work magic here.

  • They’ll show you how to do it right
  • Teach you how to engage on the move
  • Use biofeedback or light resistance tools (like Kegel weights or balls) to level you up

One of my runners added mini resistance band squats and bridges into her warmup—huge difference in 4 weeks. Leaks stopped. Confidence back. No extra miles needed.

Gear Up Like a Pro – Protect, Don’t Stress

Let’s get one thing straight: there’s zero shame in using the right gear to stay dry and confident out there.

You don’t get bonus points for suffering through soggy shorts. Smart runners—even elite ones—quietly use stuff like pads, liners, and absorbent shorts. So should you.

Pads or Liners That Actually Work

Forget period pads. Not the same job.

If you’ve got stress incontinence—those surprise leaks when you sneeze, sprint, or crush a hill—you want incontinence pads, not menstrual ones.

Brands like Poise, TENA, Always Discreet make ones specifically designed to catch fast leaks and lock them in.

A runner on a forum said switching to these totally solved her issue. The thin liners absorbed everything, stayed in place, and didn’t soak through—whereas normal panty liners? They failed. Miserably.

Use these on long runs, hard efforts, or race day. They’re thin, snug, and invisible. Game. Changer.

Leak-Proof Underwear – Sneaky Good

There are some seriously cool brands now making absorbent activewear—like Knix, Modibodi, Thinx Active.

They look like normal running underwear or shorts, but have hidden layers to handle leaks without you even noticing.

Reddit runners swear by them: “Looks like regular undies but catches leaks.”

They’re washable, reusable, and comfy. You can wear them solo for light leaks or layer them under your usual shorts with a pad for extra backup.

No crinkle, no bunching, no worry.

Dark Clothes = Confidence

Want to hide sweat, leaks, or whatever the day throws at you? Go dark.

Black or navy shorts and leggings are the unsung heroes of runners dealing with incontinence. Lighter colors? They’ll betray you fast.

And while you’re at it—pick moisture-wicking fabrics. Anything quick-dry will keep you more comfortable and way less chafe-prone if an accident happens mid-run.

Heard a story from a marathoner who straight-up peed mid-race to avoid stopping—and said it wasn’t even uncomfortable thanks to black shorts and water splashed at aid stations. Hardcore? Yeah.

But the takeaway: your gear can work for you, not against you.

Layer Up or Pack a Spare

Worried about a longer run or trail adventure? Double layer.

  • Tight compressive underwear or shorts underneath
  • Loose shorts over the top

This helps mask pad lines and gives you a second barrier if something soaks through.

You can also carry a spare pair of undies or shorts in your belt or pack—especially during ultras or long trail races.

Race-day tip: Pack a change of clothes in your finish line bag. There’s nothing better than slipping into dry, clean shorts after hours on the move—leak or no leak.

Chafe-Proof Your Gear

If you’re adding anything new down there—pads, special undies, etc.—test it on a short run first.

And use anti-chafing balm (BodyGlide, Squirrel’s Nut Butter, whatever you like) around the groin and inner thighs.

One runner once asked if an adult diaper would work for marathons. Short answer? Probably not.

  • Too bulky
  • Too wet
  • Too much chafing risk

Stick with incontinence gear made for athletes. It’s breathable, low-profile, and doesn’t feel like wearing a mattress between your legs.

Bottom Line

This isn’t about weakness—it’s about winning your run.

You wear the right socks to avoid blisters.
You wear sunglasses to block glare.

👉 So wear what keeps you dry and confident.

Gear is part of the strategy, not a crutch. Own it.

Fix Your Breathing & Posture – Yep, That Matters Too

This one surprises a lot of runners: your breathing mechanics can totally mess with your pelvic floor.

Sounds weird, right? But here’s the science.

When you belly breathe (deep diaphragm breaths), your pelvic floor and diaphragm actually work together in a rhythm—like a piston.

  • Inhale = relax and lengthen
  • Exhale = lift and support

But when you’re breathing shallow from your chest—or worse, holding your breath while pushing the pace—you jack up the pressure in your abdomen. Your pelvic floor gets overwhelmed. That’s when leaks happen.

Learn to Belly Breathe (No, Really)

Try this drill:

  1. Lie down. One hand on chest, one on belly.
  2. Breathe in through your nose for 4 counts.
  3. Let your belly rise while keeping your chest still.
  4. Exhale through your mouth for 4 counts. Belly falls.

Practice this until it feels natural. Then do it standing. Then jogging. Eventually, make it your default while running.

Your belly should move—not just your ribs.

Sync Breathing to Your Stride

This one’s all about rhythm.

  • Try 3:2 breathing (inhale for 3 steps, exhale for 2), or something that feels smooth and keeps you breathing consistently.
  • Holding your breath? That spikes pressure like crazy. And your pelvic floor can’t keep up.

Running up a hill or pushing into a sprint? Don’t grit your teeth and brace. Breathe.

Exhale on Effort

Lifting something? Sprinting? Breathe OUT on the work.

Same deal when running. That quick exhale as your foot hits or as you power through a turn engages your core and pelvic floor reflexively. It gives your body a little built-in protection.

Holding your breath under effort sends all that pressure down. That’s how leaks sneak in.

Posture = Pelvic Power

Run tall. Head over shoulders. Shoulders over hips. No slouching, no arching like a banana.

Good posture stacks your diaphragm right over your pelvic floor—so everything functions as a team. That gives you better breath control and less strain on your bladder.

Imagine a string pulling the top of your head upward. Stay long and light.

Add in a few basic core moves—like planks and bird-dogs—and you’ll build a foundation that supports every mile.

Ask yourself: How’s your posture on that last mile? Are you breathing deep or just gasping? What’s one tweak you can make today?

Breathe Better, Pee Less? Yup—Here’s Why It Works

Let’s talk about something most runners never bring up until it’s already messing with their workouts: bladder urgency.

Weird topic? Maybe. But you know what’s worse? Constantly looking for a porta-potty mid-run or stressing about whether you’ll make it through a race without an emergency stop. Been there.

Now here’s the thing most people don’t realize: your breathing and your bladder are more connected than you think.

  • When you’re tense or breathing shallowly—like panting through a hard effort or stressing pre-run—your pelvic floor (the muscle group that helps control your bladder) tightens up too.
  • That tension? It makes you feel like you need to pee, even if your bladder isn’t full.

But when you take deep, slow belly breaths?

  • Your diaphragm drops
  • Your pelvic floor relaxes
  • Your whole system settles down

That urge to go? It often fades.

Some pelvic health pros even teach diaphragmatic breathing to folks dealing with overactive bladder. And guess what? It works for runners too.

Try This Mid-Run

Next time the urge hits:

  1. Stop for a sec. Plant your feet.
  2. Take 5 deep breaths into your belly.
  3. Let your shoulders drop.
  4. Contract your pelvic floor gently a few times (like a short Kegel squeeze).

Boom—urge often disappears, or at least eases up.

You’re not just calming your mind—you’re retraining your body to handle pressure better, which means less bladder drama when you’re out running.

Bladder Training: It’s Like Strength Training for Pee Control

Alright, let’s level with each other:

If you’re peeing “just in case” five times before your run… or ducking behind a bush mid-tempo, your bladder needs some coaching.

That’s where bladder training comes in.

Think of it as a discipline workout for your bladder and your brain. It teaches you to hold longer, resist false alarms, and stop being a slave to every tiny urge.

This method is backed by real pelvic health pros, and used in cases of overactive bladder and incontinence. But for runners? It’s a game-changer—especially if you’re tired of planning routes around bathrooms.

Here’s how to do it:

Step 1: Know Your Baseline

Figure out how often you actually pee. Every hour? Every 30 minutes?

Keep a rough log or just pay attention for a couple days. You need to know your starting point.

Step 2: Delay It (Just a Little)

Next time you feel the urge, don’t rush to the toilet.

  • Try to wait 3 to 5 extra minutes.
  • Do deep breathing.
  • Do a few pelvic floor squeezes.
  • Distract yourself.

Then go.

Do this every time you feel the urge. You’re slowly reprogramming your bladder to chill the heck out.

Step 3: Stretch the Gap

After a few days of success, bump the delay up—try holding for 10 extra minutes instead of 5.

The goal: go from peeing every hour… to every 2, maybe even 3.

It’s like building mileage. Gradual, consistent progress wins.

Step 4: Use a Schedule (Timed Voiding)

Want more structure? Set bathroom breaks ahead of time.

  • Start with a doable interval—say, every 90 minutes.
  • Even if you feel the urge at 60, breathe through it, squeeze through it, and stick to the plan.
  • Then bump that interval out over time.

Bonus tip: This also works for race day.

I had a runner who used to stop during every long run. We trained her bladder up to a 2-hour hold, and now she makes it through half marathons without a single pit stop.

Step 5: Be Consistent (But Don’t Be a Hero)

Bladder training takes time—usually a few weeks.

You’ll mess up. You’ll cave early. No big deal. Don’t throw in the towel—just get back to it.

If you start feeling pain or leaking? That’s a sign you’re pushing too far. Dial it back and ease forward again.

Extra Tips That Actually Work

  • Skip bladder irritants (looking at you, coffee and carbonated drinks) while you’re training. They spike the “gotta go” feeling.
  • Use the “Freeze and Breathe” trick when urges hit: stop moving, plant your feet, do 5–6 deep belly breaths, and hit a few pelvic squeezes. Most urges will fade.
  • Hydrate smart: Don’t restrict fluids to “fix” this—it backfires. Train your bladder, don’t dehydrate it.

The Real Payoff

You’ll slowly teach your bladder to hold more volume without freaking out.

Which means you’ll stop mapping every run around the nearest bathroom or obsessively pre-peeing before every mile repeat.

One marathoner shared that she hydrates the day before, pees a few times pre-race, and can now run 26.2 without a bathroom break.

That’s bladder training in action.

Pair this with pelvic floor work and you’ve got the perfect combo:
You’re training the container (bladder) AND the lid (your pelvic floor).

How to Fuel and Hydrate Without Leaking Mid-Run

Alright, let’s talk real for a second.

When you’re dealing with bladder issues, getting hydration and nutrition right is a bit of a tightrope walk.

  • Too much fluid → you’re sloshing around like a fishbowl, praying you’ll make it to the next bathroom.
  • Too little → your pee turns neon yellow and starts burning like battery acid.

So what’s the fix? Simple: don’t chug, don’t starve — just play it smart.

Sip Steady, Don’t Slam It

Here’s the deal — your bladder hates surprises.

  • Gulping down a massive bottle of water 10 minutes before a run? Bad idea. It’s like dumping a gallon of water into a kiddie pool. Things are gonna overflow.
  • Instead, drink consistently throughout the day. Sip a little at a time, especially if you know you’re running later.
  • Then about an hour before your run, start tapering off.

Pro tip: I stop drinking water 45–60 minutes before a race or speed session. That gives my body time to process it — and gives me time to hit the bathroom (twice).

Of course, on hot days or long runs, you’ll need to hydrate mid-run — and yeah, maybe stop mid-run too. No shame in that. Just plan ahead.

Know where the bathrooms are or scope out some good “nature spots” on trail runs. Apps like SitOrSquat even help you find restrooms on your route.

Empty That Tank — Twice If You Have To

This one sounds obvious, but it’s huge: pee before you run. Every time. Even if you went 20 minutes ago, go again.

The “double void” trick:

  1. Pee once.
  2. Do something for a minute (tie your shoes, stretch, check the weather).
  3. Try again.

Boom — that second attempt usually clears out the leftovers. It’s like flushing your bladder fully so you’re not running with a ticking time bomb.

Bonus reason: Running with a full bladder isn’t just annoying — it might even contribute to bladder or kidney stone formation over time. Actual science backs this up.

Know Where You Can Go (Literally)

If you’re heading out for a long run or race, map out your bathroom options:

  • Porta-potties at races
  • Public park restrooms
  • Gas stations
  • Strategic tree lines if you’re on trails

One marathoner told me just knowing where the bathrooms were helped her stay calm — and funny enough, that calm made her need to pee less.

Watch What You Eat (and Sip)

Let’s talk caffeine.

That cup of coffee or pre-workout might be part of your routine — but it can come back to bite you.

  • Caffeine = diuretic + bladder irritant.
  • Translation: it makes you pee more, and it makes you feel like you have to pee more.

If you’re leaking mid-run and pounding caffeine pre-run, rethink your timing. Try drinking it 1–2 hours earlier so you can pee it out before your run.

Same goes for food. Spicy stuff, acidic foods, carbonated drinks, artificial sweeteners — for some folks, they mess with the bladder big time.

Don’t Dehydrate Yourself Into Trouble

This one’s important — don’t go to the extreme and cut fluids just to avoid leaks.

Running dehydrated? That’s a whole new set of problems:

  • Concentrated urine (hello bladder irritation)
  • Dizziness
  • Sluggish legs
  • Total crash during your run

Balance is the name of the game. Stay hydrated, but don’t overload. Look for pale yellow urine — that’s the sweet spot.

Track Your Triggers Like a Pro

If you’re not sure what’s setting you off, start a bladder diary.

Track:

  • What you drank
  • When you drank it
  • When you leaked

Pretty soon, you’ll start seeing patterns.

Example: “Okay, two big iced teas an hour before my run is a disaster. But one glass of water 30 minutes before? Totally fine.”

Everyone’s bladder has its limits. The only way to find yours is through a little trial, a little error, and a whole lot of honesty.

Final Word from Coach Dack

You don’t have to be perfect — just be smart.

Hydrate with intention. Fuel without fear. And if you have to stop mid-run to pee, so what? You’re still out there grinding, chasing goals, building strength.

That’s what counts.

Real Talk: What Runners Really Say About Leaking

Look, let’s cut through the awkward — pee happens.

Whether it’s post-baby body shifts, race-day nerves, or your bladder just deciding to play dirty mid-run, a lot of runners deal with incontinence.

👉 You’re not broken. You’re not alone. And yeah, it sucks — but you can still run strong, chase PRs, and feel good doing it.

Here are some real-deal stories from runners who’ve been there, leaked that, and found smart ways to cope:

“My Pelvic Floor Hates Me” – Postpartum Runner Gets Real

One mom of two put it bluntly: “If I cough or run on a bad day, it’s game over.”

She admitted she used to feel jealous of runners rocking light-colored leggings while she was planning “secret exit strategies” after races (think: a car blanket and spare clothes, just in case).

But instead of quitting, she leaned into pelvic floor rehab, talked openly with her running buddies, and found strength in owning it.

Takeaway: Postpartum leaks are crazy common. Own it, plan around it, and stay in the game while your body heals.

Teen Cross-Country Racer → Adult with a Plan

Back in high school, one runner said she’d pee right after every race.

Now in her 20s, she still deals with dribbles after long runs — but she’s cracked her own system:

  • Hydrate well days before the race
  • Go easy on fluids race morning
  • Hit the bathroom 5+ times before the start
  • Last bathroom stop? 10 minutes before the gun

With this setup, she’s crushed marathons without mid-run accidents.

Takeaway: Even young, healthy runners deal with leaks. But smart prep — especially around hydration — can make a huge difference.

“I Peed Myself for a PR” — And Honestly, Respect

A competitive marathoner didn’t hold back: “I’ve peed during races… on purpose.”

Why? She didn’t want to lose time. “You’re already soaked in sweat. It’s not as gross as people think.”

Her move? Wear black shorts, scope your surroundings (no one behind you!), and pour water over yourself right after to mask it.

Takeaway: Is it ideal? Nah. But when the goal is big — like a Boston Qualifier — some runners go full savage.

Guys Leak Too (They Just Don’t Talk About It)

A female runner shared that her male training partner peed himself chasing a BQ. Another dude on a forum admitted: “If you’re sweaty enough, no one can tell.”

So yeah — it’s not just women. Men leak too. It’s just buried under more stigma.

Pads, planning, timing bathroom breaks — all of that helps guys just as much.

Takeaway: Fellas, you’re not immune. It’s not weak. It’s human. Address it, gear up smart, and keep crushing miles.

Winning Mindsets & What Works

What ties all these stories together? Nobody let leakage stop them.

  • Some use humor (“It’s just sweat, right?”)
  • Some use gear (pads, black shorts, change of clothes)
  • Some train their bodies with pelvic floor work or by tweaking their hydration game

And here’s the cool part: lots of runners report real progress when they take action.

  • One woman did pelvic floor therapy for a few months → went from leaking every run to just tiny leaks on really tough workouts.
  • Another dropped 20 pounds → said the issue practically disappeared.

No miracle cure — but improvement? Totally possible.

7 Quick Coach Tips for Running With Confidence (Even if Leaks Are an Issue)

Let’s not tiptoe around it—leaking a little when you run sucks.

But you’re not broken. You’re not alone. And you sure as hell don’t have to quit running over it.

Here’s my quick-hit checklist—the small, smart habits that add up to big confidence on the road.

1. Double Pee Before You Leave

Yeah, I said it. Go to the bathroom twice before your run.

  • Go once
  • Wait a minute or two
  • Go again

It’s called a double void. Gets more out of the tank. Less fuel = less chance of overflow.

2. Plan Your Bathroom Bailouts

If you’re going long, know where the pit stops are.

Apps like SitOrSquat are lifesavers. Parks, gas stations, trails with toilets—map them.

👉 Having a plan = less stress. You run better when you’re not constantly scanning for a bathroom sign.

3. Stick to Flatter or Softer Routes

Downhills and concrete trails = jarring impact, and that can trigger leaks.

Stick to softer stuff like dirt paths or even a treadmill while you work on strengthening. Less bounce, less bladder stress.

4. Lift Heavy, Run Strong

Don’t just run. Strengthen your glutes and core.

  • Squats
  • Lunges
  • Planks
  • Deadlifts

Done right, they take pressure off your pelvic floor and spread the load. Strong runners leak less, period.

5. Exhale With Control

Your breath matters.

Exhale during effort (not holding your breath) to avoid spiking pressure on your pelvic floor.

Deep, rhythmic breathing not only helps you leak less—it helps you run better, period.

6. Wear Smart Gear

Black bottoms or bold patterns hide wet spots. Go moisture-wicking.

It’s a psychological win. If something happens mid-run, you’re not sidelined by embarrassment.

You finish strong, and no one’s the wiser.

7. Keep Moving

Seriously—don’t stop running unless your doctor says otherwise.

Exercise helps incontinence long-term. It builds strength, burns off stress, and keeps you in fighting shape.

Most runners find that when they stick with it (and do their pelvic floor work), the leaks get better over time.

These aren’t silver bullets—but they’re smart, coach-approved tools. Stack a few together and you’ll notice a real difference.

FAQ Time – Let’s Get Real About Leaking & Running

Q: Is it normal to pee a little when I run?
A: It’s common—but not something you have to just accept. Around 30–50% of active women deal with it at some point. You’re not weird.

But like shin splints or knee pain, common doesn’t mean “ignore it.” It means your body’s asking for some backup—especially the pelvic floor. Train it, support it, and you’ll likely see big improvement.

Q: Can I still run if I leak?
A: Hell yes. Don’t let a little leakage talk you out of your sport.

There are smart ways to manage it—gear, bladder-emptying, strengthening—and plenty of runners keep logging miles while working on it.

Modify if you need to, sure. But quitting? Not unless your doc specifically tells you to (and that’s rare).

Q: What’s the fastest fix?
A: No magic wand here.

But a combo of pelvic floor exercises (like Kegels), good support gear, and a few habit changes (like peeing before runs or avoiding bladder triggers like coffee) often gives quick wins.

Some people notice improvements in a couple of weeks. For a long-term fix? Commit to the work. Consistent reps = results.

Q: I just had a baby. Will this go away?
A: Maybe—but don’t bank on “just waiting.”

Post-baby leaking is common, especially after vaginal birth. Many new moms improve within 3–6 months, especially if they’re doing their pelvic floor rehab.

But if you want to make real progress (and prep for future pregnancies or races), be proactive. Rehab those muscles like you’d rehab a hamstring tear.

Q: Should I stop running until I fix this?
A: In most cases? Nope. Keep moving.

  • Shorter loops near a bathroom
  • Modify with cross-training if needed
  • But don’t stop altogether

Stopping can backfire: you lose fitness, you lose strength—and that makes the issue worse. Unless your doc tells you to pause, stay active and train smart while working on the root problem.

Don’t Let a Leak Steal Your Joy

Bladder leaks aren’t the end of your running story. They’re just a chapter—and not even the juiciest one.

You’ve now got a solid toolbox:

  • Strength work
  • Smart breathing
  • Good gear
  • Pre-run prep
  • Route strategies
  • Pelvic floor training

With patience and consistency, you’ll be back to focusing on your pace, not your pelvic floor.

And don’t forget—you’re not alone.

Talk about it. Ask questions. Laugh if you have to. But don’t let it hold you back.

Leaking isn’t a failure. Ignoring it is.

You’re already strong for showing up. Keep working that strength until it’s not even a thought anymore.

Now lace up, own your run, and take those miles back—leak or no leak.

You’ve got this.

Can You Run with a Heart Murmur? What Every Athlete Needs to Know

heart murmurs in runners

If you’re a runner, you already know the drill: push too hard, and your body will send you signals.

Tight calves, sore knees, a lingering fatigue that doesn’t shake off.

But what happens when the warning sign isn’t in your legs—it’s in your chest?

Hearing the words “you have a heart murmur” can stop any athlete in their tracks.

It sounds scary, almost like your heart is broken.

But here’s the truth most people don’t realize: a murmur isn’t a disease—it’s a sound.

A signal.

Sometimes it’s harmless background noise; other times, it’s your body waving a red flag.

In this post, I’ll break down what heart murmurs really are, why they happen, and most importantly, what they mean for your running.

Whether you’re training for your first 5K or your tenth marathon, you’ll walk away knowing when to shrug it off—and when to take action.

What Is a Heart Murmur?

A heart murmur is just an extra sound your heart makes—kind of like a soft whoosh or swish—when blood flows through it.

It doesn’t always mean something is wrong.

Think of it like water flowing through a narrow section of a pipe—it might gurgle or hiss a bit.

That’s what your heart might be doing. What matters isn’t the sound itself, but why it’s happening.

Here are the two types:

1. Innocent (Functional) Murmurs

These are common, harmless, and nothing to stress over.

The heart’s structure is totally normal.

Sometimes blood flows a little faster than usual—due to exercise, fever, anemia, stress, or pregnancy—and that causes the extra sound.

Fact: About 30% of kids and 1 in 10 adults have an innocent murmur at some point

. Most don’t even know they have one.

2. Abnormal (Pathological) Murmurs

These are tied to a structural issue inside the heart—like a tight valve, a leaky valve, or a hole between chambers.

Some conditions are minor and manageable (like mitral valve prolapse), while others need close monitoring or treatment.

How Doctors Tell the Difference

First, they listen with a stethoscope.

Then, they may order an echocardiogram—an ultrasound of your heart—to look at valves, chambers, and blood flow.

If the echo comes back normal, your murmur is likely innocent.

You probably don’t need treatment—and yes, you can keep running.

When to Worry: Red Flags for Runners

Innocent murmurs usually cause no symptoms.

But if you feel off, and your doctor hears a murmur, take it seriously.

Here are signs something more serious might be going on:

  • Chest pain or tightness, especially during or after runs
  • Shortness of breath at rest or during light activity
  • Dizziness or fainting (especially mid-run or after exertion)
  • Heart palpitations or a fluttering/racing feeling in your chest
  • Swollen ankles or neck veins
  • Blue lips or fingertips (a sign of poor oxygen circulation)
  • A lingering cough or drenching sweats with minimal effort
  • New or extreme fatigue—struggling with distances that used to be easy

These symptoms, paired with a murmur, are not normal runner fatigue.

They can be signs of valve disease or more serious issues like hypertrophic cardiomyopathy (HCM), aortic stenosis, or other heart conditions that demand medical attention.

Coach’s rule of thumb: If your murmur comes with strange symptoms, stop guessing and go get checked.

Running with a Heart Murmur: What Runners Need to Know

Let’s get one thing straight: a heart murmur doesn’t automatically sideline you from running.

But it does deserve your attention—especially if it comes with symptoms.

I’ve read about runners with murmurs who train pain-free, race hard, and live full athletic lives.

Others needed a pause, some tests, and treatment before coming back stronger.

The key? Know your type, listen to your body, and get medical clearance.

First Rule: If Something Feels Off, Don’t Tough It Out

New symptom you can’t explain? Dizziness, chest tightness, fainting—even once? Get checked.

One runner ignored lightheaded spells and chalked it up to training fatigue. Turned out he had hypertrophic cardiomyopathy. Catching it early may have saved his life.

Pain or passing out mid-run is never “just dehydration.” It’s your body waving a red flag. You wouldn’t ignore a searing pain in your knee—don’t ignore your heart.

So, Can You Run with a Heart Murmur?

Quick answer: Yes—if it’s an innocent murmur and your doctor clears you.

An innocent murmur is basically a harmless sound your heart makes as blood moves through it.

It’s common, even among elite athletes, and it doesn’t affect performance.

  • Structure and function = normal
  • No impact on endurance or heart strength
  • Exercise is actually encouraged

The American Heart Association is clear: if your murmur is truly innocent, there’s no need to limit activity.

When a Murmur Could Be a Problem

Not all murmurs are innocent. Sometimes, they’re a symptom of a bigger issue—like:

  • Aortic stenosis (narrowed valve = limited blood flow during exertion)
  • Hypertrophic cardiomyopathy (HCM) (thickened heart muscle, risk of arrhythmia)
  • Valve defects (may require surgery or management)

These conditions don’t mean you’ll never run again—but they do mean you need to be smart and get evaluated before logging serious miles.

Get Cleared First – Especially With a New Diagnosis

If you’ve just found out you have a murmur (or have had one for years but never got it looked at properly), book that cardiology visit.

Most doctors will:

  • Run an echocardiogram
  • Possibly do a stress test or ECG
  • Confirm whether the murmur is harmless or not

This is a one-time safety check that can save you from training through something serious.

Sports cardiology guidelines are clear: any new murmur in an athlete should be checked before continuing high-intensity exercise.

Real-Runner Story: Hiba’s Detour

Marathoner Hiba Jelahej was in peak shape—but began feeling dizzy and fainting during workouts.

Turns out she had a rare valve defect behind a murmur no one knew about.

She underwent surgery and rehab, then slowly returned to running—starting with a mile, then building up.

Her takeaway? Listen to your body, ask questions, and keep moving forward—even if the pace changes for a while.

Heart Murmur in Athletes: Why It’s More Common Than You Think

If your doctor ever tells you, “You’ve got a heart murmur,” it can sound scary—like something’s wrong.

But here’s the truth: in athletes, especially endurance runners, heart murmurs are surprisingly common—and often harmless.

In fact, they can be a byproduct of a strong, well-trained heart.

Let’s break it down.

“Athlete’s Heart” and Innocent Murmurs

When you train consistently—logging miles week after week—your heart adapts.

It gets stronger. The chambers (especially the left ventricle) may slightly enlarge. It pumps more blood per beat.

That’s called athlete’s heart, and it’s a normal physiological change.

But with more blood pumping through a bigger engine, the flow can sound turbulent or louder to a doctor’s stethoscope.

That whooshing noise? It’s often just the sound of vigorous, healthy blood flow. This is known as a flow murmur or innocent murmur.

One study found that around 50% of people exercising 5+ hours a week showed some degree of heart chamber enlargement. That’s not disease—that’s adaptation.

So if your doctor hears a murmur, and you’re a fit runner, there’s a solid chance it’s just your heart doing its job—better than average.

When It Shows Up

Most runners discover a murmur during a sports physical, race clearance, or routine checkup.

The conversation usually goes like this:

“You have a murmur, but everything else looks great.”

At that point, your doctor may order an ECG or echocardiogram to be safe.

Good call. It’s not overkill—it’s smart screening to confirm that what they’re hearing is functional, not pathological.

Sometimes, It’s a Sign of Better Performance

Believe it or not, a murmur in a trained runner can sometimes indicate enhanced cardiac function.

  • Your resting heart rate drops
  • Stroke volume increases
  • The left ventricle may enlarge slightly
  • Blood whooshes through faster = audible murmur

This is why some coaches call it the “sound of a strong heart.”

Not medically accurate, sure—but it’s a reminder that murmurs aren’t always red flags. Often, they’re just signals of an efficient cardiovascular system.

These are called functional murmurs—soft, usually systolic, and often disappear when you’re at rest.

When to Take It Seriously

Still, a murmur isn’t something to ignore. Most are innocent—but some aren’t, and you don’t want to miss the serious ones.

When to dig deeper:

  • You feel dizzy, faint, or overly winded during runs
  • There’s a family history of heart disease or sudden cardiac events
  • The murmur sounds abnormal or persists during rest
  • Your doctor suggests follow-up

In these cases, get checked. An ECG or echocardiogram can rule out things like:

  • Valve defects
  • Hypertrophic cardiomyopathy (HCM)
  • Congenital abnormalities

And if something does show up? Good. You caught it.

That’s the whole point of screening. Some athletes have literally saved their lives by catching a murmur early and following through.

Running with a Heart Murmur: Your Safety Checklist

So, you’ve got a heart murmur — and you still want to run.

Good. In most cases, you can.

But you’ve got to be smart about it.

Here some of the things you need to do according to my research:

1. Talk to a Cardiologist — Get the Full Picture

This isn’t something to Google-and-guess. Find out: is your murmur innocent (harmless), or tied to a heart condition? That usually means getting an echocardiogram and maybe an ECG.

Know what’s causing the murmur — is it just increased blood flow, or a valve issue that needs monitoring?

Don’t run blind. Get clarity — and get it from a specialist.

2. Know Your Family History

Heart problems often run deep. If someone in your family had sudden cardiac issues, valve defects, or even unexplained fainting, bring that up.

Some conditions are genetic (like hypertrophic cardiomyopathy), and it’s better to catch that early than after something goes wrong on a run.

3. Get Cleared — And Get Specifics

Once your cardiologist gives the all-clear, ask what your actual limits are. Can you do intervals? Long runs? Should you cap your heart rate?

Tip: Get your clearance in writing if you’re part of a running club or school program. Coaches will appreciate the clarity.

4. Train by Heart Rate — Not Just Feel

If you’ve got a heart murmur, training smart = training within your limits.

That might mean keeping your HR below a certain number (e.g., 150 bpm) or staying out of Zone 5 completely.

Use a chest strap or good-quality fitness watch. Don’t guess.

5. Respect the Environment

Heat, humidity, and altitude all jack up your heart’s workload. If the weather’s brutal, swap your workout for a cooler time or take it indoors.

And hydrate like it’s your job — dehydration puts extra strain on your heart, especially if your murmur is flow-related.

6. Watch for Warning Signs

You know your body. If you start feeling:

  • Dizziness
  • Chest tightness
  • Fluttering
  • Extreme shortness of breath

STOP. That’s not “mental toughness” — that’s your heart saying “pull the plug.”

7. Schedule Yearly Checkups

Even if your murmur is harmless now, things can change. Get a checkup at least once a year.

If you’ve got a valve issue, your doc may want an echo every 12–24 months. Stay ahead of it.

8. Reassess If Symptoms Pop Up

If you’ve been running fine and suddenly you’re not — don’t ignore that. A murmur that was stable can shift.

New symptoms? Get checked. Don’t wait for your annual visit.

9. Support Your Heart Outside of Running

The usual stuff applies — eat well, sleep enough, manage stress. That’s not fluff.

Sleep is when your body repairs. Good nutrition supports heart tissue and recovery.

And chronic stress can trigger arrhythmias or spikes in blood pressure.

So yeah — chill matters.

10. Keep Running (if your doctor says it’s safe)

Running is actually good for your heart, murmur or not. Aerobic fitness improves circulation, helps control blood pressure, and can even slow down the progression of some heart conditions.

As one cardiologist said to a client of mine:

“I’d rather you run carefully than sit on the couch in fear.”

Just don’t wing it. Respect the limits your doctor sets and stick to them.

With a smart plan, most runners with murmurs do just fine — and some even come back stronger because they train more intentionally.

Treatment & Management of Heart Murmurs

It’s Not About the Murmur—It’s About What’s Causing It

Let’s get this straight: a heart murmur isn’t the problem. It’s a symptom. A sound. What actually matters is why it’s happening.

So before you panic or Google yourself into cardiac dread, here’s how the treatment breakdown works.

1. Innocent (Benign) Murmurs: Nothing to Fix

If your doc says it’s an innocent murmur, you’re in the clear. Your heart’s structurally normal. You don’t need meds. You don’t need surgery. You don’t need to quit running.

You just… live your life.

Your doc might jot it down in your file and recommend routine physicals, but that’s it. In fact, many of these murmurs:

  • Disappear with age (especially in kids)
  • Show up when you’re dehydrated, anemic, or just post-hard run
  • Come and go depending on your circulation

Just keep doing the basics: train smart, eat well, stay healthy. You’re good.

2. Abnormal Murmurs: Treat the Root Cause

Now, if the murmur’s due to an actual heart condition, the goal shifts: fix the cause or manage the condition so your heart stays strong.

Here’s how that breaks down based on the source:

  • Mild: Usually just monitored. No big changes yet.
  • Moderate: You may get meds like beta blockers or ACE inhibitors to reduce strain.
  • Severe: Surgery or catheter procedures to repair or replace the valve.

Yes, open-heart surgery sounds terrifying. But sometimes drastic measures have to be taken.

HCM (Hypertrophic Cardiomyopathy)

No cure—but manageable. Common tools:

  • Beta blockers or calcium channel blockers to help the heart relax
  • Possibly an implantable defibrillator (ICD) as a safety measure
  • Modified training plans based on your specific condition

This one takes nuance. Work with a cardiologist who gets athletes.

Holes in the Heart (ASD/VSD)

  • Small defects: Often watched, no treatment needed
  • Large ones: Closed via surgery or a catheter procedure

Once healed? Most people are cleared for full activity, and the murmur disappears.

Arrhythmias

Sometimes a murmur tags along with heart rhythm issues. If that’s the case:

  • Treat the arrhythmia (meds or ablation)
  • Fix the rhythm, and often the murmur settles too

Infection (Endocarditis)

If you’ve got a new murmur and a fever, this is a red flag.

  • Requires IV antibiotics
  • Sometimes surgery if valves are damaged

Recovery depends on severity, but early treatment is everything.

Heart Failure

This one’s complex. Murmurs can come from valves not sealing right or pressure buildup. Management is all-in:

  • Meds (beta blockers, ACE inhibitors, diuretics)
  • Devices (like pacemakers)
  • Possibly transplant in extreme cases

Runners with early-stage heart failure may still train—but under strict medical guidance.

Here are some common medications:

  • Beta blockers – slow heart rate, reduce strain. Good for HCM, valve issues.
  • ACE inhibitors/ARBs – lower BP, ease heart workload.
  • Diuretics – reduce fluid if you’re swelling or short of breath.
  • Statins – protect arteries if you’ve got high cholesterol or risk factors.
  • Anticoagulants (aspirin, warfarin) – prevent clots, especially in valve issues or atrial fibrillation.
  • Antibiotics before dental work? Rare these days, but still used for high-risk valve patients. Follow your cardiologist’s lead.

Surgery: Last Resort, but Often a Game Changer

Surgery sounds scary.

But for the right person, it’s life-changing.

  • Valve repairs/replacements
  • Fixing holes (ASD, VSD)
  • Septal myectomy for HCM

Modern procedures—even minimally invasive ones—have helped countless athletes get back to what they love.

Lifestyle Adjustments for Runners with Heart Murmurs

If you’ve been diagnosed with a heart murmur—whether it’s innocent or tied to something deeper—there are some lifestyle levers you can pull to protect your heart and keep running safely.

None of this is about panic. It’s about running smarter.

Some of the changes include:

  • Cut the sodium if you’ve got high blood pressure or heart failure
  • Dial back the caffeine if you’ve got an arrhythmia (too much can trigger irregular beats)
  • No smoking—ever. If your heart has issues, smoking will make every one of them worse
  • Limit alcohol—especially binge drinking, which can lead to rhythm problems
  • Watch your weight—carrying extra pounds forces your heart to work harder, especially with valve issues or hypertrophic cardiomyopathy (HCM)

The good news? Running (in moderation) helps with all of these.

FAQs: Running with a Heart Murmur

Is running safe with a heart murmur?

Yes—if you’ve been evaluated. If it’s an innocent murmur, you’re good to go. If it’s tied to a condition, you may just need to modify your intensity or follow-up regularly.

Lots of runners have murmurs and do just fine. Get the green light from your doc, then run smart.

Can exercise cause or worsen a murmur?

Exercise can cause temporary innocent murmurs due to increased blood flow—think of it as a harmless “whoosh” when your heart’s working hard.

For real structural murmurs? Exercise won’t “break” your valve, but if you already have symptoms, going too hard could make those show up faster. That’s why intensity guidance is key.

Can a murmur go away?

Yes:

  • Kids often outgrow innocent murmurs
  • Murmurs caused by fever, anemia, or hyperthyroid often fade when the issue resolves
  • Surgery or treatment for abnormal murmurs can reduce or eliminate the sound

Some murmurs stick around forever—but never cause issues. They just need monitoring.

What tests will I need?

  • Echocardiogram (echo) – shows valve structure and function
  • Electrocardiogram (ECG) – checks rhythm and heart strain
  • Chest X-ray – looks at heart size
  • Stress test – evaluates how your heart responds to exercise
  • Cardiac MRI or catheterization – only if deeper investigation is needed

Most runners just need echo + ECG to start. From there, your doc can build the right plan.

What heart rate zones should I stay in?

This is personal. But here’s a general breakdown:

  • Innocent murmur + healthy heart = full zone access (just build up gradually like any smart runner)
  • Underlying issue (like valve disease or HCM) = likely capped at Zone 2–3
  • Zone 2 (60–70% HRmax): your safest endurance zone
  • Zone 3 (70–80%): steady but not crazy; check with your doc
  • Zone 4–5 (80%+): high effort, maybe off-limits depending on your condition

A heart rate monitor is your friend. Know your limits—and listen to your body. If Zone 2 suddenly feels like Zone 4, back off.

Final Thoughts: Run Smart, Not Scared

A heart murmur sounds scary—but in most runners, it ends up being a sidebar, not a stop sign.

The key? Get checked. Understand your condition. Then train accordingly.

We run to feel strong, clear our heads, and take care of ourselves. None of that changes just because your doctor hears a murmur. If anything, now you know more—and that’s power.

“Not every medical condition means you have to stop running—but you do need to understand it.”

When one of my own running buddies got diagnosed with a murmur, it didn’t end his running. It started a conversation—and a smarter training plan. He got cleared, adjusted his workouts, and now he’s running pain-free with more awareness than ever.

Sometimes, what sounds scary is actually a blessing in disguise—a reason to train with more intention, more gratitude, and more respect for the body you’ve got.

How to Choose the Best Running Jacket

running jacket

It was supposed to be a simple long run. Light drizzle, nothing major. I grabbed my thin windbreaker thinking, “Yeah, this’ll do.”

Spoiler: it didn’t.

Four miles in, the rain picked up. That cheap “water-resistant” shell soaked through like a sponge.

My base layer was drenched, my fingers numb, and I could feel the chill deep in my chest.

I felt miserable at the end.

That run taught me more than any gear review ever could.

Here’s the truth: the wrong jacket (or no jacket) can absolutely ruin your run.

It’s not just about comfort—it can literally end your session or, worse, put you at risk. Since then, I don’t just recommend running jackets—I insist on them when conditions call for it.

Because showing up for training matters. And the right jacket helps you do that.

Do You Really Need a Running Jacket?  

Look, I get the question all the time: “Do I actually need a running jacket, or can I just layer smarter?”

My best answer? It depends.

  • In moderate conditions? You can probably get by with a thermal base and a good mid-layer. Many runners crush 30°F runs in fleece and a vest. If you’re dealing with dry, cold air and short-to-medium distances, that’s totally doable.
  • But when the weather turns ugly—cold and wet—layering only gets you so far. Once rain soaks through, even 45°F can feel like freezing. Add wind? You’re asking for trouble.

And that’s the point: a proper jacket isn’t about style—it’s about survival. It’s the difference between powering through and pulling the plug.

Wet = cold. Cold = risk. That’s a hard no if you’re chasing consistency.

Training Insurance

Let’s be real about this: your training plan doesn’t care about the weather.

If you skip every run because it’s raining or windy, you’re gonna fall behind.

A good jacket? It’s training insurance. It keeps you moving when everyone else bails.

No jacket = no miles on bad days. And bad days happen. This makes it a part and parcel of any runner’s gear.

What Makes a Good Running Jacket (and What’s Just Hype)

Let’s be honest: most running jackets look sleek and sound high-tech… but not all of them are worth your money.

Some features matter. Others? Flashy marketing.

Here’s a breakdown of what actually matters when choosing a jacket for running — and what’s overhyped noise.

1. Breathability > Buzzwords

You don’t want to finish a rainy run drenched — from your own sweat.

  • Look for: vent panels, pit zips, mesh-lined back flaps
  • Metrics: MVTR >10,000 g/m²/24h is a solid baseline

Insider tip: No truly waterproof fabric is that breathable. It’s physics — you’ll always trade some airflow for full rain protection.

Coach’s Tip: Skip chasing lab numbers. Choose the jacket that actually vents heat, not just one with the fanciest membrane name.

2. Real Waterproofing vs. Just Water-Resistance

Here’s what you need to know:

  • Waterproof: Needed if you run through serious rain. Look for sealed seams and a waterproof rating >10,000mm.
  • Water-resistant: Fine for light drizzles or short runs. Won’t hold up in heavy rain, but it’s lighter and more breathable.

Watch for wording: “Water-repellent” ≠ waterproof. That’s just marketing.

3. Wind Protection

A jacket that blocks the wind keeps you warm. And yes, any waterproof jacket is windproof by default.

If you’re not battling Arctic gusts, a good wind-resistant shell usually does the trick — and breathes better, too.

4. Fit and Mobility

Your jacket should move with you, not against you.

  • Snug enough to avoid flapping
  • Roomy enough to layer underneath (or wear a vest over)
  • Sleeves long enough (bonus: thumbholes)
  • Hem that doesn’t ride up when you run

Try before you buy (or size up smartly). Skip anything that feels like a straightjacket.

5. Vents Are Gold

Pit zips. Mesh panels. Laser-cut holes. Thin side panels.

All of these help you dump heat fast. If your jacket doesn’t have actual vent features, don’t expect it to stay dry inside once you get rolling.

6. Packability and Weight

You want light, stashable, and forget-it’s-there.

Some top-tier shells weigh under 6 oz and pack into their own pocket. Ideal for:

Pro tip: Don’t go too light — ultralight shells often skimp on durability, pockets, or hoods.

7. Sealed Seams & Zippers

For rain jackets: sealed seams are non-negotiable. That’s where water sneaks in.

Same goes for:

  • Waterproof zippers
  • Storm flaps

If your jacket is just for wind/cold? These aren’t critical.

8. Details That Matter

Also, I’d recommend paying attention to the following:

  • Pockets: At least one zip pocket is essential. More if you run with fuel or a phone.
  • Hood: Should cinch down and stay put. A floppy hood is useless.
  • Reflectivity: Mandatory if you run in the dark. Don’t rely on tiny logos.
  • Drop-tail hem: Keeps your backside dry. Especially useful on trails.

Overhyped Jacket Features: What Doesn’t Matter That Much

Let’s get one thing straight—running gear should serve your run, not impress your gearhead friend.

Some jackets are loaded with flashy features that sound high-tech but don’t do squat for your average run.

You’ll see jackets built like they’re ready for an Everest summit—$500 price tags, pit zips, 12 pockets, “bulletproof” durability. Cool for the Alps. Overkill for your 30-minute neighborhood jog.

Here’s what to watch out for:

  • Too much insulation: Unless you’re running in sub-zero temps or standing around, you don’t need a puffball. You’ll warm up fast, then overheat.
  • Extra pockets: You’re not carrying survival gear. One zippered pocket for keys or gels is enough. More = bulk and bounce.
  • Overbuilt fabrics: Sure, bombproof fabric sounds great, but if it feels like running in a trash bag—sweaty, heavy, stiff—it’s useless.

And don’t get blinded by brand hype. Gore-Tex is great, no doubt. But there are plenty of waterproof fabrics (like Patagonia’s H2No) that get the job done just as well for way less cash.

Running Jacket Materials – What Actually Matters

Now let’s break down jacket tech without putting you to sleep.

Here’s what counts:

Waterproof vs. Water-Resistant vs. Breathable

Yes, they’re all different. Let me explain:

  • Waterproof membranes (Gore-Tex, eVent): Microscopic holes let sweat vapor out but block rain. Great for running if you get the balance right.
  • PU coatings: Cheaper, fully waterproof, but often trap sweat. Think clammy. Okay for short rainy runs, not ideal for hard efforts.

If you run hot or run long, breathability > absolute waterproofing.

Waterproof Rating (Hydrostatic Head)

This tells you how much rain a fabric can take before it leaks. Measured in millimeters (mm).

  • <5,000 mm: Light drizzle only
  • 5,000–10,000 mm: Steady rain
  • 10,000–20,000 mm+: Heavy rain and mountain-grade conditions

For most runners, 10K–15K mm is the sweet spot. More than that? It better be a monsoon.

Breathability Rating (MVTR)

Measured in grams: how much sweat vapor escapes over 24 hours.

  • 5,000 g/m²/24h: Meh
  • 10,000–15,000: Solid
  • 20,000+: Nice if you’re hammering in bad weather

But don’t obsess. Numbers are lab-tested. Real-world comfort comes from good design: vents, fit, and how you actually use it.

Some jackets even throw in pit zips to dump heat when the fabric taps out.

What Runners Really Need to Know About Rain Jackets

Let’s face it — no jacket is perfect. But if you’re running in wind, rain, or anything in between, knowing what your gear is actually doing makes a big difference.

Here’s what matters when choosing and maintaining a good running jacket:.

DWR (Durable Water Repellent): Your First Line of Defense

Most running jackets (even the breathable ones) come with a DWR coating. That’s what makes water bead and roll off instead of soaking in. Think of it as your jacket’s “rain shield.”

But here’s the deal: DWR wears off.

Usually after ~20 washes or lots of use, your jacket starts absorbing water instead of repelling it — the dreaded “wetting out.”

When that happens? Reapply DWR spray.

It’s simple, cheap, and keeps your jacket breathing and repelling like new.

Focus especially on shoulders and chest where rain hits hardest. If your jacket starts feeling clammy or heavy, that’s your cue — your DWR’s done.

Don’t throw the jacket out. Just revive it.

Gore-Tex, eVent, and Other Buzzwords – What Actually Matters

Gore-Tex is the classic name, but there are others now: eVent, Pertex Shield, NeoShell, FutureLight, H2No, etc.

  • Gore-Tex / eVent: Reliable waterproofing, decent breathability.
  • Pertex: Lightweight and softer – ideal for comfort.
  • Shakedry (RIP): Super breathable but fragile – discontinued now.

What matters:

  • Waterproof rating of 10,000 mm+
  • Breathability around 10–20,000 MVTR

That’s plenty for running. You don’t need Everest-level protection — you need something that won’t soak through or turn into a sauna at mile 3.

The Real Balancing Act: Stay Dry vs. Stay Cool

Truth: No jacket does both perfectly.

  • If it’s 100% waterproof, it’s probably going to trap some sweat.
  • If it breathes well, it might let some rain through.

The best jackets split the difference:

  • Breathable enough for tempo runs
  • Protective enough for downpours
  • Designed with smart venting or multiple layers (wicking liner + weatherproof shell)

Runner tip: Always lean toward breathability. You can layer for warmth. You can carry an emergency poncho. But if your jacket feels like a sweat lodge, you won’t wear it. And the best jacket? The one you’ll actually use.

How a Running Jacket Should Fit (No Fluff, Just Function)

Let’s get one thing straight: if your running jacket doesn’t fit right, it’s going to suck. Doesn’t matter how expensive or high-tech it is—if it flaps in the wind, chokes your neck, or rides up your back mid-run, it’s a fail.

Here’s how to dial in the fit like a seasoned runner:

Room to Layer—But Not a Tent

Your jacket should fit like a second skin in motion, not like a sausage casing.

You want enough room underneath for at least a base layer—and maybe a thin mid-layer on colder days.

Test this: Put on your base layers, zip up the jacket, and see if you can fit a clenched fist between your jacket and stomach. That’s the sweet spot.

If you’re running in sub-freezing temps or need to wear it over a vest or hydration pack, size up. Some runners purposely go one size larger for winter versatility.

But don’t overdo it—baggy = drag and wind flapping.

No Flapping, No Parachutes

If it feels like a windsock when you’re running, it’s too loose.

The jacket should hug your torso and arms closely—not tight, but close—so it doesn’t catch wind like a kite. If it’s flapping, it’s fighting your stride (and your ears).

You want a streamlined profile, especially if you’re running into wind or rain.

Test Mobility – It Should Move With You

Don’t just stand there in the mirror. Move.

  • Raise your arms overhead.
  • Swing them like you’re running.

The jacket shouldn’t pull across the shoulders or bunch in the underarms.

Pro-level jackets have articulated or raglan sleeves that naturally flex with your arm swing.

If it binds, try a different cut or size up. You want zero restriction in your stride.

Length Matters

Your jacket should hit just below the waist, not ride up and expose your lower back to windchill.

Look for a drop-tail hem—longer in the back—to shield your backside from cold gusts or puddle splashes.

But don’t go full trench coat. If the front is too long, it’ll bunch when you lift your knees. Balance is key.

Hood and Neck Game

Hoods are tricky. If yours has one, make sure it stays put in wind and doesn’t block your peripheral vision. A cinch cord or elastic band helps.

  • When it’s down, it shouldn’t bounce around.
  • When it’s up, you should still be able to turn your head and see.

The collar should zip up to your chin, snug but not suffocating. Bonus points for a soft chin guard that doesn’t rub your skin raw.

Avoid the “Tight = Warm” Myth

Some folks think tighter = warmer. Nope.

A jacket that’s too tight will restrict circulation and trap sweat—which makes you colder.

Warmth comes from layering, insulation, and airflow, not compression.

If you’re between sizes, go with the slightly larger one. You can always cinch the hem or waist drawcord.

Fit by Gender, Not Just Label

Gender also matters. Here’s why:

  • Women: Women-specific cuts taper at the waist and give more room at the hips and chest. But if you’ve got broad shoulders or prefer a looser fit, a men’s small might suit you better.
  • Men: If you’re lean or tall with long arms, you might need a slim or tall cut. Some brands even offer both.

Ignore the label—buy what fits your body.

Cold, Wet, or Windy? Match Your Jacket to the Conditions

No one jacket does it all. If you’re serious about running through the elements, your outerwear needs to be purpose-built for what the sky’s throwing at you.

Here’s how I break it down: cold, wet, or windy — and what kind of shell actually holds up in each.

Cold Weather: Insulate Smart, Don’t Overcook

When it’s bone-chilling cold, the goal isn’t just warmth — it’s warmth without bulk.

You want to keep your core warm and your stride smooth, not feel like you’re wrapped in your old sleeping bag.

What to look for:

  • Light Insulation or Thermal Lining – Synthetic fill or a fleece-lined shell works great for most cold runs. Look for terms like “insulated,” “thermal,” or “winter run jacket.”
  • Windproof Fabric – Wind will rob your heat faster than you think. Don’t skip this.
  • Breathability – You’re still going to sweat. Get a jacket that vents heat (pit zips or breathable panels help).
  • Body-mapped Insulation – Heavier fill around the torso, lighter underarms. Keeps warmth where you need it without cooking you mid-run.
  • Zippered Pockets & Thumb Loops – For warming hands and sealing wrist gaps without adding bulk.

Coach’s tip: I’d urge you to dress like it’s 10°F warmer than the actual temp. You’ll heat up fast, and overdressing leads to sweat, then chill — which is worse than being cold in the first place. Starting your run a little chilly is actually smart.

Solid example: The North Face Winter Warm Pro – it uses targeted insulation and wind-blocking fabric. Not overbuilt, not underdone.

Rain: Go Full Armor or Stay Home

Light drizzle? A water-resistant shell might do. But if you’re facing steady rain or cold showers, you want real protection — a fully waterproof jacket with taped seams.

Think of it as a storm shell for runners.

Key features:

  • Waterproof Rating – 10K mm or higher (10K is solid, 15K+ if you’re out in torrential stuff). Below that? You’ll soak through.
  • Taped Seams + Sealed Zippers – Without these, water gets in. End of story. Look for “fully seam-sealed” in the specs.
  • Functional Hood – Brimmed and adjustable. If it bounces or doesn’t turn with your head, it’s a pain.
  • Ventilation – The Achilles’ heel of many waterproofs. If it doesn’t breathe, you’ll feel like you’re boiling inside a trash bag. Look for underarm vents, back panels, or two-way zippers you can crack mid-run.

Good pick: The Janji Rainrunner Pack Jacket 2.0 is purpose-built for runners. Fully waterproof, vented panels, lightweight feel. It’s not just a shell — it’s a system.

Pro tip: If you’re doing hard workouts in the rain, prioritize venting. For easy runs, breathability matters less — just stay dry and get it done.

Heavy Rain: What Actually Works

Let’s cut to the chase: if you’re running in a monsoon, not a drizzle, you need a serious rain jacket — not that “water-resistant” windbreaker you bought on sale.

Here’s what matters when the sky opens up:

1. Waterproof Rating: 15,000 mm+ or Bust

You want a jacket that can handle sustained rain, shoulder pressure from packs, and splash-back from puddles. Look for:

  • Waterproof rating of 15,000–20,000 mm+ (aka Hydrostatic Head)
  • Fully seam-taped construction
  • Waterproof zippers and tight wrist/hood closures

If it doesn’t have those? It’s not made for real storms.

2. Breathability (As Much As You Can Get)

Even elite fabrics like Gore-Tex Active, eVent, or Pertex Shield Pro have limits in 100% humidity. That’s why good jackets add:

  • Pit zips or side vents
  • Two-way zippers (so you can crack it from the bottom)
  • Breathable panel zones (if you’re lucky)

Pro tip: You’ll sweat in any waterproof jacket. The goal is to stay mostly dry, not bone-dry. Damp is fine. Soaked from the inside? That’s a fail.

3. A Real Hood

If the hood’s floppy or loose, you’ll be miserable. Look for:

  • Adjustable cords
  • A stiff brim (to keep water off your face)
  • Snug fit that stays put when you turn your head

Hack: Wear a brimmed cap under the hood. It improves visibility and airflow, no matter how fancy your jacket is.

Coach-Tested, Runner-Approved Jackets

Want names? Here are some that actually hold up:

  • Patagonia Storm Racer – Light, fully waterproof, made for mountain miles.
  • Salomon Bonatti Pro – Trail-tested, race-legal, great hood.
  • Montane Minimus or Phase Lite – High HH, great for ultra weather.
  • Nike HyperShield – Surprisingly bomber protection. Runners have used these in tropical storms.
  • Inov-8 Stormshell – Lightweight, 20k HH, fully taped, built for long wet runs.
  • Janji Rainrunner 2.0 – Specifically designed for runners, with clever venting and trail-ready design.
  • Arc’teryx Norvan SL / Gore Shakedry – Legendary (if you can find them). Shakedry was top-tier: no face fabric to “wet out.”

If money’s no object: Gore-Tex Active or C-Knit shells from brands like Arc’teryx, Salomon, or Inov-8 are elite. Think high breathability + waterproof fortress.

Reminder: No Jacket Is Magic

Even with the best tech on your back, in full downpour you will get damp. Between sweat, soaked cuffs, and humidity, perfection isn’t the goal. Comfortable survival is.

Bonus: Windproof vs. Waterproof — Know the Difference

Don’t let the labels fool you:

Feature Windproof Jacket Waterproof Jacket
Blocks wind? ✅ Yes ✅ Yes
Blocks rain? 🚫 Light drizzle only ✅ Full rain protection
Breathable? ✅ Usually better ⚠️ Can feel clammy
Best for… Cold, dry, breezy runs Wet, stormy, exposed runs

Key takeaway:

  • Windproof ≠ waterproof
  • But waterproof = windproof

Scenario?

  • 45°F, windy but dry → wind shell
  • 45°F, rainy and windy → waterproof shell
  • Breezy with light mist → water-resistant windbreaker might work

FAQ – Running Jackets: What You Actually Need to Know

Q: Are Running Jackets Breathable?

Short answer? Yes – the good ones are.

But “breathable” doesn’t mean “you won’t sweat.” It just means your sweat won’t get trapped and soak you from the inside out.

  • Lightweight windbreakers and softshells? Usually solid on breathability. They’re often just thin woven nylon or polyester – nothing fancy, but they let moisture escape.
  • Waterproof jackets? Trickier. They use special membranes to block water, which also makes it harder for sweat to escape.

Good brands get around this with smart designs – underarm zips, mesh back vents, or super-light membranes like Gore-Tex or eVent.

If you see numbers like 10,000g or 20,000g MVTR, that’s a breathability rating – higher means better sweat control.

Bottom line:  If you’re doing a hard effort, you’ll sweat in any jacket. Use vents. Layer right. And don’t expect miracles – just know that some jackets handle heat way better than others.

Q: How Tight Should a Running Jacket Fit?

Think “athletic, not skin-tight.” You need room to move, not room to flap.

Here’s the test: Wear your usual base layer underneath, zip up the jacket, swing your arms, stretch overhead.

  • If it pinches or pulls anywhere, it’s too tight.
  • If it flaps like a sail, too loose.

You want:

  • Room for layering (but not baggy)
  • Sleeves that stay down when you pump your arms
  • No restriction in the shoulders or chest
  • A collar that doesn’t choke when zipped

Pro tip: Between sizes? Go up. You can always cinch it down with drawcords, but you can’t make a too-tight jacket fit mid-run.

Q: Do I Need a Running Jacket in the Rain?

If it’s more than a drizzle? Yes. Absolutely.

Getting wet in warm weather isn’t a big deal for short runs. But if it’s cold, windy, or long – you’ll be soaked, shivering, and miserable before you hit halfway.

A waterproof jacket keeps your core warm and your layers dry. It’s not just comfort – it’s about staying safe. Cold rain + wind = hypothermia territory, especially in winter.

  • Warm rain? Maybe you skip the jacket.
  • Cold rain or wintry mix? Don’t mess around – wear a shell.

And don’t forget visibility. A lot of rain jackets are reflective or bright, which is huge in low-light, rainy conditions.

Bottom line: If you run year-round, you want a rain jacket in your gear bag.

Q: What Should I Look for in a Winter Running Jacket?

You want a jacket that blocks wind, keeps you warm, sheds light moisture, and still breathes. Sounds like a tall order, but the best ones do it well.

Here’s what matters:

  • Insulation: Not bulky puff. Think thin synthetic fill or a fleece lining. Ideal jackets insulate the core more than the arms – keeps warmth where it matters without overheating you.
  • Windproofing: Cold wind ruins runs fast. Look for jackets labeled windproof or with tech like Gore-Tex Infinium. Even just a windproof front panel makes a difference.
  • Weather Resistance: Snow, sleet, whatever – make sure it has a DWR coating to repel moisture. Fully waterproof isn’t required unless it’s rain-heavy where you live.
  • Breathability: You’ll sweat more than you think, even when it’s freezing. Jackets with underarm vents, stretch panels, or two-way zips are gold for letting heat out.
  • Fit for Layering: You’re likely wearing a base layer underneath. Your jacket should fit over that without squeezing you like a sausage casing.
  • Hood (optional but handy): Some swear by them in icy wind or snow. Others prefer a high collar + beanie. Your call, but hoods help in harsh weather.
  • Thumbholes, Reflectivity, Pockets: Nice bonuses, not dealbreakers. But if you run early or late, make sure some part of that jacket is reflective.

Key tip: If I had to choose just one feature to prioritize?
Windproof + breathable. That combo solves 90% of cold-weather runs.

Wrap-Up: What I Tell My Runners to Buy

In the end, don’t overthink it. The best running jacket is the one that matches your climate and your habits.

I always tell my coaching clients: invest in gear that removes barriers. If cold, wind, or rain are keeping you from running—or making you hate it—then a proper jacket is worth every penny.

You don’t need the most expensive shell with the flashiest logo. You just need something breathable, lightweight, and built for how you run, not how a brand markets it.

  • Mild or dry area? A wind-resistant jacket with water-repellency will cover 90% of your needs.
  • Rainy or cold climate? Step up to waterproof or insulated gear that earns its keep in storms or winter wind.

The real goal? Stay comfortable, stay consistent.

A quality jacket is more than gear—it’s your no-excuses policy. On days when most people bail, you’ll still gear up and go, because you’re equipped.

Like the saying goes: There’s no such thing as bad weather, only bad clothing.

So find the jacket that makes you think: “I’ve got this.”

Maybe it’s a barely-there wind shell that disappears mid-run. Maybe it’s a cozy winter shield that feels like armor. Either way, once you’ve got it, take care of it—wash it right, reapply DWR when needed, and it’ll carry you through seasons of rain, wind, and cold.

Now stop waiting for perfect conditions. Suit up. Get out there. Run the weather, don’t let it run you.

Happy miles—whatever the forecast.


Calf Strain From Running – How to Recover, Prevent, and Train Smart

You’re cruising through your run—maybe it’s mile 4 of a tempo, maybe it’s the last hill of a long run—and then it hits.

A sudden “pop” in your calf.

Like someone took a swing at the back of your leg.

You stop.

Limp.

Stare at your shoe like it betrayed you.

Welcome to the world of pulled calf muscles—where one sharp twinge can derail weeks of solid training.

If you’ve been there, I feel you. I’ve had runners describe it as feeling like they got shot in the leg.

Others say it was more like a snap of a rubber band, followed by that brutal reality: you’re done for the day.

But here’s the deal: pain doesn’t mean you quit. It means you pivot.

That’s something I tell every injured runner I coach. This isn’t the end—it’s your cue to rebuild smarter.

Let’s break down how calf strains happen, how to fix them, and how to prevent them from wrecking your next block of training.

What the Heck Is a Calf Strain, Anyway?

In simple terms? A calf strain is when muscle fibers in your calf get overstretched or torn.

Sometimes it’s just a few fibers (mild). Other times it’s a bigger mess—partial tear, or full-blown rupture. And it’s a common running injury.

You’ll often hear people say they “pulled” their calf. Same thing. The words “strain,” “tear,” and “rupture” all describe damage to the muscle—but they vary by degree:

  • Grade 1: Minor overstretch. Feels tight, maybe a dull ache. You can still walk but running feels iffy.
  • Grade 2: Partial tear. Pain is sharper, you’ll probably limp, and stairs suck.
  • Grade 3: Complete rupture. Major pain. Swelling, bruising, and forget about running—walking is a chore.

Now don’t panic. Most runners get Grade 1 or 2 strains, not total blowouts.

Still, even the “mild” stuff can linger if you don’t treat it right.

More on this later…

Where It Happens (And Why It’s Always the Calf)

Your calf isn’t just one big muscle—it’s a team of two:

  • Gastrocnemius – The big, meaty muscle you can see. Crosses both the knee and ankle joints. Fast-twitch. Explosive. Most calf pulls happen here, especially on the inner side.
  • Soleus – Hides underneath the gastroc. More endurance-focused. Slower-twitch, used more for posture and long grinding runs. Also gets strained, but more from overuse than sudden motion.

Both muscles eventually feed into your Achilles tendon, which means a strain can also lead to Achilles issues if you don’t address it properly.

“Runner’s Calf” – It’s a Thing

Ever had your calf blow up more than once? That’s what we call runner’s calf—a nickname for recurring calf strains.

It’s super common in:

  • Masters runners (35+)As we age, our muscles lose elasticity and bounce.
  • Men – Statistically, guys 40+ are hit hardest by calf issues.
  • Speed workouts & hills – Those fast or uphill strides? High risk. The gastrocnemius hates sudden stress.

One study on masters runners found that 70% of calf strains happened in men over 40. That’s not bad luck—that’s biomechanics and aging muscle tissue.

What It Feels Like

Here’s what runners usually report:

  • Sudden sharp pain, often mid-stride
  • A “snap” or “pop” sensation (some swear they heard it)
  • Immediate tightness or cramping
  • Can’t push off the foot without pain
  • Limping or needing to stop completely
  • Swelling or bruising a few hours later (in worse cases)

If that sounds familiar, you’ve probably got at least a Grade 1 or 2 strain. Don’t run through it.

That’s how you go from sore calf to six weeks off.

Sprain vs. Strain – Quick Clarifier

  • A strain = muscle or tendon injury (like your calf)
  • A sprain = ligament injury (like twisting an ankle)

So if your lower leg pain is in the muscle belly, not near a joint, you’re likely dealing with a strain—not a sprain.

Grades of Calf Strain (From “Ouch” to “Oh Crap”)

Physios usually classify calf strains into three grades, depending on how much muscle damage there is.

Here’s how to tell where you’re at (and how long you might be benched).

Grade 1: The Warning Tap

What it is: Just a few muscle fibers overstretched or micro-torn.

How it feels: Slight tightness or discomfort — sometimes not even until after your run. You might be able to walk or jog, but something’s clearly off.

Recovery time: Usually 1–2 weeks. Rest, ice, gentle stretching, and easy walking usually do the trick. But don’t blow it off — even this minor stuff can turn into something bigger if you ignore it.

Grade 2: The Mid-Level Wreck

What it is: Partial tear — more serious damage.

How it feels: Sharp pain. Swelling or bruising might show up. Walking hurts. Running? Forget it.

Recovery time: 4–8 weeks, depending on how early you catch it. You’ll need a break from running, plus a proper rehab plan. This one you can’t just “walk off.” Been there.

Grade 3: The Full Shutdown

What it is: A complete tear or near-rupture.

How it feels: Like a sniper shot to the leg. Seriously. Most runners say it felt like they got kicked or hit with a rock. Immediate pain. Can’t walk. Can’t stand.

Signs: Bad swelling, bruising, maybe even a visible dent where the muscle tore.

Recovery time: 3–6 months minimum. Sometimes surgery is needed, especially if the Achilles is involved.

⚠️ Some pros use “Grade 4” for complete muscle + tendon rupture, but let’s just call Grade 3 what it is — serious.

What Causes Calf Strains in Runners?

You didn’t just wake up with a torn calf. Something caused it — and chances are, it was a mix of bad luck, training mistakes, and ignoring the warning signs.

Sudden Stretch or Explosion = Snap

Sprinting off the line, jumping, misstepping on a downhill, or even just pushing off too hard on tired legs — boom. That’s all it takes.

The gastrocnemius (the big calf muscle) is especially prone to this. It’s a fast-twitch muscle, made for short bursts — but if it gets stretched suddenly under tension, it tears.

Runners call this “tennis leg” sometimes — that sharp calf pop when you overextend.

It’s common in sports, but it happens in running too.

The Big Mistake: Training Too Much, Too Fast

I see it all the time. Runner feels good, mileage creeps up, pace starts to drop… then pop — calf strain.

Here’s why it happens:

  • Cold starts. Jumping into a run without a warm-up? That’s calf strain bait. Your muscles aren’t rubber bands yet — they’re cold spaghetti. Get some blood flowing first.
  • Mileage jumps. If you go from 15 to 35 miles a week in two weeks, you’re playing with fire. The calf lifts your heel every step — that’s ~1,400 reps per mile. That’s a ton of work. Ramp up slow.
  • Too much hill or speedwork too early. Hills = more toe-off. Speed = higher intensity. Both hammer your calves. If you jump straight into hill repeats or 400s without base work, don’t be shocked when your calf gives out.
  • No recovery. Overtraining tightens everything up. Your calf becomes a ticking time bomb. If you’re stacking hard days with no rest, eventually the muscle will just quit on you.

The Re-Injury Cycle

This is the part that gets most runners — you feel better, so you jump back in too soon… only to strain it again.

Then again.

Then again.

A guy I coached pulled his calf during training. Took a couple of weeks off, no rehab, then went straight into trail race.

Boom — same pain. He had this happened to him a few times before he finally backed off, did strength work, mobility, and a proper ramp-up.

Only then did it stick.

Calf Strains: Sometimes It’s Not What You’re Doing

Let’s be honest—runners love to talk about mileage, workouts, and races.

But form and footwear? Often overlooked.

And that’s a big problem, because poor mechanics and the wrong shoes are sneaky culprits when it comes to calf strains.

Overstriding & Low Cadence

One of the most common form fails? Overstriding.

That’s when your foot lands too far ahead of your body—usually with a hard heel strike and your toes pulled up (dorsiflexed).

The result? Your calf gets yanked, then forced to contract hard to push you forward.

Ouch.

A red flag here is a low cadence (aka steps per minute).

If you’re running an 8-minute pace and only hitting 150 steps per minute? You’re probably overstriding.

Foot Strike and Form Quirks

Too much forefoot striking (running on your toes)? Calves are doing overtime.

Extreme heel-striking with a hard toe roll? Same problem—too much strain during the transition.

The sweet spot for most runners is a midfoot strike or a light heel tap with the foot landing under your hips—not five feet out in front.

Keep a slight bend in the knee to absorb shock, and don’t lean forward from the waist like you’re trying to win a limbo contest.

Bad Shoes = Mad Calves

Running in beat-up shoes or ones that just don’t fit your stride? That’s asking for trouble.

An old pair with dead cushioning can shift more force to your muscles, especially the calves.

And switching into zero-drop or minimalist shoes cold turkey? Huge risk.

I’ve seen it a dozen times—runners go from a 10mm drop trainer to a barefoot-style shoe in one run, then wake up with calves so sore they can’t walk downstairs.

That heel drop matters.

Your calves stretch more with every step in low-drop shoes, and if they’re not ready, they’ll rebel.

Weak Links Make Calves Overwork

Sometimes the calf isn’t the problem—it’s the victim.

Weak glutes, soft hammies, or a sleepy core can all dump extra work on your calves.

If you’re not driving forward with your hips and posterior chain, you’ll end up toe-pushing your way through runs.

And that’s when the calves start screaming.

I knew one runner who kept pulling his calf on tempo runs. Turns out his glute medius was practically asleep.

After adding strength work for his hips and core, the strain stopped showing up.

His stride got stronger, smoother, and his calves finally caught a break.

Fatigue & Tightness: When Your Calves Just Give Out

Ever made it to mile 20 of a marathon and felt your calf start to cramp or “twinge”? That’s your body yelling, “I’m done.”

Fatigue is a major player in calf strains—especially during long runs or races where the muscle just can’t keep up.

A tired calf can’t absorb shock or generate force as well. Keep pushing it, and you’re one stride away from a strain or tear.

And tightness? That’s another trap. Runners who never stretch or who live on hilly terrain often end up with tight, shortened calves. Then they ask those same tight muscles to go long and strong. That’s like snapping a cold rubber band—it doesn’t end well.

Red Flags You Shouldn’t Ignore

If you notice any of these, skip the self-diagnosis and go see a doctor:

  • A big swollen lump in the calf or behind your knee
  • Redness, warmth, and swelling out of nowhere (could be a DVT)
  • A pop low in the leg or heel = possible Achilles rupture
  • You can’t move your toes or foot = could be nerve or compartment issues
  • Pain getting worse by the day, not better
  • Pain even when resting or sleeping = something’s off

Cleveland Clinic puts it bluntly: if you can’t walk, flex your foot, or the swelling is major, get help. It might not even be a calf strain. One in ten people with “calf pain” actually has a blood clot. Don’t mess around.

Coach’s Recovery Playbook: Calf Strain Edition

Tweak your calf mid-run? Pulled it on a sprint? Yeah, you’re not alone.

Calf strains are sneaky—they don’t just hurt, they linger if you don’t treat them right.

Here’s how I walk my runners through the comeback, step by step.

Compress & Protect – But Don’t Overdo It

Compression helps reduce swelling and gives the calf some backup support—especially in those first few days when everything feels raw.

  • Wrap it up with an ACE bandage or slip on a calf sleeve. Not tourniquet-tight, just snug.
  • Start from the ankle and wrap upward, keeping pressure even.
  • If your toes start tingling or your foot turns pale? Too tight—redo it. Blood still needs to move.

Some athletes also use kinesiology tape for support—it can help offload tension and cue your brain not to overstretch. Not essential, but a decent bonus if you know how to apply it.

Key point: This phase is all about protection. If it hurts to walk, use crutches for a day or two. Definitely skip anything that stretches or strains the calf.

Anti-Inflammatories: Use Wisely, Not Recklessly

Got pain? A couple days of ibuprofen or naproxen can help take the edge off. But don’t get addicted to popping pills just so you can keep training through pain. I’ve already shared my opinion about the subject here.

Caution: Some sports docs say NSAIDs might slightly slow muscle repair in the first 48 hours. The science isn’t conclusive—but it’s something to think about.

My advice: Use meds if the pain keeps you up at night or stops you from functioning—but don’t rely on them beyond a few days. And never take them to push through a workout.

Gently Get Things Moving (After 3–5 Days)

Once the worst of the pain settles (typically 3–5 days in), it’s time to start moving the area again—gently.

  • Ankle mobility drills – point/flex your foot, do ankle circles
  • Towel stretches – loop it around your foot and gently pull back
  • Muscle setting – contract the calf lightly without moving the ankle

After 72 hours, you can switch from ice to warm compresses or foot soaks, as long as swelling is down.

Try contrast bathing (hot-cold-hot-cold) to get the blood flowing.

Gentle massage around—not directly on—the tear can also help stimulate healing.

Load It Gradually – No Rushing the Process

Muscles heal stronger when you load them up again—but timing is everything. Rush it, and you’re back to square one.

Here’s the rebuild timeline I give my runners:

Days 1–3

  • Total rest. Ice. Compression.
  • No stretching, no running, no testing the calf.
  • Just some easy ankle movement if it doesn’t hurt.

Days 4–7

  • If walking is pain-free, walk a bit each day.
  • Start light stretching, ankle pumps, and isometrics.

Week 2

  • Seated calf raises (low resistance, high reps)
  • Double-leg standing raises
  • Balance drills

Week 3 and beyond (moderate strains)

  • Add single-leg calf raises
  • Introduce toe hops, jump rope, or light agility
  • Keep up glute, hamstring, and core work

One runner I worked with documented it like this:

  • Week 1: couldn’t walk
  • Week 2: walking slowly
  • Week 3: elliptical + PT work
  • Week 4: jog-walking
  • Weeks 5–6: daily slow running
  • Week 8: easing into speed again
  • Week 12: back to full sprinting

Bonus Tips:

  • Cross-train to stay fit (bike, swim, elliptical).
  • Monitor soreness—if pain spikes the next day, you did too much.
  • Progress week by week, not day by day.

Physical Therapy (When You Need Backup)

Sometimes you just need more than foam rolling and prayer.

If your calf strain is bad—or just not healing right—seeing a physical therapist can be a game-changer.

They’ll use tools like:

  • Manual therapy
  • Laser or ultrasound
  • Targeted strength work

A good PT will also test you (single-leg hops, calf raises, etc.) before giving the all-clear to run again. That way you’re not just guessing.

Patience and Mental Grit

Rehabbing a calf strain isn’t just a physical process—it’s a mental one. And this is where a lot of runners mess up.

You want to push through, get back out there, prove you’re tough.

But real toughness? Knowing when to hold back so you don’t reinjure yourself.

Celebrate the small stuff:

  • “I walked pain-free today.”
  • “Did 15 calf raises without grimacing.”
  • “Cycled for 30 minutes, no flare-up.”

Each win matters. Stack them.

As I tell my runners: “You can take a break from training without taking a break from being a runner.”

Use downtime for mobility, strength, and mindset. Don’t start pounding pavement until your calf is truly ready.

You should be able to:

  • Walk without pain
  • Hop in place without wincing
  • Do daily activities without issues

Anything less, and you’re just begging for a re-tweak.

Patience now = mileage later.

When to See a Doctor for That Calf Injury

Not every strain needs a specialist. Most? You can manage on your own with a smart plan.

But if your calf is doing anything from the list below, don’t tough it out—get checked.

Do not ignore these red flags:

  • You heard a “pop” or felt a snap: If your calf felt like someone shot it—or you felt a sudden rip, especially near the Achilles—that could be a tendon rupture. Major red flag. If you can’t push off your foot or feel a gap? Go see a doc now.
  • Can’t walk or put weight on it: If walking feels like glass in your leg or you’re hopping around just to get to the fridge, that’s not a tweak—it’s a possible full tear or avulsion. Get it looked at.
  • Swelling or visible deformity: If your calf looks like someone stuck a golf ball under your skin or it’s puffed up like a balloon? Could be a hematoma or even compartment syndrome (yes, that’s as bad as it sounds). Time for an exam.
  • Warm, red, throbbing calf (with no injury): This could be a DVT (deep vein thrombosis). Dangerous stuff. If your leg is hot, swollen, and aching even while resting, don’t wait—see a doc right away.
  • Tingling or numbness: A simple strain shouldn’t mess with your nerves. If you’ve got pins and needles, burning, or numbness down your leg or foot, it could be nerve-related or pressure building from swelling. Either way, get checked.
  • Getting worse instead of better: If after 4–5 days of rest, you’re still hobbling—or the bruising/swelling is growing—then it’s more than a “mild strain.” Might be a partial tear or even an infection. Get an expert’s eyes on it.
  • Pain that wakes you up or shows up at rest: Sore muscles feel better with rest. If yours is pounding while you’re lying still or it’s keeping you up at night? That’s more serious. Get it checked out.
  • Recurring issues: If your calves keep blowing out every time you build mileage, that’s a pattern. Time to dig deeper. Could be weak hips, stiff ankles, or bad form. Let a sports doc or PT help you fix it at the source.
  • Pain high up near the back of the knee: Could be something like a Baker’s cyst or even a torn plantaris muscle. Not the end of the world, but worth getting a proper diagnosis.

Return to Running After a Calf Strain

Train Smart, Come Back Strong

So, you tweaked your calf. Maybe it was a small twinge, maybe it felt like someone snapped a rubber band in your lower leg. Either way, now you’re stuck asking the most frustrating question every sidelined runner faces:

“When can I run again?”

Well, here’s the truth: it depends. And if you’re smart about it, you’ll come back stronger—not sidelined longer.

What Kind of Strain Are You Dealing With?

Let’s break it down by severity and what return looks like:

Strain Grade What It Means When You Might Run Again How to Come Back
Grade 1 (Mild) Micro-tear, light pain ~1–2 weeks Easy jogs once walking is pain-free. Start short, mix with walking.
Grade 2 (Moderate) Partial tear, hurts to walk at first ~2–5 weeks Begin with a walk-jog plan. Avoid speed and hills. Build slow.
Grade 3 (Severe) Major tear ~6–12+ weeks Get clearance. Rehab with PT. Walk first, then walk-jog. Maybe treadmill.
Grade 4 (Rupture) Complete tear or tendon rip 2+ months (usually surgery) Rehab like it’s your job. Don’t run until your PT signs off.

🛑 No matter what grade, pushing too soon = going backward.

Before You Even Think About Running Again…

Here’s the “Are You Ready?” checklist. Nail these, or don’t run yet:

  • Walk pain-free – at a normal pace, no limp, no wince.
    → Try a brisk 30-minute walk without pain.
  • Full range of motion – can you flex your ankle all the way without a tug?
  • Single-leg calf raises – 15–20 solid reps on the injured leg, no pain.
  • Hop test – 10 light hops on that leg without feeling like something’s gonna snap.

Still failing one of those? Back to rehab. Don’t rush it—you’re not just testing your fitness, you’re testing your tissue.

Walk-Jog Return Plan (The “Train, Don’t Strain” Phase)

You don’t jump back into 5-mile loops or Strava segments. You ease in—calf-first, ego-second.

Here’s what a smart first week might look like (for a Grade 2 comeback around 4 weeks post-injury):

  • Day 1 – 5 min brisk walk → 2 min jog / 2 min walk × 5. Ice afterward.
  • Day 2 – Rest or cross-train.
  • Day 3 – If Day 1 felt good, try 3 min jog / 2 min walk × 4–5 rounds.
  • Day 4 – Cross-train or rest.
  • Day 5 – 5 min jog, 2 min walk, 5 min jog. Easy effort. Flat surface.
  • Day 6 – Rest.
  • Day 7 – Try a 10-minute easy jog. Stop if anything feels sketchy.

Keep everything easy. Pace doesn’t matter—your calf is the limiter, not your cardio.

NO HILLS. Not yet. That’s advanced stuff. Right now, think: flat, soft, safe.

Use RPE & Watch Your Cadence

Don’t worry about pace—run by feel. Keep it conversational, effort at a 3–4 out of 10.

💡 Bonus tip: focus on short strides + quick cadence. High cadence reduces calf load. If you overstride or bounce too much, you’re begging that calf to rebel.

Treadmill? Not a bad idea. Controlled, flat, and easy to bail if needed.

Rebuilding Mileage (Slow is Smooth. Smooth is Fast.)

Once you can run 20–30 minutes every other day pain-free, you can start rebuilding:

  • Add 5 minutes/week to your easy runs.
  • Stick with every-other-day for a bit before adding more days.
  • Avoid speedwork and hills until your mileage is stable.
  • Start with strides or short fartleks before anything structured.

Think weeks for full return, not days. Most runners get back to regular mileage in 6–8 weeks after injury if they don’t rush.