The Running Gait Cycle Explained

picture of Running Gait

Looking to learn more about the running gait cycle?

Well, you are in the right place.

In this (sort of technical) short blog post, I’ll teach you about the many components of running gait, gait cycle biomechanics, phases of running gait, and how to analyze your running gait cycle so you can improve your running form and performance.

Sounds great?

Let’s get started.

The Importance of The Running Gait Cycle?

Understanding gait cycle and its many components can help you pick the right running shoes and optimize your performance and training efficiency.

Not only that, learning more about your gait cycle can also help you better assess your running technique and biomechanics, which, in turn, is key for improving it.

Plus, some running experts suggest that assessing the way you run can also offer you many clues to the cause of a particular injury.

These are all valid reasons, if you ask me.

So, are you excited?

Then here we go.

running gait cycle

First things first, let’s define what gait actually means…

What is The Running Gait Cycle?

The gait cycle describes the continuous and repetitive pattern of walking or running —in other words, how we get from point A to point B.

More specifically, gait cycle biomechanics refers to a series of movements of the lower extremities—your legs— during locomotion which starts out when one foot strikes the ground and ends when the same foot strikes the ground again.

The gait cycle typically the same for all of us as it can be split into two main phases.

  • The Stance Phase—when the foot is in contact with the ground, and
  • The Swing Phase—when the foot is not in contact with the ground.

The phases of running gait includes both a stance and swing phase.

Note: During the walking cycle (not the topic of this post), there is a period known as double stance in which both feet are in contact with the ground.

The Stance Phase Of Running

The stance phase is the first phase of the gait cycle.

It begins when your heel makes contact with the ground, and it ends with the toe off.

When it comes to performance & injury prevention, the stance phase is usually under the spotlight as it’s the phase when your foot and leg bear your body weight.

The stance phase equates to roughly 60 percent of the walking gait cycle, and 40 percent of running gait cycle.

Just keep in mind that these proportions are not written in stone as they tend to change as the speed of walking or running increases (or decreases).

The stance phase can be further divided into three stages.

It starts with initial contact, followed by midstance, then propulsion.

Initial contact

Initial contact marks the beginning of the stance phase.

Also known as foot strike, this subphase starts when your foot makes contact with the ground after having been in the air—typically heel, midfoot, or forefoot strike, based on your running speed, running style,  biomechanics, etc.—and ends when the forefoot is in direct contact with the ground.

Think of initial contact as the cushioning phase of the gait cycle.

During this point in the gait, your foot is pronating at the subtalar joint, knee is slightly bent, and leg is internally rotating to help reduce the stress forces from the impact.

Mid Stance

Also known as single support phase, during the midstance, your foot flattens on the ground (moving from pronation into supination) to provide support as your body is moving forward over the leading foot while the other foot is in swing phase.

In essence, during this subphase, your body weight shifts from the back to the front of your foot, preparing for toe off and forward propulsion.

This means that all of your body weight is born by a single leg, which might make it prone to discomfort and overuse injury.

stance phase of running

The Toe Off/ Propulsion

The propulsion portion is the final stage of the stance phase.

It kicks off after the heel is off the ground and ends with the toes leaving the ground.

As you keep pushing forward, the heel starts lifting, while the muscles on the back of the leg—mainly the Gastrocs, Soleus, and Achilles Tendon—contract, resulting in plantar flexion of the ankle, allowing for toe off.

This subphase makes up the final 35 percent of the stance phase.

A common mistake beginners make is leaning too far forwards during the toe off.

This can hinder stride angle and might limit efficiency.

Instead, stay tall, aiming for a slight lean from the ankles.

The Swing Phase Of Running

The swing phase, or the “second phase of running”, refers to the time in which the foot is not in contact with the ground.

During this, your foot is swinging forward.

The swing phase starts with toe off and ends just before the foot hits the ground against, and a new gait cycle begins.

During this phase, your legs cycle through, ready for the next foot strike.

The swing phase is the longest phase of the running gait, making up the remaining 60 percent of the running gait, compared with 40 percent of the walking gait.

The swing phase of gait tends to be less relevant to running biomechanics for preventing injuries than the stance phase as there is no weight being born through the joints and muscles.

The main portion of this phase is known as the forward descent which occurs as the foot is being carried forward while it’s positioned for weight bearing.

Both the knee and the foot are flexed.

The swing phase ends at the heel contact, and a new gait cycle begins.

Additional resource – Guide to running lingo

What Is Running Gait Analysis

Gait analysis is no exercise in futility but a scientifically-based and reliable process.

Gait analysis is a scientific method for finding and understanding biomechanical abnormalities and challenges in your gait cycle.

A gait analysis can help a runner by identifying any underactive or overactive muscles in the feet, which could contribute to inefficiencies and overuse injuries in the future

In simple terms, running gait analysis is a way to assess your running style.

It draws a clear piece of the picture of your unique running technique.

What’s not to like!

The two crucial things that make normal gait possible are your posture and your foot interface with the ground.

Any abnormalities will force you to overcompensate.

This, over the long haul, causes damage and/or injury to the affected limbs.

There’s plenty of various types of gait analysis that you can perform, some more complex than others, and some easier to have done.

Usually, gait analysis requires taking a short video (from the front, rear, and side) of roughly 30 seconds of running on a treadmill in a neutral shoe with little to no cushioning.

This helps the professional to take an in-depth look at what your body looks like and how you move as you run on the treadmill, putting the focus on any abnormalities in your gait.

In general, runners are divided into three main categories: neutral, overpronators, and supinators.

Understanding your pronation type is key for choosing the right running shoes and hopefully helping avoid injury.

running gait analysis

How To Perform Gait Analysis

The cheapest way to analyze your gait involves a relatively quick (and usually free) treadmill test at a running specialty shop.

To get started, you’ll be put in a neutral shoe and start walking, or running, on a treadmill.

Then you run for a short period on the treadmill.

This allows the staff to assess how you’re landing, where you’re landing, and check for any biomechanical deficiencies within your ankles or knees.

The whole testing process may take 15 to 20 minutes.

Once the analysis is done, the staff will show you a frame by frame replay.

By analyzing the way you run and taking into consideration your fitness level, running goals, and injury history, the staff can make the right shoe recommendation that best suits your needs.

Gait Analysis Results

Some of the most common problems revealed and found out by gait analysis include;

  • Heel striking—when the foot lands in front of the hips.
  • Slow cadence—taking longer strides at a lower frequency.
  • Hip drop—caused by a lack of core strength
  • Lack of flexibility and strength, especially in the calves and glutes.

These issues, as well as others, can limit running performance and contributes to overuse injuries.

Running Gait Cycle – The Conclusion

There you have it! If you’re curious about the phases of running and gait cycle biomechanics, then today’s post should get started on the right foot. The rest is just details.

Please feel free to leave your comments and questions in the section below.

Run and Walk to Success: Unleash Your Potential with the Run-Walk Method

Run Walk Method

Are you a beginner runner struggling to build endurance? Or an experienced athlete looking to take your performance to the next level?

Either way, the Run Walk method might just be the answer you’ve been searching for.

This method was pioneered by Jeff Galloway, a former Olympian and renowned coach who has helped countless people get into running.

But what exactly is the Run Walk method? It’s a simple yet effective training strategy that involves mixing low-intensity running intervals with walking breaks.

By finding the right balance between running and walking, you can improve your fitness, build stamina, and reduce the risk of injury and burnout.

It’s time to lace up your shoes and give this method a try!

The Benefits of The Run-Walk Method for Beginners

Jeff Galloway, a former Olympian and renowned coach, pioneered the Run-Walk Method, which has helped over 200,000 runners and walkers improve their running performance. The method is simple: mixing low-intensity running intervals with walking breaks can improve performance and reduce the risk of injury.

For beginners, this method is particularly useful as it allows them to slowly build up their endurance without risking discomfort, injury, or burnout. And for those returning to running after a long hiatus, the walk/run sessions can help fortify slow-twitch muscle fibers and improve recovery time.

But don’t be fooled into thinking this method is only for beginners. Intermediate and advanced runners can also benefit from the Run-Walk Method. In fact, it can help them stay safe while nursing an injury and even improve their race times.

Don’t take my word for it.

A study published in the Journal of Strength and Conditioning Research found that runners who used the run-walk method had similar improvements in running performance as those who completed a continuous run. The study also found that the run-walk method resulted in less muscle damage and inflammation, suggesting that it may be a useful tool for reducing the risk of injury.

Another study published in the Journal of Sports Science and Medicine found that novice runners who used the run-walk method with a 3:1 ratio of running to walking had significantly lower levels of perceived exertion and muscle soreness than those who completed a continuous run. The study also found that the run-walk method led to similar improvements in running performance as continuous running.

The Downsides of the Walk Run Method

While the run-walk method has become increasingly popular among runners, it’s important to consider both the potential benefits and downsides before trying it.

One potential downside of the run-walk method is the risk of losing mental focus during the walking intervals. That’s why you might find it hard to get into running after stopping for a walk break. It’s like hitting a speed bump on the road – it interrupts your flow and can be jarring to your system. However, some runners find that the structured intervals of the run-walk method actually help break up the monotony of continuous running and can help keep them engaged throughout the workout.

Another potential downside of the run-walk method is the risk of slowing down the overall pace. This can be frustrating for runners who are used to maintaining a consistent pace throughout their runs.

However, studies have shown that the run-walk method can actually be an effective way to improve overall pace over time.

A study published in the Journal of Science and Medicine in Sport found that runners who used the run-walk method in a half marathon were able to maintain a faster pace overall compared to those who ran continuously. This is likely because the walking intervals help reduce fatigue and allow runners to recover more quickly between running intervals.

It’s also important to note that the run-walk method may not be suitable for everyone. For example, if you have a specific time goal for a race, the run-walk method may not be the best approach. In this case, continuous running may be a more effective strategy for achieving your goal.

Run Walk Ratio For Beginners

To make the most out of this method, take the walk breaks before fatigue starts to set in.

Contrary to popular belief, the walk/run method does not mean that you should take breaks only when tired.

Au contraire, it’s about taking a brief walk break even if you are not tired.

If you wait until you are completely drained, you might go over the red line, thus burning your engine before you are done working out.

To determine the appropriate run-walk ratio for your individual needs, consider factors such as your current fitness level and personal preferences. A study published in the Journal of Sports Science and Medicine found that a run-walk ratio of 3 minutes running to 1-minute walking was more efficient and less taxing on the body than a continuous run for novice runners.

Here are three walk-to-running ratios to try out.

Choose whatever ratio of walking and running that works for you.

  • The Beginner: Run for 15 to 30 seconds. Then walk for one to two minutes
  • The Intermediate: Run for two to five minutes. Then walk for one to two minutes.
  • The Experienced: Run for eight to ten minutes. Then walk for 30 seconds to one full minute.

As you become more comfortable with the run-walk method, you can progress the ratio over time, like a gardener tending to a plant and allowing it to grow and blossom. A gradual increase in the amount of running and a decrease in the amount of walking can help build endurance and improve overall running performance.

Additional resource – How long does it take to walk a mile

Progressing the run-walk ratio over time:

As you become more comfortable with the run-walk method and your fitness level improves, you can gradually progress the run-walk ratio to challenge your body and continue improving. This may involve increasing the amount of time you spend running while decreasing the amount of time you spend walking or experimenting with different ratios to find the one that works best for you.

A general rule of thumb is to increase the running time by no more than 10% per week while also reducing the walking time by a corresponding amount. For example, if you start with a 1:1 ratio and run for one minute and walk for one minute, you might progress to a 2:1 ratio, running for two minutes and walking for one minute.

It’s important to listen to your body and make adjustments as needed, especially if you experience any pain or discomfort. Gradual progression is key to avoiding injury and getting the most out of the run-walk method over the long term.

Go For Time, Not Distance

So do you make the most out of the run walk method?

Simple. The key is to focus on time, not distance. Instead of feeling pressure to cover a specific distance at a certain pace, measure your walk and run segments in terms of minutes. This takes the pressure off and allows you to focus on improving your endurance and stamina.

The Ideal Session

For an ideal session, start with a 5-minute warm-up walk, then begin an easy run/walk routine, alternating between jogging slowly for 1 minute and walking for 2-3 minutes for recovery. Make sure to fully recover during the walk segments before beginning again. Repeat the cycle 5-7 times and end with a proper cool-down.

Additional resource – How long does it take to walk five miles

The Run Walk Run Method  for Beginners

If you’re a beginner, assess your fitness level and set realistic targets. For example, aim to run a 5K (3.1 miles) within 8-12 weeks of beginning your training. As you progress, increase your training volume, intensity, and frequency. And remember, consistency is key. By following this method consistently, you’ll be able to improve your endurance, reduce the risk of injury, and eventually run longer and faster than you ever thought possible.

Applying The Method

To incorporate the run-walk method into your training program, start with a few run-walk workouts per week and gradually increase the number of continuous runs over time like a sculptor gradually chiseling away at a block of marble to reveal a beautiful statue.

It’s also important to listen to your body and adjust your training program as needed, like a musician tuning their instrument to produce the best sound.

If you’re feeling fatigued or experiencing pain, it may be time to decrease the overall volume or intensity of your workouts, while if you’re feeling strong and making progress, you can gradually increase the volume and intensity of your workouts.

With patience and persistence, the run-walk method can be a valuable tool for improving your running performance and achieving your fitness goal.

Training Plans

The Internet is full of elaborate training programs, but I believe in keeping it simple.

Here are more tips for a great training plan:

  • Aim to exercise at least three times per week.
  • Walk, run/walk, or run for 20 to 30 minutes, three days a week.
  • Cross train or rest on your off days.
  • Keep your workouts at a conversational pace. AKA the Talk Test.

Stay In Your Lane

Remember, the key to injury-free training is staying within your fitness level. No more, no less. The Internet may be full of elaborate training programs, but keeping it simple is often the best approach. So, grab your running shoes, check the temperature, and get ready to hit the pavement with the run walk run method. Your running journey starts here!

The Run Walk Method – The Conclusion

And there you have it, my friends!

If you’re itching to dive into the world of running for the very first time, let me tell you, the run walk run method is your golden ticket. It’s the ultimate gateway to unleashing your inner runner, and the best part? The rest is just minor details. Trust me, you’ve got this!

Thank you so much for joining me on this exciting journey. Remember, when it comes to your training, keep pushing yourself and staying motivated. You’re capable of incredible things!

Wishing you endless miles of exhilarating runs and unforgettable adventures,

David D.

What is RPE in Running? Your Full Guide To RPE And Heart Rate Zones

RPE Explained for runners

What is RPE in running?

If you’re looking for an answer, then learning you’re are in the right place.

Here’s the truth.

Running intensity is vital to measure as it can tell you whether you are training too hard or not pushing it hard enough.

Do too much, and you risk injury and/or burnout.

Do too little, and your fitness level will plateau, even decline, which is not what you want.

One of the commonly used methods is the Rating of Perceived Exertion. Using this rating system is a crucial component of any training program—regardless of your current fitness level and goals.

In this post, I will give you an overview of RPE in running—what is it, why you should use it, and how to efficiently use for maximum effect.

So, are you excited? Then here we go.

RPE Running

What is The RPE Scale?

The RPE scale, also known as the “Borg CR10 scale”, or the “Modified RPE scale.” is a method of rating perceived exertion.

It’s used, mostly, by exercise physiologists and personal trainers to measure the level of effort during physical activity.

The RPE scale is a rating scale ranging from 1 to 10.

The numbers on the scale correspond to descriptive statements that rate how hard or difficult t you find an exercise or physical activity.

The ratings are based on an array of feelings and sensation of physical stresses a trainee experiences during physical activity.

These include increased respiration, increased heart rate, sweating, muscle fatigue, and discomfort.

So, for instance, a rating of 1 means you are putting in any effort, whereas a rating of 9 means you’re near maximal exertion.

The RPE is typically used in cardiovascular training, but it can just as easily be applied to other forms of training, especially resistance training.

Additional Resource – Your Guide To Running Heart Rate Zones

It’s Convenient

Using the RPE rating system requires no equipment.

As long as you’re willing to listen to your body, you’re good to go.

The RPE scale is especially handy if you don’t own a heart rate monitor and/or don’t want to stop in the middle of your run to check your pulse and how hard you’re pushing yourself.

But don’t get me wrong.

For first-timers, the RPE complex rating system can be quite overwhelming. But, with a little bit of practice and perseverance, one can learn how to correctly use this powerful tool.

And this is worth the effort, especially for the long haul once you start taking your running routine more seriously.

Additional resource – Strava for runners

Different Runners Different Strokes

Now that you have a thorough grasp (hopefully) of what an RPE is, let’s talk about how we can put it to action.

And here is the key.

If you are serious about making the most out of this rating system, you need, in simple terms, to just start using it—even if you have never done it before.

To get good at this, make sure cultivate the habit of regularly rating each workout on a 1 to 10 scale both during the workout and right after.

You have to build your inner sensors.

Next, keep tabs on your RPE for your workouts in your training diary.

Just keep in mind that this scale is different for everyone.

So, for instance, super vigorous activity could be jogging at 4.5 MPH for one person or faster running at 9 MPH for another person.

So it’s up to you to come up with the right numbers and ratings.

Additional resource – Heart murmurs while exercising

RPE In Running Explained

  1. Very easy. No exertion. You’re lounging on the couch, doing nothing physically The only movement you are doing is holding a potato chip and pushing buttons on the remote.
  2. Fairly light exertion. This is how you ought to feel when you are warming up and cooling down, or stretching. You can converse with no effort.
  3. Light exertion. You are moving, but it’s slow and easy like strolling. This how you should warm up your body before running. You can converse with almost no effort.
  4. Moderately easy. Your breathing and heart rate is a little faster. You’re feeling a little warmer. And you’re starting to work up a sweat. But you can still maintain a conversation while exercising without much effort.
  5. Moderate to somewhat hard exertion. Your heart is pumping faster. You are breathing harder. You’re feeling warmer. You can still converse, but it is getting tougher.
  6. Hard exertion. You are breathing hard now. But you can still sip from your water bottle. You can only say a few words at a time.
  7. Hard to somewhat intense exertion. You are breathing really hard, and are wondering how you can keep on going like this.
  8. Very hard. You are breathing hard and nearing your maximal limit. You can no longer say a few words without gasping for air.
  9. Super hard. You feel like your lungs are about to explode. You cannot keep this intensity for more than one minute. Conversing is impossible. This is one tad bit away from your maximum.
  • Ultimate exertion. This is your absolute limit. You cannot keep this pace for more than 10 seconds. Speaking is out of the question. Pain is everywhere.

How to Use The RPE Scale?

After warming up at a low to moderate level of exertion, begin your run.

Then, after  a few minutes in, assess your exertion level from the scale.

For instance, if you still are feeling at an RPE under 6 and want to push more, then pick up your pace to increase your intensity.

You can this by running faster, adding intensity intervals (think sprints) or seeking out inclines or uphills.

If you’re feeling an intensity of 8 or 9, but you’re still mid-workout, you might want to slow down your pace until you’re back to the moderate intensity zone.

Additional Resource – Here’s your guide to the Maffetone Method.

RPE And Heart Rate Zones

Research has found a strong correlation between your RPE ratings and your actual heart rate during exercise.

For instance, a hard interval run should be RPE 9-10 or 94 to 99 percent of your maximum heart rate.

On the other hands, an easy recovery should be RPE 3-4, which corresponds to roughly 60 to 70 percent of maximum heart rate.

Just keep in mind that it’s only a rough estimate as physical conditioning, age, and other factors, vary from one individual to the next.

This is how you can correlate it to heart rate zones so you can have more measuring tools on your hand.

  • 2-4 – Very light zone – 50 to 60 percent
  • 4-5 – Light zone – 60  to 70 percent
  • 5-7 – Moderate zone – 70 to 80 percent
  • 7-9 – Hard zone – 80 to 90 percent
  • 9-10 – Maxiumum zone – 90 to 100 percent.

New to Running? Start Here…

If you’re serious about running, getting fit, and staying injury free, then make sure to download my Runners Blueprint Guide!

Inside this guide, you’ll learn how to start running and lose weight weight the easy and painless way. This is, in fact, your ultimate manifesto to becoming a faster and a stronger runner. And you want that, don’t you?

Additional resource – Your guide to heart rate variability

 Click HERE to check out my Runners Blueprint System today!

Don’t miss out! My awesome running plan is just one click away.

RPE in Running – The Conclusion

There you have it! If you’re looking for the full guide to RPE in running, then this post should get you started on the right foot. I’ve also shared with you a brief description on the link between RPE and heart rate zones. This means that you apply the RPE chart shared while doing any form physical exercise – Not just running.

Please feel free to leave your comments and questions in the section below.

In the meantime thank you for dropping by.

Keep training strong.

How to Choose The Best Running Socks

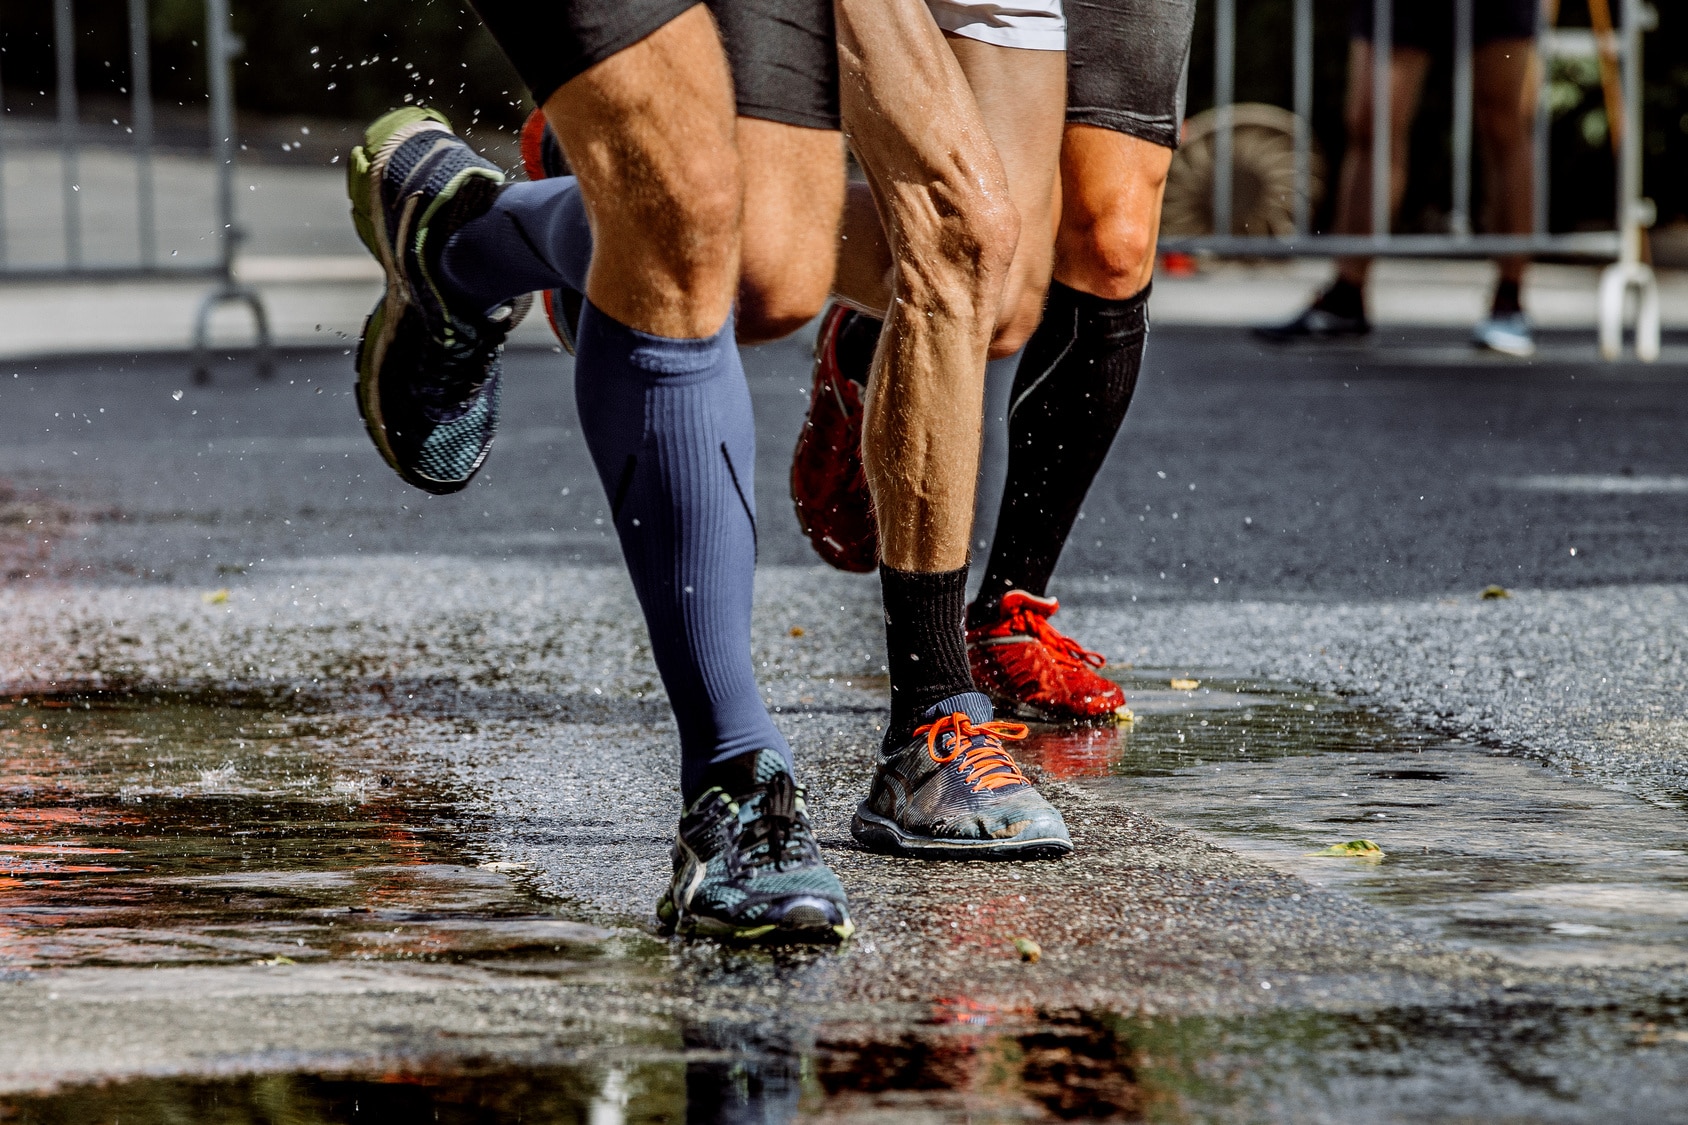
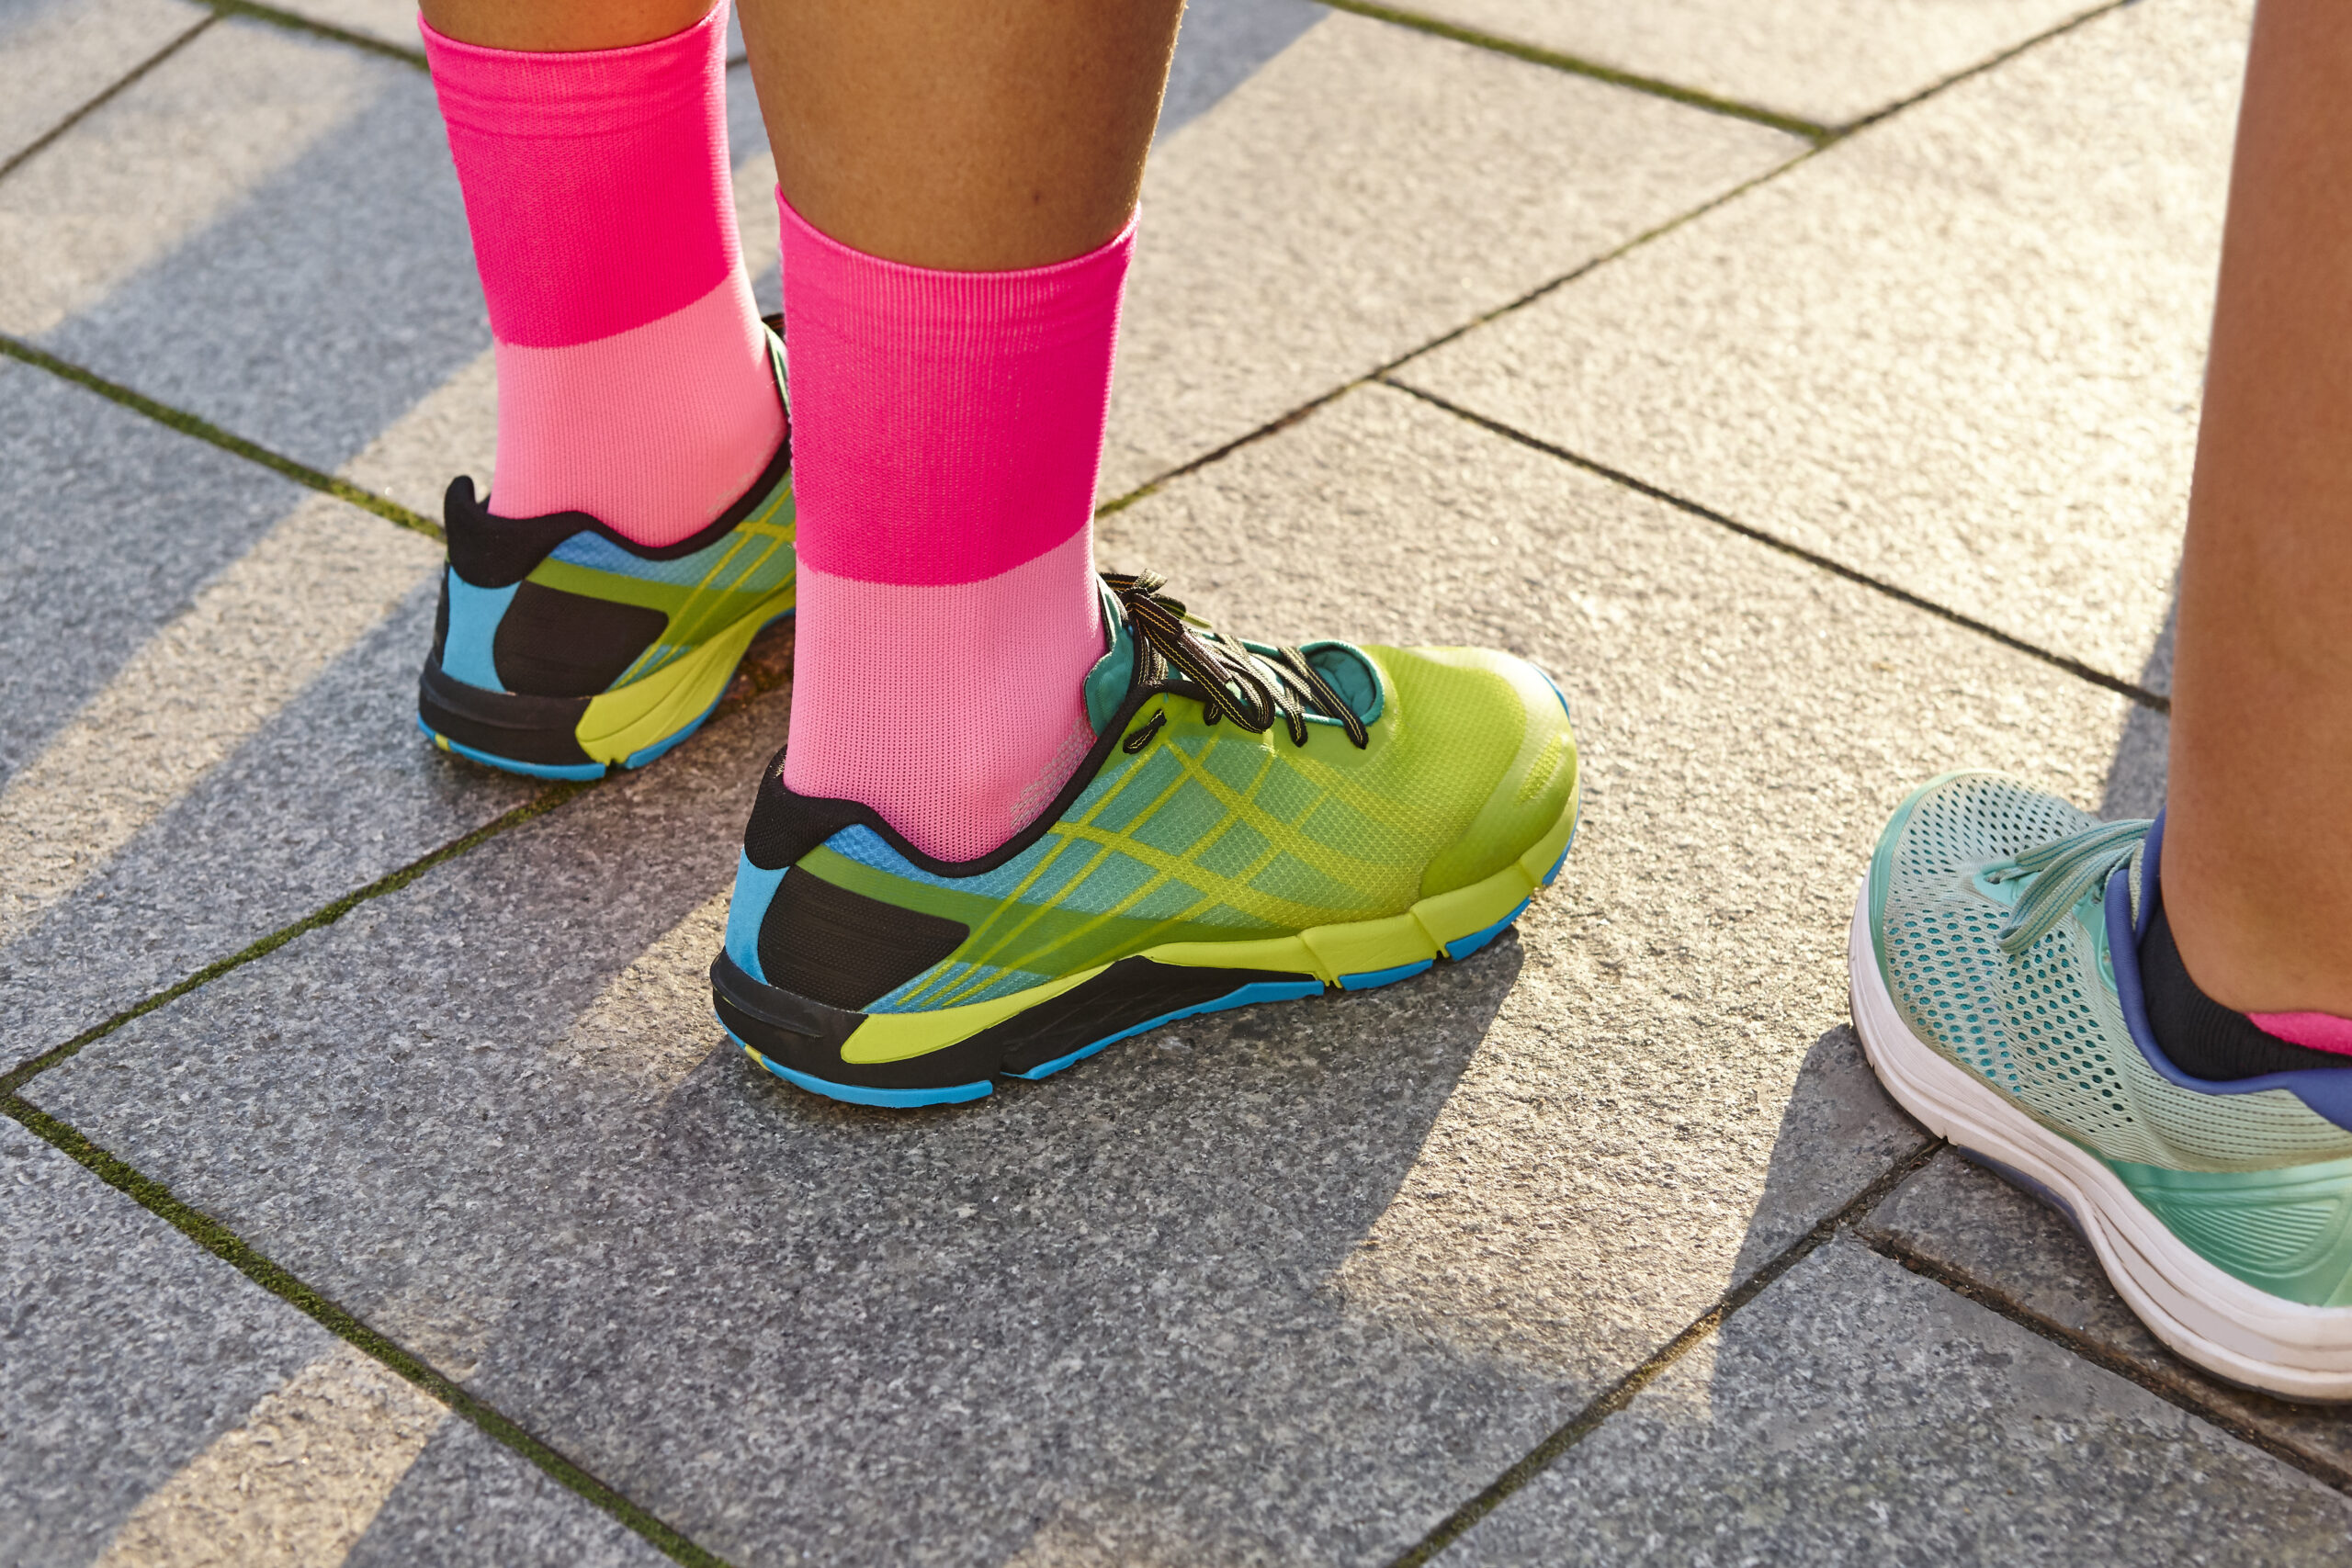
how to choose Running Compression Socks

Looking for the best advice on how to choose running socks?

You’re in the right place!

If you’re like me, you might not have thought much about socks when you first started running.

But trust me, the right pair of running socks can make all the difference between a comfortable run and one that leaves you with blisters, sore feet, or worse.

I used to think socks were just socks—until I started running seriously.

After several runs that ended with painful blisters, I finally learned that the socks you wear matter just as much as your shoes.

So, let’s talk about how you can find the perfect pair of running socks that will keep your feet dry, comfortable, and happy.

Why Proper Running Socks Matter

New to running? Let me help you skip the sock-related soreness

The right running socks can make a world of difference.

They’re designed specifically for the demands of running. They’re not just regular socks—they’re made to keep your feet dry and blister-free, even during long runs. Whether you’re heading out for a quick jog or a long-distance run, choosing the right socks is critical to your performance and comfort.

Poorly fitting socks can cause everything from toenail troubles to blisters and infections.

Wear the wrong socks, and every little irritation becomes magnified by mid-run.

The good news? Picking the right socks isn’t hard once you know what to look for.

How to Choose the Right Running Socks

When it comes to picking running socks, there are a few key factors to consider, including the material, size, length, and thickness.

Here’s what I’ve learned about choosing the right socks, so you can skip the trial and error:

Avoid Cotton Socks

One of the first lessons I learned about running socks was to avoid cotton at all costs. I used to wear cotton socks, thinking they were comfortable, but every time my feet got sweaty, they stayed wet. One rainy morning, I went for a run in those cotton socks. By the time I got home, my feet looked like raisins, and I was dealing with painful blisters.

That’s when I made the switch to synthetic materials. Socks made with CoolMax or polyester changed everything. My feet stayed dry, and the blisters became a thing of the past.

Here’s the truth.

Damp feet are a recipe for misery and blisters when running.

Running with wet feet also increases the chances of infections and can make cold-weather runs feel even colder. Instead, you want socks made from moisture-wicking materials that pull sweat away from your skin.

Fabrics too shoot for include:

  • Synthetic blends: Polyester, nylon, acrylic, and spandex are great for wicking away moisture.
  • Merino wool: A great natural option that wicks moisture, regulates temperature, and prevents odors.
  • CoolMax or Drymax: These high-tech fabrics are specifically designed to keep your feet dry.

Choosing the right material means drier, more comfortable feet with fewer blister worries.

The Right Size Of Running Socks

I used to think, “If the sock fits, wear it.” But I quickly realized that size really matters. Too tight, and your feet feel like they’re in a vice grip. Too loose, and you’ll end up with saggy socks and blisters.

For me, finding the right fit was all about getting that heel portion to land exactly where it should—right on my heel. It sounds simple, but it’s a game-changer.

One time, I wore a pair of socks that were just slightly too big. I didn’t think it would matter until I felt them bunching up in my shoes during a long run. By mile five, I had blisters forming under my arch. Lesson learned.

This is how to tell if your socks fit right:

  • The heel cup of the sock should line up with your actual heel.
  • There shouldn’t be any bunching or slipping.
  • The socks should feel snug, but not so tight that they’re cutting off circulation or overstretched.

What’s more?

Always try socks with your running shoes to avoid pressure points

The Many Lengths Of Running Socks

When it comes to sock length, I’ve tried them all. Crew socks, ankle socks, and those low-cut ones that barely peek above your shoe. I quickly learned that crew socks are a lifesaver when running trails with overgrown brush. And when I’m going for a casual road run, ankle socks are usually my go-to.

Once, I chose ankle socks for a muddy trail—big mistake. I spent the entire run stopping to empty out dirt and tiny pebbles that found their way in.

Since then, I’ve saved the ankle socks for cleaner routes and wear crew-length socks on those trail adventures.

Here’s a quick guide to the different sock lengths:

  • No-show or ankle socks: These are great for summer runs when you want to keep cool and don’t need extra coverage. They sit right above your shoe line.
  • Crew socks: These come up to mid-calf and offer more protection from debris and trail running hazards.
  • Compression socks: These knee-high socks provide graduated compression that improves blood flow and helps with recovery. They’re especially popular for longer runs or recovery after a race.

Thickness of Fabric

One of the most confusing things for me in the beginning was figuring out how thick my socks should be. I tried super-thin socks once on a summer run, thinking they would keep my feet cool. But I ended up with friction burns because they offered almost no cushioning. After experimenting, I found that a medium thickness works best for most of my runs.

Now, I keep a variety of socks on hand. When it’s colder out, I opt for thicker pairs that offer more warmth and protection. In the summer, I choose a lighter option that still provides some padding.

So as a rule:

  • Thin socks: These are lightweight and ideal for summer running or if you prefer a minimal feel. However, if you’re prone to blisters, thin socks might not offer enough protection.
  • Thick socks: Thicker socks offer more cushioning, especially around the heel and ball of the foot. They’re great for added comfort during long runs or if you’re running on harder surfaces.

Running Compression Socks

I was skeptical about compression socks at first. Could they really make a difference? Rave reviews from other runners convinced me to try them during half marathon training. And honestly, I haven’t looked back since.

For me, compression socks aren’t just about performance. They also help my legs feel less fatigued after long runs. I’ve even started wearing them after tough workouts to speed up recovery. I can’t say for sure if they’ve made me faster, but I definitely feel more comfortable and less sore.

Compression socks tighten around the ankle and loosen up the calf, boosting circulation. They also help with swelling and can prevent that heavy-leg feeling you sometimes get after a tough run. If you’re curious about compression socks, give them a try—you might just find they’re the boost you need for faster recovery.

Avoiding Blisters

Blisters are a runner’s worst enemy, but there are ways to avoid them, starting with the right socks. If you’re prone to blisters, look for socks that offer extra protection in high-friction areas, like the heel and toes. Some brands offer double-layer socks designed to reduce friction between your foot and the shoe.

You can also try wearing two pairs of socks—one thin and one thicker—to create a barrier between your foot and the shoe. This method works well for some runners, though I personally prefer single-layer socks with targeted cushioning.

Frequently Asked Questions

I know that you have more than one pressing questions about running socks. Let me address some of the most common ones.

How often should I replace my running socks?

Running socks, like any part of your gear, wear out over time. Typically, you’ll want to replace them every 6–12 months, depending on how often you run and the conditions you run in. If you notice signs like thinning fabric, loss of elasticity, or if they just don’t feel as cushioned, it’s time for a new pair. Worn-out socks can lead to more friction, which means a higher chance of blisters!

Can I use hiking socks for running?

While hiking socks are designed for comfort and durability, they’re often thicker and made from materials that aren’t as moisture-wicking as running socks. Hiking socks can work in a pinch, especially on colder days, but for regular runs, especially long distances, stick with socks specifically designed for running. They’re optimized for breathability, moisture management, and minimal friction—exactly what your feet need on a run.

What length of sock is best for running?

This really depends on your preference and the type of running you do. No-show and ankle-length socks are popular for road runners who prefer minimal coverage. For trail running or areas with brush, crew-length socks offer extra protection from dirt and debris. On cold days, longer socks (like calf-length) can provide additional warmth. The right length ultimately comes down to comfort and the conditions you’re running in.

The Conclusion

Ultimately, picking the best running socks is about what feels right for you.

My advice is to experiment with different types, lengths, and thicknesses to find what works best for you. I’ve found that having a variety of socks keeps me prepared for any weather or training condition.

Trust me, once you find your perfect pair, you’ll wonder how you ran without them.

101 Running Tricks & Hacks Every Runner Needs To Know

If you’re serious about reaching your full running potential, then you’re in the right place.

In today’s post, I’m sharing more than 100 running tips designed to help make your workout routine a complete success.

Follow these practical, simple, and proven strategies, and you’ll reach your full running potential in no time.

Let’s get this ball rolling…

Without further ado, here’s a list of the best running tips ever.

  1. Get the Right Shoes

Shoes are the most important running equipment.

Period.

A proper shoe not only makes running feel more comfortable, but also help improve your performance and ward off all sorts of injuries, including shin splints, plantar fasciitis, knee pain, and foot pain.

How do you pick the right shoes?

The golden rule is to go for a shoe that feels comfortable.

That’s the conclusion of a study published in the British Journal of Sports Medicine.

The right shoes have to match your natural foot shape and biomechanics.

As a rule of thumb, leave at least a thumbnail’s distance (roughly 1 cm, or ½ an inch) from the end of your longest toes (while flat on the floor) to the end of the shoe.

In other words, you should be able to freely wiggle all of your toes, with plenty of room to spare.

For the full guide on how to choose the right running shoes, see my post here.

  1. Visit a Specialty Running Store

Don’t know what it takes to pick a proper pair?

Head to a specialty running store dedicated specifically to running-related gear, accessories, and gadgets.

Once you’re there, have your foot type and gait analyzed by the professional staff.

That’s how you’ll find out things you might not know on your own – you might be a severe overpronator or underpronator who needs trainers with a bit of more support than the typical (mostly neutral) runner.

They’ll know and explain what you need.

When you go shoe shopping, treat their staff the way you would a physician.

Be willing to answer all sorts of questions regarding your training goals and personal preferences.

It’s worth the extra cost you’ll pay there to get a true “shoe fitting” service.

  1. Wear the Right Clothing

Once you have the right running shoes, add on some basic running clothing and apparel.

You’ll need shirts for different seasons, preferably made of moisture-wicking technical fabrics that can help pull the sweat away from your skin and keep you dry and comfortable in the process.

Some of the best fabrics include Coolmax and Dri-fit.

Special apparel costs a little bit more than casual clothing, but you’ll find that it’s worth every penny — especially if you’re serious about staying comfortable for the long haul.

You’ll need a couple of pairs of bottoms: shorts, tights, pants, or even a skirt if you find that more comfortable.

And female runners need a good sports bra that both provides support and reduces the risk of chafing.

Other items to consider include (but are not limited to) running sunglasses, hats, hydration belts, sports watches, heart monitors, and more.

Here’s the full guide to cold weather running.

  1. Opt for Smart Socks

The golden rule on running is that you should not run in cotton socks. Cotton absorbs and retains moisture, and since your feet will sweat, running in cotton will leave your feet soggy and moist.

This leads to the two side effects of moisture and friction —calluses and blisters.

Instead, go for technical running socks.

These wick moisture away from your feet, keeping them comfortable and relatively dry.

Smart socks are made from either a blend of natural fibers such as wool, or from synthetic fibers such as nylon, acrylic, or Coolmax.

You can also try compression socks.

  1. Have More than One Pair

According to research published in the British Journal of Sports Medicine, runners who rotate their shoes among various models during a 6-month period had a 40 percent lower risk of incurring a running injury than those who ran in the same pair through the same period.

If you’re serious about reducing your risk of injury, train in more than one pair.

  1. Clean Your Shoes

If you take care of your running shoes, they’ll return the favor and take good care of your feet.

They’ll also last longer.

Failure to do so will mean that your shoes will lose their cushioning properties sooner than they need to: neglect wears them out prematurely.

Here are a few shoe-cleaning rules:

  • Do not toss your running shoes in the washer. Wash them manually instead.
  • Use an old toothbrush or nail brush and mild soap — preferably an anti-grease soap. A bit of water added in will wash away stains, dirt, and mud.
  • Do not toss your shoes in the dryer. Dry them in the open air under direct sunlight.
  1. Replace Your Running Shoes

Sooner or later, your trainers will wear out and lose their shock-absorption properties.

That’s when you need to ditch them and get a new pair.

Here’s the bad news.

As far as I know, there’s no proven formula that tells you exactly when to replace your running shoes.

That’s because there are many factors that impact running shoe lifespan, including:

  • Running surfaces
  • Runner weight
  • Weekly mileage
  • Training intensity
  • Running biomechanics
  • The climate you run in

As a rough guide, a running shoe should last you between 500 and 600 miles. Once your shoes go beyond this range you’re risking discomfort and pain, as well as injury.

My best advice is to use an app like MapMyRun to keep tabs on the mileage of a specific pair, or you can do it the old-fashioned way, using pen and paper or an Excel spreadsheet.

Additional resource – Guide to running lingo

  1. Tie Your Shoes the Right Way

Tying their shoes is something that well-accomplished 5-year-olds can do with ease. But there are many different ways to lace trainers, and different techniques can not only make them more comfortable, but also help avoid all sorts of discomfort.

According to a study conducted at the University of Duisberg-Essen in Germany, shoe-lacing technique has a huge influence on impact force, pronation, and foot biomechanics.

In this infographic, you’ll find a lineup of top knots to learn.

Infographic source: RunRepeat.Com

Bonus tip: You can also invest in a pair of Lock Laces.

  1. Dress For 10 Degrees Warmer Than What the Thermometer Says

Running during the winter has its challenges, but if you overdress, you’ll get in trouble.

For winter running, you need to aim for warmth, but without making yourself sweat so much that you get a chill.

That’s why I highly recommend that you dress as if it’s 10 to 15 degrees warmer than it is outside. You should feel slightly cold when you take your first few steps outside. Once you get moving you’ll warm up quite a bit, so don’t worry about feeling cold at first.

  1. Try YakTrax

As a winter runner, you need good traction to prevent sliding and slipping — especially when road conditions are freezing and/or snowy.

One thing you can do to make sure that you stay on your feet is to try YakTrax. It’s a traction device that meets the needs of runners during wintertime. They improve control and stability when there’s snow, sleet, and ice underfoot.

  1. Buy Running Garments On Sale

Are you a runner on a tight budget?

Buy your athletic garments at the end of the season.

As with any other store, running specialty stores put sale items on clearance as the weather changes to make room for the new models and styles that are coming in.

I’ve purchased some of my favorite summer running clothes in late autumn or winter when it was too cold to run in them, and my favorite cold-weather running gear when the temperature outside was hot

There’s nothing wrong with last season’s styles. They’re generally made from the same materials, and running clothes are performance tools, not fashion statements.

For the best running shoe deals on the web, check ShoeKicker.com. It’s a great website that scours the internet looking for the best deals.

  1. Use GPS Tracking Apps

Being able to measure your day-to-day performance is a great way to reach the next athletic level. After all, if you can’t measure, you can’t improve it.

Fortunately, advances in mobile apps mean that you can challenge yourself each time you head out the door. Running apps are perfect for beginning runners who need a little bit of a push and a way to monitor their progress, as well as for elite runners trying to stay in peak shape throughout the racing season.

That’s why, whether you’re training for your first 5K or your 11th marathon, your smartphone (or any other “smart” device) can be an excellent coach.

Here are a few of some of the best apps out there:

  • Runtastic
  • RunKeeper
  • Strava
  • MapMyRun
  • Edmundo
  • MyFitnessPal
  1. Use a Heart Rate Monitor

Using a heart monitor is like having a coach along for every run. When used right, it can show you, down to the stride, how hard or easy you are working. It can help you find your running sweet spot and prevent overtraining or undertraining in the process.

Here are the four main heart rate training zones you need to be aware of. Plan your workouts within each zone for a well-rounded training program

Zone 1—The recovery or energy efficient zone, it’s roughly 60 to 70 percent of maximum heart rate, or MHR.

Zone 2—The aerobic heart rate zone, it’s roughly 70 to 80 percent of MHR.

Zone 3—The anaerobic zone, it’s about 80 to 90 percent of MHR.

Zone 4—The VO2Max or Red Zone, it’s approximately 90 to 99.99 percent of MHR

Additional resource – How long is a 100-mile race?

  1. Protect Your Electronics

If you do a lot of running in the rain with a non-waterproof phone or GPS watch, then you need to protect your electronic devices from water damage.

Here’s how:

Store your device(s) in a lightweight zip-lock bag. The bag should to be securely sealed to prevent water from leaking in.

You can also cloak your device in plastic wrap, leaving no “skin” exposed. When wrapping, make sure that the charger port is well covered.

What I love about using plastic wrap is that it’s dense enough to protect against moisture but thin enough that you’ll still be able to use the touchscreen through the plastic.

Additional resource  – Choosing a running partner

  1. Manage Your Keys

If all the jingling and jangling of running with keys in your pocket drives you nuts, you’re not alone. Here’s my favorite solution:

Take the key off of its keychain, unlace your shoe a notch, then slide one of your shoelaces through the key and put it on the string. Tuck the key under the other lace before retying your shoe.

To keep the key from bouncing around, tie your shoe using a double knot and secure the other end of the key under the crisscrossed laces.

This technique will give you peace of mind and allow you to enjoy your run.

If you don’t want to do this, you can put a rubber band around your keys before tossing them in your pocket, or try putting them on a shoelace and wearing them like a necklace.

  1. Long Walks First

If you’ve been exercising regularly for the last 3 to 6 months and you’re already in good shape, you may choose to skip this step, but if you’re a real beginner, this is the most important step for building the right foundation.

Before you start running, do plenty of walks to prep your body. Start out with 30 minutes of brisk walking, then build it up to a full hour, three times a week for a full month.

By week four you should be walking for at least 60 minutes at a brisk pace three times per week. Now you’re ready to move onto a walk/run schedule.

  1. Walk/Run

The walk/run method is ideal for helping new trainees get fit without getting hurt. The key here is to gradually stretch your comfort zone without overextending it.

Here’s how to do it

Start with a proper warm-up of 10 minutes of walking at a brisk pace. This will get your heart rate up and the blood flowing to your muscles.

Next, jog slowly for 20 to 30 seconds. Slow it down and walk for 30 seconds to a full minute, then jog again for another 20 seconds.

Keep repeating the cycle for 15 to 20 minutes, then end your session with a 10-minute cooldown.

If everything is going well, increase your running time by 5 to 10 seconds from one session to the next. Do these increases gradually, staying within your fitness level the entire time.

  1. Give C25K a Try

Newcomers to running or those returning to it after a long layoff should give the C25k app a try.

This handy app offers a nine-week training plan that can help you train for a 5K race (roughly 3.1 miles) in a gradual and safe manner. You only need to commit 20 to 30 minutes, three times a week.

Additional Resource – Running during lunch break

  1. Start on the Treadmill

The treadmill is the perfect tool for building endurance without putting too much stress on the body. It gives you full control over your speed and incline, and allows you to adjust your speed and intensity to match your fitness level.

You really can’t overtrain on the treadmill unless you’re doing so on purpose, ignoring your body’s signals of pain and discomfort.

Here’s the workout routine you need:

Warm up for 10 minutes. Start with a 10-minute walk at 1.5 to 2 mph, then jog for three minutes at a pace of 2.5 to 3 mph for next three minutes. Make sure to practice good running form.

Increase the speed to 3.5 to 4 mph and stick to this relatively fast pace for one full minute before slowing back down to a walk for another 4 minutes.

Increase your speed to 3 mph and jog for three minutes, then run for one minute, picking up your pace to 4 to 5 mph (or even faster if your fitness allows it). Back off if your body hurts or your form starts to suffer.

Finish off with a 10-minute cooldown walk.

  1. The Talk Test

As a beginning runner, make sure that you’re running at what is known as a conversational pace. This means you should be able to speak in full sentences on-the-go without gasping for air. Want to test yourself?

If you can recite the Pledge of Allegiance without too much difficulty, you’re not running too hard.

By sticking to this rule, you’ll build your aerobic endurance based on the right foundation, and this will set you up for success later on.

The only exception to this rule is when doing any sort of speed work training. Speedwork includes sprints, fartleks, hill reps, or racing. These are not moves you should concern yourself within the early stages of your training.

  1. Run For More

After three to four weeks of using the run/walk method, start lengthening your running segments until you can run at a comfortable pace for 30 minutes straight.

Depending on your fitness level and training consistency, this may take you a while. But if you stick with it long enough, you’ll get there.

Once you can run for 30 minutes straight without much trouble, feel free to take your running to the next level. That’s when you’re going to start seeing some amazing results.

Once you’ve increased your running time to an hour or more, you will be in good enough shape that you’ll be able to sign up for 5k races, do interval or hill training, and much more.

  1. Avoid The Rueful Toos

Runners who do too much too soon without giving their body enough time to adapt to their new training load will eventually run into trouble. It’s one of the most common mistakes beginners make.

Don’t fall into the trap of “too much, too soon, too often, too fast, with too little rest.” Instead, build a solid base of easy, short, aerobic distances before you up the ante with speed, distance or hill training.

Even if you feel like you can do more during the first few months of training, rein that temptation in. The temporary sense of accomplishment you might get is not worth the risk of a painful injury or a burnout.

  1. Dynamic Warm-up

A good warm-up is the backbone of effective training, especially when doing hard, intense runs such as interval sessions or hill runs.

Warming up the right way can improve your performance as well as reduce the risk of injury.

Here’s a simple routine you can try.

Do at least ten reps of each exercise below for two to three rounds.

  • High kicks
  • Lunge with a twist
  • Inchworms
  • Hip stretch with a twist
  • Butt kicks

Or check my full routine here.

  1. Cool Down Right

The cooldown is just as vital to your performance and fitness as the warm-up.

A proper cool down can help transition blood from the working muscles to the normal resting flow, but when you stop on the spot, blood can start to pool in the legs and feet, leading to dizziness, vertigo, and discomfort in some people.

Here’s how to cool down properly. Jog or walk for at least 5 to 10 minutes (depending on your training intensity). Then do some post-run strength, mobility, and stretching exercises.

  1. Stretch After Your Runs

The benefits of stretching are a hotly debated topic in both the scientific and running world, but I still recommend stretching as a way of preventing injury and improving performance.

Here a few benefits of stretching:

  • Improves muscular coordination
  • Reduces lower back pain
  • Enhances posture
  • Alleviates post-run soreness
  • Increases range of motion

Whatever you do, don’t stretch before a run like we used to do in high school gym class. Studies show that static stretching before a workout can compromise performance and may lead to injury (think muscle tears).

Aim to stretch for at least 10 to 20 minutes after a workout, focusing on the main running muscle groups including the hips, the glutes, the hamstrings, the quads, and the calves.

Hold each stretch for 20 to 30 seconds, and breathe deeply into your stretch to release any tension or discomfort.

  1. Learn Lexicology

As you get more into running, sooner or later you’re going to run into some technical jargon. As is true in most sports, running has its own verbiage that you need to get good at if you’re going to be serious about calling yourself a runner.

In other words, you have to talk the talk.

Here is my full list of running jargon, where you’ll find more than 160 definitions of most common running terms.

  1. Have a Plan

“If you fail to plan, then you’re planning to fail.”

That quote might sound like a cliche, but that does not make it any less true, especially when it comes to running. Following a training plan will help you remove the guesswork from your workout routine.

Pick a training plan. You can find an array of intricate plans online, with something for everyone. All in all, the best plan is a well-rounded plan, whether you’re a recreational runner doing it for health and fitness or an elite marathoner hoping to optimize your performance.

Include the following five elements in your training program:

  • Interval workouts
  • Tempo runs
  • Hills runs
  • Long runs (or LSDs)
  • Easy run (for recovery).
  1. Add a Long Run

Longs runs are vital for training. They increase stamina, build proper form, burn mad calories and will get you in tip-top running shape for any race or distance. And adding long runs into a running plan is not that complicated.

After at least six months of regular training, increase your longest running session—typically, your weekend workout—by up to 10 percent from one week to the next. Keep doing this until you’re running for two and a half to three hours.

Do your long runs at approximately 60 to 70 percent of your 5K pace—that should be a comfortable pace. To make sure you’re doing LSD runs right, do a quick talk test whenever you feel you might be working too hard.

  1. Speed Work

Whether you’re looking to outpace your running buddy or aiming to beat your current PB at a given distance, speedwork is the way to go. It can also increase your range of motion, improve your conditioning, burn mad calories and build muscle mass, all of which can make you a stronger and fitter runner.

Here are the main speedwork sessions you need to add to your training schedule:

  • Classic 200m sprints
  • Tabata sprints
  • 400m laps around a track
  • Short and medium hill sprints
  • Fartlek sprints

As a rule, aim for quality over quantity. Speedwork should account for no more than 20 percent of your weekly total mileage.

  1. Sprint

Long sessions have their benefits, but to take your running to the next level, sprinting is of the utmost importance.

A form of high-intensity interval training (HIIT), sprinting can help you burn three times more calories than steady-state running. According to studies, it also boosts your metabolism and helps develop killer lower body strength and speed.

What I really like about sprinting is that it takes just half an hour to complete an entire session. What’s not to love?

Here’s how to proceed:

Start with a proper warm-up. Do five minutes of slow jogging followed by dynamic movements such as knee circles, inchworms, lateral lunges and walking lunges.

Then go for your first sprint, running at 70 percent of your top speed for 30 seconds. Take a minute to recover and then do it again, running your next sprint at 80 percent of your max effort.

Shoot for eight to ten sprints, then finish off the workout with a decent cooldown. Jog slowly for five minutes, then stretch your whole lower body.

  1. Tempo Run

Also known as lactate threshold, LT, or threshold runs, tempo workouts are faster-paced runs that are vital for boosting metabolic fitness.

The primary purpose for tempo runs is to increase your lactate threshold level, the point at which the body fatigues at a certain pace.

As a general rule, your tempo workouts should feel comfortably hard. A good example is a comfortably hard and sustained 3- to 4-mile run.

Here’s how to proceed:

For a five-mile tempo workout, start by warming up with a 5-minute slow jog, then run a mile at 20 seconds slower than your half-marathon pace.

For the remainder of the workout, pick up the pace every mile by five to 10 seconds until you’re running the final mile 20 seconds faster than your half marathon pace.

  1. Tackle the Hills

Hills build leg strength, boost lung capacity, improve running form and reduce the rate of injury. For these reasons and more, do not avoid hill workouts, but make sure you train using proper form. Your uphill running should mimic your sprinting form.

Here’s how:

  • Run tall, with your core engaged and your back flat. Do not lean forward.
  • Engage your hamstrings, quads, and glutes on the way up. Make sure to push from the hip while engaging your entire lower body to get up the hill.
  • Feel free to walk on the steepest sections of any given hill.
  1. Train Negative

If you want to improve your running speed/time, practice negative splitting. This means running the second half of your session a bit faster than the first.

In the ideal negative split run, once you reach the midpoint of the workout each mile gets increasingly faster than the last. As long as you finish the last mile faster than the first, you’re in a good place.

Here’s an example of a 4-mile session:

After a thorough warm-up, run your first two miles at an easy and controlled pace—shoot for 15 to 30 seconds slower than your average pace for that distance. Once you’ve reached the midpoint, pick up your speed to a 10K or 5K pace, then switch to maximum speed for the last 100 to 200 feet of your run.

  1. Try Fartleks

Fartlek is a Swedish term that means speed play. It’s a non-structured form of interval training developed in the early 1930s.

The primary purpose of a fartlek workout is to increase your speed and endurance in the most unpredictable and playful way possible.

Here’s how to proceed:

Start your workout with a 10-minute warm-up jog, then sight an object in the distance: it can be a tree, a parked car, or a building. Run towards it fast. Once you reach it, slow down and recover. Sight the next object and repeat.

Whatever you do, make it random. Make it fun.

  1. Try Tabata Protocol Runs

Made famous by a 1996 study by Dr. Izumi Tabata and his colleagues, the Tabata protocol is a very specific method of interval training proven to shed body fat and increase performance.

A session consists of twenty seconds of maximum burst (max effort/max reps) followed by ten seconds of recovery.

To do Tabata, sprint for 20 seconds at full speed, then rest for 10 seconds.

You can also up the ante by adding in some bodyweight exercises to make the workout more challenging.

Here’s a simple Tabata protocol to try.

  • Set 1: Sprint at a moderate pace for 20 seconds. Rest for 10 seconds.
  • Set 2: Do as many push-ups as possible in 20 seconds. Rest for 10 seconds.
  • Set 3: Sprint for another 20 seconds at max speed. Rest for 10 seconds.
  • Set 4: Do as many squats as possible in 20 seconds. Rest for 10 seconds.
  • Set 5: Sprint as fast as you can for 20 seconds. Rest for 10 seconds.

Rest for two minutes and repeat the whole circuit twice.

  1. Cross Train

Cross training is vital for runners because it can help prevent overuse injuries such as runner’s knee, ITBS, shin splints, and stress fractures, as well as lower back issues, hip, joint and knee pain.

Cross training can also boost your speed, increase your stride length, improve your running form and boost your overall fitness and health level.

Here are eight super-effective training methods to try:

  • Yoga
  • Cycling
  • Weight training
  • CrossFit
  • Swimming
  • Jumping rope
  • Rowing
  1. Get Explosive

Plyometric training, also known as explosive or jump training, is another excellent cross-training method that research shows can increase running speed and power.

This type of training requires a fast and forceful recruitment of muscles fibers through high velocity, dynamic moves. These are key for building explosive power both on and off the running field.

Here’s a list of some of the best explosive exercises for runners:

  • Squat jumps
  • Box jumps
  • Kettlebell swings
  • Burpees

Here’s my full guide to plyometric training.

  1. Practice Planking

The core is made up of the muscles that connect the upper and lower body. It includes the glutes, lower back, hip, and abdominal muscles.

Your core muscles work in tandem to hold your torso upright and provide stability for your entire kinetic chain while running. That’s why you MUST do a core strengthening routine two to three times a week.

One of the best exercises for runners is the good old planks. I cannot recommend these enough. In addition to building up your core, they’ll also help develop endurance and strength in the shoulders, arms, and back.

Check the following tutorial to help you build and keep good plank form.

  1. Test Yourself

To improve your running, you MUST measure it — otherwise, you’ll have no idea whether you’re progressing.

The best way to measure your fitness progress is to test it.

Check my full guide to fitness testing here.

Here are the main tests you should be taking on a monthly basis:

  • The 400m sprint
  • The one-mile run
  • The Cooper 12-minute test
  • A 5K distance run
  • A 10K distance run
  1. Build the Habit

There’s are few things that feel worse than falling off the fitness wagon after investing so much time into building the right foundation.

That’s why even once you’ve reached your fitness goals, you have to keep your training program going strong. Quit or slack off, and you risk undoing all your hard work—and you don’t want that.

To stay consistent with your new running routine, make sure you turn it into a habit.

Here’s how:

  • Use a calendar and book your running sessions the same way you schedule an important family event or work meeting. If you create a sense of urgency and importance around your run, you’re more likely to carry through.
  • Start running with a friend or training partner. This will boost your motivation and add a sense of accountability to your program. This is vital for consistency.
  • Resolve to run at least three to four times a week for the upcoming 8 to 12 weeks. Do what you have to do never to miss a session.

For my guide on habit formation, check this post.

  1. Set Goals

When it comes to running, it’s vital to have something to work towards regardless of your training aspirations.

Whether your goal is weight loss, improved performance, stress relief, or anything else, having a set of goals creates a benchmark of progress as well as a sense of accomplishment once you start achieving them. I cannot overemphasize the importance of goal setting—even if it’s something you’ve never consider doing before.

Setting goals is what helped me go from being a complete couch potato to becoming a consistent runner, so please start setting fitness goals.

Here’s the golden rule of good goal setting:

Make your goals S.M.A.R.T., And that’s an acronym that stands for Specific; Measurable; Achievable; Realistic; and Time-related.

For my in-depth article on this topic, check my post here.

  1. Run With a Partner

Running is, by definition, a solitary sport and a solo journey, but it doesn’t have to be that way.

Research shows that pairing up with a training buddy can lead to better consistency, help you become more accountable, and may even make you exercise a bit harder than you would when you run alone. All of these can do wonders for your running routine.

I’d go so far as to claim that training partners might be the most valuable tools you can have as a runner.

Ask a friend, a family member, a gym partner, or neighbor to run with you.

If you can’t find a suitable partner among people you know, join a local running group or hunt for one online.

  1. Chart Your Progress

As I’ve already stated, if you can’t measure it you can’t improve it.

That’s why I keep stressing the importance of monitoring your progress (or lack thereof, for that matter).

Keep a written log of your running routine. You don’t need anything fancy – a standard training journal, a spiral notebook or a plain notepad will suffice.

Here are some of the things and factors you need to keep track of:

  • Your running times
  • Your running distances
  • Your heart rate (and its fluctuations)
  • Calories burned
  • Running routes
  • Aches, pains, and injuries
  • Cross training workouts and reps
  • Body weight
  • Body measurements

Use Excel spreadsheets to create simple charts for tracking your progress.

You can also keep tabs on your progress online using sites like MapMyRun, DailyMile.com, or RunKeeper.

  1. Run To And/Or From Work

Finding balance between everyday life obligations, work chores, and a running routine is no easy feat. This is especially the case if you’re already burning the candle at both ends.

Instead of running to catch up with the train or a bus, try running to or from work. Put your commute time to good use. But whatever you do, make sure you do the following two things:

First, plan your run-commute thoroughly. Have everything ready the night before, from clothes to shoes, hydration and more.

Second, invest in the right backpack. You might need to think this one through before you make a buying decision. Your pack should be runner-friendly and must not bounce with every step.

  1. Reward Yourself for Your Successes

Rewards are positive reinforcement, and can be a powerful motivator.

When you reach a certain benchmark or achieve a given goal, treat yourself for the hard work you’ve put in and what you’ve accomplished.

Here are some ideas:

  • Buy a new running shirt or a pair of shorts
  • Have a meal at a nice restaurant
  • Watch your favorite Netflix show
  • Go on a special trip
  • Go to the movies
  • Take a long nap
  1. Try Zombies, Run!

For runners looking to turn their everyday workouts into an immersive adventure through a zombie-infested wasteland, look no further than this fantastic gaming app — especially if you’re running out of enthusiasm and need to add a bit of adventure and fun.

Zombies, Run! is an amazing audio adventure for thriller-seeking runners. Thanks to this game you’ll be the hero of your very own zombie adventure story. You’ll run through various missions while being chased by zombies, while also collecting the items you need to progress through the game.

Additional resource – How to Do a Run Streak

  1. Listen to the Right Music

Studies have linked listening to music to improved athletic performance, better training experience, and superior training consistency.

It’s not rocket science. All you need is the right playlist for the job.

Here’s the golden rule: when picking songs for your running playlist, stick with songs that have a BPM (Beat Per Minute) in the range of 120 to 140.

Here’s how:

You can do it manually, but it’s a real hassle. I don’t recommend this method unless you have a lot of time to spare.

Instead, check out websites that have already compiled thousands of songs and playlists tailored to all sorts of runs and events.

RunHundred.com and RunningPlaylist.Com are two of the best of these.

  1. Get Ready the Night Before

To set yourself up for running success, lay out your running gear the night before your workout. Doing so will help eliminate any barriers between you and your workout, save you a lot of time, and keep your mornings stress-free and smooth.

It should take you no more than 5 to 10 minutes to get these things together:

  • Your running clothes, including pants, socks, t-shirt, underwear, etc. (or sleep in them if you want to)
  • Your waterbottle
  • Your music playlist
  • Your pre-run snack
  • Your running route
  • Your workout
  1. Join Online Fitness Groups and Forums

Online health communities, whether they’re fitness groups, forums, social media website or some other type of group, are all great venues for expanding your social circle and connecting with like-minded fitness folks.

Joining up will help you increase your motivation and give you the push you need to exercise a little bit harder and stay consistent over the long haul.

Some of the best fitness-oriented online resources include:

  • Men’s Health
  • Runners World Forum
  • My FitnessPal
  • Fitbit
  • Cool Running
  • Jefit
  • BodySpace
  • Nerd Fitness
  • Transformative Fitness
  1. Race

Choose one of the many running-related events in your area, whether it’s a fun local 5K race, an obstacle race course, or a serious half-marathon or marathon distance challenge, and pay your registration fees in advance to keep yourself accountable.

Just make sure that the race fits your fitness level and schedule. If you’ve never done any sort of running before, spend a few months preparing for the race and make it a shorter distance such as a 5K or 10K run.

  1. Change The Direction of Your Runs

If you run the same route day in day out, sooner or later you’re going to get bored, and that’s when you’re most likely to slack off. It’s bad for your consistency and overall training experience, so switch up your running route regularly.

The simplest way to do this is to run your typical route backward every other week.

Don’t like this idea?

For another option, use crowd-sourcing apps like MapMyRun or a web resource like WalkJogRun to find and discover new routes close to where you live.

  1. Run in The Morning

Becoming a morning runner was a true godsend for me. It helped me stay consistent and become the runner I’m today.

As a bonus, research shows that those who exercise first thing in the morning are more consistent and efficient than the folks who work out later in the day.

Morning runs can improve your mood, boost productivity, shed more calories, and increase your focus and energy for the rest of the day, so if it’s all possible, run first thing in the morning.

Here are the golden rules:

  • Prepare the night before by laying your workout gear out
  • Aim for seven to eight hours of quality sleep
  • Place your alarm clock far away from your bed to force yourself to get up and out
  • Drink plenty of water and have a light pre-run snack before you head out the door
  1. Work on your Running Form

Proper training form is king, whether you’re lifting weights in the gym or circling the running track. The right technique can help reduce your risk of injury and make your workouts more efficient.

Run with bad form, and you’re risking all sorts of strains, aches, pains, and injuries.

Here’s how to build good form:

  • Run tall.
  • Prevents neck strains by keeping your head straight and your eyes straight ahead. Don’t look down at your feet.
  • Keep your shoulders relaxed, back, and down. Don’t let them tense up toward your ears.
  1. Lean Forward

This is something I learned from the Chi Running method, and I’ve found it to be very helpful.

Instead of running with a upright posture, run with a slight forward lean of about 8 to 10 degrees. By doing so, your body falls forward with every step, which in theory helps propel you forward and increases your stride turnover.

Mastering the forward lean is more easily said than done. One major mistake I see many runners make is leaning from the waist. Running this way can put a lot of undue pressure on the lower back and slows you down.

Instead, lean from the ankles while engaging your core muscles and keeping your spine straight, allowing for no bending in the waist.

  1. Keep Your Body Relaxed

As a runner, tension is enemy number one. It wastes energy, triggers bad form and can compromise the quality of your workout, leading to premature fatigue and increasing the risk of injuries.

Check your form throughout your run, allowing no chance for tension to creep into your workout.

Here are the few hacks that can help:

  • Shake your arms and hands every couple of miles and try rolling your neck forward, backward, and to the sides.
  • Imagine you’re holding an egg in each hand, gently cupping your palm with your thumb resting on your fingers instead of clenching your fist.
  • Breathe deeply and consciously, letting go of tension and discomfort. You have to get good at catching yourself in the act, and that requires practice.
  1. Pump Your Arms

As a runner, you’re, mainly relying on your legs to propel you forward, but that’s not the whole story. Your arms can help too.

Research shows that opting for a strong arm swing has a drastic impact on the smoothness of your running gait, resulting in a reduced workload on your legs and an increase in your economy of motion.

To boost your endurance and speed, drive your arms in a fluid motion, forward and backward, aiming for a 90- to 100-degree bend at the elbows. Do not pump your arms across the midline of your body—doing so wastes energy and tires your muscles. It might also hinder the forward motion of your body.

Your elbows should swing anywhere between the waistline and chest.

  1. Kill the Bounce

Research shows that vertical oscillation (running with a bounce) has an enormous negative impact on running economy and speed.

When your body is moving up and down too much, you’re wasting a lot of energy and putting undue pressure on your lower body, especially your quads. This leads to premature fatigue and soreness.

Here’s how to keep it under control:

  • Imagine you’re running under a low roof hovering a few inches above your head. Do not hit your head on the ceiling.
  • Land with your foot almost directly below your knees. Do not let your foot land in a spot ahead of your knee.
  • Focus on a faster leg turnover by running lightly and landing softly on your foot. Think quick steps. Focus on keeping your feet under your knees.
  1. Shorten Your Stride

When you overstride your foot lands on the ground well ahead of your hips. This runs the risk of increasing the stress load on your lower body. It also creates a braking effect that can hinder performance.

So, what’s the solution?

It’s simple: shorten your stride. Doing so helps reduce the braking effect and encourages a smoother, more natural running gait.

Here’s how:

  • To cover more ground, focus on springing off rather than trying to lengthen your stride.
  • Think short, light foot strikes and keep shortening your normal stride until you reach the perfect running cadence.
  • Keep your knee positioned above your foot and keep your shin vertical as your foot strikes the ground below you.
  • To boost speed, increase your leg turnover, driving your leg back from the hips instead of reaching forward with your foot.

All of this may sound a little complicated, but with a little of practice you’ll be able to wrap your head around it in no time.

  1. Increase your Cadence

In running lexicology, running cadence stands for the number of steps you take per minute while running.

When it comes to improving speed, cadence is a vital factor. Opting for the proper cadence reduces the impact of stress on your feet, knees, and ankles, and improves running economy.

According to Jack Daniels (the legendary running guru), the optimal cadence for running is roughly 170 to 180 steps per minute.

Your cadence doesn’t have to be exactly 180 throughout your training — in fact, your racing cadence and easy training cadence shouldn’t be the same.

  1. Breathe Rhythmically

Rhythmic breathing is a form of synchronized breathing that consists of timing your breaths to your foot strikes. The right breathing ratio depends mostly on your current fitness level and training intensity.

So how do you pick the right ratio?

If you’re a complete beginner, start with a 3:3 ratio. This means that you breathe in on three steps—RIGHT foot, LEFT foot, RIGHT foot, then breathe out on the next three steps—LEFT foot, RIGHT foot, LEFT foot.

Using this pattern, you will be taking in roughly 25 to 30 breaths per minute.

This ratio is also ideal for easy (and recovery) runs.

If you feel like this is too slow for you, opt for a 3:2 ratio: inhale on the RIGHT, LEFT, RIGHT foot strikes, then exhale on the LEFT, RIGHT foot strikes.

A 2:2 ratio is ideal for when you’re running a tempo pace, or whenever you need more of a push. For the most part, this means cruising at roughly your 10K race pace, or maybe a bit slower. For quality workouts, opt for a 2:1 or even 1:1 ratio.

Here’s my full guide to proper rhythmic breathing while running.

  1. Breathe Deeply

To improve performance and stamina, cultivate the habit of diaphragmatic breathing.

Most runners are chest breathers. That’s neither the most efficient nor the healthiest way to breathe while running. Chest breathing increases the risks of hyperventilation and reduces your intake of oxygen while running.

The good news is that by switching to deep breathing you get more oxygen into your bloodstream. This can boost lung power as well while reducing the risk of side stitches.

  1. Downhill Running

As the saying goes, what goes up must come down. That’s why you should never forget the importance of downhill running.

On the descent, proper form can improve your performance and reduce post-workout soreness—especially in the quads.

Here’s the right way to run downhill:

  • Stay upright, keeping your posture perpendicular to the ground beneath you. Do not lean back or overstride, as doing so creates a braking action. The only exception is on the steepest grades.
  • Brace your core to keep control over your body and the hill. Don’t let the hill control you on the way down.
  • Do not look straight down. Look ahead while focusing on the line you wish to follow for balance.
  • Increase your cadence, aiming for quick, light steps and fast leg turnover.
  1. Let Go of the Handles on the Treadmill

When you’re running on a treadmill, holding onto the handles may help when fatigue starts to set in, but doing so will compromise your overall workout.  Positioning your hands on the handles aligns your body in an abnormal way, leading to discomfort and even injury, especially in the hips, lower back, knees, and shoulders.

Instead of touching the equipment, swing your arms backward and forward while engaging your core. This will not only help you keep good form, but will also engage your core, give you a full body workout, and burn more calories.

  1. Have a Pre-run Meal (or Snack)

The main goal behind a pre-run meal is to give you a boost of energy without giving you a troubled stomach on the road.

For a proper pre-run meal, focus on high-quality carbs and low-fiber, low-fat foods.

Make sure you time your pre-run meals correctly. Timing is the most critical variable in the pre-run meal equation.

As a general guideline, if you have an hour or more before a run, you can eat at least 250 to 300 calories worth of food. If you’ve no more than half an hour before a run then eat no more than 140 calories worth. This is frequently the case if you’re running early in the morning but don’t want to go out the door on an empty stomach.

  1. Post-Run Eating

The foods you consume immediately following a run are crucial for optimizing recovery and energy renewal.

Your post-run meal should score high on protein to help repair muscles and speed up recovery. You should also take in good carbohydrates to replenish your glycogen stores and get your body ready for your next run.

Here are three of my favorite post-workout meals:

  • Chocolate milk. The mix of carbohydrates (chocolate) and protein (milk) is just right for refueling your weary body. In fact, according to a study in the Journal of Clinical Nutrition, consuming chocolate milk after a workout can increase muscle protein synthesis.
  • Fruit salad. Fruit will not only help you replenish your energy stores with needed energy, but it will also help break down nutrients. Plus, the mix of fruits delivers a healthy punch of enzymes—anti-inflammatory properties that speed up recovery.
  • Egg whites deliver a healthy punch of proteins and key amino acids, which can help you rebuild damaged tissues after strenuous exercise.
  1. Hydrate Properly

Dehydration can lead to all sorts of serious issues such as headaches, premature fatigue, muscle cramping, decreased coordination, heat exhaustion, and more.

To keep it at bay, drink plenty of water, regardless of whether the weather is cold or warm. As a general rule, you need at least 12 to 16 glasses of water a day.

Please take note that the previous rule isn’t written in stone. The exact amount of water you need depends on many variables, including your age, body weight, gender, fitness level, training distance/intensity, sweat rate, physiology, and outdoor temperature.

One way or another, I highly recommend that you stay well hydrated throughout the day.

  1. Look At Your Pee

I hate to sound like a broken record, but research shows that dehydration can lead to decreased performance, premature fatigue, seizures, blood clots, and even death.

To check for signs of dehydration, look at your pee. You should be drinking enough water throughout the day for your urine to be a light straw color, or mostly clear with a tinge of yellow.

If your urine looks like chardonnay, or is yellow or orange, then you’re dehydrated and need to be drinking a lot more.

Additional resource – How to Stop urine leakage in runners

  1. Get More Iron

Iron is a vital component of the body’s red blood cells. Blood cells contain hemoglobin, and are crucial for transporting oxygen to your body’s various muscles and tissues. Iron deficiency leads to a reduction in hemoglobin level, which in turn hinders proper oxygen delivery.

Some of the best food sources for iron include egg yolks, lean meat, dark green leafy vegetables, lean meats, dried fruits, legumes, and whole grains. You can also go for iron-enriched or fortified cereals and bread.

To improve absorption, consume iron-rich foods with vitamin C like orange juice.

  1. Have a Sports Drinks

Sports drinks are runner-friendly beverages that score high on both carbohydrates and electrolytes. These two nutrients are vital for staying well fueled and hydrated during intense aerobic activity.

Aim for taking in at least 30 to 50 grams of carbs for each hour spent running, but keep in mind that 8 ounces of a typical sports drink might contain roughly 16 grams of carb. During a long run, aim for taking in 4 to 6 ounces of fluid for every 20 to 30 minutes spent running.

Some of the best brands include Gatorade, HEED, PowerBar Perform, and GU Roctane.

If money is an issue, then the next tip will come in handy

  1. Make your Own Sports Drink

I make my own sports drinks using whole foods and natural ingredients, and I love it. By doing so, I’m saving a lot of money while choosing a healthier path by going for more natural, whole ingredients.

For the icing on the cake, making your

Run Strong: 8 Essential Foot Strengthening Exercises for Runners

foot exercises for runners

Well, you’ve stumbled upon the holy grail of foot-strengthening exercises, right here, right now.

Listen up, because this is important. As a runner, you know that strength training is like the secret sauce that adds power and resilience to your performance. You’ve probably been diligently working on strengthening your muscles, which is fantastic.

But here’s the million-dollar question: Have you ever considered giving some love and attention to your hardworking feet? If your answer is a hesitant “no,” then hold onto your running shoes, because we’re about to open your eyes to a game-changing aspect of training that you’ve been missing out on.

You see, your feet are the unsung heroes of your running journey. They endure countless strides, absorb impact, and propel you forward mile after mile. Yet, they often don’t get the attention they deserve. It’s time to change that, and unlock a whole new level of performance.

By incorporating specific foot strengthening exercises into your training routine, you’ll unleash a world of benefits. Picture this: enhanced stability, improved balance, reduced risk of injuries, and increased overall foot strength.

Now, don’t worry if you’re not sure where to start. We’ve got your back. In this comprehensive guide, we’ll walk you through the best foot strengthening exercises tailored specifically for runners like you.

Are you ready? Let’s get started.

The Benefits of Foot Exercises For Runners

Let’s dive into the incredible world of feet!

Did you know that each foot is a complex powerhouse with roughly 20 muscles working in harmony? These muscles, including the anterior tibial, peroneal tibial, posterior tibial, flexors, and extensors, play a vital role in supporting our every move.

Numerous studies and research papers have delved into the fascinating mechanics of these muscles, shedding light on their intricate functions and how they contribute to our overall performance.

But that’s not all—your feet are home to an impressive collection of 26 bones, accounting for a whopping 25 percent of all the bones in the human body.

Imagine that! Alongside these bones, you’ll find a network of 33 joints, more than 80 tendons, and ligaments that provide stability and flexibility to this remarkable structure.

Now, let’s talk about the significance of our feet in our daily lives. We rely on them to stand, walk, run, and perform a wide range of athletic movements, such as squatting, balancing, and jumping.

They truly are the unsung heroes of our physical endeavors. In fact, the metaphorical weight they carry is immense—they can make or break us as runners.

Given the incredible demands we place on our feet, it’s no wonder that they are the most used and abused part of our bodies. Every step we take, every leap we make, puts tremendous pressure on this intricate system.

And here’s where things get interesting: any dysfunction or imbalance in the musculature structure of our feet can have a ripple effect on our overall running gait and range of motion. This can ultimately lead to overuse injuries, like Achilles Tendinitis, chronic ankle sprains, knee pain/injury, and even lower back pains and aches.

Want more? Here’s a guide on running after strength training.

8 Foot Strength Exercises For Runners

Without further ado, here are the best foot strengthening exercises for runners. Strengthen your feet for running by performing these exercises at least two to three times a week.

Foot Exercise for Runners – 1. Shin Curls

While using a step or a box, stand while assuming an athletic position with the toes hanging off the edge as much as you feel comfortable.

Next, curl your toes and foot up toward your shin as high as possible without rocking backward, hold the dorsiflexed position for a moment, then slowly lower your toes to the starting position to complete one rep.

Foot Exercise for Runners – 2. Single Leg Balance

Stand with feet hip-width apart, with the core engaged, back flat, and both hands are resting gently on your sides.

Next, lift your left leg straight toward the 12 o’clock position and balance on your right leg.

If you have any balance issues, then feel free to use a wall or a stable chair for more assistance.

For more challenge, try swinging the lifted leg forward and back, from the 12 o’clock to 6 o’clock, so and so forth, or balance on a balance disc or a seat cushion. You can also try single-leg bridges to test your balance.

Foot Exercise for Runners – 3. Heel Walking

Lift up both your feet, then pace the whole length of the room by walking slowly on your heels.

Make sure that you are on your heels the entire time.

For more, keep your toes pointed forward.

Foot Exercise for Runners – 4. Toe Presses

Assume an athletic position with a slight bend in the knees.

Next, lift your toes off the ground then flex the foot (pull the ankle back towards your shin), hold the contraction for a count of three, then release it slowly to the ground.

You can do this exercise while standing tall or while sitting.

Your choice.

Additional resource – Running Vs. Strength training

Foot Exercise for Runners – 5. Toe Curls

Start by placing a towel on the floor, then spread your toes like a fan, then grip the object and pull it toward you.

Repeat 8 to 10 times, then work the other foot.

Foot Exercise for Runners – 6. Calf Raises

Begin by standing in a shoulder-width stance with the toes flat on the edge of a step or a box, near a doorway or a counter, then hold on light for balance.

Next, raise up by pushing your toes into the step, hold for a count of three, then lower your back to the starting position.

You’ll know that you are doing this one right once you start feeling a stretch in your calves.

Additional guide – How to prevent Foot pain in runners

Foot Exercise for Runners – 7. Ankle Circles

While using a wall or a chair for balance, stand on your right foot, then raise the left foot a few inches off the floor.

Next, and without moving your legs, rotate your right ankle in a large circle in one direction.

Then perform a circular motion with the big toe.

Clockwise then counter-clockwise.

When you are done with the right foot, release and repeat on the opposite side.

Foot Exercise for Runners – 8. Toe Walks

Stand tall with your back flat, core engaged.

Next, while keeping the legs straight and heels pulled up towards the calves, walk forward on the balls of your feet for one full minute.

Make sure to keep your stomach tight and maintain an upright posture throughout the exercise.

Whatever you do, do not fold at the waist.

Here are more strength exercises for runners.

8 Foot Strengthening Exercises For Runners – The Conclusion

If you’re looking for practical advice on how to strengthen feet for running then today’s post has you covered. The rest is just details.

Please feel free to leave your comments and questions in the section below.

Thank you for dropping by.

How to Get the Smell Out of Running Clothes

smelly running clothing

Looking for the best advice on how to get smell out of running clothes? Then you’ve come to the right place.

Log in a couple of sweaty runs, and you’ve shirts, shorts, socks, and underwear that smell like a locker room.

That’s why figuring out how to get the smell out of running clothes is one of the biggest of all training mysteries.

If you’re a runner dealing with stinky workout gear, then, you’ve come to the right place.

In today’s post you’ll discover the exact steps you need to remove the sweat smell and nasty odors from running shirts, shorts, and other training clothes the easy way.

But first things first, let’s discuss why running clothes can stink so badly.

The Source of The Stink

Bad smells, be it coming from garbage cans or bad breath, is the by-product of bacteria, in one form or the other.

Generally speaking, a good wash is all that’s needed to remove the bacteria from your casual clothing.

But it’s not always the case when it comes to high performance fabrics.

So, why do running clothes tend to hold onto smells even after being washed?

Blame the Technology

The stinky odor can be blamed on the bacteria found on your skin that get trapped in the fabric fibers.

But isn’t regular washing supposed to take care of that?

That’s actually when things go awry.

High-performance clothing designed specifically for running are usually made with high-performance stretchy materials—typically of smooth synthetic tubes—think fishing line. This helps divert water and allows for sweat to evaporate off the skin, keeping your body dry and comfortable.

But here’s the downside.

High-performance fabrics may have extra crannies and nooks that cling to dirt and odors. And the typical washing process usually has a hard time getting penetrating those grooves.

That’s why synthetic materials—such as Supplex, Lycra, Coolmax, Dri-fit, Climacool, and Tactual—can turn into stink magnets.

If it seems like you can never quite the funky smell out of your favorite workout tops, you ‘re probably right—your workout gear is working against you.

Smell Out of Your Running Clothes

Don’t Hesitate to Wash

Keeping your running kit in a pile or letting it sit in a hamper after a run encourage the bacteria to grow and for the smell to linger and get worse.

And The longer your precious workout kit stays dirty, the more difficult to remove the smells.

Make it a rule never to let your running gear stew in its stench. Once you get home after a workout, remove your kit as soon as possible (or take it out of the bag) and dry it quickly.

Not doing laundry right away? Hang them up or lay them on a drying rack so they can breathe in the fresh air before laundry day.

Air Them out

Your first line of defense against the smelly odors is to expose your running clothes to natural air as soon as you are done running.

If you keep your clothes in an enclosed space, your clothes will become a breeding ground for bacteria.

In fact, the longer you keep your workout clothes in an enclosed area, the more intense your running clothes may smell.

But it’s not the whole story.

Doing this can also wear down the fabric of your clothes, contributing to a faster deterioration of your running garments.

And I’m assuming that you don’t want that.

Therefore, in case you are not planning on washing your running clothes right away following a workout, make sure to put them where they can air out instead of tossing them on the floor of your bathroom or in your laundry hamper.

For the best results, hang your clothes outside, on a drying rack if it’s available.

If it’s not the case, then the side of a laundry basket can do the trick.

Ease up on the Detergent

Most people believe that more detergent is good.

But in reality, it’s worse.

Why?

Well, most washing machines have a standard cycle that’s set to handle a set amount of the stuff. Thus, any excess of it does not get washed out. Instead, it ends up lingering on your clothes, causing all sorts of trouble.

This builds up on your clothing, trapping mold and mildew— creating an ideal breeding environment for bacteria.

As a result, to err on the side of caution, opt for half or three-quarters of the amount of detergent you typically use. Then do a sniff test to assess how things are going.

Or at least, wash your running clothes with a detergent that’s specially designed to handle fitness and sports clothing.

Some of the best brands include Tide plus Febreze Freshness Sport, and Win High-Performance Sports Detergent (Get it here on Amazon).

You can also add in an anti-odor in wash eliminator. One effective product to try out is Febreze In-Wash Odor Eliminator. ( Get it here on Amazon).

Skip the Fabric Softener

What you need to watch for, when it comes running clothes, is fabric softener.

In fact, I’d go as far as to say that fabric softener is your running gear’s worst enemy.

Instead of cleaning the clothes, fabric softeners can, in fact, create a sort of fence that traps rotten smells in. This also keeps detergent and water from penetrating those grooves for a thorough wash.

Not only does it make your running clothes stink, but it also ruins the way they fit. Fabric softeners tend to break down any materials that stretch—the building blocks of technical workout attire.

Henceforth, whether in the form of sheets or liquid, you don’t want to this stuff near your running clothes. Or, at least, go for detergents that are free of dyes or fragrances.

For the odor, try adding half a cup of white vinegar to your wash cycle (for more on how to do that, check tip No. 5).

Pre-Soak Your Running Gear

This is another simple, yet overlooked, step that can help tremendously with the stinky smells.

Before you toss your workout clothes into the wash, presoak them in four parts cold water and one part white distilled vinegar for 30 minutes.

White vinegar has a very low level of acid that cuts through the stubborn bacteria and releases it to be flushed away during the wash.

Wash your Clothes ASAP

This might sound redundant, but if your running clothes are drenched in sweat following a workout, then you gotta wash them immediately.

Do not let your workout clothes steep. That’s the Cardinal Rule.

Action Steps

Here are the three guidelines you need for a perfect wash:

(1) Use your hands

In case you don’t have a washing machine nearby, then hand wash them.

In fact, in my experience, this might be the best thing you can do to fight off the smells, be rid of those pesky stains, and prolong the lifespan of your garments.

(2) Flip Them

Flipping your running kit—especially leggings—inside out while washing give direct detergent access to the smelliest and dirtiest parts of the fabrics. These are the areas in direct contact with your skin, and the breeding ground for bacteria.

What’s more?

By exposing the inside of your running kit to all that pilling and ripping while protecting the exterior.

(3) Wash them Separately

If you want to save your other casual clothing from the smell, then PLEASE wash your regular clothing separately.

In fact, even if you followed the plan I’m sharing with you to the letter, some stubborn smells are there to stay.

So please don’t pass it on to your work or casual clothing.

Also, do not combine two (or more) people’s smelly workout clothes.  Otherwise, neither set would end up smelling fresh.

smelly running clothing

Use the Right Amount of Laundry Detergent

Using too much of detergent with hoping the more the merrier may backfire on you.

The excess stuff will only build upon your workout gear, which will then trap dead skin and foster fungus. Ick!

Whether you’re using plain old Tide, or special sports detergent (like Nathan’s Sports wash), it’ important to add the right amount to your washing machine.

I’d recommend using no more than two teaspoons of high performing brands, like Persil, Wish, or Tide, per full load. This is often more than enough per a load of laundry.

For more, try adding half a cup of baking soda to your laundry during the rinse cycle to help remove the odors.

Additional resource – How to clean running shoes

Add Vinegar

A powerful solution I found to be super helpful when it comes keeping my running clothes smelling fresh is to soak them in white vinegar just before washing them.

Actually, this might be the miraculous cure you need for getting rid of the smells altogether.

Here is how to do the vinegar pre-wash tactic:

First, soak your workout clothes in a clean kitchen sink with one part white vinegar and four parts cold water, then let the stuff chill for at least a half an hour. This is going to disinfect and loosen the stains before the wash.

Next, proceed with the washing—whether manually or using a washing machine.

For more, you can also add one cup of white vinegar to your wash during the rinse cycle.

If you are trying to get rid of a huge stink, then feel free to up that to two cups.

6. Hang Them to Dry

Most running clothes is what you may call tech gear. They are made from special fabric that insulates heat, wicks moisture away, you know the drill…

Thus, you should never toss them in the dryer.

In fact, high heat will cause shrinkage or damage to your gear, shortening its lifespan in the process. And you don’t want that.

So, what is the best course of action?

The best way to dry technical fabric is to hang dry them. So please, if you have a drying rack in your bath, then let them dry there.

Or if it’s possible, put your running clothes where they can dry in direct sunlight.

In fact, the sun’s rays naturally deter the growth of bacteria and will zap stains and odors right out of the clothing, keeping them cleaner and smelling fresher for longer.

In case it’s not possible for you to air dry your workout clothes, then put them in the dryer, opting for the lowest heat setting on your dryer possible. This will save the elastic and won’t cause much shrinkage or damage to your clothes.

Still, I’m really against this. But desperate times call for desperate measures.

Additional Resource – Here’s how to dry running shoes.

New to Running? Start Here…

If you’re serious about running, getting fit, and staying injury free, then make sure to download my Runners Blueprint Guide!

Inside this guide, you’ll learn how to start running and lose weight weight the easy and painless way. This is, in fact, your ultimate manifesto to becoming a faster and a stronger runner. And you want that, don’t you?

 Click HERE to check out my Runners Blueprint System today!

Don’t miss out! My awesome running plan is just one click away.

Knee Pain When Running: Causes, Treatment, and Prevention

Are you tired of enduring relentless knee pain while running? Look no further, because this article is tailor-made for you.

Here’s the truth.

Running, with its relentless impact on the body, can be a double-edged sword. It pushes your limits, but at the same time inflicts strains, soreness, and inflammation on the very joints, ligaments, and cartilage that make up your knees.

Trust me, you’re not alone in this struggle. Knee injuries haunt many runners like an unwelcome shadow, lurking in the background of their passion.

But fear not! I’ve got the answers you’ve been seeking.

In this captivating guide, I’ll be equipping you with the knowledge you need to overcome this hurdle as we explore the culprits behind your knee pain as well as share invaluable tips on how to prevent them.

Get ready to dive into the world of:

  • Runner’s Knee
  • IT Band Syndrome
  • Patellar Tendinitis
  • Knee Sprains
  • ACL & MCL Tears
  • Meniscus Tears
  • Baker’s Cyst

Lace up your running shoes, and let’s hit the ground running!

Knee Pain When Running 1. Runners Knee

You know what they say about knee pain when running? One notorious culprit that’s been wreaking havoc on runners is what we call “runner’s knee” or its fancy medical name, patellofemoral pain syndrome.

Trust me, it’s quite a mouthful! In fact, it’s not only a common issue but also one of the most widespread injuries that plague athletes.

Research suggests that this bothersome condition accounts for a whopping 30 percent of all running-related ailments. That’s a staggering statistic!

So, what exactly happens with runner’s knee? Well, it all boils down to the irritated cartilage in your kneecap. When that little troublemaker gets inflamed, you can expect varying degrees of pain whenever you engage in knee-bending activities like walking, running, biking, or even something as innocent as sitting or squatting.

The Symptoms

The symptoms of runner’s knee usually manifest as a nagging pain around and sometimes behind your kneecap, also known as the patella. Often, things can get worse when you’re running downhill or descending stairs.

And guess what? Even prolonged sitting can cause soreness and intense pain in your poor knee. Talk about a stubborn and unforgiving condition!

The Causes

Now, let’s talk about the causes of this pesky runner’s knee. It’s mostly an overuse injury, meaning you’ve been pushing your knees to the limit. But there’s more to it than that.

Biomechanical factors can also play a role, such as weak glutes or hip flexors, improper running form, going too hard too fast, and even wearing the wrong shoes. It’s like a perfect storm brewing inside your knee!

The Treatment

Let’s start with a golden rule: take a break from running, at least for now. Don’t worry, it’s not the end of the world! Instead, it’s time to try out alternative activities that are kinder to your knees, like swimming and yoga. They’ll give you the chance to stay active while giving those hardworking knees a well-deserved breather.

Now, let’s talk about immediate relief. Grab an ice pack and give your knee a good icing session. Trust me, it works wonders for reducing inflammation and numbing the pain. And while you’re at it, elevate your knee to give it some well-deserved rest and relief. You can also try taping your knee for more pain relief. Remember that having the right knee pain treatment plan is key for a quick recovery.

The Prevention

Strengthening your glutes should be a top priority since these muscles provide stability and support. Incorporate glute-strengthening exercises into your routine regularly, and you’ll be well on your way to building a fortress of knee protection.

You should also stretch out your hamstrings as doing so helps in maintaining flexibility and preventing imbalances that could lead to knee issues.

What’s more?

Make sure you have the proper shoes that cater to your specific foot type. It’s like finding the perfect fit for Cinderella’s glass slipper, except in this case, it’s all about finding the ideal shoe for your running endeavors.

Last but not least, work on your running form, ensuring that you’re not putting unnecessary strain on your knees.

Knee Pain When Running 2. IT Band Syndrome

Another troublemaker that likes to wreak havoc on athletes’ knees is the infamous Iliotibial Band Syndrome. Imagine this band of tissues as a mischievous troublemaker running down the outside of your thighs, from the hips to the shins. When it gets irritated and inflamed, brace yourself for some serious knee trouble!

The Symptoms

Picture this: you’re out there, pounding the pavement, and suddenly you feel a sharp pain on the outside of your knee. Ouch! Unlike runner’s knee, you won’t typically see any swelling in the area. However, don’t be surprised if your hip joins the party and starts causing you grief too. It’s like a duo of pain, working together to make your running experience less than enjoyable.

But here’s the kicker: the pain might not be a constant companion. It’s sneaky, sporadic, and loves to fade away when you rest. But just when you think you’ve shaken it off, it has a funny way of reappearing, sometimes out of nowhere, at the exact same point in your run. Talk about bad timing! The silver lining, though, is that most runners find that the pain miraculously disappears as soon as they stop running.

The Causes

ITBS is usually an overuse injury, meaning you’ve pushed your knees beyond their limits. If you’ve been doing too much too soon, without giving your knees a chance to bounce back and recover, well, they might revolt and bring you the gift of ITBS. It’s like pushing your luck with your loyal troops, demanding too much without granting them the rest they deserve.

The Treatment

If you find yourself dealing with the pesky ITBS, it’s time to take action and fix this troublemaker once and for all. Step one: pump the brakes and give your body the rest it deserves. Seriously, no cutting corners on this one.

If you want to nip this problem in the bud as soon as possible, you need to give that tendon a break. Running through the pain? Not a good idea. Trust me, it will only worsen the situation in the short and long term. So, let’s be smart about it and put those running shoes aside for a little while.

The Prevention

Now, let’s talk prevention. Hip strengthening exercises are going to be your secret weapon. Think of them as the knights in shining armor, protecting your entire leg and adding stability to your thighs and knees. Leg lifts, bridges—you name it, do them!

What’s more?

Stretching your IT band after running is another crucial step. It’s like giving your band of troublemakers a gentle post-run stretch session, releasing any tension that may have built up. And if you really want to show your IT band some love, try using a foam roller. Roll it along your IT band, especially when you feel any tightness in the area. It’s like giving your band a little massage, helping it loosen up and find its happy place.

Now, here’s a little treat for you. Check out the following helpful video that demonstrates proper running form.

Trust me, it’s like having a personal coach right in your living room, guiding you towards ITBS-free running. Learn the proper technique, be mindful of your form, and you’ll be running like a gazelle in no time.

Knee Pain When Running 3. Patellar Tendinitis

The patellar tendon isa vital connection between the powerhouse muscles at the front of your thighs and the sturdy shinbone below. It’s like the bridge that allows your quads to communicate with your lower leg bone, ensuring smooth movement and power.

But alas, sometimes this essential tendon rebels and falls victim to inflammation and irritation. When this happens, it’s known as patellar tendinitis, a pesky condition that can wreak havoc on your knees, especially when running.

Patellar tendinitis ranks as the third most common cause of knee pain among runners. But here’s the twist—it doesn’t stop there. This mischievous condition is known to target cyclists, skiers, and athletes of all kinds who engage in activities that involve lots of jumping.

The Causes

Too much hill running, especially those treacherous downhill sections, is a prime suspect. A sudden increase in mileage or pace without giving your knees enough time to adapt can also set the stage for trouble. And let’s not forget about the classic culprit—overuse.

Repetitive strain on the tendon can lead to this inflamed and irritated state. It’s like asking your knee to endure a marathon without proper preparation—eventually, it rebels.

The Symptoms

You may have heard it referred to as “jumper’s knee,” and for a good reason. It tends to unleash pain right in the front of your knee, between the patella and the point where the tendon attaches to the mighty tibia, your trusty shinbone. The ache is persistent, haunting your every move—running, squatting, jumping. Even prolonged sitting can trigger discomfort.

The Treatment

When it comes to this injury, running through the pain is a big no-no. Trust me, it’s like trying to heal a broken bone by dancing the tango—it only makes things worse. So, it’s time to hit the brakes on your running routine and give your body the rest it needs.

Now, here’s the good news: you can expect a full recovery in just a few weeks, maximum. It may seem like an eternity, but trust me, time flies when you’re healing. So be patient, my friend, and let your body work its magic.

While you’re on the road to recovery, let’s talk about some self-care strategies. Grab an ice pack and give that injured area some TLC. Apply cold therapy a few times a day to reduce inflammation and soothe any discomfort. Think of it as a refreshing breeze on a hot summer day, cooling down the heat of your injury.

But wait, there’s more! Just because you’re taking a break from running doesn’t mean you can’t stay active. Cross-training is your new best friend.

The Prevention

Here’s the deal: stick to the golden 10 percent rule. When increasing your mileage, don’t be too hasty. Gradual progress is key to avoiding these setbacks. It’s like building a solid foundation, one brick at a time.

Speaking of foundation, let’s talk about proper running form. It’s not just about looking good on the track; it’s about protecting your knees and enhancing your performance. Whether you’re conquering flat surfaces or navigating those challenging hilly terrains, be mindful of your form. Engage your core, maintain a good posture, and find your rhythm.

But wait, there’s more! Strengthen those legs, my determined athlete. Focus on exercises that give your quadriceps and calves some love. These powerhouses will provide the stability and support your knees need to conquer any challenge that comes your way. It’s like building an unbreakable fortress, ready to tackle any obstacle.

knee brace for knee pain

4. Knee Sprains

When it comes to high-impact activities, knee sprains are no surprise. These sneaky injuries occur when the ligaments in your knee undergo a sudden tear or stretch beyond their normal range of motion.

Now, picture this: any movement that overextends or overstresses these hardworking ligaments can result in a knee sprain. It’s like tugging on a rope with all your might, causing it to fray and strain under the pressure.

The Causes

Running on rugged and uneven surfaces can be a recipe for disaster. It’s like navigating a treacherous mountain path, where every twist and turn puts your knees at risk. Oh, and bad form? That’s a no-no. Just like a wobbly tightrope walker, improper technique can throw your knee ligaments off balance, making them more vulnerable to injury.

What’s more?

Overuse is another sneaky culprit. Pushing your limits too hard, too fast, without giving those knees enough time to adapt, can lead to trouble. And sometimes, life throws unexpected obstacles our way. Trips, falls, and missteps can also put your knee ligaments in a precarious position.

The Treatment

As with most injuries, at the first sign of the onset of the condition, the best course of action is to follow is the RICE method.

This is going to help you soothe the pain and reduce the swelling—all of which can speed up recovery.

Next, after a couple of days of complete rest, make sure to rehab your knee with some basic exercises to regain the function, movement, and strength of the injured knee.

In cases of extreme pain, make sure to get yourself checked out by a doctor.

The Prevention

Research shows that incorporating regular leg strength training can work wonders, especially for those key muscles around the knees like the quads and calves. By dedicating some time to strengthening these areas, you’ll be building a solid foundation of support and stability for your knees.

But that’s not all!

When it comes to hitting the trails or venturing off-road during your runs, caution is key. Studies indicate that running on uneven surfaces can put extra strain on your joints, including your precious knees. So, it’s essential to be extra mindful during these adventures and take necessary precautions to prevent injuries.

Now, let’s talk about running form and footwear. Think of your running form as the blueprint for efficiency and injury prevention. By developing proper running technique, you’ll not only enhance your performance but also reduce the risk of knee issues. Seek guidance from experts, watch tutorials, or even consider working with a running coach to fine-tune your form.

Footwear plays a significant role as well. Just like a car needs the right tires for different road conditions, your feet require suitable shoes that match your foot type and the terrains you’ll be conquering. Don’t underestimate the power of a comfortable and supportive pair of running shoes—they can make all the difference in keeping your knees happy and healthy.

Knee Pain When Running 5. ACL and MCL Tears

Let’s dive into the fascinating world of knee ligaments, specifically the notorious ACL, also known as the Anterior Cruciate Ligament. This ligament acts as a sturdy bridge connecting your thighbone to your shinbone on the outside of your knee, providing stability and support to keep you moving smoothly.

And when the dreaded tearing of the ACL strikes is like a bridge collapsing. This, in turn, disrupts the harmony in your knee joint. Ouch! This condition, commonly referred to as an ACL injury, can be quite a setback.

But here’s the twist: if you’re an athlete who participates in sports demanding sudden changes in direction, like soccer, tennis, or basketball, this is where the ACL’s arch-nemesis strikes. It’s like those sports put your ACL on the frontlines, constantly testing its resilience and stability.

The Causes

Imagine this: you’re running, playing a sport, or simply going about your day when suddenly, your knee takes an unexpected twist, leaving your foot planted like a stubborn tree. Yep, that’s one possible cause of this condition—an abrupt twist of the knee with the foot firmly rooted in place. It’s like a wild dance move gone wrong, with your knee as the unsuspecting partner.

But that’s not all. Repeated stress on the knee joint can also play a sneaky role in increasing the risk of injury. Think of it like a repetitive drumbeat, pounding on your knee joint day after day, slowly weakening its defenses. It’s important to note that these repeated stressors can gradually wear down the structures that support your knee, leaving it more susceptible to injury.

And here’s a curveball: getting hit on the knee! It’s like a sudden collision with an unexpected opponent, throwing your knee into a state of chaos. Whether it’s a sports-related collision or an accidental encounter with a solid object, such impacts can lead to this condition.

The Symptoms

If you experience an intense pain accompanied by a loud popping sound during the moment of injury, it’s like a thunderclap announcing the arrival of an ACL or MCL tear. It’s a painful reminder that something in your knee has gone awry.

Following the initial shock, you may notice varying degrees of pain in your injured knee. It could be as mild as a gentle breeze or as severe as a roaring storm. Your knee will definitely make its voice heard, signaling that it’s not happy with the situation.

Keep an eye out for tenderness and swelling along the inside of your knee. It’s like an unexpected bump or bruise that appears, adding another piece to the puzzle. These signs serve as clear indicators of the condition, raising the flag that something is amiss.

The Treatment

As a general guide, treating those tricky ACL and MCL tears often involves a combination of strategies. It’s time to meet RICE, the superhero of recovery: Rest, Ice, Compression, and Elevation.

Embrace this essential quartet and give your knee the much-needed TLC it deserves. But that’s not all! Physical therapy becomes your trusty sidekick, helping you regain strength, mobility, and stability in your injured knee. It’s like having a personal trainer specifically tailored to your knee’s needs.

Don’t forget the importance of support. Supportive gear can provide added stability and protection during the recovery process. And for those with mild to moderate injuries, crutches might come into play, acting as your temporary allies, helping you navigate the challenges of everyday movement.

The Prevention

Make it a priority to instill proper technique in your activities. Seek guidance from experts, watch tutorials, or even consider working with a coach to fine-tune your form. Trust me, it’s a game-changer.

But that’s not all! Strengthening your knees is like fortifying a castle’s walls—it adds an extra layer of support and stability. Incorporate plenty of strength training exercises that target the muscles surrounding your knees. Research shows that this can significantly reduce the risk of various knee injuries.

Knee Pain When Running 6. Meniscus Tear

The meniscus is an elastic, C-shaped rubbery cushion. It’s like a trusty bodyguard, stationed on both the inside and outside of your knees, ready to spring into action when needed.

The meniscus helps keep your knee joint steady and balanced. It’s like a skilled tightrope walker, maintaining equilibrium in the face of various movements. But that’s not all. The meniscus takes on another important role—it’s your knee’s very own shock absorber.

Imagine this: when you perform knee-bending motions, like jumping or running, the meniscus springs into action, cushioning the impact and protecting your precious knees from excessive stresses. It’s like a masterful trampoline, gracefully absorbing the forces that could otherwise wreak havoc on your knees.

However, there are times when the meniscus faces adversity. This occurs when a traumatic event, such as hyper flexing, forceful twisting, or cutting motion of the knee joint, leads to a tear in this resilient cartilage. It’s like a plot twist in an action movie, throwing your knee’s delicate balance off course.

The Causes

Any sudden turn or cutting motion can be the culprit behind a meniscus injury. Deep squatting, too, can contribute to the risk of injury, placing additional strain on the meniscus.

Additionally, it’s worth noting that meniscus tears can occur as a result of aging or underlying conditions like arthritis. Over time, wear and tear can gradually weaken the meniscus, making it more susceptible to injury. It’s a reminder that as we age, we need to pay extra attention to our knee health and take steps to protect and strengthen this vital cartilage.

The Symptoms

Pay close attention to how your knee moves. If you find it difficult to bend and straighten your injured knee, it’s like a roadblock preventing smooth motion. This could be a sign of a meniscus tear. Additionally, bending the injured knee may exacerbate the pain, making it even more noticeable. It’s like a protest from your knee, urging you to address the issue.

But that’s not all. Keep an ear out for any popping sounds coming from your knee, accompanied by a feeling of the knee “giving away.” It’s like a mischievous surprise, catching you off guard and further indicating that the meniscus may be compromised.

The Prevention

When dealing with small tears, the RICE method becomes your trusty companion. Rest, Ice, Compression, and Elevation work together as a dynamic quartet, helping you heal and recover.

However, for more severe cases, it’s time to call in the experts. An orthopedic surgeon can conduct a thorough assessment of the injured area. They’ll dive deep into the intricacies of your meniscus tear, evaluating its severity, size, and location. Depending on these factors, surgery might be necessary to correct the tear.

The Prevention

Regular leg strengthening exercises is the way to go. By fortifying the muscles surrounding your knees, you provide stability and support for your entire lower body.

What’s more?

Consider wearing knee protective gear or braces, especially during sports that involve lots of cutting, like basketball or tennis. These gear acts as your knightly armor, adding an extra layer of protection to your vulnerable knees.

Knee Pain When Running 7. Bakers Cyst

Baker’s Cyst, also referred to as the popliteal cyst, is like a hidden nightmare that develops behind the knee. Imagine a fluid-filled swelling, creating a noticeable bulge in the area. This can cause discomfort and concern.

To get a visual grasp, take a peek at the picture. It will give you a clearer understanding of this unique condition, showcasing the location and appearance of the cyst.

Causes

Baker’s Cyst is often a result of an underlying issue within the knee joint, particularly a cartilage tear or arthritis. It’s like a chain reaction, where these knee-related troubles pave the way for the development of the cyst. In fact, nearly any condition that leads to joint swelling can be a potential trigger for Baker’s Cyst. It’s a reminder of how interconnected our body’s systems are.

Main Symptoms

Pain and swelling behind the knee, right at the junction where the upper and lower leg meet. It’s like an unwelcome guest, making its presence known in a specific spot. The pressure caused by the cyst can lead to tenderness and discomfort, especially after running. Sometimes, the area might feel hot or inflamed, like a fiery warning sign.

The swelling associated with Baker’s Cyst can hinder the full bending and straightening of the knee. It’s like an obstacle course, limiting the range of motion and affecting your mobility. This decreased movement serves as a reminder that something within the knee is not functioning optimally.

The Treatment

Apply ice to soothe any pain and bring down the swelling. Embrace compression, like a gentle hug for your knee, using a wrap or brace to support and stabilize the injured area. Lastly, elevate your leg, raising it above heart level, to enhance circulation and aid in the healing process. With the power of RICE, your knee will be on the road to recovery.

In addition, consider reaching for an anti-inflammatory drug to help reduce pain and swelling. Consult with a healthcare professional to determine the best medication for your specific needs.

What’s more? Pay attention to your training plan. Make adjustments as needed. Reduce your mileage and re-adjust the intensity of your training sessions. Think of it as a recalibration, allowing your knee to heal while still staying active. By easing the load on your injured knee, you provide it with the opportunity to recover and rebuild strength.

The Knee Pain Treatment plan in a nutshell

Let’s uncover the secrets to conquering knee pain and restoring your running glory. Here’s a handy guide that sums up the steps you need to take on this journey to recovery. Get ready to lace up your shoes and embark on a path towards pain-free running!

  • Step 1: Take a breather and adjust your stride. It’s time to give your knee a break. Stop running or reduce your mileage to allow your knee to heal and regain its strength. Think of it as pressing the pause button, giving your knee the space it needs to recover.
  • Step 2: Embrace the power of ice. Like a cool breeze on a hot summer day, icing your injured knee three to four times a day works wonders. Grab an ice pack and apply it to the troubled area, letting the cold sensation soothe the pain and reduce inflammation. It’s like a refreshing oasis for your knee.
  • Step 3: Give your knee some extra love and support. Wrap it up with straps, sleeves, or an elastic bandage to provide the much-needed stability. This compression acts like a gentle hug, reminding your knee that it’s not alone on this journey. The added support expedites the recovery process and helps you get back on your feet faster.
  • Step 4: Elevate and relax. Find comfort in elevating your knee with a pillow under your heel. Whether you’re lying down or sitting, this elevated position eases pain and minimizes swelling. It’s like creating a cozy haven for your knee to rest and heal.
  • Step 5: Explore the world of anti-inflammatory warriors. Reach for over-the-counter medications like Naproxen or ibuprofen to combat swelling and alleviate pain. These mighty warriors wage war against inflammation, allowing your knee to find relief and heal more effectively. Consult with a healthcare professional to determine the best medication for your specific needs.
  • Step 6: Let the rehab journey begin. Engage in a regimen of knee-strengthening and stretching exercises. These exercises act as a renaissance for your knee, rebuilding its strength and flexibility. Seek guidance from a physical therapist or use reputable resources to ensure you’re performing the exercises correctly and safely. It’s like sculpting a masterpiece, shaping your knee into a resilient and powerful force.

Remember, each step is a piece of the puzzle, guiding you towards a pain-free running experience. Be patient, listen to your body, and embrace the healing process. With the power of rest, ice, compression, elevation, medication, and rehabilitation exercises, you’ll soon be back on the track, chasing your running dreams.

So, lace up those shoes and get ready to reclaim the joy of running without the burden of knee pain. Your journey to recovery starts now!

Knee Pain When Running – The Conclusion

The above medical conditions cover most of the reasons for your knee pain when running. That said, if you suspect that your running knee pain is caused by something else, then be sure to see a certified physician for a thorough assessment.

In the meantime, thank for you reading my post.

Run strong and stay safe.

Top 6 Cardio Alternatives to Running

Looking for the best cardio alternatives to running? Then you have come to the right place.

If you have trouble running—whether you’re injured, burned out or just looking to spice things up—know that you got alternatives.

You don’t have to suffer through pain or injury to increase your heart rate and get your body moving.

Here are my favorite running alternatives that can double up as exercises to replace running.

Enjoy!

*Disclosure: This post may contain affiliate links that at no additional cost to you. I only recommend products I’d use myself and all opinions expressed here are our own. 

Cardio Alternatives To Running Option I – Skipping

Skipping is awesome for many reasons.

This amazing workout can help you build speed, power, and agility in your legs without having to leave the comfort of your home.

How it does that?

First of all, skipping builds lower body strength—especially in the calves—and improves core power and endurance—fundamental aspects of building a powerful and injury free runner.

Also, jump roping workouts can help you become a faster running by training your legs to “spend” less time on the ground, which is one of the main keys to speed and agility.

In other words, jumping rope on a regular basis can help you improve speed, power, balance, coordination, and endurance.

These are the essential elements when it comes to becoming the best runner you can be.

Not only that, the rope also burns tons of calories.

According to research, jumping rope can burn up to 15 calories per minute, depending on intensity and your fitness level, of course.

The only downside of jump rope training that I can think of is that it’s high impact.

As a result, if you have any sort of serious injury, you should go easy on the rope and stay within your fitness level the entire time.

For more tips on jump rope training, check my post here.

Other than that, I see no objection to adding this excellent tool into your training program.

Cardio Alternatives To Running Option II – Rowing

I’m not a big rowing machine fan.

I wish I were, but I’m not.

Nonetheless, this doesn’t mean that this machine has got nothing to offer.

Au contraire, rowing is a fantastic cardiovascular exercise that targets the back, core, quads, hamstrings, glutes, as well as the shoulders and the arms, of course.

And with the right training form, you can target your abs, chest, triceps and biceps muscles in one continuous and non-stop motion and action.

In fact, the movement of pushing and pulling on a rowing machine might be more effective than traditional strength training since it hits and targets almost all of the major muscle groups, according to a study by Duke University.

That’s right.

This workout is total body exercise per excellence.

And you can do this all while getting your heart working to its max.

What’s more? Oh, rowing is also very low impact, so it’s an ideal alternative for runners recovering from an injury or looking for a low-impact exercise to replace running.

And if you’ve never used a rowing machine before, then don’t let that stop you.

The good news is that you can find an indoor rowing machine at most gyms and fitness facilities.

You might also consider signing up for an indoor rowing class or get yourself an indoor rowing machine to get the most out of this amazing workout.

Here is a YouTube tutorial to help you perfect your form and get ready to row with finesse or check this great beginner rowing machine workout plan.

Cardio Alternatives To Running Option III – The Stairs

According to a Canadian research, walking up 200 steps at least twice a day, five days a week for a duration of two months can lead to an increase in V02 max by up to 17 percent.

Which is great.

Not only that, but you also have to engage more leg muscles on the stairs since you have to constantly lift up your body upward with each step you take.

This boosts overall lower body strength like nothing else.

What’s more?

The stairs are also easier on the joints than classic sprints while also improving your range of motion and agility.

Therefore, if your office or apartment building has access to stairs, or you leave near a stadium, be sure to add this cardio option to your training arsenal.

To get the most of the stairs, be sure to switch it up between running, skipping, jumping, hopping and squatting.

For an impressive stair workout, check my post here.

Cardio Alternatives To Running Option IV – Cycling

This is my favorite cardio cross-training exercise.

I really love cycling because it works the lungs and the cardiovascular system in a similar manner to running, but without the high impact often associated with the sport.

Why?

For starters, this is one of the best workouts for shedding mad calories while building up muscles and power in the core, glutes, thighs, and legs.

Also, cycling is low impact, so it’s easier on the body and the perfect running alternative option for anyone nursing an injury.

And it’s also the ideal calorie burner.

In fact, research shows that you can burn as many calories as you would during a 45-minutes run during a typical spinning class.

Not only that, cycling can also increase your stride length and speed.

Maybe the only downside of this cardio option is that you’ll need some gear to get going, including a good bike (whether it’s a road bike, mountain bike, etc.), a helmet, and protective glasses and the right clothing.

Also, be sure to stay safe on the road.

Check my post for some of the best biking workouts for runners.

Cardio Alternatives To Running Option V –  Swimming

If you are a running fanatic, just like me, but are suffering from joint pain or an injury, then swimming might be the exact thing the doctor ordered.

Swimming can push your body and cardiovascular system to the max without so much impact on your joints—making it the IDEAL running alternative for those looking to reduce impact on their bodies and/or recovering from an injury.

In fact, according to a study in the Journal of Applied Physiology, hitting the pool for an hour, at least three times per week for ten weeks can increase VO2 max by up 10 percent.

Not only that, swimming also target almost every muscle in the upper body, making it for an excellent resistance training option.

Here is a YouTube tutorial to help you build perfect swimming technique if you are a complete beginner.

Alternatives To Running Option VI – Bodyweight Training

Last but not least, you can also get a great cardio workout without reaching for the rope, hopping on the rowing machine, hitting the pool, or purchasing an expensive bike.

Enter the world of the bodyweight training.

What I really love about bodyweight training is that it is easily scalable, convenient and mostly low impact.

This means you can do it in the comfort of your own house without paying for hefty gym fees or purchasing any expensive training equipment.

All you need is your body, a bit of space, and off you go.

What’s more? Body-only exercises are also so effective at burning calories and maximizing fitness gains.

In fact, performing bodyweight exercises in a high-intensity interval manner can be an effective way to increase total body strength while also the heart pumping.

Some of the best bodyweight cardio exercises include high knees, power skips, butt kicks, jumping jacks, bounding, plyo push-ups, squat jumps, box jumps, and burpees.

The list is almost endless.

Here are three routines to try:


Running But Not Losing Weight? Here Are The 10 Reasons

runner trying to lose weight but he keeps gaining pounds

Why can’t I lose weight while running?

If you don’t already know the answer to that question, then this post is perfect for you.

Running & Weight Loss Results

Running is the best thing you can do to help you lose weight and keep it off for good.

If truth be told, the reason I started running in the first place was to lose weight, and chances you’ve started (or thinking about it) for similar reasons.

Scores of beginners take up running because, mostly, they want to lose weight.

In other words, running does help you lose weight.

Nonetheless, and as I have learned the hard way, running does not always lead to weight loss.

This is a hard one to swallow…

Just because you took up running, it doesn’t necessarily mean that you’re going to get a flat stomach.

In fact, even if you are following a healthy diet and are hitting the pavement on a regular basis, there is no guarantee for weight loss.

My Story

When I first took up running circa 2006, I lost around 25 pounds in the first few months.

However, I couldn’t keep the weight off—regardless of my efforts and how much I wanted to stay slim.

Within six months of my initial success, I gained about 15 pounds back, even though I was running more than before and trying to set my diet in the right direction.

The irony, I know.

This frustrated the hell out of me.

All the same, I kept going after my weight loss goals.

I knew that I had no option other than staying consistent—giving up was not an option.

After a long process of trial and error, I was able to keep the weight off.

And today I’m going to share with you some of the main reasons you’re not losing weight as fast as you’d like to, along with a few tips to help you expedite the process and increase the chances of your success.

So are you excited? Then here we go…

Running But Not Losing Weight? – The Answer(s) You Seek

runner Gaining Weight While Running

Running But Not Losing Weight Reason – 1. You are Gaining Muscle Mass

When you take up running, and for the first few months, your body responds to the new rigorous activity by making some adaptations and physiological changes.

One of these changes is a significant shift in your body composition as you gain muscle mass and lose fat.

How does that happen?

Running can increase muscles mass—especially in key running muscles, such as the glutes, quads, and calves.

In fact, you could be building muscle mass faster than you are shedding fat.

The Fix

The only thing you need to here is: Patience.

That’s it.

Once you keep up the good work, the fat will eventually burn off, and you’ll end up with a leaner and sculpted body.

Also, use other measurements for weight loss beyond the scale.

You might consider taking regular measures of your waist and circumference, or calculating your body mass index—BMI—via this online calculator.

This will give you a better ballpark figure of your percentage of body fat, according to your weight and height.

Running But Not Losing Weight Reason – 2 Bad Nutrition

This seems like a no-brainer, but even if you believe that you’re eating sensibly, you might be still off the mark.

Even if you exercise regularly, it doesn’t mean you can get away with eating a big mac and chocolate cake guilt-free and still lose weight.

That’s not how things happen in the real world.

A moderate 45-minute run may burn roughly 500 calories, but follow it with a soda drink, or a donut, and the calorie deficit is effectively erased.

What’s more?

Research published in JAMA revealed that subjects underestimated the amount of calories contained in a high-caloric food virtually 100 percent of the time.

The Solution

Here’s how to eat for weight loss when running.

Eat right. While your eating plan depends heavily on many factors, including your genes, body type, metabolism, the rule is to opt for natural, whole foods, at least 90 percent of the time.

Eat Well. Shoot for three meals a day satisfying enough that you can go for four to five hours before you feel the need for food.

Skip the sugar. Say no to sugary foods, bread, and anything else that’s processed.

The fewer the ingredients on the label, the better.

If you can’t pronounce, it’s likely not something you want to be putting in your mouth.

Practice Portion Control. Use cups and spoons to measure your serving sizes and make sure they’re appropriate.

Here’s the full guide.

Time your meals. When you eat also impacts your weight loss efforts. Here’s the full guide.

Monitor your calories. Use this simple online calculator to figure your daily calorie intake.

Additional resource – Clean keto food list for beginners

Running But Not Losing Weight Reason – 3 You Run too Much

Logging in too many miles without giving your body enough recovery time can lead to overtraining and all sorts of health troubles.

But that’s not the whole story.

Overtraining also has an impact on your weight loss vision.

If you an overtrained runner, especially when it comes to fluids, electrolyte balance, blood sugar, and stress levels, then you might be harming your thyroid and hindering your metabolic rate, all of which can compromise your weight loss efforts.

In other words, stress is bad for you—regardless of how much of healthy lifestyle you are championing.

The Fix

Give recovery the priority it calls for by doing the following:

  • Eat for recovery with an emphasis on post-run eating and eating natural and nutritious food.
  • Shoot for at least 7 to 8 hours of high quality interrupted sleep during the night’s time.
  • Schedule recovery runs, recovery workouts, recovery days, and recovery weeks into your training program.
  • Do your best to eliminate and reduce stress and its triggers in your life.
  • For more recovery practices, check my post here.

Running But Not Losing Weight Reason – 4 You’re Not Running Hard (or Long) Enough

Some runners are able to lose a few pounds at first by just going for a few short runs around the block while opting for sensible diet guidelines.

But after a couple of months of doing the same thing, they suddenly hit a wall and stop seeing progress?

What’s gives?

The reason is actually quite simple.

The human body is pretty smart, and it’s designed to be as efficient as possible; this means that if you are running the same route at the same intensity and training level, your body will eventually adapt to the workload, and you’ll stop seeing results.

In fact, this is guaranteed way to encounter a weight loss plateau

According to research conducted at the University of Tampa, running on the treadmill for 45 minutes at a steady pace promotes weight loss, but only during the first few weeks.

The Fix

Be consistent.

If you are serious about losing weight, make sure to schedule at least three runs per week, aiming for a minimum of 240 minutes of exercise a week.

Plus, and this is super important, try to diversify your training intensity and duration.

HIIT running workouts, such as sprints, hill reps and other HIIT workouts might be the exact thing you need to break a weight loss plateau and reach your weight loss running goals.

Thus, Instead of doing the same steady state runs over and over again, add a couple of interval training sessions to your weekly training routines, such as interval sprints and hill reps.

Also, incorporate a couple of cross training sessions to your training program to keep you consistent and speed up your fitness gains.

Spinning, Yoga, weight training, and swimming are some of the best options.

What’s more? If you are not into cross training, then I recommend that you find smart and practical ways to add more physical activity into your daily routine.

Here are a few things to consider:

  • Stand more.
  • Play with the kids.
  • Get a stand-up work desk.
  • Play sports with the kids.
  • Exercise the dog.
  • The list is almost endless.

Just get out there and be as active as possible.

Additional link – Slow running vs fast running for weight loss

Running But Not Losing Weight Reason – 5 The Scale is Just One Piece of a Much Bigger Puzzle

“The scale is a bastard trickster” as I like to say.

If truth be told, the scale might not be your best friend when it comes to keeping track of your weight loss progress—or lack thereof.

Why?

Well, it’s really simple.

Body weight tends to rise and fall by a few pounds from one day to the next.

This fluctuation depends, mainly, on hormones activity, the foods you are eating, dehydration level, etc…and when you hang your hopes on the scale, then you are actually setting yourself a vicious cycle of ups and downs.

So please, please remember this: the numbers on the scale do not tell the whole story.

The Fix

The best advice I can give you when it comes to tracking weight loss the right way is to use a variety of measurement.

As I have already stated, you need to opt for other ways than the scale to measure your progress.

Try some of these ways to measure your progress:

  • Measure your body fat percentage once per month.
  • Measure your waist circumference.
  • Keep tabs on how well your clothes fit. Try on the same pair shirts or jeans every four to six weeks, and look for the subtle differences.
  • Take before and after pictures on a monthly basis.
  • Keep tabs on your emotional states and energy levels. Are you sleeping better? Do you have more energy? Are you feeling less stressed? Do you feel more alive? Etc.
  • Keep tabs on your athletic performance. Is your athletic performance improving? How much you can you run? How long can you run? How fast can you run? Take these fitness tests on every six to eight weeks to see how your fitness level stacks up to the average Joe.

Running But Not Losing Weight Reason – 6 Unrealistic Weight Loss Expectations

I hate to break it to you, but weight loss is not something that happens overnight.

In reality, and contrary to popular belief, weight loss is a much slower process than the majority of people want it to be.

Don’t get me wrong.

Overnight success stories do happen.

In fact, it is even possible to lose a bunch of weight fast in the first few weeks of a weight loss resolution, but the truth is, this cannot be sustained.

And according to research, this is not the healthiest thing to do.

Therefore, if you are struggling with the scale, one reason might be that you just haven’t given it enough time.

And that’s it.

Additional Resource – Here’s how to much to run to lose weight

Fix it

Stop looking for short-term results.

Weight loss is more of a marathon, not a sprint.

Slow and steady wins the weight loss race…

Yeah, that’s easier said than done.

Here is your action plan:

Aim for no more one pound per week—that’s roughly 3500 calories.

As a rule of thumb, you should, ideally, shoot for a 300 to 500 calorie deficit a day if you are serious about shedding weight the healthy and sustainable way.

Give the process time, and with enough persistence and flexibility on your part, you’ll achieve what you are after.

Just keep in mind that everybody is different and responds differently to training routines and diet habits.

No suit fits all.

That’s the beauty of life.

And in the end, it pays for the long term to start accepting your body the way it is.

I hate to break it to you, but not everyone can look like a fitness model—no matter how entitled you feel and regardless of what the latest fitness magazine covers promise—we are all different.

The truth is, most of the fitness magazine covers and the fit-inspiration are often embellished and enhanced using special software—no one actually looks like that in real life (thank you Photoshop), and you shouldn’t be hard on yourself since you are not meeting any particular standard.

Running But Not Losing Weight Reason – 7 You Are Under Too Much Stress

Plenty of research has revealed that stress and weight gain go hand in hand.

Not convinced? Check the following studies:

Research 1

Research 2

Research 3

Research 4

Research 5

Chronic stress can contribute to a host of health issues, including:

Elevated cortisol. Not only does this mess up your hunger hormone, but also cause extra belly fat storage.

Cravings. Research shows that we’re more likely to reach for ‘comfort foods’ that are rich in sugar and fat when we’re stressed.

Skipping Runs.  When you feel like the world of the world is on your shoulders, it’s easy to put your run on the backburner in favor of a delicious waffle or a beer.

The Solution

Take a few minutes throughout your day to consciously check in with yourself and reduce your stress level.

Don’t take my word for it.

Research published in the journal Eating Behaviors revealed that regular meditation could help tame binge eating and decrease emotional eating.

Running But Not Losing Weight Reason – 8 You’re Sleep Deprived

Making time for your morning runs can mean less time for sleep, but it’s vital to get enough between the sheets hours if you’re trying to lose weight.

Why it’s the case?

Plenty of research has found that poor sleep to be one of the most common risk factors for obesity.

Here are a few:

Study 1

A study out of the University of Chicago found that sleep-deprived subjects opted for foods with twice as many carbs and fats as those who had enough sleep.

Study 2

One Mayo Clinic research found that sleep deprived subjects consume an average of 500 extra calories a day.

Study 3

Research out of the American Journal of Clinical Nutrition found that sleep deprivation can increase the chances of late-night snacking and unhealthy food decisions.

Study 4

Research proposes that lack of sleep may lower your resting metabolic rate, which is the rate at which your body burns calories when at rest.

In other words, by skipping on sleep, your body is cooking up a perfect recipe for weight gain.

The reasons sleep affects your weight are manifold. These include :

  • Sleep deprivation can boost both insulin and leptin levels, resulting in the body becoming desensitized to their response.
  • You’re more likely to get takeout for dinner then hit the bed late because you feel uncomfortably full.
  • When tired following a bad night, you may choose to skip your workout or simply do less, burning fewer calories.
  • Being tired and moody the next day sets your brain up to make bad food decision, research shows.

The Solution

Get at least seven to eight hours of quality sleep every day. That may require you to change your schedule around a bit, but it’s worth the effort.

Improve your sleep quality by doing the following:

  • Build the habit of napping –30 minutes max—every
  • Try different bedtime schedules and see which one works best for you. For example, go to bed at 11 pm so you can wake up at 7 am.
  • Go to bed and wake up at the same time, including weekends
  • Reduce distraction and light exposure in the few hours leading to bedtime
  • Avoid stimulates such as caffeine or nicotine for three hours before bed.

Running But Not Losing Weight Reason – 9 You’re Losing Weight Without Realizing It

If you’ve been training hard lately and suddenly see the number on the scale go up, don’t panic.

The stats on the scale provide one variable, your absolute weight, which isn’t always the more reliable judge of what’s happening in (and to) your body.

By stepping on the scale day in day out, you’re simply measuring everyday fluctuations in your hydration levels and other trivial weight metrics.

What’s more?

Muscle gain can also be a culprit.

Sure, pounding the pavement doesn’t create a lot of bulk, but it does allow you to increase muscle mass, especially in your lower body.

In fact, if you’re running consistently enough to develop telltale running calves and quads, then you gained some muscle.

And since muscle weight more than fat, you might not see the scale move to the direction you desire, or you could put on a few pounds.

This is especially the case if you pick up training for the first time and/or are close to your ideal weight.

The Solution

Don’t jump on the scale every day.

It’s not unheard of for body weight to go up and down by a few pounds throughout the day.

Instead look for gradual, yet consistent, changes in your weight every three to four weeks.

To remove ups and downs from external factors form the equation, build the habit of weighing yourself at the same time of day and same day.

And make sure to do it first thing in the morning, before eating or getting dressed.

Use other measurements other than the scale to keep track of your progress.

  • Measure your waist circumference
  • Measure your body weight percentage.
  • Get your body composition analyzed
  • Track your body fat percentage.

Running But Not Losing Weight Reason – 10  You Have A Medical Condition

Maybe you’re not losing weight, despite running regularly and eating well, is because you have got an underlying health condition.

A host of medical conditions can hinder weight loss or cause weight gain. Among them are:

Cushing’s syndrome. Occurs when your adrenal glands release too much cortisol, resulting in the buildup of fat in your abdomen, upper back, and face.

Hypothyroidism. Happens when your thyroid is underactive, resulting in a limited production of the thyroid hormone, which is key for burning stored fat.

Polycystic over syndrome. Or PCOS, this condition is caused by a hormonal imbalance, affecting more than 5 million women in the US alone.

Insulin resistance. Or hyperinsulinemia, this is the umbrella term for host health issues thought to be rooted in insulin resistance.

Depression. You’re more likely to turn into eating to ease your emotional issues.

Some antidepressant medications (SSRIs) can also cause weight gain.

The Solution

Regardless of your exercise, diet, or lifestyle habits, if you’re piling up the pounds and don’t know why, consult with your doctor to rule out a medical issue as the cause.

Although you might feel tempted to give up, don’t. Most of these medical problems can be solved.

Conclusion

If you’re having trouble losing the pounds while running, you need to get real get back to basics—most of which I shared with you today (as well as this previous post).

It’s not only important to pay attention to what you’re putting in your mouth, but also how much sleep you’re getting, your stress level, your training intensity, and the fact that you might have medical issues that are sabotaging your weight loss efforts.

I know it’s hard to keep track off, but it’s worth the effort.

Just remember to take action, start small, and build these healthy habits gradually.

Then it’s just a question of time.

Losing weight is a messy business, especially when you’re a fat runner.  There are no shortcuts nor silver bullets—and it requires hard and persistent work to see results—the type of result that works for the long term.

Please feel free to leave your comments and questions in the section below.

In the meantime, thank you for reading my post.

Keep Running Strong.

David D.

New to Running? Start Here…

If you’re serious about running, getting fit, and staying injury free, then make sure to download my Runners Blueprint Guide!

Inside this guide, you’ll learn how to start running and lose weight weight the easy and painless way. This is, in fact, your ultimate manifesto to becoming a faster and a stronger runner. And you want that, don’t you?

 Click HERE to check out my Runners Blueprint System today!

Don’t miss out! My awesome running plan is just one click away.

Conclusion

The above reasons are the main ones to blame for not losing weight. So, if you’re still wondering what to do when you can’t lose weight, be honest with yourself and assess the possibility that you might be actually doing it to yourself.