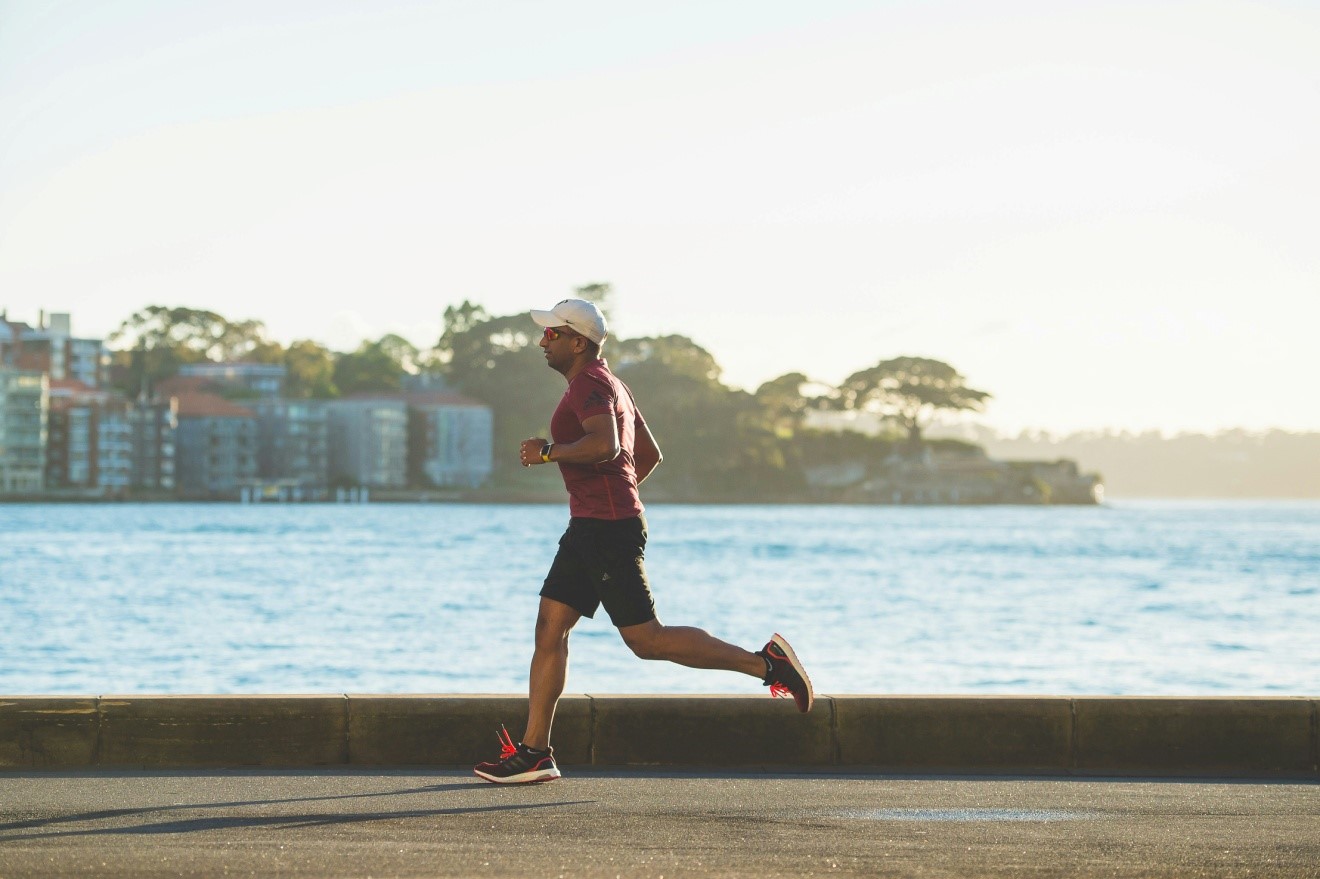
How To Maintain Muscle Mass while Marathon Training

Training for a marathon while trying to keep muscle can feel like a balancing act—trust me, I’ve been there!

When I jumped on the marathon training wagon, I was terrified of losing the muscle mass I had worked so hard to build.

It felt like I was being pulled in two directions—wanting to improve my endurance without sacrificing strength.

But through trial and error, I developed strategies that helped me maintain muscle while hitting my running goals

In this guide, I’ll share my tips on how to maintain muscle mass while training for a marathon—without sacrificing your running performance.

Building Muscle vs. Maintaining Muscle

Let’s talk about the difference between building and keeping muscle, especially when you’re also training for a marathon.

Building muscle is all about pushing your body to its limits. You lift heavier weights, challenge your muscles, and aim for growth by breaking them down so they rebuild stronger.

But maintaining muscle? That’s different. The aim here is to keep the muscle you have, not to bulk up. Just enough work to keep things from slipping.

Honestly, when you’re marathon training, keeping muscle is more realistic than trying to add more.

Long-distance running is not ideal for muscle growth, but with a smart approach, you can prevent muscle loss while focusing on your running goals.

Why Maintaining Muscle During Marathon Training is Tough

There’s a common myth that running burns muscle, but it’s a bit more complicated than that. Yes, endurance exercise can put you in a catabolic state, where your body breaks down muscle for fuel, but it’s not as severe as it sounds.

The real issue arises when your body doesn’t have enough fuel—like glycogen from carbs or fat. If you don’t fuel up, your body can start using muscle for energy on those long runs, which is the last thing you want.

Studies show that marathon runners often face muscle damage, especially the longer they go—something I definitely noticed after my first big race. So, it’s true that running can use some muscle for energy, but it’s avoidable if you fuel your body right.

How to Maintain Muscle While Training for a Marathon

Here’s how you can maintain your muscle mass and strength as you train for your marathon:

Fuel Up Properly

In my first month of marathon training, I felt drained after my long runs, and my recovery was taking forever. That’s when I realized that I wasn’t eating enough. I had been so focused on “staying lean” that I wasn’t giving my body the needed fuel.

Marathon training burns many calories, especially on long-run days, so you need to keep your energy stored up.

Carbs are your best friend here. They provide your muscles with glycogen, the fuel to power through long runs. Ensure you eat plenty of complex carbs like whole grains, vegetables, sweet potatoes, and fruits.

Timing matters, too. I started paying attention to how much I was eating—especially carbs. Before a long run, I’d have a solid meal like oatmeal with bananas or a bagel with peanut butter. After the run, I’d focus on refueling with a mix of carbs and protein—like a big bowl of pasta with chicken or a smoothie with protein powder and fruit.

For long runs (over 90 minutes), I aim to take in about 50g of carbs per hour. This could be in gels, sports drinks, or easily digestible snacks.

Once I got my nutrition sorted, my energy bounced back, and I wasn’t dragging after every run. I was even able to keep my gym sessions going strong!

Prioritize Protein

While carbs fuel your runs, protein is essential for muscle repair and maintenance. Protein supplies your body with the amino acids to repair muscle damage and maintain mass.

Protein gives your body the building blocks it needs to repair and keep muscle.. Not only you can’t build muscle without it, you won’t even be able to maintain it.

Don’t just take my word for it—there’s solid research backing this up

A study out of the International Society of Sports Nutrition (ISSN) reported that boosting protein intake from the daily suggested 0.8 per kilogram of body weight a day to 1.2 to 2 grams while reducing calories to about 30 40 percent can maximize fat loss while preserving existing muscle.

So how much should you be having?

I’d recommend having around 1.2 to 2 grams of protein per kilogram of body weight daily to maintain muscle. For a 160-pound runner, that’s around 100-145 grams of protein daily.

Some great sources of protein include:

  • Eggs
  • Lean meat (like chicken or turkey)
  • Fish
  • Greek yogurt
  • Cottage cheese
  • Beans and lentils
  • Nuts and seeds

If you struggle to hit your protein goals through food alone, protein supplements like shakes or BCAAs (branched-chain amino acids) can be a helpful addition.

Strength Train Consistently

A mistake I made early in my marathon training was cutting back on my strength workouts because I felt like I “didn’t have time.” Big mistake.

My runs started feeling harder, and my muscles didn’t have the same power they used to.

I got back into a regular strength routine, doing a couple of days a week with squats, deadlifts, and pull-ups—just enough to keep my muscles active. I also added some core work to keep my body strong and stable during my runs.

I’d recommend lifting three to four times per week. Focus on compound movements that target large muscle groups, like squats, deadlifts, and bench presses. These exercises build strength and help maintain the muscle you’ve already built.

My routine looked something like this:

  • Monday: Chest and back + easy run
  • Wednesday: Legs and core + easy run
  • Friday: Shoulders and arms
  • Saturday: Long run

By keeping my strength sessions short but effective, I didn’t feel burnt out and could keep up with my running schedule.

Supplement Wisely

While your diet and training should be your primary focus, supplements can enhance muscle maintenance during marathon training.

BCAAs (branched-chain amino acids) are a great option. They provide your body with leucine, isoleucine, and valine—amino acids that help prevent muscle breakdown during long bouts of exercise. BCAAs turned out to be really helpful for recovery. I noticed less soreness after my long runs and faster recovery for my next gym session

I was skeptical about supplements at first. But after reading up on BCAAs (branched-chain amino acids) and their role in muscle recovery, I decided to give them a shot. I added a BCAA supplement to my water bottle during long runs and before my strength workouts.

I noticed that I wasn’t as sore after intense sessions, and I recovered quicker between runs and gym days. It wasn’t a magic pill, but it made a difference, especially when pushing myself harder as race day approached.

And there’s research to back it up! These three amino acids play a big role in recovery, especially for us endurance folks

Like any other source of protein, you can get BCCAs through your diet by eating quality protein foods. But supplements can help take your intake to the next level.

Don’t Forget to Rest and Recovery

Recovery is just as important as the training itself. Without enough rest, your body won’t have the time to repair muscle fibers and recover from the stress of marathon training.

Ensure you’re getting enough sleep each night—aim for 7-9 hours—and take at least one to two rest days per week. These days, focus on low-intensity activities like stretching, yoga, or swimming.

Listening to your body is key. If you feel overly tired, sore, or unmotivated, it might be time to dial back and allow for more recovery.

Balancing It All: Weekly Schedule Example

Here’s how a balanced week might look, combining running, strength, and cross-training:

  • Monday: Easy run + lower body strength
  • Tuesday: Rest or light cross-training (e.g., cycling)
  • Wednesday: Tempo run or speed work + core and stability training
  • Thursday: Easy recovery run
  • Friday: Rest day or light cross-training (e.g., swimming or yoga)
  • Saturday: Long run
  • Sunday: Full-body strength workout

Weekly Strength Training Routine for Marathon Runners

Strength training regularly helps build a strong foundation for endurance, stability, and injury prevention. Here’s a simple, effective plan with two weekly sessions designed to complement your running and avoid over-fatiguing your muscles. This routine focuses on compound movements that engage multiple muscle groups for efficient, full-body conditioning.

Weekly Strength Plan: Compound Movements for Runners

Session 1 (Monday or Tuesday): Lower Body and Core Stability
Focus: Building glute, leg, and core strength for stability on long runs.

  1. Squats – 3 sets of 10–12 reps
    Targets: Quads, glutes, hamstrings
    • Coach’s Tip: Keep your chest up and push through your heels to engage your glutes and core.
  1. Walking Lunges – 3 sets of 10 reps per leg
    Targets: Quads, glutes, balance
    • Coach’s Tip: Take a controlled step forward, keeping your knee aligned with your ankle, to build strength and stability.
  1. Glute Bridges – 3 sets of 15 reps
    Targets: Glutes, hamstrings
    • Coach’s Tip: Squeeze your glutes at the top of each rep and avoid arching your back to protect your lower spine.
  1. Plank Hold – 3 sets of 30–45 seconds
    Targets: Core stability, shoulders
    • Coach’s Tip: Engage your core and keep your body in a straight line. Planks are great for core stability, which helps maintain good form on long runs.

Session 2 (Thursday or Friday): Full-Body Strength and Power
Focus: Enhancing overall strength and power with movements that support strong, stable strides.

  1. Deadlifts – 3 sets of 8–10 reps (use dumbbells or a barbell)
    Targets: Hamstrings, glutes, lower back
    • Coach’s Tip: Keep your spine neutral and hinge at the hips. Deadlifts help build strong hamstrings and glutes, which are crucial for powering your stride.
  1. Step-Ups – 3 sets of 10 reps per leg (use a bench or box and hold dumbbells if comfortable)
    Targets: Quads, glutes, balance
    • Coach’s Tip: Step up with control and avoid pushing off with your back foot. This move mimics the “push-off” phase in running.
  1. Single-Leg Deadlifts – 3 sets of 8 reps per leg (use bodyweight or light dumbbells)
    Targets: Balance, glutes, hamstrings
    • Coach’s Tip: Move slowly and focus on balance. This exercise strengthens the muscles around the hips and knees, improving stability on uneven terrain.
  1. Russian Twists – 3 sets of 15 reps per side (hold a light weight or a medicine ball)
    Targets: Core rotation, obliques
    • Coach’s Tip: Twist from the waist, not just your arms, and keep your core engaged. Strong obliques support lateral stability, especially helpful during longer runs.

Join the Strength Training Conversation

Strength training can make a huge difference in marathon training, and every runner has their own approach! Whether you’re a fan of squats, core workouts, or a mix of everything, I’d love to hear about your experience.

How has strength training impacted your running?

Do you have go-to exercises that have helped you build endurance or stay injury-free?

Share your favorite workouts, tips, and any advice you’ve learned along the way. Your insights could be just what another runner needs to reach their goals!

Pacing Strategy For 5K, 10K, Half Marathon & Marathon

Pacing Strategy For 5K,

If you’re gearing up for a race and wondering how to pace yourself, you’re not alone.

Race-day pacing can be tricky, especially if you’re new to racing.

But finding the right pace can be the difference between feeling like a champion as you cross the finish line and struggling halfway through.

Worry no more.

In today’s post, I’m going to walk you through everything you need to know about race day pacing. I’ll explain what pacing is, why it’s important, and how to approach each race distance.

Let’s get to it.

What’s A Race Pacing Strategy

First up, what even is a pacing strategy?

A pacing strategy is your plan for managing your speed throughout the race. It’s all about striking the perfect balance—knowing when to ease up and when to push your limits.

Imagine sprinting right out of the gate—chances are, you’ll burn out way too soon.

If you go too slow, you might end up feeling like you could have done better. A good pacing strategy helps you avoid both extremes.

I learned about pacing the hard way during my first half marathon. I went out way too fast, full of excitement and adrenaline. By mile 8, my legs felt like lead, and by mile 10, I was seriously considering walking the rest of the way.

That’s when I realized pacing isn’t just about running fast; it’s about knowing your limits and sticking to a strategy.

Since then, I’ve been much more mindful about keeping an even pace from start to finish, and it’s made a world of difference.

Common Pacing Strategies

Most of us end up using one of these three main pacing strategies, sometimes without even knowing it. Let me break down them for you:

  1. Positive Split: This is when you run the first half of the race faster than the second half. It’s common for beginners to do this because they feel strong at the start, but it often leads to slowing down later. While this can work for short sprints, it’s not ideal for longer distances.
  2. Even Split: This method means you keep your pace steady the whole race. It’s a great strategy for most races because it helps you conserve energy and maintain control.
  3. Negative Split: Here, you run the second half of the race faster than the first half. I suggest this for most runners—it lets you start slow, warm up right, and power through to a strong finish. This strategy ensures you don’t burn out early and helps you leave something in the tank for the finish line.

The Golden Rule of Pacing

Here’s my golden rule of pacing: Start slower than feels right

I know it’s tempting to charge out of the gate, especially with race-day excitement pumping you full of adrenaline, but resist that urge! If you go out too fast, you’ll burn through your energy reserves quickly and might end up struggling in the later miles.

Instead, aim to start off at a pace that feels comfortable, even easy, for the first part of the race. Then, as you settle in and your body warms up, gradually increase your pace.

By the time you’re nearing the finish line, you should still have enough energy to pick it up and finish strong.

Pacing for Different Race Distances

Different race distances call for different pacing strategies.

Let me share with you my best tips on how to pace different races, from 5Ks to marathons.

Pacing Strategy For Sprint Events

Sprint events are all about going all out, but when the distance increases, so does the need for strategy. Knowing when to push and when to hold back has made all the difference for me.

Since the race is short, you can simply sprint at your fastest speed for the duration of the event. That’s why, for example, most 400m events at the elite levels are regularly run with a positive split strategy. This means that the racers run the first 200m faster than the final 200m.

5K Pacing Strategy

A 5K is a short race, but that doesn’t mean you should sprint from the start. While the 5K is run at a relatively high effort (about 9-10 on a scale of 1-10), you still need a pacing plan.

For the first mile, hold back slightly—aim to run about 10 seconds slower than your goal pace. By mile 2, settle into your target pace, and in the final mile, push yourself to finish strong. You don’t need to worry about fueling during the race, but make sure you’re hydrated before you start.

A beginner runner? Try this couch to 5K plan.

Want more challenges? Try my 5K in 30 minutes OR  The Sub 20-min 5K Training Plan.

5K Pace Chart

Finish timeMin per-km paceMin per-mile pace
35min7:0011:16
30min6:009:39
25min5:008:03
20min4:006:26
18min3:365:48
15min3:004:50


10K Pacing Strategy

A 10K (6.2 miles) requires more endurance than a 5K, so your pacing strategy needs to reflect that. You can’t run at full speed for the entire race, or you’ll risk burning out.

Start about 5-10 seconds per mile slower than your goal pace for the first couple of miles. This allows your body to ease into the race without expending too much energy early on. Around mile 3 or 4, you should be running at your target pace, and for the last couple of miles, aim to pick up the pace if you feel strong.

Hydration is important for a 10K, especially on hot days, so consider grabbing water at aid stations.

New to the 10K? Check out this guide.

10K Pace Chart

Finish timeMin per-km paceMin per-mile pace
1hr 10min7:0011:16
60min6:009:39
55min5:308:51
50min5:008:03
45min4:307:15
40min4:006:26
38min3:486:07
35min3:305:38

Half Marathon Pacing Strategy

The half marathon (13.1 miles) is a challenging distance that requires both stamina and smart pacing. If you go out too fast, you’ll hit a wall midway through. If you go too slow, you might finish with more in the tank than you wanted.

Start the first 2-3 miles at 10-20 seconds slower than your goal pace. This gives your body time to warm up. Once you’ve settled in, run at your target pace for the bulk of the race. By the time you hit mile 10, if you’re feeling good, you can push harder for a strong finish.

What’s more?

Fueling is crucial in a half marathon. Practice eating gels, chews, or whatever works for you during training so you’ll know what your body can handle on race day.

Never run a half marathon before? Begin my couch to HM plan.

Half Marathon Pace Chart

Finish timeMin per-km paceMin per-mile pace
2hr 30min7:0711:27
2hr 15min6:2410:18
2hr5:419:09
1hr 55min5:278:46
1hr 50min5:138:23
1hr 45min4:598:01
1hr 40min4:457:38
1hr 35min4:307:15
1hr 30min4:156:52
1hr 25min4:026:29
1hr 20min3:476:06
1hr 15min3:335:43
1hr 10min3:195:20

Marathon Pacing Strategy

The marathon is a beast of its own, and pacing is critical for such a long race (26.2 miles). The key here is patience.

For the first 13 miles, run 20 seconds per mile slower than your target pace. This might feel too slow, but trust me, you’ll be thankful later. Once you reach the halfway mark, you can settle into your goal pace. If you have energy left around mile 20, that’s when you can start picking up the pace. Just remember, the marathon is all about endurance, so don’t try to make up time too early in the race.

Just like pacing, nailing your nutrition is key in a marathon.. Stick to a plan that works for you—whether that’s gels, bars, or sports drinks—and make sure to hydrate properly throughout the race.

I’ll never forget my first marathon. I had heard that the race doesn’t really start until mile 20, but I didn’t fully understand what that meant until I hit “the wall.” I started too fast, trying to bank time early on, and by mile 18, I was done.

My legs were cramping, and every step felt like a marathon in itself. The next time, I approached it differently.

I kept a slower pace for the first half, and by mile 20, I still had energy left in the tank. That made all the difference in crossing the finish line feeling strong.

Here’s how to run your first marathon.

Marathon Pace Chart

Finish timeMin per-km paceMin per-mile pace
7hr9:5716:01
6hr 30min9:1414:52
6hr8:3213:44
5hr 30min7:4912:35
5hr 15min7:2812:01
5hr7:0711:27
4hr 45min6:4510:52
4hr 30min6:2410:18
4hr 15min6:039:44
4hr5:419:09
3hr 45min5:208:35
3hr 30min4:598:01
3hr 15min4:377:26
3hr4:156:52
2hr 45min3:556:18
2hr 30min3:335:43


Pacing Strategy FAQs

I know that you have more than one pressing question about proper pacing. Let me address some of the most common concerns.

What’s the best pacing strategy for a half marathon?

Runner’s World suggests aiming for a slight negative split—picking up the pace in the final 5K if you’re feeling strong. This strategy also helps manage any pre-race nerves by easing into the rhythm, saving energy for a powerful finish.

Should I use the same pacing strategy for a 5K and a marathon?

Not exactly. For shorter races like a 5K, a slightly faster start can be effective since the race is short enough to push your pace early without running out of steam. In contrast, marathons demand an even or negative split approach to conserve energy over the long distance. According to the International Journal of Sports Physiology and Performance, even pacing is common among marathoners, as it helps sustain a steady energy output and reduces the risk of hitting the wall.

How do I practice pacing strategies in training?

Practice makes perfect! If you’re aiming for an even pace, try tempo runs where you hold a consistent pace slightly faster than your usual long run pace. For negative splits, progression runs are key: start your run easy, then gradually pick up the pace every mile or two. Training your body to handle these pacing techniques will help you execute them smoothly on race day.

What’s the best pacing strategy for beginners?

Beginners often do best with an even pacing approach, which means keeping a steady pace throughout the race. This strategy helps you learn your optimal speed without going out too fast and fading early. Over time, as you gain experience, you can experiment with negative splits for races where you feel confident in your endurance.

How can I avoid starting too fast in a race?

It’s easy to get caught up in the excitement of race day and start too fast. To avoid this, start a bit slower than your goal pace for the first mile, using it as a “warm-up” to find your rhythm. If you’re wearing a GPS watch, check your pace regularly to ensure you’re not overdoing it in the early stages.

How does race distance affect pacing strategy?

The longer the race, the more conservative you should be with your pacing. For example, a 5K might allow for a slightly faster start, while a marathon requires a more measured approach. In longer races, pacing too aggressively can lead to fatigue, making it hard to maintain energy in the later miles. Adjust your pace based on distance and experience level to set yourself up for a strong finish.

Should I adjust my pacing strategy based on weather?

Absolutely! Hot or humid conditions can make it harder to maintain your goal pace. On a hot day, consider slowing down by 5-10 seconds per mile to prevent overheating and save energy for the finish. Conversely, cooler weather might allow you to push a bit harder, but always listen to your body and adjust as needed.

How to Use KT Tape for Runners Knee While Running

kt tape for knee pain

I get it.

Knee pain is one of the most frustrating things about running.

That annoying kneecap pain that flares up when you run? I know it all too well

As a coach and fellow runner, I’ve seen many athletes—including myself—struggle with the notorious runner’s knee. It strikes often, catching both newbies and seasoned marathoners off guard.

When that familiar ache in your knee starts creeping in, you’ll search for quick, effective relief.

I’ve personally found KT tape incredibly helpful, and I highly recommend it. This isn’t just any tape; it’s designed to lift your skin slightly, which helps reduce pressure on the knee, improve circulation, and support those tender areas without restricting movement.

If you’re new to kinesiology tape, don’t worry—I’ve got you covered. In this guide, I’ll explain exactly what runner’s knee is, how KT tape can help, and how to apply it properly for maximum relief.

What Is Runner’s Knee?

Before we get into the taping part, let’s break down what a runner’s knee is.

Runner’s knee (also known as chondromalacia patella) is usually caused by overuse of your kneecap.. The symptoms are familiar to many runners: swelling, discomfort, and clicking around the kneecap, especially during weight-bearing activities. If left untreated, the pain can become stabbing and even radiate down to your lower leg.

Poor knee alignment, muscle imbalances, and faulty running mechanics all contribute to this condition. For more on this notorious overuse injury, check out my complete runners knee guide.

What Is Kinesiology Tape?

KT tape is a stretchy, elastic material that supports recovery while still allowing your body to move freely.

Designed to mimic skin’s elasticity, KT tape supports muscles and joints without holding back your range of motion.

When I tried KT tape for the first time, I was surprised at how light it felt—like a second skin, but still offering solid support

Developed by Dr. Kenzo Kase in the 1970s, kinesiology tape has been around for decades but has recently gained popularity among athletes.

It’s not just for runners—it was originally used to help patients with joint alignment and recovery.

female runner blue kinesio tape on knees running on asphalt

How Does KT Tape Help?

So, why use KT tape for patellofemoral pain?

Let me explain briefly.

The tape gently lifts the skin, creating space between the skin and the tissue underneath. This slight lift boosts circulation, reduces swelling, and eases pressure.

KT tape may also alter how your body senses pain by reducing pressure and improving body awareness

In my experience, KT tape offers extra compression, making a noticeable difference during long runs or while recovering

When I tape my knee before a run, I feel more stable and notice less soreness afterward. That’s just my anecdotal evidence, but it doesn’t hurt to try something new—especially if you’re in pain.

Does Kinesiology Tape Really Work? Here’s What the Research Says

Let’s face it—it’s tempting to try something new, especially when you see other runners swearing by it.

But does KT tape actually work for knee pain? Research offers some promising insights:

  1. Temporary Pain Relief and Support: Studies have shown that kinesiology tape can help reduce pain and improve knee function in people with patellofemoral pain syndrome . For example, a study found that KT tape helped participants experience short-term pain relief and improved muscle activation around the knee.
  2. Improved Circulation and Swelling Reduction: Kinesiology tape’s lifting effect is believed to promote circulation, which can reduce swelling and aid recovery. According to research published in Physiotherapy Research International, KT tape can improve blood flow in the taped area, which may contribute to reduced inflammation and faster recovery after intense activity.
  3. Enhanced Muscle Function: Some runners find that KT tape provides additional stability to the muscles surrounding their knee. A review in the Journal of Sports Rehabilitation concluded that KT tape may positively impact muscle activation, helping runners maintain better form and control during movement (source).

A Word of Caution – Though KT tape can be incredibly helpful, applying it incorrectly can worsen your problem. Make sure to follow proper techniques and, if possible, consult with a physical therapist before making taping a regular part of your routine. Patellofemoral pain is an injury that shouldn’t be taken lightly, and taping should never replace a full recovery plan.

How To Apply KT Tape for Runners Knee 

Before you start taping, make sure you have all the supplies at hand. These include:

  • Tape
  • Scissors
  • Low allergy or elastic tape
  • Pre-wrap
  • Clean knee

All of this helps ensure the adhesive tape sticks properly.

Remember that some kinesiology tape products come precut,  so just choose the right size for your leg, and that’s all.

Once you have everything you need, follow these steps to do it right.

Patella Taping Method

Patella taping employs rigid tape to help correct the alignment of the kneecap.

Follow this YouTube tutorial to do it right:

  • Start by measuring the bump under your patella—or what’s known as the tibial tubercle—to your quadriceps tendon.
  • Cut two KT tape strips of similar length. Minimize peeling by rounding the ends.
  • Place the low allergy tape over the front of the affected knee to act as an anchor and protect the skin.
  • Take a piece of rigid tape, then place it towards the top of your patella.
  • Add two more pieces of tape.
  • Place two strips of KT tape on your quads to form the teardrop shape, and then run them down both sides of the affected knee.

I like to tape my knee before long runs or speed sessions, giving me the needed stability. It can also stay on for a day or two after a run, supporting my knee during recovery.

The Video Tutorial

Sometimes, words aren’t enough to fully capture how to apply KT tape properly. So, let’s walk through the process with visual aids! Below, you’ll find a video and a step-by-step diagram to guide you. Whether you’re new to KT tape or just need a refresher, these resources will make it easy to get it right.

My best advice? Pause the video at each step and apply your tape along with the demo. Take your time to get the placement just right—rushing can lead to mistakes that won’t give you the full benefits of the tape!

When KT Tape Might Not Be the Best Option

KT tape is a fantastic tool, but it’s not a one-size-fits-all solution. Here are some scenarios where it might not be ideal:

  • Severe Knee Injuries: For acute injuries like ligament tears or fractures, KT tape won’t provide the support you need. In these cases, a knee brace or more specialized medical care is recommended.
  • Inflamed or Irritated Skin: If your skin is sensitive or you’re experiencing any irritation (from previous tape applications or otherwise), it’s best to avoid KT tape until your skin heals. Constant irritation can lead to rashes or even skin breakdown.
  • Chronic Knee Pain Without Diagnosis: If you’ve had knee pain for an extended period without improvement, KT tape alone may not address the underlying issue. Chronic pain should ideally be assessed by a healthcare provider who can help you identify the root cause and create a more comprehensive treatment plan.
  • Hot and Humid Conditions: KT tape can sometimes lose its adhesive strength in extreme heat or humidity. If you’re running in hot weather, consider using additional adhesive spray or switching to a compression sleeve.

Final Thoughts

KT tape has become one of my go-to tools for managing knee pain. It’s not a miracle cure, but can offer much-needed relief when used correctly. If you’re struggling with knee pain, try kinesiology tape—just make sure to get the technique right and use it with a balanced recovery plan. And as always, listen to your body.

If you have any questions or need further clarification, feel free to leave a comment. I’m happy to help guide you through the process.

Happy running, and take care of those knees!

Your Complete Guide The Myrtle Routine

Like many new runners, you might think a couple of toe touches and quad stretches are all you need to get ready for a run.

I was the same, thinking a quick 30-second stretch was enough to prep my muscles

Spoiler alert: I was wrong!

Holding static stretches before a run isn’t the best way to prep your body

Instead, try dynamic warm-ups, which involve moving stretches to activate your muscles.

One of my all-time favorite routines?

Enter the Myrtle Routine. It’s fast, needs no equipment, and totally changed how my hips feel post-run.

In this article, I’ll share the full guide to the Myrtl routine, discuss its benefits, and explain the exercises you should be performing in detail.

What’s the Myrtle Routine?

The Myrtle routine is one of the most effective dynamic warm-ups I’ve used, and it’s great for everyone—from beginners to elites.

This routine consists of bodyweight exercises aimed at strengthening your hip girdle—the muscles around your hips are crucial for maintaining good form, especially when fatigue sets in during those longer runs.

Specifically, it targets the small, stabilizing muscles around the hips that support your running. This is especially useful as fatigue sets in during the final miles of a long run or race

Regularly performing these exercises can enhance flexibility and range of motion, helping to prevent pain and injuries during training

How I Discovered the Myrtl Routine

A few years ago, after a particularly long run, I started feeling a dull ache in my hips. I chalked it up to getting older (because, let’s face it, we’ve all been there).

Then a runner friend showed me the Myrtle routine, and within weeks of regular practice, my ache vanished.

The best part? It’s only a 10-minute routine that drastically changes your flexibility, strength, and injury resistance

Why You Need This Routine

Here’s the deal: your hips are your powerhouse as a runner.

Weak or tight hips can cause a myriad of issues, from lower back pain to knee problems. Adding the Myrtle Routine regularly has kept my hips strong and flexible, improving my overall running posture and form.

The benefits are clear:

  • Improves range of motion: This is key for avoiding injuries, especially in your hips and lower back.
  • Strengthens muscles: Those smaller stabilizing muscles that don’t always get the love they deserve.
  • Prevents injuries: Nobody wants to deal with hip pain or other overuse injuries.
  • Gets blood flowing: Dynamic routines like this are much more effective at getting your body ready than just standing still and stretching.

How Often Should You Do the Myrtle Routine?

I suggest doing the Myrtle Routine three to four times weekly, ideally before running, for optimal results.

At first, I found adding another step to my pre-run routine tough, but after sticking with it, I realized it only takes 10 minutes. And those 10 minutes pay off—big time.

Turning this into a habit can keep you injury-free and enhance your running form. I tell the runners I coach that yesterday is the best time to start a warm-up routine, but today is the second-best time!

The Myrtle Routine: Step-by-Step Guide

Here’s a detailed look at the Myrtle Routine exercises.

1. Lateral Leg Raises

  • How to do it: Lie on your right side with your legs straight. Raise your left leg to a 45-degree angle and slowly lower it.
  • Reps: Five reps with your foot in a neutral position, five with toes pointed up, and five with toes pointed down.
  • Coach’s tip: Keep your legs straight and engage your core for stability.

2. Clamshell

  • How to do it: Lie on your side with knees bent at a 45-degree angle. Keep your feet together and raise your top knee, like opening a clamshell.
  • Reps: Eight reps on each side.
  • Coach’s tip: Control the movement and avoid rotating your torso. You should feel this in your glutes!

3. Donkey Kick

  • How to do it: Start on all fours. Bring your right knee toward your chest, then kick your leg straight back with your foot flexed.
  • Reps: Eight reps on each side.
  • Coach’s tip: Engage your glutes and avoid arching your back.

4. Fire Hydrant

  • How to do it: From the same all-fours position, lift your right leg to the side until your knee reaches hip height, then lower.
  • Reps: Eight reps per side.
  • Coach’s tip: Keep your back flat and core engaged.

5. Donkey Whips

  • How to do it: Extend your right leg behind you from the all-fours position, then swing it out to the side and back to the center.
  • Reps: Five reps per side.
  • Coach’s tip: Move slowly and with control to avoid straining your lower back.

Additional Hip Mobility Exercises

I also like to throw in a few extra exercises to boost hip mobility. These will keep your hips in tip-top shape for running.

6. Hurdle Trail Legs

  • How to do it: Imagine stepping over a hurdle. Lift your leg in a circular motion as if clearing a hurdle.
  • Reps: Five forward, five backward.
  • Coach’s tip: This mimics your running stride and loosens up your hips.

7. Knee Circles

  • How to do it: On all fours, make backward circles with your knee while keeping it bent.
  • Reps: Five circles per leg.
  • Coach’s tip: Keep it smooth and controlled.

8. Linear Leg Swing

  • How to do it: Stand next to a wall, and swing your leg forward and backward.
  • Reps: Ten per leg.
  • Coach’s tip: Swing from the hip, not the torso.

9. Lateral Leg Swing

  • How to do it: Swing your leg side to side in front of your body while holding onto a wall for balance.
  • Reps: Ten per side.
  • Coach’s tip: This opens up the hips and improves your range of motion.

Quick Summary: Key Tips for the Myrtl Routine

Want to keep this routine handy? Here’s a quick recap of the Myrtl Routine essentials. Save, bookmark, or share this with a friend who could use a boost in flexibility and injury prevention!

Myrtl Routine Highlights

  • Ideal for Runners: Targets hip mobility and stability, two crucial elements for efficient, injury-free running.

Myrtl Routine Exercises Checklist

  1. Clamshells – 10–15 reps per side
  2. Lateral Leg Raises – 10–15 reps per side
  3. Hip Circles – 10 circles each direction, per leg
  4. Fire Hydrants – 10–15 reps per side
  5. Donkey Kicks – 10–15 reps per side
  6. Knee Circles – 10 circles each direction, per leg
  7. Standing Hip Abductions – 10–15 reps per side

Pro Tip: Consistency is key! Aim to include the Myrtl Routine 2–3 times per week to see improvements in flexibility and stability.

If you found this guide helpful, consider sharing it with your running friends or posting it on social media. The more runners who incorporate mobility work, the stronger and more resilient we all become!

Further Reading and References

If you’re interested in diving deeper into the science behind the Myrtl Routine and hip mobility, here are some valuable resources:

  • Journal of Strength and Conditioning Research: “Influence of Hip Flexibility on Running Economy” – Link
  • American Journal of Sports Medicine: “Hip Muscle Weakness and the Link to Running Injuries” – Link
  • Runner’s World: “How Hip Mobility Boosts Running Performance” – Link

Join the Conversation: How Do You Use the Myrtl Routine?

Have you tried the Myrtl Routine before? Maybe it’s already a regular part of your training, or perhaps you’re just getting started. I’d love to hear how you’re using it!

  • Share Your Experience: Do you find that the Myrtl Routine helps with hip flexibility or injury prevention? Any favorite exercises from the routine?
  • Ask Questions: If you’re new to mobility work or curious about specific exercises, ask away! I’m here to help.

Feel free to drop your thoughts in the comments below. Let’s build a community where we can all learn from each other’s experiences and tips!

How To Get Started With Interval Training

track running

Obesity is a global epidemic and it has been on the rise for decades. The World Health Organization estimates that more than 1 in 10 adults across the globe are obese, which means over 600 million people worldwide. Obesity rates have doubled since 1980 and continue to grow at an alarming rate. In America alone, over two-thirds of American adults (approximately 150 million) are either overweight or obese, with about one-third being classified as obese.

This staggering number translates into shockingly high health care costs for both individuals and taxpayers alike; obesity-related medical expenses account for nearly ten percent of all national healthcare expenditures in the United States – roughly $190 billion annually! It’s not just America though: globally, obesity accounts for 2%to 7% of all health care costs. We need to do something about obesity rates. But what can we do?

Exercise is a key part of the solution, and interval training is one of the best types of exercise for weight loss and overall health. Let’s take a closer look at interval training and how you can get started.

What is interval training?


Interval training is a type of exercise that alternates short periods of high-intensity activity with short periods of lower-intensity activity or rest. The high-intensity intervals are typically performed at or near your maximum effort, while the lower-intensity intervals are done at a moderate intensity. This type of training is more effective than traditional steady-state cardio for improving overall health, burning fat, and building muscle. Getting the appropriate running equipment, especially shoes should be your number one priority. Many amazing choices are available online such as on Runner’s Lab where you can compare prices and models so by doing some research beforehand you can find a model that is appropriate for your needs and budget.

How to get started with interval training

If you’re interested in starting interval training, there are a few things you need to know. First, it’s important to start slowly and gradually increase the intensity of your intervals over time. This will help prevent injury and allow your body to adapt to the new demands being placed on it. Second, it’s important to have an appropriate level of fitness before starting interval training. If you’re not in good shape, start with some basic cardio exercises and work your way up.

Start slowly

If you’re new to interval training, start by doing just two or three high-intensity intervals and then rest for an equal amount of time. As you get more comfortable with the routine, gradually increase the number of intervals you do. 

Build your core

To perform interval training safely and effectively, you need a strong core. Core exercises will help you stay stable during your high-intensity intervals and prevent injuries. There are many different core exercises you can do, so find a few that you like and stick with them.

Avoid potential risks

Interval training can be risky if not done correctly. One of the risks is that you can overdo it and end up injured. These injuries can be mild, like a muscle strain, or more serious, like a stress fracture. To avoid these risks, start slowly and gradually increase the intensity and duration of your intervals. If you are new to interval training, start with three minutes of intervals at a moderate intensity and work your way up from there.

Additional Resource – Here’s your guide to the Yasso 800 Workout

Overtraining syndrome

Another risk of interval training is that you can push yourself so hard that you end up feeling sick or fatigued. This is known as overtraining syndrome, and it can lead to several negative side effects, including decreased performance, fatigue, decreased immunity, and even mental health problems. To avoid overtraining syndrome, always listen to your body and back off when you feel like you’ve pushed yourself too hard. If you’re not feeling well or if your performance starts to suffer, take a break from interval training until you feel better. 

Additional Resource – Here’s how to run faster

Recover between workout intervals

Interval training is intense, and it’s important to get enough rest between workouts. Aim to get at least eight hours of sleep per night and allow yourself plenty of time for recovery between workouts. 

In order to get the most out of your interval training, you need to make sure that you are fully recovered between workouts. This means giving yourself enough time to rest and rebuild your muscles. Depending on how hard you worked during your intervals, you may need up to 48 hours of recovery time. If you’re doing back-to-back interval workouts, make sure you allow for at least one day of rest in between.

Preparation exercises

It’s important to do some preparatory exercises before starting interval training. These exercises will help you get ready for the intense workout and prevent injuries. Some good preparatory exercises include squats, lunges, and hip bridges. Do a few sets of each exercise and rest for about 60 seconds between sets.

If you’re doing intervals on a track, do a light jog for about five minutes before starting your intervals. This will help get your body warm and ready for the intense workout.

End with a cooldown

Finish your interval workout with a few minutes of low-intensity cardio. This will help cool down your body and prevent injuries. Low-intensity cardio exercises include walking and light jogging.

Interval training can be a great way to improve your fitness level and get in better shape. However, it’s important to do it safely and intelligently. Start slowly, build up your core strength, and avoid overtraining syndrome. And be sure to end your workout with a cooldown period. Listen to your body, and take a break if you need it. And don’t forget to cool down after your workout.

As you can see, there are many things to consider before starting interval training. But if you take the time to prepare properly, you can enjoy the many benefits of this intense workout routine.

Remember to take precautions to avoid potential risks, such as overtraining syndrome and injuries. By starting slowly and gradually increasing the intensity and duration of your intervals, you can safely enjoy the benefits of interval training without any negative side effects. By following these tips, you can enjoy all the benefits of interval training while minimizing the risks.


Top 5 Essential Oils For Runners

running with hernia

Essential oils have been long used for stress relief and relaxation, but could they also help you become a better runner? Keep on reading.

Essential oils for runners are no magic pill. They offer some amazing benefits, but they are the answer to all of your running prayers. Let’s get that out of the way.

From soothing sore muscles to improving endurance, in today’s post, I’ll spill the beans on essential oils and how to use them in your training in today’s article.

Essential Oils Explained

First things first, what is an essential oil?

Basically, essential oils consist of volatile aromatic compounds found in seeds, trees, barks, flowers, roots, and other plants.

Plants produce these compounds in order to protect themselves from diseases by helping with pollinations, warding off predators, and keeping the plant robust.

Essential oils are 50 to 70 times more powerful than the herbs and plants themselves.

Want an example?

One drop of peppermint essential oil equals roughly 28 cups of peppermint tea.

What’s more?

It takes about 65 pounds of rose petals to produce 15 ml of rose essential oil.

Thanks to this highly concentrated form, quality essential oils provide a host of health benefits in a single drop.

These oils are made using the distillation process in which plant and herb compounds are carefully pressured or steamed to separate the pure flavors or scents of the oils from the rest.

How Come Essential Oils Are So Potent?

The stuff has concentrated compounds in them and contains no or very little diluent. Thus, essential oils are super effective and proved to be helpful in various physical and neurological treatments.

Lavender, tea tree, peppermint, etc., and as many herbs as many essential oils—are all popular essential oils that( can be found on the market.

How Do you Use Essential Oils

The main way your body takes in essential oils is through aroma, or what’s known as aromatherapy.  Inhaling the stuff can have a positive impact on your body’s limbic system—or what’s known as the emotional brain.

You can also consume some essential oils by adding a drop to around 250 ml of liquid.  Just keep in mind that not all oils are viable for this.

Although most essential oils can be ingested, most experts agree that oral consumption carries serious risks, such as possible organ toxicity.

For example, tea trees and eucalyptus should never be ingested. Consult with a professional before consuming any type of essential oil.

What’s more?

When you try to apply essential oils topically, dilute them by mixing with lotion or other less concentrated oils. Once you apply the oil, it’ll be absorbed into your skin to treat the affected area.

You can also use essential oils to treat injuries. Simply put a few drops of the stuff in one warm washcloth and wrap it around the affected area.

The Benefits

Essential oils have been shown to offer a wide range of fitness and health benefits.

Some of these include.

Improved Lung Function

Essential oils might be able to improve lung function, therefore, performance.

Don’t take my word for it. Research that looked into the impact of Neroli and Spearmint oils on lung function and running performance backs this up.

The participants inhaled essential oils during the experiment before a 1500m run. Both performance and lung function was measured after the test.

The researchers reported that inhaling the EOs improved lung function and a drastic reduction in running time. In addition, the impact of Neroli oils was more significant than Spearmint.

Additional resource – How to run with asthma?

Improved Performance

Your athletic performance may also stand to gain.

A BJ study reported that Eos could help prepare the mind and body for optimal athletic performance and help the body bounce back faster by reducing the effects of fatigue.

Another study of the Journal of The International Society of Sports Nutrition reported that supplementing with peppermints oils increased respiratory efficiency, blood pressure, and heart rate.

The study also reported lower levels of perceived workload.

What’s more?

Another study revealed that inhaling orange and spearmint oils enhanced lung function and exercise performance of athletes.

Stress Relief

Eos have been long used to relieve stress, and there’s plenty of evidence backing up their efficiency.

An Austrian study reported that essential oils can drastically reduce your stress levels and that the stuff is a good choice for treating and preventing stress and burnout.

Another study out of the American Journal of Nursing Science revealed that various essential oils could help treat and ward off fatigue, anxiety, and depression.

5 Types of Essential Oils To Try

Now that you know a thing or two about the impact of essential oils on the body let’s dive into some of the main ones.

There are many essential oils on the market that support many different aspects of athletic performance and recovery, but let’s stick with the essential oils most useful for runners.

1. Peppermint

The number one essential oil for runners is peppermint oil. It’s also one of my favorite ones and one I use regularly. (it’s actually the reason I got into essential oils in the first place).

One drop of peppermint oils equals about 28 cups of peppermint tea.

A study out of the Journal of the International Society of Sports Nutrition

The participants ingested 0.05ml of peppermint oil in a drink for ten consecutive days.

The result?

The daily intake of the stuff can improve exercise performance and respiratory function.

A study reported by the Journal of The International Society of Sports Nutrition backs this up. In the research, the subject was given a dose of peppermint oil with water every day pre-workout for ten consecutive days.

In the end, the total work exerted by the participants increased by 51 percent, and their time to exhaustion increased by roughly 25 percent. Keep in mind that this was only achieved in only ten days of supplementation.

In other words, they were able to run faster and for longer.

Some of the benefits of the stuff include:

  • Improved mental alertness
  • Regulating blood pressure and heart rate
  • Enhancing athletic performance.
  • Improving breathing by opening up the sinuses
  • Relieving digestion and gas
  • Reducing nausea
  • Improving mental focus

2. Lavender

As a runner, recovery is as important as the training itself. Skipping on it can limit, even compromise, your fitness gains. In fact, running too much can take a toll on your body and contribute to injuries and burnout. And you don’t want that.

Fortunately, using lavender essential oils can help speed up your recovery, especially right before going to sleep. These Eos are known for their ability to soothe stress, relax the mind and body and coast it not a more restful and optimal sleep.

Other benefits include

  • Healing wounds quicker
  • Improving sleep
  • Soothing achy muscles
  • Treating and preventing anxiety
  • Treating skin problem’s
  • Managing allergies

Additional Resource – Your Guide to feeling sleeping after running

3. Eucalyptus Oils

Eucalyptus oils aren’t just for spas. They have a lot to offer.

Some of their benefits include:

  • Improved respiratory function
  • Reducing inflammation in tired and strained muscles
  • Soothing asthma attacks
  • Cooling the body in hot weather
  • Improved flexibility
  • Rejuvenating and refreshing the mind and body

4. Lemon

Looking to cleanse and detox your body? Look no further than lemon essential oils.

You might already add lemon to hot water to fend off the flu, but adding lemon essential oil to water may offer you the powerful benefits of cold-pressing the lemon peel.

Convenient and easy to use, lemon essential oils have plenty of benefits targeting runners.

Some of the other benefits include:

  • Improving immune system
  • Help with season respiratory discomfort
  • Improving mood
  • Awakening the sense by stimulating the nervous system
  • Treating athlete’s foot.
  • Improved digestion function
  • Cleansing and detoxifying the system
  • Treating and preventing symptoms of athlete’s foot.

5. Lemongrass Oil

Another powerful EO with many health benefits. Some of which include:

  • Relieving headaches
  • Soothing period cramps
  • Relaxing muscles
  • Relieving joint pain
  • Acting an antiseptic for cuts
  • Reliving stomach issues

Tips For Using Essential Oils

While the use of essential oils carries little to no risk, I’d recommend that you perform a patch test first to ensure that you don’t have any intolerances or allergies to any of the ingredients.

Avoid Ingesting

Avoid consuming essential oils orally, as these are not meant for the exterior parts of your body.

Pay attention

Notice any redness or experience any irritation? Stop using Essential oils on the spot.

Additional Resource – Here’s the full guide lower abdominal pain while running.

The Beginner’s Guide To BCAAs for Runners

BCAAs for runners

Ready to supercharge your running game with BCAAs?

Runners, listen up! If you’re on the hunt for that extra edge in performance and recovery, those three magic letters—BCAAs—might just be what you need.

In this article, we’re not only going to unravel the mysteries of BCAAs but also explore how they can benefit you as a runner.

Curious? Let’s dive in and give your running journey a boost

What Is BCCA?

You may have heard these three-letter wonders mentioned in the fitness world, and yes, they’re closely related to protein. But let’s break it down.

Protein, the mighty macronutrient, is like the building blocks of your body. It’s not just about bulking up muscles; it’s everywhere! From your skin to your bones, hair to every tissue you can think of.

Now, protein itself is a team of 21 amino acids. These include heavy hitters like Valine, Leucine, Arginine, and more. Each of them plays a unique role in your body’s grand scheme.

But here’s the twist: nine of these amino acids are essential. Your body can’t whip them up on its own, so you gotta get ’em from your diet. These essential amino acids are like VIPs:

  • Isoleucine
  • Valine
  • Lysine
  • Methionine
  • Histidine
  • Tryptophan
  • Leucine
  • Phenylalanine
  • Threonine

Branched Amino Acids

BCAA stands for “Branched-Chain Amino Acids,” and they are indeed a group of essential amino acids crucial for various aspects of health and fitness. Let’s break down the essentials:

More specifically, BCAAs consist of three essential amino acids, each with its unique contribution to muscle health and overall well-being. These amino acids are:

  • Valine
  • Leucine
  • Isoleucine

Why the Name “Branched-Chain”?

The name “branched chain” refers to the molecular structure of these amino acids, which includes a branching side chain. This unique structure sets BCAAs apart from other amino acids.

Benefits of BCAAs

BCAAs offer a range of benefits, including:

  • Reducing muscle soreness
  • Promoting muscle growth
  • Enhancing hormone function
  • Supporting exercise recovery
  • Aiding in protein synthesis

The Star Player: Leucine

Leucine is considered the most critical amino acid among the BCAAs. It plays a significant role in promoting muscle protein synthesis, making it especially important for athletes and fitness enthusiasts.

Why BCCAs Are Unique

Branched-Chain Amino Acids (BCAAs) have garnered attention in the fitness world for their unique characteristics, including their ability to provide rapid energy during exercise. Here’s what makes BCAAs stand out:

Muscle Fuel

BCAAs have a remarkable capability to be oxidized (broken down) directly within muscle tissue for energy. This is a crucial advantage because they can be swiftly utilized by the muscles without having to go through the liver for initial processing. This translates to quick energy delivery right where it’s needed.

Fast Delivery

Because BCAAs can skip the liver’s metabolic processes, they reach the muscles rapidly. This fast delivery of amino acids can have a noticeable impact on energy levels and performance during exercise.

Enhanced Energy

Research has indeed shown that taking BCAAs can enhance overall energy levels during aerobic activities. Some studies have reported improvements of up to 10 percent in total energy output when BCAAs are incorporated into an athlete’s regimen.

Let me dive more into some of the benefits.

How BCCAs Help Runners?

People consume BCCAs for a wide range of reasons. Some of the most common benefits of BCCAs for runners include:

Improved muscle growth

One of the primary benefits of BCAA intake is their capacity to enhance muscle growth. This effect is primarily attributed to a specific amino acid within BCAAs: leucine. Let’s dive into how leucine and BCAAs contribute to improved muscle growth:

Leucine’s Key Role

Leucine plays a pivotal role in the muscle growth process. It acts as a key regulator by activating signaling pathways in the body that stimulate protein synthesis. This activation sets in motion the production of more protein, which is essential for tissue repair and muscle growth.

Evidence-Based Benefits

Research studies have provided substantial evidence supporting the muscle-building effects of BCAAs, particularly leucine. Here are a couple of noteworthy findings:

  • A study reported that consuming BCAAs, as opposed to water, resulted in a remarkable 22 percent increase in muscle protein synthesis. This demonstrates the ability of BCAAs to enhance the body’s recovery and repair processes after muscle damage.
  • A 2014 review indicated that BCAA supplements, particularly those with ample leucine content, have the potential to increase muscle mass. This improvement in muscle mass can contribute to enhanced body composition, which is a significant goal for many fitness enthusiasts.

Decrease Muscle Soreness

Muscle soreness, often referred to as delayed onset muscle soreness (DOMS), is a common sensation experienced by runners and athletes after intense training. It’s typically associated with tiny muscle tears that occur during rigorous exercise.

Here’s how BCAAs can play a role in decreasing muscle soreness and expediting recovery:

Muscle Protection and Repair

BCAAs can be valuable in limiting the rate of muscle breakdown and accelerating the rate of muscle repair. This dual action can aid in reducing the severity and duration of muscle soreness. Furthermore, some experts suggest that BCAAs may assist in managing cortisol, the stress hormone, which has the potential to contribute to muscle breakdown.

Evidence-Based Support

Numerous research studies have explored the effects of BCAAs on muscle soreness and recovery.

Here are a few noteworthy findings:

  • One study discovered that supplementing with BCAAs resulted in decreased muscle soreness following an intense session when compared to a placebo.
  • Research published in the Journal of the International Society of Sports Nutrition suggested that consuming an appropriate amount of BCAAs can be effective in reducing delayed onset muscle soreness.
  • Another study reported that individuals supplementing with BCAAs experienced a significant reduction in soreness levels, with up to a 33 percent decrease compared to those given a placebo.

It’s important to note that BCAAs have been widely utilized to enhance recovery in various contexts, including musculoskeletal injuries and surgical procedures. In these scenarios, swift tissue repair and healing are crucial for optimal outcomes

Reduce Fatigue

Fatigue can be a significant hurdle for athletes and runners during exercise, particularly for those engaged in long-distance training. Here’s how BCAAs can play a role in reducing fatigue and enhancing endurance:

Inhibiting Serotonin Production

High levels of BCAAs may interfere with the entry of tryptophan into the brain. Tryptophan is a precursor to serotonin, a neurotransmitter associated with feelings of fatigue during exercise. By limiting tryptophan’s access to the brain, BCAAs can potentially reduce the sensation of fatigue.

Supporting Evidence

Research has provided some support for these fatigue-reducing effects of BCAAs:

A small study involving college-age males found that those who consumed 20 grams of BCAAs before a workout exhibited lower levels of serotonin post-exercise compared to those given a placebo.

By incorporating BCAAs into your pre- and intra-workout nutrition, you may be able to better preserve your glycogen stores, efficiently allocate energy to your muscles, and hinder the production of fatigue-inducing neurotransmitters. This could be especially beneficial for athletes engaged in prolonged training and endurance activities.

BCAAs and Weight Loss

If you’re aiming to shed excess body fat, BCAAs (Branched-Chain Amino Acids) could be a valuable addition to your nutrition and workout regimen. Here’s how BCAAs may contribute to improved weight loss:

Increased Muscle Mass

BCAAs are known for their ability to support muscle growth and maintenance. As you build more muscle, your body’s metabolic rate increases. Muscle tissue requires more energy (calories) to maintain than fat tissue, which means having more muscle can boost your daily calorie expenditure. This can be advantageous for weight loss, as it creates a scenario where you burn more calories throughout the day.

Enhanced Fat Loss

The combination of increased muscle mass and improved fat loss can lead to more effective weight management. While strength training is a proven method for accelerating fat loss, BCAAs can help optimize your muscle-building efforts during workouts.

A study found that participants who consumed 14 grams of BCAAs per day experienced a 1% reduction in body fat and gained an additional 4.4 pounds of muscle compared to those who took whey protein. It’s important to note that dietary habits can significantly influence these results.

For more on the benefits of BCCA for athletes, check the following resources:

Will BCAA Make You A Faster Runner?

The relationship between BCAAs (Branched-Chain Amino Acids) and running speed is a topic that has garnered some attention in the fitness and endurance sports communities. While BCAAs are known for their role in muscle recovery and growth, can they actually make you a faster runner?

The Research is Inconclusive

To date, research on the direct impact of BCAAs on running speed remains inconclusive. There have been mixed findings, and several factors come into play.

Ultra-Marathon Study

In one study conducted during a 100K ultra-marathon, participants who were given BCAAs did not show significant improvements in finish times compared to those who received a placebo. This suggests that BCAAs may not enhance running speed in ultra-endurance events.

Sprint Power Study

On the other hand, a different study reported that supplementing with BCAAs for ten weeks resulted in a 19% increase in all-out sprint power and a 4% increase in power relative to body mass. This finding suggests that BCAAs may have the potential to enhance sprinting performance.

The Complexity of Running Performance

Running speed is influenced by various factors, including aerobic fitness, anaerobic capacity, endurance, and technique. BCAAs primarily play a role in muscle recovery, protein synthesis, and reducing muscle soreness. Their impact on running speed may be more significant in short bursts of high-intensity sprinting rather than long-distance endurance running.

Individual Variability

It’s important to recognize that individual responses to BCAAs may vary. Some runners may find that BCAAs help improve their sprinting abilities, while others may not experience the same benefits. The effectiveness of BCAAs can be influenced by factors such as training status, diet, and overall workout routine.

The Side Effects of BCCAs

The relationship between BCAAs (Branched-Chain Amino Acids) and running speed is a topic that has garnered some attention in the fitness and endurance sports communities. While BCAAs are known for their role in muscle recovery and growth, can they actually make you a faster runner?

The Research is Inconclusive

To date, research on the direct impact of BCAAs on running speed remains inconclusive. There have been mixed findings, and several factors come into play.

Case 1: Ultra-Marathon Study

In one study conducted during a 100K ultra-marathon, participants who were given BCAAs did not show significant improvements in finish times compared to those who received a placebo. This suggests that BCAAs may not enhance running speed in ultra-endurance events.

Case 2: Sprint Power Study

On the other hand, a different study reported that supplementing with BCAAs for ten weeks resulted in a 19% increase in all-out sprint power and a 4% increase in power relative to body mass. This finding suggests that BCAAs may have the potential to enhance sprinting performance.

The Complexity of Running Performance

Running speed is influenced by various factors, including aerobic fitness, anaerobic capacity, endurance, and technique. BCAAs primarily play a role in muscle recovery, protein synthesis, and reducing muscle soreness. Their impact on running speed may be more significant in short bursts of high-intensity sprinting rather than long-distance endurance running.

Individual Variability

It’s important to recognize that individual responses to BCAAs may vary. Some runners may find that BCAAs help improve their sprinting abilities, while others may not experience the same benefits. The effectiveness of BCAAs can be influenced by factors such as training status, diet, and overall workout routine.

BCCAs For Runners  – The Conclusion

As you can tell, BCCAs are not just helpful for strength buffs but runners as well, as they can help improve your performance.

The stuff has the ability to help improve your energy output and reduce fatigue during training, aid in muscle growth, speed up recovery—and so much more.

Can Testosterone Boosters Help Boost Testosterone Naturally?

running at night

Are you looking for a way to boost your testosterone levels? If so, you may be wondering if testosterone boosters can help. There is a lot of discussion around testosterone boosters and whether or not they work. Some people swear by them, while others think they waste money. So, what’s the truth? Can testosterone boosters help boost testosterone naturally? The answer may surprise you. This article will discuss the benefits of testosterone boosters and how they can help improve your overall health.

What are Testosterone Boosters?

Testosterone boosters are supplements that are designed to increase your testosterone levels. They typically contain various ingredients that are thought to boost testosterone, such as vitamins, minerals, herbs, and amino acids. While there is no one-size-fits-all testosterone booster, they are generally safe for most people to take.

However, you need to note that the market is filled with supplements that claim to be testosterone boosters but don’t contain any ingredients that have been proven to boost testosterone. So, it’s essential to do your research before buying a supplement. The best ones must contain clinically-proven ingredients that have been shown to increase testosterone levels.

How do Testosterone Boosters Work?

The human body produces testosterone naturally. However, as men age, the amount of testosterone produced by the body decreases. This can lead to several issues such as muscle loss, fatigue, and decreased libido. Testosterone boosters are designed to help increase the amount of testosterone in the body, which can help reduce these symptoms.

There are several different testosterone boosters on the market. Some work by increasing the amount of testosterone produced by the body, while others work by blocking the absorption of estrogen, which can help reduce the symptoms caused by low testosterone levels.

Do Testosterone Boosters Help Boost Testosterone Naturally?

There is a lot of debate over whether testosterone boosters help boost testosterone levels naturally. According to some testosterone booster reviews, some people believe they do help. Several studies have been conducted on the subject, and the results have been mixed.

Some studies have shown that testosterone boosters can help increase the amount of testosterone in the body. Others have shown that they do not help boost testosterone levels and can even be harmful. More research is needed to determine if testosterone boosters effectively increase testosterone levels naturally.

If you are thinking about taking a testosterone booster, you must speak with your doctor first. They will advise you on whether or not a booster is right for you. Some studies have shown that testosterone boosters can be harmful, so it is essential to ensure that you take a safe and effective product.

Additional Resource – Your guide to running and sex drive.

Benefits of Using Testosterone Boosters

There are several potential benefits associated with using testosterone boosters. Some of these include:

  • Increased Strength: Testosterone is responsible for the growth and development of muscle tissue. By increasing the amount of testosterone in the body, you may increase your strength.
  • Improved Muscle Mass: Testosterone boosters can also help improve muscle mass. By increasing the amount of testosterone in the body, you may build more muscle tissue.
  • Improved Libido: Testosterone is also responsible for libido. By increasing the amount of testosterone in the body, you may improve your sex life.
  • Reduced Fatigue: Testosterone boosters can help reduce fatigue. This is because testosterone plays a role in energy production.

There are several other potential benefits associated with using testosterone boosters. Speak with your doctor to determine if a booster is right for you.

Side Effects of Testosterone Boosters

There are several potential side effects associated with using testosterone boosters. Some of these include:

  • Gynecomastia: Gynecomastia is the development of breast tissue in men. This is a common side effect of testosterone boosters.
  • Hair Loss: Hair loss is another common side effect of testosterone boosters.
  • Acne: Acne is a common side effect of testosterone boosters. This is because testosterone can increase sebum production, which can clog pores and lead to acne.
  • Increased Aggression: Testosterone boosters can also cause increased aggression. Testosterone is responsible for the “fight or flight” response.

You need to note that these side effects vary from person to person. Not everyone will experience them. It is advised to start with a lower dose and increase it gradually to minimize the risk of side effects. You should also speak with your doctor if you think about taking a testosterone booster.

Testosterone Boosters vs. Hormone Replacement Therapy

There is a lot of debate over whether testosterone boosters are better than hormone replacement therapy. Hormone replacement therapy replaces the hormones that are no longer being produced by the body. Testosterone replacement therapy for men is the most common form of hormone replacement therapy.

Testosterone boosters might help some people boost their testosterone levels, but this is not always the case. Some people might experience better results than others, and the specific ingredients in a testosterone booster can make a big difference. It’s essential to do your research before purchasing any booster and consult with a healthcare professional if you have any questions or concerns.


Running Post-Knee Replacement: A Guide to Navigating the Highs and Lows

knee brace for knee pain

So, you’ve got those new knee joints, and the runner’s itch is just too hard to resist. But here’s the deal: running, despite our love for it, is a high-impact exercise per excellence. And after a knee replacement surgery, you’ve got precious new joints that deserve some TLC.

For a long time, doctors were waving the caution flag, warning against hitting the pavement post TKR (Total Knee Replacement). The fear? The high-impact nature of running could wreak havoc on those freshly minted joints.

This left many former devout runners torn between their love for running and the fear of undoing the surgical magic.

In this article, we’ll peel back the layers to explore the pros and cons of lacing up those running shoes after knee surgery.

Now, a little disclaimer—we’re not playing doctor here. I’m not a medical pro, nor have I undergone any knee surgery. This topic, however, hits close to home for me due to my family’s history of knee arthritis. So, please, consider this a friendly chat rather than medical advice, and always consult a pro when it comes to everything related to health and well-being.

What is Knee Replacement Surgery?

Knee replacement surgery, also known as total knee replacement (TKR) or knee arthroplasty, is a surgical procedure that involves replacing the damaged or diseased parts of the knee joint with artificial components. This procedure is typically performed to relieve pain, improve knee function, and enhance the quality of life for individuals with severe knee joint problems. Here’s an overview of knee replacement surgery:

Indications:

Knee replacement surgery is commonly recommended for individuals who have:

  • Osteoarthritis: The most common reason for knee replacement, osteoarthritis is a degenerative joint disease characterized by the breakdown of the knee’s cartilage.
  • Rheumatoid Arthritis: An autoimmune disease that causes inflammation and damage to the knee joint.
  • Traumatic Injury: Severe knee injuries or fractures that result in irreversible damage to the joint.
  • Other Degenerative Conditions: Conditions such as avascular necrosis, in which the bone loses its blood supply, can lead to joint deterioration.

Surgical Procedure:

During knee replacement surgery, the orthopedic surgeon makes an incision over the knee joint and removes the damaged cartilage and bone. The ends of the thigh bone (femur) and shin bone (tibia) are then reshaped to accommodate the artificial components. For those recovering from a knee replacement and looking to resume activities like running, it’s crucial to consult with a specialist who understands related issues, such as treatment options in Dallas shoulder fracture cases.

Prosthetic Components:

The prosthetic components used in knee replacement surgery typically consist of:

  • A metal femoral component: This covers the end of the thigh bone.
  • A metal tibial component: This covers the top of the shin bone.
  • A plastic spacer: Placed between the metal components to provide smooth movement.
  • Sometimes, a patellar component:  If the back surface of the kneecap is also damaged, a plastic button may be used to resurface it.

Types of Knee Replacement:

There are different types of knee replacement surgeries, including partial knee replacement (replacing only a portion of the knee joint) and total knee replacement (replacing the entire knee joint). The choice of procedure depends on the extent of knee damage.

Recovery:

After surgery, patients typically undergo physical therapy to regain strength, flexibility, and mobility in the knee. Full recovery can take several months, with most patients experiencing significant pain relief and improved joint function.

Risks:

While knee replacement surgery is generally considered safe, it is not without risks. Potential complications may include infection, blood clots, implant loosening, nerve or blood vessel injury, and persistent pain.

Benefits:

Knee replacement surgery can provide significant pain relief, improve mobility, enhance the ability to perform daily activities, and enhance the overall quality of life for individuals with debilitating knee joint conditions.

Longevity of Prosthetics:

The artificial components used in knee replacement surgery have a lifespan typically ranging from 10 to 20 years or more. Revision surgery may be required when the prosthetic components wear out or become loose.

Does Running Cause Osteoarthritis?

Alright, folks, let’s tackle a common question: Does running lead to arthritis? Well, I’ve covered this before, but it’s worth repeating – running all by itself doesn’t give you arthritis. Yep, that’s right!

In fact, the research has your back on this one. No, there’s no secret conspiracy between your running shoes and arthritis. They’re just not best buds.

But wait, here’s the cool part – some studies even suggest that running might be your joint’s superhero. It could help keep those pesky inflammatory processes, which are like the villains of the joint world, in check.

Now, here’s the deal with your knee joints. They’re like superheroes, too, built to last you a lifetime or even two. But, and it’s a big but, if you’re putting them through some crazy stuff, like running with a funky form or overdoing it without proper rest, they might start showing signs of wear and tear.

Additional resource – Running with arthritis 

runer woman with knee injury and pain

When Surgery is The Way?

Now, when you’re dealing with arthritis, your doctor’s first move is usually to try out the more conservative, non-invasive treatments. You know, stuff like anti-inflammatory meds, gentle exercises, maybe some yoga or stretching – all the good stuff.

But here’s the deal – when things take a nosedive, and your joint starts feeling like a rusty old door hinge, surgery might be your knight in shining armor. Especially if your joint has hit rock bottom, going bone-on-bone.

Early on, you’ve got options to fix, restore, or even replace the damaged tissues, like the articular cartilage, ACL, and meniscus. It’s like giving your joint a new lease on life!

How long Will A Knee Replacement Last?

Well, there’s no one-size-fits-all answer to that. It really depends on the individual. But generally speaking, those knee implants can go strong for about 15 to 20 years for most folks. Not too shabby, right?

Can You Run After Knee Replacement?

Well, technically, yes, you can hit the pavement or trails after TKR – but there’s a catch. It’s a decision that should be made with care, and it’s not the right move for everyone.

Before you lace up your running shoes, you’ve got some homework to do. You need to weigh the pros and cons of running post-surgery, and that means having a heart-to-heart with your doctor. They’ll help you map out all the possible scenarios and guide you toward the best choice.

Deciding whether it’s time to get back on the running track after knee surgery isn’t a one-size-fits-all decision. It’s all about a personalized approach between you and your doctor. So, whether you’re chasing that runner’s high or just aiming for a leisurely jog, make sure you’re on the right path for your unique situation.

The Research

Now, here’s the tricky part: there’s not a ton of scientific research out there on the impact of high-stress exercises like running on artificial knees. And what’s available is often outdated, unable to keep up with the leaps in materials and surgical techniques.

This lack of research also means we’re in the dark about a lot of things when it comes to exercise post-knee replacement. Questions like how long and how often you can safely run or if running is even a viable option after the surgery remain largely unanswered.

One reason for this gap is that researchers can’t just randomly assign patients to run after knee surgery while others stick to walking, which is the more traditional protocol for scientific testing. Instead, much of the research on this topic is retrospective. It relies on post-surgery patients to report on their own experiences with exercise after the procedure.

What makes things even more complicated is that many of the guidelines we have are anecdotal, coming from runners who’ve had the surgery themselves.

So, if you’re a passionate runner considering whether or not to hit the road after knee replacement surgery, keep in mind the lack of concrete scientific evidence. It’s a decision that requires careful thought and consultation with your healthcare team.

For more on the research, check the following resources:

The Factors To Consider

Here are some factors to consider:

Your Age

Your age is a significant factor when it comes to deciding whether or not to return to running after knee replacement surgery. As you get older, your overall health and fitness level may play a role in whether running is a suitable option for you. It’s essential to take into account your age and consult with your healthcare team to determine what forms of exercise are more age-appropriate and safe.

Accept The risk

Just like with any other activity, it’s important to understand that running or engaging in any weight-bearing exercise after knee replacement surgery does carry some risk. There’s a chance that you could damage the artificial implant or cause it to become loose. In such cases, you might need corrective surgery or even a replacement, which means undergoing another operation.

Consult Your Doctor

If you’re still enthusiastic about the idea of running after knee replacement surgery, it’s crucial to have a thorough discussion with your doctor. They can provide you with valuable insights into your specific situation, the type of implant you have, and what research on wear testing has revealed about it.

Keep in mind that over time, knee implants will naturally wear out to some extent, regardless of your activities. Your goal should be to minimize the wear and tear on the implant throughout the rest of your life, if possible, to avoid needing another surgery to replace the replacement.

Consider this: at 55 years old, you may have another 20 to 30 years ahead of you, and it’s a wise decision to try to avoid the need for additional surgeries during that time.

The good news is that you have alternative options for improving your cardiovascular fitness without putting as much load on the new joint. Walking and engaging in other lower-impact exercises can be effective ways to stay active while being gentler on your knee replacement. This approach can potentially add more years of comfortable joint function, which is definitely a positive outcome to aim for.

Additional Resource – Here’s how to use KT Tape for runners’ knee.

Recovering From Knee Surgery

Recovering from knee replacement surgery is a significant undertaking, and if your goal is to eventually return to running, you should be prepared for a longer recovery period with dedicated effort.

Here’s a general timeline of recovery milestones:

  • Three weeks post-surgery: You should be able to walk for more than 10 minutes at a time without assistance. You might still need some help from a physical therapist during this stage.
  • Six weeks post-surgery: You might receive clearance from your doctor to resume driving between weeks 4 and 6, depending on your progress and comfort.
  • Three months post-surgery: Most physical therapy programs last up to three months. By this point, you should be able to walk for longer distances, potentially covering a few blocks. You might also be ready to introduce exercises like swimming and cycling into your routine.
  • One year post-surgery: Recovery continues over the course of a full year following knee replacement surgery. By this point, your knee should have regained its full strength.

Additional resource – Knee brace for knee pain

Can You Run After Knee Replacement Surgery? – Conclusion

As a runner recovering from TKR, you should be in no haste to return to the sport. Instead, you should weigh all the pros and cons to determine if it is the right thing to be doing in the first place.

Online Personal Trainer – How to Build Your Business

Becoming an online personal trainer is a great way to help people achieve their fitness goals, and it can also be a lucrative business venture. However, there are several things you need to do in order to build a successful online personal training business. *

When starting a career it is important to know what you’re getting yourself into. In this article, we will discuss some of the most important steps you need to take in order to get started.

Get The Right Certification

In order to be a personal trainer, you will need to get a certification from an accredited institution. It is also possible that the state where you live requires certification as well. This is for your safety and those who entrust you with their health and fitness goals. 

There are several reputable institutions out there, all of which should provide competent training and certification.

An online personal trainer must make sure they receive the proper education in order to create the programs necessary for their clients. The best way to set yourself up for success is to get certified by an institution that provides its students with information about online personal training and how it works. This will ensure that you have the knowledge necessary in order to get your business off the ground and become successful.

Build A Website And Social Media Accounts

In this day and age, you need to have a website in order for your business to succeed. Professionals now expect to receive the information they are looking for online. A good site will provide potential clients with all the information they need about you and your services.  Fortunately, even if you have no experience of website building, there are resources out there like the createwpsite YouTube channel to help guide you throughout the process so that the end result is something you can really be pleased with.

You should also have social media accounts that people can visit in order to learn more about you and follow you. Having an Instagram and Facebook account is crucial for personal trainers because it allows them to reach out to their clients and potential clients on a more personal level. It also gives people the opportunity to view pictures of you and your services, before and after pictures, videos about your business, and read testimonials from past clients.

Build Online Training Programs

You need to have training programs that people can purchase in order for them to see real results. You should also offer free resources that will allow people to learn more about the things you’re teaching. It is important that these resources are high-quality and your website is easy enough for anyone to use, even those who are not very tech-savvy. People who visit your site for the first time should be guided through it with ease, so you need to make sure you get input from other people on how they would find your site if they were looking for fitness information.

Your content needs to be useful and engaging, otherwise, you won’t build a loyal following. This will help to grow your business over time because people will recommend your site to their friends and family. Make sure to put some effort into each training video you make because it will be more likely to succeed.

And don’t forget about the most important part of your program: nutrition. You’ll need to build high-quality meals into your training programs in order for your clients to see success. You can use a tool like My PT Hub’s Nutrition Software to make this task much easier.

Create A Marketing Plan And Budget

As a personal trainer, it’s important that you create a marketing plan for yourself in order to help grow your following. You can do this by creating articles, or videos for YouTube, sharing content on social media sites like Facebook and Instagram, offering free resources through your site, having a blog, and attending fitness events. Once you have an idea of how much money you can afford to spend on marketing each month, create a budget so you know what you can do in order to successfully grow your following.

Hiring a marketing agency might be a good idea, especially if you have no idea where to start. You will typically get the most bang for your buck with an agency because they know how to market online and get results. Make sure that any marketing agency you hire has worked with trainers before so they know what works best when it comes to growing your business.

Its crucial for a personal trainer to have a professional-looking site that provides potential clients with all the information they need about you and your services. Your content needs to be useful and engaging in order to build a loyal following. The tips we’ve provided should help get you started on the right path. Follow this guide to learn how to become a personal trainer in order to grow your following, enjoy success, and help clients with their fitness goals. Good luck with your new business!