How To Run An 8-Minute Mile?

Marathon Pace Chart

Are you ready to unlock the thrill of conquering an 8-minute mile? Whether you’re a newbie in the running world or a seasoned 5K enthusiast, you’ve landed in the right spot.

Now, you might be thinking, “An 8-minute mile? Sounds like a Herculean task!” But guess what? It’s far from impossible. With the perfect blend of training, dedication, and a dash of can-do attitude, you’ll be crossing that eight-minute mark before you even realize it.

In this article, we’re not just scratching the surface. We’re diving deep into the nitty-gritty of achieving this milestone.

We’ll explore everything from the need for speed to setting your starting point, sprinkled with essential insights on interval training and much more.

Ready? Set? Let’s roll!

Why It Matters

Why does your mile time matter, you ask? Well, let me tell you, it’s not just about that singular mile. It’s the secret sauce for enhancing your overall running performance, and here’s why you should pay attention.

For example, imagine you’re aiming for a faster 5K. What’s the key? Yep, you guessed it, a faster mile.

Eyeing a speedy 10K? Again, your mile time is the secret ingredient.

Even if you’re thinking about conquering the marathon, guess what? The mile time is still the cornerstone of it all.

Now, I know I might sound like a broken record here, but I can’t emphasize this enough. Your mile time is the linchpin of your running journey. It’s where your foundation is laid, your skills are honed, and your speed takes flight.

How Fast is An 8 Minute Mile?

Running an 8-minute mile isn’t just about numbers; it’s about unleashing your inner speed demon.

So, let’s dive into the specifics.

You’re out there pounding the pavement, and you want to know how fast you’re really going. Well, an 8-minute mile is your answer.

But wait, there’s more! Running an 8-minute mile is like clocking in at 4 minutes and 58 seconds for a kilometer. It’s like a turbo-charged sprint, and trust me, it’s exhilarating.

Now, here’s where it gets interesting. If you want to put this speed to the test, hop on a treadmill and crank it up to 9 miles per hour (that’s about 14.5 kilometers per hour).

Can you keep up with that pace? It’s like chasing a gazelle across the savanna, but hey, it’s all part of the fun!

The Prerequisite For Running An 8-Minute Mile

The million-dollar question: Can everyone conquer the 8-minute mile? Well, here’s the scoop.

I firmly believe it’s entirely possible. Running an 8-minute mile might sound like a Herculean feat, but it’s a challenge that’s within reach for nearly every runner out there. The catch? It comes down to two crucial factors: time and training.

Now, let’s get real for a moment. You can’t expect to hit this pace if you’ve just begun your running journey or haven’t laced up your sneakers in years. This isn’t a sprint to the finish; it’s more like a carefully crafted masterpiece.

But here’s the silver lining – if you’ve been pounding the pavement consistently for the past few months and have built a solid running base, the 8-minute mile is well within your grasp.

Training For an 8-Minute Mile – How Long it Should Take?

Alright, folks, here’s the scoop on the timeline for training toward that illustrious 8-minute mile. It’s not a one-size-fits-all journey; it’s all about where you start and how committed you are.

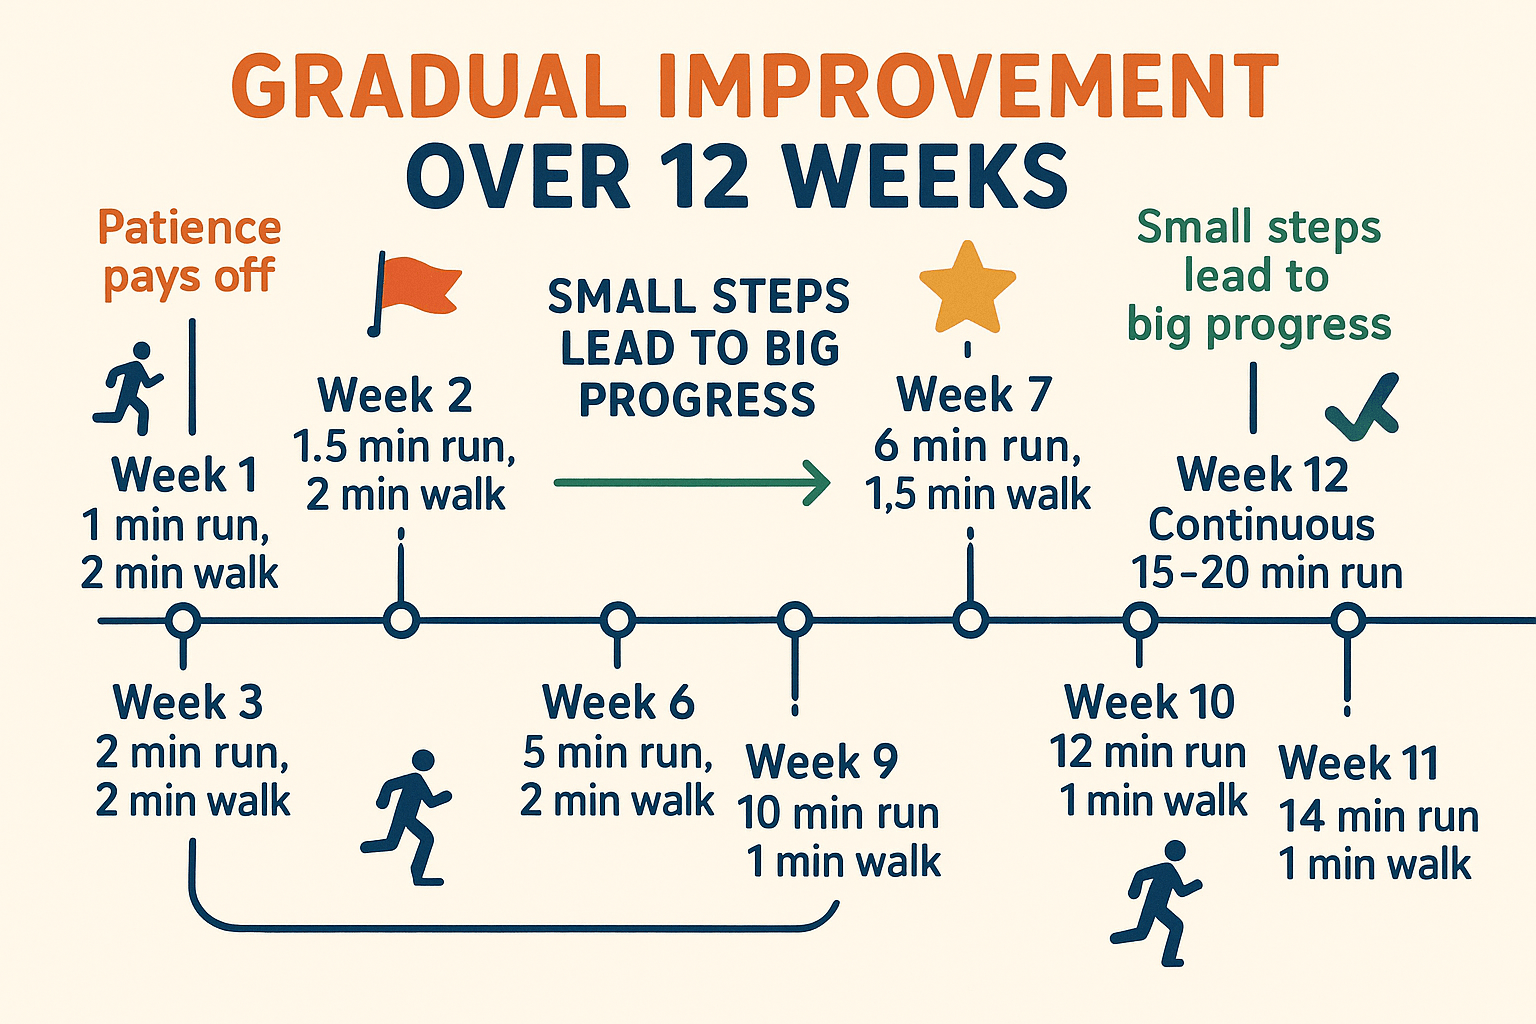
So, let’s break it down: If you’re fully committed to this goal, and you’re willing to put in the work three to four times a week, you could be clocking that 8-minute mile in a span of 8 to 12 weeks. That’s less time than it takes for a season of your favorite TV show to air!

Now, here’s the reality check: An 8-minute mile isn’t a walk in the park. It’s not something you’ll achieve overnight or by simply wishing for it. Nope, it’s about grit, sweat, and, yes, consistency.

Note – Here’s the full guide to the average time to run a mile.

How to Run an 8 Minute Mile

Without further ado, here are the guidelines you need to run a mile in 8 minutes or faster.

Do A Time Trail

Alright, runners, let’s talk strategy – and it all begins with knowing where you stand right now. Whether you’re aiming for that lightning-fast mile or eyeing a sub-20 minute 5K, it’s all about setting your baseline.

So, here’s the game plan: before you dive headfirst into this adventure, you need to establish your mile baseline time. This is your starting point, your North Star in the journey to greatness. Don’t sweat the details just yet; it’s all about knowing where you’re at.

Now, you might be thinking, “But what if I’m a few seconds or even minutes away from my goal?” Well, fret not.

What matters is that you’ve got your starting point locked in. Remember, it’s easier to shave off those precious seconds and minutes when you know where you stand.

Now, let’s get down to business. After a solid 10 to 15-minute warm-up – think of it as your pre-race ritual – hit the track. Run that mile on a flat surface and keep your stopwatch ready. One mile equals four laps on most standard outdoor tracks. (And if you’re curious about the track length, we’ve got you covered – just click here to learn more).

Once you’ve crossed that finish line, record your time. You’ve just set the stage for your epic journey. Your baseline time is your starting point, your reference, and with it, you’re ready to tackle what comes next.

Additional Resource – Here’s how to run faster

Interval Training For an 8-minute mile

When it comes to making those minutes disappear from your mile time, high-intensity interval running is your golden ticket. It’s like a turbo boost for your running game, and the best part? It doesn’t just benefit your mile; it elevates your entire athletic performance.

Now, let’s get practical. You’re at the track, ready to unleash your inner speedster. You’ve got options – you can run a series of 200-meter sprints (that’s just half a lap) or go all out with a 400-meter sprint (a full lap). The kicker? You’ll take a short break in between each effort to catch your breath.

The session itself is a breeze to understand. Start with a solid 10 to 15-minute warm-up – think of it as priming your engine. Then, dive into the main event. Run like the wind for that 200 meters, then ease into a walk for the next 200 meters. Rinse and repeat for 15 to 20 minutes.

But hold on, we’re not done yet. After you’ve given it your all, finish off with a 10-minute slow jog – consider it your victory lap, a chance to cool down and bask in the glory of your efforts.

Build Your Endurance

Speed is essential, but endurance is the secret sauce to conquering the 8-minute mile.

Sure, a mile might seem short, but when you’re gunning for that 8-minute mark, it can feel like an epic battle. That’s where the magic of long runs comes into play. You’ve got to extend your horizons beyond the mile marker if you want to blaze through it.

Here’s the deal:

Incorporate at least one long run into your weekly regimen. This isn’t just about surviving a longer distance; it’s about elevating your overall conditioning. It’s like building a strong foundation to support your need for speed.

Now, let’s get into the why of it all. Running slow and steady for those extended distances enhances your aerobic endurance and efficiency – the secret keys to unlocking a faster mile.

Plus, it cranks up the mitochondrial density in your muscle cells, those tiny powerhouses that churn out energy.

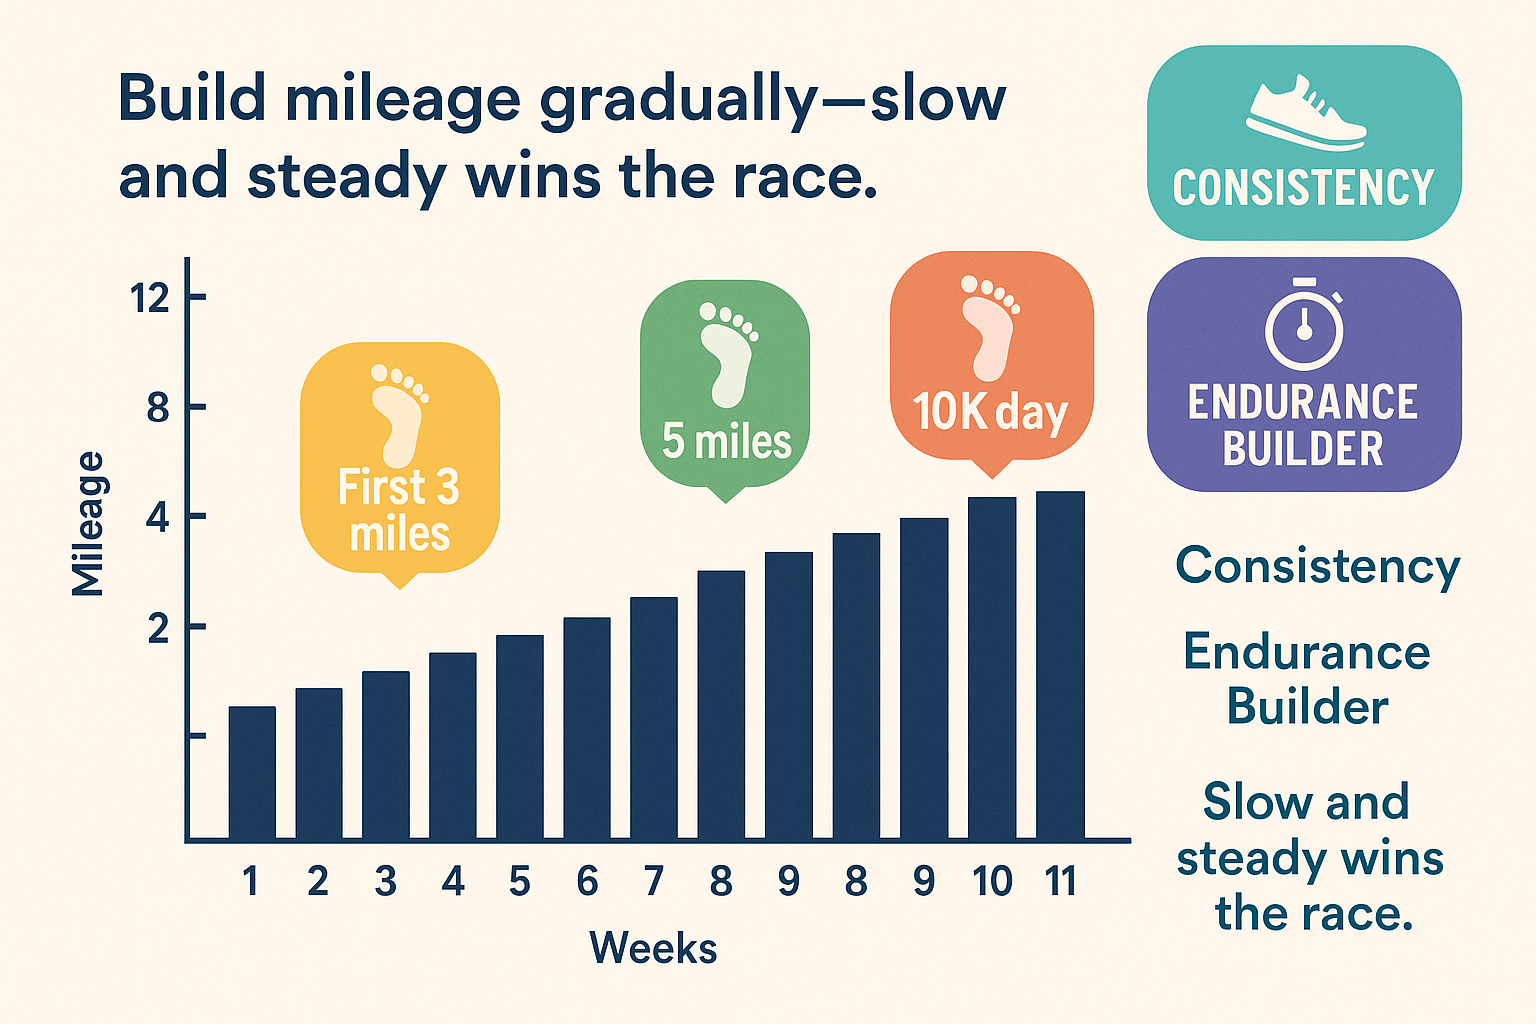
But, and here’s a big but, you’ve got to play the long game – slow and gradual. I recommend following the golden rule of the running world, the 10 percent rule. Don’t increase your weekly mileage by more than 10 percent from one week to the next.

So, how do you make the most of these long runs? Aim for a distance of around 4 to 7 miles in one session each week. But remember, take it slow and steady.

If your longest weekly run is currently at 4 miles and your total weekly mileage hovers around 11 miles, add about one mile per week until your long run hits the 7-8 mile range.

Add Hill Training

Hill training, also known as incline training, is the secret sauce for boosting your running prowess. It’s like a superhero workout for your legs and lungs, and if you’re dead serious about acing that mile, you better cozy up to those hills.

Here’s the lowdown: hill training works wonders for upping your lactate threshold – that’s the point where your muscles start screaming for mercy.

So, how do you conquer these hills of doom?

First, warm up for a good ten to 15 minutes with some easy, flat terrain running. Think of it as your gentle introduction to what’s about to come.

Now, the fun begins. Find a hill – not too steep, mind you, but with a decent incline. A hill that stretches about 100 to 200 meters should do the trick. Trust me; it’ll feel like a mountain when you’re sprinting up!

When you tackle that hill, aim for your 5K effort pace or even a tad faster. Push yourself, but don’t let your form crumble. It’s all about maintaining that steady pace and effort.

Once you conquer the hill’s peak, don’t call it quits just yet. Turn around and make your way down, recovering with a gentle jog or walk. You’re recharging your superhero powers for the next ascent!

Start with five reps, and as you gain strength and confidence, ramp it up to ten. Hill by hill, rep by rep, you’re sculpting your body into a running machine.

Improve Your Form

If you’ve been pounding the pavement, clocking those intervals, conquering long runs, and conquering hills but still feel like you’re missing the mark, it’s time to turn your attention to the often-overlooked but oh-so-critical aspect of running – your form.

Good running form? Yeah, it’s like your secret weapon, your golden ticket to running further and faster while keeping those nagging injuries at bay.

Here’s the lowdown on what to focus on:

  • Gaze Ahead: Keep your peepers looking straight ahead. Don’t let your eyes wander up or down, or you might be in for some neck and back trouble.
  • Run Tall: Imagine you’re carrying a crown on your head. Keep that back straight, engage your core, and let those shoulders relax. It’s the regal posture for a speedster.
  • Avoid Heel Landings: Ditch the heel strikes – they’re so yesterday. Land on the ball or midfoot of your foot. It’s like tip-toeing to victory.
  • Elbow Action: Bend those elbows at a neat 90-degree angle and let them swing back and forth, none of that awkward side-to-side or across-the-chest nonsense.
  • Run Quietly: Ninja mode engaged. Your feet should touch down softly around the midfoot, rolling gently onto your toes. No thunderous stomping, please.
  • Land Centered: Picture a bullseye right under your body’s center of mass. That’s your landing zone. Keep it light. Keep it springy.

For more on proper running form, check the following guidelines

Be Consistent

Whether you’re on a quest to slash seconds off your mile time or bench press like a champ, there’s one thing that separates the winners from the dreamers – commitment.

Yes, you heard it right. It’s not just about having the right training tips, though those are pretty darn crucial. It’s about showing up, day in and day out, rain or shine, to put in the work.

Sure, I’ve shared some nifty training guidelines today that can turbocharge your performance, but here’s the kicker – none of it matters if you’re not in it for the long haul. Consistency is the name of the game.

So, if you’re dead serious about conquering that 8-minute mile (or even going faster), it’s time to get your commitment game strong.

Here’s the playbook:

  • Follow a Plan: Whether you pick a tried-and-true online program or have a coach craft one just for you, a plan is your roadmap to success. It keeps you accountable and on track.
  • Four to Five Days a Week: Make running a regular part of your life. Shoot for four to five days a week. It’s not about squeezing in a mile whenever you feel like it; it’s about making it a habit.
  • No More Mile-Only Runs: It’s not a pop-up shop; it’s a commitment store. Don’t just run a mile when the mood strikes. Stick to your schedule religiously.
  • Consistency is Key: Your body needs time to adapt to the demands of running faster and farther. Give it that consistency, and it will repay you with speed.

Additional readings:

How To Run An 8-Minute Mile? – The Conclusion

There you have it! If you’re serious about running an 8-minute mile, then today’s post has you covered. The rest is just details.

Please feel free to leave your comments and questions below.

In the meantime, thank you for dropping by.

Keep training strong.

How Much Sodium Do Runners Really Need?

How Long Is A Half Marathon?

You’ve just conquered a grueling long run under the scorching sun. As you finish, you find yourself craving something salty. If you’ve experienced this, rest assured that you’re not alone in this salty saga.

Now, let’s uncover the truth behind this salt-induced craving. You see, we all know that sweat is the ultimate salty sidekick. The more you sweat, the more salt leave your body. It’s a natural phenomenon. But what’s the big deal about sodium, you ask? Well, that’s what we’re here to explore today.

In this exciting post, I’m about to shed light on the importance of sodium in a runner’s diet. I’ll dig into the symptoms of sodium deficiency, uncover the optimal amount of sodium runners need, and so much more.

But before we dive into the nitty-gritty details, let’s lay down some undeniable facts about sodium. Think of these facts as the bedrock of our salt-centric journey.

Ready? Let’s get to to it.

Sodium Explained

Alongside magnesium, potassium, calcium, phosphate, and chlorine, sodium is another vital electrolyte. These minerals, with their electrifying personalities, are like the backstage crew making sure the show goes on smoothly.

You can find these fascinating electrolytes throughout your body, from tissues to blood, urine, and various body fluids. They are the unsung heroes working diligently behind the scenes, tirelessly maintaining balance and harmony within you.

Let’s take a closer look at what these electrolytes do.

First, they help remove waste from your cells. They’re like the clean-up crew, ensuring your cellular environment stays spick and span.

But that’s not all! Electrolytes also take charge in balancing the pH levels within your body. They’re like expert chemists, constantly fine-tuning the delicate acid-base balance to keep your internal environment just right.

When it comes to hydration, electrolytes are the masters. They regulate the amount of water in your body, ensuring a proper balance that keeps you hydrated and functioning optimally.

Now, brace yourself for some mind-blowing facts. These electrolytes are crucial for the smooth operation of your muscles, nerves, brain, and even your mighty heart. They conduct the electrical signals that keep your body in sync and your heart pumping with rhythm.

Risks of Low Sodium Levels

Picture this: you’re out for a run, the sun shining brightly, and beads of sweat forming on your forehead. You push through the miles, feeling the burn in your muscles and the rush of endorphins. But little do you know, your body is silently sending distress signals, desperately in need of its trusty sidekick, sodium.

When sodium levels in your body dip too low, trouble begns to brew. You may notice your fingers and toes swelling, like tiny balloons yearning to be freed. It may seem like a minor inconvenience, but let me assure you, it’s a warning sign of a fluid imbalance that shouldn’t be taken lightly.

But that’s not all. Oh no, there’s more to this story. Imagine quenching your thirst with pure, refreshing water after a grueling run, thinking you’re doing your body a favor. Little do you know, the absence of sodium replenishment can lead you down a treacherous path called hyponatremia, also known as water intoxication. It’s like a twisted tale of too much of a good thing.

Hyponatremia creeps in when you’ve been sweating profusely and guzzling down excessive amounts of fluid without replenishing the sodium lost along the way. The consequences can be severe. Headaches start pounding like drums, energy levels plummet, and fatigue wraps around you like a heavy fog. Confusion sets in, making you question your own whereabouts. Nausea and vomiting make an unwelcome appearance, threatening to disrupt your running journey.

But it doesn’t stop there. Dizziness spins your world like a carousel, and your muscles rebel, weakened by the lack of sodium. Spasms and cramps become unwelcome companions on your running adventure. In the worst cases, seizures may seize the day, and you might find yourself losing consciousness, slipping into a dangerous coma.

Sounds alarming, doesn’t it? But fear not. By understanding the importance of maintaining adequate sodium levels and replenishing what is lost during training, you can steer clear of these perils and keep your body in harmony.

What Affects Sodium Levels

Imagine yourself on a scorching summer day, ready to tackle your run head-on. As the sun beats down and the heat intensifies, beads of sweat start trickling down your face, reminding you of the challenging journey ahead. But did you know that the composition of your sweat holds the key to your sodium needs?

If you find yourself drenched in sweat, especially if your perspiration contains a high concentration of sodium, it’s a strong indicator that you may require an extra sprinkle of salt before lacing up your running shoes. But how much salt, you ask? Well, that’s where the magic of individuality comes into play.

Your unique sweat rate and the sodium concentration within your perspiration play a crucial role in determining your sodium requirements. These variables can be influenced by a multitude of factors, each with its own impact on your salty equation.

Let’s start with training intensity. Picture yourself pushing your limits, going the extra mile, and unleashing the beast within. As your training intensity ramps up, so does the volume of sweat cascading from your pores. It’s like an orchestra playing a crescendo, with each beat of your heart orchestrating a symphony of sweat.

Next up, we have the weather conditions. When the mercury rises and the air becomes thick with humidity, your body responds by activating its natural cooling system: sweat. The sweltering heat and oppressive humidity create the perfect stage for an encore performance of perspiration, leaving you drenched and in need of replenishment.

Physiology also matters. Just as we all have different running styles and preferred distances, our bodies have their own sweat preferences. Some runners naturally exude more sweat, like a cascading waterfall, while others have sweat as scarce as an oasis in a desert. And to add another layer of complexity, the saltiness of our sweat can vary too. It’s like a genetic fingerprint, making each of us a distinct masterpiece.

Speaking of genetics, research has unveiled fascinating insights into the diverse sodium concentration in sweat among individuals. One study involving male elite athletes revealed that the average sodium concentration hovered around 950 mg per liter. However, hold on tight, because the range was as vast as the expansive sky, spanning from 350 mg to over 1,800 mg per liter.

To learn more about the impact of sodium of athletic performance, check the following studies:

The Exact Rate

If you’re the type of runner who sweats buckets, preparing to bid adieu to sodium by the thousands, you could be losing an astonishing 3,000 mg of this precious mineral every hour. Yes, you read that right – it’s a sodium extravaganza! This significant loss can wreak havoc on your hydration levels, and performance.

However, if your running adventures are less sweat-soaked and you find yourself perspiring modestly, your sodium needs may only amount to a few hundred milligrams. In such cases, the salty sea may not require additional supplementation. Consider it a gentle reminder that individuality reigns supreme when it comes to sodium requirements.

Now, let’s dive into the realm of sodium in sweat, where salty tales are spun and electrolytes dance in harmony. Within the confines of the average human body, approximately 70,000 mg of sodium reside, equivalent to a captivating narrative woven through 11 tablespoons of salt. But as you embark on your exhilarating run, be prepared to lose sodium in droves.

The amount of sodium you lose through sweat hinges upon a fascinating interplay of factors.

First, we have the volume of salt in your perspiration. It’s a spectrum of sweatiness, where some individuals possess saltier sweat than others. If you find yourself sporting a salty crust upon your skin after a grueling run, consider yourself part of this salty clan, a true warrior in the battle against sodium loss.

Next up, your sweat rate takes center stage. Are you a heavy perspirer, drenching your shirt in liquid determination, or a light sweater, producing sweat droplets as delicate as morning dew? This distinction holds significance, as the amount of sodium you bid farewell to can vary accordingly. On average, each pound of sweat equals roughly 500 mg of sodium, although this range of electrolyte exodus spans from 220 to 1100 mg, a testament to the diverse nature of our sodium stories.

But let’s not forget the influence of the scorching sun and sweltering heat. If you’re not accustomed to running in such fiery conditions, prepare to witness the sodium exodus on an even grander scale. With each pound of sweat lost, you may shed to upwards of 1,000 mg of sodium. However, fear not, for with acclimatization comes resilience. As your body adapts to the heat, your sodium losses can dwindle by as much as 300 mg, offering a glimmer of relief amidst the scorching rays.

Fluid Balance

Let’s dive into the fascinating world of sodium and its pivotal role in our hydration game. Think of sodium as the gatekeeper of hydration, a key that unlocks the door to fluid absorption and keeps our bodies quenched and ready for action.

You see, sodium isn’t just a mere companion to water; it’s a hydration superhero in its own right. Research has revealed that sodium has the power to supercharge the hydration process by improving the rate at which our bodies absorb fluids. It’s like adding a turbocharger to your body’s hydration engine, propelling you forward with enhanced efficiency.

But the wonders of sodium don’t stop there, my friends. It has another trick up its sleeve that’s especially valuable for us athletes. Studies have shown that sodium plays a crucial role in maintaining a higher blood volume, a game-changer when it comes to regulating core temperature and heart rate during those grueling long training sessions. Picture it as your trusty guardian, ensuring that your body stays cool under pressure and your heart keeps beating to the rhythm of your running symphony.

Muscle Contraction

We’ve all experienced those pesky, unwelcome intruders that sabotage our stride. But fear not, for sodium holds the key to banishing these cramp-inducing villains. You see, low sodium levels can be the culprit behind those agonizing “heat cramps” that strike when our bodies lose an excessive amount of sodium during training.

By maintaining healthy sodium levels, you fortify your defense against these muscle cramps and unleash the power of proper muscle contraction. It’s like building a fortress of electrolytes, guarding your muscles and ensuring they work in perfect harmony, allowing you to push harder, go farther, and conquer any running challenge that comes your way.

Additional resource – Your guide to Charley’s Horse in runners

Improved Performance

Listen up, fellow runners, because I’ve got some jaw-dropping evidence that will make you want to sprint to the nearest salt shaker. We’re about to dive into the realm of scientific research, where facts and stats reign supreme. Brace yourselves for some mind-blowing findings that showcase the power of healthy sodium levels in boosting your performance.

Picture this: a group of dedicated runners gearing up for a marathon, ready to put their training to the ultimate test. But here’s the twist – they were divided into two groups, each following a different sodium strategy. It’s like a running experiment of epic proportions!

In one corner, we have Group I, armed with not only sports drinks but also the mighty salt capsules. They understood the secret to unlocking their true potential by replenishing their sodium levels and maintaining that crucial electrolyte balance. On the other side, Group II relied on sports drinks alone, with placebo capsules as their companions, unaware of the power they were missing out on.

Now, let’s reveal the mind-boggling results. Are you ready? Brace yourselves. Drumroll, please!

Group I, the warriors who embraced the salt and salt supplements, crossed the finish line a whopping 26 minutes faster than their counterparts in Group II. Can you believe it? That’s like shaving off precious minutes from their marathon journey, propelling themselves to new heights of speed and endurance. It’s as if the salt-infused magic coursing through their veins gave them an extra boost of energy and resilience

This groundbreaking study, published in the esteemed Scandinavian Journal of Medicine & Science in Sports, serves as a testament to the remarkable impact of sodium on our running prowess. It’s not just a mere coincidence; it’s science in action, unveiling the performance-enhancing potential that lies within healthy sodium levels.

So, my fellow sodium enthusiasts, take note of these findings. Let them fuel your determination to incorporate the right amount of sodium into your running routine. Whether it’s through sports drinks, salt capsules, or sodium-rich foods, embrace the power of electrolyte balance and hydration optimization.

Remember, the difference between a marathon finish time can sometimes come down to the sodium strategy you choose. So don’t hold back on the salt, my friends. Let it be your secret weapon, propelling you to conquer new personal records and leave your competition in awe.

Additional resource – What to eat after running at night

How Much?

When it comes to shorter runs, those under 45 to 60 minutes, you can quench your thirst with water alone. But as the miles stretch and the clock ticks past the one-hour mark, it’s time to introduce sodium to the mix. Long runs become a whole new adventure, especially when the scorching sun beats down upon you.

But here’s the tricky part: determining the precise amount of sodium you need as a runner is no easy task. Just like the varied terrain we encounter on our running paths, sweat rates and other variables can wildly differ from one runner to another.

Consider this intriguing research on football and tennis players, which unveiled sodium losses ranging from a modest 800 milligrams to a staggering 8,500 milligrams over a mere two hours of practice. The range is vast, my friends, highlighting the intricate dance of sodium balance within our bodies.

Here’s where it gets interesting: determining your precise sweat rate requires the aid of a lab test, something that most runners don’t have access to. It’s like a hidden treasure, accessible only to a chosen few.

But fear not, for there are guidelines we can follow to navigate this sodium-filled maze.

As a starting point, a minimum recommendation of around 500 to 600 milligrams of sodium per hour emerges. It’s like a compass, guiding us in the right direction.

But be prepared for the unexpected twists and turns, for that number can shoot up to over 2000 milligrams if you find yourself on the unfit side, wearing the crown of a heavy sweater, traversing the scorching heat, or engaging in prolonged workouts that stretch for hours on end. It’s a reminder that our bodies are unique, and our sodium needs are as individual as our running strides.

When to Take Sodium

Timing also matters. Most of the research reported that salt intake had the greatest benefits when it was taken before exercise rather than during or after exercise.

Let’s look at the research.

Research out of New Zeeland reported that when subjects ingested a sodium-rich drink before running to exhaustion at 70 percent VO2 max in hot heather, they were able to lower their body temperature, keep a higher blood volume, and reduce levels of perceived exertion than when they’d a low-sodium drink before training.

How To Replace Sodium

Now, let’s dive into the depths of typical sodium needs, where numbers and surveys paint a fascinating picture. Did you know that the average American consumes a staggering 3,400 milligrams of sodium per day?

It’s like a tidal wave of salt swirling through their meals. However, the recommended daily allowance stands at a more modest 2,300 milligrams. Quite a difference, isn’t it? It’s a reminder that sometimes, we get swept away in the salt-laden currents of our food choices.

Imagine a world where salt lurks in unexpected places, hiding in bread, lunchmeat, cereals, and even snacks. No wonder it can be all too easy to exceed the recommended sodium intake without even realizing it. But fear not, my fellow runners, for we have a mission at hand—to strike the perfect balance.

As runners, our unique training demands may require us to go the extra mile in supplementing our sodium intake. It’s like adding an extra spice to our running recipe, ensuring that we have all the essential ingredients for success. T

he decision to introduce extra salt before and during training hinges on two crucial factors: the amount of sodium you lose through sweat and your current salt intake from your diet.

It’s a delicate equilibrium, where precision matters.

Real Food Options

The realm of real food options, where the flavors burst like fireworks, delighting both our taste buds and our sodium-loving souls. It’s a land filled with culinary treasures that not only provide a dose of salt but also nourish our bodies with a symphony of other nutrients.

Let’s explore these tantalizing choices, my fellow runners, and embrace the deliciousness that awaits!

  •  For starters, cheese is one of the champions of our real food options. It’s like a salty embrace, offering both satisfaction and replenishment to fuel our running endeavors.
  • Deli turkey, the unsung hero of sandwiches and salads, takes center stage in our sodium-rich symphony. It’s like the conductor of flavor, leading the ensemble of taste with its savory notes. Deli turkey not only provides a protein punch but also adds a generous sprinkle of salt to your palate.
  • Black olives, those little globes of briny delight, are like bursts of flavor in your mouth. They offer a savory tang that can elevate any dish to new heights. These mighty olives are not only a source of sodium but also provide a range of antioxidants and healthy fats.
  • As you embark on your sodium quest, don’t forget the humble salted almonds. They are like small nuggets of energy, fueling your runs and delighting your taste buds. These crunchy delights not only satisfy your salty cravings but also provide a dose of protein and healthy fats.

And when it comes to hydration, my friends, let us not overlook the refreshing elixir of coconut water. It’s like a tropical oasis, quenching your thirst and replenishing your electrolytes in one delightful sip. Coconut water naturally contains sodium, along with other essential minerals, making it a perfect choice to keep you hydrated during those long runs.

But wait, there’s more! For those seeking a quick and easy way to boost your sodium intake, a sprinkle of salt can work wonders. It’s like a magical seasoning that can transform any pre-run snack or meal into a sodium-packed powerhouse.

Sports Drinks

Sports drinks are like a secret weapon, specially crafted to restore what you lose through your noble sweat. !

Now, when it comes to choosing the perfect sports drink, knowledge is power. Each bottle holds its own secrets, its own combination of sodium and other essential electrolytes. My best advice is to pay attention to the nutritional information that lies within those ingredient labels. Aim for around 100 mg of sodium per serving, for that is the magical amount that will help replenish what you’ve lost.

But here’s a little secret for those of you with delicate stomachs. We are all unique beings, and what works for one runner may not work for another. Test out different sports drink options, explore their flavors, and observe how your stomach reacts. It’s like a grand tasting adventure, where each sip brings you closer to finding the perfect companion for your runs. Remember, different runners, different strokes!

Ah, but let us not forget another ally in our sodium quest: salt tablets. These little wonders, encapsulated doses of concentrated sodium, hold the power to rescue us from the clutches of electrolyte depletion.

With salt tablets, precision is key. They offer a precise amount of sodium, allowing you to fine-tune your intake based on your unique needs. It’s like having a secret weapon in your pocket, ready to unleash its power whenever you need that extra boost.

Sodium For Runners – The Conclusion

There you have it, my fellow runners, a glimpse into the world of sodium replenishment during your running adventures. Armed with this knowledge, you can confidently stride forward, knowing that you have the tools to conquer your sodium worries. Remember, the devil is in the details, but today’s post has set you on the right path. So, go forth, replenish your sodium levels, and conquer the roads and trails with gusto!

I eagerly await your comments and questions in the section below. Let’s continue this conversation and share our sodium-fueled wisdom. Thank you for joining me on this salty journey, and may your runs be filled with strength, endurance, and the perfect balance of electrolytes. Happy running!

14 Tips for Traveling in Winter on a Student Budget

Winter brings a long-desired break after challenging months of studying. It is so important for students to recharge their batteries and maybe change the scenery. At least for some time. This would help to meet the new semester in a much better mood!

We can all agree that the dream of a modern student is not only to have a comfortable and fun vacation but also to spend the smallest possible amount of money at the same time. And we can confidently confirm that it is achievable.

However, it will be necessary to allocate some time to plan the smallest details of the trip, to optimize costs, etc. But where can you find this time when you are constantly overwhelmed with different assignments? So, you may be thinking now, “can I just pay someone to write my paper?”. Yes, you can. There are many professional services that will get your papers ready in no time. So you can relax a little and plan your perfect winter trip.

Now it’s time to check some tips to make your winter holiday trip unforgettable and stay on budget.

Plan Your Vacation In Advance

“A pre-planned trip is peace of mind for your wallet,” a true travel expert will tell you. Have you decided on the desired destination for your vacation? Then it’s time to find fellow travelers who will share fuel costs with you, as well as book a good apartment or house in advance.

Use Your Student Card

Just in case, take your student card with you. Sometimes, it comes in handy. For example, local transport providers and museums often offer student discounts. Try to find information about additional opportunities for students in advance.

Choose Weekdays For Your Trip

On weekends and holidays, tourist cities experience a real boom. If you have the opportunity to go on a trip on weekdays, do it. Or choose one of the remote corners of the US, like Oregon, Montana, etc. Such places will surprise you with breathtaking winter magic.

Organize Your Own Tour

Everyone knows that excursions, especially sightseeing tours, are not cheap. If you can’t afford such a pleasure, you can visit a local tourist information center or use a travel guide.

Popular mobile applications, for example, Google Maps and Tripadvisor, will help you find your way around the area and suggest popular places.

Off-Season Is Cheaper

Travel off-season, it will save your budget at least twice. For example, you do not necessarily need to see the mountains in winter, and even more so — during the opening season of winter resorts. But if you are actually dreaming about skiing, pick one of the ski resorts that are affordable for students. Your wallet will be thankful.

Additional guide – Here’s how to breathe when running in the cold

Do Not Take Anything Extra If You Plan To Go Backpacking

There is no worse feeling than carrying a load on your shoulders when you are trying to enjoy your trip. If you decide to travel in winter, pack things that do not let the cold through. They will be indispensable. Warm shoes, a jacket, and several pairs of socks.

It’s always a good idea to have moisturizers or products to help keep your skin in good condition. The main thing is to put on warm sweaters and a jacket and pack things that take up less space in a backpack or suitcase.

If you are going to travel by plane, be sure to read the baggage allowance before the trip, as each airline has restrictions. Most often, such information appears on official websites, and when buying tickets, they always inform about changes.

Take Something To Eat On The Go

We all love to grab a bite to eat when we travel somewhere, right? Especially if you are going on a road trip with friends. Take care of a small “ration” with sandwiches, nuts, or crackers. They will be especially useful if there is no suitable cafe or grocery store nearby and will help you to save some money.

Eat Wisely

Try renting an apartment with a kitchen where you can prepare your own meals. And you will get extra pleasure from trips to local food markets: communication with local residents, and a sense of local culture and traditions (especially if you are in a city that is not at all like yours).

Be Frugal, But Don’t Forget To Indulge

You don’t have to blow $50 on every meal. But do care to get a taste of the local cuisine. It might cost a bit more than fast food, but you can’t skip on the experience

Tourist restaurants are not what you need if you plan to learn more about the city you are visiting. Find inexpensive home-style cafes where locals eat lunch or breakfast. This will not only help you save money but also taste real traditional cuisine, and see how the locals spend their time.

Street food also is becoming more and more popular, but here you need to be careful and find out about tested places in advance.

CouchSurfing

Another vacation budget-busting option for travelers is CouchSurfing. It is one of the largest global hospitality networks implemented as an online service. It unites more than 2 million people in 238 countries.

Members share free accommodation with each other during their travels, organize joint trips, and develop cultural exchange. Using such a service will not only allow you to save money but also let you immerse in the cultural life of the local population.

Communicate In The Local Language If You Are Going Abroad

You might be worried that you’ll mumble some words and the locals will criticize you for it, but in reality, the exact opposite is true. People like the fact that foreigners try to speak their native language and understand their culture. They will treat you with special warmth, no matter how terrible your accent is.

Additional resource – How to choose running gloves

Travel With A Friend

You will have memories that belong only to the two of you and which you can share long after the trip is over. In addition, it is beneficial in financial terms: because you will share the costs of housing, food, and other things. And you have every chance to get as close as possible and remain good friends for life.

Plan Carefully, But Leave Space For An Adventure

When you’re traveling, it’s always nice to know where you’ll be spending the next day. But on the other hand, spontaneity is the most beautiful thing about traveling. When you arrive in a new place, just get a map and ask the locals about the sights. Then rely on fate.

Make New Acquaintances

When you look back on your travels, your best memories will be not of the places you saw but of the people you met. Take the time to make friends with other travelers or locals.

Wrapping Up

At least once in our lives, each of us aspired to make a great unforgettable trip which would be nice to remember for the rest of our lives. Often there is a lack of time, money, or the necessary moment to make this dream come true. So people postpone their dreams again and again.

We hope that our tips from this article will convince you that it is possible to travel even on a minimal budget. So grab your backpack and take a step toward your winter adventure.

Author’s Bio:

Caitlyn Gardner is a Marketing Analyst whose expertise lies in data visualization. However, her passions in life don’t revolve only around her job. She likes mountain climbing and traveling. Caitlyn also dabbles in psychology which helps her maintain a positive outlook on life.

Image Source

How Many Miles Is A 100K & How to Train For One

running in the sun

Are you ready to dive headfirst into the exhilarating world of the 100K race? Well, you’re in for an epic journey!

Imagine running a distance that’s 49 miles longer than a half marathon, 36 miles more than a marathon, and over 30 miles more than a 50K. That’s the incredible challenge of a 100K race, and I’m here to be your guide on this extraordinary adventure.

In this article, we’ll unravel the mysteries of the 100K race, exploring what it’s all about, what it takes to conquer this incredible feat, and the essential training tips you’ll need to embark on this epic running odyssey.

So, fasten your laces because we’re about to embark on a remarkable journey together!

How Many Miles in 100K

Alright, let’s break it down and put those 100K miles into perspective.

Picture this: You’re gearing up for a 100K race, and it’s not just a run in the park; it’s a whopping 62.1 miles of pure endurance.

To make it crystal clear, running a 100K is like going the extra mile(s) – 49 more miles, to be exact – beyond a half marathon. That’s 36 miles more than a standard marathon! And if you’re comparing it to a 50K, well, you’re in for over 30 miles of additional mileage.

If that’s not jaw-dropping enough, think of it this way: Running a 100K is akin to conquering twenty 5K races back-to-back. Imagine lacing up your shoes for twenty 5Ks in a row; that’s the epic challenge of a 100K.

Now, why is this distance so special?

The 100K race often serves as the gateway to the revered 100-mile ultramarathon club.

Ultra runners, as we like to call them, are those brave souls who take on any footrace longer than the traditional marathon distance of 26 miles. It’s an elite club where determination meets endless miles.

How long does it Take to Run a 100K?

Running a 100K is like embarking on an epic adventure, a true test of your endurance that promises to keep you pounding the pavement for a substantial stretch of time.

I’m talking hours upon hours of relentless running, where every step is a testament to your determination and grit.

Now, if you’re a numbers person like me, let’s dive into some fascinating statistics and insights that’ll give you a deeper appreciation for the 100K challenge.

First, let’s talk about the golden standard for a solid 100K time: around 9 hours, 9 minutes, and 35 seconds.

It’s the benchmark many ultramarathoners aim for, the kind of performance that turns heads and earns you some serious bragging rights.

But where does this specific time come from, you might wonder? Well, it’s derived from a fascinating blend of data that takes into account runners of all ages and genders.

Now, here’s where it gets really interesting. If you’re the type of runner who’s all about speed and breaking records, then picture this: a 100K run completed in less than six hours.

Yes, you read that correctly—less than six hours! That’s a blistering pace for an ultra-distance race, and only a handful of elite athletes can even dream of achieving it. But hey, if you’ve got the need for speed and a burning desire to etch your name into the annals of ultrarunning history, why not give it a shot?

Training For a 100K

Running a race as demanding as 100K requires substantial dedication and preparation over an extended period.

Let’s dive deeper into what it takes to get ready for this epic endeavor and explore the multifaceted aspects of your training.

The Long Haul of Training:

It’s no secret that training for a 100K is a marathon within itself. You’re looking at months, if not years, of consistent and structured training to build the endurance and stamina necessary for this epic race. This isn’t just about putting in miles; it’s about honing your body and mind to endure the ultimate test of endurance.

Endurance Training:

To conquer the 100K distance, you’ll need to become a master of endurance. This means gradually increasing your weekly mileage, incorporating back-to-back long runs on weekends, and embracing slow, steady, and consistent progress.

A study published in the Journal of Applied Physiology suggests that progressive overload—gradually increasing the intensity and duration of your runs—is key to enhancing endurance.

Nutritional Mastery:

Nutrition plays a pivotal role in your success as an ultrarunner. Fueling your body with the right mix of carbohydrates, proteins, and healthy fats is essential. Consider consulting with a sports nutritionist to develop a personalized nutrition plan tailored to your specific needs and training intensity.

Injury Prevention:

Running such long distances puts a lot of stress on your body, which makes injury prevention a top priority. A study in the Scandinavian Journal of Medicine & Science in Sports found that strength training and mobility exercises can reduce the risk of running-related injuries. Incorporating these into your routine can help keep you injury-free during your 100K training.

Recovery and Rest:

Your body needs time to heal and adapt. Adequate recovery, both between workouts and during your tapering phase before the race, is critical. Research in the Journal of Sports Science & Medicine highlights the importance of sleep, nutrition, and active recovery techniques for optimizing your body’s recuperation.

Additional resource – How long is a half marathon

How To Know If You’re Ready To Train for 100k

Before you take the plunge into 100K training, it’s crucial to gauge your readiness properly. Training for such an ultramarathon is a monumental undertaking, and it’s not something you want to rush into blindly.

Here are some key checkpoints to ensure you’re prepared for the challenge ahead:

Ultra-Distance Experience:

One of the most critical factors in determining your readiness for a 100K is your prior experience with ultra-distance races. While a 5K or 10K might have felt like a breeze, jumping directly to a 100K is a recipe for disappointment and potential injury. Gradual progression is key. Consider conquering a few 50-mile or 80K races first. These races will serve as essential milestones in your journey towards the 100K.

Training Volume:

Your body needs time to adapt to the rigors of ultra-distance running. It’s like preparing your body for a symphony; you can’t go from practicing simple melodies to tackling a full concerto overnight.

Incrementally increasing your training volume over time is crucial. Studies in the Journal of Applied Physiology and Sports Medicine emphasize the importance of progressive overload in endurance training. Start with manageable weekly mileage and gradually ramp it up as your body adapts.

Patience is Key:

Remember, the longer the race, the more time your body requires to adjust to the increased load. There’s simply no shortcut to this process. Patience is your best friend in ultrarunning.

Embrace the journey, celebrate your achievements along the way, and respect the time it takes to prepare for a 100K.

Post-Race Feelings:

After completing those 50-mile races, take stock of how you felt. Did you finish feeling reasonably good, or were you struggling to walk?

Your ability to recover and bounce back after these races is a critical indicator of your readiness for a 100K. If you can finish 50 miles and still have a smile on your face, you’re on the right track.

How to Choose your First 100k

Selecting the right race for your first 100K is a pivotal decision that can significantly impact your experience and chances of success. Here’s a step-by-step guide to help you make a wise choice and set yourself up for a memorable debut:

Assess Your Comfort Zone:

It’s important to recognize your current strengths and limitations as a runner. If you’re new to ultra distances, it’s advisable to steer clear of races with super challenging elements like high altitude or extreme climates. These factors can add an extra layer of difficulty, especially for your first 100K. Opt for a race that aligns with your current capabilities.

Research Your Options:

Knowledge is your best ally when it comes to selecting the perfect race. Explore websites like UltraSignup, as you’ve mentioned, which provide a comprehensive database of ultramarathon events. Use the search filters to narrow down your options based on distance, location, date, and difficulty level.

Distance Matters:

As a beginner in the 100K realm, it might be wise to choose a race that offers support and logistics suitable for newcomers. Look for events that have a reputation for being well-organized and beginner-friendly.

Location and Climate:

Consider the location and climate of the race carefully. Races in your familiar terrain and climate conditions may be less intimidating for your first 100K. This familiarity can make the race less stressful and allow you to focus on the distance itself.

Race Reviews and Reports:

Dive into race reviews and reports from participants who have previously taken on the event. This firsthand information can provide invaluable insights into the course, support, and overall experience. Look for reviews from runners who were in a similar position to you when they undertook their first 100K.

Connect with the Ultrarunning Community:

Join online ultrarunning communities, forums, or social media groups to seek advice and recommendations from experienced ultrarunners. They can share their knowledge and help you make an informed decision.

Spend More Time On Your Feet

You’re absolutely right; spending more time on your feet is a critical aspect of preparing for a 100K race, and it can make a world of difference in your performance and endurance.

Let’s dive deeper into why this is so essential and how hiking can be a game-changer in your training regimen:

Building Endurance:

Ultramarathons, especially the 100K distance, demand a level of endurance that goes beyond traditional running. Your body needs to adapt to the prolonged stress of being on your feet for hours on end. By dedicating more time to being upright during training, you gradually build the muscular and skeletal endurance required for the race.

Reducing Risk:

As you rightly pointed out, hiking is a low-risk method for increasing your time on your feet. Unlike high-impact running, hiking offers a gentler way to condition your legs and joints. It’s a fantastic way to develop the leg strength and stamina needed for ultrarunning without exposing yourself to the risk of overuse injuries.

Terrain Variation:

Hiking can also introduce you to various terrains and elevations that you might encounter during a 100K race. This experience can be invaluable, especially if your race involves trails, hills, or changes in elevation. It helps train your body to adapt to different conditions.

Additional resource – Guide to Marathon Des Sables

Build Your Base

Just as you wouldn’t hop into a car and speed away without learning how to operate it, you shouldn’t rush into ultra-distance training. Begin with a solid foundation of running experience that spans 6 to 12 months of consistent, pain-free running. Building up your endurance gradually is crucial to avoid injury and burnout.

Aim to run at least five times a week during your foundation-building phase. This consistent schedule helps condition your body to handle the demands of ultrarunning.

As a rule, keep your initial runs in the range of 45 to 90 minutes, depending on your current fitness level and goals. Starting with shorter runs allows your body to adapt to the regularity of running without excessive strain.

What’s more?

Gradually introduce longer runs and back-to-back runs into your training plan. These key sessions will serve as the building blocks for your endurance. Aim for four to six of these runs over weekends to mimic the extended effort you’ll face in an ultra race.

As your base begins to solidify, incorporate a weekly long run into your training, similar to what you’d do for marathon training. Start with distances of 18 to 20 miles, gradually increasing the duration as your body adapts.

Learn To Fuel

Mastering your fueling and hydration strategy is paramount when preparing for an ultra-distance race like 100K.

Running out of fuel during such a long and grueling race can be a daunting experience.

Let’s delve into the key aspects of effective fueling and hydration for ultramarathons:

Calculate Calorie Needs:

To maintain your energy levels during an ultra race, you need to calculate your calorie needs per hour. Use this formula:

Calories per Hour = Basal Metabolic Rate (BMR) x Activity Factor + Calories Burned Through Running

Your BMR is the number of calories your body needs at rest. The activity factor accounts for the energy expenditure during running, and you’ll need to factor in the duration of the race.

Determine Hydration Needs:

Hydration is equally critical. A sweat test, as you mentioned, can help you determine your individual fluid loss rate. Knowing how much you sweat per hour will guide your hydration strategy during the race.

Experiment with Fuels:

Try different combinations of foods and products during your training to identify what works best for you. Some options include fruits, gummies, energy bars, gels, and sports drinks. It’s crucial to discover which foods and products your body tolerates well and provide you with sustained energy without digestive issues.

Create a Fueling Plan:

Based on your calorie and hydration needs, create a detailed fueling plan for race day. Determine when and how often you’ll consume calories and fluids during the race. Break your nutrition down into manageable portions to avoid overwhelming your digestive system.

Practice During Long Runs:

Use your long training runs to practice your fueling and hydration strategy. Experiment with different foods and timing to fine-tune your plan. It’s vital to discover any potential issues and address them before race day.

Stay Consistent:

Once you find a strategy that works for you, stick with it. Consistency in your fueling and hydration plan is crucial to avoid unexpected surprises on race day.

Backup Options:

Always have backup nutrition and hydration options in case your primary choices aren’t available during the race. Carrying extra gels or snacks can be a lifesaver in case of unforeseen circumstances.

Adapt to Conditions:

Be prepared to adjust your plan based on race conditions. Weather, terrain, and your physical condition can all impact your nutrition and hydration needs.

Listen to Your Body:

During the race, pay close attention to how your body responds to your fueling and hydration strategy. If you start to feel low on energy or dehydrated, don’t hesitate to make adjustments.

Additional resource – How to choose trail running gaiters

7 PRO TIPS you need to know about open water swimming

Open-water swimming is one of the most exhilarating sports you can do. You’re out in nature, surrounded by beautiful scenery, and you’re getting a great workout at the same time. It’s a wonderful way to spend your free time, but it can also be dangerous if you don’t know what you’re doing.

If you’re thinking about getting into open-water swimming, you’ve probably got a lot of questions. How to get ready? What’s the equipment? How do I stay safe? How do I not die?

I’ve got answers for all those things, and more! Here’s everything you need to know about open-water swimming.

1.   Gear yourself up

First things first: you’re going to need to get yourself ready for the water. This means getting your gear together and making sure you have everything you need before you hit the waves.

Mandatory equipment

Whether you’re a seasoned open-water swimmer or just getting started, there are some mandatory things you need to know before you hit the water.

  • Wetsuit—A wetsuit is designed to keep you warm while you’re in the water—they’re ideal for open-water swimming because they’ll help keep you from getting chilled during your swim.
  • Tow float—A tow float is a small, inflatable tube that you can use to help you swim when you’re tired or just need a little extra support in the water.
  • Goggles—Goggles are a must-have for any open-water swimmer. They will help to protect your eyes from the salt water and keep them from stinging.
  • Cap—A cap will help keep your head warm, which will prevent hypothermia while you’re exercising outside in the elements.

Recommended equipment

There are also a few recommended things you’ll want to make sure you have with you.

  • Nose clip—A nose clip keeps your nose from filling with water, which can make you feel like you’re drowning.
  • Boots and gloves—This will help keep your feet warm and prevent blisters from forming on your hands.
  • Earplugs—Earplugs keep the water out of your ear canal and prevent infections from developing.
  • Flask—If you’re going to be in the water for a long time, it can be difficult to keep track of how much fluid you’re drinking and when you should take a break from swimming so that you don’t become dehydrated.

2.   Differ pool and open water swimming

Pool and open water swimming are two totally different types of swimming.

Pool swimming is a controlled, safe environment. You’re guaranteed to have a lane, you know exactly how deep it is, and there’s almost always someone around to help if you need it.

In open-water swimming, on the other hand, you have no idea what hazards might be lurking in the water—or even what the temperature of the water is going to be.

But if you’re up for an adventure and want to try something new, open-water swimming can be incredible!

3.   Excel your swimming technique

Whether you’re just starting out or are an old pro, these tips will help keep you safe and comfortable while out in the ocean or lake. There are a few things that you can do to improve your swimming technique.

  1. Practice breathing rhythmically and taking deep breaths. This will help you to stay calm and relaxed in the water, which will make it easier for you to swim faster.
  2. Work on your kick technique by kicking your legs more strongly and rhythmically than usual. This will help build up muscle strength in your legs and give you more power when you need it most.
  3. If possible, find a pool with no-touch walls so that you can practice swimming without being interrupted by people walking by or splashing around near you.

4.   Warm yourself up

One of the most important things to get right before hitting the water is to warm up your muscles. The best way to do this is by doing some light exercise in a pool or bathtub, and then gradually increasing your intensity until you feel ready for the open water.

To warm up for open water swimming, you can do the same thing you’d do for any other kind of exercise—you can stretch, jog, or walk around in a circle.

You can also just wade into the water and start swimming. But if your body feels cold or stiff, it’s usually best to just stand in the water and get used to being there before starting your swim.

5.   Learn to swim with others

If you’re new to open-water swimming, it’s a good idea to learn from someone who knows what they’re doing. Watch other swimmers, or have a friend or family member who’s done it show you the ropes. The more time you spend in open water before your first race, the less likely it is that you’ll panic when things get hairy.

First, make sure you can swim before trying it out in open water—you don’t want to be in over your head!

Second, get comfortable with being around other people who are also swimming. You won’t always be alone out on the water, and that’s okay!

6.   Be visible to others

It’s important to stay safe in open water and make sure you can be seen by other swimmers, boats, and other watercraft.

You should wear a life jacket and/or swimsuit with reflective tape on it. When you’re swimming in daylight or near lights, your visibility will be enhanced by wearing a reflective swim cap.

You can also add reflective tape to your cap, back, or legs to make yourself even more visible in low-light conditions.

7.   Don’t panic

If you’re swimming in open water, it’s important to remember that panicking is the worst thing you can do.

It’s easy to panic when you’re in the middle of nowhere, surrounded by nothing but water and sky (and maybe a few sharks). But if you panic, your heart rate goes up and you use up more oxygen than necessary, which means that you’ll get tired faster and have to breathe more often. Not good!

So instead of freaking out, try visualizing yourself as a great swimmer. Think about how awesome it would be if you could just swim forever and never have to come up for air.

Visualize yourself doing laps around the pool, swimming across oceans like a pro, or just floating peacefully on your back while dolphins frolic around you… whatever helps you feel positive about being in the water!

Final thoughts

So whether you’re a triathlete, a seasoned open-water swimmer, or just a recreational swimmer looking to take your training to the next level, this guide should provide you with all the information you need to improve your open-water swimming techniques and get the most out of your swimming sessions.

10 Tips to Help You Survive Your First Open Water Swim

Whether you have a lot of experience as an open-water swimmer or this is your first time, we have compiled a list of tips to help make your experience as smooth as possible. Open-water swimming can be a great way to challenge yourself and improve your fitness, but it can also be daunting if you are not prepared. Follow these tips, and you will be ready to take on the open water!

What is Open Water Swimming?

Open water swimming is any swimming in natural bodies of water such as lakes, rivers, and oceans. This can be contrasted with pool swimming, which takes place in man-made pools. Swimming in open water presents unique challenges, as you cannot see the pool’s bottom or sides, and you may have to contend with waves and currents.

Open Water Swimming vs. Triathlon

While open-water and triathlon swimming may seem similar, they are quite different. Triathlon swimming occurs in a mass start with dozens or even hundreds of other swimmers. In contrast, open-water swimming typically has a smaller number of swimmers and a more relaxed atmosphere. Open-water swims are often shorter than triathlon swims, as well.

How to Prepare Yourself for Open Water Swimming

Let’s take a few tips on how you can survive and feel comfortable on your first water swimming trip.

1.    Build Endurance

One of the most important things you can do to prepare for open-water swimming is to build your endurance. This means swimming for longer distances and durations than you are used to. If you can swim for an hour in a pool, aim to swim for 90 minutes in open water. This will help your body get used to being in the water for extended periods and make the swim seem less daunting.

2.    Wear a Wetsuit

If you are swimming in colder waters, it is important to wear a wetsuit. A wetsuit will keep you warm and assist you with staying on top, which can be very helpful if you get tired during your swim. Wetsuits can be rented or purchased from most sporting goods stores.

3.    Bring a Friend

One of the best things you can do when swimming in open water is to bring a friend. Not only will they be able to help you if you get into trouble, but they can also act as a motivation to keep going. If you don’t have a friend to swim with, consider joining a local open-water swimming group.

4.    Be aware of Your Surroundings

When swimming in open water, it is important to be aware of your surroundings. This means being aware of the other swimmers around you and any obstacles in the water. If swimming in a river or lake, be aware of the current and potential hazards.

5.    Know Your Limits

It is important to know your limits when swimming in open water. If you are not a strong swimmer, consider swimming in a lifeguard-protected area. If you are swimming in cold water, make sure you are wearing a wetsuit. And always make sure you have someone with you who knows your limits and can help if you get into trouble.

6.    Start Slow

If you are new to open-water swimming, it is important to start slow. This means swimming shorter distances and taking breaks as needed. As you become more comfortable with open-water swimming, you can gradually increase the distance and duration of your swims.

7.    Be Prepared for Anything

One of the most important things to remember when swimming in open water is that anything can happen. This means being prepared for anything from bad weather to currents. Always check the forecast before you swim and be aware of potential hazards. If you are ever in doubt, it is always best to err on the side of caution and not swim.

8.    Listen to Your Body

It is important to listen to your body when swimming in open water. If you start to feel tired, take a break. And if you ever feel over your head, get out of the water and rest. Open-water swimming can be a great way to challenge yourself and improve your fitness. But it is important to be prepared before you take the plunge.

9.    Alternate Breathing

Alternating breathing is one of the best things you can do when swimming in open water. This means breathing to one side for a few strokes and then to the other. This will help you stay more focused and prevent you from swallowing water.

10.                   Have Fun!

Last but not least, remember to have fun! Open-water swimming can be a great way to challenge yourself and improve your fitness. But it is also important to enjoy the experience. So take your time, relax, and enjoy being in the open water!

Why is Warm Up Important?

Warm-up is important because it helps your body get ready for the swim. It increases your heart rate and gets your muscles loose and ready to work. A good warm-up will make your swim more enjoyable and help you avoid injury.

What are the Different Types of Strokes?

Four main strokes are used in open-water swimming: freestyle, breaststroke, backstroke, and butterfly. Freestyle is the most common stroke used in open-water swimming. Breaststroke, backstroke, and butterfly are also used, but not as often.

How Do I Breathe While Swimming?

One of the most important things to remember when swimming in open water is to breathe regularly. This means taking a breath every few strokes and not holding your breath. If you feel out of breath, slow down and take more breaks.

What Should I Eat Before Swimming?

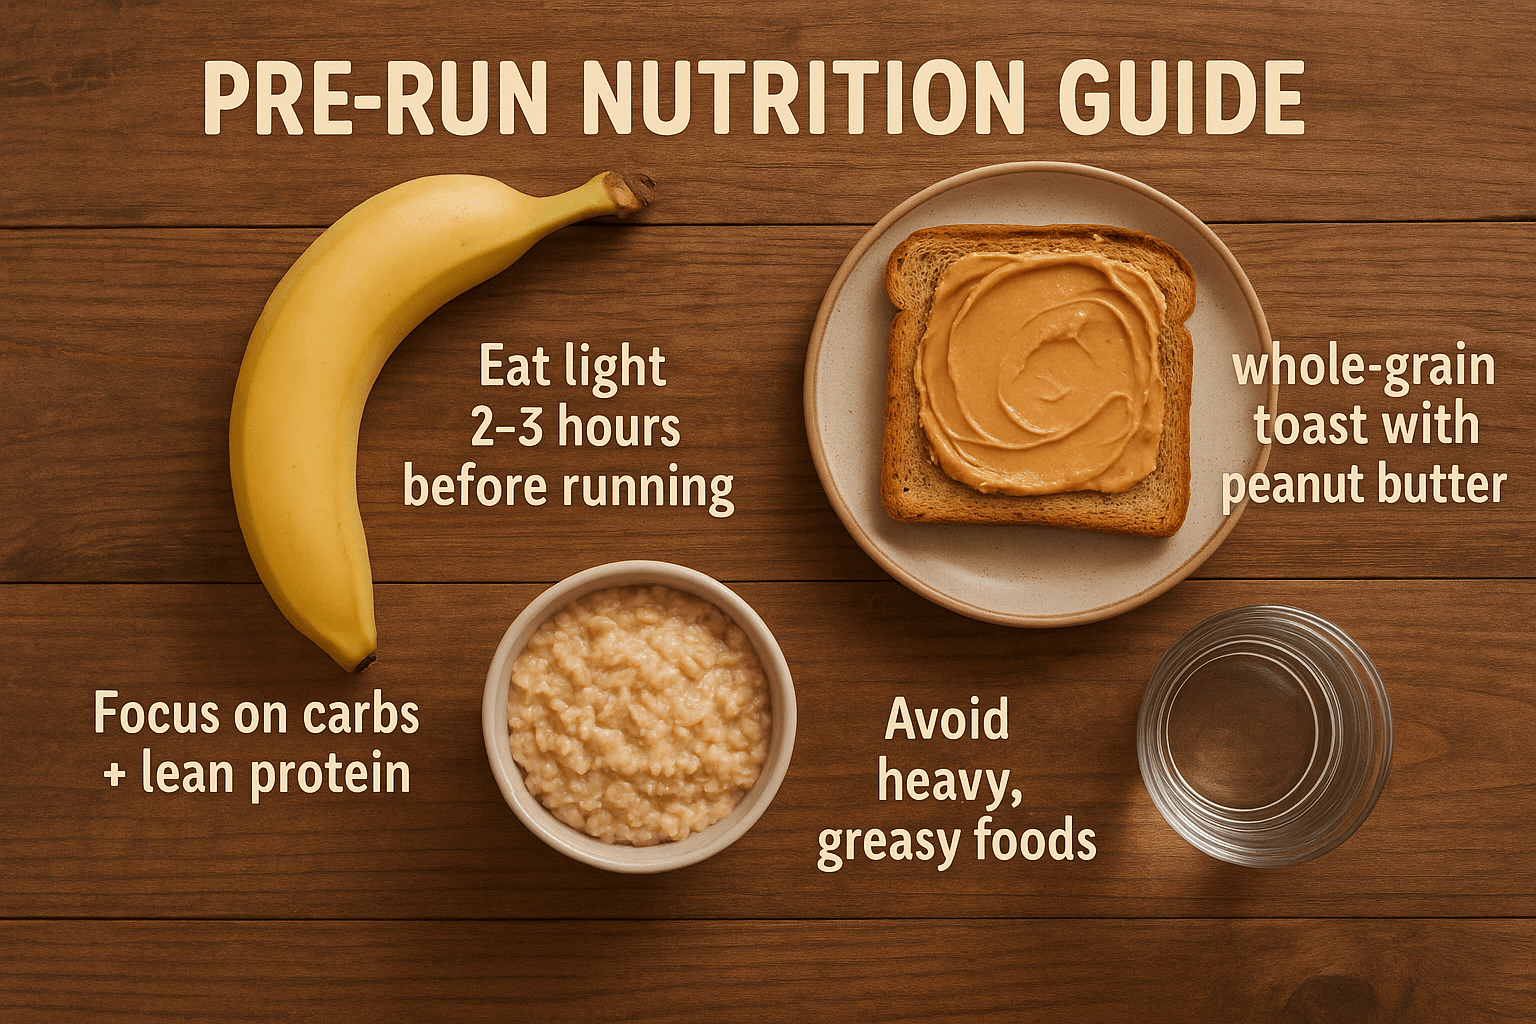
It is important to eat a light meal before swimming. This will help you stay energized and prevent you from getting cramps. A good meal before swimming is oatmeal with fruit or toast with peanut butter.

What Should I Drink Before Swimming?

It is important to drink plenty of fluids before swimming. This will help you stay hydrated and prevent you from getting cramps. A good rule of thumb is to drink 8 ounces of fluids every 20 minutes of swimming.

In Conclusion

Open-water swimming can be a great way to challenge yourself and improve your fitness. But it is important to be prepared before you take the plunge. Follow these tips, and you will be ready to take on the open water!

Getting Started with Open Water Swimming: A Beginner’s Guide

Do you love swimming but want to take your skills to the next level? Are you looking for a new challenge and some fresh air? If so, open-water swimming might be perfect for you! This type of swimming occurs in natural bodies of water such as oceans, lakes, and rivers. It can be a great way to stay fit and have fun outdoors. This blog post will discuss the basics of open-water swimming for beginners. We will cover topics such as safety, gear, and technique. Let’s get started!

What is Open Water Swimming?

Open water is swimming in natural bodies of water such as oceans, lakes, and rivers. This type of swimming can be a great way to stay fit and have fun outdoors. However, it is important to note that open-water swimming differs from pool swimming. You will need to deal with elements such as waves, currents, and temperature changes in open water. This can be a challenge for beginners, but it is also part of the appeal!

Why Swim in Open Water?

There are many reasons why people choose to swim in open water. For some, it is a great way to stay fit and active. Others enjoy the challenge of swimming in different conditions. Finally, some people love being outdoors and enjoying the natural beauty of bodies of water. Whatever your reasons, open-water swimming can be a great experience!

Here’s the full guide to aqua jogging

What You Need to Know Before You Start

Open-water swimming can be a great way to stay fit and have fun, but it is important to be safe when swimming in unfamiliar waters. Here are a few things to keep in mind before you start:

  • Make sure you know how to swim. This might seem like an obvious one, but it is important! You should feel confident and comfortable swimming in open water before you start.
  • Be aware of the conditions. Check the weather forecast and water conditions before you start swimming. Also, be sure to stay aware of your surroundings while you are swimming.
  • Wear the proper gear. You will need a minimum of a swimsuit, goggles, and a swim cap. A wetsuit can be helpful in colder conditions.
  • Use common sense. Don’t swim alone; tell someone on shore where you are about to swim.

The Gear You Need for Open-Water Swimming

One of the great things about open-water swimming is that you don’t need much gear to get started. However, here is a list of the essential gear you will need:

  • Swimsuit
  • Goggles
  • Swim cap
  • Wetsuit (optional)

This is the minimum amount of gear you will need to swim in open water. Of course, you are welcome to add other items, such as a towel, sunscreen, and a swim bag.

How to Choose the Right Swimsuit

Your swimsuit should be comfortable and allow you to move freely. Finding a suit that fits well and does not restrict your movement is important. You might want to consider a one-piece suit or a tankini if swimming in open water. A wetsuit can also be a good option, especially in colder conditions.

How to Choose the Right Goggles

Goggles are an essential piece of gear for open-water swimming. They will help you see clearly and protect your eyes from the water. When choosing goggles, it is important to find a pair that fits well and does not leak. In addition, you might want to try different types and brands of goggles to find a comfortable pair.

How to Choose the Right Swim Cap

A swim cap can help keep your hair out of your face while swimming. It can also help you stay warm in colder conditions. When choosing a swim cap, it is important to find one that fits well and does not leak. You might want to try on different types and brands of swim caps to find one that is comfortable for you.

The Right Technique for Open Water Swimming

Open-water swimming differs from pool swimming, so you must adjust your technique. Here are a few things to keep in mind:

  • Stay relaxed. Tensing up will only make it harder to swim.
  • Use your arms. Arm strokes help you move through the water more effectively.
  • Kick from your hips. This will help you move more efficiently through the water.
  • Breathe regularly. Try to take a breath every three strokes.

Breathing Techniques

One of the most important things to remember when swimming in open water is to breathe regularly. Taking a breath every three strokes is a good rule of thumb. However, it is important to be aware of your breathing and not hold your breath while swimming. If you get out of breath, slow down or take a break.

There are many different breathing techniques that you can try while swimming. For example, some swimmers prefer to breathe to one side, while others alternate with each breath. Experiment with different techniques to find the one that works best for you.

Safety First

Before swimming in open water, it is important to be aware of the conditions and use common sense. Here are a few safety tips to keep in mind:

Relax and Enjoy

The most important thing to remember when swimming in open water is to relax and enjoy yourself. Open-water swimming is a great way to get exercise and enjoy the outdoors. You will swim like a pro in no time with a little practice!

In Conclusion

Open-water swimming can be a great way to stay fit and have fun. It is important to be safe when swimming in unfamiliar waters. Be sure to wear proper gear and use the right technique. These tips are ready to enjoy open-water swimming!

Featured image source – Image Source

Stay Prepared on the Trails: The Ultimate Guide to Your Trail Running First Aid Kit

What is A Good Running Pace For Beginners

Trail running is a thrilling way to immerse yourself in nature and discover new horizons. But, let’s face it, it’s not always a leisurely stroll through the woods.

When you’re out on the trails, you’re at the mercy of the elements and the terrain. That’s why it’s crucial to be prepared for any bumps in the path, figuratively and literally.

Enter your trusty trail running first aid kit – your guardian angel in the great outdoors.

In this article, I’m going to walk you through the essentials that should find a home in your trail running first aid kit. Remember, this kit isn’t just a checklist; it’s your lifeline when you’re far from civilization.

So, whether you’re a seasoned trail runner or just getting started, I’ve got you covered. Let’s assemble that kit and hit the trails with confidence!

Trail Running First Aid Kit – The Essentials

A trail-running first aid kit is like your trusty sidekick when you’re out exploring the great outdoors. It’s got your back in case of emergencies or injuries, and you don’t want to hit the trails without it.

Here’s a checklist of the essential items to stash in your kit:

  • Bandages and Gauze: These are your first line of defense for cuts, scrapes, or larger wounds.
  • Tweezers: Handy for removing splinters, thorns, or ticks.
  • Athletic Tape: Great for providing support to sprained joints or securing bandages.
  • Rescue Whistle: A crucial tool for alerting others in case you need assistance.
  • GPS Tracking Device: In case you find yourself off the beaten path, this can be a lifesaver.
  • Sunscreen: Protect your skin from those harsh UV rays, especially on exposed areas.
  • Bug Spray: Ward off those pesky insects and potential bug bites.
  • Band-Aids: Small wounds and blisters can be quickly managed with these.
  • Flashlight: Shed some light on nighttime emergencies or navigating dark trails.
  • Zofran: Helpful for combating nausea while running.
  • Moleskin: A blister’s worst enemy, keep your feet happy and pain-free.
  • Sanitizer or Alcohol Wipes: Maintain hygiene when dealing with wounds.
  • Steri-Strip: These come in two sizes for closing wounds when necessary.
  • Firestarter (Waterproof Matches): Stay warm and cook food if you’re stranded.
  • Tobasco: Not just for flavor; it can also be used to disinfect wounds.
  • Biopatch: An antimicrobial option for wound care.
  • Tourniquet: In extreme situations, this can help control bleeding.
  • Benadryl: Be prepared for allergy reactions to bites or stings.
  • Tape (Coban): Waterproof tape is versatile and can serve various purposes.

Don’t get me wrong. This is by no means an exhaustive list, but at the very least, it should get you started on the right foot.

At a minimum, you should carry:

  • Band-aids
  • Sterile wipes
  • GPS Tracking Device
  • Moleskin
  • Athletic tape
  • Antiseptic
  • Rescue whistle

Now let me explain why these tools are so important when you’re outdoors for a long time.

Additional Resource – Running while constipated.

Anti-bacterial Bandage

These are a must-have because, let’s face it, falls and cuts are part and parcel of trail running. These bandages help keep those wounds clean and free from infection.

Athletic tape

Ankle sprains are all too common on the trails. Carrying athletic tape can be a lifesaver if you twist an ankle. It provides support and stability for the injured joint, allowing you to make your way back safely.

Check the following YouTube tutorials on how to do it right.

Rescue Whistle

While some packs come with built-in whistles, having an additional, louder whistle is a smart move. A whistle is a universal distress signal, and it can be heard from a greater distance, increasing the chances of someone coming to your aid in case of an emergency.

Additional Resource – Here’s how to protect yourself from dogs

GPS Tracking Device

While it may not be foolproof in remote wilderness areas with limited network coverage, having a GPS tracking device can be a lifesaver. It helps you keep tabs on your location and adds an extra layer of safety to your trail runs.

Map

For those off-the-grid adventures, don’t forget to pack a good old-fashioned map. Even if you’re familiar with the area, having a map as a backup is essential. It ensures you can find your way out quickly in case of an injury or emergency.

Mobile Phone

An absolute must-have. Carrying your mobile phone ensures you have a lifeline to the outside world if things take a turn for the worse. It’s your communication link and a vital tool for seeking help when needed.

Bear Spray

If you’re running in bear country, carrying bear spray is a smart move. It not only protects you from potential bear encounters but can also serve as a deterrent against other wildlife threats in the wilderness.

Headlamp

For those early morning or late evening trail runs, a reliable headlamp is a game-changer. It allows you to see where you’re stepping, especially on challenging terrain, while keeping your hands free.

Additional resource – How to choose trail running gaiters

Moleskin

Blisters might not be a major injury, but they can certainly ruin your trail running experience. Moleskin is a handy tool for managing blisters and preventing them from becoming a painful problem, especially when you’re far from civilization.

Stomach Problems

If you’re someone who often deals with stomach issues like diarrhea or gastrointestinal discomfort during your runs, consider adding a stomach relief medication like Smooth Glide to your trail running first aid kit.

Allergic Med

If you have allergies, make sure to pack any necessary allergy medication to keep your symptoms in check while you’re out on the trails.

Current Medication

If you have an existing medical condition or injury that requires medication, don’t forget to include your prescribed medications in your trail running first aid kit. Your health and well-being should always come first, so be prepared and leave nothing to chance.

Be Careful

Whether tackling technical terrains or running a loop around your neighborhood, the best way to stay safe is to pay attention to your surroundings and what’s happening around you.

If a route, place, person, or whatever gives you the hilly bellies, trust your gut and run in the other direction.

Additional resource  – Here’s your guide to pain on top of the foot while running.

Using a GPS Tracking Device

A GPS tracking device can be a lifesaver when you’re navigating unfamiliar trails or find yourself off the beaten path. Here’s how to use it effectively:

  • Familiarize Yourself: Before heading out, become familiar with your GPS device. Read the user manual, practice setting waypoints, and understand how to read coordinates.
  • Mark Your Starting Point: When you begin your run, mark your starting point as a waypoint. This ensures that you can always find your way back to your original location.
  • Set Waypoints: Along your planned route, set waypoints at key landmarks or intersections. This helps you keep track of your progress and provides reference points.
  • Record Your Track: Many GPS devices allow you to record your track as you run. This creates a breadcrumb trail that you can follow to retrace your steps.
  • Emergency Beacon: Some GPS devices have an emergency beacon feature. Familiarize yourself with how to activate it and understand that it should only be used in true emergencies.
  • Battery Management: Keep an eye on your device’s battery life. Carry spare batteries or a portable charger to ensure it remains operational throughout your run.
  • Practice, Practice, Practice: Don’t wait til disaster strikes to learn how to use your GPS device. Practice navigating with it on familiar trails to build confidence.

Using a Rescue Whistle

A rescue whistle is a simple yet powerful tool for attracting attention in emergencies. Here’s how to use it effectively:

  • Three Short Blasts: In a distress situation, blow the whistle in a pattern of three short blasts. This is a universally recognized signal for help.
  • Pause: After the three short blasts, pause for a moment to listen for any response or signs of assistance.
  • Repeat: If you don’t get a response, repeat the three short blasts, and continue to do so at regular intervals.
  • Conservation: Use the whistle conservatively. Blowing it constantly may reduce its effectiveness and drain your energy.

Using Moleskin The Right Way

Moleskin is your best friend when it comes to managing and preventing blisters. Here’s how to use it effectively:

  • Identify Hot Spots: As soon as you feel a hot spot or irritation on your foot, stop and inspect the area.
  • Clean and Dry: Ensure the affected area is clean and dry before applying Moleskin. You can use a sanitizer wipe from your kit to clean the area.
  • Cut to Size: Cut the Moleskin into the appropriate size and shape to cover the hot spot or blister.
  • Apply Carefully: Peel off the backing and apply the Moleskin directly to the affected area, ensuring it adheres well.
  • Smooth Edges: Smooth the edges to prevent them from peeling off during your run.
  • Replace as Needed: If the Moleskin becomes worn or starts to peel, replace it as soon as possible to maintain protection.

Trail Running First Aid Kit – The Conclusion

Don’t get me wrong. The list I’ve provided above is by no means the most exhaustive list of all things you could carry on a trail run. However, stuffing your trail pack may seem excessive for a relatively short run.

So, use some common sense.

In the meantime, thank you for stopping by.

Keep running strong.

David D.

7 Challenges Daily Exercise Can Solve for Students

best running shoe brands

Students these days are juggling academics, extracurriculars, and social activities. Undoubtedly, keeping up with a packed schedule is not an easy job; you might not have enough time to get through your to-do list, let alone find time for exercise.

However, studies have found that incorporating regular exercise can help students solve some of their most common problems. Often, students opt to put their studies over their own well-being. Exercise can help break out of this cycle. So, put all your worries behind you, contact a service that can write my paper for me, and concentrate on staying physically and mentally fit. In this article, let us look at how regular physical activities can be advantageous to students.

1. Challenges With Academic Performance

A 2017 study published in the journal Pediatrics mentioned that exercise, especially physical education, can improve the classroom behaviors of students. The study pointed out that regular exercise can offer students a boost in academic achievement, especially in mathematics and reading.

In the study, students participated in school programs that increased their physical activity by up to one hour every day. Put otherwise, students seem to perform well academically when they spend sufficient time on exercise or other forms of physical activity.

Although the study was conducted for school students, the same results can be translated to the case of college-going adults as well. The only difference is that exercise will not be incorporated into the college student’s class schedule. Instead, they will have to find time on their own in order to accommodate exercise into their daily routines.

As hard as this sounds, there are indeed a few ways to find the time. Most students spend hours completing assignments, which takes up most of their time. However, by getting academic paper help by WritePaper, students can find writers who can provide tailored assistance for assignments. It allows students to find time to cater to their mental and physical well-being.

2. Anxiety and Stress

Another common challenge faced by students is stress. The societal pressure to excel in academics and find a job can be overwhelming, and it causes anxiety and other physical problems. In fact, stress can influence hormone responses and can affect the mood and behavior of students.

Exercise can help students cope with mental distress. Studies have reported that students who were allowed to take an exercise break from studying found it to be a breather from daily stressors. This, in turn, helped them to focus more on their studies as well as reduce their overall anxiety.

3. Lack of Energy

For students who find themselves fatigued all the time, exercise might seem counterproductive. After all, if you don’t have sufficient energy to do daily activities, how will you find time to exercise? However, regular physical activity can improve muscle strength, thus boosting your endurance.

Exercise can strengthen your cardiovascular system and can help the body function more efficiently. This way, students will have more energy to tackle their daily chores and keep up with a strict schedule.

4. Lack of Sleep

Regular exercise can also lead to a better quality of sleep, which is crucial for students to perform well in academics as well as in other areas of their life. For students, sleep is of utmost importance as it helps the brain to retain information.

Students often find it difficult to fall asleep due to stress and other academic demands. Well of course, some assignments require students to pull off all-nighters. This inadequate sleep leads to decreased attention and alertness.

Needless to say, lack of sleep could lead to students losing focus in classrooms and struggling to retain anything they have learned. Moreover, lack of sleep can also impair brain functions such as logical reasoning and creativity, which can further affect a student’s ability to perform well during an exam or while doing an assignment.

When exercising, the elevation in the core body temperature signals the body that it needs to be awake. However, once the core body temperature starts to fall, this decline can help facilitate sleep.

5. Mood Swings

So, we have already established that exercise offers plenty of physical and mental benefits. However, exercise can also be a great way to keep one’s emotions in check. Exercising regularly releases endorphins, which can bring up the mood and make you feel happier. This is one of the reasons why people feel more energetic after exercising.

Not only does a regular workout offer more energy, but it can also help you feel good and jumpstart your brain for a good study session.

6. Find Time to Network

Exercising need not be done alone. Instead, students can easily find clubs and groups where they can exercise with other people. This can not only make exercising more enjoyable, but you will also be able to find a way to connect with other people.

Moreover, there are several types of exercises available these days. You do not have to go to the gym every single day. Rather, you can mix things up by taking a dance class, hitting the hiking trails, or even playing sports. The key is to find a physical activity that you enjoy. If you get bored with something, try a new activity, which will also help you meet new people and build relationships.

7. Combat Health Conditions

Last but not least, regular exercise can also help students combat health conditions such as heart disease or high blood pressure. No matter the weight, being active boosts high-density lipoprotein, which is often called the ‘good cholesterol. This, in turn, decreases unhealthy triglycerides. This can keep ensuring that the blood flows smoothly, thus decreasing the risk of cardiovascular diseases.

Regular exercise can also help students manage and prevent other health problems such as arthritis, stroke, metabolic syndrome, cancer, and more. So, all in all, it can help boost the immune system and improve cognitive function.

In a nutshell, exercise can help students sleep and eat better. They can also help students maintain a healthy routine and lifestyle.

Moreover, as we pointed out above, exercise can aid students in improving their academic performance. They will find that their focus is improved and that they are more energetic throughout the day.

How To Prepare For Your Best Running Race

How To Prepare For Your Best Running Race

Looking for tips on how to prepare for your best race? Then you have come to the right place.

Whether planning to run your first 5K or the 19th marathon, racing isn’t that overwhelming when you have the right mindset and tools.

Proper race preparation is key to ensuring you’re getting the most out of the event.

You’ll be ready to run your best race by preparing your body and mind.

How To Prepare For Your Best Running Race

In this article, I will share a few tips to help you feel confident and strong before your upcoming race.

Set A Realistic Goal

That’s where everything starts. You’ll be starting on the right foot by setting realistic expectations from the get-go.

Set clear goals on what you can—and cannot—physically do within your time frame. Stay flexible with your goals. Nothing is written in stone.

What’s more?

You should also adjust your race-time goal if you’re recovering from an unexpected injury, are sick, or the weather on event day is hotter than usual.

Additional Resource – Here’s how to create a running program

Follow A Training Plan

Training plans are the blueprint to success. They help to steadily build your experience and tolerance by running longer distances—or faster times—over a few months before the event itself.

A well-rounded running plan should involve a number of “easier” sessions each week, along with one (or two) speedwork runs and one long-distance session.

As the weeks go by, you’ll increase the distance and intensity of the runs to help your body gradually adapt to the demands of your race.

Fortunately, you can find plenty of training plans online—some of them from the Runners Blueprint blog. It’s key to follow your training program strictly if you’re serious about success. The rest is just detail.

Additional resource – The Sub 5K Training Plan

Know The Race Course

Another useful measure to help you prepare for your race is to familiarize yourself with the race route in advance. This way, you’ll cover all bases and know what to expect when the big day comes.

Most race organizers will provide a map of the racecourse in advance, including information on elevation gain and any other challenging topography.

If possible, run the race route—driving or biking it are also good options—so you can get familiar with where you can take it up a notch or slow down. Know all the road’s ups and downs, both literally and figuratively.

Don’t have the time to scope out the racecourse? Then, at the very least, study the route map online.

Additional Resource – Running while constipated.

The Few Days Before The Event

This is the most important period, and what you do during these few days can either make or break your race’s success.

Here’s what to do.

  • Avoid doing anything new. The few days before the race isn’t the best period to try new food, fueling strategies, or gear. Instead, stick with what works for you.
  • Rest up. The few days before the race, try to take as much rest as possible. Relax and leave every other life errands for after the race.
  • The night before. Instead of interesting as many carbs as possible, focus on eating a well-balanced meal that you know for sure won’t upset your stomach the next day.

Stay Positive

To run your best race, you’ll need to train your mind as hard as you do your body. After all, attitude is everything.

The key to success is maintaining a positive attitude during both training and racing. Cultivating this can help you overcome the dire situation and put you on track for success.

Remember that racing is about participating and crossing the finish line while competing against your best time.

I recommend using mantras to help you push when things get tough.

Additional Resource – Your Guide to fun runs

Have The Right Race Strategy

Lastly, your pacing strategy on race day can make a huge difference.

Overall trying to run your fastest on your first mile out is a recipe for disaster.

A common mistake many runners make is starting too fast. This makes it virtually impossible to keep the pace throughout the race, forcing the runner to either slow down or quit it altogether.

Instead, start the race slowly and increase your speed until you’re settled into your race pace goal. Then as you approach the finish line, speed up a little bit and give it everything you got.

This is what’s known as the negative split.

Additional Resource – Why is my running not improving

Get Up Early

On race day, you’ll want to wake up early, eat a proven and light breakfast, take a cool shower and make sure you got all of your race gear before time to leave.

You should have laid out your race gear the night before and gotten much asleep as possible—shoot for seven to nine hours.

Here’s how to avoid slowing down during  a race

Arrive Early

Once you’re double sure you got all of your race gear at hand, head to the race venue.

To save yourself a lot of hassle, try to make it there as early as possible, so you have plenty of time to pick up your number—unless you already have it—use the bathroom and warm up. You don’t want to make it later to the starting line. That will ruin the experience.

Additional Resource – Guide To Running Race Distances

Warm-up Properly

One of the key perks of making it to the race venue early is giving you time for a proper warm-up.

Overall, the shorter the distance, the longer the warm-up.

For example, for a 5K you might need to do an easy jog for around 15 minutes just to get the blood flowing and loosen up your muscles and joints.

Next, perform dynamic exercises to improve your flexibility, mobility, and range of motion.

Then, perform four to six strides of around 50 to 60 meters., speeding up to your race pace before slowing down and going again.

Additional Resource – Virtual Races Guide

Have A Few Mantras

When fighting off fatigue or challenging terrain, it helps to have a mantra to pull you through a tough patch.

I’d recommend having more than a few mantras on the mind.

Some of my favorites include:

  • Push
  • Keep going
  • Can’t stop
  • Won’t stop
  • Be brave
  • Be strong
  • Run strong
  • I run because I am
  • One step a time
  • God yes. God no.
  • Stand tall
  • Breathe deep
  • Glory

Sure, these may sound a bit cliché, but it won’t help to try them out, right?

Additional Resources:

How to prepare for your best race – The Conclusion

There you have it!

If you’re preparing for a race, the tips shared here should get you started on the right foot. The rest is really up to you.

Please feel free to leave your comments and questions in the section below.

In the meantime, time thank you for dropping by. Good luck with your race endeavors.

Stay strong

David D.