Ways Athletes Stay Motivated Before Fierce Challenges Come Knocking

Athletes face intense pressure to perform, with fierce challenges testing their physical and mental limits. The journey to success requires not only talent but also an unyielding mindset that keeps them motivated through demanding times. Whether preparing for a major competition or pushing through rigorous training, staying motivated can make all the difference between winning and falling short. But what exactly fuels their inner drive when obstacles loom large? In this blog post, we explore ways rising athletes maintain their focus, determination, and passion when challenges come knocking.

How Athletes Fuel Motivation When Tough Challenges Loom Ahead?

1. THC-infused vapes

Some athletes might explore THC-infused vapes as a way to manage stress and stay focused before facing intense challenges. THC, the primary compound in cannabis, may provide relaxation and help calm nerves, making it easier to maintain composure during training or competitions. It might also assist with recovery by promoting rest.

However, the effects can vary based on dosage and individual tolerance, so athletes should approach this option cautiously and ensure they comply with sports regulations. Well, then, if you are an athlete looking for a supportive tool as such, you may want to give TRĒ House THC Vape a try, as this brand is potentially among the best brands out there.

2. Setting achievable goals

Setting achievable goals is essential for rising athletes to stay motivated when facing fierce challenges. Breaking down big aspirations into smaller, realistic milestones makes the journey more manageable and builds confidence. When goals are clear and attainable, athletes can track their progress and feel accomplished after each step.

Whereas unrealistic goals can lead to frustration and burnout, achievable ones provide a steady path toward improvement. All in all, by evaluating their strengths and limitations, athletes can set targets that push their boundaries without overwhelming them.

3. Creating a winning routine

A winning routine is essential for athletes to stay motivated and focused before facing tough challenges. A structured routine provides a clear daily plan and helps establish consistency, build discipline, and reduce stress. This includes setting dedicated times for workouts, recovery, nutrition, and mental preparation. When athletes know what to expect, they can better manage their energy levels and avoid feeling overwhelmed.

Additionally, routines help build momentum, making it easier to stay on track and push through challenging moments. Note that a well-planned routine allows athletes to focus on their performance without distractions and fosters a sense of control over their preparation process.

4. Using positive affirmations

Positive affirmations involve repeating empowering statements to build confidence and maintain a motivated mindset. Rising athletes often face intense pressure, and negative thoughts can easily creep in before significant challenges. By consciously speaking positive words like “I am strong,” “I am capable,” or “I can handle this,” athletes can replace self-doubt with determination.

These affirmations help create a shift, making athletes believe in their abilities even when the odds seem stacked against them. Even consistency is key, as affirmations are most effective when practiced daily or as part of a pre-game routine. All in all, if an athlete begins reinforcing a winning mindset, it will not only boost self-confidence but also help him stay focused, motivated, and prepared for looming challenges.

5. Building resilience

Building resilience means developing the ability to stay strong and focused during tough situations. Challenges like intense training, competition pressure, and unexpected setbacks can be draining for rising athletes. To build resilience, athletes train their minds just as they train their bodies. They practice staying calm under pressure, learning to reframe negative thoughts, and focusing on what they can control.

In fact, regular mental exercises, such as visualization and breathing techniques, help strengthen their mindset. Know that a support system, such as coaches and teammates, plays a crucial role in this process and helps athletes push through difficult moments and maintain their motivation.

6. Seeking mentor guidance

Seeking guidance from a mentor is one of the most effective ways for rising athletes to stay motivated before facing tough challenges. Mentors provide valuable insights, constructive feedback, and personalized strategies that help athletes improve their performance and maintain focus. Having someone experienced to turn to can boost confidence, especially when doubts or setbacks arise.

Mentors not only share technical advice but also offer emotional support and perspective from their own experiences. They even help athletes navigate the pressures of competition and make informed decisions about training and performance.

7. Visualizing victory outcomes

Visualizing victory outcomes involves mentally picturing success before it happens. Rising athletes use this technique to create a clear mental image of achieving their goals, whether it’s crossing the finish line first, scoring the winning point, or completing a perfect routine. This mental exercise helps build confidence, reduce pre-competition anxiety, and improve focus.

Further, by repeatedly imagining success, athletes train their minds to expect positive results, which often translates into improved performance during actual events. On top of that, the act of visualization reinforces strategic thinking, as athletes mentally rehearse their moves and decisions under various scenarios.

Without Motivation, Can Athletes Truly Excel? The Truth Unveiled

Without motivation, athletes struggle to excel and reach their full potential. Motivation fuels the desire to train consistently, push through fatigue, and overcome setbacks. It keeps athletes focused on their goals, even when facing challenges or competitive pressures. Without it, performance can suffer as discipline and effort diminish.

Motivation also plays a vital role in mental resilience, helping athletes maintain a positive mindset during difficult times. In fact, athletes who lack motivation may lose their competitive edge, confidence, and passion for the sport. Simply put, staying motivated is essential for sustaining peak performance and achieving long-term success in any athletic journey.

Closing Lines

Staying focused and driven is essential for athletes to navigate tough challenges and achieve success. From mental strategies to physical routines and guided support, there are various ways to maintain the energy and determination needed to excel. Each approach plays a unique role in fostering growth and resilience. By adopting these practices consistently, athletes can overcome obstacles, stay on track, and unlock their full potential in their athletic journey.

The Kansas City Marathon: A Historic Race Through Missouri’s Heart

The Kansas City Marathon has been an integral part of Missouri’s athletic culture since its inception in 1979. Over the years, it has grown into one of the Midwest’s premier long-distance races, drawing runners from all over the country. Held annually every October in Kansas City, Missouri, the marathon not only tests the endurance of its participants but also celebrates the city’s history and culture.

As one of the most renowned marathons in the region, the Kansas City Marathon offers a challenging yet rewarding course that is widely recognized. Its reputation extends beyond the Midwest, as it is also a qualifying race for the prestigious Boston Marathon. Thousands of runners participate each year, making it a significant event in the national racing calendar.

Landmarks Along the Course

One of the most striking features of the Kansas City Marathon is its scenic course, which takes runners past some of the city’s most iconic landmarks. The race begins near the World War I Museum & Memorial, a historic site that pays tribute to those who served in the war. The museum’s towering Liberty Memorial serves as a breathtaking backdrop, setting the stage for an unforgettable marathon experience.

Midway through the course, runners make their way through the renowned Country Club Plaza. Known for its Spanish-inspired architecture, upscale shopping, and vibrant nightlife, this area adds a distinct charm to the marathon route. Spectators often gather here to cheer on the participants, creating an electric atmosphere that fuels the runners’ determination.

As the race progresses, runners pass by the Nelson-Atkins Museum of Art, a world-class institution housing an extensive collection of masterpieces. The museum’s iconic Shuttlecocks sculpture is a well-known symbol of Kansas City and a visual highlight of the marathon course. This section of the race provides a mix of urban scenery and cultural enrichment.

Community Involvement and Charitable Impact

The Kansas City Marathon is more than just a race; it is an event that fosters community engagement and philanthropy. Over the years, proceeds from the marathon have gone toward supporting numerous local charities. Organizations focusing on education, health, and social services benefit from the funds raised, further solidifying the marathon’s role as a pillar of community support.

A key component of the marathon’s success is the dedicated network of volunteers who contribute their time and effort. From distributing water to providing medical assistance, volunteers play an essential role in ensuring the event runs smoothly. Their involvement enhances the experience for both runners and spectators, making it a truly community-driven event.

Qualifying for the Boston Marathon

Many runners view the Kansas City Marathon as a steppingstone to the Boston Marathon, one of the most prestigious races in the world. With its certified course, the Kansas City Marathon offers athletes the chance to earn a qualifying time, making it a highly competitive event.

Due to its hilly terrain, the Kansas City Marathon presents a unique challenge for those aiming to qualify for Boston. Runners must prepare diligently to tackle the course’s elevation changes while maintaining their target pace. The demanding nature of the course makes it an excellent proving ground for serious marathoners. With the increasing popularity of sports betting, Missouri betting sites have seen a surge in activity around major sporting events, including the Kansas City Marathon. Enthusiasts place wagers on race outcomes, adding another layer of excitement to the event.

While marathons are traditionally about endurance and personal achievement, the rise of sports betting has introduced new dynamics to the racing scene. Spectators and bettors alike follow the top contenders closely, making the event even more engaging.

The Future of the Kansas City Marathon

As the Kansas City Marathon continues to grow, organizers are exploring ways to enhance the race experience. This includes expanding the course, improving organization, and increasing prize incentives to attract elite athletes.

With advancements in race-tracking technology, runners can now monitor their progress in real-time, receive live updates, and share their achievements with friends and family. The integration of new technology is expected to further elevate the marathon’s reputation in the coming years.

The Kansas City Marathon stands as a historic and culturally rich event that displays Missouri’s heart and soul. From its scenic course featuring iconic landmarks to its role as a Boston Marathon qualifier, the race continues to captivate participants and spectators alike. As the event evolves, its impact on the running community and local charities only strengthens, ensuring its legacy for generations to come.

Understanding Acromioclavicular (AC) Joint Injury: A Runner’s Guide to Recovery

An acromioclavicular (AC) joint separation isn’t fun, to say the least. When you get hurt, you may have many questions. What symptoms should you be on the lookout for? How long does a runner’s AC joint injury take to heal? What treatment is best? If your mind is racing faster than you are, take a moment to breathe. The process is relatively straightforward.

What Is an Acromioclavicular (AC) Joint Injury?

An AC joint separation happens when the AC ligament that connects your clavicle to the acromion of your scapula — meaning your collarbone to the back end of your shoulder blade — tears. Those two parts detach as a result.

These tears are common, making up over 40% of all shoulder injuries. They can range from a minor sprain to a severe tear. Hopefully, you have the most mild case since they are more likely.

Common AC joint injury symptoms include tenderness, swelling, tightness and loss of motion. You may see bruising or a visible lump. While the pain is often localized to your shoulder, you may feel it radiate across your arm or neck since everything is connected.

The Different Types of AC Joint Injuries

The Rockwood Classification is the most commonly used system for this kind of trauma. It has six distinct categories. Each type of AC joint injury has different symptoms.

Type I

Type I is the least severe classification, making it the best for you to have. It’s only a sprain or partial tear of the AC ligament. You don’t experience any fracture or displacement, making it the easiest to recover from. Returning to running after this AC joint injury is easy.

Type II

Type II damage involves a fully torn AC ligament and a potential coracoclavicular (CC) ligament sprain. There’s a slight increase in the space between the clavicle and the coracoid process of the scapula, which is the hook-shaped bone structure on the front end of your shoulder blade that serves as an attachment point for your ligaments.

Type III

If you experience a Type III, both your AC and CC tear. There’s a larger increase in the space between the clavicle and the coracoid process of the scapula — the coracoclavicular interspace for short.

Type IV

A Type IV separation is the displacement of your distal clavicle. Here’s the English translation — the outer end of your collarbone moves behind your upper back’s large, triangular muscles. Ouch.

Type V

Type V is a severe displacement of the clavicle. There’s a disruption of the AC and coracoclavicular ligaments, as well as the deltoid and trapezius muscle attachments.

Type VI

Type VI damage is the most extreme. It involves inferolateral displacement, meaning your ligaments become lodged below and to the side of your scapula. Thankfully, these are exceedingly rare. For reference, just 12 cases have been recorded in medical literature. One patient had fallen from the fifth floor, explaining the severity of the damage.

Common Causes of AC Joint Separations

Understanding the causes of an AC joint injury can help you speed along the road to recovery. Contributing factors like poor posture, previous scapula injuries and some medical conditions can affect the tear’s severity.

Physical trauma is the main AC joint injury cause. For example, falling directly on your shoulder or outstretched arm can cause a tear. Whether you play contact sports in your free time or are simply clumsy and don’t see a wall in time, sustaining a hard hit can injure you.

Also, lifting or throwing heavy objects like weights — especially during overhead exercises — can tear your ligaments. Your chances of injuring yourself increase during repetitive use due to continuous strain.

How to Treat an AC Joint Injury at Home

AI joint injury treatment is straightforward. Even if you’re midseason, get rest. Don’t sleep on your affected shoulder and avoid weightlifting — even if it means sacrificing your gains. You can put your arm in a brace to immobilize it, which helps the healing process along.

Ice has anti-inflammatory and pain relief effects, so using the tried-and-true ice pack method may help you get through the worst of it. However, while cold therapy has been generally accepted as the go-to treatment following soft-tissue injuries for decades, research shows it may delay healing. This can lengthen your AI joint injury recovery time.

Leaving an ice pack on the affected area for too long may reduce blood flow, potentially causing lasting tissue or nerve damage. Only hold it to your scapula for 20 minutes at a time to avoid causing more damage.

When should you seek medical attention? It’s always wise to get checked out by a professional, especially if you want to use that arm sooner rather than later. They may recommend nonsurgical AC joint injury treatment like physical therapy.

Crucially, if you have a Type III, IV or VI tear, it’s no longer a question — visit a doctor immediately. Sometimes, AC joint injury surgery is necessary for repairing your torn ligaments and restoring shoulder function.

How Long Does an AC Injury Take to Heal?

AC joint injury symptoms can resolve on their own, given enough time. Type I takes seven to 10 days to heal, while Type II usually requires four to six weeks of recovery. Living with an AC joint injury for weeks isn’t easy, but you’ve likely built up quite a bit of endurance as a runner.

How long does it take to recover from an AC joint injury fully? You should wait slightly longer to return to running and weightlifting. Overuse may degrade the bone and ligaments in your shoulder. Wait roughly eight to 12 weeks to be safe.

When is surgery needed for an AC joint injury? For anything more severe, the timeline varies depending on the type of surgical intervention you have and whether there are complications from AC joint injury surgery.

AC Joint Injury Prevention Tips for Runners

Follow these AC joint injury prevention tips to avoid another painfully long recovery process.

1.    Give Yourself Enough Time to Heal

It feels good to be symptom-free — but you shouldn’t let that feeling go to your head. You can damage your bones and cartilage unless you give yourself time to heal properly. Try not to return to your regularly scheduled activities before being medically cleared. 

2.    Strengthen Your Shoulder With Exercise

AC joint injury exercises include physical therapy, strength training, warm-ups and posture correction. They can help you avoid ligament damage in the future.

3.    Wear Protective Gear During Activities

When you tear something once, the likelihood of it happening again increases. Whether you sustained an injury by walking into a wall or falling into another runner during a race, wearing protective equipment in the future can help you avoid reinjury.

Returning to Running After an AC Joint Injury

Remember, diagnosing, treating and recovering from a runner’s AC joint injury isn’t a 100-yard sprint. Think of the process more like running a marathon. It will take time and may be painful, and you might get frustrated over your lack of progress. However, even if you don’t notice it, your body will heal gradually. Returning to running after an AC joint injury is possible.

Can Running Give You Abs? Let’s Get Real


People ask me this all the time—especially newer runners or folks trying to get back in shape:

“Will running give me abs?”

I get it.

You see these lean, ripped marathoners flying past the finish line and think, “That’s it—just run more, and the six-pack will show up.”

Honestly?

I used to think the same thing.

Back when I first laced up, I figured the road to abs was just… more miles. I imagined my belly fat melting away with every step.

But here’s the truth bomb—running can help reveal your abs by burning fat, yeah.

But if you think running alone will carve out a six-pack, you’re setting yourself up for disappointment.

Quick and Dirty Answer:

Running burns calories. It can lower your body fat.

But that shredded look?

That comes from a mix of running, solid core training, a dialed-in diet, and brutal consistency.

No shortcuts. No hacks.

My “Running for Abs” Wake-Up Call

I still remember the moment the illusion cracked.

I was in my 20s, running six days a week, chasing abs like they owed me money. I’d knock out 5Ks before breakfast, fantasizing about the lean, cut midsection I’d see in the mirror.

Except… the mirror didn’t cooperate.

Months passed. My endurance was up. I could run farther than ever.

But those abs? Still buried under a layer of late-night pizza and zero core training.

That’s when it hit me: running wasn’t the problem. My approach was.

I was treating running like some magic bullet. But abs don’t come from cardio alone. They come from training smart, eating right, and building strength where it counts.

When I finally got my act together—ditched the junk food, added planks and lifts to my routine, and ran with purpose instead of just clocking miles—things changed.

My performance improved. My body leaned out. And slowly, those abs started to show. Not because of running alone—but because I finally treated it like part of the equation, not the whole thing.

That shift is why I hammer this message home to every runner I coach:

Don’t fall for the myths. Understand the full picture. And then get to work.

Why Running Alone Won’t Cut It

Sure, running is awesome cardio. It builds endurance, gets your lungs working, and yes—engages your core, especially when you’re pushing the pace or holding good form.

But just running won’t automatically bring out the abs.

Let’s talk about why.

Body Fat Is the Real Gatekeeper

Here’s the deal:

We all have abs.

Yep. Even if you’ve never seen yours, they’re there.

The catch?

They’re hiding under a layer of fat—and how much fat you carry determines whether they show or not.

To start seeing abs, you typically need to be around:

  • 15% body fat or lower for men
  • 20% or lower for women

(Everyone’s different, but these are decent ballpark numbers. Shoutout to MarathonHandbook.com for breaking it down.)

And how do you drop fat?

Calorie deficit.

Clean eating.

Smart training.

That’s where running helps—it burns calories. But if you’re still smashing donuts and skipping strength work, your six-pack’s staying undercover.

I had a client who ran daily, swore off carbs, and did 200 sit-ups a night. But she wasn’t strength training, and her meals were all over the place. Her belly stayed soft—until we cleaned up the plan and approached fat loss from all angles.

That’s when her core started to tighten.

You Can’t Target Fat—So Stop Trying

One of the biggest fitness myths I’ve had to un-teach is spot reduction.

No, you can’t burn belly fat by doing more sit-ups. And no, running 5 miles a day won’t only trim your waistline.

Fat comes off your body in its own messed-up order—usually starting with places you don’t care about, like your face or arms. Your belly? That’s often the last to go.

So if you’re only running to flatten your stomach, you’re going to get frustrated fast.

Here’s what works:

Whole-body fat loss through smart, consistent training.

Pair running with core strength work and a clean, realistic eating plan. The fat will come off eventually—just not on your schedule.

Coach Truth: Abs Are Revealed, Not Built by Running

There’s a quote from a coach I once saw in a Reddit thread that stuck with me:

“Abs aren’t made in the kitchen—they’re revealed there.”

Running might chip away at the fat, but if you haven’t built the muscle underneath, nothing will show—no matter how lean you get.

You need both:

  • Build the muscle with strength work
  • Reveal it by dropping body fat

Do one without the other, and you’ll either look skinny-soft or bulky with no definition.

How Running Can Actually Help You See Your Abs

Let’s be real — running isn’t some magic trick that gives you abs overnight.

But does it help? Hell yes, it does.

If your goal is to see your abs, running can play a major role — especially when it comes to torching fat and training your core without even stepping into a gym.

Here’s how I’ve seen running reveal abs — both in my own journey and with the runners I coach:

  • Fat Burn = Ab Reveal

Running is one of the best fat burners out there.

When you lace up and start logging miles, your heart rate climbs, your body taps into its energy stores, and over time, you start burning more calories than you take in. That’s how fat loss happens — simple math, really.

And the belly fat? That’s the first layer you’ve got to strip off if you want your abs to show.

According to research (yeah, this one’s backed by science), aerobic training like running is especially helpful at reducing belly fat — as long as you’re also eating like someone who gives a damn about their goals.

Every mile you run is like taking a hammer to that soft layer covering your core. You’re not “building” abs with every step — you’re uncovering them.

  • Core Engagement on the Run

Now let’s talk core. Ever notice how your abs tighten up when you’re sprinting or grinding up a hill? That’s not just in your head — your abs are firing to keep you upright and in control.

When you run hard — especially during sprints — your abs have to brace with each stride.

According to one exercise physiologist, sprinting actually forces your core to contract in a way that can lead to a bit of muscle growth too.

I always tell runners: Good running form is a core workout in disguise.

You’re not just building endurance — your abs are learning how to stay rock-solid for longer. Better posture. Better balance. Less wobble. That’s the real benefit.

  • HIIT Runs for Fat Loss

Want to take it up a notch?

Throw some interval training into the mix.

High-Intensity Interval Training (HIIT) is one of the fastest ways to burn fat. One review even showed that people lost around 28% more fat with intervals compared to steady-state jogging.

And here’s the kicker — HIIT keeps your body burning calories even after your workout is over. That “afterburn” effect is real.

You finish a hard session, and your metabolism keeps humming for hours.

I like to keep it simple: Sprint 100 meters, walk or jog for 30 seconds, and repeat that 10 times.

That’s 15–20 minutes of pain — the good kind — and your core will be sore tomorrow. Trust me. I tell my runners all the time: “This workout is like doing planks at full speed.”

And don’t just take my word for it. One runner on Reddit put it perfectly: “Studies are showing HIIT is very effective against fat loss… your heart and body work extra hard when you’re stopping and going”.

So if you’re only logging slow, steady miles — no shame in that — but adding one HIIT session per week? That’s your fat-burning booster shot.

  • Hill Sprints = Core on Fire

Another underused gem?

Hills.

Running uphill is brutal, and that’s why it works. Gravity pulls you down, and your abs have to lock in to keep your form together.

It’s basically a moving plank. You’re driving your knees up, pumping your arms, and your midsection is doing overtime.

A lot of coaches (myself included) recommend hill sprints as a secret weapon. They don’t just torch calories — they build serious strength in your legs and your core.

I’ve had runners come back from hill sessions saying their abs were sore for two days. That’s when you know it’s working.

Even Marathon Handbook says: “Hill sprints are a great way to do higher intensity running while building muscle to burn calories and accelerate weight loss.

Here’s a hill workout you can try:

Sprint hard up a hill, walk back down to catch your breath, then repeat.

Four or five reps is enough to leave your core buzzing. Stick with it, and your abs will start to feel like a steel plate.

  • Stay Consistent or Don’t Bother

Fancy workouts are cool. But if you only run once in a while, don’t expect miracles.

Consistency is what really builds results. If you want to lean out and see progress, aim to run most days — not just once a week.

Even basic cardio guidelines suggest 4–5 sessions a week, at around 30–45 minutes per session.

You don’t have to go all-out every time — please don’t — but make running part of your weekly rhythm. Mix in some HIIT. Hit some hills.

But most importantly, show up regularly.

You don’t earn your abs with one run — it’s a streak thing. Keep stacking those miles.

Real Talk from the Community

One runner on Reddit summed it up better than I ever could:

“Running will only do one thing — burn the fat revealing your abs. But if your abs aren’t defined, there won’t be much to show.

Hit abs for 15–20 minutes 2–3 times a week, eat clean, and you’ll have great abs.”

Exactly.

Use running to strip the fat. Then do a bit of core work, clean up your diet, and your abs will start to pop.

Strength Training and Core Work – The Piece Most Runners Skip

Let me be real with you — this is where I screwed up for years. I used to think running alone would take care of everything.

Turns out, it doesn’t. Especially when it comes to your core.

Yeah, running can help shed fat and make your abs show — but it won’t build them.

If you want abs that actually pop, you’ve got to train them. Like, actually put in the work. Same way you wouldn’t grow biceps just from waving your arms around, you won’t get that six-pack just by logging miles.

Want to See Your Abs? Build Them First

A strong core isn’t just about looking good — it’s about building strength you can use. And that means doing resistance work.

Think: planks, crunches, leg raises, bicycle kicks, Russian twists — the stuff that burns in all the right places.

Even big lifts like squats and deadlifts? Yep, those hammer your core too.

When I started adding serious core work to my routine, things changed.

Not overnight, but over weeks and months, I noticed my posture got better, my stride tightened up, and yeah — my abs finally stopped looking like a flat pancake.

Don’t be afraid of “bulking up” from ab work. You’re not going to turn into a bodybuilder by doing planks and side crunches.

Abs respond well to 2–3 sessions a week. That’s it. Slot them in after a run or on your off days. Even 10–15 minutes of focused core training can make a huge difference if you stick with it.

Here’s my usual breakdown:

  • Planks: deep core and spine stability
  • Crunches/sit-ups: upper abs
  • Leg raises/flutter kicks: lower abs
  • Russian twists/side planks: obliques (the side abs)

Mix and match, but don’t skip the hard stuff. Over time, your core tightens up — and once your body fat dips, those abs you built underneath finally show up.

Lifting Builds Abs Too — Don’t Sleep on It

Let me say this loud: strength training isn’t just for muscle heads. It’s one of the best ways to boost your metabolism and improve your overall body comp — especially if you’re chasing visible abs.

Lifting makes your body burn more calories even when you’re chilling on the couch.

And a lot of those lifts — deadlifts, squats, overhead presses — crush your core without you even realizing it. You’re bracing, stabilizing, holding good form — all of that is core work.

There’s this quote I saw on Reddit that nailed it:

“Every person on the planet that has really rocking abs got them by resistance training… You’re not going to get a well-muscled physique by running alone.”
Harsh? Maybe. True? Absolutely.

If you’re new to lifting, no stress. Start with bodyweight basics: push-ups, pull-ups, squats, planks. These moves build real-world strength and light up your core at the same time.

Got access to a gym? Great — toss in some:

  • Squats/lunges (your legs and core will thank you)
  • Overhead presses (engages your entire midsection)
  • Pull-ups or rows (sneaky core activators)

The cool part?

You’re not just chasing abs — you’re becoming a stronger, more powerful runner along the way.

Strong Core = Smoother Stride, Fewer Injuries

This isn’t just about aesthetics.

A strong core keeps your running form tight.

It stabilizes your hips, keeps your torso upright, and lets your legs do their job without wasting energy.

There’s even research backing this up. Studies have found that runners who do regular core training improve their running economy — meaning they can run faster or longer with the same effort. That’s huge.

I always tell my athletes:

“Your core is like the frame of a car. If it’s solid, everything moves better. If it’s shaky, expect rattles and breakdowns.”

So yeah, don’t skip your planks. They’re not just a bonus — they’re part of the foundation.

What Runners Get Wrong About Core Work

There was this great comment on Reddit that stuck with me:

“Running itself is not a core workout. Your core is engaged while running, but not enough to be considered core strength exercise. Don’t toss out that ab roller just yet.”

And that’s the truth.

Running uses your core — but it doesn’t build it.

You need both: running to burn the fat, and strength training to build the muscle. That’s the combo that actually gets results.

9 Agility Ladder Drills for Runners to Boost Speed & Cadence

When I first heard about agility ladder drills, I thought they were some kind of secret weapon for speed.

Picture this: I was still a newbie runner, sweating through Bali’s humidity, convinced that a few quick foot tricks would turn me into Usain Bolt in flip-flops.

Reality smacked me hard.

On my first ladder workout, I tripped over the rungs like a baby goat on roller skates. My coach was trying not to laugh. I was red-faced, tangled up, and questioning all my life choices.

But honestly? That awkward first session was a turning point.

After a few weeks of sticking with it, things changed. My feet started moving with purpose. I wasn’t just surviving Bali’s trails anymore—I was gliding through rocky terrain, hopping over roots, and weaving past stray dogs like a seasoned ninja.

That’s when I realized agility work wasn’t just about speed. It was about control. Coordination. Building the kind of movement that makes you feel fast even when you’re not racing.

These days, as a coach, agility ladder drills are a regular part of what I give my runners. Not because they’re flashy, but because they work. They sharpen your footwork, lift your cadence, and prep you for trail chaos.

No, they won’t magically shave minutes off your 5K time—but they will build the groundwork for smoother form and faster reactions.

So if you’re serious about running smarter and moving better, stick with me.

I’ll walk you through the whole thing—what ladder drills actually are, why they matter (with a few honest truths), and my 9 favorite drills.

I’ve also added a 4-week plan you can do at home, plus real-world answers to the most common questions I get.

Let’s break it down.

What Are Agility Ladder Drills?

Agility means being able to change direction fast, without flailing or losing control. It’s not just about being quick—it’s about reacting. Moving clean. Staying in control when things go sideways.

According to RaymerStrength.com, scientists define agility as “rapid whole-body movement with change of velocity or direction in response to a stimulus.”

Sounds fancy, but here’s what it means for runners: being able to adjust your stride at the last second—like when you suddenly spot a hole in the pavement or have to swerve around a group of tourists hogging the sidewalk.

Agility ladder drills help you get better at that. You move your feet through a ladder laid flat on the ground, following specific step patterns—kind of like foot choreography for runners.

These drills train your feet to be quicker and more precise, which means more control on the run.

I tell my athletes: “Ladder drills teach your feet to dance.” They dial in your brain-to-foot connection—what nerds call the neuromuscular system—so that when the road gets sketchy or the trail gets wild, your feet already know what to do.

I’ve had moments out running—like flying downhill in the rain or threading through a crowded street—where I could literally feel the ladder work kicking in.

My legs moved faster than my brain could think. That’s the magic of training this way.

Now, don’t get it twisted: agility ladder drills aren’t true agility. In sports like soccer or tennis, athletes respond to unpredictable cues—like a defender or a ball. Ladder drills are planned.

You’re following patterns, not reacting to surprises. But that’s okay. These drills still build the raw tools—balance, foot speed, coordination—that help you react better in the real world.

So think of agility drills like sharpening your blade. They’re not the whole battle, but they make you a better fighter.

What Is an Agility Ladder (a.k.a. Speed Ladder)?

An agility ladder is basically a flat ladder you roll out on the ground. No, not the kind you use to clean gutters. It’s usually made of nylon sides and thin plastic “rungs” spaced about 18 inches apart. Each box is a landing zone for your feet during drills.

You can buy one online or at a sporting goods store for around $20. Mine’s been with me for years and rolls up like a yoga mat. Easy to pack. Easy to toss into a backpack.

But if you’re scrappy (or broke), make your own. I once built a DIY ladder in my garage with duct tape and a pile of paint stir sticks. Took about an hour, and it worked just fine. There’s something satisfying about training with gear you built yourself.

Here’s what you’ll need if you go the DIY route:

  • About 25–30 feet of duct tape
  • 10 flat sticks or cardboard strips (around 18 inches long)
  • Measuring tape (space rungs ~18 inches apart)
  • Scissors

Lay out two long strips of duct tape, slap the “rungs” between them, and boom—you’ve got a functional agility ladder. Not pretty, but it gets the job done. Chalk or even jump ropes on the ground can work in a pinch, too.

Agility Ladder Specs:

  • Most are 10 yards long, 16 rungs.
  • Modular ones come in smaller sections (great if space is tight).
  • Flat rungs are safer—because trust me, you will hit them sometimes.
  • Use it on a grippy surface like grass, rubber floor, or turf.
  • Avoid concrete unless you like sore joints and the taste of gravel.

I usually throw mine down in a parking lot or quiet patch of grass. Indoors, tape it to a hallway floor or gym mat. Just make sure there’s nothing breakable nearby—especially if you’re still working on your coordination!

Real Talk: Why Should Runners Care?

This isn’t just about looking cool or copying football players. Agility drills make you better on trails, in races, and in life.

They help you stay upright when the ground gets sketchy, or when you need to change direction without throwing your stride out of whack.

Here’s what I’ve seen in my own training and with my runners:

  • Cadence goes up: You learn to move your feet faster, without trying harder.
  • Form gets smoother: The foot-brain link strengthens, reducing the clunky shuffle that slows you down.
  • Confidence spikes: You trust your body more, especially when terrain gets tricky.

And here’s the kicker: agility work is fun. It breaks up the grind of regular mileage. It makes you feel like an athlete, not just someone out logging steps on Strava.

But yeah—don’t expect miracles. Ladder drills alone won’t get you to a sub-20 5K. You still need tempo runs, intervals, and strength training. But they will make those runs feel smoother and more dialed-in.

Why Runners Should Do Agility Ladder Drills (Yes, Even You)

Let me tell you something straight: agility drills aren’t just for soccer players in flashy cleats or sprinters chasing gold. If you’re a runner who wants smoother strides, quicker feet, and fewer injuries—you need these in your toolkit.

I used to ignore them too. Thought they were for athletes who cut and pivot, not for someone logging long miles. But man, was I wrong. Here’s what changed my mind—and how these drills can change your running for the better.

🔹 They Fire Up Your Brain–Body Connection

You ever feel like your feet and brain aren’t always on the same page—especially when you’re tired? Ladder drills fix that. They train your brain and legs to talk fast and react even faster.

I remember the shift myself. After a few weeks of drills, I was hitting rocky trails in Bali with more control, barely thinking about foot placement. It was like my nervous system finally got the memo.

🔹 They Help You Pick Up Cadence (Yes, That Means Speed)

Stuck in that heavy, slow stride that sounds like bricks hitting pavement? Been there. Ladder drills force you to move fast and light. Think quick, short, snappy steps.

I’ve coached runners who couldn’t break 160 steps per minute. After adding agility work, they started hitting 175+ like it was nothing. It’s not magic. It’s muscle memory.

🔹 They Make You a More Efficient Runner

No wasted motion. That’s what we’re after. Ladder work teaches you to move clean—less flailing, more control. You’ll start landing under your center of gravity instead of reaching and overstriding.

For me, I felt it most on long runs. My legs didn’t fall apart late in the game. They held strong. That’s running economy in real life—not just something you read in a study.

(But for the record, this stuff is backed by science—like a study in the Journal of Strength & Conditioning Research showing agility drills improve lower-body coordination and speed.)

🔹 They Wake Up Your Balance and Stability Muscles

Every little hop and shift in a ladder drill lights up those tiny stabilizer muscles—especially in your feet, ankles, and hips. These are the muscles that stop you from rolling your ankle on a root or crashing on a descent.

Trust me, I used to crash. A lot. Rocky trails were my nemesis until I built up this kind of foot control. Now I stay upright more often than not.

🔹 Bonus: They’re Trail Running Gold

If you love trail running like I do, these drills are your cheat code. You’ll move laterally better, lift your feet higher, and react faster to whatever nature throws at you.

I swear by lateral ladder drills before a big trail race. Makes dodging roots and rocks feel automatic.

Coach’s Final Word

Look, ladder drills won’t replace your hill repeats or tempo runs. But they will sharpen the blade. You’ll feel quicker, more controlled, and more confident out there.

I treat them like a secret weapon. 10–15 minutes, twice a week, and the benefits sneak up on you.

So if you’ve been skipping footwork drills because they look “fancy” or “not for runners,” stop that. They’re for you. Let’s level up your stride.

9 Agility Ladder Drills for Runners

These are the drills I keep coming back to—with myself and with the runners I coach. I’ve broken them down with clear steps and thrown in some personal notes to show how each one plays out in real life.

(Quick note: Do each drill for 30 seconds to a minute. Rest. Then repeat for 2–3 rounds. Twice a week is enough to see gains.)

1. Ladder Linear Run (The Classic Speed Drill)

This is your bread and butter. Great warm-up. Great turnover booster.

How to do it:

  • Start at the bottom of the ladder, facing straight ahead.
  • Run through it, one foot per box—left-right-left-right.
  • Light steps. Stay bouncy. Don’t let your heels drag.

Form Tips:
Land on the balls of your feet. Keep it fast and light—imagine running over hot coals. Arms should drive in rhythm.

Coach David’s Tip:
This drill didn’t click for me at first. I was too stiff, trying to “nail” each step perfectly. One day I just sprinted through—no overthinking—and boom: I flew. No ladder hits. Just flow. Felt like I unlocked a new gear in my legs.

Once you feel it, you’ll know. The rhythm is addicting.

2. High-Knees Run (The “A-Skip” Variation)

If your stride feels sluggish or you struggle with posture, this one is for you.

How to do it:

  • Both feet land in each box.
  • Right foot in → left foot follows.
  • Then next box. Each time, lift your knee high—aim for waist height.

Arms:
Keep elbows bent at 90 degrees. Drive your arms with the opposite knee. It’s a rhythm thing.

Goal:
You’re not trying to move forward fast. You’re aiming for quick, clean knee lifts.

Coach David’s Tip:
I used to picture running through tires, like in those old football training montages.

One day I was doing this drill in a park and a bunch of kids started mimicking me—knees way too high, laughing the whole time.

At first I felt silly. Then I realized: screw it, I’m training smart. They were just having fun.

This drill helped fix my lazy shuffle. Gave me more spring and improved my form. If you’re always dragging your feet, start here.

3. Lateral Quick Step Shuffle

Running isn’t just about pounding forward. If you’ve ever had to dodge a wayward scooter in Bali or hop a puddle mid-run, you already know that side-to-side agility is crucial.

The lateral shuffle drill trains exactly that—giving your feet the kind of quickness that keeps you upright, stable, and ready to move.

How to Do It:

  • Start by facing sideways at the edge of the ladder, with it stretching out to your right.
  • Step your right foot into the first box, then quickly bring your left foot in too—both feet land inside.
  • Now step out with your right foot (outside the ladder), then left foot into the next box, followed by right foot in again.
  • Repeat this “in-in, out” rhythm as you shuffle laterally down the ladder.

Quick Visual Tip:
Face one direction the whole time. If you’re headed right, your inside foot (left) leads the rhythm. When you get to the end, switch directions to even things out.

Form Focus:
Bend your knees slightly, drop your hips, and keep your chest tall. Land on the balls of your feet and point your toes forward. Avoid crossing your feet—this is a shuffle, not a dance-off. And don’t bounce upward. Keep the movement tight and clean from side to side.

Protect Your Ankles:
Land with both feet fully inside the box—not halfway across the rung. That’s how you build ankle stability instead of risking a roll.

Coach David’s Tip:
The first time I did this drill fast, I felt like a pro boxer warming up—sharp, quick, in control. But then, at the end of a long workout, I got lazy, dragged a foot, and nearly kissed the pavement.

Lesson? Don’t zone out.

I now cue myself (and my runners) with “quiet feet.” If you can move without slapping the ground, you’re doing it right. This drill helped me massively during trail runs where I had to sidestep rocks or slippery roots in a split second.

Your Turn:
How are your ankles holding up during runs? If you’re prone to rolling them or feel unstable on trails, this is the drill to dial in.

4. Carioca (Grapevine) Step

Here’s where things get spicy. The carioca drill—some call it the grapevine—is all about hip mobility, timing, and smooth coordination. Think of it as dancing through the ladder while secretly training your running mechanics.

How to Do It:

  • Stand on the left side of the ladder with your right shoulder facing it.
  • Step your right foot into the first box, then cross your left foot behind the right into the next box.
  • Right foot into the third box, left foot crosses behind again into the fourth box, and so on.

Key Pointers:
Say it out loud as you move: “in front, behind, in front, behind.” That rhythm helps. Keep facing the same direction and rotate through your hips. Let your shoulders twist gently in the opposite direction for balance.

Go Slow First:
This one isn’t a sprint drill—it’s coordination. March it out before you pick up the pace.

Coach David’s Tip:
Confession time: I used to trip over my own feet doing this in high school PE. The ladder made it even harder. But once it clicked, it felt smooth, like gliding.

I noticed a big difference when running tight switchbacks or weaving through crowded sidewalks—my hips moved better, and I didn’t have to think about it.

That’s the power of this drill: it rewires your movement patterns.

Your Turn:
Ever get stiff hips during long runs or struggle with quick turns? Try this twice a week and see if your stride gets looser.

5. In-and-Out (Jumping Jack Feet)

Ready to get your heart rate up? This one’s like a horizontal jumping jack—simple, but man, it wakes up your legs and coordination fast.

How to Do It:

  • Stand at the start of the ladder with both feet together.
  • Jump both feet into the first box, landing hip-width apart.
  • Then jump forward out of the ladder, landing with your feet straddling the next rung—wider than hip width.
  • Next, hop both feet together into the second box. Then out again, and so on.

Form Focus:
Bounce on the balls of your feet. Keep your knees soft and chest up. Arms help: down when feet are together, out when feet go wide—just like a jumping jack. Use your eyes to scan ahead, not down.

Common Pitfall:
People often hesitate going from wide to narrow. If that’s you, slow it down. Practice the pattern until you get that rebound rhythm going: in, out, in, out.

Coach David’s Tip:
I used to think my coordination was solid… until I realized my left foot was always late to the party. This drill exposed that. It also lit up my adductors (inner thighs), which I didn’t even know were weak.

Now I think of this drill as mini ski hops—it’s helped my trail running, especially when pushing off from uneven terrain.

Your Turn:
Feel that burn in your calves and hips? Good. Do a few rounds and time how long before your breathing gets heavy. This doubles as a cardio finisher.

6. Ickey Shuffle (Three-Step Lateral Pattern)

This is the drill that makes you feel like an athlete. Named after NFL legend Ickey Woods, it’s all about rhythm and reaction—perfect for runners who want sharper footwork and faster cadence.

How to Do It:

  • Start on the left side of the ladder. The pattern is “In-In-Out.”
  • Step your right foot into the first box.
  • Bring your left foot in.
  • Step your right foot out to the right of the ladder.
    Then:
  • Step your left foot into the next box.
  • Bring your right foot in.
  • Step your left foot out to the left side.
  • Repeat all the way down.

Pro Tip:
Chant it: “Right in, left in, right out… Left in, right in, left out…” until your feet and brain sync up.

Form First:
Start slow, like walk-through pace. The speed will come once your feet stop tripping over each other. Keep low, bounce on the balls of your feet, and let your arms swing naturally.

Coach David’s Tip:
This one had me feeling like a baby giraffe at first. I broke it into mini sections until I got the hang of it. Once you hit the rhythm, it’s almost musical.

One time during a technical trail descent, I swear my feet fell into Ickey Shuffle mode by instinct. That’s the kind of pattern this drill builds—automatic agility. It makes you quicker, lighter, and more confident in tight spaces.

Your Turn:
Struggling with foot speed or transitions during runs? Make the Ickey Shuffle your go-to. You’ll be amazed how it sharpens your game.

7. Forward & Backward Jumps

This one’s a killer — I call it the boomerang hop. It teaches your feet to react fast and your brain to stay locked in. The rhythm is simple: two boxes forward, one back. It sounds playful — but it’ll torch your calves and challenge your focus like crazy.

How to Do It:

  • Stand at the base of the ladder. This is a two-foot jump drill.
  • Start by hopping over the first box and landing in the second.
  • Then jump backward one box to the first.
  • Next, jump forward two — you’ll land in box 3.
  • Then back to box 2. Forward to box 4. Back to 3. Keep going.

The pattern:
Box 2 → back to 1 → into 3 → back to 2 → into 4 → back to 3… and on.

My routine? I walk back to the start after each round (honestly, that walk is the best breather). If you want extra challenge, flip the drill: go forward one, back two. But trust me — forward-2, back-1 is already a mental workout.

Form Tips:

  • Keep your landings soft.
  • Swing your arms with the movement — forward when jumping ahead, back for the reverse.
  • Don’t rush the jump back. Regain your balance, then push off.

Eyes up: Look a box or two ahead instead of staring straight down. It helps your body prep for what’s next.

Coach David’s Tip:
The first time I tried this, I was wrecked by the end — calves burning, heart pounding. I thought it’d be easy. Wrong.

I learned fast: bend your knees on landing or you’ll jar your joints. And don’t chase speed right away — it’s all about rhythm.

When I finally got into a groove — forward jump, boing… back jump, boing — it felt smooth. Almost like pogoing across the ladder.

I even made it a little game: “Can I land without making a sound?” The quieter the landing, the better my control.

Trail runners — this drill’s for you too. Think about those sudden moments when you realize you missed a turn and have to hop back. This trains your body to switch direction fast and smooth.

Question for You:
Have you tried backward jumps in your workouts before? If not, this one might surprise you — in a good way. What’s your go-to drill for improving power?

8. Lateral Shuffle (Two Feet In Each)

This is one of the simplest ladder drills — but don’t sleep on it. Done right, it sharpens your lateral speed and balance. I like using it as a warm-up or reset when other drills get too tricky.

How to Do It:

  • Stand facing down the ladder, with it at your side.
  • Step your left foot into box 1, then your right.
  • Step out with your left, then move your right into box 2, followed by your left.
  • Repeat: two feet in each box, one at a time, moving sideways.

In short:

  • Step in with lead foot,
  • bring the trailing foot in,
  • step the lead foot out,
  • repeat into the next box.

Once you hit the end, face the other way and come back — your opposite foot will lead this time.

Form Focus:

  • Stay low like a defender in basketball — knees bent, butt down, core tight.
  • Shoulders square to the front even as your legs move sideways.
  • Don’t cheat the drill — both feet have to touch inside each box before moving on.

As you get faster, it starts to feel like a mini hop-shuffle. But don’t force it. Build up speed only when your form is locked in.

Coach David’s Tip:
At first, I made the classic mistake: standing too tall. Felt awkward and off-balance. The second I dropped into that athletic stance — boom, everything clicked.

This drill helped me a ton with trail running, especially on switchbacks and those sneaky side-step moments when the terrain zigzags.

I once coached a guy who kept stepping on the ladder sides and getting annoyed. We slowed it way down. I told him to “place-place” his feet in each box like he was playing Twister.

Within minutes, his rhythm improved.
So yeah — speed’s great, but accuracy comes first. That’s what builds real agility.

Let’s Talk:
What side-to-side drills have helped you on trails or during road races when dodging runners? This shuffle might look basic, but it packs a punch for lateral control.

9. Single-Leg Hops (Hopscotch Balance)

Okay, now we’re getting serious. This drill is tough. It’s all about control, balance, and single-leg strength — which runners desperately need. Remember: every stride is a one-leg jump. So this is just running, turned up a notch.

How to Do It:

  • Start on one leg — right foot, left foot raised.
  • Hop into the first box.
  • Keep hopping through the entire ladder, staying on that one leg.
  • Switch legs and return hopping on the other foot.

You don’t need to move sideways — just hop forward and zigzag slightly into each box. Control matters more than speed here.

Form Focus:

  • Bend that knee. Soft landings only.
  • Use your ankle like a spring.
  • Arms can flail — that’s fine. Keep your core tight.
  • Eyes up — don’t stare at your feet or you’ll wobble more.

If you lose balance, no shame in tapping the other foot. But aim to do the full ladder cleanly with time.

Coach David’s Tip:
When I first tried this, my left leg was a mess. Wobbly, weak, uncoordinated. It exposed a clear imbalance I had been ignoring. So I added it to my drills every week.

After about a month? Huge difference.

This drill hits all the little stabilizer muscles — foot, ankle, glutes. It’s a hidden gem for injury prevention.

I remember a buddy recovering from an ankle sprain who joined me for this drill. He was nervous at first, but it helped rebuild his confidence — and his ankle strength.

Big tip: look ahead, not down. When I focused on the far end of the ladder instead of my feet, I stayed more balanced.

Also — bend your knees like you’re absorbing a landing. Think ninja mode. Light and springy. After a while, you’ll feel like a single-leg Jedi.

Your Turn:
Have you tried single-leg drills before? Which leg is your weak link? Let me know — and if this one humbles you, don’t worry. It did the same to me.

4-Week Agility Ladder Plan (Runner-Tested & At-Home Ready)

When I first added agility ladder drills to my training, I was all clumsy feet and tangled steps.

I mean it. I looked like I was playing Twister on fast-forward.

But over time, that awkward mess turned into smooth, quick steps. And now, it’s one of my favorite ways to wake up my legs and brain.

So if you’re wondering how to fit ladder drills into your running routine, here’s a no-fluff 4-week plan I use with my runners here in Bali.

All you need is about 10–15 minutes, a little space, and some willingness to look silly before you get good. Trust me, it’s worth it.

The Basics

  • Schedule: Start with 2 ladder sessions per week. Move up to 3 in week 3 if you’re feeling good.
  • When to do them: On your easy run or cross-training days. Or tack them on after an easy run as part of your drills.
  • Warm-up: Always jog 5–10 minutes and do dynamic stretches before ladder work.

WEEK 1: Learn the Moves

  • Focus: Nail the basics, stay light on your feet.
  • Sessions: 2 (e.g., Tuesday & Friday)
  • Drills: Ladder Linear Run, High-Knees, Lateral Shuffle, In-and-Out
  • Tip: Walk or jog through drills first. It’s about rhythm, not speed. By the end of the week, you should feel more coordinated.

WEEK 2: Add a Little Spice

  • New Drills: Carioca & Ickey Shuffle
  • Session A: Linear Run (2 rounds, a little quicker), High-Knees (2 rounds), Carioca (2 rounds each way), Lateral Shuffle (2 rounds)
  • Session B: In-and-Out (3 rounds), Ickey Shuffle (3 rounds), Forward/Backward Jumps (2), Single-Leg Hops (start easy)
  • Tip: It’s normal to feel awkward with the new drills. Break them down step-by-step. Rest as needed.

WEEK 3: Turn Up the Volume

  • Sessions: 2–3 (add a third light one if you’re up for it)
  • Session A: High-Knees (3 rounds), Linear Run (3 rounds, last one fast), Lateral Shuffle (3), Carioca (2)
  • Session B: Ickey Shuffle (4), Forward/Backward Jumps (3), In-and-Out (3), Single-Leg Hops (2 each leg)
  • Optional Session C: Focused technique work on your weakest drill
  • Tip: Try going circuit-style: run straight into the next drill, then rest. And yes, hitting a rung happens. Laugh, reset, go again.

WEEK 4: Own It

  • Session A: Create a circuit: Linear Run → High-Knees → Ickey Shuffle → Lateral Shuffle. Repeat 2–3 times.
  • Session B: Power session: In-and-Out (2 rounds fast), Forward/Backward Jumps (2), Single-Leg Hops (2 each leg), finish with your favorite drill
  • Tip: Imagine you’re on a technical trail or dodging crowds. Let your body move freely. Feel the work you’ve put in come together.

After Week 4

By now, these drills should feel familiar. You can:

  • Add more rounds
  • Toss on a light weight vest
  • Use them in your warm-up before interval runs

Just don’t drop them altogether. Keep ladder work in your rotation 1–2 times a week. Your future self will thank you.

Final Thoughts: My Take

I started as the guy who tripped over every rung. Now? The ladder is my secret weapon. It wakes up my coordination and helps me feel fast even on tired legs.

I use this stuff with the runners I coach — beginners and marathoners alike. One runner I worked with used to call herself “awkward and slow.” A few weeks in, she was gliding through the ladder with confidence. That’s what this work does. It builds belief.

Ladder drills are more than physical. They’re a mindset. They teach agility, yes, but also patience and play. Blast some music, smile when you mess up, and high-five yourself when you get it right.

So what’s your move? Have you tried ladder drills before? Got a favorite pattern? Ickey Shuffle still tripping you up? Drop a comment and let’s talk.

And remember: Every fumble is one step closer to feeling fast and free.

Get after it. Your agile, strong self is waiting.

Treadmills vs. Outdoor Running: How to Choose the Best Option for Your Fitness Goals

Running is one of the most popular and effective forms of exercise, offering benefits like improved cardiovascular health, weight loss, and mental clarity. However, deciding whether to run on a treadmill or outdoors can significantly impact your fitness experience and outcomes.

At Best Used Gym Equipment, we believe that choosing the right equipment, like a high-quality treadmill, can provide a convenient and effective way to achieve your fitness goals. This article explores the differences, benefits, challenges, and considerations to help you make the best choice for your goals. By understanding both options, you can align your exercise routine with your personal preferences and fitness objectives.

What Are the Main Differences Between Treadmills and Outdoor Running?

While both treadmills and outdoor running provide excellent cardiovascular workouts, they differ in several key ways:

  • Environment: Treadmills offer a controlled indoor setting, while outdoor running exposes you to natural elements and varied terrain. This can affect motivation, as some people thrive in natural environments while others prefer the predictability of indoor running.
  • Convenience: Treadmills are always available regardless of weather, whereas outdoor running depends on conditions like temperature and daylight. This makes treadmills ideal for those with unpredictable schedules.
  • Cost: Treadmills require a financial investment (either a purchase or gym membership), whereas outdoor running is free apart from basic gear. Over time, the cost of a treadmill may be offset by its convenience.
  • Impact on the Body: Treadmills often have cushioned surfaces that reduce joint stress, while outdoor surfaces can vary from soft trails to hard pavements. This variation can influence the risk of injuries and muscle engagement.

What Are the Advantages of Running on a Treadmill?

Treadmills provide a host of benefits, especially for those who prefer controlled and consistent workouts:

  • Weather independence: You can run comfortably in any season without worrying about rain, snow, or extreme heat.
  • Controlled environment: Ideal for precise training without unexpected interruptions, ensuring consistent performance tracking.
  • Reduced joint impact with cushioned surfaces: Helpful for those with joint concerns or recovering from injuries.
  • Customizable settings: Adjust speed, incline, and programs to match your fitness needs, making them versatile for various training goals.
  • Tracking metrics: Monitor heart rate, distance, pace, and calories burned in real time, providing valuable insights into your progress.

What Are the Benefits of Outdoor Running?Running outdoors offers unique advantages that cater to those who love variety and natural surroundings:

  • Varied terrain for better muscle engagement: Uneven surfaces activate stabilizing muscles, enhancing overall strength and balance.
  • Fresh air and connection with nature: Promotes mental well-being, reduces stress, and can make workouts feel less monotonous.
  • Greater calorie burn: Wind resistance and uneven surfaces increase energy expenditure, making outdoor runs more physically demanding.
  • No equipment required: All you need are proper running shoes and suitable clothing, making it an accessible option for everyone.

How Do Treadmills and Outdoor Running Impact Your Fitness Goals?

Weight Loss

Treadmills allow precise control over intensity, making it easier to maintain heart rate zones for fat-burning. Additionally, treadmill features like interval programs can further enhance calorie-burning efficiency. Outdoor running, with natural variations in terrain, can increase calorie burn but may be harder to sustain consistently due to external factors.

Building Endurance

Treadmills provide a distraction-free environment to focus on longer runs, with the added benefit of tracking metrics like pace and distance. Outdoor running, however, helps improve psychological stamina by adapting to real-world challenges like hills, wind resistance, and weather changes, which can better simulate race conditions.

Speed and Performance Training

Treadmills excel in interval training due to accurate speed settings, allowing runners to focus on specific paces without external distractions. Outdoor running replicates real-world conditions, preparing you for races and outdoor events by improving adaptability to uneven surfaces and weather.

Rehabilitation and Recovery

Treadmills are a safer option for injury recovery due to their even surface and adjustable speed. This controlled setting minimizes the risk of re-injury. Outdoor running can pose risks for those recovering from injuries because of uneven terrain and unpredictable environmental factors.

What Are the Challenges of Treadmills and Outdoor Running?

Challenges of Treadmills

  • Monotony: Running indoors can feel repetitive and boring, leading to decreased motivation over time.
  • High cost: Quality treadmills can be expensive to purchase and maintain, potentially limiting accessibility.
  • Limited muscle engagement: Flat, even surfaces don’t fully activate stabilizing muscles, which are more engaged during outdoor runs.

Challenges of Outdoor Running

  • Weather constraints: Rain, snow, and extreme temperatures can hinder outdoor runs, making it difficult to stay consistent.
  • Risk of injury: Uneven surfaces increase the risk of sprains, falls, and other injuries, especially for beginners.
  • Safety concerns: Traffic, poor visibility, and isolation can pose risks, particularly in urban or remote areas.

How to Decide Based on Your Goals and Lifestyle?

When choosing between treadmills and outdoor running, consider these factors:

  • Budget: Determine if you can invest in a treadmill or gym membership, or if outdoor running better suits your financial situation.
  • Access to safe running routes: Outdoor runners need safe, accessible trails or roads free from heavy traffic or hazards.
  • Fitness level and health conditions: Treadmills are better for beginners or those with joint issues, while outdoor running may suit experienced runners seeking variety.
  • Personal preferences for environment: Choose based on your enjoyment of indoor or outdoor settings to ensure long-term adherence to your routine.

What Are Tips for Maximizing Benefits from Both Options?

  • Alternate between treadmill and outdoor runs for variety and balance, ensuring you’re not overly reliant on one method.
  • Use incline settings on treadmills to simulate hill training and increase workout intensity.
  • Join running groups or use fitness apps to stay motivated outdoors, turning runs into a social activity.
  • Incorporate cross-training activities like cycling or swimming to complement your running routine and prevent overuse injuries.

What Gear and Equipment Do You Need for Treadmills and Outdoor Running?

Treadmill Running Gear

  • High-quality running shoes: Choose shoes with proper cushioning and support.
  • Comfortable workout attire: Opt for breathable, moisture-wicking fabrics.
  • Heart rate monitors or fitness trackers: Useful for monitoring your performance and progress.

Outdoor Running Gear

  • Weather-appropriate clothing (e.g., jackets, hats, gloves): Dress in layers to adapt to changing temperatures.
  • Reflective gear for safety in low-light conditions: Essential for running at dawn, dusk, or nighttime.
  • Hydration accessories like water bottles or belts: Stay hydrated, especially during longer runs or in warm weather.

How Do Treadmills and Outdoor Running Compare in Terms of Cost?

Treadmills

Home treadmills come with an initial investment that varies widely based on their features and quality. Alternatively, a gym membership provides access to treadmills and other equipment for a recurring monthly fee.

Outdoor Running

  • Minimal expenses for running shoes and clothing, though high-quality gear may require periodic investment.
  • Free access to parks, trails, and sidewalks makes outdoor running an affordable option for most people.

How Do Weather and Seasons Affect Your Choice?

Hot summers may make treadmills more appealing, while mild weather encourages outdoor runs. Cold, windy, or rainy conditions can deter outdoor runs but are manageable with proper gear. Treadmills ensure consistent training regardless of the season, making them a reliable year-round option.

Which Is Better for Joint Health and Injury Prevention?

Treadmills’ cushioned surfaces reduce impact on joints, making them ideal for those with arthritis or recovering from injuries. Outdoor running on soft trails can be joint-friendly, but hard pavements increase stress on knees and hips. Alternating between both can balance the benefits while minimizing risks.

What Are Expert Opinions on Treadmills vs. Outdoor Running?

Fitness trainers and health experts often recommend a combination of both. Treadmills offer precision and safety, while outdoor running provides variety and mental engagement. Finding a balance between the two can maximize fitness results. Experts emphasize tailoring your choice to personal goals, health conditions, and lifestyle.

Are There Alternatives to Running?

If running isn’t suitable, consider these cardio activities:

  • Cycling: Low-impact and great for building leg strength.
  • Swimming: Full-body workout with minimal joint impact.
  • Elliptical machines: Simulates running motions without stress on joints.
  • Rowing: Effective for cardiovascular health and upper body strength.
  • Hiking: Combines cardio and strength training in a natural setting.

Conclusion

Both treadmills and outdoor running have unique advantages and challenges. Your decision should align with your fitness goals, lifestyle, and preferences. By understanding the differences and maximizing the benefits of each, you can achieve a balanced and effective running routine that keeps you motivated and on track to meet your health objectives. Whether you prefer the control of a treadmill or the freedom of the outdoors, incorporating variety can keep your workouts exciting and sustainable.

Clean Keto Food List for Beginners

keto food list

So you’ve decided to try keto?

Good call.

I’m a running coach, and I’ve gone all-in on the keto lifestyle myself. It changed the game for my body, my energy, and even how I coach.

But I won’t lie—it’s not always easy, especially at first.

This guide will walk you through a real-world clean keto food list to help you stay fired up and consistent.

Because here’s the deal: if your meals get boring or feel like punishment, you’ll quit. I’ve seen it happen. Heck, I almost did it myself.

Let me back up.

I’m David Dack, and like many runners, I packed on some weight one off-season a few years ago. Decided to give keto a go, and within a few weeks, I dropped the extra pounds and felt sharper than I had in years.

Living in Bali, where rice and tropical fruit are everywhere, I had to get creative with local ingredients.

Think coconuts, avocados, grilled fish.

It worked.

But figuring out what to eat day in and day out? That was the tough part.

When I first started, meal boredom hit fast. The cravings, the same-old-same-old, the temptation to bail… I know the struggle.

Research even shows that 15% of people ditch diets because the food gets boring.

I get it. I’ve been there. And I’ve helped clients push through it too.

Let’s get to it.

Keto Diet 101: What It Is and Why I Stick With Clean Keto

The ketogenic diet is simple in theory: low carb, high fat.

That combo shifts your metabolism into ketosis, where your body uses fat for energy instead of sugar.

The result?

You burn fat more efficiently, feel fewer energy crashes, and (for many of us) even think clearer.

To stay in ketosis, you usually need to keep carbs under 20–30 grams a day.

That’s tight.

One apple can blow your whole day. When I started tracking carbs, I realized even “healthy” foods like bananas or too many almonds were pushing me over.

Everyone’s carb limit is a little different.

Some people can stay in ketosis at 30–40 grams, but I have to stay under 20 grams or I’m out.

But hitting ketosis isn’t just about macros.

The quality of your food matters. That’s where clean keto comes in.

  • Clean keto means eating whole foods: real meat, fresh veggies, good fats. Think grass-fed beef, wild fish, eggs, olive oil, and greens.
  • Dirty keto? That’s low-carb junk. Bacon and cheese all day, with zero fiber and a mountain of sodium. Sure, you’ll hit ketosis—but long-term, that stuff messes with your energy, digestion, and overall health.

Research backs this up. A clean keto diet gives you more vitamins and minerals and supports better fat loss and wellness outcomes than a junk-heavy version.

I’ve lived it.

The more I cut processed “keto snacks,” the better I felt.

Cravings dropped.

My runs got stronger.

And my mid-afternoon slumps? Gone.

Others have seen this too. A fiend of mine ditched dirty keto bars for real food and not only lost more weight but also felt better, had fewer stomach issues, and even said his seasonal allergies eased up. That lines up with what I’ve seen coaching runners and testing it out myself.

Don’t get me wrong—dirty keto might get you into ketosis.

But if you want to feel good, train hard, and stay in this for the long haul, clean keto is the better play.

And no, clean keto doesn’t mean bland food. We’re not talking boiled chicken and lettuce. You can read about dirty keto vs clean keto here.

Think: bunless burgers with avocado and sugar-free ketchup, rich casseroles made with coconut cream, and spicy keto egg dishes.

Here’s how to keep it simple:

Quick & Dirty Clean Keto Rules (The Way I Coach It):

  • Keep carbs super low (~20g net carbs/day). Load up on leafy greens and go easy on berries.
  • Fat is your fuel (around 70% of your calories). Go big on olive oil, coconut oil, grass-fed butter, ghee, avocado, nuts.
  • Protein is moderate (~20%). Get it from clean meats, fish, eggs, cheese.
  • Whole foods only. If it has a barcode and 12 ingredients, skip it.
  • Stay hydrated. Keto flushes out water and minerals. Drink lots, and get your sodium, potassium, and magnesium in. (Broth or electrolyte tablets are gold. I swear by them, especially in Bali heat.)
  • Spice it up. Use herbs, garlic, chili, turmeric, rosemary—whatever it takes to keep things tasty. There’s no excuse for bland food.

Clean Keto Macros Made Simple (And What They Look Like on Your Plate)

Let’s break down the math without turning this into a nutrition lecture.

Keto is all about macros—your macronutrient ratios.

But here’s the truth: obsessing over every gram is a fast track to burnout.

You don’t need a spreadsheet. You just need to know your ballpark.

Here’s the typical clean keto ratio:

  • Fat: ~70% of your daily calories
  • Protein: ~20–25%
  • Carbs: ~5–10% (usually <20–30g net per day)

Think of it like this:

What 2,000 Calories Looks Like on Clean Keto:

  • Fat: ~155g
  • Protein: ~100g
  • Carbs: ~25g net

If you’re active, a runner, or just hate being hungry, you’ll probably want to lean toward the higher end of protein.

But still, fat is your fuel. That’s the biggest shift.

When I first started, I made the rookie mistake of under-eating fat. I was eating clean, tracking carbs… but I felt sluggish.

Why?

Because I wasn’t giving my body the fuel it needed to run on fat. Once I started adding more oil to my veggies, tossing avocado into everything, and not fearing the yolks—I finally felt that steady energy people rave about.

And no, this doesn’t mean you need to track every bite.

But for the first few weeks, I recommend using an app like Cronometer or Carb Manager just to get a feel for your real intake.

Most beginners overdo protein and sneak in too many hidden carbs. The app helps you spot where you’re off.

Clean Keto Food List for Beginners 

Let’s get one thing straight—clean keto isn’t about fancy supplements or overpriced shakes.

It’s about eating real food.

Simple, whole, satisfying meals that help you cut carbs, torch fat, and actually feel good doing it.

When possible, go for the high-quality stuff—organic, grass-fed, wild-caught—but don’t let that become an excuse. If all you can afford is basic eggs and butter from the corner shop, that still works.

Clean keto is about better choices, not perfect ones.

First: What to Avoid on Keto (So You Don’t Sabotage Yourself)

Before we dive into what to pile on your plate, let’s tackle the traps that’ll knock you out of ketosis or just make you feel like crap. These are the foods I warn every beginner about—and yep, I’ve made some of these mistakes too.

High-Carb, High-Junk Offenders:

  • Sugar bombs: Candy, cookies, soda, ice cream, you name it. These are carb grenades. Even “natural” sweeteners like honey or agave? Still sugar. Still a problem. Your body doesn’t care if it came from bees or a corn syrup factory—it all spikes insulin.
  • Grains & starches: Bread, pasta, rice, cereal, oatmeal… gone. Even so-called “healthy” grains like quinoa and oats are too high-carb for keto. Same for starchy veggies—potatoes, corn, peas, sweet potatoes. Hate to break it to you, but peanuts too (they’re actually legumes).
  • Sugary fruit: Bananas, mangos, pineapple, apples—these are sugar bombs in disguise. Stick to small portions of berries if you want fruit. Juice and dried fruit? Basically candy.
  • Packaged junk: Crackers, chips, “low-carb” protein bars… Even if it says “keto” on the label, that doesn’t mean it’s clean. I’ve seen keto snacks stall progress because they sneak in hidden carbs or nasty additives. One guy on Reddit called out how some brands “fudge the fiber” to trick the net carb math. Don’t fall for it.
  • Crap fats: Margarine, shortening, and junky vegetable oils like soybean or canola? These are inflammatory and wreck your gut. Avoid them. And those greasy bacon-wrapped sausages filled with fillers and nitrates? Save ‘em for a cheat meal—don’t build your diet around them.
  • Booze bombs: Most beer, sweet cocktails, and sugary mixers are off the list. A glass of dry red wine or a shot of vodka with soda water is okay now and then—but alcohol can slow fat burning and destroy your willpower. If you’re serious about results, skip the drinks—especially in the first few weeks.

Okay, Now The Good Stuff – What You Can Eat

Here’s the heart of clean keto: fat is fuel. But not just any fat. We’re not guzzling mystery oil from deep fryers. We’re going for real, satisfying, body-loving fats. These are the ones I keep stocked at home—and recommend to every runner trying keto.

Healthy Fats and Oils (Your Main Fuel Source)

Fat isn’t the enemy. It’s your teammate—if you choose the right ones.

  • Extra Virgin Olive Oil: This one’s non-negotiable. Great for salads, low-heat cooking, and even drizzling over eggs or grilled meat. I use it every day, no exaggeration.
  • Avocado Oil: Clean taste, high smoke point—awesome for cooking. I also mix it into marinades and homemade mayo.
  • Coconut Oil: This is a keto staple. Packed with MCTs that your body quickly turns into ketones. I toss a spoonful in my coffee some mornings—turns it into a frothy, energizing fat-bomb latte that holds me over till lunch.
  • MCT Oil: Basically a concentrated shot of the good stuff from coconut. It gives quick energy and supports ketosis. But a word of advice—start small. Go overboard and you’ll regret it. Trust me.
  • Grass-fed Butter & Ghee: Butter is back, baby. Especially when it comes from grass-fed cows—it’s richer in omega-3s and vitamin K2. Ghee is butter’s cooler cousin—more stable for cooking, with a nutty flavor. I use it for eggs almost every morning.
  • Cocoa Butter: Yep, the same fat used in making chocolate. It’s got almost no carbs and smells like dessert. I melt it into keto coffee sometimes—tastes like a mocha dream.
  • Animal Fats (Lard, Tallow, Duck Fat): These get a bad rap, but they’re legit—if they come from clean sources. I was weirded out by lard at first, but roasting veggies in pastured pork fat? Total game changer.
  • Palm Oils (Sustainably Sourced): Red palm oil has a unique flavor and is rich in vitamins. Use it here and there, but it’s not a go-to for me.
  • Nut & Seed Oils (for Flavor, Not Frying): Sesame oil, macadamia, walnut oil—these are great for cold dishes. I splash toasted sesame oil into keto fried rice made with cauliflower, and it makes it taste like takeout.

But Why These Fats?

They’re mostly full of saturated and monounsaturated fats—clean-burning, steady-energy fats. None of that rancid, industrial junk.

For example:

But honestly? You don’t need a lab coat to know that real fat makes food taste better and keeps you satisfied longer.

Just remember—fat’s still dense in calories.

You don’t need to chug it. Eat till you’re full, not stuffed.

Clean Keto Proteins (Not Just a Carnivore Buffet)

Protein on keto is like your foundation.

You need enough to repair muscle, stay full, and fuel workouts—but too much and your body can convert some of it into glucose, which can kick you out of ketosis. It’s a balancing act.

Here’s what I go for and recommend to clients:

Best Clean Keto Protein Sources:

  • Eggs (pasture-raised if possible): Nature’s multivitamin. I eat 2–4 most mornings.
  • Grass-Fed Beef: Burgers, steaks, slow-cooked brisket—rich in nutrients and healthy fats.
  • Wild-Caught Salmon: Loaded with omega-3s. Grilled, pan-fried, or even canned works.
  • Chicken Thighs (Skin-On): More fat = more flavor = more keto win.
  • Pork Shoulder, Ribs, and Bacon (uncured, nitrate-free): Tasty, fatty, but don’t build every meal around bacon. It’s a sidekick, not the main character.
  • Lamb: Great for variety. Rich, fatty, and full of flavor.
  • Turkey (Dark Meat Preferred): Leaner, but still solid—especially for soups or meatballs.
  • Sardines & Mackerel: Cheap, clean, and surprisingly filling. I keep cans in my trail bag.
  • Organ Meats (Liver, Heart): Hardcore, but nutrient-packed. Worth trying at least once.
  • Whey Protein Isolate (Unsweetened): Good for a post-run shake. Watch the ingredients—no sketchy fillers or sugar alcohols.

💡 Pro tip:

Don’t fear fat in your protein cuts. Chicken breast is fine now and then, but it’s lean and can leave you hungry. You want that marbling, that skin, that richness. That’s keto fuel right there.

The Green Stuff: Low-Carb Veggies That Actually Work on Keto

Let’s be real—some folks treat keto like a meat-and-cheese-only diet.

That’s how you end up constipated, inflamed, and quitting by week two.

Fiber matters.

Micronutrients matter.

And that’s where low-carb veggies come in.

I tell every runner I coach on keto: Don’t skip your greens. You need them for digestion, hydration, recovery, and satiety.

Here’s the rule of thumb:

If it grows above ground and it’s green, it’s probably fair game.

If it’s starchy, sweet, or grows underground—proceed with caution.

My Go-To Low-Carb Veggies:

  • Spinach & Kale – Loaded with magnesium and iron. Great sautéed in butter or tossed in olive oil.
  • Arugula – Peppery and fresh. I throw it on everything—eggs, grilled meat, burgers.
  • Cauliflower – The MVP. Rice it, mash it, roast it. Keto pizza crust? Cauli saves the day.
  • Zucchini – Spiral it into noodles or slice it for stir-fry.
  • Cabbage – Super filling and dirt cheap. I love it with ghee and garlic.
  • Broccoli – Roasted in avocado oil = addicting. Pairs well with fatty cuts of beef.
  • Mushrooms – Sauté with thyme and butter. Boosts umami, low in carbs.
  • Asparagus – Fancy enough for a date night, easy enough for weeknights.
  • Cucumbers & Celery – Perfect for crunch. Great with guac or almond butter.
  • Bell Peppers (in moderation) – A little sweeter, but still manageable if you track.

Why these matter:

These veggies give you fiber to stay regular, antioxidants to fight inflammation, and potassium to avoid keto headaches and cramps.

💡 Personal tip:

When I first started keto, I got lazy with veggies. Big mistake.

Once I brought them back in—cooked in oil or paired with fatty meats—I felt fuller, recovered faster, and honestly, just felt human again.

Clean Keto Snacks (That Won’t Derail Your Progress)

Here’s the deal with snacking: it’s not mandatory on keto, but life happens.

Travel days, post-run munchies, long gaps between meals—it’s better to be prepared than end up raiding the pastry shelf at Circle K.

But the snack game’s tricky.

Most “keto snacks” on shelves are either packed with junk fillers or sweetened with mystery zero-carb chemicals that mess with your gut and stall progress.

So here’s what I actually keep on hand—and recommend to clients trying to stay clean, fueled, and sane.

Real Snacks That Pass the Clean Keto Test:

  • Boiled Eggs – The OG. Travel-friendly, filling, no BS.
  • Beef Jerky – Look for low-sugar, clean-ingredient versions. Some brands sneak in carbs—read the label.
  • Olives – Salty, fatty, and portable. Great for killing cravings.
  • Macadamia Nuts – The best keto nut: high fat, low carb. Just don’t pound the whole bag.
  • Coconut Chips (Unsweetened) – Crunchy and satisfying. I mix with almonds for a DIY trail mix.
  • Seaweed Snacks – Salty, crispy, and zero prep. Good iodine source too.
  • Tuna or Sardines (in olive oil) – Keep a can at work or in your gym bag. Add mustard or hot sauce—trust me.
  • Mini Guac Cups or Avocado Halves – Eat ‘em with celery or a spoon. Full stop.
  • Keto Fat Bombs (Homemade) – Mix coconut oil, cocoa powder, nut butter, and sea salt. Freeze. Perfect pick-me-up.

What I avoid:

Protein bars labeled “keto” but full of sugar alcohols and soy isolate. They spike my hunger instead of killing it. If it tastes like candy, treat it like candy.

💡 Runner hack:

On long training days, I’ll grab jerky, macadamias, and seaweed as my recovery snack—fat + salt + protein.

Way better than a sugary recovery drink.

What is a Fun Run? Meaning, Distance & Beginner Tips

Can Running Help Cure Your Hangover?

Picture this: You’re jogging with friends at sunrise, music blasting in the background, strangers cheering you on, and everyone’s wearing something ridiculous—tutus, wigs, maybe even banana suits.

That was me during my first fun run in Bali.

I wasn’t chasing a time. I wasn’t counting kilometers. I just wanted to laugh, sweat, and maybe snag a coconut water at the finish line.

But let’s back up—what even is a fun run?

It’s exactly what it sounds like: a run that’s all about having a good time.

No stress. No pressure. No “you must finish this in under 25 minutes or else…” stuff.

According to the definition on Wikipedia, a fun run is a friendly race done more for the experience than for any official finish time.

Think of it like a party—except instead of dancing, you’re moving forward one step at a time, in a pack of smiling people who probably couldn’t care less what your pace is.

Most fun runs are short, often around 5K (that’s 3.1 miles if you don’t speak metric)【runnersblueprint.com】. Perfect for beginners or anyone who just wants to move their body without worrying about split times.

My Coaching Take: Fun Runs Are Where New Runners Fall in Love with the Sport

I’ve coached a lot of people in Bali who swore they’d “never run unless something was chasing them.”

Guess what finally got them moving?

A fun run.

The best part?

These events don’t care how fast or slow you are.

You’ll see joggers, walkers, stroller-pushers, even people dancing through the route. There’s zero judgment.

What You Can Expect

Most fun runs come with a theme.

Maybe it’s a color run—you know, the ones where volunteers toss powdered paint on you at every kilometer. Or a mud run, where you’re slipping through obstacle courses like you’re training for a military boot camp.

Maybe it’s a superhero run or a glow-in-the-dark night run with neon paint and glow sticks. I’ve even seen barefoot beach fun runs in Bali where everyone finishes with sand between their toes and flowers around their necks.

The whole vibe is electric. CheddarUp described fun runs as being “pure, well, fun,” and I’d agree.

It’s like running through a mini street festival. One of my friends once said, “It felt like jogging through a music video.”

And they’re not just about having fun—they’re also about doing good.

Most fun runs support a cause. Local sponsors often chip in, and the entry fees go toward charities.

So yeah, you’re moving your body and helping others. That’s a pretty sweet combo if you ask me.

Quick Recap:
✅ It’s fun (no surprise there)

✅ You don’t have to “be a runner”

✅ There’s usually music, costumes, or a cause

✅ Most are 5Ks (3.1 miles)【runnersblueprint.com】

✅ You can walk, jog, dance, or crawl—nobody’s timing you

Storytime: My First Fun Run in Bali

My first one was a color run by the beach. A buddy of mine dragged me into it, swearing it’d be a good laugh.

I was skeptical. I didn’t see how running + powder + strangers = fun.

I showed up wearing plain white gear.

That was the trick—you start in white so the colors show up better. Five minutes in, I looked like a walking rainbow.

Every kilometer, someone threw a new color at us. By the finish line, I was pink, green, blue, and covered in sweat.

I looked ridiculous. And I couldn’t stop laughing. It wasn’t a race. It was a moving party.

That moment stuck with me. I

t reminded me that running doesn’t always have to be serious. Sometimes, it’s about letting loose and just being part of something joyful.

How Far Is a Fun Run?

Let’s answer the big question: How long is a fun run?

Short answer: not very.

Most fun runs are beginner-friendly and hover around the 5K range【runnersblueprint.com】.

If you’re moving at a light jog, that’s maybe 30 minutes. Walking it? Could take an hour, especially if you’re snapping selfies or stopping for a snack.

Some events offer even shorter options—like 1K or 3K for families or kids.

Others throw in a 10K if you’re feeling spicy. For example, we’ve had night glow runs in Bali that stretch out to 10K, and charity walks for local villages that keep it to 3K.

Real talk from a coach: Just check the race page before you sign up. It’ll tell you the distance.

But don’t overthink it—these events are short on purpose.

They’re built for fun. You’re not trying to PR here; you’re trying to enjoy the experience.

When I ran my first one, we were laughing so much it didn’t even feel like a workout.

We danced at water stations, stopped for photos, and crossed the finish line with zero idea of how long it took.

Final Words: Why You Should Try One

If you’ve ever said, “I’m not a runner,” this is your chance to prove yourself wrong—in the best way possible.

Fun runs are the gateway drug to running.

You show up for the party, and before you know it, you’re asking, “When’s the next one?” I’ve seen it happen time and time again.

You don’t need speed.

You don’t need fancy shoes.

You just need the willingness to show up and move. That’s it.

Who Can Do a Fun Run?

Short answer? You. Anyone.

You don’t need to be fast.

You don’t need to be fit.

Hell, you don’t even need to call yourself a runner.

Fun runs are built for everybody【runnersblueprint.com】. I mean that—every body type, every background, every level.

If you’ve never jogged more than a block in your life, that’s fine. If your buddies are going and you’re on the fence, just say yes. The whole point is showing up and having fun.

I remind beginners all the time—fun runs are about joy, not pace.

You can jog, walk, skip, crawl, whatever. No one’s judging. In fact, most fun runs want you to go at your own rhythm【runnersblueprint.com】.

One of my clients once said, “I only ran the first kilometer and walked the rest, but I still felt like a rockstar.” And honestly? She was one. She showed up. She finished smiling.

Don’t worry about speed. I’ve seen 8-year-olds fly past adults and 80-year-olds cross the line hand-in-hand.

I once watched two retired neighbors walk the entire course side by side, laughing the whole way. They were the last to finish—but got the loudest cheers.

Fun runs aren’t about crushing the clock.

They’re about showing up and doing something good for your body and your community. That’s the real win.

Reminder from experience: There’s usually plenty of time to finish. Most 5Ks allow up to an hour. So yeah, walkers, strollers, photo-stoppers—everyone makes it comfortably.

Bottom line: Lace up without fear. These events are about people, joy, and being part of something that makes you smile.

Types of Fun Runs: What’s Your Flavor?

Let’s be real—fun runs aren’t boring. There’s a version out there that matches your vibe. Here’s the rundown:

Color Runs

Pure chaos—in the best way.

Volunteers toss bright powder at you every kilometer until you look like a walking rainbow.

These are perfect for families or first-timers who want more party than race【runnersblueprint.com】. And yes, your photos will be ridiculous (and awesome).

Costume & Theme Runs

Ever seen a herd of people dressed like superheroes or unicorns sprinting through the streets?

Welcome to themed runs.

From Santa suits in December to Halloween zombies in October, these events are all about dressing up and letting go. Once, I ran as a panda. Don’t ask.

Obstacle & Mud Runs

Think climbing walls, crawling under nets, sliding into mud pits. These are tougher but still fun-focused.

Events like Tough Mudder mix low-pressure challenges with high-energy fun.

You’ll get dirty, sore, and maybe earn a few scrapes—but you’ll also feel like a total beast when you finish.

Charity & Community Runs

Feel-good runs with purpose. Your entry fee might help fund a local school, hospital, or community cause.

You often get a T-shirt or medal—but the real reward is making a difference.

Even a 3K walk here helps. I’ve done glow runs in Bali that raised money for beach cleanups, and it’s a beautiful mix of sweat, smiles, and support.

Neon & Glow Runs

Party meets pavement.

These runs usually happen at night under blacklights with neon paint, glow sticks, and DJs.

You wear white and light up the dark. I’ve run these on the beach in Bali—neon glow on one side, ocean waves on the other. Magical.

How to Get Ready for a Fun Run (Without Overthinking It)

Look, fun runs are meant to be fun—but a little prep can help you enjoy the whole thing without feeling like you’re dying halfway through.

You don’t need to train like you’re going to Boston. Just a bit of movement before race day makes a big difference.

🔹 Get Moving Ahead of Time

You don’t need a fancy plan. Just get your legs used to moving.

Try this: Go for a walk or light jog 2–3 times a week. If you’re starting from the couch, alternate 1 minute jogging with 2 minutes walking. Do that for 15–20 minutes per session. Each week, bump the running time up a bit.

It’s not about pace. It’s about reminding your lungs and legs what movement feels like. Trust me, that first fun run feels way better when your body’s not in total shock.

Coach’s Tip: If you’ve already been training a little, treat the fun run like a light workout. I once jumped into a color 5K just for laughs and ended up setting a personal best—while getting blasted with pink powder.

So yeah, go for it—but don’t push too hard if you’re new. It’s a test run, not an exam.

🔹 Run with Your Crew (Optional, But Fun)

If you signed up with friends, try jogging together a couple times before race day. It makes the whole thing way less intimidating—and way more fun.

You can even test out your silly costume ideas or practice taking mid-run selfies (yes, that’s a thing). In my Bali running club, we sometimes jog at sunrise and it feels like the miles fly by when you’re laughing with people.

🔹 Know the Plan

Race day can be chaotic, so don’t wing it.

  • Know where the event starts.
  • Figure out how you’ll get there.
  • If it’s early, plan to wake up with the sun (and maybe have a strong coffee).
  • Check the weather: in Bali, it’s hot even at dawn, so light gear is best. In colder places, dress in layers you can tie around your waist if you heat up.
  • Check if there are water stations. If not, carry your own bottle.

What to Wear (And Not Regret Later)

Let’s talk gear—because fun runs aren’t your typical race.

Clothes

Wear stuff you don’t mind getting messy.

For color runs, white shirts are a classic. Just don’t wear your favorite one.

I learned the hard way: Wore my best shirt to my first color run, and it came out looking like a tie-dye disaster. Now I have a go-to “fun run” shirt just for events like this【runnersblueprint.com】.

If it’s a muddy or themed run? Dark old shorts and something lightweight. If costumes are your thing, go wild—tutus, superhero capes, or even just some fun socks can turn heads.

Eye & Mouth Protection

Color runs can get dusty. A cheap pair of sunglasses and a neck gaiter or bandana can help keep powder out of your eyes and mouth【runnersblueprint.com】.

I never forget my old shades now. Better safe than spitting pink dust for the next two days.

Sun Protection

If your run’s outdoors—and most are—don’t mess around with the sun. I always bring a hat or visor and slap on some sunscreen. Especially in Bali. Even early runs here can burn you if you’re not careful.

Shoes

This one’s important. Wear a reliable pair of running shoes—but not your best ones if things are gonna get messy【runnersblueprint.com】.

I once destroyed my favorite shoes at a color run. Powder got in every crack and turned them into a pastel disaster. Now I keep an older pair just for fun runs.

Mud run? Trail shoes are great. Just make sure your shoes are broken in—you don’t want blisters stealing the spotlight.

Accessories

Some runs have live music along the route, so you may not need headphones. But check the rules first—some events ban them for safety.

A small running belt for your phone, keys, or snacks is helpful too. And if it’s cold at the start, throw on a hoodie or gloves you can ditch later.

And don’t forget your biggest accessory: your smile.

Race Day: What to Expect and How to Crush It

Get There Early

Aim to show up an hour before the start. Gives you time to:

  • Pick up your race bib or packet
  • Use the restroom (lines can get long)
  • Stretch out
  • Join any warm-up party stuff (some events have DJs blasting tunes and group dances)

In Bali, we always snap a big selfie under the start arch and high-five everyone like we just won the Olympics—before the run even starts.

Warm Up & Stay Hydrated

Jog in place. Swing your arms. Shake off the nerves.

Drink a little water—but not so much that you’re sloshing. Most events have water stations, but if you run hot (or it’s tropical like Bali), carry a small bottle.

Start Easy

This isn’t a race to win. Don’t rush to the front.

Stick with people at your pace. If you’re slower, starting at the front might even be easier—less chaos. When the music drops and the countdown starts, ease into a comfy rhythm.

During the Run: Soak It All In

Smile.

Dance.

Take in the madness.

Some fun runs have live bands, cheer stations, even foam machines.

If there’s a DJ booth along the route, feel free to break into a little groove.

Take silly pics. Hug a friend. Be present.

If you want to walk, walk. Just step to the side so others can pass safely. I tell my clients all the time—“This is the one run where stopping to pose with a dinosaur in a tutu makes total sense.”

The Finish Line = The Start of the Party

Cross that finish line and let the good vibes roll.

Most events celebrate hard: music, confetti, color throws, maybe even a foam party. In Bali, one run ended with reggae music and coconut drinks—I was drenched in sweat, color, and joy.

I stuck around with friends, met new people, and felt like a kid again. That’s the real finish line reward. Not a medal (though you might get one), but the memory.

Post-Run Vibe Check

  • Take pics with your crew.
  • Laugh about how wild you looked mid-run.
  • Celebrate the fact that you showed up and did something awesome.

I’ve seen strangers become friends over shared sunburns and splattered shirts. And no one ever brags about their finish time at a fun run—because that’s not what it’s about.

Final Thoughts: Why This Matters

Fun runs are more than just colorful chaos. They’re a chance to fall in love with running without pressure.

You get to sweat, smile, and maybe change how you think about fitness. One event. One step. One good memory at a time.

So if you’re still reading this wondering if you should sign up… yes. Yes, you should.

Grab a buddy. Pull out your weirdest socks. Show up. Run happy.

You’ll get more than a race—you’ll get a story.

Your Turn:

👉 Got your first fun run on the calendar?
👉 What’s your costume going to be?
👉 Tag a friend who should be doing this with you!

The Beginner’s Guide to the Long Run (2025 Edition)

best temperature for running

If you’re feeling unsure about long runs, don’t worry—you’re not the only one.

In fact, you’re new to running—or just trying to get consistent—this guide is for you.

I’ll walk you through what a long run actually is, why it matters, how to prep for it, how to pace it, and how to survive it without hating your life.

I’ll also bust some tired advice (you don’t have to blast music every time), and share some personal and community stories that’ll hopefully make you feel less alone out there.

By the time we’re done, you’ll know exactly how to tackle them with confidence. And maybe, just maybe, you’ll start to enjoy them too.

Let’s get to it.

What Actually Counts as a Long Run?

Forget the internet’s one-size-fits-all definitions.

A “long run” is any run that’s longer than your usual distance.

That’s it. If you usually do 3 miles, then 4 or 5 is your long run. It’s relative.

For some beginners, a long run means 60 minutes of easy jogging.

For others, especially those with more mileage under their belt, it might be 90 minutes or even 2 hours.

But don’t worry about what advanced runners are doing—you’re not them. Yet.

To give you a loose number, many runners start to feel the “long” in a run around the 10K (6-mile) mark.

But again—this isn’t gospel.

If 3 miles is your usual, and today you go for 4, you’ve earned the long run badge.

What matters most? That it stretches your limits. That’s how you grow.

And here’s the cool part—what feels hard now won’t stay that way. My first hour-long run felt like a big, scary mountain.

These days? That’s my warm-up.

You’ll get there too.

Promise.

Why the Long Run Is a Must-Have

Long runs aren’t just a rite of passage—they’re the secret sauce behind real running gains.

Not just endurance. Not just mental toughness. The whole package.

1. You Build Serious Endurance

There’s no shortcut here—time on your feet teaches your body how to go the distance.

Your lungs learn how to use oxygen better.

Your muscles get better at burning fat for fuel.

Your energy systems become more efficient, which means you can run longer without falling apart.

It even helps you get faster.

I know that sounds backward, but I’ve seen it firsthand—runners who consistently hit long runs end up knocking minutes off their 5K and 10K PRs. Long-run consistency can you boost glycogen storage and delay fatigue, which can give you better speed late in the race.

That’s no joke.

2. It’s Strength Training in Disguise

Long runs toughen you up. They strengthen the muscles, tendons, and joints you rely on mile after mile.

When I started, I’d get sore in places I didn’t know existed.

That soreness? It built resilience.

Over time, your legs become more armor than noodles. You’ll feel the difference on hills, rough roads, and race day. The aches get quieter. The bounce comes back quicker.

3. Your Aerobic Engine Gets a Turbo Boost

You’ve probably heard the term “aerobic base” tossed around.

This is where you build it.

Long runs help grow more capillaries (blood flow) and mitochondria (energy production). Basically, your body gets better at moving fuel and turning it into power.

The result?

You’ll be able to run farther, hold a steady pace, and not feel like collapsing at the end.

That’s not magic—it’s biology.

But it feels like magic when it starts to kick in.

4. It Builds Mental Toughness Like Nothing Else

This one gets overlooked a lot. Long runs don’t just shape your body—they sharpen your mind.

I used to look at my schedule and think, “10 miles? No way.” Then I’d finish it. And every time I did, I felt stronger mentally.

You learn to keep going when it’s boring, when your legs are tired, when your brain says, “Let’s just stop at 7.”

I used to run the last mile past my house just to force myself to keep going. That little mental win adds up over time. And it sticks with you—in races, in training, in life.

5. It’s Your Chance to Clean Up Your Form

You can’t do much self-checking when you’re gunning it through intervals. But during long runs, you’ve got time to pay attention.

I often use this time to check posture, arm swing, footstrike, breathing—like a full-body audit while moving.

The real benefit?

Learning how to hold good form when tired. That’s what race finishes feel like. If you can stay smooth after 8 miles, you’re prepping your body to stay strong when it counts.

How Far Should Your Long Runs Be?

“How long should my long run actually be?”

I’ve heard that question a thousand times. And here’s the thing—there’s no one-size-fits-all answer. It all depends on your current shape and what you’re training for.

Back when I first started, a “long run” for me was maybe 5 miles—and even that felt like I’d conquered Everest.

But over time, that number grows. For one runner, 5 miles is a grind. For another, it’s a warm-up lap.

Still, I’ve coached enough folks to know the sweet spots. So here’s what I usually recommend, based on your race goal (and yes, this comes from experience and real-world results):

Training for a 5K?

Shoot for 6 to 8 miles at your peak.

Yeah, I know—it’s way longer than the 3.1-mile race. But that’s the point.

Running easy at double the distance makes the 5K feel short and snappy.

Most cookie-cutter plans stop around 5–6 miles, but I like my runners to build a bit more. When you’ve got 7 or 8 miles under your belt, race day feels like a victory lap.

Going after a 10K?

Aim for 8 to 12 miles. The 10K is 6.2 miles, so training past that helps you stay strong the whole way.

I’ve seen runners hit 10 miles in training and suddenly crush their PR without even changing anything else.

Eyeing a Half Marathon (13.1 miles)?

You’ll want long runs to land somewhere between 10 and 15 miles.

Some plans stop at 10–11, thinking adrenaline will carry you the rest of the way. That’s fine if you’re tight on time.

But I like my crew to touch 12 at least once or twice before race day. If you can swing 14 or even 15 safely, even better. Just don’t force it. Here is the couch to half marathon you need.

Going all in on the Marathon (26.2 miles)?

You’ll often see long runs topping out at 20–22 miles. That’s where most training plans cap it.

Going the full distance in training? Usually not worth it—recovery is brutal, and the injury risk shoots up.

Research backs this up: after 3 hours of running, fatigue ramps up while benefits drop. That’s why I tell my athletes to cap long runs around 3 hours, even if it means you don’t hit 26 miles.

Two solid 20-milers are way safer—and more useful—than one reckless 26-mile sufferfest.

My Rule of Thumb 

A solid guideline: your long run should be about 20–30% of your weekly mileage.

Run 20 miles total per week? Your long one should land around 4 to 6 miles.

Cranking 40 miles a week? Then think 8 to 12.

Also, follow the 10% rule—don’t jump your long run (or total weekly mileage) by more than 10% each week.

If you did 5 miles last weekend, don’t leap to 8. Make it 5.5 or 6. That’s how you grow without blowing out your knees.

I learned that the hard way. Once jumped from 8 to 12 miles in a single week—my knees were toast. Lesson learned: build smart, not fast.

Don’t Skip the Cutback Week

Here’s something the average plan won’t emphasize: step-back weeks.

Every few weeks, take it down a notch. It helps your body catch up and adapt.

Example?

Week 1: 5 miles. Week 2: 6. Week 3: 7. Then Week 4? Drop back to 5 or 6 again. Week 5: hit 8. This wave pattern keeps you from frying your legs.

Some coaches even recommend two build weeks followed by one easy week. I’ve used that model for years—it works. Keeps you hungry, not burnt out.

Your First Long Run

So you’re gearing up for your first real long run? That’s a big deal.

I still remember mine—nervous energy, shaky pacing, and the constant fear of blowing up halfway.

But here’s the truth: your first long run doesn’t have to be perfect. It just has to happen.

Let’s walk through how to make it count—and keep you coming back for more.

Start Slower Than You Think

This is where most new runners mess up—they go out too fast.

On long run day, your only job is to start slow. Then go slower. You should feel like you’re holding back for the first few miles.

Got a running watch? Ignore the pace.

Or better yet, set it to show just the time.

Use the talk test: if you can hold a convo without gasping, you’re in the sweet spot.

Practically speaking, tack on 1–2 minutes per mile to your regular easy pace. If your usual pace is 10:00/mile, it’s totally fine—even smart—to run your long one at 11:00 or 12:00 pace.

There’s no prize for running your long run fast. A Reddit runner once said they purposely slow down to 12-minute miles while building back up, and they’re right—long runs are about showing up, not showing off.

Ask Yourself: Can I talk while running? If not, you’re pushing too hard.

Break It Into Chunks

Running 6 miles for the first time can feel like a monster. But break it down—think of it as two 3-mile runs.

After the first chunk, take a mental breather: “Nice, halfway.” Grab a sip, shake out your arms, maybe change up the route to reset your mind.

I like doing loops or turning around at odd spots just to give myself something fresh visually. Trick your brain—because six miles feels a lot easier when it’s just “two threes.”

Walk if You Need To

Walking is not weakness. Let’s kill that myth right now.

Coach Jeff Galloway built an entire method around planned walk breaks. And he’s coached thousands of marathoners. Early in my running days, I refused to walk—thought it meant I wasn’t a “real runner.” Total nonsense.

A one-minute walk here and there can recharge you and make the rest of the run smoother. Just don’t let your body cool down too much. Keep walk breaks short and planned—like one minute every mile. That way, you stay in control.

Some coaches even start newbies with run 3 minutes, walk 2. Then slowly increase the run portion. It works. It’s how you build endurance without wrecking yourself.

Pay Attention to Your Body

Long runs teach you how to listen. I mean really listen.

Is your breathing calm? Legs feeling solid? A bit of tiredness is fine—sharp pain is not.

Little things like a forming blister or some chafing? Deal with them on the go. Pause, fix the sock, slap on some Vaseline if needed. But don’t power through something that feels wrong.

Learn the difference between discomfort (a sign you’re building endurance) and pain (a red flag for injury). If something feels off, back off.

You’re not skipping the run—you’re preserving your future runs.

Build Gradually—Seriously

You did your first long run? Celebrate it. Brag a little. Eat something delicious. You earned it.

Now comes the buildup. One of the oldest and smartest rules in distance running: add about 1 mile or 10 minutes each week.

So if you just ran 4 miles, next week’s goal is 5. Then 6. Nice and steady.

Do NOT jump from 5 to 9 just because you “felt good.” I’ve had coaching clients pull that stunt.

The result? Shin splints. Fatigue. Burnout. Every time.

Only change one training variable at a time.

If you’re adding distance to your Sunday long run, keep your midweek runs the same. Don’t go increasing Tuesday and Thursday and Saturday too. Your body needs time to adjust.

As I always say: “Increase volume or intensity—not both.” When the long run goes up, everything else chills.

Your Move: What’s your current long run distance? What’s your realistic next step?

Stay in the Fight

The mental game is real. That first long run might have you constantly checking your watch, wondering “How much longer?” That’s normal.

Here’s a trick I use: I don’t peek at the distance until I know I’ve knocked out at least 75% of the run. Sometimes I even cover my watch with tape. Seriously.

Focus on the moment. Your breathing. The rhythm of your feet. Count light poles if you have to.

I’ve literally talked out loud to myself mid-run: “Come on, David, just make it to that next street sign.” It works. Whatever keeps you moving.

You will have bad runs. Everyone does. One day you’re flying. The next day, the same run feels like a death march. That’s running. Don’t let one rough run derail your whole training. It’s the cumulative work that pays off.

Pacing Your Long Run

Let me be real with you: one of the biggest rookie mistakes I see is going too fast on long runs.

I’ve done it. Almost every runner I coach has done it.

We get it in our heads that “running” means “fast,” but here’s the truth—the long run is all about building endurance, not chasing a PR.

The Talk Test: Simple but Gold

If you can talk while running—like full-on chatting or singing your favorite tune—you’re doing it right.

I used to mutter the Pledge of Allegiance under my breath every couple miles. The second I started panting before “for which it stands,” I knew I was creeping into too-fast territory.

Another trick? Nose breathing. If you can inhale and exhale through your nose for a few breaths, that means your effort is low enough to count as aerobic training. If you can’t, chill out and dial it back.

Why Slow is the Secret Sauce

Going slow builds your aerobic engine. This is your base.

And trust me, the better your base, the faster you can eventually go. There’s this fear among beginners that slow running equals slow racing.

Nah. In fact, running your long runs too fast just leads to burnout, injury, or plateaus.

So how slow is slow?

  • Try 1 to 2 minutes per mile slower than your 5K race pace.
  • For example, if your 5K pace is 9:00/mile, your long run pace might be around 10:30 or 11:00, maybe even slower if it’s hot or hilly.
  • Don’t know your race pace? Use effort. Long runs should feel like a 5 or 6 out of 10—steady but very doable.

Use RPE: Run by Feel

I love using RPE—Rate of Perceived Exertion. It’s just a fancy term for “how hard does this feel?”

  • A long run should be around 5 or 6 out of 10.
  • Not jogging in the park easy, but definitely not pushing.

Some days, that pace will feel easier. Other days—hot weather, poor sleep, sore legs—it’ll feel tougher. Adjust based on how your body responds.

Ask yourself during the run: “How hard does this feel?” If the answer is anything above 6, back off.

Also—and this is big—finish your run feeling strong. You want to end thinking, “I could’ve done more,” not, “I barely survived that.”

Fueling Your Long Runs: What to Eat, Drink & Avoid 

Long runs aren’t just about grinding out the miles. They’re about learning how to fuel right, so you don’t hit the wall halfway through.

I’ve blown it more than once—trust me, you only need to bonk badly a couple of times before you get serious about what goes in your tank.

The Night Before: Keep It Simple and Clean

Carbs are your best friend the night before a long run. But don’t go overboard. Think rice, pasta, or sweet potatoes with something lean like grilled chicken or fish.

The goal? Top off your energy stores without upsetting your stomach.

Skip the greasy stuff and the giant salads. I made the mistake of crushing a double cheeseburger and fries before a 20K once. Let’s just say the porta-potty got more action than the finish line.

Stick to light seasoning and low-fat meals. Pasta with some veggies and olive oil beats spicy takeout every time.

Morning Of: Just Enough to Get Going

You want 200–300 calories of easy carbs and maybe a little protein about 1–2 hours before the run.

Here’s what works for me:

  • A banana with a spoon of peanut butter
  • A slice of toast with jam
  • A half bowl of oatmeal with honey
  • Half a simple energy bar

Caffeine? Sure, if your gut can handle it. I love my morning coffee, but if you’re not used to it, now’s not the time to experiment.

Running late? Grab half a banana or sip a sports drink, then plan your first gel early during the run.

During the Run: Stay Ahead of the Crash

For runs over 90 minutes, start fueling early—around 45 minutes in, then every 30–45 minutes.

Options I rotate:

  • Gels
  • Chews
  • Sports drinks
  • Dried fruit or even candy (yes, candy!)

Always wash it down with water—makes it easier on your gut.

Don’t wait until you’re dragging. Think of carbs like firewood—keep feeding the fire or it dies out.

Hydration: Don’t Be a Hero

If it’s under an hour and cool outside, you might be okay without water.

But anything longer or hotter? Sip every 15–20 minutes.

Small sips beat big gulps. For runs over 90 minutes, add electrolytes. A little salt goes a long way.

A couple of week ago I ran two hours in Bali with just one bottle. Felt dizzy, salt-crusted, and had to lie down after. Never again.

Here’s your guide to proper hydration while running.

After the Run: Rebuild Fast

Refuel within 30–60 minutes. The magic combo? Carbs + protein.

Easy go-to’s:

  • Chocolate milk
  • Smoothie with protein
  • Sandwich
  • Yogurt and granola

Keep sipping water until your pee is light again.

Go Long and Prosper: A Final Encouragement

Now, I’d love to hear from you: when you complete your next (or first) long run, come back and share your experience. What worked, what was tough, any epiphanies along the way?

Drop a comment below and let’s celebrate those milestones together.

Ask questions, encourage others – we’re all in this together, one mile at a time.

Defeating Calf Pain for Runners: Conquer Sore Calves and Run Stronger

Beating Calf Pain: How I Learned the Hard Way (And How You Can Avoid It)

My calves once felt like they were made of stone. Every step felt like I was dragging bricks.

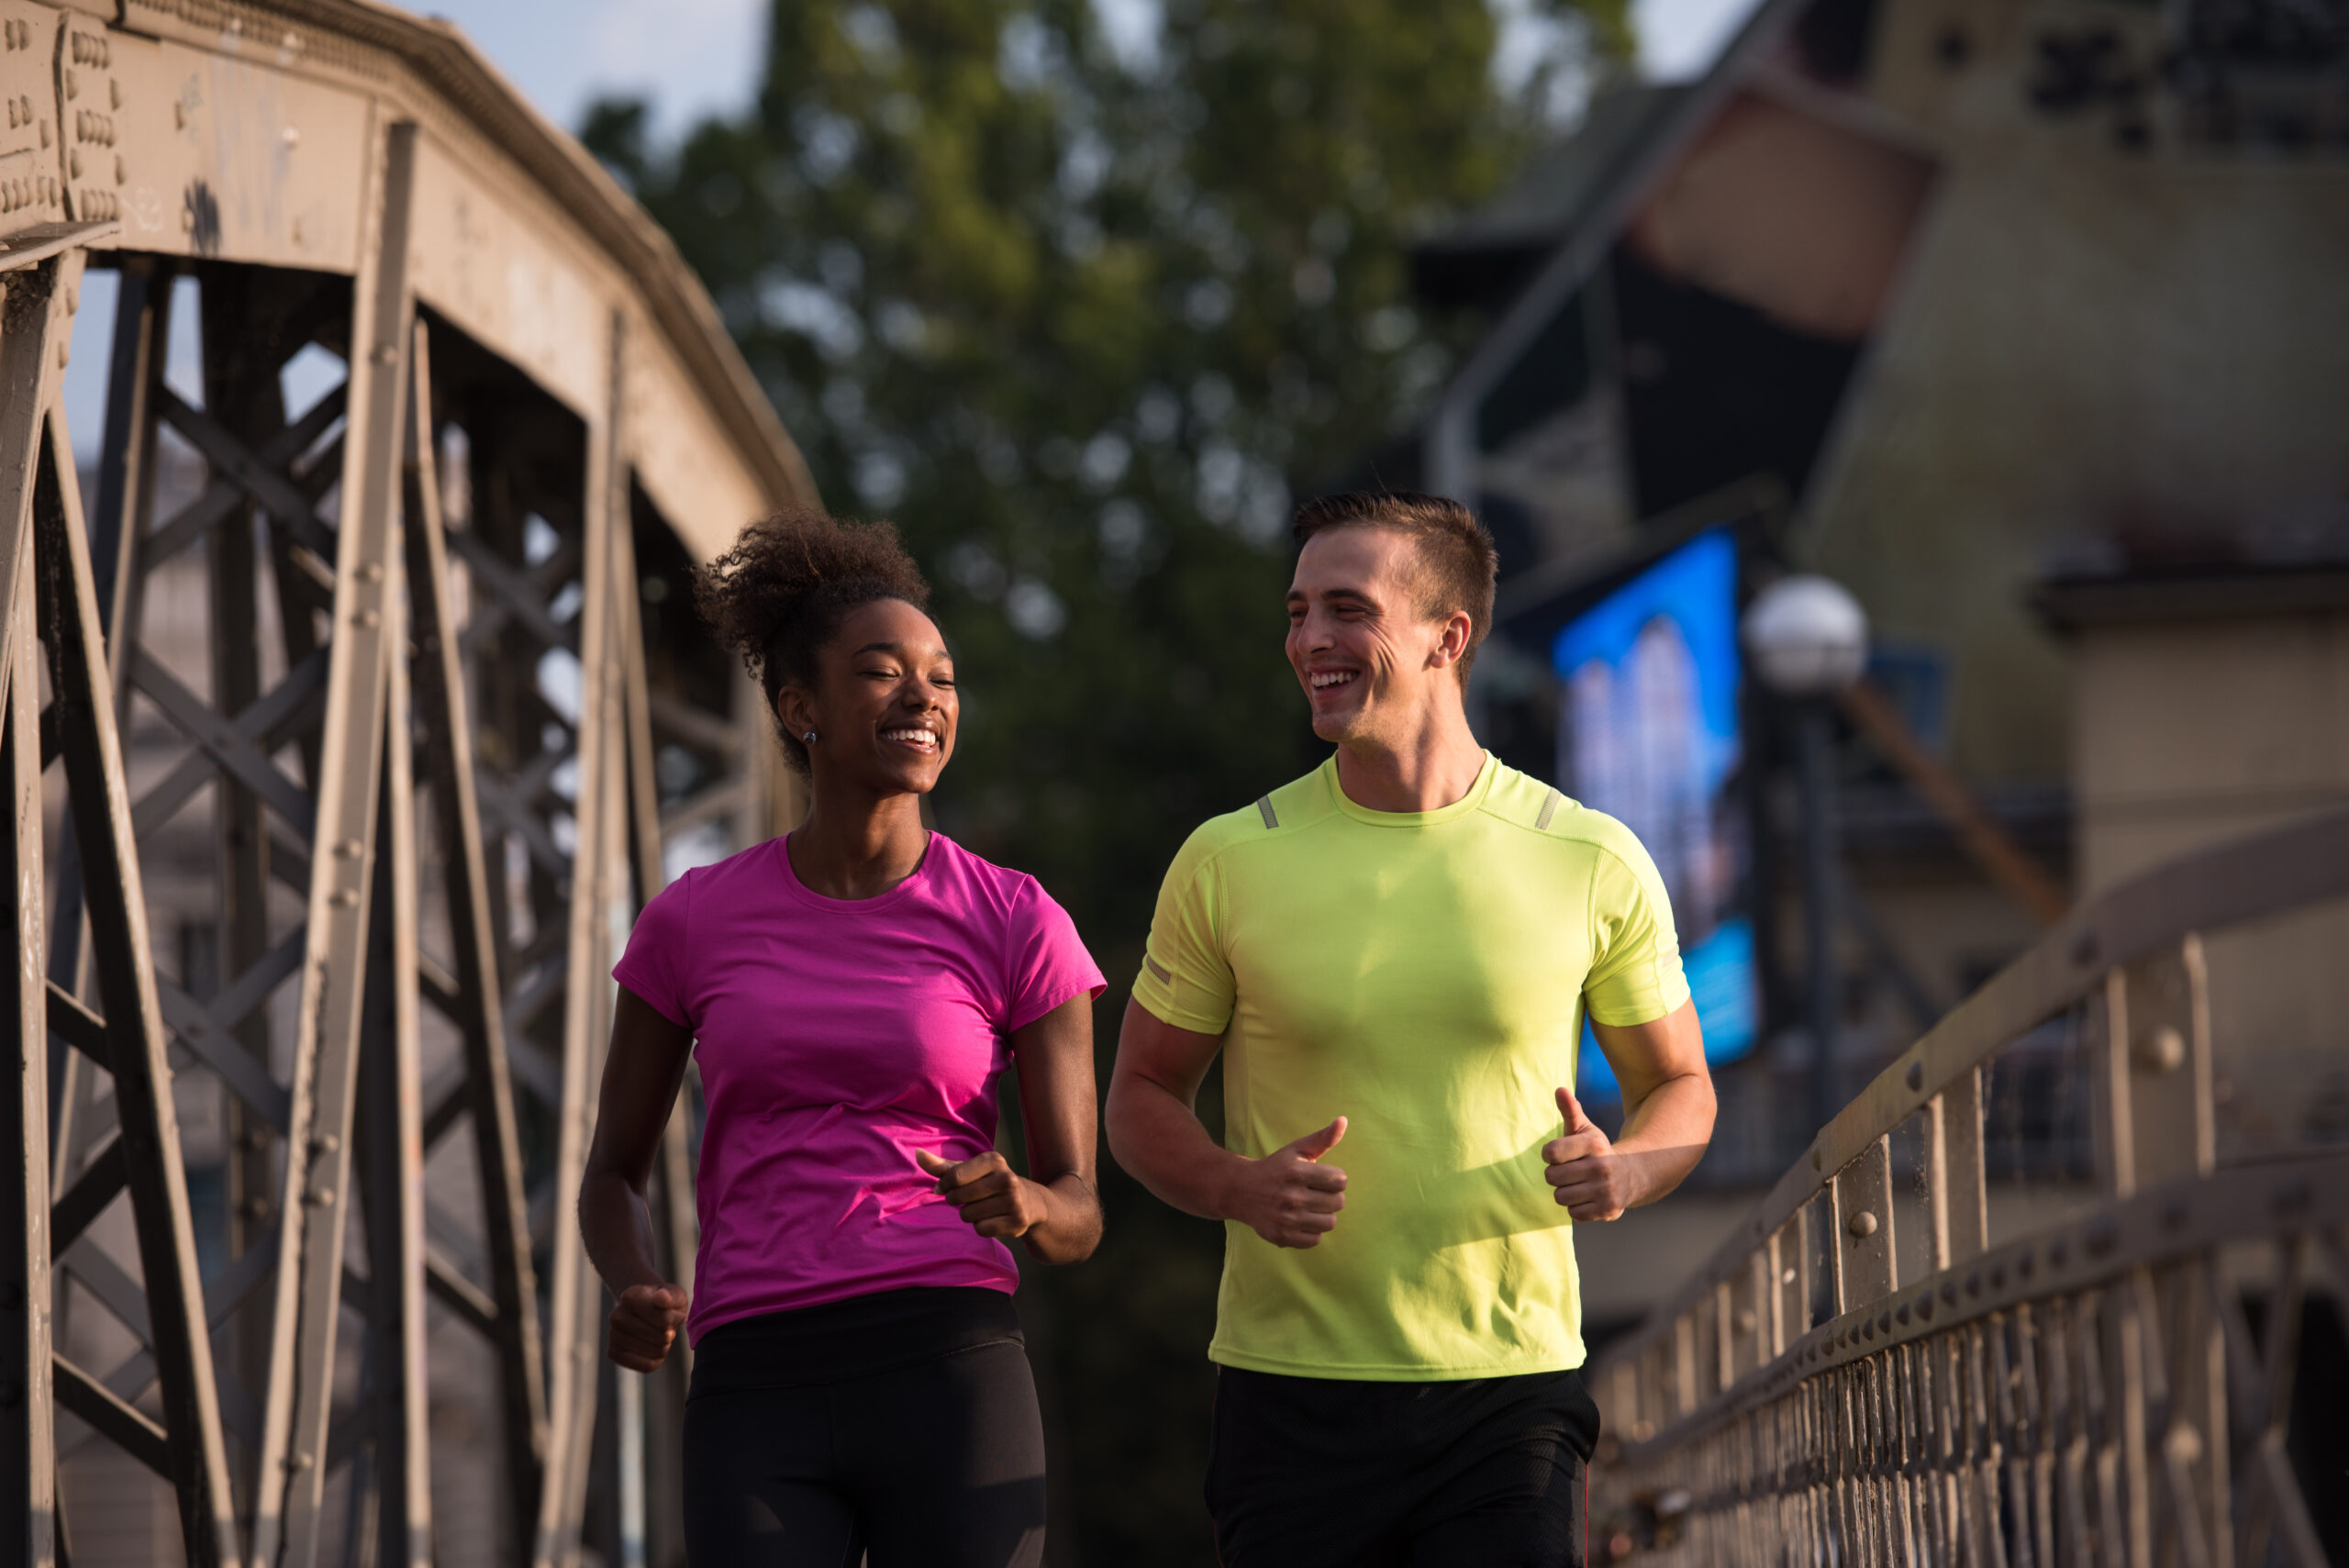
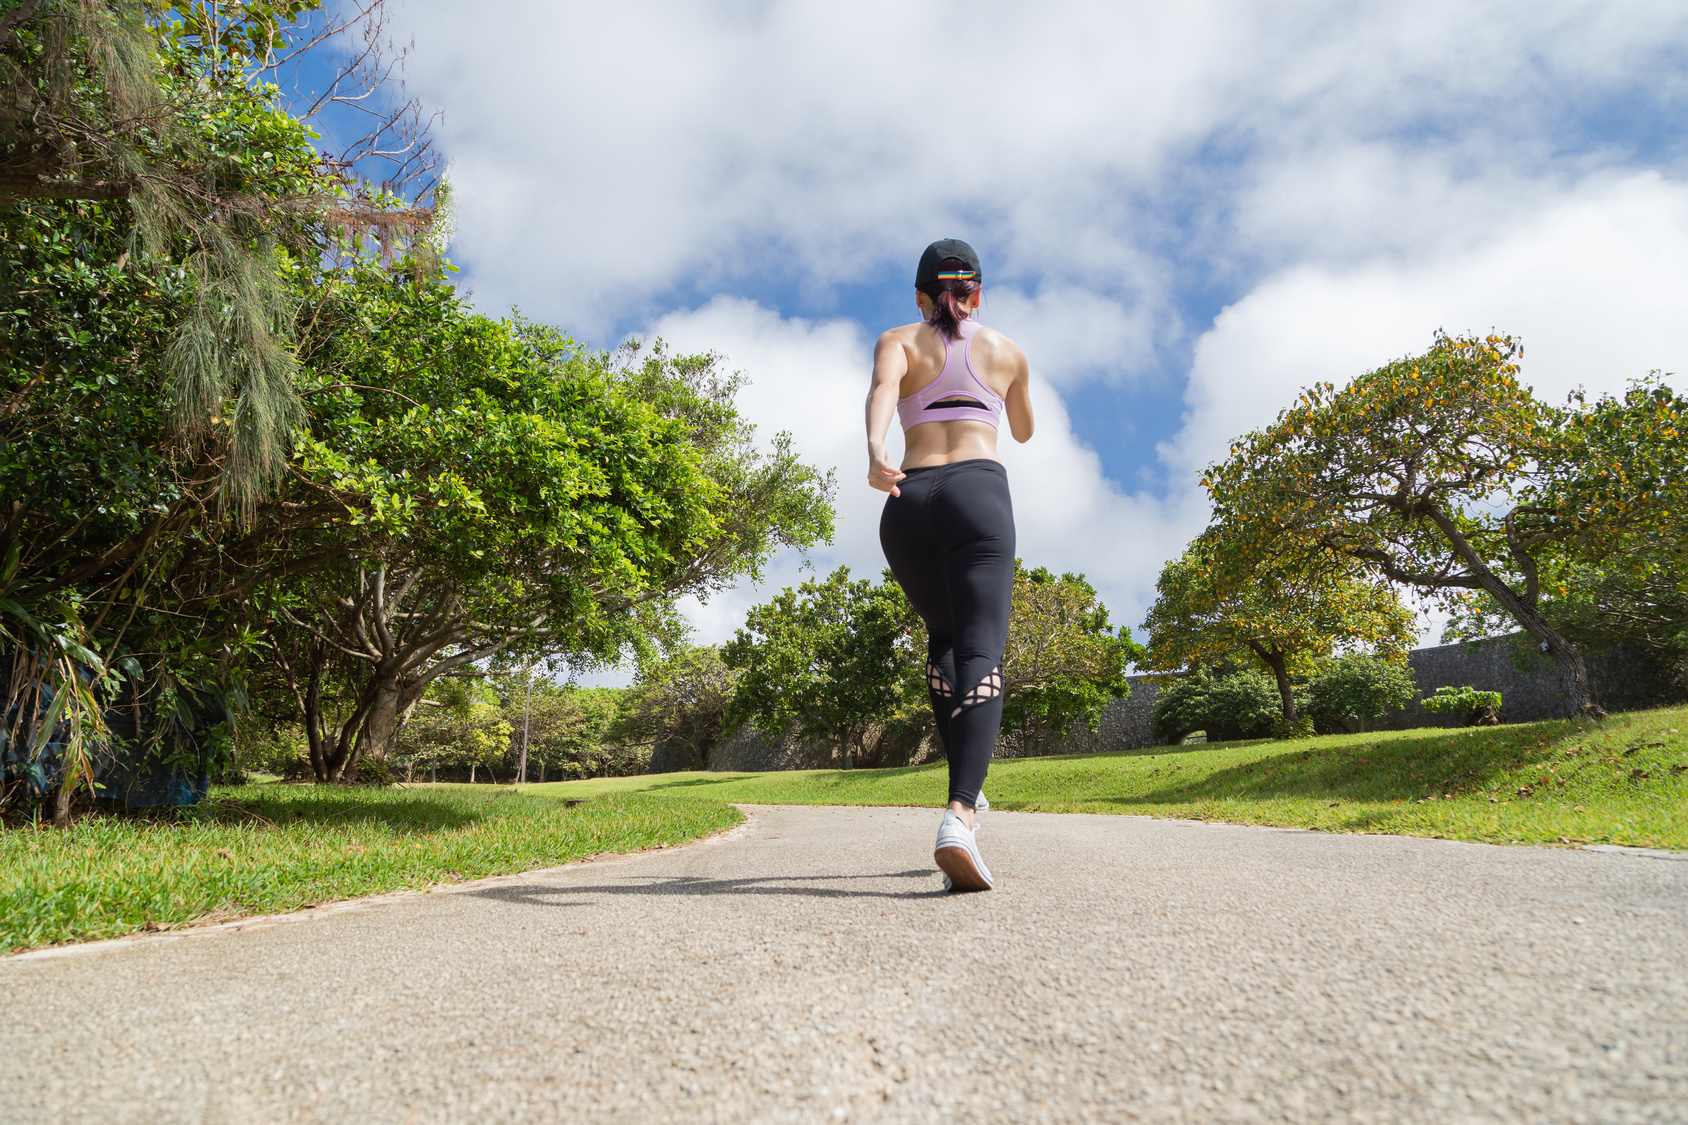
If you’re dealing with calf pain after running, I’ve been in your shoes.

Back in my early running days, I used to brush it off.

Tight calves? Just part of the grind—or so I thought.

Then one early morning, just past sunrise, a cramp hit me so hard I had to sit on the curb. I remember rubbing a knot the size of a golf ball and thinking, “Am I done running for good?”

That moment forced me to wake up and start listening to what my body was screaming.

What I learned from that scare didn’t just help me get rid of the pain. It helped me run stronger, smarter, and with way more awareness of how my body works.

Calf Pain Is the Sneaky Villain Most Runners Ignore

Here’s the truth: calf pain is super common, but it doesn’t get talked about enough.

According to data from elitehp.com.au, around 80–85% of runners report calf soreness after a run. That’s nearly all of us.

Most runners obsess over their knees or ankles. But your calves?

They quietly take the hit on every single stride. Each time your foot hits the ground, your calf has to absorb the impact and help push you forward.

If your calves are tired, weak, or too tight to do their job? Something else—like your knees or Achilles—ends up picking up the slack. That’s how injuries sneak in.

I’ve seen this play out with tons of runners I’ve coached. One guy I trained, let’s call him John, couldn’t shake off knee pain.

We tried everything.

Turns out, his calves were the problem. Once we got those calves stronger and looser, the knee pain faded. His form improved too. Calves might not be flashy, but they’re workhorses—and when they’re off, the whole machine suffers.

Why So Many Runners Brush It Off

It’s easy to overlook calf pain. It doesn’t usually scream for attention.

It starts as a tight, post-run ache. You think, “No big deal.”

And because runners are tough (sometimes to a fault), we power through. But that dull ache can hide some real issues—strained muscles, overused Achilles, or worse.

Here’s a wild stat: 80–85% of runners regularly deal with sore calves.

And if that doesn’t convince you this is a big deal, a simple calf release video from pogophysio.com.au racked up over 150,000 views. That many clicks don’t lie—tight calves are a problem we all face.

The bottom line?

Calf pain is your body’s way of waving a red flag. Ignore it, and it’ll bite you later. Address it now, and you’ll not only feel better—you’ll run better.

Know Your Calves: The Muscles That Keep You Moving

Let’s break it down real simple.

Your calf isn’t one muscle—it’s a tag team: the gastrocnemius and the soleus.

  • Gastrocnemius (aka “gastroc”): This is the bulging muscle you see when you stand on your toes. It crosses both your knee and ankle, and it’s built for power. Think sprints, jumps, and fast bursts.
  • Soleus: This guy sits underneath the gastroc. It’s flatter, deeper, and doesn’t get much credit—but it’s a beast. The soleus helps you push through long runs and supports you when you’re standing for long periods. According to sports rehab research, it can produce massive force—and it’s often undertrained. A big mistake I see in rehab routines all the time.

Together, these muscles join at the Achilles tendon, that thick cable running from your calf down to your heel. Every time you toe off the ground, your calf-Achilles combo powers that move.

If your calves are strong and loose, your stride becomes springy and smooth. But if they’re tight or weak? That spring turns into a rusty hinge.

Takeaway tip: Don’t skip calf work. Both strength and flexibility matter.

Why Do My Calves Hurt? Common Causes of Calf Pain in Runners

Let’s talk about it—calf pain sucks. It can hit hard or creep in slow, and whether it’s a sharp zing mid-run or that post-run tightness that won’t quit, it messes with your flow.

I’ve had my fair share of runs cut short by angry calves, and most of the time, the cause is one of these usual suspects:

1. Doing Too Much, Too Soon (Overuse and Strains)

This is the big one. I see it all the time—runners ramping up mileage or attacking hills before they’ve built the base.

The calf, especially that big gastroc muscle, doesn’t love surprises. Push it too far too fast, and boom—you’ve got a strain.

Sometimes it feels like a sharp snap mid-run, or just soreness and stiffness creeping in later. Even without a full tear, micro-tears add up fast.

I once coached a new runner who thought daily 5Ks with zero rest was smart. Spoiler alert: it wasn’t. His calves begged for mercy within a week. Be smart. Your body needs time to adapt.

2. Cold Calves = Angry Calves (Inadequate Warm-Up)

Rolling out of bed and straight into a run? That’s a recipe for tight calves.

Muscles need blood flow and prep. Skip the warm-up, and you’re shocking your legs into motion. It’s like flooring a cold engine—things go wrong fast.

Those cramps in mile one? Often from going 0 to 100 with tight muscles. A 5-minute dynamic warm-up can save you weeks of pain.

3. Poor Running Form & Gait

How you move matters. If you run on your toes or strike too far forward (forefoot striking), your calves eat up all the impact.

Add in uphill climbs or overstriding, and you’re giving your lower legs a beating. Even small quirks like toeing out or favoring one side can mess with you over time.

I’ve worked with runners who fixed chronic calf pain by simply adjusting stride length or aiming for a midfoot strike. Sometimes the solution isn’t more stretching—it’s better mechanics.

4. Muscle Imbalances or Weakness

Here’s the kicker—tight calves aren’t always strong calves. Sometimes they’re weak and overworked.

Maybe the gastroc is doing all the lifting while your soleus is snoozing. Or maybe your shins and hammies are too lazy to carry their share.

That’s when the calves step in and get mad. I tell my athletes: don’t just stretch, strengthen. Build balance. It pays off.

5. Dehydration & Electrolyte Issues

If you’ve ever woken up to a calf cramp that felt like a lightning bolt, you know what I’m talking about. Lack of fluids and key minerals—like magnesium, sodium, potassium—can trigger those brutal spasms.

Training in heat makes it worse. One guy I coached was cramping constantly until we added a magnesium supplement. Magic.

Don’t underestimate the power of water and electrolytes—they’re your cramp insurance.

6. Footwear Fails & Foot Mechanics

Your shoes matter.

Worn out, unsupportive, or just wrong-for-you shoes can stir up calf pain fast.

Minimalist shoes can stretch your calves more—sometimes too much. Shoes with high heel drops might shorten the calves over time.

Rapid switches between the two? Bad idea.

Also, foot shape matters. Flat feet can lead to overpronation stress, high arches to poor shock absorption. A runner I know killed his calf pain just by adding arch support insoles. The right shoe setup changes everything.

7. Old Injuries or Hidden Causes

Not all calf pain is straightforward. Sometimes it’s nerve-related, like sciatic issues sending pain signals to your calves. Old Achilles injuries, nerve tension, even circulation problems can be the culprit.

I’ve seen runners deal with calf pain for months only to find out it was a hidden nerve entrapment. If your pain lingers, feels odd, or swells up, get it checked. Don’t guess.

Bottom line?

Calf pain usually isn’t from just one thing. It’s a mix—bad shoes, skipped warm-ups, heat, form flaws, and more.

The fix? Take an honest look at your training, your gear, and your habits. The causes are fixable if you pay attention.

And trust me—as someone who’s had to limp home more times than I’d like to admit, fixing it is worth it.

Next up, we’ll dive into how to treat calf pain and keep it from derailing your training.

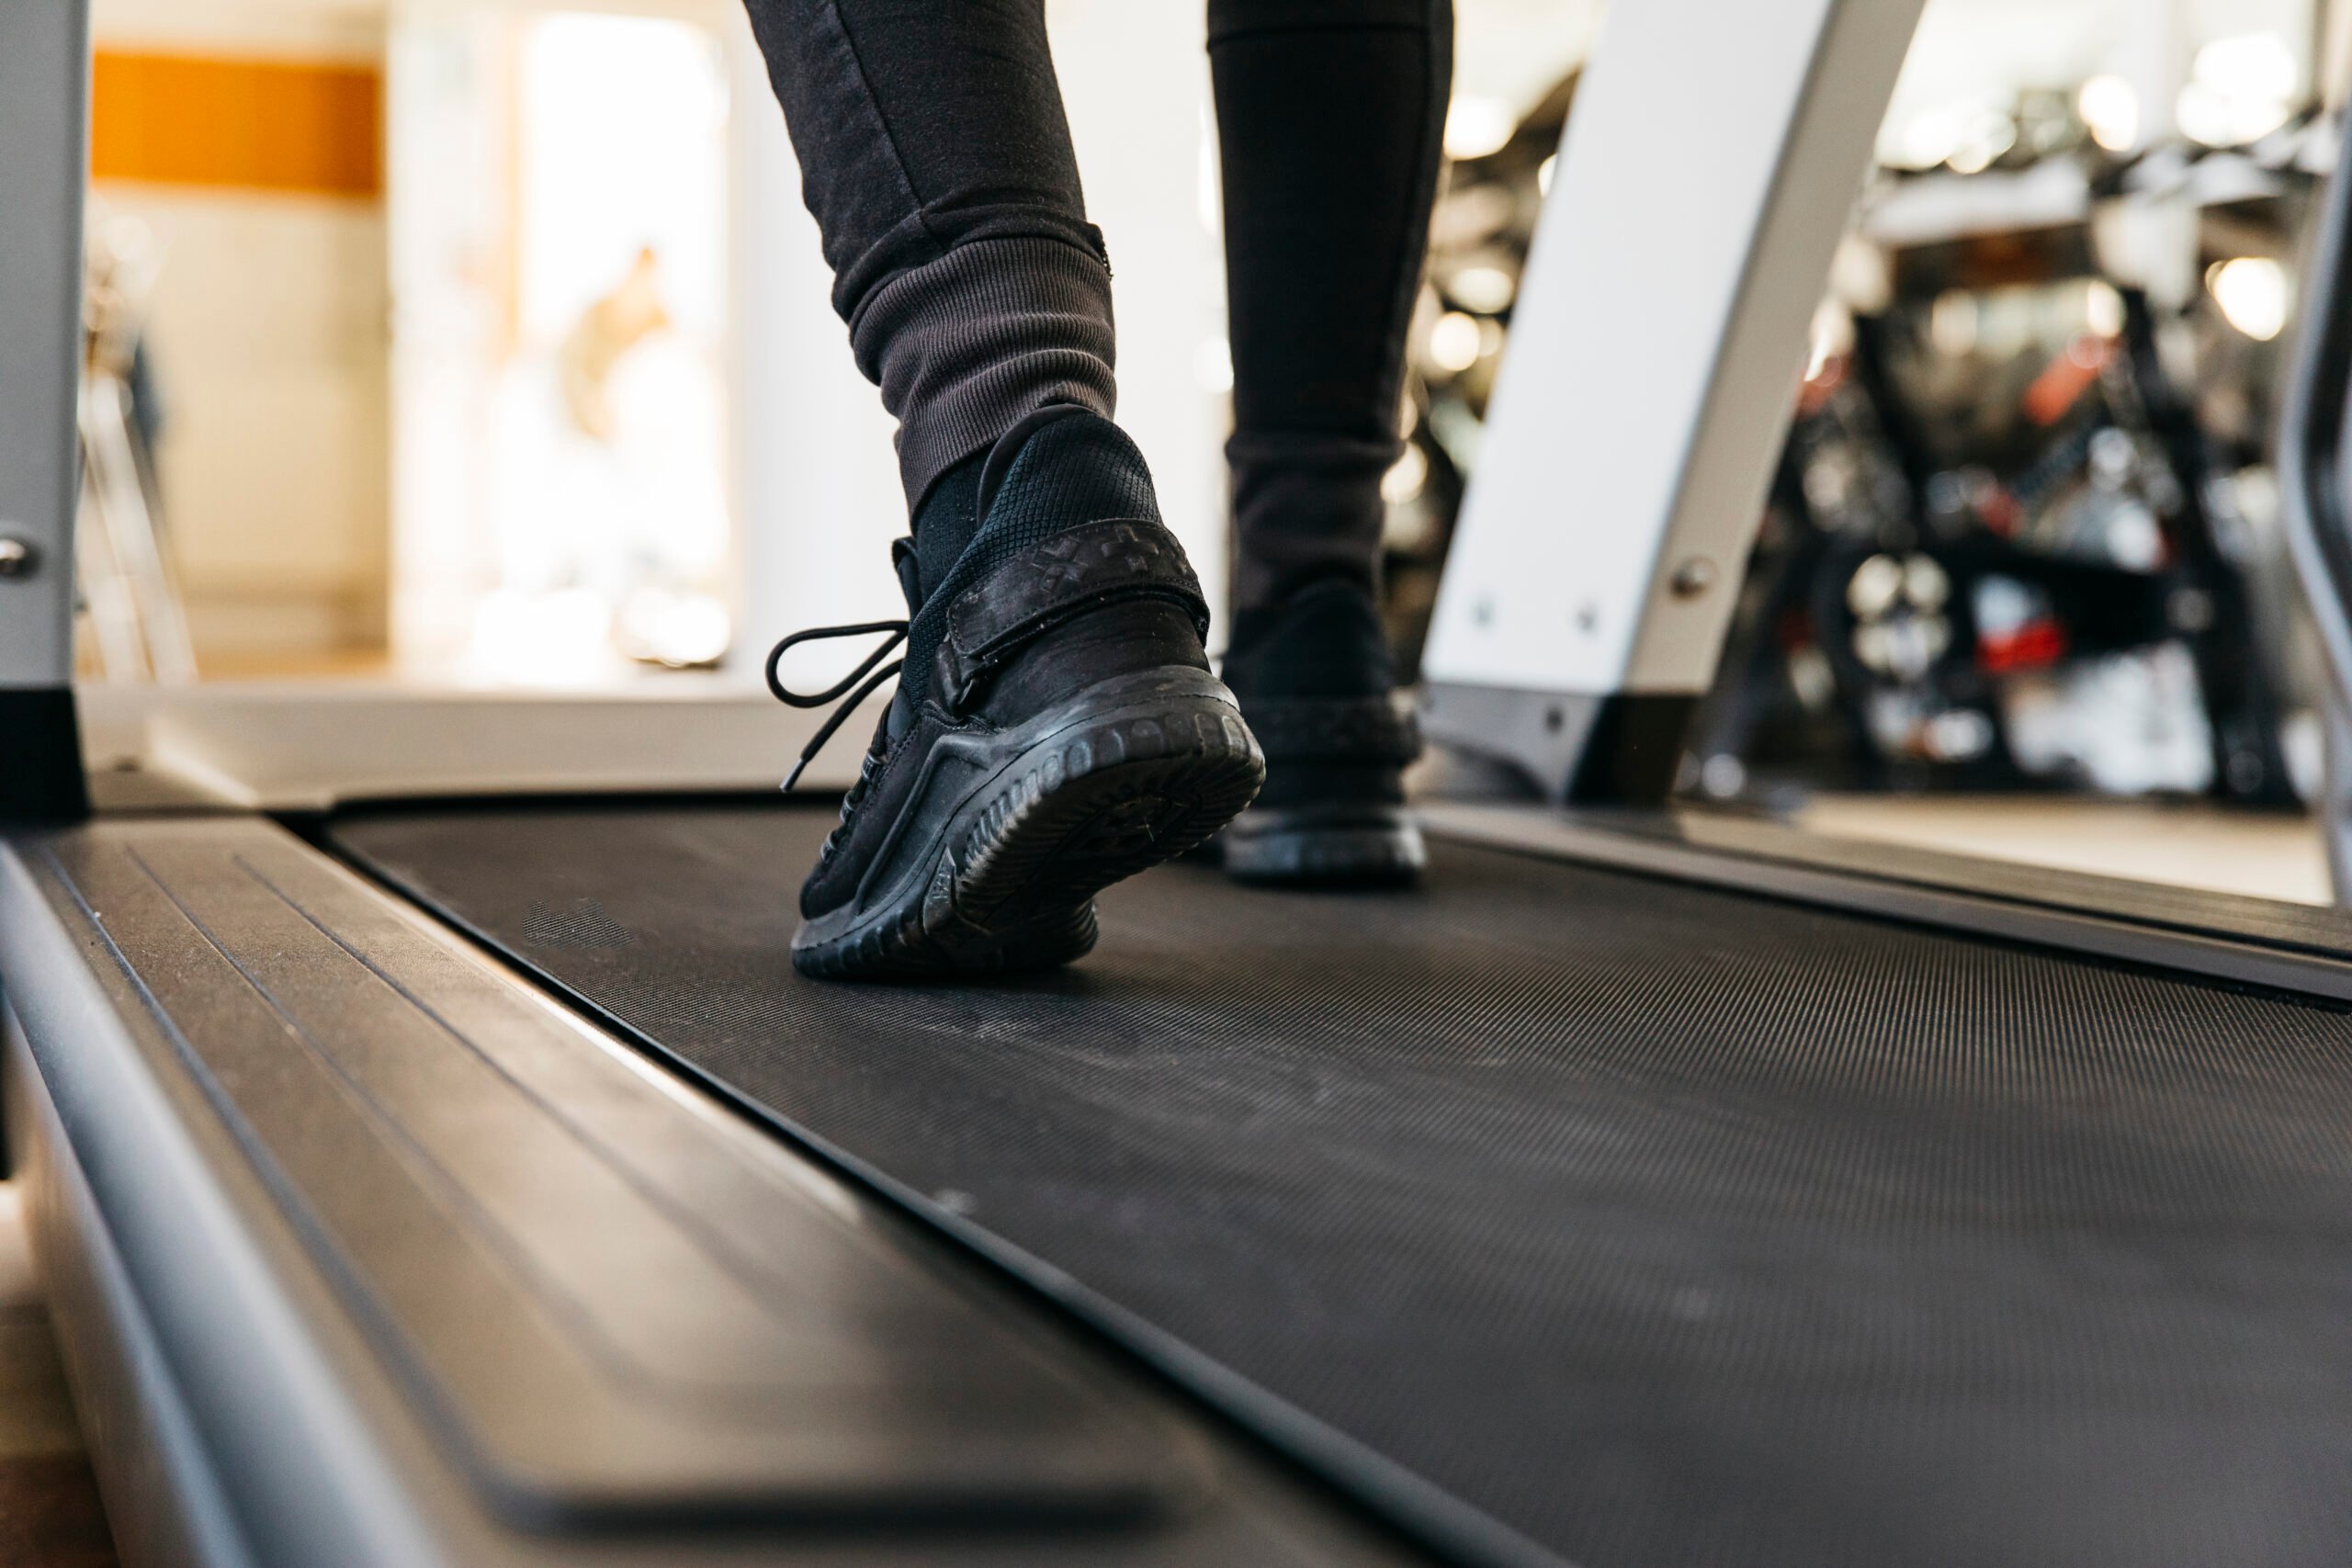
Can I Keep Running with Sore Calves?

I get this question a lot from runners I coach—and honestly, I’ve asked it myself plenty of times:
“Is it okay to run with sore calves, or am I just setting myself up for injury?”

Well, it depends. And I’ll break it down for you the way I would with any runner after a tough week of training.

1. Mild Soreness? You’re Probably Good to Go (But Don’t Be Stupid)

If your calves feel tight after a hard run, new shoes, hills, or speedwork—and we’re talking low-level soreness here, maybe a 2 or 3 out of 10—you’re likely dealing with Delayed Onset Muscle Soreness (DOMS). It’s your calves saying, “Hey, we worked hard yesterday.”

This kind of soreness is normal. In fact, it often means you’re getting stronger. If movement helps it ease up, you’re okay to keep going—lightly. No all-out hill repeats the next day.

What I tell my runners: use the 24-hour rule. If the soreness eases up within a day and you’re not limping or changing your stride, then an easy run or some cross-training should be fine.

I’ve had plenty of runs where my calves were stiff at the start but loosened up as I got going. The key is to listen, not power blindly through. You’re not trying to prove toughness—you’re trying to stay consistent.

2. Sharp Pain or No Improvement? Time to Chill

Now, if that calf pain is sharp, locked-in, or just won’t go away—even with rest—stop running. I mean it.

Here’s where runners mess up: they feel something “off,” ignore it, and end up on the sidelines for six weeks instead of one.
I’ve seen it happen. Hell, I’ve done it.

Red flags you should never ignore:

  • Pain that messes with your stride
  • Swelling or bruising
  • Pain that’s still there even when you’re just walking around

One runner told me he heard a pop mid-run, pushed through it like a hero, and then couldn’t walk the next day. That “pop”? Classic calf tear.

One of the physiotherapy clinic site calls this a serious strain, and yeah—they’re right. Keep running on that, and you’re looking at weeks (or months) out. If anything feels off, get it checked.

And let’s talk about chronic tightness—if your calves never feel loose, even after warming up or stretching for weeks, then something’s up. Could be a buildup of training mistakes, or something deeper like Achilles tendinopathy creeping in.

3. Not Sure? Rest Anyway. It’s Not Weakness—it’s Wisdom

If your calves are barking at you and you’re torn between pushing through or resting—just rest. One or two skipped runs won’t wreck your training. But ignoring warning signs? That’s how you spiral into injury.

I’ve told runners this a hundred times:

“You won’t lose all your progress by taking 48 hours off. You might lose everything if you don’t.”

Take a short break, stretch, foam roll, hydrate, and reassess.

I read a story on Reddit where a guy tried to “run through” a calf strain and ended up DNF’ing a race. After finally taking 10 days off and rehabbing properly, he came back and crushed a personal best.

That’s the power of patience. Your body heals—if you let it.

Real Talk: Ever Heard of the “Calf Heart Attack”?

Old-school runners sometimes joke about this thing called a “calf heart attack.”

It’s not a real heart attack, obviously—it’s that sudden tearing pain in the calf, often in the medial gastrocnemius, that hits during speedwork. Feels like someone shot your leg.

It’s brutal. It happens more in runners over 40. And trust me—you don’t run through it.

You stop. Right there. Ice it. Rest it. Start a slow recovery plan.

As study explains, as we age, our calf muscles lose elasticity. That’s why warming up properly, especially before speed workouts, becomes non-negotiable.

You’re not fragile—you just need to train smarter.

Quick Relief: How to Loosen Up Those Calves

Let’s say you’re dealing with tight calves right now—not a tear, just that annoying tightness that kills your stride. Here’s what I’ve found helps the most.

1. Walk Without Pain? Then Start Calf Raises

This is basic but golden: if you can walk without pain, try a few calf raises. Start slow. Test the waters. If there’s no pain, you’re probably in the clear to start easing back into activity.

2. Gentle Stretching (But Don’t Be a Hero)

Stretching can help—but it’s not about forcing things. You’re inviting the muscle to relax, not yanking it like it owes you money.

Try these:

  • Wall Calf Stretch (Straight Leg): Press your heel into the ground with a straight back leg. You should feel this in the top of your calf (gastroc). Hold for 30 seconds.
  • Soleus Stretch (Bent Knee): Same position, but bend your back knee slightly to hit the deeper soleus muscle. Again, hold it—don’t bounce.
  • Downward Dog Pose: Classic yoga move. Push hips up and back, heels reaching for the ground. It’s a great all-over stretch for the lower legs.

All of these come from years of trial and error—and yep, they’re backed by sources like runnersblueprint.com and pogophysio.com.au.

But remember: if you’re freshly injured, don’t stretch aggressively right away. Early on, stick with ankle circles, light massage, and walking around to keep blood flowing.

Some of my runners do calf stretches every night before bed. It helps with morning stiffness, especially if you’re ramping up mileage. But don’t expect miracles if stretching is your only recovery tool—it’s part of the plan, not the whole thing.

Can You Run with Sore Calves? Here’s the Real Talk

I’ve lost count of how many runners ask me this:
“Coach, my calves are sore. Should I still run or am I asking for trouble?”

Here’s the short answer: it depends. But let’s break it down properly—because not all soreness is the same.

1. Normal Post-Run Soreness? You’re Probably Good to Go (With Caution)

If it’s that dull, tight feeling a day or two after a tough session—especially if you did hills or pushed the pace—chances are it’s just DOMS (Delayed Onset Muscle Soreness). That’s your muscles saying, “Hey, we worked!”

We’re talking mild stiffness. Maybe a 2 or 3 out of 10 on the pain scale. Nothing sharp. No limping. Just that “earned it” kind of sore.

In this case, I usually tell runners to go for an easy jog, do some light cross-training, stretch, hydrate, and move. You’re not broken. You’re adapting.

I like the “24-hour rule”:
If it feels better a day after the run and nothing is sharp or weird, you’re probably good to go. Just don’t hammer it again too soon.

Real-life example?
Back when I added speedwork after a long break, my calves screamed for two days. But with some slow jogs and proper warm-ups, they calmed down—and got stronger for it.

2. Sharp, Stabbing, or Not Going Away? Time to Hit Pause

Now let’s talk about the stuff you shouldn’t ignore.

If the pain is sharp, it sticks around for more than two days, or it messes with your stride—don’t push through it. Seriously. I’ve seen runners take a one-week strain and turn it into a six-week nightmare because they “didn’t want to lose fitness.”

Red flags include:

  • A sudden “pop” during a run (that could be a tear).
  • Bruising or swelling in the calf.
  • Pain even when you’re just walking or sitting still.
  • Limping or shifting your gait to compensate.

If that’s what you’re feeling, stop. Ice it. Rest. And get it checked out if it doesn’t improve.

One study noted that older runners—especially those doing speedwork—are more likely to suffer serious calf injuries, often in the medial gastrocnemius (that’s the inside part of the calf that tends to “grab” suddenly).

3. Not Sure? Take a Day (Or Two)

This one’s simple.

If your calves are barking and you’re not sure if it’s just soreness or something worse—take a day off. Or two. Rehab with some light movement, foam rolling, maybe swimming or cycling. See how it responds.

You won’t lose fitness in 48 hours. But you could lose six weeks if you ignore the early warning signs.

One Reddit runner shared that he tried to “tough it out” through a calf strain and ended up DNF’ing a race. But after finally giving himself a proper 10-day break, he came back and PR’d a few months later.

Lesson: the body knows. Let it recover, and it’ll reward you.

Bonus Tip: Ever Heard of a “Calf Heart Attack”?

Yep, it’s a thing—kind of. That sudden, grabbing pain in the middle of a workout that feels like you just got sniped. It’s not a heart attack, obviously—but older runners (especially over 40) know this one well.

It’s usually a tear in the medial gastroc, and it hits hard. Happens most often during speedwork without a solid warm-up.

If this happens, stop immediately. Ice it. Rest. You’ll need a recovery plan—don’t even think about “running it off.”

As we age, our calf muscles lose elasticity. That’s why proper warm-ups and slow progressions become non-negotiable. Take it seriously, or risk a big setback.

Got Tight Calves Right Now? Here’s What Actually Helps

Let’s get to the good stuff—what to do when your calves are tight but not torn.

1. Can You Walk Without Pain?

Before you run, check if you can:

  • Walk pain-free
  • Do a few calf raises with no discomfort

If you can’t do those? You’re not ready to run. Back up and heal first.

2. Gentle Stretching (But Don’t Yank on It)

Stretching can help—but only when it’s done smart.

Here are my go-tos:

  • Straight-leg Calf Stretch (Gastroc): Hands on the wall, one foot back, heel pressed down, leg straight. Feel that stretch high up in the calf? Hold it for about 30 seconds. No bouncing.
  • Bent-Knee Calf Stretch (Soleus): Same setup, but this time bend the back knee slightly. This gets deeper into the soleus. Again, hold for 30–45 seconds.
  • Downward Dog Pose: Push your hips up, heels toward the ground, hands planted. You’ll feel it from your calves to your hamstrings. You can pedal your heels too—works each side individually.

Just a reminder: stretching shouldn’t be torture. You’re coaxing the muscle to relax, not punishing it.

A bit of tension is fine. Sharp pain? Back off.

Also—don’t stretch aggressively in the first 24–48 hours after a strain. Stick to light massage, ankle circles, and gentle mobility work first.

3. Make Stretching a Daily Habit

I tell my athletes to stretch calves every day, especially after a run while the muscles are still warm.

Before bed is a great time too—helps cut down that brutal morning stiffness.

One runner on Reddit said, “I stretch constantly and they’re still tight!”
And I get it. That’s because stretching is only part of the fix. The other key? Strength work. (We’ll get to that in the next section.)

4. Self-Massage and Foam Rolling (Calf Release Techniques)

You ever hit a tight spot in your calf with a foam roller and feel that “hurts-so-good” kind of pain? That’s your muscle saying, “Finally, some help.”

Self-massage is one of the simplest, most effective ways to loosen up tight calves and get the blood moving again.

Here’s what’s worked for me and the runners I coach:

● Foam Rolling

Grab a firm foam roller, drop to the floor, and get to work. Sit with one calf on the roller and support yourself with your hands behind you.

Roll slowly from your ankle to just below the knee.

Find a knot? Pause there. Breathe into it for 20–30 seconds and let the muscle release.

If you want more pressure, stack your other leg on top. Yeah, it’ll feel uncomfortable—but in a good way. That deep pressure can help flush things out.

One technique that’s gotten a lot of love is the “foam roller sit”—basically sitting on a long roller with it under your calves and rocking side to side. I saw it on PogoPhysio, and it’s been a game changer when my calves are cranky. No fancy moves—just gravity doing the work.

● Massage Stick (“The Stick”)

Looks like a rolling pin, and honestly, a kitchen rolling pin can do the trick in a pinch (I’ve done it). Just grab the handles and roll it up and down your calf like you’re kneading out pizza dough.

Reddit is full of runners who swear by this. One even said, “I love the pain of rolling out my calves”—and yeah, I kinda get it. That sweet relief after a stick session is worth every wince.

If you’ve been getting deep knots post-run, this one’s easier to control than a foam roller. And it takes about two minutes to get those calves feeling human again.

● Lacrosse or Massage Ball

For those spots that foam rollers can’t touch—usually around the outer calf or near the Achilles—a firm ball is your best friend.

Sit down, place it under your calf, and apply pressure. You can move in circles or just sit on that spot until the tension fades.

Just be careful near your Achilles—don’t go too hard there. Focus on the meaty upper part of your calf.

● Manual Massage

Got a massage therapist? Great.

If not, your own thumbs will do. Use your knuckles or thumbs to work up and down the calf, always pushing toward the heart.

I’ll do this at night while watching Netflix—thumbs digging into the tight spots while I zone out. A little lotion or oil helps smooth things out too.

You don’t need an hour. Just a few minutes a day keeps tightness from piling up. I keep a foam roller in my living room and a massage ball in my backpack. Recovery on the go.

Bonus tip: Heat helps before a massage or rolling session. A hot shower or a heating pad for 10 minutes gets the muscle loosened up—kind of like warming up clay before you shape it.

5. Compression & Elevation (Recovery Boosters)

Compression socks aren’t just for show. When I’m wearing them during long runs or hard workouts, my calves thank me later. Less soreness. Less wobble. More support.

While research is mixed on performance benefits, plenty of us runners—myself included—feel better after wearing them. Especially on days when I’ve got errands or work right after a long run.

Post-run, they help by improving blood flow and clearing out the junk that builds up after tough workouts. No fancy gear needed—just slide on the sleeves and let them do their thing.

Got tired legs? Elevate ‘em. Throw your feet up on a wall or pillow for 15–20 minutes post-run. I like to do the “legs up the wall” yoga pose—easy, calming, and it helps reset your calves. It’s a zero-effort win.

6. Topical Stuff: Balms, Rubs, and Gels

Magnesium spray. Arnica gel. Menthol rubs. I’ve tried them all. Do they fix the root cause? No. But they do offer short-term relief.

That warm, tingly feeling can distract from the soreness, and sometimes just massaging the stuff in is half the therapy. But a word of warning: don’t use heat rubs under compression sleeves unless you enjoy the feeling of lava on your legs. Trust me.

7. Active Recovery: Keep the Blood Flowing

This one’s big. Rest has its place, but movement heals.

If my calves are cooked the day after a big run, I don’t just crash on the couch. I go for a bike ride, take a brisk walk, or hit the pool. Nothing crazy—just enough to get the blood moving. That circulation helps clear out soreness and repair the muscle.

It’s not about being a hero. It’s about being smart. Gentle movement beats total rest for tightness 9 times out of 10.

Calf Pain Can Be the Fuel for Your Comeback

Here’s what I tell my runners: setbacks build grit. Calf pain isn’t just a nuisance—it’s your shot to level up. I’ve coached athletes who went from limping through easy runs to smashing PRs, simply because they stuck with the rehab process and kept showing up.

That can be you.

So if your calves have been a weak link, this is your moment to flip the script. Let those frustrating miles fuel your next breakthrough.

Every little step counts. That stretch today? That extra water bottle? That strength set you almost skipped? They all lead to one thing: crossing the line strong and pain-free.

Your Quick-Action Checklist: Beat Calf Pain for Good

  • Warm up like you mean it. Don’t skip the basics.
  • Strengthen with focused calf moves—raise, hold, repeat.
  • Stretch and roll after hard runs. Make it part of your cool-down.
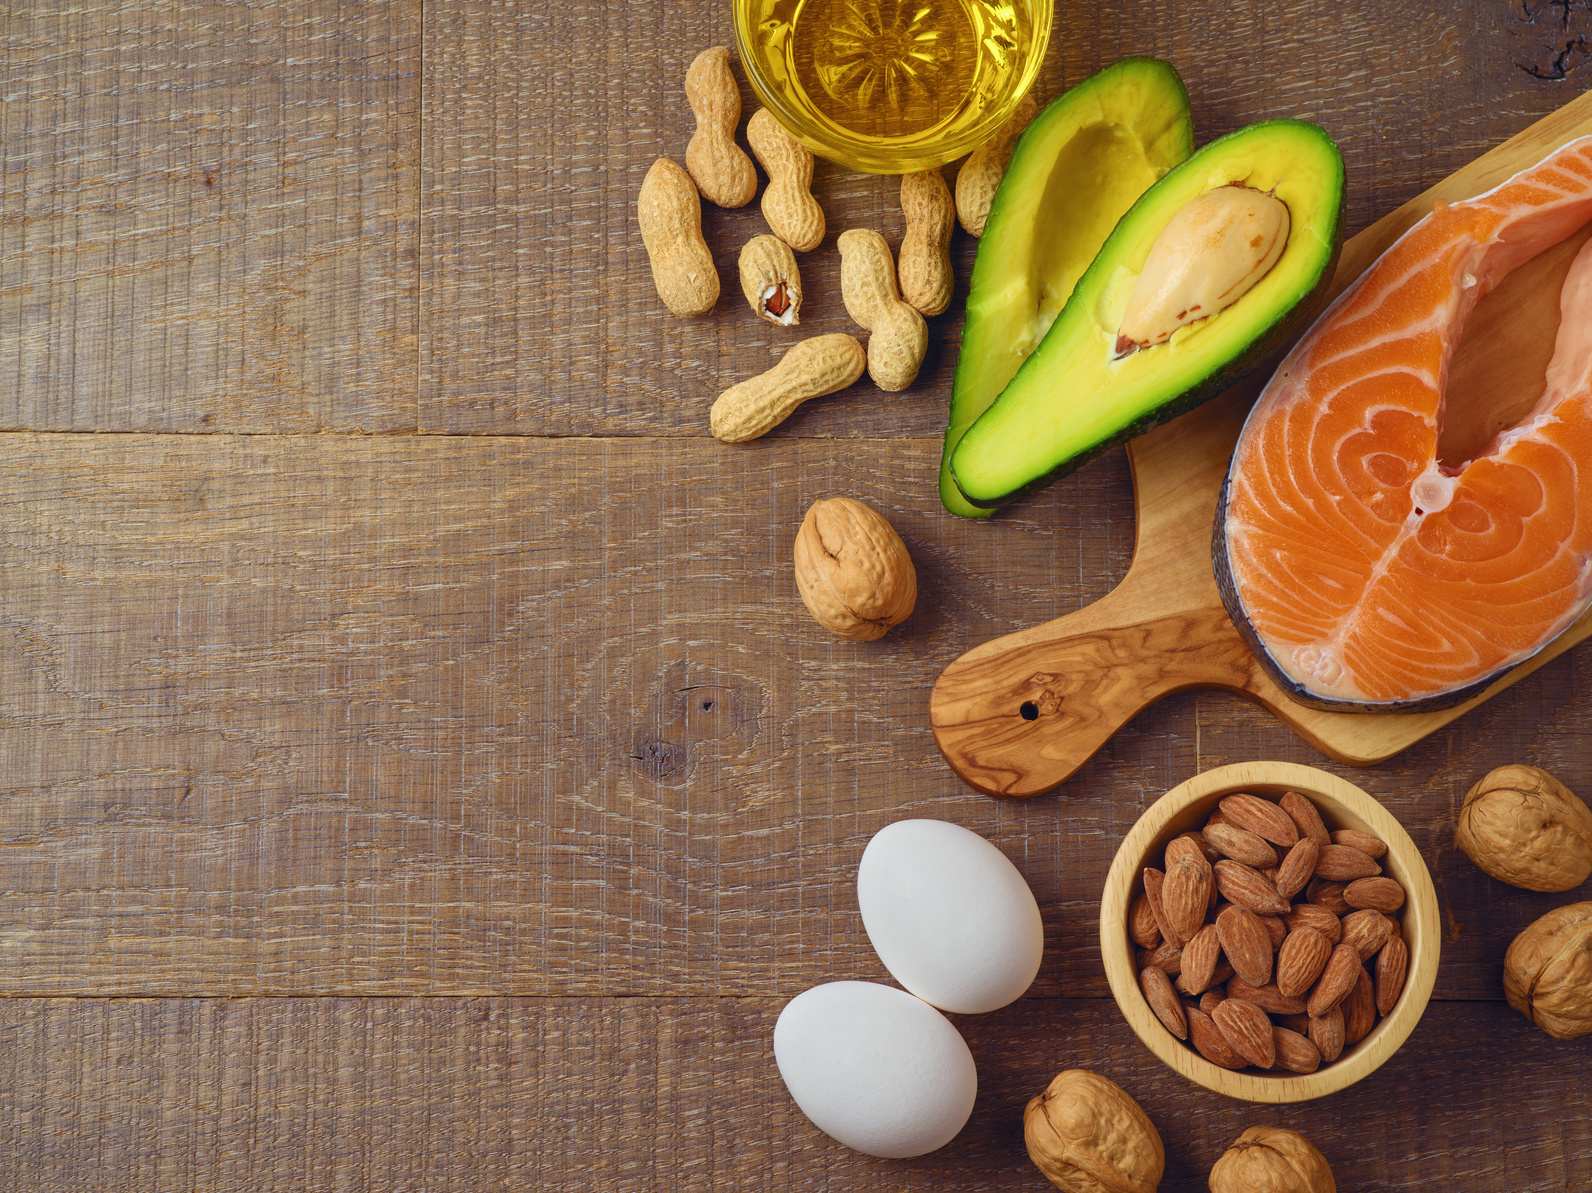
  • Hydrate and fuel right. Your calves are muscles—they need it.
  • Rest when needed. One day off beats six weeks on the sideline.
  • Don’t ignore early signs. Catch it while it’s small.
  • Ask for help if it lingers. A good PT can save your season.

Now it’s on you. Lace up with purpose, take these tips seriously, and get to work. Stronger, pain-free runs are waiting. And trust me—there’s nothing better than feeling your legs fire without fear.

Go out there and own it.

Keep running strong,
David D.