Let’s get something straight — the 10K isn’t some “halfway point” between a 5K and a half marathon.
It’s its own beast. The kind of race that’s just short enough to demand speed, and just long enough to punish you if you fake the fitness.
Run it too easy? You’ll finish wishing you’d pushed harder.
Go out too hot? You’ll be praying for the finish line before you even see 7K.
The 10K doesn’t care if you ran a marathon last month or smashed a 5K last week — it will find your weaknesses.
That’s exactly why smart runners use the 10K as a training weapon. Master it, and you sharpen every tool in your kit: endurance, speed, pacing, grit.
In today’s guide, I’ll walk you through every piece of the puzzle — whether you’re lacing up for your first 10K or chasing a sub-40 finish. We’ll talk workouts that work, the mental game, race-day execution, and even the little details like taper, gear, and fueling that can make or break your run.
Bottom line: this isn’t just about crossing a finish line. This is about learning to race with purpose — and to run smarter, stronger, and faster than ever.
Here’s what we’ll cover:
Table of Contents
- Why the 10K Is the Smart Runner’s Distance
- The Anatomy of a 10K Race: What Happens to Your Body & Mind
- Runner Types: Grinder, Speedster, Tactician — Train Your Way
- Building Your 10K Season: Macro & Micro Training Cycles
- Racing Smart: Practice vs. “A” Races
- The 10K Training Toolbox: Speed, Stamina, Long Runs, Recovery
- The Mental Game: Beating the 6K Crisis & Finishing Strong
- Gear, Shoes & Tech: What Matters, What’s Hype
- Fueling for the 10K: Before, During, and After
- Strength & Cross-Training: Staying Fast and Injury-Free
- The Taper: Show Up Sharp, Not Sluggish
- Level-Specific Training Plans
- Couch to 10K
- 10K Under 80 Minutes
- Breaking 60 Minutes
- Sub-50 10K
- Chasing Sub-40
- Race-Day Execution: From Warm-Up to Kick
- Common Mistakes & How to Avoid Them
- Beyond the Finish Line: What to Do After Your 10K

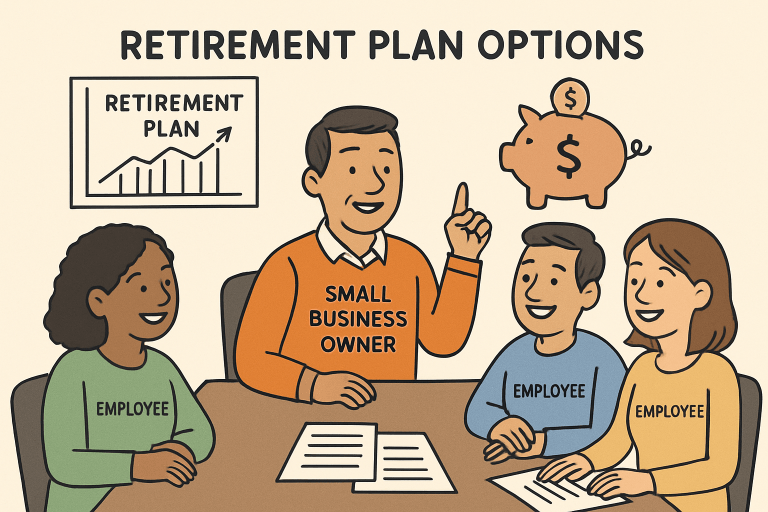
Why the 10K Is the Smart Runner’s Distance
Let’s get something straight — the 10K is not just some middle-of-the-road, in-between race. It’s not the “lite” version of a half marathon, and it’s definitely not a long 5K.
The 10K is its own beast. And it’s tougher — and smarter — than most runners give it credit for.
Lemme tell you more my friend…
The Overlooked Powerhouse
Back in the day, the 10K was the race for everyday runners.
But now? Everyone’s either chasing a PR in the 5K or racking up medals in half and full marathons.
The 10K gets forgotten. It’s the middle child — stuck between fast and long.
But you know what? That’s exactly why it’s so damn powerful.
Training for a 10K forces you to get better at everything — not just speed, not just distance, but both.
You want endurance? Gotta earn it.
You want to kick strong in the final mile? You better build that gear.
It’s a race that exposes your weaknesses — all of them. And that’s why it makes you a stronger, smarter runner.
Tactical As Hell
Don’t let the distance fool you. A 10K isn’t “short and sweet.”
It’s long enough to hurt, but short enough that if you blow the pacing, there’s no time to recover. Go out too fast? You’ll be praying for the finish line by 6K. Go out too slow? You’ll leave gas in the tank.
It’s like running on a knife edge.
You’ve got to pace with intention. Know exactly when to hold steady, when to lean in, and when to go full send.
Runners who treat the 10K casually get humbled hard — usually somewhere around 7K when their legs are cooked and the end feels just far enough away to make them doubt everything.
The Anatomy of a 10K Race
So what exactly is going on inside your body during a 10K? Why does it feel fine for 15 minutes… then suddenly like someone turned up the pain dial?
Let’s break it down, runner-style.
Aerobic Engine, Anaerobic Burn
You’ve probably heard the 10K is “mostly aerobic.” That’s true — about 85–90% of your energy is coming from oxygen-fueled metabolism. But don’t let that lull you into thinking it’s just a long, steady jog.
Because at race pace, you’re flirting with your lactate threshold — that fine line where your body starts pumping out lactate faster than it can clear it. You’re right on the edge the entire race. And if your aerobic base isn’t strong? That edge becomes a cliff real quick.
Enter the Pain Cave – Around 7K
There’s a moment in almost every 10K — usually around 6 or 7K — when things get real. Your breathing gets ragged. Legs start to tie up. Your brain starts whispering, “You sure you can hold this?”
This is the pain cave — and it’s where races are made or lost.
Physically, lactate is piling up. You’ve gone from “managing discomfort” to “hang on for dear life.” Mentally, it’s a war zone. Doubt creeps in. But here’s the truth: the best runners train for this. Not just the body — the mind too.
Elites vs. Everyday Runners: It Hurts More for Us
Here’s a twist most folks don’t know: 10Ks actually hurt more for slower runners.
Why? Because elites have such huge aerobic engines, they can cruise just below threshold for most of the race. They’re running fast, yes — but still aerobic. Then they unleash the pain in the final K.
For everyday runners, it’s different. You’re likely hitting threshold sooner — maybe even halfway through — and grinding in anaerobic land for a loooong time. That’s why the last miles feel like a death march.
Science Check: Elites can race around 85–90% of their max heart rate aerobically. Most of us start to redline around 75–80%. That means we’re huffing and puffing sooner and suffering longer. But that’s also why threshold training works — it bumps that redline higher.
The 10K Ain’t Just Aerobic—It’s a War Zone
Here’s the truth they don’t put on race posters: The 10K is a brutal fight. Sure, on paper it’s “mostly aerobic.” That sounds nice and scientific.
But any runner who’s pushed hard over 6.2 miles knows better.
By the final third, it’s not just about oxygen. It’s about pain. And who can handle it.
Your aerobic engine’s redlining, but it’s not enough. Lactate’s building up like toxic sludge, your legs are on fire, and your brain starts whispering, “Hey… maybe we should walk this out.” That voice gets louder with every stride.
And this is where the real 10K battle begins: Your muscles are drowning in acid, your form’s wobbling, and mentally, you’re hanging on by a thread.
I’ve had races where 7K felt like I was dragging cinderblocks instead of legs—breathing ragged, eyes half-glazed, everything screaming slow down.
If you’ve been there, you know what I mean.
But the smart 10K racer? They’ve trained for this very moment.
They’ve hammered tempo runs and cruise intervals until their threshold rose like a tide. They’ve practiced running on tired legs, teaching their body how to stay smooth when things go sideways. They’ve rehearsed mental comebacks—visualized the pain, welcomed it, and built the grit to say “Not today.”
Because the 10K is both engine and attitude. It’s raw physiology meets mental warfare.
You burn through glycogen. Then lactate drowns your legs. And the whole time, your brain’s trying to protect you from the suffering. Your job is to push through it.
Don’t feel ready for the 10K? Check out my guide to see whether you got it or not yet.
Wanna Go Deeper?
Want to know why some runners seem to thrive in that pain zone? Search phrases like:
- “Lactate accumulation and pacing failure in 10K runners”
- “VO2max vs lactate threshold in 10K performance”
Science backs it up: strong threshold = better survival in the late miles. Well-trained runners hold higher percentages of their VO₂max longer—which means they suffer later and less. And when they do suffer, they know how to keep it together.
But even without reading the studies, your legs already told you the truth: the 10K is a threshold test. Run too hard too soon? You drown. Run scared? You leave time on the clock.
What Kind of 10K Runner Are You?
Not every 10K warrior fights the same. Some grind, some surge, some play chess. Here’s how to figure out your style—because generic plans don’t cut it when you’re trying to PR.
The Grinder
You’re all engine, baby. You come from longer distances or just love the grind. You don’t have a scary sprint, but you can hold a tough pace and break people with consistency.
- Strengths: Endurance, steady pacing, mental toughness.
- Weaknesses: Struggles with sudden pace changes or late kicks.
- Race Style: Negative split or even pacing. You outlast people.
Grinders shine on tough courses—heat, hills, wind? No problem. The harder it gets, the more runners you pass.
The Speedster
You’re the fast-twitch freak. You’ve got a gear most don’t. Maybe you ran track, maybe you just have wicked wheels. You surge, you kick, you break souls with speed.
- Strengths: Speed, power, handling fast intervals like a champ.
- Weaknesses: Endurance can be a limiter. If you fade late, this is why.
- Race Style: Fast start or tactical surge + big final kick.
Speedsters love tactical races—they know when to strike. But if the distance isn’t backed by base, it’s a gamble.
The Tactician
Your weapon is your brain. You know exactly when to push and when to hold back. You’re the type who drafts smart, runs tangents, and beats people who might be technically “faster.”
- Strengths: Smart pacing, mental strength, reading the race.
- Weaknesses: If speed or endurance is undercooked, plans collapse.
- Race Style: Strategic. You’re a sniper, not a shotgun.
Tacticians can pick apart races with precision. If you’ve ever outkicked someone who had a faster 5K PR, that’s your superpower.
Not Sure What You Are?
Check your training and race logs:
- If your 5K and 10K times match up well (like McMillan or VDOT say they should), you’ve probably got grinder stamina.
- If your shorter distances are great but you fade in the 10K, you’re likely a speedster who needs more base.
- If you beat people who have faster solo time trials? You’re a tactician. You show up when it counts.
Train Like Your Type: Ditch Cookie-Cutter, Run Smarter
Let’s cut through the noise—most training plans out there? Too generic. They don’t care if you’re built like a diesel engine or a dragster. But you should.
Once you know your runner type—Grinder, Speedster, or Tactician—you can train smarter, not harder. It’s like tuning an engine. Everyone’s got horsepower, but how you fine-tune it makes all the difference.
Grinders: Strong Legs, Slow Gears
You’ve got the diesel engine. Long runs? No problem. But if you’re dodging speedwork because you think your endurance makes up for it… you’re leaving gains on the table.
Your Fix: Keep all the threshold runs, tempos, and long grinds—that’s your bread and butter. But add in the sizzle: strides, 200m repeats, short hill sprints. These help your nervous system learn how to turn over quicker, which is huge come race day.
Why? Because even in the 10K, research shows anaerobic speed reserve matters. That final sprint? That extra gear? You build it in training, not by accident.
✅ Coach’s Prescription: One short speed session a week—think 6×200m or 8×100m strides—won’t wreck you, but it’ll make your 10K pace feel easier. And that’s the game.
Speedsters: Quick Twitch, Short Fuse
You’ve got the wheels—but you burn through fuel fast. You can blaze a 5K, maybe even rip some 400s, but holding the line at 10K pace? That’s where you fade.
Your Fix: Build the engine. That means cruise intervals, threshold runs, longer tempos. Basically, stuff that teaches you to stay uncomfortable… longer.
You don’t need to hammer raw speed workouts all the time. You already have speed. What you’re missing is sustained effort. Endurance.
✅ Coach’s Prescription: 1–2 days a week of stamina work. Think 5×1K at 10K pace, long progression runs, or tempo blocks. Higher mileage (or more cross-training volume) helps too—just don’t trade your strength for gas mileage.
Tacticians: Smart as Hell, Sometimes in Your Head
You live for strategy. You know when to surge, when to tuck, when to kick. But let’s be real: sometimes you’re so deep in the race chess match, you forget to build the legs to match the mind.
Your Fix: Figure out your physical bias—are you more speedster or grinder? Then train accordingly. Use your mental edge to plan race-specific sessions. Want to surge mid-race? Practice that in fartlek runs. Planning to negative split? Start some long runs slow and hammer the finish.
Visualization’s great—but the body’s got to cash the checks your brain writes.
✅ Coach’s Prescription: Don’t just think about racing—train for it. Race-pace workouts, negative split runs, simulations. Make your body match your brain.
How to Build a 10K Season That Works
Think in Seasons, Not Scraps
You want to keep improving in the 10K? Start thinking like an athlete, not a hobby jogger. No more “train one week, race the next” chaos. Build a training season.
That’s how the pros do it—and guess what? It works for you too.
Instead of cramming in races every few weekends, you lock in a 12–20 week cycle with a clear goal: peak for one big race. Everything builds to that day.
The Four Phases of a Real 10K Season:
- Base Phase (6–8 weeks): High mileage. Easy runs. Strides. Build the foundation.
- Specific Phase (6–8 weeks): Add tempo, threshold, goal pace intervals. Sharpen the sword.
- Taper (1–2 weeks): Pull back the miles. Keep the pop. Don’t lose the snap.
- Race Peak: You show up rested, sharp, and ready to smash it.
It’s not magic—it’s structure. And it beats the heck out of training randomly and wondering why your time’s stuck at 47:00.
Macro vs. Micro: Zoom In AND Out
This is where most runners screw it up.
- Macrocycle = the big picture (3–4 month block).
- Microcycle = your week-to-week setup.
A good macro sets the tone. You start with mileage and easy stuff, move into tempo work, then intervals, then race sharpening.
A good micro gives your week rhythm. You need hard days spaced out with recovery. Two quality sessions (intervals + tempo) + long run = gold standard. Everything else supports that.
The mistake? Doing the same thing every week—or worse, cramming everything into one week and never recovering.
Don’t Just Race—PEAK
Let’s call this what it is: racing a 10K every month is a plateau waiting to happen. Each race pulls you out of training, forces recovery, and resets your rhythm.
Want a breakthrough? Do less. Race smarter, not more often.
Pick 1–2 goal 10Ks per year. Build your entire season around them. The rest? Use tune-up races strategically—or skip ’em.
You’ll be amazed what happens when you stack 8–12 weeks of consistent, progressive training with no distractions. Your body actually absorbs the work. That’s when PRs get crushed.
Practice Races vs. “A” Races: Know the Difference, Run Smarter
Don’t hide from racing just because your goal race is still weeks away. In fact, tossing in a few practice races can sharpen your edge big time. But here’s the trick—you’ve gotta know which race is a rehearsal, and which one is your main event.
A practice 5K or 10K? That’s a workout in disguise.
You don’t taper for it.
Maybe you roll in a little tired from training. Maybe you take it slightly easy for a couple days beforehand—but you’re not babying yourself.
This kind of race is perfect for testing gear, trying out your pre-race breakfast, or practicing pacing—like starting conservative and finishing strong. You’re not chasing a PR here. You’re building race instincts and learning what works (and what doesn’t) when things get real.
Your A-race, though? That’s the one you roll out the red carpet for. You taper. You scout the course. You set race-day routines and lock in the mental game. You’re going in fresh, sharp, and ready to empty the tank.
The real key here is mindset: treat the tune-ups like part of training, and the A-race like your chance to go full-send. Knowing the difference keeps the pressure off the warmups and lets you save the fire for when it counts.
12–20 Week Training Plans: What’s the Right Prep Window?
So how long do you need to train for a 10K? The answer is classic runner-speak: it depends.
If you’re coming off the couch, go big—20 weeks. Start with walk-jog combos, build your base slow, and avoid injury.
New runners often land in that 12-week sweet spot, giving you just enough time to build fitness and get comfortable running consistently.
Already running regularly? You can tighten it to 12 weeks and still make solid gains.
Competitive folks or runners chasing a PR often opt for a 16–20 week cycle. That lets you layer in everything: base building, speed, stamina, and a taper. Bonus: you can toss in a recovery week or two mid-cycle so you don’t flame out.
Legendary coach Jack Daniels—guy’s like the Yoda of running—suggests a full 24-week buildup as ideal. That’s gold if you’ve got the time and consistency. But let’s be real—most of us don’t plan that far ahead.
Bottom line: pick a timeline that fits your life. But give yourself at least 8–10 structured weeks. 12–16 is even better. And consider chunking it into 3–4 week blocks that each target a different training focus.
Race Less, Train More: The Contrarian Advantage
Races are fun. Medals, crowds, adrenaline, IG stories… I get it. But here’s the cold truth—racing every weekend isn’t how you hit a PR.
In fact, runners who stop over-racing often see big breakthroughs. Why? Because they finally get time to string together real training blocks without the constant taper-recover-taper cycle killing their progress.
Think about elite marathoners. They race twice a year max. They train, peak, recover—then do it again. Sure, a 10K isn’t as draining as a marathon, but the same logic applies: if you’re racing every weekend, when exactly are you training?
Smart racing means picking one or two 10Ks each season and going all in. That way, those races mean something. They motivate you. You stay hungry.
Want to dig deeper?
Look up terms like “10K periodization” or “frequent racing vs peaking”—you’ll find a ton of coaches and experienced runners saying the same thing: fewer races, better peaks.
I’ve seen it in my own running and in coaching others. When you learn to trust the process, the results show up.
Your 10K Training Toolbox: What Actually Works?
Let’s break down the workouts that build a monster 10K engine. You need more than one gear to run fast and smart. Here’s how to put the right tools in your box:
1. Speed Workouts – Raising the Ceiling
You want to run faster? You’ve gotta run fast.
Speed workouts push your VO₂ max—your top-end aerobic engine. We’re talking interval sessions like:
- 6 × 800m @ slightly faster than 5K pace, with equal jogging recovery
- 12 × 400m @ 3K pace
- 5 × 1000m @ current 5K pace
- Ladder workouts (400-800-1200-1600-1200-800-400) with pace changes
Hill sprints are another secret weapon—8 × 15-second all-out sprints up a hill builds serious power and strengthens those legs against injury.
Important note: Don’t overdo speed. Once a week is plenty. These sessions should leave you a little wrecked—in a good way. You’re training your body to handle discomfort so that 10K pace feels tame on race day.
2. Stamina Workouts – Dialing In That Cruising Gear
If speed raises your ceiling, stamina workouts move the whole house higher.
Your 10K pace sits just above your lactate threshold—that tipping point where running shifts from comfortably hard to downright brutal. If you push that threshold up, suddenly race pace feels smooth.
These workouts include:
- 20-minute tempo run @ threshold pace (the pace you can hold for about an hour)
- 4 × 1 mile @ threshold pace with 1-min jog
- 2 × 15 minutes @ 10K effort minus 10 sec/mile, 3-min jog between
Coach Greg McMillan swears by hitting this zone from all angles—some workouts just below, some dead-on, some slightly faster. It gives your body a full range of threshold stimulus and builds insane aerobic strength.
The goal? Learn to lock in and hold a hard pace without blowing up. These are the workouts where confidence gets built.
3. The Long Run: How Far for a 10K?
Alright, let’s clear something up. Just because you’re training for a 10K doesn’t mean you get to skip the long run. This isn’t just for marathoners. Long runs are your aerobic engine builders—and even for a 6.2-mile race, that engine better be solid.
Here’s the play:
- Beginners: Work your way up to 6–8 miles (10–13K). If the thought of that makes you want to cry, don’t stress—it’s a buildup. Start where you are, but keep showing up.
- Intermediates: 8–12 miles (13–20K) is a sweet spot. That gives you real staying power on race day and helps those faster sessions feel smoother.
- Advanced runners: 14–16 miles now and then is fair game, especially if you’re toying with stepping up to a half—or you just like pushing your limits.
If you can knock out 10–12 miles on a weekend, racing 6.2 suddenly feels like a cruise. Confidence goes up. Fatigue resistance climbs. But don’t get cocky: that doesn’t mean go long and trash your legs before Tuesday’s intervals.
Most solid 10K plans cap the long run at about 8–10 miles. Enough to build stamina, not so much that you’re hobbling all week.
Pace? Easy. Chill. Talk-test level. If you’re more advanced, maybe finish the last 2 miles at a steady, moderate pace just to throw in a little bite.
And treat the long run like a dress rehearsal. Wear what you’ll race in. Test your gear. Practice fuel and hydration if you’ll need it come race day.
Think of the long run as your foundation. Everything else—speed, intervals, tempo—gets built on top of it. Don’t skip the damn foundation.
4. Recovery Runs & Zone 2: Your Secret Weapon
Here’s a secret most new runners screw up: slow running makes you faster.
I know—feels backward. But trust me. The biggest gains in 10K training don’t come from hammering every workout.
They come from the Zone 2 stuff.
The easy miles.
The “could-talk-your-ear-off” pace.
Zone 2 is roughly 60–70% of your max heart rate. For most of us, it’s the pace where you’re cruising, breathing steady, maybe even bored.
Perfect.
That’s where your aerobic base gets built.
We’re talking:
- More capillaries delivering oxygen.
- More mitochondria (those little energy engines).
- Better fat-burning, better recovery, better everything.
And yeah, that means most of your weekly mileage—like 75–80%—should be in this zone.
Don’t roll your eyes. Even the elites do this. There’s a reason they’re logging monster weeks at paces you could jog next to.
Biggest mistake? Running your easy days too hard. You’ve seen that guy. Every run is a race. Then he wonders why he’s injured or stuck at the same pace year after year. Don’t be that guy.
Make your easy runs easy. A recovery run after intervals might be a chill 30–45-minute jog. No hero pace. No GPS stress. Maybe even throw in a few walk breaks. Whatever it takes to keep your ego in check and your legs fresh.
Run with a slower friend. Leave the watch. Hum a tune. You’re not wasting time—you’re building durability.
5. Sample Week Breakdown – Real Training for Real Runners
Let’s put it all together.
Here’s what a solid training week can look like depending on your level.
Use these as guides, not gospel.
Life gets in the way. The key is consistency over perfection.
Beginner (Goal: Just Finish or <80 Minutes)
4 runs, 3 rest or cross-train. Total ~10–15 miles.
- Mon – Rest
- Tue – 3 miles easy
- Wed – Rest or brisk walk
- Thu – 4 x 2 min run / 2 min walk fartlek + warmup/cooldown
- Fri – Rest
- Sat – 5-mile long run (easy pace)
- Sun – 2-mile jog or full rest
Goal here is building the habit. Keep it light. Keep it fun. Fartleks are your intro to speed. Cross-train (bike, swim, walk) if you’re sore or mentally fried. Avoid doing too much too soon.
Intermediate (Goal: Sub-60 10K)
5 runs, 1 cross-train, 1 rest. Total ~25 miles/week.
- Mon – Easy 3 miles + strides
- Tue – Quality: 5 x 1000m @ 10K pace (90s rest)
- Wed – 4 miles easy (Zone 2)
- Thu – Cross-train (bike/yoga) or rest
- Fri – 20-min tempo @ threshold pace
- Sat – 6 miles easy (throw in hills)
- Sun – 8-mile long run (easy pace)
This plan has structure. Two quality sessions (intervals + tempo), plus a long run. Everything else? Supportive easy work. You’re working both speed and stamina without overcooking.
Advanced (Goal: Sub-50 or Sub-40 10K)
6–7 runs, 1–2 strength sessions. Total ~35–40 miles.
- Mon – 6 miles easy
- Tue – 6 x 800m @ 5K pace (2:00 jog) + 4 x 200m sharp
- Wed – 5 miles recovery + core strength
- Thu – 8 miles with last 2 miles steady-state
- Fri – 4 miles tempo @ threshold + 4 x 1-min fast (3K pace)
- Sat – 4 miles recovery or easy spin
- Sun – 12-mile long run (last 2 miles faster finish)
This is the full buffet. VO₂ max, threshold work, speed, long run progression, and recovery miles. Strength work is sprinkled in—heavy lifts or plyos, 1–2x a week. Nothing crazy, just enough to stay durable and powerful.
Even here, 80% of the work is easy. That’s not a soft approach—it’s a smart one. Advanced runners don’t get there by hammering everything—they know when to throttle down so they can throttle up when it counts.
More Isn’t Always Better: Train Smart for the 10K
I’ve seen it too many times: runners thinking the answer is always more. More miles. More intervals. More sweat. More grind.
But if you want to race a sharp, nasty little beast like the 10K? More isn’t the answer. Smarter is.
Look—the 10K isn’t a slow grind like the marathon. You need that aerobic base, sure, but what wins a 10K is the ability to hurt well. You’ve got to be fast, but also strong enough to carry that speed when your legs are begging for mercy.
And here’s the kicker: piling on junk mileage or hammering intervals every other day isn’t gonna get you there. It might leave you too wrecked to hit the workouts that actually matter.
I’ve seen people crush intervals in training and still bonk in the last 2 miles of the race.
Why? No threshold work. Or they did endless long runs and never trained their turnover—so when it’s time to race, they’ve got zero gear change.
It’s all about the right mix:
- Speed sessions: Raise your top-end pace.
- Threshold runs: Build that “cruise control” just below redline.
- Long runs: Build strength and endurance.
- Easy runs: Cement the gains and keep you fresh.
And yeah—rest counts too. Rest is a tool. If you feel wrecked, don’t “tough it out” just to check off a workout. That’s how you train yourself into the ground.
Mastering the Mental Game of the 10K
You ever hit 6K into a 10K, and suddenly your brain turns into a drama queen?
“I don’t know if I can hold this.”
“Maybe I should back off.”
“Why am I doing this?!”
Welcome to the infamous 6K Crisis.
It’s the Bermuda Triangle of the 10K—effort is maxing out, fatigue is spiking, and your brain starts trying to protect you by pulling the plug.
The 10K hurts in a special way: not as brutally short as a 5K, but way too intense to coast.
You’re stuck in no-man’s-land—too long to sprint, too short to settle in. Your mind will question you. That’s normal. What matters is what you do next.
Train for that moment. Seriously. In workouts, finish strong—add a hard push at the end. Get used to the suck and learn to tell your brain:
“Yeah, I see you panic—but we’re still going.”
Break it down:
- “Just get to 7K.”
- “Hold this pace one more minute.”
- “Relax and flow.” (That one’s my go-to.)
The pain is real—but so is your strength. Expect it. Welcome it. Beat it.
Visualization: Rehearse the Win Before You Even Toe the Line
Want a free performance boost that science backs up? Visualization.
A week before race day, and especially the night before, close your eyes and run the whole race in your head. No fluff—visualize the actual details:
- The start line: stay cool, don’t get pulled out too fast.
- That first mile: smooth, smart, in control.
- Mile 3–4: you’re focused, feeling strong.
- Mile 6: the crisis hits—and you fight through.
- The finish: your arms pumping, closing hard, crushing the clock.
See it all. Not just the glory. See the grit. The doubts. The moments you nearly break—and how you answer back.
Studies have shown athletes who visualize success (and handling adversity) are multiple times more likely to hit their goals. It primes your muscles, reduces nerves, and builds confidence. So don’t just train your legs—train your head, too.
Don’t Panic at 8K: Finish Line Fear is Real
Funny thing happens when you’re 80% in, on pace for a PR: your brain starts freaking out. You’re thinking,
“Holy crap, I might actually pull this off… what if I mess it up now?!”
And boom—you tighten up. Trip up. Lose rhythm.
It’s the weirdest form of self-sabotage, and I’ve seen it take down a lot of great races. But here’s how to shut it down:
- Stay present. Don’t think about the clock. Think:
“Elbows back.”
“Quick steps.”
“Eyes up.”
Keep it now, not “what if.”
- Reframe the pain.
This part is supposed to suck. That burn in your legs? That’s your PR trying to get out. Welcome it. Say:
“Let’s go, pain. Let’s finish this.”
- Trust your work.
Panic says “You can’t do this.” But you’ve got the receipts:
“I did 3×2K at faster than this pace. I’ve already done the hard part.”
That’s what race-pace workouts are for—they’re not just physical. They’re mental ammo.
You get to 9K and your brain’s trying to pull the plug? Fire back with facts.
“I’ve been here before. I didn’t quit then, I’m sure as hell not quitting now.”
Rehearse the Pain – Build Those Mental Callouses
Let’s kill the Instagram fluff right here: mental toughness isn’t some pretty quote in a fancy font.
It’s not yelling “no pain, no gain” at your reflection in the mirror.
It’s a skill. One you build the same way you build your legs—by loading it up, suffering a bit, and doing it again next week.
You want to be tough on race day? Then suffer smart in training.
Train Your Brain Like You Train Your Body
That means intentionally throwing yourself into workouts that hurt. I’m talking 10K-effort pace at the end of a long run—when your legs are dead and your brain’s begging for mercy.
That simulates the back half of a race, when everything starts to unravel. Teach yourself to keep form and push through then, and you’ll be money on race day.
Another trick: back-to-back efforts with short rest. Maybe it’s 2 x 2 miles at tempo, barely recovering between. Or one I love to hate: 5 x 1K at faster than 10K pace, short rest, full send.
These sessions hurt. They’re supposed to. But once you’ve conquered them, the actual race feels almost… manageable. Almost.
But let’s be real—you can’t do this stuff every week. It’s spicy. Use it wisely or you’ll end up overcooked. One or two hard mental workouts per training block can do wonders.
And hey, mental training doesn’t even have to be on the run.
- Cold shower? End it with 30 seconds of ice water.
- Plank? Go until your whole body’s shaking.
- Rainy long run? Don’t skip it. Embrace it.
These little moments of discomfort—when you don’t back down—build what I call mental callouses. So when you’re deep in the pain cave at mile 5 of a 10K or halfway through a threshold session, your brain goes, “Been here. Let’s keep moving.”
Seasoned runners? They’ve got the edge because they’ve suffered more. Simple as that.
Mental Tools for Race Day (Use ’Em in Training First)
You don’t wing the mental game. Just like physical strength, mental strength has tools. And if you don’t use them, you lose them.
Mantras
Short. Punchy. Personal. Something you can repeat mid-race when the wheels start to come off.
- “Smooth and strong.”
- “Relax, power, relax.”
- “Fight.”
- Heck, even a single word like “Go” can light a fire.
Elites use these. So should you. Say it out loud if you need to.
Here’s my list.
Chunking
Break the beast into bite-sized chunks. A 10K? That’s five 2K efforts. “Just get to 2K.” Then, “Okay, just another 2K.” By 8K, you can gut out the last 2K—anyone can suffer for two more.
Use this in workouts too. Got a brutal tempo? Don’t think about the whole 30 minutes. Think: “Five minutes. Then reassess.” Most times, you’ll keep going once you get through the mini-wall.
Mindful Relaxation
When stress is high, scan for tension—jaw clenched? Hands in fists? Shoulders in your ears?
Shake it out.
Relaxation equals efficiency. And the distraction of checking your form often stops the brain spiral of “I’m dying.”
Visualization – While Running
Yep, even mid-race. Picture yourself being pulled to the finish by a magnet. Or chasing someone you admire. Or closing like your favorite pro.
Your brain is powerful—feed it a strong image, and it’ll pull your body with it.
The Contrarian Truth: Suffering > Hype
Forget the motivational posters. The real mental work happens in silence. No music, no crowd, no hype.
- It’s when you go out for a long run in sleet.
- It’s when you push through a solo workout with no splits, no GPS—just effort.
- It’s choosing to go to the track for mile repeats when the couch sounds so much better.
You don’t fake toughness. You earn it. And just like a muscle, it grows when you work it. You fatigue it. You recover. You do it again.
You want to really prep your mind? Do something harder than your goal race.
- Sign up for a brutal local 10K with a hill at mile 4.
- Run a solo time trial and push without any cheers or competition.
- Do strides at the end of your long run when your legs feel like cement.
That’s discomfort practice. And it’s where confidence is built.
Because when race day hits and the suffering comes (and it will come), you won’t panic. You’ll nod and go: “Yup. I know this pain. I’m ready.”
Gear, Tech & Shoes for the 10K Specialist
Shoes are tools. The right tool for the right job? That’s gold.
Daily Trainers
These are your mileage mules. Cushioned, durable, built to take a beating. They might not look fast, but they keep you training. And that’s the name of the game.
Racing Flats
Flats are light, lean, and fast. You feel connected to the road, every stride snappy. But they’re not for everyone—thin cushion = more load on your calves. If you’ve trained in them and your body likes ‘em, they can fly. I’ve still got a pair for speed days.
Super Shoes
You’ve heard the hype. Carbon plates, bouncy foams—rocket fuel for your feet. And yeah… they work. Even in a 10K.
Studies show they improve running economy. Less effort for more speed. Recreational runners might benefit even more than elites because we’re less mechanically efficient. Translation? Free speed. I’ve seen folks shave 30+ seconds off their 10K times after switching.
Downsides: they’re pricey, and they wear out fast. And they feel weird at first. So don’t wait until race day to try them. Use them on a fast tempo or a tune-up 5K first.
One Shoe to Rule Them All?
Maybe. Some “hybrid” shoes like the Nike Zoom Fly or Saucony Endorphin Speed split the difference—plated, but durable. They can train and race. Great option if you don’t want a three-shoe rotation.
But if you’re chasing PRs and love gear, many go with:
- Trainers for easy days
- Flats or light shoes for speed work
- Super shoes for race day
Just make sure whatever you wear on race day is tested and trusted. New shoes = new risks. Break them in during training. Get used to the ride.
Here’s my guide to running shoes brands.
GPS Watch Setup: Keep It Simple or Get Distracted
Modern GPS watches can track everything but your soul. Pace, cadence, heart rate, VO₂ max, maybe even your zodiac sign. It’s easy to get lost in the data jungle—but race day is not the time to be a stats nerd.
Keep it simple. Stay focused. Run smart.
You don’t need ten metrics flashing at you while your lungs are on fire in a 10K. You need a few key numbers you can glance at mid-effort without tripping over a cone.
Here’s how I set mine up—and how I coach others to do it:
Screen 1 (Primary): The Essentials
- Lap Pace (with auto-lap at every km or mile)
- Distance
- Elapsed Time
That’s it. That’s the bread and butter. Lap pace gives you the smoothest read on current effort—way more accurate than “instant pace” that jumps around like a squirrel on espresso. Distance and time keep you anchored: “Alright, 3.2 miles in at 21 minutes, last split was 6:45… still on track.”
That’s all you need to make smart in-the-moment decisions.
Screen 2 (Optional): Heart & Average Pace
Some runners like to peek at heart rate to make sure they’re not spiking too soon. That’s cool—as long as you know adrenaline can mess with it. I’ve had instances in which I panicked over a high HR even when my legs felt great. Big mistake!
Average Pace is okay too—but treat it as background noise. If you had a slow start and are picking it up, your average will lag behind your current effort. Don’t let it mess with your head.
Ditch the Fluff
Cadence? Vertical oscillation? Strava segments? Temperature?
Nope. Not today.
Race day isn’t for tinkering. The more data on your screen, the more chances to overthink and screw up pacing. I often race with one screen, three fields, and turn off every alert. No beeps, no buzzes. Pure focus.
If you find yourself checking your watch more than the road, flip it around on your wrist. Run by feel, check your splits at mile markers, and save the data deep dive for after.
Gear Check: Run Light, Stay Comfortable
The 10K is short enough that you don’t need much, but long enough that the wrong gear can ruin your day. Keep it simple, fast, and dialed-in.
Clothing
- Go lightweight. Technical tee or singlet and shorts. Women: tank, sports bra, or tights—whatever keeps you cool and confident.
- No cotton. You’re not running in a wet beach towel.
- Test it first. Race-day outfits should be worn in at least one hard run before go-time. Nothing new on race day.
- Layer smart. If it’s cold, bring a throwaway long sleeve or trash bag poncho to ditch at the start line.
- Tight gear is fine—compression tops, half tights—they cut wind drag and chafing. Just make sure you’ve practiced in them. You’re not out there to make a fashion statement. You’re out to run hard.
Socks
They seem minor until they give you a blister that feels like a blowtorch.
- Go with moisture-wicking synthetics or wool blends.
- Try thin socks for better “feel,” or cushioned ones if that’s your jam.
- Never race in brand-new socks.
- Double knot your laces—or use lock laces. You don’t want to stop at mile 4 retying shoes like an amateur.
Sunglasses
If you’ve ever squinted through an entire race, you know. Good shades help relax your face (and mind), block wind, and keep grit out of your eyes.
- Look for lightweight, no-bounce models (Goodr makes solid, affordable ones).
- Test ’em before race day. Some folks can’t handle the frames in their periphery.
Cap, Visor, or Headband
- Hot weather: Cap or visor keeps sun off your face and sweat out of your eyes.
- Cold rain: A cap is your windshield.
- Sweaty head? Go with a headband or Buff.
Try whatever you use on a hard run first. Don’t show up with some heavy cotton hat and expect it to feel good at race pace.
Hydration/Nutrition Gear
You don’t need a fuel belt in a 10K. Seriously.
- Use on-course water if needed.
- Running solo? A handheld’s fine.
- Taking a gel? Most don’t for a 10K, but if you’re out there for 45+ minutes, maybe one mid-race. Tuck it in a pocket or safety-pin it to your waistband.
Watch or No Watch?
Totally your call. Some folks go minimalist—no watch, no distractions, just run. Others want the full GPS readout.
If you wear one:
- Make sure it’s snug (no bounce).
- Turn off notifications. Getting a spam call at 8K will ruin your rhythm.
- Lock your screen so you’re not accidentally swiping screens mid-run.
Music or No Music?
10K is short. Loud. Fast. I say race without music—let the atmosphere, the crowd, and your own grit carry you.
But if music helps:
- Make sure it’s allowed.
- Go with secure, safe options (bone conduction or snug earbuds).
- Keep the volume low—you need to hear people around you.
Fueling for the 10K: Keep It Simple, Keep It Smart
Let’s talk carbs—because they’re your fuel for a 10K. But no, you don’t need to inhale a mountain of pasta the night before. That’s marathon stuff. A 10K doesn’t even come close to depleting your glycogen stores.
If you’ve been eating normally all week, your tank is already pretty full.
The night before? A solid dinner with some carbs—think rice, potatoes, pasta (nothing crazy)—and you’re good. Keep it familiar. Keep it light.
Pro tip: Big meals = bloated race. Not fast race.
But here’s the trap a lot of runners fall into: underfueling during training. They skip the snack before speedwork. They “wait too long” to eat after a tempo. Over time, that tanks your energy and stalls your gains.
Before a hard workout? Eat something—a banana, a bagel, whatever sits right. Afterward? Get carbs and protein in the mix fast. Chocolate milk, protein shake, peanut butter sandwich—it doesn’t need to be fancy. It just needs to be done.
Race Morning Fuel: Eat Like You’ve Been Here Before
You don’t want to toe the line hungry—or worse, with a burrito still rumbling in your gut. Here’s how to get it right:
90 minutes before:
Go for a light, familiar meal—toast with PB and honey, oatmeal with banana. Keep it around 300–400 calories. Carb-heavy, easy on the fat and fiber.
60 minutes out:
Smaller snack—maybe half a banana, an energy bar, or just a sports drink. Some folks do well with a gel. You want blood sugar topped off, not a full stomach.
Less than 45 minutes:
Skip solids. You’re too close. Maybe a gel 15 minutes before the gun if you’re feeling light. And don’t underestimate the carb rinse trick—even swishing Gatorade in your mouth can cue your brain to go harder. Weird science, but it works.
Practice this before race day. Weekend long runs are a perfect chance to test your breakfast and timing.
Caffeine: The Legal Performance Boost (Use with Care)
Let’s talk caffeine. It’s one of the few legal boosts that actually works.
- Makes you feel more alert.
- Lowers perceived effort.
- Helps you burn fuel more efficiently.
In one study, runners who took 5mg/kg of caffeine ran 1% faster. Doesn’t sound like much? That’s about 30 seconds in a 10K. I’ll take it.
But here’s the thing—only if your gut can handle it. Too much caffeine, and you’re not racing—you’re looking for a porta-potty at mile 2. Trust me, I’ve been there. It ain’t fun.
So what’s the sweet spot? 200–300mg about 45–60 minutes before the start. For most runners, that’s a strong cup of coffee. If you’re not used to caffeine, start small and test it during training.
Bonus hack? Caffeinated gum or chews hit faster. Some runners pop a gum 10 minutes pre-race for a quick spike. But again—test this in training. Don’t go full mad scientist on race morning.
Race Day Fueling for the 10K: Do You Really Need a Gel?
Let’s cut through the hype: most runners do not need energy gels during a 10K. Period.
A 10K is over in 30–70 minutes for most runners, and your body’s got more than enough glycogen on tap to fuel that effort — assuming you ate sometime this century.
Those little 100-calorie sugar packs? Yeah, they take 15–20 minutes to even start working.
By the time they hit your bloodstream, you’re probably already halfway through or close to the finish line.
So unless your stomach’s empty and your tank’s on E, popping a gel mid-10K is kinda like tossing firewood on a bonfire that’s already roaring — not much changes.
But here’s where it gets interesting…
The Brain Trick: Placebo Power Is Still Power
Some runners swear by taking a gel around mile 3 or 4 — not for the calories, but for the boost.
The sweet taste lights up your brain, and your brain lights up your legs.
It’s called a “mouth rinse” effect, and science has shown it’s real: sweet carbs (even without swallowing) can fool your central governor into letting you work harder.
So yeah, it might be a placebo — but if it helps you push harder in that final stretch, then go for it. Just know it’s a mental edge, not a physical necessity.
If you do take a gel, do it with a small sip of water. Nobody wants a sticky throat at 180 bpm. And practice it during training — don’t fumble with foil and sugar goop for the first time mid-race.
When Gels Might Actually Help in a 10K
There are a few situations where a pre-race gel makes sense:
- Skipped breakfast because of nerves?
- Afternoon race and haven’t eaten in 4+ hours?
That’s when a gel 10 minutes before the start (washed down with water) can top you off just enough to avoid feeling like a light-headed zombie during the first mile.
But you could also just sip some sports drink or take in a banana or small carb snack instead — same result, less mess.
Most runners overcompensate on race day. They underfuel their training runs (bad idea), then go full Thanksgiving dinner before a 40-minute race (also a bad idea). The result? Sluggish legs, GI cramps, and a mystery bonk at mile 4.
Hydration: The Unsung Race Day Factor
For a 10K, unless it’s blazing hot, you probably don’t need to chug water mid-race. If you’re hydrated when you start, you’re covered. Still, here’s the game plan:
- Start sipping water or sports drink about an hour before the race.
- Stop drinking ~15–20 minutes before the start.
- Hit the porta-potty one last time (trust me).
If it’s hot, and you’re drenched before the gun goes off, a mid-race water station might be helpful. But practice grabbing and drinking on the run — or just swish and spit to cool your mouth.
Electrolytes? Not a gamechanger in a 10K unless it’s super hot or you’re a salty sweater. In most cases, a bit of sports drink before the start is plenty.
Strength & Cross-Training for 10K Runners
So you wanna shave time off your 10K? Don’t just run more. Get stronger.
I know what you’re thinking: “Isn’t strength training for gym rats or marathoners trying to fix the marathon shuffle?”
Nope. If you run, you need strength—especially if you’re chasing speed over 6.2 miles.
Why? Because stronger runners hold form longer, push harder, and break down less. That’s how you stay strong through mile five instead of crumbling like a cheap folding chair.
And this isn’t just coach-speak. Real science backs it.
Studies show strength training improves running economy and performance at distances from 3K to 10K. Stronger muscles = better form + more power + less injury risk. You don’t need to bench press your bodyweight. You just need a smart routine that works the muscles that actually matter for running.
Keep It Simple, Keep It Consistent
Here’s the truth: You don’t need to deadlift your car. Just 20–30 minutes, 2x a week, done consistently, will move the needle.
Better to do short, solid sessions regularly than beast-mode once every blue moon. A couple of 10–15 minute mini-routines after your easy runs? Perfect. Hit the right muscles, avoid wrecking your legs for your workouts, and move on.
You’re a runner. Strength supports the goal—it’s not the goal itself.
And if you’re so sore you’re walking like a robot two days later? You did too much. DOMS doesn’t make you faster. Smart, consistent work does.
Cross-Training That Actually Helps
Cross-training isn’t a cop-out. Done right, it works really well.
Whether you’re injured, overcooked, or just need a break from the grind, it keeps your aerobic engine humming without beating your legs to death.
So what’s worth your time?
Active Recovery
Easy spin on the bike, relaxed swim, gentle row—these flush the legs without piling on more stress. Helps you bounce back faster. Think “movement, not mileage.”
Replacing Runs When Injured
If you can’t run, don’t just sit around sulking. Elliptical, pool running, rowing—they’ll save your fitness. Pool running especially is underrated. You mimic the motion of running with zero impact. I’ve had athletes miss a month of road time and come back sharp because they hit the water with purpose.
Supplementing Volume
Some runners (especially injury-prone ones) use cross-training to boost aerobic load without hammering their legs. For example, do speed work in the morning, then cycle easy in the afternoon. More cardio benefit, less breakdown.
What’s Best?
- Elliptical & Aqua Jogging – closest match to running motion. Great for subbing workouts.
- Cycling – awesome for endurance, but doesn’t hit hammies like running does. Add some fast-pedaling intervals to mimic run intensity.
- Swimming – great for conditioning and breathing control. Less leg-specific, but a solid recovery and VO₂ max booster.
- Stair-climbing/Uphill Hiking – glute torcher. If done carefully, this is gold for building hill strength with lower impact.
Bottom line: Use what works for your body and your goals. But don’t be afraid to mix things up. The best runners aren’t slaves to the road—they train smart and stay healthy long enough to get fast.
Tapering 101: Less Running, Not No Running
Tapering before a race isn’t about turning into a couch potato—it’s about cutting just enough volume to show up fresh, not fried. For a 10K, don’t overthink it—we’re not doing a marathon-style three-week taper. You only need about 7–10 days.
You’re aiming to feel snappy and rested, not like your legs forgot how to move. I’ve seen too many runners go overboard with rest and then wonder why they felt like a sleepy elephant on race day.
Here’s the sweet spot: run less, but keep some zip in the legs.
7-Day vs 10-Day Taper: Which One?
Let’s break it down:
- Been grinding hard? Training load has you flirting with burnout? Go with a 10-day taper. Start dialing it back around the Friday before race week. That weekend? Your “long” run is more like 75% of normal. You ease into taper mode gradually.
- Feeling strong and don’t want to lose momentum? Go for a sharper 7-day taper. Your last quality session is about 6–7 days out, and race week is mostly easy running with a little race-pace touch-up.
Either way, the last 7 days should see mileage drop to 40–60% of your usual load. Go any lower than that—like slashing to 20%—and you risk feeling stale, flat, and weirdly sluggish.
Pro tip: Taper doesn’t mean tossing your routine. Keep the rhythm—just turn the volume knob down.
What to Cut, What to Keep
Let’s keep it simple:
- Cut Mileage: Easy runs go from 6 miles to 3–4. If your Sunday long run is usually 12 miles, dial it to 6–8 the week before race day.
- Keep Frequency: If you run 5 days a week, keep running 5 days. Suddenly dropping days can mess with your flow. Stay in your groove—just go shorter.
- Keep Some Speed: Total stop on intensity = flat legs. You want some spice. A light race-paced session early in the week (like Tuesday for a Saturday race) can do wonders:
- Try 2 × 1 mile at 10K pace
- Or a fartlek like 5 × 1-min quick with full recovery
- And don’t sleep on strides: 4–6 × 100m accelerations (smooth, not all-out) after easy runs
These help you stay sharp and keep that neuromuscular pop.
- Kill the Strength Work: This ain’t the week for deadlifts or brutal HIIT. Muscles need to be springy, not sore. One coach I know says cut strength entirely in race week—or go super light with mobility stuff. Last heavy leg day? Should’ve been at least 7–10 days before race day.
- Stick to Your Pattern: If Tuesday’s usually a workout, do a mini one. If Thursday is always your rest day, don’t mess with it. Race week is no time to reinvent the wheel. Keep things familiar.
Taper ≠ Total Rest. It’s Rhythm.
Taper isn’t about “taking it easy.” It’s about dialing in that fine balance between recovery and readiness. I call it “rhythm over rest.” If you pull back too hard, you’ll get taper tantrums—moody, edgy, legs feel heavy, brain starts questioning everything.
But if you keep your usual routine with slightly less volume and just a little sharpening? You’ll toe that line ready to rip.
Think of it like turning the volume down on your playlist, not muting it completely. Keep the beat alive.
Mini Tune-Ups & Test Runs
Want to feel race-ready? Try a mini-tune up the week before:
- A short race (like a 5K or even a 2-miler) about 7–10 days out can work as a high-quality effort without wrecking you.
- Or do a controlled workout like 3 miles at 10K goal pace—enough to remind your body how it feels, but not enough to fry you.
Just don’t race a full 10K one week out. That’s a one-way ticket to showing up toasted.
Final 48–72 Hours: Trust the Work
The hay is in the barn, my friend.
In the last 2–3 days before your race, the goal is mental and physical rest. Here’s how I play it:
- 2 days out (Thursday for a Sat race): Easy 3–4 miles + a few strides.
- 1 day out (Friday): Either full rest or a 15–20 minute shakeout jog. Some folks need movement to calm nerves, others prefer full chill mode. Do what’s worked for you.
Oh—and sleep matters now. You might not sleep great the night before, so bank some zzz’s earlier in the week. Stress less. Work less. Think about your race, visualize success, and read your training log to remind yourself: you’ve earned this.
Taper Week: Don’t Sabotage the Work You’ve Done
Tapering isn’t about sitting on your butt and waiting for magic to happen—it’s about sharpening the sword without dulling the edge. But man, a lot of runners mess this part up. I’ve coached folks who nailed every workout for 10 weeks straight… only to panic in the final few days and undo all that good work with one bad decision. Don’t be that runner. Here’s how to not screw it up.
Taper Trap #1: The “Let Me Just Test My Fitness” Meltdown
Listen: your fitness isn’t vanishing in 7–10 days. You don’t need to “prove” anything to yourself three days before your race. That hard 5K time trial you snuck in on Thursday? Yeah, that’s why your legs felt like mashed potatoes at mile 4.
Physiology backs it up—your VO₂max, aerobic efficiency, all that good stuff? It improves after a proper taper. Rest helps you cash in the gains. Going hard right before race day just builds fatigue… and invites injury. Stay chill.
Taper Trap #2: Screwing With Your Diet
Don’t go full monk mode because you’re not running as much. Yes, maybe slightly fewer calories if you’re not burning it up—but don’t cut too far. You still need fuel.
Better yet, the final 2–3 days? Bump up your carb percentage a bit. This isn’t a pasta binge, just a subtle carb-load to top off glycogen stores. Keep it simple: rice, potatoes, bread—stuff your gut trusts. And for the love of all that is holy, don’t try some exotic new “superfood” the day before. GI disaster waiting to happen.
Taper Trap #3: Phantom Pains & Freak-Outs
Taper week is full of mind games. Suddenly your left calf feels “tight,” or you get a weird twinge in your hip. Chill. Your body is healing, and nerves mess with your perception. Unless you’re limping, it’s probably nothing.
Sniffles, random aches, weird dreams about missing the start line? Totally normal. Your brain’s just burning nervous energy. Embrace it. You’re ready.
Taper Trap #4: Being on Your Feet Too Much
Extra time off running doesn’t mean you suddenly need to walk six miles at the race expo or reorganize your basement. Trust me, walking the city in flip-flops two days before a race? Bad move.
Wear supportive shoes. Sit when you can. Prop your feet up. Save your legs for race day—not Costco or the hotel stairwell.
Tapering Isn’t One-Size-Fits-All
Some runners feel best with a 2-week taper. Others start feeling sluggish after 4–5 days off. That’s why keeping notes matters. What worked last race? What didn’t?
A great taper makes you feel bouncy and ready to explode. If instead you feel heavy and blah, you might’ve over-rested or cut too much intensity. One fix? Toss in some strides or short pickups a couple days out to wake the legs up.
👉 Real Talk: One of my athletes once cut mileage by 80% and skipped all running for two days… said their legs felt like they “forgot how to run fast.” Another one ran hard 3 days before, paranoid about fitness—and totally cratered on race day. Don’t let that be your story.
Go Contrarian: Taper by Feel
You don’t need to follow a rigid plan to the letter. Feel great mid-week? Add a few easy miles (nothing spicy). Still feeling cooked? Scratch a run or swap in an easy bike ride. Just don’t overdo it.
Some high-mileage runners barely cut volume—just drop workouts and keep easy runs. It’s called a “non-taper taper.” They’ve learned their legs go stale if they stop moving too much. It’s all about listening to your own body.
One elite once said, “I taper off both numbers and intuition.” Same should go for you. The big rule? Don’t be dumb. A hard 10-miler three days out is dumb. A couple extra easy miles when you’re feeling good? That’s fine.
If it’s your first time racing? Play it safe. Better to toe the line slightly undertrained than overcooked.
👉 What’s Your Taper Ritual? Got a go-to pre-race workout that calms the nerves? Do you run 3 miles with 2 at goal pace to lock in your rhythm? Or maybe you have a mantra to stop yourself from overdoing it (“The hay is in the barn, baby”)?
Drop your taper wins and horror stories. We’ve all had that race where we either felt like a superhero or a stiff-legged zombie at the start line. What did you do differently?
Master the 10K: Tailored Training Plans for Every Level
Let’s be real—no cookie-cutter 10K plan works for everyone. Your background, your fitness, your goals… they all shape the way you need to train. That’s why these 5 blueprints meet you where you’re at—whether you’re just starting out or trying to crush a PR.
Each level includes: mileage ramp-up, key workouts, pacing tips, rest guidance, and how to work in strength and cross-training. The goal isn’t just to finish the race. The goal is to own it—your way.
1. Couch to 10K (Novice Mastery)
Who’s it for? Folks starting from scratch—or coming back after a long break. No ego here. Mastery means crossing the finish line strong, proud, and injury-free.
- Timeline: 12 weeks is the sweet spot. You could get away with 8–10 if you’re already semi-active, or stretch it to 16 if you’re truly sedentary.
- Starting Point: If you can walk 30 minutes without issue, you’re good. Early “runs” might be 1–2 minute jogs mixed with walking. That’s fine. We’re building gradually.
- Long Run Base: Starts around 1–2 miles with walk breaks. Zero shame in slow running or walking—it’s forward progress that counts.
👉 Pro tip: If even walking two miles is exhausting right now? Cool. Start with a walking-only phase. No need to rush. Strong foundations beat rushed progress every time.
Mileage Ramp: Small Steps, Big Wins
If you’re starting from zero, you don’t need to do much to make progress. And that’s a good thing.
We’re talking maybe 5–8 miles in Week 1—mostly walking. From there, we bump up gently. Think 10–15% weekly increases, with built-in “step-back” weeks so your body catches up.
💡 Everything counts—run or walk, if you’re moving forward, it goes on the scoreboard.
Here’s what it could look like:
- Week 1: 8 miles total (walk 4x/week—1.5m, 2m, 1.5m, 3m)
- Week 4: 12 miles total, now doing run/walk. Maybe 5 days with short intervals (e.g., run 2 min / walk 4 min x5) + a longer walk.
- Week 8: 16 miles total, mostly running. Four run/walk sessions + one cross-train day. Long run hits 5 miles.
- Week 12: Taper week with 10–12 miles total. Long run tops out at 6.5 miles in Week 10.
🏁 You’ll hit about 15–20 miles per week at the peak—but only if your body handles it. More run time = more walking cut. But it’s your pace. The mission: consistency, not ego mileage.
Weekly Workouts: Building a Base Without Burnout
At this level, the big win is just time on feet. We’re rewiring your body to handle the motion and your brain to not freak out.
Run/Walk Sessions
Start with something like Run 1 min / Walk 2 min for 20–30 minutes. Then slowly flip the ratio as you go.
By Week 10 you might be doing:
- Run 15 min / Walk 1 min × 2
- Or maybe even your first full 30-min run. That’s a huge win.
Rule: Don’t ramp more than 10–15% per week. You’re not chasing Strava kudos—you’re building a machine.
Endurance Long Run/Walk
One day a week, go long. Early on it’s a 60-minute brisk walk. Later, it’s a 90-minute combo session where you hit 6+ miles at an easy pace with walk breaks.
This is the confidence booster. Don’t skip it.
Gentle “Speed”
Don’t think intervals. Think strides. After Week 6, sprinkle in 4×20-second relaxed pick-ups at the end of one run per week.
No sprinting. Just teaching your legs to turn over a little quicker. Or toss in a light fartlek—“run 2 min strong” mid-run. Keeps things fun and adds a little pop.
Rest & Recovery
Start with two full rest days per week. Don’t touch those unless you feel fresh and strong later in the plan.
Injury prevention starts with rest. If something starts barking (hello, shin splints), you don’t push through—you pull back.
Cross-Training & Strength: Run Less, Improve More
Early on, you probably can’t run every day. That’s okay.
- Cross-train: Bike, swim, yoga—whatever keeps your heart rate up without pounding your legs.
- Strength: Twice a week, 10–15 min max. Bodyweight stuff: squats, glute bridges, planks, calf raises. Chair workouts count. This builds muscle memory and bulletproofs your joints.
- Mobility: Stretch. Foam roll. Especially hips, calves, hamstrings. Runners don’t need to be bendy yogis, but stiff runners = sore runners.
And yep, walking counts too. Especially on recovery days.
Pacing: Go Slower Than You Think
Beginners almost always go out too hot. Don’t be that runner who gasps after 3 minutes and thinks they “can’t run.”
Effort level = conversational. If you can’t say a full sentence, back off. Doesn’t matter if you’re jogging 14 or 15 min/mile. This isn’t about speed—it’s about building the habit.
🚶♀️ If in doubt, add walk breaks. It’s a 10K, not a sprint.
Key Milestones
- ✅ First 1 mile run without stopping? Huge.
- ✅ 3-mile run? Even bigger.
- ✅ 6-mile long effort with walk breaks? You’re ready.
By Week 11 or so, you’ll have run 4–5 miles continuously. The race might still include walking—and that’s fine. Come race day, adrenaline + grit will carry you farther than training alone.
Week-By-Week Plan: Build with Flexibility
We can chart this plan out week-by-week with suggested run/walk intervals and mileage goals. But here’s the golden rule:
If a week feels too hard? Repeat it. There’s no shame in repeating Week 5 before moving to Week 6.
Training plans should fit your life, not the other way around. Miss a workout? Life happens. Just keep moving forward.
Life + Training: Make It Work for YOU
Busy parent? Older runner? New to exercise? 3 runs/week is plenty.
Already fit from another sport? You might bump quicker—but don’t skip steps.
This plan is adjustable. What matters most: consistency, patience, and staying uninjured.
Crossing the Finish Line
By the end, you’ll be doing ~60 minutes of running. You’ll have covered a 6-mile run. Race day might take 70–80 minutes—no big deal. Time doesn’t matter here.
You finished a 10K. That’s a win. Full stop.
Even better? You did it without trashing your knees, burning out, or quitting halfway. You built habits that stick. That’s what real runners do.
10K Under 80 Minutes: The Run-Walker’s Graduation Plan
So you’ve tackled a 5K (maybe with a mix of running and walking), and now you’re eyeing the 10K. Respect. This plan is for runners still building up the endurance to run the full distance—but want to finish strong, under that 1:20 mark.
Think of this as your “solidify the running” season. We’re bridging the gap between part-time runner and someone who can hold it together for a full 6.2 miles. Not with speed. With steady, honest effort.
Who This Is For:
- You can run a little, maybe a lot—but not quite 10K non-stop yet.
- You want to run most (if not all) of the 10K.
- Your goal pace is around 12:50/mile.
- You want to finish feeling in control, not crawling across the line like a wounded zombie.
How Long? Around 10–12 Weeks
If you just wrapped up Couch-to-5K, 10 weeks might be enough. Already jogging 2–3 miles a few days a week? You’re in a great spot. But giving yourself 12 weeks gives room for growth—and life’s little interruptions.
Weekly Mileage & Frequency
By mid-plan, you’ll be running 4 days a week, maybe 5 during peak weeks. We’re not chasing big mileage here—just consistent time on your feet.
- Start: ~10 miles/week
- Peak: ~22–25 miles/week
Example Mileage Progression:
- Week 1: 4 runs – 3m, 2m, 3m, 4m long = 12 miles
- Week 6: 4–5 runs – 4m, 3m + strides, 5m, 2m easy, 6m long = 18 miles
- Week 10 (Peak): 5m w/ tempo, 4m easy, 3m shakeout, 8m long run = ~22 miles
Then we taper down the last 1–2 weeks so you show up race day rested, not wrecked.
Key Workouts: What You’ll Be Doing Each Week
Easy Runs: The Foundation
These make up the bulk of your week. Slow. Controlled. Conversational pace—think 13:00 to 15:00 per mile for most folks in this zone. Doesn’t matter if you’re jogging or still adding some walk breaks. You’ll gradually cut those out. The win here? Feeling smoother, stronger, and steady.
Long Runs: Stretch It Out
This is where the magic happens. We build you from 4 miles to 7 or 8 by peak week. Walk breaks are fine—especially for hills or hydration. Just keep moving forward. By the end, aim to run at least 6-7 miles straight (or close to it). These runs are slow on purpose—probably the slowest of the week. You’re building endurance, not racing your long run.
The “Workout” Day: Light Speed, Big Confidence
Once a week, we throw in something a little spicy. Nothing wild. Just enough to remind your legs they can move.
Examples:
- Tempo workout: 2 easy miles, then 1.5 miles at a “moderate hard” effort (aim for your hopeful 10K pace), then 0.5 mile to cool down.
- Fartlek session: 4 × 2-minute pick-ups at a strong pace (11–12 min/mile effort), 2-min recovery walk/jog in between.
- Intro Intervals: 4 × 400m fast (controlled effort), with full walk/jog rest between.
These teach your body to run a bit harder, but not all-out. They also help your brain learn pacing, so race day doesn’t feel like uncharted territory.
Strides & Drills: Smooth is Fast
After a couple easy runs, tack on 4–6 strides—20 seconds building up to fast, smooth running. Focus on posture and quick turnover. Maybe toss in a few fun drills like skips or butt kicks in your warm-up. Feels silly, but it improves form big-time.
Recovery & Rest: Don’t Skip This
- 1–2 full rest days a week. That means nothing. No spinning, no HIIT. Just breathe.
- One active recovery option: short shakeout jog (~2 miles) or a low-impact cross-train session (bike, swim, yoga).
- After long runs? Recovery is crucial. Easy walk or cross-train the next day to keep things moving without pounding the legs.
Pacing Basics (Don’t Guess)
Here’s a cheat sheet so you’re not flying blind:
- Easy pace: 13:00–15:00/mile. If you can’t talk, you’re going too fast.
- Tempo pace: Around 13:00–13:30/mile. Just above comfortable. You can talk, but only in short phrases.
- Fartlek/Intervals: Shoot for 11–12:00/mile or just a “strong but controlled” effort.
- Long run pace: Chill. This can be 90–120 seconds per mile slower than your easy pace. Walk breaks welcome.
Cross-Training, Strength & Flexibility: The Bonus Fuel
- Cross-training: Once a week. Walk, bike, swim, yoga—keep it low-impact.
- Strength: 2×/week, 15–20 minutes. Focus on glutes, core, and form drills. Think squats, lunges, planks. If it burns a little, good.
- Mobility: Stretch or foam roll after your runs—especially tight spots like hips, calves, and low back. Trust me, your future self will thank you.
Plan Structure Tip
Listen: if you miss a run or feel dead tired one day, don’t try to “make it up.” Just move forward. That’s part of training smart.
Sample Mid-Plan Week
Mon – Rest or light yoga
Tue – 4 miles easy + 4 strides
Wed – 3 miles with tempo: 1 easy, 1.5 tempo, 0.5 cool down
Thu – Rest or 2 miles easy jog
Fri – 3.5 miles easy + strength
Sat – Cross-train or optional 2-mile jog
Sun – 6.5 mile long run (run/walk as needed)
Final Push
By Week 8 or 9, you’re hitting long runs of 7–8 miles and adding one decent speed workout (like 6×400m with full recovery). After that? Taper time.
- Week 10: Reduce volume 30%, keep intensity sharp
- Race week: Drop volume by half, keep one short faster session early in the week to stay sharp
Intermediate 10K: Breaking 60 Minutes
Who’s This For?
You’ve been running for a bit. Maybe you’ve clocked a couple of 5Ks or even a slow 10K. Now you want to break that classic one-hour barrier.
This is where things get exciting. You’ll be running 4–5 days a week, building up to 25–30 miles per week. You’ll do workouts that make you sweat and rest days that make you stronger. It’s not easy—but if you’ve got consistency and some grit, you can do this.
🕒 Target pace: ~9:39/mile (6:00/km). That’s your magic number.
Training Block: ~12 Weeks
Twelve weeks gives you time to ramp up smartly and fit in the quality work you need. Some runners close to 60 minutes might only need 10 weeks. Others may want a longer ramp—closer to 16 weeks. But 12 is a sweet spot for most.
Mileage Build Example:
- Week 1: 18 miles (4 runs: 4, 5, 3, 6 + cross + 1 rest)
- Week 6: 25 miles (5 runs, including 7-miler and 20-min tempo)
- Week 10 (Peak): 30 miles, with 8-mile long run and 2 key workouts
- Week 11–12: Taper to ~20, then ~15 + race
Key Workouts (How You’ll Get Faster)
Long Runs: The Engine Builders
Build these up to 8–10 miles. If you can run 10 in training, 6.2 on race day won’t scare you.
Do them easy. That’s right—chill pace. Maybe toss in a moderate finish to simulate race effort on tired legs.
Threshold Runs: Where Speed Meets Stamina
Tempo runs are your friend. Start with 15–20 minutes at “comfortably hard” effort. Could be a 2-mile tempo sandwiched by warm-up and cool-down. Later, try cruise intervals like 4 x 1 mile at slightly slower than 10K pace with 1:00 jog rests.
This stuff trains your body to clear lactate better and hold faster paces longer. Gold.
VO₂ Max Intervals: Top-End Stuff
These make your 10K pace feel easier by pushing your ceiling higher. Think 5×800m at 5K pace with 2:00 jog rests. Or a ladder: 400–800–1200–800–400. Do these every other week—more isn’t better if you’re not recovering.
Speed & Form Work: Strides & Hills
Still doing strides (now ~100m), focusing on quick turnover and relaxed power. Add hill sprints once a week during base phase—6 x 10 seconds up a steep hill, full recovery walk down. These boost power and injury-proof your legs.
Race Pace Reps
About 3–4 weeks from race day, start dialing in that 9:30/mile rhythm. Try workouts like:
- 3 x 1 mile at goal pace (2 min rest)
- 2 x 2 miles at goal pace (3 min rest)
Feel the effort. Lock it in.
Recovery, Cross-Training & Strength
You need at least one full day off each week. Use it. Trust me—rest isn’t weakness, it’s how you cash in all the work.
Recovery runs: 2–4 miles at snail pace. These should leave you feeling better than when you started.
Cross-training: Optional, but helpful if your body can’t handle more miles. Easy cycling, pool running, elliptical—good options if your joints are cranky.
Strength Training: 2x a week, 20–30 minutes. Don’t overthink it:
- Single-leg work: step-ups, single-leg squats.
- Core: planks, bird-dogs, glute bridges.
- Upper body: keep the arms strong—it helps with posture and drive.
- If you’re experienced, add some heavier lifts: deadlifts, squats, 4–6 reps, 2–3 sets.
- No access to weights? Do jump lunges, box jumps, and plyos instead.
Pacing Smarts for a Sub-60 10K
Look—if you’re aiming to break 60 minutes in a 10K, don’t get lured into thinking more is always better. More miles? Sure, up to a point. But if that mileage leaves you too beat up to hit your workouts, it’s hurting more than helping.
The 10K isn’t just a longer 5K or a shorter half. It’s its own beast—fast enough to sting, long enough to demand strategy. And it rewards runners who train with purpose, not just more volume.
Here’s how to pace your training without grinding yourself into the ground:
Easy Runs: Where the Magic Actually Happens
Yeah, I said it. Easy runs might not feel “sexy,” but they’re what build the engine. And for a sub-60 chaser, that’s probably in the 10:30–12:00/mile range. Don’t try to flex here.
Use the talk test or keep your heart rate around 65–75% max. If you can’t finish a sentence, you’re going too hard.
The 80/20 rule is gold: 80% easy, 20% spicy.
A lot of runners run their easy days too fast, then wonder why they can’t hit their workout paces. Chill on the easy days and you’ll actually be able to crush the hard ones.
Threshold / Tempo Runs: Where You Learn to Suffer Smoothly
Tempos are the “comfortably hard” effort—hard enough to make you focus, but not full send. Think around 9:45–10:00/mile for someone targeting a 9:39 race pace.
It’s the pace you could hold for about an hour—coincidence? I think not.
These runs raise your cruising speed, so don’t skip ‘em.
Intervals: Speed Work That Has a Point
This isn’t about running until you puke. It’s about teaching your legs to move fast with form.
- 800m reps at ~4:30 each (about 9:00 pace)
- 400s at ~2:00 (around 8:00 pace)
Don’t race these—run ‘em controlled and consistent. Think: “fast but relaxed.” Wild splits or sloppy form? That’s just junk speed.
Long Runs: Slow and Steady Builds the Beast
If your easy pace is 11:00, your long run pace might drift into the 11:30–12:00 range. Start chill, finish stronger—maybe even hit goal pace (9:39) in the last 2 miles once you’re deeper into training.
These are where mental grit and aerobic strength get built. Respect them.
Tune-Up Races: Dress Rehearsals That Hurt Good
Somewhere around week 8, throw in a 5K race. Use it to test your pacing and shake off the nerves.
If you can run 28–29 minutes, you’re on the right track. Treat it like a hard workout, not your Olympics.
Recovery: The Secret Sauce Nobody Talks About Enough
Progress isn’t just about the miles—it’s about absorbing them. That’s why every 3–4 weeks, cut volume and intensity by ~20%.
Down weeks aren’t lazy. They’re smart.
If you’re always grinding, your body won’t adapt—it’ll break down. So plan for:
- Week 4 → cutback
- Week 8 → another reset
- Taper at the end
Recovery is training. Don’t skip it.
The Week-to-Week Plan (and How to Tweak It)
Here’s a basic structure that works:
- Tuesday & Friday = Quality (intervals, tempo, hills)
- Sunday = Long run
- Other days = Easy, rest, or cross-train
Want 5 runs/week? Great. Can only manage 4? Still works—just prioritize:
- One hard workout (tempo or intervals)
- One long run
- Easy runs to fill the rest
You can even sub a recovery day with cycling, swimming, or elliptical. That counts.
Race-Day Fueling (Yes, You Still Need It for a 10K)
If your long runs go past 60 minutes, bring fuel. One gel mid-run. That’s it. No need to overthink.
Start practicing pre-run breakfast now—maybe toast with PB or a banana 2 hours before. By race day, your stomach should be used to it.
Hot day? Hydrate ahead and take water when offered. Don’t wait ‘til you’re parched.
Bonus: Sub-50 10K Training (Advanced Runners)
This is for runners who’ve broken 25:00 in the 5K and want to start chasing podiums or age-group placements.
Sub-50 means sustaining ~8:00/mile pace for 6.2 miles. Not a jog in the park. It takes a mix of:
- True speedwork (400s, 800s, cruise intervals)
- Long tempo runs (20–30 min at threshold)
- Smart recovery weeks
- Mileage in the 30–45 mpw range, with some flirting with 50 if they’re marathon types
Most follow a 14-week plan:
- Base (Weeks 1–4): 25 → 35 mpw
- Peak (Weeks 8–10): Touch 40–45
- Taper: Weeks 12–14, cut to 30 → 20
By this level, some runners add doubles or cross-training like a second job. But only if it supports your goal without blowing up your knees.
Here’s your blueprint.
Key Workouts – What You Need in Your Toolbox
Long Runs (10–12 Miles)
Yeah, you still need these. You don’t build endurance without going long. For a sub-50 runner, the long run might stretch up to 12 miles, and some days you’re not just cruising—you’re working.
- Standard long run: 90 minutes to 2 hours at easy pace.
- Spicy option: Finish with the last 2 miles at goal pace (8:00). It teaches you how to run strong when tired—exactly what you need to close hard in a race.
- Tempo fusion: 8 miles easy + 2 miles tempo at the end = race simulation gold.
Key point: Long runs aren’t about pace. They’re about getting comfortable with time on feet. But don’t be afraid to test yourself occasionally.
Intervals (VO₂ Max)
Here’s where the gas pedal hits the floor. You want to run faster? You’ve got to train faster. These sessions raise your ceiling.
- 5×1000m at 5K pace (~4:45 each if goal pace is 8:00/mi)
- 6×800m at between 5K and 10K pace
- 3×1600m at 10K pace (~8:00 each), short rests (2–3 mins)
Only one VO₂ workout per week (or 10 days). These are tough—don’t overdo them. This is your red zone work.
Threshold Runs (Tempo Work)
This is the bread and butter. Threshold runs raise your “floor” so you can run faster, longer, with less suffering. If intervals are the ceiling, tempo is the strong foundation.
- Classic tempo: 20–25 mins at ~8:30 pace (comfortably hard)
- Cruise intervals: 4×1 mile at ~8:00 with 1-min rest
Do one threshold workout most weeks, especially mid-cycle. These will teach your body to clear lactate and your brain to stay locked in.
Reps for Speed (Running Economy Work)
Short reps. Fast turnover. Pure leg speed. These sharpen your stride and improve efficiency.
- 10×200m at mile pace (~45 sec each), full recovery jogs
- 8×30 sec hill sprints (form over brute strength)
These show up early in your cycle for speed development or late as race sharpening. They don’t feel like much… until you realize your legs feel snappier at race pace.
Race Pace Workouts
You’ve got to feel goal pace. Your body needs to know what 8:00/mi feels like—relaxed, smooth, repeatable.
- 3×2 miles at 8:00 with 3-min rest — brutal, but confidence-building
- 4–5 miles continuous at goal pace — save this beast for late in training
- Cutdown: 4K–3K–2K–1K at descending paces from 10K to 5K pace
These teach rhythm, focus, and grit. You’ll want to bail halfway. Don’t.
Doubles, Strength & Recovery Runs
At higher mileage, it’s smart to split some days:
- 5 miles AM + 3 miles PM (easy)
- Shakeouts the day after a brutal workout
Cross-training? Optional. If you’re healthy, running gets priority. But cycling or swimming can be solid on rest days if you’re cooked.
Strength work? Non-negotiable at this level.
- 2x per week: Squats, deadlifts, lunges, planks
- Keep it heavy (4–6 reps) if your form’s solid
- Add plyos once a week if you’re ready
It’s about power now, not just staying upright. The stronger you are, the more efficient you’ll run.
Mobility & Prehab: The Details That Keep You Running
Mileage’s going up. Intensity’s higher. Weak links will get exposed.
- Glute band walks
- Ankle mobility drills
- Hip strength work
Also: dynamic warmups before hard efforts. Leg swings, lunges, drills. Prime the system before you start the engine.
Block Breakdown – Building the Monster
Weeks 1–4: Foundation & Speed
- Mileage builds
- Hill sprints, strides, light fartleks
- Introduce strength and mobility
Weeks 5–9: The Meat
- VO₂ + tempo every week
- Long runs stretch to 12 miles
- Body gets tougher, mind gets sharper
Weeks 10–12: Sharpening
- 10K pace workouts, tune-up 5K optional
- Long run becomes maintenance (~8–10 mi)
- Lock in pacing
Weeks 13–14: Taper
- Back off volume, keep intensity light
- You’re ready
Pacing Guidelines
- Easy Runs: 9:00–10:00/mi (don’t race recovery days!)
- Long Runs: ~9:30–10:00/mi, maybe faster finish
- Threshold/Tempo: ~8:20–8:30/mi
- 10K Goal Pace: 8:00/mi
- 5K Pace: ~7:40
- Mile Reps: ~7:20
- 200m Reps: ~6:00/mi pace (~45 sec)
Reminder: Most runners go too hard on easy days and too easy on hard days. Don’t be that runner.
Race Strategy & Simulations
Don’t just train your legs—train your race brain.
- Practice workouts at your race time (usually morning)
- Do goal pace in workouts (3×2 miles at 8:00/mi is perfect)
- Run even splits in workouts—learn not to blow up
- Tune-up 5K in week 11? Great way to test speed and pacing control
Recovery & Lifestyle Stuff
- At least one total rest day/week
- Sleep and food matter—especially carbs
- Foam roll. Warm up. Listen to niggles before they become injuries.
- Use HR monitors to gauge recovery—if resting HR spikes, take a lighter day
Fueling? If your long run is over 75 minutes, bring a gel or drink mix. Your race might not need it, but it’s good practice.
The Result: A Legit Sub-50 10K Engine
By the end of this plan, you’ll be able to:
- Run 7–8 miles at goal pace in training (maybe broken into chunks)
- Knock out 12-mile long runs without fear
- Cruise threshold workouts like it’s your job
- Run fast 400s and smooth 1000s
- Lock in that 8:00 pace without looking at your watch
You’ll also know suffering—and you’ll know how to keep going through it.
Sub-50? That’s yours. And maybe even sub-48 or a half marathon after that.
Chasing Sub-40 in the 10K: No BS, Just Work
Alright, so you’re chasing the big one: a 10K under 40 minutes. That’s 6:26 per mile. 4:00 per kilometer. No room for fluff.
This isn’t a casual jog. This is full-on performance mode. If you’re gunning for this, you probably already have some serious miles under your belt.
Maybe you ran track back in the day, maybe you’re grinding 40+ miles a week and dropping 5Ks in the 18–19 minute range. You’re not just running—you’re training.
Let’s break down what it takes to crack that 40 barrier—training, workouts, pacing, gear, everything. This is the competitive amateur level—close to local elite territory. And it demands a smart, no-shortcuts approach.
Timeline: 16 Weeks to Sub-40
At this level, gains don’t come overnight. You’ll need a 4-month cycle to build smart. That gives you time to stack volume, sharpen, and maybe toss in a tune-up race or two. Improvements are earned inch by inch here.
Mileage & Weekly Flow
You’re running 6–7 days a week—some might take a day off every other week. Mileage? Probably in the 50–70 miles/week range. Some runners hit sub-40 off 40 miles a week, but it’s rare. Most need volume.
A typical cycle might look like:
- Base weeks: 50 → 60 → 65 → cutback at 50
- Peak weeks: Hit 70 miles, maybe with doubles (easy AM jogs + PM workouts)
- Taper: 50 miles → down to ~30 race week
Double runs help pack in volume without trashing your legs. Example: 5 miles in the morning, 6 in the evening—keeps you aerobically loaded without redlining.
Key Workouts That Get You There
Long Runs: 12–16 Miles
These build your staying power. Even if you’re training for 10K, going long gives you the aerobic foundation to hold 6:26 pace for 40 minutes without crumbling.
- Pure 10K focus? 12 miles is solid.
- Looking to move up later? Stretch to 16.
- Want bonus points? Add quality to the end—finish last 3 miles at marathon pace.
Midweek 10-milers at a steady aerobic effort are gold too.
Threshold/Tempo Work
Bread and butter stuff. At least one threshold session per week.
- Examples:
- 4–5 miles continuous at threshold (~6:50–7:00 pace)
- 6 x 1 mile @ threshold with 1-min rest
- 8 miles @ marathon-ish pace (~7:15/mi) for endurance + strength
Threshold work raises your ceiling—it’s how you build that smooth, cruising engine that makes 6:26 feel sustainable.
VO₂ Max Intervals
Time to sharpen the blade. Speed sessions like:
- 5 x 1000m @ ~5K pace (~6:00/mi) w/2–3 min jog
- 3 x 1600m @ goal 10K pace (6:26/mi) w/2 min rest
- 12 x 400m @ 5:40/mi pace (around 85 sec per rep)
These teach you how to suffer and still hit your splits. They’re also great for mental toughness—you’ll need that when 8K hits on race day.
Speed Reps (Strides, 200s, Hill Blasts)
These don’t feel “hard,” but they matter. They teach your legs to turn over fast and efficiently.
- 10 x 200m @ mile pace (~40s) w/200m jog
- Hill sprints: 10 x 10 seconds all out
These improve economy—think of them as lube for your running engine. Smoother = faster = longer.
Race Simulation Workouts
This is where we test the engine.
- 3 x 2K @ goal pace (4:00/km) with 2-min rest
- 2 x 3K @ goal pace with 3-min rest
- 5K time trial mid-cycle (shoot for sub-19)
If you can hit those with control, you’re ready to make your move on race day.
Tune-Up Races & Test Days
Racing sharpens everything—form, mindset, pacing.
- Early in the cycle: 5K or 2-mile race to check where your speed’s at
- Week 12-ish: A rust-buster 10K to simulate race rhythm (not all-out)
- Parkruns and track meets? Perfect stand-ins for hard workouts
Doubles, Easy Runs & Recovery
Most sub-40 runners aren’t smashing every day. They live off easy mileage and smart recovery.
- Double days: AM shakeout + PM quality
- Easy runs: flush out soreness, build aerobic base
- Rest: Optional weekly. Some go 14 days straight, then break. Just don’t ignore fatigue—listen to your body.
Strength, Plyos & Extras
You’re not just a runner—you’re an athlete. Treat your body like it.
- Strength: 1–2x/week. Focus on weak links—hips, glutes, hamstrings. Can be bodyweight or heavier if you’re lifting in the off-season.
- Plyos: Depth jumps, bounding, fast feet drills. One session a week can make your stride pop. Bonus: research shows this stuff actually helps running economy for well-trained runners.
- Mobility: Daily dynamic warm-ups. Foam roll post-workout. Static stretch the problem areas (calves and hammies, especially after speed).
Cross-training? Mostly if you’re dinged up or swapping an easy run with cycling/swimming to save your joints.
Pacing Targets (Know Thy Zones)
You’ll want these dialed in:
- Easy runs: ~7:30–9:00/mi (depends on your current fitness). Roughly 60–75% effort.
- Long runs: ~60–90 seconds slower than race pace. Can progress near goal pace in last few miles.
- Threshold: ~6:45–6:50/mi
- 5K pace: ~6:00/mi
- Speed reps (e.g., 200s): ~5:20/mi or faster
- 400s: ~5:40/mi pace (85s reps)
Got power meters or HR zones? Use ‘em. But don’t let the tech run your brain. Know the feel. Know the grind.
💡 Pro tip: On big days, fuel like it’s race day—gel or carbs pre-workout, even a caffeine boost to mimic race effort. Train the gut too.
Race Day Strategy: Don’t Be a Hero at Mile 1
The number one reason people miss sub-40?
They go out too hot, then explode at 8K.
Train even pacing. Practice progression runs. Learn to start calm and close hard.
Use mental tools:
- Break the race into two 5Ks.
- Focus on your breathing, your form, your rhythm when it gets ugly.
- Keep one mantra on standby: “Hold the line.”
Taper Like a Pro: Less Running, More Racing
Here’s the golden rule heading into race day: Don’t try to squeeze in last-minute fitness. That ship has sailed. Tapering is where you sharpen the sword, not forge a new one.
For a 10K, a two-week taper usually does the trick. In Week 1, cut volume by about 20%. In Race Week? Drop it by 50%. You’re not quitting training—you’re just trimming the fat.
You’ll still hit intensity, but with fewer reps. So if you normally knock out 5×1000m at threshold pace? Drop it to 3×1000. Keep the same effort—just less volume. And toss in a few strides here and there to keep your legs poppin’.
Also, now’s the time to be boring in the best way:
- Sleep like it’s your job.
- Eat slightly more carbs in the final 3 days.
- Cut back on stress—ditch unnecessary commitments.
- Say no to the late-night Netflix bender. This is your race week.
👉 Final tune-up tip: Do a dress rehearsal—race shoes, kit, warm-up, same time of day. Get familiar with how race day will feel.
Race Day Outcome: Sub-40 Is in Reach
If you’ve hit your workouts, tapered smart, and show up ready? You’re in sub-40 shape. A tune-up race or time trial that lands around 18:50 for the 5K? That’s a green light. It means you’re ready to flirt with a 39:XX 10K.
This isn’t just fitness—it’s mastery. When you break 40, you’re not just fast, you’re trained and tactical. And from here? The doors open to bigger goals: maybe a sub-90 half or a crack at BQ pace in the marathon down the line.
You’ve built a solid foundation. This isn’t random—you’ve earned every second.
Beyond Mastery: What’s Next?
Alright — you’re not just running 10Ks anymore. You’re owning them. You’ve learned the pacing, crushed the workouts, and stared down that 7K pain cave without flinching. So what now?
That’s the beauty of the 10K: once you’ve nailed it, your engine’s primed for whatever direction you want to go. Here’s how to ride that wave.
Option 1: Level Up to the Half — Without Losing Your Edge
You’ve got the speed, and your long runs are already brushing up against double digits. That means it’s prime time to take a shot at the half marathon. And no — you don’t have to become a slow plodder to do it.
In fact, that 10K sharpness? It’ll make your half marathon feel smooth… at least early on.
Here’s the plan:
- Gradually build your long run — think 12 miles, then up to 14–15 over time.
- Swap some 10K-style intervals for longer tempo runs at half marathon pace.
- Keep sprinkling in strides and occasional short reps to stay snappy.
Pro Tip: Don’t ditch speedwork completely. I’ve seen runners “go long” and lose their zip because they forgot to keep turning over their legs. Every other week, hit a 10K pace workout to stay sharp.
Rough translation: If you’ve hit sub-50 in the 10K, you’ve got the chops for a 1:50–1:55 half (assuming your endurance is dialed in). But don’t get obsessed with the numbers — run your race, practice fueling, and pace smart.
Speaking of fueling: A half is long enough that you’ll want to train with gels or sports drink. Start practicing during your long runs — don’t let race day be a gut-check you didn’t prepare for.
Option 2: Go Shorter — Use That Strength to Smash Your 5K
Want to drop the hammer on your 5K time? Good. 10K fitness makes that possible — and painful in the best way.
See, by training for the 10K, you’ve been living just under 5K pace. That builds specific endurance and stamina. Drop back to 5K, and suddenly your body has the strength to hold near-max effort without blowing up halfway.
Tactical win: 5Ks feel shorter — mentally and physically — after racing 10Ks. You’ve developed pacing discipline and toughness. Now you get to suffer for just 20–30 minutes instead of an hour.
To fine-tune for the 5K:
- Add more short, fast intervals (think 200–800m reps)
- Slightly longer recovery between hard sessions
- Keep a weekly tempo or longer rep day to hold onto strength
Bonus: That aerobic engine will even boost your mile time. You might not do full-on speed training, but don’t be surprised if your final lap finishes stronger thanks to that endurance base.
Strength = speed reserve. You don’t need to feel faster — you need to feel less tired running fast.
Option 3: Use the 10K as Your Fitness Barometer
You’ve mastered the 10K. Now you can use it.
Think of the 10K as a fitness litmus test. Mid-marathon cycle? Plug in a hard 10K race or time trial. Between training blocks? Jump into a local 10K instead of just doing another tempo.
Why it works:
- It’s short enough to recover quickly
- Long enough to show if your aerobic base is solid
- Easy to plug into training without a full taper
Real-World Use Case: Can you run 10K in 45:00? You’re probably fit for a ~1:40 half. Prediction charts love the 10K for this reason — it bridges the short and the long.
Option 4: Go Wide – Trails, XC, Pacing, Experimenting
Maybe it’s not about chasing the next PR. Maybe it’s about exploring what else this body can do.
Try a trail 10K. If you thought road 10Ks were humbling, wait until you’re gasping up a muddy hill and tripping over tree roots. Trail 10Ks slow you down, toughen you up, and train your coordination and strength like nothing else.
Pace a race. Be the 50-minute pacer. Help someone else hit their goal. It’s one of the most satisfying ways to run a race — no pressure, just joy.
Get analytical. Now that you’ve got data — times, splits, heart rate, workouts — you can experiment. Try adding 10% to your weekly mileage. Swap a workout. Change recovery days. Use the 10K as your personal lab.
What if…
…you improve more off fewer miles?
…you handle back-to-back workout days better?
…you respond to hills more than intervals?
You’ll never know unless you test it — and the 10K is the perfect testing ground.
🧬 Some runners figure out their true strengths through this. Maybe you’re secretly built for the 5K. Or maybe, after experimenting, you realize you’re a marathoner in disguise.
Final Words – You Don’t Just Finish a 10K… You Own It
Crossing the finish line of a 10K is a win. No doubt. But owning the 10K? That’s something else entirely. That’s next-level. That’s when running stops being something you do and becomes part of who you are.
If you’ve stuck with this guide, trained smart, and pushed yourself through the process, then you’re not just another weekend warrior jogging for a medal. You’ve leveled up. You’re building mastery. And that changes everything.
This Ain’t Just About Running
Let’s be real—mastering the 10K isn’t about nailing one perfect race. It’s about understanding your body, your brain, and how the two work together. You’ve learned how to train with purpose, adjust on the fly, and grind through the tough days.
Maybe you found out you’re a grinder—steady engine, takes a while to warm up but can go forever. Or maybe you’re a speedster who had to wrestle with pacing and stamina. Either way, now you know your machine. You’ve tuned your engine. You’ve learned what fuels it, what breaks it, and how to fix it mid-run.
That’s not just running knowledge—that’s self-knowledge. That’s power.
Even elite runners are constantly fine-tuning. So are you now. Welcome to the club.
From “Jogger” to “Athlete”
Think back to where you started. Maybe running was just cardio. A way to shed a few pounds. Something you “should probably do.”
Now? You’re thinking like an athlete. You plan. You pace. You look at splits and training cycles and how your body responds to different workouts. You made the jump from just exercising to training. That mental shift—right there—is a bigger win than any finish time.
Because when you start identifying as an athlete, your decisions start changing too. That second beer the night before a long run? Nah. You skip it. Sleeping in instead of training? Not today. That’s the mindset shift. That’s what turns finishers into racers.
And here’s the wild thing: that discipline leaks into other parts of your life. Suddenly you’re sharper at work. You handle stress better. You’re more patient, more resilient. You didn’t just build fitness—you built grit.
What’s Next?
That fire you feel right now? Bottle it. Take it with you. Whether you’re aiming for faster 10Ks, longer races, or just deeper enjoyment of the run—you’ve got the tools now. You’ve proven you can commit, push through tough patches, and come out stronger.
Mastery doesn’t have a finish line. It’s a mindset. A way of showing up, again and again, ready to get a little better every time.
So go out there. Run strong. Run smart. Run like it’s yours—because now, it is.
You don’t just finish the 10K. You own it.