The Beginner’s Guide To Hydration Running Vests

Affiliate Disclosure: Runner’s Blueprint is reader-supported. If you buy through links on this page, I may earn a small commission at no extra cost to you.

Picture this: You’re halfway through a steamy trail run on a hot day. The sun’s baking your back, your tongue feels like sandpaper, and your water bottle?

Bone dry.

Been there.

It’s the kind of run where every step turns into a mental grind—thirst dragging you down, distractions piling up.

Then came the game-changer. The first time I strapped on a hydration vest, it felt like I unlocked a cheat code. Suddenly, I could carry everything I needed—water, fuel, phone, jacket—without the bounce or bulk.

I ran freer. Smarter. Longer. This guide is my way of passing that freedom on to you.

Whether you’re eyeing your first trail race or just want to stop juggling bottles on every long run, I’ve got your back.

We’ll talk about why hydration vests matter, how to choose the right one, the biggest rookie mistakes to avoid, and even break down top picks for different distances.

Let’s get you geared up and ready to go.

Quick Picks — Best Hydration Vests for Runners

If you don’t feel like reading the whole guide, here’s the quick answer.

These are the hydration vests runners consistently trust.

Best Hydration Vests for Running

Best Overall Hydration Vest
Salomon ADV Skin 5
Comfortable, stable, and incredibly popular among trail runners.
👉 Check current price on official website

Best Lightweight Vest for Beginners
Nathan QuickStart 4L
Simple, affordable, and easy to use for long runs.
👉 Compare retailers on official store

Best Vest for Ultras
Ultimate Direction Ultra Vest
Designed for long mountain runs and big adventures.
👉 View current deals on Amazon

Best Budget Hydration Vest
Aonijie Running Vest
Surprisingly solid entry-level option for new runners.
👉 See available options on Amazon

If you’re unsure where to start, most runners find the Salomon ADV Skin 5 hits the sweet spot for comfort and capacity.

How to Choose a Trail Running Vest 

Let’s be real—picking a running hydration vest can feel like walking into a candy store with too many choices and zero clue where to start.

Different sizes, pockets, bottles, bladders—yeah, it can get overwhelming fast. But trust me, once you break it down, it’s not that complicated.

Let’s cut through the noise and figure out what you actually need from a vest.

1. Start with What You’re Carrying (Water + Gear)

This is the big one. Ask yourself: How much stuff do I need to haul on my run?

Everything else flows from that.

Vests usually show two numbers: how much water they hold (fluid capacity) and how much space you get for gear (like food, phone, jacket, etc.).

Fluid Capacity

Think about your longest stretch without a refill.

  • Just running an hour or less? You might skip water or toss in a single 500ml soft flask.
  • Going longer? You’ll want 1–2 liters with you.
  • Most setups give you front bottles (like two 500ml flasks = 1L) or a back bladder (1.5L to 2L). Some vests let you do both—front bottles plus a bladder—for those long slogs or hot weather runs.

But remember—water weighs a lot (1L = 1kg). Don’t carry extra “just in case” if you can loop back or refill along the way.

Gear Capacity

This is for all the extra stuff: snacks, keys, phone, headlamp, gloves, etc.

The numbers here (like 5L, 8L, 12L) include the main compartment and every pocket.

Let me break it down how I usually match gear capacity to run length:

  • Under 1 hour: No vest. Maybe a belt. If I carry anything, it’s just a gel or my phone.
  • 1–2 hours: ~2L pack is perfect. Usually holds a liter of water and a few snacks.
  • 2–3 hours: Go for a 4–6L vest. Now I’m packing maybe 1.5L of water, plus extra food and a windbreaker.
  • 3–6 hours: You’ll want 6–12L. That’s where I’m carrying 2L water, real food, and emergency gear.
  • 6+ hours / Ultras: 8–15L packs are your best friend. These carry everything: water, nutrition, layers, first aid, poles—you name it.

What the Experts Say

Even REI recommends about 2L of gear space for a 1–2 hour run, 4–6L for 3+ hours, and more than 6L for ultra distances.

Makes sense.

In winter? You’ll need room for extra clothes.

Running in Bali like me? You’ll want space for water and maybe a towel—humidity is a beast.

A Bit More Room is Better Than Not Enough

You don’t want to fight with zippers and overstuffed pockets every time you gear up.

A vest that’s slightly bigger is okay—you can cinch it down. But you can’t stretch a tiny vest mid-run to fit your rain jacket.

I’ve got one go-to vest that handles everything from 90-minute trail runs to 4-hour mountain sessions.

Around 5–8L seems like the sweet spot for a lot of runners.

Now, if you’re doing short jogs and big races, yeah—you might need two vests. One light, one for the long haul.

Weight Matters More Than You Think

This one snuck up on me. Empty vests can vary a lot:

  • Light ones (under 200g) feel like air on your back.
  • Ultra vests (300–400g) have more structure—good for big loads.

Does 100g seem like a small difference? Sure. But at hour 4 of a long trail run, you feel every gram. Choose wisely.

Quick Recap (Vest Size vs. Run Time)

Run Time Recommended Vest
Under 1 hour No vest / small belt
1–2 hours ~2L vest
2–3 hours 4–6L vest
3–6 hours 6–12L vest
6+ hours / ultras 8–15L full-kit vest

 2. Bottles vs. Bladder: How Do You Want to Hydrate?

Alright, let’s get real—this part trips up a lot of runners. Do you roll with bottles up front, a hydration bladder on your back, or carry both like a pack mule on a mission?

I’ve tried all three. Some runs feel like a science experiment with fluids. But let’s break it down.

Bottles / Soft Flasks: Quick Access, Visible Supply

Most modern vests come with those soft flasks you tuck into your chest pockets. Usually two—one on each side. Each holds about 500ml (17 oz), so you’re carrying around 1 liter total when full.

Here’s the upside: access is ridiculously easy. I like seeing exactly how much water I’ve got left.

No guessing. Just glance down, pull one out, drink, refill. Done.

It’s way faster at aid stations too—no digging into your pack like a bear raiding a cooler.

One trick I’ve used on long races: plain water in one flask, electrolytes or sports drink in the other.

Easy to switch depending on what I’m craving (or what my stomach isn’t rejecting at mile 40).

A lot of trail runners I coach love this setup for that exact reason—mix and match fluids depending on the weather or intensity.

Also, bottles up front help balance your weight. Feels more stable on technical trails.

Plus, soft flasks don’t slosh once you start sipping. They compress against your chest and shrink as you drink—less bounce, less noise, no drama.

But yeah, there’s a flip side:

  • If they’re not strapped in well, bottles jiggle. And half-full bottles? Ugh. Annoying unless you cinch the vest tight.
  • 1 liter might not cut it on big runs—think remote trails or high temps.
  • Some runners (especially those with tighter shoulders) just hate the motion of pulling bottles in and out.

Hydration Bladder 

Now if you want maximum water with minimal fuss, bladders are king.

These things hold 1.5 to 3 liters and sit in the back sleeve of your vest. You sip through a long hose that comes over your shoulder.

Simple. No need to stop or even break stride.

This setup is a lifesaver on long training runs—especially solo treks where aid stations are a fantasy. If I’m heading into the Bali hills for 4+ hours, I’ll fill up my 2L bladder, tuck in the hose, and just zone out while sipping slowly.

A neat trick? After you fill the bladder, flip it upside down and suck the air out through the tube—it seriously reduces that annoying water slosh.

But let’s be honest, bladders come with some baggage:

  • Refilling mid-run? Kinda a pain. You usually have to take the whole pack off, unzip, pull it out, fill, reseal. And during a race? That can cost you precious minutes.
  • You can’t see how much water is left unless you yank it out. I’ve misjudged and run dry more times than I care to admit.
  • Cleaning is another beast. Mold loves bladders if you don’t dry them right. I use cleaning tablets and wide-mouth models now, but bottles still win the easy-clean battle.
  • Bonus downside: sweat. That pack sits on your back and can get hot. I’ve felt the back panel getting toasty even on chilly mountain mornings.

Oh, and in winter? Watch out for the hose freezing. Insulated tubes or blowing the water back down after sipping can help, but it’s still something to watch. Here’s how much water runners need.

Combo Setup: Why Not Both?

Yeah, it sounds like overkill—but hear me out. Some long training days or crazy ultras demand flexibility.

On a gnarly 6-hour mountain run, I’ll start with a full 2L bladder and carry two bottles too. The bottles? Sometimes they’re just filled with electrolytes, or even empty at the start. It’s peace of mind.

I drain the bottles first, then tap into the bladder. Having backup water is a mental boost, especially when I’m deep in the jungle with no streams in sight.

You don’t need both for every run—but having that option is clutch.

So, What Should You Choose?

It’s all about your kind of running:

  • For races and fast efforts, I go with bottles. They’re quick to refill, easy to manage, and lighter.
  • For long, unsupported runs, the bladder wins. It holds more, keeps me sipping, and I don’t have to stop every hour to refill.

4. What to Look for in a Running Vest 

Look, the perfect running vest doesn’t exist. But the right one for you? That’s out there.

And it’s not just about fit or how much water it can hold — it’s the little things that make or break a vest during a 4-hour mountain slog.

Here’s what I always tell my runners to check for:

🔹 Pocket Setup: Your Lifeline Mid-Run

Pockets make or break a vest — no joke. I need my stuff right where I can grab it mid-stride without stopping.

You want front chest pockets for bottles (or gels/phone if the bottles live elsewhere), zippered ones for keys and ID, and side stretch pockets for the random crap we always end up carrying.

Rear stash pockets — especially the “kangaroo” style — are gold for gloves, buffs, or snacks.

My current vest has a stretchy back pocket I can reach without taking the whole thing off — I’ve pulled gloves out mid-stride when the wind turned nasty. That’s the magic I want in a vest.

When you try one on, pretend you’re out there mid-run: Reach for a gel. Fumble for your phone. Can you do it while moving?

Good. That vest gets a thumbs up.

Tip: The more pockets, the more weight — but on long runs, I’ll take convenience over looking fast.

“If I have to take my vest off just to grab a snack, that vest is dead to me.”

🔹 Zippers vs. Open Pouches: Secure and Fast

Zippers are your best friend when it comes to valuables. My car key always goes in a zipped pocket. Same with cash or cards.

But too many zippers? Now you’re wasting time fiddling.

The sweet spot: a mix of secure zips and open stretchy pockets.

Check if the zippers are glove-friendly. Some pull-tabs are worthless when your fingers are cold and sweaty.

My go-to? Zipper pulls that I can yank open even mid-downhill.

🔹 Trekking Pole Storage: If You’re Going Vertical

If you’re doing trail runs with serious elevation or ultras, pole holders are huge.

Most use bungees or loops to strap poles on the front or back. I don’t always use poles, but I was damn glad I had loops during a brutal mountain ultra.

Hands-free on the downhills? Game-changer.

Even if you’re not a pole runner yet, get a vest that can handle them.

You might change your mind — or your race — someday.

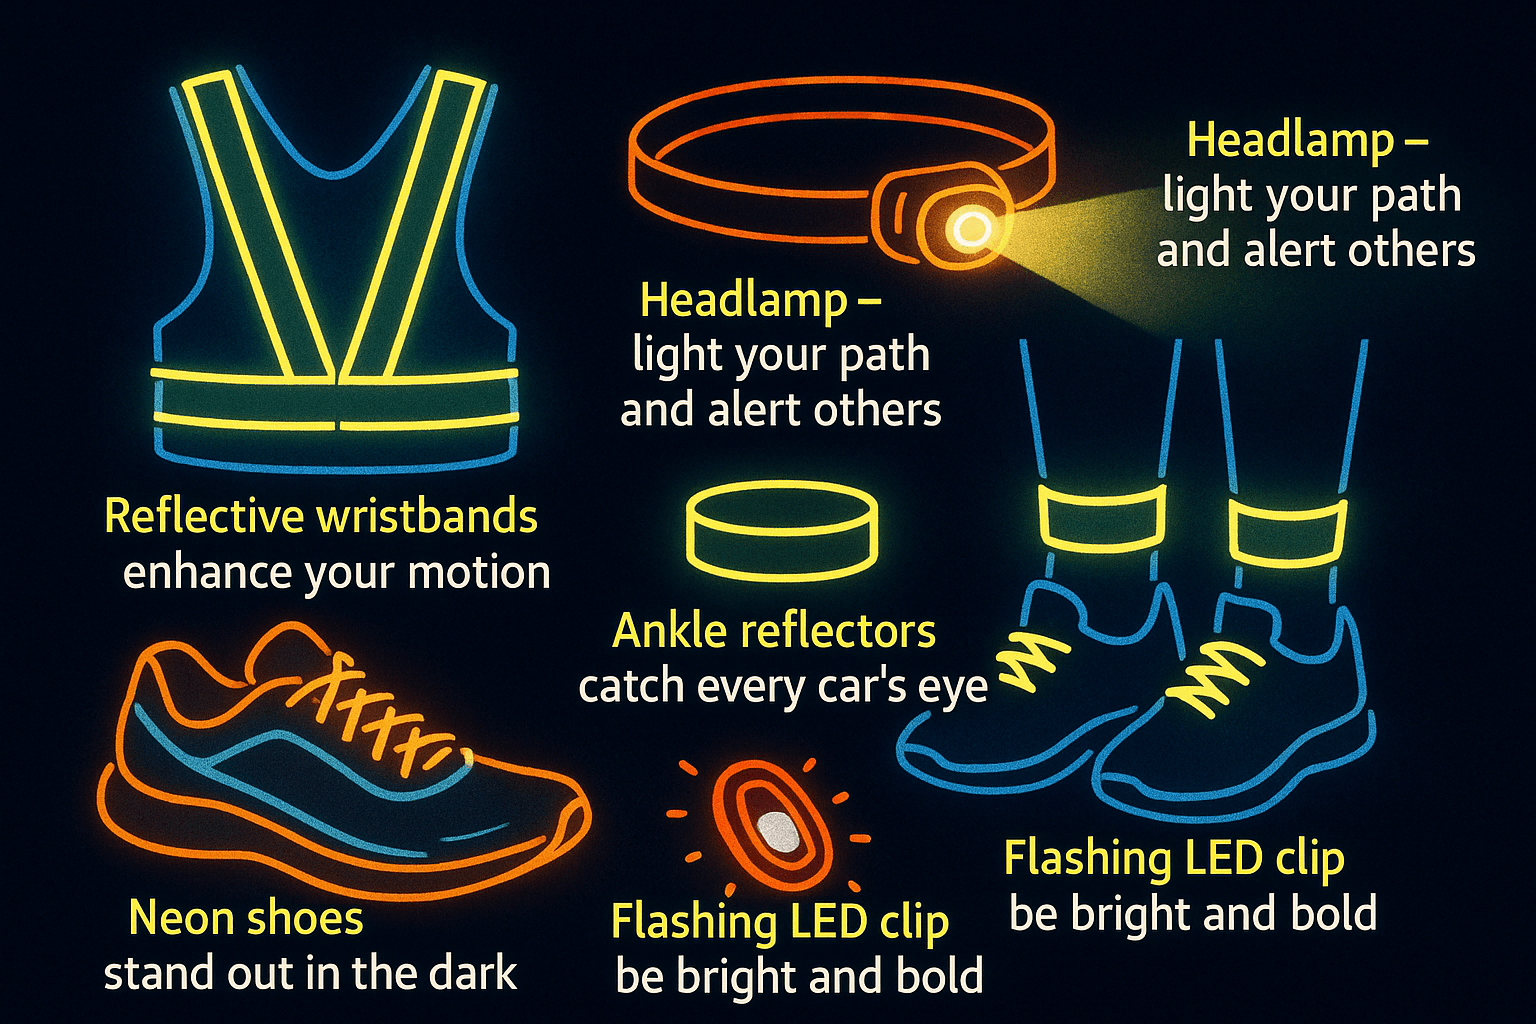
🔹 Reflectivity & Safety: Don’t Be Roadkill

I run early. I run late. I run near traffic. Reflective strips on a vest are a no-brainer.

Some vests go full neon or add reflective logos. The ones I like? Subtle but effective — just enough to catch a driver’s eye in the dark.

I always clip a blinking light to the back if I’m on the road.

Bonus: some vests come with a built-in whistle. It’s tiny, usually on the chest strap, but if you’re running solo in the wild? That whistle could matter. Some races even require it.


🏁 My Must-Haves (After Hundreds of Miles in These Things)

  • Pockets I can actually reach (gels + phone)
  • A safe place for keys
  • Pole loops
  • Reflectivity
  • Soft flasks with long straws (I hate tilting my head mid-run)
  • A clip for the hydration hose (bonus if it’s magnetic)

Trust me — these small touches make a big difference out there.

I’ve tested more than a few of of brands. Salomon nails pocket design. Nathan feels tougher. Ultimate Direction strikes a balance.

My Top Running Hydration Vest Picks

Look — hydration vests are one of those pieces of gear that seem unnecessary…

Right up until the day you run out of water halfway up a mountain trail.

Then suddenly they become the smartest thing you packed.

I’ve tested a bunch of these over the years — some on long trail days in the Bali heat, others during races where every ounce of water and every pocket mattered.

The vests below are the ones I see runners using the most and the ones I’d actually recommend to a friend.

Some are lightweight and simple for everyday long runs.

Others are built for serious adventures where you’re out for hours and need to carry half your kitchen with you.

There’s no perfect vest for everyone.

But there is a vest that fits your style of running.

Let’s break down a few solid options.

Hydration Vest Specs Comparison

If you want the quick side-by-side view, this table makes it easier to see how the most popular vests stack up.

Vest Capacity Hydration Setup Weight Best For Price
Salomon ADV Skin 5 5L Two 500ml soft flasks ~280g Long trail runs ~$140
Nathan QuickStart 4L 4L 1.5L hydration bladder ~300g Beginner trail runners ~$75
Ultimate Direction Ultra Vest 10–12L Flasks + bladder compatible ~320g Ultras and mountain runs ~$160
Aonijie Running Vest ~5L Soft flasks included ~260g Budget entry option ~$40

👉 Compare hydration vest prices
👉 Check runner reviews
👉 View available sizes

Salomon ADV Skin 5

Best for: Long trail runs and everyday training
Capacity: 5L
Hydration: Two 500ml soft flasks included
Weight: ~280g
Best run duration: 2–6 hours

👉 Check price on Amazon
👉 Check price on official website

Pros

✔ Extremely comfortable and stable fit
✔ Excellent pocket organization
✔ Soft flasks are easy to access while running
✔ Very popular among trail runners and ultrarunners

Cons

✖ Slightly expensive compared to beginner vests
✖ Takes time to learn where everything goes
✖ Front bottles can feel bulky until you get used to them


Coach’s Take

If you watch a trail race start line, you’ll see this vest everywhere. It fits well, carries enough gear for long runs, and just works.

Nathan QuickStart 4L

Best for: Runners trying hydration vests for the first time
Capacity: 4L
Hydration: 1.5L bladder included
Weight: ~300g
Best run duration: 1–3 hours

👉 Check price on Amazon
👉 Check price on official website

Pros

✔ Affordable entry point into hydration vests
✔ Simple design with easy storage
✔ Comfortable for moderate-distance runs
✔ Lightweight and beginner-friendly

Cons

✖ Less storage than larger trail vests
✖ Bladder refills take longer mid-run
✖ Fewer pockets than premium models


Coach’s Take

If you’re new to hydration vests and not sure you want to drop serious money yet, this one gets the job done without overcomplicating things.


Ultimate Direction Ultra Vest

Best for: Ultramarathons and all-day trail runs
Capacity: 10–12L depending on version
Hydration: Soft flasks + bladder compatible
Weight: ~300–350g
Best run duration: 4+ hours

👉 Check price on Amazon
👉 Check price on official website

Pros

✔ Large storage capacity for long races
✔ Comfortable even when fully loaded
✔ Balanced weight distribution
✔ Plenty of pockets for food and gear

Cons

✖ Overkill for short runs
✖ Slightly heavier than minimalist vests
✖ Easy to overpack if you’re not careful

Coach’s Take

When runs turn into full-day adventures, this vest shines. It’s built to carry everything you might need in the mountains.


Aonijie Running Vest

Best for: Budget-conscious runners trying hydration packs
Capacity: ~5L
Hydration: Soft flasks included
Weight: ~250–300g
Best run duration: 1–3 hours

👉 Check price on Amazon
👉 Check price on official website

Pros

✔ Very affordable compared to premium brands
✔ Lightweight and simple design
✔ Surprisingly comfortable for the price
✔ Good entry-level vest for beginners

Cons

✖ Lower durability than premium brands
✖ Pocket design is simpler
✖ Fit may vary between runners

Coach’s Take

If you’re just testing the waters with hydration vests, this one is a perfectly reasonable starting point. You don’t always need the most expensive gear to get the job done.

Frequently Asked Questions About Hydration Vests

Do beginners need a hydration vest?

Usually not.

Most beginners only need one when their runs exceed 90 minutes.

Are hydration vests comfortable?

Modern vests are designed to fit like clothing rather than backpacks.

When fitted correctly, they barely move.

How much water should a hydration vest carry?

Most runners carry 1–2 liters depending on weather and distance.

Are hydration vests allowed in races?

Yes.

Many trail races and ultras even require them.

Do hydration vests bounce while running?

A properly fitted vest should barely move.

Bounce usually means the vest is too loose.

Why You Can Trust This Guide

I’ve spent years trail running and training in hot conditions where hydration mistakes show up quickly.

Over time you learn which gear works and which gear ends up tossed in the closet.

The advice in this guide comes from:

  • real trail running experience
    • coaching runners preparing for long races
    • testing different hydration systems over hundreds of miles

Hydration vests aren’t magic.

But the right one makes long runs dramatically easier.

Helpful Guides for Runners

If you’re building your long-run gear setup, these guides might help.

Best Running Hydration Vests
How Much Water Runners Need
Best Trail Running Shoes
Best Running Headlamps

The right gear won’t make you faster overnight.

But it can make long runs a lot more enjoyable.

Final Coaching Advice

Here’s the truth most runners discover eventually.

A hydration vest feels unnecessary…

Right up until the day you run out of water halfway up a mountain trail.

Then suddenly it feels like the smartest piece of gear you own.

If your runs are short, skip it.

But if you’re heading into longer distances or remote trails, a good vest becomes one of those things you rely on every time you run.

The Trail Runner Guide To Running Shoes

Affiliate Disclosure: Runner’s Blueprint is reader-supported. If you buy through links on this page, I may earn a small commission at no extra cost to you.

Let me tell you about the first time I tried trail running. I thought I was all set—just grabbed my regular running shoes and figured I could handle anything.

But nope, I was wrong. As soon as I stepped onto the rocky trail, I started slipping all over the place.

It was like I was starring in some reality show, “Runner vs. Trail”—and spoiler alert: the trail was definitely winning.

My shoes, which I thought would be fine, were useless on those rocks.

My feet kept sliding, my ankles kept rolling, and my knees scraped against the ground more times than I can count.

It didn’t take long to realize road shoes just don’t cut it on the trails. I learned the hard way that having the right shoes makes all the difference.

Now, let me show you why trail shoes are a must for your safety, comfort, and performance.

Quick Picks – Best Trail Running Shoes

If you don’t feel like reading the entire guide, here’s the short version.

These are trail shoes runners consistently rely on.

Best Overall Trail Shoe – Salomon Sense Ride
Balanced traction, comfort, and durability for most trails.
👉 Check current prices on official store

Best Mud & Soft Terrain Shoe – Salomon Speedcross
Deep aggressive lugs built for sloppy, muddy conditions.
👉 Check current prices on official store

Best Rocky Terrain Shoe – Saucony Peregrine
Great balance of grip, protection, and responsiveness.
👉 Check current prices on official store

Best Ultra Distance Trail Shoe – HOKA Speedgoat
Plush cushioning for long trail days and mountain races.
👉 Check current prices on official store

Best Budget Trail Shoe – Brooks Cascadia 
Reliable traction and protection without premium pricing.
👉 Check current prices on official store

If you’re unsure where to start, most runners do well with Sense Ride or Peregrine.

Why Road Shoes Won’t Cut It on the Trails

Look, I get it. You’ve been putting in the miles on the road, and those shoes have served you well. But as soon as you hit a trail with rocks, mud, and tree roots, you’re gonna need something different.

Trail shoes are like a tough pair of boots for your feet—strong, protective, and designed to grip that uneven ground.

Out on the trail, you’re dealing with all kinds of unpredictable stuff—rocks, tree roots, and mud that can throw you off balance. What works on the road won’t give you the grip or stability you need to stay safe.

That’s where trail shoes come in. They’ve got these deep lugs on the soles to keep you from slipping and sliding like you’re on ice. 

Why You Can Trust This Guide

Trail running humbled me pretty quickly.

My first attempt involved slipping all over a rocky trail in road shoes.

That mistake taught me fast that the right shoe changes everything.

The advice here comes from:

  • real trail running experience
  • coaching runners who transitioned from road to trail
  • testing trail gear across different terrain

Trail shoes won’t make you invincible.

But they make the trail a lot more manageable.

Quick Comparison – Trail Running Shoes

If you’re trying to choose between a few trail shoes quickly, this table gives you the most important differences at a glance.

Different trails demand different shoes. Some are built for rocky terrain, some for mud, and others for long mountain runs.

Here’s how the top picks stack up.

Shoe Weight Lug Depth Drop Best Terrain
Salomon Sense Ride ~280 g 3.5 mm 8 mm Mixed terrain
Salomon Speedcross ~298 g 5–6 mm 10 mm Mud & soft trails
Saucony Peregrine ~275 g 5 mm 4 mm Rocky technical trails
HOKA Speedgoat ~291 g 5 mm 4 mm Long mountain runs
Brooks Cascadia ~298 g 4.5 mm 8 mm All-around trail use

Salomon Sense Ride

Best Overall Trail Running Shoe

Best for: runners who want one shoe that handles most trail conditions

Why runners like it

The Sense Ride is one of those shoes that just works on almost any trail. Gravel paths, forest trails, rocky climbs — it handles a bit of everything without feeling overbuilt.

I’ve recommended it to a lot of runners transitioning from road to trail because it gives you traction without feeling like you’re wearing hiking boots.

Key specs

Weight: ~280 g
Lug depth: ~3.5 mm
Drop: 8 mm
Terrain: mixed trails

Pros

✔ versatile for many trail types
✔ comfortable cushioning
✔ reliable traction

Cons

✖ not aggressive enough for deep mud

Price range: $120–$150

👉 Check current prices on Amazon
👉 Check official store


Salomon Speedcross

Best Shoe for Mud and Soft Terrain

Best for: muddy trails, wet forest routes, and sloppy terrain

Why runners like it

If you’ve ever tried running through mud with normal trail shoes, you know the struggle.

The Speedcross solves that problem with aggressive lugs that bite into soft ground. When the trail turns into a swamp, these things grip like crazy.

Key specs

Weight: ~298 g
Lug depth: 5–6 mm
Drop: 10 mm
Terrain: mud, soft trails

Pros

✔ extremely aggressive grip
✔ great for wet conditions
✔ durable upper

Cons

✖ lugs feel overkill on hard surfaces

Price range: $130–$160

👉 Compare prices on Amazon
👉 Check official store


Saucony Peregrine

Best for Rocky Technical Trails

Best for: rocky terrain and technical mountain trails

Why runners like it

The Peregrine strikes a really nice balance between protection and responsiveness.

It has enough grip for rocky terrain while still feeling light and fast. If you run trails with lots of roots, rocks, and uneven ground, this shoe handles it well.

Key specs

Weight: ~275 g
Lug depth: ~5 mm
Drop: 4 mm
Terrain: rocky and technical trails

Pros

✔ excellent grip on rocks
✔ lightweight and responsive
✔ durable outsole

Cons

✖ cushioning may feel firm for some runners

Price range: $130–$150

👉 View current deals on Amazon
👉 Check official store


HOKA Speedgoat

Best for Ultra Distance Trail Runs

Best for: long trail runs, ultras, and mountain races

Why runners like it

The Speedgoat is famous in the ultra-running world.

It’s designed for long days on the trail where cushioning and protection really matter. The shoe feels plush but still grips well on steep climbs and descents.

If you’re running mountain races or long technical trails, this one is hard to beat.

Key specs

Weight: ~291 g
Lug depth: ~5 mm
Drop: 4 mm
Terrain: mountains and long-distance trails

Pros

✔ excellent cushioning
✔ strong traction
✔ comfortable for long runs

Cons

✖ slightly bulky for short fast runs

Price range: $140–$170

👉 See available options on Amazon
👉 Check official store


Brooks Cascadia

Best Budget Trail Running Shoe

Best for: runners looking for reliable trail shoes without paying premium prices

Why runners like it

The Cascadia has been around forever for a reason.

It’s stable, protective, and handles a wide range of trails. Older versions are often discounted, which makes it one of the best value trail shoes available.

Key specs

Weight: ~298 g
Lug depth: ~4.5 mm
Drop: 8 mm
Terrain: mixed trails

Pros

✔ very durable
✔ stable ride
✔ great value when discounted

Cons

✖ heavier than some competitors

Price range: $100–$140

👉 Check current price on Amazon
👉 Check official store

Beginner Trail Running Shoe Tips

If you’re new to trail running, keep it simple.

Start with an all-around trail shoe.

Examples include:

  • Salomon Sense Ride
  • Saucony Peregrine
  • HOKA Speedgoat
  • Brooks Cascadia

These shoes handle most terrain well.

Once you gain experience, you can start choosing shoes more specifically.

What Should You Look for in a Trail Shoe?

Alright, let’s dive into it. The right trail shoe is like your best running buddy on the trails, and you need to know what to look for.

The Terrain Matters

The first thing you’ve gotta do is figure out what kind of trail you’ll be running.

Are you on soft, park paths? Go for shoes with a flexible midsole.

Muddy swamps? You’ll need shoes with aggressive lugs that won’t get stuck.

And rocky, gnarly trails? Go for shoes with stiffer outsoles to protect your feet better.

I’ve been there—once hit a trail without thinking, and found myself stuck in knee-deep mud. I couldn’t move, couldn’t run. I felt like a kid stuck in a sandpit.

Lesson learned: pick the right shoe for the right terrain.

Grip is King

Grip is key for trail shoes. You need deep lugs to handle wet rocks, slippery leaves, or whatever the trail throws at you. Without that, you might as well be running in socks. And trust me, no one wants to do that—especially when there’s a steep downhill coming up.

Here’s a pro tip: Think of your shoes as mini grappling hooks.

The deeper the lugs, the more control you’ll have, especially in muddy conditions. You’ll be thanking your shoes when you’re charging through rough spots.

Comfort for Those Long Hauls

Long trail runs? You need more than just traction.

Cushioning matters, but it’s all about balance.

Too soft, and your feet feel like they’re sinking into marshmallows. Too hard, and every rock feels like a punch to the bottom of your foot. The key is finding shoes with enough support for long runs without overdoing it.

Light Trail Shoes

For those easy gravel paths or trails that won’t make you feel like you’re fighting for your life, light trail shoes are the way to go. They’re like a cross between a road shoe and a trail shoe.

They’re light, they’ve got just enough tread to keep you from slipping, and they’re not overbuilt for tough terrain. Perfect for well-maintained trails or park loops.

Here’s the kicker: If you think your road shoes will work on a dirt trail—think again.

You’ll end up tripping over a tiny pebble, face-planting like a rookie, and regretting your choice of shoes. Light trail shoes are your go-between, ready for those dirt trails without feeling too heavy.

Rugged Trail Shoes

If you’re thinking of running through rocks, roots, or a mess of mud and branches, it’s time for rugged trail shoes. These guys are built for the tough stuff.

You get more protection, better grip, and stability that says, “Bring it on, nature.” The treads are deeper, there’s more cushion, and they’ve got tougher uppers. You’ll feel like you’re wearing a tank for your feet.

I learned the hard way—when I first ventured into the mountains with my road shoes, stepping on rocks the size of small cars. My feet were bruised, my ankles were shot, and I almost called it quits. Rookie mistake. Rugged trail shoes would’ve saved me the pain.

Lug Depth & Grip

The lugs on your shoes? Huge deal. Those chunky bits that dig into the ground?

They make all the difference, especially for muddy or technical trails. Ever tried running through knee-deep mud with road shoes? It’s not pretty. You’ll slip, slide, and feel like you’re running in slow motion. That’s where deep lugs come in.

Here’s how it breaks down:

  • For Muddy Trails: Look for deep lugs—5mm or more. Those big ones dig into the mud, giving you traction so you don’t slip around. Shoes like the Salomon Speedcross 6 are perfect for this. Those deep lugs will keep you moving, even in the muddiest conditions.
  • For Rocky, Technical Trails: You still need grip, but you don’t want to feel like you’re wearing clown shoes. For these, a mid-depth lug works best—around 3-5mm. This gives you enough traction to handle rocks without tripping over roots. The Saucony Peregrine 15 has just the right balance—aggressive enough for technical terrain but not so gnarly you feel clumsy.

Off-Trail Shoes

If you’re not just sticking to trails but venturing off the beaten path—dodging rocks, jumping streams, and navigating deep mud—you need off-trail shoes. These are the heavyweights. They’ve got rock plates to protect from sharp objects, strong grip, and ankle support for rough terrain.

You might think your rugged shoes will work off-trail. Big mistake. Off-trail shoes are built for wild terrain—mountainous, slippery, and unpredictable. If you’re crossing streams or bushwhacking, don’t even try to get by with anything else.

How to Find Your Perfect Trail Shoe: The Essentials

  1. Grip: Look for deep, aggressive lugs that can handle wet, rocky, and slippery terrain. The deeper, the better for muddy conditions.
  2. Protection: Reinforced toes and sturdy uppers are your friends. You’re going to run into rocks, tree roots, and who knows what else. You need shoes that are going to take the impact and protect your feet.
  3. Support: If you’re going to be running on uneven surfaces for hours, you need shoes with good arch and ankle support to prevent injuries.
  4. Comfort: Comfort is king. If your feet hurt, nothing else matters. So, find shoes that offer enough cushion without feeling like you’re running on marshmallows.

Don’t Make the Same Mistakes I Did

Trail running isn’t just about picking a cool shoe—it’s about choosing the right shoe for your specific needs. It’s about matching the shoe to the type of trails you’ll be running on and how long you’ll be out there.

I’ve had my share of “learning experiences” (like that first rocky run), but once I found the right shoes, everything changed. My runs became smoother, my confidence shot up, and I could actually focus on enjoying the beauty of the trail instead of worrying about slipping every five seconds.

So, whether you’re just starting out or looking to upgrade your gear, make sure you’re picking shoes that are designed for the job. Don’t make the same mistake I did—trail shoes are not just an accessory, they’re a game-changer.

Trail Running Shoe FAQ

Here are some of the most common questions runners ask when switching from road running to trails.


Are trail running shoes really necessary?

If you’re running on dirt paths or rocky terrain regularly, yes.

Trail shoes provide:

  • better traction
  • stronger protection
  • more stability on uneven ground

Road shoes simply don’t have the grip needed for most trails. Once the trail gets rocky, muddy, or steep, the difference becomes obvious very quickly.


Can you run trails with road running shoes?

You can—but it’s not ideal.

Road shoes lack the deep lugs and protection needed for trails. That means less traction, more slipping, and a higher chance of rolling an ankle.

For smooth dirt paths or park trails you might get away with it. But for technical trails with rocks and roots, trail shoes make a huge difference.


How long do trail running shoes last?

Most trail running shoes last 300–500 miles, similar to road shoes.

However, rocky or technical terrain can wear them down faster.

Signs it’s time to replace them include:

  • worn-out lugs
  • flattened cushioning
  • torn upper material

If the grip starts disappearing, it’s usually time for a new pair.


Should trail shoes be bigger than road shoes?

Many runners go half a size larger in trail shoes.

Why?

Because downhill running pushes your foot forward inside the shoe. Extra toe room helps prevent black toenails and pressure on the front of the foot.

Just make sure the shoe still feels snug around the midfoot and heel.


What’s the difference between trail shoes and road running shoes?

Trail shoes are designed specifically for uneven terrain.

They typically include:

  • deeper outsole lugs for grip
  • rock plates for protection
  • reinforced uppers for durability

Road shoes focus more on cushioning and smooth surfaces, while trail shoes prioritize traction and protection.


What lug depth is best for trail running?

It depends on the terrain.

General guideline:

  • 2–3 mm lugs: light trails and gravel paths
  • 3–5 mm lugs: mixed terrain
  • 5 mm or deeper: muddy or technical trails

If you’re unsure, start with a shoe around 3–5 mm lug depth, which works well on most trails.


Are trail running shoes good for hiking?

Yes, many trail shoes work well for hiking.

They’re lighter and more flexible than traditional hiking boots, which makes them great for fast hikes or day trips.

However, for heavy backpacking or very rugged terrain, boots may still provide more ankle support.


Do trail running shoes need a rock plate?

Not always—but they help on rocky terrain.

A rock plate is a protective layer in the midsole that prevents sharp rocks from bruising the bottom of your foot.

If you run on technical trails or mountains, rock plates can make a big difference in comfort.

Final Coaching Advice

Here’s something trail runners learn quickly.

The trail doesn’t care how good you are.

Roots, rocks, mud, and loose dirt will humble anyone.

But the right shoes give you confidence.

They help you move faster, stay stable, and actually enjoy the trail instead of fighting it.

And once you run trails with the right shoes?

You’ll never want to go back to road shoes in the dirt again.

Lower Abdominal Pain While Running – Causes, Symptoms, and How to Fix It

runners stomach

You train hard. You show up ready. But then the race punches you in the gut—literally.

Here’s the sliver lining: Lower abdominal pain is way more common than most folks admit.

One study found that over 60% of runners deal with gut-related issues during runs—and a good chunk of that includes those sharp, sudden pains in the belly.

The upside? Most of this stuff has a fix.

You don’t have to swear off running or duct-tape your stomach to keep it quiet.

You just need to understand the cause and make a few key changes.

Let’s get to it…

Why Does My Stomach Hurt When I Run?

If your lower abs start screaming mid-run, it usually comes down to four usual suspects:

  • Side stitches
  • Muscle cramps
  • Heartburn/GI distress
  • (Rarely) an actual abdominal strain

Let’s start with the most common offender…

1. The Dreaded Side Stitch (aka ETAP)

Every runner has met this little devil at some point. That sharp, jabbing pain just under your ribs, usually on the right side. In fancy medical speak, it’s called exercise-related transient abdominal pain (ETAP).

It can sneak up during long runs or slam you out of nowhere in a race. Some runners even feel it lower in the abdomen, not just under the ribs. And when it hits? Game over—at least for a few minutes.

FYI: A study out of Australia found 70% of runners had a side stitch in the past year. So if you’ve felt that stabbing sensation, you’re in good company.

What Triggers It?

Here’s what science (and real-world runners) say:

  • Diaphragm + Ligament Stress: Your diaphragm is the muscle that helps you breathe, and it’s got ligaments connecting it to your guts. When you run, all that bouncing pulls on those attachments. The theory is that the parietal peritoneum (lining of the abdomen) gets irritated, and bam—you’ve got a stitch.
  • Shallow Breathing: If you’re gasping like a fish out of water (short, choppy breaths), your diaphragm’s rhythm gets thrown off. That strain can contribute to a stitch.
  • Eating or Drinking Too Close to Run Time: Big meal before a run? Chugged a sports drink at the start line? That extra belly weight tugs on your diaphragm, messes with blood flow, and increases your odds of getting knifed in the side by your own organs.
  • Poor Posture or Weak Core: As you fatigue, your form slips. Slouching compresses your midsection, which messes with breathing. If your core’s undertrained, it won’t stabilize your torso well enough—which means more bouncing, more strain, more pain.

The Fix

Here’s how to deal with side stitches while running

  1. Ease Up. As soon as it hits, slow down. Drop to an easy jog or even walk. Trying to power through will only make it worse. Backing off early is what keeps it from escalating.
  2. Fix Your Breathing. Shift to belly breathing. Try the 3:2 rhythm — inhale for 3 steps, exhale for 2. And here’s a trick: time your exhale with the foot strike opposite the stitch (if it’s on your right side, exhale when your left foot hits). Helps take stress off the cramped side.
  3. Push & Exhale Trick. Place your hand on the stitch side. Press in hard. Then, as you exhale, lean forward slightly and push a little deeper. Inhale, release pressure a bit. Exhale, press in again. It’s like manually massaging the diaphragm. It’ll feel weird at first — but it works.
  4. Stretch It Out. Still hurting? Stop for 20–30 seconds. Raise the arm on the painful side, and lean your upper body away from it — right side stitch? Raise right arm, lean left.

Breathe deep into the stretch. Massage gently with your free hand. That combo usually loosens things up.

Bonus move: Check your posture. Slouching tightens your core. Stand tall, loosen your arms, and relax your breathing. Tension = more cramps.

2. Stomach Muscle Cramps – When Your Core Just Locks Up

Let’s be clear—not all stomach pain is a side stitch. Sometimes your abs themselves cramp up like someone’s twisting a rope inside your gut.

I’ve had runs where my whole midsection locked up like I just did 200 sit-ups in a row. It sucks. But there’s a reason it happens—and ways to keep it from ruining your run.

Why It Happens

Here are the main culprits:

You’re Dehydrated or Low on Electrolytes

This is probably the most common culprit. When it’s hot or humid, you’re sweating out more than just water—you’re losing sodium, potassium, and magnesium too. Without enough of those, your muscles—including your abs—start misfiring. That’s when the cramps hit.

No Warm-Up = You’re Asking for It

You wouldn’t jump into sprints with cold calves, so don’t do it to your core. Running forces your abs to stabilize your torso with every step. If those muscles are tight or cold, you’re setting yourself up for a mid-run charley horse in your gut.

A few light core warm-ups—leg swings, hip circles, maybe a short plank—can prep your abs to engage without seizing.

You’re Pushing Too Hard, Too Soon

Ramp up mileage too fast? Or dive into speed workouts when you’re undertrained? Your muscles will wave the white flag.

When your core’s not conditioned for long runs or pace changes, fatigue sets in, and the abs cramp from just trying to hold your form together.

Overexertion = exhaustion = your abs saying “nope.”

Heat Makes Everything Worse

When the heat is brutal, everything you ingest can feel like it’s turning against you.

Your gut gets stressed, your core temp climbs, and suddenly your abs are in rebellion. I’ve heard ultrarunners describe crawling into bushes mid-race with cramps so bad they couldn’t stand straight.

If the forecast’s hot, double down on hydration and cooling strategies—ice bandanas, electrolytes, looser pacing.

The Fix

My best advice:

  1. Stop and Stretch. Pull over. Hands on hips, gently lean backward — this stretches the front of your torso. You can also lean side to side. Then massage the cramp area in slow circles — same way you’d loosen a calf knot. You’re trying to relax clenched muscles from the inside.
  2. Sip (Don’t Guzzle) Electrolytes. If you’ve got water or a sports drink, take a few small sips. If there’s sodium or magnesium in there, even better. Cramping can be a sign of electrolyte depletion, not just dehydration. Important: Don’t chug. Chugging = more sloshing = more cramps.
  3. Cool Your Core. On hot runs, overheating is a cramp trigger. Splash water on your neck. Ditch a layer if you’re overdressed. Some runners swear by placing ice or cold water on the back of the neck to reset the system.
  4. Walk It Out. Start walking. Let your body relax, give the cramp a chance to release. Once the pain fades, jog again slowly.

If it returns? Call it a day. Live to run another.

3. Heartburn & Acid Reflux – When Your Stomach Fights Back

Now let’s talk burning chest pain mid-run. If you feel fire creeping up your throat, maybe even with burps or a sour taste, that’s not a cramp—it’s acid reflux tagging in.

Running doesn’t cause reflux, but if you’re prone to it, a hard run can poke the bear.

The bouncing, the core pressure—it all squeezes your stomach like a soda bottle being shaken. And if your lower esophageal sphincter (aka LES) isn’t tight enough, acid splashes up where it doesn’t belong.

Here is what triggers it:

Eating Too Close to Your Run

If you hit the road an hour after scarfing down pizza or pounding a smoothie, you’re asking for trouble. Your stomach’s full, and now you’re bouncing up and down like a jackhammer.

Most runners need 2–3 hours after a full meal to avoid reflux. That includes pre-race breakfast. Know your gut.

Certain Foods = Reflux Triggers

Coffee. OJ. Tomatoes. Spicy meals. Carbonated drinks. These can all relax the valve that keeps acid in your stomach. Some folks can’t even handle chocolate pre-run.

One runner shared that after drinking coffee and orange juice before her 10K, she ended up gagging at the finish line from pure acid. Don’t find out the hard way—know your triggers.

Too-Tight Gear Around the Waist

Compression gear is great—until it crushes your stomach like a vice. Tight belts, low-rise leggings, snug waistbands… all of these increase pressure on your gut and push acid upward.

Loosen that drawstring and go with higher-rise gear that gives your stomach room to do its job.

Some Folks Are Just More Prone

If you’ve got GERD or a naturally looser LES, running may stir the pot more than usual.

Also, if you tend to hunch forward (common in fatigued runners), that forward bend compresses your core and makes reflux worse.

The Fix

Reflux mid-run? Feels like lava coming up your throat. Not fun. Here’s how to deal.

  1. Stop the Trigger. If you’ve been drinking acidic sports drinks, gels, or caffeine? Stop. Switch to plain water if you’ve got some. Don’t throw more fuel on the fire.
  2. Run Tall. Think “string pulling the top of your head up.” Standing tall reduces pressure on your stomach. Slouching compresses your midsection and encourages acid to rise.
  3. Loosen the Belt. Tight waistband? Undo it. Even just an inch or two looser can reduce pressure. One runner I worked with completely fixed her mid-run reflux by switching to non-compressive, high-waisted tights.
  4. Antacids (Optional). Some runners stash Tums or chewables in their fuel belt during races. If you’re prone to reflux and heading out for 2+ hours, it might save your day. Just don’t rely on them constantly — if this is a frequent issue, it’s time to rethink your diet or pre-run fueling.
  5. Slow Down. Ease off the gas. Drop to a jog or a walk. Deep, even breathing helps reduce pressure spikes and lets the burn settle down. You don’t want to be sprinting while your gut’s in revolt.

Pulled Something in Your Gut? It Might Be a Strain

Okay, so you’re out for a run, feeling good, and BAM—sharp pain in your stomach.

Not a cramp.

Not a stitch.

This one doesn’t fade after a few minutes.

It sticks around. Hurts to stand. Hurts to cough. Hurts to laugh. Sound familiar?

You might’ve strained your abs, and trust me, this one’s no joke.

What’s an Abdominal Strain?

This is not your average side stitch.

An abdominal strain is a legit muscle injury—a tear in one of your core muscles, usually the rectus abdominis (your “six-pack”) or the obliques on the sides.

It’s rare for runners, but when it hits, it hits hard. I’ve seen it more in athletes who do sports with twisting or explosive moves—think basketball, tennis, or football.

But runners aren’t immune, especially if you’re doing hill sprints, track work, or jumped too fast into a hard core routine without enough rest.

One classic trigger? Twisting or lunging too hard—like dodging a pothole or leaping awkwardly over a puddle.

Here’s the play-by-play if it’s a true strain:

  • Sharp pain in your abdomen, usually hitting during a movement (like sprinting or twisting)
  • Pain sticks around even after the run
  • Worse when you move—especially coughing, sneezing, laughing, or trying to get out of bed
  • Tenderness, swelling, or even bruising in the area
  • Muscle weakness—your core might feel like it’s bailing on you mid-stride

If you’re poking around your abs and can pinpoint a painful spot, that’s a red flag. Side stitches don’t behave like this. They fade. Strains hang around and make everyday stuff a pain in the… abs.

Strain or Hernia?

Let’s clear this up because people often get the two mixed:

  • Strain = Muscle tear, no bulge, improves with rest
  • Hernia = Internal tissue poking through the abdominal wall, often comes with a noticeable lump that doesn’t go away

If you feel a bulge in your lower abdomen or groin and it hurts more when coughing or straining, go see a doc. That could be a hernia, and those don’t fix themselves—they usually need surgery.

The Fix

Here’s what to do if you feel that dreaded abdominal strain mid-run:

  1. Stop Running. Immediately. This isn’t a “push through it” situation. If you felt a pop, tear, or sudden stab in your gut? Stop. Right. There. Keep running, and you’re only going to tear it worse. Ease into a walk or sit down if you need to. This is your body waving a red flag — listen to it.
  2. Ice It (If You Can). If you’re near home, a store, or a race aid station, grab some ice — or even a cold water bottle — and press it on the spot for 10–15 minutes. Ice can cut down swelling and slow internal bleeding right after an injury. Use your shirt as a layer — no frostbite needed here. Quick cool = quicker recovery.
  3. Add Light Compression. If you’ve got an ACE wrap, abdominal belt, or even tight running gear? Gently wrap the area for some support. Compression can help minimize movement and give your core a little break while you walk or rest.I’ve seen runners use a Velcro brace on comeback runs after minor strains — great tool for stability once you’re moving again.
  4. Breathe Shallow (Just for Now). Usually, I preach deep belly breathing. Not here.

Deep breaths stretch the injured muscle. So for now? Chest breathing only. Shallow and gentle until the sharp pain calms down. You can go back to full breathing once you’re home and resting.

What’s That Lower Ab Pain After a Run?

Okay, maybe you felt fine during the run, but now your lower belly is sore or cramping. What’s going on?

Here are the usual suspects:

1. DOMS — But For Your Core

Running — especially hills or trails — works your core way more than you think. If your abs weren’t ready for it, they’ll let you know later.

That tight, sore feeling a few hours post-run? That’s Delayed Onset Muscle Soreness (DOMS).

Not a bad thing. Just a sign your core worked hard. Stretch it out, maybe hit a few planks later in the week.

2. Gut Rebound or Cramps

When you run, your body diverts blood away from digestion to fuel your muscles. Post-run, that blood rushes back — and your gut might start grumbling or cramping.

It’s like your digestion hits the un-pause button hard. Especially if you sit right after your run? Yeah, that “Oh no” stomach moment might show up fast.

3. Hydration (Or Lack Thereof)

If you’re even slightly dehydrated, your gut can cramp up once the run’s done. Add in some lost electrolytes, and now you’ve got lower ab discomfort, maybe a headache too.

Pro tip: rehydrate before the pain hits — small sips throughout your run, and something salty + carby afterward.

4. Fueling Blowback

Gels, sugary drinks, sports chews — they’re great when timed right. But sometimes? Your gut waits until after your run to get upset.

You might feel bloated, crampy, or like you’ve got runner’s revenge knocking at the door. Same goes for pre-run food: too much fiber or fat = delayed digestive chaos.

Test your nutrition. Know what works for you. And if it keeps happening, something in your fueling game needs a tweak.

5. Gear That’s Too Tight

We’ve all been there: finish your run, hop in the car with tight shorts or a hydration belt still on — next thing you know, your belly feels like it’s in a vice.

Your body might be bloated post-run, especially if you chugged water or swallowed air (yep, that’s a thing). Tight gear can trap pressure and cause pain.

Loosen up. Change clothes. Walk around a bit. It helps more than you’d think.

Quick Fixes That Actually Work

  • Gentle stretching — Cobra pose or upward dog opens the abs
  • Hydrate with electrolytes
  • Eat something light with carbs, salt, and potassium (banana + pretzels = perfect)
  • Keep moving — don’t sit in a car right away
  • Loosen gear and stand tall

If it’s a one-time thing, it’s probably nothing serious. But if that lower ab pain hits you after every run, it’s time to look at your fueling, hydration, and training intensity — or chat with a sports doc just to be sure.

Want Your Running Shoes to Last?

As a runner, I’ve done that before.

I get it: you’re attached to your favorite pair of shoes, they’ve been with you through so many runs, and it’s tough to give them up.

I used to believe, “These shoes could still handle a few more runs,” even when the bottom of the shoes was falling apart.

But I learned the tough way that keeping old shoes too long wasn’t a good idea.

Not only did it hurt me later with more injuries and discomfort, but it also held me back. I found out the tough way that it’s best to replace them before they start causing trouble.


Your Running Shoes Aren’t Just for Show

Your shoes are made for running, not for strolling around town or running errands. The more you wear them for things other than their actual purpose, the quicker you’re going to wear them out.

I get it—we all like a casual walk after a run to cool down, but you gotta be careful. If you’re out there using them for everything from grocery runs to casual hangouts, those miles are adding up and your shoes aren’t getting the rest they need.

I’m guilty of this, too—thinking I could use my shoes for everything, just to find myself wearing them out before their time.

Here’s the deal: save them for what they’re made for. Let them do their job, and they’ll last a lot longer.

If you’re really dedicated to keeping them fresh, rotate between pairs. I know, sounds like overkill, but trust me—it works.


Keep Your Shoes Clean

I’ve thrown my shoes in the washing machine a couple of times, and yeah, they survived. But they didn’t exactly thrive.

The fabric gets worn down, the glue starts to loosen, and your shoes? Well, they’re not the same anymore.

Instead, here’s the real play: when you finish a run and your shoes are caked in mud or soaked in sweat, don’t panic. You don’t need to throw them in the laundry.

Just grab a bucket, fill it with warm water and a bit of soap, and give those bad boys a gentle scrub. If they’re stinky, toss in some baking soda and let them soak for a bit. Trust me, your shoes will thank you for the spa treatment.

And when it comes to drying them off, forget the dryer. That’s like trying to dry your shirt with a blowtorch. Air dry those suckers. Unlace them, pull out the insoles, and let them breathe.

Here’s the full guide to cleaning running shoes.


Rotate Your Shoes Like a Pro

Listen, if you’re serious about making your shoes last, rotation is key.

I’m not talking about switching from one pair to another for a fun fashion statement.

I mean giving your shoes a chance to rest. Think of it like training: you wouldn’t run every single day without rest, right? Same goes for your shoes.

Here’s the truth.

If you’re running frequently (which you should be), having two pairs of shoes means that each one gets a chance to rest. And when they get that rest, they’ll last longer, and your feet will be less prone to injuries.

So, treat yourself to a second pair and keep your first pair in the best condition possible.


Store Your Shoes Right

So, you’ve finished your run, cleaned your shoes, and now it’s time to stash them away for next time.

Don’t just throw them in a corner or leave them in the trunk of your car.

Think of your shoes like a good pair of friends—you wouldn’t leave them hanging out in a cold, damp garage, right?

Instead, store them in a dry, cool spot. Make sure there’s some air circulating around them. And if you’ve got a box for them, great—but make sure there are ventilation holes. Just like you, your shoes need to breathe.

Keeping them in a dark, sweaty place is like keeping your feet in a sauna after a long run—not fun for anyone.


Don’t Let the Mileage Sneak Up on You

I know, it’s hard to keep track of all those miles. But if you want your shoes to last, you’ve got to know when it’s time to say goodbye. Most shoes can take anywhere from 300-500 miles before they start to lose their bounce. Once you hit that mark, you’re pushing it.

Here’s a pro tip: Track your miles with a simple running app or a journal. It sounds tedious, but it helps.

And once you’re nearing that 500-mile mark, start looking for a new pair. If you don’t, you’ll be doing your feet (and your joints) a disservice by keeping those shoes around too long.


Untie Your Laces Properly

You know that moment when you’re done with your run, you’re exhausted, and you just rip off your shoes without untying them? Yeah, I’ve been there. But listen, untying your laces properly can actually save your shoes from some serious wear and tear.

Here’s the thing: every time you yank your shoes off without loosening the laces, you’re stressing the heel cup and the upper material. This repeated motion messes with the shoe’s structure over time, and before you know it, your shoes are a weird shape, the heel’s broken down, and you’re dealing with blisters or a loose fit.


Minor Shoe Repairs 

Now, onto minor repairs. Running shoes are tough, but they’re not invincible.

Sometimes, after a few hundred miles, they start showing signs of wear—maybe a little tear in the upper, or the laces are starting to fray. Instead of tossing them out or panicking, here’s a secret: you can fix them yourself.

For a tear in the upper? Get yourself a little needle and thread, and sew that bad boy up. It’s not as hard as it sounds. You don’t need to be a seamstress; just stitch it up gently and make sure it’s not pulling or affecting your stride.

I had a pair of race shoes that started unraveling in the toe box. I thought about tossing them, but instead, I patched them up with some heavy-duty thread and a little gaffer tape on the outside. Sure, it wasn’t perfect, but those shoes went another 200 miles after that!


What to Do With Old Shoes? 

So, what’s next for your old shoes? If they’re still in decent shape, consider donating them to a local shelter or running club. There’s always someone who could use a good pair. But if they’re too far gone to make a comeback? Well, that’s where the fun begins.

Turn those old kicks into casual shoes for everyday wear, or better yet, garden shoes.

You’ll never have to worry about dirt or mud again. And I’ll tell you right now—there’s something oddly satisfying about wearing a pair of shoes you’ve just crushed a marathon in while you’re out there pulling weeds. If that’s not full-circle living, I don’t know what is.


10 Quick Tips to Make Your Running Shoes Last

  • Clean them regularly (no washing machines!).
  • Air dry only – no dryers or radiators.
  • Rotate shoes – have two pairs to give them a rest.
  • Track mileage – retire shoes after 400-500 miles.
  • Store them properly – dry, cool place only.
  • Choose quality – don’t cheap out if you can help it.
  • Don’t wear them for everything – keep them for running!
  • Replace insoles when needed – a small fix for big comfort.
  • Check the tread – if it’s worn down, it’s time for new shoes.
  • Treat them like your running partner – give them TLC.

Conclusion 

The longer your shoes last, the more mileage you’ll get out of them. Treat them right, and they’ll treat you right. Keep ‘em clean, give ‘em time to breathe, and know when to switch ‘em up.

Follow these tips, and your shoes will last longer, feel better, and keep you running strong.

So, what about you? How long do your shoes typically last? Got any tips I missed? Drop them in the comments below, and let’s keep the conversation going. After all, the more we help each other, the stronger we all get.

Now go lace up and hit the road—your shoes are ready for the next adventure!

How To Get Into Running: The No-Bull Guide for Beginners


Starting to run can feel tough. I totally get it because I’ve been there myself.

During my early runs I’d be out of breath before even hitting the first mile. I’d think, “I’m fit! I’ve got this!”—only to end up walking, hands on my knees, trying to catch my breath. It’s hard, and it can feel frustrating, but trust me, you’re not alone.

The truth is, running isn’t about going all out from the start. It’s about pacing yourself, building up your endurance, and learning how to avoid burning out too soon. I found out the hard way—it’s not about rushing. It’s about taking your time and easing into it.

Here’s the great part: you can totally do this. You don’t need to aim for crazy distances or race like a marathoner. Take it easy at first, and you’ll see improvement. I’m here to help you avoid the mistakes I made and get you on the right path.

Let’s get started the right way—no more gasping after just one mile, I promise!


How to Get Into Running – The Ultimate Guide for Beginners

Let me give it to you straight: gonna feel like crap in the beginning. But here’s the thing: that’s totally normal. I’ve been there. We’ve all been there. You’ll probably be out of breath after just a few minutes. You’ll think your legs are made of cement. And your body will be screaming, “What the heck is going on here?” But if you stick with it, running can be one of the most rewarding things you’ll ever do.

It’s all about starting slow, finding your rhythm, and not expecting to turn into a marathoner overnight. Patience and consistency are the keys. I’ll walk you through how to get started without blowing up your knees or burning out in the first week.


Start Slow: Don’t Rush It

You’ve probably seen those runners who look like they’re floating on air and thought, “I wanna do that!” But let me tell you something: that runner didn’t start out that way. They worked for it.

When I first started, I made the mistake of going too hard, too fast, and guess what? I got hurt. It’s a common rookie mistake. You get all excited, put on some cool gear, and try to keep up with someone who’s been running for ages. You push yourself until you’re gasping, and the next thing you know, you’re sidelined with an injury. I know it’s tempting to push hard, but slow and steady is the way to go.

Start with walking before you run. Easy, right? Spend a few weeks walking at a brisk pace, get your body used to the movement. Start slow with three or four one-hour walks a week, and then slowly add some jogging intervals. Believe me, your body will thank you.


The Walk/Run Method: How to Build a Running Base

If you’ve walked for a couple of weeks and feel like you’re ready to take the plunge, it’s time to introduce the Walk/Run method. This is hands down the best way to build your endurance without burning yourself out.

Here’s how it works: Warm up with a 5–10 minute brisk walk, then jog for 30 seconds to a minute, and follow it with a 1–2 minute walk. Repeat this cycle for 20–30 minutes. As you get fitter, you’ll gradually run longer and walk less.

I promise, it works. When I first started doing this, I felt like I was cheating, but within a month, I was running solid miles with no problem.


Gradual Progression: Don’t Rush It

If there’s one thing I want you to take away from this article, it’s this: Don’t rush it. Your body needs time to adjust to running.

In the beginning, it can feel like you’re not making any progress. But let me tell you, every run counts. Building your endurance takes time—months, not weeks. If you’re not willing to take it slow and build up gradually, you’re gonna end up frustrated, injured, or both.

In the beginning, try adding just 3-5 minutes to each run. So, if you ran 10 minutes last time, aim for 13 minutes this time. No need to rush. As your body gets used to the pounding, you’ll start running longer and faster.


Distance vs. Time: It’s All About Time First

Don’t worry about distance yet—focus on how long you’re running.

Instead of obsessing over how far you’re running, focus on how much time you’re running. The longer you stay active, the better. Once your stamina improves, you can start worrying about distance.


Monitor Your Effort: The Talk Test

Try the Talk Test.

It’s pretty simple: if you can carry on a conversation without gasping for air, you’re running at the right intensity. If you’re struggling to speak a full sentence, you’re probably pushing too hard. It’s not about speed when you start—it’s about going at a pace you can keep up with.


Rest Days: The Unsung Hero of Progress

Rest days are just as important as your training days.

Without proper rest, your muscles don’t get the chance to rebuild, and that’s how injuries happen. Don’t be that person who pushes themselves every day. You’ve got to let your body recover.

Take at least two days off per week. Use that time to stretch, foam roll, or take a walk. You’re not slacking—you’re giving your body time to recover.


How Long Until Running Feels “Easy”?

With time, it will get easier.

When you’re starting, running is tough, uncomfortable, and you’re probably gonna feel like quitting halfway through a run. That’s okay. I’ve been there, and I can promise you it gets better.

How long will it take? That depends on you. Your fitness level, age, and consistency all play a role. But give it time, and it will get easier.

On average, if you’re training consistently, you should start seeing real progress after 2–3 months. Don’t get discouraged early on—this is a long game.


Conclusion: Keep Going, Keep Improving

If you’re looking to start running, here’s the key: take it slow. Don’t expect overnight results. Focus on building your stamina, monitoring your pace, and being patient. The road to becoming a runner is long, but every run gets you closer to the runner you want to be.

So lace up those shoes, hit the pavement, and remember: Every run builds the runner you’re becoming.

How To Get Into Running: The No-Bull Guide for Beginners

Starting to run can feel tough.

I totally get it because I’ve been there myself.

During my early runs, I’d be out of breath before even hitting the first mile.

I’d think, “I’m fit! I’ve got this!”—only to end up walking, hands on my knees, trying to catch my breath.

It’s hard, and it can feel frustrating, but trust me, you’re not alone.

The truth is, running isn’t about going all out from the start.

It’s about pacing yourself, building up your endurance, and learning how to avoid burning out too soon.

A few runs into and I found out that it ain’t about rushing. It’s about taking your time and easing into it.

Enough talking about me.

Here’s the great part: you can totally do this.

You don’t need to aim for crazy distances or race like a marathon. Take it easy at first, and you’ll see improvement.

I’m here to help you avoid the mistakes I made and get you on the right path.

Let’s get started the right way—no more gasping after just one mile, I promise!


Start Slow: Don’t Rush It

I cannot emphasize this enough.

You’ve probably seen those runners who look like they’re floating on air and thought, “I wanna do that!” But let me tell you something: that runner didn’t start out that way.

They worked for it.

When I first started, I made the mistake of going too hard, too fast, and guess what?

I got hurt.

It’s a common rookie mistake. You get all excited, put on some cool gear, and try to keep up with someone who’s been running for ages. You push yourself until you’re gasping, and the next thing you know, you’re sidelined with an injury.

I know it’s tempting to push hard, but slow and steady is the way to go.

Again, I cannot emphasize this enough.


Walk Before You Run

Start with walking before you run.

Easy, right? Spend a few weeks walking at a brisk pace, get your body used to the movement.

Start slow with three or four one-hour walks a week, and then slowly add some jogging intervals. Believe me, your body will thank you.

This is especially the case if you’re really out of shape or have some mobility issues. I always say that walking is the perfect gateway drug to running.

Here’s a guide I wrote on how to walk five miles everyday.


The Walk/Run Method: How to Build a Running Base

If you’ve walked for a couple of weeks and feel like you’re ready to take the plunge, it’s time to introduce the Walk/Run method. This is hands down the best way to build your endurance without burning yourself out.

Here’s how it works: Warm up with a 5–10 minute brisk walk, then jog for 30 seconds to a minute, and follow it with a 1–2 minute walk.

Repeat this cycle for 20–30 minutes. As you get fitter, you’ll gradually run longer and walk less.

I promise, it works. When I first started doing this, I felt like I was cheating, but within a month, I was running solid miles with no problem.


Gradual Progression: Don’t Rush It

If there’s one thing I want you to take away from this article, it’s this: Don’t rush it.

Your body needs time to adjust to running.

In the beginning, it can feel like you’re not making any progress.

But let me tell you, every run counts.

Building your endurance takes time—months, not weeks.

If you’re not willing to take it slow and build up gradually, you’re gonna end up frustrated, injured, or both.


Increase Your Run Time Slowly

In the beginning, try adding just 3-5 minutes to each run.

So, if you ran 10 minutes last time, aim for 13 minutes this time.

No need to rush. As your body gets used to the pounding, you’ll start running longer and faster.


Distance vs. Time: It’s All About Time First

Don’t worry about distance yet—focus on how long you’re running.

Instead of obsessing over how far you’re running, focus on how much time you’re running.

The longer you stay active, the better. Once your stamina improves, you can start worrying about distance.


Monitor Your Effort: The Talk Test

Try the Talk Test.

It’s pretty simple: if you can carry on a conversation without gasping for air, you’re running at the right intensity.

If you’re struggling to speak a full sentence, you’re probably pushing too hard.

It’s not about speed when you start—it’s about going at a pace you can keep up with.

I’d also recommend paying attention to your perceived exertion. 


Remember to Rest

Rest days are just as important as your training days.

Without proper rest, your muscles don’t get the chance to rebuild, and that’s how injuries happen. Don’t be that person who pushes themselves every day. You’ve got to let your body recover.

Take at least two days off per week.

Use that time to stretch, foam roll, or take a walk. You’re not slacking—you’re giving your body time to recover.


How Long Until Running Feels “Easy”?

With time, it will get easier.

When you’re starting, running is tough, uncomfortable, and you’re probably gonna feel like quitting halfway through a run.

That’s okay. I’ve been there, and I can promise you it gets better.

But overall, expect real progress after two to three months of consistent training.

Of course, I’m not making any promises but according to my experience working with plenty of beginners, this seems like a sensible time-frame.

On average, if you’re training consistently, you should start seeing real progress after 2–3 months.

Don’t get discouraged early on—this is a long game.

In case you want more structured training plans for beginner, check my couch to 5K plan.


Conclusion: Keep Going, Keep Improving

If you’re looking to start running, here’s the key: take it slow.

Don’t expect overnight results. Focus on building your stamina, monitoring your pace, and being patient.

The road to becoming a runner is long, but every run gets you closer to the runner you want to be.

So lace up those shoes, hit the pavement, and remember: Every run builds the runner you’re becoming.

Mastering the Art of Running – Decoding Common Form Mistakes

Have you ever thought running was just putting one foot in front of the other?

I used to think the same thing. I mean, we’ve all got legs, right? So how hard can it be?

But here’s the deal: it’s not just about putting one foot in front of the other.

You need to get it right.

Trust me, if you don’t focus on your form, you’re just wasting energy.

You could end up with some painful, long-term issues.

And you don’t want that do you?

Let’s break down some common running form mistakes and get you running smooth and fast—without the injury potential.


The Importance of Proper Running Form

Proper running form isn’t just something nice to have.

It’s the difference between loving your runs and dreading them.

And it’s the difference between finishing strong and having to quit early because of an injury.

Let me share with you the top reasons you should care:

  • Avoid Pain: Good form protects you from aches and pains. You’ll avoid those sharp pains that make it feel like your legs are on fire.
  • Boost Your Performance: Want to run faster? Guess what? Form plays a role in that. The more efficient you are, the easier it is to run.
  • Injury Prevention: Running with bad form is like playing a risky game with your body. When you do it right, you’re staying injury-free.
  • Enjoyment: Running with good form? It feels smooth, almost like dancing. Nothing’s worse than dragging yourself to the finish line.

Now let’s get practical…


Mistake #1: Slow Cadence

If your running cadence is slow, your run’s gonna feel like you’re wading through mud.

I know, I’ve been there. I used to think I was killing it, but I was barely lifting my feet.

My cadence was so slow I could’ve walked faster.

Aim for about 180 steps per minute.

This is the sweet spot. Not only does this make you run smoother, but it also saves your muscles and joints from extra wear and tear.

So why do so many of us struggle with it?

Because we’re too busy trying to “stride out,” thinking a longer stride means we’re faster.

Nope. All you’re doing is overextending, wasting energy, and setting yourself up for some tight hamstrings.

My best Advice? The following:

  • Find Your Starting Point: Run naturally for 30 seconds, count how many steps you take, double it to get your cadence. If it’s below 170, start working your way up.
  • Gradual Increase: Add 5-10 steps per minute each week. Don’t try to jump from 160 to 180 overnight—your legs will revolt.
  • Get a Metronome:  Set it to 180 BPM, and match your steps to the beat. Trust me, your feet will get the rhythm soon enough.
  • Agility Ladder Drills: Yep, I’m that guy using the ladder at the gym looking like a speed demon. But it works. Helps with foot speed, form, and gets your cadence where it needs to be.

Mistake #2: Running Like a Tense Robot 

This error took a while to even realize I was guilty of.

For a long time, I was thinking I looked smooth, but actually, I looked like I was bracing against a storm with stiff arms and tense shoulders. I’d tense up like a deer in headlights, and wonder why I was more exhausted after my runs than I should’ve been.

Here’s how you can fix it:

  • Loosen Up: Are your shoulders up by your ears? Drop them and relax. Same with your fists—loosen up. Hold your hands like you’re carrying a butterfly. You know, lightly. You’re not trying to strangle it.
  • Shake It Out: Every mile, give your arms a good shake. It really helps you run smoother.
  • Elbows at 90 Degrees: Keep your arms bent at about a 90-degree angle and swing them naturally. Don’t let them wander out of whack.

Mistake #3: Heel Striking 

If you’re landing on your heels and stretching your legs too much, you’re basically hitting the brakes every time you step. I did this for years before I realized that every loud “THUD” of my feet hitting the ground was just my body begging for mercy.

Heel striking is tough on your joints and muscles. You’re basically putting the brakes on every step.

Sure, you can argue that most elite marathon runners are heel strikers, but my question to you is ‘are you an elite marathoner?’. If your answer is yes then what are you doing here? This article for beginners only.

Anyway, here’s how to fix heel striking:

  • Footstrike Awareness: When you run, make sure your feet land under your hips, not ahead of you. Imagine you’re running over hot coals. Quick, light steps.
  • Quiet Feet: If your footfalls sound like a marching band, you’re probably heel-striking. Aim for a lighter, quieter step.
  • Midfoot Landing: Focus on landing on your midfoot or the balls of your feet, not the heels. Your feet should land directly under your body.
  • Drills to Fix This: High knees, butt kicks, and skipping will get your feet under you and help eliminate that pesky heel strike. I’d also recommend trying out the chi running method.

Mistake #4: Overstriding 

Ever thought that stretching your stride would make you faster?

It’s actually slowing you down.

This is the same mistake I made early on—thinking I could channel Usain Bolt by reaching for the stars with every step.

But all I did was burn out faster than a match in a hurricane.

My best advice? In a nutshell: 

  • Shorten Your Strides: Instead of trying to stretch out your legs, focus on quick, controlled steps. Your feet should be landing directly under your body.
  • Relax and Glide: Think of it like sliding across the ground, rather than stretching or reaching for something. Keep your steps light.
  • Practice Drills: Skip, butt kicks, and high knees—these will teach you to keep your feet underneath your body and reduce overstriding.

Mistake #5: Ignoring Your Body 

Let me be straight with you  – running through pain will only make the pain worst.

Sure, you might feel invincible, running through all the aches and pains, but that’ll catch up with you.

You get that slight ache in your knee, and instead of listening to it, you push harder, thinking it’s just part of the deal. It’s not.

Here’s how to avoid this dumb mistake:

  • Take Recovery Seriously: Rest when your body tells you to rest. Don’t brush it off. Trust me, you’ll save yourself from months of being sidelined.
  • Mix It Up: If you’re hurt, switch it up. Go for a swim or ride your bike.
  • Stretch & Foam Roll: Spend a few minutes after each run stretching and rolling out. It’s a must for recovery.

Conclusion

Running might seem simple, but it’s not always easy.

It’s about getting your technique right, timing things well, and paying attention to your body.

Fix your cadence, relax that upper body, and avoid slamming the brakes with every step.

Keep your strides short and quick, and always, always pay attention to what your body’s telling you.

Fix just one of these mistakes, and your runs will feel a lot smoother. And trust me, once your form is dialed in, you’ll find yourself flying through runs without even thinking about it.

How Often Should You Run?

As a running coach, I get asked all the time—whether in person or on Twitter—“How often should I run?”

I get it.

You look at your running shoes, think about lacing up, and then wonder if today’s the day to hit the pavement… or take a well-earned break.

Here’s the thing: there’s no simple answer to that question.

What works for one runner might not work for another.

It really depends on where you’re starting, where you want to go, how your body’s feeling – I can go on and on but I bet you get the gest of it.

Yet, don’t worry, by the end of this article, you’ll have a clear idea of how often to run and how to make it work for you.


The Main Factors to Consider

Before we dive into how often you should run, let’s look at what factors play into it.

Here’s what you need to consider:

  • Past experience: Are you a seasoned runner or a beginner?
  • Current fitness level: How’s your body handling training so far?
  • Future goals: What do you want to achieve? Are you aiming for a marathon, or just trying to get healthier?

Once you know where you’re at, you can start figuring out a plan that works for you.


Step 1: Define Your Running Goals

 I get it – we all have different reasons for running.

Some of us run to lose weight, others to crush a specific race goal, and some of us just want to feel better in our day-to-day lives.

Here’s how different goals affect your running schedule:

  • Weight Loss: If dropping a few pounds is the goal, 2-3 runs a week are great to start. Throw in some run/walk intervals, and you’ve got yourself a solid plan to burn calories and build stamina.
  • Seasoned Runner: If you’re already logging some decent miles and you’re aiming for performance goals (speed, distance, race times), 5-6 days of running a week might be more your speed.

Step 2: Understand Your Uniqueness

Let’s be real—there’s no one-size-fits-all answer to how often you should run. Your body, goals, and schedule all play a role in creating a plan that works for you.

In other words:  the best training plans are made for you, not for anyone else.


Step 3: Break It Down with Your Goals in Mind

Got your goals locked in?

Awesome. Now, let’s map out the details.

For example:

  • Trying to crush your 5k PR? It’s about quality, not quantity. 3-4 runs a week with speed workouts can get you there.
  • Long-term health? Start with 2-3 runs a week, throw in some walking or cross-training, and build your foundation.
  • Marathon training? We’re talking 4-6 runs per week, plus cross-training for recovery.

Step 4: Assess Your Time Availability

Life’s busy.

We’ve got work, family, social stuff, and everything in between.

So, it’s crucial to be realistic about how much time you can actually dedicate to running each week.

Here’s the deal: staying consistent is what really matters.

If you can’t run every day, that’s cool. But if you can regularly commit to 3-4 runs a week, you’re good to go.

Now let me break down how often should you be running based on your running experience.


How Often Should You Run as a Beginner?

Alright, you’re just starting out.

Maybe you’ve got the shoes, maybe you’ve got the motivation, but now you’re wondering how often should you run as a beginner?

Step 1: Take It Slow—Start Smart

Two to three runs a week is ideal when you’re just starting out.

Why? Well, starting slow helps avoid injury.

Remember, you didn’t wake up one morning and instantly crush 5 miles, right? Same goes for running.

Step 2: Why 2-3 Runs a Week?

Why not try for 5-6 runs, you ask? Well, too much too soon is the quickest route to burnout and injury.

Focus on building your foundation with 20-30 minute runs and incorporate walking breaks if needed.

Step 3: Build Stamina, Not Speed

For now, the goal isn’t speed—it’s getting comfortable with running.

As your body adapts, you’ll start running longer and faster. But remember, don’t rush it. The tortoise wins the race.


How Often Should You Run as an Intermediate Runner?

Okay, so you’ve been running for a few months and have built some consistency. N

ow you’re ready to step it up. Here’s how to level up your running routine:

Step 1: You’re Officially an Intermediate Runner

Congrats, you’re no longer a newbie. You’ve got the basic runs down, and now it’s time to challenge yourself.

Step 2: Aim for 4-5 Runs a Week

This is your sweet spot. 4-5 runs a week gives you the perfect mix of consistency and recovery.

And don’t worry—pay attention to what your body’s telling you.

If you feel like you need a break, take it. Pushing too hard is just setting yourself up for injury.

Step 3: Gradual Volume Increase

The key to progressing without burning out is simple: increase your time and distance slowly. Add about 10% more volume each week, and watch yourself get stronger without overloading your system.

How to Progress From 2 to 5 Days a Week Without Burning Out

Alright, now let’s get to the meat and potatoes: how to safely bump up your running days without burning out.

You’re going to want to start slow and increase by no more than 10-15% per week. No rushing.

If you’re in the beginner phase, increase your frequency gradually—don’t go from 2 days to 5 in one week.

It’s a recipe for disaster.

And, don’t forget to pay attention to what your body’s telling you.

I know, I know.

It’s tough. But trust me, there’s nothing more frustrating than being sidelined for weeks because you pushed too hard.


How to Structure Your Weekly Runs for Maximum Benefit

Now that we’ve got the basics down, let’s talk strategy.

You need to structure your weekly runs to get the most bang for your buck. Here’s the game plan for a well-balanced running week:

  • Day 1: Easy-paced run to build your base
  • Day 2: Cross-training (get in the pool, hit the bike, or do some strength work)
  • Day 3: Speed or hill work to challenge your legs and lungs
  • Day 4: Rest, foam roll, and stretch!
  • Day 5: Long run at a comfortable pace
  • Day 6: Active recovery or cross-train
  • Day 7: Rest again.

Consistency doesn’t mean you have to go hard every day. You need to build yourself up over time.


Conclusion: It’s All About Consistency

How often should you run? That’s up to you.

Start with the basics, build your foundation, listen to your body, and focus on consistency over time.

Thank you for stopping by.

Keep training strong.

16 Essential Traffic Safety Tips for Urban Runners: How to Stay Safe on City Streets

I live in Bali, and if you’ve ever been to Denpasar or around Canggu, you know exactly what I’m talking about.

The traffic on this heavenly island is a whole other level of hell.

It’s chaotic, with cars weaving between each other, and don’t even get me started on the lack of sidewalks!

I’ve had my fair share of close calls—dodging motorbikes, weaving between traffic-jammed cars, and trying not to end up in the road with a scooter zooming by.

But here’s the thing: if I can handle running here in Bali, dodging traffic and motorbikes, I know you can safely run anywhere.

So, whether you’re running through city streets or just out for a peaceful jog, I’ve got some tips from my own experience that’ll help. You don’t need to be dodging traffic like I do in Bali to make sure your run is smooth and safe.

I’m here to help you run safely, stay aware, and avoid close calls on the road.


1. Cross Like a Boss

You ever feel like you’re playing Frogger when crossing the street?

Yeah, we’ve all been there. Here’s the thing: crosswalks are your best bet.

They’re the safest place to be when you’re crossing busy streets. If there’s no crosswalk? Be a detective. Look for the safest, most visible spot. Avoid those blind corners like the plague.

If a car can’t see you, that’s a big nope from me.


2. They Don’t See You

Let me break it down — drivers can miss you, even if you’re decked out in neon.

They’re often distracted by their phones or chatting away with their backseat passenger.

So, here’s what you do: stay three to five feet away from traffic.

It’s your safe space. And if you’re crossing? Use your arm.

Wave it out like you’re auditioning for “The Wave” at a baseball game. Make sure they see you!


3. Look Both Ways… Seriously

I know, I know, you’re an adult.

You don’t need me to tell you to look both ways before crossing.

But here’s the reality — you’d be amazed at how many runners forget this rule when they’re in the zone. Before you step into that street, take a second.

Check the traffic. Don’t just assume that because the light’s green, you’re safe. Trust me, I’ve had my share of close calls, and I don’t want you to go through that.


4. Make Eye Contact (No, Really)

This one’s a game-changer. Look a driver dead in the eyes — not in some creepy, “I’m gonna follow you home” way, but in a “I’m crossing, don’t hit me” kind of way.

This little move is a life-saver. If they see you, they’re less likely to try to squeeze past you at an intersection. Trust me, you’re not gonna win that race.


5. Watch Out for Intersections

I’m not saying intersections are all bad, but let’s be honest, they’re like the wild west out there.

Don’t assume you’re safe just ‘cause the “Walk” sign is on.

Some drivers are too busy texting to care that you have the green light.

If you’re crossing, double-check that no one’s going to turn into your path.

I hate to sound like a broken record, but please don’t ever take common sense advice for granted.


6. Sidewalks Are Your Best Friend

If there’s a sidewalk, use it. If there’s not, get the hell off the road.

Simple as that. You don’t need me to tell you that you don’t want to be running with cars whizzing by you at 40 mph.

But if you find yourself on a road without sidewalks, run against traffic. That way, you can see the cars coming, and they can see you.


7. Don’t Try to Outrun a Car

Listen, I know you’re fast. I know you’ve got those Usain Bolt legs when you want to.

But here’s the deal: cars are faster.

Even if you’re sprinting like a maniac, a car will still blow past you. So, if you find yourself at an intersection with a car coming at you, don’t race it.

Step aside.

You’ll live longer.

Thank me later.


8. Be Shiny, Like a Traffic Cone

When the sun starts going down, you become invisible.

You need to stand out. Bright neon gear? Yes, please. Reflective vest? Go for it.

Honestly, I know it’s not “cool,” but you’ll be glad you look like a walking highlighter when some distracted driver spots you from a mile away.

And if you’re running at night? Strap on a headlamp.

I don’t care if you look like a miner, just stay visible.


9. Pay Attention — Seriously

The best way to avoid danger is to actually be aware of it. That means cutting down on the distractions.

Keep the music low, or better yet, ditch the headphones altogether. That little voice in your head telling you to look left?

That’s your best friend right now. Pay attention to the sounds around you. Honking horns? Engine revving? Those are all your alarm bells.


10. Know the Blind Spots

Hills and blind curves — these are the spots where cars sneak up on you. If you’re about to hit one, switch sides of the road. Simple as that. If you can’t see around that corner, chances are, the driver can’t either.


11. Be Polite

When you’re about to pass someone, don’t be a jerk. Announce yourself. “Coming up on your left!” or “Heads up, I’m gonna pass.” It’s common courtesy, and it keeps everyone safe. Plus, it avoids that awkward, “Oh, I didn’t see you there!” moment.


12. Ditch the Earphones (For Real)

I get it, music is life.

But here’s the thing: you need your ears when you’re running in the city.

That honking horn? The screeching tires? You’re gonna miss that if you’re blasting your favorite playlist.

I’m not saying ditch the music, just keep the volume low or pop one earbud out.

Trust me, it’s worth it.


13. Open-Ear Headphones Are Your Friend

You want music and safety?

Get yourself some open-ear headphones. They’re a game-changer. You still get the music, but you’re not cutting yourself off from the world around you. Best of both worlds.


15. Carry ID

What happens if you get hit? Or trip and sprain your ankle? Carry your ID. I

t’s not paranoid, it’s practical.

And hey, it’s also a good idea to stash some cash on you — you never know when you might need it.


16. Trust Your Gut

Your instincts? They’re on point. If something feels off — a weird vibe, a car coming too fast, a shady character — listen to it. If you feel unsafe, change your route. Your gut doesn’t lie.

I’ve written a previous article on running safety – you can check it out here

The Bottom Line

Look, city running isn’t just about speed or hitting your weekly mileage. It’s about staying alive, keeping your head on a swivel, and not getting run over. Follow these tips, and you’ll stay safe, be seen, and be a pro out there.

Stay sharp, stay fast, and keep running strong. 

Coach D.

How to Reduce Lactic Acid Build-Up While Running (Without Burning Out)

lactic acid while running

Ever been mid-run, legs flaming, lungs clawing for air, thinking:

“Lactic acid is killing me!”?

Yeah, I’ve been there too.

But here’s the truth: lactic acid isn’t your enemy. It’s actually working for you when the going gets tough.

If you want to stop burning out halfway through a workout or race, you’ve gotta stop blaming the wrong thing—and learn how to train and pace smarter.

Let’s break it down: what’s really going on when the burn hits, and how you can avoid hitting that wall.

What Lactic Acid Actually Is (and Isn’t)

Okay, time to clear up a big myth.

When we say “lactic acid,” what we really mean is lactate. The stuff that makes your legs scream? That’s not lactate—it’s hydrogen ions (H⁺) from your muscles becoming acidic.

Lactate = fuel
Hydrogen ions = burn

Here’s the quick science, no fluff:

Your body breaks down carbs for energy.

At easy paces, you’ve got enough oxygen, so your muscles stay chill.

Start pushing hard (sprints, hills, fast tempo), and oxygen runs short.

Your body switches gears: enters anaerobic mode and churns out lactate + hydrogen ions.

  • Lactate is helpful. Your body actually recycles it for energy—like handing off fuel from one muscle group to another or sending it to the liver to turn back into usable glucose.
  • Hydrogen ions are the ones that crank up the acidity inside your muscles. That’s what causes that deep burn and that “I-can’t-hold-this-pace-any-longer” feeling.

So yeah, it’s not lactic acid’s fault. It’s more like lactate’s trying to help, while H⁺ ions are setting the place on fire.

Why You Burn Out in the Middle of a Run

Ever felt great at the start, then crashed halfway through? You probably went out too hard and blew past your lactate threshold.

Think of your lactate threshold as the redline on your engine—the hardest pace you can hold without building up that nasty acid.

Once you go over that threshold, your body can’t clear the hydrogen ions fast enough.

That’s when the burn hits, and your pace starts tanking.

It’s like running on credit—you’re borrowing energy fast, but the interest adds up. Lactate helps pay the bill, but if the charges (H⁺) keep stacking up? You default.

Bottom line: you didn’t lose to lactic acid—you lost to poor pacing.

How to Reduce “Lactic Acid” Build-Up (And Actually Feel Stronger)

You can’t avoid the burn entirely—especially during hard efforts. But you can delay it and recover faster. Here’s how:

1. Train Below Your Redline

You build your tolerance not by always going hard, but by training smart.

  • Do tempo runs at or just below your lactate threshold pace.
  • Use intervals with proper recovery (e.g., 3×1-mile at tempo pace with 2–3 min jogs).
  • Try progression runs—start easy, finish strong.

This teaches your body to clear lactate and hydrogen ions more efficiently.

The more you train that system, the longer you’ll last before burning up.

Pro tip: You don’t need to run all-out to get faster. Run just under the burn, and you’ll push the ceiling higher over time.

2. Master Your Pacing

The #1 reason runners blow up in races? They go out too hot.

  • Start slightly slower than goal pace.
  • Stay relaxed for the first third.
  • Dial it in mid-race.
  • Hammer the last stretch if you’ve got gas.

Remember: you’re not racing the first mile—you’re racing the last one.

3. Fuel Up Right

Your body burns through carbs first when you’re pushing hard.

Eat some carbs 1–2 hours before a workout (banana, toast, oatmeal).

For longer or harder sessions, fuel mid-run (gels, chews, sports drink).

Running low on carbs = faster shift to anaerobic = acid overload.

And yes, even fat-adapted runners need carbs at high effort. Your mitochondria are picky.

4. Recover Like a Pro

Recovery clears the metabolic “trash” and rebuilds your system.

  • Cool down after hard efforts (easy jog + light stretching).
  • Hydrate + refuel within 30 minutes (carbs + protein).
  • Sleep like it’s part of the training plan.

You don’t adapt during the run—you adapt between runs.

5. Stay Loose & Breathe

Tense muscles tighten blood vessels and trap acid.

Stay relaxed when running hard—drop your shoulders, unclench your fists.

Focus on rhythmic breathing—helps keep oxygen flowing and acid clearing.

Even small tweaks in form can buy you a few more minutes before fatigue hits.

How to Train Your Body to Handle Lactic Acid Like a Pro

Here’s the truth: you’re never going to completely stop lactic acid.

And you shouldn’t want to—it’s part of how your body fuels hard efforts.

But if the burn hits early and your legs start locking up halfway through a race or tempo session, that’s your body saying, “We weren’t ready for this.”

Good news? You can train to delay that burn and build serious endurance in the process.

Let’s break down how to toughen up your system and push the pain line further out.

1. Build Your Aerobic Base (Yes, Zone 2 Is Boring—but It Works)

The foundation for handling lactic acid is an engine that doesn’t panic under pressure. That means easy, consistent, conversational-paced running.

This slow stuff increases mitochondria (your cells’ power plants), builds capillaries, and trains your muscles to burn fat and clear lactate before it piles up. More aerobic fitness = more lactic acid tolerance.

In other words: easy running raises your limit.

It’s like giving your body a bigger credit card for effort—you can spend more before hitting the red zone.

2. Increase Intensity Gradually (No Jumps to Hero Workouts)

You can’t go from zero to VO₂ max overnight. If you suddenly drop into hard intervals without a solid base, you’re going to drown in acid and probably injure yourself too.

Follow the 10% rule: don’t increase your mileage or intensity more than 10% per week.

Build up 20–25 miles a week of steady running before layering in speedwork. Consistency first, fireworks later.

“You don’t build a tank with sprints. You build it with showing up—day in, day out,” as I always say.

3. Tempo Runs & Threshold Workouts – Where the Real Gains Live

This is where your lactic acid tolerance gets forged.

Run at a pace that’s “comfortably hard”—like you could talk in short sentences but really don’t want to. Stay there for 20–30 minutes. You’ll feel the burn rising, but your body will learn to clear lactate before it shuts you down.

Try:

  • 4-mile steady tempo
  • 3×1 mile at threshold with short jogs
  • Or even fast-finish tempos after easy miles

4. Intervals – Use Them as Weapons, Not Blunt Force

Intervals build tolerance, but only if used right.

Try short, controlled efforts like:

  • 6×400m at 5K pace with 1-minute jogs
  • Hill repeats (30 seconds up, jog down)

These workouts spike lactate and train your body to fight through it.

But don’t overdo them or turn every session into a sufferfest. That’s how you get overtrained and fried.

Think of intervals like sharp tools—not sledgehammers. Use them to fine-tune, not destroy.

5. Fast-Finish Long Runs – Teach Your Body to Clear Acid When Tired

Long runs build endurance. But if you end the last few miles at tempo or race pace? That’s next-level.

Start easy, then crank the final 2–4 miles to marathon or threshold effort. This teaches your legs to push through fatigue and clear lactate under stress.

Do this every few weeks, and come race day, your body will know how to close strong, not fold.

6. Avoid the “Gray Zone” Trap

This one’s sneaky. Many runners train at that medium-hard, not-quite-easy, not-really-hard pace. The problem? It’s too easy to build speed, too hard to build aerobic base, and just taxing enough to keep you constantly tired.

That’s the gray zone. Get out of it.

Use a polarized plan:

  • Easy runs = truly easy
  • Hard workouts = genuinely hard

No half-stepping.

7. Warm Up Like You Mean It

Starting hard with cold legs? That’s like flooring the gas in first gear—it just burns out.

A solid warm-up (5–10 mins jog + strides + dynamic movement) primes your body to use oxygen early and shuttles lactate better from the start.

No warm-up? Expect the burn to hit sooner—and harder.

What to Do When the Burn Hits Mid-Run

Even with great training, sometimes lactate punches you in the gut during a run or race. Here’s how to fight back when your legs are on fire:

1. Back Off – But Don’t Quit

Drop the pace slightly, even for 30 seconds. Let your body catch up. You’re not quitting—you’re buying yourself more runway to push again.

Think of it like “surfacing for air,” then diving back in.

2. Breathe Like You Mean It

Oxygen helps buffer that acid. So when you feel the sting, don’t panic—breathe deeper. Get air in. It’s like adding fuel to your fire-fighting system.

Especially on hills—power through with breath. Your lungs are tools. Use them.

3. Don’t Stop Dead – Active Recovery Wins

Ever finish a rep and collapse bent over, gasping? That actually slows down recovery.

Keep moving—jog, shuffle, walk briskly. Blood flow = faster clearance of acid.

That’s why coaches harp on cooldowns. It’s not just “extra.” It’s how you clear out the waste and feel human again.

Fighting the Burn – How to Handle Mid-Run Lactic Acid Like a Pro

Let’s be real: when the burn hits, it hits hard. You’re running strong, and then suddenly your legs turn to bricks and your lungs feel like they’re on fire.

That’s lactic acid (or more accurately, lactate) making its presence known.

Good news? You can train your body and brain to deal with it better.

Great runners don’t eliminate lactate—they just learn how to suffer well. Here’s how to fight through the burn without blowing up:

Mid-Run Fuel & Hydration

Long run? Race day? Fuel and hydrate like it matters—because it does.

Dehydration concentrates the junk floating around in your muscles, making that burn feel worse. So sip regularly—water or sports drink—especially in runs longer than an hour.

Even a little carb intake mid-run can help keep you in the aerobic zone longer and delay that anaerobic crash. That’s why gels, chews, or sports drinks are clutch.

And don’t ignore electrolytesCramping, fatigue, “heavy legs”—often it’s not lactic acid alone, it’s electrolyte imbalance.

Carry what you need. Practice fueling in training. And never let hydration be the thing that ruins a great run.

Mind Games & Form Fixes

When you’re deep in the hurt locker, your form goes to hell—shoulders tighten, fists clench, stride gets sloppy.

Fix it:

  • Relax your hands (imagine holding a potato chip)
  • Drop your shoulders
  • Shorten your stride just a hair

Small changes = big energy savings.

Mentally? Break the run into chunks. “Get to that tree.” “One more minute.” Talk yourself through it. Sometimes tricking your brain is the only way to keep moving. The best runners are part athlete, part con artist—they know how to talk their body into one more mile.

Cooling Techniques

Hot day intervals or long tempos in the sun? Try cooling your engine between reps.

  • Pour cold water on your head or forearms
  • Dump a cup over your back at aid stations

That little chill can lower your perceived effort, keep your core temp down, and help you hit the next mile without feeling like you’re boiling from the inside out.

Long-Term Ways to Raise Your Burn Threshold

You don’t want to just fight through the burn—you want to push it farther down the road. The more you train smart, the longer you can go before that lactic flood takes over.

Here’s how you get there:

Consistent Training – No Long Layoffs

The more regularly you train, the more efficient your body becomes at clearing and using lactate. Take long breaks? Your tolerance drops.

Even 3 days a week keeps your muscles sharp and your engine tuned. Consistency > hero workouts.

Gradual Progression – Don’t Shock the System

Build your mileage and intensity slowly. If you jump into hard speed work after weeks off, your legs will drown in lactic acid before the warm-up’s over.

Start with strides after easy runs. Then short fartleks. Then progress to structured intervals. Layer it, don’t leap.

Raise Your Lactate Threshold Pace

This is the gold standard. The higher your lactate threshold pace, the faster you can run before the burn sets in.

How? Tempo runs. Cruise intervals. Fast-finish long runs.

Think:

  • 20-minute tempos at “comfortably hard”
  • 4 x 5-min cruise intervals with short jog recoveries
  • Last 2 miles of your long run at HM effort

Goal: Turn your old race pace into your new training pace.

Many coaches say your half marathon pace = lactate threshold if you’re trained well. Build toward that.

Improve Running Economy with Strength Work

Stronger, more efficient runners produce less lactate at the same pace. That means you’re burning cleaner and slower—more diesel, less nitro.

Add:

  • Squats
  • Lunges
  • Calf raises
  • Core work

Even 2 sessions per week can make a big difference.

Bonus: Hill sprints. Build strength and efficiency in one punch. Strength training always pays the bills.

Rest Smart – Taper and Avoid Overtraining

Here’s the paradox: overtraining makes your burn worse.

If you’re constantly fatigued, your body struggles to clear lactate and regenerate.

You need recovery to actually adapt.

Rest is training. Period.

Keep Easy Days EASY

This is the one most runners mess up.

If you’re pushing on your “easy” days, you’re constantly simmering in low-level fatigue. That ruins your hard sessions and hammers your ability to handle lactate.

Easy days = recovery. They should feel like you’re holding back. If you can’t hold a conversation, you’re going too hard.

Train slow to race fast. It works. Trust it.

Don’t Fear the Burn—Train to Tame It

Lactic acid isn’t your enemy. It’s a byproduct of effort—a reminder that you’re pushing your edge.

The key isn’t eliminating it—it’s raising your threshold, improving your form, fueling properly, and knowing when to back off.

So next time your legs light up mid-run, smile a little. That burn? That’s the work happening. That’s you getting better.

Stay Hydrated — Always

Don’t wait till you’re dying of thirst.

As I mentioned earlier, dehydration thickens your blood and slows down oxygen delivery, which means lactic acid builds up faster and your run turns ugly.

Coach’s rule: Drink 16–24 oz of water 2–3 hours before you lace up, especially if it’s going to be a long or hard run.

Here’s the full guide to how much water runners need.

If your run’s longer than 45–60 minutes? Take in 8–12 oz of water every 20–30 minutes, more if it’s hot or you’re sweating like crazy.

Don’t Forget Electrolytes

Water’s great, but it’s not the whole picture. Sodium, potassium, magnesium — these guys keep your muscles firing properly.

When electrolytes run low, your muscles get sluggish, heavy, and more prone to cramping. Burnout can feel like bonk + battery failure. Replenish what you sweat out.

Here’s how:

  • Try electrolyte tablets, sports drinks, coconut water, or salty snacks during longer efforts.
  • If you’re a heavy sweater or out in the heat? Consider salt caps mid-run — they’ve saved more than a few runners mid-bonk.

Fuel Your Effort — Or Burn Out Fast

You burn sugar when you run hard. If you don’t have any in the tank? Your body switches to emergency mode — anaerobic burn city.

To stay in control:

  • Before the run: If it’s high intensity, have a light carb snack 30–60 min out — banana, toast with honey, half an energy bar.
  • During the run: For anything over 60–90 min, take in 30–60g of carbs per hour. Gels, sports drinks, chews — whatever your stomach can handle.

Don’t wait till you’re gasping and weak to fuel. That’s too late.

Fuel & Recovery to Battle the Burn

Lactic acid doesn’t stand a chance when your nutrition and recovery game are dialed in.

We talk a lot about workouts, pace, intervals — but when it comes to fighting that deep muscle burn, what you eat and how you recover might be just as important.

Lactate isn’t the bad guy people make it out to be, but if your body can’t clear it fast enough? You’ll feel it. And not in a good way.

Here’s how to help your body process lactate more efficiently and bounce back faster — one bite and one recovery session at a time.

B-Vitamins: The Energy Enablers

If you’re running hard, your body’s cranking through carbs for fuel — and B-vitamins are right in the middle of that engine room. Especially B6, B12, niacin, riboflavin, and folate. They help convert food into usable energy and play a key role in how you manage lactate.

Low on Bs = inefficient metabolism = more burn, more fatigue.

Here’s how to stay covered:

  • Eggs in the morning
  • Beans or lentils at lunch
  • Lean meat or fish for dinner
  • Whole grains and leafy greens anytime

Food first. Supplements are backup. And yeah — a salmon fillet and a bowl of chili beats popping a pill any day.

Omega-3s: Your Inflammation Fighters

Hard runs = micro-inflammation. That’s normal. But if it lingers too long, recovery suffers. Omega-3 fatty acids help tamp that inflammation down — which could mean less muscle soreness and better lactic clearance after the damage is done.

Sources:

  • Salmon, mackerel, sardines (2x/week if you can)
  • Ground flaxseed in your smoothie
  • Walnuts in your oatmeal

One guy I coach swears by his “salmon Sunday” dinner — says his legs feel less cooked after long runs when fish is on the menu.

Antioxidants: The Color in Your Recovery

Free radicals build up during intense exercise — think of them like little wrecking balls bouncing around your muscle cells. Antioxidants help clean that mess up.

So load your plate with color:

  • Berries (blueberries, cherries, raspberries)
  • Beets (nitrates for endurance + anti-inflammatory)
  • Citrus, leafy greens, bell peppers
  • Tart cherry juice — yeah, it’s trendy, but the research checks out

Beets have actually been shown to boost endurance and improve oxygen usage. Cherry juice? Helps reduce muscle soreness and DOMS. It’s not magic — just smart fuel.

Don’t Forget Protein (Recovery’s Best Friend)

No, protein won’t clear lactate mid-run. But it does rebuild your muscle fibers post-run — and that means your legs bounce back quicker and handle the next workout better.

Aim for protein in every meal — especially after a tough session:

  • Greek yogurt
  • Chicken sandwich
  • Protein shake with fruit
  • Eggs, fish, tofu, or legumes

Recovery doesn’t happen without repair. And repair doesn’t happen without protein.

Stay Alkaline (or at Least, Plant-Powered)

Some runners chase the “alkaline diet” to neutralize exercise-induced acidity. Science is a little mixed on whether it actually shifts blood pH — but one thing’s clear: fruits, veggies, and hydration help recovery. Period.

Go heavy on:

  • Bananas, melon, potatoes (electrolytes + potassium)
  • Spinach, kale, other leafy greens
  • Water, and plenty of it

Bottom line: alkaline or not, plants give your body what it needs to handle metabolic stress. Plus, being hydrated = better circulation = faster lactic clearance.

Try This: Lactic Acid Recovery Smoothie

Blend up:

  • 1 banana (potassium + quick carbs)
  • Handful of spinach (magnesium + nitrates)
  • ½ cup berries or splash of tart cherry juice (antioxidants)
  • Greek yogurt (protein + B12)
  • Spoon of almond butter (healthy fats + magnesium)

Result? Refuel, repair, and reset — all in one tasty shake.

Recovery Tools to Flush the Burn

Training hard creates lactate. That’s part of the deal. But how you recover after those workouts? That’s where you either level up — or stay sore and sluggish.

Here’s what actually works to flush out fatigue, speed up recovery, and make lactic acid your training partner—not your enemy.

Active Recovery & Cool-Downs

You finish a brutal run — don’t just collapse on the couch. Walk it out. Jog it out. Keep the blood moving for 5–15 minutes post-run.

The more you move, the faster your body clears out leftover lactate and hydrogen ions.

Even the next day, get in a light bike ride, easy swim, or brisk walk. Doesn’t have to be hard — just consistent.

“Motion is lotion,” as they say. Don’t let the lactic sit there and stew.

Stretching (The Right Way)

Don’t go straight into a split. But once your body’s warm and the heart rate’s dropped, stretch the big muscles:

  • Quads
  • Hamstrings
  • Glutes
  • Calves

Stretching won’t flush lactic acid magically, but it helps circulation, relaxes tension, and keeps everything moving smoothly. Feels good, too — especially post-run when your body’s still warm.

Foam Rolling & Massage: Poor Man’s Physio

Your foam roller? It’s your cheap massage therapist.

Use it pre-run to loosen tight spots. Post-run to promote blood flow. Focus on:

  • Quads
  • Hamstrings
  • Calves
  • IT bands

It hurts. But it’s that good kind of hurt — the one that keeps you from stiffening up like the Tin Man by Thursday.

One marathoner I know said, “If I skip foam rolling for two days, my legs remind me.” He wasn’t wrong.

If you’ve got the budget? Massage guns or pro massage are next-level. If not? Grab the roller and go to work.

Compression Gear: Squeeze Smarter, Recover Faster

Compression socks and tights aren’t just a trend—they’re legit.

They help push blood back toward your heart, which means better circulation, less swelling, and faster lactate clearance.

Some runners wear ‘em during cool-down jogs.

Others slip them on post-run while working or even sleeping.

Hot + Cold: Reset Your System

Heat before. Cold after.

That’s a simple rule I follow.

Warm bath, sauna, or heat pack pre-run = loose muscles, better blood flow.

Ice bath or cold shower post-run = reduced inflammation and fresher legs the next day.

Not into full-on ice plunges? No problem. Hit sore spots with an ice pack or run cool water on your calves after a brutal session.

Some runners go half and half—hot shower to clean up, then 10 minutes of cold on the legs.

Not to “flush lactate” (that myth’s mostly dead), but to calm the nervous system and shake off that buzzy, post-run burn.

Works like a charm.

Elevate Those Legs

After a long run, lie down and prop your feet up on the wall. Just 5–10 minutes.

It’s simple, costs nothing, and feels amazing.

Let gravity help move blood and fluid out of your lower legs. Most runners feel lighter afterward—like the fatigue got drained straight out of their calves.

Call it free recovery. Add it to your post-run ritual.

Sleep: The Real Secret Weapon

You want peak recovery? Don’t waste money on gadgets—get more sleep.

Deep sleep is where the magic happens:

  • Growth hormone release
  • Muscle repair
  • Glycogen restoration
  • Inflammation reduction

Less than 6 hours? You’re starting the next run in a hole. Aim for 7–9 hours, especially during heavy training blocks.

Trust me: you’ll feel stronger, tolerate harder workouts, and build better endurance just by sleeping like it matters. Because it does.

Listen to Your Body (Seriously)

This one’s simple: if you wake up and your legs feel like lead? Adjust.

Swap intervals for an easy shakeout. Do a bike ride instead. Take the rest day.

Runners love to “push through,” but there’s a fine line between hard work and dumb work.
Ignore fatigue for too long and it’ll punch back—with injury or deep burnout you can’t shake.

Smart runners adapt. Consistently.

Key Takeaways: Run Smart, Recover Smarter

  • Lactic Acid ≠ Pain: Don’t fear the burn—learn from it. Lactate helps you, it doesn’t hurt you.
  • Train to Handle It: Build your aerobic base, add threshold work, and ramp intensity gradually. Your body will adapt.
  • Pace Matters: Blitzing from the gun? Bad move. Start steady, finish strong. You don’t want to flood your system too soon.
  • Fuel and Hydrate: Keep the carbs and electrolytes flowing. A fueled muscle is a fast, resilient muscle.
  • Recover Like a Pro: Cool down. Sleep. Use compression. Elevate your legs. Take the easy days seriously.

Final Word: You’re in Control

Lactic acid doesn’t wreck your legs. Skipping recovery does.

Fuel up. Train smart. Respect the rest.

And next time that familiar burn creeps in?

Smile. That’s the sound of progress knocking.

Your Turn

Got a trick for pushing through the burn? A favorite mantra, recovery tool, or story of your own battle with the beast?

Drop it in the comments—we’re all out here chasing progress together.

Now go crush that next run. And recover like you mean it.