Back on Track: Expert Tips for Running Again After a Calf Strain

Recovering from a calf strain and looking for the best advice on how to get back to training? Then you’re in the right place.

Calf strains are a common injury that happens when the muscles at the back of your lower leg get overstretched or torn. It’s a common affliction among runners and regular athletes alike.

But the real challenge often comes after the initial recovery, which is safely getting back to running after a calf strain.

In fact, Running after a calf strain can be unnerving and challenging. During this key period, the way you approach your training can make the difference between a pain-free and efficient recovery and the risk of re-injury (and more time off the running track, and you won’t want that)

So, how do you walk this fine line? That’s where today’s post comes in handy.

In this article, I’m going to delve deep into the safe ways to resume training post-calf strain. In fact, I’ll walk you through the steps to make sure you return to the pavement or trails as smooth and risk-free as possible.

Sounds like a good deal?

Then, let’s get started.

Understanding Calf Strain: Your First Step to a Safe Running Comeback

A calf strain, a common injury among runners and athletes, occurs when the calf muscles at the back of the lower leg are torn or stretched. These muscles are essential for running, as they help propel you forward and absorb impact with each stride.

Calf strains often result from factors such as overexertion, inadequate warm-up, or pushing beyond your current level of fitness. Symptoms can include sharp pain, discomfort, or a feeling of being “struck” in the back of the leg.

Recovering from a calf strain involves more than simply waiting for the pain to diminish. It requires a careful and structured approach to ensure a safe and sustainable return to training.

Categorizing Calf Strains Calf strains are not all the same; they are typically classified into four grades, each with distinct characteristics. Let’s explore each grade in detail.

Grade 1: Mild Strain

  • Symptoms: Mild discomfort, often feeling more like a tightness or slight pain in the calf muscle.
  • Mobility: Generally, walking is still comfortable, and the injury feels more like a nuisance than a significant hindrance.
  • Recovery Timeframe: Approximately 1-2 weeks.
  • Recommendations: Rest, light stretching, and gradual reintroduction to walking and light jogging.

Grade 2: Moderate Strain

  • Symptoms: More pronounced pain, especially during and after physical activity. There may be mild swelling and bruising.
  • Mobility: Walking is possible but uncomfortable, and running is usually too painful.
  • Recovery Timeframe: Generally requires 2-4 weeks.
  • Recommendations: Extended rest, possible use of compression and ice therapy, and gentle rehabilitative exercises as pain permits.

Grade 3: Severe Strain

  • Symptoms: Sharp pain, significant swelling, and often noticeable bruising. Walking is usually quite painful, and a lump may be felt in the calf muscle.
  • Mobility: Limited; walking may require assistance.
  • Recovery Timeframe: Typically 3-6 weeks.
  • Recommendations: Strict rest is necessary, along with possible immobilization. Rehabilitation under professional guidance is often required.

Grade 4: Complete Tear

  • Symptoms: Intense pain, often with a popping or snapping sensation at the time of injury. Severe swelling, bruising, and a complete inability to use the affected muscle are common.
  • Mobility: Severely restricted; walking is usually impossible without aid.
  • Recovery Timeframe: Usually two months or longer, depending on the severity.
  • Recommendations: This grade often requires medical intervention, including potential surgery, followed by a structured rehabilitation program under medical supervision.

How To Start Running After a Calf Strain

Determining when you can return to running after a calf strain is not a one-size-fits-all answer. It depends on the severity and type of your calf strain, as well as your weekly training load.

For this reason, I highly recommend consulting a medical professional when dealing with a calf injury. They will assess your specific case and provide insight into the severity of your condition, helping you make informed decisions about resuming running.

Returning to running after a calf injury should be approached with caution. In many cases, it begins with short, easy-paced runs. Dynamic warm-up and mobility drills should be performed before any intense training to prevent re-injury.

You should only consider returning to your previous training level when you no longer experience muscle cramps or pain. Instead of immediately attempting the same distances and intensities as before the injury, start with shorter distances at a much slower pace to gradually rebuild strength and flexibility.

Staying active in some form is crucial for a speedy recovery. This can include light activities like walking in the park or engaging in an aqua jogging program to maintain your fitness and mobility.

Your doctor can assess the severity of your injury and provide a more accurate estimate of your recovery time based on the following grades:

  • Grade 1: One to two weeks to resume some running.
  • Grade 2: Two weeks or more to resume some running.
  • Grade 3: Three to six weeks to resume some running.
  • Grade 4: Two months or longer to resume some running.

Ultimately, only a medical professional can determine the severity of your calf strain and guide you in making the right decisions for a safe and effective recovery. Avoid making uninformed decisions, as they can increase the risk of reinjury, which is best to avoid.

The Plan

Here’s the ideal process in a nutshell:

  • Initial Steps: Begin with short durations of light jogging or running. For example, start with a 5 to 10-minute jog, focusing on a relaxed and comfortable pace.
  • Using the Walk-Run Method: Alternate between walking and jogging intervals. This method reduces strain on your calf and helps in building endurance.
  • Rule of Thumb: A good guideline is the “10% rule,” which suggests increasing your running distance by no more than 10% each week.
  • Monitoring Intensity: Keep your initial runs at a low to moderate intensity. Avoid hill runs or speed work in the early stages of your comeback.

Stretching and Strengthening in Calf Strain Recovery

Recovering from a calf strain involves more than just waiting it out; it requires proactive measures to heal and strengthen your muscles. Stretching and strengthening exercises play a crucial role in this process, serving as both your recovery allies and your defense against future strains.

Stretching is your muscle’s way of reclaiming lost flexibility and elasticity. Gentle stretching exercises help relax the tightened muscle fibers, reducing stiffness and enhancing your range of motion.

On the other hand, strengthening exercises are the foundation for building resilient calf muscles. Gradually increasing the load and intensity of these exercises prepares your calf muscles for the demands of running.

Incorporating both stretching and strengthening exercises into your recovery routine provides comprehensive care for your calf muscles. It’s not just about healing; it’s about returning stronger and more flexible, setting the stage for a safer and more enjoyable comeback to running.

Let’s begin by exploring some effective stretching exercises.

Standing Calf Stretch

Stand facing a wall with one foot in front of the other. Keep your back heel on the ground and lean forward until you feel a stretch in the calf of the back leg.

Hold for 30 seconds. Repeat three times on each leg.

Seated Towel Calf Stretch

Sit with your leg stretched out in front of you. Loop a towel around your foot and gently pull towards you, keeping your knee straight.

Hold for 30 seconds. Repeat three times on each leg.

Next comes the strength exercises.

Calf Raises

Stand on the edge of a step with your heels hanging off. Rise onto your tiptoes, then lower back down past the level of the step.

Do two sets of 10-15 repetitions.

Eccentric Heel Drops

Stand on a step on your tiptoes, then slowly lower your heels below the step level.

Perform two sets of 10 repetitions on each leg.

Integrating Exercises into Your Routine

Aim to perform these exercises daily, especially after a warm-up or at the end of your run.

Gradually increase the intensity and repetitions as your strength and flexibility improve.


Conquering Runner’s Knee: Proven Prevention Strategies for Pain-Free Running

Looking for practical guidelines to help you prevent runners’ knees for good? Then you’re in the right place.

Let’s face it: runner’s knee is a real pain – quite literally. It’s one of those stubborn overuse injuries that can throw a wrench in your running routine, and nobody wants that. It’s not just annoying; it’s also alarmingly common, affecting runners across the spectrum, from newbies to seasoned marathoners.

So, what’s the game plan?

Prevention is key – it’s always better to stay a step ahead than to play catch-up with injuries. Lucky for you, I’ve got some solid, science-backed strategies up my sleeve to help protect those precious knees from the dreaded runner’s knee.

In this guide, I’m going to unpack everything you need to know: what a runner’s knee really is, the science of dodging it, and, most importantly, actionable tips to keep your knees as strong and healthy as your running passion.

Ready to make runner’s knee a thing of the past and keep your running journey smooth and pain-free?

Awesome, let’s dive in and kickstart your journey to stronger, happier knees!

What is Runner’s Knee?

Let’s dive into the world of runner’s knee, or as the medical community calls it, “Patellofemoral Pain Syndrome” (PFPS). It’s a familiar foe to many runners and athletes, but it’s not exclusive to them. This overuse injury can affect anyone involved in activities that put a lot of stress on the knees – think hiking, cycling, or even prolonged sitting with bent knees.

From my experience and what I’ve learned along the way, here are some common symptoms of runner’s knee to watch out for:

  • Pain Around the Kneecap: This is the hallmark of runner’s knee. The pain can range from a dull, nagging ache to a sharp, intense discomfort. It often flares up during activities like running, squatting, or climbing stairs.
  • Crepitus: That grating or popping feeling when moving your knee? It’s a sign to pay attention to.
  • Swelling: Some people might notice mild swelling around the knee joint, signaling inflammation.
  • Instability or Weakness: If your knee feels wobbly or like it can’t be trusted to support you, that’s a red flag.
  • Pain During or After Activity: The pain associated with runner’s knee can strike during physical exertion and linger afterward, even during rest periods.
  • Difficulty in Bending or Straightening the Knee: When simple actions like bending or straightening your knee become painful, it’s time to take notice.

Knowing these symptoms is the first step. Next, we’ll look at practical ways to prevent runners’ knees and keep you moving smoothly on your running journey.

Steady and Slow

It might sound obvious, but this piece of advice is golden: go steady and slow, especially when it comes to ramping up your running routine. As someone who’s learned this lesson the hard way, I can tell you that most running injuries, including the dreaded runner’s knee, often stem from doing too much, too quickly.

Trying to fast-track your progress in running is like sending an open invitation to injuries. Our bodies need time to adjust to the increased demands of running. Making abrupt changes in your training, like suddenly increasing your intensity or mileage, is akin to trying to sprint before mastering a steady walk.

If you’re new to running, this caution is especially for you. I remember my early days of running, eager to push harder with each session. But patience and gradual progression are key. Start slow, allowing your body to adapt, and then gradually increase your intensity and mileage over months, not days.

Strength Train

The best defense against runner’s knee, and indeed most running-related injuries, is to build a solid foundation. As someone who has navigated the ups and downs of running injuries, I firmly believe in the old adage, “An ounce of prevention is worth a pound of cure.”

It’s all about creating a robust base that not only protects you from the dreaded runner’s knee but also shields you from a myriad of other potential injuries. This foundation isn’t just about physical strength; it encompasses your entire approach to running, from your training regimen to your recovery processes.

Here is what you need to do:

  • Glute Bridges: Lie on your back with your knees bent and feet flat on the ground. Lift your hips up towards the ceiling, squeezing your glutes at the top. Lower back down and repeat. Your glutes will thank you!
  • Squats: Ah, the classic squat. Stand with your feet shoulder-width apart, lower your body as if you’re sitting back into an imaginary chair, and then push back up through your heels. It’s like a workout for your entire lower body.
  • Lunges: Step forward with one leg and lower your body until both knees form 90-degree angles. Push off your front foot to return to the starting position and switch legs. Lunges are fantastic for strengthening those quads.
  • Deadlifts: Grab a barbell or some dumbbells, keeping your knees slightly bent and your back straight. Lower the weights to just below knee level, then return to the standing position. It’s a killer exercise for your hamstrings and glutes.
  • Leg Press: If you have access to a leg press machine, use it. This exercise targets your quadriceps and will help improve your patellar tracking.

Here’s how to integrate these exercises into your workout plan:

  1. Consistency is Key: Devote at least 2-3 days a week to strength training. It’s not just a one-time thing; consistency over time is what will yield results.
  2. Balance Your Routine: Alternate between core, lower body, and upper body exercises to maintain overall strength and balance.
  3. Warm Up: Always warm up before diving into strength training to prepare your muscles and joints.
  4. Post-Run or Rest Days: Consider doing strength training on days when you’re not running or after a run to complement your workout.

Stretch Your Muscles

In my running journey, I’ve learned that flexibility is a key component of a successful training regimen. Stretching regularly has not only improved my range of motion in my joints but also helped reduce muscle tightness, which can lead to poor running form.

Let me tell you, when the main muscles used in running – like the calves, hamstrings, and quadriceps – are flexible and limber, they’re better prepared to handle the demands of those miles we love to log. In my experience, ensuring these muscles are well-stretched has been instrumental in reducing the risk of overuse injuries and keeping my body aligned correctly.

Here are some effective stretches for these muscle groups:

Calf Stretch:

Find a wall and stand arm’s length away from it. Place your hands flat against the wall at shoulder height. Step one foot back and press your heel into the ground, keeping your back leg straight. You’ll feel the stretch in your calf. Hold for 30 seconds and switch legs.

Hamstring Stretch:

Sit on the floor with one leg straight and the other bent so the sole of your foot is against your inner thigh. Reach for your toes on the straight leg while keeping your back straight. Feel that stretch in your hamstring? Hold for 30 seconds and switch legs.

Quadriceps Stretch:

Stand up straight and bring one heel up towards your buttocks, grabbing your ankle with your hand. Feel the stretch in the front of your thigh? Hold for 30 seconds and switch legs.

Try to incorporate these three stretches into your training program.

Additional resource – How to start aqua jogging

Foam Rolling

Ever since I incorporated foam rolling into my running routine, I’ve noticed a significant difference in how my muscles feel and perform. If you’re looking to elevate your stretching and muscle release techniques, I highly recommend giving foam rolling a try. It’s not just for runner’s knee; it can be a game-changer for various running-related discomforts.

Foam rolling works by targeting those tight knots or trigger points in your muscles and fascia. From my experience, addressing these points is crucial as they can lead to muscle imbalances and altered biomechanics, often culminating in conditions like Runner’s Knee.

But there’s more to foam rolling than just working out knots. When you roll over a foam roller, you’re also boosting blood circulation. This increased flow of blood can speed up recovery after your runs, which, in my opinion, is a huge benefit. Additionally, regular use of a foam roller can significantly reduce muscle soreness, leaving you feeling fresher and more ready for your next run.

Now, let’s dive into the techniques that have worked wonders for me:

Calves:

Sit on the floor with your legs extended. Then, place the foam roller under your calves. Next, while supporting your body weight with your hands behind you, roll up and down the length of your calves. Focus on any tight spots. Spend 20-30 seconds on each calf.

Hamstrings:

Sit on the floor with your legs extended and the foam roller under your thighs. Next, while using your hands to lift your hips slightly off the ground, roll up and down your hamstrings from just above the knees to the base of your glutes. Spend 20-30 seconds on each leg.

Quadriceps:

Lie face down with the foam roller placed under your thighs. While supporting your upper body with your elbows and forearms, roll up and down your quadriceps from just above the knees to the hips. Spend 20-30 seconds on each leg.

IT Band:

Lie on your side with the foam roller under your bottom leg. Next, while supporting your upper body with your forearm and your top foot, roll along the length of your outer thigh, from just above the knee to the hip. Spend 20-30 seconds on each leg.

Improve Your Running Form

Think of your running form as the foundation of a house. Just like a solid foundation keeps a house stable, good running technique can help prevent Runner’s Knee.

So, what happens when your form is off? Poor form can lead to improper alignment, increased impact forces, and overuse of certain muscles, all contributing factors to Runner’s Knee. On the other hand, maintaining good technique can significantly reduce the stress on your joints, including your knees.

Here’s how I’ve honed my running technique to keep my knees happy:

  • Stand Tall: I always imagine a string pulling me up from the crown of my head. Standing tall, with a slight forward lean from the ankles and not the waist, has been a game-changer for me.
  • Stay Relaxed: I make sure my shoulders, arms, and hands are relaxed while running. Tension is a knee’s enemy, so I try to stay as loose as possible.
  • Land Lightly: Aiming for a soft landing with each step can really ease the impact on your knees. I think of it as trying to run as quietly as possible.
  • Maintain a Forward Lean: Leaning slightly forward from my ankles, not my waist, encourages a midfoot or forefoot strike. This has been crucial in reducing the strain on my knees.
  • Engage Your Core: A strong core equals a stable torso, which in turn helps maintain proper posture while running.
  • Shorten Your Stride: Shorter, quicker strides work better for me than long, loping ones. They help prevent overstriding and foster a more efficient running gait.
  • Optimal Cadence: Aim for a cadence of about 170-180 steps per minute. A higher cadence usually results in shorter strides, which means less stress on the knees.

Run on Proper Surfaces

I hate to sound overbearing, but  I can tell you that where you run matters more than you might think. Running on hard surfaces like concrete or asphalt can really take a toll on your knees. The shock and impact from these unforgiving surfaces can, over time, lead to knee pain and injuries.

Your knees, delicate as they are, tend to favor softer ground. Here are three knee-friendly surfaces I’ve come to appreciate:

  • Grass: There’s something about running on grass that’s kind to your knees. It’s softer, absorbs shock better, and lessens the impact compared to concrete. I often head to local parks or sports fields for my grassy runs.
  • Trails: Trail running is a great mix of surfaces – dirt, gravel, leaves, pine needles – and it’s been a game-changer for my knees. Trails not only reduce impact but also add an exciting variety to my runs.
  • Synthetic Tracks: Many communities have synthetic tracks made of rubber or polyurethane. These are great for cushioning your steps and are ideal for track workouts or longer runs.

And here’s another tip: Variety isn’t just the spice of life; it’s a boon for your knees, too! I make it a point not to stick to the same route every time. Mixing up surfaces can give your knees a much-needed break from repetitive impacts.

Tips for Route Variation:

  • Mix It Up: Plan routes that include a combination of pavement, trails, and grass. This diversifies the impact on your knees.
  • Hills and Inclines: I love adding hills to my routes for an extra challenge and to change the stress points on my legs.
  • New Sceneries: Don’t hesitate to explore new neighborhoods, parks, or even cities. It keeps running exciting and fresh.
  • Safety First: Whenever I’m trying a new route, especially in unfamiliar areas, I always prioritize safety.

Orthotics

Dealing with runner’s knee can be tough, especially if it’s due to biomechanical factors or a history of knee issues. That’s where orthotics come into play. As someone who’s explored various ways to keep knee pain at bay, I’ve found that these specially designed insoles can be a real lifesaver.

Slipping orthotics into your shoes helps maintain a healthier foot position, which in turn can ease the stress on your kneecap and aid in faster recovery. Here’s why you might want to consider them:

  1. Improved Alignment: If you struggle with overpronation or have high arches, orthotics can be a game-changer. They work to align your feet and lower limbs correctly, reducing strain on your knees.
  2. Shock Absorption: Some orthotics come with extra cushioning, which is great for absorbing shock during runs, thereby minimizing knee impact and injury risk.
  3. Stability: Providing additional stability, orthotics promote a balanced gait and can help prevent overuse injuries.

But how do you find the right orthotics? Consider your foot type—high arches, flat feet, or neutral? Then think about materials: rigid for stability or soft for cushioning. Also, factor in your running terrain – trails, track, or pavement – as it influences the type of support and durability you need. And don’t hesitate to consult a podiatrist or running expert for personalized advice or custom-fit orthotics.

Watch your Body Weight

It’s pretty straightforward – carrying extra weight puts more strain on your knees. I’ve seen many runners alleviate knee pain simply by losing weight. If you’re aiming to shed pounds through running, it’s crucial to do it in a way that’s kind to your knees.

Here are some tips for smart weight management:

  • Gradual Progress: Aim for steady, sustainable weight loss to avoid muscle loss and injury risk.
  • Balanced Diet: Opt for a diet rich in nutrients and steer clear of extreme diets or severe calorie cuts.
  • Portion Control: Be mindful of how much you eat. It’s easy to overeat without realizing it.
  • Regular Exercise: Mix up your running with strength training and flexibility exercises to build muscle and support weight loss.
  • Consult a Nutritionist: Personalized advice from a dietitian or nutritionist can be invaluable.
  • Stay Hydrated: Drinking enough water is crucial for metabolism, and mistaking thirst for hunger is common.
  • Prioritize Recovery: Don’t skimp on rest and recovery. Adequate sleep is vital for regulating hunger and supporting weight management.

Avoid Overtraining

If there’s one thing I’ve learned in my running journey, it’s the importance of avoiding overtraining. It’s the leading cause of overuse injuries like Runner’s Knee – and they don’t call it ‘overuse’ for nothing.

Here’s why overtraining is a trap you want to avoid:

  1. Increased Injury Risk: Overdoing it can strain your muscles and joints, upping the chances of injuries.
  2. Decreased Performance: Ironically, overtraining can actually hinder your progress instead of helping it.
  3. Burnout: Mentally and physically pushing too hard can zap the joy out of running, leading to burnout.
  4. Weakened Immune System: Intense training without proper recovery can take a toll on your immune system.

So, how can you steer clear of this common pitfall? The answer is gradual progression. It’s crucial for building strength and resilience while minimizing injury risk. It’s all about striking that perfect balance between pushing yourself and allowing your body to recover.

Steps for Smooth Progression:

  • Start Slow: For beginners, start with a manageable distance and pace. It’s all about listening to your body.
  • Follow a Training Plan: A well-structured beginner’s plan can guide you in gradually increasing mileage and intensity.
  • Increase Mileage Gradually: Stick to the “10% rule” to avoid overdoing it.
  • Rest and Recovery: Incorporate rest days. Remember, recovery is when your body gets stronger.
  • Patience is Vital: Endurance building is a slow and steady process. Don’t rush it.

Listen to Your Body

Listening to your body is your secret weapon in the battle against running injuries!

Trust the Signals: Picture this: Your body is like your own personal messaging system. It’s constantly sending signals to let you know how it’s feeling. The key is to pay attention!

The Golden Rule: Here’s the golden rule of injury prevention: If it hurts, stop! That’s right, my friend. Pain is your body’s way of saying, “Hey, slow down, we need a breather here!”

No Pain, No Gain is a Myth: Forget the whole “no pain, no gain” nonsense. Running through pain is like trying to drive a car without oil—it’ll break down eventually.

Patience, Grasshopper: Remember, your body needs time to adapt to new challenges. Rushing the process is like trying to bake a cake in 5 minutes—it’s a recipe for disaster.

Additional resource – Running shoes for overpronators

The Conclusion

To Recap

Here is my master 4-step plan for preventing the runner’s knee (and runner’s pain) for good.

  • Strengthen your lower body muscles
  • Improve flexibility
  • Improve running form and mechanics
  • Avoid doing too much

That’s all

Thank you for dropping by.

Keep training strong

David D.

Runners’ Guide to Big Toe Pain Prevention: Stay Pain-Free on the Track

Looking for practical tips to prevent big toe pain while running? Then you have come to the right place.

Although runners are often plagued by common injuries for large body parts like the knees, hips, and shin, an injury to the big toe can throw a wrench in your running routine. And you don’t want that.

Although big toe issues aren’t as common as runners’ knees, shin splints, or iliotibial band syndrome, coming down with such an injury may force any runner, regardless of how devoted they’re to training, to scare back or stop training altogether. That’s the last thing you’d aim for, namely, a specific weekly mileage or prepping for a hard race.

Worry no more.

In today’s article, I’ll share a few practical guidelines to help you prevent big toe pain while running so you can keep on logging the miles hassle-free.

Sounds like a good deal?

Then, let’s get started.

Understanding Big Toe Pain

Let’s dive into the world of big toe pain – something I’ve had to navigate through in my own running journey. Knowing the culprits behind this discomfort is crucial for effective prevention and management.

Here are the usual suspects I’ve encountered:

  • Bunions: By far the most common source of big toe pain for me and many other runners. Bunions are those bony bumps that develop at the base of the big toe. They’re not just unsightly – they can hurt, especially when they’re the result of prolonged pressure, like what we experience during our runs.
  • Ingrown Toenails: A runner’s bane that occur when a toenail grows into the surrounding skin, causing pain and inflammation. I’ve learned the hard way that tight or ill-fitting running shoes often lead to this unpleasant issue.
  • Plantar Fasciitis: While it mainly affects the arch and heel, I’ve felt its symptoms in my big toe, too. Poor technique and tight calf muscles can alter your gait and worsen this condition, leading to big toe pain.
  • Altered Biomechanics: Running forms like overpronation or supination can disrupt the natural movement of your feet and toes. For me, correcting my overpronation was key to reducing stress on my big toe joint and preventing bunions.
  • Pressure Points: Ill-fitting footwear, especially with a tight or narrow toe box, can create pressure points. I’ve experienced how this compression leads to discomfort and potential toe-related issues.

Now that we’ve covered the main causes of big toe pain in runners, it’s time to look at strategies to protect your big toe from wear and tear. Stay tuned for more insights on keeping your toes happy and healthy!

Strengthen Your Soles

As a runner who has delved into the science of foot health, I’ve learned that strengthening the muscles in your feet, particularly those around the big toe, is vital for enhancing running performance and reducing injury risk. Stronger foot muscles mean better support and stability, which are key for efficient and injury-free running.

The biomechanics of running heavily rely on the strength and flexibility of your foot muscles. When these muscles are well-conditioned, they improve foot mechanics, which in turn influences your overall running gait. This leads to a more effective push-off phase in each stride, reducing the workload on other parts of your leg and preventing overuse injuries.

Below, I’ve compiled a list of exercises, complete with detailed instructions and visual demonstrations, to help you strengthen your soles. These exercises are grounded in both my personal experience and scientific understanding of foot biomechanics:

Big-Toe Raises:

Stand with your feet flat on the ground and your weight evenly distributed. Lift your toes off the ground while keeping your heels planted. Try to raise only your big toes, leaving the other toes on the ground. Hold this position for a few seconds, then lower your big toes back to the ground. Repeat this exercise for several repetitions.

Big Toe Pushdowns:

Target Muscle: Flexor Hallucis Longus (Big Toe Flexor)

Sit comfortably in a chair with your feet flat on the floor. Then, place a small towel or cloth under your toes. While keeping your heel on the ground, press your big toe down into the towel while keeping the other toes relaxed. Hold the contraction for 5-10 seconds, then release. Perform 3 sets of 10-15 repetitions for each foot.

Toe Squeezes:

Target Muscle: Intrinsic Toe Muscles

Sit or stand with your feet flat on the floor. Then, place a small soft object like a small ball or a rolled-up towel between your big toes. Next, gently squeeze your big toes together, focusing on using the muscles of the big toe. Hold the squeeze for 5-10 seconds, then release. Perform 3 sets of 10-15 repetitions.

Toe Tapping:

Target Muscle: Extensor Hallucis Longus (Big Toe Extensor)

Sit on a chair with your feet flat on the floor. Then, lift your big toes while keeping your other toes on the ground. Next, tap your big toes up and down as rapidly as you can for 30 seconds. Rest for 10 seconds. Repeat for three sets.

Marble Pickup:

Target Muscle: Flexor Hallucis Longus (Big Toe Flexor) and Intrinsic Toe Muscles

Sit on a chair with your feet flat on the floor. Then, scatter several marbles or small objects on the floor in front of you. Next, using your toes, pick up one marble at a time and place it in a container. Continue until you’ve picked up all the marbles. Repeat this exercise for 2-3 minutes.

As you progress and your strength improves, you can increase the duration and repetitions of this exercise. It’s essential to perform exercises like these regularly to maintain strong foot muscles, which can benefit your overall running performance and comfort.

Your Running Shoes

Finding the perfect pair of running shoes is like striking gold in the running world. Let me share some insights on selecting the ideal pair, combining my own experiences with some scientific pointers.

Comfort is the golden rule here. In my running journey, I’ve found that if the shoes don’t feel right, they’re not right. Comfort is the North Star of footwear selection – a non-negotiable aspect. But just don’t take my word for it; research actually agrees.

Next, understanding your foot type is crucial. Are you a high arch, flat foot, or the Goldilocks “neutral” type? Knowing this is essential, as each foot type has specific needs that influence the choice of shoes. This self-knowledge will steer you towards the right category of running shoes.

Moreover, your running goals, the terrain you tread on, and the type of shoes you wear should harmonize like peanut butter and jelly. Whether it’s trail running, road racing, sprints, or marathons, each has its specific shoe requirements. Choosing the right type can significantly enhance your running performance and reduce injury risk.

For more in-depth guidance on choosing the right running shoes, check out these sources that I’ve found helpful:

  • Post
  • Post
  • Post
  • Post
  • Post
  • Post

Warm up & Stretch

I always start my runs with a dynamic warm-up routine. This includes movements like leg swings, high knees, butt kicks, and hip circles. From a scientific standpoint, these dynamic stretches are great for increasing blood flow, enhancing flexibility, and activating the muscles crucial for running.

Aim for 5-10 minutes of dynamic stretching. This duration is optimal for preparing your body for the workout ahead, based on both personal experience and exercise science principles.

Post-run, I dedicate 10-15 minutes to static stretching. This is crucial for improving flexibility and reducing muscle tension. Focus on major muscle groups like the quadriceps, hamstrings, calves, hip flexors, and glutes. Each stretch should last about 20-30 seconds, ensuring a gentle stretch without reaching the point of pain.

Massage Often

Block out at least 10 to 15 minutes for a soothing foot massage. It’s not just about pampering; it’s about preventing those pesky injuries.

Our feet are home to a complex network of nerves that act as tiny messengers, providing feedback on our interaction with the ground.

Regular massages stimulate these nerves, enhancing our awareness of our stride and foot placement.

From a biomechanical standpoint, this awareness is invaluable for optimizing running form. It’s like fine-tuning an instrument – the result is a more harmonious and injury-free running experience.

Additional Resource – How To Prevent Ankle Pain For Runners

Take Enough Rest

Remember, your feet are perhaps the most crucial limbs for running, so they deserve their fair share of rest.

  • Step 1: Time to Recharge: Just as we recharge after a long day, our feet need downtime. I ensure to give my feet at least two days off from running each week. This approach is grounded in sports science, which emphasizes the importance of rest in preventing overuse injuries.
  • Step 2: Race to Rest: During race training, don’t skimp on rest days. I always schedule at least one day of complete rest, with other days dedicated to cross-training activities like strength training, swimming, cycling, or yoga. These activities offer a great way to keep fit while going easy on the feet.
  • Step 3: Mileage Magic: Interested in upping your weekly mileage? Stick to the 10 percent rule – it’s a golden principle I follow. Gradually increasing your distance helps your feet adjust without overburdening them, a strategy supported by running experts and sports scientists alike. Take the following steps to help them bounce back from training.

Additional Resource -Your guide to jaw pain while running

When to Seek Professional Help

Navigating big toe pain can be a complex issue for runners. While many instances can be managed through preventive measures and home exercises, there are times when only professional medical attention is sufficient. From personal experience, understanding when to seek expert help and not dismissing persistent or severe pain is essential.

Running through pain, especially when it comes to your big toe, is a risky decision I’ve learned to avoid. Postponing a consultation with a specialist can exacerbate the issue, potentially leading to a prolonged break from running. Here are some key indicators that it’s time to see a medical professional:

  • Persistent Pain: When big toe pain persists despite rest, ice, or over-the-counter pain relievers, it’s a clear sign you need professional advice.
  • Severe Swelling: Excessive swelling, especially if it includes redness, should prompt a medical evaluation, as it could signal an underlying issue.
  • Limited Range of Motion: A significant decrease in your big toe’s range of motion could be a symptom of an injury or condition that requires attention.
  • Changes in Toe Appearance: Noticeable changes such as deformities, unusual growths, or discoloration in your big toe warrant an examination by a specialist.
  • Persistent Ingrown Toenails: If you frequently suffer from ingrown toenails or find them challenging to manage, a podiatrist can offer long-term solutions.

Don’t hesitate to reach out to a healthcare professional. They have the expertise to diagnose the issue accurately, provide immediate treatments, and suggest preventive strategies for the future. They can also recommend effective at-home treatments to ease your discomfort.

Remember, running through pain might seem tough, but it’s not worth the risk of long-term injury. So, when in doubt, check it out!

Here’s the full guide to arch support for running

Here’s the full guide to Running with bunions

How to prevent Foot pain in runners

Runners’ Guide to Calf Strain Prevention: Essential Tips and Exercises

Searching for effective ways to prevent calf strains while running? You’ve landed in the perfect spot!

As a runner who has experienced the agony of calf strains, I understand how they can disrupt your training and progress!

And we definitely don’t want that, do we?

Here’s the deal: keeping your calves in tip-top shape is crucial for your running journey. Think of your calves as the trusty engines that power every step you take. So, how about we arm ourselves with some nifty strategies to keep those calf strains at bay? Remember, it’s always better to play it safe now than to wish you had later!

No more worries.

In this article, I’ll be sharing personal strategies and exercises that I’ve found effective in preventing calf strains. I’m going to spill all the secrets – from dynamic warm-up routines that get your calves ready to rumble to the best stretches and strength exercises that will fortify them against strains.

Sounds like a good deal?

Then, let’s get started.

What Are Calf Strains?

As someone who’s experienced the sharp sting of a calf strain mid-run, I can tell you firsthand just how crucial it is to understand what calf strains are. Picture this: you’re out on a run, feeling great, when suddenly there’s a sharp pain in your lower leg – that’s the reality of a calf strain.

Let me explain

The calf muscles, situated at the back of the lower leg, play a pivotal role in running and many other lower-body movements. The calves are made up of two primary muscles:

  • Gastrocnemius: This is the larger of the two calf muscles and forms the visible “bulge” when the calf is flexed. It has two heads and crosses both the knee and ankle joints.
  • Soleus: The soleus is a deeper, flat muscle that lies beneath the gastrocnemius. It is primarily responsible for plantar flexion of the foot.

A calf strain is essentially a cry for help from these muscles. It happens when there’s damage or tearing to these muscle fibers, often during a run or jump. Picture a rope fraying under too much tension – that’s what’s happening to your muscle fibers during a strain.

Calf strains come in three grades, each more serious than the last. Let me elaborate.

  1. Grade I: Mild strain involving minimal tearing of muscle fibers. Symptoms may include minor discomfort and stiffness.
  2. Grade II: A moderate strain characterized by partial tearing of muscle fibers. This grade typically presents with more noticeable pain, swelling, and difficulty walking.
  3. Grade III: A severe strain involving a complete tear of the muscle or tendon. This is the most painful and debilitating form of a calf strain, often calling for medical attention.

Common Causes of Calf Strains

Calf strains can result from a variety of factors, including:

  • Overexertion: Pushing the calf muscles beyond their capacity through intense or sudden physical activity, such as sprinting or jumping.
  • Muscle Imbalances: Weakness or imbalance in the calf muscles, often due to inadequate stretching or strength training.
  • Inadequate Warm-Up: Failing to warm up properly before physical activity can increase the risk of calf strains.
  • Dehydration: Insufficient hydration can lead to muscle cramps, making the calf muscles more susceptible to strains.
  • Poor Running Form: Incorrect running techniques, such as overstriding or excessive heel striking, can strain the calf muscles over time.

How to Prevent Calf Strains in Runners

To prevent future calf strains, it’s all about making smart, proactive changes to your routine. By doing so, you can bolster the strength and resilience of your calf muscles, ensuring they’re ready for whatever challenges come their way.

Here’s a guide to keeping your calves happy and strain-free:

Stretch Your Calves

Once you’ve recovered from a calf strain, start with some gentle stretching. This isn’t about testing your flexibility limits; it’s about maintaining muscle suppleness and preventing future injuries.

Flexible calf muscles are less prone to strains and play a crucial role in maintaining good running form and overall lower limb health.

Remember, stretching should never be painful. If it hurts, ease up a bit. Here are some effective calf stretches:

Let’s dive into some awesome calf stretches.

Calf Chair Stretch:

How to Do It: Sit on a chair with one leg extended straight in front of you. Rest your heel on the floor and gently pull your toes back towards you. You should feel a deep stretch in the calf of the extended leg.

Why It’s Great: This stretch gets deep into the calf muscles, targeting both the gastrocnemius and soleus muscles. It’s perfect for a focused stretch that you can control the intensity of, depending on how far you pull your toes back.

Floor Stretch:

How to Do It: Sit on the floor with your legs stretched out in front of you. Loop a towel or resistance band around the ball of your foot and gently pull back, keeping your knee straight. You’ll feel the stretch along the back of your lower leg.

Why It’s Great: This floor-based stretch allows you to stretch your calf muscles gently while keeping your back and legs in a comfortable position. It’s an excellent way to release tension after a run or as part of a cool-down routine.

Wall Stretch:

How to Do It: Stand facing a wall with your hands on the wall at about chest level. Place one foot behind you, keeping it flat on the floor, and lean forward slightly, bending your front knee while keeping the back leg straight.

Why It’s Great: The wall stretch is a fantastic way to target the calf muscles, especially the gastrocnemius muscle. It’s easy to do anywhere you have a wall and can be easily adjusted for intensity by changing the distance of your feet from the wall or the depth of your lean.

Standing Stretch:

How to Do It: Stand up straight, then step one foot back. Keep your back heel on the ground and bend your front knee slightly. Lean forward until you feel a stretch in the back leg’s calf.

Why It’s Great: This stretch is quick, easy, and doesn’t require any equipment. It’s perfect for a mid-run stretch or to quickly release tightness in your calves anytime,

Warm Up Every Time

Never skip your warm-up! It’s like a pre-adventure pep talk for your muscles.

So, what’s the game plan for a top-notch warm-up? Easy peasy! Begin with a gentle 5-minute jog. This isn’t about speed; it’s about waking up those muscles and getting them in the groove.

If you’re gearing up for an interval workout, perform a few dynamic stretches to fire up your muscles before starting the work.

Here are the exercises you need:

  • Jumping Jacks (2 minutes): Start with 2 minutes of jumping jacks to gently elevate your heart rate and initiate overall body warming.
  • Ankle Circles (1 minute per leg): While standing, lift one foot off the ground and perform ankle circles in both directions. Repeat with the other leg. This exercise helps increase ankle mobility.
  • Toe Taps (1 minute per leg): Stand with one foot on the ground and tap the toes of your other foot forward, backward, and to the sides. This motion gently engages your calf muscles and helps improve circulation in the lower legs.
  • Calf Raises (2 sets of 15 reps): Stand with your feet hip-width apart. Slowly rise onto the balls of your feet, lifting your heels as high as comfortable, and then lower them back down. This exercise specifically targets your calf muscles.
  • Dynamic Calf Stretch (2 minutes): Perform dynamic calf stretches by stepping one foot back and gently pressing the heel to the ground, then alternating with the other foot. Move in a controlled, rhythmic fashion to increase calf muscle elasticity.
  • Leg Swings (1 minute per leg): Hold onto support, if needed, and swing one leg forward and backward in a pendulum motion. This exercise helps increase blood flow and flexibility in your calf muscles.

Here’s my favorite routine.

Calf-Strengthening Exercises:

Strengthening your calf muscles is crucial in any runner’s injury prevention strategy. Strong calves not only handle mechanical stress better, reducing the risk of strains and tears, but they also enhance your running efficiency.

Let’s explore some exercises to bolster your calf strength:

Beginner Level:

  1. Calf Raises: Stand with your feet hip-width apart, rise onto your toes, and then lower your heels back to the ground. Start with two sets of 15 reps.
  2. Resistance Band Calf Raises: Secure a resistance band under your toes and hold the ends in your hands. Perform calf raises as described above while pulling up on the band for added resistance.

Intermediate Level:

  1. Single-Leg Calf Raises: Perform calf raises on one leg at a time to increase the load on each calf. Begin with two sets of 10 reps per leg.
  2. Box Jumps: Find a sturdy box or platform and jump onto it, landing on the balls of your feet. Step down and repeat. Start with a lower box height and gradually increase it as you progress.

Advanced Level:

  1. Calf Raise Variations: Perform calf raises with your toes turned inwards and then outwards to target different areas of the calf muscles. Aim for two sets of 15 reps for each variation.
  2. Calf Raises on an Incline: Stand on an incline board or step with your heels hanging off the edge. Perform calf raises to maximize the range of motion.
  3. Calf Press Machine: If you have access to gym equipment, use the seated calf press machine to load your calves with weight. Start with a weight that challenges you but allows proper form, and aim for three sets of 12 reps.
  4. Plyometric Calf Exercises: Incorporate exercises like calf jumps or bounding to build explosive strength and endurance in your calf muscles. These exercises are high-impact and should be approached with caution, especially if you’re new to plyometrics.

Improve Your Running Form

Another thing you can do is to improve your running technique.

Instead of moving forward, focus on bringing your feet under your center of gravity and your knees are slightly bent. This is the essence of the midfoot strike. Imagine you’re landing on the rear part of the ball of your foot instead of the toes.

Check the following YouTube Tutorial to help you achieve the optimal foot strike.

What’s more?

Try increasing your cadence by around 4 to 8 steps per minute. By upping your stride turnover per minute, you’ll have to move your legs faster, which cuts the times for excessive knee bend.

This, overall, should reduce the load on your calf muscle. That’s a good thing if you ask me.

Don’t Overtrain

Pushing your calves too hard in your running regimen? That’s a one-way ticket to Overtrainingville, with a likely stop at Calf Strain Central.

Sur, you want to improve your running performance, whether losing weight, running a sub-20-minute 5K, or whatever, but that’s no excuse for overdoing it.

Overdoing it leads to many injuries, not just calf strains, period.

Work your way up to more intense training gradually and slowly.

Pay attention to your body when running so you can still train but not overstrain. Once you want to take your runs to the next level, do your research, consult a coach, and then do so slowly and gradually.

Here’s what you need to pay attention to:

  • Persistent Calf Soreness: Unlike normal muscle fatigue, this soreness lingers and doesn’t improve with regular rest.
  • Reduced Calf Strength and Performance: Finding it harder to push off or noticing a decline in your running efficiency? Your calves might be overworked.
  • Increased Stiffness and Reduced Flexibility: Your calves feel tight and less pliable, especially in the morning or post-run.
  • Swelling or Tenderness: Overworked muscles can become inflamed, leading to swelling or tenderness in the calf area.
  • Frequent Calf Cramping: Regular, painful cramps in your calves during or after runs.
  • Changes in Running Form: Overtrained calves can alter your running gait, which can lead to other injuries.

If you notice more than a few of the above red flags, it’s time to scale back your training—or stop altogether. The key is to prioritize health—not the miles.


Prevent Shin Splints: Expert Strategies for Pain-Free Running Success

Are you on the lookout for effective ways to keep shin splints at bay while running? If so, you’ve come to the right place.

As a runner, I understand all too well the frustration and discomfort of dealing with shin splints, or medial tibial stress syndrome as it’s officially known. It’s a common issue that can throw a wrench in your running plans, regardless of whether you’re a beginner or a seasoned pro.

It’s also almost like a rite of passage for us runners, but honestly, it’s one we’d all happily skip.

But don’t worry, it’s not all doom and gloom!

Here’s the bright side: With some savvy know-how and a proactive game plan, you can totally sidestep (pun intended) shin splints. And guess what? That’s precisely what we’re diving into today!

In today’s article, we’re going all-in on shin splints. I’m talking top-notch, science-backed tactics to help you kick shin splints to the curb for good. We’ll break down the nitty-gritty of why these nuisances crop up in the first place, dish out some top-notch prevention tips, and even throw in some tried-and-true remedies.

Sounds like a good deal?

Let’s get to it then.

What Are Shin Splints?

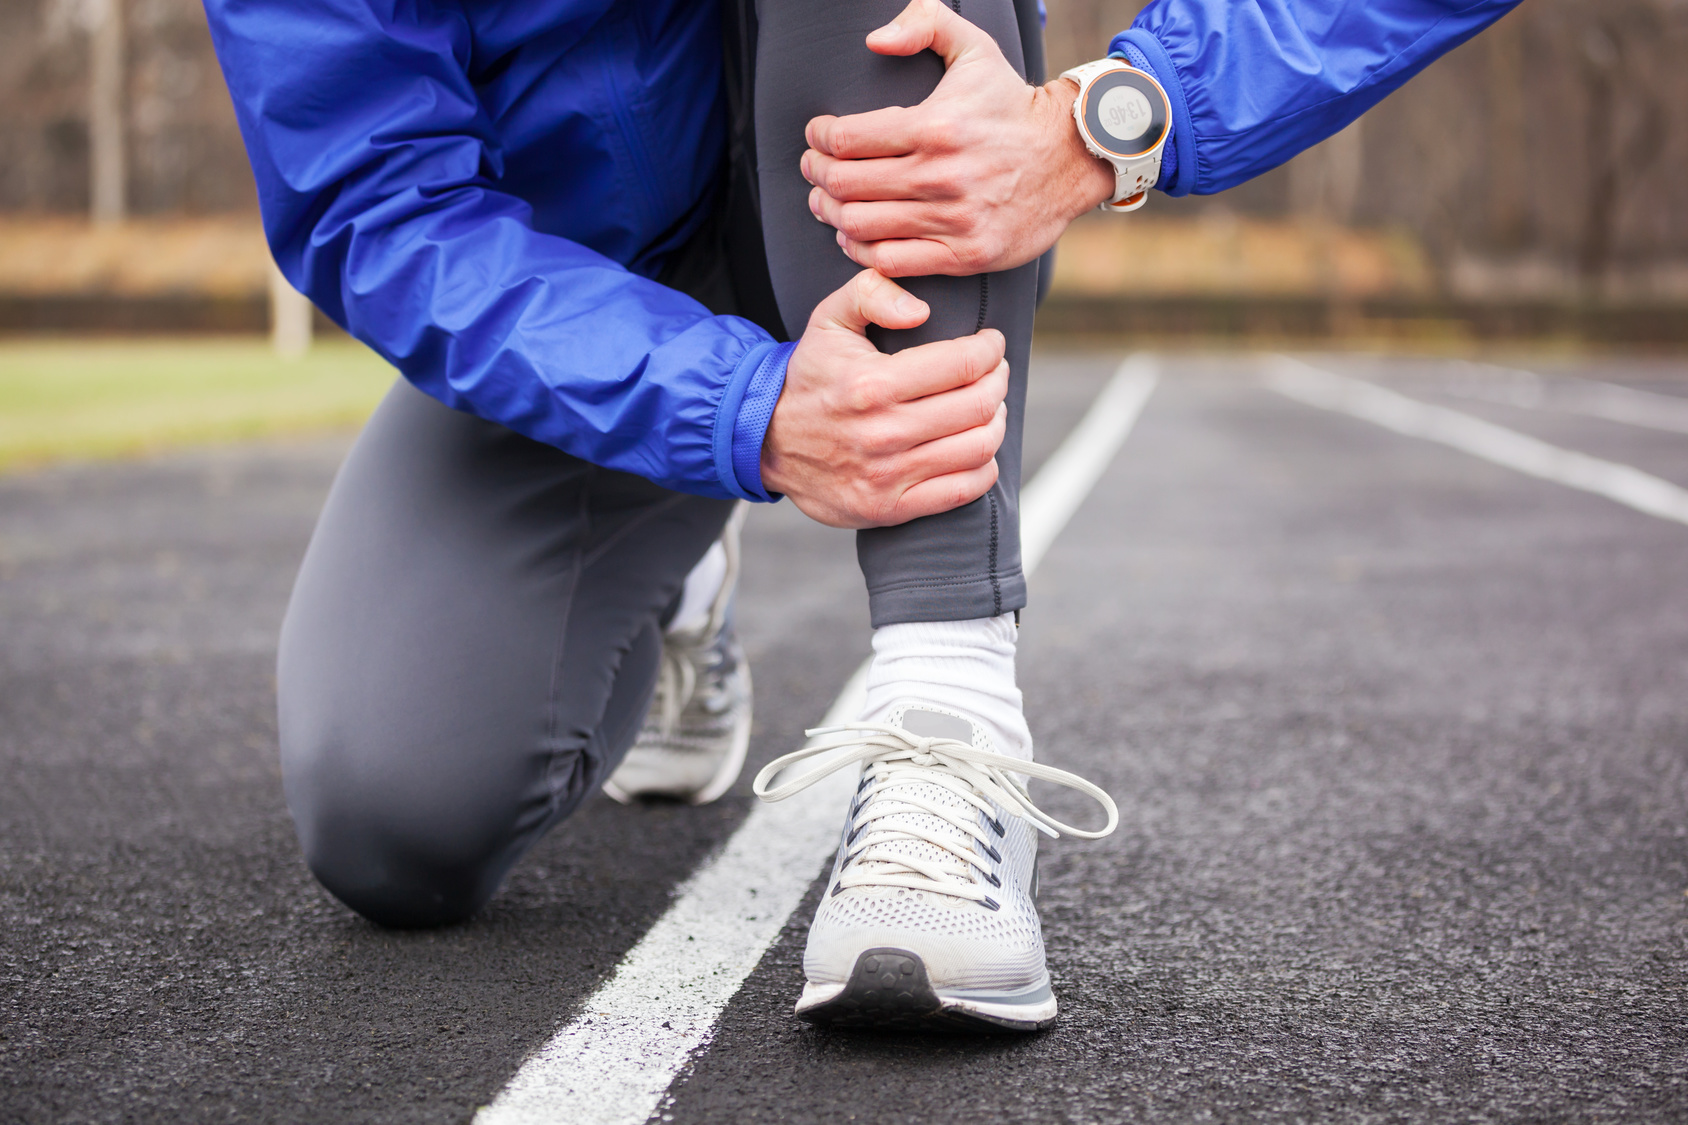
Shin splints is a common lower-leg ailment that plagues runners.

Let’s say you’re out for a run, feeling the wind in your hair, and suddenly, a sharp pain shoots up your shinbone. That’s the hallmark of shin splints. Sometimes, it’s a mild ache that lingers, and other times, it’s a sharp, throbbing pain that really grabs your attention, especially while logging the miles.

So, what are the tell-tale signs that you’re dealing with shin splints? Let’s break them down:

  1. Pain Along the Shinbone: The classic symptom. It starts off as a pain along the inner border of the tibia and, if left unattended, can spread out and make a bigger scene.
  2. Tenderness to Touch: Give your shin a gentle poke. If it feels sore or tender, that’s shin splints ringing the alarm bell.
  3. Pain Level-Up During Activities: Whether you’re running, jumping, or even just brisk walking, if the pain decides to turn up the volume during these moments, shin splints are likely the culprits.
  4. The Post-Workout Ouch: Done with your run? Well, shin splints might not be. They often like to linger and remind you of their presence even after you’ve cooled down.
  5. Swelling Squad: Sometimes, shin splints bring along a friend – mild swelling. It’s their way of saying, “Hey, we’re really here!”

Left untreated, shin splints can lead to more severe issues, such as stress fractures, which require even longer recovery periods. As runners, we depend on the strength and health of our legs to pursue our passion. Understanding shin splints and their implications is the first step toward effective prevention and treatment.

Without further ado, let’s tackle the exact measures you need to take to safeguard your legs from the pesky shin splints.

Start Slow

As a runner, it’s crucial to understand the importance of starting slow. It’s easy to get caught up in the excitement and push too hard, too fast, which can lead to overuse injuries like shin splints. Remember, it’s not just about how fast or how far you can go; it’s about building endurance and strength gradually.

When you increase your training volume or intensity too quickly, you risk sending your lower legs into a state of shock. Instead, adopt a gradual and gentle approach.

Instead of falling headfirst into this classic pitfall, here’s a smarter strategy: take it slow and steady. It’s all about the gradual and gentle approach. If you’re just starting out on your fitness journey, consider the trusty walk/run method.

That means dedicating 20 to 30 minutes to alternate between jogging and walking every other day. If you’re looking for the full playbook on this technique, I’ve got a detailed post that’ll guide you through every step – just click right here.

Next, increase your weekly mileage by no more than 10%. This conservative approach ensures your body adapts to the stress of running without being overwhelmed.

Building Shin Resilience: The Role of Strength Training

Strength training is key for not only boosting overall power but also preventing injury. Shin splints are no exception.

So, what’s the secret sauce? It’s all about working on your feet, ankles, calves, and hips – the trusty support squad for your shins. Strength training plays a vital role in preventing shin splints by enhancing the resilience of the muscles surrounding your shins. A stronger lower leg can better absorb shock and stress, reducing the burden on your shins during running.

Ready to get started? You can easily weave these exercises into your warm-up routine or treat them as a stand-alone shin splint workout. Shoot for 12 to 15 repetitions of each exercise, and shoot for two to three sets to truly power up those legs.

Incorporate these strength exercises into your routine to help prevent shin splints:

  1. Calf Raises
    • Stand with your feet hip-width apart.
    • Rise up onto your toes, lifting your heels as high as possible.
    • Lower your heels back down, then repeat.
    • Perform 3 sets of 15-20 repetitions.
  2. Toe Taps:
    • Sit on a chair with your feet flat on the floor.
    • Lift your toes upward while keeping your heels on the ground.
    • Lower your toes back down.
    • Perform 3 sets of 15-20 repetitions.
  3. Ankle Alphabet:
    • Sit or lie down with your legs extended.
    • Pretend your big toe is a pen, and write the alphabet with your ankle.
    • Perform this exercise for both ankles.
    • Aim for 2-3 rounds of the full alphabet for each ankle.
  4. Resistance Band Exercises:
    • Use a resistance band to perform exercises like dorsiflexion and plantarflexion.
    • For dorsiflexion, anchor the band around a sturdy object and hook it around your toes. Pull your toes toward your shin against the resistance.
    • For plantarflexion, anchor the band to your ankle and point your toes downward against the resistance.
    • Perform 3 sets of 15-20 repetitions for each exercise.

Stretching For Preventing Shin Splints

While there’s some debate about the role of stretching in injury prevention, I’ve found that it certainly helps in managing shin pain.

Stretching your posterior leg muscles and the muscles around your shin bone is like giving them a dose of tender loving care.

Essential stretches include the standing shin stretch, the anterior shin muscle stretch, the toe alphabet, and the calf stretch. They help maintain flexibility and can be crucial in keeping shin splints at bay.

Let’s break them down.

Standing Shin Stretch

This stretch focuses on the muscles in the front of your shin. Start by standing up straight. Lift one foot off the ground and bend your knee, bringing your heel towards your buttocks.

Grab your ankle with your hand and gently pull to increase the stretch. You should feel a gentle pull along the front of your shin. Hold the stretch for about 15-30 seconds, then switch legs.

The anterior Shin Muscle Stretch

This stretch targets the muscles at the front of your lower leg. Sit with your legs stretched out in front of you.

Point your toes and then flex them back towards your shin. You can intensify the stretch by gently pushing down on your toes when they are flexed back.

The Toe Alphabet Stretch

This is a fun and effective way to mobilize your ankle and stretch the muscles in your lower leg. While sitting, extend one leg in front of you.

Then, using your big toe as a ‘pen,’ pretend to write each letter of the alphabet in the air.

The Calf Stretch

Essential for runners, this stretch targets the calf muscles. Stand facing a wall with your hands placed on the wall at eye level.

Place one foot behind you, keeping it flat on the ground. Bend the knee of your front leg and push your hips forward, keeping your back leg straight.

You should feel a deep stretch in the calf of your back leg. Hold this position for about 30 seconds, and then switch legs.

Fix Your Form

Running form is pivotal in preventing shin splints. Incorrect form, such as heel striking and overstriding, can lead to increased stress on the lower legs.

First and foremost, let’s kick heel striking to the curb. Landing with your heels first when you run is a no-no. Why? That heel strike can send shockwaves through your legs, increasing the risk of shin splints and other running-related woes.

Want to see the difference? Check out this YouTube tutorial on the magic of midfoot running.

Now, let’s talk stride length. If you’ve had your fair share of shin splints, consider taking it easy on the length of your stride – maybe shorten it by about 10 percent.

Research shows that this small tweak can reduce the risk of tibial stress injury by a pretty solid margin. The reason? Shortening your stride means softer landings, which equals less impact – music to your shins’ ears.

What’s more?

Cadence also matters. To find your it, count how many times your foot strikes the ground on one side in a minute, then double it up. A sweet spot to aim for is around 170 to 180 strikes per minute.

Run on Softer Surfaces

Have you ever wondered why so many seasoned runners swear by softer surfaces like grass, dirt trails, or even synthetic tracks? Well, the secret is out: running on softer surfaces can be a game-changer in preventing overuse injuries—the dreaded shin splints is no exception.

This should come as no surprise, but logging the miles on hard surfaces, such as concrete and pavement, amplifies the impact on your legs, increasing the risk of shin splints. It’s like repeatedly hitting a metal rod on a hard surface – eventually, it’s going to show wear and tear.

On the other hand, softer grounds act as natural shock absorbers, offering a gentler running experience. However, it’s important to occasionally run on harder surfaces, especially if your race or regular route includes them.

And yes, don’t take my word for it. A study published in the “Journal of Science and Medicine in Sport” found that running on softer surfaces significantly reduces the impact on your legs, which, in turn, can lower the risk of shin splints.

Now, before you ditch the pavement entirely, remember balance is key. While softer surfaces are great, it’s still beneficial to mix in some road running, especially if your race day includes hard surfaces. Think of it as cross-training for your legs.

Choose Your Shoes

When it comes to running, the right footwear isn’t just about style or speed—it’s crucial for preventing injuries, particularly shin splints. Shoes with adequate cushioning and arch support can make a world of difference. Here’s how to make sure you’re choosing the right running footwear.

  • Know Your Foot Type: Are you flat-footed, or do you have a high arch? Your foot type influences the kind of support you need. Specialty running stores often offer gait analysis to help you understand your foot type.
  • Where you are running: The surface you run on matters. Road runners might need different cushioning compared to trail runners. Make sure your shoes match your environment.
  • Prioritize Fit and Comfort: A shoe that’s too tight, too loose, or simply uncomfortable can lead to issues beyond shin splints. Your running shoes should feel comfortable from the start, with enough room to wiggle your toes but snug enough to prevent excessive movement.
  • Seek Professional Advice: Don’t hesitate to consult with a podiatrist or a professional at a specialty running store. They can provide valuable insights tailored to your specific needs.

For more guidelines on how to choose proper shoes, check the following posts :

  • Post 1
  • Post 2
  • Post 3
  • Post 4
  • Post 5

Try Compression Socks

Let’s talk about a little secret weapon in the fight against shin splints: compression gear. Now, there’s some research that suggests these tight-fitting wonders can do wonders for your shins.

First off, they might just be the inflammation and swelling whisperers. And here’s the kicker: they’ve also been known to reduce muscle damage and speed up your recovery after a hardcore workout.

Now, I won’t sugarcoat it. There’s no solid proof that compression socks are the ultimate shin splint warriors. But hey, they’re worth considering, especially if you’re willing to shell out 50 to 70 bucks for a pair.

And speaking of that blood flow boost, research says you should aim for around 20 to 24 mmHg of compression at the ankle. So, look for that magic number on the label.

Foam Roll or Massage

Foam rolling acts like a self-massage, targeting adhesions in your muscles and connective tissue. It helps reduce muscle tension, improves blood flow, and enhances mobility, contributing to faster recovery and lower injury risk.

Now, here’s the scoop on the pain. Yeah, it might hurt a bit when you first start rolling. But guess what? That’s a sign that you’re hitting the right spots.

Here’s your foam rolling prescription: roll your shins and calves for about 30 to 60 seconds, then take an equal breather. Do this dance four to five times, at least five times a week

Check out this YouTube tutorial:

Try Acupuncture

Acupuncture, a technique from traditional Chinese medicine, involves inserting fine needles into specific points in the body. It has been suggested to help manage shin splints, releasing substances that alleviate pain and promote healing.

Again, don’t take my word for it. Research in the Journal of Chinese Medicine spilled the beans on this. They discovered that acupuncture could work like a charm, especially in the early stages of shin splints.

In fact, it outperformed physiotherapy and anti-inflammatories in the shin splint showdown.

Seek out Professional Help

If shin splints persist despite all efforts, it’s wise to consult a professional.

It’s not uncommon that the root of the problem goes a bit deeper. Maybe it’s biomechanics playing tricks on you, like muscle imbalances, overstriding tendencies, or postural woes. These aren’t the sort of puzzles you can solve on your own, especially if you’re not sure where to begin.

A podiatrist or physical therapist can offer specialized advice and treatment, addressing any underlying issues that may be contributing to the problem. They can help tailor a recovery and prevention plan specific to your needs, ensuring a safe and healthy running experience.

You can also dabble in some high-tech solutions, like electrotherapy methods – things like electronic muscle stimulation, therapeutic ultrasound, or microcurrent.

And hey, here’s another idea: try taping up that sore limb with some medical-grade tape.

Research shows it can help reduce swelling, boost your range of motion, and give your lower leg muscles some much-needed support.

Run, Recover, Repeat: How to Supercharge Your Training with Recovery Runs

couple doing recovery run on a sunday

As a runner, I can attest that recovery runs are an essential part of my training routine, and I’m excited to share why they should be part of yours too.

Have you ever finished a challenging run and felt like your body just couldn’t handle any more pounding? That’s where the Recovery Run comes into play. It’s like a gentle massage for your muscles, an opportunity to flush out lactic acid, and a chance to get your body ready for the next workout.

But it’s not just about feeling good. Incorporating recovery runs into your training program can help improve your running form, boost your endurance, establish base mileage, and even speed up your recovery time.

In this article, I’ll dive deep into the benefits of recovery runs, how to find the right pace, when to schedule them, how long they should be, and tips on incorporating them into race-specific training.

So grab your running shoes, and let’s explore the art of the recovery run!

What is a Recovery Run?

Basically, a recovery run is a short, slow run completed within 24 hours after a hard session, usually an interval workout or a long run.

A recovery run can be of any distance, but as a rule, shorter than your base sessions and performed at a pace 60 to 90 seconds slower than your average run.

Imagine your body as a car that just finished a grueling race. You wouldn’t immediately push it to the limits again, right? You would give it some time to cool down and recover before revving it up for the next race. This is exactly what a recovery run is all about.

Aside from helping your body recover from hard workouts, recovery runs also help to improve running form, build endurance, establish base mileage, and even speed up recovery time.

“Improved” Recovery

First of all, let’s clear up something from the get-go about recovery runs.

Although called recovery runs, research has not yet proven that these runs actually speed up the recovery process in one way or the other.

In theory, recovery runs may help flush the build-up of lactic acid in the muscles.

Once this build-up is gone, the soreness should subside while healing increases.

However, research is still inconclusive. But,, recovery runs offer other benefits that can take your running game to the next level. Let’s check a few.

Fatigue resistance

One of the most valuable benefits of recovery runs is fatigue resistance. By completing a recovery run after a hard workout or during a state of lingering fatigue, you can improve your endurance and power output, according to research conducted at the University of Copenhagen.

May Prevent Soreness

Recovery runs can help prevent soreness in your muscles, particularly in your hamstrings and calves.

They also increase blood flow and loosen up your muscles, preventing them from contracting and tightening up if you do nothing but sit on the couch all day.

Add Volume

Recovery runs can help you increase your weekly training volume, which can also help you improve your aerobic capacity.

The better your base, the faster and farther you can run.

Improve Form

Perhaps the best reason to incorporate recovery runs into your training program is that they can help you improve your running form and biomechanics.

With enough energy to focus on your technique and nothing else, you can work on perfecting your form and preventing injuries.

How To Find The Right Recovery Run Pace

Recovery runs are an essential part of any running program, but finding the right pace can be tricky. It’s important to remember that a recovery run is not a race, and it’s not the time to push yourself to your limits. Instead, it’s a chance to give your body a break and allow it to recover from a hard workout.

Here are two methods to help you find the right recovery run pace.

Method 1: Recovery Run Heart Rate

One way to find the right recovery run pace is to use a heart rate monitor. During a recovery run, you should aim to keep your heart rate between 60% to 70% of your maximum heart rate. This is also known as zone 1-2. However, it’s important to note that we all have different resting and maximum heart rates.

So, to be safe, it’s recommended to perform your recovery workouts at the lower end of that range. For example, if your normal training pace is 6:30/mile, then your recovery pace should be around 7:30 or 8:00/mile. Elite runners can aim for a pace slightly slower than their marathon pace.

Method 2: The Talk Test

Don’t have a heart rate monitor? No problem! Another way to ensure you’re running at the right pace is to use the talk test. During a recovery run, you should be able to hold a conversation without panting or gasping for air. If you’re running with a buddy, try reciting the alphabet or the pledge of allegiance together.

If you’re running solo, try talking to yourself. If you can’t speak in complete sentences, then you’re going too hard. Slow it down and enjoy the run.

The key to finding the right recovery run pace is to listen to your body. Don’t worry about your pace or the distance covered. Instead, focus on how you feel. Are you relaxed? Are you breathing comfortably? Are you enjoying the run? If the answer to these questions is yes, then you’re doing it right.

Pick a Flat Course

There are some important factors to consider when it comes to nailing your recovery run pace. One key element is the terrain.

First of all, consider the terrain. Recovery runs are not the time to tackle steep hills and rugged trails. You want to give your legs a break from the pounding they endured during your last run. Opt for a flat course instead, such as grass, flat trail, or gravel. Concrete and asphalt are not your friends during a recovery run because they can be hard on your feet.

Timing is also crucial. The best time to do a recovery run is within 24 hours of a challenging workout or long run. In fact, some experts recommend doing a recovery run in the morning if you completed a hard session the previous day. This is known as a “double” in the running world, and it’s a common technique used by elite runners to pack in as many miles as possible.

But don’t overdo it with your recovery runs. Even though the pace is slower, it still counts as running, which means there’s impact stress on your muscles, joints, ligaments, and tendons. If you’re finishing your recovery run sweating profusely and feeling completely exhausted, you’re doing it wrong. You should actually feel better at the end of your workout than you did at the start.

Balancing It Out

It’s important for runners to find the right balance between recovery runs and other types of training.

As a general guideline, aim to do no more than two recovery runs per week and should adjust the frequency and duration of recovery runs based on your recovery needs.

Additional Resource – Your Guide to fun runs

Timing – Recovery Run After a Long Run

According to experts, it’s best to complete your recovery run within 24 hours of a challenging workout or long run. And if you’re a hardcore runner, you can even do your hard session in the morning, followed by a recovery run in the evening.

That’s how some elite runners can pack in as many miles as possible. However, keep in mind that recovery runs are only necessary if you run more than three times a week. If you run two to three times per week, then each session should be a quality workout followed by a recovery or cross-training day.

What’s more?

Keep in mind that just because you’re doing a recovery run doesn’t mean you should skimp on other types of recovery.

Stretching, diet, and sleep should be the bread and butter of your recovery routine.

Don’t Overdo Your Recovery Runs

Every time you pound the track, it still counts as running, no matter the label in front of it.

This involves impact stresses on your muscles, joints, ligaments, and tendons.

Even the easiest recovery pace may aggravate a stress fracture.

As a rule of thumb, if you’re finishing your recovery runs sweating like hell and completely exhausted, then you’re doing it wrong.

The fact is, you should feel better at the end of your workout than you did at the start.

How Long Should a Recovery Run Be

What’s the point of recovery runs if you don’t know how long they should be? Generally, recovery runs can last for 3 to 5 miles or 25 to 40 minutes, depending on your fitness level and training goals.

However, even if you’re an established endurance athlete, covering 30+ miles a week, I’d still suggest no more than 3 to 4 miles for a recovery run. And remember to keep your speed steady and your breathing under control.

Race-specific Recovery Run Tips…

If you race often, then recovery runs should be a part of your post-race recovery strategy.

How quickly you pick up running again after a race depends on the length of the event you’ve just completed, your conditioning level, and when you plan to compete next.

Nonetheless, here is some general advice on when to plan your return to training.

  • Recovery Run After a 5K or 10K. Resume normal training within a few days, depending on your fitness level. The first day after the race, examine how your body feels. Usually, you’ll want to do a recovery run for at least 20 minutes, then stretch your body.
  • Recovery Run After A Half-Marathon. Completing a half marathon pretty much guarantees that you have inflicted some damage to your body. After three or four days, go for a 20 to 30-minute recovery run to help you get back into the swing of things as soon as possible.
  • Recovery Run After A Marathon. The following day following the race, walk around and stretch your body. Avoid running or any form of intense cross-training. Then, after two or three days, lightly cross-training. Next, schedule your recovery run at least a week post-race.

How to Do A Recovery Run  – Listen To Your Body

With all of this in mind, the key to making the most out of your recovery runs—and training in general—is paying attention to your body.

Take a few minutes every day to close your eyes and shift your attention inward to assess how you feel.

Start by performing a full body scan from the top of your head to the tips of your toes.

My favorite time is in the morning.

Usually, during that time, your body will show its true color, so you can easily decide what to do next.

Pay attention, and why not keep track of everything you feel.

Your body is your best coach—it knows best.

Train hard when you’re feeling good, and take it down a notch when you feel like you are coming down with something or don’t have enough energy.

Recovery Runs – The Conclusion

In conclusion, recovery runs are a crucial component of any runner’s training routine, offering a multitude of benefits that can enhance your overall performance. These gentle, slow-paced runs act as a soothing balm for your muscles, allowing them to recover and prepare for future workouts. Beyond the immediate relief they provide, recovery runs contribute to improved running form, increased endurance, and expedited recovery times.

Please leave your questions and tips in the section below

Thank you for dropping by

David D.

Chiropractor For Runners – Do you Need One?

prevent running injuries

Did you know that over 70 percent of runners get injured each year?

Of course, don’t take my word for it.

Research by Harvard scientists reported that two-thirds of runners would be injured over a period of a year of training.

Most runners are aware of the high-impact nature of the sport. Push your body harder than last time, and you’ll be prone to sprains, tears, and strains. These pains can manifest into more serious running injuries that can kick you off the training wagon for a while.

Knee injuries are pretty common, and so are other conditions. Shin splints, ankle sprains, tendonitis, and calf strains are a few of a runner’s many injuries.

In most cases, a mix of rest, compression, and proper recovery practice can get the job eventually.

But if you want to sidestep running injuries fast, a chiropractor should be on your list as they can help bring your body into proper alignment, reduce pain and injury risk, and improve your overall health.

In today’s article, I’ll explain some ways that a chiropractor can help your running game and how to pick the right one for the job.

Sounds great?

Let’s get started.

What is Chiropractic?

Technically, a chiropractor is a healthcare professional who focuses on the diagnosis, prevention, and conservative care of spine-related conditions and other painful musculoskeletal disorders.

The chiropractor’s overall objective is to soothe pain and restore normal function by manually adjusting or manipulating the spine and its structures.

The best part about working with a chiropractor is that they look at your whole body, not just the injury. For example, you might have pain in your knee, but the problem might be your hip. Your whole body works as one unit—and your spine is the center, so anything that affects it can also affect the rest of your body.

Around 50 million Americans visit a chiropractor each year.

Additional resource – Compression leggings for running

The Process Demystified

Literally translating to “healing with the hands,” chiropractors use hands-on spinal manipulation and other alternative methods. They can fix musculoskeletal problems and improve nervous function—all of this in a non-invasive manner.

How come?

By making manual adjustments to joints, mostly to those in the spine, to south pain and restore range of motion to joints and other structures hindered by scar tissue caused by injury. This is believed to help the body’s health without medicating or surgery.

During the session, you might hear some cracks—a change in pressure in the joints that releases a bubble that pops. This might be problematic for some, but most people report instant relief.

Additional resource – The Myrtl routine

Enter Sport Chiropractor

Although standard chiropractic offers plenty of health benefits to people, it’s usually not enough for those engaging in high-impact sports—runners are no exception.

That’s why sports chiropractors exist as they might be the best manual therapist for dealing with chronic injuries and optimizing performance.

A sports chiropractor is a health professional that focuses on diagnosing and treating sports-related injuries and issues. They primarily treat injured athletes and those who want to improve their athletic performance.

Most sports chiropractors, such as Gratason and Active Release Technique (ART), are trained in muscle work. They also tend to be experts at rehabilitating and preventing sports injuries and designing treatment programs that allow athletes to return to their sports faster, according to origin-massage.ch.

What’s more?

A good chiropractor can also provide soft-tissue therapies, fitness coaching, diet advice, and lifestyle recommendation.

That’s why there’s always chiropractic on professional sports and Olympic teams. Their services are invaluable.

Additional resource – Running with a labral tear

How Can A Sports Chiropractor Help Runners

When the vertebrae of your spine are misaligned, or your muscles are imbalanced, you’ll insentiently change your running gait—as in the way you move—to compensate.

When this occurs, other muscles and structures pick up the slack, forcing them to be used in the not-so-optimal (or wrong) way. This, as you can already tell, sets the stage for pain, especially overuse injury.

Runners, just like any other athletes, are prone to misalignments, including running on a slanted surface, sticking to the same type of surface, or training in ill-fitting shoes. Of course, you can simply change up your running terrains and shoes more often, but your chiropractors will help you figure you if your body is in want of more balance. The rest is just details.

So how can a sports chiropractor help?

The chiropractor’s goal is to single out muscular-skeletal issues related to physical activity and running, with the ultimate objective of relieving pain and preventing future (re)-injury.

A good sports chiropractor is trained to use advanced diagnostic tools, such as X-rays, MRIs, CT scans, and musculoskeletal Ultrasound. These tools, in turn, help fully analyze a condition while also keeping tabs on the therapy progress.

For example, a chiropractor would assess how you move and run, then test for imbalances. Next, you’ll be asked to lie on a table while they put you into different positions body to align muscles, joints, and other structures.

Additional Resource – Running with Hemorrhoids

The Benefits of Chiropractors For Runners

So why do runners need a chiropractor? First, let’s dig into how they can help improve your running game and performance.

Speed Up Recovery

I hate to be the harbinger of bad news but sooner or later if you’ll come down with a running injury. The recovery period can last up to weeks or even months. Losing the ability to run can be a real setback, especially if you’re working toward specific running goals.

For this reason, lowering the risks of spending long spells on the sideline is welcome.

Although physical therapy helps speed up recovery and restore movement post-injury, a chiropractor can take your recovery game to the next level, getting you back on the road as soon as possible.

A thorough examination by a chiropractor will assess:

  • The way you move
  • The way you tend
  • Your foot arch type
  • The alignment (or mis-) of your knees
  • The alignment (or mis-) of our hips
  • And so much more

Following the assessment, the chiropractors recommend the right treatments and proactive measures.

Reduce Risk for Injury

As I’ve explained earlier, you’ll unconsciously change your running gait to compensate when your muscles or joints are out of alignment. This, in turn, forces certain structures to bear more load than usual, leading to overuse injury down the road.

A sports chiropractor can help keep your spine in alignment, which can positively impact the rest of your body. Regular adjustments limit the impact stresses caused by running, which helps prevent overuse injuries over the long haul.

Improved Range Of Motion

Relaxed and functional joints lead to an improved range of motion, especially through your pelvis and hips. This, in turn, can help improve your gait performance.

Although working with a chiropractor won’t turn you into the fastest runner on the block overnight, improving your range of motion can undoubtedly help you move more freely. This, in turn, lowers your risk of running-related injuries.

Lower Risk of Injury Recurrence

Another great benefit of using the services of a chiropractor is reducing the risk of having an old injury recur.

Regular adjustments can help restore balance to your body, which may help stop old injuries from resurfacing. This follows the same formula as the initial preventative measures employed by chiropractors that I mentioned earlier.

Can A Chiropractor Help With Runners’ Knee?

Tough back pain isn’t the most common running issue, runners’ knee is the signature injury of the running world. It’s also a condition that could be managed under the guidance of a sports chiropractor.

Although it’s not the ONLY culprit, one common cause of the runner’s knee is poor alignment (often stemming from misalignments within the spine).

Adjusting the spine triggers a domino effect on the rest of the body since the spine plays a major role in our central nervous system and everyday function. Most manual adjustments often focus on the sacroiliac joint, where the pelvis and hips meet.

A good sports chiropractor can also help evaluate the risks of a future injury by singling out muscle imbalances or joint restrictions that somewhat contribute to knee pain.

Some of the treatment strategies used by chiropractors for runners’ knees may include:

  • Deep tissue massage to break down scar tissues
  • Stretching the muscles around the knee
  • Strengthening the muscles around the knee
  • Fixing gain and foot strike
  • Improving function in the lower back to help improve proper leg movements
  • And so much more.

Sports Chiropractic Treatments For Runners

A good sports chiropractor will use various techniques and strategies to tend to a runner’s specific needs.

According to my research, the main chiropractic treatments are often recommended for runners.

  • Active Release Technique (ART) – this method combines stretching and active massage by applying deep tension to a certain body part. The goal is to feel for damaged or abnormal tissue in the muscle, tendons, ligaments, nerves, or fascia.
  • Y-Strap adjustment – This method helps the chiropractors stretch out your back and neck, and it works by pulling the head in the Y-Axis of the body. This pulling force helps achieve spinal decompression.
  • Electrical Muscle Stimulation (EMS) – This is a technique that soothes tension by stimulating the surface muscles.
  • Functional Dry Needling – a great technique for releasing tension in trigger points via deep muscle stimulation with special needles.
  • Graston Technique – A form of Instrument Assistance Soft-tissue Mobilization, this method helps break up concentrated scar tissue with hand-held stainless steel tools.

How Much Do Chiropractors Cost?

In general, the services of a chiropractor can set you back anywhere from roughly $40 to several hundred dollars per appointment. The average fee for consulting a chiropractor in the U.S is around $65 per visit.

For some individuals, health insurance may cover a portion of chiropractic treatment. But, in most cases, a chiropractor may not design their intervention plan according to payouts from the insurance company.

How To Find A Chiropractor For Runners

Looking for a sports chiropractor? Hop onto Google. Look up terms such as “chiropractors near me” or “sports chiropractors in (your region)” for quick results.

I’d also recommend you check with your insurance company to see if they have any nearby chiropractors in your region.

What’s more?

Remember to check the reviews. You can also ask your family members, friends, or gym buddies about any referral they might have, especially if they’re also serious runners.

Chiropractor For Runners – The Conclusion

There you have it!

If you’re interested in consulting with a sports chiropractor to help you with your running program, then today’s article should set you on the right path. The rest is just details, as the saying goes.

Please feel free to leave your comments and questions in the section below.

In the meantime, thank you for dropping by.

Keep running strong.

Inner Ankle pain While Running? A Tibial Posterior Tendonitis Guide in Runners

inner ankle pain

Running is a beautiful sport that can fill your life with excitement and a sense of accomplishment.

But nothing can ruin your running experience faster than ankle pain. If you are suffering from inner ankle pain while running, you are not alone.

It’s a common problem among runners, and one of the most frequent causes is posterior tibial tendonitis.

This sneaky condition can cause severe pain, swelling, and stiffness on the inner side of your ankle, which can ultimately sideline you from your beloved sport. But don’t worry, you’re in the right place.

In this post, I’ll dive into the nitty-gritty of posterior tibial tendonitis, what triggers it, how to cure it, and how to prevent it from happening again.

Are you ready to get back on track and take control of your running life? Let’s get started!

What is Posterior Tibial Tendinitis?

Have you ever felt a sharp pain on the inside of your ankle while running? If so, you may have experienced posterior tibial tendonitis (PTTD), a common overuse injury among runners that is often overshadowed by more famous injuries such as plantar fasciitis and ankle sprains. But don’t be fooled – PTTD is one of the most prevalent issues of the foot and ankle, affecting thousands of runners every year.

So what exactly is PTTD? Essentially, it occurs when the posterior tibial tendon, which connects the calf muscles to the bones on the inside of the foot, becomes inflamed, partially ruptured, or torn. The result is tenderness and pain around the bony structure of the inside of the ankle, which can be quite debilitating if not addressed properly.

The Functions

The posterior tibial tendon is truly a hidden hero, working tirelessly to keep your feet functioning correctly during all your activities. But when it becomes inflamed, partially ruptured, or torn, you’ll feel the consequences. Posterior tibial tendonitis is not something to take lightly. In fact, this injury is so common that it affects thousands of runners every year.

When you’re suffering from this injury, you’ll feel tenderness or pain on the inside of your ankle and foot, especially when standing, walking, or running for long periods. Swelling and redness may also occur along the course of the tendon towards the foot. If left untreated, the arch of your foot may collapse, causing pain to shift to the outside of your foot, below the ankle. This can lead to flat foot and cause your toes to turn outwards and your ankle to roll in.

The Symptoms

Posterior tibialis tendonitis typically afflicts only one foot; however, in some cases, it can occur in both feet.

You may also feel pain along the inside of your foot and ankle, where the tendon lies.

You may also notice some swelling in the area.

Symptoms include:

  • Tenderness or pain on the inside of the ankle
  • Pain, usually around the inside of the foot and ankle
  • Pain is worse when standing for long periods, walking, or running.
  • Swelling along the course of the tendon towards the foot.
  • Warmth, swelling, and redness along the inside of the ankle and foot.

The Dire Consequences

As the injury gets worse, the arch along the length of the foot may start to collapse gradually, and the pain will shift to the outside of the foot, below the ankle.

As this happens, the foot becomes completely flat as the toes turn outwards and the ankle rolls in

This is what’s known as a flat foot—and it’s not the same as in those born with this anatomical structure.

The further your injury exacerbates, the more invasive treatments you’ll need to correct the problem.

Additional Resource – Here’s your guide to calf pain while running

Stages of Severity

In general, posterior tibial injury is categorized into four main stages

  • Stage 1 – Consists of tendon inflammation or damage but no change in foot shape. You might also notice that your foot has a mild flatfoot deformity.
  • Stage 2 – The tendon starts to become elongated while the arch slowly flattens. As the injury worsens, the arch of the foot starts to collapse; therefore, you can notice flat foot deformity (but not a permanent one).
  • Stage 3 – The tendon may be partially or fully ruptured. This leads to a more severe flat foot deformity that might be beyond correction, resulting in a condition known as rigid flatfoot deformity.
  • Stage 4 – Permanent damage and deformities in the ankle and foot. Not only is the foot affected, but also the adjacent deltoid ligament becomes involved and starts to collapse inward.

Here’s the full guide to arch support for running

Let’s dive deeper into the causes of inner ankle pain and how you can avoid it.

Causes Of Inner Ankle Pain

Tibial posterior tendonitis is caused by overuse of the tendon or from a specific traumatic impact, such as a fall or contact while playing sports.

Common activities that may cause overuse include:

  • Walking
  • Running
  • Hiking
  • Basketball
  • Tennis
  • Basketball
  • And other high-impact sports

Here are some of the factors that can make you more prone to the condition:

  • Gender as it’s more common in women
  • Over the age of 40
  • Improper footwear
  • Weak ankle muscles, especially the posterior tibialis or the intrinsic foot muscles
  • Having hypertension
  • Having diabetes
  • Being overweight or obese

Overall, understanding the causes of posterior tibial tendonitis can help you prevent it from happening in the first place. Proper footwear, muscle-strengthening exercises, and listening to your body’s warning signs can all help keep you on the road to healthy, pain-free running.

Should you Run with a Posterior Tibialis injury?

This is the first question any runner dealing with this injury wants the answer to.

It’s actually simple: If you’re trying to run through the tibialis tendon, stop.

In fact, if you suffer any type of pain on the inside of your ankle while running, stop training immediately, as logging in more miles can make your condition worse.

The next step is to visit your doctor as soon as possible so you can start the recovery process.

How To Treat Inner Ankle Pain While Running?

To soothe pain and speed up healing, do the following:

Lower Your Mileage

Cut down on your weekly mileage, and if the pain persists, stop running altogether.

You should also limit other sports and activities that cause you pain.

Next, ice the affected area several times per day to soothe inflammation and pain.

Your pain should fade with these measures.

If not, you should consult your doctor for additional treatment options.

Additional Resource – How To Prevent Ankle Pain For Runners

Extreme Cases

In case of pain persists despite all measures, surgery might be required to fix the damage.

For example, in advanced cases, a doctor may inject a mixture of corticosteroid and local anesthetic into the tendon sheet to help soothe the pain.

But the use of such is not recommended as research suggests that they might be associated with a risk of tendon rupture.

Prevent Posterior Tibial Tendonitis While Running?

There are many measures you can take to reduce your risk of injury.

Here are a few:

Use Orthotics

Research has shown that the use of custom-made orthotics may provide extra arch support that can help reduce stress on the posterior tibial tendon.

These devices help reposition the injured foot and reduce the stress on the tendon.

That’s why orthotics not only work great for speeding up recovery but for preventing injury, too.

If you’re looking for more support and a personalized solution, get a pair of custom orthotics from your doctor or physical therapist.

Usually, these tend to be specifically designed for your arch type.

Additional Resource – Here’s your guide to Anterior Tibial Tendonitis 

Stretch Your Calves

Most of the research that reported positive results in the treatment of posterior tibial tendon issues had some form or employed a calf stretching routine.

According to research, the go-to stretching regimen is 3 X 30 seconds of standing calf stretches against a sturdy object, such as a wall, performed twice a day.

Running Shoes

To protect your ankles from injury, consider getting a pair of running shoes with plenty of support, cushion, and comfort.

As a guideline, when looking for running shoes, choose the following:

  • Support under the forefoot
  • A well-cushioned arch
  • A wide toe box (since most of the push-off originates from the big and second toe).

You can also consider adding an orthotic to your running shoes.

Just remember to consult with a podiatrist to help you make the right decision.

Additional resource – Sore quads after running

Strength Train

Besides stretching, there are also a few strength exercises that can not only help soothe your pain but also prevent future flare-ups.

Studies have shown that targeted strengthening exercises can also help prevent posterior tibial tendonitis.

A study published in the Journal of Orthopaedic & Sports Physical Therapy found that eccentric calf muscle training significantly reduced pain and improved function in patients with posterior tibial tendon dysfunction.

Another study published in the same journal showed that adding foot-strengthening exercises to an exercise program improved pain and function in patients with this injury.

These strength exercises not only target the posterior tibial tendon but other muscles as well, especially the muscles of the calf.

When dealing with overuse injuries, it’s often the case that the affected area isn’t the only problem, but dysfunction in the area surrounding the affected limb can also be problematic.

The human body is, after all, one connected chain—only as strong as the weakest chain.

Additional Resource -Your guide to jaw pain while running

Inner Ankle Pain While Running – The Conclusion

By following these guidelines, you can reduce your risk of injury and get back to running pain-free.

And if you’re still experiencing discomfort, be sure to consult with a podiatrist to help you make the right decisions for your individual needs. Remember, the rest is just details.

Keep running strong!

David D.

Anterior Tibialis Tendonitis in Runners: Causes, Symptoms, and Solutions

runner suffering from shin splints

Are you tired of dealing with that nagging pain in your tibialis anterior? Well, you’ve come to the right place!

We all know how frustrating it can be to have that pesky pain in the front of your shin, hindering your running performance and leaving you feeling frustrated. But fear not! I’ve got your back (or rather, your shins) with all the tips, tricks, and strategies you need to kick tibialis anterior pain to the curb and get back to doing what you love most—running like the wind.

In this comprehensive guide, we’ll delve into the ins and outs of tibialis anterior tendonitis, exploring its causes, symptoms, and, most importantly, the best ways to treat and prevent it. No more guesswork or endless internet searches. I’ve got all the information you need right here, in one convenient spot.

So, are you ready to say goodbye to that annoying shin pain once and for all? I bet you are! Let’s dive into this guide and arm you with the knowledge and strategies to conquer tibialis anterior tendonitis.

What is Tibialis Anterior Tendinopathy

Alright, let’s dive into the fascinating world of tibialis anterior pain and get our anatomy lesson on! Picture this: your lower leg is like a city divided into four distinct neighborhoods, each with its own set of muscles.

In one of these neighborhoods, the Anterior District, lies the mighty tibialis anterior tendon. This tendon is responsible for flexing your foot upward, allowing you to lift your toes towards your shin. It’s like the hardworking construction crew that helps you take each confident step as you conquer the roads and trails.

But sometimes, this bustling neighborhood can face some trouble. Tibialis anterior pain can occur when the tendon becomes inflamed and swollen, putting a damper on your running adventures. This can happen due to overuse, where repetitive movements strain the tendon, or as a result of a traumatic ankle injury that throws everything off balance.

Now, let’s zoom in a bit closer. The boundaries of this Anterior District are formed by the sturdy tibia and fibula, the bones that give structure to your lower leg. Think of them as the protective walls that enclose this vibrant neighborhood. And to keep things organized, the anterior intermuscular septum and the interosseous membrane act as reliable border guards, ensuring that everything stays in its rightful place.

Understanding the intricate anatomy of our lower leg is key to unraveling the mysteries of tibialis anterior pain. So, put on your explorer hats and get ready to navigate through the remarkable world within your own body. By delving deeper into this knowledge, we’ll arm ourselves with the understanding necessary to conquer tibialis anterior pain and regain our running freedom.

What is The Anterior Tibialis?

Imagine the anterior tibialis as a trusty guide, accompanying you on every step of your running journey. This muscle-tendon duo takes its place on the outside of the tibia, marching alongside the shin bone with unwavering dedication.

As you move forward, this dynamic duo crosses the ankle and continues its mission, reaching its final destination along the inside of your foot. It’s like a well-choreographed dance routine, with the tendon connecting to the bone just behind the big toe, ensuring stability and strength.

But what exactly does this muscle-tendon duo do? Well, let’s break it down. During your gait, they have not one, but two important roles to play. Think of them as the dynamic duo with a double mission.

First, during the swing phase of your stride, the anterior tibialis goes into action, concentrically dorsiflexing your ankle.

In simpler terms, it pulls your foot upwards to help with precise foot placement.

But the journey doesn’t end there. As your foot makes initial contact with the ground, the anterior tibialis shifts gears. It now switches to an eccentric contraction, acting as a regulator for the transition from heel strike to mid-stance. It’s like a vigilant traffic controller, ensuring a smooth flow of movement as your foot hits the ground and prepares to carry you forward.

The Dire Consequences

Ignoring this problem is like poking a sleeping dragon with a stick—it can quickly escalate into a full-blown disaster. We’re talking about dire consequences that we definitely want to avoid.

Picture this: if left untreated, that innocent-looking anterior tibialis injury can turn into a full-blown tendon rupture. It’s like a ticking time bomb, waiting to go off and throw your running routine into complete chaos. Trust me, you don’t want to go down that road. Recovering from such an injury is no walk in the park; it’s a long and winding road to recovery that tests your patience and resolve.

But wait, there’s more. Brace yourselves for a term that sounds like something straight out of a sci-fi movie: “drop foot.” It’s not as fun as it sounds, believe me.

When the anterior tibialis muscle becomes alarmingly weak, it can lead to this unfortunate condition.

Imagine trying to walk with your foot seemingly dragging along, lacking the strength to lift it properly. It’s like having an invisible anchor weighing you down, making every step feel like an uphill battle.

running shoes for overpronators

Causes of Tibialis Anterior Pain

Picture this: our poor tendon, trying to keep up with our relentless training regimen, is pushed beyond its limits. It’s like squeezing a lemon until every last drop is extracted. The result? Micro-tears in the tendon, causing damage that sets off an inflammatory response within our bodies.

It’s the body’s way of saying, “Hey, we’ve got some repair work to do!”

Now, here’s where things get interesting. Tendinopathy is the culprit behind the swelling within the tendon. It’s like a sneaky intruder that sets up camp, causing discomfort and hindering our running adventures. But guess what? It’s not just our intense training sessions that can trigger this condition. Oh no, there are other factors at play too.

Let’s talk about tight footwear and tight shoelaces—those sneaky saboteurs that compress our poor anterior tibialis tendon. It’s like putting our foot in a vise grip, squeezing the life out of it and leaving our tendon crying out for freedom. So, let’s give our feet some breathing room, shall we?

And last but not least, poor foot or ankle biomechanics can add fuel to the fire. It’s like trying to run with a wonky wheel on a shopping cart—it throws our entire stride out of whack, putting undue stress on our precious anterior tibialis tendon.

The Symptoms

You’re out there pounding the pavement, feeling the wind in your hair, when suddenly, discomfort or pain strikes from your knee all the way down to your big toe.

Ouch! That’s the signal that something’s not right within the intricate web of tendons and muscles in your lower leg.

Now, let’s zoom in on the main troublemaker—the tibialis anterior tendon. It’s like a mischievous troublemaker that decides to cause a ruckus right in front of your ankle joint.

Gradually, you’ll start feeling pain in that specific area. Sometimes it creeps up on you, coming and going like a mischievous phantom.

Other times, it becomes a constant companion, reminding you of its presence with every step you take. And guess what? The intensity of your exercise can make those symptoms worse. It’s like poking a sleeping dragon with a stick—expect some fiery discomfort.

But wait, there’s more to the story. As the condition progresses, any extra miles you tack on to your run will bring about even more pain. It’s like adding fuel to the fire, intensifying the discomfort.

And it doesn’t stop there. Even non-running activities can become a pain in the ankle—literally. Imagine climbing stairs or flexing your foot—each movement can be met with a surge of unwelcome pain. You may even feel it while navigating the pedals in your car, as if the road itself is conspiring against you.

So, how do you know if you’re dealing with tibialis anterior muscle strain? Well, there are some telltale signs to watch out for.

Keep an eye out for swelling at the affected area—your body’s way of signaling that trouble is brewing. And then there’s the pain itself, which can manifest as cramping, aching, or that delightful burning sensation.

You may also notice weakness in the affected leg, as if it’s lost some of its power. It’s like trying to run a race with a limp—you’re not at your full potential.

How To Treat

Alright, my fellow runners, let’s tackle the elephant in the room—tibialis anterior tendinopathy.

You’ve been hit with this nagging injury, and let me tell you, it’s not going to magically disappear if you continue running like nothing happened. It’s time to face the music and take action. So, what’s the game plan? Let me break it down for you.

Step one: Seek professional help. Yup, that’s right. Schedule a visit with a doctor or therapist who can give you an accurate diagnosis and rule out any other possible culprits.  You need to make sure you’re addressing the right problem here. They’ll be like the detectives of your lower leg, investigating every nook and cranny to uncover the truth behind your discomfort.

Once you have your diagnosis, it’s time to embark on a personalized treatment plan. Your doctor or therapist will be your guiding light on this journey. They may recommend a variety of strategies based on your specific situation. Brace yourself—I’m about to drop some knowledge on you:

First up, let’s talk about building strength. We need to give some love to those weakened or dysfunctional muscles, especially our troublemaker, the tibialis anterior. It’s time to pump some iron, or maybe just work with resistance bands, to strengthen those muscles and restore their functionality. We want them firing on all cylinders once again.

Next on the agenda: loosen up those tight muscles. We’re talking about those sneaky troublemakers that might be causing abnormal movement within your limb. By stretching and mobilizing them, we can restore the full range of motion in your joint and create a more harmonious symphony of movement.

Now, let’s talk about some cool therapy—literally. Cold therapy is our secret weapon against inflammation and pain. Applying cold packs or ice to the affected area can help soothe those fiery sensations and speed up the recovery process. It’s like a refreshing ice bath for your muscles, calming them down and giving them a chance to heal.

Oh, and we can’t forget about orthotics. These nifty devices bring some extra support to the tendon and can address any abnormal foot biomechanics that might have contributed to the overuse of the tendon in the first place. They’re like the trusty sidekicks that provide stability and keep everything aligned, just like a superhero duo.

Prefer to Treat it On Your Own?

Alright, my fellow injured warriors, it’s time to take charge and bring that tibialis anterior tendinopathy under control. Get ready to unleash the power of the RICE method—our secret weapon for tackling swelling and pain head-on. Let’s dive in and learn how to do it like a pro.

First up, we have the letter “R” for Rest. This is your golden ticket to recovery. When you feel pain during weight-bearing, it’s crucial to give that affected limb some well-deserved rest.

Think of it as a timeout for your injury. Movement and weight-bearing can aggravate the situation, leading to more inflammation and swelling. And trust me, I don’t want to feed the fire.

Next, let’s move on to the letter “I” for Ice. Grab yourself a bag of frozen peas or some crushed ice, but hold up—don’t apply it directly to your skin. That would be a chilly mistake. Wrap it up in a damp cloth to protect your precious skin.

For a glorious 10 to 15 minutes, let the ice work its magic on the affected area. Cold therapy is like a cool breeze on a scorching summer day—it soothes inflammation, numbs the pain, and helps kickstart the healing process. Ah, refreshing relief!

Now, let’s tackle the letter “C” for Compression. Wrap that injured foot up like a present, but don’t go overboard and turn it into a tourniquet.

I’m talking about using an elastic bandage, like those trusty ACE wraps, to provide some gentle compression and support. Think of it as a cozy embrace for your injury—it stabilizes the area, minimizes irritation, and gives you that extra layer of protection. Just remember, snug but not suffocating. You want proper circulation flowing through your veins.

Last but not least, we have the letter “E” for Elevation. It’s time to give your injured foot a well-deserved lift. When you’re lying down or catching some Z’s, prop that foot up above heart level.

Why? Well, gravity becomes our ally here. By elevating your foot, we create a downhill path for those pesky fluids to escape. It’s like a grand escape plan for pain and swelling. For optimal results, aim to elevate the entire foot around eight to ten inches above your heart. Let gravity work its magic.

Additional Resource – How To Prevent Ankle Pain For Runners

Conclusion

There you have it

The above tips are all you need to know about treating (and why not prevent) this injury for good.

Please feel free to leave your comments and questions in the section below.

In the meantime, thank you for dropping by.

Keep training strong.

David D.

Top 5 Causes of Lower Leg Pain While (or After) Running

hotspots while running

For many runners, lower leg pain is an all-too-common experience. It’s the bane of our existence, the thorn in our side, the nagging ache that just won’t quit. But fear not; I’m here to help.

In this post, I’ll be diving into the five most common causes of lower leg pain while (or after) running.

Whether you’re a seasoned pro or a newbie lacing up your shoes for the first time, we’ve got you covered. So let’s dive into the nitty-gritty of this pesky problem and get you back on the road pain-free.

Lower Leg Pain Cause. 1 Shin Splints

First up, we have shin splints – a frustrating and painful condition that can plague even the most experienced runners.

Shin splints, also known as medial tibial stress syndrome or MTSS, is an inflammation of the muscles, bone tissue, and tendons around the tibia. This can cause pain along the inner (medial) side of the tibia, usually where the muscles attach to the bone.

If you think you might be dealing with shin splints, you’ll likely feel tenderness around the lower two-quarters of the inner tibia, and the affected spot will be tender to touch. You may also notice some mild swelling in the lower leg.

The causes of this injury are often attributed to repetitive stress on the shinbone and the connective tissue that attaches the muscles to the bone. This can happen when you suddenly increase your training volume, either with a new activity, or intensity or by changing something in your running routine. Even the skipping recovery section also takes part in this injury.

So, what can you do to treat and prevent shin splints?

First and foremost, rest is key. Take a break from high-impact exercises and opt for low-impact sports like swimming and cycling during the acute period.

Ice the affected area, wear proper shoes with arch support and change your running surfaces more regularly. Adding insoles or padding inside your shoes can also minimize the impact. For persistent cases, it’s important to consult a physiotherapist or chiropractor to help you improve the mobility and strength of your Achilles tendon, ankle, and calf.

Prevention

The best way to prevent shin pain is to take it slow and listen to your body. Assess your running routine and look for anything that could be making the injury worse, such as hills or hard surfaces. Instead, opt for softer surfaces like dirt paths or trails.

It’s also important to improve strength in the muscles along the front and side of your lower leg and improve the flexibility of your calf muscles. This can be done through exercises such as calf raises and stretches. And don’t forget to wear proper shoes with arch support and consider adding insoles or padding to minimize impact.

If you do experience lower leg pain, don’t push through it. Take a break from high-impact exercises and consider low-impact sports like swimming or cycling. And if the pain persists, don’t hesitate to seek the help of a physiotherapist or chiropractor to improve mobility and strength. Remember, prevention is key, so take care of your lower legs and keep them pain-free for all your running adventures.

Additional Resource – Here’s how to use KT Tape for runners knee.

Lower Leg Pain Cause. 2 Stress Fractures

Imagine you’re in the middle of your morning jog, heart pumping, sweat dripping down your face, and suddenly, you feel a sharp pain radiating down your leg. What could it be? It might be a stress fracture. This serious injury can knock you out of commission for weeks or even months, so it’s important to know the signs and how to prevent it.

Stress fractures occur when tiny cracks form in a bone due to repetitive trauma. They’re common in long-distance runners, particularly women who may be more prone to osteoporosis, hormonal imbalances, and low body weight. The metatarsals and the inside edge of the tibia are the most susceptible bones.

Unlike shin splints, which can also cause pain during or after running, stress fractures are characterized by sharp, persistent pain that worsens with each run. You might also experience tenderness, swelling, or bruising that doesn’t go away. Even putting weight on the affected leg or sleeping at night can be painful.

If you suspect a stress fracture, don’t try to power through it. That’s like driving a car with a broken engine and expecting it to work. You need to see your doctor as soon as possible for a thorough diagnosis. X-rays are necessary to detect the fracture, and you’ll likely need to stop weight-bearing exercises for 6 to 8 months, sometimes even longer in severe cases.

You may also need to wear a cast or elastic bandage for a certain amount of time to provide firm support.

Prevention

To prevent stress fractures, examine your running routine and make any necessary changes. Don’t overdo it by increasing the intensity or amount of training too quickly, as that’s the primary cause of this injury. T

It’s also important to maintain proper form and strength in the muscles along the front and side of your lower leg and improve the flexibility of your calf muscles. Take care of your body, and it will take care of you.

Lower Leg Pain Cause. 3 Achilles Tendinitis 

Imagine your Achilles tendon as a strong rope that connects your calf muscles to your heel bone. When that rope is overused, overstressed, or strained, it can lead to a painful condition known as Achilles tendinitis. This common issue affects many runners and can put a serious dent in your training routine.

One of the most frustrating things about Achilles tendinitis is that it can take a while to diagnose. You may not even realize that you have it until you start feeling pain in your lower calf or near the back of your heel. The pain can be sharp and persistent, especially in the morning, and may be accompanied by inflammation, swelling, and poor range of motion in the affected leg.

So, what causes this pesky condition? Overuse and strain on the Achilles tendon are the main culprits. Runners who log too many miles too quickly or overwork their calf muscles are particularly susceptible to Achilles tendinitis. It can also be caused by bad running form, wearing inappropriate footwear, and even certain medications.

If you suspect that you have Achilles tendinitis, it’s crucial to seek medical attention as soon as possible. Ignoring the pain and continuing to run can make the problem worse, leading to more serious injuries and a longer recovery time. Your doctor may recommend rest, ice, compression, and elevation (RICE) therapy, as well as physical therapy or even surgery in severe cases.

Preventing Achilles tendinitis requires a bit of self-care and attention to your running routine. Make sure to properly warm up before your runs, wear supportive and comfortable shoes, and gradually increase your mileage to avoid overuse.

Strengthening your calf muscles and incorporating cross-training exercises, such as swimming or cycling, can also help prevent Achilles tendinitis. Remember, taking care of your body is key to staying injury-free and reaching your running goals.

Lower Leg Pain Cause. 4 Posterior Tibial Tendonitis

Have you ever felt a sharp, stabbing pain on the inside of your ankle? If so, you may be dealing with posterior tibial tendonitis. This sneaky injury can creep up on even the most experienced runners and cause havoc on your training schedule.

The posterior tibialis muscle is a key player in running, responsible for pointing your ankle and toes downward and supporting the arch of your foot. When this muscle gets overused, it can lead to posterior tibial tendonitis, which can cause tenderness, swelling, and pain in the inside of your ankle.

But fear not! There are steps you can take to treat and prevent posterior tibial tendonitis. RICE (rest, ice, compression, elevation) is your first course of action. You can also use an ankle-compression sleeve to help soothe pain and prevent re-injury when you return to running. But remember, it’s important to avoid painkillers without consulting your doctor first.

Prevention is key when it comes to avoiding this injury altogether. Consider adding custom foot orthotics to your running shoes to provide extra arch support, and make sure your shoes are well-cushioned. To avoid compressing your neuroma, loosen the laces near the toes. And don’t forget to strengthen your ankle muscles with exercises like calf raises.

As tempting as it may be to go barefoot or wear flip-flops or flat shoes, these types of footwear can contribute to the development of a fallen arch, which can worsen your condition. So stick to well-cushioned, supportive shoes and give your feet the love and attention they deserve.

Lower Leg Pain Cause. 5 Muscle Strains

As a runner, there’s nothing more frustrating than having to deal with an injury that keeps you from pounding the pavement. And lower leg pain is a particularly common culprit that can really put a cramp in your style. One of the most frequent causes of this type of pain is muscle strain in the calf muscles.

Picture this: you’re sprinting down the track, feeling great, and suddenly, you feel a sharp pain in your calf. It’s like a light switch has been flipped, and suddenly, you can barely move. You might even feel like your calf has given up on you entirely. If this sounds familiar, you’ve likely strained a calf muscle.

Symptoms of a calf strain include pain in the lower leg, limited range of motion, and a feeling that the muscle has “given way.” This can be especially frustrating for runners, who may mistake the strain for simple tightness. You may even feel like the pain subsides during a run, only to come back with a vengeance afterward.

Calf strains are often the result of overtraining or making sudden changes to your routine, like increasing your mileage or switching up your running technique. To treat a mild strain, you can try the RICE method at home, but if the tear or strain is severe, it may require medical attention.

Preventing calf strains is key, and that means taking the time to warm up properly before your run. A good warm-up should include low-intensity running and dynamic movements like lunges, butt kicks, and squats. Additionally, it’s important to strengthen your calf muscles and prepare them properly for hard training. Isometric exercises can be particularly helpful in preventing calf strains.

If you’re dealing with lower leg pain as a runner, there are a variety of injuries and conditions that could be to blame. By taking steps to prevent injuries and addressing them quickly when they do occur, you can keep hitting the pavement and chasing those personal records.

Additional Resource – Your guide to runners itch

Lower Leg Pain – The Conclusion

In the thrilling world of running, lower leg pain can sometimes be the villain that threatens to derail our athletic pursuits. We’ve uncovered a handful of notorious culprits responsible for this pesky pain, but let me tell you, my friends, this is just the tip of the iceberg.

If you hunger for more knowledge and crave deeper insights into running injuries and prevention, be sure to pay a visit to my page. It’s a treasure trove of wisdom waiting to empower you on your journey to pain-free running.

Oh, and let’s not forget the foot pain relief article and the heel pain guide, both waiting eagerly to shower you with valuable tips and tricks.

But wait, there’s more! I’m not just here to deliver information; I’m here to connect with you. I want to hear your stories, your triumphs, and even your struggles. So drop me a line in the comments section below. Let’s build a community of passionate runners who support and inspire each other.

Thank you for dropping by.

Keep training strong.

David D