Looking to prevent and treat running injuries? Then this section is for you. Here you’ll find my best articles and resources on how to avoid, deal with, manage as well as treat common running injuries.
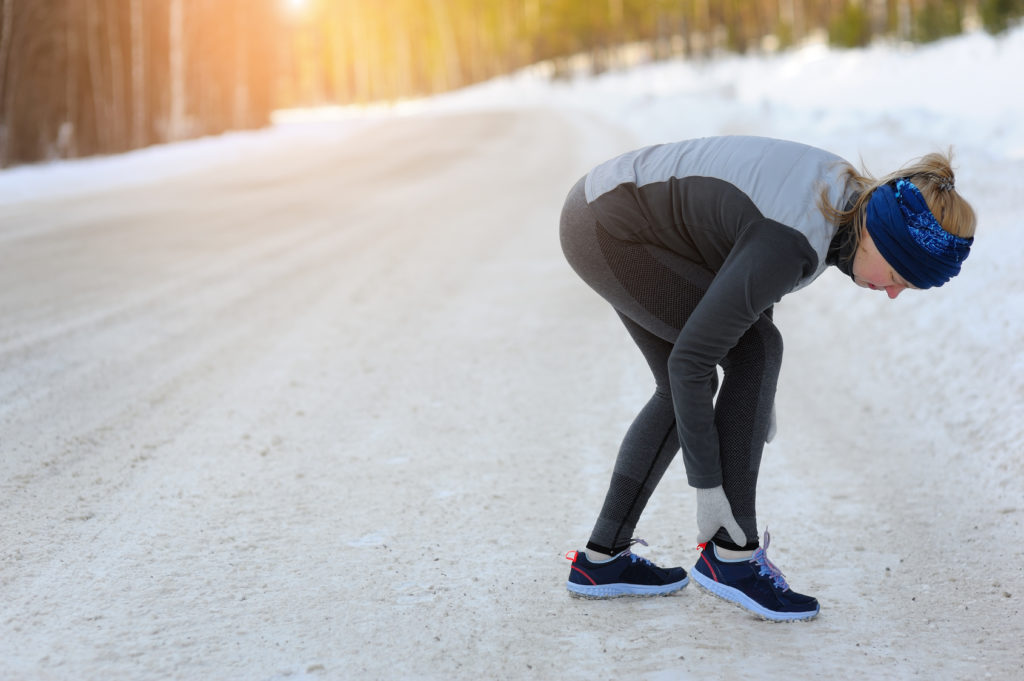
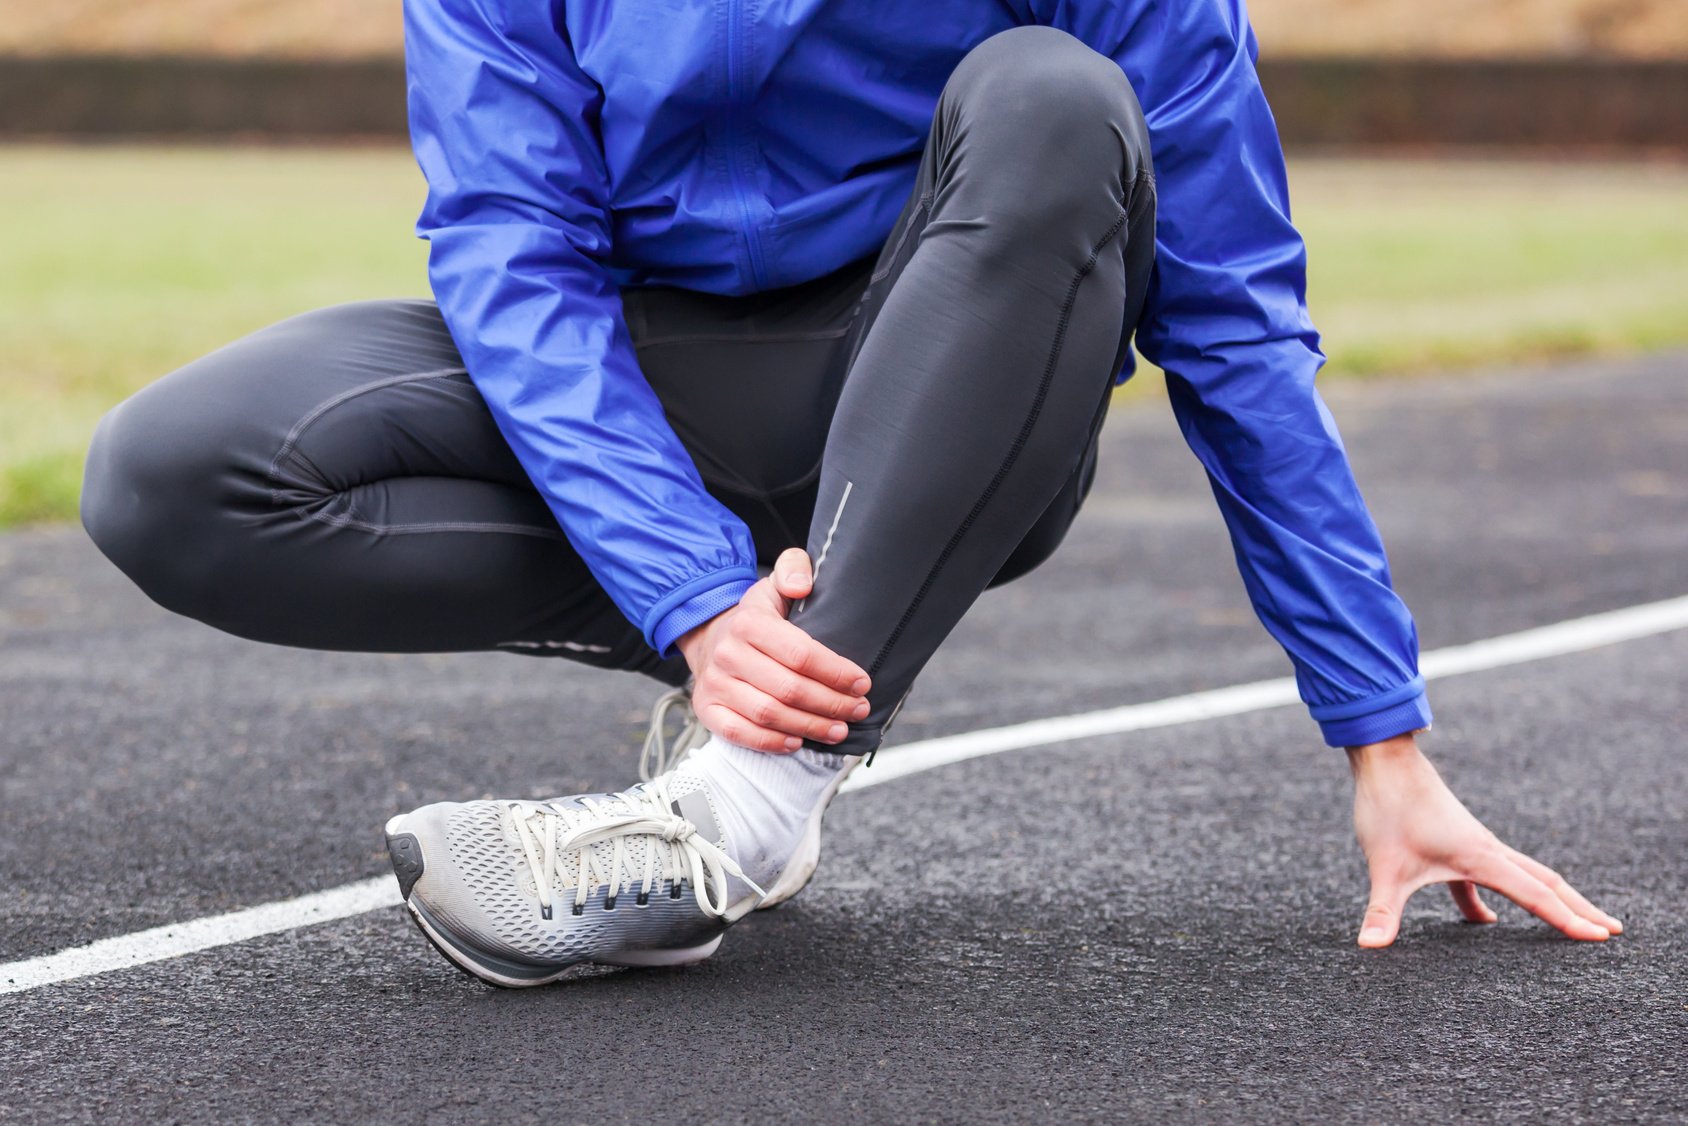
If you’ve been running long enough, you’ve probably had that moment—your ankle starts talking to you mid-run.
First it whispers, then it yells.
Ignore it, and you might end up taking a taxi back (or worse, not finishing your race).
Here’s the truth: Your ankles aren’t optional—they’re carrying 13x your body weight every single stride.
When they start hurting, it’s a signal you’d better listen to.
So let’s cut the fluff and get to what matters:
Why ankles hurt when you run
How to tell the difference between soreness and injury
When to stop, when to keep running, and how to fix it
You’re here because you want to run pain-free—not just now, but long-term. Let’s make that happen.
Stress on the Ankles
So what do you think is the main culprit behind ankle pain?
In my experience? Stress. A lot of it.
Your ankle joint is a complex thing—bones, ligaments, tendons, and muscles all working overtime every time your foot hits the pavement.
When any of those structures get overworked or messed up (even a little), your ankle fires a warning shot.
That’s the pain.
Most ankle issues fall into two buckets:
Acute Injuries – The “Oops” Kind. You land weird, roll your foot, and bam—instant sharp pain. This is your classic ankle sprain.
Overuse Injuries – The Slow Burn. You ramp up mileage too fast or run the same loop every day with a slight camber, and over time, things like Achilles tendinitis or stress fractures creep in.
Sometimes, it’s not even a full-blown injury—it’s just soreness from tight calves or weak ankle stabilizers.
But don’t blow that off. Most real injuries start small.
Let’s break down the big four ankle pain causes for runners:
1. Ankle Sprain
It’s a classic. You roll your ankle stepping off a curb, hit a root wrong on a trail, or land sideways mid-run.
That sudden twist stretches (or tears) the ligaments outside your ankle.
Usually, you’ll feel sharp pain on the outer side, maybe even hear a “pop.”
Swelling kicks in fast, followed by bruising and that uh-oh, something’s not right feeling.
How to Fix It (And Not Make It Worse)
First 48–72 hours: R.I.C.E.
Rest: No running. Period. Crutches if needed.
Ice: 15–20 mins, every couple hours
Compression: Elastic wrap—snug, not tight
Elevation: Prop it up above heart level
Anti-inflammatories like ibuprofen can help early on.
But after the first few days, movement is medicine—gentle range-of-motion drills, easy mobility, and low-load strength work.
Here’s the healing time to expect:
Grade I (mild): 2–3 weeks
Grade II (moderate): 4–6 weeks
Grade III (full tear): longer, possibly surgery
Don’t return to running until:
You can walk pain-free
Swelling is down
You can hop on one foot without wincing
💡 Pro Tip: Taping or bracing for the first few return runs can help you feel stable. But don’t rely on it forever—your goal is strong ankles, not bandaged ones.
The Rehab Most Runners Skip (But Shouldn’t)
Too many people ice, rest, then jump right back into training. That’s how you end up with chronic ankle instability or repeat sprains.
Take a few extra days to do the stuff that keeps you out of the injury cycle:
Single-leg balance (stand on one foot, close your eyes = fun times)
Resistance band ankle movements (side, up, down)
Calf raises + eccentric lowers
Short foot exercises for arch control
Train your ankle to react, stabilize, and handle uneven ground. That’s how you bulletproof it for the long haul.
If your ankle’s sore for a day and it improves with rest? You’re probably good.
But if it’s not getting better—or getting worse—you’ve got to address it before it blows up into something worse.
2. Achilles Tendinitis
Feel that dull ache in the back of your ankle? That’s likely Achilles tendinitis.
The Achilles tendon is your running shock absorber.
It connects your calves to your heel and handles a ton of force with every step.
But here’s the thing—it’s not invincible.
Most Achilles issues don’t start with a bang—they creep in. Maybe it’s a little stiffness in the morning.
Or some tightness in the first mile that eases up… only to come back with a vengeance after your run.
That’s your warning sign. Ignore it, and you’re asking for more trouble. You don’t want that right?
What Causes It?
Too much mileage, too fast
Hill repeats or speedwork overload
Crappy shoes with no heel support
Biomechanics gone rogue (think overpronation or weak glutes)
In short, it’s an overuse injury. The tendon gets micro-tears, doesn’t get time to heal, and then starts rebelling—hard.
Treatment Game Plan
Here’s how to treat this annoying injury:
Step 1: Dial It Back
Rest or switch to biking, swimming, or elliptical for at least a week or two. Cross training can really help. You’re not being lazy—you’re letting the tendon catch its breath. Avoid hills, speed, and long mileage until things calm down.
Step 2: Calm the Fire
Ice 15–20 mins post-activity
Elevate when you can
Maybe take anti-inflammatories for a day or two (but don’t rely on them long-term)
Step 3: Start Gentle Movement
Once pain eases:
Try ankle mobility (like tracing the alphabet with your toes)
Begin eccentric heel drops—stand on a step, rise with both feet, lower slowly on the affected side. This is gold for tendon healing.
Start with both feet. Build to single-leg. Aim for 3×15, once or twice a day. Don’t push through sharp pain, but mild discomfort is okay.
You can also try:
Calf raises
Calf raises with a small ball between your heels (activates inner calf and stabilizers)
Coming Back to Running
Use the “pain scale” rule:
Pain during a run = 0–2 out of 10? Probably okay.
Worse the next morning? Not okay.
Pain during running goes above a 3? Shut it down.
Think of tendon pain like a blinking check engine light. You might be fine, but ignore it, and you’ll stall out hard.
What If It Won’t Go Away?
Still limping after doing all the right things? Time to call in the pros:
Heel lifts to reduce tendon strain
Night splints
PRP injections (that’s Platelet-Rich Plasma)
In worst-case scenarios? Surgery. But that’s rare.
Most runners recover just fine with rehab and smart adjustments.
Mild cases = a few weeks. Chronic cases? 2–3 months. Tendons are stubborn, but they heal.
You just gotta give them the time.
Don’t rush it. Rehab like it matters—because it does.
3. Stress Fractures
Every runner’s nightmare: the stress fracture.
One day it’s a dull ache in your ankle or foot.
A few runs later, it’s stabbing pain that won’t let up—even when you’re just walking to the kitchen.
Unlike a sprain, this doesn’t come from a fall or twist.
It builds up quietly, then boom—sidelined for months.
How to Know It’s a Stress Fracture
Here’s the pattern:
Pain is localized—you can point to the spot
Pain increases with impact
You might feel it even when walking
Tender to the touch
Maybe mild swelling
If you’ve been pushing mileage, upping intensity, or skipping rest days, this pain could be your bone saying: “I’m done.”
6–8 weeks of no running or impact. Let the bone knit itself back together.
Boots or crutches may be needed—depends on where the fracture is.
Something like a fibula fracture? Might just need rest and a brace.
Talus or tibia? You’ll likely need to stay off it completely.
And don’t forget your nutrition. Calcium and vitamin D need to be dialed in—ask your doc if supplements make sense. Bones can’t heal without the right building blocks.
Can You Cross-Train?
Yes, but only if it’s pain-free. Deep water running, swimming, or maybe even cycling (if and only if it doesn’t stress the injured area) can keep your cardio up.
But don’t assume every cross-training option is safe. For example, even cycling might irritate a foot fracture if pushing on the pedals hurts. When in doubt, ask your doc. This is one of those “don’t guess” situations.
4. Tarsal Tunnel Syndrome
Ever feel burning, tingling, or numbness creeping into your heel, arch, or toes—especially mid-run?
Like your foot’s falling asleep in a painful way?
That’s not plantar fasciitis.
That could be Tarsal Tunnel Syndrome (TTS).
It’s basically carpal tunnel… in your ankle.
There’s a tiny space on the inside of your ankle called the tarsal tunnel.
Nerves, tendons, and vessels run through it.
When that space gets tight or inflamed, the posterior tibial nerve gets squeezed—and starts throwing a fit.
Symptoms to Watch For
Burning or tingling near your arch or heel
Weird numbness that lingers
Vague aching that gets worse after long runs
Foot feels “off” or “electrical” but not in a sharp way
It’s sneaky. Some runners mistake it for plantar fasciitis or just a cranky arch.
But this is nerve stuff—not tendon or bone. And if you keep running through it? It’ll just get worse. Way worse.
What Causes It?
Overpronation (foot rolling inward too much)
Flat feet or collapsing arches
Swelling from a nearby tendon injury or old sprain
Tight calves or ankle structures
Rarely: bone spurs, cysts, or even systemic issues like arthritis or diabetes
Bottom line: if your foot mechanics are off, your nerve takes the hit.
Treatment: Relieve the Pressure
Take the following steps to treat what’s ailing you:
Support your arch – Get into stability shoes if you’re overpronating. Add an orthotic or arch support insert. The goal: stop that inward collapse so the nerve isn’t getting crushed with every step.
Back off running – At least for now. Don’t run through nerve pain. That burning and tingling? Your body waving a red flag.
Reduce inflammation – Ice the area to shrink swelling. NSAIDs can help in the short term, but they won’t fix a mechanical issue.
Still hurting? See a doc or podiatrist. They might try a corticosteroid injection into the tunnel. Worst-case scenario: surgery to release the nerve—but that’s rare.
Bonus Tips
Work on calf mobility—tight calves can tug on structures around the nerve
Compression socks might help reduce fluid build-up
Cross-train with low-impact stuff like swimming or cycling (if it doesn’t trigger symptoms)
Be patient—nerve stuff heals slow. If you rush it, it’ll just bounce back louder.
How to Treat Running-Related Ankle Pain (Step-by-Step)
Let’s say the damage is done and you’re hurting. What now? Time to go into fix-it mode.
Step 1: Immediate First Aid – R.I.C.E.
Classic protocol still works. Hit it hard for the first 48 hours.
R – Rest. Get off it. That doesn’t mean lie in bed for three days. But avoid loading the ankle. If it’s bad, maybe crutches for a day or two.
I – Ice. Throw some cold on it. 15–20 minutes at a time, 3–4 times a day. Bag of frozen peas works just fine. Cold numbs the pain and tamps down swelling.
C – Compression. Wrap it. Elastic bandage, compression sleeve, or KT tape—whatever gives support without cutting off circulation. Keeps the swelling in check and reminds you not to push it.
E – Elevation. Kick your foot up above your heart. Lay back, prop it on a pillow, let gravity help. Especially useful early on when swelling’s at its worst. Here’s the full guide to injury recovery.
Extra Notes:
Don’t switch to heat too early—only after the swelling is gone.
Kinesio tape can be helpful if you know how to apply it (or get a PT to do it).
If walking hurts, don’t run. That’s not toughness—it’s self-sabotage.
Getting Back to Running (Without Screwing It Up)
So you’ve rested, done your rehab homework, and your ankle finally feels decent.
Awesome. But before you sprint back into your old routine like nothing happened—pause. I’ve seen too many runners rush this and wind up back at square one.
Your first outing back? Try something like: jog 1 minute, walk 2 minutes, repeat for 10–15 minutes. See how the ankle feels that day—and more importantly, the next day.
If it’s all clear (no new pain, just a little stiffness), next run might look like 2 minutes running, 2 walking for 20 minutes. Then 5 run / 1 walk. You get the picture.
Take it one step at a time. Only bump one variable at a time—either the total time or how long you run between walks. Not both.
Stick to flat, predictable surfaces early on. I’m talking treadmill, smooth road, or track.
Save the rocky trails and hills for later—especially if you’ve had Achilles or ligament issues.
Hills = more strain. And leave the speedwork out of the picture for now. All your early miles should be at a pace where you could hold a conversation.
A lot of coaches (myself included) use the 50% rule: start at half of your pre-injury weekly mileage during week one. If that feels good? Bump it by 10–15% per week. If not? Back off.
Some mild discomfort early on is totally normal—as long as it’s low-level (think 1–2 out of 10) and doesn’t get worse over time.
But if you’re limping, gritting your teeth, or waking up swollen the next morning? You’re not “toughing it out”—you’re risking a setback. Take the hint and slow down.
Here’s something runners don’t realize until it’s too late: your ankle might be the site of the pain, but the problem could be coming from upstream.
Weak hips, sloppy core control, lazy glutes—they all mess with your form and pile stress on your lower legs.
Use this downtime to shore up the rest of your body.
Stuff like clamshells, glute bridges, side planks, single-leg squats—yeah, it’s not glamorous, but it’s how you build better mechanics and run smoother.
If your hip stabilizers are weak, your form falls apart as you fatigue, which means your foot collapses inward and your ankle pays the price.
Want to run pain-free long-term? Treat your core and glutes like part of your “ankle plan.”
I’ve seen runners come back from ankle injuries stronger than they were before—because rehab forced them to address all the weak links they were ignoring.
How to Not End Up Injured Again
Let’s be real—rehab sucks. You don’t want to go through that again.
Here’s how to make your ankles more bulletproof moving forward.
Strengthen the Whole Support Squad
Ankles don’t do it alone. They rely on solid backup from your calves, peroneals, tibialis posterior, and even the tiny muscles in your feet. Weakness in any of these is a disaster waiting to happen.
Calves (Gastrocnemius & Soleus): Handle your push-off. Do both straight-leg and bent-knee calf raises a few times a week. Strong calves = stronger Achilles = less overload on your ankle.
Peroneals: Run along the outside of your lower leg. They help stop ankle rolls. Hit them with lateral band walks, resisted eversion, and side-to-side hops. Research shows weak peroneals are linked to a higher sprain risk. Don’t skip this one.
Tibialis Posterior: Deep muscle on the inside of your ankle. Controls pronation and keeps your arch lifted. Try heel raises with a ball between your heels or banded inversion.
And don’t forget your foot muscles. Towel curls, toe spreads, barefoot balance work—it’s all part of building a stable foundation. Strong feet = better shock absorption = less ankle strain.
Honestly? I coach most of my runners to include 1–2 ankle-focused strength drills in their warm-up or cooldown year-round. Keeps things tight without adding big time commitments.
Train Your Balance (Like, Every Day)
You don’t need to be on a BOSU ball at the gym for an hour. Start simple.
Stand on one foot while brushing your teeth.
Add hop-to-balance drills post-run.
Do lateral skater hops or yoga balance poses like tree or warrior III.
Balance training isn’t just for rehab—it prevents you from needing it again.
Studies show athletes who train balance have way fewer ankle sprains. It teaches your body how to catch itself when things get wobbly.
Try a 5-minute ankle circuit after your run:
Single-leg stands
Single-leg hops in place
Lateral skaters
Slow controlled toe walks
Fun, simple, and effective.
Don’t Sleep on Your Shoes
Shoes matter. No magic pair will prevent every injury, but the wrong ones can absolutely make things worse.
What to look for:
If you’ve got low arches or overpronation, try stability shoes or custom inserts. They can prevent your foot from collapsing inward too much and straining the ankle.
Got high, stiff arches? You probably need more cushioning to absorb shock.
Most important? A study showed runners who picked shoes based on what felt best had fewer injuries. Trust your body here.
And if something feels off—too tight, too sloppy, rubbing your ankles raw—fix it. Hit up a proper running store, get your gait checked, and find what works.
What Ankle Pain Is Telling You (And Why You Should Listen)
Your ankles might seem like background players in the running world, but trust me—they carry the show.
Literally.
And when they start talking, you better pay attention.
Most ankle pain isn’t random. It’s feedback. It’s your body saying:
“Hey, those shoes are shot.”
“Your stabilizers are weak.”
“You ramped up mileage too fast.”
“This terrain is wrecking me.”
Ignore those whispers, and they turn into shouts. Don’t wait until it’s a full-blown injury to respect the warning signs.
This isn’t about being soft—it’s about being smart.
Share Your Lessons
Got a go-to ankle drill that saved your training cycle? A shoe that helped stabilize your stride? A brutal mistake you swore you’d never repeat?
Share it.
We’re a community, and your story might be exactly what another runner needs to hear to avoid their own injury spiral.
Final Word: Your Ankles Are Talking—Are You Listening?
You don’t have to fear every ache—but you do have to respect what your body’s telling you.
Tune in early. Train smart. And remember:
Tough runners don’t push through pain blindly. They adjust, adapt, and show up consistently. That’s what builds longevity.
Here’s to strong ankles, smarter decisions, and many smooth miles ahead.
Have you battled ankle pain during training? What helped the most in your recovery or prevention? Drop your tips or story below—your experience might save another runner’s season.
I’ll be upfront with you—I’ve never had bunions myself.
But as a running coach, I’ve worked with plenty of runners who have, and I’ve seen firsthand just how much those bony little troublemakers can derail training.
One older runner I coached used to describe her bunion as “a pebble I can’t shake out of my shoe.”
She wasn’t exaggerating.
Every mile felt like a negotiation between her love of running and the pain in her foot.
Another runner kept trying to tough it out, only to end up sidelined not by the bunion itself, but by the knee and hip issues it set off when she unconsciously changed her stride.
That’s the thing about bunions—they’re not just some cosmetic bump you ignore.
They affect how you move, how your joints line up, and ultimately how long you get to keep running strong.
And if you’re thinking this is only an issue for older athletes, think again.
I’ve coached younger runners with bunions that showed up early and just got worse with mileage and poor shoe choices.
So let’s dig in—what exactly are bunions, why do they matter so much for runners, and how do you manage them without hanging up your shoes?
What’s a Bunion Anyway (And Why Should Runners Care)?
So what even is this little devil?
A bunion—officially called hallux valgus—is that bony bump at the base of your big toe.
It happens when the first metatarsal bone drifts outward and the big toe starts leaning in like it’s trying to make friends with its neighbors.
For runners, this matters. A lot.
That joint—your first MTP—is a powerhouse during toe-off.
When it’s outta whack? Every step starts to feel like you’re rolling your foot over a sharp pebble.
And bunions aren’t rare either. About 23% of adults under 65 have one.
For folks over 65, it jumps to 36%. These things don’t care how fast you are—they just show up and cause problems.
A lot of runners start unconsciously shifting their stride to dodge the pain.
Maybe you start landing on the outer edge of your foot, or limping without realizing it.
Sounds harmless, right? Nope. That little adjustment can mess up everything—your knees, hips, even your lower back.
I’ve coached runners who ended up sidelined not from the bunion itself, but from the cascade of issues it started.
Can You Still Run with a Bunion? Heck Yes—But Run Smart
Short answer? Yep. You can absolutely run with a bunion.
But it’s gotta be on your terms—not the bunion’s.
For minor bunions that just get cranky every now and then, a few simple tweaks can keep you cruising.
I’ve seen plenty of folks who treat their bunion like an annoying teammate—just something to manage.
The right shoes, toe spacers, maybe some tape, and they’re back to business.
But if your bunion’s getting worse?
If it feels like someone’s stabbing your toe every time you push off?
That’s your body waving a big red flag.
Ignoring it doesn’t earn you a medal—it earns you time off.
If you’re limping, swelling up after every run, or avoiding your usual pace?
Don’t power through. That’s not being tough—that’s being reckless.
Time to do something about it.
Run or Rest? Here’s Your Gut-Check Moment
Here’s a quick cheat sheet to help you decide if it’s time to run, rest, or reboot:
🟢 Mild ache or blister now and then? You’re probably fine to keep running. Just be proactive. Check your shoes (wide toe box is king), toss in a spacer, maybe tape up. Keep tabs on how your foot feels during and after runs.
🟡 Pain mid-run, swelling after, or gait getting funky? Time to pump the brakes. You don’t have to shut it all down, but cut back on mileage, skip the speed work, and maybe add in some cross-training until things cool off. This isn’t “normal runner stuff”—it’s your body asking for help.
🔴 Altering your stride, limping, or toe joint throbbing after every run? That’s your body saying “enough.” This is when it’s smart to get checked out by a sports podiatrist. You don’t need perfect feet to run, but you’ve gotta protect the ones you’ve got.
I’ve seen runners bounce back strong just by giving themselves a short break and making smart adjustments. Long-term running wins come from playing the long game—not grinding through pain like a hero.
Why Runners Get Bunions (Let’s Be Real About It)
Yeah, those nasty bumps on the side of your big toe joint that make your shoes feel like torture devices.
Bunions suck.
But runners? We get them more than most, and there’s usually more than one reason why.
Let’s break it down without sugarcoating it.
1. Born With It? Welcome to the Club
First off, blame your parents (lovingly).
If your mom or dad had bunions, odds are you’re set up for the same fun.
It’s all about how your foot’s built—flat feet, loose joints, all that biomechanical jazz that makes your forefoot a wobbly mess.
If you’re a runner who overpronates (aka your foot rolls in too much), you’re throwing extra pressure on the inner edge of your foot.
That big toe joint—the first MTP joint—takes a pounding.
One step at a time, it starts drifting sideways like a busted shopping cart wheel.
The Journal of Strength & Conditioning Research even backs this up: overpronation can gradually deform that joint. And once that starts? The bunion train’s already left the station.
I’ve coached plenty of runners with flat feet who kept wondering why their big toe looked like it was trying to escape. It’s not rocket science—it’s mechanics.
2. Crappy Shoes: The Silent Bunion Builders
Here’s the truth—shoes alone don’t “cause” bunions. But they can take a small issue and throw gasoline on it.
According to Yale Medicine, narrow shoes, pointy toes, and high heels just crank up the pressure.
Everyday dress shoes? Offenders. Heels? Don’t even get me started.
But for runners, it’s often racing flats or snug trainers that do the damage.
If your big toe is getting shoved inward every step, that bunion bump is taking the hit.
I had a runner come to me wondering why her bunion flared up every time she raced.
She was wearing narrow shoes with a tight toe box—classic mistake.
You’ve got to let that toe breathe, or else.
And yep, bunions show up more in women. Not a coincidence. Narrow shoes, more flexible joints, fashion torture devices—it all adds up.
3. Running Ain’t the Cause—But It’ll Speed Things Up
Here’s the deal: running doesn’t cause bunions from thin air.
But if you’re already predisposed—bad foot mechanics, bad shoes, or just bad luck—then every mile adds fuel to the fire.
Each foot strike hits the forefoot. If your alignment’s even slightly off? Thousands of steps will yank that big toe further out of whack.
One study on foot and ankle issues called out repetitive activities like jogging as a trigger for bunion development when the joint is already vulnerable.
I’ve seen it play out: runners who come in with a small bump and a big training load.
They don’t tweak anything—no shoe changes, no support—and a few months later, it’s way worse.
And let’s not forget the classic irritation dance: bunion rubs inside your shoe → inflammation → swelling → more misalignment. It’s a vicious cycle.
4. Bonus Culprits: Hormones, Age, and Life on Your Feet
Other stuff piles on, too.
Women deal with looser ligaments thanks to biology (and again, heels).
Some folks with conditions like rheumatoid arthritis or generalized ligament laxity? Yeah, they’re playing this game on hard mode.
Even pregnancy can stir the pot.
The hormonal changes can loosen up your foot’s structure and—bam—suddenly that mild bunion’s growing up fast.
Oh, and shoutout to all the runners who stand all day for work—nurses, teachers, retail warriors—you’ve got double duty on those feet, which means bunions can worsen faster.
Tape It Up Like You Mean It: Quick Fixes for Bunion Pain
Here’s the deal: that bump on your foot? It loves to rub the wrong way inside your shoe.
The right tape job? That’s your shield.
I’ve seen runners go from limping to cruising just by taping smart.
My go-to? Sports tape or kinesiology tape.
Wrap it right over the bunion before your sock goes on.
Make sure it sticks to the skin around it—not just the bump—so it stays put.
Some old-school road warriors swear by duct tape.
Yeah, duct tape. One buddy of mine said, “Band-aids fell off as soon as I started sweating.
Duct tape? Stayed on the whole marathon.” No joke.
You can also grab moleskin or those donut-shaped pads from the pharmacy.
Cut a hole in the center, slap it around the bunion, and boom—pressure offloaded.
Your shoe hits the pad, not your foot. Clean. Simple. Game-changer.
Blister problems? Tape might be your best defense. I’ve had clients who couldn’t fix bunion blisters with double socks or bandages—but a decent tape job? No more hot spots.
Toe Spacers: Not Magic, But They Help
Okay, toe spacers. You’ve seen them, probably tried them—or at least wondered if they actually do anything.
Let’s clear it up.
Those little silicone dudes? They aren’t gonna “correct” a bunion.
That ship sailed when the toe bone started moving.
But they can give you some real relief, especially if your toes are stacking or rubbing.
Here’s the real talk: research shows spacers can ease pain and improve alignment during your run—even if they don’t actually change the angle of the bunion.
One study found runners had less pain using toe splints during runs—even though the bone didn’t move.
Another study found toe spacer insoles beat out night splints when it came to pain relief. So yeah, they work—just not in a bone-fixing kind of way.
Now, can you run with them? Depends on the spacer. The squishy gel ones that fit between your big toe and second toe are usually low-profile enough to slide into your shoes.
There’s a brand called Correct Toes that a running podiatrist designed specifically for this. Smart guy. A lot of runners start wearing them around the house or in casual shoes to ease into it.
Also worth a look: Bunion sleeves.
They go over the joint and give you a bit of cushioning. Some are slim enough to run in, too.
And then you’ve got night splints—big, bulky contraptions that hold your toe out straight while you sleep.
They aren’t gonna cure you, but they can help maintain flexibility and stop your toe from curling in more.
A Healthline review summed it up best: these devices help with pain, not correction.
But hey, pain relief? I’ll take that every day of the week if it keeps me running.
Train Smarter, Not Just Harder
Alright, gear’s only part of the fix.
If you’ve got a bunion and still want to run (been there), you’ve gotta tweak your routine a bit.
Not talking full-on couch mode — just smart adjustments to keep you in the game.
1. Run on Softer Ground
Hard pavement is brutal when you’ve got foot issues.
That shock goes straight through your forefoot — aka bunion zone.
Trails, grass, even a treadmill with decent cushioning are way easier on your joints.
I’ve had clients swap just two road runs a week for trail work and they noticed a difference within days.
Also, watch out for roads with a tilt (cambered shoulders).
Running the same direction on a slanted road every day? That’s a recipe for aggravating one foot more than the other.
Switch it up, run both sides, or find a flatter path.
2. Shorten Your Stride
This one’s huge.
Overstriding jacks up the pressure on your big toe at push-off.
Take quicker, shorter steps instead. Picture an easy, high-cadence jog — it naturally lightens the load on your feet.
Rest days matter too. Use them. Ice your bunion, do some foot stretches, and let the swelling die down.
I had a runner who took two weeks off, mixed in some PT, and came back basically pain-free. Worth it.
5. Pain = Info, Not a Challenge
This one’s hard for us runners to hear: don’t push through bunion pain.
It’s not the good kind. It doesn’t toughen you up — it sidelines you.
If your toe starts to bark mid-run, cut it short, tape it up, and reassess. Don’t run yourself into a forced layoff.
As someone wisely said in a forum: if it hurts every time you run, go see a pro. Don’t be stubborn.
Foot Fix: Exercises That Actually Help with Bunions (Yes, Really)
Let’s get this straight from the start—foot exercises won’t magically straighten out a bunion like some Instagram miracle hack.
That bump on your big toe? It’s bone, not Play-Doh.
But here’s the good news: training the small muscles in your feet can still make a world of difference.
Stronger feet mean better alignment.
Better alignment means less pain.
And when the big toe can pull its weight (literally), everything downstream—your stride, your balance, your push-off—feels smoother.
I’ve seen it with runners I coach, and I’ve felt it myself.
Ready to put your feet through their paces? Here’s your foot gym routine:
Toe Curls with a Towel
Old-school, but still golden.
Lay a towel flat on the floor.
Sit down barefoot and use your toes to claw it toward you, then push it back out.
Do 2–3 sets of 10 reps per foot.
What’s happening here? You’re working your foot’s intrinsic muscles—these don’t get much love but are crucial for toe control. When those get stronger, the bunion joint isn’t doing all the heavy lifting. You might just feel that dull ache dial down a notch.
Toe Spreads (AKA “Toe Yoga”)
Sounds chill, feels tough.
Try to spread your toes apart like you’re making a claw.
Focus on moving your big toe away from the rest.
Do this standing or sitting—whatever works.
This one targets the abductor hallucis—that’s the muscle that fights against the bunion’s inward pull.
You’re retraining it to do its job. Do 10–15 reps, a few times a day. Think: desk break or TV time.
Marble Pickups
Turn your foot into a claw machine.
Drop 10 marbles (or coins or small rocks) on the floor.
One by one, pick them up with your toes and drop them in a cup.
Go for 10 per foot.
You’re working toe dexterity and flexor strength here. Translation? More stability and power during toe-off when you run. It also makes you feel weirdly accomplished for mastering a kids’ game.
Calf Stretch & Ankle Mobility
Don’t skip this—it’s a bunion secret weapon.
Tight calves mess up your stride. When your ankles can’t flex well, your foot rolls in too much (hello, overpronation), which throws even more pressure onto that bunion joint.
Stretch those calves—straight-knee and bent-knee versions against a wall. Also throw in ankle circles and some shin rolling (foam roller or tennis ball works great).
Big Toe Mobility Work
Stiff toe = cranky toe.
Use your hands to gently pull your big toe straight, then move it up and down. This keeps the joint from locking up.
Want more challenge? Loop a resistance band around the big toe, anchor it, and pull outward.
This is resisted abduction—teaching the toe to stay in line. Even doing slow toe circles with your hand helps with mobility.
Foot Doming (aka “Short Foot”)
Sounds weird, feels amazing.
Imagine pulling the ball of your foot toward your heel, but don’t curl your toes. You’re lifting your arch to create a little “dome.”
This one targets the deep foot stabilizers. Strong arch = better pressure distribution = less bunion stress. Try holding it for 5 seconds, then relax. Repeat a bunch.
Make It Stick: The Bunion Game Plan
Do these 3–5 times a week. Treat them like you treat your warm-ups or foam rolling—non-negotiable.
One podiatrist told me that building foot strength boosts balance and makes your feet work smarter, not harder.
Totally tracks with what I’ve seen in runners, especially those dodging bunion surgery.
When to Think About Surgery (And What It Really Feels Like)
Alright, let’s get real. No one wants to talk surgery.
It sounds drastic.
But sometimes?
You’ve tried the shoes, the inserts, the rest days, and that damn bunion still feels like it’s stabbing your foot with every step.
If running’s become miserable—or you’re limping just walking to the fridge—it might be time to face the big decision: bunion surgery.
Here’s when I tell runners to seriously consider it:
That pain in your big toe joint just won’t quit—no matter how many orthotics, spacers, or “good shoes” you throw at it.
You’ve backed off running. Heck, maybe you’ve stopped altogether. And even walking still sucks.
The toe is drifting like a slow-motion train wreck—getting worse no matter how careful you’ve been.
You’ve got complications now: bursitis that won’t go away, arthritis setting in, maybe hammertoes joining the party.
And look, I get it—if you’re in your 20s or 30s, a lot of docs might say, “Wait it out.” Bunions can come back.
But guess what? I’ve seen plenty of young runners get the surgery and bounce back better than ever.
If your bunion is genetic and getting worse, it won’t just magically vanish.
The real trick? Find a surgeon who gets runners—not just walkers—and understands your goal isn’t to stroll pain-free, it’s to crush miles again.
So What Happens in Surgery?
Bunionectomy sounds fancy, but at its core, it’s about putting your foot back in working order.
They reposition bones, ligaments, tendons—whatever it takes to straighten that toe.
There are a TON of different surgical methods (we’re talking 100+), but don’t stress. Your surgeon will pick what works for your foot.
For runners, they’ll usually aim to keep your joint moving and get you back on your feet fast.
One of the go-to moves is something called a distal metatarsal osteotomy (fancy name for cutting and realigning the bone), sometimes with soft tissue tweaks.
And yeah, it sounds intense—but I’ve seen runners literally walk out of surgery in a boot.
What Recovery Really Looks Like
Let’s talk recovery. Every surgery’s different, but here’s what I’ve seen most runners go through:
Day 1: You’ll be rocking a post-op boot or stiff surgical shoe. Some people can put a little weight on it right away, depending on the procedure. Others need crutches or a knee scooter for a few weeks.
2 Weeks In: Stitches usually come out around day 10–14. You’re still protecting the foot, maybe starting gentle mobility if the doc gives the green light.
4–6 Weeks: This is when the magic starts. Bones start knitting together. You might ditch the boot and lace into a wide sneaker. PT usually kicks in now—gotta get that strength and range of motion back.
8–12 Weeks: You’re on the comeback trail. Some runners start easing into jogging around this time. According to a sports podiatry source, you might even hop on an anti-gravity treadmill earlier if your doc says it’s cool. By three months, you could be running short stints again—just be smart about it.
3–6+ Months: Time to rebuild your miles. The foot’s still getting stronger, but most runners are back to regular runs by this point. A full comeback—where the swelling’s gone and everything feels solid—can take up to a year. But most folks feel great long before that.
Real Runner Comebacks
I’ve seen it firsthand—and so have thousands of others.
One runner told me she was back at it by week nine, no regrets, and wished she’d done it sooner.
Another was jogging again by month three, training smart, and gearing up for races by month five.
Sure, not every case is smooth. Some folks rush back and pay for it—scar tissue, stiffness, setbacks.
One runner in her 20s told me she pushed too soon, skipped PT, and walked too much too early because of school. Her result? Some stiffness that lingered. She still runs, but she learned the hard way: respect the recovery.
Pick the Right Surgeon (And Ask the Right Questions)
If you’re thinking surgery, don’t just pick any doc from a Google search. You need someone who knows feet and understands athletes.
Ask them:
Have you worked with runners?
What procedure do you recommend for someone chasing half-marathons?
Sometimes, they’ll go with a slightly more aggressive fix to make sure it stays fixed. That might mean a few extra weeks on the bench, but hey—better that than a comeback bunion haunting you later.
My Real-World Coaching Tips for Running with Bunions
Look, I’ve coached runners with all kinds of foot quirks—some with bunions so gnarly they looked like they were growing a second big toe.
But guess what?
They still got their miles in.
Bunions don’t have to bench you. You just gotta be smart about it.
Here’s what’s worked for me and my runners—the kind of stuff you won’t always hear in a sterile doctor’s office.
Ever heard of the “bunion window”? It’s not a house thing—it’s a lacing trick. You skip an eyelet or two right over the bunion to ease off the pressure.
Some runners I’ve coached swear by lacing normally up to the last two holes, then crossing the laces underneath before tying. It lifts the shoe right off the bunion zone. Less pressure = less pain. Period.
I had one runner come back after trying this and say, “Coach, my foot stopped going numb mid-run!” A little tweak, big difference. Don’t overthink it—YouTube “bunion lacing” and you’ll be good in five minutes.
Sock Smarts: Your Toes Need Breathing Room
Yeah, socks matter.
Toe socks (like the ones from Injinji) are lifesavers. They keep your toes from playing bumper cars inside your shoe—especially if your bunion’s pushing the big toe into its neighbor.
I’ve seen blisters the size of nickels because of this. One runner told me regular socks felt like a “vise grip.” Switched to toe socks, problem solved.
Also, ditch anything with seams right over the bunion. You want smooth, soft, and breathable. Some folks even stick bunion pads on their socks during long runs. Not a bad move.
Play around with sock thickness too. Thin for space, thick for padding—it all depends on how your shoes fit.
Post-Run Foot TLC: Cool It Down, Stretch It Out
You iced your knees after long runs—why not your bunions? After pounding pavement, hit that bunion with ice for 10 minutes. Follow that with toe stretches or pop in some toe spacers while you sip your recovery shake.
Keep those calluses trimmed, too. A pumice stone can work wonders. Dry, crusty bunion skin = blister central.
Rotate Shoes & Change It Up
Different shoes hit your feet in different ways. If you’ve got more than one pair, rotate ’em.
It spreads out the pressure and lets your feet breathe.
Same goes for orthotics—try switching between runs with and without them, if your doc gives the okay.
And when you’re not running? Ditch the heels or dress shoes. Go comfy. Supportive sandals, athletic shoes, or even barefoot at home (if it’s safe) are golden.
Form Fixes: Run Smarter, Hurt Less
Good form = less pain. I always tell runners: aim for a midfoot strike and boost that cadence. Somewhere around 170–180 steps per minute is the sweet spot.
If you’re heel-slamming or toe-jamming every step, your bunion’s gonna scream.
And if you overpronate? Get some stability shoes or orthotics—don’t mess around.
Bunions already twist your foot. Overpronation just makes it worse.
Don’t forget: strong glutes and hips help your form. It’s like fixing a roof by reinforcing the foundation. Worth it.
💬 When’s the last time you checked your form or cadence?
Foot Massage = Foot Heaven
Grab a lacrosse ball or golf ball. Roll it under your foot for 2–5 minutes after a run. It loosens tension and gets blood flowing.
I like hitting the forefoot right under the bunion joint—feels like you’re unlocking your foot. You can also gently massage around the bunion. Don’t go Hulk on it—just enough to ease the tightness.
Be Smart on Trails
Trails are awesome. But if they’re super rocky or off-camber, they can jack up your toe alignment—especially the big toe. That’s bunion trouble waiting to happen.
Stick to smoother trails if you can. I’ve had runners switch sides on the track every mile to avoid always leaning into the curve on the same foot. Small stuff like that adds up.
Slow Changes = Happy Feet
New shoes? New orthotics? Toe spacers? Ease in. Don’t go hammer out a 10-miler with brand-new gear. Your feet need time to adjust.
Same for bunion exercises. They’ll help long term, but the first week might feel like your foot hit the gym. That’s normal. Just build up.
Pain ≠ Progress. Know When to Adjust
I’m all for pushing hard. But there’s a difference between that satisfying post-run soreness and sharp bunion pain. That pain? It’s your body saying, “Hey, fix this before it gets worse.”
Don’t ignore it. Work with it. Plenty of runners crush marathons with bunions—it’s all about managing them the smart way.
Keep the Joy First
Above all, make sure running stays something you love. That might mean trading roads for trails. Or backing off pace goals while you heal. Or just having a laugh when your bunion acts up again (“Great, it’s throwing a tantrum today”).
Celebrate the good runs. Laugh off the weird ones. The foot freakouts, the sock drama, the surprise blisters—it’s all part of the adventure.
And remember—every runner’s got something. Plantar fasciitis, old IT band flare-ups, knees that creak like haunted doors. Your “something” just happens to be a bunion. It’s not your identity. It’s just one bump in the road (literally).
Keep running hard. Run smart. And run because you love it—bunions be damned.
Let’s be real—nobody signs up for running expecting their ears to scream mid-run.
Legs? Sure.
Lungs? Absolutely.
But that weird, stabbing ache in your ears? That one catches you off guard.
But it happens. I’ve been there—out on a cold, windy morning, cruising through the miles, only to feel like someone jammed an ice pick in my ear canal.
And here’s the thing: just because it’s not a “classic” running injury doesn’t mean it won’t take you down.
Ear pain while running is real. It’s annoying. And it’s totally fixable—once you know what’s causing it.
Quick Answer: Why Do My Ears Hurt on Runs?
Most of the time, it’s either:
Cold air hitting sensitive nerves
Pressure changes inside your ear
Something irritating your ear canal (like earbuds that don’t fit)
Other times, it’s a sneaky cause—jaw clenching, acid reflux, or even blood vessel constriction when temps drop.
Let’s break it down runner-style—simple causes, real fixes.
1. Cold Weather = Cold Ears = Pain
Running in cold or windy weather is one of the top reasons your ears hurt.
Your ears don’t have much insulation—no fat, no muscle—so they lose heat fast. The wind cuts through them, the blood vessels constrict, and bam—deep, aching ear pain.
I’ve had runs where the air was so cold it felt like needles in both ear canals. It even gave me a migraine afterward in some cases. It really sucks I can tell you.
Fix it:
Cover your ears. Always.
Wear a fleece headband, buff, beanie—whatever keeps the cold out.
I’ve run with a buff folded double under a cap in sub-40 temps. Zero ear pain.
If it’s below freezing? Double up. I’ve used earbuds + fleece to trap warmth.
💡 Bonus tip: If your ears are still red and throbbing an hour after your run, that’s a warning sign—could be early frostbite or something deeper. Don’t ignore it.
2. Earbuds That Don’t Fit (or Music That’s Too Loud)
If you run with music and your ears start hurting mid-run, your earbuds might be the problem.
Too big? They press and bruise.
Too small? They move around and irritate your canal.
Shape just wrong? That pressure builds and turns into pain.
I once had a pair that felt great walking around—but five miles in, it felt like they were drilling into my skull.
Fix it:
Switch to earbuds with adjustable tips (S/M/L). Fit matters.
Or go totally in-ear-free: bone conduction headphones (like AfterShokz) sit outside your ears—tons of runners swear by them.
If you’re set on earbuds, clean them regularly. Sweat + wax = irritation.
And if sweat’s pooling in your ears? Pause and dry them mid-run. Seriously.
When you run in the cold, your body diverts blood to your core to keep you warm. That means less blood flow to your ears, which are already thin-skinned and exposed.
The result?
Cold ears
Pain from lack of circulation
That “stuffed” or ringing feeling post-run
I’ve had runs where my fingers and ears went numb even though I felt fine otherwise. That’s vasoconstriction in action.
Fix it:
Bundle up, even if the rest of you feels fine.
Some runners do better with thin earplugs under a warm headband to trap just enough heat inside the canal.
If you’re running at elevation or in thinner air? Expect this to hit harder. Blood flow’s already challenged.
4. GERD (Acid Reflux): The Gut-Ear Connection
Sounds crazy at first. What does your stomach acid have to do with your ears?
Turns out, a lot.
When stomach acid creeps up into your esophagus or throat during a run, it can irritate nerves (like the vagus and glossopharyngeal) that connect to your ears.
That’s called referred pain—your throat is on fire, but your brain reads it as “hey, my ears hurt.”
I’ve known runners who described their ears feeling “hot,” full, or achy during runs after eating something acidic—like spicy food, tomato sauce, citrus, or even coffee. That’s a clue GERD might be behind it.
And it’s not just theory—around 40% of people with GERD report ear discomfort during exercise. Hard efforts make it worse. All that bouncing?
It can jostle stomach contents upward and aggravate reflux, especially if you ate too close to go-time.
Here’s how to make sure it’s actually GERD:
Burning in your chest or throat while running
Sour taste in your mouth
Need to burp or gag during hard workouts
Post-run hoarseness or throat irritation
Chronic indigestion outside of running
Fix It
Avoid heavy or acidic meals in the 2–3 hours before running
Watch for triggers: coffee, tomatoes, citrus, chocolate, spicy food
Stick to bland, carb-rich pre-run meals (banana, toast, oatmeal work well)
Stay upright post-meal—no yoga or stretches that crunch your gut
If needed, ask your doctor about H2 blockers or antacids (some runners use Pepcid pre-run with success)
Dial back intensity if hard running always stirs the burn
Long-term? Treat the reflux. Chronic acid exposure can mess with more than your gut—it can inflame your Eustachian tubes and lead to ear infections or hearing issues.
Good news: once you’ve got the reflux under control, those weird ear twinges usually vanish too.
Note: If ear pain is your only symptom with zero reflux signs? GERD might not be the issue. But if there’s even a hint of heartburn or throat discomfort, it’s worth exploring.
TMJ & Jaw Tension: Your Face Might Be the Problem
Here’s another silent saboteur: your own jaw.
When things get hard on the run—think hills, intervals, racing—many of us clench.
Hard.
Without even noticing.
That tension travels straight to your temporomandibular joint (TMJ)—the hinge just in front of your ears.
The muscles and nerves in that area are connected.
So when your jaw tightens, your ears can ache, throb, or feel like they’re under pressure.
Fix It
Do a head-to-toe check-in every few miles. Drop your shoulders, unclench your fists, and let your jaw hang slightly open.
I use a simple trick: gently wiggle your jaw every so often to make sure you’re not locked up.
If you clench habitually, try chewing gum or even running with a mouthguard or dental splint (yes, seriously—it works for some people).
Run tall, not hunched—forward-head posture strains the neck and jaw muscles that connect to the ears.
Off the road? Do TMJ stretches, jaw massages, and mobility drills.
Morning runner? You might be starting tight if you grind your teeth at night—hydration and stress relief help.
Oh—and don’t underestimate stress. Mental tension becomes physical tension real fast. Meditation, breathing drills, or even a vent session can unload that subconscious clenching habit.
Ruptured Eardrum: Rare, But Don’t Mess With It
Okay, let’s talk worst-case scenario: a ruptured eardrum.
Is it common for runners? Nope.
Can it derail your training if it happens? You bet.
A ruptured eardrum (aka perforation) is a tear in that thin membrane separating your ear canal from your middle ear.
You’ll usually know when it happens — it’s not subtle.
What It Feels Like
Sharp pain… then weird relief
Fluid or blood draining from the ear
Sudden drop in hearing or a loud ringing
Possible dizziness or balance issues
Sometimes it’s from a nasty ear infection.
Sometimes from trauma — like a slap to the ear, a bad fall, or pressure change on a plane.
But here’s the kicker: running doesn’t cause it — but it can aggravate one if it’s already there.
When Running Makes It Worse
If you’ve got a small tear healing up, even a normal run can make things uncomfortable.
Increased blood pressure during exercise, extra circulation to the head — it can make your ear feel sore or throbbing.
And sweat dripping into a healing eardrum? That’s an infection risk.
So yeah — it’s serious.
What to Do If You Think It’s Ruptured
Don’t run. See a doctor. Period.
Here are the red flags:
Sudden pain that fades to numbness
Fluid leaking (especially bloody or yellow)
Hearing drop or constant ringing
Dizziness or vertigo
You’re not going to “tough this out.” Most cases heal in a few weeks — but only if you treat them right. That means:
No swimming
Careful in the shower
No strenuous exercise until cleared
Your ENT might suggest keeping the ear dry and possibly using antibiotic drops.
They’ll monitor healing — and if the hole doesn’t close naturally, they can patch it with a simple procedure.
Returning to Running
Once you’re cleared, you can get back to easy running — but ease into it.
One athlete I coached wore a sweatband over the ear to protect it from moisture and wind during recovery. She started with short, easy runs — no intervals, no hills — just to keep pressure low while things healed. A couple weeks later, she was back to normal.
So yes — it sounds scary, and it is. But with rest and the right care, you’ll be back on track.
🔁 Just don’t ignore symptoms or push through pain in your ear. That’s not toughness — that’s a shortcut to chronic problems.
Preventing Ear Pain While Running: Quickfire Guide
Here’s your no-nonsense checklist for protecting your ears on the run. Whether you’re battling cold air or a clogged sinus, these habits can save your run (and your hearing).
Cause
Prevention Strategy
Cold Air
Wear ear-warming gear (fleece headband, beanie, buff). Layer up on frigid days.
Earbud Pressure
Choose proper fit. Try open-ear or bone conduction headphones to reduce canal pressure.
Loud Music
Keep volume down. Use noise-canceling buds so you’re not cranking it. Respect your ears.
Sinus Congestion
Clear your sinuses pre-run. Hydrate. Use a neti pot or saline spray. Breathe through your nose.
Acid Reflux (GERD)
Eat at least 2 hours before your run. Avoid acidic foods pre-workout. Adjust meds if needed.
Jaw Tension (TMJ)
Stay mindful — unclench. Check in with your jaw during runs. Stretch/massage if needed.
Ear Pressure / Popping
Chew gum or yawn during hilly runs. See an ENT for chronic Eustachian issues.
General Rule
Know your triggers. If cold, loud noise, or altitude messes with your ears — plan around it.
When to See a Doctor About Ear Pain from Running
Most of the time, ear pain from running is harmless and fades fast once you fix the root cause.
But sometimes it’s more than just cold air or a bad earbud fit.
So how do you know when it’s time to stop guessing and call a doc?
Pain That Lingers
If your ear still aches an hour after your run—or worse, wakes you up at night—that’s not just post-run annoyance.
Mild ear discomfort should go away pretty quickly. If it doesn’t, time to book an appointment.
Hearing Loss, Ringing, or Dizziness
If your ear feels blocked, sounds are muffled, or you suddenly notice ringing (tinnitus), take that seriously.
Dizziness or a spinning sensation (vertigo)? That can mean your inner ear’s involved.
None of that is normal runner’s ear. Call an ENT and get checked.
Discharge or Bleeding
This one’s a no-brainer. Fluid coming out of your ear—whether it’s clear, cloudy, or bloody—isn’t just a little weird.
It could mean an infection or a burst eardrum. Either way, don’t wait. Get help.
Other Alarming Symptoms
If your ear pain shows up alongside a bad sore throat, trouble swallowing, a swollen face, high fever, or a pounding headache, that’s your body waving a big red flag.
Don’t ignore it.
Pain That Keeps Coming Back
Tried everything—new earbuds, warm hats, better breathing—and you’re still wincing every time you run?
It’s time to call in a pro. Could be something deeper like Eustachian tube dysfunction or chronic inflammation.
Let a doctor take a proper look.
Coach Tip
If you’re even asking, “Should I get this checked?” — go.
Better to hear “you’re fine” than wish you had gone sooner.
ENTs can run a quick exam, rule out infections or eardrum issues, and give you peace of mind—or the right meds if needed. Either way, it’s a win.
If you run long enough, your knees are going to complain. That’s just reality.
Almost half of runners get injured each year — and the knee is public enemy number one. Every stride slams force through your legs, so when something’s off (form, strength, shoes, mileage), your knees will let you know.
But here’s the good news: knee pain is usually fixable. And more importantly, it’s usually preventable.
Smart runners don’t ignore pain. They figure out what’s causing it and fix the weak links. You don’t get stronger by running through knee pain — you get injured.
So let’s break it all down. We’ll cover:
The most common knee injuries in runners
How to spot what’s going on
What actually helps you recover
When to DIY and when to call in a pro
Ready? Let’s bulletproof those knees.
Where Does It Hurt? (And What That Tells You)
Knee pain isn’t all the same. Where it hurts gives you big clues.
Use this cheat sheet to spot what might be going on:
Pain Location
Likely Culprit
Front of knee
Runner’s knee (PFPS), Patellar tendinitis
Outside of knee
IT Band Syndrome (ITBS)
Behind knee
Baker’s cyst (popliteal cyst)
Inside of knee
Meniscus tear, MCL sprain
Under the kneecap
Patellar tendinopathy (jumper’s knee)
Whole knee swollen
General sprain or ligament tear (ACL/MCL)
If it’s front-of-the-knee pain, odds are high you’re dealing with runner’s knee — the most common running injury out there. Let’s start there.
Runner’s Knee (Patellofemoral Pain Syndrome)
What It Feels Like:
Dull ache or sharp pain around or behind your kneecap
Worse going downstairs or downhill
Knees get stiff after sitting too long (“theater sign”)
Might pop, click, or grind
Why It Happens:
It’s an overuse issue — usually tied to weak hips, poor movement patterns, or increasing mileage too fast. Your kneecap starts tracking wrong and rubs the wrong way, pissing off the cartilage.
Other triggers:
Weak glutes or quads
Collapsing knees when you run
Old shoes or bad form
Ramping up hills or mileage too fast
Studies say it hits up to 30% of runners. I’ve had it, coached runners through it, and seen it wreck training cycles when ignored.
How to Fix It:
Good news: you can usually fix this without surgery or injections — but only if you get on it early.
Some runners swear by this for stabilization and comfort during recovery runs
Step 3: Fix the Root Cause
This is where most runners fail: they don’t do the rehab. Pain goes away, they jump back into running hard, and bam — it’s back.
What actually works:
Glute bridges
Clamshells
Mini squats
Straight-leg raises
Hip abduction work
Light foam rolling (quads, IT band, calves)
Do this consistently, even after the pain fades. One runner I worked with had PFPS for months. What fixed it? Four months of disciplined strength work, mobility drills, and a smarter training plan.
How to Prevent Runners Knee
Here’s the deal — if you want to avoid runner’s knee, you’ve got to strengthen before you strain.
Most of the time, patellofemoral pain isn’t because your knee is weak — it’s because your hips and glutes aren’t pulling their weight.
Weak glute medius muscles = poor stabilization = your knee tracking all over the place like a busted shopping cart.
What to do about it:
Glute/hip strength = your best insurance. Get on the floor and knock out some:
Clamshells
Side leg lifts
Monster walks with a resistance band
Quad strength matters too — strong thighs help guide the patella. Think:
Wall sits
Step-ups
Eccentric squats
Also, stretch what’s tight:
Quads, hamstrings, calves
And yes, that grumpy IT band zone — foam roll the outer thigh to keep things loose. (Tip: don’t mash it to death. Be consistent but gentle.)
Form check:
Stop overstriding. If your foot’s landing way out in front, you’re asking for trouble.
Slight forward lean, ~170–180 steps per minute = smoother impact, less stress.
Gear check:
Running shoes matter. If you’re pounding miles on dead shoes, replace them. Most last 300–500 miles, tops.
Get shoes that fit your foot type — and don’t cheap out.
IT Band Syndrome
You’re cruising through a run, and then BAM — a sharp, burning pain slices into the outside of your knee like a knife.
Sound familiar? That’s probably ITBS — Iliotibial Band Syndrome — and it’s one of the most common overuse injuries runners deal with.
How ITBS Feels:
Knife-like pain outside the knee, usually mid-run
Comes on at a specific point or mileage — like clockwork
Often worse going downhill or down stairs
May ease when you stop, but comes right back when you start again
May radiate up the side of your thigh, or feel like it’s “catching”
💬 “I could barely make it to mile 4 without it feeling like someone jabbed me with a screwdriver.”
Why It Happens:
The IT band is a thick strap of tissue running from your hip down to the outer knee. When you suddenly boost mileage (especially on hills or downhills) or run with poor mechanics, the band gets tight and irritated where it rubs the knee bone.
Common culprits:
Weak glutes (especially the glute medius)
Poor hip stability
Running on sloped roads or with bowed legs (genu varum)
Lack of stretching, strength work, or proper rest
Training error + tight tissue = pain train.
How to Treat IT Band Syndrome
You know what doesn’t help? Running through it. Trust me.
Step one: Stop the aggravation.
Take a break from running or switch to non-impact cardio (bike, swim, elliptical)
If it’s mild, cut back hard and skip hills and speed
Next, hit RICE hard:
Rest
Ice the outside of the knee (10–15 min post-run or when it flares)
Compression helps if it’s swollen (not common with ITBS but possible)
Elevate if needed
NSAIDs like ibuprofen can help settle inflammation short-term — but they’re not the cure.
Once the pain starts to fade… that’s when the real work begins:
Foam roll the outer thigh and hips daily (light pressure — don’t grind)
Stretch:
Cross one leg behind the other and lean sideways
Glute/hip stretches against a wall or doorway
Strengthen:
Clamshells
Lateral leg lifts
Hip bridges
Single-leg squats
Monster walks
Why? Because your hip stabilizers (especially glute medius) are what keep the IT band from doing all the work.
When to See a Pro:
If pain persists even after rest and rehab
If walking or stairs become painful
If the foam rolling and strength work aren’t helping after a couple of weeks
A PT can help with:
Gait analysis
Taping
Ultrasound, massage, or dry needling
A personalized strength and mobility plan
Cortisone shots? Rarely needed — but can help in severe cases. It’s a band-aid, not a fix. Don’t skip the strength work.
How to Prevent IT Band Syndrome
If you’ve ever felt that stabbing pain on the outside of your knee mid-run, like someone jammed a knife into the side of your leg, you know what IT band syndrome feels like.
Once it hits, you’re not running through it—you’re limping home and Googling stretches in a haze of frustration.
So let’s talk prevention, because you don’t want that pain coming back.
The Fix: Strong Hips, Smart Training
Build strong hips and glutes. Most runners with ITBS have weak hip abductors and underused glutes. Add monster walks, clamshells, and single-leg bridges to your weekly routine—your IT band will thank you.
Stretch it out (yes, even just 2 minutes helps). Do a quick IT band stretch post-run. Doesn’t need to be a full yoga class—just 60–90 seconds each side to keep that lateral chain mobile.
Foam roll like it’s your job. Hit your quads, glutes, hamstrings, and yes—the side of your leg (IT band area). Don’t crush it if it’s super tender, but work around the tight spots to reduce tension.
Progress slowly. Sudden jumps in mileage or intensity? Recipe for breakdown. Follow the 10% rule, and ease into downhills and intervals.
Switch things up. Always run on the same side of the road? That sloped shoulder may be overloading one knee. Reverse direction now and then. Trail runner? Don’t overdose on steep descents. Mix in flat terrain and focus on downhill control—short strides, tight form.
Gait matters. If you’ve got a low cadence, overstride, or your knees collapse inward, ITBS may just be waiting to pounce. A running coach or physical therapist can help you tweak your form. Even something simple like bumping your cadence up to 170–180 can unload your knees big time.
Check your shoes. Worn out? Uneven wear? Toss them. Stick to neutral support unless you’ve got a good reason for something else. And always break in new shoes before going long.
Patellar Tendinitis (a.k.a. Jumper’s Knee)
If you’ve got pain right below your kneecap, especially when running downhill or going down stairs, listen up.
This is one of the top three knee injuries for runners—and one of the most stubborn if you ignore it.
What It Feels Like:
Tender, aching, or burning pain just under the kneecap
Stiff or tight at the start of your run
May improve mid-run, but comes back worse after
Going down stairs or squatting feels sketchy
Pressing on the tendon is ouch
Unlike runner’s knee (which is more diffuse), patellar tendinitis pain is localized and sharp.
What Causes It?
Repetitive overload of the patellar tendon. Too much pounding, not enough recovery.
Common Triggers:
Too much downhill running
Sudden spikes in mileage or intensity
Hill sprints, plyos, or jumping drills
Tight quads or hamstrings (which pull more stress onto the tendon)
Weak thighs or hips (more load on the tendon)
Poor landing mechanics or overpronation
Basically, if your quads aren’t strong or flexible enough to handle the load, your tendon takes the hit—and eventually says, “Enough.”
How to Treat
First rule: Don’t run through it. This isn’t a sore muscle. Keep pushing, and you’ll take a manageable issue and turn it into a months-long rehab project.
Here’s the smart way to fix it:
1. Back Off Running and Jumping
Skip hills, speed, and anything that makes it flare.
Switch to cycling, swimming, or pool running to stay in shape.
2. Ice the Area
10–15 minutes over the tendon, 2–3x/day, especially post-activity.
3. Short-Term NSAIDs (Optional)
Okay for a few days if pain is rough—but don’t rely on them.
Chronic tendinopathy = more about tendon damage than inflammation.
4. Strap It (Maybe)
A patellar tendon strap (those bands just under the kneecap) can help reduce pain by altering how force hits the tendon. Worth trying—but not a cure.
How to Prevent Jumper’s Knee
That deep ache right below your kneecap after a workout? That’s not just “tired legs.”
That might be patellar tendinitis—aka jumper’s knee—and if you don’t catch it early, it’ll catch you off guard later.
The good news? You can prevent it, and if it shows up, you can beat it. But only if you train smart.
Slow Down to Stay in the Game
Jumper’s knee isn’t usually a freak injury—it’s a build-up of overuse and poor mechanics. That’s why gradual progression is your #1 defense.
Follow the 10% rule: don’t add more than 10% mileage or intensity week to week.
If you’re training for a hilly race? Ease into those downhills. Descents load your quads and knees way more than you think.
And don’t forget your rest days. You’re not slacking—you’re rebuilding.
Get Strong, Stay Strong
Strong muscles = less stress on your knees. Focus on:
Quads (lunges, leg press, step-ups)
Glutes and hips (bridges, clamshells)
Calves (heel raises)
Especially the quads—they absorb the shock during downhill running. Weak quads = your tendon takes the hit.
Also, stay loose: stretch those quads and hamstrings regularly so they’re not yanking on your patellar tendon.
Eccentric Strength: Your Secret Weapon
Even if you’re healthy now, eccentric exercises like decline squats are money. They strengthen the tendon where it needs it most.
Start light and work them into your routine. Two or three times a week can help bulletproof your knees.
Run Smarter, Not Harder
Your form matters. A lot.
Keep an upright posture
Land under your body, not with your leg way out in front
Slightly shorten your stride and increase cadence, especially on downhills
This reduces the braking forces that shred your knees.
And yep—shoes matter too. Make sure you’ve got enough cushioning and support. Don’t run in dead shoes or pancake-thin racing flats unless your body’s ready for them.
Meniscus Tears
If you feel a sharp pain deep in the knee—especially on the inside—after a twist, bad step, or awkward pivot, you might be dealing with a meniscus tear.
It’s not super common in straight-line road runners, but trail runners, soccer players, and aging mileage monsters—pay attention.
What It Feels Like:
Pain along the inside (medial) or outside (lateral) of the knee
A “pop” when the injury happens
Swelling over a day or two
A feeling like your knee might catch, lock, or give out
Pain when twisting, squatting, or climbing stairs
You might even feel fine for a while—then suddenly, a step or twist causes a jab of pain. That’s often the sign of a loose cartilage flap moving around inside the joint.
Press around the edge of your kneecap—if the joint line’s tender to touch, that’s another red flag.
The Why: Traumatic vs. Degenerative
Traumatic tears happen fast—think pivot + twist + pop. Common in field sports and trail running.
Degenerative tears are sneaky. If you’re over 40, even something simple like a deep squat can trigger it after years of wear and tear.
One runner I know tweaked his knee sprinting uphill, stumbled, twisted on the way down—and just like that, he was out for months. MRI showed a meniscus tear. Just one misstep.
Years of mileage, plus a bad movement, and boom—cartilage says, “I’m done.”
Risk Factors:
Running on uneven trails
Abrupt changes in direction or speed
Aging cartilage (yes, your knees have a shelf life)
Weak hips or core = less control = more knee stress
This is why strength and neuromuscular work matter. If your stabilizers can’t react fast enough, your joints take the hit.
How to Treat Meniscus Tear
Look, no one wants to hear “torn meniscus.”
But if you run long enough, especially on trails or uneven ground, it’s not out of the question. The good news? You can come back from it.
I’ve seen runners go from limping off a trail to crossing a marathon finish line — but only because they took it seriously early.
Here’s how to treat a meniscus tear smartly — and how to know when to rest, rehab, or call in the pros.
Treat It Like a Real Injury (Because It Is)
If your knee starts clicking, catching, or just hurts deep in the joint after a twist or awkward landing, don’t try to tough it out. Here’s your go-to playbook:
The RICE Protocol (Your Knee’s Best Friend):
Rest: No running. None. You’ve gotta unload that joint. Walk if it’s pain-free, but no pounding.
Ice: 15–20 minutes a few times a day. Helps control swelling and calm things down.
Compression: Use a snug knee sleeve or wrap to keep swelling in check.
Elevation: Put your leg up when you can — especially at night. Helps drain that inflammation.
Add some over-the-counter pain relievers if needed, and if walking is painful? Don’t be afraid to use crutches for a few days to take the load off.
Rehab Starts Early
Even while resting, keep your knee moving gently. We’re talking basic range-of-motion drills: straighten and bend your leg as far as is comfortable, a few times a day. This keeps things from getting stiff and locked up.
As pain starts to fade, begin strengthening the muscles that support the knee — quads, hamstrings, glutes, and hips. These guys are your shock absorbers.
Most small tears — especially on the outer edge of the meniscus (the “red zone” with better blood supply) — heal in 4–6 weeks with this kind of care.
When to See a Doctor
If after 3–4 weeks of rest and rehab your knee still:
Swells after activity
Feels like it’s catching or locking
Gives out on you mid-step
…get it checked. You’re likely dealing with a bigger tear that won’t fix itself.
Doctors might order an MRI to confirm the damage. And in some cases, they’ll recommend arthroscopic surgery — either trimming the loose flap (meniscectomy) or stitching it back together (repair).
Prevention Tips for Meniscus Trouble
You can’t avoid every freak twist or bad step, but you can stack the odds in your favor:
✅ Strength train regularly — squats, lunges, bridges, leg press
✅ Train balance — wobble boards, single-leg work
✅ Wear good shoes with solid traction (especially on trails)
✅ Avoid rapid mileage jumps or sudden hard intervals
✅ Stay sharp on technical terrain — most meniscus tears happen from slips, trips, or pivots
ACL & MCL Tears
Most running injuries sneak up on you — dull aches, slow-burning pain, something you ignore too long.
This ain’t that.
An ACL or MCL tear? You know when it happens. It’s loud, violent, and instantly changes the game.
Let’s break it down: what it feels like, what causes it, and what it’s gonna take to get back.
What It Feels Like
Sudden, intense pain. A loud or internal “pop.” Maybe even audible. That’s the ACL tearing. And yeah — some runners hear it. The knee swells fast, especially with an ACL tear. It can balloon up in a couple of hours — blood in the joint, not just fluid.
ACL Tear: Knee buckles. You try to walk, it gives out. Total instability.
MCL Tear: Pain and tenderness on the inside of the knee. Might still be able to walk, but you’ll feel it when you push the knee inward or twist.
After the initial trauma, walking becomes awkward. Full bending or straightening? Forget it. Bruising often shows up after a couple days. But this isn’t a maybe-injury — you’ll know. Most people remember the exact moment it happened — twist, fall, bad landing, or weird slip.
What Causes It
This is not your average “I ran too much” overuse injury. ACL and MCL tears are trauma-driven — usually one gnarly move or accident.
ACL Tear Scenarios:
Hard pivot or sidestep (think soccer, trail running, basketball)
Jump + bad landing
Twisting fall or a hyperextended knee
Slipping with your foot planted — boom, twist + pop
ACL = center of the knee. Helps control forward shin movement and rotation. When it snaps, your knee becomes a floppy mess.
MCL Tear Scenarios:
Knee gets shoved inward (valgus force)
You catch your foot and your knee caves
Lateral pressure — common in football, skiing, even trail running wipeouts
MCL = inside of the knee. Supports side-to-side stability. Tears happen from side hits or inward buckling.
Heads-up for runners: These tears are less common in straight-line road running. But trail runners, cross-trainers, or anyone who plays rec sports on the side? You’re in the danger zone.
Also: fatigue is a factor. When your leg muscles are shot, they stop protecting the knee. That’s when things go snap.
How To Treat
First off: RICE right away (Rest, Ice, Compression, Elevation). Control that swelling and pain.
But if your knee’s unstable, ballooning, or gave out with a pop? See a doctor. MRI will tell you what you’re really dealing with.
ACL: Surgery or No Surgery?
Here’s the real deal:
Surgery: Most athletes — especially younger ones or anyone returning to pivot sports — go for ACL reconstruction. Graft from your hamstring, patellar tendon, or donor tissue. Rehab takes 6 to 9+ months. Full stop.
No Surgery: Some runners do fine without ACL surgery if they’re sticking to straight-line running. But it’s risky — your knee may still buckle without warning. Talk to a sports ortho before making that call.
MCL: Often No Surgery Needed
MCL has a decent blood supply — meaning it can heal on its own. Bracing + rehab usually does the job.
Grade I (mild sprain): 1–2 weeks
Grade II (partial tear): 3–4 weeks + brace
Grade III (full tear): 6+ weeks, brace, maybe more if it’s messy
Surgery for MCL? Only if it doesn’t heal right or if it’s part of a bigger combo injury (ACL/MCL/meniscus all gone).
Time Off: Don’t Rush This
ACL tear + surgery = months
MCL tear = weeks to a couple months, depending on severity
You need patience. Rush it, and you’re back to square one — or worse.
The good news? Lots of runners have come back from full ACL reconstructions to run marathons, race ultras, and get back to form. But they earned it through months of focused work.
“Torn ligaments don’t define you. What you do during rehab does.”
How to Make Your Knees Bulletproof (Well, Close Enough)
You can’t prevent every injury, but you can stack the odds in your favor with a little intentional training.
Neuromuscular Training = Smarter Movement
This is where ACL injury prevention really shines.
Research shows that neuromuscular training programs (fancy term for drills that build coordination, strength, and control) can dramatically cut down ACL injuries—especially for athletes who pivot, cut, or jump.
Here’s how to work it into your running life:
Plyometrics (jumping drills): Practice soft, controlled landings
Balance: Single-leg hops, BOSU work, or standing on one leg with your eyes closed
Strength: Especially hamstrings and glutes—your posterior chain is ACL armor
If your hamstrings are weak, they can’t hold your tibia back. That means more stress on your ACL. Do your curls. Do your deadlifts. Throw in some Nordic hamstring curls if you’re brave.
Core & Hip Strength: Your Knee’s Best Friends
Your knee doesn’t work in isolation. If your core is mush or your hips aren’t firing, your knees take the hit.
Build that stability with:
Bridges
Bird-dogs
Side planks
Glute kickbacks
A strong, balanced body keeps your knees from getting weird when the terrain does.
Trail runners—listen up:
If you’re hammering singletrack, include lateral agility drills and trail-specific moves in your routine. That means hopping side to side, quick-feet drills, and working on reaction time. Slipping on mud with tired legs is how knees go snap.
Flexibility & Fatigue Awareness
Tight hips and ankles can cause your knees to overcompensate. That means you need decent mobility—not contortionist-level, but enough to move cleanly.
Oh—and don’t ignore fatigue. Most ACL injuries happen when form goes out the window in the final miles. If your body’s screaming “ease up,” don’t try to be a hero. Sloppy form = sketchy knees.
And a heads-up for the ladies: Female runners are more prone to ACL injuries (blame anatomy and hormones), so targeted strength work matters even more.
ACL Red Flag: Pop + Buckle = Big Problem
Feel a loud pop followed by your knee giving out? That’s a red-alert ACL sign. Add in swelling, pain, or inability to bear weight, and it’s time to see a doctor immediately. Waiting only makes it worse.
Knee Sprains
Not every knee injury is dramatic. Sometimes you just “tweak” it. It hurts, swells a bit, and walking feels off—but you’re not totally out of commission.
Welcome to the world of knee sprains (Grade 1 or 2).
What It Feels Like
Mild to moderate pain
Swelling (not balloon-size, but noticeable)
Soreness with twisting or going downhill
Maybe a little instability
Location matters:
MCL = inner knee
LCL = outer knee
ACL/PCL = deeper pain in the center
You might even be able to jog. But it won’t feel 100%. And you’ll know something’s not right.
What Causes It?
Trail missteps (hello, hidden rocks)
Stepping off a curb wrong
Tripping but catching yourself weird
Running on slanted roads too often
Overstriding and heel-striking aggressively
Fatigue + bad form = ligament strain
Direct impact (yes, banging into something counts)
Basically, anything that forces your knee just a bit past its normal range can strain a ligament.
MCL and LCL sprains are common in runners because uneven terrain makes the knee wobble side-to-side. One wrong lateral shift and boom—you’ve got that telltale twinge.
What to Do If You Think You Sprained It
Rest it. Ice it. Compress it. Elevate it (yep, RICE still works).
Avoid running through it. Even if you can, it’ll take longer to heal if you don’t give it a break.
Try low-impact cross-training like cycling or swimming once the pain subsides.
Don’t jump back in until the knee feels strong, stable, and pain-free.
And if it still feels unstable after a few days? Go see a pro. A minor sprain can turn into a major setback if you mess around.
How To Treat
Let’s get one thing straight: a knee sprain isn’t always a season-ender, but it’s never something to ignore.
If you tweak a ligament or feel that deep ache post-run, treat it with the respect it deserves.
Start With the Basics: RICE
Right after the injury (or when pain first hits), get on the RICE protocol:
Rest – Pause your runs. Don’t try to “test it” every day. Give your body time to reset.
Ice – 15 minutes at a time, especially in the first 48 hours to fight swelling.
Compression – Use a bandage or knee sleeve to keep swelling in check and give your knee some support.
Elevation – Prop that leg up when you can to help fluid drain.
If walking hurts, don’t be a hero. Use crutches or stay off it. Letting your body unload weight early on can make a big difference.
Rebuild the Right Way
If it’s a mild sprain, you’ll usually feel better after 3–5 days of RICE. But don’t stop there.
As soon as it’s not painful to move? Start gentle mobility:
Straighten and bend the knee within a pain-free range.
Add isometric exercises like quad sets.
Try straight-leg raises for early strength work.
After about a week (if it’s healing well), move into more active rehab:
Mini-squats
Side steps with a resistance band
Balance drills on one leg
If it’s a moderate sprain, like an MCL tweak, a hinged knee brace can help protect the ligament during early rehab. And if swelling returns after exercises? Ice it down again. That’s not weakness—that’s being smart.
Take NSAIDs if you need to kill the pain and swelling, but don’t pop pills just to force a run. That’s asking for a setback.
When Can You Run Again?
Don’t rush it. No pain, no swelling, full range of motion—that’s your green light.
When you come back, start with short, flat runs. Use tape or a brace if it gives you confidence.
One runner I coached sprained her knee during a trail run. She took 2 weeks off, did daily rehab, and by week 3 she was jogging pain-free. By week 6, she was fully back to speed. That’s how you win the long game.
But if it’s not improving after 10–14 days, or if your knee feels unstable or keeps giving out? Get it checked.
You might be dealing with something more serious, like a ligament tear or cartilage injury.
How to Prevent
Want to avoid knee sprains in the first place? Strength training is your best friend.
Hit your quads, hamstrings, glutes, and hips at least 1–2 times a week.
Squats
Lunges
Deadlifts
Hamstring curls
Side leg lifts and band walks for hip stability
Strong legs = stable knees.
Balance Training = Injury Insurance
Don’t skip proprioception. Especially if you run trails or uneven ground, train your brain and muscles to respond fast.
Start with single-leg stands
Add in unstable surfaces (like a balance pad or BOSU ball)
Close your eyes to make it harder
This stuff works. It’s not flashy, but it keeps you running.
Smart Habits That Save Your Knees:
Watch your form. Keep a slight bend in your knees. Land soft, midfoot, under your center of mass.
Be extra cautious when fatigued. Most sprains happen when form gets sloppy in the last few miles.
Mix up your terrain. Running the same cambered road every day? That’s uneven stress on one knee. Switch directions or pick flatter routes.
Check your shoes. If they’re worn out or tilted from overpronation/supination, that messes with alignment. Swap them. Use orthotics if needed.
Listen to twinges. That small ache in your inner knee? Could be the start of an MCL strain. Take one day off and do some rehab, and you might avoid 6 weeks of limping.
Baker’s Cyst in Runners
You feel a weird bulge behind your knee. It’s tight. Maybe a little sore. You’re not sure if it’s serious, but it doesn’t feel right — especially after long runs or hilly sessions.
Yeah… you might be dealing with a Baker’s cyst.
It sounds like a bakery item, but it’s not nearly as fun. It’s a fluid-filled pouch that builds up in the back of your knee — and it’s your body’s way of waving a flag that says, “Hey, something’s going on in here.”
Let’s break it down, runner-style:
Why Baker’s Cysts Happen
A Baker’s cyst doesn’t just show up out of nowhere. It’s secondary, meaning it forms because something else inside your knee is already messed up.
Here’s the short version:
Your knee joint makes synovial fluid (lube for your cartilage).
When there’s too much swelling — from injury or arthritis — that extra fluid gets pushed out and collects behind the knee.
Boom: cyst.
Most common causes?
Meniscus tears
ACL tears
Osteoarthritis
Rheumatoid arthritis
Even minor cartilage injuries you barely remember can do it.
One runner told me they didn’t even realize they had a meniscus tear — they just noticed a bulge behind the knee after speedwork. Turned out, the cyst was the clue.
Running itself doesn’t cause a Baker’s cyst, but it can flare up one if there’s already damage or inflammation inside. That’s why older runners or folks with arthritis often deal with this annoyance.
How to Treat It (Without Panicking)
If it’s small and not super painful, here’s your playbook:
Cut back mileage or intensity — especially downhill or hill repeats.
Ice the back of your knee after runs or if it’s irritated.
Compression sleeves can help with swelling and support.
NSAIDs (like ibuprofen) may shrink the cyst and reduce knee inflammation.
Avoid deep squats or lunges for now — keep the knee out of those big bend positions.
When things get worse:
If it’s big, painful, or limiting your motion, a doctor might drain it (aspiration) or give you a steroid shot into the joint to calm everything down.
But unless you fix the underlying cause — like that torn meniscus or arthritis — the cyst may come back.
Most docs would rather treat the knee issue than just chase the cyst around. Makes sense, right?
How to Prevent a Baker’s Cyst
Here’s the truth — prevention = knee maintenance. There’s no magic stretch that stops cysts. But keeping your knee joint happy? That’s your best defense.
Do this:
Strengthen your quads, glutes, and hamstrings — strong muscles = less joint stress.
Manage your weight if needed — every extra pound adds pressure to the knee.
Cross-train with low-impact stuff (bike, elliptical, swim) if your knees are cranky.
Stretch your hamstrings and calves — sometimes it relieves tension in the back of the knee.
If you’ve had prior surgery or knee trauma, stay consistent with your “knee maintenance” routine (whatever your PT gave you — keep it up).
And most of all? Listen to swelling. That’s your body saying “ease off.”
Preventing Running-Related Knee Injuries: Stay Ahead of the Pain
Let’s flip the script. What if you could stop knee injuries before they start? That’s where prevention comes in — and it’s way less glamorous than race medals, but way more important.
Build Strength, Period
Strong legs = shock absorbers.
Do 1–2 strength sessions a week. No debate.
Hit:
Quads: Squats, lunges
Hamstrings: Deadlifts, bridges
Glutes: Clamshells, hip thrusts
Calves: Calf raises
Core: Planks, dead bugs, side bridges
You don’t need a barbell. Bodyweight and bands are enough — if you stay consistent.
📚 One study? Just 8 weeks of strength training = 30% fewer overuse injuries in runners. Don’t skip it.
Dial in Your Form
Ugly form wrecks knees.
Overstriding? Shorten your step. Shoot for 170–180 steps per minute.
Landing hard on your heel with a straight leg? That’s braking. Try to land closer to your center of mass.
Knees caving in? Glutes probably need work.
Slouched forward or back? Aim for a slight lean — from the ankles, not the waist.
Arms swinging across your body? Tighten it up. Keep ‘em swinging front to back.
🎥 Pro tip: Film yourself. One tweak in form — like a higher cadence or better downhill posture — can mean the difference between smooth miles and aching knees.
Don’t Let Knee Pain End Your Run
Let’s be real — knee pain is the nagging nemesis of a lot of runners. But here’s the good news: most of the time, it doesn’t “just happen.” It builds up from small mistakes. The kind you can fix.
If you want to stay in the game long-term, you’ve got to run smart. Here’s how:
Wear the Right Shoes — Period
Your shoes aren’t just gear — they’re your foundation. If they’re wrong, everything above the ankle suffers — including your knees.
Get fitted. If you overpronate, look at stability shoes. If you’re neutral, stay with neutral.
Don’t run in dead shoes. Replace every 300–500 miles.
Rotate shoes if you run a lot. It gives the foam time to decompress and your body a break from repetition.
Trails? Wear trail shoes. Roads? Stick with well-cushioned road trainers.
“There’s no ‘best shoe’ — just the one that works for your stride.”
If you’re dealing with recurring knee issues, get your gait analyzed at a specialty running shop or by a PT. You might need custom orthotics or even just a better insole.
Build Smart — Don’t Rush
The fastest way to get injured? Do too much, too soon.
Follow the 10% rule for weekly mileage increases.
Every 3–4 weeks, add a cut-back week to recover.
Add speedwork or hills gradually — not both in the same week.
Coming off an injury? Go slow. Slower than you want to. Then slower still.
Mix in different surfaces — tracks, trails, grass. Pavement every day? That’s hard on the knees.
A smart runner rests before they need to, not after they’re forced to.
Stretch and Recover
Tight muscles = cranky knees. Especially around the quads, hamstrings, calves, IT band, and hip flexors.
Post-run? Stretch for 5–10 minutes. That’s all it takes.
Foam roll the big muscle groups a few times a week.
Hydration (yes, water matters for joint health too)
Hydrated cartilage = happy knees.
Some runners swear by anti-inflammatory foods — berries, turmeric, salmon, olive oil — and honestly, they’re great for overall recovery.
Cross-Train. Seriously.
Running is great — but doing only running? That’s how you end up with imbalances.
Cycling strengthens your glutes and quads.
Swimming gives your joints a break but keeps your engine revving.
Strength training, even 2x/week, will make you more resilient.
Walking on rest days helps blood flow and recovery.
Elite runners cross-train for a reason. It works. And it keeps them healthy.
Listen to Your Body — And Make Adjustments
You know that weird twinge in your knee? The one you “ran through” last week?
That’s your warning.
Add a rest day.
Cut that tempo into an easy jog.
Change your route if camber is aggravating your joint.
Log how your body feels — patterns show up fast when you start paying attention.
The runners who stay injury-free the longest? They’re the ones who make small changes before small problems become big ones.
Weight Matters — Even If It’s Hard to Hear
Here’s the truth: every extra pound multiplies the force on your knees.
But you don’t need to be stick-thin. Runners come in all shapes. Just aim for a bodyweight that lets you train comfortably and doesn’t put excess strain on your joints.
Even losing 5–10% of your body weight can significantly reduce knee stress.
If you’re starting running to lose weight, ease in with lower-impact days (bike, walk, elliptical).
Use good shoes, recover well, and let the process work over time.
Strong, healthy, and moving pain-free beats skinny and sidelined every time.
Running With Knee Pain: Real Talk and Smart Answers
Let’s cut through the noise. Knee pain is one of the most common complaints among runners — and one of the most misunderstood. Here’s what you need to know to stay smart, stay healthy, and keep logging those miles without wrecking your joints.
Q: Can I run through knee pain?
A: Depends. Mild stiffness that disappears after warming up? Probably okay. But sharp pain, limping, or anything that worsens as you go? That’s a hard stop.
If the pain’s above a 3 out of 10, or you’re changing your stride just to “push through,” you’re risking a bigger injury. That’s how a small flare-up turns into months off the road.
Rule of thumb: if it alters how you move, it’s time to stop and figure it out.
Q: Does running ruin your knees?
A: Nope. That old myth? Total junk.
In fact, studies show recreational runners have lower rates of arthritis than sedentary folks. Motion keeps joints healthy — it nourishes cartilage and builds strength in the muscles that protect your knees.
Yes, running with bad form, overtraining, or past injuries can lead to issues. But running done right? It’s actually good for your knees. Plenty of runners are still pounding pavement well into their 60s and 70s — pain-free.
Q: Is downhill running worse for knees?
A: Yes — and here’s why: when you run downhill, your quads act like brakes. That “eccentric load” increases force on the patellofemoral joint, which can stir up issues like runner’s knee or patellar tendinitis.
But it’s manageable.
Keep your steps light and quick
Don’t overstride — it just adds pounding
Slight forward lean = better control
Strengthen those quads and glutes
Walk steep downhills if needed
Downhills aren’t the enemy, but they are extra work for your knees. Respect them.
Q: What shoes help with knee pain?
A: The right ones for your feet. No one-size-fits-all magic shoe — but here’s what helps:
Good cushioning: Helps absorb shock, especially if you’re doing longer runs or running on concrete.
Stability shoes: Can help if you overpronate, but don’t over-correct — too much structure can backfire.
Neutral shoes: Best if you have high arches or supinate.
Moderate heel-to-toe drop (6–10mm): Often a sweet spot — too low may strain the Achilles, too high can load the knees more.
Also: don’t run in dead shoes. If your midsoles are packed out or the tread’s uneven, your knees will start to complain.
Q: Can I run with a torn meniscus or ACL?
A: Maybe… but only if you’ve been cleared by a doctor.
Minor meniscus tear? Some runners still run — if the knee’s stable, not locking, and pain is manageable. Rehab first, and ease back in slowly.
Torn ACL? Generally no running, especially not on trails or uneven terrain. The knee’s unstable and you could shred other structures.
After ACL surgery or meniscus surgery, running comes back — but only when you’re cleared. That could be 3–6 months depending on the injury and recovery.
Bottom line: Don’t self-clear on ligament injuries. One bad step could mean permanent damage.
Final Thoughts
Knees are built to handle running — if you train smart, listen to your body, and act early when things feel off. Don’t fear the miles. Just respect the process.
Take care of your knees, and they’ll take care of you — for years of strong, confident, pain-free running ahead.
Got knee questions, gear worries, or form frustrations? Drop them below — I’ve helped plenty of runners work through knee stuff, and I’m happy to help you too.
So you’ve traded in that Beat-Up, Creaky Knee for a Shiny New Joint.
And now you’re staring at your running shoes, wondering: “Can I actually do this again?”
It’s a tough spot. Your body’s whispering, “Be careful,” but your runner’s soul is screaming, “Let’s go.”
I’ve seen friends and family go through total knee replacements (TKRs), and trust me — you’re not alone in wanting to get back out there.
Let’s break this down like we would on a long run — steady, honest, and with plenty of water stops for facts and reality checks.
What the Heck Is a Knee Replacement, Anyway?
Knee replacement — aka knee arthroplasty — is exactly what it sounds like.
Surgeons go in, remove the busted-up cartilage and bone at the ends of your femur (thigh) and tibia (shin), then cap ‘em with high-grade metal implants.
A piece of plastic acts like fake cartilage between the metal parts so things glide smoothly.
The underside of your kneecap might also get a makeover with a plastic “button.”
Boom. New knee.
But here’s the thing: not all replacements are full swaps.
If your arthritis is only in one part of the knee, you might’ve gotten a partial replacement, which keeps more of your natural tissue intact.
That usually feels more natural and recovers faster — but it depends on your situation. Your doc’s call.
Why Do Runners End Up Here?
You’d think pounding out thousands of miles is what wrecks knees, right? Not exactly.
Yeah, wear and tear plays a role — especially with age — but it’s usually old injuries that speed up the damage.
ACL tears, meniscus removals, years of bad mechanics — that stuff can wear the joint down to the point where even walking feels like torture.
At that stage? A new knee starts sounding better than limping through life.
We’re talking 15–20 years of use, easy — sometimes even longer if you take care of them. Some research even shows up to 90% of TKRs still going strong after two decades.
But how long yours lasts depends on what you do with it. That brings us to the big question: can you run on it?
Unless you were training like a maniac or ignoring every pain signal your body gave you, the actual act of running isn’t the villain.
And please take my word for it.
A 2023 review of long-term studies found no proof that running leads to arthritis.
In fact, runners in the studies often had less knee pain and fewer signs of joint damage than non-runners. One stat even showed that non-runners were twice as likely to end up needing a knee replacement compared to runners (4.6% vs. 2.6%).
So… Can You Run After Knee Replacement?
Here’s where it gets tricky — and real.
Most surgeons will tell you not to run after a TKR. The reasoning? That repetitive impact could wear out the implant faster, especially the plastic spacer. And sure, they’ve got a point. Replacements weren’t originally built for pounding the pavement.
Running could make that revision happen at 65 instead of 70. Is that worth it to you? That’s your call.
Should you? That depends on you, your goals, and your doctor.
Let’s dig a little deeper…
The Traditional View
For years, the playbook was crystal clear:
“No running. No jumping. Ever.”
Most orthopedic surgeons still stick to that. A survey by The Knee Society showed most surgeons won’t recommend high-impact sports after total knee replacement.
And honestly, that advice isn’t crazy. They’re trying to protect your investment — your new joint.
The New School Perspective
But things are changing. Some forward-thinking surgeons and patients are saying, “Let’s not be so rigid.”
They argue that with the right patient, modern implant, and smart rehab, running might be okay in moderation.
The key is personalization.
If you’re:
A former runner
Fit and strong
Have good balance and alignment
Willing to take it slow and listen to your body…
…then your doc might give you the go-ahead for short runs, light jogging, or occasional races.
How Long Do Knee Replacements Actually Last?
If you’ve had your knee replaced and you’re wondering, “Can I still run?” — this is the question that probably haunts you the most:
Will running trash my new knee?
Most modern knee replacements last 15 to 20 years.
That’s the average.
But some go even longer — one big analysis showed about 70% of implants were still going strong at 25 years.
Not bad for a joint made of metal alloys and plastic spacers.
That plastic part? It’s tough, but it’s also the weak link over time.
As you pound on it — running, jumping, whatever — it wears down. And once it wears enough or loosens from the bone? Boom. You’re looking at a revision surgery.
It’s kind of like driving a car. You can drive it gently for 20 years. Or you can off-road it every weekend and need new tires (or suspension) in half that time.
Let’s Look at a Few Types of Runners
The Casual Exerciser
You didn’t run much before surgery. You just wanted to walk pain-free and play with your grandkids. Great — stick with the low-impact stuff. Walking, cycling, swimming, maybe light hiking. You’ll keep that implant happy for decades.
The Lifelong Runner
Running is part of your identity. The idea of giving it up feels like giving up yourself.
If that’s you, and your strength, balance, and form are solid — you might be a candidate for light, careful running.
You’ll want:
A sports-minded surgeon
A physical therapist who knows runners
The right implant
A gradual return plan
But you’ll also need to accept that revision surgery might come sooner than it would otherwise. If you’re good with that trade-off, it’s your call.
The Competitor
Still chasing marathons or trail ultras? Look — very few runners make it back to high-volume racing post-TKR. Doesn’t mean it’s impossible, but it’s rare for a reason.
Most surgeons will strongly advise against heavy mileage. If you do push boundaries, you’ll need:
A+ form
Top-tier gear
Cushioned shoes
Soft surfaces
Perfectly managed training loads
Even then, expect walk breaks, a slower pace, and tons of body maintenance. You’re in “exception” territory. Be ready to work for it.
As one HSS surgeon put it:
“If you were a marathoner before, you might get back. If you were a weekend walker, don’t expect to start doing triathlons.”
Honest expectations = better outcomes.
What the Research Actually Says (and Doesn’t)
Here’s where it gets frustrating: we don’t have great long-term data on how running affects implant lifespan. Not because no one cares, but because you can’t ethically test it.
You can’t randomize people into a “run marathons vs. don’t” group post-surgery and just see who breaks first.
So instead, we’ve got case studies, surveys, and some lab simulations. Here’s what we do know:
Most TKR Patients Return to Some Sport or Activity
A 2016 study found that 93% of patients who were active before TKR got back to some form of sport — though usually lower impact.
Another study showed 80%+ resumed daily activities and recreational stuff.
So no, a knee replacement doesn’t chain you to the couch.
But Running? Still Rare
Only 10–15% of runners return to regular running after surgery.
That means 85–90% don’t — either by choice or doctor’s orders.
Why?
Some are older and pivot to lower impact
Some try and decide it’s not worth it
Some never ask their doctor (or don’t mention they’re running)
Some docs forbid it completely
What Do the Biomechanics Say?
Running = high peak forces on the knee, no question.
But guess what? So does stair climbing, squatting, or lunging.
Some research even shows fast walking and slow jogging produce similar loads. That’s why some experts think a well-controlled, cushioned jog might not be as damaging as we once thought.
But the verdict’s still out. And clearly, the faster you go and the longer your stride, the more stress you apply.
Talk to Your Surgeon – No Secrets, No Surprises
Before you lace up — or even before surgery — you need a real, honest talk with your orthopedic surgeon.
Not every doc sees eye to eye on post-op running. Some will shut it down completely. Others — especially sports-focused ones — might be open to it.
Don’t walk in looking for a quick yes or no. Ask smart, specific questions:
“Is my knee implant designed for high activity?”
“Is it cemented or cementless? How does that change how it handles impact?”
“Have you had other runners return post-op? How did that go?”
“If I start running again, can we schedule more checkups to monitor wear and tear?”
Showing up for regular X-rays and follow-ups proves you’re serious — not reckless.
Also, don’t just stop with your surgeon. Loop in a physical therapist or running-savvy sports trainer. A PT can analyze your gait and see how your new knee handles motion.
You might find out a tweak — like a shorter step or higher cadence — makes a world of difference. Even switching to a midfoot or forefoot strike can reduce joint stress if you’re a heavy heel-striker.
And listen — if your surgeon gives you a hard no and that crushes you, don’t go rogue and run in secret. Get a second opinion, ideally from someone who understands runners. You deserve a plan — not guesswork.
But no matter what, remember: you’re the one living with that knee every day. You’ll deal with the outcome, not your doctor.
A good one will work with you, even if you’re pushing boundaries — as long as you’re smart.
Weigh the Alternatives – Can Something Else Scratch the Itch?
Look, I get it. If you’re a runner, nothing hits quite like running. But if your knee replacement makes you think twice about pounding the pavement, ask yourself:
“Is running the only way I feel alive and fit? Or can I find that same fire in something else?”
Good news? There’s a whole buffet of low-impact sports that still bring the sweat, the burn, and the endorphin kick.
Cycling
Road bike, spin class, gravel, you name it — cycling is the go-to for many ex-runners.
Your legs get a killer workout without smashing your joints. You can race, go long, climb hills, chase PRs. Plenty of marathoners turn into century riders post-surgery and never look back.
Swimming & Water Running
Zero impact. Full-body conditioning.
Plus, water running mimics real running movement — with none of the joint load. Throw on a flotation belt and grind out some intervals in the deep end. It’s weird at first, but weird works.
Elliptical or SkiErg
Simulates running, but smoother.
The elliptical is especially great for cardio with less pounding. Machines like the SkiErg or NordicTrack can work your whole body while keeping impact low. Great way to stay conditioned while staying kind to your knee.
Add an arm swing or trekking poles and you can elevate your heart rate into training zone territory. Hiking trails work all kinds of stabilizers and give you that outdoor fix with less jarring force.
Start with 1-minute jogs and 4-minute walks. That gives your knee time to recover between impacts.
Lots of runners (replacement or not) use the Jeff Galloway method to run entire marathons with fewer injuries.
Strength Training
You might roll your eyes now, but a lot of runners only discover weightlifting during rehab — and love it.
Set new goals: build up your squat, clean up your deadlift, protect your joints with muscle.
Stronger = more resilient. That applies to everything.
Other Sports
Got a competitive streak? Try cycling races, swimming meets, even pickleball or doubles tennis (if your surgeon OKs it).
Just skip the hardcore lateral-cutting sports like singles tennis or basketball — too risky for that new joint.
Listen to Other Runners in the Trenches
Still undecided? Tap into the community.
Hit up forums like r/running, Facebook groups, or support communities for runners with arthritis or replacements.
You’ll hear both sides:
Some who got back to running and felt unstoppable
Others who tried… and ended up with swelling or regrets
Use those stories to build your game plan. You don’t need to go it alone.
Recovery Timeline for Runners After Knee Replacement
If you’re dreaming of lacing up again after a knee replacement, let me be real with you: it’s gonna take time, grit, and a boatload of patience.
Rehabbing a knee isn’t about rushing — it’s about building. Step by step. Setback by setback. Win by win.
Here’s how the typical journey shakes out — from walker to running shoes.
Every body is different. Some move faster, some slower. This isn’t a race — it’s a rebuild.
Weeks 1–2: Baby Steps (Literally)
Right after surgery, you’ll likely be using a walker or crutches.
The goal here? Just get moving. Slowly. Carefully.
PT usually starts within 24–48 hours after the operation
You’ll work on bending, straightening, and getting to ~90° flexion
By the end of week 2, some folks are hobbling around the house with a cane or nothing at all
Win of the week? Taking your first pain-controlled steps.
Weeks 3–4: Getting Your Legs Back
Now the real grind begins. You’re walking more — maybe 5–10 minutes at a time.
Flexion goal: 120° or more by the end of week 4
Add in mini squats, straight leg raises, and gentle bike work (if you can pedal a full circle)
Pain is less about arthritis now and more about muscle soreness and stiffness
You’re still early in the game, but it’s progress. Keep showing up.
Week 6: Hello, Independence
By now, you might get cleared to drive again — especially if it’s your left leg and you’ve got an automatic.
Most are walking 10–15 minutes at a stretch, no cane
PT shifts to include balance drills and functional movements (stairs, light step-ups)
You might start easy cycling or even a few golf swings
Celebrate this one — it’s a mental boost.
Month 3: Back to “Normal Life”
This is a big milestone.
Done with most formal PT
Stairs? Manageable (even if going down still feels awkward)
Low-impact cross-training: pool running, rowing, elliptical
Some runners with fast recoveries get cleared to lightly jog in a straight line.
Keyword? Lightly.
If you test your legs with a few strides, do it on soft ground and listen to your knee like it’s your coach. If it swells or hurts the next day, you’re pushing too hard.
Month 6: A Glimmer of Running
By six months, you’re stronger. The knee feels less like a foreign object and more like your own again.
Rubber track, grass, or treadmill = your best friend
A good start: 1-minute jog / 4-minute walk cycles for 20–30 minutes
You’re not back to training yet. But you’re starting to feel like a runner again. Don’t rush it.
1 Year: Ready for the Real Return
One year out, the knee is fully healed inside and out.
Daily activities? Easy
Longer hikes, careful skiing, dancing — all fair game
Running: modest miles, slow progression
By now, your quads, hamstrings, and glutes should be solid. Most surgeons will order follow-up X-rays.
If everything checks out and you feel good? You’re clear to start building a running routine — smart, slow, steady.
Beyond 1 Year: Now You’re Rolling
Some runners say year two is even better than year one. Why?
Confidence is up
Strength is back
Movement feels natural again
By now, you might be:
Jogging a few times a week
Doing short races
Smiling while running — not wincing
One rule: Never stop the strength work.
That knee doesn’t have built-in shock absorption anymore — your muscles pick up the slack. Lifelong glute, quad, and hamstring work isn’t optional. It’s maintenance for staying in the game.
Mental Recovery: The Other Battle
Physically, this process is slow. Mentally? It can be brutal.
My best advice? Every small win matters. Keep score. Celebrate them.
And remember: don’t compare timelines.
Some folks drop the cane at 2 weeks.
Others need it for 6.
Some cycle at 4 weeks.
Others? Not till 8.
Everyone’s path is different.
Should You Run Again? Let’s Get Real About It
Alright — so here you are. Maybe you’ve had knee surgery. Maybe you’re staring down recovery. Or maybe you’re just wondering if your running days are behind you.
Let’s not sugarcoat it: this is one of the toughest questions a runner can ask — and it’s not just physical, it’s emotional as hell.
Ask Yourself: Why Did You Run in the First Place?
Before you lace up again, get brutally honest with yourself.
Was it for health and fitness?
For stress relief?
To compete?
Or because running is just part of who you are?
If your answer is something like, “I just love to run” — that matters. That deserves respect.
Running isn’t just sweat and shoes. For a lot of us, it’s therapy, identity, freedom. It’s how we process life. That’s not easy to replace.
But Here’s the Flip Side… What Happens If the Knee Gives Out Again?
Knee replacements don’t come with an unlimited mileage warranty. There’s risk involved.
Some runners say, “If I wear it out, so be it. At least I lived the way I wanted.”
Others? The idea of going through another surgery and rehab scares the hell out of them — and rightly so.
No judgment here. Just know which camp you fall into. There’s no wrong answer — only your answer.
Find the Middle Ground — and Own It
You don’t have to go from TKR to tearing up marathons. Maybe your path forward looks like this:
Trade 26.2 for a happy, low-impact 5K
Hit the trail instead of the pavement (softer = kinder)
Run 2 days a week, cross-train the rest
Walk-run combos with zero shame
And yeah — you’ll probably be slower. You might need walk breaks. But who cares?
A finish line is still a finish line. A morning jog is still a victory. And every pain-free mile is something to be damn proud of.
So, Should You Run Again?
Here’s my take: If running calls to you, then yes — but do it smart.
Do this:
Move pain-free first.
Get the green light from your doc.
Heal, strengthen, then ease in with short, easy jogs.
Back off at the first sign of trouble.
Celebrate mobility. Celebrate that you’re still in the game.
Whether that’s running, walking, or something else entirely — you’re not done.
“You don’t need to run to be a runner — just move with purpose.”
You’re still in the tribe, no matter what pace you go.
FAQ: Running After a Knee Replacement — What You Need to Know
Q: Can I Jog After a Total Knee Replacement?
Short answer: maybe — but only if your surgeon clears it.
For most, jogging isn’t on the table until 4–6 months post-op, often closer to a year.
Start with soft surfaces (track, grass, treadmill) and walk breaks.
Some surgeons will allow light jogging. Others won’t. Trust your team.
Q: Will Running Wear Out My New Knee?
Yeah, it might.
Running = more force through the joint.
The more miles, the more risk of wearing the plastic spacer or loosening the implant.
Think of your knee like a car tire: the more rough miles you log, the sooner it needs attention.
👉 A few short jogs per week on soft ground? Maybe okay.
👉 Chasing sub-20 5Ks every weekend? Probably not.
Q: Are There Runners Who’ve Gone Back to Racing Post-TKR?
Yep.
Dick Beardsley runs ~50 miles a week on two artificial knees.
Some runners finish 5Ks, half marathons, even triathlons post-TKR.
But let’s be real — these are exceptions.
Most don’t return to racing. The ones who do? Lifelong athletes with rock-solid form and smart training.
Aim small. Think 5K, maybe 10K. Add walk breaks. Forget the clock. Finishing is the win.
Q: What Are the Safest Activities After Knee Replacement?
Stick with low-impact stuff:
Walking
Hiking
Cycling
Swimming
Rowing
Elliptical
Dancing
Golf
These keep you active without hammering the joint.
Intermediate activities like doubles tennis or light skiing? Maybe.
High-impact sports (running, basketball, singles tennis, soccer)? Usually off the list — unless your doc and your risk tolerance say otherwise.
Q: How Can I Protect My Knee Replacement If I Choose to Run?
Here’s your playbook:
Keep runs short and infrequent (2–3 per week, low mileage)
Use soft surfaces: tracks, trails, treadmills
Wear max-cushion, supportive shoes
Run clean: short stride, high cadence, no overstriding
Strength train: quads, glutes, hammies, core
Listen to your knee: swelling or sharp pain = stop
Use jog-walk intervals (1:4 ratios are a great start)
Consider a brace or tape if your doc approves
Get annual X-rays and checkups
Honestly? These are smart tips for any older runner — new knee or not.
Final Word: Run or Not, You’ve Got Options
At the end of the day, this isn’t about a single answer. It’s about your priorities.
If quality of life means running, and you’re okay with the trade-off? That’s valid.
If you’d rather protect the joint and thrive in hiking, biking, or swimming? That’s just as valid.
The win is staying active and owning your decision.
🦿 You’ve got a new knee. Treat it like an MVP — give it strength, rest, and respect. Do that, and it’ll give you years of movement and momentum in return.
Keep moving, however you do it. That’s what matters.
Running is a gift—a freedom, a stress release, a ritual.
But if you’ve been at it for a few months (even weeks), you’ve probably met its dark side: injury.
That first nagging pain in your knee. That strange ache in your shin. That moment your heel says “nope” as you step out of bed. We’ve all been there—or we will be.
And let me be straight with you: up to 80% of runners get injured every single year.
That’s not a maybe. That’s a near-certainty if you’re not proactive.
And please don’t take my word for it – research backs this up.
But here’s the good news: injury isn’t a death sentence for your running life.
In fact, it can be the wake-up call that turns you into a smarter, stronger, more resilient athlete.
Today I’m sharing with you the ultimate guide to running injuries. It’s packed with real talk, hard-won lessons, and battle-tested strategies for spotting injuries early, treating them smart, and building a body that lasts.
Whether you’re dealing with shin splints, runner’s knee, or just trying to dodge your next setback, you’re in the right place.
Table of Contents
1. Running Injuries 101: The Big Picture
Overuse vs. Acute Injuries
The Traffic Light Pain Scale
Load Management Mistakes
Why Pain is a Signal, Not a Weakness
2. Shin Splints (Medial Tibial Stress Syndrome)
Causes & Risk Factors
Symptoms to Watch For
Training, Shoe & Form Fixes
Rehab, Strength Work & Comeback Plan
3. Runner’s Knee (Patellofemoral Pain Syndrome)
What It Is (And What It Isn’t)
Biomechanical Triggers
Recovery Plan & Exercises
When to See a Pro
4. IT Band Syndrome (Lateral Knee Pain)
Why It Hits So Hard
Prevention & Strengthening
Downhill Running Tips
Smart Recovery Approach
5. Plantar Fasciitis
Morning Heel Pain Explained
Calf Tightness & Foot Mechanics
Footwear, Inserts & Stretching
Rehab Protocol & Return Strategy
6. Achilles Tendinopathy
The Two Types (Midportion vs Insertional)
Warning Signs & Triggers
Eccentric Loading 101
How to Heal & Stay Pain-Free
7. Stress Fractures
Red Flags Every Runner Must Know
Fueling, Bone Health, and RED-S
Recovery Timeline & Cross-Training
Return-to-Run Protocol
8. Hamstring & Calf Strains
Sprinting Gone Wrong
The Eccentric Strength Fix
Comeback Timelines by Severity
Speedwork Safety
9. Ankle Sprains & Stability
Why They Keep Happening
Rehab, Balance Drills & Bracing
Trail Running Tips
Progression Back to Trails
10. Hip & Glute Pain
Piriformis, Hip Flexors, and Glute Medius Pain
Daily Mobility & Core Fixes
When to Stretch, When to Strengthen
Realistic Return Plans
11. Back Pain in Runners
Core Weakness, Overstriding & Posture
Spine-Friendly Warm-ups
Strength & Mobility Fixes
When to Get Imaging
12. Less Common But Serious Injuries
Labral Tears
Sports Hernias
Compartment Syndrome
When to Push for a Diagnosis
Injury Basics: Overuse vs. Acute
Let’s start with the basics.
Not all running injuries are the same. They fall into two big buckets: overuse injuries and acute injuries.
Knowing which camp your pain falls into changes everything.
Overuse injuries are the most common—making up roughly 80% of running injuries. These aren’t dramatic blow-ups. They sneak in when repetitive stress outpaces your body’s ability to recover.
Think shin splints, runner’s knee, IT band syndrome, plantar fasciitis, or stress fractures.
They usually start as that mild ache you brush off, but they don’t just “go away.”
Keep hammering the same mistakes—like cranking mileage too fast, skipping rest days, running in dead shoes, or ignoring weak glutes—and those whispers of pain turn into shouts.
Acute injuries hit suddenly. One second you’re cruising, the next you’re on the ground. Roll your ankle on a curb, pull a hamstring sprinting, take a hard fall on the trails—that’s acute.
There’s usually a crystal-clear “ouch” moment.
These are less common in road running but show up plenty in speedwork and trail running.
If it happens, the only smart play is to stop immediately.
Push through an ankle roll or muscle tear, and you’re begging for a long-term layoff.
The “Traffic Light” Pain Scale
Here’s the deal: not all pain means “game over.”
But I’m also not saying that all pain is safe to ignore either.
That’s where the traffic light system comes in—a simple way sports medicine experts break down running pain.
Let me break it down for you:
Green light – This is the “don’t panic” zone. Think mild soreness, under a 3/10, that doesn’t mess with your stride. Maybe your quads are achy after hills or your calves bark a little after speedwork. Totally normal. Green means go—but keep an eye on it.
Yellow light – Now we’re in caution territory. Pain that creeps in after a certain distance, or that dull ache that makes you wince (4–6/10), but doesn’t cause a limp. This is your body saying, “Back off, bro.” Cut the mileage, ease off speed or hills, and throw in ice, rest, or some light rehab work. If it chills out, fine. If not? Treat it like a red light before it turns into one.
Red light – This is the “slam on the brakes” zone. Pain that spikes sharp (7–10/10), changes your stride, or lingers even when you’re sitting on the couch. Limping? Swelling? Instability? That’s a stop sign. Keep running through it and you’re just digging yourself into a deeper hole. Get it checked and treat it properly.
Most of us get into trouble not by ignoring red, but by blowing through yellow—convincing ourselves “it’s fine” until we’re sidelined. Pro move: rate your pain during and after runs.
If your yellow is getting “darker,” dial it back before it hits red.
I cannot stress this enough.
Load Management: The Balancing Act
Here’s why overuse injuries happen—it’s almost always a load management problem.
Your bones, tendons, muscles, and ligaments are amazing at adapting to stress.
That’s how you get fitter and stronger. But they need time to catch up.
When you pile on too much too soon? That’s when things snap.
Classic example: mileage creep. I hate to admit it as a running coach but even the “10% rule” (a rule I recommend all the time) isn’t a perfect formula—it’s just a reminder to progress slowly.
What works better both in my experience and the science, is gradual increases plus down weeks where you let your body consolidate gains.
Other silent traps?
Terrain swaps – Jumping from treadmill to hard pavement or flat roads to hills too fast.
Old shoes – Cushioning tanks after about 250 miles. By 400–600 miles, most shoes are done. Rotate two pairs so they last longer and stay dry between runs.
Weak links – Weak hips? Hello, runner’s knee. Tight calves? Plantar fasciitis or Achilles pain waiting to happen. That’s why strength and mobility work matter just as much as mileage.
Bottom line: most overuse injuries aren’t random—they’re training mistakes.
I always come back to the basics: Build mileage slow, respect recovery, and shore up weak spots.
Acute stuff (rolling an ankle, tripping in the dark) is harder to prevent, but warming up, working on balance, and not bombing down sketchy trails at night goes a long way.
Shin Splints: The Runner’s Nemesis
If you’ve been running long enough, you’ve probably had that dull, nagging ache down your shin.
That’s shin splints, the friendly nickname for medial tibial stress syndrome (MTSS).
Basically, it’s your tibia (shinbone) crying uncle from all the pounding.
At first, it feels like a vague tenderness or ache that shows up when you start running.
Sometimes it fades as you loosen up, only to come roaring back after. Ignore it long enough, and suddenly it hurts walking around the house.
I’m often afflicted by this annoying injury – and it’s really annoying.
What Causes Shin Splints?
Think of it as a tug-of-war on your shinbone.
Every step you take, the muscles around your tibia—especially that deep calf muscle, the soleus—yank on it.
If your bone hasn’t adapted to the load, it fights back with inflammation and micro-damage.
Here’s what usually lights the fire:
Training errors. Classic mistake: jumping mileage or intensity too fast. Downhill runs, cambered roads, or tossing in a hilly route without buildup? Recipe for shin splints.
Shoes and foot mechanics. Overpronators (your foot rolls in too much) and high-arched runners both get hit here. Flat feet = more tibia strain. High arches = pressure overload. Toss in worn-out shoes, and your shins will rebel.
Weak or tight muscles. Weak calves and hips shift impact to the shins. Tight calves and Achilles? They lock up ankle motion, forcing the tibia to absorb the shock.
Running form. Overstriding is a killer. Every time your foot lands too far ahead, it slams the brakes on your stride, hammering your shins. Hard heel-striking doesn’t help either. A lot of runners (me included) have found relief by shortening the stride and upping cadence. Quick, light steps = less stress per landing.
Symptoms You Can’t Ignore
Aching or throbbing along the inside of your shin is the red flag.
Usually worse at the start of a run or the morning after, then it eases once you’re warm. Push too far, and it becomes sharp, constant, and pinpoint—at that point, you might be flirting with a stress fracture.
Rule of thumb: if the pain is widespread, it’s probably shin splints.
If it’s sharp, localized, and makes you limp—get checked for a stress fracture. They’re on the same spectrum, and I have read that untreated shin splints can absolutely tip over into a fracture.
How to Stay Ahead of Shin Splints
Here’s the good news: you don’t have to live in fear of shin pain. The best cure is prevention—and that means playing it smart.
Build mileage slowly. No “hero weeks.” Stick to the golden rule: increase gradually. Some coaches like the 10% rule, but I prefer the “three up, one down” approach: build for three weeks, cut back for one. Example: 20 miles → 22 → 24 → then back to 18 before climbing again. Your bones need those cutback weeks to adapt.
Wear the right shoes (and replace them). Match your shoe to your gait. Overpronators? Go stability or use inserts. High arches? You need cushion. And swap them out around 300–500 miles—studies show shock absorption drops 30–50% by then. Bonus tip: rotate two pairs if you run a lot. It lets the foam recover and changes stress patterns just enough to keep shins happier.
Strengthen and stretch. Don’t skip this. Eccentric heel drops (lowering your heel off a step slowly) are gold for building shin-calf resilience. Add toe raises or band work for the anterior tibialis. Hit hips and glutes, too—weak hips = sloppy mechanics = shin pain. And stretch those calves religiously. Both straight-knee and bent-knee stretches to get the gastrocnemius and soleus. I swear by a 30-second calf stretch after every run—it’s a shin-saver.
Mix up your surfaces. Too much concrete? Brutal. Mix in dirt trails, tracks, or grass. But don’t baby yourself either—if you only run on soft ground, you’ll be fragile when you do hit pavement. The trick is balance. And if you’re running on sloped roads, switch sides to keep the strain even.
I’ve written a whole guide to shin pain prevention. Read here.
Recovery & Treatment: Be Smart, Not Stubborn
I hate to break it to you but the cure isn’t some magic gadget or secret supplement.
It’s patience, smart training, and fixing the stuff that got you here in the first place.
Here’s the no-BS breakdown:
1. Step Back Before You Break Down
First rule: give those shins a break. I know, taking days—or weeks—off feels like punishment.
But trust me, ignoring it is worse.
A few days off for a mild case might save you from months off with a stress fracture. I’ve seen it happen too many times.
And “rest” doesn’t mean couch potato mode. Get on a bike, hit the pool, or try aqua jogging. Keep the engine running without pounding your shins. I cannot recommend regular cross training enough.
2. Calm the Fire
Ice is your friend here. Ten to fifteen minutes a few times a day—simple, effective, and way better than pretending it doesn’t hurt.
Some folks also use NSAIDs like ibuprofen short-term, but that’s pain relief only, not a cure.
I’m old-school: ice after runs, move on.
3. Check Your Gear & Your Form
If your shoes look like they’ve run more miles than your car, replace them.
Worn-out shoes are shin-splint fuel.
Better yet, get a gait check at a running store or podiatrist.
Sometimes a small tweak in footwear—or even form—can make all the difference.
But don’t jump into big changes overnight. Easing in is the name of the game.
I once realized that I was overstriding during long runs—basically slamming my heels into the pavement every step.
Shortened my stride, bumped cadence, and my shins instantly started thanking me.
4. Build Stronger Legs
Once the pain calms down (usually after a week or two), it’s time to rebuild.
Calf raises & eccentric heel drops: Start with 3×15 slow reps off a step. Straight legs, then bent knees. Progress to single-leg or add weight.
Toe raises: Lift the forefoot while heels stay planted—3×15–20. Bonus if you’ve got a resistance band.
Hip & core work: Think clamshells, side leg lifts, bridges, planks. Strong hips = better mechanics = happier shins.
Mobility: Stretch calves, roll them out. Try rolling your shin over a frozen water bottle—double-duty massage plus ice.
Everything’s connected. Weak hips, sloppy core, and tight calves all load up your shins more than they should.
5. The Comeback: Earn It Slowly
Here’s the green light: if you can walk and hop pain-free, no tenderness, you’re ready to run again.
But go slow. Start with soft surfaces, maybe a walk/jog program (1 minute jog, 1 minute walk for 10 minutes).
If it feels good that day and the next, progress. Small bumps in mileage—10 to 15% a week, tops.
Insert rest or cross-train days between runs at first. And don’t even think about sprints or hill repeats until you’ve rebuilt a base of steady, pain-free mileage.
Bones need stress to get stronger, but too much stress breaks them down. That’s why I always recommend 2–3 weeks of progressive loading, then a lighter week to let the bones adapt.
Listen to your body’s “pain scale.” Green is fine, yellow means back off, red means stop now. I’ve already explained this before.
When to See a Pro
If your shin pain is sharp, super localized, or won’t quit after rest and rehab, don’t play tough guy. Get it checked. Sports docs and PTs can test for stress fractures (and yes, that sometimes means 6–8 weeks off with a boot).
If you’ve got swelling, numbness, or tingling in your feet, that could be compartment syndrome—don’t mess around, get help fast.
Runner’s Knee (Patellofemoral Pain Syndrome)
Let’s talk about one of the most common thorns in a runner’s side: runner’s knee.
The fancy name is Patellofemoral Pain Syndrome (PFPS), but really, it’s that dull, annoying ache around or behind your kneecap that shows up when you run, especially downhill, take the stairs, squat, or even sit too long at the movies.
That’s why some experts call it the “movie theater sign.”
Unlike a torn meniscus or blown ligament, PFPS isn’t one single injury—it’s more like your kneecap and the surrounding structures are irritated from overuse and bad tracking.
Think of it as the knee saying, “I’ve had enough of this sloppy form and overload.”
Why It Happens
Runner’s knee usually comes down to your kneecap not gliding smoothly over your femur.
Here’s what pushes it out of whack:
Weak quads and hips:Your quads—especially the inner one (vastus medialis)—keep your kneecap steady. If they’re weak, the patella drifts, grinds, and hurts. Add in weak hips and glutes, and the whole chain collapses inward (that knee valgus wobble you see in race photos).
Tight muscles: Tight hammies, calves, or quads? They mess with mechanics and crank up pressure on the knee (Cleveland Clinic). IT band tension can yank the kneecap sideways too. Basically, when one part of the chain is locked up, your knee pays the bill.
Overstriding and form issues: Heel striking way out front or running with a low cadence is like sending shockwaves into your knees. Downhills? Brutal on the patellofemoral joint if you bomb them with bad form.
Foot mechanics: Flat feet and overpronation make the tibia and femur twist, pulling the kneecap off-track (Cleveland Clinic). Sometimes, the right shoes or orthotics can help straighten things out upstream.
Training errors: Classic mistake—sudden mileage jumps, hammering downhills, piling on speedwork, or always running the same slanted road. That’s a recipe for PFPS flare-ups.
How It Feels
The pain is usually diffuse—that “can’t put my finger on it” ache around or behind the kneecap.
It ramps up with stairs (worse going down), squats, or sitting too long with bent knees. You might feel mild swelling or some grinding (crepitus) when bending, but big swelling isn’t typical for PFPS.
Key difference: if your knee locks, gives way, or had sharp pain after a twist—that’s not runner’s knee. That’s doctor territory. PFPS is stubborn, but not usually catastrophic.
How to Keep It Away
The good news? Most cases respond to simple, consistent work. Here’s the playbook:
Strengthen quads and hips: Non-negotiable. Start with pain-free moves like straight-leg raises, wall sits, and mini squats. Add clamshells, glute bridges, side-lying leg lifts, and monster walks for the hips. Research backs this up—hip and quad strength are your knee’s best friends. Focus on form: knee tracking over toes, no collapsing inward. Here’s my go-to routine.
Fix your stride: If you’re a big strider, bump cadence by 5–10%. Even a small jump can reduce knee impact because you’ll land closer to your center of mass. Aim for ~170–180 steps per minute (if you’re at 160 or less, that’s low). On downhills, shorten your stride, keep knees soft, and don’t lock out.
Stay loose: Stretch post-run—quads, hammies, calves. Foam roll the quads and IT band region. Keeps the tug-of-war on your kneecap in check.
Shoes/orthotics: Wear shoes that match your foot type. Flat-footed with knee pain? Try OTC orthotics or stability shoes before shelling out for custom ones (research notes custom insoles often aren’t more effective than simple OTC solutions). The goal is alignment, not overcomplication.
Train smart: Don’t jump mileage or hill work overnight. Sprinkle in cross-training—bike, swim, row—when knees are cranky. Respect recovery days. Limit downhill pounding unless your legs are conditioned for it.
Lucky for you, I’ve already written a whole guide to knee pain prevention. Read it here.
Recovery and Treatment: Respect the Knee, Don’t Try to Out-Stubborn It
Here’s the good news: runner’s knee almost never needs surgery.
Most of the time, conservative care works just fine. The real battle is patience.
1. Dial It Back, Don’t Quit Everything
You don’t usually have to stop moving completely, but you do have to stop picking at the scab. Keep hammering hills and deep squats while your knee is pissed off?
That’s like scratching an itch until it bleeds—it’ll stay inflamed.
Cut mileage.
Skip stairs and hills for now.
If even flat running hurts, park the shoes for a week or two and jump on the bike, hit the pool, or do any low-impact cardio that doesn’t set your knee on fire.
The mission is to calm irritation down, not prove your toughness.
This may sound too simple but believe me – it works.
2. Ice & Anti-Inflammatories
Old-school still works: ice the knee 15–20 minutes after runs or when it aches.
Short-term use of NSAIDs (like ibuprofen for a week) can help dial down inflammation. Some runners also swear by anti-inflammatory gels for local relief.
Just remember—those are band-aids. The real fix comes from getting stronger and correcting muscle imbalances.
3. Tape It or Brace It (If It Helps)
Some runners feel better with McConnell taping or kinesio tape guiding the kneecap into a less painful groove.
A good PT can show you exactly how.
There are also straps and sleeves that support the patella. These aren’t cures, but they can make running more bearable while you rehab.
4. The Real Work: Rehab Exercises
Once the pain starts calming, it’s time to rebuild. Do these every day or at least every other day.
No magic trick here—consistency is the cure.
Quad sets & straight leg raises: Fire up your quads without bending the knee. Do 10–15 reps, hold each 5 seconds.
Clamshells & side leg lifts: Train your glutes—these guys are your knee’s bodyguards. Resistance band makes them more fun (well, “fun”).
Wall sits (short arc): Sit against a wall, knees bent about 45° (not deep). Hold 10–30 sec. Builds endurance without pounding the kneecap.
Calf stretch & foam roll: Don’t let tight calves and IT band yank on your knee mechanics. Roll gently, don’t murder your IT band.
Step-downs / mini squats: Once pain eases, practice control. Stand on a low step, lower opposite heel to the ground slowly, then back up. Keep knee tracking over toes. These will burn but they’re gold for downhill strength.
5. Return to Running (Slow Is Fast)
When daily life and your rehab moves feel pain-free, it’s time to test short runs. Keep them flat and easy.
Try every other day at first. Avoid downhills—they’ll light your knee up again.
Think “yellow-light rules.” If pain creeps in, back off before it gets worse. Build slowly: 1 mile, then 1.5, then 2. Walk breaks are fine. Better to progress like a tortoise than flame out like a hare and be sidelined again.
Still looking for more guidelines like this, check out my post here.
When to Get Checked Out
If your knee is sharp, swollen, locking, or just won’t improve after weeks of smart rehab, it’s time to see a sports med doc.
They may order imaging—not to “prove” runner’s knee (that doesn’t usually show on MRI)—but to rule out cartilage issues or other sneaky problems.
And honestly, a good PT can be worth their weight in gold.
They’ll tweak your form, show you how to do the exercises right, and sometimes loosen up tight spots with hands-on work or taping.
Surgery? That’s last resort, and only if there’s a clear structural problem like a rogue cartilage flap. For the vast majority, rehab and smarter training do the trick.
IT Band Syndrome (That Outer-Knee Burn We All Dread)
The IT Band Syndrome (ITBS) one of the most common overuse injuries out there, and man, it’s a tough one.
The pain shows up sharp and burning on the outside of the knee, usually a few miles into a run, and it can get so intense it literally forces you to stop.
Sometimes it even shoots up the side of the thigh.
Classic ITBS.
What’s Going On
The iliotibial band (a thick strip of tissue running from your hip down past your knee) helps stabilize your leg when you run.
Problem is, with all the bending and straightening we do, it can rub against the femur bone and get angry.
Cue that stabbing pain at the lateral knee.
And here’s what tends to trigger it:
Weak hips. This is the big one. Your IT band connects to the TFL and the glutes. If your glute medius and crew aren’t pulling their weight, your thigh rotates inward, and the IT band grinds harder against the femur. Cleveland Clinic flat-out says weak hip abductors are one of the main causes. I’ve seen this a ton with runners I coach—once they get serious about hip strength, the knee pain often fades.
Tight hips. The IT band itself doesn’t really stretch (it’s like a seatbelt), but the muscles attached to it—your TFL and glutes—can. If they’re locked up, the IT band gets pulled tight.
Downhills & sloped surfaces. This is why trail runners and ultrarunners curse ITBS. Bombing down long downhills makes the band rub harder, and running on banked roads where one foot’s always lower than the other? Recipe for irritation. Same with track runners always turning left.
Overdoing it. Big jumps in mileage or speedwork without recovery are prime triggers. ITBS loves sudden increases.
Foot mechanics. Overpronation, leg length discrepancies, or stiff ankles can throw off your gait and put more stress on one IT band.
Shoes & terrain changes. Switch shoes without easing in, or grind out miles in worn-down trainers, and you’re asking for trouble.
How It Feels
The calling card is that sharp, localized pain on the outside of the knee.
Usually not much pain at rest, but a few miles into a run it starts to bite. Downhills are brutal. Some folks even find slow running hurts more than faster paces.
Walking downstairs can set it off too.
Push on the bony outside of the knee (lateral epicondyle) and it’s tender.
Bend the knee to about 30 degrees and—bam—you feel it. That’s the ITB test docs use.
Usually no swelling, no deep joint pain—if it’s higher up the leg or inside the joint, you’re likely dealing with something else.
How to Keep It Away (and Beat It When It Shows Up)
Here’s the good news: you can do a lot to prevent ITBS, and the same moves help treat it when it pops up.
Strengthen your hips and glutes. This is the #1 fix. Side-lying leg raises, clamshells, single-leg squats, band walks—they’re not glamorous, but they work. A side plank with a leg lift? Brutal, but golden for the lateral hip and core. Strong hips mean your knee tracks straighter, and the IT band stops getting chewed up.
Stretch & roll (smartly). Stretch your glutes, TFL, and outer thigh. Foam rolling helps some, irritates others. If you roll, focus more on the hip and quad area—don’t grind directly on the outside of the knee.
Train the downhills. If you’ve got a hilly race, work them in gradually. Don’t suddenly decide to do a monster downhill run. Your body needs to adapt.
Mix up surfaces. Switch directions on the track, alternate road sides, or stick to flat paths when you can. Trail runners—don’t always stick to one sloped side.
Keep shoes in check. Don’t push old, worn-out shoes too far. And if you’re switching models (say, neutral to stability), ease into it. Orthotics sometimes help, but that’s more case-by-case.
Catch it early. The moment you feel a twinge on the outside of your knee, back off mileage, ice it, and up your hip work. Ignoring ITBS never works—it only gets nastier.
Recovery and Treatment: Winning the Battle Against ITBS
If you’ve got IT band syndrome, here’s the deal—you can’t just “push through.”
I’ve tried it, plenty of runners have tried it, and it usually ends with hobbling home and weeks of frustration.
The fix is about reducing the fire (inflammation) first, then dealing with the root cause.
Here’s what I’d recommend you to do:
1. Rest (Don’t Be a Hero)
Yeah, I know—rest is the hardest word in a runner’s vocabulary.
But if the pain hit hard, you need at least a week or two of serious cutback.
Sometimes full stop. Cycling (stay seated) or swimming can be safe alternatives if they don’t spark pain.
Downhills? Forget about it for now—they’re ITB poison. Even walking long distances can sting, so don’t pretend you’re in a step-count competition.
2. Ice & Anti-Inflammatories
Classic combo: ice the outside of your knee for 10–15 minutes after activity.
The IT band rubs and irritates the bone like bursitis, and cooling it down helps.
NSAIDs (7–10 days) can knock down the irritation, but remember—those don’t fix the underlying issue. They just quiet the alarm bell.
3. Massage & Foam Rolling
Grab your roller or a lacrosse ball and get friendly with your outer thigh, glutes, and hip. Quads, hammies, TFL—show them some love. Some PTs swear by myofascial release or ASTYM.
The evidence is mixed, but anecdotally, tons of runners say it helps when paired with strengthening.
Personally, I’ve had that “hurts so good” moment on the roller that made me want to cry and laugh at the same time.
4. Strength Training: The Game-Changer
This is the big one.
Most ITBS stories start with weak hips and glutes. Fix that, and you’re on your way out of the woods.
As soon as the pain calms down, get after these:
Side leg raises – 2–3 sets of 15. Keep it strict, no swinging.
Clamshells – high reps, good form, hips stacked. Burn, baby, burn.
Hip thrusts / glute bridges – double or single leg.
Single-leg squats/step-downs – shallow at first, progress with control.
Lateral band walks – you’ll hate me, but your hips will thank me.
Core work – planks and side planks to lock your form.
Do these consistently, and you’ll build the armor your knees desperately want.
5. Stretching
Post-run or after a hot shower, stretch it out. The standing ITB stretch (cross leg behind, lean away) is a classic.
Add quads and hammies to ease the knee strain. But don’t yank it so hard you create new pain—stretching should feel relieving, not like punishment.
6. Careful Comeback
Your green light back to running: when you can walk stairs, squat, and move around without pain. Start flat and short—1–2 easy miles.
Treadmill or track is best.
The moment that lateral knee ache shows up—stop. Don’t tough it out, because ITBS pain ramps like a wildfire once triggered. Ice after every run.
Build mileage slowly (10–15% max per week), keep rest days, and hold off on downhills or speedwork until your body’s ready.
When to Call in Backup
If the pain won’t back down, get checked by a PT.
They’ll spot weak links you can’t see and maybe use tools like deep tissue massage, dry needling, or ultrasound. Surgery exists (IT band release, bursa work), but it’s rare.
99% of runners never need it because this thing does heal with the right approach.
Plantar Fasciitis: The Runner’s Heel Nemesis
If you’ve ever woken up, stepped out of bed, and felt like a knife just stabbed your heel—welcome to the world of plantar fasciitis.
It’s that nasty injury to the thick band of tissue running under your foot, from your heel to your toes.
Doctors call it the plantar fascia, and when it gets irritated, you’ll know it.
The pain usually hits right at the heel bone (calcaneus) and is sharp, stabbing, and brutal first thing in the morning or after you’ve been sitting too long.
I also read that it’s called “plantar fasciopathy” because in chronic cases it’s more about wear and tear than just inflammation.
I’m no stranger to this condition. Those first steps out of bed feel like walking on broken glass. You limp around, then eventually it loosens up, and you think, Maybe it’s fine.
Spoiler: it’s not fine if you don’t deal with it.
What Causes It
Think of the plantar fascia like the bowstring of your foot’s arch.
Put too much stress on it, and little tears build up—especially near the heel.
Here’s what usually pushes runners over the edge:
Tight calves/Achilles. This is the big one. When your calves are tight, your ankle can’t flex properly. That dumps extra stress on the fascia. At night, your foot points down (plantarflexed), so the fascia shortens. Then boom—you step out of bed and yank it hard, and it screams back at you.
Foot shape. Flat feet (arches collapse inward) overstretch the fascia. High arches (rigid, no give) make it too taut. Either way, the fascia gets punished.
Crappy shoes. Running in worn-out trainers or flip-flopping around with no arch support? Recipe for disaster. It’s actually one of the most common “you ignored your shoes” injury I see.
Too much, too soon. Spike your mileage, jump into speedwork, or stack plyometrics, and the fascia pays the price. Even long shifts on your feet at work can trigger it.
Surface & hills.Going from treadmill to pounding city concrete overnight? That’s stress city. Lots of uphill running also tightens calves and strains the fascia.
Extra weight. Whether it’s pregnancy, a few extra pounds, or just life—more load means more strain with every step.
What It Feels Like
The telltale sign: heel pain right at the inside/front edge of your heel. It’s worst in the morning when you first stand up.
It might loosen as you move around, but then sneak back after a run or when you get up from sitting too long.
That’s the classic “startup pain.”
On runs, it often hurts at the start, eases once you warm up, then flares again after you stop. Press on the inside of your heel—if it lights up, that’s PF.
Usually it’s one foot, sometimes both.
And unlike other injuries, there’s not much swelling or bruising. If you’ve got heel pain with numbness or pain that spikes at night, that’s probably a different beast (like tarsal tunnel syndrome).
How to Keep It Away
Here’s the tough love: if you don’t want PF, you’ve got to respect your calves, arches, and footwear.
Stretch those calves daily. Straight-leg and bent-knee stretches hit both calf muscles. Do wall stretches or use a slant board. Thirty seconds each, often. Also stretch the fascia itself—towel stretch, toe pulls, whatever works. Just make it a habit.
Strengthen your feet. Toe curls, towel scrunches, marble pickups—they sound silly, but they bulletproof your arches.
Don’t go zero to sixty. Add mileage and intensity gradually. Only one new stressor at a time—don’t jump from more miles and speedwork and new shoes all in the same week.
Support your feet everywhere. No barefoot laps around the hardwood floor if you’re prone to PF. Even at home, wear supportive sandals or recovery shoes. Some runners swear by cushiony sandals like Oofos for off-the-run relief. Replace your running shoes every 300–500 miles, or sooner if the cushion feels dead.
Listen to the early whispers. A sore arch or heel after a run is your warning light. Roll your foot on a frozen water bottle, stretch, and take a day off if needed. Don’t ignore it until it sidelines you.
Mix up terrain. If all your runs are on concrete, throw in grass or dirt to give your fascia a break.
I’ve written a full guide to pain prevention. Read it here.
Recovery and Treatment: Plantar Fasciitis
Plantar fasciitis is one of those injuries that makes you want to throw your running shoes at the wall. It heals slow—sometimes weeks, sometimes months—because that fascia is stubborn tissue.
But here’s the good news: most runners do get past it if they stay consistent with treatment.
The trick is not being hardheaded (I’ve been guilty) and trying to “just run through it.” Spoiler: that never works.
1. Rest—But Don’t Panic
I keep repeating it – Rest doesn’t always mean “couch potato.” If the pain isn’t too bad, you might still jog, but cut the mileage and ditch the speedwork and hill repeats until things calm down.
If every run makes the next morning worse, back off. Sometimes a full stop is needed for a few weeks.
Cross-train with swimming, biking, or anything that doesn’t piss off your heel.
2. Cushion & Tape It Up
Your heel takes the brunt, so give it a break.
Gel cups, silicone pads, even cut-out insoles can offload pressure.
And taping—look up “low-dye taping.” It basically cradles the arch. I’ve taped my foot mid-training cycle and it’s like giving your fascia a supportive hug.
3. Ice & Massage—The Hurts-So-Good Stuff
Freeze a water bottle, roll your foot over it. It’s massage plus ice therapy in one.
Or go old-school with a golf ball—warning, it’ll sting, but in that good way.
End of the day, after runs, whenever it flares up—ice the heel. You’ll thank yourself in the morning.
4. Stretch Like It’s Your Job
Before your first step out of bed, stretch the calves and fascia.
Keep a towel or band handy, pull your foot back gently, do ankle circles.
Some research recommends night splints or the Strassburg Sock—they keep your foot flexed overnight so you don’t wake up with that dreaded “knife in the heel” step. I’ve tried this in the past but it didn’t help much to be honest.
5. Strength Work—Load It Right
Here’s the paradox: you need to rest, but you also need to strengthen.
Think short-foot drills (scrunching the arch without curling toes), calf raises, and eccentric heel drops. Stand on a step, raise on both feet, lower down slowly on the bad one.
Mild discomfort?
Fine. Sharp pain? Stop. Do it daily, 2–3 sets, 15 reps.
Cleveland Clinic backs this up—you’ve got to be consistent for weeks to see real change. Add in towel curls or marble pickups to build those little foot muscles.
6. NSAIDs, Shots & New Tech
Ibuprofen can take the edge off early on. Docs sometimes offer cortisone shots for severe pain, but it’s risky—quick fix, not a cure, and a small chance of fascia rupture. Save that for last resort. I’ve already dived into the topic of OTC for pain.
Clinics are also using shockwave therapy (yep, sound waves blasting your fascia to spark healing). Studies show it can work in tough, chronic cases.
7. Getting Back on the Road
Patience is the name of the game. Don’t run until you can walk pain-free and hop in place without wincing.
When you do return, start with short, flat runs. Softer surfaces help.
Some runners come back using tape or orthotics for extra support. Run/walk is your friend here—alternate to ease the load.
Expect some morning stiffness to linger—it doesn’t vanish overnight.
As long as pain is mild and trending better, keep building.
But if even a short jog leaves you limping the next morning, that’s your fascia telling you, “Not yet.”
When to Get Help
If you’ve been hammering home treatments for 6–8 weeks and nothing’s budging, call in the pros.
A podiatrist or sports doc can check for sneaky mimics like a stress fracture or nerve issue, and they can fit orthotics or try advanced stuff like PRP or shockwave therapy.
Bottom line: most plantar fasciitis clears with consistency and patience. Stretch daily. Strengthen smart. Don’t rush the comeback. One day you’ll step out of bed without that “ouch” and feel that spring in your step again.
Achilles Tendinopathy: The Runner’s Nagging Nemesis
Let’s talk about one of the most common (and annoying) runner injuries out there: Achilles tendinopathy.
For a long time I called it Achilles tendinitis, but “tendinopathy” is the real deal term for chronic cases.
This is an overuse injury that hits the thick band connecting your calf muscles (gastrocnemius and soleus) to your heel bone.
It usually shows up as pain, stiffness, or tenderness in the back of your heel or lower calf—especially first thing in the morning or when you kick off a run.
The Achilles is the strongest tendon in your body, but it’s not bulletproof.
Keep stressing it with too much running and not enough recovery, and you’ll end up with microtears, degeneration, and that all-too-familiar ache that makes you limp to the coffee maker.
I found that there are two sorts of Achilles trouble:
Mid-portion tendinopathy: Pain shows up 2–6 cm above the heel, right in the middle of the tendon.
Insertional tendinopathy: Pain is right where the tendon attaches to the heel bone. This one’s trickier because it doesn’t tolerate stretching as well.
Why It Happens
Most cases, as you can already tell, come down to the classic too much, too soon mistake.
The tendon just can’t keep up with the load. Some of the biggest culprits:
Sudden spikes in training – Adding mileage, intensity, or hill workouts too fast. Hills especially torch the Achilles because every uphill stride forces it to strain harder. Same with sprints or intervals—those hard push-offs can light it up.
Tight or weak calves – If your calves are stiff as bricks, the Achilles takes more force. Weak or fatigued calves? Same story. A lot of runners carry tight calves around like it’s part of the uniform—and it sets them up for trouble.
Footwear changes – Switching to a shoe with a lower heel-to-toe drop (say from a cushioned 10mm trainer to a minimalist zero-drop) without easing in? Bad idea. Your Achilles suddenly stretches more every step, and it’s not ready for it. Worn-out shoes are no friend either.
Biomechanics – Overpronation can twist the tendon. Super rigid feet that barely pronate can pound it too, since there’s no shock absorption. Leg length differences or a funky gait only add fuel to the fire.
Age and circulation – Over 30? Welcome to the Achilles club. Blood flow drops with age, collagen weakens, and suddenly what you got away with in your 20s bites you in your 40s. Morning stiffness is classic—feels like your heel forgot how to bend overnight .
How It Feels
If you’ve had it, you know the script:
Stiff Achilles in the morning (sometimes it feels like walking on wood until you loosen up).
Ache or pain during or after running, usually at the back of the heel or calf.
Tender spots—mid-portion pain sits a couple inches above the heel; insertional hurts right at the bone.
In chronic cases, the tendon thickens, and you might even feel a bump compared to the other side.
Hills or speedwork? That’s when it really barks.
If it’s really bad, even walking or going up on your toes hurts.
Keeping the Achilles Happy (Prevention)
The good news? You don’t have to wait until you’re limping to take care of this tendon.
Here’s what has worked for me and my running clients:
Eccentric heel drops – Gold standard. Slowly lower your heel off a step. Not just rehab—great as a preventive tool. Studies show they stimulate tendon adaptation. Do a couple sets of 10–15 a few times a week.
Stretch those calves – Straight-leg stretch for gastrocnemius, bent-knee stretch for soleus. Foam roll if you’re tight. Looser calves = less morning stiffness.
Ease into hills – Don’t go from zero to 10 x 200m hill sprints. Start with 2–3, or sneak hills into easy runs first. Same with speedwork—build up, don’t shock your system.
Smart shoe transitions – Switching to lower-drop shoes? Alternate with your old pair and build mileage slowly. Heel lifts can help take stress off in the short term.
Respect recovery – Don’t suddenly double your weekly runs. Take rest days after calf-burner workouts. And don’t forget that CrossFit, jumping, or plyos hammer the Achilles too.
Strengthen calves & beyond – Calf raises (straight and bent knee) with weight build resilience. Add glutes and hamstrings so your calves don’t have to pick up the slack.
Maintenance work – Massage, foam rolling, or even a massage gun session on calves and Achilles. Doesn’t hurt, feels good, and keeps things supple.
Recovery and Treatment for Achilles Pain
When it comes to Achilles issues, the answer usually isn’t lying on the couch doing nothing.
If you’re reading in this far, then you shouldn’t be surprised.
Tendons don’t like complete rest.
What they respond to is smart, controlled loading.
Think “train it, don’t strain it.” Unless it’s a full-blown rupture (different beast altogether), you want to manage the load, not eliminate it.
Here’s how I’d approach it:
1. Cut Back, Don’t Burn Out
First step: ease up.
That means dialing back mileage and skipping the workouts that torch your Achilles—like hill repeats and speed sessions.
Flat, easy running can sometimes stay on the menu if pain stays mild (think under a 3 out of 10, and no worsening during or after).
But if even jogging makes you limp, take a week or two off and swap in cycling or swimming.
Trust me, it’s better to lose a little fitness than push into a full-blown tear.
2. Heel Lifts & Smart Stretching
Slip a small heel lift into your shoe for a bit—it reduces stress by shortening the Achilles.
If your pain is down near the heel (insertional), avoid dropping the heel below the foot (like those step stretches everyone loves). That just grinds the tendon into the bone and makes things worse.
Keep stretches gentle and on flat ground. Mid-portion pain? Some light stretching is fine—just don’t force it.
3. The Gold Standard: Eccentric Heel Drops
This one has science behind it. The Alfredson protocolis the go-to: 3 sets of 15 heel drops, twice daily, for 12 weeks.
Stand on a step, rise up with both feet, then slowly lower down (3–5 seconds) on the injured leg.
Use the other foot to help push back up. Do it with knees straight (to hit gastrocnemius) and bent (for soleus).
Warning: it’s gonna hurt a little. And that’s okay.
Alfredson himself believed working into moderate pain helps kickstart tendon remodeling.
Just don’t push into crippling pain. Over time, add weight (I used to strap on a backpack stuffed with books).
And if your pain is insertional? Only lower to flat—not below the step. Stick with it. Research in the American Family Physician shows eccentrics improve both pain and function.
4. Isometric Holds
Newer studies say isometrics—holding tension without moving—can calm pain down for hours.
Try a calf raise and hold at the top for 30–45 seconds, a few reps. Great option when the tendon’s too cranky for full heel drops.
5. Loosen Things Up
Foam rolling your calves daily works wonders.
You can also massage around the tendon with your fingers to get blood moving.
Just don’t go grinding away directly on a very sore spot. Gentle is the name of the game.
6. NSAIDs—Use With Caution
If your Achilles is inflamed (true tendinitis), NSAIDs can help short-term. But for chronic tendinopathy, inflammation isn’t the big problem—it’s degeneration.
In fact, some animal research suggests long-term NSAID use could slow healing. Topical gels might help manage flare-ups, but don’t expect pills to be your fix.
7. Morning Routine
Achilles stiff in the morning? Welcome to the club.
Before stepping out of bed, do some ankle pumps or gentle stretches.
It helps ease into the day. Night splints are sometimes used (more common with plantar fasciitis), but the key is keeping things moving early.
8. The Comeback
Here’s the hard part: just because your Achilles feels better doesn’t mean it’s fully healed.
I’ve seen runners rush this step all the time—and then regret it.
Wait until morning stiffness is minimal and you can do eccentrics without much pain before trying some flat, easy jogs. Start short. Maybe every other day at first. Avoid hills until your tendon feels bulletproof again.
And don’t stop the calf work once you’re “better.”
When to Get Help
If you’re not sure how bad it is, or if it’s just not getting better, go see a sports doc or physio. Sudden “pop”? Can’t push off? That’s emergency territory—get checked right away for rupture.
For tendinopathy, PTs can spot weak hips, stiff ankles, or other factors feeding into your Achilles issue. Some may use shockwave therapy or ASTYM to promote healing.
Worst-case scenarios (when nothing else works) may involve PRP injections or surgery—but those are last resorts. Most runners recover without going that far.
Stress Fractures: The Runner’s Wake-Up Call
Let me hit you straight: a stress fracture isn’t just “a sore shin” or “a little foot pain.”
It’s a tiny crack in your bone—a warning sign your body is waving in your face.
Unlike breaking a bone in a crash, this one sneaks up on you.
It builds over time when you push too hard, too fast, and don’t give your bones the downtime they need to rebuild.
Think of it like this: every run is a small withdrawal from your body’s bone bank.
Usually, your bones remodel and pay the debt back stronger.
But if you keep withdrawing without deposits (rest, nutrition, recovery)? Boom. The bone gets tired, then it cracks.
How Do Stress Fractures Happen?
There’s never just one reason.
It’s usually a cocktail of overtraining, bad recovery, and sometimes nutrition gaps.
Here are the big culprits:
Mileage Madness: The classic story. Runner doubles mileage, adds long runs, maybe back-to-back races—bone doesn’t keep up.
No Rest Days: Look, bones need rest as much as your muscles do. If you hammer every day—speed, long runs, no cutback weeks—you’re asking for it. Training isn’t just about stress; it’s about recovery cycles.
Underfueling (RED-S): This one’s sneaky and huge. If you don’t eat enough to support training, your bones suffer. Especially with low calcium or vitamin D. For women, missed periods (amenorrhea) are a giant red flag—part of what used to be called the Female Athlete Triad, now RED-S (Relative Energy Deficiency in Sport). Men aren’t off the hook either. If you’re chronically underfed, your bone density tanks.
Biomechanics & Shoes: Overpronation, leg-length differences, stiff or worn-out shoes—small things that concentrate stress on one bone. Ever see someone limp into the clinic with a metatarsal stress fracture? Often it’s gait plus overload.
Bone Density & Genetics: Some of us just have more fragile bones. Post-menopausal women, folks with osteoporosis, or anyone who’s had a stress fracture before are higher risk. Once you’ve had one, you’re more likely to get another if you’re not careful.
Surface & Environment: Suddenly swapping grass or trail for endless concrete? Recipe for trouble. Even with great form, hard surfaces add load your body might not be ready for.
What It Feels Like
Here’s the part every runner needs to hear: stress fractures don’t feel like “normal” soreness. The pain has a personality.
Pinpoint Pain: You can poke one exact spot on the bone and it’s like—ouch. That’s different from shin splints, which are more spread out.
Worsens With Running: Unlike a muscle strain that warms up and feels better mid-run, stress fracture pain either stays the same or gets worse the longer you go.
Swelling or a Little Bump: Sometimes the bone even shows a small lump or subtle swelling.
Percussion Test: Tap the bone, it hurts. Hop on the leg, it screams. That’s not good.
Night Pain: In bad cases, it aches even when you’re lying down.
Stress fractures are the nightmare nobody wants—painful, sneaky, and guaranteed to derail your training if you ignore them.
The good news? Most of themcan be prevented with smart training, fueling, and listening to your body.
Let’s talk about how to stay ahead of them—and what to do if you end up sidelined.
1. Train Smart, Not Stupid
Don’t go from zero to 60 with mileage.
Your bones need time to adapt.
The old “10% rule” (adding no more than 10% mileage per week) isn’t perfect, but it’s a decent guardrail
More important: actually listen to your body.
If your shin, hip, or foot feels bone-deep painful, that’s not soreness—it’s a red flag.
Build in cutback weeks every 3–4 weeks where you back off mileage. That’s recovery, not weakness.
2. Fuel Your Bones
Calories matter.
Period.
Undereating is one of the fastest ways to trash your bone health.
For bones specifically: calcium (1000–1300 mg/day) and vitamin D are key. Get your levels checked—lots of runners are low on D, especially in winter.
For women, a lost period is not a “perk” of training—it’s a huge warning sign of low energy availability and a known risk factor for fractures.
Check my guide to running nutrition.
3. Strength Training Is Bone Training
Strong muscles shield your bones. Lifting weights doesn’t just make you faster—it literally stimulates bone growth.
Think squats, lunges, and plyometrics (in moderation).
Load-bearing moves teach bones to adapt. Personally, I’ve found that once I added 2–3 strength sessions per week, I stopped dealing with shin splints that used to haunt me every training cycle.
4. Don’t Just Run, Mix It Up
Most of us aren’t built to pound pavement seven days a week.
Even elites take rest days and off-seasons.
Mix in biking, swimming, elliptical, or aqua jogging to keep your cardio without the constant bone stress. Your legs will thank you.
5. Surfaces & Shoes
Vary your terrain—road, trail, track. Each surface stresses bones differently, which spreads out the load.
As for shoes, keep them fresh. Old, dead shoes = more shock on your bones.
But don’t assume the most cushioned shoe saves you—sometimes all that padding makes you stomp harder.
Comfort and support matter most. Orthotics can also help if you’ve got biomechanical quirks like super-high arches.
6. Know Your Risks
If you’ve had stress fractures before, have low BMI, or other risk factors, talk to your doc about a DXA scan.
Knowing if you’ve got low bone density can change how aggressively (or conservatively) you train.
7. Don’t Ignore Red Flags
This one is huge. Stress fracture pain is sharp, focal, and doesn’t go away when you warm up.
One runner shared how her shin pain was brushed off as “shin splints,” cleared by X-ray… then her tibia cracked clean through just stepping at a concert.
Don’t be that runner. If pain feels wrong, stop, rest, and push for further scans (MRIs and bone scans catch fractures earlier than X-rays).
If You’re Already Injured (Been There, It Sucks)
Step 1: Rest From Running
Non-negotiable. The only way a fracture heals is to stop the pounding that caused it.
Most stress fractures need 6–8 weeks off running. High-risk spots (femoral neck, navicular) can mean longer or even surgery.
Sometimes you’ll need a boot or crutches if walking hurts. Low-risk ones (like some metatarsals) may just mean no running, but pain-free walking is okay.
Step 2: Cross-Train (Sanity Saver)
Deep-water running (aqua jogging) is gold—mimics running form without impact.
A flotation belt helps. Swimming, cycling, ElliptiGO, rowing (if it doesn’t stress the injury)—all fair game if pain-free.
When I had a tibia stress fracture, pool running kept me sane. It’s not glamorous, but it works.
Step 3: Eat Like You’re Healing
Your body is rebuilding bone—give it the raw materials.
Protein, calcium, vitamin D. Studies in military recruits show supplementing D and calcium lowers stress fracture risk, so it likely speeds healing too.
Collagen + vitamin C before training has some evidence for helping tendons and bones rebuild—worth trying.
4. Gradual weight-bearing
Here’s where patience really gets tested. You don’t just chuck the boot and start jogging because you feel okay. Follow your doc’s plan to the letter.
Usually, it’s a few weeks of partial weight-bearing (crutches, boot, the whole clunky package), then you add more weight as the bone heals.
Only when walking is 100% pain-free and you’re cleared is it time to even think about impact again.
Rushing this step is how people end up back at square one—or worse, with a full break.
5. Fix the “why” during downtime
Injuries don’t just happen—they happen for a reason.
Use this forced break to ask the hard questions.
Did you ramp mileage too fast? Skimp on recovery? Eat like a college kid on ramen? Maybe your form needs work—weak hips, sloppy core, flat feet.
Now’s the time to address it.
I’ve seen runners get hurt, then come back stronger because they finally tackled the root issue.
Example: a tibial fracture means no pounding the shin, but you can still train your core, upper body, and hips.
Don’t load the injured bone, but keep the rest of your machine sharp. Future You will thank you.
6. Return-to-run protocol
Here’s the biggest mistake runners make: thinking 8 weeks in a boot means “back to normal.”
Nope. A smart return looks like this:
Day 1: 1 min run, 4 min walk. Repeat 4–6 times. You’ve maybe “run” 5–6 total minutes. That’s it.
If the bone doesn’t flare up that night or next morning, you slowly increase. Maybe 2 min run/3 min walk.
Run every other day at first—bones need time to adapt to impact again.
Build from run-walks to continuous running. Start with 1 mile, then 2. Forget your old mileage for now.
Yes, it takes weeks to climb back. But that’s better than re-fracturing and spending months sidelined. Keep up cross-training on off days to maintain fitness, and don’t skimp on calcium + vitamin D.
And listen: a little achiness at first is normal. Sharp pain? That’s a red flag. Stop. Get checked. Better cautious than busted.
7. Patience and perspective
This one’s tough.
But here’s the upside—plenty of runners come back stronger.
They fix the mistakes, they fuel better, they train smarter.
And when you finally jog that first pain-free mile, even if it’s slow as molasses, it feels like pure victory.
Your bones might’ve cracked, but your spirit didn’t.
Hamstring & Calf Strains: The Snap You Never Forget
Strains = torn muscle fibers. Could be tiny tears (Grade I), or a complete blowout (Grade III).
Runners most often pop hamstrings (back of thigh) or calves (the “tennis leg” upper calf).
A hammy usually goes during a sprint when the muscle’s stretched and working overtime. Calves often tear during a push-off—like sprint starts, hills, or jumps.
Here’s why it happens:
Too much, too sudden. Hamstrings hate high-speed stretches. Calves hate sudden explosive pushes.
Fatigue and weakness. If you rarely sprint and then decide to hammer 200m repeats—boom, hammy. Ramp hill work too fast—hello calf strain. Weak glutes? Your hammies will try to do their job and yours, and eventually rebel.
Cold starts. Going zero to full sprint without warming up is a recipe for a “pop.” Dynamic drills and strides exist for a reason.
Old injuries. Scar tissue = weak spot. Hamstrings especially love to re-injure if you didn’t rehab right.
Imbalances. Quads way stronger than hammies? That tug-of-war doesn’t end well. Same with stiff ankles or uneven calf muscles—something gives.
What It Feels Like
A hamstring strains hits when you’re moving fast—sprinting, kicking, or finishing strong.
You’ll feel a sudden stab at the back of your thigh. If it’s bad, you might even hear a pop and limp right away.
Swelling or bruising often shows up within hours or the next day (sometimes behind the knee).
Stretch your hamstring with a straight-leg raise and—yep—it hurts. Mild ones just feel like a cramp or tightness that sneaks up later.
On the other hand, a calf strain is more sneaky.
Runners often describe it like “someone smacked me with a racket” or like a rock hit the back of the leg.
The upper calf (inside head of the gastroc) is a hot zone.
With a bad one, you’ll stop immediately, limp, maybe even grab your calf.
Bruising can pool around the ankle after a few days. Toe raises and push-offs? Forget about it for a while.
Grades of severity:
Grade I: feels like a tight knot, little or no weakness.
Grade II: definite pain, weakness, maybe 10–50% fiber damage. You’ll struggle with stairs or fast running.
Grade III: full tear—rare, but if you’ve got a visible dent or can’t contract at all, that’s surgical territory. (Seen in hamstring tendon avulsions.)
How to Stay Out of Trouble
Prevention is better than limping home mid-run.
Here’s what works:
Eccentric strength work: Your hammies and calves need to be strong while lengthening, because that’s the exact stress they take when you sprint. For hamstrings, Nordic curls are king—get a buddy to hold your ankles, lean forward slow, fight the fall. Studies show they slash hamstring injury risk. Add Romanian deadlifts and glute-ham raises too. For calves, heavy calf raises—both straight-leg (gastroc) and bent-knee (soleus)—are gold.
Warm up like you mean it: Jog, do leg swings, high knees, strides. Cold-to-sprint is how people pull stuff.
Progress gradually: Don’t go from zero sprints to all-out hill repeats. Ease back into speed. Same for plyos and heavy lifting.
Mobility & flexibility: Keep hamstrings and calves limber, but don’t overstretch thinking it’ll save you—strength matters more. Stretch gently post-run, and make sure ankles aren’t locked up (tight ankles shift stress to calves).
Glute strength: Weak glutes = hamstrings working overtime. Squats, hip thrusts, bridges—these protect your hammies.
Don’t train on fumes: Fatigue is a big injury trigger. If your legs feel like piano wires, maybe skip that speed session. Slippery surfaces and sloppy mechanics also set you up for pulls.
When You Do Get Hurt
First couple days are about protecting the muscle and letting it calm down:
RICE: Rest, Ice, Compression, Elevation. Keep it simple—ice for 15–20 minutes, wrap it snug (not strangled), elevate. Calves love compression socks.
Back off activity: You’re not running right away. Sometimes a bad calf pull means crutches for a day or two. If cycling or light movement doesn’t hurt, fine. But don’t “test it” every hour. Give the tissue space to heal.
Gentle mobility: After pain settles (a few days in), start light range-of-motion. Bend and straighten, small ankle pumps, nothing sharp.
Early activation: Use isometrics—gentle static contractions. For hamstrings: push your heel into the floor. For calves: press the ball of your foot down without moving. Pain-free only.
Build it back: Over 1–2 weeks, layer in easy curls, bridges, double-leg calf raises. Then progress to eccentrics: hamstring bridges lowering with one leg, single-leg calf raises off a step. Add resistance gradually.
Finish with speed & control: Once strength is back, add quick drills—light hops, skips, agility. Your muscles need to re-learn firing under speed before you run hard again.
The Long Road Back
Not all muscle pulls are created equal. Minor Grade I tweaks? You might be back in a week or two.
Grade II tears—give it 3–6 weeks. Grade III? That’s a 3+ month beast, and if the muscle’s completely blown, surgery could be on the table.
Most runners with a moderate pull are jogging easy again by week three or four, and back into real workouts by weeks six to eight. But don’t play tough guy here.
Hamstrings in particular are sneaky—they’ll let you feel 90% good, then tear again the first time you sprint like nothing happened.
I watched a high-schooler blow his hamstring at a meet because he felt “fine” after two weeks.
He went from jogging laps to sitting out the rest of the season. Don’t be that runner.
How to Ease Back In
Start with short, easy runs on flat ground.
No heroics.
Relax your stride—shorter steps if it’s the hamstring. If that feels solid, tack on distance slowly.
Sprinkle in easy skips or light strides at 50–60% just to test the waters.
Only when you can confidently open up your stride at faster paces without that little voice saying “Careful!” should you get back to speedwork.
Compression shorts or sleeves? They’re not miracle workers, but they can give you that little extra feeling of support and confidence.
And don’t ditch your rehab work once you’re running again.
Keep hammering the exercises that got you back—those are your insurance policy.
When to Get Help
If you felt or heard a “pop,” if you can’t walk, or if there’s a scary divot in the muscle—get checked. Sometimes a high hamstring tear up near the glute can mean tendon involvement, and those can require surgical repair.
If you’re days into rehab with zero progress, see a physio. Better to spend a little time with a pro than lose months to a re-injury.
Ankle Sprains & Stability – The Rolled-Ankle Club
Every runner has that story—one second you’re cruising, the next your foot hits a root, your ankle rolls, and you’re eating dirt. Welcome to the ankle sprain.
What’s Going On?
Most of the time it’s an inversion sprain—your foot rolls inward and stretches or tears the ligaments on the outside of your ankle (the ATFL is the usual victim).
Grade I is a mild stretch, Grade II is a partial tear, Grade III is a full rupture. Trail runners, especially, know the pain of the “rolled ankle” moment all too well.
Why It Happens
Uneven ground: Roots, rocks, potholes. Trails are ankle-eating machines.
History of sprains: Once you’ve sprained an ankle, you’re at higher risk. Ligaments loosen, your balance sense (proprioception) takes a hit, and unless you rehab properly, that ankle will keep betraying you.
Bad shoe support: Minimalist shoes on technical trails? Risky. Loose lacing? Same deal. Not a guarantee, but footwear plays a role.
Fatigue: Late in a long run, your stabilizers are shot. That’s prime time for a misstep.
Biomechanics: If you naturally supinate (roll outward), you’re more likely to roll it.
How It Feels
You’ll know it instantly—sharp pain on the outside ankle, often with a twist or even a “pop.” Swelling sets in fast, bruising shows up later (sometimes all the way into your foot).
Mild sprains? You can hobble. Severe ones? Weight-bearing feels impossible.
You’ll probably feel tenderness right over those ligaments, and trying to move your ankle inward will light you up.
Sometimes the pain is so bad people think they’ve broken a bone—and honestly, sometimes they have.
That’s where x-rays and the Ottawa Ankle Rules come in: if you’ve got pain around the malleolus and can’t bear weight, get checked for fractures.
Chronic Instability Warning Signs
If you’re rolling your ankle regularly or it feels wobbly even months later, that’s a red flag.
You need rehab to get those stabilizers firing again. Otherwise, you’re signing up for a lifetime membership in the “rolled ankle” club.
Ankle Sprain Prevention
Look, ankle sprains aren’t just bad luck—they’re usually a mix of weak spots and bad timing.
The good news? You can bulletproof those ankles if you’re willing to put in a little smart work.
Balance & Proprioception Work
One of the best ways to stop sprains (or stop repeating them) is to train your body to react better when you misstep.
Think wobble boards, Bosu balls, or even just standing on one leg.
Want to crank it up? Try closing your eyes or standing on a pillow.
It forces your ankle and those little stabilizers—especially the peroneals on the outside of your lower leg—to fire fast.
Simple band exercises pulling your foot outward (called eversion) are gold for this.
Research backs this up—balance training has been shown to slash reinjury rates.
Hips & Core Matter Too
Here’s the kicker: ankle stability doesn’t start at the ankle.
Weak hips and core can throw your whole leg out of whack, which means your ankle gets the ugly end of the deal.
That’s why good programs sneak in single-leg squats, clamshells, and hip abductor work. Strong hips = steadier stride = fewer bad twists.
Shoes & Gear
On trails, invest in legit trail shoes—good grip, sometimes rock plates for those “ouch” landings.
If you’ve got a history of sprains, semi-rigid ankle braces can add a layer of safety, especially on gnarly terrain.
But here’s the truth: braces are a crutch, not the cure. Long-term, you want strong ankles and hips, not just extra straps.
Know Your Terrain
Fatigue + rocky trail + darkness = sprain waiting to happen.
Pick your line carefully, especially when tired.
And if you’re running at night, don’t cheap out—get a headlamp that actually lights up the ground in front of you.
I once bombed down a trail with a dim lamp, caught a rock, and let’s just say the next four weeks were more about icing than running.
Tape or Brace if You’re Prone
If you’ve rolled your ankle more than once, tape or brace it for high-risk runs (long ultras, mountain trails).
Not only does it give a little mechanical support, but it reminds you to stay sharp. Studies show it really does reduce reinjury rates.
Gradual Return After a Sprain
Don’t go straight back to trailblazing after rolling it.
Start on safer ground—track or road—until your ankle proves it’s ready for uneven terrain again. That patience now saves you months later.
Ankle Sprain Recovery & Treatment
Sprain it anyway? Here’s how to come back smart instead of sidelined for good.
Acute Care = RICE
First 1–2 days: Rest, Ice (15–20 minutes every couple hours), Compression, Elevation.
Classic RICE. If it hurts to walk, crutches are fine. But for the love of running—don’t “tough it out” and keep running. That only turns a 2-week sprain into a 2-month nightmare.
Immobilize (Sometimes)
For moderate sprains, a doc might stick you in a boot for a week. But these days, most experts prefer “functional rehab” over locking it down for too long. That means moving it as soon as you safely can—keeps stiffness from setting in.
Rehab Work
Once the pain chills out, start moving it:
Alphabet drills: Write the alphabet with your foot. Feels silly, works wonders.
Resistance band moves: Eversion (outward pull), dorsiflexion (up), plantarflexion (down), inversion (inward). Hit all directions, but focus on eversion for those peroneals.
Calf raises: Start with two legs, build to one.
Balance drills: Stand on the injured leg, progress from flat ground → pillow → Bosu. Add mini squats, quick taps, single-leg hops. Studies show this proprioception training massively lowers reinjury risk.
Hip & glute work: Side leg lifts, clamshells. Weak hips = unstable ankles. Period.
Throw in towel curls or marble pickups for bonus foot strength if you’re feeling extra.
Manual Therapy & Mobility
If your ankle feels locked up, a PT can work magic with joint mobilization, soft tissue work, or even lymphatic massage to kick swelling out.
Don’t underestimate how much faster recovery moves when you’ve got pro hands helping.
Return to Running
Rebuild step by step:
Walk.
Jog straight on flat ground.
Controlled agility drills.
Trails (last stage).
Tape or brace when you’re first back—it buys your healing ligaments time to toughen up.
Timeframes
Grade I (mild stretch): 1–2 weeks.
Grade II (partial tear): 3–4 weeks.
Grade III (full tear): 6–8+ weeks, sometimes surgery, though most heal with rehab.
One study even found that wearing a brace for up to 6–12 months reduces re-sprain risk【AAFP】. Even when you feel “good as new,” keep up some balance drills. Trust me—you’ll thank yourself later.
When to Seek Help
Sprains aren’t “just sprains.” If you can’t put weight on it, or there’s sharp bone pain along the ankle bones (malleolus) or the base of the 5th metatarsal, get an X-ray.
Sometimes fractures hide behind what looks like a sprain.
And if your ankle’s still unstable or painful weeks later, don’t tough it out—see a sports doc or orthopedist. Cartilage damage or more serious issues can be lurking.
Most of the time, though, a solid physical therapist guiding your rehab will make all the difference.
Bottom line: treat ankle sprains seriously.
Acute care first, then hammer the rehab.
Done right, you can actually come back sturdier than before.
Strong ankles = confidence on any surface.
No more tiptoeing around roots or fearing every uneven sidewalk crack.
Hip & Glute Pain: The Usual Suspects
Let’s be real—hips and glutes take a beating in running. When things flare up here, it usually comes down to a few culprits.
The big ones include:
Piriformis Syndrome. That tiny butt muscle gets cranky, squeezes the sciatic nerve, and boom—deep butt pain, sometimes shooting down your leg. Not full sciatica, but it can mimic it.
Hip Flexor Strain/Tendon Pain. Pain up front in the hip crease—think iliopsoas or rectus femoris. Usually from tightness (hello, hours of sitting), then asking those muscles to suddenly work overtime when you run.
Glute Medius Issues. Weak glutes on the side? That can turn into hip pain or IT band drama.
And here’s what’s causing it:
Piriformis flares often come from overuse—lots of hills, speedwork, or running on slanted roads. Weak glutes mean the piriformis picks up the slack until it revolts.
Hip flexors hate sitting all day, then being forced into heavy duty at the track or on hills. Overstriding and uphill sessions are big triggers.
Glute weakness in general sets the stage for everything from lateral hip pain to IT band tightness.
And of course, the classic: ramping up mileage or intensity too fast, poor warm-ups, or sloppy form (like excessive pelvic tilt).
What It Feels Like:
It really depends on the source of the pain. Let me explain:
Piriformis: deep ache in the butt, maybe radiating to hamstring. Sitting makes it worse. Figure-4 stretch usually lights it up. Sometimes tingling down the leg.
Hip flexor: sharp pain at the front of the hip/groin, especially with high knees or lunges. Could even hurt walking stairs.
Side hip pain: often glute medius or bursitis. Hurts lying on that side, or after lots of hills.
Getting Back from Hip & Glute Pain
Look, hip and glute pain is a runner’s nightmare—it messes with your stride, your confidence, and sometimes your head. The good news?
Most of the time it’s fixable with patience, the right exercises, and not being stubborn. Here’s how I coach runners (and myself) through two of the big culprits: piriformis syndrome and hip flexor strain.
Piriformis Syndrome: That Deep-Glute Nag
If you’ve ever had a tight, burning pain deep in the butt that sometimes shoots down the leg, that’s likely the piriformis acting up. Here’s what helps:
Stretching daily: The figure-4 stretch on your back is a classic—hold 30 seconds, relax into it, no bouncing. I usually knock these out while watching TV. Hip external rotator and hamstring stretches are your friends here too.
Massage & release: Grab a tennis or lacrosse ball and roll your glutes. Yeah, it’s tender—sometimes you’ll find that “spot” and it feels brutal. Go easy around the sciatic nerve, though. Foam roller works too—cross one leg over the other, lean into the glute, and roll it out.
Heat for blood flow: Heating pad or hot bath before stretching helps loosen things up. Some runners like alternating hot/cold if there’s nerve irritation.
Don’t sit all day: If you’ve got a desk job, stand up often. A cushion or wedge seat can also take pressure off the piriformis. I once swapped my office chair for a stability ball for a few weeks—it forced me to move more.
Nerve glides: If you’ve got sciatic symptoms, gentle nerve glides (like straight-leg raises with ankle pumps) help the nerve slide freely.
Strengthen smart: Think side-lying clamshells, band walks, and squats—these build the glutes without trashing them. Start light. Overworking a pissed-off piriformis will only make you hate life more.
Ease back to running: Sometimes you can keep running easy with this, other times it alters your gait and forces a break. If you run, sprinkle in dynamic stretches before, and maybe even mid-run if things tighten up.
Pro help if needed: PTs sometimes do dry needling—runners rave about it. Doctors might try injections in stubborn cases. Surgery is the absolute last resort.
Hip Flexor Strain or Tendinopathy: When the Front Hip Burns
Hip flexors get overworked, especially in runners who hammer hills, sprints, or skip core work. If you’ve got pain in the front of the hip, here’s your toolbox:
Rest from triggers: Sprinting, drills, and sometimes even easy running aggravate it. If running changes your gait, step back. Otherwise, drop intensity and avoid uphills.
Ice early: If it’s a fresh pull from a sprint, ice and rest for a few days.
Stretch gently: Use a lunge stretch, but keep it shallow at first. Warm up before you stretch.
Strengthen smart:
Straight-leg raises (lying flat, lift one leg straight).
Standing marches with bands or ankle weights.
Eccentric work—lowering the leg slowly under control.
Lower-core work like dead bugs. Many runners rely on hip flexors for leg swing because their abs are weak—don’t be that runner.
Manual therapy: Massage and Active Release (ART) can dig into the iliopsoas and quads. Therapists sometimes press deep in the abdomen while you move your leg—it’s brutal but effective.
Gradual return: Once you can do high knees or marching drills pain-free, you’re ready for strides. Start at 60–70% speed, then build up. Don’t blast into sprints cold or you’ll be right back here.
Lateral Hip Pain: Outside Ache
If pain’s more on the side of the hip, often it’s the glute medius or ITB. Work on glute med strength (side leg raises, hip hikes), and stretch the ITB/TFL. Pool running can also keep you fit without pounding.
When to Call in Reinforcements
If you’ve got pain that’s sharp, keeps getting worse, or radiates into numbness, don’t guess—see a doctor. Examples:
Deep groin pain: Could be a stress fracture or labral tear.
Clicking/catching hip: Labral issue.
Chronic lateral hip pain: Sometimes it’s gluteal tendinopathy or bursitis.
Piriformis syndrome itself is usually diagnosed after ruling out spine issues (like lumbar disc problems). For most muscular stuff, imaging isn’t needed—PT evaluation is enough. But if your pain is severe or not improving, get checked out.
Back Pain in Runners: Why It Happens & How to Fix It
Here’s the deal—running may be all about the legs, but plenty of runners end up battling low back pain.
Usually it’s not some dramatic “pop” or one-off injury.
More often, it creeps in—an ache or stiffness in the lumbar area during or after a run.
Think of it less like a pulled hamstring and more like death by a thousand cuts: small imbalances, weak spots, and bad habits piling up over time.
Here are the common culprits:
Weak core, sloppy posture. Probably the #1 cause. A shaky core means your pelvis tips the wrong way—forward (anterior tilt) or under (posterior tilt). Either way, your spine pays the price. One PT put it bluntly: “Runners often have core weakness, which can contribute to lower back pain” (hingehealth.com). And yeah, tight hip flexors + weak abs = exaggerated arch and more strain on your lumbar spine.
Tight hammies & hip flexors. Most runners have tight hamstrings from the constant pounding. That pulls the pelvis under, flattening the natural arch. On the flip side, tight hip flexors drag the pelvis forward, creating too much arch. Either extreme = back crankiness (laspine.com).
Bad form & overstriding. Heel-striking way out front? That shock shoots straight up your spine. Slouching shoulders, leaning at the waist, or sticking your butt out when tired just makes it worse.
Shoes & surface. Beat-up shoes or constant pounding on concrete can send extra stress upstairs. Funny thing though—moderate running is actually good for your discs (it helps hydrate them). But if you’ve already got disc issues, the wrong combo of shoes/surface can flare things up.
Existing issues. Arthritis, old disc herniations, or SI joint problems don’t come from running, but weak core + poor management can make them worse.
Downhills. Braking on steep descents = big impact + leaning back = angry lumbar spine.
Mobility gaps. Stiff hips or mid-back? Guess who steps in to make up the difference? Your lower back.
How It Feels
Most runners describe a dull ache or stiffness in the lower back mid-run, or it shows up later—like the morning after a long one.
Sometimes it feels like “compression” in the spine. Severe cases can mess with your stride—you stiffen your torso or swing your arms less just to keep going.
If nerves get involved (like sciatica from a disc), you might feel shooting pain down the leg.
But the garden-variety runner’s back pain? Usually muscular, usually not radiating past the knee.
How to Prevent It
Here’s how I’d approach prevention:
Build a bulletproof core. Planks, side planks, dead bugs, bird dogs. Get those deep abs (transverse abdominis) firing. Don’t forget the glutes—they’re your pelvis stabilizers. Weak glutes = overworked low back.
Run tall. Lean slightly from the ankles (not the waist), head up, shoulders relaxed. Cue: imagine a string pulling you up from your crown. And don’t overstride—boost cadence instead. Studies link low cadence with higher joint/spine stress.
Stay loose. Keep hamstrings, hip flexors, and hip rotators mobile. Dynamic warm-ups—leg swings, torso twists—go a long way. One stat even found marathoners who skip warm-ups are 2.6x more likely to get low back pain (hingehealth.com).
Strengthen your back too. Superman holds, Roman chair work, or simple extensions build endurance in those muscles. Just don’t go crazy with deep hyperextensions if you already arch too much.
Respect your shoes & terrain. Get supportive shoes for your foot type, rotate surfaces (trail, road, track). And if you run cambered roads, switch sides or find flatter ground. Subtle tilt = sneaky back stress.
Ditch the heavy pack. Run commuting with a backpack? That’s an extra load your spine doesn’t need. If you must, invest in a running-specific vest/pack.
Cross-train smart. Pilates, yoga, or mobility-focused sessions are gold for spine health.
Catch the warning signs early. Back tightening up mid-run? That’s your cue to stretch, strengthen, or rest. Don’t wait until you’re sidelined.
Recovery and Treatment for Runner’s Back Pain
Alright, let’s be real—back pain sucks. It sneaks up on you, lingers after runs, and makes even tying your shoes feel like a workout.
The good news? Most running-related back pain isn’t a career-ender.
With the right adjustments, you can fix it and come back stronger.
Rest (But Don’t Turn Into a Couch Potato)
If your back is flared up, don’t just power through the miles.
Cut back on distance, skip the hill repeats, maybe swap that long run for something shorter.
Sometimes a few days of lighter running plus some focused core work is all it takes to calm things down. Total rest? Usually not necessary unless it’s severe.
Heat It Up
A hot shower, heating pad, or even one of those stick-on heat patches can do wonders for loosening tight muscles.
I know runners who swear by strapping on a heat belt before a cold-weather run to keep their back from seizing up.
Stretch and Roll the Junk Out
Hit gentle stretches like lying on your back and pulling your knees to your chest. Roll out your glutes, IT band, and hip flexors. Loosen up the upper back too—it’s all connected. If your thoracic spine moves better, your low back won’t have to take all the stress.
Core Work (The Boring Fix That Actually Works)
Yeah, I know—core drills aren’t sexy. But if you’re not doing them, your back will keep paying the price. Start simple: pelvic tilts while lying down, then progress to bird-dogs and dead bugs.
The key isn’t blasting reps—it’s learning to keep your spine and pelvis steady. That’s the skill your core needs for running.
From there, add planks and side planks as you can tolerate. Side planks especially build lateral stability, which runners desperately need.
Fire Up the Hips & Glutes
Your glutes should be the engine of your stride—but if they’re lazy, your back ends up doing extra work. Glute bridges are gold because they strengthen the backside and stretch tight hip flexors at the same time. Daily hip flexor stretches help too—tight hips tug on your spine and make everything worse.
Check Your Form
Sometimes it’s not just your muscles—it’s how you’re running.
A gait analysis from a PT or coach can reveal if you’re over-arching your back, letting your hips drop, or over-striding.
Even a small tweak like bumping your cadence up 5–10% can take a huge load off your spine.
Swap in Low-Impact Work
If running feels impossible, keep your cardio base with swimming or the elliptical. Swimming—especially backstroke—is surprisingly therapeutic. Just be careful with breaststroke if you’ve got a disk issue; the exaggerated back arch can aggravate things.
Manual Therapy & Massage
If the pain feels joint-related, some runners find relief with chiropractic adjustments or PT mobilizations. And even if it’s muscular, a sports massage targeting the QL and paraspinals can ease things up.
Just don’t skip the medical check if you’re dealing with nerve symptoms (shooting leg pain, numbness, weakness) or bladder issues—that could signal a serious disc problem.
Return to Running (Gradually)
When the pain eases, don’t just jump back into your normal mileage.
Start small and build. Sometimes shorter, more frequent runs are better for reconditioning your back than one monster long run. Keep doing your core and hip work while you ramp up.
One runner I know added just two days of core work per week, and within a couple months, his post-run backaches disappeared—and he could handle more mileage without breaking down.
When to Get Help
If the pain’s severe or not improving.
If you’ve got nerve symptoms—shooting pain, numbness, weakness.
If you have a history of osteoporosis or bone issues (sacral stress fractures, though rare, do happen in distance runners).
Most of the time, though, runner’s back pain is mechanical and responds to conservative care.
A PT can confirm this and guide you.
Less Common but Serious Running Injuries
Most of us worry about the usual suspects—runner’s knee, shin splints, plantar fasciitis.
But there are some nastier injuries lurking in the background.
They don’t show up nearly as often, but when they do, they can end a season—or even a career—if you don’t take them seriously. These aren’t “just rest it a week and you’ll be fine” injuries.
I’m talking hip labral tears, sports hernias, and compartment syndrome.
Let’s break them down.
Hip Labral Tears: When the Hip Just Won’t Move Right
Your hip joint has a ring of cartilage called the labrum that keeps the ball of the femur snug in the socket.
When that labrum tears, runners usually feel a sharp, catching pain deep in the groin or the front of the hip. Sometimes you even hear or feel a click. Sitting, lifting the knee, or running hills?
All can light it up.
Labral tears often link back to something called femoroacetabular impingement (FAI)—basically, your hip bones have shapes that don’t play nice together.
Repetitive flexion (like running) grinds the labrum until it frays.
It can happen suddenly with a twist, but in most runners it’s a slow burn from impingement.
Here’s the kicker: the labrum doesn’t heal well on its own because of poor blood supply. Diagnosis usually requires an MRI arthrogram.
Small tears might be managed with PT (strengthening glutes/core, improving mobility, avoiding deep hip flexion).
But many active folks end up needing arthroscopic surgery to clean up or repair the labrum.
If the bone shapes are part of the problem, surgeons can shave those down too.
Sports Hernia (Athletic Pubalgia): The Hidden Groin Wrecker
Despite the name, it’s not a true hernia—nothing pops out.
This is a tear or strain of the tissues where your abs attach near the pubic bone.
The result? Chronic groin or lower ab pain that flares when you sprint, cut, or do sit-ups. Even coughing or sneezing can make it worse.
The tricky part is it doesn’t show up like a regular hernia on exam.
So runners (especially sprinters or soccer players) often go months chasing what feels like a “groin strain” that never heals.
PT to strengthen the core and adductors can help, but many sports hernias eventually need surgery—sometimes with mesh, sometimes with direct tissue repair.
Compartment Syndrome: When the Pressure Builds
There are two flavors: acute and chronic.
Acute compartment syndrome—rare for runners, usually from trauma (think getting whacked in the leg). It’s a full-blown emergency.
Chronic Exertional Compartment Syndrome (CECS)—way more relevant to us distance folks. Here’s the classic pattern: after about 10 minutes of running, your shin or calf gets insanely tight, maybe even burns or goes numb. Sometimes the foot starts to drop because you can’t lift it. Stop running? The symptoms fade within minutes. That stop-start cycle is textbook CECS.
Diagnosis is made by measuring compartment pressures before/after exercise (yep, needles—no fun but definitive).
Treatment can start with form tweaks (like changing foot strike), PT, or backing off training.
But honestly? Many cases only resolve with surgery—a fasciotomy, where they cut the fascia to relieve pressure. Intense, yes, but usually effective.
Other Rare But Serious Ones Worth Knowing
Odd stress fractures – femoral neck or sacral. Groin pain with hopping? Don’t run through it. Femoral neck fractures can progress to full breaks if ignored—often requiring pins.
Popliteal artery entrapment syndrome – rare, but young muscular runners can develop calf pain from blood flow issues. Needs vascular treatment.
Nerve entrapments – tarsal tunnel (ankle version of carpal tunnel) causing foot numbness, or true sciatica from the spine. These don’t fix with stretching your piriformis—you’ve gotta treat the real source.
Major knee injuries – ACLs and meniscus tears aren’t common in straight-line running, but trail runners twisting on rocks? It happens. And yes, ACLs almost always mean surgery.
Serious Injuries: When It’s More Than Just a Niggle
Most of the time, running injuries are annoying but manageable—shin splints, IT band flare-ups, sore calves.
But every now and then, you run into the big hitters: labral tears, sports hernias, compartment syndrome.
These are the ones that can sideline you for months if you don’t respect the warning signs.
And here’s the thing—some of these aren’t really in your control.
Anatomical quirks (like FAI that leads to a labral tear) or underfueling (a common culprit for stress fractures) can put you in the danger zone no matter how “smart” you train.
But you can stack the deck in your favor by keeping your body strong, listening to pain signals, and not letting small issues snowball into big ones.
Treatment: What the Docs Do
Labral Tear: First stop is PT—fix mechanics, strengthen hips. If that doesn’t cut it, arthroscopic surgery can repair or clean up the labrum. Most runners are jogging again in 3–4 months, full training in six. Not fun, but fixable.
Sports Hernia: This one almost always needs surgery to patch the abdominal wall. The recovery is 2–3 months. Plenty of pro athletes (soccer players especially) have had it and come back fine.
Compartment Syndrome: Fasciotomy surgery—literally cutting the fascia to relieve pressure. Success rates are high, and many runners describe it as life-changing because they can finally run without pain. Recovery? Weeks to months, depending on severity.
The silver lining? These injuries sound scary, but with modern medicine, most runners come back strong. Ignore them, though, and you risk wrecking your running career.
Red Flags: When to Stop Running and See a Doctor
Here’s the truth: runners are stubborn. We’re used to “running through” discomfort. But there’s a huge difference between normal training aches and pain that screams STOP.
Miss these red flags, and you’re rolling the dice with your health.
Here’s when to back off immediately:
Sharp, sudden pain that changes your stride. Achilles pop, stabbing knee pain, anything that forces a limp—it’s game over for that run. Keep going, and you’ll only make it worse.
Pain that doesn’t ease with rest. Muscle soreness fades in a day or two. If it’s just as bad after several days—or worse when you try again—think stress fracture or bigger issue.
Swelling or big bruises. Puffy joint? Bruised calf or foot? That’s tissue damage, not “just soreness.” Time to stop.
Limping or altered mechanics. If you can’t run without compensating, you’re digging yourself a deeper hole.
In kids and teens: Persistent pain + swelling or limping is never “just growing pains.” Could be growth plate problems or osteochondritis dissecans. Get it checked.
Instability or locking joints. Knee giving out? Ankle rolling? That’s ligament or meniscus territory—don’t brush it off.
Numbness, tingling, or weakness. Could be compartment syndrome or nerve involvement. Either way—big red flag.
Redness, warmth, or feverish pain. Rare, but could mean infection. That’s ER-level serious.
Chest pain, dizziness, severe breathlessness. Not musculoskeletal, but if this happens, don’t play hero—get help immediately.
Pain that’s getting worse despite “rest.” Two weeks of dialing back and it still hurts? That’s not normal healing—it’s something bigger.
Gut feeling it’s not normal. Runners know their bodies. If it feels “off,” trust that. As one runner said after breaking her leg: “I regret not getting a second opinion. If something feels off, investigate it.”
A Red Flag? What Do Next…
So, you’ve hit that red flag pain. What now? First, drop the “no pain, no gain” garbage.
Training discomfort is one thing. But sharp, persistent pain? That’s your body yelling at you, and if you ignore it, you’re asking for bigger trouble.
1. Stop Running (For Now)
Yeah, I said it. Stop. Don’t push through. Keep running on a stress fracture, and you could turn a tiny crack into a full break.
That happened to a poor guy mid-concert season—he ignored the pain until the bone gave way. Same goes for tendons—what starts as a small tear can end in a full rupture.
And no, you won’t lose all your fitness in a couple weeks off. But you will lose months—or even your season—if you push until it snaps.
2. Get Checked Out
Sports doc, orthopedist, PT—pick the right pro depending on what you suspect. Sharp bone pain? Orthopedist. Nagging pain you can’t pin down? Sports med doc or PT is a good first stop. They’ll figure it out—or send you for imaging if needed.
3. Imaging Isn’t Overkill
Stress fractures, tendon tears, joint injuries—sometimes you need to see what’s really going on.
X-rays can catch bone injuries (though early stress fractures don’t always show).
MRI is the gold standard—it’ll spot stress fractures and soft tissue tears.
Ultrasound works for some tendon/muscle issues.
Don’t be afraid to ask for imaging. Clarity now saves wasted weeks guessing.
4. Listen to the Experts (Even If It Sucks)
If the doc says six weeks off, don’t argue. That advice isn’t punishment—it’s protection.
Ask about cross-training. Most times you can keep moving with swimming, cycling, or pool running—things that don’t pound the injury.
Rushing back early might feel like “mental toughness,” but it’s usually just setting yourself up to fail.
5. Comeback the Right Way
Once you’re cleared, ease in. Don’t play hero. Returning too early from a stress fracture can cause a non-union—bone not healing properly—and that’s a nightmare. The smart runners win long-term by respecting the timeline.
Example: one guy ignored mild foot pain for weeks.
When it got severe, he finally saw a doc—stress fracture in his second metatarsal. Lucky for him, he stopped before it displaced and just needed 6–8 weeks in a boot. Had he pushed through? He’d be looking at surgery.
Pain is a signal. Dr. Kocher from Boston Children’s nails it: ignoring pain is like ignoring an iceberg—you only see the tip, but there’s way more damage lurking underneath.
Think of this section as your quick-grab toolkit. When you’re dealing with aches, weird pains, or just want to stay one step ahead of injury, these are the basics every runner should have in their back pocket.
Injury Red Flags Checklist
Here’s the rule: if any of these show up mid-run, stop and pay attention.
Don’t tough-guy it—ignoring them can turn a niggle into months on the sidelines.
Pain so sharp you start limping or running weird.
A sudden “pop” or sharp stab in a muscle or joint.
Swelling in a joint or that wobbly, unstable feeling after a misstep.
Pain that won’t quit with rest—or feels worse overnight.
Numbness or tingling running down your leg.
Big bruises showing up after a run or tweak.
If you check yes to any of these, treat it like a red light. That means stop, assess, and if it doesn’t calm down, get it checked out.
Daily Injury-Prevention Routine (10–15 Minutes)
Do this stuff consistently and you’ll dodge a lot of problems:
Dynamic warm-up before runs: leg swings, lunges—wake the body up.
Q: Should I run through shin splints, or take time off?
Nope. Don’t try to “tough it out” through real shin splint pain. That’s your body waving a big red flag. Keep pushing and you could graduate from shin splints to a full-blown stress fracture. That’s not a path you want.
The smart play is to back off for a bit. Ice, calf stretching, and cross-train to keep fitness rolling.
I’ve had athletes switch to cycling or pool running for a couple weeks and come back strong.
If you catch it early, you’re usually looking at 1–3 weeks off running. Ignore it?
That “little” shin pain can turn into a cracked tibia (Runner’s World). Short rest now saves you from months on the sidelines.
Q: Do I need orthotics if I keep getting injured?
Orthotics can help—but they’re not some magic bullet. If you’ve got a clear biomechanical issue, like major overpronation feeding your shin splints or plantar fasciitis, an insert might give you relief (AAFP).
Research even shows over-the-counter orthotics can help plantar fasciitis (AAFP). But here’s the kicker: custom isn’t always better than good off-the-shelf options (AAFP).
That said, many runners don’t need them at all—just the right shoes and stronger feet/hips.
Orthotics are a tool, not a cure. If injuries keep piling up, get checked by a sports podiatrist or PT to see if they make sense for your body. And even if you use them, keep working on strength—orthotics support, but they don’t build muscle.
Q: How quickly will I lose fitness while injured, and how do I get it back?
Here’s the good news: you don’t lose as much as you think. Aerobic fitness only starts dipping after a week or two of zero running, and really drops after about a month.
But if you’re cross-training—cycling, swimming, elliptical—you can hang onto a big chunk of it (Trail Runner Mag).
Strength fades quicker if you’re doing nothing, but body remembers. Muscle memory is real. When you return, most runners are shocked at how fast fitness comes back.
A rough rule: every week off takes about two weeks of training to claw back. Out six weeks? With cross-training, maybe you’re back in 4–8. With nothing, maybe 6–10.
I always remind runners: don’t freak out about paces early.
Focus on effort and consistency. Fitness will return. Sometimes VO₂ max comes back faster, sometimes endurance does. Just don’t rush—let it build.
Q: Should I keep doing my rehab exercises even after I’m healed?
Short answer: yes. Long answer: hell yes. Rehab drills aren’t just temporary—they expose your weak spots. Stop doing them, and those same weaknesses can creep back.
If clamshells and band walks fixed your IT band syndrome, why ditch them?
Many runners keep those exercises in their weekly “prehab” routine. Some injuries—Achilles, hamstring tendinopathy—love to come back if you slack (AAFP). You don’t have to grind the same routine daily forever, but 2–3x/week is smart.
Or work them into warm-ups and strength sessions.
One line I tell my runners: “Once you’ve been injured, you’re a strengthening runner for life.”
The Guardian once profiled runners who beat knee pain and stayed pain-free only because they kept up the hip/core work.
If you get bored, swap in variations, but keep targeting those weak links.
Q: Can I still race that upcoming event while injured (or just after injury)?
This one’s tough. It depends how bad the injury is, how close the race is, and how much it matters to you. Racing through real pain is usually a fast track to making things worse.
A half marathon on a cranky Achilles could leave you with a rupture—goodbye season.
If you’re ~90% healed and the race is soon, you might toe the line, but lower the stakes. Tape the ankle, slow the pace, treat it like a training run. And have the guts to drop if pain flares.
If it’s your “bucket list” race or a qualifier, weigh the risks with a sports doc. Just remember—you only get one body, and races are endless.
Rule of thumb: if you can’t run at least 75–80% of the race distance in training without pain, you probably shouldn’t race. And definitely don’t attempt a distance you didn’t train for. That’s asking for trouble.
I’ve seen runners DNS a race they wanted badly, heal right, then come back to PR the next season. They all said the same thing later: “I’m glad I skipped that race.”
That sharp twinge on the inside of your ankle mid-run?
Yeah, that’s not something to tough out.
Inner ankle pain is one of those stealthy overuse injuries that creeps up on runners — and if you ignore it, it doesn’t just fade away.
It sticks around, messes with your form, and can even make walking hurt, let alone running.
Let me put it bluntly: if your medial ankle (inside part) is aching after a few miles, your body’s waving a red flag.
Don’t limp past it — listen and act early.
Let me give you the full scope on this annoying injury.
Why Is My Inner Ankle Mad at Me?
If you’re pounding pavement with bad mechanics, racking up mileage too fast, or wearing shoes that belong in the trash… that posterior tibial tendon is gonna let you know.
Here’s what piles on the stress:
Overtraining (especially more than 10% mileage jumps per week)
Weak arches or overpronation
Worn-out shoes with zero support
Tight calves (they pull the whole chain out of balance)
Hill sprints and speed work without recovery
You don’t need a dramatic injury to mess this up.
PTTD often builds gradually.
It starts whispering during runs, then nags during walking, and eventually takes over your daily life if you ignore it.
Now let’s get into the actual condition behind the pain…
What Exactly Is Posterior Tibial Tendonitis?
The posterior tibial tendon is this thick, tough cord that connects a deep calf muscle to the inside of your foot.
It acts like a built-in suspension system — stabilizing your arch, locking your ankle, and keeping everything tight when your foot hits the ground.
Every time you toe off or climb a hill, it’s working overtime.
Now imagine what happens when that tendon gets overworked:
The fibers get inflamed
Micro-tears start piling up
Your arch begins to lose integrity
Eventually, your foot may start to collapse inward
In the medical world, that’s called posterior tibial tendon dysfunction (PTTD) — but in runner speak, it’s the moment when your arch fails and every step sucks.
Who Gets Hit With PTTD?
Short answer: runners who go too hard, too fast, or too long without paying attention to form, shoes, and recovery.
But some folks are at higher risk:
Overpronators (your feet roll inward more than they should)
Runners over 40
Female runners (likely due to structure and hormones)
Anyone with weak ankle stabilizers or tight calves
If you check two or more of those boxes, and your inner ankle’s barking… you’re likely dealing with PTT.
The Main Symptoms
Here’s how to check if your inner ankle bone is actually acting up.
1. Pain or tenderness behind the inner ankle bone
If touching just behind your inner ankle bone makes you wince, that’s a red flag. That’s where the posterior tibial tendon runs — if it’s inflamed, it’ll feel sore or even burn.
2. Swelling or warmth along the inside of the foot
Notice puffiness around your ankle or into the arch? Maybe even some redness? That’s inflammation. It’s your body yelling, “Hey, we’ve got a problem here!”
3. Pain during running — especially push-off
Most runners feel it start as a dull ache that ramps up during hills, turns, or the toe-off part of your stride. After the run? It might throb or feel stiff as hell. Early stages are sneaky — it only hurts after a workout. Later stages? It hurts during walking. Or just standing.
4. Can’t stand on your toes? That’s a big one.
Try this: stand on the affected leg and raise your heel. If it hurts, or worse, you can’t even do it? Classic PTTD move. That test puts stress directly on the tendon.
5. Your arch looks flatter or weaker on one foot
Is one foot starting to roll inward? Is the arch dropping? Do your toes on that side point outward when you stand? That’s not just flat feet — it could be the tendon giving out and letting your foot collapse.
6. Pain radiating into the arch or up the shin
Yup, it’s all connected. That tendon starts up in your calf and wraps down into your arch. If the pain’s creeping up your shin or down through your instep, your posterior tib is working overtime — and failing.
7. Worse after standing or walking for a while
End-of-day aches on the inside of your ankle? That’s your tendon fatiguing. Not a good sign. The more time it spends under load, the angrier it gets.
Serious Red Flags (Don’t Mess With These)
If your arch has collapsed, your heel is rolling in, and your foot looks like it’s turning outward? That’s late-stage PTTD, possibly with a partial or full tear.
Look behind you — do you see too many toes sticking out on one side? That’s literally called the “too many toes” sign, and it means your foot is off-kilter in a major way.
And if the pain has shifted from the inner ankle to the outside? That means your bones are now impinging. At that point, you’re in surgical territory.
What Stage Are You In? (And How Screwed Are You?)
Stage
What It Feels Like
What’s Actually Happening
Stage 1
Pain only during running or hard workouts
Inflammation. Tendon’s irritated, but the structure is still solid. No visible collapse yet. Heel raises still possible (though painful).
Stage 2
Hurts during walking or stairs; arch is starting to drop
Tendon is stretching. Your arch is caving in. You probably can’t do a single-leg heel raise anymore.
Stage 3
Constant pain. Flat foot. Foot turned outward.
Partial tear or serious dysfunction. The arch is toast and rigid. Walking hurts. Foot’s reshaping itself — badly.
Stage 4
Foot + ankle pain. Total collapse.
Game over. The ankle joint is now involved. Talus is shifting. Deltoid ligaments are failing. You’re looking at joint instability, arthritis, maybe even surgery.
Should You Run with Inner Ankle Pain?
Short answer? Nope. Absolutely not.
If you’re feeling a sharp, nagging pain on the inside of your ankle when you run, stop running now.
I’m not talking about a mild ache you can shake off.
I’m talking about that deep, localized pain that hits with every step. That’s not a tight muscle — it’s your posterior tibial tendon crying for help.
You can’t “push through” this one. Try to run on it anyway, and you’re gambling with your season — or worse, your ability to run at all.
Why It’s So Serious
The posterior tibial tendon isn’t just some background tissue — it’s the structure that holds up your arch and stabilizes your foot.
It’s under pressure with every step.
Plus, it doesn’t get a ton of blood flow, so once it’s pissed off, it heals slow. Ignore it long enough, and your arch could collapse.
And no, that’s not being dramatic — once the structure breaks down, some of the damage may only be fixed with surgery.
Yikes.
How to Treat Inner Ankle Pain (a.k.a. Posterior Tibial Tendonitis)
So you’ve accepted it: you can’t run through this. Good. Now here’s how to fix it before it becomes a full-blown disaster.
1. Back Off and Rest the Tendon
I hate to sound like a broken record but some thing bear repeating.
This is the hardest step for most runners: stop running.
That doesn’t mean give up on fitness — it means stop loading the injured tissue. Especially avoid hills and speedwork, which ramp up stress on the ankle.
If it hurts to walk? A walking boot might be necessary (short term). Some folks need 2–4 weeks to fully unload the tendon.
Gentle cross-training only — no pain allowed. Swimming or easy cycling is usually okay.
This is not “just rest.” It’s strategic downtime. The faster you respect the injury, the faster it goes away.
2. Ice the Pain Zone
Ice is your best friend here.
15–20 minutes, 3x a day.
Right after activity or before bed.
Try this: freeze a paper cup of water, peel it down, and massage your ankle with the ice. That combo of cold and light pressure? Works like magic.
Keep icing for at least 1–2 weeks, or longer if pain flares up again.
3. Compression + Elevation
Get ahead of the swelling.
Wrap the ankle lightly with an ACE bandage or compression sock (but don’t wrap directly on the sore spot).
Elevate your foot above heart level in the evening — prop it up on pillows while watching Netflix.
This helps drain fluid and cut down that angry throb you might feel at the end of the day.
4. Gentle Mobility (Once the Worst Pain Calms Down)
Don’t let the rest of your leg turn to mush while your tendon recovers. Once the sharp pain starts easing up (usually after a few days), start light mobility and soft tissue work.
Here’s what I recommend:
Ankle circles & alphabet drills – Move that joint without weight.
Foam roll your calves and shins – Tight calves can mess up foot mechanics. Keep ‘em loose.
Gentle tendon massage – Light rubbing along the inside ankle/arch can boost circulation (but skip it if it’s super sore).
These little movements help your body heal while keeping everything else in shape.
5. When to See a Pro
If you’re 7–10 days into rest and nothing’s changing, or if walking still hurts, get medical help.
Here’s when to wave the red flag:
You can’t lift your heel off the ground.
Your foot arch is collapsing.
The pain is sharp even at rest or while sleeping.
A sports doc or podiatrist can run imaging (like ultrasound or MRI) to check for a tear or advanced damage. Don’t wait too long — early treatment always wins.
Medical Treatment Options for PTTD
(When RICE and foam rolling aren’t cutting it…)
As far as I can and according to my own research (not a doctor here), for most runners, the combo of rest, smart rehab, and shoe tweaks will get you back on track with PTTD.
But sometimes, this injury digs in and refuses to let go. When that happens, it’s time to bring in the pros and know your options.
Here’s the game plan for when you’ve tried the basics and your arch is still screaming:
Custom Orthotics: Your Built-In Arch Reinforcements
This is usually the first line of defense if your arch is collapsing and your tendon’s waving the white flag.
A good orthotic acts like scaffolding — it props up your arch, redistributes the pressure, and takes some load off your overworked posterior tib tendon.
Custom-made by a podiatrist? Ideal if your case is moderate or severe.
High-quality OTC inserts? Can work if you’re in early stages or have minor flatfoot.
Research shows these bad boys help realign the foot and slow down flatfoot progression.
If you overpronate or have flexible flat feet, get on this. Some runners stick with orthotics even after recovery to keep the problem from coming back. Smart move.
Physical Therapy: Rehab Like You Mean It
A good PT can be a total game-changer.
They’ll assess everything — glute strength, calf tightness, hip stability, even how you walk and stand.
Then, they’ll build a program tailored to what you need.
Typical PT tools for PTTD include:
Ankle inversion drills with resistance bands
Eccentric calf raises
Balance training (yes, standing on one leg matters)
Hip/core work to clean up your mechanics
They might also throw in manual therapy, ultrasound, or arch taping to calm things down. Usually, it’s 1–2 sessions a week, plus daily homework exercises — do not skip these.
NSAIDs: Not a Fix, But They Help
Popping ibuprofen or naproxen won’t heal the tendon — but it can make walking (and sleeping) suck less.
Use them in the short term to knock down inflammation, especially early on. Stick to proper dosing, and don’t ignore other warning signs.
If OTC stuff isn’t doing the trick, your doc might throw you a prescription NSAID or a short steroid taper to help cool things down.
Cortisone Shots: Proceed With Caution
Corticosteroid injections can reduce pain — but they come with baggage.
Most docs avoid injecting directly into the tendon because it increases the risk of rupture. Some will carefully inject around the tendon sheath using ultrasound guidance.
This can offer relief, especially for older patients who aren’t as active.
If your doc brings this up, ask questions. Pros, cons, rest time after. And if you go for it, rest that foot like you’re rehabbing a fresh tear. The tendon will be weaker for a bit.
Bracing: A Temporary Crutch That Helps You Heal
In rough cases — especially if your arch is seriously collapsing — you might need external support while you rehab.
Options include:
Lace-up ankle braces
Custom AFOs (ankle-foot orthoses) that mimic what your tendon should be doing
Arizona braces (rigid leather gauntlets that fit in your shoe) for max control
You probably won’t run in these.
But they can stabilize things during everyday life and keep your foot from getting worse while the tendon chills out.
Some runners even use light bracing for longer walks or during early return-to-run phases.
Surgery: The Final Option
If nothing works — and I mean you’ve done everything — surgery is on the table.
This is only for Stages 3 or 4 PTTD or cases that just won’t calm down. It’s not a simple in-and-out. We’re talking:
Tendon repair or transfer (using another tendon to back up the damaged one)
Flatfoot reconstruction (cutting bones, repositioning heels, even lengthening the calf)
Ligament and joint repair in Stage 4 if the ankle’s involved
Recovery? Months. Sometimes up to a year.
Running again? Possible — but not guaranteed. Many return to pain-free walking and even light jogging, but high-impact racing might not be realistic.
If you go this route, see a foot and ankle ortho who knows runners. Not all surgeons get us.
How to Prevent Posterior Tibial Tendonitis
Here’s how to keep that posterior tibial tendon happy — before it starts screaming at you again.
High arches? Make sure your shoes aren’t too stiff; you might need something neutral and cushy with added orthotics.
Put simply: your foot should feel locked in and steady — not like it’s collapsing or wobbling with every step.
Replace Shoes Before They Die
Don’t squeeze 700 miles out of a shoe meant for 400. If your legs are getting cranky — ankles, shins, or knees — and your shoes look (and feel) cooked, it’s probably time.
General rule:replace your footwear every 300–500 miles, depending on how you run. Some runners rotate pairs to keep things fresh — smart move if you’re running consistently.
Orthotics: Maybe the Missing Piece?
If your feet are flat, your ankles cave in, or you’ve had posterior tib issues before — it might be time to test out orthotics.
Over-the-counter options like SuperFeet or Powerstep can do the job for many.
If those feel meh, see a podiatrist and talk about getting custom ones. They’re pricier, yeah, but molded just for you and can make a big difference.
Some runners swear by them. Others prefer going the strength route. You do you — but don’t dismiss orthotics, especially if you’re high risk.
Warm Up Those Ankles Before You Run
Rolling out of bed and jumping straight into a run? Not smart.
You’ve got to warm up the lower legs, especially if it’s cold out or you’re running first thing. Spend 5–10 minutes waking up your feet, calves, and ankles.
A physical therapist once told me, “Lubricate the hinges before you swing the door.” Makes sense.
Don’t Be a Hero With Mileage Jumps
Posterior tibial tendon hates surprises. If you’re suddenly doubling your long run, adding hills and throwing in speedwork… guess what’s gonna snap first?
Stick to the 10% rule: no more than a 10% increase in weekly volume.
And add new stressors one at a time. If you add hills this week, don’t also tack on tempo runs. Build gradually. That’s how your body adapts — and how injuries get dodged.
And if your ankle starts to feel off during a ramp-up week? Back off early. One easy week can prevent six weeks of downtime.
Strengthen the Weak Links
If your ankle’s been barking, odds are your foot and lower-leg muscles need backup.
Do 10–15 minutes, 2–3x a week, of:
Calf raises (straight-leg and bent-knee)
Towel scrunches or toe curls (for foot strength)
Resistance band exercises (especially for inversion/eversion)
Balance drills (like single-leg stands or Bosu work)
You don’t need fancy gym gear. Just consistency.
Think of your body as a chain. If your ankles are the weak link, they’re the first to break. So shore ‘em up before they fail.
Listen to Niggles Before They Get Loud
You feel that first little twinge of soreness in your inner ankle? That’s not nothing. That’s your body whispering: “Hey… don’t ignore me.”
If you brush it off and hammer through your long run anyway? That whisper becomes a shout.
Rest a day. Ice it. Cut back. Rehab early, and you’ll dodge a full-blown breakdown.
As one runner told me, “That annoying little ache became a six-week injury because I didn’t back off soon enough.” Learn from that.
Best Exercises for Inner Ankle Pain (Fix That Posterior Tib)
If you’re dealing with that nagging pain just behind your inner ankle — yep, we’re talking posterior tib tendon trouble — you’ve gotta do more than just rest. You’ve got to strengthen, stretch, and stabilize.
And no, you can’t just hit one muscle group and call it a day. This isn’t a solo job — the posterior tib works as part of a bigger chain.
Your hips, calves, arches, and even toes play a role in how your ankle holds up mile after mile.
Let’s break down what works, what to start with, and how to get back to running without fear of blowing it up again.
1. Posterior Tib Strengthening (Start Here) – Resistance Band Inversions
This is the poster child exercise for posterior tib.
Sit down, band around your forefoot, anchored to something pulling outward.
Rotate your foot inward against the band — like you’re trying to show the sole to your other leg.
Go slow and controlled — 3 sets of 10–15.
You should feel it light up just behind the inner ankle. That’s your target. Keep it honest. No cheating with your thigh or hip.
Calf Raises with Feet Turned In
Standard calf raises are good — but turning your toes inward about 20° targets the inner calf and posterior tib more directly.
Do them on one leg if you can.
Start on the floor, then graduate to a stair for full range.
Do 3 sets of 10.
Your goal? Eventually be able to do pain-free, single-leg heel raises. That’s a solid sign you’re back in the game.
Short Foot / Foot Doming
This one looks boring. It’s not. It’s weightlifting for your arch.
Barefoot, try to shorten your foot without curling your toes.
Think: “suck up your arch.”
Hold for 5 seconds. Repeat 10–15 times.
Do this seated or standing. It’s subtle, but crazy effective.
Towel Scrunches & Marble Pick-ups
Old school, but solid.
Lay down a towel. Use your toes to scrunch it in and push it back.
Or pick up marbles or pens with your toes and drop them into a cup.
These build up those tiny intrinsic foot muscles that help support your arch and offload your posterior tib. Do it while watching Netflix — no excuses.
2. Calf Flexibility (Stretch Daily)
Here’s the thing: tight calves = more pronation = more stress on your inner ankle. So if your calves are like concrete, you’re not doing your posterior tib any favors.
Wall Stretch – Straight & Bent Knee
Straight leg = hits gastrocnemius
Bent leg = hits soleus
Hold each stretch 30 seconds, 3 times. Do this twice a day.
It’s not sexy, but it works. Calf tightness is a hidden villain in a ton of tendon issues.
Incline Board Stretch
Got a slant board? Even better.
Stand with toes up, heels down, and hold.
Both legs, even if only one hurts — stay symmetrical.
And if you don’t have a board? A curb or stair does the trick.
3. Balance & Proprioception (Make It Functional)
Strength is great. But if your ankle doesn’t know how to fire on uneven ground, you’re gonna re-injure it. That’s where balance drills come in.
Single-Leg Stands
Start simple:
Stand barefoot on one leg for 30–60 seconds.
Level up: close your eyes.
Even more: do it on a pillow or foam pad.
Eventually, try single-leg mini squats or deadlifts. Challenge that stability.
BOSU / Wobble Board
Stand on a BOSU (flat side up), one foot at a time.
Balance. Add small knee bends if you’re ready.
This lights up all those ankle stabilizers — posterior tib included.
Use a wall or rail for support at first. Your balance will catch up quick.
Agility Drills (Later-Stage)
Only when you’re pain-free and strong should you do these:
Side hops
Single-leg bounds
Ladder drills
They’ll help prep your ankle for real-world impact — like sprinting or running trails.
How to Lace Your Running Shoes to Ease Inner Ankle Pain
You wouldn’t think something as basic as how you lace your shoes could matter much — but if your inner ankle or arch is cranky, it matters a lot.
I’ve worked with runners dealing with all kinds of tendon issues around the ankle, and sometimes the fix isn’t a fancy brace or new shoes… it’s just how you tie them.
Let’s go over some lacing tricks that can give your foot the support it needs without lighting up that sore spot:
1. Skip the Hot Spot – “Window Lacing”
Got a pressure point near the inside of your ankle or top of your arch that lights up every time you tie your shoes? Time to create a little window in your lacing.
Here’s how:
Lace up normally until you reach the eyelets near the sore zone.
Instead of crossing the laces over that tender area, go straight up to the next set of holes.
Then resume crisscrossing above it.
That break in the pattern means no pressure right over the inflamed spot. Great move if you’ve got inner ankle pain, top-of-foot discomfort, or even extensor tendonitis.
2. Outer-Side Lacing for Arch Support (PTTD Trick)
If you’ve got a collapsing arch or posterior tibial tendon dysfunction (PTTD), here’s a clever one:
Lace only through the outer eyelets (the side away from your arch).
This zigzag pattern lifts the arch and secures the midfoot without crushing it.
Not every shoe has double rows of eyelets, but if yours does (check some New Balance or stability trainers), this can mimic some of the arch support of an orthotic.
It’s subtle but powerful — you’re shifting pressure outward, helping the arch stay lifted, and possibly giving your tendon a break.
3. Loose Low, Tight High + Heel Lock
One of the biggest mistakes runners make? Tying the whole shoe tight like it’s a tourniquet.
Try this:
Loosen the laces over your forefoot (closer to your toes).
Gradually tighten as you move up toward the ankle.
Finish with a heel-lock (runner’s loop) using the top set of eyelets.
This setup keeps the heel snug (so you’re not sliding and straining your ankle with every step), but it lets the front of your foot breathe a little.
4. Test Alternative Lacing Patterns
Don’t get stuck with factory lacing — that setup wasn’t made for your feet.
Try:
Straight bar lacing for pressure across high arches
Ladder lacing to distribute pressure evenly
Parallel lacing to skip tension over the top of the foot
A runner I know switched to ladder lacing when dealing with stubborn tendon pain — said it changed his game overnight. So experiment. One small tweak can unlock a whole lot of relief.
5. Softer or Stretchy Laces = More Give
Standard laces can dig in, especially if you’re pulling tight to control motion.
Consider elastic laces (super popular in triathlon). They flex with your foot and distribute pressure more evenly.
Even swapping to flat cotton laces instead of round synthetic ones can reduce pressure points.
It’s a small upgrade, but your tendons might thank you.
6. Check the Tongue and Fit While You’re At It
Sometimes the shoe tongue is the real villain. If it slips off-center or gets bunched up, it can press right where you don’t want it.
Make sure the tongue is flat and centered every time you lace up.
Avoid overtightening — you want snug, not suffocating.
You should be able to wiggle your toes and feel secure but not squeezed around the ankle.
If your shoes are constantly pressing into your inner ankle, the fit or the lacing pattern may need rethinking — or it might be time to check with a podiatrist for a better shoe/orthotic setup.
When to See a Doc for Inner Ankle Pain
Look, I know a lot of runners (my past self included) try to “walk it off” when pain shows up.
But there’s a line between normal post-run soreness and something that needs real attention.
Inner ankle pain — especially the kind tied to posterior tibial tendon dysfunction (PTTD) — isn’t the kind of pain you can just ignore and hope disappears.
Here’s when it’s time to get it checked out:
1. Still Hurts After Rest? Red Flag.
If you’ve been off your feet for a solid 10 to 14 days — ice, elevation, compression, the works — and it still feels like someone’s stabbing your ankle when you try to run or walk? Time to call in the pros.
At that point, you’re not dealing with “mild irritation.” You might need physical therapy, a brace, or even imaging to rule out deeper issues.
2. Heard a Pop or Felt a Snap?
If you felt a sharp pop, tear, or sudden weakness in your ankle mid-run, don’t tough it out. That could be a partial or full tendon tear.
Can’t push off your foot? Get to a sports doc or podiatrist. Immediately.
3. Your Arch Is Collapsing
If you look down and your foot’s flatter than it used to be — or turning outward weirdly compared to the other side — that’s likely advanced PTTD. Especially if your ankle is rolling inward a lot.
That’s not just poor posture — that’s structure failing. Get it checked before it becomes permanent.
4. Can’t Do a Single-Leg Heel Raise?
Try standing on the bad leg and lifting your heel off the ground.
If you can’t do it — or it hurts like hell — you’re dealing with tendon dysfunction, plain and simple. A PT or doc can test the tendon, joint stability, and strength, and help build a plan.
5. Ankle’s Always Swollen or Feels Wobbly
If you’ve got persistent swelling — even when you’re not running — or your ankle feels unstable, like you’re one step away from rolling it? That’s a serious warning sign.
You could have tendon damage, joint involvement, or both.
6. Everyday Life Hurts?
If walking around the house hurts, you don’t need another sign. Get help. You shouldn’t be limping through life just to prove you’re tough.
7. Something Feels Off? Could Be Something Else.
If your pain includes numbness, burning, or sharp localized bone pain, this might not be tendonitis at all.
It could be nerve entrapment or even a stress fracture in the tibia or medial malleolus. You need a pro to sort that out — X-rays, MRIs, whatever it takes. Don’t play the guessing game.
What a Good Sports Doc Will Do
A solid sports med doc or podiatrist will:
Check alignment, strength, range of motion
Test the tendon
Possibly order imaging (MRI/ultrasound)
Prescribe rehab, orthotics, or immobilization (if needed)
As Dr. David Soomekh, a foot and ankle surgeon, puts it:
“Early diagnosis and intervention are crucial to prevent long-term damage.”
So yeah, early is everything. The longer you wait, the more complicated it gets.
Final Thoughts
Inner ankle pain doesn’t mean you’re broken. It’s just your body waving a red flag:
“Hey, the foundation’s cracking. Fix it before the house collapses.”
Posterior tibial tendonitis isn’t the end — it’s a chance to course-correct. Rest, rebuild, strengthen.
Do it right, and you don’t just recover — you come back better.
Catch it early? You might be back in the game in a couple weeks. Ignore it too long? You’re risking months off — or worse, permanent changes in your foot’s structure.
And trust me, once the arch falls, running gets a lot harder.
But here’s the upside: every runner I know who took the time to rehab properly came back smarter. Stronger feet. Better balance. A new respect for load management.
It’s like fixing the base of your pyramid — once it’s solid, everything else stacks easier.
Remember the mantra:
“You don’t need to stop running — you need to start fixing.”
If this setback teaches you the value of strength work, good shoes, smarter mileage, or just patience? That’s a win.
Ready to kick heel pain to the curb and keep your running goals on track? You’ve just hit the jackpot!
Looking for practical tips to prevent that pesky heel pain from wreaking havoc on your runs? Well, you’re not alone in this journey.
Let’s face it: heel pain is like that uninvited guest at your running party – annoying and stubborn. It ranges from a mild nuisance to a major roadblock, disrupting the stride of many runners just like you. But here’s the good news: you’re not alone, and there’s plenty you can do about it.
I’m about to spill the beans on some of the most effective ways to bid farewell to that pesky heel pain. Whether you’re lacing up for your first 5K or you’re a trail-blazing 50K enthusiast, the tips I’ve got lined up are your first steps to happy, pain-free heels. Ready for some sole-saving secrets?
Awesome, let’s dive in and show heel pain the door!
The Basics of Heel Pain for Runners
Before we dive into prevention, let me share some insights into the most common causes of heel pain in runners – it’s something I’ve had to tackle in my own running journey, too. Understanding the culprits behind the pain is crucial for effective prevention.
Let’s look at the usual suspects:
Plantar Fasciitis: This pesky issue occurs when the plantar fascia, that thick band of tissue running along the bottom of your foot, gets inflamed or strained. It can really put a damper on your runs.
Achilles Tendinitis: Inflamed Achilles tendons can lead to some serious heel pain. I learned the hard way that overtraining, sudden jumps in mileage, or skimping on stretching can contribute to this condition.
Heel Spurs: These bony growths on the heel bone, or calcaneus, can be quite a nuisance. While the spurs themselves might not always hurt, they can irritate the surrounding tissues and lead to discomfort.
Stress Fractures: These tiny fractures in the heel bone or nearby bones are particularly common in runners who push too hard without adequate rest.
Tight Achilles Tendon: A tight Achilles tendon can really strain the heel area. I’ve found that inadequate stretching and flexibility can lead to this kind of pain. It’s like a constant reminder not to skip the cooldown stretches after a run.
How To Prevent Heel Pain From Running
Let me share some tips on protecting your heels from injury while running. I’ve learned that the best way to treat an injury is to avoid it in the first place.
Start Slow
As someone who’s had their fair share of running-related aches, I can tell you that starting slow and smart is crucial.
Most overuse injuries, especially those causing heel pain, creep up on you. They’re the result of doing too much, too soon. That’s why choosing a sensible running program that lets your body gradually adjust to changes in distance and speed is the key to staying injury-free.
Here are some steps that have helped me ensure smooth progress:
Set Realistic Goals: Be clear and realistic about your running goals. These will guide your training and keep you motivated. When I started setting achievable goals for myself, I noticed a significant decrease in injuries.
Follow the 10% Rule: I try to limit my weekly mileage increases to no more than 10% to avoid overuse injuries. For instance, if I run 20 miles one week, I’ll only add up to 2 miles the next week.
Incorporate Rest Days: Rest days are a lifesaver. They’re as crucial as running days, giving your body time to recover and repair. I’ve learned to love and appreciate these days for their role in my training.
Cross-Train: Activities like swimming, cycling, or strength training work different muscle groups and help reduce strain on your heels. I’ve found that a varied workout routine keeps things interesting and beneficial for my overall fitness.
Listen to Your Body: This is vital. If you feel any discomfort or heel pain during runs, don’t ignore it. Address it promptly and adjust your training plan if necessary. I’ve found that being in tune with my body’s signals is key to preventing long-term issues.
Consult a Coach or Expert: If you’re new to running or have specific goals, getting advice from a coach or sports medicine expert can be incredibly helpful. They’ve helped me tailor my training to suit my needs and avoid injuries.
Keep A Healthy Weight
Being overweight can put extra pressure on your legs, and I’ve seen how it can exacerbate issues like plantar fasciitis or heel spurs in fellow runners.
But here’s the good news – losing weight can not only lighten the load on your feet but also bring a myriad of fitness and health benefits. I remember when I started focusing on shedding a few pounds; I felt lighter and more agile on my runs.
If heel pain is hindering your weight-bearing exercises, there are plenty of low-impact alternatives that I’ve found to be effective. Swimming, strength training, cycling, water running, and yoga are great options that keep the stress off your heels while helping you stay in shape.
What’s more, I’ve learned that working with a registered dietitian can be a game-changer. They can help you create a personalized nutrition plan tailored to your specific dietary needs and preferences. It’s not just about losing weight; it’s about finding a healthy balance that supports your running goals.
For more resources on weight loss and maintaining a healthy weight, especially as a runner, there are tons of useful posts and articles out there.
Improve Your Form
One of the lessons I’ve learned as I started taking training more seriously is the importance of good form, especially when it comes to preventing injury.
Protecting yourself against heel pain can often mean identifying and correcting any abnormal movement patterns or muscle imbalances in your lower body.
That’s where a running gait analysis can be a game-changer. I remember the first time I had mine done – it was an eye-opener! Understanding how you run can be key in pinpointing issues that might lead to pain.
Conventional wisdom suggests that a heel-foot strike, where the heel hits the ground first, might cause heel pain. This was true for me. When I tried changing my foot strike to a forefoot or midfoot pattern, I noticed a significant difference in comfort.
However, it’s important to remember that this doesn’t work for everyone. Foot strike patterns are a hotly debated topic in the running community. From what I’ve experienced and heard from fellow runners, much of the advice on this topic is anecdotal – and my advice is no different.
So, proceed with care. Experiment with different foot strikes, but do it gradually and pay close attention to how your body responds. There’s no one-size-fits-all in running, and sometimes, it’s about finding what works best for your unique stride.
Run On the Right Surfaces
The surface you run on can make a huge difference, especially when it comes to preventing heel pain and other overuse injuries. Here’s a tip I’ve found invaluable: whenever possible, avoid running on hard surfaces like asphalt and concrete. These surfaces can be tough on your heels.
Instead, try mixing it up with softer options. Running on a dirt path, grass, or synthetic tracks can offer a welcome change. I’ve noticed that varying running surfaces not only keeps my runs interesting but also helps reduce repetitive strain on my heels.
But what if you’re stuck with hard surfaces? Here are some strategies I’ve used to minimize the impact:
Proper Footwear: Investing in running shoes with good cushioning and shock absorption is a game-changer. These shoes have been a lifesaver for me, helping to soften the blow each time my foot hits the pavement.
Shorten Your Stride: On those tougher surfaces, I’ve found that shortening my stride a bit can really help. It reduces the force of impact on my heels and spreads it more evenly across my feet.
Use Insoles: Cushioned insoles or orthotic inserts can be a great addition, especially if you frequently run on hard surfaces. They add that extra layer of support and shock absorption, making a world of difference in how my feet feel post-run.
Gradual Transition: If you’re moving from softer to harder running surfaces, take it slow. Your body needs time to adjust to the increased impact. I learned this the hard way – rushing the transition only led to discomfort and a setback in my training.
Warm-up
I hate to break it to you, but I cannot emphasize enough the importance of a proper warm-up. Skipping it or not doing it correctly, can lead to tissue damage in the heel. That’s why I always take a few minutes before each run to get my body ready.
I recommend starting with 5 to 10 minutes of brisk walking or light jogging. Then, move on to dynamic stretches that target key muscle groups like the calves, hamstrings, quadriceps, and groin.
Here’s a look at my favorite warm-up routine – it’s been a game-changer for my runs.
Running in the Right Shoes: A Crucial Choice
In the world of running, shoes are more than just footwear – they’re essential equipment. The wrong shoes can make or break your run. They should fit well and offer plenty of cushion and support. If they don’t, it’s a no-go for me.
When choosing running shoes, it’s crucial to consider the structure of your feet. Look for shoes with good arch support and a slightly elevated heel. Wondering how to find the right pair? I always head to a running specialty store. The staff there can analyze your gait and recommend the best shoes for your running style.
And don’t forget about the fit! Your shoes shouldn’t be too tight, narrow, or small. Give a few pairs a try before settling on the right one.
Also, remember to replace your shoes regularly. Running in worn-out shoes can lead to abnormal stresses on your feet and increase your risk of injury. The general rule I follow is to replace my running shoes every 400 to 500 miles.
Strength And Stretch
As a runner, I’ve found that regularly strengthening and stretching my ankles and feet is a game-changer. It’s not just about support; these exercises can also improve your range of motion, keeping you injury-free for longer. I’ve learned that lacking mobility and strength can lead to muscular imbalances and dysfunctions in the lower legs, eventually causing overuse injuries.
Let me share a few moves that I’ve incorporated into my cross-training routine to promote flexibility and strength in my feet:
Golf Ball Rolls:
This is a simple yet effective exercise. Grab a golf ball and use it like a personal foot masseuse. While sitting comfortably, place the ball under your foot and roll it around, applying gentle pressure under the arch and around the heel. It’s like giving your foot a mini massage – perfect for loosening tight muscles and providing relief from heel pain. I love doing this after a run or even while I’m at my desk
Foot and Ankle Stretches:
Sit down, extend your leg, and rotate your foot in a circular motion – first clockwise, then counterclockwise. Then, flex and point your toes back and forth. These movements stretch out the muscles and tendons in your feet and ankles, enhancing flexibility and reducing tension.
Calf Stretches:
Calf stretches are the secret ingredient for happy heels. Stand facing a wall, extend one leg back, and press the heel towards the floor. Feel the stretch along the back of your lower leg. It’s a gentle yet effective way to ease the tension that often leads to heel pain. Hold the stretch for about 30 seconds, breathing deeply, and then switch legs.
Pay Attention to Your Body
Lastly, the best thing you can do to protect against heel pain from running – and really, all types of injuries – is to listen to your body. Running through the pain is never a good idea.
The whole ‘no pain, no gain’ mantra doesn’t apply in the real world, unless you’re a top athlete with a deep understanding of your limits.
Pain is a signal, a way for your body to tell you that something isn’t right. Ignoring it can lead to more serious issues. So, always pay attention to what your body is telling you. Adjusting or even stopping your activities when you feel pain is not a sign of weakness; it’s smart and responsible running.
If you’re a runner, you’re likely familiar with the pain of injuries. From the notorious shin splints and the dreaded runner’s knee to the stubborn Achilles tendonitis, these overuse conditions can be a real challenge. However, in addition to these chronic issues, runners also face acute injuries, and one of the most common among them is ankle sprains.
Ankle sprains are a frequent concern for runners of all levels, ranging from mild discomfort that eases after a few miles to severe pain that can limit mobility and disrupt your running routine. Understanding this injury while running is essential for every runner. It not only helps you manage the problem effectively but also enables you to take preventive measures.
In this comprehensive guide, I’ll delve into ankle sprains in runners, explaining their causes, treatment options, and prevention strategies. Whether you’re a beginner or an experienced runner, this article will equip you with the knowledge to handle ankle sprains effectively.
Let’s get started.
Brief Anatomy
Before we dive into the complexities of ankle sprains, let’s take a closer look at the anatomy of our ankles. Understanding this foundation will provide valuable insights into how to navigate potential issues.
Your ankle is a complex structure comprised of three key bones: the talus, fibula, and tibia. These bones play a crucial role in supporting your body weight and facilitating various movements. Additionally, on the inside and outside of the ankle, you’ll find two joint areas often referred to as “gutters.” These gutters contribute to the ankle’s flexibility and range of motion.
Surrounding these bones and joints, there’s a protective capsule that ensures stability while allowing for smooth movement. Furthermore, the synovium, a specialized tissue, plays a vital role by supplying blood and oxygen to the ankle, contributing to its overall health and function.
Now, let’s shine the spotlight on ligaments—the unsung heroes responsible for keeping everything in place. Ligaments are robust, fibrous tissues that connect bones to each other, providing essential stability to joints. In the case of the ankle, ligaments play a critical role in preventing excessive movement that could lead to injury.
The Mechanics Of Ankle Sprains
Let’s delve into the world of ankle sprains—an acute and sometimes troublesome injury that can afflict not only runners but also athletes involved in sports characterized by frequent jumping and sudden directional changes.
When it comes to ankle sprains, comprehending the mechanics behind them is crucial. If your foot tends to roll outward (a condition known as supination) during a run, you may be more susceptible to a lateral ankle sprain. This type of sprain often targets the anterior talo-fibular ligament. To reduce the risk, it’s essential to pay attention to your gait and make wise footwear choices.
Conversely, if your foot tends to roll inward (pronation) while the forefoot turns outward, you might be at risk of injuring the deltoid ligament. Such injuries can occur in situations like tripping and falling on another runner or having someone accidentally step on the back of your ankle, especially at the starting line of a race.
The Grades
Now, let’s focus on the ankle joint, the injured party. Among runners, Grades 1 and 2 sprains are the most common. Here’s a detailed breakdown:
Grade 1 Ankle Sprain:
Mild Stretching Starting with the mildest of the three grades, Grade 1 ankle sprains involve gentle stretching of the ligaments around the ankle without significant tearing.
It’s akin to a ligament sending you a subtle “stretch” or “strain” signal. Runners with Grade 1 sprains typically experience mild pain and discomfort but can usually bear weight on the affected ankle. Swelling and bruising are minimal, and recovery is relatively quick, ranging from a few days to a couple of weeks.
Grade 2 Ankle Sprain:
Partial Tear Moving up the scale, Grade 2 ankle sprains are more severe, featuring a partial tear of the ligaments, particularly the anterior talofibular ligament (ATFL). This grade is akin to a “battle scar” on the ligaments.
Runners with Grade 2 sprains often encounter moderate to severe pain and swelling, making weight-bearing challenging and limiting mobility. Bruising becomes more noticeable compared to Grade 1 sprains. Recovery for Grade 2 sprains takes several weeks to a few months, depending on the extent of the tear and adherence to treatment.
The Contributor Factors
Understanding the factors that increase the risk of ankle sprains is crucial in prevention. Here are some common contributors:
Running on Uneven Surfaces: Running on trails, rocky paths, or cross-country courses with uneven surfaces can lead to missteps and ankle rolls, increasing the risk of sprains.
Quick Changes in Direction: Sports that require sudden changes in direction, like soccer, basketball, and tennis, can strain ankle ligaments if not executed with proper form, leading to sprains.
Tripping Hazards: Tripping over obstacles such as curbs, tree roots, or hidden rocks can cause sudden, awkward movements that strain the ankle ligaments.
Improper Foot Striking: Missteps during running, particularly in high-impact activities, can result in awkward landings that increase the risk of ankle sprains.
Inadequate Footwear: Shoes that lack support or do not fit well can compromise stability and contribute to ankle sprains.
Awkward Landings: Encountering awkward landings during jumps or while navigating obstacles can stress the ankle and lead to sprains.
Foot-Eye Coordination: Running safely requires good foot-eye coordination to navigate around potential tripping hazards like curbs and rocks.
Fatigue and Overuse: Running or engaging in athletic activities while fatigued can lead to decreased coordination and balance, increasing the risk of missteps and ankle sprains.
A Widespread Injury
Ankle sprains are a prevalent injury that affects over 25,000 people every day, as reported by the American Academy of Orthopedic Surgeons.
And guess what? Runners are right there in the mix, tackling the roads and trails and facing a heightened risk of ankle sprains. According to a study in the “Journal of Orthopaedic & Sports Physical Therapy,” ankle sprains make up a significant percentage of injuries experienced by runners.
This study underscores that ankle sprains are a common challenge for individuals engaged in running as a physical activity.
Building on this, another research study in the “Journal of Athletic Training” highlighted that ankle sprains rank among the most frequent injuries encountered by long-distance runners.
The study emphasized the importance of preventive measures and raising awareness within the running community. So, here’s the truth—studies and research papers consistently show that ankle sprains are a notable part of the injury landscape for runners.
Symptoms of Ankle Sprains
Recognizing the symptoms of ankle sprains is important for timely and appropriate care. Here are the key signs to watch out for:
Pain: The most immediate and noticeable symptom of an ankle sprain is pain in the injured area. This pain can range from mild to severe, depending on the extent of the injury.
Bruising and Discoloration: You may observe bruising or skin discoloration around the affected ankle. This is a result of the trauma to the soft tissues and blood vessels in the area.
Swelling: Ankle sprains often cause swelling in the injured area. This swelling can develop quickly after the injury and is a sign of inflammation.
Reduced Range of Motion: A sprained ankle may become stiff, limiting your ability to move it through its normal range of motion.
Tenderness: The injured area may be tender to touch, and you might experience pain when pressure is applied.
Instability: In more severe cases, the ankle may feel unstable or unable to bear weight properly. This can be a sign of a significant ligament tear.
If you experience these symptoms, it’s important to seek medical attention. Ankle sprains can vary in severity, and appropriate diagnosis and treatment are crucial for recovery. Mild sprains may require rest and home care, while more severe sprains might need medical intervention.
How To Treat Ankle Sprains
Treating an ankle sprain involves several steps aimed at reducing pain and swelling, and promoting healing. Here’s a straightforward approach:
Ice Therapy: Apply an ice pack to the injured ankle for 15 to 20 minutes, three to four times a day. This helps in reducing swelling and numbing the pain. Make sure to wrap the ice pack in a cloth to protect your skin.
Compression: Use an elastic bandage to wrap the injured ankle. This provides support and helps in keeping the swelling down. Ensure the bandage is snug but not too tight to cut off circulation.
Elevation: Elevate your injured foot above the level of your heart, especially when resting or sleeping. This position helps in reducing swelling by improving circulation and drainage of fluids.
Physical Therapy: Engaging in a focused physical therapy program is crucial. This involves exercises to reduce pain and inflammation, improve range of motion, strengthen muscles around the ankle, and retrain proprioception (the ankle’s sense of position).
Physical therapy is an essential component of recovery, especially for runners who need to regain full function and prevent future injuries. A licensed physical therapist can provide a personalized program based on the severity of your sprain.
In addition to these steps, considering dietary supplements like Joint Genesis can be beneficial, as it helps to reduce inflammation, stiffness, and discomfort. Joint Genesis is focused on enhancing joint health by replenishing hyaluronan, a vital molecule for maintaining healthy joints. This can be particularly helpful in supporting joint recovery and health as we age.
If pain and swelling persist or worsen, it’s important to seek medical attention. Ankle sprains can vary in severity, and more significant injuries may require additional treatments like bracing or, in rare cases, surgery.
Remember, early and appropriate treatment of ankle sprains is key to a quick and effective recovery, allowing you to return to running safely.
The Recovery Time
The recovery time for an ankle sprain varies based on the severity of the injury. Generally, if the pain and symptoms persist beyond two weeks, it’s important to consult a physician. They can assess the injury’s extent and recommend the appropriate course of action for healing.
In some cases, your doctor may suggest additional support measures to aid in recovery, such as:
Ankle Taping: This provides extra support and stability to the injured ankle, helping to protect it from further injury.
Use of An Air Cast or Ankle Brace: These devices act as a protective shield, allowing for a safer and more controlled return to running. They can help in speeding up the recovery process and offer peace of mind as you gradually resume your activities.
However, it’s crucial to follow a key guideline before returning to running: ensure that your ankle has fully recovered. This means:
Pain-Free Movement: You should be able to run without experiencing pain in the ankle. Running through pain can worsen the injury and prolong recovery.
Full Range of Motion: Your ankle should have regained its natural flexibility and range of motion. This is essential for safe and effective running.
Rushing back into running before your ankle is fully healed can lead to re-injury and long-term problems. Listen to your body and your physician’s advice, and only resume running when you have met these specific recovery criteria.
When to Seek Medical Help
It’s important to know when to seek medical help for an ankle sprain to ensure you receive the proper diagnosis and treatment. While many sprains are manageable with home care, there are certain situations where seeing a healthcare professional is necessary:
Severe Pain and Swelling: If you experience intense pain, significant swelling, or bruising that doesn’t improve with rest and home treatments, you should consult a doctor.
Inability to Bear Weight: If you cannot put weight on the injured ankle, or if it feels unstable, this could mean a more severe ligament injury or other related issues. In such cases, a medical evaluation is key.
Persistent Symptoms: If symptoms continue or worsen despite initial home care, seek a professional evaluation. This could indicate delayed healing or other complications.
Numbness or Tingling: Tingling or numbness in the foot or toes requires medical attention. These sensations could suggest nerve involvement or circulation issues.
History of Ankle Injuries: If you have a history of ankle sprains or ongoing instability, consult a healthcare provider. Repeated sprains may lead to chronic conditions that require specialized treatment.
Fracture Concerns: If you suspect a fracture (for instance, if you heard a crack during the injury or there’s severe deformity), seek immediate medical attention. Ankle fractures require specific treatments such as casting or surgery.
Let me paint a picture: It’s mile 7 of a solid long run. You’re cruising. Legs feel decent.
Then it hits—your toes go numb.
Not just tingly.
I’m talking full-on block-of-wood status. No feeling. No feedback.
Just weird and kind of scary.
Been there. I remember stomping my foot like an idiot mid-run, trying to “wake it up.” I thought maybe I tied my shoes too tight. Or was this overtraining? Nerve damage? What the hell?
Turns out, it was a mix of bad shoe fit and dumb lacing habits.
My shoes were too narrow, especially in the toe box.
And once my feet swelled from the miles, the tight laces turned my foot into a tourniquet.
I finally got smart—switched to a wider pair (half-size up) and learned to lace for performance, not lockdown.
Problem solved.
That mile-7 episode? It was my body waving a flag saying: “Yo, something’s off.” I could’ve ignored it, but instead, I used it.
And now I help other runners avoid the same mess.
Let me share with you more about my experience…
Why the Heck Do Your Feet Go Numb During a Run?
So what’s actually going on when your feet “fall asleep” during a run?
It’s called paresthesia—a fancy term for that pins-and-needles, buzzing, no-feeling sensation.
It can hit your toes, arch, top of foot, even the sides.
Usually, it’s temporary. But it’s distracting as hell.
And if it keeps happening, it can screw up your form—or your confidence.
It sounds basic, but you’d be shocked how many runners—good runners—are stuffing their feet into shoes that just don’t work for them.
Here’s the breakdown:
Too tight = your foot gets squished, compressing nerves and cutting off circulation.
Narrow toe box = pinched nerves on the sides or top of your foot (especially common in some “racing” shoes).
Overly tight laces = pressure on the top of your foot (near the anterior tarsal tunnel), killing blood flow.
Too loose = foot slides around, causes friction, and makes you clench your toes to stay stable—same outcome: numbness.
Bottom line? If your shoes feel fine at mile 1 but turn deadly by mile 4, you’ve got a sizing or structure problem.
Here’s how to fix it:
✅ Get the Fit Right
Your shoe should be snug in the heel, secure in the midfoot, but with room in the toes.
You want about a thumb’s width between your toe and the end of the shoe to leave room for swelling.
Got wide feet? Go wide—literally. Many brands now offer wider toe box options (Altra, Topo, HOKA, etc.).
Most runners wear their running shoes a half to a full size bigger than everyday shoes. Don’t size down just to make them “look cooler.”
✅ Lace Smarter, Not Tighter
Stop yanking your laces like you’re tying down a tent in a hurricane.
Feel pressure on the top of your foot? That’s a sign you’ve got the wrong lace tension.
Use a runner’s loop or skip an eyelet to relieve tension on hot spots.
Try elastic no-tie laces like Lock Laces—these adapt as your foot swells. A lot of runners swear by them for longer runs or races.
I personally switched to Lock Laces a few years ago for long races and never looked back. My feet stay snug but free. Big difference in comfort and blood flow. Here’s your guide to running shoe lace techniques.
✅ Get Fitted By Pros
Still not sure? Go to a running-specific store and get a proper fitting.
These folks look at your gait, foot shape, stride mechanics—and can help you find the model that fits like a glove.
I’ve coached runners who suffered for months with numb feet… only to realize they’d been wearing the wrong shoe brand for their foot shape.
A simple switch (and half-size up) changed everything.
2. Your Foot Strike Is Working Against You
Here’s the deal — the way your foot hits the ground matters. A lot.
If you’re overpronating (foot rolls too far inward) or supinating (rolling outward), you’re stacking pressure on one side of your foot over and over.
That uneven force can press right on nerves or blood vessels and boom — tingling, burning, or dead-leg toes.
Another big one? Overstriding. That’s when your foot lands way out in front of you, usually with a hard heel strike.
The result? Your foot slams the ground, stays there too long, and starts mashing the nerves on the bottom of your foot — especially the arch and heel.
And let’s not forget posture. If you’re running all hunched over like you’re carrying grocery bags, that tension up top can mess with your blood flow down below.
Stiff arms, clenched fists, tight shoulders = less oxygen and blood getting to your feet.
Here’s how to fix it:
✅ Shorten Your Stride. Think quicker, smaller steps — land under your hips, not out in front. A higher cadence and midfoot strike reduces that braking force and keeps pressure off your heels.
✅ Land Midfoot (Not Heel-First). A light midfoot landing spreads impact evenly. That means no one part of your foot is taking the full hit — and your nerves get to breathe a little.
✅ Relax and Run Tall. Drop your shoulders. Open your chest. Lean slightly forward from the ankles (not the waist). And unclench those fists! A loose upper body = better blood flow = happier feet.
✅ Get a Gait Analysis. Not sure if you’re pronating or just stomping like an elephant? Go see a pro. Running stores and physical therapists can film you running and tell you what’s off. If needed, you might get fitted for stability shoes or orthotics that help correct your mechanics.
3. Nerve Compression = Pins and Needles
That classic “pins and needles” zap in your toes or ball of your foot? That’s nerve compression.
And it can come from a few different sources.
Here’s what I found during my research:
Morton’s Neuroma
This one’s common. A nerve between your toe bones — usually between the 3rd and 4th toes — gets inflamed and thickens.
Runners say it feels like they’re stepping on a pebble. You might get burning, tingling, or numb toes that creep in after a few miles.
Biggest culprit? Tight shoes. Especially narrow-toe boxes that squish your forefoot and crowd the nerves.
Tarsal Tunnel Syndrome
Yep, just like carpal tunnel… but in your ankle.
There’s a tight little space called the tarsal tunnel on the inside of your ankle. The tibial nerve runs through there. If you’ve got swelling, flat feet, or you overpronate like crazy, that nerve can get pinched.
You’ll feel tingling or even burning along the sole of your foot or inner ankle — and it usually doesn’t go away just by loosening your laces.
General Nerve Irritation From Repetitive Impact
Even if you don’t have a named condition, pounding the pavement with bad shoes or sloppy form can inflame the plantar nerves (under your foot).
It usually starts as mild tingling after long runs, but ignore it too long and it can snowball into full-blown nerve damage.
One podiatrist even warned that hard-surface running in stiff shoes can lead to neuroma-type pain just from chronic pressure. It adds up.
Here’s how to fix it:
✅ Make Sure Your Shoes Fit. No toe squish. No jammed forefoot. You need a thumb’s width at the front and enough room in the toe box to wiggle without sliding around.
✅ Add Cushion. Hard shoes on hard pavement? That’s a recipe for nerve flare-ups. If your shoes feel dead or flat, swap them out. Look for shoes with decent arch support and midsole cushioning.
✅ Don’t Ignore That Weird Tingling. If your foot starts zoning out every run, don’t just shrug it off. Adjust your form, check your shoes, or back off mileage. Nerve stuff takes time to heal — don’t let it get worse.
✅ Consider Orthotics or Pads. If it’s a recurring thing (especially with neuroma symptoms), try metatarsal pads to relieve pressure. Or get checked for custom orthotics if overpronation is a big part of the issue.
Keep Those Nerves Happy: Fix Foot Tingling Before It Stops You
As I’ve mentioned before, tingling, burning, or “ghost toes” are usually your body waving a red flag.
The good news? There’s a lot you can do to fix it—starting with your shoes.
1. Loosen the Grip: Roomier Shoes, Happier Nerves
Tight shoes are nerve crushers—literally.
If you’ve got something like Morton’s neuroma, cramming your forefoot into a narrow toe box is like asking for trouble.
Fix it: Get shoes with a wider toe box. Your toes need space to splay.
Bonus points if the shoe has extra cushioning up front—your forefoot will thank you for it.
Trust me, one good shoe switch can take your run from “why is my foot on fire?” to “hey, this feels smooth.”
2. Mind Those Midsoles
Running in worn-out or stiff shoes is like running with bricks strapped to your feet.
The shock doesn’t get absorbed—it just zaps straight up into your nerves.
If you can feel every crack in the sidewalk, it’s time.
A fresh midsole with decent bounce can ease the pressure on those foot nerves. Keep your running gear fresh—it’s not just about comfort; it’s about staying in the game.
3. Lacing Can Make or Break You
Got tingling on the top of your foot? Might be a nerve pinch from your laces.
It happens more often than you’d think—especially if you crank down on the lacing like you’re tying up hiking boots.
Fix it: Loosen your laces over the instep. Try a skip-lacing pattern to avoid pressure over sensitive zones. Or use a tongue pad for a little cushion under the laces. I’ve even tossed a cotton pad under there during a race—worked like a charm.
4. Met Pads & Orthotics: When You Need Extra Help
If the nerve pain keeps flaring—think sharp tingles between the toes or the ball of your foot going numb—you might need backup.
Fix it: Talk to a podiatrist. Metatarsal pads (tiny foam saviors) can help spread your forefoot bones and take pressure off the nerve.
Custom orthotics can correct bigger issues like pronation that throw off your whole mechanics.
This stuff can be a total game-changer for chronic nerve pain.
5. Rest It If It’s Angry
Sometimes your foot just needs a break. If the nerve is already inflamed, pounding miles on it will only make it worse.
Fix it: Ice the area, back off for a few days, maybe use anti-inflammatories (with your doc’s okay). If tingling or numbness keeps showing up in the same spot, don’t play tough guy. Get it checked. A cortisone shot or guided treatment might be the thing that gets you back out there pain-free.
Final Word: Your Nerves Aren’t the Enemy—They’re Just Loud
Here’s the truth no one wants to admit:
Numb feet while running isn’t normal. Common? Yeah. Normal? Nope.
Even if it’s just a toe or two going numb occasionally, that’s your body waving a yellow flag. Maybe it’s tight laces. Maybe it’s cheap insoles. Maybe your form collapses late in the run.
Whatever it is—it’s your job to figure it out.
The good news? Most fixes are easy once you know the cause. Loosen your laces. Size up your shoes. Add a better insole. Stretch your calves. Boom—you’re back in business.
But if you keep brushing it off, guess what happens? That toe numbness turns into full-foot deadness by mile 2. And then it starts hurting. And then you’re Googling “why does my foot feel like it’s on fire?” instead of training.
Stop Toughing It Out
You’re not “pushing through” anything by ignoring numbness—you’re just risking real injury.
Comfort isn’t a luxury for runners—it’s a performance tool. Try holding good form when your foot feels like a frozen pancake. Not gonna happen.
You wouldn’t drive a car with a flat tire and expect to win a race, right? So don’t run on “flat” feet either.
Respect Your Feet – They’re the Engine
Seriously—your feet carry you mile after mile. Take care of them.
Strengthen them
Stretch them
Upgrade your gear if needed
And see a pro if things don’t improve
Plenty of runners have turned their whole training around by fixing their foot numbness—because it wasn’t just the foot. It was their form, or their recovery, or their training load. Fix the weak link, and the whole chain gets stronger..