Let me hit you with the truth upfront: easy doesn’t mean lazy.
It means smart.
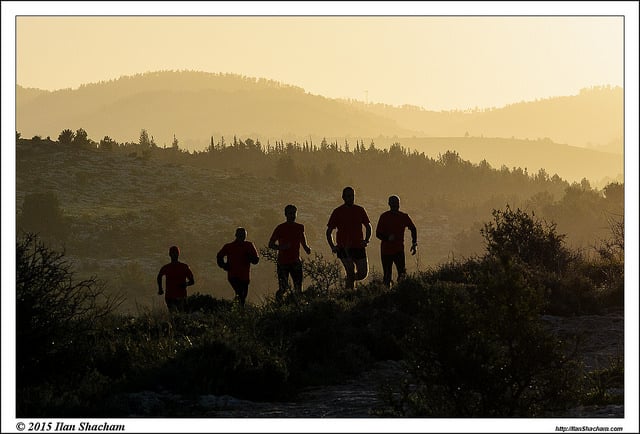
Recovery runs are the behind-the-scenes MVPs of training — the stuff that doesn’t look flashy on Strava but builds the base that lets you race stronger, recover faster, and stay injury-free.
These runs don’t come with ego boosts or big mile splits.
What they do come with? Gains — quiet, steady, relentless gains.
Let me tell you more…
What’s a Recovery Run?
Simple: It’s a short, slow jog — usually done within a day after a hard session like intervals, a long run, or a race.
It’s not meant to crush your legs.
It’s meant to shake them out, keep blood flowing, and get your body back in the fight.
I call them “anti-hero runs.” They don’t make headlines, but they keep your engine running.
Why Bother? Here’s What Recovery Runs Actually Do
A lot of runners skip these because they feel “too easy.” Don’t be one of them.
Here’s what you’re missing when you skip your recovery miles:
- They flush out the junk. Sore legs? Tight calves? A gentle jog boosts circulation, which helps clear out the metabolic leftovers from your last workout. It’s like a rinse cycle for your legs.
- They teach you to run tired. Running on fatigued legs trains your body to adapt. That’s next-level stuff. There’s a killer study out of Denmark showing athletes who trained a muscle twice in one day — the second time on tired legs — boosted endurance by 90% more than those who didn’t. Ninety percent. That’s no joke.
- They let you rack up more miles without breaking down. Want to improve your aerobic base without overstressing your knees? This is how. You add “bonus” mileage that helps long-term fitness without tipping into burnout territory.
- You get to work on form. With no pressure to hit splits, you can focus on posture, stride, arm swing — all the stuff that usually falls apart when you’re redlining. Use this time to sharpen your form, so it holds up when it counts.
How Slow Should a Recovery Run Be?
If you’re not used to running slow on purpose, this part’s gonna mess with your brain.
But trust me — it works.
This is my golden rules:
Go 60–90 seconds slower than your usual pace
Run a 9:00 on your normal days? Shoot for 10:00–10:30 on recovery runs.
Even slower if needed. There’s no speed minimum here.
Kenyan elites shuffle through recovery runs like they’re walking the dog — because they know the goal is recovery, not impressing GPS watches.
Use heart rate if you’ve got a monitor
Stick to 60–70% of your max heart rate. That’s Zone 1 or low Zone 2 in most systems.
For a lot of runners, that’s somewhere around 110–140 bpm.
If it starts creeping up, ease off. Don’t be afraid to walk hills or take short pauses.
Talk test never fails
Can you carry on a full convo without wheezing? Can you sing a few lines of your favorite song? If not, you’re going too hard.
If you’re out of breath, it’s not recovery. Slow it down.
Here’s the full guide to talk test.
Kill the ego
This is where most runners struggle. Your brain screams, “You’re wasting your time!” when your pace feels glacial. Ignore it.
Think of it like this — in music, the rests are part of the performance. Recovery runs are your rests. They set you up to play harder later. Skip them, and you’re just playing noise with no rhythm.
How Long Should a Recovery Run Be?
Short answer? Not long at all.
A recovery run isn’t about racking up miles — it’s about getting your legs moving just enough to help them bounce back, not burn them out.
Here’s the Ballpark, Depending on Your Level
| Runner Level | Recovery Run Time | Approx. Distance |
|---|---|---|
| Beginner | 20–30 min | 2–3 miles |
| Intermediate | 30–45 min | 3–5 miles |
| Advanced | 45–60 min (max) | 6–7 miles |
For most folks, 3 to 5 miles at an easy, chatty pace hits the sweet spot.
If you’re newer or just ran a monster effort (like a race or brutal long run), even 20 minutes of slow jogging can do the trick.
Now if you’re a seasoned runner with weekly mileage up in the clouds, you might stretch recovery runs to 45 or even 60 minutes — but only if you’re keeping it truly easy.
No huffing, no red-lining.
Just cruise.
Keep It Shorter Than Your Base Runs
Yes, this is the golden rule.
Don’t try to be a hero. This ain’t the day to chase mileage badges on Strava.
A recovery run is like a leg massage disguised as a jog — a light shakeout to keep the gears moving.
There’s a reason a lot of coaches swear by the 20–40 minute range. Go longer than that and you risk digging deeper into fatigue instead of recovering from it — especially if you’re not in high-mileage territory.
Think of it this way: “Done is better than more.”
If you’re on mile 3 of an easy day and your brain whispers “Let’s make it 6,” ask yourself: why?
If the answer isn’t “Because I feel amazing and I’m recovering fine,” then cut it short. Live to run strong another day.
You should finish your recovery run feeling better than you started — or at least not more wiped.
When Should You Schedule a Recovery Run?
Here’s the deal: timing matters just as much as duration.
You don’t want to throw a recovery run in just because — it’s gotta make sense.
Let’s break it down:
| After… | Should You Run? |
|---|---|
| Hard interval workout (speed) | Yes – next day is prime shakeout time. Some advanced runners even sneak in a super easy second jog later the same day. |
| Long run | Yes – but only if your legs aren’t cooked. Gentle jog the next day can loosen you up. Too sore? Take the day off or cross-train. |
| Tempo run or race-pace session | Yep – a light jog 12–24 hours later helps shift your body into recovery mode. |
| Race (half-marathon or longer) | Nope – not right away. Let your body breathe. Start with walking or full rest. Wait 2–4 days before even thinking about an easy run. |
Rule of thumb:
If you went hard yesterday, a light run within 24 hours can help flush soreness, keep you limber, and mentally reset.
Example:
- Track session Tuesday? Try 20–30 minutes easy Wednesday.
- Long run on Saturday? Go for a chill shakeout on Sunday.
When to Skip the Recovery Run
Listen — recovery runs aren’t mandatory. And they’re not magic. They only work if your body’s actually ready for them.
Here’s when to press pause:
1. You’re Too Sore or Wrecked
If your legs feel like they got hit by a freight train, don’t force a jog. That deep, post-race ache? That’s your body screaming for true rest — not more pounding.
Try walking, stretching, or non-impact recovery like cycling, swimming, or yoga. Blood flow = good. Pain = bad.
After a marathon, I’ll usually go for a slow walk the next day. No watches. No pressure. Just movement.
2. You Run Fewer Than 3–4 Days Per Week
Running less than 4 days a week? You probably don’t need dedicated recovery runs. Your rest days are already baked in.
If you’re doing Monday-Wednesday-Friday runs, just rest or cross-train on the off days. Spend that energy on your quality workouts instead.
Recovery runs matter more when you’re logging daily or near-daily mileage.
3. It Messes With Sleep or Adds Stress
If getting your recovery run means waking up at 4 a.m. and dragging tired legs out the door before work… skip it.
Sleep is recovery too. And so is not feeling mentally fried.
Recovery days should feel like a breather, not another item on your stress list.
My Real-World Recovery Run Rules (After 1,000+ Miles of Trial and Error)
Let’s be real — recovery runs aren’t flashy. They’re not the ones you brag about.
But they’re everything when it comes to staying healthy, running strong, and showing up ready for your next hard session.
After logging over 1,000 miles on so-called “easy days” — and coaching runners through thousands more — here’s what I’ve learned: recovery runs are where smart training happens.
Here’s how to nail them without wrecking your legs or your training plan.
1. Pull Out Your Cushiest, Comfiest Shoes
Recovery days are when your legs need some love. This isn’t the day for your sleek racing flats. Grab your softest, plushest trainers — the kind that feel like running on marshmallows.
Got a pair that’s a little too beat-up for long runs but still comfy? Perfect. This is their time to shine.
Think max-cushion shoes, like Hokas or those soft-as-hell trainers you use on tired-leg days.
Your joints will thank you.
I call these my “zombie shoes” — when my legs feel dead, I slip into those bad boys, and suddenly everything feels a little more manageable.
2. Choose Chill Terrain — Keep It Flat, Soft, and Forgiving
Recovery runs aren’t the time to “embrace the grind.” Skip the monster hills and rocky trails. You want flat, easy, and gentle.
Hit up a groomed trail, crushed gravel path, or that pancake-flat loop in your neighborhood.
Even grass or a golf course path (if you’re lucky) can make a huge difference. The softer the surface, the less pounding your tired legs take.
Personally, I love a slow jog on the infield trail at my local park. Zero ego, zero elevation, just getting the legs moving.
3. Run With Your Brain, Not Your Watch
Don’t chase numbers. Recovery runs are the perfect time to run by feel, not pace. Use them to do a full-body check-in.
How do your calves feel? Are your hips tight? Is your form falling apart?
Forget the stats. Some days I even leave my watch at home — or turn off the pace display. One less thing to stress about. This is your chance to just move, breathe, and reconnect with why you run in the first place.
Think of it like active meditation — movement without pressure. That’s the sweet spot.
4. If You’re Not Sure About the Pace… Slow Down More
Let’s hammer this in: you cannot go too slow on a recovery run. But you can go too fast — and mess up your next workout.
There’s a saying I live by: “Run your easy runs easy, so you can run your hard runs hard.”
Want to know how I coach my runners? I tell them if it feels like you’re “almost walking,” you’re probably doing it right.
If your legs are trash when you start, shuffle. Heck, walk a bit. Warm into it. What matters is that you keep it gentle and let your body bounce back.
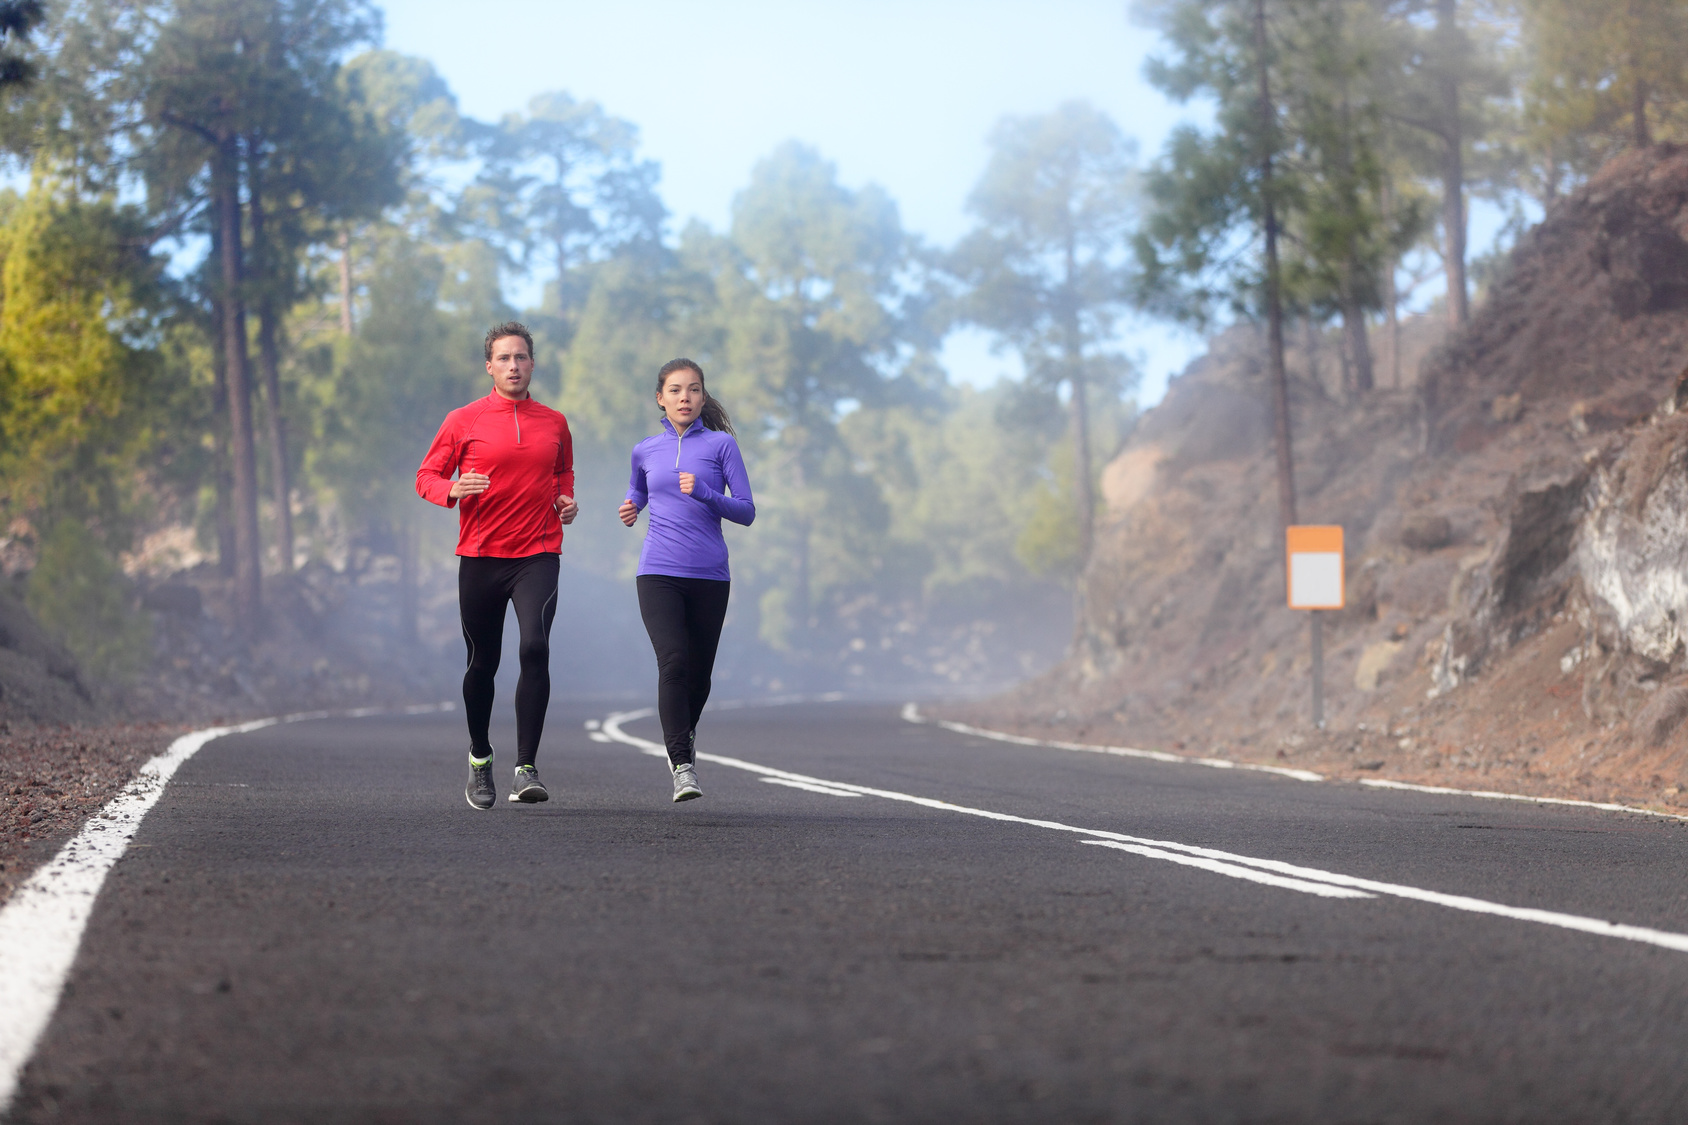
5. Talk or Tune Out: Use Conversation or Chill Vibes
The best way to lock into an easy pace? Talk to someone.
If you’ve got a running buddy, link up and keep the pace conversational — literally. If you can talk, you’re not going too fast.
Solo? Pop in a podcast or a slow-tempo playlist. I’ve coached runners who build recovery run playlists with chilled-out beats to help them stay slow.
6. Don’t Pull the “Accidental Workout” Trick
This one’s big. If it’s a recovery run, make it a recovery run.
No sneaky tempo miles, no “just a few hill reps,” no “I felt good so I picked it up.”
Save the hero workouts for hard days. These runs are black and white — either easy or hard. You can’t straddle the line.
If you’ve got a little extra juice, cool — throw in a few short strides after the run. But don’t turn recovery into a gray-zone slog. That’s how you dig a hole without realizing it.
Remember: there’s no medal for the person who trained the hardest — only the one who trained the smartest.
Bonus Rule: Be Damn Proud of Your Slow Runs
Recovery runs aren’t a sign of weakness. They’re a flex. They say, “I’m in this for the long haul.”
Some runners even post their slow recovery paces to prove a point — that smart training isn’t all about speed.
That’s the mindset we need more of.
If someone gives you crap for running “slow,” smile and wave. You’re playing the long game. And the long game wins races.
Recovery Isn’t Just Running — It’s Sleep, Fuel, and Stress Too
Let’s get real — recovery isn’t just about a slow jog around the block.
Yeah, the recovery run has its place. But if that’s all you’re doing to bounce back? You’re short-changing yourself big time.
Recovery is everything that happens between the runs — how you sleep, how you eat, how you chill out, and how you move on your off days.
Ignore that stuff, and your body’s gonna start flipping the check-engine light whether you like it or not.
Here’s what I tell my runners: recovery is a full-time job. It’s the other half of training.
Below are the five big rocks you’ve gotta nail down if you want to keep training strong and stay out of the injury pit.
Recovery Pillars for Runners (a.k.a. How to Not Break Down)
| Recovery Pillar | Key Tip for Runners |
|---|---|
| Sleep | Aim for 7–9 hours a night, especially during hard training blocks. That’s when the real rebuilding happens. Elite runners treat sleep like part of their training plan — so should you. Got time for a 20-minute nap after a brutal workout? Do it. Your body will thank you. |
| Hydration | Drink all day — not just on the run. Shoot for 2–3 liters daily, more in the heat. After a sweaty session, go with water plus electrolytes (sodium and potassium) to refuel your engine. Hydration helps your heart move nutrients to those sore, busted-up muscles. |
| Nutrition | Eat like someone who wants to recover. Within 30–60 minutes after a hard run, get in some carbs and protein. Carbs refill your fuel tank, protein patches up the muscle damage. And don’t slack on the basics — whole grains, lean protein, good fats, and tons of fruits and veggies. Every bite counts. |
| Stress Management | Here’s the truth — your body doesn’t care if the stress comes from work, life, or training. It all adds up. High stress + hard training = meltdown mode. On recovery days, give your brain a breather too. Read. Breathe. Laugh. Do stuff that chills you out. It matters more than you think. |
| Active Recovery | Not every recovery day has to be a run. Easy bike rides, swimming, foam rolling, yoga, long walks — these all help blood flow without pounding your joints. The goal isn’t to stick to some perfect formula. It’s to show up tomorrow feeling better than today. |
Your Body Rebuilds When You Let It
Here’s the big-picture reminder: training beats you up. Recovery builds you back stronger. It’s a cycle.
You run hard. You recover right. You level up.
But if one part’s off — like you’re sleeping 4 hours a night, eating garbage, or never giving your mind a break — everything else suffers.
Think of your training like a 3-legged stool: running, recovery, and lifestyle. If one leg wobbles, the whole thing crashes.
So on your easy days, don’t just run slow — double down on rest. Hydrate.
Eat real food.
Turn off your brain.
Let your body recharge.
Recovery isn’t a luxury. It’s your secret weapon.
Sample Training Weeks: Where Recovery Runs Actually Fit In
Now let’s plug this into a real week.
Below are three sample plans — for beginners, intermediates, and advanced runners — so you can see where the recovery runs actually belong.
Beginner Week (~20–25 miles)
- Monday – Rest or yoga/stretching
- Tuesday – Easy run: 3 miles, super chill
- Wednesday – Cross-train (bike, swim, or walk)
- Thursday – Workout: intervals or fartlek
- Friday – Recovery run: 20 minutes easy jog
- Saturday – Long run: 5 miles, slow and steady
- Sunday – Rest
Coach’s Tip: If you’re new to running, your recovery run should feel easier than easy.
Think “shuffle pace.” Even 15–20 minutes is enough to loosen up.
If you’re breathing hard, you’re doing it wrong. Walk breaks are allowed. The goal is to feel better after — not wiped.
Intermediate Week (~35–45 miles)
- Monday – Easy run: 4 miles, relaxed
- Tuesday – Workout: 6 x 800m @ 5K pace
- Wednesday – Recovery run: 30 minutes easy (Zone 1)
- Thursday – Cross-train or rest
- Friday – Tempo run: 4 miles at half-marathon effort
- Saturday – Long run: 8 miles easy
- Sunday – Recovery run: 35 minutes or rest
Coach’s Tip: At this level, recovery runs are key.
They’re what keep your legs turning over between the hard stuff. Wednesday and Sunday here are both used to flush out fatigue.
Don’t be afraid to slow waaaay down. A heart rate monitor or slower friend can help keep you honest.
Advanced Week (~50–60+ miles)
- Monday – Tempo run: 6 miles at marathon pace
- Tuesday – Recovery run: 5 miles AM (optional: 3 miles PM shakeout)
- Wednesday – Workout: 8 x 400m intervals
- Thursday – Recovery run: 4 miles easy
- Friday – Medium-long or hill run: 7 miles
- Saturday – Rest or light cross-train
- Sunday – Long run: 12 miles easy (plus 3-mile recovery jog optional)
Coach’s Tip: High-mileage runners live and die by their recovery runs. It’s the glue that holds the week together. On these days, go 2+ minutes per mile slower than marathon pace if needed. That’s not “lazy” — that’s smart. Run slow enough that you almost feel silly. Then show up fresh when it counts.
FAQs — Real Answers from the Road
Still wondering about recovery runs? You’re not alone. I get these questions all the time from runners at every level — so let’s cut through the noise and get honest.
Can a recovery run be too slow?
Nope. The slower, the better. I mean it.
You could jog like your shoes are stuck in molasses, and it still counts. If you’re moving, you’re winning. Some runners feel like they’re wasting time if they’re not clocking sub-9s on recovery days. That mindset? It’ll burn you out fast.
Recovery runs aren’t about ego. They’re about staying in the game.
Do I have to do recovery runs?
Short answer: not always.
If you’re only running 2–3 days a week, you’re probably good with rest days. But if you’re stacking 5+ runs a week or pushing mileage, those easy runs become your secret weapon. They let you build volume, adapt to fatigue, and avoid overtraining.
So no, you don’t have to do them — but skipping all your easy miles might put a cap on your progress. Worse, it could put you in the injury zone.
Should I skip a recovery run if I’m really sore?
Absolutely. If your legs feel like they’ve been hit by a truck after race day or a brutal long run, you’re better off resting or hopping on a bike.
Remember: a recovery run is still a run. If you’re hobbling just to jog, that’s your body saying “chill out.” Let it heal. Once the soreness fades, a light jog can actually help flush things out and get you moving again.
But pain = stop. Always.
What if I finish a recovery run feeling even more tired?
Then it wasn’t a recovery run. It was just a slower hard run.
A real recovery run should leave you feeling refreshed — or at least no more beat than when you started. If you’re finishing more drained, you either ran too far, too fast, or you just needed rest instead.
Next time, scale it way back. Try half the distance or drop the pace even more. Still not sure? Try this trick I give my athletes:
Start jogging. If after 10 minutes you still feel awful, pull the plug and call it a rest day. No guilt. No overthinking. Just smart training.
Final Thoughts: The Real Power of Going Slow
Here’s the truth no one brags about on Strava: the easy days are the ones that hold your whole training plan together.
Everyone loves to talk about track splits and long run grinds. But recovery runs? They’re the unsung heroes. They keep your legs loose, your mind steady, and your body primed to come back swinging tomorrow.
I’ve said this a hundred times:
“If you skip recovery runs, your hard days will fall apart. Respect the easy miles, and your progress compounds.”
That’s not motivational fluff — it’s just how the body works.
Think of recovery runs like brushing your teeth. You don’t skip it because you don’t feel like it’s “working.” You just do it, because it keeps everything else healthy.
And when you show up to your speed workouts or long runs feeling light, strong, and ready to rip — that’s when you realize those slow miles were doing their job.
Let’s be real: you’re not gonna post about your 11:00 pace loop around the neighborhood. But guess what? The runners who embrace those slow, unsexy jogs? They’re the ones posting PRs later.
That’s the 80/20 principle in action: 80% easy, 20% hard. Get that balance right, and you’re bulletproof.