How to Plan a Running Route?

how to plan a running route

Outdoor running is one of the best things you can do to take care of your health.

But, often than not, it is not as simple as heading out the door and hitting the pavement, especially when you’re serious about your miles.

To get the most out of your outdoor runs, you’ll want to plan the perfect route.

Whether you’re a beginner runner or already training for your 9th marathon, in today’s post, I’m going to share with you the tools you need to find and plan the perfect running route.

Sounds great?

Let’s get started.

Why Plan Your Running Routes?

Planning your running routes is key—or else it’s not easy to tell how far you have run or will run.

This can cause you to either over-or underestimate yourself, which can cause more harm than good.

The last thing you’d want while running is to find yourself 6 miles from home base dying of thirst or needing to go to the bathroom and still have to return back home somehow.

What’s more?

Planning your running routes helps you improve motivation, stay more consistent, and provide more terrain variety.

It also helps make your training safer and more enjoyable.

What’s not to like!

How To Plan A Running Route?

Here are some of the measures to take to help you plan your running routes so you can have the most out of your runs.

Enjoy!

Stay Safe

The most important factor to consider when planning a running route is safety.

The last thing you’d want is a running course that’s going to give you an upsetting experience.

Here’s how to ensure road safety.

  • Learn more about the course. If this is your first time trying a running route, try to find out as much information about it in advance. You can use Google Street View to zoom in on routes—you can also try driving or biking through it first.
  • If you live in a highly-populated city, pay attention to traffic or crowds in your surrounding area. Avoid busy streets and over-crowded sidewalks. That’s why it’s best to run early in the morning before the rest of the world starts waking up.
  • Proper light. If you plan to run early in the morning or late in the evening, make sure the course is properly lit.
  • If you plan to hit the trails, find out more about the sort of animal you could run into. For more on how to deal with animals while running, check this post.
  • Leave word. Always tell a family member or a friend where you’re going to run and when they should expect to hear from you back.

Use Apps

Whether you prefer to log in the miles on a familiar road or are a keen trail runner out there to explore uncharted terrains, there are many apps out there to help you run more efficiently.

Running apps can help you monitor pace, duration, distance, calories, elevation, and so much more—all to help you reach your running goals.

Of course, there’s an app—more like a dozen—for planning running routes.

Here are my best recommendations:

  • Plot Route. This works very well if you prefer to plan your running route on a laptop. As you plan your course, this tool will work out your running distance and provide you the option of adding running speed.
  • You can find the “route” tool in the premium version of Strava. Just put in how far you’d like to run and whether you want to avoid hills.
  • This one lets you sift through dozens of crowd-sourced routes, then filter them by length, ascent, and more. To check routes on MapMyRun, go to the Routes page and put in your address. The result should come up with a list of various user-created routes in your region.

Can’t find what you’re looking for on an app? Try Os Maps.

Ordnance Survey (OS Maps) is a hugely popular map-building tech that works well for planning running routes.

Sure, you might need to subscribe to get some of the features, but the free version has to offer.

Additional Resource – Here’s how to create a running program

Google Maps

The most useful tool for planning any type of route is undoubtedly Google Maps.

Google earth, both the browser-based and desktop versions, have built-in measuring tools that can help you plot running routes.

What’s more?

Planning your own running routes with Google Maps is quite simple.

1 – Determine your starting point, either by clicking the arrow icon (if you’re at the starting point) or by entering an address.

2 – Be sure to zoom in and out as well as drag the map using the map controls.

3 – Start drawing your running course by clicking on the map to set the starting point, then choose points along the course you’d like to create to work out the distance.

Sounds too complicated?

Check out the following YouTube Tutorial to learn how to plot running routes using Google Maps.

Plan Your Route According To Your Run

Whenever you plan a new running route, think about objectives too.

That’s why you should match your route to your run.

In other words, your routes have to satisfy your workout intention—or else, you might be heading in the wrong direction.

What type of terrain do you want to cover?

How far you’d like to go?

Are you looking for hills?

Etc.

Planning on doing an easy run?

Choose a route where you can have the opportunity to get lost in the surroundings and not worry about speed.

Or, if you’re planning on doing speedwork, head to a track rather than the busy streets of your city.

how to plan a running route

Change Up Your Running Routes

To keep things interesting, try doing more runs on grass, hills, gravel, sand—anywhere as long as it’s doable and safe.

Adding variety to your training can also force your body to adapt and get used to various running scenarios, making you into a better runner.

Additional resource – Guide to urban running

How to Plan a Running Route – The Conclusion

There you have it!

If you’re looking for practical ways to plan your running routes, then this article should get you started on the right foot—both figuratively and literally.

The rest is just details.

Please feel free to leave your comments and questions in the section below.

In the meantime, thank you for dropping by.

Keep running strong

David D

Inner Ankle pain While Running? A Tibial Posterior Tendonitis Guide in Runners

inner ankle pain

Experiencing inner ankle pain while running is pretty common.

There are many conditions to blame, but when the pain is located inside of the ankle, Tibial posterior tendonitis is often the culprit.

In today’s post, I’ll give you a full overview of the condition, what’s causing it, how to treat it, and, most importantly, how to prevent tibial posterior tendonitis while running.

Sounds exciting?

Let’s get started.

What is Posterior Tibial Tendinitis?

Though not as infamous as plantar fasciitis or ankle sprains, posterior tibial tendonitis (PTTD) is a relatively common ankle injury in runners.

Here’s the truth.

PTTD is one of the most common issues of the foot and ankle.

This injury occurs when the posterior tibial tendon is inflamed, partially ruptured, or torn, causing tenderness and pain around the bony structure of the inside of the ankle.

But, what is the posterior tibial tendon anyway?

Time for anatomy 101.

The posterior tibial tendon is one of the most crucial tendons in your lower legs.

Located on the inside of the lower leg, the posterior tibial tendon connects the calf muscles to the ones on the inside of the foot and.

Check Image.

The Functions

The posterior tibial tendon acts as one of the main supporting structures of the foot, assisting it to function optimally while walking and running.

What’s more?

The posterior tibialis contacts to produce inversion and help in the plantar flexion of the foot at the ankle.

In fact, any time you walk or run, this tendon locks your ankle in place, which helps keep your foot in a rigid position as you push off the ground.

The Symptoms

Posterior tibialis tendonitis typically afflicts only one foot; however, in some cases, it can occur in both feet.

You may also feel pain along the inside of your foot and ankle, where the tendon lies.

You may also notice some swelling in the area.

Symptoms include:

  • Tenderness or pain on the inside of the ankle
  • Pain, usually around the inside of the foot and ankle
  • Pain is worse when standing for long periods, walking, or running.
  • Swelling along the course of the tendon towards the foot.
  • Warmth, swelling, and redness along the inside of the ankle and foot.

The Dire Consequences

As the injury gets worse, the arch along the length of the foot may start to gradually collapse, and the pain will shift to the outside of the foot, below the ankle.

As this happens, the foot becomes completely flat as the toes turn outwards and the ankle rolls in

This is what’s known as flat foot—and it’s not the same as in those born with this anatomical structure.

The further your injury exacerbates, the more invasive treatments you’ll need to correct the problem.

Additional Resource – Here’s your guide to calf pain while running

Stages of Severity

In general, posterior tibial injury is categorized into four main stages

  • Stage 1 – Consists of tendon inflammation or damage, but no change in foot shape. You might also notice that your foot has a mild flatfoot deformity.
  • Stage 2 – The tendon starts to become elongated while the arch slowly flattens. As the injury worsens, the arch of the foot starts to collapse; therefore, you can notice flat foot deformity (but not a permanent one).
  • Stage 3 – The tendon may be partially or fully rupture. This leads to a more severe flat foot deformity that might be beyond correction, resulting in a condition known as rigid flatfoot deformity.
  • Stage 4 – Permanent damage and deformities in the ankle and foot. Not only is the foot affected, but also the adjacent deltoid ligament becomes involved and starts to collapse inward.

Here’s the full guide to arch support for running

Causes Of Inner Ankle Pain

Tibial posterior tendonitis is caused by overuse of the tendon or from a specific traumatic impact such as a fall or contact while playing sports.

Common activities that may cause overuse include:

  • Walking
  • Running
  • Hiking
  • Basketball
  • Tennis
  • Basketball
  • And other high impact sports

Here are some of the factors that can make you more prone to the condition:

  • Gender as it’s more common in women
  • Over the age of 40
  • Improper footwear
  • Weak ankle muscles, especially the posterior tibialis or the intrinsic foot muscles
  • Having hypertension
  • Having diabetes
  • Being overweight or obese

Additional resource – Common cause of lower leg pain while running

Should you Run with a Posterior Tibialis injury?

This is the first question any runner dealing with this injury wants the answer to.

It’s actually simple: If you’re trying to run through the tibialis tendon, stop.

In fact, if you suffer any type of pain on the inside of your ankle while running, stop training immediately, as logging in more miles can make your condition worse.

The next step is to visit your doctor as soon as possible so you can start the recovery process.

inner ankle pain while running
Female runner suffering ankle sprained injury.

How To Treat Inner Ankle Pain While Running?

To soothe pain and speed up healing, do the following:

Lower Your Mileage

Cut down on your weekly mileage, and if pain persists, stop running altogether.

You should also limit other sports and activities that cause you pain.

Next, ice the affected area several times per day to soothe inflammation and pain.

Your pain should fade with thee measures.

If not, you should consult your doctor for additional treatment options.

Additional Resource – How To Prevent Ankle Pain For Runners

Extreme Cases

In case of pain persists despite all measures, surgery might be required to fix the damage.

For example, in advanced cases, a doctor may inject a mixture of corticosteroid and local anesthetic into the tendon sheet to help soothe the pain

But the use of such is not recommended as research suggests that they might be associated with a risk of tendon rupture.

running ankle pain

Prevent Posterior Tibial Tendonitis While Running?

There are many measures you can take to reduce your risk of injury.

Here are a few:

Use Orthotics

Research has shown that the use of custom-made orthotics may provide extra arch support that can help reduce stress on the posterior tibial tendon.

These devices help reposition the injured foot and reduce the stress on the tendon.

That’s why orthotics not only work great for speeding up recovery but for preventing injury, too.

If you’re looking for more support and a personalized solution, get a pair of custom orthotics from your doctor or physical therapist.

Usually, these tend to be specifically designed for your arch type.

Additional Resource – Here’s your guide to Anterior Tibial Tendonitis 

Stretch Your Calves

Most of the research that reported positive results in the treatment of posterior tibial tendon issues had some form, or all employed, a calf stretching routine.

According to research, the go-to stretching regiment is 3 X 30-second of standing calf stretches against a sturdy object, such as a wall, performed twice a day.

Running Shoes

To protect your ankles from injury, consider getting a pair of running shoes with plenty of support, cushion, and comfort.

As a guideline, when looking for running shoes, choose the following:

  • Support under the forefoot
  • A well-cushioned arch
  • A wide toe box (since most of the push-off originates from the big and second toe).

You can also consider adding an orthotic to your running shoes.

Just remember to consult with a podiatrist to help you make the right decision.

Additional resource – Sore quads after running

Strength Train

Besides stretching, there are also a few strength exercises that can not only help soothe your pain but also prevent future flare-ups.

These strength exercise not only target the posterior tibial tendon but other muscles as well, especially the muscles of the calf.

When dealing with overuse injuries, it’s often the case that the affected area isn’t the only problem, but dysfunction in the area surrounding the affected limb can also be problematic.

The human body is, after all, one connected chain—only as strong a the weakest chain.

Additional Resource -Your guide to jaw pain while running

Inner Ankle Pain While Running – The Conclusion

There you have it!

The above guidelines should set you on the right path toward preventing and treating posterior tibial tendonitis while running.

The rest is just details.

Please feel free to leave your comments and questions in the section below.

In the meantime, thank you for dropping by.

Keep Running Strong.

David D.

Anterior Tibialis Tendonitis in Runners: Causes, Symptoms, and Solutions

runner suffering from shin splints

Are you tired of dealing with that nagging pain in your tibialis anterior? Well, you’ve come to the right place!

We all know how frustrating it can be to have that pesky pain in the front of your shin, hindering your running performance and leaving you feeling frustrated. But fear not! I’ve got your back (or rather, your shins) with all the tips, tricks, and strategies you need to kick tibialis anterior pain to the curb and get back to doing what you love most—running like the wind.

In this comprehensive guide, we’ll delve into the ins and outs of tibialis anterior tendonitis, exploring its causes, symptoms, and, most importantly, the best ways to treat and prevent it. No more guesswork or endless internet searches. I’ve got all the information you need right here, in one convenient spot.

So, are you ready to say goodbye to that annoying shin pain once and for all? I bet you are! Let’s dive into this guide and arm you with the knowledge and strategies to conquer tibialis anterior tendonitis.

What is Tibialis Anterior Tendinopathy

Alright, let’s dive into the fascinating world of tibialis anterior pain and get our anatomy lesson on! Picture this: your lower leg is like a city divided into four distinct neighborhoods, each with its own set of muscles.

In one of these neighborhoods, the Anterior District, lies the mighty tibialis anterior tendon. This tendon is responsible for flexing your foot upward, allowing you to lift your toes towards your shin. It’s like the hardworking construction crew that helps you take each confident step as you conquer the roads and trails.

But sometimes, this bustling neighborhood can face some trouble. Tibialis anterior pain can occur when the tendon becomes inflamed and swollen, putting a damper on your running adventures. This can happen due to overuse, where repetitive movements strain the tendon, or as a result of a traumatic ankle injury that throws everything off balance.

Now, let’s zoom in a bit closer. The boundaries of this Anterior District are formed by the sturdy tibia and fibula, the bones that give structure to your lower leg. Think of them as the protective walls that enclose this vibrant neighborhood. And to keep things organized, the anterior intermuscular septum and the interosseous membrane act as reliable border guards, ensuring that everything stays in its rightful place.

Understanding the intricate anatomy of our lower leg is key to unraveling the mysteries of tibialis anterior pain. So, put on your explorer hats and get ready to navigate through the remarkable world within your own body. By delving deeper into this knowledge, we’ll arm ourselves with the understanding necessary to conquer tibialis anterior pain and regain our running freedom.

What is The Anterior Tibialis?

Imagine the anterior tibialis as a trusty guide, accompanying you on every step of your running journey. This muscle-tendon duo takes its place on the outside of the tibia, marching alongside the shin bone with unwavering dedication.

As you move forward, this dynamic duo crosses the ankle and continues its mission, reaching its final destination along the inside of your foot. It’s like a well-choreographed dance routine, with the tendon connecting to the bone just behind the big toe, ensuring stability and strength.

But what exactly does this muscle-tendon duo do? Well, let’s break it down. During your gait, they have not one, but two important roles to play. Think of them as the dynamic duo with a double mission.

First, during the swing phase of your stride, the anterior tibialis goes into action, concentrically dorsiflexing your ankle.

In simpler terms, it pulls your foot upwards to help with precise foot placement.

But the journey doesn’t end there. As your foot makes initial contact with the ground, the anterior tibialis shifts gears. It now switches to an eccentric contraction, acting as a regulator for the transition from heel strike to mid-stance. It’s like a vigilant traffic controller, ensuring a smooth flow of movement as your foot hits the ground and prepares to carry you forward.

The Dire Consequences

Ignoring this problem is like poking a sleeping dragon with a stick—it can quickly escalate into a full-blown disaster. We’re talking about dire consequences that we definitely want to avoid.

Picture this: if left untreated, that innocent-looking anterior tibialis injury can turn into a full-blown tendon rupture. It’s like a ticking time bomb, waiting to go off and throw your running routine into complete chaos. Trust me, you don’t want to go down that road. Recovering from such an injury is no walk in the park; it’s a long and winding road to recovery that tests your patience and resolve.

But wait, there’s more. Brace yourselves for a term that sounds like something straight out of a sci-fi movie: “drop foot.” It’s not as fun as it sounds, believe me.

When the anterior tibialis muscle becomes alarmingly weak, it can lead to this unfortunate condition.

Imagine trying to walk with your foot seemingly dragging along, lacking the strength to lift it properly. It’s like having an invisible anchor weighing you down, making every step feel like an uphill battle.

running shoes for overpronators

Causes of Tibialis Anterior Pain

Picture this: our poor tendon, trying to keep up with our relentless training regimen, is pushed beyond its limits. It’s like squeezing a lemon until every last drop is extracted. The result? Micro-tears in the tendon, causing damage that sets off an inflammatory response within our bodies.

It’s the body’s way of saying, “Hey, we’ve got some repair work to do!”

Now, here’s where things get interesting. Tendinopathy is the culprit behind the swelling within the tendon. It’s like a sneaky intruder that sets up camp, causing discomfort and hindering our running adventures. But guess what? It’s not just our intense training sessions that can trigger this condition. Oh no, there are other factors at play too.

Let’s talk about tight footwear and tight shoelaces—those sneaky saboteurs that compress our poor anterior tibialis tendon. It’s like putting our foot in a vise grip, squeezing the life out of it and leaving our tendon crying out for freedom. So, let’s give our feet some breathing room, shall we?

And last but not least, poor foot or ankle biomechanics can add fuel to the fire. It’s like trying to run with a wonky wheel on a shopping cart—it throws our entire stride out of whack, putting undue stress on our precious anterior tibialis tendon.

The Symptoms

You’re out there pounding the pavement, feeling the wind in your hair, when suddenly, discomfort or pain strikes from your knee all the way down to your big toe.

Ouch! That’s the signal that something’s not right within the intricate web of tendons and muscles in your lower leg.

Now, let’s zoom in on the main troublemaker—the tibialis anterior tendon. It’s like a mischievous troublemaker that decides to cause a ruckus right in front of your ankle joint.

Gradually, you’ll start feeling pain in that specific area. Sometimes it creeps up on you, coming and going like a mischievous phantom.

Other times, it becomes a constant companion, reminding you of its presence with every step you take. And guess what? The intensity of your exercise can make those symptoms worse. It’s like poking a sleeping dragon with a stick—expect some fiery discomfort.

But wait, there’s more to the story. As the condition progresses, any extra miles you tack on to your run will bring about even more pain. It’s like adding fuel to the fire, intensifying the discomfort.

And it doesn’t stop there. Even non-running activities can become a pain in the ankle—literally. Imagine climbing stairs or flexing your foot—each movement can be met with a surge of unwelcome pain. You may even feel it while navigating the pedals in your car, as if the road itself is conspiring against you.

So, how do you know if you’re dealing with tibialis anterior muscle strain? Well, there are some telltale signs to watch out for.

Keep an eye out for swelling at the affected area—your body’s way of signaling that trouble is brewing. And then there’s the pain itself, which can manifest as cramping, aching, or that delightful burning sensation.

You may also notice weakness in the affected leg, as if it’s lost some of its power. It’s like trying to run a race with a limp—you’re not at your full potential.

How To Treat

Alright, my fellow runners, let’s tackle the elephant in the room—tibialis anterior tendinopathy.

You’ve been hit with this nagging injury, and let me tell you, it’s not going to magically disappear if you continue running like nothing happened. It’s time to face the music and take action. So, what’s the game plan? Let me break it down for you.

Step one: Seek professional help. Yup, that’s right. Schedule a visit with a doctor or therapist who can give you an accurate diagnosis and rule out any other possible culprits.  You need to make sure you’re addressing the right problem here. They’ll be like the detectives of your lower leg, investigating every nook and cranny to uncover the truth behind your discomfort.

Once you have your diagnosis, it’s time to embark on a personalized treatment plan. Your doctor or therapist will be your guiding light on this journey. They may recommend a variety of strategies based on your specific situation. Brace yourself—I’m about to drop some knowledge on you:

First up, let’s talk about building strength. We need to give some love to those weakened or dysfunctional muscles, especially our troublemaker, the tibialis anterior. It’s time to pump some iron, or maybe just work with resistance bands, to strengthen those muscles and restore their functionality. We want them firing on all cylinders once again.

Next on the agenda: loosen up those tight muscles. We’re talking about those sneaky troublemakers that might be causing abnormal movement within your limb. By stretching and mobilizing them, we can restore the full range of motion in your joint and create a more harmonious symphony of movement.

Now, let’s talk about some cool therapy—literally. Cold therapy is our secret weapon against inflammation and pain. Applying cold packs or ice to the affected area can help soothe those fiery sensations and speed up the recovery process. It’s like a refreshing ice bath for your muscles, calming them down and giving them a chance to heal.

Oh, and we can’t forget about orthotics. These nifty devices bring some extra support to the tendon and can address any abnormal foot biomechanics that might have contributed to the overuse of the tendon in the first place. They’re like the trusty sidekicks that provide stability and keep everything aligned, just like a superhero duo.

Prefer to Treat it On Your Own?

Alright, my fellow injured warriors, it’s time to take charge and bring that tibialis anterior tendinopathy under control. Get ready to unleash the power of the RICE method—our secret weapon for tackling swelling and pain head-on. Let’s dive in and learn how to do it like a pro.

First up, we have the letter “R” for Rest. This is your golden ticket to recovery. When you feel pain during weight-bearing, it’s crucial to give that affected limb some well-deserved rest.

Think of it as a timeout for your injury. Movement and weight-bearing can aggravate the situation, leading to more inflammation and swelling. And trust me, I don’t want to feed the fire.

Next, let’s move on to the letter “I” for Ice. Grab yourself a bag of frozen peas or some crushed ice, but hold up—don’t apply it directly to your skin. That would be a chilly mistake. Wrap it up in a damp cloth to protect your precious skin.

For a glorious 10 to 15 minutes, let the ice work its magic on the affected area. Cold therapy is like a cool breeze on a scorching summer day—it soothes inflammation, numbs the pain, and helps kickstart the healing process. Ah, refreshing relief!

Now, let’s tackle the letter “C” for Compression. Wrap that injured foot up like a present, but don’t go overboard and turn it into a tourniquet.

I’m talking about using an elastic bandage, like those trusty ACE wraps, to provide some gentle compression and support. Think of it as a cozy embrace for your injury—it stabilizes the area, minimizes irritation, and gives you that extra layer of protection. Just remember, snug but not suffocating. You want proper circulation flowing through your veins.

Last but not least, we have the letter “E” for Elevation. It’s time to give your injured foot a well-deserved lift. When you’re lying down or catching some Z’s, prop that foot up above heart level.

Why? Well, gravity becomes our ally here. By elevating your foot, we create a downhill path for those pesky fluids to escape. It’s like a grand escape plan for pain and swelling. For optimal results, aim to elevate the entire foot around eight to ten inches above your heart. Let gravity work its magic.

Additional Resource – How To Prevent Ankle Pain For Runners

Conclusion

There you have it

The above tips are all you need to know about treating (and why not prevent) this injury for good.

Please feel free to leave your comments and questions in the section below.

In the meantime, thank you for dropping by.

Keep training strong.

David D.

Achilles Tendonitis in Runners: Causes, Symptoms, and Solutions

black toenail from running

Have you ever experienced that dreaded pain in your Achilles tendon while out on a run? Or maybe it strikes just as you’re catching your breath after a satisfying workout? Well, brace yourself, because you might be dealing with a formidable foe known as Achilles tendinitis.

Now, let me tell you, Achilles tendinitis is no joke. It’s like that unwelcome guest who crashes your running party and refuses to leave. But fear not because I’ve got your back. I’ve put together the ultimate guide to Achilles tendonitis in runners, and trust me, it’s going to be a game-changer for you.

By the time we’re done here, you’ll be armed with knowledge that will help you tackle this relentless injury head-on. I’m going to dive into everything you need to know, from understanding the ins and outs of Achilles tendonitis to learning why us runners seem to be particularly susceptible to it. Oh, and I’ll explore the fascinating anatomy of the Achilles tendon too, just to give you a complete picture.

But that’s not all. I’ll also unveil the secret sauce of treating Achilles tendonitis, providing you with practical tips and strategies to get you back on your feet in no time. And hey, prevention is key, right? So I’ll equip you with the tools you need to protect yourself from future bouts of Achilles tendinitis, ensuring you can keep pounding the pavement without worry.

Sounds like a lot to digest? Well, let’s get started.

Basic Anatomy & Functions

The Achilles tendon is a strong and resilient that takes the spotlight as the heavyweight champion of your body’s tendons. It sits right behind and above your heel, connecting the powerhouse duo of calf muscles—the gastrocnemius and soleus—to the back of your heel bone, also known as the calcaneum.

Think of the Achilles tendon as the power conduit, the trusty bridge that transfers all that force and energy from your calf muscles to your ankle during the magnificent acts of walking and running.

What’s more?

The Achilles tendon is so incredibly robust that it can withstand the mind-boggling pressure of over 1,000 pounds! Yes, you heard that right. It’s as if it possesses Herculean strength, ready to take on whatever challenges come its way.

But here’s the catch: Even with its impressive fortitude, the Achilles tendon isn’t impervious to injury. In fact, it can still succumb to the forces of strain and stress. Just like any formidable hero, Achilles tendonitis can sneak up on you when you least expect it, ready to put a dent in your running aspirations.

Risk Factors For Achilles Tendon

When it comes to Achilles tendinitis, knowledge is power. Understanding the factors that may raise your risk of falling victim to this nagging condition can help you take proactive steps to protect your Achilles tendon fortress..

First on the list is the unavoidable ticking clock of age. As the years go by, the risk of Achilles tendinitis tends to creep up, especially from the age of 30 onwards. The “elasticity” of the tendon takes a hit, making it more vulnerable to micro-tears.

But wait, there’s more. Gender also plays a role in this tendon tale. Sorry, gentlemen, but studies have shown that male runners are more prone to Achilles tendinitis. It’s like the tendons are playing favorites, leaving you with an extra hurdle to overcome.

Next up, let’s talk about biomechanical challenges. If you have flat feet, consider them a double-edged sword. While they might make you an ace at limbo competitions, they also put extra pressure on your Achilles tendon, paving the way for tendinopathy to march in uninvited.

Now, let’s lace up our detective shoes and investigate the case of the culprits known as bad running shoes. Picture this: you’re out on the road, putting in the miles, but your worn-out or ill-fitting sneakers are secretly plotting against you. They’re like the villains of the running world, increasing your risk of Achilles tendinitis. Time to invest in a trusty pair of running shoes, my friend!

Speaking of running surfaces, let’s navigate the treacherous terrains that can leave your Achilles tendon vulnerable. Think of asphalt and concrete as the foes of your footwork, offering little forgiveness and amplifying the strain on your tendon. It’s like running through a minefield, risking injury with each step.

But wait, there’s a twist in the story. Certain medical conditions can also act as accomplices to Achilles tendinitis. If you have high blood pressure, diabetes, or immunological issues, consider them as potential red flags that warrant extra caution. It’s like Achilles tendinitis has a knack for targeting those already facing health challenges.

Last but not least, let’s stretch our focus to the importance of flexibility. Tight calf muscles, akin to a clenched fist, put additional strain on the Achilles tendon.

It’s like pulling on a rubber band that’s already taut, increasing the tension and leaving the tendon susceptible to tendinopathy.

The Early Signs of Achilles Tendinitis

You’ve just finished a run, feeling that post-workout glow, when suddenly a mild ache starts to creep in. It’s like a warning sign from your Achilles tendon, located either above the heel or in the back of your leg. It’s a subtle message, but one that shouldn’t be ignored.

As the hours pass, you may notice stiffness or tenderness, almost like a mischievous cramp playing hide-and-seek around your affected foot. But fear not, as these sensations often subside with mild activity, leaving you with a sense of relief.

But wait, there’s more. Your Achilles tendonitis might have a few additional tricks up its sleeve. You might experience a redness or sweltering sensation in the Achilles area, as if the fire of inflammation is dancing beneath your skin.

What’s more?

Heel pain can strike during your run or ambush you right after, like a relentless opponent determined to throw you off your feet.

Swelling becomes another player in the Achilles tendonitis game, lurking in the back of your heel or even within the tendon itself, causing discomfort and pain.

And let’s not forget the morning rituals. As you rise from your slumber, you may encounter pain and stiffness in your Achilles.

Your ankle may also become a key player in this Achilles tendonitis drama. Poor flexibility and tightness during plantar or dorso flexion, like a stiff gatekeeper, can hinder your ankle’s full range of motion..

Lastly, prepare yourself for the unexpected soundtrack of cracking sounds during ankle movement. It’s like a tiny orchestra of pops and clicks accompanying your every step, reminding you that your Achilles tendon is in a state of unrest.

Additional resource – How to run in deep water

Achilles Tendonitis – The pain scale

At the milder end of the spectrum, you may experience pain while running or shortly after. It’s like a gentle reminder from your Achilles tendon, a whisper rather than a shout. However, the pain is not overly disruptive and tends to subside during rest. You might feel this discomfort along the Achilles tendon as you continue your run, a nagging companion that doesn’t want to steal the spotlight.

Moving up the scale, the pain becomes more assertive. Not only does it accompany your activities, but you also notice swelling in the Achilles region. This swelling can be tender to the touch, as if the area has become sensitized and responsive to even the slightest contact. In some cases, you might even detect the formation of a lump within the tendon, a small intruder that adds to the complexity of the situation.

Now, brace yourself for the higher end of the pain scale. Weight-bearing activities become a battleground for your Achilles tendon. Each step brings a surge of pain in the Achilles region. The swelling along the tendon may intensify, accompanied by sharp points of pain that catch you off guard. It’s as if your Achilles tendon is protesting vehemently, demanding your attention. In extreme cases, the Achilles tendon may even tear completely, causing a level of pain that is nothing short of severe.

Remember, this pain scale is a guide to help you understand the progression of Achilles tendonitis and the potential severity of your symptoms. If you find yourself higher on the scale, it’s crucial to seek professional medical advice to ensure proper diagnosis and treatment.

Complications of Achilles Tendonitis

When Achilles tendonitis is ignored or left untreated, scar tissue starts to make its presence known. Picture it like a stubborn invader, setting up camp in the delicate balance of your tendon. This scar tissue hampers the healthy flow of blood to the tendon, obstructing the crucial process of healing. While some remodeling may still occur, it takes a detour into fibrosis territory.

Now, fibrosis is no friend to your Achilles tendon. It’s like a mischievous character that brings trouble wherever it goes. The fibrotic tissue tends to be weaker and less elastic than the healthy tendon, posing a higher risk of tears. And we’re not talking about a minor hiccup here; we’re talking about a tear that demands serious attention, potentially even surgical intervention. It’s a scenario that no runner wants to face.

Over time, if left unaddressed, the complications can progress further. The Achilles tendon itself may succumb to a degenerative tear, forming a lump that serves as a painful reminder of the neglected tendonitis. This is a sign that things have taken a turn for the worse, and action needs to be taken promptly.

As if that weren’t enough, Achilles tendinosis  can rear its head. It’s like a stubborn foe that limits your ability to even engage in a slow jog. It puts a damper on your running aspirations, leaving you longing for the freedom and joy that once accompanied your strides.

Surveys and studies have shown that roughly 66 percent of Achilles tendonitis cases strike the midpoint of the tendon, a few inches above the heel. So, this isn’t just a rare occurrence—it’s a prevalent problem that demands our attention and proactive measures to prevent its progression.

How to Treat Achilles Tendonitis In Runners

So, you’ve found yourself caught in the grips of Achilles tendonitis. But fear not for there is a road to recovery that leads to renewed strength and pain-free running. Let’s explore the steps that will guide us along the way.

Stop Running

Giving your Achilles tendon a well-deserved break from the repetitive impact is crucial for its recovery. Take a step back, lacing up those running shoes can wait for now. But fear not, for rest doesn’t mean you have to stay idle. Embrace cross-training, engaging in activities that are gentle on your Achilles tendon.

Picture yourself gliding through the water, the pool becoming your sanctuary as you swim with grace. Or imagine the rhythm of your pedaling as you conquer the miles on a bike ride, feeling the wind against your face. You might even find solace in the strength training arena, sculpting your body while giving your tendon the respite it needs. And why not explore the benefits of yoga, where stretching and mindful movements can nourish both body and soul?

During this rest period, it’s essential to listen to your body and respect its limits. Non-weight-bearing exercises are your allies during this time. Allow yourself at least three weeks of dedicated recovery, refraining from pushing through the pain. Remember, healing takes time, and patience is your greatest companion on this road to recovery.

Studies have shown that it may take at least three months or more for the pain to fully dissipate, according to The American Academy of Orthopedic Surgeons.

Ice Therapy

Imagine your Achilles tendon as a fiery battleground, with inflammation and discomfort raging within. Ice therapy swoops in as a hero, armed with its icy touch to calm the flames. Applying ice to the Achilles tendon can provide much-needed relief, reducing swelling and numbing the pain.

But here’s the catch: timing is everything. Remember not to overstay your welcome with the ice pack. Keep it to a maximum of 15 minutes per session, several times a day. Studies have shown that applying ice for less than 10 minutes has minimal effect, while over-icing for more than 30 minutes may damage the skin. So, aim for that sweet spot and let the cooling sensation work its magic.

Take Meds

Intense pain can be a formidable adversary, but fear not, for there are allies that can lend a helping hand. Nonsteroidal anti-inflammatory drugs (NSAIDs) like ibuprofen can be your go-to companions in combating both pain and swelling. However, it’s crucial to approach medication with caution.

Remember that while NSAIDs can provide temporary relief, they merely address the symptoms and don’t tackle the underlying issue. So, be mindful of using them as a short-term solution and seek comprehensive treatment for long-lasting results.

But hey, why stop there? Let’s explore some other techniques that can aid in your Achilles tendonitis recovery.

When To See A Doctor

If pain around your Achilles tendon persists despite rest and proactive measures, it’s time to bring in the experts. Consulting a doctor becomes essential when symptoms fail to improve.

Resist the temptation to reach for painkillers before your appointment, as they can mask the true extent of your condition, potentially leading to misdiagnosis. Instead, opt for an open discussion with your doctor, addressing your concerns and exploring the best course of action.

While surgery may be necessary in some cases to remove scar tissue around the tendon, my research indicates that it is not always the optimal solution, as it can stimulate further scar tissue formation.

Instead, experts recommend focusing on the root causes of the problem, rather than solely treating the symptoms. Improving flexibility and mobility in your calf muscles becomes paramount, and one tool that has shown promise in achieving this is the mighty foam roller.

Achilles Tendonitis in Runners – The Conclusion

Here’s the bad news.

We are not robots, and there’s no spare part for our bodies.

No real cure for an overuse injury.

Achilles tendonitis occurs because of damage to the tendon, and if if you run, you’re bound to cause some damage.

Healing damaged tendons requires recovery time and acute attention.

Understanding the injury and incorporating the tips above into the recovery plan is a good place to start.

If symptoms don’t improve, seek out a physical therapist to help you with your recovery.

Feel free to ask for second opinion if you’re still in doubt about surgical issues.

The Power of Walking: A Comprehensive Guide to Health and Fitness

start walking

Walking is a fantastic choice for improving your fitness and health and even working towards weight loss. It’s a low-impact, accessible exercise that can be tailored to your individual needs and goals. I’m here to guide you on your journey to becoming a healthier and more active you.

Before we dive into the details, it’s essential to emphasize safety and individual health considerations. Consulting with your doctor, especially if you have specific health concerns or conditions, is a smart and responsible first step. They can provide personalized advice to ensure that walking is a safe and suitable exercise for you.

Now, let’s get started on this exciting path to better health and fitness through walking!

Whether you’re a beginner or looking to take your walking routine to the next level, I’ve got you covered.

The Benefits of Walking

Walking is a powerhouse of exercise with a plethora of benefits for both your physical and mental well-being.

Let’s dive into some of these fantastic advantages:

  • Weight Management: Walking can help you shed those extra pounds and maintain a healthy weight. It’s a sustainable way to burn calories and boost metabolism.
  • Improved Stamina: Regular walking builds endurance, allowing you to take on more extended and more challenging walks over time.
  • Stress Reduction: Walking is an excellent stress reliever. It helps clear your mind, reduces tension, and promotes relaxation.
  • Health and Well-being: The health benefits are numerous, including reduced risk of heart disease, stroke, and certain cancers. It’s also known to lower blood pressure and cholesterol levels.
  • Mental Health: Walking is a mood booster. It releases endorphins, which are natural mood lifters and can help combat symptoms of depression.
  • Brain Health: It’s like a workout for your brain, too! Walking has been linked to improved cognitive function, memory, and creativity.
  • Low-Impact Exercise: Unlike high-impact exercises, such as running, walking is gentle on your joints while still providing an effective workout.

Consult Your Doctor

Before you lace up those sneakers and hit the pavement, let’s talk about a vital step that’s often overlooked: consulting your doctor.

Why, you ask? Here’s the scoop:

Cardiovascular Concerns:

If your family tree has a few branches dedicated to heart issues or you’ve had heart problems yourself, it’s like having a red flag that says, “Talk to your doctor!” Cardiovascular diseases can impact your ability to exercise safely.

Emerging from Hibernation:

Have you spent more time on the couch than you’d like to admit? Well, you’re not alone. But before you go from couch potato to marathoner, consider a pit stop at your doctor’s office. They can help you ease into a new routine without any hiccups.

The Lightheaded Club:

Are you the president of the “I Often Feel Dizzy” club, or do you have a VIP membership in the “Chronic Headache” association? These symptoms can be your body’s way of saying, “Hold on, let’s check this out.”

Wisdom of Age:

If you’ve celebrated a few 60th birthdays or more, your body may have some special needs when it comes to exercise. Your doctor can help tailor a plan that keeps you feeling youthful.

Medical Marvels:

Conditions like diabetes, high blood pressure, chest pain, or joint problems can be tricky when combined with exercise. Let your doctor be your health hero and create a plan that works for you.

The Mom-To-Be:

If you’re expecting, congrats! Now’s the time for some gentle guidance on the dos and don’ts of exercising while pregnant. Safety first, for you and your little one.

Recovery Mode:

If you’ve been on the injured list or recently played host to a surgical procedure, your doctor can give you the green light to get back into the swing of things safely.

How to Start Walking For Beginners?

So, you’re all geared up to embark on your walking journey, but you’re wondering, “Where do I begin?” Fear not, because the path to becoming a seasoned walker is simpler than you might think. Here’s your guide:

Start Small:

Picture this: You’re in the comfort of your home, ready to take on the world of fitness. But here’s the secret – you don’t have to conquer it all at once. Begin with a gentle introduction. Walk out that door and aim for a short 15 to 20-minute stroll.

Here’s how to walk 10000 steps everyday.

Listen to Your Body:

Your body is your best friend on this journey. Pay close attention to how it feels during and after your walk. If you’re feeling great, you’re doing it right!

The Gradual Climb:

Just like climbing a hill, your walking routine can gradually ascend. During the second week, extend your walks to 25 to 35 minutes. Slow and steady wins the race!

Here’s your guide to step count in one mile running vs walking.

Set Goals:

As you continue your walking escapades, set personal goals. Maybe you want to reach 10,000 steps a day, or perhaps you’re looking to explore new walking routes. Goals keep things exciting!

Step by Step:

Week by week, keep adding more time to your walks until you reach your desired duration. Whether you aim for a leisurely stroll or a brisk power walk, it’s all about what feels right for you.

Additional resource – How to combine keto and running

What’s the Ideal Walking Quota?

You might be wondering, “How many steps should I aim for?” Well, the magic number, according to experts, is 10,000 steps a day. That’s the golden ticket to maintaining fitness and overall health. But what does that look like?

Picture this: 10,000 steps translate to roughly four to five miles of walking. Impressive, right?

Now, here’s the exciting part – you’re not limited to 10,000 steps! If you feel like you can conquer more, go for it. But here’s the catch – always, always listen to your body. It’s like your walking compass, guiding you in the right direction.

If at any point it feels like you’re pushing too hard, don’t hesitate to slow it down. Recovery is just as important as those steps. So, stride at your own pace, and enjoy the journey!

How Fast Should Beginners Walk?

So, you’re all set to embark on your walking journey, but you might be wondering, “How fast should beginners walk?”

Well, here’s the scoop!

To maximize the benefits of your walking exercise, aim for a brisk pace that puts you in the realm of moderate-intensity walking. This sweet spot is where the magic happens, health-wise.

Here’s how you’ll know you’re hitting the mark:

  • You should be able to chat comfortably without straining your vocal cords.
  • Your breathing should be a tad heavier than usual, but not to the point where you’re huffing and puffing.
  • Your pace should be around 3 to 4 miles per hour, which is like walking with a purpose!

Additional resource – How long does it take to walk five miles

How to Progress?

So, you’ve got the hang of regular walking and want to take it up a notch? Fantastic!

Here’s a simple progression plan to keep you on the right track:

  • Weeks 1-2: Walk for at least 15-20 minutes three times a week. Get comfortable with the routine.
  • Weeks 3-4: Bump it up to four times a week. Your body is getting used to the groove.
  • Week 5 onwards: Aim for five times a week. You’re becoming a walking champ!

And if you find yourself walking for over an hour without breaking a sweat (figuratively, of course), consider adding some brief jogging intervals to spice things up. It’s a great way to challenge yourself and keep boredom at bay.

Remember, the key is gradual progression. Your journey towards better health and fitness is all about consistency and listening to your body.

Make it more Challenging

Do you feel like your walking routine needs a little extra oomph?

Here are some fun ways to make your walking sessions more challenging:

  • Backpack Boost: Strap on a backpack filled with 10 to 15 pounds of weight. It’s like leveling up in the world of walking!
  • Power Arms: Grab some light hand weights and swing those arms as you walk. It’ll give your upper body a great workout.
  • Beach Strolls: If you’re near the coast, try walking on the beach. The uneven sand surface makes every step more engaging.
  • Hill Climbing: Add some inclines or stairs to your regular route. Climbing hills can do wonders for your legs and stamina.

Additional resource – Average time to walk a mile

Improve Your Walking Form

Walking may seem simple, but good form is essential for efficiency and injury prevention.

Here’s a quick checklist to make sure you’re walking like a pro:

  • Posture Perfect: Stand tall with your feet hip-width apart. Imagine a string pulling you gently upward from the crown of your head.
  • Footwork: Land softly on your heels, then roll through the foot and push off with your toes. Avoid excessive inward or outward rolling of your feet.
  • Eyes Forward: Keep your gaze straight ahead, like you’re on a mission. Your chin should be parallel to the ground, and your neck should be in line with your spine.
  • Shoulder Ease: Relax your shoulders and let them hang naturally. No need for them to visit your ears.
  • Arms in Sync: Swing your arms back and forth rhythmically. It’s like dancing while walking!
  • Engage Your Core: Keep your core muscles gently contracted by pulling your navel toward your spine. This not only helps your posture but also gives your abs a mini workout.
  • Step It Up: Take quicker, smaller steps rather than long strides. It’s more efficient and easier on your joints.
  • Ninja Steps: Imagine you’re a stealthy ninja. Walk quietly and smoothly, avoiding heavy foot slaps.

Additional resource – How to find cheap running gear

Walking Safely

Walking is a fantastic exercise, but safety should always be a priority.

Here are some essential safety tips to keep in mind:

  • Choose Sidewalks: Whenever possible, opt for sidewalks instead of walking on the road. After all, you’re a pedestrian.
  • Carry Essentials: Don’t forget your phone, ID, and a bit of cash when you head out for your walk. It’s better to be prepared.
  • Let Someone Know: Inform a friend or family member about your walking plans, including where and when you’ll be walking. It’s a safety net.
  • Face Traffic: When walking on the streets, face oncoming traffic. This gives you better situational awareness and safety.
  • Stay Visible: If you’re walking in low-light conditions, wear reflective clothing or carry a flashlight. Being visible is crucial.
  • Confident Strides: Walk with confidence, like someone who knows where they’re going. It’s a great deterrent.
  • Keep It Simple: Leave valuable jewelry and flashy items at home. Better safe than sorry.
  • Use Your Voice: If you ever feel threatened, don’t hesitate to yell for help. Attackers don’t like attention.

Additional resource – How to start exercising with your dog

How To Start Walking For Fitness – The Conclusion

There you have it.

Today’s article should provide you with all the tools you need to get started with walking in no time.

The rest is really up to you.

Please feel free to leave your comments and questions in the section below.

In the meantime, thank you for dropping by.

Keep Walking Strong

David D.

How to Set Fitness Goals

fitness goals

Are you ready to kick your workout routine up a notch and unleash your full potential?

Well, you’ve stumbled upon the perfect starting point on your fitness journey. Get ready to dive into the exhilarating world of goal setting!

We all know that setting goals is a crucial step towards achieving greatness, whether you want to sculpt those muscles, shed some pounds, conquer a marathon, or simply boost your overall well-being.

But hey, I get it. Figuring out where to begin can be a bit overwhelming. That’s why I’m here to guide you every step of the way.

In today’s article, we’re going to unravel the secrets of effective goal setting that will transform your fitness game. Trust me, by the time you finish reading, you’ll be equipped with all the knowledge you need to conquer your aspirations and sculpt the body of your dreams.

So, what exactly are fitness goals? Why are they so darn important? How do you set the right goals that will ignite your motivation and keep you going? We’ll explore it all! From understanding the difference between short-term and long-term goals to finding the perfect balance and assessing your progress along the way, we’ve got you covered.

But wait, there’s more! I’ll also share some inspiring examples of proper fitness goals that will ignite your inner fire and get those endorphins pumping.

Let’s do this!

Why Set Fitness Goal?

Setting fitness goals is like unlocking a treasure trove of benefits that will make your fitness journey even more rewarding.

In its simplest form, a fitness goal is like a destination you set for yourself in the vast landscape of physical training. It’s that specific target or test you strive to achieve within a designated time frame. It’s like having a compass guiding you towards your ultimate fitness triumph.

Think about it as a roadmap for success. You identify what you want to improve or accomplish, and then you embark on a journey to make it happen. It’s about embracing your inner athlete and unleashing your full potential.

And let me tell you, if you’re already on the health-conscious path, chances are you’re no stranger to setting fitness goals.

Maybe you’ve been dreaming of shedding those extra pounds, sculpting those muscles, or even engaging in a friendly competition. Perhaps your goal is to lower your blood pressure and improve your overall health. The possibilities are endless! It’s all about discovering what ignites your passion and then channeling that energy into actionable steps.

Why You Should Be Setting Fitness Goals

First off, let’s talk about accountability. When you set fitness goals, you’re essentially putting yourself in the driver’s seat of your own success. Research studies have shown that setting goals increases motivation and helps you stay committed to your fitness endeavors. It’s like having a personal coach pushing you beyond your limits, helping you break through barriers, and paving the way for a stronger, fitter you.

Think of your fitness goals as stepping stones on the path to greatness. They challenge you to go beyond what you thought was possible, expand your horizons, and redefine your limits. It’s like discovering that there’s a whole universe of potential within you just waiting to be unleashed. So, embrace those temporary discomforts, push through those challenging moments, and witness the incredible transformation that awaits you.

But wait, there’s more! Setting fitness goals not only helps you monitor your progress but also gives you a clear target to aim for. It’s like having a bullseye in the distance, urging you to take aim and hit it dead center. Whether it’s running a marathon, mastering a new yoga pose, or increasing your strength, having a tangible goal motivates you to keep pushing forward.

Plus, there’s nothing quite like the rush of joy and accomplishment that washes over you when you conquer a fitness goal. It’s like crossing the finish line of a race and feeling that surge of triumph coursing through your veins.

The 10 Fitness Goals You Should Be Setting

To help set you on the right foot, I’m sharing with you a list of some of the fitness goals you should add to your bucket list for a healthier, stronger, and faster you all year round.

1. Cardiovascular Goals

At a minimum, aim to spend 180 to 220 minutes every week engaging in some sort of cardiovascular exercise, whether it’s running, cycling, swimming, spinning, or simply walking.

Shoot for three to five sessions per week at an intensity at around 70 to 90 percent of your maximum heart rate.

2. Drink More Water

Water is essential to life—getting fit is no exception.

Make it a rule to stay well hydrated throughout the day.

Aim to drink half of your body in ounces every day.

Drink more during your intense training days and/or the summer—and remember to keep track of your hydration levels.
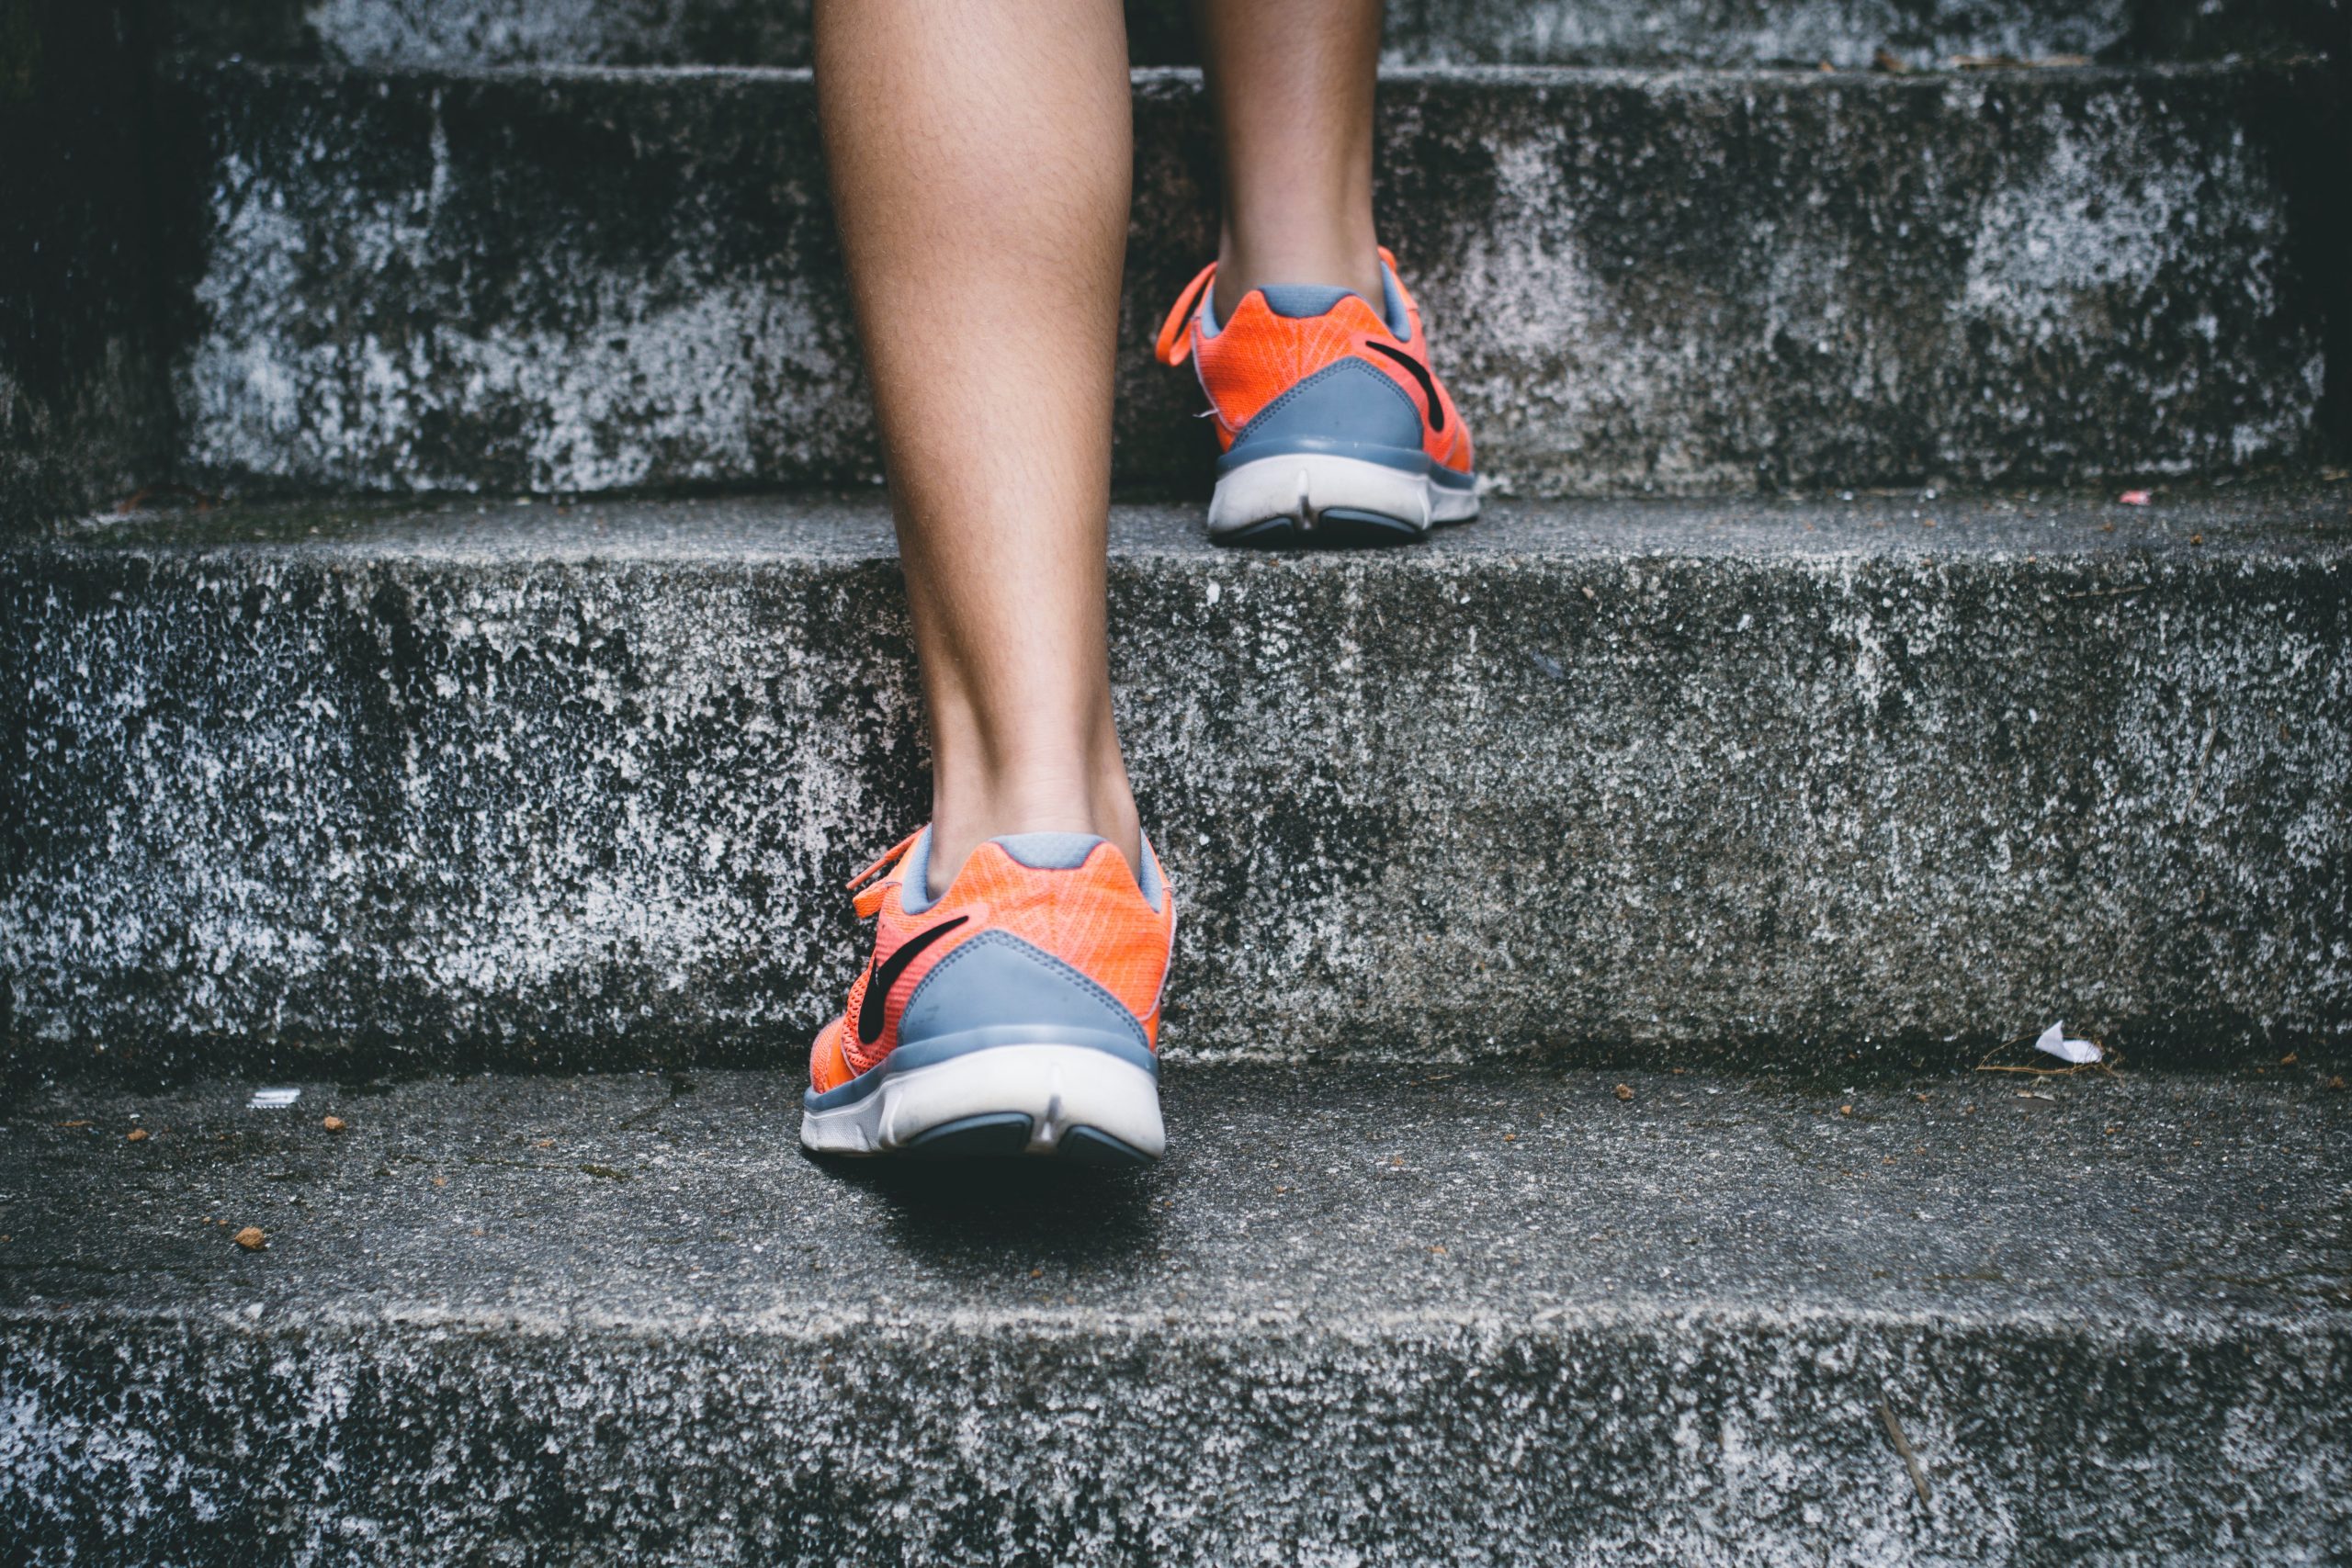
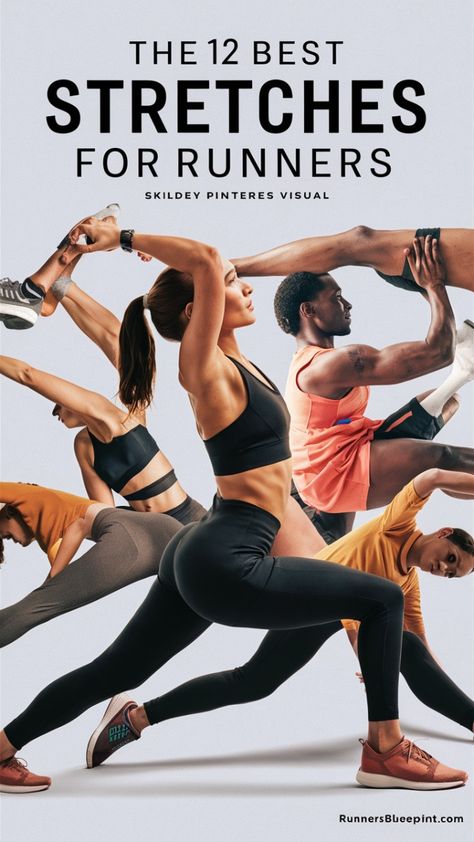
3. Stretch often

Although the science on the effectiveness of stretching for injury preventing and performance is still out for debate, I cannot emphasize it enough.

Regular stretching improves your range of motions, prepares your muscles and joints for intense activity, improves flexibility, and may speed up recovery as well as reduce post-workout aches and pains.

Make it a rule to lightly stretch your major muscle groups used during exercise for  6 to 8 seconds before a workout, and all major muscle groups for 30 to 45 seconds post-workout.

4. Do High-Intensity Interval Training

Steady-state cardio workouts, such as the long run, have their benefits.

But if you want to crank up your fitness to the max, add a couple of HIIT workouts to your exercise plan.

5. Strength Train

Target every major muscle group at least two to three times per week, shooting for a minimum of one to two sets of 10 to 12 reps.

6. Decrease Your Body Fat

Having a healthy BMI is one of the most vital steps to a healthier you.

When you a low (healthy) body fat, you also lower your risk of heart disease, reduce inflammation, protect against diabetes, enhance the functions of joints and tendons and improve your overall appearance and self-confidence.

7. Eat More Vegetables

Unless you have been living under a rock for the past few decades, then you already know that the greens are an essential ingredient in a healthy eating plan.

Eat plenty of dark, leafy vegetables as they’ll offer you a wide array of nutrients, vitamins, antioxidants, and minerals—all of which assist your body in performing at its best.

8. Reduce—or Altogether Eliminate—Sugar

This I cannot emphasize enough

What’s more?

Cutting sugar won’t cost you anything—in fact, it actually improves your health in the long run while saving you a lot of money and trouble.

What’s not to like!

9. Shoot for 10,000 Steps A Day

Besides hitting the gym and the running track, I’d also recommend that you add as much physical activity to your daily life as possible.

A good target to have to shoot for at least 10,000 steps per day.

You are not meant to sit down all day long.

Get to work and move your body.

Get a fitness tracker and start keeping track of your daily step count.

For the record, 10,000 steps per day is the equivalent of one hour’s worth of walking.

10. Shoot for 7 to 9 Hours of Sleep

This might not seem like a fitness goal, but it’s actually crucial for achieving your health vision.

Proper sleep speeds up recovery and the muscle rebuilding process as well as boost up your energy tanks for your next workout.

How to Set Good (and Smart) Fitness Goals

Now that we got the formalities out of the way let’s look at how you can actually start setting fitness goals as well as how to go after them.

Sounds exciting?

Let’s lace up and dig in.

Your Goals Must be Relevant

Listen up, my friend, because I’m about to drop some wisdom bombs on you when it comes to setting relevant fitness goals. Let’s get one thing straight: motivation can come from all directions, like a gust of wind blowing in different directions. But when it comes to your fitness goals, it’s time to take the reins and make them truly yours.

Picture this: your fitness goals are like a personal masterpiece, a work of art that reflects your deepest desires and aspirations. They shouldn’t be a carbon copy of someone else’s dreams or a paint-by-numbers template imposed upon you. No, sir! Your fitness goals should be a true representation of what you want for yourself, a reflection of your unique journey.

You see, setting relevant goals means aligning them with your life, your passions, and your health. It’s about finding that perfect harmony between what excites you and what fits into your lifestyle. Just like a tailor stitching a bespoke suit, your goals should be tailored specifically for you. Don’t settle for off-the-rack goals that don’t resonate with who you are.

Now, here’s a golden rule: make your goals YOURS. Don’t let them become a pawn in someone else’s game. It’s time to reclaim ownership and make your fitness goals a personal declaration of empowerment. So what if your friend wants to bench press a small car? If that doesn’t align with your interests or aspirations, then it’s not your goal to chase. Your goals should ignite a fire within you, make you feel proud, and push you to become the best version of yourself.

Bad Example:

“I’m going to lose 20 pounds in 8 weeks, and that gives me bragging rights all year long.”

Losing 20 pounds in two months is very had, and sorry for saying this, but no one gives a damn about the numbers on your scale but you.

Good example:

“I’m going to do my best to lose weight and get in shape because that will help me feel good about myself, increase my productivity, and improve my overall health and well being.”

Well, that’s what we’re talking about.

Additional resource – Vitamin D for runners

Make Your Goals Specific

Specificity is the secret sauce that adds flavor and purpose to your fitness journey. It’s what separates the wishy-washy dreamers from the determined achievers. So listen up and let’s dive in!

Imagine you’re embarking on a quest to conquer a mountain. You wouldn’t simply say, “I want to climb some mountain someday.” No way! You’d pinpoint the exact peak you want to conquer, visualize the breathtaking view from the summit, and set a clear path to get there.

The same goes for your fitness goals. Saying, “I want to start running” or “I want to hit the gym more often” is like trying to navigate a maze in the dark. It lacks direction. And guess what? It’s precisely why so many people throw in the towel when faced with challenges along the way.

To avoid the pitfalls of vagueness, let’s make your fitness goals as sharp as a surgeon’s scalpel. Get specific, set your sights on a clear target, and watch your motivation soar. If you want to shed some pounds, don’t just leave it at that. Ask yourself, “How many pounds do I want to lose?” Give it a number, create a tangible benchmark, and track your progress like a champion.

Now, let’s say you have dreams of becoming a runner. That’s fantastic! But don’t stop there. Get specific about how many times per week you plan to hit the pavement. Is it three times? Four times? By attaching a number to your goal, you’ll have a clear roadmap to follow, and you’ll know when you’re getting closer to crossing that finish line.

Bad example:

“I want to lift more weights.”

Good example:

“I want to be able to squat 170 pounds using the barbel in 8 weeks”.

Challenging But Realistic Goals

One of the biggest pitfalls I’ve seen people stumble into is chasing after unrealistic dreams. Now, don’t get me wrong, I’m all for dreaming big and reaching for the stars, but when it comes to your fitness goals, we need to find that sweet spot between ambition and achievability.

Think of it this way: imagine you’re a tightrope walker, balancing your way towards success. If you set your goals too high, you’ll be walking on a wire suspended in thin air with no safety net below. It’s a recipe for disaster. And guess what? It’s one of the main reasons why so many people give up on their exercise resolutions faster than a cheetah chasing its prey.

You see, when your fitness goals are so far out of reach, it’s like trying to catch a shooting star with bare hands. You know deep down that it’s an impossible feat, and that lack of belief will hinder your commitment. Why bother putting in the effort when you know you’re bound to fall short?

But fear not! I’m here to guide you towards that sweet spot of success. It’s all about finding a balance. Choose a goal that challenges you, yes, but also one that you can realistically achieve within a reasonable timeframe.

Bad example:

“I want to finish my first marathon under four hours.”

It won’t likely happen if this is your first race.

It takes years of training to reach that level.

Good example:

“I want to finish my first marathon within the four hours time frame.’

Again, what’s I’m talking about.

Remember Short Term Goals

What’s the best way to eat an elephant? Of course, one bite at a time. That’s right, the same approach applies when it comes to conquering those big, audacious fitness goals you’ve set for yourself.

Now, when I talk about big goals, I mean those ambitious feats that require some serious dedication and time. We’re talking about goals that may take a year or even more to achieve. But fear not, because I’ve got a strategy that will make them more manageable and increase your chances of success.

Within your grand fitness vision, it’s crucial to set smaller goals along the way. These are the bite-sized morsels that you can devour in a shorter time-frame and that will boost your confidence as you make progress. Think of them as stepping stones towards your ultimate destination.

Say your ultimate goal is to run a 10K race in under 60 minutes. Well, instead of diving headfirst into the deep end, start with a smaller goal like running two miles at your goal pace. Once you’ve achieved that, build on it. Gradually increase your distance and speed until you can conquer that 10K in 50 minutes. It’s all about taking one step at a time, celebrating each milestone along the way.

And let’s say you’ve got your sights set on running a full marathon, but you’re a newcomer to the racing scene. No worries! Start with shorter distances, like 5Ks, 10Ks, and half marathons. These mini-goals will help you build a solid foundation, improve your endurance, and get you race-ready without overwhelming yourself. Think of it as taming the beast, piece by piece.

Now, as a general rule of thumb, aim to achieve these mini-goals within a two to six-week timeframe. This way, you maintain a sense of progress and momentum without feeling like you’re spinning your wheels.

Use Time

Imagine you’re embarking on a journey without a destination in mind. You’re just wandering aimlessly, without any sense of urgency or purpose. Sounds pretty unfulfilling, right? Well, the same goes for setting fitness goals without a deadline.

Having a deadline is like having a compass guiding you towards your destination. It’s what gives you a roadmap to success by breaking your big goal into smaller, manageable milestones that you can tackle on a daily, weekly, and monthly basis. But here’s the catch—it has to be a realistic goal. Setting an unrealistic deadline will only lead to disappointment and frustration.

Why is a deadline so crucial? Well, it adds a sense of urgency to your fitness journey. It lights a fire under you, motivating you to take action and give it your all. Without that deadline looming over your head, it’s easy to fall into the trap of procrastination and delay. You might find yourself saying, “I’ll start tomorrow,” and before you know it, weeks turn into months, and your goals remain untouched.

So here’s what you need to do. Set a big, audacious goal that stretches you and excites you. Give yourself a longer time-frame, like one year, to achieve it. But don’t stop there. Break that big goal down into smaller, bite-sized mini-goals, each with its own deadline. These mini-goals will keep you focused, motivated, and on track.

By setting a deadline, you’re making a commitment to yourself and your fitness vision. You’re saying, “I’m dedicated, and I’m going to make this happen.” It’s like having a finish line in sight, driving you forward with determination and purpose.

Bad example:

“I want to run a 5K someday.”

Good example:

“I will run the X 5K race on Y date”.

Write it Down

Imagine your fitness goals as stars in the night sky, shining brightly and guiding you towards your desired destination. But without a map to navigate by, those stars can easily fade into the background, lost in the vastness of the universe. That’s where a workout journal comes in.

Think of your workout journal as your personal compass, keeping you on track and accountable to your goals. When you write down your goals, you’re not only declaring your intentions but also bringing them to life. It’s like planting a seed in fertile soil, giving it the best chance to grow and flourish.

But here’s the secret sauce: writing down your goals isn’t a one-and-done deal. It’s an ongoing process of refinement and adjustment. Just as a sculptor continuously shapes their masterpiece, you too should regularly revisit and tweak your goals as needed. Think of it as molding clay into a work of art, constantly refining and shaping it until it matches your vision.

When you write down your goals, use the power of words to your advantage. Instead of using weak language like “might” or “would like to,” embrace the strength of “will.” Say it with conviction and confidence. For example, say, “I will run my first 10K on my birthday,” not “I would like to be able to run a 10K on my birthday.” By using the word “will,” you’re infusing your goals with purpose and determination, making them more compelling and believable.

Now, here’s a pro tip: keep your goals visible. Don’t tuck them away in a hidden corner where they’ll gather dust. Display them proudly in places where you’ll see them every day. Whether it’s on your office desk, your bedroom wall, or even your refrigerator door, make sure those goals are a constant presence in your life. They’ll serve as a friendly reminder, motivating you to stay focused and committed.

Go Public

Now that you’ve set your smart fitness goals, it’s time to kick things into high gear and bring those goals to life. But you don’t have to go on this journey alone. In fact, sharing your goals with others can be a game-changer.

Think of it as casting a wide net into the sea of support. Whether it’s through social media platforms like Facebook and Twitter or simply by having heartfelt conversations with your family and friends, let your goals be known. Share your aspirations and ambitions with those who matter to you.

Why is this important? Well, let’s dive into the science behind it. According to a study published in the Journal of Applied Psychology, individuals who shared their goals with others were more likely to achieve them.

Not only does going public with your goals help hold you accountable, but it also acts as a filter to identify the true supporters in your life. As you unveil your goals, you’ll quickly discover who genuinely wants to see you succeed and who might not be as supportive. It’s like sifting through a garden, separating the blossoming flowers from the pesky weeds.

But here’s the thing: once you’ve identified the not-so-supportive individuals, it’s essential to distance yourself from their negative influence. Just as you wouldn’t want to carry unnecessary weight while striving to shed pounds, you don’t need the added burden of negativity hindering your progress. Surround yourself with those who uplift and inspire you, creating an environment that fuels your success.

5 Easy Ways to Make Money Running – Get Paid To Run Guide

Get Paid To Run

If you’re passionate about running, have you ever thought about making money from it?

No matter if you’re a newbie or a seasoned runner, there are clever ways to monetize your miles.

When I first started running, I never imagined my running could be more than just a hobby. But the more I got into the running community, the more I noticed people making a living—or at least some extra cash—through their love for the sport.

So, if running is already a big part of your life, why not explore ways to make it profitable?

Today, I’m going to share a few ways you can get paid to run—even if it’s just a side hustle.

Get a Job at a Running Store

Obsessed with the latest running gear and gadgets?

Working at a specialty running store could be a great way to get paid while staying close to the running community. From sales to event coordination, working in a running store immerses you in the running world.

I worked part-time at a running store a few years back, and not only did I learn so much about the latest shoes and gear, but I also met amazing people who were just as passionate about running as I was. You also get firsthand knowledge about all the newest trends, which is always a plus.

It’s a great way to build your running knowledge, and who knows? Maybe you’ll climb the career ladder, or even run your own store someday..

If you’re interested in joining a running store, you’ll find it’s not just about working the cash register. Depending on the size of the shop, you could be organizing events, coordinating training groups, or even trying out new gear to share insights with customers.

Launch Your Own Online Running Gear Store

If you’ve been running for a while, you probably know what works and what doesn’t when it comes to running gear. Why not use that knowledge to help other runners by selling products they’ll love?

An online store isn’t a huge investment and lets you share your running passion globally. You can sell custom medals, apparel, or even design your own running gear. For example, custom medals. It is important for every runner. You can design and make a personalized medal at a custom medal manufacturer. They are cheap and beautiful, which is the best selling product in the store.

If you have some creative ideas or want to share your favorite gear with others, setting up an online store can be a fun and relatively low-risk way to earn money.

Start Your Running Blog

If you love running and enjoy writing, starting a blog could be the perfect way to combine both passions. Blogging lets you share experiences, offer tips, and build your personal running brand.

I never guessed how much my blog would grow when I first started. Writing about my personal experiences and sharing what I’ve learned not only helped me connect with other runners but also opened up opportunities for sponsorships and affiliate marketing.

It took time to gain traction, but with consistency and a passion for sharing my love of running, my blog grew. I even started earning through affiliate links and sponsored posts.

Just remember, it’s not an overnight success, but if you love running and writing, it’s a rewarding way to connect with others and build your brand.

Here are some blog niche ideas to get you started:

Whatever niche you choose, focus on delivering great content that resonates with your readers.

Become A Running Coach

One day, a friend asked me to help him prepare for his first 5K. I wasn’t certified yet, but I jumped at the chance to help. It was such a fulfilling experience to see him cross the finish line after weeks of training together. That’s when it hit me—I could turn this into something more.

As a coach, you can help new runners start their journey, train for their first race, or even help more experienced runners refine their techniques. Coaching can be done in person or virtually, allowing you to reach clients from all over the world.

I’ve found that coaching is not just about running but also about building connections with people and helping them push past their limits. It’s incredibly rewarding to see someone you’ve coached cross the finish line of their first 5K or marathon.

Become a Brand Ambassador on Instagram

If you love sharing your running journey on Instagram, why not turn that passion into a paycheck? Many brands are looking for influencers who can promote their products, and if you already have a dedicated following, this could be a great way to earn money while doing what you love.

To become a brand ambassador, focus on building a genuine, engaged audience. Brands are more interested in engagement than just follower count, so make sure your content resonates with your community.

Sponsors on Instagram look for two things: a large following (the type of following that suits their target demographics) and high engagement rates. Fake followers are unacceptable.

Create Running Content on YouTube

Are you comfortable in front of the camera?

Starting a YouTube channel focused on running tips, workouts, gear reviews, and your personal running journey could be another avenue to explore. YouTube offers many ways to monetize your content, such as ad revenue, sponsorships, and affiliate marketing.

As a running coach, sharing workout routines, advice for beginners, or even documenting your training for races can attract a lot of attention from fellow runners. The key is consistency—uploading videos regularly and engaging with your audience.

The Conclusion

Hopefully, one or more of these ideas will help you start earning money in the running niche.

Still looking for more ways to make money with fitness? Check the following:

  • Become a top athlete.
  • Become a certified physiologist.
  • Create a product.
  • Make YouTube videos.
  • Try affiliate marketing.
  • Write an eBook.
  • Sell your own products.
  • Build a running app.
  • Create an online course.
  • Sell Healthy Food.
  • Become a Retailer.
  • Fitness Writing.
  • Custom Meal Plans.
  • Host a seminar or workshop.
  • Create a video interview series.
  • Start a podcast.

The key is to find what resonates with you and stick with it. Whether it’s writing, coaching, selling gear, or building a social media following, the possibilities are endless. So why not turn your passion into profit and start getting paid to run?

One last piece of advice—don’t rush it. Take time to explore different options and be patient with the process. Success doesn’t come overnight, but if you stick with it, you’ll be amazed at what you can achieve.

What do you think? Have other ideas to share? Drop your comments below—I’d love to hear from you!

Top 5 Causes of Lower Leg Pain While (or After) Running

hotspots while running

For many runners, lower leg pain is an all-too-common experience. It’s the bane of our existence, the thorn in our side, the nagging ache that just won’t quit. But fear not; I’m here to help.

In this post, I’ll be diving into the five most common causes of lower leg pain while (or after) running.

Whether you’re a seasoned pro or a newbie lacing up your shoes for the first time, we’ve got you covered. So let’s dive into the nitty-gritty of this pesky problem and get you back on the road pain-free.

Lower Leg Pain Cause. 1 Shin Splints

First up, we have shin splints – a frustrating and painful condition that can plague even the most experienced runners.

Shin splints, also known as medial tibial stress syndrome or MTSS, is an inflammation of the muscles, bone tissue, and tendons around the tibia. This can cause pain along the inner (medial) side of the tibia, usually where the muscles attach to the bone.

If you think you might be dealing with shin splints, you’ll likely feel tenderness around the lower two-quarters of the inner tibia, and the affected spot will be tender to touch. You may also notice some mild swelling in the lower leg.

The causes of this injury are often attributed to repetitive stress on the shinbone and the connective tissue that attaches the muscles to the bone. This can happen when you suddenly increase your training volume, either with a new activity, or intensity or by changing something in your running routine. Even the skipping recovery section also takes part in this injury.

So, what can you do to treat and prevent shin splints?

First and foremost, rest is key. Take a break from high-impact exercises and opt for low-impact sports like swimming and cycling during the acute period.

Ice the affected area, wear proper shoes with arch support and change your running surfaces more regularly. Adding insoles or padding inside your shoes can also minimize the impact. For persistent cases, it’s important to consult a physiotherapist or chiropractor to help you improve the mobility and strength of your Achilles tendon, ankle, and calf.

Prevention

The best way to prevent shin pain is to take it slow and listen to your body. Assess your running routine and look for anything that could be making the injury worse, such as hills or hard surfaces. Instead, opt for softer surfaces like dirt paths or trails.

It’s also important to improve strength in the muscles along the front and side of your lower leg and improve the flexibility of your calf muscles. This can be done through exercises such as calf raises and stretches. And don’t forget to wear proper shoes with arch support and consider adding insoles or padding to minimize impact.

If you do experience lower leg pain, don’t push through it. Take a break from high-impact exercises and consider low-impact sports like swimming or cycling. And if the pain persists, don’t hesitate to seek the help of a physiotherapist or chiropractor to improve mobility and strength. Remember, prevention is key, so take care of your lower legs and keep them pain-free for all your running adventures.

Additional Resource – Here’s how to use KT Tape for runners knee.

Lower Leg Pain Cause. 2 Stress Fractures

Imagine you’re in the middle of your morning jog, heart pumping, sweat dripping down your face, and suddenly, you feel a sharp pain radiating down your leg. What could it be? It might be a stress fracture. This serious injury can knock you out of commission for weeks or even months, so it’s important to know the signs and how to prevent it.

Stress fractures occur when tiny cracks form in a bone due to repetitive trauma. They’re common in long-distance runners, particularly women who may be more prone to osteoporosis, hormonal imbalances, and low body weight. The metatarsals and the inside edge of the tibia are the most susceptible bones.

Unlike shin splints, which can also cause pain during or after running, stress fractures are characterized by sharp, persistent pain that worsens with each run. You might also experience tenderness, swelling, or bruising that doesn’t go away. Even putting weight on the affected leg or sleeping at night can be painful.

If you suspect a stress fracture, don’t try to power through it. That’s like driving a car with a broken engine and expecting it to work. You need to see your doctor as soon as possible for a thorough diagnosis. X-rays are necessary to detect the fracture, and you’ll likely need to stop weight-bearing exercises for 6 to 8 months, sometimes even longer in severe cases.

You may also need to wear a cast or elastic bandage for a certain amount of time to provide firm support.

Prevention

To prevent stress fractures, examine your running routine and make any necessary changes. Don’t overdo it by increasing the intensity or amount of training too quickly, as that’s the primary cause of this injury. T

It’s also important to maintain proper form and strength in the muscles along the front and side of your lower leg and improve the flexibility of your calf muscles. Take care of your body, and it will take care of you.

Lower Leg Pain Cause. 3 Achilles Tendinitis 

Imagine your Achilles tendon as a strong rope that connects your calf muscles to your heel bone. When that rope is overused, overstressed, or strained, it can lead to a painful condition known as Achilles tendinitis. This common issue affects many runners and can put a serious dent in your training routine.

One of the most frustrating things about Achilles tendinitis is that it can take a while to diagnose. You may not even realize that you have it until you start feeling pain in your lower calf or near the back of your heel. The pain can be sharp and persistent, especially in the morning, and may be accompanied by inflammation, swelling, and poor range of motion in the affected leg.

So, what causes this pesky condition? Overuse and strain on the Achilles tendon are the main culprits. Runners who log too many miles too quickly or overwork their calf muscles are particularly susceptible to Achilles tendinitis. It can also be caused by bad running form, wearing inappropriate footwear, and even certain medications.

If you suspect that you have Achilles tendinitis, it’s crucial to seek medical attention as soon as possible. Ignoring the pain and continuing to run can make the problem worse, leading to more serious injuries and a longer recovery time. Your doctor may recommend rest, ice, compression, and elevation (RICE) therapy, as well as physical therapy or even surgery in severe cases.

Preventing Achilles tendinitis requires a bit of self-care and attention to your running routine. Make sure to properly warm up before your runs, wear supportive and comfortable shoes, and gradually increase your mileage to avoid overuse.

Strengthening your calf muscles and incorporating cross-training exercises, such as swimming or cycling, can also help prevent Achilles tendinitis. Remember, taking care of your body is key to staying injury-free and reaching your running goals.

Lower Leg Pain Cause. 4 Posterior Tibial Tendonitis

Have you ever felt a sharp, stabbing pain on the inside of your ankle? If so, you may be dealing with posterior tibial tendonitis. This sneaky injury can creep up on even the most experienced runners and cause havoc on your training schedule.

The posterior tibialis muscle is a key player in running, responsible for pointing your ankle and toes downward and supporting the arch of your foot. When this muscle gets overused, it can lead to posterior tibial tendonitis, which can cause tenderness, swelling, and pain in the inside of your ankle.

But fear not! There are steps you can take to treat and prevent posterior tibial tendonitis. RICE (rest, ice, compression, elevation) is your first course of action. You can also use an ankle-compression sleeve to help soothe pain and prevent re-injury when you return to running. But remember, it’s important to avoid painkillers without consulting your doctor first.

Prevention is key when it comes to avoiding this injury altogether. Consider adding custom foot orthotics to your running shoes to provide extra arch support, and make sure your shoes are well-cushioned. To avoid compressing your neuroma, loosen the laces near the toes. And don’t forget to strengthen your ankle muscles with exercises like calf raises.

As tempting as it may be to go barefoot or wear flip-flops or flat shoes, these types of footwear can contribute to the development of a fallen arch, which can worsen your condition. So stick to well-cushioned, supportive shoes and give your feet the love and attention they deserve.

Lower Leg Pain Cause. 5 Muscle Strains

As a runner, there’s nothing more frustrating than having to deal with an injury that keeps you from pounding the pavement. And lower leg pain is a particularly common culprit that can really put a cramp in your style. One of the most frequent causes of this type of pain is muscle strain in the calf muscles.

Picture this: you’re sprinting down the track, feeling great, and suddenly, you feel a sharp pain in your calf. It’s like a light switch has been flipped, and suddenly, you can barely move. You might even feel like your calf has given up on you entirely. If this sounds familiar, you’ve likely strained a calf muscle.

Symptoms of a calf strain include pain in the lower leg, limited range of motion, and a feeling that the muscle has “given way.” This can be especially frustrating for runners, who may mistake the strain for simple tightness. You may even feel like the pain subsides during a run, only to come back with a vengeance afterward.

Calf strains are often the result of overtraining or making sudden changes to your routine, like increasing your mileage or switching up your running technique. To treat a mild strain, you can try the RICE method at home, but if the tear or strain is severe, it may require medical attention.

Preventing calf strains is key, and that means taking the time to warm up properly before your run. A good warm-up should include low-intensity running and dynamic movements like lunges, butt kicks, and squats. Additionally, it’s important to strengthen your calf muscles and prepare them properly for hard training. Isometric exercises can be particularly helpful in preventing calf strains.

If you’re dealing with lower leg pain as a runner, there are a variety of injuries and conditions that could be to blame. By taking steps to prevent injuries and addressing them quickly when they do occur, you can keep hitting the pavement and chasing those personal records.

Additional Resource – Your guide to runners itch

Lower Leg Pain – The Conclusion

In the thrilling world of running, lower leg pain can sometimes be the villain that threatens to derail our athletic pursuits. We’ve uncovered a handful of notorious culprits responsible for this pesky pain, but let me tell you, my friends, this is just the tip of the iceberg.

If you hunger for more knowledge and crave deeper insights into running injuries and prevention, be sure to pay a visit to my page. It’s a treasure trove of wisdom waiting to empower you on your journey to pain-free running.

Oh, and let’s not forget the foot pain relief article and the heel pain guide, both waiting eagerly to shower you with valuable tips and tricks.

But wait, there’s more! I’m not just here to deliver information; I’m here to connect with you. I want to hear your stories, your triumphs, and even your struggles. So drop me a line in the comments section below. Let’s build a community of passionate runners who support and inspire each other.

Thank you for dropping by.

Keep training strong.

David D


Running Blisters Explained: Causes and Solutions For Runners

running blisters

Got blisters? Don’t let them slow down your running game! We’ve all been there, and I’m here to tell you that there’s no need to hang up your running shoes for good.

In fact, with the right know-how, you can treat those pesky blisters and keep them from ruining your runs.

In this article, we’re diving deep into the world of running blisters: what causes them, how to treat them like a pro, and most importantly, how to kick them to the curb for good. Ready to hit the ground running?

Let’s jump right in!

Running Blisters Explained

Picture this: You’re in the middle of an exhilarating run, the wind in your hair, and the world at your feet. But then, it happens – that telltale burning sensation that reminds you of an unwelcome guest: blisters.

Yep, those pesky little bumps that seem to have a knack for showing up just when you least expect them.

So, what exactly is a running blister? Well, think of it as your body’s way of saying, “Hey, I need a break!”

Blisters are like the little alarms that go off when the outer layers of your skin decide to have a friction-filled party. They rub together, break apart, and fill up with not-so-pleasant fluid.

Now, here’s the kicker – anything that cranks up the friction can make these blisters throw an even bigger tantrum.

We’re talking about improper running shoes, the ones that are either too tight or feel like they’ve got a mind of their own. And let’s not forget about bad running form – it’s like an open invitation for blisters to crash your running party.

But wait, there’s more! Sometimes, it’s not your shoes or your form but your feet themselves that can lead to blister trouble. Conditions like hammertoes, bunions, and heel spurs are like the troublemakers of the foot world, making you more susceptible to these irritating bumps.

Now, where do these blisters like to hang out the most? Well, they’ve got a soft spot for areas like the arches, the soles of your feet, and those poor little toes.

Why? Because these spots love to cozy up to your running shoes, engaging in a non-stop rubbing marathon.

The Blistering Process

Have you ever wondered what’s cooking beneath that bubbly surface? Well, here’s the lowdown, and trust me, it’s more intriguing than you might think.

Stage 1: The Epidermal Tear

So, picture this: you’re out on a long run, miles under your belt, and suddenly, you start feeling that familiar hot spot on your foot. That’s when the blister story begins. It all kicks off with a tiny tear in the epidermis – that’s the fancy term for the upper layer of your skin.

Stage 2: Separation Anxiety

Now, the real action starts. The outer layer of your skin decides to have a little separation party from the inner layers. It’s like they’re saying, “We need some space!”

So, they create a gap, a pocket of emptiness if you will, while keeping the surface intact.

Stage 3: Lymph Fluid Invasion

As if the separation shindig wasn’t enough, here comes the guest of honor – lymph fluids. These little guys seep into that gap, filling it up under the affected skin.

It’s like a mini swelling party that’s just getting started. The pressure builds, and voilà, you’ve got yourself a full-blown blister.

Bonus Stage: The Blood Vessel Twist

And for the grand finale – sometimes, things take a dramatic turn. A blood vessel in the vicinity might decide to add a little extra pizzazz to the mix. That’s when you end up with a blood blister.

Yep, it’s as intense as it sounds. Blood vessel rupture, fluid buildup, and a vibrant shade of red – it’s a blister with a twist!

For more on blisters and the science behind treatment, check the following scientific articles:

How to Treat Blisters For Runners

Most cases of running blisters aren’t medical emergencies but shouldn’t be ignored—especially when they’re too painful.

In fact, some blisters can get infected if you don’t take care of them early and properly.

Here’s how to safely treat running blisters in the comfort of your own home.

race warm-up

“To Pop or Not to Pop—That is the Question.”

Imagine this scenario: you’re out on a run, pounding the pavement, and suddenly, you feel the unmistakable presence of a blister. But here’s the deal – if it’s not causing you pain, it’s okay to let nature do its thing. You see, blisters have a tendency to break on their own eventually, and when they do, the fluid drains naturally.

Now, let’s talk about the big, bad blisters – the ones that are throbbing and causing you agony. When you’ve got a blister that’s making every step painful, it’s time to take matters into your own hands – but don’t worry, we’ll guide you through it.

Safely Draining a Running Blister: Step by Step

Do the following for a safe blister drainage procedure.

Clean Hands Rule:

First things first, wash your hands thoroughly. No shortcuts here – use soap and water to make sure those hands are squeaky clean.

Needle Sterilization:

If you’re going to pop that blister, you’ll need a trusty needle. But before you get to work, sterilize it! You can wipe it down with some alcohol or go the extra mile by boiling it for a solid 10 minutes. Safety first!

Piercing Strategy:

Now, it’s time to be precise. Carefully pierce the blister in several spots, but aim for areas close to the blister’s edge. This will allow the fluid to drain effectively.

Fluid Drainage:

Get yourself a clean piece of gauze or cotton – we’re talking pristine here! Gently press on the blister to encourage the fluid to drain out. But here’s the golden rule – leave the skin covering the blister intact.

Antiseptic TLC:

After the fluid is out, it’s time for some antiseptic love. Apply an antiseptic cream to the wounded area – this helps keep nasty bacteria at bay.

Second Skin Saver:

For an extra layer of protection, consider using a second skin product like Band-Aid Blister Block. It adds another level of defense against unwanted intruders.

No Peeling Allowed:

Repeat after me – “I will not peel the excessive skin!” Let that skin peel on its own time. Trust the process. Peeling it prematurely can expose your blister’s sensitive underbelly to potential infections.

Dealing With Blisters in The Middle of A Race

So, you’re in the middle of a race – be it a middle-distance sprint or a long-haul endurance challenge – and suddenly, there it is, that unwelcome blister making its grand entrance.

What do you do? Here’s your playbook:

Stop at a Medical Station:

Most races, especially organized ones, have medical stations strategically placed along the route. Consider these your pit stops for foot-related emergencies. When a blister strikes, make a beeline for the nearest medical station.

Let the Pros Handle It:

At these medical stations, you’ll find seasoned professionals who know the ins and outs of dealing with blisters. They’ve seen it all and can provide expert advice and assistance.

Assessment and Treatment:

The pros will assess your blister, taking into account its size, location, and severity. Based on their evaluation, they’ll recommend the best course of action. Sometimes, it might be as simple as draining the blister or providing padding to reduce friction.

Return to the Race:

Now, here’s the good news – with a bit of luck and the right care, you should be able to get back in the race pain-free. The pros are equipped to offer quick solutions so you can continue chasing your race-day goals.

Why It’s the Best Approach

Dealing with a blister during a race is no joke, and here’s why turning to the medical station is your best bet:

Medical stations offer immediate care, ensuring you don’t waste precious time fumbling with your blister or trying to tough it out. They’ll get you back on track faster.

These medical professionals deal with runners’ woes day in and day out. They know what works best and can provide tailored solutions for your specific situation.

How to Prevent Running Blisters

Want to avoid running blisters in the future?

Do the following.

Minimize Friction

Alright, let’s talk about the real MVPs of your running journey – your shoes! Whether you’re a seasoned pro or just starting out, your choice of running shoes can make or break your experience.

When it comes to preventing those pesky blisters, it all starts with proper footwear.

Here’s your guide to finding the perfect pair of running shoes and avoiding blisters like a pro.

The Shoe-Blisters Connection

Let’s get straight to the point – shoes are often the culprits behind those annoying blisters that plague many runners.

Ill-fitting trainers can turn your exhilarating run into a painful ordeal, particularly in areas like the arches, under your toes, and around the ends of your toenails. But fear not because we’ve got the playbook to help you make the right shoe choices.

Rule #1: Proper Fit

The golden rule of choosing running shoes is that they should fit like a glove but not too tight! You want to leave enough room inside the shoe for your feet to breathe and move comfortably. Here’s how to nail the perfect fit:

Aim for at least a thumb’s width of space between your longest toe and the end of the shoe. This gives your toes room to wiggle without feeling cramped.

Rule #2: Test Drive Your Shoes

Before committing to a pair of running shoes, it’s like dating – you’ve got to test the waters! Don’t just grab the first pair you see and hit the road. Instead, follow these steps:

Try on different pairs:

Explore a variety of brands and models to see which ones feel the most comfortable. Everyone’s feet are unique, so what works for one runner may not work for another.

Test drive them:

Once you’ve picked a potential pair, wear them around for a bit. Walk, jog, and let your feet get accustomed to the shoes. This “breaking in” period is essential to prevent blisters and ensure maximum comfort.

Additional Resource – Your guide to runners itch

Choose Running Socks

Socks play a vital role in keeping your feet comfortable and blister-free during your runs. They’re not just an afterthought; they’re a crucial part of your running gear.

Here’s why:

Extra Support:

Running socks are designed with your comfort in mind. They offer extra cushioning and support in all the right places, reducing the risk of blisters.

Moisture Management:

Sweaty feet are a breeding ground for blisters. Proper running socks are excellent at wicking moisture away, keeping your feet dry and blister-free.

Friction Fighters:

Running socks are your first line of defense against friction. They reduce the chances of your skin rubbing against your shoes, a common cause of blisters.

Say No to Cotton

Now, let’s address the sock no-no – cotton. While cotton socks might be cozy for lounging around, they’re a big no-no for running. Here’s why:

Cotton soaks up sweat and moisture like a sponge, increasing your risk of blisters.

Instead, go for specialized running socks designed to keep your feet happy. We recommend synthetic options like polypropylene socks or brands like WrightSocks, Teflon, or CoolMax. These socks are moisture-wicking pros, ensuring your feet stay dry and blister-free.

Double Trouble – In a Good Way!

If blisters have been a persistent problem for you, here’s a pro tip – double up on your socks. When you wear two pairs of socks, any friction occurs between the socks themselves rather than between your skin and the sock. It’s like an extra layer of protection for your precious feet.

Prepare for Rainy Runs

For those unpredictable rainy runs or races, always have an extra pair of socks on hand. Wet socks are a recipe for disaster, increasing your chances of blisters. Switching to dry socks, mid-run can make a world of difference.

Additional resource  – Here’s your guide to pain on top of the foot when running.

Apply Lubricants

You’ve got your shoes and socks sorted, but there’s one more trick to keep those blisters at bay – lubricants. Think of them as your secret weapon against friction, the arch-nemesis of blister-free running.

Here’s why.

Lubricants act as a protective barrier between your skin and your trainers. They’re like the bodyguards of your feet, reducing the friction that can lead to blisters.

If you’ve got dry skin or skin with cracks, you know how vulnerable those areas are to blisters. Lubricants step in to keep these trouble spots in check.

What’s more?

Applying a lubricant is a breeze. It’s a simple step that can make a big difference in your running comfort.

Apply Liberally (But Not Too Much!)

Now, let’s talk application. The key here is to strike a balance – apply enough to protect your feet, but not so much that you turn your shoes into a slip ‘n slide.

Here’s how to do it right:

Trouble Areas: Start by identifying the areas of your feet that are prone to blisters or where you tend to develop dry skin. These are your trouble spots, and they deserve extra attention.

When it comes to lubricants, you’ve got options. Many runners swear by good ol’ petroleum jelly – it’s affordable and readily available. But if you’re looking for specialized products, consider brands like Sportlick, Runners Lube, Body Glide, Chamois, or Sports Shield. Your pick may come down to personal preference.

Last but not least, don’t skimp on lubrication. Apply it generously to your feet, paying close attention to those trouble areas. A little extra now can save you from a lot of discomfort later.

Running Blisters – The Conclusion

There you have it! If you’re serious about treating and preventing foot blisters when running, then today’s article has you covered.

The rest is just details.

Please feel free to leave your comments and questions in the section below.

Thank you for stopping by

The 12 Best Stretches For Runners

runners stretches

I love running—it’s one of the best cardio workouts you can do.

It keeps me fit, clears my mind, and makes me feel good overall.

But there’s a catch (there’s always a catch, right?).

Running is a high-impact sport, and all that pounding on the pavement can take a toll on your body, especially your lower limbs and joints.

Over time, this stress can limit your flexibility and mobility, slow your performance, and—worst of all—increase your risk of injury.

And let me tell you, that’s the last thing you want as a runner. I’ve been there, and it’s no fun being sidelined due to injuries like Achilles tendonitis or IT Band Syndrome.

That’s why stretching is so important!

It helps your muscles recover after a run and prevents that tightness that can mess with your running form and performance.

Stretching can even help prevent post-run soreness—at least, that’s been my experience, though I can’t promise scientific proof for that. I’d recommend you try and see if it works for you.

In short, making stretching a regular part of your post-run routine will help you feel better after each run and make your running more efficient and enjoyable in the long term.

The Myth of Pre-Run Stretching

A lot of people think you should stretch before you run, but that’s not the best idea—at least not static stretching. Research shows that static stretching (holding a stretch for 30 seconds or more) before a workout can reduce your strength and running performance.

Plus, it doesn’t seem to do much to prevent injuries.

So, focus on a good warm-up instead of stretching before your run to get your muscles ready. Save the stretching for after your run when your muscles are warm and pliable, which is when it’s most effective.

How to Stretch Properly

When you stretch, the goal is to loosen your running muscles, improve flexibility, and prevent post-run tightness. Here’s how to do it right:

  • Stretch after your run when your muscles are warm. This helps prevent injury and ensures you get the most out of each stretch.
  • Hold each stretch for 30 to 60 seconds. Don’t rush! Stretching is about releasing tension, not forcing your muscles.
  • Avoid bouncing or jerky movements. These can lead to injury. Instead, stretch slowly and gently.
  • Focus on your breathing. Deep, controlled breaths will help you relax into the stretch and get a deeper release.

Key Muscle Groups to Stretch After Running

Not sure which muscles to focus on? As a runner, there are a few key areas you need to pay attention to:

  • Hamstrings: Tight hamstrings can lead to lower back problems and reduce your running efficiency.
  • Quadriceps: Flexible quads are key for knee lift and speed, but tight quads can cause a runner’s knee.
  • Hip Flexors: If you have tight hips, you’re setting yourself up for issues like IT Band Syndrome and lower back pain.
  • Calves: Tight calves commonly cause shin splints and plantar fasciitis.
  • Lower Back: A tight lower back can affect your posture and running form, so keeping this area flexible is important.

The Best Stretches For Runners

Without further ado, here’s a list of my favorite runners-friendly stretches.

Enjoy!

Targeted Muscle: The Hamstrings

The hamstrings are prone to injury, especially among runners.

Tight hamstrings can lead to pulled muscles and lower back problems.

They can also hinder range of motion, which limits running efficiency.

Here are two runner’s stretches to help you improve your hamstring’s flexibility and mobility.

1: Standing Single Leg Hamstring

Stand with your feet hip-distance apart.

Bend your right knee slightly and extend your left leg before you, pointing your toes up.

Holding this position, lower your upper body towards your knee and reach your hands toward your left foot’s toes as far as possible.

Hold this position for 30 seconds, then switch to the other side.

2: The Lying Hamstring Stretch

Lie flat on your back with your legs extended and your back straight.

Pull your right knee to your chest to keep your left leg extended on the floor.

Put your hands behind your right knee and slowly straighten the leg towards the ceiling, keeping both hips on the floor.

Hold for 30 seconds, then switch sides.

Targeted Muscle: The Calves

The calves are runners’ most overworked muscles, and inflexible calves set the stage for strains, shin splints, and plantar fasciitis.

Boosting this muscle’s flexibility and mobility can also improve stride length and cadence.

3: The Runner’s Calf Stretch

Stand facing a wall.

Then, place both arms on the wall with your arms extended and your back straight.

Step your right leg backward while keeping your heel planted to the ground and your leg extended without bending your knee.

To stretch the calf, lean forward slightly towards the wall while pressing your back heel into the ground until you feel a good stretch in the muscle.

Breathe deeply and hold for 30 seconds or more, then switch sides.

Targeted Muscle: The Quadriceps

Flexible quadriceps muscles are the key to stronger knee lift and speed, while tight quads are one of the main causes of the dreaded “runner’s knee.

4. The Standing Quadriceps Stretch

Start by standing with your legs and hips apart.

Stand tall while holding your right foot behind your butt, with your knee pointing to the floor.

If you need it, grab a chair for balance.

Keep your thighs lined up and your core engaged throughout the stretch, holding for no more than 30 seconds.

Repeat with the left leg.

Targeted Muscles: The Hip Flexors

For most runners, the hips are the weakest link.

Ignoring them can set the stage for a runner’s knee, Iliotibial Band Syndrome, lower back pain, and other trouble.

It’s happened to me.

I believe that tight hip flexors are the reason I suffered from knee problems for so many years.

5. The Hip Flexors Lunge Stretch

Begin kneeling and lunge forward with your right leg, pressing your left knee to the floor.

Extend your hips forward until you feel a stretch down the front of your left leg around your hips.

Repeat on the opposite side.

6: The Pigeon

This is one of my favorite yoga poses for runners.

It targets the hip flexors and the lower back.

Assume table position (on your hands and knees with a flat back).

Bend your right knee and bring it to a comfortable position between your hands.
Take your left leg and stretch it fully behind you.
Exhale and bend down to the ground.

Make sure you’re resting your torso on your leg and rest your head on the floor.

Targeted Muscles: The Lower Back Muscles

This is another major muscle group you need to stretch regularly to release running stress, improve mobility in the lower body, and prevent aches and pains.

7. The Lower Back Knee Crossover Stretch

Lie on your back with your legs extended and your back straight.

Bend your right leg and grab your right foot.

Keeping your left shoulder on the floor, grab the outside of your knee with your left hand and guide it across your body and towards the ground on your left side.

Try to move your knee closer to the ground while keeping both shoulders in contact with the floor.

Return to the starting position and repeat the same stretch on the other side.

You can end this runner’s stretch routine by doing Shavasana.

Lay on your back, with your arms and legs spread at about 45 degrees, and breathe deeply.

It’s good for you!

8. Hip Flexors & Psoas Stretch

Muscle targeted: The hip flexors and the Psoas

Proper Form

Start with a forward lunge position, then place your hands on your lead knee.

Next, lower your left knee to the ground, then stretch. Press down with your hands and extend the hips forward until you feel a stretch in front of your thigh, groin, and hip.

While keeping your pelvis tucked.

Hold the stretch for 30 seconds, then switch sides.

9. The Forward Hang

Muscle targeted: lower back, glutes, hamstrings, and calves

Proper Form

Stand with your feet hip-distance apart and knees slightly bent to perform this powerful stretch.

Next, bend at your waist on the exhale and fold forward from the hips, reaching for the floor.

Reach as far down as you can and grab onto your shins, ankles, or toes.

For more stretch, interlace your fingers behind your back.

Hold the stretch for one full minute and breathe deeply to release tension in the lower back, hamstrings, and calves.

Additional Resource – 13 Exercises to improve running

10. The Standing Chest Stretch

Muscle targeted:

Chest and shoulder muscles.

Proper Form

Stand tall with your feet shoulder-width apart.

Next, lace your fingers together behind your back and straighten your arms.

Then, with your arms straight, squeeze your shoulder blades together while aiming to extend your elbows out to the sides to open and stretch your chest.

Hold the stretch for 30- 45 seconds, then slowly release your arms to the sides.

11. Standing IT Band Stretch

Muscle targeted:

The Iliotibial Band is a group of fibers that run outside your thighs.

Proper Form

Begin by standing tall, then cross your left leg behind your right and point the toes of your left foot out about 45 degrees.

Next, while engaging your core, lean slightly forward and to the right side until you start feeling a stretch on the outside of your left leg.

To stay on the safe side, make sure to lean against a chair or a wall.

Hold the stretch for 30 seconds, then switch to the other side.

12. The Inner Thigh Stretch

Muscle targeted: Adductors and the whole groin area

Proper Form

Stand upright with straight back, feet wider than the hips, and toes turned out.

Next, slowly bend your knees, squatting straight down while keeping your hands on your thighs until you start feeling a stretch all over the inner thighs.

Keep your shoulders relaxed and back straight throughout the stretch, and never allow your knees to move past your toes.

Hold the stretch for 30- 45 seconds, then slowly press back to the starting position.

Customizing Your Stretching Routine for Your Running Style

Stretching isn’t a one-size-fits-all approach—different runners have different needs, and a sprinter’s routine might look a lot different than a marathoner’s. Here’s how you can tailor your stretching routine to match your running style and goals, plus tips for pre- and post-run stretches that get you prepped and recovered in the best way.

For Sprinters: Focus on Dynamic Power

If you’re a sprinter or enjoy shorter, fast-paced runs, prioritize stretches that warm up your fast-twitch muscles. Dynamic stretching before you start can activate those muscles for the explosive power you need in sprints.

Pre-Run:

Add high knees and butt kicks to your warm-up to target your hamstrings, glutes, and hip flexors—muscles that power your speed. Aim for 2 sets of 20 seconds each.

Post-Run:

Cool down with longer-held static stretches, focusing on the muscles that take a beating during sprints. Try a standing quad stretch (hold for 30 seconds each side) and seated hamstring stretch (hold for 30 seconds per leg) to aid recovery and prevent tightness.

For Marathon and Long-Distance Runners: Keep it Balanced

Long-distance running is all about endurance, so stretching routines for marathoners focus on injury prevention and flexibility to support your stride over long periods.

Pre-Run:

Start with dynamic stretches that increase blood flow and gently activate muscles without overstressing them. Leg swings (10 reps per leg, front-to-back and side-to-side) are great for loosening up your hips, and walking lunges (10 reps per leg) help engage your quads, hamstrings, and glutes.

Post-Run:

After a long run, prioritize stretches that help reduce stiffness and promote circulation. Try a downward dog stretch to target your calves and hamstrings, and finish with a hip flexor stretch to keep your hips from tightening up after those long miles. Hold each stretch for about 30 seconds on each side.

For Trail Runners: Build Stability and Flexibility

Trail running involves uneven terrain and engages stabilizer muscles more than road running. Your stretching routine should prepare those stabilizers and help prevent ankle or knee injuries.

Pre-Run:

Use dynamic calf raises (15 reps per leg) to warm up your calves and ankles, essential for navigating rocky or hilly trails. Lateral lunges (10 reps per side) also help prepare your hips and inner thighs for uneven footing.

Post-Run:

Target the calves, hamstrings, and hips with static stretches to release tension and improve mobility. A calf stretch (hold for 30 seconds on each leg) and figure-four stretch for your glutes (hold for 30 seconds per side) can be especially helpful after a challenging trail run.

Conclusion

Stretching after your run is one of the easiest ways to keep your muscles flexible, prevent injury, and improve your overall running performance. I’ve made it a regular part of my routine, and I highly recommend you do the same. Whether a beginner or a seasoned runner, these stretches will keep you feeling good and ready for your next run.

If you have any questions or want to share your favorite stretches, please comment below.

David D.