How to Go from 1 Mile to 3 Miles


Start Slow: Build a Solid Base

I get it. The moment you run your first mile, you’re ready to push past it, right? But trust me, rushing it will only leave you wiped out.

The key here? Patience.

Your body needs time to adjust to the stress of running, so don’t go doubling your distance too quickly.

Instead, add 5–10 minutes to your weekly mileage. I know, it sounds like something you’ve heard before, but small and steady wins the race.

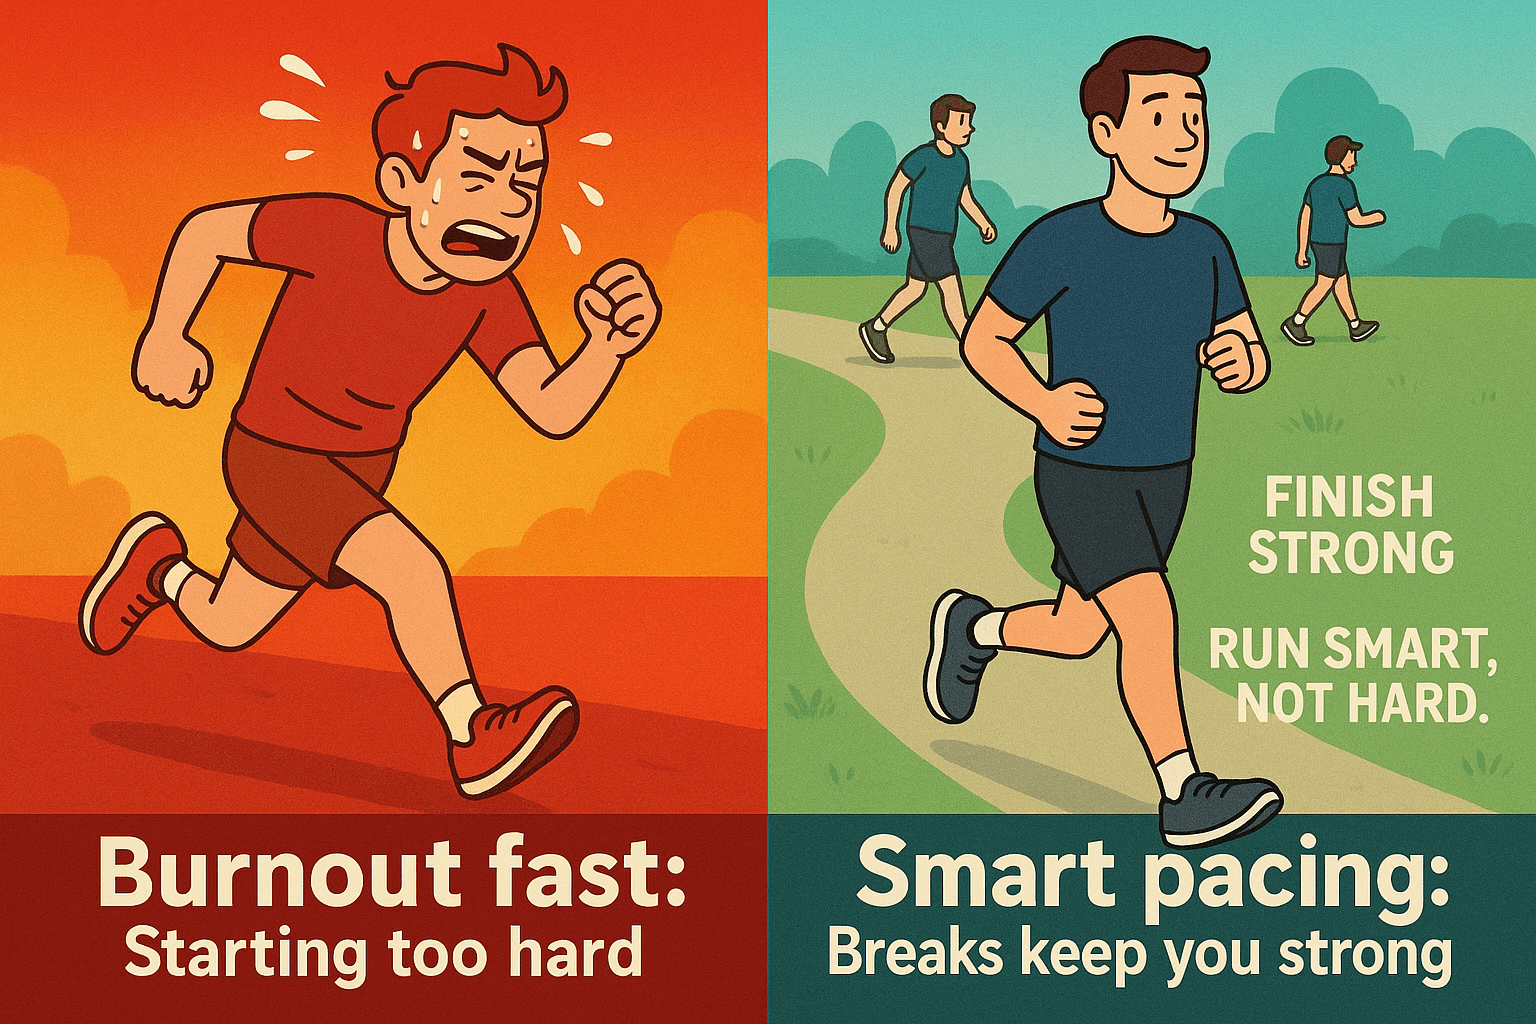
Gradually increase your distance each week, but don’t overload your body. I’ve seen way too many runners try to jump straight from running a few minutes to 20 or more and burn out halfway through.

Trust me, I don’t want you to fall into that trap. Build that base first.


The 10 Percent Rule—But…

You’ve probably heard of the 10% rule if you’ve been around the running community for even a minute—the one where you don’t increase your mileage by more than 10% each week.

I’m all for this rule, but here’s the thing: it’s not set in stone. 

Honestly, I usually recommend beginners to stick to 3–5% increases instead.

And most importantly, it has to feel comfortable.

The goal isn’t to add miles for the sake of it, it’s to gradually increase distance without risking injury.

So, take it slow. Seriously. Your body will thank you for it in the long run.


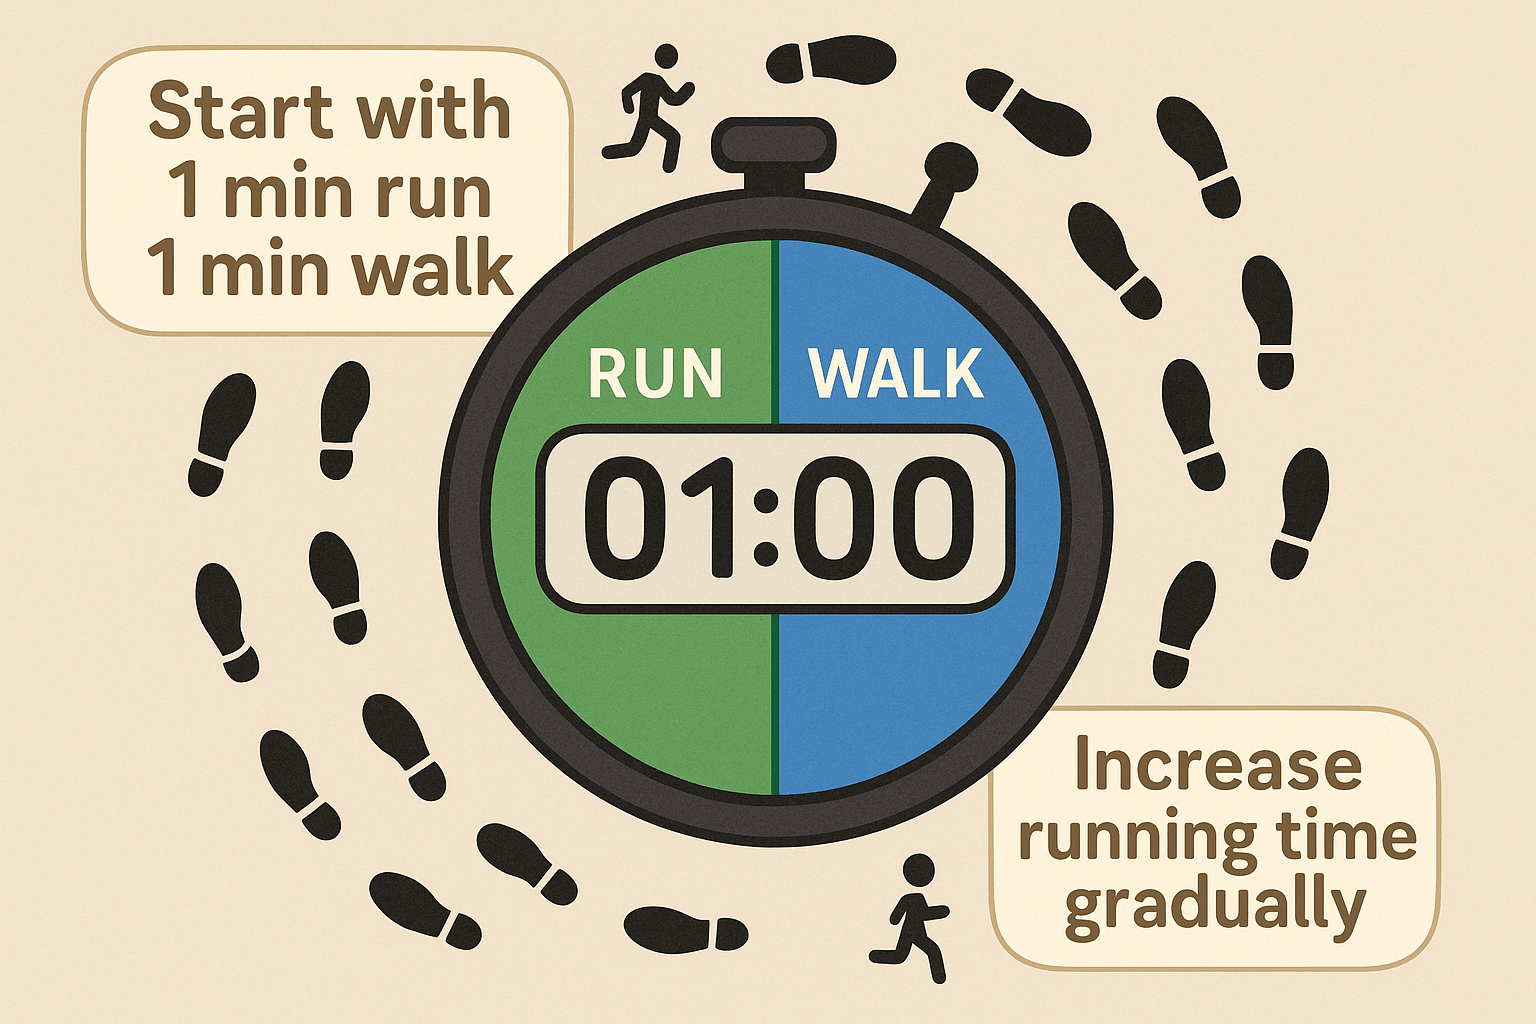
Run/Walk Intervals Are Your Friend

Here’s the truth. Just because you can go for one mile non-stop doesn’t mean that you have to try to run those 3 miles non-stop right away.

Instead, you should build your stamina first—and that’s where the run/walk intervals come in.

It’s really simple. Start with 1 minute of running, 1 minute of walking.

As you progress, you can increase your running time and reduce the walking.

But please, if you’re gasping for air early, don’t be afraid to throw in more walking breaks. It’s about building consistency and endurance, not speed.


Cross-Training

Running every day?

Yeah, it’ll get you there eventually, but cross-training is a game-changer.

Things like cycling, swimming, or even just brisk walking can seriously boost your fitness without putting extra stress on your joints. This gives your legs a chance to recover while still building that aerobic base.

To be honest, I didn’t cross-train enough when I first started running. I was running almost every day like an idiot, wondering why I was always dealing with aches and pains.

Once I added strength training to my routine, my body started feeling stronger, and my runs got way smoother.

What’s not to like about that?

Of course, it’s just my experience, but I bet every hardcore runner out there shares the same sentiment. Cross-training works.


Keep Your Running Form in Check

As you work your way up to 3 miles, your technique will make all the difference.

It might not seem like a big deal at 1 mile, but once you hit 2 or 3, bad form will catch up to you. That’s when quick adjustments can really change how you feel.

Here are a few tips to keep you running strong:

  • Posture: Keep it upright. No slouching—your body’s got to be in alignment to work efficiently.
  • Shoulders: Relax them. Tension in your shoulders means wasted energy.
  • Stride: Keep it light and quick. Don’t overstride—that’s just going to drain your energy and mess with your rhythm.
  • Arms: Let them swing naturally, not too stiff. They should move in sync with your legs.
  • Footstrike: Aim for a midfoot strike, not heel striking. Landing too hard on your heels can lead to injuries.
  • Breathing: Breathe deeply and rhythmically. Don’t hold your breath—let the air flow through you to stay relaxed.
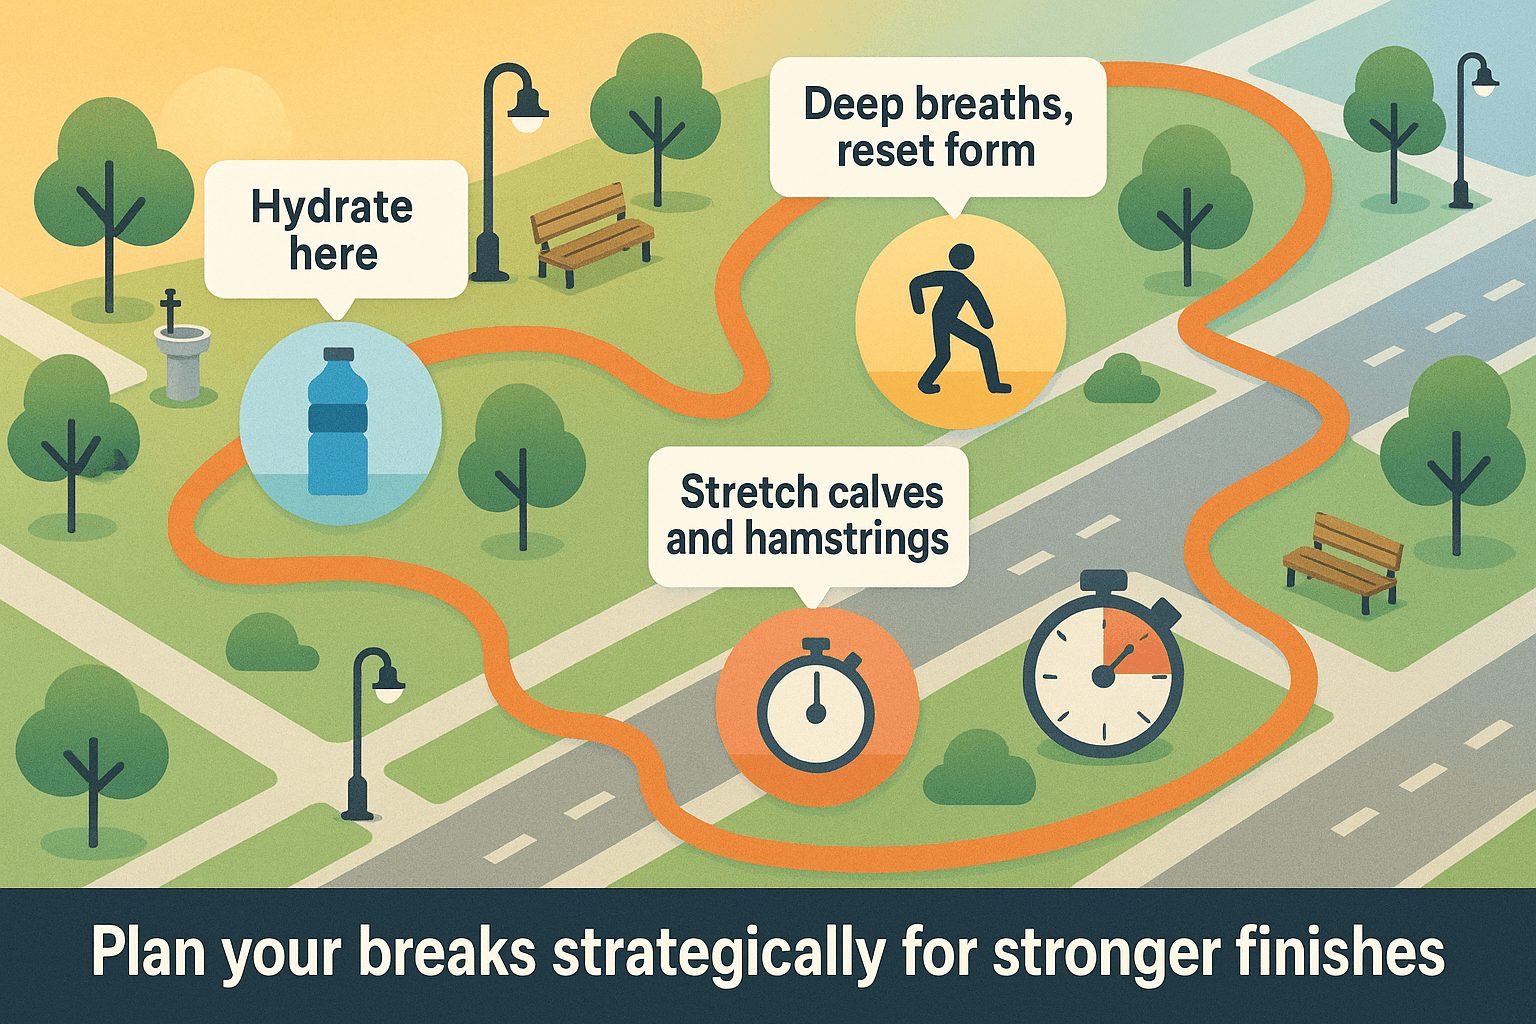
Hydrate and Refuel

If you’re aiming for 3 miles, hydration is key. Skipping on water is a big mistake and you don’t be making it.

As a general rule, drink water before and after your runs.

Staying hydrated helps with performance and recovery.

Ideally, drink about 16–20 ounces of water 1-2 hours before your run, and then sip on water during and after.

But hydration’s only half the story—nutrition matters too.

About 30-60 minutes before your run, eat something light. A banana or a handful of nuts is great, but here are a few other ideas:

  • Greek yogurt with honey and berries
  • Oatmeal with a sprinkle of chia seeds
  • A slice of whole-grain toast with almond butter
  • An apple with peanut butter

After your run, refuel with a balanced meal that includes protein, carbs, and healthy fats. Some options:

  • A smoothie with protein powder, banana, and spinach
  • A turkey sandwich with whole-grain bread and veggies
  • Quinoa salad with grilled chicken and avocado
  • A protein bar with some fruit on the side

Rest Days Are Non-Negotiable

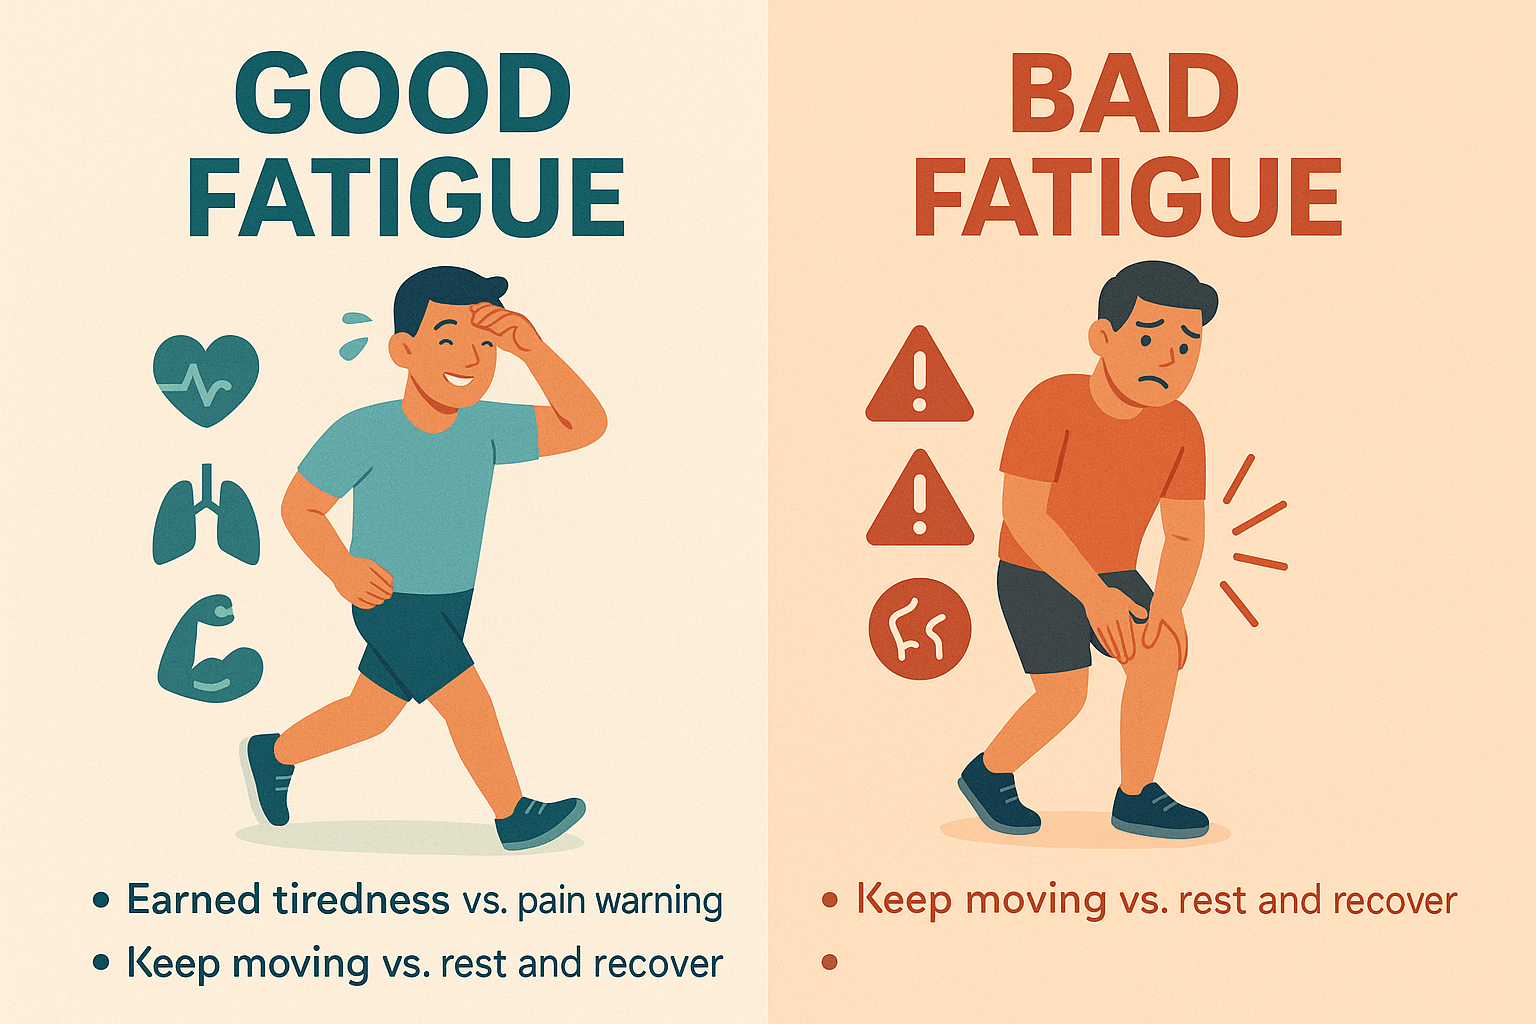
Rest is just as important as running. Don’t skip your rest days. I’ve made that mistake before—trying to run every day when I was just starting out. It led to burnout and injury.

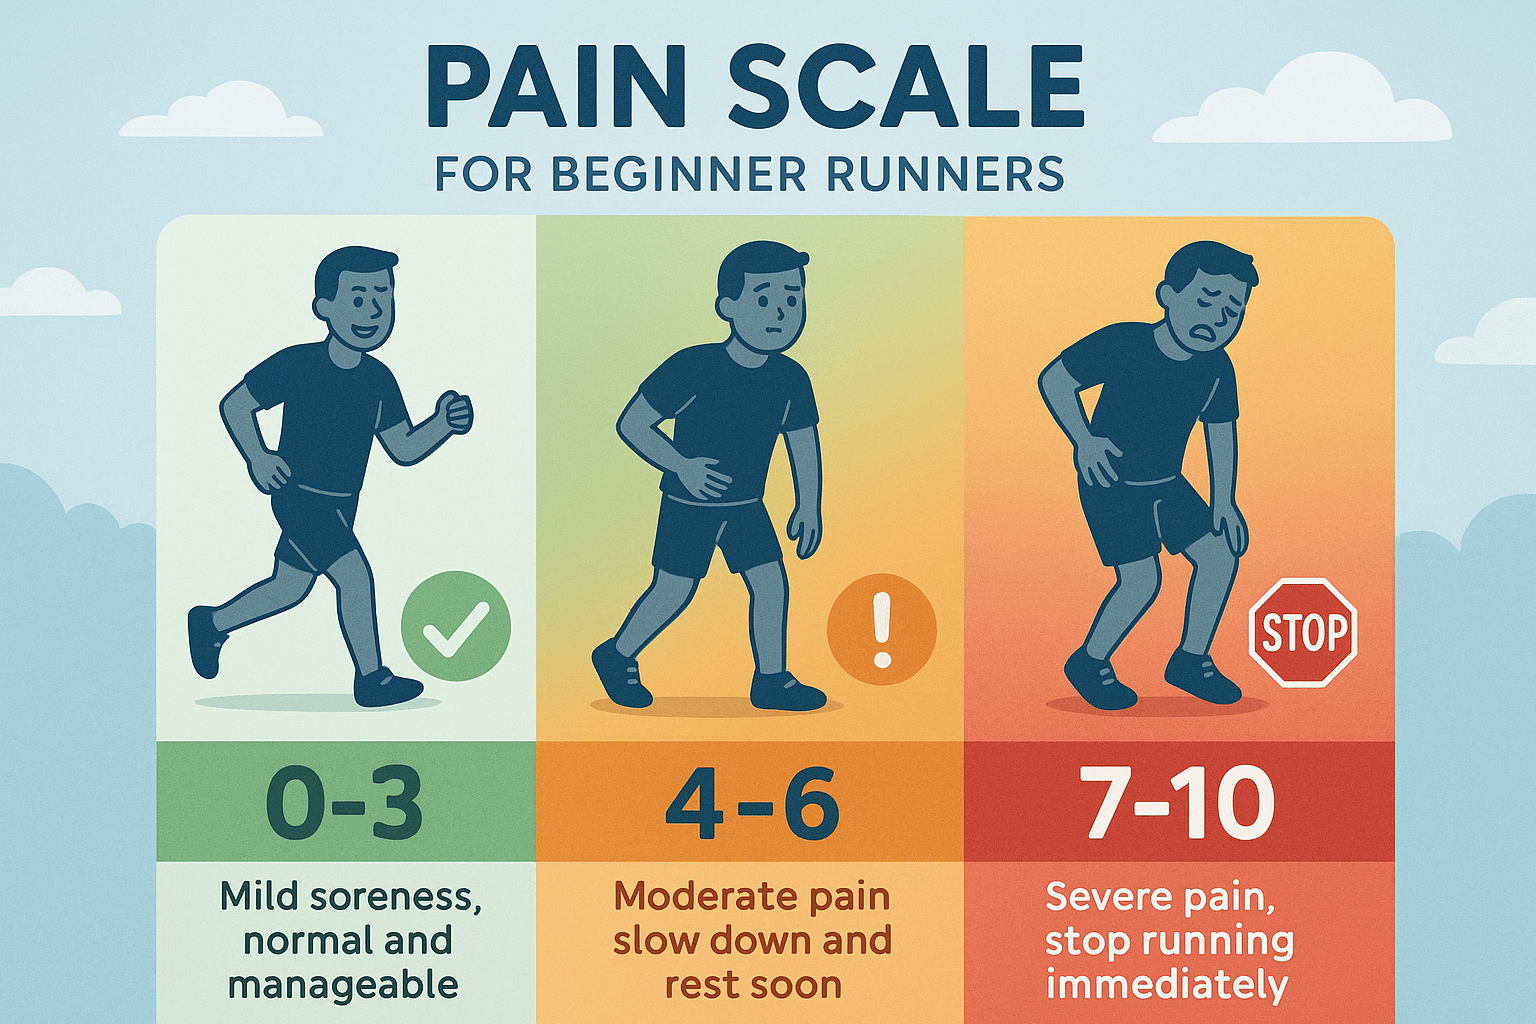
Your muscles need time to recover. If you’re feeling sore or exhausted, it’s okay to skip a run. Listen to your body.

Rest is part of the process. It’s how you get stronger and avoid injury in the long run. So take those days off—your body will thank you.


4-Week Training Plan for Beginner Runners: 1 Mile to 3 Miles

Goal: To run 3 miles continuously without stopping


Week 1: Start Slow and Build Consistency

  • Day 1: Run 1 minute, walk 2 minutes
    Repeat 4x (Total: 12 minutes running, 8 minutes walking)
  • Day 2: Rest or cross-train (e.g., brisk walking, swimming, or cycling for 30 minutes)
  • Day 3: Run 1 minute, walk 1 minute
    Repeat 5x (Total: 15 minutes running, 5 minutes walking)
  • Day 4: Rest
  • Day 5: Run 2 minutes, walk 2 minutes
    Repeat 4x (Total: 16 minutes running, 8 minutes walking)
  • Day 6: Rest or cross-train (e.g., yoga or strength training for 20-30 minutes)
  • Day 7: Rest

Focus: Build a routine and get comfortable with the run/walk intervals

  • Keep the pace easy—if you can’t talk comfortably while running, slow down.

Week 2: Increase Running Time

  • Day 1: Run 3 minutes, walk 2 minutes
    Repeat 4x (Total: 24 minutes running, 8 minutes walking)
  • Day 2: Rest or cross-train (e.g., cycling for 30 minutes)
  • Day 3: Run 4 minutes, walk 2 minutes
    Repeat 3x (Total: 24 minutes running, 6 minutes walking)
  • Day 4: Rest
  • Day 5: Run 5 minutes, walk 2 minutes
    Repeat 3x (Total: 30 minutes running, 6 minutes walking)
  • Day 6: Rest or cross-train
  • Day 7: Rest

Focus: Build endurance

  • If the walking intervals feel too long, try reducing them slightly and increasing the running time.

Week 3: Push the Pace and Distance

  • Day 1: Run 8 minutes, walk 1 minute
    Repeat 3x (Total: 24 minutes running, 3 minutes walking)
  • Day 2: Rest or cross-train (e.g., brisk walk for 30 minutes or an easy bike ride)
  • Day 3: Run 10 minutes, walk 1 minute
    Repeat 2x (Total: 20 minutes running, 2 minutes walking)
  • Day 4: Rest
  • Day 5: Run 12 minutes, walk 1 minute
    Repeat 2x (Total: 24 minutes running, 2 minutes walking)
  • Day 6: Rest or cross-train
  • Day 7: Rest

Focus: Increase running time, reduce walking intervals

  • Maintain a consistent pace.

Week 4: Running 3 Miles

  • Day 1: Run 15 minutes, walk 1 minute
    Repeat 2x (Total: 30 minutes running, 2 minutes walking)
  • Day 2: Rest or cross-train (light cycling or swimming for 30 minutes)
  • Day 3: Run 20 minutes, walk 1 minute
    Repeat 2x (Total: 40 minutes running, 2 minutes walking)
  • Day 4: Rest
  • Day 5: Run 25 minutes continuously (or use intervals: run 12 minutes, walk 1 minute, repeat)
  • Day 6: Rest or cross-train (optional 30-minute brisk walk)

Your One to Three Miles Run Checklist:

  • Start with small increments: Increase your mileage by 5-10 minutes each week
  • Use the run/walk method: Start with 1 minute of running and 1 minute of walking
  • Gradually shift toward longer runs
  • Add cross-training: Incorporate activities like cycling or swimming to build endurance without adding too much impact
  • Hydration is key: Drink water before and after your runs, and during if needed
  • Prioritize rest days: Don’t skip them—they’re just as important as your training days
  • Focus on your form: Relax your shoulders, avoid overstriding, and keep your footfalls light and quick
  • Fuel properly: Eat a light snack (like a banana or a small handful of nuts) 30-60 minutes before you run
  • Listen to your body: If you’re feeling worn out early, take more walking breaks

What’s the Best Temperature For Running?

running in the heat

Every runner dreams of that perfect running weather – the day when the air feels just right and every stride is effortless.

But what is the ideal running temperature?

As a running coach based in Bali, I’ve grappled with this question personally.

I’ve literally felt the extremes: from sweltering tropical mornings that left me drenched by sunrise, to crisp mountain air in my earlier years that made my lungs burn and my spirit soar.

Each experience taught me something profound about how temperature impacts our runs.

Let me take you on a journey through those lessons – from a terrifying heatstroke at the Solo Half Marathon to nostalgic winter training runs – combining personal stories, scientific research, and hard-earned coaching wisdom.

By the end, you’ll not only know the optimal running temperature for peak performance, but also how to thrive in any weather, hot or cold.

What’s the Best Running Temperature?

According to research—and just about every seasoned runner I’ve coached—the ideal temp for long-distance running hovers around 50°F (10°C).

That’s the sweet spot where your body doesn’t overheat and can focus on moving efficiently.

In fact, elite marathoners tend to crush their times in conditions between 44–59°F (7–15°C). Your muscles stay warm, but not boiling, and your heart doesn’t have to go into overdrive just to cool you off.

Sprinters?

They love it warmer—around 70–73°F (21–23°C)—because warmer muscles mean more explosiveness.

But for most of us logging miles on the road or trail, that cooler range is gold.

The Heat Slap: My Solo Half Marathon Wake-Up Call

Let’s talk about heat—and why it’ll chew you up if you don’t respect it.

I’ve had a few run-ins with it.

One time, I headed out in Bali at midday (yeah, genius move, I know). The sun was brutal—over 90°F (32°C)—and by mile three I was wobbly and lightheaded. Heart thumping like a bass drum. I had to bail and walk it in, drenched and wrecked.

But that wasn’t the worst of it.

The real gut punch came at the 2023 Solo Half Marathon.

Race morning was already hot and thick with humidity. I felt it in my bones at the starting line, but like an idiot, I thought my training would bulldoze through it.

By mile 11, the heat won.

Everything went sideways—legs locked up, vision blurred—and I blacked out. Next thing I remember, I was in a hospital bed. I’d collapsed from heatstroke. Didn’t finish. Didn’t even remember the final kilometers.

That moment taught me something brutal: toughness means listening to your body, not ignoring it.

What’s Actually Happening in the Heat?

Here’s what’s going on inside your body when it’s scorching out:

  • Your body shifts blood from your muscles to your skin to help you sweat and cool down.
  • That means less oxygen and fuel to your legs.
  • Your heart rate spikes because it’s working double-duty.
  • And your core temp climbs dangerously fast.

Running in the heat feels like you’re driving a car with the handbrake on. You’re trying to move, but everything’s fighting against you. Every degree above that sweet spot can slow you down—and I’ve felt it in my bones.

Flip Side: Why Cold Runs Can Make You Fly

Now let’s talk cold—because when it’s done right, cool weather can feel like rocket fuel.

Some of my best runs happened on cold mornings. Not freezing, but that crisp 45°F (7°C) type of air that stings at first and then lifts you.

Cool temps help your body regulate heat more easily. Instead of wasting energy trying to stay cool, you can focus on the run itself.

That’s why you’ll see so many PRs and records set in fall races.

Your heart rate stays steady. Breathing feels cleaner. It’s like your body has more room to perform.

But Let’s Not Pretend Freezing Temps Are Easy

There’s a point where cold stops helping and starts hurting. Below freezing, things get tricky:

  • Muscles take longer to warm up.
  • Breathing cold, dry air can make your throat and lungs ache.
  • Slippery roads mess with your form.
  • And god help you if you forget gloves.

Also, don’t forget: you can still dehydrate in cold weather. You’re losing moisture through your breath and sweat—even if you don’t feel it.

What Science (and Experience) Says About the Best Running Temperature

Let’s talk weather — and not just to complain about it.

I’m talking about the sweet spot where your body runs fast, your engine runs cool, and you feel like you could go forever.

Because yes, temperature matters way more than most runners realize.

So… What’s the Magic Number?

Over the years, scientists have pored over marathon race data and lab tests to figure this out.

And guess what? The best running temps are cold — colder than most of us would consider “comfortable” for hanging out.

According to my research while writing this article, air temperature is one of the biggest factors affecting marathon finish times — and even dropout rates.

For every 1°C (1.8°F) increase above the sweet spot, times slowed down and DNFs (Did Not Finish) went up. That hurts.

The golden range?

Most studies point to 44°F to 59°F (7–15°C) as the prime zone for marathons. A long-term study on the Boston Marathon — a race that draws runners of all speeds and ages — found 46–59°F (8–15°C) to be ideal for both elites and everyday runners.

Personally, I’ve always found around 50°F (10°C) to be that Goldilocks zone — not too cold, not too warm. That’s when the engine purrs and you can hold pace without overheating.

And you’re not alone if you think 45°F feels freezing when you first step out. But trust me, once you’re moving, it’s perfect.

What About the Fastest of the Fast?

Turns out elites like it even colder. A study in PLOS ONE found that male elite marathoners peaked at around 39°F (3.8°C), while elite women ran their best at about 50°F (10°C).

Makes sense — when you’re burning fuel that fast, cooler air keeps you from overheating. I’ve seen this play out firsthand — the pros often shiver at the start line while us mid-packers are layered up like it’s winter camping.

And for the rest of us?

We’re usually best somewhere around the mid-40s°F. That lines up with how I’ve felt on race mornings — my best performances almost always came on chilly mornings when I could see my breath during warm-up.

But Wait — What About Humidity?

Temperature’s only part of the story. Humidity is the silent killer.

You’ve heard of the “real feel” or “heat index”? That’s where heat + humidity gang up on you.

Let’s say it’s 88°F (31°C). In dry conditions, sure, that’s hot — but manageable. Add 70% humidity, and suddenly it feels like over 100°F (38°C). That’s brutal.

Why?

Because sweat doesn’t evaporate well when the air’s already full of moisture, so your body can’t cool down.

Living and training in Bali, I know this struggle.

I’ve run 10Ks in 80°F with 90% humidity and felt like I was drowning in my own sweat by kilometer three. It’s not just uncomfortable — it’s performance-crushing.

On the flip side, cold wind or rain can make a seemingly perfect 40°F run feel miserable. Ever been hit with icy gusts on a long run? Yeah, that’ll humble you quick.

What This Means for You

The takeaway? Cool and dry = fast. Hot and humid = sufferfest. It’s that simple — and the science backs it.

That said, we all have our own “perfect” range. Some folks run hot and prefer 40°F, others are fine at 60°F, especially for short runs. Your body size, how much you sweat, and what weather you’re used to all play a role.

But if you’re chasing that next PR? You’re praying for a start line at 50°F, overcast skies, and a dry breeze.

Adapting to the Heat (and Cold): 

Let’s be real—everyone loves the idea of running in 50°F weather.

It’s cool, comfortable, and your body doesn’t feel like it’s melting.

But here’s the catch: most of us don’t live in “ideal” conditions.

I live in Bali. It’s hot, humid, and sticky year-round.

When I first moved here, even an easy run at sunrise felt like a death march.

I’d be drenched by mile one, gasping for air, and my heart rate was through the roof—at jogging pace. One run in 78°F and 90% humidity felt worse than a 15-miler back in Europe.

I actually wondered if my running days were numbered.

But here’s the thing—your body adjusts. Slowly, stubbornly, but it does.

After a couple months of steady running (and plenty of sweating), I started noticing the shift. I wasn’t overheating as fast. I could finish a 5K before sunrise without turning into a puddle.

Six months in, a 10K in the morning heat became “just another run.” I learned how to hydrate better, slow down early, and pick shady loops or routes that passed shops for a cold drink.

That’s heat acclimation in action—your body starts sweating earlier, your blood volume goes up, and everything just runs a little smoother. Studies back this up. Your system actually learns how to manage heat more efficiently. It’s wild.

I even met a local runner who thought 75°F was “cool.”

Meanwhile, a guy from Florida once told me he races better in swampy heat—said 50°F felt cold to him.

It blew my mind, but it made sense. You race how you train, and your comfort zone is built by exposure.

Same goes for the cold. I’ve got a Canadian buddy who runs in freezing temps all winter. To him, 32°F is “perfect.” He layers up, protects his skin, and goes out like it’s nothing.

But when snow or ice hit, he admits things slow way down—not because of cold, but because you can’t sprint on ice without eating pavement. Fair.

What I’ve learned is this: while science tells us that ~50°F is objectively better for performance, what really matters is what you’re used to.

Acclimation isn’t about running your fastest in 90°F—because you won’t. It’s about surviving and thriving in less-than-perfect conditions.

I even throw in hot midday jogs here in Bali just to keep that heat tolerance sharp. If I ever sign up for a cool-weather race, I’ll run with the AC cranked or travel to cooler spots just to get used to it again.

Training in tough conditions builds mental strength too. If you only run when it’s “nice out,” race day surprises will wreck you.

Bottom line? You can adapt. Whether it’s heat or cold, it’s not about chasing perfect weather—it’s about learning to run smart in the weather you’ve got.

FAQs: Weather, Performance & Real-World Running

Q: What’s “too hot” to run in?

Once the heat index hits around 90°F (32°C), you’re entering danger zone. Anything above 85°F (29°C), especially with humidity, will slow you down and spike your risk of overheating. At 100°F heat index or more? I usually tell my runners to cut it short, run easy, or hit the treadmill.

If you start feeling dizzy, your heart’s racing, or you stop sweating—that’s a red flag. Walk it in, cool down, and live to run another day.

Q: What temp is “too cold”?

Cold’s not the enemy—it’s frostbite and slipping on ice. Most runners can go down to 0°F (-18°C) with layers and protection.

But when the windchill drops below -20°F (-29°C), you’re risking skin damage fast. If it’s icy or your lungs hurt from the air, it’s time to reconsider. Treadmills exist for a reason, and using one doesn’t make you soft—it means you’re smart.

Q: Is cold better than heat for racing?

Yep. According to multiple studies (like from youraustinmarathon.com and runnersblueprint.com), marathon times drop as temps rise. Most people run best between 40°F and 60°F (4–15°C).

Why?

Your body doesn’t waste energy cooling down, so your pace holds longer. You might be a minute slower per mile at 85°F than at 55°F. Even a 10°F shift can affect performance by a few percent. Cold’s better—until it’s too cold and your legs freeze up.

Q: Do I burn more calories running in the cold?

A little.

Your body does work harder to stay warm, especially if you’re underdressed and shivering. But don’t expect a major fat-loss boost just from cold air.

In fact, running in heat feels harder but doesn’t burn more—it just feels like it does because of water loss. Want to burn calories? Focus on effort, distance, and consistency, not the weather. Here’s how many calories you burn running a mile.

Q: What should I wear when it’s ~50°F out?

Ah, the sweet spot. In 50°F (10°C), I usually go with shorts and a long-sleeve or just a tech tee with sleeves I can push up. Maybe gloves for the first few miles, a buff if it’s breezy. You don’t need a jacket unless it’s windy.

Trick is to feel a bit cool at the start—by mile 2, you’ll be golden. I ran a race once at 52°F in shorts and a short-sleeve with gloves. I froze for five minutes, then felt perfect the rest of the way.

The Couch To Half Marathon Plan For Beginner Runners

couch to half marathon

Thinking about running a half marathon but feeling it is too far out of reach?

Well, it’s not. Believe it or not, 13.1 miles is totally doable, even if you’re starting from the couch.

I’ve been there too, wondering if I’d ever be able to run that far. But with a solid plan and steady effort, you can definitely get there.

In today’ post, I’ll guide you through a couch to half marathon training plan that’s all about consistency, small wins, and building confidence. A

long the way, you’ll find personal stories, helpful tips, and a strategy to stick with it—even on the tough days.

The key here? You don’t need to run fast. In fact, most beginner half marathon training plans (as well as mine) emphasize that the goal is not to sprint your way to 13.1 miles. It’s about building endurance.

Let’s get to it.

Why a Half Marathon is Within Your Reach

I know, 13.1 miles sounds like a lot, right? But if I can do it, you can too, no matter where you’re starting from.

Here’s how I look at it: two 10Ks back-to-back with a little bit of a bonus at the end.

It’s all about endurance, not speed.

Speed doesn’t matter here—just stick with it and show up consistently.

When I got into running, I could barely run a block without stopping to catch my breath. But I just kept it slow and steady. That slow, steady grind paid off big time.

Soon enough, I was running farther without stopping. It just happened. Starting slow? Perfectly fine. Don’t rush it.

Like they always say: “Endurance is key here, not speed.” For a lot of us, it’s not just about the miles. It’s about proving to ourselves that we can tackle something huge.

TL:DR – The couch to half marathon plan works, period.

Setting Your Goal and Mindset

Start by setting a real, achievable goal and locking in the right mindset. Don’t get caught up in times or mile splits—those don’t matter right now. At first, it’s all about showing up. Progress will follow.

When I signed up for my first HM event, my goal was simple: run or walk for 45 to 60 minutes, four to five times a week. And that was it. No pressure about how far or how fast. Just move.

I won’t lie—there were times I wondered if I’d ever get better. I felt sluggish and doubted myself.

But every run brought me closer to my goal. The key? Consistency. It’s about building strength and endurance—your pace, your rules. Most runners will tell you: take it slow. Don’t rush the process.

You’ve heard it before—don’t rush things. It takes time, but every run makes you stronger.

Here are my best tips:

  1. Start with Baby Steps: Your first runs will probably feel slow and short—and that’s totally fine. Even 10–15 minutes of run/walk is a great start. Once you get comfy, just add a bit more time or distance each week.
  2. Track Your Progress: Track your runs. Whether it’s a log or an app, keeping tabs on your progress is a game changer. Some people even love marking their routes on a map. It’s a great way to visualize your progress.
  3. Stay Positive: Running is tough when you’re new to it. I get it. But be kind to yourself. You’re doing something hard—and that’s worth respect. This is your journey. Don’t worry about anyone else. Stop apologizing for your pace. We’re all running our own race.
  4. Celebrate Small Wins: Celebrate every little step. Big wins come from small victories. You ran today? That’s enough. You showed up.
  5. Too much of a challenge? If my couch to half marathon is too hard for you, then consider trying out my couch to 5K plan or couch to 10K plan. no excuses.

Your 15-Week Couch to Half Marathon Training Plan

Here’s your beginner-friendly 15-week plan to help you cross the finish line of your first half marathon.

We’ll gradually build up your miles and give you plenty of rest and cross-training days to keep you healthy and injury-free.

Don’t worry about being perfect—this plan is just a guide. Feel free to adjust things like rest days, pacing, or even throw in some run/walk intervals if you need to. The key here is steady progress, not rushing ahead too quickly. Stick with it!

The Plan:

Week Monday Tuesday Wednesday Thursday Friday Saturday Sunday
1 Rest 20 min run/walk Cross-train 20 min run/walk Cross-train Rest 3 mi run
2 Rest 25 min run Cross-train 25 min run Cross-train Rest 4 mi run
3 Rest 30 min run Cross-train 30 min run Cross-train Rest 5 mi run
4 Rest 35 min run Cross-train 35 min run Cross-train Rest 6 mi run
5 Rest 35 min run Cross-train 40 min run Cross-train Rest 7 mi run
6 Rest 40 min run Cross-train 45 min run Cross-train Rest 8 mi run
7 Rest 45 min run Cross-train 50 min run Cross-train Rest 9 mi run
8 Rest 45 min run Cross-train 55 min run Cross-train Rest 10 mi run
9 Rest 40 min run Cross-train 45 min run Cross-train Rest 8 mi run (recovery week)
10 Rest 50 min run Cross-train 55 min run Cross-train Rest 11 mi run
11 Rest 50 min run Cross-train 60 min run Cross-train Rest 12 mi run
12 Rest 55 min run Cross-train 60 min run Cross-train Rest 10 mi run (taper week)
13 Rest 45 min run Cross-train 50 min run Cross-train Rest 8 mi run
14 Rest 30 min run Cross-train 30 min run Cross-train Rest 5 mi run
15 Rest 20 min easy run Cross-train 20 min easy run Cross-train Rest Race Day: 13.1 mi

Weeks 1–4: Laying the Foundation

These first few weeks are about getting comfortable and making running a habit. You’re not going to break any records yet—and that’s perfectly fine! The focus is on consistency. If you need to start with run/walk intervals, that’s totally okay. Just get out there and keep moving forward.

Start each run with a 5-minute warm-up. A brisk walk, light jog, or leg swings will get your muscles awake and ready to go. On rest days, keep moving gently. A walk, light stretching, or yoga will help your body recover while keeping you on track. It’s all about staying active without pushing yourself too hard.

Weeks 5–9: Building Endurance

By now, you’ll feel your runs becoming a little easier, and you’ll start building serious endurance. The weekday runs will get longer, and your Sunday long runs will start to ramp up to 8-10 miles. You might have some tough weeks—just stick with it. You’re building strength, and that’s what counts.

On those longer runs, focus on breathing and form. Keep it at a pace where you can still talk, but just barely. This is how you build endurance without overexerting yourself. If you’re feeling low on energy, grab a banana, a gel, or a sports drink halfway through. And don’t forget to refuel after your run! A carb and protein snack, like chocolate milk or a smoothie, will help speed up your recovery.

Weeks 10–12: Peaking

Now, you’re entering the final stretch. You’ll hit your longest runs—up to 12 miles—and then taper to make sure you’re fresh for race day. These weeks are all about getting comfy running for 2+ hours. Trust your training and don’t worry about overdoing it.

If you’re feeling sore, take extra rest or cross-train (swimming or yoga work great). Soreness is normal, but don’t push through pain. It’s easy to get excited on race day and start too fast. One runner said, “We would’ve enjoyed the last 3 miles more if we started slower.” Remember, it’s a marathon, not a sprint.

Weeks 13–15: Taper and Race Day

As you near race day, it’s time to dial it back. These final two weeks are all about letting your body recover and staying fresh. Early in Week 13, you might feel a little sluggish. Don’t worry, that’s normal! It’s your body catching up after all that hard work. By Week 15, your runs should be short (20–30 minutes)—just enough to keep your legs loose and ready to race.

Ease off on the training. Trust me, I know that nervous feeling, but don’t let it mess with you. You’ve done the work—now let it pay off. Stick to what you’ve been doing and skip anything new that could hurt you.

What’s more?

The day before the race, just relax. Have a solid dinner—something with carbs like pasta or rice. Don’t stay up late. And before bed, take a moment to visualize yourself crossing that finish line.

Next, on race day morning, eat a light breakfast—toast with peanut butter or oatmeal about 1–2 hours before the start. Keep your pace steady from the beginning. And just remember—you’ve earned this. Consistency in your training leads to success, so trust in what you’ve done.

Want to take things to the next level? Check out my couch to marathon plan.

Cross-Training and Recovery

Here’s my take: Cross-training has saved me from so many injuries. I used to only run, and it took a toll. But once I added in some biking and strength training, I felt way better and ran faster. Trust me, strength training is huge for those long runs. Being stronger allows my muscles and joints to handle those long runs way better.

For recovery, sleep and nutrition are the two biggest things to focus on. After long runs, your body needs fuel within 30 minutes—your muscles are like sponges for nutrients right after exercise. Go for something like a smoothie or chocolate milk, with a 3:1 or 4:1 carb-to-protein ratio. And stay hydrated. Water’s your best friend—sip on it all day, especially after your runs.

Stretching and foam rolling should be a regular thing too. After your runs, take 1–2 minutes to foam roll those tired muscles—your calves, quads, hamstrings, and glutes. You’ll feel way better after. If you’re super sore, it’s okay to take an extra rest day or switch out a run for cross-training.

Gear, Nutrition, and Runner Essentials

Let’s talk about gear.

First thing’s first: your shoes.

Don’t mess around here. A solid pair of running shoes is your foundation. You don’t need anything fancy, just shoes that fit well and feel right.  Replace your shoes every 300–400 miles to keep your legs feeling fresh.

Moisture-wicking socks are also a must to avoid blisters. And dressing for the weather is huge. In cold weather, layers are your friend. If you’re running in low light, make sure you’re visible—think bright clothes and reflective gear.

Now, for nutrition—balanced meals every day are key. On running days, have a little extra carbs before your run. A banana or toast with peanut butter is perfect. Afterward, get that 4:1 carb-to-protein snack in to kickstart recovery.

And always listen to your body when it comes to hydration and food. If you’re feeling extra tired, take an extra rest day and eat a little more. Running’s part of the equation, but sleep and proper food fill in the rest.

Overcoming Doubts and Staying Motivated

Everyone has those tough days. You’ll find yourself thinking, “Can I really do this?” The key is to push through. Remember why you started, and lean on your community.

Whether it’s friends, a local run group, or virtual buddies, it helps to have someone to share your goals with.

So please start slow and find a partner. It makes it fun and a lot harder to quit.

Not every run is going to feel amazing. Some days you’ll feel unstoppable, and other days you’ll feel like you’re dragging. And that’s totally normal. Don’t give up! Some days are great, some days are okay. Just take it one mile at a time.

Fitting Training into Your Busy Life

Life’s busy, I get it. But trust me, you can still fit in your runs if you plan ahead and get a little creative. Treat your runs like any important meeting or appointment.

My best advice? Treat your run like an appointment.

Put it on your calendar, set a reminder, and stick with it. If you’re not sure where to start, plan your week ahead.

Yes, that might mean waking up early or squeezing in a run on your lunch break, but trust me, it’s worth it.

When time’s tight, focus on quality, not quantity. You don’t need to run every single day. Even 3–4 focused runs a week can totally do the job, especially when you’re just getting started.

Here’s a simple breakdown that works: one long run, one or two moderate runs (with some faster intervals or hills), and an easy run to recover. It doesn’t take a lot of mileage to get fit. Too much running can actually lead to burnout, and no one wants that.

And don’t forget about the days you can’t run. Take a brisk walk, do a quick home workout, or stretch. Every little bit helps, and consistency is key.

Here are a few tips that have worked for me — and others, too:

  • Plan Ahead: Get ready the night before—lay out your running clothes, fill your water bottle, and pack some snacks. ASICS says prepping ahead of time removes those last-minute excuses.
  • Use Small Windows: Got 20 minutes? Use it! You can fit in a quick run before breakfast, during lunch, or after work. It all adds up.
  • Combine Activities: Running errands on foot, or with a stroller if you’ve got little ones? That counts. Even doing squats or lunges during TV commercials helps you get fitter without even thinking about it.
  • Adjust as Needed: Life happens, and that’s okay. Miss a run? Don’t sweat it. It’s not the end of the world. ASICS has a solid reminder: “One or two missed runs won’t wreck your fitness or mess up your goals… just get back to your training the next day.” Give yourself a break and get back on track the next day.

Your training plan should work for you — not the other way around. It’s okay to shuffle workouts or take an extra rest day if you need it. The goal is to do most of those key workouts, not follow a rigid schedule that burns you out.

Handling Soreness and Preventing Injuries

Soreness? Totally normal. It means your muscles are getting stronger. Mayo Clinic says that mild discomfort can actually mean progress — just don’t go overboard. Gradual is the way to go.

Prevent injuries by not cranking up the mileage too fast, and don’t skip your warm-ups. Always start your run with easy jogging or dynamic stretches (think leg swings or lunges) to wake your body up.

Got sore muscles? There are some solid ways to ease the pain:

  • Hot/Cold Therapy: A warm shower or bath can help loosen tight muscles. After a tough run, an ice pack (15 minutes max) can reduce any inflammation. Use these tricks sparingly to keep things fresh between tough workouts.
  • Injury Prevention: Build up those supporting muscles. Squats, lunges, planks, and calf raises — do them 2–3 times a week. Even just 15 minutes at home can save your knees and ankles down the road.
  • When to Slow Down: If you’re dealing with a sharp pain, especially in your knees or shins, take it seriously. Mayo says that if the pain is mild and doesn’t get worse, you can keep going — but always listen to your body. If it doesn’t improve after a couple of days, don’t hesitate to see a professional.

Conclusion: Trust the Process and Keep Running

Congrats — you’re officially on your way to that half marathon! But remember, consistency is what counts. Every run, every cross-training session, every bit of movement helps you get closer to that finish line. Trust the process.

On tough days, look back at how far you’ve come. On easier days, enjoy the flow of your run. Just keep showing up. Like a runner said, “Starting is the worst, but there will come a day where running feels like bliss.” Stick with it, and remember that every week, you’re getting stronger.

I want to hear from you: What part of training has been the toughest so far? Drop your wins, questions, or struggles in the comments! And if these tips helped, pass them along to someone else who’s just getting started.

The finish line is closer than you think — now lace up and get running!

Check the following chart for the exact breakdown of common couch to half marathon running paces:

Half marathon pace chart


couch to half marathon plan


Supporting an Active Lifestyle with Smart Wellness Practices

Maintaining an active lifestyle isn’t just about exercise—it’s about how you move, recover, and manage your routine in a way that feels sustainable. For many fitness enthusiasts, the real challenge isn’t just showing up for workouts, but building a lifestyle that supports consistency and balance over time. That’s where smart wellness practices come into play.

From incorporating mindful movement into your recovery days to using systems that keep your schedule in check, simple changes can make a big difference. Let’s explore two practices that can help support your active routine: low-impact aerial movement and efficient fitness management.

Finding Balance Through Aerial Yoga

While activities like running, cycling, or weight training provide great cardiovascular and muscular benefits, they can also place a lot of stress on the body, especially when recovery isn’t prioritized. That’s why integrating low-impact movement into your weekly routine is so important.

Aerial yoga is one such practice. It allows you to use a fabric swing to support your body during yoga poses, helping you achieve deeper stretches while minimizing strain on the joints and spine. Beyond the physical benefits, aerial yoga also promotes mental calm and body awareness—something that’s often overlooked in high-intensity fitness routines.

A great example of a platform that promotes this practice is Gravotonics, a pioneer in the aerial yoga space. In addition to high-quality yoga swings, they offer retreats, tutorials, and educational content that make it easier to explore aerial yoga at home or in a class setting. Whether you’re looking for recovery after a tough workout or simply want to move in a way that feels refreshing and fun, aerial yoga is a smart addition to any wellness plan.

Staying Organized with Smarter Scheduling

Being physically active often goes hand-in-hand with having a packed calendar. Between classes, appointments, and personal commitments, things can easily slip through the cracks. For trainers, instructors, or studio owners, the need to stay organized becomes even more critical—not just for their own routine, but for their clients as well.

That’s where wellness practice meets smart scheduling. Platforms designed for fitness business management can help you streamline tasks like booking sessions, managing payments, and communicating with clients. This isn’t just a convenience—it’s a way to reduce stress, avoid burnout, and keep your focus where it matters most.

One such example is Fitli, an all-in-one fitness management software. Designed specifically for solo instructors, boutique studios, and wellness professionals, Fitli helps streamline operations by combining appointment scheduling, payment processing, and client management into one powerful, easy-to-use platform.

By reducing manual tasks and automating day-to-day operations, Fitli empowers business owners to avoid burnout, boost client retention, and focus more time on what matters: coaching, training, and delivering results. Whether you run a yoga studio, personal training business, or sports program, Fitli makes your services more seamless, professional, and scalable—giving you the tools to grow without the grind.

Even if you’re not running a fitness business, using scheduling systems can help structure your own personal fitness goals—keeping you accountable and more likely to follow through.

Supporting Your Skin’s Health Post-Activity

Another often-overlooked aspect of wellness is skin health, which plays a key role in your overall well-being, especially when maintaining an active lifestyle. Exercise, sweating, and frequent showers can leave your skin vulnerable to irritation and dehydration. This is where The Naked Chemist steps in, offering skincare products formulated with natural, science-backed ingredients to restore and protect your skin. Their range of serums and moisturizers is designed to combat the effects of frequent physical activity on your skin, keeping it hydrated, balanced, and nourished. Whether you’re facing post-workout irritation or simply want to keep your skin looking its best, their products are a perfect addition to your wellness routine, helping you recover not just physically, but with holistic skin care.

Why These Practices Matter

The key to a long-term active lifestyle isn’t just physical endurance—it’s balance. It’s finding ways to move that support your body, routines that make sense for your schedule, and practices that promote recovery rather than exhaustion. By combining physical wellness with mindful planning, you create a routine that feels good, fits into your life, and doesn’t lead to burnout.

Aerial yoga offers a restorative, strengthening movement option that complements more intense activities, while efficient scheduling tools keep your commitments and routines on track. Together, these wellness practices create space for consistency, reflection, and growth—something that’s often missing in fast-paced fitness culture.

Building a Sustainable Routine

Supporting your active lifestyle doesn’t require overhauling everything. It’s about making small, smart adjustments that help you stay aligned with your goals. Whether you’re exploring new ways to move or trying to simplify your weekly schedule, the right practices can help you stay active without feeling overwhelmed.

At the end of the day, wellness is about more than performance—it’s about building habits that support your body, mind, and time. Thoughtful movement, recovery, and planning are key components. When combined, they create a lifestyle that not only keeps you moving but helps you feel your best along the way.

What Should You Do if You Feel Pain While Running as a Beginner?

When I started out running, I freaked out over every ache.

Turns out, there’s a big difference between “good” soreness and “bad” pain.

A little tightness or muscle wake-up is fine, but sharp pain or lingering aches?

That’s your body’s way of yelling at you to slow down.

In this guide, I’m breaking down the pain scale for runners—what’s mild and manageable, what’s a warning sign, and when to stop immediately and get help.

You’ll learn how to use the RICE method to keep small aches from turning into big problems, when to take rest days seriously, and how to strengthen your muscles and improve flexibility to prevent injuries before they happen.

Let’s get to it.

Mild Pain: “A Little Soreness Is No Biggie”

When you’re just starting, a little soreness is pretty much part of the deal.

You know that feeling, right?

Your calves are tight, your knees are creaking, or your hamstrings are like, “Yep, we’re awake now!” It’s just your body getting used to the grind.

Nothing to freak out about.

On the pain scale? This is like a 1 or 2—just a little reminder that you’re working those muscles. Honestly, this stuff used to freak me out when I was starting too.

What to Do:

If it’s mild, just use the RICE method after your run—rest, ice, compression, elevation.

Trust me, it’ll save you from bigger issues later. That’s how you keep it chill and avoid making things worse.

Quick Tips for Handling Pain While Running:

  • Listen to your body—a little soreness is fine, but don’t push too hard.
  • Rest and recover—don’t skip the RICE method.
  • Cross-train—mix in cycling or swimming to keep up your fitness without risking injury.
  • Get professional help—if you feel severe pain, see a physiotherapist.

Moderate Pain: “This Could Be a Bad Sign”

Now we’re talking about the kind of pain that sticks around during your run—like a 4-6 on the pain scale.

It’s annoying, but you’re still moving okay, no limping or anything. You can keep going, but this is your body’s way of saying, “Hey, pay attention here.” Ignore it, and that little ache will turn into a full-on problem.

What to Do:

If it’s moderate pain, don’t try to push through it. Finish the run, but take it easy for a couple of days after. Rest up, you deserve it. Mix it up with some cross-training—hop on the bike or go for a swim. It’ll help you recover without risking injury.

Severe Pain: “Stop. Now.”

If you’re dealing with severe pain, like an 8-10 on the pain scale — stop. No debate. Severe pain isn’t something you power through. If you’re limping, or every step is a grimace, that’s your body’s red flag. You’ve hit the danger zone.

What to Do:

If it’s bad, rest up, and don’t try to tough it out. Go see a professional — a physio or a sports doctor who understands the demands of running. Get to the root of the problem before it becomes something worse.


The Pain Checklist for Runners

Pain Scale for All:

  • 0-3: Mild discomfort. It’s normal, and it goes away after warming up.
  • 4-6: Moderate discomfort. Can be run through, but take note. This may need rest soon
  • 7-10: Severe pain. Stop running immediately. It’s likely an injury that requires attention

Remember to Listen to Your Body

Look, I get it. You want to push yourself, and some discomfort is just part of the deal with running. But pushing too hard, too fast? That’s how injuries happen.

As a beginner, your body isn’t used to all that impact, so don’t beat yourself up when things get tough.

Be Proactive – The Power of Prevention

Here’s the thing: as a beginner, you’re going to feel aches and pains. It’s unavoidable. But the key to staying injury-free long-term is strengthening your muscles and improving flexibility. Don’t just focus on running.

Start strengthening your core and legs with these 5 exercises to protect your joints and keep your runs pain-free.

Make stretching part of your cool-down, too. Focus on those calves, quads, and hamstrings — give them some love after every run. This simple stuff keeps your legs fresh and prevents muscle strains from creeping up on you.

How to Know When You’re Ready to Push Again

Alright, so you’ve taken the rest you needed, and the pain has finally settled down. But now you’re wondering, “When can I get back to running without risking injury?”

I can relate.

I’ve been tempted to rush back into my runs because I missed that post-run high. But trust me, doing it too soon can lead to setbacks, and nobody wants that. Here’s my best advice:

You’ll know when it’s time to push again by checking in with a few key things:

  • Pain-Free Movement. You should be able to walk, jog, or stretch without any of that old pain creeping back in. If you still feel tightness or discomfort during your warm-up, hold off a little longer. You want to feel like you’re moving freely before jumping back into full runs.
  • Comfortable Range of Motion. If your stretches don’t feel like you’re about to snap something (looking at you, tight hamstrings), you’re on the right track. When your muscles feel loose and mobile, you’re good to start easing back into it.
  • Gradual Progress. Start slow. Begin with short, easy jogs—no need to go full throttle right away. Listen to your body as you ease into it. If you finish a light run and the pain doesn’t come back, you’re golden. But if it does, slow down and dial it back.
  • No Limping. If you’re walking without a limp and running without any weird hobbles, you’re in a safe spot to increase your mileage and intensity. But if you find yourself favoring one side or your form is off, stop. That’s your body saying, “Not yet.”
  • Energy Levels. After a break, you should have enough energy to get through the run. If you’re dragging halfway through, it’s a sign your body isn’t quite ready for the usual load. Don’t force it.

Conclusion: Listen, Learn, and Get Better

Running is a journey. You’re going to hit bumps, get frustrated, and feel like you’re stuck sometimes. But learning to listen to your body? That’s how you keep improving.

Don’t fear a little pain — but don’t ignore it when it’s serious, either.

You’ve got to start slow, build up smart, and always know when to back off.

Stay smart, take care of your body, and keep pushing. Every step forward is progress.

Thank you for dropping by.

David D

How to Know If You’re Getting Better at Running

If you’ve been running a while but aren’t sure if you’re actually getting better, you’re not alone.

Progress doesn’t always look like smashing PRs every time you hit the pavement.

I used to think getting faster meant slicing seconds off my pace every run.

Turns out, progress often sneaks up on you in smaller ways.

Maybe your pace starts feeling easier, even if the numbers don’t change much.

Or you find yourself actually looking forward to long runs instead of dreading them. Maybe those hills that once wiped you out suddenly don’t seem so bad.

In this guide, I’m sharing the real signs that show you’re improving—even when it feels like you’re stuck.

You’ll learn why dropping your heart rate and bouncing back faster are key, how your running form naturally smooths out with time, and why consistency is your best friend.

Let’s get to it.

  1. Your Pace Feels Easier (Even Without Trying)

One of the first signs you’re improving? Your pace just starts feeling easier.

You know that moment when you’re running along, doing your thing, and you glance at your watch and think, “Wait, did I just do that?”

You’ve hit a new pace without even trying.

I used to think effortless progress was a joke, but when I started tracking my times, I was shocked to see I’d shaved a couple of minutes off my usual loop without even realizing it.

Yes, real progress sneaks up on you. And it’s the kind of progress you can’t fake.

2. You Start Loving Hills

Yes, you read that right. If you’re still tackling hills like you’re climbing Everest, don’t stress.

When those hills start feeling less brutal, it means you’re getting stronger.

The real win? When that hill that used to leave you winded and begging for a break suddenly feels manageable, that’s when you know your body’s adapting.

Trust me, I know this from personal experience.

I used to dread a long hill on my usual route. For the first few weeks, I’d have to walk up it. But after a few months, I was running up that same hill like it was no big deal. You know that feeling? Like you just leveled up? That’s exactly what you’re working toward.

3. You Start Looking Forward to Long Runs

Remember when your long runs used to leave you totally wiped out?

Well, if you can run for over an hour and still feel like you’re not completely wrecked at the end, that’s a big sign of progress.

But let me be clear—don’t overdo it. Progress isn’t about crushing yourself on every run.

It’s about being able to finish a long run and still feel like you could go just a little bit further.

That’s the sweet spot—when the challenge starts to feel more like an accomplishment, kind of like flipping through a progress photo calendar and seeing how far you’ve come

4. You’re Getting Comfortable with Running Consistently

When you first started running, getting out there three times a week probably felt like a chore. I get it. For most beginners, the first few weeks—or even months—feel like a struggle. Running sucks at first.

But here’s the thing: once you invest the time and effort, it just becomes part of your routine.

And that’s a huge win.

The more you run, the more your body adapts.

You’re building a habit that makes the whole process smoother, even if the results don’t show up overnight.

And whenever you feel tempted to skip a run because you’re not feeling it?

You toss that thought aside and grab your running shoes instead. That’s how you make running stick.

5. Your Heart Rate Drops

This one might sneak up on you, but it’s a huge indicator that your cardiovascular fitness is improving.

Did you know elite athletes can have resting heart rates as low as 40 beats per minute due to their training?

As you run more, your heart becomes more efficient at delivering oxygen to your muscles.

This happens because regular training increases the volume of blood your heart can pump per beat (known as stroke volume), and it reduces your resting heart rate.

Over time, your heart doesn’t need to work as hard to achieve the same effort, meaning your heart rate drops.

Elite athletes, for example, often have resting heart rates in the 40s or even lower because their cardiovascular systems are highly efficient.

As you improve, you’ll see a similar drop, indicating that your fitness is improving and your heart is getting stronger.

6. Your Recovery Time Is Shorter

Remember when every run left you feeling like you needed to nap for days?

That’s a thing of the past. Now, recovery is quicker, and your muscles bounce back faster than ever.

Regular training helps increase your mitochondria—the “powerhouses” of your cells—making your muscles use oxygen more efficiently.

As a result, you’ll recover faster after each run, and the soreness you once felt will fade more quickly.

You’ll notice you can handle your next run with less recovery time, thanks to improved muscle repair and better overall cardiovascular function.

7. Your Running Form Feels More Natural

Remember when running felt like you were just trying not to trip over your own feet?

Fast forward, and now you’re moving like you’ve been doing this for years.

When you first started running, you were probably hyper-aware of every little detail—your form, your stride, your breathing.

Every step felt like a mental checklist. But now? It just clicks. You don’t have to think about every little detail anymore. Your body’s figured it out, and you’re moving more naturally without even realizing it. That’s when you know your form’s improving.

Final Thoughts: Small Wins Add Up to Big Progress

Look, if you’re waiting for a major breakthrough every week, you might be disappointed. But trust me—when you start noticing the small wins, that’s when the magic happens.

Real progress in running is about those little victories that add up over time.

And when you realize you’re running longer, faster, and feeling better? That’s when it all comes together.

The more consistent you are, the more you’ll see that progress pile up.

And before you know it, you’ll look back and realize how far you’ve come.

Thank you for stopping by.

Keep training strong.

Revolutionizing Restaurant Menus with Digital Access

Restaurants operate on razor-thin margins while juggling rising costs and evolving customer preferences. Amid these challenges, a quiet revolution has taken root at dining tables worldwide. Digital restaurant menus are transforming not just how customers view food options but also how businesses manage their core offerings.

Those small QR code sign displayed on restaurant tables? They’re gateways to a fundamental shift in the dining experience. What began as a pandemic stopgap has evolved into a strategic asset for restaurants looking to modernize operations. This isn’t simply swapping paper for screens—it’s reimagining the entire customer-restaurant relationship through menu technology that delivers unprecedented flexibility and insight.

Paper to Pixels: How Restaurant Menus Evolved

Restaurant menus have remained surprisingly consistent since their origins in 18th century France—printed materials requiring complete replacement whenever dishes or prices changed. This static approach created obvious limitations in a business where adaptability matters.

Early digital restaurant menus appeared around 2010, with iPad implementations and basic website listings that provided limited online menu access. Adoption remained niche until the pandemic created an urgent need for contactless dining solutions.

Recent industry data shows that 72% of restaurants that implemented digital menus during the pandemic now view them as permanent operational improvements. What started as a safety measure has become a competitive advantage embraced by both businesses and diners.

Why Traditional Menus Fall Short

Paper menus create several ongoing headaches for restaurants:

  • They’re expensive (typical restaurants spend $1,200-$2,400 annually on reprints)
  • They waste paper (millions of menus discarded yearly)
  • They can’t adapt quickly to price changes or ingredient availability
  • They harbor bacteria (up to 185,000 microbes per square centimeter)
  • They limit information due to physical space constraints

Digital restaurant menus eliminate these problems through instantly updatable content. When implemented via QR code sign systems, restaurants can modify offerings in real time without reprinting costs while providing enhanced information and visuals that paper simply cannot deliver.

Understanding Digital Menu Systems

The digital restaurant menu ecosystem includes several distinct approaches:

  • QR-Based: The most widespread solution uses QR code sign placement at tables or entrances, directing customers to web-based menus via smartphone cameras. This requires minimal investment while maximizing update flexibility.
  • Dedicated Apps: Some restaurants develop proprietary applications offering expanded functionality like ordering, payment, and loyalty programs. While feature-rich, these face adoption barriers as customers must download new software.
  • Web Platforms: Cloud-hosted menu systems accessible through short URLs provide rich features without requiring app installation.
  • Kiosks: Self-service stations present digital restaurant menus through dedicated hardware throughout the establishment.

Effective menu technology typically includes content management systems for easy updates, POS integration, analytics tracking, multi-language support, allergen filtering, and high-quality images—all focused on making online menu access enhance rather than complicate the dining journey.


Getting Started: Digital Menu Implementation

Launching digital restaurant menus through a QR code sign system involves five key phases:

1. Choose Your Platform

  • Evaluate custom development versus SaaS menu solutions
  • Compare features, integration capabilities, and pricing structures
  • Consider your growth trajectory and scaling needs

2. Design for Digital

  • Convert your menu with enhanced descriptions and images
  • Optimize layout specifically for mobile viewing (critical)
  • Include accessibility features for visually impaired guests
  • Incorporate food photography for signature dishes

3. Set Up QR Codes

  • Generate dynamic QR codes linked to your menu platform
  • Create visually distinctive QR code sign displays with clear instructions
  • Place codes strategically on tables, at entrances, and on takeout packaging
  • Implement alternatives for customers without smartphones

4. Train Your Team

  • Prepare staff to help guests with digital access
  • Establish protocols for handling technical issues
  • Create systems for communicating menu updates across departments

5. Guide Your Customers

  • Install clear signage explaining digital menu access
  • Consider offering first-time digital menu incentives
  • Actively collect and respond to feedback

The most successful implementations focus on gradual transitions rather than abrupt changes, allowing both staff and customers to adapt while maintaining backup options during the early phases.

The Multi-Layered Benefits of Digital Menus

Digital restaurant menus deliver advantages across several business dimensions:

For Operations:

  • 60-80% reduction in printing expenses
  • Instant menu updates without service disruption
  • Dynamic pricing capabilities for promotions or events
  • Streamlined inventory management through direct system integration
  • Less staff time explaining menu items, thanks to enhanced descriptions

For Customers:

  • Contactless dining options addressing hygiene concerns
  • Better accessibility through text scaling and screen readers
  • Language options expand your customer reach
  • Dietary filtering for personalized menu views
  • Rich media improving dish understanding

For Marketing:

  • Seamless integration of limited-time offers
  • Data collection on viewing patterns and preferences
  • Testing capabilities for descriptions and pricing
  • Better visual merchandising through quality photography
  • Digital loyalty program integration

For Sustainability:

  • Dramatic reduction in paper consumption
  • Lower carbon footprint from eliminated printing and delivery
  • Reduced waste from menu disposals
  • Alignment with growing environmental concerns

Restaurants with comprehensive digital menus report average revenue increases of 3-7% through optimized item placement, enhanced upselling, and improved order accuracy, creating compelling financial returns even for small establishments.

Success Stories: Real Restaurants, Real Results

Neighborhood Bistro: A 40-seat independent restaurant implemented QR code sign menus with ordering capabilities and saw:

  • 82% drop in menu printing costs
  • A 22% jump in dessert orders through better visuals
  • 4.2% overall revenue increase
  • 93% positive customer feedback

Regional Chain: A 12-location restaurant group adopted centralized digital restaurant menus and experienced:

  • Menu update time slashed from 3 days to 4 hours across all locations
  • 31% increase in high-margin cocktail orders
  • Staff training time cut by 46%
  • Consistent brand experience across all properties

Food Truck Operation: A gourmet food truck using smart menus with location-specific offerings achieved the following:

  • Real-time menu updates based on ingredient availability
  • A 36% increase in social sharing through integrated promotions
  • Expanded customer communication capabilities
  • Broader customer base through language options

These examples demonstrate that digital restaurant menus provide tangible benefits regardless of establishment size or concept, and they are adaptable to specific business models and customer demographics.


Tackling Digital Menu Challenges

Restaurants implementing digital restaurant menus must navigate several common obstacles:

Customer Hesitation:

  • Certain demographics show resistance to new technologies
  • Privacy worries exist around QR scanning
  • Some diners experience screen fatigue

Solution: Keep backup paper menus available, provide clear privacy policies, and focus on creating genuine value through the digital experience.

Technical Issues:

  • Wi-Fi reliability varies in restaurant environments.
  • Device compatibility across smartphone types
  • Loading speed affects user satisfaction

Solution: Strengthen Wi-Fi infrastructure, test across multiple devices, optimize for rapid loading, and provide alternative access methods.

Staff Adoption:

  • Resistance to workflow changes
  • Training requirements for effective guest assistance
  • Managing parallel systems during transitions

Solution: Implement changes gradually with clear training, incentivize staff adoption, and demonstrate direct benefits to server efficiency.

Accessibility Gaps:

  • Ensuring all guests can access menu information
  • Accommodating visually impaired diners
  • Addressing customers without smartphones

Solution: Create ADA-compliant digital designs, maintain limited paper options, and train staff to provide accommodations.

Successful restaurants approach digital implementation as a customer experience enhancement rather than merely a cost-saving measure.

What’s Next: The Future of Menu Innovation

Today’s digital restaurant menus are just the beginning. Several emerging technologies will define the next generation of smart menus:

  • Augmented Reality Visualization: Some restaurants now offer AR overlays showing 3D renderings of dishes at the table before ordering. This reduces order dissatisfaction while encouraging experimentation with new items.
  • Smart Personalization: Advanced menu technology now incorporates learning algorithms that adapt displays based on customer history, dietary needs, and even weather conditions—highlighting relevant dishes and customizing recommendations.
  • Voice Navigation: Integration with voice assistants enables hands-free menu browsing and ordering, further enhancing the contactless dining experience while improving accessibility.
  • Seamless Payment: Next-generation digital restaurant menus eliminate traditional checkout processes, allowing customers to order and pay directly through the menu interface without server steps.
  • Dynamic Pricing Models: Advanced systems implement algorithms that adjust prices based on demand patterns, inventory levels, and local events, optimizing revenue while maintaining customer value perception.
  • Ingredient Transparency: Modern menu technology offers unprecedented detail, giving customers nutritional information, sourcing details, and even carbon footprint measurements for menu items.

These innovations represent the ongoing evolution of restaurant innovation through digital menu systems, potentially reshaping the economics and experience of dining out.

The Digital Menu Advantage: Tomorrow’s Standard Today

The shift from paper to digital represents more than a material change—it’s a fundamental reimagining of restaurant operations and customer engagement. Digital restaurant menus have matured from emergency measures to competitive necessity, offering flexibility, insights, and efficiencies that traditional menus cannot match.

That QR code sign on your table is no longer just a pandemic accommodation but a portal to enhanced dining experiences. It allows restaurants to present offerings with rich detail while gathering valuable preference data. As menu technology advances, the gap between digital adopters and holdouts widens, with significant advantages flowing to innovation leaders.

For restaurants still weighing options, the question has shifted from whether to implement digital solutions to how quickly they can do so. The rare combination of operational savings and enhanced customer experiences creates a compelling case for embracing digital restaurant menus as essential restaurant innovation.

In an industry defined by tight margins and fierce competition, strategic deployment of smart menus and contactless dining options offers that elusive business opportunity: simultaneously reducing costs while improving customer satisfaction—a powerful advantage that forward-thinking restaurants can leverage today.

How Often Should You Take Breaks During a Long Run?

You’re out on a long run, feeling good, then suddenly your legs feel heavy, breathing’s tough, and you wonder, “Should I take a break?”

I’ve been there.

Knowing when to stop isn’t about quitting—it’s about running smarter.

When I started adding long runs into my routine, I often took a quick 1-2 minute break every 20-30 minutes. It keeps my energy up and prevents burnout.

Even nowadays, I’d still take such breaks during my 20-mile plus long run for water and bathroom (in case of emergency).

I see no shame in that.

But, of course there’s a sweet spot. If you have to stop too often, you might be pushing too hard or not fueling right.

In this article, I’ll share with you some of my thoughts and strategies on how to make the most out of your long runs.

Sounds like a great idea?

Let’s get to it.

How Often Should You Take Breaks During a Long Run?

As a general rule, take a break every 20-30 minutes during long runs. A quick 1-2 minute break helps maintain your energy and keeps you from burning out. This is especially the case if you’re a beginner and still trying to build up your long runs.

It’s simple: break up your run into manageable chunks to avoid hitting that dreaded wall.

Here are a few signs to watch for when it’s time to take a break:

  • Breathing becomes hard: If you’re gasping for air or feel like your lungs are about to give out, it’s time to take a moment.
  • Muscle fatigue sets in: If your legs are starting to feel like lead and you can’t maintain a smooth stride, it’s a sign to slow down and rest.
  • Mental fatigue: If your mind starts wandering, losing focus, or your form starts slipping, it’s your body’s way of saying it needs a break.
  • Heart rate spikes: If your heart rate shoots up beyond your comfortable range, especially if you’re struggling to keep pace, ease off and take a breather.

When Is the Best Time to Take Breaks During Long Runs?

The best time to take breaks is when you notice any of the signs mentioned above—like shallow breathing or muscle fatigue. It’s all about knowing your limits and being proactive.

For most runners, I found that taking a break every 20-30 minutes helps prevent hitting the wall later on in the run.

How to Incorporate Walk Breaks Into Your Long Runs

The walk/run method isn’t just for beginners—it’s a game-changer at every level.

Early on, I hated the idea of taking breaks during long runs.

I thought it meant I wasn’t tough enough or that I was “cheating.” But then I learned the truth: taking breaks on long runs actually improves performance.

Even elite marathoners use a version of this method. Some use a 4:1 ratio—four minutes of running, one minute of walking.

It’s not about slowing down; it’s about staying fresh and maximizing performance.

The beauty of the walk/run method is its flexibility. You can tailor it to your fitness level and adjust it as you progress.

So, whether you’re just starting or you’re training for your first marathon, don’t underestimate the power of breaks. They’re the secret to staying strong and finishing your long runs feeling good.

Taking Breaks: Why It’s NOT a Fail 

We’ve all been there—sweat dripping, legs on fire, and then—you hit a stoplight or spot a water fountain.

Instant break. And you know what? That’s actually a good thing.

The goal of a long run isn’t to never stop.

It’s about pacing yourself, keeping your form in check, and building endurance without burning out. Those breaks? They’re just part of the process. They allow you to recharge, reset, and keep moving forward.

So, don’t feel bad about taking that break when you need it.

Hydrate, catch your breath, stretch, or just walk for a minute. It’s not cheating; it’s how you stay fresh and finish strong.

The Power of a Strategic Pause

One of the biggest mistakes I made in my earlier runs was starting too fast.

I’d feel great at the start—bursting with energy, thinking I was invincible. But by the time I hit the halfway point, I was already dragging.

The fix? Smart pacing.

And guess what? Breaks play a huge role in pacing yourself. In fact, research actually shows that the run/walk method helps you finish faster because it reduces muscle strain and keeps your energy levels up.

So, take that break.

Hydrate, stretch, or walk for a minute. It’s not a failure—it’s the strategy that keeps you going the distance.

When Breaks Become a Problem

Of course, there’s such a thing as too many breaks.

If you find yourself stopping every few minutes, something’s off. Ask yourself these questions:

  • Am I running too fast? If you’re pushing your pace like it’s race day, your body’s going to hit a wall. Slow it down! A good rule of thumb is to run 90 seconds to 2 minutes slower than your race pace during training runs.
  • Am I fueling properly? If you’re running for more than 75 minutes without taking in fuel (gels, water, etc.), your body will run out of energy. This is a biggie—keep your body fueled to avoid those sudden energy crashes.
  • Is stress affecting my run? Life doesn’t stop just because you’re running. Stress from work, relationships, or other life factors can mess with your mental focus, making you feel like you need to take more breaks. If that’s the case, it’s worth stepping back and addressing the mental load. Adjust your schedule if needed.

Quick Guide to Taking Breaks During Long Runs

Here’s a quick checklist to help you make the most of your breaks during long runs:

  • When to break: Aim for a break every 20-30 minutes of running.
  • How long should the break be? A 30-second to 2-minute pause is ideal.
  • What to do during the break: Hydrate, stretch lightly, take deep breaths to relax your muscles.
  • How to adjust breaks: If you’re a beginner, start with a 1:1 ratio of running and walking. As you get stronger, adjust the intervals (e.g., 3 minutes running, 1-minute walking).
  • Listen to your body: If your legs are dead or you’re losing focus, take a break. Don’t wait for the fatigue to take you out—be proactive.

Final Thoughts: Breaks are Part of the Process

Don’t let the idea of stopping during your long runs make you feel weak or like you’re doing something wrong.

Taking breaks is a key strategy for long-run success.

Whether it’s for hydration, recharging, or preventing burnout, breaks give you the reset you need to finish strong.

The real win isn’t about never stopping; it’s about building endurance, pacing yourself, and coming through the other side feeling stronger than before.

So go ahead—take that break, and keep moving forward. You’re doing exactly what you need to do.


How Often Do You Take Breaks During Your Long Runs? Comment below and let’s compare strategies!

The Guide to Your First Week of Running

Starting to run felt like stepping into a whole new world for me—equal parts exciting and totally overwhelming.

I remember my first week thinking, “How far should I even run without wrecking myself?”

If you’re new to running, here’s my best advice: forget miles for now.

Focus on time. Aim for 20-30 minutes, 2-3 times a week, mixing walking and running to build your stamina without burning out.

In this guide, I’ll walk you through why the first week always sucks a little, how to tell the difference between good and bad fatigue, and why consistency beats speed every time.

I’ll also share how to recover smartly so you don’t get sidelined, when and how to gradually step up your runs, and why slowing down now sets you up to run longer later.

Let’s get to it.


Running Sucks At First Your first week of running?

Yeah, it’s gonna suck. Your legs will probably feel heavy, and you might wonder if it’s worth it halfway through.

But that’s completely normal.

At the start, it’s less about speed and more about allowing your body to adjust to running. Your muscles, tendons, and even your mind are getting used to something new.

The key is recognizing the difference between ‘good’ fatigue and ‘bad’ fatigue.

  • Good fatigue is the kind where your legs feel tired, your lungs are working, and you’re sweating, but it feels earned
  • Bad fatigue is when you’re in pain or your body’s telling you to stop. Sharp pain or strain, particularly in your knees, hips, or lower back, is a warning sign.

Running through pain can lead to injury, so it’s important to listen to your body.

It’s essential to listen to your body.


Start Slow: It’s About Time, Not Distance

Let’s talk about the biggest mistake new runners make: doing too much too soon.

You’re excited, you’ve got the gear, and you’re ready to crush it. But here’s the truth: running too far, too soon, only leads to burnout and injury.

It’s way better to start small and build up than to push yourself hard and crash out.

When I first started, I thought I could nail a 5K right off the bat.

Many beginners make the mistake of thinking they can handle a 5K right away.

I barely made it through one mile without needing a break. It wasn’t until I focused on time, not distance, that I started making real progress.

My best advice? Start with 20-30 minutes of running, but break it up.

Run/walk intervals are your best friend. Try running for 60 seconds, then walking for 90 seconds. Repeat that for the whole session.

Don’t feel guilty about taking it slow. That’s how you build the stamina to keep going without wrecking your legs.


Set a Time Goal, Not a Distance Goal

Let’s cut through the noise here—forget about distance for now.

If you’re just starting, chasing miles is a recipe for frustration.

Focus on time. Aim for 20-30 minutes of movement, mixing in running and walking. Your body will figure it out. I get it—when I first started, I was obsessed with hitting a certain distance.

Stick with it. You’ll be amazed at how quickly your body adapts. Soon, you’ll be running longer without even thinking about it. But for now? Keep it simple and just get the time in. The rest will follow.

How to Handle the First Week As A Runner

Wondering how much you should run in your first week?

Let’s keep it simple to avoid overdoing it:

  • Start with 20-30 minutes, 2-3 times a week. Don’t stress about distance—just focus on time. Move at your own pace, alternating between walking and running as you feel.
  • Rest is key. Give yourself at least one rest day between runs. If you’re itching to move, go for a walk or do some light stretching. But don’t push it.
  • Your body is adapting, so let it rest. Focus on effort, not speed. When you’re running, aim for a pace where you can still talk without gasping for air. If you’re too out of breath to get a full sentence out, slow down.

When to Progress? Don’t Rush It

Alright, you’ve made it through your first week, and now you’re probably thinking, “When can I run farther?” Here’s the deal: progress isn’t about rushing through the miles. Seeing results from running takes times.

Once you’re comfortable running for 30 minutes, then you can start increasing your distance—but don’t go overboard.

So what should you do? Simple. Don’t jump from 2K to 5K in one shot. Gradually increase your distance—around 500 meters at a time.

For example, if you’re running 3K in 30 minutes, push it to 4K next. Give your body time to adjust. Don’t rush into that 5K until it feels like a natural next step. Once you can run a 5K in 30 minutes, then shoot for a faster time – so on and so forth.


The Power of Consistency

This is the big one: consistency. It’s not about trying to do everything at once. It’s about building the habit.

Running one day, resting the next, and running again the day after—that rhythm? That’s your best friend.

At first, it won’t feel like you’re sprinting toward progress, but trust me, if you stick with it, you’ll get stronger, faster, and more confident over time.

Week by week, you’ll start noticing the improvements, and before you know it, you’ll be running longer without even thinking about it.

Small, steady progress—that’s the name of the game.


What to Do If You’re Feeling Tired After Your First Run?

Feeling wiped out after your first few runs? Totally normal. Your body is just figuring it all out.

Here’s how to recover like a pro:

  • Sleep – It’s simple, but it’s crucial. Make sure you’re getting enough rest to let your body rebuild and repair.
  • Hydrate – After your run, drink water and replenish those electrolytes. Don’t go overboard with sports drinks just yet—plain water is usually all you need.
  • Stretch – Spend a few minutes stretching your legs, calves, hamstrings, and quads. It doesn’t have to be a deep stretch, just enough to loosen up. Trust me, it makes a huge difference in reducing soreness.
  • Active Rest Days – Don’t just sit around. Go for a light walk or swim to keep your body moving and blood flowing. Your muscles will thank you.
  • Fuel Right – Refuel with a carb-protein snack within 30 minutes of finishing your run. This helps kickstart recovery and keeps you feeling strong for your next workout.

How Far to Run on Your First Week: Quick Tips

  • Start slow—aim for 20-30 minutes, 2-3 times a week.
  • Focus on time, not distance.
  • Mix running with walking to build stamina.
  • Gradually increase your distance once you’re comfortable.
  • Listen to your body and rest when needed.

Conclusion: Keep It Slow, Keep It Steady

The goal in your first week is simple: get out there, move, and stay consistent. Forget about chasing miles and focus on the rhythm of the run.

Listen to your body, take rest days seriously, and know that every step you take is getting you closer to your running goals.

Thank you for dropping by.

Pls let me know if you have any questions

David D.


The Runner’s Roadmap: Navigating the Cooper 12-Minute Run Test

The Cooper Test is one of the most honest tools in your running toolkit.

Developed by Dr. Kenneth Cooper back in 1968 for the U.S. military, it’s still going strong over 50 years later.

Why? Because it strips everything down to the bare essentials: run as far as you can in 12 minutes.

That’s it. No gadgets. No labs. Just effort.

What you get from it is a raw, powerful snapshot of your VO₂ max—the size of your aerobic engine.

In layman’s terms, it tells you how well your body uses oxygen when things get hard. The farther you go, the fitter you are. Simple.

Let me explain more…

Why It Matters (and Why Runners Love It)

Why the Cooper Test Rocks

You don’t need fancy gear. You don’t need a lab. Just a flat stretch of road or track, a watch, and the guts to go all out for 12 minutes.

Here’s why I love this test — and why it’s in the toolbox of coaches, soldiers, gym teachers, and serious runners around the world:

  • It’s Simple (But Brutal). No VO₂ mask. No GPS wizardry. Just run. As far as you can in 12 minutes. Done.
  • Fast Feedback. Busy? No excuses. The whole thing — warm-up, test, cooldown — can be wrapped in under 30 minutes. That’s a full fitness assessment in less time than it takes to watch an episode of your favorite show.
  • Tracks Progress Over Time. Run it again in 6–8 weeks. Did your distance go up? That’s improvement you can measure — no guessing. Maybe you ran 1.5 miles in July and 1.7 in September. That’s real growth.
  • Correlates to VO₂ Max. This test was literally built to estimate VO₂ max — and it’s been proven to do it well. The farther you go in 12 minutes, the higher your cardio ceiling.
  • Used by Pros. This isn’t some trendy TikTok fitness challenge. The U.S. Air Force, police departments, and coaches worldwide use the Cooper Test to gauge real-world endurance.
  • Builds Mental Toughness. Twelve minutes of non-stop effort with no pacing crutch — it’s all feel, grit, and guts. It trains your brain as much as your body.

How to Run the Cooper Test (Without Blowing Up)

Let’s walk through it, step by step:

1. Warm-Up (10 Minutes Minimum)

Do not skip this. Jog. Do some dynamic stretches. Fire up the legs.

Going from couch to full-throttle in 60 seconds is a recipe for disaster. Trust me—I’ve seen it. You want to feel ready, not rusty.

2. Set the Course

Use a 400-meter track if possible (easy to measure).

No track? No problem. Use a flat road and GPS. Just make sure you know your start point and how far you’re going.

Even a treadmill works—just crank it to a 1% incline to mimic outdoor effort.

3. The Test: Go Hard. Steady. Relentless.

Start the clock. Now run as far as you can in 12 minutes.

Not a sprint. Not a jog. Sustained discomfort.

  • Don’t go out like a bat outta hell and fade in 4 minutes.
  • Don’t pace it like a Sunday long run either.

Find that redline, hover near it, and kick hard in the last minute.

4. Record Your Distance

Track your total distance in meters or miles.

  • On a track, count laps and add any extra distance.
  • On GPS? Grab that number.

Say you ran 1.6 miles (2,575 meters)? Lock it in.

5. Cool Down

Walk or jog for 5–10 minutes. Breathe. Recover. Stretch.

Your lungs might be on fire, but this step helps settle the system and flush out the post-test tightness.

Bonus tip: Cold water on the neck after helps if you’re overheating.

Additional Tips

To make sure you’re doing the cooper test right, do the following:

  • Pick a decent weather day—no windstorms, heatwaves, or icy roads.
  • Be fresh. Don’t test the day after leg day or a tempo run.
  • If you’re recovering from illness or feeling off? Postpone it.
  • You want max effort, not a half-hearted shuffle.

And yeah, if you’re new to running or have health conditions, get cleared by a doc first. Safety first.

How to Estimate VO₂ Max From Your Cooper Test

After the test, you can plug your result into a formula and estimate your VO₂ max.

The Formula (Meters)

VO₂ max = (Distance in meters – 504.9) ÷ 44.73

Example: If you ran 2,575 meters → (2,575 – 504.9) ÷ 44.73 ≈ 46.3 ml/kg/min

The Formula (Miles)

VO₂ max = (35.97 × miles) – 11.29

Example: For 1.6 miles → (35.97 × 1.6) – 11.29 = 46.3

Boom. You’ve got a VO₂ max estimate.

Keep in mind this is an estimate—it’s not a clinical lab test. Terrain, pacing, wind, even GPS accuracy can swing the number a bit.

But if you give it 100%? It’s damn close and super useful.

Tracking Progress

Repeat the test every couple of months and track progress.

If your VO₂ max goes up, you’re doing something right.

Cooper Test Performance Standards (Age 20–29)

Let me give you some reference points so you can make sense of the numbers:

Men (20–29)

  • Excellent: Over 2800 meters (that’s 1.74+ miles)
  • Good: 2400–2800 meters
  • Average: 1800–2399 meters
  • Poor: Less than 1800 meters

Women (20–29)

  • Excellent: Over 2700 meters (1.68+ miles)
  • Good: 2200–2699 meters
  • Average: 1600–2199 meters
  • Poor: Less than 1600 meters

(And yeah, these numbers shift down a bit as you get older. What’s “excellent” for a 50-year-old might be just “average” for someone 25 — because age matters, and so does context.)

What These Numbers Actually Mean

  • “Excellent” means your aerobic engine is firing strong — likely a VO₂ max over 50 if you’re male and in your 20s. This is elite territory for recreational runners.
  • “Good” means you’re in solid shape, better than average — your training’s paying off.
  • “Average” is the middle of the pack. Not bad, but lots of room to grow.
  • “Poor”? Hey, it’s just your starting line. Everyone starts somewhere. Use it as fuel, not shame.

Limitations of the Cooper Test (And Why It’s Not for Everyone, Every Time)

As you can already tell, I’m a fan of the Cooper test — but let’s be honest, it’s not a magic metric. It’s a tool. A good one, yes. But like any tool, it has its limits.

Before you lace up and race the clock, here’s what you need to know.

It’s Brutal If You Don’t Know How to Push

To get meaningful results, you’ve got to go all out for the full 12 minutes. That’s not a casual run. That’s you red-lining the whole way.

  • If you hold back? Your distance won’t reflect your real fitness.
  • If you go out too fast? You might blow up by minute six and crawl the rest.
  • If you’re not used to this kind of effort? You’re gonna feel wrecked.

Bottom line: This test assumes you can pace and suffer. That’s not beginner-friendly.

Not Ideal for Beginners or Rehab Runners

Twelve minutes of steady pounding at max effort isn’t great if:

I’ve seen new runners attempt it and end up wiped out—or worse, hurt.

If you’re just starting out, or if you’ve got health limitations, do yourself a favor: try something like the Rockport 1-mile walk test or a gentle time trial first.

Build up.

The Cooper test is more advanced than most people realize.

Conditions Can Screw With Your Score

This test is simple—run as far as you can in 12 minutes. But it’s not perfectly controlled.

  • Running in 90°F heat vs. 50°F chill? That’ll affect your performance.
  • Humidity, headwinds, hills, uneven trails — all of it matters.

If you want to compare your results over time, try to run in similar conditions each test:

  • Same track
  • Similar weather
  • Similar surface (avoid trail-to-track comparisons)

Your fitness might actually be better than your test score shows — just know the context.

Pacing Errors & Mental Grit Can Sabotage You

The Cooper test assumes you know how to pace yourself.

  • If you start off sprinting, you’ll fade fast.
  • If you hold back too much, you’ll leave potential on the table.

And doing it alone? That’s a mental game.

You’ve got to push hard, even when your lungs scream. That’s tough without competition or accountability. That’s why some folks perform better in group settings or simulated races—it helps them dig deeper.

My best advice?

I’d recommend that you practice pacing before your test. Do a few controlled efforts to get the feel for discomfort. There’s no shame in learning how to hurt smart.

It Doesn’t Measure Everything

The Cooper test is great for gauging aerobic endurance, but it’s not the full picture.

  • A runner with great form will cover more ground than one who’s inefficient, even at the same fitness level
  • A bigger or more muscular runner might have a high VO₂ max but run a slower time due to mechanics or mass
  • A sprinter-type athlete might be insanely fit but not suited for a 12-minute sustained effort

In other words, you can be fit and still perform poorly if running economy or mechanics are off. This test doesn’t account for that.

It’s a Hard Workout—You’ll Need Recovery

Treat your Cooper test like a tough interval day. You’re going all out—it’s basically a race.

Expect sore legs, tight calves, or general fatigue afterward.

I always tell runners:

  • Don’t schedule anything tough the next day.
  • Fuel up. Rest up. Respect the effort.

So… Is the Cooper Test Still Worth Doing?

Absolutely. Just do it when you’re ready, not when you’re guessing.

Use it for:

  • Progress checks during a training cycle
  • Benchmarking VO₂ max or pacing
  • Building mental toughness

Skip it (or modify it) if:

  • You’re new
  • You’re injured
  • You haven’t trained at higher intensities yet

And remember, there are other options.

If 12 minutes at max effort isn’t realistic for you right now, try a time trial, shuttle test, walk test, or just work with a coach to find something better suited to your current level.

🧠 Final word: The Cooper test doesn’t lie — but it can mislead if done at the wrong time or in the wrong way.

Approach it smart, and it becomes a powerful weapon in your training toolkit.