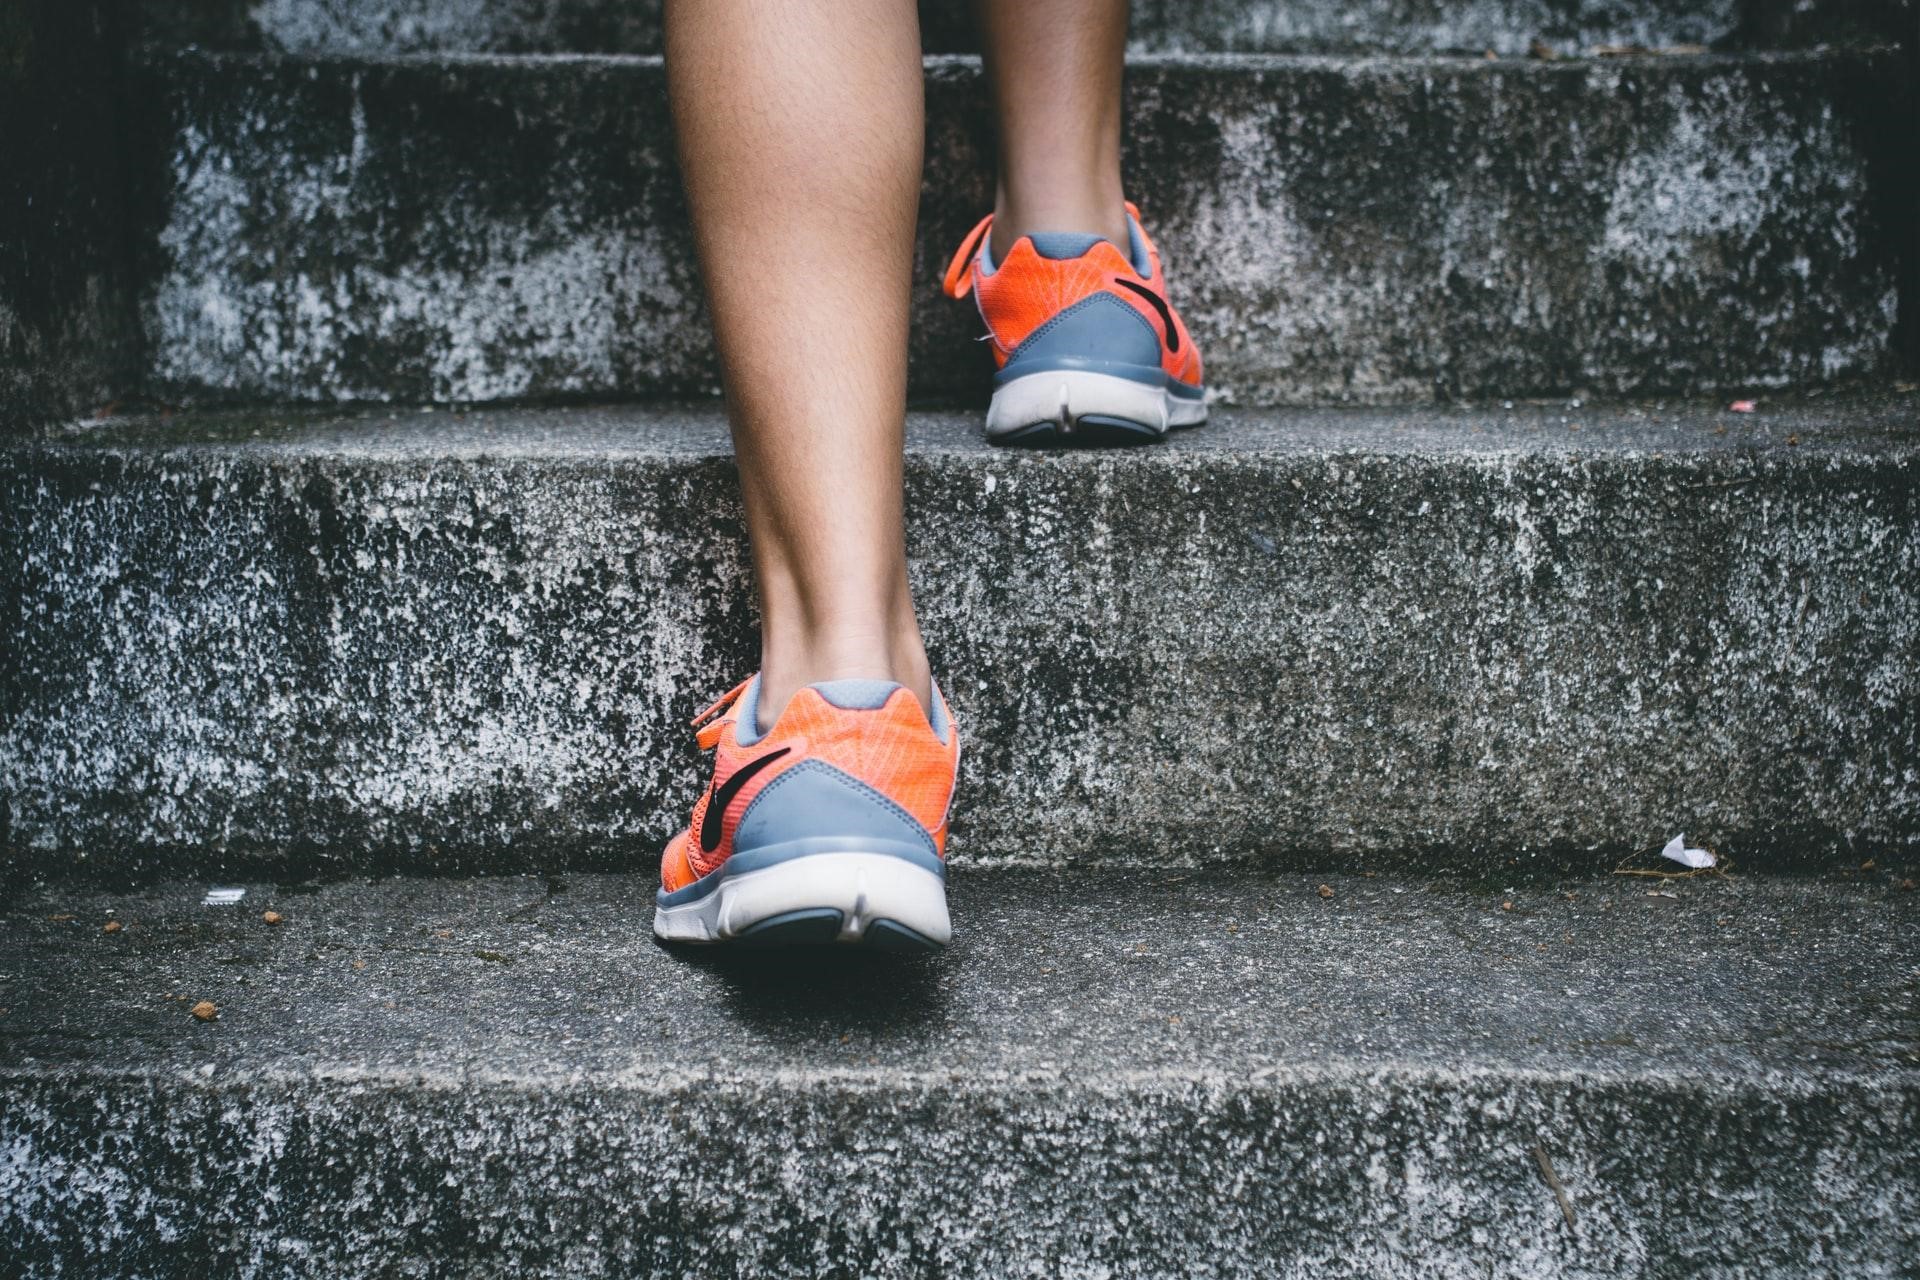
Looking to prevent and treat running injuries? Then this section is for you. Here you’ll find my best articles and resources on how to avoid, deal with, manage as well as treat common running injuries.
If you’re dealing with hip pain, you’re far from alone.
In fact, around 7 to 14% of all running injuries hit the hip or pelvis area, according to The Journal of Strength & Conditioning Research. That’s a big chunk of us runners.
But here’s the upside: most of this stuff is fixable.
Over the years—coaching others and working through my own issues—I’ve seen that hip pain usually comes down to training habits, weak links in the chain, or overdoing it without enough support work.
You just need to figure out the real cause and get to work.
So let’s break it down.
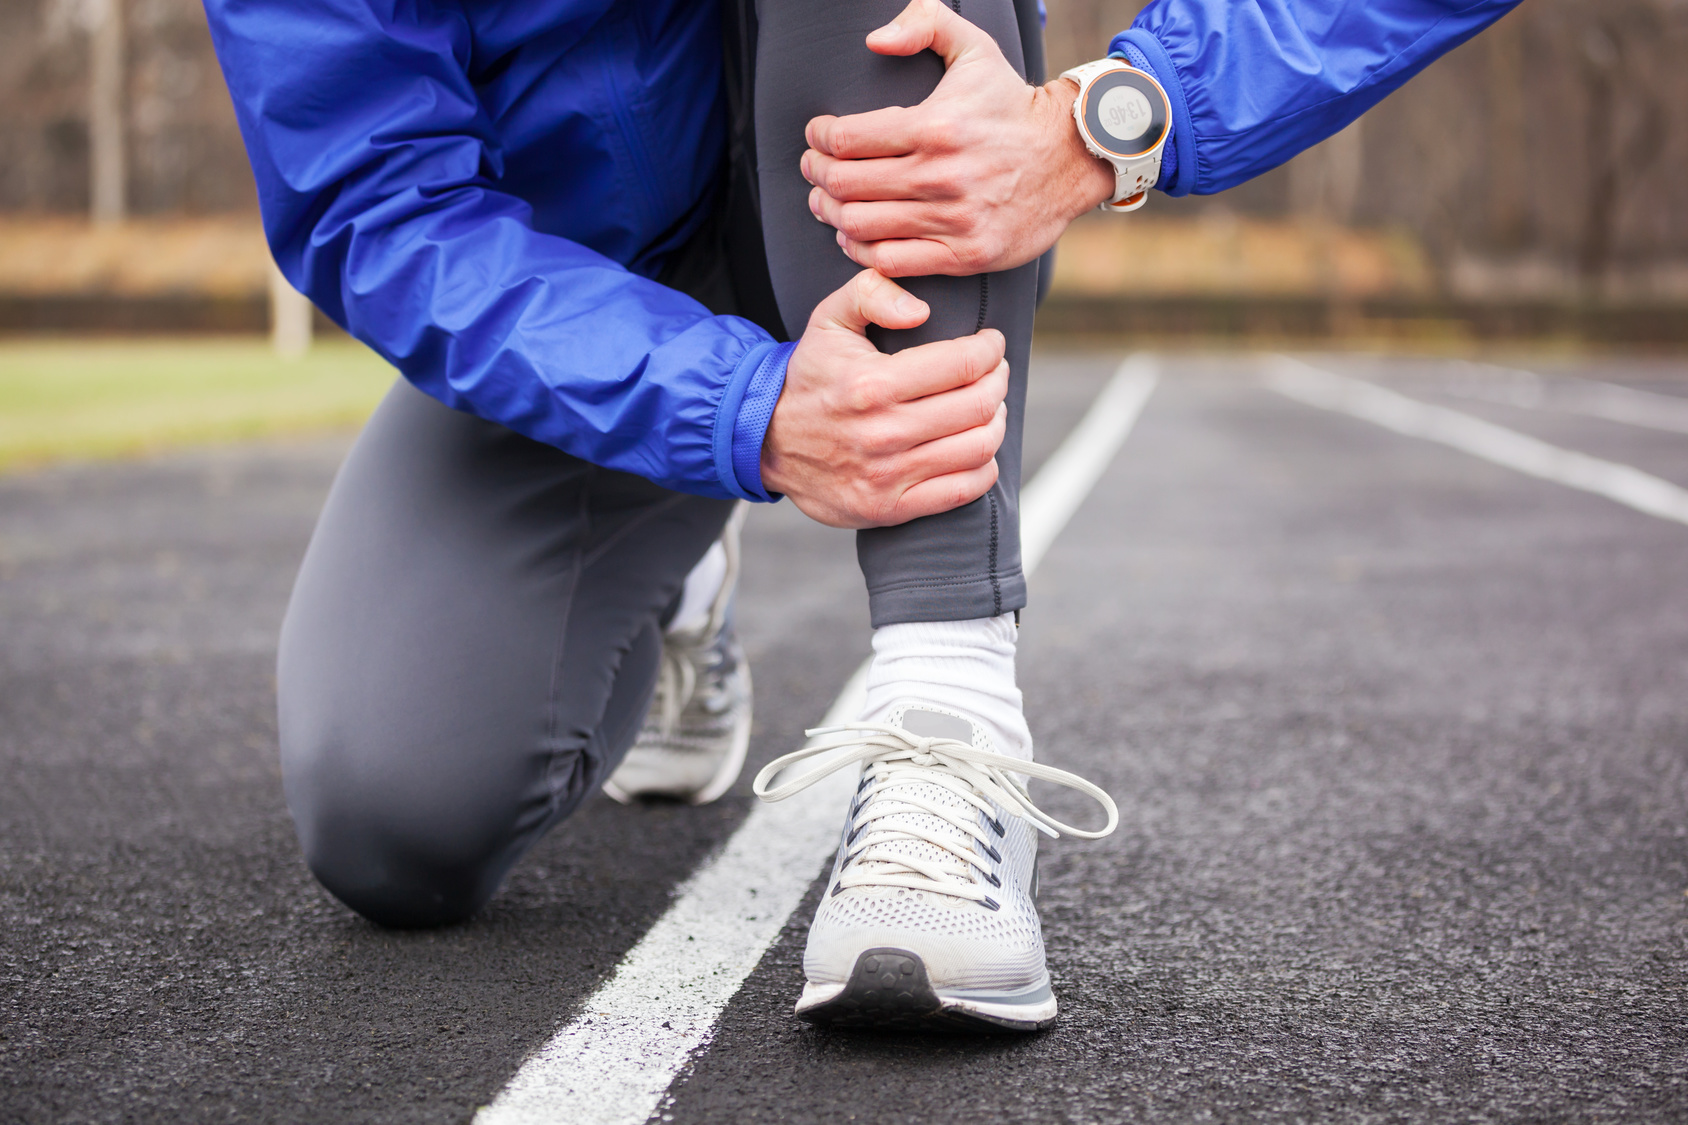
1. Trochanteric Bursitis – That Outer Hip Burn
Ever feel a sharp sting or dull ache on the outside of your hip, especially when you press on that bony spot?
That’s likely trochanteric bursitis. It’s basically when the little cushioning sacs (bursae) on the side of your hip get inflamed—usually from overuse or rubbing by tight muscles, like your IT band.
This is common in runners—especially those who ramp up too fast or always train on sloped roads.
Why it Happens
A lot of the time, it’s not just the bursa. It’s a whole chain of problems.
If your glutes are weak or your hips lack stability, your form breaks down. That makes tendons and muscles rub where they shouldn’t, which inflames the area.
A sports doc I trust once said that a lot of women get diagnosed with bursitis when the real culprit is overworked glute tendons sitting right next to the bursa. Basically, when your stabilizers aren’t doing their job, everything else pays the price.
Also, running on cambered (sloped) roads or changing your gait suddenly can spark it.
How It Feels
Sharp pain on the outer hip that can turn into a deep ache
Hurts to lie on that side or go up stairs
You might feel it down the outside of your thigh
Tenderness or slight swelling on the side of the hip
What to Do About It
Step one: chill out the inflammation.
That means cutting back mileage (or full rest if needed), avoiding hills or sloped roads, and icing the area after workouts. I usually go with 10–15 minutes of ice post-run.
An anti-inflammatory can help short-term—but don’t mask the pain just to keep running. That’s a fast track to making things worse.
Next, fix what caused it.
Start stretching the IT band and outer hip (a standing crossover stretch or figure-four stretch is money). But more importantly, strengthen your glutes.
I’m talking side-leg raises, clamshells, band walks. One of my athletes nicknamed her resistance band “the pain noodle” because it burned so good—but she’s pain-free now.
I’ve also seen other runners bounce back with a combo of yoga, crab walks, and lots of consistent strength work.
The key? Don’t rush it.
Most cases clear up with rest and smart rehab, but it can take a few weeks. When you’re ready to run again, ease back in and keep doing strength work twice a week.
Don’t drop it the moment the pain goes away.
And hey, if nothing’s improving after a few weeks, get it checked out.
Sometimes you need a cortisone shot or a pro to look at your stride. But most of the time? This is something you can fix with smarter training and stronger hips.
2. Iliotibial Band Syndrome (ITBS)
Let’s talk about one of the most annoying—and sneaky—sources of hip pain for runners: IT band syndrome.
If you’ve ever felt a stabbing pain on the outside of your knee or that deep, nagging ache near your outer hip, this one’s for you.
Here’s the deal.
The IT band is this thick strap of tissue that runs down the outside of your leg—from your hip to your knee. It’s not a muscle. You can’t really stretch it.
But it can still flare up like crazy. And when it does, it feels like your knee is being stabbed every time your foot hits the ground. Sometimes, the pain even crawls up toward the hip.
Most runners think of ITBS as a knee thing, but it often starts higher up—at the hip. Weak glutes, especially the glute medius, can force the IT band to pick up the slack.
That’s when the problems start. Too much friction, too much tension, and boom—hello pain. Downhill runs and slanted roads? Those make it worse. Trust me, I’ve been there.
Why it happens:
ITBS is classic overuse.
Too much running, not enough recovery, worn-out shoes, and a lot of terrain imbalance.
And here’s the pattern—tight TFL (a small hip muscle) + weak glutes = overloaded IT band. Add in too much cambered road or track running, and you’re on the fast track to pain.
The symptoms:
You’ll usually feel a sharp or stabbing pain on the outer knee—right around mile 2 or 3 of your run. It might ease off when you stop, but the next day, it comes back.
Sometimes it clicks or snaps near the hip. Walking downstairs or running downhill? That’s when it bites hardest.
The fix:
Rule number one—don’t ignore it.
If you catch ITBS early, you can get back to pain-free running in a few weeks. But if you push through, you’re in for a long haul. Here’s the protocol I use with my runners:
Back off your mileage. Cut it by 30–50%. If every run hurts, take a week or two off completely [runnersblueprint.com].
Avoid downhill and sloped roads for now.
Start a foam rolling and stretching routine. You can’t stretch the IT band itself, but you can loosen up the muscles around it. Roll out your quads, glutes, and outer thighs gently. I like the standing IT band stretch too—cross one leg behind the other and lean sideways.
Strengthen your hips. This is where the magic happens. Hit your glute medius, glute max, and rotators. Clamshells, side-lying leg lifts, single-leg squats, and step-downs are the holy grail. Research backs this up—glute strength reduces strain on the IT band.
3. Muscle Strains and Tendinitis
Not all hip pain starts in the joint.
A lot of it comes from the muscles and tendons wrapped around it—especially if you’re pushing hard, training more, or skipping the strength work you know you should be doing.
Let’s talk about the big three troublemakers: your hip flexors, hamstrings, and adductors (inner thigh/groin area).
These are prime targets for runners—especially if your glutes are asleep or your training load jumps too fast.
Hip Flexor Trouble
If you’ve ever felt a sharp, stabby pain at the front of your hip or deep in your groin, it might be your hip flexors waving a white flag.
These little guys (mainly your iliopsoas) are responsible for lifting your knees every time you run. When they’re weak or locked up tight, they get overworked and inflamed.
I’ve seen it with athletes ramping up their mileage too fast or adding hill sprints without the strength to back it up.
One study found that tight or weak hip flexors are a common cause of hip pain in athletes, especially due to the repetitive motion of running. No surprise there.
Hamstring Strain
Now, if the pain’s in your butt or right under your sit bone, it could be a hamstring strain.
Usually pops up when you’re sprinting or powering up hills. You’ll notice it when you try to stretch or accelerate—it bites back hard. I’ve had runners describe it as a snap or a pop mid-sprint.
Not fun.
Groin Strain or “Sports Hernia”
Pain deeper in the inner thigh?
It might be an adductor strain—or what’s often called a sports hernia. Basically, a tear in your lower ab muscles or groin tendons.
It won’t bulge like a regular hernia, but it still hurts like hell.
Sprinting and quick direction changes are common culprits here. One runner I coached had this flare up just from stepping awkwardly during a tempo run. Took weeks to settle.
Why It Happens
Most of the time, this stuff comes down to one thing: imbalance. When one muscle group does all the work because the opposing group isn’t pulling its weight, something eventually gives.
Think of it like this: if your glutes and hamstrings are weak, your quads and hip flexors pick up the slack.
Keep piling on speed workouts or hill repeats, and you’ve got a recipe for strains and tendinitis.
I read a Reddit thread where a runner added intervals too fast and wound up with hip flexor tendinitis. He said it got so bad he couldn’t even lift his leg to put on pants. His PT traced it back to—you guessed it—weak glutes and a soft core.
What It Feels Like
A muscle strain usually comes with a sharp, sudden pain.
You might feel or hear a “pop.” It could swell, bruise, or make the muscle feel weak or shaky—like your leg’s not firing right.
Tendinitis, on the other hand, is sneakier.
It starts as a dull ache that builds over time, especially after your runs.
The pain’s usually right where the tendon connects to bone. It stiffens up after sitting—ever get up from a chair and limp for a few steps? That’s a cranky tendon talking.
What To Do About It
If it’s an acute strain, hit it with RICE (Rest, Ice, Compression, Elevation) for the first couple of days.
Don’t run through it. Ice for 10-15 minutes a few times a day.
If it’s swollen, use a compression wrap and elevate your leg.
After a few days, start moving again—but easy. Gentle mobility work. Heat instead of ice. Walk. Let blood flow do its thing.
For tendinitis or minor strains, rest doesn’t mean lying on the couch all day—but you do need to scale back.
Ditch speedwork and hills. Switch to cross-training like cycling, swimming, or pool running—just avoid anything that flares it up.
Once the pain settles, start rehabbing with strength work.
Eccentric exercises (where the muscle lengthens under tension) are gold for tendons. I’m talking Nordic hamstring curls for hamstrings, slow-lowering lunges for hip flexors.
And don’t sleep on core training—a strong midsection takes pressure off your hips.
Keep stretching too. Gentle dynamic stretches for your quads, hip flexors, and hammies can help prevent scar tissue from locking things up.
4. Weak Glutes & Muscle Imbalances
Let’s not sugarcoat this: weak glutes and muscle imbalances are sneaky culprits behind a lot of hip pain in runners.
I already brushed over it earlier, but this deserves its own spotlight because I’ve seen it ruin seasons — including mine.
Your hips aren’t just a hinge—they’re like a four-way intersection. You’ve got muscles in the front (hip flexors and quads), the back (glutes and hamstrings), the inner thighs (adductors), and the outer hips (like your glute med).
When everything’s firing right, your hips stay stable. But if one side gets lazy—say, your glutes are snoozing from too much desk time—another group jumps in to cover.
That imbalance? That’s how pain shows up.
For runners, the classic pattern is weak glutes and core mixed with tight hip flexors and quads. Some call it lower cross syndrome. I call it runner’s butt gone wrong.
Back in my early marathon days, I had constant low back and hip soreness after long runs. At first, I chalked it up to mileage.
But truth is, my glutes weren’t pulling their weight, so my lower back and hip flexors stepped in and got overworked. Once I started hammering glute bridges, clamshells, and core work, it felt like someone turned the pain dial down.
Another red flag?
Imbalances between your left and right side. One hip weaker than the other? You might overstride, compensate, and overload one leg.
I once coached a runner who kept battling right hip pain. Turns out, her right leg was literally a centimeter shorter.
A simple shoe insert plus a glute-focused strength plan? Boom—pain gone after two years of struggle.
It’s not just about strength either.
Modern life sets us up to fail—sitting all day shuts your glutes off and tightens your hips.
Add in running without strength work, and it’s no wonder your stabilizer muscles wave the white flag once mileage goes up.
I read a great quote from a physical therapist in Runner’s World who said, “Running on weak hips is like doing a tug-of-war under load.” That nailed it. Every step becomes a mini battle of muscles pulling in the wrong direction.
Signs to Watch For
You might not feel the imbalance right away.
But if you’re dealing with chronic tightness in your hip flexors, always lose form when you’re tired, or notice that one side wobbles more than the other—those are warning signs.
Try a single-leg squat or bridge. If one side folds like a house of cards, that’s the side begging for more strength.
I have my athletes do a simple test: stand on one leg for 30 seconds. If you’re flailing on one side and solid on the other, you’ve found your weak link.
The Fix: Get Strong. Stay Strong.
The fix isn’t complicated—but it does take effort. Strength training is your best defense.
No gym? No excuses.
A living room, resistance band, or a set of dumbbells will do just fine.
Start with the basics: squats, lunges, deadlifts, glute bridges, and step-ups. These build full-body strength. Then zero in on weak zones:
Two sessions a week during your training cycle is a solid goal.
And trust me—you don’t need hour-long workouts. Even 20–30 minutes of consistent, focused strength work can make a huge difference.
Also, add in single-leg work. Think: single-leg squats, single-leg deadlifts. Why? Because running is a one-leg-at-a-time sport.
These moves challenge your balance, coordination, and hip stability.
I still remember the first time I tried single-leg deadlifts—my balance was trash.
But that wobble? That was feedback. It told me I had work to do.
Stretch Smart, Not Just More
Flexibility matters too—but don’t fall into the “just stretch more” trap.
Stretch what’s tight—hip flexors, quads, hamstrings—but strength should be the focus, especially if you’ve got outer hip pain or tendon irritation.
I’ve seen athletes stretch their hip flexors for months hoping the pain would fade.
But the real fix? Strengthen the glutes. When your glutes do their job, the flexors stop getting overworked.
Sometimes, feeling “tight” is your body protecting a weak muscle. And strengthening that muscle is what actually makes it feel better.
5. Bad Running Form Can Wreck Your Hips
Let’s talk about form—because if your hips are barking after every run, there’s a good chance your mechanics are part of the problem.
Most runners don’t even realize their form is off until the pain sets in.
But trust me, I’ve been there.
Running with sloppy form is like driving a car with the wheels out of alignment—you might get away with it for a while, but sooner or later, something’s gonna wear out.
My Story (Because Yep, I Messed This Up Too)
A few years back, I started feeling this pinchy, nagging pain in my right hip and groin every time I pushed the pace.
At first, I blamed the shoes.
Then the trail.
Then the weather.
But the truth? I was overstriding and heel-striking like crazy while trying to run faster. My long stride was jamming my femur into the socket.
What fixed it? I shortened my stride, bumped up my cadence, and boom—pain gone.
It was a smack-in-the-face reminder: how you run matters. A lot.
Why Form Breaks You Down
Running is repetitive—thousands of steps in a single run.
If your form is off by even a little, that error gets multiplied over time.
It’s not just about pain in the hips. It can snowball into knee trouble, shin splints, or even lower back strain. Like a crooked door hinge—eventually, it sticks or breaks.
Often, the real issue is upstream: weak core, weak glutes, or just poor habits built over time. And when you’re tired? That’s when form really starts to crumble.
If your hip pain only shows up at the end of long runs or after speedwork, your form’s probably falling apart when fatigue sets in.
The Fix: Small Tweaks, Big Gains
Here’s what I coach my runners to focus on:
Run Tall with a Slight Forward Lean (from the ankles, not the waist). Picture a string pulling you up from your head. Keep your pelvis neutral—don’t stick your butt out or slouch. That gentle lean helps use gravity to move you forward, not your lower back.
Crank Up Your Cadence. Aim for around 170–180 steps per minute. It doesn’t have to be perfect, but a quicker turnover usually means less overstriding. I like doing 30-second drills mid-run where I count steps—try it. It’s a game-changer.
Land Under Your Body. You don’t need to be a forefoot striker. Just make sure your foot isn’t landing way out in front. Think “light feet” or imagine the ground is on fire. Quick, snappy steps. Let gravity do the work.
Engage Core & Glutes. Your core stabilizes your spine and pelvis. Engage your lower abs like someone’s about to punch you. Glutes? They’re your power source. I’ll even sneak a hand to my backside mid-run to check if my glutes are firing with each push-off (just… not in public).
Upper Body Check. Relax those shoulders. Arms should swing naturally, elbows around 90 degrees. Too much torso twisting can throw your hips off. Look ahead—not down—so your posture doesn’t collapse.
6. Overtraining & Sudden Increases
One of the first things I ask when a runner tells me, “David, I didn’t fall or twist anything—so why the heck does my hip hurt?” is this: “Show me your training log.”
Nine times out of ten, it’s the usual suspect—overtraining.
You feel great, start piling on miles, maybe throw in some hill sprints or speedwork because you’re fired up… and then boom—your hip starts barking.
You think it came out of nowhere, but really?
It’s been creeping up quietly for weeks.
Why This Happens
Your body needs time to catch up with your training ambitions.
Muscles, tendons, bones—they all adapt slower than your heart and lungs. So even if your fitness feels strong, your hips might be hanging on for dear life.
I’ve seen this play out a hundred times:
A runner goes from 10 miles a week to 30 overnight.
Or they grab a random marathon plan off the internet and go full throttle from day one.
And guess what? That’s a recipe for breakdown.
One review published in the Journal of Strength & Conditioning Research flagged training errors—especially sudden mileage spikes and poor recovery—as major causes of running injuries.
That tracks with what Runner’s World found too: around two-thirds of hip stress fractures come from pushing too hard, too soon.
What It Feels Like
Hip pain from overtraining can show up in all sorts of ways:
Tendonitis
Muscle strain
Or worst-case: a stress fracture
One red flag?
Bilateral pain—both hips feeling sore, or your hip + another area (like your knee or shin) nagging at the same time. That’s your body saying, “Hey, you’re overcooking it.”
And if the pain kicks in right after a big training jump—especially if you’re feeling run-down, sleeping poorly, or dragging through workouts—you might be staring down overtraining syndrome.
What to Do About It
Here’s the real fix—and yeah, it’s not flashy:
Back off. Rest. Rebuild smarter.
If your pain is sharp or deep, especially bone-deep, hit pause.
I’d rather you take 10 days off than end up sidelined for 10 weeks with a stress fracture (Runner’s World warns how fast those can escalate if ignored).
At a minimum, cut your volume in half. Skip the intervals and hill sprints for now. Let the fire cool.
Use this downtime to look at the bigger picture:
Were you following the “10% rule”?
Did you include cutback weeks every 3-4 weeks?
Are you listening to those early warning signs?
Honestly, I’ve ignored them too.
That tightness that lingered after a long run? I brushed it off. Until it turned into something bigger. Now, I’ve learned—don’t be a hero, be consistent.
7. Stress Fracture of the Hip
Alright, now we’re entering serious territory.
A stress fracture in the hip—usually in the femoral neck or head—isn’t just another tight muscle or sore tendon.
This one’s a bone issue. A small crack that builds up from repetitive pounding, often without enough recovery in between.
It’s one of those overuse injuries runners really fear—and for good reason.
Even though it’s less common than stuff like tendonitis or muscle pulls, it still happens.
Especially to distance runners logging big mileage or cranking up intensity without giving their body the time or fuel to bounce back. I’ve seen it more than a few times in marathoners who tried to ramp up too fast.
What It Feels Like
It usually starts with this subtle ache deep in your groin or the front of the hip.
At first, it might only show up late in a run.
A week later, it kicks in earlier. Then maybe you feel it walking, climbing stairs, or even just standing still. Eventually, it becomes this deep, dull throb that haunts you at night.
If your hip pain wakes you up?
That’s a giant red flag. Stop guessing—get it checked.
Why It Happens
Your bones aren’t static.
They rebuild and remodel based on the stress you put them through—that’s called Wolff’s Law.
But if you keep stacking on stress (like increasing mileage too quickly) without giving your body the nutrients or time to recover, you set yourself up for breakdown.
First comes bone swelling (a stress reaction), and if you keep pushing, it turns into a crack.
According toRunner’s World, around two-thirds of hip stress fractures in runners are linked to sudden jumps in mileage.
I’m not surprised.
Most of the athletes I’ve coached through this either doubled their long run or cut their rest days right before it hit.
Who’s More at Risk?
There are some common patterns:
Women, especially those with irregular periods or low bone density.
Low body weight or a history of disordered eating.
Poor nutrition, especially lacking calcium or vitamin D.
High training volume, like marathoners or ultra runners logging huge weeks.
In women, something called RED-S (Relative Energy Deficiency in Sport) is a big warning sign.
It messes with energy levels, menstrual cycles, and bone health. But don’t think men are immune—guys who underfuel while training hard are at risk too.
How to Spot It
The pain is usually right in the groin or front of the hip.
It might shoot into your thigh.
It gets worse the more you move—running, walking, jumping—and feels better with rest, at least early on.
But here’s the clue: the pain shows up earlier and earlier in each run, and sticks around longer afterward. If you’re limping up stairs or hurting while walking, it could be serious.
And if it throbs while you’re lying in bed? Don’t wait.
There’s a quick check called the hop test.
If hopping on one leg sends a sharp pain into your hip, that could mean a stress fracture.
But seriously—don’t overdo this test. Let a sports doc take it from here.
What to Do
First rule: stop running.
Don’t try to “run through it.”
This isn’t shin splints—it’s a bone injury. See a doctor, preferably a sports orthopedist. They’ll likely order an X-ray, and possibly an MRI or bone scan, since early fractures don’t always show up on regular scans.
Treatment is simple, but not easy: rest.
Usually 6 to 8 weeks of zero impact. No running, no jumping, no “but I feel fine.” You’ve got to treat it like a broken bone.
Sometimes they’ll let you bike or swim if it doesn’t hurt, but that’s up to your doc.
Deep water running can be gold here. Think of your “cast” as your willpower. You have to protect that bone even though you can’t see the damage.
Nutrition Matters
Your bones can’t heal on wishful thinking.
This is the time to eat more, not less.
Forget the diet. Your body needs calories, calcium, vitamin D, and protein to rebuild. Some doctors even run blood tests to check your vitamin D levels and recommend supplements if needed.
I always tell my athletes to bump up their protein intake during injury. Bones are living tissue, and they need building blocks to heal—just like muscles.
Coming Back
Once the doc clears you—usually with a repeat scan and no pain—you’ll ease back in slowly.
Then very gradual build-ups. I usually follow the 10% rule, adding no more than 10% distance per week, and make sure runners take at least two full rest days between runs early on.
Physical therapy helps here. A good PT will check your gait, form, and strength. You might find out that weak glutes or poor stride mechanics contributed to the injury in the first place.
How to Avoid It
Increase mileage gradually—don’t double your long runs.
Eat like an athlete. Fuel your training.
Get your vitamin D and calcium checked if you’re at risk.
If you’re a woman with irregular cycles or super low body fat, talk to a doc about RED-S.
And most importantly: don’t ignore the whispers.
Your body always talks. It starts with a whisper—a dull ache, a nagging soreness.
If you blow that off, it’ll start shouting. And when bones start screaming, you’re looking at weeks or months on the bench.
8. Hip Impingement (FAI)
Ever feel a sharp pinch deep in the front of your hip—especially when you’re lifting your knee high, sitting too long, or doing squats?
That could be hip impingement.
The technical term is Femoroacetabular Impingement (FAI), but let’s keep it simple: your hip socket and femur aren’t getting along.
Some runners are born with hips that aren’t shaped quite right. Others develop this from years of intense movement—like sprinting, hill running, or smashing squats in CrossFit.
The bones can literally pinch the soft tissue inside the hip joint when you move a certain way.
There are two types:
Cam impingement: Your femur (thigh bone) has an extra bump, and it rubs.
Pincer impingement: Your hip socket has extra bone, and it digs into things.
Some unlucky folks get both.
That pinch adds up over time and can mess up the cartilage or even tear the labrum (more on that later). According to RunnersWorld.com, FAI is one of the top reasons younger adults end up with early hip arthritis—especially active folks in their 20s to 40s.
How It Shows Up
You’ll usually feel it right in the front of the hip or groin.
It can stab or just ache like hell after running hills, doing speed drills, or sitting for hours.
One giveaway is the FADIR test: pull your knee toward your opposite shoulder—if that sparks the pain, bingo.
I coached a guy who swore stretching would help his hip pain. Problem was, every time he did deep lunges or squats, it made things worse. His groin felt stiff and achy, and it clicked sometimes too.
We figured out that shortening his stride, skipping deep squats, and focusing on single-leg strength helped keep things in check.
Eventually, he did go in for surgery because the bony growth was too much—but that’s not always the path.
How to Handle It Without Surgery
If you’re dealing with FAI, here’s what you can actually do before jumping into a hospital gown:
Avoid Painful Movements. Skip the deep squats, pigeon pose, knees-to-chest stretches, or anything that shoves your hip into the pinch zone. If hill repeats make it worse, swap them for flat runs. Don’t try to “stretch it out”—that’s how you aggravate it.
Move Where It Feels Good. A lot of runners with FAI also have tight hips, weak glutes, or stiff ankles. Loosening up your hip flexors and glutes (without pushing into pain) might give the joint a bit more room. Work on ankle mobility and core control too. I’ve seen people unlock better movement just by fixing their form from the ground up.
Strengthen Smart. Stronger glutes help pull the femur back into the socket, which can reduce pinching. Core work matters too—especially the deep lower abs. That keeps your pelvis from tilting or your back from over-arching during runs. One PT I trust always includes this kind of work when dealing with FAI patients.
What I Tell My Athletes
If you’re running with mild FAI, you can still train smart.
Just dial back the things that piss off your hip—no deep bounding drills, fewer high knees, limit hill sprints.
Add more low-impact cross-training like cycling or swimming if needed.
And don’t try to play doctor—groin pain can come from all kinds of things, and not every pinch is FAI.
But if you’ve got that specific, persistent front-of-hip pain that worsens with deep movement, go get it looked at. You’ll train better when you actually know what you’re dealing with.
9. Labral Tear (Torn Hip Cartilage)
Let’s talk about one of the trickiest hip injuries I’ve seen runners deal with—a labral tear.
That little ring of cartilage around the hip socket (the labrum) is like a seal and shock absorber for the joint.
When it gets torn, things get messy: sharp pain, weird clicking or catching, and that unstable “my hip’s not right” kind of feeling.
This one isn’t your run-of-the-mill soreness.
It’s more serious and often needs a doc’s help, but I’m including it here because I’ve seen too many runners ignore the signs until it’s too late.
If you’ve had deep groin pain that just won’t quit, this might be the hidden culprit.
How It Happens
Tears can come from a bad fall, a car crash, or years of pounding pavement with bad movement patterns.
For runners, it’s usually overuse and something called FAI—femoroacetabular impingement—which is just a fancy way of saying the bones in your hip joint don’t move well together.
Over time, that constant grind can wear down the labrum.
I once coached a runner—Phoebe, 35, ultra-fit and training for long distances—who had everything from glute tendon pain to bursitis. After months of frustration, she finally got an MRI.
The verdict?
A complex labral tear. Looking back, it was probably a slow build-up: one issue weakening another until the labrum couldn’t hold up anymore.
And it’s not always dramatic.
Sometimes just twisting your leg while your foot is planted (like changing direction during drills or trail running) is enough to cause a tear—especially if you already have joint tightness or instability.
How It Feels
The pain usually settles deep in the groin.
Some runners feel it constantly; others say it comes and goes. The big red flags are clicking, catching, or that odd locking feeling—like the hip gets stuck mid-move.
Running becomes painful, especially when driving the knee forward or twisting.
And here’s something I’ve noticed with athletes I’ve worked with: the pain often gets worse after the run, once the joint cools down. That stiffness post-run? It’s inflammation kicking in.
Phoebe described it like this: “It starts as a dull ache while running, but when I stop, the whole area gets angry.” That’s classic labral behavior.
You might also feel weakness, or like the hip is giving out on you. Since the labrum plays a role in joint stability, a tear can leave things feeling wobbly or unreliable.
What to Do About It
Small tears?
Sometimes they can be managed without surgery.
Bigger ones? You might end up on the operating table. Here’s the usual roadmap:
Conservative Treatment
Physical Therapy is your first line of defense—especially hip strength work focused on the glutes and core.
Activity modification helps too: ease off things that aggravate it (hill sprints, deep squats, etc.).
Anti-inflammatories and rest can calm things down short term.
Some folks try corticosteroid injections into the joint. Phoebe did two—neither helped. That’s pretty common if the tear is still being pinched during movement.
The goal here isn’t to “heal” the tear completely—it’s to stabilize the joint enough that the tear stops bugging you day to day.
When Surgery Makes Sense
If PT and rest don’t cut it after a few months—or you’re dealing with daily locking and pain—you might need arthroscopic surgery.
That’s where the surgeon goes in through tiny incisions, stitches up the labrum if it’s detached, or trims the damaged parts.
Most importantly, they’ll usually smooth out any bone irregularities (FAI stuff) while they’re in there.
That step matters if you want to avoid tearing it again.
I’ve seen good outcomes with this.
10. Piriformis Syndrome: The Literal Pain in the Butt
Let’s get one thing straight—not all hip pain comes from the hip joint itself. Sometimes it’s a sneaky nerve problem pretending to be a muscle issue.
That little deep muscle in your butt—the piriformis—can clamp down on the sciatic nerve, and when it does, oh man, you’ll feel it.
Pain in your glutes, hip, even down the back of your leg. Classic sciatic pain—but coming from outside the spine.
What Causes It?
The piriformis helps rotate and stabilize the hip, but when your glutes are weak or you’re hammering hills and speedwork without proper strength, it can get ticked off.
Tighten up. Spasm. And when it does?
It presses right into the sciatic nerve that runs underneath—or in some people, straight through—it. Some folks are built in a way that makes this more likely, especially if their nerve pierces the muscle belly.
I had it after a brutal trail marathon—one of those events where the climbs never ended and the downhills burned.
My glutes were shot, and the next day, boom. Deep ache in my left butt cheek. Zing down the hamstring. Sitting felt like torture. Driving was worse. My piriformis had basically thrown a tantrum and latched onto the nerve like a pitbull.
What It Feels Like
Here’s what you’ll notice:
A deep, annoying ache right in the middle of one glute.
Shooting or burning pain that might run down the back of your thigh, even into your calf or foot.
Tingling, especially after sitting on hard surfaces or when your wallet’s in the back pocket (guys—ditch the wallet back there).
Uphill runs might make it worse.
And while it can feel like disc-related sciatica, piriformis syndrome usually doesn’t get worse with back movements.
One telltale sign?
Pressing into the piriformis muscle (just behind the hip) feels super tender. If your back feels fine, but your butt’s screaming—that’s your sign.
How to Deal With It (And Get Back on the Road)
1.Stretch & Release
You’ve got to get that piriformis to chill out.
Best way?
Start with the figure-4 stretch—lie on your back, cross one ankle over the other knee, and pull that leg toward your chest. You’ll feel it right where it hurts.
Self-massage also helps.
I’ve sat on a tennis ball, gritting my teeth, just to loosen that thing up. It’s a “hurts-so-good” kind of pain.
But don’t go too hard—poke the nerve too much and it gets angrier.
A little heat (warm compress or heating pad) can also help the muscle let go. I remember lying on the couch with a hot pack on my butt while my wife laughed at me—but hey, it worked.
2.Nerve Glides (a.k.a. Sciatic Flossing)
If the nerve feels stuck or keeps zinging down the leg, try some nerve glides.
One move I use is lying on your back, raising your leg into a gentle hamstring stretch, and flexing and pointing your foot.
It gets the sciatic nerve moving without irritating it. A physical therapist can teach you these properly—and it’s worth learning.
3. Strengthen the Right Muscles
Once the pain’s down, don’t just jump back into normal running.
Build up your glutes—especially glute max and med. A tight piriformis often means other muscles aren’t doing their job.
Add bridges, clamshells, lateral band walks, hip thrusts—you name it.
And don’t forget the core. I added deep squats and bird-dogs once I was pain-free, and they really helped stabilize my hips so the piriformis wasn’t doing all the work.
4.Tweak Your Training
Take a break from the stuff that’s lighting the nerve up—hills, track sprints, anything explosive.
Flat and easy is your friend. If even that hurts? Pull back.
I took a full week off running and did easy cycling instead, and it helped me turn a corner. Don’t let your pride push you into prolonging the pain—nerve stuff can be stubborn.
Most cases will calm down with the above within a few days to a few weeks.
If not? Get checked out to rule out anything deeper like a lumbar spine issue.
In rare cases, runners get relief with corticosteroid or even botox injections—but honestly, that’s the last resort. Usually, a smart combo of stretching, glute strengthening, and rest does the trick.
11. Osteoarthritis (Wear-and-Tear Arthritis)
Let’s talk about one of the first things people think of when you say “hip pain” — arthritis.
You’d be surprised how many non-runners instantly assume running ruins joints.
But truth is, it doesn’t. In fact, research (RunnersWorld.com cites several studies) shows that long-term runners aren’t more likely to get hip arthritis than non-runners.
Still, some of us—especially older runners or those with a history of hip injuries—can end up dealing with osteoarthritis in the hip.
And it’s no joke.
We’re talking about cartilage wearing down, bone-on-bone rubbing, and a hip that just feels stiff and angry more often than not.
Why It Happens
Age plays a role—no getting around that.
The older we get, the more miles our joints rack up.
Genetics also matter. Some folks are just more prone to joint issues no matter how careful they are. And if you’ve had an injury in that area—like a labral tear or a fracture—arthritis can set in faster.
If you had something like untreated FAI (femoroacetabular impingement) and kept pushing through it, those years of stress can catch up to you in your 40s or 50s.
I’ve seen it in runners I’ve coached—and honestly, I wouldn’t be surprised if my own body gives me that wake-up call someday.
Here’s the irony: moderate running can protect your joints.
One study found that recreational runners have lower rates of hip and knee arthritis than sedentary folks. That’s probably because regular running keeps your weight in check and your joints moving.
But pounding out 100+ mile weeks for decades? That’s when the risk starts creeping up—especially if your form’s off or you’ve had injuries.
If you’re over 50 and notice that dull groin ache, or if your hips feel like concrete in the morning but loosen up as the day goes on, arthritis might be the reason.
Common Symptoms
Deep ache in the groin, butt, or front of the hip
Stiffness, especially in the morning or after sitting
Less range of motion — the hip doesn’t rotate or spread like it used to
Grinding/crunching sounds (yep, crepitus is real)
Pain tends to be worse with weight-bearing activities or cold/damp weather
You might feel better during the run, but pay for it later—classic arthritis pattern
I’ve had runners tell me the first few miles feel awful—like rusted hinges.
But then the hip warms up, moves easier, and they start enjoying it again. Until they cool down, and the ache returns like a bad houseguest.
So… What Can You Do About It?
There’s no magic pill that brings back cartilage (yet), but that doesn’t mean it’s game over. You can manage arthritis and still enjoy running—if you play it smart.
1. Tweak Your Training
Cut down on the pavement. Trails, treadmills, and soft tracks are your friends.
Reduce intensity and volume if needed. Instead of 6 hard days, try 3-4 run days and 2-3 cross-training days (bike, swim, row, whatever keeps you moving).
Many arthritic runners do better with shorter, more frequent runs—like 3–4 miles most days, instead of one long 12-miler that wrecks the hip for a week.
2. Build Strength Where It Matters
Glutes, hips, quads, core—they all support your hip joint.
I don’t care how many miles you run, if those muscles are weak, your joint takes the beating.
Machines, bands, or bodyweight—just avoid anything that causes sharp pain.
Add dynamic warmups (think leg swings and hip circles) to get things moving before your runs.
3.Keep Your Range of Motion
Gentle daily stretches can help, but don’t force it.
Avoid deep lunges or painful yoga poses that jack up your joint.
Stay loose, but respect your limits.
4. Lose a Few Pounds (If You Need To)
Every pound you drop takes several pounds of pressure off your hip with every step.
I’ve seen big improvements in hip pain when runners shed just 5–10 pounds—not for vanity, but for relief.
5. Smart Use of Meds and Supplements
NSAIDs like ibuprofen can help on flare-up days—but don’t make them a daily habit.
Talk to a doctor before popping pills too often.
Supplements like glucosamine, chondroitin, and omega-3s? Hit or miss, but if they’re safe and help you, go for it.
6. Advanced Options
Cortisone shots = short-term relief (weeks to months).
PRP and hyaluronic acid injections are being explored more—ask your doc.
Physical therapy can make a huge difference. A good PT will tailor exercises and use techniques like ultrasound to help you move better and hurt less.
And yeah, if it gets bad—like you’re limping through life and not just runs—you might start talking hip replacement.
But here’s the good news: I know multiple runners who’ve had the surgery and come back strong. One guy even ran a marathon post-replacement.
That’s not a promise, but it is possible with proper rehab.
12. Rare but Serious Hip Issues (Don’t Panic, Just Be Informed)
Look, most hip pain in runners isn’t life-threatening.
But just in case you’re one of the rare exceptions, let’s quickly run through a few outliers that doctors keep an eye out for.
Avascular Necrosis (AVN): This is serious stuff—when blood flow to the femoral head (top of your thigh bone) gets cut off, bone tissue starts dying. It’s not a running injury—it’s more linked to heavy steroid use, alcohol abuse, or trauma. If you’ve got it, chances are you already know something’s up. The pain is deep and constant, and it eventually leads to joint collapse. You don’t run through this—you see a doctor fast.
Slipped Capital Femoral Epiphysis (SCFE):This mostly hits teens. If your kid (or a young runner you coach) is complaining of hip pain and walking funny, this might be it. It’s a growth plate issue, not a running overuse thing.
Labrum Cysts or Tumors: I’ve never seen this personally, but they’re out there. If your hip hurts constantly—day and night—and doesn’t change with activity, you need imaging to rule out something more serious.
Septic Arthritis: If your hip flares up big-time and you’ve got a fever, chills, or you feel sick in general—don’t mess around. Get to the ER. This could be an infection inside the joint. Rare, yes—but emergencies don’t give warnings.
Hernias: If your groin aches and there’s a bulge (especially when coughing or lifting), it could be an inguinal hernia. Pain sometimes radiates toward the hip, and runners often misread it.
Meralgia Paresthetica: Say that three times fast. It’s basically nerve compression near your outer thigh. Might feel like buzzing, tingling, or numbness. Not a hip joint issue, but it can mimic one. Think tight waistbands, weight gain, or awkward running belts.
Bottom line: 95% of hip pain is from the usual suspects—strain, tightness, overuse, ITBS.
But if you’ve got weird symptoms—like fever, intense nighttime pain, or you suddenly can’t bear weight—get checked out.
I always say, it’s better to get reassurance than to let something serious slip under the radar.
Track Your Hip Pain Like a Coach (Because Data Doesn’t Lie)
Here’s one of the most underrated tools for injury recovery: your own training log.
I don’t mean just logging miles and calling it a day.
I’m talking about tracking what really matters when something feels off—your pain, your stress, your recovery, your shoes, your terrain, your life.
Use This System:
Log the run: Distance, pace, terrain (pavement, trail, treadmill), and the shoes you wore. Shoes matter more than people think.
Note the pain (if any): When did it show up? Early miles? After sitting all day? Was it sharp or dull? Gone after warming up or still there later that night?
Record life stuff: Bad sleep? Stressful week? New gym routine? These things can stack up and break you down.
Track strength and cross-training: Especially if you just started something new—like plyometrics or squats. Pain the next day? There’s your clue.
Look for patterns: After a few weeks, go back and connect the dots. You might notice the hip flares up every time you run over 30 miles in a week. Or maybe speed workouts on road surfaces trigger it. Sometimes it’s post-squat soreness that lingers too long.
I once coached a runner who had mystery hip pain every few weeks. We combed through her training log and noticed it always hit right before her period.
Turns out, hormone shifts were likely playing a role. She started backing off during that window—just easier miles or a rest day—and boom: no more flare-ups. Logs work.
Even more important: Tracking helps you see progress. Maybe you went from “hip hurts after 3 miles” to “no pain until mile 6.” That’s a win.
If things aren’t getting better despite rest, rehab, and modifications, that’s also valuable. It’s a sign to dig deeper—or bring the log to a pro who can help.
Pro Tip: Add a “Body Check-in” section in your journal. One line. How’d your hip feel today? Don’t overthink it—just note it. Future you (or your PT) will thank you.
Now it’s your turn: apply what you’ve learned to your own situation.
And if you need extra help or have questions, don’t hesitate to reach out to running coaches, physical therapists, or a running community (online forums are full of people who’ve been where you are).
You’re not alone in this.
Here’s to many happy, healthy miles ahead. Train smart, listen to your body, and never lose the joy of running. You’ve got this!
You ever be mid-run, feeling good, then out of nowhere—bam—sharp pain shoots up your shin like someone stabbed you with a pencil? That’s shin splints. And they suck.
I’ve had them. My girlfriend had it worse—she literally broke down crying mid-run during her half marathon training.
It’s the kind of pain that makes even walking feel like punishment. You’re doing everything right—running, training, staying consistent—and then your body throws that curveball.
Funny thing? One of the best fixes we found was a simple roll of KT tape.
I didn’t buy it at first. Tape? Really? But I tried it. She tried it. And it helped. She ran pain-free for the first time in weeks. I was shocked.
So yeah, it’s not magic. But when you use it right, it works.
Here’s how I use KT tape for shin splints, what actually makes it effective, and how to get relief without spending a fortune or taking a month off training.
It’s basically your lower leg screaming from too much stress. Whether it’s ramping up mileage too fast, pounding pavement without enough rest, or wearing dead shoes, the tissues in that area get inflamed.
Flat feet and overpronation? Big culprits too. If you’re coming back from a break and trying to go beast mode too soon, you’re also in the danger zone.
I’ve seen this over and over with clients—and lived it myself. According to Healthline and PMC, shin splints hit between 13–20% of runners and make up around 60% of all lower leg overuse injuries. That’s not a small club.
How KT Tape Helps Shin Splints (Science + Real Life)
I didn’t believe in tape until I saw it work. Here’s why it’s earned a spot in my gear drawer:
1. It Reduces Pain and Inflammation
KT tape lifts the skin slightly—just enough to improve blood and lymph flow. That extra circulation helps flush out gunk and reduce swelling.
In one PubMed-backed study, runners who taped their shins for just a week had less pain and better leg function than those using shoe inserts.
Think of it like peeling the pressure off your sore shin. That space matters. It speeds up healing and eases soreness, especially after a hard effort.
Real Talk: My girlfriend said it felt like her shin could breathe again. That alone made it worth the 60 seconds it takes to tape up.
2. It Supports—Without Locking You Down
This isn’t a clunky brace. KT tape moves with you. It hugs your leg but still lets you run, squat, walk—whatever.
Better yet, it “talks” to your nervous system through your skin, telling your muscles to chill out and stabilize. That’s huge when your leg’s overreacting and firing in weird patterns to avoid pain.
As a coach, I’ve had athletes tape up, test a few strides, and smile like they just dodged a season-ending injury. It builds confidence—and sometimes that’s half the battle.
3. It Speeds Up Recovery
More blood flow = more healing. Simple.
When I taped up after flare-ups, I noticed less lingering shin pain the next day. My girlfriend shaved a couple of recovery days off her usual downtime just by keeping the tape on post-run.
It’s not magic. But pair it with smart rest, strength work, and a gradual return—and you’ve got a solid recovery plan.
4. It’s Cheap, Easy, and Actually Useful
One roll of tape costs less than your morning smoothie. And you don’t need a degree to use it. Just follow a few steps (I’ll show you), and you’re good to go.
It sticks through sweat, showers, long runs—you name it. I’ve even taped up my Achilles and knee with the same roll.
Honestly, KT tape is like the duct tape of running injuries. Cheap, reliable, and surprisingly effective when you just need to keep moving.
KT Tape Is Not a Magic Fix
Let’s get something straight: KT tape isn’t a miracle. It’s not going to fix your shin splints by itself. Think of it like a solid backup player — helpful, but it’s not going to win the game for you. That’s on you.
I’ve seen it work. I’ve also seen people slap it on and expect pain to disappear while they keep running like they’re bulletproof. Doesn’t work like that.
In fact, some old-school runners argue KT tape is just a fancy placebo. And honestly? If you don’t fix the real reason your shins are hurting, they’re not totally wrong.
My Take as a Coach
I’ve coached runners who use tape like it’s duct tape for injuries — wrap it on and keep pushing. I’ve done it myself.
But here’s what I’ve learned: if your form is off or your legs aren’t ready for the pounding, no amount of tape will keep the pain away forever.
Take my girlfriend, for example. She ramped up mileage way too fast and skipped calf work. Her shins lit up.
We taped her up, sure — it helped her get through some light runs. But that wasn’t the solution.
We pulled her back a bit, added calf/ankle strength work, and switched her to more cushioned shoes. Boom — progress.
The Shin Taping Method That Works
Follow this tutorial for proper shin pain KT tape relief:
The Real Work: Fix the Root
KT tape should be one piece of your game plan — not the whole playbook. Here’s what else you need to focus on if you want to get rid of shin splints for good:
1. Rest & Don’t Be a Hero
If your shins hurt, back off. Don’t be that runner limping through miles thinking it’s “just soreness.” Shin splints ignored can turn into something nastier — like a stress fracture.
When the pain flares up, take a break or cut your miles way down. Once it settles, build back slow — no more than 10% increase per week. That’s the old rule, and it still works.
2. Strengthen What’s Weak
Most shin pain comes from weak calves and hips. Your legs aren’t absorbing the force, so your shins take the hit.
That’s what happened with my girlfriend. We added toe raises and band work for her ankles and calves — and within a few weeks, the pain backed off big time.
If you’re not already doing calf work, you’re missing the basics. Add glute and hip strength too — strong runners are balanced runners.
3. Fix Your Form & Check Your Shoes
Overstriding? Landing heavy on your heels? You’re punishing your shins. Start listening to your footsteps — aim for quiet landings. Soft, midfoot strikes will save your lower legs.
And your shoes? If they’re old, worn out, or just not right for your foot type (like flat feet or overpronation), they’re part of the problem.
Consider arch support or orthotics if needed. I’ve had athletes tape their arches in addition to their shins to get through rough patches — it can help.
4. Ice & Stretch (Don’t Skip This)
After a run, hit those shins with ice for 10–15 minutes. It calms down inflammation.
Then stretch. Tight calves pull on your shins — foam roll them too. This part isn’t flashy, but it keeps your legs running smooth.
5. Cross-Train & Run Smarter
Sub in cycling or swimming when things flare up. Your lungs stay strong without pounding your shins.
Also, ditch the concrete jungle sometimes — trails and grass are way easier on your legs. Too much pavement is a shin killer.
Here’s the part most runners don’t want to hear: if your shin pain sticks around even when you’re not running, get checked out. You might be dealing with a stress fracture.
That’s not something you can tape your way through.
Yep, it can help — not as a miracle cure, but as a solid tool for keeping you moving when your shins are screaming. It won’t fix the root cause, but it sure can take the edge off.
I’ve used KT tape during those stretches when every step felt like I was getting stabbed in the tibia. It made things bearable so I could stay active while I worked on the real problem (like dialing back mileage, strengthening my calves, and checking my shoes).
And the science backs it up: A study found that after just one week, taping reduced shin pain more than insoles did (PubMed study).
So no, it’s not magic. But it’s a damn good band-aid while you work on the bigger picture.
Your move: Ever tried KT tape on angry shins? If so, did it help? If not, is it time to test it?
Q2: How do you tape your leg for shin splints?
It’s pretty simple once you’ve done it a couple of times. You don’t need to be a PT to figure this out.
Here’s the gist:
Flex your foot.
Stick one long strip of tape starting near your ankle and run it up along the shin, ending just under the knee — give it a gentle stretch.
Then slap on a shorter strip across the pain spot horizontally for extra support.
Rub it a bit to heat up the glue — and boom, you’re good to go.
(If you want the full step-by-step, scroll up — I’ve laid it all out clearly.)
This trick has helped me hit the road when rest wasn’t an option. And I’ve shown plenty of coaching clients how to do it, even in hotel rooms before race day.
Question for you: Do you already use tape? Or still winging it with ice packs and crossed fingers?
Q3: Can I run with KT tape on my shin splints?
Yeah, that’s the point — taping lets you keep running without making things worse (as long as you’re smart about it).
KT tape is built to give support without locking you up. When my shin pain flared during a training cycle, taping let me keep logging miles — though I did scale back speedwork and hills.
It didn’t give me a free pass to hammer it. That’s the key: use the tape to help, not to hide.
And if it still hurts? That’s your body throwing a red flag. Switch to biking, swimming, or even just take a couple days off.
No tape will save you if you’re just stacking injury on injury.
Think about this: Are you training smart with tape — or using it to avoid resting?
Q4: How long should I leave KT tape on for shin splints?
Most tape brands will hold for about 3 to 5 days. That includes through showers, sweaty runs, and a bit of wear and tear.
In my case, around day 3 or 4 the edges start peeling — especially if I’ve been running in Bali humidity or showering twice a day (which I usually do).
If it starts flapping or if your skin gets cranky, peel it off and let your skin breathe for a bit before reapplying.
Don’t layer tape on tape. Let your legs rest too.
Tip from the road: I’ve raced and trained with tape that held up like a champ. But I’ve also had a bad roll peel off mid-run and slap my leg like a wet noodle. Test it before race day.
Bringing It All Together: The Real Takeaway
Look, I’ve had shin splints that made me limp off a trail cursing under my breath. I’ve also made comebacks using nothing but tape, calf raises, and a stubborn refusal to quit.
KT tape won’t “heal” you overnight. But it’s a reliable teammate in your recovery lineup — especially when paired with the right shoes, smart training, and rest when needed.
I’ve seen this stuff help beginners stay consistent, help my girlfriend finish a brutal race series without hobbling, and help me survive brutal back-to-back long runs during peak weeks.
It works if you respect it for what it is — a support, not a fix.
So Now What?
Grab a roll. Tape your leg. Try it on your next easy run and see how it feels. That small strip of tape might just be the edge you need to get through a tough patch.
Your mission:
Let me know how it goes. Are you giving KT tape a shot this week? Drop a comment or DM — I’m always curious how it works for other runners.
Stay strong, take care of those legs, and never let a little pain stop you from chasing big goals.
Ready to take action? Your shins won’t tape themselves! Give this taping method a shot and let me know how it goes.
Here’s to many miles of happy, healthy running ahead. Stay strong, stay positive, and take care of those legs!
If you’re dealing with calf pain after running, I’ve been in your shoes.
Back in my early running days, I used to brush it off.
Tight calves? Just part of the grind—or so I thought.
Then one early morning, just past sunrise, a cramp hit me so hard I had to sit on the curb. I was rubbing a knot the size of a golf ball and thinking, “Am I done running for good?”
That moment forced me to wake up and start listening to what my body was screaming.
What I learned from that scare didn’t just help me get rid of the pain. It helped me run stronger, smarter, and with way more awareness of how my body works.
Let’s get to it.
Calf Pain Is the Sneaky Villain Most Runners Ignore
Here’s the truth: calf pain is super common, but it doesn’t get talked about enough.
According to data, around 80–85% of runners report calf soreness after a run.
That’s nearly all of us.
Most runners obsess over their knees or ankles. But your calves?
They quietly take the hit on every single stride. Each time your foot hits the ground, your calf has to absorb the impact and help push you forward.
If your calves are tired, weak, or too tight to do their job?
Something else—like your knees or Achilles—ends up picking up the slack. That’s how overuse injuries sneak in.
Why So Many Runners Brush It Off
It’s easy to overlook calf pain. It doesn’t usually scream for attention.
It starts as a tight, post-run ache. You think, “No big deal.”
And because runners are tough (sometimes to a fault), we power through. But that dull ache can hide some real issues—strained muscles, overused Achilles, or worse.
Here’s a wild stat: 80–85% of runners regularly deal with sore calves.
The bottom line?
Calf pain is your body’s way of waving a red flag. Ignore it, and it’ll bite you later. Address it now, and you’ll not only feel better—you’ll run better.
Know Your Calves: The Muscles That Keep You Moving
Gastrocnemius (aka “gastroc”): This is the bulging muscle you see when you stand on your toes. It crosses both your knee and ankle, and it’s built for power. Think sprints, jumps, and fast bursts.
Soleus: This guy sits underneath the gastroc. It’s flatter, deeper, and doesn’t get much credit—but it’s a beast. The soleus helps you push through long runs and supports you when you’re standing for long periods. According to research, it can produce massive force—and it’s often undertrained. A big mistake I see in rehab routines all the time.
Together, these muscles join at the Achilles tendon, that thick cable running from your calf down to your heel. Every time you toe off the ground, your calf-Achilles combo powers that move.
If your calves are strong and loose, your stride becomes springy and smooth. But if they’re tight or weak? That spring turns into a rusty hinge.
Takeaway tip: Don’t skip calf work. Both strength and flexibility matter.
Why Do My Calves Hurt? Common Causes of Calf Pain in Runners
Let’s talk about it—calf pain sucks. It can hit hard or creep in slow, and whether it’s a sharp zing mid-run or that post-run tightness that won’t quit, it messes with your flow.
I’ve had my fair share of runs cut short by angry calves, and most of the time, the cause is one of these usual suspects:
1. Doing Too Much, Too Soon (Overuse and Strains)
This is the big one. I see it all the time—runners ramping up mileage or attacking hills before they’ve built the base.
The calf, especially that big gastroc muscle, doesn’t love surprises.
Push it too far too fast, and boom—you’ve got a strain.
Sometimes it feels like a sharp snap mid-run, or just soreness and stiffness creeping in later. Even without a full tear, micro-tears add up fast.
Rolling out of bed and straight into a run? That’s a recipe for tight calves.
Muscles need blood flow and prep. Skip the warm-up, and you’re shocking your legs into motion. It’s like flooring a cold engine—things go wrong fast.
Those cramps in mile one? Often from going 0 to 100 with tight muscles. A 5-minute dynamic warm-up can save you weeks of pain.
3. Poor Running Form & Gait
How you move matters. If you run on your toes or strike too far forward (forefoot striking), your calves eat up all the impact.
Add in uphill climbs or overstriding, and you’re giving your lower legs a beating.
Even small quirks like toeing out or favoring one side can mess with you over time.
I’ve worked with runners who fixed chronic calf pain by simply adjusting stride length or aiming for a midfoot strike. Sometimes the solution isn’t more stretching—it’s better mechanics.
4. Muscle Imbalances or Weakness
Here’s the kicker—tight calves aren’t always strong calves. Sometimes they’re weak and overworked.
Maybe the gastroc is doing all the lifting while your soleus is snoozing. Or maybe your shins and hammies are too lazy to carry their share.
That’s when the calves step in and get mad. I tell my athletes: don’t just stretch, strengthen. Build balance. It pays off.
5. Dehydration & Electrolyte Issues
If you’ve ever woken up to a calf cramp that felt like a lightning bolt, you know what I’m talking about.
Lack of fluids and key minerals—like magnesium, sodium, potassium—can trigger those brutal spasms.
Training in heat makes it worse. One guy I coached was cramping constantly until we added a magnesium supplement. Magic.
Don’t underestimate the power of water and electrolytes—they’re your cramp insurance.
Worn out, unsupportive, or just wrong-for-you shoes can stir up calf pain fast.
Minimalist shoes can stretch your calves more—sometimes too much. Shoes with high heel drops might shorten the calves over time.
Rapid switches between the two? Bad idea.
Also, foot shape matters. Flat feet can lead to overpronation stress, high arches to poor shock absorption.
7. Old Injuries or Hidden Causes
Not all calf pain is straightforward. Sometimes it’s nerve-related, like sciatic issues sending pain signals to your calves. Old Achilles injuries, nerve tension, even circulation problems can be the culprit.
I’ve seen runners deal with calf pain for months only to find out it was a hidden nerve entrapment. If your pain lingers, feels odd, or swells up, get it checked. Don’t guess.
Bottom line?
Calf pain usually isn’t from just one thing. It’s a mix—bad shoes, skipped warm-ups, heat, form flaws, and more.
The fix? Take an honest look at your training, your gear, and your habits. The causes are fixable if you pay attention.
And trust me—as someone who’s had to limp home more times than I’d like to admit, fixing it is worth it.
Next up, we’ll dive into how to treat calf pain and keep it from derailing your training.
Can I Keep Running with Sore Calves?
I get this question a lot from runners I coach—and honestly, I’ve asked it myself plenty of times: “Is it okay to run with sore calves, or am I just setting myself up for injury?”
Well, it depends. And I’ll break it down for you the way I would with any runner after a tough week of training.
1. Mild Soreness? You’re Probably Good to Go (But Don’t Be Stupid)
If your calves feel tight after a hard run, new shoes, hills, or speedwork—and we’re talking low-level soreness here, maybe a 2 or 3 out of 10—you’re likely dealing with Delayed Onset Muscle Soreness (DOMS).
This kind of soreness is normal. In fact, it often means you’re getting stronger. If movement helps it ease up, you’re okay to keep going—lightly. No all-out hill repeats the next day.
What I tell my runners: use the 24-hour rule. If the soreness eases up within a day and you’re not limping or changing your stride, then an easy run or some cross-training should be fine.
I’ve had plenty of runs where my calves were stiff at the start but loosened up as I got going. The key is to listen, not power blindly through. You’re not trying to prove toughness—you’re trying to stay consistent.
2. Sharp Pain or No Improvement? Time to Chill
Now, if that calf pain is sharp, locked-in, or just won’t go away—even with rest—stop running. I mean it.
Here’s where runners mess up: they feel something “off,” ignore it, and end up on the sidelines for six weeks instead of one.
I’ve seen it happen. Hell, I’ve done it.
Red flags you should never ignore:
Pain that messes with your stride
Swelling or bruising
Pain that’s still there even when you’re just walking around
One runner told me he heard a pop mid-run, pushed through it like a hero, and then couldn’t walk the next day. That “pop”? Classic calf tear.
One of the physiotherapy clinic site calls this a serious strain, and yeah—they’re right. Keep running on that, and you’re looking at weeks (or months) out. If anything feels off, get it checked.
And let’s talk about chronic tightness—if your calves never feel loose, even after warming up or stretching for weeks, then something’s up.
Could be a buildup of training mistakes, or something deeper like Achilles tendinopathy creeping in.
3. Not Sure? Rest Anyway. It’s Not Weakness—it’s Wisdom
If your calves are barking at you and you’re torn between pushing through or resting—just rest. One or two skipped runs won’t wreck your training.
But ignoring warning signs? That’s how you spiral into injury.
I’ve told runners this a hundred times:
“You won’t lose all your progress by taking 48 hours off. You might lose everything if you don’t.”
Take a short break, stretch, foam roll, hydrate, and reassess.
I read a story on Reddit where a guy tried to “run through” a calf strain and ended up DNF’ing a race. After finally taking 10 days off and rehabbing properly, he came back and crushed a personal best.
That’s the power of patience. Your body heals—if you let it.
Ever Heard of the “Calf Heart Attack”?
Old-school runners sometimes joke about this thing called a “calf heart attack.”
It’s not a real heart attack, obviously—it’s that sudden tearing pain in the calf, often in the medial gastrocnemius, that hits during speedwork. Feels like someone shot your leg.
It’s brutal. It happens more in runners over 40. And trust me—you don’t run through it.
You stop. Right there. Ice it. Rest it. Start a slow recovery plan.
As study explains, as we age, our calf muscles lose elasticity. That’s why warming up properly, especially before speed workouts, becomes non-negotiable.
You’re not fragile—you just need to train smarter.
Got Tight Calves Right Now? Here’s What Actually Helps
Let’s get to the good stuff—what to do when your calves are tight but not torn.
1. Can You Walk Without Pain?
Before you run, check if you can:
Walk pain-free
Do a few calf raises with no discomfort
If you can’t do those? You’re not ready to run. Back up and heal first.
Straight-leg Calf Stretch (Gastroc): Hands on the wall, one foot back, heel pressed down, leg straight. Feel that stretch high up in the calf? Hold it for about 30 seconds. No bouncing.
Bent-Knee Calf Stretch (Soleus): Same setup, but this time bend the back knee slightly. This gets deeper into the soleus. Again, hold for 30–45 seconds.
Downward Dog Pose: Push your hips up, heels toward the ground, hands planted. You’ll feel it from your calves to your hamstrings. You can pedal your heels too—works each side individually.
Just a reminder: stretching shouldn’t be torture. You’re coaxing the muscle to relax, not punishing it.
A bit of tension is fine. Sharp pain? Back off.
Also—don’t stretch aggressively in the first 24–48 hours after a strain. Stick to light massage, ankle circles, and gentle mobility work first.
3. Make Stretching a Daily Habit
I tell my athletes to stretch calves every day, especially after a run while the muscles are still warm.
Before bed is a great time too—helps cut down that brutal morning stiffness.
One runner on Reddit said, “I stretch constantly and they’re still tight!”
And I get it. That’s because stretching is only part of the fix. The other key? Strength work. (We’ll get to that in the next section.)
4. Self-Massage and Foam Rolling (Calf Release Techniques)
You ever hit a tight spot in your calf with a foam roller and feel that “hurts-so-good” kind of pain? That’s your muscle saying, “Finally, some help.”
Self-massage is one of the simplest, most effective ways to loosen up tight calves and get the blood moving again.
Here’s what’s worked for me and the runners I coach:
● Foam Rolling
Grab a firm foam roller, drop to the floor, and get to work. Sit with one calf on the roller and support yourself with your hands behind you.
Roll slowly from your ankle to just below the knee.
Find a knot? Pause there. Breathe into it for 20–30 seconds and let the muscle release.
If you want more pressure, stack your other leg on top. Yeah, it’ll feel uncomfortable—but in a good way. That deep pressure can help flush things out.
One technique that’s gotten a lot of love is the “foam roller sit”—basically sitting on a long roller with it under your calves and rocking side to side.
I saw it on PogoPhysio, and it’s been a game changer when my calves are cranky. No fancy moves—just gravity doing the work.
Check out the technique below:
● Massage Stick (“The Stick”)
Looks like a rolling pin, and honestly, a kitchen rolling pin can do the trick in a pinch (I’ve done it). Just grab the handles and roll it up and down your calf like you’re kneading out pizza dough.
If you’ve been getting deep knots post-run, this one’s easier to control than a foam roller. And it takes about two minutes to get those calves feeling human again.
● Lacrosse or Massage Ball
For those spots that foam rollers can’t touch—usually around the outer calf or near the Achilles—a firm ball is your best friend.
Sit down, place it under your calf, and apply pressure. You can move in circles or just sit on that spot until the tension fades.
Just be careful near your Achilles—don’t go too hard there. Focus on the meaty upper part of your calf.
● Manual Massage
Got a massage therapist? Great.
If not, your own thumbs will do. Use your knuckles or thumbs to work up and down the calf, always pushing toward the heart.
I’ll do this at night while watching Netflix—thumbs digging into the tight spots while I zone out. A little lotion or oil helps smooth things out too.
You don’t need an hour. Just a few minutes a day keeps tightness from piling up. I keep a foam roller in my living room and a massage ball in my backpack. Recovery on the go.
Bonus tip: Heat helps before a massage or rolling session. A hot shower or a heating pad for 10 minutes gets the muscle loosened up—kind of like warming up clay before you shape it.
5. Compression & Elevation (Recovery Boosters)
Compression socks aren’t just for show. When I’m wearing them during long runs or hard workouts, my calves thank me later. Less soreness. Less wobble. More support.
Post-run, they help by improving blood flow and clearing out the junk that builds up after tough workouts. No fancy gear needed—just slide on the sleeves and let them do their thing.
Got tired legs? Elevate ‘em. Throw your feet up on a wall or pillow for 15–20 minutes post-run. I like to do the “legs up the wall” yoga pose—easy, calming, and it helps reset your calves. It’s a zero-effort win.
6. Topical Stuff: Balms, Rubs, and Gels
Magnesium spray. Arnica gel. Menthol rubs. I’ve tried them all. Do they fix the root cause? No. But they do offer short-term relief.
That warm, tingly feeling can distract from the soreness, and sometimes just massaging the stuff in is half the therapy. But a word of warning: don’t use heat rubs under compression sleeves unless you enjoy the feeling of lava on your legs. Trust me.
7. Active Recovery: Keep the Blood Flowing
This one’s big. Rest has its place, but movement heals.
If my calves are cooked the day after a big run, I don’t just crash on the couch. I go for a bike ride, take a brisk walk, or hit the pool. Nothing crazy—just enough to get the blood moving. That circulation helps clear out soreness and repair the muscle.
It’s not about being a hero. It’s about being smart. Gentle movement beats total rest for tightness 9 times out of 10.
Calf Pain Can Be the Fuel for Your Comeback
Here’s what I tell my runners: setbacks build grit. Calf pain isn’t just a nuisance—it’s your shot to level up. I’ve coached athletes who went from limping through easy runs to smashing PRs, simply because they stuck with the rehab process and kept showing up.
That can be you.
So if your calves have been a weak link, this is your moment to flip the script. Let those frustrating miles fuel your next breakthrough.
Every little step counts. That stretch today? That extra water bottle? That strength set you almost skipped? They all lead to one thing: crossing the line strong and pain-free.
Your Quick-Action Checklist: Beat Calf Pain for Good
Warm up like you mean it. Don’t skip the basics.
Strengthen with focused calf moves—raise, hold, repeat.
Stretch and roll after hard runs. Make it part of your cool-down.
Hydrate and fuel right. Your calves are muscles—they need it.
Rest when needed. One day off beats six weeks on the sideline.
Don’t ignore early signs. Catch it while it’s small.
Ask for help if it lingers. A good PT can save your season.
Now it’s on you. Lace up with purpose, take these tips seriously, and get to work. Stronger, pain-free runs are waiting. And trust me—there’s nothing better than feeling your legs fire without fear.
You finish a tough run—legs are good, lungs feel scorched—and then it hits: that dry, hacking cough.
It might last a few minutes. Maybe longer. You’re not sick, not wheezing like crazy… but you sound like you smoked a pack mid-tempo.
I’ve been there. So have a ton of other runners. For some runners, it might feel like hacking up a lung, and it happens like clockwork after long runs or speedwork.
The good news? It’s usually not serious. The better news? There are ways to manage it.
Let’s break it down.
What Is “Runner’s Cough”?
“Runner’s cough” (aka “track hack,” “tempo throat,” or “that gross noise I make after hills”) is that annoying cough you get during or after a run.
It’s not a cold.
It’s not a flu.
It’s just your lungs reacting to stress—especially from breathing hard in dry, cold, or polluted air.
When you run hard, you suck in a ton of air—fast, dry, maybe full of gunk like dust or pollen—and it irritates your bronchial tubes. Your airways freak out, tighten up, and boom: you’re coughing.
TL;DR: Your lungs got mad. They’ll chill soon.
Exercise-Induced Bronchoconstriction (EIB)
This is a mouthful, but it’s one of the most common causes of post-run coughing—especially if it happens often.
What the heck is EIB?
It’s basically temporary airway tightening during or after exercise. Used to be called “exercise-induced asthma,” and yep—it can happen even if you don’t have asthma.
What it feels like:
Coughing that kicks in mid-run or right after
Wheezing or chest tightness (like someone’s stepping on your lungs)
Feeling out of shape, even when you know you’re not
That deep, rattling cough that comes from the chest, not your throat
A lot of runners just assume it’s normal to cough after hard intervals or long tempo runs. But if it’s consistent, it could be EIB—and it’s way more common than you think.
👉 Research shows 5–20% of people without asthma still get EIB. For folks who do have asthma? Nearly 90% of them experience it during exercise.
How to Manage EIB (And Keep Running Strong)
Here’s how I’d recommend handling this one:
Use a Fast-Acting Inhaler (If Prescribed)
Albuterol is a common one. Two puffs before your workout can keep your airways open and chill. Always follow the prescription—this isn’t one of those “more is better” situations.
I knew a guy who accidentally doubled his dose… and ended up jittery with a resting HR of 150 bpm. Don’t do that.
Warm Up Like You Mean It
Don’t blast into your run at full throttle. Give yourself 5–10 minutes of light jogging and mobility work. Think of it as “priming” your lungs.
A good warm-up can actually trigger a little airway tightening before the main effort—then your lungs adapt, and you’re less likely to flare up when the real work starts.
Cold or Dry Air? Protect Your Face
Cold air is a major trigger. I tell runners to wear a buff or thin scarf over their nose and mouth in winter.
It helps warm and humidify the air before it slams into your lungs. And it works—especially for folks who say they only cough after cold-weather runs.
Try Nose Breathing (When You Can)
It’s not easy during speedwork, but during easy runs, breathe in through your nose and out through your mouth.
Your nose acts like a built-in humidifier. Mouth breathing in dry air = fast-track to cough city.
Cold or Dry Weather Running: Meet the “Track Hack”
Ever finish a winter run and suddenly feel like your lungs are on fire and your throat’s been sandpapered?
You’re not broken — that’s just cold-air cough, also known as the “track hack.”
And if you’ve ever done repeats on a dry indoor track or run in sub-40 temps, you know exactly what I’m talking about.
Why It Happens
Your lungs like their air warm and damp. But winter air? It’s cold, dry, and rough on your airway lining.
Breathe that in hard and fast, and your lungs fight back — tightening up (sometimes causing that tight-chest, can’t-breathe feeling of exercise-induced bronchospasm) and producing mucus to try and protect themselves.
What you get is a scratchy throat, a dry cough that can last for hours, maybe even some clear mucus coming up as your body tries to rehydrate your airways.
What It Feels Like:
Cough starts near the end of the run or just after
Feels like a cold burn in your chest
Dry or slightly phlegmy cough
Raw throat or scratchy chest afterward
Even indoor tracks with dry air can trigger it. The real issue? Cold + dry = irritated lungs.
How to Deal With It
Here’s how to stop this one in its tracks.
Cover Your Mouth and Nose
Neck gaiter, buff, thermal mask — whatever it is, cover up.
Trapping just a bit of moisture and warmth in your breath goes a long way. Even a thin layer over your mouth makes the air feel friendlier to your lungs.
Run Later in the Day
Mornings are the coldest. Midday runs usually have less windchill and a little warmth from the sun.
Even just a 10°F difference can mean the difference between a smooth run and a post-run cough fest.
Go Indoors on Brutal Days
If it’s below freezing, windy, or dry as a bone, treadmill runs are totally fair game. Save your lungs.
You’re not soft — you’re smart.
Warm Up Longer
Ease into your run. Brisk walk, slow jog, dynamic drills — get your breathing warmed up before you start hammering the pace.
Cold air and fast breathing right out of the gate is a recipe for coughing fits.
Postnasal Drip: When Your Nose Messes With Your Run
Let’s call it what it is: snot sliding down the back of your throat and triggering a cough.
Postnasal drip is gross, but common — and it can totally ruin your run.
Why It Happens
When you run, especially in cold or dusty air, your sinuses ramp up mucus production.
That extra gunk drains down your throat, and your body tries to clear it out with coughing or constant throat clearing.
Allergies? Dry air? Leftover cold? All of those can crank up the drip.
How You’ll Know:
Wet cough (you’re bringing up stuff)
Throat-clearing during or after runs
Scratchy or sore throat
Sinus pressure or that annoying “mucus stuck in the throat” feeling
It’s especially common in cold weather (your nose runs more) or allergy season (hello, pollen). And if you’re just getting over a cold? Your airways are still sensitive and junky.
How to Tame the Drip:
Take the following steps to protect yourself from the drip:
Rinse Your Nose Before Running
Saline spray or a quick neti rinse can help wash out dust, pollen, or dried mucus.
It’s gross but effective. Clear the pipes before you run, and you might save yourself a hacking fit halfway through your tempo.
Try an OTC Fix
Decongestants dry things up (good if you’re drowning in mucus).
Expectorants (like guaifenesin) thin the mucus so it doesn’t stick.
Ask a pharmacist if you’re not sure what’s best for your case — especially if you’re on other meds or have health stuff going on.
Breathe Moister Air
If you’re indoors, use a humidifier.
If you’re outside, cover your mouth like we talked about earlier.
Recent cold? Back off the pace for a bit and let the body clear it out.
It’s not always about pushing harder — sometimes it’s just about letting your system reset.
Seasonal Allergies: When the Air Fights Back
If you’re a runner with seasonal allergies, you already know what I’m about to say: spring hits, everything starts blooming, and boom — you’re coughing like you just inhaled chalk dust mid-tempo.
That cough? It might not be from effort. It could be an allergy-driven airway freakout.
When pollen or mold is floating thick in the air, your immune system throws a fit — inflaming your airways, making you wheeze, and producing histamine like it’s going out of style.
Cough, sniffle, itch, repeat.
The American Lung Association even flags pollen as one of the biggest spring allergy triggers — and it hits runners hard.
You go out for a nice run. The sun’s out. Trees blooming.
Halfway through, your nose runs faster than your pace, your throat itches, and you start coughing.
After the run? Still coughing. Eyes watering. You’re miserable.
If you also deal with exercise-induced asthma (EIB)? You might get double-hit — allergies + airway constriction. That cough gets louder and longer.
Here are my best tips on running through the allergy season without losing your mind:
Check the pollen count before you run. If it’s sky-high? Go treadmill. Or swap your run for cross-training that day.
Run at the right time. Pollen levels spike in the morning and on warm, windy days. Evening or dusk is usually better. Rainy days? Gold.
Pre-load with an antihistamine. Non-drowsy versions like loratadine (Claritin) or cetirizine (Zyrtec) work well for most. Just don’t try something new on a race day.
Wear gear that helps. Wraparound sunglasses = fewer itchy eyes. A light buff over your nose/mouth can cut down pollen inhalation.
Shower and change ASAP post-run. Get that pollen off your skin and clothes before it lingers in your lungs.
If the cough still kicks in despite all this — talk to a doc. You might have allergic asthma and need an inhaler. Better to manage it early than wheeze through workouts all season long.
Acid Reflux (a.k.a. Your Stomach Being a Jerk)
Ever get a cough mid-run, followed by a nasty burning in your chest or throat?
Or sometimes laryngopharyngeal reflux when it affects the throat.
Doesn’t matter what you call it — if you’re coughing and tasting bile during runs, it’s a problem.
Here’s how to tell it’s not asthma, but reflux;
You feel a burn in your chest or throat
A sour taste creeps up during or after runs
Cough happens after eating or when lying down
Cough is worse when running downhill or bouncing a lot
Inhalers don’t help — but diet tweaks do
How to Prevent Reflux
Here are my best tips:
Don’t eat big meals before runs. Wait 2–3 hours after eating. If you need fuel, go small and bland (banana > burrito).
Know your trigger foods. Coffee, citrus, chocolate, spicy or fatty meals — all can stir up reflux. Avoid these close to workouts.
Use meds if needed. Antacids like Tums work short-term. H2 blockers or PPIs like famotidine or omeprazole help longer-term — but talk to your doc if you’re using these often.
Stay upright post-run. Don’t lay down or do yoga inversions right after running. Let gravity keep the acid where it belongs.
Ditch tight belts or waistbands. Sounds small, but squeezing your stomach can make reflux worse. Wear looser running gear.
Train your core and breathing. Some reflux is mechanical — weak core muscles and poor diaphragm control make acid creep upward. Fixing posture and core strength helps more than people realize.
Vocal Cord Dysfunction (VCD) – When It’s Not Your Lungs
Sounds weird, right? But it’s legit—and I’ve seen runners misdiagnosed with asthma because of it.
The catch? VCD has nothing to do with your lungs.
It’s your vocal cords closing when they’re supposed to open.
Think about that: trying to suck in air during a tough run, and your throat’s literally shutting the door.
That’s VCD.
How to Know It’s VCD (Not Asthma)
Most runners chalk this up to asthma—tight chest, trouble breathing, coughing—but here’s the difference:
With asthma, you wheeze on the exhale
With VCD, you’ll hear a high-pitched sound on the inhale, and it feels like your throat’s clenching shut
I read that it’s been described like “breathing through a straw” or “choking mid-run.”
It hits hardest during high-intensity workouts—track repeats, tempo runs, hill efforts.
You’ll probably cough, maybe feel hoarse, and your inhaler won’t help.
🎯 Key sign: If you’ve got a wheezy, tight throat during hard efforts and your asthma meds do nothing, start thinking VCD.
What Causes VCD?
It’s not allergies. It’s not lung inflammation.
Common triggers:
Hard effort breathing mechanics
Stress or anxiety
Smoke or strong smells
Even vocal strain from yelling or overuse
You could have the lungs of an Olympian—but if your voice box locks up, it’s game over.
How to Fix It (Hint: Not With Meds)
Here’s the cool part: VCD isn’t permanent. It’s very trainable—you just need the right tools.
Speech Therapy & Breathing Techniques
This is the gold standard. A speech-language therapist can teach you how to:
Relax your throat during inhalation
Use belly breathing
Do specific vocal cord control drills
They’ll walk you through stuff like “sniff-breathe” techniques or rescue maneuvers that help you stop an episode before it snowballs.
Think of it as strength training—for your voice box.
Rescue Breathing Tricks
These are little “in-the-moment” tools to get through an episode:
Quick shallow pants
Inhaling through pursed lips
Nose breathing to calm the system
Runners with VCD often learn to spot the signs early and reset their breathing before it spirals.
Avoid Triggers (If You Know Yours)
If:
Cold air kicks it off? Warm up longer or use a buff over your mouth.
Chemical smells set you off? Don’t run near traffic or smoke.
It’s hard effort alone? Learn how to pace and breathe more efficiently under load.
Key tip: Prevention is a heck of a lot easier than fighting your throat mid-interval.
The Good News
VCD feels intense, but it’s not dangerous long-term.
Once diagnosed, it’s usually very manageable—and doesn’t need meds.
Tons of athletes have beaten it and gone on to race strong. You just need to understand what you’re dealing with.
If you suspect it, ask your doc for a specialist referral. You may need a scope or breathing test to confirm.
Most runners with VCD are initially told it’s asthma—and end up frustrated until someone looks deeper.
How Long Does Runner’s Cough Last?
I get asked this very often: “Why am I still coughing after my run?”
Runner’s cough is common—but how long it lingers depends on what’s causing it.
Here’s the general timeline:
Simple airway irritation (cold air, dry air, light bronchospasm):
Usually clears in 10 to 60 minutes post-run. Water, warm air, and rest usually do the trick.
Exercise-induced bronchoconstriction (EIB):
Typically resolves in 30–60 minutes. With a rescue inhaler? You might feel better in 10–15 minutes.
Allergy-driven cough or postnasal drip:
Might last a little longer—up to 1–2 hours, especially if you’re still around the trigger (pollen, mold, etc.).
When It’s NOT Normal
If you’re still coughing hard 2, 3, 4 hours later, or if it lingers all day, that’s not just “runner’s cough.” That could be:
A brewing chest infection
Uncontrolled asthma
Something else like VCD or an environmental trigger you haven’t identified
Pay attention to patterns:
Does it only happen in winter?
Does it go away when you run indoors?
Does it get worse with every run?
Those clues help pinpoint whether it’s just irritation or something bigger.
My Final Word
If winter running makes you cough, you’re not broken—you’re normal. But that doesn’t mean you have to just suffer through it.
Bundle up. Pick your time. Know your limits. Adjust when needed. And if it still doesn’t feel right, get help.
Cold air doesn’t have to be your enemy. With the right approach, you can train through winter without hacking up a lung.
Got a winter running tip or compression mask you swear by? Or maybe a story about finally solving your post-run cough? Drop it in the comments—I’m always down to learn from fellow winter warriors.
You’re cruising through your run—maybe it’s mile 4 of a tempo, maybe it’s the last hill of a long run—and then it hits.
A sudden “pop” in your calf.
Like someone took a swing at the back of your leg.
You stop.
Limp.
Stare at your shoe like it betrayed you.
Welcome to the world of pulled calf muscles—where one sharp twinge can derail weeks of solid training.
If you’ve been there, I feel you. I’ve had runners describe it as feeling like they got shot in the leg.
Others say it was more like a snap of a rubber band, followed by that brutal reality: you’re done for the day.
But here’s the deal: pain doesn’t mean you quit. It means you pivot.
That’s something I tell every injured runner I coach. This isn’t the end—it’s your cue to rebuild smarter.
Let’s break down how calf strains happen, how to fix them, and how to prevent them from wrecking your next block of training.
What the Heck Is a Calf Strain, Anyway?
In simple terms? A calf strain is when muscle fibers in your calf get overstretched or torn.
Sometimes it’s just a few fibers (mild). Other times it’s a bigger mess—partial tear, or full-blown rupture. And it’s a common running injury.
You’ll often hear people say they “pulled” their calf. Same thing. The words “strain,” “tear,” and “rupture” all describe damage to the muscle—but they vary by degree:
Grade 1: Minor overstretch. Feels tight, maybe a dull ache. You can still walk but running feels iffy.
Grade 2: Partial tear. Pain is sharper, you’ll probably limp, and stairs suck.
Grade 3: Complete rupture. Major pain. Swelling, bruising, and forget about running—walking is a chore.
Now don’t panic. Most runners get Grade 1 or 2 strains, not total blowouts.
Still, even the “mild” stuff can linger if you don’t treat it right.
More on this later…
Where It Happens (And Why It’s Always the Calf)
Your calf isn’t just one big muscle—it’s a team of two:
Gastrocnemius – The big, meaty muscle you can see. Crosses both the knee and ankle joints. Fast-twitch. Explosive. Most calf pulls happen here, especially on the inner side.
Soleus – Hides underneath the gastroc. More endurance-focused. Slower-twitch, used more for posture and long grinding runs. Also gets strained, but more from overuse than sudden motion.
Both muscles eventually feed into your Achilles tendon, which means a strain can also lead to Achilles issues if you don’t address it properly.
“Runner’s Calf” – It’s a Thing
Ever had your calf blow up more than once? That’s what we call runner’s calf—a nickname for recurring calf strains.
It’s super common in:
Masters runners (35+) – As we age, our muscles lose elasticity and bounce.
Men – Statistically, guys 40+ are hit hardest by calf issues.
Speed workouts & hills – Those fast or uphill strides? High risk. The gastrocnemius hates sudden stress.
One study on masters runners found that 70% of calf strains happened in men over 40. That’s not bad luck—that’s biomechanics and aging muscle tissue.
What It Feels Like
Here’s what runners usually report:
Sudden sharp pain, often mid-stride
A “snap” or “pop” sensation (some swear they heard it)
Immediate tightness or cramping
Can’t push off the foot without pain
Limping or needing to stop completely
Swelling or bruising a few hours later (in worse cases)
If that sounds familiar, you’ve probably got at least a Grade 1 or 2 strain. Don’t run through it.
That’s how you go from sore calf to six weeks off.
Sprain vs. Strain – Quick Clarifier
A strain = muscle or tendon injury (like your calf)
So if your lower leg pain is in the muscle belly, not near a joint, you’re likely dealing with a strain—not a sprain.
Grades of Calf Strain (From “Ouch” to “Oh Crap”)
Physios usually classify calf strains into three grades, depending on how much muscle damage there is.
Here’s how to tell where you’re at (and how long you might be benched).
Grade 1: The Warning Tap
What it is: Just a few muscle fibers overstretched or micro-torn.
How it feels: Slight tightness or discomfort — sometimes not even until after your run. You might be able to walk or jog, but something’s clearly off.
Recovery time: Usually 1–2 weeks. Rest, ice, gentle stretching, and easy walking usually do the trick. But don’t blow it off — even this minor stuff can turn into something bigger if you ignore it.
Grade 2: The Mid-Level Wreck
What it is: Partial tear — more serious damage.
How it feels: Sharp pain. Swelling or bruising might show up. Walking hurts. Running? Forget it.
Recovery time: 4–8 weeks, depending on how early you catch it. You’ll need a break from running, plus a proper rehab plan. This one you can’t just “walk off.” Been there.
Grade 3: The Full Shutdown
What it is: A complete tear or near-rupture.
How it feels: Like a sniper shot to the leg. Seriously. Most runners say it felt like they got kicked or hit with a rock. Immediate pain. Can’t walk. Can’t stand.
Signs: Bad swelling, bruising, maybe even a visible dent where the muscle tore.
Recovery time: 3–6 months minimum. Sometimes surgery is needed, especially if the Achilles is involved.
⚠️ Some pros use “Grade 4” for complete muscle + tendon rupture, but let’s just call Grade 3 what it is — serious.
What Causes Calf Strains in Runners?
You didn’t just wake up with a torn calf. Something caused it — and chances are, it was a mix of bad luck, training mistakes, and ignoring the warning signs.
Sudden Stretch or Explosion = Snap
Sprinting off the line, jumping, misstepping on a downhill, or even just pushing off too hard on tired legs — boom. That’s all it takes.
The gastrocnemius (the big calf muscle) is especially prone to this. It’s a fast-twitch muscle, made for short bursts — but if it gets stretched suddenly under tension, it tears.
Runners call this “tennis leg” sometimes — that sharp calf pop when you overextend.
It’s common in sports, but it happens in running too.
The Big Mistake: Training Too Much, Too Fast
I see it all the time. Runner feels good, mileage creeps up, pace starts to drop… then pop — calf strain.
Here’s why it happens:
Cold starts. Jumping into a run without a warm-up? That’s calf strain bait. Your muscles aren’t rubber bands yet — they’re cold spaghetti. Get some blood flowing first.
Mileage jumps. If you go from 15 to 35 miles a week in two weeks, you’re playing with fire. The calf lifts your heel every step — that’s ~1,400 reps per mile. That’s a ton of work. Ramp up slow.
Too much hill or speedwork too early. Hills = more toe-off. Speed = higher intensity. Both hammer your calves. If you jump straight into hill repeats or 400s without base work, don’t be shocked when your calf gives out.
No recovery. Overtraining tightens everything up. Your calf becomes a ticking time bomb. If you’re stacking hard days with no rest, eventually the muscle will just quit on you.
The Re-Injury Cycle
This is the part that gets most runners — you feel better, so you jump back in too soon… only to strain it again.
Then again.
Then again.
A guy I coached pulled his calf during training. Took a couple of weeks off, no rehab, then went straight into trail race.
Boom — same pain. He had this happened to him a few times before he finally backed off, did strength work, mobility, and a proper ramp-up.
Only then did it stick.
Calf Strains: Sometimes It’s Not What You’re Doing
Let’s be honest—runners love to talk about mileage, workouts, and races.
But form and footwear? Often overlooked.
And that’s a big problem, because poor mechanics and the wrong shoes are sneaky culprits when it comes to calf strains.
Overstriding & Low Cadence
One of the most common form fails? Overstriding.
That’s when your foot lands too far ahead of your body—usually with a hard heel strike and your toes pulled up (dorsiflexed).
The result? Your calf gets yanked, then forced to contract hard to push you forward.
Ouch.
A red flag here is a low cadence (aka steps per minute).
If you’re running an 8-minute pace and only hitting 150 steps per minute? You’re probably overstriding.
Foot Strike and Form Quirks
Too much forefoot striking (running on your toes)? Calves are doing overtime.
Extreme heel-striking with a hard toe roll? Same problem—too much strain during the transition.
The sweet spot for most runners is a midfoot strike or a light heel tap with the foot landing under your hips—not five feet out in front.
Keep a slight bend in the knee to absorb shock, and don’t lean forward from the waist like you’re trying to win a limbo contest.
An old pair with dead cushioning can shift more force to your muscles, especially the calves.
And switching into zero-drop or minimalist shoes cold turkey? Huge risk.
I’ve seen it a dozen times—runners go from a 10mm drop trainer to a barefoot-style shoe in one run, then wake up with calves so sore they can’t walk downstairs.
That heel drop matters.
Your calves stretch more with every step in low-drop shoes, and if they’re not ready, they’ll rebel.
Weak Links Make Calves Overwork
Sometimes the calf isn’t the problem—it’s the victim.
Weak glutes, soft hammies, or a sleepy core can all dump extra work on your calves.
If you’re not driving forward with your hips and posterior chain, you’ll end up toe-pushing your way through runs.
And that’s when the calves start screaming.
I knew one runner who kept pulling his calf on tempo runs. Turns out his glute medius was practically asleep.
His stride got stronger, smoother, and his calves finally caught a break.
Fatigue & Tightness: When Your Calves Just Give Out
Ever made it to mile 20 of a marathon and felt your calf start to cramp or “twinge”? That’s your body yelling, “I’m done.”
Fatigue is a major player in calf strains—especially during long runs or races where the muscle just can’t keep up.
A tired calf can’t absorb shock or generate force as well. Keep pushing it, and you’re one stride away from a strain or tear.
And tightness? That’s another trap. Runners who never stretch or who live on hilly terrain often end up with tight, shortened calves. Then they ask those same tight muscles to go long and strong. That’s like snapping a cold rubber band—it doesn’t end well.
Red Flags You Shouldn’t Ignore
If you notice any of these, skip the self-diagnosis and go see a doctor:
A big swollen lump in the calf or behind your knee
Redness, warmth, and swelling out of nowhere (could be a DVT)
A pop low in the leg or heel = possible Achilles rupture
You can’t move your toes or foot = could be nerve or compartment issues
Pain getting worse by the day, not better
Pain even when resting or sleeping = something’s off
Cleveland Clinic puts it bluntly: if you can’t walk, flex your foot, or the swelling is major, get help. It might not even be a calf strain. One in ten people with “calf pain” actually has a blood clot. Don’t mess around.
Coach’s Recovery Playbook: Calf Strain Edition
Tweak your calf mid-run? Pulled it on a sprint? Yeah, you’re not alone.
Calf strains are sneaky—they don’t just hurt, they linger if you don’t treat them right.
Here’s how I walk my runners through the comeback, step by step.
Compress & Protect – But Don’t Overdo It
Compression helps reduce swelling and gives the calf some backup support—especially in those first few days when everything feels raw.
Wrap it up with an ACE bandage or slip on a calf sleeve. Not tourniquet-tight, just snug.
Start from the ankle and wrap upward, keeping pressure even.
If your toes start tingling or your foot turns pale? Too tight—redo it. Blood still needs to move.
Some athletes also use kinesiology tape for support—it can help offload tension and cue your brain not to overstretch. Not essential, but a decent bonus if you know how to apply it.
Key point: This phase is all about protection. If it hurts to walk, use crutches for a day or two. Definitely skip anything that stretches or strains the calf.
Anti-Inflammatories: Use Wisely, Not Recklessly
Got pain? A couple days of ibuprofen or naproxen can help take the edge off. But don’t get addicted to popping pills just so you can keep training through pain. I’ve already shared my opinion about the subject here.
Caution: Some sports docs say NSAIDs might slightly slow muscle repair in the first 48 hours. The science isn’t conclusive—but it’s something to think about.
My advice: Use meds if the pain keeps you up at night or stops you from functioning—but don’t rely on them beyond a few days. And never take them to push through a workout.
Gently Get Things Moving (After 3–5 Days)
Once the worst of the pain settles (typically 3–5 days in), it’s time to start moving the area again—gently.
Ankle mobility drills – point/flex your foot, do ankle circles
Towel stretches – loop it around your foot and gently pull back
Muscle setting – contract the calf lightly without moving the ankle
After 72 hours, you can switch from ice to warm compresses or foot soaks, as long as swelling is down.
Try contrast bathing (hot-cold-hot-cold) to get the blood flowing.
Gentle massage around—not directly on—the tear can also help stimulate healing.
Load It Gradually – No Rushing the Process
Muscles heal stronger when you load them up again—but timing is everything. Rush it, and you’re back to square one.
Here’s the rebuild timeline I give my runners:
Days 1–3
Total rest. Ice. Compression.
No stretching, no running, no testing the calf.
Just some easy ankle movement if it doesn’t hurt.
Days 4–7
If walking is pain-free, walk a bit each day.
Start light stretching, ankle pumps, and isometrics.
Week 2
Seated calf raises (low resistance, high reps)
Double-leg standing raises
Balance drills
Week 3 and beyond (moderate strains)
Add single-leg calf raises
Introduce toe hops, jump rope, or light agility
Keep up glute, hamstring, and core work
One runner I worked with documented it like this:
Week 1: couldn’t walk
Week 2: walking slowly
Week 3: elliptical + PT work
Week 4: jog-walking
Weeks 5–6: daily slow running
Week 8: easing into speed again
Week 12: back to full sprinting
Bonus Tips:
Cross-train to stay fit (bike, swim, elliptical).
Monitor soreness—if pain spikes the next day, you did too much.
Progress week by week, not day by day.
Physical Therapy (When You Need Backup)
Sometimes you just need more than foam rolling and prayer.
If your calf strain is bad—or just not healing right—seeing a physical therapist can be a game-changer.
They’ll use tools like:
Manual therapy
Laser or ultrasound
Targeted strength work
A good PT will also test you (single-leg hops, calf raises, etc.) before giving the all-clear to run again. That way you’re not just guessing.
Patience and Mental Grit
Rehabbing a calf strain isn’t just a physical process—it’s a mental one. And this is where a lot of runners mess up.
You want to push through, get back out there, prove you’re tough.
But real toughness? Knowing when to hold back so you don’t reinjure yourself.
Celebrate the small stuff:
“I walked pain-free today.”
“Did 15 calf raises without grimacing.”
“Cycled for 30 minutes, no flare-up.”
Each win matters. Stack them.
As I tell my runners: “You can take a break from training without taking a break from being a runner.”
Use downtime for mobility, strength, and mindset. Don’t start pounding pavement until your calf is truly ready.
You should be able to:
Walk without pain
Hop in place without wincing
Do daily activities without issues
Anything less, and you’re just begging for a re-tweak.
Patience now = mileage later.
When to See a Doctor for That Calf Injury
Not every strain needs a specialist. Most? You can manage on your own with a smart plan.
But if your calf is doing anything from the list below, don’t tough it out—get checked.
Do not ignore these red flags:
You heard a “pop” or felt a snap: If your calf felt like someone shot it—or you felt a sudden rip, especially near the Achilles—that could be a tendon rupture. Major red flag. If you can’t push off your foot or feel a gap? Go see a doc now.
Can’t walk or put weight on it: If walking feels like glass in your leg or you’re hopping around just to get to the fridge, that’s not a tweak—it’s a possible full tear or avulsion. Get it looked at.
Swelling or visible deformity: If your calf looks like someone stuck a golf ball under your skin or it’s puffed up like a balloon? Could be a hematoma or even compartment syndrome (yes, that’s as bad as it sounds). Time for an exam.
Warm, red, throbbing calf (with no injury): This could be a DVT (deep vein thrombosis). Dangerous stuff. If your leg is hot, swollen, and aching even while resting, don’t wait—see a doc right away.
Tingling or numbness: A simple strain shouldn’t mess with your nerves. If you’ve got pins and needles, burning, or numbness down your leg or foot, it could be nerve-related or pressure building from swelling. Either way, get checked.
Getting worse instead of better: If after 4–5 days of rest, you’re still hobbling—or the bruising/swelling is growing—then it’s more than a “mild strain.” Might be a partial tear or even an infection. Get an expert’s eyes on it.
Pain that wakes you up or shows up at rest: Sore muscles feel better with rest. If yours is pounding while you’re lying still or it’s keeping you up at night? That’s more serious. Get it checked out.
Recurring issues: If your calves keep blowing out every time you build mileage, that’s a pattern. Time to dig deeper. Could be weak hips, stiff ankles, or bad form. Let a sports doc or PT help you fix it at the source.
Pain high up near the back of the knee: Could be something like a Baker’s cyst or even a torn plantaris muscle. Not the end of the world, but worth getting a proper diagnosis.
Return to Running After a Calf Strain
Train Smart, Come Back Strong
So, you tweaked your calf. Maybe it was a small twinge, maybe it felt like someone snapped a rubber band in your lower leg. Either way, now you’re stuck asking the most frustrating question every sidelined runner faces:
“When can I run again?”
Well, here’s the truth: it depends. And if you’re smart about it, you’ll come back stronger—not sidelined longer.
What Kind of Strain Are You Dealing With?
Let’s break it down by severity and what return looks like:
Strain Grade
What It Means
When You Might Run Again
How to Come Back
Grade 1 (Mild)
Micro-tear, light pain
~1–2 weeks
Easy jogs once walking is pain-free. Start short, mix with walking.
Grade 2 (Moderate)
Partial tear, hurts to walk at first
~2–5 weeks
Begin with a walk-jog plan. Avoid speed and hills. Build slow.
Grade 3 (Severe)
Major tear
~6–12+ weeks
Get clearance. Rehab with PT. Walk first, then walk-jog. Maybe treadmill.
Grade 4 (Rupture)
Complete tear or tendon rip
2+ months (usually surgery)
Rehab like it’s your job. Don’t run until your PT signs off.
🛑 No matter what grade, pushing too soon = going backward.
Before You Even Think About Running Again…
Here’s the “Are You Ready?” checklist. Nail these, or don’t run yet:
Walk pain-free – at a normal pace, no limp, no wince.
→ Try a brisk 30-minute walk without pain.
Full range of motion – can you flex your ankle all the way without a tug?
Single-leg calf raises – 15–20 solid reps on the injured leg, no pain.
Hop test – 10 light hops on that leg without feeling like something’s gonna snap.
Still failing one of those? Back to rehab. Don’t rush it—you’re not just testing your fitness, you’re testing your tissue.
Walk-Jog Return Plan (The “Train, Don’t Strain” Phase)
You don’t jump back into 5-mile loops or Strava segments. You ease in—calf-first, ego-second.
Here’s what a smart first week might look like (for a Grade 2 comeback around 4 weeks post-injury):
Day 1 – 5 min brisk walk → 2 min jog / 2 min walk × 5. Ice afterward.
Day 2 – Rest or cross-train.
Day 3 – If Day 1 felt good, try 3 min jog / 2 min walk × 4–5 rounds.
Day 4 – Cross-train or rest.
Day 5 – 5 min jog, 2 min walk, 5 min jog. Easy effort. Flat surface.
Day 6 – Rest.
Day 7 – Try a 10-minute easy jog. Stop if anything feels sketchy.
Keep everything easy. Pace doesn’t matter—your calf is the limiter, not your cardio.
NO HILLS. Not yet. That’s advanced stuff. Right now, think: flat, soft, safe.
Use RPE & Watch Your Cadence
Don’t worry about pace—run by feel. Keep it conversational, effort at a 3–4 out of 10.
💡 Bonus tip: focus on short strides + quick cadence. High cadence reduces calf load. If you overstride or bounce too much, you’re begging that calf to rebel.
Treadmill? Not a bad idea. Controlled, flat, and easy to bail if needed.
Rebuilding Mileage (Slow is Smooth. Smooth is Fast.)
Once you can run 20–30 minutes every other day pain-free, you can start rebuilding:
Add 5 minutes/week to your easy runs.
Stick with every-other-day for a bit before adding more days.
Avoid speedwork and hills until your mileage is stable.
Start with strides or short fartleks before anything structured.
Think weeks for full return, not days. Most runners get back to regular mileage in 6–8 weeks after injury if they don’t rush.
One morning a few years ago, I found myself limping home, sweaty, pissed off, and walking like a penguin. My right knee had flared up again, just weeks before a race. Backing off wasn’t even on my radar.
If you’ve ever had runner’s knee, you know the deal. It’s frustrating, stubborn, and always shows up when you least need it.
A friend handed me a roll of bright KT tape and said, “Give this a shot.” I rolled my eyes—it looked like something from a CrossFit influencer’s gym bag. But I was desperate, so I slapped it on.
Shockingly, it helped.
Years later, I’ve seen the same thing play out with runners I coach. KT tape isn’t magic, but used right—and combined with proper strength work and better form—it can actually make a difference.
Let me walk you through how I use it for runner’s knee, when it works, and why it’s not just a fancy sticker for your leg.
What the Heck Is Runner’s Knee?
Let’s keep it simple.
Runner’s knee—officially called patellofemoral pain syndrome—is that annoying pain you feel at the front of your knee, usually around or just behind the kneecap.
If you’ve ever felt a deep ache or sudden jab while going up stairs, jogging downhill, or sitting with bent knees for too long, you’ve met the beast.
It happens when your kneecap (patella) stops tracking properly. Usually, it’s a mix of muscle imbalances—weak glutes, tight quads, lazy hips—and bad mechanics.
You throw in a jump in mileage, worn-out shoes, or poor running form, and your knee says, “Nope.”
I ignored my first signs during marathon training. That slight twinge under my patella? I ran through it until it felt like someone stabbed me in the knee at mile 15.
That DNF taught me a lesson: listen early, or pay later.
Runner’s knee doesn’t have to be forever. Strengthen the right muscles. Fix your stride. Ease off when needed. And yes, tools like KT tape can help you manage the pain while doing the real work underneath.
What It Is and Why Runners Swear By It
You’ve probably seen KT tape before—those stretchy strips on runners’ knees, shoulders, and backs at races.
I used to think it was just flashy gear until I started using it myself.
KT stands for kinesiology tape. It’s cotton-based, super stretchy (about 40–60% longer than resting length), and designed to move with your skin.
Unlike old-school white athletic tape that locks joints in place, KT tape supports your movement—not restricts it.
What’s cool is how it works. When you apply it right, the tape gently lifts the skin, giving space for blood and lymph flow. That helps reduce swelling and inflammation.
It stayed mostly behind the scenes in therapy clinics until the 2008 Beijing Olympics. That’s when athletes started showing up with colorful strips on national TV, and everyone suddenly wanted in.
Now it’s everywhere—and for good reason. It’s easy to carry, easy to apply (once you learn how), and gives just enough support to keep you moving.
But let’s not get it twisted: KT tape isn’t just for knees. You can use it on shoulders, backs, ankles—whatever needs help.
For us runners, though, knees are where it gets real.
How KT Tape Actually Helps Runner’s Knee
So let’s cut the fluff—what does a few stretchy strips of tape really do for that stabbing ache under your kneecap?
I asked the same thing before I started using KT tape. And after countless long runs, coaching sessions, and post-run limp-hobble-repeats, here’s what I’ve learned—both from the science and from the trail.
1. It Helps Dial Down the Pain
When taped right, kinesiology tape works a little like magic for your brain’s pain sensors. It gently lifts the skin, which lowers the pressure on those screaming nerve endings beneath. This tiny lift can ease inflammation and reduce discomfort.
I’ve personally felt the difference. On days when my knee’s acting up, that tape makes the burn bearable.
That’s the catch. KT tape doesn’t “fix” the issue—it just helps you get through your run without wincing every step.
2. It Adds Support
KT tape isn’t some miracle brace, but it does give your knee just enough backup to move better.
Think of it like giving your knee a gentle hug.
I’ve used it before long trail runs, and that taped-up leg always feels tighter, more stable—like someone spot-welded the joint in place (in a good way).
Some runners use taping techniques to guide their kneecap back into better alignment.
3. It Improves Blood Flow & Swelling
That same skin-lift action that helps with pain also encourages better blood flow and lymph drainage.
Basically, you’re giving your knee’s recovery crew a faster highway to get in and clean things up.
One study even showed that taping improved blood circulation in the area.
When I leave the tape on for a day post-run, I notice less puffiness and tightness. Maybe it’s placebo. Maybe it’s real. But my knee feels better—so I keep doing it.
4. It Boosts Body Awareness (AKA Proprioception)
Here’s the woo-woo part that actually works.
KT tape gives your brain extra feedback from your knee. That makes you more aware of how you’re moving—like a reminder buzzing on your leg that says, “Hey, tighten up that form.”
On sketchy trails, this awareness helps. I feel more stable and less likely to plant my foot wrong.
It’s probably part mental, part physical, but if it gets you to run with better form, that’s a win in my book.
So… Does KT Tape Actually Work?
Now let’s put the tape under the microscope.
I’m the kind of guy who likes to feel results—but I also want to know what the research says.
Spoiler: It’s not black and white.
Let’s check the science:
One study found KT tape gave temporary pain relief and better knee function in folks with runner’s knee. It even boosted quad muscle activation.
Another review showed it might help with circulation and swelling, which fits with that lifting effect we talked about (com).
The Journal of Sports Rehabilitation said KT tape could help with muscle activation and proprioception—which, again, makes sense based on what I feel out on the trail.
BUT—and here’s the honest truth—other research says it’s not much better than placebo.
A big 2015 meta-analysis found that KT tape wasn’t significantly more helpful than sham taping.
A systematic review on PFPS (patellofemoral pain) agreed: Taping works best when paired with rehab exercises, not alone.
And a 2022 paper in the Medicine journal said that KT tape might relieve pain short term, but doesn’t fix knee function or long-term issues.
👉 Bottom line:KT tape helps some runners—especially short term—but don’t expect it to heal you.
How to Tape Your Knee for Running
Alright, let’s roll up that pant leg and get into it.
If you’ve been dealing with knee pain—or just want extra support around the patella—kinesiology taping can make a difference.
It might feel tricky the first couple of times, but once you get the hang of it, it’s a 2-minute routine before your run.
This taping method? I call it the “criss-cross setup.” It’s often used for patellofemoral pain and is solid for keeping the kneecap in check during your miles.
Here’s What You’ll Need:
KT tape (2 strips): Use a decent brand. The cheap stuff peels off the second you start sweating.
Scissors: Round those corners unless you want the tape catching on your shorts.
Clean, dry skin: Wipe off any lotion or sweat. If your knees are extra hairy, trim them. You don’t need to go full shave mode—just enough to help the tape stick.
Optional: Adhesive spray if you’re heading into a sweat-fest or water, and maybe a mirror to help with positioning.
Here’s the quick breakdown:
Bend the Knee Slightly. Sit or stand with a soft bend—about 30 degrees. This mimics how your knee behaves when you’re running. Don’t tape with a locked leg or it’ll feel off when you move.
Cut & Prep the Tape. Two strips, each around 10 to 12 inches—enough to stretch from your mid-thigh, across the kneecap, to your shin. Round the corners so they don’t peel mid-run.
First Strip – The Diagonal. Tear the backing in the center of your first strip. That middle part gets anchored right below the kneecap (just above the shinbone). Give it a light pull—around 50% stretch—and angle it diagonally up across the inside of the kneecap. The ends should land on your outer thigh. No stretch on the last 1–2 inches. That part should just lay flat.
Second Strip – Cross the Opposite Way. Repeat the move, but reverse it. Start on the outside of the lower knee this time, then pull up and across diagonally toward the inner thigh. You’re making an “X” over the kneecap. Moderate stretch through the middle, no stretch on the ends. Simple.
Activate the Adhesive. Rub the tape gently from center out. That friction warms up the adhesive and helps it bond. Your knee should feel snug—not squeezed. Bend and straighten it a few times. If it’s pinching or feels like it’s pulling your skin too hard, take it off and try again with less tension.
Optional: Add a Small Horizontal Strip. If that area right under your kneecap is super sensitive (patellar tendon), cut a 4–5 inch strip. Give it a little stretch and lay it straight across that tender spot while your knee’s bent. It can help take some pressure off.
Test Drive. Stand up. Walk around. Do a squat. It should feel like a soft brace—not a vice. If anything’s tingling, going numb, or you notice a cold spot—rip it off. That’s a sign something’s not right.
Let me dig a little deeper.
1. Figure Out What’s Really Going On
Most of the time, runner’s knee isn’t about the knee itself. It’s a symptom. Weak hips, lazy glutes, tight quads, poor form — these are the real culprits.
Taping your knee might help with pain, but it won’t fix muscle imbalances or bad mechanics.
So don’t just ask, “How do I tape this?” Ask, “Why is this happening in the first place?”
When I got runner’s knee, it smacked me in the face with the reality that I’d been skipping strength work.
Now, I don’t miss my twice-a-week glute and core sessions. My knees are happier for it.
2. Do the Boring Work (It Works)
If your physio gave you exercises, do them like it’s your job.
Think clamshells, bridges, monster walks, step-downs. None of it’s sexy. You won’t get Instagram likes for it. But this stuff works.
I’ve spent countless nights band-walking across my living room like a crab. It’s awkward, but it got my kneecap tracking right again.
3. Tape Isn’t a Free Pass
Tape can help. But don’t treat it like a hall pass to ignore pain.
Think of it like support, not a solution. RICE still matters. Sleep still matters.
And if you slap on some tape then try to hammer a tempo run every day, you’re asking for trouble.
When my knee pain drops from a 7 to a 3 with tape, I know I can train a bit. But I don’t go hard.
Smart runners use tape as a tool, not as an excuse to bulldoze through warning signs.
4. Mix in Other Tools
Cross-training is your friend.
Cycling, swimming, rowing – all great ways to keep up fitness without pounding your knees. Foam roll the tight spots. Do balance drills. Try a yoga class.
I started doing Bosu ball balance work and my knee stability improved way more than I expected.
Rehab isn’t one-size-fits-all. Stack up the tools.
5. Train Your Brain Too
KT tape isn’t just physical – it can give you confidence. And that’s a big deal.
But don’t become dependent.
One of my athletes forgot her tape on race day, freaked out, and still ran a PR. That taught her the strength was already there.
Sometimes I purposely go for short runs without tape just to prove to myself I’m okay. Like mental strength training.
6. Count the Wins
Recovery is a mess. Some days feel amazing, others suck.
Celebrate the small stuff.
Ran two miles with no pain over a 2/10? Huge win. Finished all your rehab sessions this week? You’re crushing it.
One time I ran downhill pain-free with tape on and actually shouted out loud mid-run. That moment stuck with me.
Keep stacking those little wins.
7. Know When to Move On
Eventually, your knee should be good enough to try running without tape.
Test it. Ease into it.
Save tape for the big efforts or occasional flare-ups.
I still keep a roll in my gym bag, but most days, I don’t need it anymore.
That’s the goal: to run freely without that extra layer.
Final Thoughts from Coach
KT tape? It’s a solid sidekick.
But the real magic comes from the work you put in.
Rehab, patience, consistency – that’s how you fix runner’s knee for good.
Tape might nudge you forward when you’re struggling, but it shouldn’t be the reason you keep running.
Injuries can teach you so much.
Taping reminded me to respect pain signals, hit the gym, and stop skipping the basics.
If you’re in the thick of it right now, don’t give up. Tape if you need to. But be doing the work too.
You’re not stuck. You’re adapting. And that’s what strong runners do.
Breaking a toe sounds like a minor hiccup in the grand scheme of running injuries.
It’s not your knee, it’s not your hamstring… it’s a toe, right?
Wrong.
You use that little sucker every step—for balance, push-off, and control.
So even a tiny crack can throw off your stride, jack up your mechanics, and start a chain reaction of pain up the leg.
Ignore it, and next thing you know you’ve got calf strain, hip issues, or worse.
I’ve seen runners try to “run through it” because hey—it’s just a toe. Don’t make that mistake.
Trust me: a broken toe can wreck your training block if you don’t deal with it right.
Let’s break this down and see whether you can still train—or if it’s time to chill and let it heal.
What Actually Counts as a Broken Toe?
A broken toe means you’ve cracked one of the bones (called phalanges) in your foot.
Each of the smaller toes has three bones.
The big toe? Two.
Now, this is different from a sprain. A sprain hits the soft tissue—ligaments, tendons. A fracture is in the bone itself.
Thing is, they feel really similar.
Both can swell up, both can bruise, both can hurt like hell when you put weight on them.
Even pros can’t always tell without an X-ray. So don’t feel bad if you’re unsure.
How to Tell If It’s Broken (Without a Scan)
Here’s what to look for:
Sudden, sharp pain after a specific event (stubbed it hard, dropped a dumbbell on it, etc.)
Swelling or black-and-blue bruising
Pain right on the bone, especially with pressure or walking
Crooked or bent toe (yep—get that checked ASAP)
You heard a crack or pop when it happened
Compare that to a sprain, which usually feels more like general tenderness, puffiness, and stiffness—not that sharp, deep bone pain.
Two Types of Broken Toes You Need to Know
Not all broken toes are created equal. Two distinctions:
1. Traumatic Fractures
These are the “ow, I stubbed it on the coffee table” kind. One big impact.
In running? That might be tripping on a root mid-trail or smashing your foot into a curb at mile 23.
You’ll usually know when it happens. Pain hits fast. Swelling shows up. Sometimes, you hear that dreaded snap. Could be a clean break or something like an avulsion fracture, where a piece of bone gets yanked off by a tendon.
If your toe suddenly looks crooked or bruises like crazy—yeah, you probably broke it.
2. Stress Fractures
These are sneaky. You don’t feel them right away. They build up over time—thanks to too many miles, not enough rest, crappy shoes, or upping intensity too fast.
At first it’s just a dull ache. Maybe you feel it after long runs. Then it creeps into your shorter runs. Then it sticks around while walking. That’s a red flag.
Stress fractures happen when your bones can’t keep up with the micro-damage from pounding pavement.
Think of it as the toe whispering, “Hey, slow down,” before it starts screaming.
💡If you feel toe pain that gets worse with every run and doesn’t go away with rest—don’t brush it off. That’s exactly how stress fractures sneak in and steal your race season.
Can You Run with a Broken Toe?
Here’s the deal: breaking a toe as a runner sucks—but it doesn’t always mean you’re benched.
Whether or not you can keep running depends on which toe you broke and how bad the break is.
Some toes are just along for the ride. Others are key players in every push-off. Let’s break it down, toe by toe.
Let me explain more…
Middle Toes (2nd, 3rd, 4th): The “Maybe” Zone
These guys aren’t as essential as the big toe when it comes to propulsion.
If you’ve broken one of them, there’s a chance—and I emphasize the word chance—you can keep running, but only under the right conditions.
The go-to trick here is buddy taping—wrapping the busted toe to the healthy one next to it to give it a little backup support.
Some runners swear by it. I stubbed my fourth toe hard last year just days before Batur Trail race in Bali, taped it up, and still run a decent event.
The pain was really bad on the downhill sections but overall manageable.
That’s lucky—but it also shows that running on a middle toe break can be done if it’s not too severe.
BUT—big warning here: the second you start limping, compensating, or feeling that toe scream louder each mile, you’ve crossed the line.
Don’t try to “tough guy” your way through it. All it takes is one altered stride to start a domino effect—ankle strain, knee pain, hip tightness… You know the drill.
✅ The safe rule: If taping keeps things stable and you can jog without pain or limping, maybe keep the runs super short and easy. But if it hurts? Shut it down. No race is worth a broken gait.
The Little Toe: Small But Mighty (And a Lot Trickier)
Don’t underestimate your pinky toe. Yeah, it’s tiny—but it does more than you think.
It’s key for balance, especially during toe-off and cornering. Running without its help? Surprisingly awkward.
That’s the pinky for you—it might let you run, but it might completely shut things down.
The pain and loss of lateral stability can be brutal, especially if you’re dodging rocks or turning fast.
So what’s the move?
Try buddy taping, test it on a walk or slow jog, and listen hard to your body.
If it hurts like hell or you feel off-balance, back off.
You’re better off taking two weeks off now than wrecking your stride for the next six months.
Broken Big Toe? Don’t Even Think About Running
Let’s be blunt: if you’ve broken your big toe—a.k.a. your hallux—running is off the table.
That toe does more work than the other four combined when it comes to running.
It’s the toe that drives you forward, keeps you balanced, and takes a beating every single stride.
Try to run on a busted big toe? You’re gonna limp, hurt, and probably screw something else up while you compensate.
And here’s the kicker: according to my research, big toe breaks are treated way more conservatively than smaller toe injuries. That’s how important it is.
Docs might cast it. They’ll almost always boot it. Because if it heals wrong, you could end up with permanent issues—think arthritis in the joint or a wonky gait that lingers for years.
All Toe Breaks Are Not Equal: What to Consider
Not all broken toes mean instant shutdown—but if you’re even thinking about running with one, here’s what you need to assess (honestly):
1. Which Toe’s Busted?
Big toe = STOP. It’s a deal-breaker.
Middle toes = maybe. You might be able to do some light stuff if it’s not severe.
Pinky toe = depends. It plays less of a role in push-off, but if it throws off your gait, you’re still risking trouble.
2. How Bad’s the Break?
There’s a big difference between a tiny crack and a full-blown displaced fracture.
If your bone’s shattered or moved out of place, you’ll probably need a boot, maybe even surgery.
Mild swelling, dull pain, and no weird toe angle? Could be minor.
Throbbing, major bruising, or a toe that looks off? That’s serious—get an X-ray and stay off it.
And don’t fool yourself if you haven’t gotten it checked. Err on the side of caution. One runner said, “Once I saw how bruised it was, I knew I wasn’t jogging on that thing without regrets.”
3. What’s the Pain Telling You?
If the pain is dull and doesn’t change much while running, maybe there’s wiggle room. But sharp or increasing pain? That’s your body yelling “sit down.”
Don’t be the person who pops ibuprofen to power through. That might mask the pain, but it won’t stop the damage.
One experienced marathoner put it best: “You’re not helping your fitness if every step is delaying the bone from healing.”
4. Can You Move Naturally—Or Are You Limping?
Try this: walk briskly, hop on both feet, maybe a gentle jog in place.
Now ask:
Are you favoring the toe?
Is your foot rolling funny to avoid pain?
Are you landing differently?
Any change in your gait is a huge red flag. You might not feel it immediately, but compensating can mess with your whole kinetic chain. Suddenly your arch hurts, your ankle’s tight, or your knee’s flaring up.
One runner who pushed through a broken pinky toe said she ended up sidelined with hip tendinitis from the compensation. All because she didn’t want to skip a week of running. That “just a toe” injury turned into a month off.
Can You Run on a Broken Toe? Sure. Should You? Probably Not.
Let’s get one thing straight: if your toe is so swollen you can’t even get your running shoe on without wincing, that’s your body screaming, “Sit your butt down.”
Don’t be the runner who tries to “tough it out” and ends up limping through a race and six months of forced time off. That ain’t grit. That’s dumb.
Swollen Toe = Stay Home
Here’s the test: Can you slide your foot into a regular shoe and walk across the room without wincing or limping like a zombie?
If the answer is no, you’ve got no business running. Period.
Forcing a swollen, possibly broken toe into a tight shoe? That’s not only agonizing—it can cut off circulation and delay healing.
I’ve seen runners try to duct-tape a broken toe just to “get the miles in.” Don’t do that. Take a couple days off and test it again once the swelling starts to drop. If the shoe still feels like a vice grip, you’re not ready.
What the Doc Says Goes
Seen a doc? Got an X-ray? If your podiatrist says no running, don’t play games. I don’t care how close race day is. Let the bone start healing.
If the injury turns out to be minor—a bruise or tiny crack—you might get the green light to run “as tolerated.” But if you’re guessing based on vibes and Google? Dangerous territory.
Think Big Picture: Risk vs Reward
Ask yourself: Are you chasing your A-race that’s just days away? Or are you in the off-season trying to build base?
If this is your goal race and your toe’s only mildly fractured and taped, you might make it work.
But realize—you could finish that one race and then be out for months. You’re rolling the dice.
Unless your paycheck or personal pride rides on this race, the smart move is usually to back off.
A week off now can save your entire season. Trying to “hero” your way through pain just means you’ll be sidelined longer later. I’ve seen it too many times.
Remember:“Trying to run on a broken toe isn’t gritty — it’s reckless.”
How to Know If It’s Time to Shut It Down
Still unsure? Take two full rest days. No running. No pretending you’re “just walking fast.” Just ice, elevate, and chill.
After 48 hours, reassess:
Pain getting better? Might be a bruise.
Still sharp, deep pain? Probably a break.
And if you’re still guessing? Stop. Go see a doctor and get it X-rayed. Don’t gamble your next race on hope.
Broken Toe Recovery Game Plan: Let It Heal Right the First Time
So maybe you do have a fracture. That sucks—but now it’s time to lock in and treat it like an athlete.
Because what you do in these first few days matters.
Step 1: Stop Running. Immediately.
This one’s obvious, but I’ve seen too many runners try to “walk it off” or sneak in a short run “just to test it.” Don’t. Every step adds more stress to a fragile bone that’s begging for a break. Serious injuries shouldn’t be trifled with.
Sit down. Rest. Take weight off. Cancel the run. The faster you chill, the faster you’ll heal.
One mindset shift that helps? “Every step I don’t take now is one less week off later.”
Step 2: Ice Like You Mean It
Swelling’s the enemy here, and icing is your weapon.
First 48 hours? Ice every couple of hours.
Wrap the cold pack or frozen peas in a towel.
Hit it for 10–15 minutes at a time, max 20.
One runner told me his post-injury routine was clockwork: every night, foot up on the couch, frozen peas on the toe, 15 minutes while watching TV. It didn’t feel great at first, but it worked.
The swelling dropped fast, and he slept better with less pain.
Be consistent with it. Just don’t over-ice. Give your skin breaks between sessions.
Coming Back After a Broken Toe: Don’t Rush the Return
You’ve been sidelined, watching others log miles while you ice and tape. Now your toe finally feels normal-ish, and you’re itching to lace up. Totally get it. But this part—the comeback—is where runners either return smart or land right back on the injury bench.
So the question is: When can you start running again after breaking a toe?
The Real Answer: It Depends (But Here’s the Playbook)
Healing time isn’t one-size-fits-all. It depends on how bad the break was, which toe took the hit, and how your body heals.
Minor fractures (like stress cracks or hairlines)
You might be back around 3–4 weeks if things go smoothly. If your pain’s totally gone in day-to-day life—no limp, no twinge when walking—you can maybe test out a short jog.
Just remember: pain-free walking comes before pain-free running. One runner with a broken pinky toe said he didn’t run until he could walk briskly and hop in place without discomfort. Smart move.
Moderate fractures (say, a couple toes at once or a more traumatic break)
You’re looking at 5–6 weeks, maybe longer if swelling lingers or stiffness hangs around. Some athletes bounce back faster, but that’s the exception—not the rule.
A few folks have jogged at 4 weeks with tape still on, but that’s not a green light for everyone. Be honest about your own pain and mobility.
Severe fractures (like a displaced break or anything involving the big toe)
This usually needs 6–8 weeks or more. If you were in a boot or cast, plan on even longer.
And here’s the kicker—just because the bone heals doesn’t mean you’re ready to run hard.
The joint might still be stiff.
The muscles might’ve gone soft.
Give yourself a couple weeks to walk, stretch, and rebuild strength before pounding pavement again.
And yes, your doc might want a follow-up X-ray to be sure things are solid.
Don’t skip it. If the bone’s not fully knit, you’re risking another setback just as you’re getting momentum.
Pain-Free Isn’t Optional – It’s the Bar
Healing is biological. You can’t force it. You can eat clean, load up on calcium and vitamin D, and avoid stuff that slows bone growth (like smoking)… but at the end of the day, your body’s on its own timeline.
One solid rule to follow:
✅ If walking is pain-free (brisk pace, normal stride, maybe even light hopping)? You can consider a short jog.
❌ If walking still hurts? You’re not ready.
A runner who broke his fourth toe waited the full six weeks. Once he hit that pain-free point, he jogged half a mile, super easy. No pain. Next run? One mile. He worked up slowly, and within a month, he was back to full training. That’s how you win the long game.
The Comeback Rulebook (For Your First Few Runs)
Start with time, not distance. Go out for 10–15 minutes of easy jogging. Not a tempo. Not a progression. Just a shakeout.
Run on flat, soft surfaces (grass or treadmill if possible). Save hills and trails for later.
Keep your ego in check. Even if your lungs feel ready, your toe might not be. You’re not behind—you’re rehabbing.
Watch your form. If your footstrike feels weird or off-balance, stop. That’s your body protecting itself—and telling you to slow down.
Check in afterward. Does your toe feel sore later that night or the next morning? If yes, scale back or rest another few days.
Rebuild Mileage Like You’ve Got a Brain
Let’s be real—you might feel ready to run far. Cardio-wise, you’re probably still solid from biking, pool running, or whatever cross-training you did.
But here’s the catch: your toe isn’t ready to take full mileage yet.
Treat your comeback like you’re retraining your foot from scratch:
Week 1: 5 miles total? Cool.
Week 2: 6 or 7.
Week 3: 8 or 9.
You get the idea. That 10–15% rule? It works. It’s not just some coach myth—it’s how bones readapt to pounding.
One way to cheat the system a little and still build back smart: run-walk. Run a mile, walk a minute. Rinse and repeat. Even if you can run straight through, throwing in walk breaks early on helps unload the toe.
Run Smooth, Build Foot Strength
This is your golden opportunity to dial in your form. Smooth cadence. No overstriding. Keep that landing soft and quick.
And don’t skip foot strength. Get weird with it—towel scrunches, marble pickups, toe curls. They seem silly, but they work.
Toe’s been resting? Now you’ve gotta wake those tiny muscles back up.
Even a few minutes a day of mobility drills (toe flexion, toe spreads, towel slides) can make a difference. A stronger foot = less chance of this injury showing up again down the line.
Patience: Your New Favorite Training Tool
Let me say it louder for the runners in the back:
Don’t try to “make up” for lost time.
I know you’re tempted. You’ve missed long runs. Maybe a race. But pushing too hard, too soon turns a short comeback into a long rehab.
One runner I know nailed it: a 3-week ramp-up after a 6-week layoff.
Week 1: Three short run-walks (~2 miles each)
Week 2: Every other day, up to 3 miles continuous
Week 3: Running 4–5 miles, added one light pickup to test speed
Week 4: Back to normal training
No drama. No re-injury. Just smart training.
Compare that to another runner who jumped into a 10-mile long run the moment the calendar said “six weeks post-injury.” Ended up with a re-fracture. Another month in the boot.
You’ve got one shot to heal it right. Don’t blow it.
FAQs – Running with a Broken Toe (And What Not to Do)
Can I Run with a Broken Pinky Toe?
Short answer: maybe, but tread carefully.
Some runners have pulled off short, easy runs with a broken pinky toe by buddy-taping it and wearing roomy shoes. But if you’re limping or changing your gait to get through it? Nope. Shut it down.
The pinky toe helps more than you think—balance, push-off, stabilizing your stride. If you’re running through pain, you’re not just risking that toe… you’re begging for a cascade of new problems.
Better move? Take a week or two off. Cross-train. Let it heal.
Will Running on a Broken Toe Make It Worse?
Yes. Almost always.
Every step pounds that fracture site. What starts as a hairline crack can turn into a full break, or worse, heal the wrong way (misaligned, non-union, long-term issues).
And let’s be real—running through pain doesn’t make you hardcore. It just makes your comeback longer.
Unless your doc gave you the green light for some gentle movement, assume that running will only drag out the healing. Let it rest now so you can get back to real training sooner.
Can I Tape a Broken Toe and Keep Training?
Taping, aka buddy-taping (wrapping the broken toe to its neighbor), can help stabilize things. It’s great for basic breaks—like a simple pinky toe fracture—and can reduce pain for walking or light movement.
Yes, you can train around it—but not through it.
Try this:
Ride the stationary bike
Do upper body work
Walk easy
Swim if you’re into it
But taping isn’t a magic fix. If it still hurts to run? Don’t run. And if taping makes it worse or cuts off circulation? Remove it and reassess.
If it’s the big toe or the break is severe? That’s probably a boot situation. Don’t mess around with that.
How long should I wait before running again?
Here’s the honest answer: until it’s healed and pain-free.
Mild break → maybe 3–4 weeks
Bad break (esp. big toe) → 6–8 weeks or longer
The golden rule: If you can’t walk normally, without pain, and push off your toe without wincing—you’re not ready.
Even when it starts feeling okay, start with short, easy jogs. If it talks back? Shut it down and give it more time.
⏳ Around 6 weeks is when most runners can start easing back, but always go by how it feels. If your doc gave you a timeline or wants an X-ray? Do it. Be patient now so you’re not sidelined later.
What if it’s just a stubbed or bruised toe?
Different beast, same rule: listen to your body.
If it’s just bruised and not broken, you might be able to run through it—if the pain is mild and you’re not limping. Tape it up, test it on an easy run, and see how it goes.
Still limping or getting worse after a few days? Don’t be a hero—it might be a small fracture pretending to be a bruise. Treat it like one just to be safe.
🏃♂️ Lots of runners train through black toenails or stubbed toes. Just skip the speedwork and keep it easy until things settle down.
Do I need physical therapy?
Most of the time? Nah. For a basic toe break, you’re probably fine with home rehab and some toe mobility drills (like towel scrunches or marble pickups).
But if:
You were in a boot for weeks…
Your big toe joint got stiff…
Your gait feels weird post-recovery…
Then yeah—one or two PT sessions can be clutch. A good physio will show you how to restore motion, strength, and mechanics. Especially important if it was a gnarly break or there was tendon damage too.
Think of PT like optional maintenance—it’s not mandatory for everyone, but if your body isn’t moving right, it’s worth the tune-up.
Will I be more likely to break it again?
Good news: once it heals, the bone is solid. In fact, bone usually heals stronger at the break site.
That said—if it healed crooked, stiff, or if the joint’s a little janky now, that might increase your risk of annoying stuff down the road. Not necessarily another break, but weird wear, jamming, or compensations that could cause trouble.
Just don’t assume you’re doomed. Many runners—marathoners, trail junkies, even ultrarunners—have broken toes and came back strong. Take care of it now, build foot strength, and wear good shoes. You’ll be just fine.
Final Thoughts: A Broken Toe Feels Like a Big Deal. But You’ve Got This.
Yeah, it’s small in size—but to a runner, a busted toe can feel like the end of the world. Suddenly you’re sitting still, staring at your shoes, wondering if you’ll ever lace up again.
You will.
But here’s what you don’t do: force it. Running on a broken toe—especially a big toe—is a fast track to a longer layoff. Don’t turn one month off into six because you wanted to feel “tough.”
💬 Like I tell my athletes: “You’re not proving anything by running through sharp pain. You’re just delaying your comeback.”
L Let me tell you the truth: Most runners avoid: your workouts don’t make you stronger — your recovery does.
That 12-mile long run that left your legs screaming? That track workout that had you gasping for air? Those were just the stress.
The growth happens later — when you fuel right, sleep deep, and give your body the chance to rebuild. Ignore recovery, and you’re setting yourself up for plateaus, injuries, or burnout.
Nail it, and you’ll bounce back faster, crush workouts with fresh legs, and keep stacking fitness for years. I know you might already know about this but I’d to make it clear from the get-go.
Recovery isn’t a passive thing you “let happen.” It’s a discipline. A plan.
And when you get it right, it becomes your secret weapon for breaking PRs and building a running life that actually lasts.
This guide is your blueprint. No gimmicks. No magic wands. Just the same proven recovery strategies that elite runners, seasoned coaches, and long-haul athletes swear by — adapted for real runners with real lives.
Table of Contents
The Four Phases of Recovery – Immediate, short-term, daily, and long-term essentials
Post-Run Cooldown Routine – The moves and methods that speed repair
Refueling for Recovery – Nutrition timing, carbs-protein balance, and hydration
The Sleep Advantage – How rest supercharges muscle repair and performance
Foam Rolling, Stretching & Mobility – What works, what doesn’t, and when to do it
Recovery Tools & Gear – Separating science from hype
How Long Recovery Really Takes – By workout type, race distance, and effort level
Active vs Passive Recovery – When to move, when to completely rest
Strength Training During Recovery – Smart integration without sabotaging rest
Post-Race & Off-Season Recovery – How to rebuild strength and motivation
Mindset Reset – Recharging the mental game after a goal cycle
Common Recovery Mistakes – 7 habits that quietly kill your progress
Recovery by Race Distance – Tailored strategies for 5K through ultras
Final Word: Recovery as a Discipline – Making rest your competitive edge
Let’s get to it.
Recovery Happens in Phases—Don’t Miss Any
Recovery isn’t just “chill and hope it works out.” It happens in four distinct stages, and each one matters.
Phase
When
What to Focus On
Immediate
0–15 min after run
Cooldown walk, breathing, hydration
Short-Term
15–90 min after run
Refuel with carbs + protein, light mobility, nervous system reset
Daily
24–48 hrs
Sleep, nutrition, soreness management
Long-Term
Weeks to months
Deload weeks, off-seasons, full rest periods
Each of these stages sets up the next. Walk off your run to flush the legs. Refuel fast to rebuild. Sleep hard to adapt. Take down weeks so you don’t burn out.
Think like a pro. Train hard, yes—but recover harder.
Cooldown: What to Do Right After You Stop Running
You just finished your run. Don’t flop onto the grass. Don’t sit on the curb scrolling Strava. That cooldown window is pure gold—here’s what to do:
1. Keep Moving (5–10 Minutes)
Walk. Just move. Let your heart rate come down gradually. This keeps blood from pooling in your legs and helps circulate waste out of your muscles. Think of it as hitting the brakes smoothly, not slamming them.
2. Breathe to Recover
Try some slow breathing to shift into recovery mode. Something simple like:
Inhale for 4 seconds
Hold for 4
Exhale for 4
Hold for 4
Do that a few rounds and you’ll feel the tension start to melt. This activates your parasympathetic nervous system—the “rest and repair” switch your body needs to start healing.
3. Rehydrate Right Away
Water first. Electrolytes if it’s hot or you’re a salty sweater. You don’t need to chug a gallon—just start sipping. If you lost a pound or two during your run, aim to replace 16–24 oz of fluid per pound lost.
Your pee should be light yellow within a few hours. If it’s dark, drink more.
4. Gentle Mobility Drills
While your muscles are still warm, do some easy, flowing movements:
Leg swings
Hip circles
Arm sweeps
Light downward dog or lunges
Keep it relaxed. Nothing forced. No deep holds. You’re just keeping things moving and signaling to your body, “Hey, we’re done running—time to recover.”
Skip Deep Static Stretching
Don’t dive into 60-second hamstring stretches when your legs are cooked. That can actually do more harm than good. Save deep stretching for later—like post-shower or in the evening when you’re fully relaxed.
Post-Run Nutrition: Eat Like It Matters
You finished the run. You’re sweaty, maybe wrecked, maybe floating. Doesn’t matter if it was 3 miles or 20 — your next move is crucial: refuel.
This isn’t just about filling the hunger hole. It’s about rebuilding your body so you can come back stronger tomorrow. If you skip it or get lazy with junk food, don’t be surprised when your next run feels like garbage.
Here’s how to recover like a runner who wants to improve:
Timing Matters: Eat Within 30–90 Minutes
Your muscles are in prime recovery mode right after a run — blood flow’s high, enzymes are doing their thing, and they’re begging for fuel. Here’s my golden rule: Try to eat something within 30 minutes of finishing — definitely within 90. Doesn’t have to be a full meal. Just start the recovery process.
→ Snack first, then eat a solid meal within 1–2 hours.
And if you’re too nauseous post-run? Go liquid. Chocolate milk, smoothie, protein shake — get something down. Your legs will thank you tomorrow.
Don’t Forget Fluids & Electrolytes
Post-run hydration isn’t just “grab a water bottle.” Especially after a hot or sweaty effort, you need to replace what you lost — and plain water sometimes isn’t enough.
Homemade fix: water + pinch of salt + splash of juice
Salty snack with your recovery meal
Quick check: If your pee is dark, you’re behind. Aim for light yellow over the next couple of hours. Hydration is part of recovery — not a separate job.
Match Intake to Effort
Short, easy run? → Light snack might be enough — maybe an apple with almond butter, or some trail mix.
Long or hard run (especially over 60 minutes)? → Snack ASAP, then a real meal when hunger returns.
Don’t wait until you feel ravenous. If you do, you’re already behind. What’s more? Prep your post-run fuel ahead of time. You don’t want to be hunting through your kitchen sweaty and depleted. Set that banana and protein bar out before you even lace up.
Quality Counts — Junk Food Can Wait
You burned a lot of calories — that doesn’t mean you earned a junk food binge right away. Your muscles need real nutrients, not processed filler.
Skip the greasy drive-thru right after the run. That bacon cheeseburger can wait. Fuel your body first. Then have your treat later — when the rebuild is underway.
Sleep: The Most Underrated Performance Booster
You want to get stronger? Recover faster? Show up ready to crush workouts instead of dragging through them?
I’ve worked with enough runners to know this: you can nail every workout, eat all the right carbs, and still stall out if you’re shortchanging sleep. Recovery doesn’t just happen when you’re foam rolling—it happens deep in the night, when your body’s doing the real behind-the-scenes work.
Let’s break it down.
Deep Sleep = Hormone Magic & Muscle Repair
Your toughest training days leave micro-tears in your muscles. You don’t grow stronger from the run itself—you grow stronger while recovering from it. Deep sleep is key here.
During the deepest stage (slow-wave sleep), your body releases a flood of human growth hormone (hGH)—up to 70% of your daily dose. That’s what triggers muscle repair, tissue rebuilding, and tendon healing.
No protein shake can replace what your body makes naturally overnight. If you skip sleep, you skip the recovery jackpot.
As one sleep doc puts it: “Sleep isn’t a luxury—it’s a necessity. Skip it, and you’re shortchanging your gains.”
Poor Sleep = High Cortisol, Slower Recovery
Now here’s the flip side: when you don’t sleep enough, your body fights back. You pump out more cortisol, the stress hormone. That messes with muscle repair, elevates inflammation, and keeps your system on edge. You’ll feel tired… but wired.
Ever woken up after a red-eye or late night and felt achy, puffy, and irritable? That’s not just poor mood—it’s your body in stress mode. Elevated cortisol also blunts glycogen replenishment, which means you recover slower and hit workouts with less in the tank.
Lack of sleep even messes with your insulin sensitivity, which affects how well you restock carbs in your muscles.
Bottom line? Bad sleep = less rebuild, more breakdown.
How Much Sleep Do You Actually Need?
The sweet spot for most runners? 7–9 hours a night, with the upper end better if you’re training hard. Some elites clock 9–10 hours a night and toss in a nap, too.
Eliud Kipchoge? Yeah, he reportedly logs around 10 hours of total sleep daily. No surprise he’s breaking records.
You don’t need to nap daily, but here’s the takeaway: more (within reason) is better. Even a short bump in sleep can lead to better performance. One study showed runners improved race times by ~3% just by adding an extra hour of sleep per night for a week.
Not sleeping well the night before your race? Don’t panic. What matters more are the two or three nights before that. So “bank sleep” leading into race week.
As the saying goes: “The night before the race doesn’t matter—two nights before does.”
How to Actually Sleep Better (Not Just Longer)
Getting to bed is only half the battle—the quality of your sleep matters just as much. Here’s how to level up your rest:
Keep a Regular Schedule. Go to bed and wake up at the same time. Your recovery hormones love rhythm.
Cool, Dark, and Quiet. Set your room to ~65°F (18°C), block out light with blackout curtains or a mask, and shut out sound with earplugs or white noise. Treat your bedroom like a recovery cave.
Wind Down Right. Ditch the phone an hour before bed. No emails, no doomscrolling. Read a paper book. Do some gentle stretching or yoga. Legs-up-the-wall pose can help drain tension.
Watch What You Eat & Drink. A beer after your long run? Cool. But booze before bed can mess with sleep quality. Same with late-night heavy meals. Wrap up eating at least 2 hours before lights-out.
Naps (Done Right). If you’ve got time, a 20–30 minute nap after a hard session can work wonders. Just don’t nap too late in the day or you’ll mess with your night sleep.
Foam Rolling, Stretching & Mobility: What’s Worth Your Time
We all want faster recovery. But let’s be honest—after a tough run, half of us just flop on the floor and scroll Instagram instead of doing anything useful. But if you’re serious about feeling better and running stronger, you’ve gotta take care of the machine.
Here’s the real breakdown of what recovery tools actually help—and how to use them like a pro, not like someone attacking their IT band with a foam roller like it owes them money.
Foam Rolling: The Runner’s DIY Massage
Foam rollers are everywhere now, and for good reason. Rolling out your legs after a hard effort is one of the few “recovery hacks” that actually delivers.
Rolling works like a mini self-massage. It increases blood flow, eases tight spots, and helps reset your muscle tone. It’s not magic, but it works—especially if you don’t treat it like a speed bump. Here’s how to do it:
Roll slowly over major muscle groups: quads, hamstrings, calves, glutes, IT bands.
Stop and breathe on tight spots—don’t just zip back and forth like a windshield wiper.
Aim for 1–2 minutes per muscle group, not just a 30-second drive-by.
Do it after a workout or the next day, especially when DOMS is creeping in.
Skeptical? No worries. Let’ talk science. One study showed that athletes who foam rolled post-workout had less soreness and better performance the next day. That’s a win. It may not fix all your problems, but it helps flush the junk out and makes your legs feel less like lead pipes.
Static Stretching: Overrated (But Not Useless)
Let’s bust a myth: stretching right after a run doesn’t do much for recovery. Holding that quad stretch for 30 seconds at the trailhead? Not helping your DOMS. Not preventing injury either.
But that doesn’t mean stretching is a waste. It’s just a long game—not a quick fix.
Best Uses:
Use static stretchinglater, not right after a run. Think: post-shower, before bed, or on rest days.
Focus on problem areas—hips, hamstrings, calves—but only when your body’s warm.
Keep it gentle. No forcing splits just because a yoga influencer said so.
The goal here is maintaining healthy range of motion, not turning yourself into a pretzel.
Dynamic Stretching & Mobility Work
This is where the good stuff lives.
Dynamic mobility drills—like leg swings, lunges with rotation, cat-cow stretches—help you stay limber and keep your joints moving like they should. These movements do promote blood flow and help prevent that stiff, robotic runner stride. Here are my favorites:
Hip mobility: world’s greatest stretch, kneeling hip openers
Ankle mobility: calf raises, toe taps, ankle circles
Thoracic spine: cat-cow, open book stretch
You can use these before a workout as warm-up, or on recovery days as a maintenance tune-up. 5–10 minutes a day is all it takes to keep the rust off your joints.
Other Recovery Tools That Actually Help
Let me share with you a few tools that can take your recovery to the next level.
Massage Balls (or Lacrosse Ball Torture)
Perfect for getting into small, nasty spots—like under your glutes or arches of your feet. Sit on one. Find the tight spot. Breathe through the pain.
Massage Guns
These things work—if you use them right. Don’t dig a hole into your quad. Just let the device do the work.
Here how to use it:
Post-run or the day after
Gently for 1–2 minutes per muscle group
Don’t go deep on a fresh injury
It’s like a power tool for recovery—but treat it with respect or it’ll do more harm than good.
Compression Gear
Not gonna lie, compression socks feel amazing after a long run. They help move fluid out of your legs and reduce swelling. Some folks love compression boots, but you don’t need fancy gear. Throw on your socks for a few hours post-long run—you’ll feel the difference.
⏳ How Long Does It Actually Take to Recover?
The million-dollar question: “How long till I’m fully recovered?”
Short answer: it depends. On the run, your fitness level, sleep, nutrition—everything. But here’s a rough cheat sheet:
🏃♂️ Run Type
⏱ Typical Recovery Time
Easy 5K jog
4–8 hours (basically none)
Tempo/Threshold (30–60 min)
24–36 hours
Long Run (12+ miles)
48–72 hours
VO₂ Max Intervals
48+ hours (especially if done right)
Marathon (26.2)
10–14 days (yes, days)
Ultra (50K+)
3–6 weeks (yup, weeks)
These are ballpark figures. You bounce back faster if you recover smart. But ignore recovery, and those timelines double.
🟢 Easy Runs: Low Cost, High Reward
An easy 3–5 miler at conversational pace? That’s not something you need to recover from—it’s often part of recovery itself. Within hours, your body’s back to baseline. Your legs might even feel better than before.
Just make sure you keep it truly easy. If it turns into a stealth tempo run, that changes the game.
🟠 Tempo Runs / Threshold Efforts
These hit deeper. A solid 30–40 minute tempo might leave your legs a little heavy and your system tapped for a day or two. Usually by 36 hours, you’re back. But don’t schedule another hard run the very next day—your body’s still cooking.
Newer runners? Give it two full days before another speed effort.
🔴 Long Runs, VO₂ Max, and Racing? Buckle In
Long runs (12+ miles) and interval workouts tap into muscle damage, glycogen depletion, and central fatigue. Don’t treat them like your weekday 5-miler. You might feel “fine” the next day, but your system is still recovering underneath.
After a marathon? Take 10–14 days minimum before doing anything intense again. After an ultra? You’re in recovery mode for weeks. That’s just reality. Push through that window, and you’re playing with fire.
Absolutely—here’s your full rewrite of the recovery timing section in David Dack’s trademark gritty, honest, and coach-next-door voice. It’s grounded, science-backed, but sounds like a real conversation between training buddies who know the grind:
Recovery Timing – How Long Do You Really Need?
You just finished a big run. Legs are toast. You feel like you’ve earned a medal—and a nap. But the question now is: how long do I need to recover before I go hard again?
Spoiler: it depends. But here’s a breakdown of what real recovery looks like after different kinds of runs—and how to know when you’re ready to hit it hard again.
🥴 Long Runs: The Sneaky Destroyer
Anything over 13 miles? It takes more out of you than you think. Even if you finish strong, there’s deeper fatigue brewing—glycogen depletion, muscle damage, microtears… it’s all there.
Plan on 2–3 days of real recovery after a 13–20 miler.
Expect stiffness on day one
DOMS (delayed soreness) usually peaks around 36–48 hours
By day 3, most trained runners feel mostly normal—if the long run wasn’t a beast (e.g., fast-finish, hot weather, monster hills)
👀 Watch your resting heart rate and general soreness. If either’s still jacked up on day 2, don’t force it.
Many training plans put two easy days after long runs for this reason—smart, not soft.
🧨 Interval Workouts: High-Intensity, High-Impact
Speed workouts like VO₂ max intervals (think 6×800m at 5K pace or brutal track ladders) mess with your nervous system as much as your legs.
You might feel fine 24 hours later, but don’t trust it. That deep fatigue takes about 48 hours to clear fully—especially if you want to be sharp for another quality session.
🚫 Try to do another hard workout the next day? Expect garbage paces and a side of frustration.
Shorter intervals (like strides or hill sprints) with full recovery are a different story—lighter stress, quicker bounce-back. But those lung-burning, lactic-laced sessions? Give ‘em space.
🧱 Marathons: Not Just a Long Run on Steroids
A marathon isn’t just 6.2 miles more than a 20-miler. It’s a whole different animal. You probably ran it faster, longer, and dug deeper.
Expect 2 full weeks minimum before anything hard again. Some coaches use the “one day per mile” rule (so, ~26 days), meaning:
Light running after a week is okay
But no speed or serious long runs until the 2–3 week mark
Elite pros often take 10–14 days totally off after a big race
Feeling “fine” after 7–10 days? Awesome. But don’t trust that feeling too soon. Deep tissue and hormonal recovery can lag behind how your legs feel. Respect the distance. You earned the rest.
🏔️ Ultramarathons: The Deep Wreckage
Ultras don’t just crush your legs—they scramble your whole system: immune, hormonal, emotional.
A 50K or 50-miler? You’re looking at 3–4 weeks to truly feel “normal” again.
100K or 100 miles? Six weeks minimum before you should even think about hard training. And that’s assuming you’re sleeping, eating, and recovering like a pro.
First 2 weeks? Total recovery mode. Walk, eat, nap, stretch. Maybe some easy spins or light swims. Running? Only if it feels like a treat, not a chore.
From weeks 3–4, you can start layering in short, easy runs and mobility work. But hard efforts? Wait till week 5–6 unless you’re a cyborg.
A common rule? One day per kilometer raced. So yeah—50K = ~50 days before full firepower is back.
How to Know You’re Actually Recovered
Forget guessing. Here’s how to really tell:
Resting Heart Rate (RHR)
Take your pulse first thing in the morning (or check your wearable). If it’s up 5–10 bpm from your baseline, you’re still in recovery mode.
A spike in resting HR = stress response still active. Don’t push.
Heart Rate Variability (HRV)
Low HRV = your nervous system is fried. High = you’re chill and recovered. Don’t obsess over daily numbers—watch the trend over 3–4 days. If it’s creeping back up, you’re good.
Declining HRV for days? Back off. Here’s the full guide to heart rate variability in case you’re curious.
Sleep & Mood
If you’re waking up groggy, having trouble falling asleep, or snapping at your cat—your body’s telling you to chill.
Good sleep and good mood are huge signs you’re ready to train again.
Motivation
Still dreading your runs? That’s not just laziness—it’s fatigue talking. When you feel pumped to run again, that’s a green light.
Muscle Soreness
Do the stair test. If you wince going down stairs two days post-run? You’re not there yet. Gentle soreness = fine. Sharp pain or lingering tenderness = more rest.
Also check for swelling. If your feet or ankles are still puffy a day later, your body is still handling damage.
The Easy Run Check-In
Experienced runners use this all the time:
“How does my easy pace feel today?”
If your normal recovery jog suddenly feels like a tempo effort—or your heart rate is jacked at a pace that’s usually chill—it’s a red flag. You’re probably not recovered yet.
On the flip side, when you’re truly bouncing back, easy runs feel… well, easy. Some days, you’ll even be cruising a little quicker than usual at the same effort. That’s called supercompensation—your body rebuilding stronger after rest.
General Energy Levels
Forget the pace for a second. How are you moving through your day?
Dragging? Yawning nonstop? Legs feel like bricks walking up the stairs?
You’re not ready yet.
Recovery shows up outside of running too—when your legs feel snappy walking to the kitchen, or you wake up without groaning. That’s a good sign you’re ready to go hard again.
Track Recovery Like You Track Miles
Many runners journal their runs. But the smart ones track recovery too.
Try this:
Rate your soreness (1–5)
Note HR during easy runs
Track sleep, mood, energy
If something starts trending downward—address it before it takes you out.
One extra rest day rarely hurts. One too-early workout? That’s how you lose weeks.
Active vs. Passive Recovery: When to Move, When to Chill
Not all rest is created equal. Some days you keep moving. Other days, you need to do absolutely nothing.
Active Recovery: Keep the Engine Idling
This isn’t a bonus workout—it’s gentle movement to flush out the junk. Here are a few examples:
If your legs are a little stiff but not broken, active recovery can help keep you loose, boost circulation, and clear out the cobwebs. That post-race walk where everything hurts, but then feels better after? That’s active recovery doing its thing.
Best times to use it:
The day after a tough workout or long run
During taper weeks (when you feel stir-crazy)
On easy days where you feel beat but still want to move
Passive Recovery: Full System Shutdown
Sometimes, you need to just shut it down. No movement, no stimulus, just rest. Here are my go-tos:
Sleeping in (or napping)
Watching a movie with your legs up
Massage (you lie there while someone else does the work)
Meditation or breathwork
A day completely off training
This is the move after big efforts: races, breakthrough workouts, or when your body’s screaming for rest. You’re not lazy—you’re healing.
Recovery isn’t the absence of effort. It’s the presence of repair.
And don’t underestimate mental fatigue either. Passive rest helps your brain unplug too.
🕑 Best times to use it:
After a race (especially marathon/ultra)
When feeling ill, burnt out, or on the edge
If you sense an injury brewing
When to Go Full Passive
Here’s when you earn a true day off:
You’re so smoked that even a jog sounds like torture
You’re dealing with a flare-up, soreness in bone or joint
You’ve had a mental overload week—life stress + training = burnout risk
A good rule: take at least 1 day off every 7–10 days. Real rest resets your nervous system and allows supercompensation (that’s coach speak for “you come back stronger”).
Example Week Flow:
Tuesday: Brutal track workout
Wednesday: Light active recovery jog or bike
Thursday: Still feel trashed? Go passive—zero cardio, maybe a massage
Friday-Saturday: Back to light running or workouts with fresh legs
Not sure what to do? Start with rest. If by afternoon you’re feeling wired and good, maybe walk or do some mobility. But if your body says “nah” all day—respect that.
Active + Passive = Best of Both Worlds
Recovery doesn’t have to be either/or. Some days you mix it up:
Sleep in = passive
Easy 30-minute walk or yoga later = active
Chill again before bed = passive
The only goal of recovery days is to promote healing without adding stress. That’s it.
When to Use Which:
Use active recovery (walks, swims, easy rides) when you’re a little sore, but not wrecked. Great for blood flow and aerobic upkeep.
Use passive recovery when you’re deeply tired, post-race, or flirting with injury.
This one trips a lot of runners up. Should you lift during recovery phases? Or rest completely?
Here’s the breakdown.
After Long Runs or Races: Go Gentle or Don’t Go At All
You just ran 15+ miles or raced hard? Your muscles are beat up, even if you feel okay.
Do NOT go hitting the squat rack.
Wait 2–3 days post-long run or race before doing any heavy strength
Stick to mobility, light core, and bodyweight moves early in recovery
Think: glute bridges, lunges (no weights), planks, clamshells
Example: Ran a marathon Sunday? → Monday = rest → Tuesday = light walk or spin → Wednesday = maybe light strength or yoga → Heavy lifts = end of week or next week when DOMS is gone
Deload Weeks = Strength Reboot
Deload week? That’s prime time to do strength work that gets missed during heavy mileage.
Skip the max lifts—this week isn’t about hitting PRs
Focus on eccentric moves (slow calf lowers, hamstring curls, etc.)
Mix in isometric holds (wall sits, planks)
Add balance and joint work (single-leg stands, hip mobility drills)
This stuff reinforces movement quality without trashing your legs. Perfect fit when mileage is light.
When to Schedule Strength in Your Week
If you’re serious about combining running and lifting, timing matters. You don’t want to ruin a good run day or sabotage your recovery day.
Here’s a tried-and-true strategy:
Pair hard with hard.
Run hard Tuesday AM? Lift that PM or Wednesday AM (light).
That way, Wednesday PM = full rest.
Avoid heavy legs lifting the day before a key run—total rookie move.
Why it works: You consolidate stress, then recover clean. Instead of two tough days spread out (which messes up the recovery rhythm), you batch the load and earn a full reset.
Post-Race & Off-Season Recovery: Rebuild the Right Way
So, you just ran your big race—or wrapped up a full season. Now what?
This is where a lot of runners blow it. You’re either riding high on a PR and itching to “strike while hot,” or you’re dragging from the effort but feeling guilty for wanting to rest.
Here’s the truth: you’ve got to rebuild gently. No ego lifts. No “I should be doing more.” Now’s the time to heal, reset, and lay the groundwork for your next cycle.
Rebuild Strength You Lost in Peak Training
During marathon prep or a heavy block, strength training often takes a backseat. You’re focused on mileage, not deadlifts—and that’s fair. But now, with mileage low, it’s prime time to get strong again.
Give your tendons time to re-adapt. If you took a break from lifting, don’t go charging back to your old PRs. Lighter weights, tighter form, more control.
Start with movements that target:
Glutes
Core
Hips
Ankles/calves
These are your injury-proofing muscles. Strengthening them now will save your butt when mileage ramps up later. I’d suggest the following flow:
Days 1–10 post-race: gentle yoga, walking, bodyweight work only
Days 10–14: isometrics, core, maybe light resistance bands
Weeks 3–4: add dumbbells, balance work, dynamic strength if you’re feeling good
Don’t lift hard while your legs are still rebuilding from your race. The point is to support recovery, not sabotage it.
Strength Training Year-Round
Ideally, strength doesn’t disappear completely during race training. But let’s be real—some weeks it’s hard to even fit your long run in, let alone squats.
Here’s the deal:
During heavy run blocks: Keep strength short and simple. 20–30 min, 2x/week. Low reps, good form, no soreness.
During base or off-season: Go bigger. 2–3 sessions/week, heavier lifts if you want, longer circuits, more variety.
This builds that “armor” that helps you absorb more mileage later on. Stronger runners tend to run healthier. It’s that simple.
A weak core or sleepy glutes = injuries waiting to happen.
And don’t sleep on isometrics. They’re easy on joints, powerful for tendon health, and a great bridge back to lifting. Planks, wall sits, calf push-holds—these are your foundation.
Mental & Emotional Recovery: The Part Nobody Talks About Enough
Let’s talk about the post-race brain fog. That “meh” feeling that shows up when the race is over, the medal’s on the shelf, and suddenly you’re left wondering… now what?
Totally normal. Totally fixable. Let me show you how…
The Post-Race Blues Are Real
You train for months, pour yourself into the goal, crush race day (or not), and then boom—it’s over. That adrenaline, that sense of purpose? Gone.
It’s called post-race depression, and a lot of runners go through it.
You feel low, like something’s missing
You’re unmotivated, even if the race went well
You might feel… lost
This doesn’t mean you’re weak. It means you’re human.
Give yourself space to feel it. Then move forward with intention. Here my favorite mental reset tools:
1. Journaling
Write it out:
What worked?
What didn’t?
How did you feel mentally, emotionally, physically?
This gives closure. It also helps for next time. Your future self will thank you.
Even just writing out “why I run” can reconnect you to the spark.
2. Fun Runs Only
Ditch the watch. Run without pace goals. Walk if you want. Explore a trail. Run with a friend you haven’t seen in a while. No structure, just movement.
Let your brain breathe.
3. Mind Deload Weeks
Just like your body needs cutback weeks, so does your mind.
Take a full week (or more) where your training dial is turned way down. Sleep in. Do something completely unrelated to running. Let your motivation rebuild naturally.
If you’re still dragging mentally after 2–3 weeks off, don’t jump back into a race plan. Your mind needs more time to catch up to your body.
Mindset Reset: Recharge Your Head
Recovery isn’t just for the body. It’s for your brain, your focus, your spirit. You’ve poured weeks or even months into training, chasing a goal, managing early alarms and hard workouts. Now it’s time to reset — not just your muscles, but your mindset.
Here’s how to train your brain while your legs rest:
1. Mindfulness or Meditation
I’m not talking about becoming a monk. I’m talking 5–10 quiet minutes a day. Just sit. Breathe. Let your brain catch up. This stuff calms stress, clears mental fog, and improves emotional recovery.
Use an app or just stare at a wall and breathe slow. No judgment. It’ll serve you just as much as strides and hill repeats in the long run.
2. Visualization
Picture yourself finishing strong. Replay the parts of your race or training that made you proud. Or imagine yourself crushing the next goal.
You’re keeping your mind in the game — but gently. No pressure. Just clarity and belief.
3. Do Something Creative (That Isn’t Running)
Paint. Doodle. Cook. Play music. Build Legos. Whatever. You’ve been calculating splits and monitoring paces for weeks. Let your brain shift into a different gear. Creative stuff restores you in ways GPS data never will.
4. Reconnect with People
Running can be a little lonely. And when you’re deep in a training cycle, everything else gets sidelined.
Now’s the time to be present with friends, family, your dog — whoever. Human connection is powerful recovery fuel. Laugh. Share stories. Be more than just “the runner.”
Know When to Ask for Help
Sometimes, the post-race blues go deeper. If you’re still feeling down, numb, anxious, or lost weeks after finishing a big goal, it’s more than just needing a nap. It might be time to talk to someone.
And that’s not weakness. It’s wisdom.
A lot of athletes hit a mental wall after reaching a huge milestone. It’s normal. But if your energy doesn’t return — for running or life — consider reaching out to a counselor or sports psychologist. That kind of help can be a game-changer, especially if you’re stuck in a rut and can’t find the motivation to start moving forward again.
How You Know You’re Mentally Recovered
You’ll feel it.
A little itch to train again.
Excitement for the next goal (or peace with no goal — that’s fine too).
A calm sense of, “I did something awesome. I’m proud. I’m ready for what’s next.”
One runner told me she felt lost after her first marathon. So she journaled, made a scrapbook, and didn’t run for three weeks. Then one day, she laced up and jogged easy… and smiled the whole time. That’s recovery done right.
Recovery by Race Distance
Let’s break it down. Here’s how to recover smart based on how far (and how hard) you went.
5K: Small Race, Big Burn
You raced hard — lungs on fire, legs lactic. But good news: your muscles aren’t too beat up.
Focus: Cooldown + Hydrate
Jog or walk 5–10 minutes after to flush the junk out
Sip water or a sports drink — short race, but you still sweat
Snack if you’re hungry, but normal meals usually do the trick
You’ll likely feel normal in 24 hours, unless you really emptied the tank
Running is a gift—a freedom, a stress release, a ritual.
But if you’ve been at it for a few months (even weeks), you’ve probably met its dark side: injury.
That first nagging pain in your knee. That strange ache in your shin. That moment your heel says “nope” as you step out of bed. We’ve all been there—or we will be.
And let me be straight with you: up to 80% of runners get injured every single year.
That’s not a maybe. That’s a near-certainty if you’re not proactive.
And please don’t take my word for it – research backs this up.
But here’s the good news: injury isn’t a death sentence for your running life.
In fact, it can be the wake-up call that turns you into a smarter, stronger, more resilient athlete.
Today I’m sharing with you the ultimate guide to running injuries. It’s packed with real talk, hard-won lessons, and battle-tested strategies for spotting injuries early, treating them smart, and building a body that lasts.
Whether you’re dealing with shin splints, runner’s knee, or just trying to dodge your next setback, you’re in the right place.
Table of Contents
1. Running Injuries 101: The Big Picture
Overuse vs. Acute Injuries
The Traffic Light Pain Scale
Load Management Mistakes
Why Pain is a Signal, Not a Weakness
2. Shin Splints (Medial Tibial Stress Syndrome)
Causes & Risk Factors
Symptoms to Watch For
Training, Shoe & Form Fixes
Rehab, Strength Work & Comeback Plan
3. Runner’s Knee (Patellofemoral Pain Syndrome)
What It Is (And What It Isn’t)
Biomechanical Triggers
Recovery Plan & Exercises
When to See a Pro
4. IT Band Syndrome (Lateral Knee Pain)
Why It Hits So Hard
Prevention & Strengthening
Downhill Running Tips
Smart Recovery Approach
5. Plantar Fasciitis
Morning Heel Pain Explained
Calf Tightness & Foot Mechanics
Footwear, Inserts & Stretching
Rehab Protocol & Return Strategy
6. Achilles Tendinopathy
The Two Types (Midportion vs Insertional)
Warning Signs & Triggers
Eccentric Loading 101
How to Heal & Stay Pain-Free
7. Stress Fractures
Red Flags Every Runner Must Know
Fueling, Bone Health, and RED-S
Recovery Timeline & Cross-Training
Return-to-Run Protocol
8. Hamstring & Calf Strains
Sprinting Gone Wrong
The Eccentric Strength Fix
Comeback Timelines by Severity
Speedwork Safety
9. Ankle Sprains & Stability
Why They Keep Happening
Rehab, Balance Drills & Bracing
Trail Running Tips
Progression Back to Trails
10. Hip & Glute Pain
Piriformis, Hip Flexors, and Glute Medius Pain
Daily Mobility & Core Fixes
When to Stretch, When to Strengthen
Realistic Return Plans
11. Back Pain in Runners
Core Weakness, Overstriding & Posture
Spine-Friendly Warm-ups
Strength & Mobility Fixes
When to Get Imaging
12. Less Common But Serious Injuries
Labral Tears
Sports Hernias
Compartment Syndrome
When to Push for a Diagnosis
Injury Basics: Overuse vs. Acute
Let’s start with the basics.Not all running injuries are the same. They fall into two big buckets: overuse injuries and acute injuries.Knowing which camp your pain falls into changes everything.Overuse injuries are the most common—making up roughly 80% of running injuries. These aren’t dramatic blow-ups. They sneak in when repetitive stress outpaces your body’s ability to recover.Think shin splints, runner’s knee, IT band syndrome, plantar fasciitis, or stress fractures.They usually start as that mild ache you brush off, but they don’t just “go away.”Keep hammering the same mistakes—like cranking mileage too fast, skipping rest days, running in dead shoes, or ignoring weak glutes—and those whispers of pain turn into shouts.Acute injuries hit suddenly. One second you’re cruising, the next you’re on the ground. Roll your ankle on a curb, pull a hamstring sprinting, take a hard fall on the trails—that’s acute.There’s usually a crystal-clear “ouch” moment.These are less common in road running but show up plenty in speedwork and trail running.If it happens, the only smart play is to stop immediately.Push through an ankle roll or muscle tear, and you’re begging for a long-term layoff.
The “Traffic Light” Pain Scale
Here’s the deal: not all pain means “game over.”But I’m also not saying that all pain is safe to ignore either.That’s where the traffic light system comes in—a simple way sports medicine experts break down running pain.Let me break it down for you:
Green light – This is the “don’t panic” zone. Think mild soreness, under a 3/10, that doesn’t mess with your stride. Maybe your quads are achy after hills or your calves bark a little after speedwork. Totally normal. Green means go—but keep an eye on it.
Yellow light – Now we’re in caution territory. Pain that creeps in after a certain distance, or that dull ache that makes you wince (4–6/10), but doesn’t cause a limp. This is your body saying, “Back off, bro.” Cut the mileage, ease off speed or hills, and throw in ice, rest, or some light rehab work. If it chills out, fine. If not? Treat it like a red light before it turns into one.
Red light – This is the “slam on the brakes” zone. Pain that spikes sharp (7–10/10), changes your stride, or lingers even when you’re sitting on the couch. Limping? Swelling? Instability? That’s a stop sign. Keep running through it and you’re just digging yourself into a deeper hole. Get it checked and treat it properly.
Most of us get into trouble not by ignoring red, but by blowing through yellow—convincing ourselves “it’s fine” until we’re sidelined. Pro move: rate your pain during and after runs.If your yellow is getting “darker,” dial it back before it hits red.I cannot stress this enough.
Load Management: The Balancing Act
Here’s why overuse injuries happen—it’s almost always a load management problem.Your bones, tendons, muscles, and ligaments are amazing at adapting to stress.That’s how you get fitter and stronger. But they need time to catch up.When you pile on too much too soon? That’s when things snap.Classic example: mileage creep. I hate to admit it as a running coach but even the “10% rule” (a rule I recommend all the time) isn’t a perfect formula—it’s just a reminder to progress slowly.What works better both in my experience and the science, is gradual increases plus down weeks where you let your body consolidate gains.Other silent traps?
Terrain swaps – Jumping from treadmill to hard pavement or flat roads to hills too fast.
Old shoes – Cushioning tanks after about 250 miles. By 400–600 miles, most shoes are done. Rotate two pairs so they last longer and stay dry between runs.
Weak links – Weak hips? Hello, runner’s knee. Tight calves? Plantar fasciitis or Achilles pain waiting to happen. That’s why strength and mobility work matter just as much as mileage.
Bottom line: most overuse injuries aren’t random—they’re training mistakes.I always come back to the basics: Build mileage slow, respect recovery, and shore up weak spots.Acute stuff (rolling an ankle, tripping in the dark) is harder to prevent, but warming up, working on balance, and not bombing down sketchy trails at night goes a long way.
Shin Splints: The Runner’s Nemesis
If you’ve been running long enough, you’ve probably had that dull, nagging ache down your shin.That’s shin splints, the friendly nickname for medial tibial stress syndrome (MTSS).Basically, it’s your tibia (shinbone) crying uncle from all the pounding.At first, it feels like a vague tenderness or ache that shows up when you start running.Sometimes it fades as you loosen up, only to come roaring back after. Ignore it long enough, and suddenly it hurts walking around the house.I’m often afflicted by this annoying injury – and it’s really annoying.
What Causes Shin Splints?
Think of it as a tug-of-war on your shinbone.Every step you take, the muscles around your tibia—especially that deep calf muscle, the soleus—yank on it.If your bone hasn’t adapted to the load, it fights back with inflammation and micro-damage.Here’s what usually lights the fire:
Training errors. Classic mistake: jumping mileage or intensity too fast. Downhill runs, cambered roads, or tossing in a hilly route without buildup? Recipe for shin splints.
Shoes and foot mechanics. Overpronators (your foot rolls in too much) and high-arched runners both get hit here. Flat feet = more tibia strain. High arches = pressure overload. Toss in worn-out shoes, and your shins will rebel.
Weak or tight muscles. Weak calves and hips shift impact to the shins. Tight calves and Achilles? They lock up ankle motion, forcing the tibia to absorb the shock.
Running form. Overstriding is a killer. Every time your foot lands too far ahead, it slams the brakes on your stride, hammering your shins. Hard heel-striking doesn’t help either. A lot of runners (me included) have found relief by shortening the stride and upping cadence. Quick, light steps = less stress per landing.
Symptoms You Can’t Ignore
Aching or throbbing along the inside of your shin is the red flag.Usually worse at the start of a run or the morning after, then it eases once you’re warm. Push too far, and it becomes sharp, constant, and pinpoint—at that point, you might be flirting with a stress fracture.Rule of thumb: if the pain is widespread, it’s probably shin splints.If it’s sharp, localized, and makes you limp—get checked for a stress fracture. They’re on the same spectrum, and I have read that untreated shin splints can absolutely tip over into a fracture.
How to Stay Ahead of Shin Splints
Here’s the good news: you don’t have to live in fear of shin pain. The best cure is prevention—and that means playing it smart.
Build mileage slowly. No “hero weeks.” Stick to the golden rule: increase gradually. Some coaches like the 10% rule, but I prefer the “three up, one down” approach: build for three weeks, cut back for one. Example: 20 miles → 22 → 24 → then back to 18 before climbing again. Your bones need those cutback weeks to adapt.
Wear the right shoes (and replace them). Match your shoe to your gait. Overpronators? Go stability or use inserts. High arches? You need cushion. And swap them out around 300–500 miles—studies show shock absorption drops 30–50% by then. Bonus tip: rotate two pairs if you run a lot. It lets the foam recover and changes stress patterns just enough to keep shins happier.
Strengthen and stretch. Don’t skip this. Eccentric heel drops (lowering your heel off a step slowly) are gold for building shin-calf resilience. Add toe raises or band work for the anterior tibialis. Hit hips and glutes, too—weak hips = sloppy mechanics = shin pain. And stretch those calves religiously. Both straight-knee and bent-knee stretches to get the gastrocnemius and soleus. I swear by a 30-second calf stretch after every run—it’s a shin-saver.
Mix up your surfaces. Too much concrete? Brutal. Mix in dirt trails, tracks, or grass. But don’t baby yourself either—if you only run on soft ground, you’ll be fragile when you do hit pavement. The trick is balance. And if you’re running on sloped roads, switch sides to keep the strain even.
I’ve written a whole guide to shin pain prevention. Read here.
Recovery & Treatment: Be Smart, Not Stubborn
I hate to break it to you but the cure isn’t some magic gadget or secret supplement.It’s patience, smart training, and fixing the stuff that got you here in the first place.Here’s the no-BS breakdown:
1. Step Back Before You Break Down
First rule: give those shins a break. I know, taking days—or weeks—off feels like punishment.But trust me, ignoring it is worse.A few days off for a mild case might save you from months off with a stress fracture. I’ve seen it happen too many times.And “rest” doesn’t mean couch potato mode. Get on a bike, hit the pool, or try aqua jogging. Keep the engine running without pounding your shins. I cannot recommend regular cross training enough.
2. Calm the Fire
Ice is your friend here. Ten to fifteen minutes a few times a day—simple, effective, and way better than pretending it doesn’t hurt.Some folks also use NSAIDs like ibuprofen short-term, but that’s pain relief only, not a cure.I’m old-school: ice after runs, move on.
3. Check Your Gear & Your Form
If your shoes look like they’ve run more miles than your car, replace them.Worn-out shoes are shin-splint fuel.Better yet, get a gait check at a running store or podiatrist.Sometimes a small tweak in footwear—or even form—can make all the difference.But don’t jump into big changes overnight. Easing in is the name of the game.I once realized that I was overstriding during long runs—basically slamming my heels into the pavement every step.Shortened my stride, bumped cadence, and my shins instantly started thanking me.
4. Build Stronger Legs
Once the pain calms down (usually after a week or two), it’s time to rebuild.
Calf raises & eccentric heel drops: Start with 3×15 slow reps off a step. Straight legs, then bent knees. Progress to single-leg or add weight.
Toe raises: Lift the forefoot while heels stay planted—3×15–20. Bonus if you’ve got a resistance band.
Hip & core work: Think clamshells, side leg lifts, bridges, planks. Strong hips = better mechanics = happier shins.
Mobility: Stretch calves, roll them out. Try rolling your shin over a frozen water bottle—double-duty massage plus ice.
Everything’s connected. Weak hips, sloppy core, and tight calves all load up your shins more than they should.
5. The Comeback: Earn It Slowly
Here’s the green light: if you can walk and hop pain-free, no tenderness, you’re ready to run again.But go slow. Start with soft surfaces, maybe a walk/jog program (1 minute jog, 1 minute walk for 10 minutes).If it feels good that day and the next, progress. Small bumps in mileage—10 to 15% a week, tops.Insert rest or cross-train days between runs at first. And don’t even think about sprints or hill repeats until you’ve rebuilt a base of steady, pain-free mileage.Bones need stress to get stronger, but too much stress breaks them down. That’s why I always recommend 2–3 weeks of progressive loading, then a lighter week to let the bones adapt.Listen to your body’s “pain scale.” Green is fine, yellow means back off, red means stop now. I’ve already explained this before.
When to See a Pro
If your shin pain is sharp, super localized, or won’t quit after rest and rehab, don’t play tough guy. Get it checked. Sports docs and PTs can test for stress fractures (and yes, that sometimes means 6–8 weeks off with a boot).If you’ve got swelling, numbness, or tingling in your feet, that could be compartment syndrome—don’t mess around, get help fast.
Runner’s Knee (Patellofemoral Pain Syndrome)
Let’s talk about one of the most common thorns in a runner’s side: runner’s knee.The fancy name is Patellofemoral Pain Syndrome (PFPS), but really, it’s that dull, annoying ache around or behind your kneecap that shows up when you run, especially downhill, take the stairs, squat, or even sit too long at the movies.That’s why some experts call it the “movie theater sign.”Unlike a torn meniscus or blown ligament, PFPS isn’t one single injury—it’s more like your kneecap and the surrounding structures are irritated from overuse and bad tracking.Think of it as the knee saying, “I’ve had enough of this sloppy form and overload.”
Why It Happens
Runner’s knee usually comes down to your kneecap not gliding smoothly over your femur.Here’s what pushes it out of whack:
Weak quads and hips:Your quads—especially the inner one (vastus medialis)—keep your kneecap steady. If they’re weak, the patella drifts, grinds, and hurts. Add in weak hips and glutes, and the whole chain collapses inward (that knee valgus wobble you see in race photos).
Tight muscles: Tight hammies, calves, or quads? They mess with mechanics and crank up pressure on the knee (Cleveland Clinic). IT band tension can yank the kneecap sideways too. Basically, when one part of the chain is locked up, your knee pays the bill.
Overstriding and form issues: Heel striking way out front or running with a low cadence is like sending shockwaves into your knees. Downhills? Brutal on the patellofemoral joint if you bomb them with bad form.
Foot mechanics: Flat feet and overpronation make the tibia and femur twist, pulling the kneecap off-track (Cleveland Clinic). Sometimes, the right shoes or orthotics can help straighten things out upstream.
Training errors: Classic mistake—sudden mileage jumps, hammering downhills, piling on speedwork, or always running the same slanted road. That’s a recipe for PFPS flare-ups.
How It Feels
The pain is usually diffuse—that “can’t put my finger on it” ache around or behind the kneecap.It ramps up with stairs (worse going down), squats, or sitting too long with bent knees. You might feel mild swelling or some grinding (crepitus) when bending, but big swelling isn’t typical for PFPS.Key difference: if your knee locks, gives way, or had sharp pain after a twist—that’s not runner’s knee. That’s doctor territory. PFPS is stubborn, but not usually catastrophic.
How to Keep It Away
The good news? Most cases respond to simple, consistent work. Here’s the playbook:
Strengthen quads and hips: Non-negotiable. Start with pain-free moves like straight-leg raises, wall sits, and mini squats. Add clamshells, glute bridges, side-lying leg lifts, and monster walks for the hips. Research backs this up—hip and quad strength are your knee’s best friends. Focus on form: knee tracking over toes, no collapsing inward. Here’s my go-to routine.
Fix your stride: If you’re a big strider, bump cadence by 5–10%. Even a small jump can reduce knee impact because you’ll land closer to your center of mass. Aim for ~170–180 steps per minute (if you’re at 160 or less, that’s low). On downhills, shorten your stride, keep knees soft, and don’t lock out.
Stay loose: Stretch post-run—quads, hammies, calves. Foam roll the quads and IT band region. Keeps the tug-of-war on your kneecap in check.
Shoes/orthotics: Wear shoes that match your foot type. Flat-footed with knee pain? Try OTC orthotics or stability shoes before shelling out for custom ones (research notes custom insoles often aren’t more effective than simple OTC solutions). The goal is alignment, not overcomplication.
Train smart: Don’t jump mileage or hill work overnight. Sprinkle in cross-training—bike, swim, row—when knees are cranky. Respect recovery days. Limit downhill pounding unless your legs are conditioned for it.
Lucky for you, I’ve already written a whole guide to knee pain prevention. Read it here.
Recovery and Treatment: Respect the Knee, Don’t Try to Out-Stubborn It
Here’s the good news: runner’s knee almost never needs surgery.Most of the time, conservative care works just fine. The real battle is patience.
1. Dial It Back, Don’t Quit Everything
You don’t usually have to stop moving completely, but you do have to stop picking at the scab. Keep hammering hills and deep squats while your knee is pissed off?That’s like scratching an itch until it bleeds—it’ll stay inflamed.Cut mileage.Skip stairs and hills for now.If even flat running hurts, park the shoes for a week or two and jump on the bike, hit the pool, or do any low-impact cardio that doesn’t set your knee on fire.The mission is to calm irritation down, not prove your toughness.This may sound too simple but believe me – it works.
2. Ice & Anti-Inflammatories
Old-school still works: ice the knee 15–20 minutes after runs or when it aches.Short-term use of NSAIDs (like ibuprofen for a week) can help dial down inflammation. Some runners also swear by anti-inflammatory gels for local relief.Just remember—those are band-aids. The real fix comes from getting stronger and correcting muscle imbalances.
3. Tape It or Brace It (If It Helps)
Some runners feel better with McConnell taping or kinesio tape guiding the kneecap into a less painful groove.A good PT can show you exactly how.There are also straps and sleeves that support the patella. These aren’t cures, but they can make running more bearable while you rehab.
4. The Real Work: Rehab Exercises
Once the pain starts calming, it’s time to rebuild. Do these every day or at least every other day.No magic trick here—consistency is the cure.
Quad sets & straight leg raises: Fire up your quads without bending the knee. Do 10–15 reps, hold each 5 seconds.
Clamshells & side leg lifts: Train your glutes—these guys are your knee’s bodyguards. Resistance band makes them more fun (well, “fun”).
Wall sits (short arc): Sit against a wall, knees bent about 45° (not deep). Hold 10–30 sec. Builds endurance without pounding the kneecap.
Calf stretch & foam roll: Don’t let tight calves and IT band yank on your knee mechanics. Roll gently, don’t murder your IT band.
Step-downs / mini squats: Once pain eases, practice control. Stand on a low step, lower opposite heel to the ground slowly, then back up. Keep knee tracking over toes. These will burn but they’re gold for downhill strength.
5. Return to Running (Slow Is Fast)
When daily life and your rehab moves feel pain-free, it’s time to test short runs. Keep them flat and easy.Try every other day at first. Avoid downhills—they’ll light your knee up again.Think “yellow-light rules.” If pain creeps in, back off before it gets worse. Build slowly: 1 mile, then 1.5, then 2. Walk breaks are fine. Better to progress like a tortoise than flame out like a hare and be sidelined again.Still looking for more guidelines like this, check out my post here.
When to Get Checked Out
If your knee is sharp, swollen, locking, or just won’t improve after weeks of smart rehab, it’s time to see a sports med doc.They may order imaging—not to “prove” runner’s knee (that doesn’t usually show on MRI)—but to rule out cartilage issues or other sneaky problems.And honestly, a good PT can be worth their weight in gold.They’ll tweak your form, show you how to do the exercises right, and sometimes loosen up tight spots with hands-on work or taping.Surgery? That’s last resort, and only if there’s a clear structural problem like a rogue cartilage flap. For the vast majority, rehab and smarter training do the trick.
IT Band Syndrome (That Outer-Knee Burn We All Dread)
The IT Band Syndrome (ITBS) one of the most common overuse injuries out there, and man, it’s a tough one.The pain shows up sharp and burning on the outside of the knee, usually a few miles into a run, and it can get so intense it literally forces you to stop.Sometimes it even shoots up the side of the thigh.Classic ITBS.
What’s Going On
The iliotibial band (a thick strip of tissue running from your hip down past your knee) helps stabilize your leg when you run.Problem is, with all the bending and straightening we do, it can rub against the femur bone and get angry.Cue that stabbing pain at the lateral knee.And here’s what tends to trigger it:
Weak hips. This is the big one. Your IT band connects to the TFL and the glutes. If your glute medius and crew aren’t pulling their weight, your thigh rotates inward, and the IT band grinds harder against the femur. Cleveland Clinic flat-out says weak hip abductors are one of the main causes. I’ve seen this a ton with runners I coach—once they get serious about hip strength, the knee pain often fades.
Tight hips. The IT band itself doesn’t really stretch (it’s like a seatbelt), but the muscles attached to it—your TFL and glutes—can. If they’re locked up, the IT band gets pulled tight.
Downhills & sloped surfaces. This is why trail runners and ultrarunners curse ITBS. Bombing down long downhills makes the band rub harder, and running on banked roads where one foot’s always lower than the other? Recipe for irritation. Same with track runners always turning left.
Overdoing it. Big jumps in mileage or speedwork without recovery are prime triggers. ITBS loves sudden increases.
Foot mechanics. Overpronation, leg length discrepancies, or stiff ankles can throw off your gait and put more stress on one IT band.
Shoes & terrain changes. Switch shoes without easing in, or grind out miles in worn-down trainers, and you’re asking for trouble.
How It Feels
The calling card is that sharp, localized pain on the outside of the knee.Usually not much pain at rest, but a few miles into a run it starts to bite. Downhills are brutal. Some folks even find slow running hurts more than faster paces.Walking downstairs can set it off too.Push on the bony outside of the knee (lateral epicondyle) and it’s tender.Bend the knee to about 30 degrees and—bam—you feel it. That’s the ITB test docs use.Usually no swelling, no deep joint pain—if it’s higher up the leg or inside the joint, you’re likely dealing with something else.
How to Keep It Away (and Beat It When It Shows Up)
Here’s the good news: you can do a lot to prevent ITBS, and the same moves help treat it when it pops up.
Strengthen your hips and glutes. This is the #1 fix. Side-lying leg raises, clamshells, single-leg squats, band walks—they’re not glamorous, but they work. A side plank with a leg lift? Brutal, but golden for the lateral hip and core. Strong hips mean your knee tracks straighter, and the IT band stops getting chewed up.
Stretch & roll (smartly). Stretch your glutes, TFL, and outer thigh. Foam rolling helps some, irritates others. If you roll, focus more on the hip and quad area—don’t grind directly on the outside of the knee.
Train the downhills. If you’ve got a hilly race, work them in gradually. Don’t suddenly decide to do a monster downhill run. Your body needs to adapt.
Mix up surfaces. Switch directions on the track, alternate road sides, or stick to flat paths when you can. Trail runners—don’t always stick to one sloped side.
Keep shoes in check. Don’t push old, worn-out shoes too far. And if you’re switching models (say, neutral to stability), ease into it. Orthotics sometimes help, but that’s more case-by-case.
Catch it early. The moment you feel a twinge on the outside of your knee, back off mileage, ice it, and up your hip work. Ignoring ITBS never works—it only gets nastier.
Recovery and Treatment: Winning the Battle Against ITBS
If you’ve got IT band syndrome, here’s the deal—you can’t just “push through.”I’ve tried it, plenty of runners have tried it, and it usually ends with hobbling home and weeks of frustration.The fix is about reducing the fire (inflammation) first, then dealing with the root cause.Here’s what I’d recommend you to do:
1. Rest (Don’t Be a Hero)
Yeah, I know—rest is the hardest word in a runner’s vocabulary.But if the pain hit hard, you need at least a week or two of serious cutback.Sometimes full stop. Cycling (stay seated) or swimming can be safe alternatives if they don’t spark pain.Downhills? Forget about it for now—they’re ITB poison. Even walking long distances can sting, so don’t pretend you’re in a step-count competition.
2. Ice & Anti-Inflammatories
Classic combo: ice the outside of your knee for 10–15 minutes after activity.The IT band rubs and irritates the bone like bursitis, and cooling it down helps.NSAIDs (7–10 days) can knock down the irritation, but remember—those don’t fix the underlying issue. They just quiet the alarm bell.
3. Massage & Foam Rolling
Grab your roller or a lacrosse ball and get friendly with your outer thigh, glutes, and hip. Quads, hammies, TFL—show them some love. Some PTs swear by myofascial release or ASTYM.The evidence is mixed, but anecdotally, tons of runners say it helps when paired with strengthening.Personally, I’ve had that “hurts so good” moment on the roller that made me want to cry and laugh at the same time.
4. Strength Training: The Game-Changer
This is the big one.Most ITBS stories start with weak hips and glutes. Fix that, and you’re on your way out of the woods.As soon as the pain calms down, get after these:
Side leg raises – 2–3 sets of 15. Keep it strict, no swinging.
Clamshells – high reps, good form, hips stacked. Burn, baby, burn.
Hip thrusts / glute bridges – double or single leg.
Single-leg squats/step-downs – shallow at first, progress with control.
Lateral band walks – you’ll hate me, but your hips will thank me.
Core work – planks and side planks to lock your form.
Do these consistently, and you’ll build the armor your knees desperately want.
5. Stretching
Post-run or after a hot shower, stretch it out. The standing ITB stretch (cross leg behind, lean away) is a classic.Add quads and hammies to ease the knee strain. But don’t yank it so hard you create new pain—stretching should feel relieving, not like punishment.
6. Careful Comeback
Your green light back to running: when you can walk stairs, squat, and move around without pain. Start flat and short—1–2 easy miles.Treadmill or track is best.The moment that lateral knee ache shows up—stop. Don’t tough it out, because ITBS pain ramps like a wildfire once triggered. Ice after every run.Build mileage slowly (10–15% max per week), keep rest days, and hold off on downhills or speedwork until your body’s ready.
When to Call in Backup
If the pain won’t back down, get checked by a PT.They’ll spot weak links you can’t see and maybe use tools like deep tissue massage, dry needling, or ultrasound. Surgery exists (IT band release, bursa work), but it’s rare.99% of runners never need it because this thing does heal with the right approach.
Plantar Fasciitis: The Runner’s Heel Nemesis
If you’ve ever woken up, stepped out of bed, and felt like a knife just stabbed your heel—welcome to the world of plantar fasciitis.It’s that nasty injury to the thick band of tissue running under your foot, from your heel to your toes.Doctors call it the plantar fascia, and when it gets irritated, you’ll know it.The pain usually hits right at the heel bone (calcaneus) and is sharp, stabbing, and brutal first thing in the morning or after you’ve been sitting too long.I also read that it’s called “plantar fasciopathy” because in chronic cases it’s more about wear and tear than just inflammation.I’m no stranger to this condition. Those first steps out of bed feel like walking on broken glass. You limp around, then eventually it loosens up, and you think, Maybe it’s fine.Spoiler: it’s not fine if you don’t deal with it.
What Causes It
Think of the plantar fascia like the bowstring of your foot’s arch.Put too much stress on it, and little tears build up—especially near the heel.Here’s what usually pushes runners over the edge:
Tight calves/Achilles. This is the big one. When your calves are tight, your ankle can’t flex properly. That dumps extra stress on the fascia. At night, your foot points down (plantarflexed), so the fascia shortens. Then boom—you step out of bed and yank it hard, and it screams back at you.
Foot shape. Flat feet (arches collapse inward) overstretch the fascia. High arches (rigid, no give) make it too taut. Either way, the fascia gets punished.
Crappy shoes. Running in worn-out trainers or flip-flopping around with no arch support? Recipe for disaster. It’s actually one of the most common “you ignored your shoes” injury I see.
Too much, too soon. Spike your mileage, jump into speedwork, or stack plyometrics, and the fascia pays the price. Even long shifts on your feet at work can trigger it.
Surface & hills.Going from treadmill to pounding city concrete overnight? That’s stress city. Lots of uphill running also tightens calves and strains the fascia.
Extra weight. Whether it’s pregnancy, a few extra pounds, or just life—more load means more strain with every step.
What It Feels Like
The telltale sign: heel pain right at the inside/front edge of your heel. It’s worst in the morning when you first stand up.It might loosen as you move around, but then sneak back after a run or when you get up from sitting too long.That’s the classic “startup pain.”On runs, it often hurts at the start, eases once you warm up, then flares again after you stop. Press on the inside of your heel—if it lights up, that’s PF.Usually it’s one foot, sometimes both.And unlike other injuries, there’s not much swelling or bruising. If you’ve got heel pain with numbness or pain that spikes at night, that’s probably a different beast (like tarsal tunnel syndrome).
How to Keep It Away
Here’s the tough love: if you don’t want PF, you’ve got to respect your calves, arches, and footwear.
Stretch those calves daily. Straight-leg and bent-knee stretches hit both calf muscles. Do wall stretches or use a slant board. Thirty seconds each, often. Also stretch the fascia itself—towel stretch, toe pulls, whatever works. Just make it a habit.
Strengthen your feet. Toe curls, towel scrunches, marble pickups—they sound silly, but they bulletproof your arches.
Don’t go zero to sixty. Add mileage and intensity gradually. Only one new stressor at a time—don’t jump from more miles and speedwork and new shoes all in the same week.
Support your feet everywhere. No barefoot laps around the hardwood floor if you’re prone to PF. Even at home, wear supportive sandals or recovery shoes. Some runners swear by cushiony sandals like Oofos for off-the-run relief. Replace your running shoes every 300–500 miles, or sooner if the cushion feels dead.
Listen to the early whispers. A sore arch or heel after a run is your warning light. Roll your foot on a frozen water bottle, stretch, and take a day off if needed. Don’t ignore it until it sidelines you.
Mix up terrain. If all your runs are on concrete, throw in grass or dirt to give your fascia a break.
I’ve written a full guide to pain prevention. Read it here.
Recovery and Treatment: Plantar Fasciitis
Plantar fasciitis is one of those injuries that makes you want to throw your running shoes at the wall. It heals slow—sometimes weeks, sometimes months—because that fascia is stubborn tissue.But here’s the good news: most runners do get past it if they stay consistent with treatment.The trick is not being hardheaded (I’ve been guilty) and trying to “just run through it.” Spoiler: that never works.
1. Rest—But Don’t Panic
I keep repeating it – Rest doesn’t always mean “couch potato.” If the pain isn’t too bad, you might still jog, but cut the mileage and ditch the speedwork and hill repeats until things calm down.If every run makes the next morning worse, back off. Sometimes a full stop is needed for a few weeks.Cross-train with swimming, biking, or anything that doesn’t piss off your heel.
2. Cushion & Tape It Up
Your heel takes the brunt, so give it a break.Gel cups, silicone pads, even cut-out insoles can offload pressure.And taping—look up “low-dye taping.” It basically cradles the arch. I’ve taped my foot mid-training cycle and it’s like giving your fascia a supportive hug.
3. Ice & Massage—The Hurts-So-Good Stuff
Freeze a water bottle, roll your foot over it. It’s massage plus ice therapy in one.Or go old-school with a golf ball—warning, it’ll sting, but in that good way.End of the day, after runs, whenever it flares up—ice the heel. You’ll thank yourself in the morning.
4. Stretch Like It’s Your Job
Before your first step out of bed, stretch the calves and fascia.Keep a towel or band handy, pull your foot back gently, do ankle circles.Some research recommends night splints or the Strassburg Sock—they keep your foot flexed overnight so you don’t wake up with that dreaded “knife in the heel” step. I’ve tried this in the past but it didn’t help much to be honest.
5. Strength Work—Load It Right
Here’s the paradox: you need to rest, but you also need to strengthen.Think short-foot drills (scrunching the arch without curling toes), calf raises, and eccentric heel drops. Stand on a step, raise on both feet, lower down slowly on the bad one.Mild discomfort?Fine. Sharp pain? Stop. Do it daily, 2–3 sets, 15 reps.Cleveland Clinic backs this up—you’ve got to be consistent for weeks to see real change. Add in towel curls or marble pickups to build those little foot muscles.
6. NSAIDs, Shots & New Tech
Ibuprofen can take the edge off early on. Docs sometimes offer cortisone shots for severe pain, but it’s risky—quick fix, not a cure, and a small chance of fascia rupture. Save that for last resort. I’ve already dived into the topic of OTC for pain.Clinics are also using shockwave therapy (yep, sound waves blasting your fascia to spark healing). Studies show it can work in tough, chronic cases.
7. Getting Back on the Road
Patience is the name of the game. Don’t run until you can walk pain-free and hop in place without wincing.When you do return, start with short, flat runs. Softer surfaces help.Some runners come back using tape or orthotics for extra support. Run/walk is your friend here—alternate to ease the load.Expect some morning stiffness to linger—it doesn’t vanish overnight.As long as pain is mild and trending better, keep building.But if even a short jog leaves you limping the next morning, that’s your fascia telling you, “Not yet.”
When to Get Help
If you’ve been hammering home treatments for 6–8 weeks and nothing’s budging, call in the pros.A podiatrist or sports doc can check for sneaky mimics like a stress fracture or nerve issue, and they can fit orthotics or try advanced stuff like PRP or shockwave therapy.Bottom line: most plantar fasciitis clears with consistency and patience. Stretch daily. Strengthen smart. Don’t rush the comeback. One day you’ll step out of bed without that “ouch” and feel that spring in your step again.
Achilles Tendinopathy: The Runner’s Nagging Nemesis
Let’s talk about one of the most common (and annoying) runner injuries out there: Achilles tendinopathy.For a long time I called it Achilles tendinitis, but “tendinopathy” is the real deal term for chronic cases.This is an overuse injury that hits the thick band connecting your calf muscles (gastrocnemius and soleus) to your heel bone.It usually shows up as pain, stiffness, or tenderness in the back of your heel or lower calf—especially first thing in the morning or when you kick off a run.The Achilles is the strongest tendon in your body, but it’s not bulletproof.Keep stressing it with too much running and not enough recovery, and you’ll end up with microtears, degeneration, and that all-too-familiar ache that makes you limp to the coffee maker.I found that there are two sorts of Achilles trouble:
Mid-portion tendinopathy: Pain shows up 2–6 cm above the heel, right in the middle of the tendon.
Insertional tendinopathy: Pain is right where the tendon attaches to the heel bone. This one’s trickier because it doesn’t tolerate stretching as well.
Why It Happens
Most cases, as you can already tell, come down to the classic too much, too soon mistake.The tendon just can’t keep up with the load. Some of the biggest culprits:
Sudden spikes in training – Adding mileage, intensity, or hill workouts too fast. Hills especially torch the Achilles because every uphill stride forces it to strain harder. Same with sprints or intervals—those hard push-offs can light it up.
Tight or weak calves – If your calves are stiff as bricks, the Achilles takes more force. Weak or fatigued calves? Same story. A lot of runners carry tight calves around like it’s part of the uniform—and it sets them up for trouble.
Footwear changes – Switching to a shoe with a lower heel-to-toe drop (say from a cushioned 10mm trainer to a minimalist zero-drop) without easing in? Bad idea. Your Achilles suddenly stretches more every step, and it’s not ready for it. Worn-out shoes are no friend either.
Biomechanics – Overpronation can twist the tendon. Super rigid feet that barely pronate can pound it too, since there’s no shock absorption. Leg length differences or a funky gait only add fuel to the fire.
Age and circulation – Over 30? Welcome to the Achilles club. Blood flow drops with age, collagen weakens, and suddenly what you got away with in your 20s bites you in your 40s. Morning stiffness is classic—feels like your heel forgot how to bend overnight .
How It Feels
If you’ve had it, you know the script:
Stiff Achilles in the morning (sometimes it feels like walking on wood until you loosen up).
Ache or pain during or after running, usually at the back of the heel or calf.
Tender spots—mid-portion pain sits a couple inches above the heel; insertional hurts right at the bone.
In chronic cases, the tendon thickens, and you might even feel a bump compared to the other side.
Hills or speedwork? That’s when it really barks.
If it’s really bad, even walking or going up on your toes hurts.
Keeping the Achilles Happy (Prevention)
The good news? You don’t have to wait until you’re limping to take care of this tendon.Here’s what has worked for me and my running clients:
Eccentric heel drops – Gold standard. Slowly lower your heel off a step. Not just rehab—great as a preventive tool. Studies show they stimulate tendon adaptation. Do a couple sets of 10–15 a few times a week.
Stretch those calves – Straight-leg stretch for gastrocnemius, bent-knee stretch for soleus. Foam roll if you’re tight. Looser calves = less morning stiffness.
Ease into hills – Don’t go from zero to 10 x 200m hill sprints. Start with 2–3, or sneak hills into easy runs first. Same with speedwork—build up, don’t shock your system.
Smart shoe transitions – Switching to lower-drop shoes? Alternate with your old pair and build mileage slowly. Heel lifts can help take stress off in the short term.
Respect recovery – Don’t suddenly double your weekly runs. Take rest days after calf-burner workouts. And don’t forget that CrossFit, jumping, or plyos hammer the Achilles too.
Strengthen calves & beyond – Calf raises (straight and bent knee) with weight build resilience. Add glutes and hamstrings so your calves don’t have to pick up the slack.
Maintenance work – Massage, foam rolling, or even a massage gun session on calves and Achilles. Doesn’t hurt, feels good, and keeps things supple.
Recovery and Treatment for Achilles Pain
When it comes to Achilles issues, the answer usually isn’t lying on the couch doing nothing.If you’re reading in this far, then you shouldn’t be surprised.Tendons don’t like complete rest.What they respond to is smart, controlled loading.Think “train it, don’t strain it.” Unless it’s a full-blown rupture (different beast altogether), you want to manage the load, not eliminate it.Here’s how I’d approach it:
1. Cut Back, Don’t Burn Out
First step: ease up.That means dialing back mileage and skipping the workouts that torch your Achilles—like hill repeats and speed sessions.Flat, easy running can sometimes stay on the menu if pain stays mild (think under a 3 out of 10, and no worsening during or after).But if even jogging makes you limp, take a week or two off and swap in cycling or swimming.Trust me, it’s better to lose a little fitness than push into a full-blown tear.
2. Heel Lifts & Smart Stretching
Slip a small heel lift into your shoe for a bit—it reduces stress by shortening the Achilles.If your pain is down near the heel (insertional), avoid dropping the heel below the foot (like those step stretches everyone loves). That just grinds the tendon into the bone and makes things worse.Keep stretches gentle and on flat ground. Mid-portion pain? Some light stretching is fine—just don’t force it.
3. The Gold Standard: Eccentric Heel Drops
This one has science behind it. The Alfredson protocolis the go-to: 3 sets of 15 heel drops, twice daily, for 12 weeks.Stand on a step, rise up with both feet, then slowly lower down (3–5 seconds) on the injured leg.Use the other foot to help push back up. Do it with knees straight (to hit gastrocnemius) and bent (for soleus).Warning: it’s gonna hurt a little. And that’s okay.Alfredson himself believed working into moderate pain helps kickstart tendon remodeling.Just don’t push into crippling pain. Over time, add weight (I used to strap on a backpack stuffed with books).And if your pain is insertional? Only lower to flat—not below the step. Stick with it. Research in the American Family Physician shows eccentrics improve both pain and function.
4. Isometric Holds
Newer studies say isometrics—holding tension without moving—can calm pain down for hours.Try a calf raise and hold at the top for 30–45 seconds, a few reps. Great option when the tendon’s too cranky for full heel drops.
5. Loosen Things Up
Foam rolling your calves daily works wonders.You can also massage around the tendon with your fingers to get blood moving.Just don’t go grinding away directly on a very sore spot. Gentle is the name of the game.
6. NSAIDs—Use With Caution
If your Achilles is inflamed (true tendinitis), NSAIDs can help short-term. But for chronic tendinopathy, inflammation isn’t the big problem—it’s degeneration.In fact, some animal research suggests long-term NSAID use could slow healing. Topical gels might help manage flare-ups, but don’t expect pills to be your fix.
7. Morning Routine
Achilles stiff in the morning? Welcome to the club.Before stepping out of bed, do some ankle pumps or gentle stretches.It helps ease into the day. Night splints are sometimes used (more common with plantar fasciitis), but the key is keeping things moving early.
8. The Comeback
Here’s the hard part: just because your Achilles feels better doesn’t mean it’s fully healed.I’ve seen runners rush this step all the time—and then regret it.Wait until morning stiffness is minimal and you can do eccentrics without much pain before trying some flat, easy jogs. Start short. Maybe every other day at first. Avoid hills until your tendon feels bulletproof again.And don’t stop the calf work once you’re “better.”
When to Get Help
If you’re not sure how bad it is, or if it’s just not getting better, go see a sports doc or physio. Sudden “pop”? Can’t push off? That’s emergency territory—get checked right away for rupture.For tendinopathy, PTs can spot weak hips, stiff ankles, or other factors feeding into your Achilles issue. Some may use shockwave therapy or ASTYM to promote healing.Worst-case scenarios (when nothing else works) may involve PRP injections or surgery—but those are last resorts. Most runners recover without going that far.
Stress Fractures: The Runner’s Wake-Up Call
Let me hit you straight: a stress fracture isn’t just “a sore shin” or “a little foot pain.”It’s a tiny crack in your bone—a warning sign your body is waving in your face.Unlike breaking a bone in a crash, this one sneaks up on you.It builds over time when you push too hard, too fast, and don’t give your bones the downtime they need to rebuild.Think of it like this: every run is a small withdrawal from your body’s bone bank.Usually, your bones remodel and pay the debt back stronger.But if you keep withdrawing without deposits (rest, nutrition, recovery)? Boom. The bone gets tired, then it cracks.
How Do Stress Fractures Happen?
There’s never just one reason.It’s usually a cocktail of overtraining, bad recovery, and sometimes nutrition gaps.Here are the big culprits:
Mileage Madness: The classic story. Runner doubles mileage, adds long runs, maybe back-to-back races—bone doesn’t keep up.
No Rest Days: Look, bones need rest as much as your muscles do. If you hammer every day—speed, long runs, no cutback weeks—you’re asking for it. Training isn’t just about stress; it’s about recovery cycles.
Underfueling (RED-S): This one’s sneaky and huge. If you don’t eat enough to support training, your bones suffer. Especially with low calcium or vitamin D. For women, missed periods (amenorrhea) are a giant red flag—part of what used to be called the Female Athlete Triad, now RED-S (Relative Energy Deficiency in Sport). Men aren’t off the hook either. If you’re chronically underfed, your bone density tanks.
Biomechanics & Shoes: Overpronation, leg-length differences, stiff or worn-out shoes—small things that concentrate stress on one bone. Ever see someone limp into the clinic with a metatarsal stress fracture? Often it’s gait plus overload.
Bone Density & Genetics: Some of us just have more fragile bones. Post-menopausal women, folks with osteoporosis, or anyone who’s had a stress fracture before are higher risk. Once you’ve had one, you’re more likely to get another if you’re not careful.
Surface & Environment: Suddenly swapping grass or trail for endless concrete? Recipe for trouble. Even with great form, hard surfaces add load your body might not be ready for.
What It Feels Like
Here’s the part every runner needs to hear: stress fractures don’t feel like “normal” soreness. The pain has a personality.
Pinpoint Pain: You can poke one exact spot on the bone and it’s like—ouch. That’s different from shin splints, which are more spread out.
Worsens With Running: Unlike a muscle strain that warms up and feels better mid-run, stress fracture pain either stays the same or gets worse the longer you go.
Swelling or a Little Bump: Sometimes the bone even shows a small lump or subtle swelling.
Percussion Test: Tap the bone, it hurts. Hop on the leg, it screams. That’s not good.
Night Pain: In bad cases, it aches even when you’re lying down.
Stress fractures are the nightmare nobody wants—painful, sneaky, and guaranteed to derail your training if you ignore them.The good news? Most of themcan be prevented with smart training, fueling, and listening to your body.Let’s talk about how to stay ahead of them—and what to do if you end up sidelined.
1. Train Smart, Not Stupid
Don’t go from zero to 60 with mileage.Your bones need time to adapt.The old “10% rule” (adding no more than 10% mileage per week) isn’t perfect, but it’s a decent guardrailMore important: actually listen to your body.If your shin, hip, or foot feels bone-deep painful, that’s not soreness—it’s a red flag.Build in cutback weeks every 3–4 weeks where you back off mileage. That’s recovery, not weakness.
2. Fuel Your Bones
Calories matter.Period.Undereating is one of the fastest ways to trash your bone health.For bones specifically: calcium (1000–1300 mg/day) and vitamin D are key. Get your levels checked—lots of runners are low on D, especially in winter.For women, a lost period is not a “perk” of training—it’s a huge warning sign of low energy availability and a known risk factor for fractures.Check my guide to running nutrition.
3. Strength Training Is Bone Training
Strong muscles shield your bones. Lifting weights doesn’t just make you faster—it literally stimulates bone growth.Think squats, lunges, and plyometrics (in moderation).Load-bearing moves teach bones to adapt. Personally, I’ve found that once I added 2–3 strength sessions per week, I stopped dealing with shin splints that used to haunt me every training cycle.
4. Don’t Just Run, Mix It Up
Most of us aren’t built to pound pavement seven days a week.Even elites take rest days and off-seasons.Mix in biking, swimming, elliptical, or aqua jogging to keep your cardio without the constant bone stress. Your legs will thank you.
5. Surfaces & Shoes
Vary your terrain—road, trail, track. Each surface stresses bones differently, which spreads out the load.As for shoes, keep them fresh. Old, dead shoes = more shock on your bones.But don’t assume the most cushioned shoe saves you—sometimes all that padding makes you stomp harder.Comfort and support matter most. Orthotics can also help if you’ve got biomechanical quirks like super-high arches.
6. Know Your Risks
If you’ve had stress fractures before, have low BMI, or other risk factors, talk to your doc about a DXA scan.Knowing if you’ve got low bone density can change how aggressively (or conservatively) you train.
7. Don’t Ignore Red Flags
This one is huge. Stress fracture pain is sharp, focal, and doesn’t go away when you warm up.One runner shared how her shin pain was brushed off as “shin splints,” cleared by X-ray… then her tibia cracked clean through just stepping at a concert.Don’t be that runner. If pain feels wrong, stop, rest, and push for further scans (MRIs and bone scans catch fractures earlier than X-rays).
If You’re Already Injured (Been There, It Sucks)
Step 1: Rest From Running
Non-negotiable. The only way a fracture heals is to stop the pounding that caused it.Most stress fractures need 6–8 weeks off running. High-risk spots (femoral neck, navicular) can mean longer or even surgery.Sometimes you’ll need a boot or crutches if walking hurts. Low-risk ones (like some metatarsals) may just mean no running, but pain-free walking is okay.
Step 2: Cross-Train (Sanity Saver)
Deep-water running (aqua jogging) is gold—mimics running form without impact.A flotation belt helps. Swimming, cycling, ElliptiGO, rowing (if it doesn’t stress the injury)—all fair game if pain-free.When I had a tibia stress fracture, pool running kept me sane. It’s not glamorous, but it works.
Step 3: Eat Like You’re Healing
Your body is rebuilding bone—give it the raw materials.Protein, calcium, vitamin D. Studies in military recruits show supplementing D and calcium lowers stress fracture risk, so it likely speeds healing too.Collagen + vitamin C before training has some evidence for helping tendons and bones rebuild—worth trying.
4. Gradual weight-bearing
Here’s where patience really gets tested. You don’t just chuck the boot and start jogging because you feel okay. Follow your doc’s plan to the letter.Usually, it’s a few weeks of partial weight-bearing (crutches, boot, the whole clunky package), then you add more weight as the bone heals.Only when walking is 100% pain-free and you’re cleared is it time to even think about impact again.Rushing this step is how people end up back at square one—or worse, with a full break.
5. Fix the “why” during downtime
Injuries don’t just happen—they happen for a reason.Use this forced break to ask the hard questions.Did you ramp mileage too fast? Skimp on recovery? Eat like a college kid on ramen? Maybe your form needs work—weak hips, sloppy core, flat feet.Now’s the time to address it.I’ve seen runners get hurt, then come back stronger because they finally tackled the root issue.Example: a tibial fracture means no pounding the shin, but you can still train your core, upper body, and hips.Don’t load the injured bone, but keep the rest of your machine sharp. Future You will thank you.
6. Return-to-run protocol
Here’s the biggest mistake runners make: thinking 8 weeks in a boot means “back to normal.”Nope. A smart return looks like this:
Day 1: 1 min run, 4 min walk. Repeat 4–6 times. You’ve maybe “run” 5–6 total minutes. That’s it.
If the bone doesn’t flare up that night or next morning, you slowly increase. Maybe 2 min run/3 min walk.
Run every other day at first—bones need time to adapt to impact again.
Build from run-walks to continuous running. Start with 1 mile, then 2. Forget your old mileage for now.
Yes, it takes weeks to climb back. But that’s better than re-fracturing and spending months sidelined. Keep up cross-training on off days to maintain fitness, and don’t skimp on calcium + vitamin D.And listen: a little achiness at first is normal. Sharp pain? That’s a red flag. Stop. Get checked. Better cautious than busted.
7. Patience and perspective
This one’s tough.But here’s the upside—plenty of runners come back stronger.They fix the mistakes, they fuel better, they train smarter.And when you finally jog that first pain-free mile, even if it’s slow as molasses, it feels like pure victory.Your bones might’ve cracked, but your spirit didn’t.
Hamstring & Calf Strains: The Snap You Never Forget
Strains = torn muscle fibers. Could be tiny tears (Grade I), or a complete blowout (Grade III).Runners most often pop hamstrings (back of thigh) or calves (the “tennis leg” upper calf).A hammy usually goes during a sprint when the muscle’s stretched and working overtime. Calves often tear during a push-off—like sprint starts, hills, or jumps.Here’s why it happens:
Too much, too sudden. Hamstrings hate high-speed stretches. Calves hate sudden explosive pushes.
Fatigue and weakness. If you rarely sprint and then decide to hammer 200m repeats—boom, hammy. Ramp hill work too fast—hello calf strain. Weak glutes? Your hammies will try to do their job and yours, and eventually rebel.
Cold starts. Going zero to full sprint without warming up is a recipe for a “pop.” Dynamic drills and strides exist for a reason.
Old injuries. Scar tissue = weak spot. Hamstrings especially love to re-injure if you didn’t rehab right.
Imbalances. Quads way stronger than hammies? That tug-of-war doesn’t end well. Same with stiff ankles or uneven calf muscles—something gives.
What It Feels Like
A hamstring strains hits when you’re moving fast—sprinting, kicking, or finishing strong.You’ll feel a sudden stab at the back of your thigh. If it’s bad, you might even hear a pop and limp right away.Swelling or bruising often shows up within hours or the next day (sometimes behind the knee).Stretch your hamstring with a straight-leg raise and—yep—it hurts. Mild ones just feel like a cramp or tightness that sneaks up later.On the other hand, a calf strain is more sneaky.Runners often describe it like “someone smacked me with a racket” or like a rock hit the back of the leg.The upper calf (inside head of the gastroc) is a hot zone.With a bad one, you’ll stop immediately, limp, maybe even grab your calf.Bruising can pool around the ankle after a few days. Toe raises and push-offs? Forget about it for a while.
Grades of severity:
Grade I: feels like a tight knot, little or no weakness.
Grade II: definite pain, weakness, maybe 10–50% fiber damage. You’ll struggle with stairs or fast running.
Grade III: full tear—rare, but if you’ve got a visible dent or can’t contract at all, that’s surgical territory. (Seen in hamstring tendon avulsions.)
How to Stay Out of Trouble
Prevention is better than limping home mid-run.Here’s what works:
Eccentric strength work: Your hammies and calves need to be strong while lengthening, because that’s the exact stress they take when you sprint. For hamstrings, Nordic curls are king—get a buddy to hold your ankles, lean forward slow, fight the fall. Studies show they slash hamstring injury risk. Add Romanian deadlifts and glute-ham raises too. For calves, heavy calf raises—both straight-leg (gastroc) and bent-knee (soleus)—are gold.
Warm up like you mean it: Jog, do leg swings, high knees, strides. Cold-to-sprint is how people pull stuff.
Progress gradually: Don’t go from zero sprints to all-out hill repeats. Ease back into speed. Same for plyos and heavy lifting.
Mobility & flexibility: Keep hamstrings and calves limber, but don’t overstretch thinking it’ll save you—strength matters more. Stretch gently post-run, and make sure ankles aren’t locked up (tight ankles shift stress to calves).
Glute strength: Weak glutes = hamstrings working overtime. Squats, hip thrusts, bridges—these protect your hammies.
Don’t train on fumes: Fatigue is a big injury trigger. If your legs feel like piano wires, maybe skip that speed session. Slippery surfaces and sloppy mechanics also set you up for pulls.
When You Do Get Hurt
First couple days are about protecting the muscle and letting it calm down:
RICE: Rest, Ice, Compression, Elevation. Keep it simple—ice for 15–20 minutes, wrap it snug (not strangled), elevate. Calves love compression socks.
Back off activity: You’re not running right away. Sometimes a bad calf pull means crutches for a day or two. If cycling or light movement doesn’t hurt, fine. But don’t “test it” every hour. Give the tissue space to heal.
Gentle mobility: After pain settles (a few days in), start light range-of-motion. Bend and straighten, small ankle pumps, nothing sharp.
Early activation: Use isometrics—gentle static contractions. For hamstrings: push your heel into the floor. For calves: press the ball of your foot down without moving. Pain-free only.
Build it back: Over 1–2 weeks, layer in easy curls, bridges, double-leg calf raises. Then progress to eccentrics: hamstring bridges lowering with one leg, single-leg calf raises off a step. Add resistance gradually.
Finish with speed & control: Once strength is back, add quick drills—light hops, skips, agility. Your muscles need to re-learn firing under speed before you run hard again.
The Long Road Back
Not all muscle pulls are created equal. Minor Grade I tweaks? You might be back in a week or two.Grade II tears—give it 3–6 weeks. Grade III? That’s a 3+ month beast, and if the muscle’s completely blown, surgery could be on the table.Most runners with a moderate pull are jogging easy again by week three or four, and back into real workouts by weeks six to eight. But don’t play tough guy here.Hamstrings in particular are sneaky—they’ll let you feel 90% good, then tear again the first time you sprint like nothing happened.I watched a high-schooler blow his hamstring at a meet because he felt “fine” after two weeks.He went from jogging laps to sitting out the rest of the season. Don’t be that runner.How to Ease Back InStart with short, easy runs on flat ground.No heroics.Relax your stride—shorter steps if it’s the hamstring. If that feels solid, tack on distance slowly.Sprinkle in easy skips or light strides at 50–60% just to test the waters.Only when you can confidently open up your stride at faster paces without that little voice saying “Careful!” should you get back to speedwork.Compression shorts or sleeves? They’re not miracle workers, but they can give you that little extra feeling of support and confidence.And don’t ditch your rehab work once you’re running again.Keep hammering the exercises that got you back—those are your insurance policy.
When to Get Help
If you felt or heard a “pop,” if you can’t walk, or if there’s a scary divot in the muscle—get checked. Sometimes a high hamstring tear up near the glute can mean tendon involvement, and those can require surgical repair.If you’re days into rehab with zero progress, see a physio. Better to spend a little time with a pro than lose months to a re-injury.
Ankle Sprains & Stability – The Rolled-Ankle Club
Every runner has that story—one second you’re cruising, the next your foot hits a root, your ankle rolls, and you’re eating dirt. Welcome to the ankle sprain.What’s Going On?Most of the time it’s an inversion sprain—your foot rolls inward and stretches or tears the ligaments on the outside of your ankle (the ATFL is the usual victim).Grade I is a mild stretch, Grade II is a partial tear, Grade III is a full rupture. Trail runners, especially, know the pain of the “rolled ankle” moment all too well.
Why It Happens
Uneven ground: Roots, rocks, potholes. Trails are ankle-eating machines.
History of sprains: Once you’ve sprained an ankle, you’re at higher risk. Ligaments loosen, your balance sense (proprioception) takes a hit, and unless you rehab properly, that ankle will keep betraying you.
Bad shoe support: Minimalist shoes on technical trails? Risky. Loose lacing? Same deal. Not a guarantee, but footwear plays a role.
Fatigue: Late in a long run, your stabilizers are shot. That’s prime time for a misstep.
Biomechanics: If you naturally supinate (roll outward), you’re more likely to roll it.
How It Feels
You’ll know it instantly—sharp pain on the outside ankle, often with a twist or even a “pop.” Swelling sets in fast, bruising shows up later (sometimes all the way into your foot).Mild sprains? You can hobble. Severe ones? Weight-bearing feels impossible.You’ll probably feel tenderness right over those ligaments, and trying to move your ankle inward will light you up.Sometimes the pain is so bad people think they’ve broken a bone—and honestly, sometimes they have.That’s where x-rays and the Ottawa Ankle Rules come in: if you’ve got pain around the malleolus and can’t bear weight, get checked for fractures.
Chronic Instability Warning Signs
If you’re rolling your ankle regularly or it feels wobbly even months later, that’s a red flag.You need rehab to get those stabilizers firing again. Otherwise, you’re signing up for a lifetime membership in the “rolled ankle” club.
Ankle Sprain Prevention
Look, ankle sprains aren’t just bad luck—they’re usually a mix of weak spots and bad timing.The good news? You can bulletproof those ankles if you’re willing to put in a little smart work.
Balance & Proprioception Work
One of the best ways to stop sprains (or stop repeating them) is to train your body to react better when you misstep.Think wobble boards, Bosu balls, or even just standing on one leg.Want to crank it up? Try closing your eyes or standing on a pillow.It forces your ankle and those little stabilizers—especially the peroneals on the outside of your lower leg—to fire fast.Simple band exercises pulling your foot outward (called eversion) are gold for this.Research backs this up—balance training has been shown to slash reinjury rates.
Hips & Core Matter Too
Here’s the kicker: ankle stability doesn’t start at the ankle.Weak hips and core can throw your whole leg out of whack, which means your ankle gets the ugly end of the deal.That’s why good programs sneak in single-leg squats, clamshells, and hip abductor work. Strong hips = steadier stride = fewer bad twists.
Shoes & Gear
On trails, invest in legit trail shoes—good grip, sometimes rock plates for those “ouch” landings.If you’ve got a history of sprains, semi-rigid ankle braces can add a layer of safety, especially on gnarly terrain.But here’s the truth: braces are a crutch, not the cure. Long-term, you want strong ankles and hips, not just extra straps.
Know Your Terrain
Fatigue + rocky trail + darkness = sprain waiting to happen.Pick your line carefully, especially when tired.And if you’re running at night, don’t cheap out—get a headlamp that actually lights up the ground in front of you.I once bombed down a trail with a dim lamp, caught a rock, and let’s just say the next four weeks were more about icing than running.
Tape or Brace if You’re Prone
If you’ve rolled your ankle more than once, tape or brace it for high-risk runs (long ultras, mountain trails).Not only does it give a little mechanical support, but it reminds you to stay sharp. Studies show it really does reduce reinjury rates.
Gradual Return After a Sprain
Don’t go straight back to trailblazing after rolling it.Start on safer ground—track or road—until your ankle proves it’s ready for uneven terrain again. That patience now saves you months later.
Ankle Sprain Recovery & Treatment
Sprain it anyway? Here’s how to come back smart instead of sidelined for good.
Acute Care = RICE
First 1–2 days: Rest, Ice (15–20 minutes every couple hours), Compression, Elevation.Classic RICE. If it hurts to walk, crutches are fine. But for the love of running—don’t “tough it out” and keep running. That only turns a 2-week sprain into a 2-month nightmare.
Immobilize (Sometimes)
For moderate sprains, a doc might stick you in a boot for a week. But these days, most experts prefer “functional rehab” over locking it down for too long. That means moving it as soon as you safely can—keeps stiffness from setting in.
Rehab Work
Once the pain chills out, start moving it:
Alphabet drills: Write the alphabet with your foot. Feels silly, works wonders.
Resistance band moves: Eversion (outward pull), dorsiflexion (up), plantarflexion (down), inversion (inward). Hit all directions, but focus on eversion for those peroneals.
Calf raises: Start with two legs, build to one.
Balance drills: Stand on the injured leg, progress from flat ground → pillow → Bosu. Add mini squats, quick taps, single-leg hops. Studies show this proprioception training massively lowers reinjury risk.
Hip & glute work: Side leg lifts, clamshells. Weak hips = unstable ankles. Period.
Throw in towel curls or marble pickups for bonus foot strength if you’re feeling extra.
Manual Therapy & Mobility
If your ankle feels locked up, a PT can work magic with joint mobilization, soft tissue work, or even lymphatic massage to kick swelling out.Don’t underestimate how much faster recovery moves when you’ve got pro hands helping.
Return to Running
Rebuild step by step:
Walk.
Jog straight on flat ground.
Controlled agility drills.
Trails (last stage).
Tape or brace when you’re first back—it buys your healing ligaments time to toughen up.
Timeframes
Grade I (mild stretch): 1–2 weeks.
Grade II (partial tear): 3–4 weeks.
Grade III (full tear): 6–8+ weeks, sometimes surgery, though most heal with rehab.
One study even found that wearing a brace for up to 6–12 months reduces re-sprain risk【AAFP】. Even when you feel “good as new,” keep up some balance drills. Trust me—you’ll thank yourself later.
When to Seek Help
Sprains aren’t “just sprains.” If you can’t put weight on it, or there’s sharp bone pain along the ankle bones (malleolus) or the base of the 5th metatarsal, get an X-ray.Sometimes fractures hide behind what looks like a sprain.And if your ankle’s still unstable or painful weeks later, don’t tough it out—see a sports doc or orthopedist. Cartilage damage or more serious issues can be lurking.Most of the time, though, a solid physical therapist guiding your rehab will make all the difference.Bottom line: treat ankle sprains seriously.Acute care first, then hammer the rehab.Done right, you can actually come back sturdier than before.Strong ankles = confidence on any surface.No more tiptoeing around roots or fearing every uneven sidewalk crack.
Hip & Glute Pain: The Usual Suspects
Let’s be real—hips and glutes take a beating in running. When things flare up here, it usually comes down to a few culprits.The big ones include:
Piriformis Syndrome. That tiny butt muscle gets cranky, squeezes the sciatic nerve, and boom—deep butt pain, sometimes shooting down your leg. Not full sciatica, but it can mimic it.
Hip Flexor Strain/Tendon Pain. Pain up front in the hip crease—think iliopsoas or rectus femoris. Usually from tightness (hello, hours of sitting), then asking those muscles to suddenly work overtime when you run.
Glute Medius Issues. Weak glutes on the side? That can turn into hip pain or IT band drama.
And here’s what’s causing it:
Piriformis flares often come from overuse—lots of hills, speedwork, or running on slanted roads. Weak glutes mean the piriformis picks up the slack until it revolts.
Hip flexors hate sitting all day, then being forced into heavy duty at the track or on hills. Overstriding and uphill sessions are big triggers.
Glute weakness in general sets the stage for everything from lateral hip pain to IT band tightness.
And of course, the classic: ramping up mileage or intensity too fast, poor warm-ups, or sloppy form (like excessive pelvic tilt).
What It Feels Like:
It really depends on the source of the pain. Let me explain:
Piriformis: deep ache in the butt, maybe radiating to hamstring. Sitting makes it worse. Figure-4 stretch usually lights it up. Sometimes tingling down the leg.
Hip flexor: sharp pain at the front of the hip/groin, especially with high knees or lunges. Could even hurt walking stairs.
Side hip pain: often glute medius or bursitis. Hurts lying on that side, or after lots of hills.
Getting Back from Hip & Glute Pain
Look, hip and glute pain is a runner’s nightmare—it messes with your stride, your confidence, and sometimes your head. The good news?Most of the time it’s fixable with patience, the right exercises, and not being stubborn. Here’s how I coach runners (and myself) through two of the big culprits: piriformis syndrome and hip flexor strain.
Piriformis Syndrome: That Deep-Glute Nag
If you’ve ever had a tight, burning pain deep in the butt that sometimes shoots down the leg, that’s likely the piriformis acting up. Here’s what helps:
Stretching daily: The figure-4 stretch on your back is a classic—hold 30 seconds, relax into it, no bouncing. I usually knock these out while watching TV. Hip external rotator and hamstring stretches are your friends here too.
Massage & release: Grab a tennis or lacrosse ball and roll your glutes. Yeah, it’s tender—sometimes you’ll find that “spot” and it feels brutal. Go easy around the sciatic nerve, though. Foam roller works too—cross one leg over the other, lean into the glute, and roll it out.
Heat for blood flow: Heating pad or hot bath before stretching helps loosen things up. Some runners like alternating hot/cold if there’s nerve irritation.
Don’t sit all day: If you’ve got a desk job, stand up often. A cushion or wedge seat can also take pressure off the piriformis. I once swapped my office chair for a stability ball for a few weeks—it forced me to move more.
Nerve glides: If you’ve got sciatic symptoms, gentle nerve glides (like straight-leg raises with ankle pumps) help the nerve slide freely.
Strengthen smart: Think side-lying clamshells, band walks, and squats—these build the glutes without trashing them. Start light. Overworking a pissed-off piriformis will only make you hate life more.
Ease back to running: Sometimes you can keep running easy with this, other times it alters your gait and forces a break. If you run, sprinkle in dynamic stretches before, and maybe even mid-run if things tighten up.
Pro help if needed: PTs sometimes do dry needling—runners rave about it. Doctors might try injections in stubborn cases. Surgery is the absolute last resort.
Hip Flexor Strain or Tendinopathy: When the Front Hip Burns
Hip flexors get overworked, especially in runners who hammer hills, sprints, or skip core work. If you’ve got pain in the front of the hip, here’s your toolbox:
Rest from triggers: Sprinting, drills, and sometimes even easy running aggravate it. If running changes your gait, step back. Otherwise, drop intensity and avoid uphills.
Ice early: If it’s a fresh pull from a sprint, ice and rest for a few days.
Stretch gently: Use a lunge stretch, but keep it shallow at first. Warm up before you stretch.
Strengthen smart:
Straight-leg raises (lying flat, lift one leg straight).
Standing marches with bands or ankle weights.
Eccentric work—lowering the leg slowly under control.
Lower-core work like dead bugs. Many runners rely on hip flexors for leg swing because their abs are weak—don’t be that runner.
Manual therapy: Massage and Active Release (ART) can dig into the iliopsoas and quads. Therapists sometimes press deep in the abdomen while you move your leg—it’s brutal but effective.
Gradual return: Once you can do high knees or marching drills pain-free, you’re ready for strides. Start at 60–70% speed, then build up. Don’t blast into sprints cold or you’ll be right back here.
Lateral Hip Pain: Outside Ache
If pain’s more on the side of the hip, often it’s the glute medius or ITB. Work on glute med strength (side leg raises, hip hikes), and stretch the ITB/TFL. Pool running can also keep you fit without pounding.
When to Call in Reinforcements
If you’ve got pain that’s sharp, keeps getting worse, or radiates into numbness, don’t guess—see a doctor. Examples:
Deep groin pain: Could be a stress fracture or labral tear.
Clicking/catching hip: Labral issue.
Chronic lateral hip pain: Sometimes it’s gluteal tendinopathy or bursitis.
Piriformis syndrome itself is usually diagnosed after ruling out spine issues (like lumbar disc problems). For most muscular stuff, imaging isn’t needed—PT evaluation is enough. But if your pain is severe or not improving, get checked out.
Back Pain in Runners: Why It Happens & How to Fix It
Here’s the deal—running may be all about the legs, but plenty of runners end up battling low back pain.Usually it’s not some dramatic “pop” or one-off injury.More often, it creeps in—an ache or stiffness in the lumbar area during or after a run.Think of it less like a pulled hamstring and more like death by a thousand cuts: small imbalances, weak spots, and bad habits piling up over time.Here are the common culprits:
Weak core, sloppy posture. Probably the #1 cause. A shaky core means your pelvis tips the wrong way—forward (anterior tilt) or under (posterior tilt). Either way, your spine pays the price. One PT put it bluntly: “Runners often have core weakness, which can contribute to lower back pain” (hingehealth.com). And yeah, tight hip flexors + weak abs = exaggerated arch and more strain on your lumbar spine.
Tight hammies & hip flexors. Most runners have tight hamstrings from the constant pounding. That pulls the pelvis under, flattening the natural arch. On the flip side, tight hip flexors drag the pelvis forward, creating too much arch. Either extreme = back crankiness (laspine.com).
Bad form & overstriding. Heel-striking way out front? That shock shoots straight up your spine. Slouching shoulders, leaning at the waist, or sticking your butt out when tired just makes it worse.
Shoes & surface. Beat-up shoes or constant pounding on concrete can send extra stress upstairs. Funny thing though—moderate running is actually good for your discs (it helps hydrate them). But if you’ve already got disc issues, the wrong combo of shoes/surface can flare things up.
Existing issues. Arthritis, old disc herniations, or SI joint problems don’t come from running, but weak core + poor management can make them worse.
Downhills. Braking on steep descents = big impact + leaning back = angry lumbar spine.
Mobility gaps. Stiff hips or mid-back? Guess who steps in to make up the difference? Your lower back.
How It Feels
Most runners describe a dull ache or stiffness in the lower back mid-run, or it shows up later—like the morning after a long one.Sometimes it feels like “compression” in the spine. Severe cases can mess with your stride—you stiffen your torso or swing your arms less just to keep going.If nerves get involved (like sciatica from a disc), you might feel shooting pain down the leg.But the garden-variety runner’s back pain? Usually muscular, usually not radiating past the knee.
How to Prevent It
Here’s how I’d approach prevention:
Build a bulletproof core. Planks, side planks, dead bugs, bird dogs. Get those deep abs (transverse abdominis) firing. Don’t forget the glutes—they’re your pelvis stabilizers. Weak glutes = overworked low back.
Run tall. Lean slightly from the ankles (not the waist), head up, shoulders relaxed. Cue: imagine a string pulling you up from your crown. And don’t overstride—boost cadence instead. Studies link low cadence with higher joint/spine stress.
Stay loose. Keep hamstrings, hip flexors, and hip rotators mobile. Dynamic warm-ups—leg swings, torso twists—go a long way. One stat even found marathoners who skip warm-ups are 2.6x more likely to get low back pain (hingehealth.com).
Strengthen your back too. Superman holds, Roman chair work, or simple extensions build endurance in those muscles. Just don’t go crazy with deep hyperextensions if you already arch too much.
Respect your shoes & terrain. Get supportive shoes for your foot type, rotate surfaces (trail, road, track). And if you run cambered roads, switch sides or find flatter ground. Subtle tilt = sneaky back stress.
Ditch the heavy pack. Run commuting with a backpack? That’s an extra load your spine doesn’t need. If you must, invest in a running-specific vest/pack.
Cross-train smart. Pilates, yoga, or mobility-focused sessions are gold for spine health.
Catch the warning signs early. Back tightening up mid-run? That’s your cue to stretch, strengthen, or rest. Don’t wait until you’re sidelined.
Recovery and Treatment for Runner’s Back Pain
Alright, let’s be real—back pain sucks. It sneaks up on you, lingers after runs, and makes even tying your shoes feel like a workout.The good news? Most running-related back pain isn’t a career-ender.With the right adjustments, you can fix it and come back stronger.
Rest (But Don’t Turn Into a Couch Potato)
If your back is flared up, don’t just power through the miles.Cut back on distance, skip the hill repeats, maybe swap that long run for something shorter.Sometimes a few days of lighter running plus some focused core work is all it takes to calm things down. Total rest? Usually not necessary unless it’s severe.
Heat It Up
A hot shower, heating pad, or even one of those stick-on heat patches can do wonders for loosening tight muscles.I know runners who swear by strapping on a heat belt before a cold-weather run to keep their back from seizing up.
Stretch and Roll the Junk Out
Hit gentle stretches like lying on your back and pulling your knees to your chest. Roll out your glutes, IT band, and hip flexors. Loosen up the upper back too—it’s all connected. If your thoracic spine moves better, your low back won’t have to take all the stress.
Core Work (The Boring Fix That Actually Works)
Yeah, I know—core drills aren’t sexy. But if you’re not doing them, your back will keep paying the price. Start simple: pelvic tilts while lying down, then progress to bird-dogs and dead bugs.The key isn’t blasting reps—it’s learning to keep your spine and pelvis steady. That’s the skill your core needs for running.From there, add planks and side planks as you can tolerate. Side planks especially build lateral stability, which runners desperately need.
Fire Up the Hips & Glutes
Your glutes should be the engine of your stride—but if they’re lazy, your back ends up doing extra work. Glute bridges are gold because they strengthen the backside and stretch tight hip flexors at the same time. Daily hip flexor stretches help too—tight hips tug on your spine and make everything worse.
Check Your Form
Sometimes it’s not just your muscles—it’s how you’re running.A gait analysis from a PT or coach can reveal if you’re over-arching your back, letting your hips drop, or over-striding.Even a small tweak like bumping your cadence up 5–10% can take a huge load off your spine.
Swap in Low-Impact Work
If running feels impossible, keep your cardio base with swimming or the elliptical. Swimming—especially backstroke—is surprisingly therapeutic. Just be careful with breaststroke if you’ve got a disk issue; the exaggerated back arch can aggravate things.
Manual Therapy & Massage
If the pain feels joint-related, some runners find relief with chiropractic adjustments or PT mobilizations. And even if it’s muscular, a sports massage targeting the QL and paraspinals can ease things up.Just don’t skip the medical check if you’re dealing with nerve symptoms (shooting leg pain, numbness, weakness) or bladder issues—that could signal a serious disc problem.
Return to Running (Gradually)
When the pain eases, don’t just jump back into your normal mileage.Start small and build. Sometimes shorter, more frequent runs are better for reconditioning your back than one monster long run. Keep doing your core and hip work while you ramp up.One runner I know added just two days of core work per week, and within a couple months, his post-run backaches disappeared—and he could handle more mileage without breaking down.
When to Get Help
If the pain’s severe or not improving.
If you’ve got nerve symptoms—shooting pain, numbness, weakness.
If you have a history of osteoporosis or bone issues (sacral stress fractures, though rare, do happen in distance runners).
Most of the time, though, runner’s back pain is mechanical and responds to conservative care.A PT can confirm this and guide you.
Less Common but Serious Running Injuries
Most of us worry about the usual suspects—runner’s knee, shin splints, plantar fasciitis.But there are some nastier injuries lurking in the background.They don’t show up nearly as often, but when they do, they can end a season—or even a career—if you don’t take them seriously. These aren’t “just rest it a week and you’ll be fine” injuries.I’m talking hip labral tears, sports hernias, and compartment syndrome.Let’s break them down.
Hip Labral Tears: When the Hip Just Won’t Move Right
Your hip joint has a ring of cartilage called the labrum that keeps the ball of the femur snug in the socket.When that labrum tears, runners usually feel a sharp, catching pain deep in the groin or the front of the hip. Sometimes you even hear or feel a click. Sitting, lifting the knee, or running hills?All can light it up.Labral tears often link back to something called femoroacetabular impingement (FAI)—basically, your hip bones have shapes that don’t play nice together.Repetitive flexion (like running) grinds the labrum until it frays.It can happen suddenly with a twist, but in most runners it’s a slow burn from impingement.Here’s the kicker: the labrum doesn’t heal well on its own because of poor blood supply. Diagnosis usually requires an MRI arthrogram.Small tears might be managed with PT (strengthening glutes/core, improving mobility, avoiding deep hip flexion).But many active folks end up needing arthroscopic surgery to clean up or repair the labrum.If the bone shapes are part of the problem, surgeons can shave those down too.
Sports Hernia (Athletic Pubalgia): The Hidden Groin Wrecker
Despite the name, it’s not a true hernia—nothing pops out.This is a tear or strain of the tissues where your abs attach near the pubic bone.The result? Chronic groin or lower ab pain that flares when you sprint, cut, or do sit-ups. Even coughing or sneezing can make it worse.The tricky part is it doesn’t show up like a regular hernia on exam.So runners (especially sprinters or soccer players) often go months chasing what feels like a “groin strain” that never heals.PT to strengthen the core and adductors can help, but many sports hernias eventually need surgery—sometimes with mesh, sometimes with direct tissue repair.
Compartment Syndrome: When the Pressure Builds
There are two flavors: acute and chronic.
Acute compartment syndrome—rare for runners, usually from trauma (think getting whacked in the leg). It’s a full-blown emergency.
Chronic Exertional Compartment Syndrome (CECS)—way more relevant to us distance folks. Here’s the classic pattern: after about 10 minutes of running, your shin or calf gets insanely tight, maybe even burns or goes numb. Sometimes the foot starts to drop because you can’t lift it. Stop running? The symptoms fade within minutes. That stop-start cycle is textbook CECS.
Diagnosis is made by measuring compartment pressures before/after exercise (yep, needles—no fun but definitive).Treatment can start with form tweaks (like changing foot strike), PT, or backing off training.But honestly? Many cases only resolve with surgery—a fasciotomy, where they cut the fascia to relieve pressure. Intense, yes, but usually effective.
Other Rare But Serious Ones Worth Knowing
Odd stress fractures – femoral neck or sacral. Groin pain with hopping? Don’t run through it. Femoral neck fractures can progress to full breaks if ignored—often requiring pins.
Popliteal artery entrapment syndrome – rare, but young muscular runners can develop calf pain from blood flow issues. Needs vascular treatment.
Nerve entrapments – tarsal tunnel (ankle version of carpal tunnel) causing foot numbness, or true sciatica from the spine. These don’t fix with stretching your piriformis—you’ve gotta treat the real source.
Major knee injuries – ACLs and meniscus tears aren’t common in straight-line running, but trail runners twisting on rocks? It happens. And yes, ACLs almost always mean surgery.
Serious Injuries: When It’s More Than Just a Niggle
Most of the time, running injuries are annoying but manageable—shin splints, IT band flare-ups, sore calves.But every now and then, you run into the big hitters: labral tears, sports hernias, compartment syndrome.These are the ones that can sideline you for months if you don’t respect the warning signs.And here’s the thing—some of these aren’t really in your control.Anatomical quirks (like FAI that leads to a labral tear) or underfueling (a common culprit for stress fractures) can put you in the danger zone no matter how “smart” you train.But you can stack the deck in your favor by keeping your body strong, listening to pain signals, and not letting small issues snowball into big ones.
Treatment: What the Docs Do
Labral Tear: First stop is PT—fix mechanics, strengthen hips. If that doesn’t cut it, arthroscopic surgery can repair or clean up the labrum. Most runners are jogging again in 3–4 months, full training in six. Not fun, but fixable.
Sports Hernia: This one almost always needs surgery to patch the abdominal wall. The recovery is 2–3 months. Plenty of pro athletes (soccer players especially) have had it and come back fine.
Compartment Syndrome: Fasciotomy surgery—literally cutting the fascia to relieve pressure. Success rates are high, and many runners describe it as life-changing because they can finally run without pain. Recovery? Weeks to months, depending on severity.
The silver lining? These injuries sound scary, but with modern medicine, most runners come back strong. Ignore them, though, and you risk wrecking your running career.
Red Flags: When to Stop Running and See a Doctor
Here’s the truth: runners are stubborn. We’re used to “running through” discomfort. But there’s a huge difference between normal training aches and pain that screams STOP.Miss these red flags, and you’re rolling the dice with your health.Here’s when to back off immediately:
Sharp, sudden pain that changes your stride. Achilles pop, stabbing knee pain, anything that forces a limp—it’s game over for that run. Keep going, and you’ll only make it worse.
Pain that doesn’t ease with rest. Muscle soreness fades in a day or two. If it’s just as bad after several days—or worse when you try again—think stress fracture or bigger issue.
Swelling or big bruises. Puffy joint? Bruised calf or foot? That’s tissue damage, not “just soreness.” Time to stop.
Limping or altered mechanics. If you can’t run without compensating, you’re digging yourself a deeper hole.
In kids and teens: Persistent pain + swelling or limping is never “just growing pains.” Could be growth plate problems or osteochondritis dissecans. Get it checked.
Instability or locking joints. Knee giving out? Ankle rolling? That’s ligament or meniscus territory—don’t brush it off.
Numbness, tingling, or weakness. Could be compartment syndrome or nerve involvement. Either way—big red flag.
Redness, warmth, or feverish pain. Rare, but could mean infection. That’s ER-level serious.
Chest pain, dizziness, severe breathlessness. Not musculoskeletal, but if this happens, don’t play hero—get help immediately.
Pain that’s getting worse despite “rest.” Two weeks of dialing back and it still hurts? That’s not normal healing—it’s something bigger.
Gut feeling it’s not normal. Runners know their bodies. If it feels “off,” trust that. As one runner said after breaking her leg: “I regret not getting a second opinion. If something feels off, investigate it.”
A Red Flag? What Do Next…
So, you’ve hit that red flag pain. What now? First, drop the “no pain, no gain” garbage.Training discomfort is one thing. But sharp, persistent pain? That’s your body yelling at you, and if you ignore it, you’re asking for bigger trouble.
1. Stop Running (For Now)
Yeah, I said it. Stop. Don’t push through. Keep running on a stress fracture, and you could turn a tiny crack into a full break.That happened to a poor guy mid-concert season—he ignored the pain until the bone gave way. Same goes for tendons—what starts as a small tear can end in a full rupture.And no, you won’t lose all your fitness in a couple weeks off. But you will lose months—or even your season—if you push until it snaps.
2. Get Checked Out
Sports doc, orthopedist, PT—pick the right pro depending on what you suspect. Sharp bone pain? Orthopedist. Nagging pain you can’t pin down? Sports med doc or PT is a good first stop. They’ll figure it out—or send you for imaging if needed.
3. Imaging Isn’t Overkill
Stress fractures, tendon tears, joint injuries—sometimes you need to see what’s really going on.
X-rays can catch bone injuries (though early stress fractures don’t always show).
MRI is the gold standard—it’ll spot stress fractures and soft tissue tears.
Ultrasound works for some tendon/muscle issues.
Don’t be afraid to ask for imaging. Clarity now saves wasted weeks guessing.
4. Listen to the Experts (Even If It Sucks)
If the doc says six weeks off, don’t argue. That advice isn’t punishment—it’s protection.Ask about cross-training. Most times you can keep moving with swimming, cycling, or pool running—things that don’t pound the injury.Rushing back early might feel like “mental toughness,” but it’s usually just setting yourself up to fail.
5. Comeback the Right Way
Once you’re cleared, ease in. Don’t play hero. Returning too early from a stress fracture can cause a non-union—bone not healing properly—and that’s a nightmare. The smart runners win long-term by respecting the timeline.Example: one guy ignored mild foot pain for weeks.When it got severe, he finally saw a doc—stress fracture in his second metatarsal. Lucky for him, he stopped before it displaced and just needed 6–8 weeks in a boot. Had he pushed through? He’d be looking at surgery.Pain is a signal. Dr. Kocher from Boston Children’s nails it: ignoring pain is like ignoring an iceberg—you only see the tip, but there’s way more damage lurking underneath.
Think of this section as your quick-grab toolkit. When you’re dealing with aches, weird pains, or just want to stay one step ahead of injury, these are the basics every runner should have in their back pocket.
Injury Red Flags Checklist
Here’s the rule: if any of these show up mid-run, stop and pay attention.Don’t tough-guy it—ignoring them can turn a niggle into months on the sidelines.
Pain so sharp you start limping or running weird.
A sudden “pop” or sharp stab in a muscle or joint.
Swelling in a joint or that wobbly, unstable feeling after a misstep.
Pain that won’t quit with rest—or feels worse overnight.
Numbness or tingling running down your leg.
Big bruises showing up after a run or tweak.
If you check yes to any of these, treat it like a red light. That means stop, assess, and if it doesn’t calm down, get it checked out.
Daily Injury-Prevention Routine (10–15 Minutes)
Do this stuff consistently and you’ll dodge a lot of problems:
Dynamic warm-up before runs: leg swings, lunges—wake the body up.
Q: Should I run through shin splints, or take time off?
Nope. Don’t try to “tough it out” through real shin splint pain. That’s your body waving a big red flag. Keep pushing and you could graduate from shin splints to a full-blown stress fracture. That’s not a path you want.The smart play is to back off for a bit. Ice, calf stretching, and cross-train to keep fitness rolling.I’ve had athletes switch to cycling or pool running for a couple weeks and come back strong.If you catch it early, you’re usually looking at 1–3 weeks off running. Ignore it?That “little” shin pain can turn into a cracked tibia (Runner’s World). Short rest now saves you from months on the sidelines.
Q: Do I need orthotics if I keep getting injured?
Orthotics can help—but they’re not some magic bullet. If you’ve got a clear biomechanical issue, like major overpronation feeding your shin splints or plantar fasciitis, an insert might give you relief (AAFP).Research even shows over-the-counter orthotics can help plantar fasciitis (AAFP). But here’s the kicker: custom isn’t always better than good off-the-shelf options (AAFP).That said, many runners don’t need them at all—just the right shoes and stronger feet/hips.Orthotics are a tool, not a cure. If injuries keep piling up, get checked by a sports podiatrist or PT to see if they make sense for your body. And even if you use them, keep working on strength—orthotics support, but they don’t build muscle.
Q: How quickly will I lose fitness while injured, and how do I get it back?
Here’s the good news: you don’t lose as much as you think. Aerobic fitness only starts dipping after a week or two of zero running, and really drops after about a month.But if you’re cross-training—cycling, swimming, elliptical—you can hang onto a big chunk of it (Trail Runner Mag).Strength fades quicker if you’re doing nothing, but body remembers. Muscle memory is real. When you return, most runners are shocked at how fast fitness comes back.A rough rule: every week off takes about two weeks of training to claw back. Out six weeks? With cross-training, maybe you’re back in 4–8. With nothing, maybe 6–10.I always remind runners: don’t freak out about paces early.Focus on effort and consistency. Fitness will return. Sometimes VO₂ max comes back faster, sometimes endurance does. Just don’t rush—let it build.
Q: Should I keep doing my rehab exercises even after I’m healed?
Short answer: yes. Long answer: hell yes. Rehab drills aren’t just temporary—they expose your weak spots. Stop doing them, and those same weaknesses can creep back.If clamshells and band walks fixed your IT band syndrome, why ditch them?Many runners keep those exercises in their weekly “prehab” routine. Some injuries—Achilles, hamstring tendinopathy—love to come back if you slack (AAFP). You don’t have to grind the same routine daily forever, but 2–3x/week is smart.Or work them into warm-ups and strength sessions.One line I tell my runners: “Once you’ve been injured, you’re a strengthening runner for life.”The Guardian once profiled runners who beat knee pain and stayed pain-free only because they kept up the hip/core work.If you get bored, swap in variations, but keep targeting those weak links.
Q: Can I still race that upcoming event while injured (or just after injury)?
This one’s tough. It depends how bad the injury is, how close the race is, and how much it matters to you. Racing through real pain is usually a fast track to making things worse.A half marathon on a cranky Achilles could leave you with a rupture—goodbye season.If you’re ~90% healed and the race is soon, you might toe the line, but lower the stakes. Tape the ankle, slow the pace, treat it like a training run. And have the guts to drop if pain flares.If it’s your “bucket list” race or a qualifier, weigh the risks with a sports doc. Just remember—you only get one body, and races are endless.Rule of thumb: if you can’t run at least 75–80% of the race distance in training without pain, you probably shouldn’t race. And definitely don’t attempt a distance you didn’t train for. That’s asking for trouble.I’ve seen runners DNS a race they wanted badly, heal right, then come back to PR the next season. They all said the same thing later: “I’m glad I skipped that race.”
Ready to kick heel pain to the curb and keep your running goals on track? You’ve just hit the jackpot!
Looking for practical tips to prevent that pesky heel pain from wreaking havoc on your runs? Well, you’re not alone in this journey.
Let’s face it: heel pain is like that uninvited guest at your running party – annoying and stubborn. It ranges from a mild nuisance to a major roadblock, disrupting the stride of many runners just like you. But here’s the good news: you’re not alone, and there’s plenty you can do about it.
I’m about to spill the beans on some of the most effective ways to bid farewell to that pesky heel pain. Whether you’re lacing up for your first 5K or you’re a trail-blazing 50K enthusiast, the tips I’ve got lined up are your first steps to happy, pain-free heels. Ready for some sole-saving secrets?
Awesome, let’s dive in and show heel pain the door!
The Basics of Heel Pain for Runners
Before we dive into prevention, let me share some insights into the most common causes of heel pain in runners – it’s something I’ve had to tackle in my own running journey, too. Understanding the culprits behind the pain is crucial for effective prevention.
Let’s look at the usual suspects:
Plantar Fasciitis: This pesky issue occurs when the plantar fascia, that thick band of tissue running along the bottom of your foot, gets inflamed or strained. It can really put a damper on your runs.
Achilles Tendinitis: Inflamed Achilles tendons can lead to some serious heel pain. I learned the hard way that overtraining, sudden jumps in mileage, or skimping on stretching can contribute to this condition.
Heel Spurs: These bony growths on the heel bone, or calcaneus, can be quite a nuisance. While the spurs themselves might not always hurt, they can irritate the surrounding tissues and lead to discomfort.
Stress Fractures: These tiny fractures in the heel bone or nearby bones are particularly common in runners who push too hard without adequate rest.
Tight Achilles Tendon: A tight Achilles tendon can really strain the heel area. I’ve found that inadequate stretching and flexibility can lead to this kind of pain. It’s like a constant reminder not to skip the cooldown stretches after a run.
How To Prevent Heel Pain From Running
Let me share some tips on protecting your heels from injury while running. I’ve learned that the best way to treat an injury is to avoid it in the first place.
Start Slow
As someone who’s had their fair share of running-related aches, I can tell you that starting slow and smart is crucial.
Most overuse injuries, especially those causing heel pain, creep up on you. They’re the result of doing too much, too soon. That’s why choosing a sensible running program that lets your body gradually adjust to changes in distance and speed is the key to staying injury-free.
Here are some steps that have helped me ensure smooth progress:
Set Realistic Goals: Be clear and realistic about your running goals. These will guide your training and keep you motivated. When I started setting achievable goals for myself, I noticed a significant decrease in injuries.
Follow the 10% Rule: I try to limit my weekly mileage increases to no more than 10% to avoid overuse injuries. For instance, if I run 20 miles one week, I’ll only add up to 2 miles the next week.
Incorporate Rest Days: Rest days are a lifesaver. They’re as crucial as running days, giving your body time to recover and repair. I’ve learned to love and appreciate these days for their role in my training.
Cross-Train: Activities like swimming, cycling, or strength training work different muscle groups and help reduce strain on your heels. I’ve found that a varied workout routine keeps things interesting and beneficial for my overall fitness.
Listen to Your Body: This is vital. If you feel any discomfort or heel pain during runs, don’t ignore it. Address it promptly and adjust your training plan if necessary. I’ve found that being in tune with my body’s signals is key to preventing long-term issues.
Consult a Coach or Expert: If you’re new to running or have specific goals, getting advice from a coach or sports medicine expert can be incredibly helpful. They’ve helped me tailor my training to suit my needs and avoid injuries.
Keep A Healthy Weight
Being overweight can put extra pressure on your legs, and I’ve seen how it can exacerbate issues like plantar fasciitis or heel spurs in fellow runners.
But here’s the good news – losing weight can not only lighten the load on your feet but also bring a myriad of fitness and health benefits. I remember when I started focusing on shedding a few pounds; I felt lighter and more agile on my runs.
If heel pain is hindering your weight-bearing exercises, there are plenty of low-impact alternatives that I’ve found to be effective. Swimming, strength training, cycling, water running, and yoga are great options that keep the stress off your heels while helping you stay in shape.
What’s more, I’ve learned that working with a registered dietitian can be a game-changer. They can help you create a personalized nutrition plan tailored to your specific dietary needs and preferences. It’s not just about losing weight; it’s about finding a healthy balance that supports your running goals.
For more resources on weight loss and maintaining a healthy weight, especially as a runner, there are tons of useful posts and articles out there.
Improve Your Form
One of the lessons I’ve learned as I started taking training more seriously is the importance of good form, especially when it comes to preventing injury.
Protecting yourself against heel pain can often mean identifying and correcting any abnormal movement patterns or muscle imbalances in your lower body.
That’s where a running gait analysis can be a game-changer. I remember the first time I had mine done – it was an eye-opener! Understanding how you run can be key in pinpointing issues that might lead to pain.
Conventional wisdom suggests that a heel-foot strike, where the heel hits the ground first, might cause heel pain. This was true for me. When I tried changing my foot strike to a forefoot or midfoot pattern, I noticed a significant difference in comfort.
However, it’s important to remember that this doesn’t work for everyone. Foot strike patterns are a hotly debated topic in the running community. From what I’ve experienced and heard from fellow runners, much of the advice on this topic is anecdotal – and my advice is no different.
So, proceed with care. Experiment with different foot strikes, but do it gradually and pay close attention to how your body responds. There’s no one-size-fits-all in running, and sometimes, it’s about finding what works best for your unique stride.
Run On the Right Surfaces
The surface you run on can make a huge difference, especially when it comes to preventing heel pain and other overuse injuries. Here’s a tip I’ve found invaluable: whenever possible, avoid running on hard surfaces like asphalt and concrete. These surfaces can be tough on your heels.
Instead, try mixing it up with softer options. Running on a dirt path, grass, or synthetic tracks can offer a welcome change. I’ve noticed that varying running surfaces not only keeps my runs interesting but also helps reduce repetitive strain on my heels.
But what if you’re stuck with hard surfaces? Here are some strategies I’ve used to minimize the impact:
Proper Footwear: Investing in running shoes with good cushioning and shock absorption is a game-changer. These shoes have been a lifesaver for me, helping to soften the blow each time my foot hits the pavement.
Shorten Your Stride: On those tougher surfaces, I’ve found that shortening my stride a bit can really help. It reduces the force of impact on my heels and spreads it more evenly across my feet.
Use Insoles: Cushioned insoles or orthotic inserts can be a great addition, especially if you frequently run on hard surfaces. They add that extra layer of support and shock absorption, making a world of difference in how my feet feel post-run.
Gradual Transition: If you’re moving from softer to harder running surfaces, take it slow. Your body needs time to adjust to the increased impact. I learned this the hard way – rushing the transition only led to discomfort and a setback in my training.
Warm-up
I hate to break it to you, but I cannot emphasize enough the importance of a proper warm-up. Skipping it or not doing it correctly, can lead to tissue damage in the heel. That’s why I always take a few minutes before each run to get my body ready.
I recommend starting with 5 to 10 minutes of brisk walking or light jogging. Then, move on to dynamic stretches that target key muscle groups like the calves, hamstrings, quadriceps, and groin.
Here’s a look at my favorite warm-up routine – it’s been a game-changer for my runs.
Running in the Right Shoes: A Crucial Choice
In the world of running, shoes are more than just footwear – they’re essential equipment. The wrong shoes can make or break your run. They should fit well and offer plenty of cushion and support. If they don’t, it’s a no-go for me.
When choosing running shoes, it’s crucial to consider the structure of your feet. Look for shoes with good arch support and a slightly elevated heel. Wondering how to find the right pair? I always head to a running specialty store. The staff there can analyze your gait and recommend the best shoes for your running style.
And don’t forget about the fit! Your shoes shouldn’t be too tight, narrow, or small. Give a few pairs a try before settling on the right one.
Also, remember to replace your shoes regularly. Running in worn-out shoes can lead to abnormal stresses on your feet and increase your risk of injury. The general rule I follow is to replace my running shoes every 400 to 500 miles.
Strength And Stretch
As a runner, I’ve found that regularly strengthening and stretching my ankles and feet is a game-changer. It’s not just about support; these exercises can also improve your range of motion, keeping you injury-free for longer. I’ve learned that lacking mobility and strength can lead to muscular imbalances and dysfunctions in the lower legs, eventually causing overuse injuries.
Let me share a few moves that I’ve incorporated into my cross-training routine to promote flexibility and strength in my feet:
Golf Ball Rolls:
This is a simple yet effective exercise. Grab a golf ball and use it like a personal foot masseuse. While sitting comfortably, place the ball under your foot and roll it around, applying gentle pressure under the arch and around the heel. It’s like giving your foot a mini massage – perfect for loosening tight muscles and providing relief from heel pain. I love doing this after a run or even while I’m at my desk
Foot and Ankle Stretches:
Sit down, extend your leg, and rotate your foot in a circular motion – first clockwise, then counterclockwise. Then, flex and point your toes back and forth. These movements stretch out the muscles and tendons in your feet and ankles, enhancing flexibility and reducing tension.
Calf Stretches:
Calf stretches are the secret ingredient for happy heels. Stand facing a wall, extend one leg back, and press the heel towards the floor. Feel the stretch along the back of your lower leg. It’s a gentle yet effective way to ease the tension that often leads to heel pain. Hold the stretch for about 30 seconds, breathing deeply, and then switch legs.
Pay Attention to Your Body
Lastly, the best thing you can do to protect against heel pain from running – and really, all types of injuries – is to listen to your body. Running through the pain is never a good idea.
The whole ‘no pain, no gain’ mantra doesn’t apply in the real world, unless you’re a top athlete with a deep understanding of your limits.
Pain is a signal, a way for your body to tell you that something isn’t right. Ignoring it can lead to more serious issues. So, always pay attention to what your body is telling you. Adjusting or even stopping your activities when you feel pain is not a sign of weakness; it’s smart and responsible running.