Patellar Tendonitis: Causes, Symptoms, and Treatment for Runners

knee brace for knee pain

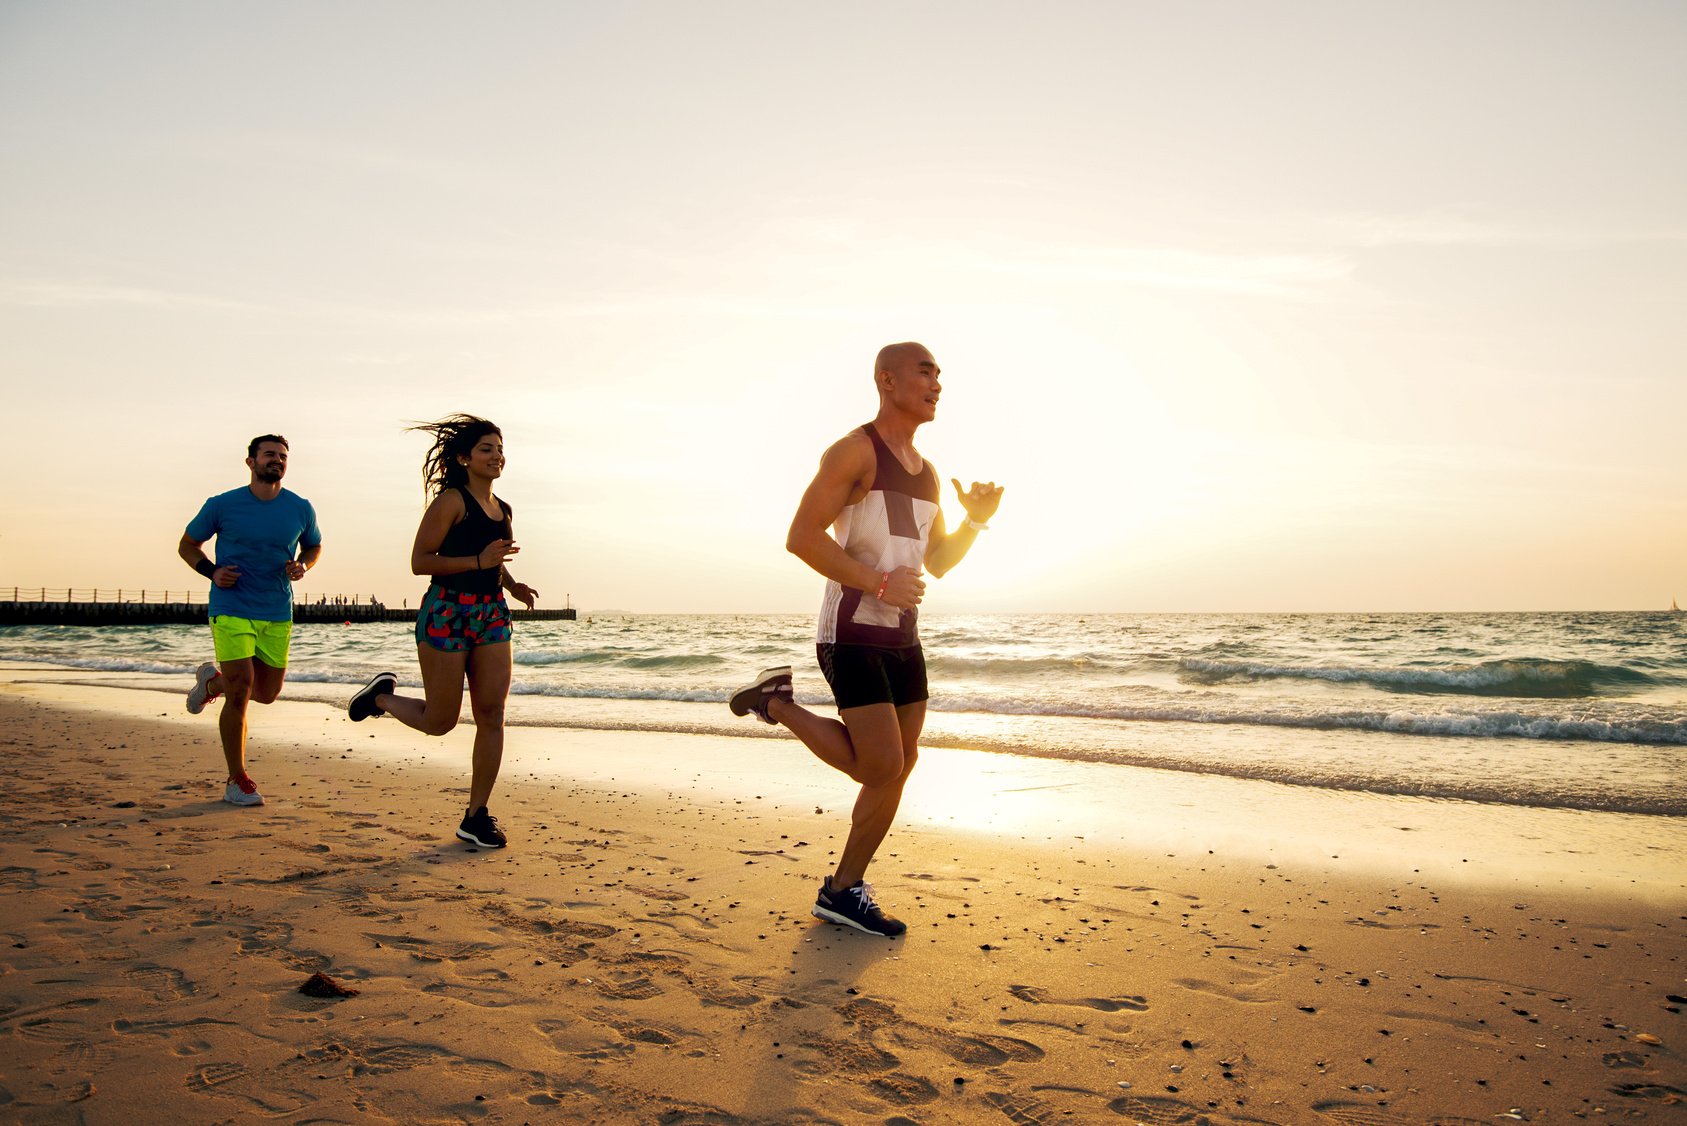
When you delve into the realm of knee injuries among runners, what pops into your mind? Most likely, the notorious Runners Knee (patellofemoral syndrome) and the dreaded Iliotibial band syndrome come to the forefront.

But what about the sneaky culprit that hides in the shadows, inflicting relentless pain? Allow me to introduce you to the villain known as patellar tendonitis.

Now, before you dismiss it as a problem only affecting jump-sport enthusiasts, let me set the record straight. Runners, too, can fall victim to this treacherous condition. That’s precisely why I’ve prepared a comprehensive guide to patellar tendonitis exclusively for you.

In this exhilarating journey, I will unravel the intricacies of this ailment, unveiling its causes and shedding light on the recovery process. I’ll share plenty of treatment options and prevention strategies that will not only accelerate your healing but also safeguard your knees from future perils.

What’s Patellar Tendinitis?

Picture this: you’re out on the run, feeling the wind in your hair and the pavement beneath your feet. But suddenly, a sharp pain shoots through your knee, bringing your joyous stride to a screeching halt. What could be the culprit behind this unexpected agony?

Enter patellar tendonitis, which a condition that can catch any runner off guard.

Now, don’t let the name intimidate you. Patellar tendonitis is simply a fancy term for inflammation, degeneration, or even rupture of the patellar tendon.

But what is the patellar tendon?

Also known as the patellar ligament, the patellar tendon is like the bridge between your kneecap and the shin bone. This tendon plays a crucial role in your leg’s structure and function. When you activate your quad muscles, they pull on the patellar tendon, straightening your knee and extending your leg. This incredible mechanism allows you to run, kick, and jump with grace and power.

However, this tendon isn’t just a one-trick pony. It also plays a crucial role in maintaining proper kneecap alignment and transferring forces from your thigh to your lower leg. It’s a multitasking superstar, absorbing significant loading with each step you take. So you shouldn’t be surprised if you’re nursing patellar tendon pain, especially if you run often.

Patellar Tendinitis is Common

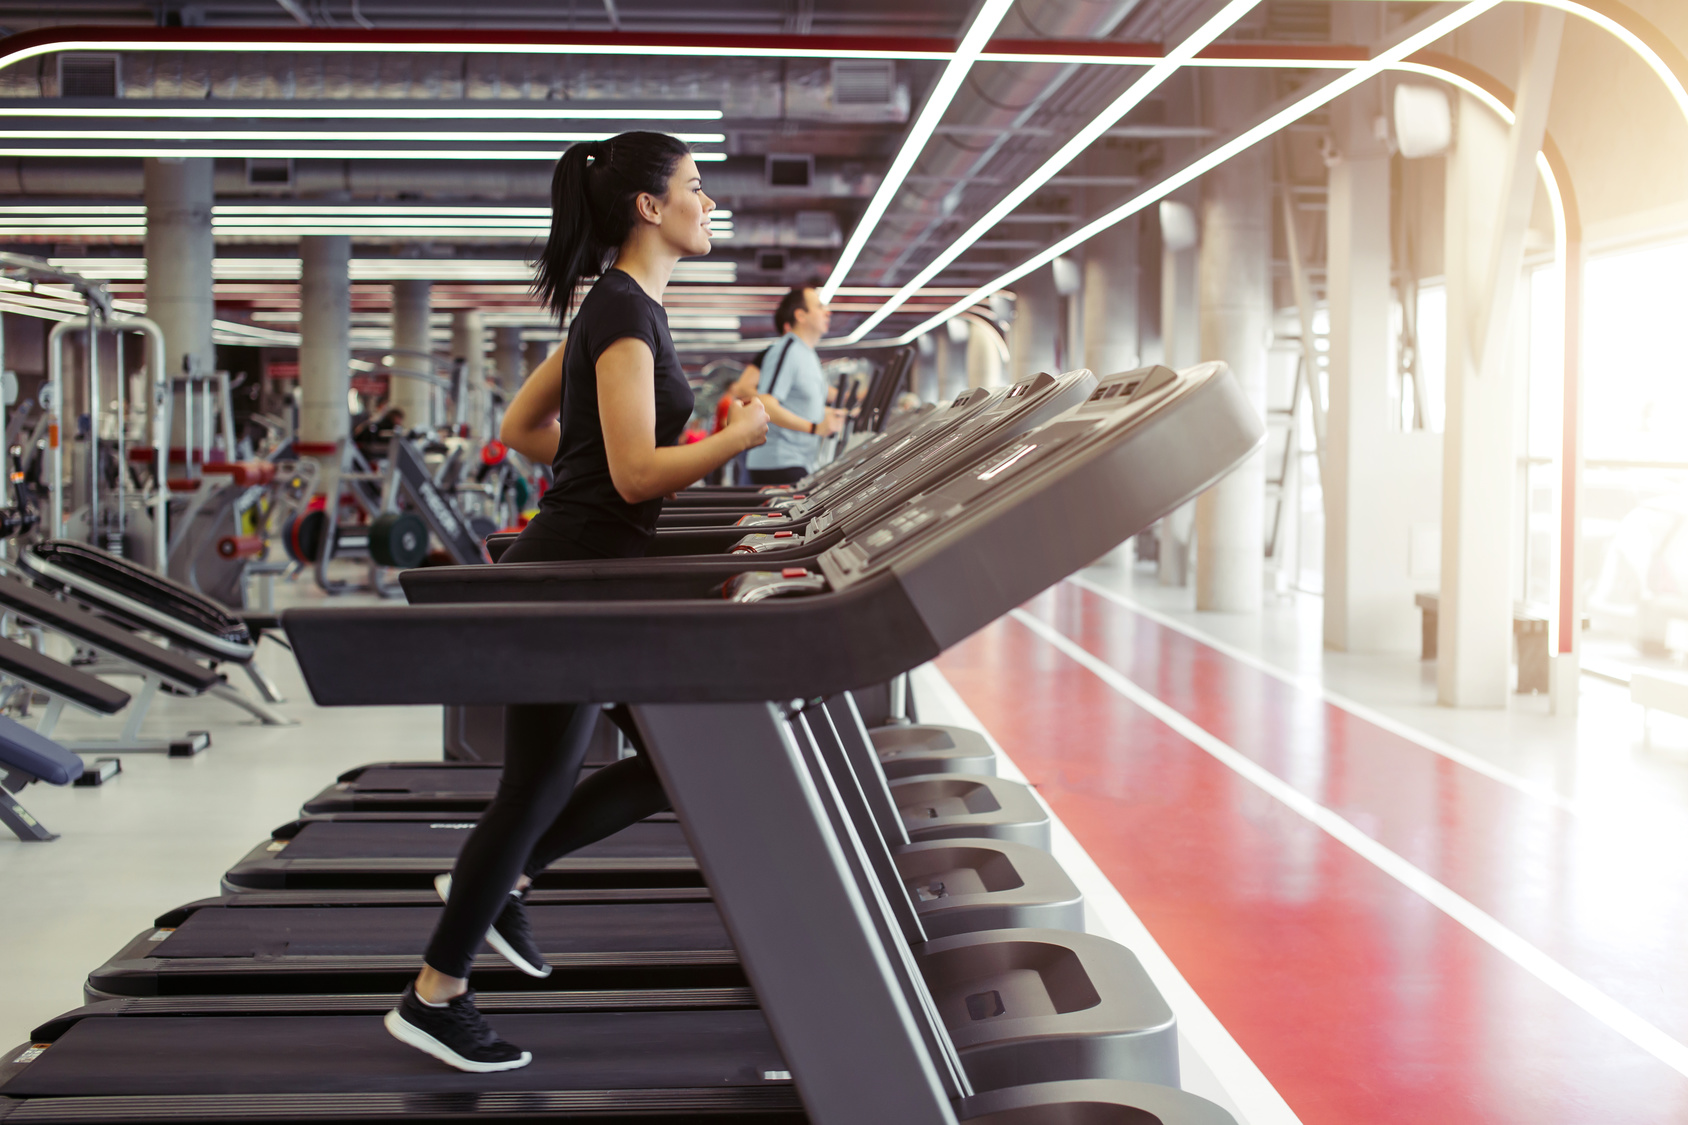
When you hit the pavement during your runs, you’re subjecting your patellar tendon to quite a beating. The repetitive pounding can lead to irritation and inflammation, causing what we call patellar tendinitis. It’s like the tendon is crying out for a break, saying, “Hey, give me some rest!”

In fact, studies have shown that about 5 percent of all running injuries can be attributed to patellar tendinitis. It’s not just the realm of high-flying athletes anymore. Runners, too, are at risk of experiencing the discomfort and limitations that come with jumpers’ knee.

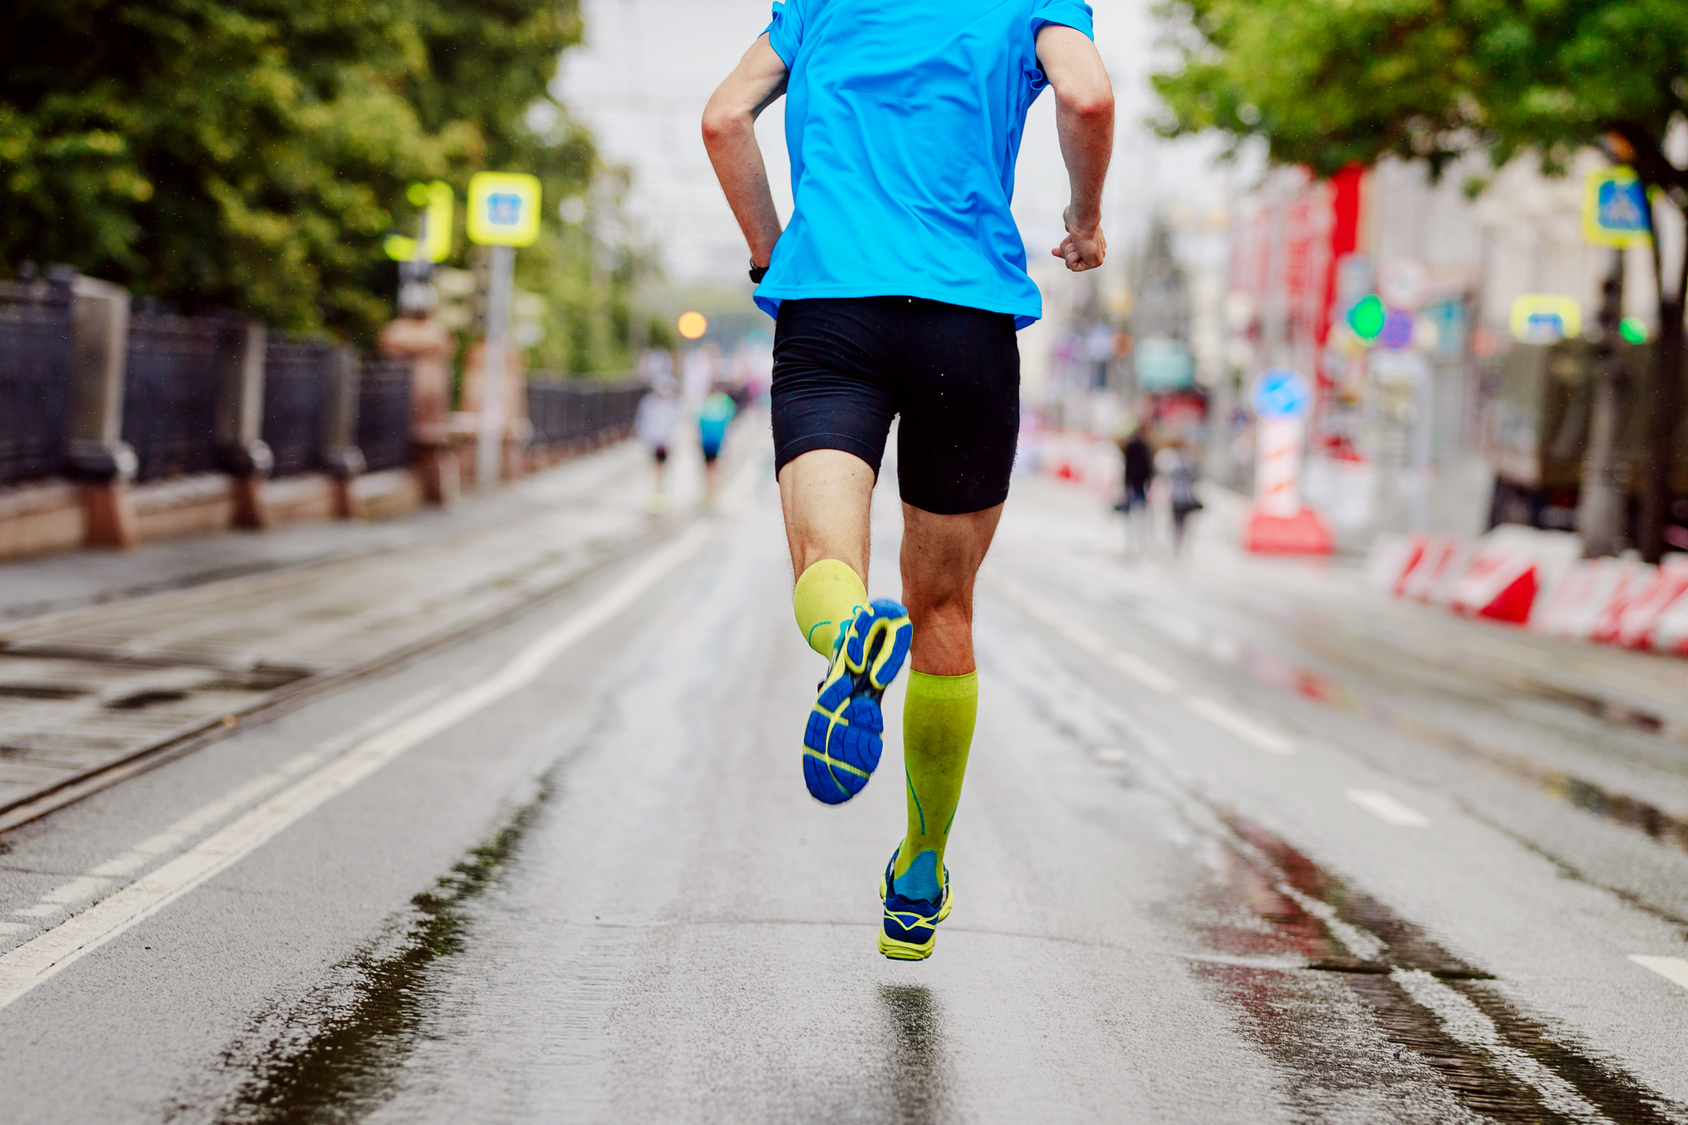
The Causes Of Patellar Tendinitis In Runners

What’s causing patellar tendinitis is like a puzzle, with various factors coming together to create the perfect storm for this nagging condition. One of the main culprits is repetitive load. Picture this: you’re pounding the pavement, day after day, with little rest and recovery in between. Your poor patellar tendon doesn’t get a chance to catch its breath and heal properly.

Several studies have highlighted the relationship between training load and the risk of patellar tendonitis. In a study published in the American Journal of Sports Medicine (Kujala et al., 2005), researchers investigated the training factors associated with the development of patellar tendon disorders in young athletes.

The results showed that athletes who experienced rapid increases in training volume and intensity were at a higher risk of developing patellar tendonitis.

Similarly, a study published in the Journal of Science and Medicine in Sport (Fahlström et al., 2003) found that excessive training frequency and inadequate recovery periods were significant risk factors for the onset of patellar tendonitis in elite volleyball players.

But that’s not the whole story. Biomechanical problems, like overpronation, can throw off the balance and put extra stress on your patellar tendon. It’s like a misaligned cog in a well-oiled machine.

And let’s not forget about the hills. As runners, we love a good challenge, but excessive hill training can push our patellar tendons to the limit. It’s like climbing a mountain without a break, with each step adding more strain to the tendon.

Weight matters too. If you’re overweight, your patellar tendon may have to work harder to support you. It’s like asking a bridge to hold more weight than it was designed for.

Other factors that can tip the scales include having an increased angle of the knee, being knock-kneed or bow-legged, or even having limb-length discrepancies. These quirks in our anatomy can throw the balance off, putting extra pressure on the patellar tendon.

So, you see, patellar tendinitis isn’t just a random occurrence. It’s a result of repetitive load and a combination of factors that push our patellar tendons to their limits. But fear not! In the next part of our journey, we’ll explore strategies to prevent and manage patellar tendinitis, so you can keep running strong and pain-free.

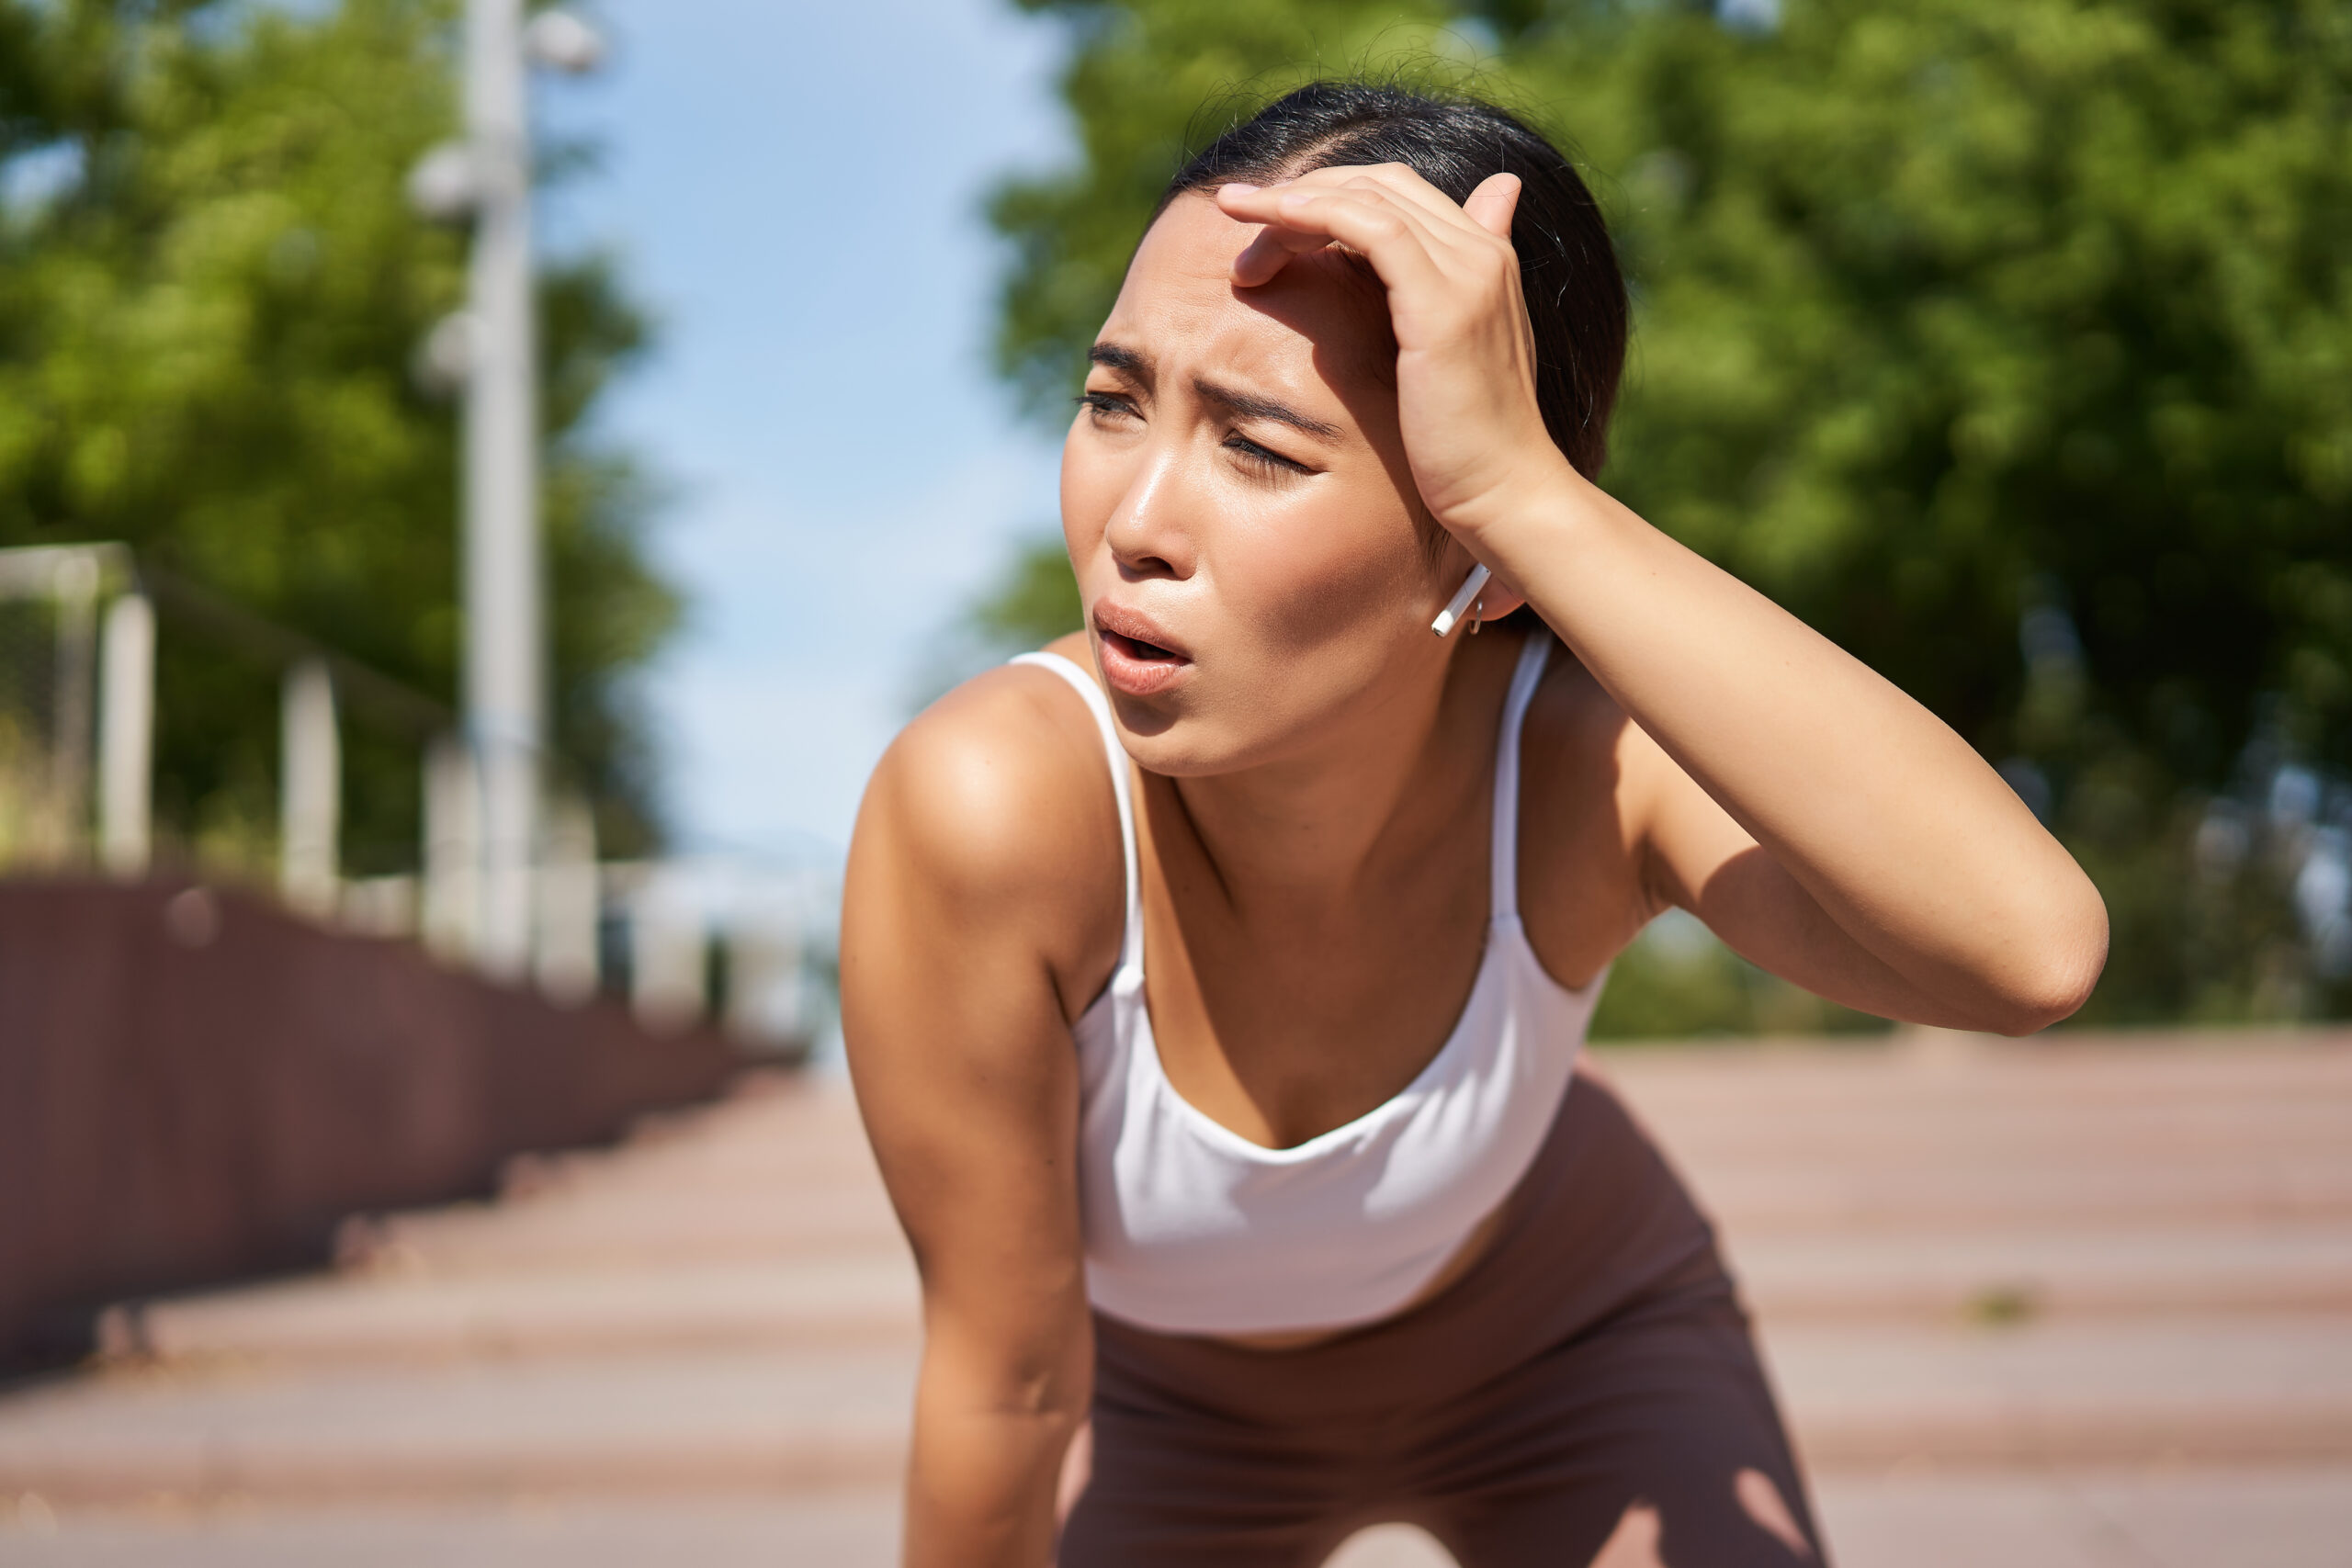
The Telling Signs Of Patellar Tendinitis

Just like other injuries, patellar tendonitis comes with a host of red flags.

Runners suffering from jumpers’ knees usually describe pain in the front of the knee—on what’s known as the lower pole of the patella, during and after exercise.

On the onset, jumpers knee starts as an inflammation of the tendon, with the pain usually only felt after a hard run.

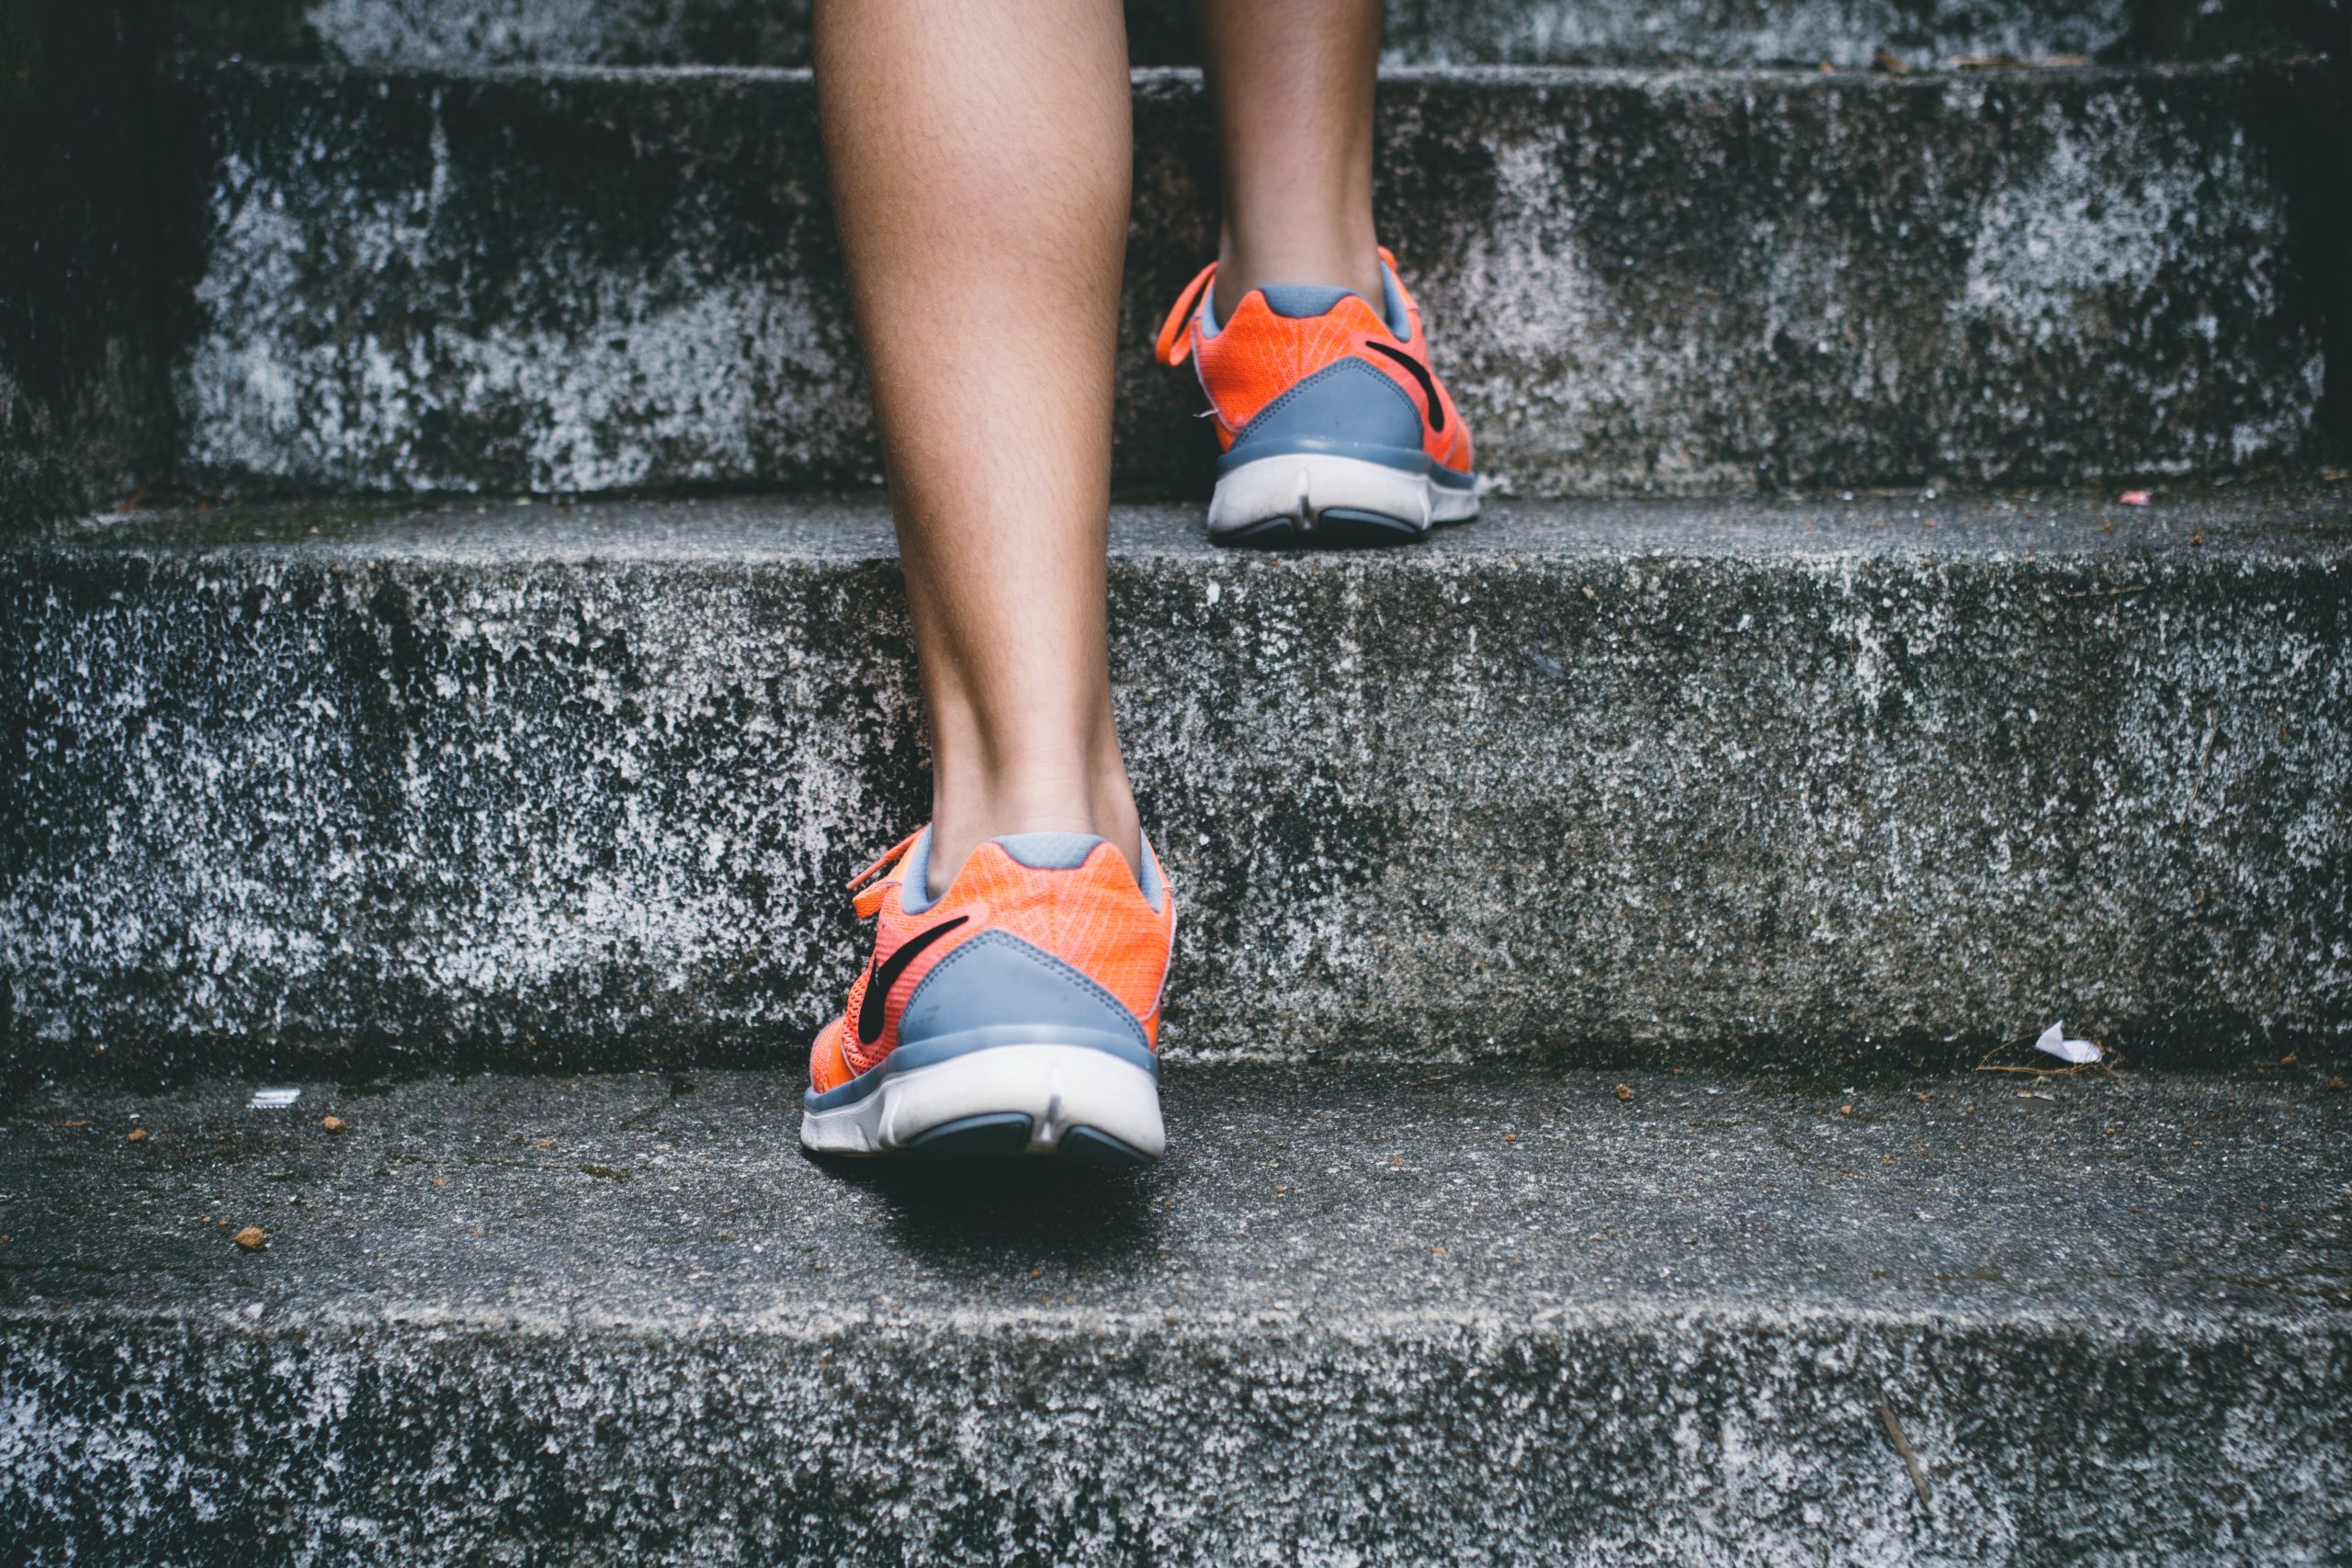
Symptoms may be tolerable, but training may become more and more uncomfortable as the injury worsens, affecting the normal activities of one’s day, such as when climbing stairs or after sitting for long periods.

Once you have severe tendonitis, even bending and/or straightening the injured limb can be very painful.

Some of the main symptoms include:

  • Swelling under the patella
  • Knee stiffness in the morning
  • Tenderness behind the lower part of the patella
  • Pain when straightening or bending the leg.
  • Pain gets worse with running or jumping

Patellar Tendinitis Vs. Runners Knee

Let’s talk about an important comparison: Patellar Tendinitis vs. Runners Knee. It’s like trying to solve a puzzle and decipher the clues our knees are giving us.

Now, here’s the deal.

When you’re experiencing knee pain, it’s crucial to distinguish between different knee injuries. For instance, if you feel pain at the top or sides of your kneecap, you might be dealing with a runner’s knee instead of patellar tendonitis. It’s like a case of mistaken identity for our knees.

Jumpers’ knee, on the other hand, has its own unique features. It doesn’t cause pain along the top or side of the patella, and it’s not usually sensitive to the touch.

Experiencing pain on the outside of your knee? You should be blaming it on iliotibial band syndrome. Our knees sure know how to keep us on our toes!

Now, here’s a golden nugget of advice: If your knee pain persists beyond a few days, it’s time to hit the brakes and assess the situation. Don’t hesitate to pay a visit to your doctor. They’re the experts who can properly diagnose your condition and discuss the best treatment methods tailored to your specific case.

Listen up, runners, it’s not a death sentence. Patellar tendinitis may not be the worst running injury you can encounter. However, if you ignore or neglect it, the tendon can become more damaged, sidelining you for weeks, maybe even months. We don’t want that! That’s why it’s essential to take care of your jumpers’ knee from the get-go. Treat it with the attention it deserves, or else your patellar ligament may become weaker and more susceptible to tears in the future. It’s like reinforcing the foundation of a building to prevent future collapses.

How To Treat Patellar Tendinitis In Runners

Let’s explore some conservative measures to relieve pain and halt the progression of this pesky condition while you continue running.

Ice It

Take the necessary steps to give your knee some well-deserved rest and follow the R.I.C.E method. If the pain persists, reach out to your doctor for expert guidance. Remember, treating patellar tendinitis is a journey, and with the right care, you’ll be back on track to pain-free running in no time. Keep up the positive mindset and stay committed to your recovery. You’ve got this!

Rest It

First things first, rest is key. Pushing through the pain will only prolong your recovery. Embrace the R.I.C.E method: Rest, Ice, Compression, and Elevation. Give your injured limb the rest it needs, and apply ice to the affected area for about 15 minutes, three to four times a day, to reduce inflammation.

Compress It

If you still feel pain following a few days despite resting and icing, the next step would be to use a band or brace on the knee.

This may help reduce the stress on the tendon, stabilize the knee, and reduce inflammation—all of which can speed up recovery.

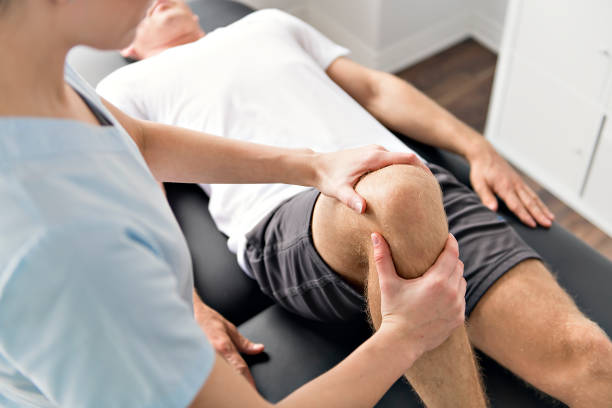
When to Call A Doctor For Knee Pain

Now, if you’ve been diligently following the R.I.C.E method, but the pain persists after a few days, it may be time to consult a doctor. They can assess your condition and determine the next steps. They may recommend anti-inflammatories or physical therapy to speed up your recovery. In more severe cases of jumpers’ knees, a combination of physical therapy and platelet-rich plasma (PRP) therapy could be considered. But remember, surgery should only be considered as a last resort.

Typically, platelet-rich plasma (PRP) therapy is an invasive procedure that works by injecting plasma into the injured area. Platelets are blood cells that contain growth factors, which are proteins that help to promote healing. PRP therapy is thought to work by stimulating the body’s natural healing process and reducing inflammation. It’s typically done in an outpatient setting. The procedure is performed under local anesthesia. The doctor will draw blood from your arm and then spin it down in a centrifuge to split up the platelets and the blood. 

However, if you consider using PRP therapy for your patellar tendonitis, choose a provider that uses PRP kits. These kits should offer extended platelet delivery and contain all essential components for preparing and administering platelet-rich plasma. This way, you can ensure outstanding and safe results. 

In addition to PRP, a doctor may recommend surgery to address patellar tendonitis

But your goal should be to explore non-invasive options first, like detectives solving a mystery.

How to Prevent Patellar Tendinitis While Running

Kudos to you for being proactive and taking charge of your running journey!

So, let’s dive into some effective strategies to keep patellar tendinitis at bay and ensure your knees stay strong and pain-free.

The Importance of Warm-ups & Cool-Downs

Warm-up exercises prepare the muscles and tendons for the demands of physical activity, while cool-down exercises aid in recovery and prevent muscle stiffness. Neglecting these essential components of a workout routine can increase the risk of developing patellar tendonitis.

Research studies have shown the positive effects of warm-up and cool-down exercises on injury prevention, including patellar tendonitis. A study published in the Journal of Science and Medicine in Sport (Bahr et al., 2004) examined the effects of a standardized warm-up program on the incidence of overuse injuries in female football players. The results demonstrated that participants who followed a structured warm-up routine experienced a significant reduction in the occurrence of patellar tendonitis compared to those who did not.

To prevent patellar tendonitis, perform a dynamic warm-up routine before engaging in running or any strenuous physical activity. This should involve exercises that target the lower extremities, such as leg swings, lunges, high knees, and gentle stretches for the quadriceps and hamstrings. Gradually increasing the intensity of the warm-up can help prepare the patellar tendon for the stress it will undergo during exercise.

Additionally, incorporating a proper cool-down routine is equally important. This allows the body to gradually transition from exercise to rest, aiding in the removal of metabolic waste products and reducing muscle soreness. Cool-down exercises should involve gentle stretching for the lower body muscles, particularly focusing on the quadriceps, hamstrings, and calves.

Stretching

One essential element in your prevention toolkit is stretching. When the muscles surrounding your knee joint are tight, they can put extra strain on the patellar tendon, increasing the risk of tendonitis. So, let’s make stretching a regular part of your routine.

To target the key muscles that support your kneecap, focus on stretching your quads, hamstrings, calves, and hip flexors. These stretches will help keep your knee joint happy and ready for action.

Now, let’s go through a few stretches to get you started:

  • Quadriceps Stretch: Stand tall, grab your foot or ankle, and gently pull it towards your glutes. Feel the stretch in the front of your thigh. Hold for about 30 seconds on each leg.
  • Hamstring Stretch: Sit on the ground with one leg extended in front of you and the other leg bent. Reach forward and try to touch your toes while keeping your back straight. You’ll feel the stretch in the back of your thigh. Hold for 30 seconds, and then switch legs.
  • Calf Stretch: Stand facing a wall, place your hands on the wall for support, and step one leg back. Keep your back heel on the ground and lean forward, feeling the stretch in your calf muscle. Hold for 30 seconds and switch legs.
  • Hip Flexor Stretch: Step into a lunge position with one foot in front of you and the other leg extended behind you. Keep your back straight and gently push your hips forward. You’ll feel the stretch in the front of your hip. Hold for 30 seconds and switch sides.

Incorporate these stretches into your warm-up routine before each run, and consider adding them to your post-run cool-down as well. Consistency is key, my friend!

By taking the time to stretch and loosen up those muscles, you’ll be building a solid foundation for healthy knees and preventing the onset of patellar tendinitis. Remember, prevention is the secret ingredient to a long and joyful running journey. So, keep up the good work, stay flexible, and let those knees soar with every stride!

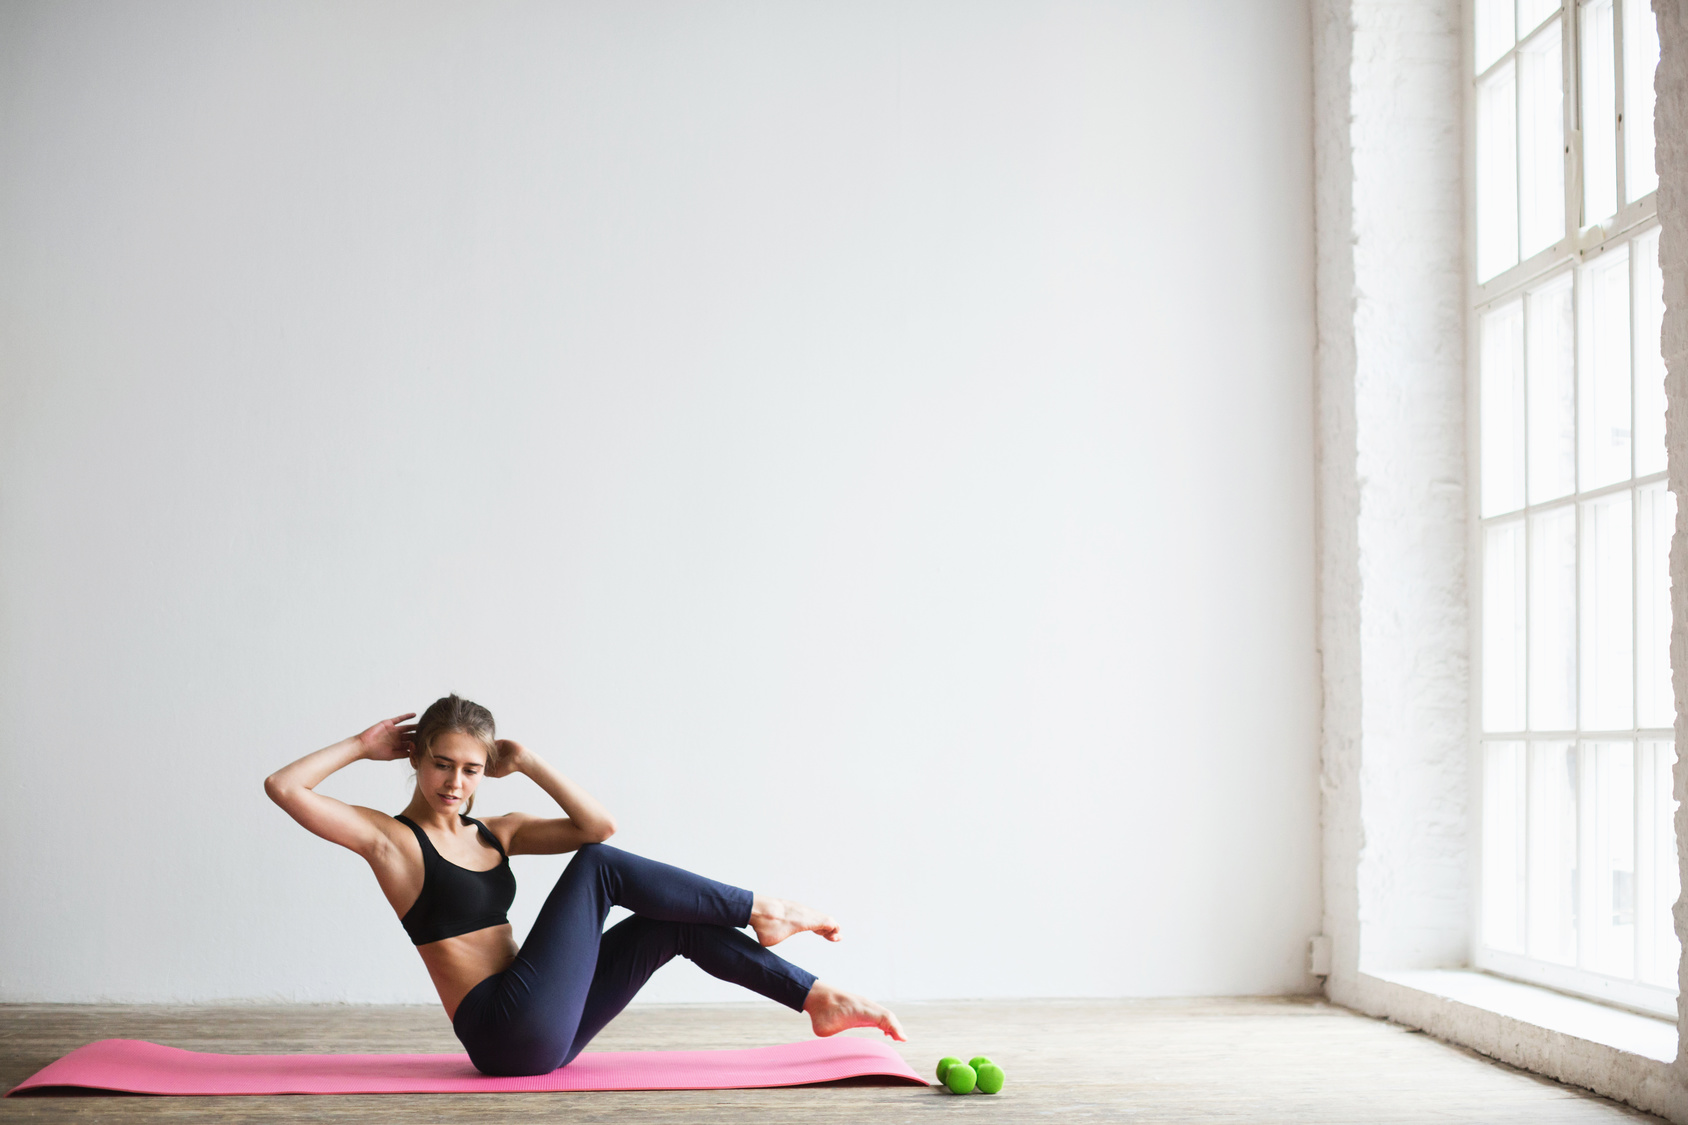
Strengthen Your Muscles To Prevent Patellar Tendonitis

Strengthening your muscles is crucial when it comes to preventing and recovering from knee problems like patellar tendonitis. Think of your muscles as a protective shield for your knees. The stronger they are, the better they can shield your knees from serious ailments. It’s like having a suit of armor for your joints!

When it comes to safeguarding your knees, two muscle groups play a significant role: the quadriceps and the hamstrings. These powerhouses provide support and protection, particularly for the delicate patellar tendon.

Let’s dive into some exercises that can help you strengthen these important muscles and fortify your knees:

Slow Squats:

Imagine these as your knee’s secret weapon! Slow squats are a fantastic exercise for building strength in your quadriceps and hamstrings. Not only do they target the key muscles, but they also engage your entire lower body, giving you a well-rounded workout.

Single Leg Glute Bridges:

Single-leg glute bridges are a fantastic exercise that isolates and strengthens your glutes and hamstrings. By performing this exercise, you enhance the stability and resilience of your knees.

Standing Clamshells:

Standing clamshells are a superb exercise for activating the muscles around your hips and thighs, including the all-important quadriceps. This exercise helps to improve stability and balance, further protecting your knees.

Remember, these exercises are not only about building strength but also about safeguarding your knees and preventing patellar tendonitis. Incorporating them into your routine will not only reduce the risk of injury but also accelerate your recovery if you do happen to experience any knee-related issues.

So, grab your workout gear and start strengthening those muscles! Your knees will thank you for the extra support, just like a suit of armor shields a knight in battle.
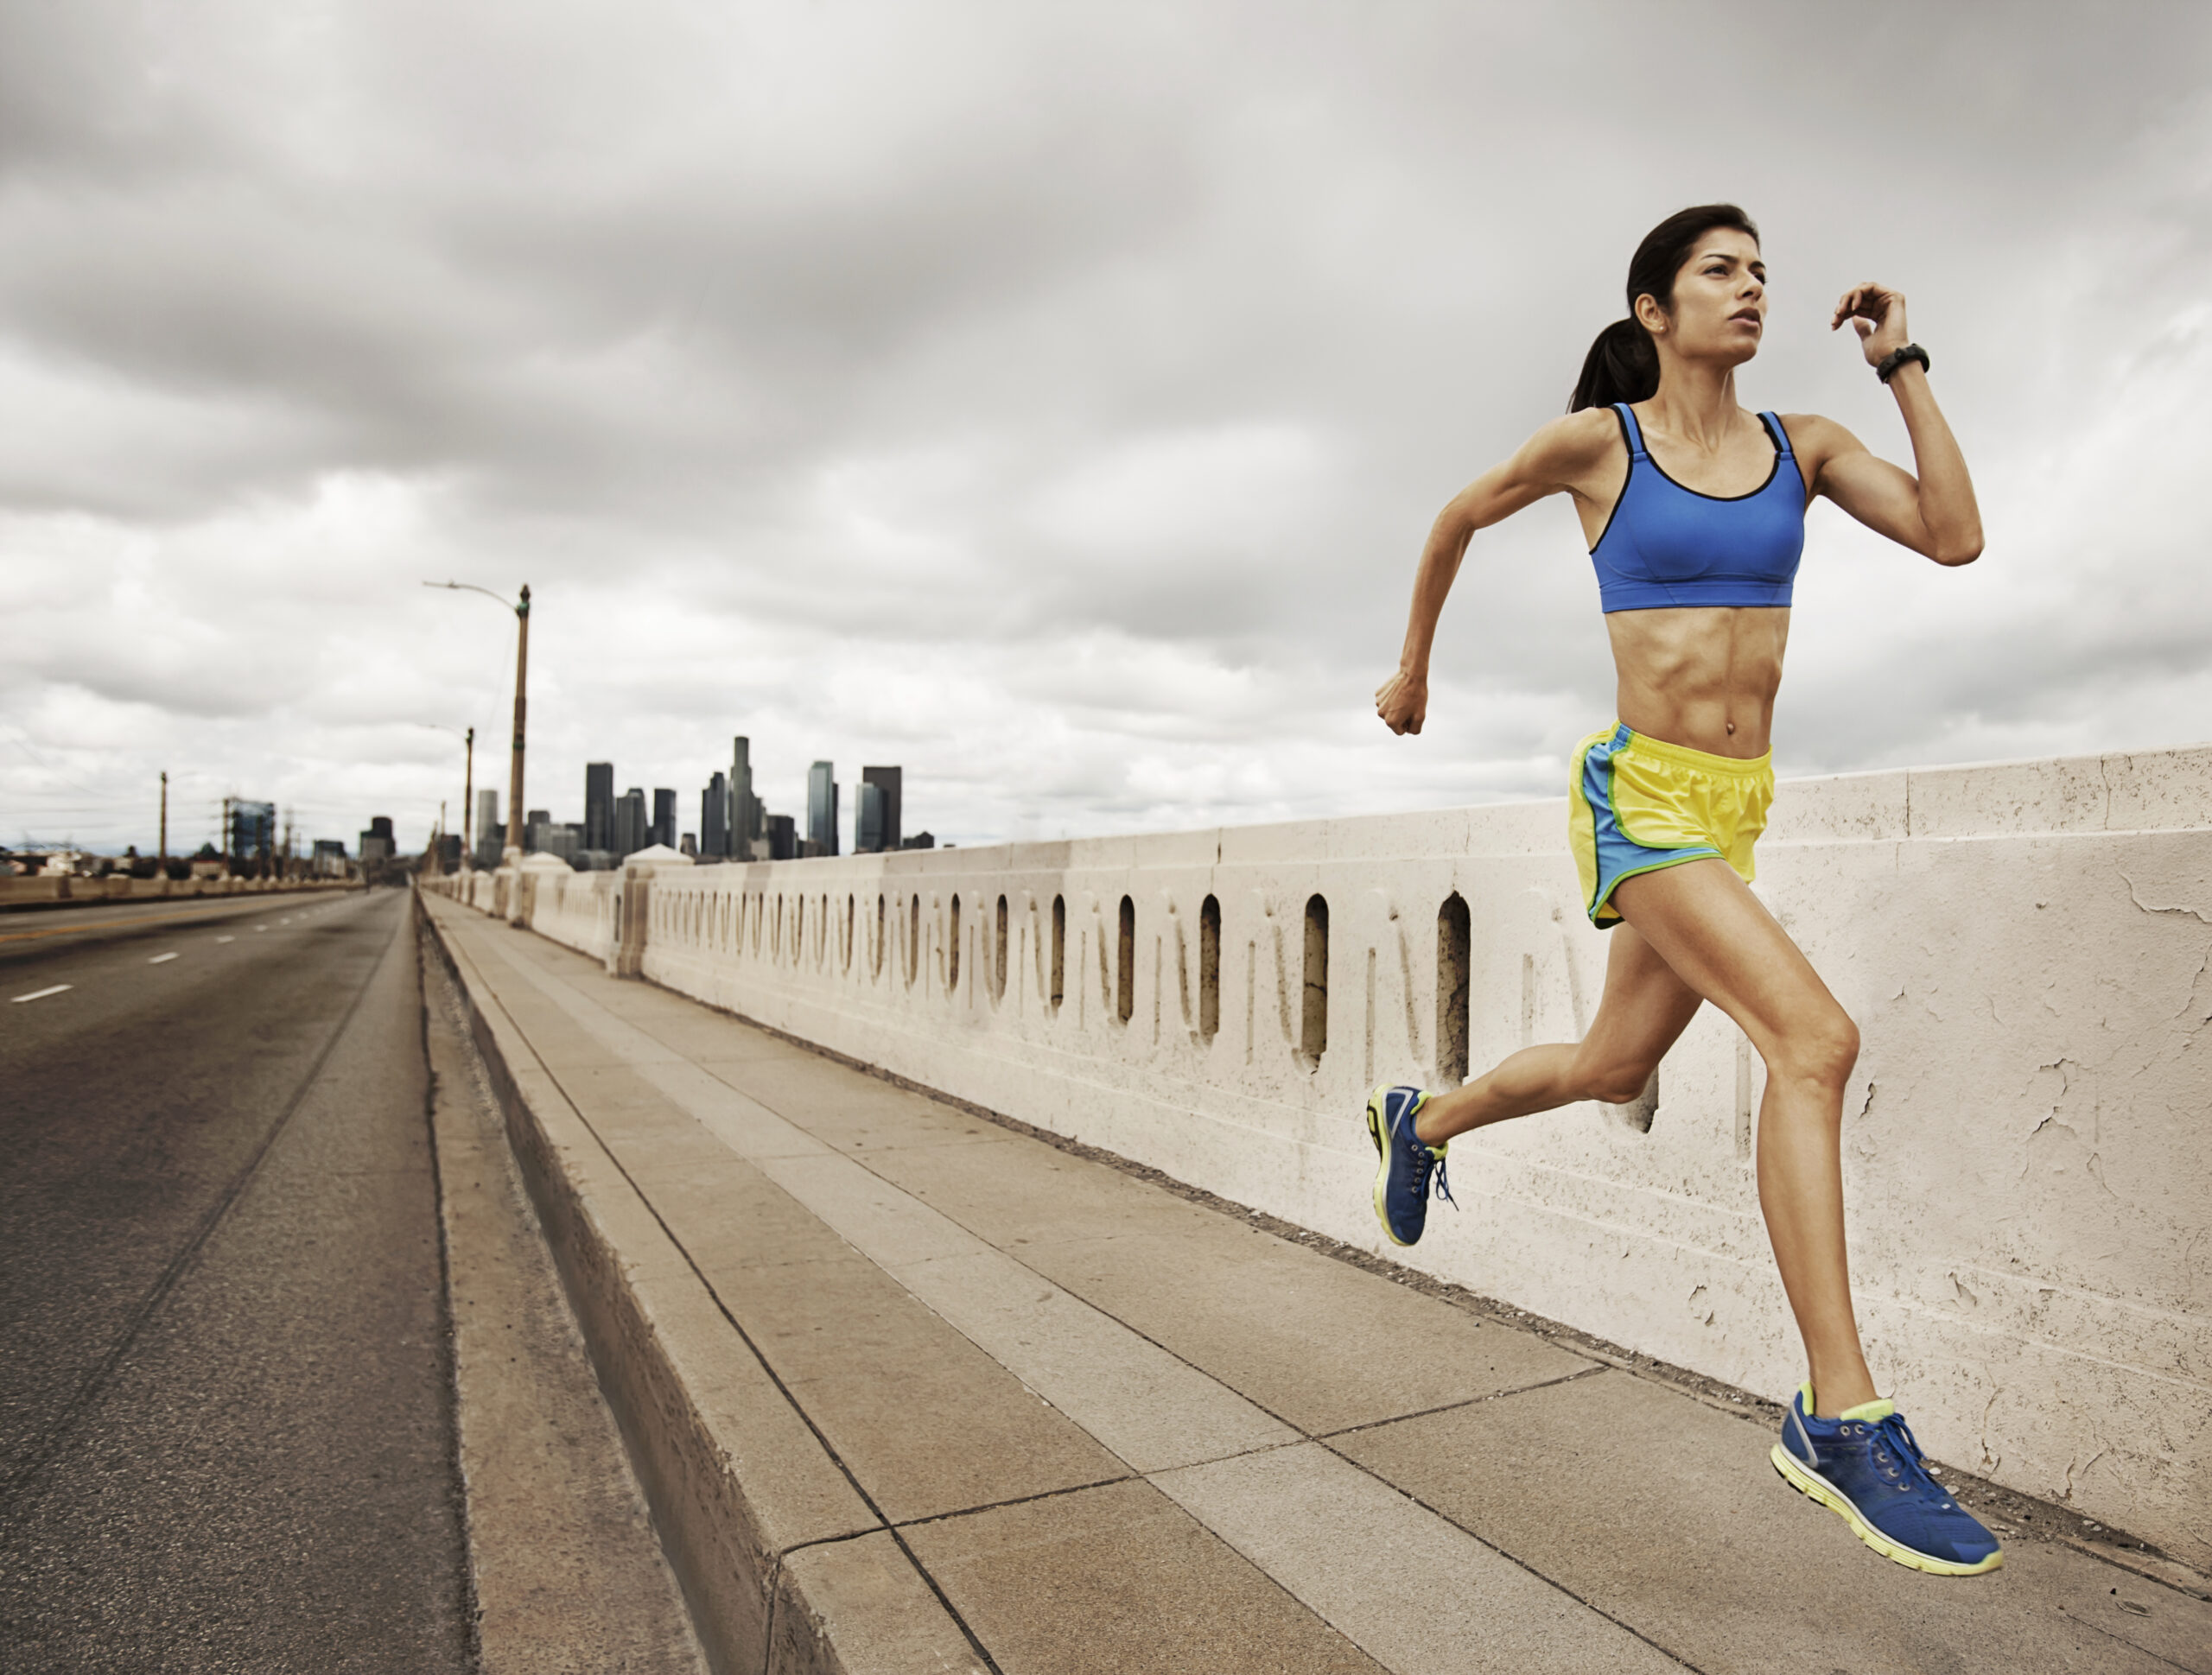
Improve Your Form

Did you know that making a few tweaks in the way you move can significantly reduce the load on your patellar tendon? It’s like finding the perfect rhythm in a dance—smooth, effortless, and injury-free.

My research has uncovered a game-changing form tweak that can work wonders for protecting your lower body from overuse injuries: avoiding overstriding. Overstriding occurs when you land your foot too far in front of your hips, putting unnecessary stress on your knees.

To achieve this, focus on two key things during your runs:

  • Land directly underneath your body: Imagine a string attached to your body, pulling you forward. As you take each stride, aim to land your foot directly underneath your hips. This way, your foot will act as a solid foundation, absorbing the impact and distributing it evenly, sparing your knees from any undue strain.
  • Improve your running cadence: Cadence refers to the number of steps you take per minute. Research suggests that increasing your cadence can help reduce the load on your lower body and minimize the risk of injuries. Aim for a cadence of around 170-180 steps per minute. To achieve this, try taking shorter, quicker strides. It may feel a bit unfamiliar at first, but your knees will thank you for it.

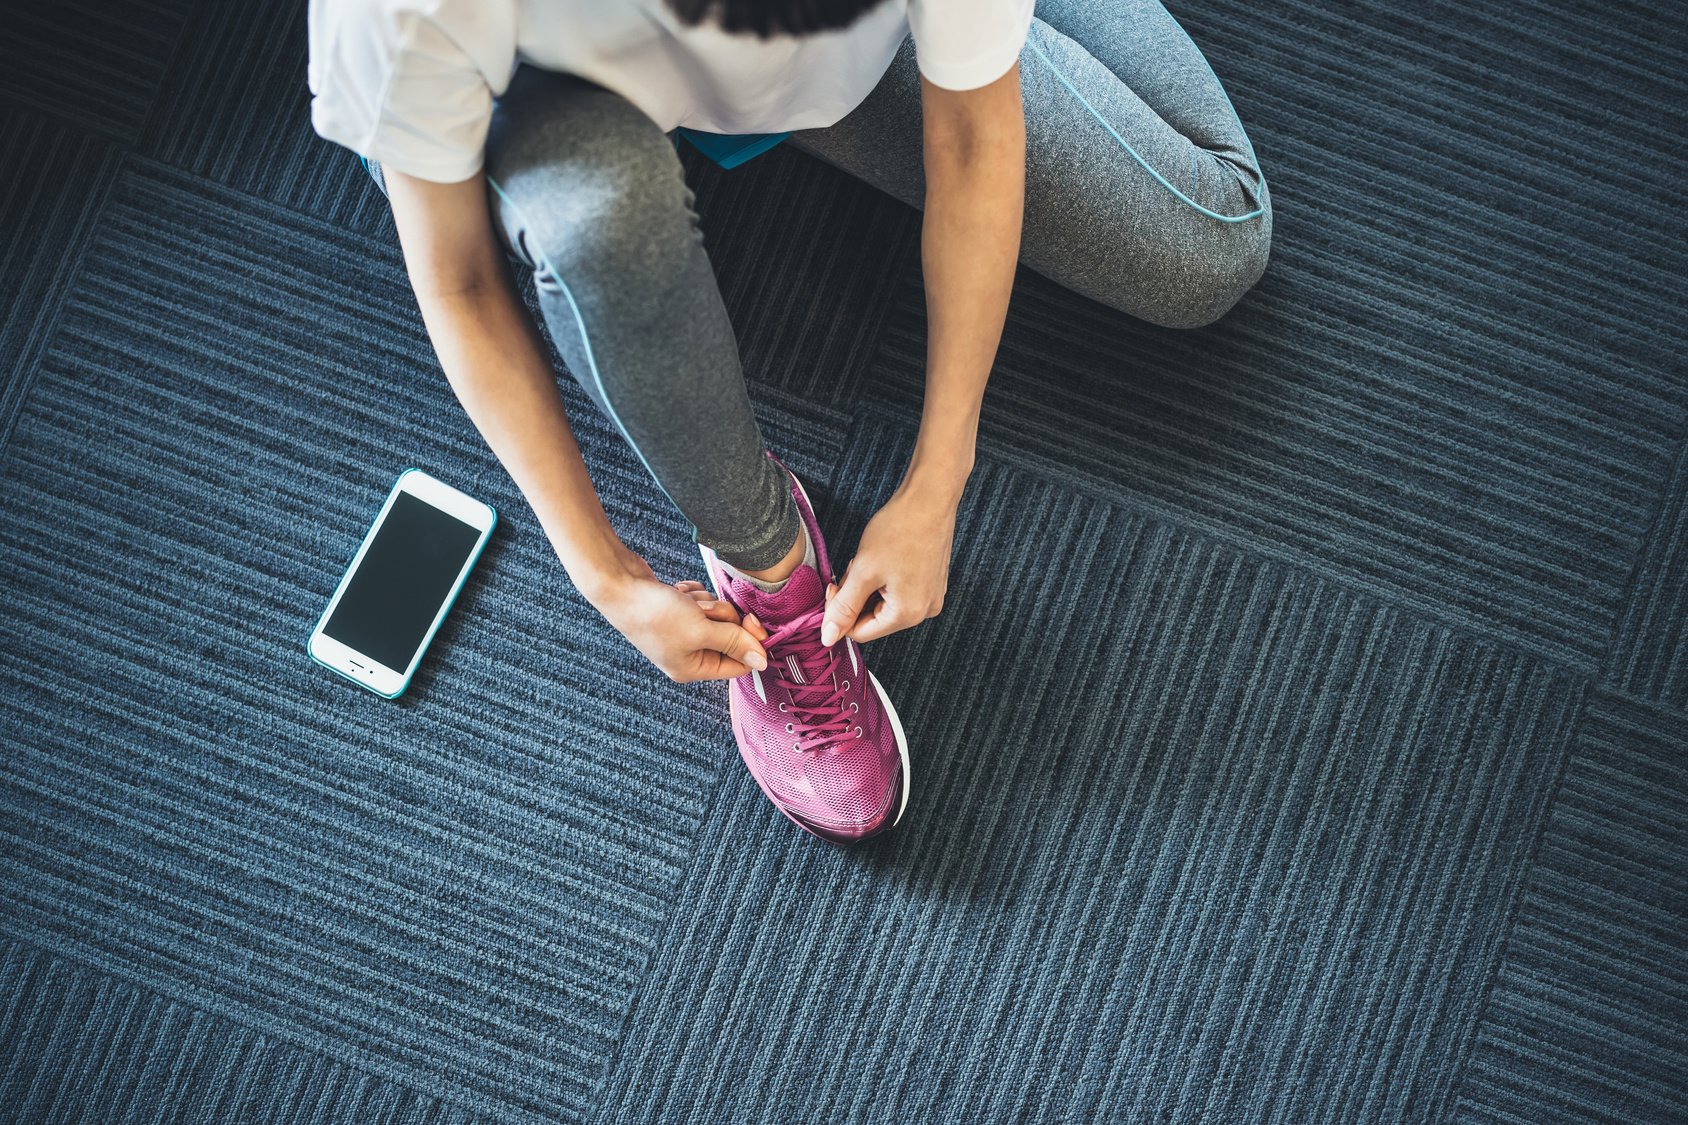
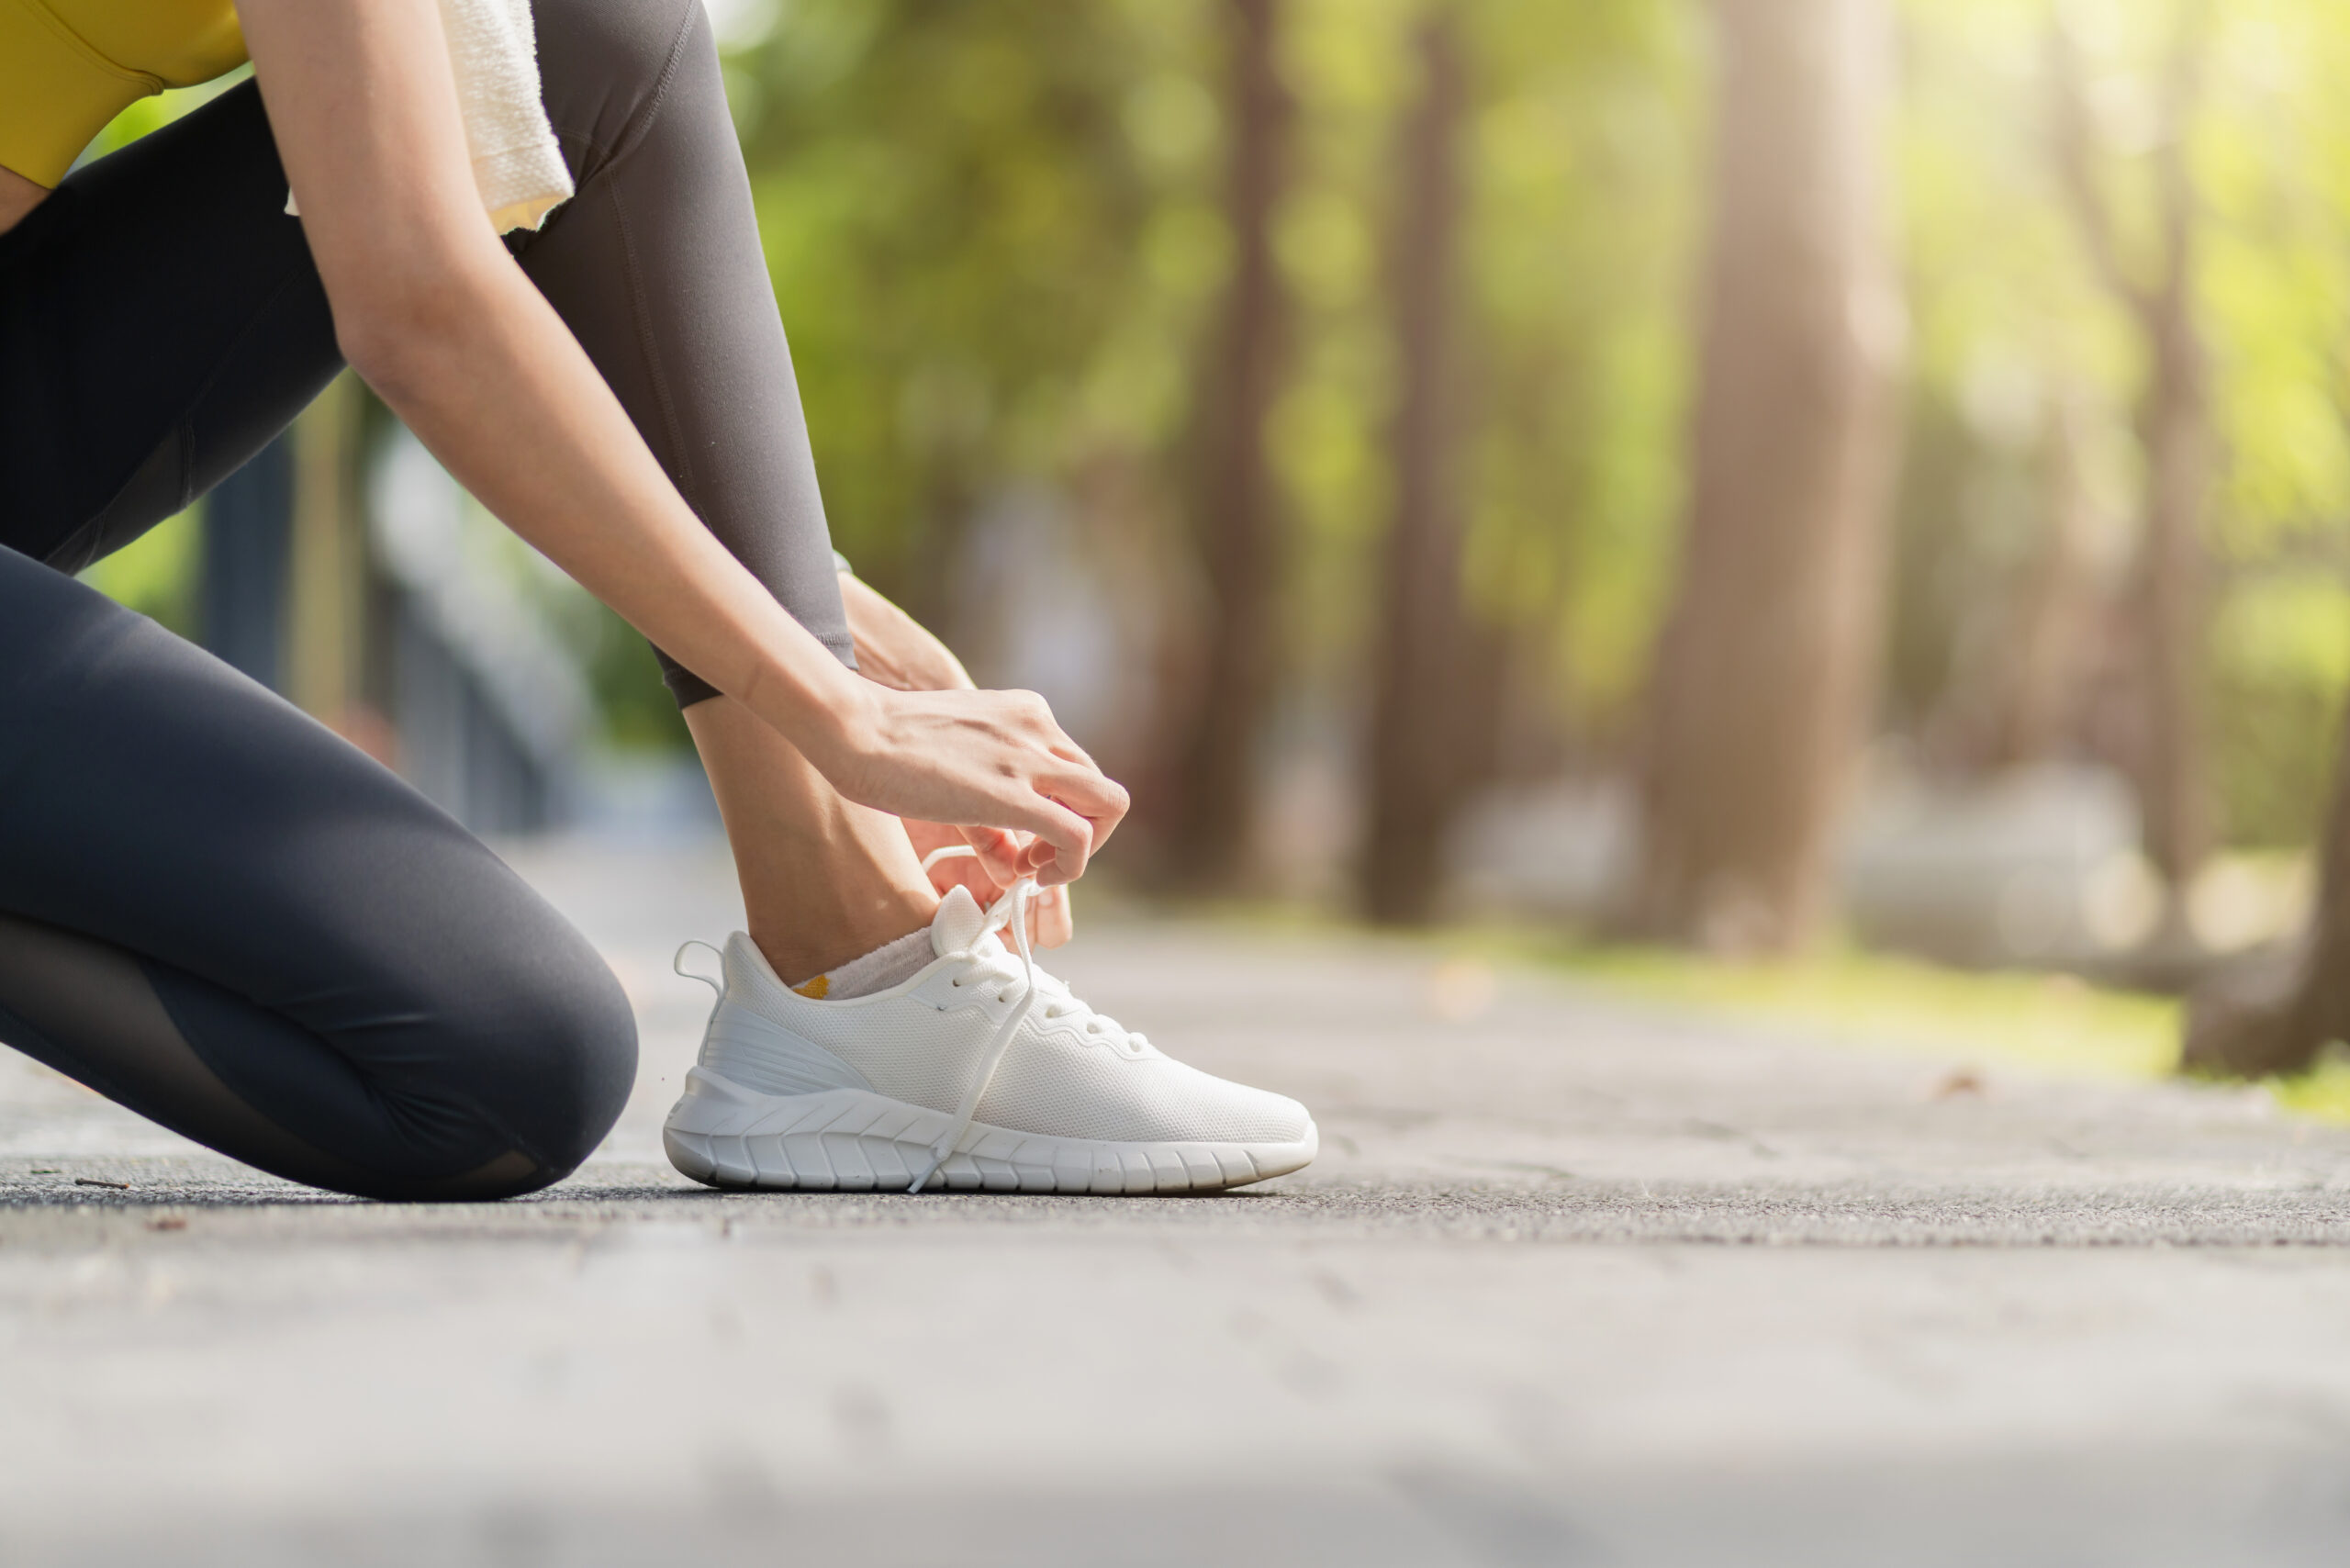
Get Proper Running Shoes

Let’s not forget about the unsung heroes of your running journey—your trusty running shoes. They play a vital role in supporting your knees and ensuring a smooth, comfortable ride.

When choosing your running shoes, keep an eye out for the heel-to-toe drop. Shoes with a significant drop can add unnecessary stress to your patellar tendon, and we definitely want to avoid that. Look for trainers that offer a more balanced platform, keeping your knees stable and happy throughout your runs. They should also provide ample cushioning to absorb impact and support your lower leg as you glide through each stride. Think of them as your own personal shock absorbers, ready to take the pounding so your knees don’t have to.

Now, here’s an interesting tidbit for you: Did you know that running shoes have limited mileage? Just like a favorite song on repeat, they eventually lose their magic. As a general rule of thumb, it’s time to bid farewell to your shoes after around 400 miles of running. Why? Because they start to lose their support and cushioning powers, leaving your knees vulnerable to the harsh realities of the road.

Patellar Tendonitis In Runners  – The Conclusion

As far as I can tell, as long as you’re listening to your body and treating patellar tendonitis early on, you’ll be okay.

And in case you’re dealing with a jumpers’ knee, taking the above treatment and prevention measures will surely help you relieve your pain and keep training injury free.

It’s up to you to take action.

Please feel free to leave your comments and questions in the section below.

In the meantime, thank you for reading my post.

Keep Running Strong.

David D.


The Ultimate 30-Day Running Challenge: Revolutionize Your Running Journey

runners itch

Looking for the ultimate 30-day running challenge? Then you’re in the right place.

Whether you’re a running newbie or someone who’s been hitting the pavement sporadically, this program will revolutionize your running journey.

Consistency is the key to unlocking extraordinary fitness and maintaining it in the long run. This is the goal of my 30-day running challenge. It’s all about pushing through those tough moments, defying the odds, and staying committed to your goals.

Now, brace yourself because this challenge combines the best of the Couch to 5K method with my personal favorite beginner running training guidelines and tips.

So, are you feeling the excitement building up? Great! Buckle up and get ready to embark on this incredible 30-day running challenge.

Let’s do this!

Be Careful

Before I get into the 30-day running challenge, let’s first talk about something crucial: your safety. I don’t want to nag, but safety is key, especially if you’re a beginner runner.

So let’s make “get fit without getting hurt” your ultimate motto. It’s like navigating a treacherous path with caution and grace, ensuring you reach your destination unscathed.

But if you intend to ignore this rule, I’d hate to see you miss out on the awesomeness of this challenge. But hey, no hard feelings! If running isn’t your cup of tea right now, feel free to explore other exciting activities that light your fire.

Keep in mind that this training schedule is flexible, like a rubber band. So, go ahead and customize it to align with your goals, abilities, and unique circumstances.

Let’s address the elephant in the room: runners aren’t born overnight. Nope, it takes time, patience, and dedication to build a powerful runner body. Think of it as planting a seed and nurturing it with care. With each training session, you’re watering that seed, allowing it to sprout, grow, and flourish into a mighty running machine.

The 30-Day Running Challenge You Need To Try

If you have always craved to run regularly, but haven’t quite found the right plan to get started, look no further. This 4-week plan is your ticket to running for a solid 30 to 40 minutes straight per session. Let’s dive in!

Think of these four weeks as your personal training adventure. Each week comes packed with three specific workouts designed to gradually build your stamina, endurance, and running prowess. It’s like embarking on a thrilling quest where you level up your running skills with each passing week.

The Importance of Recovery

Downtime is the perfect opportunity to mix things up and give your body some well-deserved TLC. While I encourage you to cross-train and explore other forms of cardio, such as biking or swimming, you can also hit the weight room for some resistance training.

It’s like adding different spices to your fitness recipe, keeping things exciting, and giving your body a chance to work in new and beneficial ways.

30-Day Running Challenge – Week One

Welcome to Week One of the exhilarating 30-day running challenge! This week is all about finding your starting point and embracing the journey ahead.

e thing, my friend. When it comes to running, it’s crucial to listen to your body. The key is to find that sweet spot where you’re challenging yourself without pushing too hard. You want it to be just right—neither scalding your taste buds nor lukewarm and bland.

The Plan Is Flexible

Consider my plan your trusty compass, guiding you through the vast terrain of running. But keep in mind it’s not written in stone. I’m not married to it, and neither should you. Therefore, feel free to make adjustments along the way, like savvy explorer altering their route to accommodate unforeseen obstacles or hidden gems. This challenge is about empowering you to tailor it to your needs, preferences, and abilities.

If you’re a total newbie in the running realm, fear not! I’ve got your back. I recommend starting with a 3:1 ratio. That means you’ll walk for three minutes after every one-minute interval of jogging. It’s like easing yourself into the water, one toe at a time, before diving headfirst into the glorious pool of running.

Feel in top-tip shape? Then choose a 2:1 or even a 1:1 ratio. The choice is yours, my friend. As long as you’re honoring what feels right for you and staying within your fitness level, you’re in a fantastic place.

Tip: Pre-Run Meal

About one to two hours before lacing up those running shoes, grab a quick bite like a juicy banana, a crisp apple, or even an energy bar. It’s like putting the perfect octane fuel in your tank, ensuring you have the energy to conquer the miles ahead.

What’s more?

Hydration also matters. Water is your trusty companion throughout your running journey. Before you hit the pavement, make sure to hydrate like a champion.

Take refreshing sips and let the water flow through you, quenching your thirst and preparing your body for action. And don’t forget to keep the water flowing even after your run. Replenish those lost fluids and give your body the hydration it craves. Think of it as watering a beautiful garden. Your body blooms and thrives when properly hydrated.

  • Day 1: After a 10-minute brisk walk warm-up, complete 8 to 10 cycles of 1-minute jog interspersed with 2 minutes of walking for recovery. Finish off the session with a 5-minute walk.
  • Day 2: Cross-train or rest
  • Day 3: Repeat Workout I.
  • Day 4: Cross-train or rest
  • Day: after a warm-up, perform 7 to 8 cycles of one-minute to 90 seconds jogs and one-minute to 90 seconds walking breaks.
  • Day 6 & 7: Take a couple of days off at the end of every week to allow your body to recover. Go out, watch a movie, see some friends, or stay home and Netflix all day long.

30-Day Running Challenge -Week Two

During this week, running should feel a bit easier than before.

So if you are feeling that way, then it’s time to crank up the intensity by increasing the time spent running and taking less and less for recovery.

But if it’s not so, then repeat Week One workouts to the letter, and only progress with the plan after you feel confident enough about your fitness level.

The key here is maintaining your consistency even if your results suck big time.

Tip: Practice Proper Breathing

Let’s talk about one of the secrets to running success—proper breathing. It’s like the wind carrying you forward, propelling you through each stride. During Week Two, pay close attention to your breathing rhythm.

Aim for a conversational pace where you can run while comfortably holding a conversation. If you find yourself huffing, puffing, and desperately gasping for air with every step, it’s a sign that you’re pushing too hard. Take a step back, my friend, and find your sweet spot. Inhale that fresh air, let it fuel your lungs, and exhale any doubts or tension. You’ve got this!

Here are the workouts:

  • Day 8: After a decent warm-up, perform 6 to 8 cycles of two minutes jogs and 30-second breaks.
  • Day 9: cross train
  • Day 10: Repeat the Day 8 Workout, aiming for at least eight cycles.
  • Day 11: Cross Train
  • Day 12: after a warm-up, perform six cycles of 3 minutes of jogging, interspersed with 30-second of walking breaks.
  • Day 13 & 14: Rest completely.

30-Day Running Challenge – Week Three

Week 3 is going to be the hardest because this is when resistance starts to set in when it comes to building your running habit.

Therefore, what you need to do here is to keep moving no matter what.

Even if you can’t run, then make sure to at least for a walk or cross-train instead.

Tip: Running Form

During this week, pay extra attention to your running form and make sure to develop the right mechanics from the get-go.

Try to keep your body relaxed the entire time—especially your fists, shoulders, neck, and face; run as tall as you can—by keeping your back straight and core engaged.

Plus, keep your stride smooth and relatively short—by making sure to land under the center of gravity of your body.

  • Day 15: After the warm-up, run for four minutes, and recover for one minute. Next, run for five minutes, recovery for one minute, then for six minutes, and finish off your workout with a 10-minute brisk walk as a cool down.
  • Day 16: Cross Train
  • Day 17: After a 10-minute brisk walk warm-up, run for five minutes, and recover for 30 seconds. Run for six minutes, recover for one minute, and then run for seven minutes.
  • Day 18: Cross-train.
  • Day 19: After a warm-up, run for six minutes, and recover for one minute. Run for seven minutes, recover for one minute, then run for eight minutes. Finish off your workout with a 10-minute brisk walk cool down.
  • Days 20 & 21: Rest

30-Day Running Challenge – Week Four

This is the last week of this 30-day challenge, and this is when the rubber meets the road.

Keep in mind that you can always repeat week three or week two if you feel like you have to.

Nothing is written in stone.

Use your body and your comfort level as the ultimate gauging tool.

I don’t know what’s best for you, but you surely do if you only listen to your body and adjust your training accordingly.


Tip: Practice Recovery

If you are experiencing any aches or pains both during and after your workout, then it’s time to be more diligent with your recovery.

Post-run pains and aches might be a sign that you are pushing too much.

So if you feel like you need a rest day, then simply go for a 30-minute brisk walk to get your body moving.

Just don’t sit around the whole day.

During your training days, you need to be moving, mate.

Here are the workouts:

  1. Day 22: After the warm-up, run for eight minutes, rest for one minute, then run for seven minutes. Next, rest for one minute, then run for six minutes, and finish off with a cool down.
  2. Day 23: Cross Train
  3. Day 24: After the warm-up, run for 10 minutes, recover for one minute, run for 8 minutes, recover for one, run for six minutes, and finish off with a cool down.
  4. Day 25: Cross Train
  5. Day 26: Run for 12 minutes, recover for one minute, run for 10 minutes, recover for one minute, then run for 8 minutes, and finish off with a cool down.
  6. Days 27 & 28, and 29: Rest

Day 30 – The End of the 30-Day Running Challenge

This is the last day of this challenge, so make sure to end it on a high note.

Here is the workout you need to do.

I know it’s quite challenging, but do your best here.

After four weeks of the walk-run method, I feel like you have already built a good base.

After a 10-minute brisk walk warm-up, start picking up the pace and jog slowly for 15 to 20 minutes non-stop.

Make sure to keep a conversational pace throughout the workout.

If you are huffing and puffing, stop, recover, and go at it again.

Finish the workout with a 5-minute walk to bring your heart rate down and recover.

And that’s it, folks.

Beyond the 30-Day Running challenge

Completing this 30-day beginner running challenge is just the first step. Now you need to up the ante and do more if you are serious about improving and reaching your full running potential.

For that, here are a few running workouts to try out.

Hopefully, by now, you have built the habit of running into your life, and you are willing to expand on it.

The 25 Best Core Exercises For Runners

If you’re after some solid core exercises to boost your running, I’ve got over 25 go-to moves that’ll do just that!

But before I do that, let me clear something up.

It goes without saying—the best way to get better at running is to, well, run more.

The rule of training specificity still applies—you practice what you want to improve.

There’s no way around that.

But that doesn’t mean other types of workouts aren’t valuable for your training.

The right kind of cross-training makes a huge difference, keeping you fit and injury-free.

The funny thing? Most runners know this but tend to skip it anyway—and that’s where problems can start.

For me, adding in core work has been a game-changer. It’s made all the difference in keeping me balanced and strong.

The core muscles are crucial, even if they often get overlooked in running programs.

So today, I’m sharing my top core exercises for runners—these are moves that’ve actually made a difference in my run

What Exactly Is The Core?

So, what exactly do we mean by ‘core’? Let’s break it down.

Your core isn’t just about abs or a six-pack—it’s actually a whole network of muscles that work together to keep you stable and powerful.

The core includes the whole series of muscles connecting the pelvis, spine, and trunk and the rest of the body. Stretching from the diaphragm and pelvis to the hips and back, these interconnected core muscles provide stability, strength, and power to your upper and lower body.

More specifically, the core involves five main areas:

  • Transverse abdominis—internal core muscles that wrap around your spine and sides.
  • Erector spinae—your lower back muscles.
  • Obliques—both the external and internal muscles on the sides of your abdomen.
  • Rectus abdominis—what most people assume when they hear “abs.”
  • Other muscles include the glutes, scapula, flexors, and pelvic floor.

The Benefits of Core Exercises for Runners

So, why should runners care about core strength?

It’s simple: a strong core can make you a faster, more efficient runner and reduce your risk of injury.

Here are some key benefits:

  1. Improved Running Posture: A strong core keeps you from slouching and helps you hold your posture so you’re not hunched over or risking back pain.
  2. Increased Power: Your core is what transfers power from your upper to lower body, adding some serious oomph to every step. A stronger core means more power behind each stride.
  3. Better Balance and Stability: I’ve found that when I neglect proper core work, I get sloppy with my form. You might start under-striding or over-striding without realizing it. A strong core helps you stay balanced, especially when your legs start to tire on long runs or intervals.
  4. Reduced Injury Risk: Strengthening your core can prevent common running injuries, such as lower back pain, IT band syndrome, and even knee pain, by promoting proper form and reducing joint stress.
  5. Keeps You Going Strong: In the last few miles of a race or a long run, it’s easy to lose form. When your core’s solid, it helps you keep your form and push through even when your legs are begging you to stop.
  6. Faster Recovery: A strong core even speeds up recovery after tough runs by improving circulation and keeping things balanced.

The 25 Best Core Exercises for Runners

Ready to get to work? I’ve put together 25 of my favorite core exercises that’ll target every part of your midsection.

These exercises range from beginner-friendly moves to more advanced variations, ensuring you can adapt them as you progress. You can perform these exercises anywhere—no gym is required!

Planks

I love planks.

This tough isometric exercise hits every angle of the core.

It also works on spinal stability, vital for efficient and pain-free running.

Proper Form

Lie on your stomach and prop yourself onto your toes and elbows with your feet slightly apart.

Your toes should be about hip distance apart, with your elbows resting on the ground in a straight line under your shoulders.

Now lift and straighten your body to form a straight line from your head to your heel. Keep your core muscles engaged throughout the exercise.

Gaze at the floor while keeping your head relaxed and stress-free.

Hold the plank position for 45 seconds.

For more of a challenge:

Hold the position for a full minute or more as you get stronger.

Additional Reading  – Does running give you abs?

Side Planks

This plank variation strengthens the obliques while building endurance throughout the core.

Just make sure you engage your obliques the entire time.

No cheating allowed!

Proper Form

Lie on your side, supporting your upper body on your lower forearm while holding your top arm at your side or up in the air.

Your feet should stack on top of each other.

While lifting your body, keep a straight diagonal line from your head to your feet.

Hold the position for 30 seconds to one full minute, then switch sides.

Balance Plank

An advanced plank variation that builds strength and endurance throughout the body.

Proper Form

Assume a plank position.

While keeping a straight line from your head to toe, hold the position, making sure your lower back, glutes, and abs are all engaged.

While holding the position, extend your left arm in front of you, return to position and then extend your right arm.

Then return to position and lift your right Leg off of the ground behind you, return to position and repeat with the left Leg.

Hold each new position for 3 to 5 seconds, and repeat the cycle for 45 seconds.

For even more of a challenge: Hold each position longer, or do crunches in a plank position by bringing your left elbow down to meet your right knee while lifting the knee, then switch sides.

Russian Twists

Russian twists are some of the best exercises for firing up side muscles.

Proper Form

Have a 5- to 15-pound medicine ball or weight next to you.

Sit on the floor with your knees bent and your heels about a foot from your butt

Keeping your back straight, lean back slightly without rounding your spine to a 45-degree angle, and raise your feet off the floor.

Pick up the weight and hold it at chest level, then twist to the right, reaching with the ball as far behind you as possible.

Pause, then rotate to the other side.

Keep alternating sides.

For more of a challenge: Use a heavier medicine ball or dumbbell, or do more reps.

Superman

The Superman exercise targets your lower back muscles, vital for maintaining stability in the hip region.

Proper Form

Lie on your stomach with your arms and legs extended and raise your head off the floor slightly to look like Superman in flight.

While holding this pose, raise your left arm with your right leg roughly 3 to 5 inches off the floor, holding for a 5-second count.

Slowly lower your arm and Leg, and switch sides. Repeat for 45 seconds.

For more of a challenge: Hold the Superman pose longer and do more reps.

Single-Leg Glute Bridge

This excellent core exercise mainly targets the glutes, but other core muscles work hard as well.

Proper Form

Lie on your back with your legs bent at almost 90-degree angle and your feet flat on the floor.

While engaging your core, lift your hips off the ground, so there’s a straight line from your knees to your shoulder.

Extend your right Leg with your toes pointing toward the ceiling.

Hold for a moment, then lower your Leg to the floor and repeat on the other side.

Continue for 45 seconds.

Make sure to use good form throughout the exercise.

No sagging or dipping of the butt is allowed.

For more of a challenge: Flex your legs and reach them as high as you can while solely relying on your glutes to support you the entire time.

Windshield Wipers

Also known as metronomes, this is a powerful core exercise for your obliques.

It’s also key for building rotational core strength, another vital component of good performance.

Proper Form

Begin by lying on your back with your knees bent and raised over your hips and your ankles parallel to the floor.

While engaging your core muscles and keeping your hips in contact with the floor, rotate your legs to the right, hold for a moment, then bring them back up and repeat the movement on the other side.

Aim for at least eight reps on each side.

Avoid swinging too fast and using the momentum of the movement.

For more of a challenge: Flex your toes and keep your Leg straight while doing the exercise, or hold the pose longer on each side.

Scorpion Planks:

This tough move will not only give your core a tough workout but also build strength and mobility in your upper body.

Scorpion planks also help you stretch out your hip flexors and obliques, which are often neglected.

Proper Form

Assume a push-up position with your hands on the floor and the balls of your feet resting on a low chair or a bench.

Keep your back and legs aligned in a straight form.

Lift your left Leg off the bench and cross your knee under your body toward your right shoulder as far as you can, then return it to the bench and do the same with your right knee and left shoulder.

Repeat for 45 seconds

For more of a challenge, add a push-up to the top of every scorpion move you make.

The Boat

A fantastic exercise to strengthen your erector spinae, rectus abdominis, and the hip flexors.

Proper form

Begin by sitting up straight on the floor with your knees bet, feet flat on the floor, and back straight.

Next, hold your arms out in front of you as you slowly lift your feet off the floor while keeping them together until they form a 45-degree angle to your torso.

Active your entire core, balance on your tailbone, and keep your back flat the whole time.

Extend your legs so they’re straight and your body forms a V shape.

Hold the pose for a count of 10, slowly lower your legs, then repeat.

Reach your arms straight in front of you while keeping them parallel to the ground.

For more support, feel free to place your hands on the ground or underneath your hips.

Dead Bug

The dead bug (which looks exactly like it sounds) is an awesome exercise for connecting your mind to your core.

It’s an all-encompassing core move that works your deep inner core, mainly the diaphragm, transverse abdominis, multifidus, and pelvic floor; what’s not to like.

Proper form

Begin by laying on your back with your arms extended toward the ceiling, directly over your shoulders, and legs in a tabletop position (both knees bent 90 degrees and stacked over your hips).

Lower your left arm and right Leg at the same time until they’re hovering just above the ground, then slowly return to starting position.

Keep both knees hovering a few inches from the floor.

Engage your core and squeeze your body throughout the exercise, lower back pressed into the floor.

Slowly extend your left leg straight while dropping your right arm overhead at the same time.

Kneeling Extension

Another great move that keeps your core muscles strong, as well as helps prevent lower back pain.

Proper Form

Begin by kneeling on all fours, with your hands beneath your shoulders and knees directly under your hips.

Activate your core muscles and slowly raise your left arm and extend it straight forward.

Slowly lift your right Leg and extend it straight back, and point your toes down.

Hold the pose for a count of ten and slowly lower to starting position, and switch sides.

Repeat five times on each side.

Bicycle Crunches

Regular crunches are too boring.

Spice them up with bicycle crunches.

It’s beginner-friendly, and can be done anywhere, but it’s also challenging.

This is one of the best core exercises you can do—and one of my favorites—targeting not only the usual abs but also the obliques and deep abs.

Proper Form

Lie flat on the ground, with your lower back pressed flat into the ground, knees bent, and head and shoulders raised slightly above it.

Next, place your hands lightly behind your head, then bring your knees toward your chest and raise your shoulder blade off the floor, but be sure not to pull on the back of your neck.

Bring one knee up towards your armpit while straightening the other Leg, keeping both elevated higher than your hips.

Rotate your torso as much as possible so you can touch your elbow to the opposite knee as it comes up.

As you perform the movement, twist through your core as the opposite arm comes towards the elevated knee.

Focus on moving through your core as you turn your torso.

Don’t feel like you have to touch the elbow to knee, but it’s a worthy goal to have.

Additional resource – Guide to running lingo

Scissors kick

Begin by laying on your back, knees bent, feet on the floor, and hands underneath the lower back for support.

Next, lift your left leg one inch off the ground while extending the right Leg to the ceiling, then kick the legs, toes pointed. Keep alternating back and forth so that it looks like a scissor motion.

Engage your abs throughout the exercise.

Aim for eight reps on each side to complete one set.

Glute kickback

Start by kneeling on the floor, on all fours, hips lined over the knee, hands directly under the shoulders, and back parallel to the floor.

Next, lift your right leg until your hamstrings are in line with your back, pause, and then slowly lower your Leg back to starting position, then switch sides to complete one rep.

Continue alternating between legs.

The Bridge

Lay flat on the ground with hands on the side and knees bent. Next, raise your hips off the ground by pushing with the heels.

Next, squeeze your glutes for a moment as hard as possible to keep the hips up.

Then take three to five seconds to slowly lower back to the ground to complete one rep.

Mountain climbers

Assume a push-up position, so your hands are directly under your chest at shoulder-width apart with straight arms.

Next, while holding the upper body steady, raise your right foot off the ground, bring the knee as close to the chest as possible, then repeat with the left Leg.

Continue alternating right knee, then left knee to the chest, as fast as possible while keeping good form.

Aim for 16 to 20 reps to complete one set.

Swiss-ball Roll-out

Begin by kneeling on a mat or the floor, elbows bent under the shoulders and resting tightly on a stability ball and core engaged.

To perform the Swiss ball roll-outs, roll the ball forward on the elbows as far as possible, then slowly roll back to starting position while keeping the back straight the entire time.

That’s one repetition.

Do three sets of 15 reps each.

Cross-climber with Feet on a Swiss Ball

Assume a standard push-up position, arms straight, shins resting firmly on a Swiss ball.

Be sure that your body is forming a straight line from the head to the ankles.

Next, while bracing the core and keeping the back straight, raise the right Leg off the ball and bring the right toward the left elbow, hold it for a moment, then move the right Leg to start position, and repeat on the other side, left knee to right elbow this time.

That’s one rep.

Do 12 reps to complete one set.

Aim for three sets.

Medicine Ball V-up

Hold a med ball, and lie on your back with legs straight and arms directly above the head.

That’s the starting position.

Next, while keeping the elbows straight the entire time, lift your torso and legs as you bring the ball toward your feet, pause for a count of three, then slowly lower back to starting position.

That’s one rep.

Do three sets of 12 to 15 reps each.

Spider-man Plank Crunch

Begin in a classic plank position with your forearms on the mat and body straight from head to ankles.

Next, raise your right Leg, and bring your right knee in towards the right elbow, hold it for a moment, then move your Leg back to plank position and switch sides.

Make sure to engage your core and keep your body steady and straight throughout the movement.

Keep alternating sides for a total of 16 reps to complete one set.

Aim for three sets.

Double Mountain Climber

Get into a push-up position with hands a bit wider than the shoulders.

Next, jump both of your feet up towards the hands, with the knees coming just outside of the elbows, pause for a second, then push back to starting position in one continuous and explosive motion.

Do at least 25 reps on each side to complete one set.

Aim for three sets.

Jump Squats

Assume an athletic position and stand as tall as you can with the feet spread shoulder-width apart.

Next, while keeping your back straight and head up, squat down until the knees are bent at roughly 90 degrees; then, as soon as you reach the bottom part of the squat, jump up explosive in the air by mainly pressing with the balls of your feet, using the thighs like springs.

Move into the next rep as soon as you land on the floor.

Do 12 to 16 reps to complete one set.

Aim for three sets.

Plank with Alternating arm and Leg Raise

Assume a standard push-up position with both arms straight, fingers pointed forward, and core activated.

Next, raise your right arm and left Leg, then extend and straighten them both until they are parallel to the floor, hold it for a count of three, then repeat to starting positing and switches sides.

Do eight reps on each side to complete one set.

Shoot for three sets.

Join the Conversation: Share Your Core Tips!

A strong core can make all the difference in your running, and every runner has their favorite exercises for building that strength. I’d love to hear from you!

Whether it’s planks, Russian twists, bird dogs, or something unique, jump into the comments below and let us know which core exercises have made a difference for you.

Your go-to moves, tips, and insights could inspire other runners to take their training to the next level!

Why is My Running Not Improving

Ever feel like you’re putting in the miles but not seeing the improvement you expect?

I’ve felt stuck too, running hard yet going nowhere fast.

There was a time when I ran five days a week and still didn’t get any faster or last any longer

Plateaus happen to all of us, even the most dedicated runners.

But don’t lose hope—there are strategies to break those plateaus!

Let’s look at the common reasons your running might be stalling—and how you can overcome them.

Overtraining: Are You Pushing Too Hard?

One mistake I see all the time (and I’ve made it myself!) is overtraining.

It’s easy to think that just more running will make you faster, but pushing too hard can backfire. I remember when I started getting serious about my mileage—I was convinced that running every day would get me to my goals faster.

But I ended up burnt out, sluggish, and even slower than before Turns out, more isn’t always better.

But don’t just take my word for it.

Research from the Journal of Sports Medicine shows that adequate sleep and scheduled rest days are linked to reduced injury rates and improved performance in endurance athletes.

The Fix:

Finding the right balance is key. Alternate between hard and easy days, and take at least one full rest day per week. Back when I was overtraining, adding in rest days was a game-changer.

Try this: Do your interval training or tempo runs on Monday, Wednesday, and Saturday, and keep Tuesday, Thursday, and Friday as easy days. Sunday? That’s your day to relax and recover.

Keep an eye out for overtraining signs such as poor sleep, fatigue, or a higher heart rate.—and back off if needed.

Not Eating Enough: Is Your Fuel Running Low?

I found this out through some tough lessons. At one point, I thought that cutting calories would help me lean out and get faster at the same time.

Spoiler: It didn’t.

Skimping on fuel left me feeling tired, sluggish, and unmotivated.

Your body needs fuel to perform, plain and simple.

Not eating enough can sabotage both your workouts and your progress

The Fix:

Make sure you’re fueling adequately to match your training.

You’ll likely need between 2,400 and 3,000 calories daily as a runner.

Focus on eating whole foods: plenty of carbs from fruits, veggies, and grains to keep your energy up, protein to help your muscles recover, and healthy fats.

Hydration is key, too. I aim for about 60 to 90 ounces of water daily, depending on how hard or long I run. It’s a simple thing, but staying hydrated can make a difference.

The Weather: Running in Extremes

If you’ve ever run in 90-degree heat with humidity so thick you feel like you’re wading through water, you know what I’m talking about.

I’ve had more than a few runs where I thought, “Why am I so slow today?”—only to realize I was pushing myself through brutal conditions.

Running in extremes—scorching heat or freezing cold—can seriously affect your performance.

The Fix:

Ignore your pace and focus on the effort when the weather turns nasty

Leave the GPS at home and listen to your body on hot or cold days.

Harsh conditions can make your runs much more challenging, so don’t beat yourself up if your pace isn’t what it normally is. The effort you’re putting in will make you stronger over time.

I like to think of those tough-weather runs as character builders—they might be brutal in the moment, but they’re setting me up for better days ahead.

running not improving

Doing the Same Runs: Mix It Up

I used to fall into the habit of doing the same 5-mile route at the same pace every day.

And you know what?

I hit a plateau fast.

Your body adapts fast, so you need to vary your training—speedwork, hills, long, slow miles—you’ll stagnate.

Don’t take my word for it.

According to a study published in Medicine & Science in Sports & Exercise, high-intensity interval training (HIIT) can improve aerobic capacity and promote performance gains in runners.

The Fix:

Add variety to your week!

If you’re used to steady-state runs, toss in some interval or fartlek sessions.

Not every run must be hard, but give it your all when it’s time to push.

I remember my first fartlek session—I thought I was going to hate it, but it ended up being a fun way to break out of my rut.

Laziness: Are You Being Consistent?

I’ve had weeks where life got busy, and I missed more runs than I could admit.

Skipping a run now and then might seem harmless, but those missed sessions can add up and slow your progress.

The truth is, consistent effort is crucial for improvement.. The American College of Sports Medicine advises a gradual increase in training intensity to prevent overtraining and improve athletic endurance.

The Fix:

Set a realistic training schedule. Maybe you can’t run six days a week, and that’s okay.

Commit to a number of days that fit your lifestyle and stick to it.

I’ve found that having a goal—chasing a new personal best or running for a cause—keeps me motivated.

When I don’t feel like running, I remind myself why I’m doing it in the first place.

Age: Embrace the Change

I hate to admit it, but age has slowed me down, too. VO2 max (your body’s ability to use oxygen) starts to drop after age 40, affecting performance.

By hitting 50, you may have lost up to 20% of your aerobic power.

It’s a tough pill, but I’ve learned that accepting this change doesn’t mean I can’t improve.

The Fix:

You can’t stop the clock, but you can keep training smart.

Continue running, but don’t forget to incorporate strength and balance work to maintain muscle mass and agility. I added in regular strength sessions and noticed a big difference—not just in my running but how I felt daily.

I may not be as fast as I was at 25, but I’m running stronger and smarter now.

Not Enough Sleep: Are You Resting Enough?

Sleep has always been my Achilles’ heel.

I prioritized everything else—work, family, training—over sleep for a long time.

But once I started taking rest seriously, my performance skyrocketed.

Sleep is when your body recovers and gets stronger. Skimp on it; you’re missing out on some of your best potential gains.

The Fix:

Aim for 7-9 hours of quality sleep per night.

Develop a relaxing bedtime routine, avoid heavy meals or caffeine late in the day, and keep a consistent sleep schedule.

I’ve found that once I started treating sleep like part of my training, everything improved—from my energy levels to my race times.

Tired young female runner, asian girl taking break during workout, stop jogging, panting while breathing, running in park.

Further Reading

For those who want to dive deeper into the science and strategies for breaking through running plateaus, here are some additional resources:

  • Runner’s World: “How to Break Through a Running Plateau” – Link
  • Medicine & Science in Sports & Exercise: “Effects of High-Intensity Training on Performance Adaptation” – Link
  • Journal of Sports Medicine: “Rest and Recovery in Endurance Training” – Link
  • American Council on Exercise: “Strength Training for Runners” – Link

Join the Conversation: Share Your Running Journey!

Hitting a running plateau can be frustrating, but remember, you’re not alone! Every runner goes through ups and downs, and sometimes all it takes is a fresh perspective to get back on track. Let’s learn from each other and keep moving forward.

Leave a comment below with your thoughts and experiences! Your insight could be exactly what another runner needs to hear. And if you found this article helpful, consider sharing it with friends or on social media. Let’s keep building a supportive running community together!

How to Start Running On a Treadmill – 6 Treadmill Workouts for Beginners

Looking for the best guidelines on how to start running on a treadmill?

Then you have come to the right place.

Here’s the truth. the treadmill is thee best way to get into the world of running without risking injury or burnouts. How come? Keep on reading.

In today’s post, I’m sharing with you the essential treadmill workout guidelines you need to get started with indoor running.

By the end of this beginner guide to treadmill running, you’ll learn:

  • How to use the treadmill
  • The benefits of treadmill running
  • The exact treadmill running gear you need
  • How to take your first steps on the machine
  • How to stay motivated when treadmill running
  • The Treadmill running apps you need
  • The exact treadmill workout for beginners
  • Advanced treadmill workouts to try
  • And so much more.

Sounds great?

Let’s press the start button and get started!

*Disclosure: This post may contain affiliate links that at no additional cost to you. I only recommend products I’d use myself and all opinions expressed here are our own. 

How to Start Running On a Treadmill –  The Benefits

Here’s what you stand to gain from hitting the belt more often.

Less Impact

Running on hard surfaces, like asphalt and concrete, increases the risks of overuse injury.

However, the treadmill belt offers extra cushioning that helps absorb much of this stress.

Forget About the Outdoor Conditions

Outdoor running exposes you to the elements, be it the weather, unsafe streets, uneven surfaces, etc.

All of these can stand in the way of your running success.

Luckily,  you don’t have to worry about any of this when treadmill running.

Simulate the Race

Preparing for a race?

A treadmill can help you nail your perfect pace.

For example, if you are planning for a hilly 10K race, you can simulate that racing experience by incline training or even intervals on the treadmill.

Additional Source – Check this treadmill pace chart

Safer Than Running Outside

You can always run into troubles when doing outdoor running workouts: cracks, ruts, cyclists, cars, people, thieves, stray dogs, the wrong side of town, you name it.

Again, a treadmill can help you sidestep all of these risks.

Privacy

Dealing with insecurities?

Worry no more.

Hopping on the treadmill gives you more privacy as you don’t have to fret about anyone judging your performance.

You can run at your own pace and call it to quit anytime you want.

Measurable Data

On a treadmill, you have a say on your training conditions, helping you run with more accuracy, whether it’s speed, incline, calories burned, heart rate, step count, and so on.

Beginner Treadmill Workout
FAQ

Before we get into how you actually can get started with treadmill running, let’s address some of the most common questions beginner runners have about the treadmill.

How Fast Should I train on the Treadmill As A Beginner?

The answer depends on your current fitness level.

If you’re a sedentary, overweight, 50 years+ beginner, you’re not going to be faster then you once were.

But if you’re already in a good shape, exercise often, and are young, you should be able to crank up the pace  (check out the beginner treadmill routines below for more details).

If you can get to 5 mph or higher as a beginner, that would be terrific.

This will provide you more room for growth while upping your heart rate and pushing your body out of your comfort zone.

Just keep in mind that five miles per hour is the equivalent of a 12-minute mile.

Not bad at all for someone who’s just starting out.

Here’s a cheat sheet so you can have more ideas about your per-mile pace.

  • 5.0 mph = 12:00 minutes per mile
  • 5.5 mph = 10:55 minutes per mile
  • 6.0 mph = 10:00 minutes per mile
  • 6.5 mph = 9:14 minutes per mile
  • 7.0 mph = 8:34 minutes per mile
  • 7.5 mph = 8:00 minutes per mile
  • 8.0 mph = 7:30 minutes per mile

How long Should a Beginner Train on a Treadmill?

Again, the answer depends on you.

Every beginner is different and has a different starting point.

Just do as much as you can in the beginning while staying within your fitness level and paying attention to your body’s needs and signals the entire time.

For a complete beginner, you can start off treadmill training at a slow pace for no more than 15 to 20 minutes three times a week.

Then slowly increase the duration to 30 to 40 minutes over the course of a few week.

Here’s how many miles to run per week as well as  how often should you run per week.

Treadmill Vs. Outdoor Running – Is treadmill running easier than running outdoors?

The answer is not all black or white.

But overall, running on the treadmill is less challenging than running outdoors for many reasons.

When treadmill running, the ground is moving underneath you, making it easier to run faster.

That’s one reason many runners find that their treadmill pace and speed don’t correlate to their outdoor running pace.

What’s more?

When you’re running outdoor, you’re also dealing with the elements and weather conditions, especially wind and heat.

This can make outdoor running more taxing as you have to deal with a lot of resistance.

But on the treadmill, you’re in a controlled environment that’s intentionally designed to make you as comfortable as possible.

It’s also recovery friendly.

For those who just had injury or accident, they don’t need to worry about the ground.

It’s perfectly stable and sturdy.

A beginner runner? Try this couch to 5K plan.

women running on treadmill for first time
Young healthy athletic woman running on a treadmill near the sunny window in the gym and listening music.

How long should you run on a treadmill to lose weight?

If you’re looking to lose weight, especially if you’re really out of shape and/or embarrassed to run in public, the treadmill is exactly what you need.

How long should you train on it depends on you, but I’d recommend that you shoot for at least three 30 to 45 minutes sessions per week 

Wht’s more?

Keep in mind that exercise is only half the battle when it comes to losing weight—the other half being diet.

So, if you train often, and eat clean, you can pretty much guarantee that you’ll be able to lose weight and keep it off for good.

How To Start Running on A Treadmill
For Beginners?

To make the most out of your treadmill workouts, try to incorporate these two valuable training tips.

Know Your Treadmill

Taking your first few steps on the treadmill can be quite unnerving.

But it’s no rocket science.

In case you have never used a treadmill before and don’t even know how to turn one on, here are the basics:

First, the “Start Workout” or “Quick Workout” button.

Hold the handrails, step onto the belt, simply press this button, and in 3…2…1, the belt will start to move.

The belt will start at a slow walking speed, and it’s up to you to play with speed.

Keep in mind that you may feel wobbly or dizzy when you use a treadmill for the first time—as if you were going to slide back or lean forward.

Don’t panic.

You’re practicing a new motor skill, and it will take a few sessions to feel at ease.

Next, familiarize yourself with the speed controls, the incline/decline options, the “Stop” and the emergency stop mechanism, as well as the programming controls.

Of course, not all treadmills are made equal.

Some are simple and often come with minimal options (think hotel treadmill) while other more fancy treadmill offers a more complicated user interface.

But the basics are still the same: Start/Speed/Stop.

The Right Treadmill Workout Gear

Getting the right treadmill training gear is the first step.

Start by training in proper running shoes.

Of course, you won’t need specific shoes just for the treadmill

(although I’d recommend you do that, so you can still use the same running shoes for indoor and outdoor running— just make sure they are clean ).

As a rule, your running shoes have to fit well, which is why I always advise buying shoes from a specialty running store (here’s is how to make your shoes last longer).

Just like you’d choose proper clothing for outdoor runs, your treadmill runs deserve the same attention.

You also need comfortable wicking underwear. Don’t go for fancy cotton clothes. They won’t cut. They can cause more harm than good—and you don’t want that. I can assure you.

Female runners should also choose a sports bra that hold their chest securely in place.

Shirt

Choose a lightweight tank for treadmill running. Make sure it’s made from high performance, moisture wicking fabrics to help wick moisture away from your body, keeping you dry and comfortable in the process. Avoid wearing cotton clothing. More than likely, indoor running will make you sweat a lot. And all that sweat will stick to your clothes, causing all sorts of troubles, when wearing cotton fabrics.

To avoid at all times.

Here’s the full guide to proper running gear.

Keep hydrated

Remember to keep your body well hydrated when running on the treadmill. You’ll be shedding a lot of fluids through sweat.

When running on the treadmill for more than 30 minutes, it’s key to drink water to stay hydrated.

As a general rule, drink about four to six ounces of water every 15 to 20 minutes.

For indoor running, I’d recommend Hydro Flask’s stainless-steel bottles. Check this reasonably priced water bottle at amazon’s.

I’d recommend the Hydro Cell Stainless Steel Water bottle.

Cooling Fan

Last but not least, if you find yourself sweating more than usual when indoor running (or don’t have proper air conditioning), consider setting up a cooling fan. Sure, some treadmills have a build-in fan, but they tend to be less than powerful and effective.

Plus they only blow air at your face, ignoring the rest of your body. That ain’t good at all.

In addition, expect to sweat a lot—even if it’s cold outside—so get yourself a towel to wipe your arms, hands, and face as needed. You should also check out this guide on belt replacement.

Warm-Up For Your Treadmill Workout

Just like outdoor running, the key effective treadmill training is a proper warm-up.

Skipping it will only increase the risks of premature fatigue and injury.

A good warm-up helps you get your blood pumping and heart rate ticking and be for the hard effort ahead.

Invest in at least 5 to 10 minutes warm-up period, then aim to slowly increase your speed as you go, but never speed up to the point that your form begins to suffer.

Pay attention to your body before you speed up.

Partner Up

Just as it’s more enjoyable to pound the pavement in the company of others, the same is true for treadmill running.

In fact, pairing up with a workout partner can turn long treadmill runs into a social hour—or two.

In case you couldn’t find a willing partner, then, at the very least, call a friend or enlist a family member to keep you company.

Additional resource – How to combine keto and running

Visualize a Route

Another trick to help you avoid the dreadmill is to visualize an outdoor route you like running on.

Imagine your favorite outdoor route and pretend that you are on it, running by certain landmarks, and play with the incline to simulate elevation change.

Your brain already has storage of good running memories, and by using active visualization, you’re tapping into that valuable resource and using it to your advantage.

If you have difficulties visualizing, look for pictures on Google images for pristine running routes and imagine yourself tackling them.

Listen to Music

Think of running with music as a dissociative strategy.

It helps take your focus off of what’s ahead.

Also, listening to music while exercising can reduce the perception of exertion and boost endurance by up to 10 to 15 percent.

Pick a playlist with a nice uplifting beat—shoot for the 120-160 bpm range.

Not a fan of music?

Then turn to audiobooks or podcasts.

Some of my current favorites include The Joe Rogan Experience, Embedded, The Rubin Report, etc.

Watch TV

Visual is always the best distraction.

This is why when you run.

n with TV on, it’s more fun and hassle-free

Go for shows you don’t have to be too involved in and would rarely let yourself sit around and watch.

I won’t watch the walking dead finale on the treadmill.

Need some good ideas?

Here’s a list of my favorite shows:

  • How I met Your Mother
  • It’s Always Sunny in Philadelphia
  • Casa De Papel
  • Stranger Things
  • Daredevil
  • Into the Badlands
  • Preacher
  • Supernatural

Additional resource – Here’s your guide to buying a second hand treadmill.

Treadmill Running Apps For beginners

No matter your running goals are, there’s probably an app for that.

You can find plenty of cheap apps for different running goals that you can download to make your training more exciting.

Need distraction? There’s an app for that!

Need motivation? There’s an app for that!

Need inspiration? There’s an app for that!

Need more structure for your training?

There’s an app for that.

See, there’s an app for almost any running goal or desire.

My best recommendation?

The following:

  • Nike + Run Club. This app provides you with more than 50 guided runs, with over six sessions specifically tailored for the treadmill. The running sessions are roughly 20 to 30 minutes in length and come with audio instructions.
  • Treadmill Trails. If you dread indoor running, then feel free to head outside in the virtual world with this app. Treadmill trails routes take you everywhere from Central Park in New York to Mt. Kilimanjaro.
  • Peloton Digital. In this app, you can choose from more than 170 Tread Studio live and on-demand running classes that can go from 15 to 60 minutes in duration and cover everything from speedwork to race pace training.
  • Studio. Another great app that offers treadmill classes that can last 15 to 60 minutes and work great for beginners runners as well as those training for the 11th
  • Couch to 5K. Are you a complete running beginner? This app is for you. The Couch to 5K provides you with the exact training plan you need to go from a complete newbie to being able to run a 5K in 8 weeks or less. Pretty amazing!
  • Zombies Run! You can turn you run into a virtual game with the app Zombies, Run!. This app turns your treadmill workout into a story about surviving a zombie attack.

Additional resource – How to start running at 50

Treadmill Running Form

Treadmill running form is essential.

Bad form hinders performance and leads to injury.

Keep your treadmill running technique in check by doing the following:

  • Run tall and look straight ahead as if gazing to the horizon.
  • Aim to run with your natural gait, and avoid taking short and quick strides as well as thumping the belt too hard. No good for your sole and ankle.
  • Keep your posture straight, the head should be up, back straight, and shoulders level.
  • Never slouch or curve your back, especially when going against an incline. Open your chest, make space for more air.
  • Let go of the handrails and keep pumping your arms the same way you do when running outside.

how to start running on a treadmill – 6 Treadmill Workouts For
Beginners

Now that know the basics of safe and efficient treadmill running for beginners, let’s look at a few treadmill beginner workouts.

If you’re not sure how to proceed with your next treadmill workout, here are six treadmill runs to get you started.

how to start running on a treadmill
Young focused fit woman running on treadmill

Routine I – The 30-minutes Beginner Treadmill Workout

If you’re taking up running for the first time, then start with this routine.

This beginner treadmill routine will have you perform intervals of slow jogging interspersed with walking breaks for recovery.

First step Start walking at a 1.5 to 2 mph pace and stick to it for at least 10 minutes.

Be sure to breathe deeply and visualize success all the way through.

Mental preparation is key.

Second Step Pick up the pace and start jogging at 5 to 5.5 mph for two minutes.

This is your first interval, so you shouldn’t push yourself here.

Practice good running form the entire time.

Run as tall as you can, engage your core, let go of the handrails, and swing your arms by the sides.

Keep your form aerodynamic,

Third Step – This is your first two minutes break, so make the most out of it.

Breathe deeply, towel off, and hydrate.

Fourth Step – Repeat the jogging/walking cycle for five times.

If it feels too much, pace yourself and slow it down, especially when your form starts to suffer.

Fifth Step –Slowly decrease your jogging pace and start walking at 2 mph for five minutes and cool down properly.

Breathe deeply and release all tension.

Make sure to also check in with your body and see how you feel.

Try to perform this workout at least three times per week during the first few weeks.

Then, as you get fitter and stronger, increase the time you spend jogging and less for recovery until you can run at a comfortable pace for 30 minutes without gasping for air.

Want more structure? Try my Couch to 5K treadmill Plan.

Routine II – The 30-minute Interval treadmill workout

Already a runner?

Then try this more challenging routine.

First Step – Warm-up for 5-minute by jogging slowly and taking deep breaths.

Skipping on the warm-up leads to premature fatigue, or even worse, injury.

Second Step – Run at your 5K pace (it should feel hard) for one to two minutes, depending on your fitness level.

Third Step – Recover by jogging slowly for one full minute.

Fourth Step – Repeat “Second Step” and “Third Step” five to eight times, depending on your fitness experience and training goals.

Fifth Step – End your workout a 5-minute slow jog to cool down.

Stretch gently afterward.

A proper cool-down will help you avoid dizziness and might reduce muscle soreness for the following day.

Additional Resource- Your guide to curved treadmills

Routine III – The Incline Treadmill Workout

Want to take intervals to the next level?  Do them on an incline.

This helps simulate outdoor hill running, which boosts endurance and builds killer lower-body strength.

First Step – Warm-up for 10 minutes.

Second Step – Increase the incline to 3 or 4 percent and run for 90-second at 80 percent of max-effort—a pace that feels moderately challenging.

Third Step (Recovery) – Jog for 60 seconds with no incline.

This is your recovery break.

Fourth Step – Raise the incline to five or seven percent and run for another 90-second at 15 seconds slower than your 10K pace.

Recover for one minute

Fifth Step – Repeat the previous step three to four times, depending on your fitness level and goals.

Choose a steeper incline for more challenge.

Sixth Step – Cool-down

Additional Resource  – When to replace a treadmill belt

Routine IV – The Beginner Tempo Treadmill Run

A treadmill tempo workout teaches your body how to efficiently adapt to increased intensity.

This type of running helps you build up a fairly high volume of intense exercise that enhances both aerobic and lactate-threshold systems.

First Step – Warm-up for 10 minutes.

Second Step – Run a mile at 20 to 30 seconds slower than your half-marathon pace—a pace that feels comfortably easy.

Third Step – Pick up the pace every mile by five to 20 seconds until you’re running the final mile 20 to 30 seconds faster than your half marathon pace.

Fourth step –  Cool-down for five minutes.

Additional resource – How To run with a partner

Routine V – The Pyramid Treadmill Workout

Pyramid workouts are straightforward.

You’re simply kicking off your hard interval at one-minute segments, going for to a longer running segment, and the working you’re back down one minute.

It should take you at least 50 minutes to complete the routine, but that’s not cast in stone.

Do what feels the best for you and remember to always stay within your fitness level.

First Step – Five minutes: The Warm-up

Start with a proper warm-up, jogging for 10 minutes at a speed of 4 to 5 mph with no incline.

Second Step –Seven minutes: 1st Ladder

Increase speed to 6.0 mph and keep it going for the next three minutes. Practice good form.

Keep your torso straight, and body relaxed from head to toe.

Next, increase speed to 7 mph and incline to three percent for four minutes.

Second Step – Two minutes: Recovery

Slow down and recover for three minutes.

Hydrate, breathe deeply, and release any built-up tension.

Third Step – Nine minutes: 2nd Ladder Interval

Increase the speed to 7 mph and incline to three percent for four minutes.

Next, increase the speed again to 8 mph and incline to five percent for five minutes.

Fourth Step – Two Minutes: Recovery

Slow down to 4 mph with two percent incline.

Fifth Step – Nine minutes: 3rd Ladder

Increase speed to 7 to 7.5 mph and incline to five percent and keep running strong for a full five minutes.

For the upcoming four-minute, keep the same speed, but lower the incline to three percent.

Sixth Step – Two minutes: Recovery

Slow down to 4 mph and recover.

Seventh Step – Six minutes: Ladder No 4

Speed it up to 8 mph and raise the incline to three percent.

Then, for the next two minutes, keep the same speed but raise the incline to five percent for the last interval of this pyramid workout.

Eighth Step – Five minutes: The cool-down

Jog slowly for ten minutes at a speed of 4 mph with no incline.

Additional resource – How to become a morning a runner

Routine VI – The Beginner Hybrid Treadmill Workout

Mixing treadmill training with bodyweight exercises can help you burn more fat, improve performance, and bust treadmill boredom.

Here is a CrossFit-Running treadmill workout.

It’s one of my favorites.

You can choose to add these bodyweight exercises into your treadmill workout any way you like.

After a proper warm-up of 5-minutes jogging and some dynamic exercises, do the following.

  • Sprint for 30-second
  • Pushups: 8-12 reps
  • Sprint for 30-second
  • Squat Jumps: 8-12 reps
  • Sprint for 30-second
  • Treadmill recovery: 90 seconds slow jogging.
  • Sprint for 30-second
  • Jumping jacks: 60 seconds
  • Lunge steps: 16 to 20 reps
  • Sprint for 30-second
  • Finish it off with a 5-minute slow jog as a cool down, followed by stretching.

Need more structure?

Try my beginner running plan.

For more, check my how to design your running program guide.


Conclusion

Still wondering how to start running on a treadmill? Then I believe today’s post has you covered.

The above simple training guidelines are all you need start treadmill running.

The rest is really up to you.

Please feel free to leave your comments and questions in the section below.

And please if you have any treadmill workouts for beginners, please share.

In the meantime, thank you for reading my post.

Keep running strong.

David D.

How to Prevent Feeling Dizzy While Running?

Can Running Help Cure Your Hangover?

Feeling dizzy while running? It’s a common experience for many runners, especially when pushing hard during a workout or after long runs.

Let’s face it: feeling lightheaded or dizzy while running can really scare the daylights out of you.

Over the years, I’ve seen plenty of runners, newbies and seasoned pros alike, struggle with this.

I cannot emphasize the importance of knowing the root cause of this dizziness, whether it’s dehydration, low blood sugar, or something else, and then taking steps to address it.

In this article, I’ll break down the potential causes of feeling dizzy while running, how to prevent it, and what to do if you experience it during your runs. If you’re ready to dive in, let’s get started.

Feeling Dizzy While Running: What’s Going On?

First off, getting dizzy doesn’t always signal a major problem.

In most cases, dizziness during a run can be attributed to dehydration, low blood sugar, or overexertion. These are all manageable if you know what to look out for.

But, if that dizziness comes with serious stuff like chest pain or major headaches, it’s time to see a doctor.

Last time I felt woozy during a run was a few weeks ago on a really hot and humid day.

It was around mile 10 of a 20-mile long run. I was feeling strong, and suddenly, the sidewalk seemed to shift under me. My vision blurred, and I had to stop and hold onto a lamppost.

I know what I did wrong. I was pushing hard in temperatures bit too extreme. Don’t make my mistake (more on this later).

Symptoms to Watch Out For

When dizziness strikes during or after a run, it might come with other symptoms that can give you clues as to what’s going on. These include:

  • Lightheadedness: Feeling like you might faint or your head is spinning.
  • Poor balance: Difficulty staying steady on your feet.
  • Blurry vision: Sudden changes in vision can indicate an issue with blood pressure or oxygen levels.
  • Nausea: Feeling queasy or sick to your stomach.
  • Weakness: Feeling unusually tired or weak during or after your run.

If you experience these symptoms, it’s time to take action and figure out what’s causing them so you can get back to running safely.

These symptoms can manifest suddenly while running, just after a workout, or build slowly over time.

Seek medical attention if you’re experiencing any of these symptoms:

  • Slurred speech
  • Severe and chronic headache
  • Sudden deafness in one ear
  • Numbness
  • Extreme exhaustion
  • Chest pain and/or palpitations
  • Projectile vomit

How To Prevent Getting Dizzy While Running

Here are some of the most common reasons runners feel dizzy, along with tips on addressing each one.

Blood Pressure Drops

One of my biggest mistakes was skipping a proper cool-down. After a long run, I’d jump straight into a shower and wonder why I felt dizzy.

Here’s what I found out. When you’re running, your heart works hard to pump blood to your muscles, and your blood pressure increases slightly. But if you stop running abruptly, your blood pressure can drop suddenly, causing lightheadedness or dizziness.

How to prevent it:

Cool down gradually instead of stopping your run abruptly. This means slowing down to a jog or walk for 5 to 10 minutes before you stop completely. This gives your body time to adjust, and your heart rate and blood pressure will gradually return to normal. Think of it as easing your body back into a resting state.

Overexertion

Pushing yourself too hard, especially during high-intensity workouts or long runs, can lead to dizziness. When you overexert yourself, your heart rate can skyrocket, and the body struggles to keep up with the increased demand for oxygen. Combined with heavy sweating, you can experience lower blood pressure and dizziness.

Like many runners, I used to think pushing harder meant progress. But after too many episodes of feeling faint, I realized that going all out every time wasn’t doing me any favors.

A high-intensity workout is good every now and then, but overdoing it just invites problems. Whenever I feel that heaviness or dizziness creeping in, I slow down, catch my breath, and remind myself that there’s no point in pushing if I can’t finish strong.

How to prevent it:

Be mindful of your limits. It’s okay to push yourself but always listen to your body. If you feel yourself getting lightheaded, it’s a sign that you need to slow down. Take a break, breathe deeply, and give your body time to recover. Building intensity gradually will help prevent overexertion and dizziness.

Dehydration & Dizziness During A Run

Dehydration is a leading cause of dizziness, especially during long runs or when running in hot weather. When you sweat, your body loses water and essential electrolytes. If you don’t replace those fluids, your blood volume can drop, leading to lower blood pressure and dizziness.

How to prevent it:

Stay well-hydrated before, during, and after your run. Aim to drink plenty of water throughout the day, especially before heading out for a run. Bring water with you on long runs or hot days and take small sips regularly—about an ounce or two every 15 to 20 minutes. For even more hydration benefits, consider electrolyte drinks to help replenish lost salts.

Low Blood Sugar

Your body relies on glucose (sugar) as fuel when you run. If you haven’t eaten enough before your run, your blood sugar levels can drop, leaving you feeling weak, dizzy, or shaky. This is especially true if you run long or push yourself hard on an empty stomach.

How to prevent it:

Don’t run on an empty stomach. Have a light snack 30 minutes to an hour before you head out. Something like a banana with peanut butter, yogurt with fruit, or a small handful of nuts can provide the energy you need to maintain steady blood sugar levels during your run.

Improper Breathing

Dizziness can also come from not breathing right while you run. Many runners, especially beginners, tend to take shallow breaths or hold their breath while running, which limits the amount of oxygen flowing to the brain and muscles.

How to prevent it:

Focus on your breathing. Try to sync your breathing with your steps—one popular technique is the 3:2 ratio, where you inhale for three steps and exhale for two. This helps you take deeper, more controlled breaths and ensures you get enough oxygen. If you feel yourself getting dizzy, slow down and take deeper breaths.

Dealing with Treadmill Dizziness

Feeling dizzy after stepping off the treadmill? Then let’s talk about it.

Treadmills definitely have their own set of challenges.. The first time I experienced treadmill dizziness, I thought I was tired. But after some reading, I realized it was the abrupt transition from a moving belt to a still floor.

Now, I make sure to gradually slow down at the end of each treadmill session, taking a few minutes to walk it out before hopping off. It helps my brain and body stay in sync.

How to prevent it:

Don’t worry.

This type of vertigo is not dangerous and often goes away after a few treadmill runs.

It’s just a matter of practice and getting your body used to the machine.

One thing you can do if you typically feel dizzy after using a treadmill is to slow down gradually.

Reduce your pace over three to five minutes until you’re walking comfortably and breathing normally.

Then, and only then, get off the machine.

Get into a recovery position, or simply sit down.

Rehydrate.

What To Do If You Feel Lightheaded When Running?

Don’t try to be a hero if you ever feel dizzy mid-run.

Hit the emergency red stop button and stop down.

Next, elevate your legs above your heart, placing your feet on a wall, chair, or bench.

This way, the blood can circulate back into your heart and brain.

Try not to push your body more than it can handle.

It’s key to manage dizziness while exercising right.

Ignore your symptoms, and it will get worse.

Stop, find some shade, and elevate your legs. It’s something I learned the hard way. Pushing through only made things worse. Taking a few moments to recover helps you avoid a fainting spell and ensures you can get back to running safely another day.

Before picking up running again, try to rule out the cause of the lightheadedness and a practical solution.

If you adjust your training approach but continue to dizziness while exercising, make an appointment with your doctor ASAP.

When is it Time to See a Doctor?

In most cases, dizziness while running is manageable with a few adjustments. However, it’s time to see a doctor if you’re experiencing frequent or severe dizziness. These could be signs of a more serious underlying condition, such as heart or neurological issues, that need medical attention.

Frequently Asked Questions About Dizziness While Running

I know that you have more pressing questions about feeling woozy while working out. Let me try to address some of them.

What should I do if I feel dizzy while running?

If you start to feel dizzy while running, the best thing you can do is slow down and find a safe spot to stop. Take deep breaths, sip some water if you have it, and wait until the dizziness subsides. It’s essential to let your body recover rather than pushing through—ignoring dizziness can lead to a fall or make things worse.

Make sure to include a cool-down period at the end of your run, as it helps gradually lower your heart rate and blood pressure, which can prevent dizziness.

Is dizziness normal for beginner runners?

Yes, beginners sometimes experience dizziness, especially if they’re pushing harder than their bodies are used to or haven’t eaten enough beforehand. Running is an intense cardiovascular workout, and your body needs time to adapt to this new level of exertion. Starting with shorter, slower runs and gradually building up your endurance can help reduce dizziness.

My best advice? Begin with a few minutes of brisk walking or light jogging to ease your body into the activity. If dizziness persists, try eating a light snack 30-60 minutes before your run.

How can I tell if dizziness is a sign of something serious?

While dizziness is often caused by simple factors like dehydration, low blood sugar, or overexertion, it’s essential to listen to your body. If you frequently experience dizziness, or if it’s accompanied by symptoms like chest pain, difficulty breathing, nausea, or loss of consciousness, it may be a sign of an underlying health issue. In such cases, consult a healthcare provider to rule out any serious conditions.

Share Your Tips for Preventing Dizziness While Running!

Dizziness during a run can be a real hurdle, and sometimes the best advice comes from fellow runners who’ve been through it.

Have you ever felt dizzy on a run? Share your experiences and any tips that have worked for you in the comments below!

Whether it’s a hydration trick, a pre-run snack, or a cool-down routine, your insights could make all the difference for someone else!

How to Run a 5K Under 20 Minutes (Sub-20 5K Training Guide)

5K good time

Running a 5K under 20 minutes is a dream many road runners chase.

And trust me, I know it’s a tough one.

A few years ago, my best was around the 23-minute mark and wasn’t bulging at all.

In fact, the mere thought of breaking 20 minutes seemed downright impossible.

But you know what?

I made it happen.

It wasn’t easy, but with the right training and plenty of hard work, I got there.

Now I’m going to show you exactly how you can do it too.

Don’t worry. Ain’t gonna bore you with technicalities and jargon. I’ll keep it as simple as possible.

I’ll walk you through training tips, a solid plan to get you there, the mental game, and some lessons I learned along the way (including my own journey from a 23:30 to sub-20 5K).

By the end of this guide, you’ll know exactly what it takes to break that 20-minute barrier.

Ready to roll? It’s going to be a long read so let’s get to it.

Getting Started: Know Your Current Fitness Level

First off, you need to know where you’re starting from.

How fast can you run a 5K right now?

If you haven’t done it in a while, go out and run a time trial – it’s important to know where you’re at.

When I made the decision to go sub-20, my 5K was around 23:30. That meant I needed to cut 3½ minutes.

Seems like a lot, but trust me, it’s doable My advantage back in the day is that I had a coach that believed in me and that was a huge game-changer.

So here’s the deal.

If you’re running between 22 and 25 minutes, hitting sub-20 in a few months of focused training is within your reach.

Even if you’re a little slower, don’t stress – just stay consistent and train the right way, and you’ll see results.

In fact, I worked recently with a runner who went from 24:54 to 19:43 in just 8weeks. Yep, two months! Of course, I  believe he was an exception but it’s still an impressive feat nonetheless.

Everyone’s timeline will be different, but with patience and commitment, you can do it.

But what if your current 5K time is way slower than that.. Let’s say your 5K PB is around 35 minutes.

Then what should you do? Should you give up?

Of course, no. I’d urge you to change your goal into a a more realistic one. Instead, shoot for a 30-minute 5K and work on it from there. Adopt the progressive mindset.

A complete beginner? Please start with my couch to 5K plan.

In case you’re curious about average 5K times, check out this chart:

Assess Your Strengths and Weaknesses

Nope, we are not done analyzing what you’re capable of.

Now, take a moment and think about your running style. Are you more of a long-distance runner who can go forever but struggles to pick up the pace? Or are you fast out of the gate but struggle to hold that pace? Knowing this is key, because it’ll show you where to focus your training.

For me, I had solid endurance from just jogging, but speed? That was a whole other challenge. Maybe you’re the opposite, and that’s cool too. Knowing where you need to put in the work will make your training more efficient and effective.

Now let’s get to the more practical stuff.


The Benefits of Speed Work (and How to Make It Work for You)

If you want to break 20 minutes in a 5K, there’s no way around it: speed work is your best friend.

I’m not gonna lie, when I first heard about interval training and track workouts, I thought it wasn’t for me.

My first interval session had me gasping for air and thinking, “What did I get myself into?”

But let me tell you, adding structured speed workouts was a total game-changer. It’s the #1 thing that helped me shave 3 minutes off my 5K time—from 23-22 minutes to breaking 20. If I’d to do it all over again, I’d done speedwork earlier in my training.

So why bother with speed work?

It’s simple: it trains your body to run faster and makes your usual pace feel easier.

Speed work isn’t just about getting faster; it helps you hold that pace longer.

Interval training (short bursts of speed followed by recovery) improves your body’s ability to use oxygen, or what’s known as VO2 Max, and delays the point where you fatigue. This means you can go faster for longer.

Don’t just take my word for it—science backs it up.

One study showed that runners who did 4 weeks of sprint intervals shaved about 4.5% off their 5K times (about a minute on a 22-minute 5K!). Pretty good, right?

Another study found that runners using the “10-20-30” interval method (30 seconds of jogging, 20 seconds of moderate running, 10 seconds of sprinting) cut an average of 42 seconds off their 5K time in six weeks.

I can go on and on but you get it for sure.

Speed work works. Period.

How to Add Speed Work to Your Routine

Now you’re sold (hopefully) on speed work, let’s get into how do you actually fit it in.

Here’s how you can make it happen:

Track Intervals:

Find a local track or any flat area where you can measure distance.

One of the best ways to get started is with 400-meter repeats.

For a sub-20 5K, try running 4–6 x 400m repeats at a pace slightly faster than your goal race pace.

For example, aim for 93 seconds per 400m (around 6:15 per mile pace). After each repeat, take 1 minute to walk or jog to recover.

When I first did this, my lungs were on fire., It felt impossible. But, here’s the thing: it got easier every week.

And after a few weeks, I was hitting those 400m repeats faster than I thought I could. Over time, you can increase the number of repeats or run them faster.

You can also try 800m or 1km repeats, which help build the endurance you’ll need for race day.

For example, 5 x 1000m at goal pace (around 4:00 per km) with 90 seconds of easy jogging in between is a killer workout that’ll get you race-ready.

Tempo Runs:

Tempo runs are your bread and butter for improving speed at longer distances. It’s a sustained effort that’s faster than your normal pace but not so hard that you’re gasping for air.

Tempo runs help your body get rid of lactic acid more effectively, which means you can sustain that faster pace for longer.

For a sub-20 5K, this might be a 3–4 mile run with the middle 2 miles at a “comfortably hard” pace—around 7:00–7:15 per mile. (This is a little slower than race pace but faster than easy pace).

When I did these in my training, I really noticed the difference. I could lock into a strong rhythm that made race pace feel more manageable.

Fartleks & 10-20-30:

Fartlek, Swedish for “speed play,” is a fun way to add speed work into an easy run. You simply mix in bursts of speed whenever you feel like it.

For example, during a 30-minute run, you might sprint for 30 seconds, jog for 1 minute, and repeat the cycle.

It’s less structured and more about having fun with speed. The “10-20-30” workout is a more structured form of fartlek: jog for 30 seconds, run at a moderate pace for 20 seconds, then sprint for 10 seconds. Do this for 5 sets, then take a 1–2 minute jog break.

The cool thing? Even doing 10-second sprints at 80% effort (not full-out) still gives you huge fitness gains (Science Daily).

So don’t stress about sprinting at max effort. Just get out there, push yourself a little, and enjoy it.

Hill Repeats:

Find a hill that takes you about 60–90 seconds to run up, and get ready to build strength.

Do 6 x 60-second uphill sprints, then jog or walk back down to recover. Hills help build leg strength and power, which translates into faster flat running.

I make sure to add hill workouts into my routine every couple of weeks. They suck while you’re doing them, but afterward, everything else feels a little easier.

Think of hills like “strength training on the run.”

How to Get Started

If you’re new to speed work, start with one session a week, and then build up to two as your body gets used to the intensity.

For example, do intervals on Tuesday and a tempo or hill workout on Friday, with easy runs in between to help your body recover.

And, listen, don’t skip the warm-up. 10-15 minutes with easy jogging, plus some dynamic stretches or strides to get your muscles ready is all you need.

Balancing Endurance and Speed Training

Speed work might grab attention, but don’t skip out on building that endurance base.

If you want to crush a 5K, you need a mix of speed and stamina.

Here’s the deal: speed workouts make your race pace faster, but it’s endurance training that lets you hold that pace all the way to the finish line without falling apart.

To break that sub-20 5K, you’ve gotta strike the right balance between both.

So, let’s break it down:

Easy Runs = Building Your Engine

Most of your weekly miles should be easy, relaxed runs. Yep, we’re talking about those slow, conversation-paced miles.

This is the foundation you build everything on. It might seem counterintuitive, but even the fastest 5K runners spend a lot of time running slower than race pace.

For example, if you’re aiming for 6:26/mile for a sub-20 5K, you might find your easy runs clocking in around 8:00–9:30/mile (maybe even slower).

When I started out, I made the rookie mistake of pushing my easy days too fast.

I thought it’d make me “extra fit,” but it just made me tired! I’ve heard other runners say the same thing—that pushing too hard on recovery days led to a “boom-bust cycle of injuries.” I can definitely relate to that.

Once I finally slowed down my easy runs, I was able to go longer, recover quicker, and crush my speed workouts. The key? Train smarter, not just harder.

Please learn from my mistake. Be wiser.

Long Runs for Endurance

Even though a 5K is “only” 3.1 miles, you should still put in the work with long runs (5 to 8+ miles, depending on your level). Why? Because the more comfortable you are with running longer, the easier those 5K miles will feel.

For your long runs, aim for a pace that’s easy and steady—about 1½–2 minutes slower per mile than your 5K pace. It might seem “boring” for speedsters, but mix it up with some trail runs or run with a friend to keep it fun. Think of it as your engine-building day.

Rest & Recovery Days

Balance isn’t just about the workouts—it’s about recovery too.

You don’t get faster by hammering workouts non-stop; you get faster by letting your body recover.

Make sure you have at least one or two days a week where you’re resting or doing some super light cross-training.

Here’s a rule I’ve stuck with: the “80/20 rule.” That means 80% easy and steady runs, and 20% hard efforts.

So, if you’re running five days a week, four of those runs should be easy (including your long run), and one or two should be tougher efforts (like intervals or tempo). Don’t make your easy runs too fast! Trust me—running slow on your easy days actually makes you faster on your hard days.

As one coach told me, “If you want to race fast, you’ve gotta train slow and fast—just don’t always do medium.” If you’re running medium effort all the time, you’re just setting yourself up for burnout or a plateau.

Periodize Your Training

Don’t try to do everything at once.

You don’t need to cram all the speed and mileage into every week.

Focus on building up your mileage for a few weeks, then start adding in more speedwork as you get fitter.

Or alternate weeks with higher mileage and others with a speed focus. Listen to your body—if you’re feeling drained, it’s fine to back off the intensity for a couple of days. It’s better to show up at the starting line a little undertrained but fresh, than overtrained and exhausted.

3-Week Training Plan for Breaking 20 Minutes in the 5K

Alright, let’s get real.

This 3-week plan is designed for runners who are already pretty close to cracking that sub-20 5K goal. If you’re running about 4-5 days a week and around 20+ miles, this plan is gonna help you dial in and break that barrier.

Time to fine-tune and push yourself through that last stretch.

Let’s break it down.

Week 1: Build the Base

We’re getting the basics locked in this week. It’s about getting your body ready, but not burning yourself out just yet.

  • Monday: 30-minute easy run. Nice and slow. You’re just shaking off any soreness from the weekend and gearing up for the work ahead.
  • Tuesday: Intervals – 5 x 1 km at goal 5K pace (4:00/km or 6:25/mile). Jog for 90 seconds between each rep. Finish with a short cooldown jog. Don’t go out too hot, but feel that goal pace. The last rep should get tough but still be doable.
  • Wednesday: 30-minute easy run or cross-training (bike, swim, whatever feels easy). This is all about recovery from Tuesday’s workout.
  • Thursday: Speedwork – 6 x 400 meters at a pace faster than 5K pace (around 93 seconds per 400m). Rest for 1 minute in between. This is all about turning your legs into rockets. Keep the form tight, but if 93 seconds is too quick, don’t stress—aim for 95 seconds and work your way down.
  • Friday: Rest or easy cross-train. Give your legs some TLC. Hydrate, stretch, and keep it relaxed.
  • Saturday: Long run – 45–60 minutes at a pace you can hold a conversation. This isn’t about speed; it’s about building that endurance. You should finish feeling like you could keep going.
  • Sunday: Rest. Recovery day.

Week 2: The Push

This week, we’re turning up the intensity a little. We’re pushing your limits but also respecting recovery.

  • Monday: 30-minute easy run. Don’t push it today—keep it chill and let your body catch up from last week.
  • Tuesday: Intervals – 6 x 800 meters at goal pace (3:10–3:12 per 800m). Jog 200 meters between each rep. This is a VO2 max workout—your body is learning to hold that fast pace.
  • Wednesday: 30-40 minute easy run or cross-training. If you’re feeling beat up, take it easy and maybe do a light bike ride.
  • Thursday: Hill Sprints – 6–8 x 60 seconds uphill, then jog down to recover. Focus on driving with those legs. If you don’t have hills, try a 20-minute tempo run at your 10K pace. Push yourself, but don’t gas out.
  • Friday: Rest or light cross-train. Focus on recovery here. Don’t skip this!
  • Saturday: 30-minute easy run + 4 strides (4 x 100m accelerations). This will remind your legs how to move quickly.
  • Sunday: Long run – 50–60 minutes. This should feel easier than last week. Progress!

Week 3: Taper and Race Week

We’re tapering down this week. The goal is to be fresh and ready to crush it on race day.

  • Monday: 30-minute easy jog. Relax, you’ve done the work.
  • Tuesday: Interval sharpening – 4 x 400m at 5K pace with full recovery (2-3 minutes walking rest). Or, 3 x 1 km at 5K pace with 2 minutes rest. This is just to keep your legs fresh—not a time to kill yourself.
  • Wednesday: 20 minutes super easy jog or rest. If you’re feeling great, go for a short jog, but if you’re feeling sore or drained, skip it. Recovery’s key.
  • Thursday: Rest day. Mentally prepare for the race. Visualize your pacing strategy. Check your gear. This is about getting your mind right.
  • Friday: 15-minute light jog + 5 x 100m strides. Just a little tune-up before race day. These strides should feel quick, but not exhausting.
  • Saturday: RACE DAY – Time to break 20 minutes! Warm up with a 1-2 mile jog, dynamic stretches, and strides. Don’t go out too fast; stick to your pacing strategy. In that last mile, when the pain hits, remind yourself why you’ve been training so hard. Push it all the way to the line. Let’s do this.
  • Sunday: Recovery day. You’ve earned it. Celebrate your sub-20 achievement. Do a light shakeout run if you feel up to it, but mostly just chill. Enjoy the win.

How does this plan look? Would you change anything based on your own training style or schedule? Maybe you prefer long runs on Saturdays, or you need an extra rest day before race day? Let me know how you’d tweak it for your needs.

Final Thoughts: Stay Motivated and Join the Community

Chasing a sub-20 minute 5K? Yeah, it’s tough. But trust me, it’s totally worth it. Whether you’re at a 30-minute 5K or pushing for 20:30, make sure you remember why you’re out there.

Maybe you want to show yourself you can do it, beat your buddy in a race, or just test how far you can go. Whatever it is, keep that “why” front and center. On those days when you’re low on motivation, it’s that ‘why’ that’ll keep you going.

Progress doesn’t always happen in a straight line—sometimes it’s slow, sometimes fast. You might feel like you’re in a rut, then bam—suddenly you shave 45 seconds off your time.

Take it from me, the hard work pays off. It might take longer than you expect, but don’t let that throw you off track. You’ve heard it before: “The days are long, but the years are short.” It’s real. In a few months, you’ll look back and be amazed by how far you’ve come.

Keep it fun and dream bigger. Once you smash that sub-20 5K (and you will if you put in the work!), what’s next? Maybe a sub-19, a 10K, or even a half marathon—heck, maybe you’ll just love running even more and help others along the way.

The discipline you build chasing that 5K PR will stick with you, whether you’re racing a marathon or a 10K. I’ll never forget the rush of finally breaking 19. That moment still gives me goosebumps.

So here’s the final coach’s pep talk: You’ve got this! The road to sub-20 is tough, but every single runner I know who really wanted it and stuck with it has hit that goal.

Be patient, trust the process, listen to your body, and enjoy the journey. The moment you see that ‘19’ on the clock at the finish line will make every early morning, every track session, and every sore leg feel totally worth it.

Now go out there and make it happen. I’m rooting for you every step (and every second) of the way.

How To Run Commute – The Complete Running To Work Guide

run commute

It’s a fantastic way to sweat while doing something productive.

But it requires some preparation and planning.

I’ve compiled today’s article’s ultimate guide to starting your run-commute.

By the end, you’ll learn the following:

  • What is run commuting?
  • The benefits of running to and from work
  • How to get started with run commuting
  • The run commuter checklist
  • How to choose the right running bag pack for running commuting
  • How to plan your route
  • How to get cleaned up
  • And so much more…

Let’s get started

The Benefits of The Run-Commute

Though run-commuting is not a popular way to get to and from work, there are many benefits to doing so.

Let’s discuss a few.

  • Running Is Fast Than Walking. On average, expect to be able to walk three to four miles per hour. But if you can keep an 8-minute running pace, you can cover 7.5 miles per hour or 12 kilometers per hour. In some cities, running can also be faster than driving. For example, driving speeds in crowded cities can be around seven mph.
  • Boosts productivity. Running first thing in the morning improves your productivity. Not only will you arrive at the office feeling awake, but your brain will be functioning at its best.
  • Reduce Stress. Running home from work can help clear up your mind and clear the day’s stress from your system so you can enjoy the rest of your day.
  • No More Traffic. Hate getting stuck in traffic? Then run commuting is for you. By running to work, you’ll no longer have to worry about getting stuck in traffic for hours and hours, moving at a snail’s pace while losing your sanity with every passing minute. Instead, you’ll be the master of your work commute. So say goodbye to burning traffic—as long as you have a realistic run-commute plan.
  • More base miles. One of the best ways to build endurance is to do a lot of long, slow miles. The more miles you can run without fatigue, the faster you’ll likely run on race day. But it’s not easy to find time for them. Running to and from work is a great opportunity to add miles to your weekly total without compromising your lifestyle.
  • Running Is Cheap. Compared to other transportation means, running is cheap. You don’t need to pay for any gas, train tickets, or parking fees. It’s just you and your feet. Of course, you’ll still use up your running shoes, but you’ll use them most productively and frugally.
  • Eco-friendly. You’ll be doing an excellent service to the environment by leaving a “smaller” footprint and inspiring other people to follow (and run) in your footsteps.

How to Start Run-Commuting 

Here are the guidelines you need to become a daily run commuter.

Plan Thoroughly

Success favors the prepared mind—this couldn’t be more true regarding run-commuting.

As a rule, plan out the logistics and running gear needed for the job in advance—you’ll need more than your running shoes.

Here are the five steps to an effective run-commute plan:

  • Make a Run commute list
  • Lay out your running gear
  • Get the right running backpack
  • Plan your running route
  • Have fun Run Commuting

Let’s explain each step.

Make a Run Commute List

Make a checklist of everything you’ll need for the run and work.

Planning takes care of all your excuses not to start running and commuting.

Here are the run commute essentials to consider.

  • Running gear such as your shoes, clothes, reflective vest, and a GPS watch,
  • A small purse,
  • Your phone and other electronics,
  • Work-related stuff, like your laptop, a diary, a lightweight folder, and glasses,
  • door keys,
  • Breakfast and/or lunch packs. Snacks too,
  • A water bottle,
  • A waterproof jacket that wicks moisture away for a rainy day,
  • A spare plastic bag to keep your spare clothes dry,
  • Reflective tape or a reflective vest if you plan to run near sunrise and/or sunset on roads.
  • Towel and toiletries

Of course, you cannot keep all this in your pocket and typical work bag.

You’ll need a special running bag.

Let’s see how to choose one.

Running Backpack

The most important piece of run commute gear is the one that carries everything—your backpack.

Few things are as frustrating as a backpack that bounces all over the place and causes painful rubbing.

Of course, if you can narrow your carry-on items to your phone, wallet, and keys, then a fanny pack is enough.

But that’s not always the case, as most of us need to carry more, whether it’s clothes, a laptop, toiletries, or any other item.

The market for running packs has grown thanks to run commute’s rising popularity in recent years. You can find these online and in most running shops.

The Right Backpacks For Run-Commuting

Get a backpack that’s specifically designed for running.

These are usually made with ultralight materials and have straps that wrap around the chest or waist level. This helps prevent it from bouncing all over the place during a run

The straps also help evenly distribute the backpack’s weight and hold it comfortably across your back.

Make sure the backpack fits firmly without chafing or weighing you down.

Try out a few before you make up your mind.

Here’s how to carry your keys while running

Pack Smart

Do not pack more than you must—or this will wear you out, especially when you’re not used to running with weights.

One trick to help you avoid carrying extra items is to bring several days’ worth of toiletries and clothing in your drawer or locker room.

Things to leave at the office may include:

  • Deodorant
  • Suit
  • Loose change
  • Laptop
  • Hard files
  • Towel
  • Work shoes

Not sure if your backpack is waterproof?

Pop your clothes and electronics into a plastic bag.

how to run commute

Know The Route

Always taking public transport to the office? Then you might not know exactly how far is your daily commute.

So, as a rule, know your routine. Then, check your online maps and look for the alternative route if it seems not passable. You can also check out likely routes by car or bike first if you’re unfamiliar with the region.

It’s not fun if you get lost and run out of time. Few things are worse than arriving at the office drenched wet, exhausted, hungry, and behind schedule because you got lost and had to run some extra miles

I’d also recommend looking for the most pedestrian-friendly areas, especially if running through an urban area.

Running on the freeway is no fun—it’s also illegal.

What’s more?

Have a few running routes of different lengths to vary your running distance and make your training more enjoyable.

When It’s Too Far

Let’s be practical.

If you live 30 miles from your office, then you’ll have to run an ultramarathon every time you run commute. That will be asking for too much.

Here’s the workaround: you don’t have to run the whole distance.

Here are three options:

  • Get off the train or bus a stop earlier, then log the remaining miles on your feet.
  • If you drive to work, perhaps you can find a safe parking lot, then run the rest of the distance to the office.
  • Look for a colleague who lives closer to the office and asks them to join you.

Give It a Test Run

Anything that can derail you from your new plan during the early stages will discourage you from carrying on.

Before running to and from work, your first step should be to test your running gear and run-commute strategy.

Doing this will ensure that everything is in place and working smoothly. Once you know you have a solid strategy and backpack, try your first few runs on days when the weather is friendly.

Get Cleaned Up

Unless you’re willing to spend the next work shift avoiding all of your colleagues, then having a shower is a must.

Most office buildings have a shower (even facilities for fitness fanatics), but what if your workplace is a shower-free zone?

The easy solution is to take a bus/train to the office, then run home and shower in the comfort of your home.

Insist on running to work, but your office building is a free shower zone?

Consider visiting nearby cheap gyms or pools you can join and use their changing facilities.

Take Care of Your Hygiene

Here are the essentials:

  • Shampoo,
  • Soap,
  • Deodorant,
  • Comb,
  • Foot powder,
  • Wipes,
  • Lotion

You can easily find all of this in the travel section of any department store.

Get all you need, stash all your toiletries in a little bag, and store it in your drawer.

How To Run Commute  – The Conclusion

Here you have it!

Now you know all there is to know about running to and/or from work.

I hope you start doing that soon.

So please make sure to build this awesome running habit ASAP.

Thank you for reading my blog

Cheers.

How To Choose The best Running Shoes for Overpronation

running shoes for overpronators

Let’s talk about why choosing the right shoes matters if you overpronate

After years of coaching, I can say the right shoes really make a difference

If you’ve had issues like shin splints or runner’s knee, overpronation might be to blame.

So, what is overpronation, and how can the right shoes help prevent it?

Let’s get to it.

What Is Pronation?

Before getting into overpronation, let’s look at what pronation is.

Pronation is the natural way your foot rolls from heel to toe when it hits the ground. It helps your body absorb shock and adapt to different surfaces..

In a healthy stride, your foot rolls inward a bit to spread out the impact

Pronation usually falls into three categories::

  • Neutral pronation: Your foot rolls inward just the right amount.
  • Overpronation: Your foot rolls inward too much.
  • Supination: Your foot doesn’t roll inward enough, often landing on the outer edge.

What Is Overpronation?

Overpronation happens when your foot rolls excessively inward, more than 15% of the way. This extra inward roll flattens your foot more than normal, adding pressure to the inner side.

According to the American Podiatric Medical Association (APMA), overpronation can lead to pain and injuries in the feet, knees, and lower back, as it disrupts the natural alignment of the leg. This inward rolling puts excess pressure on the inner edge of the foot, which can lead to issues like plantar fasciitis, shin splints, and Achilles tendinitis. Learn more about overpronation from the APMA.

I’ve seen runners deal with issues like shin splints, runner’s knee, and stress fractures because of overpronation.

What’s more?

Runners with overpronation often have flat feet.

Key Features to Look for in Running Shoes for Overpronation

If you overpronate, look for shoes with stability features to help control motion and give you support.

And please don’t take my word for it.

The American College of Sports Medicine (ACSM) suggests that stability and motion control shoes are ideal for runners with overpronation, as they offer structured support through elements like medial posts, firmer foam, and guide rails that limit excessive inward rolling. These features help balance your stride and reduce the risk of injuries.

Similarly, Mayo Clinic emphasizes the importance of supportive shoes with stability and arch support to help prevent injuries and discomfort from overpronation. Shoes with extra cushioning can also be beneficial for overpronators, as they absorb impact and alleviate pressure on the arch and heel.

But before you start using shoes for overpronators, ensure you do overpronate. Don’t try to fix something that ain’t broken!

Let me explain more…

How to Tell if You Overpronate

Not sure if you’re an overpronator? Here’s how to check::

  1. Check Your Shoes: Check the wear pattern on your old running shoes. If the inner edge of your shoe sole is more worn than the rest, you probably overpronate.
  2. Gait Analysis: Many running stores offer free gait analysis. They’ll watch you run on a treadmill and check how your foot moves.
  3. See a Professional: A podiatrist or physical therapist can help you assess your foot mechanics in more detail.

Choosing the Right Shoes for Overpronation

Once you know you overpronate, it’s time to find the right shoes

For mild to moderate overpronation, stability shoes are a good choice, as they give extra support but stay flexible and comfortable

If you have severe overpronation, motion-control shoes offer firmer support to keep your foot from rolling inward too much.

Here’s your guide to running shoe brands.

Not sure how to make sense of this?

Then I’d recommend stability shoes. These tend to be more flexible and less heavy than motion-control shoes.

They’re also easier to run in.

If the overpronation is causing problems, try moving onto motion control shoes.

The Checklist For Running Shoes For Overpronators

Here’s what to look for in running shoes if you overpronate:

  • Arch support: Proper support in the arch helps prevent your foot from rolling inward.
  • Stability features: Stability shoes often include denser foam or extra cushioning in the midsole to keep your foot in alignment.
  • Durability: Overpronators tend to put more wear on their shoes, so look for durable outsoles that can handle the extra stress.

Top 5 Running Shoes for Overpronation

Below are some shoes that offer some of the features that overpronators need. Feel free to experiment, then choose the shoe that best suits your needs.

Asics GEL-Kayano 24 Lite-Show

ASICS Gel Kayano 24 is one of the best shoes for overpronators, providing comfort and stability.

This shoe focuses on the two primary spots where you need a lot of support as an overpronator—the heel and midsole.

Despite the extra cushioning in those key areas, the shoe is also lightweight and flexible.

What’s more?

ASICS lite-show reflective technology helps you stay more visible in low light conditions, which is key for staying safe when running early in the morning or at night when it’s dark outside.

Asics Gel-Kayano 27

Another awesome shoe designed by Asics for the overpronator.

This shoe is one of the top stability shoes, designed with a dual-density midsole, a structured heel counter, and an outsole Guidance line to guide your foot straight and lessen pronation.

The sole is also more flexible to help encourage a more natural gait.

What’s more?

The mesh upper helps keep your feet cool and comfortable.

Brooks Addiction 14

This fantastic motion-control shoe works very well for runners who require a lot of stability on their runs and heavy runners who overpronate.

It also provides a generous fit, ideal for those with flat feet or using custom orthotics.

Remember that Brooks Addiction shoes tend to be heavier than others since they have a lot of cushioning.

Saucony Omni ISO 2

In Latin for “everything” or “all,” Omni ISO 2 is a stability shoe that works well for overpronators.

It has a good fit and comes in a good-looking design.

The shoe also features ISOFIT technology, which appeals to various foot types as it adapts to most foot types for a comfortable fit.

Frequently Asked Questions

Let’s address some of the most common questions and concerns when it comes overpronation and footwear.

What are the signs of overpronation?

Overpronation occurs when your foot rolls inward excessively while you run, which can put extra stress on your feet, ankles, and knees. Common signs include:

  • Uneven shoe wear, especially on the inner edges of the sole.
  • Frequent pain or discomfort in the arch, heel, or ankle.
  • Recurring injuries like shin splints, plantar fasciitis, or knee pain.
  • Flattened arches when you stand, which can be a sign of low or flexible arches.
    If you’re unsure, consider visiting a running store or podiatrist for a gait analysis.

Can overpronation lead to injuries?

Yes, overpronation can contribute to various injuries if left unaddressed. Since overpronation puts excess pressure on certain areas of the body, it can lead to injuries such as:

  • Plantar fasciitis (heel and arch pain)
  • Shin splints
  • Achilles tendinitis
  • Patellar tendinitis (knee pain)
  • Hip and lower back pain
    Wearing the right shoes with proper support can significantly reduce the risk of these injuries.

How often should I replace my running shoes?

For most runners, replacing shoes every 300 to 500 miles is recommended. However, if you overpronate, you might find that your shoes wear out faster, especially on the inner edge. Signs that it’s time for a new pair include:

  • Noticeable wear on the outsole, especially along the inner edge.
  • Reduced cushioning or support, which you might feel as discomfort or fatigue.
  • Loss of stability, especially if the shoe feels uneven when you wear it.
    Keeping track of your mileage and monitoring wear patterns can help you determine when it’s time to replace your shoes.

Final Thoughts on Running Shoes for Overpronation

Choosing the right shoes isn’t just about comfort—it’s about staying injury-free and enjoying every step of your running journey.

I’ve seen firsthand how the right footwear transformed my runs and those of countless runners I’ve coached. So don’t wait until the pain sidelines you—get a proper gait analysis, invest in the right shoes, and confidently hit the road. Your feet (and knees) will thank you!

Do you have any questions or want to share your experiences with overpronation? Drop a comment below, and I’d be happy to help.

Stress Fractures In Runners: Causes, Symptoms, Tests & Treatment

running 3 miles a day

Out of all running injuries, nothing strikes more fear into a runner’s heart than stress fractures. They’re a painful, nagging condition that requires long weeks, even months, of recovery.

What’s more?

This notorious injury is common among runners, especially those that run long distances and/or push themselves more than they should.

So would you like to learn more about how to manage stress injuries in runners? Then you’ve come to the right place.

In this post, I’ll provide a full overview of stress fractures in runners. By the end, you’ll learn the following:

  • What is a stress fracture?
  • The causes of stress fractures in runners
  • The most stress fracture-prone areas in runners
  • The main symptoms to look for
  • Can you run with a stress fracture?
  • And so much more

Stress Fractures In Runners Explained

Also known as a hairline fracture, basically a small crack or severe bruising in a bone.

Stress fractures are the classic form of overuse injury caused by the gradual build-up of trauma from repetitive submaximal loading and bad posture.

The typical stress fracture onsets as a stress reaction, which manifests as swelling around the bone.

Then, in case it progresses, it can develop a small crack. If this injury reaches this stage,  you’ll likely have to rest the injured limb for a few weeks—even months—to let your body heal.

Surveys show that stress fractures may account for 20 percent of all running injuries.

Athletes who participate in high-impact sports like basketball, football, and soccer are also prone to this condition.

In some cases, but rarely among productive age runners, stress fractures may be blamed on inadequate bone mineral density or bone diseases, such as osteoporosis.

They can also be traced to genetic disorders or nutritional and hormonal imbalances.

Stress Fractures Vs. Bone Breaks

This may surprise you, but a fractured bone and a broken one aren’t technically the same.

As I explained earlier, a stress fracture is a bone crack or break that occurs when force is applied to a bone repeatedly and over time.

This means that they develop slowly over an extended period.

The other characteristic is your bone stays still in the same place. You won’t even notice anything except the ongoing pain or bruising.

On the other hand, the typical bone break happens when an outside force is applied suddenly to a bone. The key here is the discontinuation of bone structure.

Falls, car accidents, and sports contacts like football can often cause bone breaks.

Common Stress Fractures In Runners

A stress fracture can strike any bone, but the weight-bearing bones are most prone in runners.

Let me explain.

The lower leg in the shin bone (the tibia) is the most affected area.

Survey shows that about half of all stress fractures occur in the tibia.

But stress fractures are also common in other bones.

The foot, especially the second metatarsal, is another stress fracture-prone bone.

More specifically, the second and third metatarsals in the foot, according to the American Academy Of Orthopedic Surgeons. According to surveys, roughly 25 percent of all stress fractures strike these two bones.

The condition is also pretty common in:

  • The heel, what’s known as the calcaneus;
  • The ankle joint, more commonly in a small bone called the talus;
  • The fibula, the outer bone of the ankle and lower leg; and
  • The navicular is a boat-shaped bone on the top of the midfoot, specifically in the ankle between the talus and the cuneiform bones.
  • The talus is a small bone located within the ankle joint

Extreme (but rare) Cases of Stress Fractures

The bigger bones in your pelvis, hips, and femur are also prone to stress fractures, which aren’t common among runners.

And only a few people can feel it since it’s not the main weight-bearing.

Causes of Stress Fractures While Running

The primary cause of the condition is, of course, overuse.

If you increase your training volume and/or intensity too fast and over a short period, you’re setting yourself up for injury.

Other factors that may contribute to stress fractures include:

  • Bad footwear. Running in improper running shoes that provide little or no shock-absorbing ability.
  • Being a female runner. Research shows that female athletes are more prone than male athletes. This is blamed on the so-called “female athlete triad,” a mix of eating disorders, bone density issues, and menstrual dysfunction.
  • Running technique. Overstriding may sometimes contribute to tibial stress fracture as it stresses the main weight-bearing bones more.
  • Inadequate nutrition. For example, insufficient vitamin D intake can put you at risk, according to research from The Journal of Foot & Ankle Surgery.
  • Bone conditions. Bone disease compromises bone strength and density. Osteoporosis is one example.
  • Weather condition. Research shows that stress fractures are more common in the winter than in any other season of the year due to a deficiency in Vitamin D.
  • Foot Abnormalities. According to research, runners with anatomical foot abnormalities, such as fallen arches, are more prone to stress fractures than those with a neutral arch.
  • Muscle tightness. Research from the Journal of Orthopedic and Sports Physical Therapy reported that tight calves make you roughly five times more likely to sustain a metatarsal stress fracture.

Symptoms of a Stress Fracture

If you notice any bony tenderness that worsens during running but subsides during rest, you might be experiencing the onset of a stress fracture.

Stress fractures are characterized as achy or generalized pain in and around the affected area.

You can’t pinpoint the exact place.

This pain usually develops slowly and worsens during running or any weight-bearing activity.

Pain worsens the more miles you log in. Then, it becomes highly localized to a specific “area” on the bone, which will even be painful to the touch. Sometimes it causes bruising but is mild.

Devoid of rest, the pain gradually worsens—to the point where it limits your range of motion and alters your running gait. In these circumstances, various methods can be used to alleviate this pain, which I will go in depth about below. But, alternative methods can also be used like THC, THCa, and CBD to help with many symptoms of pain such as stress and upset. You can order THCA gummies online, or buy them in person, however, it would be best to speak to a medical professional first.

stress fractures while running

How Are Stress Fractures Diagnosed

Sometimes, your doctor can diagnose a stress fracture from a medical history and physical checkup, but imaging tests are often required to confirm the condition.

Since stress fractures are thin, X-rays usually cannot spot them, especially shortly after the onset of pain. The doctor may recommend an MRI or CT scan in addition to the physical checkup.

Can you Run With a Stress Fracture?

Though you might feel tempted to run on a stress fracture, it’s never a good idea. Running through a stress fracture does nothing but delay healing and will likely cause a compensatory injury for changing your running gait.

From my experience and the stories I’ve heard, I wouldn’t risk it.

It’s the dumbest thing you can do as a runner.

Running through the tibia, fibula, or fracture requires a more serious injury. It’s also painful since these are the major weight-bearing bones that withstand a lot of the stresses of running.

What’s the next plan?

Depends.

If it’s an incomplete fracture with no misalignment, bandage, and casting might help. But if it’s a complete fracture with multiple breakages, a knife and fixation are the only solution.

Next? Six months rest.

As a rule of thumb, avoid running through a stress fracture.

What Should I Do If I Do Have A Stress Fracture?

If you suspect a stress fracture, stop training altogether and do what you must to speed up recovery.

Next, visit a physician—preferably a podiatrist or an orthopedist—to have it diagnosed.

Let me break down what you need to do.

Stop High Impact Exercise

Your first step is to let the affected bone(s) recover completely following injury.

It takes at least 28 days for complete remodeling.

I’d recommend that you cross-train during your recovery period.

Choose exercises with minimum impact.

Ideal options include aqua jogging, cycling, swimming, or yoga.

You’re good to go if you avoid high-impact weight-bearing exercises like running, rope jumping, and plyometrics.

Keep it as long as you feel comfortable before adding the intensity.

Reassess every month.

Cold Therapy

Apply ice on the affected area to keep swelling down and ease tenderness.

I’d recommend using a frozen bag of beans or ice wrapped in a towel or cloth for 15 to 20 minutes at a time, at least three times a day.

Just whatever you do, do not apply a source of cold directly on your skin.

Compress it

Compress the injured limb by lightly wrapping it in a soft elastic bandage to reduce swelling.

Elevate it

Keep your injured limb raised higher than your chest level.

Using a hanging traction device can help.

Severe Cases

What should you do if home treatments don’t improve your symptoms?

Simple.

Consult a doctor or podiatrist.

They will help you determine your injury’s exact location and severity and what to do next to bounce back and speed up your recovery.

Left untreated, stress fractures can result in the bone breaking completely.

Further Tests

First of all, expect to be X-rayed.

But you may need to do more.

Often, traditional X-rays may look healthy as they might not be enough to spot a stress fracture, especially when the fracture is not completely through the bone.

For this reason, I recommend you consult a sports-oriented physician for a thorough bone scan.

They’ll typically recommend a nuclear bone scan, an MRI, or other advanced imaging techniques to fully detect the condition.

The Doctors Recommended Treatment Options

Your doctor will recommend taking an NSAID—Nonsteroidal anti-inflammatory drugs— such as Ibuprofen and Paracetamol to alleviate pain and reduce swelling.

Depending on the area and the severity of the stress fracture, your doctor might also recommend a splint, a cast, or protective footwear  (such as a wooden-soled sandal or a stiff-soled shoe) to immobilize the injured limb.

Crutches are also recommended to keep weight off the injured leg until you’re past the acute phase.

Sometimes, your doctor may need to put a fracture boot on the injured limb to keep the bones fixed.

This helps eliminate the stress on the leg and speed up recovery.

Expect Surgery As The Worst-Case Scenario

In extreme stress fractures, surgical intervention is needed to patch up the damage, especially when the fracture line has extended completely across the bone, or you have low bone density.

This is done by inserting a type of fastening, known as internal fixation, to support the bones of the injured area. External fixation might be one of the treatment choices for osteoporotic patients.

Again, it depends on the severity and alignment.

How long It Takes To Recover From A Stress Fracture

Recovery time varies from one runner to the next.

The good news is that most stress fractures will heal after time and rest.

Some people can recover well, starting from 28 days, but most take six weeks to six months or even longer.

That’s a wide range.

And reason stress fractures are categorized into two main groups:low risk” and “high risk.”

A stress fracture within the low-risk category often heals independently and may not call for aggressive treatment measures such as long rest time or crutches. This category includes fibular and tibial stress fractures as well as metatarsal stress fractures.

On the other hand, a high-risk stress fracture often occurs in areas notorious for healing poorly. Examples include stress fractures of the pelvis, navicular, and femur. If you develop fractures in any of these bones, you’ll need drastically longer times away from running and a proactive approach to resuming running again.

The only good news is that these high-risk fractures are less common in runners than in the low-risk types.


Stress Fractures in Runners – The Conclusion

There you have it!

If you’re serious about learning to better manage stress fractures from running, then today’s post should get you started on the right foot.

The rest is just details.

Please feel free to leave your comments and questions in the section below.

In the meantime, thank you for dropping by.