Unmasking the 17 Most Common Running Excuses That Hold You Back

woman running

I see you. You’re here, diving headfirst into the world of running, ready to seize the countless benefits it has to offer. And boy, oh boy, does running have a lot to offer!

Endurance? Check. Calorie burn? Double check. And let’s not forget about its magical ability to keep the craziness of life at bay. Trust me; I could wax poetic about running for hours on end. It’s a passion that runs deep within me (pun absolutely intended).

But let’s address the elephant on the track, shall we? We all know that despite our burning desire to hit the pavement, excuses have a sneaky way of creeping in. They lurk in the shadows, ready to pounce and derail our running aspirations. “I’m too old,” “I’m too tired,” “I don’t have time”—sound familiar?

Now, don’t get me wrong. There are valid reasons for taking a break from running, like recovering from an injury or allowing your body some well-deserved rest. But let’s be real, most of the time, these excuses are flimsier than a poorly tied shoelace.

When we allow these feeble excuses to dictate our running routine, we’re depriving ourselves of reaching our true potential. And my friend, that’s a situation we need to rectify, pronto!

Are you ready to leave those excuses in the dust and discover the unstoppable force within you? Well, buckle up because we’re about to embark on a journey together. In this article, I’ve gathered the 17 most common running excuses that hold us back, and I’ll equip you with the practical steps you need to defeat them once and for all.

Running Excuse # 1 – I don’t Feel Motivated To Run

As a runner, you’re bound to experience those moments when the fire within dims and the urge to lace up your shoes wanes. It’s a swirling mix of maybes that can leave you feeling stuck in a rut.

Maybe you’ve just achieved a big goal and find yourself floating in a sea of accomplishment. Maybe it feels like you’re running in circles, caught in a whirlwind of monotony. Or perhaps life has thrown a flurry of busyness your way, leaving you drained and uninspired. Sound familiar?

Here’s the truth—it’s completely normal. We all have those moments. But here’s the catch: if you let this lack of motivation become a habit, it’s like running with empty fuel tanks. You lose that precious energy that propels you forward.

So, how do we reignite that spark and reclaim our running mojo? Let me introduce you to the magic of setting a public goal. It’s like flicking a switch and illuminating the path ahead.

Here’s the drill: Grab a pen and paper and jot down a specific running goal that gets your heart pumping—whether it’s conquering a 5K, shedding those stubborn 10 pounds, or even tackling a full-blown marathon. Now, this is where it gets exciting. Share your goal with your loved ones and your friends, and hey, why not throw it out into the digital realm of social media? The more, the merrier!

By broadcasting your goal, you create a sense of accountability that will keep you on track. Plus, it’s an open invitation for cheers, support, and virtual high-fives along the way. But remember, my friend, keep those goals realistic. Don’t set yourself up for a tumble down the disappointment rabbit hole.

And here’s a bonus tip: Don’t go it alone. Find running buddies, whether they’re friends, neighbors, or co-workers. Exercising in a group has a magical effect. Studies have shown that it boosts consistency and increases pain tolerance—two superpowers that will supercharge your performance and overall health.

Running Excuse # 2 – I always Get Side Stitches

Trust me; I feel your pain. Side stitches can be downright excruciating, but fear not, my running friend. They shouldn’t be the reason to wave the white flag and surrender your training.

Now, let’s dive into the nitty-gritty of these devilish side stitches. There are a myriad of theories swirling around as to what causes them, but the most likely culprit is an oxygen debt to your abdominal muscles. In simpler terms, it’s like your tummy muscles are gasping for air, leaving you with that sharp, stabbing pain. Ouch!

But here’s the reassuring news: side stitches are incredibly common, affecting roughly 25 percent of runners, according to surveys. You’re not alone in this battle. So, let’s equip ourselves with some strategies to overcome these pesky interruptions.

First things first, let’s talk fuel. Opt for a lightweight pre-run meal that’s low in fat and fiber. Now, if you’re a fan of gassy foods (we all have our guilty pleasures), you might want to hold back a bit. Experiment with different pre-run snacks to find what works best for your body. Remember, we’re aiming for fuel, not food, baby.

Next up, warming up. Yes, I know, it’s tempting to skip this step and dive headfirst into the main event. But trust me on this one—the warm-up is your golden ticket to a smoother, stitch-free run. Not only does it prepare your muscles for action, but it also sets the stage for optimal breathing. Skipping the warm-up may shave off a few seconds on the clock, but it can also trigger irregular and rapid-fire breathing patterns, making you more susceptible to side stitches. Nobody got time for that!

Now, let’s talk about damage control. If a side stitch strikes mid-run, don’t panic. Slow down or even pause for a moment, and take long, slow deep breaths. Fill those lungs with fresh air and let the cramp know who’s boss. If the pain persists, try this nifty move: extend both arms up toward the sky, then gently bend at the waist towards the affected side while exhaling. Let your arms dangle like the branches of a willow tree. This stretch creates space for your diaphragm and chest, providing some much-needed relief. Hold this stretch for 10 to 20 seconds on each side. Once the pain subsides, lace up those shoes and hit the pavement once again.

Here’s another trick up our sleeve: applying gentle pressure to the affected area with your hand while breathing deeply. It’s like giving a little massage to calm the cramp and ease the tension. Ah, sweet relief.

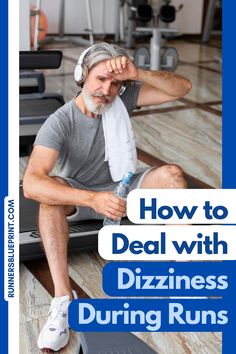
Running Excuse # 3 – I’m Running Out Of Breath

Feeling like you’re gasping for air while running? Take a deep breath and relax. There’s probably nothing wrong with you. It’s quite normal to find yourself huffing and puffing, especially if you’re new to the running scene or pushing yourself too hard too soon.

Now, I must clarify that there are exceptions to this rule. If you have an underlying condition that affects your lung function, such as asthma, emphysema, bronchiectasis, or chronic bronchitis, then it’s a different story.

For the majority of beginner runners, running out of breath is simply a part of the training process. It’s like being on a roller coaster ride—you’re bound to experience moments where your breath is taken away. So, don’t take it personally. Embrace it as a sign that you’re pushing your limits and building your cardiovascular endurance.

To tackle this challenge head-on, I have a couple of strategies up my sleeve. First, let’s talk about pacing. During the initial weeks of your running program, aim for a conversational pace. Picture yourself engaging in a light chat with a running buddy. On an intensity scale of one to ten, aim for around a six. If you find yourself gasping for air and struggling to utter a complete sentence, it’s a clear sign that you’re pushing too hard. Ease up and find your rhythm.

Now, let’s dive into the art of deep breathing. Most runners are guilty of shallow chest breathing, but here’s the secret—it’s not the most efficient way to fill your lungs with precious oxygen. We need to tap into the power of deep belly breathing. It’s like taking a refreshing gulp of air that nourishes your body from within. To practice deep breathing, place your palm on your abdomen and feel it rise and fall with each breath. That’s the sweet spot. Your abdomen should be doing the heavy lifting, not just your chest. Embrace the rhythm of your breath and let it fuel your every stride.

Now, let’s address those with lung conditions. If you’re dealing with asthma, emphysema, bronchiectasis, or chronic bronchitis, it’s crucial to consult with your physician. They can provide you with personalized guidance and tips to ensure your running journey is safe and enjoyable.

Running Excuse # 4 – I Don’t Have Time

Having more time is something we all seem to be chasing, yet it slips through our fingers like sand. It’s no wonder that lack of time is one of the most common excuses for skipping runs. Between school, work, social media scrolling, family commitments, and endless Netflix binges, it feels like there’s barely a spare moment in the day. But here’s the truth—we all have the same 24 hours. It’s not about finding more time; it’s about how we choose to use it. Time management is the name of the game, my friend.

Let’s get real for a moment. It’s all about priorities. If running truly matters to you, if it fuels your soul and makes you feel alive, then it deserves a place at the top of your priority list. It’s about making a conscious decision to carve out time for what brings you joy and improves your well-being. So, how can we overcome this time crunch and make running a non-negotiable part of our lives?

First and foremost, set your priorities straight. Acknowledge the significance of running in your life and allocate ample time for it. Treat it with the same importance as you would a crucial work meeting or a cherished family event. Schedule your runs into your daily or weekly planner, and stick to them like glue. By giving running the attention it deserves, you’re more likely to find the time for it.

Now, I know life can throw curveballs at us. There will be days when an hour-long run feels impossible. But remember this: “A short run is better than none.” When time is tight, don’t throw in the towel completely. Instead, lace up your shoes and go for a quick run—even if it’s just 15 minutes. Every step counts, and you’ll still be burning calories and reinforcing the habit of running in your daily routine. It’s about making the most of the time you have, no matter how fleeting it may seem.

Are you up for a challenge? Give yourself a 30-day running challenge. Set a goal, whether it’s increasing your mileage or tackling a specific training plan, and commit to it for a month. It’s a great way to stay motivated and stay accountable. And if you’re a complete newbie, don’t fret—I’ve got a beginner running plan waiting for you, tailored to help you take those first exhilarating steps.

Running Excuse # 5 – I’m too Tired To Run

Ah, the exhaustion that settles in after a long day of work. It’s like a heavy fog, clouding our motivation and making the thought of running seem downright impossible. Trust me; I’ve been there. But let me share a little secret with you—running in the morning can be a game-changer. Why? Because as the day wears on, our brain chemistry starts playing tricks on us.

You see, in the evening, our dopamine levels—the brain chemical responsible for energizing us—take a nosedive. It’s like someone pulled the plug on our internal battery. On top of that, our blood sugar levels plummet, leaving us feeling sluggish and far from motivated to hit the pavement. It’s no wonder that running becomes the last thing on our minds.

But here’s the silver lining: it’s not all doom and gloom. There’s a way to overcome this fatigue and reignite your running mojo. And it starts with a simple shift in your routine—start your day with a run. Yes, you heard me right. By lacing up your shoes and hitting the road in the morning, you’ll not only sculpt your body but also supercharge your energy levels for the entire day.

Now, here’s an interesting twist. Don’t confuse mental fatigue with physical fatigue. A study conducted by the brilliant minds at Bangor University in Wales found that short-term mental fatigue has little to no impact on our physical performance. So, when you feel that overwhelming tiredness creeping in, remember that it’s your mind—not your body—calling for a break and “time to kill.”

Believe it or not, running—yes, that very activity you’re tempted to skip—can be the key to unlocking a new wellspring of energy. Exercise, including running, has the power to boost dopamine, serotonin, and endorphins—the trio of feel-good chemicals in our brains. They’re like a symphony playing harmoniously, lifting our spirits and infusing us with a renewed sense of vitality.

Running Excuse # 6 – I’m Not A Morning Person

If you’re not a morning person, I completely understand where you’re coming from. But let me tell you a little secret: those early hours hold incredible potential for your running journey. Yes, I’m talking about lacing up your shoes and hitting the pavement while the rest of the world is still deep in slumber.

You see when your schedule is jam-packed, and life throws curveballs at you left and right, mornings become your sanctuary. It’s the one time of day when distractions are minimal, and you can truly focus on logging those miles. But wait, there’s more to it than just convenience. Science has shown that those who exercise first thing in the morning tend to be more consistent with their training. It’s like setting the tone for the day—a commitment to your own well-being.

Now, let’s talk about the delightful perks that come with embracing the early morning exercise routine. Picture this: as you lace up your shoes and venture into the world of running, you’re not only jump-starting your metabolism but also igniting a fire within your mind. Morning exercise has a magical way of sharpening your mental focus, boosting productivity, and setting you up for success throughout the day. It’s like a secret superpower that enhances every aspect of your life.

But how do you overcome the natural aversion to early mornings? Fear not, my friend. I have a few tricks up my sleeve to help you make the transition. It all starts with preparation. The night before your intended morning run, set yourself up for success. Embrace the wisdom of old and prioritize a good night’s sleep—early to bed, early to rise. By tucking yourself in earlier, you not only ensure sufficient rest but also awaken with a renewed sense of energy.

Now, here’s a golden tip to help you disconnect from the digital realm and ease into a peaceful slumber. Switch off your TV, shut down your computer, and bid farewell to those glowing screens at least two hours before bedtime. The absence of focused light triggers the release of melatonin—a hormone that promotes deep, restorative sleep. It’s like creating a tranquil cocoon for your weary mind.

And here’s a little visual cue to give you that extra push in the morning. Lay out your running gear the night before, right where your groggy eyes can easily spot it. Imagine waking up, grogginess lingering, and then catching sight of your vibrant running shoes and vibrant attire beckoning you.

Running Excuse # 7 – I’ve Tried Running & I Failed

Success is not final; failure is not fatal: it is the courage to continue that count. These words of Winston S. Churchill resonate deeply when it comes to the challenges of running. Let’s face it if running were a walk in the park; we’d all be sprinting effortlessly from one place to another. But here’s the truth: running is meant to be tough. It’s designed to push us mentally and physically, to test our limits, and to transform us from the inside out. Because let’s be honest, what doesn’t challenge us won’t change us.

So, my fellow runner, if you find yourself gasping for breath, legs aching, and doubts creeping in, know that you’re not alone. Running is a beautiful struggle, and even the most seasoned athletes face moments when every step feels like a mountain to conquer. It’s in these moments that true growth happens. It’s in these moments that you have the opportunity to rise above your own limitations and reach new heights.

But how do you overcome the inevitable challenges that come with running? The answer lies in setting realistic goals. You see, many beginner runners make the mistake of diving headfirst into intense training without considering their current fitness level. It’s like picking up a guitar for the first time and expecting to sound like Jimi Hendrix. We have to start small and build from there.

Instead of pushing yourself to run a full hour every day right off the bat, take a step back and set achievable milestones. For example, aim to run for 20 minutes three times a week during the first month. By keeping your goals within reach, you’ll avoid the pitfalls of injury and burnout. It’s all about pacing yourself and gradually building up your endurance and intensity.

Here’s how to design your running program.

how to start running in the morning

Running Excuse # 8 – I Always Chafe my Thighs

If you’ve experienced the friction-induced agony of chafed thighs, you know exactly what I’m talking about. That raw, tender skin that turns into blisters before you even realize it. It’s every runner’s nightmare, and it can really put a damper on your training.

Chafing occurs when the delicate skin on your inner thighs rubs against itself or your clothing, creating a fiery sensation that brings tears to your eyes. And let’s not forget those other trouble spots like the bra cup line and the nipples (ouch!). Sweat, the not-so-friendly companion of a runner, only adds fuel to the fire, especially if you have dry skin. Left untreated, chafing can lead to damaged skin, painful blisters, and a whole lot of discomfort.

But fear not, my fellow runner, for there are ways to conquer the chafing beast and reclaim your stride. Prevention is key here, and it starts with eliminating the source of friction. Experiment with different clothing made from various fabrics and sizes to find what works best for you. As a first line of defense, apply a lubricant or body lotion, like Vaseline or Body Glide, to those chafe-prone areas. Inner thighs, underarms, and nipples, I’m looking at you!

When it comes to clothing, steer clear of loose-fitting garments that can rub against your skin. Opt for high-performance running gear made from sweat-wicking fabric that pulls moisture away from your body and allows it to evaporate. Ladies, invest in a synthetic sports bra with smooth seams, or go for the seamless option. Say goodbye to cotton, my friends, because once it gets wet, it becomes a soggy mess that only exacerbates the chafing situation. And trust me; you don’t want to be that runner with bloody nipples rocking a cotton shirt.

Now, let’s say you’re dealing with a bad case of chafing. Don’t worry; there’s relief in sight. Apply talcum powder to the troubled area to reduce friction and discomfort. Cover the chafed spot with a bandage to protect it from further irritation. And if you’re really in a pinch, silicon nipple pads or pasties might just become your new best friends.

But hey, let’s not forget about excessive sweat. Running and sweating go hand in hand, but excessive perspiration can make chafing even worse. Stay hydrated, wear moisture-wicking socks, and consider using antiperspirant on chafe-prone areas to help control the sweat.

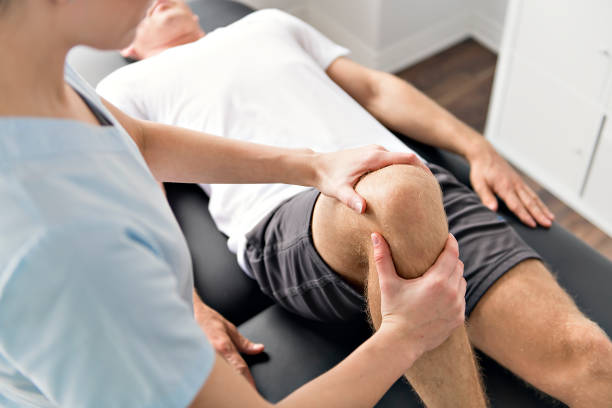
Running Excuse # 9 – I’m Afraid of Hurting My Knees

It’s a common concern among runners, and trust me, you’re not alone in this. Nobody wants to deal with the dreaded runner’s knee, that nagging pain that makes you wince every time you take a step. But fear not, my friend, for there are ways to conquer this hurdle and keep your knees happy and healthy.

Runner’s knee, also known as patellofemoral pain syndrome, is an overuse injury that can make even the simplest activities a painful ordeal. That intense pain around or behind the kneecap is enough to make anyone think twice about hitting the pavement. But here’s the thing: running itself doesn’t cause runners’ knees. It’s often a combination of factors, including overuse, muscle imbalances, and issues with foot mechanics.

Now, when it comes to overcoming the fear of hurting your knees, prevention is key. At the first sign of trouble, listen to your body and cut back on your mileage or take a break from running altogether. Ignoring knee pain can lead to more serious problems down the road. Instead, cross-train by focusing on upper body exercises and activities that don’t put excessive stress on your knees. Give them the rest they need to heal.

Stretching is another vital component of knee care. Regularly stretching your hamstrings and calves can help prevent overpronation, a common cause of runners’ knees. By keeping these muscles flexible and balanced, you can protect against unnecessary strain on your knees.

But let’s not forget about strength training. Building strength in your quadriceps, the muscles at the front of your thighs, can improve patellar tracking and address muscle imbalances in your lower body. So, don’t be afraid to hit the weights or incorporate exercises like squats and lunges into your routine. Your knees will thank you for it.

In addition to these measures, there are a few other steps you can take to protect your knees. Make sure you’re running in proper shoes that provide adequate support and cushioning. Opt for softer surfaces whenever possible, as they can reduce the impact on your joints. And remember the golden rule of running: stick to the 10 percent weekly mileage increase. Gradual progression is key to avoiding overuse injuries.

Lastly, focus on your running form. Developing good form can help minimize stress on your knees and prevent injuries. Keep your stride light and efficient, engage your core, and maintain a slightly forward lean. It may take some practice, but it’s worth it in the long run.

Running Excuse # 10 – I Don’t Want to Sprain my Ankle

An ankle sprain can be quite an unwelcome surprise, leaving you with a bit of swelling and some colorful bruises. But don’t let that scare you away from hitting the road. With the right approach, you can minimize the risk and keep those ankles in tip-top shape.

This injury occurs when the foot lands in an awkward or incorrect position, causing the ankle to twist or roll. It’s like a sudden unexpected plot twist in your running journey. The soft tissues and ligaments around the ankle can get damaged, leading to pain, swelling, and a few artistic bruises. It’s a common occurrence whether you’re a beginner or a seasoned pro.

Now, let’s tackle the question of overcoming this fear. After spraining your ankle, your first few steps may be a bit painful, like tiptoeing through a field of broken dreams. But fear not, for as you keep moving, your ankle will gradually loosen up, allowing you to find your pace once again. However, if the pain persists, it’s crucial to listen to your body and give it the rest it needs.

Take a break from running and give that ankle some well-deserved TLC. Rest is essential for the healing process. Ice the injured ankle a few times a day to reduce swelling and provide some sweet relief. Compress it gently with a supportive wrap, and elevate it to a comfortable position. This will not only help alleviate pain but also prevent further damage.

Remember, patience is key. Don’t rush back into your training until you’re pain-free and have a full range of motion in your ankle. Wiggle those toes and make sure your ankle is as flexible as ever. You’ll also want to ensure that the strength and balance in your injured limb match that of your uninjured ankle. It’s all about finding that perfect balance between caution and progress.

But don’t let this setback discourage you. Ankle sprains are part of the journey, and they can be overcome. With time, proper care, and a sprinkle of determination, you’ll be back on your feet, conquering those miles once again.

Running Excuse # 11 – I Get Sidelined by Muscle Cramps

Muscle spasms can really throw a wrench in your running plans, can’t they? The excruciating pain, the involuntary contractions—it’s a runner’s worst nightmare. But fear not, my friend, for there are ways to conquer these cramps and keep them from sidelining you.

Picture this: you’re out on a run, pushing yourself to the limit, feeling the wind against your face when suddenly, a cramp strikes. It’s like a lightning bolt of pain shooting through your muscles, threatening to bring your running adventure to a screeching halt. But fear not, for I have some strategies to help you overcome this challenge.

First things first, let’s talk prevention. One of the best ways to avoid those dreaded muscle cramps is to stay well-hydrated and warm up properly. Hydration is key, my friend. Before your run, make sure to drink at least 16 ounces of water to keep those muscles happy and hydrated. And if you’re planning a long-distance run or a particularly intense workout, consider taking a water bottle with you or mapping out your route to include water stops. Trust me, your muscles will thank you.

But what if a cramp strikes mid-run? Don’t panic! Stop running and give that cramp some attention. Apply firm pressure to the affected muscle for about 15 seconds, as if you’re giving it a reassuring squeeze. Then, gently stretch the muscle to help release the tension. It’s like giving your muscles a little love and encouragement to calm down. Repeat this procedure until the cramp starts to subside, and you can feel the relief washing over you.

Once the cramp has eased its grip on your muscles, it’s time to ease back into action. Start by walking to get those legs moving again. Feel the rhythm of your stride as you gradually pick up the pace. And when you’re ready when you feel that surge of confidence, start running again.

Running Excuse # 12 – I’m Afraid of Falling

I hear you, my friend. Running may not be a contact sport, but let me tell you, plenty of runners have faced their fair share of falls and walked away with some battle scars. I’ve had my clumsy moments, too, tripping and falling three to four times a year during my outdoor runs. Thankfully, I’ve been fortunate enough to avoid any broken bones, but I’ve definitely sported a few bloody knees and wrists along the way. Luck has been on my side so far.

But let’s talk about how to conquer this fear and keep those graceful feet firmly planted on the ground. It all starts with one simple but powerful rule—pay attention. Yes, my friend, it may sound like common sense, but it’s the foundation of a safe and enjoyable run. Keep your head up, gaze straight ahead, focusing on a point about 10 to 15 feet in front of you. By doing so, you’ll have a clear view of what lies ahead. Avoid the temptation to constantly stare down at your feet, especially when you’re tackling those adventurous trails. Trust me, that’s where all the mischievous obstacles like moss, roots, rocks, logs, and branches love to play hide-and-seek. Keep your eyes peeled and your focus steady.

Now, let’s talk about the soundtrack to your run—music. I get it; running with your favorite tunes blasting through your earbuds can be an exhilarating experience. But if you want to stay aware of your surroundings and minimize the risk of unexpected surprises, it’s wise to keep the volume low or even leave one earbud out. This way, you can enjoy your music while still tuning in to the sounds of the world around you. Oh, and if you’re hitting the pavement at night or navigating busy streets, it’s best to pass on the music altogether. Safety should always take priority, my friend.

But let’s say, despite all your best efforts, you find yourself face down on the ground. Take a deep breath, my friend; it’s not the end of the world. The first step is to gather yourself and assess the damage. Check your knees, ankles, wrists, and elbows to make sure nothing is seriously injured. Make sure there’s no active bleeding or any other concerning signs. If it’s a minor scrape or bruise, you can tend to it once you’re back home. Wash the wound gently with warm water, soap, and a touch of hydrogen peroxide. Applying a bit of antibiotic cream will help keep it clean and prevent any unwanted infections.

However, if you’re experiencing heavy bleeding or any worrisome symptoms, don’t hesitate to seek immediate medical attention. Your well-being is of utmost importance, and it’s always better to be safe than sorry.

Running Excuse # 13 – I get Blisters Often

Ah, those pesky blisters. They can really put a damper on your running experience, can’t they? I feel your pain, my friend. Trying to run with a blister is like trying to dance with a pebble in your shoe—it’s no fun. So, I completely understand why you’d want to avoid them at all costs.

Let’s dive into the fascinating world of blisters and how we can conquer them. Most foot blisters are the unfortunate result of that continuous rubbing between your sock, your running shoe, and the delicate skin of your foot. It’s like a friction-fueled battle, causing the outer layers of your skin to rebel, break apart, and fill with fluid. Ouch, indeed!

Now, there are several culprits that contribute to the blister mayhem. Excessive moisture, wrinkled socks, those sneaky sharp seams, any foot abnormalities you might have, and let’s not forget about the role of improper running shoes or insoles.

But fear not, my friend, for there are ways to overcome this blister ordeal and keep those feet happy. Prevention is the name of the game. Start by ensuring you’re running in shoes that fit you properly. Give your toes some breathing room by leaving at least a half-inch of space between your longest toe and the end of the shoe’s toe box. Trust me, they’ll thank you for it.

Next up, let’s talk socks. Not just any socks, but running-specific socks. Say goodbye to cotton socks—they’re not your blister’s best friend. Opt for moisture-wicking, blister-resistant socks that will keep your feet dry and comfortable. And here’s a little trick for added protection: consider wearing two thin pairs of socks to reduce friction even further. It’s like giving your feet a cozy, double-layered shield against those blister bullies.

Now, let’s talk about preemptive strikes. Before a run, you can apply a layer of Vaseline sports lube or strategically place bandages over those blister-prone spots—typically the bony surfaces like your toes and heels. They act as your trusty allies, creating a barrier between your skin and the forces of friction. And if you want to take it up a notch, feel free to embrace the power of silicone padding. It’s like giving your feet a cushiony hug, protecting them from the blister battlefield.

But what if, despite all your efforts, a blister decides to show up uninvited during your run? Here’s the deal, my friend—assess the situation. If the pain is manageable and it’s not throwing off your stride too much, you can keep going. After all, you’re the captain of your running ship. Just be mindful and listen to your body.

Remember, blisters are a part of the running journey for many of us. But by taking these preventive measures and being mindful of your feet, you can minimize their occurrence and keep running in blissful bliss without those pesky blisters interrupting your stride. So, lace up those shoes, slip on those blister-resistant socks, and hit the road with confidence. Happy blister-free running!

Running Excuse # 14 – I’m Going to Have to Use The Bathroom

Picture this: you’re out there pounding the pavement, enjoying the rhythm of your stride, when suddenly your stomach starts playing a not-so-melodious symphony. Gassiness, bloating, the urgent need to find a restroom—runners’ trots can come in all shapes and forms. And yes, it can be embarrassing, especially if you’re running with a group. But here’s the thing—it’s more common than you might think. Surveys have shown that around 60 percent of athletes experience some form of gastrointestinal issues while running or immediately after.

So, what’s behind this unpleasant phenomenon? Well, it’s a combination of factors. The jostling motion of running, coupled with restricted blood flow to the digestive tract (thanks to the blood being diverted to your hardworking extremities), can lead to what we affectionately call “runner’s diarrhea.” It’s like a not-so-pleasant dance between the motion of running and your digestive system, resulting in an urgent call to the bathroom.

But fear not, my friend, for there are ways to conquer this bathroom-related dilemma and regain control of your runs. It all starts with a little pre-run preparation. First things first, try to give yourself a window of at least three hours between your last meal and the run. This will give your body enough time to digest the food properly and minimize the chances of any GI distress. And here’s a tip: steer clear of caffeine, artificial sweeteners, spicy foods, and anything else that might irritate your sensitive GI tract. Instead, opt for easy-to-digest foods like bagels, rice, or pasta. Think of them as your running fuel without the unwanted digestive fireworks.

Now, let’s talk about the importance of making a pit stop before you hit the pavement. It’s like having a pre-flight checklist—checking that bathroom box can save you from unexpected mid-run detours. If you know your body’s rhythm and have a general idea of when nature typically calls, plan your running route accordingly. Find a convenient stopping spot around the time you usually have the urge to go. Trust me, it’s a game-changer.

And let’s not forget the golden rule: listen to your body. If you feel the urge to go mid-run and it’s not something you can comfortably ignore, find a restroom. There’s no shame in taking care of business—after all, nature’s calls are part of being human.

Running Excuse # 15 – Too Embarrassed to Run

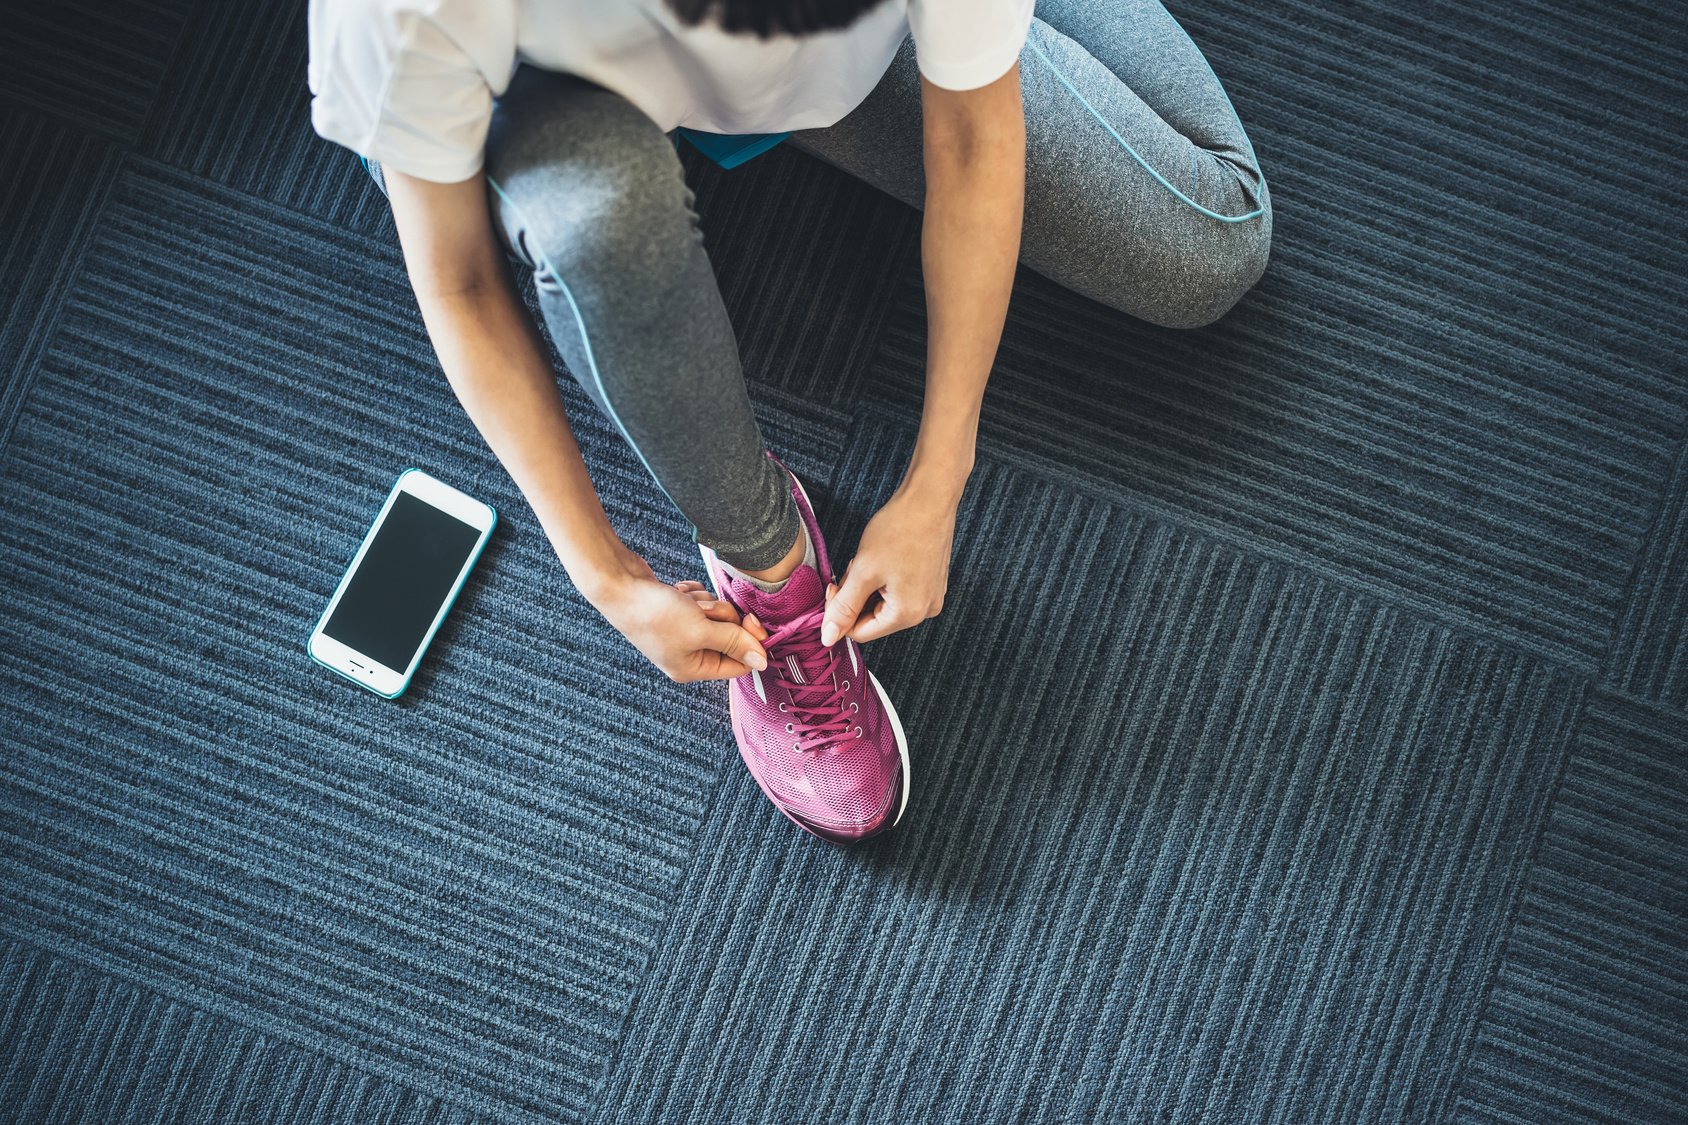
Feeling self-conscious about running in public is a common hurdle that many beginners face, and it’s one that can make you question your decision to lace up those running shoes. But fear not, for there are ways to conquer this fear and unleash your inner runner.

First things first, let’s address the root of the problem. It’s easy to fall into the trap of thinking that everyone around you is judging your every step, critiquing your form, and scrutinizing your speed. But here’s the reality check: they’re not. Most people are too busy with their own lives, lost in their own thoughts and worries, to even notice you running by. The truth is, nobody cares as much as you think they do. So, instead of trying to read everyone else’s minds, bring the focus back to yourself and your own journey.

Now, let’s talk about that little voice in your head that keeps whispering, “You’re not a real runner.” It’s time to silence that voice and embrace the fact that you are taking control of your health and well-being. Running is a powerful act of self-care, and you should be proud of yourself for making the choice to prioritize your body and your fitness. So what if you don’t fit some stereotypical image of a “runner”? The only thing that matters is that you’re out there, putting one foot in front of the other and making progress.

But I get it—feeling like a runner is easier said than done. So, let’s try a little trick: fake it until you make it. Dress the part. Treat yourself to a pair of proper running shoes that make you feel like you can conquer any distance. Slip into comfortable running attire that makes you feel confident and ready to take on the world. When you step out the door looking like a runner, you’ll start to believe it yourself.

Running Excuse # 16 – I’m Old/Too Fat/Too Big/Not in Shape/Not Athletic

Being a beginner is a beautiful stage in any exercise journey. It’s a time of exploration, a time to push your boundaries and discover what your body is truly capable of. Think of it as embarking on a grand adventure, where each step you take is a step towards discovering your own strength and resilience. And guess what? You don’t have to be an athlete or in top shape to start running. Running is for everyone, regardless of age, size, or athletic background.

Now, let’s talk about linear growth. Every mile you run, every step you take, is an opportunity for improvement. Your body is an incredible machine that adapts and grows stronger with each run. It’s like planting a seed and watching it grow into a magnificent tree. Each run you complete, no matter how short or slow, is a building block for your progress. So don’t be discouraged by where you’re starting from. Embrace it as a starting point for a journey towards a healthier, fitter, and more confident you.

Now, how do you overcome the belief that you’re too old, too fat, too big, not in shape, or not athletic? It’s simple, my friend—start slow and build gradually. Rome wasn’t built in a day, and neither will your running fitness. If you’re out of shape or carrying extra weight, consider beginning with a walking routine. Start by lacing up your shoes and taking brisk walks, gradually increasing the duration and intensity. As you become fitter and more comfortable, start incorporating short intervals of jogging. Before you know it, you’ll be running for 30 minutes straight and surprising yourself with your progress.

One word of caution: don’t overdo it. Listen to your body and give it the time it needs to adapt and recover. Pushing yourself too hard too fast can lead to injuries and setbacks, which is the last thing we want. Remember, this is a journey, not a sprint. Take it one step at a time, and soon enough, you’ll witness the transformative power of running on your fitness and overall well-being.

Here’s something you might not realize—runners come in all shapes, sizes, ages, and body types. Don’t believe me? Take a trip to your nearest public park and observe the runners there. You’ll see a diverse community of people, each with their own unique journey and story. Running is a welcoming and inclusive sport where everyone is encouraged to lace up their shoes and hit the pavement.

If you’re looking for a structured approach to getting fit without getting hurt, I’d recommend starting with the walk-run method. Alternate between walking and running intervals, gradually increasing the time spent running and decreasing the time spent walking. This method allows your body to adapt and build endurance while minimizing the risk of injury.

Running Excuse # 17 – The Weather Is Not Nice

First of all, I want to acknowledge that the weather can sometimes be, well, not so nice. When it’s too cold, hot, windy, or raining, it can be tempting to stay cozy indoors and avoid the discomfort. I mean, who wants to venture out when the wind is blowing you sideways or when the rain is pelting down like a symphony of tiny drumsticks on your head? It’s understandable that you’d prefer the comfort of your couch.

But here’s the thing—we can’t control the weather. No matter how hard we try, we can’t command the clouds to part or the sun to shine on cue. If we had that power, well, let’s just say we’d be more than just runners. We’d be weather deities, ruling over the skies with our running shoes as our scepters. But alas, that’s not the case.

Instead of lamenting about the weather, let’s shift our perspective a bit. Have you ever heard the saying, “There’s no such thing as bad weather—just bad clothes”? It’s a nugget of wisdom that holds true in the running world. If you’re prepared with the right gear to face those less-than-ideal conditions, you can still head out for a run and even find some enjoyment in it.

When it’s hot outside, make sure you wear moisture-wicking clothing and a breathable hat to shield yourself from the sun. Hydrate properly before, during, and after your run, and consider adjusting your pace to accommodate the heat.

For rainy days, embrace the power of waterproof or water-resistant gear. A good pair of running shoes with decent traction will keep your feet dry and prevent any slippery situations. And trust me, there’s something strangely exhilarating about running in the rain—feeling those raindrops on your skin as you defy the wetness.

When the temperature drops, layer up! Dress in light, moisture-wicking layers to trap heat and keep your body warm. Don’t forget to protect your extremities with gloves and a hat. Running in the cold can be invigorating—it’s like a dance with the winter air, where you warm up as you go.

Now, if the weather is truly unbearable or unsafe, there’s always the option of indoor training. Hop on that trusty treadmill and get your miles in a while enjoying the comfort of a controlled environment. It’s not the same as running outdoors, I’ll give you that, but it’s a great alternative when Mother Nature is throwing her tantrums.

Piriformis Syndrome In Runners: Causes, Symptoms, and Effective Treatment Strategies

Running with Hemorrhoids

Have you ever experienced that annoying pain in your butt while out for a run? Well, chances are you might be dealing with piriformis syndrome to some extent. Don’t worry, you’re not alone! This condition is surprisingly common among runners, regardless of their training experience or background.

In this post, I’m going to dive deep into the world of piriformis syndrome. I’ll explore what causes it, the best treatment approaches to get you back on track, and some awesome prevention measures to keep you from falling back into the same painful trap.

So, grab a seat (a comfortable one, of course), and let’s unravel the mystery of piriformis syndrome together!

What is Piriformis Syndrome?

So, what exactly is Piriformis Syndrome? It’s a condition that causes the piriformis muscle to go haywire. Picture this: your piriformis muscle starts spasming or contracting, leading to an infiltration of chemicals and mechanics that irritate the pain receptors on the sciatic nerve. And bam! You’re left with pain shooting along the path of that nerve.

But hold on, let’s unravel the mystery of the piriformis muscle itself, which is nestled deep within your gluteal region, just behind the mighty Gluteus Maximus. This triangular-shaped muscle sets its origins on the front surface of the sacrum, extends through the greater sciatic foramen, and attaches itself to the greater trochanter of the femur (that’s your upper thighbone, by the way).

Now, here’s the fun part. The piriformis muscle is a multitasking maestro. It supports the external rotation of your hips, keeps your pelvis stable, and ensures your hips stay level during various movements. And yes, you guessed it right—running is no exception! This muscle works hard to withstand the repetitive forces that running puts on your body.

What Causes Piriformis Syndrome While Running?

Repetitive movement is the name of the game, especially when it comes to high-impact activities like running. Imagine your poor piriformis muscle working tirelessly with each stride, only to end up drained and irritated. Ouch! And as time goes by, this wear and tear can lead to not just pain but also potential injury.

But that’s not all. There are several factors that can contribute to the onset of Piriformis Syndrome.

First up, we have the dreaded “Sleepy Glute Syndrome” – a fancy term for weak glutes. Yep, those muscles that are crucial for keeping your hips stable and powering your stride can let you down if they’re not up to the task.

Next on the list: weak hamstrings. These powerful muscles at the back of your thighs are part of the support system for your hips and can affect how your piriformis muscle functions. So, if they’re not pulling their weight, trouble can arise.

Now, let’s talk about the perils of prolonged sitting. Picture this: you spend hours on end glued to a chair, and your hip stability muscles start to weaken. It’s like they’re taking an extended vacation, leaving your poor piriformis muscle to fend for itself. No wonder it gets cranky!

And let’s not forget about overpronating feet. When your feet roll inward excessively while running, it can throw off the alignment of your lower body and put extra stress on the piriformis muscle. It’s like a misaligned gear in a well-oiled machine – it’s just asking for trouble.

Lastly, we have the ever-present culprit: bad running form. Your running technique plays a crucial role in how your muscles and joints work together. If your form is off, it’s like driving with a wonky steering wheel – you’re bound to encounter problems sooner or later.

Symptoms Of Piriformis Syndrome In Runners

According to my trusty research, diagnosing Piriformis Syndrome is like trying to solve a complex puzzle. It’s a sneaky little injury that can be quite elusive. So, if you’re experiencing any of the following symptoms, it’s time to pay close attention.

First, you might notice some soreness or tightness right in the middle of your buttock area. It’s like a nagging sensation that just won’t quit. And if you press on the back of your hip joint, you might find tenderness making its presence known. It’s like your body is sending out warning signals, trying to tell you that something’s not quite right.

But wait, there’s more! Let’s talk about sciatica-like pain. It’s like a lightning bolt shooting down the back of one or both of your thighs, making its way to your calves and sometimes even extending all the way down to your feet. It’s a real nerve party down there!

Now, when it comes to hip motion, you might notice a limited range of motion, especially when it comes to internal hip rotation. It’s like your hip joint is throwing a temper tantrum, refusing to move as freely as it should.

But here’s the kicker: the pain can be even worse when you’re running and going through your gait cycle.

And if that’s not enough, prolonged sitting or lying on your back can make the pain even more intense. It’s like your body saying, “Hey, why are you trying to relax? I’m still here, making sure you don’t forget about me!”

Don’t Confuse With Sciatica

Piriformis Syndrome often gets mistaken for other troublemakers in the neighborhood, particularly its notorious cousin, sciatica. Let’s unravel this confusion and shed some light on the treatment options for our stubborn piriformis.

You see, the sciatic nerve and the piriformis muscle are like close neighbors who sometimes don’t get along. In fact, the sciatic nerve runs right alongside—or even through—the piriformis muscle, extending all the way down the leg and even to the foot.

So, when the piriformis muscle decides to act up, it can cause some serious pain that travels the entire length of the leg, playing a not-so-friendly game of tag with your nerve endings. No wonder it’s often mistaken for sciatica and a whole host of other ailments!

The Treatment Of Piriformis Syndrome In Runners

Piriformis syndrome is a condition that can sideline you for weeks or months at a time.

I know that’s the last thing you want to hear if you’re dealing with it now.

Treatment options for piriformis syndrome revolve around managing the irritated piriformis muscle.

Here are some of the recommended options.

Rest

The key to treating piriformis syndrome lies in managing that irritated muscle of yours. And the first step on this healing journey is to give that muscle a well-deserved rest. Yes, you heard me right. It’s time to temporarily bid farewell to your beloved running and high-impact exercises. By stepping back and allowing your piriformis muscle some downtime, you’re giving it a chance to recover and regain its strength.

As long as you can perform your activities pain-free, you can still keep moving. Just be cautious and avoid those intense and longer-than-usual runs that could potentially put unnecessary strain on the muscle. We don’t want to overload the poor thing, do we?

Ease the Pain

When that fiery pain flares up, ice becomes your trusty ally. Simply grab an ice pack, wrap it in a towel (we don’t want to give your skin an icy kiss), and apply it to the affected area for about 10 to 15 minutes. Feel that cool sensation? It’s like a gentle breeze calming the raging storm within your piriformis muscle.

But sometimes, the pain is stubborn and refuses to budge, even with the help of ice. That’s when you might want to consider bringing in the reinforcements. Over-the-counter anti-inflammatory medicines can be your knight in shining armor during those acute phases when the affected region is tender to the touch. Just pop one of those little warriors according to the recommended dosage, and let them wage war against the inflammation that’s causing you so much grief.

Visit a Professional

Now, here’s the deal: if the pain persists and you’re not getting the relief you desperately seek, it’s time to call in the professionals. Yes, my friend, it’s time to pay a visit to the good ol’ doctor. They have a few tricks up their white-coated sleeves that might just do the trick.

One common treatment measure involves injecting a magical drug straight into the rebellious piriformis muscle. This superhero injection aims to reduce swelling and calm the storm within. It’s like sending in a peace envoy to negotiate with the troublesome muscle and restore harmony to your body.

But wait, there’s more! In rare cases where the pain is relentless and all other measures have failed, surgery might be on the table.

Instead, skilled surgeons might perform a procedure that involves cutting through the muscle itself to relieve the pressure that’s been tormenting your sciatic nerve. This should be enough to liberate the nerve from its constricting prison and set it free.

Seek Professional Guidance:

If you’re experiencing persistent symptoms of piriformis syndrome, seeking professional guidance can be highly beneficial. I’d recommend booking a few sessions with a running coach or physical therapist who specializes in working with runners.

Working with a professional allows for individualized care and guidance based on your specific needs and goals. They can provide you with proper exercises, stretches, and modifications to support your recovery from piriformis syndrome and help prevent future occurrences.

A running coach can assess your running form, stride mechanics, and overall technique. They can identify any areas of improvement and provide guidance on how to optimize your form to reduce stress on the piriformis muscle. They may also evaluate your training plan to ensure it is appropriately balanced and doesn’t contribute to overuse or excessive strain.

A physical therapist can conduct a thorough evaluation of your musculoskeletal system, identifying any muscle imbalances or weaknesses that may contribute to piriformis syndrome. They can develop a tailored exercise program to strengthen the surrounding muscles, improve flexibility, and enhance overall hip stability. They may also incorporate manual therapy techniques to address any soft tissue restrictions or joint dysfunctions that could be contributing to your symptoms.

Remember, seeking professional guidance is an investment in your long-term running health. They can provide valuable insights and personalized strategies to address your unique situation and keep you on track toward achieving your running goals safely and effectively.

Preventing Piriformis Syndrome In Runners

The best way to minimize re-injury risk is to reduce the piriformis muscle’s vulnerability.

External factors, such as poor running form, excessive mileage, overtraining, running on banked surfaces, or wearing improper shoes, can all over-tax this muscle, leading to trouble.

An ounce of prevention is worth a pound of cure, as the saying goes. By taking proactive steps, you can reduce the vulnerability of your piriformis muscle and minimize the risk of developing or re-injuring piriformis syndrome. Consider the following prevention measures:

Stretching

Regular stretching is a key component of maintaining flexibility and reducing inflammation, stiffness, and pain along the sciatic nerve.

Research has even shown the effectiveness of yoga in patients with piriformis syndrome and sciatic nerve pain. Incorporate stretches that target the piriformis muscle, quadriceps, and IT band to keep them supple and prevent tightness and strain.

Foam Roll the Piriformis, Quadriceps, and IT-Band

Leg Slides

Knees to the Side

Improve Your  Running Form

Faulty running mechanics can contribute to piriformis pain and increase the risk of developing piriformis syndrome. That’s why it’s crucial to invest time in improving your running form. By adopting proper running mechanics, you can reduce the strain on your piriformis muscle and minimize the risk of injury.

To improve your form, focus on a few key elements. First, pay attention to your posture. Maintain an upright position, with your head aligned with your spine and your shoulders, relaxed. Avoid slouching or leaning forward excessively, as this can lead to increased strain on the piriformis muscle.

Next, concentrate on your stride. Aim for a midfoot strike, where your foot lands beneath your center of gravity. Avoid overstriding, as this can put additional stress on your muscles and joints, including the piriformis. Maintain a quick cadence and try to keep your steps light and efficient.

What’s more?

Pay attention to the position of your hips and pelvis. Keep your hips stable and level while running, avoiding excessive hip drop or rotation. Engage your core muscles to provide stability and support to your pelvis, which can help alleviate strain on the piriformis muscle.

If you’re unsure about your running form or suspect any imbalances, it can be beneficial to seek guidance from a running coach or undergo a running gait analysis. These professionals can assess your form, identify any areas of improvement, and provide personalized recommendations to help you optimize your running mechanics and reduce the risk of piriformis syndrome.

And if you really want to take it to the next level, consider enlisting the help of a running coach. They’ll be your personal form guru, observing your every move and offering guidance to ensure you’re running in harmony with your body.

Strength Train

Incorporating strength training into your exercise routine can be beneficial for preventing and managing piriformis syndrome. Strengthening the muscles surrounding the piriformis can help provide support, stability, and balance to the hip region, reducing the strain on the piriformis muscle itself.

Research agrees. One example is research published in the Journal of Orthopaedic & Sports Physical revealed that strengthening the adductor muscles of the hips can reduce symptoms and relieve pain in patients with piriformis syndrome.

Consider including exercises that target the hip abductors, adductors, and gluteal muscles in your strength training routine. These muscles play a crucial role in hip stability and can help alleviate stress on the piriformis. Here are some exercises you can incorporate:

  • Clams: Lie on your side with your knees bent and feet together. Keeping your feet together, lift your top knee as high as you comfortably can while keeping your pelvis stable. Lower your knee back down. Repeat for a set of repetitions and then switch sides.
  • Toe Touch Drill: Stand with your feet shoulder-width apart. Lift one leg off the ground, bending your knee to a 90-degree angle. While balancing on the standing leg, reach down with the opposite hand and touch your toes. Return to the starting position and repeat on the other side. This exercise helps improve balance and strengthens the muscles in the hip and core.
  • Squats: Stand with your feet shoulder-width apart. Lower your body down as if sitting back into a chair, keeping your knees aligned with your toes. Engage your glutes and hamstrings as you push through your heels to return to the standing position. Repeat for a set of repetitions. Squats target the gluteal muscles and can help improve overall hip strength.
  • Deadlifts: Stand with your feet hip-width apart, holding a barbell or dumbbell in front of your thighs. Hinge at your hips and lower the weight down towards the ground while keeping your back straight. Engage your glutes and hamstrings as you lift the weight back up, returning to a standing position. Deadlifts target the posterior chain muscles, including the glutes and hamstrings.

Incorporate these exercises into your strength training routine two to three times per week, allowing for adequate rest and recovery between sessions.

Start with lighter weights or bodyweight and gradually increase the resistance as your strength improves. It’s essential to maintain proper form during these exercises to ensure optimal benefits and minimize the risk of injury.

Run On proper Surfaces/ No slanted Surfaces.

Avoid running on slanted surfaces.

This increases the likelihood of pelvic misalignment, and that puts you at a higher risk for an overuse injury.

If you must, then make sure to switch up in which direction you run on the track.

Conclusion

There you have it! The above treatment options and training guidelines are all you need to relieve piriformis syndrome symptoms and keep training pain-free so you can reach your running goals as soon as you can.

The rest is up to you.

Please feel free to leave your comments and questions in the section below.

In the meantime, thank you for reading my post.

Keep Running Strong.

David D.

How To Make Running More Enjoyable & Less Painful

Whether you’re a fresh-faced newbie eager to hit the pavement or a seasoned veteran who’s been pounding the pavement for years, one thing’s for sure: we all want to keep running consistent and enjoyable for the long haul. Am I right?

Well, you’re in luck because you’ve landed in the perfect spot. Get ready to discover some awesome strategies that will make running less painful and more pleasurable. Trust me, these tips will help you maximize your runs without the unnecessary hassle.

So, let’s lace up those shoes, get in the zone, and dive right into this article. Together, we’ll uncover the secrets to running with greater ease and enjoyment. Sounds like a plan? Great! Let’s hit the ground running!

1. Develop Proper Form

Picture this: you’re a runner, pounding the pavement with each stride, feeling the wind on your face and the exhilaration in your heart. But wait, there’s something missing. Ah, yes, proper form! It’s the secret sauce that can take your running game from mediocre to magnificent.

Now, you might be thinking, “But I’m not aiming for Olympic gold; why should I care about my running technique?” Well, my friend, let me drop some knowledge on you. Studies have shown that even for us casual runners, proper form is crucial. It’s like the foundation of a sturdy house or the melody in a beautiful symphony—it sets the stage for a flawless performance.

So, how do you develop this mythical proper running technique?

First and foremost, imagine yourself as a majestic tower, standing tall and proud. Keep your back flat, head up, and let your feet gracefully land beneath your body’s center of gravity. This alignment is like finding your rhythm in a dance, allowing you to glide effortlessly across the ground.

But wait, there’s more! Relaxation is the name of the game. Loosen that death grip on your jaw and unclench those fists. Let go of any tension in your facial muscles as if you’re releasing a deep sigh of relief. Trust me, and your body will thank you for it.

And here’s a little secret to add some pep to your step: increase your cadence. Aim for a rhythm of 170 to 180 strikes per minute. It’s like finding the perfect tempo in a song, propelling you forward with ease. And when it comes to speedwork and racing, don’t be afraid to crank up that cadence even more.

2. Dress Right

Now, here’s the scoop: to make your runs less painful and more enjoyable, you need to deck yourself out in the right gear.

Studies have shown that these magical fabrics have the power to whisk away moisture from your skin, keeping you dry and comfortable. It’s like having a personal sweat-wicking assistant by your side, ensuring that you don’t get bogged down by the dreaded sweat monster. Say goodbye to uncomfortable chafing and blisters, my friends.

Now, let’s talk about cotton. Ah, sweet, innocent cotton. It may be soft and cozy, but when it comes to running, it’s a big no-no. Why, you ask? Well, cotton has a sneaky little secret—it loves to soak up moisture like a sponge and hold onto it for dear life. Once it’s wet, it’s like running with a wet blanket clinging to your body.

But wait, there’s more to dressing right than just choosing the right materials. Let me introduce you to the “20 degrees rule.” Picture this: you step outside, and it’s a sunny day with a temperature of 70 degrees Fahrenheit. Now, imagine dressing as if it’s actually 20 degrees hotter. Why, you ask? Well, when you start running, and your body heats up, you don’t want to be weighed down by excessive layers.

Now, don’t worry. Dressing right doesn’t mean breaking the bank. You don’t need to empty your pockets for fancy brand names or high-end gear. It’s all about finding the right clothing for the job. Look for affordable options that are specifically designed for running. Trust me, your wallet and your comfort levels will thank you.

3. Get The Right Shoes

Listen up, my fellow runners! We’re about to embark on a quest for the holy grail of running—finding the right shoes. Believe me when I say proper footwear can make all the difference in your running journey. It’s like having a trusty steed that carries you swiftly and painlessly through the miles. So, let’s dive in and discover the secrets of getting the right shoes.

First things first, let’s talk about the dark side of running—pain and injury. Improper training shoes are like villains lurking in the shadows, ready to sabotage your running experience. They can be the root cause of all sorts of woes, from pesky blisters to nagging knee pain. But fear not, my friends, for we have a solution.

Picture this: you stride into a running store, feeling like a celebrity walking the red carpet. But instead of photographers, you’re greeted by a team of shoe experts ready to analyze your every move. They’ll examine your gait and foot type, dissecting every step you take to determine which pair of shoes will be your perfect match.

Now, here’s a fun fact for you: the average lifespan of a running shoe is like a journey through the miles, spanning somewhere between 400 to 600 miles. But hold on, that number can vary depending on factors like your stride and the terrains you conquer. For most of us, that translates to around 5 to 6 months of regular running adventures.

But wait, there’s more to this footwear extravaganza. Let’s not forget about the unsung heroes of our running ensemble—the socks! They may seem small, but their impact is mighty. Look for socks made of wicking fabrics designed to keep your precious footsies dry and cozy. It’s like wrapping your feet in a magical shield that repels moisture and provides a snug, supportive embrace.

Again, you don’t need to break the bank to find your perfect pair of running shoes. You don’t have to be a millionaire or a shoe model to rock the latest trends. Comfort should always be your number one priority. With a budget of around $60 to $90, you can snag yourself a quality pair that will accompany you on countless adventures.

4. Warm Up Right

Imagine yourself stepping onto the starting line of a race, feeling the adrenaline pumping through your veins. But hold on, my friends, before you take off like a rocket, there’s something crucial you must not overlook—the warm-up. Skipping it is like playing with fire, tempting fate, and inviting disaster to crash your running party.

So, here’s the golden rule of warming up: start slow and build up the heat gradually. It’s like kindling a fire, starting with a small spark and letting it grow into a blazing inferno. Begin your running session with a gentle 5 to 10 minutes of slow jogging. This will kickstart your heart rate, awaken your muscles, and prepare your body for the challenges that lie ahead.

Now, let’s spice things up a bit. If you’re planning to unleash your inner speed demon and engage in some sprints or hill reps, it’s time for a dynamic warm-up extravaganza. Think of it as a dance routine that limbers up your body, getting every muscle fired up and ready to rock. Include exercises like lunges, squats, inchworms, and all sorts of movements that awaken your inner athlete.

But wait, there’s more to the warm-up party! Forget about those static stretches that leave you feeling like a statue. Instead, opt for body looseness exercises that bring life and vitality to your muscles. It’s like oiling the gears of a well-oiled machine, ensuring smooth and effortless movement. Perform knee circles, ankle rolls, hip rotations—anything that gets your body loose without putting too much strain on your cold muscles and joints.

Now, my friends, I have a special treat for you—a dynamic warm-up routine that will elevate your running experience to new heights. It’s like a secret handshake among runners, a ritual that connects us all in the pursuit of greatness. Follow this routine, and you’ll feel like a superhero ready to conquer the world.

5. Keep your Tanks Humming

Just like a car needs the right type and amount of fuel to run smoothly, our bodies crave the perfect blend of nourishment to power us through our runs. So, let’s explore the fascinating realm of proper fueling and discover the secrets to keeping our tanks humming.

Now, before we dig in, it’s essential to understand that the quantity and quality of your fuel intake depend on various factors like your running schedule, duration, and intensity. Think of it as a customized menu designed exclusively for you and your running adventures.

First things first, if you’ve indulged in a delightful feast, it’s best to give your digestive system some time to work its magic before hitting the pavement. Wait for around 2 to 3 hours after a big meal before you embark on your running journey. This allows your body to digest the food, extract the precious energy it holds, and prevent any unwanted gastrointestinal distress along the way. Trust me, you don’t want an upset stomach crashing your running party.

But hey, running on empty is not always a problem, my friends! For those short and easy runs, you can lace up your shoes and hit the road without worrying about fueling beforehand. It’s like taking a quick joyride around the block in your trusty running machine. Just make sure to listen to your body and refuel when it signals that it’s time for a pit stop.

Now, let’s talk about the magical pre-run snacks—the mini powerhouses that provide you with a quick burst of energy to kickstart your running adventure. Picture yourself on a grand quest, and these snacks are your trusty companions, ready to fuel your every stride. Opt for something easily digestible, like a banana, a handful of dried fruit, or a refreshing smoothie. These delectable treats provide the fuel your body needs without weighing you down or causing any unwanted digestive issues.

6. Stay Hydrated

Proper hydration is like a refreshing oasis in the midst of your running adventures. It helps flush out toxins, keeps your body temperature in check, and even reduces inflammation caused by those mighty cells working hard to carry you forward. It’s the elixir that keeps your running machine running smoothly, preventing those dreaded muscle cramps, headaches, and fatigue from crashing your party.

Now, let’s talk numbers, my thirsty comrades. As a general guideline, aim to drink at least half of your body weight in ounces each day. So, if you weigh 180 pounds, challenge yourself to sip on a refreshing 90 ounces of water throughout the day. I know it might sound like a lot but fear not! You don’t have to gulp it all down in one go. With a little practice and some mindful sips here and there, you’ll transform hydration into a habit that keeps you quenched and ready for your running adventures.

But what about those long runs where your body craves more than just a few sips? Fear, I have a solution for you. Plan your routes strategically, keeping in mind the locations of convenience stores or fountains where you can quench your thirst along the way. It’s like mapping out an adventure with secret water oases, ensuring that hydration is never far from your reach. You can even run with a trusty handheld water bottle or sport a stylish hydration belt—accessories that not only keep you hydrated but also make you look like a true running warrior.

And here’s a little anecdote to drive home the importance of staying hydrated. Imagine your body as a well-oiled machine, gears turning, muscles firing, and energy flowing freely. But without proper hydration, it’s like forgetting to refill the oil in your beloved machine. It starts to sputter, the gears grind to a halt, and your once smooth-running adventure becomes a struggle. But fear not, my friends, for the remedy, is simple—sip, sip, sip that water and keep those hydration levels soaring.

7. Listen to Your Body

Let’s talk about a crucial aspect of your running journey—listening to your body. Imagine your body as a wise old friend, whispering words of wisdom, dropping hints, and nudging you in the right direction. It’s like having a personal running coach within you, always ready to guide you if you’re willing to lend an ear.

You see, my friends, no one knows your body better than you do. It’s a unique masterpiece, finely tuned and designed specifically for you. So, when it comes to what works best for your running, the power is in your hands. You’re the captain of your running ship, the conductor of your training orchestra. But to steer in the right direction, you must learn to listen to the melodies your body plays.

Our bodies are incredible communicators, always sending signals to let us know how they’re doing. It’s like a secret language, and all we have to do is tune in and decipher the messages. Perhaps it’s a slight ache in your knee or a feeling of heaviness in your legs. Maybe it’s a burst of energy that tells you it’s time to push a little harder or a subtle fatigue that urges you to take a well-deserved rest. These signals, my friends, are precious nuggets of information guiding you toward running bliss.

But here’s the thing: listening is just the first step. You must also be willing to take action based on what your body is telling you. If you find yourself experiencing acute overtraining symptoms—persistent fatigue, decreased performance, irritability—while pushing through intense intervals like hill reps or sprints, it’s time to heed your body’s warning.

By ignoring these signals, you not only increase the risk of injury but also hinder your progress in the long run. It’s like driving a car with a blinking warning light and pretending everything is fine. Let’s not do that, my friends.

Conclusion

Now, I invite you to share your thoughts, anecdotes, and questions in the comment section below. Let’s create a vibrant community where we support and inspire each other on this incredible running adventure.

Thank you for joining me today, and may your running be filled with joy, determination, and the sweet harmony of listening to your body. Keep training strong, my friends.

With gratitude,

David D.

Patellar Tendonitis: Causes, Symptoms, and Treatment for Runners

knee brace for knee pain

When you delve into the realm of knee injuries among runners, what pops into your mind? Most likely, the notorious Runners Knee (patellofemoral syndrome) and the dreaded Iliotibial band syndrome come to the forefront.

But what about the sneaky culprit that hides in the shadows, inflicting relentless pain? Allow me to introduce you to the villain known as patellar tendonitis.

Now, before you dismiss it as a problem only affecting jump-sport enthusiasts, let me set the record straight. Runners, too, can fall victim to this treacherous condition. That’s precisely why I’ve prepared a comprehensive guide to patellar tendonitis exclusively for you.

In this exhilarating journey, I will unravel the intricacies of this ailment, unveiling its causes and shedding light on the recovery process. I’ll share plenty of treatment options and prevention strategies that will not only accelerate your healing but also safeguard your knees from future perils.

What’s Patellar Tendinitis?

Picture this: you’re out on the run, feeling the wind in your hair and the pavement beneath your feet. But suddenly, a sharp pain shoots through your knee, bringing your joyous stride to a screeching halt. What could be the culprit behind this unexpected agony?

Enter patellar tendonitis, which a condition that can catch any runner off guard.

Now, don’t let the name intimidate you. Patellar tendonitis is simply a fancy term for inflammation, degeneration, or even rupture of the patellar tendon.

But what is the patellar tendon?

Also known as the patellar ligament, the patellar tendon is like the bridge between your kneecap and the shin bone. This tendon plays a crucial role in your leg’s structure and function. When you activate your quad muscles, they pull on the patellar tendon, straightening your knee and extending your leg. This incredible mechanism allows you to run, kick, and jump with grace and power.

However, this tendon isn’t just a one-trick pony. It also plays a crucial role in maintaining proper kneecap alignment and transferring forces from your thigh to your lower leg. It’s a multitasking superstar, absorbing significant loading with each step you take. So you shouldn’t be surprised if you’re nursing patellar tendon pain, especially if you run often.

Patellar Tendinitis is Common

When you hit the pavement during your runs, you’re subjecting your patellar tendon to quite a beating. The repetitive pounding can lead to irritation and inflammation, causing what we call patellar tendinitis. It’s like the tendon is crying out for a break, saying, “Hey, give me some rest!”

In fact, studies have shown that about 5 percent of all running injuries can be attributed to patellar tendinitis. It’s not just the realm of high-flying athletes anymore. Runners, too, are at risk of experiencing the discomfort and limitations that come with jumpers’ knee.

The Causes Of Patellar Tendinitis In Runners

What’s causing patellar tendinitis is like a puzzle, with various factors coming together to create the perfect storm for this nagging condition. One of the main culprits is repetitive load. Picture this: you’re pounding the pavement, day after day, with little rest and recovery in between. Your poor patellar tendon doesn’t get a chance to catch its breath and heal properly.

Several studies have highlighted the relationship between training load and the risk of patellar tendonitis. In a study published in the American Journal of Sports Medicine (Kujala et al., 2005), researchers investigated the training factors associated with the development of patellar tendon disorders in young athletes.

The results showed that athletes who experienced rapid increases in training volume and intensity were at a higher risk of developing patellar tendonitis.

Similarly, a study published in the Journal of Science and Medicine in Sport (Fahlström et al., 2003) found that excessive training frequency and inadequate recovery periods were significant risk factors for the onset of patellar tendonitis in elite volleyball players.

But that’s not the whole story. Biomechanical problems, like overpronation, can throw off the balance and put extra stress on your patellar tendon. It’s like a misaligned cog in a well-oiled machine.

And let’s not forget about the hills. As runners, we love a good challenge, but excessive hill training can push our patellar tendons to the limit. It’s like climbing a mountain without a break, with each step adding more strain to the tendon.

Weight matters too. If you’re overweight, your patellar tendon may have to work harder to support you. It’s like asking a bridge to hold more weight than it was designed for.

Other factors that can tip the scales include having an increased angle of the knee, being knock-kneed or bow-legged, or even having limb-length discrepancies. These quirks in our anatomy can throw the balance off, putting extra pressure on the patellar tendon.

So, you see, patellar tendinitis isn’t just a random occurrence. It’s a result of repetitive load and a combination of factors that push our patellar tendons to their limits. But fear not! In the next part of our journey, we’ll explore strategies to prevent and manage patellar tendinitis, so you can keep running strong and pain-free.

The Telling Signs Of Patellar Tendinitis

Just like other injuries, patellar tendonitis comes with a host of red flags.

Runners suffering from jumpers’ knees usually describe pain in the front of the knee—on what’s known as the lower pole of the patella, during and after exercise.

On the onset, jumpers knee starts as an inflammation of the tendon, with the pain usually only felt after a hard run.

Symptoms may be tolerable, but training may become more and more uncomfortable as the injury worsens, affecting the normal activities of one’s day, such as when climbing stairs or after sitting for long periods.

Once you have severe tendonitis, even bending and/or straightening the injured limb can be very painful.

Some of the main symptoms include:

  • Swelling under the patella
  • Knee stiffness in the morning
  • Tenderness behind the lower part of the patella
  • Pain when straightening or bending the leg.
  • Pain gets worse with running or jumping

Patellar Tendinitis Vs. Runners Knee

Let’s talk about an important comparison: Patellar Tendinitis vs. Runners Knee. It’s like trying to solve a puzzle and decipher the clues our knees are giving us.

Now, here’s the deal.

When you’re experiencing knee pain, it’s crucial to distinguish between different knee injuries. For instance, if you feel pain at the top or sides of your kneecap, you might be dealing with a runner’s knee instead of patellar tendonitis. It’s like a case of mistaken identity for our knees.

Jumpers’ knee, on the other hand, has its own unique features. It doesn’t cause pain along the top or side of the patella, and it’s not usually sensitive to the touch.

Experiencing pain on the outside of your knee? You should be blaming it on iliotibial band syndrome. Our knees sure know how to keep us on our toes!

Now, here’s a golden nugget of advice: If your knee pain persists beyond a few days, it’s time to hit the brakes and assess the situation. Don’t hesitate to pay a visit to your doctor. They’re the experts who can properly diagnose your condition and discuss the best treatment methods tailored to your specific case.

Listen up, runners, it’s not a death sentence. Patellar tendinitis may not be the worst running injury you can encounter. However, if you ignore or neglect it, the tendon can become more damaged, sidelining you for weeks, maybe even months. We don’t want that! That’s why it’s essential to take care of your jumpers’ knee from the get-go. Treat it with the attention it deserves, or else your patellar ligament may become weaker and more susceptible to tears in the future. It’s like reinforcing the foundation of a building to prevent future collapses.

How To Treat Patellar Tendinitis In Runners

Let’s explore some conservative measures to relieve pain and halt the progression of this pesky condition while you continue running.

Ice It

Take the necessary steps to give your knee some well-deserved rest and follow the R.I.C.E method. If the pain persists, reach out to your doctor for expert guidance. Remember, treating patellar tendinitis is a journey, and with the right care, you’ll be back on track to pain-free running in no time. Keep up the positive mindset and stay committed to your recovery. You’ve got this!

Rest It

First things first, rest is key. Pushing through the pain will only prolong your recovery. Embrace the R.I.C.E method: Rest, Ice, Compression, and Elevation. Give your injured limb the rest it needs, and apply ice to the affected area for about 15 minutes, three to four times a day, to reduce inflammation.

Compress It

If you still feel pain following a few days despite resting and icing, the next step would be to use a band or brace on the knee.

This may help reduce the stress on the tendon, stabilize the knee, and reduce inflammation—all of which can speed up recovery.

When to Call A Doctor For Knee Pain

Now, if you’ve been diligently following the R.I.C.E method, but the pain persists after a few days, it may be time to consult a doctor. They can assess your condition and determine the next steps. They may recommend anti-inflammatories or physical therapy to speed up your recovery. In more severe cases of jumpers’ knees, a combination of physical therapy and platelet-rich plasma (PRP) therapy could be considered. But remember, surgery should only be considered as a last resort.

Typically, platelet-rich plasma (PRP) therapy is an invasive procedure that works by injecting plasma into the injured area. Platelets are blood cells that contain growth factors, which are proteins that help to promote healing. PRP therapy is thought to work by stimulating the body’s natural healing process and reducing inflammation. It’s typically done in an outpatient setting. The procedure is performed under local anesthesia. The doctor will draw blood from your arm and then spin it down in a centrifuge to split up the platelets and the blood. 

However, if you consider using PRP therapy for your patellar tendonitis, choose a provider that uses PRP kits. These kits should offer extended platelet delivery and contain all essential components for preparing and administering platelet-rich plasma. This way, you can ensure outstanding and safe results. 

In addition to PRP, a doctor may recommend surgery to address patellar tendonitis

But your goal should be to explore non-invasive options first, like detectives solving a mystery.

How to Prevent Patellar Tendinitis While Running

Kudos to you for being proactive and taking charge of your running journey!

So, let’s dive into some effective strategies to keep patellar tendinitis at bay and ensure your knees stay strong and pain-free.

The Importance of Warm-ups & Cool-Downs

Warm-up exercises prepare the muscles and tendons for the demands of physical activity, while cool-down exercises aid in recovery and prevent muscle stiffness. Neglecting these essential components of a workout routine can increase the risk of developing patellar tendonitis.

Research studies have shown the positive effects of warm-up and cool-down exercises on injury prevention, including patellar tendonitis. A study published in the Journal of Science and Medicine in Sport (Bahr et al., 2004) examined the effects of a standardized warm-up program on the incidence of overuse injuries in female football players. The results demonstrated that participants who followed a structured warm-up routine experienced a significant reduction in the occurrence of patellar tendonitis compared to those who did not.

To prevent patellar tendonitis, perform a dynamic warm-up routine before engaging in running or any strenuous physical activity. This should involve exercises that target the lower extremities, such as leg swings, lunges, high knees, and gentle stretches for the quadriceps and hamstrings. Gradually increasing the intensity of the warm-up can help prepare the patellar tendon for the stress it will undergo during exercise.

Additionally, incorporating a proper cool-down routine is equally important. This allows the body to gradually transition from exercise to rest, aiding in the removal of metabolic waste products and reducing muscle soreness. Cool-down exercises should involve gentle stretching for the lower body muscles, particularly focusing on the quadriceps, hamstrings, and calves.

Stretching

One essential element in your prevention toolkit is stretching. When the muscles surrounding your knee joint are tight, they can put extra strain on the patellar tendon, increasing the risk of tendonitis. So, let’s make stretching a regular part of your routine.

To target the key muscles that support your kneecap, focus on stretching your quads, hamstrings, calves, and hip flexors. These stretches will help keep your knee joint happy and ready for action.

Now, let’s go through a few stretches to get you started:

  • Quadriceps Stretch: Stand tall, grab your foot or ankle, and gently pull it towards your glutes. Feel the stretch in the front of your thigh. Hold for about 30 seconds on each leg.
  • Hamstring Stretch: Sit on the ground with one leg extended in front of you and the other leg bent. Reach forward and try to touch your toes while keeping your back straight. You’ll feel the stretch in the back of your thigh. Hold for 30 seconds, and then switch legs.
  • Calf Stretch: Stand facing a wall, place your hands on the wall for support, and step one leg back. Keep your back heel on the ground and lean forward, feeling the stretch in your calf muscle. Hold for 30 seconds and switch legs.
  • Hip Flexor Stretch: Step into a lunge position with one foot in front of you and the other leg extended behind you. Keep your back straight and gently push your hips forward. You’ll feel the stretch in the front of your hip. Hold for 30 seconds and switch sides.

Incorporate these stretches into your warm-up routine before each run, and consider adding them to your post-run cool-down as well. Consistency is key, my friend!

By taking the time to stretch and loosen up those muscles, you’ll be building a solid foundation for healthy knees and preventing the onset of patellar tendinitis. Remember, prevention is the secret ingredient to a long and joyful running journey. So, keep up the good work, stay flexible, and let those knees soar with every stride!

Strengthen Your Muscles To Prevent Patellar Tendonitis

Strengthening your muscles is crucial when it comes to preventing and recovering from knee problems like patellar tendonitis. Think of your muscles as a protective shield for your knees. The stronger they are, the better they can shield your knees from serious ailments. It’s like having a suit of armor for your joints!

When it comes to safeguarding your knees, two muscle groups play a significant role: the quadriceps and the hamstrings. These powerhouses provide support and protection, particularly for the delicate patellar tendon.

Let’s dive into some exercises that can help you strengthen these important muscles and fortify your knees:

Slow Squats:

Imagine these as your knee’s secret weapon! Slow squats are a fantastic exercise for building strength in your quadriceps and hamstrings. Not only do they target the key muscles, but they also engage your entire lower body, giving you a well-rounded workout.

Single Leg Glute Bridges:

Single-leg glute bridges are a fantastic exercise that isolates and strengthens your glutes and hamstrings. By performing this exercise, you enhance the stability and resilience of your knees.

Standing Clamshells:

Standing clamshells are a superb exercise for activating the muscles around your hips and thighs, including the all-important quadriceps. This exercise helps to improve stability and balance, further protecting your knees.

Remember, these exercises are not only about building strength but also about safeguarding your knees and preventing patellar tendonitis. Incorporating them into your routine will not only reduce the risk of injury but also accelerate your recovery if you do happen to experience any knee-related issues.

So, grab your workout gear and start strengthening those muscles! Your knees will thank you for the extra support, just like a suit of armor shields a knight in battle.

Improve Your Form

Did you know that making a few tweaks in the way you move can significantly reduce the load on your patellar tendon? It’s like finding the perfect rhythm in a dance—smooth, effortless, and injury-free.

My research has uncovered a game-changing form tweak that can work wonders for protecting your lower body from overuse injuries: avoiding overstriding. Overstriding occurs when you land your foot too far in front of your hips, putting unnecessary stress on your knees.

To achieve this, focus on two key things during your runs:

  • Land directly underneath your body: Imagine a string attached to your body, pulling you forward. As you take each stride, aim to land your foot directly underneath your hips. This way, your foot will act as a solid foundation, absorbing the impact and distributing it evenly, sparing your knees from any undue strain.
  • Improve your running cadence: Cadence refers to the number of steps you take per minute. Research suggests that increasing your cadence can help reduce the load on your lower body and minimize the risk of injuries. Aim for a cadence of around 170-180 steps per minute. To achieve this, try taking shorter, quicker strides. It may feel a bit unfamiliar at first, but your knees will thank you for it.

Get Proper Running Shoes

Let’s not forget about the unsung heroes of your running journey—your trusty running shoes. They play a vital role in supporting your knees and ensuring a smooth, comfortable ride.

When choosing your running shoes, keep an eye out for the heel-to-toe drop. Shoes with a significant drop can add unnecessary stress to your patellar tendon, and we definitely want to avoid that. Look for trainers that offer a more balanced platform, keeping your knees stable and happy throughout your runs. They should also provide ample cushioning to absorb impact and support your lower leg as you glide through each stride. Think of them as your own personal shock absorbers, ready to take the pounding so your knees don’t have to.

Now, here’s an interesting tidbit for you: Did you know that running shoes have limited mileage? Just like a favorite song on repeat, they eventually lose their magic. As a general rule of thumb, it’s time to bid farewell to your shoes after around 400 miles of running. Why? Because they start to lose their support and cushioning powers, leaving your knees vulnerable to the harsh realities of the road.

Patellar Tendonitis In Runners  – The Conclusion

As far as I can tell, as long as you’re listening to your body and treating patellar tendonitis early on, you’ll be okay.

And in case you’re dealing with a jumpers’ knee, taking the above treatment and prevention measures will surely help you relieve your pain and keep training injury free.

It’s up to you to take action.

Please feel free to leave your comments and questions in the section below.

In the meantime, thank you for reading my post.

Keep Running Strong.

David D.


The Ultimate 30-Day Running Challenge: Revolutionize Your Running Journey

runners itch

Looking for the ultimate 30-day running challenge? Then you’re in the right place.

Whether you’re a running newbie or someone who’s been hitting the pavement sporadically, this program will revolutionize your running journey.

Consistency is the key to unlocking extraordinary fitness and maintaining it in the long run. This is the goal of my 30-day running challenge. It’s all about pushing through those tough moments, defying the odds, and staying committed to your goals.

Now, brace yourself because this challenge combines the best of the Couch to 5K method with my personal favorite beginner running training guidelines and tips.

So, are you feeling the excitement building up? Great! Buckle up and get ready to embark on this incredible 30-day running challenge.

Let’s do this!

Be Careful

Before I get into the 30-day running challenge, let’s first talk about something crucial: your safety. I don’t want to nag, but safety is key, especially if you’re a beginner runner.

So let’s make “get fit without getting hurt” your ultimate motto. It’s like navigating a treacherous path with caution and grace, ensuring you reach your destination unscathed.

But if you intend to ignore this rule, I’d hate to see you miss out on the awesomeness of this challenge. But hey, no hard feelings! If running isn’t your cup of tea right now, feel free to explore other exciting activities that light your fire.

Keep in mind that this training schedule is flexible, like a rubber band. So, go ahead and customize it to align with your goals, abilities, and unique circumstances.

Let’s address the elephant in the room: runners aren’t born overnight. Nope, it takes time, patience, and dedication to build a powerful runner body. Think of it as planting a seed and nurturing it with care. With each training session, you’re watering that seed, allowing it to sprout, grow, and flourish into a mighty running machine.

The 30-Day Running Challenge You Need To Try

If you have always craved to run regularly, but haven’t quite found the right plan to get started, look no further. This 4-week plan is your ticket to running for a solid 30 to 40 minutes straight per session. Let’s dive in!

Think of these four weeks as your personal training adventure. Each week comes packed with three specific workouts designed to gradually build your stamina, endurance, and running prowess. It’s like embarking on a thrilling quest where you level up your running skills with each passing week.

The Importance of Recovery

Downtime is the perfect opportunity to mix things up and give your body some well-deserved TLC. While I encourage you to cross-train and explore other forms of cardio, such as biking or swimming, you can also hit the weight room for some resistance training.

It’s like adding different spices to your fitness recipe, keeping things exciting, and giving your body a chance to work in new and beneficial ways.

30-Day Running Challenge – Week One

Welcome to Week One of the exhilarating 30-day running challenge! This week is all about finding your starting point and embracing the journey ahead.

e thing, my friend. When it comes to running, it’s crucial to listen to your body. The key is to find that sweet spot where you’re challenging yourself without pushing too hard. You want it to be just right—neither scalding your taste buds nor lukewarm and bland.

The Plan Is Flexible

Consider my plan your trusty compass, guiding you through the vast terrain of running. But keep in mind it’s not written in stone. I’m not married to it, and neither should you. Therefore, feel free to make adjustments along the way, like savvy explorer altering their route to accommodate unforeseen obstacles or hidden gems. This challenge is about empowering you to tailor it to your needs, preferences, and abilities.

If you’re a total newbie in the running realm, fear not! I’ve got your back. I recommend starting with a 3:1 ratio. That means you’ll walk for three minutes after every one-minute interval of jogging. It’s like easing yourself into the water, one toe at a time, before diving headfirst into the glorious pool of running.

Feel in top-tip shape? Then choose a 2:1 or even a 1:1 ratio. The choice is yours, my friend. As long as you’re honoring what feels right for you and staying within your fitness level, you’re in a fantastic place.

Tip: Pre-Run Meal

About one to two hours before lacing up those running shoes, grab a quick bite like a juicy banana, a crisp apple, or even an energy bar. It’s like putting the perfect octane fuel in your tank, ensuring you have the energy to conquer the miles ahead.

What’s more?

Hydration also matters. Water is your trusty companion throughout your running journey. Before you hit the pavement, make sure to hydrate like a champion.

Take refreshing sips and let the water flow through you, quenching your thirst and preparing your body for action. And don’t forget to keep the water flowing even after your run. Replenish those lost fluids and give your body the hydration it craves. Think of it as watering a beautiful garden. Your body blooms and thrives when properly hydrated.

  • Day 1: After a 10-minute brisk walk warm-up, complete 8 to 10 cycles of 1-minute jog interspersed with 2 minutes of walking for recovery. Finish off the session with a 5-minute walk.
  • Day 2: Cross-train or rest
  • Day 3: Repeat Workout I.
  • Day 4: Cross-train or rest
  • Day: after a warm-up, perform 7 to 8 cycles of one-minute to 90 seconds jogs and one-minute to 90 seconds walking breaks.
  • Day 6 & 7: Take a couple of days off at the end of every week to allow your body to recover. Go out, watch a movie, see some friends, or stay home and Netflix all day long.

30-Day Running Challenge -Week Two

During this week, running should feel a bit easier than before.

So if you are feeling that way, then it’s time to crank up the intensity by increasing the time spent running and taking less and less for recovery.

But if it’s not so, then repeat Week One workouts to the letter, and only progress with the plan after you feel confident enough about your fitness level.

The key here is maintaining your consistency even if your results suck big time.

Tip: Practice Proper Breathing

Let’s talk about one of the secrets to running success—proper breathing. It’s like the wind carrying you forward, propelling you through each stride. During Week Two, pay close attention to your breathing rhythm.

Aim for a conversational pace where you can run while comfortably holding a conversation. If you find yourself huffing, puffing, and desperately gasping for air with every step, it’s a sign that you’re pushing too hard. Take a step back, my friend, and find your sweet spot. Inhale that fresh air, let it fuel your lungs, and exhale any doubts or tension. You’ve got this!

Here are the workouts:

  • Day 8: After a decent warm-up, perform 6 to 8 cycles of two minutes jogs and 30-second breaks.
  • Day 9: cross train
  • Day 10: Repeat the Day 8 Workout, aiming for at least eight cycles.
  • Day 11: Cross Train
  • Day 12: after a warm-up, perform six cycles of 3 minutes of jogging, interspersed with 30-second of walking breaks.
  • Day 13 & 14: Rest completely.

30-Day Running Challenge – Week Three

Week 3 is going to be the hardest because this is when resistance starts to set in when it comes to building your running habit.

Therefore, what you need to do here is to keep moving no matter what.

Even if you can’t run, then make sure to at least for a walk or cross-train instead.

Tip: Running Form

During this week, pay extra attention to your running form and make sure to develop the right mechanics from the get-go.

Try to keep your body relaxed the entire time—especially your fists, shoulders, neck, and face; run as tall as you can—by keeping your back straight and core engaged.

Plus, keep your stride smooth and relatively short—by making sure to land under the center of gravity of your body.

  • Day 15: After the warm-up, run for four minutes, and recover for one minute. Next, run for five minutes, recovery for one minute, then for six minutes, and finish off your workout with a 10-minute brisk walk as a cool down.
  • Day 16: Cross Train
  • Day 17: After a 10-minute brisk walk warm-up, run for five minutes, and recover for 30 seconds. Run for six minutes, recover for one minute, and then run for seven minutes.
  • Day 18: Cross-train.
  • Day 19: After a warm-up, run for six minutes, and recover for one minute. Run for seven minutes, recover for one minute, then run for eight minutes. Finish off your workout with a 10-minute brisk walk cool down.
  • Days 20 & 21: Rest

30-Day Running Challenge – Week Four

This is the last week of this 30-day challenge, and this is when the rubber meets the road.

Keep in mind that you can always repeat week three or week two if you feel like you have to.

Nothing is written in stone.

Use your body and your comfort level as the ultimate gauging tool.

I don’t know what’s best for you, but you surely do if you only listen to your body and adjust your training accordingly.


Tip: Practice Recovery

If you are experiencing any aches or pains both during and after your workout, then it’s time to be more diligent with your recovery.

Post-run pains and aches might be a sign that you are pushing too much.

So if you feel like you need a rest day, then simply go for a 30-minute brisk walk to get your body moving.

Just don’t sit around the whole day.

During your training days, you need to be moving, mate.

Here are the workouts:

  1. Day 22: After the warm-up, run for eight minutes, rest for one minute, then run for seven minutes. Next, rest for one minute, then run for six minutes, and finish off with a cool down.
  2. Day 23: Cross Train
  3. Day 24: After the warm-up, run for 10 minutes, recover for one minute, run for 8 minutes, recover for one, run for six minutes, and finish off with a cool down.
  4. Day 25: Cross Train
  5. Day 26: Run for 12 minutes, recover for one minute, run for 10 minutes, recover for one minute, then run for 8 minutes, and finish off with a cool down.
  6. Days 27 & 28, and 29: Rest

Day 30 – The End of the 30-Day Running Challenge

This is the last day of this challenge, so make sure to end it on a high note.

Here is the workout you need to do.

I know it’s quite challenging, but do your best here.

After four weeks of the walk-run method, I feel like you have already built a good base.

After a 10-minute brisk walk warm-up, start picking up the pace and jog slowly for 15 to 20 minutes non-stop.

Make sure to keep a conversational pace throughout the workout.

If you are huffing and puffing, stop, recover, and go at it again.

Finish the workout with a 5-minute walk to bring your heart rate down and recover.

And that’s it, folks.

Beyond the 30-Day Running challenge

Completing this 30-day beginner running challenge is just the first step. Now you need to up the ante and do more if you are serious about improving and reaching your full running potential.

For that, here are a few running workouts to try out.

Hopefully, by now, you have built the habit of running into your life, and you are willing to expand on it.

How to Start Running On a Treadmill – 6 Treadmill Workouts for Beginners

Looking for the best guidelines on how to start running on a treadmill?

Then you have come to the right place.

Here’s the truth. the treadmill is thee best way to get into the world of running without risking injury or burnouts. How come? Keep on reading.

In today’s post, I’m sharing with you the essential treadmill workout guidelines you need to get started with indoor running.

By the end of this beginner guide to treadmill running, you’ll learn:

  • How to use the treadmill
  • The benefits of treadmill running
  • The exact treadmill running gear you need
  • How to take your first steps on the machine
  • How to stay motivated when treadmill running
  • The Treadmill running apps you need
  • The exact treadmill workout for beginners
  • Advanced treadmill workouts to try
  • And so much more.

Sounds great?

Let’s press the start button and get started!

*Disclosure: This post may contain affiliate links that at no additional cost to you. I only recommend products I’d use myself and all opinions expressed here are our own. 

How to Start Running On a Treadmill –  The Benefits

Here’s what you stand to gain from hitting the belt more often.

Less Impact

Running on hard surfaces, like asphalt and concrete, increases the risks of overuse injury.

However, the treadmill belt offers extra cushioning that helps absorb much of this stress.

Forget About the Outdoor Conditions

Outdoor running exposes you to the elements, be it the weather, unsafe streets, uneven surfaces, etc.

All of these can stand in the way of your running success.

Luckily,  you don’t have to worry about any of this when treadmill running.

Simulate the Race

Preparing for a race?

A treadmill can help you nail your perfect pace.

For example, if you are planning for a hilly 10K race, you can simulate that racing experience by incline training or even intervals on the treadmill.

Additional Source – Check this treadmill pace chart

Safer Than Running Outside

You can always run into troubles when doing outdoor running workouts: cracks, ruts, cyclists, cars, people, thieves, stray dogs, the wrong side of town, you name it.

Again, a treadmill can help you sidestep all of these risks.

Privacy

Dealing with insecurities?

Worry no more.

Hopping on the treadmill gives you more privacy as you don’t have to fret about anyone judging your performance.

You can run at your own pace and call it to quit anytime you want.

Measurable Data

On a treadmill, you have a say on your training conditions, helping you run with more accuracy, whether it’s speed, incline, calories burned, heart rate, step count, and so on.

Beginner Treadmill Workout
FAQ

Before we get into how you actually can get started with treadmill running, let’s address some of the most common questions beginner runners have about the treadmill.

How Fast Should I train on the Treadmill As A Beginner?

The answer depends on your current fitness level.

If you’re a sedentary, overweight, 50 years+ beginner, you’re not going to be faster then you once were.

But if you’re already in a good shape, exercise often, and are young, you should be able to crank up the pace  (check out the beginner treadmill routines below for more details).

If you can get to 5 mph or higher as a beginner, that would be terrific.

This will provide you more room for growth while upping your heart rate and pushing your body out of your comfort zone.

Just keep in mind that five miles per hour is the equivalent of a 12-minute mile.

Not bad at all for someone who’s just starting out.

Here’s a cheat sheet so you can have more ideas about your per-mile pace.

  • 5.0 mph = 12:00 minutes per mile
  • 5.5 mph = 10:55 minutes per mile
  • 6.0 mph = 10:00 minutes per mile
  • 6.5 mph = 9:14 minutes per mile
  • 7.0 mph = 8:34 minutes per mile
  • 7.5 mph = 8:00 minutes per mile
  • 8.0 mph = 7:30 minutes per mile

How long Should a Beginner Train on a Treadmill?

Again, the answer depends on you.

Every beginner is different and has a different starting point.

Just do as much as you can in the beginning while staying within your fitness level and paying attention to your body’s needs and signals the entire time.

For a complete beginner, you can start off treadmill training at a slow pace for no more than 15 to 20 minutes three times a week.

Then slowly increase the duration to 30 to 40 minutes over the course of a few week.

Here’s how many miles to run per week as well as  how often should you run per week.

Treadmill Vs. Outdoor Running – Is treadmill running easier than running outdoors?

The answer is not all black or white.

But overall, running on the treadmill is less challenging than running outdoors for many reasons.

When treadmill running, the ground is moving underneath you, making it easier to run faster.

That’s one reason many runners find that their treadmill pace and speed don’t correlate to their outdoor running pace.

What’s more?

When you’re running outdoor, you’re also dealing with the elements and weather conditions, especially wind and heat.

This can make outdoor running more taxing as you have to deal with a lot of resistance.

But on the treadmill, you’re in a controlled environment that’s intentionally designed to make you as comfortable as possible.

It’s also recovery friendly.

For those who just had injury or accident, they don’t need to worry about the ground.

It’s perfectly stable and sturdy.

A beginner runner? Try this couch to 5K plan.

women running on treadmill for first time
Young healthy athletic woman running on a treadmill near the sunny window in the gym and listening music.

How long should you run on a treadmill to lose weight?

If you’re looking to lose weight, especially if you’re really out of shape and/or embarrassed to run in public, the treadmill is exactly what you need.

How long should you train on it depends on you, but I’d recommend that you shoot for at least three 30 to 45 minutes sessions per week 

Wht’s more?

Keep in mind that exercise is only half the battle when it comes to losing weight—the other half being diet.

So, if you train often, and eat clean, you can pretty much guarantee that you’ll be able to lose weight and keep it off for good.

How To Start Running on A Treadmill
For Beginners?

To make the most out of your treadmill workouts, try to incorporate these two valuable training tips.

Know Your Treadmill

Taking your first few steps on the treadmill can be quite unnerving.

But it’s no rocket science.

In case you have never used a treadmill before and don’t even know how to turn one on, here are the basics:

First, the “Start Workout” or “Quick Workout” button.

Hold the handrails, step onto the belt, simply press this button, and in 3…2…1, the belt will start to move.

The belt will start at a slow walking speed, and it’s up to you to play with speed.

Keep in mind that you may feel wobbly or dizzy when you use a treadmill for the first time—as if you were going to slide back or lean forward.

Don’t panic.

You’re practicing a new motor skill, and it will take a few sessions to feel at ease.

Next, familiarize yourself with the speed controls, the incline/decline options, the “Stop” and the emergency stop mechanism, as well as the programming controls.

Of course, not all treadmills are made equal.

Some are simple and often come with minimal options (think hotel treadmill) while other more fancy treadmill offers a more complicated user interface.

But the basics are still the same: Start/Speed/Stop.

The Right Treadmill Workout Gear

Getting the right treadmill training gear is the first step.

Start by training in proper running shoes.

Of course, you won’t need specific shoes just for the treadmill

(although I’d recommend you do that, so you can still use the same running shoes for indoor and outdoor running— just make sure they are clean ).

As a rule, your running shoes have to fit well, which is why I always advise buying shoes from a specialty running store (here’s is how to make your shoes last longer).

Just like you’d choose proper clothing for outdoor runs, your treadmill runs deserve the same attention.

You also need comfortable wicking underwear. Don’t go for fancy cotton clothes. They won’t cut. They can cause more harm than good—and you don’t want that. I can assure you.

Female runners should also choose a sports bra that hold their chest securely in place.

Shirt

Choose a lightweight tank for treadmill running. Make sure it’s made from high performance, moisture wicking fabrics to help wick moisture away from your body, keeping you dry and comfortable in the process. Avoid wearing cotton clothing. More than likely, indoor running will make you sweat a lot. And all that sweat will stick to your clothes, causing all sorts of troubles, when wearing cotton fabrics.

To avoid at all times.

Here’s the full guide to proper running gear.

Keep hydrated

Remember to keep your body well hydrated when running on the treadmill. You’ll be shedding a lot of fluids through sweat.

When running on the treadmill for more than 30 minutes, it’s key to drink water to stay hydrated.

As a general rule, drink about four to six ounces of water every 15 to 20 minutes.

For indoor running, I’d recommend Hydro Flask’s stainless-steel bottles. Check this reasonably priced water bottle at amazon’s.

I’d recommend the Hydro Cell Stainless Steel Water bottle.

Cooling Fan

Last but not least, if you find yourself sweating more than usual when indoor running (or don’t have proper air conditioning), consider setting up a cooling fan. Sure, some treadmills have a build-in fan, but they tend to be less than powerful and effective.

Plus they only blow air at your face, ignoring the rest of your body. That ain’t good at all.

In addition, expect to sweat a lot—even if it’s cold outside—so get yourself a towel to wipe your arms, hands, and face as needed. You should also check out this guide on belt replacement.

Warm-Up For Your Treadmill Workout

Just like outdoor running, the key effective treadmill training is a proper warm-up.

Skipping it will only increase the risks of premature fatigue and injury.

A good warm-up helps you get your blood pumping and heart rate ticking and be for the hard effort ahead.

Invest in at least 5 to 10 minutes warm-up period, then aim to slowly increase your speed as you go, but never speed up to the point that your form begins to suffer.

Pay attention to your body before you speed up.

Partner Up

Just as it’s more enjoyable to pound the pavement in the company of others, the same is true for treadmill running.

In fact, pairing up with a workout partner can turn long treadmill runs into a social hour—or two.

In case you couldn’t find a willing partner, then, at the very least, call a friend or enlist a family member to keep you company.

Additional resource – How to combine keto and running

Visualize a Route

Another trick to help you avoid the dreadmill is to visualize an outdoor route you like running on.

Imagine your favorite outdoor route and pretend that you are on it, running by certain landmarks, and play with the incline to simulate elevation change.

Your brain already has storage of good running memories, and by using active visualization, you’re tapping into that valuable resource and using it to your advantage.

If you have difficulties visualizing, look for pictures on Google images for pristine running routes and imagine yourself tackling them.

Listen to Music

Think of running with music as a dissociative strategy.

It helps take your focus off of what’s ahead.

Also, listening to music while exercising can reduce the perception of exertion and boost endurance by up to 10 to 15 percent.

Pick a playlist with a nice uplifting beat—shoot for the 120-160 bpm range.

Not a fan of music?

Then turn to audiobooks or podcasts.

Some of my current favorites include The Joe Rogan Experience, Embedded, The Rubin Report, etc.

Watch TV

Visual is always the best distraction.

This is why when you run.

n with TV on, it’s more fun and hassle-free

Go for shows you don’t have to be too involved in and would rarely let yourself sit around and watch.

I won’t watch the walking dead finale on the treadmill.

Need some good ideas?

Here’s a list of my favorite shows:

  • How I met Your Mother
  • It’s Always Sunny in Philadelphia
  • Casa De Papel
  • Stranger Things
  • Daredevil
  • Into the Badlands
  • Preacher
  • Supernatural

Additional resource – Here’s your guide to buying a second hand treadmill.

Treadmill Running Apps For beginners

No matter your running goals are, there’s probably an app for that.

You can find plenty of cheap apps for different running goals that you can download to make your training more exciting.

Need distraction? There’s an app for that!

Need motivation? There’s an app for that!

Need inspiration? There’s an app for that!

Need more structure for your training?

There’s an app for that.

See, there’s an app for almost any running goal or desire.

My best recommendation?

The following:

  • Nike + Run Club. This app provides you with more than 50 guided runs, with over six sessions specifically tailored for the treadmill. The running sessions are roughly 20 to 30 minutes in length and come with audio instructions.
  • Treadmill Trails. If you dread indoor running, then feel free to head outside in the virtual world with this app. Treadmill trails routes take you everywhere from Central Park in New York to Mt. Kilimanjaro.
  • Peloton Digital. In this app, you can choose from more than 170 Tread Studio live and on-demand running classes that can go from 15 to 60 minutes in duration and cover everything from speedwork to race pace training.
  • Studio. Another great app that offers treadmill classes that can last 15 to 60 minutes and work great for beginners runners as well as those training for the 11th
  • Couch to 5K. Are you a complete running beginner? This app is for you. The Couch to 5K provides you with the exact training plan you need to go from a complete newbie to being able to run a 5K in 8 weeks or less. Pretty amazing!
  • Zombies Run! You can turn you run into a virtual game with the app Zombies, Run!. This app turns your treadmill workout into a story about surviving a zombie attack.

Additional resource – How to start running at 50

Treadmill Running Form

Treadmill running form is essential.

Bad form hinders performance and leads to injury.

Keep your treadmill running technique in check by doing the following:

  • Run tall and look straight ahead as if gazing to the horizon.
  • Aim to run with your natural gait, and avoid taking short and quick strides as well as thumping the belt too hard. No good for your sole and ankle.
  • Keep your posture straight, the head should be up, back straight, and shoulders level.
  • Never slouch or curve your back, especially when going against an incline. Open your chest, make space for more air.
  • Let go of the handrails and keep pumping your arms the same way you do when running outside.

how to start running on a treadmill – 6 Treadmill Workouts For
Beginners

Now that know the basics of safe and efficient treadmill running for beginners, let’s look at a few treadmill beginner workouts.

If you’re not sure how to proceed with your next treadmill workout, here are six treadmill runs to get you started.

how to start running on a treadmill
Young focused fit woman running on treadmill

Routine I – The 30-minutes Beginner Treadmill Workout

If you’re taking up running for the first time, then start with this routine.

This beginner treadmill routine will have you perform intervals of slow jogging interspersed with walking breaks for recovery.

First step Start walking at a 1.5 to 2 mph pace and stick to it for at least 10 minutes.

Be sure to breathe deeply and visualize success all the way through.

Mental preparation is key.

Second Step Pick up the pace and start jogging at 5 to 5.5 mph for two minutes.

This is your first interval, so you shouldn’t push yourself here.

Practice good running form the entire time.

Run as tall as you can, engage your core, let go of the handrails, and swing your arms by the sides.

Keep your form aerodynamic,

Third Step – This is your first two minutes break, so make the most out of it.

Breathe deeply, towel off, and hydrate.

Fourth Step – Repeat the jogging/walking cycle for five times.

If it feels too much, pace yourself and slow it down, especially when your form starts to suffer.

Fifth Step –Slowly decrease your jogging pace and start walking at 2 mph for five minutes and cool down properly.

Breathe deeply and release all tension.

Make sure to also check in with your body and see how you feel.

Try to perform this workout at least three times per week during the first few weeks.

Then, as you get fitter and stronger, increase the time you spend jogging and less for recovery until you can run at a comfortable pace for 30 minutes without gasping for air.

Want more structure? Try my Couch to 5K treadmill Plan.

Routine II – The 30-minute Interval treadmill workout

Already a runner?

Then try this more challenging routine.

First Step – Warm-up for 5-minute by jogging slowly and taking deep breaths.

Skipping on the warm-up leads to premature fatigue, or even worse, injury.

Second Step – Run at your 5K pace (it should feel hard) for one to two minutes, depending on your fitness level.

Third Step – Recover by jogging slowly for one full minute.

Fourth Step – Repeat “Second Step” and “Third Step” five to eight times, depending on your fitness experience and training goals.

Fifth Step – End your workout a 5-minute slow jog to cool down.

Stretch gently afterward.

A proper cool-down will help you avoid dizziness and might reduce muscle soreness for the following day.

Additional Resource- Your guide to curved treadmills

Routine III – The Incline Treadmill Workout

Want to take intervals to the next level?  Do them on an incline.

This helps simulate outdoor hill running, which boosts endurance and builds killer lower-body strength.

First Step – Warm-up for 10 minutes.

Second Step – Increase the incline to 3 or 4 percent and run for 90-second at 80 percent of max-effort—a pace that feels moderately challenging.

Third Step (Recovery) – Jog for 60 seconds with no incline.

This is your recovery break.

Fourth Step – Raise the incline to five or seven percent and run for another 90-second at 15 seconds slower than your 10K pace.

Recover for one minute

Fifth Step – Repeat the previous step three to four times, depending on your fitness level and goals.

Choose a steeper incline for more challenge.

Sixth Step – Cool-down

Additional Resource  – When to replace a treadmill belt

Routine IV – The Beginner Tempo Treadmill Run

A treadmill tempo workout teaches your body how to efficiently adapt to increased intensity.

This type of running helps you build up a fairly high volume of intense exercise that enhances both aerobic and lactate-threshold systems.

First Step – Warm-up for 10 minutes.

Second Step – Run a mile at 20 to 30 seconds slower than your half-marathon pace—a pace that feels comfortably easy.

Third Step – Pick up the pace every mile by five to 20 seconds until you’re running the final mile 20 to 30 seconds faster than your half marathon pace.

Fourth step –  Cool-down for five minutes.

Additional resource – How To run with a partner

Routine V – The Pyramid Treadmill Workout

Pyramid workouts are straightforward.

You’re simply kicking off your hard interval at one-minute segments, going for to a longer running segment, and the working you’re back down one minute.

It should take you at least 50 minutes to complete the routine, but that’s not cast in stone.

Do what feels the best for you and remember to always stay within your fitness level.

First Step – Five minutes: The Warm-up

Start with a proper warm-up, jogging for 10 minutes at a speed of 4 to 5 mph with no incline.

Second Step –Seven minutes: 1st Ladder

Increase speed to 6.0 mph and keep it going for the next three minutes. Practice good form.

Keep your torso straight, and body relaxed from head to toe.

Next, increase speed to 7 mph and incline to three percent for four minutes.

Second Step – Two minutes: Recovery

Slow down and recover for three minutes.

Hydrate, breathe deeply, and release any built-up tension.

Third Step – Nine minutes: 2nd Ladder Interval

Increase the speed to 7 mph and incline to three percent for four minutes.

Next, increase the speed again to 8 mph and incline to five percent for five minutes.

Fourth Step – Two Minutes: Recovery

Slow down to 4 mph with two percent incline.

Fifth Step – Nine minutes: 3rd Ladder

Increase speed to 7 to 7.5 mph and incline to five percent and keep running strong for a full five minutes.

For the upcoming four-minute, keep the same speed, but lower the incline to three percent.

Sixth Step – Two minutes: Recovery

Slow down to 4 mph and recover.

Seventh Step – Six minutes: Ladder No 4

Speed it up to 8 mph and raise the incline to three percent.

Then, for the next two minutes, keep the same speed but raise the incline to five percent for the last interval of this pyramid workout.

Eighth Step – Five minutes: The cool-down

Jog slowly for ten minutes at a speed of 4 mph with no incline.

Additional resource – How to become a morning a runner

Routine VI – The Beginner Hybrid Treadmill Workout

Mixing treadmill training with bodyweight exercises can help you burn more fat, improve performance, and bust treadmill boredom.

Here is a CrossFit-Running treadmill workout.

It’s one of my favorites.

You can choose to add these bodyweight exercises into your treadmill workout any way you like.

After a proper warm-up of 5-minutes jogging and some dynamic exercises, do the following.

  • Sprint for 30-second
  • Pushups: 8-12 reps
  • Sprint for 30-second
  • Squat Jumps: 8-12 reps
  • Sprint for 30-second
  • Treadmill recovery: 90 seconds slow jogging.
  • Sprint for 30-second
  • Jumping jacks: 60 seconds
  • Lunge steps: 16 to 20 reps
  • Sprint for 30-second
  • Finish it off with a 5-minute slow jog as a cool down, followed by stretching.

Need more structure?

Try my beginner running plan.

For more, check my how to design your running program guide.


Conclusion

Still wondering how to start running on a treadmill? Then I believe today’s post has you covered.

The above simple training guidelines are all you need start treadmill running.

The rest is really up to you.

Please feel free to leave your comments and questions in the section below.

And please if you have any treadmill workouts for beginners, please share.

In the meantime, thank you for reading my post.

Keep running strong.

David D.

How to Prevent Feeling Dizzy While Running?

Can Running Help Cure Your Hangover?

Feeling dizzy while running? It’s a common experience for many runners, especially when pushing hard during a workout or after long runs.

Let’s face it: feeling lightheaded or dizzy while running can really scare the daylights out of you.

Over the years, I’ve seen plenty of runners, newbies and seasoned pros alike, struggle with this.

I cannot emphasize the importance of knowing the root cause of this dizziness, whether it’s dehydration, low blood sugar, or something else, and then taking steps to address it.

In this article, I’ll break down the potential causes of feeling dizzy while running, how to prevent it, and what to do if you experience it during your runs. If you’re ready to dive in, let’s get started.

Feeling Dizzy While Running: What’s Going On?

First off, getting dizzy doesn’t always signal a major problem.

In most cases, dizziness during a run can be attributed to dehydration, low blood sugar, or overexertion. These are all manageable if you know what to look out for.

But, if that dizziness comes with serious stuff like chest pain or major headaches, it’s time to see a doctor.

Last time I felt woozy during a run was a few weeks ago on a really hot and humid day.

It was around mile 10 of a 20-mile long run. I was feeling strong, and suddenly, the sidewalk seemed to shift under me. My vision blurred, and I had to stop and hold onto a lamppost.

I know what I did wrong. I was pushing hard in temperatures bit too extreme. Don’t make my mistake (more on this later).

Symptoms to Watch Out For

When dizziness strikes during or after a run, it might come with other symptoms that can give you clues as to what’s going on. These include:

  • Lightheadedness: Feeling like you might faint or your head is spinning.
  • Poor balance: Difficulty staying steady on your feet.
  • Blurry vision: Sudden changes in vision can indicate an issue with blood pressure or oxygen levels.
  • Nausea: Feeling queasy or sick to your stomach.
  • Weakness: Feeling unusually tired or weak during or after your run.

If you experience these symptoms, it’s time to take action and figure out what’s causing them so you can get back to running safely.

These symptoms can manifest suddenly while running, just after a workout, or build slowly over time.

Seek medical attention if you’re experiencing any of these symptoms:

  • Slurred speech
  • Severe and chronic headache
  • Sudden deafness in one ear
  • Numbness
  • Extreme exhaustion
  • Chest pain and/or palpitations
  • Projectile vomit

How To Prevent Getting Dizzy While Running

Here are some of the most common reasons runners feel dizzy, along with tips on addressing each one.

Blood Pressure Drops

One of my biggest mistakes was skipping a proper cool-down. After a long run, I’d jump straight into a shower and wonder why I felt dizzy.

Here’s what I found out. When you’re running, your heart works hard to pump blood to your muscles, and your blood pressure increases slightly. But if you stop running abruptly, your blood pressure can drop suddenly, causing lightheadedness or dizziness.

How to prevent it:

Cool down gradually instead of stopping your run abruptly. This means slowing down to a jog or walk for 5 to 10 minutes before you stop completely. This gives your body time to adjust, and your heart rate and blood pressure will gradually return to normal. Think of it as easing your body back into a resting state.

Overexertion

Pushing yourself too hard, especially during high-intensity workouts or long runs, can lead to dizziness. When you overexert yourself, your heart rate can skyrocket, and the body struggles to keep up with the increased demand for oxygen. Combined with heavy sweating, you can experience lower blood pressure and dizziness.

Like many runners, I used to think pushing harder meant progress. But after too many episodes of feeling faint, I realized that going all out every time wasn’t doing me any favors.

A high-intensity workout is good every now and then, but overdoing it just invites problems. Whenever I feel that heaviness or dizziness creeping in, I slow down, catch my breath, and remind myself that there’s no point in pushing if I can’t finish strong.

How to prevent it:

Be mindful of your limits. It’s okay to push yourself but always listen to your body. If you feel yourself getting lightheaded, it’s a sign that you need to slow down. Take a break, breathe deeply, and give your body time to recover. Building intensity gradually will help prevent overexertion and dizziness.

Dehydration & Dizziness During A Run

Dehydration is a leading cause of dizziness, especially during long runs or when running in hot weather. When you sweat, your body loses water and essential electrolytes. If you don’t replace those fluids, your blood volume can drop, leading to lower blood pressure and dizziness.

How to prevent it:

Stay well-hydrated before, during, and after your run. Aim to drink plenty of water throughout the day, especially before heading out for a run. Bring water with you on long runs or hot days and take small sips regularly—about an ounce or two every 15 to 20 minutes. For even more hydration benefits, consider electrolyte drinks to help replenish lost salts.

Low Blood Sugar

Your body relies on glucose (sugar) as fuel when you run. If you haven’t eaten enough before your run, your blood sugar levels can drop, leaving you feeling weak, dizzy, or shaky. This is especially true if you run long or push yourself hard on an empty stomach.

How to prevent it:

Don’t run on an empty stomach. Have a light snack 30 minutes to an hour before you head out. Something like a banana with peanut butter, yogurt with fruit, or a small handful of nuts can provide the energy you need to maintain steady blood sugar levels during your run.

Improper Breathing

Dizziness can also come from not breathing right while you run. Many runners, especially beginners, tend to take shallow breaths or hold their breath while running, which limits the amount of oxygen flowing to the brain and muscles.

How to prevent it:

Focus on your breathing. Try to sync your breathing with your steps—one popular technique is the 3:2 ratio, where you inhale for three steps and exhale for two. This helps you take deeper, more controlled breaths and ensures you get enough oxygen. If you feel yourself getting dizzy, slow down and take deeper breaths.

Dealing with Treadmill Dizziness

Feeling dizzy after stepping off the treadmill? Then let’s talk about it.

Treadmills definitely have their own set of challenges.. The first time I experienced treadmill dizziness, I thought I was tired. But after some reading, I realized it was the abrupt transition from a moving belt to a still floor.

Now, I make sure to gradually slow down at the end of each treadmill session, taking a few minutes to walk it out before hopping off. It helps my brain and body stay in sync.

How to prevent it:

Don’t worry.

This type of vertigo is not dangerous and often goes away after a few treadmill runs.

It’s just a matter of practice and getting your body used to the machine.

One thing you can do if you typically feel dizzy after using a treadmill is to slow down gradually.

Reduce your pace over three to five minutes until you’re walking comfortably and breathing normally.

Then, and only then, get off the machine.

Get into a recovery position, or simply sit down.

Rehydrate.

What To Do If You Feel Lightheaded When Running?

Don’t try to be a hero if you ever feel dizzy mid-run.

Hit the emergency red stop button and stop down.

Next, elevate your legs above your heart, placing your feet on a wall, chair, or bench.

This way, the blood can circulate back into your heart and brain.

Try not to push your body more than it can handle.

It’s key to manage dizziness while exercising right.

Ignore your symptoms, and it will get worse.

Stop, find some shade, and elevate your legs. It’s something I learned the hard way. Pushing through only made things worse. Taking a few moments to recover helps you avoid a fainting spell and ensures you can get back to running safely another day.

Before picking up running again, try to rule out the cause of the lightheadedness and a practical solution.

If you adjust your training approach but continue to dizziness while exercising, make an appointment with your doctor ASAP.

When is it Time to See a Doctor?

In most cases, dizziness while running is manageable with a few adjustments. However, it’s time to see a doctor if you’re experiencing frequent or severe dizziness. These could be signs of a more serious underlying condition, such as heart or neurological issues, that need medical attention.

Frequently Asked Questions About Dizziness While Running

I know that you have more pressing questions about feeling woozy while working out. Let me try to address some of them.

What should I do if I feel dizzy while running?

If you start to feel dizzy while running, the best thing you can do is slow down and find a safe spot to stop. Take deep breaths, sip some water if you have it, and wait until the dizziness subsides. It’s essential to let your body recover rather than pushing through—ignoring dizziness can lead to a fall or make things worse.

Make sure to include a cool-down period at the end of your run, as it helps gradually lower your heart rate and blood pressure, which can prevent dizziness.

Is dizziness normal for beginner runners?

Yes, beginners sometimes experience dizziness, especially if they’re pushing harder than their bodies are used to or haven’t eaten enough beforehand. Running is an intense cardiovascular workout, and your body needs time to adapt to this new level of exertion. Starting with shorter, slower runs and gradually building up your endurance can help reduce dizziness.

My best advice? Begin with a few minutes of brisk walking or light jogging to ease your body into the activity. If dizziness persists, try eating a light snack 30-60 minutes before your run.

How can I tell if dizziness is a sign of something serious?

While dizziness is often caused by simple factors like dehydration, low blood sugar, or overexertion, it’s essential to listen to your body. If you frequently experience dizziness, or if it’s accompanied by symptoms like chest pain, difficulty breathing, nausea, or loss of consciousness, it may be a sign of an underlying health issue. In such cases, consult a healthcare provider to rule out any serious conditions.

Share Your Tips for Preventing Dizziness While Running!

Dizziness during a run can be a real hurdle, and sometimes the best advice comes from fellow runners who’ve been through it.

Have you ever felt dizzy on a run? Share your experiences and any tips that have worked for you in the comments below!

Whether it’s a hydration trick, a pre-run snack, or a cool-down routine, your insights could make all the difference for someone else!

How to Run a 5K Under 20 Minutes (Sub-20 5K Training Guide)

5K good time

Running a 5K under 20 minutes is a dream many road runners chase.

And trust me, I know it’s a tough one.

A few years ago, my best was around the 23-minute mark and wasn’t bulging at all.

In fact, the mere thought of breaking 20 minutes seemed downright impossible.

But you know what?

I made it happen.

It wasn’t easy, but with the right training and plenty of hard work, I got there.

Now I’m going to show you exactly how you can do it too.

Don’t worry. Ain’t gonna bore you with technicalities and jargon. I’ll keep it as simple as possible.

I’ll walk you through training tips, a solid plan to get you there, the mental game, and some lessons I learned along the way (including my own journey from a 23:30 to sub-20 5K).

By the end of this guide, you’ll know exactly what it takes to break that 20-minute barrier.

Ready to roll? It’s going to be a long read so let’s get to it.

Getting Started: Know Your Current Fitness Level

First off, you need to know where you’re starting from.

How fast can you run a 5K right now?

If you haven’t done it in a while, go out and run a time trial – it’s important to know where you’re at.

When I made the decision to go sub-20, my 5K was around 23:30. That meant I needed to cut 3½ minutes.

Seems like a lot, but trust me, it’s doable My advantage back in the day is that I had a coach that believed in me and that was a huge game-changer.

So here’s the deal.

If you’re running between 22 and 25 minutes, hitting sub-20 in a few months of focused training is within your reach.

Even if you’re a little slower, don’t stress – just stay consistent and train the right way, and you’ll see results.

In fact, I worked recently with a runner who went from 24:54 to 19:43 in just 8weeks. Yep, two months! Of course, I  believe he was an exception but it’s still an impressive feat nonetheless.

Everyone’s timeline will be different, but with patience and commitment, you can do it.

But what if your current 5K time is way slower than that.. Let’s say your 5K PB is around 35 minutes.

Then what should you do? Should you give up?

Of course, no. I’d urge you to change your goal into a a more realistic one. Instead, shoot for a 30-minute 5K and work on it from there. Adopt the progressive mindset.

A complete beginner? Please start with my couch to 5K plan.

In case you’re curious about average 5K times, check out this chart:

Assess Your Strengths and Weaknesses

Nope, we are not done analyzing what you’re capable of.

Now, take a moment and think about your running style. Are you more of a long-distance runner who can go forever but struggles to pick up the pace? Or are you fast out of the gate but struggle to hold that pace? Knowing this is key, because it’ll show you where to focus your training.

For me, I had solid endurance from just jogging, but speed? That was a whole other challenge. Maybe you’re the opposite, and that’s cool too. Knowing where you need to put in the work will make your training more efficient and effective.

Now let’s get to the more practical stuff.


The Benefits of Speed Work (and How to Make It Work for You)

If you want to break 20 minutes in a 5K, there’s no way around it: speed work is your best friend.

I’m not gonna lie, when I first heard about interval training and track workouts, I thought it wasn’t for me.

My first interval session had me gasping for air and thinking, “What did I get myself into?”

But let me tell you, adding structured speed workouts was a total game-changer. It’s the #1 thing that helped me shave 3 minutes off my 5K time—from 23-22 minutes to breaking 20. If I’d to do it all over again, I’d done speedwork earlier in my training.

So why bother with speed work?

It’s simple: it trains your body to run faster and makes your usual pace feel easier.

Speed work isn’t just about getting faster; it helps you hold that pace longer.

Interval training (short bursts of speed followed by recovery) improves your body’s ability to use oxygen, or what’s known as VO2 Max, and delays the point where you fatigue. This means you can go faster for longer.

Don’t just take my word for it—science backs it up.

One study showed that runners who did 4 weeks of sprint intervals shaved about 4.5% off their 5K times (about a minute on a 22-minute 5K!). Pretty good, right?

Another study found that runners using the “10-20-30” interval method (30 seconds of jogging, 20 seconds of moderate running, 10 seconds of sprinting) cut an average of 42 seconds off their 5K time in six weeks.

I can go on and on but you get it for sure.

Speed work works. Period.

How to Add Speed Work to Your Routine

Now you’re sold (hopefully) on speed work, let’s get into how do you actually fit it in.

Here’s how you can make it happen:

Track Intervals:

Find a local track or any flat area where you can measure distance.

One of the best ways to get started is with 400-meter repeats.

For a sub-20 5K, try running 4–6 x 400m repeats at a pace slightly faster than your goal race pace.

For example, aim for 93 seconds per 400m (around 6:15 per mile pace). After each repeat, take 1 minute to walk or jog to recover.

When I first did this, my lungs were on fire., It felt impossible. But, here’s the thing: it got easier every week.

And after a few weeks, I was hitting those 400m repeats faster than I thought I could. Over time, you can increase the number of repeats or run them faster.

You can also try 800m or 1km repeats, which help build the endurance you’ll need for race day.

For example, 5 x 1000m at goal pace (around 4:00 per km) with 90 seconds of easy jogging in between is a killer workout that’ll get you race-ready.

Tempo Runs:

Tempo runs are your bread and butter for improving speed at longer distances. It’s a sustained effort that’s faster than your normal pace but not so hard that you’re gasping for air.

Tempo runs help your body get rid of lactic acid more effectively, which means you can sustain that faster pace for longer.

For a sub-20 5K, this might be a 3–4 mile run with the middle 2 miles at a “comfortably hard” pace—around 7:00–7:15 per mile. (This is a little slower than race pace but faster than easy pace).

When I did these in my training, I really noticed the difference. I could lock into a strong rhythm that made race pace feel more manageable.

Fartleks & 10-20-30:

Fartlek, Swedish for “speed play,” is a fun way to add speed work into an easy run. You simply mix in bursts of speed whenever you feel like it.

For example, during a 30-minute run, you might sprint for 30 seconds, jog for 1 minute, and repeat the cycle.

It’s less structured and more about having fun with speed. The “10-20-30” workout is a more structured form of fartlek: jog for 30 seconds, run at a moderate pace for 20 seconds, then sprint for 10 seconds. Do this for 5 sets, then take a 1–2 minute jog break.

The cool thing? Even doing 10-second sprints at 80% effort (not full-out) still gives you huge fitness gains (Science Daily).

So don’t stress about sprinting at max effort. Just get out there, push yourself a little, and enjoy it.

Hill Repeats:

Find a hill that takes you about 60–90 seconds to run up, and get ready to build strength.

Do 6 x 60-second uphill sprints, then jog or walk back down to recover. Hills help build leg strength and power, which translates into faster flat running.

I make sure to add hill workouts into my routine every couple of weeks. They suck while you’re doing them, but afterward, everything else feels a little easier.

Think of hills like “strength training on the run.”

How to Get Started

If you’re new to speed work, start with one session a week, and then build up to two as your body gets used to the intensity.

For example, do intervals on Tuesday and a tempo or hill workout on Friday, with easy runs in between to help your body recover.

And, listen, don’t skip the warm-up. 10-15 minutes with easy jogging, plus some dynamic stretches or strides to get your muscles ready is all you need.

Balancing Endurance and Speed Training

Speed work might grab attention, but don’t skip out on building that endurance base.

If you want to crush a 5K, you need a mix of speed and stamina.

Here’s the deal: speed workouts make your race pace faster, but it’s endurance training that lets you hold that pace all the way to the finish line without falling apart.

To break that sub-20 5K, you’ve gotta strike the right balance between both.

So, let’s break it down:

Easy Runs = Building Your Engine

Most of your weekly miles should be easy, relaxed runs. Yep, we’re talking about those slow, conversation-paced miles.

This is the foundation you build everything on. It might seem counterintuitive, but even the fastest 5K runners spend a lot of time running slower than race pace.

For example, if you’re aiming for 6:26/mile for a sub-20 5K, you might find your easy runs clocking in around 8:00–9:30/mile (maybe even slower).

When I started out, I made the rookie mistake of pushing my easy days too fast.

I thought it’d make me “extra fit,” but it just made me tired! I’ve heard other runners say the same thing—that pushing too hard on recovery days led to a “boom-bust cycle of injuries.” I can definitely relate to that.

Once I finally slowed down my easy runs, I was able to go longer, recover quicker, and crush my speed workouts. The key? Train smarter, not just harder.

Please learn from my mistake. Be wiser.

Long Runs for Endurance

Even though a 5K is “only” 3.1 miles, you should still put in the work with long runs (5 to 8+ miles, depending on your level). Why? Because the more comfortable you are with running longer, the easier those 5K miles will feel.

For your long runs, aim for a pace that’s easy and steady—about 1½–2 minutes slower per mile than your 5K pace. It might seem “boring” for speedsters, but mix it up with some trail runs or run with a friend to keep it fun. Think of it as your engine-building day.

Rest & Recovery Days

Balance isn’t just about the workouts—it’s about recovery too.

You don’t get faster by hammering workouts non-stop; you get faster by letting your body recover.

Make sure you have at least one or two days a week where you’re resting or doing some super light cross-training.

Here’s a rule I’ve stuck with: the “80/20 rule.” That means 80% easy and steady runs, and 20% hard efforts.

So, if you’re running five days a week, four of those runs should be easy (including your long run), and one or two should be tougher efforts (like intervals or tempo). Don’t make your easy runs too fast! Trust me—running slow on your easy days actually makes you faster on your hard days.

As one coach told me, “If you want to race fast, you’ve gotta train slow and fast—just don’t always do medium.” If you’re running medium effort all the time, you’re just setting yourself up for burnout or a plateau.

Periodize Your Training

Don’t try to do everything at once.

You don’t need to cram all the speed and mileage into every week.

Focus on building up your mileage for a few weeks, then start adding in more speedwork as you get fitter.

Or alternate weeks with higher mileage and others with a speed focus. Listen to your body—if you’re feeling drained, it’s fine to back off the intensity for a couple of days. It’s better to show up at the starting line a little undertrained but fresh, than overtrained and exhausted.

3-Week Training Plan for Breaking 20 Minutes in the 5K

Alright, let’s get real.

This 3-week plan is designed for runners who are already pretty close to cracking that sub-20 5K goal. If you’re running about 4-5 days a week and around 20+ miles, this plan is gonna help you dial in and break that barrier.

Time to fine-tune and push yourself through that last stretch.

Let’s break it down.

Week 1: Build the Base

We’re getting the basics locked in this week. It’s about getting your body ready, but not burning yourself out just yet.

  • Monday: 30-minute easy run. Nice and slow. You’re just shaking off any soreness from the weekend and gearing up for the work ahead.
  • Tuesday: Intervals – 5 x 1 km at goal 5K pace (4:00/km or 6:25/mile). Jog for 90 seconds between each rep. Finish with a short cooldown jog. Don’t go out too hot, but feel that goal pace. The last rep should get tough but still be doable.
  • Wednesday: 30-minute easy run or cross-training (bike, swim, whatever feels easy). This is all about recovery from Tuesday’s workout.
  • Thursday: Speedwork – 6 x 400 meters at a pace faster than 5K pace (around 93 seconds per 400m). Rest for 1 minute in between. This is all about turning your legs into rockets. Keep the form tight, but if 93 seconds is too quick, don’t stress—aim for 95 seconds and work your way down.
  • Friday: Rest or easy cross-train. Give your legs some TLC. Hydrate, stretch, and keep it relaxed.
  • Saturday: Long run – 45–60 minutes at a pace you can hold a conversation. This isn’t about speed; it’s about building that endurance. You should finish feeling like you could keep going.
  • Sunday: Rest. Recovery day.

Week 2: The Push

This week, we’re turning up the intensity a little. We’re pushing your limits but also respecting recovery.

  • Monday: 30-minute easy run. Don’t push it today—keep it chill and let your body catch up from last week.
  • Tuesday: Intervals – 6 x 800 meters at goal pace (3:10–3:12 per 800m). Jog 200 meters between each rep. This is a VO2 max workout—your body is learning to hold that fast pace.
  • Wednesday: 30-40 minute easy run or cross-training. If you’re feeling beat up, take it easy and maybe do a light bike ride.
  • Thursday: Hill Sprints – 6–8 x 60 seconds uphill, then jog down to recover. Focus on driving with those legs. If you don’t have hills, try a 20-minute tempo run at your 10K pace. Push yourself, but don’t gas out.
  • Friday: Rest or light cross-train. Focus on recovery here. Don’t skip this!
  • Saturday: 30-minute easy run + 4 strides (4 x 100m accelerations). This will remind your legs how to move quickly.
  • Sunday: Long run – 50–60 minutes. This should feel easier than last week. Progress!

Week 3: Taper and Race Week

We’re tapering down this week. The goal is to be fresh and ready to crush it on race day.

  • Monday: 30-minute easy jog. Relax, you’ve done the work.
  • Tuesday: Interval sharpening – 4 x 400m at 5K pace with full recovery (2-3 minutes walking rest). Or, 3 x 1 km at 5K pace with 2 minutes rest. This is just to keep your legs fresh—not a time to kill yourself.
  • Wednesday: 20 minutes super easy jog or rest. If you’re feeling great, go for a short jog, but if you’re feeling sore or drained, skip it. Recovery’s key.
  • Thursday: Rest day. Mentally prepare for the race. Visualize your pacing strategy. Check your gear. This is about getting your mind right.
  • Friday: 15-minute light jog + 5 x 100m strides. Just a little tune-up before race day. These strides should feel quick, but not exhausting.
  • Saturday: RACE DAY – Time to break 20 minutes! Warm up with a 1-2 mile jog, dynamic stretches, and strides. Don’t go out too fast; stick to your pacing strategy. In that last mile, when the pain hits, remind yourself why you’ve been training so hard. Push it all the way to the line. Let’s do this.
  • Sunday: Recovery day. You’ve earned it. Celebrate your sub-20 achievement. Do a light shakeout run if you feel up to it, but mostly just chill. Enjoy the win.

How does this plan look? Would you change anything based on your own training style or schedule? Maybe you prefer long runs on Saturdays, or you need an extra rest day before race day? Let me know how you’d tweak it for your needs.

Final Thoughts: Stay Motivated and Join the Community

Chasing a sub-20 minute 5K? Yeah, it’s tough. But trust me, it’s totally worth it. Whether you’re at a 30-minute 5K or pushing for 20:30, make sure you remember why you’re out there.

Maybe you want to show yourself you can do it, beat your buddy in a race, or just test how far you can go. Whatever it is, keep that “why” front and center. On those days when you’re low on motivation, it’s that ‘why’ that’ll keep you going.

Progress doesn’t always happen in a straight line—sometimes it’s slow, sometimes fast. You might feel like you’re in a rut, then bam—suddenly you shave 45 seconds off your time.

Take it from me, the hard work pays off. It might take longer than you expect, but don’t let that throw you off track. You’ve heard it before: “The days are long, but the years are short.” It’s real. In a few months, you’ll look back and be amazed by how far you’ve come.

Keep it fun and dream bigger. Once you smash that sub-20 5K (and you will if you put in the work!), what’s next? Maybe a sub-19, a 10K, or even a half marathon—heck, maybe you’ll just love running even more and help others along the way.

The discipline you build chasing that 5K PR will stick with you, whether you’re racing a marathon or a 10K. I’ll never forget the rush of finally breaking 19. That moment still gives me goosebumps.

So here’s the final coach’s pep talk: You’ve got this! The road to sub-20 is tough, but every single runner I know who really wanted it and stuck with it has hit that goal.

Be patient, trust the process, listen to your body, and enjoy the journey. The moment you see that ‘19’ on the clock at the finish line will make every early morning, every track session, and every sore leg feel totally worth it.

Now go out there and make it happen. I’m rooting for you every step (and every second) of the way.

How To Run Commute – The Complete Running To Work Guide

run commute

It’s a fantastic way to sweat while doing something productive.

But it requires some preparation and planning.

I’ve compiled today’s article’s ultimate guide to starting your run-commute.

By the end, you’ll learn the following:

  • What is run commuting?
  • The benefits of running to and from work
  • How to get started with run commuting
  • The run commuter checklist
  • How to choose the right running bag pack for running commuting
  • How to plan your route
  • How to get cleaned up
  • And so much more…

Let’s get started

The Benefits of The Run-Commute

Though run-commuting is not a popular way to get to and from work, there are many benefits to doing so.

Let’s discuss a few.

  • Running Is Fast Than Walking. On average, expect to be able to walk three to four miles per hour. But if you can keep an 8-minute running pace, you can cover 7.5 miles per hour or 12 kilometers per hour. In some cities, running can also be faster than driving. For example, driving speeds in crowded cities can be around seven mph.
  • Boosts productivity. Running first thing in the morning improves your productivity. Not only will you arrive at the office feeling awake, but your brain will be functioning at its best.
  • Reduce Stress. Running home from work can help clear up your mind and clear the day’s stress from your system so you can enjoy the rest of your day.
  • No More Traffic. Hate getting stuck in traffic? Then run commuting is for you. By running to work, you’ll no longer have to worry about getting stuck in traffic for hours and hours, moving at a snail’s pace while losing your sanity with every passing minute. Instead, you’ll be the master of your work commute. So say goodbye to burning traffic—as long as you have a realistic run-commute plan.
  • More base miles. One of the best ways to build endurance is to do a lot of long, slow miles. The more miles you can run without fatigue, the faster you’ll likely run on race day. But it’s not easy to find time for them. Running to and from work is a great opportunity to add miles to your weekly total without compromising your lifestyle.
  • Running Is Cheap. Compared to other transportation means, running is cheap. You don’t need to pay for any gas, train tickets, or parking fees. It’s just you and your feet. Of course, you’ll still use up your running shoes, but you’ll use them most productively and frugally.
  • Eco-friendly. You’ll be doing an excellent service to the environment by leaving a “smaller” footprint and inspiring other people to follow (and run) in your footsteps.

How to Start Run-Commuting 

Here are the guidelines you need to become a daily run commuter.

Plan Thoroughly

Success favors the prepared mind—this couldn’t be more true regarding run-commuting.

As a rule, plan out the logistics and running gear needed for the job in advance—you’ll need more than your running shoes.

Here are the five steps to an effective run-commute plan:

  • Make a Run commute list
  • Lay out your running gear
  • Get the right running backpack
  • Plan your running route
  • Have fun Run Commuting

Let’s explain each step.

Make a Run Commute List

Make a checklist of everything you’ll need for the run and work.

Planning takes care of all your excuses not to start running and commuting.

Here are the run commute essentials to consider.

  • Running gear such as your shoes, clothes, reflective vest, and a GPS watch,
  • A small purse,
  • Your phone and other electronics,
  • Work-related stuff, like your laptop, a diary, a lightweight folder, and glasses,
  • door keys,
  • Breakfast and/or lunch packs. Snacks too,
  • A water bottle,
  • A waterproof jacket that wicks moisture away for a rainy day,
  • A spare plastic bag to keep your spare clothes dry,
  • Reflective tape or a reflective vest if you plan to run near sunrise and/or sunset on roads.
  • Towel and toiletries

Of course, you cannot keep all this in your pocket and typical work bag.

You’ll need a special running bag.

Let’s see how to choose one.

Running Backpack

The most important piece of run commute gear is the one that carries everything—your backpack.

Few things are as frustrating as a backpack that bounces all over the place and causes painful rubbing.

Of course, if you can narrow your carry-on items to your phone, wallet, and keys, then a fanny pack is enough.

But that’s not always the case, as most of us need to carry more, whether it’s clothes, a laptop, toiletries, or any other item.

The market for running packs has grown thanks to run commute’s rising popularity in recent years. You can find these online and in most running shops.

The Right Backpacks For Run-Commuting

Get a backpack that’s specifically designed for running.

These are usually made with ultralight materials and have straps that wrap around the chest or waist level. This helps prevent it from bouncing all over the place during a run

The straps also help evenly distribute the backpack’s weight and hold it comfortably across your back.

Make sure the backpack fits firmly without chafing or weighing you down.

Try out a few before you make up your mind.

Here’s how to carry your keys while running

Pack Smart

Do not pack more than you must—or this will wear you out, especially when you’re not used to running with weights.

One trick to help you avoid carrying extra items is to bring several days’ worth of toiletries and clothing in your drawer or locker room.

Things to leave at the office may include:

  • Deodorant
  • Suit
  • Loose change
  • Laptop
  • Hard files
  • Towel
  • Work shoes

Not sure if your backpack is waterproof?

Pop your clothes and electronics into a plastic bag.

how to run commute

Know The Route

Always taking public transport to the office? Then you might not know exactly how far is your daily commute.

So, as a rule, know your routine. Then, check your online maps and look for the alternative route if it seems not passable. You can also check out likely routes by car or bike first if you’re unfamiliar with the region.

It’s not fun if you get lost and run out of time. Few things are worse than arriving at the office drenched wet, exhausted, hungry, and behind schedule because you got lost and had to run some extra miles

I’d also recommend looking for the most pedestrian-friendly areas, especially if running through an urban area.

Running on the freeway is no fun—it’s also illegal.

What’s more?

Have a few running routes of different lengths to vary your running distance and make your training more enjoyable.

When It’s Too Far

Let’s be practical.

If you live 30 miles from your office, then you’ll have to run an ultramarathon every time you run commute. That will be asking for too much.

Here’s the workaround: you don’t have to run the whole distance.

Here are three options:

  • Get off the train or bus a stop earlier, then log the remaining miles on your feet.
  • If you drive to work, perhaps you can find a safe parking lot, then run the rest of the distance to the office.
  • Look for a colleague who lives closer to the office and asks them to join you.

Give It a Test Run

Anything that can derail you from your new plan during the early stages will discourage you from carrying on.

Before running to and from work, your first step should be to test your running gear and run-commute strategy.

Doing this will ensure that everything is in place and working smoothly. Once you know you have a solid strategy and backpack, try your first few runs on days when the weather is friendly.

Get Cleaned Up

Unless you’re willing to spend the next work shift avoiding all of your colleagues, then having a shower is a must.

Most office buildings have a shower (even facilities for fitness fanatics), but what if your workplace is a shower-free zone?

The easy solution is to take a bus/train to the office, then run home and shower in the comfort of your home.

Insist on running to work, but your office building is a free shower zone?

Consider visiting nearby cheap gyms or pools you can join and use their changing facilities.

Take Care of Your Hygiene

Here are the essentials:

  • Shampoo,
  • Soap,
  • Deodorant,
  • Comb,
  • Foot powder,
  • Wipes,
  • Lotion

You can easily find all of this in the travel section of any department store.

Get all you need, stash all your toiletries in a little bag, and store it in your drawer.

How To Run Commute  – The Conclusion

Here you have it!

Now you know all there is to know about running to and/or from work.

I hope you start doing that soon.

So please make sure to build this awesome running habit ASAP.

Thank you for reading my blog

Cheers.

How To Choose The best Running Shoes for Overpronation

running shoes for overpronators

Let’s talk about why choosing the right shoes matters if you overpronate

After years of coaching, I can say the right shoes really make a difference

If you’ve had issues like shin splints or runner’s knee, overpronation might be to blame.

So, what is overpronation, and how can the right shoes help prevent it?

Let’s get to it.

What Is Pronation?

Before getting into overpronation, let’s look at what pronation is.

Pronation is the natural way your foot rolls from heel to toe when it hits the ground. It helps your body absorb shock and adapt to different surfaces..

In a healthy stride, your foot rolls inward a bit to spread out the impact

Pronation usually falls into three categories::

  • Neutral pronation: Your foot rolls inward just the right amount.
  • Overpronation: Your foot rolls inward too much.
  • Supination: Your foot doesn’t roll inward enough, often landing on the outer edge.

What Is Overpronation?

Overpronation happens when your foot rolls excessively inward, more than 15% of the way. This extra inward roll flattens your foot more than normal, adding pressure to the inner side.

According to the American Podiatric Medical Association (APMA), overpronation can lead to pain and injuries in the feet, knees, and lower back, as it disrupts the natural alignment of the leg. This inward rolling puts excess pressure on the inner edge of the foot, which can lead to issues like plantar fasciitis, shin splints, and Achilles tendinitis. Learn more about overpronation from the APMA.

I’ve seen runners deal with issues like shin splints, runner’s knee, and stress fractures because of overpronation.

What’s more?

Runners with overpronation often have flat feet.

Key Features to Look for in Running Shoes for Overpronation

If you overpronate, look for shoes with stability features to help control motion and give you support.

And please don’t take my word for it.

The American College of Sports Medicine (ACSM) suggests that stability and motion control shoes are ideal for runners with overpronation, as they offer structured support through elements like medial posts, firmer foam, and guide rails that limit excessive inward rolling. These features help balance your stride and reduce the risk of injuries.

Similarly, Mayo Clinic emphasizes the importance of supportive shoes with stability and arch support to help prevent injuries and discomfort from overpronation. Shoes with extra cushioning can also be beneficial for overpronators, as they absorb impact and alleviate pressure on the arch and heel.

But before you start using shoes for overpronators, ensure you do overpronate. Don’t try to fix something that ain’t broken!

Let me explain more…

How to Tell if You Overpronate

Not sure if you’re an overpronator? Here’s how to check::

  1. Check Your Shoes: Check the wear pattern on your old running shoes. If the inner edge of your shoe sole is more worn than the rest, you probably overpronate.
  2. Gait Analysis: Many running stores offer free gait analysis. They’ll watch you run on a treadmill and check how your foot moves.
  3. See a Professional: A podiatrist or physical therapist can help you assess your foot mechanics in more detail.

Choosing the Right Shoes for Overpronation

Once you know you overpronate, it’s time to find the right shoes

For mild to moderate overpronation, stability shoes are a good choice, as they give extra support but stay flexible and comfortable

If you have severe overpronation, motion-control shoes offer firmer support to keep your foot from rolling inward too much.

Here’s your guide to running shoe brands.

Not sure how to make sense of this?

Then I’d recommend stability shoes. These tend to be more flexible and less heavy than motion-control shoes.

They’re also easier to run in.

If the overpronation is causing problems, try moving onto motion control shoes.

The Checklist For Running Shoes For Overpronators

Here’s what to look for in running shoes if you overpronate:

  • Arch support: Proper support in the arch helps prevent your foot from rolling inward.
  • Stability features: Stability shoes often include denser foam or extra cushioning in the midsole to keep your foot in alignment.
  • Durability: Overpronators tend to put more wear on their shoes, so look for durable outsoles that can handle the extra stress.

Top 5 Running Shoes for Overpronation

Below are some shoes that offer some of the features that overpronators need. Feel free to experiment, then choose the shoe that best suits your needs.

Asics GEL-Kayano 24 Lite-Show

ASICS Gel Kayano 24 is one of the best shoes for overpronators, providing comfort and stability.

This shoe focuses on the two primary spots where you need a lot of support as an overpronator—the heel and midsole.

Despite the extra cushioning in those key areas, the shoe is also lightweight and flexible.

What’s more?

ASICS lite-show reflective technology helps you stay more visible in low light conditions, which is key for staying safe when running early in the morning or at night when it’s dark outside.

Asics Gel-Kayano 27

Another awesome shoe designed by Asics for the overpronator.

This shoe is one of the top stability shoes, designed with a dual-density midsole, a structured heel counter, and an outsole Guidance line to guide your foot straight and lessen pronation.

The sole is also more flexible to help encourage a more natural gait.

What’s more?

The mesh upper helps keep your feet cool and comfortable.

Brooks Addiction 14

This fantastic motion-control shoe works very well for runners who require a lot of stability on their runs and heavy runners who overpronate.

It also provides a generous fit, ideal for those with flat feet or using custom orthotics.

Remember that Brooks Addiction shoes tend to be heavier than others since they have a lot of cushioning.

Saucony Omni ISO 2

In Latin for “everything” or “all,” Omni ISO 2 is a stability shoe that works well for overpronators.

It has a good fit and comes in a good-looking design.

The shoe also features ISOFIT technology, which appeals to various foot types as it adapts to most foot types for a comfortable fit.

Frequently Asked Questions

Let’s address some of the most common questions and concerns when it comes overpronation and footwear.

What are the signs of overpronation?

Overpronation occurs when your foot rolls inward excessively while you run, which can put extra stress on your feet, ankles, and knees. Common signs include:

  • Uneven shoe wear, especially on the inner edges of the sole.
  • Frequent pain or discomfort in the arch, heel, or ankle.
  • Recurring injuries like shin splints, plantar fasciitis, or knee pain.
  • Flattened arches when you stand, which can be a sign of low or flexible arches.
    If you’re unsure, consider visiting a running store or podiatrist for a gait analysis.

Can overpronation lead to injuries?

Yes, overpronation can contribute to various injuries if left unaddressed. Since overpronation puts excess pressure on certain areas of the body, it can lead to injuries such as:

  • Plantar fasciitis (heel and arch pain)
  • Shin splints
  • Achilles tendinitis
  • Patellar tendinitis (knee pain)
  • Hip and lower back pain
    Wearing the right shoes with proper support can significantly reduce the risk of these injuries.

How often should I replace my running shoes?

For most runners, replacing shoes every 300 to 500 miles is recommended. However, if you overpronate, you might find that your shoes wear out faster, especially on the inner edge. Signs that it’s time for a new pair include:

  • Noticeable wear on the outsole, especially along the inner edge.
  • Reduced cushioning or support, which you might feel as discomfort or fatigue.
  • Loss of stability, especially if the shoe feels uneven when you wear it.
    Keeping track of your mileage and monitoring wear patterns can help you determine when it’s time to replace your shoes.

Final Thoughts on Running Shoes for Overpronation

Choosing the right shoes isn’t just about comfort—it’s about staying injury-free and enjoying every step of your running journey.

I’ve seen firsthand how the right footwear transformed my runs and those of countless runners I’ve coached. So don’t wait until the pain sidelines you—get a proper gait analysis, invest in the right shoes, and confidently hit the road. Your feet (and knees) will thank you!

Do you have any questions or want to share your experiences with overpronation? Drop a comment below, and I’d be happy to help.