How Many Miles is a 50K? Your Guide to Entry Level Ultra Running

The 50K race is often referred to as the “entry-level” ultra, and for a good reason—it’s the shortest distance that qualifies as an ultra marathon. But don’t let that fool you: even though it’s the shortest ultra, it’s still a serious challenge.

At around 31 miles, this “entry-level” event is no joke—it’s about five miles longer than a marathon.

But here’s the kicker: it’s not just the distance. The terrain, elevation, and mental hurdles will throw a whole new set of challenges at you.

When I first decided to take on the 50K, I wasn’t sure what to expect. But looking back, I can tell you it’s a completely achievable goal for anyone willing to put in the work.

In fact, with the right mindset, training, and a good sense of humor, you can totally crush your first 50K.

In this guide, I’ll give you the lowdown on everything from training tips to nutrition, gear, and mental strategies. And of course, I’ll throw in a few personal stories, like my Bromo Desert adventure and the wild midnight start at the CTC 50K Ultra.

Let’s get to it!

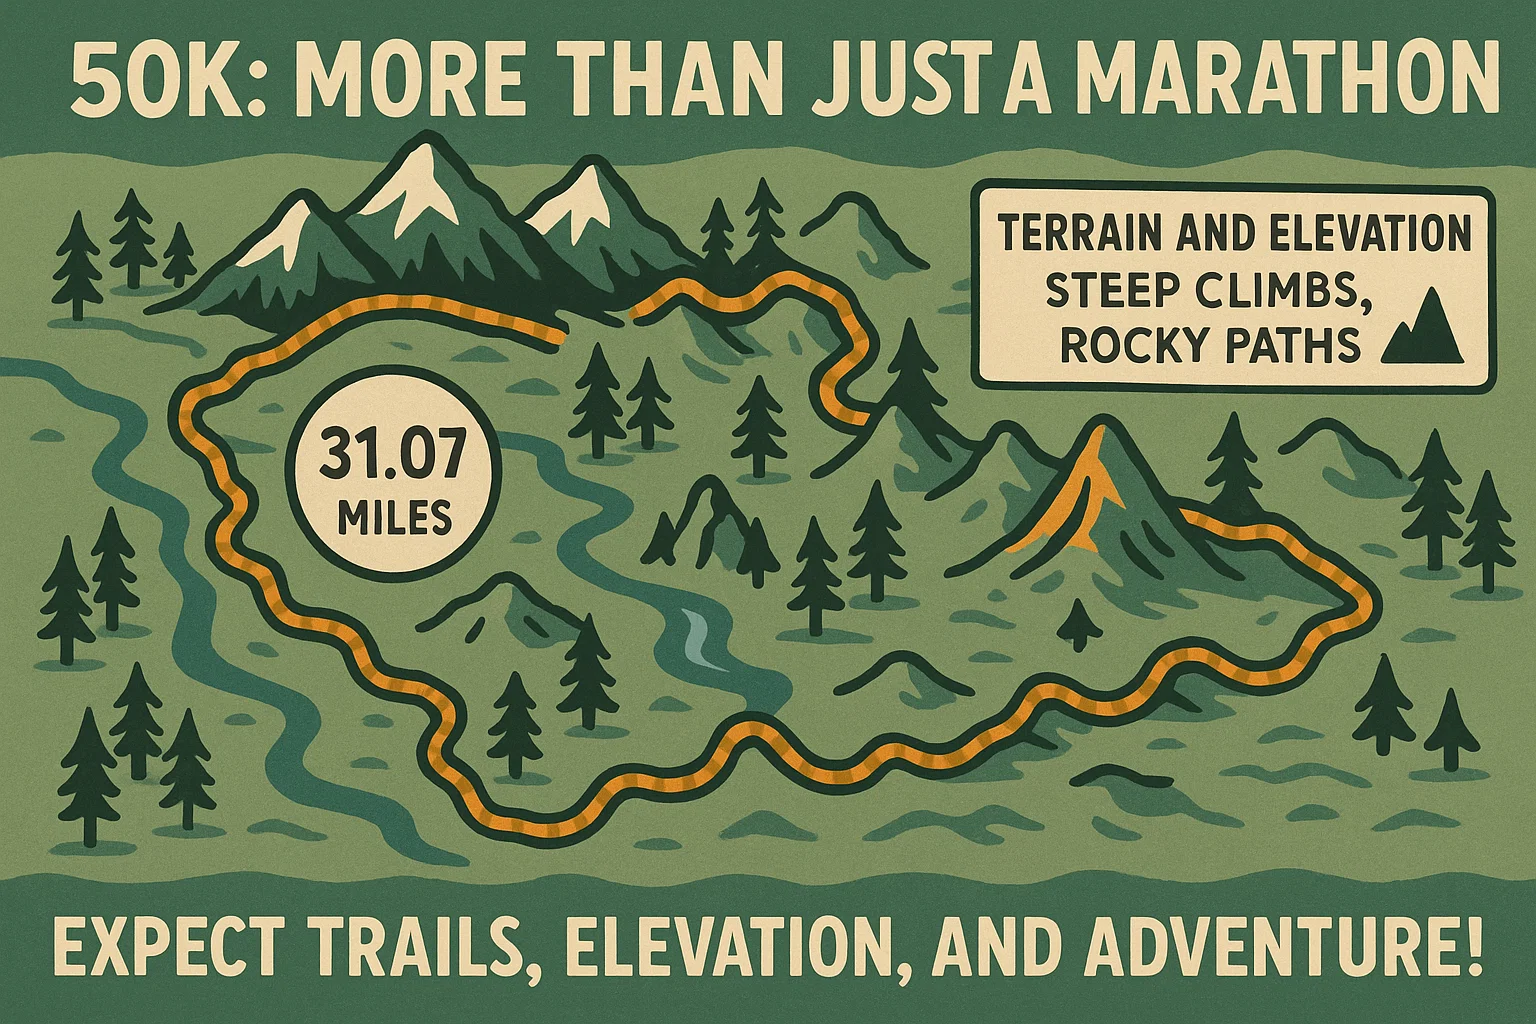
What Is a 50K Ultramarathon?

Let’s start with the basics.

A 50K is an ultramarathon, which is just a fancy way of saying it’s any race longer than a 26.2-mile marathon.

In miles, that’s 31.07 miles.

It might sound intimidating, but trust me—50K is often the first ultramarathon distance that new ultra-runners tackle.

The “feel” at ultras is totally different from a road marathon.

Picture less of that ‘big city race’ feeling and more of an ‘adventure on the trails’ kind of vibe.

Many 50Ks are run on trail courses, which means you’ll probably be jogging up mountains, sloshing through mud, and hopping over roots or scrambling across rocks.

Let me explain what I mean…

Not yet ready for an ultra? Try my marathon plan.

Trail vs. Road Challenges

Now, if you’re coming from road marathons, here’s the kicker: trail ultras are a whole different beast.

Road marathons are usually spot-on in terms of distance and pace. Aid stations hand out gels and water every few miles.

In trail ultras, things get… wild.

A “50K” might actually turn out to be closer to 55K or 56K. Surprise, right? And the terrain? It can slow you down big time.

Take my experience in the Bromo Desert Marathon 50K, for example. Instead of running on smooth, flat roads, I found myself tackling volcanic sand dunes and steep climbs at high altitude.

One minute, I was running, and the next, I was power-hiking up a freaking crater! Trail ultras often demand that you slow down or even take hiking breaks—especially on those steep uphills.

And that’s totally fine! Walking breaks? Yeah, they’re actually part of a smart 50K strategy. That’s why ultra trail runners are often dubbed power walkers – we do more walking than running, truth be told.

The trails are unpredictable—rocks, mud, rivers, crazy weather. You’ve got to be ready for anything. But that’s what makes ultramarathons so much fun—just the adventure of it all.

50k race challenge

Elevation = Extra Challenge

Let’s talk about elevation for a second. Many trail 50Ks come with some serious vertical gain. We’re talking hills, hills, and more hills. And it can make a HUGE difference in your race.

Here’s a trick: for every 100 meters of climbing, you can think of it like adding a whole kilometer to the effort. So, if you’re doing a 50K with tons of elevation, it could feel like running a much longer race.

During my Bromo Desert 50K, I had almost 1800 meters of climbing. Compared to other events, the elevation isn’t too much but for a first-timer, I’d to be careful and pick a a beginner-friendly ultra event (more on this later).

And it took me hours longer to finish than it would have on a flat course.

But that’s the deal with trail ultras—terrain and elevation make all the difference, so don’t worry too much about pace. The goal is to keep moving and take in the scenery. It’s all part of the experience.

To give you an idea, here’s the course profile for the bromo 50K event:

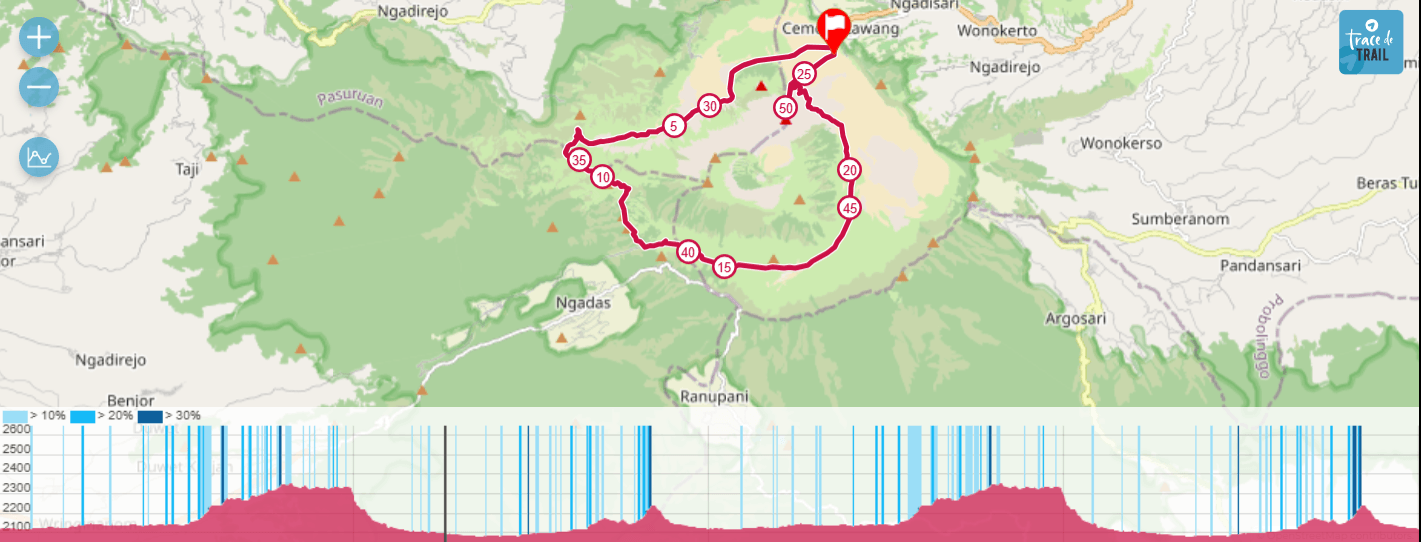
P.S Yes, that’s me being featured on the main page of the website. Famous right? Na. Just by accident

50K Race Times: World Records and Average Joes

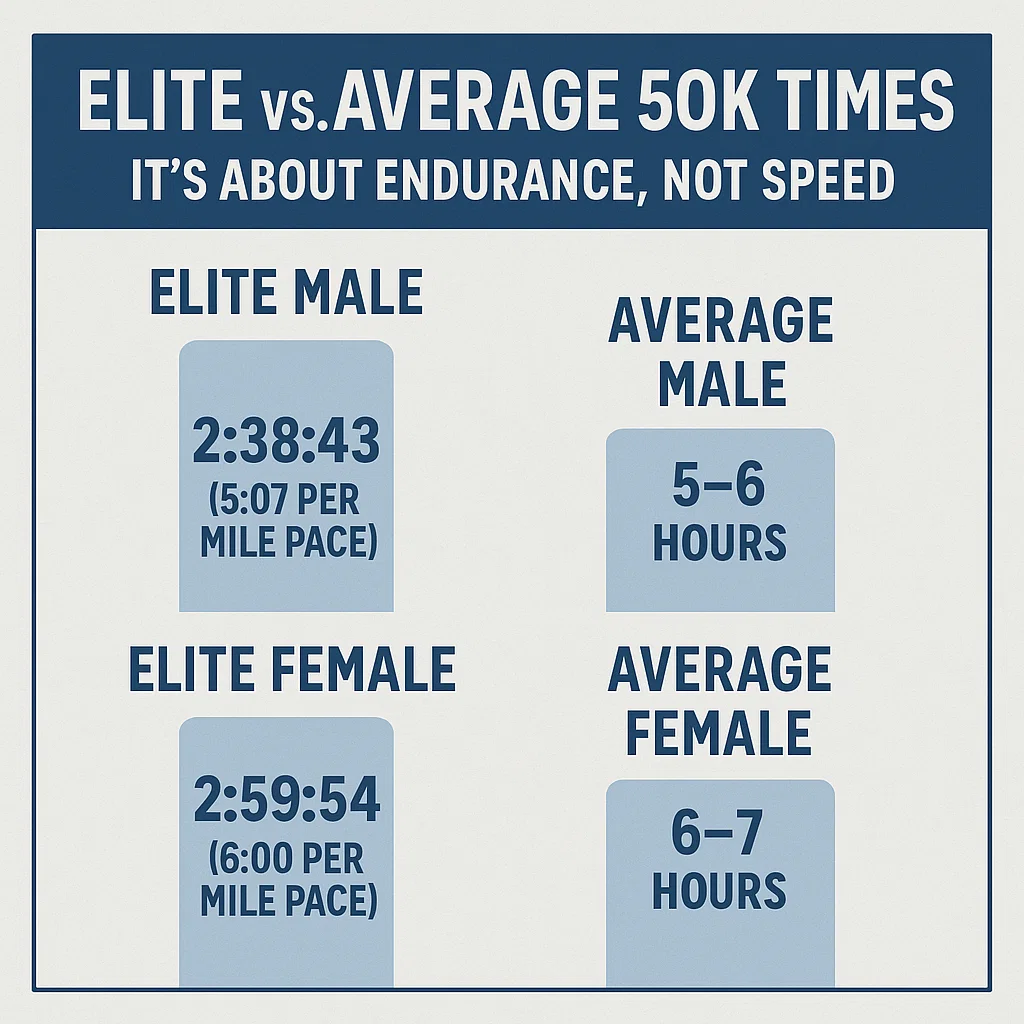
Now, you might be wondering—how fast can 50K runners really go? Let me tell you, the pros make it look easy (even though it’s anything but). The men’s 50K world record? That’s CJ Albertson, who ran it in 2:38:43—31 miles at a crazy-fast 5:07 per mile pace! And for the women, Desiree Linden set the record at 2:59:54—she was the first woman to break 3 hours for a 50K. That’s insane!

But let’s be real here, that’s elite level. For most of us regular folks, a 50K is gonna take a lot longer than that. A solid amateur might finish in 5 to 6 hours on a good day.

Most people? They’re looking at finish times in the 6 to 7-hour range. And that’s totally okay! In fact, most 50Ks have 8-10 hour cut-off times, and plenty of runners take the full time to finish.

And here’s a fun fact: ultramarathons? Experience counts for a lot. Peak performance for a 50K tends to hit around 39-40 years old. So even if you’re not in your 20s, there’s a good chance you’ll be getting faster as you age!

P.S. Please keep in mind that these world records were performed on road, usually on indoor tracks. Not your typical trail course with elevation and treacherous terrains.

Trail vs Road Times

If you’re coming from marathons, expect to be slower in a 50K. It’s normal to run each mile 10 to 30 seconds slower than your marathon pace, even on a good day.

For example, if you run 8:00 minute miles in a marathon, your 50K pace might fall around 9:00-10:00 per mile.

That might add another hour or so to your time.

If the trails are technical or hilly, add more time to that.

For my first 50K took me about 8 hours, even though I had run a 3.5-hour marathon before. The sandy dunes, the slippery hills, the scorching heat and the mental aspect of running beyond 26.2 miles made it a whole new challenge.

Remember this: in ultras, it’s not about finishing fast. It’s about finishing strong.

Don’t stress about your time. As a first-timer, the main goal is to get across that finish line with a smile on your face.

And hey, sometimes being on the trail longer just means more time to fuel up, enjoy nature, and soak it all in.

Training Principles for a 50K Ultramarathon

Training for a 50K is a lot like marathon training, but with a few extra challenges thrown in.

The main things you need to focus on are building your endurance (lots of mileage and those long runs), running on terrain that matches race day, taking recovery seriously, and getting used to being out there for hours.

Let’s break it down into some solid principles.

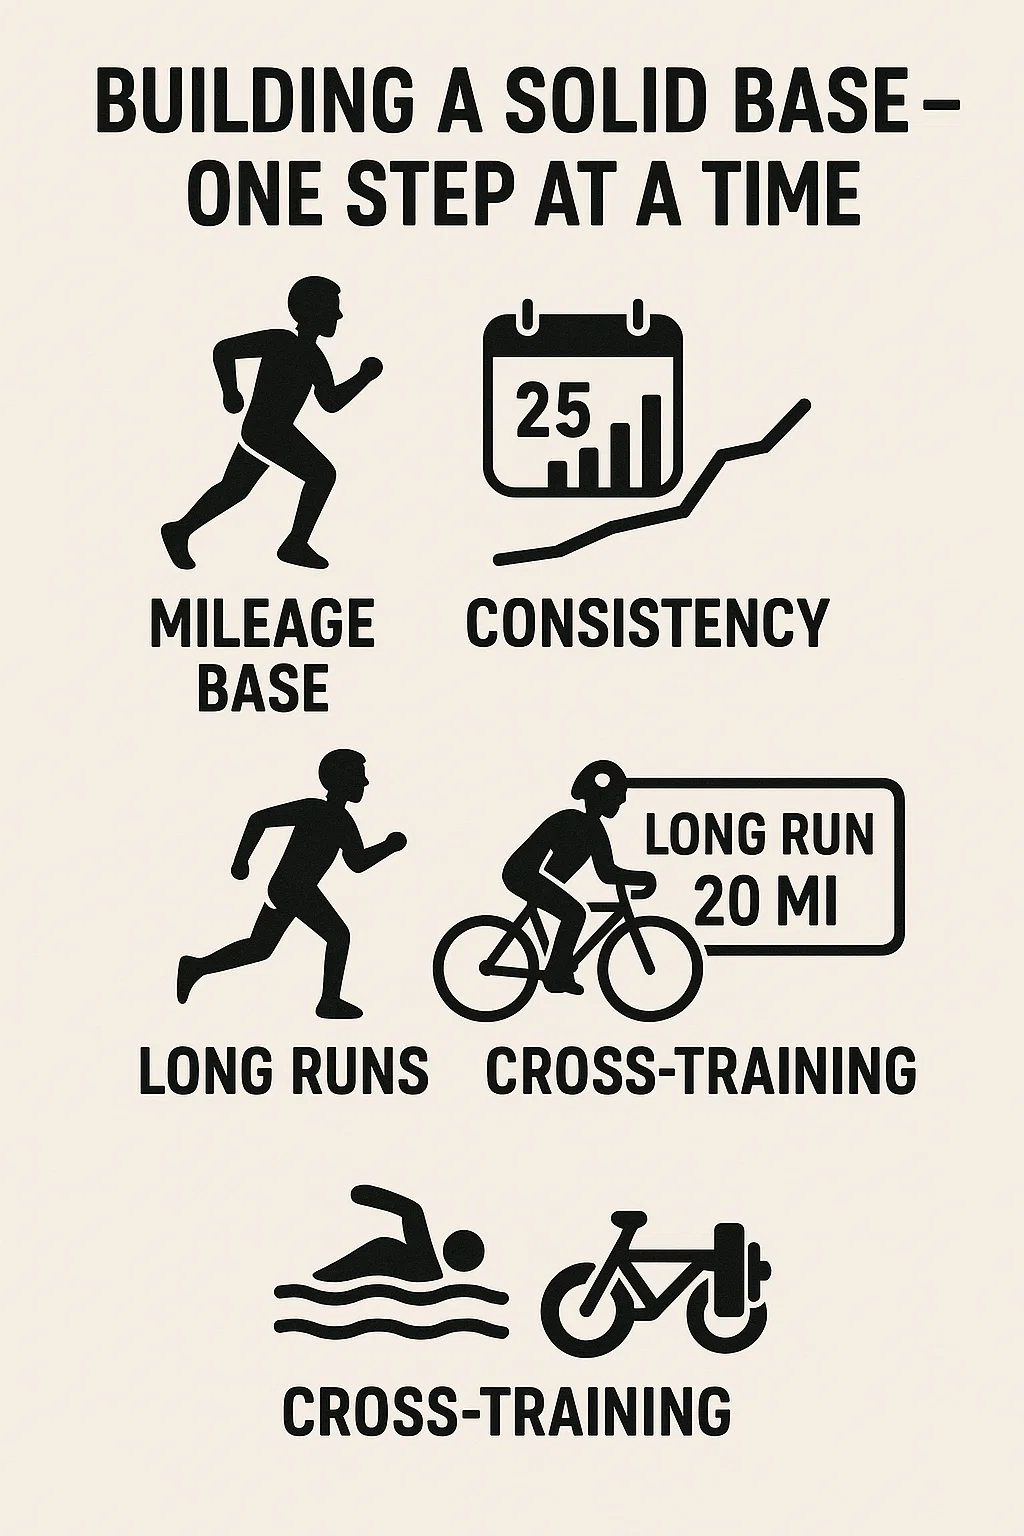
Build Your Mileage Base (Consistency is Key)

To finish 31 miles, you need to have a solid base.

This isn’t about cramming in a few massive workouts. It’s all about consistency.

Start slow and build up gradually. Think of it like this: the more time you spend running, the more you teach your body and mind to handle the long hours on the trails.

Before your 50K, aim to reach a peak mileage of 50-60 miles per week. This isn’t a one-week wonder — it’s about steadily increasing your mileage until your body is ready to handle it.

If you’re just getting started and are newer to running, it might take up to a year of steady training.

But if you’re already running around 40 miles a week, six months of focused ultramarathon training should get you there.

Don’t stress about speed work for your first ultra. Throw in some strides or tempo runs for variety, but the real focus is just time on your feet.

One ultramarathon coach put it this way: “A 50K is a slower marathon.” The basic principles are the same as marathon training, but your focus should be on time on your feet, handling terrain, and fueling during those long runs.

My best advice?

Your first goal for a 50K? Simple — just finish. Forget about setting time goals. Your main focus is building that base and staying healthy. The biggest mistake I see in rookies is ramping up miles too quickly and ending up injured or burned out. Stick to the classic “10% rule” or listen to your body — increase gradually, and don’t forget to take recovery weeks when needed.

The Long Run 

Long runs are your bread and butter for ultramarathon training.

They’re going to feel like your best friend and, at times, like a challenge you want to throw out the window. But no matter how hard they get, these long runs teach your body how to keep going when it feels like it can’t.

For marathons, long runs peak around 20 miles, but for a 50K, you’re going to stretch that further.

Aim for your longest run to be between 20 and 26 miles. Some plans even recommend running a full marathon as part of your training. But honestly, hitting 20-22 miles is plenty, especially if you’re doing back-to-back long runs (more on that later).

When I was gearing up for the CTC 50K, my longest training run was 24 miles on trails, and it took me nearly 5 hours.

It was exhausting, but it gave me serious confidence: “Okay, I can handle being on my feet for hours.” Those first long runs will break you down, but they’ll build you up too.

I’d break the run into mental chunks: “Just get to the next mile,” “Make it to the top of this hill,” “Just reach the next water stop.” It made those long, grueling hours feel a little more manageable.

Back-to-Back Runs:

One trick I used in my training was back-to-back long runs.

For example, I’d do a long 18-mile run on Saturday and then follow it up with 10-12 miles on Sunday.

It was tough at first, but it simulated running on tired legs — which is basically what an ultra feels like. A good rule of thumb from coaches is to get in 30-40 miles over two days when you’re training for a 50K.

That one weekend where I did 20 miles on Saturday and 12 miles on Sunday really changed my mindset.

Sunday’s run was tough at first, but I realized I could still keep going on tired legs — a huge confidence boost for race day because when you hit that halfway point in an ultra, your legs are already begging you to stop.

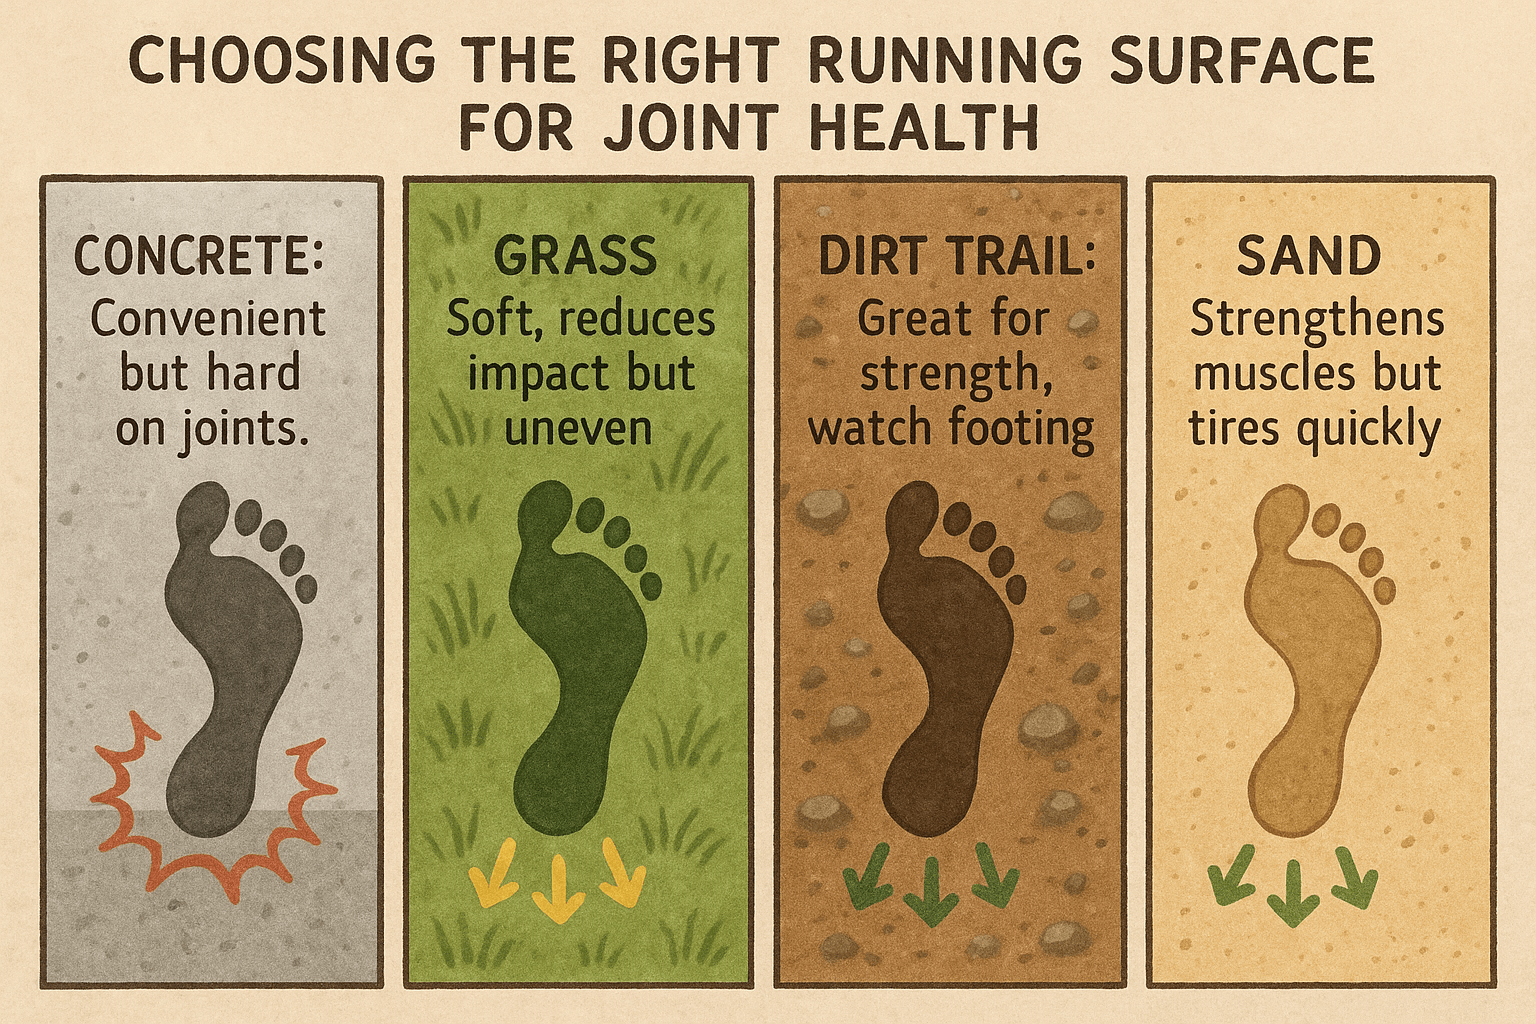
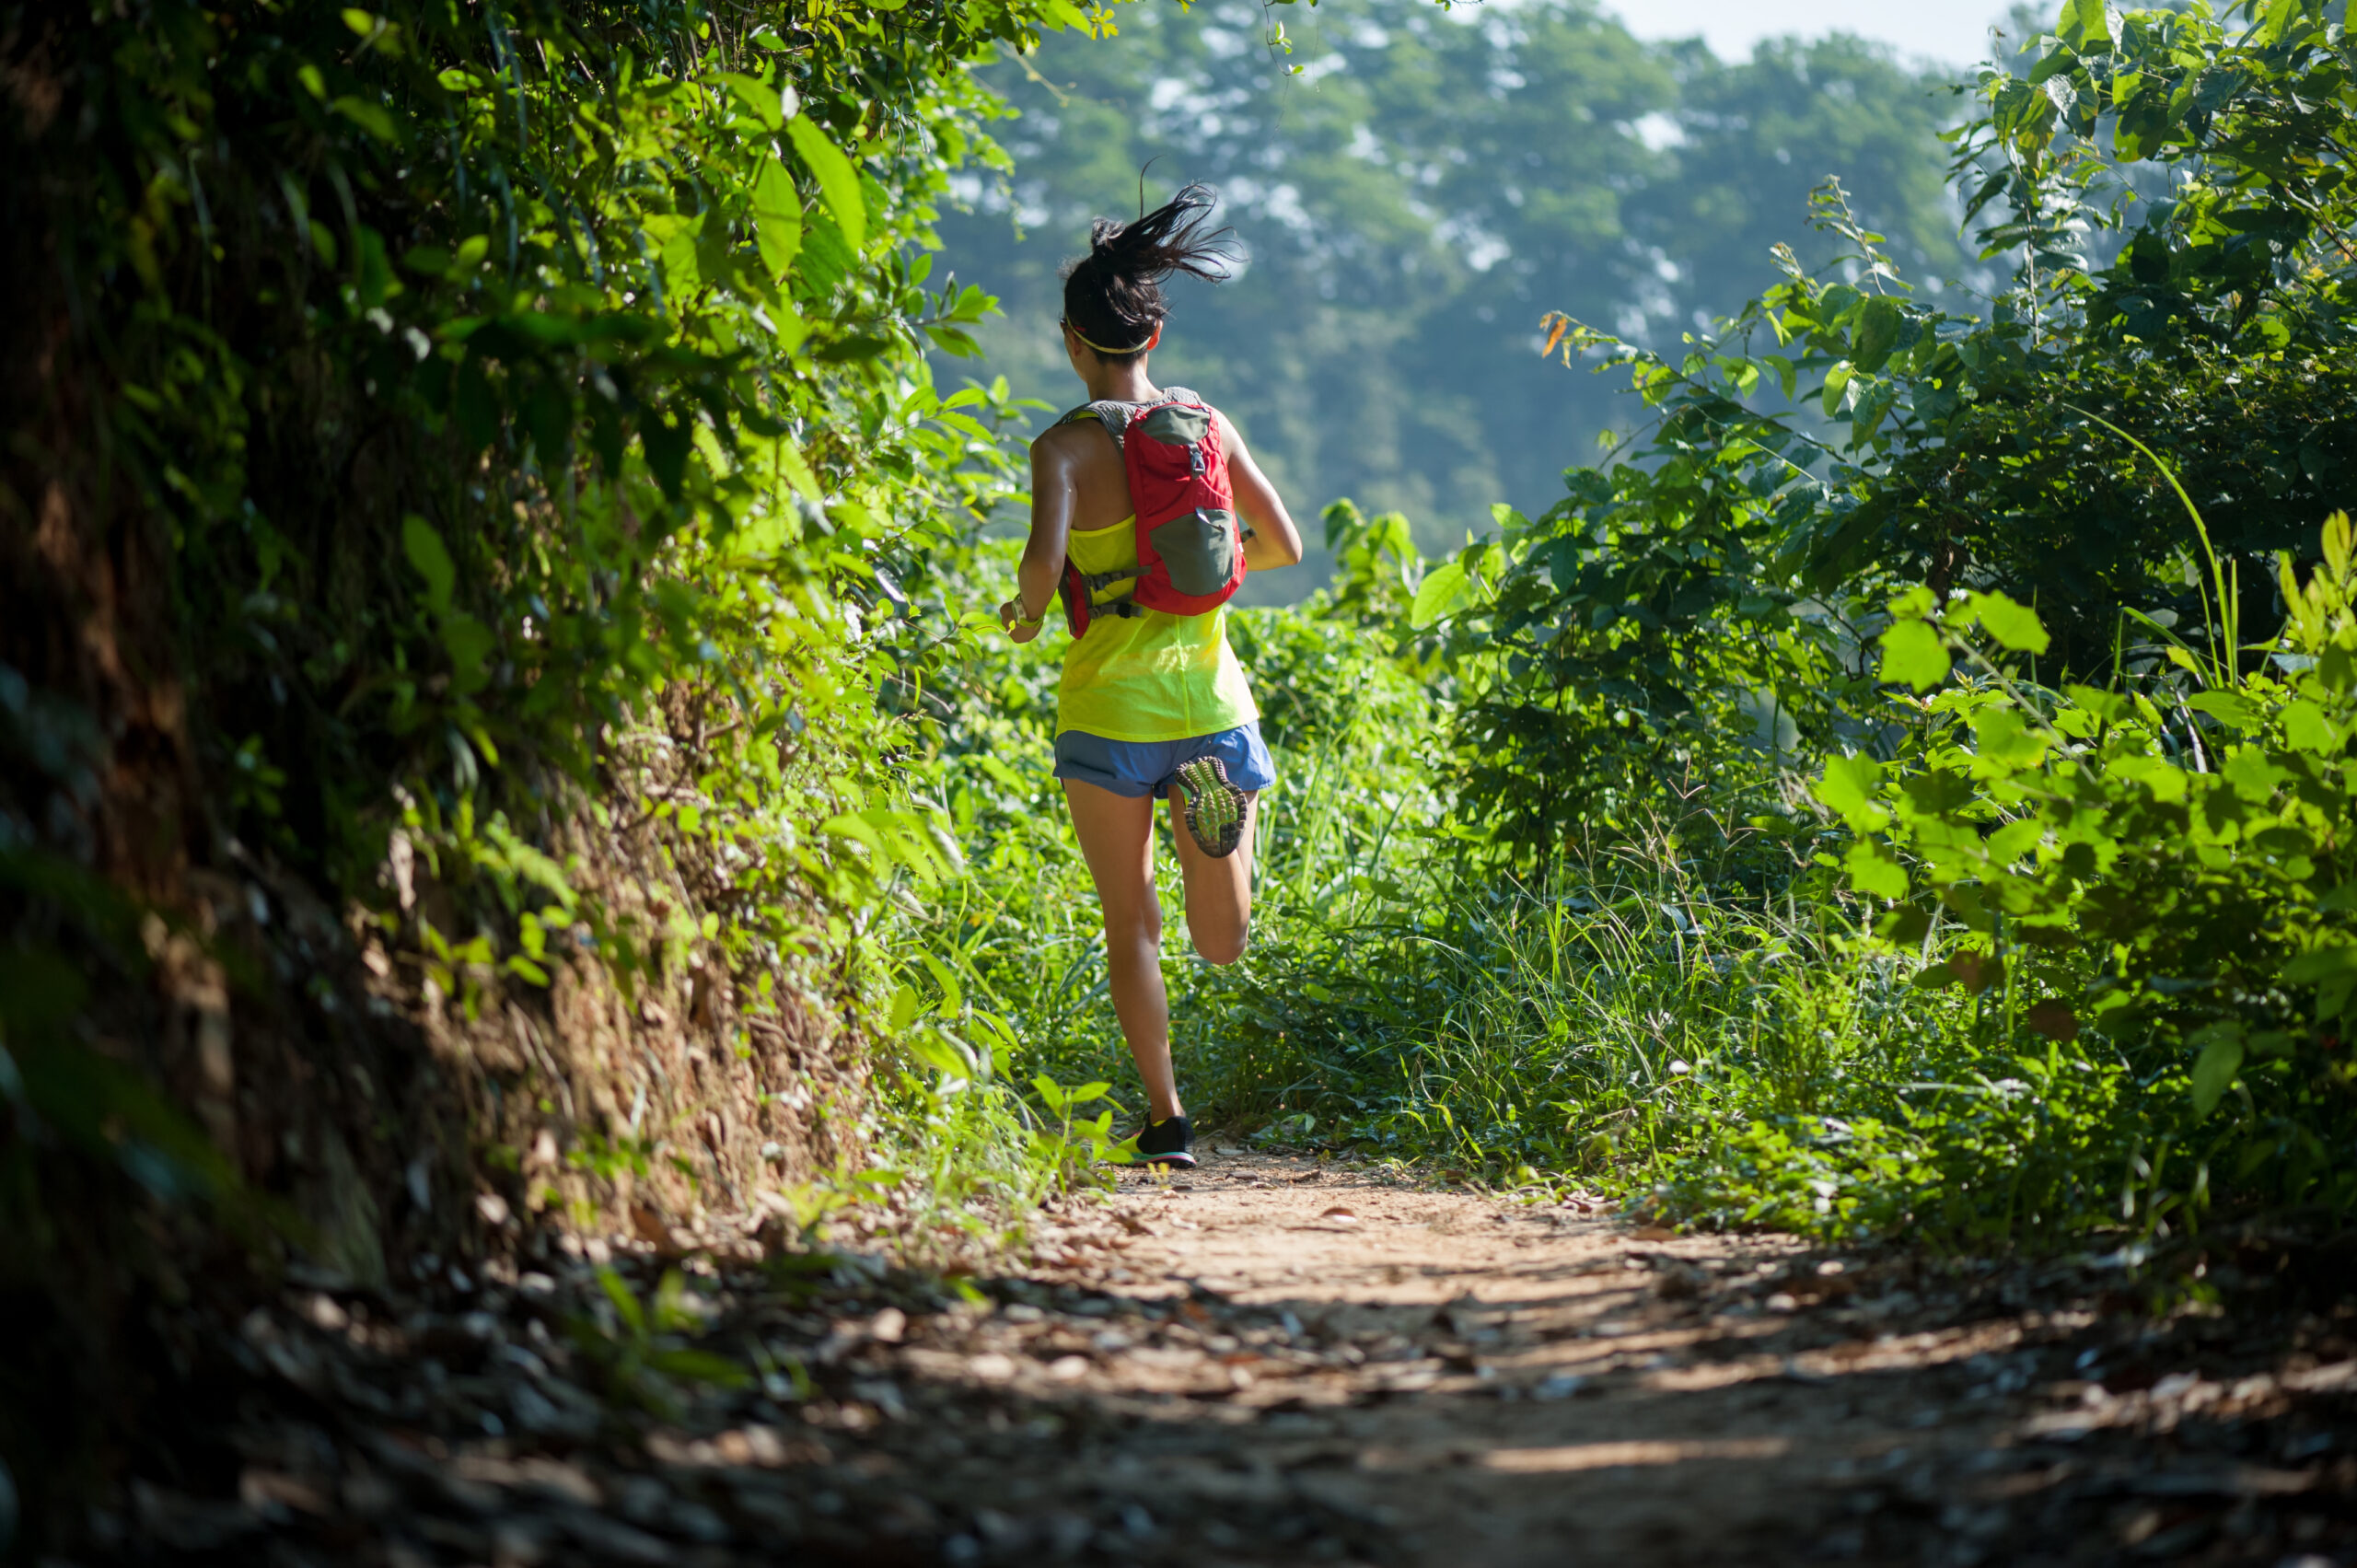
Train on Terrain (Hills & Trails are a Must) 

If you’re training for a 50K trail race, here’s a piece of advice that’ll make all the difference: train on terrain that’s as close as possible to your race.

If your race has mountains, then find hills.

If it’s a technical trail, look for some gnarly paths to run on.

Running on trails isn’t the same as pounding pavement—it’s a whole different ball game.

You’ll be using muscles you never knew you had (I’m talking about those stabilizers and your ankles). It’s tougher, and your body’s going to feel it, so it’s important to get it used to the challenge.

When I was gearing up for Bromo, I didn’t just run any trails—I sought out the steepest, most challenging ones I could find. I even did hill repeats on a local trail until I was crawling up it.

But you know what? That paid off big time on race day when I faced those endless climbs. Train the way you race—it makes all the difference.

Now, let’s talk hills. When you’re facing big climbs in training (or race day), hiking is completely fine. In fact, it’s often the best way to get up those steep sections without burning out.

During my second ultra, the CTC 50K, the hikes were much more brutal. During the event, my mantra became: hike the ups, run the flats and downs.

Whenever I saw a big hill coming, I gave myself permission to power-hike it.

Guess what? I passed a lot of folks who tried to run up those hills, only to blow up halfway.

And don’t forget to train for those “extras” you might encounter on race day: running in the dark (ever tried a night run with a headlamp? If your race starts early or like CTC, at 10 PM, this is a must ), running in the heat, or even training in sand if your race happens in the desert. The more familiar race day feels, the better.

If you’re running a flat road 50K, don’t worry about the major elevation training, but still try to get in some soft-surface runs. You want to reduce the pounding on your legs. And yes, make sure you’re doing some long runs on flat pavement so your legs get used to that constant repetitive motion. You’ll need it come race day.

Recovery: Rest Hard, Run Hard 

Let’s face it, ultra training is no joke.

It’s tough on your body. As you increase your mileage and long-run distance, recovery becomes just as important as the training itself. You’re pushing your muscles, joints, and even your immune system to the limit, so you need to prioritize rest just like you do with your runs.

Here’s what I’ve learned about recovery that keeps me coming back stronger:

  • Sleep: Aim for 8+ hours of sleep per night. Your body does most of its repair work while you’re asleep. I always treated sleep like it was part of my training. Honestly, it’s the easiest “workout” ever. All you have to do is nothing, and your body gets stronger for it.
  • Rest Days: Take at least one or two rest days a week. No running, no excuses. Let your legs fully recover. If you need to move, go for a gentle walk or do some stretching or yoga. But don’t push it on rest days.
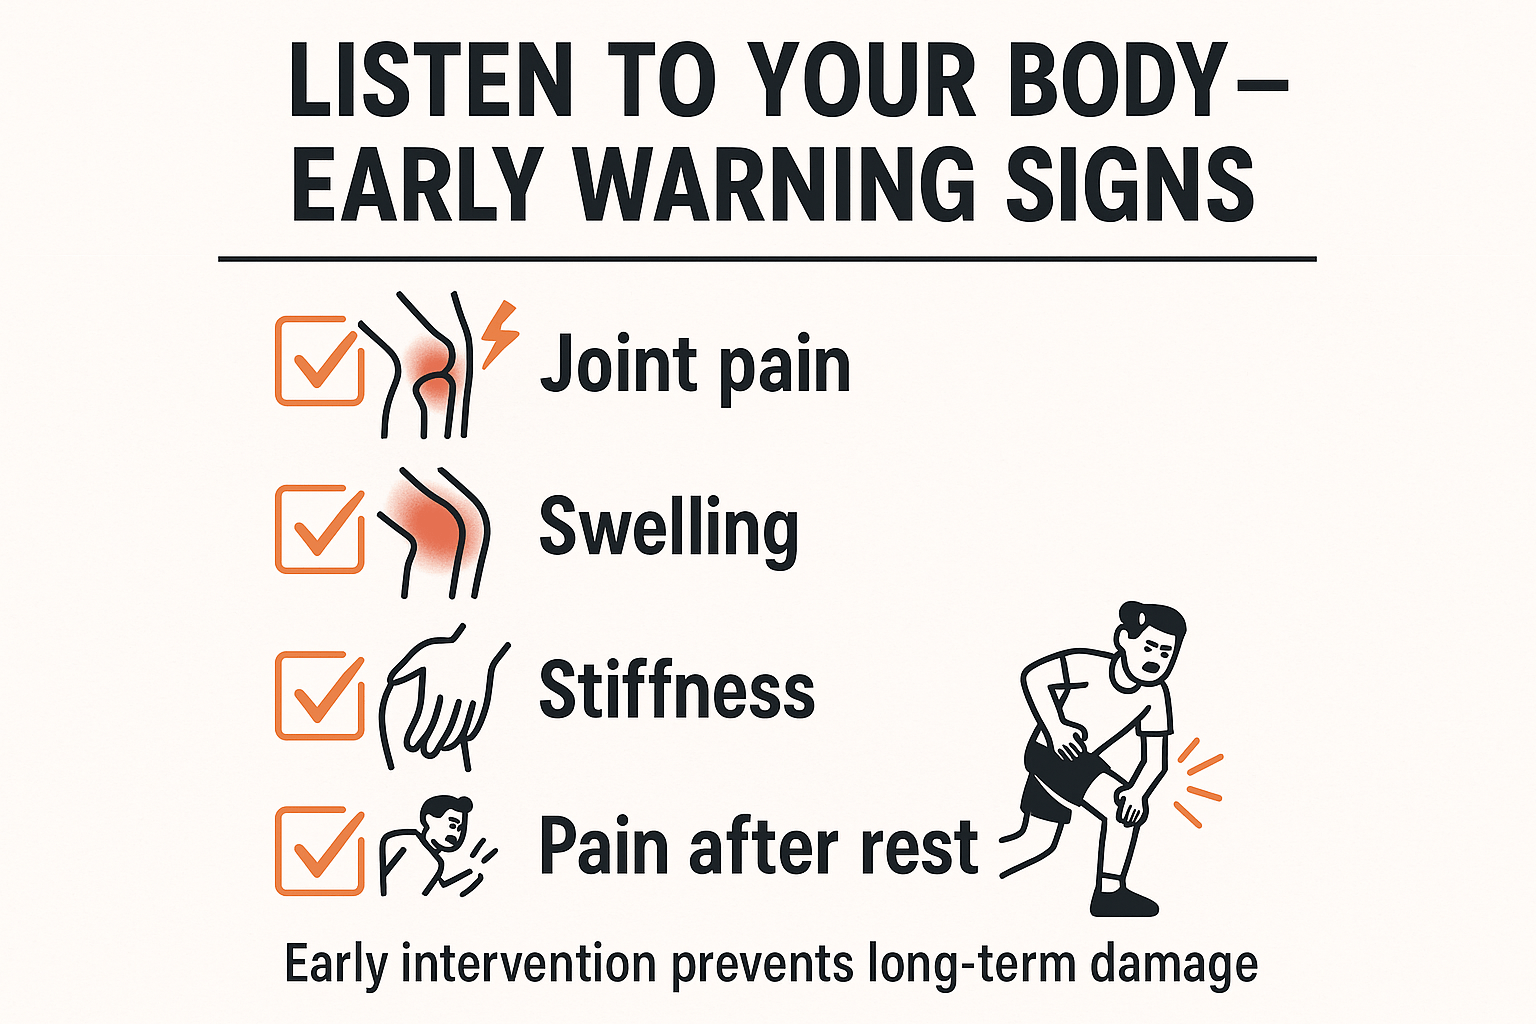
  • Listen to Your Body: If something feels off or you’re dealing with a nagging pain, don’t just push through it. Take a step back if you need to. I learned this the hard way after running through Achilles pain. I had to take an unplanned week off, and it wasn’t fun. Now, I respect rest like I respect my longest runs.
  • Nutrition for Recovery: After those long runs, you need to refuel. Your body needs protein and carbs to rebuild those muscles. For me, a big smoothie or a solid meal always hits the spot. My go-to recovery snack is chocolate milk and a turkey sandwich—simple, but it works every time.

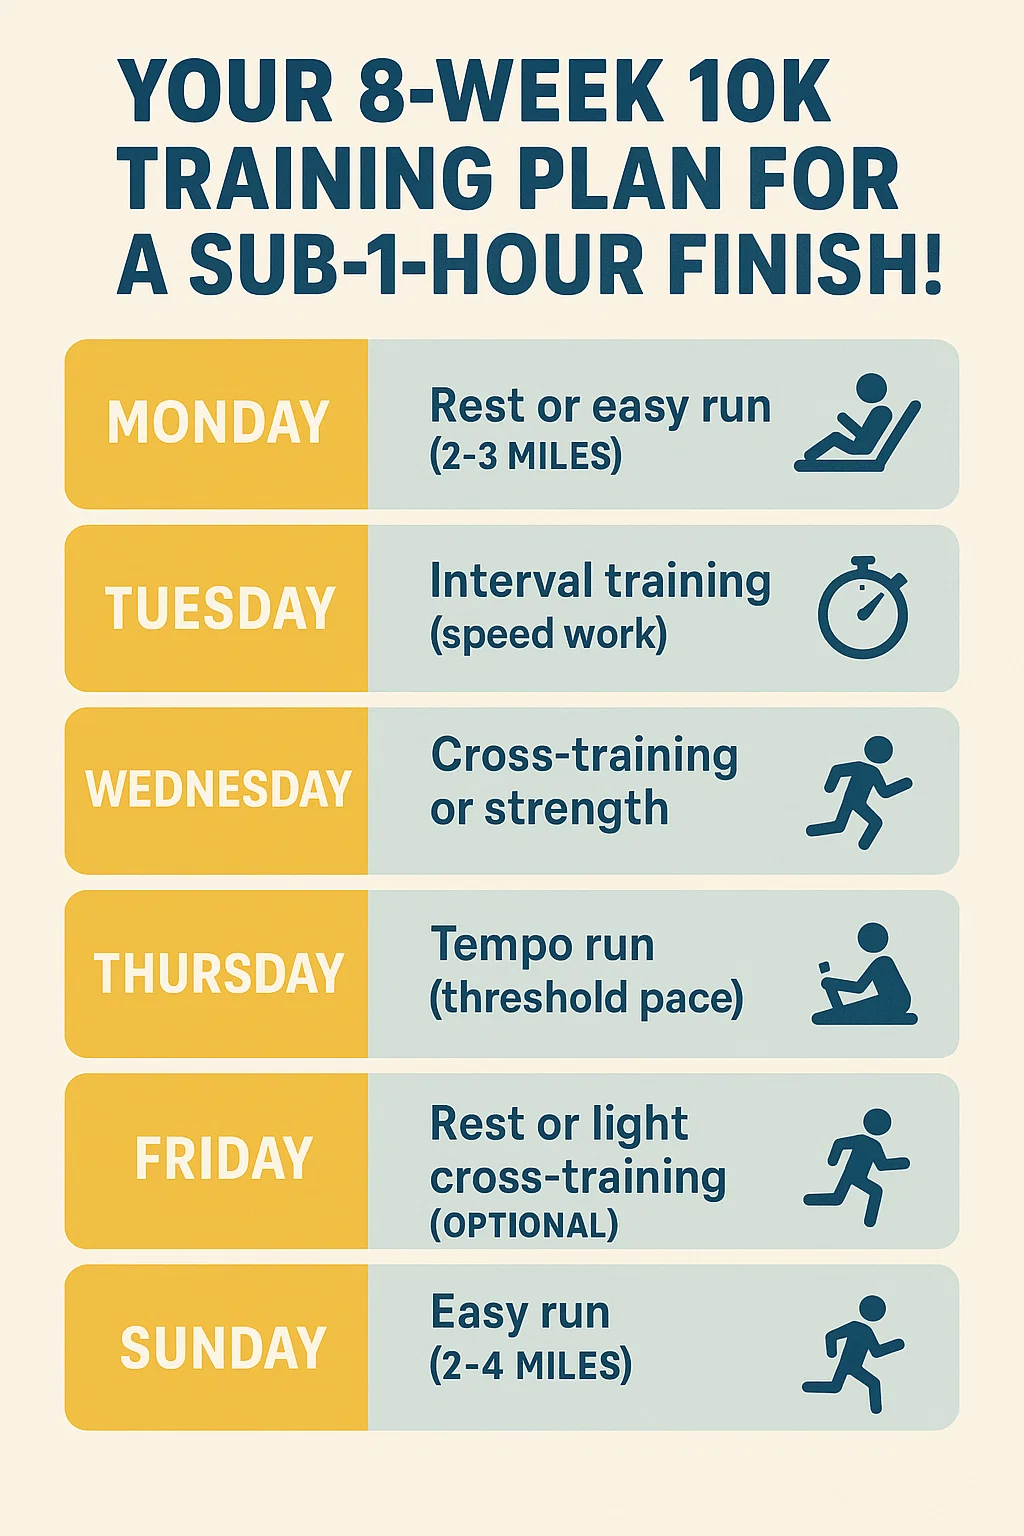
Put It All Together: A Sample Week 

To give you an idea of what a peak training week might look like for a 50K, here’s what it could look like:

  • Monday: Rest or easy cross-training (yoga, cycling, etc.)
  • Tuesday: 5-mile easy run
  • Wednesday: 8-10 mile run (moderate pace, maybe add in some hills or tempo work)
  • Thursday: 5-mile recovery jog (super easy pace)
  • Friday: Rest day
  • Saturday: Long run – 20-22 miles on trails, go slow, and practice fueling
  • Sunday: Second long-ish run – 10 miles easy (on tired legs from Saturday)

This comes out to about 50 miles for the week. The next week, you might cut back for a “down week” to recover, then build back up again. Everyone’s plan will vary, but the key parts are: one long run, maybe a back-to-back, and mostly easy-paced running.

Training for a 50K isn’t just about logging miles. It’s about listening to your body, training smart, and putting recovery just as high on the list as the running. You’ve got to run hard, but you’ve got to rest hard, too.

Hydration

Start early when it comes to hydration. Drink consistently throughout the race, not just when you’re thirsty. I made this mistake early on, but it’s especially important if it’s hot, like it was during my Bromo Desert 50K, where temps hit 30°C (86°F). I drank about 500-750 ml of water per hour and carried electrolyte tablets to avoid dehydration and cramping.

But here’s the key: Don’t overdo it. Too much water can actually be harmful. There’s something called hyponatremia, and you definitely don’t want that. So, listen to your body. Drink when you’re thirsty, but don’t drown yourself. Keep sipping, stay ahead of your hydration, and you’ll be good.

Practice Your Fueling in Training

The best time to figure out your fueling strategy is during your long runs. I practiced with gels, bars, and electrolytes every 30 minutes during a 20-mile training run. By the time race day came around, I knew exactly what my stomach could handle. And trust me, there’s nothing worse than trying to figure out your fueling plan during a race.

Test everything during training. Your body will thank you when race day comes around.

Gear Essentials: What You’ll Need for a 50K

Gear can make or break your race. After my first ultra, I knew exactly what I needed to feel comfortable and get through the race. Here’s the gear I swear by:

  • Trail Running Shoes: You need the right shoes for grip and support on rocky, uneven terrain. Don’t make the mistake of showing up with shoes that aren’t broken in. Trust me, you don’t want blisters on race day.
  • Hydration Pack or Belt: You’ll need to carry your own water and snacks. Aid stations might be spaced out, so a hydration vest or belt is your best friend.
  • Headlamp: If your race starts early or ends late (like my CTC 50K did), you’ll need a headlamp to see where you’re going.
  • Clothing: Moisture-wicking clothes are a must. You want to stay dry, not drenched. Bring a jacket or vest just in case the weather changes.
  • Electrolyte Supplements: I always carry electrolyte tablets to keep my sodium and potassium levels in check. These really help prevent cramps.

Don’t forget a small first-aid kit, sunscreen, and chapstick. Trust me, those little things go a long way on race day.

Start Slow, Finish Strong

Here’s something I can’t stress enough—start slow. I know the race day excitement makes you want to go fast, but ultramarathons aren’t sprints. When I ran my first 50K, I took it easy at the start, and it paid off. I didn’t burn out in the first half, which gave me enough in the tank to pick up the pace later.

On the downhills, push the pace. On the uphills, take it slow—don’t be afraid to hike. It’s all about pacing. The key to finishing strong is managing your effort. Walk when you need to, and make sure you’re not going too hard early on.

Remember my mantra: hike the ups, run the flats and downs.

Pace Yourself: “Be the Fastest Tortoise”

When you’re gearing up for a 50K, forget obsessing over mile splits like you would in a marathon. Here, it’s all about the effort. There’s this saying in the ultra world: “Be the fastest tortoise.” Start slow, and try to keep it that way. You’re not racing to set a record in the first few miles – you’re setting yourself up for the long haul.

Run by Effort, Not Pace

For me, trail ultras are all about listening to my body. Sometimes I wear a heart rate monitor, but it’s mostly about the feeling. I use RPE (Rate of Perceived Exertion) – if I can talk, I’m in the sweet spot. If I’m gasping for breath, I dial it back. I want to save my energy for the long grind.

During my first 50K, I kept reminding myself: “If it feels slow, slow down some more.” I know, it sounds counterintuitive, but it works. During the CTC 50K, I saw a ton of runners take off like they were in a sprint, only to fade hard later.

I stuck to my plan, kept it steady, and ended up passing a bunch of those same runners in the second loop. Slow and steady? Definitely wins the race.

Pacing Mantras That Keep You Going

I’ve got a few mantras that keep me grounded on race day:

  • “Your slowest pace matters more than your fastest.” This one’s big. You’re in it for the long haul, so don’t blow yourself out in the first few miles just to impress anyone. Keep it steady, and you’ll stay stronger longer.
  • “Race the second half.” This one’s my favorite. I don’t push for speed until I’m well past the halfway point. In the first half, I let others zoom past. But come the second half? If I’ve still got legs under me, I start reeling people in. That’s when it’s really fun.

The Bromo Desert had two big loops, and I was pacing myself by walking the steep climbs and taking the downhills at a light shuffle. The first loop, I watched people zoom ahead, and I could feel the temptation to chase them.

But then I heard my coach’s voice in my head: “If it feels slow, slow down some more.” That advice saved me. By the second loop, I was passing runners who had started too fast.

Embrace the Ultra Mentality

Let’s face it: Ultras are mostly mental. While 50Ks might be 10% physical, that other 90% is all about your mind.

There will be moments when you’re feeling beat up and questioning why you’re out there. But this is where the mental game is won.

Here’s how I push through:

  • Break it down into sections: Looking at the full 31 miles can be overwhelming. Instead, focus on small wins – the next aid station, the next gel, the next mile. I’ve done long runs where I just told myself, “Get to the next hill.” That’s all you need to think about.
  • Positive self-talk: Sounds cheesy, but trust me, it works. I’ve used mantras like “One foot in front of the other” or “You’ve got this” when things get tough. I remember mile 28 during the Bromo Ultra – I was running on fumes, and all I could think was, “You didn’t come this far to only come this far.” It kept me going.
  • Expect the lows, but know they’ll pass: There will be times when you feel like absolute garbage. But, just like life, things change. I hit a serious low during the CTC Ultra at 3 AM. The rain was pouring down, my headlamp failed me, my legs were wrecked, and I was exhausted. I told myself, “Just make it to the next aid station.” Once I got there, I had some hot Indomie (noodle soup), a little Coca-Cola (honestly, magic), and I was back on my feet.

Final Thoughts – You Can Do This! 

Training for a 50K is a journey, no doubt. There’s no magic shortcut – just time, patience, and the grind. It’ll challenge you physically and mentally, but trust me, you’ll come out stronger than ever. Remember: it’s about consistency. Even when it sucks, just keep going. When you cross that finish line, you’ll know it was all worth it.

I’ll never forget the Bromo Desert 50K. I was nervous as hell at the start – doubts swirling in my mind. But once I settled into my rhythm, I was in the zone. I finished exhausted but proud, with a grin on my face. And honestly? It was one of the best feelings ever.

And you? Whether your goal is just to finish, or to crush it, your 50K will be one of the most rewarding experiences you’ll ever have. Let’s go – get out there and start training. You’ve got this.

Call to Action:

I want to hear about your 50K journey. Have you run one already, or are you gearing up for your first? Drop a comment below, and let’s support each other through this ultra journey. And if you found this guide helpful, share it with others who are thinking about their first 50K!

FAQ: Running Your First 50K

Q1: How many miles is a 50K race?

A 50K race is approximately 31.07 miles, making it just over a marathon distance.

Q2: Is a 50K considered an ultramarathon?

Yes! Any race longer than a marathon (26.2 miles) is considered an ultramarathon.

Q3: How should I train for a 50K race?

Gradually increase mileage with long runs, tempo efforts, and recovery days over several months. Back-to-back long runs and trail running (if relevant) are great additions.

Q4: How long does it take to finish a 50K?

Finish times vary depending on experience, terrain, and fitness. Most runners complete a 50K in 5 to 10+ hours.

Q5: Do I need to eat during a 50K?

Yes! Plan to fuel every 30–45 minutes with a mix of carbs, electrolytes, and fluids to keep energy levels stable.

Q6: Can I walk during a 50K race?

Absolutely! Walking is common, especially on tough climbs or technical terrain. Strategic walking can help manage energy.

Q7: What’s the difference between a 50K and a marathon?

A 50K is longer (31 miles vs. 26.2), often run on trails with more elevation and varied terrain, demanding more mental and physical endurance.

Q8: How many days a week should I train for a 50K?

Aim for 4 to 5 running days per week, including at least one long run and one rest or cross-training day.

Q9: What gear do I need for a 50K?

Key items include trail shoes (if off-road), hydration pack or bottles, nutrition, a hat or visor, and layered clothing for changing weather.

Learn More about Ultra-Distance Running

To dive a little deeper into the world of ultra-distance running, I’ve picked a few resources that can help:

  1. American College of Sports Medicine (ACSM): The ACSM offers a wealth of information on exercise science and training techniques. Their position stand on “Nutrition and Athletic Performance” provides evidence-based recommendations on fueling for endurance events, including ultra-marathons.
  2. UltraRunning Magazine: This publication is devoted to ultra-distance running and features articles, training tips, and interviews with experienced ultra-runners.
  3. Trail Runner Magazine: A great source for those focusing on trail running, which often overlaps with ultra-distance training. Their article on “Tips for Your First Ultra” provides practical advice for newcomers to ultra races.
  4. Running USA: This organization focuses on promoting and supporting the running industry. They often publish statistics and trends related to running events, including ultra-marathons.
  5. The North Face Endurance Challenge: The official website of this popular series of ultra-distance races includes a wealth of training resources, articles on endurance running, and nutrition tips. Check out their training resources here.


23 Best Core Exercises for Runners to Run Stronger (2025 Guide)

I’ll never forget that day grinding up a brutal Bali trail—sweat pouring, legs burning—and suddenly, my lower back just gave out.

It was mile 10, and I thought I was in solid shape.

But turns out, I’d been skipping the one thing holding my whole stride together: core strength.

That day was a slap in the face.

A painful one. But it forced me to finally respect my core and what it actually does for us runners.


Hey, I’m David Dack.

I coach runners here in Bali—and if there’s one thing I’ve drilled into my own training and passed on to every runner I coach, it’s this: your core matters more than you think.

Sure, running more is the key to getting better at running. No argument there.

But ignore your core, and you’ll eventually pay for it—in sloppy form, slow times, or a trip to the physio.

Once I committed to real core work, things changed. My back pain vanished, my form tightened up, and I even shaved a few minutes off my half-marathon time.

These weren’t just minor gains—this was a shift in how my body handled mileage, especially when it mattered most: the late miles.

The truth?

Most runners skip core work. I get it.

For years, if I had 15 extra minutes, I’d run an extra two miles instead of dropping into a plank.

But now I know: those 15 minutes of core work can unlock more running gains than you’d think. That’s why I put together this guide.

Inside, you’ll find the 23 best core exercises I swear by—ones I’ve tested on myself and my athletes.

I’ll also share coaching tips, mini confessions (like how a move called the “dead bug” embarrassed me in the gym), and the no-BS reasons why this stuff works.


The 23 Best Core Exercises for Runners 

Let’s Talk Core

Want to run smoother, stronger, and with fewer injuries?

Then stop skipping your core work.

A solid core holds your posture together when the miles stack up.

Below are 25 core exercises that I’ve used in my own training—and with athletes I coach—to build a midsection that actually holds up under pressure.

These aren’t just sit-ups for show.

This is about real, runner-specific strength.

Think planks, glute bridges, twisting drills, and dynamic movements that hit every angle. I’ve laid them out from basics to tougher ones, so start where you are and build up.

1. Plank

If I could force you to only do one core move, it’d be this.

The plank hits your abs, back, shoulders, glutes—pretty much your whole trunk. It’s simple but brutal.

I used to shake after 30 seconds. Now I can go longer, but it’s still not easy—it just gets more intense the stronger you get.

How to do it:

  • Start face-down, elbows under shoulders, forearms flat.
  • Lift into a straight line from head to heels.
  • Squeeze your glutes, tighten your abs, breathe steady.
  • Hold 30–45 seconds. Work your way up.

Coaching tip:

If you sag or pike, stop and reset. Short, clean holds beat long, sloppy ones.

Want to level up? Elevate your feet or lift a leg. Trust me—this pays off when your form stays tight at mile 20.

2. Side Plank

This move checks your side-to-side strength.

It hits your obliques and hip stabilizers—crucial for trails, turns, and keeping your knees aligned.

Most runners can’t hold this long at first (I couldn’t either).

How to do it:

  • Lie on one side, elbow under shoulder.
  • Stack feet or stagger for balance.
  • Lift your hips into a straight diagonal line.
  • Hold 20–30 seconds per side.

Coaching tip:

Struggling?

Try bending your bottom knee for a shorter lever. Don’t let your chest rotate or hips wobble.

To make it harder, do dips or lift the top leg (star plank). Side planks torch your obliques in the best way.

3. Balance Plank (Arm/Leg Extensions)

Add limb movement to your plank and you’ve got a full-body challenge. This teaches your core to stay stable when your limbs are doing different things—just like in running.

How to do it:

  • Start in a push-up plank.
  • Lift one arm out in front, hold 2 seconds.
  • Return, then lift the other arm. Repeat with legs.
  • Alternate arms and legs for 30–45 seconds.

Coaching tip:

Move slowly. Don’t rush. Control is everything.

If that’s too hard, drop to all fours (bird dog).

Want a real challenge? Lift opposite arm and leg together. That’s when your core really kicks in.

4. Russian Twists

Time to add some rotation.

Russian twists hit your obliques and challenge your balance. They mimic the torso rotation that happens subtly with every stride.

How to do it:

  • Sit on the ground, lean back to 45 degrees.
  • Feet up (or heels down to modify), hands clasped.
  • Twist side to side, tapping the ground beside your hips.

Coaching tip:

Start light—don’t go heavy out the gate. I bruised my ego once going too hard with a medicine ball.

Focus on twisting your torso, not just flailing your arms. This move helped me feel more stable on uneven trails.

5. Superman

A strong core isn’t just abs—you need a strong back, too. This move targets the muscles along your spine, plus your glutes and shoulders.

How to do it:

  • Lie face-down, arms extended overhead.
  • Lift opposite arm and leg, hold 2–3 seconds.
  • Lower and switch. Repeat for 10–12 reps per side.

Coaching tip:

Don’t go too high—control matters more than range.

If you’re feeling it in your low back, good. That’s where you need strength to stay tall in a race instead of folding forward.

6. Single-Leg Glute Bridge

Your glutes power your stride. This move builds strength and balance one leg at a time.

How to do it:

  • Lie on your back, knees bent.
  • Extend one leg up, drive through the opposite heel.
  • Lift hips until your body forms a straight line.
  • Lower and repeat 10–12 times, then switch sides.

Coaching tip:

Start with both feet down if needed. Push from your heel, not your back.

This move helped fix my IT band pain years ago—strong glutes changed the game.

7. Windshield Wipers

These build rotational strength and challenge your control. Go slow—this isn’t a race.

How to do it:

  • Lie on your back, arms out in a T.
  • Lift legs to tabletop (or straight for harder).
  • Rotate slowly side to side, stopping before your shoulder lifts.

Coaching tip:

Control the motion. No swinging. Your core should pull your legs back to center.

Want more?

Straighten the legs or add a med ball between your feet. Your abs will light up.

8. Scorpion Plank

A more advanced move—this one adds a knee drive twist to a decline plank. It builds strength, mobility, and serious coordination.

How to do it:

  • Feet elevated on a bench, hands on the ground.
  • From a plank, drive one knee toward the opposite elbow.
  • Return to plank, switch sides.

Coaching tip:

Keep hips low and tight. Don’t swing the leg—move with purpose.

I love these when I need to sweat fast and build rotational control. They’ll humble you quick, but the payoff is real.

9. Boat Pose (V-Sit)

Boat pose is basically a gut-check in disguise. You’re sitting on your tailbone, legs up, chest up, trying to stay balanced while everything in your core screams.

Runners often skip it, but they’re missing out.

This move hits the front and deep core hard—think rectus abdominis and transverse abdominis—and helps you lock in posture when you’re tired late in a run. I call it the seated cousin of the plank, but meaner.

I first tried it in a yoga class and barely lasted 15 seconds. My legs were shaking like I’d just run a downhill mile at race pace.

But the more I practiced it, the more I felt my upper and lower body working as a unit. That mind-muscle link carried straight into my runs.

How to Do It:

  • Sit on the ground with knees bent, feet flat.
  • Shift so you’re on your sit bones, chest lifted, back straight. Think “tall spine.”
  • Arms reach forward at shoulder height—or keep hands on the floor for balance if you’re new.
  • Lean back a bit while lifting feet off the floor. Shins parallel is a good starting point.
  • Want more heat? Straighten your legs into a full “V” shape.
  • Squeeze your core to hold. Start with 10 seconds, build to 30+.

Coach’s Tips:

If you feel your lower back take over, reset. Chest up. Draw your belly button in.

And if your legs shake? Good. That means you’re working.

For a boost, try light pulses or boat pose with a twist. Runners—do this 20–30 seconds at a time, a couple rounds.

It’s one of those sneaky moves that’ll make your uphill runs smoother.

10. Dead Bug

Don’t let the name fool you—dead bugs are sneaky strong.

This move teaches your core to brace while your limbs move, which is exactly what your body does while running. It’s a top pick for runners with low back pain or who struggle to activate their lower abs.

I made the rookie mistake of rushing through it when my PT gave it to me.

Thought it was too easy… until I slowed down, pressed my back into the floor, and felt the fire light up in my belly. Humbling, but effective.

How to Do It:

  • Lie on your back, arms straight up, knees bent to 90 degrees.
  • Flatten your lower back into the floor.
  • Slowly lower your left arm and right leg, keeping your back glued to the ground.
  • Return to center, then switch sides.
  • Do 8–10 reps per side, moving slow and breathing with control.

Coach’s Tips:

No arching. No rushing. If you feel your back lift, you’ve gone too far—shorten the range.

Want a challenge?

Add ankle weights or a light dumbbell. But even bodyweight hits hard when done right.

I’ve had athletes knock out their low back pain with just five minutes of dead bugs a day. Start there.

11. Bird-Dog (Kneeling Extension)

Bird-dogs are like the ground version of running: opposite limbs moving while the core holds everything together. They’re easy to underestimate but crucial for fixing wobbly running form.

I add them to almost every warm-up, especially before trail runs. They switch on your balance and coordination without taxing your joints.

How to Do It:

  • On hands and knees, keep back neutral.
  • Extend left arm and right leg. Pause.
  • Keep hips level—no wobbling.
  • Return, switch sides. 5–8 reps per side.

Coach’s Tips:

Imagine a cup of coffee on your lower back. Don’t spill it.

Brace your abs, avoid arching, and stay slow.

Add a little twist by touching elbow to knee under your body for more challenge. I’ve seen these clean up hip dips and improve posture in just a couple weeks.

12. Bicycle Crunches

These are old-school, but they still bring the heat. Way better than regular crunches, because they hit your obliques, hip flexors, and rectus abdominis—all while getting your heart rate up.

In college, our coach had us do 100 of these after track sessions. I still hear him yelling, “twist, don’t flap!”

How to Do It:

  • Lie on your back, hands lightly behind your head.
  • Knees at 90 degrees.
  • Twist to bring right elbow toward left knee while extending right leg.
  • Switch sides. That’s one rep.
  • Go for 15–20 per side.

Coach’s Tips:

Don’t yank your neck. Lead with the shoulder. Extend legs low only if your back stays flat. If your form slips, rest.

I use these to fire up my core before runs and sometimes finish a session with them.

Done right, you’ll feel the burn the next day.

13. Scissor Kicks

These will light up your lower abs and hip flexors—perfect for runners who want more power in their stride. Just don’t fake your way through them. They get tough fast.

I used to hate these in track practice, but now I love them. They target the part of the core that helps drive your knees forward with each stride.

How to Do It:

  • Lie on your back, hands by your sides or under your hips.
  • Legs hover 6 inches off the floor.
  • Raise one leg up to 45 degrees, then switch.
  • Keep alternating. Aim for 15–20 per leg.

Coach’s Tips:

Back flat. Don’t let it arch. Start with small kicks if needed.

For variation, try cross-body scissors.

I use these as a finisher. The burn is real, but the payoff on hills and sprints is worth it.

14. Donkey Kicks (Glute Kickback)

These aren’t just booty builders—they’re performance boosters. Your glutes are your power plant. Weak glutes = sloppy form and injury risk. Donkey kicks get them firing without stressing your knees.

When I started doing these consistently, I felt my stride tighten up and my knees stopped aching.

How to Do It:

  • On all fours, core tight.
  • Keep right knee bent and kick heel toward ceiling.
  • Squeeze your glute at the top.
  • Lower with control. Do 12–15 per leg.

Coach’s Tips:

Don’t twist your hips.

Don’t arch your back.

Imagine stamping the ceiling. Add a band or dumbbell behind the knee if you want more load. Strong glutes = happy knees and stronger finishes.

15. Glute Bridge

Simple, effective, and underrated. Glute bridges hit the backside while opening up your tight hip flexors. Runners who sit a lot? You need this.

This was one of the first drills I did to fix my underactive glutes—and it worked.

How to Do It:

  • Lie on your back, knees bent, feet flat.
  • Press through your heels and lift hips.
  • Squeeze your glutes at the top.
  • Lower slowly. 15–20 reps.

Coach’s Tips:

Don’t over-arch. Keep knees aligned. If hamstrings cramp, bring feet closer.

For more glute work, lift your toes. Add a band or weight on hips to progress.

I hold the last rep for 10 seconds for extra burn. Total game changer for posture and hill power.

16. Mountain Climbers

These are like sprinting in plank position. Great for core, cardio, and coordination. I love throwing them in as a finisher to simulate that end-of-race grind.

How to Do It:

  • Start in high plank.
  • Drive one knee in, then quickly switch.
  • Keep back flat, hips steady.
  • Go for 20–30 seconds.

Coach’s Tips:

Form first. No butt in the air, no hips sagging.

Start slow, build speed. Quiet feet = controlled movement. Cross-body versions hit obliques harder.

Want a challenge? Try these after your long run—feel that burn.

17. Swiss Ball Roll-Out

This one builds a steel-trap core. If you’ve ever done ab wheel roll-outs, this is the friendlier version. Perfect for runners who want better form control, especially on downhills.

I started with this after face-planting on an ab wheel. It taught me how to brace hard and move slow—skills that paid off big on trails.

How to Do It:

  • Kneel with forearms on a Swiss ball.
  • Brace core and roll ball forward.
  • Keep hips from sagging.
  • Roll back to start. Repeat 10–15 times.

Coach’s Tips:

Less is more—don’t overreach.

Neck neutral, back flat. You’ll feel the shake. That’s your deep core waking up.

Do this slowly, with control. You’ll start to notice your form staying tight when you’re tired on a run. That’s the goal.

18. Cross-Body Mountain Climber (Feet on Ball)

This move is like a plank-mountain climber combo on steroids. You’ve got your feet on a Swiss ball, doing cross-body knee drives.

Sounds simple. It’s not.

Your core gets smoked trying to keep you from rolling all over the place. And when you cross that knee to the opposite elbow? Boom—your obliques are lit.

Runners, this one is gold. It trains your core to brace while your limbs move wildly. Exactly what happens when you’re sprinting up hills or maneuvering tricky trails.

I didn’t touch this move until I had mastered standard ball planks and roll-outs. First time I tried it? Rolled off the ball like a clown. Took me weeks to stop face-planting. Worth it.

How to do it:

  1. Start in plank with your shins on a Swiss ball.
  2. Bring your right knee toward your left elbow (under your body). Place it back.
  3. Do the same with your left knee toward your right elbow.
  4. Alternate sides for 5–8 reps per leg. Control matters more than speed.

Coach Tips:

  • Can’t control the wobble? Start with regular ball planks.
  • Tuck your pelvis and squeeze your core. It protects your back.
  • Spread your feet a little for more stability.
  • A softer ball sometimes helps—it molds better.

19. Medicine Ball V-Up

This one brings the heat. A V-up is already spicy—but add a medicine ball and your abs are in for a rude awakening.

Think folding your body in half while holding a weighted ball. Total-body coordination, with a deep hit to your abs and hip flexors.

I love using these as a finisher. Just like pushing through the last 400m of a race.

How to do it:

  1. Lie on your back, med ball in hands overhead.
  2. Lift your torso and legs at the same time. Try to touch the ball to your shins.
  3. Lower slowly without letting your back arch.
  4. Do 8–12 reps.

Coach Tips:

  • Use a light ball (4–6 lbs). Heavier isn’t always better.
  • Exhale on the way up. Engage your core like you’re bracing for a punch.
  • Bend your knees a bit if your hamstrings are tight.

20. Spider-Man Plank Crunch

Channel your inner superhero. This one has you in a plank, bringing your knee to the same-side elbow. It’s sneaky tough—your obliques and hips will feel it fast.

I like this one as a warm-up too. Opens up the hips, fires up the sides. Bonus: makes you feel cool.

How to do it:

  1. Get in a forearm or high plank.
  2. Bring your right knee out to your right elbow. Pause.
  3. Return and switch sides.
  4. Alternate 10 reps per side.

Coach Tips:

  • Don’t rush. Slower is harder—and better.
  • Keep your hips level. Don’t twist too much.
  • Think of trying to touch your elbow—even if you can’t

21. Double Mountain Climber

Take your regular mountain climber and double the chaos. You jump both feet in toward your chest, then jump them back out. Kinda like a burpee’s cousin.

It’s intense. Core, quads, shoulders—all fired up. Great for runners needing quick power bursts.

How to do it:

  1. Start in high plank.
  2. Jump both feet forward under your chest.
  3. Jump them back to plank.
  4. Do 10–12 reps.

Coach Tips:

  • Land softly. Don’t let your hips sag.
  • Use your core to drive the knees in.
  • Break it into sets if you’re gassed.

22. Jump Squats (with Core Focus)

Sure, these torch your legs. But your core? It’s what keeps you upright and safe on the landing.

Runners benefit big here. You get power, explosiveness, and better form under fatigue.

How to do it:

  1. Squat down.
  2. Explode up into a jump.
  3. Land softly into the next squat.
  4. Do 10–15 reps.

Coach Tips:

  • Keep your chest up. Core tight.
  • Don’t land like a tree falling—bend those knees.
  • Too intense? Start with regular squats or add a small hop.

23. Plank with Alternating Arm and Leg Raise

Plank meets bird-dog. You lift opposite arm and leg at the same time and try not to tip over.

This is a true core stability test. And a humbling one. My first time, I fell over immediately. Took practice, but now it’s one of my go-to balance drills.

How to do it:

  1. Get into a push-up plank.
  2. Lift left arm and right leg. Hold 2–3 seconds.
  3. Lower, then switch sides.
  4. Do 6–8 reps per side.

Coach Tips:

  • Wider feet make it easier.
  • Don’t lift too high—aim for shoulder/hip level.
  • Think “reach forward and back,” not “lift up.”


Final Thoughts:

You don’t need to do all of these at once.

Pick 4–5 and rotate them into your weekly routine. Focus on form, not how many reps you can hammer out.

A few years ago, I coached a group that added 15 minutes of core twice a week.

After two months, one runner knocked five minutes off her half marathon PR. Not because she ran more—but because she ran stronger.

Consistency wins. Quality matters. Your strong core is the glue that holds your running form together—especially when you’re tired.

So… start now. Pick a few. Try them. Stick with it.

And hey—why not hit a plank right now?

What’s the Best Temperature for Running?

Introduction: Chasing the Perfect Running Weather

Every runner dreams of that perfect running weather – the day when the air feels just right and every stride is effortless.

But what is the ideal running temperature?

As a running coach based in Bali, I’ve grappled with this question personally.

I’ve literally felt the extremes: from sweltering tropical mornings that left me drenched by sunrise, to crisp mountain air in my earlier years that made my lungs burn and my spirit soar.

Each experience taught me something profound about how temperature impacts our runs.

Let me take you on a journey through those lessons – from a terrifying heatstroke at the Solo Half Marathon to nostalgic winter training runs – combining personal stories, scientific research, and hard-earned coaching wisdom.

By the end, you’ll not only know the optimal running temperature for peak performance, but also how to thrive in any weather, hot or cold.

What’s the Best Running Temperature?

Most runners and studies agree the perfect running temperature is around 50°F (10°C) for long-distance runs Marathon performances peak in the cool 44–59°F (7–15°C) range allowing your body to dissipate heat efficiently.

Sprinters, however, prefer warmer weather near 70–73°F (21–23°C)  to keep their muscles loose and explosive.

Ultimately, the best temperature for running varies with the individual – it’s that sweet spot where you feel comfortable, strong, and fast without overheating.

Finding That Sweet Spot Between Sweat and Shivers

Let’s be honest—every runner dreams about that perfect weather run.

You know the one: where your legs feel light, the air feels clean, and every step just clicks. No dripping heat, no icy sting. Just you and the road, dialed in.

I’ve chased that feeling across some wild weather—steaming-hot Bali mornings that cooked me before sunrise… and bone-chilling winter days back when I trained somewhere a little less tropical.

And let me tell you, temperature matters.

A lot more than you might think.

So here’s what I’ve learned—from real-world screwups, close calls, and a good chunk of science-backed training—about how weather impacts your run.

Quick Hit: Best Running Temp?

According to research—and just about every seasoned runner I’ve coached—the ideal temp for long-distance running hovers around 50°F (10°C).

That’s the sweet spot where your body doesn’t overheat and can focus on moving efficiently.

In fact, elite marathoners tend to crush their times in conditions between 44–59°F (7–15°C). Your muscles stay warm, but not boiling, and your heart doesn’t have to go into overdrive just to cool you off.

Sprinters?

They love it warmer—around 70–73°F (21–23°C)—because warmer muscles mean more explosiveness. But for most of us logging miles on the road or trail, that cooler range is gold.

The Heat Slap: My Solo Half Marathon Wake-Up Call

Let’s talk about heat—and why it’ll chew you up if you don’t respect it.

I’ve had a few run-ins with it.

One time, I headed out in Bali at midday (yeah, genius move, I know). The sun was brutal—over 90°F (32°C)—and by mile three I was wobbly and lightheaded. Heart thumping like a bass drum. I had to bail and walk it in, drenched and wrecked.

But that wasn’t the worst of it.

The real gut punch came at the 2023 Solo Half Marathon.

Race morning was already hot and thick with humidity. I felt it in my bones at the starting line, but like an idiot, I thought my training would bulldoze through it.

By mile 11, the heat won.

Everything went sideways—legs locked up, vision blurred—and I blacked out. Next thing I remember, I was in a hospital bed. I’d collapsed from heatstroke. Didn’t finish. Didn’t even remember the final kilometers.

That moment taught me something brutal: toughness means listening to your body, not ignoring it.

What’s Actually Happening in the Heat?

Here’s what’s going on inside your body when it’s scorching out:

  • Your body shifts blood from your muscles to your skin to help you sweat and cool down.
  • That means less oxygen and fuel to your legs.
  • Your heart rate spikes because it’s working double-duty.
  • And your core temp climbs dangerously fast.

Running in the heat feels like you’re driving a car with the handbrake on. You’re trying to move, but everything’s fighting against you.

And yeah, the science backs it up.

A 2021 piece in Marathon Handbook confirmed that heat is the biggest factor that screws with performance and even finish rates. Every degree above that sweet spot can slow you down—and I’ve felt it in my bones.

Flip Side: Why Cold Runs Can Make You Fly

Now let’s talk cold—because when it’s done right, cool weather can feel like rocket fuel.

Some of my best runs happened on cold mornings. Not freezing, but that crisp 45°F (7°C) type of air that stings at first and then lifts you.

I remember one snowy run years ago—quiet, fresh flakes crunching underfoot—and I was gliding. No extra effort. Just flow.

Cool temps help your body regulate heat more easily. Instead of wasting energy trying to stay cool, you can focus on the run itself.

That’s why you’ll see so many PRs and records set in fall races.

Your heart rate stays steady. Breathing feels cleaner. It’s like your body has more room to perform.

Even Reddit runners talk about how they feel like they can “run forever” in the 40s. I get it. I’ve had that run-too-far-on-purpose kind of vibe on a 50°F day more times than I can count.

But Let’s Not Pretend Freezing Temps Are Easy

There’s a point where cold stops helping and starts hurting. Below freezing, things get tricky:

  • Muscles take longer to warm up.
  • Breathing cold, dry air can make your throat and lungs ache.
  • Slippery roads mess with your form.
  • And god help you if you forget gloves.

I once ran in January without gloves—rookie mistake—and my hands were so frozen I couldn’t even turn the doorknob afterward. Took 15 minutes with my armpits to thaw out enough to open the house.

That pain? Never again.

Also, don’t forget: you can still dehydrate in cold weather. You’re losing moisture through your breath and sweat—even if you don’t feel it.

What Science (and Experience) Says About the Best Running Temperature

Let’s talk weather — and not just to complain about it.

I’m talking about the sweet spot where your body runs fast, your engine runs cool, and you feel like you could go forever.

Because yes, temperature matters way more than most runners realize.

So… What’s the Magic Number?

Over the years, scientists have pored over marathon race data and lab tests to figure this out.

And guess what? The best running temps are cold — colder than most of us would consider “comfortable” for hanging out.

According to research published in Marathon Handbook, air temperature is one of the biggest factors affecting marathon finish times — and even dropout rates.

For every 1°C (1.8°F) increase above the sweet spot, times slowed down and DNFs (Did Not Finish) went up. That hurts.

The golden range?

Most studies point to 44°F to 59°F (7–15°C) as the prime zone for marathons. A long-term study on the Boston Marathon — a race that draws runners of all speeds and ages — found 46–59°F (8–15°C) to be ideal for both elites and everyday runners.

Personally, I’ve always found around 50°F (10°C) to be that Goldilocks zone — not too cold, not too warm. That’s when the engine purrs and you can hold pace without overheating.

And you’re not alone if you think 45°F feels freezing when you first step out. But trust me, once you’re moving, it’s perfect.

What About the Fastest of the Fast?

Turns out elites like it even colder. A study in PLOS ONE found that male elite marathoners peaked at around 39°F (3.8°C), while elite women ran their best at about 50°F (10°C).

Makes sense — when you’re burning fuel that fast, cooler air keeps you from overheating. I’ve seen this play out firsthand — the pros often shiver at the start line while us mid-packers are layered up like it’s winter camping.

And for the rest of us?

We’re usually best somewhere around the mid-40s°F. That lines up with how I’ve felt on race mornings — my best performances almost always came on chilly mornings when I could see my breath during warm-up.

But Wait — What About Humidity?

Temperature’s only part of the story. Humidity is the silent killer.

You’ve heard of the “real feel” or “heat index”? That’s where heat + humidity gang up on you.

Let’s say it’s 88°F (31°C). In dry conditions, sure, that’s hot — but manageable. Add 70% humidity, and suddenly it feels like over 100°F (38°C). That’s brutal.

Why?

Because sweat doesn’t evaporate well when the air’s already full of moisture, so your body can’t cool down.

Living and training in Bali, I know this struggle. I’ve run 10Ks in 80°F with 90% humidity and felt like I was drowning in my own sweat by kilometer three. It’s not just uncomfortable — it’s performance-crushing.

On the flip side, cold wind or rain can make a seemingly perfect 40°F run feel miserable. Ever been hit with icy gusts on a long run? Yeah, that’ll humble you quick.

What This Means for You

The takeaway? Cool and dry = fast. Hot and humid = sufferfest. It’s that simple — and the science backs it.

That said, we all have our own “perfect” range. Some folks run hot and prefer 40°F, others are fine at 60°F, especially for short runs. Your body size, how much you sweat, and what weather you’re used to all play a role.

But if you’re chasing that next PR? You’re praying for a start line at 50°F, overcast skies, and a dry breeze.

Warm Muscles, Fast Sprints: Why Sprinters Like It Hot

Now let’s flip the script.

All that “cool weather” stuff? That’s for endurance junkies. If you’re a sprinter, it’s a different game.

Sprinting isn’t about pacing — it’s about power. In events like the 100m or 200m, you’re done in seconds. You’re not worried about overheating; you’re focused on explosiveness. And for that, your muscles need to be warm, loose, and ready to fire.

That’s why many sprinters train or compete in warmer weather — or overdress during warm-ups to stay hot. I’ve coached short-distance runners who hated the cold. If the temp dipped below 65°F, they’d say they felt tight and slow.

There’s solid research behind it too: according to Runners Blueprint, sprinters tend to perform best around 72–73°F (22–23°C). That’s warm enough to keep muscles firing but not so hot that you’re melting.

Heck, the women’s 100m world record? Set on a warm summer day in Rome. Not a coincidence.

So while a marathoner might be praying for clouds and cool air, a sprinter is thrilled when the sun’s out.

What About Middle-Distance Runners?

Good question.

Runners doing events like the 800m or mile fall somewhere in between. They need both speed and endurance. Most prefer moderate temps — around 60°F. Not cold enough to seize up, not hot enough to slow them down.

The Real Point: Context Matters

There’s no one-size-fits-all temperature for “perfect running weather.” A sprinter’s ideal is a marathoner’s nightmare. A trail runner training in Bali has different needs than someone prepping for Boston.

But one rule still holds: if you’re going long, cooler is better. If you’re going short and fast? A little heat might be your secret weapon.

Adapting to the Heat (and Cold): What Running in Bali Taught Me About Acclimation

Let’s be real—everyone loves the idea of running in 50°F weather. It’s cool, comfortable, and your body doesn’t feel like it’s melting.

But here’s the catch: most of us don’t live in “ideal” conditions. I live in Bali. It’s hot, humid, and sticky year-round. When I first moved here, even an easy run at sunrise felt like a death march.

I’d be drenched by mile one, gasping for air, and my heart rate was through the roof—at jogging pace. One run in 78°F and 90% humidity felt worse than a 15-miler back in Europe. I actually wondered if my running days were numbered.

But here’s the thing—your body adjusts. Slowly, stubbornly, but it does.

After a couple months of steady running (and plenty of sweating), I started noticing the shift. I wasn’t overheating as fast. I could finish a 5K before sunrise without turning into a puddle.

Six months in, a 10K in the morning heat became “just another run.” I learned how to hydrate better, slow down early, and pick shady loops or routes that passed shops for a cold drink.

That’s heat acclimation in action—your body starts sweating earlier, your blood volume goes up, and everything just runs a little smoother. Studies back this up. Your system actually learns how to manage heat more efficiently. It’s wild.

I even met a local runner who thought 75°F was “cool.” Meanwhile, a guy from Florida once told me he races better in swampy heat—said 50°F felt cold to him.

It blew my mind, but it made sense. You race how you train, and your comfort zone is built by exposure.

Same goes for the cold. I’ve got a Canadian buddy who runs in freezing temps all winter. To him, 32°F is “perfect.” He layers up, protects his skin, and goes out like it’s nothing.

But when snow or ice hit, he admits things slow way down—not because of cold, but because you can’t sprint on ice without eating pavement. Fair.

What I’ve learned is this: while science tells us that ~50°F is objectively better for performance, what really matters is what you’re used to.

Acclimation isn’t about running your fastest in 90°F—because you won’t. It’s about surviving and thriving in less-than-perfect conditions.

I even throw in hot midday jogs here in Bali just to keep that heat tolerance sharp. If I ever sign up for a cool-weather race, I’ll run with the AC cranked or travel to cooler spots just to get used to it again.

Training in tough conditions builds mental strength too. If you only run when it’s “nice out,” race day surprises will wreck you.

Bottom line? You can adapt. Whether it’s heat or cold, it’s not about chasing perfect weather—it’s about learning to run smart in the weather you’ve got.

FAQs: Weather, Performance & Real-World Running

Q: What’s “too hot” to run in?

Once the heat index hits around 90°F (32°C), you’re entering danger zone. Anything above 85°F (29°C), especially with humidity, will slow you down and spike your risk of overheating. At 100°F heat index or more? I usually tell my runners to cut it short, run easy, or hit the treadmill.

If you start feeling dizzy, your heart’s racing, or you stop sweating—that’s a red flag. Walk it in, cool down, and live to run another day.

Q: What temp is “too cold”?

Cold’s not the enemy—it’s frostbite and slipping on ice. Most runners can go down to 0°F (-18°C) with layers and protection.

But when the windchill drops below -20°F (-29°C), you’re risking skin damage fast. If it’s icy or your lungs hurt from the air, it’s time to reconsider. Treadmills exist for a reason, and using one doesn’t make you soft—it means you’re smart.

Q: Is cold better than heat for racing?

Yep. According to multiple studies (like from youraustinmarathon.com and runnersblueprint.com), marathon times drop as temps rise. Most people run best between 40°F and 60°F (4–15°C).

Why?

Your body doesn’t waste energy cooling down, so your pace holds longer. You might be a minute slower per mile at 85°F than at 55°F. Even a 10°F shift can affect performance by a few percent. Cold’s better—until it’s too cold and your legs freeze up.

Q: Do I burn more calories running in the cold?

A little.

Your body does work harder to stay warm, especially if you’re underdressed and shivering. But don’t expect a major fat-loss boost just from cold air.

In fact, running in heat feels harder but doesn’t burn more—it just feels like it does because of water loss. Want to burn calories? Focus on effort, distance, and consistency, not the weather.

Q: What should I wear when it’s ~50°F out?

Ah, the sweet spot. In 50°F (10°C), I usually go with shorts and a long-sleeve or just a tech tee with sleeves I can push up. Maybe gloves for the first few miles, a buff if it’s breezy. You don’t need a jacket unless it’s windy.

Trick is to feel a bit cool at the start—by mile 2, you’ll be golden. I ran a race once at 52°F in shorts and a short-sleeve with gloves. I froze for five minutes, then felt perfect the rest of the way.

How to Choose the Right Running Surface for Beginners

When I first started running, I never thought much about the ground beneath my feet.

I just grabbed my shoes and hit the pavement.

But over time, I learned that where you run matters just as much as how far or how fast.

Running on the wrong surface can slow you down, wear you out, or worse—cause injuries that keep you sidelined.

Whether you’re just starting out or training for your next race, picking the right surface can make a huge difference.

In this guide, I’ll walk you through the pros and cons of different running surfaces and share tips to help you run smarter, feel better, and stay injury-free.

Sounds like a great idea?

Let’s get to it.


Pavement (Concrete & Asphalt)

Pavement? Yeah, it’s tough on your body, we all know that. It’s reliable, but it feels like running on a concrete block that’s not doing your knees any favors.

Pros:

  • Convenience: Pavement’s everywhere. You can always find a route through the city, and no worrying about running out of track. It’s quick, easy, and ready when you are.
  • Asphalt’s softer: Asphalt’s got a little give to it, so it’s easier on your joints than concrete. Concrete? Not so much.

Cons:

  • Joints: Yeah, poor knees! You’ll feel it after a while.
  • Shins, calves, and ankles: Pavement’s tough on your legs. You’ll feel it in all the wrong places.
  • Potholes: Watch out for those potholes—they’re everywhere, and they’ll throw off your stride.

My best advice?

Watch out for cambered roads. Try running on them one way for a week, then switch it up. It’ll help balance your muscles and keep that knee strain in check. Pavement isn’t friendly, but sometimes, you gotta deal with it. Mix it up and be smart about it.


Grass & Dirt Trails

Grass and dirt trails are ideal in my opinion. The soft ground means less pounding, and it gets those stabilizing muscles working harder.

Feels good, right?

Pros:

  • Easy on your joints: If your knees are feeling the pavement, grass and dirt trails are like a vacation for your legs.
  • Feels like a break: Running through a well-maintained park or field feels like you’re floating. Seriously, it’s like a spa day for your legs.

Cons:

  • Uneven terrain: Can be tricky. If your ankles aren’t stable or you’re not careful, you might twist something.
  • Wet grass: Forget it. Unless you’re into slipping around like it’s an ice rink, stay away from wet grass.

My best tip?

If you’re new to trail running, focus on stabilizing those ankles and getting your form solid. When it’s wet, stick to dirt if you can. It’ll save you a lot of hassle and make the run way smoother.


Sand

Running on sand? It’s a killer for your legs and core, but in a good way. It absorbs the shock, so it’s a little easier on your knees than pavement. But be careful—the ground’s uneven, so one wrong step, and you could twist an ankle.

Pros:

  • Strength training: Running on sand is like a workout for your legs and core. You’ll feel it in your calves, quads, and abs with every step. It’s awesome for building strength.
  • Gentler on your joints: Sand absorbs the impact, making it easier on your knees compared to pavement.
  • Push yourself: If you’ve got the energy, running on sand feels like you’re conquering a challenge.

Cons:

  • It’s tough: Running in deep sand is way harder than you think. Your legs will feel heavy and tire you out faster than you expect.
  • Uneven ground: The ground’s soft, so stay focused. A wrong step and your ankle will remind you it’s there.
  • Slower pace: Sand’s a bit slower, so don’t expect to set any speed records. It’ll feel like you’re running through mud.

My best advice?

Run near the waterline where the sand’s firmer. It’ll make a huge difference in how fast you can go without burning out too quickly. Use the soft sand for a challenge, but keep it smart for when you’re really ready to push yourself.


Treadmill

Let’s be real—the treadmill isn’t fun, but it’s got its place. It’s perfect for when the weather’s bad, but yeah, it can get pretty boring. You control everything—speed, incline, no worrying about traffic.

Pros:

  • Predictable: You control the speed, incline, and there’s no potholes or traffic to deal with. Simple.
  • Injury recovery: If you’re coming back from an injury, the treadmill is soft and safe while you get back into it.
  • Work on your form: Plus, it’s easier to focus on your form without worrying about bumps or hills.

Cons:

  • Boring: Staring at the same spot for miles isn’t the most exciting thing.
  • No scenery: You’re not seeing much. The lack of change in environment messes with your head a bit.
  • No real-world adjustments: No hills, no wind, no turns—it can throw off your natural stride and form.

My best advice?

Throw a 1% incline on that treadmill. Trust me, it’ll mimic outdoor running better and keep your workout from feeling like you’re walking on a conveyor belt to nowhere. You’ll feel more like you’re actually out there running. Here’s how to get started on the treadmill.


Trails (Woodland, Mountain, etc.)

Want to feel like a pro? Hit the trails. They’re awesome for strength and adventure, but yeah, you gotta be careful. Trails are amazing, but they can be rough on your ankles if you’re not paying attention.

Pros:

  • Adventure time: Trails take you to cool spots, and the bumpy ground is great for building strength.
  • Easier on your body: Trails are easier on your joints than pavement, and the less impact is a win in the long run.
  • The real deal: The fresh air, the quiet—this is the kind of run that’ll leave you feeling alive.

Cons:

  • Roots, rocks, and mud: One wrong step, and you’re twisting an ankle. It’s beautiful, but don’t expect a fast pace if you’re dodging rocks and roots all the time.
  • Focus on footing: You’ll need to pay more attention to where you step than how fast you’re running.

My best advice?

Keep an eye on the ground. Most hazards can be avoided if you just watch your step. Start slow on the easy trails before jumping into the gnarly stuff. That way, you’ll build confidence and strength while keeping those ankles in check.


Track

Track time—this is where you go to push your speed! The track’s flat and smooth, perfect for crushing lap times—just don’t let it get boring.

Pros:

  • Speed work: If you love speed work, the track’s your best friend. The surface is smooth, no bumps, and you can easily track your distance.
  • Body-friendly: The synthetic surface is easier on your body than concrete, so you can really push yourself without worrying about wrecking your joints.

Cons:

  • Boring: Lap after lap, it can get old.
  • Tight turns: Those tight turns can mess with your knees and hips, especially if you’re always running in the same direction.
  • Monotonous: Don’t make the track your go-to every day, or it can get repetitive.

My best advice?

Mix it up and change directions every few laps (but make sure to abide by local etiquette). Your body will thank you, and it’ll make your workout way more interesting.

Conclusion Checklist for Beginner Runners: 

As you start running, choosing the right surface can seriously help you crush your goals and avoid injuries.

Here’s a quick checklist to guide you:

  1. Pavement (Concrete & Asphalt):
    • Best for: Easy access, quick city routes, and speed work.
    • Pros: Convenient, smooth, predictable. Asphalt is easier on your joints than concrete.
    • Cons: Hard on your body over time—especially your knees and shins. Watch out for potholes.
    • My Advice: Mix it up! Alternate your direction to prevent muscle imbalances.
  2. Grass & Dirt Trails:
    • Best for: Giving your joints a break and adding some variety.
    • Pros: Soft on your body, helps build strength, feels like you’re adventuring.
    • Cons: Uneven terrain, easy to twist your ankle, and slippery when wet.
    • My Advice: Start slow on easier trails, and make sure your form’s solid before hitting the tougher stuff.
  3. Sand:
    • Best for: Building strength, especially for your legs and core.
    • Pros: Great workout, low impact on joints.
    • Cons: Tough, tires you out quickly, and tricky to run in deep sand.
    • My Advice: Stick to firmer sand near the waterline to avoid burning out too fast.
  4. Treadmill:
    • Best for: Bad weather, controlled environment, and injury recovery.
    • Pros: Predictable, customizable speed/incline, low-impact surface.
    • Cons: Boring, can mess with your form, no real-world adjustments.
    • My Advice: Add a 1% incline to mimic outdoor running and keep things interesting.
  5. Trails (Woodland, Mountain, etc.):
    • Best for: Adventure and building strength.
    • Pros: Beautiful scenery, easier on joints, and a real challenge.
    • Cons: Roots, rocks, and uneven surfaces that can lead to injury.
    • My Advice: Look at the ground, focus on your steps, and start with easier trails.


Final Thoughts:

No one surface is perfect, and each has its place. As a beginner, it’s key to mix it up. Run on pavement for speed, hit the trails for a change of scenery and strength, and add sand or the treadmill for variety.

Listen to your body, and switch things up to keep your muscles guessing and prevent overuse injuries.

Your body’s tougher than you think, but it needs the right kind of variety. B

e adaptable, creative, and always keep your runs interesting! Keep building that foundation and enjoy the ride.

FAQ Section (Optimized for Featured Snippets)

What is a Cambered Road?

A cambered road is slightly tilted to one side to help with water drainage.
The downside? One leg works harder than the other, throwing off your stride and putting extra stress on your joints.


How Does a Cambered Road Affect My Running?

Running on a cambered road messes with your alignment, making your body fight against gravity. It’s like running uphill on one side and downhill on the other—not exactly easy on your body.


What’s the Difference Between Asphalt and Concrete for Running?

Asphalt is softer and has a bit of give, making it easier on your joints. Concrete, on the other hand, is much harder, which can lead to more wear and tear on your body over time. If you have to choose, asphalt is the better option for long runs.


How Does Trail Running Affect My Body Compared to Pavement?

Trail running offers a softer surface, so it’s easier on your joints. But the uneven ground forces your muscles to work harder to stabilize your body. It’s a great way to build strength, but also be careful of rocks, roots, and other obstacles that could cause injury.


What’s the Best Surface for a Long Run?

If you’re aiming for a long run, asphalt or well-maintained dirt trails are your best bets. They’re softer on your body than concrete, but still provide enough stability to keep you moving without too much strain. Avoid running on rough trails or concrete for long distances unless you’re really trying to push your limits.


Why Does Running on Grass Feel Easier on My Body?

Grass provides a natural cushion that absorbs a lot of the shock, making it easier on your joints compared to harder surfaces like pavement. However, it can be a little tricky to run on because of uneven ground, so make sure you’re watching your step. Running on grass can feel like a break for your body but still gives you a solid workout.


Can Running on Sand Help Build Strength?

Yes! Running on sand is like a strength workout for your calves, quads, and core. It’s tough, but it’s great for building muscle.
The only downside is it’s much harder to maintain speed, so if you’re looking to race, stick to more solid surfaces. But for strength and endurance, sand’s a killer option

What Are the Long-Term Effects of Running on Your Joints?

A lot of runners worry about how running impacts their knees and joints. I’ve been there myself—put in tons of miles and felt those joint aches.

But honestly? Running has been one of the best things I’ve done for my body in the long run.

And hey, science has my back on this one too.

Let’s talk about how running affects your joints, what can go wrong, and how to keep them happy in the long run.

Spoiler alert: it’s not running that messes up your joints, it’s how you run and how you take care of your body between runs.

Let me get to it.


Running: The Good, The Bad, and The Myths

First off—running’s not automatically bad for your joints.

You won’t automatically end up with arthritis just from running. Studies show runners often have healthier knees than people who sit around all day.

But don’t get too excited just yet—let’s talk about where things can go wrong. Running’s great, but you’ve got to be smart about it to keep your body in check.


Myth #1: “Running Causes Arthritis”

The myth that running causes arthritis? It’s outdated and debunked. In fact, a study showed that sedentary people have nearly three times the risk of developing osteoarthritis compared to recreational runners.

But here’s the kicker: It’s all about how you run. And yep, form is everything.


The Real Risk: Overuse and Poor Form

Look, if you’re running every day without paying attention to your form and recovery, you’re asking for trouble.

Overuse injuries like patellar tendonitis or IT band issues? They’re no joke, trust me. And if you’re new to running, doing too much too soon will make your joints throw a tantrum.

Staying injury-free? It’s all about consistency and being smart with your effort.


So, What Actually Happens to Your Joints When You Run?

Believe it or not, running actually helps strengthen your knees. Studies show that regular running can help ‘condition’ your knee cartilage. Basically, it makes your knee cartilage stronger over time.

So, not only can your knees handle the stress, they actually adapt and get stronger.

But don’t overdo it—take it slow and steady. Too much of anything is still too much. If you’re running like you’re preparing for an ultra every day and skipping recovery, you’re setting yourself up for trouble.

Long-distance or high-volume training without proper rest? That increases your risk of joint issues big time.


The Power of Strengthening

Weak muscles? Yeah, they can cause joint issues. Think of your muscles like bodyguards for your knees. If your muscles aren’t strong enough, guess who gets the hit? Your knees.

That’s where cross-training comes in—things like strength training, biking, or swimming. Building up your quads, hamstrings, and calves gives your knees the backup they need.


Form Matters More Than You Think

Bad form? It’s like a fast track to injuries. If you’re landing on your heels or your foot is too far ahead of you, you’re asking for trouble. Focus on landing mid-foot and keeping your posture tall.

Small tweaks like this can save you from a lot of pain later on. Not sure about your form? Get someone to check it out. It’ll be worth it, and it could make a big difference in keeping you injury-free. You can also check my guide here.


What Can You Do to Protect Your Joints?

Here are few of my best tips to help protect your joints while performing high impact exercises.

Choose the Right Surface

I get it—concrete’s easy, and it’s everywhere. But it’s tough on your joints. So, why not mix it up?

Try switching it up with softer surfaces, like grass or dirt trails. It won’t get rid of the impact entirely, but it’ll definitely take the edge off.

I made the switch years ago, and my knees are much happier now.


Proper Footwear is Non-Negotiable

Look, I’ve been there—running in shoes that were on their last leg because they “still felt okay.” Don’t make that mistake.

Your shoes are your first line of defense for your knees. If your shoes are worn out, your knees will feel it.

Get fitted for shoes that match your foot type and running style. Don’t just grab any pair off the shelf. It’s worth the time and effort to find what works for you.


Build Those Muscles

Want to keep your knees in top shape? Add strength training to your routine.

Lunges, squats, and leg extensions—they’re your friends. These exercises help build the muscle stability your knees need so you’re not relying solely on the joint for support.

A bit of strength work goes a long way to keeping your knees strong and injury-free.


Don’t Forget to Rest

Rest is your secret weapon for recovery. I get it—rest might seem like slacking off, but trust me, your body needs it. It’s when your muscles and joints repair and get stronger.

After a tough run or training week, don’t skip the rest. Overtraining is the quickest way to turn healthy knees into sore ones. Your body will thank you for giving it the rest it needs.


Conclusion: The Takeaway

Running doesn’t have to hurt your knees—as long as you’re doing it the right way. Pay attention to your form, make time for recovery, and don’t skip your strength training. Your knees will thank you, and you’ll be running strong for years!


Quick Tips for Healthy Knees:

  • Run with proper form to protect your knees
  • Choose softer surfaces like grass or dirt to reduce impact
  • Strengthen muscles around the knees for better support
  • Get fitted for the right running shoes to protect your joints
  • Allow for proper recovery between runs to prevent injury

FAQ

Can running cause knee arthritis? No, running itself doesn’t cause arthritis. In fact, studies show runners often have healthier knees than sedentary people. The key is to run with proper form and allow for recovery.

What’s the best surface for avoiding joint injuries? Softer surfaces like grass or dirt trails are easier on your joints compared to hard concrete or asphalt. Mix it up and avoid always running on hard surfaces.

How can I strengthen my knees for running? Strength training exercises like lunges, squats, and leg extensions help build muscle around your knees, providing better support and reducing the risk of injury.

Can You Train For a Marathon on a Three-Run Per Week Plan

Many marathon training plans have you running five or six days a week. That can sound overwhelming.

You might have a busy life or worry that running too much could get you hurt.

This might make you wonder: Can I train for a marathon by running only three days per week?

As a running coach, I’ll be honest – I’m a bit skeptical of such a low-mileage approach.

I usually recommend training about five days a week with plenty of easy running. (We call those easy efforts Zone 2 training, which means running at a comfortable pace.)

However, I also understand that not everyone has the time or ability to run that often. Some runners have tight schedules or past injuries.

For those runners, three runs a week might be all they can manage.

Still want my answer? 

Then I gotta say yes – you can finish a marathon with only 3 runs per week (the keyword here is finishing a marathon, not running a fast one).

But you have to be smart about it.

Each run becomes very important when you only have three.

You’ll also likely need to do some other exercise on the non-running days to build your endurance.

Let’s talk about how such a plan works and how to make the most of it.


How to Train for a Marathon on 3 Runs per Week

I’ll level with you.

When runners ask me for a 3-day-a-week marathon plan, I often start by handing them a 5-day beginner plan!

Then I tell them to drop a couple of the weekday runs and replace it with cross-training (like cycling or swimming).

This way, they’re still staying active five days a week.

But only three of those days involve running.

That leaves us with three key runs in the week. These three runs are the essentials that every good marathon training plan needs.

If you nail these three, race day won’t feel like a struggle.

Instead, you’ll feel in a good spot despite not fully committing to training. 

Let me break down the plan even further.


The Three Important Runs:

  • The Long Run: the distance-building run for endurance.
  • A Faster Run (Tempo or Intervals): a run to work on speed and strength.
  • An Easy Run: a short, relaxed run to aid recovery and add some mileage.

Long Runs – Building Endurance

The long run is the most important workout of your week.

This is where you practice running far, gradually building your distance over time.

If you’re on the slower side, I might cap your long run based on time instead of distance.

For example, you might stop after 3 to 3.5 hours, even if you haven’t hit 18-20 miles. This keeps you from burning out and gives your body a better chance to recover.

When you do your long run, the goal is to run at an easy, conversational pace

You should be able to talk in full sentences without gasping for air. This pace is called your aerobic zone (or Zone 2). I’d also recommend you take some breaks during these extended efforts.

It’s a level where you’re working but still comfortable, and it’s key for building endurance without pushing too hard or risking overuse injury.


Pacing for the Long Run

The goal? Take it slow—find a pace that builds your endurance, not one that leaves you gasping for air halfway through.

  • Beginners: Aim for about 90 seconds slower per mile than your marathon pace. The focus here is on being out there for the time, not worrying about speed.
  • Intermediate Runners: You’re looking at 60-75 seconds slower. You’ve got the distance down, now it’s about building that stamina.
  • Advanced Runners: You may only need to slow down by 60 seconds per mile. Your goal is endurance, not speed.

Tempo Run

A tempo run is all about running at a “comfortably hard” pace for an extended period.

You’re not sprinting, but you’re not cruising either.

A typical tempo run lasts 20-40 minutes at this steady, hard pace. That doesn’t include your warm-up and cool-down, by the way.

Tempo runs train your body to maintain a faster pace for longer, which helps improve your overall speed.

Here’s a good example: jog easy for 10 minutes to warm up, then run 20 minutes at a strong, steady pace, then cool down with a 10-minute jog.


Interval Workout

Intervals are all about short bursts of fast running with quick recovery periods in between.

For example, you might run hard for 2 minutes, then jog or walk for 2 minutes to catch your breath.

You repeat that cycle several times.

Interval workouts (sometimes called “repeats” when done on a track) are great for building speed and power.

They’re tough, but they can also be a lot of fun. You get to push yourself hard, then take a break and do it again.

Here’s an example: 6 × 400-meter repeats at a 5K pace, with a 2-minute rest between each.

These intervals help train your legs to run fast and teach your body to recover quickly, which is key for improving speed.

In a 3-day training plan, you might do intervals one week and a tempo run the next. It really depends on what your plan calls for.

Both interval workouts and tempo runs will help make your marathon pace feel easier over time.


The Key to Success: Cross-Training

I know what you’re thinking: “Doesn’t cross-training just add more work to my already busy schedule?”

Let me explain why it’s worth it.

Cross-training can help build strength and endurance while keeping you injury-free. And it’s all about doing other forms of exercise besides running.

This can include many activities, such as:

  • Cycling (riding a bike)
  • Swimming
  • Brisk walking or hiking
  • Using an elliptical machine (a low-impact exercise machine that simulates running)
  • Rowing or cross-country skiing
  • Strength training

Here are some great ways to cross-train:

  • Cycling: Hop on your bike for 45 minutes and keep your cardio strong, without the pounding that running puts on your joints.
  • Swimming: Swimming gives you a killer full-body workout, boosting your cardio while giving your legs a break.
  • Elliptical: Got access to an elliptical? It’s a great way to mimic the running motion without the impact.

These activities keep your fitness up while giving your legs a break.

Let’s say your 3-day running schedule looks like this:

  • Monday: Long run (10-15 miles)
  • Wednesday: Tempo run (5-7 miles)
  • Friday: Speed work (intervals or hill sprints)

For the days in between, cross-train to work your heart and keep your muscles strong:

  • Tuesday: Swim for 30-45 minutes, focusing on endurance with a steady pace.
  • Thursday: Do a 45-minute cycling session at a moderate intensity to keep your legs active without overloading them.
  • Saturday: Take it easy with the elliptical for 45 minutes, focusing on maintaining a good rhythm and heart rate.

Cross-training isn’t just for fitness—it helps keep you injury-free and gives you the break your legs need.


Rest

Of course, rest is important too.

Make sure to take at least one full day off each week to let your body fully recover. On a 3-run schedule, you might run on Monday, Wednesday, and Saturday. Then you could do cross-training on two or three of the other days. That leaves at least one or two true rest days.

Find a routine that fits your life. With a 5-day training week, you get two days of full rest. This should be more than enough.

Strength Training for Runners

I’m a big fan of strength training.

It helps build your muscles, improve bone density – I can go on and on.
And you don’t need a lot of it, to be honest.

Just 20-30 minutes twice a week is all it takes to keep your body strong and ready for race day.

Key exercises every runner should include:

  • Squats: Target your quads, hamstrings, and glutes.
  • Lunges: Improve knee stability and balance.
  • Core Workouts: Strengthen your core and improve posture.
  • Deadlifts: Strengthen your hamstrings, glutes, and lower back.

Sample 3 Runs A Week Marathon Plan

Here’s an example of a week in action—so you can see how it all fits together:

  • Monday: Rest
  • Tuesday: Speed workout (e.g., 6x800m intervals)
  • Wednesday: Cross-train (cycling, swimming)
  • Thursday: Tempo run (e.g., 3×10-minute intervals)
  • Friday: Rest
  • Saturday: Long run (starting at 10 miles, building up to 20)
  • Sunday: Cross-train or rest

The Conclusion

This plan is all about making running work for you—not just running for the sake of it, but fitting it into your busy life.

If you’ve been injured before, this plan helps reduce the risk of overuse injuries while still getting you ready for race day.

Not in your 20s anymore? No problem!

This plan is kinder to your joints, making it perfect for older runners.

Thank you for dropping by.

Keep training strong.

When to Replace Your Running Shoes, Clothes, and Gear for Maximum Performance and Injury Prevention

If you’re like me, you’ve probably kept running shoes and gear way past their prime.

But here’s the truth: holding onto old gear can actually hurt your performance—and lead to injury.

Let’s chat about how long your gear should last before it’s time to say goodbye. I’ll help you figure out when it’s time to let go and keep your runs as strong as possible.


How Often Should You Replace Your Running Shoes?

Your shoes? They’re the foundation of every great run. But even the best shoes wear out eventually.

You’ve probably heard the rule: change your shoes every 300-500 miles. That’s a good starting point, but there’s more to it than just miles.

I’ve done it too—kept running in shoes even when they were done, just to save a few bucks. Trust me, that’s when injuries pop up out of nowhere.

So, how do you know when to finally let them go?

1. The Surface You Run On

Where you run makes a big difference too.

Running on pavement? Your shoes won’t last as long.

Trails are kinder to your shoes.

But if you take road shoes onto rocky trails, they’ll wear out faster.

2. Your Running Style

Are you a heel striker or do you land on your forefoot? The way you land affects how your shoes wear down.

If you’ve got a heavy heel strike, you’re burning through that cushioning much faster.

Next time you’re at the store, check out the wear pattern on your shoes—it’ll give you a good idea of your running form.

Best tip? If you run a lot, get two pairs of shoes and switch between them. This way, each pair gets a rest, and they’ll last longer.


Signs Your Running Gear Needs Replacing

  • Thin spots
  • Visible holes
  • Loss of elasticity around toes/cuffs

Don’t wait until it hurts—replace those shoes before they mess up your form and cause injuries.


How Often Should You Replace Your Running Sports Bras for Comfort and Support?

Sports bras are meant to give you support, and once they start losing that, it’s time to replace them. If the elastic bands start to stretch out or the straps lose their shape, it’s a clear sign they’re done.

On average, you should replace your sports bras every 6-12 months, depending on how often you use them.


How Often Should You Replace Your Running Tops and Bottoms?

Moisture-wicking fabrics are a game changer—when they’re fresh. But once they lose their elasticity or start thinning out, they’re not doing their job anymore.

If you notice stubborn smells that won’t come out or the fabric starts feeling “sticky,” it’s time to let go.

I used to hold onto my favorite running shorts way too long, even though they were getting a little too see-through. Finally, I had to retire them after a very awkward moment during a group run. Trust me, you don’t want to wait that long.


When to Replace Your Running Hat

I’ll be honest: I used to hang on to my hats way longer than I should have. That favorite cap of mine? It had seen better days—faded color, sweat stains, and the brim was drooping like it had been through a hurricane.

But we runners get sentimental about our gear, right?

Here’s the deal with hats: they’re meant to shield you from the sun and keep the sweat out of your eyes. But once the shape starts to go, or the fabric becomes too worn out, it’s time to replace them.

And, let’s be real, if you notice that sweatband starting to stretch out or smell funky no matter how many times you wash it, that’s your signal to let it go.


When to Replace Your Running Sunglasses

Those sunnies are supposed to protect your eyes from the sun, but if they’ve seen too many miles, they might be doing more harm than good.

If your sunglasses’ lenses are scratched, you’re not just dealing with a cosmetic issue—you’re compromising your vision.

A good pair of running sunglasses should give you clear, distortion-free vision to see your path ahead. Once they start to get foggy, or the frames are too loose, you might as well be running blind.

My advice? If they’re slipping down your nose during your runs, it’s definitely time for an upgrade. Don’t wait for them to fall off mid-stride.


When to Replace Your Running Gloves

Gloves aren’t just for keeping your hands warm during those chilly runs—they’re a crucial part of your running kit when it comes to comfort.

But here’s the thing: running gloves have a shelf life. They’re taking on sweat, dirt, and the elements all winter long, so over time, they start to lose their insulation or get holes where you don’t want them.

Once they’ve been through a few seasons, and you notice that the fabric isn’t as warm or snug as it used to be, it’s time for a new pair.

Don’t wait for your gloves to develop holes and leave your hands exposed to the cold. Trust me, it’s not fun running with frozen fingers.


When to Replace Your Running Watch or GPS Device

We all rely on that trusty GPS watch to track our runs, monitor our heart rate, and help us stay on pace. But like everything, even your tech needs replacing every now and then.

Battery Life:

If your GPS watch is struggling to hold a charge, or it takes forever to charge up, that’s a red flag. A battery that dies quickly is a sign the watch is on its last legs. Don’t wait for it to give out in the middle of a run.

Accuracy:

Running is all about tracking progress, and if your watch starts giving you inaccurate readings—whether it’s distance, heart rate, or pace—you’re better off investing in a new device.

A GPS watch is meant to be your training partner, and if it’s no longer reliable, you’re just running blind.


When to Replace Your Running Socks

Running socks are one of those things you don’t think about until it’s too late. You’re out on your run, and suddenly, there’s a blister forming. Well, guess what? Those socks you’ve been holding on to probably have something to do with it.

Signs They Need Replacing:

  • Thin spots
  • Visible holes
  • Loss of elasticity around toes/cuffs

When to Replace:

If you’re running consistently, replace them at least every 6 months. It’s a small investment that’ll save you from discomfort, and possibly injury.


How to Store Your Running Gear

Proper storage can seriously extend the life of your gear. You might think tossing everything into the laundry basket or leaving your shoes by the door is fine, but trust me, how you store your gear makes a big difference.

Shoes:

Don’t leave them in a damp, humid environment—like the garage or the trunk of your car. The moisture can cause the material to break down faster. Instead, let them air out after a run and store them in a cool, dry place.

Clothing:

Running clothes, especially moisture-wicking fabrics, need to be stored in a way that keeps them from losing their elasticity. Avoid tossing them in a laundry hamper where they might get moldy. Hang them to dry if possible, and store them in a cool, dry area to preserve the fabric.

Proper storage means your gear stays in better shape for longer, saving you money and preventing unnecessary wear and tear.


Frequently Asked Questions About Running Gear Lifespan

1. How do I know if my running shoes are still providing the right support?

As your shoes wear down, the cushioning and support degrade. To check if your shoes are still offering the support you need, press the midsole (the cushy part) with your thumb. If it feels stiff or hard, it’s time to replace them. Also, if you notice pain in your knees, hips, or back after a run, your shoes may not be supporting you correctly anymore.

2. Can I extend the lifespan of my running shoes?

Yes! Rotating between two pairs of shoes can help extend their lifespan. By alternating between them, each pair gets a break, allowing the cushioning to recover. Also, always let your shoes dry out fully after each run and store them in a cool, dry place to avoid moisture breaking them down faster.

3. How can I tell if my running gear is too tight or too loose?

If your gear starts to feel tight or restrict your movement during a run, it’s time for a new piece of equipment. Tight clothing can lead to chafing and discomfort, while loose clothing can get in the way of your performance. Pay attention to any signs of discomfort, like rubbing or shifting, during your runs.

4. How often should I replace my running socks if I have blisters?

If you’re getting blisters regularly, even though you’ve tried new shoes or different socks, it could be time to replace your socks. Over time, running socks lose their elasticity and cushioning, which may no longer provide the protection your feet need. You should aim to replace them every 6 months or sooner, depending on how much you run.

5. How long do running sunglasses typically last?

Running sunglasses can last anywhere from one to three years, depending on how often you use them and how well you care for them. If the lenses get scratched, it’s time to replace them to ensure proper protection for your eyes.

Average 5K Time for Beginners: What to Expect and How to Improve

What is a Good 5K Time for a Beginner?

Your first 5K is a huge milestone, and it’s totally normal to wonder, “How long should a beginner run a 5K in?”

As a running coach, I know everyone’s journey is different, but for most newbies, you’re looking at finishing between 30–40 minutes.

Don’t sweat it if you’re a bit slower at first – I’ve been there myself, and trust me, it gets better with time.

Most folks cross the line somewhere around 32 minutes for men and 39 for women in a typical 5K.

Fun fact: even Facebook’s Mark Zuckerberg ran a 20:35 5K, but that’s a way faster pace than most beginners (about 10 minutes faster, to be exact)!

Here’s the deal: if your first race feels like it’s taking a bit longer, that’s totally fine. Many beginners mix jogging and walking, so a time anywhere between 40-50 minutes is also totally normal.

Don’t stress about your time too much — and truth be told, for your your first 5K… showing up is a win, and finishing, without worrying about your time, is a bigger win.

Let me break down more 5K stats and numbers for beginners.

Understanding the 5K Distance

Before we talk about time goals, let’s break down what a 5K actually is.

It’s 3.1 miles. Sounds short, right? But believe me, when you’re out there racing, it feels a lot longer than it sounds.

It’s about 22.5 laps around a standard track or running back and forth on a football field about 50 times.

So, don’t underestimate it – treat each mile with respect and you’ll do great.

Average 5K Times for Beginners

Let’s look at what other runners typically do:

  • Sub 25 minutes: This is pretty fast for a first-timer. If you’re running at an 8:00/mile pace, you’re going hard! Some elite fun-run groups might see this, but it’s not the norm for a first 5K.
  • 30-40 minutes: This is the sweet spot for most beginners who’ve put in a bit of training. Hitting that 30-minute mark is a solid goal, and honestly, it’s what many Couch-to-5K programs target in about 8-10 weeks.
  • 40+ minutes: This is totally fine too. I’ve had tons of runners who took it slow with walk breaks, and they finished around this time.

Remember: “Any pace is a good pace.” If you’re not at the sub-30 level yet, don’t sweat it — just train at your own pace and work up from there. Here’s what the data says: When new runners start out, the average pace is about 13:00/mile (that’s a 42-minute 5K for women and a 35-minute 5K for men). So if you finished your first race anywhere in the 30s–40s, you’re in great company.

 average 5K time for beginner

5K Pace Chart for Beginners

Want to set a goal for your first 5K? A simple way is to figure out what pace you can comfortably maintain.

This chart below shows different paces and how they translate into your 5K time. Find a pace that feels good, and aim for the finish time that goes with it:

Let’s say you’re running at a 10:00/mile pace during training. If that feels comfortable, shooting for a 31-minute 5K is a solid, realistic first goal. Pro tip: The Mayo Clinic’s “Magic Mile” method is a great trick for predicting your 5K time. Run a hard mile, then add 1-2 minutes for your estimated 5K time.

Setting Your First 5K Time Goal

How do you choose a time goal for your first 5K?

Here’s the trick: find a goal that’s tough, but still doable.

You can try the Magic Mile method: run a mile as fast as you can, then add about 2 minutes to guess your 5K finish time.

Or you could check out local race results to see what other beginners (same age/sex as you) have done.

But listen, this is YOUR race.

Set a personal goal. If finishing without stopping is your goal, awesome. Go at your own pace, or even plan for a walk-jog strategy. If you’re shooting for a faster time — like breaking 35 or 30 minutes — that’s great too.

But don’t set a goal that’s too far out of reach. For example, if you haven’t trained at close to a 25:00 pace yet, don’t set that as your first goal.

Your First Race

For your first 5K, here’s my advice: forget the clock.

The main thing is to run or run-walk the whole distance. Endurance first, speed later.

Sure, if you already fit enough and can run the whole distance in one-go, be my guest. But I also know that many beginners are still… beginners. So aiming a little bit too high might be an overstretch.

So do what works for you.

I coached a runner who was obsessed with finishing his first 5K in under 25 minutes.

He went way too hard at the start, and by the last mile, he was walking — and not the fun kind of walk.

He was frustrated and pointed out to me – angrily – that my training plan wasn’t good enough. I simply reminded him that our goal was to finish within 30 minutes despite him being a gym regular for the past five years.

I also reminded them that lifting weights on a regular but only jumping on the treadmill every now and then helps a runner but doesn’t make one.

He was smart enough to recognize the error of his way.

When he came back for the next race, he focused on pacing and finished in 28 minutes. Not the sub-25 min he hoped for, but it was better than his first disastrous attempt.

The moral of the story? Patience and consistency are key.

Average 5K Times by Age Group: What’s the Deal?

You’re looking to run a 5K, right?

Here’s the thing: it all depends on a few factors, like how old you are and how much you’ve been running.

But let’s not stress too much – these numbers are just averages. The real magic comes from your training and your consistency. Here’s what the average 5K looks like across different age groups:

For Men:

  • 20-29: 16:45
  • 30-39: 17:41
  • 40-49: 18:13
  • 50-59: 19:31

For Women:

  • 20-24: 36:22
  • 30-34: 38:41
  • 40-44: 38:26
  • 50-54: 41:20

Your Pace and Finish Time

Your pace is key. Here’s a breakdown of what the numbers look like at different paces.

Don’t get too hung up on hitting these numbers right away—it’s all about working towards your goal.

  • 5 min/mile – 15:32
  • 6 min/mile – 18:38
  • 7 min/mile – 21:45
  • 8 min/mile – 24:51
  • 9 min/mile – 27:58
  • 10 min/mile – 31:04

If you’re just getting started, hitting a 9-minute mile is an awesome target. But with some training, you’ll notice those times starting to drop. That’s the fun part.

Age-Group Runners: Here’s the Real Scoop

We’re not all out there trying to chase down the pros.

And honestly? That’s perfectly fine.

A lot of us are just regular age-group runners doing our best. If you’re in this category, you’ll see a lot of differences in race times, and that’s because some people have trained more seriously or even ran in college. But regardless, it’s all about doing your best.

Age GroupMen’s AverageWomen’s Average
0-1534:4337:55
16-1929:3937:39
20-2429:2736:22
25-2931:0936:16
30-3431:2738:41
35-3933:4437:21
40-4432:2638:26
45-4933:1339:19
50-5434:3041:20
55-5937:3345:18
60-6440:3345:49
65-9942:5950:13

You can see the trend here—times tend to get slower as people age, but there are always those who defy the odds and keep pushing. It’s all about consistency and sticking with it, no matter what age you are.

What’s a Good Time for a 40-Year-Old?

A lot of us don’t start running until later in life, so if you’re in your 40s, you might be wondering what’s a solid time for your age group.

For guys, hitting 18:13 in a 5K is pretty good.

For women, finishing somewhere in the mid-to-late 30-minute range is an excellent target.

But, here’s the most important part: don’t compare yourself to others. Focus on your personal growth. That’s what matters most. Every step forward is a win.

Quick Tips to Set Your Goal

Setting goals is important – but they need to be realistic. Here’s how I’d suggest you go about it:

  • Do a Practice Run: Go out and run a few miles, then figure out what kind of pace you can comfortably sustain. This will help you set a solid 5K goal.
  • Be Honest About Your Training: If your 5K training is mostly easy runs, setting a 25-minute goal might be a stretch. Set a more realistic goal like 30-40 minutes instead.
  • Have Two Goals: Set one goal you know you can hit (like finishing in 40 minutes) and then shoot for a stretch goal (like 35 minutes). You’ll feel pumped even if you hit the first one!

Pacing Strategies for New Runners

This is where a lot of beginners go wrong: starting out way too fast and burning out. If you want to avoid that, here’s how to pace yourself:

  • Start Slow: Trust me on this. Start with an easy pace – don’t rush. You’ve got 3.1 miles to cover, so save some energy for the finish.
  • Find Your Rhythm: Once you hit your stride, keep it steady. Negative splits (starting slower and speeding up later) are always the best way to go.
  • Use Downhills to Your Advantage: If you’re lucky enough to have some downhills, use them to recover. Then give it 90% effort on that last mile.
  • Listen to Your Body: If you feel like you’re about to crash, don’t be afraid to slow down or walk for a bit. It’s way better than pushing too hard and blowing up before the finish.

The key is to pace yourself in a way that feels good. The last thing you want is to get caught up in other people’s pace and end up burning out.

Common Mistakes to Avoid

Let’s keep it real: beginners make the same mistakes all the time.

Here’s what to avoid so you can run smarter:

  • Sprinting at the Start: Everyone gets excited at the beginning, but if you go too hard too early, you’ll pay for it later. Start steady and build from there.
  • Skipping Warm-Ups or Rest: Don’t skip your warm-up – muscles work better when they’re ready to go. Also, don’t cram all your training into one week. Keep it steady and avoid injury.
  • Trying New Stuff on Race Day: Race day is NOT the time to try new shoes or food. Stick with what you know works.
  • Setting Unrealistic Expectations: If you’re just getting started, aiming for a 20-minute 5K right off the bat is probably too much. Set a goal that’s achievable.
  • Comparing Yourself to Others: Everyone’s journey is different. Focus on your own progress instead of comparing yourself to the person in front of you.
  • Skipping Walk Breaks: If your plan includes walk breaks, do it! It’s all about finding your rhythm and finishing strong. There’s no shame in taking a breather.

FAQs About Average 5K Times

Here are some common questions:

Q1: What is a good 5K time for a beginner?

For most beginners, finishing a 5K under 30 minutes is an excellent goal. It reflects a steady pace and a solid level of fitness, especially if you’re new to running.

Q2: How long does it take to train for a 5K?

Most beginners can get ready for a 5K in 6 to 8 weeks with consistent training. Focus on gradual mileage build-up, easy runs, and rest days.

Q3: Can beginners run a 5K without walking?

Yes! With a well-structured plan that builds endurance safely, many beginners can run a full 5K continuously by race day.

Q4: How can I improve my 5K time?

Incorporate interval training, tempo runs, and strength exercises into your weekly routine. These boost speed, endurance, and overall running efficiency.

Q5: What’s a good weekly mileage when training for a 5K?

Most beginners benefit from 10–15 miles per week, split over 3 to 4 runs. This builds endurance without overloading your body.

Q6: Should I run every day to prepare for a 5K?

Running every day isn’t necessary. Aim for 3 to 4 running days per week, allowing for rest or cross-training to prevent injury.

Q7: Do I need special shoes for a 5K?

A comfortable pair of running-specific shoes with proper support is important. Visit a running store for a gait analysis if possible.

Q8: What’s the best way to pace myself during a 5K?

Start at a comfortable pace you can maintain. Aim to finish strong by gradually increasing your effort in the final mile.

Q9: Is it normal to feel nervous before my first 5K?

Absolutely! Nerves are common but can be channeled into positive energy. Remind yourself you’ve trained and you’re ready to enjoy the experience.

Conclusion: What’s a Good 5K Finish Time for a Newbie?

Ultimately, a “good” 5K time depends on you. For most beginners, under 30 minutes is a great goal, and anything sub-25 minutes is excellent. But here’s the most important part: enjoy the process. Celebrate the fact that you ran 3.1 miles. You’re a runner. That’s what counts.

So if this is your first 5K, focus on finishing strong, having fun, and looking forward to the next race. The rest will follow.

Your turn! What’s your 5K goal? Drop a comment and let’s chat about it!

Run a 10K in One Hour: Essential Strategies for Beginners

Run a 10K in one hour

Ready to run that 10K in under an hour? That was me not too long ago.

When I got into training, the thought of running 6.2 miles in under 60 minutes seemed impossible.

My first 5K race? About 33 minutes. I was pumped, but the idea of running twice that distance and doing it faster? A little intimidating.

But here’s the thing—I did it. And if I can, so can you.

In this guide, I’m gonna share exactly how I got there and how you can too.

We’ll talk training plans, interval workouts, pacing (yep, negative splits!), and why cross-training should be your best friend.

Plus, we’ll touch on how to fuel up, stay hydrated, and keep your mind strong when things get tough.

Let’s get to it.

Setting the Sub-1-Hour 10K Goal

Alright, here’s the deal. A sub-1-hour 10K means you’re averaging 6 minutes per kilometer (or about 9:39 per mile).

Sounds like a lot, right? But trust me, it’s possible.

I felt the same way when I started. But once I got a solid game plan, it became doable.

Where are you now? If you’re running a 5K in around 30–33 minutes, you’re already on the right track.

That’s pretty close to the fitness level needed for a 65–70-minute 10K. Getting those extra minutes shaved off? Totally possible with the right focus and effort.

The 8-Week Sub-60 10K Training Plan for Beginners

If you want to break an hour in your 10K, you need to build endurance AND speed. It’s not gonna happen overnight, so plan on 8-10 weeks of training. Your body needs time to adjust.

You’ll be running 3 to 4 times a week. But don’t forget—cross-training and rest days are just as important for injury prevention and overall fitness. Here’s a breakdown of what a typical week might look like:

sub 1-hour 10K training plan

(pls don’t mind the little error in the image, I’ll be fixing it later)

Let me break down what this plan is all about:

  • Monday (Rest or easy run): Keep this light. If you’re running, aim for a relaxed pace. This is all about recovery and base-building.
  • Tuesday (Interval training): Speed work is key to hitting that sub-60 goal. Intervals push your VO₂ max and leg turnover. This means your body gets used to running faster, and you can hold a quicker pace over the full 10K.
  • Wednesday (Cross-training or strength): Think of this as a way to build overall fitness and prevent injury. Activities like cycling, swimming, or weightlifting can help you get stronger without overloading your legs.
  • Thursday (Tempo run): Here, you’ll work on your lactate threshold, which is the pace you can sustain without your legs screaming at you. This is where you’ll get a feel for your 10K race pace.
  • Friday (Rest or light cross-training): Listen to your body. If you’re feeling worn out, skip the run and do some light stretching, yoga, or another gentle cross-training activity.
  • Saturday (Easy run): This is all about keeping the legs moving and building mileage. Keep it easy, don’t push the pace, just keep it comfortable.
  • Sunday (Long run): This is where you build your endurance. Don’t worry about speed—just focus on running for longer periods, aiming to build up to 10-12K before race day.

Balancing Speed and Endurance Training for a Successful 10K

When you’re training for a 10K, it’s all about finding that sweet spot between speed and endurance. You need both to run faster and longer.

Here’s how each piece of the puzzle comes together:

Long Endurance Runs

These long runs are usually your weekend workouts when you’ve got more time to spare. You’ll hit 60 to 90 minutes per session.

Now, I know this sounds counterintuitive, but you’ve gotta keep it slow and steady. You might be thinking, “This feels way too easy.” But that’s the point.

Going slow helps you build your endurance and teach your body how to burn fat. It’s like building the engine that’ll carry you through the race.

As you get stronger, a 60-minute run will start to feel like a walk in the park.

Interval Training (Speed Work)

Speed work is all about short bursts of fast running, followed by recovery.

Here’s an example: 400-meter repeats on the track—one lap all-out, then jog a lap to recover.

This type of training works wonders for improving how efficiently your body uses oxygen when you’re pushing hard.

And don’t forget the mental side of things. Speed work teaches you to push through that discomfort of running fast.

You’ll start to get comfortable with that “I wanna stop” feeling, and that mental toughness will make a big difference in your 10K.

Tempo Runs (Threshold Runs)

Tempo runs are where you push yourself to hold a pace that’s tough, but you can sustain it. You’re shooting for a pace that’s 10-20 seconds slower than your race pace. So, if you’re aiming for 9:40 per mile, a tempo run might look like 10:00–10:10 per mile.

The goal here is to raise your lactate threshold. That’s the point where your muscles start screaming for mercy.

By pushing that threshold up, you’ll be able to run faster and longer without crashing. It teaches you to hold that hard pace and feel in control—just like you will on race day.

Easy Runs & Recovery

Not every run needs to be a killer workout. In fact, most of your weekly miles should be at a chill pace.

Easy runs and rest days are just as critical as speed work or tempos because they give your body the chance to recover and soak up all the hard work you’ve been putting in.

Cross-Training: Your Secret Weapon

When I first started training for races, I made the rookie mistake of thinking that more running was the answer.

But overtraining led to aches and injuries. Adding cross-training into my routine was a game-changer.

It kept me fit and helped me avoid burning out.

Cross-training can include cycling, swimming, rowing, or even hiking—anything that gets your heart rate up without the pounding impact of running. F

or example, going for a bike ride on a Wednesday will work your cardiovascular system, strengthen your legs, and give your running muscles a break.

Try to cross-train on 1-2 non-running days a week (like Wednesdays or Fridays). Just 30-45 minutes of moderate effort is great. But don’t overdo it—if you’ve had a tough spin class on Monday, keep your Tuesday run easy.

Pacing Strategy for a 10K: Run Smarter, Not Just Harder

When it comes to the 10K, your pacing strategy can make or break your race.

If you’re going for a sub-60, you’ll want to aim for around 9:39 per mile (or 6:00 per km) – that’s your target pace.

But the real trick is how you pace yourself over those 6.2 miles. Start smart, finish strong – that’s the goal.

  1. Practice Race Pace in Training

Before race day, make sure you’re getting used to that goal pace during your training. Toss in some tempo runs and interval workouts that match your 10K pace.

Think of it like this: doing a few 800-meter repeats at goal pace with short rest breaks.

This helps you get familiar with how that pace feels – so when it’s race day, it’s not a shock to your system.

Back when I was training for my first sub-60 10K, I was sure I’d never hit race pace in training.

But with enough effort and consistency, it felt like second nature by race day. Trust me – getting used to that pace in training is key.

  1. Start with a Plan for Splits

A pacing strategy isn’t just about pushing yourself to the max from the start – it’s about knowing when to hold back and when to give it everything.

For a 60-minute 10K, aim for a 5K split around 29:30. Your mile splits should stay around 9:39.

Don’t get obsessed with hitting that exact split every mile. Use the splits as a rough guide – but know it’s okay to have a little wiggle room. The real goal here is to avoid going out too fast and crashing, or running out of gas too soon.

When I first started planning my splits, I was obsessed with hitting every single one perfectly. Now I know: it’s about sticking to the plan and not getting greedy too early.

  1. Master the Negative Split

Here’s where it gets interesting: the negative split. That’s when you run the second half of the race faster than the first half.

Sounds wild, right? But trust me, it works.

You’ve got to start a little slower to keep some gas in the tank for the last stretch.

If you try to sprint out of the gate to “bank time,” you’ll likely crash and burn – hitting that dreaded wall.

A negative split strategy? That’s the one that helps you finish strong and sometimes even faster than you planned.

Let me give you an example breakdown for a ~59-minute 10K:

  • Mile 1: ~10:00 (Warming up, easy pace)
  • Mile 2: ~9:50 (Getting into the groove)
  • Mile 3: ~9:40 (At goal pace, feeling good)
  • Mile 4: ~9:30 (Pushing a bit now)
  • Mile 5: ~9:15 (Feeling confident, ramping up)
  • Mile 6: ~9:10 (Giving it everything in that last mile)
  • Last 0.2: ~:**50 (Time to kick it into gear and finish strong!)

The principle here is simple: start controlled, finish strong. I used to think I needed to push hard from the start, but once I tried a negative split, it changed my whole race.

  1. Use Markers and Mental Cues

During the race, those mile (or kilometer) markers are your checkpoints. They’re perfect reminders to check in with yourself and stick to the plan.

Early on, I always tell myself, “Slow down, we’ve got a long way to go.”

Around the middle, I remind myself, “This is it, keep this pace and stay on track.”

By the end, it’s all about digging deep: “Alright, let’s finish this thing!”

Some runners break the race into smaller sections – maybe 0-5K is about staying controlled, 5K-8K is about maintaining, and then that last 2K? That’s your chance to give it everything you’ve got.

  1. Don’t Forget the Warm-Up

A proper warm-up is crucial for a race like the 10K. Get in a light jog and throw in some dynamic stretches – think leg swings, lunges, whatever wakes up the legs. Spend about 10 minutes warming up, and make sure you’re ready to hit that goal pace right from the start.

But don’t overdo it. Keep the warm-up easy, with maybe a couple of short accelerations to get your legs firing. You don’t have time to ease into it – you’re going to be at race pace fast, so be prepared.

Race Day Fueling:

A 10K race is pretty straightforward when it comes to fueling.

Day Before:

You don’t need to go all-out on carb-loading like you might for a marathon, but you should still make sure your meals the day before have a decent amount of carbs – about 50-60% of your calories.

Pasta for dinner or extra rice throughout the day will do the job.

Skip anything too fibrous, spicy, or greasy in the 24 hours before the race – you don’t want stomach issues on race day. And of course, hydrate well. Your urine should be a light straw color by evening. That’s a good sign you’re on track.

Morning of:

Get a familiar breakfast in about 1.5–2 hours before the race.

Something that’ll give you energy without sitting heavy in your stomach.

A piece of toast with peanut butter and a banana, or oatmeal with some fruit, works well for me.

Keep sipping water or a sports drink, but stop about 30 minutes before the race starts to avoid that sloshing feeling. And don’t forget to hit the bathroom – you’ll feel better once that’s out of the way.

During the 10K:

You don’t need to eat during a 10K – your body has enough energy stored to fuel you for the race.

If you’ve had a good dinner the night before and breakfast on race morning, you’re set.

But hydration is still important. Make sure to grab water at least once during the race. Most races have water stations around the 5K mark.

Just grab a cup, take a few sips (sip, don’t gulp), and keep moving. If it’s hot or you’re a heavy sweater, you might want a sports drink for the electrolytes, but water usually works just fine for a 10K.

If you think you’ll take longer than 90 minutes to finish (or if you didn’t eat much before), have an energy gel on and take it around 30–40 minutes in. But honestly, most runners won’t need it.

After the Race:

You did it! Time to celebrate, but before you collapse in a pile of joy, try to follow the 3 R’s of recovery in your next meal or snack:

  • Rehydrate – water or a sports drink.
  • Refuel – get some carbs back in with a bagel or fruit.
  • Repair – get some protein to help your muscles recover.

You can keep it simple with a banana and some water, then grab a bigger meal within 1–2 hours. Maybe that burger or pizza you’ve been dreaming about? That’ll help reduce soreness and get you ready to run again soon.

The Mental Game and Crossing the Finish Line

Training for a sub-1-hour 10K isn’t just about pounding the pavement—it’s a mental battle, too.

You’re gonna hit some rough patches.

Trust me, I’ve been there—doubt creeps in, motivation dips, and the body just doesn’t seem to cooperate some days.

And that’s totally normal. But here’s the thing: developing mental toughness is just as important as getting the right miles in.

It’s the thing that’ll help you push through when your legs feel like they’ve been hit by a truck and get you across that finish line strong.

Mini-Goals for Motivation

Instead of just staring down the big 60-minute goal, break it down into smaller, bite-sized wins. This isn’t about hitting the big number right out of the gate. Celebrate when you hit your first 5-mile run.

Or maybe you manage to stick to your training schedule and run 3 times a week consistently.

How about improving your 5K time?

Every time you knock out one of these mini-goals, you’re gonna feel a boost in confidence.

Trust me, keeping track of your progress—whether on an app or a good old training log—helps so much. Just seeing how much farther or faster you’re running than a month ago? That’s pure motivation.

Embrace the Tough Runs

Look, not every run’s gonna feel like you’re cruising on cloud nine.

I’ve had mornings when getting out of bed was the hardest part of my day.

You’re gonna have runs where your legs feel heavy or you feel like you’d rather just snooze the alarm than get up and move.

But here’s the secret: those tough days?

They make you stronger—mentally and physically.

Every time you push through, you’re telling yourself, “I don’t quit when things get hard.” That’s the kind of mentality that’s gonna carry you through those last miles of your 10K.

But remember, listen to your body.

Pain’s one thing, but if something sharp or serious starts up, it’s time to rest.

Training’s about consistency, not trying to be perfect every time.

Visualization and Mental Rehearsal

Before race day, take a few minutes each day to visualize your success.

Picture yourself at the starting line—feeling calm, excited, and ready.

Imagine hitting your target splits and keeping your pace steady. And then, see yourself crossing the finish line with that clock ticking past 59 minutes.

I know, it sounds kind of cheesy, but trust me—it works. A lot of athletes do this to mentally prepare, and it’s a great way to get your brain in gear before the big day.

Race Day Nerves

So, it’s race morning. You’ve done the work, but that nervous energy is still there. That’s totally normal. A little bit of nerves means you care about hitting that goal. Use it. Turn those nerves into excitement.

Stick to your usual pre-race routine—get your breakfast in, do your warm-up, and remind yourself you’ve got this.

You’ve done the hard work, and now it’s time to let it show. Sometimes, that nervous adrenaline can even give you a bit of a boost. When the gun goes off, take a deep breath, smile, and enjoy the ride. You’ve earned this.

The Final Stretch

Okay, this is the tough part. Your legs are on fire, your lungs feel like they’re going to explode, and every part of your body is screaming for you to slow down.

But this is where you dig deep. You’ve been through harder stuff in training. Think back to those brutal workouts you crushed or focus on a runner ahead that you’re gonna pass.

When you’re just meters from the finish and you see “59:xx” on the clock, give it everything you’ve got.

That moment of pure exhaustion will turn into pure adrenaline. When you cross that line, it’s not just about the time.

It’s about every single training session, every tough run, and every bit of growth that got you there. Take a second to soak it in. The pride and joy you feel when you finish—there’s nothing like it.

FAQ: Running a Sub‑1‑Hour 10K

Q1: What pace do I need to run a 10K in under 1 hour?

To break the 1‑hour 10K barrier, you need to hold an average pace of 6:00 per kilometer, or roughly 9:39 per mile. That means every kilometer counts—so consistency is key, not just speed bursts.

Q2: How should a beginner train for a sub‑1‑hour 10K?

Start with a smart mix of easy runs, intervals, and tempo sessions—gradually increasing both pace and mileage. For example:

  • Easy runs for endurance

  • Intervals (e.g., 4×800 m) for speed

  • Tempo runs (20–30 min near goal pace) for stamina
    Keep the 10% rule in mind and build your base steadily.

Q3: How long does it take to run a sub‑1‑hour 10K?

With 3–5 quality runs per week—including one tempo session and interval work—many beginners can hit a sub‑1‑hour 10K within 8–12 weeks. Your starting fitness level will guide the exact timeline.

Q4: Can I run a 10K under 1 hour every day?

Running at goal pace daily is highly taxing. Instead, aim for 3–4 hard-paced sessions per week, with rest or easy days in between. Recovery is essential for building strength and avoiding injury.

Q5: How many weekly miles should I run to aim for sub‑1‑hour?
Most training plans suggest 25–35 miles (40–55 km)/week, giving you enough volume to support speed work without burning out.

Q6: What’s a good workout to improve pace for a sub‑1‑hour 10K?

Try interval workouts like 5×1 km at 5:45/km pace, with 2–3 min recovery jogs. This sharpens your race pace and helps your body get used to the effort.

Q7: Should I include long runs when training for sub‑1‑hour?

Yes! A weekly long run of 10–12 miles (16–19 km) at an easy pace builds endurance and aerobic foundation—crucial for maintaining pace in the final kilometers.

Q8: How important is tempo running for reaching 1‑hour?

Tempo runs are essential—they teach your body and mind to sustain faster efforts. Include 20–30 minutes at just slower than goal pace once per week.

Q9: What signs mean I’m progressing too fast or slow?

Progress is good—but watch for stiffness, nagging aches, or stalling times. If you feel flat every run, ease back. If your tempo efforts feel easier over weeks, you’re on the right track.

Q10: What should I do in the week leading up to a sub‑1‑hour 10K?

During taper week, reduce mileage by 20–30%, keep workouts short and sharp, hydrate well, and prioritize sleep. Then trust your training and go for it!

What challenges are you working through?

Drop a comment—I’d love to hear your story. And hey, if you’ve got a friend chasing their own 10K PR, share this guide with them. Let’s help each other out. See you out there on the roads—and at that sub-60 finish line!

How to Train For Your First 8K: Plans & Expert Tips

How to Train For Your First 8K

So, you’ve signed up for your first 8K—awesome!

This race is just shy of 5 miles (4.97 miles, to be exact), and it’s the perfect distance to push your limits without jumping straight into a 10K.

It’s that sweet spot for runners who want something a little more than a 5K but aren’t quite ready for the big league yet.

Let’s get to it.

How Far is an 8K?

As I have already mentioned, an 8K is about 4.97 miles.

Yeah, just under five miles. When I first started pushing past 3 miles, that “extra” distance felt like running a marathon.

But once I hit my stride, 5 miles didn’t seem so bad at all. It just takes the right training, and suddenly, that distance feels more like a challenge you can totally conquer.

My first time running more than 3 miles. I was thinking, “Okay, this is a big deal.” But guess what? It wasn’t as tough as I thought.

The secret? A solid plan and sticking with it. That extra distance? Not as intimidating as I made it out to be. It was all about switching my mindset from “I don’t know if I can do this” to “I’m going to crush this.”

Training for Your First 8K

When I trained for my first 8K, I didn’t follow some rigid plan.

Here’s what worked for me:

  • Long runs to build endurance
  • Interval training to work on speed
  • Tempo runs to maintain a steady pace without burning out

I kept it simple, not overcomplicating things.

I listened to my body—sometimes pushing myself, sometimes giving myself extra rest.

Some weeks I needed more recovery, other weeks I felt strong enough to push harder. This flexibility helped me stay consistent without burning out.

Key Workouts: What Helped Me Most

For me, tempo runs and intervals were the foundation of my training. Tempo runs helped me build the ability to keep a strong, steady pace. It’s not about going all-out—it’s about hitting a rhythm that feels tough but doable.

Usually when I’m doing a tempo run, I’m pushing myself to a challenging pace, but still being able to talk. By the end, I feel tired, but it that good kind of tired. This always helps me on race day.

What’s more?

Intervals. Yes, they are brutal but they deliver. Short bursts of effort followed by recovery—those intervals got me faster and taught me how to recover quickly.

I’d push hard for a couple of minutes, then jog or walk to catch my breath, and repeat. They always make a huge difference in how fast and strong I feel.

Weekly Training Plan: A Simple Approach

I don’t want to sound like a broken record but here’s again how I broke down my weekly training:

  1. Long Run: I built up to 5-6 miles each week, focusing on endurance. This was my “big” run of the week.
  2. Speed Work/Intervals: One or two shorter, faster runs to boost my pacing for the race.
  3. Tempo Run: A steady-paced run to practice pacing and build confidence for race day.
  4. Cross-Training: I didn’t just run—I did strength training (squats, lunges, planks) and swam to keep my body strong and injury-free.

I didn’t run every day. Rest days or easy cross-training were key. Don’t skip those rest days—they’re just as important as your workouts.

Building Your Weekly Training Plan

Aim for 3-4 runs each week, with at least one rest or cross-training day between them.

Every week, make one run longer than the others (your “long run”). Start small—maybe 3-4 miles for your long run, and then add 1 mile each week. But remember, don’t increase your mileage by more than 10% each week! Here’s an example of how to build up:

  • Week 1: Easy runs of 1.5 miles, 2 miles, and 2 miles.
  • Week 2: Build to 2 miles, 2 miles, 3 miles.
  • Week 3: 2.5 miles, 2.5 miles, 3 miles.
  • Week 4: 2.5 miles, 3 miles, 4 miles.
  • Week 5: 3 miles, 3 miles, 4 miles.
  • Week 6: 3 miles, 3 miles, 5 miles (about race distance).
  • Week 7: 3 miles, 3 miles, 6 miles (bonus confidence).
  • Week 8: Taper with shorter runs (e.g., 4 miles, 3 miles, 2 miles), then race day!

By Week 6-7, your long run should be around 5 miles, so you’re ready to rock race day! On non-running days, rest or try low-impact cross-training like biking or swimming. And listen to your body—don’t run hard two days in a row. Recovery is key!

Easy Runs, Long Runs & Pace

Most of your runs should be easy—think conversation pace. Keep that easy pace at about 60-65% of your max heart rate. These relaxed runs help build your aerobic fitness and keep burnout or injury at bay.

Your long run should be easy too—it’ll gradually get longer, but it’s all about steady effort. Some coaches recommend peaking a bit above race distance (6-7 miles) for a confidence boost, but do what feels right for you.

When your long run day comes, treat it like this: start at a comfortable pace—don’t go out sprinting! Just keep moving. The goal isn’t to hit a specific speed; it’s to finish strong.

Tempo Runs & Intervals (Speedwork)

As you get stronger, add one tempo run or interval workout per week to increase speed:

  • Tempo Run: After a 10-15 minute easy warm-up, run 15-20 minutes at a “comfortably hard” pace—about 25-30 seconds slower than your 5K pace. Cool down with another 10 minutes of easy running. This is a solid, challenging effort that helps teach your body how to sustain a faster pace for longer.
  • Interval Workout: Warm up with 1 mile easy, then do short bursts at your goal 8K race pace. For example, run hard for half a mile (or 3-4 minutes), then jog or walk easy for 2 minutes. Repeat 3-5 times, then cool down with 1 mile. These intervals train your legs to handle race pace and build speed endurance.

Cross-Training & Strength

Cross-training is your secret weapon to stay strong and injury-free. Add 1-2 cross-training sessions each week, especially on rest days. Try cycling, swimming, the elliptical, or even a brisk walk. These activities boost cardio fitness without adding extra impact on your legs.

Also, make sure you’re doing strength training 2-3 times a week. No need to hit the gym for heavy lifting—bodyweight exercises like squats, lunges, and planks after a run are perfect. Strength training helps improve your running efficiency and reduces the risk of injury. It’ll make you feel stronger and more powerful on the road.

And don’t forget recovery. Take at least one full rest day each week. Foam-roll tight muscles, stretch gently after runs, and get plenty of sleep and hydration. Your body needs to rebuild, especially as the mileage increases.

Recovery: The Key to Avoiding Injury

Here’s one of the best lessons I learned during my training: focus on recovery. I used to think I needed to run more to get better, but all I got from that was burnout and sore muscles. Once I started embracing rest, everything started to fall into place.

On rest days, I didn’t just sit around—I stretched, foam-rolled, and sometimes did some light swimming to keep the blood flowing without the pounding of running. My muscles needed time to repair, and recovery allowed me to push harder the next week.

Cross-Training: Why It’s Crucial

If you’re only running, you’re missing out. Cross-training was a game-changer for me. Strength training helped me build the muscles I needed to run more efficiently, while swimming and cycling gave me a cardio boost without adding more stress to my legs. A little variety went a long way, keeping me injury-free and preventing fatigue from all the pavement pounding.

Race Day Strategy: Stick to What You Know

I have one simple rule for race day: Don’t try anything new. I wore the same shoes, used the same gear, and ate the same breakfast I had during training. It’s easy to get caught up in the excitement, but sticking to what works makes all the difference.

By race day, you should know exactly what works for you. Wear the same shoes and clothes you’ve trained in, and fuel up with a breakfast that you know sits well with you (like oatmeal or a banana, 2-3 hours before). Warm up with a few easy strides.

When the race starts, take it easy. It’s tempting to sprint off with the crowd, but resist!

Start at a controlled pace that feels comfortable—like you could chat with a friend. Use your run/walk plan if you’ve practiced it. Then, if you’re feeling strong in the last 1-2 miles, give it a little gas.

Aim for a negative split (run the second half faster than the first).

And remember, the win is crossing that finish line. Even if you have to slow down at the end, finishing is the real victory.

FAQ: Training for an 8K Race

Q1: How long does it take to train for an 8K?

Most beginners can get ready for an 8K in 6 to 8 weeks with consistent training. The key is gradual mileage increases and balancing easy runs with rest days.

Q2: What is a good training plan for a first 8K?

A solid 8K training plan includes easy runs, cross-training, and progressive mileage builds. Include rest days and occasional speed workouts to build confidence and stamina.

Q3: How many miles is an 8K run?

An 8K run is approximately 4.97 miles, making it a fun challenge for runners ready to go beyond the 5K distance.

Q4: Can I train for an 8K if I’m new to running?

Absolutely! Even beginners can tackle an 8K by following a structured, gradual plan that balances running and rest, while focusing on building endurance safely.

Q5: How many days a week should I run when training for an 8K?

Most beginners benefit from 3 to 4 running days per week. This allows enough training volume while keeping injury risk low.

Q6: Should I include cross-training in my 8K plan?

Yes—cross-training like cycling, swimming, or strength training can boost overall fitness and reduce injury risk.

Q7: What pace should I aim for in an 8K race?
It depends on your fitness level, but many beginners target a steady, conversational pace, gradually building speed as fitness improves.

Q8: How do I stay motivated during 8K training?

Set small goals each week, run with friends or groups, and celebrate milestones along the way. Staying consistent is key.

Q9: What gear do I need for 8K training?

Comfortable, supportive running shoes, moisture-wicking clothes, and a reliable watch or app to track mileage and pace. Don’t forget water for hydration.

Your Turn: Share Your 8K Journey!

I want to hear from you! What’s your 8K goal? Have you started training yet, or are you about to? Drop your thoughts and questions below—let’s keep this conversation going. Whether you’re just starting or you’ve been running for a while, let’s motivate each other as we work towards our goals.

Remember, you’ve got this. One step at a time, one run at a time. Before you know it, you’ll be crossing that 8K finish line with a big smile on your face.

Happy running!