The Power of Walking: A Comprehensive Guide to Health and Fitness

start walking

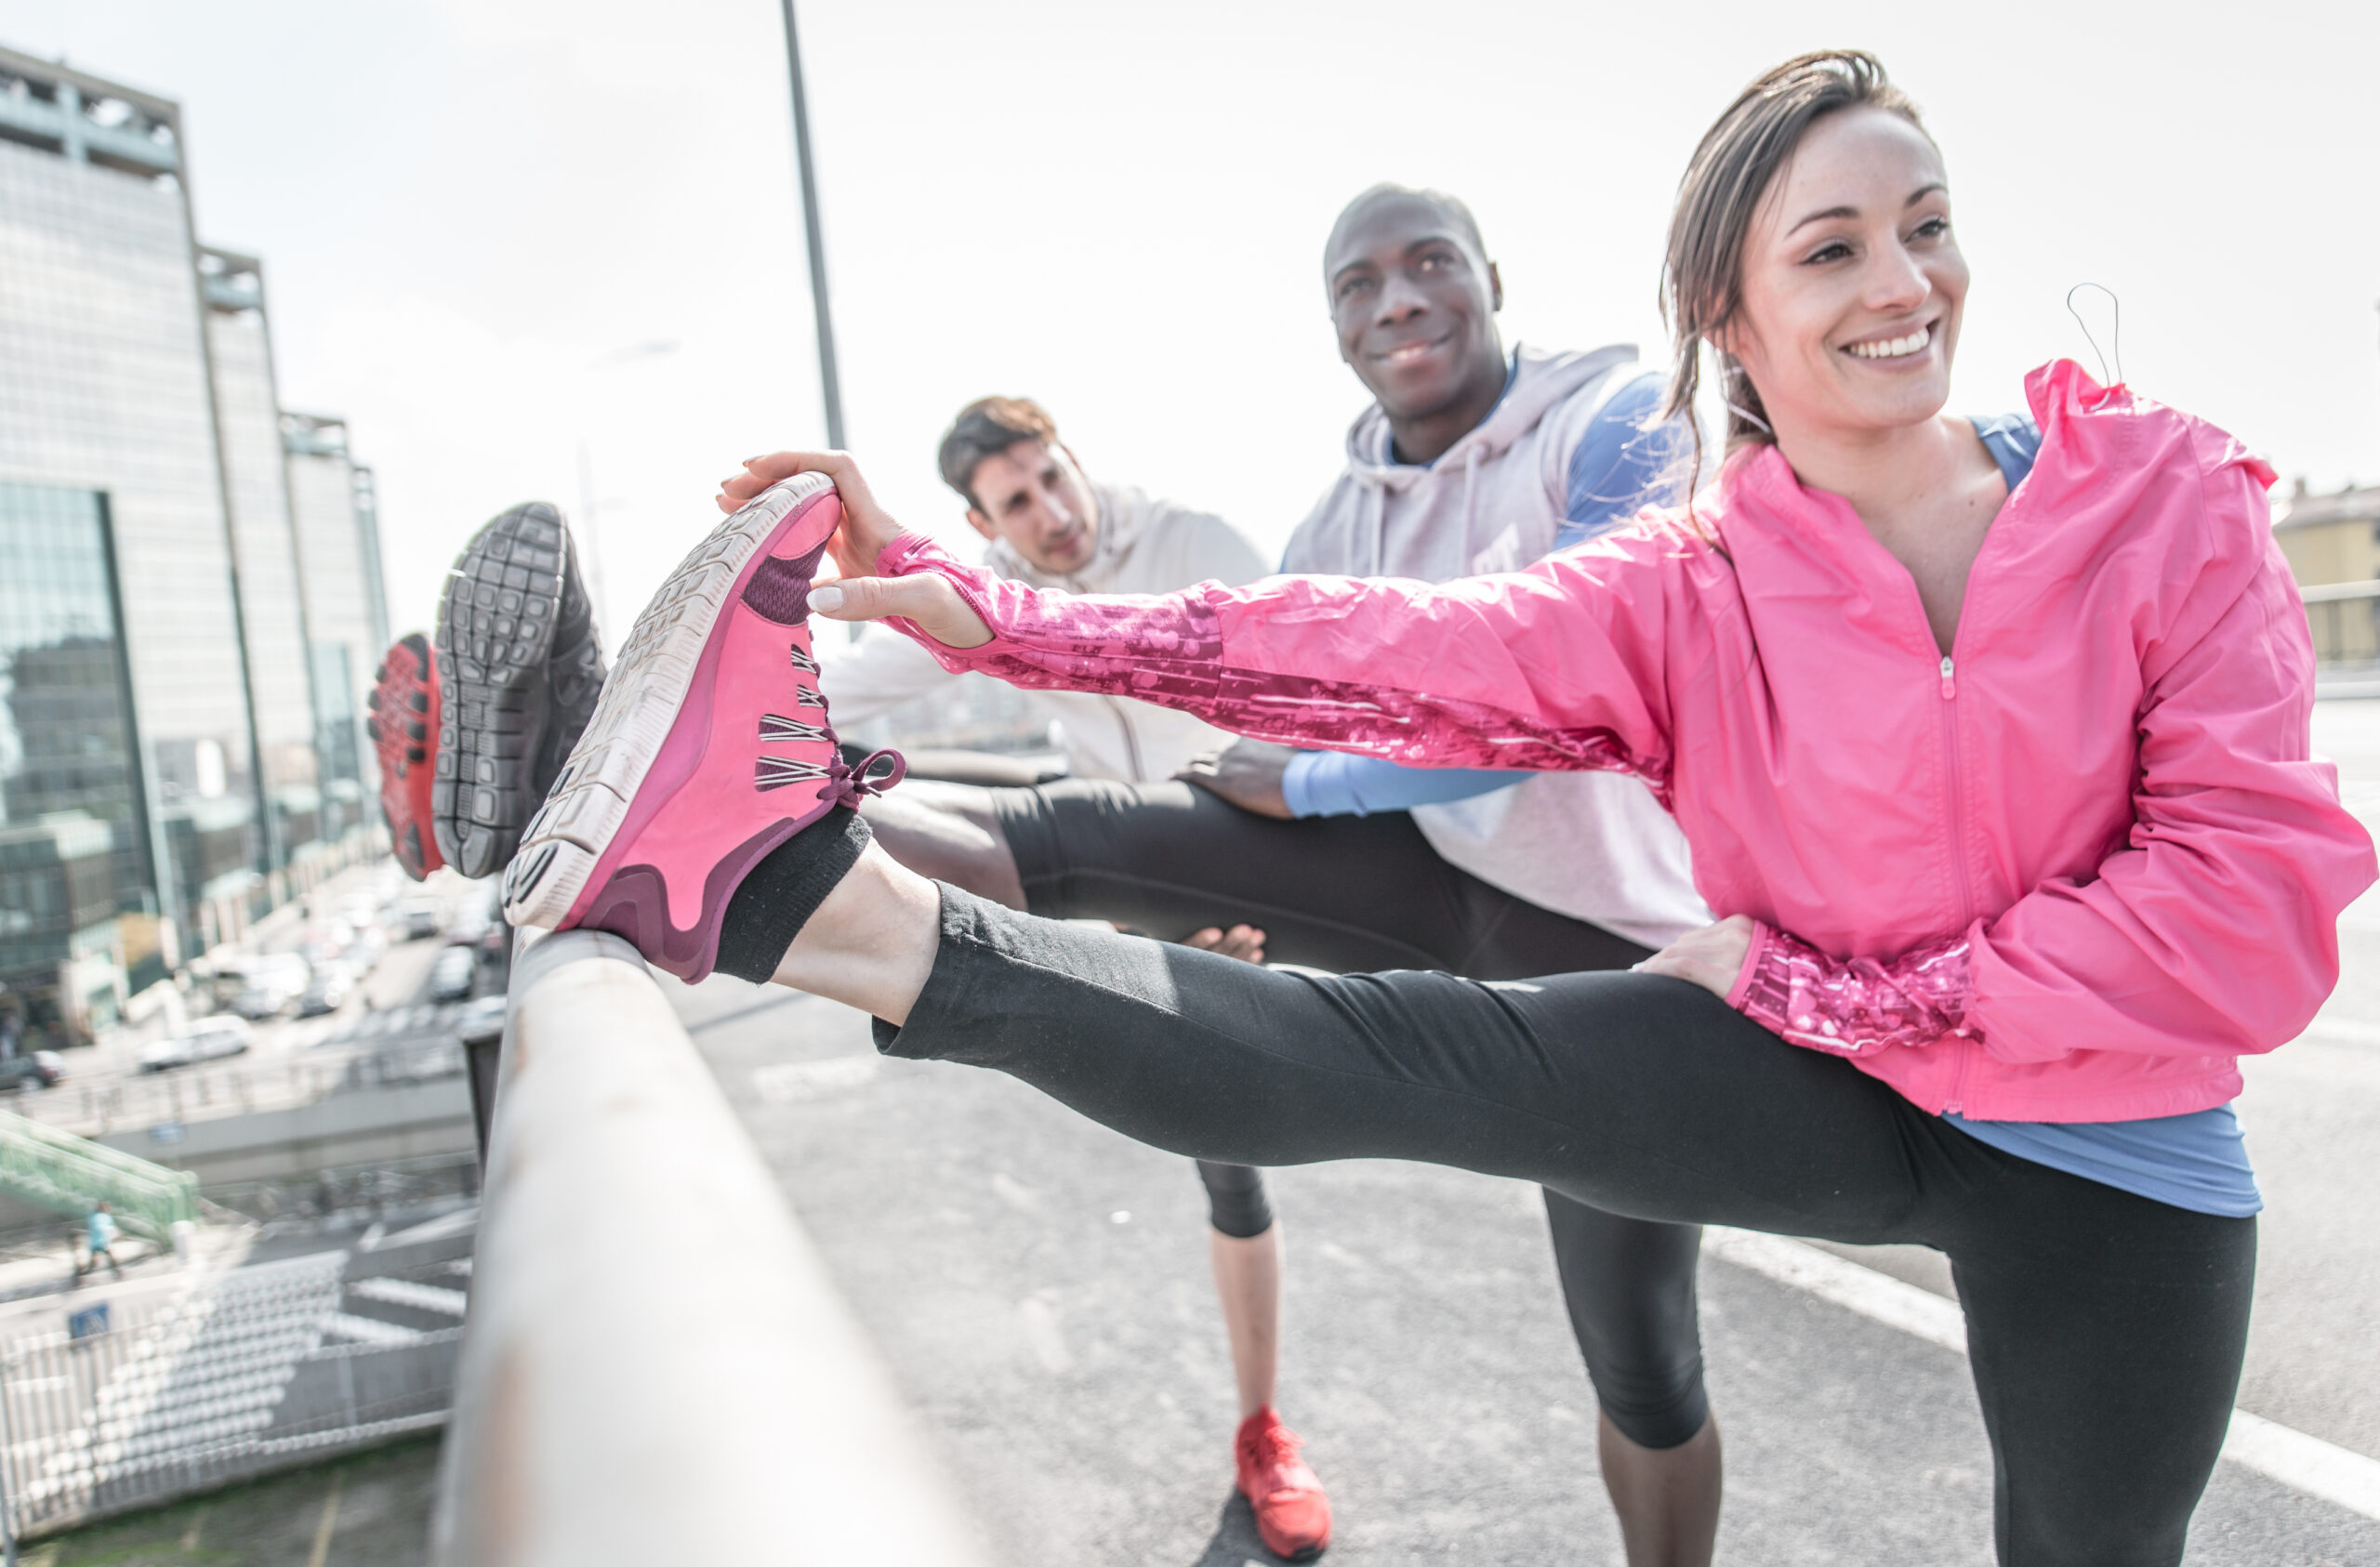
Walking is a fantastic choice for improving your fitness and health and even working towards weight loss. It’s a low-impact, accessible exercise that can be tailored to your individual needs and goals. I’m here to guide you on your journey to becoming a healthier and more active you.

Before we dive into the details, it’s essential to emphasize safety and individual health considerations. Consulting with your doctor, especially if you have specific health concerns or conditions, is a smart and responsible first step. They can provide personalized advice to ensure that walking is a safe and suitable exercise for you.

Now, let’s get started on this exciting path to better health and fitness through walking!

Whether you’re a beginner or looking to take your walking routine to the next level, I’ve got you covered.

The Benefits of Walking

Walking is a powerhouse of exercise with a plethora of benefits for both your physical and mental well-being.

Let’s dive into some of these fantastic advantages:

  • Weight Management: Walking can help you shed those extra pounds and maintain a healthy weight. It’s a sustainable way to burn calories and boost metabolism.
  • Improved Stamina: Regular walking builds endurance, allowing you to take on more extended and more challenging walks over time.
  • Stress Reduction: Walking is an excellent stress reliever. It helps clear your mind, reduces tension, and promotes relaxation.
  • Health and Well-being: The health benefits are numerous, including reduced risk of heart disease, stroke, and certain cancers. It’s also known to lower blood pressure and cholesterol levels.
  • Mental Health: Walking is a mood booster. It releases endorphins, which are natural mood lifters and can help combat symptoms of depression.
  • Brain Health: It’s like a workout for your brain, too! Walking has been linked to improved cognitive function, memory, and creativity.
  • Low-Impact Exercise: Unlike high-impact exercises, such as running, walking is gentle on your joints while still providing an effective workout.

Consult Your Doctor

Before you lace up those sneakers and hit the pavement, let’s talk about a vital step that’s often overlooked: consulting your doctor.

Why, you ask? Here’s the scoop:

Cardiovascular Concerns:

If your family tree has a few branches dedicated to heart issues or you’ve had heart problems yourself, it’s like having a red flag that says, “Talk to your doctor!” Cardiovascular diseases can impact your ability to exercise safely.

Emerging from Hibernation:

Have you spent more time on the couch than you’d like to admit? Well, you’re not alone. But before you go from couch potato to marathoner, consider a pit stop at your doctor’s office. They can help you ease into a new routine without any hiccups.

The Lightheaded Club:

Are you the president of the “I Often Feel Dizzy” club, or do you have a VIP membership in the “Chronic Headache” association? These symptoms can be your body’s way of saying, “Hold on, let’s check this out.”

Wisdom of Age:

If you’ve celebrated a few 60th birthdays or more, your body may have some special needs when it comes to exercise. Your doctor can help tailor a plan that keeps you feeling youthful.

Medical Marvels:

Conditions like diabetes, high blood pressure, chest pain, or joint problems can be tricky when combined with exercise. Let your doctor be your health hero and create a plan that works for you.

The Mom-To-Be:

If you’re expecting, congrats! Now’s the time for some gentle guidance on the dos and don’ts of exercising while pregnant. Safety first, for you and your little one.

Recovery Mode:

If you’ve been on the injured list or recently played host to a surgical procedure, your doctor can give you the green light to get back into the swing of things safely.

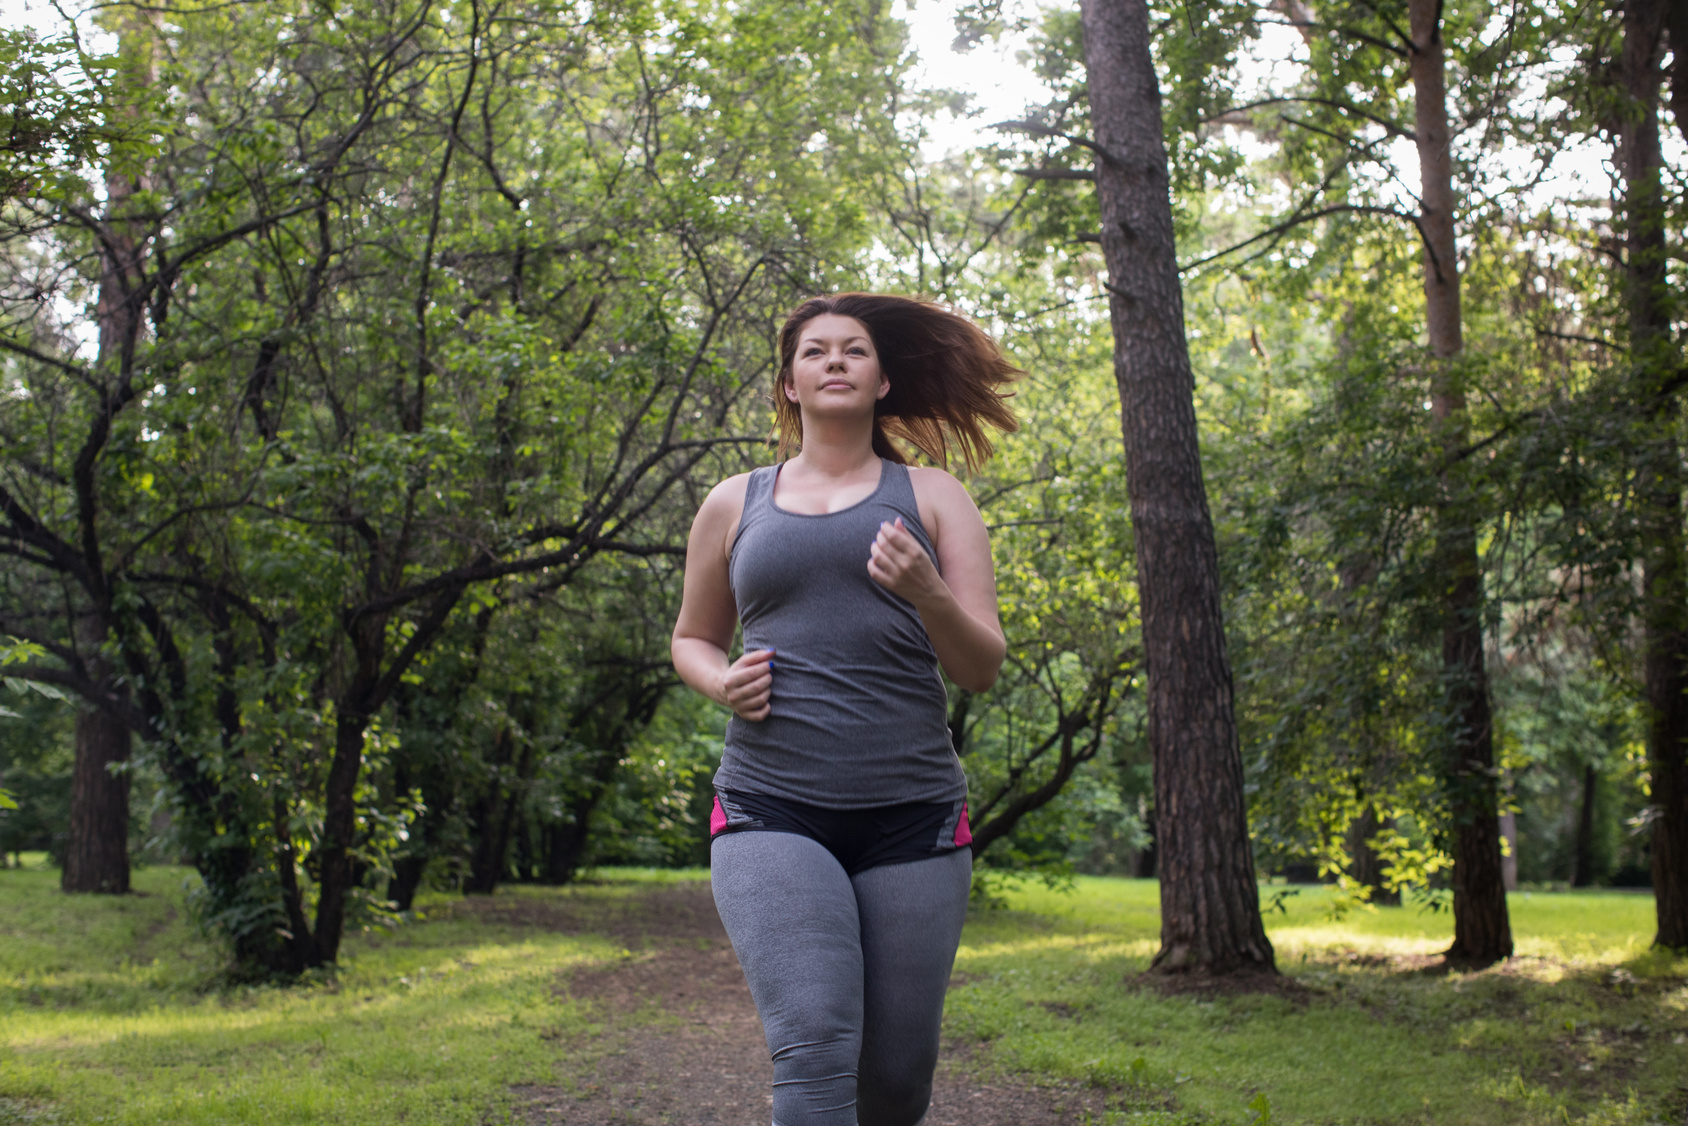
How to Start Walking For Beginners?

So, you’re all geared up to embark on your walking journey, but you’re wondering, “Where do I begin?” Fear not, because the path to becoming a seasoned walker is simpler than you might think. Here’s your guide:

Start Small:

Picture this: You’re in the comfort of your home, ready to take on the world of fitness. But here’s the secret – you don’t have to conquer it all at once. Begin with a gentle introduction. Walk out that door and aim for a short 15 to 20-minute stroll.

Here’s how to walk 10000 steps everyday.

Listen to Your Body:

Your body is your best friend on this journey. Pay close attention to how it feels during and after your walk. If you’re feeling great, you’re doing it right!

The Gradual Climb:

Just like climbing a hill, your walking routine can gradually ascend. During the second week, extend your walks to 25 to 35 minutes. Slow and steady wins the race!

Here’s your guide to step count in one mile running vs walking.

Set Goals:

As you continue your walking escapades, set personal goals. Maybe you want to reach 10,000 steps a day, or perhaps you’re looking to explore new walking routes. Goals keep things exciting!

Step by Step:

Week by week, keep adding more time to your walks until you reach your desired duration. Whether you aim for a leisurely stroll or a brisk power walk, it’s all about what feels right for you.

Additional resource – How to combine keto and running

What’s the Ideal Walking Quota?

You might be wondering, “How many steps should I aim for?” Well, the magic number, according to experts, is 10,000 steps a day. That’s the golden ticket to maintaining fitness and overall health. But what does that look like?

Picture this: 10,000 steps translate to roughly four to five miles of walking. Impressive, right?

Now, here’s the exciting part – you’re not limited to 10,000 steps! If you feel like you can conquer more, go for it. But here’s the catch – always, always listen to your body. It’s like your walking compass, guiding you in the right direction.

If at any point it feels like you’re pushing too hard, don’t hesitate to slow it down. Recovery is just as important as those steps. So, stride at your own pace, and enjoy the journey!

How Fast Should Beginners Walk?

So, you’re all set to embark on your walking journey, but you might be wondering, “How fast should beginners walk?”

Well, here’s the scoop!

To maximize the benefits of your walking exercise, aim for a brisk pace that puts you in the realm of moderate-intensity walking. This sweet spot is where the magic happens, health-wise.

Here’s how you’ll know you’re hitting the mark:

  • You should be able to chat comfortably without straining your vocal cords.
  • Your breathing should be a tad heavier than usual, but not to the point where you’re huffing and puffing.
  • Your pace should be around 3 to 4 miles per hour, which is like walking with a purpose!

Additional resource – How long does it take to walk five miles

How to Progress?

So, you’ve got the hang of regular walking and want to take it up a notch? Fantastic!

Here’s a simple progression plan to keep you on the right track:

  • Weeks 1-2: Walk for at least 15-20 minutes three times a week. Get comfortable with the routine.
  • Weeks 3-4: Bump it up to four times a week. Your body is getting used to the groove.
  • Week 5 onwards: Aim for five times a week. You’re becoming a walking champ!

And if you find yourself walking for over an hour without breaking a sweat (figuratively, of course), consider adding some brief jogging intervals to spice things up. It’s a great way to challenge yourself and keep boredom at bay.

Remember, the key is gradual progression. Your journey towards better health and fitness is all about consistency and listening to your body.

Make it more Challenging

Do you feel like your walking routine needs a little extra oomph?

Here are some fun ways to make your walking sessions more challenging:

  • Backpack Boost: Strap on a backpack filled with 10 to 15 pounds of weight. It’s like leveling up in the world of walking!
  • Power Arms: Grab some light hand weights and swing those arms as you walk. It’ll give your upper body a great workout.
  • Beach Strolls: If you’re near the coast, try walking on the beach. The uneven sand surface makes every step more engaging.
  • Hill Climbing: Add some inclines or stairs to your regular route. Climbing hills can do wonders for your legs and stamina.

Additional resource – Average time to walk a mile

Improve Your Walking Form

Walking may seem simple, but good form is essential for efficiency and injury prevention.

Here’s a quick checklist to make sure you’re walking like a pro:

  • Posture Perfect: Stand tall with your feet hip-width apart. Imagine a string pulling you gently upward from the crown of your head.
  • Footwork: Land softly on your heels, then roll through the foot and push off with your toes. Avoid excessive inward or outward rolling of your feet.
  • Eyes Forward: Keep your gaze straight ahead, like you’re on a mission. Your chin should be parallel to the ground, and your neck should be in line with your spine.
  • Shoulder Ease: Relax your shoulders and let them hang naturally. No need for them to visit your ears.
  • Arms in Sync: Swing your arms back and forth rhythmically. It’s like dancing while walking!
  • Engage Your Core: Keep your core muscles gently contracted by pulling your navel toward your spine. This not only helps your posture but also gives your abs a mini workout.
  • Step It Up: Take quicker, smaller steps rather than long strides. It’s more efficient and easier on your joints.
  • Ninja Steps: Imagine you’re a stealthy ninja. Walk quietly and smoothly, avoiding heavy foot slaps.

Additional resource – How to find cheap running gear

Walking Safely

Walking is a fantastic exercise, but safety should always be a priority.

Here are some essential safety tips to keep in mind:

  • Choose Sidewalks: Whenever possible, opt for sidewalks instead of walking on the road. After all, you’re a pedestrian.
  • Carry Essentials: Don’t forget your phone, ID, and a bit of cash when you head out for your walk. It’s better to be prepared.
  • Let Someone Know: Inform a friend or family member about your walking plans, including where and when you’ll be walking. It’s a safety net.
  • Face Traffic: When walking on the streets, face oncoming traffic. This gives you better situational awareness and safety.
  • Stay Visible: If you’re walking in low-light conditions, wear reflective clothing or carry a flashlight. Being visible is crucial.
  • Confident Strides: Walk with confidence, like someone who knows where they’re going. It’s a great deterrent.
  • Keep It Simple: Leave valuable jewelry and flashy items at home. Better safe than sorry.
  • Use Your Voice: If you ever feel threatened, don’t hesitate to yell for help. Attackers don’t like attention.

Additional resource – How to start exercising with your dog

How To Start Walking For Fitness – The Conclusion

There you have it.

Today’s article should provide you with all the tools you need to get started with walking in no time.

The rest is really up to you.

Please feel free to leave your comments and questions in the section below.

In the meantime, thank you for dropping by.

Keep Walking Strong

David D.

How to Set Fitness Goals

fitness goals

Are you ready to kick your workout routine up a notch and unleash your full potential?

Well, you’ve stumbled upon the perfect starting point on your fitness journey. Get ready to dive into the exhilarating world of goal setting!

We all know that setting goals is a crucial step towards achieving greatness, whether you want to sculpt those muscles, shed some pounds, conquer a marathon, or simply boost your overall well-being.

But hey, I get it. Figuring out where to begin can be a bit overwhelming. That’s why I’m here to guide you every step of the way.

In today’s article, we’re going to unravel the secrets of effective goal setting that will transform your fitness game. Trust me, by the time you finish reading, you’ll be equipped with all the knowledge you need to conquer your aspirations and sculpt the body of your dreams.

So, what exactly are fitness goals? Why are they so darn important? How do you set the right goals that will ignite your motivation and keep you going? We’ll explore it all! From understanding the difference between short-term and long-term goals to finding the perfect balance and assessing your progress along the way, we’ve got you covered.

But wait, there’s more! I’ll also share some inspiring examples of proper fitness goals that will ignite your inner fire and get those endorphins pumping.

Let’s do this!

Why Set Fitness Goal?

Setting fitness goals is like unlocking a treasure trove of benefits that will make your fitness journey even more rewarding.

In its simplest form, a fitness goal is like a destination you set for yourself in the vast landscape of physical training. It’s that specific target or test you strive to achieve within a designated time frame. It’s like having a compass guiding you towards your ultimate fitness triumph.

Think about it as a roadmap for success. You identify what you want to improve or accomplish, and then you embark on a journey to make it happen. It’s about embracing your inner athlete and unleashing your full potential.

And let me tell you, if you’re already on the health-conscious path, chances are you’re no stranger to setting fitness goals.

Maybe you’ve been dreaming of shedding those extra pounds, sculpting those muscles, or even engaging in a friendly competition. Perhaps your goal is to lower your blood pressure and improve your overall health. The possibilities are endless! It’s all about discovering what ignites your passion and then channeling that energy into actionable steps.

Why You Should Be Setting Fitness Goals

First off, let’s talk about accountability. When you set fitness goals, you’re essentially putting yourself in the driver’s seat of your own success. Research studies have shown that setting goals increases motivation and helps you stay committed to your fitness endeavors. It’s like having a personal coach pushing you beyond your limits, helping you break through barriers, and paving the way for a stronger, fitter you.

Think of your fitness goals as stepping stones on the path to greatness. They challenge you to go beyond what you thought was possible, expand your horizons, and redefine your limits. It’s like discovering that there’s a whole universe of potential within you just waiting to be unleashed. So, embrace those temporary discomforts, push through those challenging moments, and witness the incredible transformation that awaits you.

But wait, there’s more! Setting fitness goals not only helps you monitor your progress but also gives you a clear target to aim for. It’s like having a bullseye in the distance, urging you to take aim and hit it dead center. Whether it’s running a marathon, mastering a new yoga pose, or increasing your strength, having a tangible goal motivates you to keep pushing forward.

Plus, there’s nothing quite like the rush of joy and accomplishment that washes over you when you conquer a fitness goal. It’s like crossing the finish line of a race and feeling that surge of triumph coursing through your veins.

The 10 Fitness Goals You Should Be Setting

To help set you on the right foot, I’m sharing with you a list of some of the fitness goals you should add to your bucket list for a healthier, stronger, and faster you all year round.

1. Cardiovascular Goals

At a minimum, aim to spend 180 to 220 minutes every week engaging in some sort of cardiovascular exercise, whether it’s running, cycling, swimming, spinning, or simply walking.

Shoot for three to five sessions per week at an intensity at around 70 to 90 percent of your maximum heart rate.

2. Drink More Water

Water is essential to life—getting fit is no exception.

Make it a rule to stay well hydrated throughout the day.

Aim to drink half of your body in ounces every day.

Drink more during your intense training days and/or the summer—and remember to keep track of your hydration levels.

3. Stretch often

Although the science on the effectiveness of stretching for injury preventing and performance is still out for debate, I cannot emphasize it enough.

Regular stretching improves your range of motions, prepares your muscles and joints for intense activity, improves flexibility, and may speed up recovery as well as reduce post-workout aches and pains.

Make it a rule to lightly stretch your major muscle groups used during exercise for  6 to 8 seconds before a workout, and all major muscle groups for 30 to 45 seconds post-workout.

4. Do High-Intensity Interval Training

Steady-state cardio workouts, such as the long run, have their benefits.

But if you want to crank up your fitness to the max, add a couple of HIIT workouts to your exercise plan.

5. Strength Train

Target every major muscle group at least two to three times per week, shooting for a minimum of one to two sets of 10 to 12 reps.

6. Decrease Your Body Fat

Having a healthy BMI is one of the most vital steps to a healthier you.

When you a low (healthy) body fat, you also lower your risk of heart disease, reduce inflammation, protect against diabetes, enhance the functions of joints and tendons and improve your overall appearance and self-confidence.

7. Eat More Vegetables

Unless you have been living under a rock for the past few decades, then you already know that the greens are an essential ingredient in a healthy eating plan.

Eat plenty of dark, leafy vegetables as they’ll offer you a wide array of nutrients, vitamins, antioxidants, and minerals—all of which assist your body in performing at its best.

8. Reduce—or Altogether Eliminate—Sugar

This I cannot emphasize enough

What’s more?

Cutting sugar won’t cost you anything—in fact, it actually improves your health in the long run while saving you a lot of money and trouble.

What’s not to like!

9. Shoot for 10,000 Steps A Day

Besides hitting the gym and the running track, I’d also recommend that you add as much physical activity to your daily life as possible.

A good target to have to shoot for at least 10,000 steps per day.

You are not meant to sit down all day long.

Get to work and move your body.

Get a fitness tracker and start keeping track of your daily step count.

For the record, 10,000 steps per day is the equivalent of one hour’s worth of walking.

10. Shoot for 7 to 9 Hours of Sleep

This might not seem like a fitness goal, but it’s actually crucial for achieving your health vision.

Proper sleep speeds up recovery and the muscle rebuilding process as well as boost up your energy tanks for your next workout.

How to Set Good (and Smart) Fitness Goals

Now that we got the formalities out of the way let’s look at how you can actually start setting fitness goals as well as how to go after them.

Sounds exciting?

Let’s lace up and dig in.

Your Goals Must be Relevant

Listen up, my friend, because I’m about to drop some wisdom bombs on you when it comes to setting relevant fitness goals. Let’s get one thing straight: motivation can come from all directions, like a gust of wind blowing in different directions. But when it comes to your fitness goals, it’s time to take the reins and make them truly yours.

Picture this: your fitness goals are like a personal masterpiece, a work of art that reflects your deepest desires and aspirations. They shouldn’t be a carbon copy of someone else’s dreams or a paint-by-numbers template imposed upon you. No, sir! Your fitness goals should be a true representation of what you want for yourself, a reflection of your unique journey.

You see, setting relevant goals means aligning them with your life, your passions, and your health. It’s about finding that perfect harmony between what excites you and what fits into your lifestyle. Just like a tailor stitching a bespoke suit, your goals should be tailored specifically for you. Don’t settle for off-the-rack goals that don’t resonate with who you are.

Now, here’s a golden rule: make your goals YOURS. Don’t let them become a pawn in someone else’s game. It’s time to reclaim ownership and make your fitness goals a personal declaration of empowerment. So what if your friend wants to bench press a small car? If that doesn’t align with your interests or aspirations, then it’s not your goal to chase. Your goals should ignite a fire within you, make you feel proud, and push you to become the best version of yourself.

Bad Example:

“I’m going to lose 20 pounds in 8 weeks, and that gives me bragging rights all year long.”

Losing 20 pounds in two months is very had, and sorry for saying this, but no one gives a damn about the numbers on your scale but you.

Good example:

“I’m going to do my best to lose weight and get in shape because that will help me feel good about myself, increase my productivity, and improve my overall health and well being.”

Well, that’s what we’re talking about.

Additional resource – Vitamin D for runners

Make Your Goals Specific

Specificity is the secret sauce that adds flavor and purpose to your fitness journey. It’s what separates the wishy-washy dreamers from the determined achievers. So listen up and let’s dive in!

Imagine you’re embarking on a quest to conquer a mountain. You wouldn’t simply say, “I want to climb some mountain someday.” No way! You’d pinpoint the exact peak you want to conquer, visualize the breathtaking view from the summit, and set a clear path to get there.

The same goes for your fitness goals. Saying, “I want to start running” or “I want to hit the gym more often” is like trying to navigate a maze in the dark. It lacks direction. And guess what? It’s precisely why so many people throw in the towel when faced with challenges along the way.

To avoid the pitfalls of vagueness, let’s make your fitness goals as sharp as a surgeon’s scalpel. Get specific, set your sights on a clear target, and watch your motivation soar. If you want to shed some pounds, don’t just leave it at that. Ask yourself, “How many pounds do I want to lose?” Give it a number, create a tangible benchmark, and track your progress like a champion.

Now, let’s say you have dreams of becoming a runner. That’s fantastic! But don’t stop there. Get specific about how many times per week you plan to hit the pavement. Is it three times? Four times? By attaching a number to your goal, you’ll have a clear roadmap to follow, and you’ll know when you’re getting closer to crossing that finish line.

Bad example:

“I want to lift more weights.”

Good example:

“I want to be able to squat 170 pounds using the barbel in 8 weeks”.

Challenging But Realistic Goals

One of the biggest pitfalls I’ve seen people stumble into is chasing after unrealistic dreams. Now, don’t get me wrong, I’m all for dreaming big and reaching for the stars, but when it comes to your fitness goals, we need to find that sweet spot between ambition and achievability.

Think of it this way: imagine you’re a tightrope walker, balancing your way towards success. If you set your goals too high, you’ll be walking on a wire suspended in thin air with no safety net below. It’s a recipe for disaster. And guess what? It’s one of the main reasons why so many people give up on their exercise resolutions faster than a cheetah chasing its prey.

You see, when your fitness goals are so far out of reach, it’s like trying to catch a shooting star with bare hands. You know deep down that it’s an impossible feat, and that lack of belief will hinder your commitment. Why bother putting in the effort when you know you’re bound to fall short?

But fear not! I’m here to guide you towards that sweet spot of success. It’s all about finding a balance. Choose a goal that challenges you, yes, but also one that you can realistically achieve within a reasonable timeframe.

Bad example:

“I want to finish my first marathon under four hours.”

It won’t likely happen if this is your first race.

It takes years of training to reach that level.

Good example:

“I want to finish my first marathon within the four hours time frame.’

Again, what’s I’m talking about.

Remember Short Term Goals

What’s the best way to eat an elephant? Of course, one bite at a time. That’s right, the same approach applies when it comes to conquering those big, audacious fitness goals you’ve set for yourself.

Now, when I talk about big goals, I mean those ambitious feats that require some serious dedication and time. We’re talking about goals that may take a year or even more to achieve. But fear not, because I’ve got a strategy that will make them more manageable and increase your chances of success.

Within your grand fitness vision, it’s crucial to set smaller goals along the way. These are the bite-sized morsels that you can devour in a shorter time-frame and that will boost your confidence as you make progress. Think of them as stepping stones towards your ultimate destination.

Say your ultimate goal is to run a 10K race in under 60 minutes. Well, instead of diving headfirst into the deep end, start with a smaller goal like running two miles at your goal pace. Once you’ve achieved that, build on it. Gradually increase your distance and speed until you can conquer that 10K in 50 minutes. It’s all about taking one step at a time, celebrating each milestone along the way.

And let’s say you’ve got your sights set on running a full marathon, but you’re a newcomer to the racing scene. No worries! Start with shorter distances, like 5Ks, 10Ks, and half marathons. These mini-goals will help you build a solid foundation, improve your endurance, and get you race-ready without overwhelming yourself. Think of it as taming the beast, piece by piece.

Now, as a general rule of thumb, aim to achieve these mini-goals within a two to six-week timeframe. This way, you maintain a sense of progress and momentum without feeling like you’re spinning your wheels.

Use Time

Imagine you’re embarking on a journey without a destination in mind. You’re just wandering aimlessly, without any sense of urgency or purpose. Sounds pretty unfulfilling, right? Well, the same goes for setting fitness goals without a deadline.

Having a deadline is like having a compass guiding you towards your destination. It’s what gives you a roadmap to success by breaking your big goal into smaller, manageable milestones that you can tackle on a daily, weekly, and monthly basis. But here’s the catch—it has to be a realistic goal. Setting an unrealistic deadline will only lead to disappointment and frustration.

Why is a deadline so crucial? Well, it adds a sense of urgency to your fitness journey. It lights a fire under you, motivating you to take action and give it your all. Without that deadline looming over your head, it’s easy to fall into the trap of procrastination and delay. You might find yourself saying, “I’ll start tomorrow,” and before you know it, weeks turn into months, and your goals remain untouched.

So here’s what you need to do. Set a big, audacious goal that stretches you and excites you. Give yourself a longer time-frame, like one year, to achieve it. But don’t stop there. Break that big goal down into smaller, bite-sized mini-goals, each with its own deadline. These mini-goals will keep you focused, motivated, and on track.

By setting a deadline, you’re making a commitment to yourself and your fitness vision. You’re saying, “I’m dedicated, and I’m going to make this happen.” It’s like having a finish line in sight, driving you forward with determination and purpose.

Bad example:

“I want to run a 5K someday.”

Good example:

“I will run the X 5K race on Y date”.

Write it Down

Imagine your fitness goals as stars in the night sky, shining brightly and guiding you towards your desired destination. But without a map to navigate by, those stars can easily fade into the background, lost in the vastness of the universe. That’s where a workout journal comes in.

Think of your workout journal as your personal compass, keeping you on track and accountable to your goals. When you write down your goals, you’re not only declaring your intentions but also bringing them to life. It’s like planting a seed in fertile soil, giving it the best chance to grow and flourish.

But here’s the secret sauce: writing down your goals isn’t a one-and-done deal. It’s an ongoing process of refinement and adjustment. Just as a sculptor continuously shapes their masterpiece, you too should regularly revisit and tweak your goals as needed. Think of it as molding clay into a work of art, constantly refining and shaping it until it matches your vision.

When you write down your goals, use the power of words to your advantage. Instead of using weak language like “might” or “would like to,” embrace the strength of “will.” Say it with conviction and confidence. For example, say, “I will run my first 10K on my birthday,” not “I would like to be able to run a 10K on my birthday.” By using the word “will,” you’re infusing your goals with purpose and determination, making them more compelling and believable.

Now, here’s a pro tip: keep your goals visible. Don’t tuck them away in a hidden corner where they’ll gather dust. Display them proudly in places where you’ll see them every day. Whether it’s on your office desk, your bedroom wall, or even your refrigerator door, make sure those goals are a constant presence in your life. They’ll serve as a friendly reminder, motivating you to stay focused and committed.

Go Public

Now that you’ve set your smart fitness goals, it’s time to kick things into high gear and bring those goals to life. But you don’t have to go on this journey alone. In fact, sharing your goals with others can be a game-changer.

Think of it as casting a wide net into the sea of support. Whether it’s through social media platforms like Facebook and Twitter or simply by having heartfelt conversations with your family and friends, let your goals be known. Share your aspirations and ambitions with those who matter to you.

Why is this important? Well, let’s dive into the science behind it. According to a study published in the Journal of Applied Psychology, individuals who shared their goals with others were more likely to achieve them.

Not only does going public with your goals help hold you accountable, but it also acts as a filter to identify the true supporters in your life. As you unveil your goals, you’ll quickly discover who genuinely wants to see you succeed and who might not be as supportive. It’s like sifting through a garden, separating the blossoming flowers from the pesky weeds.

But here’s the thing: once you’ve identified the not-so-supportive individuals, it’s essential to distance yourself from their negative influence. Just as you wouldn’t want to carry unnecessary weight while striving to shed pounds, you don’t need the added burden of negativity hindering your progress. Surround yourself with those who uplift and inspire you, creating an environment that fuels your success.

5 Easy Ways to Make Money Running – Get Paid To Run Guide

Get Paid To Run

If you’re passionate about running, have you ever thought about making money from it?

No matter if you’re a newbie or a seasoned runner, there are clever ways to monetize your miles.

When I first started running, I never imagined my running could be more than just a hobby. But the more I got into the running community, the more I noticed people making a living—or at least some extra cash—through their love for the sport.

So, if running is already a big part of your life, why not explore ways to make it profitable?

Today, I’m going to share a few ways you can get paid to run—even if it’s just a side hustle.

Get a Job at a Running Store

Obsessed with the latest running gear and gadgets?

Working at a specialty running store could be a great way to get paid while staying close to the running community. From sales to event coordination, working in a running store immerses you in the running world.

I worked part-time at a running store a few years back, and not only did I learn so much about the latest shoes and gear, but I also met amazing people who were just as passionate about running as I was. You also get firsthand knowledge about all the newest trends, which is always a plus.

It’s a great way to build your running knowledge, and who knows? Maybe you’ll climb the career ladder, or even run your own store someday..

If you’re interested in joining a running store, you’ll find it’s not just about working the cash register. Depending on the size of the shop, you could be organizing events, coordinating training groups, or even trying out new gear to share insights with customers.

Launch Your Own Online Running Gear Store

If you’ve been running for a while, you probably know what works and what doesn’t when it comes to running gear. Why not use that knowledge to help other runners by selling products they’ll love?

An online store isn’t a huge investment and lets you share your running passion globally. You can sell custom medals, apparel, or even design your own running gear. For example, custom medals. It is important for every runner. You can design and make a personalized medal at a custom medal manufacturer. They are cheap and beautiful, which is the best selling product in the store.

If you have some creative ideas or want to share your favorite gear with others, setting up an online store can be a fun and relatively low-risk way to earn money.

Start Your Running Blog

If you love running and enjoy writing, starting a blog could be the perfect way to combine both passions. Blogging lets you share experiences, offer tips, and build your personal running brand.

I never guessed how much my blog would grow when I first started. Writing about my personal experiences and sharing what I’ve learned not only helped me connect with other runners but also opened up opportunities for sponsorships and affiliate marketing.

It took time to gain traction, but with consistency and a passion for sharing my love of running, my blog grew. I even started earning through affiliate links and sponsored posts.

Just remember, it’s not an overnight success, but if you love running and writing, it’s a rewarding way to connect with others and build your brand.

Here are some blog niche ideas to get you started:

Whatever niche you choose, focus on delivering great content that resonates with your readers.

Become A Running Coach

One day, a friend asked me to help him prepare for his first 5K. I wasn’t certified yet, but I jumped at the chance to help. It was such a fulfilling experience to see him cross the finish line after weeks of training together. That’s when it hit me—I could turn this into something more.

As a coach, you can help new runners start their journey, train for their first race, or even help more experienced runners refine their techniques. Coaching can be done in person or virtually, allowing you to reach clients from all over the world.

I’ve found that coaching is not just about running but also about building connections with people and helping them push past their limits. It’s incredibly rewarding to see someone you’ve coached cross the finish line of their first 5K or marathon.

Become a Brand Ambassador on Instagram

If you love sharing your running journey on Instagram, why not turn that passion into a paycheck? Many brands are looking for influencers who can promote their products, and if you already have a dedicated following, this could be a great way to earn money while doing what you love.

To become a brand ambassador, focus on building a genuine, engaged audience. Brands are more interested in engagement than just follower count, so make sure your content resonates with your community.

Sponsors on Instagram look for two things: a large following (the type of following that suits their target demographics) and high engagement rates. Fake followers are unacceptable.

Create Running Content on YouTube

Are you comfortable in front of the camera?

Starting a YouTube channel focused on running tips, workouts, gear reviews, and your personal running journey could be another avenue to explore. YouTube offers many ways to monetize your content, such as ad revenue, sponsorships, and affiliate marketing.

As a running coach, sharing workout routines, advice for beginners, or even documenting your training for races can attract a lot of attention from fellow runners. The key is consistency—uploading videos regularly and engaging with your audience.

The Conclusion

Hopefully, one or more of these ideas will help you start earning money in the running niche.

Still looking for more ways to make money with fitness? Check the following:

  • Become a top athlete.
  • Become a certified physiologist.
  • Create a product.
  • Make YouTube videos.
  • Try affiliate marketing.
  • Write an eBook.
  • Sell your own products.
  • Build a running app.
  • Create an online course.
  • Sell Healthy Food.
  • Become a Retailer.
  • Fitness Writing.
  • Custom Meal Plans.
  • Host a seminar or workshop.
  • Create a video interview series.
  • Start a podcast.

The key is to find what resonates with you and stick with it. Whether it’s writing, coaching, selling gear, or building a social media following, the possibilities are endless. So why not turn your passion into profit and start getting paid to run?

One last piece of advice—don’t rush it. Take time to explore different options and be patient with the process. Success doesn’t come overnight, but if you stick with it, you’ll be amazed at what you can achieve.

What do you think? Have other ideas to share? Drop your comments below—I’d love to hear from you!

Running Blisters Explained: Causes and Solutions For Runners

running blisters

Got blisters? Don’t let them slow down your running game! We’ve all been there, and I’m here to tell you that there’s no need to hang up your running shoes for good.

In fact, with the right know-how, you can treat those pesky blisters and keep them from ruining your runs.

In this article, we’re diving deep into the world of running blisters: what causes them, how to treat them like a pro, and most importantly, how to kick them to the curb for good. Ready to hit the ground running?

Let’s jump right in!

Running Blisters Explained

Picture this: You’re in the middle of an exhilarating run, the wind in your hair, and the world at your feet. But then, it happens – that telltale burning sensation that reminds you of an unwelcome guest: blisters.

Yep, those pesky little bumps that seem to have a knack for showing up just when you least expect them.

So, what exactly is a running blister? Well, think of it as your body’s way of saying, “Hey, I need a break!”

Blisters are like the little alarms that go off when the outer layers of your skin decide to have a friction-filled party. They rub together, break apart, and fill up with not-so-pleasant fluid.

Now, here’s the kicker – anything that cranks up the friction can make these blisters throw an even bigger tantrum.

We’re talking about improper running shoes, the ones that are either too tight or feel like they’ve got a mind of their own. And let’s not forget about bad running form – it’s like an open invitation for blisters to crash your running party.

But wait, there’s more! Sometimes, it’s not your shoes or your form but your feet themselves that can lead to blister trouble. Conditions like hammertoes, bunions, and heel spurs are like the troublemakers of the foot world, making you more susceptible to these irritating bumps.

Now, where do these blisters like to hang out the most? Well, they’ve got a soft spot for areas like the arches, the soles of your feet, and those poor little toes.

Why? Because these spots love to cozy up to your running shoes, engaging in a non-stop rubbing marathon.

The Blistering Process

Have you ever wondered what’s cooking beneath that bubbly surface? Well, here’s the lowdown, and trust me, it’s more intriguing than you might think.

Stage 1: The Epidermal Tear

So, picture this: you’re out on a long run, miles under your belt, and suddenly, you start feeling that familiar hot spot on your foot. That’s when the blister story begins. It all kicks off with a tiny tear in the epidermis – that’s the fancy term for the upper layer of your skin.

Stage 2: Separation Anxiety

Now, the real action starts. The outer layer of your skin decides to have a little separation party from the inner layers. It’s like they’re saying, “We need some space!”

So, they create a gap, a pocket of emptiness if you will, while keeping the surface intact.

Stage 3: Lymph Fluid Invasion

As if the separation shindig wasn’t enough, here comes the guest of honor – lymph fluids. These little guys seep into that gap, filling it up under the affected skin.

It’s like a mini swelling party that’s just getting started. The pressure builds, and voilà, you’ve got yourself a full-blown blister.

Bonus Stage: The Blood Vessel Twist

And for the grand finale – sometimes, things take a dramatic turn. A blood vessel in the vicinity might decide to add a little extra pizzazz to the mix. That’s when you end up with a blood blister.

Yep, it’s as intense as it sounds. Blood vessel rupture, fluid buildup, and a vibrant shade of red – it’s a blister with a twist!

For more on blisters and the science behind treatment, check the following scientific articles:

How to Treat Blisters For Runners

Most cases of running blisters aren’t medical emergencies but shouldn’t be ignored—especially when they’re too painful.

In fact, some blisters can get infected if you don’t take care of them early and properly.

Here’s how to safely treat running blisters in the comfort of your own home.

race warm-up

“To Pop or Not to Pop—That is the Question.”

Imagine this scenario: you’re out on a run, pounding the pavement, and suddenly, you feel the unmistakable presence of a blister. But here’s the deal – if it’s not causing you pain, it’s okay to let nature do its thing. You see, blisters have a tendency to break on their own eventually, and when they do, the fluid drains naturally.

Now, let’s talk about the big, bad blisters – the ones that are throbbing and causing you agony. When you’ve got a blister that’s making every step painful, it’s time to take matters into your own hands – but don’t worry, we’ll guide you through it.

Safely Draining a Running Blister: Step by Step

Do the following for a safe blister drainage procedure.

Clean Hands Rule:

First things first, wash your hands thoroughly. No shortcuts here – use soap and water to make sure those hands are squeaky clean.

Needle Sterilization:

If you’re going to pop that blister, you’ll need a trusty needle. But before you get to work, sterilize it! You can wipe it down with some alcohol or go the extra mile by boiling it for a solid 10 minutes. Safety first!

Piercing Strategy:

Now, it’s time to be precise. Carefully pierce the blister in several spots, but aim for areas close to the blister’s edge. This will allow the fluid to drain effectively.

Fluid Drainage:

Get yourself a clean piece of gauze or cotton – we’re talking pristine here! Gently press on the blister to encourage the fluid to drain out. But here’s the golden rule – leave the skin covering the blister intact.

Antiseptic TLC:

After the fluid is out, it’s time for some antiseptic love. Apply an antiseptic cream to the wounded area – this helps keep nasty bacteria at bay.

Second Skin Saver:

For an extra layer of protection, consider using a second skin product like Band-Aid Blister Block. It adds another level of defense against unwanted intruders.

No Peeling Allowed:

Repeat after me – “I will not peel the excessive skin!” Let that skin peel on its own time. Trust the process. Peeling it prematurely can expose your blister’s sensitive underbelly to potential infections.

Dealing With Blisters in The Middle of A Race

So, you’re in the middle of a race – be it a middle-distance sprint or a long-haul endurance challenge – and suddenly, there it is, that unwelcome blister making its grand entrance.

What do you do? Here’s your playbook:

Stop at a Medical Station:

Most races, especially organized ones, have medical stations strategically placed along the route. Consider these your pit stops for foot-related emergencies. When a blister strikes, make a beeline for the nearest medical station.

Let the Pros Handle It:

At these medical stations, you’ll find seasoned professionals who know the ins and outs of dealing with blisters. They’ve seen it all and can provide expert advice and assistance.

Assessment and Treatment:

The pros will assess your blister, taking into account its size, location, and severity. Based on their evaluation, they’ll recommend the best course of action. Sometimes, it might be as simple as draining the blister or providing padding to reduce friction.

Return to the Race:

Now, here’s the good news – with a bit of luck and the right care, you should be able to get back in the race pain-free. The pros are equipped to offer quick solutions so you can continue chasing your race-day goals.

Why It’s the Best Approach

Dealing with a blister during a race is no joke, and here’s why turning to the medical station is your best bet:

Medical stations offer immediate care, ensuring you don’t waste precious time fumbling with your blister or trying to tough it out. They’ll get you back on track faster.

These medical professionals deal with runners’ woes day in and day out. They know what works best and can provide tailored solutions for your specific situation.

How to Prevent Running Blisters

Want to avoid running blisters in the future?

Do the following.

Minimize Friction

Alright, let’s talk about the real MVPs of your running journey – your shoes! Whether you’re a seasoned pro or just starting out, your choice of running shoes can make or break your experience.

When it comes to preventing those pesky blisters, it all starts with proper footwear.

Here’s your guide to finding the perfect pair of running shoes and avoiding blisters like a pro.

The Shoe-Blisters Connection

Let’s get straight to the point – shoes are often the culprits behind those annoying blisters that plague many runners.

Ill-fitting trainers can turn your exhilarating run into a painful ordeal, particularly in areas like the arches, under your toes, and around the ends of your toenails. But fear not because we’ve got the playbook to help you make the right shoe choices.

Rule #1: Proper Fit

The golden rule of choosing running shoes is that they should fit like a glove but not too tight! You want to leave enough room inside the shoe for your feet to breathe and move comfortably. Here’s how to nail the perfect fit:

Aim for at least a thumb’s width of space between your longest toe and the end of the shoe. This gives your toes room to wiggle without feeling cramped.

Rule #2: Test Drive Your Shoes

Before committing to a pair of running shoes, it’s like dating – you’ve got to test the waters! Don’t just grab the first pair you see and hit the road. Instead, follow these steps:

Try on different pairs:

Explore a variety of brands and models to see which ones feel the most comfortable. Everyone’s feet are unique, so what works for one runner may not work for another.

Test drive them:

Once you’ve picked a potential pair, wear them around for a bit. Walk, jog, and let your feet get accustomed to the shoes. This “breaking in” period is essential to prevent blisters and ensure maximum comfort.

Additional Resource – Your guide to runners itch

Choose Running Socks

Socks play a vital role in keeping your feet comfortable and blister-free during your runs. They’re not just an afterthought; they’re a crucial part of your running gear.

Here’s why:

Extra Support:

Running socks are designed with your comfort in mind. They offer extra cushioning and support in all the right places, reducing the risk of blisters.

Moisture Management:

Sweaty feet are a breeding ground for blisters. Proper running socks are excellent at wicking moisture away, keeping your feet dry and blister-free.

Friction Fighters:

Running socks are your first line of defense against friction. They reduce the chances of your skin rubbing against your shoes, a common cause of blisters.

Say No to Cotton

Now, let’s address the sock no-no – cotton. While cotton socks might be cozy for lounging around, they’re a big no-no for running. Here’s why:

Cotton soaks up sweat and moisture like a sponge, increasing your risk of blisters.

Instead, go for specialized running socks designed to keep your feet happy. We recommend synthetic options like polypropylene socks or brands like WrightSocks, Teflon, or CoolMax. These socks are moisture-wicking pros, ensuring your feet stay dry and blister-free.

Double Trouble – In a Good Way!

If blisters have been a persistent problem for you, here’s a pro tip – double up on your socks. When you wear two pairs of socks, any friction occurs between the socks themselves rather than between your skin and the sock. It’s like an extra layer of protection for your precious feet.

Prepare for Rainy Runs

For those unpredictable rainy runs or races, always have an extra pair of socks on hand. Wet socks are a recipe for disaster, increasing your chances of blisters. Switching to dry socks, mid-run can make a world of difference.

Additional resource  – Here’s your guide to pain on top of the foot when running.

Apply Lubricants

You’ve got your shoes and socks sorted, but there’s one more trick to keep those blisters at bay – lubricants. Think of them as your secret weapon against friction, the arch-nemesis of blister-free running.

Here’s why.

Lubricants act as a protective barrier between your skin and your trainers. They’re like the bodyguards of your feet, reducing the friction that can lead to blisters.

If you’ve got dry skin or skin with cracks, you know how vulnerable those areas are to blisters. Lubricants step in to keep these trouble spots in check.

What’s more?

Applying a lubricant is a breeze. It’s a simple step that can make a big difference in your running comfort.

Apply Liberally (But Not Too Much!)

Now, let’s talk application. The key here is to strike a balance – apply enough to protect your feet, but not so much that you turn your shoes into a slip ‘n slide.

Here’s how to do it right:

Trouble Areas: Start by identifying the areas of your feet that are prone to blisters or where you tend to develop dry skin. These are your trouble spots, and they deserve extra attention.

When it comes to lubricants, you’ve got options. Many runners swear by good ol’ petroleum jelly – it’s affordable and readily available. But if you’re looking for specialized products, consider brands like Sportlick, Runners Lube, Body Glide, Chamois, or Sports Shield. Your pick may come down to personal preference.

Last but not least, don’t skimp on lubrication. Apply it generously to your feet, paying close attention to those trouble areas. A little extra now can save you from a lot of discomfort later.

Running Blisters – The Conclusion

There you have it! If you’re serious about treating and preventing foot blisters when running, then today’s article has you covered.

The rest is just details.

Please feel free to leave your comments and questions in the section below.

Thank you for stopping by

The 12 Best Stretches For Runners

runners stretches

I love running—it’s one of the best cardio workouts you can do.

It keeps me fit, clears my mind, and makes me feel good overall.

But there’s a catch (there’s always a catch, right?).

Running is a high-impact sport, and all that pounding on the pavement can take a toll on your body, especially your lower limbs and joints.

Over time, this stress can limit your flexibility and mobility, slow your performance, and—worst of all—increase your risk of injury.

And let me tell you, that’s the last thing you want as a runner. I’ve been there, and it’s no fun being sidelined due to injuries like Achilles tendonitis or IT Band Syndrome.

That’s why stretching is so important!

It helps your muscles recover after a run and prevents that tightness that can mess with your running form and performance.

Stretching can even help prevent post-run soreness—at least, that’s been my experience, though I can’t promise scientific proof for that. I’d recommend you try and see if it works for you.

In short, making stretching a regular part of your post-run routine will help you feel better after each run and make your running more efficient and enjoyable in the long term.

The Myth of Pre-Run Stretching

A lot of people think you should stretch before you run, but that’s not the best idea—at least not static stretching. Research shows that static stretching (holding a stretch for 30 seconds or more) before a workout can reduce your strength and running performance.

Plus, it doesn’t seem to do much to prevent injuries.

So, focus on a good warm-up instead of stretching before your run to get your muscles ready. Save the stretching for after your run when your muscles are warm and pliable, which is when it’s most effective.

How to Stretch Properly

When you stretch, the goal is to loosen your running muscles, improve flexibility, and prevent post-run tightness. Here’s how to do it right:

  • Stretch after your run when your muscles are warm. This helps prevent injury and ensures you get the most out of each stretch.
  • Hold each stretch for 30 to 60 seconds. Don’t rush! Stretching is about releasing tension, not forcing your muscles.
  • Avoid bouncing or jerky movements. These can lead to injury. Instead, stretch slowly and gently.
  • Focus on your breathing. Deep, controlled breaths will help you relax into the stretch and get a deeper release.

Key Muscle Groups to Stretch After Running

Not sure which muscles to focus on? As a runner, there are a few key areas you need to pay attention to:

  • Hamstrings: Tight hamstrings can lead to lower back problems and reduce your running efficiency.
  • Quadriceps: Flexible quads are key for knee lift and speed, but tight quads can cause a runner’s knee.
  • Hip Flexors: If you have tight hips, you’re setting yourself up for issues like IT Band Syndrome and lower back pain.
  • Calves: Tight calves commonly cause shin splints and plantar fasciitis.
  • Lower Back: A tight lower back can affect your posture and running form, so keeping this area flexible is important.

The Best Stretches For Runners

Without further ado, here’s a list of my favorite runners-friendly stretches.

Enjoy!

Targeted Muscle: The Hamstrings

The hamstrings are prone to injury, especially among runners.

Tight hamstrings can lead to pulled muscles and lower back problems.

They can also hinder range of motion, which limits running efficiency.

Here are two runner’s stretches to help you improve your hamstring’s flexibility and mobility.

1: Standing Single Leg Hamstring

Stand with your feet hip-distance apart.

Bend your right knee slightly and extend your left leg before you, pointing your toes up.

Holding this position, lower your upper body towards your knee and reach your hands toward your left foot’s toes as far as possible.

Hold this position for 30 seconds, then switch to the other side.

2: The Lying Hamstring Stretch

Lie flat on your back with your legs extended and your back straight.

Pull your right knee to your chest to keep your left leg extended on the floor.

Put your hands behind your right knee and slowly straighten the leg towards the ceiling, keeping both hips on the floor.

Hold for 30 seconds, then switch sides.

Targeted Muscle: The Calves

The calves are runners’ most overworked muscles, and inflexible calves set the stage for strains, shin splints, and plantar fasciitis.

Boosting this muscle’s flexibility and mobility can also improve stride length and cadence.

3: The Runner’s Calf Stretch

Stand facing a wall.

Then, place both arms on the wall with your arms extended and your back straight.

Step your right leg backward while keeping your heel planted to the ground and your leg extended without bending your knee.

To stretch the calf, lean forward slightly towards the wall while pressing your back heel into the ground until you feel a good stretch in the muscle.

Breathe deeply and hold for 30 seconds or more, then switch sides.

Targeted Muscle: The Quadriceps

Flexible quadriceps muscles are the key to stronger knee lift and speed, while tight quads are one of the main causes of the dreaded “runner’s knee.

4. The Standing Quadriceps Stretch

Start by standing with your legs and hips apart.

Stand tall while holding your right foot behind your butt, with your knee pointing to the floor.

If you need it, grab a chair for balance.

Keep your thighs lined up and your core engaged throughout the stretch, holding for no more than 30 seconds.

Repeat with the left leg.

Targeted Muscles: The Hip Flexors

For most runners, the hips are the weakest link.

Ignoring them can set the stage for a runner’s knee, Iliotibial Band Syndrome, lower back pain, and other trouble.

It’s happened to me.

I believe that tight hip flexors are the reason I suffered from knee problems for so many years.

5. The Hip Flexors Lunge Stretch

Begin kneeling and lunge forward with your right leg, pressing your left knee to the floor.

Extend your hips forward until you feel a stretch down the front of your left leg around your hips.

Repeat on the opposite side.

6: The Pigeon

This is one of my favorite yoga poses for runners.

It targets the hip flexors and the lower back.

Assume table position (on your hands and knees with a flat back).

Bend your right knee and bring it to a comfortable position between your hands.
Take your left leg and stretch it fully behind you.
Exhale and bend down to the ground.

Make sure you’re resting your torso on your leg and rest your head on the floor.

Targeted Muscles: The Lower Back Muscles

This is another major muscle group you need to stretch regularly to release running stress, improve mobility in the lower body, and prevent aches and pains.

7. The Lower Back Knee Crossover Stretch

Lie on your back with your legs extended and your back straight.

Bend your right leg and grab your right foot.

Keeping your left shoulder on the floor, grab the outside of your knee with your left hand and guide it across your body and towards the ground on your left side.

Try to move your knee closer to the ground while keeping both shoulders in contact with the floor.

Return to the starting position and repeat the same stretch on the other side.

You can end this runner’s stretch routine by doing Shavasana.

Lay on your back, with your arms and legs spread at about 45 degrees, and breathe deeply.

It’s good for you!

8. Hip Flexors & Psoas Stretch

Muscle targeted: The hip flexors and the Psoas

Proper Form

Start with a forward lunge position, then place your hands on your lead knee.

Next, lower your left knee to the ground, then stretch. Press down with your hands and extend the hips forward until you feel a stretch in front of your thigh, groin, and hip.

While keeping your pelvis tucked.

Hold the stretch for 30 seconds, then switch sides.

9. The Forward Hang

Muscle targeted: lower back, glutes, hamstrings, and calves

Proper Form

Stand with your feet hip-distance apart and knees slightly bent to perform this powerful stretch.

Next, bend at your waist on the exhale and fold forward from the hips, reaching for the floor.

Reach as far down as you can and grab onto your shins, ankles, or toes.

For more stretch, interlace your fingers behind your back.

Hold the stretch for one full minute and breathe deeply to release tension in the lower back, hamstrings, and calves.

Additional Resource – 13 Exercises to improve running

10. The Standing Chest Stretch

Muscle targeted:

Chest and shoulder muscles.

Proper Form

Stand tall with your feet shoulder-width apart.

Next, lace your fingers together behind your back and straighten your arms.

Then, with your arms straight, squeeze your shoulder blades together while aiming to extend your elbows out to the sides to open and stretch your chest.

Hold the stretch for 30- 45 seconds, then slowly release your arms to the sides.

11. Standing IT Band Stretch

Muscle targeted:

The Iliotibial Band is a group of fibers that run outside your thighs.

Proper Form

Begin by standing tall, then cross your left leg behind your right and point the toes of your left foot out about 45 degrees.

Next, while engaging your core, lean slightly forward and to the right side until you start feeling a stretch on the outside of your left leg.

To stay on the safe side, make sure to lean against a chair or a wall.

Hold the stretch for 30 seconds, then switch to the other side.

12. The Inner Thigh Stretch

Muscle targeted: Adductors and the whole groin area

Proper Form

Stand upright with straight back, feet wider than the hips, and toes turned out.

Next, slowly bend your knees, squatting straight down while keeping your hands on your thighs until you start feeling a stretch all over the inner thighs.

Keep your shoulders relaxed and back straight throughout the stretch, and never allow your knees to move past your toes.

Hold the stretch for 30- 45 seconds, then slowly press back to the starting position.

Customizing Your Stretching Routine for Your Running Style

Stretching isn’t a one-size-fits-all approach—different runners have different needs, and a sprinter’s routine might look a lot different than a marathoner’s. Here’s how you can tailor your stretching routine to match your running style and goals, plus tips for pre- and post-run stretches that get you prepped and recovered in the best way.

For Sprinters: Focus on Dynamic Power

If you’re a sprinter or enjoy shorter, fast-paced runs, prioritize stretches that warm up your fast-twitch muscles. Dynamic stretching before you start can activate those muscles for the explosive power you need in sprints.

Pre-Run:

Add high knees and butt kicks to your warm-up to target your hamstrings, glutes, and hip flexors—muscles that power your speed. Aim for 2 sets of 20 seconds each.

Post-Run:

Cool down with longer-held static stretches, focusing on the muscles that take a beating during sprints. Try a standing quad stretch (hold for 30 seconds each side) and seated hamstring stretch (hold for 30 seconds per leg) to aid recovery and prevent tightness.

For Marathon and Long-Distance Runners: Keep it Balanced

Long-distance running is all about endurance, so stretching routines for marathoners focus on injury prevention and flexibility to support your stride over long periods.

Pre-Run:

Start with dynamic stretches that increase blood flow and gently activate muscles without overstressing them. Leg swings (10 reps per leg, front-to-back and side-to-side) are great for loosening up your hips, and walking lunges (10 reps per leg) help engage your quads, hamstrings, and glutes.

Post-Run:

After a long run, prioritize stretches that help reduce stiffness and promote circulation. Try a downward dog stretch to target your calves and hamstrings, and finish with a hip flexor stretch to keep your hips from tightening up after those long miles. Hold each stretch for about 30 seconds on each side.

For Trail Runners: Build Stability and Flexibility

Trail running involves uneven terrain and engages stabilizer muscles more than road running. Your stretching routine should prepare those stabilizers and help prevent ankle or knee injuries.

Pre-Run:

Use dynamic calf raises (15 reps per leg) to warm up your calves and ankles, essential for navigating rocky or hilly trails. Lateral lunges (10 reps per side) also help prepare your hips and inner thighs for uneven footing.

Post-Run:

Target the calves, hamstrings, and hips with static stretches to release tension and improve mobility. A calf stretch (hold for 30 seconds on each leg) and figure-four stretch for your glutes (hold for 30 seconds per side) can be especially helpful after a challenging trail run.

Conclusion

Stretching after your run is one of the easiest ways to keep your muscles flexible, prevent injury, and improve your overall running performance. I’ve made it a regular part of my routine, and I highly recommend you do the same. Whether a beginner or a seasoned runner, these stretches will keep you feeling good and ready for your next run.

If you have any questions or want to share your favorite stretches, please comment below.

David D.

Does Running Burn Belly Fat?

runner belly fat

Does running burn belly fat?

The answer is a heck yeah!

In fact, a lot of beginners take up running to lose belly fat and and get a flat stomach.

When it comes to losing weight, it’s hard to beat running.

You can burn up to 600 to 800 calories while running, depending on your factors such as your size, training intensity, and fitness level.

But long runs alone aren’t going to help you lose that belly fat.

In fact, you need to back up your plan with the right diet and lifestyle changes—or else, you’ll fail miserably.

And you don’t want that.

In today’s post, I’m sharing with you some of the most effective ways to get rid of that stubborn belly fat and get a flat stomach.

But first things first, let’s discuss what’s belly fat as well as some of the dangers it poses.

What’s Belly Fat?

Belly fat, or “visceral fat” in medical terms—is the most dangerous fat there is.

This lethal fat accumulates in the abdominal area and envelopes your organs.

Surveys show that 30 percent of U.S. adults are classified as obese.

That’s just over one in three people, making the US one of the fattest countries in the world.

Probability, half the population of the US will be obese by 2040.

This fat not only affects how you look, but it’s also a significant risk factor for many serious diseases, including:

  • Type II diabetes
  • Heart diseases
  • Coronary artery disease
  • Hypertension
  • Some cancers
  • Sleep apnea
  • Shorter life expectancy

Part 1 – Diet Changes to Get A Flat Stomach

The kitchen is the heart of the house and also where the battle for losing belly fat is won or lost.

Make the following changes to your nutrition plan and see your belly slimming down as a result.

1. Remove The Sugars

One of the best things you can do right now to get a flat stomach as soon as possible is to reduce your daily sugar intake.

Don’t take my word for it.

Science agrees.

Here are a few studies:

  • Research revealed that subjects who consumed four to five servings of white bread a day resulted in more belly fat gains than those who only had one serving of white bread, even though both groups consumed the same amount of calories.
  • Research has found that consuming low-carb diets resulted in reduced appetite, which is conducive to weight loss.
  • A study from the University of North Caroline at Chapel Hill determined that the average American consumes about 80 more calories per day than they did in 1977.

Action Step

Cut back (or eliminate them for good) on all forms of refined and processed calories, including white bread, cookies, waffles, muffins, candy, chips, bagels, pastries, cakes, donuts, pasta, crackers, junk & fried foods and any other processed foods you get in a bag or a box.

I know that’s a lot, but you can do it in a slow manner.

2. Banish Liquid Calories

These liquid calories come in just about any form—soda, coffee, energy drinks, fruit juice, beer, and other sugar-sweetened beverages.

Liquid sugars are the worst as they don’t get “indexed” by the brain in the same way as it would index solid food.

In short, you end up taking in a lot of extra calories without even taking notice.

Even diet coke is bad for you.

A study published in the Journal of the American Geriatrics Society found that people who consumed diet soda on a regular basis gained about triple the amount of fat over a period of nine years as those who didn’t drink it.

That’s why I said any form of sugar, even artificial.

Action Step

Mindful eating!

Eat what’s essential and good for you.

Limit your intake of all sources of liquid calories, and that includes coke, sports drinks, beer, alcohol, juice, coffees, and other forms of sugar-sweetened drinks.

Instead, drink water.

Note – Looking for the best Beginner’s Guide To Running?
Then Check my Runners Blueprint System Here.

3. Eat More Healthy Fats

Are you in the habit of skimping on fats because you want to lose weight? That’s a big mistake

The truth is, not all fats are bad for you.

In fact, you need fats as much as you need carbs and proteins in your diet.

Healthy fats increase satiety levels, improve fat burning, increase metabolism, regulate blood sugar levels, etc.

Research published in the journal Diabetic Care reported that a diet rich in monounsaturated fats is more effective at regulating blood sugar levels than a high-carb diet

Another study published in the medical journal Appetite revealed that long-chain omega-3 fats could help control hunger.

Action Step

Healthy fats are abundant in:

  • Olives and olive oil
  • Canola oil
  • Flax oil
  • Seeds
  • Peanuts
  • Cashews
  • Almonds
  • Peanut butter
  • Avocadoes
  • Sesame seeds
  • Tahini
  • Pesto sauce


4. Count Your Calories

Let’s be honest, we are terrible at guesstimating the amount of calories consumed during a meal, and the number of calories burnt during a workout.

Research out of the Pennington Biomedical Research Center found that subjects who kept track of calories consumed still missed roughly 18 percent of them.

Further research also has shown that people—both those who are overweight or those within a healthy weight—tend to overestimate the amount of calories burnt during exercise.

So, you are not alone.

Action Step

Learn how to log smarter.

There is a wide range of apps and online resources to help you simplify the calorie counting process—provided that you’re willing to engage in it regularly.

Here are a few apps and websites:

  • SparkPeople
  • Lose it!
  • MyPlate
  • FitDay
  • MyFitnessPal
  • Cron-o-meter

To figure out how many calories you should eat each day, use this calculator

  • Training intensity
  • Fitness level
  • Age
  • Bodyweight
  • Gender

5. Eat A High-Protein Diet

Protein is an essential nutrient that not only helps you build muscle but also loses weight.

During an experiment published in The FASEB Journal, female subjects were instructed to follow a diet for two months that consisted of roughly 30 percent protein, 30 percent fat, and 40 percent carb.

While the control group stuck to a diet that was 16 percent protein, 26 percent fat, and 55 percent carbs.

Result shown that the first group lost drastically more fat—including belly fat—than the other group without losing muscle mass.

Action Step

As a general guideline, roughly 30 to 35 percent of calories should come from lean sources of quality protein.

These include:

  • Lean meats
  • Whole eggs
  • Fish
  • Nuts, and
  • Dairy

6. Eat Probiotics

Probiotics are various types of healthy bacteria found in a variety of foods and supplements. Bioma Probiotics is a great example of a supplement that can help introduce these beneficial bacteria into your system.

These have a lot to offer, but more importantly, they help reduce tummy fat.

In research published in the European Journal of Clinical Nutrition, subjects had two cups per day of fermented milk containing Lactobacillus Gasseri, (a probiotic strain), for a period of three months.

The subjects reported a reduction in abdominal visceral fat by roughly 4.6 percent and subcutaneous fat by just over 3 percent.

Another research shows the supportive result that: Probiotics are not only conducive to weight loss, but also work very well for belly fat.

Let’s say its like a detoxing agent.

Action Step

You need to support the growth of probiotic bacteria by eating plenty of prebiotic foods that naturally pack in a lot of soluble fiber.

These include:

  • Asparagus,
  • Bananas,
  • Jerusalem artichokes
  • Garlic,
  • Onions,
  • Leeks.

7. Try Intermittent Fasting

A review of research conducted on intermittent fasting reported that subjects experienced a 4 to 7 percent reduction in abdominal fat within a period of two to six months.

Another research published in the journal Cell Research revealed that intermittent fasting could cause drastic weight loss in just weeks in a mice group who were fed a typical diet for two days, followed by a 24-hour fast.

So, how does IF work?

Intermittent fasting is effective due to a mix of the following mechanisms:

  • Lowering insulin levels.
  • Regulating ghrelin levels, AKA “the hunger ”
  • Promoting the release of human growth hormone.
  • Increasing abdominal subcutaneous blood flow.
  • Stimulating anti-inflammatory cells.

Action Step

In the past few years, I’ve experimented with a few different IF schedules, and this is my personal favorite as it’s easy to implement once your body has adjusted to the new eating approach.

The 16/8 method involves fasting for 16 hours per day, then having all of your meals in an 8 hour period.

For example, you could restrict your food intake to the hours of 1 pm to 9 pm.

So, basically, you’re just hopping breakfast and making lunch your first meal of the day.

Sure, feel free to drink your coffee in the morning—but that’s it.

Try to refrain from any sugar or sweets for breakfast if you don’t want to spend the remaining hours with hunger pangs.

I know there are a lot of IF variations, but 16/8 is the best and easiest form for beginners.

8. Drink Green Tea

When it comes to healthy beverages, green tea tops the list.

I’m talking about pure green tea, no latte, no frappe.

Just classic green tea ala Japan.

Research reported that drinking green tea can increase metabolism by up to 4 percent.

It may not seem as much, but it adds up.

What’s more?

According to research published in the American Journal of Clinical Nutrition, subjects who drank green tea with caffeine saw their weight drop and also reduced their belly fat more than those who only had caffeine.

Action Step

Shoot for 600 mg—or the equivalent of two to three cups of green tea per day.

For those with insomnia, try to have it gradually so you won’t disrupt your sleeping pattern.

Additional resource – Here’s how to lose body fat.

9. Eat Plenty of Soluble Fiber

An experiment, published in the journal Obesity, reported that for every ten grams increase in soluble fiber intake per day, subjects were able to reduce their tummy fat by roughly 3.7 percent over a period of five years.

Examples of ten grams of soluble fiber include two servings of black beans, two small apples, and two cups of asparagus

Another study published in the Journal of Nutrition revealed that subjects who consumed more fiber from whole grains and cereals had less body fat and belly fat than those who skipped the fiber.

lose belly fat

Action Step

Soluble fiber can be found in different foods, including:

  • Flaxseeds
  • Brussel sprouts
  • Avocadoes
  • Shirataki noodles
  • Legumes
  • Blackberries

10. Eat Fatty Fish

A study published in the British Journal of Nutrition that found that consuming omega-3 fatty acids from fatty fish, like mackerel, is effective at reducing visceral fat.

You can also turn to fish oil supplements if you can’t find a good fish source.

Research conducted on subjects with liver fatty diseases reported that fish oil supplements could drastically reduce abdominal and liver fat.

Action Step

Aim for, at least, three servings of fatty fish per week to get enough levels of omega-3’s.

Here are the few:

  • Sardines
  • Halibut
  • Salmon
  • Herring
  • Mackerel

11. Go Easy on The Alcohol

They call it a beer belly for a reason.

A single serving of wine, beer, or spirits can pack in roughly 120 to 150 calories, and if you tend to overindulge, you can end with severe calorie overload.

A study published in Obesity found that alcoholic drinks make your brain more sensitive to the smell of food, increasing appetite.

Action Step

I’m not saying that you should give up beer altogether.

But a little moderation can go a long way in helping you get a flat stomach.

Part 2 – Exercise & Running Strategies to Lose Stomach Fat 

The way you run, and exercise in general, also matters when it comes to burning belly fat.

Apply the following strategies to ensure you’re making the most out of your sweat time.

12. Do Intervals

I’ve already confirmed that running does burn stomach fat, however, logging endless miles isn’t the best way to go.

Instead, do intervals by alternating between high-intensity bursts of running and slow jogging or walking for recovery.

Not only good for speed work, according to studies, intervals are proven to reduce belly fat and boost metabolism.

Action Step

Start with a proper warm-up of 5 to 10 minutes of slow jogging to raise your core temperature and get your muscles ready for the task ahead.

Go hard for 30 seconds, then rest for one minute, then go hard again.

Shoot for 8 or 9 on the RPE scale.

Repeat the process for 15 to 20 minutes. Don’t forget a proper cool down.

For more, check my six fat burning workouts. This guide on running for abs is also helpful.

13. No More Crunches

Classic ab exercises like sit-ups and crunches can strengthen your abs, but they’re not the most efficient exercises you can do to help you lose belly fat.

So what kind of ab exercises you should be doing?

You need exercises that engage multiple muscle groups and also challenge your cardiovascular system, so you end up burning off more calories.

These also work well for building strength in the core muscles—upper and lower abs, obliques, glutes.

Action Step

One of the best core exercises in the world is the good ol’ planks, where you hold yourself in a standard push-up position, core engaged, back flat, forearms resting firmly on the ground.

Planks cannot only hit your core hard, but they also activate your legs, chest, and shoulders.

Alignment first, strength later.

If you are beginner, then start with 3 to 5 sets of plank hold for 20 to 30 seconds each.

As you get stronger, hold it for longer and try adding in more variations.

14. Try HIIT Bodyweight Training

High-intensity interval training, as the name implies, consists of alternating between intense exercise intervals with recovery periods of low-intensity training.

Greek researchers found that performing intervals helped subjects lose more belly fat than moderate steady-state cardio training.

Another research published in the Journal of Sports & Physical Fitness showed that HIIT style workouts increase metabolism.

This means you continue burning calories at a higher rate for several hours post-workout.

“Also, You can try some waist cinchers while HIIT Bodyweight Training. Learning about Best Waist Trainer it will make your time less consumed and eventually you would see the results much faster.”

Action Step

You can copy my bodyweight routine below and do reps as many as possible with good form.

Take 20 seconds of rest between each exercise, then rest for one to two minutes between each round.

Aim for six to eight rounds

15. Perform Resistance Training

Research reported that resistance training to be super beneficial for people with prediabetes, type II diabetes, and other metabolic issues.

For instance, this experiment revealed that a mix of strength training and cardio exercise is most effective in reducing visceral fat in overweight teenagers.

Action Step

Incorporate the following guidelines into your training program:

  • Start out training with a personal trainer. This will help you nail good form from the get-go—key to injury-free and efficient training.
  • Combine it with cardio. How? By adding kettlebells, battle ropes, medicine ball exercises.
  • Do compound moves. Spot reduction is a myth. Instead, do multi-joint, full-body exercises that target many muscles at once. Examples include squats, bench presses, deadlifts, overhead presses, burpees, etc.
  • Go heavy or go home. Research shows that opting for heavier weight with fewer reps is most useful for shedding body fat. And don’t worry about getting bulked up.

Lifestyle Changes To Get a Flat Stomach

Your everyday lifestyle choices can also affect your belly fat loss results.

Don’t worry.

I’m sharing with you below the exact measures you need to take to get your lifestyle up to speed.

The sweat will be for nothing if you neglect your lifestyle.

Does Running burn belly fat

16. Sleep Well

According to a study published in the journal Sleep, people how logged six to seven hours of sleep during the night’s time had the lowest levels of visceral fat.

The researchers concluded that sleeping above or below that range was linked to more belly fat, and those who slept less than 5 hours reported the worst numbers.

In a 16-year study, 68,000 women who logged in less than five hours of sleep per night were likely to gain weight than those who slept seven hours or longer per night.

Research also has associated sleep deprivation with a number of conditions that contribute to excess visceral fats.

These include:

  • Increased concentration of the hormone cortisol and serotonin..
  • Reduced insulin sensitivity
  • Reduced levels of the satiety hormone leptin and increased secretion of hunger-inducing ghrelin.

Action Step

Here is what you need to ensure that you are getting enough sleep.

  • Sleep at least 7 to 8 hours of high-quality uninterrupted sleep during the night’s time.
  • Ensure quality sleep by removing all sorts of distractions, like your TV, Smartphone, and other electronics, from your bedroom.
  • Keep your room cool—around 65 degrees. Some people prefer a warm room, so make it as comfy as you want.
  • Avoid caffeine and other stimulants three to four hours before going to bed.
  • Keep a strict and fixed sleeping schedule by going to bed and getting up at the same time, even on the weekend.
  • Accept the fact that you cannot accomplish everything on the to-do list. That’s life, and bad stuff happens to good people all the time.
  • Your bedroom has two functions: Sleep and sex. So keep it that way.

17. Reduce Stress

 A study from the Ohio State University revealed that stress could hinder you from losing weight, or even add more pounds, by disturbing healthy hormone regulation.

It will make you hungry as your body keeps on releasing cortisol as long as the stress continues.

The bad news is when you are stressed out, you will tend to go for high-fat, high-calorie treats, and foods because these foods stimulate the brain to release good-feel chemicals that ease the tension.

Action Step

Here are a few things you can do here:

  • Start meditating. Techniques like Vipassana and Transcendental Meditation can be easily learned in the comfort of your house. Not into silent meditation? Try vibrational meditation like a Tibetan bowl or gong bath.
  • Keep a daily journal and jot down what’s bothering you. This will help you identify major stressors in life, along with ways of dealing with them.
  • Start a yoga class, especially restorative yoga.
  • Make more time for yourself. Learn how to be more assertive and say no to family members, friends, and the rest of the world, especially when they ask you for something you just don’t have the time to do.
  • Get enough sleep—at least 7 to 8 hours a night.
  • Remove friction and grey zone areas from your life.
  • Find time to do the things you enjoy—even if it’s watching South Park for the third time.

 18. Set Challenging Goals

Research reported in the Journal of Human Nutrition & Dietetics suggested that the key to long-term weight loss is setting challenging goals.

The study, led by researchers at Nottingham University, assessed the impact of goal setting in roughly 24,000 overweight participants for a 12-month duration.

The following conclusion:

  • Subjects who set no clear goals were the least successful overall
  • Those who set relatively modest goals shed 10 percent of their body weight.
  • Those who set more challenging goals lost an average of 19 percent of their body in one year–almost twice as much weight as the “realistic group.”

Also, this falls within the expert recommendation for a safe weight loss of one to two pounds per week.

Action Step

As a rule of thumb, start out by setting short-term fat loss goals.

These shorter, mini, goals are gradual achievements that lead up to your ultimate goals.

A good example would be to lose one pound per week.

That might not seem like much, but it adds up.

Keep that weight loss consistent for three months, and you’ll achieve the longer-term goal of shedding 10 to 12 pounds, in other words, aim for 10-20% from your old bodyweight.

You should expect slow, gradual weight loss, but not instant results. Everything instant are never good.

19.  Stay Consistent

Consistency at its best!

The key to shedding the pounds and keeping them off is consistently losing a small amount each week, according to research conducted at the Drexel University.

Duing the experiment, a group of 183 overweight participants went on a weight loss plan for a year.

In the end, subjects who shed a consistent amount of weight over the first two months of the experiment ended up losing more weight than the yo-yo dieters, despite the latter group reporting bigger weight loss results to start.

Further research on achievement and personal success shows that the most successful people in the world—those you might consider lucky—possess a tremendous level of perseverance.

Never give up before you even start it.

Action Step

Make exercise a daily must remove junk foods from your life, do the work, and you’ll see improvement, but just not right away.

It’s okay to have some time for recreational foods or cheating day, but please limit it as much as possible.

And that’s all.

Today’s post is full of useful strategies to help you burn belly fat and get a flat stomach.

But it’s up to you to get started on the path.

Eat right, exercise often and take care of your body.

The rest is just details.

Conclusion

I think that’s it for today. If you’re still asking yourself “does running burn belly fat?” then today’s article should get you started on the right path.

Don’t worry, I will be writing more about running to lose belly fat in the near future.

Please do your best to put into action what you just learned so you can lose your belly fat and enjoy a flat stomach.

In the meantime, thank you for reading my post.

Feel free to leave your comments and questions below.

David D

The Ultimate Guide to Sprint Workouts for Explosive Running Performance

Sprint training

Looking to take your running game to the next level? If so, sprint training is your ticket to burning calories, increasing speed, and building muscular endurance.

However, for those who have never tried it before, starting a sprint training program can be intimidating. It’s like signing up for an advanced physics course when you haven’t brushed up on the basics in a while. Except, unlike physics, sprinting can leave you with sore muscles and potential injuries if you’re not careful.

But fear not because I’m here to guide you through the process!

In this post, I’ll be sharing the ultimate beginner’s guide to sprint training.

I’ll cover everything you need to know to get started, from proper warm-ups to the best sprinting workouts.

So, let’s lace up our shoes and get ready to sprint toward a stronger, fitter you!

What is Sprint Training

Sprint training consists of high-intensity, short bursts of running performed at top speed. This workout method helps build muscle, burn fat, and increase metabolism.

There are two basic ways to perform sprint workouts: on flat surfaces or incline surfaces. If you’re just starting out, flat sprints are the way to go. All you need is a safe, open area like a track, jogging path, or sports field. And trust me, and you’ll want to be paying attention to your surroundings – the last thing you want is to be dodging pedestrians or tripping over debris mid-sprint.

Once you’ve built up your base with flat sprints, it’s time to take things up a notch with incline sprints. These are more challenging but also more rewarding. To do incline sprints, find a hill with a steep grade and at least 40 to 60 yards of running space.

For example, you might choose:

  • A hilly road
  • A mountain path
  • A city park
  • A treadmill

Just imagine the satisfaction of conquering a steep hill or powering up a mountain path at top speed.

The Benefits of Sprint Training

Sprint training is not just a workout, it’s a way of life. And the benefits are worth the effort. Science has proven that sprint training is a highly efficient way to provide plenty of benefits.

Of course, don’t take my word for it.

A study published in the Journal of Strength and Conditioning Research shows that sprinting drills can help you build endurance and improve your running performance.

What’s more?

This type of training can improve your VO2 max more than any other form of exercise, according to a meta-analysis published in Sports Medicine.

And the best part? HIIT running burns more calories in half the time of a steady-state workout, as reported by Biology of Sports..

I can go on and on about the importance of HIIT for runners, but that’s another topic for another day.

Here’s more about the history as well as the benefits of a sprint training program:

 Risks of Sprint Workouts

While sprint training has a lot to offer when it comes to improving speed and power, it also has its downsides.

For starters, sprinting puts a lot of stress on your joints, particularly the knees and ankles, so if you’re dealing with any pre-existing joint conditions or injuries, you should proceed with caution.

What’s more?

Sprinting can be challenging for beginners who are overweight or obese, as the extra weight places additional stress on the joints and may increase the risk of injury.

In other words, sprinting is like driving a high-performance sports car. Just like driving a high-performance sports car requires skill and caution, sprinting requires proper form and caution to avoid injury.

If you’re not sure whether sprinting is for you, I’d recommend that you consult with a qualified healthcare professional before beginning any new exercise program.

Running Shoes for Sprinting

Before you lace up your shoes and go for a sprint, you need to choose the right ones. Pro sprinters have different shoes for different tracks and events, and you should too.

Again, don’t take my word for it. A study published in the Journal of Sports Sciences found that track spikes offer better performance than regular running shoes during sprinting. Track spikes are designed to keep you on your toes and offer maximum traction for power and thrust. They also fit snugly, feeling more like an extension of your foot rather than shoes.

Look for a pair of lightweight shoes with a relatively stiff design and an outsole that can grip the track surface for maximum propulsion. Track spikes are a great option, as they offer maximum traction for power and thrust, fitting snugly and feeling like an extension of your foot.

Additionally, consider your running mechanics, training experience, and the field you train in to determine the best type of shoes for your needs.

Additional resource – Bolt top running speed

Recovery and Rest

Recovery is an integral part of any training plan, as it allows your body to rest and repair the muscle tissue that is broken down during exercise. Proper recovery between sprint sessions can help prevent injury, reduce muscle soreness, and improve overall performance.

To promote recovery, do the following:

  • Consume a balanced diet that includes adequate protein, carbohydrates, and healthy fats.
  • Hydrate well by drinking plenty of water before, during, and after your workouts.
  • Try active recovery techniques, such as foam rolling or light stretching, to improve blood flow and reduce muscle tension.
  • Sleep better. Aim to get 7-8 hours of sleep per night, as sleep is essential for muscle recovery and growth.

Dynamic Warm-up

Think of your warm-up as a key that unlocks your body’s potential. Without it, your muscles and joints are stiff and unprepared for intense exercise, leaving you vulnerable to injury and poor performance.

Here’s how to do it.

Start with a 10-minute easy jog to get your blood flowing, and your heart rate up. Then, incorporate some speed drills to fine-tune your mechanics and prevent injury.

Kick your heels up with some butt kicks, drive your knees high with high knees, and practice quick footwork with ankling. Don’t forget to work your calves with heel raises and improve your coordination with A and B skips. And if you’re feeling bold, add some jumping lunges and backward runs to spice things up.

Now that you’re warmed up and feeling limber, it’s time to dive into the sprinting workout. Start with short strideouts, pushing yourself to run at 80 percent of your maximum effort for 40, 50, and 60 meters with 90 seconds of recovery between each burst. Focus on proper form and maximum speed to get the most out of your training.

Once you’ve completed your sets, finish strong with a closing routine. Sprint as fast as you can for 20 seconds, then jog slowly for a minute to allow your heart rate to recover. Repeat this cycle eight to ten times to really push yourself and see results.

Here is what you need to do next…

Short Strideouts

This is the first section of the sprinting workout and involves performing short sprints at 80 percent max effort with 90 seconds of recovery between each burst.

Focus on maximum speed and proper form.

Here is how to proceed:

  • Sprint for 40 meters as fast as possible, then rest for 90 seconds.
  • Sprint for 50 meters as fast as possible, then rest for 90 seconds.
  • Sprint for 60 meters as fast as possible to complete one set.
  • Rest for two to three minutes, then perform four to five sets, pushing your body as hard as you can.

Next, perform this closing routine.

Sprint as fast as you can for 20 seconds.

Jog slowly for one minute, allowing your heart rate to slow down and recover fully before jumping into the next sprint.

Repeat the cycle 8 to 10 times.

Proper Sprint Technique For Beginners

Sprinting is like a dance – a carefully choreographed routine of movements that require technique, grace, and proper form. Without proper form, you might find yourself stumbling on the dance floor or, worse yet, nursing an injury.

Let’s start with your shoulders. Imagine your shoulders as a set of wings ready to take flight. Keep them relaxed, and don’t shrug them up. Instead, use them to power your movement, like a graceful bird soaring through the sky.

Now, let’s move on to your arms. Think of them as pistons, moving rapidly and powerfully. Keep them bent at a 90-degree angle and pump them backward in an open arc behind your body. This motion creates momentum, so avoid crossing them over your body.

Next, your elbows should stay flexed at a 90-degree angle and move in a straight line. Pump them back vigorously in coordination with your legs, driving them back to create forward momentum.

As for your feet, focus on pushing off from the toe as if you’re launching yourself like a rocket. Take short, fast strides instead of long ones, as this will help you generate more power and avoid overstriding.

The key to maintaining proper form is to relax your body. Don’t hold onto tension or waste energy. Instead, keep it relaxed like a lazy Sunday afternoon.

For more, watch the following Youtube Tutorial:

How to Cool Down After Sprinting Workouts

Once you’re done sprinting, don’t forget to cool down properly. Start with a slow jog for 5 to 10 minutes, letting your breathing and heart rate gradually return to normal. Then, take a leisurely walk to let your muscles relax.

To finish off, perform a series of static stretches, holding each pose for 45 to 60 seconds. This will help prevent post-workout soreness and keep you feeling limber and ready for your next sprinting session.

Great post-run stretches include:

The Hamstring Stretch

The Calves Stretch

The Hip Stretch

The Beginner Sprint Workout

If you’re new to sprinting, I’d urge you to kick it off with this beginner routine. This session is perfect for anyone looking to get started with sprinting and improve their overall fitness.

To perform this workout, start with a 15-minute warm-up that includes dynamic stretches and light jogging.

Then, perform three 400m sprints at 90% of your maximum speed, resting for 30 seconds between each sprint.

Next, perform three 200m sprints at 90% of your maximum speed, resting for 15 seconds between each sprint.

Finally, perform five 100m sprints at maximum speed, resting for 15 seconds between each sprint. Finish the workout with a 10-minute slow jog cool down.

Explosive Hill Sprint Workout

If you’re looking for a more challenging workout, try incorporating hill sprints into your routine. Uphill running helps you build explosive strength and power that can improve your speed and running economy. Incline training targets your anaerobic energy system, which is the primary source of quick sprinting energy, helping you improve your power and explosiveness. Additionally, running uphill also targets your quadriceps and can improve strength in your tendons and joints.

Here’s a sample hill sprint workout for beginners:

  • Warm up for 10 to 15 minutes.
  •  Perform your first hill sprints at 80 percent of max power for 30 seconds.
  • Jog down for recovery. Take more recovery time if you need to.
  • Repeat the cycle for 15 to 20 minutes. Give it 100 percent each time
  • Finish your sessions with a 10-minute slow jog on flat ground.

As you get fitter, make this workout more challenging by increasing the number of reps and/or the incline. Keep in mind that hill sprints are pure explosiveness, so they should be quite challenging.

Note – You don’t have to perform these sprints on the steepest hill around—it can also be a gradual incline.

How to Progress Sprint Workouts:

To take your sprint training to the next level, it’s key to gradually increase the intensity, volume, and frequency of your sprints over time. This can be achieved through a process called periodization, which involves dividing your training into distinct phases of increasing intensity and volume.

During the initial phase, focus on building your sprinting power by improving your sprint technique and boosting endurance with shorter sprints and longer rest intervals.

As the months go by, make your workouts more challenging by limiting rest periods and increasing the distance or duration of the sprints. Finally, during the peak phase, perform high-intensity sprints with shorter rest intervals to improve your speed and power.

Cross-Training – Backing up Your Sprint Training Efforts

Do you want to become an explosive sprinter? Then you need to train like one! Sprinting is an anaerobic sport that requires a combination of power and strength to excel. While running intervals and sprints is essential, it’s not enough on its own. To become a top sprinter, you need to strengthen your key sprinting muscles, which is where cross-training comes in.

Let’s start with strength training. I can’t stress enough how important it is for runners. Two to three strength sessions a week will do wonders for your sprinting ability.

When performing your strength exercises, aim for three sets of 8 to 12 reps, pushing yourself to the limit and reaching muscle failure in the last few reps. So what exercises should you be doing? Try barbell squats, front squats, sumo deadlifts, chin-ups, dips, hanging knee raises, jump squats, jump rope, and sled drags.

Power Clean

Begin by standing with your feet shoulder-width apart with a barbell positioned under your shins.

Next, while keeping your back straight and engaging your core, squat down and grab the barbell with an overhand grip a bit wider than shoulder-width.

Please make sure to keep your chest out, shoulder back, and head up the entire time.

Next, while keeping the bar as close to your body as possible, push your knees back, lift your chest up, then start to slowly raise the barbell from the ground to roughly above your knees.

As soon as the bar passes your knees, explosively stand up by first rising up on tiptoes, pulling the bar up higher (leading with the elbows).

Then, once the weight reaches your sternum level, assume a mini-squat position, drop your body under the barbell, flipping your wrists over so that your palms are facing the ceiling, and stand up tall with your upper arms parallel to the ground.

Last up, to lower the bar down, slightly bend your knees then lower the bar to thigh position.

Then slowly lower it to the floor, while keeping the core engaged and back straight the entire time.

Single-Leg Squats

While balancing on your right foot while extending the left straight in front as high as possible with arms extended out, squat down by bending at the knee and sitting your hips back.

Imagine you are going to sit in a chair behind you.

Once you reach at least a 100-degree angle in your right knee, extend your leg back to standing position, repeat for 8 to 10 reps, then switch sides.

If the single-leg squat is too challenging, then perform the chair assist or the TRX version.

For more challenge, rest a dumbbell on your chest.

Please make sure to keep your back flat and the right knee pointing in the same direction as the right foot.

Romanian Deadlift

Start by holding a loaded barbell at the hip level with a pronated grip—with the palms facing down.

keep your knees slightly bent, hips high, and shoulder on top of the barbell.

Next, lower the barbell by moving your butt back and bending your hips as far as you can while keeping the core engaged and back straight throughout the motion.

make sure to keep the barbell as close to your body as possible, with shoulders back and head looking forward the entire time.

Once you reach the bottom of your range of motion (you will be feeling a good stretch in the hamstrings if you are doing it right), slowly return to the starting position then stand up tall, and repeat for the desired reps.

I love to do this in front of the mirror because I can keep my lower back under control.

Keep it straight, don’t let it curved too much.

Plyometric Lunges

Begin by assuming an athletic position, then lunge forward with your right leg.

Next, while keeping the torso straight and core engaged, jump up as high as possible, and switch your leg position in midair, landing with your left leg in a forward lunge.

Then, powerfully jump up and switch legs to land back in a lunge with the left leg out in front.

Keep jump lunging, alternating sides for 45-second to one minute.

Bench Press

Start by laying on your back on a flat bench.

grab the bar with an overhand grip, lift it off the rack, and hold it above your chest with arms fully extended and core engaged.

Next, slowly lower the bar straight down in a controlled and slow motion until it touches the middle of your chest.

Hold for a moment, then press the barbell in a straight line back up to the starting position.

Please focus on using your chest muscles to move the bar throughout the exercise.

Don’t let your shoulder and elbow work alone.

No cheating allowed.

Perform 10 to 12 reps to complete one set.

Box jumps

Stand tall feet hip-width apart, at a comfortable distance from a 60cm high box or an elevated step (or sturdy object).

Next, assume a mini squat, then while engaging your core, extending your hips and swinging your arms, leap onto the box, landing softly on both feet.

Hold for a moment, then jump backward down to starting position and spring quickly back up.

Sprint Training Explained – The Conclusion

Ready to take your running routine to the next level? Sprint workouts are the secret weapon you need!

These quick and effective fitness boosters are perfect for runners who want to improve their athletic power and performance, but don’t have the luxury of long runs.

So, lace up your sneakers and get ready to sprint your way to success!

How to Make Running Fun & More Enjoyable – 30 Ways

What is A Good Running Pace For Beginners

Looking for the best advice on how to make running fun? Then you’re in the right place.

Here’s the truth.

“Running is boring.”

“Ugh, I have to go running after work!”.

“I really don’t want to go running today.”

“I should take a day off, but I’ll go run anyway.”

If these thoughts have ever crossed your mind, then you’re not alone.

Running is hard, and at times, quitting might feel like an option—maybe the only option.

But you know what, quitting is not the way to go if you’re serious about reaching your running goals.

One thing you can do to make sure you stick with your running routine, despite the negative thoughts, is to make your training more pleasurable.

Easier said than done, of course.

Would you like to learn a few tricks that can help you more running more fun?

Then you have come to the right place.

How To Make Running Fun – The 30 Tricks

Here are 30 measures you can take to make running more pleasurable.

Apply them to your training program and you’ll be able to add some extra enthusiasm back into your running routine.

 Make Running Fun – 1. Get The Right Gear

Want to make running more fun (or just less painful)?

Get the right gear as it’s key for helping you avoid pain and injury.

For instance, ill-fitting running shoes can lead to blisters, black toenails, and serious overuse injuries.

Clothing also matters.

Essential items include breathable and waterproof shirts, pocketed leggings as well as clothing for different weathers.

To get the best (and proper) deal, I highly recommend going to a specialist running store, instead of a high street sports shop.

In most of these specialty stores, you can find expert staff (who are runners themselves) that can give you personalized gait analysis and set you off with the right gear.

 Make Running Fun – 2. Slow Down

Many beginner runners start off at a sprint, but quickly flame out.

That’s the classic rookie mistake and the reason so many fall out of love with running.

So, how do you start the right way?

What I’d recommend you do is to alternate easy jogging and walking—say a minute of each.

That’s what’s known as the walk/run method, and it’s the best way to get fit without getting hurt.

As your training progresses, adjust your intervals.

Increase the time spent jogging while taking less and less time for recovery until you’re running for 30 to 45 minutes a session without panting for air.

Even then, don’t be hard on yourself.

Make it a rule stick to a conversational pace.

You should be able to hold a conversation with a training buddy without gasping for air.

You used to be a runner?

Here’s how to start running again.

 Make Running Fun – 3. Set The Right Goals

Before you start running or decide to take your running to the next level, you’ve to have an idea about what you want to achieve.

Do you want to lose weight?

Are you looking to improve your 5K timing?

Do you want to be a role model for your kids?

You have to know your goals then set the right ones.

By doing so, you give yourself something to work toward— even when that inner mind chatter suggests otherwise.

Just know that running goals don’t have to be that complicated.

In fact, they can be as simple as running three times per week or losing 15 pounds.

Once you want to take your training to the next level, make your goals more specific, like running a sub-30-minute 5K or completing a marathon race distance in less than four hours.

This also does wonders to your running motivation.

 Make Running Fun – 4. Reward Yourself For The Tiniest Progress

Studies show that self-rewarding helps improve motivation—running is no exception.

In fact, regardless of the habit you’re trying to build, getting your brain to link the pleasure of the reward with the activity makes it more likely for you to succeed.

That’s a good thing if you ask me.

What’s more?

Your achievement DO NOT have to be big to call for celebration.

In fact, rejoice in everything—even the tiniest progress.

Some of the best rewards include:

  • Taking a long nap,
  • Binge-watching your favorite show,
  • Buying a new running outfit,
  • Getting new shoes,
  • Having dinner out with a friend,
  • Spending the evening at the movies.

 Make Running Fun – 5. Race

Running to get in shape is one thing.

Training for a race is an entirely different experience.

In fact, the first time I trained for a race was a big turning point for me. That’s when I felt like a real runner for the first time in my life.

Just don’t sit around, waiting for the perfect race.

Instead, go and register for that race—any practical race— in advance.

Luckily, there are plenty of other races to choose from: mud runs, obstacle races, trail races, or even go the extra mile—literally—with ultra distances, ranging from 50K to a 100-miler or more.

You can also train for a sub 20 5K race.

 Make Running Fun – 6. Change up Your Running Routine

Another simple thing you can do to make running more fun is to explore a new running route.

This will definitely spark drastic changes in your attitude and approach toward the sport.

Look up an open road, a new trail, or a state park—preferably where you can immerse yourself in the beauty of nature.

You should also keep changing your running routes on a regular basis—never let routine settle in.

do this to make running fun
Female jogger exercising outdoors in nature

 Make Running Fun – 7. Take a Break

Feeling a bit burned out?

Maybe it’s time to put some distance between you and your running.

I know it’s cliché, but absence makes the heart grow fonder.

If the time spent away from running doesn’t make you appreciate it, then it’s time to find a new sport.

 Make Running Fun – 8. Try A Running Streak

Don’t get me wrong.

I’m not suggesting that you go running naked through a public place.

That’s criminal behavior.

I don’t want you to end up in jail because of me.

In the running world, streaking refers to running on consecutive days for a specific period of time, usually for more than a month or so.

My longest streak lasted for two months.

Your streaking goal is simple: aim to run at least a mile every day for three months.

As the weeks go by, add 5 to 10 minutes to your daily runs until you’re doing it for an hour or so.

As a rule, you should already be at moderately high training mileage before you start a streaking routine.

This ensures that your body is well adjusted to increased load—or else, you’re risking injury and you don’t want that.

Here’s how long does it take to run 3 miles a day.

 Make Running Fun – 9. Stay in The Moment

This might sound like the type of advice you’ll usually hear in new age circles, but it’s not all bogus.

The stuff works.

I mean, just think about it for a moment.

All there is the NOW.

No past.

No future.

Only the eternal moment of the NOW.

Here’s how to practice:

First of all, get into the right mindset: clear your mind, breathe deep, stand tall, relax your body, and set your intention on staying in the moment.

Next, focus on what you’re doing and your surrounding.

Bring your attention to your gross motor movements, the temperature, the wind, the elements, and go through every one of your senses: smells, sounds, everything.

 Make Running Fun – 10. Give it Time

Making running more fun doesn’t happen overnight.

It actually takes time, and trying to rush things out is never the path to a healthy and happy relationship.

It’s a long-term commitment (with lots of ups and downs just like a real relationship).

Time will tell in the end.

If your current running routine is not working out according to your expectations, then give it time.

Try out different things, change up your routine, reevaluate your goals, ask for help, and get the support you need.

Here’s how to overcome your running excuses.

Make Running Fun – 11. Get a Running App

You can find tons of fun, cheap (often free) running apps you can start using right away to make your runs more fun.

These apps not only track your runs, but also inspire you with music, provide valuable coaching, keep you safe, and so on.

Here are some of my favorites:

  • Couch to 5K. One of the most popular apps in the running world. The C2K app is ideal if you’re looking to go from zero to a true runner. The app guides you through three 30-minute sessions per week to get ready for a 5K race within two months.
  • Zombies, Run! This app turns your running sessions into a game that takes place in the middle of the aftermath of an apocalyptic zombie world. The app provides a series of stories and missions for you to listen to and complete as you run.
  • Rock My Run. For music lovers, this app is a must. As the name implies, RockMyRun is an app that provides the best workout music so you can maintain your energy and keep up a rockin’ pace while running.
  • This is one of my favorites. Runtastic has a more detailed approach to tracking and will record duration, elevation gain, distance, speed, calories burned, and more. It’s ideal if you’re a running nerd like me.

Make Running Fun – 12. Run at Night

Yes, you heard that right.

Maybe this is something you have never done, and not considering to do anytime soon.

Of course, be careful with —especially if you fear for your safety.

To err on the side of caution, run in safe and well-lit areas while wearing reflective gear (even a headlamp if you had to).

You should also consider bringing a pepper spray or partnering up with a buddy or group for extra safety.

Here’s the full guide to safe outdoor running.

 Make Running Fun – 13. Run Naked

Again, don’t get me wrong.

What I mean is, run with yourself, and nothing else.

Leave your music, GPS, and the rest at home so that you can focus on the workout.

This is going to be a new experience—especially if you’re a tech addict obsessed with performance metrics.

When running naked, you log the miles for the sake of the sport.

You run for yourself, you compete with yourself.

Additional resource – How to Do a Run Streak

 Make Running Fun – 14. Buddy Up

Another way to make running more fun is to train with a friend.

In fact, training with a partner is ONE of the best ways to get you committed to your training program.

With the right training partner, you can explore new running routes, try out new running workouts, and gab about the latest episode of The Walking Dead.

don’t be shy and do approach a lot of runners, and keep in mind that if you don’t ask, the answer will always be no.

Ask around.

Join a running club.

Befriend other runners.

Use online running communitiesto match yourself up with a suitable running buddy.

 Make Running Fun – 15. Watch TV on the Treadmill

Feeling bored on the treadmill?

Try this.

Watching television helps make treadmill runs more fun.

I tend to prefer humor shows for short runs and drama or police shows for longer runs.

Some of my favorite treadmill shows include:

  • The Big Bang Theory,
  • Amy Schmidt,
  • BoJack Horseman,
  • The Blacklist,
  • The Flash, and

Need more structure for your treadmill workout?

Try my Couch to 5K treadmill plan.

 Make Running Fun – 16. Listen to Music

I’m a big fan of music.

The running music I choose depends on my mood.

I usually pick different songs for different purposes: a high-energy playlist for faster-paced and interval workouts and a relaxed playlist for my recovery and long runs.

Science also agrees.

According to research out of the Brunel University in London, subjects who listened to music while exercising were able to run farther, swim faster, and bike longer than usual.

To get the most out of music, look for songs with the right tempo and groove.

I recommend playlists organized by BPM (beats per minute).

Apps like Tempo Run and RockMyRun are fantastic for helping you do that.

 Make Running Fun – 17. Try a Podcast

Not a fan of music?

Try a podcast.

You can find plenty of running-related podcasts on the web by just doing a simple Google Search.

Also, feel free to listen to other types of podcasts covering a broad range of topics.

My favorite is the 4-Hour workweek blogger Tim Ferris.

He talks about all things fitness, health, adventure, finance, startup, business and everything in between.

Audiobooks are an option, too.

Additional resource – What’s the best temperature for running

 Make Running Fun – 18. Try Fartlek

Fartlek is a Swedish training term that means “speed play,” and it’s all about performing sprints while following no specific structure

Here’s how to do them?

After a proper warm-up, sight an object in the distance, whether it’s pole, a car, a cat, a person, or the end of the block then sprint to it as fast as you can.

Once you reach it, slow down, recover and sight the next object.

Keep doing it until you can’t do no more.

 Make Running Fun – 19. Add Bodyweight Exercises to Your Run

This is not only a fun way to change up your runs, but it can also help you build both strength and stamina.

Add bodyweight exercises to your run by performing do-anywhere moves, such as push-ups, squats, pulse lunges every 5 minutes you spend running.

You can also do some  jump roping for a few minutes.

This is like adding a CrossFit elements to your runs.

runner having fun

 Make Running Fun – 20. Try Hill Reps

Hill training is a crucial part of any running program—whether you are a recreational runner or an elite athlete.

It builds power and strength like nothing else.

Here is how to proceed:

Locate a long hill that should take you at least five minutes to run up.

Then after a 10-minute dynamic warm-up, run up the hill at a sustainable pace, turn around and recover on the way back down.

Repeat the cycle three to five times (or until you can do no more).

For more,  learn how to design your own running program.

 Make Running Fun – 21. Smile While Running

I know it sounds awkward.

But, research shows that faking a smile tricks the brain into releasing the good-feel chemicals, such as endorphins, and serotonin, associated with states of happiness and euphoria.

Not only that, research shows that smiling decreases recovery time from stress and lowers heart rate.

Here’s how to put it into practice.

Build the habit of greeting every person you pass with a heartfelt nod, a good morning, or a big smile.

 Make Running Fun – 22. Do a Ladder Workout

This is another variation of the traditional interval workout.

A ladder workout is a well-known form of speed work interval workout in which you climb, down, or both in speed and distance as the workout progresses.

As a rule, run each interval a bit faster than the preceding one, then jog for 100 to 200 meters for recovery between each interval.

Here is how to proceed:

After a 10-minute dynamic warm-up, run 100m, rest, run 300m, rest, run 400m, rest, run 500m, rest, and so on until you can do no more.

Then finish your sprint workout with a cool down.

 Make Running Fun – 23. Run to Your Favorite Restaurant

Although I don’t usually recommend rewarding your hard effort by indulging in an unhealthy meal, this time, I’m making an exception.

To do this, pick a food or snack spot you’ve been dying to try, plan the running route, then run all the way there.

Or you can also prepare in advance (or order) a huge meal to feast on when you return home from your run.

Whatever you like the most go for it.

Try to avoid junk food, opt for healthier or homemade food.

My favorite: Indian food.

 Make Running Fun – 24. Try Motion Meditation

If you want to sense what it’s like to run with the mind and body in union, try meditating while logging the miles.

By doing this, you’ll be taking transcendental strides toward achieving a more focused and calm mind while running.

In fact, I do believe that the time you spend running is perfect for meditating because of the repetitive nature of the sport.

If you don’t know how to do this, then this post on Zen Running from Leo at the Zen Habits Blog.

You can also repeat affirmative words or mantra during your run.

Sometimes you just need to shut the world out and tune in with yourself.

 Make Running Fun – 25. Try Trail Running

Trail running is an integral part of any training program.

locate a nearby trail—preferably ones that cross waterways, mud, or rivers—and just get in there and run.

You can also sign up for any mud run or obstacle race course.

For more on trail running, check my full guide here.

 Make Running Fun – 26. Try a New Running Form

Two of the most well-known techniques are the Chi Running and Pose Method alternative running forms.

I have personally tried Chi Running, and it’s quite good—especially the keep yourself tall with a slight lean forward technique.

Maybe it’s time you try it out and see for yourself.

 Make Running Fun – 27. Try a Running Breathing Ratio

Having trouble breathing properly while running?

Try synchronizing your breaths with your foot strikes, in what’s known as rhythmic breathing.

In theory, breathing this way not only helps you stay more focused (and in the present) but may also prevent injury.

That’s a good thing if you ask me.

Of course, the exact breathing ratio will depend, mostly, on your running intensity and fitness level, but for a beginner, I’d recommend a 2:3 breathing ratio pattern.

This involves running for three steps on the inhale, then out for two steps. In for three steps, out for two steps…

I think you get the big picture here.

 Make Running Fun – 28. Do a Negative Split

Instead of keeping the same level of intensity/speed throughout your run, perform the first portion of the workout 10 to 15 seconds per mile slower than your average 5K pace.

Then, once you reach the halfway mark, speed it up, and run the rest of the distance 10 to 15 seconds faster than your average 5K pace.

For the last few hundred yards, go as fast as you can without fainting.

 Make Running Fun – 29. Join a Running Club

If running with just one partner didn’t do the trick, then join a running club.

These clubs are freaking everywhere, and chances you are already living near one right now.

Most of these clubs also cost a few bucks a year and might organize a free event every now and then.

The competitive sprite of a running group can encourage you to push a little bit further and harder than you’d do when you go solo.

How To Make Running Fun – The Conclusion

There you have it Making your runs more fun is just as simple as taking a few of the above measures The rest is just details

Please feel free to leave your comments and questions in the section below

Thank you for dropping by

How to Choose Best Running Sunglasses

couple runner with sunglasses

Whether you just picked up running or are an elite runner, investing in a nice pair of running sunglasses is essential.

Picking the right pair of frames for outdoor exercise can sometimes be tricky, but no need to worry—in today’s post, I got you covered.

In today’s post, I’m providing you with the guidelines you need to find the perfect eyewear for any running distance.

Please keep in mind, I’m not gonna give you style advice, but comfort advice.

In this article, I’ll share with you the guidelines you need to help you choose the perfect pair of sunglasses for your next run.

The Dangers Of Sunlights

Our eyes are one of the vital organs—and they deserve all the protection they can get.

Not only do your eyes see shapes and distinguish between millions of colors but also regulate light signals that keep your body’s internal clock functioning properly.

So why should you wear sunglasses when running?

Excessive sun exposure can take a toll not only on your skin but on your eyes, too.

It can actually damage your eyesight in more than one way.

Without proper eye protection, excessive exposure increase your risk of developing eye problems such as from the lightest problem, foreign bodies, dry eye syndromes, to cataracts, macular degeneration, and growth on the eyes called pterygium and pinguecula.

That’s not the whole story.

The eyelids and the sensitive skin surrounding it are cancer-prone.

What’s more?

Running eyewear will also help keep the rain and elements out of your eyes during rainy weather.

Rainwater can be too acidic, causing a lot of harm.

Sports sunglasses can also protect your eyes from insects, cobwebs, leaves, branches, or any mud or dirt from getting into your eyes when running outdoor, especially on trails.

The bottom line –Proper eyewear is one of the best ways to minimize eye damage and should be part of your running kit and gear.

You don’t need to be an elite runner to grab one running glasses for you.

How To Choose The Right Running Sunglasses

Here’s what to look for when choosing running sunglasses:

Protection

The first factor to consider when choosing a pair of running sunglasses is the level of protection.

There are three types of rays emitted by the sun: UVA, UVB, and UVC— When choosing running sunglasses, look for a pair that blocks all of these ultraviolet rays.

What’s more?

Remember—Ultraviolet light can be dangerous on both sunny days and when the skies are cloudy.

So it’s best to keep your eyes protected anytime you’re running outdoors.

runner choosing proper running sunglasses

Running Sunglasses – Proper Fit & Comfort

Casual sunglasses may protect your eyes from sunlight, but might not stay in place when running, so another priority is getting a pair that doesn’t bounce around.

Go for what feels most comfortable for you.

Not only finding a pair of sunglasses that stay in place while running is comfortable, but can also prevent unnecessary tensing, distraction, strain, and squinting.

For instance, if you have a wide face, make sure your running sunglasses don’t pinch over the temples.

Conversely, if you have a smaller head, look for a model that fits tightly and doesn’t slip nor bounce around.

Take some attention to your nose shape too, make sure the bridge fits perfectly and not slips down when you start bouncing the ground.

Additional resource – Buy glasses online with GlassesUSA

Wraparound Running Sunglasses

UV rays can reach your eyes from all angles, so go for sunglasses that cover as much of the eye area as possible.

I’d recommend wraparound sunglasses as these offer the best coverage from side to side.

Polarized Tint

Consider getting a pair of sunglasses with polarized lenses as they’ll reduce glare, especially if you do a lot of running on paved roads or near lakes.

The polarization can reduce the glare reflected from the cars and road surfaces, allowing you to pay more attention to your run. Polarized sunglasses can be real life-saver.

Wear A Hat Or Visor

Besides running sunglasses, another measure for added protection is wearing a cap or a visor.

A hat helps shade the entire top half of your face, especially the sensitive skin on the eyelids that sunglasses often fail to protect against the sun’s harmful rays.

In fact, a cap or wide-brimmed hat may block as much as half of the UV rays.

These can also hinder UV rays that strike the eyes from above or around glasses.

What’s more?

Headgear can also help absorb sweat, so it won’t get into your eyes.

You’ll also love running with a hat if you get caught running in the rain.

Conclusion

In the end, the price is not that important.

Pick a pair of running glasses with these features, not the most expensive one.

Choose comfort over the brand.

Fit over fashion.

Get it.

Trail Running 101: A Complete Guide for Beginner Runners

man running on trail

Ready to ditch the city streets and venture into the wild world of trail running? You’re in the right spot!

If you’ve been pondering the idea of hitting the trails but aren’t quite sure where to begin, don’t fret. Many new runners face the same dilemma. The world of trail running offers a refreshing escape from the concrete jungle, but those first steps can be intimidating.

But hey, there’s no need to worry any longer! In this article, we’re about to embark on a journey—a complete guide to trail running that’ll turn you from a city slicker to a trail-blazing pro. By the time you finish reading, you’ll have all the knowledge you need to:

  • Start trail running with confidence
  • Discover fantastic trails near you
  • Stay safe and sound during your trail adventures
  • Pick the perfect trail running gear

Excited? Good! So, let’s lace up those shoes, embrace the great outdoors, and dive into the exciting world of trail running.

Trail Running Explained

So, what’s trail running all about?

In layman’s terms, trail running involves running on anything that is unpaved and/or natural, mostly taking place on softer, more cushioned surfaces like dirt paths and grass.

In general, a good trail surface should:

(1) Offer natural obstacles (think roots and rocks),

(2) Be unpaved (preferably natural),

(3) Provide great scenery (away from the hustle and bustle of the city) and

(4) Involve elevation gain (lots of ascents and descents).

The Benefits of Trail Running

Let’s uncover the treasure trove of benefits that await you in the world of trail running. It’s not just a run; it’s a journey filled with advantages you won’t want to miss out on.

  • Less Risk of injury. Trail running is your body’s best friend. Why? Because it’s a kinder, gentler alternative to the relentless pounding of pavement. The surfaces beneath your feet are forgiving, like a plush carpet for your muscles and joints.
  • More challenge. Trail running serves up a smorgasbord of obstacles. You’ll conquer steep hills that leave your lungs gasping for air, navigate technical terrain that demands quick thinking and nimble footwork, and power through mud, rocks, and roots.
  • Burns more calories. Research shows that trail running can torch around 10 percent more calories than road running. Sure, 10 percent might not sound like a lot, but it adds up over time. So, if you’re looking to shed those extra pounds while enjoying nature’s beauty, trail running is key.
  • Improves balance and coordination.  As you navigate the unpredictable terrain, your body engages those smaller, intrinsic “helper” muscles, especially in the hips and core. These muscles work in harmony to keep you upright, helping you develop a rock-solid foundation and agility.
  • Gets you into nature. The off-beaten path whisks you away from the hustle and bustle of city life, immersing you in the tranquility of the wilderness. Picture yourself running alongside glistening streams, weaving through ancient forests, and breathing in the pure, untamed air.

What’s not to like!

The Bad News

Now, before you dive headfirst into the thrilling world of trail running, let’s address the elephant on the trail: the challenges. Here a few:

  • The Rugged Terrain: Mother Nature doesn’t always lay out a red carpet for trail runners. You’ll encounter steep ascents and descents that feel like scaling a mini-mountain, jagged terrains that test your footing, and sneaky spots in the sand that can throw off your balance. But guess what? These challenges are what makes trail running an epic adventure.
  • Nature’s Little Surprises: Picture this: branches seemingly conspiring to trip you up, low-hanging trees that demand you to duck and dive, and rocks and roots that play hide-and-seek with your feet. It’s a wilderness out there, and these surprises are all part of the game.
  • Risky Business: Yes, there’s an element of risk when you’re out in the wild. But fear not; I’m about to arm you with tips and tricks to keep those risks in check.

How To Find a Trail Near You?

Finding the perfect trail is like discovering a hidden gem, and it can make or break your trail running experience.

Here are a few tips on how to locate the best trails around you.

Urban Trails Exist:

Living in a bustling urban area doesn’t mean you’re miles away from trails. You’d be surprised at how many hidden pockets of nature you can find. Look for local reserves, parks, or even the network of gravel roads and dirt trails that many towns and cities offer. These can be your starting point for off-road running adventures.

Connect with the Community:

Joining local running clubs or visiting running stores is like unlocking a treasure trove of trail knowledge. These seasoned runners can point you in the right direction and even introduce you to fellow trail enthusiasts. It’s a win-win!

Tech-Savvy Solutions:

In this digital age, technology can be your trusty sidekick. Consider using apps like Suunto Heat Maps to discover new trails, or simply rely on Google and Google Earth to scout potential routes. The internet is teeming with resources like Trail Run Project, where you can find valuable trail information and even connect with the trail-running community.

Know Your Terrain:

Before you lace up those trail shoes, do some research on your chosen trail. Understand its unique characteristics, from potential obstacles and hazards to convenient pit stops.

And don’t forget to check for any wildlife encounters you might expect—knowledge is your best friend when it comes to staying safe.

Get the Right Trail Running Shoes

Ah, the age-old debate: road shoes vs. trail shoes. Let’s dive into this footwear conundrum, shall we?

Road Shoes vs. Trail Shoes:

You might wonder if your trusty road shoes can handle the trails. Well, for short trail runs, they can do the job, but hear us out. Regular trail running will eventually call for a pair of dedicated trail shoes. Why, you ask? Let’s break it down:

Protect Those Feet:

Trail shoes are your armor against all sorts of foot-related troubles. From the ever-dreaded stubbed toes to bruised soles and slippery falls, they’ve got you covered. Plus, with those gnarly terrains and uneven surfaces, a sprained ankle might be lurking.

Lower to the Ground:

Here’s a nifty trick that trail shoes bring to the table—they tend to be lower profile, meaning they sit closer to the ground. Why is this important, you wonder? Well, it significantly reduces your risk of those pesky ankle twists and sprains. No one wants to hobble home after a run, right?

Traction Galore:

Ever found yourself sliding around on muddy trails like Bambi on ice? Trail shoes come equipped with rugged treads that offer more grip than a superhero on a mission. Slippery slopes and muddy paths won’t stand a chance.

Get the Right Trail Running Gear

Now, let’s talk gear because hitting the trails isn’t just about the shoes; it’s about being well-prepared for whatever Mother Nature throws your way.

So, gear up, trailblazers!

Trail-Worthy Threads:

Your regular running gear won’t cut it here. Opt for technical clothing made from synthetic, moisture-wicking fabric. It’s like your second skin, keeping you dry and comfortable through mud, rain, or sweat

Battle the Bugs:

Depending on where and when you run, insects might decide you’re their new favorite snack. Arm yourself with insect repellent—your shield against pesky bites and unwelcome tick guests.

Gaiters: The Unsung Heroes:

These might look like oversized socks, but they’re your secret weapon against nature’s little surprises. Gaiters guard your feet and shoes against the elements—think dirt, debris, and pebbles. They’re like a forcefield for your feet.

Shine a Light:

Planning a dawn or dusk adventure? A headlamp or flashlight is your trusty sidekick. Navigating the trails in the dark becomes a breeze, and you’ll avoid those accidental encounters with tree branches. Ouch!

Other trail running items include:

Additional resource – Trail Running First Aid Kit 

Start Slowly

Alright, let’s get real about your first trail runs. Remember that feeling when you first started running? Well, you might just experience it all over again, and yes, it might not be all sunshine and rainbows.

Even if you’re a seasoned road runner, brace yourself for a reality check: trail running can slow you down. In fact, according to Trail Running magazine, expect to be 10 to 20 percent slower on those winding trails compared to your flat-road pace.

Here’s a little math for you: if you usually conquer a 5-mile road run in a cool 50 minutes, that same distance on the trails might stretch into more than an hour. Yep, it’s a whole different ballgame out there.

However, don’t fret about your pace. Instead, focus on finding your trail running groove. Start with about 60 to 70 percent of your usual effort. Take your time, soak in the surroundings, and, most importantly, keep an eagle eye out for those sneaky obstacles Mother Nature throws your way.

A complete beginner?

Try my beginner running plan.

Hydrate All the Time

Hydration is always important when you’re running, but it becomes much more crucial during your trail adventures, especially when you find yourself deep in the wilderness, far from the familiar sights of urban life.

Here’s the golden rule: aim to drink at least 15 to 20 ounces of liquid for every hour you’re out there pounding the trails. But hey, if you feel like your body’s thirsting for more, don’t hold back. Listen to what it’s telling you, and gulp down that refreshing H2O.

Now, it’s not just about chugging water; you’ve got to keep those electrolytes in check. Electrolytes are key for optimal performance – calcium, magnesium, potassium, sodium – they’re the ones responsible for muscle function, water retention, and even blood pH levels.

To keep the hydration game strong, think about investing in a trusty hydration belt or pack. Sure, some folks might opt for the handheld water bottle, but let’s be honest, it can be a bit distracting – not to mention it might throw off your trail-running groove.

Trail Running Safety

Like any other outdoor sport, trail running has its dangers, and if you plan to spend any length of time on remote trails, it’s key to know how to stay safe.

To stay safe on the trails, do the following:

  • Say something. Tell someone—a family member, a friend, a neighbor, you name it—where you’re running and let them know when they should expect to hear back from you. Here’s the full guide to safe running.
  • Cell phones & maps. Bring your cell phone, and learn how to use a map and a compass —in the event you get lost. Of course, most phones today are equipped with a GPS system, but you should keep in mind there may be no signal outside city limits.
  • Be identifiable. Bring with you your ID and a list of emergency contacts—in the off chance something bad happens to you, God forbid.
  • Run distraction-free. Leave your headphones at home so you can keep your ears on your surroundings. Remember to enjoy the pristine sights and sounds of the natural world—without letting them distract you from the task at hand.
  • Stay on the mark. Keep your runs on marked trails as often as possible, and don’t be afraid of running right through a stream—getting your feet wet is part and parcel of the trail running experience.
  • Run with others. There is safety in numbers, to do your best to schedule your trail runs with a training buddy or a running group.
  • Beware of animals. Familiarize yourself with the type of wildlife in your area, and know what to do when you come face to face with a bear, a mountain lion, a snake, or any other dangerous animal.
  • Protect yourself. You can always bring with you pepper spray if you are running alone and safety is an issue.
  • Use a Safety app. Download and use safety apps for your phones, such as Road ID and bSafe.
  • Bring energy. For long trail runs, make sure to bring with you water and some food and fuel.
  • Be visible. Put on a headlamp or flashlight if you are planning to run when it’s dark.
  • Pay attention to wildlife. Here’s how to prevent animal attacks while running.
  • Keeps your eyes open. Be mindful of your surroundings. Use common sense. Listen to your gut, and never ignore those ancient gut feelings.

Practice Good Trail Running Etiquette

Trails have their own unspoken code, and if you want to keep the outdoors safe and friendly, it’s time to embrace it. Here are some pearls of wisdom to make you the trail etiquette champ:

  • Mind Your Manners: Always be aware of fellow trail users. Nobody likes surprises, so if you’re coming up from behind, give a friendly heads-up with a hearty “Passing on your right (or left),” especially if you’re about to zoom past them. It avoids startling them and keeps everyone on the same page. And on those narrow single tracks, be ready to yield if needed.
  • Maintain Your Space: If you’re part of a running pack, remember the ten-foot rule – keep a healthy distance from each other. This not only ensures you get a better view of the terrain ahead but also prevents any accidental stumbles or tumbles.
  • Friendly Vibes Only: Embrace your inner trail ambassador. Be the hiker, runner, or walker who smiles, nods, and shares a few friendly words. It’s amazing how a simple “hello” can create a sense of camaraderie on those winding trails.
  • Spread the Love: Remember, it’s not just about following the rules; it’s about contributing to the thriving trail community. Whether it’s a smile, a nod, or a few encouraging words, spread positivity and make the trail a welcoming place for all.