How to Dry Wet Running Shoes (Fast, Safe & Damage Free)

What To Do With Old Running Shoes - how to recycle running shoes


A few months back, I got caught in one of those classic Bali downpours mid-run. One minute I’m cruising, the next I’m soaked head to toe—and my shoes? Waterlogged like they just finished a triathlon.

I made it home sloshing and dripping, staring at my soaked trainers like, “How am I supposed to run tomorrow in these?”

Sound familiar? Yeah, if you run long enough, this will happen to you. Whether it’s rain, creek crossings, or just a sweaty summer long run, your shoes are going to get wet.

But here’s the thing—drying them fast matters, and doing it the wrong way can absolutely trash your shoes. I’ve learned that the hard way too. So here’s how to get ’em dry, quick and safe, without cooking the glue or wrecking the foam.

Why Drying Them Properly Actually Matters

Running in wet shoes isn’t just uncomfortable—it’s straight-up dangerous for both your gear and your body.

Here’s What You’re Risking:

  • Blisters & Funk: Wet shoes = skin softening = friction. You’ll be nursing hot spots by mile three. And the moisture? It’s a breeding ground for mold and athlete’s foot. Gross.
  • Destroyed Cushioning: Wet midsoles lose their bounce. EVA foam soaks up water, and that “cloud-like” feel turns to soggy pancake real quick. A study even found that midsole shock absorption can drop by up to 50% when wet. That’s brutal on your joints.
  • Altered Gait & Injury Risk: Wet shoes weigh more, sag differently, and throw off your foot’s alignment. That instability can mess with your stride and increase your risk of shin splints, knee pain, or worse.
  • Shortened Shoe Lifespan: Moisture messes with everything—foam, glue, upper fabric. Dry ’em wrong (like, say, tossing them over a heater) and you’re cutting miles off their life.

💡 As I always say: heat ruins shoes faster than training miles do.

Step-by-Step: Dry Your Shoes Like a Pro

Step 1: Break ’Em Down

First thing—disassemble the crime scene.

  • Pull out the insoles. These little guys hold a ton of water. Let them dry separately in open air or near a fan.
  • Loosen or remove the laces. Open the tongue wide and give the shoe some breathing room.
  • Brush off dirt and mud. No need to dry mud into your shoes. Use a soft brush or damp cloth and clear that junk first. If they’re seriously dirty? Give them a light rinse, then follow this drying routine.

👉 This step is all about access. Moisture hides in creases and foam. You want to expose every inch to airflow.

Step 2: Newspaper to the Rescue

The OG move. It’s old-school, but it works. Like, really works.

Why it’s clutch:
Newspaper is ridiculously absorbent. It wicks water from every part of your shoe—especially deep inside where fans or towels can’t reach.

How to do it:

  • Crumple up a few sheets and stuff them into the shoe. Push it into the toe box, under the arch, and around the heel.
  • Wrap a sheet around the outside if the upper’s soaked too. Use a rubber band if needed.
  • Put the shoes in a dry, well-ventilated area—NOT in direct sunlight or next to a heat source (seriously, don’t roast your shoes).
  • Replace the newspaper every 1–2 hours at first. You’ll be amazed at how fast that paper gets soggy. Fresh paper = faster drying.

🧠 Pro tip: If you’ve got light-colored shoes and worry about ink smudges, use paper towels or blank newsprint. I’ve dried dozens of pairs with newsprint and never had an issue—but it’s something to watch if you care about aesthetics.

By the end of the night, your shoes will go from swampy to just damp. Then you’re ready for the final touch.


Next Step: Bring in the Airflow

Once you’ve done the stuffing game for a few rounds, the shoes should feel damp but not dripping. This is where a fan becomes your MVP.

Set the shoes up under or in front of a fan. Point the airflow right into the shoe opening. You can even rig them up with a wire hanger or clip to hold them upright if you’re fancy. No heat needed—just steady air. Leave them overnight and you’ll usually be good to go by morning.

What NOT to do

  • Don’t toss your shoes in the dryer. Even on low heat, the tumbling will warp the shape and break down glue.
  • Don’t put them on a radiator or heater. Foam hates heat. So does mesh. So does your wallet when you’re replacing wrecked $150 shoes.
  • Don’t dry them in direct sunlight for hours. UV rays can fade and weaken the fabric, especially on darker shoes.

Step 3: Use a Fan — Kickstart the Drying With Airflow

After soaking up the worst of the water with newspaper, it’s time to move air. Fans are your secret weapon. They don’t just dry your shoes faster—they do it safely, without cooking your midsoles or warping your fit.

Here’s how to set it up:

  • Grab a floor or tabletop fan. The stronger the breeze, the better.
  • Aim the airflow directly into the mouth of each shoe—that’s where moisture lingers most.
  • Remove any soaked newspaper or stuffing first. You want air getting inside the shoes, not blocked by soggy paper.
  • Need to get creative? Hook shoes to the front of the fan grill using a wire hanger or bungee cord. You can also tie the laces together and hang them over the top of a box fan.
  • No floor fan? Set shoes under a ceiling fan, elevated if possible. Flip them sideways or upside down to let air reach the insides.
  • Don’t forget the insoles and laces—lay them out nearby so they dry too.
  • Watch those laces! If they’re flapping near the fan, either tie them up or remove them completely.

Real-world tip: I angle a box fan toward my shoes and leave it running for a couple hours. They go from soaked to almost bone-dry. A runner on Reddit swears by his little 6-inch fan—says his shoes are ready by the next morning.

If you’ve got one of those blower-style fans or a tilting model, try setting your shoes right on top—so air flows straight into the footbed. It’s like a mini boot dryer, minus the price tag.

Once they’re “paper dry” to the touch? Time to finish with the last step.

Step 4: Let Them Air Dry in a Ventilated Space

After the fan, your shoes should feel damp but no longer squishy. Now it’s just about giving them space and time to finish the job.

Here’s how to air dry the right way:

  • Pick a spot that’s dry, well-ventilated, and not humid. Near a window with a breeze works. Bonus points for a room with a dehumidifier.
  • Don’t trap them. That means no closets, no gym bags. Let them breathe.
  • If you can, elevate the shoes—like on a drying rack or shelf—so air can reach them from all sides.
  • Keep the room warm, not hot. Room temp or slightly warmer is perfect. If you’ve got a heating vent nearby, set the shoes near it (but not directly on it).
  • Avoid direct sun. UV rays can break down shoe glue and warp materials.
  • If they still feel a little damp, you can loosely stuff them with dry paper towels or a clean cloth. Just remember to remove that stuffing after an hour or so so it doesn’t trap new moisture.
  • Give it time. For most shoes, a night in a dry, well-vented room is enough.

👉 Why this matters: The final bit of drying prevents mildew, stink, and long-term damage. Shoes that get almost-dry and then get shoved into a dark bag? That’s how you end up with moldy insoles and shoes that smell like a wet locker room.

Once everything is dry, pop the insoles back in, re-lace, and they’re ready to run.

Shoe-Drying 101 (for Runners Who Hate Wet Feet)

If you train in the rain, run trails, or sweat like a beast—wet shoes are just part of life. But they don’t have to be a nightmare. Drying your shoes properly can extend their life, keep your feet healthy, and save you from slipping into soggy misery the next morning.

Once you’ve pulled the insoles out, untied the laces, and wiped off the worst of the mud, here are two solid options for getting your shoes dry fast—and without wrecking them.

Option 1: Electric Shoe Dryers (Set It and Forget It)

This is the Cadillac of drying options. If you’re constantly training in wet weather, buy a legit shoe dryer and thank yourself later.

  • What it is: A small plug-in device that blows gently warmed air (not hot!) into your shoes.
  • How long it takes: 3–8 hours depending on how drenched your shoes are.
  • Top picks: PEET dryers, DryGuy, and similar rack or tube-style models.

“I’ve been using a PEET dryer for 6 years. Zero damage, no mildew, and 500+ miles from every pair.” — trail runner in the PNW

Pro tips:

  • Look for low or no-heat models (~90–110°F). You don’t want an oven—you want a warm breeze.
  • Make sure the brand is reputable and safety-certified (this is electricity + fabric = play it safe).
  • Use it for gloves, ski boots, insoles too—it’s a multi-tool for wet gear.

Downsides? It costs a bit ($50–100) and needs an outlet. But if your shoes are wet more than twice a week, it pays for itself in saved gear and fewer blisters.

Option 2: Moisture-Absorbing Inserts (Portable, Passive, Still Awesome)

No plug? No problem. Try a silica gel insert, cedar pouch, or boot banana.

  • How it works: These suck moisture out of your shoes overnight. Like a sponge for your sweat-soaked Hokas.
  • Good picks: DrySure, cedar-filled pouches, silica bags, or odor-absorbing inserts with minerals.

They’re great for travel or the gym. You can even toss them into your shoes after a muddy trail run and forget about them until morning.

One ultrarunner said his drying inserts were “non-negotiable” during race season. Always dry shoes, no mildew, no stink.

💡 Bonus: Combine them with the fan method and you’ve got a dry-shoe express lane.


Extra Tips to Dodge the Dreaded Wet Shoe Situation

Look, wet shoes happen. It rains. You misjudge a puddle. A surprise creek shows up mid-trail. But with a little planning, you can dodge the worst of it—or at least deal with it like a pro.

Here’s how I help my runners stay dry (or at least dry faster):

1. Rotate Your Shoes (Seriously, Do It)

If you run more than three days a week, you need a second pair.

Not just for recovery and performance—but because wet shoes need time to dry. Rotate pairs, and you’ll always have a dry set ready to go.

Bonus: Your shoes last longer and your legs get a little variety. Even the Cleveland Clinic recommends this for injury prevention. No-brainer.

2. Prep for Bad Weather Like You Mean It

  • Waterproof shoes (like Gore-Tex trail runners) are great for keeping rain out—but if water gets in, it stays in.
  • Use gaiters or waterproof socks to block water at the ankle.
  • My old-school emergency trick? Plastic baggies over your socks, inside the shoes. Not breathable, but for short runs in pouring rain, it works.

Key takeaway: Don’t let wet feet ruin your training—plan for it.

3. Pick Shoes That Drain Well

If you’re hitting creeks or soaking trails, look into quick-dry trail shoes—the kind made to get wet and bounce back.

  • Brands like Salomon, Merrell, or SwimRun models often include drainage ports.
  • Breathable mesh sheds water faster than thick padding or waterproof liners.

👉 You’ll still get soaked—but you won’t slosh for the next 10 miles.

4. Wear the Right Socks

Cotton? That’s a hard no.

Go with:

  • Merino wool – stays warm even when wet
  • Technical synthetics – labeled “moisture-wicking” or “ultra-dry”

💡 Pro tip: Bring a spare pair if you’re going long. Changing into dry socks mid-run can save your feet from blisters—and keep your shoes from turning into swamps.

5. Bring Newspapers (Yes, Really)

Old school but wildly effective:

  • Stuff your soaked shoes with newspaper.
  • It absorbs water quickly—way faster than just air drying.
  • Even better: use a fan + newspaper combo = dry shoes by morning.

I keep a few newspaper sheets and a towel in my race bag just in case. Muddy trail race? Wet relay leg? You’ll be glad you did.

6. Dry Them Right Before Storing

Tossing damp shoes into a closet is the fast track to funky smells and mold.

If you rinse mud off, let them air out first. Use a fan. Set them near a vent. Just don’t stash them wet.

Pro move: Sprinkle a little baking soda inside after drying to cut down odor.

How Long Do Wet Running Shoes Take to Dry?

Here’s a quick cheat sheet:

Drying MethodEstimated Time
Newspaper + fan~6–8 hours (overnight)
Fan only~8–12 hours
Newspaper only~12+ hours
Air dry, open room24–48 hours
Clothes dryer (don’t!)~1 hour (but risky)

Best combo: absorption + airflow. Start drying them as soon as you get back from your run. Swap the newspaper after an hour or two to keep the drying efficient.

Clothes dryers? Yeah, they’re fast—but they can melt glue, warp midsoles, or shrink materials. Trust me, it’s not worth ruining $100+ shoes for a shortcut.

Material Tip

  • Mesh shoes dry faster than anything with leather overlays or waterproof membranes.
  • Padded collars and tongues hold water longer—squeeze gently with a towel to speed up drying.

Respect Your Tools

Your shoes are your foundation. You don’t need a $250 carbon-plated super shoe for every run—but you do need them to be dry, secure, and not smell like death.

As I always say:
“The better you take care of your gear, the more your gear will take care of you.”

Drying your shoes right is one of those behind-the-scenes habits that make a difference in the long game. Over time, it adds up—fewer injuries, longer shoe life, better performance.

You’ve Got a System Now

Next time you stumble in from a stormy run or pull your soaked shoes out of a duffel, don’t stare at them like you’re stuck. You’ve got a system:

  • Insoles out
  • Stuff ‘em up
  • Fan, airflow, or old-school window drying
  • Skip the heat
  • Let ‘em breathe

No gimmicks. Just smart recovery for your gear—so you can recover better too.

Your Turn

What’s your go-to shoe-drying trick?

Got a horror story involving melted soles, newspaper fails, or next-level MacGyver hacks?

Drop a comment below. Let’s trade tips, swap cautionary tales, and help each other survive the next rainy season like seasoned pros.

Because in running, you don’t just train hard—you maintain smart.
And that includes your shoes.

Now get back out there. Dry shoes, dry feet, strong legs—repeat.

– David D. 🏃‍♂️💨

Understanding Acromioclavicular (AC) Joint Injury: A Runner’s Guide to Recovery

An acromioclavicular (AC) joint separation isn’t fun, to say the least. When you get hurt, you may have many questions. What symptoms should you be on the lookout for? How long does a runner’s AC joint injury take to heal? What treatment is best? If your mind is racing faster than you are, take a moment to breathe. The process is relatively straightforward.

What Is an Acromioclavicular (AC) Joint Injury?

An AC joint separation happens when the AC ligament that connects your clavicle to the acromion of your scapula — meaning your collarbone to the back end of your shoulder blade — tears. Those two parts detach as a result.

These tears are common, making up over 40% of all shoulder injuries. They can range from a minor sprain to a severe tear. Hopefully, you have the most mild case since they are more likely.

Common AC joint injury symptoms include tenderness, swelling, tightness and loss of motion. You may see bruising or a visible lump. While the pain is often localized to your shoulder, you may feel it radiate across your arm or neck since everything is connected.

The Different Types of AC Joint Injuries

The Rockwood Classification is the most commonly used system for this kind of trauma. It has six distinct categories. Each type of AC joint injury has different symptoms.

Type I

Type I is the least severe classification, making it the best for you to have. It’s only a sprain or partial tear of the AC ligament. You don’t experience any fracture or displacement, making it the easiest to recover from. Returning to running after this AC joint injury is easy.

Type II

Type II damage involves a fully torn AC ligament and a potential coracoclavicular (CC) ligament sprain. There’s a slight increase in the space between the clavicle and the coracoid process of the scapula, which is the hook-shaped bone structure on the front end of your shoulder blade that serves as an attachment point for your ligaments.

Type III

If you experience a Type III, both your AC and CC tear. There’s a larger increase in the space between the clavicle and the coracoid process of the scapula — the coracoclavicular interspace for short.

Type IV

A Type IV separation is the displacement of your distal clavicle. Here’s the English translation — the outer end of your collarbone moves behind your upper back’s large, triangular muscles. Ouch.

Type V

Type V is a severe displacement of the clavicle. There’s a disruption of the AC and coracoclavicular ligaments, as well as the deltoid and trapezius muscle attachments.

Type VI

Type VI damage is the most extreme. It involves inferolateral displacement, meaning your ligaments become lodged below and to the side of your scapula. Thankfully, these are exceedingly rare. For reference, just 12 cases have been recorded in medical literature. One patient had fallen from the fifth floor, explaining the severity of the damage.

Common Causes of AC Joint Separations

Understanding the causes of an AC joint injury can help you speed along the road to recovery. Contributing factors like poor posture, previous scapula injuries and some medical conditions can affect the tear’s severity.

Physical trauma is the main AC joint injury cause. For example, falling directly on your shoulder or outstretched arm can cause a tear. Whether you play contact sports in your free time or are simply clumsy and don’t see a wall in time, sustaining a hard hit can injure you.

Also, lifting or throwing heavy objects like weights — especially during overhead exercises — can tear your ligaments. Your chances of injuring yourself increase during repetitive use due to continuous strain.

How to Treat an AC Joint Injury at Home

AI joint injury treatment is straightforward. Even if you’re midseason, get rest. Don’t sleep on your affected shoulder and avoid weightlifting — even if it means sacrificing your gains. You can put your arm in a brace to immobilize it, which helps the healing process along.

Ice has anti-inflammatory and pain relief effects, so using the tried-and-true ice pack method may help you get through the worst of it. However, while cold therapy has been generally accepted as the go-to treatment following soft-tissue injuries for decades, research shows it may delay healing. This can lengthen your AI joint injury recovery time.

Leaving an ice pack on the affected area for too long may reduce blood flow, potentially causing lasting tissue or nerve damage. Only hold it to your scapula for 20 minutes at a time to avoid causing more damage.

When should you seek medical attention? It’s always wise to get checked out by a professional, especially if you want to use that arm sooner rather than later. They may recommend nonsurgical AC joint injury treatment like physical therapy.

Crucially, if you have a Type III, IV or VI tear, it’s no longer a question — visit a doctor immediately. Sometimes, AC joint injury surgery is necessary for repairing your torn ligaments and restoring shoulder function.

How Long Does an AC Injury Take to Heal?

AC joint injury symptoms can resolve on their own, given enough time. Type I takes seven to 10 days to heal, while Type II usually requires four to six weeks of recovery. Living with an AC joint injury for weeks isn’t easy, but you’ve likely built up quite a bit of endurance as a runner.

How long does it take to recover from an AC joint injury fully? You should wait slightly longer to return to running and weightlifting. Overuse may degrade the bone and ligaments in your shoulder. Wait roughly eight to 12 weeks to be safe.

When is surgery needed for an AC joint injury? For anything more severe, the timeline varies depending on the type of surgical intervention you have and whether there are complications from AC joint injury surgery.

AC Joint Injury Prevention Tips for Runners

Follow these AC joint injury prevention tips to avoid another painfully long recovery process.

1.    Give Yourself Enough Time to Heal

It feels good to be symptom-free — but you shouldn’t let that feeling go to your head. You can damage your bones and cartilage unless you give yourself time to heal properly. Try not to return to your regularly scheduled activities before being medically cleared. 

2.    Strengthen Your Shoulder With Exercise

AC joint injury exercises include physical therapy, strength training, warm-ups and posture correction. They can help you avoid ligament damage in the future.

3.    Wear Protective Gear During Activities

When you tear something once, the likelihood of it happening again increases. Whether you sustained an injury by walking into a wall or falling into another runner during a race, wearing protective equipment in the future can help you avoid reinjury.

Returning to Running After an AC Joint Injury

Remember, diagnosing, treating and recovering from a runner’s AC joint injury isn’t a 100-yard sprint. Think of the process more like running a marathon. It will take time and may be painful, and you might get frustrated over your lack of progress. However, even if you don’t notice it, your body will heal gradually. Returning to running after an AC joint injury is possible.

Concrete or Asphalt? The Best Running Surfaces & Shoes (Coach’s Guide)

picture of Calf Pain


The Real Deal on Pavement Running Coach’s Guide: What You’re Really Running On

Why This Stuff Actually Matters

Look, when most runners hit the streets, they’re thinking about pace, playlists, maybe dodging that trash can on the corner—but not the actual surface under their feet.

I’ve been there. Years ago, I was grinding out 10K training runs on the rock-solid sidewalks of Batubulan, Bali. Beautiful scenery, yeah—but my knees? Toast.

That was the wake-up call: the ground you run on matters more than you think.

If you live in a city, odds are you’re logging most of your miles on pavement—concrete sidewalks, asphalt roads, or some messy combo of the two. And here’s the kicker: while they might look the same, they’re not. Not even close.

After 14 years of coaching runners, here’s what I’ve learned—both from science and from limping home a few too many times.

We’re gonna break down what’s under your feet, how it messes with your body (or doesn’t), and which shoes help soften the blow. So if you’ve ever wondered whether concrete or asphalt is wrecking your legs—or just want to run smarter—keep reading.

What’s Under Your Feet: Not All Pavement’s Equal

Alright, quick ground lesson. Concrete and asphalt are both hard, sure—but they’re built different.

Concrete is that stiff, unforgiving stuff you see on sidewalks and city plazas. It’s made of cement and aggregate, and it barely budges when you land on it. In fact, engineering tests say it’s about ten times harder than asphalt. That’s wild.

Asphalt, on the other hand—think roads and bike paths—is a mix of tar and crushed rock. It’s got a little give, especially when it’s warm out. Ever notice how a car tire or even your foot leaves a tiny dent on hot asphalt? That softness makes a difference.

Here’s a fun test: drop a hammer on both. On concrete, it bounces like crazy. On asphalt, it thuds. That’s your knees and hips we’re talking about. The more energy that bounces back, the more your body has to deal with it.

Science Says: Your Body Adjusts (But Only So Much)

Now don’t panic—your body’s not just sitting there taking damage. It’s smart.

Studies show that runners naturally adjust their stride and joint stiffness based on the surface they’re on. So if the ground is hard, your legs act like springs and absorb more shock. Pretty cool, right?

One study even showed that the peak impact forces on concrete vs. softer ground were surprisingly similar—because the runner’s form changed to match the surface.

And get this: your shoes matter even more. A triathlete-turned-physicist ran some lab tests and found that the difference in surface stiffness basically disappears if your shoes have decent cushioning. The foam in your midsoles is doing a lot of the work—sometimes way more than the surface ever could.

But here’s the deal: even if it’s subtle, those differences pile up over the long haul. Especially if you’re doing 20, 30, 50 miles a week. That little extra shock from hard pavement? It adds up—in your shins, knees, hips, everywhere.

Also, different surfaces tweak your running style:

  • Soft ones (grass, track) absorb more energy, so you have to push off harder.
  • Hard ones return energy better—great for speed, but your joints pay for it.

So yes, stiffer ground can help you go faster… but the price is wear and tear.

Bottom line? Surface stiffness changes how your body runs—and how much punishment it takes.

Concrete: The Toughest of the Tough

Alright, let’s talk concrete—the sidewalk king. It’s everywhere, and it’s rough on your legs. But it’s not all bad. Let’s be real about the ups and downs.

Why Some Runners Stick With Concrete

It’s Everywhere
You can’t walk a block in most cities without hitting concrete. It’s often the safest option too—no cars swerving next to you like on the road.

One guy I coached did 80–90% of his 80 weekly miles on concrete or asphalt because he trusted it more than crazy drivers or sketchy trails. Predictable, flat, and right outside your door. Hard? Yeah. But convenient? Absolutely.

Super Predictable
Sidewalks are flat. No roots, no potholes, no snake hiding in the trail. That means you can keep a solid pace, especially if you’re doing tempo or speed work.

It’s easier to zone in and focus on your stride when the ground isn’t throwing surprises at you.

Plus, ever notice most world records in road races happen on pavement? That’s not a coincidence. Flat, hard surfaces are great for speed—just make sure your legs are ready for the impact.

Always Ready to Go
Concrete doesn’t care if it’s raining or snowing. Unlike muddy trails or soggy grass, sidewalks are ready year-round.

City crews usually clear ’em too, which means you’ve got a winter option without needing to drive anywhere.


The Brutal Truth About Concrete

Alright, let’s not sugarcoat it—concrete is a tough bastard.

Sure, it’s everywhere—sidewalks, city blocks, you name it. But when it comes to running on it? Not ideal. Actually, it’s the worst.

Here’s the deal: concrete is stupid hard. Like, scientifically hard. Lab tests show it’s got a super high elastic modulus (yeah, that’s fancy talk for “zero give”). One study even found it absorbs 10 times less impact than asphalt.

Translation? When your foot hits the ground, there’s no cushion. It’s like slamming a hammer into stone—and guess who the hammer is? Yep, your body.

As one sports med doc put it: “Concrete is the least forgiving running surface… the ground doesn’t absorb any of the shock.”

So where does all that shock go? Straight into your ankles, knees, hips, and spine. No wonder legendary coach Bob Glover didn’t mince words: “Concrete… is the worst surface in terms of shock absorption. If the choice is between concrete and asphalt, take asphalt – it is much more forgiving.” Amen, coach.

I’ve felt this myself. I once did a 12-week training block where most of my miles were on sidewalks. By week eight, my knees were barking, my shins were tender, and I was limping out of bed every morning. Lesson learned.

Injuries? Yeah, They’ll Find You on Concrete

Here’s the harsh reality: concrete running beats you up over time.

Not always overnight—but eventually, it catches up. Overuse injuries creep in—shin splints, plantar fasciitis, knee pain, stress fractures. You name it.

A coach I know ditched concrete for his high school team entirely. Guess what? Stress fractures dropped off the map.

Running on concrete is like sparring with a heavyweight—it hits back, and it doesn’t get tired. If you’ve already got some minor aches, it’ll make ‘em worse, fast.

Even Hal Goforth, a top masters runner, came right out and said it: “Never run on concrete… anyone who has to run on concrete is bound to have something happen.”

A bit dramatic? Maybe. But he’s not wrong.

Think about this: concrete is 10 times harder than asphalt. And even if each step sends just 2–3% more force up your legs, multiply that by thousands of strides in a run. Now do that four or five days a week.

That’s a recipe for breakdown.

One marathoner told me straight up: “After a 70-mile week on concrete, I’m wrecked. But do the same mileage on trails or asphalt, and I feel way less beat up.”

And Don’t Forget the Slip Factor

On top of all that? Concrete turns slick when wet.

Ever hit a sidewalk painted with those white lines in the rain? It’s like stepping on ice. Fallen leaves, sealed walkways, rain—concrete gets slippery fast.

Asphalt, being a bit rougher, usually gives you more grip in bad conditions. Not perfect, but safer.

Bottom line: If you have the choice, don’t make concrete your main training ground. Use it when you have to, but don’t build your base on it. Your joints will thank you later.

Asphalt – The “Less Evil” Option

Now let’s talk asphalt.

Still pavement, still hard—but miles ahead of concrete in terms of forgiveness.

Why Runners Pick Asphalt (And Why I Do Too)

1. Softer Underfoot

Compared to concrete, asphalt’s got a little more give. Technically, it absorbs more energy—like a built-in shock absorber.

Runners often describe it as “less jarring,” and they’re right. It’s not exactly a cloud, but it won’t beat your legs down as badly.

Even doctors agree: “Asphalt is less hard than concrete.”

And a podiatrist who also runs marathons put it this way: “After running on asphalt, my legs [feel] shock and strain, whereas running on concrete batters my calves, hamstrings and knees.” Couldn’t have said it better.

2. It’s What You’ll Race On

Most road races—from your local 5K to the Boston freakin’ Marathon—are run on asphalt.

So if you’re racing on it, train on it. You want your legs used to that surface come race day.

Asphalt is smooth, flat, and lets you lock into a steady pace—perfect for tempo runs, long runs, and speed work.

Some evidence even hints that asphalt may help your running economy a bit. Not like a trampoline or anything, but the slight give might bounce back a smidge of energy. I’ll take every edge I can get.

3. Better Flow, Less Fuss

One of the best things about asphalt? You can run for miles without stopping every block.

No curb-hopping, no dodging pedestrians. Just stretch out your stride and zone in.

On a trail or a road shoulder, I can really get into my groove—something sidewalks rarely let me do.

4.Easier on the Achilles

This one’s big if you’ve got cranky tendons: asphalt puts a little less strain on your Achilles than concrete.

Why? Because that slight softness reduces the sudden yank on the tendon when your heel hits the ground. It’s subtle, but for folks with Achilles issues, every bit helps.

My Take?

If it’s between asphalt and concrete, I’m picking asphalt every damn time.

So are most experienced runners I know. The science may still be catching up, but our legs already know the truth: concrete hurts, asphalt is manageable.

And hey, asphalt ain’t perfect—we’ll talk about that too. But if your city runs are mostly pavement? Stick to the blacktop when you can.


What to Watch For on Asphalt 

Let’s get one thing straight – asphalt ain’t soft. It’s just softer than concrete.

That’s like saying a slap is better than a punch – still gonna sting if you don’t respect it.

I’ve logged thousands of miles on asphalt roads, and yeah, it’s the better choice when you’re stuck between concrete sidewalks or dodging traffic. But there’s stuff you’ve gotta keep your eyes on.

Camber & Slope – The Sneaky Strain

Ever run a stretch of road and notice one hip starts nagging you outta nowhere? Could be the camber messing with your stride.

Roads are rarely flat – they’re sloped for drainage. Looks subtle, but that tilt means one foot’s always hitting lower than the other. Over time? Boom – IT band flare-ups, hip pain, weird imbalances.

A chiropractor once broke it down to me like this: if you’re always on that slant, your lower foot ends up overpronating and throwing your whole alignment off. That stuck with me.

It’s like doing squats with one shoe thicker than the other – eventually, something’s gonna bark.

My fix? If I’m on a quiet road, I switch sides halfway through – out on the right, back on the left. Keeps things even.

On busier roads, I hunt for the flattest section – often near the center line – but only if it’s safe.

Think of it like the track: nobody runs laps all day in the same direction without reversing, right? Same idea here.

Potholes, Cracks, Gravel – Watch Your Step

Asphalt gets chewed up fast – weather, traffic, time.

I’ve nearly wiped out more than once because I zoned out and missed a crack or rock hiding in plain sight. Shoulder running is especially sketchy – that’s where all the debris collects.

Broken glass, gravel, junk… even the odd beer bottle on a weekend morning run.

I train myself to scan the ground a few feet ahead every few strides. Not constantly staring at your feet – just enough to avoid eating asphalt.

Especially after storms. Trust me, stepping on a wet branch at 6:30 pace is not how you want to start your Monday.

Traffic – The Real Threat

Look, the pavement won’t injure you like a car will. Hard truth.

Most injuries from road running aren’t from the surface – they’re from cars. Period.

I once had a guy in a truck brush past my elbow like I wasn’t even there. Since then, it’s face-traffic or nothing. Non-negotiable.

If you’ve only got high-traffic roads around, you might be safer on the sidewalk – concrete or not.

One runner I chatted with on Reddit said it best: “Asphalt means roads, and I don’t trust drivers.” Preach.

That’s why I love park loops or wide-shouldered roads with low traffic – that way you get the cushion of asphalt without risking your life.

Still a Hard Surface – Don’t Get Cocky

Let’s not kid ourselves – asphalt still beats up your legs if you overdo it.

Shin splints, stress fractures, sore joints… been there, done that. Just ‘cause it’s a notch softer than concrete doesn’t mean you’re bulletproof.

I learned that the hard way ramping up mileage too fast. My knees were screaming.

The problem wasn’t just the surface – it was my ego pushing too far, too fast.

Asphalt can help reduce the likelihood of injury, sure, but only if you train smart. That means good shoes, recovery, maybe some cross-training to give your joints a break.

Bottom line? Asphalt’s your friend – most races are on it anyway. But treat it with respect. Watch your form, scan for hazards, and stay alert. That’s how you stay in the game.

Your Turn: Do you run mostly on asphalt or concrete? Got a favorite low-traffic route or a road running hack? Drop it in the comments – let’s share what’s working.

Asphalt vs. Concrete – What’s the Better Beast to Tame?

Alright, let’s settle this once and for all: when you’re pounding the pavement, is asphalt or concrete the lesser evil?

I’ll give it to you straight—neither is a dream for your joints, but if you’re forced to choose between the two, asphalt wins, hands down.

It’s like choosing a firm mattress over the floor. Not perfect, but way better for your body in the long haul.

Here’s why I lean toward asphalt—and why most coaches, docs, and hardcore runners do too.

The Science Stuff (But Keep Your Eyes Open)

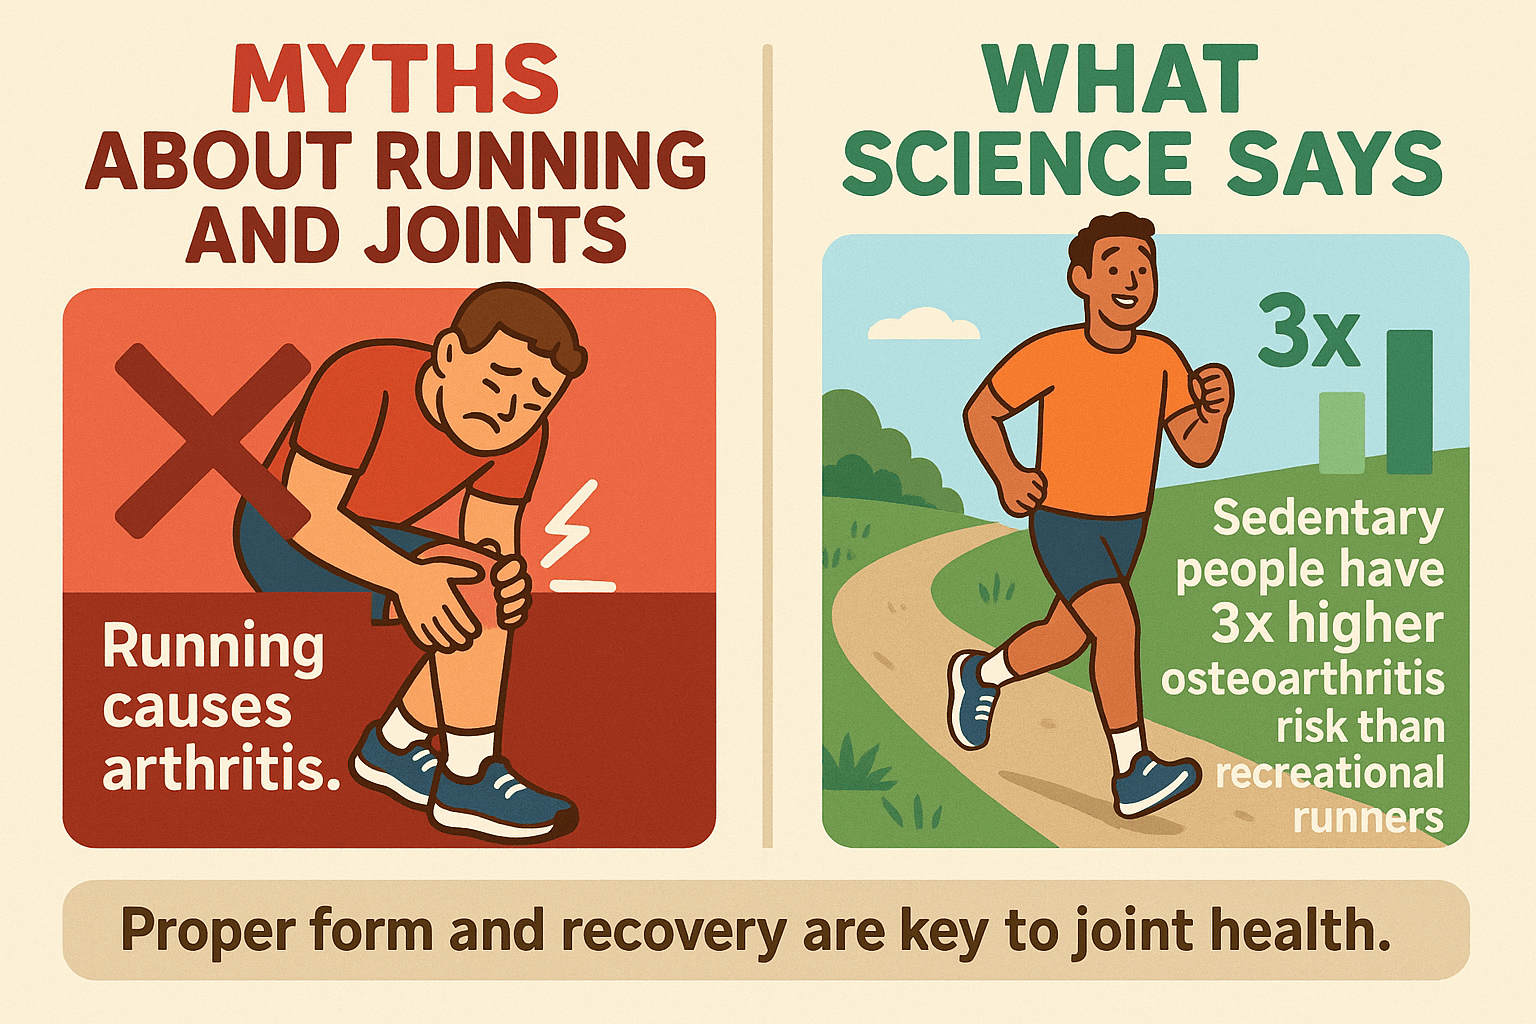
Let’s bust a myth first: science hasn’t officially declared concrete as the evil villain some make it out to be.

Researchers like Dr. Benno Nigg—a biomechanics legend—have pointed out that studies don’t show a clear link between running surface and injury. Sounds wild, right?

One controlled study even found no real difference in the peak forces your body takes on different surfaces.

Why? Because runners are smart. Subconsciously, we adjust. Shorten the stride, soften the landing—it’s like our bodies know how to protect us.

Still, don’t let that fool you into thinking surface doesn’t matter. It does. Especially over time.


Physics Doesn’t Lie

Now here’s where logic kicks in. Concrete is way denser than asphalt—like, orders of magnitude harder. It doesn’t give an inch.

Asphalt, while still firm, has just a bit more give. Like running on a packed trail versus a tile floor.

Imagine this: every step on concrete is like getting hit with a tiny hammer. Not enough to break you at first, but after 30,000 steps on a long run? Yeah, you’ll feel it.

I always say concrete charges you a tax with every stride, and the “bill” comes in the form of shin splints, aching knees, or barking feet.

The Coaches Agree: Pick Asphalt

I’ve read tons of running books, talked to physios, and swapped stories with marathon vets.

The consensus is crystal clear—when you don’t have access to soft trails or turf, asphalt is your go-to.

One coach even said, “Avoid concrete like the plague.” That might sound dramatic, but anyone who’s done long-term training on sidewalks knows it’s not far off.

Concrete’s the hardest of the hard. Asphalt’s more middle-of-the-road. Literally.

Real Runners, Real Talk

Let me tell you—this isn’t just coach-speak.

I’ve coached runners who swore their shin splints vanished once they ditched the sidewalk and stuck to the road shoulder.

One guy I trained ran pain-free for months on asphalt, then went on vacation, trained for a week on concrete sidewalks… boom: shin splints from hell.

Another runner, post-knee surgery, told me even two years into recovery, one short jog on concrete would light his knees up. Now he sticks to asphalt and trails. Smart move.

I’ve felt it myself. On weeks when I’ve had no choice but to log miles on concrete? My feet and hips start complaining loud and early. It sneaks up on you.

But Hey—Not Everyone Feels It the Same

Full honesty—some folks do just fine on concrete. They’ve got cast-iron legs or they just don’t have options.

And you can train safely on concrete if you’ve got solid shoes, smart programming, and a recovery game on point.

In fact, softer surfaces like grass or sand can sometimes backfire too.

I’ve had runners develop Achilles issues because the surface gave too much, and their lower legs overworked to stabilize.

So yeah—both ends of the spectrum have pros and cons.

But in a face-off between concrete and asphalt? Concrete’s the hard-hitting bully, asphalt’s the rough-around-the-edges buddy who won’t beat you up quite as bad.

Final Word: Go Asphalt When You Can

So here’s the real-deal advice from a guy who’s been through it:

If you’ve got the choice, go with asphalt. It’s just a bit more forgiving, and over months and years, your body will thank you.

It’s also usually closer to what you’ll race on. Faster surface, better bounce, and easier on your legs. Not perfect—but you can work with it.

Concrete? That’s your last resort. Use it when it’s the only safe option—like a sidewalk next to a crazy road—but don’t make it your main training ground.

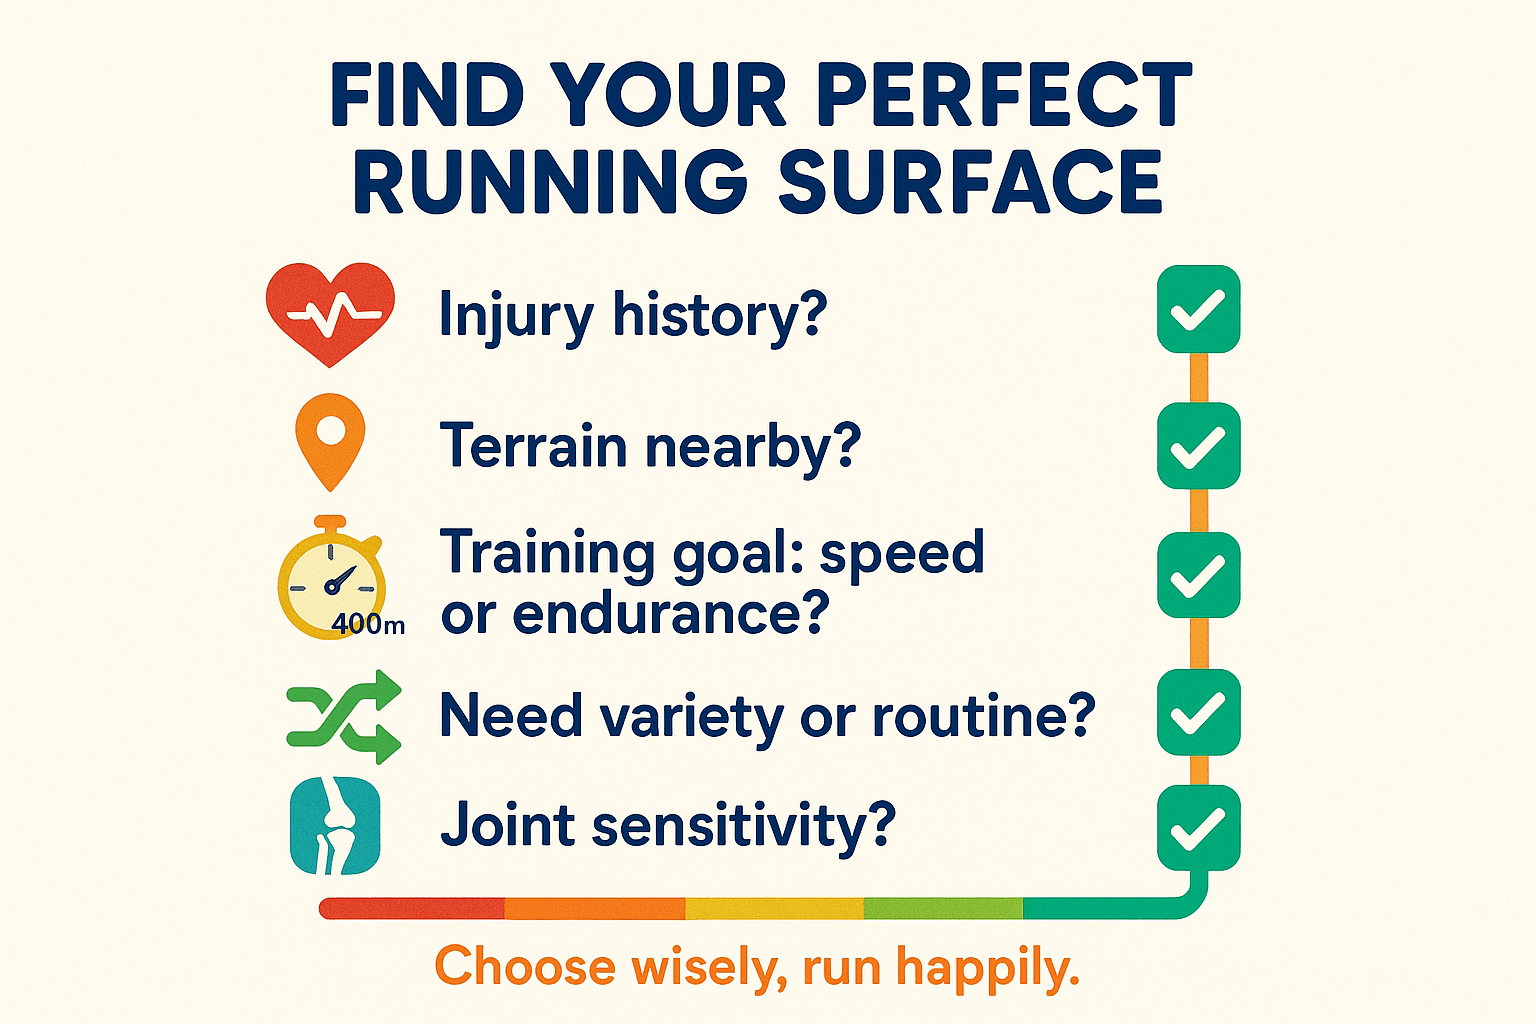
And no matter what you run on, mix it up. Hit some trails, hop on a treadmill, or sneak in a recovery run on grass once a week. Variety keeps you running strong and injury-free.

Tips to Run Safely on Hard Surfaces

(Because the pavement isn’t going to get any softer.)

Alright, let’s talk pavement—concrete, asphalt, city streets… whatever you’re pounding out your miles on.

Running on hard surfaces is part of the game, especially if you live in the real world and not some trail-running fantasy land.

But just because it’s hard doesn’t mean you have to wreck your body doing it. There are ways to run smart and protect your legs from taking a beating.


First Things First: Don’t Get Hit by a Car

I shouldn’t have to say this, but I will anyway: face traffic.

Wear something drivers can actually see—think neon, reflective, even one of those headlamps that makes you look like a running coal miner.

If it’s dark or foggy, light yourself up like a Christmas tree. I’ve had a few close calls, and trust me—you don’t want to play dodgeball with a speeding SUV.

Watch That Camber – It Can Wreck Your Stride

Here’s something sneaky most runners miss: road camber—that little slope on the edge of the road that keeps water from pooling.

Seems harmless, but if you run miles and miles with one leg always lower than the other? Hello, knee pain. Hello, hip tightness. Hello, IT band flare-up.

Here’s how to dodge that trap:

  • Switch Sides on Out-and-Backs: Run against traffic on the right side going out. On the way back, carefully cross over and run against traffic on the left. Boom—your legs get equal time on the high and low side of the road. Just make sure it’s safe to cross and stay visible.
  • Run the Flat Part: If you’re in a quiet neighborhood or park with no cars, hug the centerline (safely). That’s where the road is flattest. That’s why runners cut tangents during races—flat is fast, and flat is friendly to your joints.
  • Use Bike Lanes or Shoulders: They’re usually more level and give you a buffer from traffic. I run most of my weekday miles in the bike lane—it’s flat, open, and doesn’t try to tilt my pelvis sideways.
  • Mix Up Your Routes: Don’t be the runner who does the same loop in the same direction every. single. day. Flip it. Go backwards. Your hips will thank you.

One chiropractor I know (who treats tons of runners) says sloped roads are a common culprit for recurring pain. Don’t be that runner who blames shoes when it’s really the dang camber messing you up.

Gear Up and Run Smart

You can’t soften the road, but you can soften how your body handles it. That starts with what’s on your feet—and how you move.

Cushioned Shoes Are Your Friend

Running on concrete in beat-up shoes is like boxing without gloves.

If your knees are screaming, try shoes with more cushion. A lot of runners swear by HOKAs or other “max cushion” options for hard surfaces.

If you’ve got weird foot issues, try orthotic inserts or gel insoles—some folks swear by ‘em. And check your shoes: if you’ve got 400+ miles on them, the cushioning is toast, even if the upper still looks okay.

Compression Gear (Maybe)

Not a magic bullet, but some runners (myself included) like compression socks or sleeves on long road days.

They won’t stop impact, but they might reduce the muscle vibration that makes your calves feel like ground beef after a concrete tempo run.

I’ve worn knee sleeves on long runs when I felt a twinge coming on—and it helped. Worth trying if you’re feeling beat up.

Fix Your Form or Pay the Price

If you’re overstriding on concrete, every step is like hitting the brakes with your face.

Focus on short, quick steps—cadence around 170–180 bpm is a good place to start. Land with bent knees, not locked sticks.

Think soft, light, quick. When I coach runners on form, I tell them: “Run like you’re sneaking up on someone.”

That mental trick helps dial in a smooth, quiet stride that’s way easier on your joints.

And if you’re heel-striking like you’re putting out cigarettes, you might try shifting toward a midfoot strike—gradually. Don’t overhaul your stride overnight or your calves will riot.

Strength = Shock Absorption

The pavement isn’t going to soften up… so you have to get stronger.

Strong glutes, hamstrings, quads, calves—these are your shock absorbers. If your muscles are weak, your joints eat the impact. That’s a losing game.

Get serious about bodyweight strength—squats, lunges, calf raises, core work.

Eccentric calf work (like slow heel drops off a step) is money for protecting your Achilles and boosting durability.

When I upped my strength training, my post-run aches basically vanished. No joke. Strong legs = less whining from the knees.

Stay Loose or Stay Injured

Tight calves? Tight hamstrings? You’re asking for trouble.

Keep everything moving with dynamic warmups before you run—leg swings, lunges, ankle rolls.

Afterward, hit the foam roller. Especially after a hard pavement session, rolling your quads, IT band, and calves can make tomorrow’s run feel way less awful.

Think of it as maintenance. Like brushing your teeth. Skipping it feels fine at first—until it doesn’t.


Respect Your Recovery – Or It’ll Bite You Back

Look—I get it. You love pounding pavement. It’s convenient, it’s efficient, and for a lot of us, it’s the only surface we’ve got.

But if you’re running hard on concrete or asphalt day after day without respecting recovery, you’re flirting with injury.

Trust me. I’ve been there. One minute you’re cruising through a 10-miler on city streets, feeling unstoppable… the next, your shin’s lighting up and your knee’s making sounds it shouldn’t.

That’s not just wear and tear—that’s your body yelling, “Hey genius, back it off!”

Here’s how I—and every runner who wants to stay in the game—manage the fallout from all that hard-surface pounding.

Alternate Hard and Soft (or Rest) Days

If you go hard on the roads—say a long Sunday run on asphalt or a brutal interval session on concrete—don’t turn around and do the same thing the next day. You’re not made of rubber.

Instead, follow it with soft surface running, cross-training, or straight-up rest.

After a long road run, I’ll hop on the bike or do a mellow jog on dirt or grass. Heck, even a treadmill works—it’s way gentler on your joints than pavement.

Even elite road warriors throw in treadmill or off-road recovery runs to break up the pounding.

One coach recommends hitting soft terrain for at least a few runs each week if most of your training is on pavement. That kind of variety helps keep your legs—and your season—intact.

Listen to Your Body (Not Just Your Watch)

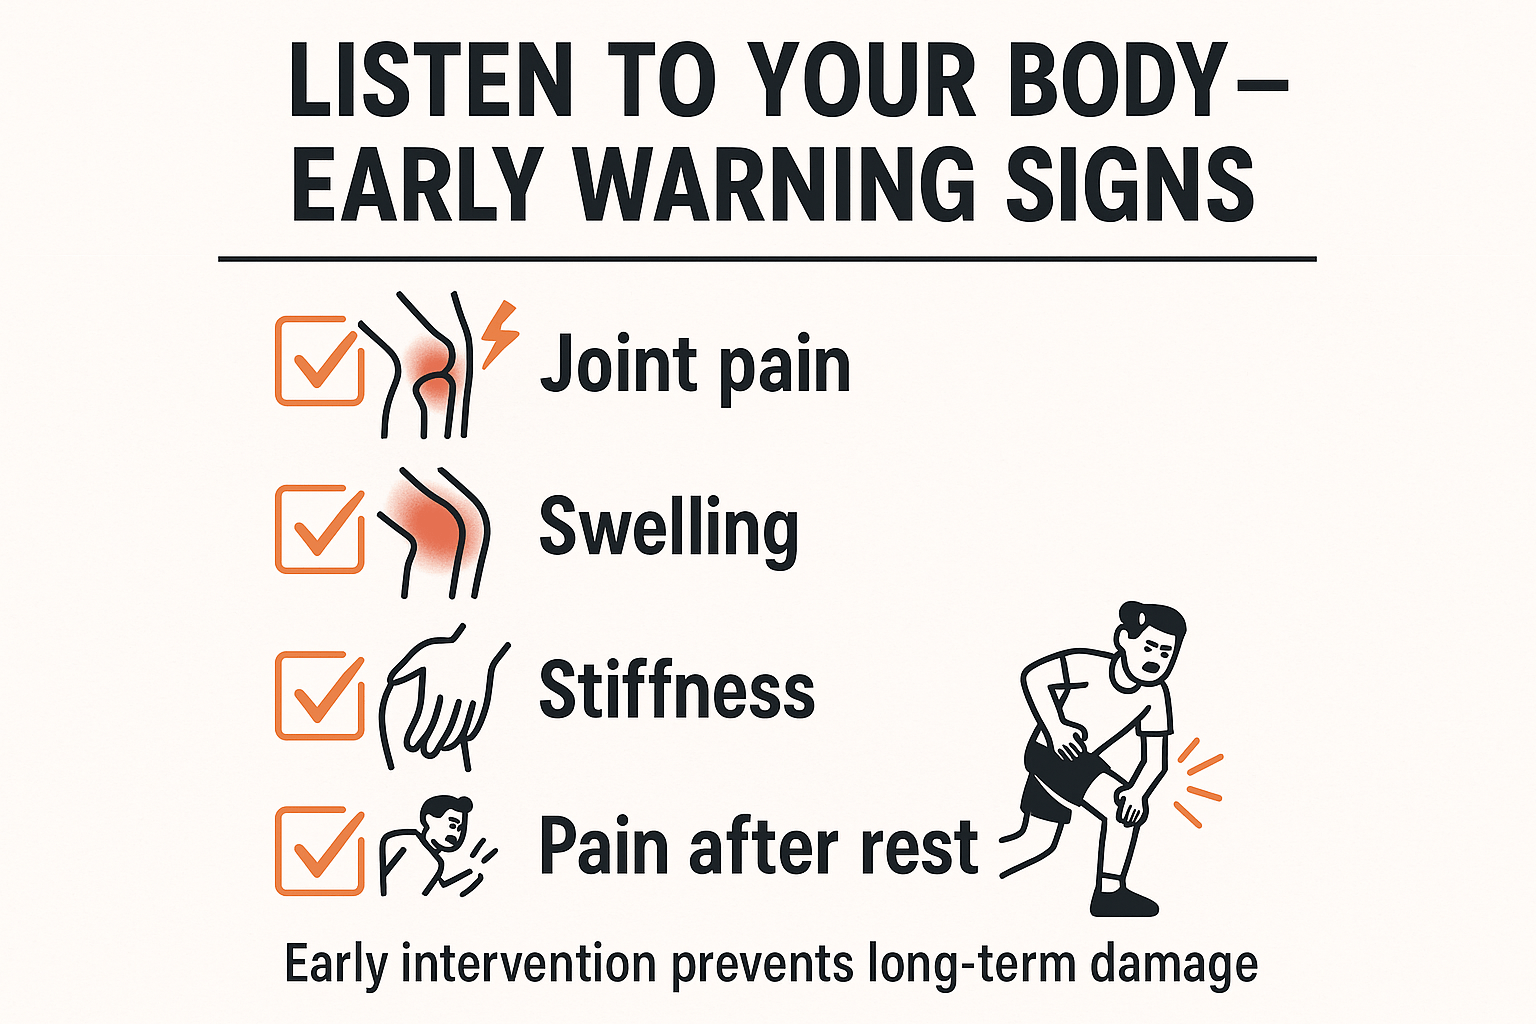
You know that dull shin or knee ache you keep trying to “run through”? Yeah—don’t.

Hard surfaces make little niggles grow teeth fast.

If that soreness keeps popping up every time you run concrete, take the hint. Back off. Swap your run for the bike. Try water running, trails, or dirt for a few days. Ice it. Stretch. Let it cool down.

It’s way smarter to take a few easy days now than get sidelined for six weeks with a stress fracture.

Concrete’s a sneaky beast—it feels fine… until it doesn’t. Stay one step ahead.

Shorten That Stride When Tired

When fatigue hits late in a long pavement run, form often goes out the window. Your stride gets sloppy. Your foot slaps the ground like a fish.

Here’s a trick: shorten your stride a bit and bump up your cadence.

Those quick, short steps help you stay light on your feet and avoid heel-smashing your way to injury.

Marathoners use this all the time. It’s like damage control for your joints. Learn to finish runs looking controlled, not wrecked.

Use Recovery Tools Like You Mean It

Just finished a long road run? Good. Now recover like a pro.

  • Contrast baths
  • Ice your shins or calves
  • Toss on some compression socks
  • Prop your legs up and stretch
  • Use a massage gun or foam roller if you’ve got it

Hard surfaces do a number on your muscles—they create tiny micro-tears. That’s normal. But if you don’t help your body bounce back, they pile up into something worse.

And don’t sleep on nutrition either. Hydrate, eat some protein and carbs post-run, and give your muscles what they need to rebuild. You’re not just running—you’re training. So treat recovery like part of the workout.

Get Smart With Your Footwear (Even Off the Clock)

If you’re walking on concrete floors all day at work or standing for hours—don’t make it worse by wearing flat, dead shoes. Your feet already took a beating on your run.

Cushioned shoes, insoles, or even those ugly recovery sandals (Oofos, Crocs—you know the type) aren’t a fashion statement. They’re foot-savers.

Same goes for standing desks. If your home has tile or hardwood floors, use cushioned mats or slippers with support.

It all adds up. Every hour you don’t spend absorbing shock counts toward staying healthy.

Run Smarter, Not Just Harder

Running on roads is fine. Millions of us do it. But the margin for error is smaller. You’ve got to be smart with your volume, recovery, and terrain choices if you want to keep logging miles pain-free.

So train hard, sure—but recover harder.

Pavement Alternatives (When You Can Find ‘Em)

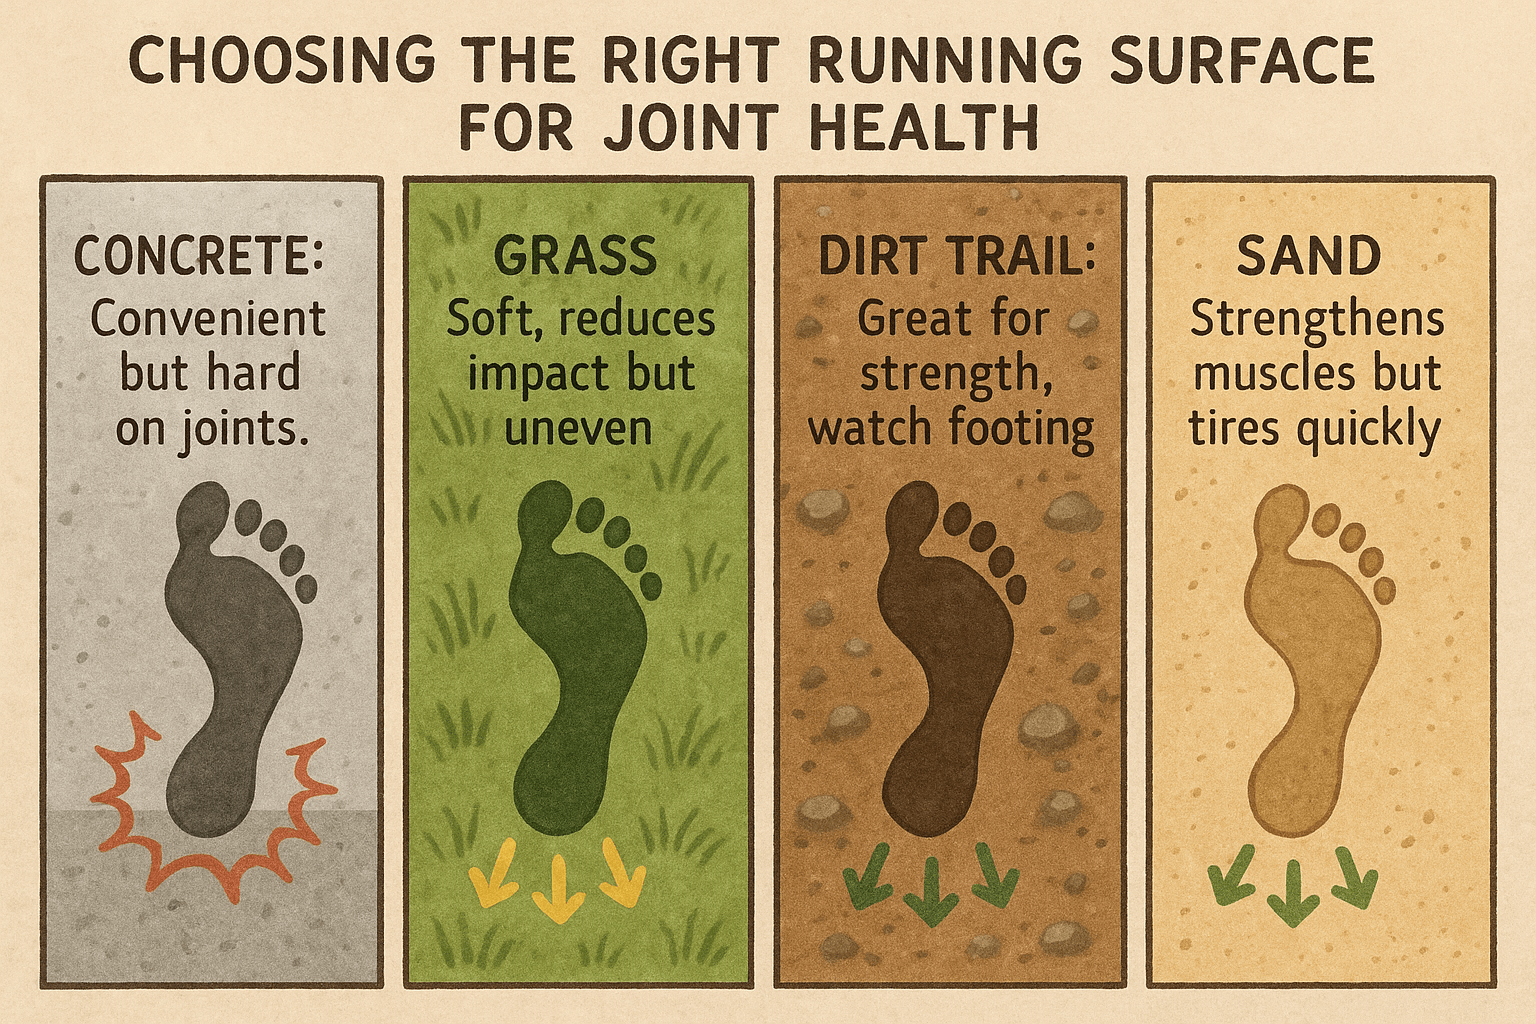
Even if you’re stuck in the city, it pays to chase softer ground once in a while. Not just to give your joints a break—but to build more well-rounded strength.


Trails & Dirt Paths

Got access to trails? Use ‘em. Especially on recovery days. Dirt and packed earth have some give, which helps reduce joint stress. You’ll still work, but your legs won’t take the same beating.

Plus, trails work your stabilizer muscles and balance—ankles, hips, and core—because of all the little adjustments you have to make. It’s strength training in disguise.

Just be smart. If you’re new to trails, avoid the rocky, root-filled nightmares. A mellow dirt path at your local park is perfect.

A lot of road runners are shocked at how good their legs feel after a trail run. Less soreness, even when the effort feels harder cardio-wise.

Grass Fields or Parks

Grass is even softer than trails. Perfect for those days when pace doesn’t matter, and you just want a gentle cruise.

Running on grass absorbs more impact—your legs press into the ground rather than bouncing off it like concrete. Great for recovery.

But grass isn’t perfect. It can be uneven or slippery, and in some cases, it might mess with your foot mechanics if you’ve got plantar fasciitis issues.

So start with smooth, well-maintained grass (think golf course edges or soccer fields) and see how it feels.

Barefoot (But Be Smart)

Barefoot running on concrete? Hard pass. But barefoot strides on grass? Game-changer.

Find a clean stretch of grass and run a few short strides—100 meters or so—light and quick. It teaches you to land softer and activates your foot muscles in a different way.

Some coaches add this once a week as a form drill. Bonus: it’s fun. In places like Bali, runners do this on the beach or grassy fields to build foot strength and feel grounded.

Totally optional—but if it works for you, it’s worth adding.

Synthetic Track

Tracks are made for this. Most are rubberized, bouncy, and way easier on your joints than roads.

Perfect for interval days, easy runs, or even cooldown laps. Just watch out for the monotony and always turning left—switch directions now and then to avoid overloading one side.

Pro tip: If you’ve just finished a tough road run, doing your cooldown jog on the track or infield grass is a nice way to flush the legs without more pounding.

Choose Your Surface: Run Smarter, Not Just Harder

Look, I get it—most of us don’t have the luxury of daily trail runs through misty forests. We’re city runners.

We dodge traffic lights, hop curbs, and grind out miles on whatever pavement we’ve got. But here’s the deal: not all surfaces treat your body the same, and if you want to run strong long term, you’ve gotta pay attention to what’s under your feet.

Sand – A Love-Hate Relationship

If you’re lucky enough to live near a beach, you’ve got access to one of the most brutal-yet-effective cross-training tools out there.

Running on sand is no joke.

Wet sand, right near the waterline, can actually feel pretty decent—firmer than you’d expect, and much easier to run on than the deep stuff. It’s kind of like a forgiving dirt trail.

Dry, soft sand, though? Whew. It’s like trying to sprint through mashed potatoes. Super low impact (your joints will thank you), but the instability? That’ll torch your calves and light up your Achilles like a Christmas tree if you’re not ready for it.

Use it sparingly. Think of sand runs more like a strength workout than a regular mileage day.

And if you’re new to it, consider keeping your shoes on—barefoot sand running is a different animal and needs a slow build-up.

Real talk: I’ve done short, easy sand runs just to shake things up—and I’m always surprised how sore I get in places I didn’t even know existed. It’s humbling. But it builds toughness.

Treadmill – Not Just a Winter Lifeline

Treadmills get a bad rap from some runners, but they’ve got real value—especially if you’re battling hard concrete all week or stuck indoors during winter.

Modern treadmills have shock-absorbing decks that go easier on your knees than pavement. Running on one is kind of like running on a slightly soft track.

Controlled pace, no wind, no potholes, no ice. Just you and the machine.

Here’s something you might not know: the treadmill actually reduces eccentric loading on your legs a bit (because the belt assists your stride), which can mean less muscle damage and soreness.

Use it to your advantage. Even swapping one or two weekly runs to the treadmill can lower the wear and tear on your legs.

I’ve even split long runs—first half outside, second half inside—to cut down the pounding when training through cold months.

Just keep in mind: treadmill running isn’t a perfect match for outdoor road racing. You still need those outdoor miles for race prep. But for recovery, bad weather, or late-night grind sessions? The ‘mill can be a lifesaver.

Mix It Up for Long-Term Gains

The smartest runners I coach are the ones who don’t just chase miles—they chase smart miles.

Here’s what a solid surface rotation might look like in marathon training:

  • Tuesday: Track intervals (soft surface, max speed)
  • Thursday: Tempo run on asphalt (race-sim effort)
  • Friday: Easy jog on grass or treadmill (low impact)
  • Sunday: Long run that mixes road + trail (build strength + volume)

This kind of variety:

  • Prevents repetitive strain
  • Builds better coordination
  • Keeps things fresh (mentally and physically)

Coaches love this stuff for a reason: trails build strength, grass aids recovery, asphalt sharpens your edge. Blend it all, and you get a durable, well-rounded runner.


Story from the Field: Rice Fields & Reset Runs

One runner I worked with out in Bali used to pound pavement all week. His knees started barking.

So, once a week, he’d drive out to a quiet rice field trail, slow it down, and run barefoot for the last mile on a grassy stretch. Mud between his toes, peaceful surroundings—it became his “reset run.”

After a month? Way less knee pain. Better balance. He said it felt like his legs were getting “tuned up” for the rest of the week. That one soft-ground day became a game-changer for his recovery.

Final Thoughts: The Ground Truth

When it comes to asphalt vs. concrete, asphalt wins—slightly softer, slightly kinder.

But let’s not sugarcoat it: they’re both still hard. And hard ground, over time, takes a toll.

So here’s your plan:

  • Favor asphalt over concrete whenever you’ve got the choice.
  • Shorten or slow down your runs on concrete.
  • Double up on recovery after rough-surface runs (think: foam rolling, mobility, shoes with fresh cushioning).
  • Rotate your terrain. Don’t beat up the same tissue day after day.
  • Invest in good shoes and switch them out regularly.

A wise coach once told me:

“Don’t just run miles. Run smart miles.”

And man, that stuck with me.

Because here’s the thing: a mile on pavement isn’t the same as a mile on dirt. And if you’re ramping up mileage or chasing a big goal, you’d better factor in the pounding—or the pounding will find you first.

Coach’s Challenge

What surface are you hitting this week? Are you feeling the difference after that weekend trail run vs. your weekday sidewalk loop?

Drop a comment below:
What’s your favorite surface? Got a go-to shoe for grass, concrete, or trails?

Let’s share some ground-tested tips.

In the meantime—run smart, listen to your legs, and keep showing up.

We’re not just logging miles. We’re building runners who last.

Can Running Give You Abs? Let’s Get Real


People ask me this all the time—especially newer runners or folks trying to get back in shape:

“Will running give me abs?”

I get it.

You see these lean, ripped marathoners flying past the finish line and think, “That’s it—just run more, and the six-pack will show up.”

Honestly?

I used to think the same thing.

Back when I first laced up, I figured the road to abs was just… more miles. I imagined my belly fat melting away with every step.

But here’s the truth bomb—running can help reveal your abs by burning fat, yeah.

But if you think running alone will carve out a six-pack, you’re setting yourself up for disappointment.

Quick and Dirty Answer:

Running burns calories. It can lower your body fat.

But that shredded look?

That comes from a mix of running, solid core training, a dialed-in diet, and brutal consistency.

No shortcuts. No hacks.

My “Running for Abs” Wake-Up Call

I still remember the moment the illusion cracked.

I was in my 20s, running six days a week, chasing abs like they owed me money. I’d knock out 5Ks before breakfast, fantasizing about the lean, cut midsection I’d see in the mirror.

Except… the mirror didn’t cooperate.

Months passed. My endurance was up. I could run farther than ever.

But those abs? Still buried under a layer of late-night pizza and zero core training.

That’s when it hit me: running wasn’t the problem. My approach was.

I was treating running like some magic bullet. But abs don’t come from cardio alone. They come from training smart, eating right, and building strength where it counts.

When I finally got my act together—ditched the junk food, added planks and lifts to my routine, and ran with purpose instead of just clocking miles—things changed.

My performance improved. My body leaned out. And slowly, those abs started to show. Not because of running alone—but because I finally treated it like part of the equation, not the whole thing.

That shift is why I hammer this message home to every runner I coach:

Don’t fall for the myths. Understand the full picture. And then get to work.

Why Running Alone Won’t Cut It

Sure, running is awesome cardio. It builds endurance, gets your lungs working, and yes—engages your core, especially when you’re pushing the pace or holding good form.

But just running won’t automatically bring out the abs.

Let’s talk about why.

Body Fat Is the Real Gatekeeper

Here’s the deal:

We all have abs.

Yep. Even if you’ve never seen yours, they’re there.

The catch?

They’re hiding under a layer of fat—and how much fat you carry determines whether they show or not.

To start seeing abs, you typically need to be around:

  • 15% body fat or lower for men
  • 20% or lower for women

(Everyone’s different, but these are decent ballpark numbers. Shoutout to MarathonHandbook.com for breaking it down.)

And how do you drop fat?

Calorie deficit.

Clean eating.

Smart training.

That’s where running helps—it burns calories. But if you’re still smashing donuts and skipping strength work, your six-pack’s staying undercover.

I had a client who ran daily, swore off carbs, and did 200 sit-ups a night. But she wasn’t strength training, and her meals were all over the place. Her belly stayed soft—until we cleaned up the plan and approached fat loss from all angles.

That’s when her core started to tighten.

You Can’t Target Fat—So Stop Trying

One of the biggest fitness myths I’ve had to un-teach is spot reduction.

No, you can’t burn belly fat by doing more sit-ups. And no, running 5 miles a day won’t only trim your waistline.

Fat comes off your body in its own messed-up order—usually starting with places you don’t care about, like your face or arms. Your belly? That’s often the last to go.

So if you’re only running to flatten your stomach, you’re going to get frustrated fast.

Here’s what works:

Whole-body fat loss through smart, consistent training.

Pair running with core strength work and a clean, realistic eating plan. The fat will come off eventually—just not on your schedule.

Coach Truth: Abs Are Revealed, Not Built by Running

There’s a quote from a coach I once saw in a Reddit thread that stuck with me:

“Abs aren’t made in the kitchen—they’re revealed there.”

Running might chip away at the fat, but if you haven’t built the muscle underneath, nothing will show—no matter how lean you get.

You need both:

  • Build the muscle with strength work
  • Reveal it by dropping body fat

Do one without the other, and you’ll either look skinny-soft or bulky with no definition.

How Running Can Actually Help You See Your Abs

Let’s be real — running isn’t some magic trick that gives you abs overnight.

But does it help? Hell yes, it does.

If your goal is to see your abs, running can play a major role — especially when it comes to torching fat and training your core without even stepping into a gym.

Here’s how I’ve seen running reveal abs — both in my own journey and with the runners I coach:

  • Fat Burn = Ab Reveal

Running is one of the best fat burners out there.

When you lace up and start logging miles, your heart rate climbs, your body taps into its energy stores, and over time, you start burning more calories than you take in. That’s how fat loss happens — simple math, really.

And the belly fat? That’s the first layer you’ve got to strip off if you want your abs to show.

According to research (yeah, this one’s backed by science), aerobic training like running is especially helpful at reducing belly fat — as long as you’re also eating like someone who gives a damn about their goals.

Every mile you run is like taking a hammer to that soft layer covering your core. You’re not “building” abs with every step — you’re uncovering them.

  • Core Engagement on the Run

Now let’s talk core. Ever notice how your abs tighten up when you’re sprinting or grinding up a hill? That’s not just in your head — your abs are firing to keep you upright and in control.

When you run hard — especially during sprints — your abs have to brace with each stride.

According to one exercise physiologist, sprinting actually forces your core to contract in a way that can lead to a bit of muscle growth too.

I always tell runners: Good running form is a core workout in disguise.

You’re not just building endurance — your abs are learning how to stay rock-solid for longer. Better posture. Better balance. Less wobble. That’s the real benefit.

  • HIIT Runs for Fat Loss

Want to take it up a notch?

Throw some interval training into the mix.

High-Intensity Interval Training (HIIT) is one of the fastest ways to burn fat. One review even showed that people lost around 28% more fat with intervals compared to steady-state jogging.

And here’s the kicker — HIIT keeps your body burning calories even after your workout is over. That “afterburn” effect is real.

You finish a hard session, and your metabolism keeps humming for hours.

I like to keep it simple: Sprint 100 meters, walk or jog for 30 seconds, and repeat that 10 times.

That’s 15–20 minutes of pain — the good kind — and your core will be sore tomorrow. Trust me. I tell my runners all the time: “This workout is like doing planks at full speed.”

And don’t just take my word for it. One runner on Reddit put it perfectly: “Studies are showing HIIT is very effective against fat loss… your heart and body work extra hard when you’re stopping and going”.

So if you’re only logging slow, steady miles — no shame in that — but adding one HIIT session per week? That’s your fat-burning booster shot.

  • Hill Sprints = Core on Fire

Another underused gem?

Hills.

Running uphill is brutal, and that’s why it works. Gravity pulls you down, and your abs have to lock in to keep your form together.

It’s basically a moving plank. You’re driving your knees up, pumping your arms, and your midsection is doing overtime.

A lot of coaches (myself included) recommend hill sprints as a secret weapon. They don’t just torch calories — they build serious strength in your legs and your core.

I’ve had runners come back from hill sessions saying their abs were sore for two days. That’s when you know it’s working.

Even Marathon Handbook says: “Hill sprints are a great way to do higher intensity running while building muscle to burn calories and accelerate weight loss.

Here’s a hill workout you can try:

Sprint hard up a hill, walk back down to catch your breath, then repeat.

Four or five reps is enough to leave your core buzzing. Stick with it, and your abs will start to feel like a steel plate.

  • Stay Consistent or Don’t Bother

Fancy workouts are cool. But if you only run once in a while, don’t expect miracles.

Consistency is what really builds results. If you want to lean out and see progress, aim to run most days — not just once a week.

Even basic cardio guidelines suggest 4–5 sessions a week, at around 30–45 minutes per session.

You don’t have to go all-out every time — please don’t — but make running part of your weekly rhythm. Mix in some HIIT. Hit some hills.

But most importantly, show up regularly.

You don’t earn your abs with one run — it’s a streak thing. Keep stacking those miles.

Real Talk from the Community

One runner on Reddit summed it up better than I ever could:

“Running will only do one thing — burn the fat revealing your abs. But if your abs aren’t defined, there won’t be much to show.

Hit abs for 15–20 minutes 2–3 times a week, eat clean, and you’ll have great abs.”

Exactly.

Use running to strip the fat. Then do a bit of core work, clean up your diet, and your abs will start to pop.

Strength Training and Core Work – The Piece Most Runners Skip

Let me be real with you — this is where I screwed up for years. I used to think running alone would take care of everything.

Turns out, it doesn’t. Especially when it comes to your core.

Yeah, running can help shed fat and make your abs show — but it won’t build them.

If you want abs that actually pop, you’ve got to train them. Like, actually put in the work. Same way you wouldn’t grow biceps just from waving your arms around, you won’t get that six-pack just by logging miles.

Want to See Your Abs? Build Them First

A strong core isn’t just about looking good — it’s about building strength you can use. And that means doing resistance work.

Think: planks, crunches, leg raises, bicycle kicks, Russian twists — the stuff that burns in all the right places.

Even big lifts like squats and deadlifts? Yep, those hammer your core too.

When I started adding serious core work to my routine, things changed.

Not overnight, but over weeks and months, I noticed my posture got better, my stride tightened up, and yeah — my abs finally stopped looking like a flat pancake.

Don’t be afraid of “bulking up” from ab work. You’re not going to turn into a bodybuilder by doing planks and side crunches.

Abs respond well to 2–3 sessions a week. That’s it. Slot them in after a run or on your off days. Even 10–15 minutes of focused core training can make a huge difference if you stick with it.

Here’s my usual breakdown:

  • Planks: deep core and spine stability
  • Crunches/sit-ups: upper abs
  • Leg raises/flutter kicks: lower abs
  • Russian twists/side planks: obliques (the side abs)

Mix and match, but don’t skip the hard stuff. Over time, your core tightens up — and once your body fat dips, those abs you built underneath finally show up.

Lifting Builds Abs Too — Don’t Sleep on It

Let me say this loud: strength training isn’t just for muscle heads. It’s one of the best ways to boost your metabolism and improve your overall body comp — especially if you’re chasing visible abs.

Lifting makes your body burn more calories even when you’re chilling on the couch.

And a lot of those lifts — deadlifts, squats, overhead presses — crush your core without you even realizing it. You’re bracing, stabilizing, holding good form — all of that is core work.

There’s this quote I saw on Reddit that nailed it:

“Every person on the planet that has really rocking abs got them by resistance training… You’re not going to get a well-muscled physique by running alone.”
Harsh? Maybe. True? Absolutely.

If you’re new to lifting, no stress. Start with bodyweight basics: push-ups, pull-ups, squats, planks. These moves build real-world strength and light up your core at the same time.

Got access to a gym? Great — toss in some:

  • Squats/lunges (your legs and core will thank you)
  • Overhead presses (engages your entire midsection)
  • Pull-ups or rows (sneaky core activators)

The cool part?

You’re not just chasing abs — you’re becoming a stronger, more powerful runner along the way.

Strong Core = Smoother Stride, Fewer Injuries

This isn’t just about aesthetics.

A strong core keeps your running form tight.

It stabilizes your hips, keeps your torso upright, and lets your legs do their job without wasting energy.

There’s even research backing this up. Studies have found that runners who do regular core training improve their running economy — meaning they can run faster or longer with the same effort. That’s huge.

I always tell my athletes:

“Your core is like the frame of a car. If it’s solid, everything moves better. If it’s shaky, expect rattles and breakdowns.”

So yeah, don’t skip your planks. They’re not just a bonus — they’re part of the foundation.

What Runners Get Wrong About Core Work

There was this great comment on Reddit that stuck with me:

“Running itself is not a core workout. Your core is engaged while running, but not enough to be considered core strength exercise. Don’t toss out that ab roller just yet.”

And that’s the truth.

Running uses your core — but it doesn’t build it.

You need both: running to burn the fat, and strength training to build the muscle. That’s the combo that actually gets results.

Cross Country Running: What It Is, How to Train, and Why You’ll Love This Tough Sport

cross country running


It’s race morning. Cold. Wet. Your feet are already damp before the warm-up. You’re lining up for your first cross country race feeling confident—because hey, you’ve crushed 5Ks on the road, right?

Then the gun goes off. And it’s instant chaos.

Mud flying. Elbows bumping. You slip on the first hill, nearly lose a shoe in the second mile, and by the finish line, you’re soaked, scraped, and barely holding your form together.

Welcome to XC. It’s not just a race—it’s a gut check.

But here’s the kicker: you’ll love it. You’ll crave it. Because cross country isn’t about flashy paces or perfect splits—it’s about grit. It’s about how deep you can dig when the course throws everything at you and says, “Still going?”

I’ve coached runners for years—seasoned road athletes who thought grass would be easy. I remember one track stud, all talent and swagger, who lost both shoes in mile 2 of a rainy meet. She finished barefoot, freezing, and grinning.

That’s XC. It kicks your ego—and somehow makes you hungry for more.

So, What Is Cross Country Running?

Cross country (or XC, if you’re in the tribe) is distance racing stripped down to its wild roots. No flat pavement, no lanes. Just you, your teammates, and a course that wants to break you.

Here’s what you’re up against:

  • Distance: Races range from 3K to 12K (usually around 5K for high school, 8K or 10K for college).
  • Terrain: Grass, dirt, mud, gravel, forest trails—sometimes all in one race.
  • Obstacles: Hills, sharp turns, soggy fields, roots, the occasional log or ditch.
  • Weather: Rain, wind, cold, snow—XC doesn’t cancel for weather. That’s part of the sport. You run through it.

Every course is different. One weekend you’re hammering across a dry golf course. Next weekend? You’re knee-deep in muck trying not to fall face-first into a stream crossing.

That unpredictability is what makes XC such a wild ride. Track is precise. Road racing is predictable. Cross country is… well, cross country.

Best description I’ve ever heard:
“Roads tell you what to expect. Cross country makes you figure it out.”
Truth.

The Team Element (And Why It Matters)

Cross country is one of the few running disciplines where the team really counts. You race as an individual, yes—but you score for a squad. Seven runners line up, five score. Lower finish place = better team score.

That means strategy matters. Pack running matters. You might sacrifice your own pace to drag a teammate up a hill. You push each other through that middle mile when everything’s screaming “slow down.”

And you celebrate together when it’s done—win or lose.

There’s a bond forged out there in the mud that road running just can’t replicate.

Why It’s Not About the Clock

Here’s the deal: you’re not chasing PRs in cross country. You’re racing placement, not time.

A 5K might take you 17 minutes one week and 20 the next—and the 20 might be a better effort. Course conditions can swing wildly depending on rain, frost, or the wear and tear of hundreds of cleats.

If you’re obsessed with pace data, XC will mess with your head. But if you let go of that and race the terrain, you’ll find a new kind of strength—mental and physical.


Why Cross Country Makes You a Better Runner

  • Builds full-body strength: Hills, uneven footing, and off-camber terrain force you to engage more muscle groups—especially hips, glutes, and core.
  • Improves mental toughness: When you’re slogging up a mud hill with 3K to go, you learn how to suffer without backing off.
  • Increases agility & balance: You learn how to run with feel. To adjust on the fly. That transfers to trails, road races, even marathons.
  • Breaks your comfort zone: This sport is raw. It’s unpredictable. And it will make you better in every other type of racing.

How to Train for Cross Country (Beginner Style – No BS Edition)

So, you’ve caught the XC bug. Or maybe someone dragged you out to practice and now you’re wondering what the heck you just signed up for. Either way—welcome.

Cross country is raw, gritty, and one of the best ways to build endurance, mental toughness, and race smarts. But yeah, it’s not for the faint of heart. Here’s how to train for it without getting wrecked along the way.

Build Your Aerobic Engine First (Before You Worry About Speed)

Cross country is a short race that feels long. Hills, mud, uneven ground, spikes digging in—it’s a whole different beast from road 5Ks. And you’ll crash and burn hard if your endurance sucks.

Your #1 priority as a beginner? Build your aerobic base. That means easy miles. Lots of ‘em.

  • Start where you are, not where you think you should be.
  • Add mileage slowly. 5–10% per week, tops.
  • Run 4–5 days a week, mostly at conversational pace.

High schoolers might build to 20–25 miles/week. New adult runners? Maybe 25–30, depending on background. Doesn’t matter where you start—just keep stacking those miles.

💡 Pro tip: Be able to comfortably run 1–2 miles longer than your race distance. Racing a 5K? Long runs should hit 4–6 miles. This gives you a cushion and keeps you from melting down in the final mile.

“Few things suck more than getting passed by a dozen runners in the final stretch because you ran out of gas.” — Every XC runner who’s learned the hard way.

Train Where You Race (Ditch the Treadmill)

You don’t prep for a trail run by pounding treadmill miles. Same logic applies to cross country. You’ve got to get dirty.

  • Run on grass, dirt, and uneven terrain.
  • Find trails, fields, parks—anything that’s not pavement.
  • Add hills. Even small ones help.

Why? Because XC isn’t just cardio—it’s coordination, balance, ankle strength, and stability.

A study showed trail runners improved leg strength and balance way more than road runners. And guess what XC courses are made of? Trail-like chaos.

Practice turns, quick bursts, and random footing. Learn to surge after slowdowns, like climbing a hill or getting bogged down in mud. This teaches your body to snap back fast. That’s XC racing.

Even just weaving around trees or cones mid-run helps train your reaction time and pacing instincts.

Get Comfortable Being Uncomfortable

Let’s be honest: cross country racing is tough. The pace is fast, the terrain’s uneven, and there’s no hiding. You’ve got to build the physical and mental skill of running hard when your lungs are on fire and your legs feel like concrete.

Key Workouts to Build Race-Ready Grit:

Tempo Runs (1x/week):

  • 15–20 minutes at “comfortably hard” effort
  • Think: a pace you could hold for an hour (10K pace-ish)
  • Teaches control at high effort and builds lactate threshold

Intervals / Fartleks:

  • 4×5 mins hard, 2 mins easy
  • Or 6–8 × 800m on a grassy loop
  • These sessions build speed + aerobic power

Progressive Long Runs:

  • 5–7 miles total (build over time)
  • Last mile at close to race pace
  • Builds finishing strength when you’re already tired

These will hurt. That’s the point. XC doesn’t reward the fastest 400m split—it rewards the one who can hang on after 15 minutes of suffering.

Pacing: Don’t Be the Rookie Who Redlines at the Start

XC starts are chaos. Everyone sprints off like it’s a 200m dash. It’s easy to get swept up… and completely toast yourself by halfway.

Practice controlled starts.

  • In intervals, start easy, pick up mid-rep, finish strong.
  • Some workouts: simulate the fast start, then settle into tempo.
  • Learn to run your own race, not someone else’s pace.

💡 “If you’re not a front-runner, don’t try to be. Let the hotheads fly out. You’ll pass half of them in mile two.”


Bonus Tips: Stay Healthy, Run Smart

Cross country training is hard. So is staying healthy through it. Here’s how to stay in one piece while leveling up:

Recovery Matters

  • Sleep like it’s part of your training.
  • Take easy days seriously—don’t turn them into secret workouts.
  • Get on top of niggles early. Don’t “run through” sharp pain.

Strength Training

Do simple stuff:

  • Eccentric calf raises
  • Glute bridges
  • Side planks
  • Bodyweight squats/lunges

This builds a solid base so you can handle trails, hills, and hard efforts without breaking down.

Nutrition & Hydration

Fuel your training. Under-eating kills recovery and performance. Keep water, carbs, protein, and color on your plate. Simple.

Sample Weekly Training Plan (Beginner XC)

Getting into cross country? Good. It’s one of the rawest, grittiest ways to build both mental and physical toughness. But if you’re new, don’t overthink it—you don’t need fancy gadgets or a perfect training app.

Just a smart weekly structure, consistent work, and the willingness to show up when it’s hard.

Here’s a simple XC week I recommend for newer runners — whether you’re heading into your first season or rebuilding your base:

Weekly Breakdown

Monday – Easy Run
3–4 miles on grass, trail, or road. Comfortable pace—you should be able to talk the whole way. Add some stretching post-run.

Tuesday – Fartlek Workout (Speed Play)
Warm-up jog + drills. Then:
→ 5 x 3 minutes at a “hard” effort on a trail or grass
→ 2-minute easy jogs between reps
Cool down for 5–10 minutes. Don’t chase pace—chase consistent effort.

Wednesday – Recovery or Rest
Run 2–3 miles very easy, or take the day off. The goal: let your legs rebound.

Thursday – Hill Repeats (Welcome to the Crucible)
Warm up well. Then find a hill (200–400m).
→ Run up strong, jog easy back down
→ Do 6 repeats
Cool down. Stretch calves after. This builds grit, not just muscle.

Friday – Easy Run + Strides
Run 3 miles nice and relaxed.
Finish with 4 x 20-second strides on grass—fast but controlled pickups to stay snappy.

Saturday – Long Run
5–6 miles easy to moderate. Roll over hills and mixed terrain if possible.
Last mile? Dial up to a steady effort—not racing, just finishing strong.

Sunday – Cross-Train or Rest
Ride a bike, go for a swim, or do nothing. Let your body reset. Recovery = growth.

Keep in mind: If this feels like too much at first, cut it back. Do just one quality workout per week and build from there. There’s no shame in starting slower—just don’t skip the foundation.

And yes, practice racing during training. Find a local time trial, or just run a simulated race effort on your course. The only way to get better at racing… is to race.

One runner on Reddit said it best:
“I felt like nothing was working during summer training. But then race day came — and I shocked myself.”

That’s the magic of consistent training. It doesn’t always feel like progress until the gun goes off.

Hill Running: The Crucible of XC

Look, you can’t run cross country and avoid hills. They’re in the DNA of the sport—and they’re where races are won or lost. Learn to love them or at least learn how to use them to your advantage.

I call hill work the “crucible” because it’ll break you down—and build you back up tougher than ever.

How to Own the Uphill

  • Shorten your stride. Think quick, light steps—not bounding leaps.
  • Upright posture. Lean from your ankles, not your waist. Don’t hunch.
  • Pump your arms. They’re your engines on the climb.
  • Run by effort, not pace. Hills slow everyone. That’s normal.

Avoid sprinting to the top and dying over the crest. Instead, stay steady, then surge once you level out. That’s how you break runners late in the race.

Hill Workouts to Build Your Engine

Short Hill Sprints (Power Focus):
→ 6–8 x 15-second sprints up a steep hill
→ Full walk-back recovery
→ Builds explosive power and finishing kick strength

Long Hill Repeats (Strength + Aerobic Engine):
→ 4–8 reps of 60–90 seconds uphill at a strong effort
→ Jog back down recovery
→ Builds aerobic toughness and race-specific strength

Trail Fartlek with Hill Surges:
→ 20 minutes easy-to-steady run on rolling trails
→ Surge every time you hit an uphill
→ Cruise the downhills
→ Great for simulating race surges and learning to recover on the fly

Pro Tip: Don’t do hill workouts cold. Warm up thoroughly, especially the calves. And build up gradually. Start with 4 repeats your first time. Increase slowly.

Real Talk from the Trenches

A high school runner once told me she dreaded hill workouts so much, she’d get nervous the night before. But halfway through the season? She realized they were why she was crushing the racecourse hills.

“Hills went from terrifying to the one thing I actually looked forward to,” she said. “Because I knew I could handle them. Most others couldn’t.”

That’s the goal. Hills teach toughness—and that mental edge is priceless.

Downhill Running: Speed Up, Don’t Brake

If you’re letting people pass you on downhills, you’re leaving free time on the course. It blows my mind how many runners train hard for every hill climb, every repeat… then tap the brakes on a descent like it’s a ski slope.

Downhills are your chance to gain ground, not lose it—if you run them right.

The Technique

  • Lean forward slightly—from the ankles, not your waist
  • Increase your turnover—short, quick steps
  • Land light—aim for a soft midfoot strike
  • Use your arms for balance—spread them a bit if needed

Don’t slam your heels down. That’s a one-way ticket to trashed quads and sore knees.

One coach once told me: “Run down like you’re water flowing downhill.” That stuck with me. Stop overthinking. Let go a bit. Stay upright and smooth, and let gravity help—not hurt—you.

👉 Pro tip: After a tough uphill workout, practice jogging down with good form. Don’t just shuffle—use it as a downhill session too.

And in a race? While others tiptoe down, you can fly past them. This is where fearless runners get the edge.

One Warning:
Downhills work your quads hard (eccentric loading), so introduce it gradually. Don’t go sprinting down mountains on day one and wonder why your legs don’t work the next day.

Mental Grit: Hills Build Champions

Here’s the truth: everyone suffers on the hill. The question is who responds better. The hill doesn’t care about your PR. It asks, “Are you gonna keep pushing or fold?”

Your Hill Mindset

  • Smile at the pain—it actually helps. Literally grin when it gets hard.
  • Say it out loud: “I love hills.” Cheesy? Maybe. Effective? Absolutely.
  • Break it up: “Just to that tree.” “Just 10 more steps.” Focus small, win big.
  • Visualize ahead of time. Know where the hills are on your course. Picture yourself attacking them. See yourself passing people.

Every time you choose to keep form when your body screams “stop,” you’re building grit. And that grit? It shows up on race day when it counts.

One runner said her team would shout encouragement on every hill repeat: “You got this!” “Stay strong!” That energy is contagious.

If you train alone, use positive self-talk. I’ve muttered “One more step” on more climbs than I can count.


Race-Day Hill Strategy

On race day, hills aren’t just terrain—they’re opportunities.

Run the uphills at a steady effort, not a crazy pace. Your time might slow, but your energy won’t burn out.

Accelerate over the top. Most runners relax. That’s when you surge and break someone’s spirit.

Downhill? Let loose. Use your practice to pick up speed without burning extra gas.

Pick one key hill in the race and make it your move. Mile 2? Final hill before the finish? Own it. You don’t need to be the best climber. You just need to climb better than the guy next to you.

As Lydiard used to say: Hills make the runner. Embrace them in training, and they won’t scare you in a race.

Footwear: The Gear That Can Make or Break You

Shoes matter—a lot. If you’re trying to run cross country in road trainers on a muddy hill, you’re setting yourself up to eat dirt.

Spikes vs. Trail Shoes vs. Flats – What You Need to Know

Cross Country Spikes

  • Best for: Mud, grass, soft ground, serious racing
  • Lightweight, minimal cushion
  • Metal pins (6mm–15mm) grip like claws
  • Feel the ground, move fast
  • Not great on pavement or gravel

You’ll feel like a rocket on steep hills when everyone else is slipping.

💬 “Once I switched to spikes in muddy races, it changed everything. I could charge the hill instead of tiptoeing up it.”

Trail Running Shoes

  • Best for: Mixed terrain, rocky or hard-packed trails, casual racing
  • More cushion and foot protection
  • Lugged rubber soles for grip
  • Good for ankles, especially if you’ve rolled yours before
  • More forgiving than spikes on your calves and Achilles

💡 If you’re racing but don’t want to beat yourself up with spikes, trail shoes are the in-between choice.

Flats

  • Best for: Dry, hard-packed courses with pavement sections
  • No spikes, just lightweight shoes with some grip
  • Less aggressive than trail shoes
  • Okay for speed, but terrible in mud

These are fading out—trail shoes or spikes are usually the better bet. But if your course is basically a 5K with some dirt? Flats can work.

Cross Country Shoes for Beginners: What You Really Need

Alright, let’s keep it real—if you’re just getting started with cross country, you’re probably wondering: Do I need spikes? Are trail shoes enough? What won’t get me wrecked out there?

Short answer: It depends on your goals, your course, and your budget. But here’s what I tell every beginner I coach:

If You’re Doing an Official XC Season (School or Club)…

Yes, get a pair of spikes.

They’re not crazy expensive (usually $60–$100), and they’re built for exactly what you’ll face: grass, dirt, hills, and mud. You’ll notice the difference—trust me.

I’ve seen it firsthand: one high school runner showed up to his first race in trail shoes, slipped and slid around like he was on ice. Next week, he wore spikes and said, “I couldn’t believe how much more control I had. Total game-changer.”

Spikes dig in. They grip when trail shoes can’t. They give you that confidence to attack slippery corners instead of tiptoeing around them.

If You’re Racing Just for Fun or Can’t Get Spikes…

Trail shoes are fine—as long as they’re made for running (not hiking boots, please) and have good tread. Think grippy, snug, and light. Models like the Saucony Peregrine, Nike Terra Kiger, or Salomon Speedcross are solid bets.

They’re heavier than spikes (8–10 oz vs. 5–6 oz), but beginners don’t need to obsess over grams. You want support, comfort, and traction.

Key tip: If it’s a flat, dry course or has lots of pavement? Trail shoes might actually be better. Spikes on pavement = clack-clack death trap. Some races even ban spikes if there’s sensitive trail or road segments—so always read the race info.

Common Questions from New XC Runners

Are spikes hard to run in?
Not really. You’ll adjust naturally. Just do a short practice run or a few strides in them before race day. And check the spike length—9mm is standard, but you can swap in 6mm for firm ground or 12mm for deep mud.

What about socks?
Some runners go sockless in spikes. Don’t do that if you’re new. Unless you like blisters, wear thin, moisture-wicking socks you’ve tested in training. Wool or synthetic works best in wet races. And bring a dry pair for after the race. You’ll thank me.

How do I keep my shoes from flying off mid-race?
Double-knot your laces. Tape them if the course is a shoe-eater. I’ve seen races where a runner finishes with one shoe in their hand—don’t be that guy.

One recent example: Habtom Samuel at the 2024 NCAA XC Champs lost a shoe at the 5K, ran the rest with one bloody foot, and still got second. Incredible grit. But for us mortals? Tie your shoes right.

Foot & Shoe Tips (From Hard-Earned Mistakes)

  • Break in your spikes/trail shoes before race day. Even just a few miles makes a difference.
  • Trim your toenails. Downhills jam your toes forward. Long nails = black toenails = misery.
  • Vaseline or tape hot spots if you’re blister-prone. Your arches, heels, or toes will thank you.
  • Don’t use hiking boots or basketball shoes. One beginner showed up in heavy hiking boots. He survived… but barely. Blisters, fatigue, and a lesson learned.

Take Care of Your Shoes After the Race

If your shoes get muddy, clean them that day. Rinse the mud off, remove the spike pins, and stuff them with newspaper to dry.

Don’t toss wet, muddy shoes into your bag and forget them for a week. Unless you want your gear to smell like a swamp gym.

Bonus Gear (Optional But Nice to Have)

  • Spike wrench – comes with most spikes, used to change pin length
  • Small brush – for cleaning mud out of your spike plate
  • Gaiters – not common in XC, but if it’s super muddy, they can help keep your shoes on
  • Compression socks/gloves – for cold races, if needed

Budget Tip

Check for last year’s models online—you can often score great spikes or trail shoes for 30–50% off. You don’t need flashy carbon shoes. You need traction, comfort, and durability. That’s it.

And yes, some of the best spikes look ridiculous. Neon colors, crazy designs—but they work. No one’s judging style out there in the mud.

Bottom Line for Beginners

  • If you’re racing more than once, invest in spikes.
  • If you’re only doing one or two races and it’s not super muddy, trail shoes work.
  • Test your shoes in practice. Break them in. Tie them right.
  • Blisters, toenails, and ankles matter. Protect them.

It doesn’t have to be complicated—but it does have to be thoughtful. Show up with the right gear, and you’ll run with way more confidence and a lot less pain.

To the Newbies: You’re Invited

Never raced XC before? Try it. Just once. Doesn’t matter if you’re scared. Doesn’t matter if you’re slow.

Someone has to finish last, and trust me — XC crowds cheer the last finisher as loud as the winner. That’s what makes this sport different.

You’ll come away muddy, gasping, and probably wondering what the hell just happened. Then, a few hours later… you’ll be planning your next one.

Because no road race, no treadmill jog, no “fun run” compares to the full-body challenge that is cross country.

And if you “hate hills”? Even better. That means you’ve got something to conquer. Fear is the best reason to try.

To the Veterans: Come Back to the Dirt

If you’ve been stuck on roads, in training cycles, or racing the clock — consider heading back to XC.

There’s something about the shared misery, the slipping and sliding, the stripped-down nature of it all that rekindles the joy of just running.

This is where many of us fell in love with the sport in the first place. It reminds you why you started — and why you’re still here.

Got a Story? Share It.

I want to hear your cross country stories. The shoe-losing, hill-crying, mud-faceplanting, personal-best-breaking kind of stories.

Or if you’re still on the fence — what’s holding you back? Let’s talk about it.

You might inspire someone to give it a shot. And who knows, maybe they’ll thank you when they finish their first muddy, brutal, glorious race.

Final Word: Go Get Dirty

Cross country doesn’t sugarcoat anything. It’s the kind of sport that punches you in the gut and then claps you on the back and says, “See? You can do hard things.”

You leave the course a little broken — but also a little more whole. That mud washes off. The soreness fades. But the grit, the confidence, the mental edge? That sticks with you for life.

So here’s to the sport that doesn’t care about your PR… just your heart.

Lace up. Show up. Face the mud. And find out what you’re made of.

I’ll see you at the starting line.

👇 Drop your story in the comments. Let’s swap some mud memories.

9 Agility Ladder Drills for Runners to Boost Speed & Cadence

When I first heard about agility ladder drills, I thought they were some kind of secret weapon for speed.

Picture this: I was still a newbie runner, sweating through Bali’s humidity, convinced that a few quick foot tricks would turn me into Usain Bolt in flip-flops.

Reality smacked me hard.

On my first ladder workout, I tripped over the rungs like a baby goat on roller skates. My coach was trying not to laugh. I was red-faced, tangled up, and questioning all my life choices.

But honestly? That awkward first session was a turning point.

After a few weeks of sticking with it, things changed. My feet started moving with purpose. I wasn’t just surviving Bali’s trails anymore—I was gliding through rocky terrain, hopping over roots, and weaving past stray dogs like a seasoned ninja.

That’s when I realized agility work wasn’t just about speed. It was about control. Coordination. Building the kind of movement that makes you feel fast even when you’re not racing.

These days, as a coach, agility ladder drills are a regular part of what I give my runners. Not because they’re flashy, but because they work. They sharpen your footwork, lift your cadence, and prep you for trail chaos.

No, they won’t magically shave minutes off your 5K time—but they will build the groundwork for smoother form and faster reactions.

So if you’re serious about running smarter and moving better, stick with me.

I’ll walk you through the whole thing—what ladder drills actually are, why they matter (with a few honest truths), and my 9 favorite drills.

I’ve also added a 4-week plan you can do at home, plus real-world answers to the most common questions I get.

Let’s break it down.

What Are Agility Ladder Drills?

Agility means being able to change direction fast, without flailing or losing control. It’s not just about being quick—it’s about reacting. Moving clean. Staying in control when things go sideways.

According to RaymerStrength.com, scientists define agility as “rapid whole-body movement with change of velocity or direction in response to a stimulus.”

Sounds fancy, but here’s what it means for runners: being able to adjust your stride at the last second—like when you suddenly spot a hole in the pavement or have to swerve around a group of tourists hogging the sidewalk.

Agility ladder drills help you get better at that. You move your feet through a ladder laid flat on the ground, following specific step patterns—kind of like foot choreography for runners.

These drills train your feet to be quicker and more precise, which means more control on the run.

I tell my athletes: “Ladder drills teach your feet to dance.” They dial in your brain-to-foot connection—what nerds call the neuromuscular system—so that when the road gets sketchy or the trail gets wild, your feet already know what to do.

I’ve had moments out running—like flying downhill in the rain or threading through a crowded street—where I could literally feel the ladder work kicking in.

My legs moved faster than my brain could think. That’s the magic of training this way.

Now, don’t get it twisted: agility ladder drills aren’t true agility. In sports like soccer or tennis, athletes respond to unpredictable cues—like a defender or a ball. Ladder drills are planned.

You’re following patterns, not reacting to surprises. But that’s okay. These drills still build the raw tools—balance, foot speed, coordination—that help you react better in the real world.

So think of agility drills like sharpening your blade. They’re not the whole battle, but they make you a better fighter.

What Is an Agility Ladder (a.k.a. Speed Ladder)?

An agility ladder is basically a flat ladder you roll out on the ground. No, not the kind you use to clean gutters. It’s usually made of nylon sides and thin plastic “rungs” spaced about 18 inches apart. Each box is a landing zone for your feet during drills.

You can buy one online or at a sporting goods store for around $20. Mine’s been with me for years and rolls up like a yoga mat. Easy to pack. Easy to toss into a backpack.

But if you’re scrappy (or broke), make your own. I once built a DIY ladder in my garage with duct tape and a pile of paint stir sticks. Took about an hour, and it worked just fine. There’s something satisfying about training with gear you built yourself.

Here’s what you’ll need if you go the DIY route:

  • About 25–30 feet of duct tape
  • 10 flat sticks or cardboard strips (around 18 inches long)
  • Measuring tape (space rungs ~18 inches apart)
  • Scissors

Lay out two long strips of duct tape, slap the “rungs” between them, and boom—you’ve got a functional agility ladder. Not pretty, but it gets the job done. Chalk or even jump ropes on the ground can work in a pinch, too.

Agility Ladder Specs:

  • Most are 10 yards long, 16 rungs.
  • Modular ones come in smaller sections (great if space is tight).
  • Flat rungs are safer—because trust me, you will hit them sometimes.
  • Use it on a grippy surface like grass, rubber floor, or turf.
  • Avoid concrete unless you like sore joints and the taste of gravel.

I usually throw mine down in a parking lot or quiet patch of grass. Indoors, tape it to a hallway floor or gym mat. Just make sure there’s nothing breakable nearby—especially if you’re still working on your coordination!

Real Talk: Why Should Runners Care?

This isn’t just about looking cool or copying football players. Agility drills make you better on trails, in races, and in life.

They help you stay upright when the ground gets sketchy, or when you need to change direction without throwing your stride out of whack.

Here’s what I’ve seen in my own training and with my runners:

  • Cadence goes up: You learn to move your feet faster, without trying harder.
  • Form gets smoother: The foot-brain link strengthens, reducing the clunky shuffle that slows you down.
  • Confidence spikes: You trust your body more, especially when terrain gets tricky.

And here’s the kicker: agility work is fun. It breaks up the grind of regular mileage. It makes you feel like an athlete, not just someone out logging steps on Strava.

But yeah—don’t expect miracles. Ladder drills alone won’t get you to a sub-20 5K. You still need tempo runs, intervals, and strength training. But they will make those runs feel smoother and more dialed-in.

Why Runners Should Do Agility Ladder Drills (Yes, Even You)

Let me tell you something straight: agility drills aren’t just for soccer players in flashy cleats or sprinters chasing gold. If you’re a runner who wants smoother strides, quicker feet, and fewer injuries—you need these in your toolkit.

I used to ignore them too. Thought they were for athletes who cut and pivot, not for someone logging long miles. But man, was I wrong. Here’s what changed my mind—and how these drills can change your running for the better.

🔹 They Fire Up Your Brain–Body Connection

You ever feel like your feet and brain aren’t always on the same page—especially when you’re tired? Ladder drills fix that. They train your brain and legs to talk fast and react even faster.

I remember the shift myself. After a few weeks of drills, I was hitting rocky trails in Bali with more control, barely thinking about foot placement. It was like my nervous system finally got the memo.

🔹 They Help You Pick Up Cadence (Yes, That Means Speed)

Stuck in that heavy, slow stride that sounds like bricks hitting pavement? Been there. Ladder drills force you to move fast and light. Think quick, short, snappy steps.

I’ve coached runners who couldn’t break 160 steps per minute. After adding agility work, they started hitting 175+ like it was nothing. It’s not magic. It’s muscle memory.

🔹 They Make You a More Efficient Runner

No wasted motion. That’s what we’re after. Ladder work teaches you to move clean—less flailing, more control. You’ll start landing under your center of gravity instead of reaching and overstriding.

For me, I felt it most on long runs. My legs didn’t fall apart late in the game. They held strong. That’s running economy in real life—not just something you read in a study.

(But for the record, this stuff is backed by science—like a study in the Journal of Strength & Conditioning Research showing agility drills improve lower-body coordination and speed.)

🔹 They Wake Up Your Balance and Stability Muscles

Every little hop and shift in a ladder drill lights up those tiny stabilizer muscles—especially in your feet, ankles, and hips. These are the muscles that stop you from rolling your ankle on a root or crashing on a descent.

Trust me, I used to crash. A lot. Rocky trails were my nemesis until I built up this kind of foot control. Now I stay upright more often than not.

🔹 Bonus: They’re Trail Running Gold

If you love trail running like I do, these drills are your cheat code. You’ll move laterally better, lift your feet higher, and react faster to whatever nature throws at you.

I swear by lateral ladder drills before a big trail race. Makes dodging roots and rocks feel automatic.

Coach’s Final Word

Look, ladder drills won’t replace your hill repeats or tempo runs. But they will sharpen the blade. You’ll feel quicker, more controlled, and more confident out there.

I treat them like a secret weapon. 10–15 minutes, twice a week, and the benefits sneak up on you.

So if you’ve been skipping footwork drills because they look “fancy” or “not for runners,” stop that. They’re for you. Let’s level up your stride.

9 Agility Ladder Drills for Runners

These are the drills I keep coming back to—with myself and with the runners I coach. I’ve broken them down with clear steps and thrown in some personal notes to show how each one plays out in real life.

(Quick note: Do each drill for 30 seconds to a minute. Rest. Then repeat for 2–3 rounds. Twice a week is enough to see gains.)

1. Ladder Linear Run (The Classic Speed Drill)

This is your bread and butter. Great warm-up. Great turnover booster.

How to do it:

  • Start at the bottom of the ladder, facing straight ahead.
  • Run through it, one foot per box—left-right-left-right.
  • Light steps. Stay bouncy. Don’t let your heels drag.

Form Tips:
Land on the balls of your feet. Keep it fast and light—imagine running over hot coals. Arms should drive in rhythm.

Coach David’s Tip:
This drill didn’t click for me at first. I was too stiff, trying to “nail” each step perfectly. One day I just sprinted through—no overthinking—and boom: I flew. No ladder hits. Just flow. Felt like I unlocked a new gear in my legs.

Once you feel it, you’ll know. The rhythm is addicting.

2. High-Knees Run (The “A-Skip” Variation)

If your stride feels sluggish or you struggle with posture, this one is for you.

How to do it:

  • Both feet land in each box.
  • Right foot in → left foot follows.
  • Then next box. Each time, lift your knee high—aim for waist height.

Arms:
Keep elbows bent at 90 degrees. Drive your arms with the opposite knee. It’s a rhythm thing.

Goal:
You’re not trying to move forward fast. You’re aiming for quick, clean knee lifts.

Coach David’s Tip:
I used to picture running through tires, like in those old football training montages.

One day I was doing this drill in a park and a bunch of kids started mimicking me—knees way too high, laughing the whole time.

At first I felt silly. Then I realized: screw it, I’m training smart. They were just having fun.

This drill helped fix my lazy shuffle. Gave me more spring and improved my form. If you’re always dragging your feet, start here.

3. Lateral Quick Step Shuffle

Running isn’t just about pounding forward. If you’ve ever had to dodge a wayward scooter in Bali or hop a puddle mid-run, you already know that side-to-side agility is crucial.

The lateral shuffle drill trains exactly that—giving your feet the kind of quickness that keeps you upright, stable, and ready to move.

How to Do It:

  • Start by facing sideways at the edge of the ladder, with it stretching out to your right.
  • Step your right foot into the first box, then quickly bring your left foot in too—both feet land inside.
  • Now step out with your right foot (outside the ladder), then left foot into the next box, followed by right foot in again.
  • Repeat this “in-in, out” rhythm as you shuffle laterally down the ladder.

Quick Visual Tip:
Face one direction the whole time. If you’re headed right, your inside foot (left) leads the rhythm. When you get to the end, switch directions to even things out.

Form Focus:
Bend your knees slightly, drop your hips, and keep your chest tall. Land on the balls of your feet and point your toes forward. Avoid crossing your feet—this is a shuffle, not a dance-off. And don’t bounce upward. Keep the movement tight and clean from side to side.

Protect Your Ankles:
Land with both feet fully inside the box—not halfway across the rung. That’s how you build ankle stability instead of risking a roll.

Coach David’s Tip:
The first time I did this drill fast, I felt like a pro boxer warming up—sharp, quick, in control. But then, at the end of a long workout, I got lazy, dragged a foot, and nearly kissed the pavement.

Lesson? Don’t zone out.

I now cue myself (and my runners) with “quiet feet.” If you can move without slapping the ground, you’re doing it right. This drill helped me massively during trail runs where I had to sidestep rocks or slippery roots in a split second.

Your Turn:
How are your ankles holding up during runs? If you’re prone to rolling them or feel unstable on trails, this is the drill to dial in.

4. Carioca (Grapevine) Step

Here’s where things get spicy. The carioca drill—some call it the grapevine—is all about hip mobility, timing, and smooth coordination. Think of it as dancing through the ladder while secretly training your running mechanics.

How to Do It:

  • Stand on the left side of the ladder with your right shoulder facing it.
  • Step your right foot into the first box, then cross your left foot behind the right into the next box.
  • Right foot into the third box, left foot crosses behind again into the fourth box, and so on.

Key Pointers:
Say it out loud as you move: “in front, behind, in front, behind.” That rhythm helps. Keep facing the same direction and rotate through your hips. Let your shoulders twist gently in the opposite direction for balance.

Go Slow First:
This one isn’t a sprint drill—it’s coordination. March it out before you pick up the pace.

Coach David’s Tip:
Confession time: I used to trip over my own feet doing this in high school PE. The ladder made it even harder. But once it clicked, it felt smooth, like gliding.

I noticed a big difference when running tight switchbacks or weaving through crowded sidewalks—my hips moved better, and I didn’t have to think about it.

That’s the power of this drill: it rewires your movement patterns.

Your Turn:
Ever get stiff hips during long runs or struggle with quick turns? Try this twice a week and see if your stride gets looser.

5. In-and-Out (Jumping Jack Feet)

Ready to get your heart rate up? This one’s like a horizontal jumping jack—simple, but man, it wakes up your legs and coordination fast.

How to Do It:

  • Stand at the start of the ladder with both feet together.
  • Jump both feet into the first box, landing hip-width apart.
  • Then jump forward out of the ladder, landing with your feet straddling the next rung—wider than hip width.
  • Next, hop both feet together into the second box. Then out again, and so on.

Form Focus:
Bounce on the balls of your feet. Keep your knees soft and chest up. Arms help: down when feet are together, out when feet go wide—just like a jumping jack. Use your eyes to scan ahead, not down.

Common Pitfall:
People often hesitate going from wide to narrow. If that’s you, slow it down. Practice the pattern until you get that rebound rhythm going: in, out, in, out.

Coach David’s Tip:
I used to think my coordination was solid… until I realized my left foot was always late to the party. This drill exposed that. It also lit up my adductors (inner thighs), which I didn’t even know were weak.

Now I think of this drill as mini ski hops—it’s helped my trail running, especially when pushing off from uneven terrain.

Your Turn:
Feel that burn in your calves and hips? Good. Do a few rounds and time how long before your breathing gets heavy. This doubles as a cardio finisher.

6. Ickey Shuffle (Three-Step Lateral Pattern)

This is the drill that makes you feel like an athlete. Named after NFL legend Ickey Woods, it’s all about rhythm and reaction—perfect for runners who want sharper footwork and faster cadence.

How to Do It:

  • Start on the left side of the ladder. The pattern is “In-In-Out.”
  • Step your right foot into the first box.
  • Bring your left foot in.
  • Step your right foot out to the right of the ladder.
    Then:
  • Step your left foot into the next box.
  • Bring your right foot in.
  • Step your left foot out to the left side.
  • Repeat all the way down.

Pro Tip:
Chant it: “Right in, left in, right out… Left in, right in, left out…” until your feet and brain sync up.

Form First:
Start slow, like walk-through pace. The speed will come once your feet stop tripping over each other. Keep low, bounce on the balls of your feet, and let your arms swing naturally.

Coach David’s Tip:
This one had me feeling like a baby giraffe at first. I broke it into mini sections until I got the hang of it. Once you hit the rhythm, it’s almost musical.

One time during a technical trail descent, I swear my feet fell into Ickey Shuffle mode by instinct. That’s the kind of pattern this drill builds—automatic agility. It makes you quicker, lighter, and more confident in tight spaces.

Your Turn:
Struggling with foot speed or transitions during runs? Make the Ickey Shuffle your go-to. You’ll be amazed how it sharpens your game.

7. Forward & Backward Jumps

This one’s a killer — I call it the boomerang hop. It teaches your feet to react fast and your brain to stay locked in. The rhythm is simple: two boxes forward, one back. It sounds playful — but it’ll torch your calves and challenge your focus like crazy.

How to Do It:

  • Stand at the base of the ladder. This is a two-foot jump drill.
  • Start by hopping over the first box and landing in the second.
  • Then jump backward one box to the first.
  • Next, jump forward two — you’ll land in box 3.
  • Then back to box 2. Forward to box 4. Back to 3. Keep going.

The pattern:
Box 2 → back to 1 → into 3 → back to 2 → into 4 → back to 3… and on.

My routine? I walk back to the start after each round (honestly, that walk is the best breather). If you want extra challenge, flip the drill: go forward one, back two. But trust me — forward-2, back-1 is already a mental workout.

Form Tips:

  • Keep your landings soft.
  • Swing your arms with the movement — forward when jumping ahead, back for the reverse.
  • Don’t rush the jump back. Regain your balance, then push off.

Eyes up: Look a box or two ahead instead of staring straight down. It helps your body prep for what’s next.

Coach David’s Tip:
The first time I tried this, I was wrecked by the end — calves burning, heart pounding. I thought it’d be easy. Wrong.

I learned fast: bend your knees on landing or you’ll jar your joints. And don’t chase speed right away — it’s all about rhythm.

When I finally got into a groove — forward jump, boing… back jump, boing — it felt smooth. Almost like pogoing across the ladder.

I even made it a little game: “Can I land without making a sound?” The quieter the landing, the better my control.

Trail runners — this drill’s for you too. Think about those sudden moments when you realize you missed a turn and have to hop back. This trains your body to switch direction fast and smooth.

Question for You:
Have you tried backward jumps in your workouts before? If not, this one might surprise you — in a good way. What’s your go-to drill for improving power?

8. Lateral Shuffle (Two Feet In Each)

This is one of the simplest ladder drills — but don’t sleep on it. Done right, it sharpens your lateral speed and balance. I like using it as a warm-up or reset when other drills get too tricky.

How to Do It:

  • Stand facing down the ladder, with it at your side.
  • Step your left foot into box 1, then your right.
  • Step out with your left, then move your right into box 2, followed by your left.
  • Repeat: two feet in each box, one at a time, moving sideways.

In short:

  • Step in with lead foot,
  • bring the trailing foot in,
  • step the lead foot out,
  • repeat into the next box.

Once you hit the end, face the other way and come back — your opposite foot will lead this time.

Form Focus:

  • Stay low like a defender in basketball — knees bent, butt down, core tight.
  • Shoulders square to the front even as your legs move sideways.
  • Don’t cheat the drill — both feet have to touch inside each box before moving on.

As you get faster, it starts to feel like a mini hop-shuffle. But don’t force it. Build up speed only when your form is locked in.

Coach David’s Tip:
At first, I made the classic mistake: standing too tall. Felt awkward and off-balance. The second I dropped into that athletic stance — boom, everything clicked.

This drill helped me a ton with trail running, especially on switchbacks and those sneaky side-step moments when the terrain zigzags.

I once coached a guy who kept stepping on the ladder sides and getting annoyed. We slowed it way down. I told him to “place-place” his feet in each box like he was playing Twister.

Within minutes, his rhythm improved.
So yeah — speed’s great, but accuracy comes first. That’s what builds real agility.

Let’s Talk:
What side-to-side drills have helped you on trails or during road races when dodging runners? This shuffle might look basic, but it packs a punch for lateral control.

9. Single-Leg Hops (Hopscotch Balance)

Okay, now we’re getting serious. This drill is tough. It’s all about control, balance, and single-leg strength — which runners desperately need. Remember: every stride is a one-leg jump. So this is just running, turned up a notch.

How to Do It:

  • Start on one leg — right foot, left foot raised.
  • Hop into the first box.
  • Keep hopping through the entire ladder, staying on that one leg.
  • Switch legs and return hopping on the other foot.

You don’t need to move sideways — just hop forward and zigzag slightly into each box. Control matters more than speed here.

Form Focus:

  • Bend that knee. Soft landings only.
  • Use your ankle like a spring.
  • Arms can flail — that’s fine. Keep your core tight.
  • Eyes up — don’t stare at your feet or you’ll wobble more.

If you lose balance, no shame in tapping the other foot. But aim to do the full ladder cleanly with time.

Coach David’s Tip:
When I first tried this, my left leg was a mess. Wobbly, weak, uncoordinated. It exposed a clear imbalance I had been ignoring. So I added it to my drills every week.

After about a month? Huge difference.

This drill hits all the little stabilizer muscles — foot, ankle, glutes. It’s a hidden gem for injury prevention.

I remember a buddy recovering from an ankle sprain who joined me for this drill. He was nervous at first, but it helped rebuild his confidence — and his ankle strength.

Big tip: look ahead, not down. When I focused on the far end of the ladder instead of my feet, I stayed more balanced.

Also — bend your knees like you’re absorbing a landing. Think ninja mode. Light and springy. After a while, you’ll feel like a single-leg Jedi.

Your Turn:
Have you tried single-leg drills before? Which leg is your weak link? Let me know — and if this one humbles you, don’t worry. It did the same to me.

4-Week Agility Ladder Plan (Runner-Tested & At-Home Ready)

When I first added agility ladder drills to my training, I was all clumsy feet and tangled steps.

I mean it. I looked like I was playing Twister on fast-forward.

But over time, that awkward mess turned into smooth, quick steps. And now, it’s one of my favorite ways to wake up my legs and brain.

So if you’re wondering how to fit ladder drills into your running routine, here’s a no-fluff 4-week plan I use with my runners here in Bali.

All you need is about 10–15 minutes, a little space, and some willingness to look silly before you get good. Trust me, it’s worth it.

The Basics

  • Schedule: Start with 2 ladder sessions per week. Move up to 3 in week 3 if you’re feeling good.
  • When to do them: On your easy run or cross-training days. Or tack them on after an easy run as part of your drills.
  • Warm-up: Always jog 5–10 minutes and do dynamic stretches before ladder work.

WEEK 1: Learn the Moves

  • Focus: Nail the basics, stay light on your feet.
  • Sessions: 2 (e.g., Tuesday & Friday)
  • Drills: Ladder Linear Run, High-Knees, Lateral Shuffle, In-and-Out
  • Tip: Walk or jog through drills first. It’s about rhythm, not speed. By the end of the week, you should feel more coordinated.

WEEK 2: Add a Little Spice

  • New Drills: Carioca & Ickey Shuffle
  • Session A: Linear Run (2 rounds, a little quicker), High-Knees (2 rounds), Carioca (2 rounds each way), Lateral Shuffle (2 rounds)
  • Session B: In-and-Out (3 rounds), Ickey Shuffle (3 rounds), Forward/Backward Jumps (2), Single-Leg Hops (start easy)
  • Tip: It’s normal to feel awkward with the new drills. Break them down step-by-step. Rest as needed.

WEEK 3: Turn Up the Volume

  • Sessions: 2–3 (add a third light one if you’re up for it)
  • Session A: High-Knees (3 rounds), Linear Run (3 rounds, last one fast), Lateral Shuffle (3), Carioca (2)
  • Session B: Ickey Shuffle (4), Forward/Backward Jumps (3), In-and-Out (3), Single-Leg Hops (2 each leg)
  • Optional Session C: Focused technique work on your weakest drill
  • Tip: Try going circuit-style: run straight into the next drill, then rest. And yes, hitting a rung happens. Laugh, reset, go again.

WEEK 4: Own It

  • Session A: Create a circuit: Linear Run → High-Knees → Ickey Shuffle → Lateral Shuffle. Repeat 2–3 times.
  • Session B: Power session: In-and-Out (2 rounds fast), Forward/Backward Jumps (2), Single-Leg Hops (2 each leg), finish with your favorite drill
  • Tip: Imagine you’re on a technical trail or dodging crowds. Let your body move freely. Feel the work you’ve put in come together.

After Week 4

By now, these drills should feel familiar. You can:

  • Add more rounds
  • Toss on a light weight vest
  • Use them in your warm-up before interval runs

Just don’t drop them altogether. Keep ladder work in your rotation 1–2 times a week. Your future self will thank you.

Final Thoughts: My Take

I started as the guy who tripped over every rung. Now? The ladder is my secret weapon. It wakes up my coordination and helps me feel fast even on tired legs.

I use this stuff with the runners I coach — beginners and marathoners alike. One runner I worked with used to call herself “awkward and slow.” A few weeks in, she was gliding through the ladder with confidence. That’s what this work does. It builds belief.

Ladder drills are more than physical. They’re a mindset. They teach agility, yes, but also patience and play. Blast some music, smile when you mess up, and high-five yourself when you get it right.

So what’s your move? Have you tried ladder drills before? Got a favorite pattern? Ickey Shuffle still tripping you up? Drop a comment and let’s talk.

And remember: Every fumble is one step closer to feeling fast and free.

Get after it. Your agile, strong self is waiting.

Home Workouts for Runners: 9 No-Excuse Strength Moves (No Gear Needed)

No-Equipment Home Workout for Runners


Why Strength Training at Home Can Straight-Up Save Your Running

Look, I get it — when life gets crazy, the first thing most runners ditch is strength work.

And then… bam! Your hips are tight, your knees start barking, and suddenly your “easy 5-miler” feels like a death march.

I’ve coached runners through this mess more times than I can count. One guy I worked with was stuck at 20 miles a week and always limping around with shin splints and cranky Achilles.

We added two simple bodyweight strength sessions per week. A few months later? Dude was clocking 40 miles per week, injury-free.

Didn’t change his shoes. Didn’t add cryo chambers or fancy massage guns. He just got stronger.

And this isn’t just me yapping — science backs it up. A massive review found that strength training can slash your risk of sports injuries by two-thirds and nearly cut overuse injuries in half.

That’s not some gimmick. That’s data.

And the best part? You don’t need a gym. You don’t need fancy crap. Just your body, your floor, and a little sweat equity.

Yeah, bodyweight training works — when you do it right.

I’m not talking about endless burpees till your lungs explode. I mean real, functional moves that target the stuff that matters for runners:

  • Strong glutes to power those hills.
  • A solid core to stop you from folding at mile 20.
  • Joints tough enough to take the pounding.

I’ll be real with you — there was a stretch when I couldn’t hit the gym for weeks. Thought I’d be fine.

Spoiler: I wasn’t. My form fell apart, knees started whining, and my runs got ugly fast.

I learned the hard way that you don’t always need barbells — but you do need strength.

That’s why I put together this no-equipment workout. I give it to every runner who tells me, “But I don’t have time for the gym.”

No excuses. You can do this anywhere.

You’ll build the kind of strength that shows up when it counts — on the roads, on the trails, when your legs are toast and your brain’s telling you to quit.

And hey — you’re not alone trying to juggle running with work, kids, life. Tons of runners are crushing it with short, at-home sessions.

I saw one runner in a forum say, “I prefer a 20-minute HIIT session at home — done in under half an hour, no commute, no drama.”

Respect. That’s how you make training fit your life, not the other way around.

Bottom line: Home strength training works.

It makes you stronger, faster, and less likely to hobble off the couch holding your IT band.

Let’s get into the mindset first — then I’ll show you the 9-move circuit that gets the job done.

The Strength Mindset for Runners (Home Edition)

Okay, listen up: runners don’t need to train like bodybuilders.

You’re not here to flex at the beach. You’re here to build a body that can take the hits — mile after mile — without falling apart.

That means strong joints, stable hips, powerful glutes, a rock-solid core, and good movement patterns that don’t break down under pressure.

Like one coach said: “For runners, strength training is about bones, joints, tendons — not just muscles.”

Couldn’t agree more.

You’re not chasing bigger quads. You’re chasing durability.

Here’s the deal: when your muscles fire right, and your body stays aligned, you’re not just running better — you’re running safer.

That’s what strength training does. It dials in your neuromuscular system so you move smoother, with fewer energy leaks.

That slouchy, knees-caving-in form at mile 10? That’s what we’re fixing.

And yep, bodyweight training can absolutely get you there.

You don’t need dumbbells to start — especially if you’re new to strength work or coming back from injury.

Bodyweight is where it’s at.

One coach on Reddit put it best: “If you’re not doing any strength work yet, just doing bodyweight stuff at home can seriously level up your running.”

Later, sure, add bands or weights if you want. But don’t wait for “perfect.” Start with what you’ve got.

Also, don’t sleep on plyometrics — those jumpy, explosive moves. They can really improve your running economy (read: you move faster with less effort).

A few well-placed jump squats or lunge jumps? Game-changers.

How to Work This Into Your Week

Here’s my rule: 2 to 3 sessions a week. That’s it.

Even 20–30 minutes can move the needle. Hit strength right after easy runs or on cross-training days.

Keep hard days hard. Keep rest days sacred. And don’t go crushing leg day before your long run. Common sense, right?

If you’re ramping up mileage or in peak training, you can dial it back to once or twice a week.

But in the offseason? Push that strength work. That’s your time to build.

Oh, and don’t skip the warm-up.

You’d never go straight into a tempo run without loosening up (at least, I hope not), so give your strength sessions the same respect.

A few minutes of leg swings, lunges, ankle hops — it gets the blood moving and keeps you from jacking something up.

And please — quality over quantity.

Ten clean reps will help you more than 30 sloppy ones that mess up your movement patterns.

I’ve seen runners do strength work with garbage form, and then wonder why their knees still hurt. That stuff carries into your run form, so dial it in.

Be Flexible. Be Real.

Some days you’ll have 30 minutes. Other days, you’ll have 8. That’s life. Do what you can.

One coach told me, “Something is better than nothing.” Preach.

Break it up into short chunks if needed. Do core in the morning. Hit glutes at night. It adds up.

Micro workouts might actually be easier to stick with, too. Less fatigue. More flexibility. And hey — your knees and hips will thank you.

Let me give you a real-world example:

A marathoner named Mindy was benched with IT band syndrome for 7 months. She tried everything. Nothing worked.

Then she ditched the machines, started doing solid strength work — think deadlifts, squats, real movement.

Seven weeks later, she was back on the roads. Later that year? Boston qualifier.

Her words: “Without strength training, I couldn’t have done it.”

Now, I’m not saying you need to go deadlift 300 pounds.

But the point stands: strength work changes the game. For injury prevention, for performance, for confidence.

It’s not optional. It’s part of the plan. Own it.

Ready? Let’s Get Into the 9-Move, No-Equipment Circuit That’ll Toughen You Up 

Listen up — I don’t care if you’re chasing a new 5K PR or just trying to keep your knees from screaming on the downhills, strength work matters.

And no, you don’t need a gym membership or fancy gear. Just your body, a little floor space, and the will to get stronger.

Here’s a no-BS circuit I swear by.

It’s 9 exercises, done in a smart order to hit every major muscle runners need — quads, glutes, hamstrings, calves, core, back — and yeah, we’re throwing in some plyo to keep your stride snappy.

This isn’t some random YouTube list. Each move’s got a job to do.

We’re talking stability, power, injury-proofing, and building that tough runner body that can handle miles without falling apart.

How to Do It

  1. Do each move for the reps or time listed.
  2. Rest 30–60 seconds between each one. Take a sip of water. Shake out your legs.
  3. After all 9? That’s 1 round. Shoot for 2–3 total, resting 1–2 minutes between rounds.

New to this? Start with 1 or 2 circuits, shorten the reps if needed, and focus on form. This isn’t about showing off — this is about getting stronger where it counts.

Do this thing 2–3 times a week on non-running days. Or tag it onto an easy run.

Example: Jog 3 miles, then hit this. Or knock it out on a cross-training Monday.

Warm-up included, you’re looking at 30–45 minutes. That’s all it takes.

1. Bodyweight Squats

Why it matters: Squats are the meat and potatoes of runner strength. They hit your quads, glutes, and hamstrings — the engines that drive your stride.

They also clean up your form by locking in that hip-knee-ankle alignment.

Janet Hamilton, an exercise physiologist, backs this up — she says squats help fix imbalances, increase range of motion, and reduce injury risk. That means fewer knee issues, better posture, and a smoother ride all around.

Ever felt your legs go dead on a hill or in the last mile of a race? Squats build the muscle endurance to power through that wall.

How to Do It

  • Feet shoulder-width apart, toes forward or slightly out.
  • Stick your butt back like you’re sitting in a chair.
  • Drop down until your thighs are at least parallel to the floor. Keep your chest proud, back flat, and knees tracking over your feet.
  • Push through your heels and stand tall.

Pro tip: Think “drive the floor away” with your heels. It fires those glutes right up.

Do: 3 sets of 15–25 reps.

Coach’s Corner: Control the movement — 2 seconds down, 1 second up.

No bouncing. No folding forward like a lawn chair.

If this gets too easy (and it will), grab a backpack, throw a dumbbell in it, or progress to single-leg squats.

One PhD-level Redditor even pointed out that unweighted, full-range squats beat the heck out of machines for functional strength.

Bottom line: Master these. They build the foundation for every strong stride you take.

2. Walking Lunges

Why it matters: If squats are the meat, lunges are the seasoning.

This move mimics the running stride — basically a slow-motion, muscle-building version of what you do with every step.

Lunges hit glutes, quads, hammies, calves, and your core too. Plus, they iron out left-right imbalances that running tends to exaggerate.

A lot of coaches say lunges are “running in disguise” — and they’re right.

You’re learning to balance, stabilize, and push off strong from one leg at a time. Exactly what your body needs to handle hills, sprints, and long runs without breaking down.

How to Do It

  • Stand tall. Step forward with your right leg.
  • Drop down into a 90-degree bend in both knees. Don’t let the front knee go past your toes.
  • Keep your chest up and your core tight.
  • Push through your right heel to bring your left leg forward. Now lunge with the left.
  • Keep alternating.

Do: 3 sets of 12–16 lunges per leg (24–32 total).

Coach’s Corner: Watch that front knee — don’t let it cave in or shoot forward like a rocket. Keep the weight in your heel.

Feel that front-leg glute working? That’s what drives your stride forward.

If walking lunges feel sketchy balance-wise, do stationary split squats till you’ve got it locked in.

Oh, and wobbly legs at first? Totally normal. That’s your stabilizer muscles learning to work. Stick with it and you’ll feel the difference in your running form — especially when you’re grinding out the last mile of a tough run.

3. Single-Leg Lateral Hops

Why it matters: Running’s mostly forward, but life throws curveballs. Uneven trails. Curbs. Potholes. That awkward sidestep to dodge a stroller.

This move trains your body to handle those surprises. It builds side-to-side strength in your ankles, knees, and hips.

And it’s not just me saying this — sports rehab pros use these hops to rebuild dynamic ankle and knee stability after injuries.

So why wait for a sprain? Train that control now.

It’s also a plyo move, which means you’re building explosive strength and elasticity — key for improving running economy. Translation: less effort, more speed.

How to Do It

  • Picture a line on the ground. Stand on your right foot on one side of it.
  • Slight bend in the knee, core engaged.
  • Hop sideways to the left side, land softly on that same foot.
  • Regain balance, then hop back.

Do: 3 sets of 12–16 hops each leg.

Don’t overthink distance. Even a hop of 1–2 feet works. Just stay balanced and land soft.

Coach’s Corner: This one isn’t about looking pretty. You might wobble. You might flail. That’s the point.

Your body’s learning to react and stabilize in real time. Use your arms naturally to help balance.

Trail runners, this is gold for you. But even road runners benefit — think of the control you need when your form starts breaking down late in a race.

These hops build that next-level durability.

Lateral Hops

Why it works: Let’s talk ankle insurance. Yeah, that’s what I call lateral hops.

These little side-to-side jumps might look simple, but they train your ankles, knees, and brain to stay sharp — especially when running trails or dodging curbs.

You’re teaching your joints how to handle that “oh crap” sideways step when your foot hits a rock or an uneven patch of road.

Start easy. If single-leg hops make you feel like Bambi on ice, back it up and start with two-legged ones. Or heck, just balance on one foot and gently shift your weight side to side.

It all counts. The point is to wake up those stabilizers and sharpen your reflexes.

Here’s the key: land soft on the ball of your foot, and let your knees and ankles bend naturally — don’t lock up.

That bounce teaches your body how to absorb impact when things go sideways (literally).

And whatever you do, don’t let your knee cave in. Keep it stacked over your foot. Control matters way more than how far you hop.

One PT I know always tells his athletes: “Stick the landing like a gymnast. That’s what keeps you in the game.”

Over time, you can ramp up the distance or make it more reactive (faster side-to-side). It’s all about building that body awareness and ankle trust.

Real talk: I messed up my ankle bad on a trail last year — classic rock-roll situation. It was swollen and angry.

Once I could walk without wincing, I started doing lateral hops. At first, I could barely keep my balance. But a couple weeks in? I was hopping side to side with purpose.

When I hit the trails again, that ankle felt bulletproof. It knew how to react.

That’s what this drill gives you: confidence in your footing.

Coaching Tips:

  • Start small — quick, short hops. Nail the form first.
  • Land soft, knees bent, core tight.
  • Don’t chase distance — chase clean landings.
  • Use this drill as ankle insurance — especially if you’ve had a sprain before.
  • PTs often require lateral hops pain-free before letting runners back post-ankle injury. There’s a reason for that.

Your turn: Ever twisted an ankle on a run? What’s your go-to rehab drill? Drop it in the comments — I wanna hear what worked for you.

4. Burpees

Why it works: Ah yes… the burpee. The love-hate legend. Most folks groan at the word — but if you’re a runner trying to build real toughness, this is your friend.

Burpees are like the Swiss Army knife of bodyweight exercises. You’re getting a plank, a push-up, a squat, and a jump — all in one brutal little package.

They’ll hit your legs, chest, arms, core, lungs, and brain. You’ll be gassed, but stronger for it.

And get this: a 185-pound person doing 20 burpees per minute torches around 15 calories a minute. That’s more than running at a 7-minute mile pace. No treadmill required.

For runners, burpees mimic the grind of a hard finish — legs on fire, lungs screaming, but still needing to push.

They also build the kind of explosive strength that helps with sprint finishes and those nasty late-race hills.

How to Do It 

  1. Stand tall, feet shoulder-width.
  2. Drop into a squat, hands on the floor.
  3. Kick both feet back — plank position.
  4. Do a push-up (or drop to knees if needed).
  5. Jump your feet back in — land outside your hands if you can.
  6. Stand and explode up with a jump, arms overhead.
  7. Land soft, right back into your squat.

That’s one rep. Aim for 10–20 reps per set, 2–3 sets.

Adjust as needed — omit the push-up or jump if you’re just starting.

Coaching Tips:

  • Stay smooth — burpees should flow.
  • Keep your core tight — don’t sag in the plank.
  • Use your arms in the jump — they’ll help get you off the ground.
  • If your form starts falling apart, pause, reset, and finish strong.

Want to finish a workout like a beast? Add a set of burpees.

Your legs will hate you… and then thank you.

Pro Tip: Don’t go zero to hero. Start with just 5 burpees after a run. Build up to 20 over a few weeks.

They sneak up on you. But once you get the rhythm down? You’ll be turning into a conditioning machine.

Your move: What’s the most burpees you’ve ever done in a row? Think you could hit 30? Try it out — and tell me how it goes.


5. Plank Variations (Front & Side)

Why it works: Let’s be real — your core is your engine room.

It’s what keeps you tall when your legs are dying. It keeps your stride smooth, your form clean, and your hips from collapsing.

Planks are the real MVP for runners. No fancy movement. Just hold steady.

Front planks hit your whole midsection — abs, lower back, hips. Side planks go after your obliques and those small-but-mighty stabilizers like the QL (quadratus lumborum) that keep your pelvis level.

Unlike crunches (which are mostly a six-pack show), planks teach your core how to brace — just like you do when running.

You’re resisting movement, not creating it. That’s pure running gold.

Jason Fitzgerald of Strength Running says it best: Plank variations help you run more efficiently and avoid those common overuse injuries.

Think of them as your guardrails. They keep everything stable when you’re logging those long miles.

How to Do It

Front Plank: Forearms on the ground, elbows under shoulders. Straight line from head to heels. Feet hip-width. Abs tight, glutes on. Don’t sag or pike. Breathe deep.
– Aim for 60–90 seconds per set (start with 20–30 sec if needed).

Side Plank: Lie on one side, prop up on your forearm. Stack your feet, lift your hips. Straight line, shoulder to feet. Arm on hip or up in the air.
– Go for 30–60 seconds per side.

Coaching Tips:

  • Form first. Shaky backs or dropped hips? Reset.
  • Planks aren’t about holding forever. Once you hit 90 seconds, add variety instead.
  • Breathe. If you’re holding your breath, you’re doing it wrong.
  • Side planks are especially key for runners — running is one-legged at a time, and side planks train that lateral stability.
  • Add spice: lift one leg, tap shoulders, or try stir-the-pot on a stability ball if you want to feel your abs scream.

6. Russian Twists

Why it works: Alright, let’s talk Russian Twists.

If you’re serious about running stronger — not just faster, but smoother and more efficient — then your core better be doing more than just looking good in the mirror.

Russian twists hit those side muscles — your obliques — that help control rotation.

When you run, your body naturally twists a bit: left shoulder comes forward, right leg swings through.

That counter-rotation? It’s how your body balances and drives power. But if your core is weak? That twist becomes sloppy. Wasted energy. Poor form. Potential injury.

Russian twists train your obliques to lock that movement in, so you’re not flailing around like an inflatable tube guy.

Runner’s World nailed it when they said this move builds “core strength and power necessary to improve running speed and efficiency.”

Why? Because the twist mimics that natural cross-body motion in running.

I’ve coached runners who went from chaotic, wobbly torsos to looking like machines on the track — all thanks to dialing in their rotational strength.

Bonus: strong obliques also help steady your spine and hips, which means better arm swing, better foot strike, better everything.

How to Do It

  • Sit your butt on the floor. Knees bent. Feet either planted or, if you want to feel the burn, hover them an inch or two off the ground.
  • Lean back to about 45 degrees — don’t hunch, stay tall.
  • Clasp your hands in front of you. Now twist from your ribcage, not your shoulders, and tap the floor on one side… then the other.

That’s one rep. Nice and controlled, no rushing.

Do: 3 sets of 10–20 twists per side.

Add a med ball or water bottle if you want to level up, but don’t let the weight do the work — your core’s gotta do the twisting.

Coach’s Tips:

  • Slow is strong. Don’t just whip your arms around — that’s not helping.
  • Focus on twisting from the abs. Exhale as you twist.
  • Keep your chest proud like you’re showing off a race medal.
  • If your lower back starts whining, ease up a bit — maybe keep your feet down at first.

If you want a spicy variation, try bicycle-style twists — as you twist right, extend your left leg out, then switch.

That brings in the lower abs and hip flexors. It’s a good kind of nasty.

Real Talk: When you’re sprinting or grinding up a hill, the last thing you need is your torso wobbling all over the place.

Russian twists build the control to keep your midsection tight and transfer that power cleanly from your arms to your legs.

And if this one bothers your back? No shame. Try Pallof presses or banded woodchoppers instead.

But if you’ve got no equipment? Russian twists, done right, are a killer go-to.

Your turn: Do you add core work to your run training? What’s your go-to move? Drop a comment — I wanna hear what’s working for you.

7. Lying Superman

Why it works: Okay, you know how everyone obsesses over core and quads? Cool. But don’t forget the muscles that hold you upright — your back, glutes, and hammies.

That’s your posterior chain, and the Superman is one of the best no-equipment ways to wake it up.

It’s simple: you lie down and lift your limbs like you’re flying. But don’t let the simplicity fool you — this move fires up your spinal erectors, your glutes, and even your shoulders a bit.

All the stuff that keeps your posture solid during long runs.

Janet Hamilton, a seasoned strength coach, calls it exactly what it is: a full-backside burner.

“Your whole posterior chain gets fired up,” she says — and she’s spot on.

Why does this matter for runners?

Because when your back and glutes are weak, you slouch. You lose form. Your stride shortens. Your lower back starts complaining 6 miles in.

But when that backside is strong? You stay upright, stride stays powerful, and you finish feeling like a champ instead of crumpling like a taco.

How to Do It

  • Lay flat on your stomach, arms stretched out overhead, legs straight.
  • Lift your chest, arms, and legs a few inches off the floor — hold for 2 to 3 seconds.
  • Lower slowly.

That’s one rep. Go for 3 sets of 12–16. Don’t rush. Feel every rep.

Coaching Tips:

  • You’re not trying to break into a backbend here — just activate the muscles.
  • Even a few inches off the ground is enough if you’re squeezing the right places.
  • Glutes tight, back working. Neck stays neutral — look straight down, not up.
  • Exhale as you lift, inhale on the way down.

Avoid flinging your arms and legs — that’s momentum, not muscle.

Keep it clean and controlled. Think precision, not height.

Variations

  • Alternate sides — right arm and left leg, then switch — for a swimming-style move.
  • Hold each rep longer.
  • Add a resistance band around your hands to challenge your shoulders.

Personally, I love adding a quick set of Supermans before a run.

It wakes up the muscles that are usually asleep from too much sitting (shoutout to desk jobs).

You’ll feel taller, stronger, and more stable from the first step.

8. Dive Bomber Push-Ups

Why it works: Alright, if regular push-ups are starting to feel stale, it’s time to spice things up.

Enter: dive bomber push-ups. These bad boys don’t just work your chest and arms – they bring your core, shoulders, and even your tight runner hamstrings into the game.

It’s like someone took a yoga flow and mashed it with upper body strength training. You get the benefits of downward dog, upward dog, and a legit push-up all in one movement.

For runners? This move is gold.

It stretches out the calves, hamstrings, shoulders — basically all the stuff that gets stiff after miles on the road — while also working the muscles you need to keep your posture upright and your arms pumping late in the race.

I’ve used this with runners who complain about tightness or stiff upper bodies. Dive bombers wake everything up.

In fact, one source pointed out that this move doesn’t just build strength — it improves flexibility in the calves, hammies, glutes, and lower back.

It’s not just strength work — it’s moving strength, control, and mobility all wrapped together. And trust me, holding your bodyweight through that range of motion fires up muscles you didn’t even know you had.

How to Do It

  1. Start in a downward dog — hands a little wider than shoulder-width, feet hip-width apart, hips high like you’re making an upside-down “V.”
  2. Knees can bend a little if your hammies are barking, heels aiming toward the ground (no stress if they don’t touch).
  3. Bend your elbows and lead with your head and chest, like you’re sneaking under a low fence.
  4. Your chest skims just above the floor between your hands, then you press into upward dog — hips low, chest forward and up, arms straight.
  5. Trace that same arc backward — lift your hips and push back to the starting V.

That’s one rep. Smooth, controlled. Don’t rush it.

Do: 3 sets of 8–15 reps.

Coaching Tips:

  • This move asks a lot of your shoulders and spine, so if it’s too much at first, no shame in modifying.
  • You can drop to your knees during the swoop.
  • Or try Hindu push-ups — same swoop down, but instead of reversing the arc, push back to down dog without the full rewind.
  • Keep your core tight to protect your lower back — especially when you’re arching up into that upward dog stretch.
  • Don’t let your shoulders creep up to your ears — keep them down and back.

Breathe like this: Inhale as you dive, exhale as you press up. Inhale going back, exhale as you hit that inverted V again.

Once you lock in the rhythm, it’s almost like a runner’s version of yoga.

Feels good, works hard. And if you can crank out 10 smooth reps? Your body’s got strength, mobility, and control — a rare combo for most pavement-pounders.

Your move: Try adding these to your warm-up or strength circuit once or twice a week.
▶ What’s your push-up limit right now? Ever tried dive bombers before? Let me know how they go!

9. Fire Hydrants

Why it works: Yeah, this one looks kinda goofy. But don’t let the silly name fool you — fire hydrants are straight-up glute medicine, especially for runners.

We’re talking about your gluteus medius here, the little guy on the side of your hip that keeps your pelvis stable when you land on one foot — which, by the way, is every single step you take when you run.

When your glute med is weak, all hell can break loose: your knees cave in, your hips wobble, and your IT band starts throwing a fit.

I’ve seen this over and over, and I’ve lived it too.

A few years back, I had a nasty case of IT band pain. My PT basically handed me fire hydrants and clamshells as my prescription.

I stuck with ‘em, and within weeks, my pain dropped and my stride felt smoother. No joke.

Strong glutes don’t just prevent injuries — they also help you generate more power, especially uphill.

Runner’s World even pointed out that these moves boost hip extension, which is key to a solid, efficient stride.

How to Do It

  1. Get on all fours — hands under shoulders, knees under hips. Keep your back flat.
  2. Bend one knee 90 degrees and lift it out to the side, like a dog doing its business on a hydrant (yep, that’s where the name comes from).
  3. Don’t twist your body — keep your torso still. The movement comes just from the hip.
  4. Pause at the top, then lower that knee back down with control.

That’s one rep.

Do: 15–20 reps per side, 3 sets total.

Coaching Tips:

  • Keep your core braced so your back doesn’t arch or sag.
  • Don’t swing the leg — move slow and feel the burn in the side of your butt.
  • If your range of motion is tiny at first, no worries — that just means the muscle’s sleepy. Wake it up.

Want more activation? Flex your foot and lead with the heel, pointing the sole of your shoe toward the sky.

Keep that 90-degree bend the whole way through.

If bodyweight becomes too easy (and it will), slap on a resistance band around your thighs and enjoy the burn.

Or pair these with clamshells and lateral band walks for a full-on glute blitz.

One therapist-led program I read about found fire hydrants helpful for both glute max and med activation — meaning better hip power and knee stability.

And better knees mean fewer setbacks and stronger runs.

Coach’s Tips to Get Stronger (Without Wrecking Yourself)

Alright, you’ve got the moves, you’ve got the plan—now here’s the real talk.

These are the tips I give the runners I coach (and the ones I wish someone drilled into me earlier).

This stuff is what keeps you progressing and pain-free.

Warm Up or Pay the Price

Don’t skip your warm-up. I’m dead serious.

Before hitting any strength moves, take 5–10 minutes to get your body moving.

I don’t care if it’s jogging in place, leg swings, high knees, or big hip circles—get that body warm. You’re not a machine. You can’t just go from zero to max effort.

Think of it like starting your car in the middle of a freezing winter morning—you gotta let it warm up or things seize up.

Especially if you’re doing explosive stuff like plyo hops or burpees. Jumping into those cold? That’s an injury waiting to happen.

It’s Not a Rep Contest—Form First

I’d take 10 clean lunges over 20 wobbly disasters any day.

I’ve seen too many runners rush through strength workouts chasing reps, only to mess up their form and pay for it later—usually in the knees or lower back.

If your knees cave in during squats? That’s a problem—and it’ll carry over to your running stride too.

Pro tip: Use a mirror. Film yourself. Ask a running buddy to check your form.

It might feel weird at first, but this stuff pays off big time later. Nail the basics, and your body will remember it when it counts—like in mile 10 of a race.

Show Up Consistently—Even if It’s Just 20 Minutes

Here’s the truth: You’ll get more results from two short, focused sessions a week than from one monster 90-minute session once a month.

Don’t overthink it.

Block out 20 minutes on a Monday. Maybe another 25 on a Thursday.

If the day gets crazy, split the circuit—5 moves in the morning, 4 in the evening. It all adds up.

One coach from Canadian Running nailed it:

“Doing some form of strength training consistently is better than none at all.”

Even one quick bodyweight session helps maintain the gains.

Consistency wins. Always.

Timing Matters: Run First or Strength First?

This one trips a lot of runners up.

Here’s the deal:

  • Easy run day? Do your strength work after the run while you’re still warm.
  • Hard workout day? Either split it (run in the morning, strength later) or keep the strength light.
  • Never go heavy on legs before a speed workout or long run. Your form will fall apart, and you’ll feel wrecked.

Some runners like pairing strength on hard run days to keep true rest days clear.

That’s smart. But listen to your body—if you’re wiped, you’re wiped. Cut the workout short.

Rest is part of the plan, not a break from it.

Sore is Fine—Pain is Not

Strength training breaks your muscles down so they rebuild stronger. But there’s a line between sore and hurt.

  • Sore? Normal. Welcome to progress.
  • Sharp pain? Nope. Stop.

If your knees scream during squats, swap ‘em for glute bridges or half-squats. There’s always a workaround.

And don’t fall into the “more is better” trap. That’s how overtraining starts.

Two to three strength days per week is the sweet spot. On off days, do some core work or light stretching if you want. But give those big muscles a breather.

Make It Yours (And Keep It Fun)

You’re not a robot. You don’t have to do the exact same routine every single time.

  • Swap burpees for mountain climbers.
  • Try bridges instead of Supermans.
  • Mix it up—as long as you’re hitting the same muscle groups.

Keep a log. Even scribbling “3 sets of 15 squats” in a notebook can fire you up and give you a sense of progress—same way logging miles does.

Every couple of weeks, challenge yourself:

  • Add a rep or two.
  • Cut 10 seconds off your rest.

But only if your form stays tight.

Tie It Back to Your Running Goals

Don’t think of strength work as “extra.” It’s part of your training. Period.

  • New runner? These moves help you build a base so you don’t break down when mileage goes up.
  • Training for a marathon? Planks keep your posture from collapsing at mile 22.
  • Racing trails? Lateral hops give you the stability to bomb down rocky switchbacks without eating dirt.

You’re not just doing random lunges and bridges—you’re bulletproofing your body for the thing you love to do.

One physio coach put it best:

“Strength training is designed to support and complement your running, not take away from it.”

You don’t have to love every rep of fire hydrants or push-ups. But you will love what they do for your running.

Final Words: No Gym, No Excuse

You don’t need a squat rack or fancy machines to get stronger.

All you need is a bit of space, some grit, and the willingness to show up.

This 9-move routine? You can knock it out in your living room, garage, or backyard. Wherever.

So next time it’s pouring outside, your schedule’s a mess, or you just don’t feel like running—pull this routine out. Hit the circuit. Break a sweat. Stay strong.

You got this.

Your Turn:
What’s your go-to strength move?
What do you struggle with most—consistency, timing, soreness?

Drop it in the comments and let’s talk shop.

The Ultimate Guide to Strengthening Your Obliques

Oblique Exercises

I’ll be honest—when I first started running, I barely knew what an oblique was.

Side planks? Russian twists?

Nope.

I thought a few crunches here and there were enough.

Here’s the truth.

If you’ve ever felt your form fall apart late in a race—or ended a long run with lower back pain—you’ve probably experienced what I call the “core crash.”

The good news? You can fix it. And it starts with those forgotten side abs.

In this guide, I’ll show you:

  • What your obliques do (beyond looking good)
  • Why they’re mission-critical for runners
  • How to train them in a way that helps—not hurts—your stride

You’ll get the science, a few mini confessions from my own training, and yes—I’ve done the research and even eavesdropped on Reddit threads to bring you what real runners are saying.

By the end, you’ll have a no-BS blueprint to run taller, last longer, and build a core that works just as hard as your legs.

What Are Obliques, Really?

Put your hands on your sides, just below your ribs—that’s your obliques.

There are two sets of them: external and internal, and together they form the muscular straps that keep your torso from wobbling like a noodle when you run.

External Obliques

These guys are the outermost layer—if you’re lean enough, they’re what pop when you twist. They run from your lower ribs toward your pelvis, diagonally. They’re the ones that fire up every time you turn your body or lean sideways.

Fun twist (literally): when you rotate to the right, it’s your left external oblique doing the heavy lifting.

That criss-cross firing is what helps stabilize your spine when you’re turning or running.

These muscles don’t just move you—they hold you together. They support posture, keep your core tight under pressure, and even shield your internal organs.

Basically, your external obliques are like your built-in suspension system.

Internal Obliques: The Hidden Powerhouse

These sit just under the externals, and they run the opposite way—forming an upside-down V. You can’t see or touch them, but they matter a lot.

When you twist, both sides of your internal obliques kick in to stabilize and guide that motion. They also help resist over-rotation, which is huge for runners. If you’ve ever felt your upper body twisting wildly when you’re tired, weak internal obliques might be the reason.

Together, these layers build a 360° core that isn’t just for show—it’s built for performance.

Obliques in Action: Why They Matter for Runners

Your obliques do more than help you twist during yoga. Here’s how they work for you on the run:

Lateral Flexion

Every time you reach down to the side or sway while turning a corner, you’re using your obliques. When you’re on uneven trails or dodging a pothole mid-stride, strong obliques help you stay upright instead of tipping like a shopping cart with one busted wheel.

Forward Flexion

Yes, the “crunch” motion. While the rectus abdominis (the six-pack) takes the lead, your obliques are right there assisting. Going uphill? They’re keeping you from folding backward.

Rotation Control

This one’s massive for runners. Your upper body naturally rotates opposite your legs—right leg forward, torso goes a little left, and vice versa. Obliques make sure that twist is controlled, not floppy.

They’re like the rudder on a boat—guiding just enough movement to stay smooth and efficient.

Stabilization & Anti-Rotation

Maybe the most underrated job: preventing what shouldn’t happen. Obliques stop excessive side sway and torso collapse. Every time one foot hits the ground, your body’s fighting gravity on one side. Obliques help keep your spine straight and your pelvis level.

Without them, all that energy leaks sideways instead of pushing you forward.

You Can’t Spot-Reduce Fat—But You Can Build a Stronger Core

Let’s bust a myth: no, doing a thousand side bends won’t melt off your “love handles.” That’s mostly fat sitting on top of the muscle. You can’t spot-target fat loss—that’s just not how the body works.

But here’s what will happen if you train your obliques smart:

  • That area will firm up.
  • You’ll feel more stable, more upright, and more confident mid-run.
  • Over time, with fat loss and consistent work, that definition will start to show.

Forget vanity. This is about building a body that performs, mile after mile.

How to Use This Oblique Workout For Runners

You’ve got options. Treat these 7 as a circuit—go one after the other. Or pick 3–4 and tack them on after a run or strength session. I like to throw them in after a leg workout, when I’m already gassed—just like late in a race.

Shoot for 2–3 core sessions a week. Consistency beats one “core destroyer” day a month.

Big tip: Quality over quantity. Eight perfect Russian twists beat twenty sloppy ones every time. And don’t forget to breathe—no holding your breath like you’re grinding out a deadlift.

As you train, keep that navel pulled in slightly. That’s your deeper core—your transverse abdominis—doing work behind the scenes.

Let’s get into it.


1. T-Stabilization (Side Plank T-Pose)

How to do it: Start in a plank. Shift your weight to your right side. Rotate into a side plank, stacking feet and raising your top arm so you form a “T”. Hold for 30–60 seconds, keeping hips lifted and obliques tight. Then switch sides.

Sets/Reps: 2–3 rounds. One hold per side = one set.

Why it works: You’re training your side core to resist gravity—just like when you’re on one foot mid-stride. Bonus: it hits shoulders and glutes too.


2. Side Plank Crunch

How to do it: Start in a side plank on your forearm. Top hand behind your head. Bring your top knee and elbow together in front of you, crunching through the oblique. Return to start.

Sets/Reps: 8–10 crunches per side, 2–3 sets.

Why it works: Your bottom side is holding you up while the top side moves. This builds endurance and dynamic strength at the same time. Exactly what you need when you’re twisting or bounding over roots mid-run.


3. Russian Twist

How to do it: Sit down, lean back to 45°. Hold your hands at your chest or grab a weight. Twist side to side, tapping the floor. Lift your feet for more challenge.

Sets/Reps: 12–16 total taps, 2–3 sets.

Why it works: Teaches your body to rotate with control—and more importantly, to stop that rotation. Great for anyone who runs trails or takes tight turns.


4. Lying Side Oblique Crunch

How to do it: Lie on your side, knees bent. Hand behind your head. Crunch your top shoulder toward your hip. Focus on the squeeze—small range, big burn.

Sets/Reps: 10–15 each side, 2–3 sets.

Why it works: You feel exactly where your obliques are firing. Helps find imbalances too—one side weak? You’ll know real quick.


5. Windshield Wipers

How to do it: Lie on your back. Knees up, arms out. Lower legs side to side, like windshield wipers. Stop just before the floor. Pull back to center using your core.

Sets/Reps: 8–10 total reps (one each direction = 1), 2–3 sets.

Why it works: Builds anti-rotational strength. Think of it like putting the brakes on mid-twist. It’s gold for trail runners and anyone wanting better torso control.


6. Around the World (Weighted Trunk Circles)

How to do it: Stand tall with feet shoulder-width apart. I like to turn my toes slightly out and keep a soft bend in the knees—it gives me that solid, ready-to-move stance.

Grab a light weight—maybe a 10 lb plate or kettlebell. No need to go heavy here. Hold it in front of your chest with both hands. Brace your core like someone’s about to smack you in the gut (playfully… hopefully).

Now press the weight overhead—arms straight but not locked—and start circling it around your head, like you’re drawing a halo. Go clockwise first. That means elbows bend and shoulders move as you guide the weight around: right side of your head, behind, left side, then back to the front.

You’ll feel your obliques fire hard to stop you from tipping or twisting. That’s the good stuff. Do 8 to 12 circles, then switch directions and go counter-clockwise.

Sets/Reps: 8–12 circles each direction = 1 set. Do 2–3 sets.

You can go heavier later, but smooth control beats brute strength. No wild swinging—this is about staying steady while things move around you.

Why it works: This move hits your core from all angles. Perfect for runners—especially if you trail run or deal with uneven terrain. Your core’s job is to keep you upright and moving forward, no matter what’s going on underfoot.

7. Spiderman Push-Up

No spiders, I promise—but it does make you feel like you’re climbing walls. This one’s a full-body grind: chest, arms, shoulders, obliques, and a core that’s on full alert.

How to do it: Start in a solid push-up position. Hands a bit wider than shoulders, legs back, body in a straight line. Can’t do regular push-ups yet? No big deal—drop to your knees. It still works.

Now, as you lower into the push-up, bring your right knee toward your right elbow, like you’re crawling sideways up a wall. Keep it close to your body—your right obliques are gonna crunch like mad. At the bottom of the push-up (just above the floor), pause for a sec, then push back up and return your foot.

Switch sides on the next rep: left knee to left elbow.

If it’s too much, skip the push-up and just hold a high plank while driving the knees. Once you’ve built up a bit more strength, add the push-up back in.

Sets/Reps: Each rep = one push-up and one knee drive. Do 8–10 reps total (4–5 each side), for 2–3 sets. And don’t let your form go to trash—better to do five good ones than ten sloppy reps. If your form fades, switch to plank knee drives and finish strong.

Why it works: This is runner gold. Every time that knee comes up, your obliques light up. Meanwhile, your arms, chest, and shoulders build the strength to hold good form—even when you’re tired mid-run.


Wrapping It Up: Your Oblique Routine in Action

And there you have it—the full breakdown of the seven oblique moves I rely on. Whether you’re a beginner or a seasoned runner, these core tools are your insurance policy for better posture, stronger form, and fewer late-run wobbles.

Here’s how to use them:

  • New to this stuff? Start with 3 or 4 moves from the list. Focus on clean reps and how each one feels.

  • Already got a strong core game? Hit all 7 in a row. Boom. One 20–30 minute workout that’ll leave your sides sore in the best way.


Quick Coaching Tips

  • 2–3 sessions per week is plenty. Your core needs recovery like any other muscle. If you went hard on Monday, give it a break Tuesday.

  • Make it harder when it gets easy. Add reps, slow things down, or add weight when bodyweight feels too light.

  • Form over ego. Twisting too far or rushing leads to tweaks. Controlled moves build strength, protect your back, and train good habits.


Let’s Get Real — Your Turn

Now it’s your move. Pick two of these exercises and give them a shot in the next 24 hours.

No fancy setup, no perfect timing. Just commit to it. Do it after an easy run or while watching Netflix. Doesn’t matter. Just start.

Then, pick two more for later this week. Add them after your cross-training day or recovery jog.

These don’t have to be perfect sessions—just consistent ones.

Let me know how it feels. Are you noticing more control? Less wobble? Better posture? Drop a comment or DM me. Let’s make this a conversation. You train better when you train with purpose.

New to Running? Start Here…

If you’re serious about running, getting fit, and staying injury free, then make sure to download my Runners Blueprint Guide!

Inside this guide, you’ll learn how to start running and lose weight weight the easy and painless way. This is, in fact, your ultimate manifesto to becoming a faster and a stronger runner. And you want that, don’t you?

 Click HERE to check out my Runners Blueprint System today!

Don’t miss out! My awesome running plan is just one click away.

The 7 Best Oblique Exercises To Try – Conclusion

There you have it.

The above oblique exercises workout routine is all you need to build strong and powerful side abs. Just make sure to perform the seven side abs exercises on a regular basis while staying within your fitness level the entire time.

In the meantime thank you for dropping by.

Keep Running Strong

David D.

How to Increase Running Stamina For Beginners – 12 Ways

Running VS. Strength Training

If you’re struggling with your running stamina, trust me—you’re not alone.

Every runner starts there. That brutal first mile, the doubt, the frustration.

But here’s the truth: stamina isn’t something you’re born with. It’s something you build.

And yes, even if that first jog wrecked you, you can get stronger, step by step.

I’ve helped a lot of beginners over the years —and I’ve lived every awkward, sweaty moment of it myself.

This guide isn’t fluff. It’s the real stuff I wish someone had handed me when I first started.

By the end of this, you’ll know how to train smarter—not harder—to increase your running stamina without falling apart.

We’ll talk strategy (yes, the run-walk method has its place), mental blocks, and lessons straight from new runners just like you—plus a few coaching gems from my side of the fence.

Whether you’re dreaming of running your first 5K or just making it around the block without collapsing, this guide will help you get there.

Let’s jump in.

Start Slow to Go Far: The Beginner’s Rulebook

If you’re just getting into running, one of the fastest ways to wreck your progress is thinking you need to sprint or go far on day one.

Big mistake.

I made it too. Remember me gasping on the side of the road? Yeah—I went out too fast.

You don’t need speed right now. You need consistency.

Running endurance starts with keeping things slow and easy.

Think walk-jog combos. Think “as slow as a brisk walk” jogs.

And yes—it all counts.

In my early days, I had a friend walk next to me while I jogged. And she still talked like nothing was happening.

Meanwhile, I sounded like I was choking on air.

But that’s where it starts.

One minute jogs. Maybe two. Then a walk break. No shame in that game.

You’re laying the foundation. And that’s the most important part.

Train, Don’t Strain

There’s a phrase I always remind my runners: “Train, don’t strain.”

It’s not just about pushing hard—it’s about being smart. You want progress that sticks. Not a two-week burst followed by injury or burnout.

A simple rule I use with new runners is the 10% rule. That means don’t add more than 10% to your total weekly running time or distance.

So, if you jogged for 30 minutes this week total? Add about 3 minutes next week.

Not 10. Not 20. Just a little bump. It might feel too slow, but your body needs time to catch up. And when it does? You’ll run longer, stronger, and with way less struggle.

I’ve seen beginners go from gasping through a single minute to running 30+ minutes straight—all by playing the long game.

Patience Builds Fire

Here’s how I see it: building stamina is like lighting a fire.

You don’t throw a giant log on a match and hope for the best. You start with twigs. Small flames. Feed it slowly. And over time? That flicker becomes something solid and steady.

Your early runs are those twigs. Little efforts that don’t look like much—but they matter. Don’t rush it. Feed the fire.

Run-Walk Method 

Let’s be real—if you’re asking “How do I build stamina as a beginner runner?” the answer isn’t some high-tech secret or perfect gear combo.

It starts with something most runners don’t talk about enough:

Walking.

Yep. Straight-up walking.

When I first started running, I thought taking a walk break meant I was failing. But it turns out, it’s one of the smartest things I ever did.

The run-walk method is how I got through my first few weeks without quitting, and it’s what I now teach every single beginner I coach. It works for couch-to-5K runners, weekend warriors, and even marathoners chasing PRs.

What Is the Run-Walk Method?

Here’s the gist: You alternate running and walking. Simple. Nothing fancy. Just controlled intervals that let your body catch its breath before asking it to run again.

Example: Jog for 1 minute, walk for 1 minute. Then repeat. That walk isn’t a cop-out—it’s your recovery window. It gives your lungs a breather and your legs a second wind.

When I tried it, I’ll be honest—it felt too easy. I wasn’t gasping. I didn’t collapse afterward.

But that’s actually the point.

You finish the workout thinking, “Hey, I could probably go a bit more next time.” That’s how endurance is built: not with burnout, but with consistency.

How to Do Run-Walk 

Here’s a no-BS plan to get you moving:

  • Start with a brisk walk (5–10 minutes). Get the blood flowing.
  • Jog easy for 1 minute. You should be able to talk in short sentences. If you’re huffing out single words, slow down.
  • Walk for 1 minute. Not a stroll—walk like you’ve got somewhere to be.
  • Repeat that cycle for 15–20 minutes. Then cool down with a 5-minute walk.

If that 1:1 ratio feels too hard? Drop to 30 seconds run / 1 minute walk. Too easy? Bump it up to 2:1 or 3:1.

It’s your call—find the balance where you’re working, but not wrecking yourself.

Here’s the trick: stick with it. A few times a week is all it takes. And every week or two, stretch the running a little longer.

You’ll go from 1-minute jogs to 5-minute stretches… and eventually, you’ll surprise yourself by running a full mile without stopping.

That’s how thousands of people go from couch to 5K—and beyond.

Why Run-Walk Actually Works

There’s real science behind this. Physically, it helps your heart, lungs, and muscles adjust to the demands of running.

Mentally? It’s way easier to say “Just 60 more seconds” than “Only 2 more miles to go.”

Those short intervals stack up. And so does your confidence.

Pros Use It Too—Don’t Be Fooled

Think walk breaks are just for beginners? Think again.

I’ve run with marathoners—fast ones—who walk through every aid station. I walk hills on purpose during trail runs in Bali.

Why blast your quads on a steep climb when you can save them for the downhill?

Olympian Jeff Galloway even coaches elite runners using this exact method. It’s not a shortcut. It’s a strategy.

Walk breaks help you go longer, recover faster, and stay consistent. That’s the game.

Build Distance Slowly 

Once you’ve been running a bit — whether that’s a solid run-walk combo or straight-up jogging for short stretches — it’s time to bring in the long run.

And no, don’t let the name scare you.

“Long” is personal. If your usual run is a mile, then 1.5 miles is your long run. If you’re doing 10-minute jogs, then 15–20 minutes is your next big move.

The point? Once a week, you stretch things a little. You go further than you did last time.

That’s it. That’s the long run.

Every solid endurance plan — beginner or elite — is built on this one habit. Because every time you go a little farther, you’re teaching your body how to handle more, and your brain how to stop freaking out when you’re tired.

Long runs are magic. They boost your heart strength, train your lungs to go longer, and build those energy stores in your legs (hello, glycogen).

But maybe more than anything, they teach your brain not to quit when things get uncomfortable. And in running, that mental toughness? It’s gold.

Here’s how to transition from walking to running.

How to Bump Up Your Long Run Without Wrecking Yourself

Here’s how I coach it:

  • Pick your day. Choose one day a week — Saturday or Sunday works for most — and make that your long run day. Block it out. It’s non-negotiable.
  • Run slooow. I mean easy-peasy pace. You should be able to talk while running — full sentences. Walk breaks? Totally fine. No ego here. Long runs aren’t about pace, they’re about time on your feet.
  • Add just a bit. Rule of thumb: tack on 5 more minutes or about half a mile to your long run each week. So if you ran 20 minutes last Sunday, try 25 this time. 2 miles last week? Shoot for 2.5. Small steps = big progress.
  • Listen to your body. A little tired is okay. Sharp pain or feeling like you got hit by a truck? Pull back. There’s no trophy for powering through an injury. Live to run another day.
  • When I trained for my first 5K, my “long run” was just running around the block a couple times. That was it.

Each week, I’d add one more block. Some days I’d finish thinking, “That was too easy,” but that was the plan.

Slow growth.

Two months later, I ran 3 miles nonstop. I remember tearing up because not long before, I could barely jog for 3 minutes.

That kind of progress sticks with you.

Long Run Pro Tips

Talk test it. If you can’t talk while running, you’re going too fast. I talk to myself out loud sometimes just to check. Weird? Maybe. Effective? Absolutely.

  • Forget about speed. Distance and time are your only goals on long run day. A slow 40-minute jog-walk is solid gold for your endurance. You’ll get faster later — first, you’ve gotta earn your stamina.
  • Out-and-back routes rock. Run 15 minutes out, then turn around. It locks in your time and gives your brain a “just get home” focus. Super simple, super effective.
  • Mental tricks help. I like to split the run into three chunks: First third = warm-up cruise. Middle third = get into rhythm. Last third = dig deep and tell myself, “This is where I get tougher.” It works. Try it.

At the end of your long run, you should feel tired but proud — not wrecked.

If you’re dragging for hours after or can’t walk the next day, back off next time. You probably pushed too hard or jumped too far ahead.

The sweet spot? When you finish and think, “Damn, I just ran farther than ever… and I still feel pretty good.”

That’s how you build real endurance.


Mixing In Speed 

So, you’ve been running consistently. You’ve got that weekly long run down. Nice. That’s a huge milestone most people never reach.

Now you’re probably asking the next logical question:

“How do I build endurance and maybe get faster?”

This is where we bring in faster running—but don’t worry, I’m not talking about sprinting like a maniac or doing brutal track repeats.

I’m talking about smart effort. One workout a week. Just enough to push the system and shake things up.

But before we go any further, let me be clear:

If you’re still brand new to running—like still building up to running 20–30 minutes without stopping—don’t worry about any of this yet.

Keep showing up, keep stacking those easy runs. That’s where the magic begins.

Once you can run (or do a solid run-walk) for 30 minutes and have a few weeks of training under your belt, then it’s time to mix it up a bit.

Why Add Faster Running?

Because running faster occasionally teaches your body to handle more stress—and recover from it.

Your lungs work harder. Your legs get stronger. And your regular runs? They’ll start to feel easier, smoother, lighter.

I like to compare it to driving. If you’re used to cruising at 30 km/h, then try going 60 for a bit.

When you slow back down, 30 feels like nothing.

That’s what these faster efforts do. They raise the ceiling, so your baseline improves.

Plus—it breaks the routine. A bit of spice in your training goes a long way to keep things fun.

Tempo Runs

Tempo runs are steady efforts that land right in the “this kind of sucks, but I can hold it” zone.

You’re not sprinting. But you’re not jogging either.

It’s the pace you could keep up for maybe 15–20 minutes tops. You’re breathing harder, but you can still speak in short phrases. Not sentences—just a few words at a time.

Beginner Tempo Session (How to Do It)

  • Jog easy for 5–10 minutes to warm up
  • Then bump the pace—like switching from 3rd to 4th gear
  • Hold that faster pace for 5 minutes
  • Jog easy again for another 5–10 minutes

That’s it. Just one round to start.

Once that feels good, bump the tempo portion up gradually: 8 minutes… then 10… then 15.

This kind of workout teaches your body to clear out the fatigue (lactate) more efficiently so you can go longer without crashing.

Interval Training 

Intervals are all about controlled bursts of faster running with easy recovery between.

If tempo runs are a steady grind, intervals are more like “run fast, back off, run fast again.”

Simple Beginner Workout: The “60/60s”

Warm up for 5–10 minutes easy

Then do 6 rounds of this:

  • 60 seconds fast running (not sprinting—just 80% effort)
  • 60 seconds walking or slow jog
  • Cool down for 5–10 minutes

That’s your intro to speedwork.

You’ll feel your heart rate spike during those fast bursts—and you’ll probably feel gassed by the last couple reps. That’s the point. You’re building cardio power and getting your legs used to moving faster.

Want to make it more real? Imagine you’re late for a bus. Or racing the last 400 meters of a 5K.

That’s the energy you want. Not all-out. Just quick, light, and controlled.

These workouts also light up muscle fibers you don’t use in easy runs—plus they’re fun.

For 60 seconds, you get to pretend you’re Usain Bolt. No shame.

Don’t Overdo It

Here’s where most runners mess up: they think “harder = better.” So they start hammering every run.

I’ve been there. Trust me, that path leads straight to injury, burnout, or both.

Stick to one faster run per week. That’s all you need.

The rest of your training should be chill, easy-pace stuff.

Ironically, it’s that mix—mostly slow with a pinch of fast—that builds real endurance. That’s how you actually get stronger without breaking yourself.


Build Real-Runner Strength with Cross-Training

Here’s the truth no one tells you when you start running: building stamina isn’t just about pounding the pavement day after day.

If you want to last longer, feel stronger, and stop getting sidelined by random aches, you’ve got to train your whole body—not just your legs.

And that’s where cross-training comes in.

Cross-training is just a fancy way of saying: “Do other stuff that helps your running without always running.”

Think of it as active recovery that actually makes you better. It builds endurance, gives your joints a break, and keeps your training from turning into Groundhog Day.

My Go-To Cross-Training Picks for Runners

Here’s what I like and actually use—especially for beginner runners looking to build a real base.

Walking or Hiking

Yeah, walking. Sounds basic, right? But power walking or trekking up hills builds leg strength and aerobic fitness without beating your body up.

I do it on recovery days—especially here in Bali where I can hike along rice fields. It’s low-impact but still moves the needle.

Swimming

When I had a busted foot a few years back, swimming was a lifesaver. I couldn’t run, but I kept my cardio engine humming by hitting the pool twice a week.

Even slow laps or treading water gets your heart and lungs working—with zero impact on your legs.

Cycling

If you want stronger legs without trashing your knees, hop on a bike.

I love mountain biking the trails here in Bali. It’s fun, it’s sweat-inducing, and my lungs always thank me when I’m back on the run.

Indoor or outdoor—it all counts.

Elliptical or Rowing Machine

If you’ve got access to a gym, these machines are great backup plans.

The elliptical mimics the running motion without the pounding, and the rowing machine lights up your whole body.

I usually pop in some music or a podcast and crank out 20–30 minutes. Solid effort without the soreness.


Strength Training 

Now, let’s talk about what most runners skip: lifting stuff.

Look, I used to think weight training was just for bodybuilders and sprinters. But then I started doing it, and my whole running game changed.

You don’t need to lift heavy or spend hours in the gym. Just 1–2 short sessions a week can make a big difference.

Focus on moves that work several muscles at once.

Try These Moves:
  • Squats & Lunges: These are your bread and butter for stronger glutes, quads, and hammies. Start with bodyweight. Add dumbbells later.
  • Push-ups & Planks: Upper body and core are what keep your posture solid when your legs want to give out mid-run.
  • Deadlifts or Glute Bridges: Strengthens the back side—hamstrings, glutes, lower back. I recommend glute bridges if you’re new or dealing with balance issues.
  • Calf Raises: Don’t ignore your lower legs. Strong calves = better push-off and fewer shin splints.

If you’re clueless on where to begin, grab a beginner-friendly app or join a class.

Even a 20-minute bodyweight session at home helps.

I always tell my runners: “Stronger runners last longer.”


Make Cross-Training Fun or You Won’t Do It

Here’s the deal: the best cross-training routine is the one you’ll actually stick to.

If you love dancing, join a Zumba class. That’s cardio too.

Got a thing for team sports? Go kick a ball around or shoot some hoops—those quick bursts help your running stamina.

I’ve got a runner friend who swears that her weekly yoga class helped her control her breathing during long runs.

Yoga’s sneaky like that—strengthens your core and stretches what running tightens.

Me? I do CrossFit a couple times a week. I don’t go all-in like a Games athlete, but I love how it pushes me differently. Strength, speed, grit—wrapped into one workout.

But honestly, you don’t need anything fancy. Even a long walk or some mobility work on your off days keeps your momentum rolling.

The key is variety and keeping your body moving without overloading it.


Rest and Recovery 

Let me be real with you—rest isn’t slacking. It’s part of the grind.

If you’re constantly telling yourself, “I should run every day,” or, “If I push harder, I’ll get fitter faster,” let me stop you right there.

That mindset? It’s a shortcut to burnout, injury, and frustration. I learned that the hard way.

Here’s how it actually works: running breaks your body down a little.

Think tiny muscle tears, drained energy stores.

It’s during the rest—especially sleep—that your body repairs, rebuilds, and levels up.

Skip recovery and you’re just stacking fatigue on top of fatigue. That’s when progress stalls or reverses.

Trust me, it’s not a fun place to be.

What Recovery Really Means

  • Sleep like it’s part of your workout. Aim for 7–9 hours a night. That’s when your body does the real repair work. I can feel the difference between a groggy 5-hour night and a full 8 hours—morning runs just flow better after solid sleep.
  • Easy days matter. Not every session should feel like a sufferfest. Light walks, slow bike rides, yoga, or just a chill day around the house—these keep blood moving without stressing your system.
  • Listen to your body. Tired beyond reason? Niggling pain that won’t go away? Take the hint. It’s not weakness to skip a run when your body is waving a yellow flag. One runner said it best: “It was about habit, not heroics. I didn’t want to get injured—just wanted to keep going.”
  • Cutback weeks. Every few weeks, dial your mileage back by 30–50%. If you’ve hit 15 miles a week, back off to 8–10 for a bit. I do this religiously, and it keeps me fresh and injury-free.
  • Refuel right. After long or hard runs, get in some protein and carbs within an hour. This helps with muscle repair. Hydration matters too—I swear by cold coconut water after a sweaty Bali run. It’s tasty, refreshing, and loaded with electrolytes. Think of it like charging your phone. If you never plug it in, you’ll end up with 2% battery and no power when you need it most. Rest days fill your battery back up.

Mind Over Matter 

Let’s be honest—endurance isn’t just about legs. It’s a mental game.

That little voice whispering, “You can’t do this,” or, “Why not just quit?” Yeah, I’ve heard it too. We all have.

But just like physical stamina, mental grit is something you can build.

Here are my favorite mental tricks:

  • Mini goals during runs. Break the run into chunks. I’ll tell myself, “Just get to the next lamp post,” or, “Give it 2 more minutes.” Before I know it, I’ve stacked 30 minutes.
  • Mantras work. I used to laugh at this, but now I’ve got a few go-to phrases: “One step at a time,” or, “Strong and steady.” One of my friends repeats, “I love running” on the tough days. Sounds cheesy, but it tricks your brain into staying positive
  • Distractions help. A good playlist, a podcast, or even a running app like Zombies, Run! can shift your focus away from the struggle. Just make sure you’re safe if running outside.
  • Visualize finishing strong. Before long runs, I’ll picture myself sprinting that final stretch, feeling proud. It helps, especially on days where everything feels heavy.
  • Remember your “why.” Why did you start running? To lose weight? Clear your head? Prove something to yourself? Keep that reason close.

For me, it started with weight loss. But it grew into a deeper habit—a space where I rebuild myself.

And hey, don’t downplay small wins.

Ran for 5 minutes without stopping? That’s a win.

Longest run yet? Celebrate it. I’ve definitely done solo fist-pumps on quiet trails.

Here’s a different angle: we often think mental toughness means never stopping. But true toughness is also knowing when to slow down, when to take care of your body.

A seasoned runner once told me, “It’s not weakness to walk. It’s smart training.”

So yeah, build grit—but also practice grace.

Push when it’s time to push, pause when you need to. Soon enough, what felt like a mountain will feel like a hill.

Consistency + Patience 

We’ve covered a lot—run-walk strategies, long runs, cross-training, mindset shifts—the whole toolkit.

But if I had to hammer home just one core truth about building stamina?

Consistency and patience win every time.

Stamina isn’t something you magically “get.” You don’t wake up one day able to run an hour straight.

It’s brick-by-brick work. One run at a time. One mile at a time.

Keep stacking those bricks, and before you know it, you’ve built a fortress.


Make Running Stick (Even When Life Gets Messy)

Here’s what’s worked for me and for runners I’ve coached:

  • Treat your runs like appointments. Block them off on your calendar: “Wednesday, 7am – run.” That’s your meeting with yourself. Don’t skip it.
  • Find someone to run with. Accountability is real. When you know someone’s waiting at the corner, it’s a lot harder to snooze the alarm.
  • Track your progress. Whether it’s an app, a journal, or a whiteboard on the fridge—record your runs. Seeing those numbers grow? It’s addicting in the best way.
  • Keep things fresh. Try a new trail. Blast a new playlist. Get those bright neon socks. Little changes help keep the fire lit.
  • Listen to your body. Skipping one run to rest beats missing a whole month from burnout or injury.

Above all—find the joy in the process.

You’ll have these tiny moments that feel huge:

  • The first time you run a hill without walking.
  • The day a 20-minute jog doesn’t leave you gasping.
  • The morning you finish a run and think, “Hey, that felt… good?”

Those are the wins. That’s progress.


Stop Comparing. Start Owning Your Path.

You’ll always see someone faster or fitter. Let them go. They’ve got their story. You’ve got yours.

I’ve coached folks in their 60s who ran their first 5K after years of inactivity.

I’ve seen beginners go from couch to half-marathon with sheer grit.

None of them had superpowers. They just kept going.

Endurance isn’t about age, weight, or background. It’s about commitment.

You show up. You run. You recover. You grow. Repeat.


Let’s Recap the Game Plan:

Here’s your real-world roadmap to better stamina:

  • Start small and slow. Don’t rush. Train, don’t strain.
  • Use run-walk intervals. They’re a smart tool, not a crutch.
  • Stretch your long runs slowly. That 5K will become 6K. Then 8K. Then double digits.
  • Spice things up. Once you’re comfortable, mix in some tempo runs or short intervals.
  • Cross-train smart. Strengthen the muscles that power your runs.
  • Take rest days seriously. Recovery isn’t weakness—it’s fuel for the next session.
  • Train your brain, too. Positive self-talk, setting mini goals, and reminding yourself you’re improving all matter.
  • Stay consistent. Trust the process.

And remember—every elite runner was once a beginner.

They didn’t skip the hard parts. They just didn’t quit.


It’s Your Turn Now

Whether today is your very first run, or your tenth “I’m starting over again” moment—this is where it begins.

Every minute you run. Every step you take. It all counts. It’s all building toward something.

And I promise, the day will come when you’ll look back and think:
“Wow. I’ve come a long way.”


So here’s your challenge:

What’s your mile time right now? What’s one small goal you can chase this week?

Drop it in the comments, or better yet—lace up and make it happen.

You don’t need to be perfect. You just need to keep going.

I’ll be out there too. Sweating it out. Building one brick at a time—right alongside you.

Let’s run.

The 9 Best Ways to Measure Your Body Fat Percentage

measure body fat percentage

You hop on the scale, hoping for magic. But the number doesn’t move.

Been there?

As a coach working with runners of all levels, I’ve seen that scene play out more times than I can count.

But here’s the deal: your weight doesn’t tell the whole story. Not even close. If you’re serious about progress, you’ve got to track your body fat percentage—not just what the scale spits out.

Body fat tracking gives you the real picture. I’ve coached athletes who were ready to quit because the scale didn’t move—only to discover they were burning fat and building muscle at the same time. That’s a big win. You don’t see it if you’re only focused on pounds.

I’m not here to push obsession or perfection. I’m here to tell you: knowing your fat-to-muscle ratio is like flipping the lights on in a dark room.

You start seeing what’s actually happening inside your body. And that changes everything.

Lemme explain more.

Why Body Fat Percentage Matters More Than Just Your Weight

So let’s clear something up: body fat percentage = the amount of your total weight that’s fat. If you weigh 180 lbs and 35 of those pounds are fat, you’re sitting at about 19%.

That number can swing depending on your age, sex, training history, even genetics. But in general, men aim for 10–20%, and women land closer to 18–28%. Women naturally carry more essential fat—totally normal, totally healthy.

So why care?

Because composition tells the truth. Not the scale.

You can be dropping fat, gaining muscle, feeling amazing—and the scale still makes you feel like nothing’s happening. That’s why I’m a big believer in tracking body fat. It’s the truth beneath the surface.

Not only that, but a high body fat percentage—especially around the belly—is tied to heart disease, diabetes, and other stuff you don’t want to deal with.

I always tell my athletes: “Body fat tracking isn’t about looking ripped. It’s about staying healthy, running strong, and feeling good in your skin.”

  • It can also explain weird stuff like:
  • Why your jeans fit better even if the scale says nothing changed.
  • Why two runners with the same weight can look completely
  • Why BMI is kinda trash for anyone with muscle (it doesn’t care if your weight is from biceps or burgers).

And look, this isn’t about becoming a slave to numbers. It’s about finding new ways to celebrate progress—even the quiet wins.

So let’s ditch the fear and start tracking body fat like it’s your secret weapon.

I’ll walk you through 9 ways to do it—from no-cost mirror checks to high-tech scans. Plus a few confessions, coaching tricks, and things I wish someone told me when I started.

Let’s go.

1. The Mirror & Progress Photos

You don’t need fancy gadgets to see if you’re leaning out. Sometimes all you need is a mirror—and a little honesty.

Here’s how I do it with clients (and myself):

  • Pick a day each week or month. Same time. Same lighting. Same clothes.
  • Snap a photo from the front, side, and back. That’s it.

Over time, stack those pics side-by-side. You’ll notice things:

  • A tighter waist
  • More arm definition
  • Less puffiness around the hips

One of my runners didn’t think she was making any progress until I showed her a Day 1 vs. Day 30 shot.

The difference? Night and day. It lit her up—and fired her up to keep going.

How Accurate Is This?

Not very. Let’s be real—you won’t get a “16.4%” reading from a mirror.

But it’s solid for spotting changes. If your waist looks tighter and your muscles pop a bit more, you’re losing fat. That’s the goal.

Some experienced folks (especially leaner athletes) can even eyeball their body fat within a few percent.

My Coaching Tip:

Stay consistent with your setup. Use the same lighting, same pose, same mirror. That’s how you compare apples to apples.

And remember: no need to post these anywhere. They’re just for you—unless you decide to share your wins later (which I fully support, by the way).

If you’re stuck, check out visual guides online. Some show real people at different body fat percentages. Compare. Get a ballpark idea. Then focus on trends, not perfection.

2. Waist Measurement

This one’s so underrated it’s almost funny. A plain ol’ soft tape measure—like the one in your grandma’s sewing kit—can be one of the best tools in your fat-loss journey.

Here’s what you do:

  1. Wrap the tape around your waist at belly-button height.

  2. Don’t suck in. Don’t puff out. Just stand normal.

  3. Do it first thing in the morning (before food or water), and write it down.

This method is especially useful because belly fat—also known as visceral fat—is a major red flag for health risks. According to the American Heart Association, men with waists over 40 inches and women over 35 inches have a higher risk of heart disease and diabetes.

Back when I was 12 pounds heavier, I didn’t feel that different… until I measured my waist and saw the truth. Dropping just 1.5 inches made my runs feel lighter and smoother.

And honestly? My confidence went up too.

How Accurate Is This?

It won’t tell you your exact body fat number. But if your waist is shrinking while everything else holds steady? You’re on the right track.

A shrinking waist almost always means less fat—especially in men, who tend to store it there first. It’s also a good sign that your nutrition is working and your training is clicking.

Coach Tip:

Don’t measure every day. Too many ups and downs (bloating, hydration, etc.). I recommend every 2–4 weeks. And always at the same spot. No guessing.

Want more precision? Later we’ll talk about formulas like the Navy Method, which does use waist and neck measurements to estimate your body fat percentage. But even on its own, this tape trick is gold.

So yeah, grab a tape. No batteries. No apps. Just data that actually matters.

3. The Tape Trick: U.S. Navy Body Fat Formula

You don’t need fancy machines or a lab coat to estimate your body fat — just a decent measuring tape and some basic math. This old-school trick comes straight from the U.S. Navy. I’ve coached plenty of folks with military backgrounds, and most of them already knew this method like the back of their hand.

It’s what the armed forces use to keep people within fat standards — no DEXA scans in the barracks, just tape, math, and discipline.

How It Works

Here’s the gist:

  • If you’re a guy, you’ll measure your waist (right at the belly button), your neck (just under the Adam’s apple), and your height.
  • If you’re a woman, it’s waist, neck, hips, and height.

You plug the numbers into a calculator — tons of them online — and boom, you get a body fat percentage estimate. No gym, no gadgets, just a tape and 60 seconds.

The idea is simple: bigger waist = more fat.

A thicker neck might balance it out a bit (muscle or fat), so the formula adjusts based on the combo. It’s not bulletproof, but it’s solid enough for everyday use.

I’ve had clients measure once a month using this method — some swore by it.

One guy tracked his waist weekly with his belt — literally. His neck and height didn’t change, so if the belt got tighter, the fat percentage dropped. Simple and visual.

How Accurate Is It?

Pretty decent, actually. Most studies and my own experience show it’s usually within 3–5% of more accurate tools. Not perfect, but for general tracking? It works.

Now, if you’re a beast with traps the size of melons and abs for days, it’ll likely overestimate. I once trained a guy who looked like a pro linebacker. The Navy formula clocked him at 28% body fat — even with visible abs. He was closer to 10%.

On the flip side, if you carry fat in your legs or arms (areas the tape doesn’t touch), it might underestimate.

But for the average runner or gym-goer? It’s a quick, easy snapshot.

Try this:

  • Measure your waist, neck, and height.
  • Plug it into an online calculator.
  • Repeat monthly.
  • Don’t yank the tape too tight, and always average a few measurements.
  • Then ask yourself: Am I trending in the right direction?

4. Skinfold Calipers (a.k.a. The Pinch Test)

Alright, time to talk about a tool that feels a bit more old-school: skinfold calipers. Think “personal trainer in the ’90s” vibes — except they still work.

I’ve used them with dozens of clients, and once you get the hang of it, they’re surprisingly useful.

I remember my first time holding a pair. I was a new coach, and let’s just say the client walked away with a bruise and probably doubts about my credentials. But hey, I learned.

How It Works

Skinfold calipers measure the thickness of your fat under the skin — the “pinchable” stuff. You grab a fold of skin at specific spots (like your belly, thigh, tricep), clamp the caliper down, and read the number in millimeters.

Plug those into a formula or an app like BodyTracker, and you’ll get a body fat estimate.

There are a few different versions:

  • 3-site (simple)
  • 7-site (standard)
  • 9-site (if you’re a body comp geek)

For most runners or lifters, the 3- or 7-site method is plenty.

  • For guys, common sites are chest, abs, and thigh.
  • For women, usually triceps, suprailiac (just above the hip), and thigh.

It’s not rocket science, but it does take practice.

I always measure clients on the same side of the body (usually right side), take three readings per spot, and average them. That way, even if one pinch is off, you’ve got a backup.

Is It Accurate?

If done right? Not bad. You’re looking at a ±3–5% range compared to gold-standard tests. That’s close enough for most folks.

The catch? You’ve got to be consistent. It’s easy to pinch the wrong place or press too hard. I’ve had days where I was slightly dehydrated, and the numbers came out weirdly low.

Post-workout readings can be tighter too, especially around chest or arms.

Key tip: If someone else can help — great. Pinching your own back fat isn’t exactly fun or accurate. But even if you’re solo, just use the same spots every time. You can even mark them with a washable pen. I do this myself during cut phases to keep things legit.

5. DEXA Scan (a.k.a. the “Body Composition Truth-Teller”)

If you want to see your body laid bare — muscle, fat, bone, the whole picture — DEXA is where it’s at.

This scan is no gimmick. It’s the real deal.

Hospitals use it to measure bone health, and athletes use it to track fat and muscle with surgical precision. I still remember lying on that scanner bed, wondering if I was about to be beamed into space.

The results? They hit like a reality check. I found out exactly where my fat was hiding, how much muscle was packed into each leg, and even got the lowdown on my bone density.

Honestly, it felt like unlocking a cheat code for my own body.

What Actually Happens

You lie flat on an open table — no claustrophobic tunnel, thank god — while a scanning arm slowly glides over you. It uses two low-dose X-rays to measure how different tissues absorb energy.

Because fat, muscle, and bone absorb X-rays differently, the machine can tell exactly what you’re made of.

The scan itself takes maybe 10–15 minutes. You just need to stay still and ditch any metal items beforehand.

After that, the machine spits out a full report — body fat percentage, lean mass, bone mineral content — sometimes even breaking it down by region.

You’ll know if your right leg is stronger than your left (been there), or whether you’re carrying more fat around your belly — which, by the way, is more of a health red flag than fat in your arms or legs.

How Accurate Is It?

DEXA doesn’t mess around. It’s one of the most accurate methods out there, with an error margin around ±2–3% body fat.

According to studies published in the Journal of Strength & Conditioning Research, it’s often used to validate other methods like BIA or calipers. That says a lot.

That said, even DEXA can be thrown off slightly — hydration levels, eating a huge meal beforehand, or even switching machines can tweak results. So, for best results, always scan under the same conditions and preferably at the same place.

Why I Still Recommend It

Beyond the numbers, there’s something satisfying about seeing real, measurable progress.

One guy from my running group lost 5% body fat and gained muscle over 6 months — all confirmed by DEXA. He framed his report like it was his finisher medal.

I did the same, to be honest. I stuck it next to my marathon bib. Proof that the grind was paying off — that eating better, running smarter, and showing up every damn day was changing my body.

6. Hydrostatic Weighing (The Old-School Dunk Tank Test)

Before DEXA became the go-to, hydrostatic weighing was the gold standard. It’s old-school. It’s weird. But it still works.

I remember the first time I tried it. I was in swim trunks, sitting on a chair in a big tank, trying to blow every ounce of air out of my lungs before getting dunked underwater. I felt like a lab rat. But the science behind it is rock solid.

How It Works

It’s all about density. Fat floats. Muscle sinks.

So, first you get weighed dry, like normal. Then, you’re submerged in a water tank while sitting on a special platform. You blow out as much air as you can (which is not easy), and then get weighed underwater. The technician uses the weight difference to calculate your body density.

From there, math takes over. Using equations like Siri or Brozek (don’t worry, you won’t need to memorize them), the system estimates your body fat percentage. Basically, the denser you are, the leaner you are.

Is It Accurate?

Yep. Very. Studies put it in the same league as DEXA, with error margins around ±2%. The biggest mistake people make is not blowing out enough air — even a little leftover oxygen can throw off the reading.

Timing matters, too. If you just ate a burrito or haven’t gone to the bathroom in hours, that trapped gas or weight can mess with results. Most places ask you to fast a bit before the test, or at least avoid big meals.

A Word on Comfort

Not everyone likes being dunked. If water makes you anxious, skip it. But honestly, it’s not that bad. You’re underwater for maybe 5 seconds at a time. Most techs will let you do a practice round to get used to it.

7. Bod Pod (Air Displacement Plethysmography)

If being dunked underwater isn’t your thing, the Bod Pod might just be your ticket. It’s this funky, egg-shaped capsule that looks like something NASA cooked up.

I remember the first time I saw it — I half expected it to launch me into orbit. But jokes aside, it’s one of the best ways to measure your body fat without getting wet.

How It Works

You hop inside wearing tight gear — like compression shorts and a swim cap. (Yes, the cap matters. Hair holds air, and the machine wants clean data.)

The Bod Pod uses tiny air pressure changes to figure out how much space your body takes up. Combine that with your weight, and it does the math to spit out your body fat percentage.

The whole thing takes maybe 2 minutes. You sit still for two short scans while it makes some sci-fi hissing sounds. It’s painless and dry — and your ears might pop slightly, like in an airplane.

Is It Accurate?

Pretty dang accurate. Studies (including ones from places like the Journal of Strength & Conditioning Research) put it close to hydrostatic weighing with about a 1–3% margin of error.

I’ve used it myself and with clients, and it’s consistent if you follow the prep rules. That means: no eating, drinking, or working out a few hours before.

8. Bioelectrical Impedance Analysis

Let’s talk about the tech you probably already have in your bathroom: BIA.

If you’ve ever stood barefoot on a smart scale or used those hand grips at the gym, that’s BIA. It sends a tiny electrical current through your body (you won’t feel a thing) and measures how fast it moves.

The idea? Muscle and water carry current well. Fat doesn’t. More resistance = more fat.

How It Works

The device shoots a current through your body — either foot to foot, hand to hand, or both. It uses your stats (height, weight, age, etc.) to estimate body fat.

The fancier the machine (like InBody), the more contact points, which usually means better accuracy.

What’s the Catch?

Hydration messes with the numbers. Big time.

Drink too much water? You might register leaner than you are. Dehydrated? You’ll come out looking fluffier than reality. Eating, working out, even how cold your feet are can throw off the results.

Use It Smart

  • Weigh yourself first thing in the morning, fasted, post-bathroom.

  • Don’t compare devices — each one runs its own math.

  • Wipe the sensors now and then. Dry feet and good contact matter.

  • Skip testing after a workout or huge meal.

9. 3D Body Scanners 

Alright, let’s talk about something that feels like it’s straight out of a sci-fi movie: 3D body scanners.

These machines are the new kids on the block when it comes to checking body fat.

If you’ve never stepped into one, imagine a full-body spin that scans every inch of you — kind of like getting a 360-degree selfie… except you’re nearly naked, and it shows every bump, curve, and soft spot.

It’s not exactly flattering, but it is honest.

What Actually Happens

I gave it a shot at a local fitness expo where they were offering free scans. I figured, why not?

One minute I was standing on a turntable in my compression shorts, and the next, boom — I’m staring at a rotating 3D version of myself on a screen. Uncanny? Absolutely. Useful? Even more.

Here’s how it works: You either stand on a spinning platform or the scanner itself does the rotating. In 30–40 seconds, it grabs your body’s shape using sensors or cameras. Then it pieces together a full-body image and pulls out a bunch of measurements — waist, hips, chest, arms, thighs, you name it.

Some systems use infrared or laser light, but don’t worry — no radiation, no needles, just light and math.

From those numbers, it runs a few prediction equations (plus your weight, either measured or entered) to estimate your body fat percentage. Think of it like the tape measure method… but juiced up with way more data points.

But How Accurate Are These Scans?

Not bad — when they’re used right.

Most brands claim their scanners are within 2–4% of your actual body fat. Some research backs that up. In fact, one study compared 3D scans to DEXA (the gold standard), and results were usually close for average-shaped people.

Still, take the number with a grain of salt.

From my own experience and coaching runners over the years, I’ve found 3D scans are generally solid — especially for tracking progress. But if you’re extremely muscular or have an unusual body shape, the estimates might swing a bit.

These tools run on math based on the “average person,” so the further you are from that, the more room for error.

Also, don’t mess with the setup.

Loose clothes? Bad idea. Sucking in your stomach? Don’t. It messes up the shape reading. Stick to tight gear — ladies, sports bras and shorts; guys, trunks or compression shorts.

Oh, and if you’ve got long hair, tie it up — it can mess with the neck and shoulder scan.

What Makes It Worth It?

Here’s what I really like about it: the scanner doesn’t just give you a number — it shows you your actual progress in 3D.

You can track waist or hip size down to the millimeter, then compare month-over-month. Some programs even overlay your “before” and “after” bodies side by side.

Pro Tip From a Coach

If you’re gonna use this tool, treat it like you would a tape measure: stay consistent.

Same time of day. Same clothes. Same pose. Don’t play tricks — don’t flex, twist, or fake your posture. Just stand tall, breathe normal, and let the scanner do its thing.

And don’t freak out if your first scan shows a higher number than expected. That’s just a starting line, not the finish.

What matters most is the trend.

If your scan drops you from 30% to 25%, that drop is very likely real — even if your actual number is more like 28 to 23. Watch the direction, not the decimal.

Final Thoughts

Look, there are lots of ways to track body fat — from old-school calipers to high-tech wizardry like this. The tool you pick doesn’t matter as much as what you do with the info.

Progress can be slow. Maybe just half a percent drop in a month. Maybe one less inch on your waist. Maybe you suddenly notice your jeans don’t pinch like they used to.

That’s still progress. That’s winning.

So here’s my question for you:

Have you ever tried a 3D body scan? What did it tell you? Was it helpful or just weird? Let me know in the comments or hit me up on socials.

I love hearing real stories from real runners.

Whether you’re using calipers, a mirror, or high-tech gadgets — track your progress, be patient, and keep showing up.