Custom Orthotics vs Stability Shoes: A Running Coach’s Personal Take

As a coach now, I see this question pop up all the time: orthotics or stability shoes? And yeah, the advice out there is all over the place.

So let’s cut through the noise. In this guide, I’ll walk you through what I’ve learned—both from my own experience and from working with hundreds of runners. I’ll break down what each option actually does, what the science says, and how to know what might work best for your feet.

We’ll also squash some myths along the way (because more support isn’t always better).

By the end, you’ll walk away with a clear, no-fluff answer: are stability shoes enough for you—or is it time to invest in custom orthotics?

Custom Orthotics vs Stability Shoes?

Here’s the quick answer.

Both stability shoes and custom orthotics are designed to fix the same thing—too much inward foot roll (overpronation).

Stability shoes come with built-in features like firmer foam on the inner side to control that roll. They’re great for runners with mild to moderate flat feet.

Custom orthotics, on the other hand, are made specifically for your foot and better suited for more serious or specific issues.

Most runners can start with a well-built stability shoe—it’s easier and cheaper. But if your pain lingers or your pronation is extreme, getting custom orthotics from a pro might be worth it.

Best bet? Get a gait analysis, try both, and see what feels best on your run.

Now let’s dive a little deeper…

Flat Feet, Overpronation & Injury: The Basics

Let’s talk feet.

Flat feet usually mean your arches have dropped—and with that comes overpronation, where your foot rolls too far inward when it lands.

A little roll is normal—it helps absorb shock. But too much? That throws off your alignment. Ankles, knees, hips, lower back… they all get dragged into the mess.

The American Podiatric Medical Association warns that overpronation can lead to everything from arch pain to knee and back issues.

I’ve seen it firsthand with runners dealing with shin splints, runner’s knee, and even stress fractures. A lot of them had flat feet. It’s a common combo.

So if someone told you, “Hey, you need support,” they’re not wrong. You might. Because when your arch collapses over and over, your risk of injury climbs.

Here’s an easy test: check your old running shoes. If the inside edges are worn down way more than the outside, you’re probably overpronating.

Better yet, get a free gait analysis at a running store—they’ll record your stride and slow it down frame by frame. That alone can be a game-changer.

Once you confirm it? You’ve got two ways to fight the roll: buy shoes built to handle it or use inserts inside your current shoes.

Let’s break down the first one.

What Are Stability Shoes—and How Do They Help?

Stability shoes are made to slow down overpronation.

Think of them like neutral running shoes—but with backup. They’ve got features that help keep your feet from collapsing inward.

Here’s what makes them different:

  • Firmer Foam on the Inner Edge: Most stability shoes use denser foam under the arch (called a dual-density midsole). It resists compression and slows down that inward roll. Take the ASICS GT-2000, for example—its inner foam wedge (now called “Litetruss”) helps reduce excess movement.
  • Guide Rails: Brands like Brooks use guide rails in models like the Adrenaline GTS. These act like bumper lanes, gently nudging your foot back in line when it veers too far.
  • Support Frames & Heel Counters: Some shoes (like the Saucony Tempus) have an EVA frame built into softer foam to cradle the foot. Others use firm heel counters or shanks under the arch to keep your foot stable.

Basically, these shoes are like training wheels. They let your foot move naturally—but they stop it from going too far.

This helps spread pressure evenly and keeps your knees aligned. According to the American College of Sports Medicine, stability and motion-control shoes are ideal for overpronators, and Mayo Clinic agrees—they recommend shoes with good arch structure to cut down on pain.

From what I’ve seen, a good pair of stability shoes can make an immediate difference.

And the science backs this up: studies have shown that motion-control shoes (the most supportive kind) can lower injury risk for runners who overpronate.

Another review found that arch-supportive shoes or insoles helped reduce injury for flat-footed runners.

Stability Shoes Aren’t One-Size-Fits-All

Let’s get one thing straight: not all stability shoes are the same. There’s a full spectrum out there, depending on how much support your feet need.

Mild stability shoes are kind of like “supportive neutral” shoes. They’ve got just a hint of guidance—perfect if you slightly overpronate but don’t need anything extreme.

Moderate stability is where most runners with flat feet end up. These shoes have visible support features but still feel smooth enough for daily miles.

Motion control is the big guns—heavy, max support shoes for folks with severe overpronation or who are on the heavier side. Think Brooks Beast or ASICS Gel-Forte—solid, wide, firm builds that aren’t messing around.

Back in the day, stability shoes were tanks. Heavy, clunky, and about as subtle as a brick. But now? Brands have stepped it up. They’ve made these shoes lighter, sleeker, and more runner-friendly.

A physical therapist at Doctors of Running put it best: “Stability shoes are better than they ever have been…plenty of options where arch support is designed into the shoe.”

Here’s the Deal:

If you already wear stability shoes—or you’re thinking about trying them—make sure they feel right when you run.

Support shouldn’t mean “stiff.” It should feel like your arch is being hugged, not smothered. If a shoe jabs into your foot or feels like a brick, try something else.

Some runners love a softer stability ride—like the Nike Structure or Saucony Guide—while others prefer the firmer posts in something like the New Balance 860.

One more thing: shoes aren’t magic wands. They can reduce pronation, but they won’t fix deep-rooted biomechanical issues.

Got one leg longer than the other? Weak glutes? That’s where orthotics or strength work might need to tag in.

Take a look at the midsole of a Brooks Adrenaline—you’ll see a darker foam along the arch side. That’s the medial post, built to gently fight off overpronation and keep your stride cleaner.

What Are Custom Orthotics?

Now let’s talk about the other piece of the puzzle: custom orthotics.

Think of them as inserts made just for your feet—like a tailored insole built to fix whatever quirks your feet throw at the pavement. They’re usually prescribed by a podiatrist and built using molds or 3D scans of your foot.

They’re not soft, cushy gel pads either—most are semi-rigid, designed to guide your foot’s shape while you walk or run.

Here’s how they actually work:

  • Stability shoes tweak the midsole.
  • Orthotics change the entire surface your foot lands on.

They support your arch, adjust your foot angles, and shift your alignment. Some can even post your heel or forefoot to address imbalance.

A well-made orthotic feels like a mini coach under your foot—nudging it back into a more neutral position with every step.

They can help reduce pronation, fix heel strike patterns, and absorb stress where your body needs it most.

According to a 2023 randomized trial, runners using orthotic inserts reported greater comfort—and even fewer injuries (though not a major statistical win there).

But the big standout? Comfort. Orthotics significantly boosted comfort scores across the board.

And let’s be honest—when the run feels better, you’re more likely to stick with it.

But It’s Not All Sunshine

Here’s where things get real. Orthotics might work wonders for some—but they’re not a perfect fit for everyone.

Let’s break it down:

Cost

Custom orthotics are pricey. In the U.S., they usually run $300–$600. Unless insurance has your back, it’s a big hit to the wallet.

Coach Michael at RunnersConnect says they can be up to $500 out-of-pocket.

Compare that to off-the-shelf insoles like Superfeet or PowerStep—those run around $50–$60.

And yep, some runners feel burned. One athlete I know spent big on customs and ended up tossing them for a cheap cork insole that felt way better.

Comfort Isn’t Guaranteed

Here’s the kicker—some runners hate the feel of orthotics. They can be stiff, archy, or just plain weird.

One guy in my running group said they made his shoes feel cramped and awkward. Another runner described sharp pain under his toes when he wore orthotics in a stability shoe—like his foot couldn’t bend right.

The problem? Overcorrection. Orthotics need to match your shoes and your feet. Often, they work best in neutral shoes with enough space.

Break-In Time & “Crutch” Concerns

Don’t slap orthotics into your shoes and run 10 miles right away. You’ve got to ease into them—some folks need weeks to adjust.

And here’s something worth thinking about: some coaches argue that relying on orthotics too much could weaken your feet.

Coach Jason Fitzgerald said it best: “An insert under the arch can act as a crutch—restricting movement and allowing the arch to weaken over time.” 

He’s not wrong. Orthotics help with alignment, but they don’t build strength in your feet.

So if you’re relying on inserts without doing footwork or strength drills? You’re just putting a Band-Aid on the issue.

So, When Are Orthotics Actually Worth It?

Here’s my honest take: orthotics should be the last resort, not your first move. That’s how I treat them in my coaching.

And I’m not alone—most podiatrists and physical therapists will try everything else first: better shoes, strength work, form tweaks. Only after that comes the “custom” card.

Most runners do just fine with a solid stability shoe. Orthotics? Only if you’ve already tried the usual stuff and still feel broken.

Most people don’t need custom or even off-the-shelf insoles unless there’s a real diagnosis on the table.

That’s key: custom doesn’t mean better—only necessary when it’s truly needed.

When Custom Orthotics Might Actually Make Sense

If you check one of these boxes, orthotics might be worth a shot:

  • Your arch is basically falling apart. I’m talking severe. If a stability shoe still isn’t enough, and one foot pronates more than the other—orthotics can provide that precise, side-specific fix.
  • You’re injured… again. Tried the right shoes and still battling the same plantar fasciitis or tibial tendonitis? A custom insert might shift your load just enough to finally give that sore spot a break.
  • Your feet are… unique. Crazy high arches? Mismatched foot lengths? Arthritic joints? This is where custom orthotics shine—they can be tailored to your exact foot shape, pressure points, and even conditions like arthritis.

And bonus: one pair can work across shoes. Use them in your running shoes, walking shoes, work shoes—whatever.

That means 24/7 support, which can be a game changer if you’re dealing with foot pain all day long.

“Orthotics” Doesn’t Always Mean Custom

Let’s clear something up.

When runners talk about orthotics, they’re not always talking about those $400 custom-molded ones.

There’s a middle ground: quality off-the-shelf insoles like Superfeet, Currex, or PowerStep. These aren’t made just for you, but they come in different arch heights and provide decent support.

And for some folks? That’s all they need.

I remember reading a runner’s post who paired PowerStep insoles with a light stability shoe—totally kept his ankle pain in check.

Another guy swore by Fulton cork insoles that molded to his feet over time. He actually preferred them over the expensive customs he tried before.

So yeah, orthotics come in tiers. You don’t have to go full-custom on day one.

Quick tip: Try a $50 over-the-counter insole in a neutral shoe. If it helps, maybe later you upgrade to custom. Test before you invest.

Custom Orthotics vs Stability Shoes: Pros & Cons Showdown

Let’s break it down like a coach would.

Stability shoes and orthotics both aim to fix the same issue—overpronation or flat feet—but they go about it differently.

Stability Shoes – The First Line of Defense

Pros:

  • Built-in Support: No fiddling. Just lace up and run.
  • Made for Movement: They flex naturally where your foot does. Good ones aren’t clunky bricks—they’re comfy and responsive.
  • Great for Mild to Moderate Overpronation: For many runners, that’s all you need. Stability shoes can knock out shin splints or knee pain by correcting how your foot lands.
  • Plenty of Choices: You’ve got options like the Asics Kayano, Brooks Adrenaline, Saucony Guide, New Balance 860, and Nike Structure. One will probably fit your vibe.
  • Cost-effective: You’re buying shoes anyway. A stability version doesn’t add extra cost like orthotics do.

Cons:

  • One-Size-Fits-Most: These shoes aren’t built for your exact foot. If one foot pronates more, or your arches are odd, it might not cut it.
  • Feel & Weight: Some people find them stiff or heavier than neutral shoes. If you like soft or super minimalist shoes, they might feel clunky.
  • Not for Extreme Cases: If your feet collapse like a pancake, even a stability shoe may not hold you up enough. That’s when we start talking orthotics.

Custom Orthotics – The Precision Fix

Pros:

  • Tailored to You: This is the big one. Built for your feet—left and right can even be different if needed.
  • Specific Pain Relief: They can target ball-of-foot pain, heel spurs, bunions—whatever’s bothering you.
  • Serious Support: If your arch totally collapses and your ankles roll, orthotics can prevent that when a shoe can’t.
  • All-Day Help: Use them in all your shoes, not just your runners. Great for people with issues that aren’t just limited to training.

Cons:

  • Expensive & Time-Consuming: You need to see a specialist, do fittings, wait weeks… and they cost more than a pair of shoes. Not always covered by insurance.
  • Can Be Too Much: If your orthotic is too rigid or paired with a super controlling shoe, it can overcorrect your stride. That might fix one issue and cause another—like forefoot pain or tight calves. One runner online said the combo gave him sharp forefoot pain.
  • Not a Cure-All: Orthotics don’t fix poor form or weak glutes. They’re a tool—not a magic solution. You still need to do the strength work, the drills, and run smart.

Do I Need Custom Orthotics If I Wear Stability Shoes?

Let’s cut straight to it: if you already run in solid stability shoes, do you really need custom orthotics too?

Most of the time—nope.

Here’s the deal. Tossing orthotics into a stability shoe can sometimes be like adding salt to an already salty dish. It doesn’t make things better—it makes it too much.

You get overcorrected.

That’s a fancy way of saying your foot’s natural movement gets jammed up because there’s too much support fighting against itself.

Why You Shouldn’t Stack Support on Support

Stability shoes are already designed to guide your gait. They assume how your foot moves and try to fix things—like overpronation—along the way.

Now imagine dropping an orthotic in there that also wants to correct your stride. It’s like two backseat drivers yelling conflicting directions.

Here’s what happens: the shoe’s medial post pushes up on your arch, the orthotic does the same, and boom—you’ve got a foot that’s locked up and can’t move naturally.

You might even feel like you’re running with a brick in your shoe.

What the Pros Say

Most podiatrists agree: if you get custom orthotics, don’t shove them in a motion-control or heavy stability shoe.

The folks at Doctors of Running are very clear—pair orthotics with neutral shoes that have enough room to work. Otherwise, you’re just asking for trouble.

I’ve heard the same advice again and again: if you’re in a stability shoe and it’s doing the job—no pain, no weirdness—you likely don’t need orthotics. Don’t fix what isn’t broken.

That said, there are exceptions. If you’ve got a legit issue—like a leg length discrepancy, bunion, or post-surgical change—an orthotic might be necessary even with a supportive shoe.

But that’s a medical call, not something to guess on.

Flip It: Got Orthotics? 

Here’s where things get flipped.

If you already have custom orthotics (and they’re helping), you probably don’t need a bulky stability shoe on top of that.

A lot of folks think, “Oh, I have foot issues—I’ll get both.” Nope. That double-dip often backfires.

Instead, go with a neutral shoe that plays nice with your insert. Think removable insole, wide enough toe box, enough volume for the orthotic to sit right.

Some favorites among orthotic-wearers:

  • Brooks Dyad
  • Saucony Echelon
  • Certain New Balance trainers
  • ASICS Cumulus
  • Nike Pegasus

A sports podiatrist I know often recommends “stable neutral” shoes.

Basically, these aren’t full-on stability shoes, but they’ve got a wide, flat base and a little structure—just not aggressive posting.

The orthotic does the heavy lifting. The shoe just supports the stage.

So… Which One Wins?

Let’s keep it simple:

Are stability shoes better than orthotics for overpronation?
In a lot of cases—yeah.

A well-designed stability shoe can take care of mild to moderate overpronation without needing a custom insert
(Runners Connect, Doctors of Running).

Orthotics are usually the second line of defense—used when shoes alone aren’t cutting it.

If your current shoe isn’t solving the problem (or you’ve got a very specific issue), then orthotics might help. But they’re not the default.

And if you do need orthotics, you can probably say goodbye to motion-control tanks like the Beast.

A lighter, neutral shoe with a flat base usually works better with orthotics doing the correcting from the inside.

I’ve even seen runners on Reddit say their podiatrist advised them to skip the stability shoe and just pair a good orthotic with a neutral base.

That’s becoming more common.

Final Word: Don’t Go Overboard

Here’s the real coaching moment: don’t just pile on more “support” thinking it’ll fix everything.

Support isn’t a contest. More isn’t always better.

Dr. Matt Klein said it best: “More is not better. The right amount is best”

Your feet are meant to move.

Even in a stability shoe—or with orthotics—you still want some natural pronation. Zero movement means overcorrection, and that leads to its own set of problems.

Takeaway

  • If your stability shoes feel great? Don’t add orthotics. Let the shoe do its thing.
  • If you’re in a stability shoe and still hurting? Get assessed. You might need an orthotic—or a totally different shoe.
  • If you already wear orthotics? Use them with a neutral shoe that gives them space to work.
  • If something feels off? Listen to your body. New pain = a red flag.

The sweet spot? Enough support to run pain-free—but not so much that your feet can’t do what they’re built to do.

How to Break in New Running Shoes (Without Wrecking Your Feet)

woman running

So, you just got yourself a fresh pair of running shoes—box still smells like the store, laces crisp, soles untouched.

I get it.

You’re itching to lace them up and hit the road.

I know exactly how you feel.

A few months ago, I tore open a new pair and headed out for a long run without thinking twice.

Three miles in, I had blisters on both feet, my arches were throbbing, and I was cursing myself the whole way back.

Rookie mistake—but one I had to make to learn a simple truth:

Even the best shoes need time to settle in.

But here’s the thing—it doesn’t have to be a painful process.

If you ease into it the right way, breaking in your new running shoes can be smooth, maybe even enjoyable.

In this guide, I’ll walk you through exactly how long it takes (spoiler: it depends), how I approach it with my runners, and what to watch for so you’re not sidelined by avoidable aches.

How Long Does It Take to Break In Running Shoes?

This is probably one of the most common questions I get as a coach: “How long until my new shoes feel good?”

I wish I could give you a magic number.

But the truth?

It depends—on the shoe, your feet, and how you run.

For me, most shoes feel fully broken in after two to three weeks of regular use.

I had one pair of beefy stability shoes that took almost a month before they stopped fighting my feet.

At first, I thought something was wrong with my form. Turns out, I just needed to give them time.

For most runners, I recommend planning for 15 to 25 miles of steady running before shoes feel dialed in.

That usually falls within the 2–3 week range if you’re running regularly. This isn’t just my experience—it lines up with what experts say too.

According to podiatrist Dr. Bruce Pinker, some shoes start to feel right after just 5 to 10 miles. For others, especially structured models, the break-in curve is steeper.

Here’s how it usually plays out:

  • Light, flexible shoes (like most daily trainers)?
    They often feel good right out of the box—or by run number two.
  • Heavy-duty shoes (think: high-stack stability or trail shoes)?
    They take longer to break in. I had a friend swear his firm-foam Adidas didn’t feel right until after 30 miles.

Contrast that with a pair of ZoomX Nike trainers I tested last year—those babies felt great on my second run. That soft foam just needed a couple of miles to settle in.

It’s Not Just the Shoe—It’s You

Your feet matter. A lot.

If you’ve got high arches, wide feet, bunions, or anything like plantar fasciitis, your break-in window might be longer.

Shoes aren’t made in custom shapes (unless you’re splurging on that), so your foot might need a little time to get used to the way a new shoe moves, supports, and lands.

Also, switching shoe types can throw your body off.

Going from a plush stability shoe to a sleek minimalist trainer?

You’re going to feel that transition—and you’ll need more patience while your body adapts.

On the flip side, if the new pair is just a newer version of what you’ve been running in, the adjustment might only take a few runs.

When to Say “Nope”—This Shoe Ain’t It

Let’s keep it real—not every shoe is “break-in-able.”

If you’re 50 miles in and still feeling hot spots, weird pressure points, or pain you can’t explain, don’t keep pushing.

That’s not a shoe that needs more time.

That’s a shoe that doesn’t fit your foot or running style. And no amount of toughing it out will fix that.

Return it. Exchange it. Move on.

You’re not weak for doing that—you’re smart.

Running in shoes that don’t work for your body is how injuries happen.

I’ve coached too many runners through plantar fasciitis, shin splints, and knee pain that could’ve been avoided if they had just swapped their shoes sooner.

Why Breaking In Running Shoes Actually Matters

I get this question a lot: “Do I really have to break in my running shoes? Can’t I just lace ‘em up and go?”

Honestly, I used to think the same thing.

Some veteran runners will tell you that if a shoe fits well, it should feel great from day one—and they’re not totally wrong.

A solid pair should feel comfortable right out of the box, especially if you’ve nailed the sizing and the fit (shoutout to verywellfit.com for backing that up).

But here’s what most people won’t say loud enough: just because it feels okay on day one doesn’t mean your body is ready for 10 miles in them.

Here’s why that matters:

1. Your Shoes Need Time to Loosen Up

Right out of the box, everything—the upper, the midsole, even the insole—is stiff.

It hasn’t molded to your foot yet.

That rigidity can create pressure points, friction, and rubbing. The first few runs help soften the shoe so it starts shaping around your unique stride.

Think of it like a baseball glove or a leather jacket. It feels tight at first, but after a few wears, it fits you like it was made for you.

2. New Shoes Limit Your Foot’s Natural Movement

Running coach Sean Fortune backs this up—brand-new shoes tend to be stiffer and restrict your natural range of motion.

If you head out for a long run right away, you’re asking your body to adapt to something that hasn’t softened yet.

That’s extra stress on your feet, calves, and lower legs.

I’ve seen that stress turn into foot cramps, blisters, even cases of plantar fasciitis or a flared-up Achilles. All because the shoe wasn’t given time to chill out.

3. Switching Shoe Types? Break-In Is Non-Negotiable

If you’re changing brands, dropping from a high-cushioned shoe to a minimalist one, or moving from a stability to a neutral shoe, listen up: you need a transition period.

Nike expert Ashley Campbell points out that a new shoe can mess with your mechanics—your stride, your foot strike, the way your muscles fire.

I saw this firsthand when I tried switching to zero-drop minimalist shoes after years of running in traditional trainers.

I thought I could jump right in.

Nope.

Ended up with a strained calf after one overly confident run. Took me a full month of easing in before my calves and Achilles stopped hating me.

4. You’re Avoiding Injuries

The obvious stuff like blisters or black toenails? Those show up quickly.

But more serious stuff—shin splints, sore knees, hip pain, even IT band flare-ups—sneak in when a shoe subtly messes with your gait.

Breaking in gives you a “test drive” window.

If something doesn’t feel right—a rub here, a weird pressure there—you’ll catch it on a short run, not during mile 12 of your long Sunday outing.

How to Break In Running Shoes (Without Destroying Your Feet)

Let’s be real—nothing kills motivation like getting blisters or sore feet from a brand-new pair of running shoes.

Here’s my go-to system. It’s been battle-tested over the years—both on my own feet and with runners I coach.

Step 1: Don’t Start with the Wrong Shoes

Before we even talk about “breaking them in,” let’s make sure you picked the right damn pair in the first place.

Sounds obvious, right? But trust me, I’ve made that mistake more than once.

I grabbed a pair that looked fast—sleek design, flashy color, and every guy at my track club seemed to be wearing them.

Bad call.

They were way too narrow and had zero support for my overpronating feet. No amount of breaking-in magic was gonna fix that.

So, here’s what I tell every runner now: the best shoes to break in are the ones that fit right from the start.

Here’s how to stack the odds in your favor:

  • Pick the right type for your gait. Know whether you need neutral, stability, or motion-control shoes. If you’re not sure, try a gait analysis at a running store, or do the old-school “wet foot test” at home to check your arch type. I’ve got fairly average arches and roll in a bit (overpronation), so support shoes usually work best for me.
  • Size matters—really. Your feet swell when you run. You want about a thumb’s width—roughly a centimeter—between your big toe and the front of the shoe. Snug at the midfoot and heel is good. But if your toes feel cramped, or your pinky is already rubbing the side? Don’t hope it gets better. It won’t.
  • Comfort counts on day one. The shoes should feel pretty good right out of the box. Not perfect—but not painful. If they’re already rubbing weird or feel like bricks, that’s a red flag. Ask yourself: Do these feel like they hug my foot in a good way? Or is something off?

I always say: If you’re forcing your foot into the shoe, the shoe’s not the problem—you just need a different shoe. A better fit from the start means less pain later. And a lot fewer blisters.

Step 2: Wear Them Around the House Like a Weirdo

Once you’ve found your Cinderella shoe, don’t just rip the tag off and go hammer 10 miles.

Slow your roll.

Step one of breaking them in? Wear them like slippers first.

No joke—I wear my new running shoes around the house for a few days. Doing dishes, answering emails, even watching Netflix. My girlfriend thinks I’m nuts. But it works.

Here’s why: just walking around helps the shoe start to mold to your foot without the pounding from running.

The midsole softens up.

Your foot gets used to the shape. You avoid hotspots and heel blisters before they start.

A few pro tips:

  • Keep it short at first. Wear them for an hour or two around the house, then swap back to your old shoes. Gradually increase it each day. On day one, I might just clean the kitchen in them. By day four, I’ll wear them to the grocery store or around the neighborhood.
  • Keep them clean (for now). Most running stores only accept returns if the shoes still look new. So wear them on clean floors or treadmills while you’re testing them. If they start causing issues—slipping heels, hot spots, weird pressure—you’ll still be able to return them.
  • Loosen them up with your hands. I’ll gently flex the toe box a few times—just a light bend forward and back to get some movement in the sole. Some experts even recommend manually flexing the forefoot 4-5 times before the first run. You’re not trying to break the shoe, just wake it up a little.
  • Do a few squats or lunges. Sounds silly, but it helps. You’re flexing the midsole, letting your foot settle into the shoe’s shape. I’ve done air squats in my living room plenty of times just to get that break-in started.

I usually give it about 5–7 days of casual wear.

When the shoe starts feeling like a natural extension of your foot—even while you’re pacing around the house—you’re ready to take it outside.

3. Take Your New Shoes for a Gentle Test Run

Once you’ve logged some solid walking time in your new shoes, it’s time for the real test: running.

But don’t go full beast mode just yet.

This isn’t the day for crushing a tempo run or chasing a PR.

Whenever I lace up a new pair, I treat that first run like a slow first date.

No pressure. No pushing.

Just a short, easy jog—20 to 30 minutes max, around 2 to 4 miles depending on your pace. If your usual is five miles a day, scale it back to two or three. The goal here isn’t mileage—it’s feedback.

I always tell my coaching clients: think of it as a “test drive.”

You’re not trying to hit top gear. You’re just seeing how the shoes move, feel, and respond under a light load.

Here’s how I usually go about it:

  • Keep It Easy. No speedwork. No hills. No chasing Strava segments. Treat this like a recovery run—conversational pace only. When I take a new pair out, I’m tuned into every step. Do they rub near the toes? Feel tight on the midfoot? Any heel slippage? Running slow gives you the space to notice these things—before they turn into blisters or bigger problems.
  • Keep It Short. That first run? Think 2 miles around the block. If all feels good, maybe bump it to 3 or 4 on the next one. I usually give it a full week of short runs—never more than 3–4 miles—before I even think about taking them out for a long haul. Let your body adjust. Let the shoe adjust. You’re building a relationship here.
  • Skip the Hard Stuff (For Now). I’ve made the mistake of doing intervals in brand-new shoes. Bad idea. The cushioning’s still stiff, the fit might not be perfect, and your feet haven’t adapted yet. Give them 1–2 weeks of easy running before you throw them into a fast workout or long run. You don’t want to find out at mile 5 of your 12-miler that they rub your pinky toe raw.

4. Rotate Your New Shoes with Your Old Pair

Here’s a move that’s saved me more than once: don’t go all-in on the new shoes right away. If you’ve got an older pair that’s still hanging in there, use it.

Rotate.

Let’s say you run four times a week.

Start by using the new pair once or twice.

Run the other days in your old, reliable shoes. This gives your feet a break and helps you ease into the new kicks without getting banged up.

Here’s why this helps:

  • Eases the Transition. Your feet and legs need time to adjust—especially if the new shoes have a different feel, drop, or support level. When I switched to lower-drop shoes a few years ago, alternating saved my calves from being wrecked. Think of it like weaning off caffeine—slow and steady works best.
  • Shoes Need Recovery Too. The foam in your shoes needs time to bounce back. After a run, that midsole gets squashed. Give it a day off, and it rebounds better. This extends the life of your shoes and helps keep the cushioning feeling fresh. Research from the Scandinavian Journal of Medicine & Science in Sports backs this up. They found that rotating between different running shoes can cut your injury risk by up to 39%. That’s huge.
  • Test Without Risk. If you’ve got a race or a big long run coming up, you don’t want to risk going all-in with brand-new shoes. Rotate them in during your easy runs first. Once you’ve logged 40–50 miles in them and they feel good, you can start trusting them on longer efforts or race day.

When I break in a new pair, it usually looks like this:

  • Tuesday: Easy run in new shoes
  • Thursday: Workout in old shoes
  • Saturday: Long run in old shoes
  • Sunday: Recovery jog in new shoes

After a couple of weeks, if everything feels dialed in, I start mixing them into workouts and long runs. Injury rates dropped big-time once I adopted this pattern.

5. Mind Your Socks and Blister Prevention

Let’s be real: few things kill a good run faster than a nasty blister.

New shoes might feel exciting, but they’ve also got that little risk — a pinch here, a rub there — that can turn into a full-blown hotspot if you’re not careful.

I’ve been through it all.

Raw heels. Popped blisters on long runs. I even once ran a half marathon with tape wrapped around both pinky toes.

Not fun.

But with a bit of planning, you can avoid most of that pain.

Here’s what’s worked for me — and for the runners I coach:

Moisturize Your Feet (Seriously)

This might sound like a skincare tip, but it’s legit.

Dry feet are like sandpaper inside your socks. And friction is the enemy.

I make it a habit to slap on some plain, fragrance-free lotion after my shower or before bed — especially during dry months. It helps keep the skin soft and less prone to cracking or rubbing.

Just don’t do it right before a run — nobody wants greasy feet sliding around in their shoes. Do it the night before or give it plenty of time to soak in.

Once I started this habit, my post-run blister rate dropped like crazy. Try it. Your feet will thank you.

Sock Choice Is Make-or-Break

Forget those 10-for-$5 cotton socks from the department store. They soak up sweat like a sponge, bunch up, and turn your foot into a blister magnet.

Go for moisture-wicking socks made of technical fabric — think polyester, nylon, or merino wool. These keep your feet drier and cooler and reduce the chance of hotspots.

Pay attention to thickness too.

If your new shoes feel tight, wear your thinnest pair. If they feel a little loose or your heel’s moving around, go for a cushioned sock. I’ve got a drawer full of sock options just for this reason.

Think of your sock like part of your shoe fit system — it’s not just something you throw on.

One expert at Nike even suggested experimenting with sock thickness when breaking in shoes. That advice helped me solve a rubbing issue in the heel once — just by switching socks. No shoe change needed.

Anti-Blister Balm = Cheap Insurance

If you know your feet — and you know where you usually get rubbed raw — get ahead of it.

I always apply BodyGlide or a little Vaseline on trouble spots before a long run, especially in new shoes.

For me, it’s the back of the Achilles or the arch.

If you’ve got tape or blister pads, use ’em.

One time I got a small blister on the inside of my toe during a tempo run. The next few days, I taped that toe, and boom — no more pain. It’s a tiny fix that can keep your training on track.

Tweak Laces, Insoles, and Tongue Position

Sometimes all you need is a quick adjustment.

Try different lacing patterns — like skipping an eyelet if you’re feeling pressure on the top of your foot, or using heel-lock lacing if your heel is slipping.

Make sure the tongue is laying flat (I’ve had wrinkled tongues cause weird irritation before).

And don’t be afraid to swap insoles.

If the stock one is causing arch pain or rubbing, drop in one from another pair or an aftermarket option. That tweak alone has saved me from tossing out shoes that just needed a little tuning.

If you feel a blister starting mid-run, don’t be a hero. Stop. Adjust your sock. Apply tape if you carry it. It’s better to pause for 30 seconds than to be sidelined for a week.

The combo of solid socks, moisturized skin, and some preemptive care can save your feet.

After 10–20 miles, most shoes mold to your foot, and if you’ve done things right, they’ll feel like part of your body — not something you’re fighting against.

6. Take Your Time and Listen to Your Body

Now let’s talk about the mindset.

Breaking in a new pair of shoes isn’t a race.

I get it — you’re pumped to hit the road and rack up miles. I’m the same way. But I’ve also rushed the process and paid for it in sore arches and ruined workouts.

Give your shoes — and your body — time to adjust. It’s not just smart. It’s necessary.

Build Up Slowly

Start with short, easy runs — think 2 to 4 miles max.

In week two, maybe add some distance or a short tempo segment. By week three, you can go longer if things feel good.

But don’t force it.

If something feels off — heel soreness, tight calves, hotspots — back off.

Rotate your old pair in and give it time. Research even shows that gradual transitions help your body adapt and prevent injury.

Know the Difference Between “New Shoe Weird” and Real Pain

Some odd feelings are normal with new shoes — your foot isn’t used to them yet.

But sharp arch pain?

Burning blisters?

Pain that lingers after the run?

That’s your body screaming at you to stop.

As a coach, I always say: discomfort is okay, pain is not. Don’t tough it out if your gut tells you something’s wrong.

How to Know When Your Running Shoes Are Fully Broken In (And Ready for Real Work)

So, you’ve been putting in the miles, easing into those new shoes, trying not to rush the process.

But now you’re wondering—are they finally broken in?

How do you really know?

Here’s the deal: when your shoes are dialed in, they should feel like an extension of your feet.

No distractions. No pinching. No “new shoe” weirdness.

Just you, the ground, and the rhythm of your run.

I always say—when you forget you’re even wearing them, that’s when you’ve nailed it.

Let’s break it down with a few signs that your shoes are fully broken in and ready for whatever you throw at them:

They Move With You, Not Against You

At first, new shoes can feel stiff—like your feet are arguing with them every step. Maybe the sole feels a bit like a plank, or the upper digs into your pinky toe just enough to be annoying.

But after 30, maybe 40 miles?

The shoe should start flexing where your foot naturally bends. The upper softens up. The midsole molds to your stride. It’s like they’ve learned your foot’s language.

For me, that’s the sweet spot. When my trainers start feeling like they were made just for me, I know they’re game-ready.

No More Rubbing, Blisters, or Hot Spots

This one’s huge.

If your heel is still getting chewed up after a few weeks, something’s off. You shouldn’t be finishing runs with sore toes or mystery pain.

Once broken in:

  • The heel should feel snug but soft—no digging into your Achilles.
  • The toe box should let your toes wiggle without jamming the front.
  • No more new blisters. No more tape. No more band-aids.

If you’re finishing your runs without noticing your shoes at all, that’s a massive green light.

That Brand-New Stiffness is Gone

You know that tight, overly springy feeling some shoes have out of the box?

Especially with modern foam tech—sometimes it feels like you’re running on the shoes, not with them.

But give it a week or two of real running and that bounce levels out. The sole gets more predictable, more stable.

If you bend the shoe in your hands and it flexes more than it did on day one, that’s a physical sign the break-in is happening.

Your Stride Feels Normal Again

When I lace up a new pair, my first few runs always feel a little off.

Maybe my cadence is weird.

Maybe I subconsciously adjust my form.

It’s normal.

But once the shoes are broken in, it all clicks. I’m back to my usual flow. I’m hitting my splits, my stride feels clean, and I trust the shoes on any surface or pace.

That’s when I know: these are ready for speed workouts, long runs, race day—whatever I’ve got planned.

Final Word: Trust the Feel

There’s nothing like that moment when your shoes finally feel broken in.

No more doubts. No more adjusting. Just smooth miles ahead.

They’ve gone from strangers to training partners. From fresh-out-the-box to road warriors.

So enjoy it.

You earned that comfort.

Now tell me—what’s your favorite running shoe to break in? Ever had a pair that felt like magic once you hit that sweet spot?

Drop your stories in the comments—I’m always up for some good shoe talk.

The Trail Runner Guide To Running Shoes

Affiliate Disclosure: Runner’s Blueprint is reader-supported. If you buy through links on this page, I may earn a small commission at no extra cost to you.

Let me tell you about the first time I tried trail running. I thought I was all set—just grabbed my regular running shoes and figured I could handle anything.

But nope, I was wrong. As soon as I stepped onto the rocky trail, I started slipping all over the place.

It was like I was starring in some reality show, “Runner vs. Trail”—and spoiler alert: the trail was definitely winning.

My shoes, which I thought would be fine, were useless on those rocks.

My feet kept sliding, my ankles kept rolling, and my knees scraped against the ground more times than I can count.

It didn’t take long to realize road shoes just don’t cut it on the trails. I learned the hard way that having the right shoes makes all the difference.

Now, let me show you why trail shoes are a must for your safety, comfort, and performance.

Quick Picks – Best Trail Running Shoes

If you don’t feel like reading the entire guide, here’s the short version.

These are trail shoes runners consistently rely on.

Best Overall Trail Shoe – Salomon Sense Ride
Balanced traction, comfort, and durability for most trails.
👉 Check current prices on official store

Best Mud & Soft Terrain Shoe – Salomon Speedcross
Deep aggressive lugs built for sloppy, muddy conditions.
👉 Check current prices on official store

Best Rocky Terrain Shoe – Saucony Peregrine
Great balance of grip, protection, and responsiveness.
👉 Check current prices on official store

Best Ultra Distance Trail Shoe – HOKA Speedgoat
Plush cushioning for long trail days and mountain races.
👉 Check current prices on official store

Best Budget Trail Shoe – Brooks Cascadia 
Reliable traction and protection without premium pricing.
👉 Check current prices on official store

If you’re unsure where to start, most runners do well with Sense Ride or Peregrine.

Why Road Shoes Won’t Cut It on the Trails

Look, I get it. You’ve been putting in the miles on the road, and those shoes have served you well. But as soon as you hit a trail with rocks, mud, and tree roots, you’re gonna need something different.

Trail shoes are like a tough pair of boots for your feet—strong, protective, and designed to grip that uneven ground.

Out on the trail, you’re dealing with all kinds of unpredictable stuff—rocks, tree roots, and mud that can throw you off balance. What works on the road won’t give you the grip or stability you need to stay safe.

That’s where trail shoes come in. They’ve got these deep lugs on the soles to keep you from slipping and sliding like you’re on ice. 

Why You Can Trust This Guide

Trail running humbled me pretty quickly.

My first attempt involved slipping all over a rocky trail in road shoes.

That mistake taught me fast that the right shoe changes everything.

The advice here comes from:

  • real trail running experience
  • coaching runners who transitioned from road to trail
  • testing trail gear across different terrain

Trail shoes won’t make you invincible.

But they make the trail a lot more manageable.

Quick Comparison – Trail Running Shoes

If you’re trying to choose between a few trail shoes quickly, this table gives you the most important differences at a glance.

Different trails demand different shoes. Some are built for rocky terrain, some for mud, and others for long mountain runs.

Here’s how the top picks stack up.

Shoe Weight Lug Depth Drop Best Terrain
Salomon Sense Ride ~280 g 3.5 mm 8 mm Mixed terrain
Salomon Speedcross ~298 g 5–6 mm 10 mm Mud & soft trails
Saucony Peregrine ~275 g 5 mm 4 mm Rocky technical trails
HOKA Speedgoat ~291 g 5 mm 4 mm Long mountain runs
Brooks Cascadia ~298 g 4.5 mm 8 mm All-around trail use

Salomon Sense Ride

Best Overall Trail Running Shoe

Best for: runners who want one shoe that handles most trail conditions

Why runners like it

The Sense Ride is one of those shoes that just works on almost any trail. Gravel paths, forest trails, rocky climbs — it handles a bit of everything without feeling overbuilt.

I’ve recommended it to a lot of runners transitioning from road to trail because it gives you traction without feeling like you’re wearing hiking boots.

Key specs

Weight: ~280 g
Lug depth: ~3.5 mm
Drop: 8 mm
Terrain: mixed trails

Pros

✔ versatile for many trail types
✔ comfortable cushioning
✔ reliable traction

Cons

✖ not aggressive enough for deep mud

Price range: $120–$150

👉 Check current prices on Amazon
👉 Check official store


Salomon Speedcross

Best Shoe for Mud and Soft Terrain

Best for: muddy trails, wet forest routes, and sloppy terrain

Why runners like it

If you’ve ever tried running through mud with normal trail shoes, you know the struggle.

The Speedcross solves that problem with aggressive lugs that bite into soft ground. When the trail turns into a swamp, these things grip like crazy.

Key specs

Weight: ~298 g
Lug depth: 5–6 mm
Drop: 10 mm
Terrain: mud, soft trails

Pros

✔ extremely aggressive grip
✔ great for wet conditions
✔ durable upper

Cons

✖ lugs feel overkill on hard surfaces

Price range: $130–$160

👉 Compare prices on Amazon
👉 Check official store


Saucony Peregrine

Best for Rocky Technical Trails

Best for: rocky terrain and technical mountain trails

Why runners like it

The Peregrine strikes a really nice balance between protection and responsiveness.

It has enough grip for rocky terrain while still feeling light and fast. If you run trails with lots of roots, rocks, and uneven ground, this shoe handles it well.

Key specs

Weight: ~275 g
Lug depth: ~5 mm
Drop: 4 mm
Terrain: rocky and technical trails

Pros

✔ excellent grip on rocks
✔ lightweight and responsive
✔ durable outsole

Cons

✖ cushioning may feel firm for some runners

Price range: $130–$150

👉 View current deals on Amazon
👉 Check official store


HOKA Speedgoat

Best for Ultra Distance Trail Runs

Best for: long trail runs, ultras, and mountain races

Why runners like it

The Speedgoat is famous in the ultra-running world.

It’s designed for long days on the trail where cushioning and protection really matter. The shoe feels plush but still grips well on steep climbs and descents.

If you’re running mountain races or long technical trails, this one is hard to beat.

Key specs

Weight: ~291 g
Lug depth: ~5 mm
Drop: 4 mm
Terrain: mountains and long-distance trails

Pros

✔ excellent cushioning
✔ strong traction
✔ comfortable for long runs

Cons

✖ slightly bulky for short fast runs

Price range: $140–$170

👉 See available options on Amazon
👉 Check official store


Brooks Cascadia

Best Budget Trail Running Shoe

Best for: runners looking for reliable trail shoes without paying premium prices

Why runners like it

The Cascadia has been around forever for a reason.

It’s stable, protective, and handles a wide range of trails. Older versions are often discounted, which makes it one of the best value trail shoes available.

Key specs

Weight: ~298 g
Lug depth: ~4.5 mm
Drop: 8 mm
Terrain: mixed trails

Pros

✔ very durable
✔ stable ride
✔ great value when discounted

Cons

✖ heavier than some competitors

Price range: $100–$140

👉 Check current price on Amazon
👉 Check official store

Beginner Trail Running Shoe Tips

If you’re new to trail running, keep it simple.

Start with an all-around trail shoe.

Examples include:

  • Salomon Sense Ride
  • Saucony Peregrine
  • HOKA Speedgoat
  • Brooks Cascadia

These shoes handle most terrain well.

Once you gain experience, you can start choosing shoes more specifically.

What Should You Look for in a Trail Shoe?

Alright, let’s dive into it. The right trail shoe is like your best running buddy on the trails, and you need to know what to look for.

The Terrain Matters

The first thing you’ve gotta do is figure out what kind of trail you’ll be running.

Are you on soft, park paths? Go for shoes with a flexible midsole.

Muddy swamps? You’ll need shoes with aggressive lugs that won’t get stuck.

And rocky, gnarly trails? Go for shoes with stiffer outsoles to protect your feet better.

I’ve been there—once hit a trail without thinking, and found myself stuck in knee-deep mud. I couldn’t move, couldn’t run. I felt like a kid stuck in a sandpit.

Lesson learned: pick the right shoe for the right terrain.

Grip is King

Grip is key for trail shoes. You need deep lugs to handle wet rocks, slippery leaves, or whatever the trail throws at you. Without that, you might as well be running in socks. And trust me, no one wants to do that—especially when there’s a steep downhill coming up.

Here’s a pro tip: Think of your shoes as mini grappling hooks.

The deeper the lugs, the more control you’ll have, especially in muddy conditions. You’ll be thanking your shoes when you’re charging through rough spots.

Comfort for Those Long Hauls

Long trail runs? You need more than just traction.

Cushioning matters, but it’s all about balance.

Too soft, and your feet feel like they’re sinking into marshmallows. Too hard, and every rock feels like a punch to the bottom of your foot. The key is finding shoes with enough support for long runs without overdoing it.

Light Trail Shoes

For those easy gravel paths or trails that won’t make you feel like you’re fighting for your life, light trail shoes are the way to go. They’re like a cross between a road shoe and a trail shoe.

They’re light, they’ve got just enough tread to keep you from slipping, and they’re not overbuilt for tough terrain. Perfect for well-maintained trails or park loops.

Here’s the kicker: If you think your road shoes will work on a dirt trail—think again.

You’ll end up tripping over a tiny pebble, face-planting like a rookie, and regretting your choice of shoes. Light trail shoes are your go-between, ready for those dirt trails without feeling too heavy.

Rugged Trail Shoes

If you’re thinking of running through rocks, roots, or a mess of mud and branches, it’s time for rugged trail shoes. These guys are built for the tough stuff.

You get more protection, better grip, and stability that says, “Bring it on, nature.” The treads are deeper, there’s more cushion, and they’ve got tougher uppers. You’ll feel like you’re wearing a tank for your feet.

I learned the hard way—when I first ventured into the mountains with my road shoes, stepping on rocks the size of small cars. My feet were bruised, my ankles were shot, and I almost called it quits. Rookie mistake. Rugged trail shoes would’ve saved me the pain.

Lug Depth & Grip

The lugs on your shoes? Huge deal. Those chunky bits that dig into the ground?

They make all the difference, especially for muddy or technical trails. Ever tried running through knee-deep mud with road shoes? It’s not pretty. You’ll slip, slide, and feel like you’re running in slow motion. That’s where deep lugs come in.

Here’s how it breaks down:

  • For Muddy Trails: Look for deep lugs—5mm or more. Those big ones dig into the mud, giving you traction so you don’t slip around. Shoes like the Salomon Speedcross 6 are perfect for this. Those deep lugs will keep you moving, even in the muddiest conditions.
  • For Rocky, Technical Trails: You still need grip, but you don’t want to feel like you’re wearing clown shoes. For these, a mid-depth lug works best—around 3-5mm. This gives you enough traction to handle rocks without tripping over roots. The Saucony Peregrine 15 has just the right balance—aggressive enough for technical terrain but not so gnarly you feel clumsy.

Off-Trail Shoes

If you’re not just sticking to trails but venturing off the beaten path—dodging rocks, jumping streams, and navigating deep mud—you need off-trail shoes. These are the heavyweights. They’ve got rock plates to protect from sharp objects, strong grip, and ankle support for rough terrain.

You might think your rugged shoes will work off-trail. Big mistake. Off-trail shoes are built for wild terrain—mountainous, slippery, and unpredictable. If you’re crossing streams or bushwhacking, don’t even try to get by with anything else.

How to Find Your Perfect Trail Shoe: The Essentials

  1. Grip: Look for deep, aggressive lugs that can handle wet, rocky, and slippery terrain. The deeper, the better for muddy conditions.
  2. Protection: Reinforced toes and sturdy uppers are your friends. You’re going to run into rocks, tree roots, and who knows what else. You need shoes that are going to take the impact and protect your feet.
  3. Support: If you’re going to be running on uneven surfaces for hours, you need shoes with good arch and ankle support to prevent injuries.
  4. Comfort: Comfort is king. If your feet hurt, nothing else matters. So, find shoes that offer enough cushion without feeling like you’re running on marshmallows.

Don’t Make the Same Mistakes I Did

Trail running isn’t just about picking a cool shoe—it’s about choosing the right shoe for your specific needs. It’s about matching the shoe to the type of trails you’ll be running on and how long you’ll be out there.

I’ve had my share of “learning experiences” (like that first rocky run), but once I found the right shoes, everything changed. My runs became smoother, my confidence shot up, and I could actually focus on enjoying the beauty of the trail instead of worrying about slipping every five seconds.

So, whether you’re just starting out or looking to upgrade your gear, make sure you’re picking shoes that are designed for the job. Don’t make the same mistake I did—trail shoes are not just an accessory, they’re a game-changer.

Trail Running Shoe FAQ

Here are some of the most common questions runners ask when switching from road running to trails.


Are trail running shoes really necessary?

If you’re running on dirt paths or rocky terrain regularly, yes.

Trail shoes provide:

  • better traction
  • stronger protection
  • more stability on uneven ground

Road shoes simply don’t have the grip needed for most trails. Once the trail gets rocky, muddy, or steep, the difference becomes obvious very quickly.


Can you run trails with road running shoes?

You can—but it’s not ideal.

Road shoes lack the deep lugs and protection needed for trails. That means less traction, more slipping, and a higher chance of rolling an ankle.

For smooth dirt paths or park trails you might get away with it. But for technical trails with rocks and roots, trail shoes make a huge difference.


How long do trail running shoes last?

Most trail running shoes last 300–500 miles, similar to road shoes.

However, rocky or technical terrain can wear them down faster.

Signs it’s time to replace them include:

  • worn-out lugs
  • flattened cushioning
  • torn upper material

If the grip starts disappearing, it’s usually time for a new pair.


Should trail shoes be bigger than road shoes?

Many runners go half a size larger in trail shoes.

Why?

Because downhill running pushes your foot forward inside the shoe. Extra toe room helps prevent black toenails and pressure on the front of the foot.

Just make sure the shoe still feels snug around the midfoot and heel.


What’s the difference between trail shoes and road running shoes?

Trail shoes are designed specifically for uneven terrain.

They typically include:

  • deeper outsole lugs for grip
  • rock plates for protection
  • reinforced uppers for durability

Road shoes focus more on cushioning and smooth surfaces, while trail shoes prioritize traction and protection.


What lug depth is best for trail running?

It depends on the terrain.

General guideline:

  • 2–3 mm lugs: light trails and gravel paths
  • 3–5 mm lugs: mixed terrain
  • 5 mm or deeper: muddy or technical trails

If you’re unsure, start with a shoe around 3–5 mm lug depth, which works well on most trails.


Are trail running shoes good for hiking?

Yes, many trail shoes work well for hiking.

They’re lighter and more flexible than traditional hiking boots, which makes them great for fast hikes or day trips.

However, for heavy backpacking or very rugged terrain, boots may still provide more ankle support.


Do trail running shoes need a rock plate?

Not always—but they help on rocky terrain.

A rock plate is a protective layer in the midsole that prevents sharp rocks from bruising the bottom of your foot.

If you run on technical trails or mountains, rock plates can make a big difference in comfort.

Final Coaching Advice

Here’s something trail runners learn quickly.

The trail doesn’t care how good you are.

Roots, rocks, mud, and loose dirt will humble anyone.

But the right shoes give you confidence.

They help you move faster, stay stable, and actually enjoy the trail instead of fighting it.

And once you run trails with the right shoes?

You’ll never want to go back to road shoes in the dirt again.

Best Running Shoe Brands for Beginners & Intermediates: The Ultimate 2025 Guide

running shoe brands

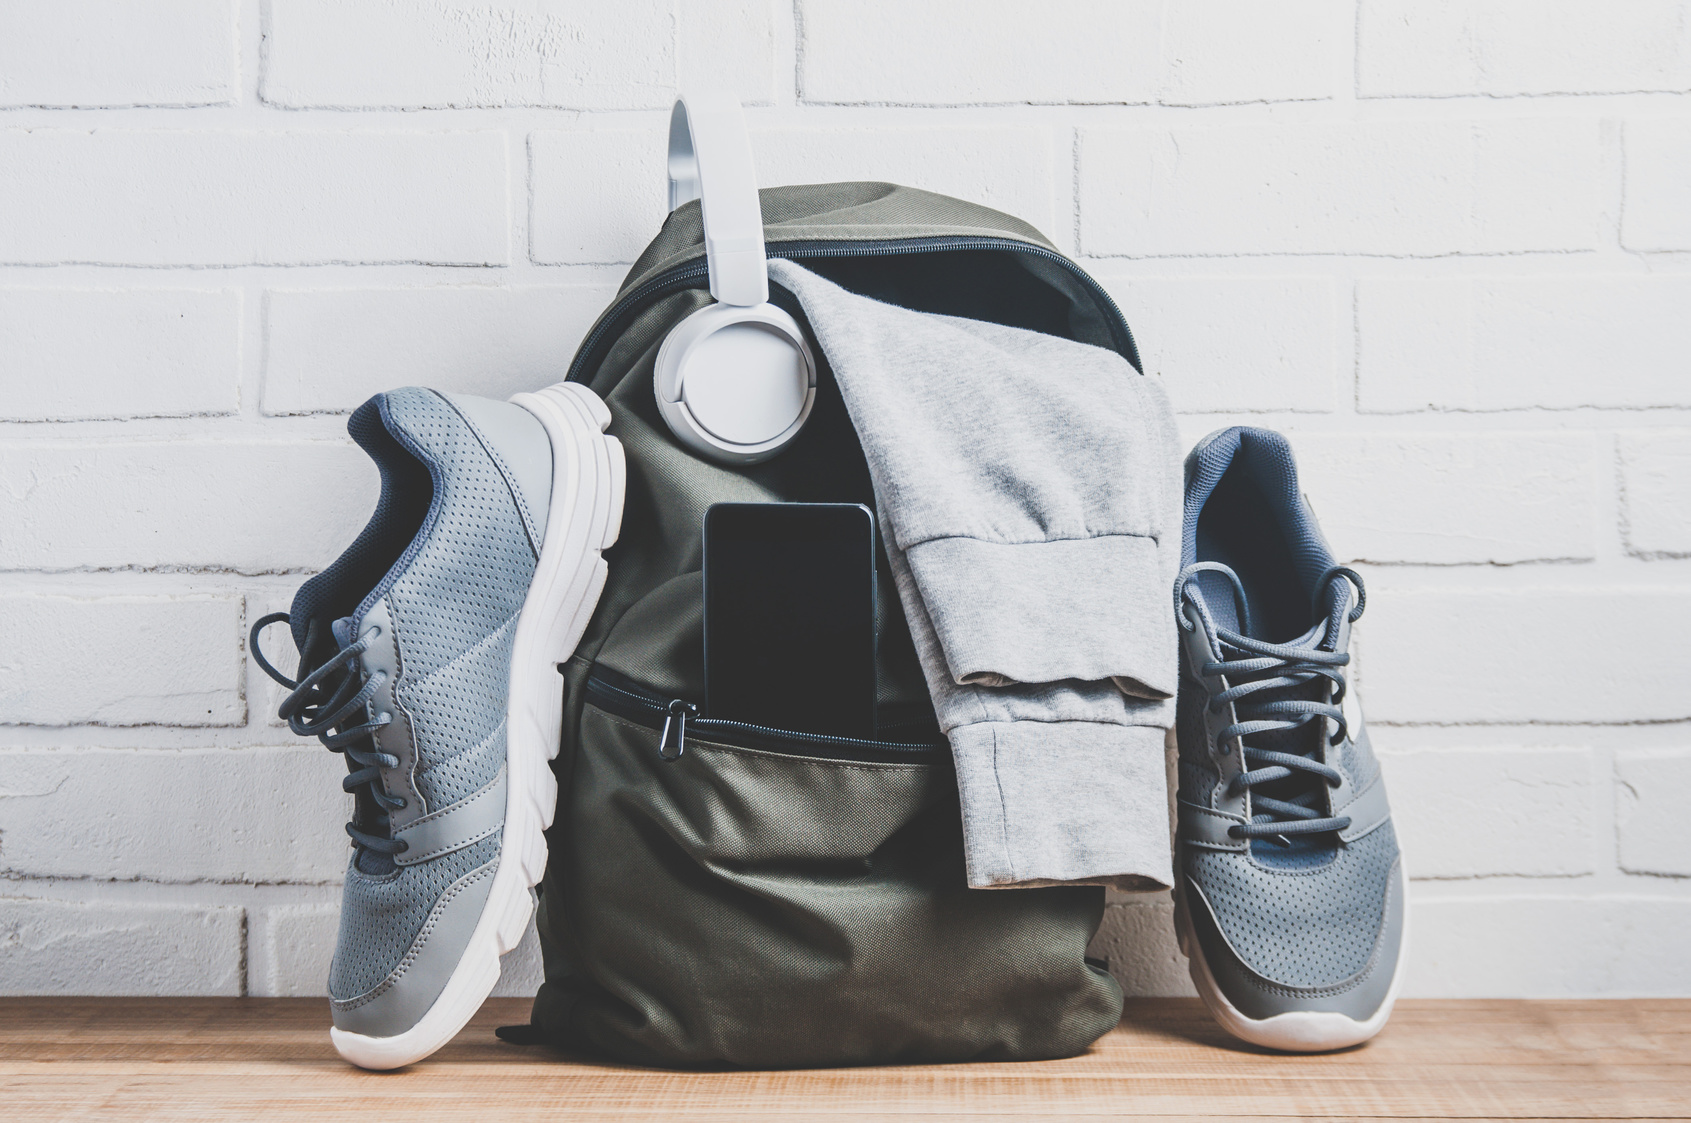
If you’re a new or intermediate runner overwhelmed by all the shoe options out there, take a deep breath. I’ve been in your shoes (quite literally), and I’m here to help as your running buddy and coach.

In this guide, I’ll break down the best running shoe brands on the market,  sharing what each brand is known for, their pros and cons, standout models, and a bit of my own experience and research from the running community (yes, I lurk Reddit threads so you don’t have to!).

By the end, you’ll know how to choose the right pair for you – whether you’re lacing up for your first 5K or training for your tenth. Let’s dive in!

Ready? Here we go.

Nike – The Innovator and Pace-Setter

When it comes to running shoes, Nike’s like the heavyweight champ. It’s everywhere – from rookies to elite athletes, you’ll find Nike on the feet of runners all around the world.

And why?

Because they’re all about innovation, style, and performance. Nike doesn’t just follow trends; they set ‘em. They’ve been pushing running tech to new heights for years.

I might sound like a Nike ad but we all know it’s truth.

What Nike is known for:

Speed, style, and being ahead of the game.

Nike’s always tweaking, always improving. They brought us ZoomX foam and carbon-fiber plates, which honestly turned the racing world upside down. The first time I wore Nike Vaporfly? I felt like I was flying.

These shoes are no joke, breaking records and setting new standards. But don’t get it twisted – Nike isn’t just for elite racers. They’ve got something for every runner.

Take the Air Zoom Pegasus – a go-to for beginners and pros alike. It’s the perfect mix of comfort and durability, and it’s been a favorite for years.

Fit and feel:

Let’s get real about comfort. Nike shoes are known for having a slightly narrow fit, especially around the toe box. Now, that might be a game-changer if, like me, you’ve got narrow feet.

I swear, Nike shoes feel custom-made for my feet. But if your feet are on the wider side, it might not be the best fit. Don’t worry though, Nike has some wide options.

The real magic happens when you feel Zoom Air or React foam under your feet. Whether you want that firm response for speedwork or soft cushioning for longer runs, they’ve got you covered.

For beginners, the Air Zoom Pegasus is a solid choice – a great all-around shoe that’s not too soft, not too firm. Just the right balance.

Durability:

Nike shoes are pretty solid, but it depends on the model.

If you’re rocking the Pegasus or Structure, you’re looking at 300-500 miles before things start to wear down.

But if you’re splurging on something like the Vaporfly with its ZoomX foam, don’t expect it to last forever. These shoes are built for speed, but they do wear down quicker than your everyday shoes.

It’s a trade-off.

Innovations:

Nike’s big win? Carbon plate tech. Back in 2017, the Nike Zoom Vaporfly 4% hit the scene and it was a game-changer. That carbon plate, paired with ZoomX foam, made every step feel like you were getting a boost.

These shoes have helped a lot of runners reach new personal bests. Fast forward to today, and Nike’s Vaporfly Next% 3 and Alphafly Next% 2 are still dominating the marathon scene.

And it’s not just about race-day shoes. Nike’s Flyknit uppers give you a sock-like fit that moves with your foot, while that ZoomX foam delivers a super light, responsive feel.

Plus, Nike’s getting on board with sustainability, using recycled materials under their Move to Zero initiative.

Popular models and who they’re for:

Nike Air Zoom Pegasus – Neutral Daily Trainer.

This one’s a classic. It’s affordable, reliable, and great for daily runs.

  • Strengths: Durable outsole, breathable upper, and balanced cushioning.
  • Weaknesses: Not the lightest, and some folks feel the midsole’s too firm for long-distance.
  • Ideal for: Daily runs, moderate-paced workouts, or even hitting the gym.
Nike ZoomX Vaporfly Next% – Elite Racer.

If speed’s your thing, this is the shoe. Lightweight, bouncy, and has that carbon plate magic.

  • Strengths: Insane energy return and speed.
  • Weaknesses: Not the most durable, and you’ll need to fork out $200+.
  • Ideal for: Racing, 10K to marathon, or anytime you want to feel like you’re flying.
Nike Wildhorse/Pegasus Trail – Trail Shoes.

Nike’s trail shoes have come a long way. The Wildhorse and Pegasus Trail are solid options for lighter trails.

  • Strengths: Comfortable cushioning, stylish, and versatile.
  • Weaknesses: Traction isn’t as aggressive as specialized trail shoes like Salomon.
  • Ideal for: Road-to-trail runs or dirt paths. If you’re tackling tough terrain, you might want something with more grip.

Adidas – The Boost Cushioning Pioneer

If you’re into running shoes, you’ve probably heard of Boost foam. Adidas made a big splash back in 2013 when they dropped that bouncy, springy Boost technology.

Adidas has earned its place in the running world with their Boost tech, and these shoes have become a go-to for both rookies and marathoners. They’re durable too.

Sure, they’re not the lightest shoe out there, but I’ve used Ultraboosts on my long runs, and they’ve got the right mix of comfort and support to make it all work. So, if you’re just starting your running journey, this is a great option for you.

Fit and design:

Adidas shoes usually have a snug fit, especially around the midfoot. That locked-in feel? I love it. It’s like the shoe was custom-made for my foot.

The Adizero Adios line is a favorite among elite marathoners for a reason—these shoes are responsive and fast. But, heads up: if you’ve got wide feet, be mindful of that midfoot snugness.

Some models come in wider versions, so keep an eye out for those.

Durability:

One of the standout features of Adidas is how tough their outsoles are. Take the Adidas Boston, for example—you can easily get 400-500 miles out of those (according to my research, I’m yet to try them). The Continental rubber outsoles?

Total game-changer. That extra grip is always a lifesaver.

The Boost foam holds up in all sorts of weather too, which is why I always reach for my Ultraboosts when the temperature drops. They perform just as well in the cold.

Technology and innovation:

Adidas is no slouch when it comes to performance. With their Adizero Adios Pro series, they’ve entered the super-shoe game. Lightstrike Pro foam and carbon-infused energy rods give these shoes a fast, responsive feel.

Sure, they haven’t gotten as much hype as Nike’s Vaporfly, but trust me—Adidas is making waves in the racing world. Their athletes are crushing it in these shoes.

Brooks – The Reliable Running Specialist

When I think of Brooks, I think of that coach you can always rely on—steady, supportive, and there when you need them. They’ve built their reputation around comfort, injury prevention, and a fit that feels just right.

Their “Run Happy” motto says it all: Brooks wants your running experience to be smooth and enjoyable.

I’ve logged hundreds of miles in Brooks shoes, and I can honestly say they’ve always been there for me.

Fit and feel:

Brooks shoes typically have a wider toe box than most brands, which I absolutely love. I’ve struggled on occasions with cramped toes in other shoes, but with Brooks, my toes have room to breathe and splay naturally.

For runners like me with wider feet, it’s a game-changer.

And if you use orthotics, you’ll be pleased to know that Brooks shoes fit those well too. Whether you’ve got flat feet, high arches, or something in between, there’s a Brooks shoe that’ll fit your needs.

Cushioning:

Brooks’ DNA Loft and BioMoGo DNA cushioning systems offer a smooth, stable ride. It’s not too soft, not too firm—just right. What I love most is that the cushioning adapts to your stride, offering a personalized feel.

These shoes are built for the long haul, whether you’re grinding out a long run or recovering after a hard race. The ride is always comfortable—never harsh.

Durability:

Brooks shoes last. I’ve put in a ton of miles on my Brooks Ghost, and the outsoles are still going strong. They’re made with high-quality rubber, which holds up even after hundreds of miles.

A lot of other shoes need replacing after just a few hundred miles, but I can keep running in Brooks for over 500 miles before I start noticing wear.

Innovation:

Brooks may not make as many flashy moves as some of the other brands, but they do things right. Take their GuideRails tech, for example. It helps control pronation without interfering with your stride unless you need it.

I’ve had so many runners tell me that switching to the Adrenaline or Glycerin models has helped reduce joint pain and made their runs feel more controlled. Brooks isn’t about jumping on trends—they’re about refining what works.

Popular Models and Who They’re For:

Brooks Ghost – Neutral Everyday Trainer.

My favorite. The Ghost is Brooks’ most popular neutral shoe. It’s perfect for daily runs and long runs. It’s cushioned and versatile. Some might find it a little “boring” if they want something with more bounce, but honestly, when you’re running, boring is good. It’s all about comfort.

Brooks Adrenaline GTS – Stability Trainer. 

If you overpronate, this is the shoe for you. It’s got the same great comfort as the Ghost, with the added stability of Brooks’ GuideRails. It’s not the fastest shoe, but if you need stability and comfort, it’s a solid option for daily training and long runs.

Brooks Glycerin – Max Cushion Trainer.

The Glycerin is all about that soft, cushioned feel. It’s perfect for recovery runs or high-mileage training. It’s not the lightest shoe, but if you want a plush ride, this is your pick.

ASICS – The Gel King That Just Gets It

ASICS has been around forever, right? It’s like that one brand you can always count on, whether you’re a newbie or an experienced marathoner.

If you’ve ever hit up a running store or talked to a seasoned runner, you’ve probably heard the name. These guys know what they’re doing, especially when it comes to shoes that don’t let you down when you’re battling injuries or sore joints.

What ASICS is known for:

GEL technology, reliability, and solid durability. ASICS is all about shock absorption and impact reduction. If you’ve had joint pain or shin splints, chances are ASICS can help ease that discomfort.

The first time I tried the Gel-Kayanos, it felt like I was walking on air. The cushioning was top-notch, and the stability was perfect for those long runs where your joints are begging for mercy.

Fit and feel:

ASICS shoes usually run a little narrower, especially in the heel and midfoot. If you’ve got narrow feet, you’ll probably feel like they were made just for you.

But if you’re dealing with wider feet, you might need to grab a wide version or look for one of their models with more room in the forefoot.

The Gel-Kayano toe box isn’t as roomy as something like the Brooks Ghost, but it still gives you plenty of comfort if you don’t need a ton of space upfront. And the upper? It’s like a cozy hug for your feet—secure, soft, and supportive all at once.

Cushioning:

ASICS is all about that shock absorption with their GEL technology.

Whether it’s the Gel-Kayano, Gel-Nimbus, or Gel-Cumulus, their gel padding helps absorb impact and ease the stress on your joints. It’s plush without feeling too soft or squishy.

I’ve run hundreds of miles in the Gel-Nimbus, and they’ve always felt just as cushioned as when I first slipped them on—no drop-off in the padding.

As a coach, I always recommend ASICS to runners dealing with joint pain or just looking for that added protection on longer runs.

Mizuno – Wave Technology and Firm, Smooth Rides

Mizuno doesn’t always get the buzz like Nike or Adidas, but trust me, if you’ve ever laced up their shoes, you’ll get why so many runners swear by them. Known for their Wave Plate tech, Mizuno gives you a smooth, stable ride. If you like a shoe that’s firm but responsive, they’ve got you covered.

What Mizuno is known for:

Here’s what makes Mizuno stand out: the Wave Plate. It’s a wave-shaped insert in the midsole that helps cushion the impact and gives you that springy push forward. It helps stabilize the foot without all the bulk of traditional stability posts, so you get the support without the clunky feel.

Fit and Feel:

Mizuno shoes are pretty spot-on with sizing. They’re snug in the midfoot and heel but give you enough room in the toes to avoid that pinched feeling. If you’re coming from brands like HOKA or Altra, which are more cushioned, Mizuno has a more classic, no-frills feel.

Cushioning:

Mizuno finds that sweet spot. The Wave Rider, for instance, gives you just the right cushioning with a kick of responsiveness. You get a bouncy feel without feeling like you’re floating. They’ve also added Enerzy foam in the newer models, which is softer and bouncier, giving you comfort without losing that springy feel.

Durability:

Mizuno shoes hold up, no doubt. They’re made to take the miles and still give you that solid support. The outsoles are tough, handling hundreds of miles before they even start to show signs of wear. I’ve put these shoes through some serious training, and they’ve held up great.

Popular models and who they’re for:

Mizuno Wave Rider 26 – Neutral Trainer:

The Wave Rider is one of Mizuno’s longest-running models, and for good reason. It’s a reliable, neutral shoe that’s great for daily training.

  • Strengths: Balanced ride with solid cushioning and responsiveness.
  • Weaknesses: Not as plush or soft as some competitors.
  • Ideal for: Daily runners who need something that can handle high mileage without sacrificing performance.
Mizuno Wave Inspire 18 – Stability Trainer:

If you need a bit of extra support but don’t want something too heavy or restrictive, the Wave Inspire is a fantastic choice.

  • Strengths: Provides stability without feeling overly firm.
  • Weaknesses: Not as soft or cushioned as other shoes in the same category.
  • Ideal for: Runners who need moderate support for their stride, but want a shoe that’s still lightweight and responsive.
Mizuno Wave Sky 6 – Max Cushioned Trainer:

Mizuno’s answer to shoes like the Brooks Glycerin or ASICS Nimbus, the Wave Sky offers maximum cushioning for long runs or recovery days.

  • Strengths: Plush cushioning with a smooth transition.
  • Weaknesses: It’s a bit on the heavier side, so not ideal for fast-paced workouts.
  • Ideal for: Runners who prioritize cushioning and comfort during their long-distance runs.

Mizuno Wave Rebellion Pro – Elite Racer:

For those looking for a performance shoe, the Wave Rebellion Pro is Mizuno’s take on the carbon-plated racer.

  • Strengths: Lightweight and fast with excellent energy return.
  • Weaknesses: Limited cushioning for longer distances.
  • Ideal for: Racers looking for a fast, competitive edge.

Salomon – Trail Titans (and More) with Precision Fit

Salomon’s the go-to brand for trail runners, no question.

Born in the French Alps, they’ve become the brand to trust for rugged, technical trails. And even though they’ve ventured into road shoes recently, their bread and butter is still those aggressive, off-road shoes.

Let me tell you why Salomon is a trail running legend.

What Salomon is known for:

If there’s one word to describe Salomon, it’s grip. Their trail shoes are known for their aggressive traction and precise fit. Whether you’re running on muddy trails, rocky descents, or snow-covered paths, Salomon shoes give you that grip and protection.

They also introduced the Quicklace system — a toggle lacing mechanism that makes tightening your shoes quick and easy, especially when you’re on the go. And their EndoFit and Sensifit technologies provide a locked-in feel, which is crucial when you’re navigating technical terrain.

Fit:

Salomon shoes typically have a narrower fit, especially in the midfoot. This snug fit provides precision and control, especially on steep slopes or rocky trails.

If you have wide feet, you might find the classic Salomon fit a bit tight, but they’ve introduced wider toe box models and wide versions in popular shoes like the Speedcross and Sonic series. The fit is designed to hold your foot securely, preventing slippage when you’re navigating tricky terrain.

Cushioning:

Salomon’s known for a firmer ride compared to other trail shoes. Their midsole cushioning provides comfort, but it’s not as plush or soft as what you might find in HOKA or Brooks.

But that’s actually a good thing when you’re out on technical trails—it gives you more responsiveness and stability.

Some models like the S/Lab Ultra have a higher stack for added cushioning, making them perfect for long-distance races, but overall, Salomon focuses on traction and stability over plushness.

Durability:

Salomon shoes are built to last. The outsoles are made with Contagrip rubber, which offers incredible traction and durability on a variety of surfaces. Whether you’re running through mud, snow, or rocky terrain, you’ll get a long life out of these shoes.

The upper materials are also tough, able to withstand the abrasions that come with off-road running.

Popular models and who they’re for:

Salomon Speedcross 6 – Aggressive Trail Shoe:

This is the shoe that most people think of when they hear Salomon. The Speedcross features huge lugs that dig into soft, muddy trails.

  • Strengths: Best-in-class traction for technical trails.
  • Weaknesses: Can feel awkward on hard, smooth surfaces due to the aggressive lugs.
  • Ideal for: Trail runners who need exceptional grip and stability on muddy, slippery, or rocky terrain.

Salomon Sense Ride 5 – Versatile Trail Shoe:

This shoe is great for all-around trail running.

  • Strengths: Comfortable cushioning, good grip, and a flexible midsole.
  • Weaknesses: Less aggressive traction than the Speedcross, so it’s not ideal for extreme trails.
  • Ideal for: Beginner to intermediate trail runners looking for an all-purpose shoe that can handle moderate trail conditions.

Salomon Ultra Glide – Max Cushion Trail Shoe:

For long-distance runners, the Ultra Glide offers more cushioning and comfort while maintaining Salomon’s stability and grip.

  • Strengths: Soft underfoot, great for ultramarathons.
  • Weaknesses: A bit less stable than other Salomon models on very technical terrain.
  • Ideal for: Ultramarathoners or long-distance runners who need a cushioned, protective shoe on trails.

Reebok – The Underdog with Surprising Energy

When you think of Reebok, you might picture their retro sneakers or those famous Reebok Pumps from the 80s. But trust me, don’t write them off when it comes to running shoes.

Recently, they’ve quietly made a name for themselves in the performance shoe market with innovations like Floatride foam and surprisingly light and responsive trainers.

If you’re looking for a shoe that delivers value without breaking the bank, Reebok could really surprise you.

What Reebok is known for:

Reebok’s Floatride foam is a game-changer. This foam gives you that bouncy, springy feel that makes you want to pick up the pace, and it doesn’t come with the high price tag of other brands.

Honestly, the Floatride Run Fast and Run Fast Pro models are so light and responsive, they’ve been compared to Nike’s Vaporfly, but without the crazy price.

Fit and Design:

Reebok shoes generally have a snug midfoot with a little extra space in the forefoot, which is awesome if you’ve got wider feet. The uppers are usually made from mesh or knit fabric, so they’re breathable and flexible. They may not be the flashiest shoes around, but they’ve got a sleek, minimalist design that’s still pretty modern, and they come in some cool colors.

Cushioning:

The Floatride foam in shoes like the Floatride Energy series gives you a responsive, bouncy ride.

It’s not as plush as Boost foam or HOKA’s cushiony soles, but it strikes a nice balance of softness and energy return—perfect for tempo runs or longer training sessions. If you’re the type of runner who likes a more energized feel, definitely give these a try.

Durability:

Reebok’s shoes have been getting good feedback for durability, especially the Floatride Energy series. The outsoles last a decent amount of time, and the Floatride foam holds up better than some lighter foams.

You’ll get 400-500 miles out of these shoes before you see noticeable wear. That’s right in line with most top brands.

Popular models and who they’re for:

Reebok Floatride Energy 4 – Neutral Daily Trainer:

This one’s for the budget-conscious runner who doesn’t want to sacrifice performance. It’s lightweight, responsive, and comfy enough for long runs. The only downside? It’s not as plush as some of the others out there, but that makes it a great shoe for an energetic feel. Ideal for beginners or intermediate runners who want a reliable trainer.

Reebok Floatride Run Fast 2 – Lightweight Trainer/Speed Shoe:

This shoe is made for speed. If you’re looking for a racing shoe or a tempo trainer, the Floatride Run Fast 2 is perfect. It’s ultra-lightweight and awesome for fast-paced workouts. But, it’s not built for long races, and the outsole might wear out faster than some heavier shoes. Perfect for speedwork or 5K/10K races.

Reebok Floatride Energy X – Plated Distance Shoe:

A solid, affordable option for those who want a carbon-plated shoe for marathons or long-distance races without spending a fortune. The Energy X offers great value and solid energy return. It’s not quite as light or responsive as premium carbon shoes, but it gets the job done. Ideal for long-distance runners who want a carbon-plated shoe without breaking the bank.

HOKA – Max Cushion Magic for Happy Legs

Let’s talk about HOKA—the brand that flipped the script on running shoes. When they first showed up, their thick, chunky soles raised a few eyebrows.

I’ll admit, when I first saw them, I thought, “What are those, moon boots?”

But I’ll tell you, after trying them, I was hooked. I remember lacing up a pair of HOKA Clifton and feeling like I was stepping onto a cloud—smooth, cushioned, and soft underfoot.

After a few miles, I could feel the magic—my legs didn’t feel tired, my knees weren’t aching, and I felt like I could keep going forever. HOKA completely changed the game when it comes to cushioning.

What HOKA is known for:

Maximal cushioning with a rocker geometry that helps push you through each stride. If you’re the type of runner who loves cushioning but doesn’t want to feel bogged down, HOKA could be your new best friend. Their signature feature is that high stack height, giving you loads of foam underfoot.

And it’s not just for comfort—it helps reduce shock, take pressure off your joints, and give you a smoother ride during long runs. I’ve had some of my best recovery runs in HOKA shoes, and I can’t stress enough how much they help me feel fresh, even after logging miles.

Fit and feel:

If you’re used to low-profile shoes, HOKA’s fit can feel a bit different. Their shoes typically have a normal to slightly narrow fit in the midfoot, with a wider base. Early models had some issues with narrow toe boxes, but they’ve fixed that with newer releases, especially the Clifton.

The cushioning is plush, but the rocker design guides your foot forward with every stride. It’s like the shoe is pushing you to keep going, making it great for smooth, effortless strides. For long runs, I swear by HOKA—they reduce leg fatigue and keep me feeling fresh.

Cushioning:

The cushioning is where HOKA really shines. Their midsoles are made with a proprietary EVA foam that provides a soft, bouncy ride, almost like running on marshmallows. Some models, like the Bondi, are super plush, while others, like the Mach or Rincon, offer a more moderate cushioning.

I’ve used HOKA for both long runs and recovery days, and they’ve never let me down. Some runners worry that all that cushion will make the shoe feel slow or heavy, but HOKA managed to keep their shoes lightweight, even with the high stack. That’s one of the reasons I love them—maximum cushioning without the added weight.

Durability:

The durability of HOKA shoes can vary a bit. They use lightweight materials to keep the shoes from feeling too heavy, but this can affect how long they last. I’ve managed to get around 300 miles from my Cliftons, and I’ve heard of others pushing them to 500 miles.

The durability of the outsole depends on the model, but generally, if you’re running on roads, you’ll get solid mileage out of them. I was told that trail shoes like the Speedgoat hold up better, thanks to the Vibram rubber lugs.

HOKA’s newer releases have stepped up their durability, so I’d say they’re safe bets for good mileage.

Popular Models and Who They’re For:

HOKA Clifton 9 – Neutral Trainer
This is HOKA’s flagship shoe, great for runners who want tons of cushioning without feeling too elevated.
Strengths: Super cushioned yet lightweight, perfect for long runs and recovery.
Weaknesses: Might feel too soft for speed workouts.
Ideal for: Runners who want to protect their legs and knees or those logging long miles.

HOKA Bondi 8 – Max Cushion Trainer

If you’re after plush comfort, this is your shoe. The Bondi’s thick foam layer absorbs impact like nothing else.

  • Strengths: Ultimate cushioning for long runs and recovery.
  • Weaknesses: Heavy for a trainer, not the best for speed.
  • Ideal for: Long, slow runs, recovery runs, or anyone with joint issues looking for top-tier comfort.

HOKA Speedgoat 6 – Trail Shoe

My next buy and one of the most beloved trail shoes, designed for tough terrain.

  • Strengths: Amazing grip with Vibram Megagrip outsole, lightweight, and cushioned.
  • Weaknesses: Might feel a bit unstable on technical trails with extreme elevation.
  • Ideal for: Trail running, especially ultra-distance events, or anyone who loves a cushioned ride on the trails.

New Balance – Versatility and Foot-Friendly Design

I’ve got a soft spot for New Balance because they understand the struggle of finding a shoe that actually works for your foot. Whether you’ve got narrow, wide, or flat feet, New Balance has got your back.

And speaking from personal experience, having a brand that offers a wide range of sizing options is a total game-changer when you’ve battled foot issues like I have.

What New Balance is known for:

Exceptional fit options, balanced cushioning, and performance-driven designs. New Balance stands out because they focus on fit, and I’ve seen so many runners with wide feet swear by them. They offer a variety of widths, from narrow to extra-wide, making sure you find something that fits you.

Plus, New Balance isn’t just about the fit—they innovate with technologies like Fresh Foam and FuelCell. I’ve had personal experience with the Fresh Foam 1080v13, which is perfect for long runs and is seriously a lifesaver when dealing with plantar fasciitis.

Fit and comfort:

The real hallmark of New Balance shoes is their fit. They offer widths from D (standard) to 4E (extra wide), so if your feet tend to be on the wider side, you won’t feel like you’re squeezing into something that’s not made for you.

When I’ve worn their shoes, I’ve always felt like my foot has enough space to breathe, but not so much that it feels loose. The Fresh Foam 1080 is a great example—super comfortable with just the right cushioning for everyday runs.

Cushioning:

When it comes to cushioning, New Balance’s Fresh Foam is one of the best out there. It’s soft enough to cushion your feet on hard surfaces but still firm enough to keep you connected to the ground.

The FuelCell foam is their bouncier option—perfect for speedwork or tempo runs. I’ve used both and the combination of Fresh Foam and FuelCell is perfect for balancing comfort and responsiveness, whether you’re cruising through easy miles or pushing the pace. New Balance shoes support you without feeling like you’re running on marshmallows.

Durability:

If you’re looking for a shoe that’s going to last, New Balance has earned its reputation for durability. I’ve worn the Fresh Foam 880 series for marathon training cycles, and they’ve held up for over 500 miles without losing that cushioning feel.

The rubber outsoles don’t break down, making them a solid choice for high-mileage training. Trust me, these shoes go the distance.

Popular models and who they’re for:

New Balance Fresh Foam 1080v13 – Neutral Trainer

This shoe is the gold standard for neutral runners who want comfort and cushioning for long runs. It’s especially great for people with wider feet.

  • Strengths: Cushioned ride, great for long runs, wide-foot friendly.
  • Weaknesses: Not the most responsive for speedwork.
  • Ideal for: Daily runs, long-distance training, or anyone who values a cushioned, secure fit.

New Balance FuelCell Rebel v3 – Lightweight Tempo Shoe

If you’re looking for a shoe that’s fast and light, the Rebel v3 is perfect.

  • Strengths: Lightweight, responsive, great for speedwork.
  • Weaknesses: Not cushioned enough for long runs.
  • Ideal for: Speed days, tempo runs, and races (especially 5K/10K).

New Balance 880v13 – Everyday Trainer

This shoe is a workhorse for runners who need something reliable and durable for daily runs.

  • Strengths: Stable, comfortable, and built to last.
  • Weaknesses: Not the flashiest or plushest model out there.
  • Ideal for: Everyday training, especially if you’re just starting or need a dependable shoe.

Saucony – Fast, Flexible, and Comfortably Cushioned

Saucony might not have the same massive fame as Nike or Adidas, but ask any runner who’s tried them, and they’ll tell you—Saucony is the perfect mix of comfort and performance.

They’ve got a great reputation for lightweight shoes that still give you enough cushioning for those long runs without feeling sluggish.

Whether you’re just starting out or chasing a new PR, Saucony has shoes that work for all kinds of runners.

What Saucony is known for:

Lightweight shoes and a unique geometry called SpeedRoll, which gives you that quick, lively toe-off. Saucony knows how to balance speed and comfort—just ask anyone who’s run in a pair of Kinvaras.

Fit and feel:

Saucony shoes tend to have a snug fit, especially around the midfoot, so if you’ve got wide feet, you might need to go for their wider options. But once they’re on, they lock your foot in without feeling too tight.

I’ve always found their shoes flexible, which works great for my style of training. The PWRRUN and PWRRUN PB foams give that responsive feeling, making it easy to pick up the pace and feel like you’re in control of your stride. If you’re someone who wants more responsiveness than cushioning, Saucony hits the sweet spot.

Cushioning:

Saucony’s foam tech is one of the key things that sets their shoes apart. Their PWRRUN foam is light and springy, giving you that bouncy feel underfoot. But the real magic happens with PWRRUN PB, which is a PEBA-based superfoam used in the Endorphin Pro and Endorphin Speed models.

This foam isn’t just about cushioning; it gives you some serious energy return, making you feel like you’re springing forward with each step. I’ve had the chance to run in the Endorphin Pro, and let me tell you—it’s a game-changer for race day. It’s fast, responsive, and has just enough cushioning to keep you comfortable while giving you that extra pop to push through the finish line.

Durability:

Surprisingly, the PWRRUN and PWRRUN PB foams don’t just bounce back—they last. I’ve put in some serious miles with Saucony, especially the Ride series, and the cushioning’s held up like a champ. No worries about that ‘sinking’ feeling after a few hundred miles.

The outsoles on their shoes are made with high-abrasion rubber (like XT-900), which means they last long and offer great grip, even on wet or rocky surfaces. Saucony knows how to build shoes that endure, whether you’re putting in miles on the road or the track.

Popular Models and Who They’re For:

Saucony Ride 15/16 – Neutral Trainer:

The Ride is one of Saucony’s most versatile shoes. It’s got that perfect balance of cushioning and responsiveness, making it ideal for daily runs.

  • Strengths: Light, comfortable, and durable enough to last.
  • Weaknesses: Some might find it a bit too firm if they’re used to super plush shoes.
  • Ideal for: Beginners and intermediates looking for an all-around, everyday trainer. If you want a no-frills shoe that gets the job done without breaking the bank, Ride is your go-to.

Saucony Endorphin Speed 3 – Plated Tempo Shoe:

The Endorphin Speed series is all about speed and versatility. With PWRRUN PB foam and a flexible nylon plate, it delivers an explosive feel with each stride.

  • Strengths: Fast, lightweight, and responsive.
  • Weaknesses: Not as cushioned for long runs as other models like the Ride or Triumph.
  • Ideal for: Tempo runs, track workouts, or anyone looking to set a personal best in shorter races.

Saucony Endorphin Pro 3 – Carbon Plated Racer:

If you’re chasing a PR in the marathon or half-marathon, this is the shoe you want. The Endorphin Pro combines PWRRUN PB foam with a carbon plate for maximum energy return and propulsion.

  • Strengths: Speed, lightweight, and perfect for long-distance racing.
  • Weaknesses: Expensive, and not the most durable shoe if you’re not using it for races.
  • Ideal for: Serious runners who need a top-tier racing shoe that won’t let them down.

Saucony Kinvara 13 – Lightweight Trainer/Racer:

The Kinvara is a classic lightweight trainer that has stood the test of time.

  • Strengths: Super light and responsive, with just enough cushioning to keep you comfortable on the run.
  • Weaknesses: Not as cushioned as some of the more plush models, so it might not be ideal for long-distance runners looking for maximum comfort.
  • Ideal for: Runners who prefer a minimalist feel for faster workouts, racing, or speed training.

Altra – Zero-Drop Natural Running 

If you’ve never heard of them before, don’t worry—I’ll break it down for you.

Altra is known for its zero-drop design and wide toe box, and they’ve been making waves in the running world by helping people achieve a more natural stride.

If you’ve ever felt like your running shoes were squishing your toes or forcing you to land on your heels, Altra might just be the brand for you.

I’ve never had Altra shoes before but I keep hearing raving reviews about them so I decided to add them to this post. If you’d experience with them, please let me know in the comments section.

What Altra is Known For:

Zero-drop and a FootShape™ toe box. Let me explain. The zero-drop feature means that your forefoot and heel are at the same level, which encourages a midfoot or forefoot strike.

This aligns with a barefoot-style running philosophy that’s been gaining popularity in recent years.

Additionally, the FootShape™ toe box allows your toes to spread out naturally, which can improve stability and comfort during runs.

Fit and Feel:

The fit of Altra shoes is quite unique. If you’ve got wide feet, you’ll feel right at home in Altra’s shoes, especially in the toe box area. They also offer various shapes for the toe box, from Standard to FootShape™ Slim and FootShape™ Wide models, so no matter what your foot size is, you’ll find a pair that works for you.

The zero-drop feature will feel different if you’re used to traditional running shoes, so it’s important to ease into it.

Cushioning:

Altra’s cushioning varies depending on the model, but they generally use a combination of EGO foam and EGO PRO foam, which provides a soft and responsive feel. For long runs, I was told that the Altra Torin offers a good balance of cushioning without feeling too soft. For those who prefer a firmer ride, Altra’s Escalante or Lone Peak series offer a more minimal feel.

The cushioning works well for those looking to run in a more natural, barefoot-style manner, and if you’re new to Altra, I’d recommend starting with something like the Torin for its moderate cushioning.

Durability:

Altra shoes are generally durable, especially on the outsole. The company has improved their materials over the years, and the Lone Peak trail shoes, for example, are known for their durability even on rugged terrain.

The EGO foam used in their midsoles is pretty resilient, though some of the older models had issues with midsole degradation over time. Overall, you can expect good durability, but it’s always best to keep an eye on wear if you’re putting in high mileage.

Popular Models and Who They’re For:

Altra Torin 7 – Neutral Road Trainer:

If you’re looking for a cushioned shoe that handles long runs or recovery days like a pro, this one’s got you.

  • Strengths: Cushioned, roomy toe box, zero-drop design.
  • Weaknesses: Takes some time to get used to the zero-drop design.
  • Ideal for: Neutral runners who want a cushioned ride with a more natural feel.

Altra Lone Peak 7 – Trail Shoe:

If you’re hitting the trails, this is a great option.

  • Strengths: Wide toe box, durable, and cushioned enough for ultra distances.
  • Weaknesses: Not as soft or responsive as some other trail shoes, especially on technical terrain.
  • Ideal for: Trail runners looking for a comfortable, protective shoe for long distances.

Altra Escalante 3 – Lightweight Casual Trainer:

This is one of Altra’s lighter shoes, making it perfect for shorter runs or everyday wear.

  • Strengths: Light, flexible, and foot-shaped.
  • Weaknesses: Not a lot of cushioning for longer runs.
  • Ideal for: 5K/10K runners or those looking for a minimalist shoe for daily wear.

Skechers – From Casual to Competition with Hyper Burst

Yep, Skechers—the brand you probably think of when it comes to comfy slip-ons or memory foam shoes—has seriously stepped up its game in the performance running world. And guess what? They’re killing it. Let’s break it down.

What Skechers is known for:

Skechers made a name for itself in running shoes with Hyper Burst foam. It’s a lightweight, responsive foam that gives you the perfect bounce and comfort, but without the weight.

Their GOrun series has earned major praise for providing top-tier performance without the hefty price tag. Skechers even got elite athlete Meb Keflezighi on board after he won the Boston Marathon in their shoes—now that’s some serious street cred.

Fit and Design:

Skechers shoes tend to fit most feet pretty well. They usually have a wider forefoot than brands like Nike or Adidas, which is perfect if you need a little extra room for your toes. The mesh uppers are breathable and light, and while their design isn’t as flashy as some competitors, they’ve got a clean, modern look that holds its own.

Cushioning:

The Hyper Burst foam is one of the lightest and most responsive foams you’ll find. You get that bouncy feel without sinking into the shoe. If you’ve ever worn HOKA or Adidas Ultraboost, the Hyper Burst feels springier and more responsive. Skechers has also added a rockered geometry, called M-Strike, in many of their shoes to help encourage a natural midfoot strike and make your run feel smoother.

Durability:

While Skechers isn’t known for making shoes that last forever, they still hold up pretty well, especially considering how light they are. Many runners report getting 300+ miles out of Skechers’ performance shoes, especially the GOrun Razor and GOrun Ride series. The outsole does wear faster than some brands, but the Hyper Burst foam holds its cushioning for a long time.

Popular models and who they’re for:

Skechers GOrun Razor 3+/Excess 2 – Lightweight Trainer/Tempo:

This one’s for the speedsters. The Razor 3 is loved by runners who want a super-light shoe with a fast feel. It’s highly responsive and great for tempo runs. The downside? Durability could be a concern, especially on rougher surfaces. Ideal for speedwork or race days when you want a nimble, lightweight shoe.

Skechers GOrun Ride 9 – Everyday Neutral Trainer:

This is a solid daily trainer that offers a responsive, cushioned ride without feeling too soft. It’s lightweight and versatile, though the upper doesn’t have much padding. Ideal for daily training and long runs when you want something light and comfy.

Skechers GOrun MaxRoad 5 – Max Cushion Trainer:

If you’re all about that cushion, the MaxRoad 5 is your shoe. It offers loads of cushioning without feeling heavy. The downside? It’s not as responsive as the Razor. Ideal for long-distance running and recovery days, or if you need extra cushioning.

Final Thoughts: Choosing the Right Running Shoe for You

Choosing the right shoe really comes down to your personal needs as a runner. Whether you’re just starting out or training for a race, the right pair of shoes can make a huge difference. Here’s a quick breakdown of what some of the biggest brands offer:

  • Nike – If you’re all about speed and innovation, Nike’s got you covered.
  • Adidas – Durable and cushioned shoes that will last through many miles.
  • Brooks – Reliable and comfortable, perfect for injury prevention.
  • ASICS – Long-lasting cushioning with stability, great for distance runners.
  • HOKA – Ultra-cushioned shoes that make running feel easy, perfect for newbies or those recovering from injuries.
  • New Balance – Versatile fit and great cushioning for everyday runs.
  • Saucony – Lightweight shoes that still give you the comfort you need.
  • Altra – Zero-drop shoes with a wide toe box, perfect for a more natural stride.
  • Mizuno – Sturdy, firm rides that give you great ground feel.
  • Salomon – The king of trail running with amazing traction and protection.
  • Reebok – Offering lightweight shoes at a great value.
  • Skechers – Don’t count them out—lightweight and cushioned options that compete with the big names.

Your perfect shoe depends on your running style, what kind of terrain you’re tackling, and your personal fit preferences. As your running coach, I’d say: Don’t rush it.

Try a few on, and if possible, take them for a spin before committing. Your feet will thank you!

And remember, the best shoes are the ones that make you feel unstoppable. Find the pair that makes you feel confident, comfortable, and ready to crush your goals. Happy running!

Ultimately, running shoes should make you feel like a champion. When you slip on the right pair, it’s like magic—each stride feels effortless. The brands above are solid choices depending on what you need. Keep exploring, keep running, and before long, you’ll find the perfect shoes to take you to the next level.

Ready, set, go! Find those shoes that make you want to run and run happy.

Choosing the Right Running Shoes for Your Foot Type

foot types for runners

I’ve coached a lot of miles on a lot of feet—high arches that snap like springs, flat arches that melt into the floor, and everything in between.

If there’s one lesson the road keeps teaching, it’s this: your arch is the steering wheel of your stride.

Get it working with you, and running feels smooth and effortless.

Get it working against you, and every step turns into friction.

Forget the marketing buzzwords for a second.

Foot type isn’t about labels—it’s about load.

Neutral feet usually spread impact like a well-tuned suspension.

Low arches tend to roll in more and ask your ankles and knees to pick up the slack.

High arches don’t roll enough and send a jolt upstairs to your shins and hips.

None of these are “bad.” They’re just mechanics—and mechanics we can manage.

So let’s make this simple. Know your arch. Read your wear pattern. Choose gear that supports—not fights—your natural motion.

Do that, and you’ll spend less time troubleshooting pain and more time stacking miles.

Ready to figure out what your feet are telling you? Let’s dive in.

The 3 Main Foot Types

Most runners fall into one of three arch categories:

  • Neutral (Medium Arch)
  • Flat (Low Arch) / Overpronator
  • High Arch / Underpronator

Each type affects how your foot moves on impact (pronation) and how forces are distributed.

Understanding where you fall on this spectrum helps you choose shoes that support—not fight—your natural motion.

1. Neutral Arch (Medium)

On a wet footprint test, you’ll see a visible arch — not too high, not fully filled in. Think of a soft curve inward in the middle of the print.

How it works:

Neutral runners have a balanced gait. Your heel strikes, and the foot rolls inward just enough to absorb shock.

This is ideal pronation — your foot is doing what it’s supposed to do. Most impact stays centered, and your arch helps distribute forces naturally.

Shoe wear pattern:

Look for an “S” shaped wear pattern from the heel to the ball of the foot, centered along the sole.

Common issues:

Neutral feet are efficient, but they’re not injury-proof. Poorly fitting shoes or overtraining can still cause problems.

I’ve seen neutral runners sidelined because they picked the wrong shoe just because it was “popular” or “highly rated.” Comfort always wins.

Best shoes:

Stick with neutral running shoes — well-cushioned, flexible, and without aggressive stability features. Great examples include:

  • Brooks Ghost
  • Nike Pegasus
  • Saucony Ride
  • ASICS Cumulus

Coaching tip:

If what you’re doing is working, don’t overthink it. If it ain’t broke, don’t fix it.

Neutral runners don’t need added support unless they’re dealing with a specific issue.

Focus on feel, fit, and updating your shoes regularly (every ~300–500 miles).

2. Flat Feet (Low Arch / Overpronation)

Your wet footprint shows almost the full foot — minimal to no inward curve. The arch is low or completely collapsed. Shoes placed on a table may lean inward.

How it works:

Flat feet often overpronate, meaning the foot rolls inward more than it should during each step.

The arch collapses fully, letting your ankle rotate inward and throwing off alignment up the leg.

Think of your arch like a spring — and in this case, the spring compresses completely.

Shoe wear pattern:

You’ll see heavy wear on the inner edge of the shoe, especially under the ball of the foot and heel.

Common issues:

That sounds like a lot — but flat feet are not a deal-breaker.

Plenty of runners (including elite ones like Haile Gebrselassie) have flat feet and still perform at world-class levels.

The key is managing that inward roll so it doesn’t lead to chronic injury.

Best shoes:

Look for stability or motion-control shoes — these offer medial support to prevent overpronation.

Look for features like firm arch support, dual-density midsoles, or guiderails.

Popular options include:

  • Brooks Adrenaline GTS
  • ASICS Gel-Kayano
  • Saucony Guide
  • Mizuno Wave Inspire
  • HOKA Arahi

Coaching tip:

If you’re flat-footed and getting frequent injuries, don’t just slap in an arch support and hope for the best. Visit a specialty running store or see a podiatrist who understands biomechanics. A small shoe change can mean the difference between sidelined and strong.

Best Running Shoes for Flat Feet

If you’ve got flat feet or overpronate, chances are someone’s told you to grab a “stability” or “motion-control” shoe and call it a day. And to be fair, that advice can work—for some runners.

These shoes are designed with firmer materials along the arch (called medial posts or guide rails) to limit excessive inward roll.

Think Brooks Adrenaline GTS, ASICS Gel-Kayano, or heavy-duty motion-control models like the Brooks Beast.

Plenty of flat-footed runners do great in these shoes.

I’ve coached runners who saw shin splints disappear once they got into something more supportive that “locked” their arch in place.

But here’s the twist: not everyone with flat feet needs that much structure.

Let’s Clear the Air: Stability Isn’t a Cure-All

Recent studies (including one year-long trial on new runners) found that moderate pronators had no greater injury risk when wearing neutral shoes versus stability shoes.

And in a military study, giving recruits shoes based on arch type didn’t reduce injury rates at all.

Translation? Pronation alone isn’t always the enemy. Overcorrecting it with stiff shoes might do more harm than good.

What Should You Do?

  • Try stability or motion-control models if you’ve had issues like knee pain, arch collapse, or chronic shin splints.
  • But if those shoes feel too stiff, clunky, or cause outer foot pain, they might be overcorrecting.
  • Some runners with flat feet actually feel better in a neutral shoe plus an orthotic insert (which gives arch support without locking your foot into an unnatural motion).

Orthotics: Helpful Tool, Not a Crutch

If you’ve had multiple injuries or very flat feet, custom or over-the-counter orthotics can give you that extra support.

Just don’t become dependent. Use them to get strong—not to compensate forever.

And no, flat feet don’t make you a bad runner. Plenty of elite athletes—including Olympic Moroccan champ Said Aouita—ran on flat arches.

It’s about finding what works and pairing it with smart training and foot-strengthening work.

High Arches (Cavus Foot): When Cushion is King

Now, let’s flip the script.

If you’ve got high arches, you’re dealing with the opposite problem: underpronation (aka supination). Instead of collapsing inward, your foot stays rigid and doesn’t absorb shock well.

On a footprint test, you’ll see almost no connection between your heel and forefoot—just two blobs with little in between.

What Happens When You Underpronate?

The outer edge of your heel hits first. Your foot stays stiff through the stride and doesn’t roll in to absorb impact.

That means more jarring forces go straight up your leg, stressing bones and joints.

This leads to issues like:

  • Stress fractures (especially in the shin)
  • Ankle instability and sprains
  • Heel and ball-of-foot pain
  • Achilles tightness and plantar fasciitis
  • Shin splints or tibial pain

What to Look For in a Shoe (If You Have High Arches)

  • Neutral cushioning: Skip the motion-control. You need give, not stiffness.
  • Soft, flexible midsoles: Look for models like the ASICS Nimbus, Brooks Glycerin, or HOKA Clifton.
  • Room for foot expansion: High arches can make shoes feel tight. A flexible upper and roomy toe box help.
  • Extra forefoot cushion: Supinators often feel pressure under the ball of the foot—cushion helps.

And yes, just like with flat feet, strengthening your feet matters.

A rigid arch won’t magically become flexible, but you can improve control and stability with targeted exercises.

Best Running Shoes for High Arches: Cushion, Flexibility & Smart Support

If you’ve got high arches, the name of the game is shock absorption and flexibility.

Your foot’s natural suspension system isn’t doing much to soften the blow—so your shoes need to pick up the slack.

What You Need:

  • Neutral shoes with serious cushioning. Think soft midsoles that soak up impact your foot won’t. Look for descriptions like “maximal cushioning” or “plush ride.”
  • Flexibility matters. A stiff shoe won’t help. You want the sole to bend with you, not fight your stride. Look for models with flex grooves or split outsoles that allow a bit more foot movement.
  • Avoid stability shoes. That rigid support is great for flat feet—but it’ll make a high-arched foot feel like you’re running on plywood. Let your foot move.

Coach-Approved Picks:

  • Brooks Glycerin – Plush, soft ride with a forgiving feel.
  • ASICS Gel-Nimbus – Cushioned yet durable, solid for long miles.
  • Nike Zoom Vomero – Well-cushioned and slightly bouncy.
  • HOKA Clifton or Bondi – Max cushion kings. Shock absorption for days.

If your arches feel sore, or your foot feels like it’s collapsing at the ball and heel, consider adding a cushioned insole made for high arches.

It’s not about adding arch support to stop pronation—it’s about filling the gap so pressure is distributed more evenly.

And remember: Soft shoes are not your enemy.

There’s an old myth that plush shoes make you sloppy. Not true—especially if your alternative is nagging injuries.

In fact, studies show cushioned shoes can reduce muscle fatigue and improve performance by minimizing impact stress.

Understand Pronation: It’s Your Body’s Built-In Shock Absorber

Let’s break this down, no fluff.

Pronation = natural inward roll of the foot when it hits the ground. You need it. It’s how your body absorbs shock.

Supination = underpronation → your foot doesn’t roll in enough. Rigid, high-arched feet usually fall here.

Overpronation = too much inward roll. Often tied to flat feet.

Neutral = just the right amount of roll. Smooth shock absorption, efficient push-off.

Here’s how it plays out in real life:

Foot Type Pronation Style Common Problems Shoe Type
Flat Feet Overpronation Shin splints, plantar fasciitis, runner’s knee Stability / Motion Control (e.g. Brooks Adrenaline)
Neutral Arch Neutral Pronation Minimal biomechanical issues Neutral Cushioned (e.g. Saucony Ride)
High Arch Underpronation (Supination) Stress fractures, IT band pain, ankle sprains Cushioned Neutral (e.g. HOKA Clifton, Nimbus)

Pro tip: Some supinators do well with a midfoot strike to reduce heel impact. It’s worth experimenting with technique and shoes.

Don’t Just Rely on Shoes—Strengthen Your Feet

High arches often mean underused foot muscles, especially in the midfoot and ankles. That rigidity can make you more prone to stress injuries.

Here’s your simple strength checklist:

  • Toe curls (pick up a towel with your toes)
  • Calf raises (single-leg is even better)
  • Balance drills (barefoot on one leg, or on a wobble board)

Stronger feet = better impact control = fewer injuries.

3 Easy Ways to Test Your Foot Type (No Fancy Gear Needed)

Knowing your foot type can save you from injuries and help you pick the right shoe type without wasting money on the wrong pair.

You don’t need a sports lab or a Ph.D. in biomechanics—just a few simple tests, some observation, and a little curiosity.

Here’s how to figure out what your feet are really doing:

1. The Wet Test (a.k.a. the Footprint Test)

This is the old-school classic. It’s not perfect, but it gives you a decent snapshot of your arch height.

How to do it:

  • Wet the sole of your foot
  • Step onto a dry surface—brown paper bag, cardboard, or dry concrete
  • Step off and check the print

What it shows:

  • Flat Foot (Low Arch): The whole foot shows up with little to no curve on the inner side. Looks wide and solid.
  • Neutral Foot (Medium Arch): There’s a visible curve on the inside. The print connects heel to toe with a solid but not full strip.
  • High Arch (Supinated): Heel and forefoot are there, but the middle is barely visible or even disconnected. That arch is staying high off the ground.

Coach’s note: This is a quick test—but not the full story. If you’re somewhere between flat and neutral (most people are), it might not be crystal clear. My own wet test looks “neutral,” but a gait analysis showed I mildly overpronate. So yeah, it’s helpful—but don’t stop here.

2. The Shoe Wear Test (Read Your Soles)

Your old running shoes are talking. You just have to know how to listen.

Grab the most beat-up pair you’ve got. Flip them over. Look at where the rubber’s worn down.

Patterns to watch for:

  • Neutral Pronation: Wear forms an “S” curve—from the outer heel to the ball of your foot (center forefoot). Even, balanced wear.
  • Overpronation: More wear on the inner edge, especially near the big toe and inner heel. Your foot rolls in too far.
  • Supination (Underpronation): Heavy wear on the outer edge—both heel and little toe area. Foot doesn’t roll inward enough.

Want to double-check? Set your shoes on a flat surface and get eye-level with the heel.

  • Tilt inward? Likely overpronation
  • Tilt outward? Supination
  • Straight? You’re probably neutral

Also check the midsole. Foam compressed on one side = that’s where your weight’s going.

Quick warning: Shoe wear isn’t 100% reliable. If you scuff your heels or run a lot of hills, the wear could be misleading. Use this test alongside others, not in isolation.

3. Pro Gait Analysis (or DIY It)

Want the most accurate picture? Get a gait analysis.

Many specialty running stores offer it for free. Some use slow-mo treadmill video, others just have you run while someone watches your mechanics.

They’ll look at:

  • How your ankle and arch behave with each stride
  • Whether your knee tracks straight or collapses
  • How your foot lands and rolls
  • Whether you overpronate, supinate, or run neutral

High-tech versions might use pressure sensors or force plates—but honestly, a trained eye and a basic video can tell you what you need to know.

Can’t get to a store? Film yourself.

Have a friend record you running on a treadmill or on pavement from behind.

Slow the footage down.

Watch your heel and ankle:

  • Is it wobbling side to side?
  • Does the ankle cave inward?
  • Does it stay stable and straight?

Bonus: The One-Leg Balance Test

This one isn’t for diagnosing foot type directly—but it’s great for checking foot strength and stability.

How to do it:

  • Stand barefoot on one foot
  • Do a mini squat—watch your ankle and arch

If your arch collapses or your ankle wobbles like crazy? That’s a sign of weakness and instability, often tied to flat feet or overpronation.

If you’ve got a high, rigid arch, you might struggle to balance because your foot doesn’t absorb shock well.

Use this test to figure out if you need foot strengthening work—like arch exercises, balance drills, or short foot workouts.

After the Tests: What Now?

Once you’ve done 2–3 of these tests, you should have a good idea of your foot mechanics:

  • Neutral = most cushioned or neutral shoes work
  • Overpronator (Flat Feet) = you might need stability or motion-control shoes
  • Underpronator (High Arch) = go with neutral shoes with extra cushioning and flexibility

Remember, no test is perfect in isolation—but together, they can tell you a lot.

Shoe Types Based on Your Foot Type

Alright, so you know your foot type — now what? Time to match it to the right kind of running shoe.

This isn’t about marketing jargon — it’s about support, comfort, and staying injury-free.

Here’s the breakdown:

If You Have Neutral Arches (a.k.a. Normal Feet)

Stick with neutral running shoes.

You don’t need heavy-duty support. Your foot mechanics are doing just fine, and neutral shoes let your foot move naturally. These are the bread-and-butter trainers for runners who pronate normally (or just a little).

What to look for:

  • No medial posts or stability rails
  • Foam that’s consistent across the midsole
  • Smooth, natural ride

Solid options:

  • Nike Pegasus
  • Brooks Ghost
  • Saucony Ride
  • ASICS Cumulus
  • New Balance 1080

If you’re a heavier runner or clocking serious weekly mileage, look into max-cushion models like the HOKA Clifton or Brooks Glycerin.

Want something lighter for speedwork? Try Nike Free or New Balance Beacon — but only if your legs are ready for less shoe.

If You Have Flat Feet or Overpronate

Look at stability or motion control shoes.

These are built to limit excessive inward roll (aka overpronation) and keep your stride aligned.

Stability Shoes – for mild to moderate overpronation

These give you guidance without locking your foot in place.

Look for:

  • Medial posts (firmer foam on the inner arch side)
  • Guide rails or J-frames
  • Slightly structured but still flexible

Great examples:

  • Brooks Adrenaline GTS
  • ASICS GT-2000
  • Saucony Guide
  • Mizuno Wave Inspire
  • Nike Structure

You’ll feel that solid arch support underfoot — that’s the control feature doing its job.

Motion Control Shoes – for severe overpronation or bigger bodies

These are the tanks. Built stiffer, bulkier, and with max correction. They’re not for everyone, but if your ankles collapse or you’ve battled injuries, these might be the ticket.

Examples:

  • Brooks Beast (men) / Ariel (women)
  • New Balance 1540

Heads up: These can feel pretty rigid. Try them before you buy, and only go this route if you truly need that much structure.

New Wave: Stability Meets Comfort

Shoes like the Saucony Tempus or ASICS Kayano Lite blend lightweight feel with subtle stability.

They’re great for runners who want support without the brick-foot feel.

I’ve had flat-footed runners who hated traditional stability shoes fall in love with these.

Fit Matters More Than Labels
Flat-footed? Don’t get stuck in a shoe that chokes your midfoot. Too tight around the arch = rubbing, blood flow issues, and all kinds of problems.

Make sure:

  • There’s no pressure on your arch
  • Your forefoot isn’t cramped
  • Toes have room to move

Also: Just because you overpronate doesn’t mean you need stability forever. Some runners strengthen their feet and transition to neutral shoes with orthotics — or no support at all.

As one Reddit runner put it: “Stability shoes don’t fix your stride — they just accommodate it.” Spot on.

If You Have High Arche

If you’ve got high arches or you tend to underpronate (a.k.a. supinate), your feet aren’t doing much shock absorption naturally.

That means you need your shoes to do the heavy lifting.

So forget what your buddy wears or what the trendiest shoes on Instagram are — you need cushion, flexibility, and the right fit for your foot.

Here’s what to look for:

1. Maximum Cushioning

Go for soft, plush shoes. You want foam that actually absorbs shock, not just looks cool.

Try:

  • HOKA One One (especially Bondi, Clifton) – weird-looking, but buttery soft
  • Nike Invincible Run – ZoomX foam = trampoline for your feet
  • Brooks Glycerin 20, New Balance More, Saucony Triumph

If a shoe says “responsive” but feels like concrete, it’s not for you.

2. Flexibility Up Front

Your high-arched foot is already stiff. Don’t add a shoe that’s rigid as a brick.

Quick test:

  • Grab the heel and toe and bend the shoe. It should flex at the forefoot.
  • Try to twist it a bit. A little give is good.

Some shoes have “flex grooves” under the forefoot to help here. Take advantage of that.

3. Arch Contour – Not Flat Inside

Ironically, high arches like some support inside the shoe. A gentle arch shape helps cradle your foot instead of leaving it hanging.

If the insole feels flat, try swapping in a high-arch insert.

Most neutral shoes let you do this. And if you don’t like the feel right away, walk in them before tossing them aside. Your feet might just need a few miles to adjust.

Best Shoes for High Arches (Tried and Tested)

  • ASICS Gel-Nimbus / Cumulus – nice arch curve, good cushioning
  • Brooks Ghost – neutral, semi-curved last
  • Nike Vomero – a plush, neutral tank
  • Saucony Triumph – soft and smooth
  • Nike Pegasus (with extra insole) – for faster runs with a firmer ride

Bottom line: You don’t need a stability shoe. Your foot doesn’t need controlling — it needs cushion and freedom to move.

What If You’re In-Between Foot Types?

Let’s be honest—not everyone fits perfectly into the “neutral,” “overpronator,” or “supinator” boxes.

A lot of runners fall somewhere in between. Maybe your arch is low, but not flat.

Or you have one foot that pronates more than the other. Or your foot looks neutral but behaves differently once you start moving.

That’s normal. It just means your gear needs a little more strategy.

Combo Arches or Semi-Flexible Feet

You’ve got a decent-looking arch when standing, but it collapses under load when running?

That’s a flexible arch—and you’re probably overpronating a bit even if your shoes don’t show it.

A full-blown motion control shoe might be overkill. But a true neutral shoe might not give enough support either.

Coach’s Tip:

  • Try a light stability shoe, like the Mizuno Wave Inspire or Brooks Launch GTS. They give subtle support without turning your shoe into a tank.
  • Or run in a neutral shoe with a support insole (like SuperFeet or PowerStep).

Don’t underestimate how much difference a $30 insole can make. I’ve seen runners eliminate inner ankle pain just by dropping one into their favorite trainers.

One Foot Overpronates More?

Totally common. We’re not symmetrical robots.

One foot can pronate, the other stays neutral. It can come from leg length differences, past injuries, or just how you’re built.

What to do:

  • Fit your shoes to the more problematic foot. Better to over-support the neutral foot than under-support the one that needs help. Most feet can adapt to a little extra structure.
  • Some runners add extra padding or an extra insole on just one side. One athlete I know uses a thin arch wedge under the sockliner in just his right shoe to balance out his gait.
  • Tighten laces differently per side if needed. You’d be surprised how much that can tweak feel and support.
  • If nothing works? Custom orthotics with asymmetric support are your best bet.

Medium-High Arches with Light Supination?

You’re not flat-footed, but not rigid-high either. And you roll slightly to the outside (supinate), but not dramatically. What now?

You might hate the ultra-soft, high-arch shoes made for pure supinators. And you might find you like a little structure to keep things centered.

Try this:

  • Look at firm-neutral shoes like the ASICS Gel-Cumulus or Brooks Ghost.
  • Trail shoes also work surprisingly well for borderline feet—their low stack height and stable base handle uneven terrain, which benefits mild pronators or supinators alike.

Not Sure What’s Best? Start Somewhere Comfortable

Here’s my rule: start with a moderate-support shoe (light stability or firm neutral).

Run a few times. See how it feels.

  • If it feels clunky, restrictive, or causes weird aches (like outer knee or Achilles pain)? Step back toward neutral.
  • If your foot still feels unsupported or you get that ankle-rolling-in sensation? Step up the support.

Use a running log to note how your feet, ankles, and knees feel in each setup. Don’t just guess—track and adjust.

Final Advice: It’s Not Just About Your Feet

Congrats—you now know more about feet and shoes than 95% of runners. But here’s the thing: running injury-free isn’t just about shoes or foot type. Those are important, sure. But they’re just one piece of the bigger picture.

Shoes Help. Form Matters More.

No shoe can fix poor running mechanics.

If you’re overstriding—landing with your foot way out in front of you—no amount of cushion or stability is going to save your knees.

Focus on:

  • Shorter, quicker strides
  • Landing with your foot roughly under your hips
  • Cadence in the ballpark of 170–180 steps per minute
  • Soft, quiet landings

I tell my athletes all the time: “Run light, run tall, run smooth.” That alone will take pressure off your feet and make your shoes more effective.

Final Word: Know Your Foot, Know Your Stride, Then Run Free

Strong feet, smart shoes, solid form. That’s the foundation.

But running is more than mechanics. It’s the freedom of the open road. It’s the head-clearing rhythm of footfalls. It’s chasing goals—and sometimes just chasing the sunrise.

So yes, know your feet. Choose wisely. Train smart.

Then get out there and enjoy the ride.

Happy running—and here’s to many strong, pain-free miles. 👟💪

When to Replace Running Shoes: Why It Matters

When to replace running shoes

Let’s cut to the chase.

If you’ve been pounding out miles in the same pair of shoes for what feels like forever, it’s probably time to say goodbye.

I know, I know… parting with a favorite pair feels like breaking up with a running partner.

But hanging onto dead shoes isn’t tough or frugal—it’s asking for trouble.

Think about it: would you drive cross-country on bald tires? Didn’t think so.

Your shoes aren’t just for style—they’re your shock absorbers, your stabilizers, your silent bodyguards.

Once they wear out—and they always do—your legs, joints, and feet take the hit.

No bounce.

No support.

Just raw impact over and over again.

I’ve seen runners ignore this, and they always end up limping into my inbox with shin splints, mystery knee pain, or worse.

Let’s put a stop to this.

In today’s article, I’m going to break down how long your running shoes actually last, what wears them down, and the red flags that scream “Retire me!”

I’ll even toss in some real-life runner regrets and tips to stretch your shoe life (without stretching your Achilles).

Sounds like a good idea?

Let’s get to it.

Why Replacing Worn Shoes Actually Matters

This isn’t about being gear-happy or chasing every new color drop. It’s about saving your body from a slow breakdown.

See, the magic in a running shoe lives in the midsole—that soft, squishy foam between your foot and the ground.

It’s filled with tiny air pockets that cushion every step. But after hundreds of miles, that foam gets cooked.

Instead of springing back, it stays compressed.

Translation? Your legs are suddenly absorbing way more shock than they should.

There’s real research backing this up.

A scientific review found that worn-down shoes with weak shock absorption can lead to more impact hitting your bones and joints. And you don’t need a PhD to know that’s not a good thing.

Bottom line? You wait too long to replace your running shoes, and you’re not saving money—you’re investing in downtime, PT bills, and frustration.

Even if they look okay, the real damage is inside where the eye (and the support) can’t see.

When your shoes are done, they’re done. No excuses. No “just a few more miles.”

As I always tell my clients: dead shoes = increased injury risk. Period.

How Often Should You Replace Running Shoes?

Alright, let’s talk numbers.

Most experts say to change shoes every 300 to 500 miles.

That’s your classic range. So if you’re running 20 miles a week, you’re looking at a new pair roughly every 4–6 months.

But don’t take that 500 number as gospel. Some runners burn through shoes in 250 miles.

Others coast past 600. I once had a pair that started falling apart at 280. Another set gave me 750 before they felt “off.”

Different shoes, different lifespans. Can’t have the same numbers.

So yeah, mileage matters—but feel and function matter more.

1. Shoe Quality & Build

Cheap shoes die fast. Good construction, dense foam, strong outsoles—those last longer.

A tank of a shoe like the Brooks Ghost or Adrenaline? Might give you 600–700 solid miles.

But superlight racing flats or carbon-plated shoes? You’re lucky to squeeze out 200–300.

2. Your Body & Running Style

Heavier runners or folks with a forceful stride break shoes down faster.

If you’re light and efficient? You might ride that same pair longer.

I’ve coached both kinds, and the difference is real.

3. Where You Run

Smooth treadmill or groomed trail? Easy on shoes. Cracked sidewalks, rocky trails, or hot asphalt in summer? Shoe shredder central.

Your surface is chewing through rubber whether you notice or not.

4. Type of Shoe

Cushioned daily trainers last longer. Race-day rockets don’t. A lightweight speed shoe might feel magical for tempo runs—but you’ll be replacing it sooner.

Just how it goes.

Some runners get lucky with newer midsole tech. I’ve seen shoes with updated foams (like those in some Hoka or Nike models) stretch into the 700–800 mile range.

But don’t bank on it—check in with your body, not just the odometer.

Listen to Your Body, Not Just Your Mileage App

Sometimes the wear signs are subtle. A shoe might look fine, but if you start feeling:

  • Random shin splints
  • Knee soreness out of nowhere
  • Achy arches or foot fatigue
  • Stiffness after runs that didn’t used to bother you

…those are red flags. Check your training log. If you’re hitting 350–400 miles? That might be the culprit.

10 Signs Your Running Shoes Are Cooked 

You don’t have to track every single mile to know when your shoes are done.

Your feet, your legs — heck, even your shoes — will start talking. You just have to listen.

I’ve burned through more pairs than I can count, and if there’s one thing I’ve learned the hard way, it’s this: Don’t wait for pain to swap your shoes. Stay ahead of it.

Here’s how to spot when it’s time to retire those tired trainers.

1. Your Tread Looks Like a Bald Tire

Flip your shoe over and check the bottom. That rubber outsole is like your shoe’s armor — it’s what grips the ground and keeps you upright.

But once it starts going slick? You’re basically running on soap.

Look for bald patches, smooth spots, or places where the black rubber’s worn through and you see the foam underneath (usually white or colored).

That’s your shoe crying for help.

⚠️ Red Flag: If your outsole’s flat as a pancake, it won’t grip — especially in rain or turns. Worse, it messes with how your foot lands. That can lead to shin pain, knee issues, even hip problems. Don’t risk it.

Here’s what to check for:

  • Is the tread mostly gone?
  • Can you see the foam?
  • Are you sliding more than usual?

If yes, time to move on. You wouldn’t drive on bald tires — don’t run on ‘em either.

2. Your Cushioning Feels Dead

The midsole — that thick layer of foam between the outsole and your foot — is where all the magic happens.

That’s your shock absorber.

And when it’s worn out? Every step feels like pounding the pavement barefoot.

Here’s how to check it:

  • The Press Test: Push your thumb into the side of the midsole. Does it give a little? Or feel stiff like a wooden board? If it doesn’t compress and bounce back, that foam’s done its job — and it’s done.
  • The Twist Test: Grab the toe and heel and try to twist the shoe. A new or semi-used shoe will resist a bit. But if you can twist it like a dish rag? It’s lost its structure.
  • The Wrinkle Check: Look at the side of the foam. Are there deep creases or horizontal lines in the midsole, especially in the heel or forefoot? Those wrinkles mean the foam’s been crushed down mile after mile. Think of it like an old couch cushion — once it’s compressed, it’s not bouncing back.

And get this — if your shoes start making a slapping sound when you run? That’s not you suddenly turning into Bigfoot.

That’s the cushioning gone flat, and your foot’s hitting harder than it should.

3. The Heel’s a Wreck? Time to Let Go.

You ever peek inside the heel of your running shoe and see… carnage?

I’m talking frayed fabric, ripped lining, exposed plastic—like a raccoon nested in there.

If so, don’t ignore it.

That kind of heel damage?

It’s usually the first sign your shoe’s past its expiration date.

Now, I’ve seen this a bunch—especially with runners who don’t bother to untie their shoes before ripping them off (don’t lie, you’ve done it).

That constant heel slip and friction starts chewing through the lining.

Before you know it, you’re feeling the heel counter—yeah, that hard plastic piece—rubbing straight into your skin. Blisters? Oh yeah. Structure breaking down? You bet.

And if you’ve noticed that your heel used to lock in tight but now slides even with your laces cranked down, that heel support might be toast. The heel cup can get warped.

The foam padding? Compressed like a dead sponge. If you’re doing all the lacing tricks in the book and still getting heel slop, that’s the shoe telling you it’s tired.

Also, keep an eye out for rips in the upper near the heel—or really anywhere.

A tear where the big toe flexes or the sides of the toe box might not kill your run today, but it’s a clear sign the material’s had enough. Shoes age like bananas—once they go soft or split open, there’s no coming back.

I had a pair once that I loved—solid midsole still, tread wasn’t terrible—but the heel lining wore clean through to the plastic. After one run too many with blood on my sock, I knew: time to retire ’em. Hurts to let go, but trust me, it’s better than limping for a week.

Runner tip:
If the fraying’s just starting, you might get a few more miles by patching the inside or wearing protective socks. But once the heel’s shredded, chances are the rest of the shoe is on life support too.

Your Move:
Check those heels. Feel around. If it’s rough back there, maybe it’s not just your sock that’s thinning out.

4. Feels Like a Slipper? It’s Done.

Remember how fresh your shoes felt out of the box? That springy, bounce-back feeling that made your feet feel fast? Yeah, that doesn’t last forever.

Eventually, the midsole—the guts of your shoe—stops rebounding.

Instead of helping you move, it just flattens under your weight like a tired mattress. You lose that little “pop” that makes running smooth and snappy.

This “flat” feeling? It’s one of the most common reasons runners swap shoes—even when they still look decent. A bunch of us were chatting during a group long run once, and almost everyone agreed: around 300–400 miles in, shoes start to lose that magic.

They don’t feel dead necessarily, just… meh. Less energy, less return.

And it creeps up slowly—you get used to it until one day you try on a new pair of the same model and go, “Oh dang. Mine were way more cooked than I thought.”

You know what I mean if you’ve ever said, “Weren’t these shoes bouncier?” Yeah, they were. You just adjusted to the slow fade.

Another dead giveaway? That once-reliable “speed” shoe now feels like a brick during workouts. Maybe you’re dreading using them for tempo runs or long efforts. That’s your body telling you the cushioning and responsiveness have left the chat.

5. Aches & Pains from Nowhere? Your Shoes Might Be Toast

Let me put it bluntly: if your body starts sending weird pain signals out of the blue — especially in places that used to be fine — don’t just blame the miles. Check your shoes.

I’m talking sore knees, shin splints, aching hips, back tightness, barking feet, or cranky Achilles tendons.

And here’s the kicker — if it’s both sides acting up (like both knees, both arches), that’s a big neon sign pointing to worn-out shoes.

Overuse injuries? Those usually show up on one side — like that left Achilles you’ve been nursing for weeks.

But when your cushioning’s dead and your shoes have no support left, impact hits both legs equally. That’s when stuff starts breaking down across the board.

You might even feel weird stuff in your arches or ankles — both sides again — which usually means your shoe lost its structure. The support’s shot, and now your foot’s rolling around like it’s got no guidance. Hello, arch strain.

6. You Feel Every Pebble Like It’s a Boulder

Here’s a dead giveaway your shoes are done: you feel every single bump in the road.

Small rocks, cracks in the sidewalk, even texture on the pavement — it all comes through. Like running barefoot with a paper-thin insole. That cushioning? Gone. And your body feels it.

The midsole (that squishy stuff between you and the ground) wears out slowly. And when it does, shock absorption tanks.

Each step hits harder. Your feet take the brunt of the blow, and those vibrations climb up into your ankles, knees, even your hips.

Trail runners, listen up: when your lugs are worn flat and your rock plate feels like cardboard, you’re gonna feel every root and stone like a jab to the foot.

Another clue? If your shoes feel flat — like they’ve got no bounce or spring — then they’re likely dead. The support is gone, the ride sucks, and your joints are paying the price.

Remember: a good running shoe acts like a shock absorber. If you’re feeling each step all the way into your bones, that’s not you getting old — that’s your shoe giving up the ghost.

7. Post-Run Wreckage: Tightness, Soreness, and Fatigue That Lingers

After a solid run, yeah, you’re supposed to feel worked. But your shoes shouldn’t be the reason you feel like a beat-up sack of bricks.

If you’re finishing normal runs and your feet are sore for hours, or your lower back is stiff, or your calves feel like steel cables — and nothing else in your training has changed — look at the bottom of your shoes.

One runner told me his post-run “hangover” got worse and worse.

“My ankles ached, feet felt bruised, even my back was stiff — all after an easy five-miler.”

His solution? New shoes. And the difference was night and day.

Worn shoes mess with your gait. Your footstrike shifts, your muscles compensate, and suddenly you’re sore in all the wrong places. That extra tightness and fatigue is your body trying to make up for your shoes slacking off.

Worse? If you wake up the next morning and your feet or shins are barking louder than usual, it’s not just delayed soreness — it’s your body saying, “This ain’t working.”

And here’s another sign: blisters. Not just any blisters — new ones. In weird places.

That’s usually a hint the fit has changed or the shoe’s shape is warped. Maybe the foam compressed and now your foot’s sliding around more.

Rubbing = blisters.

8. Slipping Where You Used to Stick? Your Grip’s Gone

Ever feel like you’re skating around in shoes that used to stick like glue?

That little skid around a dry corner, or the slight slip on painted lines in the crosswalk—it’s your shoes talking, and what they’re saying is: “We’re toast.”

As your outsole wears down, the tread that used to bite into the ground gets smoother than an old bald tire.

You might not notice it when looking at the sole—but your body does. Tiny slips on routine routes, tiptoeing cautiously downhill, second-guessing every wet patch—those are signs your traction’s cooked.

And don’t forget about what’s going on inside the shoe.

If your foot’s suddenly sliding forward into the toe box or your heel’s lifting even when your laces are tight, that internal fit’s gone too.

Could be the upper stretched out or the insole’s flattened. Either way, your foot’s swimming—and that means blisters or bruised toenails are next.

Also, even if the tread looks okay, old rubber gets slick over time. Some midsoles and outsoles harden with age, losing their stick. So that pair that’s “barely worn” but sat in your closet for a year? Don’t trust it blindly. Old age can ruin traction just as much as mileage.

9. You’re Past 500KM—Time for a Full Shoe Check

Sometimes your shoes don’t scream, “I’m done!” They whisper it.

And if you’re past 500 km (~310 miles), it’s time to listen.

Even if nothing feels dramatically wrong, it’s smart to do a full inspection:

  • Outsole: Is the tread pattern fading or gone in places? Any smooth patches or foam poking through?
  • Midsole/Sidewalls: Are they bulging or flattened? Cracked-looking foam?
  • Upper: Loose mesh? Stretchy fit that used to hug your foot better?
  • Lopsided wear: Put the shoes on a flat surface and look from the back—do they tilt inward or outward? That uneven lean is a red flag, especially for overpronators.

Don’t forget the smell test. If your shoes stink so bad your training partner gags—well, that’s not exactly a performance metric, but it can be another sign they’re beyond their lifespan.

You don’t have to toss them at exactly 500 km, but it’s a great check-in point. Some shoes might last 700 km. A few rare pairs hit 800. But those are unicorns.

If you’re at the 5–6 month mark with regular miles, do the visual check. You’ll often find sneaky signs of wear you didn’t notice because you adapted to them.

10. New Blisters or Hot Spots? Your Shoes Are Shifting

This one sneaks up on runners. You’re cruising through your regular routes, same socks, same shoes, and suddenly… blisters? What gives?

The answer: your shoes changed.

As they age, the inside compresses, the upper loosens, and next thing you know, your foot’s moving around in ways it didn’t before.

That extra wiggle means rubbing, and rubbing means more hot spots and blisters.

Blisters on the heel? Could be the heel counter padding is gone.

On the forefoot? Your foot’s sliding forward because the shoe’s stretched.

Even mild hot spots are an early clue. If your feet feel irritated in places they never did before, don’t ignore it.

And if you find yourself cranking your laces tighter just to feel secure? That’s a sign the structure’s toast. Over-tightening causes pressure points, numbness, and more blisters. It’s a temporary fix for a permanent problem.

Conclusion: Don’t Get Sent to the Bench by Old Shoes

Let’s bring it home. Running shoes don’t last forever. Every mile wears them down. Keep pushing worn-out shoes and you’re playing injury roulette.

Think you’re saving money by pushing a pair past 600 miles? You’re not.

A busted knee or plantar flare-up costs way more—in time, money, and missed runs. As one coach told me years ago: “Worn-out shoes are the cheapest way to get injured.”

Yeah, it’s tough saying goodbye to a pair that’s been through the miles with you. But shoes are replaceable. Your body? Not so much.

When it’s time, it’s time. Get a new pair, break them in gradually, and keep moving forward.

If your old model worked, grab the new version. If not, take what you learned and try something new. Just don’t make the switch cold turkey—your feet need time to adjust.

Most smart runners track mileage—whether it’s an app or just a note in a notebook.

If your shoes tend to wear out around 400 miles, order your next pair around 350. That way, you can alternate and phase out the old ones without risking a bad run on dead foam.

The Runner’s Guide to the Heel-To-Toe Drop

Heel To Toe Drop for runners

Ever put on two pairs of running shoes that look almost identical—but one just feels off?

Chances are, it’s the heel-to-toe drop messing with you.

That’s the little height difference between the heel and the forefoot, and it can seriously change how your body handles impact.

I like to think of it like adjusting a bike seat.

A few millimeters might not sound like much, but it changes everything—your posture, your power, your comfort. Same goes for shoes.

So, What the Heck Is Heel-To-Toe Drop?

In plain English, heel-to-toe drop (a.k.a. heel drop or offset) is how much higher your heel sits compared to your toes.

It’s measured in millimeters.

If your shoe has a 0 mm drop, your heel and forefoot are the same height—basically barefoot style. A 10 mm drop means your heel is sitting 10 mm higher.

Here’s the quick breakdown:

  • 0 mm drop: Flat like pancakes—common in minimalist or barefoot shoes.
  • 1–4 mm: Low drop—almost flat and often nudges you toward landing on your mid or forefoot.
  • 5–8 mm: Middle ground—neutral territory.
  • 10 mm+: High drop—your classic old-school cushioned trainers.

Lower drops tend to push you forward on your foot. Higher drops lean you back on your heel.

I’ve seen it time and time again with clients—switching drop can either ease pain or stir up new issues.

One guy I worked with got brutal hip flexor pain in Brooks Adrenalines (12 mm drop). It disappeared like magic when he swapped to a 4 mm shoe.

But it cuts both ways—runners with tight calves or cranky Achilles tend to feel better with a higher heel.

When Drop Matters… and When It Doesn’t

Drop isn’t the end-all, be-all. It’s one piece of a messy puzzle that includes cushioning, shoe shape, your own gait, and how much you’re pounding the pavement.

But it still matters—if you respect it.

Let’s dig into the facts:

  • Injury Risk Isn’t Black & White: A 2016 AJSM study tracked 553 runners in low (0 mm), medium (6 mm), and high (10 mm) drop shoes. About a quarter of runners in each group got hurt. Translation? Changing drop alone doesn’t save your knees. Your training load and running history matter just as much.
  • Too Much Lift = Trouble: A 2024 study from the University of Florida found runners in very high-drop shoes were more injury-prone. Some even had trouble sensing how their feet were hitting the ground. In contrast, flatter shoes helped runners stay tuned in and adjust better. The key? Don’t make a sudden switch. It’s like going from couch to marathon overnight. Bad idea.
  • The Biomechanics Breakdown: A review dug into dozens of studies and found that switching drop didn’t wildly change stride or form—except for zero-drop shoes, which did encourage more toe or midfoot strikes. But here’s the kicker: landing flatter often meant higher impact forces at first. So yeah, it can feel jarring.

My Rookie Mistake: Zero Drop, Full Pain

I’ll admit it—I screwed this up early on.

I got sucked into the barefoot craze and bought a pair of zero-drop Altras.

First week? Amazing.

Second week? Foot pain.

Third week? Metatarsal ache so bad I could barely jog.

I read a Reddit post that could’ve been my own words: “Went zero-drop too fast… now I’m out with bone marrow edema.”

Brutal. Don’t be that guy. Your body needs time to catch up with your ambition.

Here’s what I’d recommend:

  • Ease into it: Whether you’re going lower or higher, take your time. Give your body weeks—not days—to adjust. I now use barefoot-style shoes for short walks and drills before I ever try them on a run.
  • Muscles Need Time: A coaching buddy once told me, “Changing drop is like swapping your office chair for a barstool.” Totally true. Your calves, hips, and Achilles need time to figure it out. Even Dr. Heather Vincent, who co-authored that 2024 study, said it took her six months to get used to a more minimal shoe. Don’t rush it.
  • Use Drop to Recover Smarter: I’ve found that a low-drop shoe helps me bounce back faster after races. When my knees are trashed, I’ll throw on a 4 mm trainer. It lets my quads rest and shifts some of the work to the back chain. After my last half marathon, that small switch felt like a game-changer during recovery week.

Using Drop as a Recovery Tool (From the Coach’s Toolbox)

Most runners talk about heel-to-toe drop like it’s some mysterious number printed on the box.

But here’s the deal—it’s not just about performance.

Drop can actually be a sneaky-smart rehab tool. I’ve used it with runners nursing injuries, and it works—if you use it right.

Lemme explain more:

Achilles/Calf Problems?

When your Achilles is barking or your calves are stiff as bricks, bumping up the drop can make runs feel less like punishment.

I’ve seen runners fresh off an Achilles rupture thrive in 10–14 mm drop shoes with plush cushioning. I think a 10 mm drop may shift your ankle angle by about 4°, making walking and running feel more natural during recovery. Over time, they gradually drop back to 5–8 mm as the strength returns. Smart and simple.

Chronic Knee Pain?

On the flip side, if your knees are taking too much heat, dropping down a few millimeters might help. That slight shift can move your footstrike forward a bit, easing stress on the knees. I’ve seen it help a few folks—but only when paired with form work and strength training. Don’t expect miracles from the shoe alone. Use it as one piece of the puzzle.

Forefoot Issues or Plantar Fasciitis?

Pain under the front of your foot or in the arch? Try nudging your drop higher. That’ll help take some pressure off the forefoot and let you run without gritting your teeth through every step. It won’t fix everything—but it can make things more bearable on moderate runs.

Rotating Drop Based on the Workout

This is one of my favorite coaching tricks. Think of your shoe rotation the same way you think of your workouts—each has a purpose.

Here’s how one coach buddy of mine sets it up:

  • Tuesday Easy Run: 4 mm drop – light, fast cadence
  • Wednesday Speed Intervals: 6–8 mm – cushion for impact
  • Thursday Recovery Jog: 10 mm – legs get a break
  • Saturday Long Run: If it’s chill pace, go 10 mm. If it’s a harder race-pace effort, 6–8 mm for better response.

He’s not rigid with it. Some days he even uses a shoe randomizer app just for fun.

The real goal is variety—keep the muscles guessing. Rotate smart, and your body adapts instead of breaking down.

How to Find Your Ideal Running Shoe Drop

Here’s my rule: if you can feel the drop with every step, something’s off. The right drop should disappear under you. You shouldn’t have to think about it.

Try this:

  • Get 2–3 pairs of shoes with different drops (say 4 mm, 6 mm, and 10 mm).
  • Rotate them on easy runs.
  • Pay attention:
    • Did one make your knees happier?
    • Did another blow up your calves?
    • Did one just feel right from the first stride?

Track that feedback. Your body’s telling you what it likes—listen to it over the next few weeks, not just one day.

A contrarian take?

Some coaches argue drop doesn’t matter much if your form is dialed. And I get that—form and strength are king.

But I’ve seen drop tip the scales enough times to say: keep it on your radar. Not the only factor, but one worth testing.

And please, also make sure to choose proper running shoes.

Bottom Line

Drop is personal. It’s not about trends or shoe reviews—it’s about what helps you run smoother, recover faster, and stay injury-free.

Trust your body more than the internet.

The perfect drop? It’s the one you forget about because your run just flows.

The wrong drop? That’s the one that turns every step into a battle.

Let your form, goals, and injury history guide your choice. Use research. Ask fellow runners. But in the end, your feet are the real experts.

Quick Q&A: Heel-to-Toe Drop FAQs

What is drop in a running shoe?

It’s the difference in height between the heel and forefoot inside the shoe. Basically, how slanted the shoe feels under your foot.

Does drop matter for injury?

Kind of. Drop changes how force hits your legs.

Higher drop usually takes pressure off your calves and Achilles. Lower drop might shift more load to your knees. But no one study proves drop alone causes injuries—it’s just one piece of the puzzle.

Is zero-drop better?

Depends. Zero-drop (like Altra or minimalist shoes) builds foot strength and encourages a forefoot strike.

But it’s brutal if you’re not ready. You need to ease into them and build calf/foot strength first. Jump in too fast and you’re asking for trouble.

Can high drop shoes help shin pain?

Yep. A bigger heel can take some load off your Achilles and calves, which often eases shin splints too.

That’s why high-drop shoes are often used in rehab. Just be careful—it can shift the strain up to your knees if you overdo it.

Research Side Note

A running biomechanics review showed that changing drop doesn’t really mess with knee or hip motion much. But it does affect ground impact. Lower drop shoes tend to create more vertical impact force. So yeah—ease into them, and expect your legs to feel a bit stiffer until they adapt.


Ready to Find Your Drop? (Next Steps)

Running is a personal journey, and so is finding the right drop. Use this guide as your roadmap. Start by listening to your body on your next run: does any shoe feel surprisingly good or awkward after just a mile?

Try mixing in a different drop on easy days and note the difference. Maybe join a local running group or forum and ask others what’s worked for them.

Remember, I’ve been there too – the excitement of minimalist shoes and the crash of calf strain. But I also know the thrill when the perfect pair of shoes finally clicks.

The moment you lace up a pair and your legs say “this is the one,” you’ll understand why we care about drop in the first place.

So lace up with confidence!

Pay attention to how your feet and legs feel, adjust gradually, and enjoy the process. Every runner is unique – find your fit, run happy, and let us know how it goes.

Keep moving forward, one drop at a time!

How to Dry Wet Running Shoes (Fast, Safe & Damage Free)

What To Do With Old Running Shoes - how to recycle running shoes

A few months back, I got caught in one of those classic Bali downpours mid-run.

One minute I’m cruising, the next I’m soaked head to toe—and my shoes?

Waterlogged like they just finished a triathlon.

I made it home sloshing and dripping, staring at my soaked trainers like, “How am I supposed to run tomorrow in these?”

Sound familiar? Yeah, if you run long enough, this will happen to you.

Whether it’s rain, creek crossings, or just a sweaty summer long run, your shoes are going to get wet.

But here’s the thing—drying them fast matters, and doing it the wrong way can absolutely trash your shoes.

I’ve learned that the hard way too.

So here’s how to get ’em dry, quick and safe, without cooking the glue or wrecking the foam.

Why Drying Them Properly Actually Matters

Running in wet shoes isn’t just uncomfortable—it’s straight-up dangerous for both your gear and your body.

Here’s what you’re actually risking:

  • Blisters & Funk: Wet shoes = skin softening = friction. You’ll be nursing hot spots by mile three. And the moisture? It’s a breeding ground for mold and athlete’s foot. Gross.
  • Destroyed Cushioning: Wet midsoles lose their bounce. EVA foam soaks up water, and that “cloud-like” feel turns to soggy pancake real quick. A study even found that midsole shock absorption can drop by up to 50% when wet. That’s brutal on your joints.
  • Altered Gait & Injury Risk: Wet shoes weigh more, sag differently, and throw off your foot’s alignment. That instability can mess with your stride and increase your risk of shin splints, knee pain, or worse.
  • Shortened Shoe Lifespan: Moisture messes with everything—foam, glue, upper fabric. Dry ’em wrong (like, say, tossing them over a heater) and you’re cutting miles off their life.

Step-by-Step: Dry Your Shoes Like a Pro

Without further ado, here are the exact steps I take to dry my running shoes:

Step 1: Break ’Em Down

First thing—disassemble the crime scene.

  • Pull out the insoles. These little guys hold a ton of water. Let them dry separately in open air or near a fan.
  • Loosen or remove the laces. Open the tongue wide and give the shoe some breathing room.
  • Brush off dirt and mud. No need to dry mud into your shoes. Use a soft brush or damp cloth and clear that junk first. If they’re seriously dirty? Give them a light rinse, then follow this drying routine.

👉 This step is all about access. Moisture hides in creases and foam. You want to expose every inch to airflow.

Step 2: Newspaper to the Rescue

The OG move. It’s old-school, but it works. Like, really works.

Let me tell you why it works. Newspaper is ridiculously absorbent. It wicks water from every part of your shoe—especially deep inside where fans or towels can’t reach.

How to do it:

  • Crumple up a few sheets and stuff them into the shoe. Push it into the toe box, under the arch, and around the heel.
  • Wrap a sheet around the outside if the upper’s soaked too. Use a rubber band if needed.
  • Put the shoes in a dry, well-ventilated area—NOT in direct sunlight or next to a heat source (seriously, don’t roast your shoes).
  • Replace the newspaper every 1–2 hours at first. You’ll be amazed at how fast that paper gets soggy. Fresh paper = faster drying.

🧠 Pro tip: If you’ve got light-colored shoes and worry about ink smudges, use paper towels or blank newsprint. I’ve dried dozens of pairs with newsprint and never had an issue—but it’s something to watch if you care about aesthetics.

By the end of the night, your shoes will go from swampy to just damp. Then you’re ready for the final touch.

Step 3: Use a Fan — Kickstart the Drying With Airflow

After soaking up the worst of the water with newspaper, it’s time to move air.

Fans are your best ally. They don’t just dry your shoes faster—they do it safely, without cooking your midsoles or warping your fit.

Here’s how to set it up:

  • Grab a floor or tabletop fan. The stronger the breeze, the better.
  • Aim the airflow directly into the mouth of each shoe—that’s where moisture lingers most.
  • Remove any soaked newspaper or stuffing first. You want air getting inside the shoes, not blocked by soggy paper.
  • Need to get creative? Hook shoes to the front of the fan grill using a wire hanger or bungee cord. You can also tie the laces together and hang them over the top of a box fan.
  • No floor fan? Set shoes under a ceiling fan, elevated if possible. Flip them sideways or upside down to let air reach the insides.
  • Don’t forget the insoles and laces—lay them out nearby so they dry too.
  • Watch those laces! If they’re flapping near the fan, either tie them up or remove them completely.

Once they’re “paper dry” to the touch? Time to finish with the last step.

Step 4: Let Them Air Dry in a Ventilated Space

After the fan, your shoes should feel damp but no longer squishy.

Now it’s just about giving them space and time to finish the job.

Here’s how to air dry your shoes the right way:

  • Pick a spot that’s dry, well-ventilated, and not humid. Near a window with a breeze works. Bonus points for a room with a dehumidifier.
  • Don’t trap them. That means no closets, no gym bags. Let them breathe.
  • If you can, elevate the shoes—like on a drying rack or shelf—so air can reach them from all sides.
  • Keep the room warm, not hot. Room temp or slightly warmer is perfect. If you’ve got a heating vent nearby, set the shoes near it (but not directly on it).
  • Avoid direct sun. UV rays can break down shoe glue and warp materials.
  • If they still feel a little damp, you can loosely stuff them with dry paper towels or a clean cloth. Just remember to remove that stuffing after an hour or so so it doesn’t trap new moisture.
  • Give it time. For most shoes, a night in a dry, well-vented room is enough.

👉 Why this matters: The final bit of drying prevents mildew, stink, and long-term damage. Shoes that get almost-dry and then get shoved into a dark bag? That’s how you end up with moldy insoles and shoes that smell like a wet locker room.

Once everything is dry, pop the insoles back in, re-lace, and they’re ready to run.

Shoe-Drying 101 (for Runners Who Hate Wet Feet)

If you train in the rain, run trails, or sweat like a beast—wet shoes are just part of life.

But they don’t have to be a nightmare.

Drying your shoes properly can extend their life, keep your feet healthy, and save you from slipping into soggy misery the next morning.

Once you’ve pulled the insoles out, untied the laces, and wiped off the worst of the mud, here are two solid options for getting your shoes dry fast—and without wrecking them.

Option 1: Electric Shoe Dryers

This is the Cadillac of drying options. If you’re constantly training in wet weather or just washed your shoes, buy a legit shoe dryer and thank yourself later.

  • What it is: A small plug-in device that blows gently warmed air (not hot!) into your shoes.
  • How long it takes: 3–8 hours depending on how drenched your shoes are.
  • Top picks: PEET dryers, DryGuy, and similar rack or tube-style models.

Here’s what I’d recommend:

  • Look for low or no-heat models (~90–110°F). You don’t want an oven—you want a warm breeze.
  • Make sure the brand is reputable and safety-certified (this is electricity + fabric = play it safe).
  • Use it for gloves, ski boots, insoles too—it’s a multi-tool for wet gear.

Downsides? It costs a bit ($50–100) and needs an outlet. But if your shoes are wet more than twice a week, it pays for itself in saved gear and fewer blisters.

Option 2: Moisture-Absorbing Inserts

No plug? No problem. Try a silica gel insert, cedar pouch, or boot banana.

  • How it works: These suck moisture out of your shoes overnight. Like a sponge for your sweat-soaked Hokas.
  • Good picks: DrySure, cedar-filled pouches, silica bags, or odor-absorbing inserts with minerals.

They’re great for travel or the gym. You can even toss them into your shoes after a muddy trail run and forget about them until morning.

Extra Tips to Dodge the Dreaded Wet Shoe Situation

Look, wet shoes happen.

It rains.

You misjudge a puddle.

A surprise creek shows up mid-trail.

But with a little planning, you can dodge the worst of it—or at least deal with it like a pro.

Here’s how I help my runners stay dry (or at least dry faster):

1. Rotate Your Shoes (Seriously, Do It)

If you run more than three days a week, you need a second pair.

Not just for recovery and performance—but because wet shoes need time to dry. Rotate pairs, and you’ll always have a dry set ready to go.

Your shoes last longer and your legs get a little variety. Even the Cleveland Clinic recommends this for injury prevention. No-brainer.

2. Pick Shoes That Drain Well

If you’re hitting creeks or soaking trails, look into quick-dry trail shoes—the kind made to get wet and bounce back.

  • Brands like Salomon, Merrell, or SwimRun models often include drainage ports.
  • Breathable mesh sheds water faster than thick padding or waterproof liners.

👉 You’ll still get soaked—but you won’t slosh for the next 10 miles.

3. Wear the Right Socks

Cotton? That’s a hard no.

Go with:

  • Merino wool – stays warm even when wet
  • Technical synthetics – labeled “moisture-wicking” or “ultra-dry”

💡 Pro tip: Bring a spare pair if you’re going long. Changing into dry socks mid-run can save your feet from blisters—and keep your shoes from turning into swamps.

Here’s your guide to running socks.

4. Bring Newspapers (Yes, Really)

I hate to sound repetitive but this trick really works. Works very well.

  • Stuff your soaked shoes with newspaper.
  • It absorbs water quickly—way faster than just air drying.
  • Even better: use a fan + newspaper combo = dry shoes by morning.

I keep a few newspaper sheets and a towel in my race bag just in case. Muddy trail race? Wet relay leg? You’ll be glad you did.

5. Dry Them Right Before Storing

Tossing damp shoes into a closet is the fast track to funky smells and mold.

If you rinse mud off, let them air out first. Use a fan. Set them near a vent. Just don’t stash them wet.

Pro move: Sprinkle a little baking soda inside after drying to cut down odor.

How Long Do Wet Running Shoes Take to Dry?

Here’s a quick cheat sheet:

Drying Method Estimated Time
Newspaper + fan ~6–8 hours (overnight)
Fan only ~8–12 hours
Newspaper only ~12+ hours
Air dry, open room 24–48 hours
Clothes dryer (don’t!) ~1 hour (but risky)


Best combo:
absorption + airflow. Start drying them as soon as you get back from your run. Swap the newspaper after an hour or two to keep the drying efficient.

Clothes dryers? Yeah, they’re fast—but they can melt glue, warp midsoles, or shrink materials. Trust me, it’s not worth ruining $100+ shoes for a shortcut.

Material Tip

  • Mesh shoes dry faster than anything with leather overlays or waterproof membranes.
  • Padded collars and tongues hold water longer—squeeze gently with a towel to speed up drying.

Respect Your Tools

Your shoes are your foundation. You don’t need a $250 carbon-plated super shoe for every run—but you do need them to be dry, secure, and not smell like death.

As I always say: “The better you take care of your running gear, the more your it will take care of you.”

Drying your shoes right is one of those behind-the-scenes habits that make a difference in the long game.

Over time, it adds up—fewer injuries, longer shoe life, better performance.

You’ve Got a System Now

Next time you stumble in from a stormy run or pull your soaked shoes out of a duffel, don’t stare at them like you’re stuck. You’ve got a system:

  • Insoles out
  • Stuff ‘em up
  • Fan, airflow, or old-school window drying
  • Skip the heat
  • Let ‘em breathe

No gimmicks. Just smart recovery for your gear—so you can recover better too.

Your Turn

What’s your go-to shoe-drying trick?

Got a horror story involving melted soles, newspaper fails, or next-level MacGyver hacks?

Drop a comment below. Let’s trade tips, swap cautionary tales, and help each other survive the next rainy season like seasoned pros.

Because in running, you don’t just train hard—you maintain smart.
And that includes your shoes.

Now get back out there. Dry shoes, dry feet, strong legs—repeat.

– David D. 🏃‍♂️💨

Running Shoe Size Guide: How to Measure Your Foot for the Perfect Fit

How To Clean Running Shoes

Here’s the truth: Fit Is Everything.

Even the best running shoes on the planet won’t do squat for you if they don’t fit right.

And I’m speaking from personal experience.

I once ran for over a year in shoes 1.5 sizes too small.

For a while I thought I had ankle problems. Turns out, I had a shoe size problem. Once I ditched the shoes for a new pair, my pain vanished.

So yeah — size matters. A lot. And yet so many runners are winging it.

Let’s fix that.

Here’s how to measure your feet for the right fit, and why fit makes or breaks your performance, your comfort, and your injury risk.

Why Fit Matters (More Than You Think)

Wearing the wrong size isn’t just uncomfortable — it can wreck your training.

No exaggeration.

Some of the nightmare scenarios include:

  • Shoes too tight? Say hello to black toenails, blisters, bunions, and nerve pain.
  • Too loose? Enjoy heel slippage, calluses, and shin stress.
  • Misfit shoes = messed-up biomechanics = more strain on your joints.

I’d honest with you. Every black toe I’ve ever had was from shoes that were just a touch too small.

Better Fit = Better Running

When your shoes hug your feet just right, everything flows better.

  • Your stride, push-off, and energy transfer all click
  • Secure heel and midfoot = no slippage
  • Roomy toe box = no pain on toe-off

A coach friend of mine always says: “If your shoes don’t feel right, your stride won’t be right.” Simple but true.

Step-by-Step: How to Measure Your Feet (So Your Shoes Actually Fit)

Forget fancy scanners or high-end tools. You can get a rock-solid measurement at home with some basic stuff.

What You’ll Need

  • A sheet of paper (bigger than your foot — tape two together if needed)
  • A hard floor and a wall (not carpet)
  • Tape (to keep the paper from sliding)
  • Pen or pencil (for tracing)
  • Ruler or measuring tape (in centimeters = more precise)
  • Your usual running socks

Here’s my no-fluff, real-runner guide to measuring your foot at home.

1. Set the Stage

  • Grab a piece of paper. Tape it to the floor, flush against a wall.
  • The wall = your heel stop. The paper = your measuring zone.
  • Hard surface only. Carpet messes with accuracy.

2. Put On Your Running Socks

  • Don’t measure barefoot unless you plan on racing like that.
  • Wear the socks you run in — especially if they’re thick or compressive.
  • They’ll affect the fit, even if it’s just a few millimeters.

3. Stand Tall on the Paper

  • Heel against the wall.
  • Weight evenly on the foot you’re measuring. Slight knee bend. Stand natural.

Pro Tip: Don’t sit. Your foot spreads under pressure. We want real-world size, not sleepy foot size.

Need balance? Stand near a chair — just don’t shift weight off the measuring foot.

4. Trace Your Foot (Like Elementary School Days)

  • Hold the pen upright (not angled under your foot).
  • Trace the full outline — heel to toe, side to side.
  • Longest toe matters (sometimes it’s the second toe, not the big one).

Best case? Have someone else do the tracing so you stay relaxed.

5. Measure Length & Width

  • Step off the paper.
  • Length: draw a line at the heel and tip of longest toe. Measure in cm/inches.
  • Width: draw lines at widest part (ball of foot). Measure across.

Boom — that’s your foot profile.

6. Repeat for the Other Foot

  • Most runners have one foot slightly bigger. Always size for the larger foot.
  • Trust me — better wiggle room than black toenails.

7. Measure at the Right Time

  • End of the day (or after a run if your feet swell a lot).
  • Feet expand as the day goes on. Morning = too small.

Quick Recap

  • Stand with heel against wall, weight loaded
  • Trace foot with socks on
  • Measure heel-to-toe (length) and ball-to-ball (width)
  • Do both feet
  • Use evening size, not morning size
  • Record both numbers — they’ll help for width and size conversion

Find Your Running Shoe Size: The No-BS Conversion Chart for Runners

So you measured your feet (well done — most runners don’t bother). Now you’re wondering:

“What size running shoes do I actually need?”

Here’s the thing — running shoes fit different than your everyday kicks. They need room to breathe. Literally. Your toes swell. Your foot expands. Your stride depends on it.

Quick Coach Tip

Running shoes should usually be about half a size bigger than your street shoes.

You want a little wiggle room — a thumb’s width in front of your toes. Tight shoes = black toenails and blisters. No thanks.

Running Shoe Size Conversion Chart

Use your foot length (in inches or cm) to find your ideal size across US, UK, EU, and the internal shoe length (in cm).

Foot (in) Foot (cm) US Men US Women UK EU Shoe Length (cm)
9.00″ 22.9 cm 6 M 7.5 W 5 38–39 ~24.5 cm
9.25″ 23.5 cm 6.5 M 8 W 5.5 39 ~25.0 cm
9.50″ 24.1 cm 7 M 8.5 W 6 40 ~25.5 cm
9.63″ 24.4 cm 7.5 M 9 W 6.5 40.5 ~25.7 cm
9.75″ 24.8 cm 8 M 9.5 W 7 41 ~26.0 cm
10.00″ 25.4 cm 8.5 M 10 W 7.5 42 ~26.5 cm
10.13″ 25.7 cm 9 M 10.5 W 8 42.5 ~27.0 cm
10.25″ 26.0 cm 9.5 M 11 W 8.5 43 ~27.3 cm
10.50″ 26.7 cm 10 M 11.5 W 9 44 ~27.9 cm
10.63″ 27.0 cm 10.5 M 12 W 9.5 44.5 ~28.3 cm
10.75″ 27.3 cm 11 M 12.5 W 10 45 ~28.6 cm
11.00″ 27.9 cm 11.5 M 13 W 10.5 45.5 ~29.4 cm
11.13″ 28.3 cm 12 M 13.5 W 11 46 ~29.8 cm
11.25″ 28.6 cm 12.5 M 14 W 11.5 46.5 ~30.2 cm
11.50″ 29.4 cm 13 M 14.5 W 12 47–48 ~30.9 cm

How to Use It

Let’s say your foot measures 10.25 inches (26.0 cm).

You’re looking at:

  • Men’s US 9.5
  • Women’s US 11
  • UK 8.5
  • EU 43
  • Shoe length: ~27.3 cm (gives you that toe buffer)

Real-Runner Fit Tips

Now let’s take things to the next level. Here are some fitting tips to help you make the right decision:

1. When in Doubt, Size Up

If you’re between sizes, go up, not down. You can always adjust with socks or lacing. You can’t stretch a too-small shoe mid-marathon.

2. Account for Width

This chart’s all about length. But if you’ve got wide feet, look for:

  • D/Standard = Regular width for men
  • B/Standard = Regular width for women
  • 2E or EE = Wide
  • 4E = Extra wide

Bonus: Some brands (like New Balance and Altra) do widths better than others.

3. Every Brand Is a Little Different

You might be a 9.5 in Brooks and a 10 in HOKA. That’s normal.

That’s why you should always check the brand’s sizing chart if you’re switching shoes.

And if you can try them on in-store? Do it. Your feet will thank you.

Running Shoe Widths

Let’s be clear: fit isn’t just about length.

You can have the perfect size number on the box, but if the shoe’s too narrow or too wide? You’re going to feel it — and not in a good way.

Running shoes come in different widths, and if you’re not paying attention to that part of the equation, you’re playing with fire… or at least blisters, black toenails, and bunions.

Common Width Letters (From Narrow to Wide)

Here’s the cheat sheet:

Width Women’s Fit Men’s Fit
4A (AAAA) Extra Narrow Rare / Very Narrow
2A (AA) Narrow Extra Narrow
B Standard / Medium Narrow
D Wide Standard / Medium
2E (EE) Extra Wide Wide
4E (EEEE) XX-Wide (rare) Extra Wide
6E (EEEEEE) Not made XX-Wide (huge)

Men’s standard width = D.
Women’s standard width = B.
Go one letter up to go wider, one letter down to go narrower.

Why Width Matters (More Than You Think)

When you run, your foot expands with every stride. Doesn’t matter if you’re going 2 miles or 20 — impact, heat, and swelling mean your foot’s doing more than you think inside that shoe.

If the fit’s too tight:

  • Toes get crammed and start overlapping
  • Blisters, calluses, or numbness show up
  • You may stir up bunions or Morton’s neuroma

If the fit’s too loose:

  • Your foot slides around, causing friction and hotspots
  • You might over-tighten your laces just to feel “locked in” — messing with blood flow or creating pressure on the top of your foot

Bottom line: you need that Goldilocks fit — not too tight, not too sloppy. Just right.

Wide Toe Box = Happy Toes

Ever feel like your toes are begging for air mid-run? You’re not alone.

Many runners (especially those with bunions, hammertoes, or just a natural foot splay) need more space up front. A wide toe box gives your forefoot room to spread like it’s supposed to, which helps with balance, comfort, and shock absorption.

If you’re hunting for roomy-toe-box runners, check out:

  • Altra – famous for its “FootShape” design
  • Topo Athletic – another solid option with anatomical fit
  • Some models from Brooks and New Balance in wide/extra-wide sizes

Measuring Shoe Width (Not as Simple as a Ruler)

There’s no universal width chart because it depends on shoe size and brand. A 2E in size 13 isn’t the same width as a 2E in size 8.

What you can do:

  • Check brand-specific sizing guides
  • Compare insole width from a shoe that fits well
  • Get fitted at a real running store (they’ll know what to look for)

Pro Tip: If you only feel slightly snug, try a single-wide (D for women, 2E for men).

But if your foot feels crammed and deformed after every run? Time to go extra wide.

Running Shoe Sizing: Not All Brands Play Nice

You ever try on a size 10 in Nike and swear you were stuffing your foot into a toddler shoe — then slip into a 10 in Brooks and suddenly feel like Cinderella? Yeah. Brand-specific sizing is a real thing. And if you’re ordering shoes online or switching brands, you’ve gotta know what you’re stepping into.

Here’s how the major brands tend to fit — straight from the feet of real runners:

Nike – Sleek. Snug. Narrow.

Nike shoes look fast — and they fit that way too.

  • Expect a slim fit, especially in the toe box.
  • Standard width can feel tight if you’ve got average-to-wide feet.
  • Many runners go half a size up in Nike compared to Brooks or New Balance.

“If the forefoot feels like it’s in a vise — it’s not you, it’s the shoe.”

Nike’s gotten better about offering Wide and Extra-Wide options in popular models like the Pegasus — but if your toes like to spread, you may still want to size up or skip altogether.

TL;DR: Great for narrow feet. Others? Size up or grab the wide version.

Brooks – The Goldilocks Fit (For Most Feet)

Brooks has built a loyal fanbase by nailing that sweet spot between snug and roomy.

  • Length runs true to size (TTS) — maybe a touch short, so half-size up is usually smart.
  • Forefoot has breathing room, great for runners with a little width.
  • Solid heel lock and midfoot hold — with comfort up front.
  • Multiple widths available for narrow heels or flipper feet.

“I wear a 10.5 in Brooks and never think twice about it.”

TL;DR: Stick with your measured size + half. Roomy toe box. Easy to dial in.

Altra – Toe Freedom Champions

Altra’s the brand for runners who say, “Why are all these shoes squeezing my toes?”

  • Built with a FootShape™ toe box — wide and roomy by design.
  • Zero-drop platform (heel and forefoot at same height), so they feel different even if the length is on point.
  • Some models run slightly short, depending on the version (check reviews).
  • Original vs. Standard FootShape models: Original = super wide, Standard = still roomy but more tapered.

“Don’t mistake toe room for a bad fit — it’s what Altra does best.”

If you’ve got narrow feet, they might feel sloppy. But for average or wide feet? Pure comfort.

TL;DR: TTS for most. Wide up front on purpose. Check model-specific notes before buying.

New Balance – Your Wide Foot’s Best Friend

NB is the OG when it comes to width options and consistent sizing.

  • TTS for most runners, maybe a touch longer than Nike or Asics.
  • Multiple widths available: Narrow to 4E+.
  • Great if your feet are wide, flat, or oddly shaped.

“If nothing else fits, try New Balance in your size and width — it probably will.”

Just make sure you’re comparing performance running shoes, not lifestyle kicks (NB’s casual sneakers run differently).

TL;DR: Great for wide feet. TTS, consistent fit. Plenty of width options to dial it in.

HOKA Fit Guide: Max Cushion, But Does It Fit Your Foot?

Let’s talk HOKA. Known for their cloud-like cushioning, these shoes have helped a lot of runners stay pain-free — but for some, especially those with wider feet, they’ve been a mixed bag.

Here’s the truth: HOKA has come a long way in dialing in their fit, but not all models are created equal.

What to Know About HOKA Sizing and Fit

  • Racing shoes (Carbon X, Rocket X): snug and race-tuned. Expect a tighter, locked-in feel.
  • Daily trainers (Bondi, Clifton, Arahi): more forgiving. Newer models like the Clifton 9 have fixed a lot of the narrow toe-box complaints from earlier versions.
  • Trail shoes (Speedgoat, Challenger, etc.): built for security. Some still run a little narrow, but many now come in wide. Speedgoat Wide is a popular fix for those who found the original too tight.

General fit tip: Hokas run true to length, but if you have wide or high-volume feet, you’ll likely want the WIDE version — labeled “D” for women, “2E” for men.

That said, even HOKA wide isn’t as roomy as Altra or Topo, which are more foot-shaped up front.

One wide-foot runner put it best: “Even in the wide, HOKAs are roomier — but not as toe-friendly as Altras.”

So if you’re coming from Altra and switching to HOKA, don’t expect that same spread-out feel. But it’s a big step up from the days when every HOKA felt like a straightjacket for your feet.

If you’ve got narrow feet, you’ll probably love the standard fit — snug without being suffocating, especially in newer models.

Pro Tips for Getting the Right Shoe Fit (Not Just HOKA)

No matter the brand — HOKA, ASICS, Nike, Brooks — here’s how to make sure your shoes aren’t just “pretty close,” but actually right for your feet.

1. Shop Later in the Day

Your feet swell. A shoe that fits at 8 AM might feel like a vice by 5 PM. Try on shoes after a workout or later in the day to match your real-world running foot size.

2. Test With Your Gear

Bring your actual running socks. Bring your orthotics if you use them. Even a slightly thicker sock can make a shoe feel tight, and an insole can change volume and support feel. Simulate race-day setup.

3. Master Your Lacing Game

Sometimes it’s not the shoe — it’s how you lace it.

  • Heel slipping? Use the heel lock lacing trick.
  • High instep? Skip an eyelet or two.
  • Narrow heel but wide forefoot? There’s a lacing pattern for that too.

Before you ditch a shoe, try lacing adjustments. It can be a game-changer.

4. Break Them In Gently

Even a great shoe needs time to mold to your foot.

  • Don’t lace up a brand-new pair and head out for 20 miles.
  • Do a few short runs (3–6 miles) first.
  • If anything rubs or feels weird, tweak lacing or try different socks.

Most shoes feel best around 10–20 miles in — that’s when the magic happens.

5. Don’t Buy for the Bargain Bin

A clearance deal sounds great — until you’re running in a shoe that’s a half size too small or too narrow.

Fit > Price > Color. Every time.

Your shoes are your foundation. If they’re wrong, everything above the ankle pays the price.

6. Track Mileage — and Know When to Retire Them

Even the best-fitting shoe won’t last forever.

  • Foam breaks down.
  • Outsoles wear.
  • The upper stretches out.

Suddenly that magic fit isn’t so magical. Most running shoes last 300–500 miles. If you’re logging 20 miles a week, that’s 4–6 months. Keep track — or rotate shoes so each pair lasts longer.

7. Get Professionally Fitted (At Least Once)

If you’re new to running, haven’t changed shoes in years, or just aren’t sure what you need — visit a running specialty store. Let them look at your gait, measure your feet, and suggest models that suit your stride.

Even if you buy elsewhere, the knowledge is priceless.

8. Listen to Your Body

New knee pain? Arch discomfort? Shin splints out of nowhere? Sometimes it’s not “training load” — it’s shoe mismatch.

Pay attention. If you switch shoes and something new starts hurting, take the hint. It might be the shoe’s shape, support level, or even how it alters your stride.

You’re not being picky — you’re being smart.

Conclusion: Find Your Fit, Run Stronger

Let me be blunt — if your shoes don’t fit right, everything else in your training suffers.

It might seem like a small detail, but dialing in your running shoe size can be the difference between logging pain-free miles or sitting on the sideline nursing foot injuries.

Here’s the recap, coach-style:

  • Measure your feet — length and width. Don’t guess, and don’t rely on what you wore five years ago. Feet change. Re-check once or twice a year.
  • Use those numbers to get the right size — enough room up front (thumb-width at the toe), snug heel and midfoot, and zero hot spots. You should barely notice your shoes when running.
  • Expect to size up — most runners go half a size bigger than their casual kicks.
  • Got unique feet? Bunions, wide forefoot, high arches, pregnancy, aging joints? Adjust accordingly. There’s no “standard foot” and no single model fits everyone.
  • Brands vary — Nike fits different than Brooks, which fits different than Altra. Try stuff on. Be picky.
  • Don’t settle. If it’s “almost right,” it’s wrong. Keep searching. The perfect shoe for you is out there — you just have to hunt it down.

Run Smarter, Not Harder: Top Tips for a More Comfortable Running Experience

Ready to make your running experience less challenging and more enjoyable?

You’re in the right place!

While running is a fantastic way to stay fit and have fun, it’s not uncommon to encounter aches and pains, particularly as you increase your mileage.

The impact of running can lead to discomfort in your ankles, knees, hips, and lower back, making even the most dedicated runners hesitate to lace up their shoes.

The good news is that there are several steps you can take to alleviate these issues and enhance your overall running experience.

By avoiding common training mistakes, refining your running technique, and addressing any imbalances or weaknesses, you can find relief and make running a more enjoyable endeavor.

Here are some strategies to help you make running less challenging and more fun:

Invest in the Right Warm-up

Making your running experience less challenging can be as simple as incorporating a proper warm-up routine before your runs. A well-executed warm-up serves as a signal to your body that it’s time for some intense exercise.

It accomplishes several key goals, such as elevating your heart rate, increasing core body temperature, and loosening up your muscles. Not only does this make those initial miles feel more manageable, but it also helps reduce the risk of injury.

To get the most out of your warm-up, begin each run with a 5-minute light jog. Follow this with dynamic exercises like squats, high knees, exaggerated marches, inchworms, and lunges for another 5 minutes.

This combination of jogging and dynamic movements prepares your body for the upcoming run and sets a positive tone for your workout.

Take A lot of Brisk Walking Breaks

When you’re just starting your running journey, it’s crucial to set realistic expectations. Don’t aim to compete with experienced runners right from the beginning; it’s a recipe for disappointment and potential injury.

If you’re new to running, attempting to cover long distances right away is unlikely to end well.

Instead, opt for a smarter approach by adding walking breaks into your runs. Begin with a pattern of two to three minutes of jogging followed by three minutes of walking.

Stick to a comfortable pace that doesn’t leave you gasping for breath. Remember, the goal is to build a solid foundation, not to push yourself to the brink of exhaustion.

Even if you end up walking for the entire workout, you’re still making progress. You’re burning calories, building your fitness base, and, most importantly, forming the habit of exercise.

As your fitness improves, gradually increase the duration of your running intervals while reducing the time you spend walking. With time and persistence, you’ll find yourself running for 30 to 45 minutes without the need for frequent breaks.

It’s all about gradual progress and building your running capacity at a pace that suits you. The details will fall into place over time.

Here’s what makes a good running pace.

Stop the Chafing

Chafing is a common issue for many runners, causing discomfort and irritation, especially in areas like the thighs and nipples. The culprit here is friction – when your skin repeatedly rubs against itself or your clothing during a sweaty workout.

The good news is that preventing chafing doesn’t require a degree in rocket science. You can invest in products like Body Glide, which creates a protective barrier on your skin to reduce the friction that leads to chafing.

Apply this product generously to areas prone to chafing, such as the inner thighs, nipples, armpits, and anywhere else you’ve experienced discomfort during your runs.

Another smart strategy is to wear leggings or compression gear. These snug-fitting garments minimize skin-to-skin or skin-to-clothing contact, effectively preventing chafing.

Get The Right Socks

Blisters can be a runner’s worst nightmare, capable of stopping your training in its tracks, no matter how determined you are to keep going. Blisters typically form due to friction, often caused by your shoes and socks rubbing against your feet and toes.

Multiple factors can contribute to the development of blisters, including wearing improper shoes, having foot abnormalities, or running downhill. Moisture and heat can exacerbate the problem.

To prevent blisters, it’s crucial to choose the right socks. Opt for synthetic, non-cotton socks, such as wicking poly-blend socks. These types of socks help manage moisture and reduce the friction that leads to blisters.

Additionally, consider using products like Body Glide between your toes or in blister-prone areas to further reduce friction and discomfort. Another wise choice is to invest in compression running socks, which can provide added support and protection to your feet during long runs.

Get The Right Shoes

Are you experiencing discomfort while running? If so, it might be because you’re wearing the wrong shoes. The correct running shoes can make your runs significantly more comfortable and reduce the risk of injuries. They can also make your training more enjoyable. Replacing worn-out laces with durable options from Lace Lab can also help keep your running shoes secure and comfortable.

To find the right pair of running shoes, it’s essential to visit a running specialty store. The staff at these stores are trained to assess your running style and biomechanics. They can help you choose a pair of shoes that are perfectly suited to your unique needs and preferences.

With the proper footwear, you’ll experience greater comfort and support during your runs, allowing you to focus on your goals without worrying about discomfort or injury.

Keep Track of your Shoe Mileage

Wearing the right running shoes is crucial, but it’s equally important to know when to replace them. Even the best shoes have a limited lifespan, especially when used regularly.

The mileage at which you should replace your running shoes can vary based on factors like your weight, training frequency, and the type of terrain you run on. However, as a general guideline, consider getting new shoes after you’ve covered approximately 400 to 500 miles in them.

To keep track of your shoe mileage, you can use a training journal or take advantage of apps like MapMyRun, which allow you to monitor the distance you’ve covered with a specific pair after each run. This practice ensures that you always have supportive, comfortable shoes that make your runs less difficult and more enjoyable.

You should try this beginner running plan.

Listen & Adjust

Don’t underestimate the importance of rest and recovery. Running continuously without adequate rest can lead to burnout and injuries. Embrace recovery days, especially during intense training periods or when you’re not getting enough sleep.

Here are a few tips to help improve your recovery game:

  • Quality Over Quantity: Focus on the quality of your training rather than the quantity. Pushing yourself too hard can lead to overuse injuries. Pay attention to how your body responds and adapt your training accordingly.
  • Prioritize Sleep: Sleep is essential for recovery. It’s during sleep that your body repairs tissues builds muscles, and adapts to the demands of running. Ensure you’re getting enough quality sleep to support your running routine.
  • Spacing Workouts: Plan your workouts throughout the week with adequate rest days in between. This spacing allows your body to recover and reduces the overall difficulty of your runs.
  • Recovery Practices: Incorporate recovery practices like restorative yoga, foam rolling, and regular sports massages into your routine. These can help speed up the recovery process and keep your body in top condition.