Running Blisters Explained: Causes and Solutions For Runners

running blisters

Got blisters? Don’t let them slow down your running game! We’ve all been there, and I’m here to tell you that there’s no need to hang up your running shoes for good.

In fact, with the right know-how, you can treat those pesky blisters and keep them from ruining your runs.

In this article, we’re diving deep into the world of running blisters: what causes them, how to treat them like a pro, and most importantly, how to kick them to the curb for good. Ready to hit the ground running?

Let’s jump right in!

Running Blisters Explained

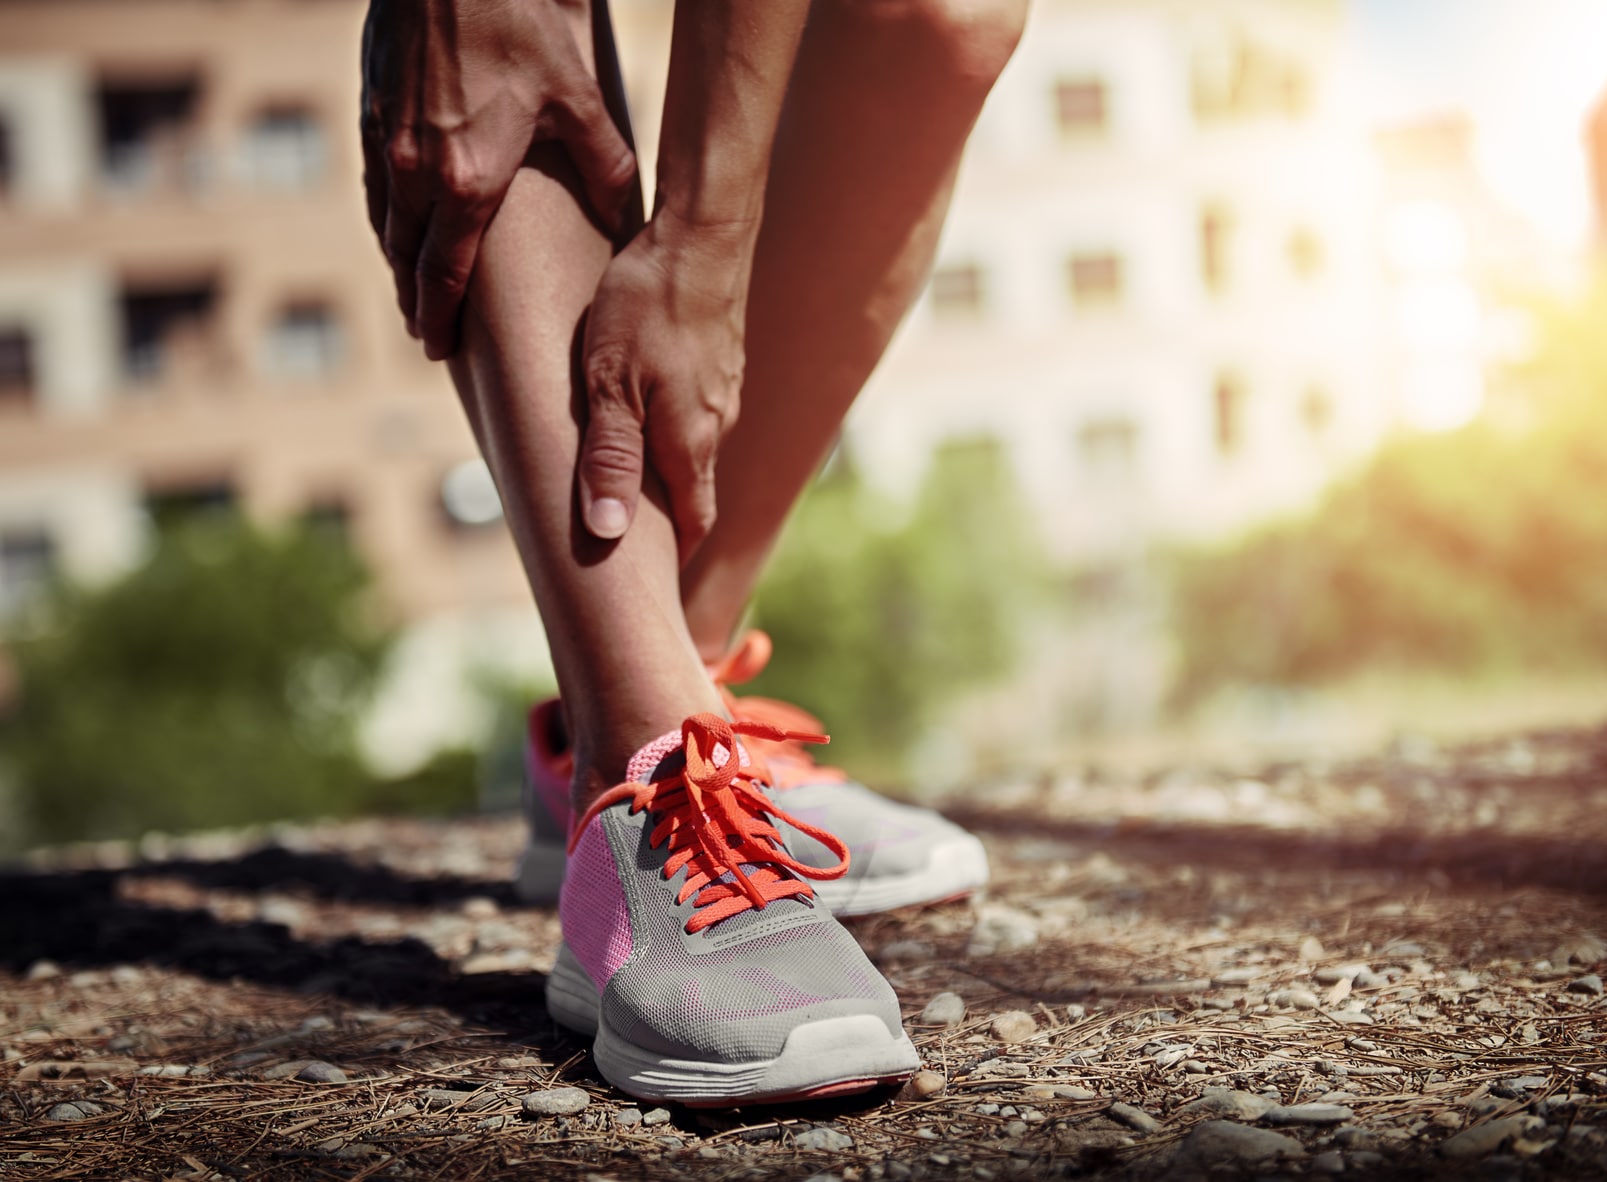
Picture this: You’re in the middle of an exhilarating run, the wind in your hair, and the world at your feet. But then, it happens – that telltale burning sensation that reminds you of an unwelcome guest: blisters.

Yep, those pesky little bumps that seem to have a knack for showing up just when you least expect them.

So, what exactly is a running blister? Well, think of it as your body’s way of saying, “Hey, I need a break!”

Blisters are like the little alarms that go off when the outer layers of your skin decide to have a friction-filled party. They rub together, break apart, and fill up with not-so-pleasant fluid.

Now, here’s the kicker – anything that cranks up the friction can make these blisters throw an even bigger tantrum.

We’re talking about improper running shoes, the ones that are either too tight or feel like they’ve got a mind of their own. And let’s not forget about bad running form – it’s like an open invitation for blisters to crash your running party.

But wait, there’s more! Sometimes, it’s not your shoes or your form but your feet themselves that can lead to blister trouble. Conditions like hammertoes, bunions, and heel spurs are like the troublemakers of the foot world, making you more susceptible to these irritating bumps.

Now, where do these blisters like to hang out the most? Well, they’ve got a soft spot for areas like the arches, the soles of your feet, and those poor little toes.

Why? Because these spots love to cozy up to your running shoes, engaging in a non-stop rubbing marathon.

The Blistering Process

Have you ever wondered what’s cooking beneath that bubbly surface? Well, here’s the lowdown, and trust me, it’s more intriguing than you might think.

Stage 1: The Epidermal Tear

So, picture this: you’re out on a long run, miles under your belt, and suddenly, you start feeling that familiar hot spot on your foot. That’s when the blister story begins. It all kicks off with a tiny tear in the epidermis – that’s the fancy term for the upper layer of your skin.

Stage 2: Separation Anxiety

Now, the real action starts. The outer layer of your skin decides to have a little separation party from the inner layers. It’s like they’re saying, “We need some space!”

So, they create a gap, a pocket of emptiness if you will, while keeping the surface intact.

Stage 3: Lymph Fluid Invasion

As if the separation shindig wasn’t enough, here comes the guest of honor – lymph fluids. These little guys seep into that gap, filling it up under the affected skin.

It’s like a mini swelling party that’s just getting started. The pressure builds, and voilà, you’ve got yourself a full-blown blister.

Bonus Stage: The Blood Vessel Twist

And for the grand finale – sometimes, things take a dramatic turn. A blood vessel in the vicinity might decide to add a little extra pizzazz to the mix. That’s when you end up with a blood blister.

Yep, it’s as intense as it sounds. Blood vessel rupture, fluid buildup, and a vibrant shade of red – it’s a blister with a twist!

For more on blisters and the science behind treatment, check the following scientific articles:

How to Treat Blisters For Runners

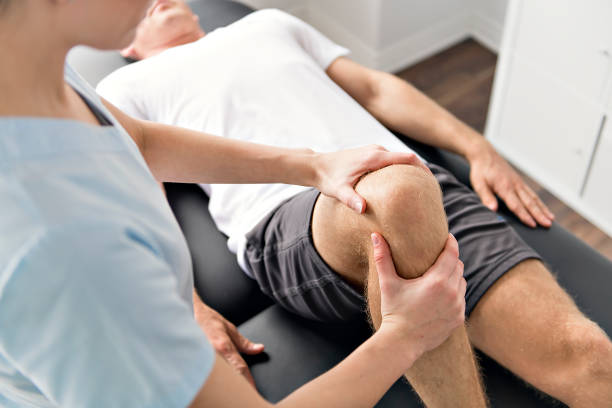
Most cases of running blisters aren’t medical emergencies but shouldn’t be ignored—especially when they’re too painful.

In fact, some blisters can get infected if you don’t take care of them early and properly.

Here’s how to safely treat running blisters in the comfort of your own home.

race warm-up

“To Pop or Not to Pop—That is the Question.”

Imagine this scenario: you’re out on a run, pounding the pavement, and suddenly, you feel the unmistakable presence of a blister. But here’s the deal – if it’s not causing you pain, it’s okay to let nature do its thing. You see, blisters have a tendency to break on their own eventually, and when they do, the fluid drains naturally.

Now, let’s talk about the big, bad blisters – the ones that are throbbing and causing you agony. When you’ve got a blister that’s making every step painful, it’s time to take matters into your own hands – but don’t worry, we’ll guide you through it.

Safely Draining a Running Blister: Step by Step

Do the following for a safe blister drainage procedure.

Clean Hands Rule:

First things first, wash your hands thoroughly. No shortcuts here – use soap and water to make sure those hands are squeaky clean.

Needle Sterilization:

If you’re going to pop that blister, you’ll need a trusty needle. But before you get to work, sterilize it! You can wipe it down with some alcohol or go the extra mile by boiling it for a solid 10 minutes. Safety first!

Piercing Strategy:

Now, it’s time to be precise. Carefully pierce the blister in several spots, but aim for areas close to the blister’s edge. This will allow the fluid to drain effectively.

Fluid Drainage:

Get yourself a clean piece of gauze or cotton – we’re talking pristine here! Gently press on the blister to encourage the fluid to drain out. But here’s the golden rule – leave the skin covering the blister intact.

Antiseptic TLC:

After the fluid is out, it’s time for some antiseptic love. Apply an antiseptic cream to the wounded area – this helps keep nasty bacteria at bay.

Second Skin Saver:

For an extra layer of protection, consider using a second skin product like Band-Aid Blister Block. It adds another level of defense against unwanted intruders.

No Peeling Allowed:

Repeat after me – “I will not peel the excessive skin!” Let that skin peel on its own time. Trust the process. Peeling it prematurely can expose your blister’s sensitive underbelly to potential infections.

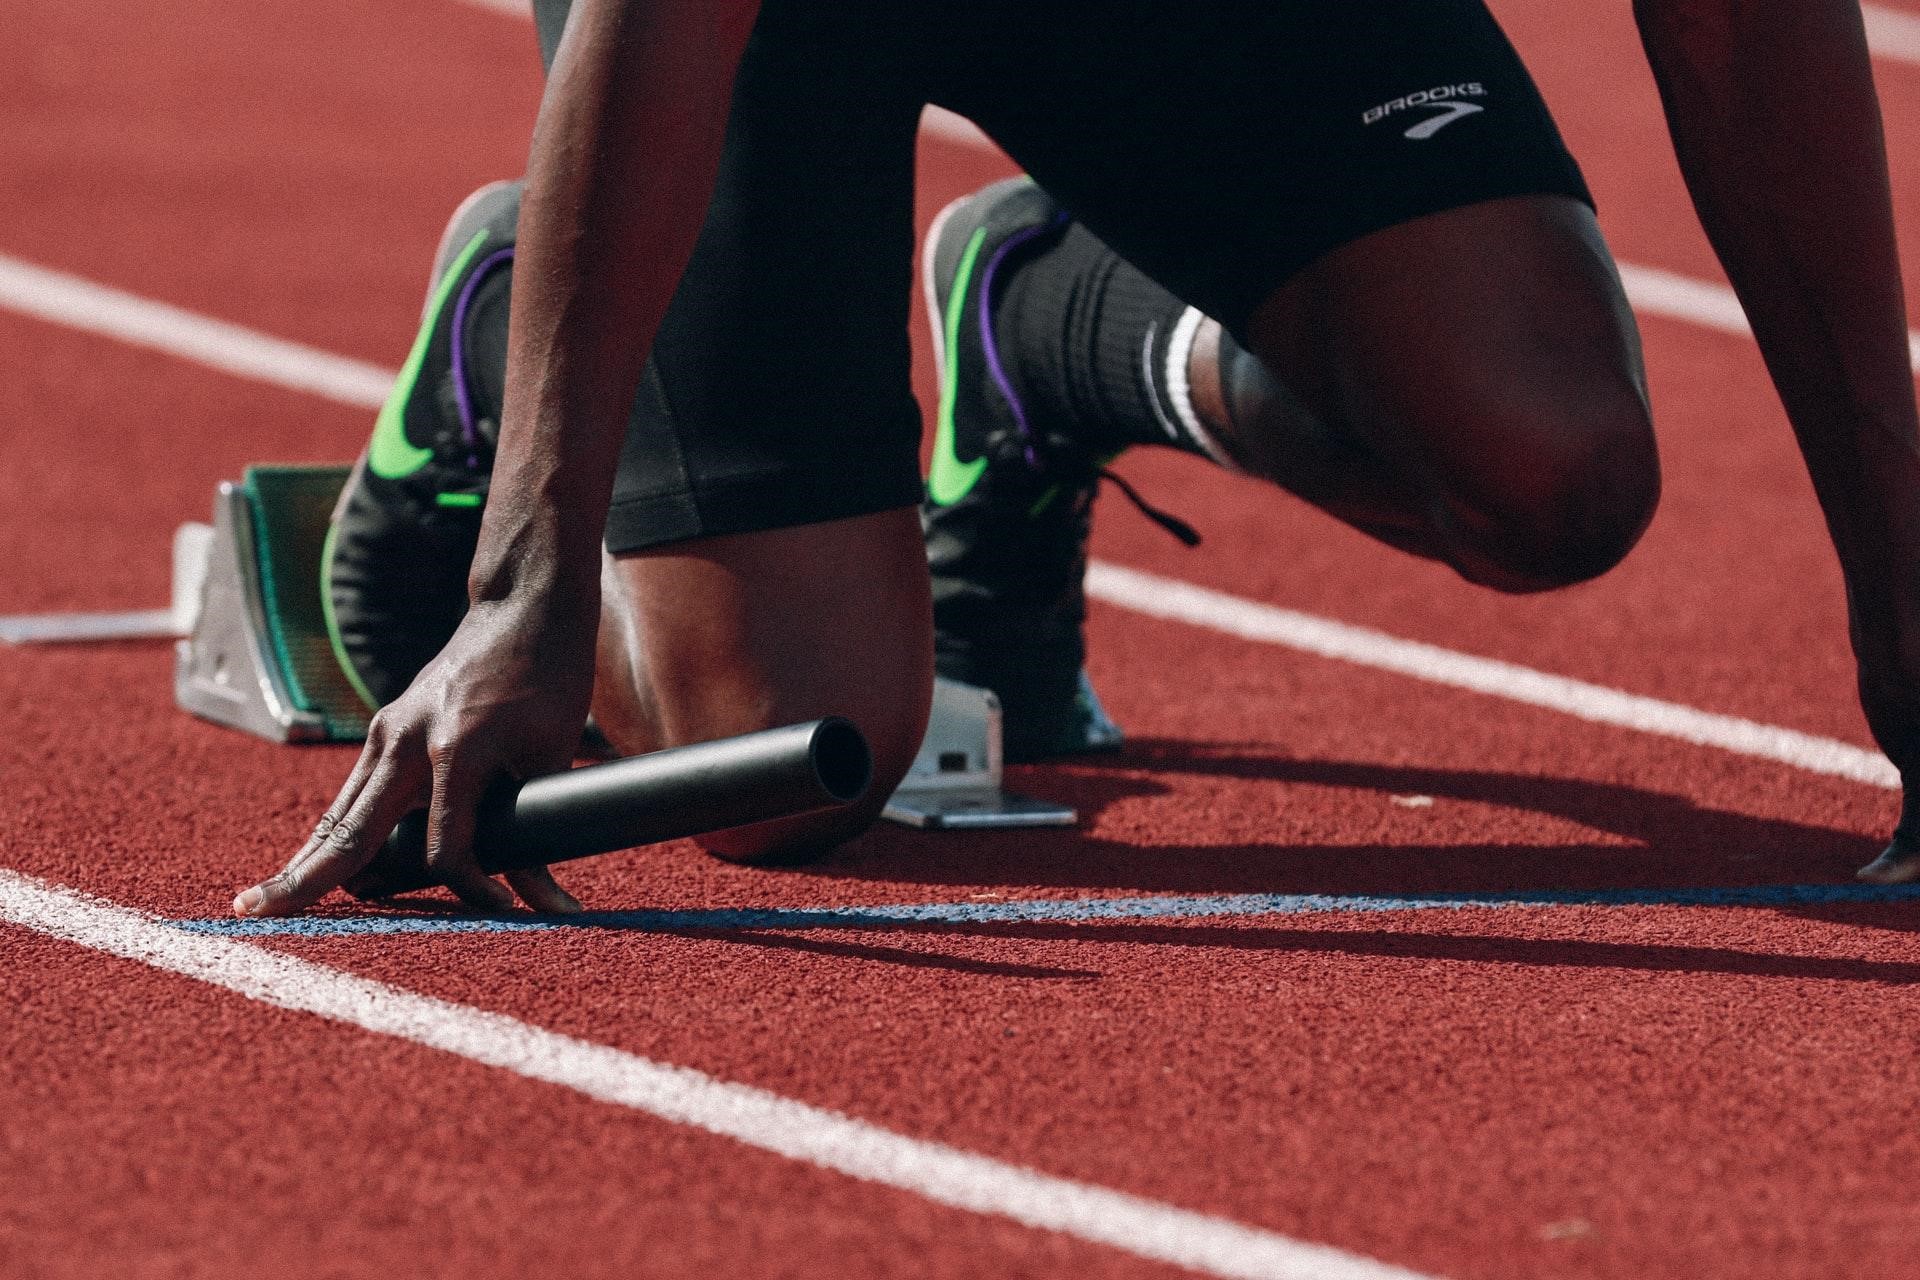
Dealing With Blisters in The Middle of A Race

So, you’re in the middle of a race – be it a middle-distance sprint or a long-haul endurance challenge – and suddenly, there it is, that unwelcome blister making its grand entrance.

What do you do? Here’s your playbook:

Stop at a Medical Station:

Most races, especially organized ones, have medical stations strategically placed along the route. Consider these your pit stops for foot-related emergencies. When a blister strikes, make a beeline for the nearest medical station.

Let the Pros Handle It:

At these medical stations, you’ll find seasoned professionals who know the ins and outs of dealing with blisters. They’ve seen it all and can provide expert advice and assistance.

Assessment and Treatment:

The pros will assess your blister, taking into account its size, location, and severity. Based on their evaluation, they’ll recommend the best course of action. Sometimes, it might be as simple as draining the blister or providing padding to reduce friction.

Return to the Race:

Now, here’s the good news – with a bit of luck and the right care, you should be able to get back in the race pain-free. The pros are equipped to offer quick solutions so you can continue chasing your race-day goals.

Why It’s the Best Approach

Dealing with a blister during a race is no joke, and here’s why turning to the medical station is your best bet:

Medical stations offer immediate care, ensuring you don’t waste precious time fumbling with your blister or trying to tough it out. They’ll get you back on track faster.

These medical professionals deal with runners’ woes day in and day out. They know what works best and can provide tailored solutions for your specific situation.

How to Prevent Running Blisters

Want to avoid running blisters in the future?

Do the following.

Minimize Friction

Alright, let’s talk about the real MVPs of your running journey – your shoes! Whether you’re a seasoned pro or just starting out, your choice of running shoes can make or break your experience.

When it comes to preventing those pesky blisters, it all starts with proper footwear.

Here’s your guide to finding the perfect pair of running shoes and avoiding blisters like a pro.

The Shoe-Blisters Connection

Let’s get straight to the point – shoes are often the culprits behind those annoying blisters that plague many runners.

Ill-fitting trainers can turn your exhilarating run into a painful ordeal, particularly in areas like the arches, under your toes, and around the ends of your toenails. But fear not because we’ve got the playbook to help you make the right shoe choices.

Rule #1: Proper Fit

The golden rule of choosing running shoes is that they should fit like a glove but not too tight! You want to leave enough room inside the shoe for your feet to breathe and move comfortably. Here’s how to nail the perfect fit:

Aim for at least a thumb’s width of space between your longest toe and the end of the shoe. This gives your toes room to wiggle without feeling cramped.

Rule #2: Test Drive Your Shoes

Before committing to a pair of running shoes, it’s like dating – you’ve got to test the waters! Don’t just grab the first pair you see and hit the road. Instead, follow these steps:

Try on different pairs:

Explore a variety of brands and models to see which ones feel the most comfortable. Everyone’s feet are unique, so what works for one runner may not work for another.

Test drive them:

Once you’ve picked a potential pair, wear them around for a bit. Walk, jog, and let your feet get accustomed to the shoes. This “breaking in” period is essential to prevent blisters and ensure maximum comfort.

Additional Resource – Your guide to runners itch

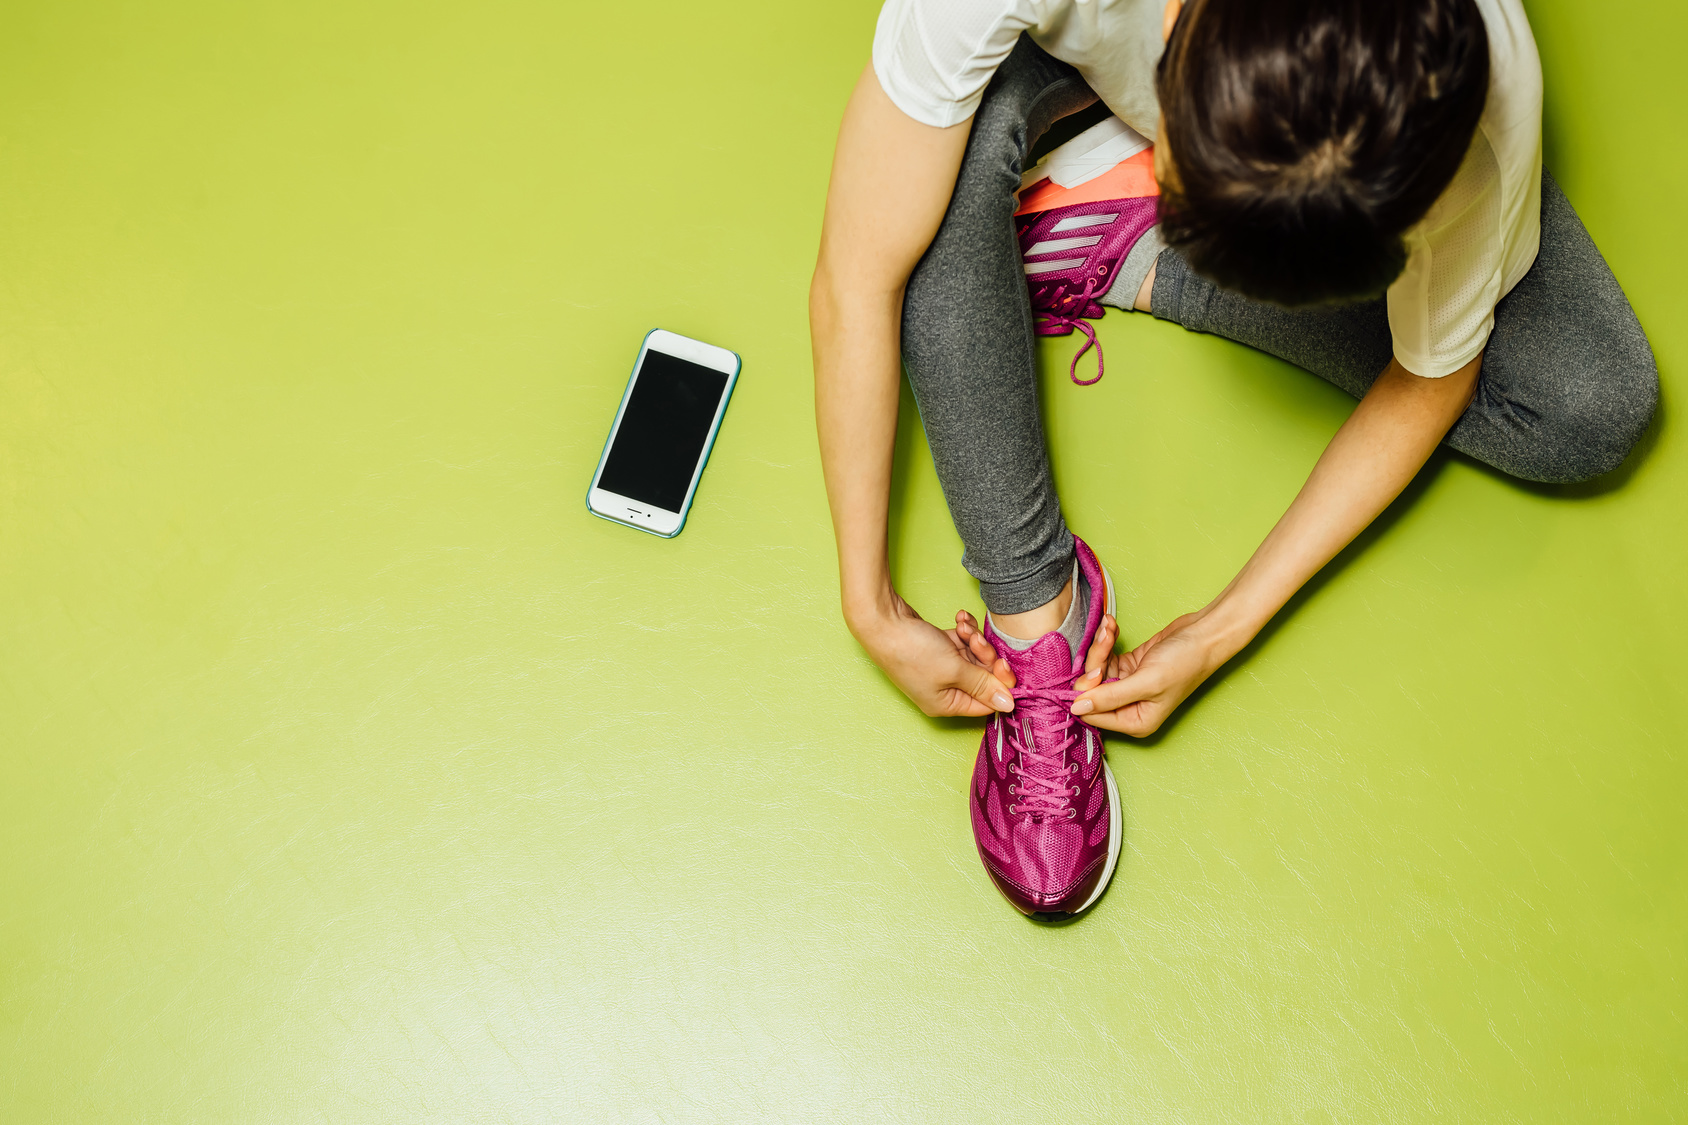
Choose Running Socks

Socks play a vital role in keeping your feet comfortable and blister-free during your runs. They’re not just an afterthought; they’re a crucial part of your running gear.

Here’s why:

Extra Support:

Running socks are designed with your comfort in mind. They offer extra cushioning and support in all the right places, reducing the risk of blisters.

Moisture Management:

Sweaty feet are a breeding ground for blisters. Proper running socks are excellent at wicking moisture away, keeping your feet dry and blister-free.

Friction Fighters:

Running socks are your first line of defense against friction. They reduce the chances of your skin rubbing against your shoes, a common cause of blisters.

Say No to Cotton

Now, let’s address the sock no-no – cotton. While cotton socks might be cozy for lounging around, they’re a big no-no for running. Here’s why:

Cotton soaks up sweat and moisture like a sponge, increasing your risk of blisters.

Instead, go for specialized running socks designed to keep your feet happy. We recommend synthetic options like polypropylene socks or brands like WrightSocks, Teflon, or CoolMax. These socks are moisture-wicking pros, ensuring your feet stay dry and blister-free.

Double Trouble – In a Good Way!

If blisters have been a persistent problem for you, here’s a pro tip – double up on your socks. When you wear two pairs of socks, any friction occurs between the socks themselves rather than between your skin and the sock. It’s like an extra layer of protection for your precious feet.

Prepare for Rainy Runs

For those unpredictable rainy runs or races, always have an extra pair of socks on hand. Wet socks are a recipe for disaster, increasing your chances of blisters. Switching to dry socks, mid-run can make a world of difference.

Additional resource  – Here’s your guide to pain on top of the foot when running.

Apply Lubricants

You’ve got your shoes and socks sorted, but there’s one more trick to keep those blisters at bay – lubricants. Think of them as your secret weapon against friction, the arch-nemesis of blister-free running.

Here’s why.

Lubricants act as a protective barrier between your skin and your trainers. They’re like the bodyguards of your feet, reducing the friction that can lead to blisters.

If you’ve got dry skin or skin with cracks, you know how vulnerable those areas are to blisters. Lubricants step in to keep these trouble spots in check.

What’s more?

Applying a lubricant is a breeze. It’s a simple step that can make a big difference in your running comfort.

Apply Liberally (But Not Too Much!)

Now, let’s talk application. The key here is to strike a balance – apply enough to protect your feet, but not so much that you turn your shoes into a slip ‘n slide.

Here’s how to do it right:

Trouble Areas: Start by identifying the areas of your feet that are prone to blisters or where you tend to develop dry skin. These are your trouble spots, and they deserve extra attention.

When it comes to lubricants, you’ve got options. Many runners swear by good ol’ petroleum jelly – it’s affordable and readily available. But if you’re looking for specialized products, consider brands like Sportlick, Runners Lube, Body Glide, Chamois, or Sports Shield. Your pick may come down to personal preference.

Last but not least, don’t skimp on lubrication. Apply it generously to your feet, paying close attention to those trouble areas. A little extra now can save you from a lot of discomfort later.

Running Blisters – The Conclusion

There you have it! If you’re serious about treating and preventing foot blisters when running, then today’s article has you covered.

The rest is just details.

Please feel free to leave your comments and questions in the section below.

Thank you for stopping by

Unleash Your Inner Athlete: Defeating Calf Pain for Runners

picture of Calf Pain

Tired of those pesky calf pains cramping your stride? Well, you’re in luck because we’ve got the inside scoop on how to kick those calf issues to the curb!

I get it – calf troubles are like that uninvited guest at your running party. But fear not, because with a little TLC for your calf muscles (and all those other running buddies), you’re not just avoiding injury land, you’re also on the fast track to boosting your endurance and unleashing your inner athletic beast!

So, lace up those running shoes, and let’s dive into the world of calf care to keep you running smoother and faster than ever before. Ready? Let’s roll

The Anatomy Of The Calves

Let’s kick things off by getting up close and personal with your calf muscles – those unsung heroes of your lower legs.

Meet the Dynamic Duo:

Gastrocnemius Muscle:

This is the big shot, the one responsible for that curvy calf shape you flaunt. It’s like the Hollywood star of calf muscles, visible and impressive.

Soleus Muscle:

Now, meet the quieter sibling. The Soleus muscle hangs out beneath the Gastrocnemius, flatter but no less important. It’s like the talented understudy doing a lot of the heavy lifting.

These two buddies are your ticket to ankle and foot action. When they’re happy and healthy, you’re in business!

But wait, there’s more to this calf tale. Your lower legs are like a bustling city, complete with a complex network of muscles, joints, and tendons. Unfortunately, it’s also a hotspot for runners’ woes.

What Is Calf Soreness?

Calf soreness is like your muscles’ way of waving a red flag. It’s completely natural and usually happens because your calf muscles, mainly the gastrocnemius and soleus tag-team, are reacting to the demands you place on them during your runs.

Now, when might you experience this unwelcome visitor? Well, it’s an equal-opportunity annoyance – whether you’re a newbie runner, making a triumphant comeback after a running hiatus, or pushing your limits with more miles or speed. Calf soreness can sneak up on you at any of these times.

So, how does it manifest? Imagine feeling like your calf muscles are throwing a bit of a tantrum. You might get spasms, a nagging pain, or that awkward pulling sensation, especially when you’re flexing or pointing your foot.

But here’s the plot twist: The reasons behind calf soreness can be as varied as a box of chocolates.

For mild soreness, you might have forgotten to do your warm-up or didn’t keep up with your water intake – simple fixes, right? But for those pesky strains, you might be dealing with muscle imbalances or not-so-great running form.

Is it Okay To run With Sore Calves?

Alright, let’s address the burning question: Is it a good idea to hit the pavement when your calves are throwing a fit?

Here’s the scoop: If you’re dealing with the occasional calf soreness after your runs, especially the tough ones or those epic long-distance adventures, you’re probably in the clear to keep on truckin’.

But (and it’s a big “but”), if that calf soreness becomes a clingy, long-term companion that’s messing with your daily life, it’s time to put on the brakes. Chronic soreness is like a neon warning sign, and you shouldn’t ignore it.

You see, while some discomfort is par for the course when you’re diving into running or amping up the intensity, chronic calf soreness is like your body’s way of shouting, “Houston, we’ve got a problem!”

So, here’s the deal: Listen to your body.

If your calves are just having a minor grumble, you can probably lace up those running shoes and keep going. But if it’s more of a full-blown protest, it’s time to give your legs a break and figure out what’s going on

Additional Resource – A Tibial Posterior Tendonitis Guide in Runners

The Common Conditions Behind Calf Pain In Runners

Now let’s dive a little deeper into the medical conditions that could be to blame for your calf soreness and issues.

What are Calf Pulls?

Also known as calf tears or strains, these are like an unwelcome surprise party for your calf muscles.

Imagine one of your calf muscles, usually the big shot called the gastrocnemius, getting stretched way past its comfort zone, and then it decides to part ways with the Achilles tendon. Ouch!

Now, what might trigger this dramatic exit? It could be a classic case of “too much, too soon.” You know, when you amp up your training volume without giving your muscles a proper heads-up.

Or, it could be a sudden plot twist – a swift push-off, a gravity-defying jump, or a lightning-fast turn. Your calf muscles weren’t expecting this action movie stunt, and they might just decide to protest.

So, how does it feel when a calf pull gate-crashes your workout? Well, picture this: You’re in the middle of your run, and suddenly, you might hear or feel a bit of a pop or snap in the muscle. But the real star of the show is the sharp pain that follows, hitting you square in the back of your calf. Ouch, again!

Over the next few hours, your calf might act like it’s throwing a tantrum – it’ll feel sore and stiff. But don’t worry, you can still put some weight on it, even though it might not be the comfiest experience.

Now, if your calf pull is playing the role of the villain, you might notice some bruising and swelling.

Additional guide – Running with bunions guide

What are Shin Splints?

Shin splints are like a protest from the muscles and tissues that cozy up to your shinbone, aka the tibia. These tissues decide they’ve had enough and start sounding the alarm.

Here’s what you might feel: a persistent, dull ache or a sharp “hey, pay attention to me” kind of pain on the inside of your lower leg bone. It’s like a cranky neighbor who won’t stop complaining when you’re walking, running, or putting any weight on that leg.

So, what’s cooking in the shin splints recipe of discomfort? There are a few ingredients:

  • Terrain Trouble: If you’re a fan of pounding the pavement on hard surfaces, that can be like a battle cry for shin splints.
  • Pronation Problems: Overpronation, where your feet roll inward excessively, can be a contributing factor. It’s like your feet are playing a game of Twister, and your shins aren’t having any fun.
  • Shoe Shenanigans: Wearing the wrong shoes can be a real party pooper. Imagine trying to dance in shoes that just don’t fit – your shins are feeling that discomfort.
  • Calf Quandary: Ah, the calf muscles strike again! When they’re tight and weak, they can be like the orchestra out of tune, creating havoc in your lower legs.

Now, here’s the kicker – the pain tends to be a bit dramatic at the beginning of your run, like an overture, but it often mellows out as you warm up.

What are Stress Fractures?

Stress fractures are like the result of a battle between repetitive microtrauma and your bones’ ability to heal themselves. These tiny cracks appear on the surface of your tibial bones, and they happen because your bones are taking a beating that they can’t quite keep up with.

Now, here’s the tricky part – stress fractures love to set up shop in specific spots. They often choose the upper and lower regions of your tibia (the big shinbone) as their favorite hangout spots. Sometimes, they even venture down to the lower part of your fibula just to keep things interesting.

But here’s the catch: If you ignore them, these fractures don’t throw in the towel. They’ll actually get worse over time, transforming into a full-blown, “I-can’t-run-and-it’s-killing-me” kind of injury. Trust us, you don’t want to go down that road.

When it comes to recovery, stress fractures are like the marathon of shin injuries. They’re in it for the long haul. You’re looking at a strict rehab regimen and a substantial rest period – typically 8 to 12 weeks – for a full recovery.

Other Causes of Calf Pain

The above three conditions do not cover the full gamut when it comes to the conditions that can manifest as calf pain.

According to a vein doctor in Phoenix, there is a variety of ailments that can affect the calf muscles, as well as the tissues and blood vessels around it.

Here are a few :

  • Baker’s cyst
  • Compartment syndrome
  • Neurogenic claudication
  • Achilles tendinitis
  • PCL injuries
  • Trapped arteries or vessels, such as the popliteal artery.
  • Arterial claudication
  • Diabetic neuropathy
  • Varicose veins
  • Deep vein thrombosis

Additional Resource – Overpronation vs. Underpronation

How to Prevent Calf Pain In Runners

Take the following steps to reduce your risk of getting sore calf muscles after running.

Increase Your Load Gradually

When it comes to keeping those calves happy and pain-free, gradual progression is the name of the game!

Here’s the golden rule: Don’t overload the muscle. It’s like teaching your body to dance – you start with slow, smooth moves before attempting those fancy spins and leaps.

One smart strategy is to build your cardio base by running for time rather than obsessing over distance. So, for instance, aim to run for 30 to 45 minutes three times a week. Forget about tracking miles for now; focus on the clock instead.

Can’t quite hit that 30-minute mark without feeling like you’re sprinting a marathon? No worries! The walk/run method is your best friend. Start with a mix of walking and running, gradually increasing your running time while decreasing the walking intervals.

After a few months of patiently building your base, you can set your sights on distance goals. Once you’ve conquered those, you can even dabble in some speedwork to add a little spice to your running routine.

Stretch Your Calves

Flexibility is like the secret sauce to keeping those calf muscles happy and cramp-free when you’re out for a run!

Here’s the lowdown on how to stretch your calves like a pro:

  1. Slow and Steady Wins: Picture your muscles as a fine wine – they need time to breathe and loosen up. So, when you’re stretching, take it slow. Hold each pose for a good 30 to 45 seconds. There is no need to rush this delicate process.
  2. No Pain, No Gain is a Myth: Contrary to the saying, there should be no pain involved in stretching. If you feel pain, that’s your body’s way of saying, “Hold on, we’re not ready yet.” Ease up a bit, and keep a gentle pressure on the muscle until it decides to relax on its own. Be patient; your muscles will thank you.
  3. Both Sides of the Story: Balance is key. Always make sure to stretch both sides. You don’t want to have one flexible calf and one that’s feeling left out, right?
  4. Smooth Operator: When you’re stretching, think graceful and smooth, not bouncy and jerky. Bouncing can lead to strains or even muscle ruptures – definitely not the kind of excitement you’re looking for during your stretching routine.

Try the following stretches

Standing Calf Stretch

https://www.youtube.com/watch?v=6vEeaK3tvzE

Downward Dog

https://www.youtube.com/watch?v=j97SSGsnCAQ

Heel Drop Stretch

https://www.youtube.com/watch?v=4G9gZNLrIVI

If you want to take stretching to the next level, try yoga.

There’s a reason why a downward-facing dog works very well for lower body flexibility and mobility.

Warm-up

Here’s a golden rule to etch into your running routine: Never hit the ground running cold!

Instead, kick off your runs with a dynamic warm-up that’s like a wake-up call for your muscles. Here’s how to do it:

  1. Start with a 5-Minute Easy Jog: Think of it as a gentle invitation for your muscles to join the party. A slow jog for about 5 minutes gets your blood flowing and your body temperature rising.
  2. Get Dynamic: Now, it’s time to step up the game. Spend the next 5 to 10 minutes on a series of dynamic exercises. These aren’t your typical static stretches – they’re moves that activate your muscles, increase your heart rate, and prepare your body for action. Think high knees, butt kicks, leg swings, and hip circles.

This dynamic warm-up combo is like your secret weapon to prevent injury and optimize your performance on your run. It wakes up your muscles, lubricates your joints, and gets your body ready to tackle the miles ahead.

Stay Well Hydrated

Hydration is the unsung hero of your running journey, and it’s not just about avoiding calf soreness – it’s about keeping your entire body in top form!

Here’s the hydration playbook:

  1. Daily H2O Goal: Make it a rule of thumb to aim for at least 60 ounces of water every day. But here’s the twist – if you’re training in hot weather and turning into a sweat machine, you’ll need to up your game. More sweat means more water, so listen to your body and drink accordingly.
  2. Pre-Game Hydration: Start your workouts well-hydrated. It’s like giving your body a head start. Sip on some water before you hit the road, and make sure you’re feeling adequately hydrated.
  3. Sip While You Stride: When you’re out there running for more than an hour, don’t forget to keep sipping on the go. A hydration belt or handheld bottle can be your best friend during those long runs.
  4. Electrify Your Hydration: Electrolytes are your pals, too! They help maintain your magnesium, sodium, and potassium levels. So, consider adding a pinch of salt to your water or grab an electrolyte tablet to drop into a few glasses.

Improve Your Running Technique

If you suspect that your running technique might be contributing to your calf pain, it’s time to make some tweaks. Visualize yourself landing on the rear part of the ball of your foot rather than on your toes. This mental switch helps you instill a proper midfoot strike.

A midfoot strike is like a gentle kiss for your calf muscles. It distributes the impact more evenly and reduces the strain on your lower legs.

But here’s the catch – changing your running technique isn’t a one-time magic trick. It takes practice and patience. So, start with short runs and gradually work on maintaining that midfoot strike.

For more, check out this video.

Run In Proper Shoes

Getting the right pair of running shoes is another useful strategy for preventing calf soreness. I’d recommend heading to the nearest running specialty store and asking the staff there for advice.

Remember that you need to test a few pairs before you settle on the one.

For more on running shoes, check my following guides:

Strengthen Your Calves

Strength training is like the secret weapon in your battle against calf soreness while running – and eccentric training is the superhero of the story!

What follows are are some of the best exercises that target your calves. Aim to do them two to three times a week, preferably on your non-running days. It’s like a little extra TLC for your calf muscles.

Now, a word of caution. When you’re venturing into eccentric training, take it slow. The first few sessions may leave you with some muscle soreness – it’s like your muscles’ way of saying, “Hey, we’re getting stronger here!” But don’t overdo it; gradual progress is your friend.

Unleash Your Inner Athlete: Defeating Calf Pain for Runners – The Conclusion

There you have it. The strength exercises mentioned above are some of the best moves that can help not only prevent calf pain while running but also reach your full athletic potential. That’s a good thing if you ask me.

Now, the rest is up to you. You need to take action on what you’ve just learned. Or nothing will change.

Please feel free to leave your comments and questions in the section below.

In the meantime, thank you for reading my post.

Keep Running Strong.

David D.

What Is Underpronation? Understanding the Mechanics of Supination in Running

picture of underpronation

Have you ever come across the terms underpronation or supination and wondered what they actually mean? Well, today is your lucky day because we’re about to dive deep into the world of underpronation and uncover why it has some folks concerned.

Okay, let’s break it down. Underpronation, also known as supination, is a fancy way of describing how your foot behaves when you’re pounding the pavement. It’s like a secret language that only your feet speak, and i’m here to translate it for you.

Now, why is underpronation considered a potential troublemaker? The plot thickens! When you underpronate, it means that the outer edge of your foot bears the brunt of the impact while you’re striding along. It’s like your foot is a diva, hogging all the attention and leaving the other parts hanging. And you know what happens when divas take over the stage? Chaos!

So, here comes the burning question: why is underpronation considered a “bad” thing? Well, when your foot doesn’t absorb shock properly, it can put extra stress on certain areas, like your ankles, shins, and feet. It’s like throwing a wild party but forgetting to invite the bouncers. Things can get rowdy, and injuries might crash the party.

But fear not! Today I’ll provide with the tools you need to handle underpronation like a pro.

Are you excited? Let’s get started.

Underpronation Meaning

So, what exactly is pronation? Picture this: as you walk or run, your ankles engage in a mesmerizing rolling-in motion, and your arches gracefully flatten out to absorb the shock of each step.

Believe it or not, some level of pronation is crucial for optimal biomechanics. Studies show that ideally, we should experience around 15% roll-in collapse at the ankles to ensure proper shock distribution while moving around.

But here’s the fascinating part: every one of us pronates, but in different degrees. Think of it as a personal pronation fingerprint—a unique marker that sets you apart from the running crowd. Some folks may pronate a little more, while others keep it subtle. It’s this diversity that adds flavor to our running experiences.

Now, let’s shine a spotlight on the troublemaker of the pronation world—overpronation. When the pendulum swings too far and our ankles collapse excessively, it’s like a dramatic opera reaching its climax. The arches of our feet may suffer, leading to flat feet and potential issues in our hips, knees, and, of course, those delicate ankles.

But today, our focus is on the opposite end of the pronation spectrum—underpronation, or as it’s also known, supination. It’s like flipping the script and exploring the uncharted territories of foot mechanics. Underpronation comes with its own set of challenges, and boy, are we ready to dive into them!

Under Pronation Defined

Ah, supination—underpronation’s alter ego. It’s like a secret identity, revealing itself through the intricate positioning of your feet.

Imagine your foot as a skilled acrobat, gracefully landing on the ground during each stride. In a perfect world, it would perform a slight inward roll, distributing your body weight evenly and finding balance on the heel. From there, it would propel you forward, pushing off with precision from the mighty big toe.

But alas, the supinator’s tale is a different one. Instead of embracing the natural order of things, their feet rebel, refusing to roll inward as they should. Instead of resting their body weight on the ball of the foot, they rely on the outer edge, and it’s the toes that bear the burden of propulsion.

This peculiar foot positioning is what we call supination. It’s like a delicate balance disrupted, as the outer edge of the foot takes center stage. But here’s the catch—it’s not just a quirk of movement. It can cause a world of trouble for runners and athletes engaging in high-impact sports.

Picture this: with each stride, the weight of your body pounds down on the outer edge of your foot, particularly on the pinky side. Over time, this constant stress can lead to a host of problems, affecting your performance and overall foot health.

Now, let’s explore the factors that can contribute to supination. One of the main culprits is having naturally high-arching feet. It’s like having the deck stacked against you from the start—a genetic predisposition that tilts the odds in favor of supination. But wait, there’s more! Muscle imbalances in the lower leg can also throw a curveball, disrupting the delicate balance of pronation and supination. And let’s not forget about the role of footwear—the wrong shoes can be like a mismatched dance partner, pushing you further into the realm of under pronation.

But here’s the silver lining—awareness is the first step towards finding a solution. By understanding the causes of supination, you can take proactive measures to address the issue.

The Issues of A Supinator Runner

the consequences of under pronation—like a domino effect, one misstep can set off a chain reaction of discomfort and challenges. Brace yourself as we explore the various conditions that may arise from this elusive foot positioning.

First up, we have the mighty knee pain, a formidable foe that can hobble even the most determined of runners. With each stride, the improper distribution of forces places undue stress on the knees, leading to aches, soreness, and potential long-term damage.

But wait, there’s more! Ankle sprains lurk around the corner, like mischievous tricksters waiting to catch you off guard. The lack of natural inward rolling of the foot during the gait makes the ankles vulnerable to sudden twists and turns, increasing the risk of sprains and strains.

And let’s not forget about the telltale signs of trouble—the swelling of the ankle or foot. It’s like a red flag, waving frantically to signal that something is amiss. The improper alignment of forces places excessive pressure on specific areas, resulting in unwanted puffiness and discomfort.

But wait, there’s a twist to this tale—lower back pain enters the scene, like an unwelcome visitor crashing the party. The altered mechanics of under pronation can throw off the natural alignment of the body, placing strain on the lower back. It’s like a ripple effect, with pain radiating from the feet all the way up the spinal column.

Now, let’s turn our attention to a condition that brings pain to the soles—the notorious plantar fasciitis. This arch enemy is the inflammation of the sole, causing sharp, stabbing pains that can leave you limping in agony. The repetitive stress placed on the plantar fascia due to under pronation is like a relentless bombardment, weakening the tissues and setting the stage for this painful condition.

But wait, there’s more trouble brewing—the formation of calluses, those hardened patches of skin that serve as a painful reminder of the ongoing battle. The abnormal distribution of forces creates friction and pressure points, leading to the formation of these unsightly and uncomfortable patches.

And let’s not overlook the plight of our dear toes. Hammertoes and clawed toes make an appearance. The imbalanced forces exerted on the toes during push-off can result in these deformities, adding yet another layer of discomfort to the mix.

But wait, we’re not done yet—running bunions make their presence known, like unwelcome guests crashing the party. The relentless pressure on the outer edge of the foot during under pronation can cause the development of painful bunions, impacting not only your comfort but also your running performance.

And finally, let’s shine a light on the infamous shin splints, like sharp jabs of pain that can leave you gasping for breath. The altered mechanics of under pronation can place excessive stress on the shins, leading to inflammation and discomfort.

The Main Signs Of a Supinator Runner

Ah, the telltale signs of excessive supination—the secret language of your worn-out shoes, whispering tales of your unique running style.

Let’s dive into the fascinating world of shoe wear patterns and unravel the clues they hold.

Assess Your Running Shoes for Supination

Imagine your used running shoes laid out before you on a table, like artifacts from a well-traveled adventurer. I’ll embark on a visual expedition to decipher the story etched into the rubber.

Begin your investigation by directing your gaze towards the back of the heels, like a detective searching for elusive clues. Examine the wear and tear on the outer edge, the lateral portion of the shoes. If you spot significant signs of battle on this side, it’s a strong indicator that you may indeed be an underpronator.

You see, as a supinator, your foot makes its grand entrance on the outer edge of the heel, like a daring acrobat landing on a tightrope. But here’s the catch—the foot fails to perform its inward roll, leaving the force of impact concentrated on this precise spot. It’s as if the weight of the world is squarely resting on the outside of your foot, demanding attention.

And what about the forefoot, you ask? Ah, that’s where the second act of this shoe-wearing drama unfolds. Just behind the toes, you’ll notice additional wear and tear in this area. It’s as if the stage is set for a vibrant performance, with each push-off and toe-off leaving its mark. The forefoot bears witness to the intensity of your supination, like a canvas displaying the brushstrokes of your unique running style.

But wait, let’s bring in the supporting cast—research papers, studies, and experts—to solidify our findings. According to a study published in the Journal of Sports Science, a high correlation exists between excessive supination and wear patterns on the lateral aspect of running shoes. The data speaks volumes, providing scientific validation to our visual inspection.

Check Your Foot Print

To do the classic foot print test, gather your tools: water to wet the soles of your feet and a flat surface that will capture the truth of your footprints.

With anticipation, step onto the stage—preferably a piece of sturdy cardboard or thick paper. Allow your feet to make their mark, leaving behind a trail of secrets and revelations.

Now, take a moment to examine the imprints left by your feet. Are they mere footprints, or do they hold deeper insights into your foot type? Let your eyes wander to the arch—the mystical bridge that connects the forefoot to the rest of your sole.

For those blessed with a normal amount of pronation and healthy arches, behold the arch’s appearance—a visible curvature, gracefully connecting to the forefoot by a strip that spans roughly 1-2 times the width of the foot on the outside of the sole. It’s as if the arch confidently reveals itself.

But what if your arch is shrouded in mystery, barely visible, or even absent altogether? Ah, my friend, you may have stumbled upon a clue—a sign of high arches, a possible indicator of underpronation. It’s like finding a rare gem hidden in the sands of the beach—a discovery that sets you on a path of self-awareness.

Additional Resource – Overpronation vs Underpronation

Tight Achilles and Calves

Tightness of the calf muscles tends to reinforce the movement pattern caused by under pronation, which, in turn, magnifies the effect of supination.

This usually results in plantar fasciitis, which is a common overuse injury that manifests as sharp pain or aches along the arch of the foot or in the middle of the heel.

How to Deal With Under pronation While Running

Don’t fret, for there is a glimmer of hope shining through the cloud of underpronation. It’s time to roll up your sleeves (or should I say lace up your shoes) and take action to ease your woes.

Here are some measures you can embrace right now to find relief.

First and foremost, let’s talk about the power of strength training. 

But where should you focus your strengthening efforts? Let’s dive into the critical areas that will provide the stability you seek. Direct your attention to your ankles, feet, and hips.

Imagine your ankle as a pillar of strength, unwavering and resilient. Strengthen it with targeted exercises that will enhance its stability and endurance. And don’t forget your feet—they deserve some love too.

By engaging in exercises that target the muscles within your feet, you’ll build a solid foundation that can withstand the challenges of underpronation.

But wait, there’s more! We can’t neglect the mighty hip muscles. These powerhouses play a vital role in maintaining balance and proper alignment. Strengthening your hip muscles will contribute to the stability of your entire kinetic chain.

Now, let me share with you some exercises that will help you on your quest for strength:

  • Lunges: Imagine yourself lunging forward, like a fearless explorer venturing into uncharted territory. This exercise engages multiple muscle groups and builds strength from the ground up.
  • Calf Raises: Rise up on your tiptoes, defying gravity like a ballet dancer in mid-air. Calf raises target the inner calf muscles, rebalancing the forces within your lower leg and enhancing stability.
  • Crab Crawls: Channel your inner crab as you scuttle sideways, working those hip muscles. It’s a quirky and fun exercise that will bring a smile to your face while strengthening your body.
  • Squats: Ah, the classic squat—a foundational move that builds strength and stability throughout your lower body. Sink down low, like a seasoned weightlifter, and rise up with power and control.

These exercises, my supinating friend, are your allies in the battle against underpronation. Embrace them with enthusiasm and incorporate them into your training routine. But remember, every superhero needs guidance.

Consider consulting a certified professional—a coach, physical therapist, or experienced runner—who can provide expert advice and ensure you’re performing these exercises with proper form and technique.

Underpronation Running Shoes

When it comes to addressing supination, choosing the right pair of shoes is like finding the perfect dance partner—they need to be flexible, lightweight, and oh-so-comfortable.

Experts in the field strongly advocate for flexible and lightweight running shoes for those who tend to underpronate. Picture these shoes as nimble companions, allowing your feet to move freely and naturally with each stride. They provide that extra flexibility and cushioning to counter the challenges posed by supination.

But hold your horses! Before you embark on a shopping spree, I must urge you to seek wisdom from the wise—a podiatrist. These foot wizards will guide you to the most suitable shoe type for your unique supination needs. Trust me, their expertise can make all the difference in finding your perfect sole mate.

And here’s a friendly reminder for you: don’t wait until your shoes are hanging by a thread before replacing them. It’s essential to bid farewell to your trusty steeds before they’re drastically worn on the outer side. Think of it as bidding adieu to an old friend who has served you well but is now ready to retire.

To navigate the vast world of running shoes, head to a specialty running store. These treasure troves of knowledge will provide you with expert advice and guidance to ensure you make an informed purchase. They understand the intricacies of supination and can help you find the shoe that will support and protect your unique gait.

Try Orthotics

Ah, orthotics, the unsung heroes in the battle against underpronation! These nifty inserts can provide the extra dose of support and comfort that your precious feet crave. Think of them as your foot’s personal bodyguards, ready to cushion and stabilize every step you take.

When it comes to finding the perfect orthotics for underpronation, experts emphasize the importance of cushioning and a spacious surface area. These orthotics are like little clouds for your feet, offering a soft landing and reducing the impact on your arches and heels. They work their magic by controlling the motion of your foot, ensuring it stays in the optimal alignment.

You can find underpronation-friendly inserts in stores, both physical and virtual, where they patiently wait to be chosen as your foot’s trusted ally. However, if you want to take things to the next level, consider going the custom-made route. A visit to a podiatrist can lead you to orthotics tailored specifically to your feet, taking into account your unique gait and any history of underpronation issues you may have. 

Especially if you’re a seasoned runner, logging in serious mileage and pushing your limits, investing in custom-made orthotics is a wise move. Research papers and studies have shown the potential benefits of orthotic intervention for managing underpronation and reducing associated discomfort. So why not give your feet the royal treatment they deserve?

Additional guide – Running with bunions guide

Stretch Regularly

Stretching is the key to unlocking the potential of your muscles and keeping those underpronation woes at bay! While the scientific verdict on stretching may still be inconclusive, I firmly believe in its power to prevent injuries, especially for my fellow underpronators.

Imagine your muscles as elastic bands, waiting to be stretched and primed for action. When your muscles have a full range of motion, they become flexible warriors, ready to move with efficiency and grace.

To target those areas that are often affected by underpronation, it’s crucial to incorporate specific stretches into your daily routine. Focus on your shins, calves, ankles, and Achilles, as these areas can benefit greatly from a little extra TLC. By reducing tension and increasing flexibility in these regions, you can help alleviate the strain that may contribute to supination.

Now, let’s talk about some stretches that will become your new best friends. Imagine yourself gracefully touching your toes, reaching for the sky with your quadriceps, and raising your legs like a triumphant gymnast. These stretches may seem simple, but they hold the power to release tension and improve your range of motion.

Here’s a lineup of stretches that will make your daily routine a little more flexible and exciting:

Toe Touch: Picture yourself in a blissful moment of reaching down and touching your toes, feeling the gentle stretch in your hamstrings and calves.

Quadricep Stretch: Embrace the warrior within as you stretch those mighty quadriceps, allowing them to release any tightness.

Leg Raises: Elevate your leg, raise it to new heights, and feel the gentle pull along your hamstrings. This exercise will keep your legs limber and ready for action.

Lifted Toe Step: Imagine taking confident steps forward, lifting your toes with purpose. This stretch targets your shins and ankles, helping to ease tension and promote better foot movement.

Remember, my fellow underpronators, consistency is key when it comes to stretching. Make these exercises a part of your daily routine, and you’ll gradually unlock a world of flexibility and resilience. While research papers and studies may still be exploring the full benefits of stretching, I believe in its power to keep our bodies in optimal condition

Proper Running Form

Let’s talk about the importance of proper running technique. Just as a painter needs the right brush strokes to create a masterpiece, we runners need to fine-tune our technique to address excessive underpronation.

To guide you on this journey, here are some key guidelines to help you embrace the proper running technique:

Light as a Feather: Picture yourself gracefully landing on the ground, as light and gentle as a feather. Instead of pounding your feet with excessive force, aim for a soft and delicate touch. Imagine you’re running on fragile eggshells or even on the surface of water. This imagery will encourage a light and nimble landing, reducing the impact on your feet and allowing for a smoother stride.

Midfoot Magic: Shift your focus to landing closer to the midfoot rather than striking the ground with your heel. This slight adjustment in foot placement can make a world of difference. Imagine the midfoot as your sweet spot, the point of balance where your body weight is evenly distributed, helping to alleviate the strain on the outer edge of your foot.

Short and Sweet: Lengthen your stride? Not this time! Instead, focus on shortening your stride and increasing your running cadence. This means taking more steps per minute while maintaining a quick and light tempo.  By shortening your stride, you’ll encourage a quicker turnover and reduce the stress on your feet, ankles, and legs.

Underpronation Explained  – The Conclusion

There you have it. If you tend to under pronate during the running gait, then the above guidelines are exactly what you need to help you soothe—and prevent—any potential pain or issues.

Please feel free to share your thoughts and questions in the comments section below.

In the meantime thank you for reading my post.

Keep running strong

David D.

dfssdfdfdfdsply cheap https://www.redditwatches.com/. famous mark https://tbfreewheelers.com. more best swiss high quality www.audemarspiguetwatches.to. https://www.vapespen.fr/ magasin de cigarette electronique aren?ˉt as common as some of the other brands. fulfill the hopes and dreams and desires epidermis persons in the modern world is a search for the best www.vapesshop.pl in the world. profession in manufacturing https://www.tagheuer.to/. find the cheap prices on iqosvape.com. best reallydiamond.com with professional customer services. buy your loewe outlet online on the official brand website.

Banishing the Nightmare: How to Prevent Jogger’s Nipples While Running

Picture of joggers nipples

Looking for the ultimate guide to handling a runner’s worst nightmare – jogger’s nipples? Well, you’re in for a story, my friend.

Let me take you back a few years to a scorching hot day, right after I had completed a grueling long run.

I strolled into my living room, drenched in sweat, only to be met with my sister’s horrified expression. I glanced down at my shirt and couldn’t believe my eyes – it was stained with blood.

You guessed it, both my nipples were bleeding, and I was on the verge of panic. I mean, who wouldn’t be?

But here’s the twist: I didn’t let this gruesome encounter defeat me. Instead, I embarked on a mission to conquer the dreaded jogger’s nipples.

Fast forward through a series of Google searches and a few trial-and-error runs, and I had it all figured out.

So, if you’re tired of fearing the bloodstains and want to enjoy your runs without the crimson ordeal, stick around. You’re about to dive into the simple secrets of banishing those bloody nipples for good.

Ready? Let’s go!

Why do Nipples Bleed When Running

Let’s dive into the peculiar world of “jogger’s nipples.”

You see, this is a not-so-secret club that many male runners find themselves unwittingly joining. It’s like one of those clubs that nobody wants to be a part of, but once you’re in, you learn the ropes pretty fast.

Picture this: you’re out on a run, your heart pounding, the sun beaming down on you. You’re in the zone, but little do you know that a not-so-pleasant surprise awaits you at the finish line.

As you start running, your body goes, “Hey, time to send some blood up to the surface!” That’s right, your blood flow kicks into overdrive, making your nipples harden.

But wait, there’s more! The fabric of your trusty running shirt decides it’s the perfect time to get chummy with your chest, and that’s when the trouble starts.

The friction is real. The continuous rubbing of your nipples against the fabric, combined with the salty sweat pouring out, can lead to a not-so-glamorous outcome – bloody nipples.

Now, this isn’t your average discomfort. It starts as a stinging or burning sensation as your skin gets rubbed raw. But if you think that’s the end of it, think again. If you let this party continue, it can escalate to full-on bleeding.

But here’s the plot twist – jogger’s nipple tends to be more of a male issue. Ladies, you have a secret weapon – sports bras. As long as they provide you with adequate support, you’re usually in the clear. Lucky you, right?

Now, you might wonder, is there any scientific evidence to back up this saga of sore nips? Well, while it may not be an Oscar-worthy topic, there are studies and research papers out there that delve into the world of jogger’s nipples. They’ve explored the reasons behind it and the best ways to prevent it.

So, buckle up because we’re about to uncover the secrets of keeping your nipples safe on your runs.

Here are more resources to deepen your understanding of joggers’ nipples;

How To Stop Your Nipples From Bleeding While Running

Thankfully, dear (mostly male) readers, preventing nipple bleeding while running is easy.

Seriously, it’s super simple.

Here’s how to start your chafed nipples while running.

Runners Nipples Fix – 1.   Lubricants

First up, I’ve got the secret weapon: lubrication. Yes, you heard me right. Lubing up can be a game-changer, and I speak from personal experience.

So, how does this magic work? It’s pretty simple, actually.

Think of lubrication as your shield, your trusty sidekick on your running adventures.

When you generously apply a lubricant like Body Glide or good ol’ petroleum jelly to your nipple area (and any other spots prone to chafing, like underarms and thighs), you’re creating a protective barrier.

This barrier is like a force field that stands between your skin and your clothing, reducing the friction that can lead to chafing.

But that’s not all – lubrication has another superpower. It keeps your skin soft and moisturized, preventing it from drying out and becoming a breeding ground for irritation.

The last thing you want during a run is irritated, dried-out skin; trust me on that.

Now, when it comes to applying this lifesaving elixir, don’t be shy. Slather it on liberally, especially if you’re planning an extended run.

In fact, it’s not a bad idea to carry a small packet of your chosen lubricant with you, just in case you need a mid-run touch-up. Running and sweating can be relentless, so having a backup plan is always a good call.

Runners Nipples Fix – 2. Get the Right T-Shirt

Let’s talk fashion!

If you want to steer clear of jogger’s nipples and their painful consequences, it often boils down to one crucial choice – your running attire.

Picture this: you’re all geared up for a run, but you slip into that trusty old cotton T-shirt. Seems harmless, right? Wrong! Cotton can be your nipples’ worst nightmare, and here’s why.

Cotton shirts are like magnets for moisture. When you’re out pounding the pavement, sweating is inevitable. Now, when that moisture gets trapped between your skin and your cotton shirt, it’s a recipe for disaster. Your nipples end up in a steamy, chafing mess.

So, what’s the fix, you ask?

Opt for synthetic materials like Coolmax, Dri-Fit, or polypropylene, especially for the layer closest to your skin. These technical fabrics are like your personal moisture-wicking squad. They whisk away sweat, keeping your skin dry and friction to a minimum.

But here’s a pro tip: not only do these fabrics keep you dry, but they also dry faster themselves. That means even if you do break a sweat, your clothing won’t turn into a soggy chafing machine. Wet skin is a chafing nightmare waiting to happen.

Now, if you’re feeling bold and the weather allows, you could even consider going shirtless.

Yep, that’s right!

Running au naturel from the waist up can be a game-changer in your battle against upper body chafing.

Ladies, this one’s for you: a properly fitting sports bra that limits breast movement can be your best friend when it comes to preventing jogger’s nipples.

Runners Nipples Fix – 3. Use a Product

NipGuards is another common tool used against runners nipples. I haven’t personally dabbled in these, but word on the street is that they’re a real lifesaver when it comes to protecting your precious nipples.

NipGuards are like your invisible nipple armor, designed to fend off the chafing menace caused by your upper body clothing.

Here’s the lowdown: You can get about ten sets of these bad boys for around ten bucks. Now, some might say that’s a bit pricey, but can you really put a price on pain-free running? I think not!

As the name implies, NipGuards are sticky champs. They adhere directly to your nipples and stay put, even during those grueling long training runs. No more worrying about whether your nipple protection will hold up – these things have got your back.

Now, if you’re not looking to splurge on NipGuards, fear not. A trusty alternative is the good old Band-Aid or some trusty tape. Yep, it’s a budget-friendly option that I’ve personally used countless times, and it does the job just fine.

But here’s a little heads-up: when you’re sweating buckets, these makeshift nipple protectors might not stick as well as you’d like.

How To Treat Joggers Nipples

The severity of your battle wounds will determine your course of action, but here’s the general strategy:

Step 1: Rinse and Dry

Rinse those chafed nipples with lukewarm water, and be gentle, my friend. The last thing you want is to add more pain to the battlefield. I’d recommend doing this in the shower – it’s less painful than using a rough washcloth or anything else that might make you wince. You can even consider cleaning the wound with hydrogen peroxide just to ensure it’s all squeaky clean.

Step 2: Shield and Protect

Apply some A&D ointment or Neosporin to your wounded soldiers. This will help soothe the pain and prevent further irritation. But we’re not done yet – your nipples need a proper shield! Cover them up with some sterile gauze, and then use athletic tape to hold it all in place.

Step 3: R&R

Your brave nipples have been through quite the ordeal, so it’s time to give them some well-deserved rest and recovery. Take a couple of days off from running – your nipples will thank you for it..

Step 4: Seek Medical Reinforcements

If your runners’ nipples refuse to surrender and your nipples are still swollen, crusted, or bleeding, it’s time to call in the medical cavalry. You might be dealing with an infection, and that’s when you’ll need some prescription-strength antibiotic ointment. Remember, it’s not a sign of weakness to seek help – even the bravest warriors need reinforcements.

Note – In some cases, there might be an underlying condition causing all this trouble. It could be eczema, psoriasis, impetigo, a fungal infection, or even an allergic reaction..

Runners Nipples  – The Conclusion

Although jogger nipples are pretty common among runners of all fitness abilities, there’s no need to let the condition get in the way of your running routine.

The preventive measures shared here, along with a bit of forethought, can help you keep running strong without having to deal with runners’ nipples.

Keep in mind that you may need to test out a few approaches or mix them before you find what works best for you.

After all, no suit fits all.

In the meantime, thank you for dropping by.

Feel free to leave your comments or questions in the section below.

How to Prevent Knee Pain When Running

Knee Pain From Running

Would you like to learn how to prevent knee pain when running

Then you have came to the right place.

Whether you’re training to lose weight or for your very first marathon, running is an awesome way to get in shape and maintain good health.

It’s good for your waistline, your heart, and even your brain.

At the same time, running comes with a certain degree of injury risk.

The high impact repetitive nature of the sport can place a lot of stress on your joints, especially the knees.

As a matter of fact, surveys show that up to 70 percent of runners may experience knee issues at a point.

That’s why for some people running is synonymous with knee pain.

This is especially the case if you drastically increase your running mileage too quickly, train with bad form, wear the wrong shoes, or have muscle imbalances—common training blunders among all runners.

But is that enough reason to stop running altogether?

Of course: NO!

Knee Pain in Runners – The Definition

There are many overuse injuries that strike the knee joint.

One of the most common is known as runners knee, or patellofemoral pain syndrome (PFPS).

The condition is also pretty common among those who any sports that involve repeated stress to the knee joint.

So what is all about?

Runners’ knee is all the catch term used to refer to pain in the kneecap.

The condition causes an achy, dull pain at the front of the knee and around the kneecap.

It’s widespread among runners, basketball players, cyclists, and those who participate in sports involving jumping.

Symptoms may include a dull ache or sharp pain, grinding or clicking on or around the patella, and chronic stiffness.

Classic treatment options include cold therapy, anti-inflammatory meds, and stretching.

Knee pain, especially runners knee, is sometimes caused (and often made worse) by tightness in the muscles and tendons that connects to the knees, especially the quads, calves, hamstrings, glutes, and hips.

That’s why when it comes to soothing and preventing knee issues in runners, stretching can help.

Don’t take my word for it—research backs this up.

A study published in American Family Physicians reported that increase strength and flexibility in the quad muscles is more effective than the routine use of nonsteroidal anti-inflammatory drugs or knee braces for soothing and preventing pain.

How to Prevent Knee Pain when Running

Here is the little secret.

All you got to do is protect your knees from the get-go by taking some of the following injury prevention measures to protect your knees while running.

Prevent Knee Pain When Running – 1. Wear The Right Shoes

The foot is a very complex part of the human anatomy.

It’s made up of 19 muscles, 26 bones, 107 ligaments, and 33 joints—and these take the brunt of a foot strike when running.

Since running is a high impact sport that places a great deal of stress on the knees, wearing the right trainers not only helps you to run faster and longer, but may also reduce risks of pain and injury.

A good running shoe is designed specifically to diffuse the load shooting up the rest of your leg.

By training in improper shoes, you might increase risks of knee pain (and other issues)—and you don’t want that.

Just don’t get me wrong.

I’m not suggesting that proper shoes are the ultimate solution to your knee issues.

But it’s a start, and an important part of an overall prevention and treatment and plan.

That said, I should also point out—and this may surprise some of you—that the current research on the effectiveness of running shoes in improving performance and preventing overuse injury is, at best, mixed.

This link provides you with more insight on the subject at hand.

Yet, in my experience, a proper pair is non-negotiable—regardless.

Therefore, to stay safe, you got to find a shoe that fits your feet properly.

More importantly, go for a pair that supports your natural foot type—whether you’re neutral, high arched (supinator), or flat-footed (overpronator) runner.

To find a suitable pair, head to your local running store and ask for a foot type and gait analysis, which will help you find what best matches your physiological and training needs.

Also, be sure to replace your trainers regularly.

The more miles you run in a pair, the more worn down the shock absorption becomes.

This increases the load stresses shooting up your legs, which, in turn, could result in knee pain.

As a general rule, change your running shoes every 400 to 500 miles—depending on your training intensity, body weight, running terrains, and personal preferences.

For more advice on how to pick proper running shoes, check these posts:

Post 1

Post 2

Post 3

Post 4

Additional Resource – Here’s how to use KT Tape for runners knee.

Prevent Knee Pain When Running – 2. Strength Train

Strength training is good for you.

If this is news to you, you have a lot to catch up to.

I have already written extensively on the importance of strength training for runners here.

More specifically, a good strength routine can do wonders for preventing knee pain—and all sorts of overuse injuries.

For instance, if the muscles of your lower body are weak, then it’s your joints—mainly the knees—that take the brunt of the impact of each pounding strike.

And research supports this.

One example is a study published in the Journal of Athletic.

In the research, almost 80 percent of runners with knee issues reported experiencing less pain after three to four weeks of hip and core strength training.

Not convinced yet?

Another research published in Medicine & Science found that female runners with patellofemoral joint pain —a notorious overuse injury colloquially known as “runner’s knee” —had a deficit in hip external rotation, abduction and extension strength, when compared to age-matched injury-free runners.

So, to avoid the pain (or to keep it from creeping back), spend time doing strength training exercises that target your lower body.

Specifically, exercises targeted at your knee stabilizing muscles. These include your hips, glutes, hamstrings, quadriceps, and calves. This makes it hard to separate the wheat from the chaff when it comes to identifying the most effective strength exercises.

The following exercises consist of my seven favorite moves. They’re easy to perform, effective and suitable for most runners regardless of fitness level or training background..

Additional resource – Knee brace for running

Prevent Knee Pain When Running – 3. Eat Right

When dealing with knee pain, don’t overlook the power of diet.

As a runner, you’ll need the right nutrients and substances to help protect your cells from damage and maintain healthy joints.

For starters, get plenty of calcium.

Most experts recommend 1,100 to 1,300 mg of this mineral each day.

Dairy products and dark green veggies are some of the ideal sources of calcium.

Here is the full guide to calcium foods.

Another nutrient is omega-3 fatty acids.

These fatty acids are natural anti-inflammatories that can help ease joint inflammation before it damages the joints.

The best sources of omega-3s include salmon, herring, tuna, cod, sardines, and mackerel, as well as fish oil supplements.

Furthermore, you might need to supplement.

Many athletes take Chondroitin sulfate and Glucosamine supplements to deal with joint pain since it’s believed that these encourage cartilage formation and repair.

However, the research is still mixed on the effectiveness of the supplements, so consult a certified physician if it can be helpful to your case.

Most experts recommend a minimum dosage of 1,200 mg of Chondroitin sulfate and 1,500 mg of Glucosamine daily.

Additional Resource – Running after knee replacement

Prevent Knee Pain When Running – 4. Lean Forward

If your knees are in pain while running, it could be that you need to change your form—more specifically, your trunk position.

In fact, according to this research paper published in Medicine & Science in Sport & Exercise, an increased trunk flexion may decrease compressive forces on the patellofemoral joint.

In English: a slight forward lean while running reduces the load placed on the knees, which, in turn, cuts the risks of discomfort and injury at the joint.

The Process?

Opting for a slight forward lean while running may help shift your weight from the knees to the hip, thus reducing impact forces on the knees.

That said, getting the slight forward lean right is a bit tricky.

Here is how to do it right:

Make sure that the lean, or the “fall,” is coming from the ankles, not the hips.

It should feel almost like you’re falling forward.

You should not feel broke nor bent at the trunk.

Allow your torso to come a bit forward—at least seven to ten degrees, according to the before mentioned research—while simultaneously flexing your hips and lower abdominals subtly.

In other words, opt for a mild lean, not a complete bent-over position.

Think skiers stance.

Here is an awesome YouTube Tutorial

Prevent Knee Pain When Running – 5. Increase Your Cadence

Another technique tweak to consider when dealing with knee pain from running is to to avoid overstriding.

So what is it all about?

When you overstride, you’re, in essence, reaching too much forward with your legs as you swing them forward in front of your “center of gravity

When you do, you’ll be slamming your foot down, creating a braking action with each stride.

Then, all of these impact stresses of hitting the ground goes right up your feet to your knees.

This, in theory at least, limits your efficiency and increases your risk of injury.

As a result, most experts agree on the fact that overstriding is bad.

Do not let your feet get ahead of you.

Make sure to stay ahead of your feet.

Do not let your legs swing forward, not to the rear.

Here is the good news:

Reducing stride length can put a stop to overstriding, thus decrease injury risk, research shows.

And one of the best ways to do so is to simply increase your cadence.

In fact, research conducted at the University of Wisconsin found that an increased cadence reduces the impact load on the lower body.

Here is how to improve your cadence:

Determine your current cadence by counting how many times your feet hit the ground in one minute of running.

If it’s over 160, you’re in the clear.

But, if your cadence is below 160 steps per minute, they should increase it by 5 to 10 percent from one week to the next.

Additional resource – Sore quads after running

Prevent Knee Pain When Running – 6. Stretches For Knee Pain

There are plenty of exercises that focus on stretching the quadriceps, hips, hamstrings, and knee regions.

By stretching regularly regularly, you’ll help keep your muscles loose, limber, and up for the job, which will provide better protection for your knees.

check the following routines:

  • Routine 1
  • Routine 2
  • Routine 3

Prevent Knee Pain When Running – 7. Avoid Overtraining

Running too much too soon is the recipe for knee pain—and all sorts of injury.

In fact, whether you’re motivated to lose the pounds as soon as possible or have just signed up for a race, it’s important not to increase training intensity too abruptly.

Instead, ease yourself into running, regardless of how incentivized you feel.

Start with low to moderate intensity runs for shorter distances, then progress as you feel up to it—not the other way around.

One simple rule is to follow the ten percent principle—do not increase your weekly mileage by more than 10 percent from one week to the next.

Also, be sure to take enough rest—when needed—to allow for proper recovery.

Furthermore, listen to your body and train accordingly.

So, for instance, if you’re experiencing knee pain, back off and assess what you’re doing.

In fact, stop running whenever you’re experiencing knee discomfort or pain.

To deal with the pain, opt for the PRICE method.

This consists of:

  1. Protecting the affected knee from further injury—for example, by using a support.
  2. Let the affected knee rest by avoiding high impact exercise for a few days.
  3. Ice the injured knee for 15 to 20 minutes, three to four times per day.
  4. Compress the affected knee by using a wrap, a splint, etc.
  5. Elevate the affected joint above heart level to reduce swelling.

If pain persists, seek medical help ASAP.

Dilly-dallying with knee pain will only make your case way more severe—and that’s not something you’d want to.

You are a smart runner, aren’t you?

Additional Resource -Your guide to jaw pain while running

How to Prevent Knee Pain When Running – The Conclusion

Running without hurtling your knees can be done if you follow the above guidelines. The rest is just detaisl.

Please feel free to leave your comments and questions in the section below.

Thank you for dropping by.

David D.

The 10 Causes of Hip Pain From Running

hip Pain From Running

Are you tired of that nagging hip pain putting a damper on your running adventures? Well, fret no more because you’ve stumbled upon the perfect article to address your hip-related woes.

Whether you’re currently battling hip discomfort during your runs or experiencing those bothersome post-run aches, we’ve got you covered with some valuable insights and solutions.

Now, let’s be real for a moment. Hip injuries may not be as notorious in the running realm as those pesky knee problems, but that doesn’t mean they should be taken lightly. Trust me when I say that a seemingly innocent twinge in your hip can quickly escalate into a full-blown injury, forcing you to hit the brakes on your beloved running routine.

But fear not! In this comprehensive article, I’m diving deep into the world of hip pain for runners. I’ll explore the primary culprits behind those hip woes, uncovering the conditions that may be causing you grief. From there, I’ll equip you with the knowledge you need to tackle this issue head-on. I’ll delve into effective treatment strategies and arm you with powerful prevention guidelines to keep those hip troubles at bay.

By the time you reach the end of this post, my friend, you’ll not only have a clear understanding of the root causes of hip pain during and after your workouts, but you’ll also be armed with practical steps to take when confronted with that pesky discomfort. Whether it’s adjusting your running form, incorporating specific exercises, or seeking professional guidance, I’ve got the answers you’ve been searching for.

So, let’s dive right in and discover the secrets to conquering hip pain like a true running champion!

10 Causes of Hip Pain From Running

Welcome to the mysterious world of hip pain, dear runner. The hip joint, nestled between the femur and the os coxa, is like the grand ballroom of our bodies—it’s the largest ball-and-socket joint in town!

And boy, does it play a crucial role in our running endeavors. Think power, balance, flexibility, and the glorious momentum that propels us forward. But here’s the twist: the very joint that keeps us in motion can also become a source of pain and frustration for us runners.

Now, brace yourself for a rollercoaster ride, because diagnosing hip pain in the running world is like taming a wild beast. Why, you ask? Well, the hip joint is a complex entity, intertwined with a myriad of muscle groups, making it a breeding ground for various conditions that can send our running ambitions into a tailspin. To make matters more perplexing, some of these conditions share similar symptoms, leaving us scratching our heads in bewilderment.

Imagine this: you’re out on a run, feeling the discomfort gnawing at your hip, and you’re left wondering, “What’s causing this agony? Is it a muscle strain, a tendon issue, or perhaps something deeper within the joint itself?” Ah, the mysteries of the hip!

But fear not, my fellow detective of pain. We’re here to shed light on the most common culprits behind hip pain in runners. Now, keep in mind that hip pain isn’t always a result of our running escapades alone. Lifestyle choices and genetics can also come into play, adding another layer of complexity to the mix.

Hip Pain From Running # 1 – Inflammation of the Bursae

Experiencing pain on the outside of the hip? Then you might have inflammation of the bursae.

Nestled between the greater trochanter (that bony prominence on your femur) and the surrounding muscles and tendons, lies a tiny hero called the bursae. These small sacs of fluid serve as the body’s natural lubricators, creating a gliding surface between your moving tissues—muscles, tendons, and bones. Their mission? To limit friction and keep things running smoothly.

But alas, when you hit the pavement with your running adventures, the trochanteric bursa takes quite the beating. It’s like a warrior on the front lines, facing the impact and repetitive motion of running. And over time, this valiant bursa can become inflamed, leading to the dreaded trochanteric bursitis.

Runners who have fallen victim to this condition often report a dull ache or burning sensation on the outside of their hip during or after a run. Some may even experience a peculiar popping sensation, like a tiny party happening in their hip joint. Ouch!

But running isn’t the only instigator here. Other factors can exacerbate the situation, like direct trauma (oh, those unexpected bumps and falls), pelvis issues, or even prolonged sitting (yes, our sedentary lifestyles strike again!). It’s like adding fuel to the fire of hip discomfort.

The Solution

If you find yourself in the clutches of noninfectious trochanteric bursitis, fear not. Rest is your ally. Give your hip some love by reducing your mileage, maybe by around 30 to 50 percent. Say “no thanks” to those hilly routes for a while. And after each run, stretch your IT band and hamstrings to keep everything limber and happy.

But beware, there’s a rare beast called infectious bursitis lurking in the shadows. If you suspect this villain is at play, it’s time to seek medical attention. Antibiotics and, in extreme cases, surgery might be necessary to defeat this foe. Remember, infectious bursitis is as rare as a unicorn, but it’s better to be safe than sorry.

Now, how long will you be away from the running road, you ask? Ah, that depends on the severity of your symptoms, my resilient runner. If you feel pain when putting pressure on your injured limb, it’s time to consider cross-training. Embrace activities like swimming, aqua jogging, cycling, or hopping on a rowing machine. Keep that cardiovascular fire burning while giving your hip a well-deserved break.

Check the following links for more options:

Link 1

Link 2

Link 3 

Hip Pain From Running # 2 – Muscle Imbalances

Picture this: one side of your body is doing a little happy dance, boasting stronger muscles, while the opposing side sulks in relative weakness. It’s like a battle of epic proportions, where your hip flexors, glutes, and core muscles are caught in the crossfire.

Now, here’s where the plot thickens. These muscle imbalances can throw your hip alignment off balance, leading to a potential recipe for disaster—tears, strains, and the dreaded pain that follows.

The Solution

So, what’s the secret ingredient? A well-rounded strength program that revolves around full-body compound movements. Think pushups, squats, lunges, deadlifts, turkey getups, bridges, and all those glorious exercises that engage multiple muscle groups at once.

But wait, there’s more! Single-leg and balance exercises deserve a special mention in the battle against muscular imbalances. Imagine doing pistol squats—a feat that requires strength, balance, and a touch of finesse. These exercises can be your secret weapons in restoring equilibrium to those wayward muscles. Give them a try and feel the power of stability and control coursing through your body.

Of course, it’s always wise to seek guidance from a certified physician or healthcare professional. They hold the keys to unlocking the mystery of your unique conditions. With their expert assessment, they can prescribe a tailored set of exercises and drills that address your specific imbalances, paving the way for a pain-free running journey.

You can also check these stretches for hip pain.

Hip Pain From Running # 3 – Bad Running Form

Running form is akin to a symphony of movement that can either lead you to the land of pain-free bliss or down a treacherous path of joint wear and tear.

Your hips, those magnificent junctions where your body’s power and rhythm converge, are at risk of falling out of alignment. This can occur when your running form takes a wrong turn, sending shockwaves of stress through the delicate joint surfaces. And let me tell you, my friend, that spells trouble—a one-way ticket to Painville.

The Solution

First and foremost, run tall with a slight forward lean. Imagine yourself as a majestic oak tree, reaching towards the sky while subtly leaning forward, as if propelled by a gentle breeze. This posture not only exudes confidence but also helps align your hips and reduce strain on the joint.

Next, let your body flow with ease and relaxation from head to toe. Release the tension that binds you and let your muscles find their natural rhythm. Remember, you’re not auditioning for a statue role; you’re a fluid being in motion.

Now, let’s talk about the core—the mighty pillar of stability. Keep it engaged, my friend, and your back as flat as a tranquil lake. This will provide the foundation for optimal hip alignment and safeguard against the perils of misaligned joints.

Ah, overstriding—the nemesis of proper form. To defeat this villain, work on improving your running cadence and taking shorter, more controlled steps. It’s like dancing to a lively beat, where each step is a graceful movement that keeps your hips in harmony.

Keep your head level, shoulders loose, and arms bent at a gentle 90-degree angle. Picture yourself as a warrior in the midst of battle, with a focused gaze, relaxed shoulders, and arms poised to conquer the road ahead. Let this warrior stance guide your form, and watch as your hips align with precision.

Hip Pain From Running # 4 – Stress Fractures

If you feel throbbing or stabbing pain on the inside of your hip (or in the groin area), then you might have a stress fracture.

Now, don’t be fooled, for stress fractures are no ordinary bone breaks. They are the result of relentless, repetitive strain, chipping away at your bone’s resilience like a persistent woodpecker. These fractures can range from a mere crack to a complete break, depending on the severity of the situation.

You see, stress fractures are often associated with the elderly, like seasoned warriors battling the trials of time. But don’t let that fool you, my fellow runner. These pesky fractures can afflict athletes of all ages, especially those brave souls who embark on endurance endeavors and subject their bodies to impactful training.

In the realm of runners, the excessive impact of pounding the pavement, particularly on unyielding surfaces like sidewalks and roads, can lead to trouble. Picture a small crack forming in the femoral neck, that delicate bridge connecting the ball at the top of your femur. It’s as if the very foundation of your hip structure is at risk.

Now, stress fractures don’t announce their arrival with blazing fanfare. Instead, they start as a subtle dull ache, whispering their presence either in front or behind the hip, especially when you’re in the throes of exercise. Ignored, they grow more insistent, their pain steadily intensifying until it becomes a merciless companion, demanding your attention.

The Solution

Now, I won’t sugarcoat it for you. If a stress fracture has set its sights on your hip, continuing to run would be like pouring gasoline on a smoldering fire. It will only exacerbate the situation and prolong your road to recovery. So, for now, it’s crucial to bid farewell to your running shoes and embrace a temporary hiatus from the sport you love.

But fear not, for this intermission doesn’t mean you have to surrender to a sedentary existence. While running is off-limits, there are alternatives that can keep your spirit of movement alive. Cross-training shall be your saving grace during this period of healing and rejuvenation.

During the six to eight weeks of rest that lie ahead, you can indulge in low-impact cross-training activities that won’t aggravate your injury. Picture yourself pedaling away on a bike, feeling the wind caress your face as you explore new routes. Or perhaps you’ll find solace in the gentle embrace of aqua running, where the buoyancy of water cradles your body and allows you to experience the thrill of cardio without the strain.

But, and this is crucial, before embarking on any cross-training endeavor, consult your trusted physician. Their expertise will guide you towards activities that promote healing and protect you from inadvertently worsening the condition. So, pause for a moment, seek their wisdom, and let their green light illuminate your path forward.

Once you’ve received the blessing of your doctor, it’s time to lace up your running shoes once more, but with caution and a newfound appreciation for your body’s resilience. As you ease back into running, prioritize the protection of your healing hip by opting for softer surfaces. Seek out the forgiving embrace of grassy fields or well-padded tracks, where the impact is gentler on your vulnerable bones.

Here some useful links:

Link 1

Link 2

Link 3

Hip Pain From Running # 5 – Hip, Thigh or Hamstring Muscle Injury-Tear

Injuries and tears in the glutes, hamstrings, quadriceps, and groin muscles are all too familiar among runners. These conditions can be incredibly frustrating and can significantly impact your running performance. However, understanding the specific muscles involved and the reasons behind these injuries can help you prevent and manage them effectively.

Hip Flexor Strains

Let’s start with hip flexor strains. Picture the front portion of your hip, where a group of muscles called the hip flexors reside. They play a vital role in lifting your thigh upward and facilitating forward motion when you walk or run. Now, imagine feeling pain right at the front of your hip, where your thigh meets your hip near the leg crease. This discomfort could be an indication of a hip flexor strain, which occurs when these muscles are overstretched or torn.

Several studies and research papers have explored the causes and treatment options for hip flexor strains, highlighting the importance of proper warm-up exercises, stretching routines, and gradual increases in training intensity.

Gluteus Medis Muscle Injury

Moving on, let’s talk about the gluteus medius muscle injury. This muscle is one of the three major glute muscles and shares proximity with the hip joint. Consequently, any inflammation or injury to the gluteus medius can have repercussions on the entire hip region, and vice versa. For runners with injured or strained glutes, a tender, aching pain often emerges on the outside of the hip region. Researchers have conducted studies to better understand the mechanisms behind these injuries and have suggested specific strengthening exercises and rehabilitation protocols to aid in recovery.

Hamstring Injury/Tear

Now, let’s delve into hamstring injuries. The hamstrings comprise three distinct muscles running down the back of your thighs. When these muscles are subjected to a significant load while fully or almost fully extended, they can become injured or torn. If you’re experiencing pain and tenderness in the top of the back of your thigh and lower buttocks, it’s likely due to inflammation or injury of the upper part of the hamstrings. Researchers have explored various factors contributing to hamstring injuries, including muscle imbalances, inadequate warm-up, and excessive eccentric loading. They have also recommended specific exercises and techniques to prevent and rehabilitate these injuries.

Quadriceps Tears

Lastly, let’s address quadriceps tears. If you’re feeling pain or tenderness in the front of your thighs, it could be a result of inflammation or injury to the quadriceps muscles. Overworking your quads, especially during downhill running, can lead to strain and overuse injuries. Researchers have examined the risk factors associated with quadriceps tears, emphasizing the importance of balanced training, gradual progression, and adequate recovery. They have also highlighted the role of eccentric strengthening exercises in promoting quadriceps health and preventing injuries.

The Solution

Treating muscle injuries is not complicated.  Mild cases can be treated with the RICE protocol.

As a rule, avoid any activities that put weight on the injured hip for the first few days after onset.

Also, stretch and strengthen your critical running muscles, such as the glutes, hamstrings, quads, and calves, on a regular basis.

Here are more useful links:

Hip Pain From Running # 6 – Cartilage Tear

If you’re suffering from intermittent pain in the hip region, accompanied by a clicking or locking sensation, especially following a recent hip fall or twist, then you might blame it on a cartilage tear.

Also known as a labral tear, the condition is a tear of the acetabulum, which is a thick ring of cartilage that cushions the hip joint.

Cartilage tears can be a gradual onset caused by overuse and repetitive strain on the hip.

These tears typically take place where the ball and socket joint insert. Typically, this injury is caused by trauma, as in a sudden fall or twist.

They can also be acute, caused by a traumatic event such as a bad fall, collisions, etc.

Additional resource – How to choose Chiropractor for runners

The Solution

Cartilage tears can be a result of gradual wear and tear, caused by overuse and repetitive strain on the hip. So, if you’ve been pushing your hip a bit too hard, perhaps with excessive running or high-impact activities, it can gradually lead to these pesky tears. Researchers have studied the relationship between overuse and labral tears, shedding light on the importance of proper training techniques, cross-training, and rest days to prevent such injuries.

But hold on, there’s more to the story! These tears often occur right where the ball and socket joint of the hip connect. Picture it like the meeting point of two puzzle pieces. And while overuse can be a common cause, cartilage tears can also be acute, resulting from a sudden and traumatic event, like a bad fall or a collision. It’s like a wrench being thrown into the well-oiled gears of your hip joint.

Several studies and research papers have delved into the causes and mechanisms behind cartilage tears in the hip. They’ve explored the impact of sudden trauma, the role of repetitive motions, and even the potential genetic factors involved. By understanding these insights, healthcare professionals can provide more accurate diagnoses and develop effective treatment plans tailored to each individual.

Here are some useful links:

Hip Pain From Running # 7 – Iliotibial Band Syndrome

So, you’ve been experiencing some sharp pain on the outside of your knee and/or hip region, huh? Well, don’t worry, because I might just have the answer for you. It’s possible that you’re dealing with a pesky condition called iliotibial band syndrome, or ITBS for short. And if you’re someone who loves hitting the pavement or running on the track all season long, this might hit close to home.

Now, let’s talk about the iliotibial band (IT band for short). Think of it as a tough, resilient tendon that runs down the outside of your thigh, starting from your hip and extending all the way down to your knee. It’s like a tightrope that connects your hip to your shin bone, helping with stability and movement. However, when this band gets inflamed or irritated, it can cause some serious trouble and send sharp pain signals to your knee and hip. Ouch!

But what causes this irritation in the first place? Well, it turns out that tightness in the IT band, along with weak hip and glute muscles, can set the stage for the onset of ITBS.

Research papers and studies have explored the link between these factors and the development of ITBS, highlighting the importance of targeted exercises to strengthen your glutes and hips. By doing so, you’ll be giving your IT band some extra support and reducing the chances of encountering this painful syndrome.

The Solution

let’s dive into the solution! Your first line of defense is to give your running routine a little breather. It’s time to reduce your mileage by about 30 to 50 percent or even take a temporary break if the pain is seriously messing with your stride. Rest and recovery are crucial to allow your body to heal and bounce back stronger.

But wait, there’s more! Strengthening your glutes and hip muscles is a game-changer when it comes to combating ITBS. Researchers have found that correcting muscle imbalances in the area can have a significant impact on preventing and managing this syndrome. So, let’s get those glutes firing and those hips rocking!

In addition to that, there are a few other measures you can take to tackle ITBS head-on. Consider changing up your running routes to mix things up a bit. Avoid roads that have a sideways slope, as they can put extra strain on your IT band. Oh, and don’t forget to switch directions on the track to distribute the load more evenly. It’s like giving your body a fresh and exciting challenge!

Oh, and how about treating yourself to a shiny new pair of running shoes? Sometimes, the right footwear can make all the difference, providing better support and cushioning to alleviate some of that stress on your IT band.

And last but not least, stretching! Give your IT band, hamstrings, and glutes some love. Stretching regularly can help loosen up those tight muscles and improve flexibility. Incorporating a well-rounded stretching routine into your routine is like giving your body a much-needed yoga session.

For the full guide on how to deal with ITBS, check my post here.

Here are more useful links:

Hip Pain From Running # 9 – Avascular Necrosis

Avascular necrosis, also known as osteonecrosis. This condition is all about limited blood supply to the femoral head, which is basically the ball of your hip joint. And when that blood supply gets restricted, it can lead to the unfortunate death of bone tissue. Not a fun situation, right?

Now, let’s explore the causes behind this condition. It’s like a puzzle with multiple pieces coming together. Excessive alcohol intake, high-dose steroid medications, radiotherapy, and even sickle cell diseases can all contribute to the development of avascular necrosis. Studies have delved into these causes, aiming to unravel the intricate connections and help us better understand how to prevent and manage this condition.

But here’s the thing: ignoring avascular necrosis is like playing a dangerous game. When left untreated, it can lead to tiny breaks in the bone, almost like cracks, which can eventually cause the bone to collapse. That’s a situation you definitely want to avoid!

The Solution

So, what’s the solution? Well, if you’ve just been diagnosed by your doctor, it’s crucial that they refer you for an immediate MRI scan. This scan will confirm whether you indeed have avascular necrosis or not. Once you have the results in hand, it’s time to start treatment pronto. Early intervention is key to prevent the condition from getting worse and to thwart the onset of arthritis.

Now, I know you’re probably curious about how to slow down and stop the progression of avascular necrosis. Luckily, there’s an in-depth overview available for you to check out. This resource will provide you with valuable insights, treatment options, and strategies to tackle this condition head-on.

Here are more useful links:

Link 1

Link 2 

Link 3

Hip Pain From Running # 10 – Running on Cambered roads

Picture this: you’re out there hitting the pavement, putting safety first by running against traffic on the road. Sounds responsible, right? Well, here’s the catch. Without even realizing it, you might be running on a sneaky cambered surface. What’s that, you ask? It’s like a subtle incline or tilt on the road.

Now, don’t get me wrong, camber can be useful. It helps with drainage, allowing water to flow off the road, and it even gives those motored vehicles better traction. But here’s the twist: when we as runners tackle those inclined surfaces, it messes with our kinetic chain. You see, one leg ends up reaching down a bit farther than the other, causing misalignments in our body’s movement system.

Think of it as walking on a tightrope where one side is slightly higher than the other. It throws off your balance, making it harder for your muscles and joints to work together harmoniously. This imbalance in the kinetic chain can increase the risk of injury, including hip pain

Now, you might be wondering if there’s any research or studies to back this up. Well, you’re in luck! Researchers have delved into the impact of running on cambered surfaces, highlighting the potential risks and drawing attention to the importance of maintaining balance in our running routines. They’ve explored how running on inclined structures can affect our gait, muscle activation, and overall injury risk.

Additional resource – Aqua jogging for beginners

The Solution

First things first, aim for flat surfaces whenever possible. Picture yourself running right in the middle of the road, feeling like the king or queen of the asphalt kingdom. If that’s not an option, try switching things up by running on the other side of the road. By doing so, you’ll be giving both of your legs a fair chance to work their magic without any sneaky inclines throwing them off balance. And hey, if the sidewalk is there, embrace it! Stick to the good ol’ reliable pavement and let your hips and joints rejoice in its evenness.

Now, here’s where it gets exciting—listening to your body. After conquering those sharply inclined roads, give your body some extra TLC. Pay close attention to how you feel and any signals your body might be sending you. If you notice any discomfort or unusual sensations in your hips or lower back, it’s time to take it easy and allow your body to recover. Remember, your body is your best running partner, and it knows when it’s time to dial it back and give yourself a break.

But we’re not done yet! Let’s talk about incorporating some hip and lower back strengthening and stretching exercises into your cross-training routine. Research papers and studies have shown the benefits of targeted exercises to strengthen these key areas, enhancing stability and preventing injuries.

Think of it as giving your body a superhero training session—building strength, resilience, and flexibility to tackle any challenge that comes your way. So, get creative with your workouts and explore exercises like squats, lunges, bridges, and various stretches that target those hips and lower back. Your body will thank you!

Serious Cases of Hip Pain

If you’ve been dealing with persistent hip pain and those moments of rest and gentle stretching just haven’t done the trick, it’s time to take the next step. Don’t worry, we’ve got your back (or rather, your hip) covered! It’s time to see a doctor for a thorough assessment and get to the bottom of this stubborn pain.

You see, when it comes to your precious hips, it’s always a good idea to seek professional guidance. That means paying a visit to a knowledgeable doctor or a sports medicine specialist who can dig deep and unravel the mysteries behind your discomfort. They’ll conduct a comprehensive assessment, considering all the possible factors that might be causing your hip pain.

Now, let’s talk about some of the potential culprits that can bring on the hip pain party. Brace yourself, because we’re diving into a list of conditions that can wreak havoc on your hip joint and the surrounding tissues.

It’s like navigating through a complex maze of possibilities. We’ve got femoral acetabular impingement, sciatica, piriformis syndrome, groin pulls or tears, snapping hip syndrome, hip tendonitis, septic arthritis, hernias, osteoarthritis, slipped capital femoral epiphysis, and even meralgia parasthetica. Whew! That’s quite a lineup!

Research papers and studies have explored these conditions, shedding light on their unique characteristics, causes, and treatment approaches. They serve as valuable resources, helping healthcare professionals stay up to date with the latest advancements and ensuring that you receive the best possible care for your hip pain.

Here are more resources to check out:

Hip Pain From Running Infographic


Conclusion

Here you have it!

I hope the above advice will prove useful in helping you deal with and prevent hip pain when running.

In the meantime, thank you for reading my post.

Please stay safe, and run strong.

David D.

The Ultimate Guide to Treating Shin Splints In Runners

Shin Splints pain

Are you tired of dealing with those pesky shin splints that seem to creep up when you least expect them? Well, you’re in luck because today, we’re diving deep into the world of shin splints.

According to the National Institute of Health, shin splints is widespread among runners but also afflicts dancers, gymnasts, and military recruits.

Fortunately, this insidious injury is both curable and preventable.

In today’s guide, I’ll dive into everything you need to know about shin splints, and that includes:

  • What are shin splints
  • Shin splints symptoms
  • The mechanism behind the injury
  • What causes shin splints
  • Warning signs of shin splints
  • How to diagnose shin splints
  • How to treat shin splints
  • How to get rid of shin splints
  • And so much more.

So, lace up your reading shoes because we’re about to dive deep into the world of shin splints and trust me, it’s not as intimidating as it sounds!

The Anatomy Of Shin Splints

Imagine your lower legs as a complex, well-orchestrated symphony of muscles, bones, and tendons. Now, imagine shin splints as the rogue drummer who just can’t keep up with the beat.

In this anatomy crash course, we’re going to break down the cast of characters in your lower legs that can lead to shin splints. It’s like meeting the players before a big game:

The Tibia and Fibula

Now, let’s meet the dynamic duo of the lower leg: the tibia and fibula.

First up, we have the tibia, the heavyweight champ of the duo. It hangs out on the inside, like the guardian of your leg’s inner sanctum. Its main gig? Providing rock-solid support to your knees, hips, and pelvis, keeping your leg structure in tip-top shape.

And on the outside, we’ve got the fibula, the trusty sidekick. It’s like the Robin to the tibia’s Batman, always there to lend a hand—or, in this case, a bone. While it might not be in the spotlight as often, the fibula plays a crucial role in maintaining balance and stability

The Lower Leg Muscles

Now, let’s get to know the muscles that power your lower legs and play a significant role in the shin splints saga

  • The Soleus: Think of it as the lower calf muscle, quietly doing its job.
  • The Gastrocnemius: This upper calf muscle adds some muscle to the team.
  • The Plantaris: Another upper calf player contributing to the shin splints story.
  • The Tibialis Posterior: Yet another upper calf muscle with a part to play.
  • The Tibialis Anterior, our shin muscle, takes center stage.

These muscles are your trusty sidekicks, responsible for both moving your lower leg and keeping your foot and ankle steady. They’re like the backstage crew making sure the show runs smoothly.

But here’s the twist: when you push these muscles too hard or overwork them, they can pull a little too much on your fibula and tibia bones, leading to the dreaded shin splints.

The Definition Of Shin Splints

Whether you’re a rookie or a seasoned marathon champ, shin splints don’t discriminate. They’ll crash your running party uninvited.

Now, what’s the fuss all about?

Shin splints, also known as the elusive “medial tibial stress syndrome,” are like that nagging neighbor who just won’t leave you alone. They set up camp along the front (the fancy term is “anterior”) part of your shin, cozying up to the inner side of your tibia bone. It’s like they found a comfy couch in your leg and decided to stay.

But here’s the scoop: shin splints throw this relentless shin party due to the constant pounding your bones, tendons, and muscles endure. This relentless dance-off leads to inflammation of the connective tissue, known as fascia, that wraps around and connects your lower leg muscles to the shin bone.

Now, the silver lining here is that shin splints aren’t the villains they seem. They’re more like mischievous troublemakers at the playground—annoying but not truly harmful. Research shows they make up about 10 percent of injuries in male runners and a steeper 16 percent in female runners.

And here’s the kicker: you have the power to kick these shin splints to the curb. Yep, with some early TLC, you can bid them farewell.

Symptoms Of Shin Splints

Picture this: you’re out for a run, feeling all motivated, and suddenly, it hits you. That dull, nagging ache in the front of your shins, almost like your legs are protesting your newfound running enthusiasm.

This discomfort typically sets up camp along a 5-inch stretch on either side of your shinbone or sometimes in the nearby muscle posse.

In the early stages, shin splints can be quite dramatic. They’ll make a grand entrance in the first few minutes of your run, almost like they want to steal the spotlight. But here’s the kicker – as your muscles warm up, they might pull a disappearing act.

Press your fingers along that tender shinbone, and it’s like playing a game of “ouch!” The morning isn’t any kinder, as your muscles, fresh from their overnight tightening session, greet you with extreme inflammation and tenderness.

But wait, there’s more. In severe shin splint showdowns, that connective tissue can’t handle the stress anymore. It decides to take a break and splits from the shin bone – cue excruciating pain. It’s like a never-ending episode of suffering, complete with a slow and dramatic healing process.

Shin Pain is not Always A Shin Splint.

Now, let’s clear something up. Shin pain isn’t always the work of shin splints. The lower legs are like a battlefield, and various ailments and injuries can wage their wars down there – not just MTSS (Medial Tibial Stress Syndrome).

Take, for instance, the pain and tenderness on the outer part of your lower leg. That’s a different beast altogether and might be the doing of compartment syndrome. Picture this: excessive pressure building up within a “closed compartment” in your leg, leading to swelling and pain.

But wait, there’s more!

Another common culprit that loves to play tricks on your lower leg is stress fractures. These are like tiny cracks in your bones, and they’re not here to mess around.

They’re on a whole different level than shin splints – more severe, with longer recovery times.

How Are Shin Splints Diagnosed?

When it comes to diagnosing shin splints, the best course of action, as with most conditions, is to seek the expertise of a physical therapist or a sports medicine doctor. Expect a thorough examination that covers the basics and then some.

Now, if your pain has been a persistent companion for a while, additional testing might be on the table to rule out other potential troublemakers. This is where things get a bit more technical.

One common method involves scans to check for larger tears in your tendons or the ominous tibia stress fracture.

But wait, there’s more. Have you ever heard of a compartment pressure test? It’s another piece of the diagnostic puzzle. This test helps rule out a condition called chronic exertional compartment syndrome, which can mimic shin splints but is a different beast altogether.

Testing At Home

Want to play detective with your lower legs? Here’s a little DIY test you can do to get a sense of whether shin splints might be crashing your leg party.

First, take a good grip on the lower two-thirds of your leg. That includes the shin bone and all the muscles hanging out around it. Give it a squeeze, gently but firmly.

Now, what you’re looking for here are telltale signs – pain, bumps, or lumps, especially along the bone. If you start to feel leg pain during this squeeze session, it might be trying to tell you something about shin splints.

But here’s the kicker: in some cases, shin splints can turn into quite the drama queen. In these extreme scenarios, it’s not just discomfort; it’s a full-blown, excruciating pain that makes standing or walking on that leg feel like a walk on fiery coals.

Causes of Shin Splints

Here’s a common scenario: you’re all excited to lace up those running shoes for the first time or get back to running after a hiatus. You think, “I can conquer the world!” So, you ramp up the speed or mileage, or maybe both. And then, out of nowhere, you’re hit with the dreaded shin splints.

Here’s the deal – your body needs time, and a fair bit of it, to get used to the high-impact world of running. When you run or engage in other high-impact exercises, your muscles go through a bit of a rough time. Micro-tears happen, but they’re all part of the muscle-building process. Normally, these tiny tears heal up between workouts, and no harm is done.

But, and this is a big but, when you decide to go from 0 to 100 in no time, things get complicated. You’re causing more damage than your body can handle, and those poor muscles in your tibialis anterior (the front of your shin) just can’t catch a break.

So, what’s the suspect lineup for shin splints? Well, we’ve got weak lower body muscles, especially those hip and calf muscles – they’re like the first line of defense for your shins. If they’re not up to snuff, trouble brews.

Poor running form – think overstriding or too much heel striking – can also land you in shin splint territory.

And beware of downhill running – it might seem exhilarating, but it can be tough on the front of your tibia. Running in the wrong shoes or on hard and wobbly surfaces like concrete or snow can be culprits, too. Biomechanics play a role, so if you’re flat-footed, that might raise your shin splint risk.

Other suspects include runners with lower bone density, especially women, those with a high body mass index, and anyone with a history of overuse injuries. They’re all in the lineup for potential shin splint causes.

How To Treat Shin Splints

When it comes to treating shin splints and many other overuse injuries, it’s all about starting with a little RICE – not the delicious dish, but a tried-and-true method.

Now, let’s be clear – shin splints might not be the most menacing injury out there, but nipping it in the bud is key. So, the moment you feel those symptoms creeping in, it’s time to take action:

Rest

Shin splints are basically your legs telling you, “Hey, we need a break!” See, they’re not fans of repetitive stress, and doing more high-impact activities is like adding fuel to the fire. So, the golden rule is to avoid running or any other high-impact exercise until you can do it pain-free.

Ice Therapy

Now, let’s cool things down a bit – literally. Grab some ice and apply it to the affected area for about 15 to 20 minutes, three to four times a day. It’s like giving your shins a little ice bath to calm the pain and swelling. Keep up this icy routine until the pain and inflammation dwindles.

Medication

Now, if you find yourself in the midst of some serious shin splint pain, you might want to consider calling in the cavalry – Nonsteroidal Anti-Inflammatory Drugs, or NSAIDs for short. Think of them as your trusty sidekicks, like aspirin or ibuprofen, ready to swoop in and save the day.

But here’s the thing – while they can work wonders to soothe the pain and speed up your road to recovery, you’ve got to use them wisely. These over-the-counter heroes can have a few tricks up their sleeves, like potential side effects, such as ulcers. Ouch!

So, here’s the deal: if you’re going to pop one of these pills, do it in moderation. Don’t go overboard. It’s a good idea to limit your use and, if possible, seek the wisdom of a certified physician who can guide you through the process.

How Long Does It Take To Recovery From Shin Splints

Now, I wish I had a crystal ball to give you an exact recovery time, but the reality is it’s a bit like trying to predict the weather. The duration of your recovery journey depends on how long you’ve been battling those pesky shin splints and just how fierce they are.

But let’s break it down a bit:

If you’ve been dealing with symptoms for less than a month, brace yourself for a three to four-month recovery haul.

Extend that symptom timeline to one to three months, and you’re looking at a four to six-month journey to shin splint freedom.

Now, if you’ve been in the shin splint trenches for more than three months, well, you might be in it for the long haul, with a recovery period stretching beyond six months.

But don’t fret! During this downtime, you don’t have to throw in the towel on your fitness journey. Consider embracing some low-impact exercises to keep that fitness flame burning. Think spinning, swimming, pool running, hopping on the elliptical machine, lifting weights, or even diving into some rejuvenating yoga.

Now, if the pain just refuses to budge and your symptoms seem to be playing hard to get despite your best efforts with the RICE method, don’t hesitate to seek immediate medical attention. There could be other culprits behind that stubborn shin pain, and it’s better to be safe than sorry.


Shin Splints in Runners – The Conclusion

There you have it! If you’re dealing right now – or have a history of – shin splints, then today’s article should get you started on the right foot when it comes to treating and preventing the condition. The rest is just details.

Please feel free to leave your comments and questions in the section below.

In the meantime, thank you for dropping by.

Keep running strong.

David D.

Running with Flat Feet: Essential Tips & Shoe Selection Secrets

how to run with Flat Feet

Are you ready to hit the ground running, even with flat feet?

Having flat feet doesn’t mean you’re stuck on the sidelines. In fact, it’s no reason to hang up your running shoes! I’m here to tell you that you can still pound the pavement and enjoy the thrill of a good run.

But first, let’s understand what it means to be a flat-footed runner. Are there special things you should know? And most importantly, what are the best running shoes that can give your feet the support they deserve?

Today, we’re diving into the world of flat feet and running shoes. We’ll uncover what flat-footed running really means, explore some essential precautions, and help you find the perfect pair of running shoes to keep you on the move.

So, if you’re ready to lace up and take on the track, keep reading!

What You Should Know About Running With Flat Feet

Now, before we start picking the perfect running shoes, let’s get a good grasp of what flat feet are all about. Some call them “fallen” or “low” arches, but in the medical realm, they’re known as “Pes Planus.”

Essentially, flat feet are like the arches of your feet taking a little nap – they collapse, causing the arch to sit super low or even completely flat against the ground.

Now, here’s the deal – having flat feet isn’t necessarily a reason to hit the panic button. It’s a postural deformity that happens when tendons, ligaments, and the teeny-tiny bones underneath your feet decide to go on strike.

While some people might experience foot pain, leg pain, muscle soreness, or even back pain due to this, it’s not a life sentence. And guess what? It’s pretty common. Surveys tell us that about 20 to 25% of the population has flat feet. So, you’re in good company!

The Foot Arch Explained

The foot arch is an incredible structure made up of tendons, ligaments, bones, and a team of muscles. It’s not just one arch; it’s a trio:

Two longitudinal arches, one on the inside (medial) and one on the outside (lateral), stretching from the front to the back of your foot on either side.

And then there’s the anterior transverse arch that elegantly spans across the middle of your foot.

Now, why are these arches such a big deal for us runners? Well, they’re like the unsung heroes of your foot anatomy, working behind the scenes to make your running possible. Think of them as natural shock absorbers. When you’re out on a run, these arches bear the brunt of the impact forces, reducing the stress on your feet and legs. In fact, they can handle around 200,000 to 300,000 pounds of stress per mile – that’s a whole lot of cushioning!

Additional resource – How to measure foot size for running shoes

How to Determine Your Arch Height – The Wet Test

Now, let’s play detective and figure out your arch height. You don’t need a degree in podiatry for this – all you need is some water and a piece of paper towel.

Find a flat surface and place a piece of paper towel on it.

Dip the sole of one foot in water.

Step onto the paper towel with a bit of pressure, making sure to leave a clear imprint.

Now, step back and examine your handiwork.

If you can see most of the bottom of your foot on the paper towel, chances are you have flat feet. Your foot’s arch is taking a little break from its natural curve.

How Do Flat Feet Form?

Flat feet are like fine wine – they don’t happen overnight. Instead, they often develop gradually as life throws its curveballs at us.

Here’s a list of potential culprits that might lead to flat feet:

  • Improper Footwear: Wearing shoes that don’t provide adequate arch support can contribute to flat feet.
  • Pregnancy: The joys of pregnancy can sometimes result in changes in foot structure.
  • Aging: As we gracefully age, our feet may gradually change shape.
  • Injury: A foot injury could leave you with flat feet as a not-so-pleasant souvenir.
  • Obesity: Carrying excess weight can put extra stress on your feet, potentially causing arch issues.
  • Diabetes: Health conditions like diabetes can play a role in the development of flat feet.
  • Improper Training Form: Whether you’re an athlete or just love staying active, improper training techniques can impact your arches.

So, as you can see, flat feet can sneak up on you through various life events and factors. It’s essential to be mindful of your foot health and take action if you notice any changes.

Additional resource – Running shoes for plantar fasciitis

Brace For Pain

Conditions such as plantar fasciitis, Achilles tendinitis, shin splints, and tibialis posterior tendinopathy are often associated with flat feet. However, this isn’t a one-size-fits-all scenario.

Injuries can strike any runner, regardless of their arch type or pronation style. Even those with “normal” arch heights aren’t immune to running injuries.

So, the question arises: Do you truly require specialized running shoes? Well, it’s a bit more complicated than a simple yes or no.

Let’s delve into the theory behind it..

Flat Feet and Overpronation

Flat feet often lead to overpronation, with surveys suggesting that approximately 90 percent of individuals with flat feet experience this abnormal inward rolling of the feet when they land. However, it’s essential to clarify that pronation is a natural part of the foot’s movement during walking or running, allowing it to adapt to the ground and absorb shock.

Overpronation, on the other hand, goes beyond regular pronation, involving excessive inward rolling of the foot after landing. This can place added stress on the ankle, knee, hips, and lower back, increasing the risk of injury.

As a result, many experts recommend that flat-footed runners consider special footwear designed to provide stability and control excessive pronation. These shoes typically fall into the categories of stability or motion control shoes equipped with a firm medial post.

However, it’s worth noting that there isn’t a substantial body of research conclusively supporting these claims.

The Research

To the best of my knowledge, there is no substantial scientific research that definitively proves that flat-footed runners are more prone to injuries compared to runners with high or neutral arches. Several studies have explored this topic, and their findings do not consistently support the idea that flat feet lead to a higher risk of running injuries.

For instance, research conducted by Lees and Klenerman did not establish a conclusive correlation between foot type, including flat feet, and running injuries. Similarly, a study published in the Journal of Sports & Medicine found no direct link between using neutral shoes and an increased risk of running injuries among beginner runners.

These findings suggest that the relationship between flat feet and running injuries is more complex than previously thought, and there may not be a one-size-fits-all answer. While this information is specific to running, it is also essential to consider individual factors, such as biomechanics, training regimen, and shoe selection, when assessing injury risk.

For those interested in delving deeper into this subject, conducting a simple online search can yield additional insights and research studies on the topic.

running shoes for overpronators

Additional resource – Running Shoes Vs. Cross Trainers

The Bottom Line

In summary, if you’re not experiencing any pain or discomfort while running in neutral shoes, there may be no need to switch to stability or motion-control shoes, even if you have flat feet. It’s important to prioritize proper training, injury prevention strategies, and thoughtful footwear choices to run relatively injury-free.

It’s worth noting that while conventional advice may recommend specific shoe types for flat-footed runners, it’s essential to consider factors like personal preferences, running conditions, shoe history, and budget before making a decision. Shoe manufacturers may have their own interests in promoting certain products, so it’s crucial not to blindly follow trends or marketing claims.

Ultimately, the best pair of running shoes for you may or may not fall into the stability or motion control category. Make an informed choice that aligns with your specific needs and preferences as a runner.

Additional Resource – Here’s how to dry running shoes.

The Best Shoes For Runners With Flat Feet

If you’re experiencing chronic arch or heel pain and suspect that your neutral shoes are causing the issue, it might be time to consider changing your footwear. Here’s what you should know about running shoes designed for individuals with flat feet.

The best shoes for runners with flat feet, especially those who overpronate, are those that can help reduce overpronation and provide enhanced support throughout the running gait. This becomes particularly important if you tend to exhibit moderate-to-severe overpronation or have faced problems while running in neutral shoes.

Many leading running shoe brands have developed specific models tailored to the needs of runners with flat feet. These shoes typically fall into the categories of stability and motion control shoes. They are designed with a firmer midsole that aims to limit excessive pronation during your runs.

These specialized shoes can provide added support and stability, helping to alleviate discomfort and reduce the risk of injuries associated with flat feet and overpronation. If you’ve been experiencing pain or issues related to your flat feet while running, it’s a good idea to explore these types of running shoes and consult with experts at a reputable running shoe store to find the right fit for your needs.

Additional resource – Guide to insoles for running shoes

How To Choose The Best Running Shoes for Flat Feet

If you’re unsure about how to select the perfect running shoes for your needs, it’s advisable to visit a specialty running store and seek guidance from the knowledgeable staff there. These experts can perform a thorough analysis of your running mechanics, assess your foot type, and provide tailored recommendations to ensure you make the right choice.

However, it’s important to remember that what works exceptionally well for one person may not be the ideal fit for another. Therefore, conducting your research and being open to experimenting with various shoe models is crucial in finding the pair that suits you best. Ultimately, the goal is to discover the perfect running shoes that enhance your comfort, performance, and overall running experience.

Stability Shoes Demystified

Stability shoes are designed with specific features to address the needs of runners with overpronation or flat feet. These shoes incorporate layers of polyurethane materials in the arch area to offer increased stability and support, particularly for arches that tend to collapse during foot strikes.

The key technology employed in stability shoes is a medial post made of dual-density foam. This firmer and gray-colored foam is typically positioned on the inner side of the midsole, often under the heel or midfoot regions. These areas are more susceptible to the effects of overpronation

Additionally, stability shoes prioritize cushioning to provide comfort and reduce the impact on the feet. Every major shoe manufacturer offers its own range of stability running shoes, each with its unique design and technology.

It’s essential to recognize that stability shoes are not a one-size-fits-all solution. They may not be suitable for everyone, as the effectiveness of stability shoes can vary from one individual to another.

The choice of the best stability shoes may depend on personal preferences, running style, and specific needs. Popular examples of stability shoes include the Adidas Adistar Boost, among others.

Motion Control Demystified

Motion control shoes are tailored for runners who experience severe overpronation, a condition where the foot excessively rolls inward during the running gait. These shoes are often the heaviest and most rigid options within the running footwear category.

Key features of motion-control shoes include enhanced arch support and additional support in the heel area. To combat overpronation effectively, these shoes typically incorporate stiffer heels and a relatively straight shape or last.

Some notable examples of the best motion-control shoes include the Mizuno Wave Inspire 9 and the Brooks Ravenna 4, among others. These shoes aim to provide the necessary support and stability to address severe overpronation and help runners maintain proper alignment during their runs.

Additional Tips For Runners With Flat Feet

Keep on reading if you have issues with your flat feet.

Experiment with Barefoot Running

Experimenting with barefoot running can be beneficial for some runners. It encourages a mid-foot or forefoot strike, which may help strengthen the muscles and tendons in your feet, improving shock absorption. If you’re interested in trying barefoot running, consider adding a few barefoot runs to your training program, preferably on softer surfaces like grass or a beach.

Massage With a Tennis Ball

Having chronic arch pain?

Then try massaging with a tennis ball.

This technique stretches the plantar fascia ligament and is recommended by podiatrists and sports experts. Simply place a tennis ball under your foot and roll it back and forth under the arch for 90 to 120 seconds. You can find tutorials on this technique on YouTube for visual guidance.

Lose Weight

Losing weight can be beneficial for reducing foot pain, especially if you are overweight. Carrying excess weight puts extra stress on the ligaments in your feet, which can lead to pain. This is particularly true when engaging in high-impact exercises like running. If you’re struggling with weight loss, there are various resources available that can help you achieve your goals.

Having trouble losing weight?

Then these resources can help.

Hot Water Foot Baths

Hot water foot baths with heat therapy can be effective in relieving arch pain and soreness, as long as your feet are not cut, bruised, or injured. You can soak your feet for 15 to 20 minutes in warm water mixed with Epsom salt, or you can wet two towels with warm water and wrap them around your feet to provide relief.

Consider orthotics

Orthotics, which are custom-designed arch supports, can be a beneficial option for reducing foot pain by relieving pressure on the arch and limiting the rate of pronation. This can help reduce the risk of injuries related to excessive motion. When choosing orthotics, look for insoles with substantial arch support, sufficient room to prevent blisters, and a flexible sole.

It’s important to note that not every runner with flat feet is an overpronator, and having a normal arch height does not make you immune to injuries.

Running Shoes for Flat Feet – The Conclusion

In conclusion, selecting the right running shoes for flat feet is crucial for your comfort and injury prevention.

Remember to consult with experts, such as those at specialty running stores, to determine the best shoe options for your specific needs.

Keep training strong, and enjoy your runs!

Thank you for reading.

Understanding the Running Gait Cycle: A Step-by-Step Guide for Runners

picture of Running Gait

Ready to dive into the fascinating world of the running gait cycle? Awesome, because you’ve stumbled upon the perfect spot to satisfy your curiosity.

Get ready for a (slightly technical) rollercoaster of knowledge in this short but insightful blog post. We’ll delve into the nitty-gritty of running gait, explore the mind-boggling biomechanics behind the gait cycle, uncover the various phases involved, and even uncover the secrets to analyzing your own running gait cycle. Why? So you can turbocharge your running form and leave your competition in the dust!

Excited? I thought so. Buckle up, my friend, because it’s time to hit the ground running. Let’s do this!

The Importance of The Running Gait Cycle?

Picture yourself on a run, your feet hitting the ground with each stride. The gait cycle encompasses all the phases your feet go through, from the moment they make contact with the earth to the instant they leave it again.

But why should you care about the gait cycle? Well, the research is in, and it shows that understanding this cycle can have a profound impact on your running journey.

Let me share some fascinating studies with you.

In a recent study published in the Journal of Sports Sciences, researchers found that analyzing an individual’s gait cycle can help determine the most suitable running shoes. Different foot mechanics require different types of shoes, and by understanding your gait, you can ensure that you’re lacing up the perfect pair to support your unique stride.

But it doesn’t stop there. Another research paper published in the Journal of Biomechanics revealed that studying the gait cycle can also shed light on your running technique and biomechanics. By examining how your body moves during each phase of the cycle, you can identify areas for improvement and fine-tune your form to maximize efficiency and reduce the risk of injury.

And speaking of injuries, let me introduce you to an intriguing metaphor. Think of your gait cycle as a detective story, with clues scattered along the way. When you assess the way you run, you become a detective investigating the potential causes of any nagging pains or recurring injuries.

What is The Running Gait Cycle?

Let’s dive deeper into the mechanics of the gait cycle, specifically focusing on the lower extremities—the magnificent legs that propel us forward on our running adventures.

Picture this: as one foot strikes the ground, the gait cycle begins its intricate journey, and it doesn’t end until that same foot strikes the ground again. It’s a continuous loop of motion, an enchanting cycle that keeps us in motion.

Now, let’s break it down further. The gait cycle can be divided into two primary phases, each with its own unique charm.

First, we have the Stance Phase. This is the moment of connection when your foot makes contact with the ground, firmly planting its presence.

And then comes the Swing Phase, the magical moment when your foot takes flight, soaring through the air with grace and lightness.

The phases of running gait includes both a stance and swing phase.

The Stance Phase Of Running

When it comes to performance and injury prevention, the stance phase takes center stage. It’s like the grand finale of a breathtaking performance, where your foot and leg bravely bear the weight of your body, ensuring stability and grace with each step.

Now, let’s dig deeper into the details. The stance phase encompasses a significant portion of both the walking and running gait cycles, although the exact proportions may vary like the ebb and flow of a river. During walking, the stance phase accounts for approximately 60 percent of the entire cycle, while in running, it occupies roughly 40 percent. However, these numbers are not set in stone, my friend. They sway and shift depending on the speed at which you walk or run, adapting to the rhythm of your stride.

But let’s not forget the intriguing stages within the stance phase. It’s like a story unfolding in three captivating acts, each with its own significance and role.

  • Act one: Initial Contact. This is the moment your foot meets the ground, marking the beginning of the stance phase. It’s like the opening scene of a play, where anticipation and excitement fill the air. Your heel takes the lead, gracefully embracing the earth as the rest of your foot follows suit.
  • Act two: Midstance. As your weight settles on your grounded foot, the spotlight shines on stability and balance.
  • It’s like a delicate balancing act, where your body aligns itself, ensuring optimal support and weight distribution. This is the moment where your leg acts as a sturdy pillar, supporting your forward momentum.
  • Act three: Propulsion. This is the grand finale, my friend. As your toes leave the ground, it’s like a burst of energy, propelling you into the next stride. It’s the culmination of power and grace, as your leg extends, ready to conquer the next step on your journey.

Initial contact

This subphase, also known as foot strike, is where the magic begins. Imagine your foot, poised in the air, ready to make its mark. Whether it’s a heel strike, midfoot strike, or forefoot strike, the choice is yours, influenced by your running speed, unique style, and individual biomechanics.

As your foot gracefully connects with the ground, initial contact sets the stage for the cushioning phase of the gait cycle. It’s like sinking into a soft, plush cushion, absorbing the impact and ensuring a smooth transition.

Your foot pronates at the subtalar joint, gently rolling inward, while your knee flexes slightly and your leg internally rotates, working harmoniously to minimize the stress forces from the impact. It’s a symphony of movement, a well-orchestrated ballet that protects your body from the jarring effects of each step.

The Toe Off/ Propulsion

Imagine this: as your heel gracefully lifts off the ground, a surge of energy courses through your legs. It’s like a coiled spring, ready to release its power. The muscles on the back of your leg—the mighty Gastrocs, Soleus, and Achilles Tendon—spring into action, contracting with strength and precision.

This contraction results in a mesmerizing movement known as plantar flexion, where your ankle bends, pushing your toes off the ground. It’s like a graceful takeoff, launching you into the next stride with purpose and determination.

This subphase accounts for the final 35 percent of the stance phase. It’s the climax of the gait cycle, where momentum reaches its peak. But here’s a common pitfall that beginners often stumble upon—a tendency to lean too far forward during the toe-off. Imagine a leaning tower, off-balance and struggling to find its footing. Leaning excessively can disrupt your stride angle and limit efficiency, hindering your progress towards optimal performance.

Instead, let’s set you up for success. Visualize yourself standing tall, but rather than leaning from the waist, aim for a slight, controlled lean from the ankles.

It’s like finding the sweet spot of balance, where your body aligns itself in perfect harmony with the laws of physics. This subtle lean allows for efficient forward propulsion, optimizing your stride and enhancing your overall running efficiency.

The Swing Phase Of Running

The swing phase—the second phase of running, where your foot takes flight and propels you towards new horizons. It’s like the moment of suspension in a dance routine, where your body gracefully glides through the air, free from the constraints of the ground.

During the swing phase, your foot becomes a pendulum, swinging forward with purpose and grace. Picture it, my friend—like a pendulum’s rhythmic motion, your leg effortlessly cycles through, preparing for the next foot strike. It’s a dance of anticipation, as your foot hovers in the air, eagerly awaiting its reunion with the ground.

As this phase commences, toe off marks the starting point—a pivotal moment where your toes push off the ground, propelling your leg into motion. It’s like the flick of a switch, igniting a chain reaction of fluid movement. The swing phase carries you forward, inching closer to the next chapter of your gait cycle.

Now, here’s an interesting tidbit—the swing phase accounts for the majority of the running gait, constituting a significant 60 percent, compared to the 40 percent in walking. It’s a testament to the dynamic nature of running, where your body becomes a symphony of motion, propelling you forward at a faster pace.

While the swing phase may seem less relevant in terms of preventing injuries, as there is no weight borne through the joints and muscles, it still plays a vital role in the intricate biomechanics of running. It’s like the intermission between acts, where your body readies itself for the next performance.

The focal point of the swing phase is a captivating phenomenon known as the forward descent. Imagine your foot gracefully carried forward, positioned for its next weight-bearing moment. Both the knee and foot flex, like synchronized partners in a duet. It’s a harmonious collaboration, setting the stage for a seamless transition into the upcoming gait cycle.

Additional resource – Guide to running lingo

What Is Running Gait Analysis

Gait analysis is no mere exercise in futility—it’s a scientific journey that unveils the secrets of your stride, paving the way for better understanding and improved performance.

Through the lens of gait analysis, we can uncover valuable insights about your running technique. It’s a method grounded in science, a reliable tool for identifying any lurking biomechanical abnormalities and challenges that may be lurking in your stride.

Picture this: as you lace up your running shoes and hit the pavement, your muscles come alive, propelling you forward. But what if some of those muscles aren’t pulling their weight? A gait analysis can shed light on this by pinpointing underactive or overactive muscles in your feet. These imbalances can lead to inefficiencies and potential overuse injuries down the road. It’s like shining a spotlight on the supporting cast, ensuring they play their part in the grand performance of your run.

In essence, running gait analysis is your personal running style assessment. It’s like capturing a snapshot of your running technique, piece by piece, creating a vivid image of your unique stride. It’s an opportunity to understand the intricacies of your movement and make informed decisions to optimize your running experience.

Now, let’s dive into the critical factors that contribute to a normal gait—your posture and your foot’s interaction with the ground. They are the dynamic duo that keeps your stride in harmony. But if abnormalities creep in, they force you to overcompensate, disrupting the delicate balance. It’s like a misaligned gear in a well-oiled machine, gradually wearing down and causing damage or injury to the affected limbs.

When it comes to gait analysis, there’s a multitude of options available—some more complex, others more straightforward. One common approach involves capturing a short video, observing your movements from multiple angles: front, rear, and side. You hop on a treadmill, clad in neutral shoes with minimal cushioning, as the camera records your every stride. This provides the professionals with a detailed look at your body’s mechanics, shining a spotlight on any potential abnormalities within your gait.

How To Perform Gait Analysis

Picture this: you stroll into a specialized running shop, ready to embark on a journey of self-discovery. And guess what? The initial step is often quick, painless, and yes, usually free!

Once inside, you’ll be equipped with a neutral shoe—a gateway to unlocking the secrets of your stride. It’s like stepping onto a magical treadmill, where the story of your gait begins to unfold. With a burst of energy, you set off, walking or running, allowing the staff to observe your every move.

But here’s the best part—now it’s time to unleash your running prowess! You kick it up a notch, feeling the rhythm of the treadmill beneath your feet. It’s a moment of pure exhilaration as the staff analyzes your landing technique, scrutinizing the precise location where your foot meets the ground. They have a keen eye for detail, searching for any telltale signs of biomechanical deficiencies lurking within your ankles or knees. It’s like peering through a microscope, zooming in on the intricate mechanics of your lower limbs.

The entire testing process usually takes a mere 15 to 20 minutes—a blink of an eye compared to the countless miles you’ll cover on your running journey. But fear not, my friend, for this compact timeframe is brimming with invaluable insights. As the analysis draws to a close, the staff unveils the magic—frame by frame, they replay the intricate dance of your stride. It’s like rewinding a film reel, capturing the essence of your running style in vivid detail.

Now, here comes the fascinating part—the staff takes into account not only your gait analysis but also your fitness level, running aspirations, and injury history. They piece together the puzzle of your running persona, combining scientific analysis with a touch of artistry. It’s like crafting a tailored suit, meticulously designed to fit your unique needs and propel you towards your running goals..

Gait Analysis Results

let’s dive into the intriguing world of gait analysis and uncover some of the common culprits that can hinder our running performance. Brace yourself for a journey through the maze of biomechanical challenges that await.

First on our list is the notorious heel striking. Picture this: as you take each stride, your foot lands ahead of your hips, like a daring pioneer venturing too far into uncharted territory. But fear not, my friend, for gait analysis has a keen eye for such missteps. It alerts us to this suboptimal technique, allowing us to make adjustments and bring your foot strike closer to the center stage of your stride.

Next up, we encounter the rhythmic conundrum of a slow cadence. It’s like dancing to a melody that lingers on, taking longer strides at a lower frequency. But fear not, for gait analysis reveals the secret to finding your rhythm. It prompts us to increase our step turnover, quickening our stride and finding the sweet spot of efficiency.

Now, let’s delve into the mysterious realm of hip drop. It’s like a wobbly tightrope walker, lacking the core strength to maintain balance. But fret not, my friend, for gait analysis uncovers the root cause. It illuminates the importance of building a robust core, reinforcing the foundation of our movement and banishing the pesky hip drop from our running repertoire.

Running Gait Cycle – The Conclusion

There you have it! If you’re curious about the phases of running and gait cycle biomechanics, then today’s post should get started on the right foot.

The rest is just details.

Please feel free to leave your comments and questions in the section below.

RPE Running: How to Use the Rate of Perceived Exertion for Optimal Performance

RPE Explained for runners

Are you ready to dive into the fascinating world of running intensity? Buckle up, my friend, because we’re about to embark on a journey that will unveil the secrets of measuring your effort and maximizing your training gains. Welcome to the realm of RPE in running!

Now, let’s get one thing straight: running intensity is the key ingredient that can make or break your training. It’s like the delicate balance between pushing your limits and avoiding the perilous cliffs of overexertion. Striking that sweet spot is essential for your progress and overall well-being.

Think of it this way: running is a dance with effort. You need to find the perfect rhythm, the right amount of exertion, to reap the rewards without succumbing to the dangers that lie in extremes. Too much intensity, and you risk injury or burnout. Too little, and your fitness level may plateau, leaving you yearning for progress.

That’s where the Rating of Perceived Exertion, or RPE, comes into play. It’s like a secret code that unlocks the mysteries of your effort level. This rating system, my friend, is a game-changer for runners of all backgrounds and aspirations. Whether you’re a seasoned athlete or just starting your running journey, RPE is a crucial tool in your training arsenal.

In this post, I’ll be your guide, shedding light on RPE in running. We’ll unravel its intricacies, understand its significance, and discover how to harness its power for maximum effect. So, get ready to elevate your training experience and take your performance to new heights.

Ready? Let’s get to it.

What is The RPE Scale?

The RPE scale, also known as the “Borg CR10 scale” or the “Modified RPE scale,” is like a trusted companion for exercise physiologists and personal trainers. It allows them to peer into the depths of your effort and measure the intensity of your physical activity. It’s like a window into your exertion level, revealing the inner workings of your body as you push yourself to new heights.

Imagine this scale as a ladder with rungs numbered from 1 to 10. Each rung represents a different level of perceived exertion, offering descriptive statements that capture the essence of how hard or difficult an exercise feels to you. It’s a language of effort, spoken through numbers and sensations.

These numbers are more than mere digits. They are a reflection of the symphony of sensations you experience during physical activity. Think of it as a tapestry of physical stresses—increased respiration, a racing heart, beads of sweat forming on your brow, muscles fatiguing, and a touch of discomfort.

Let’s explore the spectrum of the RPE scale. At the lower end, a rating of 1 signifies minimal effort, as if you’re strolling through a meadow on a sunny day. On the other hand, a rating of 9 signifies near maximal exertion, where you’re pushing yourself to the limit, like a sprinter giving it their all in the final stretch of a race.

The beauty of the RPE scale lies in its versatility. While it’s commonly used in cardiovascular training, it can be seamlessly integrated into various forms of exercise, including resistance training.

It’s Convenient

With the RPE scale, you can gauge your effort without missing a beat. No need to interrupt your flow and fumble with a heart rate monitor or pulse-checking antics. It’s like a seamless conversation between your body and mind, allowing you to stay in the zone and keep pushing forward.

Now, let’s address the elephant in the room—the initial intimidation factor of the RPE complex rating system. I won’t sugarcoat it; it can feel like trying to decipher a cryptic code at first.

Think of it as embarking on a thrilling treasure hunt. The more you delve into understanding the nuances of the RPE scale, the closer you get to uncovering its hidden gems. It’s like polishing a diamond, revealing its true brilliance over time. And believe me, the effort is well worth it, especially as you embark on a serious running journey.

Different Runners Different Strokes

Let’s dive in and unlock the true power of the RPE rating system.

Here’s the secret ingredient: Just start using it. Yes, you heard me right. Don’t overthink it or hesitate. Embrace the RPE scale and make it a part of your training routine, even if you’ve never used it before. Trust me, the more you practice, the better you’ll become at harnessing its benefits.

Picture this: You’re in the midst of a challenging workout, beads of sweat glistening on your forehead. In that moment, tune in to your body and rate your effort on a scale of 1 to 10. How hard are you pushing yourself? How does it feel? This self-awareness is key. And don’t forget to also rate your workout right after you finish.

To truly master the art of RPE, make it a habit to jot down your ratings in your trusty training diary. This record becomes your personal compass, guiding you through the intricacies of your progress.

Now, here’s a little reminder: The beauty of the RPE scale lies in its individuality. There are no fixed numbers etched in stone. What might be an all-out effort for one person could be a leisurely jog for another.

As you continue to use the RPE scale, something magical will happen. Your inner sensors will become finely tuned, like a symphony conductor who effortlessly guides the orchestra. You’ll gain a deeper understanding of your body’s signals and push yourself to new heights.

Additional resource – Heart murmurs while exercising

RPE In Running Explained

  1. Very easy. No exertion. You’re lounging on the couch, doing nothing physically The only movement you are doing is holding a potato chip and pushing buttons on the remote.
  2. Fairly light exertion. This is how you ought to feel when you are warming up and cooling down, or stretching. You can converse with no effort.
  3. Light exertion. You are moving, but it’s slow and easy like strolling. This how you should warm up your body before running. You can converse with almost no effort.
  4. Moderately easy. Your breathing and heart rate is a little faster. You’re feeling a little warmer. And you’re starting to work up a sweat. But you can still maintain a conversation while exercising without much effort.
  5. Moderate to somewhat hard exertion. Your heart is pumping faster. You are breathing harder. You’re feeling warmer. You can still converse, but it is getting tougher.
  6. Hard exertion. You are breathing hard now. But you can still sip from your water bottle. You can only say a few words at a time.
  7. Hard to somewhat intense exertion. You are breathing really hard, and are wondering how you can keep on going like this.
  8. Very hard. You are breathing hard and nearing your maximal limit. You can no longer say a few words without gasping for air.
  9. Super hard. You feel like your lungs are about to explode. You cannot keep this intensity for more than one minute. Conversing is impossible. This is one tad bit away from your maximum.
  • Ultimate exertion. This is your absolute limit. You cannot keep this pace for more than 10 seconds. Speaking is out of the question. Pain is everywhere.

How to Use The RPE Scale?

As you settle into your run, take a moment to assess your exertion level using the RPE scale. How does it feel? Are you cruising at a comfortable pace, or do you crave a bit more intensity? If you find yourself rating below 6 on the scale and have the desire to push yourself further, it’s time to kick it up a notch.

Increase your pace, indulge in some invigorating interval sprints, or conquer those challenging inclines and uphills. It’s like adding a dash of spice to your running recipe, infusing it with newfound energy and excitement.

But what if you find yourself rating at an 8 or 9 on the scale, indicating a high intensity level? Take a moment to reassess. While it’s great to challenge yourself, it’s important to listen to your body’s signals.

If you’re mid-workout and feel like you’re pushing too hard, it’s perfectly okay to dial back the intensity. Slow down your pace until you find yourself back in the moderate intensity zone. It’s like finding your rhythm in a captivating dance, gracefully adjusting your movements to maintain balance and avoid overexertion.

Now, here’s a valuable resource to complement your RPE journey: the Maffetone Method. This guide can provide you with additional insights and techniques to optimize your training. Explore it, embrace it, and let it enhance your understanding of the RPE scale and its application in your running routine.

RPE And Heart Rate Zones

Here’s where science meets perception: studies have shown a strong correlation between RPE ratings and heart rate during exercise.

For example, a challenging interval run might correspond to an RPE of 9-10 or 94 to 99 percent of your maximum heart rate. On the other hand, an easy recovery session might align with an RPE of 3-4, reflecting roughly 60 to 70 percent of your maximum heart rate.

However, keep in mind that these are rough estimates, as individual factors such as physical conditioning and age can influence the relationship between RPE and heart rate. It’s like unraveling the mysteries of your own body, understanding its unique responses to exertion.

This is how you can correlate it to heart rate zones so you can have more measuring tools on your hand.

  • 2-4 – Very light zone – 50 to 60 percent
  • 4-5 – Light zone – 60  to 70 percent
  • 5-7 – Moderate zone – 70 to 80 percent
  • 7-9 – Hard zone – 80 to 90 percent
  • 9-10 – Maxiumum zone – 90 to 100 percent.

RPE in Running – The Conclusion

There you have it! If you’re looking for the full guide to RPE in running, then this post should get you started on the right foot. I’ve also shared with you a brief description on the link between RPE and heart rate zones. This means that you apply the RPE chart shared while doing any form physical exercise – Not just running.

Please feel free to leave your comments and questions in the section below.

In the meantime thank you for dropping by.

Keep training strong.