Types of Feet & How to Choose the Right Running Shoe for Yours

foot types for runners

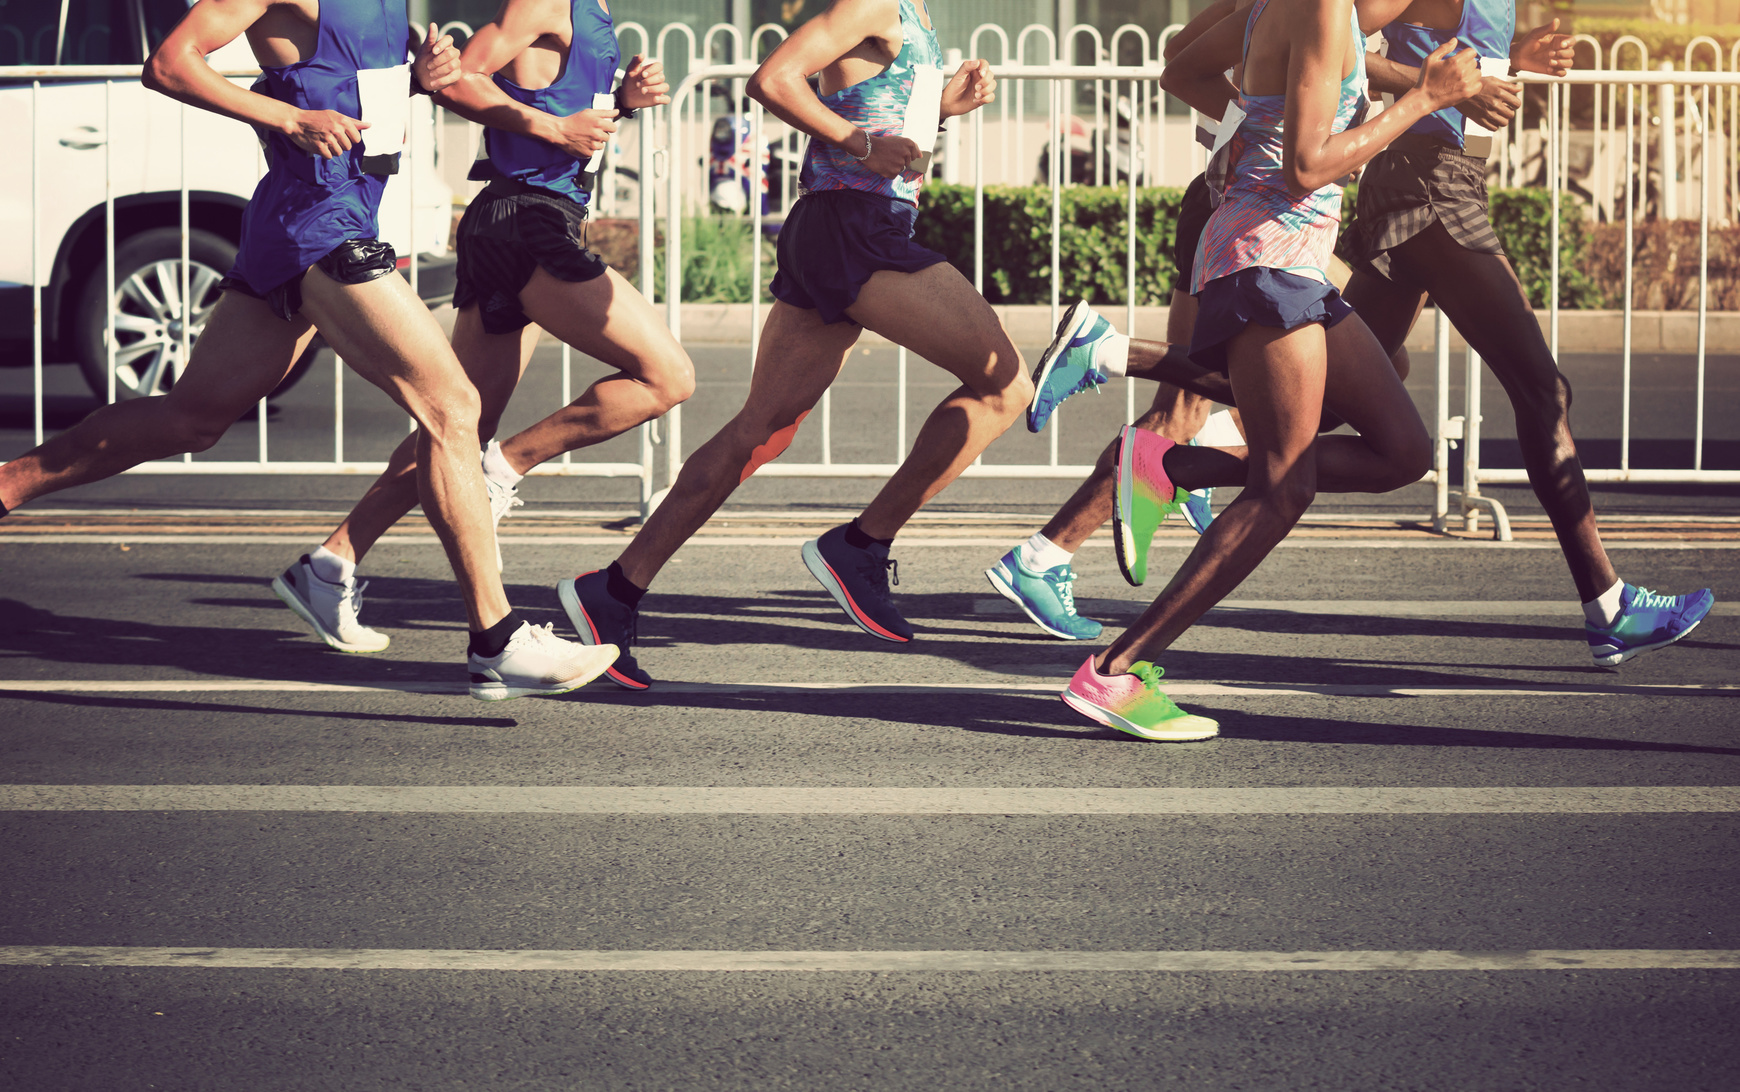
Choosing the Right Running Shoes for Your Foot Type

“I once ran a half marathon in the wrong shoes. By mile 9, my knees hated me.”

This isn’t just a one-off horror story — it’s a common tale. The truth is, your foot type may be the reason your runs feel uncomfortable or why nagging injuries keep showing up.

Your feet absorb 2–3 times your body weight with every step. Pick the wrong shoes, and that impact travels to your knees, shins, or hips. Pick the right shoes? You’ve just laid a strong foundation for pain-free, efficient running.

Let’s break down how to identify your foot type and find shoes that work with your stride, not against it.

The 3 Main Foot Types (and What They Mean for Runners)

Most runners fall into one of three arch categories:

  • Neutral (Medium Arch)
  • Flat (Low Arch) / Overpronator
  • High Arch / Underpronator

Each type affects how your foot moves on impact (pronation) and how forces are distributed. Understanding where you fall on this spectrum helps you choose shoes that support—not fight—your natural motion.

1. Neutral Arch (Medium)

What it looks like:
On a wet footprint test, you’ll see a visible arch — not too high, not fully filled in. Think of a soft curve inward in the middle of the print.

How it works:
Neutral runners have a balanced gait. Your heel strikes, and the foot rolls inward just enough to absorb shock. This is ideal pronation — your foot is doing what it’s supposed to do. Most impact stays centered, and your arch helps distribute forces naturally.

Shoe wear pattern:
Look for an “S” shaped wear pattern from the heel to the ball of the foot, centered along the sole.

Common issues:
Neutral feet are efficient, but they’re not injury-proof. Poorly fitting shoes or overtraining can still cause problems. I’ve seen neutral runners sidelined because they picked the wrong shoe just because it was “popular” or “highly rated.” Comfort always wins.

Best shoes:
Stick with neutral running shoes — well-cushioned, flexible, and without aggressive stability features. Great examples include:

  • Brooks Ghost
  • Nike Pegasus
  • Saucony Ride
  • ASICS Cumulus

Coaching tip:
If what you’re doing is working, don’t overthink it. As one coach said: “If it ain’t broke, don’t fix it.” Neutral runners don’t need added support unless they’re dealing with a specific issue. Focus on feel, fit, and updating your shoes regularly (every ~300–500 miles).

2. Flat Feet (Low Arch / Overpronation)

What it looks like:
Your wet footprint shows almost the full foot — minimal to no inward curve. The arch is low or completely collapsed. Shoes placed on a table may lean inward.

How it works:
Flat feet often overpronate, meaning the foot rolls inward more than it should during each step. The arch collapses fully, letting your ankle rotate inward and throwing off alignment up the leg. Think of your arch like a spring — and in this case, the spring compresses completely.

Shoe wear pattern:
You’ll see heavy wear on the inner edge of the shoe, especially under the ball of the foot and heel.

Common issues:

  • Plantar fasciitis
  • Shin splints
  • Knee pain (inner or medial)
  • Posterior tibial tendonitis
  • Lower back or hip pain
  • Bunions, heel spurs (due to extra pressure on the inner foot)

That sounds like a lot — but flat feet are not a deal-breaker. Plenty of runners (including elite ones like Haile Gebrselassie) have flat feet and still perform at world-class levels. The key is managing that inward roll so it doesn’t lead to chronic injury.

Best shoes:
Look for stability or motion-control shoes — these offer medial support to prevent overpronation. Look for features like firm arch support, dual-density midsoles, or guiderails.

Popular options include:

  • Brooks Adrenaline GTS
  • ASICS Gel-Kayano
  • Saucony Guide
  • Mizuno Wave Inspire
  • HOKA Arahi

Coaching tip:
If you’re flat-footed and getting frequent injuries, don’t just slap in an arch support and hope for the best. Visit a specialty running store or see a podiatrist who understands biomechanics. A small shoe change can mean the difference between sidelined and strong.

Best Running Shoes for Flat Feet (and Why the Old Advice Isn’t Always Right)

If you’ve got flat feet or overpronate, chances are someone’s told you to grab a “stability” or “motion-control” shoe and call it a day. And to be fair, that advice can work—for some runners.

These shoes are designed with firmer materials along the arch (called medial posts or guide rails) to limit excessive inward roll. Think Brooks Adrenaline GTS, ASICS Gel-Kayano, or heavy-duty motion-control models like the Brooks Beast.

Plenty of flat-footed runners do great in these shoes. I’ve coached runners who saw shin splints disappear once they got into something more supportive that “locked” their arch in place. But here’s the twist: not everyone with flat feet needs that much structure.

Let’s Clear the Air: Stability Isn’t a Cure-All

Recent studies (including one year-long trial on new runners) found that moderate pronators had no greater injury risk when wearing neutral shoes versus stability shoes.

And in a military study, giving recruits shoes based on arch type didn’t reduce injury rates at all.

Translation? Pronation alone isn’t always the enemy. Overcorrecting it with stiff shoes might do more harm than good.

What Should You Do?

  • Try stability or motion-control models if you’ve had issues like knee pain, arch collapse, or chronic shin splints.
  • But if those shoes feel too stiff, clunky, or cause outer foot pain, they might be overcorrecting.
  • Some runners with flat feet actually feel better in a neutral shoe plus an orthotic insert (which gives arch support without locking your foot into an unnatural motion).

💡 Coach’s note:
One of my marathon trainees had low arches and mild pronation. She hated motion-control shoes—they made her knees ache. We switched her to a moderate stability shoe with soft arch support, and she ran her first marathon pain-free.

Orthotics: Helpful Tool, Not a Crutch

If you’ve had multiple injuries or very flat feet, custom or over-the-counter orthotics can give you that extra support.

Just don’t become dependent. Use them to get strong—not to compensate forever.

And no, flat feet don’t make you a bad runner. Plenty of elite athletes—including Olympic champ Said Aouita—ran on flat arches.

It’s about finding what works and pairing it with smart training and foot-strengthening work.

High Arches (Cavus Foot): When Cushion is King

Now, let’s flip the script. If you’ve got high arches, you’re dealing with the opposite problem: underpronation (aka supination). Instead of collapsing inward, your foot stays rigid and doesn’t absorb shock well. On a footprint test, you’ll see almost no connection between your heel and forefoot—just two blobs with little in between.

What Happens When You Underpronate?

The outer edge of your heel hits first.
Your foot stays stiff through the stride and doesn’t roll in to absorb impact.
That means more jarring forces go straight up your leg, stressing bones and joints.

This leads to issues like:

  • Stress fractures (especially in the shin)
  • Ankle instability and sprains
  • Heel and ball-of-foot pain
  • Achilles tightness and plantar fasciitis
  • Shin splints or tibial pain

One runner I worked with had high arches and constant tibial stress fractures. She was training in motion-control shoes meant for overpronators—totally the wrong match. Once we moved her into a neutral, plush shoe (ASICS Nimbus) and added some foot mobility work, the pain vanished. No more fractures the next season.

What to Look For in a Shoe (If You Have High Arches)

  • Neutral cushioning: Skip the motion-control. You need give, not stiffness.
  • Soft, flexible midsoles: Look for models like the ASICS Nimbus, Brooks Glycerin, or HOKA Clifton.
  • Room for foot expansion: High arches can make shoes feel tight. A flexible upper and roomy toe box help.
  • Extra forefoot cushion: Supinators often feel pressure under the ball of the foot—cushion helps.

And yes, just like with flat feet, strengthening your feet matters. A rigid arch won’t magically become flexible, but you can improve control and stability with targeted exercises.

Best Running Shoes for High Arches: Cushion, Flexibility & Smart Support

If you’ve got high arches, the name of the game is shock absorption and flexibility. Your foot’s natural suspension system isn’t doing much to soften the blow—so your shoes need to pick up the slack.

What You Need:

  • Neutral shoes with serious cushioning. Think soft midsoles that soak up impact your foot won’t. Look for descriptions like “maximal cushioning” or “plush ride.”
  • Flexibility matters. A stiff shoe won’t help. You want the sole to bend with you, not fight your stride. Look for models with flex grooves or split outsoles that allow a bit more foot movement.
  • Avoid stability shoes. That rigid support is great for flat feet—but it’ll make a high-arched foot feel like you’re running on plywood. Let your foot move.

Coach-Approved Picks:

  • Brooks Glycerin – Plush, soft ride with a forgiving feel.
  • ASICS Gel-Nimbus – Cushioned yet durable, solid for long miles.
  • Nike Zoom Vomero – Well-cushioned and slightly bouncy.
  • HOKA Clifton or Bondi – Max cushion kings. Shock absorption for days.

If your arches feel sore, or your foot feels like it’s collapsing at the ball and heel, consider adding a cushioned insole made for high arches. It’s not about adding arch support to stop pronation—it’s about filling the gap so pressure is distributed more evenly.

Bonus: Some high-arched runners find that slightly lower drop shoes or midfoot-friendly designs feel better—less heel thumping, more controlled landings.

And remember: Soft shoes are not your enemy. There’s an old myth that plush shoes make you sloppy. Not true—especially if your alternative is nagging injuries. In fact, studies show cushioned shoes can reduce muscle fatigue and improve performance by minimizing impact stress.

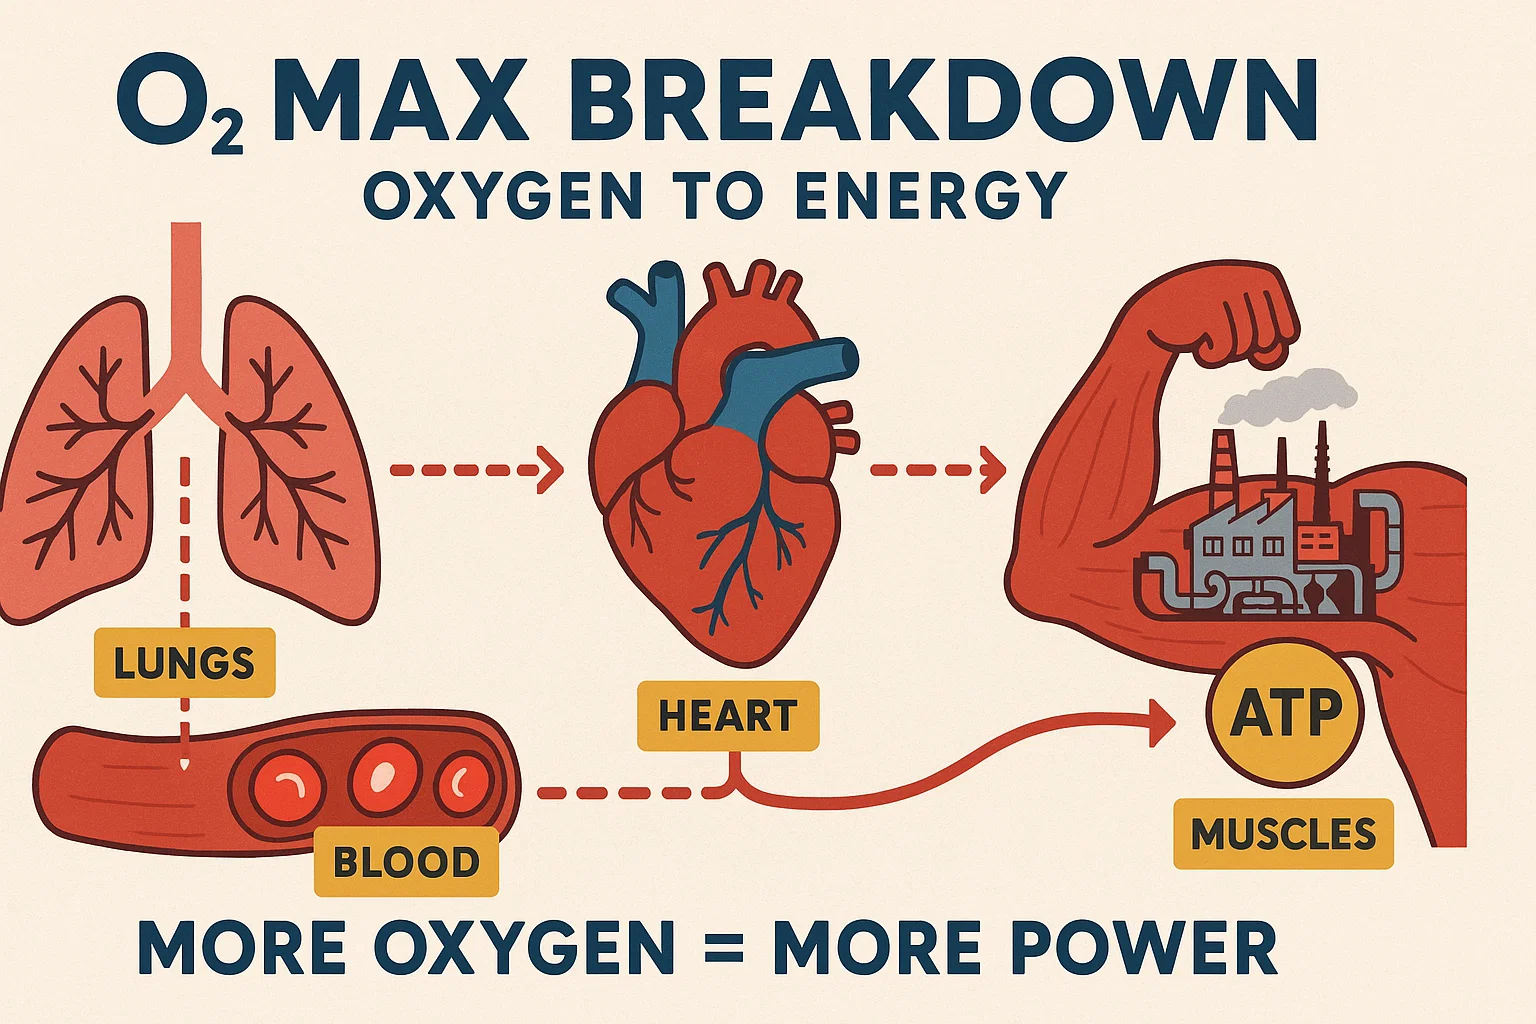
Understand Pronation: It’s Your Body’s Built-In Shock Absorber

Let’s break this down, no fluff.

Pronation = natural inward roll of the foot when it hits the ground. You need it. It’s how your body absorbs shock.
Supination = underpronation → your foot doesn’t roll in enough. Rigid, high-arched feet usually fall here.
Overpronation = too much inward roll. Often tied to flat feet.
Neutral = just the right amount of roll. Smooth shock absorption, efficient push-off.

Here’s how it plays out in real life:

Foot TypePronation StyleCommon ProblemsShoe Type
Flat FeetOverpronationShin splints, plantar fasciitis, runner’s kneeStability / Motion Control (e.g. Brooks Adrenaline)
Neutral ArchNeutral PronationMinimal biomechanical issuesNeutral Cushioned (e.g. Saucony Ride)
High ArchUnderpronation (Supination)Stress fractures, IT band pain, ankle sprainsCushioned Neutral (e.g. HOKA Clifton, Nimbus)

Pro tip: Some supinators do well with a midfoot strike to reduce heel impact. It’s worth experimenting with technique and shoes.

Don’t Just Rely on Shoes—Strengthen Your Feet

High arches often mean underused foot muscles, especially in the midfoot and ankles. That rigidity can make you more prone to stress injuries.

Here’s your simple strength checklist:

  • Toe curls (pick up a towel with your toes)
  • Calf raises (single-leg is even better)
  • Balance drills (barefoot on one leg, or on a wobble board)

Stronger feet = better impact control = fewer injuries.

3 Easy Ways to Test Your Foot Type (No Fancy Gear Needed)

Knowing your foot type can save you from injuries and help you pick the right shoes without wasting money on the wrong pair. You don’t need a sports lab or a Ph.D. in biomechanics—just a few simple tests, some observation, and a little curiosity.

Here’s how to figure out what your feet are really doing:

1. The Wet Test (a.k.a. the Footprint Test)

This is the old-school classic. It’s not perfect, but it gives you a decent snapshot of your arch height.

How to do it:

  • Wet the sole of your foot
  • Step onto a dry surface—brown paper bag, cardboard, or dry concrete
  • Step off and check the print

What it shows:

  • Flat Foot (Low Arch): The whole foot shows up with little to no curve on the inner side. Looks wide and solid.
  • Neutral Foot (Medium Arch): There’s a visible curve on the inside. The print connects heel to toe with a solid but not full strip.
  • High Arch (Supinated): Heel and forefoot are there, but the middle is barely visible or even disconnected. That arch is staying high off the ground.

Coach’s note: This is a quick test—but not the full story. If you’re somewhere between flat and neutral (most people are), it might not be crystal clear. Use this as a starting point, not your final answer.

My own wet test looks “neutral,” but a gait analysis showed I mildly overpronate. So yeah, it’s helpful—but don’t stop here.

2. The Shoe Wear Test (Read Your Soles)

Your old running shoes are talking. You just have to know how to listen.

Grab the most beat-up pair you’ve got. Flip them over. Look at where the rubber’s worn down.

Patterns to watch for:

  • Neutral Pronation: Wear forms an “S” curve—from the outer heel to the ball of your foot (center forefoot). Even, balanced wear.
  • Overpronation: More wear on the inner edge, especially near the big toe and inner heel. Your foot rolls in too far.
  • Supination (Underpronation): Heavy wear on the outer edge—both heel and little toe area. Foot doesn’t roll inward enough.

Want to double-check? Set your shoes on a flat surface and get eye-level with the heel.

  • Tilt inward? Likely overpronation
  • Tilt outward? Supination
  • Straight? You’re probably neutral

Also check the midsole. Foam compressed on one side = that’s where your weight’s going.

Quick warning: Shoe wear isn’t 100% reliable. If you scuff your heels or run a lot of hills, the wear could be misleading. Use this test alongside others, not in isolation.

3. Pro Gait Analysis (or DIY It)

Want the most accurate picture? Get a gait analysis.

Many specialty running stores offer it for free. Some use slow-mo treadmill video, others just have you run while someone watches your mechanics.

They’ll look at:

  • How your ankle and arch behave with each stride
  • Whether your knee tracks straight or collapses
  • How your foot lands and rolls
  • Whether you overpronate, supinate, or run neutral

High-tech versions might use pressure sensors or force plates—but honestly, a trained eye and a basic video can tell you what you need to know.

Can’t get to a store? Film yourself. Have a friend record you running on a treadmill or on pavement from behind. Slow the footage down. Watch your heel and ankle:

  • Is it wobbling side to side?
  • Does the ankle cave inward?
  • Does it stay stable and straight?

Coach tip: I once helped a remote athlete this way—she sent me slo-mo clips, and we discovered her left foot collapsed inward way more than her right. We adjusted her shoe insert on that side—and her shin pain disappeared.

Bonus: The One-Leg Balance Test

This one isn’t for diagnosing foot type directly—but it’s great for checking foot strength and stability.

How to do it:

  • Stand barefoot on one foot
  • Do a mini squat—watch your ankle and arch

If your arch collapses or your ankle wobbles like crazy? That’s a sign of weakness and instability, often tied to flat feet or overpronation.

If you’ve got a high, rigid arch, you might struggle to balance because your foot doesn’t absorb shock well.

Use this test to figure out if you need foot strengthening work—like arch exercises, balance drills, or short foot workouts.

After the Tests: What Now?

Once you’ve done 2–3 of these tests, you should have a good idea of your foot mechanics:

  • Neutral = most cushioned or neutral shoes work
  • Overpronator (Flat Feet) = you might need stability or motion-control shoes
  • Underpronator (High Arch) = go with neutral shoes with extra cushioning and flexibility

Remember, no test is perfect in isolation—but together, they can tell you a lot.

Bottom line: The better you know your feet, the better you can protect them. And that means fewer injuries, smarter training, and a smoother ride every step of the way.

Shoe Types Based on Your Foot Type

Alright, so you know your foot type — now what? Time to match it to the right kind of running shoe. This isn’t about marketing jargon — it’s about support, comfort, and staying injury-free.

Here’s the breakdown — no fluff, just real advice:

If You Have Neutral Arches (a.k.a. Normal Feet)

Stick with neutral running shoes.

You don’t need heavy-duty support. Your foot mechanics are doing just fine, and neutral shoes let your foot move naturally. These are the bread-and-butter trainers for runners who pronate normally (or just a little).

What to look for:

  • No medial posts or stability rails
  • Foam that’s consistent across the midsole
  • Smooth, natural ride

Solid options:

  • Nike Pegasus
  • Brooks Ghost
  • Saucony Ride
  • ASICS Cumulus
  • New Balance 1080

If you’re a heavier runner or clocking serious weekly mileage, look into max-cushion models like the HOKA Clifton or Brooks Glycerin. Want something lighter for speedwork? Try Nike Free or New Balance Beacon — but only if your legs are ready for less shoe.

Coach tip: Not all neutral shoes feel the same. Some have higher arch profiles. If you have a flexible foot, you might prefer a little structure. If you’ve got a rigid arch, you may want something flatter and softer. Try a few on and trust the comfort test.

If You Have Flat Feet or Overpronate

Look at stability or motion control shoes.
These are built to limit excessive inward roll (aka overpronation) and keep your stride aligned.

Stability Shoes – for mild to moderate overpronation

These give you guidance without locking your foot in place.

Look for:

  • Medial posts (firmer foam on the inner arch side)
  • Guide rails or J-frames
  • Slightly structured but still flexible

Great examples:

  • Brooks Adrenaline GTS
  • ASICS GT-2000
  • Saucony Guide
  • Mizuno Wave Inspire
  • Nike Structure

You’ll feel that solid arch support underfoot — that’s the control feature doing its job.

Motion Control Shoes – for severe overpronation or bigger bodies

These are the tanks. Built stiffer, bulkier, and with max correction. They’re not for everyone, but if your ankles collapse or you’ve battled injuries, these might be the ticket.

Examples:

  • Brooks Beast (men) / Ariel (women)
  • New Balance 1540

Heads up: These can feel pretty rigid. Try them before you buy, and only go this route if you truly need that much structure.

New Wave: Stability Meets Comfort

Shoes like the Saucony Tempus or ASICS Kayano Lite blend lightweight feel with subtle stability. They’re great for runners who want support without the brick-foot feel. I’ve had flat-footed runners who hated traditional stability shoes fall in love with these.

Fit Matters More Than Labels
Flat-footed? Don’t get stuck in a shoe that chokes your midfoot. Too tight around the arch = rubbing, blood flow issues, and all kinds of problems.

Make sure:

  • There’s no pressure on your arch
  • Your forefoot isn’t cramped
  • Toes have room to move

Also: Just because you overpronate doesn’t mean you need stability forever. Some runners strengthen their feet and transition to neutral shoes with orthotics — or no support at all.

As one Reddit runner put it: “Stability shoes don’t fix your stride — they just accommodate it.” Spot on.

Got High Arches or Underpronate? Here’s How to Pick the Right Running Shoe

If you’ve got high arches or you tend to underpronate (a.k.a. supinate), your feet aren’t doing much shock absorption naturally. That means you need your shoes to do the heavy lifting.

So forget what your buddy wears or what the trendiest shoes on Instagram are — you need cushion, flexibility, and the right fit for your foot.

What to Look For:

1. Maximum Cushioning

Go for soft, plush shoes. You want foam that actually absorbs shock, not just looks cool.

Try:

  • HOKA One One (especially Bondi, Clifton) – weird-looking, but buttery soft
  • Nike Invincible Run – ZoomX foam = trampoline for your feet
  • Brooks Glycerin 20, New Balance More, Saucony Triumph

If a shoe says “responsive” but feels like concrete, it’s not for you.

2. Flexibility Up Front

Your high-arched foot is already stiff. Don’t add a shoe that’s rigid as a brick.

Quick test:

  • Grab the heel and toe and bend the shoe. It should flex at the forefoot.
  • Try to twist it a bit. A little give is good.

Some shoes have “flex grooves” under the forefoot to help here. Take advantage of that.

3. Arch Contour – Not Flat Inside

Ironically, high arches like some support inside the shoe. A gentle arch shape helps cradle your foot instead of leaving it hanging.

If the insole feels flat, try swapping in a high-arch insert. Most neutral shoes let you do this. And if you don’t like the feel right away, walk in them before tossing them aside. Your feet might just need a few miles to adjust.

Best Shoes for High Arches (Tried and Tested)

  • ASICS Gel-Nimbus / Cumulus – nice arch curve, good cushioning
  • Brooks Ghost – neutral, semi-curved last
  • Nike Vomero – a plush, neutral tank
  • Saucony Triumph – soft and smooth
  • Nike Pegasus (with extra insole) – for faster runs with a firmer ride

Bottom line: You don’t need a stability shoe. Your foot doesn’t need controlling — it needs cushion and freedom to move.

Pro Tips

  • Track your mileage. High arches feel the wear faster. Replace around 300–500 miles, or sooner if the cushioning feels dead.
  • Don’t go cheap. With your foot type, tech matters. Those fancy foams exist for a reason — they protect your joints.
  • Rotate your shoes. A cushioned long-run shoe + a lighter daily trainer or speedwork shoe is a good combo.
  • Ease into any new pair slowly.

What If You’re In-Between Foot Types?

Let’s be honest—not everyone fits perfectly into the “neutral,” “overpronator,” or “supinator” boxes. A lot of runners fall somewhere in between. Maybe your arch is low, but not flat. Or you have one foot that pronates more than the other. Or your foot looks neutral but behaves differently once you start moving.

That’s normal. It just means your gear needs a little more strategy.

Combo Arches or Semi-Flexible Feet

You’ve got a decent-looking arch when standing, but it collapses under load when running? That’s a flexible arch—and you’re probably overpronating a bit even if your shoes don’t show it.

A full-blown motion control shoe might be overkill. But a true neutral shoe might not give enough support either.

Coach’s Tip:

  • Try a light stability shoe, like the Mizuno Wave Inspire or Brooks Launch GTS. They give subtle support without turning your shoe into a tank.
  • Or run in a neutral shoe with a support insole (like SuperFeet or PowerStep).

Don’t underestimate how much difference a $30 insole can make. I’ve seen runners eliminate inner ankle pain just by dropping one into their favorite trainers.

One Foot Overpronates More?

Totally common. We’re not symmetrical robots. One foot can pronate, the other stays neutral. It can come from leg length differences, past injuries, or just how you’re built.

What to do:

  • Fit your shoes to the more problematic foot. Better to over-support the neutral foot than under-support the one that needs help. Most feet can adapt to a little extra structure.
  • Some runners add extra padding or an extra insole on just one side. One athlete I know uses a thin arch wedge under the sockliner in just his right shoe to balance out his gait.
  • Tighten laces differently per side if needed. You’d be surprised how much that can tweak feel and support.
  • If nothing works? Custom orthotics with asymmetric support are your best bet.

Medium-High Arches with Light Supination?

You’re not flat-footed, but not rigid-high either. And you roll slightly to the outside (supinate), but not dramatically. What now?

You might hate the ultra-soft, high-arch shoes made for pure supinators. And you might find you like a little structure to keep things centered.

Try this:

  • Look at firm-neutral shoes like the ASICS Gel-Cumulus or Brooks Ghost.
  • Trail shoes also work surprisingly well for borderline feet—their low stack height and stable base handle uneven terrain, which benefits mild pronators or supinators alike.

Not Sure What’s Best? Start Somewhere Comfortable

Here’s my rule: start with a moderate-support shoe (light stability or firm neutral).

Run a few times. See how it feels.

  • If it feels clunky, restrictive, or causes weird aches (like outer knee or Achilles pain)? Step back toward neutral.
  • If your foot still feels unsupported or you get that ankle-rolling-in sensation? Step up the support.

Use a running log to note how your feet, ankles, and knees feel in each setup. Don’t just guess—track and adjust.

Mix It Up: Rotate Your Shoes

Rotating shoes is one of the smartest moves a runner can make—especially if you’re not a perfect fit in one category.

Try this combo:

  • Long runs in a light stability shoe (more support when fatigue sets in)
  • Short runs or workouts in a neutral shoe (more freedom and foot engagement)

This slight variation changes stress patterns on your body and can actually help prevent overuse injuries. Research backs this up—rotation lowers injury risk.

Example from the Field

One runner I worked with was misdiagnosed as a severe overpronator. They threw him into a motion control brick and boom—Achilles pain. Turns out, he had a flexible, high-ish arch that only flattened under pressure.

Our fix?

  • Neutral shoe (Saucony Freedom)
  • Custom insole for slight arch support

Result? No more pain, and his running felt light again.

The takeaway: Don’t let a shoe label decide for you. You’re allowed to create your own hybrid setup.

How to Choose the Right Running Shoe for Your Feet

Let’s be real: the wrong shoe can wreck your running. Blisters, aches, weird knee pain — all of it can come down to a bad match between your foot and your footwear.

But when you nail the fit? Everything clicks. Your run feels smooth. You’re not thinking about your feet. That’s the goal.

Here’s how to find that shoe:

1. Get Fitted (If You Can)

If there’s a legit running store nearby — go. A trained eye can measure your foot, check your arch, watch your gait, and get you started with a solid short list.

Even if you plan to buy online, just getting measured once a year can make a big difference. A lot of runners are wearing shoes that are too small.

Your running shoe should usually be a half to full size up from your everyday sneakers — your toes need room to splay, especially after mile 4.

Got flat feet? You might need more width. High arches? You might need more support. Don’t guess — get looked at.

2. Try Shoes on Later in the Day

Your feet swell when you’re on them all day — or after a run. Trying on shoes after work (or after a jog) gives you a more realistic idea of how they’ll feel mid-run.

You want a thumb’s width between your longest toe and the front of the shoe. If your toes are jammed up from the start, you’re asking for black toenails.

3. Bring Your Old Shoes and Inserts

The wear pattern on your old shoes tells a story — bring them in.

Also bring your orthotics or insoles if you use them. The shoe needs to work with those, not against them. You’ll know fast if it’s too tight or awkward once they’re in.

4. Test Run Every Pair

Standing around in the store tells you nothing. Jog in the shoes. Treadmill, sidewalk, whatever the store allows.

  • Feel the heel. Check for slippage.
  • Notice any pressure points.

If the store has a run-and-return policy, use it — sometimes it takes a few real runs to know what’s working.

5. Fit Checklist (Don’t Skip This)

  • Heel: Snug, no slipping. Shouldn’t dig into your Achilles either.
  • Midfoot/Arch: Supportive, not suffocating. If the arch feels aggressive from the jump, it might be too much.
  • Forefoot: Toes need room to move. No pinching, no hot spots. Look out for seams that rub bunions or pinky toes.
  • Flex Point: The shoe should bend where your foot bends — at the ball. Not in the middle. Unless you’re buying carbon-plated racers, you want that flex to match your stride.

6. Don’t Buy Hype Over Fit

Just because everyone’s wearing super shoes or talking about HOKAs doesn’t mean they’re right for you. Your foot doesn’t care what’s trendy. It cares about feel. Focus on fit and function, not fashion.

7. Use Reviews Smartly

Reviews are helpful — but they’re not gospel. Look for trends (“runs narrow,” “soft cushioning,” etc.) that match your needs.

But remember, what works for your running buddy might feel like bricks to you. Read, compare, then test for yourself.

8. Ask About Return Policies

If you’re new to this or trying a new brand, favor stores with 30-day wear-test guarantees.

Sometimes the first run reveals problems you didn’t feel in the store. Save the receipt and keep the shoes clean-ish just in case.

9. Pay Attention to How You Feel After the Run

The right shoe won’t make you sore in weird places.

  • Sore arches? Maybe too much support or the wrong shape.
  • Aching knees? Might be too little cushion or stability.
  • Blisters? Could be a fit issue or lacing problem.

A great shoe disappears under you. That’s the sign you’ve got a winner.

10. Don’t Cheap Out on Beat-Up Shoes

You don’t need to buy the $200 model — but don’t keep running in shoes that are dead.

Worn-out midsoles stop absorbing shock, and that impact goes straight to your knees, hips, and spine.

Rule of thumb:

  • 300–500 miles per pair
  • Heavier runners = closer to 300
  • Rotate two pairs = shoes last longer and legs stay fresher

11. Feet Change. Get Measured Yearly.

Feet flatten out. Arches drop. Pregnancy, weight gain/loss, even consistent training can change your shoe size or width.

Don’t assume you’re “always a size 9.” Measure again. Could be the difference between comfort and discomfort.

Bonus: The Foot Fatigue Test

If your feet feel beat up after a run — or even after walking around in your running shoes — something’s off.

  • High arches in a soft shoe = tired feet.
  • Flat feet in a stiff shoe = tired feet.

The right shoe supports your structure, not fights it.

Final Advice: It’s Not Just About Your Feet

Congrats—you now know more about feet and shoes than 95% of runners. But here’s the thing: running injury-free isn’t just about shoes or foot type. Those are important, sure. But they’re just one piece of the bigger picture.

Shoes Help. Form Matters More.

No shoe can fix poor running mechanics.

If you’re overstriding—landing with your foot way out in front of you—no amount of cushion or stability is going to save your knees.

Focus on:

  • Shorter, quicker strides
  • Landing with your foot roughly under your hips
  • Cadence in the ballpark of 170–180 steps per minute
  • Soft, quiet landings

I tell my athletes all the time: “Run light, run tall, run smooth.” That alone will take pressure off your feet and make your shoes more effective.

Strength & Mobility: Your Built-In Support System

Your glutes, core, hips, and lower legs? They’re your real shock absorbers.

  • Flat feet? Do arch-strengthening drills (toe yoga, towel scrunches, single-leg balances).
  • High arches? Work on ankle and calf mobility to absorb more ground contact.

And no matter your foot shape, a strong core and stable hips will reduce the stress that trickles down to your knees, shins, and feet.

Weak hips = poor alignment = bad loading = foot pain. Fix it upstream.

Do a couple strength sessions a week. Doesn’t have to be fancy—just functional.

Smart Training Beats Any Shoe

The best shoe in the world won’t protect you if you’re doing too much, too soon.

If you ramp up mileage too quickly or hammer every run, you’re asking for trouble—even if your form and shoes are dialed.

Follow progressive overload:

  • Increase weekly mileage gradually (10% rule is a loose guide)
  • Add speedwork and hills one at a time
  • Respect recovery days

A neutral-footed runner going from 10 miles to 30 in a week will break down faster than a flat-footed runner increasing intelligently.

Your feet can get stronger. But you’ve got to give them time to adapt.

Listen to Pain Signals

Don’t ignore consistent aches. If your foot, knee, or shin hurts every run, new shoes won’t be enough. Pain is feedback—listen to it.

Sometimes the fix is simple:

  • Slight cadence tweak
  • Change in terrain
  • Strengthen a weak link
  • Swap gear that doesn’t agree with you

If it lingers, get assessed. A coach, PT, or sports doc can spot form flaws or gait issues you can’t see yourself.

Build Foot Strength—Don’t Outsource It All to Shoes

Supportive shoes are great, but you don’t want your feet going soft.

Do barefoot work on safe, soft surfaces (like grass or a track). Think:

  • Barefoot strides
  • Balance work
  • Toe spread drills
  • Even just yoga barefoot

The stronger your feet get, the more support they’ll provide on their own—and the less you’ll rely on “stability” tech.

Shoes are tools. Your body is the engine. Build both.

Big Picture: Your Feet Are Just the Starting Point

All this foot talk? It’s to help you enjoy running longer, healthier, and with fewer setbacks. The goal isn’t to obsess over arch types or shoe tech. It’s to run with freedom and confidence.

I’ve coached runners with flat feet, high arches, weird gait quirks—you name it. And many of them are out there crushing long runs and races pain-free.

Why? Because they listened to their bodies, trained smart, and put the pieces together—not just shoes, but form, strength, recovery, and consistency.

Refine What Works for You

Forget the marketing hype. If you feel better in Shoe B than Shoe A, trust that. You don’t need a motion control shoe just because someone told you you overpronate.

Find what works. Stick with it. Tweak as needed.

You’re your own best experiment.

Final Word: Know Your Foot, Know Your Stride, Then Run Free

Strong feet, smart shoes, solid form. That’s the foundation.

But running is more than mechanics. It’s the freedom of the open road. It’s the head-clearing rhythm of footfalls. It’s chasing goals—and sometimes just chasing the sunrise.

So yes, know your feet. Choose wisely. Train smart.

Then get out there and enjoy the ride.

Happy running—and here’s to many strong, pain-free miles. 👟💪

How Long Is a Marathon?

How Long Is A Marathon

Ever wondered exactly how long a marathon is – and why that odd distance became the standard?

Or maybe you’re just curious how long it really takes to run 26.2 miles — and what kind of grit it takes to go from start to finish.

I get it.

As a running coach and marathoner, I’ve been down that road myself.

I still remember the first time I heard the word “marathon.” I was a kid, watching the Olympics, slack-jawed as the announcer said the race was 26.2 miles long.

Twenty-six point two miles?! That sounded completely nuts at the time.

Little did I know, years later, I’d be crossing marathon finish lines — and helping others do the same.

If you’re a new runner and the idea of running that far feels overwhelming, take a breath.

In this guide, I’m going to walk (or rather, run) you through everything you need to know — from the actual marathon distance and how it came to be, to how long it takes to finish one, to tips on pacing, training, and the wild emotional ride of race day.

I’ll share stories from my own journey — the good, the bad, and the sweaty — and some real-world lessons from the running community.

How long is a marathon in miles and kilometers?

A standard marathon is 26.2 miles, or 42.195 kilometers.

That’s the official distance — no more, no less.

It’s basically the run from Marathon to Athens, plus a little extra kick at the end — a brutal 0.2-mile stretch that runners never forget.

Why 26.2 Miles? (Here’s the Backstory)

So why the weird distance?

Why not a clean 20 or 30 miles?

Or a round 40 km?

It’s a mix of ancient legend and a little royal family drama from the early 1900s. No joke.

Let’s go back over 2,500 years to 490 B.C., when a Greek soldier named Pheidippides pulled off an epic run.

According to legend, he ran from the town of Marathon to Athens — about 25 miles — to deliver news of a military victory over the Persians. He arrived, gasped, “We have won,” and then collapsed and died.

Talk about leaving it all out there.

That story is what inspired the first “marathon” in modern times.

When the 1896 Olympics were held in Athens, organizers included a long-distance race meant to honor Pheidippides’ legendary effort — about 40 km (or 24.8 miles).

But here’s where it gets oddly specific.

At the 1908 London Olympics, Britain’s royal family wanted the marathon to start at Windsor Castle (so the royal kids could watch) and finish in front of the royal box at the Olympic stadium.

That change stretched the race to 26 miles, 385 yards — or 26.2 miles.

Yup, that last 0.2 mile was added to make sure the royals had a great view of the finish.

There’s still debate about whether the royal request was that deliberate or if it just turned out that way. Either way, the quirky distance stuck.

Over the next few years, marathons varied — some around 24 miles, others around 26. But in 1921, the International Amateur Athletic Federation made it official: 26.2 miles, or 42.195 km.

That’s been the standard ever since.

And That Final .2? It’s a Beast

Trust me, that .2 at the end is no joke.

After running 26 miles, those last few hundred yards can feel longer than the first 10K.

I’ll never forget my first marathon — I saw the 26-mile sign and thought, “I’m home free.” Then came the realization: I still had a lap around the track for that final 0.2.

Every. Step. Hurt.

Now I always warn new marathoners: don’t stop at 26 in your mind.

The race ends at 26.2, not a step earlier. Mentally quitting too soon is a guaranteed way to crash right before the finish.

What’s a Good Marathon Time for a Beginner?

I get this question a lot—“What’s a good first marathon time?” And my honest answer?

Any time you finish.

That’s already a win.

Seriously, just crossing the line at your first marathon puts you in a club most people will never join. That alone makes your time “good.”

Don’t let anyone (or any website) make you feel like your first finish needs to be fast.

Now, I get it—we’re wired to chase numbers.

Most beginners end up targeting somewhere between 4:30 to 5:30 for their debut. It’s a broad range, sure—but training history, fitness level, and life all factor in.

If you’ve been running consistently, a finish around 5 hours is super common.

And if you roll in closer to six hours? That’s still awesome. You moved your body 26.2 miles. That’s no small thing.

I remember my first marathon.

I just wanted to finish before the street sweepers came through. I hit 4 hours and 33 minutes, and honestly, I felt like a rockstar.

Not because of the time, but because I finished.

I ran smart, soaked it all in, and proved to myself I could do it. One of my early mentors told me something I’ll never forget:

“First, you run to finish. Then, you run for time.”

Take your first marathon as a learning mission.

You’ll figure out pacing, nutrition, gear, and mindset. And if you fall in love with it like I did? You’ll have plenty of chances to chase PRs later.

Here’s how to walk a marathon race in case running it ain’t your thing.

What Impacts Your Marathon Time?

There’s no universal standard here—marathon times are personal. But some factors absolutely play a role:

Age

Generally, runners in their 20s and 30s tend to have a speed edge.

But let’s be real—I’ve seen plenty of 40+ and 50+ runners cruise past younger folks on race day. Age gives you experience and mental grit—and those matter just as much as fresh legs.

Gender

Sure, men’s average times are usually a bit faster than women’s, but it’s not a fixed rule. A well-trained woman will absolutely smoke an undertrained man.

The real separator? Consistent training.

Training & Fitness

This is the big one.

How many miles you’ve logged, how smart your workouts have been, how you’ve managed recovery—these are the game-changers.

I’ve coached 45-year-olds who outpaced 25-year-olds just by sticking to a solid, long-term plan. You get what you train for.

The Course Matters More Than You Think

Not all marathons are created equal.

A flat course like Berlin? Great place to aim for a fast time.

Something like Boston with its legendary hills? That’s a grind even for seasoned runners.

I live and train in Bali, and trust me—humidity and heat are no joke.

If you’re racing in tropical weather, slow down on purpose—maybe by 10 to 30 seconds per mile—to avoid blowing up halfway through. I’ve learned that the hard way more than once.

Even the time of day makes a difference. Cooler early morning races often lead to faster finishes than scorching afternoon ones. You’ll feel it in your legs and your lungs.

Fueling & Pacing: The Invisible Enemies

Even if your training’s on point, you can blow it on race day if your fueling or pacing is off.

I’ve seen strong runners hit “the wall” at mile 20 and crawl the last 10K because they skipped gels or went out way too fast. I’ve been that guy once—trust me, bonking is brutal.

But when you fuel right and pace yourself smartly?

That’s when the magic happens.

Your body holds up, your mind stays sharp, and you cross the finish feeling proud—not wrecked.

Advice for First-Time Marathoners

Alright, if you’re still reading, that means you’re serious.

So let’s strip it down.

This is the talk I’d give my best friend the night before their first marathon.

No fluff, no clichés—just the raw, honest stuff that actually matters.

Show Up Consistently—Not Perfectly

Marathon training isn’t about smashing every single run.

It’s about stringing together weeks of “pretty good” runs.

Life will get in the way. You’ll miss a workout, maybe two.

Don’t freak out. Don’t cram missed miles like you’re cramming for a test. Just get back to it. One messy week won’t wreck you—quitting will.

I’ve coached runners who trained 80% of the time and still crushed it on race day. No one trains perfectly.

You don’t need perfection. You need to show up, again and again.

Respect the Distance—It’s No Joke

This ain’t a 5K. The marathon humbles people.

So build slow. Bump up your long runs and weekly mileage a little at a time—about 10% per week, max.

I’ve seen runners peak too soon or blow up from pushing too hard too fast. Trust me—it’s better to toe the line slightly undertrained than to show up broken.

Know the Difference Between Pain and Injury

If you feel sharp pain? Stop.

That’s your body yelling at you. But sore calves, tired quads, burning lungs? Welcome to the party.

During my a recent marathon, I thought I was injured at mile 8. Turned out it was just panic mixed with tight hamstrings. Took a deep breath, adjusted my stride, and rolled on.

You’ll learn to tell what’s “deal with it” pain and what’s “see a physio” pain.

Test Everything in Training—No Surprises on Race Day

Shoes, socks, gels, breakfast, even the underwear—test it all.

Do long runs in full race gear.

Don’t wing it.

I once ran a race in a fresh-out-the-box singlet. Bad move.

Mile 18 and my underarms were bleeding. No exaggeration. Now I do full “dress rehearsals” during training.

Also, Vaseline is your friend—inner thighs, nipples, underarms, toes. Trust me.

Fuel and Hydrate Like a Pro

Start carb-loading a couple days out—nothing crazy, just more rice, pasta, potatoes. Don’t eat like it’s your last meal.

On race morning, keep it light and simple. Then take in fuel every 40–45 minutes once the race starts—gels, sports drink, or both.

My gel strategy? Mile 6, 12, 18, and 22.

Adjust as needed. Sip water often. Even a few gulps at aid stations help. Don’t wait till you feel empty—it’s already too late by then.

Start Slow. No, Slower Than That

The number one rookie mistake? Going out too fast.

Run the first few miles like you’re warming up for a long run.

I always tell my runners: “Run the first half with your head, the second half with your heart.” You’ll thank yourself when you’re passing folks who blew up at mile 15.

Expect Something to Go Wrong

Something will go sideways.

Weather, tech, cramps, a random porta-potty stop—whatever. That’s the marathon. Be ready to roll with it.

I once had my shoe untie at mile 20. Stopped, tied it, stretched my calves for 10 seconds, then carried on.

Stuff happens. Don’t let it shake you. Adapt and move.

Use Your Mental Toolbox

Have a mantra.

Write it on your arm. Mine’s “Strong. Steady. Savage.”

When it hurts, break the race into chunks. “Get to the next lamp post. Now the next one.”

That’s how you survive the wall.

And yeah, I smile when I’m hurting. Literally.

Studies show smiling can help lower perceived effort. Plus, it confuses your brain. You trick yourself into thinking, “I’ve got this.”

Remember Why You Signed Up

There’ll be moments when you ask, “Why am I doing this?” Have your answer ready.

For me, it’s my runners. I’ve told them I’m running, and I want to lead by example.

I’ve also done marathons for my younger self—the kid who never thought he’d be an athlete. That kind of fuel is stronger than any gel.

Plan What Happens After You Finish

Have dry clothes ready. A snack. A place to meet your people (you’ll be too foggy to think straight). Walk a bit post-race—don’t collapse and lock up.

My go-to: chocolate milk, a giant burger, and some quiet time to soak in what I just did. Then a hot bath and zero running for a few days.

Respect the recovery. You just did something huge.

Soak It In

This is your first marathon.

You’ll never get another first.

Look around. High-five a kid. Thank a volunteer. Smile at the stranger who’s also hurting but still grinding.

I still remember a guy giving me a thumbs-up when I started walking at mile 23. I got back to running because of that moment. You’ll have those too—little sparks that stick with you.

Final Thoughts: Your Marathon Story Awaits

So, how long is a marathon? It’s 26.2 miles (42.2 kilometers) – but in truth, it’s as long as the countless hours you dedicate to a dream, as long as the friendships forged on long runs, as long as the memory of achieving something truly special.

In practical terms it might be a few hours of running, but in meaning, it can last a lifetime in your heart.

Now, it’s your turn to add your own chapter to the marathon story.

Lace up those shoes, trust the training, pace your race, and soak up every moment from start to finish.

The final stretch might be the hardest thing you’ve ever done – but as you cross that finish line, exhausted and exhilarated, you’ll realize exactly why the marathon is worth every mile.

See you at the finish line – I’ll be the one cheering loudest for you. 😉

Happy running, and welcome to the 26.2 club!

Lose 100 Pounds Safely – The Fast Track Guide That Works

Picture stepping on the scale and seeing a number that’s 100 pounds lighter. Yeah, that might feel like looking up at a mountain summit when you’re still at the bottom.

But here’s the truth—I’ve been there. I got into running in my 20s because I needed to drop weight, not to win medals.

How much I needed to lose weight? Around 40 pounds – not 100 pounds – but the process is relatively the same.

And over the past few years, I’ve coached folks who’ve lost 100+ pounds without starving themselves or living in the gym.

So let me be straight with you: This isn’t going to be quick. And it sure as hell won’t be easy.

Anyone promising some 6-week miracle plan? They’re selling you hot air.

But with a solid plan, the right headspace, and some grit—you can absolutely do this.

In this guide, I’ll lay out the exact game plan: realistic timelines, no-nonsense nutrition, how to move your body without breaking it, and the mindset shifts that carry you through the rough patches. I’ll also share real stories from people who made it happen.

This isn’t theory. It’s road-tested stuff.

By the end, you’ll have a clear roadmap. And more importantly, you’ll believe you can take that first real step.

How to Drop 100 Pounds (Safely)

Want the short version? Here it is:

You’re shooting to lose 1–2 pounds a week, which is the steady pace backed by experts (yep, even Healthline says so). That’s about a year or more to hit the 100-pound mark.

No crash diets. No punishing bootcamps. Just real changes that stick.

Here’s your checklist:

  • Create a Calorie Deficit. Eat fewer calories than you burn. Period. No magic. Track your food with an app or notebook—whatever works. You’d be shocked how much junk sneaks in. Cut soda. Ditch mindless snacking. It adds up fast.

  • Eat Like You Want to Feel Good. Go heavy on protein, fiber, and real food. Chicken, fish, veggies, eggs, oats. Keep treats around, but treat them like, well, treats—not a food group. You don’t have to starve. You just need to fuel like you give a damn.

  • Move More (But Start Small). You don’t need to run marathons on Day One. Just walk. Ten minutes. Then 20. Build up to 150 minutes of cardio a week (brisk walks, cycling, whatever). Toss in strength training twice a week so you keep your muscle. And do stuff you actually like—or you won’t stick with it.

  • Set Up Your Environment. Stock your kitchen with stuff that helps you, not sabotages you. Prep meals. Keep protein snacks handy. Log your wins—how your clothes fit, how you feel—not just your weight.

  • Stay Accountable (Even When It Sucks). Track progress in 10-pound chunks. Celebrate wins. Join a group, find a coach, text a friend. You will hit plateaus. You will screw up. The ones who make it? They keep showing up.

Bottom line? Losing 100 pounds the “right” way is the fast way. Fad diets just bounce you around. This plan helps you build habits that stick—so when the weight’s gone, it stays gone.

What’s more?

Weight loss isn’t a straight line. You might drop 8 pounds in one month, then just 2 the next. That’s fine. The key is to zoom out. Trends matter more than weeks.

Let’s get to the practical stuff.

1. Start With a Goal and a Mindset That Doesn’t Suck

Here’s where it all starts—not in the gym, not in your fridge—in your head.

You want to lose 100 pounds? Great. Now accept that it’s gonna take time. That’s not defeat—it’s strategy.

You’re not trying to win a 6-week contest. You’re building a new life.

So set a goal. And then break it down. 100 pounds? That’s a big number.

Start with 5. Then 10. That first 10 might take 4–6 weeks. And before you know it, you’ve already lost 25 pounds.

When I first started, I remember hitting 12 pounds down and thinking, “I can actually do this.” That belief is rocket fuel.

Also—don’t underestimate visualizing. Imagine the wins: walking without pain, playing with your kids without needing to sit down, not sweating through your shirt during errands. It’s not about a number on a scale—it’s how your life changes.

Expect slip-ups. Expect setbacks. One of my clients, Jason, lost 120 pounds—but it took him 3 years. He gained back 10 once during the holidays. But instead of quitting, he dusted himself off and kept going.

That’s what separates success from start-overs: not giving up when it’s hard.

And here’s your tough-love dose: If you’re still hoping for a shortcut, you’re not ready. But if you’re willing to change—day by day—you can get there.

You’re not broken. You don’t need perfect. You just need consistent.

2. Clean Up Your Diet

Let’s be honest—if you want to lose 100 pounds, the food side of the equation is everything.

You can’t outrun a bad diet, no matter how many miles you put in.

But here’s the thing: you don’t need to go on some miserable crash diet or ban every food you love to get there.

I’ve coached people who tried cutting entire food groups, living off shakes, or going “zero carbs.”

Sure, the weight comes off fast… but so does your sanity.

On keto? Check out this clean ketogenic food list.

Start with a Calorie Deficit — But Be Smart About It

Yeah, the science is simple: to lose weight, you’ve got to eat fewer calories than you burn.

But don’t get tunnel vision chasing some trendy “magic diet.” Focus on real food and reasonable portions. That’s where the win is.

Portion Awareness Is a Game-Changer

You don’t need to count every crumb for the rest of your life—but for a few weeks? Absolutely. I’ve been there myself—thinking I was “eating healthy” until I logged it. Surprise: I was eating way more than I thought.

Use a free app or just write stuff down in a notebook. Doesn’t matter how—just track it. Research backs this up: folks who log their meals tend to lose more weight . Aim for a steady calorie deficit—usually 500 to 1000 calories under your maintenance. That’s about 1–2 pounds per week.

Make Protein Your Wingman

Want to stay full, protect your muscle, and burn more fat? Then protein has to be a priority.

Add some to every meal—chicken, eggs, fish, Greek yogurt, beans, tofu, protein shakes—whatever works. High-protein diets are proven to cut hunger and help with fat loss, especially around the belly.

Plus, it helps preserve muscle while you’re dropping pounds, which keeps your metabolism from crashing.

Pile On the Veggies (and a Bit of Fruit)

Veggies matter for fat loss—low in calories, high in volume, packed with fiber. That’s the trifecta. They fill you up without weighing you down.

Try making half your plate non-starchy veggies—spinach, broccoli, peppers, cauliflower. Roast ’em with garlic and olive oil, throw in herbs. Seriously—this can convert even the veggie haters.

Fruit’s great too. Whole fruit has fiber, so it won’t spike your blood sugar the way juice or candy does. Just don’t go overboard.

Fiber = Your Secret Weapon

Fiber slows digestion, keeps you full, and stabilizes blood sugar. That means fewer cravings and less overeating. Whole grains, beans, nuts, veggies—they all work.

Instead of white bread or rice, swap in oatmeal, quinoa, or whole grain options.

And healthy fats? Don’t fear them. A bit of avocado, olive oil, or nuts goes a long way in keeping you satisfied.

A solid meal = protein + fiber + healthy fat. That combo destroys cravings better than any diet book ever could.

Cut Back the Junk (Without Going Cold Turkey)

Refined carbs—white bread, sugary cereal, soda—they’re calorie bombs with zero staying power. They’re the classic diet mistake.

You eat, and you’re hungry again 20 minutes later. They mess with your blood sugar and make it harder to burn fat.

Benji’s turning point was ditching liquid calories. He stopped drinking soda, started drinking water, and made smarter drink choices. That shift alone carved out a big calorie deficit over time.

You don’t need to swear off sweets forever. Just save them for when they’re really worth it.

Want something sweet? Try a square of dark chocolate instead of a whole donut. Small swaps = big wins.

Moderation > Deprivation

Here’s a truth bomb: if you say you’ll never eat pizza or ice cream again until you lose 100 pounds, guess what’s going to be on your mind all day?

Deprivation leads to obsession, and obsession leads to quitting.

Instead, learn to work your favorites into the plan. Love pizza? Have two slices and a big salad, not the whole pie. Burgers? Go with turkey or lean beef, skip the cheese, ditch the fries—or just eat half and enjoy it.

That’s the point: you need a diet you can live with. Otherwise, it won’t last.

Plan Ahead

If your plan is “I’ll just eat something later,” then later usually means pizza or chips.

Don’t wing it—build a weekly plan.

On Sundays, I prep a few basics: grilled chicken, hard-boiled eggs, chopped veggies. That way, when I’m hungry, the healthy stuff is ready.

You don’t have to be a kitchen wizard. If you find a few go-to meals that you like, repeat them.

My personal staples? Oatmeal and berries in the morning. Chicken, rice, and veggies for lunch. I don’t get bored—I get results.

Audit Your Pantry

If your kitchen’s loaded with chips, cookies, and soda, you’re not weak for grabbing them—you’re human. So set yourself up to win. Clean out the junk.

If it’s not there, you won’t eat it. That simple.

I’ve told clients to donate unopened snacks, toss the old candy, and start over. Then stock up with foods that help you stay on track—Greek yogurt, cut-up veggies, nuts (just a handful, not the whole bag), whole grain crackers.

Easy swaps, big difference.

3. Start Moving: Make Exercise Your Sidekick 

Let’s get one thing straight—nutrition does most of the heavy lifting when it comes to dropping serious pounds.

But if you want to speed things up, feel better, and actually like the body you’re building? You’ve gotta move.

That doesn’t mean signing up for a military-style bootcamp or running 10Ks tomorrow. I’m not about that punishment mentality.

You don’t need to destroy yourself to get results. In fact, the best exercise plan is one that feels doable and keeps you coming back.

Start with Low-Impact Cardio

If your joints are grumpy or your fitness is at ground zero, forget about HIIT. Just walk.

I’ve coached folks who started by walking to the end of their driveway and back—and that was enough at first. One of my clients was over 300 lbs when she started. Her first “workouts” were walking around the block and doing dishes.

A few months later, she was down over 30 pounds—no 400-meter sprints required.

Start with 10 minutes if that’s all you can handle. Add a few minutes each week. Work toward 30 minutes a day, and if you can, shoot for 45–60 minutes as you get fitter.

You can break it into chunks—two 20-minute walks count. Don’t overthink it. Just keep it consistent.

If walking hurts, try water workouts or hop on a stationary bike. The goal isn’t to crush yourself—it’s to move regularly.

Hit the 150-Minute Mark 

According to general health guidelines, aiming for 150 minutes of moderate activity per week is a solid goal. That’s 30 minutes a day, 5 days a week.

Totally doable.

And if you ever work your way up to 300 minutes a week? Even better.

What counts? Anything that gets your heart rate up but still lets you talk in short sentences: brisk walks, dancing, swimming, even yard work.

I always say this to new clients: A 20-minute walk five days a week beats a one-time, all-out 2-hour session that leaves you too sore to move for a week.

Don’t chase hero workouts. Build a habit.

Do What You Like 

Hate the treadmill? Skip it. There’s no rule saying you have to suffer to lose weight. Try stuff until you find what sticks.

One reader told me she dropped 50+ pounds after falling in love with Zumba and yoga. Before that, exercise felt like punishment. Now it’s her therapy.

Like nature? Go hike. Like music? Dance around your kitchen. Even if you’re flailing like a newborn deer, you’re still burning calories.

The key is finding movement that makes you smile. That joy keeps you going when motivation fades.

Step It Up Gradually

As you lose weight and get fitter, what once felt like Everest will feel like a warm-up. That’s your sign to push a bit more. Maybe you jog for a few minutes during your walk. Maybe you ride a little faster.

Progress isn’t about perfection—it’s about effort over time.

But don’t be a hero. If you feel pain—not soreness, but sharp pain—or if you’re gasping like a fish out of water, ease off. This is a long game. Your body needs time to adjust. You’re building strength, lung power, and endurance, and that takes time.

I’ve seen so many people go too hard too fast, get injured, and quit. That’s not your story. Take it slow, and you’ll go far.

Add Strength Training When You’re Ready

Cardio’s great—but if you want a turbo boost? Strength training. It helps you keep muscle while you lose fat, and that means your metabolism stays higher.

Translation: you’ll burn more calories even when you’re watching Netflix.

No need to lift like a bodybuilder. Start with bodyweight stuff—chair squats, wall push-ups, resistance bands. Aim for 2–3 sessions a week. Once you feel confident, bump up the weight or reps.

And no—lifting won’t make you bulky. That’s a myth. Especially if you’re in a calorie deficit, you’ll just get leaner and tighter.

Promise.

If you’re unsure where to begin, a session or two with a trainer can help. Or follow beginner-friendly workouts from trustworthy sites. Just make sure you’re working all your major muscle groups each week—legs, core, chest, back, and arms.

Move More All Day 

Not every movement needs to be a “workout.”

There’s something called NEAT—Non-Exercise Activity Thermogenesis.

Fancy term, but all it means is the calories you burn doing normal stuff: walking, fidgeting, cleaning, climbing stairs.

These little actions stack up. Walk instead of drive. Pace while you’re on the phone. Play with your dog. March in place during commercials. Set a timer and stand up every hour. Here’s your guide to walking 10,000 steps a day.

It’s not about burning 1,000 calories at once—it’s about never going hours stuck in one position.

I tell clients: being consistently active throughout the day matters just as much as your gym time.

Movement is movement. Use it.

Progress Takes Time

You might feel clumsy and breathless at first. That’s okay. Everyone starts somewhere.

Give it a few weeks and you’ll notice things getting easier. Your body is way more adaptable than you think. Treat it right and it’ll surprise you.

4. Track Your Progress (Beyond Just the Scale)

Let’s get one thing straight: if you don’t track it, you can’t fix it.

That’s not just some cheesy quote—it’s a truth I’ve seen play out with every client I’ve coached, and in my own journey too.

Now, I’m not saying you need to obsess over every single number, but if you’re gunning for something big—like dropping 100 pounds—then you need feedback. Real feedback. Not just “I feel kinda lighter today.”

Let’s talk about how to actually track progress in ways that matter—not just what the scale tells you.

Step on the Scale—But Don’t Let It Own You

Some folks swear by daily weigh-ins. Others check once a week. My advice? Do what keeps your head in the game without messing with it.

If you weigh in daily, cool—just understand that your weight is going to swing a bit.

Sodium, hormones, water retention… even a big meal the night before can throw things off.

That doesn’t mean you failed. What matters is the trend over time. If the line is generally headed down, you’re doing the work.

Research backs this up too—frequent weighing has been shown to help people stay aware and consistent with their efforts (Healthline even reported this based on several studies).

But if the scale ruins your mood, step back. Weigh once a week instead.

Just don’t ignore it out of fear—because that number is information, not judgment.

Measure the Body That’s Changing

You ever feel like the scale’s frozen—but your pants suddenly fit better? That’s why measurements matter.

I tell my clients to break out the measuring tape once a month. Hit the key spots—waist, hips, chest, arms, thighs, neck.

Trust me, you’ll be shocked by the changes that don’t show up on the scale. You might only lose 2 pounds in a month, but drop 2 inches off your waist.

That’s fat loss, baby. That’s progress.

So write it down. Celebrate that smaller belt notch like it’s a gold medal.

Take the Dang Photos

Look, I hated this one at first too. I didn’t want to see myself shirtless when I was out of shape. But now? I wish I had more of those early pics.

Take photos. Front, side, back. Every 4 weeks or so. Wear something that shows your shape. No need to share it with anyone—just keep it for you.

Because the mirror lies when change is slow. But photos? They tell the truth. One day you’ll look back and go, “Whoa. I did that.”

Track Health Wins—Not Just Weight

The scale’s just one piece. There’s stuff happening under the hood, too. Blood pressure dropping. Blood sugar getting better. Cholesterol improving.

I had one client who didn’t care much about the number on the scale—but the day he got off his meds? That was a celebration.

And don’t sleep on the smaller wins. You feel more energetic. You sleep better. You can jog up stairs without gasping like a fish. That’s real progress.

If you’re having a rough week, remind yourself: “Okay, I didn’t lose weight—but I walked the dog without needing a break. A month ago that would’ve wrecked me.” Write that stuff down.

Use a Journal or an App (Your Choice)

Whether it’s pen-and-paper or an app like MyFitnessPal, LoseIt, or Cronometer—log your journey.

Even just jotting your weight, meals, and mood each day builds awareness.

I can’t tell you how many people start eating better just because they don’t want to log those three donuts. It’s a sneaky accountability trick that works.

Celebrate the Non-Scale Wins (NSVs)

Let’s be real—some of the best milestones don’t show up in numbers.

You fit in that airplane seat comfortably. You ran your first nonstop mile. Your kid said, “Wow, you’re faster than me now!”

That’s the kind of stuff you hold onto when the scale’s being stubborn.

One of my clients kept their old pair of 4XL pants just to step into once in a while and laugh at how far they’d come. Another taped an old photo to the fridge—not to shame themselves, but to say, “Never again.”

Whatever works for you—do it. Celebrate those wins like they’re trophies, because they are.

Quick Warning: Don’t Obsess Over Every Hour

Here’s where people go sideways—checking their weight three times a day, wrapping measuring tape around their wrist at midnight…

Don’t do that. Stick to a routine: daily or weekly weigh-ins, monthly measurements, and maybe a photo check-in once a month. Then move on with your day.

Live the plan. Let the data catch up.

Here’s a guide on how to measure your body fat.

5. Build a Support System and Stay Accountable

Let’s be real—dropping 100 pounds isn’t something you should try to tackle alone.

This isn’t just about food and workouts. This is about having people in your corner when your brain’s screaming, “Screw it, let’s quit.”

Having support is like wearing good running shoes—on the hard days, it can be the only thing keeping you from breaking down.

Tell Your People (Even If It Feels Weird)

I know, it can feel awkward to say, “Hey, I’m trying to lose 100 pounds.” Especially if you’ve tried before.

But telling close friends or family can turn them into your personal hype squad.

When I first told my girlfriend I was cutting out soda—she didn’t laugh or roll her eyes. She stopped stocking the fridge with it and joined me for walks instead.

That made a difference.

If you’ve got someone like that in your life—hold onto them. Tell them what you need: maybe it’s not bringing junk food home, maybe it’s checking in once a week.

Don’t expect everyone to jump in, though. Some folks won’t get it. That’s okay. Focus on the ones who do.

Get a Buddy or Group

There’s something powerful about knowing someone else is grinding with you. Maybe it’s a coworker, someone from your gym, or a new friend you meet on a Reddit thread.

If they’re trying to lose weight too, you can keep each other in check.

You can swap progress updates, complain about cravings, celebrate wins. Even a quick text—“I hit my step goal today”—can fire up motivation.

No in-person buddy? No problem.

Online communities like /r/loseit on Reddit are full of people who’ve lost 100+ pounds and share both the highs and the screw-ups. I’ve lurked there for years—it’s raw, honest, and helpful.

And sometimes, strangers on the internet are more supportive than people we know. Use what works.

Structured Programs (If That’s Your Jam)

Some people thrive with rules and routine. If that’s you, look into things like Weight Watchers or TOPS. They’re not magic pills, but the regular check-ins and built-in community can give you a serious boost.

Hiring a coach is another solid move—someone to design a plan and keep you on it. It’s not cheap, but if you’ve got the cash, having a coach who gets your body and your mindset can make a massive difference.

I’ve coached folks through massive weight loss before, and having that weekly accountability? Game-changer.

 Use Your Tech as Backup

Even if you don’t have a buddy or coach, you’ve got a secret weapon in your pocket: your phone.

Apps like MyFitnessPal or HabitShare let you track streaks—steps, meals, workouts. Seeing a 30-day streak is oddly satisfying.

Fitness watches, smart scales, step counters—they all help you visualize progress.

And yeah, some apps let you bet real money on your goals. If betting $20 means you’ll stay out of the cookie jar, why not?

Think of your phone as your digital coach. No judgment, just gentle nudges.

Watch Out for Saboteurs

Now for the hard truth: not everyone wants to see you succeed.

Sometimes it’s subtle—“C’mon, just skip the gym tonight” or “You’ve been so good, treat yourself.” Other times, it’s straight-up jealousy.

I’ve seen this in real life. A friend loses 40 pounds, and suddenly her coworkers act distant. People project their insecurities.

You’ve got to hold your ground.

It’s okay to say, “This is important to me. Please don’t push me to eat stuff I’m trying to avoid.”

And yeah, you might need to take space from certain people for a while—especially if they’re constantly dragging you off course.

One guy told me after his 100-pound loss, “There are people I just can’t be around if I want to stay healthy.” That’s real.

Social Media: Use It, Don’t Let It Use You

Creating an anonymous Instagram or TikTok just to document your journey? Do it.

I’ve seen people post daily check-ins, progress pics, even short workout clips—and the encouragement they get back is wild.

But don’t fall into the trap of comparing your Day 3 to someone’s Day 300. Social media’s a highlight reel.

Use it as fuel, not as proof you’re not doing enough.

Celebrate the Small Wins

5 pounds down? Celebrate it.

New PR on your walk pace? Hell yes.

Pants feel looser? Do a little dance.

Tell your crew. Post about it. Treat yourself—just not with food. Buy new shoes. Go for a massage.

I’ve seen folks make jars with 100 beads—one for every pound they plan to lose. Every time they drop a pound, they move one bead to a second jar.

It’s visual. It’s satisfying. It works.

You’re building something big, and every step matters.

6. How to Power Through Plateaus Without Quitting on Yourself

Let’s not sugarcoat it—losing 100 pounds isn’t some straight, easy trail. It’s full of potholes. You’ll hit plateaus. You’ll slip up. You’ll question everything.

But that doesn’t mean you’re failing. It just means you’re on the path.

Plateaus Happen. Don’t Panic.

Here’s the deal: even when you’re doing everything right—eating clean, moving more, staying on track—your weight might still stall.

That’s called a plateau. It’s not a sign you’re broken. It’s biology.

Your body’s smart. Drop a bunch of weight, and your metabolism naturally slows down a bit because there’s less of you to carry around. It’s like your body goes, “Alright, let’s conserve energy.”

I’ve coached folks who hit a wall halfway through their journey. Sometimes it’s 3 weeks with no change. Then out of nowhere—bam—five pounds gone. It’s what some call a “whoosh.” Your body holds water, adjusts, then finally lets go.

So, if the scale’s frozen, here’s your play:

  • Check your habits. Have your portions crept up?
  • Getting enough protein?
  • Maybe toss in 10 more minutes of movement or try something new.

Sometimes you don’t need to overhaul everything. A small shift can restart progress.

Just don’t jump to crash diets out of fear. That’s panic, not progress.

“Trust the process. Stay consistent. Make one smart tweak. Keep going.”

When You Slip, Bounce Back Like a Pro

Look, life’s gonna throw you curveballs—holidays, stress, birthdays, random Netflix-and-pizza nights. You might overeat. Skip workouts. Gain a few pounds back.

The danger isn’t the slip-up. It’s the reaction.

Most people spiral. They say, “Screw it, I blew it,” and fall completely off the wagon. That’s what you can’t afford.

Here’s what you do instead: you catch yourself. Right away.

Had a blowout dinner? Cool. Acknowledge it. Chug a big glass of water. Maybe go for a walk to clear your head.

And then? Next meal—clean slate. No starvation. No punishment workouts. Just normal, sane choices.

That’s what real long-term success looks like. You recover fast and don’t let shame steer the wheel.

Stop With the All-Or-Nothing BS

You ate a donut. So what? Doesn’t mean you now need to eat the whole box.

This kind of perfectionist thinking—“I ruined the day”—kills more progress than the donut ever will. Eat it. Enjoy it. Move on.

Progress is about patterns, not perfection. Some days, you’re gonna nail your goals. Other days, 50% is the best you can do.

That’s still better than zero. Keep stacking good days, and you’ll get there.

Celebrate the Wins You Can’t Weigh

When the scale isn’t moving, you’ve got to zoom out. Look at other victories:

  • Are your clothes looser?
  • Can you walk longer without gasping?
  • Are you sleeping better? Less joint pain? More energy?

One of my clients hit a plateau and decided to train for a 5K just to stay focused. Guess what? The weight started dropping again—and she got addicted to running in the process.

Weight loss isn’t just physical. It’s mental, emotional, even spiritual. Recognize all the growth, not just what the scale tells you.

Reconnect With Your “Why” When Doubt Creeps In

It’ll happen. You’ll think, “Why am I even doing this? It’s taking forever.”

Those thoughts are normal—but they’re not facts.

When that self-doubt hits, you’ve got to anchor yourself.

Why did you start this journey?

  • Is it to live longer for your kids?
  • Fit in plane seats comfortably?
  • Feel strong in your own skin?

Write it down. Stick it on your fridge. Keep it in your phone notes. Whatever it takes—make your why visible and unshakable.

Personally, I’ve pulled strength from others’ stories more times than I can count. Reading about someone who lost 80, 100, 150 pounds—it reminds you this is possible.

You just need to keep showing up.

Every Setback Is a Lesson—If You’re Willing to Learn

Let’s say you went on vacation, hit the buffet too hard, and came home 5 pounds up. That’s not failure—it’s feedback.

Lesson? Maybe next time plan a hike, pack some protein snacks, or decide in advance how many desserts you’ll actually enjoy without going off the rails.

Or maybe you stress-ate a tub of ice cream after a rough workday. That tells you food is your coping tool. Cool—now what’s another tool you can use? Walks, music, journaling, venting to a friend?

If you treat setbacks like teachers, not enemies, you’ll get stronger every time.

Don’t Be Afraid to Ask for Backup

Sometimes willpower isn’t enough—and that’s okay.

If emotional eating or mental health is getting in the way, a good therapist can work wonders. Same with a dietitian if you’re stuck and unsure what’s going wrong.

There’s no shame in needing help. Your weight loss journey is part of your health journey.

And health is a team sport.

“I’ve sent runners to PTs, nutritionists, therapists. Why? Because getting help is a sign of strength, not weakness.”

7. Stay Fired Up with Milestones, Rewards & Real Growth

Let’s be real — staying motivated for a journey this big? It’s not about being pumped 24/7. No one is.

That kind of fire fades if you don’t keep stoking it. What you need is a system that keeps lighting the match — day after day, mile after mile.

This part isn’t just about dropping weight. It’s about building mental muscle too.

Break It Down & Celebrate the Wins

You’re not just losing 100 pounds. You’re stacking small victories until they add up to something massive.

Set milestones that feel real to you. Maybe every 10 pounds. Maybe hitting a weight that starts with a “1” instead of a “2”. Whatever gives you that little extra push.

And when you hit one? Don’t just say “cool” and move on. Reward yourself.

Not with food — with something that reminds you you’re crushing it.

  • A new pair of shoes at 20 pounds down
  • A solo getaway or spa day at 50
  • A new bike or a badass photoshoot at 80

Even the little things count — a new book, a bubble bath, a movie night with a healthier snack stashed in your bag.

Doesn’t have to cost much. It just has to say: “Look how far I’ve come.”

Momentum is built on celebration. Don’t wait until the finish line to feel proud.

Write It Out 

Grab a notebook, a doc, anything. Journaling your struggles, wins, and everything in between gives your brain proof that you’re making moves.

Write letters to your future self. Or from your future self.

Sounds weird? Maybe. But it works. I’ve done it with clients — they come back weeks later saying that letter snapped them out of a slump.

Borrow Fire from Others

Don’t isolate.

Go watch a weight loss doc, scroll through some transformation stories, join a community.

You’ll find people who’ve lost 100, 150, 200 pounds. They’ve been where you are. And they found their way out.

I read about a guy who lost 100 pounds by hiking. First summit he reached? He broke down in tears. I still think about that story. Grit like that is contagious.

Ask yourself: What’s your version of that summit moment?

See It, Feel It, Own It

Picture you — not the old version, not the “trying” version — but the one who made it.

  • What do you look like?
  • How do you move?
  • What can you do that you couldn’t before?

Can you chase your kids around the park without gasping for air? Walk into any store and grab whatever fits — not just what hides?

Maybe it’s the moment you cross the finish line of your first 5K.

Visualize that version of you every damn day.

Not just reaching the goal, but living in that new reality. The one where this isn’t some temporary challenge — it’s just who you are now.

Ride the Emotional Rollercoaster

This isn’t just about body fat. You’re shedding old habits, old mindsets, sometimes even old identities.

You’ve been “the big guy” or “the big girl” for years. What happens when that label doesn’t fit anymore?

That’s not always easy.

There will be emotional highs — the day someone compliments you, the day your jeans fall off your hips — and there will be low points too.

That’s all part of the process.

Therapy helps some people. Talking to a friend. Journaling. Meditating. Do what helps you feel the feels without getting stuck in them.

Losing weight might change your body. But growing through it? That’s what changes your life.

Switch It Up, Keep It Fresh

What fires you up in month one might bore you to death in month ten.

Stay flexible. Get curious. Sign up for a 5K. Join a walking challenge. Try a recipe you’d never normally cook. Track your steps and aim for new highs.

If things feel stale, shake them up.

I once had a client who hated the gym. So we swapped in trail hiking — and that lit her up like nothing else. Boom, consistency unlocked.

Keep looking for what makes this lifestyle feel alive, not like a grind.

Don’t Just Praise the Scale

Maybe you didn’t drop a pound this week.

But…

  • You walked instead of stress eating
  • You cut your soda habit in half
  • You ran up the stairs without gasping

Those wins matter. That’s real growth.

Start thinking of yourself differently:

I’m someone who takes care of my body. I’m active. I don’t give up.

That shift in identity? That’s the engine that gets you to your goal — and helps you stay there.

Go Back to the Start

Why did you start this?

Maybe it was a scary doctor visit. Maybe an embarrassing photo. Or a moment when you realized, “I don’t want to feel like this anymore.”

Keep that moment close. Not to shame yourself, but to remind you what you’re walking away from.

Some folks tape a “before” photo on their fridge. Others keep a list of reasons and reread it every time the drive starts to dip.

Use what hits you hardest.

Progress Fuels Progress

Once the pounds start dropping… once your jeans fit better… once someone says, “You look different,” — that’s when motivation stops being something you chase.

It becomes something you ride.

But those first few weeks? That’s the battle zone. You might not see much progress. You’re tired. Sore. Maybe cranky.

Push through that fog. That’s when your brain starts rewiring itself to believe: “I can actually do this.”

I’ve seen it over and over as a coach. Someone loses 20 or 30 pounds and suddenly? They walk different. They speak different. They know they’ll hit -100. That belief is gold.


Final Words

Look — you’re not just dropping 100 pounds.

You’re gaining confidence, discipline, strength, and clarity.

You’re becoming someone who doesn’t quit.

That person you imagined? They’re waiting for you up the mountain. They’re waving. Telling you, “Come on — the view’s worth it.”

So keep moving. Keep climbing.

Every healthy meal, every workout, every hard decision — it’s a step closer.

VO2 Max: What It Is & How to Improve Your Fitness Level

Ever wish you had a single number that told you exactly how fit you are?

That’s VO2 Max. It’s like a fitness report card, giving you a snapshot of how well your body uses oxygen when you’re pushing your limits.

VO2 Max stands for maximal oxygen uptake—it’s the amount of oxygen your body can use per minute per kilogram of body weight during intense exercise.

Think of it like the horsepower of your engine: the higher it is, the harder you can push yourself.

The first time I came across VO2Max was years ago. I had just finished a run, chatting with some friends, and one asked, “Do you know your VO2 Max?”

Honestly, I had no clue. I dove deep into Google searches, lab tests, fitness trackers, and training tweaks to figure it out.

But over time, I realized something: V02 Max is helpful, but it’s not everything. It’s one piece of the puzzle, not the whole picture.

Lately, I’ve been noticing a lot of beginner runners getting caught up in the hype around VO2 Max—obsessing over numbers before even focusing on the basics. The truth is, if you’re new to running, there are more important things to tackle first—like building consistency and form.

So please, remember the basics and that V02 max is just one model.

Let’s get to it now.

In this guide, I’ll break down this important fitness metric, how it works, and share a few personal stories. I’ll also give you tips on how to improve it, but don’t get too hung up on the numbers just yet.

Let’s dive into the real work that matters in your training

What is VO2 Max and How It Works
 
VO2 Max is basically a measure of how fit you are. The higher the number, the better your endurance and health.
 
Harvard Health says VO2Max is an “objective way to tell how fit you are.”
 
The best part? Higher VO2 Max numbers are linked to a lower risk of heart disease and longer life.

Physically, here’s how it works: you breathe in oxygen, your lungs send it to your blood, and then your heart pumps that oxygen-rich blood to your muscles. Your muscles use that oxygen to create ATP – the energy your muscles need to work. V02 Max measures how well your body can deliver and use oxygen when you’re going full throttle.

You’ll usually see VO2 Max numbers in mL/kg/min (milliliters of oxygen per kilogram of body weight per minute).

So, if your VO2 Max is 50, it means your body can use 50 mL of oxygen per kilogram per minute when you’re pushing hard. The higher the number, the better your body can keep up with the demands of exercise.

Explaining VO2Max to Beginners

Let’s break it down into simpler terms:

  1. Your body is a factory – it needs oxygen to produce energy for exercise. VO2 Max is how much oxygen it can process in one minute when you’re running at full speed.
  2. Bigger lungs, stronger heart = better VO2 Max – The bigger your lungs and heart, the more oxygen you can take in and use. So, someone with a higher VO2 Max can get more oxygen to their muscles.
  3. Everyday analogy: Think about climbing stairs. If you’ve got a higher VO2 Max, you can climb two flights without breaking a sweat. Someone with a lower VO2 Max might huff and puff after just one. It’s all about the power of your “oxygen engine.”
  4. VO2 Max is just one piece of the puzzle: It’s a measure of aerobic fitness, but it’s not the whole story. A coach might say, “It’s like knowing how big your fuel tank is, but you also need to know how well your engine runs on that fuel and how fast you can use it.”

If you’re new to running, here’s the bottom line: V02 Max tells you how much oxygen your body can use when you’re working hard. Think of it like your car’s fuel intake – the bigger it is, the more fuel you can burn per minute. In running terms, the more oxygen you can take in and use, the faster and farther you can go.

But remember, VO2 Max is just one factor. How efficiently you use that fuel (your running economy) and how long you can keep going (your lactate threshold) matter, too..

My Own Take

When I first got curious about VO2 Max, I decided to take the plunge and book a lab test.

I walked into the local university’s exercise lab, strapped on a mask, and got on a treadmill.

The scientist gradually cranked up the speed and incline until I was gasping for air – it felt like I was in some sci-fi movie. But in the end, I saw my number: 52 mL/kg/min. Not bad for a 26-year-old runner who wasn’t exactly gunning for elite status.

A few years later, I grabbed a GPS watch that estimated my VO2 Max.

At first, I thought, “There’s no way this watch can measure VO2.” Turns out, these devices can’t actually measure oxygen intake – they estimate it using your heart rate and pace. I found that my watch often showed slightly higher numbers than my lab test, but it still gave me a sense of progress. 

After adding in some HIIT workouts and cycling, I saw my VO2 Max improve.

After 12 weeks of doing 800m repeats and spin classes, my lab-tested VO2 Max went up by 6%.

Research backs this up – high-intensity interval training can boost VO2 Max, even for people who are already pretty fit.

But when I took a break from training (hello, holiday laziness!), I saw my numbers drop. That’s the thing with VO2 Max – it’s a reflection of your consistency.

What Affects V02 Max?

There are a few things that affect your VO2 Max. Some you’ve got no control over, and some you can definitely work on with time. Here’s the lowdown:

  • Genetics: Yeah, some of this is in the genes. If your family’s packed with athletes, you might have a natural advantage. But even if you didn’t inherit superhuman VO2 Max genes, don’t sweat it. You can still improve with the right training. I didn’t exactly have the natural build of an elite runner, but with consistent effort, I’ve seen my VO2Max improve.
  • Age: As we get older, VO2 Max starts to dip. A healthy 20-year-old might be sitting around 40-50 ml/kg/min, but by the time you hit your 70s, you’re looking at 20-30. Not ideal, but the good news is that staying active can slow that decline a lot. The key? Don’t let age be an excuse. Keep working, and you’ll be in better shape than most people your age.
  • Sex/Gender: On average, women have a VO2 Max about 15-30% lower than men. This is because of differences in body fat, muscle mass, and hemoglobin. But guess what? If you’re a female athlete with the right training, you can close that gap to about 10%. So ladies, don’t let the numbers scare you—focus on your training.
  • Body Composition: Since VO2 Max is measured per kilogram of body weight, carrying extra weight (especially fat) will lower your score. The good news? If you drop unnecessary weight (while keeping muscle), you’ll naturally boost your VO2 Max. Even Harvard Health backs this up—losing fat can help increase your VO2.
  • Training Status: This one’s in your control. Regular training, especially high-intensity stuff, will raise your VO2 Max. Beginners often see huge improvements, but don’t get down if you’re a veteran runner—those small gains are still worth celebrating. It’s about consistency.
  • Altitude: Training or living in the mountains can help you build up red blood cells, which can improve your VO2 Max. But heads up: when you’re up there, your VO2 Max will temporarily drop because of the thinner air. It’s all about the long haul.
  • Health and Diet: Got a health issue like anemia or a lung condition? That can lower your VO2 Max. But a healthy lifestyle—good sleep, eating well, and avoiding smoking—can help you keep it up. It’s all about those solid habits.
  • Day-to-Day Variation: Your VO2 Max might shift a little depending on things like how tired you are or if you’re dehydrated, but those changes won’t be huge. It’s all about consistency over time.

What affect vo2 max

VO2Max and Your Running Performance

So, how does VO2 Max actually affect your running? It’s important, but it’s not the whole picture. Think of endurance like a three-legged stool:

  1. VO2 Max (how much oxygen you can use)
  2. Lactate threshold (how fast you can go before lactic acid builds up)
  3. Running economy (how efficiently you use oxygen)

All three are key. VO2 Max is important because it’s the size of your engine. But once your engine’s decent, you need to work on the other stuff—lactate threshold and economy.

If you want to run faster, it’s not all about pushing that VO2 Max higher and higher.

Take this: Runner A has a VO2 Max of 60, and Runner B has 50. All else equal, Runner A can go faster for the same effort. Elite runners usually have VO2 Maxes in the 70s or 80s, sometimes even higher. The world record-holders? We’re talking numbers like 96 for men and 79 for women. That’s nearly double what the average person has.

But once you’ve built up a decent VO2 Max, it’s about honing those other aspects—your lactate threshold and running economy. That’s why some of the fastest runners focus on tempo runs, long runs, and strength work. Don’t just focus on VO2Max; mix it all up.

VO2 Max in the Real World: What’s ‘Normal’ For You?

VO2 Max is a great fitness gauge, but it’s not a perfect one-size-fits-all measurement. For example, a well-trained 30-year-old guy might sit at about 50 ml/kg/min, while a top high school runner might have something in the high 60s. If you’re in your 60s, don’t worry. If you’re staying active, you might still have a VO2 Max in the 20s or 30s.

In short races (like a 5K or 10K), VO2 Max matters a lot. For marathons, it’s still important, but your lactate threshold is key. Your ability to sustain a pace over time is what separates good runners from great ones. VO2 Max will give you a solid foundation, but it’s what you do with that oxygen that counts.

VO2 max charts

VO2 max chart

The Bottom Line: VO2 Max is Key, but It’s Not Everything

VO2 Max is one of the most important factors for endurance athletes, but it’s not the only factor. You can train to improve your VO2 Max, but don’t forget about tempo runs, long runs, and strength training. It’s the combination of all these that will get you faster and more efficient.

So, don’t worry too much about your number on paper. Keep putting in the work, and your V02 Max will improve. Keep pushing, and you’ll keep improving.

How to Measure VO2Max (Lab and DIY)

So, you’re curious about how to measure VO2 Max? It’s a great question! There are two main ways to do it: the gold-standard lab test and a few DIY methods you can try on your own. Let’s break it down, starting with the lab.

Lab Testing (Gold Standard)

In a sports science lab, they measure VO2 Max directly. They slap a heart rate monitor on you and fit you with a tight mask that collects every breath.

Sounds a little sci-fi, right? You’ll run on a treadmill or ride a stationary bike while the intensity slowly increases until you’re completely gassed (usually in 10–20 minutes) (health.harvard.edu).

The mask tracks the oxygen you inhale and the carbon dioxide you exhale. When your oxygen consumption levels off, bingo—that’s your VO2 Max. This method is solid because it directly measures how much oxygen your body is using.

But here’s the catch: these lab tests aren’t cheap. They can run anywhere from $50 to $200, and they’re not something most recreational runners are doing every weekend. But if you ever find yourself in a sports physiology study or exercise medicine clinic, you could get a test done.

Field and DIY Tests

If the lab route isn’t in the cards for you, don’t sweat it—there are plenty of DIY options that’ll give you a decent estimate.

Cooper 12-Minute Run Test:

The deal is simple: run as far as you can in 12 minutes. Once you’re done, plug your distance into this formula:

V02 Max ≈ (distance in meters – 504.9) ÷ 44.73 (brianmac.co.uk).

For example, if you ran 2400 meters, it works out like this: (2400–504.9)/44.73 ≈ 42.4 ml/kg/min. Easy enough, right?

Cooper VO2 max

One-Mile Walk/Run Test:

Walk or run a mile as fast as you can, then immediately take your heart rate. Plug your time, heart rate, weight, and age into an online calculator. Harvard Health has a good one for estimating V02 Max.

Rockport (1-Mile) Walk Test:

Walk a mile as fast as you can, and measure your finish time and heart rate. Then, you can use the Rockport formula or an online tool to get your VO2 Max estimate.

Beep Test:

This is the “20-meter multistage fitness test” (yeah, the bleep test). You run back and forth to timed beeps. Your final level reached gives a rough idea of your VO2 Max.

Maximal Heart Rate Estimates:

Use the classic formula (220 – age) or get a little more advanced with ACSM’s tables. Combine that with your fastest pace for a quick VO2 Max guess.

Fitness Trackers/Apps:

Devices like Garmin, Fitbit, and Apple Watch use your heart rate at different paces to estimate your VO2 Max. They apply some algorithms and give you a ballpark figure.

These DIY methods aren’t as exact as a lab test, but they’ll get you close. Just make sure you keep your testing conditions consistent—flat course, well-rested, same shoes. And if you’re using a tracker, watch how your VO2Max trends over time. If it’s creeping up over a few weeks, you’re definitely improving!

Still want more V02 Max tests?

There are many methods for estimating VO2’max scores and different types of V02 max charts.

Maybe you heard a similar term but different methods.

Here are some of the most reliable ones.

These should be suitable for any fitness and lifestyle—even if you can’t walk:

How to Improve (Increase) Your VO2’Max Through Training

Alright, so now that you’ve got a VO2 Max number, let’s talk about how to raise it. If you want a higher VO2 Max, you’ve got to challenge your aerobic system. You need to push your body, and with the right training, it will adapt by improving your heart, lungs, and muscles. Here’s what works for me:

High-Intensity Interval Training (HIIT):

This is by far the most effective way to raise your VO2 Max. Short bursts of near-all-out effort push your system to its limits. For example, try 800-meter repeats or 3–5 minute hard efforts at max intensity. Harvard Health even says “HIIT is a fast and effective way to increase VO2 max, even if you’re already very active”. Aim for 2–3 interval sessions per week.

Long VO2 Max Intervals (Track Workouts):

Try this: 3 minutes at 90–95% effort, followed by 2 minutes easy jog. Repeat that 4 times for a 20-minute workout. This forces your heart and muscles to use more oxygen. It’s tough, but it’s a great workout.

Tempo Runs:

This is running at about 85–90% of your max effort—what I call a comfortably hard pace. For instance, run at this pace for 20 minutes, and you’ll see a nice improvement in how your muscles use oxygen.

Steady-State Aerobic Runs:

Don’t neglect the long, easy runs. These build your aerobic base. Think 60–90 minutes at an easy pace. This improves capillary density and mitochondrial function, indirectly supporting VO2.

Cross-Training:

Mix it up! If you’re always running, add cycling, swimming, or rowing. These activities challenge your cardiovascular system in new ways, helping boost VO2 Max.

Personal Experience:

For me, variety was key. I’ve gone through phases where I did hill sprints (20–30 second all-out efforts uphill) twice a week, and then there were times I focused on steady miles at a moderate pace. I always saw gains, but the biggest jumps in VO2 came from pushing hard. Interval training was a game-changer.

After a few weeks of HIIT, my body started to crave those high-intensity efforts. I remember one spring when I did 5×1000m intervals twice a week. My legs felt like they were spring-loaded, and my VO2 Max jumped by 5 points in 8 weeks.

There’s no magic trick—just a mix of consistent effort and pushing your limits. Every coach, no matter how many studies they quote, will tell you the same: push near your max capacity to see V02 improvements.

And don’t forget rest—overtraining can totally stall your progress.

Sample HIIT Workout:

  1. Warm up with an easy 10-minute jog.
  2. Then do 4 repeats of:
    • 3 minutes at near-all-out effort
    • 2 minutes easy recovery jog
  3. Cool down with 10 minutes of easy jogging.

This 20-minute workout hits your system hard and gets results (rei.com).

VO2 Max for Runners: Recreational vs Elite

So, let’s get this out there—VO2 Max is a big deal, but it’s not the only deal, especially for those of us who aren’t trying to land a spot on Team USA.

Recreational Runners: The Sweet Spot for Improvement

If you’re not trying to break world records (and let’s face it, most of us aren’t), don’t stress about having a VO2 Max like a pro runner. The great news? If you’re just starting out or you’re moderately trained, you’ve got a ton of room to grow.

In fact, untrained folks can see a 15-20% increase in their VO2 Max with a solid training block. That means, if your starting number is 40, with consistent effort, you could push it to 46-48. For a 30-year-old, that jump could take you from average to above-average. That’s a big win, right?

Top Athletes: Tiny Gains, Big Focus

For elite runners, they’re already at the top of the game with their VO2Max. We’re talking numbers in the 80s and 90s (ml/kg/min). Think of legends like Oskar Svendsen (cycling) with a VO2 of 97.5 and Bjørn Dæhlie (cross-country skiing) at 96.0. For women, Joan Benoit Samuelson’s 78.6 is something to marvel at.

These athletes are already pushing the limits, so every little increase in VO2 is harder to come by. They work obsessively on these tiny gains because when you’re already at the top, every edge counts.

But here’s the kicker: they’re not obsessing over the number—they’re focusing on getting stronger, faster, and better with every step.

Take a look at thee scores:

v02 max chart

VO2 Max FAQs: Your Personal Running Game-Changer

Q: Why is my VO2 Max important?

A: VO2 Max is one of the key ways we measure how fit we are. The higher it is, the better you can perform—whether that’s running a faster 5K or pushing through a long race. It’s also tied to overall health—lower risk of heart disease, better endurance, and more. Basically, the higher your VO2 Max, the more “fit” you are. Keep that in mind when you’re out on your runs—it’s a big piece of the puzzle.

Q: Can I increase my VO2 Max if I’m older?

A: Absolutely. VO2 Max drops with age, sure, but that doesn’t mean it’s a lost cause. Staying active—especially with HIIT—can slow that decline. In fact, studies show that even folks in their 50s and 60s can still boost their VO2 Max. You might not hit those teenage numbers, but you’ll definitely feel the benefits in how you perform and how you feel. The key is consistency and staying active, no matter what age you are. Trust me, you’ve still got a lot of power in those legs.

Q: How often should I test my VO2 Max?

A: There’s no strict rule. If you’re really trying to track your progress closely, lab tests might happen every 3-6 months. But for most of us, using a fitness watch to check in weekly or monthly is enough to see trends. Personally, I liked checking mine seasonally to see how I was doing. Just don’t overdo it—your numbers might fluctuate a little from day to day. It’s normal.

Q: What if I lose weight? Does my VO2 Max change?

A: Yep, it does. Since VO2 Max is relative to body weight, losing fat can make it look better, as long as your oxygen uptake stays the same. If you shed some weight, your body has less to move around, so your VO2 Max goes up. But hey, don’t just focus on the number—how you feel is what matters most. Weight loss can definitely help, though.

Q: I don’t run much—do I need to worry about VO2 Max?

A: You don’t need to obsess over it, but it definitely matters if you’re doing any cardio—running, biking, swimming, hiking, whatever. VO2 Max is all about how efficiently your body uses oxygen during exercise, and if you’re active, it’s going to help you do all those things with less struggle. Don’t stress if you don’t track your VO2, but just know that staying active and improving it can make your workouts feel easier.

Q: Should I only focus on VO2 Max training?

A: Nah, don’t get stuck just trying to chase that number. While intervals can help, a balanced approach is the way to go. Mix in some easy runs, tempo work, and even strength training. That’s what’ll make you a better all-around runner. I learned this firsthand—when I switched to adding longer tempo runs to my training, my race times got faster, even though my VO2 plateaued. So, focus on variety, not just VO2 Max.

Q: How accurate are VO2 Max estimates on my watch?

A: They’re estimates, not perfect. Devices like the Garmin or Apple Watch usually have a 5-10% margin of error. For instance, if your real VO2 Max is 50, your watch might show 52 or 48. But honestly, that doesn’t matter too much as long as you’re consistent with the same device and setup. What matters is the trend over time—don’t sweat the small fluctuations. It’s a solid way to track progress.

Q: Can altitude training boost my VO2 Max?

A: Altitude training can help by increasing your red blood cell count, which can boost your VO2 Max once you get back to sea level. But here’s the thing—training at altitude is tough, especially at first. It’s usually something advanced athletes do. For most of us, regular training at home is enough. So, don’t stress if you can’t get to the mountains—keep working hard where you are.

Final Thoughts:

VO2 Max is a useful tool, but it’s just one part of the fitness puzzle. It’s all about how efficiently your body uses oxygen during exercise, and you can use it to train smarter and run stronger.

But here’s the thing: don’t become obsessed with the number. Use it as a gauge for progress, but don’t let it define your running journey. If it’s going up, awesome. If it stalls, take a step back and adjust your training or focus on recovery.

And above all, remember why you’re running in the first place. It’s not just about numbers or stats—it’s about enjoying the process and improving yourself over time.

Whether you’re chasing a PR or just out for a fun run with friends, let the joy of running drive you. So next time you’re pushing through a hard workout, know you’re making gains, whether you’re aware of it or not. Keep learning about your body, keep pushing forward, and most importantly—have fun with it!

Good luck, and may your VO2 Max rise along with your smile as you cross that finish line!

Further Reading on VO2 Max

To deepen your understanding of VO2 max and its importance for runners, here are some reputable organizations and studies that provide valuable insights:

  • American College of Sports Medicine (ACSM): The ACSM is a leading authority on sports medicine and exercise science. Their comprehensive guidelines on exercise testing and prescription emphasize the significance of VO2 max for athletic performance. You can explore their resources on VO2 max in their position stand, available at the ACSM website.
  • Journal of Sports Science and Medicine: This peer-reviewed journal features a range of studies that delve into the effects of VO2 max on performance. For instance, the article titled “The Relationship Between VO2 Max and Running Performance” discusses how VO2 max levels correlate with various race performances.
  • British Journal of Sports Medicine: This journal regularly publishes research on exercise physiology and training methods. A notable study, “How to Measure and Improve Your VO2 Max”, provides insights into measuring VO2 max and training strategies to enhance it.
  • Mayo Clinic: The Mayo Clinic offers accessible information on VO2 max and its implications for cardiovascular health. Their article on “Exercise and Heart Health” discusses the role of aerobic exercise and VO2 max in maintaining heart health.
  • Runner’s World: This popular resource provides articles specifically focused on running and performance metrics, including VO2 max. Check out their article, “How to Boost Your VO2 Max” for practical tips and insights.


How Extra Pounds Slow You Down (and What to Do About It)

If you’ve ever wondered, “Does weight actually mess with your pace?” — the answer is a loud yes.

But it’s not just a doom-and-gloom story of “lose weight or lose speed.”

There’s more to it. There’s strategy, there’s progress, and yep — there’s science to back it up.

Let’s break it down in real terms.

No fluff.

Just what actually matters when it comes to weight, running pace, and feeling lighter on your feet.

The Real Cost of Carrying Extra Weight

Running’s like driving uphill with a loaded trunk — the heavier you are, the harder your body has to work to move forward.

Some classic research nailed this down.

In one study, runners who carried added weight slowed down by about 1.4 seconds per mile for every extra pound.

Another lab study flipped the script — they lightened runners with pulleys and saw a gain of 2.4 seconds per mile for every pound lost .

Do the math: drop 10–20 pounds?

That’s potentially 20–50 seconds faster per mile. That’s not a tweak — that’s a whole new race day.

I’ve seen it happen first-hand.

One runner I coached dropped about 13 pounds and cut over a minute off his 6-mile loop. From 10:30 to 9:20 per mile. That kind of change doesn’t just show up on the stopwatch — it shows up in confidence too.

Your Body’s Energy Budget

Most people don’t realize this, but nearly 75% of your energy while running goes into just keeping your body up off the ground.

Not sprinting forward.

Not pacing smart.

Just… not faceplanting.

The other 25% actually moves you forward.

So if your body’s carrying more weight than it needs, it’s spending most of its gas on survival, not speed.

Weight Messes With Your Form

Here’s something most people don’t think about: extra weight messes with your stride.

It’s not just about huffing and puffing more. Extra pounds throw off your whole running form.

You lean more.

You strike harder.

You shorten your stride without meaning to.

I’ve trained with a weighted vest a few times just to simulate effort. Let me tell you — just 5 kilos strapped to my chest made me feel like I was slogging through sand. Everything changed: my posture, my stride, even my breathing.

Coach tip?

On heavier days, shorten your stride. Go for quick, light steps instead of big bounds. Trust me — your knees will thank you later.

Joints Take the Hit Too

Every step when you’re carrying extra weight is like a mini assault on your joints. That adds up fast.

One of my runners once told me, “I didn’t know plantar fasciitis could go away until I leaned out a bit.” Sometimes it’s not the shoes. It’s the load.

On the flip side, even losing 5% of your body weight can make hill repeats feel less like torture and more like a challenge you can actually finish. But quick warning — crash diets don’t fix anything. We’ll get into that in a bit.

What the Science Says (And Why It Matters)

This whole weight-speed thing isn’t just in our heads. It’s in the data.

That old-school study I mentioned?

The one where runners wore added weights? Yep — 1.4 seconds per mile slower per pound. A more recent one “lightened” runners using pulleys and clocked 2.4 seconds per mile faster per pound lost.

Why?

Because running is basically hopping against gravity, over and over. And the more you weigh, the more fuel your body has to burn just to lift itself.

Here’s something wild: adding 4 lbs to your waist raises your energy cost by 4%.

But adding that same weight to your ankles? That jacks energy cost up by 24%. Where your weight sits matters too.

And one more thing: not all weight loss is equal.

Losing muscle can backfire. Muscle helps generate force. Fat, on the other hand, is just along for the ride. So the goal is fat loss — not just any weight loss.

How Much Faster Can You Run If You Drop 20 Pounds?

This is one of those questions I get all the time:

“If I lose 20 pounds, will I get faster?”

Short answer? Most likely—yes.

But how much faster? That depends.

There’s no perfect formula, but the rough estimate backed by research is this: 1–2 seconds per mile per pound lost. So, 20 pounds could shave 20 to 40 seconds off each mile.

Let’s break that down.

  • A study once crunched the numbers to about 4 seconds per mile per pound. That’s roughly 28 seconds faster per mile if you lose 20 pounds.
  • Another report pushed it to 4 seconds per mile per pound—meaning a potential gain of 48 seconds per mile.

So yeah, it adds up fast. Especially across longer races.

Don’t get me wrong. I’m not saying that dropping to zero pounds will make you run at the speed of sound. But extra pounds matter. And they matter a lot. Just keep in mind that if you drop too low, performance tanks.

Lose too much weight, and you’re not just shedding fat—you’re shedding power.

Rules of Thumb That Actually Work

If you’re into quick-and-dirty ways to set goals, here are two simple tools runners and coaches have used for years:

1. The “1% Rule”

Drop 1% of your body weight, and your pace improves by about 1%. So if you weigh 150 lbs and lose 1.5 lbs, expect about a 1% boost in speed. Nothing magic—just physics.

2. The “2-Second Rule”

Lose 1 pound, run 1 to 2 seconds faster per mile. A lot of runners swear by the 2-second estimate. Over a marathon, that’s about a minute faster per pound.

But again, these are just ballpark numbers. They only apply if the weight lost is mostly fat, and your training stays steady.

If you’re cutting calories so hard that your workouts suffer or you start losing muscle, those speed gains might vanish.

So here’s the bottom line: Use these rules to set expectations, not to obsess over numbers. They’re guides, not gospel.

Fat vs. Muscle: It’s Not the Same

Let’s clear this up—not all weight is created equal.

  • Muscle is your engine. It weighs more, but it helps you run stronger and handle hills, sprints, and long miles.
  • Fat? That’s just cargo. It slows you down and offers zero return on effort.

I had a sprinter friend who bulked up in the winter. Crushed it in the gym.

But on the track? His times got worse. Once he cut the fat—not the muscle—his speed came back.

If you’re lifting weights and eating enough protein while dropping fat, you’ll run leaner, stronger, and more efficient. That’s the sweet spot.

Running Isn’t Just Math

Let’s be real for a second.

Anyone can write down “lose 20 lbs” in a notebook. But executing that goal while still training hard? That’s where most runners hit the wall—usually around week 3 of some crash diet they found online.

Focus on Performance First

All the best runners I’ve coached?

They trained smart, fueled right, and didn’t obsess over the scale.

Their bodies leaned out as a result of consistent effort, not restriction.

A coach once said, “Do the training, eat well, and the right weight will find you.” And that’s been true in my experience too.

Eat to Run—Don’t Starve to Shrink

If you’re upping the mileage or adding speedwork, your body needs fuel.

Yes, you want to drop fat—but cutting too many calories will leave you flat, slow, and frustrated.

Think real food: lean protein, colorful veggies, solid carbs. You’re not just feeding your stomach—you’re charging your battery.

Training Beats Dieting—Every Time

Let’s not forget: speed comes from smart workouts—long runs, tempos, intervals, strength.

Dropping weight can help, but it’s not the whole puzzle.

I always tell my athletes: “You can’t out-diet bad training.”

Find Your Racing Weight

Everyone’s got a personal best weight—not the lowest weight, but the strongest one.

One runner I worked with said, “My coach warned me if I drop below 136 lbs (I’m 5’9”), I lose power. I feel best at 140.” That’s what you’re looking for—the weight where you feel fast, healthy, and in control.

Don’t chase someone else’s number.

Genetics matter.

Instead, track how you feel and perform at different weights. Let that guide you—not the bathroom scale.

Practical Tips: Committing to Your Ideal Race Weight

Let’s bring it home with a few action steps. These are not about starving yourself; they’re about smart, sustainable choices that naturally tune your weight for speed:

  • Set Process Goals, Not Just a Number: For example, commit to 4 runs a week or to adding one speed session. Let these activities help balance your weight over time.
  • Strength Train Regularly: At least twice a week. Muscle boosts your metabolism and power. Strong runners handle weight changes better.
  • Watch the Fuel, Not Just Fat: Quality matters. If you do cut calories, do it slowly (250–500 kcal/day deficit), and focus on protein and veggies. Avoid empty carbs and sugars.
  • Be Patient: Safe fat loss is about 0.5–1% of body weight per week. Faster often means muscle loss.
  • Use Tools Wisely: A running calculator or watch can estimate effect of weight on pace, but don’t get obsessed. Use them for motivation, not stress.
  • Listen to Your Body: Slower recovery, increased injuries, constant fatigue? These can be signs you’re losing more than fat. Adjust food or training accordingly.
  • Remember Recovery: More sleep, better hydration, and stress management help your body adapt and recover, making weight goals more attainable.

Conclusion: Embrace Your Journey

Extra weight on your frame is only one factor in a complex equation.

The good news is, it’s one you can work on with training and smart nutrition.

I’ve seen runners shave minutes off marathons after dialing in their weight and their workouts. But I’ve also seen runners crash from overdoing it.

Here’s the truth I want you to take away: Don’t let the scale be the boss of you. Use it as feedback.

Train hard, fuel well, and your body will find its racing groove.

I challenge you to commit to finding your ideal race weight – not by obsessing on pounds, but by building a strong, well-fueled body that wants to stay lean.

Check in on your weight every few weeks, but base your decisions on how you feel and perform, not just a number.

Keep running with heart; the speed will follow.

Run-Walk Your First 10K – The Smart, No-Burnout Way to Go the Distance

Let’s get this out of the way up front: you don’t have to run every step of a 10K to be a real runner.

That idea messes with a lot of beginners.

They think unless they’re sprinting across the finish line like they’re in the Olympics, they’ve somehow failed.

That’s garbage.

If you cover 6.2 miles—any way you do it—you’ve earned your stripes.

Yes, you’re a runner.

And that’s where the run-walk method comes in. It’s hands-down the best way to train for your first 10K without blowing up halfway through or limping into week three with shin splints.

It’s what I always recommend to brand-new runners or anyone returning from injury.

Instead of going all-out until you collapse (which never ends well), you flip the script: jog a bit, walk a bit, repeat. It’s not cheating—it’s strategic recovery built into your workout.

Your heart rate gets a breather, your legs reset, and your lungs stop screaming. You stay in control.

And it works but just don’t take my word for it.

The great Jeff Galloway, who basically wrote the book on this, coached a group of 22 beginners through a 10-week run-walk program—and none of them got injured.

That’s almost unheard of.

Meanwhile, some studies show that up to 25% of new runners get hurt while training the traditional way. You do the math.

I’ve coached people who went from zero to 10K using run-walk—and not only did they finish strong, they were smiling at the end.

In this guide, I’ll walk you (and run you) through:

  • What makes a 10K unique
  • How long it might take to finish it using run-walk
  • A full 12-week training plan, broken down week by week
  • How to recover, stay consistent, and keep your head in the game

Whether you’re lacing up for the first time or bouncing back from a long break, this is your no-BS roadmap to 10K success—with walking breaks built in.

Let’s go.

What Is a 10K Anyway? (And Why It’s the Perfect Challenge)

A 10K is 10 kilometers—or 6.2 miles.

Not short, but totally doable.

Picture 25 laps around a track… or think of it as the distance you might walk across town and back if you got lost on a Sunday morning.

In the racing world, it’s the middle child: longer than a 5K (3.1 miles), but not as scary as a half marathon (13.1 miles).

That’s why I love it for beginners—it’s long enough to be a serious win but short enough to train for without flipping your life upside down.

How popular is it?

Well, the 5K still wins the numbers game—it makes up nearly half of all race registrations in the U.S. (around 49%).

But the 10K isn’t far behind, holding steady at about 9–10% of all races.

Globally, more than 1.8 million runners finished a 10K in 2019 alone. That’s a lot of sweaty shoes.

It shows up everywhere: holiday fun runs, charity events, community road races.

It’s the race distance that lets you test yourself without needing a six-month training block and a chiropractor on speed dial.

And here’s the best part—you don’t need to be fast to do it well.

I’ve seen people walk a 10K in 90+ minutes and feel just as accomplished as someone who ran it in 45. The race distance is fixed—but the pace? That’s all yours.

Even better, race organizers know people are walk-running this thing, so time limits are usually generous.

You’ll see folks using the run-walk method, walkers with hydration belts, moms with jogging strollers—you name it.

You’re not alone out there.

How Long Does It Take to Walk (or Run-Walk) a 10K?

So, you’re eyeing that 10K and wondering, “How long is this thing gonna take me?”

Totally fair question. But here’s the deal—it depends on how you move.

Walk it? Run-walk it? Or run it all out?

Let’s break it down the way I’d explain it to a new runner in one of my groups.

All-Walk: Around 1.5 to 2 Hours

If you’re planning to walk the whole 6.2 miles, awesome. That’s still a legit effort.

  • A brisk walking pace (around 15 minutes per mile) will land you at the finish in about 1 hour 30–40 minutes.
  • If you take it easier (say 18–20 minutes per mile), you’re looking at closer to 2 hours.

That’s right in line with what Verywell Fit found—most walkers finish a 10K in 1.5 to 2 hours.

Races know this. They’re not kicking people off the course.

I’ve coached folks who walked their first 10K and still finished smiling and proud.

Bottom line: budget two hours, wear comfy shoes, and enjoy the ride.

Run-Walk: 70 to 90 Minutes is Solid

Now if you’re doing the run-walk thing—first of all, good on you. That’s how a ton of runners get started (and many stick with it forever).

Most first-timers using this method land somewhere between 1 hour 10 minutes to 1 hour 30 minutes. That might sound long, but trust me, you’re moving faster than you think.

Early in training, your runs will be short and your walks longer—but that balance shifts as you build up.

By race day? You’ll probably be running more than you think—and finishing strong.

I always tell beginners: don’t chase the clock on your first 10K.

Just focus on crossing that finish line feeling good and not broken.

Your first 10K is your baseline.

There’s time later to shave minutes.

And yeah—I’ve had clients who took close to two hours their first time.

Didn’t matter.

They finished.

They smiled.

They came back stronger.

Continuous Running: Just For Comparison

If you’re wondering how your time stacks up against others, here’s a quick reality check:

  • Average 10K time overall: 50 to 70 minutes
  • Average for men: ~60 minutes
  • Average for women: ~1 hour 14 minutes

Again—that’s including experienced folks. Lots of newer runners finish closer to 1 hour 20–30 minutes, especially if it’s hot, hilly, or just a rough day.

So don’t stress. Completion over competition, especially on your first go.

Real Talk: Run-Walk Works

Let’s get into why the run-walk method is so good—especially if you’re just getting into this.

The whole idea came from former Olympian Jeff Galloway back in the ’70s.

He figured out that taking short walk breaks on purpose actually helps you go farther, feel better, and recover faster.

He calls it “Jeffing.”

Don’t ask me why he named it after himself; I’d do the same thing haha.

Here’s how it goes:

You might start with something like run 2 minutes, walk 1.

Or run 1 minute, walk 2. Doesn’t matter—it’s about staying in control.

Why does it work? Running pounds your body.

Each stride hits you with 2.5x your body weight in force.

Walking cuts that almost in half. By mixing the two, you avoid the wear and tear that wrecks most new runners.

Galloway swears he hasn’t had a running injury since 1978—because he Jeffs everything. And science backs it up.

A study in the Journal of Science and Medicine in Sport found that marathoners using run-walk had the same finish times as nonstop runners—but with less muscle soreness and fatigue. You recover faster and feel better.

For beginners and older runners, it’s gold. You end up running stronger during the run parts, because you’re not grinding yourself down with nonstop jogging.

12-Week Run-Walk Plan for a 10K: Why It Works (And Why It’s Worth It)

Alright, so you wanna go from zero to 10K? You’re in the right place—and no, you don’t need to be “a runner” yet to pull it off.

This 12-week run-walk plan is built for true beginners. I’m talking from-the-couch, haven’t-run-in-years beginners.

And if that’s you? Good.

Because that means you’ve got everything to gain and nothing to lose—except excuses.

Why 12 Weeks? Because Rushing It Breaks People

I’ve coached a lot of folks who tried to cram it into 6–8 weeks, only to end up burned out or busted up.

Twelve weeks gives your body time to adjust, and more importantly, your mind time to believe it can do this.

Science backs it up too: most of your big cardio gains happen between weeks 1 and 12.

That’s when your heart gets stronger, muscles build more capillaries and mitochondria (that endurance engine), and your joints and tendons start toughening up.

But none of that happens overnight.

This plan lets you build it slow and smart—without crashing and burning.

By the time you hit week 12, you’ll notice something wild: you’re running longer without feeling smoked.

That’s the payoff of consistent effort.

Let’s break down how it all comes together.

Weeks 1–2: Shake Off the Rust

We’re starting easy. Think 1 minute of running, 2 minutes walking.

That’s it.

Three short sessions per week, maybe 20–30 minutes max.

The goal here isn’t to impress anyone—it’s just to show up and start moving.

You’re building the habit, not chasing pace. No back-to-back run days, either. You’ll earn your rest days.

By the end of week 2, you’ll be covering a couple of miles per session—mostly walking, sure—but you’ll be moving, and your body will be waking up.

Weeks 3–4: Push a Little Further

Now we nudge those run intervals up to 2 minutes and trim the walk breaks to about 1 minute. Total time goes up to 30–35 minutes. Still manageable, still three days a week.

This is when a lot of people hit their first “Whoa, I’m actually doing this” moment. That first full 2-minute run? Feels like a win.

And if it’s still tough? Stick with the 1:2 pattern for another week. Progress isn’t one-size-fits-all.

Weeks 5–6: You’re Becoming a Runner

We’re talking 3 to 5 minutes of running at a time now, with just 30 seconds to 1-minute walks.

Your sessions might last 40 minutes, and you’re probably clocking in over 3 miles.

You might feel some muscle aches here—don’t freak out. That’s your body adapting. Use the walk breaks when you need ‘em.

If you’ve got energy, try some light cross-training (bike, swim, yoga) on off days. It’ll help with endurance and build strength in places running doesn’t hit.

Weeks 7–8: Big Leaps Happen Here

You’ll be running 5, 6, even 8 minutes at a time with short walk breaks. Sessions stretch to 45+ minutes, and you’re likely hitting 4.5–5.5 miles in one go.

For a lot of runners, this is when it clicks: “I can actually do this 10K thing.

Your breathing evens out, your legs don’t scream as much, and recovery gets faster. That’s not magic—it’s consistency. Stick with it.

Weeks 9–10: The Hard Work Pays Off

We’re hitting peak training now. 10-minute run intervals with just 1-minute walks?

Totally doable. Some sessions might hit 6 miles, which is right around 10K territory.

You don’t have to hit the full 10K distance before race day. Many runners top out at 5 or 5.5 miles and save that final push for race day adrenaline.

The main thing is building time on your feet and getting your legs used to longer efforts.

Weeks 11–12: Confidence Mode

You’re cruising now—running for 10 to 15 minutes at a time, maybe even going 40 minutes straight if you’re feeling strong.

This is when you actually started making giant leaps toward transitioning from walking to running.

Week 12 might have a full hour-long workout.

That’s the dry run.

If you can go 6 miles, you can finish a 10K.

Throw in a mini-taper during the last few days to freshen up before race day. Fewer miles, more rest. Trust the work you’ve put in.

Final Tips: Don’t Be a Hero, Be Smart

  • Stick to 3 runs a week—your body needs the recovery days.
  • Move days around if needed. Life happens. Just don’t double up back-to-back runs.
  • Miss a week? Repeat it. It’s better to go slow than get sidelined.
  • Don’t skip walk breaks early on. They’re not weakness—they’re strategy.

This plan isn’t about cranking out mileage until you break. It’s about training smarter, giving your body time to catch up to your ambition.

By the end of this thing, you’ll not only be able to finish a 10K—you’ll start seeing running as something you actually enjoy.

And that? That’s where the real transformation happens.

10K Run-Walk Plan: Week-by-Week Breakdown (The No-Fluff Version)

If you’re lacing up for your first 10K, good on you. This plan is built for real beginners—folks who might be walking more than running right now but are committed to getting stronger each week.

We’re doing three sessions per week—think Monday, Wednesday, Saturday—with rest or light cross-training in between. Every workout uses simple run/walk intervals. You’ll run for X minutes, walk for Y, and repeat that cycle Z times.

Keep the warm-up simple: brisk walk and a few leg swings or butt kicks. Cool down after. Don’t skip that stuff—it matters.

Week 1: Just Getting Started

Goal: Get used to moving. That’s it. Start slow. Be consistent.

  • Monday: Run 1 min / Walk 2 min × 7 (26 min)
  • Wednesday: Run 1 min / Walk 2 min × 8 (30 min)
  • Saturday: Run 1 min / Walk 2 min × 9 (33 min)

Week 2: Turning the Dial Up

Goal: Add a little more run time, cut the walking down just a touch.

  • Monday: Run 2 min / Walk 2 min × 5 (35 min)
  • Wednesday: Run 90 sec / Walk 1 min × 6 (31 min)
  • Saturday: Run 90 sec / Walk 30 sec × 8 (35 min)

Week 3: More Running, Less Rest

Goal: Time on your feet goes up, walk breaks go down.

  • Monday: Run 2 min / Walk 1 min × 6 (35 min)
  • Wednesday: Run 2 min / Walk 1 min × 8 (40 min)
  • Saturday: Run 2 min / Walk 30 sec × 10 (40 min)

Week 4: Holding Steady, Running Longer

Goal: Lock in 3-minute run segments. This is where it starts to feel like actual running.

  • Monday: Run 2 min / Walk 30 sec × 10 (40 min)
  • Wednesday: Run 3 min / Walk 1 min × 6 (40 min)
  • Saturday: Run 3 min / Walk 30 sec × 8 (40 min)

Week 5: Welcome to the Grind

Goal: Hit 4–5 minute run intervals and push endurance smartly.

  • Monday: Run 4 min / Walk 90 sec × 6 (40 min)
  • Wednesday: Run 4 min / Walk 30 sec × 8 (40 min)
  • Saturday: Run 5 min / Walk 1 min × 6 (45 min)

Week 6: Hitting New Highs

You’re not just building miles anymore—you’re building belief.

  • Monday: 45 min – Run 5 min, walk 30 sec × 8
  • Wednesday: 45 min – Run 7 min, walk 2 min × 4
  • Saturday: 45 min – Run 7 min, walk 1 min × 6

Week 7: Transition to Mostly Running

You’re now running longer than most people jog to their mailbox.

  • Monday: 45 min – Run 8 min, walk 90 sec × 4
  • Wednesday: 50 min – Run 10 min, walk 2 min × 3
  • Saturday: 45 min – Run 10 min, walk 1 min × 3

Week 8: Building Real Distance

You’re covering 4–5 miles with ease now. That’s not beginner-level anymore.

  • Monday: 50 min – Run 12 min, walk 2 min × 3
  • Wednesday: 50 min – Run 15 min, walk 90 sec × 3
  • Saturday: 50 min – Run 20 min, walk 1 min, run 20 min

Week 9: Reaching the Distance

This is it. You’re running full 10K distances—no guessing, no “maybe.” You’re doing it.

  • Monday: 55 min – Run 25 min, walk 2 min × 2
  • Wednesday: 50 min – Run 30 min, walk 2 min, then run 20 min
  • Saturday: 55 min – Run 35 min, walk 3 min, then run 15 min

Week 10: Let the Taper Begin

Time to freshen up, not fall off. You’ve earned the miles—now protect the engine.

  • Monday: 50 min – Run 30 min, walk 2 min, then run 15 min
  • Wednesday: 55 min – Run 35 min, walk 3 min, then run 10 min
  • Saturday: 45 min – Run 40 min (steady, no intervals unless needed)

Week 11: Final Prep

This week is about rhythm, not ramping. You’ve got it. Now stay sharp.

  • Monday: 45 min – Run 40 min (easy effort)
  • Wednesday: 50 min – Run 45 min (steady or race pace if you’re feeling good)
  • Saturday: 60 min – Run 30 min, walk 5 min, run 20 min

Week 12: Taper Time – Don’t Overcook It

You’ve made it to Week 12. This is where we dial things back and start getting sharp for race day. Think of it like loading a spring—you’re storing up energy, not burning it out.

Here’s the game plan:

  • Monday: 45 minutes total. Easy 40-minute run, then cool it down.
  • Wednesday: 50 minutes. Cruise for 45 easy, then call it.
  • Saturday: Long run, dress rehearsal style. 35 minutes easy, then walk for 3, followed by a steady 20-minute run.

Week 13: Race Week – Less is More

This is it. Everything you’ve done over the last 12 weeks leads here. But here’s the kicker: don’t do too much now. Your fitness is locked in. What you do this week either helps you feel fresh—or burns you out. Choose wisely.

Race Week Plan:

  • Monday: Optional light jog or cross-train (30 mins, super chill).
  • Wednesday: 20–30 minutes easy running with a few 30-second pick-ups to stay sharp.
  • Friday: 10–15 minute shakeout jog (optional) or total rest.
  • Sunday: Race Day! 10K time—run 6.2 miles using the run-walk rhythm you’ve practiced. You’ve got this.

Want to run Monday? Cool. Want to rest? Also cool. Same with Friday—do what settles the nerves without tiring you out.

Rest Days, Recovery & Cross-Training – Don’t Skip This Stuff

Let’s get one thing straight: rest and cross-training are not slacking.

They’re how you grow stronger without breaking down. Every runner who’s been sidelined by overuse injuries wishes they’d taken this part more seriously. Don’t learn that lesson the hard way.

Rest Days = Stronger Days

At least 2–3 non-running days per week are a must. That’s baked into this plan. Your muscles rebuild and adapt during those breaks—not during the actual run.

If your legs feel dead, take an extra rest day. That one missed run won’t derail your training. But running through pain might.

Remember: soreness is okay. Limping? Not okay.

Cross-Training = Smart Training

Cross-training keeps you fit without wrecking your legs. Here’s what works great for runners:

  • Cycling / Spin classes – Low impact, builds endurance.
  • Swimming or Aqua Jogging – Awesome for recovery and total-body strength.
  • Elliptical / Rowing – Solid cardio options without the pounding.
  • Hiking / Brisk walks – Good for recovery and still gets your heart rate up.
  • Yoga / Pilates – Improves balance, flexibility, and core control.

Want bonus points? Throw in some bodyweight strength work or light resistance training. Just don’t go beast mode. High reps, light weight = runner-friendly strength without the next-day soreness ambush.

What’s the Best Cross-Training?

Easy answer: the one you’ll actually do.

If you love biking, bike. If you hate swimming, don’t force it. It’s not punishment—it’s meant to keep you feeling good, moving well, and not bored out of your mind.

Some runners swear their weekly swim day made them stronger. Others use the stationary bike after long runs to flush the legs. Experiment, but stay consistent.

I’m a big fan of strength training and cycling as forms of cross training for runners.

Listen to Your Body Like It’s a Coach

Know the difference between “ugh, I’m sore” and “ouch, that’s not right.”

  • Soreness = dull ache, goes away as you warm up.
  • Pain = sharp, stabbing, or something that makes you limp. That’s your STOP sign.

One runner ignored a nagging foot ache during 10K training. Ended up with a stress fracture and lost 8 weeks. Don’t be that story. Rest, ice it, or go see a pro if something feels off.

Recovery Habits That Actually Help

  • Stretch after runs – Hamstrings, calves, hip flexors.
  • Foam roll – It hurts. But it works.
  • Sleep – Not optional. That’s when your body repairs.
  • Hydration + Nutrition – You can’t recover on Doritos and caffeine alone.
  • Contrast showers or Epsom salt baths – Feels great. Can reduce soreness.

Some of these have “meh” science backing them. But if it makes you feel better and helps you show up to your next run fresher, that’s a win in my book.

What’s Next? You’ve Got Options

Just finished your first 10K and wondering what to do next?

Here’s how to take things to the next level:

1. Go Back and Improve Your 10K Time

Now you’ve got a baseline. You know the distance. You know the suck.

You can absolutely go back and shave time off. A little more mileage, some light speed work (like fartleks or intervals), and better pacing can do wonders.

Even if you’re still using the run-walk method, you’ll probably get faster just by showing up more consistently.

Say your first 10K was 1:15? Maybe you go for 1:10 next time.

Doesn’t mean going all-in—it just means training smarter, maybe pushing just a little harder where it makes sense.

But take your time. You’re not chasing world records—you’re chasing progress.

2. Think About a Half Marathon

A lot of runners finish their first 10K and start eyeing the half marathon.

Makes sense—13.1 miles is the next big leap.

It’s a commitment, yeah—but it’s also totally doable. Surveys show the half is the most popular race distance among adult runners.

You can even keep using a run-walk strategy—just stretched over a longer training plan (usually 16 weeks or so).

If that challenge excites you? Go for it. Just respect the distance. The half is no joke—it’s double the mileage, so plan for longer long runs, more recovery, and more time on your feet.

3. Join a Running Crew

You’re officially a runner now. So why not run with others?

Check out a local running club, group runs at a shoe store, or even online spots like r/running or Facebook groups.

Trust me—accountability helps, and the vibe of a group can turn a “blah” run into something fun.

Plus, hearing other runners’ stories—what worked for them, what didn’t—can teach you more than any training plan.

And yeah, you might even make some running friends who drag you into your next race (in a good way).

4. Switch Things Up

Who says you need to run longer or faster?

You could try a trail 10K, a 5K for speed, or even dip your toes into triathlon if you like variety.

Some people go full running nerd and get a GPS watch, dial in their form, or plan destination races in cool places. Why not?

The running world’s massive—from 1-mile time trials to 100-mile ultras. Find what fires you up.

5. Or… Just Keep It Going

No pressure to chase a new goal right away. You can run just for health and happiness.

You’ve built a rhythm. Don’t let that go. Running 2–3 times a week without racing is still huge for your body, your mind, and your overall life.

Consistency is the secret sauce, whether you’re training or not. If you keep the habit going, the gains will come—mentally and physically.

As I always tell my runners: 👉 The best training plan is the one you’ll actually do.

So find what fits your life—and keep showing up.

This Is Just the Beginning

Let’s be real: that 10K finish line? It’s not just the end of a race—it’s the start of something way bigger.

Stats show that a big chunk of first-time 10K runners go on to run longer races within a year.

But hey, even if you don’t? You’re still a runner. Whether your next move is a half marathon or just a chill loop around your neighborhood, it counts.

As I always tell my athletes: run your own damn race.

Some runners thrive chasing age-group podiums. Others fall in love with weekend trail runs and coffee after. Both are legit. Your path is yours.

You went from zero to 10K. That’s no small thing. That medal? That’s proof you showed up when it was hard, stuck it out when it sucked, and got to the other side. That never goes away.

Final Thoughts – You Did It, Now Keep Going

Training for and finishing a 10K—especially if you used the run-walk method—is a massive win.

You didn’t grind your body into the ground. You trained smart. You took breaks when needed. You built endurance without burnout. That’s how you build a base that lasts.

Here’s what you probably realized along the way:

  • Walking breaks aren’t weakness—they’re wisdom.
  • Everyone starts somewhere.
  • Running doesn’t have to be torture. It can actually be… kind of fun.

You followed the plan. You took your rest days seriously. You kept showing up.

And in doing that, you proved one of the core truths I believe as a coach:

  • Consistency > intensity.
  • Smart > flashy.
  • Sustainable = success.

What’s Next For You?

Take a breath. Celebrate. Reflect.

Then pick a new goal—any goal—and go after it with the same grit that got you through your first 10K.

Because here’s the secret:

💡 You’re already a runner.
💡 You proved that.
💡 Now go see what else you’re capable of.

Running with a Broken Toe: Can You Still Train or Should You Rest?

Can You Run with a Broken Toe?

Look, I get it.

Breaking a toe sounds like a minor hiccup in the grand scheme of running injuries.

It’s not your knee, it’s not your hamstring… it’s a toe, right?

Wrong.

You use that little sucker every step—for balance, push-off, and control.

So even a tiny crack can throw off your stride, jack up your mechanics, and start a chain reaction of pain up the leg.

Ignore it, and next thing you know you’ve got calf strain, hip issues, or worse.

I’ve seen runners try to “run through it” because hey—it’s just a toe. Don’t make that mistake.

Trust me: a broken toe can wreck your training block if you don’t deal with it right.

Let’s break this down and see whether you can still train—or if it’s time to chill and let it heal.

What Actually Counts as a Broken Toe?

A broken toe means you’ve cracked one of the bones (called phalanges) in your foot.

Each of the smaller toes has three bones.

The big toe? Two.

Now, this is different from a sprain. A sprain hits the soft tissue—ligaments, tendons. A fracture is in the bone itself.

Thing is, they feel really similar.

Both can swell up, both can bruise, both can hurt like hell when you put weight on them.

Even pros can’t always tell without an X-ray. So don’t feel bad if you’re unsure.

How to Tell If It’s Broken (Without a Scan)

Here’s what to look for:

  • Sudden, sharp pain after a specific event (stubbed it hard, dropped a dumbbell on it, etc.)
  • Swelling or black-and-blue bruising
  • Pain right on the bone, especially with pressure or walking
  • Crooked or bent toe (yep—get that checked ASAP)
  • You heard a crack or pop when it happened

Compare that to a sprain, which usually feels more like general tenderness, puffiness, and stiffness—not that sharp, deep bone pain.

Two Types of Broken Toes You Need to Know

Not all broken toes are created equal. Two distinctions:

1. Traumatic Fractures

These are the “ow, I stubbed it on the coffee table” kind. One big impact.

In running? That might be tripping on a root mid-trail or smashing your foot into a curb at mile 23.

You’ll usually know when it happens. Pain hits fast. Swelling shows up. Sometimes, you hear that dreaded snap. Could be a clean break or something like an avulsion fracture, where a piece of bone gets yanked off by a tendon.

If your toe suddenly looks crooked or bruises like crazy—yeah, you probably broke it.

2. Stress Fractures

These are sneaky. You don’t feel them right away. They build up over time—thanks to too many miles, not enough rest, crappy shoes, or upping intensity too fast.

At first it’s just a dull ache. Maybe you feel it after long runs. Then it creeps into your shorter runs. Then it sticks around while walking. That’s a red flag.

Stress fractures happen when your bones can’t keep up with the micro-damage from pounding pavement.

Think of it as the toe whispering, “Hey, slow down,” before it starts screaming.

💡If you feel toe pain that gets worse with every run and doesn’t go away with rest—don’t brush it off. That’s exactly how stress fractures sneak in and steal your race season.

Can You Run with a Broken Toe?

Here’s the deal: breaking a toe as a runner sucks—but it doesn’t always mean you’re benched.

Whether or not you can keep running depends on which toe you broke and how bad the break is.

Some toes are just along for the ride. Others are key players in every push-off. Let’s break it down, toe by toe.

Let me explain more…

Middle Toes (2nd, 3rd, 4th): The “Maybe” Zone

These guys aren’t as essential as the big toe when it comes to propulsion.

If you’ve broken one of them, there’s a chance—and I emphasize the word chance—you can keep running, but only under the right conditions.

The go-to trick here is buddy taping—wrapping the busted toe to the healthy one next to it to give it a little backup support.

Some runners swear by it. I stubbed my fourth toe hard last year just days before Batur Trail race in Bali, taped it up, and still run a decent event.

The pain was really bad on the downhill sections but overall manageable.

That’s lucky—but it also shows that running on a middle toe break can be done if it’s not too severe.

BUT—big warning here: the second you start limping, compensating, or feeling that toe scream louder each mile, you’ve crossed the line.

Don’t try to “tough guy” your way through it. All it takes is one altered stride to start a domino effect—ankle strain, knee pain, hip tightness… You know the drill.

The safe rule: If taping keeps things stable and you can jog without pain or limping, maybe keep the runs super short and easy. But if it hurts? Shut it down. No race is worth a broken gait.

The Little Toe: Small But Mighty (And a Lot Trickier)

Don’t underestimate your pinky toe. Yeah, it’s tiny—but it does more than you think.

It’s key for balance, especially during toe-off and cornering. Running without its help? Surprisingly awkward.

That’s the pinky for you—it might let you run, but it might completely shut things down.

The pain and loss of lateral stability can be brutal, especially if you’re dodging rocks or turning fast.

So what’s the move?

Try buddy taping, test it on a walk or slow jog, and listen hard to your body.

If it hurts like hell or you feel off-balance, back off.

You’re better off taking two weeks off now than wrecking your stride for the next six months.

Broken Big Toe? Don’t Even Think About Running

Let’s be blunt: if you’ve broken your big toe—a.k.a. your hallux—running is off the table.

That toe does more work than the other four combined when it comes to running.

I’m talking 80–85% of your push-off power going right through it.

It’s the toe that drives you forward, keeps you balanced, and takes a beating every single stride.

Try to run on a busted big toe? You’re gonna limp, hurt, and probably screw something else up while you compensate.

And here’s the kicker: according to my research, big toe breaks are treated way more conservatively than smaller toe injuries. That’s how important it is.

Docs might cast it. They’ll almost always boot it. Because if it heals wrong, you could end up with permanent issues—think arthritis in the joint or a wonky gait that lingers for years.

All Toe Breaks Are Not Equal: What to Consider

Not all broken toes mean instant shutdown—but if you’re even thinking about running with one, here’s what you need to assess (honestly):

1. Which Toe’s Busted?

  • Big toe = STOP. It’s a deal-breaker.
  • Middle toes = maybe. You might be able to do some light stuff if it’s not severe.
  • Pinky toe = depends. It plays less of a role in push-off, but if it throws off your gait, you’re still risking trouble.

2. How Bad’s the Break?

There’s a big difference between a tiny crack and a full-blown displaced fracture.

  • If your bone’s shattered or moved out of place, you’ll probably need a boot, maybe even surgery.
  • Mild swelling, dull pain, and no weird toe angle? Could be minor.
  • Throbbing, major bruising, or a toe that looks off? That’s serious—get an X-ray and stay off it.

And don’t fool yourself if you haven’t gotten it checked. Err on the side of caution. One runner said, “Once I saw how bruised it was, I knew I wasn’t jogging on that thing without regrets.”

3. What’s the Pain Telling You?

If the pain is dull and doesn’t change much while running, maybe there’s wiggle room. But sharp or increasing pain? That’s your body yelling “sit down.”

Don’t be the person who pops ibuprofen to power through. That might mask the pain, but it won’t stop the damage.

One experienced marathoner put it best: “You’re not helping your fitness if every step is delaying the bone from healing.”

4. Can You Move Naturally—Or Are You Limping?

Try this: walk briskly, hop on both feet, maybe a gentle jog in place.

Now ask:

  • Are you favoring the toe?
  • Is your foot rolling funny to avoid pain?
  • Are you landing differently?

Any change in your gait is a huge red flag. You might not feel it immediately, but compensating can mess with your whole kinetic chain. Suddenly your arch hurts, your ankle’s tight, or your knee’s flaring up.

One runner who pushed through a broken pinky toe said she ended up sidelined with hip tendinitis from the compensation. All because she didn’t want to skip a week of running. That “just a toe” injury turned into a month off.

Can You Run on a Broken Toe? Sure. Should You? Probably Not.

Let’s get one thing straight: if your toe is so swollen you can’t even get your running shoe on without wincing, that’s your body screaming, “Sit your butt down.”

Don’t be the runner who tries to “tough it out” and ends up limping through a race and six months of forced time off. That ain’t grit. That’s dumb.

Swollen Toe = Stay Home

Here’s the test: Can you slide your foot into a regular shoe and walk across the room without wincing or limping like a zombie?

If the answer is no, you’ve got no business running. Period.

Forcing a swollen, possibly broken toe into a tight shoe? That’s not only agonizing—it can cut off circulation and delay healing.

I’ve seen runners try to duct-tape a broken toe just to “get the miles in.” Don’t do that. Take a couple days off and test it again once the swelling starts to drop. If the shoe still feels like a vice grip, you’re not ready.

What the Doc Says Goes

Seen a doc? Got an X-ray? If your podiatrist says no running, don’t play games. I don’t care how close race day is. Let the bone start healing.

If the injury turns out to be minor—a bruise or tiny crack—you might get the green light to run “as tolerated.” But if you’re guessing based on vibes and Google? Dangerous territory.

Think Big Picture: Risk vs Reward

Ask yourself: Are you chasing your A-race that’s just days away? Or are you in the off-season trying to build base?

If this is your goal race and your toe’s only mildly fractured and taped, you might make it work.

But realize—you could finish that one race and then be out for months. You’re rolling the dice.

Unless your paycheck or personal pride rides on this race, the smart move is usually to back off.

A week off now can save your entire season. Trying to “hero” your way through pain just means you’ll be sidelined longer later. I’ve seen it too many times.

Remember: “Trying to run on a broken toe isn’t gritty — it’s reckless.”

How to Know If It’s Time to Shut It Down

Still unsure? Take two full rest days. No running. No pretending you’re “just walking fast.” Just ice, elevate, and chill.

After 48 hours, reassess:

  • Pain getting better? Might be a bruise.
  • Still sharp, deep pain? Probably a break.

And if you’re still guessing? Stop. Go see a doctor and get it X-rayed. Don’t gamble your next race on hope.

Broken Toe Recovery Game Plan: Let It Heal Right the First Time

So maybe you do have a fracture. That sucks—but now it’s time to lock in and treat it like an athlete.

Because what you do in these first few days matters.

Step 1: Stop Running. Immediately.

This one’s obvious, but I’ve seen too many runners try to “walk it off” or sneak in a short run “just to test it.” Don’t. Every step adds more stress to a fragile bone that’s begging for a break. Serious injuries shouldn’t be trifled with.

Sit down. Rest. Take weight off. Cancel the run. The faster you chill, the faster you’ll heal.

One mindset shift that helps?
“Every step I don’t take now is one less week off later.”

Step 2: Ice Like You Mean It

Swelling’s the enemy here, and icing is your weapon.

  • First 48 hours? Ice every couple of hours.
  • Wrap the cold pack or frozen peas in a towel.
  • Hit it for 10–15 minutes at a time, max 20.

One runner told me his post-injury routine was clockwork: every night, foot up on the couch, frozen peas on the toe, 15 minutes while watching TV. It didn’t feel great at first, but it worked.

The swelling dropped fast, and he slept better with less pain.

Be consistent with it. Just don’t over-ice. Give your skin breaks between sessions.

Coming Back After a Broken Toe: Don’t Rush the Return

You’ve been sidelined, watching others log miles while you ice and tape. Now your toe finally feels normal-ish, and you’re itching to lace up. Totally get it. But this part—the comeback—is where runners either return smart or land right back on the injury bench.

So the question is: When can you start running again after breaking a toe?

The Real Answer: It Depends (But Here’s the Playbook)

Healing time isn’t one-size-fits-all. It depends on how bad the break was, which toe took the hit, and how your body heals.

Minor fractures (like stress cracks or hairlines)

You might be back around 3–4 weeks if things go smoothly. If your pain’s totally gone in day-to-day life—no limp, no twinge when walking—you can maybe test out a short jog.

Just remember: pain-free walking comes before pain-free running. One runner with a broken pinky toe said he didn’t run until he could walk briskly and hop in place without discomfort. Smart move.

Moderate fractures (say, a couple toes at once or a more traumatic break)

You’re looking at 5–6 weeks, maybe longer if swelling lingers or stiffness hangs around. Some athletes bounce back faster, but that’s the exception—not the rule.

A few folks have jogged at 4 weeks with tape still on, but that’s not a green light for everyone. Be honest about your own pain and mobility.

Severe fractures (like a displaced break or anything involving the big toe)

This usually needs 6–8 weeks or more. If you were in a boot or cast, plan on even longer.

And here’s the kicker—just because the bone heals doesn’t mean you’re ready to run hard.

The joint might still be stiff.

The muscles might’ve gone soft.

Give yourself a couple weeks to walk, stretch, and rebuild strength before pounding pavement again.

And yes, your doc might want a follow-up X-ray to be sure things are solid.

Don’t skip it. If the bone’s not fully knit, you’re risking another setback just as you’re getting momentum.

Pain-Free Isn’t Optional – It’s the Bar

Healing is biological. You can’t force it. You can eat clean, load up on calcium and vitamin D, and avoid stuff that slows bone growth (like smoking)… but at the end of the day, your body’s on its own timeline.

One solid rule to follow:

If walking is pain-free (brisk pace, normal stride, maybe even light hopping)? You can consider a short jog.
If walking still hurts? You’re not ready.

A runner who broke his fourth toe waited the full six weeks. Once he hit that pain-free point, he jogged half a mile, super easy. No pain. Next run? One mile. He worked up slowly, and within a month, he was back to full training. That’s how you win the long game.

The Comeback Rulebook (For Your First Few Runs)

  • Start with time, not distance. Go out for 10–15 minutes of easy jogging. Not a tempo. Not a progression. Just a shakeout.
  • Run on flat, soft surfaces (grass or treadmill if possible). Save hills and trails for later.
  • Keep your ego in check. Even if your lungs feel ready, your toe might not be. You’re not behind—you’re rehabbing.
  • Watch your form. If your footstrike feels weird or off-balance, stop. That’s your body protecting itself—and telling you to slow down.
  • Check in afterward. Does your toe feel sore later that night or the next morning? If yes, scale back or rest another few days.

Rebuild Mileage Like You’ve Got a Brain

Let’s be real—you might feel ready to run far. Cardio-wise, you’re probably still solid from biking, pool running, or whatever cross-training you did.

But here’s the catch: your toe isn’t ready to take full mileage yet.

Treat your comeback like you’re retraining your foot from scratch:

  • Week 1: 5 miles total? Cool.
  • Week 2: 6 or 7.
  • Week 3: 8 or 9.

You get the idea. That 10–15% rule? It works. It’s not just some coach myth—it’s how bones readapt to pounding.

One way to cheat the system a little and still build back smart: run-walk. Run a mile, walk a minute. Rinse and repeat. Even if you can run straight through, throwing in walk breaks early on helps unload the toe.

Run Smooth, Build Foot Strength

This is your golden opportunity to dial in your form. Smooth cadence. No overstriding. Keep that landing soft and quick.

And don’t skip foot strength. Get weird with it—towel scrunches, marble pickups, toe curls. They seem silly, but they work.

Toe’s been resting? Now you’ve gotta wake those tiny muscles back up.

Even a few minutes a day of mobility drills (toe flexion, toe spreads, towel slides) can make a difference. A stronger foot = less chance of this injury showing up again down the line.

Patience: Your New Favorite Training Tool

Let me say it louder for the runners in the back:

Don’t try to “make up” for lost time.

I know you’re tempted. You’ve missed long runs. Maybe a race. But pushing too hard, too soon turns a short comeback into a long rehab.

One runner I know nailed it: a 3-week ramp-up after a 6-week layoff.

  • Week 1: Three short run-walks (~2 miles each)
  • Week 2: Every other day, up to 3 miles continuous
  • Week 3: Running 4–5 miles, added one light pickup to test speed
  • Week 4: Back to normal training

No drama. No re-injury. Just smart training.

Compare that to another runner who jumped into a 10-mile long run the moment the calendar said “six weeks post-injury.” Ended up with a re-fracture. Another month in the boot.

You’ve got one shot to heal it right. Don’t blow it.

FAQs – Running with a Broken Toe (And What Not to Do)

Can I Run with a Broken Pinky Toe?

Short answer: maybe, but tread carefully.

Some runners have pulled off short, easy runs with a broken pinky toe by buddy-taping it and wearing roomy shoes. But if you’re limping or changing your gait to get through it? Nope. Shut it down.

The pinky toe helps more than you think—balance, push-off, stabilizing your stride. If you’re running through pain, you’re not just risking that toe… you’re begging for a cascade of new problems.

Better move? Take a week or two off. Cross-train. Let it heal.

Will Running on a Broken Toe Make It Worse?

Yes. Almost always.

Every step pounds that fracture site. What starts as a hairline crack can turn into a full break, or worse, heal the wrong way (misaligned, non-union, long-term issues).

And let’s be real—running through pain doesn’t make you hardcore. It just makes your comeback longer.

Unless your doc gave you the green light for some gentle movement, assume that running will only drag out the healing. Let it rest now so you can get back to real training sooner.

Can I Tape a Broken Toe and Keep Training?

Taping, aka buddy-taping (wrapping the broken toe to its neighbor), can help stabilize things. It’s great for basic breaks—like a simple pinky toe fracture—and can reduce pain for walking or light movement.

Yes, you can train around it—but not through it.

Try this:

  • Ride the stationary bike
  • Do upper body work
  • Walk easy
  • Swim if you’re into it

But taping isn’t a magic fix. If it still hurts to run? Don’t run. And if taping makes it worse or cuts off circulation? Remove it and reassess.

If it’s the big toe or the break is severe? That’s probably a boot situation. Don’t mess around with that.

How long should I wait before running again?

Here’s the honest answer: until it’s healed and pain-free.

  • Mild break → maybe 3–4 weeks
  • Bad break (esp. big toe) → 6–8 weeks or longer

The golden rule: If you can’t walk normally, without pain, and push off your toe without wincing—you’re not ready.

Even when it starts feeling okay, start with short, easy jogs. If it talks back? Shut it down and give it more time.

⏳ Around 6 weeks is when most runners can start easing back, but always go by how it feels. If your doc gave you a timeline or wants an X-ray? Do it. Be patient now so you’re not sidelined later.

What if it’s just a stubbed or bruised toe?

Different beast, same rule: listen to your body.

If it’s just bruised and not broken, you might be able to run through it—if the pain is mild and you’re not limping. Tape it up, test it on an easy run, and see how it goes.

Still limping or getting worse after a few days? Don’t be a hero—it might be a small fracture pretending to be a bruise. Treat it like one just to be safe.

🏃‍♂️ Lots of runners train through black toenails or stubbed toes. Just skip the speedwork and keep it easy until things settle down.

Do I need physical therapy?

Most of the time? Nah. For a basic toe break, you’re probably fine with home rehab and some toe mobility drills (like towel scrunches or marble pickups).

But if:

  • You were in a boot for weeks…
  • Your big toe joint got stiff…
  • Your gait feels weird post-recovery…

Then yeah—one or two PT sessions can be clutch. A good physio will show you how to restore motion, strength, and mechanics. Especially important if it was a gnarly break or there was tendon damage too.

Think of PT like optional maintenance—it’s not mandatory for everyone, but if your body isn’t moving right, it’s worth the tune-up.

Will I be more likely to break it again?

Good news: once it heals, the bone is solid. In fact, bone usually heals stronger at the break site.

That said—if it healed crooked, stiff, or if the joint’s a little janky now, that might increase your risk of annoying stuff down the road. Not necessarily another break, but weird wear, jamming, or compensations that could cause trouble.

Just don’t assume you’re doomed. Many runners—marathoners, trail junkies, even ultrarunners—have broken toes and came back strong. Take care of it now, build foot strength, and wear good shoes. You’ll be just fine.

Final Thoughts: A Broken Toe Feels Like a Big Deal. But You’ve Got This.

Yeah, it’s small in size—but to a runner, a busted toe can feel like the end of the world. Suddenly you’re sitting still, staring at your shoes, wondering if you’ll ever lace up again.

You will.

But here’s what you don’t do: force it. Running on a broken toe—especially a big toe—is a fast track to a longer layoff. Don’t turn one month off into six because you wanted to feel “tough.”

💬 Like I tell my athletes:
“You’re not proving anything by running through sharp pain. You’re just delaying your comeback.”

Smart Recovery = Stronger Return

So here’s your checklist:

  • Rest the damn thing.
  • Ice, tape, elevate.
  • Protect it with the right shoes.
  • Cross-train smart (bike, pool, upper body strength).
  • Use this time to fix weak links.

One runner told me, “Resting is 51% of the training.” I’ll go further—recovery is what makes your next PR possible.

The Beginner’s Guide To Track Running

track running

Thinking about giving track running a shot but feeling awkward just looking at that red oval? I’ve been there.

I remember my first time stepping onto a track. I was a clueless newbie clutching a beat-up stopwatch, watching sprinters fly by in lane 1 like they were training for the Olympics.

My heart was racing, and not from running—I was terrified I’d screw something up. Wrong lane, wrong pace, maybe get lapped and humiliated.

I felt like an outsider.

But here’s the truth no one tells you: everyone starts out feeling that way. Every seasoned runner you see today once stood where you are—unsure, slow, and trying to figure it out.

And the track? It’s not just for elites. It’s actually one of the best places to level up your running. It’s a space where every step teaches you something—about pace, grit, form, and pushing past your limits.

So let me walk you through the basics. By the end of this, you’ll see the track not as some intimidating arena, but as a super useful tool for improving your speed and confidence.

So What Is a Running Track, Anyway?

Simple: it’s a 400-meter loop made for running. That red rubber surface? It’s not just for looks.

Most tracks are made of synthetic rubber or polyurethane, which gives a little bounce and cuts down the pounding on your joints. Way easier on the body than pavement.

Here’s the lowdown:

  • Lap Length: One full lap in the innermost lane is 400 meters. That’s roughly a quarter mile. So yeah, four laps = about a mile. Technically, it’s around 9 meters short of a true mile, but for training? Close enough.
  • Lane Math: The farther out you go, the longer each lap gets. Lane 8 can be 40–50 meters longer than lane 1. That’s why races use those funky staggered starts. So if you’re doing laps in lane 6, just know you’re running a little extra. It won’t ruin your training—but it’s good to be aware.
  • Consistent Surface: No hills. No curbs. No cars trying to murder you like they do on busy roads. The track is smooth, flat, and predictable. That consistency is gold when you’re working on pace, intervals, or just trying to get a solid session in.
  • Helpful Markings: All those lines and arrows? They’re actually useful. The straight section (called the “straightaway”) is 100 meters. The curve? Another 100. So if you run one straight + one curve, that’s 200m. Boom. Now you can do short intervals without needing a GPS watch or fancy tech.

Quick math: 4 laps = ~1 mile, 8 laps = ~2 miles, 12.5 laps = 5K. Write those numbers down and make the track your measuring tape.

“But Isn’t Running in Circles… Boring?”

I get it. On paper, it sounds dull.

But honestly? That repetition is what makes it powerful.

The track strips away distractions. No hills. No traffic. No weird terrain changes. Just you and your effort. It becomes a kind of mental dojo—a place where you can focus.

For me, the track became a training lab. I could test my speed, hold a steady pace, and measure exactly how I was improving. No more guessing.

No more vague “felt good” runs.

The numbers don’t lie.

Why Bother with Track Workouts?

I used to be a road-only guy. Track workouts sounded scary and intense. But after just a few weeks of doing intervals once a week, my endurance shot up, my pace dropped, and I felt faster and stronger.

Here’s why the track works:

1. You Know the Distance—Exactly

Forget GPS errors and guessing how far you’ve gone. On the track, one lap = 400 meters. No surprises.

That’s why it’s the perfect place for interval training. You can time your 200s, 400s, 800s, whatever—and know you’re running the right distance, every time.

Studies back this up. One research project found that runners who added interval sessions on the track (like 200m fast, 200m recovery) improved their VO₂ max, sprint times, and even dropped body fat—more than those doing just steady road runs.

I’ve seen it in my own coaching, too. Athletes who commit to a weekly track session make serious gains. It’s not magic—it’s consistency plus effort in a setting that gives you honest feedback.

2. Speed Happens Here

If your goal is to run faster, the track is your best friend.

That slight bounce in the track surface helps absorb impact and gives you a bit of return with each step. Add in the fact that you’re not dodging potholes or climbing hills, and you’ve got a space built for pure speed.

Even marathoners do track work. Why? Because pushing the pace on a flat surface teaches your legs and lungs how to move faster—and that strength translates to your long runs too.

3. Building Confidence, One Split at a Time

My first real track workout humbled the hell out of me. I thought, “400 meters? That’s one lap—how bad could it be?” Famous last words. By rep three, I was sucking wind and seriously questioning my life choices.

But week after week, something clicked. I hit my splits. I stopped dreading that burning lung feeling. I stopped panicking when lactic acid kicked in. And I started seeing progress—not just on paper, but in my head.

Track teaches you how to suffer smart. It forces you to face discomfort in a place where it’s safe to fail and grow. By the time race day rolls around, that pain zone won’t freak you out anymore. You’ve been there. You know it. You own it.?

4. A Change of Scenery

Let’s be honest—all tracks kinda look alike. But the training stimulus they give? Totally different beast from your usual jog route.

Running on the track forces you to get intentional. You’re not just “going for a run.” You’re doing 6×400 at 5K pace. Or 12×200 with 100m jog.

That structure gives your training purpose. And that variety keeps your body guessing—and your brain from checking out.

I like to use the track for sharp, focused work. Then I save my easy miles and long runs for the road or trails. That balance? It keeps you healthy, motivated, and less likely to burn out.

5. The Ultimate Feedback Loop

Want to actually see your progress? Use the track.

It’s called a track for a reason—because everything’s measured, controlled, and repeatable.

Four laps is a mile. No guessing. No Strava discrepancies.

If last month you were walking between intervals, and now you’re jogging your recoveries, that’s real growth. If your splits dropped from 2:10 to 2:00 per 400m, that’s proof you’re getting fitter.

I tell my runners to log every session. Even the ugly ones. Especially the ugly ones. It’s not about perfection—it’s about patterns. And the track shows those patterns better than any road loop ever will.

Track Etiquette 101 (Without Being That Guy)

Walking onto a track for the first time can feel like jumping onto a freeway. Everyone’s got their own pace, direction, and flow. But don’t stress—there are just a few simple things to keep in mind.

Passing Rules: Stay Predictable. Stay Chill.

On most tracks, we run counter-clockwise. That means if someone’s faster than you, they’ll usually pass on your right, swinging into lane 2 or 3 to go around.

Your job? Hold your line. No zig-zagging, no sudden lane changes. Stay steady and let the speedster do the work.

Sometimes you’ll hear someone shout “Track!” as they approach. That’s runner speak for “Heads up, I’m passing!”

It’s not rude—it’s actually helpful. You don’t have to move; just be aware and maybe hug the inside of your lane a little tighter so they can cruise past without drama.

Some runners might say “on your right” or “lane 1,” depending on where you are, but the vibe is the same.

When I started, I thought I had to jump out of the way every time I heard “Track!”—like it was a fire drill.

Nope. You just stay in your lane and let them do their thing. Truth is, most experienced runners won’t even bother yelling. They’ll just quietly pass and vanish down the stretch.

If you’re the one passing someone and they haven’t noticed you, a calm “excuse me” or “coming on your right” goes a long way. And if you’re getting passed a lot—don’t sweat it.

We’ve all been there. It’s like skiing: the faster person has to avoid the slower one, not the other way around.

Walkers & Side-by-Side Joggers: Please Use the Outer Lanes

Walking is totally cool at the track. I walk there for warm-ups and cooldowns all the time. But if you’re walking, especially with friends, stay in the outer lanes—lane 6, 7, or 8.

Same goes for group jogs or recovery shuffles. Don’t turn lane 1 into a social lounge.

I’ve seen full-blown brunch conversations happening mid-track, blocking 3–4 lanes like it’s a sidewalk café. Don’t do that. If you need to chat or take a breather, just step off the track. It’s basic respect.

My go-to? I warm up in lane 8 if the track’s busy. Keeps me out of the way, and I can still shake out the legs without playing dodgeball.

Every Track Has Its Own Vibe

At your local high school track, you might see everything from bootcamps to barefoot kids to folks doing TikTok dances in lane 5.

The etiquette there is usually chill, but safety still matters. Keep your head up, don’t blast music so loud you miss a warning, and definitely don’t bring your dog for a poop jog.

Now, if you’re training on a college or elite-level track, expect more structure.

Athletes there are often locked into strict intervals, and they’re moving.

Give them space. Read the room. And always check the posted rules—some tracks don’t allow public use during school hours or team practice. Others ban spikes, bikes, skateboards, or even water bottles on the surface.

If There’s a Team Workout Happening… Respect It

You’ll know it’s a team session if there’s a coach on the side barking splits and a bunch of runners moving like clockwork. In that case, be smart.

Don’t hog lane 1. If they need space, either wait it out, run in an outer lane, or do what I’ve done before—start your workout on the opposite side of the track to stay out of their way.

Once, I showed up to a local track to find a junior club doing repeats. I shifted to lane 2 and started my intervals on the backstretch. Zero issues.

They got their workout done. I got mine in. That’s how you share space without stepping on anyone’s groove.

Be a Good Human Out There

Smile. Nod. Give a wave. Help someone if they look lost. I once gave a quick lane-use tip to a beginner who kept drifting into lane 1 mid-warm-up. Just a kind nudge, nothing preachy. They thanked me and adjusted right away.

And if you’re the one who accidentally cuts someone off or jogs into lane 1 during someone’s rep? No biggie. Give a little wave and carry on. Happens to the best of us.

The Golden Rule: Don’t Be a Jerk

Track etiquette isn’t about being perfect. It’s about being respectful and aware. After a few sessions, it becomes second nature. I learned most of it just by watching others and asking questions.

So don’t stress over it. You already win points just by caring enough to learn this stuff. That puts you ahead of half the people out there.

Track Running Shoes & Gear: What You Actually Need 

When it comes to track workouts, people love to overcomplicate things. Flashy spikes, carbon plates, the whole works.

But here’s the truth: you don’t need high-tech gear to get faster. What you do need is consistency, effort, and shoes that don’t mess with your stride.

Your Regular Running Shoes Are Just Fine

Let’s get this out of the way—if you already own a pair of comfy, reliable running shoes, you’re good.

I did an entire year of weekly track workouts in my beat-up daily trainers and still knocked out personal bests.

Were they flashy? Nope.

But they worked. And that’s the point. Gear doesn’t fix bad form. Consistency does.

Spikes: Flashy, but Not Essential (Especially for Beginners)

Track spikes are great—for short-distance sprinters. We’re talking 100 to 400 meters. They’re super light and make you feel fast, but they hammer your calves and Achilles.

Most beginners? Not ready for that.

You’re better off building a solid base with regular shoes before even thinking about spikes. And heads up—not every track allows them, anyway. So, no need to rush.

Racing Flats or Lightweight Trainers: A Solid Middle Ground

Want something that feels faster but doesn’t wreck your legs?

Try a pair of racing flats. They’re light, responsive, and easier on the body than spikes. I’ve used mine for interval days when I want that “race day” feeling without going all-in on gear.

But honestly? Even this is optional. Your go-to trainers are still your best training partners.

Carbon-Plated Super Shoes: Cool Tech, But Tread Lightly

Super shoes like Vaporflys are built for straight-line speed, not tight curves. I’ve seen runners wobble like newborn deer trying to corner in them on the track. Plus, overusing them weakens your stabilizer muscles.

I tell my athletes: think of these shoes like espresso—great once in a while, but not something you want to depend on daily. Once a week, max.

Other Gear That’s Actually Useful:

  • Moisture-wicking clothes – Layers if it’s cold. Trust me, cotton turns into a wet sponge.
  • Water bottle – Most tracks don’t have fountains. Bring your own.
  • Watch or timer – For intervals, or just to get a sense of pace. Or run by feel. Either works.
  • Hat/sunglasses/sunscreen – Tracks can feel like frying pans under the sun.
  • Towel – You’ll need it. Enough said.

Coach Tip: Rotate your shoes. Save your “race-day” shoes for special sessions. Use your daily trainers for most of your mileage. It’s like cars—don’t drive a Ferrari through traffic every day. Save it for the open road.

Don’t Stretch Your Recovery Too Far

Let’s get real.

If you’re taking 5-minute breaks between 400m repeats, chances are you went out too hot… or you’re just not ready for that many reps yet. It happens. No shame in dialing it back.

Now, if your form is falling apart mid-workout?

That’s your cue to stop. I always tell my athletes—it’s better to cut one rep short than limp through it and risk injury. This isn’t about punishing yourself. It’s about training smart.

That said, try to stick to the recovery plan. Whether it’s a 200-meter walk or 2-minute jog, the goal is to start the next interval with a little fatigue in your legs.

That’s how you train your body to push when it’s tired—because that’s exactly what racing feels like.

Over time, you can make your workouts harder without even touching the pace. How? By shaving down your rest. Going from a 400m walk to a 200m jog between reps is a sneaky way to level up without going all out.

Cool Down or You’ll Regret It Tomorrow

Once the hard work’s done, don’t just crash into the car and call it a day.

You need to cool down. I’m talking 5 to 10 minutes of easy jogging—either a few slow laps or a chill run around the block.

Why? Because your body needs help winding down. That cooldown jog helps flush out the junk in your legs and sets the tone for better recovery. Skip it, and you’ll likely feel like trash the next day.

Personally, I like stretching later in the evening—foam rolling the calves, quads, hammies. Nothing fancy, just a few minutes while watching Netflix. It’s those little habits that help you stay consistent long term.

And honestly, there’s something peaceful about jogging slowly around the track as the sun sets, feeling that mix of exhaustion and pride. That’s the stuff that keeps you coming back.

Don’t Let the Track Burn You Out

Let me be clear: track work is spicy. You don’t need to do it every other day to get faster.

For beginners, once a week is plenty. Maybe even once every two weeks if you’re just getting started or coming off an injury. More than that, and you’re asking for trouble—fatigue, burnout, injury, you name it.

And here’s a warning: don’t turn the track into your everyday route.

Easy runs and long runs should live on the roads or trails. Doing slow miles on a track isn’t just boring—it messes with your body. Tracks only curve one way, and running endless laps that direction can cause weird muscle imbalances over time.

Trust me, I’ve seen it happen.

Stick to using the track for what it’s good at—controlled, focused speedwork. That way, it stays fresh and exciting instead of becoming another mental drag.

Start Small, Build Slowly

You wouldn’t show up to the gym after months off and try to deadlift your bodyweight on Day One.

Same rules apply here.

If it’s your first time on the track, keep it simple. Something like 4x200m strides or a few 1-minute pickups is more than enough. Feel it out.

One of the coaches put it best: don’t start with 8x400m. That’s a shortcut to fatigue and frustration. Begin with 3x400m and full rests. Nail that. Then build week by week—4 reps, then 5, and so on.

That’s progressive overload—adding just enough to challenge your body without wrecking it. Maybe you go from 8x200m with full rest to 8x200m with half the recovery. Small tweaks like that stack up over time.

Bottom line: listen to your body. Soreness in your calves and quads? That’s normal. Sharp pain or being totally wrecked the next day? Back off.

Beginner Track Workouts That Actually Work

When I first stepped onto a track, I felt like a complete impostor.

Everyone around me looked like they knew exactly what they were doing.

Me?

I was just trying to survive the warm-up without gasping like a dying fish. But the track taught me some lessons real fast—one repeat at a time.

These workouts below are beginner-friendly, but that doesn’t mean easy. They’ll wake up your legs, push your lungs, and sharpen your form. Let’s dive in.

🔹 400m Repeats – A Solid Start

Try 4 to 6 × 400m at a strong, steady pace. Between each one, jog or walk 400m to catch your breath. Think of it like this: run one lap at about 80–90% effort, then take a full lap to recover—just don’t stop moving.

This was my first “real” interval workout. I remember doing just four reps and feeling like I’d conquered Everest. But it works. It teaches your body to handle pace without burning out. Over time, you can stack more reps or shave down the recovery.

🔹 200m Repeats – Speed That Doesn’t Break You

Not ready for full laps? Go half: 6 to 8 × 200m fast, with 200m walking or slow jogging between.

One turn, one straight—short and sharp. These are great for working on form: relaxed shoulders, fast feet. I like to tell runners to aim for around their 800m or mile race pace—hard but controlled.

They’re over in 40–60 seconds for most beginners. Honestly, they’re kind of fun. Like sprinting back in middle school before we started overthinking everything.

🟢 Coach’s tip: Run the straights, recover on the curve, or jog back to the start if you’re not on a full loop. Either way, don’t skip the recovery—speed without form is a recipe for pulled hamstrings.

🔹 100m Strides – Small But Mighty

Perfect for beginners or recovery days. On a standard track, run the straightaway (100m) at around 85–90% effort, then walk the curve. Do this 8 to 10 times.

This isn’t about going full send—it’s about quick turnover, clean form, and fluid movement. I like using strides at the end of an easy run or as a short, sharp standalone workout when time is tight.

🔹 Ladder Workout – Up & Down the Pain Scale

A ladder workout adds variety and keeps your brain engaged. Try this set:

200m – 400m – 800m – 400m – 200m, with a slow 200m or 400m jog after each.

That 800m in the middle? That’s your test. It’ll sting. But once you clear it, the rest feels like a victory lap.

If you’re new to track stuff, skip the 800m the first few times. Do a 200-400-400-200 setup instead.

🔹 Mile Repeats – The Big League Session

This one’s for advanced beginners aiming at longer races (think 10K or half marathon). Classic workout:

2 or 3 × 1600m (4 laps) at a “comfortably hard” effort—roughly your 10K race pace or a pace you could hold for 30–40 minutes straight. Recover with 1–2 laps of easy jogging between.

I still use this workout during base building. It’s not sexy. But it works. It teaches you how to hold pace without falling apart.

🔹 Fartlek on the Track – No Watch Needed

Don’t want to stress about splits? Do a fartlek session.

Try this: alternate hard/easy every lap for 15–20 minutes. Or go:

1 lap fast, 1 lap easy, 2 laps fast, 1 lap easy, 1 lap fast.

No fancy math. No exact times. Just effort and movement. It’s a great way to get comfortable on the track without overthinking it.

My Final Track Wisdom

Alright, runner. Before you head off and tackle the oval, here’s some real talk from a coach who’s spent years sweating it out and coaching others to do the same.

1. Show Up More Than You Show Off

I’ve seen this play out too many times: someone crushes one monster track session and then ghosts the oval for a month.

That’s not how progress works.

Want to get faster? Show up.

Even once a week. Even when you’re tired. Even when your reps are ugly. Because showing up—consistently—is how those tiny gains stack up into something big. I’ll take a year of “solid” over one day of “heroic” any time.

2. Make It Suck Less by Making It Fun

Track isn’t just about pain—it can be weirdly fun.

Some days, hitting your target time feels like hitting a jackpot. Other days, you’ll laugh at how slow your legs feel.

Either way, enjoy it. Try workouts that fire you up—maybe it’s the grind of 800s or the thrill of fast 200s. Celebrate small wins, even if it’s just feeling stronger on rep 6 than rep 2. That stuff matters.

3. Recover Like You Mean It

You don’t grow stronger from workouts—you grow from recovering after them.

Let that sink in.

So after you beat yourself up on the track, respect the rest.

Easy days? Actually make them easy. Fuel up, sleep well, and don’t skimp on water. Think of recovery not as skipping work, but as part of the work. That’s where the real fitness happens.

4. Park Your Ego at the Gate

Track workouts are not a competition unless you’re in a race.

If someone blows past you—good for them. Let them go. You’ve got your own mission.

And if you’re the one passing, don’t be a jerk about it. We’re all trying to get better.

I’ve had sessions where I was the slowest runner out there and others where I led every rep.

Neither meant much—what mattered was that I gave it my best that day. Stay humble. Be kind. Cheer for someone else between reps—you never know who needs it.

5. Adjust When You Need To

Not every track day will be magic. Some days your legs just don’t show up.

That’s fine. Modify. Cut a rep. Slow the pace. Come back next week.

The track doesn’t care—it’ll be waiting.

And if you’re feeling beast mode and everything’s clicking? Go ahead and push a little harder on your last rep. Just don’t overdo it. Learning when to push and when to pull back? That’s what separates smart runners from injured ones.

6. Build That Track Grit

The oval teaches a kind of toughness you can’t fake. When you’re gasping through rep 9 and still line up for 10? That’s character.

That grit carries into race day—and life.

The track is brutal, but it’s honest. It shows you exactly where you’re at, and if you keep showing up, it’ll show you how far you’ve come.

Now it’s your turn:

What’s your go-to track workout?

Have you ever had a breakthrough on the oval—or a meltdown?

Drop a comment and let’s talk track war stories.

The clock’s waiting. Let’s see what you’ve got.

Compression Pants for Running: Do They Really Help?

I Used to Laugh at Compression Pants — Now I Live in Them

I’ll be honest: back in the day, I used to side-eye guys in compression tights.

I figured they were either trying to look like superheroes or just copying elite runners they saw on Instagram.

I remember thinking,

“Why would anyone squeeze into those things unless they were racing Kipchoge?”

But like a lot of things in running, experience changes you.

Over the years — especially coaching newer runners and getting humbled on trails in Bali — I’ve come to see compression gear differently.

I’ve watched beginners finally enjoy pain-free runs, trail runners stay protected from the elements, and marathoners bounce back faster post-race… all thanks to a good pair of tights.

So here’s the truth — from someone who used to laugh and now owns more pairs than he wants to admit.

Let’s break it down.

So, Do Compression Pants Actually Help?

Look — they won’t make you a speed demon overnight.

But they can make the miles feel smoother.

The science backs it up: compression helps reduce muscle vibration and can delay that deep ache that creeps in during longer runs (source: VU.edu.au).

They’re also champs at fighting off thigh chafing (if you know, you know), and they’re surprisingly good at keeping you warm when the temperature drops — something I learned the hard way running through the chilly highlands here in Indonesia.

But maybe the biggest perk?

Recovery.

According to VU research, wearing compression gear after a hard run can speed up muscle recovery, reduce soreness, and improve blood flow.

That’s not hype — that’s data. One 2023 study showed that runners who wore compression for four hours post-run recovered faster and believed in the gear more after feeling the results.

I’ve had days when I finished a long run, showered, and immediately slipped into my compression pants. Sometimes, I even sleep in them after races — not sexy, but hey, it works.

Why Runners Actually Wear Compression Tights (Beyond Looking Fast)

Let’s go beyond the ads and break down what these things really do for runners:

🔹 Chafing Prevention

This is the big one.

Compression fabric hugs your skin like a second layer, so there’s no thigh-on-thigh crime mid-run.

A fellow runner on Reddit said it best: “I wear compression shorts because my thighs like to kiss — and it’s not cute after mile 5.”

I’ve coached beginners who ditched cotton shorts and finally made it through long runs rash-free. That alone makes compression gear worth trying.

🔹 Muscle Support & Less Jiggle

Compression pants hold everything in — which means less bounce, less wasted energy, and more stability.

There’s a fancy term for it: muscle oscillation. But all you need to know is this: your legs feel more “together,” especially when you’re tired.

Some runners even describe it like wearing a hug or weighted blanket on your legs. I’ve felt it on trails — especially on rocky terrain — where the tightness gives me better balance and awareness of each step.

🔹 Better Blood Flow = Longer Lasting Legs

Good compression gear helps push blood back up to your heart.

That means more oxygen to your muscles and less build-up of the junk that causes soreness.

It’s not some miracle drug — but the benefits show up on those back-to-back training days, when your legs aren’t totally trashed.

🔹 Warm When It’s Cold (And Cool Enough When It’s Not)

In cold or windy weather, compression pants trap just enough heat to keep your legs warm without turning into a sweat swamp.

I’ve done some long chilly runs in the mountains, and my compression tights were the only reason I didn’t turn into an ice sculpture.

Even better, some fabrics breathe enough that you can wear them in warm-ish weather without overheating. They’re like a smart shell: warm when needed, cool when it counts.

🔹 Recovery Game-Changer

This one’s personal.

I’ve had marathon days where every muscle in my legs screamed “retire.” I’d pull on compression tights after the race, and by the next morning, I was moving like a human again — not a zombie.

Multiple studies agree: compression tights used after a tough session can improve circulation and reduce muscle soreness. It’s not magic — it’s smart blood flow.

🔹 Mental Edge

Don’t underestimate this part.

When I slide into compression gear before a big run, I feel ready.

It’s the same reason some people have “lucky” race socks — it’s not just about performance, it’s about mindset.

One Reddit runner said compression pants made them “feel powerful.” Another said they made their butt look great — and honestly, if something makes you feel good before a run, that’s a win.

I Used to Scoff at Tights Too—Until They Saved My Legs

Let’s be honest—compression tights don’t exactly scream “hardcore runner” at first glance.

I used to roll my eyes at them too. Thought they were just overpriced spandex for people who wanted to look fast instead of get fast.

Back in the day, I’d pull on some beat-up basketball shorts and call it a day.

A few of my buddies did the same. At one of the clubs I trained with, anyone rocking full-length tights got teased—called ‘posers’ or told to save it for the yoga studio.

There’s this weird macho myth floating around—like real runners shouldn’t care about gear comfort.

And I’ll admit, part of me thought compression pants were all hype. Just another gimmick claiming to shave off seconds, boost performance, yada yada.

But then came two wake-up calls:

  1. My inner thighs started getting wrecked from long runs. Bloody chafing. Every. Single. Time.
  2. I stumbled across a Reddit post from a runner who said compression tights helped his legs “feel less beat up” on trail runs. Not a sales pitch. Just a regular guy sharing what worked for him.

Then I started paying attention.

Another guy said his tights felt like “a hug” for his legs—and that it even improved his mood. A few of my trail friends told me they swear by compression gear for better stability and support over rough terrain.

It took me a while, but the seed was planted.

One cold morning, I finally gave in.

Slid on a pair of tights under my shorts, just to keep my knees from freezing.

And holy crap. No wind burn. No thigh burn. No friction. Just a smooth, solid run that left me feeling way fresher than usual.

Did I suddenly run faster?

Nah. But I recovered quicker, ran again sooner, and didn’t have to limp around for two days. That’s a win in my book.

Now? I’m that guy. The coach who recommends compression tights—right after proper shoes. Because if they save your skin and keep you training longer, why not?

And if you’re still on the fence, trust me—I’ve been there. But if one run in tights could mean no chafing, less soreness, and a more comfortable grind… why not give it a go?


Trail Running in Compression Tights: Like Armor for Your Legs

Now, if you’re hitting the trails, compression tights go from helpful to hell yes territory.

Picture this: you’re dodging rocks, ducking under branches, and charging through overgrown paths. Your shins are magnets for nettles, thorns, and all kinds of trail trash.

I’ve run enough jungle races in Indonesia to know that one bad scratch can mess with your whole stride.

But when I wear compression tights, they act like a barrier—like trail armor. No more bloody scratches, itchy skin, or bug bites all over my calves.

One UK runner summed it up perfectly: compression tights “keep you warm and protect you from nettle attacks.” I couldn’t agree more.

Support-wise? They’ve got your back there too.

When I’m bombing down technical descents or grinding out a long ultra, my legs take a beating.

Compression tights help reduce that muscle shake—especially in the quads and calves. Less vibration = less damage = faster recovery. Simple math.

Personally, I double up: compression leggings and compression socks. That combo helps my legs feel steady, especially on gnarly descents and river crossings.

And let’s talk weather.

Out on exposed ridges or up in the mountains, the sun and wind can mess you up. Instead of constantly reapplying sunscreen that sweats off in five minutes, I’ll sometimes throw on a pair of UV-protective compression tights. Some of the better brands advertise UPF 50+—basically sunblock in fabric form.

I’ve also been caught in monsoon-level downpours during trail races. While everything else was soaked and freezing, my tights at least kept my legs from going numb.

Quick tip: If you’re running through bug-heavy zones or poison ivy territory, tuck those tights into your socks. Might look goofy, but it works.

Do Compression Tights Help Prevent Injuries?

Short answer: They won’t fix bad form—but they can help support your stride when things get rough.

Some compression tights, like the ones from CW-X, have built-in support bands that act like a gentle brace for your knees.

I’ve coached a few runners with IT band issues who swear by these on tough trail runs. They say it’s like someone’s holding their knees together on every downhill.

Even basic compression gear can help you stay more aware of your form when you’re dead tired. That little squeeze around the legs is a reminder to engage your muscles and stay sharp.

If you’re new to trail running—or just want to stay out there longer without wrecking your legs—compression tights are worth a shot.

Just don’t cheap out.

Flimsy pairs will rip the second they meet a thorn bush. I’ve torn more than one cheap pair before I learned to invest in gear that can take a beating.

Fit & Sizing: The Muscular Runner’s Struggle is Real

If you’ve got tree-trunk quads or calves that don’t fit into skinny jeans, welcome to the club.

One thing I’ve learned after coaching hundreds of runners—especially the more muscular ones—is that compression tights are hit or miss if the sizing’s off.

Too loose and you lose the point. Too tight and it feels like you’re being vacuum-sealed.

I’ve had runners come to me frustrated—“How do I find tights that actually fit both my thighs and my waist?”

Totally fair.

Most brands size based on some imaginary runner with noodle legs and a flat butt. That’s not all of us.

Big Legs, Big Problems

If you’ve built your legs through years of soccer, cycling, or just happen to be genetically blessed (or cursed) with meaty quads, then you know the deal.

I remember one guy on Reddit joking, “My thighs are still too big,” when trying on compression shorts. Felt that.

Here’s what I tell runners with bulk: Look for brands that label their gear “athletic fit” or use 4-way stretch.

That extra give can save you from feeling like you’re stuffing a Thanksgiving turkey into lycra. Brands like CW-X actually recommend measuring both your waist and the thickest part of your thigh—finally, someone gets it.

Should You Size Up?

Tempting, I know.

But here’s the catch: size up too far and the gear loses its compression power. Then it’s just tight pajama pants.

A good pair of tights should hug your body, not strangle it.

Try squatting, high-knees, even a few strides in place when trying them on. If the waistband rolls down or the seams dig into your skin? Nope. Try again.

I once bought a pair that felt great until I ran in them—halfway through my tempo run, they were halfway down my butt. Lesson learned.

Fit Hacks for Muscular Runners

  • Drawstring waistbands help if you need to size up for your thighs but still want the tights to stay up.
  • Stick with running brands like Nike, 2XU, or Under Armour—they usually leave more room in the legs.
  • Avoid cheap knock-offs. I’ve seen runners get chafed raw from low-quality seams. One guy told me every off-brand tight he tried gave him thigh burn, but his Nike ones? No issues, ever.
  • Flat seams and smooth materials make a huge difference—especially for runners with thick legs that rub together.

What About Length?

Tall runners often get the short end (literally). I’ve had to go up a size just to avoid the ankle peekaboo.

Some brands offer “tall” lengths—worth hunting down. If not, try ¾-length tights—they hit below the knee and dodge that awkward mid-calf look.

On the flip side, shorter runners may find tights bunching at the ankle. No shame in rocking calf sleeves or even trimming them if needed.

Quick PSA: Ditch the Underwear

Please.

Compression tights are made to be worn commando.

That’s why they have that gusset built in—it’s there to reduce seams and prevent chafing. I’ve seen folks complain about discomfort, only to find out they were wearing boxer briefs underneath.

Just don’t.

If modesty’s a thing, throw a pair of shorts on top like most guys do.

Look, if your first pair of tights feels like medieval torture gear, don’t panic.

It’s trial and error.

Use sizing charts, read reviews, and listen to other runners built like you. When you find that perfect pair, you’ll know it. You’ll move better, feel supported—not squeezed—and most importantly, you won’t be thinking about your pants mid-run.

Do Compression Tights Really Work? Let’s Keep it Honest

I’ve been asked this a dozen times: “Do compression tights actually do anything, or are they just expensive yoga pants for runners?”

Let’s cut through the hype. I looked at the science, tested it myself, and here’s what really matters.

🔹 They Won’t Make You Faster… But They Might Keep You Running Stronger

Studies—including one from the Journal of Strength & Conditioning Research—show that compression tights won’t improve your VO₂ max, top-end speed, or race time.

So no, wearing tights won’t turn you into Kipchoge overnight. But—and this is key—they reduce muscle vibration when your foot strikes. That bounce your muscles take with every step? Compression limits it.

I notice it most on long runs. Less wobble = less post-run soreness. When I wear tights on 20K+ runs, I feel fresher the next day. That’s a win in my book.

🔹 Recovery is Where They Really Earn Their Keep

This is the sweet spot. Compression helps increase blood flow and reduce swelling, according to multiple studies. One even found runners who wore them for 4 hours post-run had less soreness and faster strength recovery.

I’ve done this after hill repeats, and the next morning, I’m not limping like a zombie. That recovery boost makes it easier to stay consistent—and that’s how you actually get better.

🔹 They Sharpen Your Awareness

There’s some science suggesting compression might improve proprioception—that fancy word for “knowing where your limbs are.” Basically, that snug squeeze helps you stay in tune with your form when you’re tired.

Late in a long run, when my mechanics start to wobble, the tight wrap on my thighs reminds me to straighten up and not shuffle.

🔹 And Yeah, They Boost Your Mindset Too

Let’s be real—half of running is mental. If tights make you feel like a serious athlete, that’s not placebo—it’s focus.

Wearing mine post-workout signals to my brain, “I’m in recovery mode now. Let’s bounce back stronger.” That kind of mindset keeps me sharp even when the legs are toast.

Features That Actually Matter (From a Runner Who’s Been There)

Not all compression tights are created equal—and trust me, I’ve had enough pairs ride down mid-run to know the difference.

So when you’re shopping for a new pair of compression jogging pants or tights, don’t just go by the brand or looks.

Here’s what actually matters, from one runner to another:

Compression Level: The Squeeze That Works With You

This is what you’re paying for. Some brands slap a number on it—like 15-25 mmHg—and others just call it “medium” or “firm.”

For running, that sweet spot is usually somewhere in that 15–25 mmHg range: snug enough to support, but not so tight it feels like your legs are in a blood pressure cuff.

Bonus if the tights are graduated compression (tighter near the ankle, looser as it goes up). That helps with blood flow. Most quality running tights do this by default, but it’s worth double-checking.

Real-world tip: I once ran a half in a pair of “fashion” tights that looked the part but gave me zero support. Lesson learned—compression matters, and flimsy tights are a waste of time (and chafe magnets).

Fabric & Breathability: Don’t Let Sweat Win

You want fabrics that work as hard as you do. Think moisture-wicking and quick-drying.

Most solid pairs are a nylon-spandex blend. If you train in heat like I do here in Bali, lightweight, breathable materials are your best friend—especially around sweat zones like behind the knees and lower back.

Running in the cold? Go for thermal tights with a brushed interior.

Also, high-quality fabric = durability.

Cheap tights thin out fast or tear on trails. Look for anti-odor or antimicrobial treatments too—because nobody wants to smell like a gym sock by mile five.

I used to buy whatever was on sale… until I ripped a hole sliding over a rock during a trail run.

Pay for durability upfront—it’s cheaper than a busted run and bloodied knees.

Waistband & Fit: The War Against Sag

A tight that fits well stays up, period. I swear by a wide waistband that hugs the midsection without cutting into it.

And a drawstring?

Absolute game-changer. Without it, you’re one sprint away from mooning traffic.

Check for flatlock seams, too—they cut down on chafing.

I had a pricey pair from 2XU with a drawstring that still slipped mid-run. The waistband looked great but didn’t hold. I spent most of the run yanking them back up.

Not fun. Always check reviews for fit complaints—if people mention “constant adjusting,” skip ‘em.

Pockets: Because We’ve All Got Stuff

These days, pockets are non-negotiable—especially if you run without a vest.

Some tights give you a tiny zipper pocket in the back waistband (barely fits a key), others add side thigh pockets that hold phones, gels, and even a soft flask if you jam it just right.

What I look for?

If I’m trail running, I want easy-access side pockets for snacks or my phone. I’ve even tried some women’s compression tights just because the pockets are better designed. No shame—go with what works.

If you’re the minimalist type, you might be okay with a key pocket. But if you’re logging long miles or hate running with a belt, aim for a pair with real storage.

Length & Cut: Know Your Preferences

You’ve got options: full-length, ¾ capris, and shorts.

Full-length gives you the most coverage and muscle support.

Capris free up the lower leg—great for warmer days or gym work.

Shorts are all about anti-chafe and thigh support, with less bulk.

Some folks even layer tights under running shorts for modesty or to get extra pockets. Totally fair game.

Also, pay attention to the cut—men’s, women’s, or unisex. Women’s tights often have higher waists and more shape in the hips; men’s might offer more room up front. Try different ones and don’t worry about the label—just find what fits you best.

Other Little Features That Make a Big Difference

  • Reflective strips: If you run at dawn or dusk, you need to be seen. Reflective logos or 360° detailing can save your life.
  • Ankle zippers: Old-school, but still awesome if you hate wrestling sweaty tights off post-run.
  • Reinforced panels: Extra knee or rear fabric? Great for trail runners or folks who want durability.
  • Crotch lining or dual-layer panels: Avoids the dreaded see-through squat test. (Please. We’ve all seen it happen.)
  • UV protection: If you run under strong sun, fabrics with a UPF rating are a great bonus.
  • Style and color: Black is classic, but if a loud pattern gets you fired up to run—go for it. I’ve got a neon pair I save for weekend group runs. They always start conversations, and honestly, they make me smile.

Bottom Line: Know What You Need

Before you buy, ask yourself:

  • Do I need pockets or not?
  • Is sliding down a dealbreaker?
  • What’s my climate like?
  • Will I use these mostly for trails or road?

A trail runner in rainy Oregon needs something different than a Florida road racer.

Once you find the pair that hits your sweet spot—stays up, supports well, fits your needs, doesn’t annoy you mid-run—don’t let go.

Black Toenails from Running: Causes, Treatment, and How I Learned to Keep My Feet Intact

black toenail from running

I’ll never forget the first time I lost a toenail.

It was after a long, sweaty 12-miler in the middle of summer.

I peeled off my sock and there it was: my big toenail, black as oil, throbbing like it had its own pulse.

Blood in the toe box.

Sock ruined.

Nail eventually fell off.

And here’s the kicker—I knew I should’ve trimmed my nails the night before. Big mistake.

But hey, I was tired.

Figured it could wait.

It couldn’t.

At the time, I weirdly wore it like a badge of honor. “I’m a real runner now,” I thought. Like a lost toenail was some war trophy.

Turns out, it was just a sign I was being careless.

Since then, I’ve heard the same story from all types of runners—weekend warriors, 5K newbies, ultra vets.

Let’s dive deeper into this annoying but not so dangerous running ailment.

What Is Runner’s Toe, Anyway?

Here’s the deal. That black nail? It’s basically a bruise under the toenail—called a subungual hematoma if you want the science.

Most runners call it “runner’s toe.”

It happens when your toe keeps banging against the front or top of your shoe, over and over.

Every footstrike adds up, and those little hits break tiny blood vessels under the nail.

The blood gets trapped. That’s the dark color you see—red, purple, black.

Imagine gently tapping your toenail with a hammer 10,000 times.

Eventually, it’s gonna protest.

Runner’s toe is super common if you’re doing long runs, downhill work, or trail miles where your foot’s shifting around a lot.

The big toe and second toe usually take the beating, especially if they’re the longest.

Good news: It’s usually not serious. Just ugly and annoying.

The nail might hurt for a bit, change colors like a bad bruise, maybe fall off. Then it grows back. Slowly.

But here’s the catch—if you ignore it and let bacteria sneak under that loose nail in a hot, sweaty shoe? Now we’re talking infection territory.

That’s where things can get nasty.

Most of the time, though, podiatrists will tell you it “looks worse than it is.”

And I agree—unless you let it fester. Then you’ve got problems.

Why Runners Get Black Toenails

Let’s cut the fluff and get into what’s actually causing your toe to turn into a horror movie scene.

1. Shoes That Don’t Fit Right

This is the big one. And 9 out of 10 times, it’s the reason your toe’s taking a beating.

Too tight? Your toes are getting slammed into the front of the shoe every time you land.

Too loose? Your foot slides forward and still smacks the front.

Either way—impact city.

When I got my first black nail, I realized I was wearing the same size in my running shoes as my casual sneakers.

Not a good idea.

Running shoes need room—your feet swell, your toes need wiggle space.

Rule of thumb (literally): you should have a thumb’s width of space between your longest toe and the front of the shoe.

And the toe box should be roomy enough that your toes aren’t pinched from the sides.

Oh, and don’t forget heel lockdown.

If the back of the shoe is loose, your whole foot shifts forward on every downhill. Boom—toe slam.

When I got into running, I used to suffer from constant blood blisters under my big toes, especially after a long run. But when I finally sized up a full shoe size and—no surprise—the problem disappeared.

Some brands are better for toe space too.

Altra, for example, is popular among trail and ultra folks because the foot-shaped toe box gives your toes room to breathe.

No more cramming them into a pointy wedge.

2. Dead Shoes That Should’ve Been Retired

Even if your shoes fit great when new, they don’t stay that way forever.

Old shoes lose their shape, cushioning, and internal structure.

That includes the toe bumper up front. If that gets crushed down, there’s less padding between your nail and the outside world.

If your shoe’s got 400+ miles on it, the fit might’ve changed just enough to start causing problems—especially on longer runs.

3. Downhills + Overstriding = Toenail Carnage

If you’ve ever finished a hilly race and peeled off your socks to find one of your toenails black or halfway gone… welcome to the club. Downhill running is one of the fastest ways to destroy your toenails.

Here’s why:

Every step downhill, gravity is doing its thing—sliding your foot forward in your shoe and jamming your toes into the front like battering rams.

And if your form breaks down and you start overstriding (landing too far out front), you’re basically hitting the brakes with every stride and driving your nails into the shoe over and over.

One podiatrist from Cleveland Clinic straight-up said runner’s toe is caused by your toenail “repeatedly and forcefully” hitting the shoe. And guess what ramps that up? Descents.

4. High Mileage = More Chances to Wreck Your Nails

You don’t need to be running mountains to mess up your toenails—sometimes, it’s just the sheer mileage that does it.

More miles = more steps = more mini toe-bashes.

A runner-doc once told me: “You probably won’t get black toenails running 10 miles a week. But start hitting 40, 50, 60 miles? It’s almost a rite of passage.”

Why? At higher mileage, your feet swell.

Your shoes stay moist.

Your toes take thousands more micro-hits.

That’s a recipe for bruised nails—especially if your shoes are even slightly tight or your socks don’t manage moisture well.

In fact, research shows that running 30–40+ miles per week increases your risk for various injuries.

The study didn’t zero in on toenails, but I can tell you from coaching experience: every marathon build-up, someone in the group starts complaining about a black nail.

It’s usually the first clue we need to check their footwear.

The warning sign: one or two black nails popping up after mileage spikes.

Not always a dealbreaker, but definitely a sign to check your shoes, socks, and stride.

5. Cotton Socks & Bad Shoes 

You could have perfect form and a smooth stride, but if your socks and shoes suck, your toes are still in trouble.

Let’s start with socks: if you’re still running in old-school cotton socks, we need to talk.

Cotton holds moisture like a sponge.

That wet environment softens skin and makes your feet slide more inside your shoe—add in the friction, and you’ve got a toe-pounding mess.

Plus, soggy feet = blisters = more toe trauma.

Go for moisture-wicking socks—synthetic blends or merino wool. These keep your feet dry and reduce slippage.

And don’t assume thicker is better. Thick socks in a snug shoe might crowd your toes even more.

Always test your race-day shoes with your race-day socks.

Now the shoes: worn-out midsoles, too-small toe boxes, or stiff non-running footwear are all red flags.

6. Long Toenails: The Silent Toe Killer

Let me be real with you—if you’re out here running with long toenails, you’re asking for it.

I’ve done it. And paid the price.

We’re talking black nails, bloody socks, and pain that makes every step feel like your toe’s in a vise.

When your toenails grow past the tip of your toe, they don’t just look gnarly—they become weapons.

Every step you take, that nail jams into the front of your shoe, and it doesn’t take long before your nail starts to lift, bleed underneath, and turn into a full-blown horror scene.

Here’s what I’ve learned: keep your toenails trimmed flush with the end of your toe. Not freakishly short, but short enough that your actual toe—not the nail—is taking the hit inside the shoe. That one little detail can save you from a whole world of pain.

And yeah, I know it sounds a little bougie, but nowadays I wear by regular pedicures —just to keep the nails in check. You don’t need to hit a spa, but grab those clippers once a week.

Straight across trim, no crazy curves at the corners (unless you like dealing with ingrown nails). And don’t forget to file any sharp bits. I’ve skipped a trim before a long run and ended up with a black nail overnight. Never again.

Oh—and bonus: clean, short nails mean fewer foot funk problems too. Fungal infections love long, dirty nails. Just sayin’.

Spotting Runner’s Toe Before It Gets Ugly

Black toenails don’t start out dramatic. It sneaks up on you.

One day your toe’s fine, the next it looks like a crime scene.

That Creepy Color Change

The first red flag? Discoloration.

I’m talking deep red, dark purple, greenish-black… not normal toe stuff.

This is blood pooling under the nail—what docs call a subungual hematoma. At first it might just look like a dark smudge. Then it grows. If you’ve ever had one, you know the dread.

The color won’t fade like a regular bruise because it’s stuck under the nail. And no, pressing on it won’t turn it white—it’s not on the skin surface. That’s one way to know it’s the real deal.

Now, if you see black or brown streaks in your nail and you haven’t whacked your toe or done a long run recently? Get it checked. It’s rare, but melanoma can show up in the nail.

But if you just finished a 10-miler and your toe turned black? Yeah, it’s almost always a running war wound.

That Nasty Pressure Throb

Sometimes you don’t even feel it during your run. But a few hours later? That nail starts to throb like it’s got its own pulse.

According to the American Osteopathic College of Dermatology, that pain is from blood pooling and creating pressure under the nail.

Tap it gently. If you wince? You’ve got a problem brewing under there.

Some runners can walk it off.

Others can barely get their shoe back on.

Pain peaks in the first 24–48 hours, then usually eases off—unless the pressure builds up so bad the nail lifts.

That’s when it gets gnarly.

Nail Lifting (AKA: The Gross Part)

If the damage is deep enough, your nail can start to lift off the bed.

It might not be right away—you’ll see signs over time. Like the edge of the nail separating, or a bubble forming underneath it.

WebMD says if there’s enough blood trapped under there, the whole nail might eventually fall off.

I’ve had this happen, and it’s both disgusting and weirdly satisfying (don’t judge). It usually takes a few weeks, once new nail starts growing underneath.

If you notice the black spot covers most of the nail, or you can wiggle the nail and it feels loose, don’t rip it off.

Seriously.

I know it’s tempting.

But tearing it can scar the nail bed—and the new nail might grow back thick, warped, or not at all.

Let it come off naturally, or ask a doc to trim it if it’s just barely hanging on.

Signs of Infection: When That Black Toenail Goes Rogue

So, you’ve got a black toenail. Welcome to the club.

Most of the time, it’s just gross-looking and annoying.

But sometimes? It turns into something a little more serious.

If bacteria sneak under the nail—especially if it’s partially lifted or you tried a DIY drain job with a safety pin and a prayer—you’re at risk of infection.

That’s when runner’s toe stops being a badge of honor and starts being a problem.

Here’s what to look out for:

  • Redness and swelling that gets worse, not better
  • Throbbing pain that cranks up a few days later
  • Warmth, ooze, or pus under or around the nail
  • That gross, sour-smelling funk (you’ll know it)
  • In bad cases? Fever or red streaks up your foot—rare, but serious

Can You Run with a Black Toenail?

Short answer: Yeah, usually.

Long answer: It depends on how bad it hurts.

If it’s just a little sore or ugly-looking but not really affecting your stride, you’re probably good to go.

Dr. Jordan Metzl (sports doc who’s seen it all) says, “If it doesn’t hurt too much, you should be fine to run.”

And I agree. I’ve run with more black toenails than I can count. A little tape, a thick sock, maybe a toe sleeve—and I’m out the door.

Pro tip: Trim the nail short so it doesn’t snag your sock. And if it’s tender? Pad it. I’ve even cut a hole in the top of an old shoe mid-race just to give my toe some breathing room. Ultra-runners do it all the time.

How to Treat a Black Toenail from Running

So you’ve got one. Now what?

When You Don’t Need a Doctor

  • Nail’s just dark? No biggie. It’ll fall off eventually, and a new one will grow.
  • Mild pain? Ice it, tape it, and carry on.

When to See a Doctor

Sometimes you gotta wave the white flag and let a pro step in:

  • Throbbing pain that won’t quit: If your toe feels like it’s pulsing with each heartbeat, it might need to be drained. That blood trapped under the nail is building pressure. Doctors do a quick drain (called trephination), and relief is almost instant.
  • Signs of infection: Red, hot, swollen, leaking pus? That’s serious. You’ll need antibiotics and maybe the nail removed.
  • Nail’s 75% black and ballooning: That much trapped blood usually means a doc should take a look. You might save the nail—or not—but the pain’s gotta go.
  • Not sure it’s just trauma: If you didn’t stub it or jam it during a long downhill and one random nail turns black, it’s worth letting a doctor rule out other stuff like fungal infection—or, rarely, something worse like melanoma.
  • If you have diabetes or circulatory issues: Any foot injury is a bigger deal. Don’t wait—get seen.

When you do see a doc, they’ll likely poke a tiny sterile hole to drain the blood. If the nail is dangling, they may remove it cleanly so a new one can grow in straight.

They might slap on an antibiotic ointment or give you pills if it’s infected. Quick, easy, and worth it if you’re in legit pain.

Home Treatment for Mild Black Toenails 

Let’s be real—if you’ve been running long enough, black toenails are almost a badge of honor. Ugly? Yeah. Painful? Sometimes. But scary? Usually not.

If the pain’s minor and the nail just looks bruised or a bit weird, good news: you probably don’t need to panic or hit the doc’s office.

Most mild cases are easy to treat from your own bathroom floor—just be smart and don’t rush it.

Here’s what to do:

Rest & Put Your Feet Up

Give that toe a break. Take a couple of days off from pounding pavement—especially if it hurts to walk.

Elevating your foot when you’re chilling can help kill the throbbing. Less blood rushing down = less pressure = less pain.

Ice It (But Don’t Go Overboard)

The first day or two, ice can be your best buddy.

Wrap some in a towel or use a cold can of soda (seriously, it works), and give that toe 15–20 minutes of chill time. Don’t slap ice directly on bare skin unless you want frostbite to go with your bruised nail.

Painkillers, If Needed

Ibuprofen’s great for knocking down swelling and pain. Acetaminophen works too if you’re just trying to dull the ache. Use whatever you’d take for a sore back or a headache—but follow the directions, yeah?

Keep It Clean & Dry

This isn’t the time for sweaty socks and dirty locker room floors.

Wash the foot daily, especially around the nail. If the nail’s lifted a bit, squirt some antiseptic (like iodine or alcohol) around the edges to keep the funk out. On your runs, cover it with a bandage, then let it air out after.

Don’t Torture the Nail More

Loose nail? Don’t yank it. Seriously. Trim off any bits that are totally unattached so they don’t snag, but let the rest ride.

Wear open-toe sandals or shoes with plenty of toe room—your foot deserves some breathing space right now.

Usually, the pain fades after a couple of days, and you’ll be fine to lace up again soon.

The nail might look gnarly for weeks (or months), but as long as there’s no pain or infection, you’re good to train again.

Just keep tabs on it. If something starts feeling worse instead of better, don’t tough-guy it—get it looked at.

DIY Drainage (AKA the Sketchy Part—Be Careful)

Alright, this next bit? It’s not for the faint of heart. Or anyone squeamish. But hey, runners are a gritty bunch.

Sometimes the pressure under a black toenail builds up like a balloon.

If you can’t get to a doc, and it’s really painful—like pulsing, can’t-sleep kind of pain—some runners drain it themselves. I’ve done it.

Others have too.

Doesn’t mean you should. Infection’s a real risk here. But if you’re gonna do it, here’s how to not completely screw it up:

  • Sterilize your weapon of choice. Needle, safety pin, unfolded paperclip—whatever you use, burn it till it’s red-hot or soak it in alcohol. If it’s not sterile, forget it.
  • Find the darkest spot. You’re going through the nail plate—not the skin below. That’s key. You want to pierce the area where the blood’s pooled.
  • Go slow. Use the heated paperclip to burn through the nail (yep, that’s a thing), or twist the needle slowly until… POP. Blood might start oozing out. Could be a little, could be a horror show. Either way, once the pressure’s gone, the relief is often instant.
  • Clean it up. Press gently to drain the rest, wipe with sterile gauze, then hit it with antiseptic. Bandage it and keep it wrapped for a few days. Change that dressing daily, and don’t ignore signs of infection (redness, pus, nasty smell).
  • Respect the aftermath. You just made a hole in your body, so treat it like one. Keep it clean, cover it up for runs, and don’t expect miracles. That nail’s probably still gonna fall off. You just gave it a head start.

And for the love of feet, don’t use a power drill. Someone once told me they tried that. Don’t be that guy.

What Happens Next? The Long Road to Normal (Sorta)

Once the pain’s under control and there’s no infection, your next question is probably: “What now?” Well, the ugly truth is… the nail’s probably toast.

Nail Fall-Off Timeline: 1–3 Weeks (Give or Take)

If the bruise under the nail was big, the connection at the base is likely shot.

Within a week or two, you’ll notice it loosening—maybe catches on socks, maybe starts to lift. Sometimes, a new nail starts growing underneath and slowly pushes the old one off.

I’ve had one take a month to finally pop. Another one bailed after two weeks. Everyone’s feet write their own story.

Rule of thumb: Don’t rip it. If it wants to leave, it’ll leave. Until then, keep it clean, tape it down during runs, and trim any snags.

But What If It Stays Put?

Lucky you.

If the bruise was small or shallow, the nail might not fall off at all—it’ll just grow out over time.

You’ll watch that black spot move up the nail month by month like some kind of slow-motion scar.

Eventually, you’ll clip it away and be done with it. Best-case scenario, honestly.

New Toenail? Don’t Hold Your Breath. 

Alright, real talk — toenails grow slower than a long run with dead legs. If you’ve ever lost a toenail (hi, marathon training), you already know: it’s not coming back anytime soon.

We’re talking 6 to 18 months for a full toenail regrowth.

Yeah, you read that right — a year or more for the big toe. Smaller toes are a bit quicker, but still slow.

Fingernails? 4 to 6 months.

Toes? Grab a snack. It’s a long ride.

I lost my big toenail after Mantra 166 Trail race in East Java, and it took close to 8-9 months before it looked like a toenail again — and not some zombie horror prop.

While your body’s working behind the scenes to rebuild it, you’ll notice some changes: the skin underneath (the nail bed) starts to thicken and toughen up.

That’s your body throwing down some natural armor.

When the nail starts growing back, it might be thinner, ridged, or even look a little off. Don’t panic — that’s normal. It strengthens up over a few trim cycles.

Sometimes It Grows Back… Funky

Let’s be honest — that new nail might look like it came back from war. It’s not always pretty. After trauma, it’s pretty common for the first regrowth to be:

  • Thicker
  • Bumpier
  • Curved weirdly

If you yanked the nail off too aggressively or wrecked the nail matrix (the growth zone), you might have a permanent ridge or odd shape.

Dr. Botek says tearing a nail can scar the nail bed, and yeah — the nail may never grow back exactly the same.

Been there. After one nasty subungual hematoma (that’s the gross blood blister under the nail), my toenail came back like it had armor plating. Stayed that way for a year, then finally chilled out.

Quick PSA: Keep the area clean while it’s regrowing. Fungal infections love damp, damaged nail beds — and they’ll leave your new nail thick, yellow, and gnarly.

Some of us just accept the gnarly. If your toenails look like they’ve been through combat, you’re not alone. Calluses under the nail, weird edges — they’re mostly cosmetic. If it bugs you, a doc can grind it down or treat for fungus. But if it’s not hurting? Just roll with it.

Dean Karnazes (yep, the ultrarunning legend) once said:

“Toenails are overrated.”

He’s not wrong.

No Toenail? You Can Still Run

This might surprise you — you don’t actually need a toenail to run. I’ve run plenty of miles with nothing on the big toe but tough skin. Once it doesn’t hurt, you’re good to go.

Some runners even have chronic toe issues and choose to get the nail removed permanently. Extreme? Maybe. But if that nail keeps falling off every race season, I get it.

Point is — don’t obsess. Your body knows what it’s doing. That new nail will grow in on its own schedule. All you’ve gotta do is protect it, keep your shoes dialed in, and be patient.

Final Word from Coach Dack: Black Toenails Ain’t a Badge

After pounding pavement for over 15 years — and losing more toenails than I care to admit — I’ve finally stopped treating black toenails like battle medals. Yeah, I used to think they meant I was tough. “Look at me, real runner stuff!” But truth is? They’re not a badge. They’re a signal. And usually, they’re your feet yelling, “Yo! Something’s off!”

Here’s the real talk: black toenails are preventable. And no, I’m not saying you’re soft if you get one. It happens. But don’t wear it like it’s something to celebrate either. Like I tell my runners all the time — pain isn’t proof of progress. It’s feedback. And if your nail turns purple and dies? That’s feedback you can’t ignore.

Maybe your shoes are too tight. Maybe you’re bombing down hills with sloppy form. Or maybe those toenails are long enough to carve a turkey. Whatever the reason, that little mess under your sock is a coachable moment.

What to Do Instead? Run Smart, Not Bloody

Want to keep your toenails? Cool — then here’s what you do:

  • Size up your shoes: You want enough toe room, especially for downhills.
  • Trim your nails: Don’t let ‘em dig in.
  • Sock game matters: Look for blister-free, sweat-wicking socks that don’t bunch.
  • Fix your downhill form: Lean slightly forward, keep your cadence up, and control the descent.

When you do that stuff right, your toenails stay pink and boring — just how we like ’em.

If You’ve Got One Now…

Got a black nail right now? First off — respect. You earned that gnarliness. It’ll fall off eventually, and yeah, it’ll look gross for a bit. But you’ll live. Just don’t let it happen again if you can help it. Learn from it. Adjust.

Use it as part of your runner war stories:
“Remember that race where my nail came off at mile 12 and I kept going?”

Classic. Just… aim for it to be the last time you tell that story firsthand.

Got a Toenail Tale? Let’s Hear It.

Look, runners are a strange and resilient tribe. If you’ve got a horror photo, a clever hack, or a toenail prevention trick that saved your soles — drop it in. I’ve heard everything from duct tape wraps to silicone toe caps and even DIY toenail rituals worthy of a garage horror movie.

We share this stuff not to brag about pain — but to stay in the game longer. Stronger. Smarter.

Wrap It Up: Keep the Toenails, Skip the Drama

I get it — losing a toenail can feel like part of the runner rite of passage. But the truth is, your best runs happen when your feet aren’t screaming at you. Trust me. It’s way more hardcore to line up healthy and ready than limping through with bandaged toes and bloodied socks.

Take care of your feet. Stay one step ahead. And remember, toenails might be overrated… but not having to explain your missing one every time you wear sandals? That’s the real win.

Keep running strong — and may your toenails stay boring as hell.