Bruised Toenail from Running (Runner’s Toe): Causes, Treatment & Prevention

Bruised Toenail From Running

Let Me Paint You a Picture

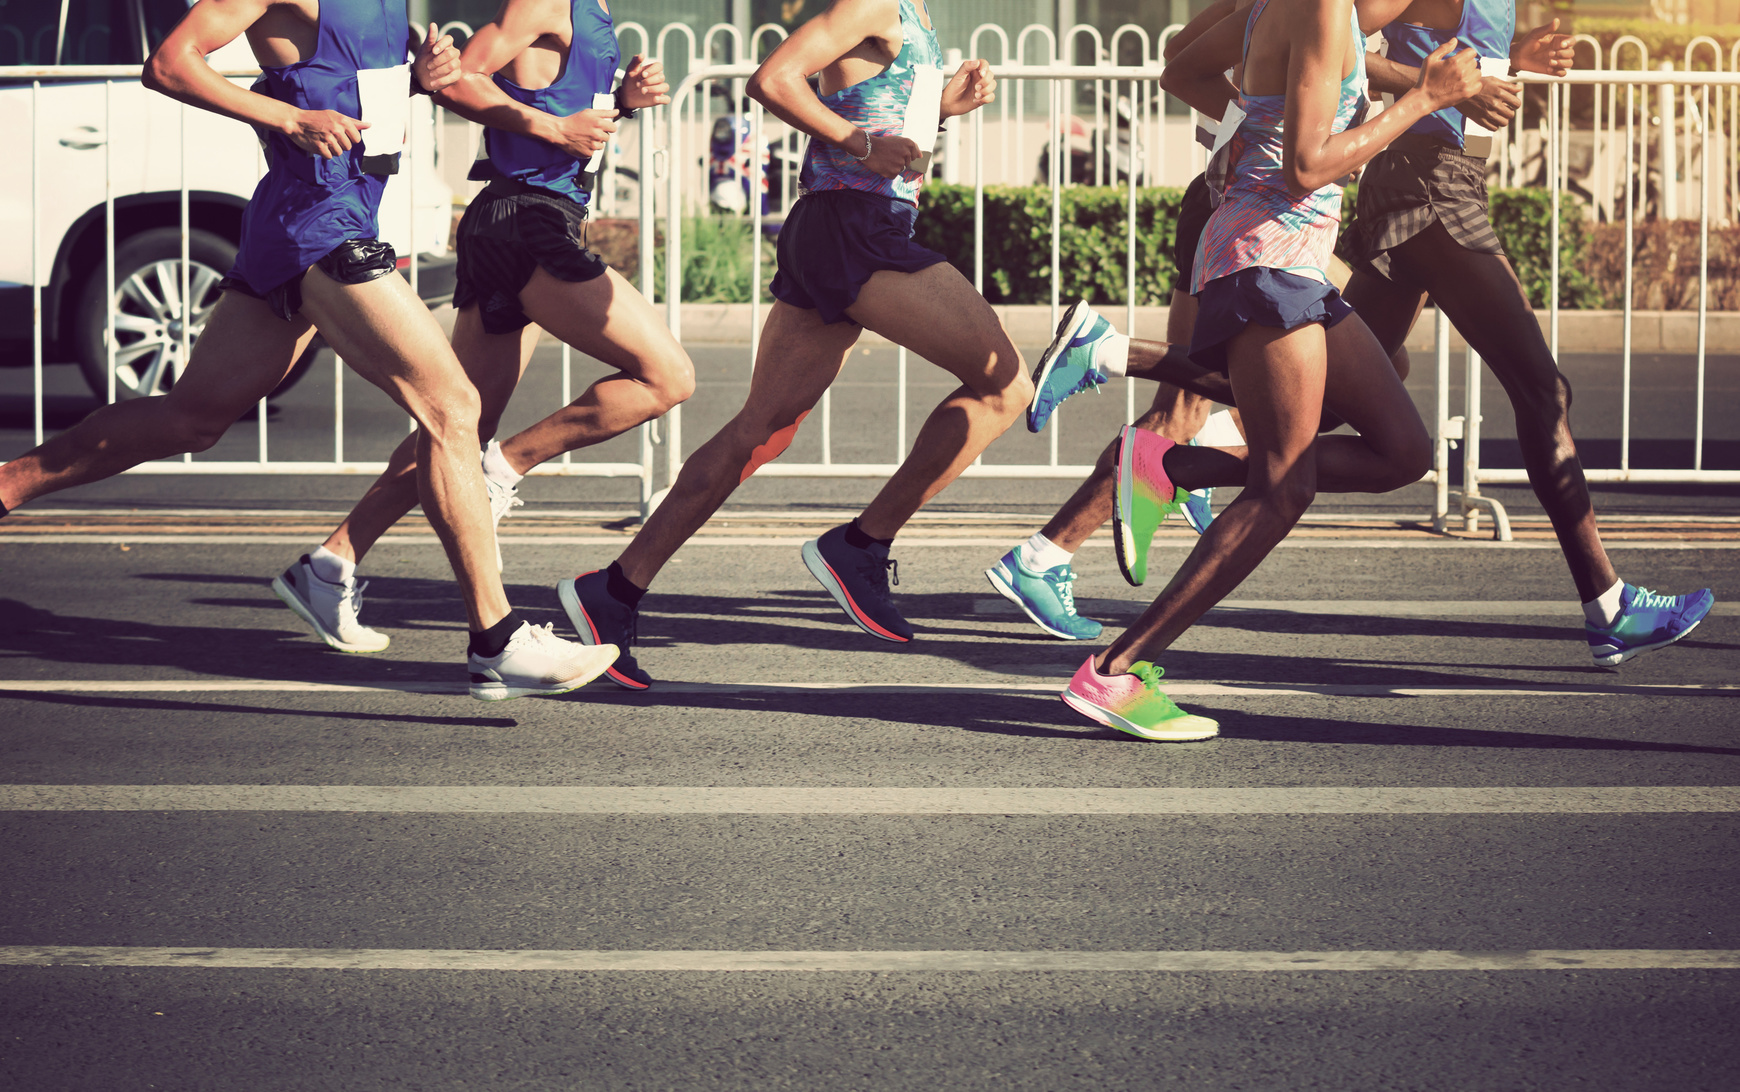
End of a Batur Trail race.

A 30K adventure on volcanic rocks and sandy descents.

Legs trashed.

Quads fried. That final descent into Toya Devasya (the famous hot sprint resort)? A quad-melting, toe-slamming, soul-crushing drop that went on forever.

I could feel my big toe crashing into the front of my shoe on every downhill step.

But I kept pushing. Because, you know—pain is just part of the game, right?

Wrong.

I crossed the finish line, sat down in a fog, peeled off my sock… and there it was. My right big toenail was jet-black, throbbing, and barely hanging on.

A few days later, it popped off completely. The nail bed underneath looked like raw meat. And suddenly the whole “runner’s badge of honor” thing didn’t feel so cool.

That moment hit me hard—not just the pain, but the realization.

I had let this happen. I used to laugh about bruised toenails, even saw them as proof I was putting in serious work.

But that missing toenail? That was a warning sign I’d ignored. A toe-sized red flag waving in my face.

I’ve coached a lot of runners since, and here’s the truth: bruised or black toenails aren’t a badge of toughness—they’re a sign something’s wrong.

And the good news? You can almost always prevent it.

Let’s dig into what’s really going on with runner’s toenail—and how to fix it before your next race leaves you minus a nail.

What Is Runner’s Toenail, Really?

Runner’s toe (a.k.a. jogger’s toe, black toenail, the gross thing you keep hiding in sandals) is officially called a subungual hematoma.

Translation? Blood pooling under the nail from busted capillaries due to repetitive trauma.

That blood has nowhere to go, so it builds up and turns the nail dark—blue, purple, black.

The pressure can make it feel tight, sore, even throbbing.

Sometimes it’s no big deal. Sometimes it hurts like hell. If enough blood gets in there, the nail might loosen, lift off, and eventually fall off.

It’s not usually dangerous—but it is your body saying: “Hey, stop smashing me.”

Most commonly? It hits your big toe or second toe—they’re usually the longest, and they take the brunt of the shoe contact.

And while a lot of runners shrug it off (been there), it’s worth paying attention. If it keeps happening, it’s not just cosmetic—it’s a mechanical issue.

Can Running Really Mess Up Your Toenails?

Yep. And not just ultramarathons. Any distance, any surface—if the conditions are right (or wrong), it can happen.

It comes down to microtrauma—little impacts, over and over.

Your foot slides forward. Your toe hits the shoe front. Once? No big deal. 40,000 times over 26.2 miles? That’s a problem.

Here’s what usually causes it:

Shoe Fit: The Big One

  • Too tight? Your toes are cramped and get pounded with every step.
  • Too loose? Your foot slides and your nails slam the shoe from the inside.

Either way, your toe pays the price.

👉 Fix: You need about a thumb’s width of space beyond your longest toe. And a roomy toe box—not a pointy dress shoe shape. Lock the heel and midfoot in snug, but give the toes room to spread.

Downhill Running = Toe Smash City

Downhills increase the braking force through your feet. Gravity’s doing half the work—but your toes are taking the punishment.

That ultramarathon I ran? The descent did more damage than the previous 40 miles.

👉 Fix: Trim your nails short. Lace your shoes to keep the heel locked (heel-lock lacing works great). And practice downhill form—shorten your stride, increase cadence, and stay light on your feet.

Foot Swelling: The Silent Toe Killer

Your feet swell when you run—especially in heat or during long events. Up to half a shoe size by the end of a marathon, according to some studies.

Suddenly, that “perfect fit” is now too tight, and your toe has no escape.

👉 Fix: Buy your running shoes in the afternoon (when your feet are naturally swollen), and always size for late-run volume. Leave wiggle room.

Poor Running Form

Heel striking too hard? Overstriding? Your foot slams forward and your toe takes the hit.

I’ve seen runners go from chronic black toenails to none at all just by switching to a smoother midfoot landing and quick cadence.

👉 Fix: Work on cadence (170–180 steps per minute is a good range). Lighten your stride. Think “quiet feet” when you run.

Wet Conditions + Slippage

Rain, sweat, or soaked socks turn your shoes into slippery slides. That soft skin and soggy sock combo leads to blisters and black toenails alike.

I’ve seen it happen on 10-mile rainy runs—not even marathons.

👉 Fix: Use moisture-wicking socks. Try toe socks or anti-friction balm if you’re prone to problems. And re-lace mid-run if you feel your foot sliding forward.

Black Toenails Aren’t Just “Part of the Sport”

Yes, runner’s toe is common. But it’s not inevitable. It’s a mechanical issue, and your body’s sending a clear message: “Fix your shoes, fix your form, or I’m sending more nails to the grave.”

I used to think I was just “one of those runners” who got bruised nails.

Turns out, I was one of those runners making avoidable mistakes.

Black Toenails: When Is “Runner’s Toe” Serious?

Let’s get one thing straight — if you’re logging long miles, especially downhill or in snug shoes, a black toenail isn’t some rare event.

It’s basically a runner’s badge of honor.

But while most black toenails are harmless (just ugly and annoying), some can signal something a little more serious going on.

Here’s how to tell when you’re just bruised… and when you need to stop ignoring it.

What “Runner’s Toe” Looks and Feels Like

Here’s how to tell you’re dealing with runner’s toe:

Dark Discoloration

This is the big one. Your nail turns dark red, purple, or straight-up black. If it’s fresh blood, it might look deep red under the nail. Older stuff dries into a brown or black mess. Doesn’t mean disaster — but it means blood pooled up under there.

Note: If you spot a vertical dark streak in the nail and there wasn’t trauma? That might not be runner’s toe. Get it checked — some types of skin cancer can show up like that.

Throbbing Pain & Pressure

A big hematoma under the nail (that’s the fancy word for blood blister) can cause legit pressure. Runners say it feels like the nail’s going to pop. Walking hurts. Running? Forget it. Even touching the nail can feel brutal.

Smaller bruises? Sometimes they don’t hurt at all. But if there’s pressure — especially right after a race or run — pay attention.

Nail Lifting or Getting Loose

If blood keeps collecting under the nail, it can start lifting the nail up. You might feel it wobble or squish a little. Eventually, it could pop off completely — or hang there like a zombie nail.

Blood Blisters

Sometimes, instead of the whole nail turning color, you’ll just see a dark bubble under one edge. Blisters like these can hurt like hell if they’re pressing up under the nail.

Infection (Don’t Mess Around Here)

Normally, blood under the nail is sterile. But if there’s a cut or skin break? Bacteria can get in.

Watch for:

  • Redness that spreads
  • Swelling that gets worse
  • Heat
  • Yellow gunk (pus)
  • Fever

If you see red streaks going up your foot or feel chills? That’s an emergency trip to the doc. No “let’s see how it feels tomorrow” here.

When to Chill, and When to Get Help

Don’t Panic If:

  • It’s black but not painful
  • It’s tender but improving
  • There’s no sign of infection
  • The nail’s staying put

In that case, you’re likely good. Let it grow out (which can take months — toenails are slow), keep it clean, and don’t pick at it. It’ll eventually work its way to the tip and you’ll clip off the evidence.

Time to See a Pro If:

  • Pain is intense and building
  • You’ve got visible nail lifting
  • You see pus, swelling, or heat
  • You’re limping and can’t wear shoes
  • You don’t remember injuring it

Treating a Bruised Toenail (What Works, What Doesn’t)

So you’ve got a bruised (or black) nail — now what?

If It Doesn’t Hurt…

Do nothing. Seriously. If it’s just discolored and doesn’t hurt, don’t mess with it.

Clean it, clip it as it grows, and move on. No draining, no poking, no YouTube surgery, please.

If It Feels Like It’s Going to Explode…

Get it drained. Fast.

There’s a safe, sterile way to do this called trephination. A doc (usually a podiatrist) will melt a tiny hole in the nail with a sterile tool or laser. The blood comes out, pressure drops instantly, and you usually feel so much better.

⚠️ DO NOT try this at home with a paperclip and a lighter like you saw on some forum. Infection risk is real, and if you miss the right spot, you’re just burning your foot for nothing. Let a pro handle it — ideally within 24–48 hours of the injury.

If the Nail’s Loose or Falls Off

  • Trim the loose part (don’t yank).
  • Keep the raw nail bed clean.
  • Apply antibiotic ointment.
  • Cover with a sterile bandage daily.
  • Avoid running until the skin isn’t super tender.

Once it toughens up, you can lace up again — maybe with some toe protection.

You’ll start to see a new nail peek through after a couple weeks. Full regrowth can take months, depending on how much was lost.

Managing Pain & Swelling

Ice it in the first 24 hours (wrapped in cloth, not straight on skin). Elevate the foot if it’s swelling.

Pop some ibuprofen if it hurts. That won’t drain the blood, but it’ll keep things tolerable.

Infection? Act Fast

If there’s pus, pain that keeps escalating, or anything looks red and angry, get to a doctor.

You might need antibiotics — sometimes even minor surgery if there’s an abscess.

Letting it fester? Bad idea. Trust me — a toenail infection can go from nuisance to nightmare real fast.

Should You Get It Removed?

Sometimes the nail is so trashed that it’s better off gone. If it’s 90% detached, broken, or constantly catching on socks, a podiatrist can numb your toe and take it off.

It sounds gnarly, but it’s quick and pretty painless. Nail will grow back — just be patient.

Painting Over a Black Nail?

Tempting, but risky. Nail polish locks in moisture and can hide signs of infection.

If you have to cover it for a wedding or beach day, fine. But strip it off regularly to check what’s happening underneath.

When a Black Toenail Isn’t from Running (And Why That Matters)

Okay, so if you’re a runner and your toenail turns black, your first thought is probably, “Yep, classic runner’s toe.” And odds are… you’re right.

But not always.

Sometimes that dark, ugly nail isn’t from logging miles—it’s from something else entirely. And while most cases are harmless, some are definitely not.

If you’ve got a black toenail and you didn’t just hammer a long downhill or wear tight shoes, it’s time to pay attention.

Here’s what else could be behind that dark nail—and how to know when it’s time to call a doc.

Fungal Infection (It’s Not Just for Locker Rooms)

Toenail fungus (the fancy name is onychomycosis) can get nasty. While fungal nails usually turn yellow or chalky, some infections can go brown-black, especially when the gunk builds up under the nail.

Signs it might be fungus:

  • The nail’s thick, crusty, or brittle
  • It smells weird (yep, fun times)
  • It’s lifting or has white/yellow debris underneath

Runners are prime targets because sweaty socks and warm shoes make a five-star resort for fungus.

Mild infections might clear up with over-the-counter antifungals. For tougher cases, you might need prescription meds—or even laser treatment.

👉 Don’t guess—have a doc check it out. A quick nail clipping test can confirm it.

Subungual Melanoma (Rare but Serious)

This one’s rare—thankfully—but you need to know about it. Subungual melanoma is a type of skin cancer that forms under the nail. Unlike trauma bruises, it doesn’t grow out or fade.

Red flags to look for:

  • A dark streak or spot that keeps growing
  • Discoloration spreading onto the skin near your cuticle
  • One nail affected, not multiple
  • No history of trauma

If you’ve got a weird mark under your nail and can’t explain it by banging your foot or running long miles, don’t ignore it.

👉 Get it checked by a dermatologist. Early detection saves lives. Simple as that.

Melanonychia Striata (Sounds Scary, Usually Isn’t)

This is a harmless cause of dark stripes in the nail—especially common in people with darker skin. It’s just excess melanin getting deposited in the nail matrix.

But here’s the catch: it can look like melanoma.

So unless a doctor has ruled it out, don’t try to self-diagnose.

👉 If a dark line shows up in your nail and wasn’t there before, get it looked at. Better safe than scrambling later.

Subungual Exostosis (Bone Spur Under the Nail)

Weird one, but it happens. A bone spur (basically a little bony growth) forms under the nail—usually after repeated trauma—and it starts pushing the nail up or making it look bruised.

This isn’t something you’d notice from just looking. You’ll need an X-ray to know for sure.

And yeah, sometimes it requires minor surgery to clean things up.

👉 If one nail keeps looking warped or irritated, even in good shoes, this could be why.

Chronic Ingrown or Toe Deformities

Ingrown nails and odd toe shapes—like hammer toes or mallet toes—can keep slamming the same spot inside your shoe, over and over.

One runner on Reddit said his mallet toe bruises every training block, no matter how perfect the shoe fit is.

👉 If you’ve got a nail that’s always the problem child, check your foot shape. It may be time to adjust how you trim your nails, or in some cases, talk to a podiatrist about a more permanent fix.

Underlying Health Issues

This one’s easy to overlook. If you’ve got something systemic—like diabetes, anemia, or kidney disease—your nails can show signs of trouble.

Diabetic runners, for example, need to be extra careful with nail health because poor circulation can slow healing and hide injuries.

So if you’ve got a black toenail out of nowhere and a chronic condition? Call your doc. It might not be about running at all.

What I Tell Runners Dealing with Toenail Trouble

A bruised or busted toenail might seem like a small deal—but ask anyone who’s lost one mid-marathon how it felt.

Nasty. Painful. Disruptive.

Sure, it’s not the typical overuse running injury yet the pain is nothing to scoff at.

But it doesn’t have to stop your training dead in its tracks—if you handle it smart.

Here’s exactly what I tell the runners I coach when a toenail goes south:

1. Ease Off the Pressure—Literally

First few days? Get that toe some breathing room. Tight shoes will turn a sore toe into a full-on meltdown.

  • Switch to looser laces, roomier shoes, or even slides or sandals if walking around.
  • If the nail’s partially off or the skin underneath is raw, bandage it up.
  • One trick I swear by: cut a little “donut” out of moleskin and place it around the nail. That keeps your shoe from pressing right on the sore spot.

🎯 Goal: No added pressure = no added pain.

2. Cross-Train, Don’t Limp Through

If running hurts too much, cross-train. Bike, swim, hit the elliptical—whatever lets you move without wincing.

⚠️ Don’t be that runner who “runs through it” and ends up with a jacked-up foot or knee because they were limping to protect a toe.

As Dr. Jordan Metzl puts it: “If it doesn’t hurt too much, you should be fine to run.” Just don’t lie to yourself—let pain be your guide, not your pride.

3. Lay Off the Downhills and Speed for a Bit

Lost a nail? Just drained one? No sprints. No steep descents. No tempo hammerfests.

Those hard toe-slamming efforts will re-aggravate things faster than you can say “black toenail.”

Instead:

  • Stick to flat, mellow terrain
  • Keep runs easy effort
  • Dial it back for a week or two until the pain’s gone

💬 I tell my runners: “One week of patience beats six weeks of limping.”

4. Clean It Like You Mean It

This is not the time to slack on hygiene.

  • Wash and dry the foot thoroughly after every run
  • Dab on some antibiotic ointment
  • Keep it lightly bandaged until the skin under the nail is dry, sealed, and toughened up

See redness, oozing, or pain that’s getting worse? Don’t mess around—go see a doc.

5. Let the New Nail Do Its Thing

Toenails grow slower than race-day lines at the porta-potty. You’re looking at 3 to 6 months for a full toenail regrowth—up to a year in some cases.

Early on, the new nail will be thin and fragile—treat it like a baby tooth.

  • Trim it straight, keep it clean, and don’t let it get too long.
  • If it grows in thick, jagged, or looks weird? See a podiatrist. Better to fix it early than deal with a chronic ingrown.

Patience here = strong, pain-free nail later.

6. Log It. Learn from It.

This is big: Track what led up to the bruise.

Was it:

  • A long run in the heat?
  • Tight shoes on a downhill course?
  • A new sock or lacing setup?

I had one runner who only got black nails in the summer. Turns out her feet swelled more in the heat—and her shoes were suddenly too small.

We went up half a size for summer training and boom—problem solved.

🏁 Lesson: Treat your black toenail as feedback, not a fluke.

7. Fix the Root Cause While You Heal

This is your window to get things right.

  • Rethink your shoe size
  • Revisit socks and lacing
  • Maybe even swap in a shoe with a wider toe box or better downhill grip

🎯 Pro mindset shift: A black toenail isn’t a badge of toughness—it’s your foot screaming that something needs to change.

When to See a Doctor (Don’t Be a Hero)

Look, runner’s toenail is usually just an annoying little badge you can laugh about over post-run beers. But sometimes? It’s more than that.

If your toe’s screaming at you—or doing something weird—it’s time to quit toughing it out and get it checked. No medals for limping through an infection.

Here’s when it’s smart to see a doc or podiatrist:

Pain That Won’t Quit

If your toe is throbbing like a bad drum solo and it’s not getting better a few days after draining or resting? Don’t wait.

Could be a bone bruise, fracture, or something jacked up under the nail that needs fixing. Especially if you’re limping or can’t sleep because of the pain—that’s not something to “grind through.”

Infection Red Flags

Pus? Red streaks? Swelling getting worse? Fever?

Don’t mess around—go get help. Infections under toenails can turn nasty fast because everything’s trapped in there.

You might need antibiotics, and yeah, maybe a doc will have to drain it properly. That’s way better than letting it fester and end up needing full nail removal (or worse).

Smashed Nail Bed

Dropped a dumbbell on your toe and now it’s bleeding from every corner? That’s beyond runner’s toe—that’s trauma.

If the nail’s split and the bed underneath is cut or mangled, a doc may need to remove the nail and patch you up.

It’s rare with running but common with clumsy lifting or house accidents.

Toenail Trouble That Won’t Go Away

Keep getting black nails no matter how perfect your shoe fit is? There might be something else going on—like toe structure issues (hello, long second toe or hammertoes) or mechanics that need orthotics or expert advice.

Or maybe it’s fungal and not even from running. Chronic toenail problems? Time to call in a pro.

Weird Nail That Doesn’t Look Right

If your nail’s black and it’s not from trauma… if there’s a stripe that goes up onto the skin… if it hasn’t changed for months and doesn’t grow?

Stop guessing. Go see a dermatologist or podiatrist and get it checked.

Could be nothing—or something serious. Melanoma is rare, but it’s real. Don’t roll the dice.

Nail Grew Back Funky

Lost the nail, and now it’s growing back thick, misshapen, or painful? That doesn’t mean you’re stuck with it.

A podiatrist can trim it, grind it down, or even fix how it grows with a quick procedure.

No need to suffer through a rogue toenail stabbing your shoe every step.

You’ve Got Underlying Health Issues

If you have diabetes, vascular disease, or anything that slows healing—don’t take risks with foot injuries.

What’s minor for others can turn serious fast for you.

Get medical advice early. It’s not being cautious—it’s being smart.

Trust Your Gut

If something about that toe doesn’t sit right—get it checked. Podiatrists have seen way gnarlier stuff than your black toenail.

They’ll either fix it or tell you it’s nothing. Either way, you win.

Like I always tell my runners: your feet talk to you all the time—on impact, in pain, and when something’s off. Listen. That whisper might be warning you before a scream.

No More “Battle Scars” – Just Smart Running

Let’s kill this idea that black toenails are some sort of badge of honor. They’re not. They’re a sign something’s off—shoes, form, or training.

Here’s the truth:

  • 💥 Bruised nails are usually preventable. Don’t treat them like a rite of passage. Use them as feedback to get better gear or habits.
  • 👟 Fix the root cause. Right shoes, clean lacing, trimmed nails, proper downhill form—those small tweaks keep your feet happy and injury-free.
  • 🩹 If you get one, treat it right. Drain it if needed, keep it clean, and don’t ignore signs of infection.
  • 🧠 Preventing injuries is training. Being smart isn’t weak. It’s how you keep logging miles long-term.
  • 🚫 Your ego doesn’t get a say. If your feet are taking a beating, listen and adjust. This isn’t a toughness contest.

I haven’t had a bruised nail in years—because I stopped being stubborn. I found shoes that fit, dialed in my lacing, kept my nails in check, and ran hills with control instead of full-send recklessness.

I’m running more than ever—and my feet are better than they’ve ever been.

Happy feet = strong running. So respect your toes, and they’ll take you the distance.

Your Turn

Still dealing with black toenails?
Got a weird one growing back funny?
Finally found a shoe that solved the problem?

👉 Let’s hear it. Drop your toe tale—gross, inspiring, or just honest. We’ve all been there.

Lower Ab Strain from Running? Symptoms, Treatment & Recovery Timeline

runners diarrhea

I’ve run thousands of miles, coached all types of runners, dodged shin splints, knee flare-ups, plantar pain—you name it.

But you know what snuck up and blindsided me? A pulled abdominal muscle.

Yep. A lower ab strain. And let me tell you, it humbled the hell out of me.

Here’s how it went down: I finished a long run one Sunday—legs fried, core taxed, the usual.

But instead of resting, I did the genius thing and hit the gym for a “quick” core session.

Bad call. On the very last rep of an intense core move, I felt a deep tug down near my lower abs.

Not a cramp.

Not a side stitch.

It was sharp, sudden, and it stopped me cold.

At first, I brushed it off. Just soreness, right?

Except the next morning, sitting up felt like I got stabbed.

Coughing was torture. Sneezing? Don’t even ask.

I tried jogging—barely made it a block. Every step rattled my midsection.

I hate to sound cliche and all but you don’t realize how much you use your abs until they’re out of commission.

Let me give you the full scope…

So… What the Heck Is a Lower Ab Strain?

A lower abdominal strain is basically a pulled or torn muscle in your core—usually the lower part of your rectus abdominis (that six-pack muscle) or your obliques down near the groin

It can be a mild overstretch or a full-on muscle tear.

The lower abs are critical for running—they stabilize your pelvis, support your stride, and fire during every movement.

So when they’re hurt? You feel it with every single step.

Muscle Strain vs. Hernia vs. Tear — What’s the Difference?

  • A strain can range from micro-tears (mild) to big fiber ruptures (severe).
  • A tear is really just a severe strain—same family, just worse.
  • A hernia, on the other hand, is a whole different beast: tissue pushing through a weak spot in the muscle wall.

If you’ve got a visible lump in your lower abdomen, especially when you stand, cough, or strain? Go see a doc—that’s hernia territory.

🔍 Plain English: If it hurts to move, laugh, or sneeze, but you’re not sprouting a bulge in your gut, it’s probably a strain—not a hernia.

What Causes It?

It doesn’t take much. The usual suspects:

  • Overdoing core work when you’re already fatigued (yup, me).
  • Sprinting or doing high-intensity intervals without enough recovery.
  • Lifting something heavy without bracing your core.
  • Even sneezing or coughing too hard (yep, that happens).

For runners, this often comes from cumulative fatigue—those miles add up, your form breaks down, and then one bad movement finishes the job.

In other words, the more we run, the more prone.

What Does It Feel Like?

Here’s what tipped me off — and what you should watch for:

  • Sharp abdominal pain in one spot on your belly — usually lower and to one side. It shows up when you try to sit up, twist, stand, or even roll out of bed.
  • Pain when sneezing, coughing, or laughing. This was my biggest red flag. Every sneeze felt like a dagger. If you’re bracing every time you cough? That’s not normal soreness.
  • Tenderness & swelling — not always obvious, but the area might feel puffy or sore to the touch.
  • Bruising — if you see some black-and-blue on your lower belly, you’ve probably got a more serious tear.
  • Weakness and stiffness — your core might feel useless. Can’t sit up. Can’t twist. Feels like everything locks up after you’ve been sitting for a bit.

For me, the pain was immediate. I felt something “snap” during that final rep, then a constant ache afterward.

Walking downhill was especially rough—it tugged at the injury with every stride.

Sitting up, coughing, even just rolling out of bed? Brutal.

The Gut Punch: Lower Ab Strains in Runners

Ever been mid-workout and suddenly feel like something just snapped in your gut?

Not soreness.

Not a side stitch.

I’m talking a sharp, stabby, “uh-oh-this-ain’t-good” kind of pain.

That’s what a torn or strained ab feels like.

It’s not vague or achy like stomach cramps.

It’s mechanical. It hurts when you move, twist, laugh, sneeze, or breathe too deep.

Press on it and it’s tender. If it’s really bad, you might even feel a little gap where the muscle tore (rare, but real).

Most folks describe it like being stabbed or pulled apart—because yeah, that’s kind of what happened.

So why are runners, who usually complain about knees or hamstrings, ending up with ripped-up abs?

Let’s break it down.

1. The Mileage Creep: Repetitive Strain

Running is high-impact. Every step, your core braces to keep you upright and moving smooth. It’s like a suspension system—absorbing force and keeping everything aligned.

But here’s the catch: when you’re logging lots of miles or hammering speed sessions, that stress adds up.

Most runners don’t feel anything at first. But week after week, mile after mile, those tiny contractions add up.

It’s death by a thousand strides.

Suddenly, during one hard effort or core workout—snap. The muscle’s had enough.

2. Weak Core = Weak Link

Here’s where I get fired up. Runners skip core work way too often. “I run, so my core’s fine.” Nope. That’s like saying doing bicep curls makes you good at bench press.

Your core is your engine. If it’s weak, everything else falls apart.

Especially when fatigue hits late in a long run—that’s when form collapses, posture sways, and your abs take the hit.

Don’t just take my word for it.

Research from Mayo Clinic backs this up: weak core = bad stability = more injuries. And not just ab strains—back pain, hip issues, knee problems, the works.

Bottom line: If you’re skipping core strength, you’re running on a ticking time bomb.

3. Form Fails: When Bad Running Mechanics Strike Back

Running form matters more than most folks realize.

If you overstride (landing too far ahead), twist your torso like you’re in a dance-off, or lean weirdly forward with a swayback? You’re asking your abs to work overtime.

The body’s smart. If your glutes or hips aren’t pulling their weight, your core picks up the slack.

But it wasn’t designed for that—especially not at mile 12 of a long run.

That extra twisting, arching, or pelvic tilt can stretch your lower abs into a danger zone.

Add speed work or hills? Boom—strain city.

4. Lifting Dumb on a Tired Body

We all love to push ourselves.

That go-hard-or-go-home mentality? It’s addicting. But listen—fatigue turns good movement into sloppy movement, and that’s when injuries creep in.

I once tried to knock out a tough ab circuit right after a long run. My core was toast, but I figured, “Just push through it.” Boom—strained my lower abs. Took me out for weeks. Dumb.

Same goes for runners who hit the gym after hammering out 15 miles, thinking they’re still sharp.

Newsflash: your stabilizers are wrecked, your form’s shaky, and your ego is writing checks your core can’t cash.

Can You Run With an Ab Strain?

Ah yes—the question every runner asks the moment something hurts:
“Can I still run?”

Short answer: It depends.

Longer answer: Here’s a no-BS traffic light system I use with my athletes:

GREEN LIGHT: Minor Discomfort, No Sharp Pain

If your abs feel just a little tight or achy—but not worse as you go—you might be okay for a slow jog. We’re talking shakeout run pace here, not a tempo session.

Rules for green light running:

  • Easy effort, flat terrain
  • Zero sharp pain
  • You’re not compensating with weird form
  • Pain doesn’t ramp up mid-run

I’ve had some minor strains where running gently actually helped loosen things up. But the moment it starts getting worse? Shut it down. Immediately.

YELLOW LIGHT: Twinges, Sharp Pain with Movement

If you feel a sharp pull when you twist or lift your leg—stop. You’re flirting with trouble.

You might still move a bit (like walking or biking), but running needs to take a backseat for a few days. Don’t wait until your gait gets weird or you start limping—you’ll just trade one injury for another.

Try this:

  • Gentle walking
  • Pool running (less core stress)
  • Engage the core lightly and check if bracing helps
  • If you’re altering your stride? Call it

One time I tried to “gut through” a yellow-light day. Ended up running lopsided and jacked up my hip. Don’t be me.

RED LIGHT: Intense Pain, Pops, Bruising, or Weakness

Yeah… no. You don’t run through this. Period.

Red flags:

  • Pain at rest
  • Pain when laughing, coughing, or getting out of bed
  • Visible swelling or bruising
  • “Pop” sensation followed by severe pain
  • Struggling with basic movements

I don’t care if your Strava streak is on the line—running through a real strain can turn a tiny tear into a major one. And in some cases, that bulge in your gut? That might be a hernia. You don’t want that.

Get it checked. Sports med docs can tell if it’s a basic strain or something more serious.

So… Should You Run?

Here’s the question I always ask myself and my clients:
“Will running today help, hurt, or be neutral?”

  • If it might help (green zone), cool—go light and easy.
  • If it’ll hurt or delay healing (yellow or red), sit it out.

Trust me, missing 3–4 days now is better than 3 months later. You’re not soft for resting—you’re smart.

If You Must Run With a Mild Strain…

Okay, stubborn runner, here’s your cheat sheet:

  • Keep it flat
  • No hills, no sprints
  • Short runs only
  • Wrap your core (light compression or even hug it with your hand)
  • Stop at the first sign of worsening pain
  • Hydrate and stretch after

And again: if it doesn’t improve in a few days—or gets worse—see a pro. Don’t Google yourself into denial. Get checked.

How Long Does an Ab Strain Take to Heal?

(Hint: Longer if you’re stubborn.)

Alright, let’s tackle the question that’s probably been bugging you (literally and figuratively): how long am I out with this ab strain?

The short answer? It depends on how bad you tweaked it—and how smart you are about your comeback.

Let’s break it down by strain type, because not all pulls are created equal.

Grade I: The “It Hurts but I Can Still Move” Strain

This is the minor league version—just a few fibers overstretched or micro-torn.

You’re sore, sure, but you can still move around, and it doesn’t stop you dead in your tracks.

🕒 Typical healing time: 2–4 weeks

Some folks bounce back in a week or two.

I’ve had a strain like this—maybe a “Grade 1.5” if I’m honest. I could jog lightly after two weeks, but core stuff? Forget it.

Planks felt like getting stabbed. Around week 3, I could finally do some controlled core work, and by week 4, I felt 90% back—though I still played it safe.

Pro tip: Don’t go from “no pain” to full beast mode. Ease back in, or you’ll be back at square one faster than you can say “sit-up.”

Grade II: The “Crap, This Is Serious” Strain

Now we’re talking about a decent tear—more than just a tweak, but not a full rupture. You’ll probably see bruising, maybe swelling, and definitely feel like you lost some strength.

🕒 Healing time: 4–8 weeks (sometimes longer)

If you’re smart with rest and rehab, you might be moving pretty well in 6 weeks.

But I’ve heard stories of folks jumping back into crunches too soon at 3 months—then re-tearing the thing and being out another 6 months.

Don’t be that person.

Bottom line: At 6–8 weeks, you should be mostly back. But don’t test your luck with max-effort core moves until your body gives you the green light consistently—no tightness, no tugging.

Grade III: The “Oh No, This Might Need Surgery” Tear

This is the big one. Full rupture. Muscle ripped in two or torn off the bone. These aren’t common unless something goes really wrong—like a gnarly accident or a deadlift from hell.

🕒 Recovery: 4–6 months (or more)

If surgery’s involved, you’re looking at 1–2 months of doing next to nothing, then a slow, deliberate climb back to full function. Rehab is essential. Even pro athletes take 3–4 months with top-tier care.

If you don’t get surgery (which is rare for a Grade III), recovery can stretch out longer, and odds are, the area won’t feel quite the same again.

So yeah—let’s hope you’re not in this category. But if you are? Accept that recovery is a marathon, not a sprint.

Factors That Speed You Up (Or Slow You Down)

Your healing isn’t just about how bad the tear is. Other stuff matters too:

  • Age – Young guns bounce back faster
  • Nutrition – More protein = better repair
  • Smoking – Delays healing (quit already)
  • Rest & Rehab – Do it right, don’t cut corners

Your job is to support healing, not sabotage it. You can’t fast-forward biology, but you can delay it by being reckless.

What Healing Feels Like Week by Week

  • First 48–72 hours: Sharp pain. Even coughing hurts. Ice it. Rest it. You’re in the acute phase—just don’t poke the bear.
  • By Week 1: If it’s mild, daily movements hurt less. But sneezing might still be a “hold onto the wall” moment.
  • Week 2: You’ll likely turn a corner here. You might still feel off, but at least you’re not wincing with every move.
  • Weeks 3–4: For Grade I, this is when you can test light exercise. Grade II? Maybe gentle walking or stretching—but still no core work.
  • Weeks 6–8: Moderate strains start fading here. Some stiffness might linger, but you should be functioning well with daily life.
  • Month 3+: If it still hurts now, something’s not right. Time to reassess (or maybe you rushed the comeback).

I’ve known runners who treated a mild strain poorly, then dealt with it for years. One guy told me 17 years later, a hard sneeze still flares it up. Why? Because he never let it heal right. Don’t make his mistake.

Scar tissue forms as you heal. Rehab helps that tissue lay down in a functional way. Rush it, and that scar gets messy and fragile. Re-tears are real—and brutal.

Want to Heal Right? Don’t Be a Hero.

I get it—you’re itching to get back out there. But trust me: rushing back after a muscle strain is the fastest way to turn a 2-week injury into a 2-month nightmare.

Don’t play the tough guy. Go slow, be smart, and your body will bounce back stronger.

According to the Cleveland Clinic, most people recover fully from even severe abdominal strains—as long as they rehab the right way.

The key? Patience. That’s not optional—it’s essential if you care about your long-term running game.

Quick Recap

SymptomAb Strain ✅Hernia ❌
Visible bulge?NoYes (usually)
Pain with movement?Sharp, muscle-specificDull, pressure-like
Gets better with rest?YesRarely
GI symptoms?NopePossibly (if intestines involved)
Cause?Lifting, twisting, etc.Weak spot in abdominal wall


Final Thoughts: The Injury That Made Me Smarter

I’ll be honest—my ab strain was a low point. It forced me to sit out when all I wanted to do was run. But it also changed how I train, how I warm up, and how I treat recovery.

I started doing 15-minute core circuits and dynamic warmups before every run. I started checking my posture when working. I stopped doing dumb stuff like moving furniture solo. I started listening to my body before it shouted.

And I haven’t had a single core injury since.

Lessons That Stuck

  • Respect the warning signs. That “just a tight spot” feeling might be your one chance to prevent a strain.
  • Recovery isn’t time off—it’s time invested. Set rehab goals. Treat it like training.
  • Come back better. Use downtime to fix weak links. When I returned, I had a stronger core and better form than before. A few months later? PR’d in a race. No accident.

Your abs are your engine room. They stabilize every stride. Keep them strong. Keep them mobile. And treat them like they matter—because they do.

If you’re dealing with a strain now, hang tough. Stay patient. It’ll heal. Use this time to rebuild better, not just rush back.

And when you’re back out on the road or trail, remember:

Listen to the twinge before it becomes a tear.

That’s how you train for the long run—not just for today, but for years ahead.

How to Qualify for the Boston Marathon – Times, Strategy, and What You Need to Know

How Long Is A Marathon

Times, Strategy & What It Really Takes to BQ

Let’s get something straight—qualifying for Boston isn’t just a goal. It’s a statement. A finish line, sure—but also a challenge to your discipline, your grind, your grit.

Thousands of runners chase that BQ every year. Most don’t get it. Not because they’re not fit—but because Boston isn’t just a race… it’s a reward. And you’ve gotta earn it.

We’re talking about a race where even the slowest qualifying time still crushes the average marathon finish. The median marathon finish? Around 4:30 for men, just under 5 hours for women. Boston standards? Way ahead of that.

You’re not just toeing the line in Hopkinton—you’re lining up with the fastest 10% of runners on the planet. That’s why a BQ isn’t just a time—it’s a badge of honor.

I’ve said it before and I’ll say it again: Boston doesn’t take cash—it takes commitment.

Let’s break down how you get there.

What Makes Boston So Special (and So Hard to Get Into)

Boston isn’t just another race on your calendar. It’s the marathon.

Started in 1897. Oldest annual marathon in the world. One of the six World Marathon Majors. You can’t buy your way in. There’s no charity loophole or raffle luck here. Unless you’re a pro or doing it for a cause, you run your way in.

That exclusivity? That’s the magic. And it’s why qualifying means something.

Runners talk about getting a BQ like it’s winning an Olympic trial. Because in some ways, it is. Most races just take your money. Boston takes your best.

To BQ, you’ve got to hit a certified time that meets your age and gender bracket—and that just gets you in line to apply.

But here’s the kicker:
Even if you hit the standard, it might still not be enough.

In recent years, 35,000+ people have qualified—but only around 30,000 spots exist. That’s right: plenty of people who technically qualified didn’t get in. Why? Because Boston fills from the fastest down.

That’s why every second counts.

Boston Qualifying Standards: What You Need to Know

So how do you actually qualify?

Here’s what the Boston Athletic Association lays down:

1. Age & Gender Matter

Your qualifying time is based on your age on race day, not when you run your qualifier.

So if you’re 39 now but will be 40 on Boston race day? You get to use the 40–44 age group time.

There are three main categories:

  • Male
  • Female
  • Non-binary (recently added)

And yeah—you need to be at least 18 years old on race day.

2. Your Marathon Must Be Certified

No shortcuts here.

You’ve gotta run your time on a certified course—USATF, AIMS, or whatever your country’s governing body is. Think big city races, officially measured events—not your local fun run or a Strava DIY effort.

3. Timing Window: You Only Get So Long

To qualify for a specific Boston, your race has to happen within a set window—usually starting in September about 18 months before race day.

Example:

  • To run the 2025 Boston, your qualifying race needed to happen between Sept 2023 and Sept 2024.
  • To get into 2026, you’ll need to run your time after Sept 1, 2024.

Run too early? Doesn’t count.

4. It’s All About Chip Time

Boston uses your net time—the actual time from when you crossed the starting mat to the finish.

So no, it’s not gun time.

If your standard is 3:30:00, you better finish at or under 3:30:00—not 3:30:01. They don’t round up. Not even for half a second. Brutal, but fair.

Pro tip: Don’t aim for the cutoff—beat it. These days, just meeting the standard probably won’t get you in. Aim to be at least 1–2 minutes faster than the published time.

5. The Bar Keeps Moving

Boston qualifying times aren’t set in stone—they’re getting harder. Why? Too many fast runners.

  • In 2020, the BAA dropped every time by 5 minutes.
  • For the 2026 Boston Marathon, they’re doing it again—another 5-minute cut for most age groups (up to age 59).

That means if your previous standard was 3:30, now it’s 3:25. Welcome to the grind.

Real Talk from the Line

I’ve coached runners who chased their BQ for years. Some missed by seconds. Others finally cracked it by building smarter, not just going harder.

Every one of them will tell you: Boston isn’t just 26.2 miles—it’s a journey.

It’s about patience. Resilience. Showing up again and again.

And when that BAA confirmation email finally hits your inbox? Man, it hits different.

BQ Doesn’t Mean You’re In – The Boston Cut-Off Explained

So you nailed your Boston Qualifying time? First off—congrats. That’s no small feat. But here’s the truth that catches a lot of runners off guard:

Just because you hit your BQ doesn’t mean you’re guaranteed a bib.

Yeah, I know. That stings.

The Boston Athletic Association (BAA) only has so many spots—roughly 30,000 each year—and they give priority to the fastest runners. If more people apply than there are spots (and spoiler: they usually do), Boston sets a cut-off time below the qualifying standard. If your time doesn’t beat the standard by enough, you’re out.

Let’s break it down runner-to-runner:

What’s the Cut-Off, and Why Should You Care?

After registration closes, the BAA stacks everyone up by how far under their qualifying time they ran. This buffer is called your “BQ minus.” The deeper your cushion, the better your chances.

Think of it like this: your qualifying time gets you in line. How far under that time you ran determines how far ahead you are in that line.

So what’s the magic number? That changes every year depending on how many people apply and how fast they are. Some years you only need to beat your standard by a minute or two. Other years? You could miss out even with seven minutes under. Seriously.

Let’s take a lap through recent history.

Recent Boston Marathon Cut-Off Times & Denials

YearField SizeCut-Off (Under BQ)Runners Denied
2017~30,0002:09~2,950
2018~30,0003:23~5,000
201930,0004:527,248
202031,5001:393,161
202120,000*7:479,215
202230,0000:00 (all in)0
202330,0000:00 (all in)0
202430,0005:2911,039
2025~30,000TBD (~5+ mins est.)TBD (>10,000?)

*2021 had a reduced field due to COVID.

Real Stories, Real Frustration

I’ve talked to runners who’ve crushed a marathon, thrown their arms up at the finish line in celebration… only to get the “Sorry, not accepted” email months later.

Like one guy who ran 2:59:45 thinking he was golden for his 3:05 BQ. Turns out, the cut-off that year was 4:52. He needed a 2:59:32 to get in. Missed it by 13 seconds.

Another runner trained her butt off, nailed her BQ, then learned in 2021 that she missed by nearly eight minutes. Oof. That year was brutal.

So What’s “Safe” Now?

Honestly? These days, a 5+ minute cushion is the new standard if you want peace of mind.

The BAA has already tightened the qualifying times for 2026 to slow down the flood. Still, demand is nuts. In 2024, over 33,000 runners applied—11,000+ didn’t get in. For 2025? Over 36,000 threw their names in for roughly 22,000 qualifying spots.

Bottom line: just BQ-ing isn’t enough anymore. You’ve got to beat it. By a lot.

Coach’s Take: Train for the Cushion

If your BQ is 3:30, shoot for 3:25 or better. Got a 3:00 standard? Train for 2:55. Not just to get in — but to feel confident when registration day hits.

And remember: BAA registration happens in waves. First dibs go to those with 20+ minutes under, then 10+, then 5+, and so on. The deeper your cushion, the earlier you get to register. That’s huge.

That BQ Game: Hope, Hustle, and the Dreaded Cut-Off

So, here’s the real talk on the Boston Qualifier: hitting your BQ time doesn’t mean you’re in.

Yeah, that’s the kicker. One guy on a running forum nailed it when he said, “The BQ is 3:30, but the cut-off says you need to beat it by 3 minutes… so why don’t they just say the BQ is 3:27?” You feel that in your soul, right?

But the BAA sticks with the official standard and then trims the field using a yearly cut-off. From our side, that means you’ve got to do more than meet the mark—you’ve gotta crush it.

I remember one runner who spent 10 years chasing their BQ. Finally nailed it. Booked travel the next day. And then came the wait—weeks of nail-biting before finding out if the cut-off would let them in or slam the door.

When the acceptance finally hit their inbox? Straight-up tears. That’s what makes Boston so special. You don’t just register. You earn it. And then you sweat out the verdict.

When to Qualify, When to Apply: Boston’s Timeline, Simplified

Boston always falls on Patriots’ Day—third Monday in April. But don’t think April is when the magic starts. It’s a long game, and if you want in, you’ve gotta plan months—sometimes years—ahead.

Here’s the breakdown:

Step 1: Run a Qualifying Marathon

Your qualifying race needs to happen within a set window—usually from about 18 months to 7 months before race day.

If you want to toe the line in Boston 2025, you’ve got to qualify between September 1, 2023, and mid-September 2024.

Fall races are popular for a reason—they give you time to apply, recover, and build back up for Boston. Don’t leave it to the last minute unless you’re okay living dangerously (and possibly rehabbing instead of training).

Step 2: Registration Opens in September

The BAA opens registration in early-to-mid September. You get a five-day window to throw your hat in the ring.

It’s not first-come, first-served—everyone can apply during that window if they’ve got a qualifying time.

Step 3: Rolling Admissions = Faster Gets First

This is where it gets tense. The BAA rolls out registration in waves:

  • Day 1–2: 20+ minutes under standard
  • Then: 10+ under
  • Then: 5+ under
  • Finally: everyone else

So, if you just barely squeaked under your BQ, you’re in the final round. Fingers crossed the field doesn’t fill before your group’s turn.

Step 4: The Wait Begins

After registration closes, the BAA takes a couple weeks to confirm times and do the math.

By late September or early October, you’ll know if you’re in—or if you’re getting that dreaded “we regret to inform you” email.

That email stings. Been there. But it’s part of what makes the “You’re accepted!” message feel like winning a lottery.

What About Charity Spots?

About 20% of Boston entries go to charity runners or special cases (think 10-year streakers, invited elites, etc.).

Charity runners don’t need a qualifying time, but they do need to raise serious cash—usually thousands—for a BAA-approved cause. If time is out of reach this cycle, this is a legit alternate route.

Real Timing Example

Want to run Boston in April 2025?

  • Qualify between Sept 1, 2023 and Sept 2024
  • Apply in Sept 2024
  • Find out in Oct 2024
  • Train like mad for April 2025

If you qualify after the reg window closes—say, in October 2024—that time rolls over for 2026. No skipping ahead, no fast-tracking, even if you crush your BQ by 40 minutes.

BQ Planning Tip: Timing is Everything

Smart runners don’t leave it to chance. They map out their year like this:

  • Fall marathon for BQ attempt (more recovery time, less pressure)
  • Spring marathon as a backup if fall doesn’t go to plan
  • Rest, apply, then ramp up for Boston the following April

Whatever your plan, don’t gamble on last-minute qualifiers. And remember: qualifying by a huge margin won’t get you into Boston sooner, but it does help you beat the cut-off and land a better corral.

Bottom line? Run your BQ early, train smart, and be ready to apply when that September window opens. Then comes the real fun—training for Boston.

Want to Qualify for Boston? Start with More Miles

If you want to qualify for Boston, you’re not just chasing a number—you’re chasing consistent, aerobic strength. And that starts with mileage.

Real Data: What the Numbers Say

Strava dug into training logs from over 30,000 marathoners and found something crystal clear: the more miles you run, the better your odds.

  • Male BQers ran ~560 miles in the 12 weeks pre-race
  • Male non-BQers? Closer to 300 miles
  • Women? Same pattern: ~480 miles (BQ) vs ~280 miles (non-BQ)

That’s nearly double the distance. And those who qualified peaked around 55–60 miles per week, versus 40–45 for those who didn’t make it.

Why It Works

Every mile you run adds to your aerobic engine. You’re not just burning calories—you’re building endurance that carries you through mile 23 when your legs start lying to you.

That base lets you hold pace longer, recover faster, and stay in control. Mileage is the foundation. Speed and workouts matter too, but without a strong base, they won’t stick.

Real Runners, Real Results

One guy treated his first marathon like a bucket-list item—ran 30 miles a week, finished in 3:40. Not bad. But not Boston. A few years later, he built up to 50+ miles a week and added structure. Boom—3:12 at age 52. Boston-bound.

Another dude in his 20s went from a 4:48 debut to a 2:59 over six years. How? He increased weekly volume gradually, stayed consistent, and treated his training like a craft.

Word of Caution

Don’t jump from 20 to 50 miles overnight. That’s how runners end up on injury timeout. Stick to the 10% rule—slow, steady growth. It might take a year to build the volume you need. That’s okay. This is a long game.

Run often. Many BQers run 6–7 days a week. The average? Seven runs a week for qualifiers vs. five for non-qualifiers. The more days you run, the more you reinforce fitness—and the more natural running feels.

Easy Days Easy, Hard Days Hard (Stop Racing Every Run)

If you’re chasing a BQ and running every day like you’re trying to impress Strava, you’re doing it wrong.

One of the biggest screwups I see from runners trying to qualify for Boston is running too damn hard on their “easy” days. I get it. You want to feel fast. But if you’re hammering every run like it’s race day, you’re just digging yourself into a hole.

Here’s the truth: if you want to run fast, you’ve gotta run slow. Yeah, I know it sounds backwards—but it works.

You build endurance by stacking miles that don’t beat the hell out of your body. That’s where easy running comes in.

What the Data Says

Strava crunched the numbers. Turns out Boston qualifiers ran about 85% of their miles slower than marathon pace—only 15% of their runs were fast.

The folks who didn’t qualify? They ran 57% of their miles at or above goal pace. Basically, they ran too hard, too often, and probably never recovered right.

Same story with women: qualifiers ran just 23% of their miles fast. Non-qualifiers? A brutal 64%. That’s not training—that’s redlining your way to burnout.

Another study found that runners who kept their easy runs about 30% slower than goal pace hit their targets way more often than those who hovered too close to marathon pace every day.

So yeah, that guy trying to run 3:00 who insists on doing most runs at 7:00/mile? He’s probably breaking down while someone cruising at 9:00 pace is quietly building a monster aerobic base.

The 80/20 Rule (And Why It Works)

Aim for 80% easy, 20% hard. That’s the golden ratio.

Easy should feel conversational. I’m talking 90 seconds, sometimes 2 minutes per mile slower than marathon pace.

If your BQ goal is 8:00/mile, then your weekday runs might be 9:30–10:30/mile. And if that pace feels “too slow,” good—that’s the point. It’s supposed to feel easy.

Running slow lets you stack miles, build your heart, expand your capillary network—all that aerobic engine stuff—without frying your legs.

Then when it’s time for speed work or long runs? You’re actually fresh enough to hit the paces that matter.

Real Talk From the Trenches

A lot of Boston qualifiers say their biggest breakthrough wasn’t from some fancy workout—it was finally learning to slow the hell down on recovery days.

One guy I coached plateaued for two straight cycles running “medium” effort all the time. Once we made him run truly easy 4–5 days a week and only hammer his key sessions, boom—his speed jumped, his mileage went up, and he dropped minutes off his time.

You don’t build speed by sprinting your daily six-miler. You build it by stacking smart volume, then attacking your workouts with purpose.

Bottom line: Run more. Run slow. And save the racing for race day.

Speed Work: Sharpen the Sword

Now—just because we said “easy” doesn’t mean you skip the hard stuff. You still need the sharp end of the stick: goal pace workouts, tempo runs, VO₂ max intervals—the stuff that teaches your body how to run fast and hold it.

The key? Don’t overdo it. One or two hard sessions a week is plenty. More than that, and you’re flirting with burnout or injury.

A solid setup might look like this:

  • Mid-week speed workout: intervals, hill repeats, tempo efforts
  • Weekend long run: maybe steady at first, but later with goal pace segments or fast finishes

That combo—paired with lots of easy miles—builds the durability and speed you need without frying your system.

Train smart. Pace yourself. Nail your workouts. And leave something in the tank for the next one.

Want to BQ? Here’s the Work That Actually Moves the Needle

Let’s be straight: chasing a Boston Qualifier isn’t about luck. It’s about building speed endurance, dialing in your pace, and doing workouts that teach your body to suffer well and recover smarter.

1. Tempo Runs = Your BQ Workhorse

Tempo runs are where you learn to hold the line when your legs want out. We’re talking that “comfortably hard” zone—right at the edge where you can still think straight but have to work to stay there.

For most, that’s somewhere near 15K to half marathon pace. Or roughly the pace you could hold for an hour if someone told you the finish line had tacos and a PR waiting.

Start with 20-minute tempo efforts and build up. By the time you’re peaking, aim for 6–8 miles straight at tempo pace. These teach your body to buffer lactic acid and stay strong at fast marathon paces. Almost every BQ plan I’ve seen has tempos as the weekly bread and butter.

2. Goal Marathon Pace Runs: Get Real With Your Pace

You’ve gotta practice race pace—not just to train your legs, but to train your brain. You need to feel what 7:15/mile (or whatever your target is) feels like on tired legs.

Best way? Mix it into long runs. Try something like:

  • 10 miles easy + 8 miles at goal pace
  • 12 miles steady at marathon pace

This builds mental and physical efficiency. It’s not sexy, but it works.

3. Intervals: Build the Top Gear

Speed workouts raise the ceiling. When you boost your VO₂ max and leg turnover, marathon pace feels more doable.

Classic BQ workouts?

  • Yasso 800s – 6×800 meters, goal time matches your marathon hours/minutes
  • Mile repeats at 10K pace
  • Hill sprints – short and nasty, but they build leg strength like nothing else

Intervals train you to suffer. They’re brutal. They’re gold.

4. Long Runs With a Kick

Anyone can shuffle through a 20-miler. But finishing strong? That’s next level.

Try:

  • Fast finish long runs (last 5 at goal pace)
  • Progression long runs (each section faster than the last)
  • Back-to-back hard days (e.g., a tempo Saturday + long run Sunday)

You don’t need these every week. But drop them in strategically during peak weeks. They’re tough—but they teach you how to fight through mile 22 without folding.

⚠️ Heads up: these workouts are high stress. Don’t add them until you’ve built a mileage base. Overdo it, and you’ll be injured before you ever toe the line.

What the BQ Runners Actually Do

Here’s a fun stat: Over 80% of Boston qualifiers said tempo runs and intervals were critical to their plan.

But here’s the catch—they didn’t just run hard. They ran smart.

Some people pull off a BQ on 30–40 miles a week—but those runs were intentional and hard. Like a 26-year-old woman who ran her first marathon on hill-heavy workouts and 3–4 runs a week. Or a dude who ran a 2:58 on ~35 miles/week, just from knowing how to suffer well.

But let me be real: those folks are the exception. For most runners, you need both volume and speed. The combo is what gets you there without blowing up.

Eat to Train, Sleep to Recover

Your workouts don’t mean jack if your body isn’t ready to absorb them. I’ve seen runners train hard and stall for years—then finally hit their BQ once they fixed their nutrition and recovery.

Eat Like a Runner, Not a Rabbit

Marathon training isn’t the time for keto, fasting, or skipping dinner to “cut weight.” You need carbs, protein, and fat to fuel, rebuild, and stay healthy.

  • Load up on complex carbs (oats, rice, fruit, bread)
  • Get protein every meal (eggs, chicken, beans)
  • Don’t be afraid of healthy fats (avocados, nuts, olive oil)

And yeah—some runners need 3000+ calories/day during peak weeks. That’s not gluttony. That’s fuel.

Race-Day Fuel Starts in Training

If you’re not practicing fueling on long runs, you’re training to bonk.

Take in carbs during any run over 90 minutes. Gels, sports drinks, chews—doesn’t matter, just train your gut. Figure out what works and make it routine.

One guy I coached kept missing his BQ by a few minutes. Turns out he was under-fueling during races. We doubled his carb intake (from 30g/hour to over 60g) and boom—he didn’t hit the wall and finally qualified.

Food = performance. Don’t treat it like an afterthought.

Sleep: The Most Underrated Weapon

Want free recovery? Get more sleep.

Your body rebuilds and resets when you’re knocked out. That 6-hour-a-night hustle life might fly at the office, but in marathon training, it’ll wreck you. Aim for 7–9 hours if you want to feel good on your runs and bounce back between workouts.

Can You BQ in Your First Marathon?

So, you’re wondering: “Is it possible to qualify for Boston my first time out?”

Short answer? It’s rare—but yeah, it happens. It’s just not the norm, and you’ve gotta be real with yourself going in.

Most First-Timers Don’t BQ—And That’s Okay

Let’s be honest here: the marathon is a different animal. You can be a solid 10K or half-marathon runner and still get chewed up by the full 26.2.

It’s not just about running fast—it’s about pacing, fueling, staying mentally dialed in when your legs feel like bricks. Most runners need a few marathons to figure that out.

In fact, the stats back that up:

  • Sub-3 marathoners (aka BQ beasts) usually have 6 marathons under their belts.
  • Even 4-hour runners average around 4 marathons.
  • Experience builds wisdom—and grit.

But Yeah, Some First-Timers Crush It

That said, there are unicorns. Runners who show up, lace up, and drop a BQ on day one.

  • One 26-year-old woman trained for just 3–4 months at 30–40 miles per week and nailed a 3:34 in her first race—just under the 3:35 standard for her age group.
  • A med student (with barely enough time to train) clocked a 3:09 in his debut.
  • Another outlier trained 14 weeks at 30–40 miles per week and ran a jaw-dropping 2:58 his first go.

These stories are inspiring—but also outliers. Most of us mortals? We’ll be hobbling past mile 20 just hoping our toenails survive.

What’s a More Realistic Scenario?

Let’s say you’ve run a few half marathons. You’ve got some fitness and maybe a decent time or two.

Here’s the honest math:

  • A 1:25 half marathon (solid, fast) predicts around a 3:00 full. If that’s your wheelhouse and you’re 35 and male, you’re already flirting with BQ pace.
  • But if your half PR is 1:45, expecting a 3:10 marathon (the BQ standard for many men) on your first try is, let’s face it, a big leap.

Could it happen? Sure. Should you bet your whole season on it? Probably not.

Coach’s Advice: Don’t Chase It Blind

If it’s your first marathon, make BQ your stretch goal, not your only goal. Train your butt off, absolutely. Go all-in. But also set a backup target like “finish strong,” “stay steady,” or “break 4 hours.”

Use the race as a launchpad. Learn how it feels to hit the wall. Learn where your fueling plan holds up—and where it doesn’t.

Learn how your mind reacts when your legs are screaming but the finish line’s still miles away. That stuff? You don’t get it from training alone.

Timing Is Everything—And Sometimes Age Is On Your Side

Here’s a little silver lining: the older you get, the easier the BQ times get. Not dramatically, but enough to matter.

There are folks who never sniffed Boston in their 30s but finally got in at 50 because:

  • The standard eased up a bit
  • They kept training consistently
  • They got smarter about how to race

BQ doesn’t care how long it takes. Whether you hit it on try #1 or try #10, the result feels just as sweet.

What If You Miss the Boston Qualifier?

So, you trained your butt off for months. Race day came. You gave it everything… and still didn’t hit the Boston qualifying time.

First off—breathe. Yeah, it stings. I’ve been there. So have a lot of runners. But listen: missing a BQ doesn’t define you. It just means your story isn’t done yet.

Here’s what to do when Boston says “not this time.”

Step 1: Break It Down (Not Yourself)

Don’t spiral—analyze. Where did it fall apart?

  • Did you hit the wall in the last 10K? Super common. Could be a fueling issue or just not enough long-run endurance.
  • Did you go out too hot in mile 1? Pacing error. Rookie mistake. Happens to veterans, too.
  • Did the hills eat you alive? Might need more strength work or hill repeats.

The point? Pinpoint what held you back so you can fix it. Every race has a lesson if you’re willing to look for it.

Step 2: Try Again (If Timing Makes Sense)

If you’re still in the qualifying window, you’ve got options. Some runners miss in October and squeeze in another attempt at CIM in December. It’s fast, flat, and perfectly timed.

But don’t just sign up tomorrow without thinking it through. Your body needs to recover. Racing marathons back-to-back is brutal unless you’re built like a tank.

Rule of thumb: 6–8 weeks between hard marathons, minimum. More if you’re nursing fatigue or injury.

One guy I know missed his BQ by 3 minutes in November—signed up for a May marathon that same day. Smart move. Gave him time to train, recover, and come back better.

Step 3: Get Fast Before Going Long Again

If you missed by a big margin—like, “I wasn’t even close”—you might need to zoom out.

Take a break from the 26.2 grind. Focus on shorter stuff. Work on your 10K and half-marathon speed for the next 6–12 months. You’ll build speed, raise your lactate threshold, and come back stronger.

Real example: Coach Greg McMillan talked about a 48-year-old runner named Becky who couldn’t crack 3:50 for her BQ. They paused marathons and trained her up to a 48-minute 10K and a 1:47 half. Next marathon? She nailed 3:50. That break made all the difference.

Sometimes you gotta back off the gas to get there faster.

Step 4: Choose a Better Course (or Season)

Was the race too hot? Too hilly? Too crowded? Logistics a nightmare?

Next time, take control of the variables. Pick a race that suits you: fast, flat, cool temps, well-organized. Don’t just sign up for the local race because it’s close—sign up for the race that gives you your best shot.

Step 5: Shift Your Mindset

Missing a goal hurts. Missing by 10 seconds? That’s next-level pain. But don’t let it crush you.

Turn it into fuel. I’ve seen runners miss by a minute, then train like absolute monsters and come back to crush it.

One guy missed by 1:20, then toughed out a freezing cold winter marathon and got it. Another missed by 10 seconds and came back like a bat outta hell. Use the sting. Let it sharpen you.

Step 6: Recover Before You Reload

After the race, let your body heal. I’m talking:

  • Hydrate like it’s your job
  • Eat real food (yes, that pizza is earned)
  • Sleep like a teenager on summer break
  • Cross-train lightly or jog easy—don’t jump back into training too soon

Races beat you up more than you think. Respect the recovery. Then, once your head’s clear and legs feel good, plan your comeback.

Step 7: Get a Second Set of Eyes

If you’ve taken multiple shots and keep coming up short, bring in help. That could mean hiring a coach, joining a structured plan like Pfitzinger’s, or simply picking the brain of a more experienced runner.

Fresh eyes can spot what you missed—maybe it’s your training intensity, your pacing, your nutrition, or even your recovery habits.

There’s a whole community out there. Reddit, Strava groups, local running clubs—they’re filled with runners who’ve been exactly where you are. Tap into that knowledge.

Step 8: Don’t Burn Out

Don’t fall into the trap of marathon after marathon, year after year. That grind breaks people down.

If you’re feeling mentally cooked or physically drained, it’s okay to take a season off. Focus on fun runs. Hit some 5Ks. Rebuild the fire.

One guy I know? Took 26 years to get his BQ. Missed by 2, 4, then 6 minutes—but kept coming back. That’s the long game. That’s heart.

You’re Not Done

BQ’ing is supposed to be hard. That’s what makes it so sweet when you finally get there.

Missing it? That’s just part of the journey. And honestly—it’s the near-misses that make the success even better.

You didn’t fail. You’re just not finished.

Keep showing up. Keep tweaking the plan. Keep running.

Because the dream isn’t just Boston.
It’s earning your way to that starting line.

Final Thoughts from Coach Dack: Boston’s No Accident. You Earn It.

Let’s be real—qualifying for Boston is hard. Brutally hard. And that’s exactly what makes it worth chasing.

A BQ isn’t some lucky break. It’s not handed to you. You build it—one early-morning run, one smart workout, one tough decision at a time. You grind for it. You bleed for it. You fight through setbacks, bad races, long plateaus, and days where you wonder if you’re good enough.

But you keep going.

Because here’s the truth I drill into my athletes: you don’t qualify for Boston by luck—you get there on purpose.

Every mile you log when you’d rather stay in bed. Every stretch, every healthy meal, every skipped shortcut—that’s you laying another brick. And someday, you’ll look up and realize you’ve built the path to Hopkinton with your own damn hands.

BQ Isn’t Just a Time—It’s a Rite of Passage

When it finally happens—when you see that finish time tick down below your standard—it’s not just a number. It’s years of work finally clicking into place.

Runners have told me that the moment they hit their BQ felt bigger than running Boston itself. Because that’s the moment you earned your way in.

One of my runners called it a “rite of passage.” He was right. Boston isn’t just a race—it’s a milestone. It means you set a goal that most people would call crazy… and you made it real.

Still Chasing the BQ? Here’s Your Playbook

If you’re still grinding toward that qualifier, I see you. I’ve been you. And I can tell you—it’s possible. But you’ve got to be strategic:

  • Set stepping stones: Shave 5–10 minutes off your current PR. Get under 4:00. Then under 3:45. Break it down and build momentum.
  • Volunteer at Boston or run the course unofficially with friends. Soak in the energy. Let it fuel you.
  • Surround yourself with people who get it. This isn’t a casual goal. You need training partners who respect the hustle.
  • Keep the joy alive. If training starts killing your love for running, it’s time to reassess. BQ goals are big, but they shouldn’t burn you out.

Use Every Tool in the Toolbox

If you’re serious about that BQ, treat it like a mission. Use the data. Use the plans. Test yourself.

  • Pace calculators (like Greg McMillan’s or Jack Daniels’ charts) will show you what you need to hit at shorter distances to be in BQ shape.
  • Run a half marathon at goal pace—if you can do that and feel strong, you’re getting close.
  • Use a heart rate monitor to make sure your easy days are actually easy and your workouts are hitting the mark.
  • Grab a BQ-focused plan from a trusted coach—or better yet, get help tailoring one to you.

When You Line Up in Hopkinton…

Here’s what I want you to picture. You’re standing in Hopkinton, race bib on, nerves buzzing. And you know—you earned this.

Those 26.2 miles through New England? They’re not just a race. They’re your reward.

You’ll fly past Wellesley and hear the scream tunnel.
You’ll grind up the Newton hills and dig deep over Heartbreak.
And when you turn onto Boylston Street, you’ll run with the pride of someone who refused to quit.

Boston is tough. But so are you.

The only way to get there is to keep showing up. Keep dreaming big. Keep training smart. And when that finish line finally comes into view?

You’ll understand what I mean when I say:
“Running Boston is the dream. But earning Boston? That’s the real victory.”

Stay in the fight.

Train smart. Run hard. And never, ever give up on your BQ.
I’ll see you on Boylston.

— Coach Dack

What’s the Best Temperature For Running?

running in the heat

Every runner dreams of that perfect running weather – the day when the air feels just right and every stride is effortless.

But what is the ideal running temperature?

As a running coach based in Bali, I’ve grappled with this question personally.

I’ve literally felt the extremes: from sweltering tropical mornings that left me drenched by sunrise, to crisp mountain air in my earlier years that made my lungs burn and my spirit soar.

Each experience taught me something profound about how temperature impacts our runs.

Let me take you on a journey through those lessons – from a terrifying heatstroke at the Solo Half Marathon to nostalgic winter training runs – combining personal stories, scientific research, and hard-earned coaching wisdom.

By the end, you’ll not only know the optimal running temperature for peak performance, but also how to thrive in any weather, hot or cold.

What’s the Best Running Temperature?

According to research—and just about every seasoned runner I’ve coached—the ideal temp for long-distance running hovers around 50°F (10°C).

That’s the sweet spot where your body doesn’t overheat and can focus on moving efficiently.

In fact, elite marathoners tend to crush their times in conditions between 44–59°F (7–15°C). Your muscles stay warm, but not boiling, and your heart doesn’t have to go into overdrive just to cool you off.

Sprinters?

They love it warmer—around 70–73°F (21–23°C)—because warmer muscles mean more explosiveness.

But for most of us logging miles on the road or trail, that cooler range is gold.

The Heat Slap: My Solo Half Marathon Wake-Up Call

Let’s talk about heat—and why it’ll chew you up if you don’t respect it.

I’ve had a few run-ins with it.

One time, I headed out in Bali at midday (yeah, genius move, I know). The sun was brutal—over 90°F (32°C)—and by mile three I was wobbly and lightheaded. Heart thumping like a bass drum. I had to bail and walk it in, drenched and wrecked.

But that wasn’t the worst of it.

The real gut punch came at the 2023 Solo Half Marathon.

Race morning was already hot and thick with humidity. I felt it in my bones at the starting line, but like an idiot, I thought my training would bulldoze through it.

By mile 11, the heat won.

Everything went sideways—legs locked up, vision blurred—and I blacked out. Next thing I remember, I was in a hospital bed. I’d collapsed from heatstroke. Didn’t finish. Didn’t even remember the final kilometers.

That moment taught me something brutal: toughness means listening to your body, not ignoring it.

What’s Actually Happening in the Heat?

Here’s what’s going on inside your body when it’s scorching out:

  • Your body shifts blood from your muscles to your skin to help you sweat and cool down.
  • That means less oxygen and fuel to your legs.
  • Your heart rate spikes because it’s working double-duty.
  • And your core temp climbs dangerously fast.

Running in the heat feels like you’re driving a car with the handbrake on. You’re trying to move, but everything’s fighting against you. Every degree above that sweet spot can slow you down—and I’ve felt it in my bones.

Flip Side: Why Cold Runs Can Make You Fly

Now let’s talk cold—because when it’s done right, cool weather can feel like rocket fuel.

Some of my best runs happened on cold mornings. Not freezing, but that crisp 45°F (7°C) type of air that stings at first and then lifts you.

Cool temps help your body regulate heat more easily. Instead of wasting energy trying to stay cool, you can focus on the run itself.

That’s why you’ll see so many PRs and records set in fall races.

Your heart rate stays steady. Breathing feels cleaner. It’s like your body has more room to perform.

But Let’s Not Pretend Freezing Temps Are Easy

There’s a point where cold stops helping and starts hurting. Below freezing, things get tricky:

  • Muscles take longer to warm up.
  • Breathing cold, dry air can make your throat and lungs ache.
  • Slippery roads mess with your form.
  • And god help you if you forget gloves.

Also, don’t forget: you can still dehydrate in cold weather. You’re losing moisture through your breath and sweat—even if you don’t feel it.

What Science (and Experience) Says About the Best Running Temperature

Let’s talk weather — and not just to complain about it.

I’m talking about the sweet spot where your body runs fast, your engine runs cool, and you feel like you could go forever.

Because yes, temperature matters way more than most runners realize.

So… What’s the Magic Number?

Over the years, scientists have pored over marathon race data and lab tests to figure this out.

And guess what? The best running temps are cold — colder than most of us would consider “comfortable” for hanging out.

According to my research while writing this article, air temperature is one of the biggest factors affecting marathon finish times — and even dropout rates.

For every 1°C (1.8°F) increase above the sweet spot, times slowed down and DNFs (Did Not Finish) went up. That hurts.

The golden range?

Most studies point to 44°F to 59°F (7–15°C) as the prime zone for marathons. A long-term study on the Boston Marathon — a race that draws runners of all speeds and ages — found 46–59°F (8–15°C) to be ideal for both elites and everyday runners.

Personally, I’ve always found around 50°F (10°C) to be that Goldilocks zone — not too cold, not too warm. That’s when the engine purrs and you can hold pace without overheating.

And you’re not alone if you think 45°F feels freezing when you first step out. But trust me, once you’re moving, it’s perfect.

What About the Fastest of the Fast?

Turns out elites like it even colder. A study in PLOS ONE found that male elite marathoners peaked at around 39°F (3.8°C), while elite women ran their best at about 50°F (10°C).

Makes sense — when you’re burning fuel that fast, cooler air keeps you from overheating. I’ve seen this play out firsthand — the pros often shiver at the start line while us mid-packers are layered up like it’s winter camping.

And for the rest of us?

We’re usually best somewhere around the mid-40s°F. That lines up with how I’ve felt on race mornings — my best performances almost always came on chilly mornings when I could see my breath during warm-up.

But Wait — What About Humidity?

Temperature’s only part of the story. Humidity is the silent killer.

You’ve heard of the “real feel” or “heat index”? That’s where heat + humidity gang up on you.

Let’s say it’s 88°F (31°C). In dry conditions, sure, that’s hot — but manageable. Add 70% humidity, and suddenly it feels like over 100°F (38°C). That’s brutal.

Why?

Because sweat doesn’t evaporate well when the air’s already full of moisture, so your body can’t cool down.

Living and training in Bali, I know this struggle.

I’ve run 10Ks in 80°F with 90% humidity and felt like I was drowning in my own sweat by kilometer three. It’s not just uncomfortable — it’s performance-crushing.

On the flip side, cold wind or rain can make a seemingly perfect 40°F run feel miserable. Ever been hit with icy gusts on a long run? Yeah, that’ll humble you quick.

What This Means for You

The takeaway? Cool and dry = fast. Hot and humid = sufferfest. It’s that simple — and the science backs it.

That said, we all have our own “perfect” range. Some folks run hot and prefer 40°F, others are fine at 60°F, especially for short runs. Your body size, how much you sweat, and what weather you’re used to all play a role.

But if you’re chasing that next PR? You’re praying for a start line at 50°F, overcast skies, and a dry breeze.

Adapting to the Heat (and Cold): 

Let’s be real—everyone loves the idea of running in 50°F weather.

It’s cool, comfortable, and your body doesn’t feel like it’s melting.

But here’s the catch: most of us don’t live in “ideal” conditions.

I live in Bali. It’s hot, humid, and sticky year-round.

When I first moved here, even an easy run at sunrise felt like a death march.

I’d be drenched by mile one, gasping for air, and my heart rate was through the roof—at jogging pace. One run in 78°F and 90% humidity felt worse than a 15-miler back in Europe.

I actually wondered if my running days were numbered.

But here’s the thing—your body adjusts. Slowly, stubbornly, but it does.

After a couple months of steady running (and plenty of sweating), I started noticing the shift. I wasn’t overheating as fast. I could finish a 5K before sunrise without turning into a puddle.

Six months in, a 10K in the morning heat became “just another run.” I learned how to hydrate better, slow down early, and pick shady loops or routes that passed shops for a cold drink.

That’s heat acclimation in action—your body starts sweating earlier, your blood volume goes up, and everything just runs a little smoother. Studies back this up. Your system actually learns how to manage heat more efficiently. It’s wild.

I even met a local runner who thought 75°F was “cool.”

Meanwhile, a guy from Florida once told me he races better in swampy heat—said 50°F felt cold to him.

It blew my mind, but it made sense. You race how you train, and your comfort zone is built by exposure.

Same goes for the cold. I’ve got a Canadian buddy who runs in freezing temps all winter. To him, 32°F is “perfect.” He layers up, protects his skin, and goes out like it’s nothing.

But when snow or ice hit, he admits things slow way down—not because of cold, but because you can’t sprint on ice without eating pavement. Fair.

What I’ve learned is this: while science tells us that ~50°F is objectively better for performance, what really matters is what you’re used to.

Acclimation isn’t about running your fastest in 90°F—because you won’t. It’s about surviving and thriving in less-than-perfect conditions.

I even throw in hot midday jogs here in Bali just to keep that heat tolerance sharp. If I ever sign up for a cool-weather race, I’ll run with the AC cranked or travel to cooler spots just to get used to it again.

Training in tough conditions builds mental strength too. If you only run when it’s “nice out,” race day surprises will wreck you.

Bottom line? You can adapt. Whether it’s heat or cold, it’s not about chasing perfect weather—it’s about learning to run smart in the weather you’ve got.

FAQs: Weather, Performance & Real-World Running

Q: What’s “too hot” to run in?

Once the heat index hits around 90°F (32°C), you’re entering danger zone. Anything above 85°F (29°C), especially with humidity, will slow you down and spike your risk of overheating. At 100°F heat index or more? I usually tell my runners to cut it short, run easy, or hit the treadmill.

If you start feeling dizzy, your heart’s racing, or you stop sweating—that’s a red flag. Walk it in, cool down, and live to run another day.

Q: What temp is “too cold”?

Cold’s not the enemy—it’s frostbite and slipping on ice. Most runners can go down to 0°F (-18°C) with layers and protection.

But when the windchill drops below -20°F (-29°C), you’re risking skin damage fast. If it’s icy or your lungs hurt from the air, it’s time to reconsider. Treadmills exist for a reason, and using one doesn’t make you soft—it means you’re smart.

Q: Is cold better than heat for racing?

Yep. According to multiple studies (like from youraustinmarathon.com and runnersblueprint.com), marathon times drop as temps rise. Most people run best between 40°F and 60°F (4–15°C).

Why?

Your body doesn’t waste energy cooling down, so your pace holds longer. You might be a minute slower per mile at 85°F than at 55°F. Even a 10°F shift can affect performance by a few percent. Cold’s better—until it’s too cold and your legs freeze up.

Q: Do I burn more calories running in the cold?

A little.

Your body does work harder to stay warm, especially if you’re underdressed and shivering. But don’t expect a major fat-loss boost just from cold air.

In fact, running in heat feels harder but doesn’t burn more—it just feels like it does because of water loss. Want to burn calories? Focus on effort, distance, and consistency, not the weather. Here’s how many calories you burn running a mile.

Q: What should I wear when it’s ~50°F out?

Ah, the sweet spot. In 50°F (10°C), I usually go with shorts and a long-sleeve or just a tech tee with sleeves I can push up. Maybe gloves for the first few miles, a buff if it’s breezy. You don’t need a jacket unless it’s windy.

Trick is to feel a bit cool at the start—by mile 2, you’ll be golden. I ran a race once at 52°F in shorts and a short-sleeve with gloves. I froze for five minutes, then felt perfect the rest of the way.

Curved Treadmills: Benefits, How to Use Them & Top Picks for Your Home Gym

The first time I hopped on a curved treadmill, I thought, “No big deal—I run 30+ miles a week. This’ll be fun.”

Ten minutes later, I was drenched, legs smoked, and wondering who swapped my lungs for sandbags.

It was humbling.

There was no motor carrying me along.

No speed button. Just me, my legs, and this brutal arc of a machine daring me to keep up.

That’s the beauty of curved treadmills—they force you to work for every step.

And once I caught my breath, I realized how effective (and addictive) that challenge could be.

Studies back it up: running on a curved, manual treadmill cranks up the effort by 25–30% compared to motorized ones.

And yeah, your body feels every bit of it.

So if you’re considering bringing one into your home gym—or just want to learn how to use it without getting flung off the back—this guide is for you.

What Is a Curved Treadmill?

Think of a curved treadmill as a manual treadmill with no motor and no mercy.

The running deck is U-shaped—curved like a shallow bowl.

There’s no plug, no console that controls your pace.

You move the belt with your legs. You run, it moves. You ease off, it slows. Simple as that.

The curve itself isn’t just for show—it actually does two big things:

  • Forces a more natural stride (you’ll feel yourself landing more midfoot/forefoot, not heel-slamming like on a flat treadmill).
  • Cranks up the intensity. Even a slow jog feels like an incline.

What’s more?

There’s no top speed limit.

If you’ve got the horsepower, you can go all-out without waiting for a motor to catch up. (Fun fact: some pro sprinters have hit 24+ mph on these things.)

Why It’s Tough (and Why That’s a Good Thing)

You’ll feel it immediately: a curved treadmill is always uphill, and there’s no hiding behind a pace setting.

It forces good form and punishes laziness.

You’ll likely:

  • Burn more calories per mile
  • Improve your running mechanics
  • Engage your posterior chain (glutes + hammies) more
  • Build better cardio in less time

It’s like doing a long hill repeat—without needing a hill.

How to Use a Curved Treadmill

If you’re new to these beasts, don’t jump on and sprint your heart out.

Here’s the step-by-step playbook:

Start Slow – Walk Before You Run

Hop on, grip the rails, and ease into a walk or shuffle. At first, the belt might feel like it’s glued down—just lean in and let your stride slowly build momentum.

Don’t go full send out the gate. Warm up. Or you’ll be gasping in 90 seconds.

Find Your Position

Your spot on the belt controls everything:

  • Too far forward? You’ll accidentally speed the belt up.
  • Too far back? It’ll slow or stop.
  • The sweet spot? Dead center of the curve.

Think of your body like a throttle.

Want to speed up? Lean slightly forward.

Want to slow? Ease back an inch.

It’ll feel weird at first—like learning how to ride a bike—but give it a few sessions, and it’ll click.

Lock In Your Posture

Form matters more here than on a regular treadmill training:

  • Eyes up, not down
  • Core tight
  • Shoulders relaxed
  • Lean slightly forward from the ankles, not the waist

Let the curve do some of the work. If you hunch or flail, you’ll feel it fast—probably in your lower back or balance.

Use Short, Quick Strides

Forget long, loping steps. Curved treadmills reward fast turnover and proper foot strike.

  • Short, snappy strides = smoother belt movement
  • Aim for midfoot or forefoot strikes under your hips
  • Think: light feet, fast cadence

Try to “pull” the belt backward with each step rather than pushing off. That mental cue can help you keep your feet under control.

🏁 Pro tip: Curved treadmills naturally improve cadence and stride mechanics.

You’ll carry that back to road running without even trying.

How to Run on a Curved Treadmill 

Now you know how to use the machine? Let’s get to how to actually run on it.

Let me be honest with you.

Curved treadmills aren’t your average gym toy. They’re self-powered, unforgiving, and brutally effective—if you use them right.

If you’re new to the game, expect a learning curve (literally).

But once you get the feel, these machines can sharpen your stride, crank up your cardio, and turn your glutes into steel.

Stay Loose and Centered

Here’s the deal: your first time on a curved treadmill might feel weird. Like you’re running uphill in molasses. That’s normal.

The biggest mistake? Stiffening up.

  • Don’t death-grip the handrails.
  • Don’t lock your arms or shoulders.
  • And for the love of your knees, don’t panic when the belt speeds up.

Let your body relax.

If it’s too fast, drift backward.

Too slow? Lean slightly forward.

The treadmill reacts to your body position—not buttons—so stay calm and learn how to ride that sweet spot.

Know How to Stop (Without Faceplanting)

Curved treadmills don’t have a “Stop” button. You’re the motor—and the brake.

To stop, gradually move back on the belt and let it slow.

If you’re smoked or off-balance, grab the rails and step off onto the side platforms.

Don’t be a hero. This isn’t the time to practice parkour. Grab, step, reset.

It Feels Weird at First. Stick With It.

Every runner I know who stuck with the curved treadmill for more than a few sessions ended up loving it. But yeah—it’ll humble you at first.

You’ll feel like your legs are stuck in mud.

You’ll breathe harder than you thought possible.

But once you figure out the balance and rhythm, the belt flows with you.

And the fitness payoff? Massive.

Curved Treadmill Form & Strategy

Once you’re past the awkward phase, it’s time to run like you mean it.

Here’s what I recommend to get the most out of this machine.

1. Use Real Running Form

Forget the shuffle you use on the gym treadmill. This thing won’t let you cheat.

  • Run tall but lean slightly forward—from your ankles, not your hips
  • Midfoot or forefoot strike—the curve rewards it
  • Quick cadence, active arms, high knees—treat it like you’re doing track work

A track athlete told me it’s the closest thing to outdoor running indoors—because it forces you to run right.

No lazy strides, no bouncing, no belt carrying you along.

2. Fire Up Your Glutes (And Hamstrings, And Calves…)

This machine makes you work.

You have to pull the belt back with every step.

That means your posterior chain—glutes, hammies, calves—is on full blast.

If you’ve only trained on flat motorized belts, this will feel like a different sport.

And that’s a good thing.

  • Push down and back
  • Drive your stride like you’re powering a sled
  • Engage your core and keep your torso stable

It’s why your heart rate spikes faster. You’re recruiting more muscle, burning more energy, and building real power.

3. Ditch the Pace Obsession

Almost everyone is slower on a curved treadmill. Don’t freak out.

  • Your perceived effort (RPE) is what counts
  • Most runners are 30–60 seconds per mile slower on the curved belt
  • That doesn’t mean you’re less fit—it means you’re working harder

I’ve had athletes think their treadmill was broken because their normal 8:00 pace felt like a sprint.

It’s not broken—you’re just earning it now.

Here’s how to adjust:

  • Reduce total time or distance by ~20%
  • Focus on intervals, not pace targets
  • Use heart rate or effort to guide training

4. Use It for Intervals and Tempos

This is where the curved treadmill shines. No buttons, no lag—you just run.

Want to sprint? Lean in and go.

Want to recover? Back off.

That makes it ideal for:

  • Sprints: explode, float, repeat
  • Fartleks: random effort surges
  • Tempo work: steady grind, high effort

It’s like outdoor fartlek training—without worrying about traffic or terrain.

Many athletes even use curved treadmills to simulate hill workouts, since the constant resistance builds leg strength like a mild incline would.

Should You Buy a Curved Treadmill?

Let’s cut to it: curved treadmills are badass—but they’re not for everyone. They’re hard, expensive, and a little brutal on the ego the first time you try one. But if you’ve got the right goals, they can be a game-changing tool.

Let me break it down for you:

You’re All About High-Intensity Training

If you thrive on sprints, HIIT, or getting absolutely wrecked in 20 minutes, a curved treadmill will meet you there.

It’s self-powered. There’s no “set speed” to lean on.

The harder you run, the faster it goes.

Stop moving? It stops. Perfect for interval training, CrossFit, Hyrox, or any workout that mixes cardio with strength.

You Want to Fix Your Running Form

Curved treadmills punish bad form.

Heel-strike or overstride? You’ll feel it immediately.

They naturally encourage:

  • Midfoot strike
  • Forward lean
  • Quicker cadence

If you’re looking to refine your mechanics, it’s like having a form coach under your feet.

Trail runners and forefoot strikers especially love the natural rhythm it reinforces.

You’re Building the Ultimate Home Gym (and Have the Budget)

Let’s be real—these things are not cheap. Expect $3,500–$6,000+ for a quality model.

But if it’s within reach and you’re serious about long-term fitness, it’s a high-durability investment.

No motor, no plug-in, barely any moving parts = fewer things to break.

Bonus: if you’re a coach or trainer, clients will love it. It stands out and opens up unique training options.

You Want an Eco-Friendly, No-Frills Option

No electricity.

No buzzing motor.

Just you and the belt.

Some off-grid runners buy them specifically to stay in shape during winter while sticking to their values.

It’s literally a self-sustaining training solution.

You Do Circuit or Functional Training

Ever tried a circuit where you run 400m, hop off for kettlebells, then jump back on?

With a traditional treadmill, you’re stuck waiting for it to speed up.

A curved treadmill fixes that:

  • Starts when you move
  • Stops when you stop
  • Perfect for circuit training, CrossFit WODs, or Hyrox

When a Curved Treadmill Might Not Be Right for You

As much as I love what a curved treadmill can do, it’s not for everyone.

In fact, there are a few very real reasons you might want to pass—or just stick with the one at your gym instead of buying your own.

Here’s when it might be smarter to hit pause:

1. You’re Focused on Long, Steady Endurance Runs

If your training sweet spot is 60–90 minutes of easy running—especially in aerobic zones—a curved treadmill is probably the wrong tool.

These machines are built for intensity, intervals, and form work—not long, steady efforts.

Trying to do your weekly long run on one? You’ll either fry your legs or your patience.

For base mileage and zone 2 training, you’re better off outside or on a standard treadmill with cruise control.

2. You’re on a Budget (or Just a Casual Runner)

Look—these things aren’t cheap. Many curved treadmills run $3,000–$5,000+.

If you’re not serious about using it on a regular basis—or you’re just trying to stay active without breaking the bank—it probably makes more sense to:

  • Stick with the gym’s equipment
  • Buy a solid $1,000 motorized treadmill
  • Or split your cash across a full home gym setup

Ask yourself: Will I use this thing regularly for years? If not, save the space and the cash.

3. You’re Dealing with Lower-Leg Injuries

If you’ve got Achilles issues, tight calves, plantar fasciitis, or recent calf strains—be careful.

Curved treadmills put more load on your posterior chain, especially the lower leg.

That can be a good thing for training… once you’re healthy.

But if you’re still in rehab mode, skip it for now.

You don’t want your recovery derailed by a well-intentioned sprint session on a self-propelled torture arc.

4. You Avoid Indoor Running Like the Plague

If you’re the kind of runner who braves rain, snow, and sleet just to stay outside? Be honest with yourself.

Some folks buy a fancy treadmill thinking they’ll use it “on bad days,” but end up ignoring it 350 days a year. That’s an expensive clothes rack.

That said, some outdoor diehards find that curved treadmills are the only indoor running they can tolerate—because it feels more like real running. You decide which camp you’re in.

5. You’re Tight on Space

These things are tanks. Heavy, non-folding, often 300+ pounds.

If you live in a small apartment or 5th-floor walkup with no elevator, delivering and storing one of these isn’t just inconvenient—it’s nearly impossible.

If space is a concern, opt for something lighter and more portable—or just take your runs outside.

Final Thoughts: Once You Try It, Running Will Never Feel the Same

Let’s be clear—running on a curved treadmill is a gut check. It’s not for passive miles or zone-out jogs while binging a Netflix doc. It’s for real work. Full-body engagement. Legs, lungs, and brain firing together.

The first time you try it, it might crush you. That’s part of the draw.

But give it a few sessions and you’ll feel stronger, more efficient, and probably never look at a motorized treadmill the same way again.

I don’t use mine for every run—but when I want a session that forces me to show up, stay focused, and push my limits? I get on the curve.

How Many Miles is a 50K? Your Guide to Entry Level Ultra Running

The 50K race is often referred to as the “entry-level” ultra, and for a good reason—it’s the shortest distance that qualifies as an ultra marathon. But don’t let that fool you: even though it’s the shortest ultra, it’s still a serious challenge.

At around 31 miles, this “entry-level” event is no joke—it’s about five miles longer than a marathon.

But here’s the kicker: it’s not just the distance. The terrain, elevation, and mental hurdles will throw a whole new set of challenges at you.

When I first decided to take on the 50K, I wasn’t sure what to expect. But looking back, I can tell you it’s a completely achievable goal for anyone willing to put in the work.

In fact, with the right mindset, training, and a good sense of humor, you can totally crush your first 50K.

In this guide, I’ll give you the lowdown on everything from training tips to nutrition, gear, and mental strategies. And of course, I’ll throw in a few personal stories, like my Bromo Desert adventure and the wild midnight start at the CTC 50K Ultra.

Let’s get to it!

What Is a 50K Ultramarathon?

Let’s start with the basics.

A 50K is an ultramarathon, which is just a fancy way of saying it’s any race longer than a 26.2-mile marathon.

In miles, that’s 31.07 miles.

It might sound intimidating, but trust me—50K is often the first ultramarathon distance that new ultra-runners tackle.

The “feel” at ultras is totally different from a road marathon.

Picture less of that ‘big city race’ feeling and more of an ‘adventure on the trails’ kind of vibe.

Many 50Ks are run on trail courses, which means you’ll probably be jogging up mountains, sloshing through mud, and hopping over roots or scrambling across rocks.

Let me explain what I mean…

Not yet ready for an ultra? Try my marathon plan.

Trail vs. Road Challenges

Now, if you’re coming from road marathons, here’s the kicker: trail ultras are a whole different beast.

Road marathons are usually spot-on in terms of distance and pace. Aid stations hand out gels and water every few miles.

In trail ultras, things get… wild.

A “50K” might actually turn out to be closer to 55K or 56K. Surprise, right? And the terrain? It can slow you down big time.

Take my experience in the Bromo Desert Marathon 50K, for example. Instead of running on smooth, flat roads, I found myself tackling volcanic sand dunes and steep climbs at high altitude.

One minute, I was running, and the next, I was power-hiking up a freaking crater! Trail ultras often demand that you slow down or even take hiking breaks—especially on those steep uphills.

And that’s totally fine! Walking breaks? Yeah, they’re actually part of a smart 50K strategy. That’s why ultra trail runners are often dubbed power walkers – we do more walking than running, truth be told.

The trails are unpredictable—rocks, mud, rivers, crazy weather. You’ve got to be ready for anything. But that’s what makes ultramarathons so much fun—just the adventure of it all.

50k race challenge

Elevation = Extra Challenge

Let’s talk about elevation for a second. Many trail 50Ks come with some serious vertical gain. We’re talking hills, hills, and more hills. And it can make a HUGE difference in your race.

Here’s a trick: for every 100 meters of climbing, you can think of it like adding a whole kilometer to the effort. So, if you’re doing a 50K with tons of elevation, it could feel like running a much longer race.

During my Bromo Desert 50K, I had almost 1800 meters of climbing. Compared to other events, the elevation isn’t too much but for a first-timer, I’d to be careful and pick a a beginner-friendly ultra event (more on this later).

And it took me hours longer to finish than it would have on a flat course.

But that’s the deal with trail ultras—terrain and elevation make all the difference, so don’t worry too much about pace. The goal is to keep moving and take in the scenery. It’s all part of the experience.

To give you an idea, here’s the course profile for the bromo 50K event:

P.S Yes, that’s me being featured on the main page of the website. Famous right? Na. Just by accident

50K Race Times: World Records and Average Joes

Now, you might be wondering—how fast can 50K runners really go? Let me tell you, the pros make it look easy (even though it’s anything but). The men’s 50K world record? That’s CJ Albertson, who ran it in 2:38:43—31 miles at a crazy-fast 5:07 per mile pace! And for the women, Desiree Linden set the record at 2:59:54—she was the first woman to break 3 hours for a 50K. That’s insane!

But let’s be real here, that’s elite level. For most of us regular folks, a 50K is gonna take a lot longer than that. A solid amateur might finish in 5 to 6 hours on a good day.

Most people? They’re looking at finish times in the 6 to 7-hour range. And that’s totally okay! In fact, most 50Ks have 8-10 hour cut-off times, and plenty of runners take the full time to finish.

And here’s a fun fact: ultramarathons? Experience counts for a lot. Peak performance for a 50K tends to hit around 39-40 years old. So even if you’re not in your 20s, there’s a good chance you’ll be getting faster as you age!

P.S. Please keep in mind that these world records were performed on road, usually on indoor tracks. Not your typical trail course with elevation and treacherous terrains.

Trail vs Road Times

If you’re coming from marathons, expect to be slower in a 50K. It’s normal to run each mile 10 to 30 seconds slower than your marathon pace, even on a good day.

For example, if you run 8:00 minute miles in a marathon, your 50K pace might fall around 9:00-10:00 per mile.

That might add another hour or so to your time.

If the trails are technical or hilly, add more time to that.

For my first 50K took me about 8 hours, even though I had run a 3.5-hour marathon before. The sandy dunes, the slippery hills, the scorching heat and the mental aspect of running beyond 26.2 miles made it a whole new challenge.

Remember this: in ultras, it’s not about finishing fast. It’s about finishing strong.

Don’t stress about your time. As a first-timer, the main goal is to get across that finish line with a smile on your face.

And hey, sometimes being on the trail longer just means more time to fuel up, enjoy nature, and soak it all in.

Training Principles for a 50K Ultramarathon

Training for a 50K is a lot like marathon training, but with a few extra challenges thrown in.

The main things you need to focus on are building your endurance (lots of mileage and those long runs), running on terrain that matches race day, taking recovery seriously, and getting used to being out there for hours.

Let’s break it down into some solid principles.

Build Your Mileage Base (Consistency is Key)

To finish 31 miles, you need to have a solid base.

This isn’t about cramming in a few massive workouts. It’s all about consistency.

Start slow and build up gradually. Think of it like this: the more time you spend running, the more you teach your body and mind to handle the long hours on the trails.

Before your 50K, aim to reach a peak mileage of 50-60 miles per week. This isn’t a one-week wonder — it’s about steadily increasing your mileage until your body is ready to handle it.

If you’re just getting started and are newer to running, it might take up to a year of steady training.

But if you’re already running around 40 miles a week, six months of focused ultramarathon training should get you there.

Don’t stress about speed work for your first ultra. Throw in some strides or tempo runs for variety, but the real focus is just time on your feet.

One ultramarathon coach put it this way: “A 50K is a slower marathon.” The basic principles are the same as marathon training, but your focus should be on time on your feet, handling terrain, and fueling during those long runs.

My best advice?

Your first goal for a 50K? Simple — just finish. Forget about setting time goals. Your main focus is building that base and staying healthy. The biggest mistake I see in rookies is ramping up miles too quickly and ending up injured or burned out. Stick to the classic “10% rule” or listen to your body — increase gradually, and don’t forget to take recovery weeks when needed.

The Long Run 

Long runs are your bread and butter for ultramarathon training.

They’re going to feel like your best friend and, at times, like a challenge you want to throw out the window. But no matter how hard they get, these long runs teach your body how to keep going when it feels like it can’t.

For marathons, long runs peak around 20 miles, but for a 50K, you’re going to stretch that further.

Aim for your longest run to be between 20 and 26 miles. Some plans even recommend running a full marathon as part of your training. But honestly, hitting 20-22 miles is plenty, especially if you’re doing back-to-back long runs (more on that later).

When I was gearing up for the CTC 50K, my longest training run was 24 miles on trails, and it took me nearly 5 hours.

It was exhausting, but it gave me serious confidence: “Okay, I can handle being on my feet for hours.” Those first long runs will break you down, but they’ll build you up too.

I’d break the run into mental chunks: “Just get to the next mile,” “Make it to the top of this hill,” “Just reach the next water stop.” It made those long, grueling hours feel a little more manageable.

Back-to-Back Runs:

One trick I used in my training was back-to-back long runs.

For example, I’d do a long 18-mile run on Saturday and then follow it up with 10-12 miles on Sunday.

It was tough at first, but it simulated running on tired legs — which is basically what an ultra feels like. A good rule of thumb from coaches is to get in 30-40 miles over two days when you’re training for a 50K.

That one weekend where I did 20 miles on Saturday and 12 miles on Sunday really changed my mindset.

Sunday’s run was tough at first, but I realized I could still keep going on tired legs — a huge confidence boost for race day because when you hit that halfway point in an ultra, your legs are already begging you to stop.

Train on Terrain (Hills & Trails are a Must) 

If you’re training for a 50K trail race, here’s a piece of advice that’ll make all the difference: train on terrain that’s as close as possible to your race.

If your race has mountains, then find hills.

If it’s a technical trail, look for some gnarly paths to run on.

Running on trails isn’t the same as pounding pavement—it’s a whole different ball game.

You’ll be using muscles you never knew you had (I’m talking about those stabilizers and your ankles). It’s tougher, and your body’s going to feel it, so it’s important to get it used to the challenge.

When I was gearing up for Bromo, I didn’t just run any trails—I sought out the steepest, most challenging ones I could find. I even did hill repeats on a local trail until I was crawling up it.

But you know what? That paid off big time on race day when I faced those endless climbs. Train the way you race—it makes all the difference.

Now, let’s talk hills. When you’re facing big climbs in training (or race day), hiking is completely fine. In fact, it’s often the best way to get up those steep sections without burning out.

During my second ultra, the CTC 50K, the hikes were much more brutal. During the event, my mantra became: hike the ups, run the flats and downs.

Whenever I saw a big hill coming, I gave myself permission to power-hike it.

Guess what? I passed a lot of folks who tried to run up those hills, only to blow up halfway.

And don’t forget to train for those “extras” you might encounter on race day: running in the dark (ever tried a night run with a headlamp? If your race starts early or like CTC, at 10 PM, this is a must ), running in the heat, or even training in sand if your race happens in the desert. The more familiar race day feels, the better.

If you’re running a flat road 50K, don’t worry about the major elevation training, but still try to get in some soft-surface runs. You want to reduce the pounding on your legs. And yes, make sure you’re doing some long runs on flat pavement so your legs get used to that constant repetitive motion. You’ll need it come race day.

Recovery: Rest Hard, Run Hard 

Let’s face it, ultra training is no joke.

It’s tough on your body. As you increase your mileage and long-run distance, recovery becomes just as important as the training itself. You’re pushing your muscles, joints, and even your immune system to the limit, so you need to prioritize rest just like you do with your runs.

Here’s what I’ve learned about recovery that keeps me coming back stronger:

  • Sleep: Aim for 8+ hours of sleep per night. Your body does most of its repair work while you’re asleep. I always treated sleep like it was part of my training. Honestly, it’s the easiest “workout” ever. All you have to do is nothing, and your body gets stronger for it.
  • Rest Days: Take at least one or two rest days a week. No running, no excuses. Let your legs fully recover. If you need to move, go for a gentle walk or do some stretching or yoga. But don’t push it on rest days.
  • Listen to Your Body: If something feels off or you’re dealing with a nagging pain, don’t just push through it. Take a step back if you need to. I learned this the hard way after running through Achilles pain. I had to take an unplanned week off, and it wasn’t fun. Now, I respect rest like I respect my longest runs.
  • Nutrition for Recovery: After those long runs, you need to refuel. Your body needs protein and carbs to rebuild those muscles. For me, a big smoothie or a solid meal always hits the spot. My go-to recovery snack is chocolate milk and a turkey sandwich—simple, but it works every time.

Put It All Together: A Sample Week 

To give you an idea of what a peak training week might look like for a 50K, here’s what it could look like:

  • Monday: Rest or easy cross-training (yoga, cycling, etc.)
  • Tuesday: 5-mile easy run
  • Wednesday: 8-10 mile run (moderate pace, maybe add in some hills or tempo work)
  • Thursday: 5-mile recovery jog (super easy pace)
  • Friday: Rest day
  • Saturday: Long run – 20-22 miles on trails, go slow, and practice fueling
  • Sunday: Second long-ish run – 10 miles easy (on tired legs from Saturday)

This comes out to about 50 miles for the week. The next week, you might cut back for a “down week” to recover, then build back up again. Everyone’s plan will vary, but the key parts are: one long run, maybe a back-to-back, and mostly easy-paced running.

Training for a 50K isn’t just about logging miles. It’s about listening to your body, training smart, and putting recovery just as high on the list as the running. You’ve got to run hard, but you’ve got to rest hard, too.

Hydration

Start early when it comes to hydration. Drink consistently throughout the race, not just when you’re thirsty. I made this mistake early on, but it’s especially important if it’s hot, like it was during my Bromo Desert 50K, where temps hit 30°C (86°F). I drank about 500-750 ml of water per hour and carried electrolyte tablets to avoid dehydration and cramping.

But here’s the key: Don’t overdo it. Too much water can actually be harmful. There’s something called hyponatremia, and you definitely don’t want that. So, listen to your body. Drink when you’re thirsty, but don’t drown yourself. Keep sipping, stay ahead of your hydration, and you’ll be good.

Practice Your Fueling in Training

The best time to figure out your fueling strategy is during your long runs. I practiced with gels, bars, and electrolytes every 30 minutes during a 20-mile training run. By the time race day came around, I knew exactly what my stomach could handle. And trust me, there’s nothing worse than trying to figure out your fueling plan during a race.

Test everything during training. Your body will thank you when race day comes around.

Gear Essentials: What You’ll Need for a 50K

Gear can make or break your race. After my first ultra, I knew exactly what I needed to feel comfortable and get through the race. Here’s the gear I swear by:

  • Trail Running Shoes: You need the right shoes for grip and support on rocky, uneven terrain. Don’t make the mistake of showing up with shoes that aren’t broken in. Trust me, you don’t want blisters on race day.
  • Hydration Pack or Belt: You’ll need to carry your own water and snacks. Aid stations might be spaced out, so a hydration vest or belt is your best friend.
  • Headlamp: If your race starts early or ends late (like my CTC 50K did), you’ll need a headlamp to see where you’re going.
  • Clothing: Moisture-wicking clothes are a must. You want to stay dry, not drenched. Bring a jacket or vest just in case the weather changes.
  • Electrolyte Supplements: I always carry electrolyte tablets to keep my sodium and potassium levels in check. These really help prevent cramps.

Don’t forget a small first-aid kit, sunscreen, and chapstick. Trust me, those little things go a long way on race day.

Start Slow, Finish Strong

Here’s something I can’t stress enough—start slow. I know the race day excitement makes you want to go fast, but ultramarathons aren’t sprints. When I ran my first 50K, I took it easy at the start, and it paid off. I didn’t burn out in the first half, which gave me enough in the tank to pick up the pace later.

On the downhills, push the pace. On the uphills, take it slow—don’t be afraid to hike. It’s all about pacing. The key to finishing strong is managing your effort. Walk when you need to, and make sure you’re not going too hard early on.

Remember my mantra: hike the ups, run the flats and downs.

Pace Yourself: “Be the Fastest Tortoise”

When you’re gearing up for a 50K, forget obsessing over mile splits like you would in a marathon. Here, it’s all about the effort. There’s this saying in the ultra world: “Be the fastest tortoise.” Start slow, and try to keep it that way. You’re not racing to set a record in the first few miles – you’re setting yourself up for the long haul.

Run by Effort, Not Pace

For me, trail ultras are all about listening to my body. Sometimes I wear a heart rate monitor, but it’s mostly about the feeling. I use RPE (Rate of Perceived Exertion) – if I can talk, I’m in the sweet spot. If I’m gasping for breath, I dial it back. I want to save my energy for the long grind.

During my first 50K, I kept reminding myself: “If it feels slow, slow down some more.” I know, it sounds counterintuitive, but it works. During the CTC 50K, I saw a ton of runners take off like they were in a sprint, only to fade hard later.

I stuck to my plan, kept it steady, and ended up passing a bunch of those same runners in the second loop. Slow and steady? Definitely wins the race.

Pacing Mantras That Keep You Going

I’ve got a few mantras that keep me grounded on race day:

  • “Your slowest pace matters more than your fastest.” This one’s big. You’re in it for the long haul, so don’t blow yourself out in the first few miles just to impress anyone. Keep it steady, and you’ll stay stronger longer.
  • “Race the second half.” This one’s my favorite. I don’t push for speed until I’m well past the halfway point. In the first half, I let others zoom past. But come the second half? If I’ve still got legs under me, I start reeling people in. That’s when it’s really fun.

The Bromo Desert had two big loops, and I was pacing myself by walking the steep climbs and taking the downhills at a light shuffle. The first loop, I watched people zoom ahead, and I could feel the temptation to chase them.

But then I heard my coach’s voice in my head: “If it feels slow, slow down some more.” That advice saved me. By the second loop, I was passing runners who had started too fast.

Embrace the Ultra Mentality

Let’s face it: Ultras are mostly mental. While 50Ks might be 10% physical, that other 90% is all about your mind.

There will be moments when you’re feeling beat up and questioning why you’re out there. But this is where the mental game is won.

Here’s how I push through:

  • Break it down into sections: Looking at the full 31 miles can be overwhelming. Instead, focus on small wins – the next aid station, the next gel, the next mile. I’ve done long runs where I just told myself, “Get to the next hill.” That’s all you need to think about.
  • Positive self-talk: Sounds cheesy, but trust me, it works. I’ve used mantras like “One foot in front of the other” or “You’ve got this” when things get tough. I remember mile 28 during the Bromo Ultra – I was running on fumes, and all I could think was, “You didn’t come this far to only come this far.” It kept me going.
  • Expect the lows, but know they’ll pass: There will be times when you feel like absolute garbage. But, just like life, things change. I hit a serious low during the CTC Ultra at 3 AM. The rain was pouring down, my headlamp failed me, my legs were wrecked, and I was exhausted. I told myself, “Just make it to the next aid station.” Once I got there, I had some hot Indomie (noodle soup), a little Coca-Cola (honestly, magic), and I was back on my feet.

Final Thoughts – You Can Do This! 

Training for a 50K is a journey, no doubt. There’s no magic shortcut – just time, patience, and the grind. It’ll challenge you physically and mentally, but trust me, you’ll come out stronger than ever. Remember: it’s about consistency. Even when it sucks, just keep going. When you cross that finish line, you’ll know it was all worth it.

I’ll never forget the Bromo Desert 50K. I was nervous as hell at the start – doubts swirling in my mind. But once I settled into my rhythm, I was in the zone. I finished exhausted but proud, with a grin on my face. And honestly? It was one of the best feelings ever.

And you? Whether your goal is just to finish, or to crush it, your 50K will be one of the most rewarding experiences you’ll ever have. Let’s go – get out there and start training. You’ve got this.

Call to Action:

I want to hear about your 50K journey. Have you run one already, or are you gearing up for your first? Drop a comment below, and let’s support each other through this ultra journey. And if you found this guide helpful, share it with others who are thinking about their first 50K!

FAQ: Running Your First 50K

Q1: How many miles is a 50K race?

A 50K race is approximately 31.07 miles, making it just over a marathon distance.

Q2: Is a 50K considered an ultramarathon?

Yes! Any race longer than a marathon (26.2 miles) is considered an ultramarathon.

Q3: How should I train for a 50K race?

Gradually increase mileage with long runs, tempo efforts, and recovery days over several months. Back-to-back long runs and trail running (if relevant) are great additions.

Q4: How long does it take to finish a 50K?

Finish times vary depending on experience, terrain, and fitness. Most runners complete a 50K in 5 to 10+ hours.

Q5: Do I need to eat during a 50K?

Yes! Plan to fuel every 30–45 minutes with a mix of carbs, electrolytes, and fluids to keep energy levels stable.

Q6: Can I walk during a 50K race?

Absolutely! Walking is common, especially on tough climbs or technical terrain. Strategic walking can help manage energy.

Q7: What’s the difference between a 50K and a marathon?

A 50K is longer (31 miles vs. 26.2), often run on trails with more elevation and varied terrain, demanding more mental and physical endurance.

Q8: How many days a week should I train for a 50K?

Aim for 4 to 5 running days per week, including at least one long run and one rest or cross-training day.

Q9: What gear do I need for a 50K?

Key items include trail shoes (if off-road), hydration pack or bottles, nutrition, a hat or visor, and layered clothing for changing weather.

Learn More about Ultra-Distance Running

To dive a little deeper into the world of ultra-distance running, I’ve picked a few resources that can help:

  1. American College of Sports Medicine (ACSM): The ACSM offers a wealth of information on exercise science and training techniques. Their position stand on “Nutrition and Athletic Performance” provides evidence-based recommendations on fueling for endurance events, including ultra-marathons.
  2. UltraRunning Magazine: This publication is devoted to ultra-distance running and features articles, training tips, and interviews with experienced ultra-runners.
  3. Trail Runner Magazine: A great source for those focusing on trail running, which often overlaps with ultra-distance training. Their article on “Tips for Your First Ultra” provides practical advice for newcomers to ultra races.
  4. Running USA: This organization focuses on promoting and supporting the running industry. They often publish statistics and trends related to running events, including ultra-marathons.
  5. The North Face Endurance Challenge: The official website of this popular series of ultra-distance races includes a wealth of training resources, articles on endurance running, and nutrition tips. Check out their training resources here.


Runner’s Cough: Why You Hack After Hard Runs (And What to Do About It)

You finish a tough run—legs are good, lungs feel scorched—and then it hits: that dry, hacking cough.

It might last a few minutes. Maybe longer. You’re not sick, not wheezing like crazy… but you sound like you smoked a pack mid-tempo.

I’ve been there. So have a ton of other runners. For some runners, it might feel like hacking up a lung, and it happens like clockwork after long runs or speedwork.

The good news? It’s usually not serious. The better news? There are ways to manage it.

Let’s break it down.

What Is “Runner’s Cough”?

“Runner’s cough” (aka “track hack,” “tempo throat,” or “that gross noise I make after hills”) is that annoying cough you get during or after a run.

It’s not a cold.

It’s not a flu.

It’s just your lungs reacting to stress—especially from breathing hard in dry, cold, or polluted air.

When you run hard, you suck in a ton of air—fast, dry, maybe full of gunk like dust or pollen—and it irritates your bronchial tubes. Your airways freak out, tighten up, and boom: you’re coughing.

TL;DR: Your lungs got mad. They’ll chill soon.

Exercise-Induced Bronchoconstriction (EIB)

This is a mouthful, but it’s one of the most common causes of post-run coughing—especially if it happens often.

What the heck is EIB?

It’s basically temporary airway tightening during or after exercise. Used to be called “exercise-induced asthma,” and yep—it can happen even if you don’t have asthma.

What it feels like:

Coughing that kicks in mid-run or right after

Wheezing or chest tightness (like someone’s stepping on your lungs)

Feeling out of shape, even when you know you’re not

That deep, rattling cough that comes from the chest, not your throat

A lot of runners just assume it’s normal to cough after hard intervals or long tempo runs. But if it’s consistent, it could be EIB—and it’s way more common than you think.

👉 Research shows 5–20% of people without asthma still get EIB. For folks who do have asthma? Nearly 90% of them experience it during exercise.

How to Manage EIB (And Keep Running Strong)

Here’s how I’d recommend handling this one:

Use a Fast-Acting Inhaler (If Prescribed)

Albuterol is a common one. Two puffs before your workout can keep your airways open and chill. Always follow the prescription—this isn’t one of those “more is better” situations.

I knew a guy who accidentally doubled his dose… and ended up jittery with a resting HR of 150 bpm. Don’t do that.

Warm Up Like You Mean It

Don’t blast into your run at full throttle. Give yourself 5–10 minutes of light jogging and mobility work. Think of it as “priming” your lungs.

A good warm-up can actually trigger a little airway tightening before the main effort—then your lungs adapt, and you’re less likely to flare up when the real work starts.

Cold or Dry Air? Protect Your Face

Cold air is a major trigger. I tell runners to wear a buff or thin scarf over their nose and mouth in winter.

It helps warm and humidify the air before it slams into your lungs. And it works—especially for folks who say they only cough after cold-weather runs.

Try Nose Breathing (When You Can)

It’s not easy during speedwork, but during easy runs, breathe in through your nose and out through your mouth.

Your nose acts like a built-in humidifier. Mouth breathing in dry air = fast-track to cough city.

Cold or Dry Weather Running: Meet the “Track Hack”

Ever finish a winter run and suddenly feel like your lungs are on fire and your throat’s been sandpapered?

You’re not broken — that’s just cold-air cough, also known as the “track hack.”

And if you’ve ever done repeats on a dry indoor track or run in sub-40 temps, you know exactly what I’m talking about.

Why It Happens

Your lungs like their air warm and damp. But winter air? It’s cold, dry, and rough on your airway lining.

Breathe that in hard and fast, and your lungs fight back — tightening up (sometimes causing that tight-chest, can’t-breathe feeling of exercise-induced bronchospasm) and producing mucus to try and protect themselves.

What you get is a scratchy throat, a dry cough that can last for hours, maybe even some clear mucus coming up as your body tries to rehydrate your airways.

What It Feels Like:

  • Cough starts near the end of the run or just after
  • Feels like a cold burn in your chest
  • Dry or slightly phlegmy cough
  • Raw throat or scratchy chest afterward

Even indoor tracks with dry air can trigger it. The real issue? Cold + dry = irritated lungs.

How to Deal With It

Here’s how to stop this one in its tracks.

Cover Your Mouth and Nose

Neck gaiter, buff, thermal mask — whatever it is, cover up.

Trapping just a bit of moisture and warmth in your breath goes a long way. Even a thin layer over your mouth makes the air feel friendlier to your lungs.

Run Later in the Day

Mornings are the coldest. Midday runs usually have less windchill and a little warmth from the sun.

Even just a 10°F difference can mean the difference between a smooth run and a post-run cough fest.

Go Indoors on Brutal Days

If it’s below freezing, windy, or dry as a bone, treadmill runs are totally fair game. Save your lungs.

You’re not soft — you’re smart.

Warm Up Longer

Ease into your run. Brisk walk, slow jog, dynamic drills — get your breathing warmed up before you start hammering the pace.

Cold air and fast breathing right out of the gate is a recipe for coughing fits.

Postnasal Drip: When Your Nose Messes With Your Run

Let’s call it what it is: snot sliding down the back of your throat and triggering a cough.

Postnasal drip is gross, but common — and it can totally ruin your run.

Why It Happens

When you run, especially in cold or dusty air, your sinuses ramp up mucus production.

That extra gunk drains down your throat, and your body tries to clear it out with coughing or constant throat clearing.

Allergies? Dry air? Leftover cold? All of those can crank up the drip.

How You’ll Know:

  • Wet cough (you’re bringing up stuff)
  • Throat-clearing during or after runs
  • Scratchy or sore throat
  • Sinus pressure or that annoying “mucus stuck in the throat” feeling

It’s especially common in cold weather (your nose runs more) or allergy season (hello, pollen). And if you’re just getting over a cold? Your airways are still sensitive and junky.

How to Tame the Drip:

Take the following steps to protect yourself from the drip:

Rinse Your Nose Before Running

Saline spray or a quick neti rinse can help wash out dust, pollen, or dried mucus.

It’s gross but effective. Clear the pipes before you run, and you might save yourself a hacking fit halfway through your tempo.

Try an OTC Fix

Decongestants dry things up (good if you’re drowning in mucus).

Expectorants (like guaifenesin) thin the mucus so it doesn’t stick.

Ask a pharmacist if you’re not sure what’s best for your case — especially if you’re on other meds or have health stuff going on.

Breathe Moister Air

If you’re indoors, use a humidifier.

If you’re outside, cover your mouth like we talked about earlier.

You can also breathe more through your nose, which naturally humidifies the air better than mouth-breathing.

Treat the Root Cause

Allergies? Use antihistamines or nasal sprays.

Sinus issues? See a doc.

Recent cold? Back off the pace for a bit and let the body clear it out.

It’s not always about pushing harder — sometimes it’s just about letting your system reset.

Seasonal Allergies: When the Air Fights Back

If you’re a runner with seasonal allergies, you already know what I’m about to say: spring hits, everything starts blooming, and boom — you’re coughing like you just inhaled chalk dust mid-tempo.

That cough? It might not be from effort. It could be an allergy-driven airway freakout.

When pollen or mold is floating thick in the air, your immune system throws a fit — inflaming your airways, making you wheeze, and producing histamine like it’s going out of style.

Cough, sniffle, itch, repeat.

The American Lung Association even flags pollen as one of the biggest spring allergy triggers — and it hits runners hard.

You’re outside. You’re breathing hard. You’re basically a walking allergen magnet.

What It Looks Like:

You go out for a nice run. The sun’s out. Trees blooming.

Halfway through, your nose runs faster than your pace, your throat itches, and you start coughing.

After the run? Still coughing. Eyes watering. You’re miserable.

If you also deal with exercise-induced asthma (EIB)? You might get double-hit — allergies + airway constriction. That cough gets louder and longer.

Here are my best tips on running through the allergy season without losing your mind:

  • Check the pollen count before you run. If it’s sky-high? Go treadmill. Or swap your run for cross-training that day.
  • Run at the right time. Pollen levels spike in the morning and on warm, windy days. Evening or dusk is usually better. Rainy days? Gold.
  • Pre-load with an antihistamine. Non-drowsy versions like loratadine (Claritin) or cetirizine (Zyrtec) work well for most. Just don’t try something new on a race day.
  • Wear gear that helps. Wraparound sunglasses = fewer itchy eyes. A light buff over your nose/mouth can cut down pollen inhalation.
  • Shower and change ASAP post-run. Get that pollen off your skin and clothes before it lingers in your lungs.

If the cough still kicks in despite all this — talk to a doc. You might have allergic asthma and need an inhaler. Better to manage it early than wheeze through workouts all season long.

Acid Reflux (a.k.a. Your Stomach Being a Jerk)

Ever get a cough mid-run, followed by a nasty burning in your chest or throat?

Maybe even a sour taste in your mouth?

That’s not your lungs.

That’s acid reflux, and it can wreck your runs.

When you’re bouncing up and down on a full stomach, all that movement pushes stomach acid back up the pipe (your esophagus).

If it gets far enough? It can hit the back of your throat and even your airways. That’s when the coughing starts.

Doctors call this GERD (Gastroesophageal Reflux Disease).

Or sometimes laryngopharyngeal reflux when it affects the throat.

Doesn’t matter what you call it — if you’re coughing and tasting bile during runs, it’s a problem.

Here’s how to tell it’s not asthma, but reflux;

  • You feel a burn in your chest or throat
  • A sour taste creeps up during or after runs
  • Cough happens after eating or when lying down
  • Cough is worse when running downhill or bouncing a lot
  • Inhalers don’t help — but diet tweaks do

How to Prevent Reflux

Here are my best tips:

  • Don’t eat big meals before runs. Wait 2–3 hours after eating. If you need fuel, go small and bland (banana > burrito).
  • Know your trigger foods. Coffee, citrus, chocolate, spicy or fatty meals — all can stir up reflux. Avoid these close to workouts.
  • Use meds if needed. Antacids like Tums work short-term. H2 blockers or PPIs like famotidine or omeprazole help longer-term — but talk to your doc if you’re using these often.
  • Stay upright post-run. Don’t lay down or do yoga inversions right after running. Let gravity keep the acid where it belongs.
  • Ditch tight belts or waistbands. Sounds small, but squeezing your stomach can make reflux worse. Wear looser running gear.
  • Train your core and breathing. Some reflux is mechanical — weak core muscles and poor diaphragm control make acid creep upward. Fixing posture and core strength helps more than people realize.

Vocal Cord Dysfunction (VCD) – When It’s Not Your Lungs

Alright, here’s one that flies under the radar: vocal cord dysfunction, aka VCD.

Sounds weird, right? But it’s legit—and I’ve seen runners misdiagnosed with asthma because of it.

The catch? VCD has nothing to do with your lungs.

It’s your vocal cords closing when they’re supposed to open.

Think about that: trying to suck in air during a tough run, and your throat’s literally shutting the door.

That’s VCD.

How to Know It’s VCD (Not Asthma)

Most runners chalk this up to asthma—tight chest, trouble breathing, coughing—but here’s the difference:

  • With asthma, you wheeze on the exhale
  • With VCD, you’ll hear a high-pitched sound on the inhale, and it feels like your throat’s clenching shut

I read that it’s been described  like “breathing through a straw” or “choking mid-run.”

It hits hardest during high-intensity workouts—track repeats, tempo runs, hill efforts.

You’ll probably cough, maybe feel hoarse, and your inhaler won’t help.

🎯 Key sign: If you’ve got a wheezy, tight throat during hard efforts and your asthma meds do nothing, start thinking VCD.

What Causes VCD?

It’s not allergies. It’s not lung inflammation.

Common triggers:

  • Hard effort breathing mechanics
  • Stress or anxiety
  • Smoke or strong smells
  • Even vocal strain from yelling or overuse

You could have the lungs of an Olympian—but if your voice box locks up, it’s game over.

How to Fix It (Hint: Not With Meds)

Here’s the cool part: VCD isn’t permanent. It’s very trainable—you just need the right tools.

Speech Therapy & Breathing Techniques

This is the gold standard. A speech-language therapist can teach you how to:

  • Relax your throat during inhalation
  • Use belly breathing
  • Do specific vocal cord control drills

They’ll walk you through stuff like “sniff-breathe” techniques or rescue maneuvers that help you stop an episode before it snowballs.

Think of it as strength training—for your voice box.

Rescue Breathing Tricks

These are little “in-the-moment” tools to get through an episode:

  • Quick shallow pants
  • Inhaling through pursed lips
  • Nose breathing to calm the system

Runners with VCD often learn to spot the signs early and reset their breathing before it spirals.

Avoid Triggers (If You Know Yours)

If:

  • Cold air kicks it off? Warm up longer or use a buff over your mouth.
  • Chemical smells set you off? Don’t run near traffic or smoke.
  • It’s hard effort alone? Learn how to pace and breathe more efficiently under load.

Key tip: Prevention is a heck of a lot easier than fighting your throat mid-interval.

The Good News

VCD feels intense, but it’s not dangerous long-term.

Once diagnosed, it’s usually very manageable—and doesn’t need meds.

Tons of athletes have beaten it and gone on to race strong. You just need to understand what you’re dealing with.

If you suspect it, ask your doc for a specialist referral. You may need a scope or breathing test to confirm.

Most runners with VCD are initially told it’s asthma—and end up frustrated until someone looks deeper.

How Long Does Runner’s Cough Last?

I get asked this very often: “Why am I still coughing after my run?”

Runner’s cough is common—but how long it lingers depends on what’s causing it.

Here’s the general timeline:

  • Simple airway irritation (cold air, dry air, light bronchospasm):
    Usually clears in 10 to 60 minutes post-run. Water, warm air, and rest usually do the trick.
  • Exercise-induced bronchoconstriction (EIB):
    Typically resolves in 30–60 minutes. With a rescue inhaler? You might feel better in 10–15 minutes.
  • Allergy-driven cough or postnasal drip:
    Might last a little longer—up to 1–2 hours, especially if you’re still around the trigger (pollen, mold, etc.).

When It’s NOT Normal

If you’re still coughing hard 2, 3, 4 hours later, or if it lingers all day, that’s not just “runner’s cough.” That could be:

  • A brewing chest infection
  • Uncontrolled asthma
  • Something else like VCD or an environmental trigger you haven’t identified

Pay attention to patterns:

  • Does it only happen in winter?
  • Does it go away when you run indoors?
  • Does it get worse with every run?

Those clues help pinpoint whether it’s just irritation or something bigger.

My Final Word

If winter running makes you cough, you’re not broken—you’re normal. But that doesn’t mean you have to just suffer through it.

Bundle up. Pick your time. Know your limits. Adjust when needed. And if it still doesn’t feel right, get help.

Cold air doesn’t have to be your enemy. With the right approach, you can train through winter without hacking up a lung.

Got a winter running tip or compression mask you swear by? Or maybe a story about finally solving your post-run cough? Drop it in the comments—I’m always down to learn from fellow winter warriors.

Stay warm. Run smart. And protect those lungs.

—Coach Dack

Average 5K Time for Beginners: What to Expect and How to Improve

What is a Good 5K Time for a Beginner?

Your first 5K is a huge milestone, and it’s totally normal to wonder, “How long should a beginner run a 5K in?”

As a running coach, I know everyone’s journey is different, but for most newbies, you’re looking at finishing between 30–40 minutes.

Don’t sweat it if you’re a bit slower at first – I’ve been there myself, and trust me, it gets better with time.

Most folks cross the line somewhere around 32 minutes for men and 39 for women in a typical 5K.

Fun fact: even Facebook’s Mark Zuckerberg ran a 20:35 5K, but that’s a way faster pace than most beginners (about 10 minutes faster, to be exact)!

Here’s the deal: if your first race feels like it’s taking a bit longer, that’s totally fine. Many beginners mix jogging and walking, so a time anywhere between 40-50 minutes is also totally normal.

Don’t stress about your time too much — and truth be told, for your your first 5K… showing up is a win, and finishing, without worrying about your time, is a bigger win.

Let me break down more 5K stats and numbers for beginners.

Understanding the 5K Distance

Before we talk about time goals, let’s break down what a 5K actually is.

It’s 3.1 miles. Sounds short, right? But believe me, when you’re out there racing, it feels a lot longer than it sounds.

It’s about 22.5 laps around a standard track or running back and forth on a football field about 50 times.

So, don’t underestimate it – treat each mile with respect and you’ll do great.

Average 5K Times for Beginners

Let’s look at what other runners typically do:

  • Sub 25 minutes: This is pretty fast for a first-timer. If you’re running at an 8:00/mile pace, you’re going hard! Some elite fun-run groups might see this, but it’s not the norm for a first 5K.
  • 30-40 minutes: This is the sweet spot for most beginners who’ve put in a bit of training. Hitting that 30-minute mark is a solid goal, and honestly, it’s what many Couch-to-5K programs target in about 8-10 weeks.
  • 40+ minutes: This is totally fine too. I’ve had tons of runners who took it slow with walk breaks, and they finished around this time.

Remember: “Any pace is a good pace.” If you’re not at the sub-30 level yet, don’t sweat it — just train at your own pace and work up from there. Here’s what the data says: When new runners start out, the average pace is about 13:00/mile (that’s a 42-minute 5K for women and a 35-minute 5K for men). So if you finished your first race anywhere in the 30s–40s, you’re in great company.

 average 5K time for beginner

5K Pace Chart for Beginners

Want to set a goal for your first 5K? A simple way is to figure out what pace you can comfortably maintain.

This chart below shows different paces and how they translate into your 5K time. Find a pace that feels good, and aim for the finish time that goes with it:

Let’s say you’re running at a 10:00/mile pace during training. If that feels comfortable, shooting for a 31-minute 5K is a solid, realistic first goal. Pro tip: The Mayo Clinic’s “Magic Mile” method is a great trick for predicting your 5K time. Run a hard mile, then add 1-2 minutes for your estimated 5K time.

Setting Your First 5K Time Goal

How do you choose a time goal for your first 5K?

Here’s the trick: find a goal that’s tough, but still doable.

You can try the Magic Mile method: run a mile as fast as you can, then add about 2 minutes to guess your 5K finish time.

Or you could check out local race results to see what other beginners (same age/sex as you) have done.

But listen, this is YOUR race.

Set a personal goal. If finishing without stopping is your goal, awesome. Go at your own pace, or even plan for a walk-jog strategy. If you’re shooting for a faster time — like breaking 35 or 30 minutes — that’s great too.

But don’t set a goal that’s too far out of reach. For example, if you haven’t trained at close to a 25:00 pace yet, don’t set that as your first goal.

Your First Race

For your first 5K, here’s my advice: forget the clock.

The main thing is to run or run-walk the whole distance. Endurance first, speed later.

Sure, if you already fit enough and can run the whole distance in one-go, be my guest. But I also know that many beginners are still… beginners. So aiming a little bit too high might be an overstretch.

So do what works for you.

I coached a runner who was obsessed with finishing his first 5K in under 25 minutes.

He went way too hard at the start, and by the last mile, he was walking — and not the fun kind of walk.

He was frustrated and pointed out to me – angrily – that my training plan wasn’t good enough. I simply reminded him that our goal was to finish within 30 minutes despite him being a gym regular for the past five years.

I also reminded them that lifting weights on a regular but only jumping on the treadmill every now and then helps a runner but doesn’t make one.

He was smart enough to recognize the error of his way.

When he came back for the next race, he focused on pacing and finished in 28 minutes. Not the sub-25 min he hoped for, but it was better than his first disastrous attempt.

The moral of the story? Patience and consistency are key.

Average 5K Times by Age Group: What’s the Deal?

You’re looking to run a 5K, right?

Here’s the thing: it all depends on a few factors, like how old you are and how much you’ve been running.

But let’s not stress too much – these numbers are just averages. The real magic comes from your training and your consistency. Here’s what the average 5K looks like across different age groups:

For Men:

  • 20-29: 16:45
  • 30-39: 17:41
  • 40-49: 18:13
  • 50-59: 19:31

For Women:

  • 20-24: 36:22
  • 30-34: 38:41
  • 40-44: 38:26
  • 50-54: 41:20

Your Pace and Finish Time

Your pace is key. Here’s a breakdown of what the numbers look like at different paces.

Don’t get too hung up on hitting these numbers right away—it’s all about working towards your goal.

  • 5 min/mile – 15:32
  • 6 min/mile – 18:38
  • 7 min/mile – 21:45
  • 8 min/mile – 24:51
  • 9 min/mile – 27:58
  • 10 min/mile – 31:04

If you’re just getting started, hitting a 9-minute mile is an awesome target. But with some training, you’ll notice those times starting to drop. That’s the fun part.

Age-Group Runners: Here’s the Real Scoop

We’re not all out there trying to chase down the pros.

And honestly? That’s perfectly fine.

A lot of us are just regular age-group runners doing our best. If you’re in this category, you’ll see a lot of differences in race times, and that’s because some people have trained more seriously or even ran in college. But regardless, it’s all about doing your best.

Age GroupMen’s AverageWomen’s Average
0-1534:4337:55
16-1929:3937:39
20-2429:2736:22
25-2931:0936:16
30-3431:2738:41
35-3933:4437:21
40-4432:2638:26
45-4933:1339:19
50-5434:3041:20
55-5937:3345:18
60-6440:3345:49
65-9942:5950:13

You can see the trend here—times tend to get slower as people age, but there are always those who defy the odds and keep pushing. It’s all about consistency and sticking with it, no matter what age you are.

What’s a Good Time for a 40-Year-Old?

A lot of us don’t start running until later in life, so if you’re in your 40s, you might be wondering what’s a solid time for your age group.

For guys, hitting 18:13 in a 5K is pretty good.

For women, finishing somewhere in the mid-to-late 30-minute range is an excellent target.

But, here’s the most important part: don’t compare yourself to others. Focus on your personal growth. That’s what matters most. Every step forward is a win.

Quick Tips to Set Your Goal

Setting goals is important – but they need to be realistic. Here’s how I’d suggest you go about it:

  • Do a Practice Run: Go out and run a few miles, then figure out what kind of pace you can comfortably sustain. This will help you set a solid 5K goal.
  • Be Honest About Your Training: If your 5K training is mostly easy runs, setting a 25-minute goal might be a stretch. Set a more realistic goal like 30-40 minutes instead.
  • Have Two Goals: Set one goal you know you can hit (like finishing in 40 minutes) and then shoot for a stretch goal (like 35 minutes). You’ll feel pumped even if you hit the first one!

Pacing Strategies for New Runners

This is where a lot of beginners go wrong: starting out way too fast and burning out. If you want to avoid that, here’s how to pace yourself:

  • Start Slow: Trust me on this. Start with an easy pace – don’t rush. You’ve got 3.1 miles to cover, so save some energy for the finish.
  • Find Your Rhythm: Once you hit your stride, keep it steady. Negative splits (starting slower and speeding up later) are always the best way to go.
  • Use Downhills to Your Advantage: If you’re lucky enough to have some downhills, use them to recover. Then give it 90% effort on that last mile.
  • Listen to Your Body: If you feel like you’re about to crash, don’t be afraid to slow down or walk for a bit. It’s way better than pushing too hard and blowing up before the finish.

The key is to pace yourself in a way that feels good. The last thing you want is to get caught up in other people’s pace and end up burning out.

Common Mistakes to Avoid

Let’s keep it real: beginners make the same mistakes all the time.

Here’s what to avoid so you can run smarter:

  • Sprinting at the Start: Everyone gets excited at the beginning, but if you go too hard too early, you’ll pay for it later. Start steady and build from there.
  • Skipping Warm-Ups or Rest: Don’t skip your warm-up – muscles work better when they’re ready to go. Also, don’t cram all your training into one week. Keep it steady and avoid injury.
  • Trying New Stuff on Race Day: Race day is NOT the time to try new shoes or food. Stick with what you know works.
  • Setting Unrealistic Expectations: If you’re just getting started, aiming for a 20-minute 5K right off the bat is probably too much. Set a goal that’s achievable.
  • Comparing Yourself to Others: Everyone’s journey is different. Focus on your own progress instead of comparing yourself to the person in front of you.
  • Skipping Walk Breaks: If your plan includes walk breaks, do it! It’s all about finding your rhythm and finishing strong. There’s no shame in taking a breather.

FAQs About Average 5K Times

Here are some common questions:

Q1: What is a good 5K time for a beginner?

For most beginners, finishing a 5K under 30 minutes is an excellent goal. It reflects a steady pace and a solid level of fitness, especially if you’re new to running.

Q2: How long does it take to train for a 5K?

Most beginners can get ready for a 5K in 6 to 8 weeks with consistent training. Focus on gradual mileage build-up, easy runs, and rest days.

Q3: Can beginners run a 5K without walking?

Yes! With a well-structured plan that builds endurance safely, many beginners can run a full 5K continuously by race day.

Q4: How can I improve my 5K time?

Incorporate interval training, tempo runs, and strength exercises into your weekly routine. These boost speed, endurance, and overall running efficiency.

Q5: What’s a good weekly mileage when training for a 5K?

Most beginners benefit from 10–15 miles per week, split over 3 to 4 runs. This builds endurance without overloading your body.

Q6: Should I run every day to prepare for a 5K?

Running every day isn’t necessary. Aim for 3 to 4 running days per week, allowing for rest or cross-training to prevent injury.

Q7: Do I need special shoes for a 5K?

A comfortable pair of running-specific shoes with proper support is important. Visit a running store for a gait analysis if possible.

Q8: What’s the best way to pace myself during a 5K?

Start at a comfortable pace you can maintain. Aim to finish strong by gradually increasing your effort in the final mile.

Q9: Is it normal to feel nervous before my first 5K?

Absolutely! Nerves are common but can be channeled into positive energy. Remind yourself you’ve trained and you’re ready to enjoy the experience.

Conclusion: What’s a Good 5K Finish Time for a Newbie?

Ultimately, a “good” 5K time depends on you. For most beginners, under 30 minutes is a great goal, and anything sub-25 minutes is excellent. But here’s the most important part: enjoy the process. Celebrate the fact that you ran 3.1 miles. You’re a runner. That’s what counts.

So if this is your first 5K, focus on finishing strong, having fun, and looking forward to the next race. The rest will follow.

Your turn! What’s your 5K goal? Drop a comment and let’s chat about it!

MAF Training Plan: The Ultimate Guide to the Maffetone Method for Runners

Walking five miles

Ever finish a run and still feel like you’ve got gas in the tank?

Like you could actually live your life afterward instead of crawling into recovery mode?

That was a rare feeling for me—until I ran into the Maffetone Method.

Now, I’ll be straight with you: I used to think running slow was for people who didn’t train hard enough.

Living in Bali, with hills that eat your quads and heat that melts your willpower, “easy running” sounded like a joke. I’d scoff at the idea of walking up a hill.

But then I tried it—and it flipped my training upside down.

MAF training made me eat my ego, but in the best way possible.

It taught me how to build real endurance without wrecking my body every session.

It reminded me why I love this sport—because it’s not about looking fast, it’s about becoming strong from the inside out.

So if you’re a beginner just trying to get your legs under you or a veteran marathoner tired of burnout, I’m walking you through everything I’ve learned (the hard way) about MAF.

We’ll talk about the science, the mindset shifts, how to create your own plan, and why sometimes the biggest gains come from the slowest runs.

You’ll get real tips, real examples, and yeah—some of my own stories where I nearly threw in the towel.

MAF isn’t easy, but it works. Let’s dig in.

What Is the Maffetone Method?

The Maffetone Method (MAF) is a way of training based on heart rate—not pace, not mileage, not how tough you feel.

The goal is to stay in your aerobic zone, where your body uses fat for fuel (Zone 2, if you’re tracking that stuff).

Dr. Phil Maffetone—a guy who’s been helping athletes since the 80s—came up with this method to focus on building aerobic power without beating up the body.

Instead of chasing speed all the time, MAF flips the mindset: train easy, build the engine, and then see the speed come.

The backbone of the method is the 180 Formula:

180 – your age = your max aerobic heart rate

That number? That’s your ceiling. You don’t go over it on most runs.

For example:

  • Got health issues or just coming back? Subtract 5–10 beats.

  • Been training consistently for a couple years? Use the base number.

  • Elite and injury-free for years? Maybe add 5.

So if you’re 40 and healthy, your MAF number is around 140 bpm. That’s your magic zone. Go over it, and you’re dipping into anaerobic territory—something we avoid during MAF blocks.

When I plugged in my numbers, I got 143 bpm. That number ruled my life for months.

I’d be jogging along, heart rate creeping up—boom, I’d back off. Sometimes that meant walking. Sometimes it meant people passing me left and right.

I hated it.

But it worked.

Why It Works (Even If It Feels Way Too Easy)

The real genius behind MAF? You train your body to run faster at the same heart rate.

You don’t need to push harder—you just become more efficient.

Over time, you go from slogging along at 12:00/mile to cruising at 10:00/mile with the same heart rate.

It’s all about adaptation.

You teach your muscles and your heart to work smarter, not harder.

Fat becomes your go-to fuel source.

Oxygen gets used better.

Recovery feels easier.

And you’re not stuck nursing overuse injuries every couple of months.

Still think it’s too soft?

Let me throw down a name: Mark Allen—six-time Ironman world champ.

The guy couldn’t run faster than 8:15/mile when he started MAF training, and that was 3 minutes slower than his usual pace.

But he stuck with it. Months later, he was running 5:20 miles at the same heart rate.

Let that sink in.

He didn’t change his gear. He didn’t find some magic diet. He just slowed down, trained smarter, and built a base most of us only dream about.

Why I Swear By Zone 2 Training 

Let’s be real—most runners want to go fast. We crave that finish-line kick, that feeling of pushing the edge.

But here’s the deal: the real gains? They start when you slow down.

Training in Zone 2, your lower aerobic zone, teaches your body how to run smart—not just hard.

It’s where your heart rate stays chill and steady, and your body taps into fat for fuel instead of guzzling through limited carb reserves.

I know, fat-burning sounds like some diet ad, but this isn’t fluff. It’s physiology.

When you’re in Zone 2, your body’s mostly burning fat and preserving your precious glycogen (that’s your carb energy). And that matters because you’ve only got about 90 to 120 minutes of solid carb fuel in you at moderate intensity.

That’s why you bonk during a long race if you haven’t trained this system.

Fat, though? Even lean runners are walking around with tens of thousands of calories stored. Zone 2 teaches your body to dip into that bank early and often. That’s how you go longer without crashing.

From Sluggish to Strong 

Here’s the cool part. Training in this zone doesn’t just help you burn fat—it reshapes your entire engine.

According to science, regular Zone 2 running leads to more capillaries (those tiny blood highways that feed your muscles), and boosts the number of mitochondria—the “power plants” of your cells.

More of those little guys means more energy, better endurance, and a heart that beats stronger and more efficiently.

Your resting heart rate might even drop.

It’s like giving your whole cardiovascular system a performance upgrade—without needing fancy shoes or tech.

When I stuck to Zone 2 during my base-building phase, I wasn’t just running slower—I was building a machine.

What About Speed?

I get it—slow running sounds like the opposite of getting faster.

But trust me, this is the long game. This kind of training lays the foundation so that when you do hit the gas, your body’s ready for it.

Elite coaches have known this forever. In fact, many of them suggest that around 70–80% of your running should be done at low intensity.

Even Dr. Phil Maffetone took it a step further with his MAF Method—where, at first, you might do nearly 100% of your running at this slow, easy pace.

Yeah, it’s strict. But it works.

It’s not about pace. It’s about heart rate.

One runner might be cruising at 7:30 per mile while staying in Zone 2, while another is doing run-walk intervals just to keep the heart rate in check.

And that’s totally fine.

Effort is what counts. Not Strava pace.

If you can talk while running, you’re in the zone. If you’re gasping for air like you’re finishing a 5K, back off.

Lifestyle Matters More Than You Think

Here’s where it gets interesting—and where Maffetone’s philosophy really shines. Your run effort isn’t just about the run.

Had a night of crap sleep? Your heart rate’s gonna spike. Stressed from work or ate junk food? Same deal. Skipped your rest day? Yep, your heart’s working harder even on an easy jog.

MAF forces you to pay attention to those things because they show up in your running—even when you think you’re taking it easy. It’s not just a training plan; it’s a mirror.

I’ve had days where I felt fine but my heart rate told another story. That feedback was a wake-up call—I had to clean up the rest of my life if I wanted better runs.

Calculating Your MAF Heart Rate 

Let’s break it down in runner-speak.

You want your MAF number? Here’s the quick-and-dirty formula:

180 – your age = your base aerobic cap.

Tweak it depending on your training background:

  • If you’ve had a major illness or injury lately, knock 10 beats off.
  • If you’re a little banged up, been inconsistent, or out of shape, subtract 5–10.
  • If you’ve been training steadily for the past couple of years with no big setbacks, keep it as-is.
  • If you’re a seasoned athlete with years of consistent running under your belt, add 5.

That final number? That’s your max heart rate for MAF-style aerobic runs.

And here’s the kicker: staying under it is fine—even better when warming up. Going over? Not okay. Every beat counts in this method.

When I first started this, I kept creeping over by 2–3 bpm and thought, “Eh, close enough.” But the truth is, those few beats shift you out of the aerobic zone and into no-man’s-land.

You’re not going easy, but you’re not going hard either—you’re just frying your system without real gains.

Heart rate monitor? Non-negotiable.

I recommend a chest strap or a reliable armband. I made the rookie mistake of relying on my wristwatch when I first dabbled with MAF. One day it told me I was cruising at 150 bpm. Spoiler alert: I wasn’t. The watch was picking up my cadence, not my heart rate. I was running blind and fooling myself.

Wrist sensors are notorious for flaking, especially in heat or during bouncy runs.

Chest straps might be old school, but they don’t lie. And if you don’t have one? You can still MAF-train by feel—just run really easy.

Like, embarrassingly easy.

The Ego Punch You Didn’t See Coming

Let’s get real—MAF running feels ridiculously slow in the beginning.

Your pride? It’s going to scream. But that’s part of the process.

I’ll never forget one of my earliest MAF runs. I was puttering along a flat stretch, and some guy walking his dog passed me. I wanted to chase him down just to prove I was a “real runner.”

But I checked my heart rate—138, safely under my 143 cap—and told myself, “Let it go, David. Long game.” I kept jogging. That was the first time I felt like I truly got what MAF training was all about.

This mental battle? Totally normal. Most runners hit it hard in the first few weeks. Stick with it.

A few months in, you’ll be gliding past those same walkers—still breathing through your nose, still under your cap—and wondering why you ever doubted the method.

Is MAF Training Right for You?

Now let’s get to the real question: Should you even bother with this stuff?

Short answer: It depends on your goals, mindset, and how beat up you feel.

Here’s who should seriously consider going full-MAF:

1. You’re chasing endurance, not just a medal.

Thinking about your first half marathon or ultra? MAF works super well for building a massive aerobic base—the foundation every distance runner needs. Without it, you’re just stacking bricks on sand.

2. You’re always injured or burnt out.

If your training cycle is just “build, break, repeat,” it’s time to chill out. MAF reduces overall body stress so you can recover, rebuild, and come back stronger—without smashing yourself into the ground every week.

3. You want to burn more fat and stop bonking.

Been there. That late-race crash where you hit the wall? That’s poor fat utilization. MAF teaches your body to burn fat more efficiently by staying in the aerobic zone. Bonus: you’ll lean out in the process if weight loss is on your radar.

4. Your “easy runs” aren’t actually easy.

If you think you’re running easy but still finishing sweaty and gassed—newsflash: you’re not going easy. MAF puts you on a leash and teaches true discipline and pacing. It’s like running school for grown-ups.

5. You want to run by feel.

It’s weird, but using a heart rate monitor helps you become a more intuitive runner. You start noticing your breathing, your footstrike, your tension levels. Over time, you’ll know what 140 bpm feels like without even looking. That’s power.

6. You’re just starting out or coming back after a break.

MAF is perfect for beginners or comeback runners. It keeps your ego in check and lets your body adjust without cooking your joints or lungs.

7. You’re fried—physically, mentally, emotionally.

If your resting heart rate’s up, your sleep’s crap, and your motivation is shot… MAF is your lifeline. It’s not sexy, but it works. Think of it as a reset button for your body and brain.

When MAF Might Not Be a Fit

It’s not for everyone.

If you only run twice a week and have a race coming up in a few weeks, MAF probably won’t work magic in that short window.

Or if you’re hooked on speed sessions and dread slow miles, you might mentally struggle with the patience it takes. (Though, honestly, those are the folks who probably need it the most.)

MAF is a slow burn, not a firework show.

Crafting Your MAF Training Plan 

Alright, let’s get real. If you’re new to MAF training—or running in general—you don’t need a fancy strategy.

What you need is a solid plan that actually works in the real world.

Here’s how to build your MAF training routine from scratch, no fluff, no BS.

Step 1: Find Your MAF Heart Rate

You’ve probably seen this already, but let’s hammer it home:

Take 180 and subtract your age. That’s your rough max aerobic heart rate.

For most folks, your sweet spot will sit about 10 beats below that number up to the max.

So if your MAF is 140, your working zone is around 130–140 bpm.

You don’t need to stay glued to the top of that range. Hover anywhere in the zone and you’re doing work.

As a beginner, you’ll probably want to sit in the lower end anyway to make sure it’s truly easy.

I remember when I first started—anything above 125 felt like I was pushing it.

Take your time. This is about building, not burning out.

Step 2: Gear Up Like You Mean It

You need a decent heart rate monitor. Period.

Chest straps are best, but optical armbands or wrist sensors can work—just know wrist sensors can be a little moody.

Wear it tight, check it often, and don’t freak out if it spikes randomly.

Also—shoes matter. More than most people think.

MAF runs are slow and steady, but that slower pace can change how your feet hit the ground.

If you’re shuffling more, you need shoes that actually feel good at that pace.

I’ve had runners who swear by higher-cushion or more flexible soles for their easy runs. Try a few pairs, see what clicks.

Step 3: Build a Weekly Rhythm That Fits You

The beauty of MAF? It’s chill. That means your body can handle more volume—eventually.

But don’t get greedy too soon. Start with something manageable and grow from there.

Here’s a rough breakdown:

  • Brand new to running? Run/walk three times a week. Let’s say Tuesday, Thursday, Saturday. Keep it short—20 to 30 minutes. Walk breaks are not weakness. They’re part of the deal.
  • Been running a few months? 4–5 days a week is doable. Add a longer session on Sunday, keep the others short and sweet.
  • Got some races on the radar? You might hit 5–6 days, following that old-school “3 weeks build, 1 week back-off” cycle.

This is flexible. Life happens. Just aim for consistency—not perfection.

Step 4: Start Every Run Slow (Like, Sloth-Level Slow)

Here’s the rookie mistake: bolting out the door like you’re chasing a PR.

Don’t do that.

When you start from rest, your heart rate shoots up fast. It’s called cardiac lag.

Fix it by easing in.

Me? I walk for 2–3 minutes. Then I jog gently for another couple, heart rate still well below MAF. I don’t get to my MAF zone until minute 10.

It’s not wasted time—it’s the setup that makes the rest of the run smoother.

Step 5: Use the Talk Test

Forget the numbers for a second.

Can you breathe through your nose?

Can you talk in full sentences?

If yes, you’re probably right where you should be.

If not—if you’re gasping, mouth open, wheezing through a sentence—you’re going too hard.

In Bali’s heat and humidity, nose breathing feels impossible some days.

But back in cooler weather? It’s a solid gut check.

Learn to listen to your body. It’s smarter than your watch.

Step 6: Walk Breaks = Progress (Not a Step Back)

Let’s kill this myth right now—walking doesn’t mean you failed.

It means you’re training smart.

Early on, even a slow jog might shoot your heart rate above your cap. That’s fine.

So jog, watch your HR, then walk until it drops.

Repeat.

You’ll start with short jogs and longer walks.

Then, without forcing it, you’ll flip that around.

One day you’ll notice—you haven’t walked in 15 minutes. That’s improvement.

Got hills? Walk them. I do.

There’s no ego in grinding up a hill at 170 bpm just to say you ran it.

Walk strong, stay aerobic, move on.

Step 7: Long Runs Are Still the Cornerstone

Even with MAF, long runs matter—especially if you’re training for a 10K, half, or full marathon.

Keep them fully aerobic.

Pick one day a week (usually weekends) and just go a little longer.

If you’re used to 30-minute runs, make your long run 45 or 50. Don’t jump to 90 minutes out of the gate.

Add 5–10 minutes a week, then back off every few weeks. That rhythm keeps you building without frying your legs.

Since MAF is all easy pace, you can bump mileage a little faster than in high-intensity plans—but only if your body’s cool with it.

I’ve seen beginners go from a 3-mile long run to 10 miles in a few months, walking part of it, all in zone 2.

That’s how you build endurance without burning out.

And don’t sweat the pace.

Yes, it might be slow. Yes, you might walk some of it.

That’s not just okay—it’s expected.

Step 8: Cross-Training & Strength

Just because you’re training MAF-style doesn’t mean you skip everything else.

In fact, this is the perfect time to sneak in some strength work and mobility—especially since you’re not fried from hardcore intervals.

Think push-ups, planks, squats, deadlifts—basic, honest work.

And don’t worry, strength doesn’t usually jack up your heart rate like running (unless you’re going full CrossFit beast-mode). Maffetone himself is a big believer in strength and mobility.

Two days a week of proper strength training? That’s gold.

You’ll be more durable and less injury-prone.

Pro tip though: Don’t turn your lifting sessions into HIIT. I see people trying to “lift for cardio” and end up gassed like they’re in a spin class.

Chill. Rest between sets. Nail your form. Save the heart rate spikes for your long runs.

Now, aerobic cross-training? Absolutely.

Bike rides, swimming, elliptical—all fair game at MAF heart rate. It all counts toward your aerobic engine.

I’ve coached runners who couldn’t run due to injury, but they kept their base solid by cycling at 130 bpm.

Your heart doesn’t know the difference—it just beats.

If you get bored with just running, toss in a swim or a mellow bike ride once a week.

That mix keeps your legs fresher and your brain sane.

Step 9: Keep Tabs on Your Body

Track your progress. Not just with pace, but with how you feel.

Use the MAF test monthly. But also watch your energy.

If your MAF pace tanks or you’re constantly dragging, take a hard look at what else is going on: poor sleep, stress, ramping up mileage too fast?

Don’t be that person who thinks slow running means you’re invincible. It’s still training. You still need rest days.

I recommend 1–2 days off per week, especially if you’re new to this.

And “off” doesn’t mean lazy. Walk. Stretch. Do yoga. Recharge.

One more tip: listen to your heart—literally.

If you head out and your heart rate shoots up 15 beats above normal on an easy jog? Something’s off.

That’s your body waving a red flag.

I’ve had days where my watch says 150 bpm before I even get going—on those days, I turn around or take a walk instead.

Your ego won’t like it, but your recovery will thank you.

Step 10: When (and How) to Add Speed

After a few months of solid MAF base work—say 3 to 6 months—you can start mixing in some faster stuff if your goal calls for it.

That’s the beauty of this approach.

You’ve built the engine. Now you can hit the gas.

This is where 80/20 training kicks in: 80% MAF, 20% quality work. Intervals, tempos, hill reps—you’re ready for it now.

As I’ve explained earlier, Mark Allen, one of the greats, did exactly that after his base phase and unlocked a whole new gear.

But here’s the deal—only add speed if you’re chasing something specific.

If your goal is general health or just finishing a marathon without collapsing, you might not need much fast stuff at all.

Some folks live happily in the low-intensity lane and still get fitter every year.

If you’re eyeing a 5K PR though? Yeah, you’ll need to fire up those legs.

Just make sure speed doesn’t trash your base.

Keep testing your MAF pace. If it slips after adding intervals, back off and recalibrate.

One quality session a week and a moderate tempo can be plenty.

The rest? Keep it slow.

That’s how you build forever fitness.

Step 11: Fuel Like It Matters

MAF isn’t just about what’s on your watch—it’s also about what’s on your plate.

You don’t need to overhaul your entire diet, but you do need to eat like your training matters.

Whole foods. Less junk. Try not to pound sugar before every run.

Maffetone often encouraged trimming refined carbs and playing with fasted runs to boost fat-burning.

Personally? I’ve found that dialing back sugar, especially during base building, helps me feel more steady on long runs.

Sleep, stress, hydration—it all ties in.

MAF rewards the runners who treat their bodies like performance machines, not trash compactors.

Eat enough, recover well, and let the aerobic magic do its thing.

Step 12: The Boring Truth—Consistency Wins

Here’s the not-so-sexy truth: MAF works best when you stick with it.

Miss a day? Who cares. Just get back to it tomorrow.

One good week won’t change much, but six good months? That’s where transformation lives.

Track mini wins.

Celebrate those moments—like staying under MAF heart rate on a hilly route or finishing a long run feeling like you could keep going.

Journal your training. Find a rhythm. Enjoy the process.

And when in doubt? Remember the motto:

Slow down to get faster.

It’s not just a catchphrase—it’s a mindset shift. Trust the process.


Sample MAF Running Plan for Total Newbies

Here’s a no-fluff layout to help you ease into MAF training without burning out:

Weeks 1–2

  • Run 3x/week for 20–25 minutes at your MAF heart rate

  • Expect plenty of walking—it’s normal

  • Cross-train 1–2x a week if you want to move more

Weeks 3–4

  • Bump it up to 4 runs/week

  • Each run around 30 minutes. Try stretching one to 40 minutes

  • Always keep your heart rate capped at MAF

Weeks 5–6

  • Aim for 4–5 runs/week

  • Mix: 2 runs at 30 minutes, 2 at 40–45 minutes

  • Long run creeps up to around 60 minutes

  • By now, walking might be less frequent as your aerobic base builds

Weeks 7–8

  • Keep the rhythm going

  • Gradually stretch one run to 75–90 minutes if you’re thinking of a future half marathon

  • The rest can stay at 30–45 minutes


Test Yourself

Do a MAF test at the end of week 4 and again at the end of week 8.

This helps you see if your pace is improving at the same heart rate.


Rest Weeks Matter Too

Every 3–4 weeks, plan a down week.

Cut the volume by 20–30%. This is where the magic happens—your body adapts and gets stronger.

You can either reduce your running time or swap one run for a brisk walk.


Make It Fit You

This plan isn’t one-size-fits-all.

If you’re younger, already active, or recover quickly, you might be able to handle more.

If you’re older, brand new to running, or dealing with nagging aches, pull back.

MAF training works because it’s flexible. The heart rate formula stays the same, but the pace, mileage, and walking ratio will look different for everyone.

I’ve coached people in their 60s doing MAF with walking breaks—and they still improved.

I’ve also worked with runners training for ultras who used this exact layout as their foundation.

The key?

Stay consistent and keep your ego in check.

Sample Week – Beginner 10K Plan (MAF Style)

  • Monday: Total rest or gentle yoga

  • Tuesday: 30-min MAF run (run/walk if needed). ~2.5 miles. Keep HR ~130–140.

  • Wednesday: 30-min brisk walk or bike ride (stay under MAF). Or short run if you’re feeling good.

  • Thursday: 40-min MAF run. Maybe 3–4 miles. Walk the hills if your heart rate spikes.

  • Friday: Strength training (bodyweight-focused, not cardio-crazy).

  • Saturday: Long run: 60 minutes at MAF (5–6 miles).

  • Sunday: Easy jog or walk (20–30 mins). Or full rest and some mobility.


Sample Week – Marathon Base-Building Plan

  • Monday: 5 miles easy (MAF)

  • Tuesday: 8 miles easy (MAF)

  • Wednesday: 5 miles + strength work

  • Thursday: 8 miles easy (MAF)

  • Friday: Rest

  • Saturday: 15-mile long run at MAF

  • Sunday: 4-mile recovery jog (way below MAF, just moving the legs)


Walking on Hills Isn’t Weak—It’s Smart Running

Let me tell you a little story.

There’s this hill not far from my place. It’s not Everest or anything, but it’s steep enough to make your quads curse.

First time I hit it during MAF training? My heart rate monitor basically screamed at me halfway up. I had two choices—slow down to a near stop or swallow my pride and walk.

Now, the old me? I would’ve kept running no matter what. Because “walking = failure,” right?

Wrong.

MAF David decided to be smarter, not stubborn. I slowed to a power walk, felt a little goofy doing it, but guess what?

My heart rate stayed right where it needed to be. And I finished the rest of that run strong.

Fast forward a couple of months—after putting in consistent effort—I could jog more of that hill.

Eventually, I made it to the top with a slow trot, all under my MAF heart rate cap. No alarms, no ego, just progress.

That was real aerobic fitness talking.

So if there’s a hill on your route, don’t fight it.

Walk if you need to. That’s not weakness—it’s just you being smart about your training. Gravity doesn’t care about your ego.


Ready to Give MAF a Try?

By now you know that the journey won’t be easy – at least not on your ego – but the rewards can be incredible.

I encourage you to take the MAF challenge: commit to several weeks of dedicated low heart-rate running and see what happens.

You might be amazed at the transformation in your endurance and how you feel.

Remember, every runner’s path is unique, but the principles of patience, consistency, and listening to your body are universal.

So, strap on that HR monitor, embrace the process, and run on your terms.

In a few months, you could be running stronger, faster, and healthier than ever before – all thanks to slowing down.

Best Running Shoe Brands for Beginners & Intermediates: The Ultimate 2025 Guide

running shoe brands

If you’re a new or intermediate runner overwhelmed by all the shoe options out there, take a deep breath. I’ve been in your shoes (quite literally), and I’m here to help as your running buddy and coach.

In this guide, I’ll break down the best running shoe brands on the market,  sharing what each brand is known for, their pros and cons, standout models, and a bit of my own experience and research from the running community (yes, I lurk Reddit threads so you don’t have to!).

By the end, you’ll know how to choose the right pair for you – whether you’re lacing up for your first 5K or training for your tenth. Let’s dive in!

Ready? Here we go.

Nike – The Innovator and Pace-Setter

When it comes to running shoes, Nike’s like the heavyweight champ. It’s everywhere – from rookies to elite athletes, you’ll find Nike on the feet of runners all around the world.

And why?

Because they’re all about innovation, style, and performance. Nike doesn’t just follow trends; they set ‘em. They’ve been pushing running tech to new heights for years.

I might sound like a Nike ad but we all know it’s truth.

What Nike is known for:

Speed, style, and being ahead of the game.

Nike’s always tweaking, always improving. They brought us ZoomX foam and carbon-fiber plates, which honestly turned the racing world upside down. The first time I wore Nike Vaporfly? I felt like I was flying.

These shoes are no joke, breaking records and setting new standards. But don’t get it twisted – Nike isn’t just for elite racers. They’ve got something for every runner.

Take the Air Zoom Pegasus – a go-to for beginners and pros alike. It’s the perfect mix of comfort and durability, and it’s been a favorite for years.

Fit and feel:

Let’s get real about comfort. Nike shoes are known for having a slightly narrow fit, especially around the toe box. Now, that might be a game-changer if, like me, you’ve got narrow feet.

I swear, Nike shoes feel custom-made for my feet. But if your feet are on the wider side, it might not be the best fit. Don’t worry though, Nike has some wide options.

The real magic happens when you feel Zoom Air or React foam under your feet. Whether you want that firm response for speedwork or soft cushioning for longer runs, they’ve got you covered.

For beginners, the Air Zoom Pegasus is a solid choice – a great all-around shoe that’s not too soft, not too firm. Just the right balance.

Durability:

Nike shoes are pretty solid, but it depends on the model.

If you’re rocking the Pegasus or Structure, you’re looking at 300-500 miles before things start to wear down.

But if you’re splurging on something like the Vaporfly with its ZoomX foam, don’t expect it to last forever. These shoes are built for speed, but they do wear down quicker than your everyday shoes.

It’s a trade-off.

Innovations:

Nike’s big win? Carbon plate tech. Back in 2017, the Nike Zoom Vaporfly 4% hit the scene and it was a game-changer. That carbon plate, paired with ZoomX foam, made every step feel like you were getting a boost.

These shoes have helped a lot of runners reach new personal bests. Fast forward to today, and Nike’s Vaporfly Next% 3 and Alphafly Next% 2 are still dominating the marathon scene.

And it’s not just about race-day shoes. Nike’s Flyknit uppers give you a sock-like fit that moves with your foot, while that ZoomX foam delivers a super light, responsive feel.

Plus, Nike’s getting on board with sustainability, using recycled materials under their Move to Zero initiative.

Popular models and who they’re for:

Nike Air Zoom Pegasus – Neutral Daily Trainer.

This one’s a classic. It’s affordable, reliable, and great for daily runs.

  • Strengths: Durable outsole, breathable upper, and balanced cushioning.
  • Weaknesses: Not the lightest, and some folks feel the midsole’s too firm for long-distance.
  • Ideal for: Daily runs, moderate-paced workouts, or even hitting the gym.
Nike ZoomX Vaporfly Next% – Elite Racer.

If speed’s your thing, this is the shoe. Lightweight, bouncy, and has that carbon plate magic.

  • Strengths: Insane energy return and speed.
  • Weaknesses: Not the most durable, and you’ll need to fork out $200+.
  • Ideal for: Racing, 10K to marathon, or anytime you want to feel like you’re flying.
Nike Wildhorse/Pegasus Trail – Trail Shoes.

Nike’s trail shoes have come a long way. The Wildhorse and Pegasus Trail are solid options for lighter trails.

  • Strengths: Comfortable cushioning, stylish, and versatile.
  • Weaknesses: Traction isn’t as aggressive as specialized trail shoes like Salomon.
  • Ideal for: Road-to-trail runs or dirt paths. If you’re tackling tough terrain, you might want something with more grip.

Adidas – The Boost Cushioning Pioneer

If you’re into running shoes, you’ve probably heard of Boost foam. Adidas made a big splash back in 2013 when they dropped that bouncy, springy Boost technology.

Adidas has earned its place in the running world with their Boost tech, and these shoes have become a go-to for both rookies and marathoners. They’re durable too.

Sure, they’re not the lightest shoe out there, but I’ve used Ultraboosts on my long runs, and they’ve got the right mix of comfort and support to make it all work. So, if you’re just starting your running journey, this is a great option for you.

Fit and design:

Adidas shoes usually have a snug fit, especially around the midfoot. That locked-in feel? I love it. It’s like the shoe was custom-made for my foot.

The Adizero Adios line is a favorite among elite marathoners for a reason—these shoes are responsive and fast. But, heads up: if you’ve got wide feet, be mindful of that midfoot snugness.

Some models come in wider versions, so keep an eye out for those.

Durability:

One of the standout features of Adidas is how tough their outsoles are. Take the Adidas Boston, for example—you can easily get 400-500 miles out of those (according to my research, I’m yet to try them). The Continental rubber outsoles?

Total game-changer. That extra grip is always a lifesaver.

The Boost foam holds up in all sorts of weather too, which is why I always reach for my Ultraboosts when the temperature drops. They perform just as well in the cold.

Technology and innovation:

Adidas is no slouch when it comes to performance. With their Adizero Adios Pro series, they’ve entered the super-shoe game. Lightstrike Pro foam and carbon-infused energy rods give these shoes a fast, responsive feel.

Sure, they haven’t gotten as much hype as Nike’s Vaporfly, but trust me—Adidas is making waves in the racing world. Their athletes are crushing it in these shoes.

Brooks – The Reliable Running Specialist

When I think of Brooks, I think of that coach you can always rely on—steady, supportive, and there when you need them. They’ve built their reputation around comfort, injury prevention, and a fit that feels just right.

Their “Run Happy” motto says it all: Brooks wants your running experience to be smooth and enjoyable.

I’ve logged hundreds of miles in Brooks shoes, and I can honestly say they’ve always been there for me.

Fit and feel:

Brooks shoes typically have a wider toe box than most brands, which I absolutely love. I’ve struggled on occasions with cramped toes in other shoes, but with Brooks, my toes have room to breathe and splay naturally.

For runners like me with wider feet, it’s a game-changer.

And if you use orthotics, you’ll be pleased to know that Brooks shoes fit those well too. Whether you’ve got flat feet, high arches, or something in between, there’s a Brooks shoe that’ll fit your needs.

Cushioning:

Brooks’ DNA Loft and BioMoGo DNA cushioning systems offer a smooth, stable ride. It’s not too soft, not too firm—just right. What I love most is that the cushioning adapts to your stride, offering a personalized feel.

These shoes are built for the long haul, whether you’re grinding out a long run or recovering after a hard race. The ride is always comfortable—never harsh.

Durability:

Brooks shoes last. I’ve put in a ton of miles on my Brooks Ghost, and the outsoles are still going strong. They’re made with high-quality rubber, which holds up even after hundreds of miles.

A lot of other shoes need replacing after just a few hundred miles, but I can keep running in Brooks for over 500 miles before I start noticing wear.

Innovation:

Brooks may not make as many flashy moves as some of the other brands, but they do things right. Take their GuideRails tech, for example. It helps control pronation without interfering with your stride unless you need it.

I’ve had so many runners tell me that switching to the Adrenaline or Glycerin models has helped reduce joint pain and made their runs feel more controlled. Brooks isn’t about jumping on trends—they’re about refining what works.

Popular Models and Who They’re For:

Brooks Ghost – Neutral Everyday Trainer.

My favorite. The Ghost is Brooks’ most popular neutral shoe. It’s perfect for daily runs and long runs. It’s cushioned and versatile. Some might find it a little “boring” if they want something with more bounce, but honestly, when you’re running, boring is good. It’s all about comfort.

Brooks Adrenaline GTS – Stability Trainer. 

If you overpronate, this is the shoe for you. It’s got the same great comfort as the Ghost, with the added stability of Brooks’ GuideRails. It’s not the fastest shoe, but if you need stability and comfort, it’s a solid option for daily training and long runs.

Brooks Glycerin – Max Cushion Trainer.

The Glycerin is all about that soft, cushioned feel. It’s perfect for recovery runs or high-mileage training. It’s not the lightest shoe, but if you want a plush ride, this is your pick.

ASICS – The Gel King That Just Gets It

ASICS has been around forever, right? It’s like that one brand you can always count on, whether you’re a newbie or an experienced marathoner.

If you’ve ever hit up a running store or talked to a seasoned runner, you’ve probably heard the name. These guys know what they’re doing, especially when it comes to shoes that don’t let you down when you’re battling injuries or sore joints.

What ASICS is known for:

GEL technology, reliability, and solid durability. ASICS is all about shock absorption and impact reduction. If you’ve had joint pain or shin splints, chances are ASICS can help ease that discomfort.

The first time I tried the Gel-Kayanos, it felt like I was walking on air. The cushioning was top-notch, and the stability was perfect for those long runs where your joints are begging for mercy.

Fit and feel:

ASICS shoes usually run a little narrower, especially in the heel and midfoot. If you’ve got narrow feet, you’ll probably feel like they were made just for you.

But if you’re dealing with wider feet, you might need to grab a wide version or look for one of their models with more room in the forefoot.

The Gel-Kayano toe box isn’t as roomy as something like the Brooks Ghost, but it still gives you plenty of comfort if you don’t need a ton of space upfront. And the upper? It’s like a cozy hug for your feet—secure, soft, and supportive all at once.

Cushioning:

ASICS is all about that shock absorption with their GEL technology.

Whether it’s the Gel-Kayano, Gel-Nimbus, or Gel-Cumulus, their gel padding helps absorb impact and ease the stress on your joints. It’s plush without feeling too soft or squishy.

I’ve run hundreds of miles in the Gel-Nimbus, and they’ve always felt just as cushioned as when I first slipped them on—no drop-off in the padding.

As a coach, I always recommend ASICS to runners dealing with joint pain or just looking for that added protection on longer runs.

Mizuno – Wave Technology and Firm, Smooth Rides

Mizuno doesn’t always get the buzz like Nike or Adidas, but trust me, if you’ve ever laced up their shoes, you’ll get why so many runners swear by them. Known for their Wave Plate tech, Mizuno gives you a smooth, stable ride. If you like a shoe that’s firm but responsive, they’ve got you covered.

What Mizuno is known for:

Here’s what makes Mizuno stand out: the Wave Plate. It’s a wave-shaped insert in the midsole that helps cushion the impact and gives you that springy push forward. It helps stabilize the foot without all the bulk of traditional stability posts, so you get the support without the clunky feel.

Fit and Feel:

Mizuno shoes are pretty spot-on with sizing. They’re snug in the midfoot and heel but give you enough room in the toes to avoid that pinched feeling. If you’re coming from brands like HOKA or Altra, which are more cushioned, Mizuno has a more classic, no-frills feel.

Cushioning:

Mizuno finds that sweet spot. The Wave Rider, for instance, gives you just the right cushioning with a kick of responsiveness. You get a bouncy feel without feeling like you’re floating. They’ve also added Enerzy foam in the newer models, which is softer and bouncier, giving you comfort without losing that springy feel.

Durability:

Mizuno shoes hold up, no doubt. They’re made to take the miles and still give you that solid support. The outsoles are tough, handling hundreds of miles before they even start to show signs of wear. I’ve put these shoes through some serious training, and they’ve held up great.

Popular models and who they’re for:

Mizuno Wave Rider 26 – Neutral Trainer:

The Wave Rider is one of Mizuno’s longest-running models, and for good reason. It’s a reliable, neutral shoe that’s great for daily training.

  • Strengths: Balanced ride with solid cushioning and responsiveness.
  • Weaknesses: Not as plush or soft as some competitors.
  • Ideal for: Daily runners who need something that can handle high mileage without sacrificing performance.
Mizuno Wave Inspire 18 – Stability Trainer:

If you need a bit of extra support but don’t want something too heavy or restrictive, the Wave Inspire is a fantastic choice.

  • Strengths: Provides stability without feeling overly firm.
  • Weaknesses: Not as soft or cushioned as other shoes in the same category.
  • Ideal for: Runners who need moderate support for their stride, but want a shoe that’s still lightweight and responsive.
Mizuno Wave Sky 6 – Max Cushioned Trainer:

Mizuno’s answer to shoes like the Brooks Glycerin or ASICS Nimbus, the Wave Sky offers maximum cushioning for long runs or recovery days.

  • Strengths: Plush cushioning with a smooth transition.
  • Weaknesses: It’s a bit on the heavier side, so not ideal for fast-paced workouts.
  • Ideal for: Runners who prioritize cushioning and comfort during their long-distance runs.

Mizuno Wave Rebellion Pro – Elite Racer:

For those looking for a performance shoe, the Wave Rebellion Pro is Mizuno’s take on the carbon-plated racer.

  • Strengths: Lightweight and fast with excellent energy return.
  • Weaknesses: Limited cushioning for longer distances.
  • Ideal for: Racers looking for a fast, competitive edge.

Salomon – Trail Titans (and More) with Precision Fit

Salomon’s the go-to brand for trail runners, no question.

Born in the French Alps, they’ve become the brand to trust for rugged, technical trails. And even though they’ve ventured into road shoes recently, their bread and butter is still those aggressive, off-road shoes.

Let me tell you why Salomon is a trail running legend.

What Salomon is known for:

If there’s one word to describe Salomon, it’s grip. Their trail shoes are known for their aggressive traction and precise fit. Whether you’re running on muddy trails, rocky descents, or snow-covered paths, Salomon shoes give you that grip and protection.

They also introduced the Quicklace system — a toggle lacing mechanism that makes tightening your shoes quick and easy, especially when you’re on the go. And their EndoFit and Sensifit technologies provide a locked-in feel, which is crucial when you’re navigating technical terrain.

Fit:

Salomon shoes typically have a narrower fit, especially in the midfoot. This snug fit provides precision and control, especially on steep slopes or rocky trails.

If you have wide feet, you might find the classic Salomon fit a bit tight, but they’ve introduced wider toe box models and wide versions in popular shoes like the Speedcross and Sonic series. The fit is designed to hold your foot securely, preventing slippage when you’re navigating tricky terrain.

Cushioning:

Salomon’s known for a firmer ride compared to other trail shoes. Their midsole cushioning provides comfort, but it’s not as plush or soft as what you might find in HOKA or Brooks.

But that’s actually a good thing when you’re out on technical trails—it gives you more responsiveness and stability.

Some models like the S/Lab Ultra have a higher stack for added cushioning, making them perfect for long-distance races, but overall, Salomon focuses on traction and stability over plushness.

Durability:

Salomon shoes are built to last. The outsoles are made with Contagrip rubber, which offers incredible traction and durability on a variety of surfaces. Whether you’re running through mud, snow, or rocky terrain, you’ll get a long life out of these shoes.

The upper materials are also tough, able to withstand the abrasions that come with off-road running.

Popular models and who they’re for:

Salomon Speedcross 6 – Aggressive Trail Shoe:

This is the shoe that most people think of when they hear Salomon. The Speedcross features huge lugs that dig into soft, muddy trails.

  • Strengths: Best-in-class traction for technical trails.
  • Weaknesses: Can feel awkward on hard, smooth surfaces due to the aggressive lugs.
  • Ideal for: Trail runners who need exceptional grip and stability on muddy, slippery, or rocky terrain.

Salomon Sense Ride 5 – Versatile Trail Shoe:

This shoe is great for all-around trail running.

  • Strengths: Comfortable cushioning, good grip, and a flexible midsole.
  • Weaknesses: Less aggressive traction than the Speedcross, so it’s not ideal for extreme trails.
  • Ideal for: Beginner to intermediate trail runners looking for an all-purpose shoe that can handle moderate trail conditions.

Salomon Ultra Glide – Max Cushion Trail Shoe:

For long-distance runners, the Ultra Glide offers more cushioning and comfort while maintaining Salomon’s stability and grip.

  • Strengths: Soft underfoot, great for ultramarathons.
  • Weaknesses: A bit less stable than other Salomon models on very technical terrain.
  • Ideal for: Ultramarathoners or long-distance runners who need a cushioned, protective shoe on trails.

Reebok – The Underdog with Surprising Energy

When you think of Reebok, you might picture their retro sneakers or those famous Reebok Pumps from the 80s. But trust me, don’t write them off when it comes to running shoes.

Recently, they’ve quietly made a name for themselves in the performance shoe market with innovations like Floatride foam and surprisingly light and responsive trainers. If you’re looking for a shoe that delivers value without breaking the bank, Reebok could really surprise you.

What Reebok is known for:

Reebok’s Floatride foam is a game-changer. This foam gives you that bouncy, springy feel that makes you want to pick up the pace, and it doesn’t come with the high price tag of other brands. Honestly, the Floatride Run Fast and Run Fast Pro models are so light and responsive, they’ve been compared to Nike’s Vaporfly, but without the crazy price.

Fit and Design:

Reebok shoes generally have a snug midfoot with a little extra space in the forefoot, which is awesome if you’ve got wider feet. The uppers are usually made from mesh or knit fabric, so they’re breathable and flexible. They may not be the flashiest shoes around, but they’ve got a sleek, minimalist design that’s still pretty modern, and they come in some cool colors.

Cushioning:

The Floatride foam in shoes like the Floatride Energy series gives you a responsive, bouncy ride.

It’s not as plush as Boost foam or HOKA’s cushiony soles, but it strikes a nice balance of softness and energy return—perfect for tempo runs or longer training sessions. If you’re the type of runner who likes a more energized feel, definitely give these a try.

Durability:

Reebok’s shoes have been getting good feedback for durability, especially the Floatride Energy series. The outsoles last a decent amount of time, and the Floatride foam holds up better than some lighter foams. You’ll get 400-500 miles out of these shoes before you see noticeable wear. That’s right in line with most top brands.

Popular models and who they’re for:

Reebok Floatride Energy 4 – Neutral Daily Trainer:

This one’s for the budget-conscious runner who doesn’t want to sacrifice performance. It’s lightweight, responsive, and comfy enough for long runs. The only downside? It’s not as plush as some of the others out there, but that makes it a great shoe for an energetic feel. Ideal for beginners or intermediate runners who want a reliable trainer.

Reebok Floatride Run Fast 2 – Lightweight Trainer/Speed Shoe:

This shoe is made for speed. If you’re looking for a racing shoe or a tempo trainer, the Floatride Run Fast 2 is perfect. It’s ultra-lightweight and awesome for fast-paced workouts. But, it’s not built for long races, and the outsole might wear out faster than some heavier shoes. Perfect for speedwork or 5K/10K races.

Reebok Floatride Energy X – Plated Distance Shoe:

A solid, affordable option for those who want a carbon-plated shoe for marathons or long-distance races without spending a fortune. The Energy X offers great value and solid energy return. It’s not quite as light or responsive as premium carbon shoes, but it gets the job done. Ideal for long-distance runners who want a carbon-plated shoe without breaking the bank.

HOKA – Max Cushion Magic for Happy Legs

Let’s talk about HOKA—the brand that flipped the script on running shoes. When they first showed up, their thick, chunky soles raised a few eyebrows.

I’ll admit, when I first saw them, I thought, “What are those, moon boots?”

But I’ll tell you, after trying them, I was hooked. I remember lacing up a pair of HOKA Clifton and feeling like I was stepping onto a cloud—smooth, cushioned, and soft underfoot.

After a few miles, I could feel the magic—my legs didn’t feel tired, my knees weren’t aching, and I felt like I could keep going forever. HOKA completely changed the game when it comes to cushioning.

What HOKA is known for:

Maximal cushioning with a rocker geometry that helps push you through each stride. If you’re the type of runner who loves cushioning but doesn’t want to feel bogged down, HOKA could be your new best friend. Their signature feature is that high stack height, giving you loads of foam underfoot.

And it’s not just for comfort—it helps reduce shock, take pressure off your joints, and give you a smoother ride during long runs. I’ve had some of my best recovery runs in HOKA shoes, and I can’t stress enough how much they help me feel fresh, even after logging miles.

Fit and feel:

If you’re used to low-profile shoes, HOKA’s fit can feel a bit different. Their shoes typically have a normal to slightly narrow fit in the midfoot, with a wider base. Early models had some issues with narrow toe boxes, but they’ve fixed that with newer releases, especially the Clifton.

The cushioning is plush, but the rocker design guides your foot forward with every stride. It’s like the shoe is pushing you to keep going, making it great for smooth, effortless strides. For long runs, I swear by HOKA—they reduce leg fatigue and keep me feeling fresh.

Cushioning:

The cushioning is where HOKA really shines. Their midsoles are made with a proprietary EVA foam that provides a soft, bouncy ride, almost like running on marshmallows. Some models, like the Bondi, are super plush, while others, like the Mach or Rincon, offer a more moderate cushioning.

I’ve used HOKA for both long runs and recovery days, and they’ve never let me down. Some runners worry that all that cushion will make the shoe feel slow or heavy, but HOKA managed to keep their shoes lightweight, even with the high stack. That’s one of the reasons I love them—maximum cushioning without the added weight.

Durability:

The durability of HOKA shoes can vary a bit. They use lightweight materials to keep the shoes from feeling too heavy, but this can affect how long they last. I’ve managed to get around 300 miles from my Cliftons, and I’ve heard of others pushing them to 500 miles.

The durability of the outsole depends on the model, but generally, if you’re running on roads, you’ll get solid mileage out of them. I was told that trail shoes like the Speedgoat hold up better, thanks to the Vibram rubber lugs.

HOKA’s newer releases have stepped up their durability, so I’d say they’re safe bets for good mileage.

Popular Models and Who They’re For:

HOKA Clifton 9 – Neutral Trainer
This is HOKA’s flagship shoe, great for runners who want tons of cushioning without feeling too elevated.
Strengths: Super cushioned yet lightweight, perfect for long runs and recovery.
Weaknesses: Might feel too soft for speed workouts.
Ideal for: Runners who want to protect their legs and knees or those logging long miles.

HOKA Bondi 8 – Max Cushion Trainer

If you’re after plush comfort, this is your shoe. The Bondi’s thick foam layer absorbs impact like nothing else.

  • Strengths: Ultimate cushioning for long runs and recovery.
  • Weaknesses: Heavy for a trainer, not the best for speed.
  • Ideal for: Long, slow runs, recovery runs, or anyone with joint issues looking for top-tier comfort.

HOKA Speedgoat 5 – Trail Shoe

My next buy and one of the most beloved trail shoes, designed for tough terrain.

  • Strengths: Amazing grip with Vibram Megagrip outsole, lightweight, and cushioned.
  • Weaknesses: Might feel a bit unstable on technical trails with extreme elevation.
  • Ideal for: Trail running, especially ultra-distance events, or anyone who loves a cushioned ride on the trails.

New Balance – Versatility and Foot-Friendly Design

I’ve got a soft spot for New Balance because they understand the struggle of finding a shoe that actually works for your foot. Whether you’ve got narrow, wide, or flat feet, New Balance has got your back.

And speaking from personal experience, having a brand that offers a wide range of sizing options is a total game-changer when you’ve battled foot issues like I have.

What New Balance is known for:

Exceptional fit options, balanced cushioning, and performance-driven designs. New Balance stands out because they focus on fit, and I’ve seen so many runners with wide feet swear by them. They offer a variety of widths, from narrow to extra-wide, making sure you find something that fits you.

Plus, New Balance isn’t just about the fit—they innovate with technologies like Fresh Foam and FuelCell. I’ve had personal experience with the Fresh Foam 1080v13, which is perfect for long runs and is seriously a lifesaver when dealing with plantar fasciitis.

Fit and comfort:

The real hallmark of New Balance shoes is their fit. They offer widths from D (standard) to 4E (extra wide), so if your feet tend to be on the wider side, you won’t feel like you’re squeezing into something that’s not made for you.

When I’ve worn their shoes, I’ve always felt like my foot has enough space to breathe, but not so much that it feels loose. The Fresh Foam 1080 is a great example—super comfortable with just the right cushioning for everyday runs.

Cushioning:

When it comes to cushioning, New Balance’s Fresh Foam is one of the best out there. It’s soft enough to cushion your feet on hard surfaces but still firm enough to keep you connected to the ground.

The FuelCell foam is their bouncier option—perfect for speedwork or tempo runs. I’ve used both and the combination of Fresh Foam and FuelCell is perfect for balancing comfort and responsiveness, whether you’re cruising through easy miles or pushing the pace. New Balance shoes support you without feeling like you’re running on marshmallows.

Durability:

If you’re looking for a shoe that’s going to last, New Balance has earned its reputation for durability. I’ve worn the Fresh Foam 880 series for marathon training cycles, and they’ve held up for over 500 miles without losing that cushioning feel.

The rubber outsoles don’t break down, making them a solid choice for high-mileage training. Trust me, these shoes go the distance.

Popular models and who they’re for:

New Balance Fresh Foam 1080v13 – Neutral Trainer

This shoe is the gold standard for neutral runners who want comfort and cushioning for long runs. It’s especially great for people with wider feet.

  • Strengths: Cushioned ride, great for long runs, wide-foot friendly.
  • Weaknesses: Not the most responsive for speedwork.
  • Ideal for: Daily runs, long-distance training, or anyone who values a cushioned, secure fit.

New Balance FuelCell Rebel v3 – Lightweight Tempo Shoe

If you’re looking for a shoe that’s fast and light, the Rebel v3 is perfect.

  • Strengths: Lightweight, responsive, great for speedwork.
  • Weaknesses: Not cushioned enough for long runs.
  • Ideal for: Speed days, tempo runs, and races (especially 5K/10K).

New Balance 880v13 – Everyday Trainer

This shoe is a workhorse for runners who need something reliable and durable for daily runs.

  • Strengths: Stable, comfortable, and built to last.
  • Weaknesses: Not the flashiest or plushest model out there.
  • Ideal for: Everyday training, especially if you’re just starting or need a dependable shoe.

Saucony – Fast, Flexible, and Comfortably Cushioned

Saucony might not have the same massive fame as Nike or Adidas, but ask any runner who’s tried them, and they’ll tell you—Saucony is the perfect mix of comfort and performance. They’ve got a great reputation for lightweight shoes that still give you enough cushioning for those long runs without feeling sluggish.

Whether you’re just starting out or chasing a new PR, Saucony has shoes that work for all kinds of runners.

What Saucony is known for:

Lightweight shoes and a unique geometry called SpeedRoll, which gives you that quick, lively toe-off. Saucony knows how to balance speed and comfort—just ask anyone who’s run in a pair of Kinvaras.

Fit and feel:

Saucony shoes tend to have a snug fit, especially around the midfoot, so if you’ve got wide feet, you might need to go for their wider options. But once they’re on, they lock your foot in without feeling too tight.

I’ve always found their shoes flexible, which works great for my style of training. The PWRRUN and PWRRUN PB foams give that responsive feeling, making it easy to pick up the pace and feel like you’re in control of your stride. If you’re someone who wants more responsiveness than cushioning, Saucony hits the sweet spot.

Cushioning:

Saucony’s foam tech is one of the key things that sets their shoes apart. Their PWRRUN foam is light and springy, giving you that bouncy feel underfoot. But the real magic happens with PWRRUN PB, which is a PEBA-based superfoam used in the Endorphin Pro and Endorphin Speed models.

This foam isn’t just about cushioning; it gives you some serious energy return, making you feel like you’re springing forward with each step. I’ve had the chance to run in the Endorphin Pro, and let me tell you—it’s a game-changer for race day. It’s fast, responsive, and has just enough cushioning to keep you comfortable while giving you that extra pop to push through the finish line.

Durability:

Surprisingly, the PWRRUN and PWRRUN PB foams don’t just bounce back—they last. I’ve put in some serious miles with Saucony, especially the Ride series, and the cushioning’s held up like a champ. No worries about that ‘sinking’ feeling after a few hundred miles.

The outsoles on their shoes are made with high-abrasion rubber (like XT-900), which means they last long and offer great grip, even on wet or rocky surfaces. Saucony knows how to build shoes that endure, whether you’re putting in miles on the road or the track.

Popular Models and Who They’re For:

Saucony Ride 15/16 – Neutral Trainer:

The Ride is one of Saucony’s most versatile shoes. It’s got that perfect balance of cushioning and responsiveness, making it ideal for daily runs.

  • Strengths: Light, comfortable, and durable enough to last.
  • Weaknesses: Some might find it a bit too firm if they’re used to super plush shoes.
  • Ideal for: Beginners and intermediates looking for an all-around, everyday trainer. If you want a no-frills shoe that gets the job done without breaking the bank, Ride is your go-to.

Saucony Endorphin Speed 3 – Plated Tempo Shoe:

The Endorphin Speed series is all about speed and versatility. With PWRRUN PB foam and a flexible nylon plate, it delivers an explosive feel with each stride.

  • Strengths: Fast, lightweight, and responsive.
  • Weaknesses: Not as cushioned for long runs as other models like the Ride or Triumph.
  • Ideal for: Tempo runs, track workouts, or anyone looking to set a personal best in shorter races.

Saucony Endorphin Pro 3 – Carbon Plated Racer:

If you’re chasing a PR in the marathon or half-marathon, this is the shoe you want. The Endorphin Pro combines PWRRUN PB foam with a carbon plate for maximum energy return and propulsion.

  • Strengths: Speed, lightweight, and perfect for long-distance racing.
  • Weaknesses: Expensive, and not the most durable shoe if you’re not using it for races.
  • Ideal for: Serious runners who need a top-tier racing shoe that won’t let them down.

Saucony Kinvara 13 – Lightweight Trainer/Racer:

The Kinvara is a classic lightweight trainer that has stood the test of time.

  • Strengths: Super light and responsive, with just enough cushioning to keep you comfortable on the run.
  • Weaknesses: Not as cushioned as some of the more plush models, so it might not be ideal for long-distance runners looking for maximum comfort.
  • Ideal for: Runners who prefer a minimalist feel for faster workouts, racing, or speed training.

Altra – Zero-Drop Natural Running 

If you’ve never heard of them before, don’t worry—I’ll break it down for you. Altra is known for its zero-drop design and wide toe box, and they’ve been making waves in the running world by helping people achieve a more natural stride.

If you’ve ever felt like your running shoes were squishing your toes or forcing you to land on your heels, Altra might just be the brand for you.

I’ve never had Altra shoes before but I keep hearing raving reviews about them so I decided to add them to this post. If you’d experience with them, please let me know in the comments section.

What Altra is Known For:

Zero-drop and a FootShape™ toe box. Let me explain. The zero-drop feature means that your forefoot and heel are at the same level, which encourages a midfoot or forefoot strike.

This aligns with a barefoot-style running philosophy that’s been gaining popularity in recent years.

Additionally, the FootShape™ toe box allows your toes to spread out naturally, which can improve stability and comfort during runs.

Fit and Feel:

The fit of Altra shoes is quite unique. If you’ve got wide feet, you’ll feel right at home in Altra’s shoes, especially in the toe box area. They also offer various shapes for the toe box, from Standard to FootShape™ Slim and FootShape™ Wide models, so no matter what your foot size is, you’ll find a pair that works for you.

The zero-drop feature will feel different if you’re used to traditional running shoes, so it’s important to ease into it.

Cushioning:

Altra’s cushioning varies depending on the model, but they generally use a combination of EGO foam and EGO PRO foam, which provides a soft and responsive feel. For long runs, I was told that the Altra Torin offers a good balance of cushioning without feeling too soft. For those who prefer a firmer ride, Altra’s Escalante or Lone Peak series offer a more minimal feel.

The cushioning works well for those looking to run in a more natural, barefoot-style manner, and if you’re new to Altra, I’d recommend starting with something like the Torin for its moderate cushioning.

Durability:

Altra shoes are generally durable, especially on the outsole. The company has improved their materials over the years, and the Lone Peak trail shoes, for example, are known for their durability even on rugged terrain.

The EGO foam used in their midsoles is pretty resilient, though some of the older models had issues with midsole degradation over time. Overall, you can expect good durability, but it’s always best to keep an eye on wear if you’re putting in high mileage.

Popular Models and Who They’re For:

Altra Torin 7 – Neutral Road Trainer:

If you’re looking for a cushioned shoe that handles long runs or recovery days like a pro, this one’s got you.

  • Strengths: Cushioned, roomy toe box, zero-drop design.
  • Weaknesses: Takes some time to get used to the zero-drop design.
  • Ideal for: Neutral runners who want a cushioned ride with a more natural feel.

Altra Lone Peak 7 – Trail Shoe:

If you’re hitting the trails, this is a great option.

  • Strengths: Wide toe box, durable, and cushioned enough for ultra distances.
  • Weaknesses: Not as soft or responsive as some other trail shoes, especially on technical terrain.
  • Ideal for: Trail runners looking for a comfortable, protective shoe for long distances.

Altra Escalante 3 – Lightweight Casual Trainer:

This is one of Altra’s lighter shoes, making it perfect for shorter runs or everyday wear.

  • Strengths: Light, flexible, and foot-shaped.
  • Weaknesses: Not a lot of cushioning for longer runs.
  • Ideal for: 5K/10K runners or those looking for a minimalist shoe for daily wear.

Skechers – From Casual to Competition with Hyper Burst

Yep, Skechers—the brand you probably think of when it comes to comfy slip-ons or memory foam shoes—has seriously stepped up its game in the performance running world. And guess what? They’re killing it. Let’s break it down.

What Skechers is known for:

Skechers made a name for itself in running shoes with Hyper Burst foam. It’s a lightweight, responsive foam that gives you the perfect bounce and comfort, but without the weight. Their GOrun series has earned major praise for providing top-tier performance without the hefty price tag. Skechers even got elite athlete Meb Keflezighi on board after he won the Boston Marathon in their shoes—now that’s some serious street cred.

Fit and Design:

Skechers shoes tend to fit most feet pretty well. They usually have a wider forefoot than brands like Nike or Adidas, which is perfect if you need a little extra room for your toes. The mesh uppers are breathable and light, and while their design isn’t as flashy as some competitors, they’ve got a clean, modern look that holds its own.

Cushioning:

The Hyper Burst foam is one of the lightest and most responsive foams you’ll find. You get that bouncy feel without sinking into the shoe. If you’ve ever worn HOKA or Adidas Ultraboost, the Hyper Burst feels springier and more responsive. Skechers has also added a rockered geometry, called M-Strike, in many of their shoes to help encourage a natural midfoot strike and make your run feel smoother.

Durability:

While Skechers isn’t known for making shoes that last forever, they still hold up pretty well, especially considering how light they are. Many runners report getting 300+ miles out of Skechers’ performance shoes, especially the GOrun Razor and GOrun Ride series. The outsole does wear faster than some brands, but the Hyper Burst foam holds its cushioning for a long time.

Popular models and who they’re for:

Skechers GOrun Razor 3+/Excess 2 – Lightweight Trainer/Tempo:

This one’s for the speedsters. The Razor 3 is loved by runners who want a super-light shoe with a fast feel. It’s highly responsive and great for tempo runs. The downside? Durability could be a concern, especially on rougher surfaces. Ideal for speedwork or race days when you want a nimble, lightweight shoe.

Skechers GOrun Ride 9 – Everyday Neutral Trainer:

This is a solid daily trainer that offers a responsive, cushioned ride without feeling too soft. It’s lightweight and versatile, though the upper doesn’t have much padding. Ideal for daily training and long runs when you want something light and comfy.

Skechers GOrun MaxRoad 5 – Max Cushion Trainer:

If you’re all about that cushion, the MaxRoad 5 is your shoe. It offers loads of cushioning without feeling heavy. The downside? It’s not as responsive as the Razor. Ideal for long-distance running and recovery days, or if you need extra cushioning.

Final Thoughts: Choosing the Right Running Shoe for You

Choosing the right shoe really comes down to your personal needs as a runner. Whether you’re just starting out or training for a race, the right pair of shoes can make a huge difference. Here’s a quick breakdown of what some of the biggest brands offer:

  • Nike – If you’re all about speed and innovation, Nike’s got you covered.
  • Adidas – Durable and cushioned shoes that will last through many miles.
  • Brooks – Reliable and comfortable, perfect for injury prevention.
  • ASICS – Long-lasting cushioning with stability, great for distance runners.
  • HOKA – Ultra-cushioned shoes that make running feel easy, perfect for newbies or those recovering from injuries.
  • New Balance – Versatile fit and great cushioning for everyday runs.
  • Saucony – Lightweight shoes that still give you the comfort you need.
  • Altra – Zero-drop shoes with a wide toe box, perfect for a more natural stride.
  • Mizuno – Sturdy, firm rides that give you great ground feel.
  • Salomon – The king of trail running with amazing traction and protection.
  • Reebok – Offering lightweight shoes at a great value.
  • Skechers – Don’t count them out—lightweight and cushioned options that compete with the big names.

Your perfect shoe depends on your running style, what kind of terrain you’re tackling, and your personal fit preferences. As your running coach, I’d say: Don’t rush it.

Try a few on, and if possible, take them for a spin before committing. Your feet will thank you!

And remember, the best shoes are the ones that make you feel unstoppable. Find the pair that makes you feel confident, comfortable, and ready to crush your goals. Happy running!

Ultimately, running shoes should make you feel like a champion. When you slip on the right pair, it’s like magic—each stride feels effortless. The brands above are solid choices depending on what you need. Keep exploring, keep running, and before long, you’ll find the perfect shoes to take you to the next level.

Ready, set, go! Find those shoes that make you want to run and run happy.