23 Best Core Exercises for Runners to Run Stronger (2025 Guide)

The Benefits Of Core Training For Runners

One of the best ways to improve your running without running more is improving your core power and strength. The core—as the name implies—is the baseline of human performance.

What Is The Core?

The core muscles are the epicenter of the body. They connect the pelvis, spine and trunk to each other and to the rest of your body, including your shoulders blades, hips and legs.

They are at the center of everything—the the basis for all of your movement, whether you are an elite runner or an Olympic power lifter.

It’s More Than Abs

First of all, you need to understand that your “core” isn’t just your abs. it’s more than that. Having a solid core is more than just having strong abdominal muscles. The core extends to the lower back, gluteal muscles, and other areas.

The core involves five main areas.

The rectus abdominus—what we usually refer to the six-pack muscle.
The oblique—or what’s known as the side abs.
The erector spinae—aka the lower back muscles.
The transversus muscles or deep abs, and
The gluteal muscles—the butt muscles.

The Beginner’s Guide To Hydration Running Vests

Picture this: You’re halfway through a steamy trail run on a hot day. The sun’s baking your back, your tongue feels like sandpaper, and your water bottle?

Bone dry.

Been there.

It’s the kind of run where every step turns into a mental grind—thirst dragging you down, distractions piling up.

Then came the game-changer. The first time I strapped on a hydration vest, it felt like I unlocked a cheat code. Suddenly, I could carry everything I needed—water, fuel, phone, jacket—without the bounce or bulk.

I ran freer. Smarter. Longer. This guide is my way of passing that freedom on to you.

Whether you’re eyeing your first trail race or just want to stop juggling bottles on every long run, I’ve got your back.

We’ll talk about why hydration vests matter, how to choose the right one, the biggest rookie mistakes to avoid, and even break down top picks for different distances.

Let’s get you geared up and ready to go.

Why Runners Use Hydration Vests 

Hydration vests have exploded in the running world for good reason. They’re not just fancy backpacks—they’re purpose-built gear made for runners.

Lightweight.

Snug.

Packed with pockets that are actually where you need them while moving.

Most vests carry soft flasks or a bladder for water, along with energy gels, your phone, keys, maybe a light jacket.

All that, without bouncing around like a tourist bag.

The best part? You stay in the zone. No stopping. No fumbling.

Here’s why so many long-distance and trail runners swear by them:

1. Hands-Free Drinking

Forget squeezing a bottle for 20 miles or stopping at every fountain. With bottles up front or a straw over your shoulder, you just sip and keep going.

The first time I drank mid-stride without breaking rhythm, it felt like discovering a new superpower.

2. Carry What You Actually Need

From salt tabs to your windbreaker, a vest lets you bring it all—without stuffing your shorts or strapping on a noisy waist pack.

I usually slide a rain shell into the back pocket, stash some gels up front, and boom—I’m set for anything without messing up my form.

3. No More Lopsided Running

Holding a bottle throws off your arm swing. A regular backpack flops. But a solid vest? It hugs your frame.

The weight sits evenly on your torso, with sternum and side straps keeping it tight. If it’s fitted right, you’ll barely notice it’s there.

Seriously—on some runs, I forget I’m even wearing mine.

4. Breathable and Sweat-Friendly

These vests are built with runners in mind—think mesh panels, sweat-wicking material, and airflow in all the right places.

Even in brutal humidity, my vest doesn’t feel like a furnace on my back.

Bonus: a lot of them resist stink and dry fast after a long sweat session.

5. Safety on the Trails

When you’re heading into the wild—like remote mountains or anything ultra-distance—a vest becomes more than just gear. It’s your survival kit.

I’ve packed headlamps, space blankets, salt pills, even a tiny first-aid kit in mine. Some races require certain items (like a whistle or waterproof layer), and the vest makes carrying all that possible.

You don’t need to be a racer either—just being ready gives peace of mind.

Runners wear hydration vests to go longer, run safer, and keep moving without missing a beat. And once you try it, you’ll wonder how you ever managed without one.

5. Don’t Pack Like You’re Climbing Everest

Now here’s a rookie mistake I made—and one I see all the time: treating your hydration vest like it’s a backpacking pack.

I get it. You want to be ready. But there’s a fine line between “prepared” and “hauling a mini fridge on your shoulders.”

When I first got my vest, I went overboard.

I stuffed in over 2 liters of water, a ton of snacks, a full first-aid kit, spare clothes, you name it.

I was “ready,” sure—but also dragging extra weight on what should’ve been a chill 2-hour run. I was slower, and 70% of the gear never left the vest.

Lesson learned: smart runners pack light.

Later in this guide, I’ll break down exactly how much water and gear you actually need based on run length, terrain, and weather.

But the rule of thumb? Bring enough to be safe and comfortable—no more, no less.

How to Choose a Trail Running Vest 

Let’s be real—picking a running hydration vest can feel like walking into a candy store with too many choices and zero clue where to start.

Different sizes, pockets, bottles, bladders—yeah, it can get overwhelming fast. But trust me, once you break it down, it’s not that complicated.

Let’s cut through the noise and figure out what you actually need from a vest.

1. Start with What You’re Carrying (Water + Gear)

This is the big one. Ask yourself: How much stuff do I need to haul on my run?

Everything else flows from that.

Vests usually show two numbers: how much water they hold (fluid capacity) and how much space you get for gear (like food, phone, jacket, etc.).

Fluid Capacity

Think about your longest stretch without a refill.

  • Just running an hour or less? You might skip water or toss in a single 500ml soft flask.
  • Going longer? You’ll want 1–2 liters with you.
  • Most setups give you front bottles (like two 500ml flasks = 1L) or a back bladder (1.5L to 2L). Some vests let you do both—front bottles plus a bladder—for those long slogs or hot weather runs.

But remember—water weighs a lot (1L = 1kg). Don’t carry extra “just in case” if you can loop back or refill along the way.

Gear Capacity

This is for all the extra stuff: snacks, keys, phone, headlamp, gloves, etc.

The numbers here (like 5L, 8L, 12L) include the main compartment and every pocket.

Let me break it down how I usually match gear capacity to run length:

  • Under 1 hour: No vest. Maybe a belt. If I carry anything, it’s just a gel or my phone.
  • 1–2 hours: ~2L pack is perfect. Usually holds a liter of water and a few snacks.
  • 2–3 hours: Go for a 4–6L vest. Now I’m packing maybe 1.5L of water, plus extra food and a windbreaker.
  • 3–6 hours: You’ll want 6–12L. That’s where I’m carrying 2L water, real food, and emergency gear.
  • 6+ hours / Ultras: 8–15L packs are your best friend. These carry everything: water, nutrition, layers, first aid, poles—you name it.

What the Experts Say

Even REI recommends about 2L of gear space for a 1–2 hour run, 4–6L for 3+ hours, and more than 6L for ultra distances.

Makes sense.

In winter? You’ll need room for extra clothes.

Running in Bali like me? You’ll want space for water and maybe a towel—humidity is a beast.

A Bit More Room is Better Than Not Enough

You don’t want to fight with zippers and overstuffed pockets every time you gear up.

A vest that’s slightly bigger is okay—you can cinch it down. But you can’t stretch a tiny vest mid-run to fit your rain jacket.

I’ve got one go-to vest that handles everything from 90-minute trail runs to 4-hour mountain sessions.

Around 5–8L seems like the sweet spot for a lot of runners.

Now, if you’re doing short jogs and big races, yeah—you might need two vests. One light, one for the long haul.

Weight Matters More Than You Think

This one snuck up on me. Empty vests can vary a lot:

  • Light ones (under 200g) feel like air on your back.
  • Ultra vests (300–400g) have more structure—good for big loads.

Does 100g seem like a small difference? Sure. But at hour 4 of a long trail run, you feel every gram. Choose wisely.

Quick Recap (Vest Size vs. Run Time)

Run TimeRecommended Vest
Under 1 hourNo vest / small belt
1–2 hours~2L vest
2–3 hours4–6L vest
3–6 hours6–12L vest
6+ hours / ultras8–15L full-kit vest

 2. Bottles vs. Bladder: How Do You Want to Hydrate?

Alright, let’s get real—this part trips up a lot of runners. Do you roll with bottles up front, a hydration bladder on your back, or carry both like a pack mule on a mission?

I’ve tried all three. Some runs feel like a science experiment with fluids. But let’s break it down.

Bottles / Soft Flasks: Quick Access, Visible Supply

Most modern vests come with those soft flasks you tuck into your chest pockets. Usually two—one on each side. Each holds about 500ml (17 oz), so you’re carrying around 1 liter total when full.

Here’s the upside: access is ridiculously easy. I like seeing exactly how much water I’ve got left.

No guessing. Just glance down, pull one out, drink, refill. Done.

It’s way faster at aid stations too—no digging into your pack like a bear raiding a cooler.

One trick I’ve used on long races: plain water in one flask, electrolytes or sports drink in the other.

Easy to switch depending on what I’m craving (or what my stomach isn’t rejecting at mile 40).

A lot of trail runners I coach love this setup for that exact reason—mix and match fluids depending on the weather or intensity.

Also, bottles up front help balance your weight. Feels more stable on technical trails.

Plus, soft flasks don’t slosh once you start sipping. They compress against your chest and shrink as you drink—less bounce, less noise, no drama.

But yeah, there’s a flip side:

  • If they’re not strapped in well, bottles jiggle. And half-full bottles? Ugh. Annoying unless you cinch the vest tight.
  • 1 liter might not cut it on big runs—think remote trails or high temps.
  • Some runners (especially those with tighter shoulders) just hate the motion of pulling bottles in and out.

Hydration Bladder 

Now if you want maximum water with minimal fuss, bladders are king.

These things hold 1.5 to 3 liters and sit in the back sleeve of your vest. You sip through a long hose that comes over your shoulder.

Simple. No need to stop or even break stride.

This setup is a lifesaver on long training runs—especially solo treks where aid stations are a fantasy. If I’m heading into the Bali hills for 4+ hours, I’ll fill up my 2L bladder, tuck in the hose, and just zone out while sipping slowly.

A neat trick? After you fill the bladder, flip it upside down and suck the air out through the tube—it seriously reduces that annoying water slosh.

But let’s be honest, bladders come with some baggage:

  • Refilling mid-run? Kinda a pain. You usually have to take the whole pack off, unzip, pull it out, fill, reseal. And during a race? That can cost you precious minutes.
  • You can’t see how much water is left unless you yank it out. I’ve misjudged and run dry more times than I care to admit.
  • Cleaning is another beast. Mold loves bladders if you don’t dry them right. I use cleaning tablets and wide-mouth models now, but bottles still win the easy-clean battle.
  • Bonus downside: sweat. That pack sits on your back and can get hot. I’ve felt the back panel getting toasty even on chilly mountain mornings.

Oh, and in winter? Watch out for the hose freezing. Insulated tubes or blowing the water back down after sipping can help, but it’s still something to watch. Here’s how much water runners need.

Combo Setup: Why Not Both?

Yeah, it sounds like overkill—but hear me out. Some long training days or crazy ultras demand flexibility.

On a gnarly 6-hour mountain run, I’ll start with a full 2L bladder and carry two bottles too. The bottles? Sometimes they’re just filled with electrolytes, or even empty at the start. It’s peace of mind.

I drain the bottles first, then tap into the bladder. Having backup water is a mental boost, especially when I’m deep in the jungle with no streams in sight.

You don’t need both for every run—but having that option is clutch.

So, What Should You Choose?

It’s all about your kind of running:

  • For races and fast efforts, I go with bottles. They’re quick to refill, easy to manage, and lighter.
  • For long, unsupported runs, the bladder wins. It holds more, keeps me sipping, and I don’t have to stop every hour to refill.

4. What to Look for in a Running Vest 

Look, the perfect running vest doesn’t exist. But the right one for you? That’s out there.

And it’s not just about fit or how much water it can hold — it’s the little things that make or break a vest during a 4-hour mountain slog.

Here’s what I always tell my runners to check for:

🔹 Pocket Setup: Your Lifeline Mid-Run

Pockets make or break a vest — no joke. I need my stuff right where I can grab it mid-stride without stopping.

You want front chest pockets for bottles (or gels/phone if the bottles live elsewhere), zippered ones for keys and ID, and side stretch pockets for the random crap we always end up carrying.

Rear stash pockets — especially the “kangaroo” style — are gold for gloves, buffs, or snacks.

My current vest has a stretchy back pocket I can reach without taking the whole thing off — I’ve pulled gloves out mid-stride when the wind turned nasty. That’s the magic I want in a vest.

When you try one on, pretend you’re out there mid-run: Reach for a gel. Fumble for your phone. Can you do it while moving?

Good. That vest gets a thumbs up.

Tip: The more pockets, the more weight — but on long runs, I’ll take convenience over looking fast.

“If I have to take my vest off just to grab a snack, that vest is dead to me.”

🔹 Zippers vs. Open Pouches: Secure and Fast

Zippers are your best friend when it comes to valuables. My car key always goes in a zipped pocket. Same with cash or cards.

But too many zippers? Now you’re wasting time fiddling.

The sweet spot: a mix of secure zips and open stretchy pockets.

Check if the zippers are glove-friendly. Some pull-tabs are worthless when your fingers are cold and sweaty.

My go-to? Zipper pulls that I can yank open even mid-downhill.

🔹 Trekking Pole Storage: If You’re Going Vertical

If you’re doing trail runs with serious elevation or ultras, pole holders are huge.

Most use bungees or loops to strap poles on the front or back. I don’t always use poles, but I was damn glad I had loops during a brutal mountain ultra.

Hands-free on the downhills? Game-changer.

Even if you’re not a pole runner yet, get a vest that can handle them.

You might change your mind — or your race — someday.

🔹 Reflectivity & Safety: Don’t Be Roadkill

I run early. I run late. I run near traffic. Reflective strips on a vest are a no-brainer.

Some vests go full neon or add reflective logos. The ones I like? Subtle but effective — just enough to catch a driver’s eye in the dark.

I always clip a blinking light to the back if I’m on the road.

Bonus: some vests come with a built-in whistle. It’s tiny, usually on the chest strap, but if you’re running solo in the wild? That whistle could matter. Some races even require it.

Bladder Setup: Stay Hydrated Without the Hassle

If you’re using a hydration bladder, check how it sits.

  • Does it have a sleeve to keep water cold (or from freezing)?
  • Does it have hooks or Velcro to stop it from sagging?
  • Are there hose guides?

Mine has elastic loops that keep the hose from flopping. Bonus if the vest includes a bladder you actually like — but don’t sweat it if it doesn’t. You can always upgrade to your fave brand.

Lots of runners love Hydrapak or Salomon flasks for their bite valves.

🔹 Soft Flasks vs. Hard Bottles: Know Your Gear

Soft flasks are the gold standard these days. They shrink as you drink — less slosh, less bounce.

Older or budget vests might come with hard bottles, which are fine but can be bulky and noisy.

If you get a vest with hard bottles, no biggie — just swap them out later if they drive you nuts. Just check that the pockets fit your replacement flasks.

🔹 Breathability: No Swamp Backs Allowed

Look for mesh panels and breathable material. Anything that touches your skin should help sweat evaporate, not trap it.

Some vests even use trampoline-like back panels — fancy, but they work.

Run your hand along the seams. Anything scratchy now will feel like sandpaper 15 miles in.

I once got my neck raw from a chafing vest. Never again. Now I always check the edging.

Lightweight is great — but don’t trade away durability if you’re running through thick brush or crashing into the occasional tree (been there).

Some ultralight vests tear easily. Know your trail habits.

🔹 Ease of Use: Don’t Fight Your Gear

Filling bottles should be quick and spill-free. Pockets should stretch but hold tight.

Buckles? I’m a fan of sliding rail ones — you can adjust them with one hand while still moving.

If your vest rides up when empty, or sags when full, that’s a problem. The better ones have cinch cords or straps to pull everything back snug.

A good vest performs at mile 1 and mile 20. Anything less? Pass.

🔹 Cool Extras: Only If You’re a Gear Nerd

Some higher-end vests have modular features like extra belts, rain covers, or quiver attachments.

You don’t need those unless you’re going full mountain goat, but they’re fun for long adventures.

Salomon makes great add-ons. Ultimate Direction is modular too.

If you’re a gear geek or running alpine races, it’s worth considering.


🏁 My Must-Haves (After Hundreds of Miles in These Things)

  • Pockets I can actually reach (gels + phone)
  • A safe place for keys
  • Pole loops
  • Reflectivity
  • Soft flasks with long straws (I hate tilting my head mid-run)
  • A clip for the hydration hose (bonus if it’s magnetic)

Trust me — these small touches make a big difference out there.

I’ve tested more than a few of of brands. Salomon nails pocket design. Nathan feels tougher. Ultimate Direction strikes a balance.

I’ve even seen some off-brand vests pop up in ads, but on the trails, the trusted names dominate — and for a reason: their gear was forged from actual miles, not marketing hype.

“If I can grab a gel, drink, and adjust straps while hammering downhill — that’s a damn good vest.” 

Leg Workouts for Runners: Top 8 Exercises for Strength and Speed

runner doing Legs Strength Exercises

Let me guess—you’re a runner who avoids the weight room like it’s a trap. I used to be the same.

I figured pounding out miles was enough. I called myself a “pure runner” and believed leg workouts were just fluff. That fantasy ended at mile 15 of a brutal Bali trail race. My knee buckled, and I had to limp to the sideline, humiliated.

My PT hit me with the truth: “Your legs aren’t strong enough.”

That hit harder than the trail did. But it was a turning point. Since then, I’ve built strength, stayed injury-free, and helped dozens of runners do the same.

This guide isn’t some generic leg day blueprint. It’s what worked for me and the athletes I coach. You’ll get real-world tips, stories from the trenches, and a workout plan that fits into your week without frying your legs. Let’s go.

Why Runners Need Leg Strength (Trust Me, You Do)

Let me dive into why you need strength work as a runner:

🔹 Injury Prevention

Your muscles are shock absorbers. If they’re weak, your joints take the hit. Research even shows strength training can slash your injury risk in half. Personally? I haven’t had a serious injury since I started lifting.

🔹 Running Economy = Free Speed

Stronger legs mean you burn less energy at the same pace. After a few weeks of squats and lunges, my “easy pace” actually felt easy. Like running with upgraded legs.

🔹 More Power on Hills and Finishes

You want that final kick? Or the legs to power up a climb? Strength is the answer. I remember gunning up a hill at mile 10 of a half marathon after months of deadlifts. I didn’t just survive. I attacked.

🔹 Form That Holds Up

Running is basically balancing on one leg over and over. Weak glutes and hamstrings? That’s when your running form breaks down. Single-leg work cleaned up my stride and made me feel stable, even on Bali’s uneven sidewalks.

The 30-Minute Leg Workout for Runners

This workout hits every key lower-body muscle you use when running. Glutes, quads, hamstrings, calves, and core stabilizers. It takes about 30 minutes, tops.

How it works:

  • 8 moves total
  • Alternate between different muscle groups
  • Mix of single-leg and two-leg exercises
  • 3 sets of 8–12 reps (adjust if you’re new)
  • Rest ~60 seconds between sets
  • Warm-up first! Think 5–10 mins of light cycling, jogging, or bodyweight squats

Progress your training by:

  • Adding weight (start small, increase weekly)
  • Bumping up reps or sets
  • Switching to tougher variations (e.g. jump squats, single-leg deadlifts)

Heavy lifting (around 80% of your one-rep max) has been shown to improve running economy, but work your way up slowly and stay sharp with form.

1. Lunges

Muscles Worked: Glutes, quads, calves — plus a solid hit to your hamstrings and core for balance.

Lunges are my bread-and-butter leg move for runners. If running is all about single-leg strength and forward drive, lunges hit that right on the nose. Think of it like a slow-motion running stride, but with fire. When I started adding them regularly, I noticed two big changes: I had way more power in my push-off, and my knees stopped doing that sketchy wobble mid-run.

How to Do Them Right:

Stand up tall, feet about hip-width. Start with just your bodyweight if you’re new. If you’re ready for more, grab a couple of dumbbells or sling a barbell across your back.

Step forward with your right foot — not a baby step, but not a leap either — and plant it strong. Bend your front knee to roughly 90 degrees and let your back knee drop toward the floor (don’t slam it; control is everything). Your front thigh should end up almost parallel to the ground, and your knee should stay in line with your ankle — not flying past your toes.

Now here’s the real work: push through your front heel like you’re pressing the floor away and bring yourself back to standing. Alternate legs if you’re doing walking lunges, or do one side at a time if you want to fry your legs a little more.

Reps: I usually go 10–12 reps per leg, per set. You can walk them across a field or stick to in-place lunges — whatever gets you fired up.

David’s Go-To Variations:

  • Walking lunges = great for range of motion
  • Reverse lunges = easier on the knees
  • Bulgarian split squats = pure leg fire. You prop your back foot on a bench and go deep on the front leg. It’s brutal — but it builds monster strength and reveals if one leg is slacking. I love to hate this one.

2. Calf Raises

Muscles Worked: Your calves — both the gastrocnemius (the big one) and the soleus (the deeper one). These are your power generators for push-off and ankle control.

Here’s the deal: runners talk quads and glutes all day, but your calves? They’re the unsung heroes. Every time you toe-off, your calves fire. Strong calves make your stride more efficient and can keep nasty stuff like Achilles pain and calf cramps away.

I learned the hard way. I used to cramp up deep into long runs. My fix? Regular calf raises. It changed everything.

How to Do Them:

Find a step or a sturdy ledge. Stand with the balls of your feet on it, heels hanging off. Hold something for balance if you need to.

Push through your toes and raise up high — think ballerina tall. Pause at the top, feel that hard contraction in your calves, then slowly lower until your heels dip just below the step. That slight drop gives your calves a juicy stretch. No bouncing. No momentum. Just honest work.

Reps: I usually hit 12–16 reps per set. Some days I’ll do 15 with both feet, then 10 single-leg on each side. That one-leg version really exposes any imbalances.

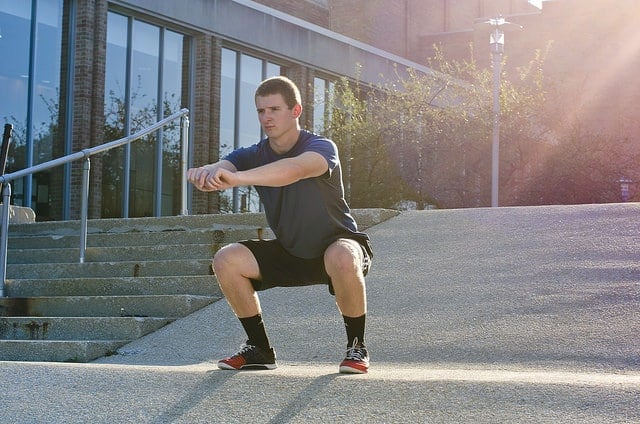
3. Squats

Muscles Worked: Quads, glutes, hamstrings, and core.

If I had to crown one strength move for total leg power, it’d be squats. Period. They build raw strength and help stabilize your knees, hips, and core. When I started squatting regularly, I stopped feeling sketchy going downhill. Before, I used to tip-toe down descents, worried my knees would buckle. That fear? Gone.

How to Do Them:

Feet shoulder-width. Toes turned out just a touch — whatever feels right for your hips. Drop it like you’re sitting in a chair behind you. Keep your chest proud, back straight, heels grounded. Don’t let your knees cave in or shoot forward past your toes.

Go down until your thighs are at least parallel to the ground. If you’ve got the mobility, deeper is great — more glute activation. Then drive through your heels and stand up strong.

Start with bodyweight. Goblet squats (holding a dumbbell at your chest) are also a solid entry point. More advanced? Load up a barbell for back squats.

Reps: 8–12 reps per set. Go heavier with fewer reps, lighter with more. Just never trade form for ego.

Coach’s Tip:

Form over depth. Always. Some runners obsess over going “ass to grass.” But if your form falls apart at the bottom, it’s not worth it. A solid partial squat with good control is better than a deep one that jacks up your lower back.

Also, your eyes should look straight ahead — not down. That tiny adjustment helps keep your spine aligned.

4 . Sumo Squats

Target Areas: Quads, glutes, and those underused inner thighs (adductors).

Sumo squats deserve their own spotlight. If you’re a runner struggling with knee wobble or hip instability, these can be a game-changer. The wide stance and feet turned out hit the inner thighs way more than your standard squat.

Why does that matter? Because your adductors help control side-to-side leg movement. If they’re weak, your knees might cave inward during a run, especially when fatigue sets in. I’ve seen this plenty in runners with IT band issues or that annoying “runner’s knee.”

Here’s how to do it:

  • Take a wide stance, feet pointed out at about 45 degrees.
  • Go bodyweight at first or hold a dumbbell/kettlebell between your legs. Barbell works too if you’re comfy with it.
  • Sit back and down, keeping knees aligned with toes (they should track outward, not collapse in).
  • Drop until thighs are parallel or you feel a good stretch in your inner thighs.
  • Push through your heels and squeeze your glutes to stand.

Shoot for 10–12 reps. Start light. Form over everything.

A common mistake? Knees collapsing inward. Fight that by driving them outward as you come up.

5. Leg Press

Target Areas: Quads, glutes, hamstrings, calves (a little).

The leg press machine catches a lot of hate from gym purists, but don’t dismiss it. Especially for runners new to strength training or anyone needing to load the legs safely. I leaned on leg press heavily when my squat form was garbage. It let me build strength and confidence without risking my back.

How to do it:

  • Sit down and set feet shoulder-width (or a little wider) on the platform.
  • Keep feet flat, hips and back pressed into the seat.
  • Start with knees bent around 90 degrees.
  • Press out until your legs are nearly straight (don’t lock out).
  • Lower back under control to that 90-ish degree bend.

Aim for 12 solid reps per set. Go heavier than your squats here — you’re supported, so you can push it. I do 3–4 sets of 10–12 when I’m in a heavy strength block.

Coach’s Tip: Foot placement changes what gets worked. High hits more glutes, low blasts quads. Keep knees aligned with toes. Never lock your knees at the top. Also, hands off your legs — use the grips, not your thighs, to stay stable.

6. Single-Leg Deadlifts

Target Areas: Hamstrings, glutes, lower back, core.

If I could only give a runner two exercises, the deadlift would be one of them. Why? Because running is basically a series of single-leg stances. And this move not only strengthens your backside, but also reveals any lopsidedness between legs. Trust me — you’ll know which leg is weaker.

How to do it:

  • Stand on one leg, knee slightly bent.
  • Hold dumbbells or just go bodyweight at first.
  • Hinge forward at the hips as your free leg extends back.
  • Keep your spine flat and hips square (no twisting).
  • Lower until your torso is parallel to the ground (or as far as your hamstring flexibility allows).
  • Drive through your heel to return to standing.

Do 8–10 reps per side. It’s gonna feel wobbly. That’s part of the magic.

Coach’s Tip: Hips love to cheat and open up. A trick? Point your back foot’s toes toward the ground. It helps square your hips. Also, keep your back flat like you’re balancing a cup of coffee on it.

I once had a runner whose left leg trembled like mad on these. He stuck with it. A few weeks in, the shakes were gone and his form looked clean. That carryover to his running? Massive.

And hey, there’s a reason physios love single-leg work. Running is a one-legged sport. Don’t ignore it.

7. Lunges with Rotation

Target Areas: Quads, glutes, calves, obliques, balance muscles.

Add some twist to your lunge and suddenly it hits different. Running isn’t just forward and back. Your torso rotates with each stride. This lunge variation taps into that natural twist and strengthens your ability to stay upright and stable under motion.

How to do it:

  • Grab a medicine ball or dumbbell.
  • Hold it in front of your chest, arms straight.
  • Step into a lunge with your right leg.
  • As you sink into it, rotate your torso toward that same side.
  • Keep arms extended as you rotate from the spine.
  • Come back to center and step back.
  • Repeat on the other side.

10–12 reps per side does the trick. Don’t rush it.

Coach’s Tip: Smooth control is key. Don’t fling the weight. If you’re wobbling like crazy, lighten up or use just your hands. Keep chest up and eyes forward.

Why do I love this one? Because it mimics real-life running mechanics in a smart way. I used to have slight crossover gait and some IT band flares. My physio threw this move into my program and it paid off. My stride smoothed out, and my hips felt more locked in. It’s a small tweak with big returns.

8. Cable Knee Drives

Target Muscles: Hip flexors (mostly the iliopsoas), glutes, and your core for stability.

Let me tell you—this one hits a part of your stride that most runners ignore: the knee drive. That explosive motion that powers you forward, especially when you’re sprinting or charging up hills? Yeah, this is how you build it.

Funny thing is, for as much running as we do, hip flexors often get tight or weak from all the sitting and limited motion in daily life. Tight hips, short stride, sluggish form. Fixing that can make a night-and-day difference.

Cable knee drives aren’t just another gym move—they actually mimic how your leg works when running hard. I love using the cable machine here because it gives constant resistance through the full range of motion, just like your stride does.

How to Do It:

Set up at a cable machine with a low pulley and ankle strap. If you’re at home, a resistance band works too. Hook the strap to your right ankle and stand facing the machine, about two feet away so the cable has tension. Start light—this isn’t about heavy loads.

From there, balance on your left leg and drive your right knee up toward your chest, like you’re doing a high-knee sprint. Go for that 90-degree angle at the hip (think thigh parallel to the floor). Focus on a strong upward drive, not a lazy lift. Control the return—don’t just let it flop down.

Do 10–12 reps on one leg, then switch sides. Go for 3 rounds each leg. You’ll feel it fire up your hip flexors and make your stabilizing leg (the one on the ground) work too.

Coach’s Tip: Stand tall. Don’t lean back or hunch over. Let the movement come from your hips—not from swinging your body like a kettlebell. If you’re yanking with momentum, lower the weight. Trust me, you don’t need much here. Activate your abs on each rep too—that’s what your core does during real running.

No cable machine? No problem. Loop a resistance band around your foot, anchor it behind you, and mimic the same movement. Or grab some ankle weights and try high-knee marches. Just make sure there’s resistance as you lift the knee—that’s the magic.

Weekly Plan: Strength + Running

Here’s a simple way to mix strength into your week:

  • Monday: Easy run or full rest. No lifting.
  • Tuesday: Leg workout #1 (30 min)—can pair with a light run.
  • Wednesday: Medium-distance run or cross-train.
  • Thursday: Speed session (intervals, tempo).
  • Friday: Leg workout #2—again, pair it with an easy run if needed.
  • Saturday: Long run. The timing works—legs had a full day since lifting.
  • Sunday: Off or recovery jog.

You don’t need to follow this exact setup—just keep the principle: don’t blast your legs the day before a big run.

If you’re running every day (shout out to my streak runners), tack these on after short easy days or bunch them with speed days if you’re going with the “hard day, hard day” plan.

Here’s your guide to strength training for runners.


Progression Plan

Stick with this for 8 weeks and level it up like this:

  • Weeks 1–4: Get familiar with the moves. Start light. Bump up from 2 sets to 3 if things feel good.
  • Weeks 5–8: Add weight where it makes sense. Or sneak in a fourth set. Or try a harder version of the move.
  • By Week 8: You’ll feel stronger. You’ll run stronger. You’ll see the difference.

Maybe you’re cruising up hills you used to crawl. Maybe your easy pace is quicker at the same heart rate. Strength work doesn’t lie—it shows up in your runs.


Pre-Race Tapering

Got a race coming up? Ease off about 10–14 days before. The goal is fresh legs, not DOMS two days out. Some runners stop lifting altogether two weeks before, others just cut back to bodyweight or light stuff.

Me? I taper the load and volume, keep a bit of movement, and let the legs breathe.


Maintenance Phase

Race season gets hectic. You don’t have to go beast mode in the gym year-round. During heavy race blocks, keep just one full-body session per week. That’s enough to maintain the strength you built.

Remember: it’s easier to maintain than to build.


Recovery: Don’t Skip It

Strength training adds load. Respect the recovery. Eat right (protein matters), hydrate, sleep like it’s your job. I always foam roll my quads, calves, and hamstrings after leg day.

DOMS? That soreness is your badge of honor—it means you’re doing something new and your body’s adapting. A light recovery run or swim can help too.

I once read a comment from a seasoned runner on Reddit that stuck with me:

“DOMS is real, but it’s proof you’re working.”

True that. It fades, and then you level up.


Strong Legs = Strong Runner

If you’re serious about running better—not just logging miles but running with purpose—then get to work on your legs.

This isn’t about looking good in shorts. It’s about injury-proofing, building power, and running smarter.

The weight room (or your living room floor) is your next training ground.

Lace up. Load up. Let’s build those bulletproof runner legs.

The Couch To Half Marathon Plan For Beginner Runners

couch to half marathon

Thinking about running a half marathon but feeling it is too far out of reach?

Well, it’s not. Believe it or not, 13.1 miles is totally doable, even if you’re starting from the couch.

I’ve been there too, wondering if I’d ever be able to run that far. But with a solid plan and steady effort, you can definitely get there.

In today’ post, I’ll guide you through a couch to half marathon training plan that’s all about consistency, small wins, and building confidence. A

long the way, you’ll find personal stories, helpful tips, and a strategy to stick with it—even on the tough days.

The key here? You don’t need to run fast. In fact, most beginner half marathon training plans (as well as mine) emphasize that the goal is not to sprint your way to 13.1 miles. It’s about building endurance.

Let’s get to it.

Why a Half Marathon is Within Your Reach

I know, 13.1 miles sounds like a lot, right? But if I can do it, you can too, no matter where you’re starting from.

Here’s how I look at it: two 10Ks back-to-back with a little bit of a bonus at the end.

It’s all about endurance, not speed.

Speed doesn’t matter here—just stick with it and show up consistently.

When I got into running, I could barely run a block without stopping to catch my breath. But I just kept it slow and steady. That slow, steady grind paid off big time.

Soon enough, I was running farther without stopping. It just happened. Starting slow? Perfectly fine. Don’t rush it.

Like they always say: “Endurance is key here, not speed.” For a lot of us, it’s not just about the miles. It’s about proving to ourselves that we can tackle something huge.

TL:DR – The couch to half marathon plan works, period.

Setting Your Goal and Mindset

Start by setting a real, achievable goal and locking in the right mindset. Don’t get caught up in times or mile splits—those don’t matter right now. At first, it’s all about showing up. Progress will follow.

When I signed up for my first HM event, my goal was simple: run or walk for 45 to 60 minutes, four to five times a week. And that was it. No pressure about how far or how fast. Just move.

I won’t lie—there were times I wondered if I’d ever get better. I felt sluggish and doubted myself.

But every run brought me closer to my goal. The key? Consistency. It’s about building strength and endurance—your pace, your rules. Most runners will tell you: take it slow. Don’t rush the process.

You’ve heard it before—don’t rush things. It takes time, but every run makes you stronger.

Here are my best tips:

  1. Start with Baby Steps: Your first runs will probably feel slow and short—and that’s totally fine. Even 10–15 minutes of run/walk is a great start. Once you get comfy, just add a bit more time or distance each week.
  2. Track Your Progress: Track your runs. Whether it’s a log or an app, keeping tabs on your progress is a game changer. Some people even love marking their routes on a map. It’s a great way to visualize your progress.
  3. Stay Positive: Running is tough when you’re new to it. I get it. But be kind to yourself. You’re doing something hard—and that’s worth respect. This is your journey. Don’t worry about anyone else. Stop apologizing for your pace. We’re all running our own race.
  4. Celebrate Small Wins: Celebrate every little step. Big wins come from small victories. You ran today? That’s enough. You showed up.
  5. Too much of a challenge? If my couch to half marathon is too hard for you, then consider trying out my couch to 5K plan or couch to 10K plan. no excuses.

Your 15-Week Couch to Half Marathon Training Plan

Here’s your beginner-friendly 15-week plan to help you cross the finish line of your first half marathon.

We’ll gradually build up your miles and give you plenty of rest and cross-training days to keep you healthy and injury-free.

Don’t worry about being perfect—this plan is just a guide. Feel free to adjust things like rest days, pacing, or even throw in some run/walk intervals if you need to. The key here is steady progress, not rushing ahead too quickly. Stick with it!

The Plan:

WeekMondayTuesdayWednesdayThursdayFridaySaturdaySunday
1Rest20 min run/walkCross-train20 min run/walkCross-trainRest3 mi run
2Rest25 min runCross-train25 min runCross-trainRest4 mi run
3Rest30 min runCross-train30 min runCross-trainRest5 mi run
4Rest35 min runCross-train35 min runCross-trainRest6 mi run
5Rest35 min runCross-train40 min runCross-trainRest7 mi run
6Rest40 min runCross-train45 min runCross-trainRest8 mi run
7Rest45 min runCross-train50 min runCross-trainRest9 mi run
8Rest45 min runCross-train55 min runCross-trainRest10 mi run
9Rest40 min runCross-train45 min runCross-trainRest8 mi run (recovery week)
10Rest50 min runCross-train55 min runCross-trainRest11 mi run
11Rest50 min runCross-train60 min runCross-trainRest12 mi run
12Rest55 min runCross-train60 min runCross-trainRest10 mi run (taper week)
13Rest45 min runCross-train50 min runCross-trainRest8 mi run
14Rest30 min runCross-train30 min runCross-trainRest5 mi run
15Rest20 min easy runCross-train20 min easy runCross-trainRestRace Day: 13.1 mi

Weeks 1–4: Laying the Foundation

These first few weeks are about getting comfortable and making running a habit. You’re not going to break any records yet—and that’s perfectly fine! The focus is on consistency. If you need to start with run/walk intervals, that’s totally okay. Just get out there and keep moving forward.

Start each run with a 5-minute warm-up. A brisk walk, light jog, or leg swings will get your muscles awake and ready to go. On rest days, keep moving gently. A walk, light stretching, or yoga will help your body recover while keeping you on track. It’s all about staying active without pushing yourself too hard.

Weeks 5–9: Building Endurance

By now, you’ll feel your runs becoming a little easier, and you’ll start building serious endurance. The weekday runs will get longer, and your Sunday long runs will start to ramp up to 8-10 miles. You might have some tough weeks—just stick with it. You’re building strength, and that’s what counts.

On those longer runs, focus on breathing and form. Keep it at a pace where you can still talk, but just barely. This is how you build endurance without overexerting yourself. If you’re feeling low on energy, grab a banana, a gel, or a sports drink halfway through. And don’t forget to refuel after your run! A carb and protein snack, like chocolate milk or a smoothie, will help speed up your recovery.

Weeks 10–12: Peaking

Now, you’re entering the final stretch. You’ll hit your longest runs—up to 12 miles—and then taper to make sure you’re fresh for race day. These weeks are all about getting comfy running for 2+ hours. Trust your training and don’t worry about overdoing it.

If you’re feeling sore, take extra rest or cross-train (swimming or yoga work great). Soreness is normal, but don’t push through pain. It’s easy to get excited on race day and start too fast. One runner said, “We would’ve enjoyed the last 3 miles more if we started slower.” Remember, it’s a marathon, not a sprint.

Weeks 13–15: Taper and Race Day

As you near race day, it’s time to dial it back. These final two weeks are all about letting your body recover and staying fresh. Early in Week 13, you might feel a little sluggish. Don’t worry, that’s normal! It’s your body catching up after all that hard work. By Week 15, your runs should be short (20–30 minutes)—just enough to keep your legs loose and ready to race.

Ease off on the training. Trust me, I know that nervous feeling, but don’t let it mess with you. You’ve done the work—now let it pay off. Stick to what you’ve been doing and skip anything new that could hurt you.

What’s more?

The day before the race, just relax. Have a solid dinner—something with carbs like pasta or rice. Don’t stay up late. And before bed, take a moment to visualize yourself crossing that finish line.

Next, on race day morning, eat a light breakfast—toast with peanut butter or oatmeal about 1–2 hours before the start. Keep your pace steady from the beginning. And just remember—you’ve earned this. Consistency in your training leads to success, so trust in what you’ve done.

Want to take things to the next level? Check out my couch to marathon plan.

Cross-Training and Recovery

Here’s my take: Cross-training has saved me from so many injuries. I used to only run, and it took a toll. But once I added in some biking and strength training, I felt way better and ran faster. Trust me, strength training is huge for those long runs. Being stronger allows my muscles and joints to handle those long runs way better.

For recovery, sleep and nutrition are the two biggest things to focus on. After long runs, your body needs fuel within 30 minutes—your muscles are like sponges for nutrients right after exercise. Go for something like a smoothie or chocolate milk, with a 3:1 or 4:1 carb-to-protein ratio. And stay hydrated. Water’s your best friend—sip on it all day, especially after your runs.

Stretching and foam rolling should be a regular thing too. After your runs, take 1–2 minutes to foam roll those tired muscles—your calves, quads, hamstrings, and glutes. You’ll feel way better after. If you’re super sore, it’s okay to take an extra rest day or switch out a run for cross-training.

Gear, Nutrition, and Runner Essentials

Let’s talk about gear.

First thing’s first: your shoes.

Don’t mess around here. A solid pair of running shoes is your foundation. You don’t need anything fancy, just shoes that fit well and feel right.  Replace your shoes every 300–400 miles to keep your legs feeling fresh.

Moisture-wicking socks are also a must to avoid blisters. And dressing for the weather is huge. In cold weather, layers are your friend. If you’re running in low light, make sure you’re visible—think bright clothes and reflective gear.

Now, for nutrition—balanced meals every day are key. On running days, have a little extra carbs before your run. A banana or toast with peanut butter is perfect. Afterward, get that 4:1 carb-to-protein snack in to kickstart recovery.

And always listen to your body when it comes to hydration and food. If you’re feeling extra tired, take an extra rest day and eat a little more. Running’s part of the equation, but sleep and proper food fill in the rest.

Overcoming Doubts and Staying Motivated

Everyone has those tough days. You’ll find yourself thinking, “Can I really do this?” The key is to push through. Remember why you started, and lean on your community.

Whether it’s friends, a local run group, or virtual buddies, it helps to have someone to share your goals with.

So please start slow and find a partner. It makes it fun and a lot harder to quit.

Not every run is going to feel amazing. Some days you’ll feel unstoppable, and other days you’ll feel like you’re dragging. And that’s totally normal. Don’t give up! Some days are great, some days are okay. Just take it one mile at a time.

Fitting Training into Your Busy Life

Life’s busy, I get it. But trust me, you can still fit in your runs if you plan ahead and get a little creative. Treat your runs like any important meeting or appointment.

My best advice? Treat your run like an appointment.

Put it on your calendar, set a reminder, and stick with it. If you’re not sure where to start, plan your week ahead.

Yes, that might mean waking up early or squeezing in a run on your lunch break, but trust me, it’s worth it.

When time’s tight, focus on quality, not quantity. You don’t need to run every single day. Even 3–4 focused runs a week can totally do the job, especially when you’re just getting started.

Here’s a simple breakdown that works: one long run, one or two moderate runs (with some faster intervals or hills), and an easy run to recover. It doesn’t take a lot of mileage to get fit. Too much running can actually lead to burnout, and no one wants that.

And don’t forget about the days you can’t run. Take a brisk walk, do a quick home workout, or stretch. Every little bit helps, and consistency is key.

Here are a few tips that have worked for me — and others, too:

  • Plan Ahead: Get ready the night before—lay out your running clothes, fill your water bottle, and pack some snacks. ASICS says prepping ahead of time removes those last-minute excuses.
  • Use Small Windows: Got 20 minutes? Use it! You can fit in a quick run before breakfast, during lunch, or after work. It all adds up.
  • Combine Activities: Running errands on foot, or with a stroller if you’ve got little ones? That counts. Even doing squats or lunges during TV commercials helps you get fitter without even thinking about it.
  • Adjust as Needed: Life happens, and that’s okay. Miss a run? Don’t sweat it. It’s not the end of the world. ASICS has a solid reminder: “One or two missed runs won’t wreck your fitness or mess up your goals… just get back to your training the next day.” Give yourself a break and get back on track the next day.

Your training plan should work for you — not the other way around. It’s okay to shuffle workouts or take an extra rest day if you need it. The goal is to do most of those key workouts, not follow a rigid schedule that burns you out.

Handling Soreness and Preventing Injuries

Soreness? Totally normal. It means your muscles are getting stronger. Mayo Clinic says that mild discomfort can actually mean progress — just don’t go overboard. Gradual is the way to go.

Prevent injuries by not cranking up the mileage too fast, and don’t skip your warm-ups. Always start your run with easy jogging or dynamic stretches (think leg swings or lunges) to wake your body up.

Got sore muscles? There are some solid ways to ease the pain:

  • Hot/Cold Therapy: A warm shower or bath can help loosen tight muscles. After a tough run, an ice pack (15 minutes max) can reduce any inflammation. Use these tricks sparingly to keep things fresh between tough workouts.
  • Injury Prevention: Build up those supporting muscles. Squats, lunges, planks, and calf raises — do them 2–3 times a week. Even just 15 minutes at home can save your knees and ankles down the road.
  • When to Slow Down: If you’re dealing with a sharp pain, especially in your knees or shins, take it seriously. Mayo says that if the pain is mild and doesn’t get worse, you can keep going — but always listen to your body. If it doesn’t improve after a couple of days, don’t hesitate to see a professional.

Conclusion: Trust the Process and Keep Running

Congrats — you’re officially on your way to that half marathon! But remember, consistency is what counts. Every run, every cross-training session, every bit of movement helps you get closer to that finish line. Trust the process.

On tough days, look back at how far you’ve come. On easier days, enjoy the flow of your run. Just keep showing up. Like a runner said, “Starting is the worst, but there will come a day where running feels like bliss.” Stick with it, and remember that every week, you’re getting stronger.

I want to hear from you: What part of training has been the toughest so far? Drop your wins, questions, or struggles in the comments! And if these tips helped, pass them along to someone else who’s just getting started.

The finish line is closer than you think — now lace up and get running!

Check the following chart for the exact breakdown of common couch to half marathon running paces:

Half marathon pace chart


couch to half marathon plan


How Much Water Should a Runner Drink

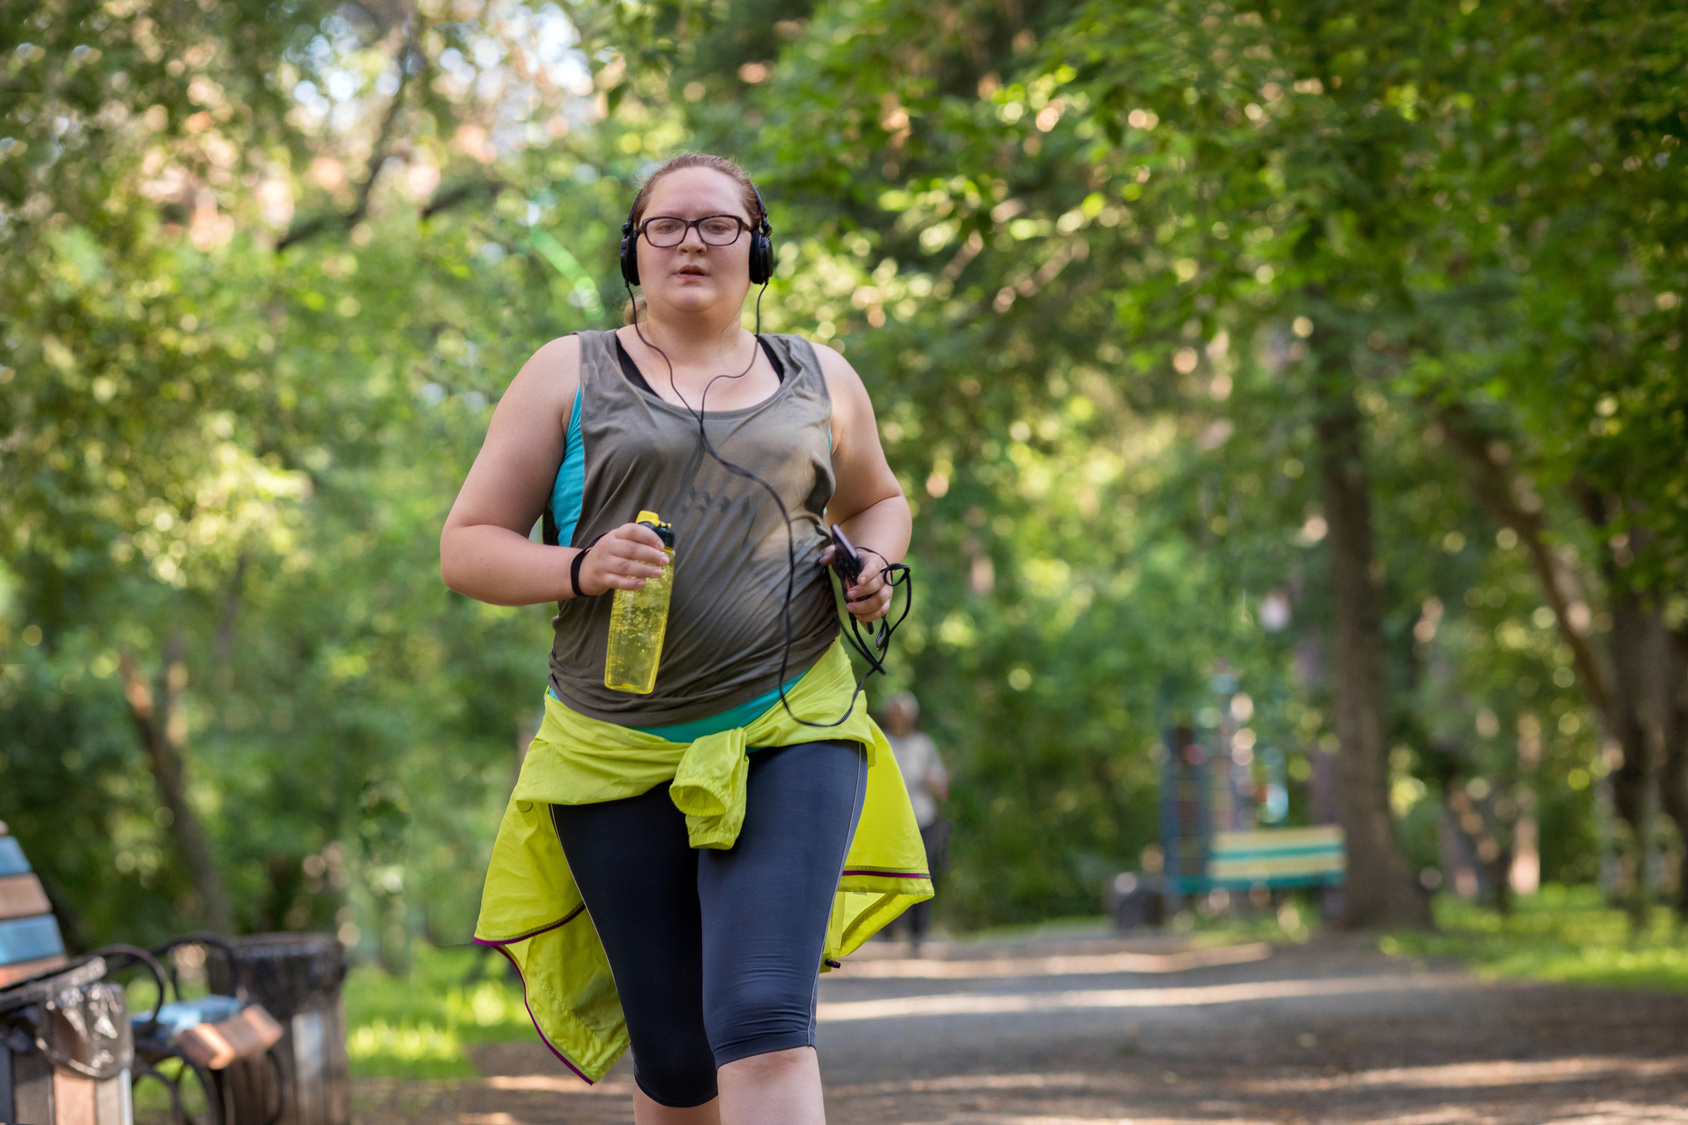
runner drinking water

Looking for practical guidelines on how much water should a runner drink? Then you’ve come to the right place.

Here’s the truth. Proper hydration for runners is key both during the winter season and through the long hot summer.

In fact, if you do any sort of exercise, drinking enough water, before, during, and after your workouts is vital for performance and injury prevention.

This shouldn’t surprise you at all!

Here is the good news.

Staying well-hydrated while running is not rocket science.

This blog post will teach about the importance of water intake in runners as well as how to stay properly hydrated for your runs.

Feel excited?

Let’s lace up and dig in.

The Importance Of Proper Hydration For Runners

Human beings can survive for as long as a month without food.

But, devoid of water, we would perish in three to four days, science says.

Why it’s the case is no mystery.

The human body is about 60 to 70 percent water, and every living cell in the body; it needs to keep functioning.

More specifically, the brain is composed of 95 percent water; lungs are almost 90 percent, blood is 82 percent water.

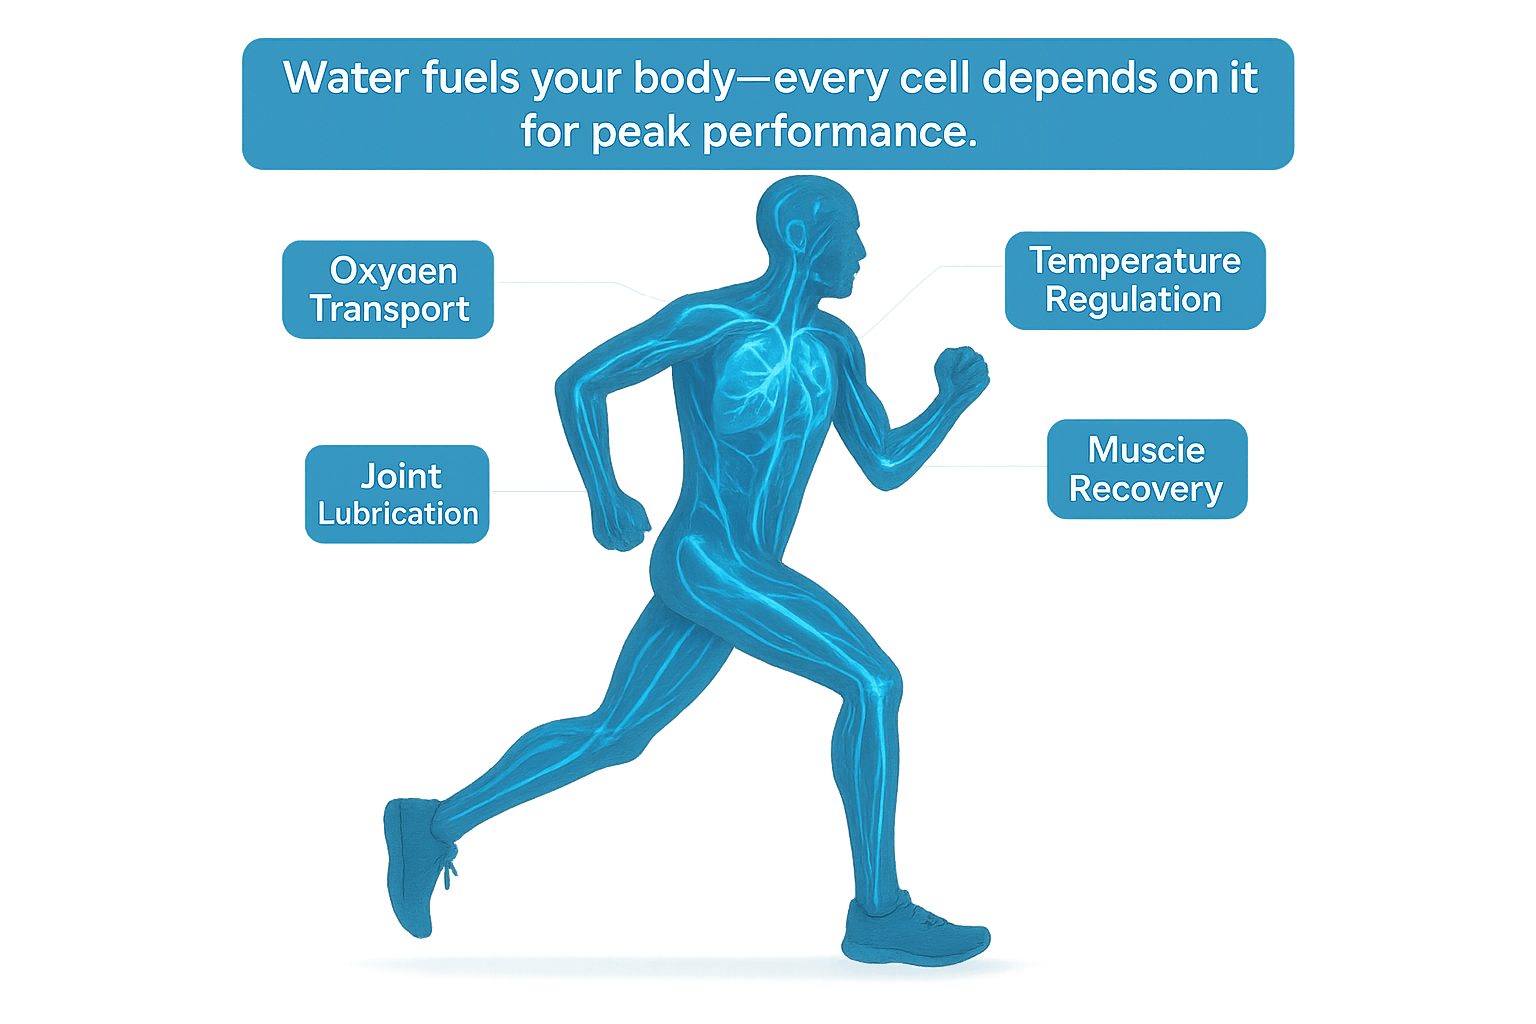
Here are some of the main functions of water:

  • Water flows through the bloodstream, carrying both nutrients and oxygen to cells and flushing waste out of your body.
  • Water cushions our soft tissues and acts as a lubricant for our joints.
  • Water facilitates the proper digestion of food to provide energy. Without it, your digestion system will grind to a halt.
  • Water keeps your skin healthy by eliminating toxins.
  • Water regulates body temperature through sweating and respiration.

For these reasons, it’s not a secret that water is the most critical nutrient for growth, recovery, and health.

Dehydration – Why Do you Need to Avoid it?

Dehydration strikes when you’ve lost too much liquid without replacing it.

When this happens, your organs, cells, and tissues will fail to function as they should, leading to dangerous, even life-threatening, complications.

You might feel easily winded, have muscle cramps, experience loss of coordination or dizziness during your workout as well as other acute symptoms.

The Process – Dehydration and Blood Volume Levels

So, what happens to your body as you become dehydrated?

According to biology, our blood is about 82 percent water.

When you run, you sweat.

As you sweat, your blood volume drops, thus less blood returns to the heart.

Next, the volume of blood your heart pumps with each beat declines, which can hinder oxygen- and nutrient-rich blood from reaching your working muscles.

This leads to a reduction in your aerobic energy production, forcing you to slow down.

Research has found that runners who lose as little as two percent of body weight through sweating experience a drastic drop in blood volume, which, in turn, forces the heart to work harder to circulate blood.

A reduction in blood volume may also cause fatigue, muscle cramps, dizziness, nausea, and heat-induced illnesses, such as heat stroke and heat exhaustion.

Severe cases may result in death.

Additional Resource – What’s the best temperature for running?

Mild VS Severe Dehydration

Dehydration levels can range from mild to serious, even life-threatening cases.

Mild dehydration can typically be treated at home, whereas severe cases of the condition require immediate medical attention in a hospital or emergency care setting.

The most common symptoms of dehydration include:

Mild Dehydration

  • Dry, cool skin
  • Dry, muggy mouth
  • Fatigue or sleepiness
  • Constipation
  • Headache
  • Lightheadedness or dizziness
  • Muscle cramps

Severe Dehydration

  • Extreme thirst
  • Sunken eyes
  • Confusion and irritability
  • Rapid breathing and heart rate
  • Low blood pressure
  • Dark urine, or no urine at all
  • Fever
  • Loss of consciousness (in serious cases).

We are a dehydrated Nation

Most people don’t drink the recommended daily amount of water, which is 60 to 70 ounces of liquid—runners included.

In fact, research shows that up to 75 percent of Americans might not be meeting this daily recommended water intake.

How Much Water Should a Runner Drink

How Much Water Should a Runner Drink

So, how much water should you drink while running?

Here is the thing.

There are no universal rules for how much liquid to drink because everyone is different.

In general, your hydration needs depend on the following factors:

  • Training intensity,
  • Fitness level,
  • The clothes you’re wearing,
  • Your sweat rate, your physiology, and most importantly,
  • The heat and humidity in your environment.

But, all in all, a good general guideline is to aim to drink half of your body weight in ounces each day.

So, for instance, if you weigh 170 pounds, you typically want to try to drink 85 ounces of water per day.

That might seem like too much at first, but if you get yourself into the habit, you’ll be able to reach that target.

Additional resource – Your guide to Charleys Horse in runners

How to Stay Well Hydrated While Running

Here are a few ways that can help reach your daily quota of the life-granting liquid:

Drink The Whole Day

The golden principle is to drink plenty of water throughout the day to stay well hydrated.

Build the habit of drinking water all day long.

Drink first thing in the morning and right before you doze off to sleep.

Also, keep a full water bottle nearby, whether at your desk at work or in your car.

This can serve as a reminder to keep your hydration topped up.

Additional Resource – Running in polluted areas

Start Your Runs Well Hydrated

Have enough water before a run.

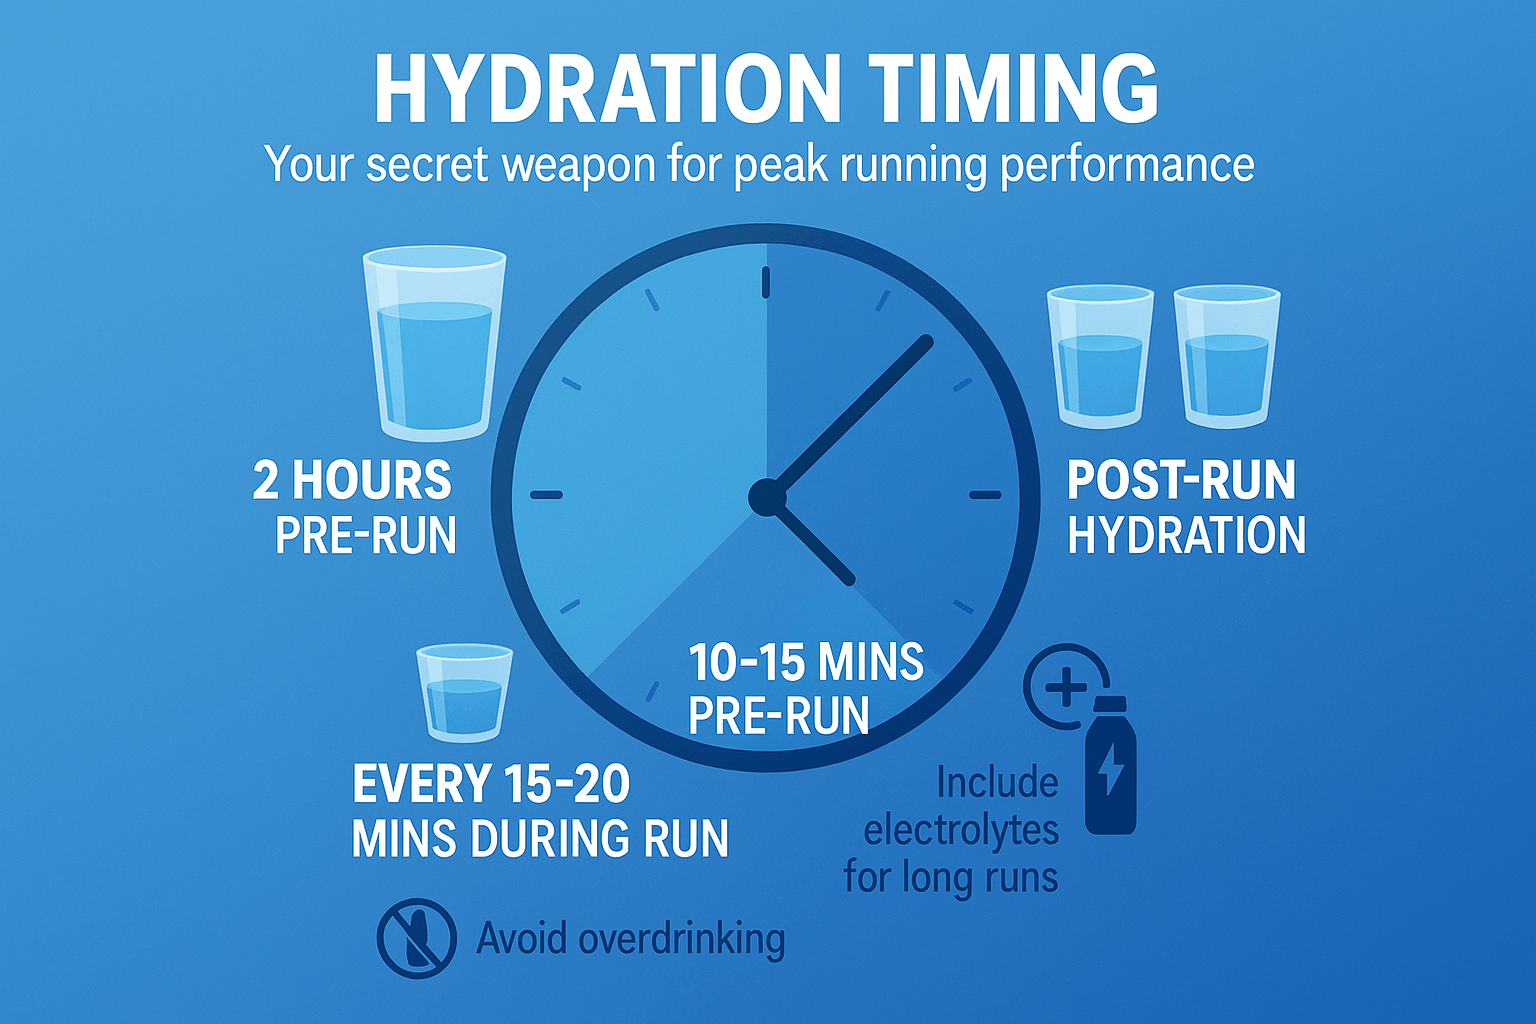
In general, this might translate to drinking  500 to 900 ml—the equivalent of two to four glasses of water —in the two to three hours before a run.

Just keep in mind that if you feel thirsty, then you’re already dehydrated.

Note: Do not drink too much water before a workout as doing so can force your kidneys to flush it out, resulting in frequent trips to the bathroom.

Overdrinking can also dilute your body’s sodium balance and boost your risks of hyponatremia.


Hydration During Long Runs

For long distance running, shoot for 150 to 250 ml—roughly one cup—for every 15 to 20 minutes of training.

You should also consider having a sports drink containing carbs and electrolytes for runs over an hour, especially when training in hot weather.

No excuse for lack of water stops

Keep a hydration plan ready, and consider investing in a hydrogen water bottle for added benefits. Hydrogen-rich water is known for its antioxidant properties, which help reduce inflammation and support faster recovery, making it a great choice for runners who need optimal hydration and performance.

You can also use a hydration running vest.

After Your Runs

In general, you can lose up to half a liter for each hour of running.

This can be considerably higher when exercising in warm and/or hot weather.

So, immediately post-run, drink another two to three glasses within 10 to 20 minutes.

To Conclude

  • Drink two glasses—500ml—two hours before a run.
  • Drink one to two cups—250 to 500 ml—10 to 15 minutes before a workout.
  • Drink third a cup—about 75 to 250 ml—every 15 to 20 minutes during running.
  • Drink two to three glasses—500 to 750 ml—in the 30 minutes following a workout.

Keep in mind, as a runner, you can shed up to half a liter of fluid for each hour of running.

This can get drastically higher when running in hot weather.

Be careful.

Monitoring Hydration Levels

These tips are the basic rules of thumb when it comes to proper hydration, but it’s vital to remember that everyone’s fluid needs are different.

Some runners sweat more than others.

That’s why to make sure that you’re not under- or over-hydrating your body, you need to learn to monitor your hydration levels.

Weigh Yourself

To determine how much water you need,  know your sweat rate.

Weighing yourself both before and after each run can help you measure how much water you lose typically through sweat, which, in turn, helps you determine fluid needs.

This is especially a good strategy if you’re running throughout the hot season.

The Formula

As a rule of thumb, drink 16 ounces of water for every pound you’ve lost during a workout.

So, for example, if you are three pounds lighter after a 90-minute run, aim to drink 48 ounces in the hours following your workout.

Just don’t swig it all at once.

Aim to drink about 500ml in the first hour after your run, then keeping sipping water every 10 to 15 minutes until you have reached your target.

On your next long run, aim to drink 60 ounces of more before or during the workout.

The Pee Test

Another easy way to tell if you’re drinking enough is the urine test.

This may sound like an odd thing to do, but assessing the color of your pee is a proven strategy to monitor hydration levels, according to the University of Connecticut research.

Typically, your urine color should be light yellow—think lemonade.

But once it gets too dark (think apple juice), or particularly smelly, you need to drink up.

That said, clear, transparent urine is a bit excessive.

Still unsure which belong to which?

You can print the urine color guide and take it inside your pocket or running bag.

Wait wait… is there such a thing as drinking too much water.

Of course, there is.

Additional resource – Ice bath for runners

Do not Overdrink

Finally, it is possible to drink too much water while running.

In fact, overhydrating before (and sometimes during) a workout is a common mistake many fluid-conscious runners make.

In the scientific circles, this case is known as Hyponatremia, a condition of low blood sodium, usually associated with Overhydration.

Along with dehydration, this condition is one of the most common medical complications in endurance training and racing.

Mild cases of the condition will cause nausea and bloating, whereas extreme forms of hyponatremia can cause confusion, vomiting, and seizures, even death.

A survey revealed that 9 out of the 17 runners who were hospitalized during an 89KM Marathon in South Africa had been overdrinking—drinking too much water than their bodies’ needs.

To Err On The Side Of Caution…

One measure you can take to cut your risks of this condition is to sip on a sports drink comprising of sodium and electrolytes alongside plain water.

You can also increase your salt intake during hard and intense training days.

Still unsure?

Check with your doctor or nearest lab.

They will take your blood sample to analyze electrolyte serum.

If there’s happen to be abnormal findings, maybe they will show you how to correct so you can keep running comfortably.

How Much Water Should a Runner Drink – Conclusion

I think that’s pretty much it.

Today’s post covers all you need to know about staying well hydrated when running and exercising.

Now it’s up to you to put it into practice.

The rest is just detail.

Please feel free to leave your comments and questions in the section below.

In the meantime, thank you for dropping by.

KT Tape for Shin Splints: How to Tape and Relieve Shin Splint Pain

runner suffering from shin splints

You ever be mid-run, feeling good, then out of nowhere—bam—sharp pain shoots up your shin like someone stabbed you with a pencil? That’s shin splints. And they suck.

I’ve had them. My girlfriend had it worse—she literally broke down crying mid-run during her half marathon training.

It’s the kind of pain that makes even walking feel like punishment. You’re doing everything right—running, training, staying consistent—and then your body throws that curveball.

Funny thing? One of the best fixes we found was a simple roll of KT tape.

I didn’t buy it at first. Tape? Really? But I tried it. She tried it. And it helped. She ran pain-free for the first time in weeks. I was shocked.

So yeah, it’s not magic. But when you use it right, it works.

Here’s how I use KT tape for shin splints, what actually makes it effective, and how to get relief without spending a fortune or taking a month off training.

What Are Shin Splints, Really?

The technical term is medial tibial stress syndrome (yep, sounds intense), but for runners like us, it just means pain that creeps—or stabs—along your shinbone, usually on the inside edge.

It’s basically your lower leg screaming from too much stress. Whether it’s ramping up mileage too fast, pounding pavement without enough rest, or wearing dead shoes, the tissues in that area get inflamed.

Flat feet and overpronation? Big culprits too. If you’re coming back from a break and trying to go beast mode too soon, you’re also in the danger zone.

I’ve seen this over and over with clients—and lived it myself. According to Healthline and PMC, shin splints hit between 13–20% of runners and make up around 60% of all lower leg overuse injuries. That’s not a small club.

How KT Tape Helps Shin Splints (Science + Real Life)

I didn’t believe in tape until I saw it work. Here’s why it’s earned a spot in my gear drawer:

1. It Reduces Pain and Inflammation

KT tape lifts the skin slightly—just enough to improve blood and lymph flow. That extra circulation helps flush out gunk and reduce swelling.

In one PubMed-backed study, runners who taped their shins for just a week had less pain and better leg function than those using shoe inserts.

Think of it like peeling the pressure off your sore shin. That space matters. It speeds up healing and eases soreness, especially after a hard effort.

Real Talk: My girlfriend said it felt like her shin could breathe again. That alone made it worth the 60 seconds it takes to tape up.

2. It Supports—Without Locking You Down

This isn’t a clunky brace. KT tape moves with you. It hugs your leg but still lets you run, squat, walk—whatever.

Better yet, it “talks” to your nervous system through your skin, telling your muscles to chill out and stabilize. That’s huge when your leg’s overreacting and firing in weird patterns to avoid pain.

As a coach, I’ve had athletes tape up, test a few strides, and smile like they just dodged a season-ending injury. It builds confidence—and sometimes that’s half the battle.

3. It Speeds Up Recovery

More blood flow = more healing. Simple.

When I taped up after flare-ups, I noticed less lingering shin pain the next day. My girlfriend shaved a couple of recovery days off her usual downtime just by keeping the tape on post-run.

It’s not magic. But pair it with smart rest, strength work, and a gradual return—and you’ve got a solid recovery plan.

4. It’s Cheap, Easy, and Actually Useful

One roll of tape costs less than your morning smoothie. And you don’t need a degree to use it. Just follow a few steps (I’ll show you), and you’re good to go.

It sticks through sweat, showers, long runs—you name it. I’ve even taped up my Achilles and knee with the same roll.

Honestly, KT tape is like the duct tape of running injuries. Cheap, reliable, and surprisingly effective when you just need to keep moving.

KT Tape Is Not a Magic Fix 

Let’s get something straight: KT tape isn’t a miracle. It’s not going to fix your shin splints by itself. Think of it like a solid backup player — helpful, but it’s not going to win the game for you. That’s on you.

I’ve seen it work. I’ve also seen people slap it on and expect pain to disappear while they keep running like they’re bulletproof. Doesn’t work like that.

In fact, some old-school runners argue KT tape is just a fancy placebo. And honestly? If you don’t fix the real reason your shins are hurting, they’re not totally wrong.

My Take as a Coach

I’ve coached runners who use tape like it’s duct tape for injuries — wrap it on and keep pushing. I’ve done it myself.

But here’s what I’ve learned: if your form is off or your legs aren’t ready for the pounding, no amount of tape will keep the pain away forever.

Take my girlfriend, for example. She ramped up mileage way too fast and skipped calf work. Her shins lit up.

We taped her up, sure — it helped her get through some light runs. But that wasn’t the solution.

We pulled her back a bit, added calf/ankle strength work, and switched her to more cushioned shoes. Boom — progress.

The Shin Taping Method That Works

Follow this tutorial for proper shin pain KT tape relief:

The Real Work: Fix the Root

KT tape should be one piece of your game plan — not the whole playbook. Here’s what else you need to focus on if you want to get rid of shin splints for good:

1. Rest & Don’t Be a Hero

If your shins hurt, back off. Don’t be that runner limping through miles thinking it’s “just soreness.” Shin splints ignored can turn into something nastier — like a stress fracture.

When the pain flares up, take a break or cut your miles way down. Once it settles, build back slow — no more than 10% increase per week. That’s the old rule, and it still works.

2. Strengthen What’s Weak

Most shin pain comes from weak calves and hips. Your legs aren’t absorbing the force, so your shins take the hit.

That’s what happened with my girlfriend. We added toe raises and band work for her ankles and calves — and within a few weeks, the pain backed off big time.

If you’re not already doing calf work, you’re missing the basics. Add glute and hip strength too — strong runners are balanced runners.

3. Fix Your Form & Check Your Shoes

Overstriding? Landing heavy on your heels? You’re punishing your shins. Start listening to your footsteps — aim for quiet landings. Soft, midfoot strikes will save your lower legs.

And your shoes? If they’re old, worn out, or just not right for your foot type (like flat feet or overpronation), they’re part of the problem.

Consider arch support or orthotics if needed. I’ve had athletes tape their arches in addition to their shins to get through rough patches — it can help.

4. Ice & Stretch (Don’t Skip This)

After a run, hit those shins with ice for 10–15 minutes. It calms down inflammation.

Then stretch. Tight calves pull on your shins — foam roll them too. This part isn’t flashy, but it keeps your legs running smooth.

5. Cross-Train & Run Smarter

Sub in cycling or swimming when things flare up. Your lungs stay strong without pounding your shins.

Also, ditch the concrete jungle sometimes — trails and grass are way easier on your legs. Too much pavement is a shin killer.

Here’s more on how to prevent shin splints while running.

Don’t Ignore Serious Pain

Here’s the part most runners don’t want to hear: if your shin pain sticks around even when you’re not running, get checked out. You might be dealing with a stress fracture.

That’s not something you can tape your way through.

Dealing knee pain? Here how KT tape can help.

Frequently Asked Questions (FAQs)

Q1: Does KT tape really help with shin splints?

Yep, it can help — not as a miracle cure, but as a solid tool for keeping you moving when your shins are screaming. It won’t fix the root cause, but it sure can take the edge off.

I’ve used KT tape during those stretches when every step felt like I was getting stabbed in the tibia. It made things bearable so I could stay active while I worked on the real problem (like dialing back mileage, strengthening my calves, and checking my shoes).

And the science backs it up: A study found that after just one week, taping reduced shin pain more than insoles did (PubMed study).

So no, it’s not magic. But it’s a damn good band-aid while you work on the bigger picture.

Your move: Ever tried KT tape on angry shins? If so, did it help? If not, is it time to test it?

Q2: How do you tape your leg for shin splints?

It’s pretty simple once you’ve done it a couple of times. You don’t need to be a PT to figure this out.

Here’s the gist:

  • Flex your foot.
  • Stick one long strip of tape starting near your ankle and run it up along the shin, ending just under the knee — give it a gentle stretch.
  • Then slap on a shorter strip across the pain spot horizontally for extra support.
  • Rub it a bit to heat up the glue — and boom, you’re good to go.

(If you want the full step-by-step, scroll up — I’ve laid it all out clearly.)

This trick has helped me hit the road when rest wasn’t an option. And I’ve shown plenty of coaching clients how to do it, even in hotel rooms before race day.

Question for you: Do you already use tape? Or still winging it with ice packs and crossed fingers?

Q3: Can I run with KT tape on my shin splints?

Yeah, that’s the point — taping lets you keep running without making things worse (as long as you’re smart about it).

KT tape is built to give support without locking you up. When my shin pain flared during a training cycle, taping let me keep logging miles — though I did scale back speedwork and hills.

It didn’t give me a free pass to hammer it. That’s the key: use the tape to help, not to hide.

And if it still hurts? That’s your body throwing a red flag. Switch to biking, swimming, or even just take a couple days off.

No tape will save you if you’re just stacking injury on injury.

Think about this: Are you training smart with tape — or using it to avoid resting?

Q4: How long should I leave KT tape on for shin splints?

Most tape brands will hold for about 3 to 5 days. That includes through showers, sweaty runs, and a bit of wear and tear.

In my case, around day 3 or 4 the edges start peeling — especially if I’ve been running in Bali humidity or showering twice a day (which I usually do).

If it starts flapping or if your skin gets cranky, peel it off and let your skin breathe for a bit before reapplying.

Don’t layer tape on tape. Let your legs rest too.

Tip from the road: I’ve raced and trained with tape that held up like a champ. But I’ve also had a bad roll peel off mid-run and slap my leg like a wet noodle. Test it before race day.

Bringing It All Together: The Real Takeaway

Look, I’ve had shin splints that made me limp off a trail cursing under my breath. I’ve also made comebacks using nothing but tape, calf raises, and a stubborn refusal to quit.

KT tape won’t “heal” you overnight. But it’s a reliable teammate in your recovery lineup — especially when paired with the right shoes, smart training, and rest when needed.

I’ve seen this stuff help beginners stay consistent, help my girlfriend finish a brutal race series without hobbling, and help me survive brutal back-to-back long runs during peak weeks.

It works if you respect it for what it is — a support, not a fix.

So Now What?

Grab a roll. Tape your leg. Try it on your next easy run and see how it feels. That small strip of tape might just be the edge you need to get through a tough patch.

Your mission:

Let me know how it goes. Are you giving KT tape a shot this week? Drop a comment or DM — I’m always curious how it works for other runners.

Stay strong, take care of those legs, and never let a little pain stop you from chasing big goals.


Ready to take action? Your shins won’t tape themselves! Give this taping method a shot and let me know how it goes.

Here’s to many miles of happy, healthy running ahead. Stay strong, stay positive, and take care of those legs!

Happy running and speedy recovery!

Couch to Marathon: The Ultimate Training Plan & Guide

Going from couch potato to marathon finisher?

That’s no joke—it’s a massive leap.

But trust me, it’s also one of the most satisfying things you’ll ever do.

In today’s post, I’ll walk you through everything I wish I knew when I started:

  • How to train smart, not just hard
  • What all those running terms mean (like VO₂ max and lactate threshold)
  • What phases to expect (base → build → peak → taper)
  • How to dodge injuries and burnout
  • And so much more…

So if you’re staring at that 26.2-mile goal wondering, “Can I actually do this?”—you’re in the right place.

Let’s get to it.

What Is a Marathon, Anyway?

A marathon is 26.2 miles (or 42.2 kilometers).

To put that in perspective: you’d be running around a 400-meter track 105.5 times.

Yeah… brutal.

If you’re running at a 12-minute mile pace, you’re looking at about 5 hours and 15 minutes out there. Some folks move faster, others slower—there’s no magic number for your first marathon.

Your only real goal?

Cross that finish line strong and proud.

How Long Does Couch to Marathon Take?

 About 6 months.

Most true beginners need 24–30 weeks to train safely without wrecking their body.

That’s enough time to build up mileage, endurance, and mental grit without flirting with injury.

Now, I’ve seen exceptions.

Some people train for three months and crush it.

Others have been running for years and still DNF their first race. It all depends.

If you’ve already done a few 5Ks or maybe a 10K, you might squeeze your training into 4–5 months.

But here’s my coaching advice: don’t rush it. A little extra time is better than limping off the course halfway through.

And hey, this all assumes you’re healthy and not battling any major injuries.

If you’re completely new to fitness, start with a few weeks of walking or a couch-to-5K program.

You don’t need to leap straight into marathon mode.

Build a base first. That’s where the wins are made.

What should my weekly mileage be before starting a marathon plan?

Ideally, be running about 15–25 miles per week.

That means you can comfortably knock out a 5–6 mile run, even if you walk some of it.

Hal Higdon’s beginner plan kicks off with a 6-mile long run in Week 1.

If that sounds insane right now, no stress. Just spend a few extra weeks doing a couch to 5K or couch to10K plan to build up.

Already ran a 10K? Then progress to the couch to half marathon plan.

Think of it like this: the more miles you already have in your legs, the smoother the next few months will go—and the less likely you are to get sidelined by injury.

Don’t Skimp on Gear (Especially Shoes)

If you ignore everything else in this article, hear this: don’t cheap out on your shoes. They’re your most important weapon.

Running Shoes

Go to a running store.

Get fitted.

Find something with decent cushioning and support for distance.

Don’t run your marathon—or your long runs—in brand-new shoes.

I made that rookie mistake once. Slipped into a flashy new pair and thought I was golden.

By mile five, I was bleeding through my socks. Had to hobble home with angry blisters and a bruised ego.

Trust me, break your shoes in with at least 100 miles before race day. Better yet, rotate two pairs during training.

Socks

Get synthetic or wool-blend running socks. Seamless, moisture-wicking stuff.

Cotton socks are blister factories. Learned that the hard way on a humid Bali long run—looked like I ran through a meat grinder.

Clothes

Wear moisture-wicking shirts and shorts.

No cotton.

For women, a solid sports bra is non-negotiable.

Here in Bali, I live in feather-light running gear because the heat’s no joke. If you’re training somewhere cold, layer up with smart technical gear you can peel off as you warm u.

Hydration

Once your long runs creep past an hour, you’ll need water.

Whether it’s a handheld bottle, a waist belt, or a hydration vest—just find what works.

Don’t let dehydration sneak up and kill your run.

Other Essentials

  • Running hat + UV-blocking sunglasses
  • Waterproof jacket if you train in rainy weather
  • Anti-chafe balm (thighs, armpits, nipples—don’t wait until it’s too late)
  • GPS watch or app to track your runs

If you’re going to spend money on anything, make it shoes, socks, and anti-chafe balm.

That trio has saved me (and my runners) more times than I can count.

Marathon Training, Step by Step: What It Really Looks Like

So you’ve got the fire.

You’ve picked up your gear.

You’re ready to go.

But if you think marathon training is just “run a little more each week,” let’s hit pause right now.

Marathon prep is a process.

A grind.

A system that builds layer by layer, like stacking bricks. Without structure, it’s like building a house on sand—you’ll crash before you even get to the 10-mile mark.

Here’s how I walk my runners through the journey from couch to 26.2.

The 4 Phases of Marathon Training

I break marathon training into four blocks. Think of it like climbing a hill in stages—each part builds you up for the next.

1. Base Phase – Laying the Foundation

You start from wherever you are. Maybe you can barely run a mile without stopping.

That’s okay.

This phase gets you running regularly, gradually stretching your distance toward a solid 5K base.

You’re not chasing pace here—you’re just showing up, again and again.

2. Build Phase – Stacking the Miles

This is where things get serious.

We start adding more distance.

Long runs creep from 5K toward 10K and beyond.

You’ll also dip your toes into faster efforts—think strides or simple intervals—just enough to remind your legs they’ve got gears.

3. Peak Phase – Testing the Engine

This is the heavy lifting.

Mileage gets high. Long runs stretch to 15, 18, even 20 miles. You’re running tired.

Training on tired legs is gold—it makes race day feel lighter.

This part tests your head as much as your legs. You’ll want to quit. Don’t.

4. Taper Phase – Rest & Sharpen

The final 2–3 weeks.

You cut back on mileage so your body can heal up and absorb the work. It’s not slacking—it’s strategy.

Don’t let the taper freak you out. You’ll feel weird, maybe even sluggish. That’s your body gearing up for race day.

How Many Runs Per Week?

Aim for 3–4 runs a week. You don’t need to run daily—in fact, you shouldn’t. The sweet spot for beginners is usually:

  • Short run
  • Midweek run
  • Long run (usually on weekends)
  • Optional fourth easy run

Rest is part of training. So are cutback weeks. Don’t ignore them.

Long Runs: The Backbone of Your Plan

The long run is the main event. Do one every week.

It might start at just 3 miles with walk breaks—and that’s fine. What matters is showing up and slowly building the distance.

Add about a mile each week. Every few weeks, pull back (cutback week) to avoid overload.

Eventually, your longest run will top out around 18–20 miles.

And no, you’re not running those at race pace.

You go slow. You should be able to chat during these.

If you’re gasping, you’re going too hard. This is about time on your feet and building mental grit.

Easy Runs: Don’t Overthink These

Most of your weekly miles will be easy pace.

And I mean easy.

You should feel like you’re holding back. Forget pace. Easy runs build your engine and help recovery.

Roughly 80% of your runs should be easy. The 80/20 method—coined by coach Matt Fitzgerald—works.

It helps you stay consistent and keeps injuries at bay. I tell my athletes: “Easy is a feeling, not a number.” If it feels smooth, it’s working.

Walk-Run Works (Especially at the Start)

If you’re new to running, walk breaks are not cheating.

They’re smart.

One of the best ways to build endurance without injury is with a run-walk combo.

Start with something like “Run 1 minute, walk 2 minutes, repeat 10 times.” Gradually flip that ratio over the weeks until you’re running more than walking.

And hey—on race day, walk breaks might still be part of your strategy. The Jeff Galloway method is based on it. I’ve seen it help runners finish strong instead of crawling to the end.

Cross-Training & Rest Are Non-Negotiable

You’ll take 1–2 full rest days a week—no workouts, no guilt. Your body needs recovery just as much as it needs miles.

You’ll also cross-train 1–2 times per week. That means stuff like:

  • Cycling
  • Swimming
  • Brisk walking
  • Yoga or mobility work
  • Strength training (especially core and glutes)

Cross-training builds you up without the pounding of running. It also keeps things interesting.

Personally, I love yoga and short strength circuits on off days. Keeps me limber, resets my head, and protects me from injury.

The 10% Rule: Build Smart

The golden rule in marathon prep? Don’t get greedy with mileage.

Increase your weekly distance by no more than 10% each week.

So if you ran 15 miles total last week, your next week should be around 16–17, not 20.

Same goes for long runs—slow, steady gains.

Every 3–4 weeks, take a cutback week. Hold mileage steady or drop it slightly to let your body catch up. That’s where the real growth happens.

Phase 1: Base Building (Weeks 1–6)

Goal: Build a solid running habit and get your body used to moving for 3 miles without falling apart.

This first stretch isn’t about going fast or far. It’s about getting your legs to show up, even when your brain says, “Nah.”

Especially if you’re starting from the couch, expect to lean on the run/walk method for a bit—and that’s more than okay.

Here’s a sample of how I’d ease someone in during the first six weeks:

  • Week 1: Start with 1-minute jog, 2-minute walk. Repeat that 10 times. Boom—30 minutes done. Do that 3x/week. Long run? 1–2 miles, even if it’s mostly walking.
  • Week 2: Run/walk 3–4 times. Try to get that long run closer to 3 miles—running more if you’re up for it. Weekly mileage? Around 5–8 miles total.
  • Week 3: Run a little longer. Something like 2 min run / 1 min walk. Long run hits 4 miles.
  • Week 4 (Cutback): Step back a bit. Let your legs soak up what you’ve done. Maybe stick to a 3-mile long run.
  • Week 5: Aim for a few continuous runs—even if they’re short. Long run pushes to 5 miles.
  • Week 6: Less walking, more running. Try for a 6-mile long run, if it feels right.

If you can cover a 5K (3.1 miles) comfortably by the end of this phase—even if you still walk a little—you’re winning. Weekly mileage might land between 10 and 15 miles.

But don’t obsess over numbers.

This isn’t about stats yet—it’s about routine, momentum, and not quitting when your legs are screaming.

What’s Happening Behind the Scenes (Physiology Check):

This is where your aerobic system gets its first serious workout. You’re teaching your body to use oxygen better—to build a bigger engine.

Even if you’re not doing intervals, every run is nudging your VO₂ max higher (that’s just your body’s max oxygen delivery system, by the way).

According to Runner’s World, even easy runs help expand capillaries, boost mitochondria (your cells’ engines), and start laying down endurance foundations.

You’re also slowly lifting your lactate threshold—the pace at which your legs start burning and your body yells, “Nope.”

That means you’ll feel less wiped at the same pace over time. It’s happening without you even thinking about it.

Phase 2: Build Endurance (Weeks 7–12)

Goal: Go from 5K to 10K and beyond.

Start building mileage into the 15–25 weekly range, with a little sprinkle of speed.

By now, you’ve probably got a groove going. You’re not gasping after the first 10 minutes, and that 3-mile run doesn’t feel like Everest.

Now we’re going to push the envelope—gently.

The key word here is “progression.”

  • Week 7: Long run hits 6 miles (~10K). Toss in 2–3 shorter runs. Maybe try an easy fartlek—speed up for 30 seconds here and there to wake up those fast-twitch muscles.
  • Week 8: Long run goes to 7 miles. Weekly total might be 18–20 miles.
  • Week 9: Long run 8 miles. Add a simple tempo run: 3 miles total, with the middle mile at “comfortably hard” pace (think 10K race effort). These teach your body to handle fatigue without falling apart.
  • Week 10 (Cutback): Step back again. Long run drops to 6 miles. Let your body recover and bounce forward.
  • Week 11: Long run 9 miles. Weekly mileage passes 20.
  • Week 12: Long run hits 10 miles—double digits, baby! Try running 1–2 of those at goal marathon pace just to feel it.

At this stage, you’re probably running 10Ks and even 15Ks in training. That’s huge. It’s common to see your 5K pace drop noticeably too—more fitness, better efficiency, and confidence.

What’s Happening Under the Hood:

We’re getting more strategic here—adding tempo runs and speed play to start pushing that anaerobic threshold. That’s the point where your muscles flood with lactic acid.

According to Marathon Handbook, tempo runs help your body handle and clear lactate, so you can run faster for longer without blowing up.

Runner’s World also notes this is when you improve your running economy—how much oxygen your body uses to hold a certain pace.

More miles = better efficiency. You’ll burn less energy for the same result. That’s a quiet win that shows up later in your long races.

Phase 3: Peak Training – Welcome to the Grind (Weeks 13–20)

Goal: Stack your biggest mileage weeks, cap off with an 18–20 miler, sharpen your race pace legs, and finish feeling tired—but strong.

Not broken. Not overcooked. Just that deep fatigue that tells you: You’re getting ready.

This is the part where it gets real.

If Base Phase was the warm-up and Build was the hard work, then Peak Phase is the final exam before the marathon.

This is where you teach your body—and your brain—to go the distance. You’ve already built decent endurance.

Now you’re training for fatigue. For grit. For holding your pace when everything in your body is yelling slow down.

Here’s how these weeks usually play out for most first-timers:

Weeks 13–14: Climbing Higher

Your long runs go from 10 to 12, then 14 miles. Weekly mileage creeps into the low-30s.

Start mixing in Marathon Pace (MP) segments at the end of your long runs.

Example: On a 10-miler, run the last 2 miles at your goal marathon pace.

Trust me, it’s a humbling experience—but a necessary one. This simulates that “late-race fatigue” feeling. You’re not just building your legs here—you’re teaching your brain how to stay locked in when things get heavy.

Week 15: Cut Back and Catch Your Breath

Dial it down a bit—long run drops to 10 miles.

You’ve earned a down week. Let the body soak in the work you’ve done so far.

Some runners use this week to run a casual half marathon or do a solo time trial.

Not mandatory, but it’s a great way to test your race-day routine: fueling, pacing, shoes, even your playlist. Nothing fancy—just go out, run steady, and see what happens.

Weeks 16–17: Long and Lonely

You’re now logging 16- and 18-mile long runs. This is where a lot of runners hit a wall mentally.

Plan ahead—safe route, maybe a loop course so you can stash water and gels.

Bring a buddy for those last miles if you can. These runs will take over 3 hours – maybe even 4 – so slow it down and focus on fueling.

And please remember to take plenty of walking breaks during this long run.

I usually treat these like mini simulations: carry sports drink, take a gel every 45 minutes, and see what your stomach agrees with. Don’t try anything new on race day—learn now.

Week 18: The Big One

This is it—your 20-miler.

Not everyone hits 20, and that’s okay.

Some stop at 18. But mentally, 20 is a milestone.

Don’t feel like you have to run 26.2 in training—that’s a fast-track to injury.

Running 20 miles tired is more than enough prep for race day, especially since you’ll be tapering with fresh legs by then.

Most runners also hit their peak weekly mileage here—somewhere between 35–40 miles. That’s solid for your first time.

Week 19–20: The Taper Begins

Week 19: Pull back by about 20–25%. Long run drops to around 12–13 miles. Your body starts recovering.

Week 20: Drop it even more—half your peak mileage. Long run is only 8 miles, and it should feel easy.

Your legs start to feel lighter. You might even get a little antsy—that’s the taper magic.

Midweek Workouts? Optional, Not Required

If you’ve got the energy, you can throw in one faster session midweek—like mile repeats at 10K pace or a tempo run (4–6 miles at moderately hard effort).

But for most first-time marathoners, this isn’t essential.

Focus on the long runs. Easy mileage is your bread and butter. Endurance is what gets you to the finish line, not flashy intervals.

Fueling the Machine: Don’t Wait Until Race Day to Figure This Out

Once your long runs are over 90 minutes, fueling isn’t optional.

You need to start experimenting.

Most runners aim for 30–60 grams of carbs per hour during long efforts—via gels, chews, sports drinks, or real food (I’ve seen people eat rice balls and PB&Js mid-run).

Example: I usually take a gel every 45 minutes and chase it with water. I also carry an electrolyte drink with carbs and sodium, especially on humid days here in Bali. Figure out what works now, not when the stakes are high.

Pre-run meal? Keep it simple—some toast and peanut butter, or oatmeal 1–2 hours before.

Post-run? Don’t skip it. Within 30 minutes, get some protein and carbs in—like a protein shake or chocolate milk. Your body will thank you later.

The Science: Why Running on Tired Legs Works

This phase isn’t just about mileage—it’s about fatigue resistance.

There’s this concept called accumulated fatigue.

Basically, you’re running on legs that haven’t fully recovered from earlier in the week. It’s deliberate. It’s how you teach yourself to keep moving when your body’s begging to stop.

You might notice your heart rate’s higher on easy days. Or your pace is slower even though the effort feels the same. That’s part of the process.

According to studies published in the Journal of Strength & Conditioning Research, these long, slow efforts help your muscles become more efficient at using fat for fuel (huge for marathons), and they increase your glycogen storage.

You also see modest gains in lactate threshold and VO₂ max, but at this point, the real benefit is mental.

This is where you train your brain to deal with discomfort, boredom, doubt—all the stuff that shows up in the final 10K of a marathon.

This is where you earn the right to call yourself a marathoner-in-training.


Burnout Isn’t Weakness, It’s a Signal

Quick story: I coached a runner who was 3 weeks out from her marathon. She was grinding every day, but I could tell something was off. She finally said,

“Coach, I’m done. My legs hurt all the time. I don’t even want to run anymore.”

Classic training burnout.

We made a simple switch—swapped a run for a bike ride, added an extra rest day, and doubled down on sleep and fueling.

Within a week, she was smiling again. The bounce came back. She ran her marathon strong.

Moral of the story: Listen before your body screams. Fatigue is part of the game, but full-on dread? That’s a red flag.

If you’re feeling cooked, take a day off or cross-train. You won’t lose fitness. You might just save your race.

Phase 4: Taper Time (Weeks 21–24)

Goal: Shed the fatigue. Keep the fitness. Roll into race day fresh and ready to crush.

First off—congrats.

You survived the hardest part.

You did the long runs.

You earned this taper.

Now comes the weird part: slowing down. And yeah, it feels strange. Most runners hit this phase and panic like, “Wait, am I losing fitness?! I’m barely running!”

Breathe. That’s exactly what your body needs.

Here’s how taper usually plays out:

3 Weeks Out

  • Cut weekly mileage to about 70% of your peak.
  • Long run = ~12–13 miles.
  • No more beast-mode speedwork—just short strides if anything. Save the fire for race day.

2 Weeks Out

  • Drop to ~50% of peak.
  • Long run = ~8–10 miles.
  • You should start feeling fresher, less sore, more bouncy. That’s the point. Don’t chase last-minute gains.

Race Week

  • 2–3 short, easy jogs (2–4 miles).
  • Maybe a couple miles at marathon pace—but nothing that leaves you drained.
  • 2 days out: I like a 2-mile shakeout.
  • Day before: Some runners jog a mile. Others rest completely. Go with what helps you chill.

Take Care of the Small Stuff

Use this time to sharpen everything else:

  • Sleep more.
  • Eat well.
  • Carb up smart (especially in the last 3 days).
  • Avoid dumb injuriesnow isn’t the time to jump into a basketball game or rearrange your garage.
  • Got some aches? Try gentle stretching, foam rolling, or a sports massage. Let your body absorb the work.

Taper Madness Is Real

You might start overthinking, doubting your plan, or feeling antsy.

That’s normal.

Use that energy to mentally rehearse race day:

  • Picture hitting mile 20 and still having gas in the tank.
  • Go over your fueling plan.
  • Lay out your race gear.
  • Print your pace chart.

If you feel a little bored during taper… good. That means it’s working.

Marathon Week: Lock It In

Let’s walk through your final checklist:

Gear Rehearsal

Do a short run in your exact race-day kit.

Socks, shoes, shorts, everything. No surprises.

✅ Nutrition Strategy

Plan your dinner (carbs, not spicy), your breakfast (something you know works), and your race fuel.

I usually go: gel at miles 8, 14, and 20. You do you—but test it first.

Pacing Plan

If it’s your first marathon, just finishing is a win.

If you’ve got a goal, use a pace band or calculator—but also have a Plan B.

Hot day? Bad sleep?

Adjust. It’s smarter to run slightly slower and finish strong than blow up chasing a dream pace.

✅ Logistics

Sort your ride, alarm clock, gear layout, etc.

Race morning is way less stressful when you’ve got everything dialed in.

Race Day: Time to Cash In

You’ve trained for this.

You’ve sacrificed for this.

Now all that’s left is to show up and run your race.

The first 10 miles? You’ll feel invincible.

The halfway point? Still solid.

Then around mile 18 or 20—that wall hits.

Here’s where you dig deep.

Think back to all those long runs on tired legs.

Think about your “why.”

Use whatever you’ve got—crowd energy, your playlist, a friend’s voice in your head.

Take walk breaks if needed. They don’t make you weak. A 1-minute walk can save your race.

Final Mile Magic

When you see that finish line—lean into it.

Smile, cry, scream—whatever you feel, let it out.

Because you just joined the 1% who can say they’ve run a marathon.

Every sore muscle, early alarm, and soaked shirt was worth it.

Welcome to the club, marathoner.

The Real Finish Line

By the time you hit that start line, you won’t be the same person who signed up months ago.

You’ll have already fought through doubt, soreness, missed workouts, maybe even a few breakdowns. And you kept showing up. That’s the real win.

The race?

That’s just your victory lap — yeah, a long one at 26.2 miles — but by then, you’ll have earned it.

I’ve coached a lot of people through this journey, and one thing always holds true: when you cross that line, something clicks.

You realize it wasn’t just about the miles.

It was about proving to yourself that you could do something hard. Something most people won’t even try.

And maybe it’s not just about you. Maybe your grit fires up a friend, your kids, or someone scrolling past your post thinking, Damn. If they can do it, maybe I can too.

I’ll leave you with a quote I saw once on Reddit that stuck with me:

“No matter what your finish time is, you cleared 26.2 miles — and that is worth celebrating.”

Run it. Walk it. Crawl it.

Doesn’t matter. Once you cross that line, you’re a marathoner. Forever.

So go write your marathon story.

One mile at a time.

One foot in front of the other.

I’ll be rooting for you — loud and proud.

How to Start Running to Lose Weight: An 8-Week Beginner Plan

Free beginner running plan schedule

Starting to run for weight loss can feel intimidating.

I totally get it – when I first decided to lace up and hit the pavement, I was overweight and had zero clue what I was doing.

Back then, there weren’t many guides for beginners like me, so I just ran aimlessly.

I remember feeling wiped out after just a few minutes and wondering if I was even doing it right.

But you know what? With every step, I made progress. It wasn’t easy, but it worked.

Now, I’m here to save you from the mistakes I made with a simple, beginner-friendly 8-week running plan designed to help you burn fat, get fit, and avoid injury.

Start Slow—Seriously

Trust me on this – one of the biggest mistakes I made was thinking I could go from couch potato to marathoner in no time.

I wanted to be that runner who could just crush miles, but after a week of running without a plan, I ended up sidelined with shin splints.

Lesson learned: running too hard, too fast only leads to pain and frustration.

And let me tell you, pushing through pain just got me stuck on the bench for weeks.

That’s why I can’t stress this enough: start slow. Don’t go out trying to sprint. Your body needs time to adjust to the pounding that running puts on your joints, muscles, and tendons.

Think of it like hitting the gym – you wouldn’t try to bench 300 pounds on your first day, right?

Building your endurance gradually gives your body time to adjust, so you can avoid injuries and actually enjoy the ride.

How Long Does It Take?

When I first started running, I had no idea how long it would take to get fit or lose weight. It felt like climbing a mountain. But after a few weeks, I started seeing some wins.

My energy went up, I could run longer without feeling like I was about to collapse, and things were just… better.

Weight loss? Yeah, it’s not a fast track, but that’s cool – consistency is the real game-changer.

I learned to celebrate the little victories. I sure didn’t lose the belly overnight, but I noticed I was running further, breathing easier, and feeling better every time I laced up.

Stick with it, and you’ll see the changes – not just in your weight, but in how you feel mentally and physically.

Here are some things to keep in mind when figuring out how long it’ll take for you to get there:

  • Your starting shape – are you already active, or just starting out?
  • Your age – the younger you are, the faster you’ll get in shape.
  • Your current body weight – if you’re carrying more weight, it might take a little longer, but trust me, it’s worth it.
  • Your running program – if you follow my beginner plan, you’ll probably see faster results.

The Run-Walk Method

I won’t lie – I wasn’t a fan the first time I heard about the run-walk method.

I thought it was cheating, like I wasn’t really running if I was taking breaks.

But looking back, that method was a lifesaver. It saved me from burnout and injury, and honestly, it boosted my confidence like crazy. It helped me build endurance without overdoing it. And to this day, I cannot thank enough an old friend who showed me how to do follow this simple method.

I started with small intervals – run for 30 seconds, walk for a minute.

The idea is simple: mix running and walking so you don’t burn out too soon.

You can gradually increase your running time as you get stronger.

At first, it felt a little awkward, but after a few weeks, I was running longer and taking fewer breaks, and that felt amazing. I wasn’t just running – I was actually getting stronger.

Finding the Right Balance Between Walking and Running

To get the most out of the run-walk method, you need to find a balance that works for you. And that depends entirely on where you’re starting from.

Here are three ratios to try:

  • The Newbie: Jog for 20 to 30 seconds, then walk for 1-2 minutes.
  • The Intermediate: Jog for 3-5 minutes, then walk for 2-3 minutes.
  • The Experienced: Jog for 8-10 minutes, then walk for 30 seconds to 1 minute.

What’s More?

Remember to take those walk breaks before you’re really tired. The goal is to keep your body moving without burning out. Trust me, you’ll feel a lot better in the long run.

In case you want to learn more about the run/walk method, please check my post here.

8-Week Running Plan for Beginners

Below is a week-by-week plan.

Each week includes three run/walk workouts, rest days, and an optional cross-training or strength workout.

Adjust days to fit your schedule, but keep at least one full rest day between hard sessions. Pace yourself (keep it conversational!), and remember: the goal each week is consistency and gradual progress.

Let’s break it down:

Week 1

Workouts (3 days): Start with a 5-minute brisk walk to get your legs moving. Then do 8 rounds of (30-second jog, 90-second walk). Wrap it up with a 5-minute cool-down walk. You’ll probably only hit 15–20 minutes, but hey, that’s perfectly fine.

Rest/Cross-training (4 days): Take at least 3 full rest days (think Monday, Wednesday, and Friday). On one other day (maybe Sunday), mix it up with 20–30 minutes of easy cross-training – like a light bike ride, some swimming, or a bodyweight strength routine (think squats, lunges, and planks).

Tips: Keep your jog nice and slow – if you can’t hold a conversation, slow down. The goal here is comfort. Breathe steadily, whether through your nose or mouth. Let your arms move naturally, and don’t overthink your posture.

Motivation: Just getting all 3 workouts done this week? That’s a win! This is your foundation week, so give yourself a high-five for just showing up.

Week 2

Workouts (3 days): Start with the same warm-up. Now, do 6 rounds of (1-minute jog, 2-minute walk). This adds a little more running time. End with a 5-minute cooldown walk.

Rest/Cross-training (4 days): Again, take 2–3 rest days. On one day, add a 20–30-minute low-impact workout (bike, elliptical, or even a brisk walk).

Tips: You might feel your lungs working a bit more this week – that’s good! Stick to an easy pace, and breathe from your belly. Aim to finish each workout without stopping your intervals early.

Actionable Advice: If you have time, try adding a short strength circuit (push-ups, planks, squats) on a rest day. Building muscle boosts metabolism and helps with weight loss.

Week 3

Workouts (3 days): Warm up for 5 min. Then do 5 rounds of (2–3 minutes jog, 1 minute walk). (Example: Jog 2:00, walk 1:00 ×5). Finish with a 5-minute cooldown.

Rest/Cross-training (4 days): Same pattern – 2–3 rest days, 1 optional cross session. You could try a yoga or stretching class once this week to help with recovery.

Tips: Your runs are longer now. Keep a conversational pace. If you feel good by repeat 4, you can slightly extend the last jog (up to 3 min). If needed, you can break the last repeat into smaller chunks (like two 1.5 min jogs with short walks).

Motivation: Notice how by Week 3 you’re jogging several minutes at a time – that’s real progress. Trust the process: these minutes add up!

Week 4

Workouts (3 days): Start with a warm-up, then do 4 rounds of (5-minute jog, 1.5-minute walk). Finish it off with a 5-minute cool-down.

Rest/Cross-training (4 days): Take 2 rest days (including Sunday). On one extra day, do 30 minutes of moderate cross-training – maybe a dance class, cycling, or a long hike.

Tips: At this point, you should be getting the hang of pacing. If that 5-minute jog feels tough, just slow it down a bit. But if it’s easy, try cutting down the walking breaks on the last one. Always finish strong, even if it means walking at the end.

Actionable Advice: Keep track of these workouts in a journal or app (note the distance and how you felt). When you look back and see “5-minute jog,” that’s your proof you’ve got this!

Week 5

Workouts (3 days): Start with a warm-up, then do 3 rounds of (8-minute jog, 1-minute walk). Finish with a 5-minute cool-down. You should be running ~24 minutes total (split into 3 segments).

Rest/Cross-training (4 days): Take 2 rest days. Use one extra day for a longer cross-training session (40 min easy bike/swim or a full-body strength workout).

Tips: These 8-minute jogs are serious – stick with a pace that lets you breathe steadily. Remember, weight loss is most effective when you keep a calorie deficit, not just by running hard. Don’t reward yourself by eating big meals; plan healthy post-run snacks (fruits, yogurt, nuts) to satisfy hunger.

Motivation: You’re in the home stretch! By the end of this week, you’ll have run 24 minutes with only brief rests. Drink plenty of water, and get extra sleep – your body is adapting quickly.

Week 6

Workouts (3 days): Start with a warm-up, then do 3 rounds of (12-minute jog, 1-minute walk). Finish with a 5-minute cool-down. Each session now has 36 minutes of running.

Rest/Cross-training (4 days): Keep 2 rest days. For cross-training, try something different (like a Pilates or light strength class) to challenge muscles in new ways.

Tips: You’re running long intervals now. If your legs feel heavy by the last repeat, don’t risk a fall – just walk it out. Focus on keeping good form (upright posture, relaxed shoulders) rather than speed right now.

Actionable Advice: Pay attention to your nutrition. Stick with whole foods (veggies, lean protein, whole grains). It’s easy to snack or grab late-night treats – so keep track of what you eat to stay on point with your goals.

Week 7

Workouts (3 days): Start with a warm-up, then run 15 minutes, walk 1 minute, and run another 15 minutes (two long jogs split by a short walk). This is like doing a half 5K (~2.5 miles total).

Rest/Cross-training (4 days): After these big sessions, give yourself 2 full rest days. On the other day, enjoy 30–40 minutes of moderate cross-training (like a casual bike ride or swim).

Tips: These 15-minute runs should feel challenging but under control. If needed, break them into smaller chunks (e.g., 3×5-minute jogs with brief walks). But aim to minimize breaks as you finish the week.

Motivation: Big congrats – you’re hitting 3 miles (5K) in your longest runs now! That’s a massive win for a beginner. No matter how it feels, that’s proof your fitness and endurance are leveling up.

Week 8

Workouts (2 days): Pick two days (e.g. Tue and Sat). Warm up 5 minutes, then run 30 minutes continuously at an easy, steady pace. Cool down 5 min. You can jog slowly the entire time, or use one short walk break (1–2 min around the halfway point) if you feel you need it.

Rest/Cross-training (5 days): You only have two runs this week. Use the extra days to rest completely or do light activities like walking, yoga or easy cycling to stay loose.

Tips: This is the finale – 30 minutes non-stop. Celebrate how far you’ve come: when you started, jogging even 3 minutes was a big deal, and now you’ll run for half an hour! Keep the pace relaxed; this is a long, fat-burning run.

Actionable Advice: Once you crush both 30-minute runs, take a second to recognize how far you’ve come. Think about signing up for a free 5K (virtual or local) or setting your next challenge. Just running 30 minutes a few times a week can do wonders for weight loss and your health.

Each week’s progress is a step toward your goal. Stick to the plan, be kind to your body, and remember that consistency beats intensity at this stage. If you need to take more breaks in the beginning, that’s totally fine. It’s all about progress, not perfection. And remember, every step forward is a victory.

Additional Tips

Here are more guidelines to help you get the most out of my beginner running plan.

Time Over Distance

A huge lesson I learned when I first started was that time matters more than distance. I used to focus so much on hitting a specific distance – like 3 miles – that I forgot to pay attention to my body. But what I’ve realized is that if I focus on running for a set time instead of a set distance, I’m less likely to push myself too hard.

In the beginning, try to focus on how long you’re running instead of how far you’re going. For example, aim for a 20–30 minute workout. Once you can consistently hit that time, then start thinking about distance.

Rest and Recovery for Runners

I’ve gotta be honest – when I first started running, I thought I had to go full throttle every single day. I quickly realized, though, that rest is just as important as the running itself. Your muscles need time to repair and rebuild, or you’re just asking for injury, burnout, or overtraining.

Now, I stick to a routine where I take 1-2 full rest days every week. On those days, I’ll do something light, like yoga or just taking a walk – nothing that’s gonna wear me out. The body needs a break to recharge, and trust me, it pays off in the long run. Rest isn’t just a luxury; it’s what keeps the running habit alive.

The Right Shoes

When I started, I was just throwing on whatever sneakers I had lying around. Big mistake. I ended up with blisters and sore knees. That’s when I made the switch to a solid pair of running shoes, and man, what a game-changer. Good shoes protect your joints, keep your form in check, and make every run feel way better.

So, get fitted at a store that actually knows running shoes. Find the pair that works for you, whether you need neutral, stability, or motion control. Don’t skimp on this – your body will thank you later.

Tracking Progress

At first, I didn’t track anything. I just ran. But when I started tracking my runs, I realized how much I was improving – even on days when it felt like nothing was changing. Whether it’s with a fitness watch, an app, or just jotting things down in a notebook, tracking your runs is a solid way to stay motivated and see how far you’ve come.

I remember tracking how long I could run without stopping, and over time, I saw those times getting longer. You don’t need fancy tools, either. A simple log with your run time, how you felt, and your pace is all you need to see huge progress.

Staying Motivated

In the beginning, I needed all the motivation I could get. I drew inspiration from success stories of people who had lost weight through running. Watching shows like The Biggest Loser made me think, “If they can do it, so can I!” I set small, manageable goals, and every time I hit one, I celebrated. And trust me, no matter how small, those victories kept me going.

As you go, find what fires you up – whether it’s new shoes, a running group, or treating yourself to something healthy after each run. Motivation is like a muscle – the more you use it, the stronger it gets.

Nutrition and Weight Loss

One thing I didn’t realize at first was how much nutrition matters. I thought just running would be enough to shed the weight. Turns out, it’s not just about the miles. What you eat plays a huge role. Now, I make sure my meals are balanced: protein, healthy fats, and complex carbs.

It’s not about dieting; it’s about fueling your body right. A healthy diet, alongside running, can boost your weight loss and give you the energy to run longer and feel stronger.

Mental Barriers

Overcoming self-doubt was one of the hardest parts of my journey. I thought I had to be super lean or fast to be a “real” runner. But then I realized that running is for everyone, no matter what you look like. The key is just getting started.

I had to change my thinking – from “I can’t” to “I’m doing this.” It wasn’t about being perfect. It was about sticking with it and pushing through the tough days. Once I made that mental shift, running became not just exercise, but a tool for self-improvement and empowerment.

Frequently Asked Questions

I know you probably have a ton of questions right now, so I’m gonna tackle some of the most common ones.

What if I miss a day in my running plan?

Missing a day is totally normal, especially when you’re starting out. If you miss a run, don’t sweat it! Just pick up where you left off. Consistency is key, but so is listening to your body. If you’re feeling wiped or under the weather, it’s okay to take a rest day.

Can I repeat a week if needed?

For sure! If you’re feeling challenged by a particular week, or just need more time to adjust, go ahead and repeat it. The goal is to build a solid foundation, and taking the time to get comfortable with your running will pay off big-time in the long run.

How do I know if I’m overdoing it?

Listen to your body. If you’re constantly tired, sore, or just unmotivated to run, you might be pushing too hard. Overtraining is real, so be mindful of those signs. Make sure you’re incorporating rest days and cross-training to keep your body balanced.

What should I wear for my runs?

Wear gear that actually helps you run better. A good pair of running shoes that fit well is essential. Comfortable, moisture-wicking clothes are a must too – they’ll keep you dry and prevent chafing. And always check the weather before you head out, so you can dress accordingly.

How can I stay motivated throughout the plan?

Motivation can be tough, especially early on. Setting small goals, tracking your progress, and maybe running with a friend can all help. Joining a local running group or signing up for virtual challenges can also keep you accountable and give you a sense of community.

Join the Community!

I want to hear from you! Whether you’re just starting your running journey or you’ve been at it for a while, sharing your experiences can help others. What challenges have you faced? What tips or tricks have helped you?

Feel free to drop your thoughts and questions in the comments below. Your story could be exactly what someone else needs to keep moving forward.

Final Thoughts

You’ve already done the hardest part: you’ve decided to start. And trust me, it’s going to be worth it. Running isn’t just about weight loss – it’s about building a stronger, more resilient version of yourself. Stick to the plan, stay consistent, and don’t let setbacks hold you back. You’ve got this!

Remember, every step forward counts. Whether it’s 30 seconds or 30 minutes, it’s all progress. Keep running, keep believing in yourself, and enjoy the ride!

Defeating Calf Pain for Runners: Conquer Sore Calves and Run Stronger

picture of Calf Pain

If you’re dealing with calf pain after running, I’ve been in your shoes.

Back in my early running days, I used to brush it off.

Tight calves? Just part of the grind—or so I thought.

Then one early morning, just past sunrise, a cramp hit me so hard I had to sit on the curb. I was rubbing a knot the size of a golf ball and thinking, “Am I done running for good?”

That moment forced me to wake up and start listening to what my body was screaming.

What I learned from that scare didn’t just help me get rid of the pain. It helped me run stronger, smarter, and with way more awareness of how my body works.

Let’s get to it.

Calf Pain Is the Sneaky Villain Most Runners Ignore

Here’s the truth: calf pain is super common, but it doesn’t get talked about enough.

According to data, around 80–85% of runners report calf soreness after a run.

That’s nearly all of us.

Most runners obsess over their knees or ankles. But your calves?

They quietly take the hit on every single stride. Each time your foot hits the ground, your calf has to absorb the impact and help push you forward.

If your calves are tired, weak, or too tight to do their job?

Something else—like your knees or Achilles—ends up picking up the slack. That’s how overuse injuries sneak in.

Why So Many Runners Brush It Off

It’s easy to overlook calf pain. It doesn’t usually scream for attention.

It starts as a tight, post-run ache. You think, “No big deal.”

And because runners are tough (sometimes to a fault), we power through. But that dull ache can hide some real issues—strained muscles, overused Achilles, or worse.

Here’s a wild stat: 80–85% of runners regularly deal with sore calves.

The bottom line?

Calf pain is your body’s way of waving a red flag. Ignore it, and it’ll bite you later. Address it now, and you’ll not only feel better—you’ll run better.

Know Your Calves: The Muscles That Keep You Moving

Let’s break it down real simple.

Your calf isn’t one muscle—it’s a tag team: the gastrocnemius and the soleus.

  • Gastrocnemius (aka “gastroc”): This is the bulging muscle you see when you stand on your toes. It crosses both your knee and ankle, and it’s built for power. Think sprints, jumps, and fast bursts.
  • Soleus: This guy sits underneath the gastroc. It’s flatter, deeper, and doesn’t get much credit—but it’s a beast. The soleus helps you push through long runs and supports you when you’re standing for long periods. According to research, it can produce massive force—and it’s often undertrained. A big mistake I see in rehab routines all the time.

Together, these muscles join at the Achilles tendon, that thick cable running from your calf down to your heel. Every time you toe off the ground, your calf-Achilles combo powers that move.

If your calves are strong and loose, your stride becomes springy and smooth. But if they’re tight or weak? That spring turns into a rusty hinge.

Takeaway tip: Don’t skip calf work. Both strength and flexibility matter.

Why Do My Calves Hurt? Common Causes of Calf Pain in Runners

Let’s talk about it—calf pain sucks. It can hit hard or creep in slow, and whether it’s a sharp zing mid-run or that post-run tightness that won’t quit, it messes with your flow.

I’ve had my fair share of runs cut short by angry calves, and most of the time, the cause is one of these usual suspects:

1. Doing Too Much, Too Soon (Overuse and Strains)

This is the big one. I see it all the time—runners ramping up mileage or attacking hills before they’ve built the base.

The calf, especially that big gastroc muscle, doesn’t love surprises.

Push it too far too fast, and boom—you’ve got a strain.

Sometimes it feels like a sharp snap mid-run, or just soreness and stiffness creeping in later. Even without a full tear, micro-tears add up fast.

2. Cold Calves = Angry Calves (Inadequate Warm-Up)

Rolling out of bed and straight into a run? That’s a recipe for tight calves.

Muscles need blood flow and prep. Skip the warm-up, and you’re shocking your legs into motion. It’s like flooring a cold engine—things go wrong fast.

Those cramps in mile one? Often from going 0 to 100 with tight muscles. A 5-minute dynamic warm-up can save you weeks of pain.

3. Poor Running Form & Gait

How you move matters. If you run on your toes or strike too far forward (forefoot striking), your calves eat up all the impact.

Add in uphill climbs or overstriding, and you’re giving your lower legs a beating.

Even small quirks like toeing out or favoring one side can mess with you over time.

I’ve worked with runners who fixed chronic calf pain by simply adjusting stride length or aiming for a midfoot strike. Sometimes the solution isn’t more stretching—it’s better mechanics.

4. Muscle Imbalances or Weakness

Here’s the kicker—tight calves aren’t always strong calves. Sometimes they’re weak and overworked.

Maybe the gastroc is doing all the lifting while your soleus is snoozing. Or maybe your shins and hammies are too lazy to carry their share.

That’s when the calves step in and get mad. I tell my athletes: don’t just stretch, strengthen. Build balance. It pays off.

5. Dehydration & Electrolyte Issues

If you’ve ever woken up to a calf cramp that felt like a lightning bolt, you know what I’m talking about.

Lack of fluids and key minerals—like magnesium, sodium, potassium—can trigger those brutal spasms.

Training in heat makes it worse. One guy I coached was cramping constantly until we added a magnesium supplement. Magic.

Don’t underestimate the power of water and electrolytes—they’re your cramp insurance.

6. Footwear Fails & Foot Mechanics

Your shoes matter.

Worn out, unsupportive, or just wrong-for-you shoes can stir up calf pain fast.

Minimalist shoes can stretch your calves more—sometimes too much. Shoes with high heel drops might shorten the calves over time.

Rapid switches between the two? Bad idea.

Also, foot shape matters. Flat feet can lead to overpronation stress, high arches to poor shock absorption.

7. Old Injuries or Hidden Causes

Not all calf pain is straightforward. Sometimes it’s nerve-related, like sciatic issues sending pain signals to your calves. Old Achilles injuries, nerve tension, even circulation problems can be the culprit.

I’ve seen runners deal with calf pain for months only to find out it was a hidden nerve entrapment. If your pain lingers, feels odd, or swells up, get it checked. Don’t guess.

Bottom line?

Calf pain usually isn’t from just one thing. It’s a mix—bad shoes, skipped warm-ups, heat, form flaws, and more.

The fix? Take an honest look at your training, your gear, and your habits. The causes are fixable if you pay attention.

And trust me—as someone who’s had to limp home more times than I’d like to admit, fixing it is worth it.

Next up, we’ll dive into how to treat calf pain and keep it from derailing your training.

Can I Keep Running with Sore Calves?

I get this question a lot from runners I coach—and honestly, I’ve asked it myself plenty of times:
“Is it okay to run with sore calves, or am I just setting myself up for injury?”

Well, it depends. And I’ll break it down for you the way I would with any runner after a tough week of training.

1. Mild Soreness? You’re Probably Good to Go (But Don’t Be Stupid)

If your calves feel tight after a hard run, new shoes, hills, or speedwork—and we’re talking low-level soreness here, maybe a 2 or 3 out of 10—you’re likely dealing with Delayed Onset Muscle Soreness (DOMS).

This kind of soreness is normal. In fact, it often means you’re getting stronger. If movement helps it ease up, you’re okay to keep going—lightly. No all-out hill repeats the next day.

What I tell my runners: use the 24-hour rule. If the soreness eases up within a day and you’re not limping or changing your stride, then an easy run or some cross-training should be fine.

I’ve had plenty of runs where my calves were stiff at the start but loosened up as I got going. The key is to listen, not power blindly through. You’re not trying to prove toughness—you’re trying to stay consistent.

2. Sharp Pain or No Improvement? Time to Chill

Now, if that calf pain is sharp, locked-in, or just won’t go away—even with rest—stop running. I mean it.

Here’s where runners mess up: they feel something “off,” ignore it, and end up on the sidelines for six weeks instead of one.
I’ve seen it happen. Hell, I’ve done it.

Red flags you should never ignore:

  • Pain that messes with your stride
  • Swelling or bruising
  • Pain that’s still there even when you’re just walking around

One runner told me he heard a pop mid-run, pushed through it like a hero, and then couldn’t walk the next day. That “pop”? Classic calf tear.

One of the physiotherapy clinic site calls this a serious strain, and yeah—they’re right. Keep running on that, and you’re looking at weeks (or months) out. If anything feels off, get it checked.

And let’s talk about chronic tightness—if your calves never feel loose, even after warming up or stretching for weeks, then something’s up.

Could be a buildup of training mistakes, or something deeper like Achilles tendinopathy creeping in.

3. Not Sure? Rest Anyway. It’s Not Weakness—it’s Wisdom

If your calves are barking at you and you’re torn between pushing through or resting—just rest. One or two skipped runs won’t wreck your training.

But ignoring warning signs? That’s how you spiral into injury.

I’ve told runners this a hundred times:

“You won’t lose all your progress by taking 48 hours off. You might lose everything if you don’t.”

Take a short break, stretch, foam roll, hydrate, and reassess.

I read a story on Reddit where a guy tried to “run through” a calf strain and ended up DNF’ing a race. After finally taking 10 days off and rehabbing properly, he came back and crushed a personal best.

That’s the power of patience. Your body heals—if you let it.

Ever Heard of the “Calf Heart Attack”?

Old-school runners sometimes joke about this thing called a “calf heart attack.”

It’s not a real heart attack, obviously—it’s that sudden tearing pain in the calf, often in the medial gastrocnemius, that hits during speedwork. Feels like someone shot your leg.

It’s brutal. It happens more in runners over 40. And trust me—you don’t run through it.

You stop. Right there. Ice it. Rest it. Start a slow recovery plan.

As study explains, as we age, our calf muscles lose elasticity. That’s why warming up properly, especially before speed workouts, becomes non-negotiable.

You’re not fragile—you just need to train smarter.

Got Tight Calves Right Now? Here’s What Actually Helps

Let’s get to the good stuff—what to do when your calves are tight but not torn.

1. Can You Walk Without Pain?

Before you run, check if you can:

  • Walk pain-free
  • Do a few calf raises with no discomfort

If you can’t do those? You’re not ready to run. Back up and heal first.

2. Gentle Stretching (But Don’t Yank on It)

Stretching can help—but only when it’s done smart.

Here are my go-tos:

  • Straight-leg Calf Stretch (Gastroc): Hands on the wall, one foot back, heel pressed down, leg straight. Feel that stretch high up in the calf? Hold it for about 30 seconds. No bouncing.
  • Bent-Knee Calf Stretch (Soleus): Same setup, but this time bend the back knee slightly. This gets deeper into the soleus. Again, hold for 30–45 seconds.
  • Downward Dog Pose: Push your hips up, heels toward the ground, hands planted. You’ll feel it from your calves to your hamstrings. You can pedal your heels too—works each side individually.

Just a reminder: stretching shouldn’t be torture. You’re coaxing the muscle to relax, not punishing it.

A bit of tension is fine. Sharp pain? Back off.

Also—don’t stretch aggressively in the first 24–48 hours after a strain. Stick to light massage, ankle circles, and gentle mobility work first.

3. Make Stretching a Daily Habit

I tell my athletes to stretch calves every day, especially after a run while the muscles are still warm.

Before bed is a great time too—helps cut down that brutal morning stiffness.

One runner on Reddit said, “I stretch constantly and they’re still tight!”
And I get it. That’s because stretching is only part of the fix. The other key? Strength work. (We’ll get to that in the next section.)

4. Self-Massage and Foam Rolling (Calf Release Techniques)

You ever hit a tight spot in your calf with a foam roller and feel that “hurts-so-good” kind of pain? That’s your muscle saying, “Finally, some help.”

Self-massage is one of the simplest, most effective ways to loosen up tight calves and get the blood moving again.

Here’s what’s worked for me and the runners I coach:

● Foam Rolling

Grab a firm foam roller, drop to the floor, and get to work. Sit with one calf on the roller and support yourself with your hands behind you.

Roll slowly from your ankle to just below the knee.

Find a knot? Pause there. Breathe into it for 20–30 seconds and let the muscle release.

If you want more pressure, stack your other leg on top. Yeah, it’ll feel uncomfortable—but in a good way. That deep pressure can help flush things out.

One technique that’s gotten a lot of love is the “foam roller sit”—basically sitting on a long roller with it under your calves and rocking side to side.

I saw it on PogoPhysio, and it’s been a game changer when my calves are cranky. No fancy moves—just gravity doing the work.

Check out the technique below:

● Massage Stick (“The Stick”)

Looks like a rolling pin, and honestly, a kitchen rolling pin can do the trick in a pinch (I’ve done it). Just grab the handles and roll it up and down your calf like you’re kneading out pizza dough.

If you’ve been getting deep knots post-run, this one’s easier to control than a foam roller. And it takes about two minutes to get those calves feeling human again.

● Lacrosse or Massage Ball

For those spots that foam rollers can’t touch—usually around the outer calf or near the Achilles—a firm ball is your best friend.

Sit down, place it under your calf, and apply pressure. You can move in circles or just sit on that spot until the tension fades.

Just be careful near your Achilles—don’t go too hard there. Focus on the meaty upper part of your calf.

● Manual Massage

Got a massage therapist? Great.

If not, your own thumbs will do. Use your knuckles or thumbs to work up and down the calf, always pushing toward the heart.

I’ll do this at night while watching Netflix—thumbs digging into the tight spots while I zone out. A little lotion or oil helps smooth things out too.

You don’t need an hour. Just a few minutes a day keeps tightness from piling up. I keep a foam roller in my living room and a massage ball in my backpack. Recovery on the go.

Bonus tip: Heat helps before a massage or rolling session. A hot shower or a heating pad for 10 minutes gets the muscle loosened up—kind of like warming up clay before you shape it.

5. Compression & Elevation (Recovery Boosters)

Compression socks aren’t just for show. When I’m wearing them during long runs or hard workouts, my calves thank me later. Less soreness. Less wobble. More support.

While research is mixed on performance benefits, plenty of us runners—myself included—feel better after wearing them. Especially on days when I’ve got errands or work right after a long run.

Post-run, they help by improving blood flow and clearing out the junk that builds up after tough workouts. No fancy gear needed—just slide on the sleeves and let them do their thing.

Got tired legs? Elevate ‘em. Throw your feet up on a wall or pillow for 15–20 minutes post-run. I like to do the “legs up the wall” yoga pose—easy, calming, and it helps reset your calves. It’s a zero-effort win.

6. Topical Stuff: Balms, Rubs, and Gels

Magnesium spray. Arnica gel. Menthol rubs. I’ve tried them all. Do they fix the root cause? No. But they do offer short-term relief.

That warm, tingly feeling can distract from the soreness, and sometimes just massaging the stuff in is half the therapy. But a word of warning: don’t use heat rubs under compression sleeves unless you enjoy the feeling of lava on your legs. Trust me.

7. Active Recovery: Keep the Blood Flowing

This one’s big. Rest has its place, but movement heals.

If my calves are cooked the day after a big run, I don’t just crash on the couch. I go for a bike ride, take a brisk walk, or hit the pool. Nothing crazy—just enough to get the blood moving. That circulation helps clear out soreness and repair the muscle.

It’s not about being a hero. It’s about being smart. Gentle movement beats total rest for tightness 9 times out of 10.

Calf Pain Can Be the Fuel for Your Comeback

Here’s what I tell my runners: setbacks build grit. Calf pain isn’t just a nuisance—it’s your shot to level up. I’ve coached athletes who went from limping through easy runs to smashing PRs, simply because they stuck with the rehab process and kept showing up.

That can be you.

So if your calves have been a weak link, this is your moment to flip the script. Let those frustrating miles fuel your next breakthrough.

Every little step counts. That stretch today? That extra water bottle? That strength set you almost skipped? They all lead to one thing: crossing the line strong and pain-free.

Your Quick-Action Checklist: Beat Calf Pain for Good

  • Warm up like you mean it. Don’t skip the basics.
  • Strengthen with focused calf moves—raise, hold, repeat.
  • Stretch and roll after hard runs. Make it part of your cool-down.
  • Hydrate and fuel right. Your calves are muscles—they need it.
  • Rest when needed. One day off beats six weeks on the sideline.
  • Don’t ignore early signs. Catch it while it’s small.
  • Ask for help if it lingers. A good PT can save your season.

Now it’s on you. Lace up with purpose, take these tips seriously, and get to work. Stronger, pain-free runs are waiting. And trust me—there’s nothing better than feeling your legs fire without fear.

Go out there and own it.

Keep running strong,

David D.

Mastering Proper Treadmill Running Form: Tips For Better Technique

How to Run On a Treadmill

Running on a treadmill doesn’t feel natural at first — I get it.

You hop on, press start, and suddenly your form feels stiff, your neck’s tight, and you’re glancing at the screen every five seconds like it’s going to give you permission to stop.

But here’s the truth: a few simple tweaks can turn that awkward machine jog into a smooth, efficient session that actually transfers to outdoor running.

Research backs this up too — studies show that with a slight incline and proper posture, treadmill mechanics can closely mimic outdoor conditions (yep, it’s not just in your head).

Let me walk you through the same form fixes I use with the runners I coach — the ones that helped me go from clunky treadmill strides to feeling fast, light, and pain-free, even during long winter mileage sessions.

You’ll get practical tweaks, relatable stories, and real-runner tips you can use today.

Let’s get into it.

Start With an Athletic Posture 

Before you even touch the “Start” button, take a second to scan your setup from head to toe.

Head & Shoulders

  • Lift your head. Gaze forward. Not at your shoes. Not at the pace screen. Forward.

  • Roll your shoulders back and let them relax — no tension.

When I started out, I used to hunch over and peek at the display every 30 seconds. My neck would be toast after even a short run. Now I imagine scanning the horizon like I’m on a sunrise trail — it naturally fixes the slouch.

Spine & Core

  • Think “tall and active.”

  • Stand upright, lean just slightly from your ankles (not your hips), and keep your spine long — not stiff.

  • Tighten your core like someone’s about to poke your belly. That’s your base.

Back when I ignored this, I’d end treadmill runs with nagging lower-back pain. Once I focused on “running tall,” that pain disappeared. My balance improved too — especially when the belt picked up speed.

Hips & Feet

  • Face your hips straight ahead, not swaying side to side.

  • Keep your feet hip-width apart, toes pointing straight forward.

This keeps your knees tracking well and prevents awkward compensations that can throw off your stride. Too narrow and you’ll feel unstable. Too wide and your form starts leaking energy.

And yes, it’ll feel weird at first. You might catch yourself thinking, “This is too upright.” That’s just your old habits talking. Trust me — give it a few sessions and this new alignment will feel like home.

Don’t Stare at Your Feet. Seriously. Stop That.

This one’s huge — and most runners mess it up.

Where your eyes go, your form follows. Look down too often and you’ll hunch, lose balance, and feel stiff. I’ve coached dozens of runners who constantly drift on the treadmill — and it always comes back to the same bad habit: watching their feet like they’re walking a tightrope.

Fix it:

  • Pick a spot 10–15 feet ahead. Wall sign? Exit light? Picture on the wall? Doesn’t matter.

  • Just look forward — not down. It straightens your spine, lifts your chin, and frees your chest for easier breathing.

It’s how you’d run outside, so mimic that.

Also — if you’re addicted to checking your pace, cover the screen with a towel for part of the run. I do this myself on easy days. You’ll start tuning into your breathing, your stride, your effort — instead of just chasing numbers.

Quick Reset Tip: Every 5–10 minutes, do a “form scan.”

  • Are your hands clenched? Shake them out.

  • Shoulders tight? Drop them.

  • Breathing shallow? Take a slow, deep breath.

Small resets = big returns.

Mimic Your Outdoor Running Form

One of the biggest mistakes I see on treadmills? Treating them like a different sport.

Your running form shouldn’t suddenly go weird just because you’re indoors. The more your treadmill stride mimics your outdoor stride, the better.

Here’s how to get it right.

Use Your Real Stride — Not the Treadmill Shuffle

Run like you’re on the road. That means using your natural stride — not tiny panicked steps or exaggerated lunges just because the belt’s moving underneath you.

I see it all the time: people overthink the treadmill and end up changing everything.

If you usually run with a midfoot strike and moderate stride, stick with that. Don’t let the belt mess with your mechanics. Focus on landing your foot under your hips, not way out in front.

If you reach forward too much, the belt will yank your foot back before you’ve even had a chance to stabilize — and that’s when trouble starts.

I’ve coached runners who lost months to shin pain just from letting the belt dictate their stride. Keep it controlled. Let the treadmill follow your form — not the other way around.

Fix the Overstriding Mess

Overstriding — landing with your foot too far in front — happens outside too, but it’s even more punishing on a treadmill.

One guy I coached joked that he felt like “a drunken circus bear with crap form” when he first came back to treadmill running after years off.

I laughed, but I knew exactly what he meant. Overstriding feels clunky and off. You heel strike hard, the belt yanks your foot back, and your knees take the hit.

The fix?

  • Shorten your stride just slightly.
  • Bump your cadence.
  • Aim to land closer to your midfoot or forefoot — not your heel.

When your foot lands beneath you, the treadmill actually helps push you into the next step, making the whole motion feel smoother.

Add a 1% Incline — Trust Me

Here’s a trick that makes a huge difference: bump the incline up to 1%.

Why? Because that small incline mimics the energy cost of running outdoors.

The Journal of Sports Sciences backs this up — a slight incline compensates for the missing wind resistance and that little assist the belt gives you.

You don’t need to go wild — even 1–2% is enough. Personally, I find 2% is my sweet spot. It makes the run feel “real” — not artificially easy like a flat belt.

It also fires up your calves and glutes more and protects against the downhill-like pounding you’d get from staying at 0%.

Bonus: less repetitive stress on your legs = less chance of shin splints.

Here’s your guide hill treadmill training.

Stand Tall — Ditch the Forward Hunch

You’ve probably heard that a slight forward lean is good for outdoor running. That’s true — from the ankles, with a tall spine.

But on a treadmill, that belt is already doing some of the forward work.

So if you lean too far forward on the ‘mill? You’re just throwing off your balance and straining your back or neck.

Instead, focus on running tall:

  • Chest up

  • Eyes forward

  • Head neutral

Think “proud runner, not slouching zombie.”

Stack your ears over shoulders, shoulders over hips. If you catch yourself hunching or staring at your feet, reset your posture.

Mental Trick: Pretend You’re Outside

I’ll be honest — treadmill running can feel boring.

But here’s something I tell runners I coach: Visualize your favorite outdoor route while you’re on the machine. Seriously.

Close your eyes for a few seconds, picture that path, then sync your form with that memory. You’ll move more naturally — and it’ll snap your brain out of treadmill autopilot.

If something feels off (maybe your strides feel choppy or you’re slamming your heels), slow the pace.

Form > speed. Every time.

Shorten Your Stride 

I know I sound like a broken record but this bears repeating.

Back when I first started running indoors, I didn’t think much about my stride. I just hopped on, hit “start,” and hoped I looked like I knew what I was doing.

But I was overstriding like crazy — basically reaching forward with every step like I was trying to win a long-jump contest.

My knees didn’t appreciate it.

Then I discovered cadence.

Why Cadence Matters

Cadence is just how many steps you take per minute. Most solid runners hit somewhere around 170–180 steps per minute on easy runs.

That number isn’t just for outdoor purists — it applies on the treadmill too. In fact, it’s even more important indoors, where your form can go sideways fast.

Here’s the deal: when you increase your cadence, you automatically take shorter, quicker steps, which keeps you from overstriding.

A study in the Journal of Sports Science showed that this reduces the impact forces on your joints.

Translation? Less stress on your knees and ankles. That’s a big win in my book.

Too slow, and you’re just stomping the belt with every step — basically punching your joints in the face.

Cadence = Less Energy Burned 

Here’s the fun part. Most runners find that when they up their cadence, running actually feels easier.

Less bouncing, less braking, less wasted energy.

How to Actually Fix Your Cadence

This is the part most runners skip — but it’s where the magic happens.

  • Find your current cadence. Count how many times one foot hits the belt in 30 seconds and double it.

  • If you’re below 170, aim to bump it up slowly — just 5% at a time.

  • Use cues. Think: “Quick feet.” Or, pretend the belt is hot and your goal is to barely touch it.

  • Use a playlist or metronome. Look for songs around 170–180 BPM. Let the beat drive your stride.

I tell my runners: Your feet should be popping off the treadmill, not dragging like you’re stuck in glue.

Over a few weeks, your body will adjust. You’ll feel smoother, lighter, and your knees will thank you.

Cadence Also Wakes Up Lazy Muscles

Here’s something most people don’t realize: Running on a treadmill tends to turn off your hamstrings.

The belt does some of the work pulling your leg back. Studies show hamstring activation drops by 10–15% compared to running outside.

What does that mean? If you just cruise without thinking about form, your glutes and hammies might take a nap — leading to muscle imbalances and eventually pain.

A quicker cadence, especially paired with a midfoot strike, helps bring those muscles back into the game.

You’re not just “floating” — you’re working with purpose.

Let Your Arms Do Their Job 

Let’s get honest — if you’ve ever death-gripped the treadmill rails mid-run, you’re not alone.

I’ve been there too. In my early days, especially on steep inclines, I’d hold on like the machine was trying to buck me off.

Here’s the truth: Grabbing the rails wrecks your form. It’s one of the top mistakes I see runners make indoors.

Free Arms = Real Balance

Your arms are designed to swing. That’s what keeps your body balanced as your legs move.

Hold the rails, and you’re locking your upper body, throwing everything off.

You’ll probably lean back or shuffle. Your stride shortens. You end up stiff, awkward, and totally off rhythm.

Instead:

  • Let your arms swing naturally — bent at about 90 degrees
  • Keep your hands loose
  • Move them front to back (not across your body)
  • Stand tall. Let them lead your stride.

You might feel a little shaky at first, but give it a few runs.

Your core and balance will kick in and start doing the real work.

Grabbing the Rails = Cheating

Yup, I said it.

When you hold on, you’re taking weight off your legs and leaning into the machine. My old coach said it perfectly:

“You’re not getting your heart rate up. You’re not burning enough calories.”

Ouch. But true.

Holding on reduces your leg workload, messes with your posture, and cheats your fitness goals. If you’re doing a hard workout, it should feel hard — not supported by your arms.

What to Do If You Feel Wobbly

If you’re holding on because you’re off balance or it feels too fast, lower the speed or incline.

Better to run a little slower hands-free than to go fast while hanging on for dear life.

Rails are there for emergencies — not for every run. Build your stability. It’s part of the training.

Arm Swing 101

Here’s how to dial in arm form:

  • Elbows bent at ~90 degrees
  • Swing from the shoulders
  • Hands near your waist, moving gently back and forth
  • No clenched fists, no crossing your arms across your chest
  • Think: compact and relaxed

Fun fact: a strong backward arm drive actually helps drive your legs. It’s all connected.

Treadmill Mistakes That Wreck Your Running Technique

Let’s cut through the fluff.

If you want to get stronger on the treadmill — not just survive it — then you’ve gotta stop making these common mistakes.

I’ve seen them all, made some myself, and coached runners out of every single one.

Here’s what to watch for, and how to fix it without overthinking.


1. Overstriding Like You’re Chasing a Bus

You’re landing way out in front of your body — heel smashing down, legs fighting the belt.

That’s a recipe for sore joints and a stiff back. You’ll feel like you’re battling the machine instead of flowing with it.

Fix it: Shorten that stride. Pick up your cadence. Think quick, light steps — your foot should land under your hip, not in front. A midfoot strike works best. And hey — if your steps are loud, you’re stomping. Try to sound like a ninja, not an elephant.


2. Hunching Over Like You’re Reading Texts

Staring down at your feet or the treadmill screen? That slouched posture wrecks your neck and shoulders.

I used to finish runs with more neck pain than leg fatigue.

Fix it: Keep your eyes forward, chin neutral, chest open. Pretend a string’s pulling you up from the crown of your head. And do a quick shoulder shrug and drop every now and then to shake out tension. One runner I coached fixed their neck soreness just by lifting their gaze. No massage needed.


3. Clutching the Rails Like You’re on a Rollercoaster

Holding on for dear life? That’s fear — or fatigue — messing with your form.

It also robs you of balance, core engagement, and calorie burn.

Fix it: Drop your speed or incline to where you can go hands-free. Your arms are built for balance and rhythm, not decoration. Unless you’re climbing Everest on a 15% grade, ditch the rails.

4. Running on Your Tiptoes or Slamming Your Heels

Some folks bounce like they’re jumping rope. Others stomp like they’re marching.

Both mess with your stride and wear out your calves or knees.

Fix it: Aim for a soft midfoot strike. Your heel can gently kiss the belt, but your foot should land almost flat under your body. Think: light and quick. If you’re bouncing too high, you’re on your toes. If you’re thudding, you’re probably heel-slamming. I teach all my beginners this: quiet steps = efficient form.


5. Leaning Forward Like You’re in a Wind Tunnel

Leaning from the waist (instead of from the ankles) puts stress on your back.

It’s usually your body’s way of saying, “This pace is too dang fast.”

Fix it: Stand tall — ears over shoulders, shoulders over hips. Lock in your core. If you feel like you’re falling forward, hit that speed button and dial it down. Treadmill belts move for you — you don’t need to lean in like it’s uphill.


6. Hugging the Front Like It’s a Safety Blanket

Staying too close to the console cramps your stride and kills your arm swing.

It also makes you feel claustrophobic, like you’re about to trip.

Fix it: Slide back a bit. Find the center of the belt and claim your space. That extra room gives you freedom to move naturally. If you’re scared of drifting, clip on that safety key and start slow. You’ll build confidence with every run. I always tell my athletes: give yourself space to move like you would outdoors.

7. Tensing Up Like You’re Being Chased

Clenched fists. Tight shoulders. Locked jaw.

You’re not running — you’re bracing for impact. Happens a lot when nerves kick in or the pace creeps up.

Fix it: Shake it out. Literally. Do the following: wiggle your fingers, drop your arms and give ‘em a little floppy shake, and unclench your jaw and take a deep belly breath. You should feel relaxed and loose — like water flowing, not a robot ticking.


Everyone Slips Up

Even the pros. Even me.

Don’t beat yourself up if your form falls apart now and then.

The good news? The treadmill gives you instant feedback. If something feels off — slow down, reset, fix it, and go again.

And yeah, maybe you feel awkward sometimes, like everyone’s watching you.

Truth is, unless you’re flailing like Phoebe from Friends, no one cares.

You’re doing the work. That’s what matters.